Pumpkin Streusel Coffee Cake

Fall arrived with brilliant colors and cold temperatures. Now, the peak color of autumn has passed. There are more leaves on the ground than in the trees, and the word snow is frequently overheard in whispered conversation. Time, as has happened on so many occasions before, has gotten away from me again.

At the end of summer, I worried that I wasn’t engaging meaningfully in my own life. I was going through the motions, but I felt detached—from myself and from my family. With the start of another school year on the horizon (and finding a new work-life balance), I feared this situation would only worsen.

And it did, for awhile, because finding a new normal takes time.

However, I gradually began to find the active role in my own life by adjusting my priorities and learning to let things go. I started going to the gym at 5:30 am (which I never thought I was capable of) because it gave me the time I need for myself and more goofy baby time with N when I get home in the afternoons (which eases that mama guilt).

My house is a dirty, cluttered mess and I’m learning to be okay with that. Sometimes it really is more important to sit on the couch with my husband and watch a television show together than to make sure the dishes in the sink are washed or the laundry is done.

I am leaving my oven turned off in favor of enjoying the quiet everyday activities of life—a cup of coffee to start the weekend with my husband, an afternoon walk as a family on a crisp fall afternoon, and sore knees while I crawl around with N on the floor (while she reminds me what I still need to baby-proof—how do I have a mobile baby already?).

I don’t intend to paint a rosy picture here. There are still many days when my hopeful intentions come crashing down, but I am feeling better. After a difficult year of adjusting to my new identity as a mother, I am beginning to feel present again.

And though it may seem small, it is everything.

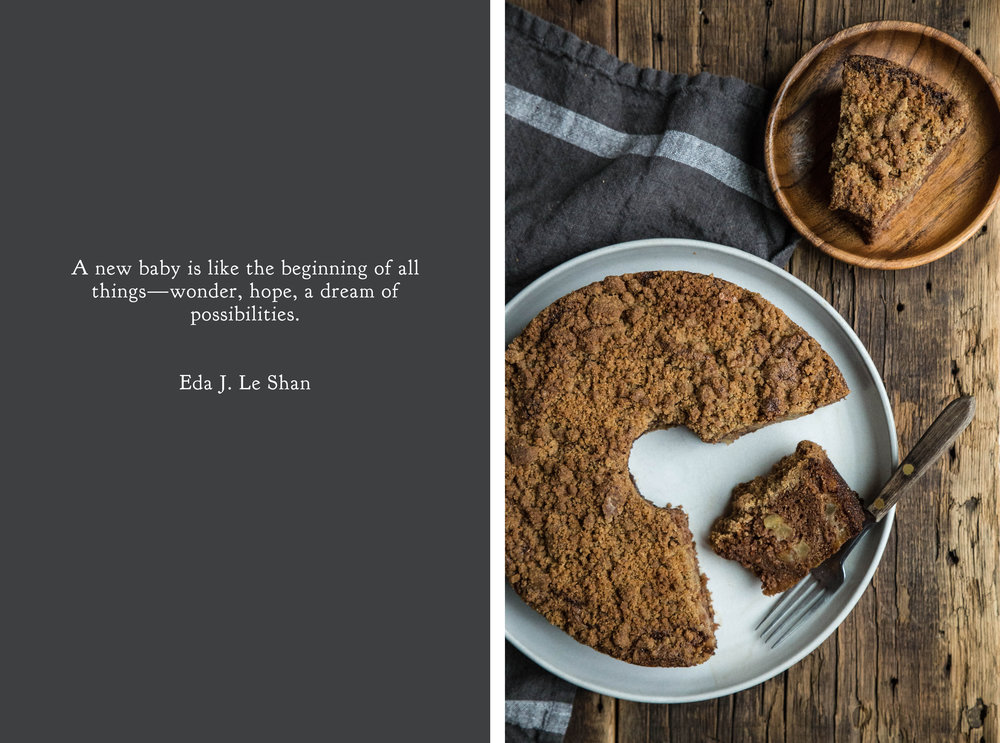
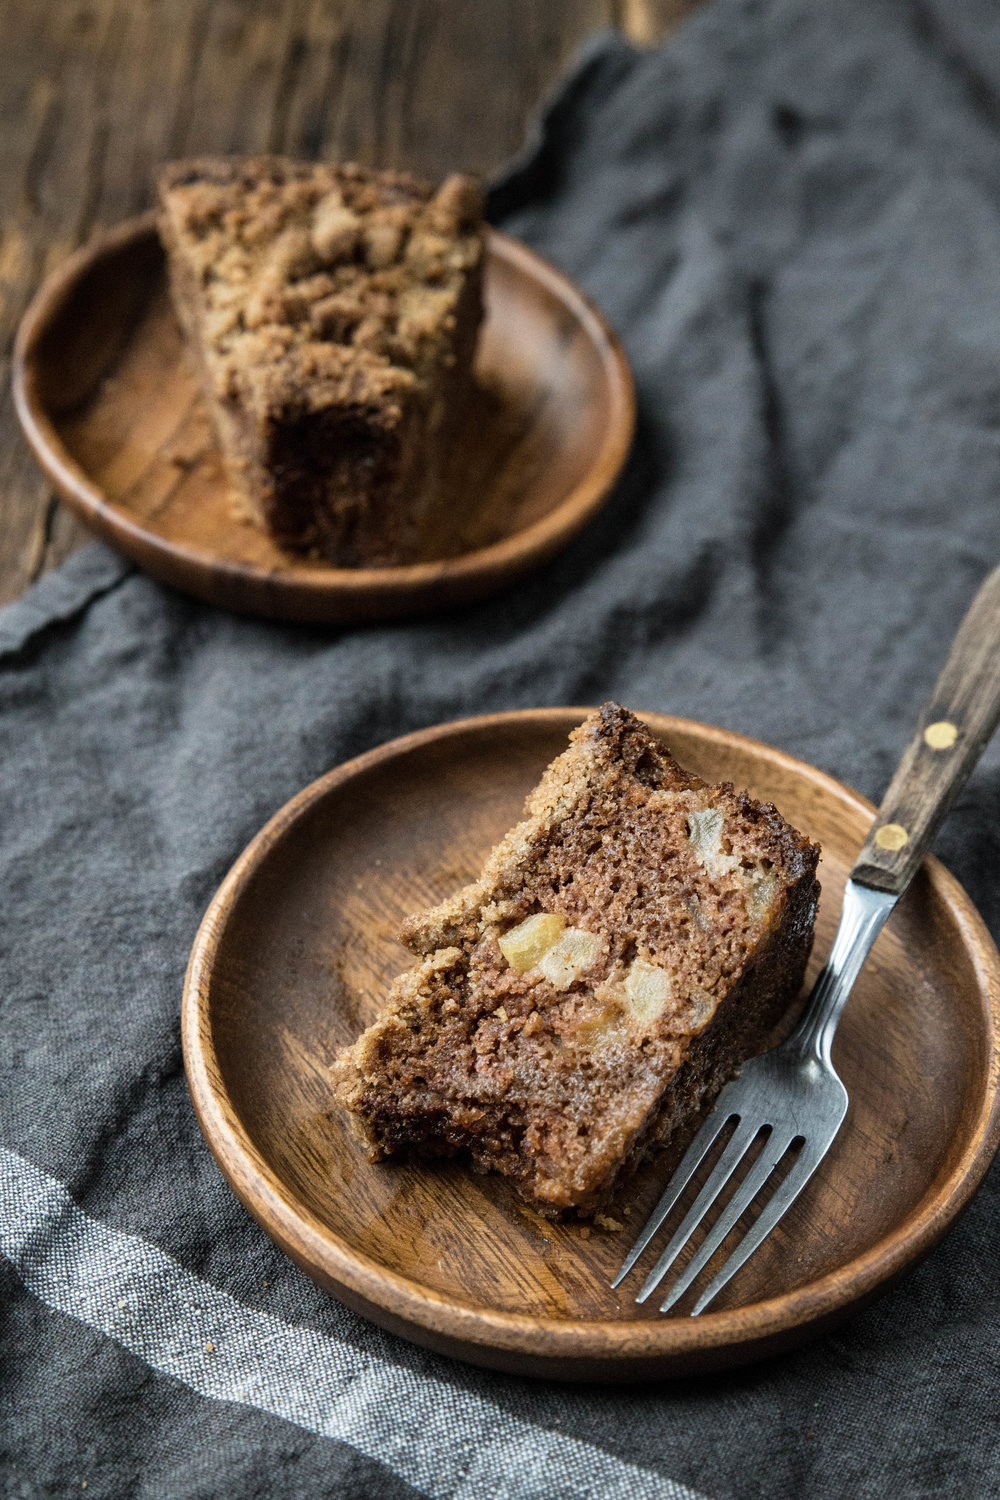
I made this Pumpkin Streusel Coffee Cake a few times over the last month, each time changing it slightly until I found my personal preference. I was looking for an easy way to give the cake texture without needing to pull out a mixing bowl to whip up a batch of frosting.

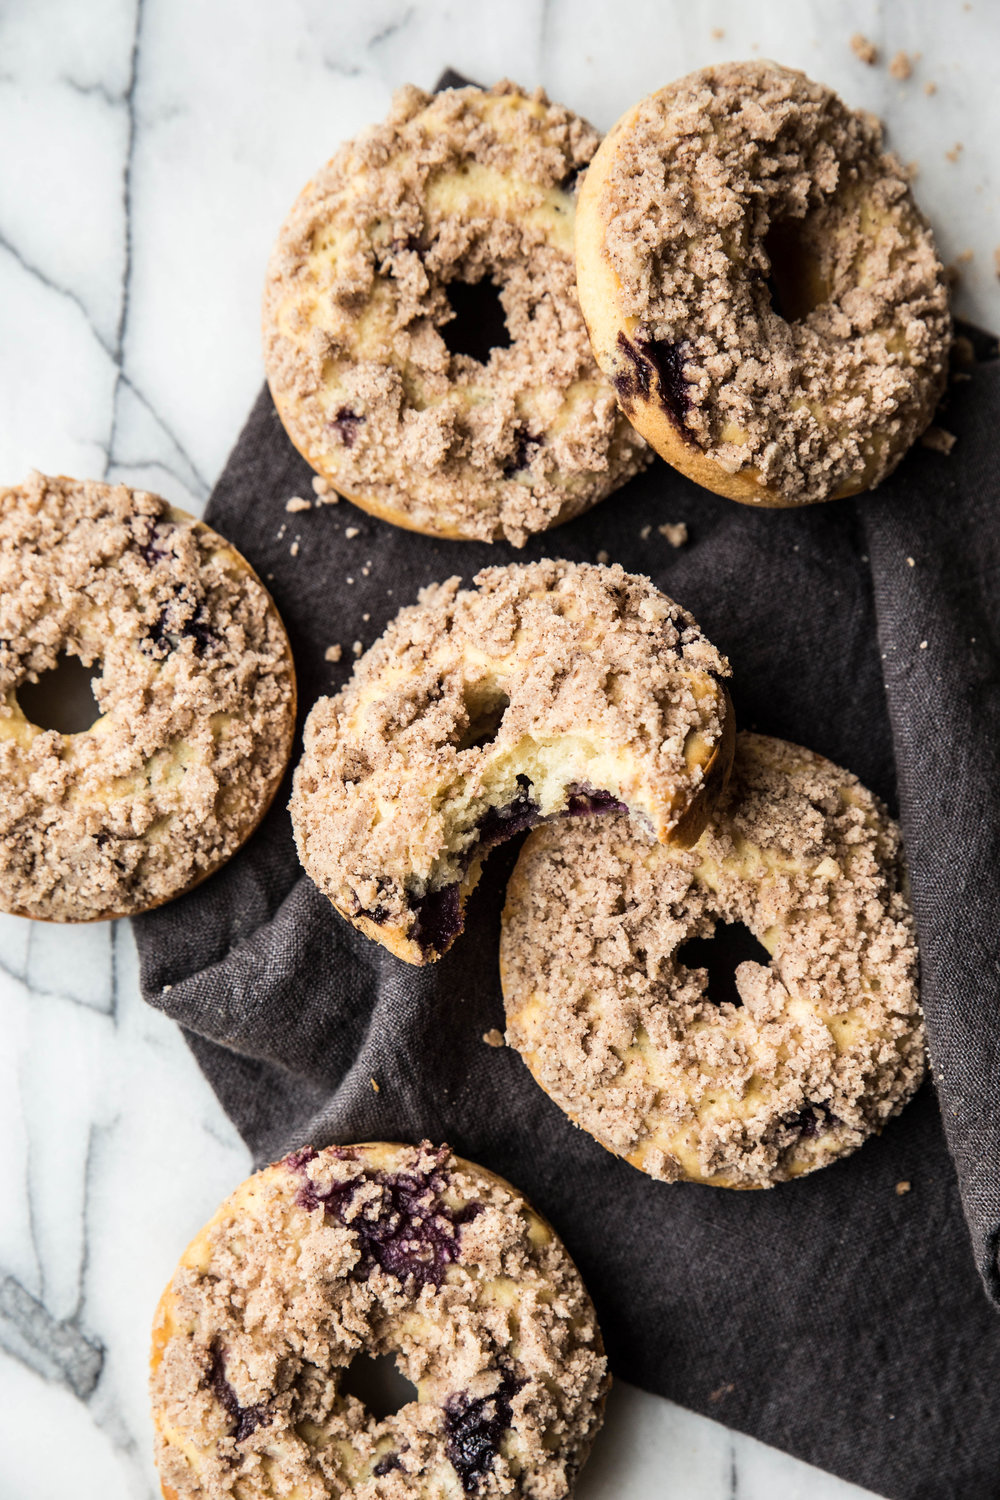
Inspired in part by these pumpkin streusel muffins, I quickly stirred together a cinnamon-scented streusel topping to top off the pumpkin sheet cake. This pumpkin cake recipe—generously spiced and heavy on the pumpkin—is my go-to during the autumn season and has been for many years.

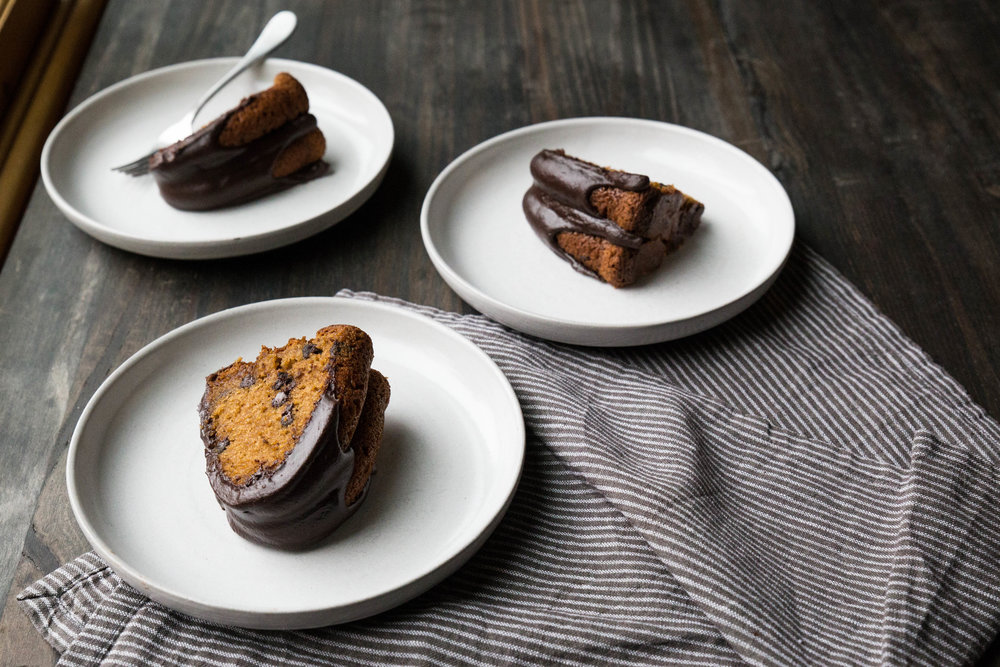
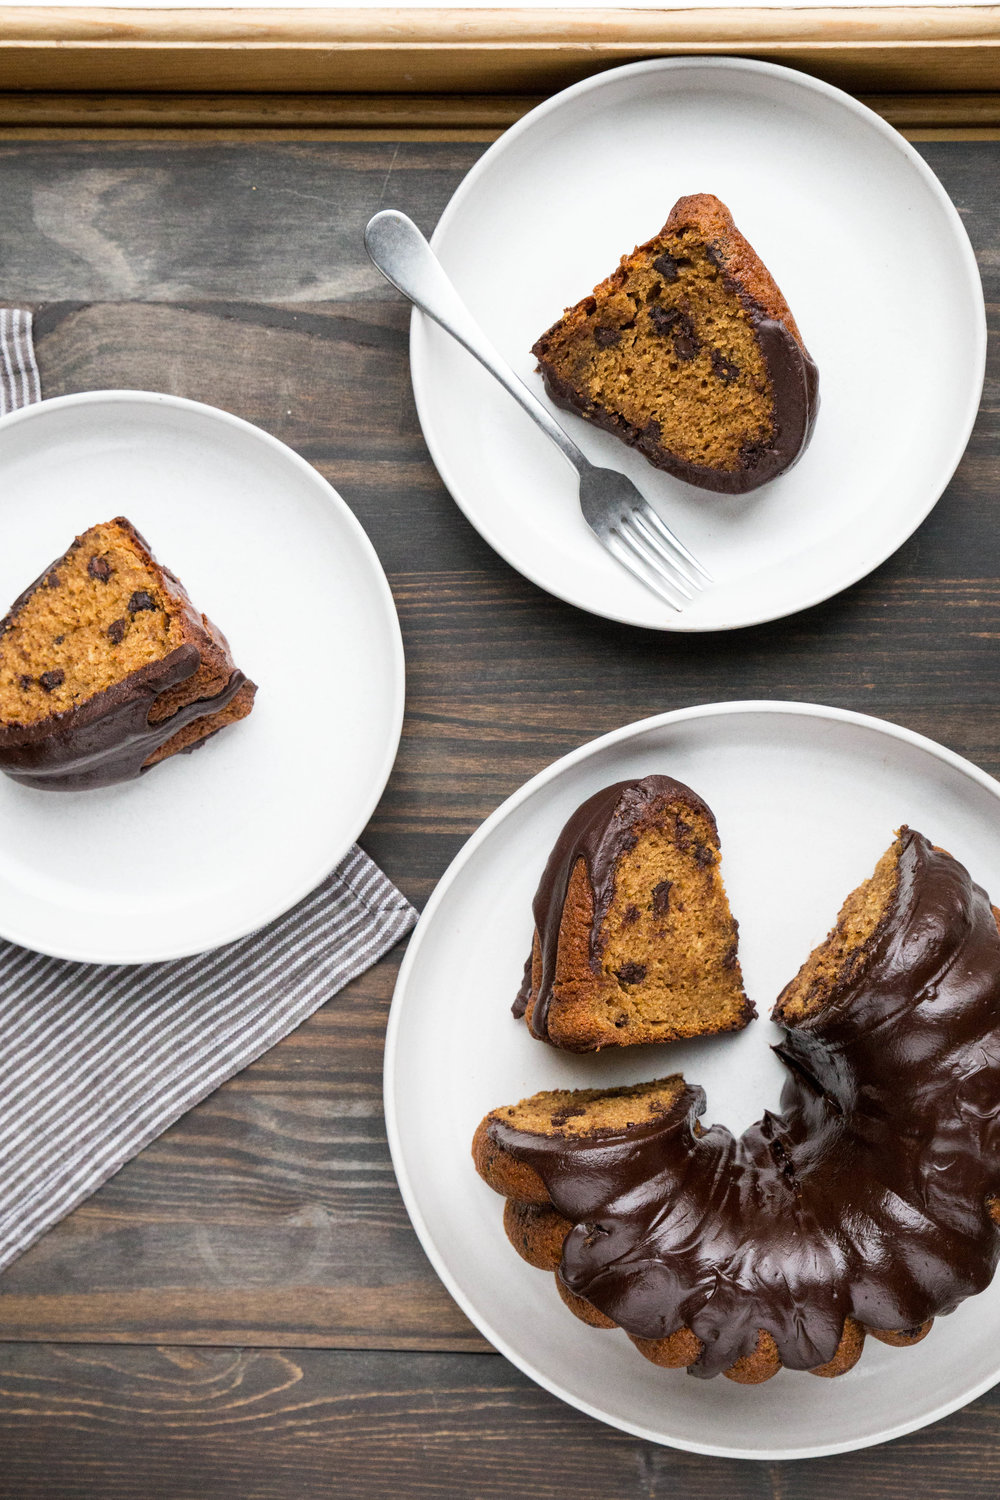
While the powdered sugar glaze is optional, I do like the look it gives to the final coffee cake (and a little extra sweetness is just the icing on the cake, right?).

This Pumpkin Streusel Coffee Cake is easy to make and ideal for sharing. A sweet cinnamon streusel tops a moist pumpkin cake, adding texture to a classic flavor combination. With a powdered sugar glaze for appearance and extra sweetness, the cake is complete. Serve alongside a hot cup of coffee or a tall glass of milk.

Pumpkin Streusel Coffee Cake

Yields 9 x 13-inch cake

Pumpkin Cake
15 ounces (425 grams) pumpkin puree
4 large eggs
3/4 cup (177 mL) vegetable oil
1 cup (200 grams) brown sugar, packed
3/4 cup (150 grams) granulated sugar
1 teaspoon vanilla extract
2 cups (250 grams) all-purpose flour
2 teaspoons baking powder
1 teaspoon baking soda
1 1/2 teaspoons pumpkin pie spice
1 teaspoon ground cinnamon
1 teaspoon salt

Streusel Topping
1/2 cup (100 grams) granulated sugar
1/2 cup (100 grams) brown sugar, packed
1 cup (120 grams) all-purpose flour
1 1/2 teaspoons ground cinnamon
1/4 teaspoon salt
6 tablespoons (85 grams) butter, melted

Glaze
1 cup (125 grams) powdered sugar
2 tablespoons milk

Preheat oven to 350 degrees F (180 degrees C). Grease a 9 x 13-inch cake pan. Set aside.

For the pumpkin cake, beat together the pumpkin, eggs, oil, brown sugar, granulated sugar, and vanilla extract in a large mixing bowl until well blended. Stir in the flour, baking powder, baking soda, pumpkin pie spice, cinnamon, and salt until smooth and uniform in appearance. Pour into prepared baking pan and set aside.

For the streusel topping, stir together the granulated sugar, brown sugar, flour, cinnamon, salt, and melted butter in a small mixing bowl. Crumble the mixture evenly over the top of the pumpkin batter.

Bake for 30-35 minutes, or until a toothpick inserted into the center comes out clean. Allow cake to cool before glazing.

To prepare glaze, stir together the powdered sugar and milk until smooth. If the glaze is too thick, thin with a teaspoon or two of milk. Drizzle over the top of the cake. Allow glaze to set before cutting cake and serving.

Banana Snacking Cake

Lately, I find myself gravitating towards familiar foods in my kitchen. The meals and desserts that I’ve enjoyed since childhood are on rotation—grilled cheese and tomato soup, spaghetti made with sauce from a jar, and chocolate chip cookies. It feels easier, in these final chaotic days of the school year, to reach for recipes that I know both forwards and backwards.

While there are no moments of surprise with new flavors or textures, the comfort of these routine meals is indulgent in a different way, for both body and soul.

This banana cake is one that I remember fondly from my childhood. Whenever the bananas were forgotten on the counter long enough to blacken, the mixing bowls would come out and this cake would emerge from the oven. The aroma of banana filling the air was the cue for the rest of my family to flock to the kitchen, stealing a bite or two before the cake had properly cooled.

It has been many years since I’ve last eaten this cake. Perhaps having my own little one in the house is causing these food memories to stir up, but, regardless of the reason, I am delighted to revisit this recipe.

This banana cake is a simple, unpretentious snacking cake—however, that doesn't mean this cake isn't something worth talking about.

The texture is my favorite part of this cake. As with most banana breads and cake, the final product has a bit of heft, but I think it works in the cake’s favor instead of against it. The chocolate glaze is also made with butter instead of heavy cream like a traditional ganache, which lends itself to a more intense buttery, chocolate flavor.

All these years later, my family is still in debate about the best way to eat this cake. My dad and I prefer to eat this cake chilled. The cold brings out a heaviness to the cake we both love, and the chocolate glaze becomes stiff making it literally melt in your mouth. My sister, on the other hand, prefers the cake slightly warmed, which yields a lighter feel to the cake and turns the chocolate glaze silky smooth. Though our debate may never be settled, the truth is that this cake is delicious any way you choose to serve it.

Since it is my belief that snacking cakes should be easy to prepare, instead of making a chocolate glaze, you could simply add chocolate chips to the batter to bring in the chocolate flavor without needing to use more pans. The choice, as always, is yours.

This Banana Snacking Cake combines the classic flavors of chocolate and banana. The addition of mashed banana to the cake lends a moistness, while a touch of cinnamon brings out a greater depth of flavor. The chocolate glaze is simple to make, melting together only chocolate and butter, but I could eat it by the spoonful (and I usually do). The glaze spreads smooth when slightly warm and holds its shape like a dream. This cake is a good option to reach for when you are looking for a sweet snack and, if your kitchen is anything like mine, it will disappear before you are ready to see it go.

Banana Snacking Cake

Yields 9 x 13-inch cake

Banana Cake
2 1/2 cups (300 grams) all-purpose flour
1 tablespoon baking powder
1/2 teaspoon cinnamon
1/2 teaspoon salt
1/2 cup (113 grams) unsalted butter, room temperature
1/2 cup (100 grams) granulated sugar
3/4 cup (150 grams) brown sugar, packed
2 large eggs
3 medium ripe bananas, mashed
1 teaspoon vanilla extract
3/4 cup (180 mL) buttermilk (or regular milk)

Chocolate Glaze
6 ounces (170 grams) semi-sweet chocolate, coarsely chopped
1/2 cup (113 grams) butter, cubed

Preheat oven to 325 degrees F (160 degrees C). Grease a 9 x 13-inch baking pan.

To prepare the banana cake, whisk together flour, baking powder, cinnamon, and salt in a medium bowl. Set aside.

In a large mixing bowl, cream together the butter and sugars until light and fluffy. Add the eggs one at a time, beating well after each addition. Mix in the mashed bananas and vanilla extract.

Beat in the flour mixture and buttermilk in alternating additions, starting and ending with the flour. Pour batter evenly in the prepared baking pan and bake for 35-40 minutes, or until golden and a toothpick inserted in the center comes out clean. Allow the cake cool completely.

To prepare the chocolate glaze, melt together the chopped chocolate and cubed butter in a small saucepan over low heat until smooth and uniform. Spread evenly over the cooled cake and allow the glaze to set before cutting and serving the cake.

Lemon Almond Cake

The fog of early parenthood has finally lifted. I have emerged stronger—with a bigger heart, immeasurable patience, and the ability to function on limited sleep. I am starting to feel like myself again and it feels good.

I lost myself in those first few months, as I imagine happens often with new parents. With the newborn routine of eat-change-sleep on repeat every three hours, I felt like a shell of my former self. There wasn’t time to explore interests or hobbies—there was hardly time to sneak in a shower.

To survive, I followed the mantra “one task a day.” Some days the only thing I accomplished was making dinner; other days it was making it to mama/baby yoga class so I could start the process of making my body feel like my own again. These small daily goals fueled me without overwhelming me.

It was the only balance I could seem to manage.

Even though I enjoyed my time at home with sweet Baby N, I credit the act of going back to work with helping me reclaim my individuality. It’s true that I am a parent now, but that is not the only attribute that defines me. I welcome the daily challenges of being a high school teacher because my students remind me of the other aspects of myself that I appreciate (plus, the knowledge that summer break is around the corner eases the transition of being away from N during the day).

Although I’ve started to realize how important it is for me to have time for myself, I still very much struggle with allowing that dedicated time. Although the days feel long, the hours are short and time seems to evaporate into the ether. The great irony of parenthood is the knowledge that I could be more present for my daughter if I spend time away to recharge myself.

This balance between a parent and an individual with my own needs and desires will be a work in progress, but the journey is helping me understand myself on a new level, which I recognize is a gift in itself.

Lemon and almond is one of my favorite flavor combinations in spring. The sharpness of lemon and the nutty warmth of almond add both warmth and a wake up call to a palate that has been saturated in the comfort of winter. Taking advantage of a day off from school and Baby N’s napping schedule, I spent some much needed time in the kitchen. It wasn’t until I had finished the photographs that I realized this cake felt—and looked—remarkably familiar.

Perhaps unsurprisingly, after an exploration into the recipe archive, I noticed this lemon almond cake was quite similar to a lemon cake I had made the year prior (down to the exact date!). Mom brain, anyone?

I like to believe these resemblances work in my favor—this cake is so good, I unknowingly created a recipe for it twice. Perhaps that is all the encouragement you’ll need to turn on the oven, zest a couple lemons, and start baking.

This Lemon Almond Cake brings together the warmth of almond with the spiritedness of lemon. The cake batter is infused with both lemon zest and lemon oil to give it a bright lemon flavor, and almond extract and almond flour to round out a nutty undertone. Once baked, the cake is brushed with a lemon glaze on the outer edges to give the cake additional flavor and to seal in the cake's moisture. This cake is perfect to serve plain and unadorned—the flavors are so vivid, it needs nothing else to feel complete.

Lemon Almond Cake

Yields 12 servings

Lemon Almond Cake
1 1/2 cups (300 grams) granulated sugar
Zest of 2 lemons
3/4 cup (180 mL) vegetable oil
4 large eggs
1 teaspoon vanilla extract
1 teaspoon almond extract
1 teaspoon lemon oil (optional)
1 teaspoon salt
2 teaspoons baking powder
2 1/4 cups (270 grams) all-purpose flour
3/4 cup (75 grams) almond flour
1 cup (250 mL) milk

Lemon Glaze
1/2 cup (100 grams) granulated sugar
Juice of 2 lemons

Preheat oven to 350 degrees F (180 degrees C). Heavily grease and flour a 10-cup Bundt pan. Set aside.

For the lemon cake, place the granulated sugar and lemon zest in a large mixing bowl. Rub the sugar and zest together until fragrant. Whisk in the vegetable oil, eggs, vanilla extract, almond extract, lemon oil, salt, and baking powder. Alternate adding the flours and milk, stirring after each addition, until the batter is smooth and uniform in appearance. 

Pour batter into the prepared baking pan and bake for 45-55 minutes, or until a toothpick inserted into the center comes out clean. Allow cake to cool in pan for 15 minutes before unmolding.

While the cake is baking, prepare the glaze by heating the granulated sugar and lemon juice in a small saucepan until the sugar dissolves. Set aside. 

Place the cake on a cooling rack and brush the glaze over the cake, giving time for the glaze to absorb between layers. Allow the cake to cool completely and the glaze to set before cutting and serving.

Blueberry Crumble Doughnuts

After two months, I finally feel like I am settling into motherhood. In the foggy haze of these early days, it simultaneously feels like I have been a parent forever and for no time at all. The transition into motherhood was unexpectedly difficult for me. Since I have wanted to be a mother since I was a young child, I anticipated that the transition would be natural and instinctual. It never occurred to me that I may feel otherwise.

While not all women feel the same, I loved pregnancy. I enjoyed watching my body change, feeling the baby’s kicks and movements, and experiencing the joy of carrying a child. It helped, of course, that my pregnancy was virtually symptom-free—as far as I was concerned, there weren’t any aspects not to love.

When we found out our daughter was growth restricted and would therefore be arriving a few weeks earlier than anticipated, my heart grew heavy. I wasn’t ready for my pregnancy to be over, for this part of the journey my baby and I embarked on to come to a close. I wanted to stay pregnant forever. My body didn’t feel ready to give birth; I wasn’t yet ready to meet my daughter.

I told my husband that I needed more time. If I could somehow be pregnant longer, maybe I would find the emotional and physical connection I needed to say goodbye to my deeply loved pregnancy and welcome a new beginning with the birth of our daughter.

When the big day arrived, I went into the hospital conflicted. Even with more time, I hadn’t been able to shift my unwanted emotions. Yet, I still felt hopeful. After reading so many stories of mothers feeling an instant deep love for their children during birth, I anticipated that these feelings would overtake me when the moment arrived.

During the C-section—when the doctors lifted my daughter over the curtain and I laid eyes on her for the first time—I felt taken aback. While I had no idea what she would look like, her actual appearance took me completely by surprise. The birth experience was shocking to me in a way I did not expect.

When they handed her to me for the first time minutes later, she felt like someone else’s baby. I felt detached and confused. Where was the instant love and connection I was supposed to feel? What kind of mother was I going to be if this is how I felt in these early moments?

I didn’t learn this until later, but over 40% of women do not bond with their babies right away. Even though my husband and I took childbirth education and early parenthood classes, our instructors did not touch on this subject. I wish I had been told my feelings were normal, that parenthood is an enormous adjustment and that sometimes it takes time for emotions to sort themselves out. Instead, I felt like I was somehow failing at this job I just began.

The next couple weeks were rough for me. I had a difficult recovery due to the C-section and resulting complications. I struggled to do the most basic of tasks, unable to sit upright or walk without enormous amounts of pain. Breastfeeding was not going well. Since Baby N was born early and weighed so little, it was vital for her to get the calories she needed to grow, but she also didn’t have the energy necessary to feed. I had to deal with the reality that I would not be able to provide milk for my daughter in the way I had planned.

The postpartum hormones hit me harder than I anticipated. I couldn’t even think about my pregnancy without bursting into tears. I was grieving the loss of being pregnant, of my life before having a child. Even though I’ve wanted to be a mother as long as I can remember (I was ecstatic when I found out I was pregnant), I was dealing with unexpected feelings of remorse—and then guilt that I could ever have these emotions at all. Exhaustion and sleep deprivation only intensified everything I was experiencing.

Life with a newborn is hard.

It was several weeks before I found myself in a better place, before I was able to fully bond with and enjoy time with my daughter. Now, of course, I can’t imagine life without her—her big smiles, goofy mannerisms, and love for sleepy snuggles.

My transition into motherhood was not beautiful or graceful. It has taken time for me to accept that reality doesn’t always match expectations and that’s okay. I expect I will learn this lesson over and over again in my new role as a parent.

Right now, the fog of early parenthood has not completely dissipated, but it is starting to lift. I am still working on finding my new identity both in and out of parenthood. One lesson I have taken away from the transition to motherhood is to have grace with myself.

One day at a time. Everything will eventually fall into place—it always does.

Blueberry Crumble Doughnuts feature a baked, cake-based doughnut. To prepare, blueberries are folded into a vanilla-scented batter. A cinnamon crumble is sprinkled over the top before baking. For best texture, these doughnuts should be enjoyed the same day they are baked, but I still savored the leftovers a day or two later.

Blueberry Crumble Doughnuts

Yields 6-8 doughnuts

Blueberry Doughnuts
1/3 cup (70 grams) granulated sugar
2 tablespoons vegetable oil
1 large egg
1 teaspoon vanilla extract
1 1/4 cups (150 grams) all-purpose flour
1 teaspoon baking powder
1/2 teaspoon salt
1/2 cup (120 mL) milk
4 ounces (113 grams) fresh or frozen blueberries

Crumble Topping
2 tablespoons butter, room temperature
1/4 cup (50 grams) granulated sugar
1/2 cup (60 grams) all-purpose flour
1 teaspoon ground cinnamon

Preheat oven to 350 degrees F (180 degrees C). Grease a standard-size doughnut pan.

In a large mixing bowl, whisk together the sugar, vegetable oil, egg, and vanilla. Stir in the flour, baking powder, and salt. Stir in the milk until uniform. Fold in the blueberries.

Transfer the batter to a pastry bag (or large resealable plastic kitchen bag with the corner snipped off). Fill the depressions in the prepared pan with the batter until 2/3 full (alternatively, you could spread the batter into the pan using an offset spatula, but this results in more unevenly shaped doughnuts).

For the crumble topping, beat together butter and sugar until well combined. Stir in flour and cinnamonuntil crumbly. Crumble the topping evenly over the batter. Bake for 18-24 minutes, or until crumble topping browns and a toothpick inserted into the center comes out clean. Cool in pan for 15-20 minutes before transferring to a cooling rack to cool completely.

Butternut Squash Chocolate Chip Bundt Cake

With less than nine weeks to go before we meet our little one, the nesting phase has been setting in quickly for me. Unfortunately for my husband, this means waking up on the weekend to pressing “to do” lists featuring half a dozen lengthy chores that need to be done right now because we are running out of time.

Last Sunday I pulled out the holiday lights to hang on the roof right after breakfast. My poor husband asked if he could finish his morning coffee before pulling out the ladder.

The desire to get the house organized and ready is more than I bargained for. Even though I wanted to relax and enjoy our time as a couple before we become a family of three, the need to “nest” is proving hard to suppress.

Today’s quote is perhaps more aspirational than reflective of my current state of being, but I trust I’ll find that happy medium soon.

Although autumn squash is primarily featured in savory preparations, as a baker I have a hard time imagining it as anything other than sweet. While pumpkin is the go-to squash when it comes to baking, butternut squash can also work equally well in many of the same recipes.

For this seasonal cake, I started by roasting and pureeing a small butternut squash. The squash is then sweetened in a traditional cake batter. With the addition of cinnamon, nutmeg, ginger, and cloves, the cake takes on the classic autumn flavors.

And, because chocolate only makes things better, I added a cup of chocolate chips to the batter and covered the cake in a thick chocolate glaze. The combination of chocolate and spiced squash is one of my favorites. I hope you’ll enjoy it as much as I do.

This Butternut Squash Chocolate Chip Bundt Cake features the spices of autumn. Butternut squash forms the base flavor of the cake, which is enhanced with spices and chocolate chips. While the cake can certainly stand-alone without the glaze, the addition of the glaze will help seal in the cake’s moisture and enhance the overall chocolate flavor.

Serve with a hot cup of coffee, a rainy windowpane, and a sense of happiness being exactly where you are.

One Year Ago: Apple Pandowdy
Two Years Ago: Apple Cinnamon Muffins & Maple Glazed Pumpkin Scones
Three Years Ago: Pear Almond Tart & Pumpkin Espresso Bundt Cake
Four Years Ago: Pumpkin Molasses Bread, Vegan Caramel & Rustic Apple Tart
Five Years Ago: Butternut Squash Biscuits & Apple Crisp
Six Years Ago: Pumpkin Waffles, Apple Cinnamon SconesPear Crisp, Pumpkin Rolls, & Butternut Squash Cake
Seven Years Ago: Red Wine Chocolate Cake, Pear Spice Cake, Pumpkin Spice Latte Cheesecake, & Apple Cinnamon Cake
Eight Years Ago: Pumpkin Bread Pudding, Apple Tart with Almond Cream, & Fresh Ginger Pear Cake

Butternut Squash Chocolate Chip Bundt Cake

Yields 8-10 servings

Butternut Squash Batter
1 1/2 cups (370 grams) butternut squash puree
4 large eggs
3/4 cup (177 mL) vegetable oil
1 cup (200 grams) brown sugar, packed
3/4 cup (150 grams) granulated sugar
1 teaspoon vanilla extract
2 cups (250 grams) all-purpose flour
2 teaspoons baking powder
1 teaspoon baking soda
2 teaspoons ground cinnamon
1/4 teaspoon ground ginger
1/4 teaspoon ground nutmeg
1/8 teaspoon ground cloves
1 teaspoon salt
1 cup (170 grams) semisweet chocolate chips

Chocolate Glaze
6 ounces (170 grams) semisweet or milk chocolate, coarsely chopped
1/2 cup (120 mL) heavy cream (or full-fat coconut milk)

Preheat oven to 350 degrees F (180 degrees C). Heavily grease a 10-cup Bundt pan. Set aside.

For the butternut squash batter, beat together the butternut squash puree, eggs, oil, brown sugar, granulated sugar, and vanilla extract in a large mixing bowl until well blended. Stir in the flour, baking powder, baking soda, spices, and salt until smooth and uniform in appearance. Stir in the chocolate chips.

In the prepared baking pan, add the cake batter. Bake for 50-60 minutes, or until a toothpick inserted into the center comes out clean. Allow cake to cool in pan for 15 minutes before un-molding and transferring to a cooling rack to cool completely.

For the chocolate glaze, heat the heavy cream in a small saucepan until steaming. Be careful not to boil. Immediately remove from heat and pour over chopped chocolate, allowing the chocolate to melt for 5 minutes before stirring until smooth and uniform. Allow glaze to cool until it reaches a thicker consistency before pouring glaze evenly over the top of the cooled cake.

Serve the cake after the glaze has fully set. 

Apple Crumble Cake

I have been keeping some big news from you the last few months—Chris and I are expecting! We are delighted to welcome a baby girl into to our family this January.

The announcement of this baby feels extra sweet because we were not sure this day would ever come to pass. I was born with a heart condition, which carries its own unique set of challenges. Since my teenage years, my doctors have placed a question mark over my head when it comes to the idea of carrying my own children. While I knew I wanted a family someday, the path to creating that family was always in question.

I came to terms with the uncertainty, researching adoption and surrogacy in equal measure. I was fortunate to find a wonderful husband who was open to whichever path life would eventually deal us. Yet, I still fantasized about pregnancy—how could I not? But I knew deep down it was a distant dream that may never be fulfilled.

When I was officially given the doctors’ blessing, it felt like I had been awarded a golden ticket. Happily, I can report that so far this pregnancy has been healthy, for both mother and baby. I was lucky to completely avoid many of the classic pregnancy symptoms, including morning sickness. In many ways, I have felt completely normal except for the ever expanding waistline.

As I near the third trimester, the aches, pains, and exhaustion are slowly starting to set in. Even so, these inconveniences pale in comparison to the moments when our baby shares her little kicks and movements with me. I’m trying to enjoy this time, knowing it is so brief.

I find it hard to believe that we’ll be parents in a few short months.

While this baby hasn’t brought about any food cravings, she does seem to have a preference for salty foods over sweet. Though there will always be room in my diet for cookies, I have been leaning heavily towards natural sugars the last few months, particularly enjoying the sweetness found in summer fruits.

With autumn’s arrival and apple season in full swing, I took the opportunity to create a cake to take advantage of the harvest and fall’s comfort spices. This Apple Crumble Cake is sweetened primarily with honey, which lends the cake a subtle sweetness and depth of flavor that traditional sugar alone cannot provide. Because the cake is not overly sweetened, I recommend using apples that are on the sweeter end of the spectrum, which truly allow the apple flavor to shine.

Along with a cinnamon crumble topping, the slices disappear quickly.

This Apple Crumble Cake celebrates autumn’s apple season. The cake is sweetened with honey and spiced with cinnamon, nutmeg, and ginger. Sweet apple pieces are baked evenly throughout the cake, which provide additional sweetness and texture. After baking, I recommend cooling the cake completely before cutting and serving so the flavors have time to develop. Serve the cake plain or warmed with a scoop of vanilla ice cream.

One Year Ago: Spiced Chocolate Swirled Bread
Two Years Ago: Roasted Fig & Almond Cake
Three Years Ago: Carrot Almond Muffins
Four Years Ago: Espresso Chocolate Chip Coffee Cake & Boiled Cider
Five Years Ago: Vanilla Bean Malt Cake, Cinnamon Raisin Swirl Bread, Apple Cinnamon Pancakes, & Classic Apple Pie
Six Years Ago: Pumpkin Espresso Cake, Triple Coconut CookiesChewy Vanilla Bean Bars, & Peanut Butter Cup Cookies
Seven Years Ago: Pumpkin Granola, Chocolate Cherry Bread, Pumpkin Spice Latte, & Oatmeal Raisin Crisps
Eight Years Ago: Maple Roasted Bananas, Chocolate Avocado Cupcakes, & Butternut Squash Custard

Apple Crumble Cake

Yields 10-12 servings

Apple Cake
2 1/4 cups (270 grams) all-purpose flour
2 teaspoons baking soda
3/4 teaspoon salt
1/4 teaspoon ground ginger
1/4 teaspoon ground nutmeg
2 teaspoons ground cinnamon
1/2 cup (118 mL) vegetable oil
1 cup (340 grams) honey
2 large eggs
4 cups (500 grams or about 4 medium) apples, peeled, cored, and finely diced

Crumble Topping
3/4 cup (90 grams) all-purpose flour
1/3 cup (67 grams) brown sugar, packed
1/4 teaspoon ground cinnamon
1/8 teaspoon ground ginger
1/8 teaspoon ground nutmeg
4 tablespoons (67 grams) butter, melted

Preheat oven to 350 degrees F (180 degrees C). Grease a 10-cup tube pan and set aside.

For the cake, whisk together flour, baking soda, salt, and spices in a large mixing bowl. Mix in the vegetable oil, honey, and eggs until uniform. The batter will be thick. Stir in the diced apples and set aside.

For the crumble, stir together the flour, brown sugar, spices, and butter in a medium mixing bowl until uniform and crumbly. Set aside.

In prepared pan, spread out cake batter evenly. Sprinkle the top with the crumble topping and bake for 50-60 minutes, or until a toothpick inserted in the center comes out clean. Cool in pan for 10 minutes before transferring cake to a cooling rack to cool completely.

Chocolate Espresso Cupcakes

I am thrilled to announce that my longtime boyfriend, Chris, and I are finally getting married! After eight years together, this milestone may appear to be a bit overdue, but I'm excited all the same.

We have survived two years long distance, two separate career changes (both my own),  five moves in three cities and two states,  a masters and a doctorate degree, my first years as a high school teacher (when I rarely emerged from my work), buying our first home together, and all of the small and big moments in-between.

There are two types of marriages: cornerstone and capstone. A cornerstone marriage is one in which the marriage is the starting point, and together a life is created from that point on. A capstone marriage is one in which the marriage is the "capstone," or icing on top, to celebrate a life that has already been built together.

Our engagement story differs from most—less romance, more practicality. We have both felt married for so long already that the actual ceremony feels more like a formality. I suppose you could say we fall firmly into the "capstone" marriage model. 

Sitting on the couch after dinner on a weeknight, the topic of marriage arose.

We should probably get married, shouldn't we?

Yeah, I think we should. But when?

From there, a wedding date was set for two months later, and the rest of the planning very quickly fell into place.

We are having a private outdoor ceremony in our favorite arboretum with family, followed by a nice dinner at a local restaurant. I'm still not sure how we were able to find a ceremony and reception venue, photographer, officiant, and wedding dress within a week for one of the busiest wedding weekends of the year, but I am grateful. A week later we will celebrate in my hometown with friends and extended family.

With everything falling neatly into place, it feels like it was meant to be.

With nearly three weeks left until the big day, there are still dozens of small details to sort out. Instead of letting myself get overwhelmed with the planning, I'm trying to tackle one detail at a time. For the reception, I'm ambitiously planning to bake my own cupcakes to share.

While I baked hundreds of cupcakes for my sister's wedding reception a couple years ago—vanilla beanchocolate, coconut, and dulce de leche—it's a different feat to do it for my own. However, with my own dairy intolerance to manage, I find the dairy-free options from local bakeries lacking both in flavor and texture. So, into the kitchen I must go.

These chocolate espresso cupcakes are a flavor I wanted to give a spin before the big day. Chris and I adore the flavors of chocolate and coffee, so it feels natural to bring them together in this cake.

The cupcakes are infused with chocolate by adding espresso powder and strong coffee to the batter. The frosting is made by mixing strong coffee into semisweet chocolate. The cupcakes are not overly sweet, instead focusing on the deep chocolate and coffee flavors. I topped the finished cupcakes with toffee pieces, but any type of sprinkles will work here (or feel free to keep them plain). Enjoy alongside a cup of coffee or tall glass of milk!

One Year Ago: Grandma's Chocolate Cupcakes
Two Years Ago: Blueberry Crumble Bread & Chocolate Chunk Coconut Oil Cookies (my favorite!)
Three Years Ago: S'mores Tarts, Raspberry Rhubarb Sorbet, & Banana Peanut Butter Green Smoothie
Four Years Ago: Mixed Berry Quinoa Crumble, Cookies & Cream Ice Cream, & Lavender Vanilla Bean Cake
Five Years Ago: Rhubarb Ginger Bars, Berry Cheesecake Tarts, Frozen Strawberry Bars, & Coconut Sorbet
Six Years Ago: Cherry Almond Granola, Vegan Chocolate Chunk Cookies, Cherry Cream Cheese MuffinsBlueberry Breakfast Quinoa, & Vegan Brownies
Seven Years Ago: Bizcochitos, Blueberry Hand Pies, Harry Potter Treats, Cauldron Cakes, Butterbeer, & Butterbeer Cupcakes
Eight Years Ago: Chocolate Chip Oatmeal Raisin Cookies, Mocha Frappuccino, & Roasted Cherry Coconut Ice Cream

Chocolate Espresso Cupcakes

Yield 1 dozen

1 1/2 cups (190 grams) all-purpose flour
3/4 cup (150 grams) granulated sugar
1/3 cup (60 grams) cocoa powder
2 teaspoons espresso powder
1 teaspoon baking soda
1/2 teaspoon salt
1 teaspoon vanilla extract
1/3 cup (78 mL) vegetable oil
1 cup (240 mL) strong coffee, divided
1/2 cup (120 mL) milk of choice
6 ounces (170 grams) semi-sweet chocolate, chopped finely

Preheat oven to 350 degrees F (180 degrees C). Line a cupcake pan with baking cups.

In a mixing bowl, whisk together the flour, sugar, cocoa, espresso powder, baking soda, and salt. Add the vanilla extract, oil, 1/2 cup strong coffee, and milk. Using a spatula, mix the batter until smooth. 

Divide batter evenly between 12 baking cups (about 3/4 full). Bake for 18-22 minutes, or until a toothpick inserted into the center comes out clean. Remove from baking pan and allow to cool to room temperature.

To make the chocolate espresso frosting, place chopped chocolate into a mixing bowl. Warm the remaining 1/2 cup strong coffee to boiling and pour over the chocolate. Allow it to set for 5 minutes then stir until smooth. Allow frosting to rest in the refrigerator, stirring occasionally, until it cools and thickens into a spreadable consistency (anywhere from 30 to 60 minutes).

Place frosting in a pastry bag (or plastic bag with the corner cut out) and pipe frosting onto the cooled cupcakes or spread frosting with an offset spatula.