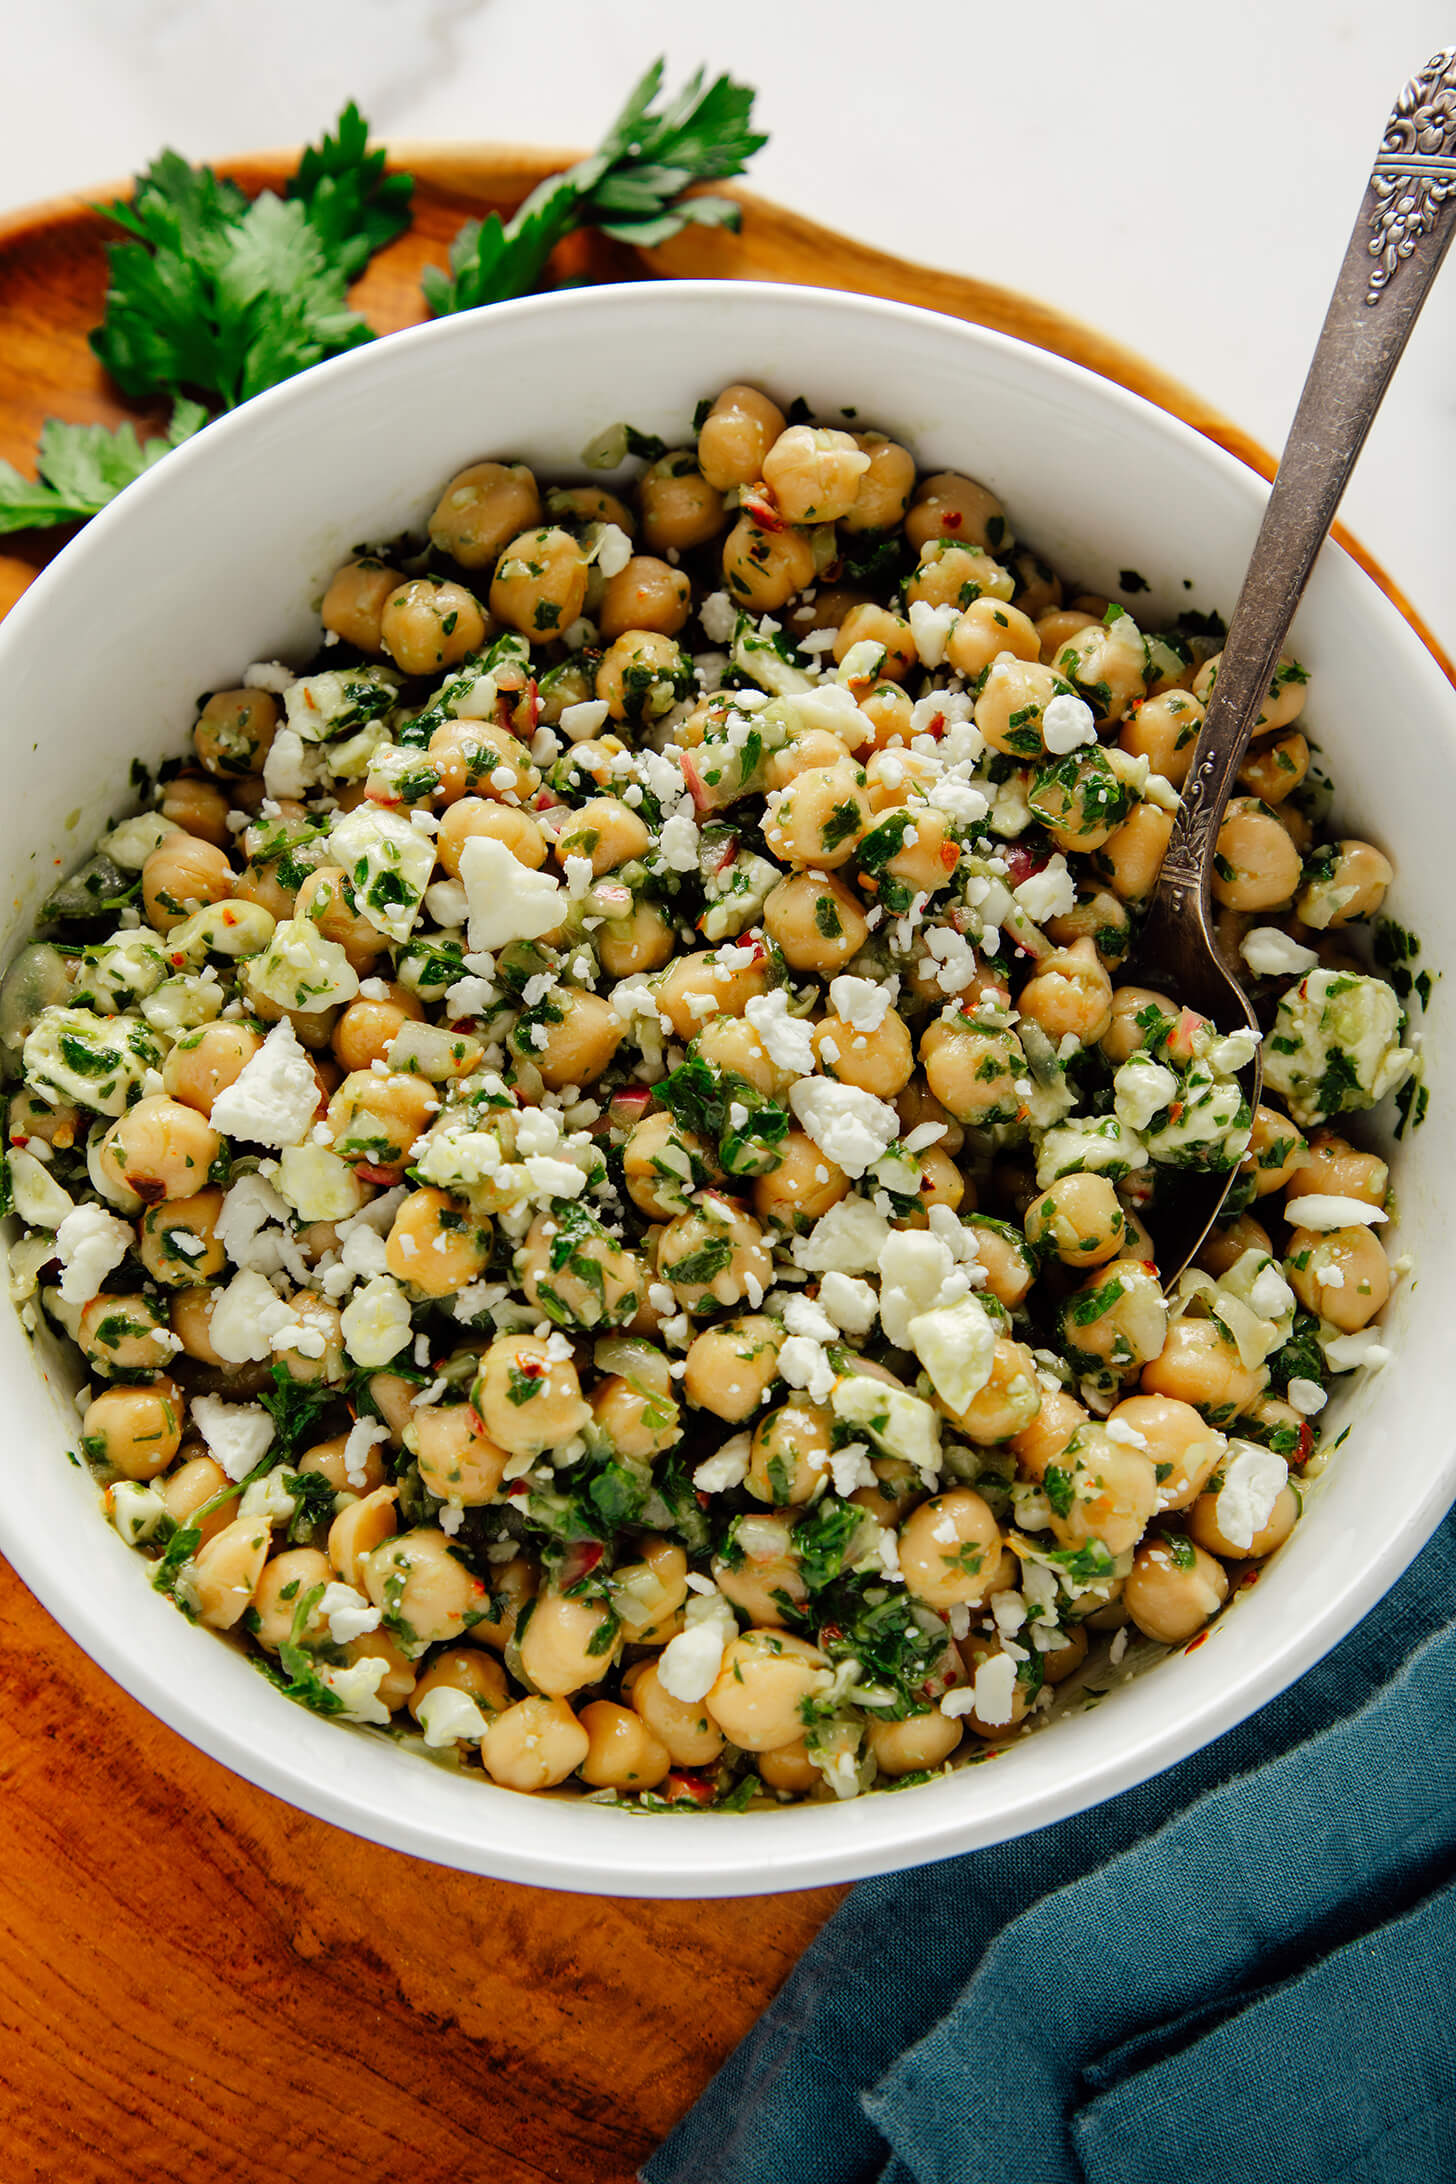
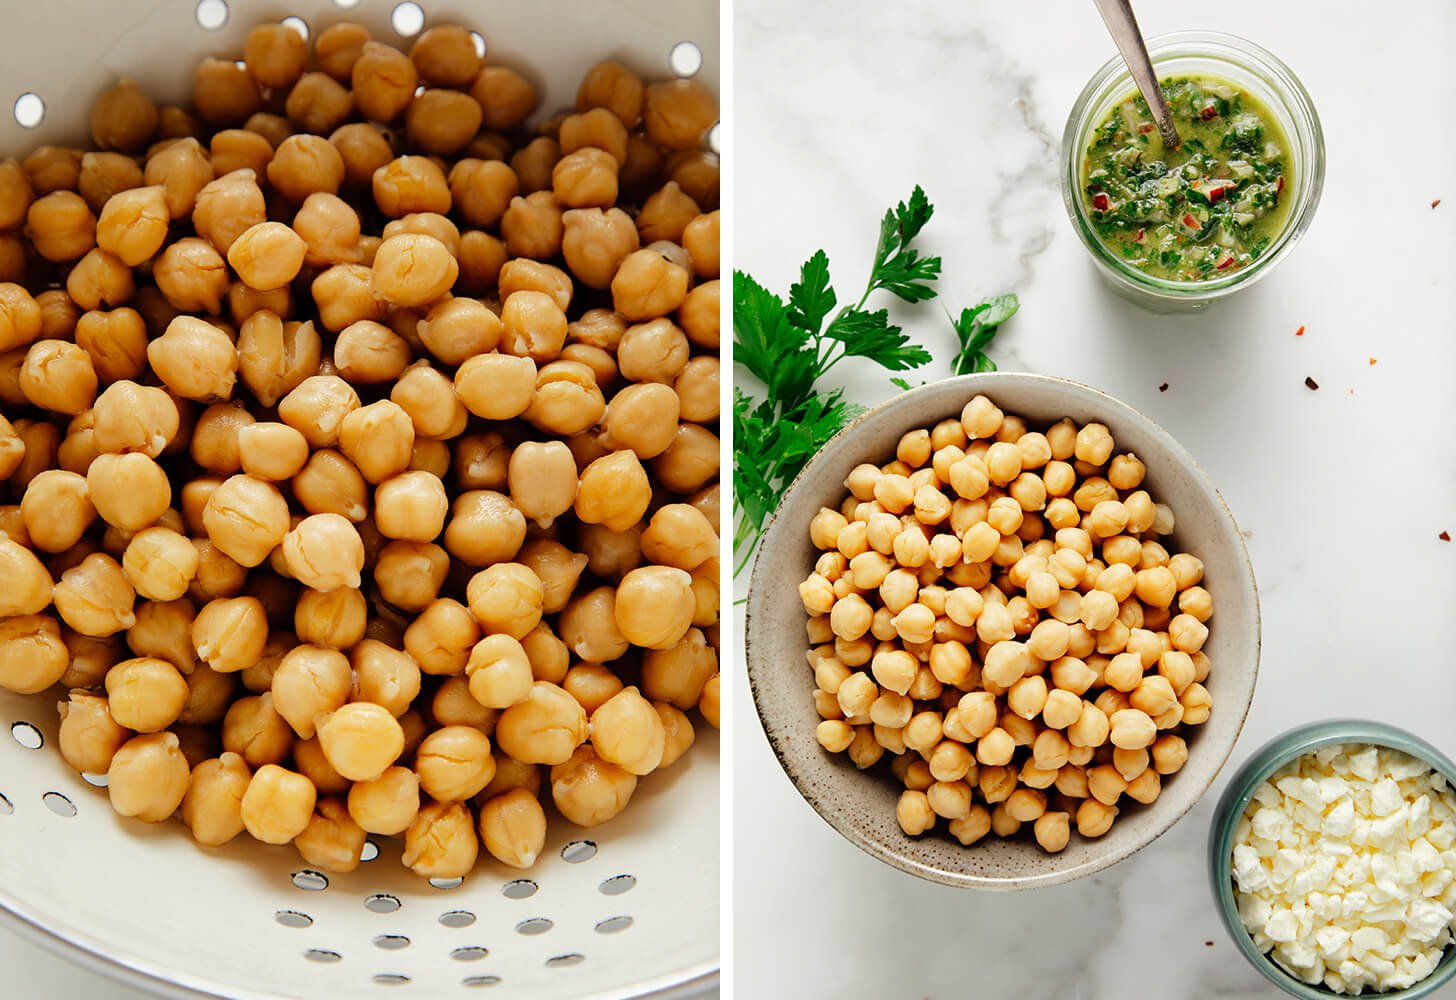
These chimichurri chickpeas are bold and zippy. This simple dish features hearty chickpeas, crumbled feta cheese, and homemade chimichurri sauce. Chimichurri verde hails from Argentina and is…
These chimichurri chickpeas are bold and zippy. This simple dish features hearty chickpeas, crumbled feta cheese, and homemade chimichurri sauce.
Chimichurri verde hails from Argentina and is typically served on steak, though I love it in many other preparations. It’s a bright herbed sauce made with fresh parsley, garlic, red onion, red pepper flakes, red wine vinegar, and olive oil.
You could call this recipe is a collision of leftovers or, better yet, a happy coincidence. This summer, we invited friends over to grill and I made my chimichurri sauce to go with our meal. I was thrilled when one of our friends took his first bite and demanded the recipe.
We had a bit of sauce leftover, so I stashed it in the refrigerator near some extra chickpeas. The combination proved fantastic once I added some creamy, tangy feta cheese.
While the sauce is Argentinean, this dish’s flavor profile is more recognizably Mediterranean. I love this lively side dish, and I hope you do, too.
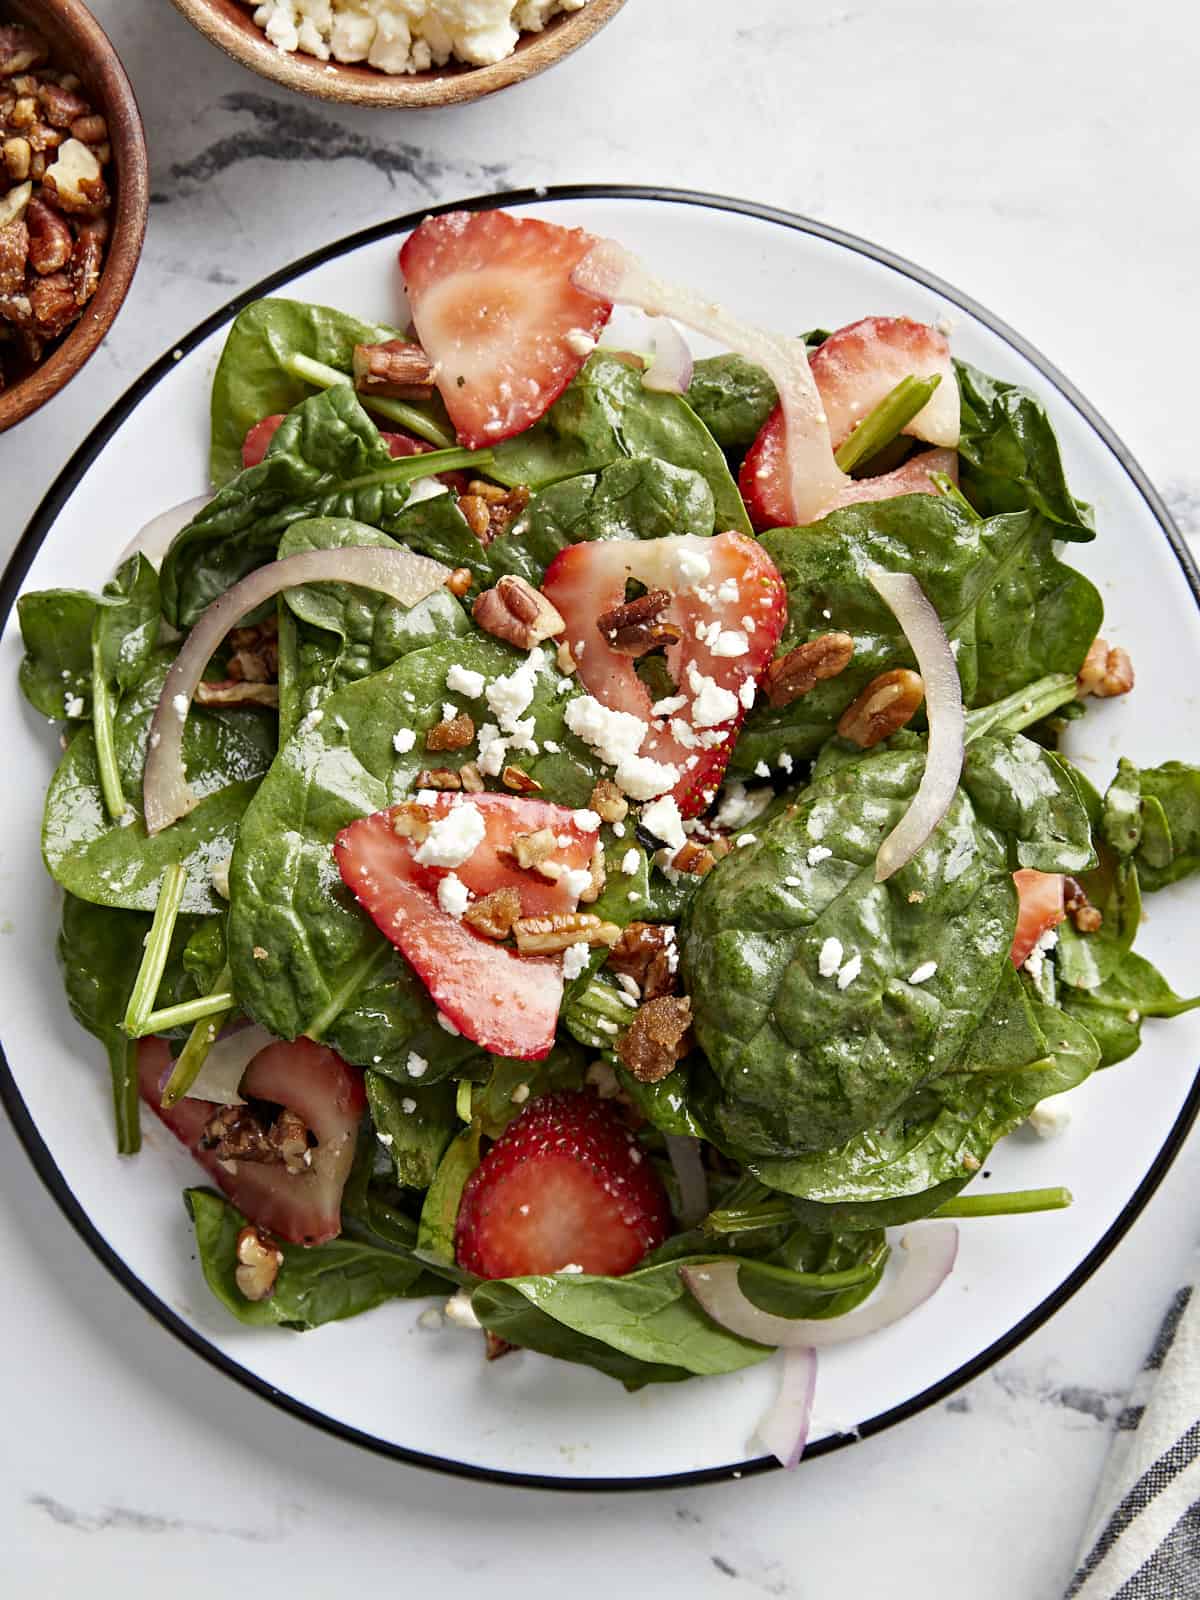
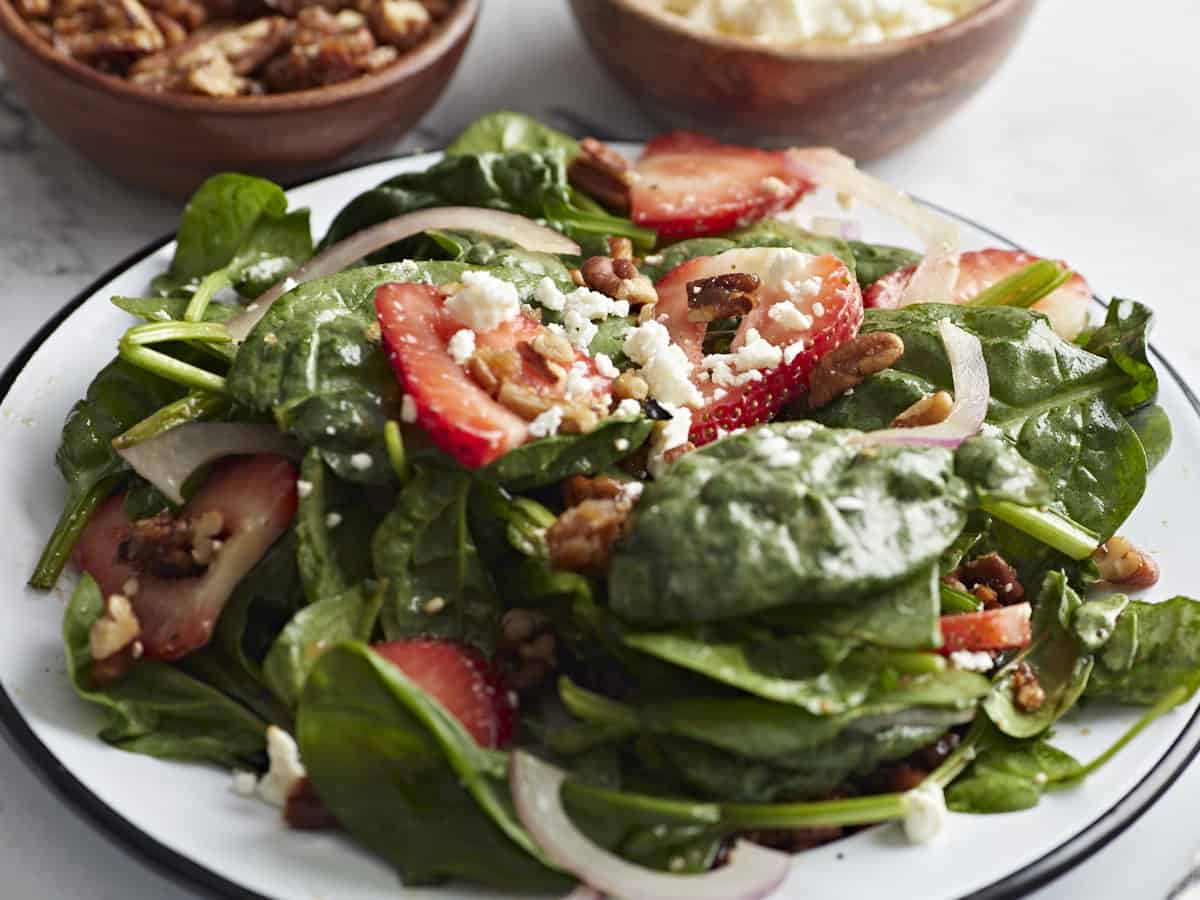
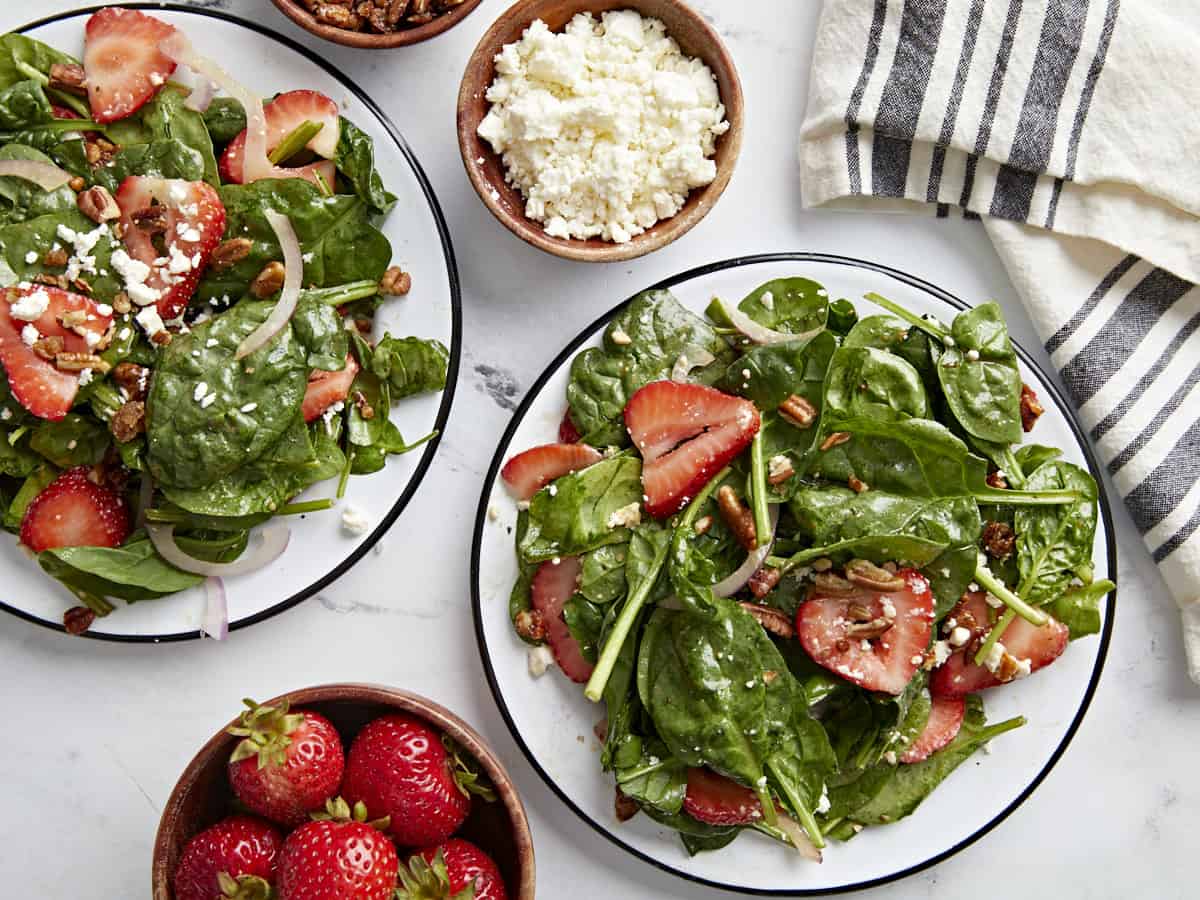
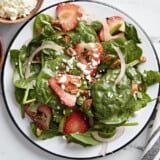
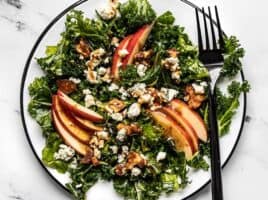
I’ve made several versions of Strawberry Spinach Salad over the years, but this by far is my favorite! It includes fresh strawberries, salty feta cheese, candied pecans, and an easy homemade balsamic vinaigrette. The textures and flavors are insanely delicious and compliment each other perfectly! It reminds you of a fancy salad that you’d get at a cafe, but you can make it at home for a fraction of the cost. This is one of those “summer” salads that I could literally eat all year long!
What’s in Strawberry Spinach Salad
Strawberry Spinach Salad includes lots of wonderful flavors and textures that compliment each other perfectly. Here’s what you’ll need:
Baby Spinach – a simple bed of spinach greens is the base foundation for this salad.
Strawberries – fresh, juicy, strawberries add a simple and wonderful sweetness.
Red onion – slightly sharp and a nice contrast to the sweetness of the strawberries and candied pecans.
Feta cheese – soft, creamy, salty feta cheese pairs well with the strawberries in this salad. If you’re not a fan of feta cheese, goat cheese or blue cheese would also work well.
Candied pecans – these candied pecans, in my humble opinion, are one of the best parts of the salad. It adds a crunchy, sweet texture, and you can swap the pecans out for toasted walnuts or toasted sliced almonds, which would also be totally delicious!
Balsamic vinaigrette – easy homemade balsamic vinaigrette dressing tops it all off.
Balsamic Vinaigrette Dressing
The dressing for this strawberry salad is probably my favorite part…ok it’s actually tied with the candied pecans! I started with Beth’s easy homemade balsamic vinaigrette and made one adjustment by replacing the mayonnaise with honey for a slightly sweeter taste. The results – absolutely amazing!
You can certainly use a store bought balsamic vinaigrette if you don’t have a well stocked pantry with all the necessary ingredients on hand, but I promise this homemade balsamic vinaigrette will taste wayyy better! I highly recommend you give it a try! ;)
Budget-Friendly Recipe Tips
If chopped nuts are a little too costly at your local store, toast up some day-old bread to use in place of the chopped pecans, similar to our Panzanella salad.
To bulk up the salad and make it stretch a little further, add your favorite pasta like penne or bow-tie pasta.
How To Store Strawberry Spinach Salad
Strawberry spinach salad stores well in the fridge for up to 3 days. In order to keep the spinach from wilting too much, it’s best to store the strawberries and the dressing separately and add them to the salad right before you’re ready to serve.
Serving Suggestions
This salad makes a great lunch meal by itself, Monti and I totally gobbled it up at the test studio, but you can also add some grilled chicken or sautéed shrimp on top for a more filling meal. This salad also pairs well with other leaner protein like baked cod and pan-seared chicken.
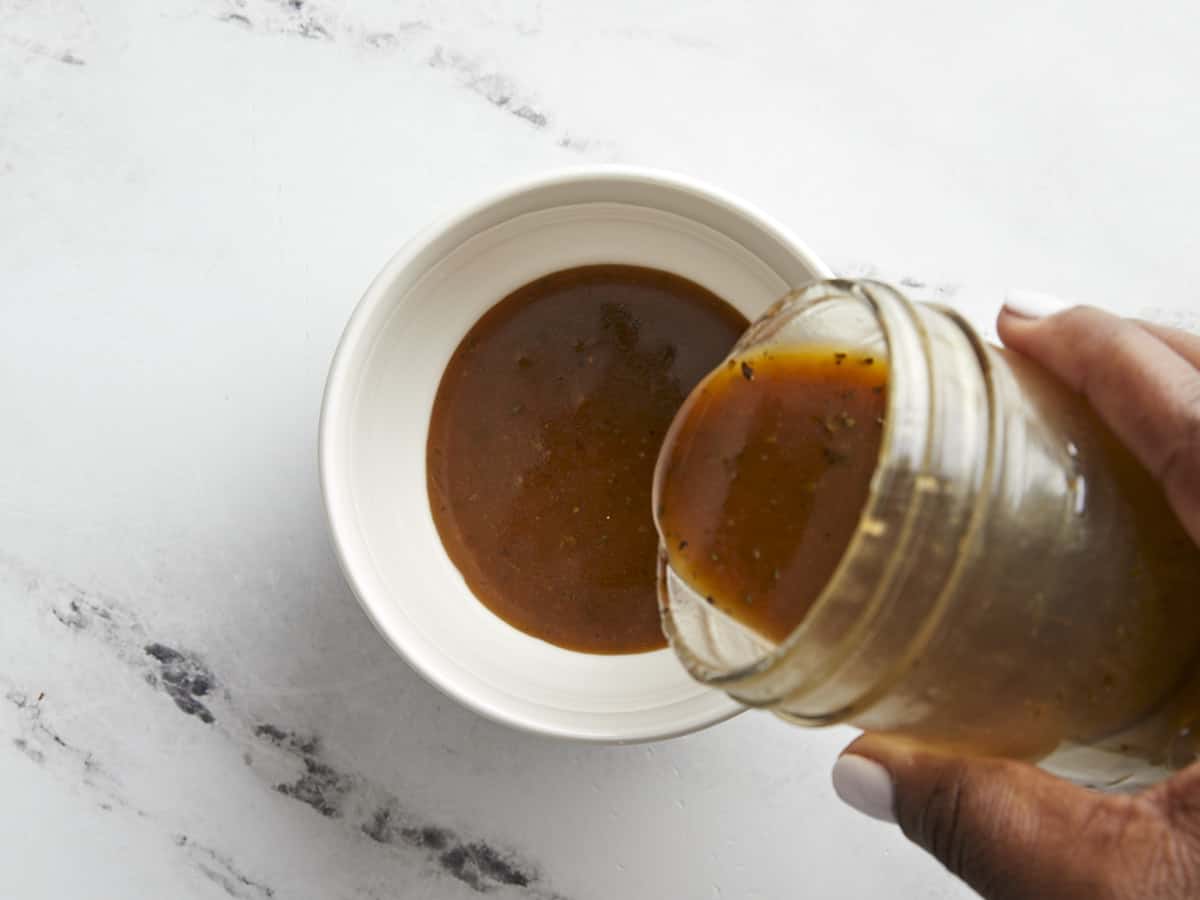
Start by making the homemade balsamic vinaigrette dressing. Add the olive oil, balsamic vinegar, honey, Dijon mustard, minced garlic clove, dried basil, salt, and freshly cracked black pepper to a jar, bowl, or blender. Close the jar and shake the ingredients together, whisk in a bowl, or blend until the dressing is evenly combined. Set the dressing aside.
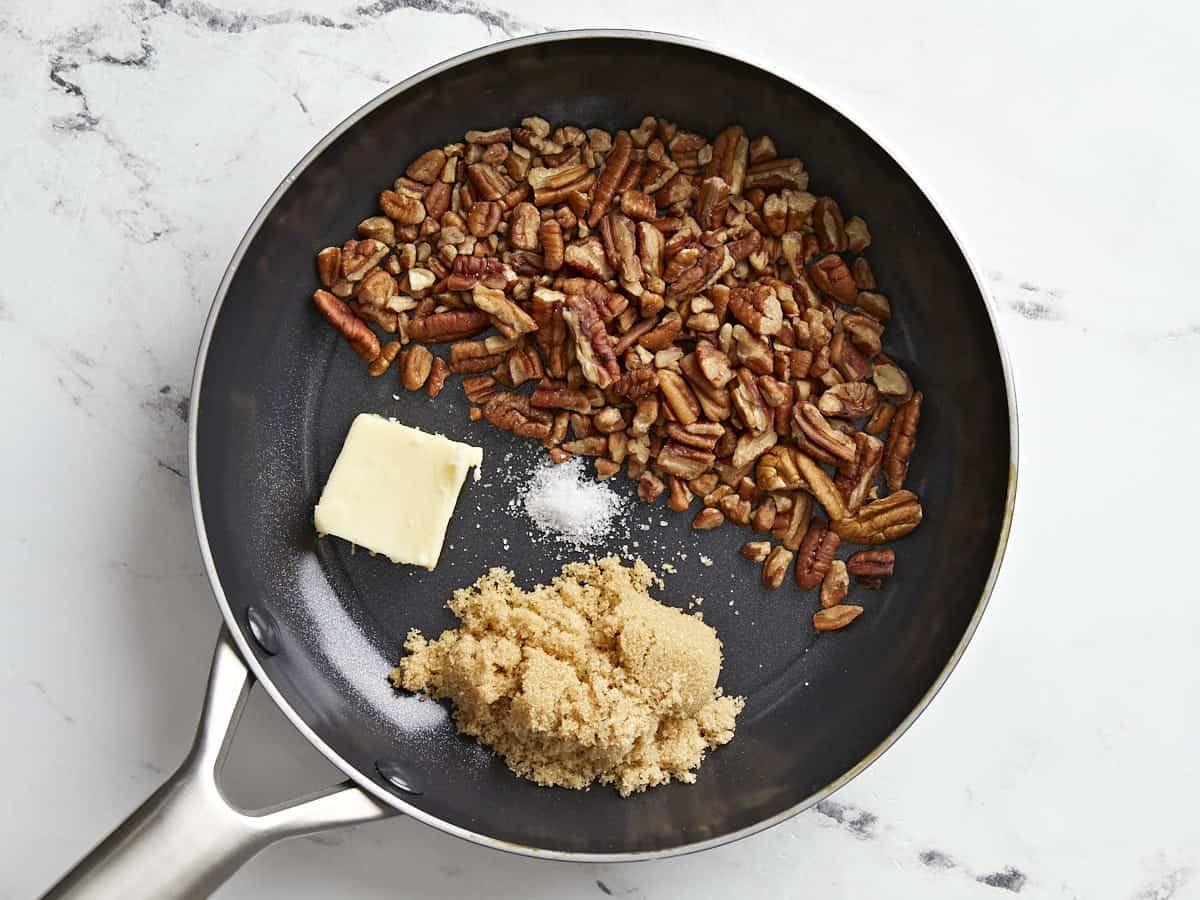
Next make the candied pecans. Add the butter, brown sugar and a pinch of salt to a small non-stick skillet. Heat over medium heat while stirring.
Once the butter and brown sugar begins to melt add the chopped pecans to the skillet and stir with the brown sugar mixture. Continue to cook over medium heat, stirring every 10-15 seconds until the brown sugar fully melts (looks glossy instead of grainy) and completely coats the pecans.
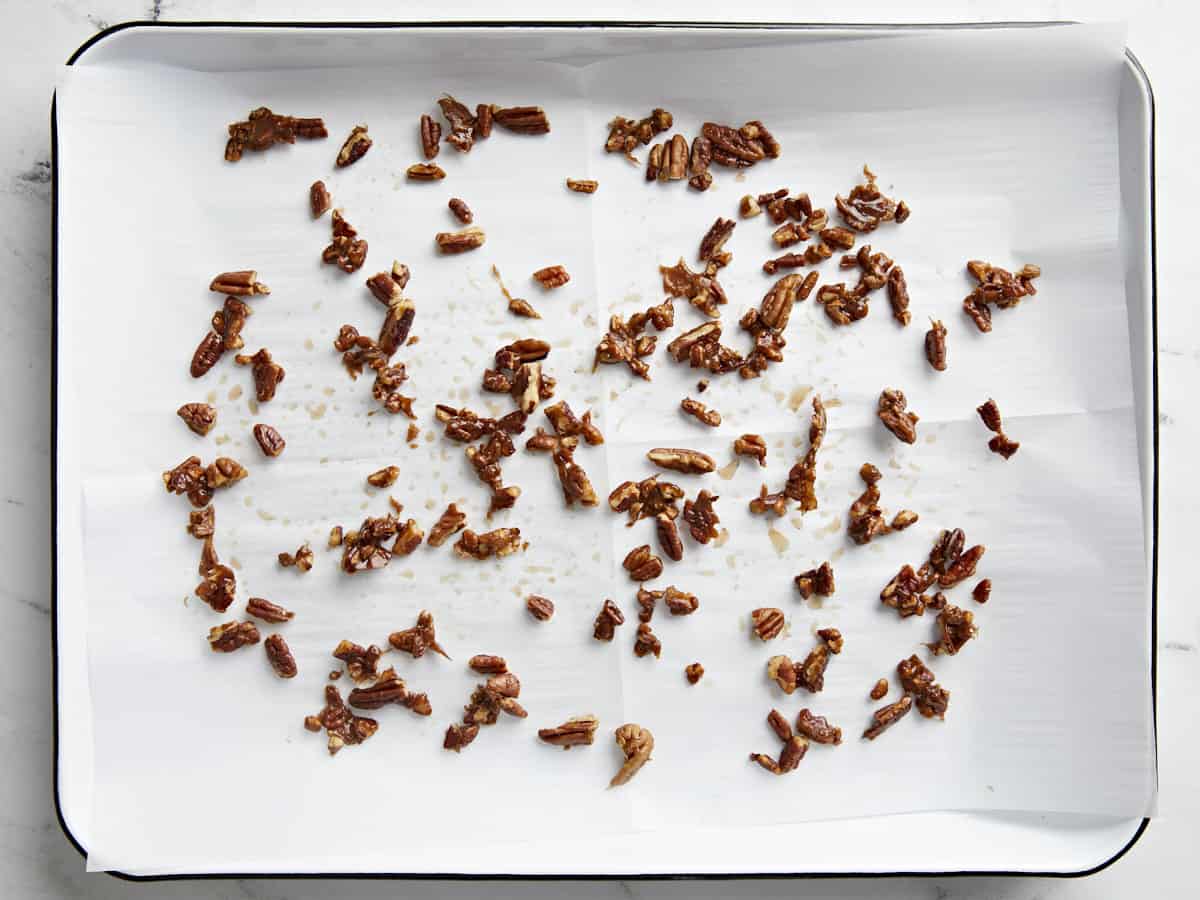
Remove the skillet from the heat immediately and transfer the candied pecans to a parchment lined baking sheet. Spread the pecans out evenly in a flat layer and allow them to cool for 10 minutes while the candied coating fully hardens.
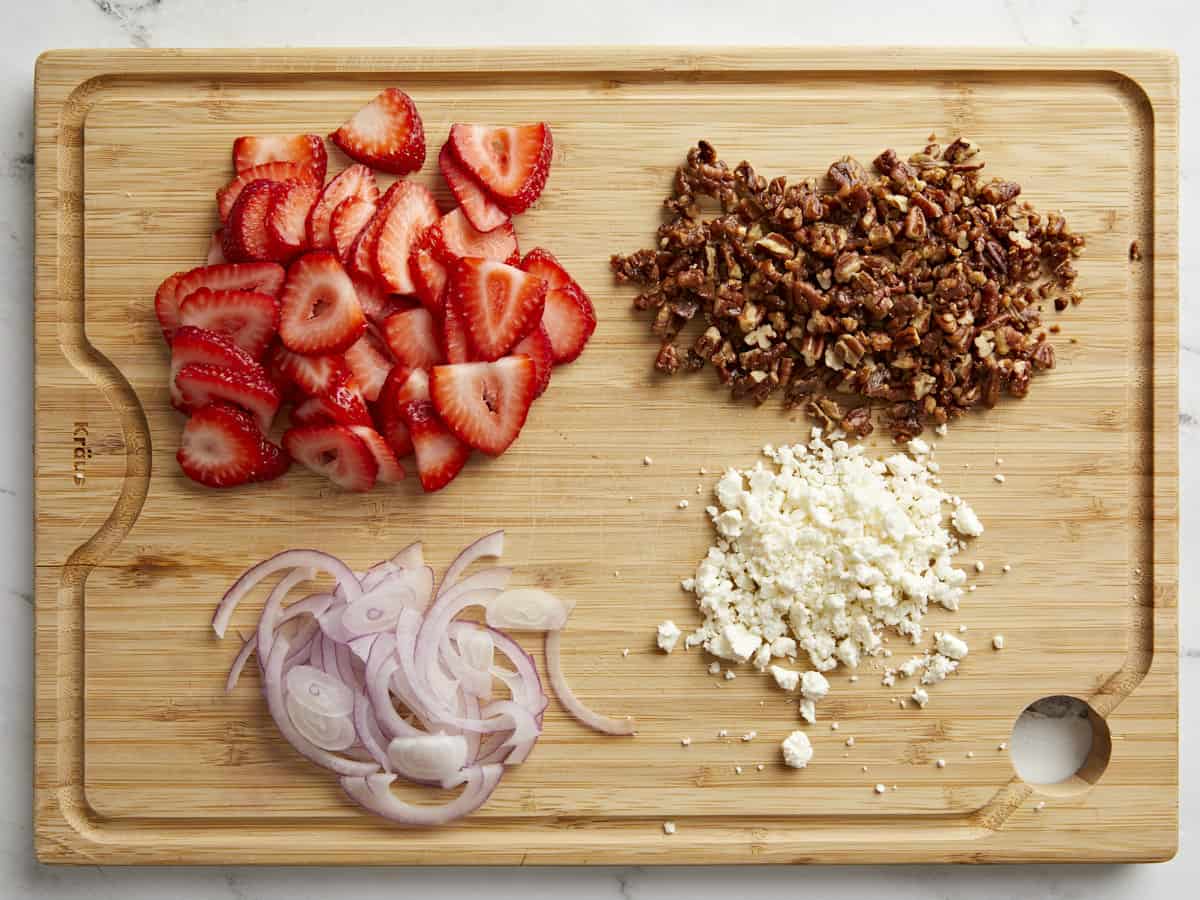
Now prep the strawberries, red onion and feta cheese. Remove the stems and slice the strawberries, thinly slice the red onion, and crumble the feta. Set these ingredients to the side.
Divide the spinach between four plates. Drizzle 2 Tbsp of balsamic vinaigrette on top of each bed of spinach.
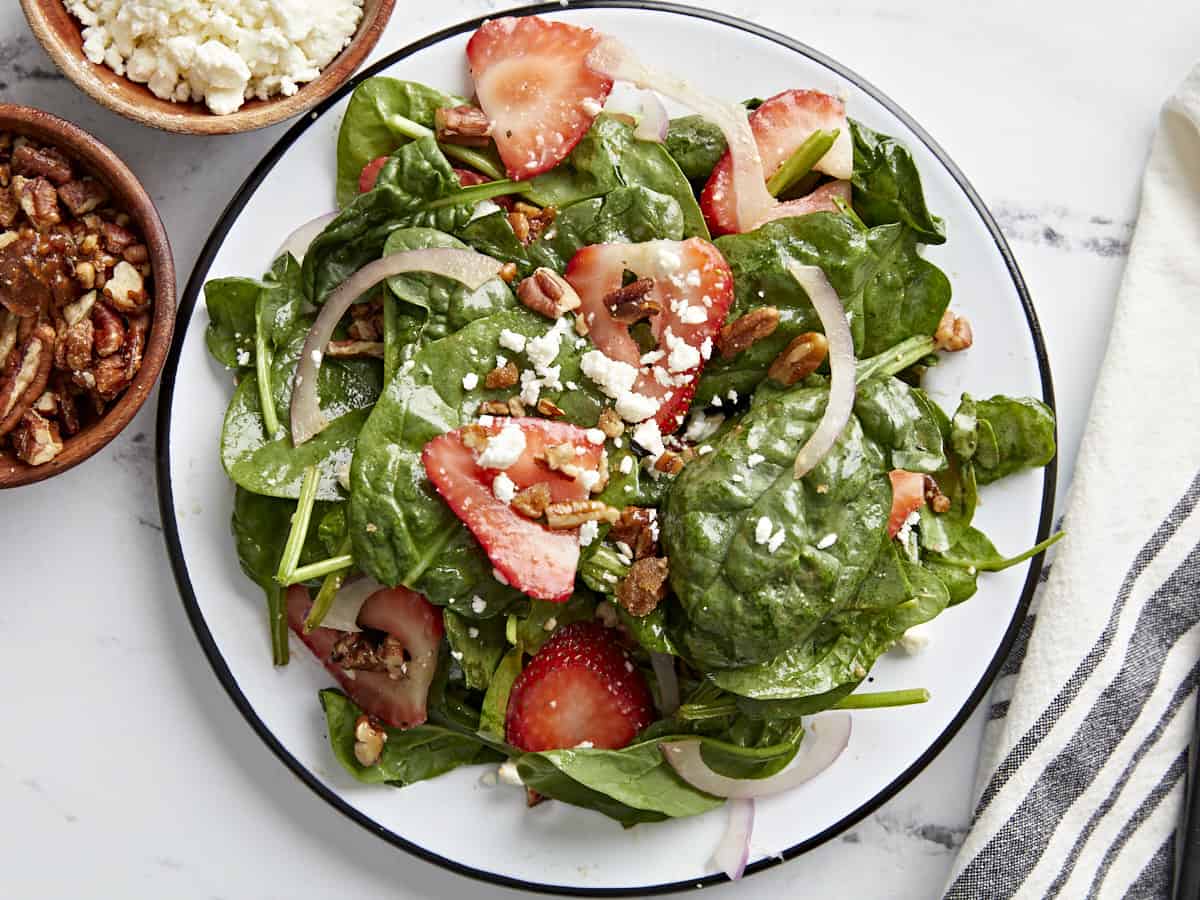
Add sliced strawberries, red onions, a tablespoon or two of candied pecans, and a tablespoon of feta cheese to each salad. Feel free to drizzle a little more balsamic vinaigrette over the top of each and enjoy!
HOW TO MAKE STRAWBERRY SPINACH SALAD – STEP BY STEP PHOTOS
Start by making the homemade balsamic vinaigrette. Add 1/3 cup olive oil, 3 Tbsp balsamic vinegar, 2 Tbsp honey, 1/2 Tbsp Dijon mustard, 1 garlic clove minced, 1/2 tsp dried basic, 1/4 tsp salt, and 1/4 tsp freshly cracked black pepper to a jar, bowl, or blender. Add a top to the jar and shake, whisk in a bowl, or blend until all the ingredients are evenly combined. Set the vinaigrette dressing aside.
Next make the candied pecans. In a small non-stick skillet add 1/2 Tbsp butter, 2 Tbsp brown sugar, and a pinch of salt. Heat over medium heat while stirring just until the butter and brown sugar begins to melt. Add 1/2 cup of chopped pecan and stir to coat in the brown sugar mixture. Continue to cook for 2-4 minutes or until the brown sugar is fully melted (looks glossy, not grainy) and completely coating the pecans.
Remove the skillet from the heat immediately, to prevent the brown sugar from over cooking and burning. Transfer the candied pecans to a parchment lined baking sheet, spread out in a flat layer. Allow them to cool for 10 minutes and the sugar coating will fully harden.
Now prep the rest of the salad ingredients. Wash and slice 1/2 pound of strawberries, thinly slice 1/4 of a red onion, portion out 2 oz of crumbled feta cheese, and gather your cooled candied pecans.
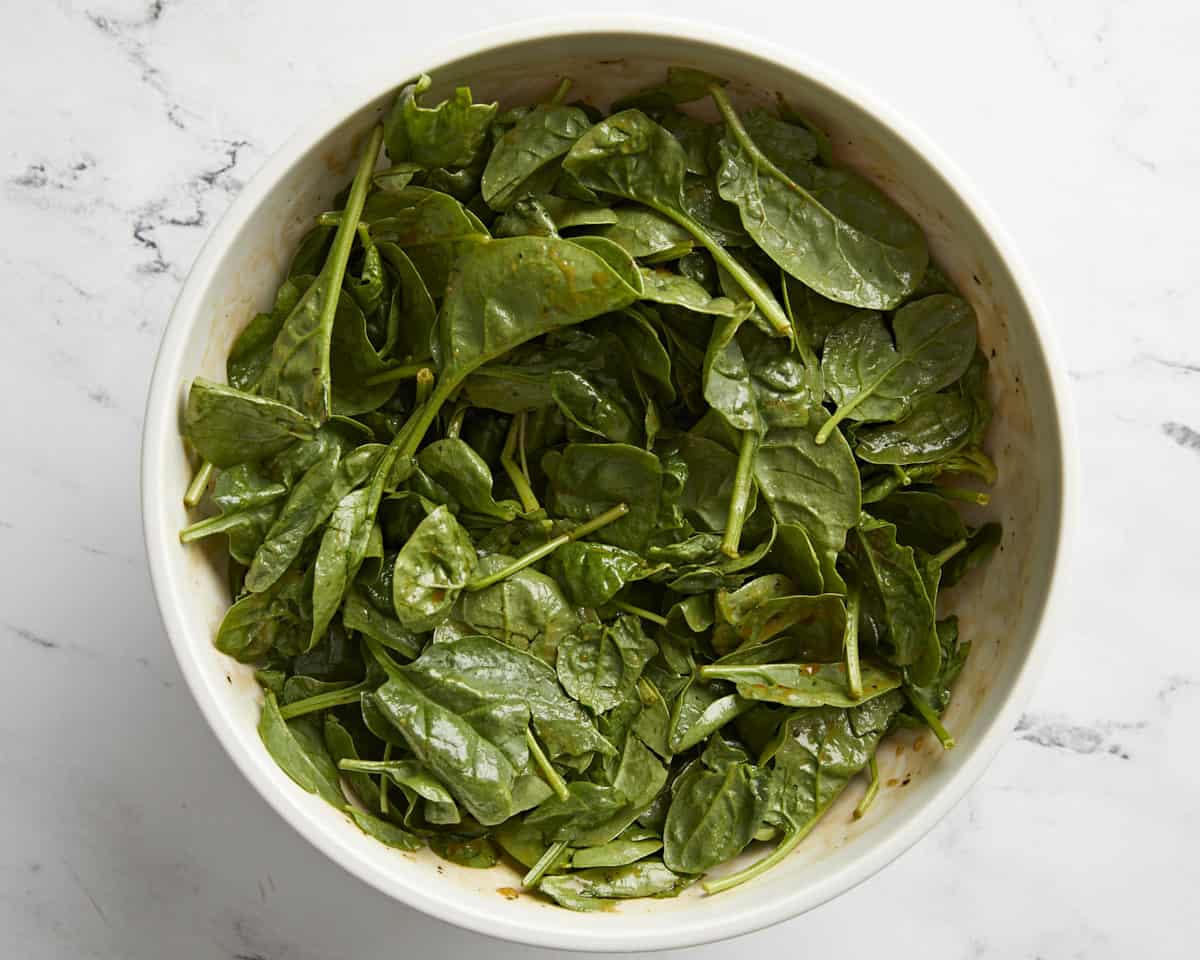
Divide 8 oz of spinach between four salad plates (roughly 2 oz per plate) or you can add all of the spinach to a larger serving bowl. Add 2 Tbsp of the balsamic vinaigrette to each salad plate or drizzle 1/3 cup of the dressing over the bowl of spinach. Reserve the rest of the dressing to add right before serving.
Divide the toppings (sliced strawberries, sliced red onion, 1 tablespoon of crumbled feta, and 1-2 tablespoons of candied pecans) between the four salad plates or add the toppings to a larger salad serving bowl. Drizzle each salad with a little more of the balsamic dressing and enjoy!
This orzo pasta salad recipe is the perfect side dish or lunch! Bursting with flavor, it’s loaded with fresh veggies and feta cheese.
Need an easy side dish or lunch idea? This orzo pasta salad recipe is bursting with flavor and the perfect accessory for any meal. It stars the tender pasta grains with crunchy veggies, salty feta cheese, fresh herbs and a zippy vinaigrette dressing. The best part? It tastes great for days! Leftovers hold up well in the fridge, making it perfect for lunches throughout the week too.
Ingredients in orzo pasta salad
This orzo pasta salad recipe is simple to put together: it’s a matter of cooking pasta, chopping veggies, and making a quick vinaigrette! The flavor profile has Mediterranean or Greek vibe, bursting with fresh herbs, lemon and olive oil. You can also add any vegetables you like! Here’s what you’ll need for the base salad:
Orzo
English cucumber
Cherry tomatoes
Shallot
Fresh oregano and parsley
Lemon juice and lemon zest
Red wine vinegar
Garlic powder, dried dill, and salt
Olive oil
Feta cheese crumbles
Types of orzo
Orzo is a small pasta that’s shaped like grains of rice. Known as risoni in Italy, it can be served in various ways: as a side dish, pilaf, as part of an orzo salad, or in soups. There are several sizes of orzo available in stores; we prefer the medium grains that are about the size of grains of rice. You can also find different colors of orzo, like tricolor orzo that’s colored naturally with sundried tomatoes and spinach.
Variations and mix-ins
This orzo pasta salad is easily customizable to the ingredients you have on hand or your flavor preferences! It would be perfect with Kalamata olives like in a Greek pasta salad, or whatever vegetables are hiding in your refrigerator. Here are a few ideas for adding to this orzo pasta salad:
Kalamata olives
Red pepper, diced
Jarred roasted red pepper, diced
Broccoli, cut into very small florets
Red onion slices
Zucchini, small diced
Spinach or kale, chopped
Orzo pasta salad storage info
This orzo pasta salad recipe tastes great the day it is made, but it stores very well! You can also make it in advance and refrigerate until serving, or keep it refrigerated as a lunch idea to eat throughout the week. Here are a few tips for storage:
This orzo pasta salad lasts for up to 5 days in the refrigerator. It’s ideal for making ahead or healthy lunches throughout the week.
Refresh the flavors before serving. Bring the salad to room temperature. Then stir in a drizzle of olive oil and a bit more crumbled feta cheese. You may or may not need an extra pinch of salt.
Ways to serve it
Pasta salad recipes are fun and versatile: they work with just about anything! They’re great for a summer dinner with any grilled main, or with fish, chicken, or vegetarian mains. Or add pita bread for a light lunch! Here are a few great ways to serve it:
Fill a medium pot with 10 cups water and bring it to a boil. Once boiling, add the orzo and stir. Bring the pot back to a boil, then boil for about 8 minutes until the orzo is tender. Place the orzo in a strainer to drain, then rinse it under cold water until it comes to room temperature.
Meanwhile, prepare the fresh vegetables and herbs as noted in the ingredient list.
In a large bowl, whisk together the lemon juice, lemon zest, red wine vinegar, garlic, garlic powder, dill, and kosher salt. Then whisk in the olive oil.
Once the orzo is done, add it to the large bowl of dressing and toss with the chopped vegetables and herbs. Add the feta cheese and fresh ground black pepper and stir to combine.
Taste and add more salt to taste if necessary. Serve immediately. Stores up to 5 days refrigerated (leftovers taste great; allow to come to room temperature and add a swirl more olive oil or a bit more cheese or salt as necessary).
Category:Side dish
Method:Stovetop
Cuisine:Pasta salad
Diet:Vegetarian
Keywords: Orzo pasta salad, orzo pasta salad recipe, orzo salad
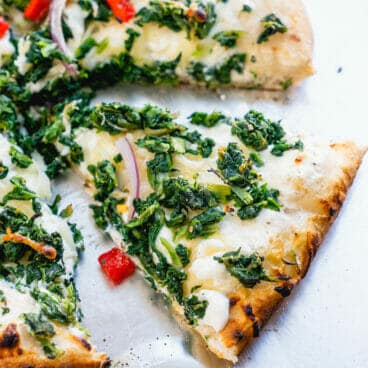
This red pepper pizza is an easy topping idea with major flavor! Sprinkle with roasted peppers, feta, and oregano for an unforgettable pie.
Need some pizza night ideas? Here’s an idea that’s so simple but tastes like it’s from your favorite pizza joint: this red pepper pizza with feta and oregano! First stir together our famous easy pizza sauce, which requires just 5 ingredients for its garlicky tomato flavor. Then top with mozzarella cheese, jarred roasted red pepper strips and salty feta cheese. Baked until the crust is golden and showered with fresh oregano, it’s one unforgettable pie.
Ingredients for red pepper pizza
This red pepper pizza is quick and easy: the model of Italian simplicity! Here at A Couple Cooks we’ve eaten a lot of great pizza in the US and Italy, and what we’ve found is this: the best topping combinations are the simplest. There’s a reason that margherita pizza is the world’s favorite! All you need are a few quality ingredients to make magic. Here’s what you’ll need for this recipe:
Shredded mozzarella cheese (whole milk if possible)
Feta cheese crumbles
Jarred roasted red peppers
Fresh oregano
For the pizza dough
The trick to the best red pepper pizza? Homemade pizza dough. There are several options for dough depending on your preferences and what tools you have available. The first recipe is our standard, but the others are great alternatives.
Best Pizza Dough: The standard! This is our best oven pizza dough and works best on a pizza stone.
Pizza Oven Dough: Got a pizza oven? This is the dough recipe for you.
There are a few other styles of pizza dough that also work here. You can try a Pan Pizza in a cast iron skillet, no special pizza tools required. Or, make our Best-Ever Sheet Pan Pizza: it makes a double recipe in a large sheet pan, perfect for serving a crowd.
Pizza making tools
You’ll need a few tools if you choose the standard or thin crust dough recipes. Again, if you chose the pan pizza or sheet pan pizza recipes above, no extra tools are needed!
Pizza stone: High temperatures make the crust crisp on the outside and chewy on the inside. Here’s the pizza stone we recommend, and a bit more on how to care for it.
Pizza oven (optional): Want to make next level pizza? Try an outdoor pizza oven! We own and have extensive experience with both the Ooni pizza oven and the ROCCBOX (the ROCCBOX is our favorite). We used a pizza oven to get the charred crust you see in the photos.
Red pepper pizza topping variations
There are lots more fun pizza toppings to add to this red pepper pizza, if you’d like to get more creative! Here are a few ideas for flavors that would pair well:
Place a pizza stone in the oven and preheat to 500°F. OR preheat your pizza oven (here’s the pizza oven we use).
Make the pizza sauce: Make the Homemade Pizza Sauce. (You’ll use about ½ cup for the pizza; reserve the remaining sauce and refrigerate for up to 1 week.)
Bake the pizza: When the oven is ready, dust a pizza peel with cornmeal or semolina flour. (If you don’t have a pizza peel, you can use a rimless baking sheet or the back of a rimmed baking sheet. But a pizza peel is well worth the investment!) Stretch the dough into a circle; see How to Stretch Pizza Dough for instructions. Then gently place the dough onto the pizza peel.
Spread a thin layer of the pizza sauce over the dough. Add the mozzarella cheese. Add the red pepper strips and sprinkle with feta cheese.
Use the pizza peel to carefully transfer the pizza onto the preheated pizza stone. Bake the pizza until the cheese and crust are nicely browned, about 5 to 7 minutes in the oven (or 1 to 2 minutes in a pizza oven).
Allow the pizza to cool for a minute or two before adding the fresh oregano leaves. Slice into pieces and serve immediately.
We’re all about “catch-all” recipes here at Budget Bytes—flexible recipes that you can add just about anything to, so you can use up the leftover odds and ends in your fridge. This Baked Eggs recipe is especially great because it’s an almost effortless way to treat yourself to an extra special weekend breakfast AND use up your leftovers at the same time. Now that’s what I call working smarter, not harder. 🙌
What Are Baked Eggs?
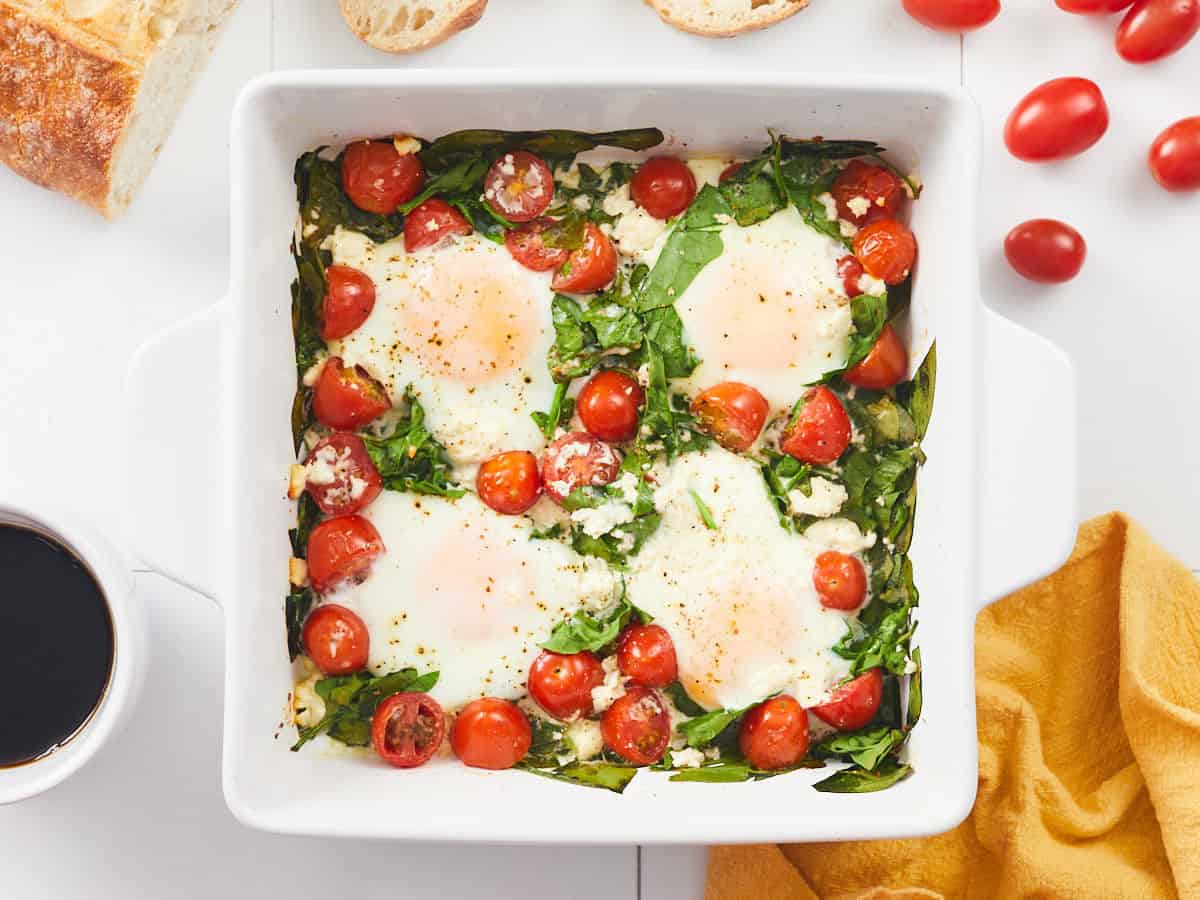
I know, the name sounds self-explanatory, but let me explain a little further about what we’ve got going on in this dish. These baked eggs are simply eggs that have been cracked into a casserole dish with a few “extras” (like vegetables and cheese), a little seasoning, and a splash of cream to keep the eggs moist and delicate as they bake. It’s seriously the easiest breakfast dish you can make.
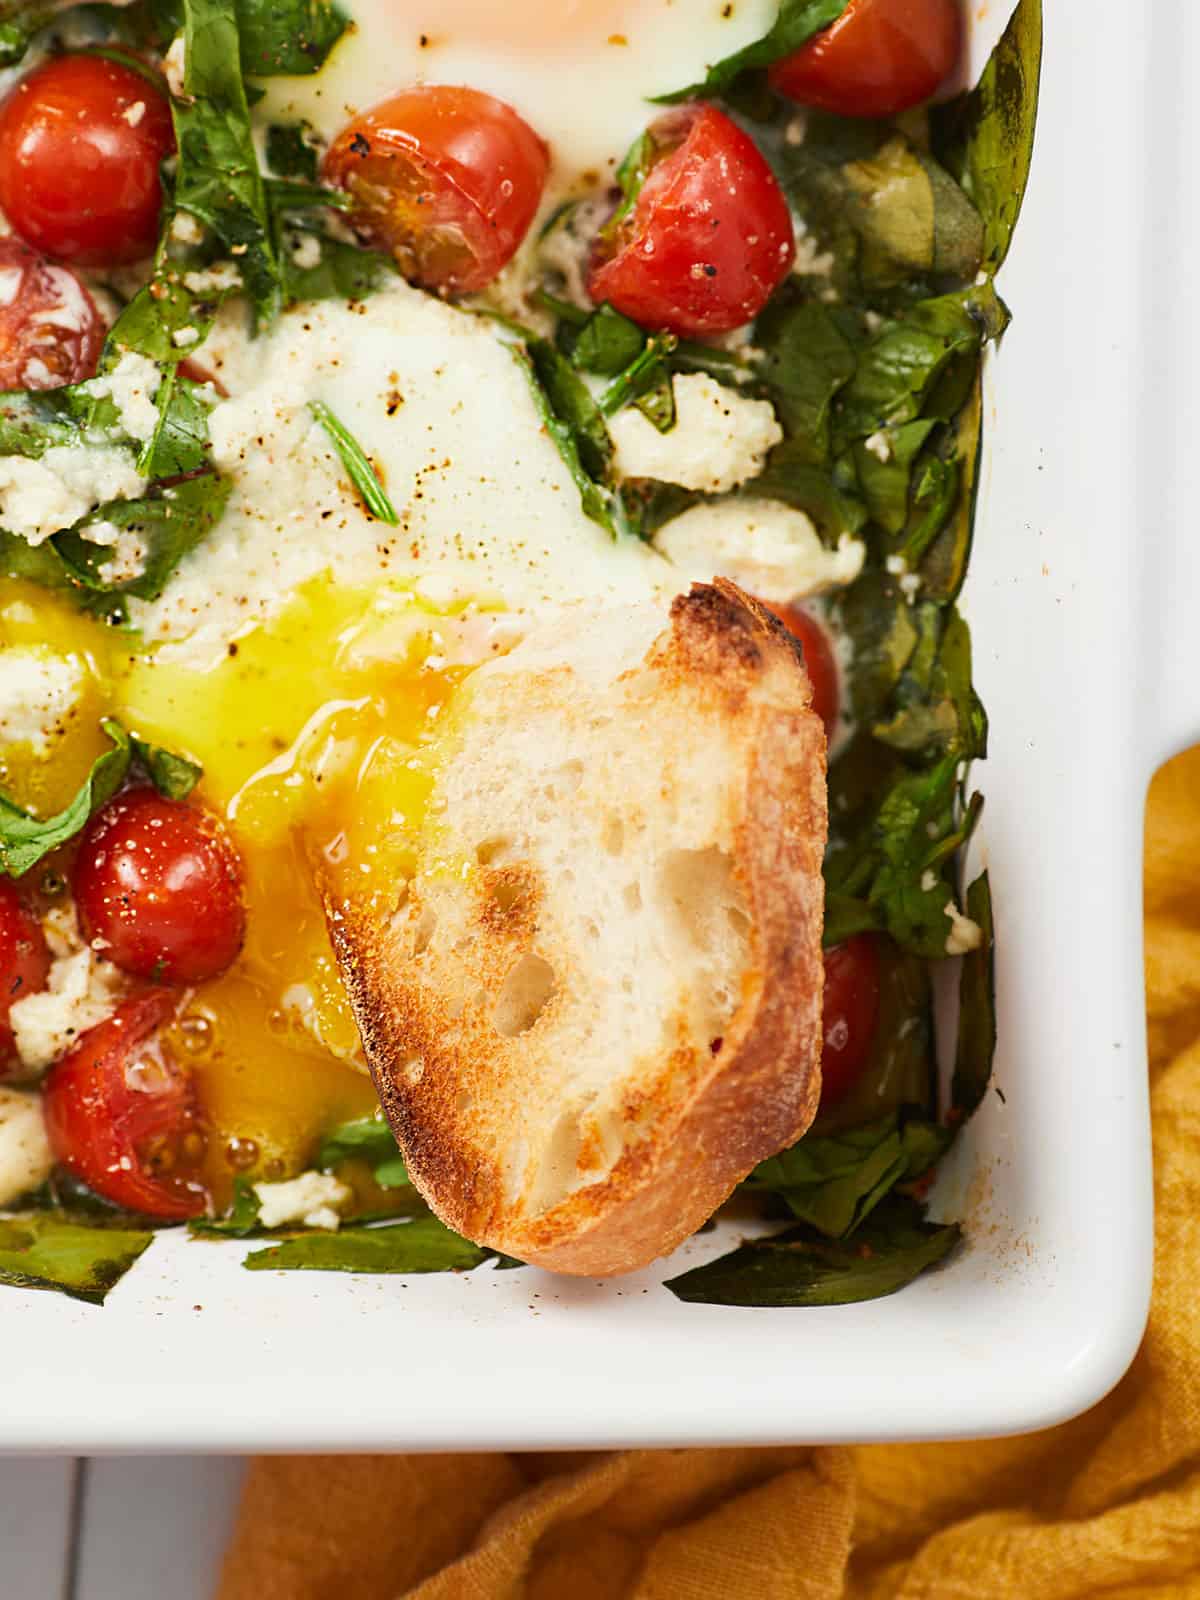
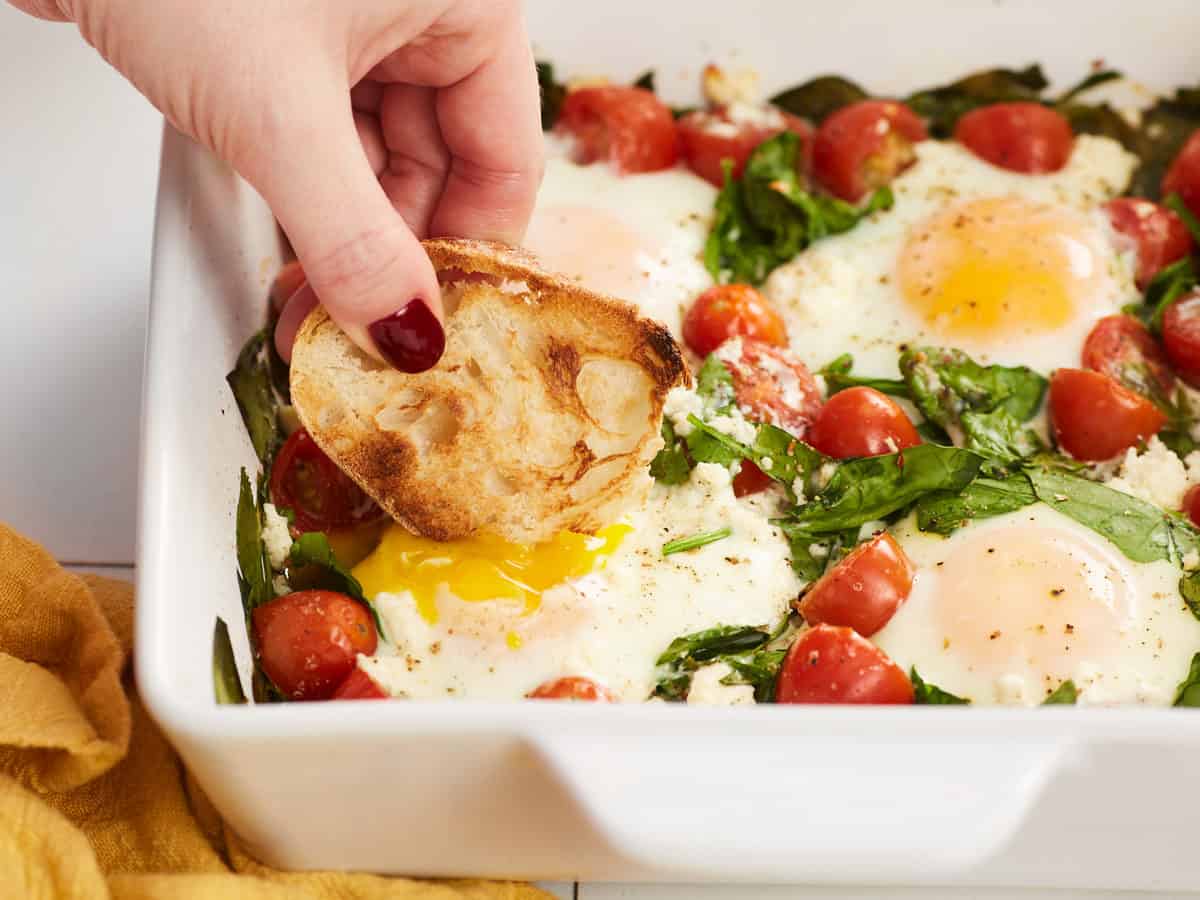
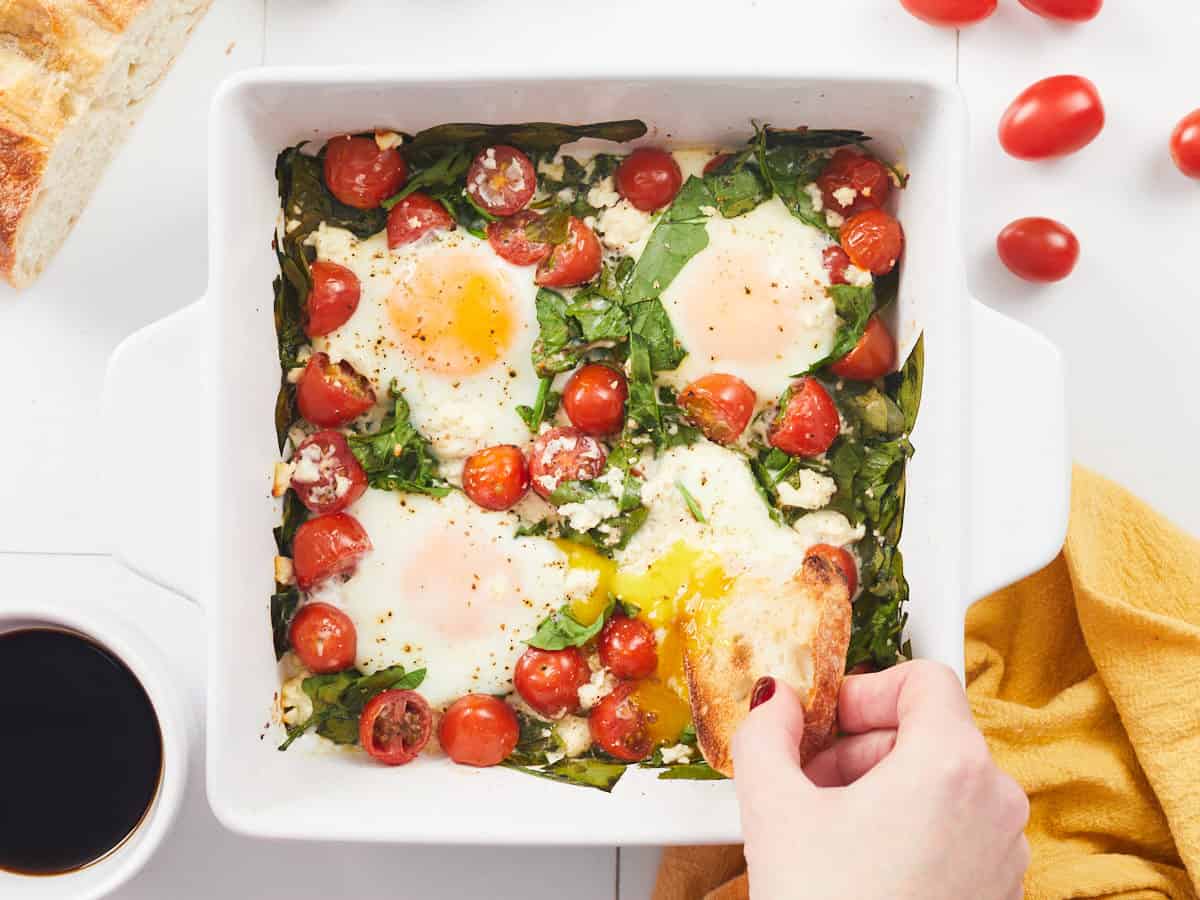
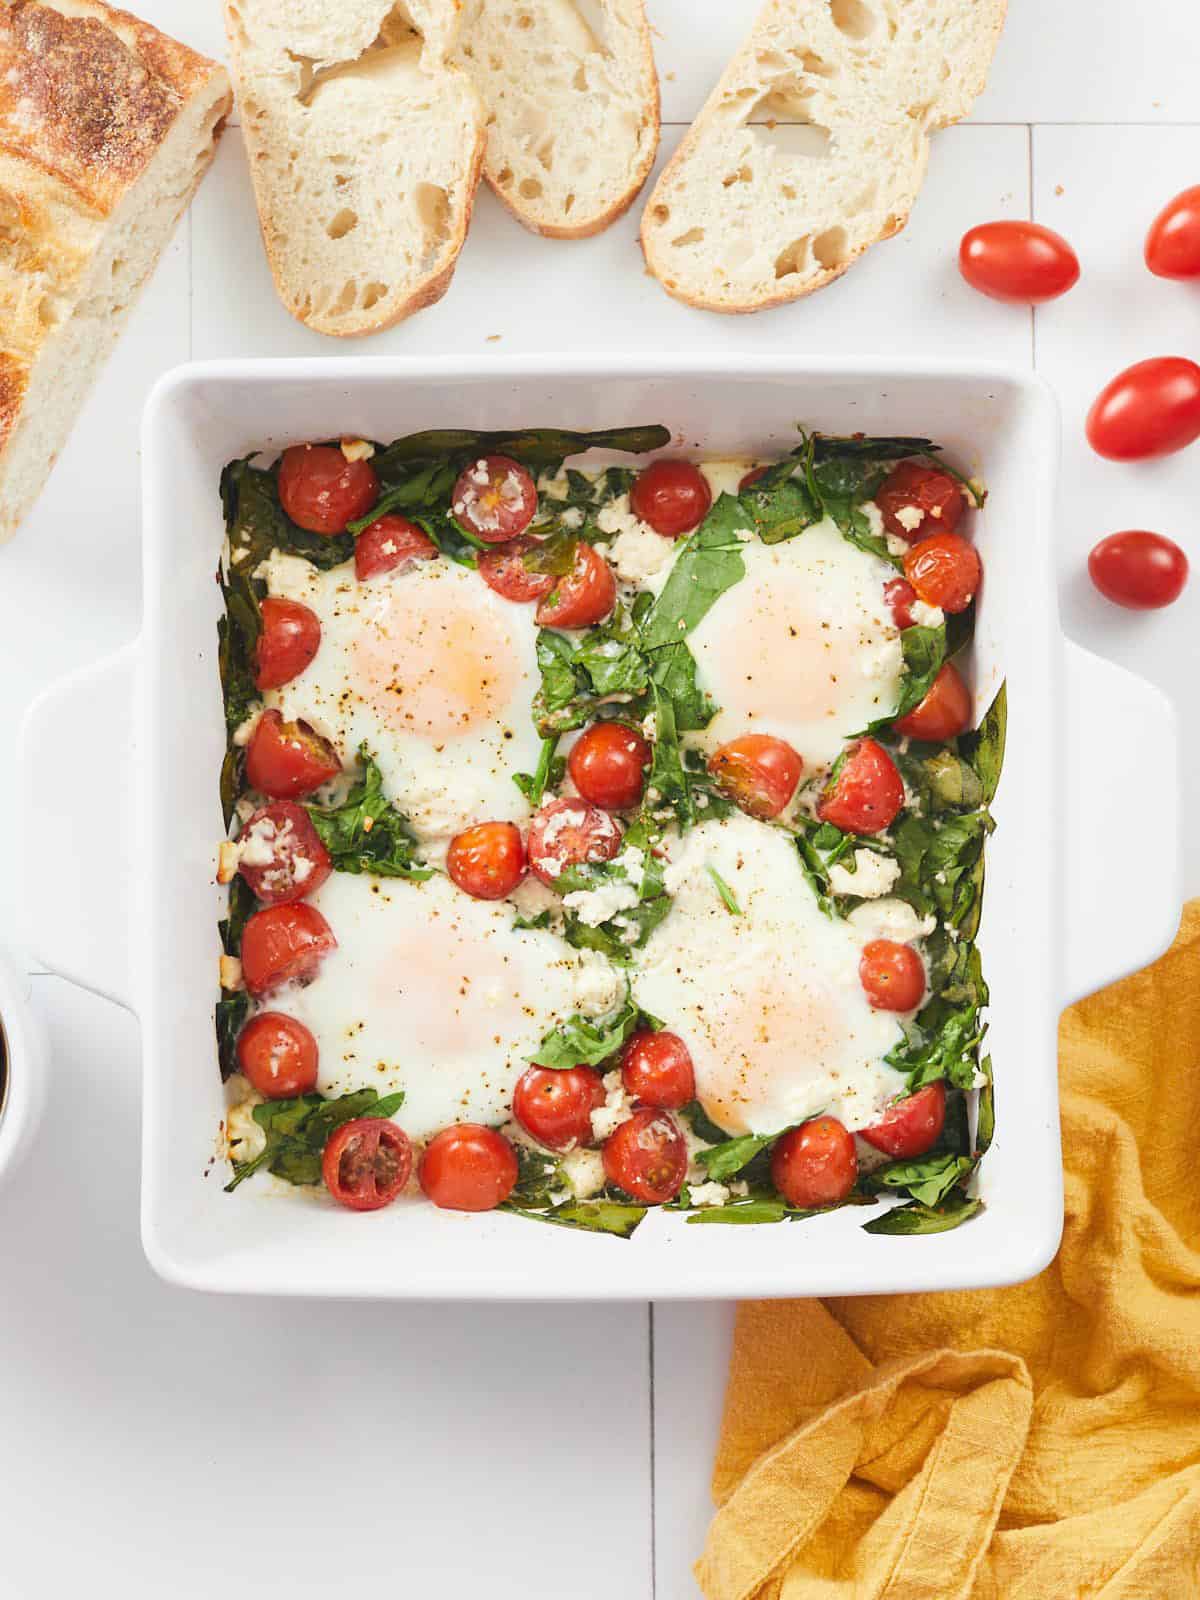
Baked eggs are usually baked only to the point where the whites are softly set and the yolks are still liquid. The yolks act as a sauce that pours over the eggs as they’re eaten, and it can be dipped or stopped up with some good bread. It’s the type of delicious simplicity that I love!
How Long to Bake Eggs
The amount of time needed to bake eggs to perfection is going to depend on several factors like the size and material of your baking dish, the temperature of the ingredients when they go into the oven, how many eggs you’re baking, and your oven’s temperature. So it’s imperative that you check the eggs early and keep a close eye on them as they bake.
I suggest baking eggs at either 350ºF or 375ºF and checking their doneness after about 10 minutes. If the whites are still not set, give them a few more minutes and just watch them closely.
What Else Can I Add?
One of the main reasons I love baked eggs is that they’re extremely versatile. Here are some ideas for other ingredients you can add to baked eggs:
Meat: try diced deli ham, cooked bacon, or cooked breakfast sausage.
Vegetables: bell pepper, onion, mushrooms, artichokes, zucchini.
You can also drizzle your favorite sauce over your baked eggs, like salsa, hollandaise sauce, or chimichurri. Get creative with this baked eggs recipe!
What to Serve with Baked Eggs
Baked eggs are begging to be served with some crusty bread, a toasted English muffin, or a biscuit. You can dip the bread or spoon the baked eggs right on top of the bread or biscuit. Either way, you don’t want to lose a drop of those liquid gold yolks! Round out the meal with some oven baked bacon or maple breakfast sausage, and then maybe some lemon blueberry scones for dessert. ;)
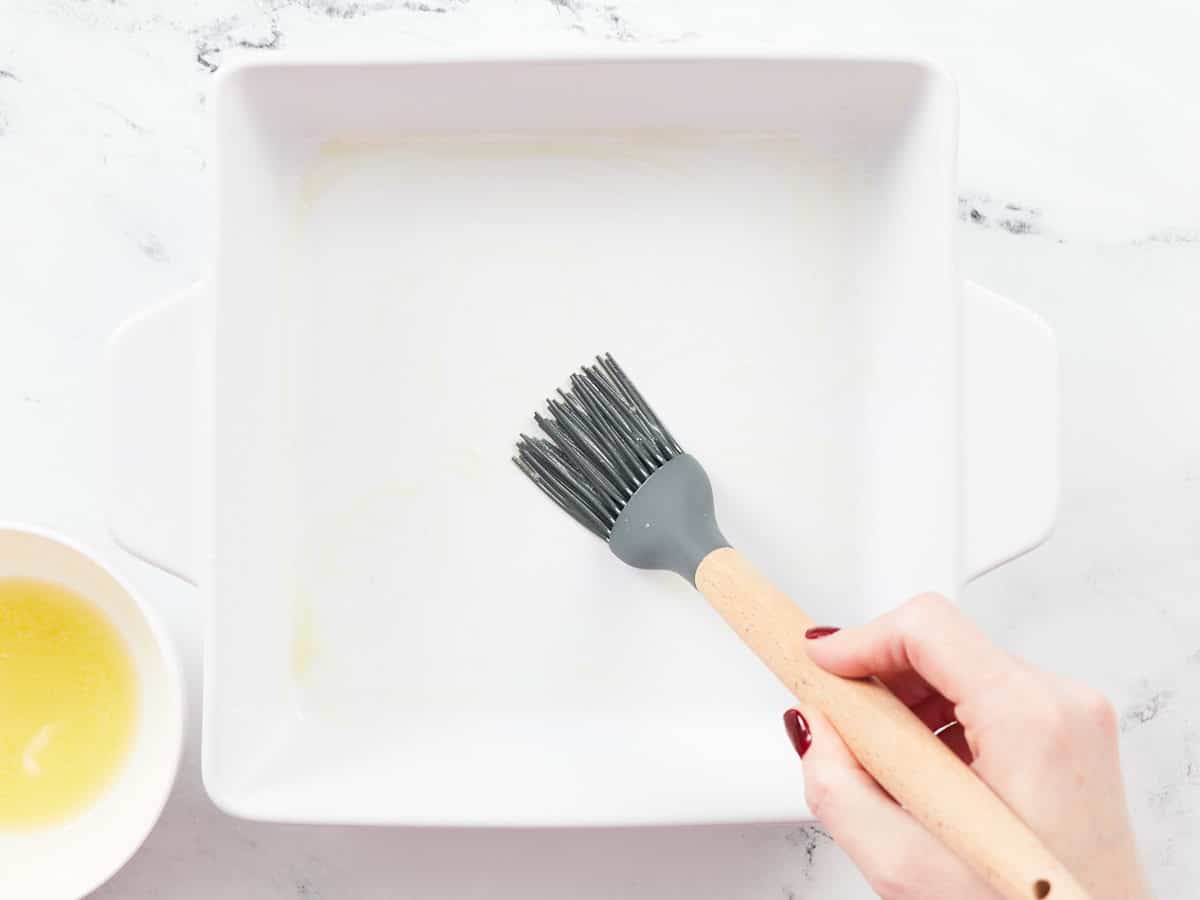
Preheat the oven to 375ºF. Melt the butter and brush the inside of an 8×8-inch casserole dish.
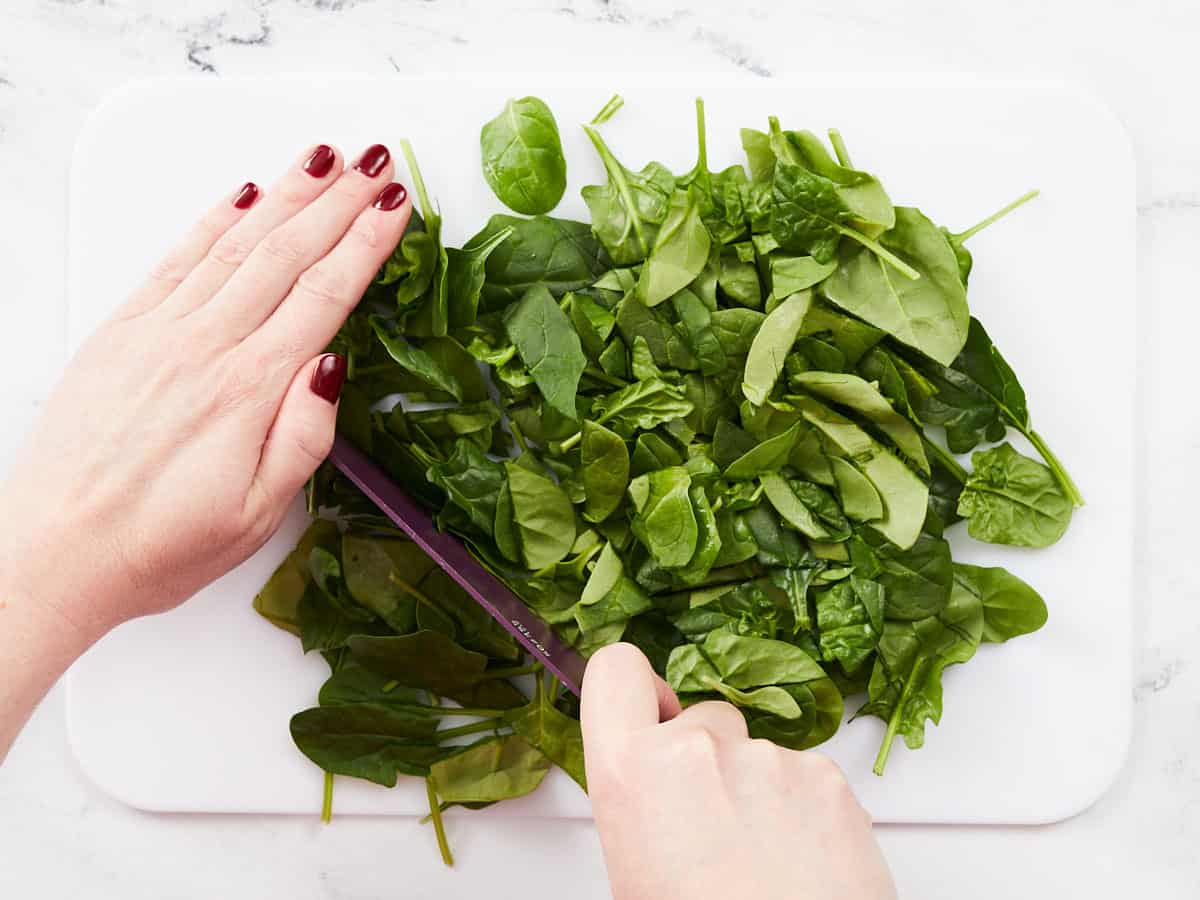
Roughly chop the spinach and slice the tomatoes in half. Sprinkle the spinach and tomatoes inside the casserole dish.
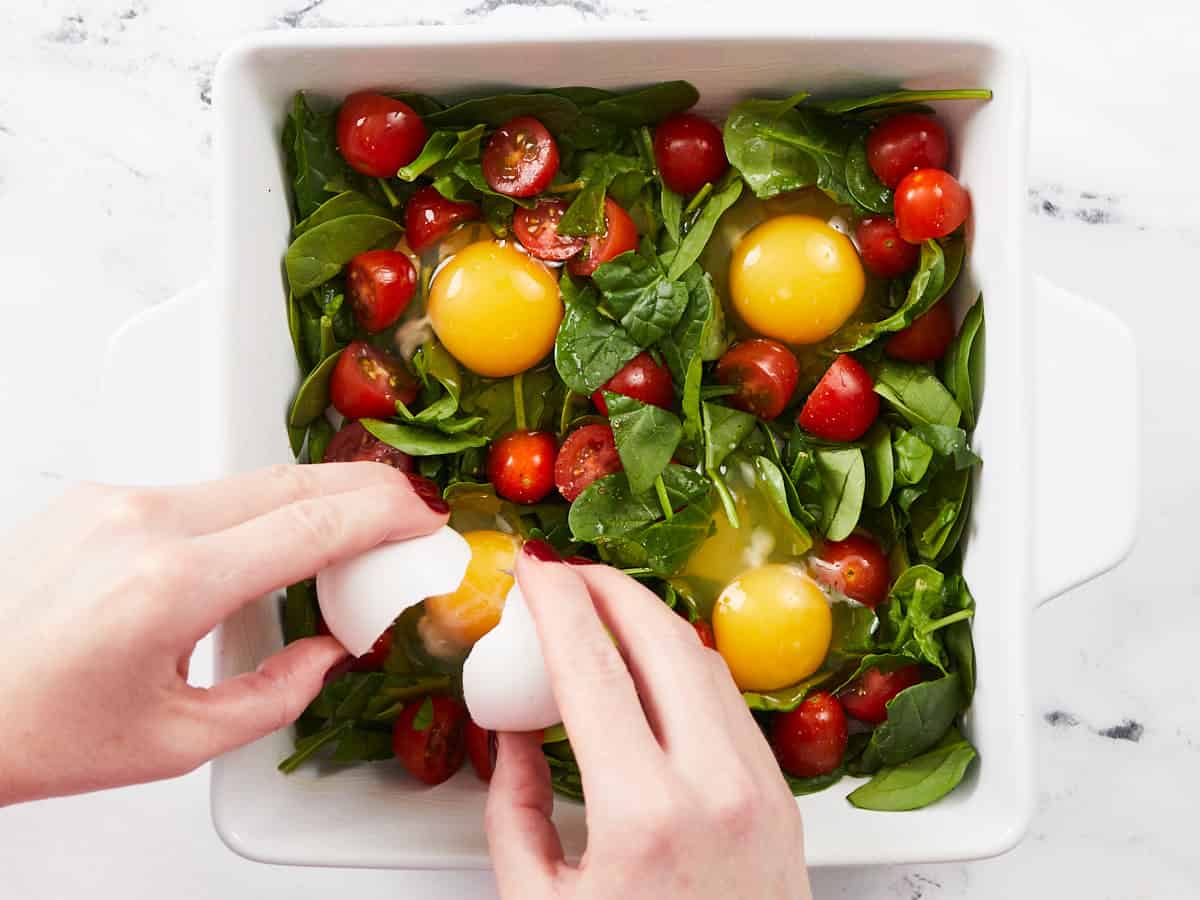
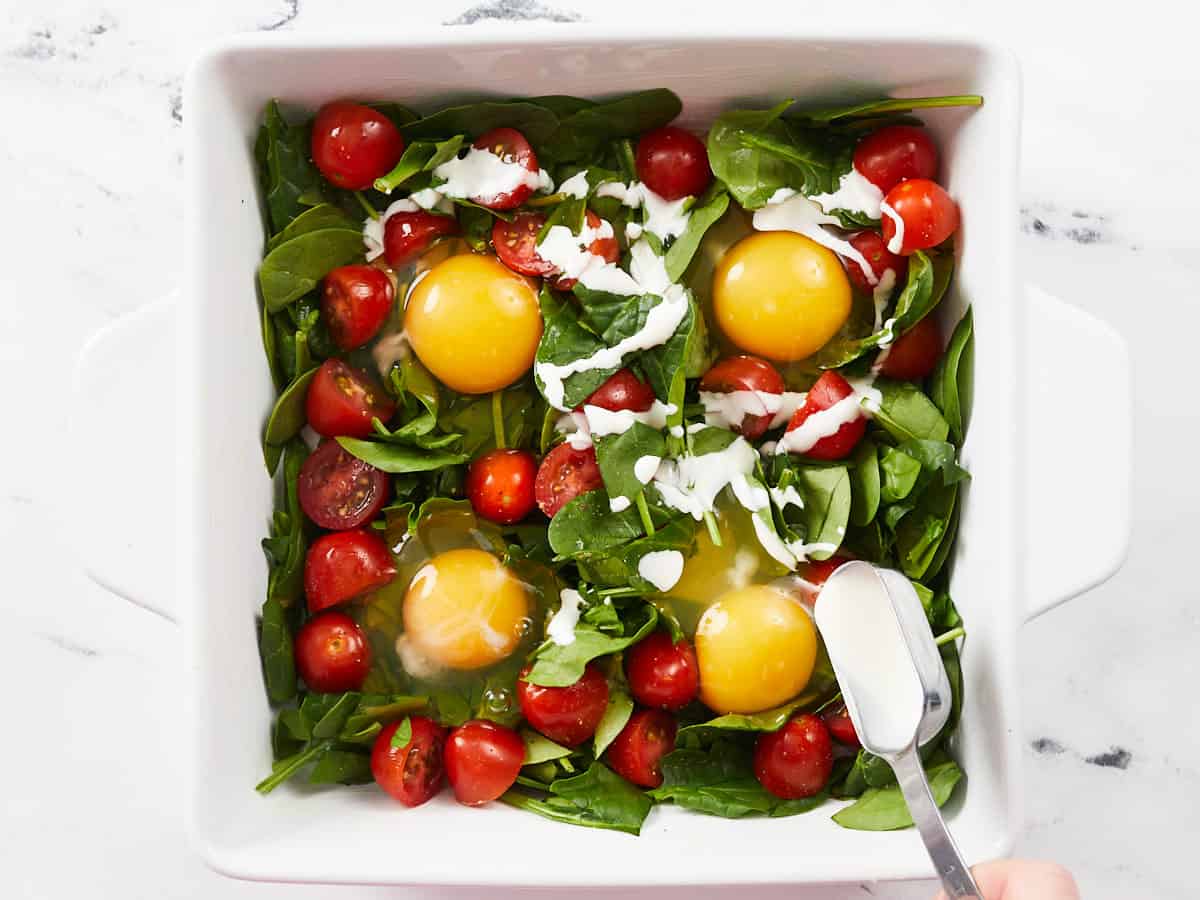
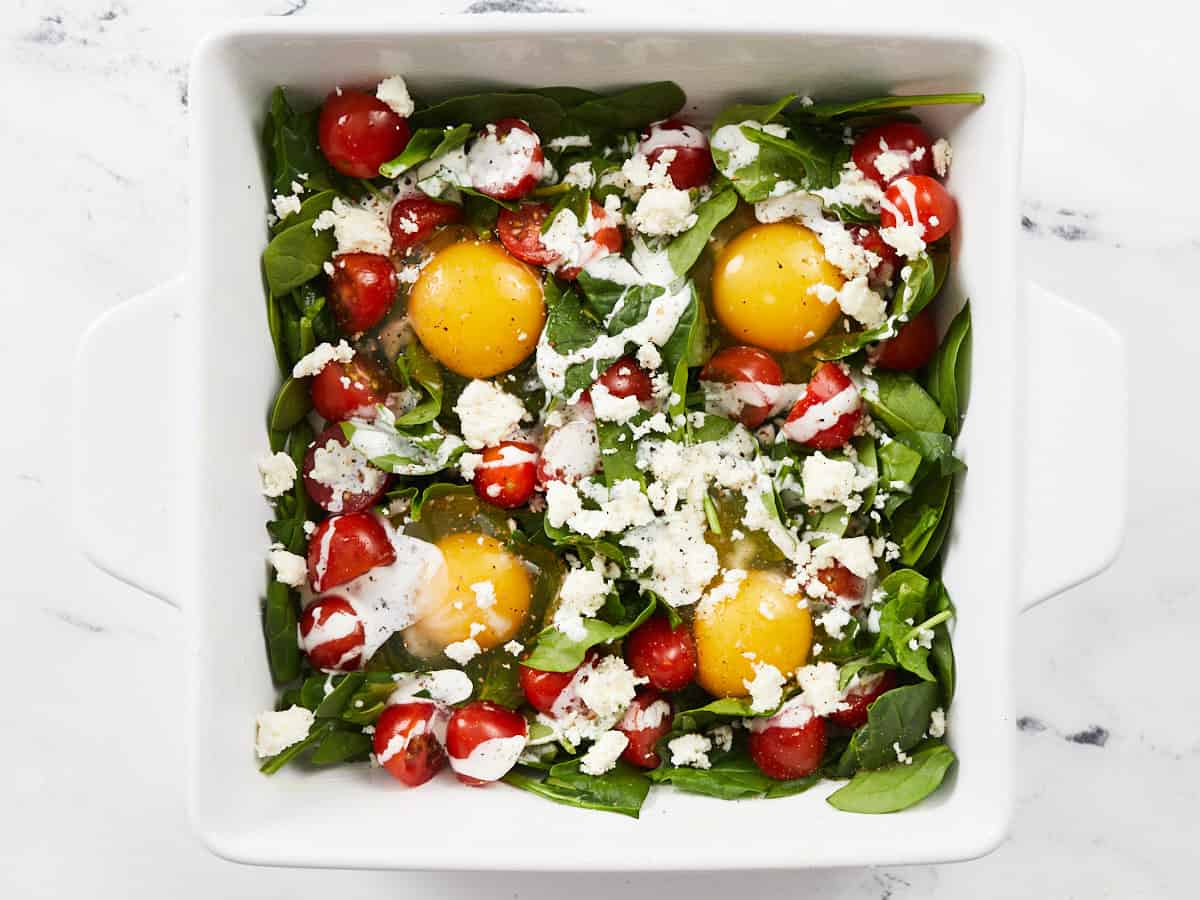
Crack the eggs into the casserole dish on top of the spinach and tomatoes. Season with the salt, pepper, and crushed red pepper. Drizzle the heavy cream over the eggs, then sprinkle the crumbled feta on top.
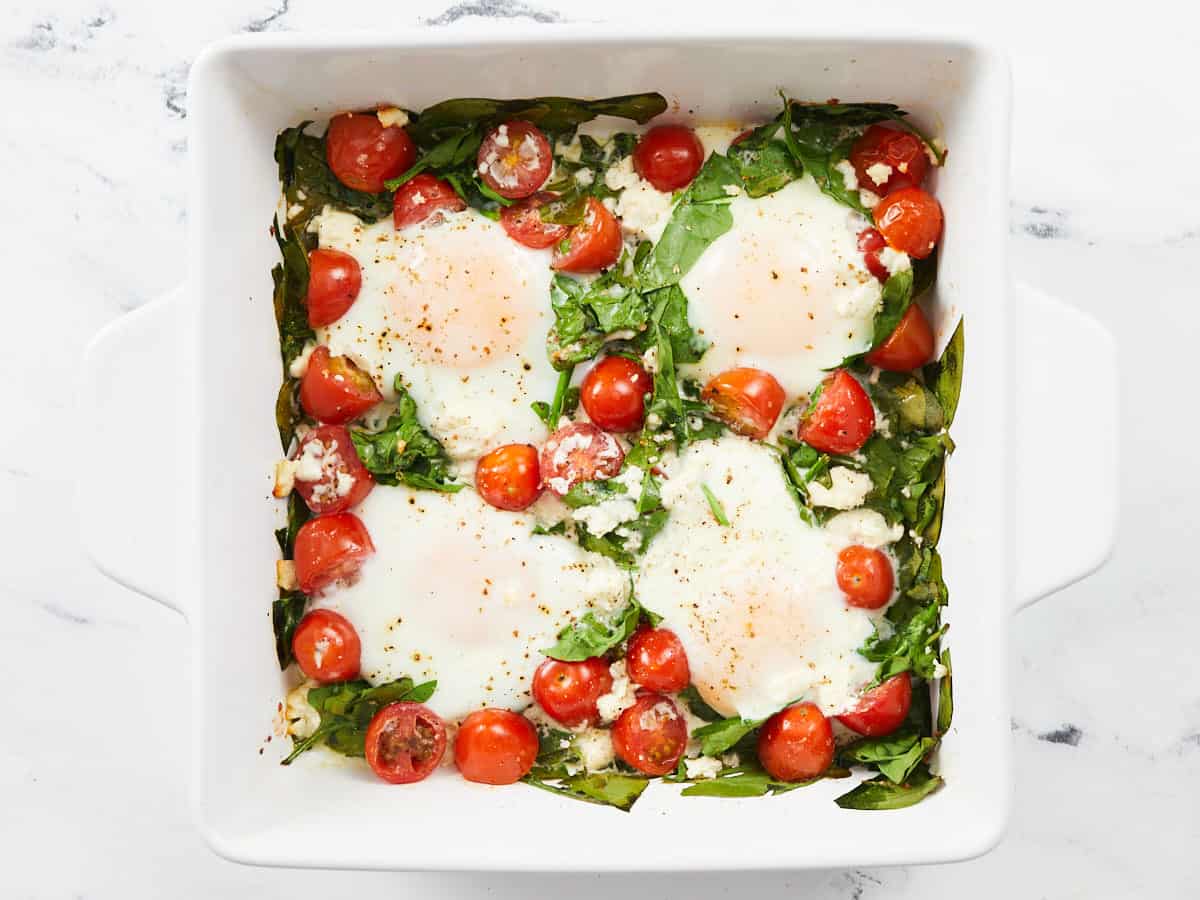
Transfer the casserole dish to the oven and bake for about 15 minutes, or just until the whites are set and the yolks are still liquid. (start checking around 10 minutes and add time as needed). Serve with crusty bread for dipping!
*You can use frozen spinach in place of fresh, just make sure to fully thaw and squeeze out the excess moisture first.**You can use any type of cheese you like, although creamier cheeses work best.To increase the servings to two eggs per person, simply keep all of the other ingredients the same and add 8 eggs to the dish instead of four. Baking time may increase.
Begin by preheating the oven to 375ºF. Melt 1 Tbsp butter and brush the inside of an 8×8-inch baking dish with the melted butter.
Prep your add-ins. We roughly chopped two handfuls of fresh spinach and sliced one cup of grape tomatoes. You could also sauté your vegetables first, if you prefer.
Place the spinach and tomatoes in the baking dish. Crack four eggs on top of the spinach and tomatoes.
Drizzle 2 Tbsp heavy cream over the eggs. The fat and moisture in the cream helps keep the eggs soft and moist while they bake.
If you’re adding cheese, sprinkle that over top (we added about 2 Tbsp crumbled feta). Season the eggs with about ⅛ tsp each of salt, pepper, and crushed red pepper.
Bake the eggs in the preheated 375ºF oven for about 15 minutes, or until the whites are set and the yolks are still liquid (the tops might get a little cloudy, but that’s okay). Start taking a peek at the eggs after about 10 minutes, just to make sure you don’t over cook them.
Enjoy the baked eggs with some crusty bread, biscuits, bacon, or sausage! Oh, and don’t forget a cup of really good coffee… 🤤
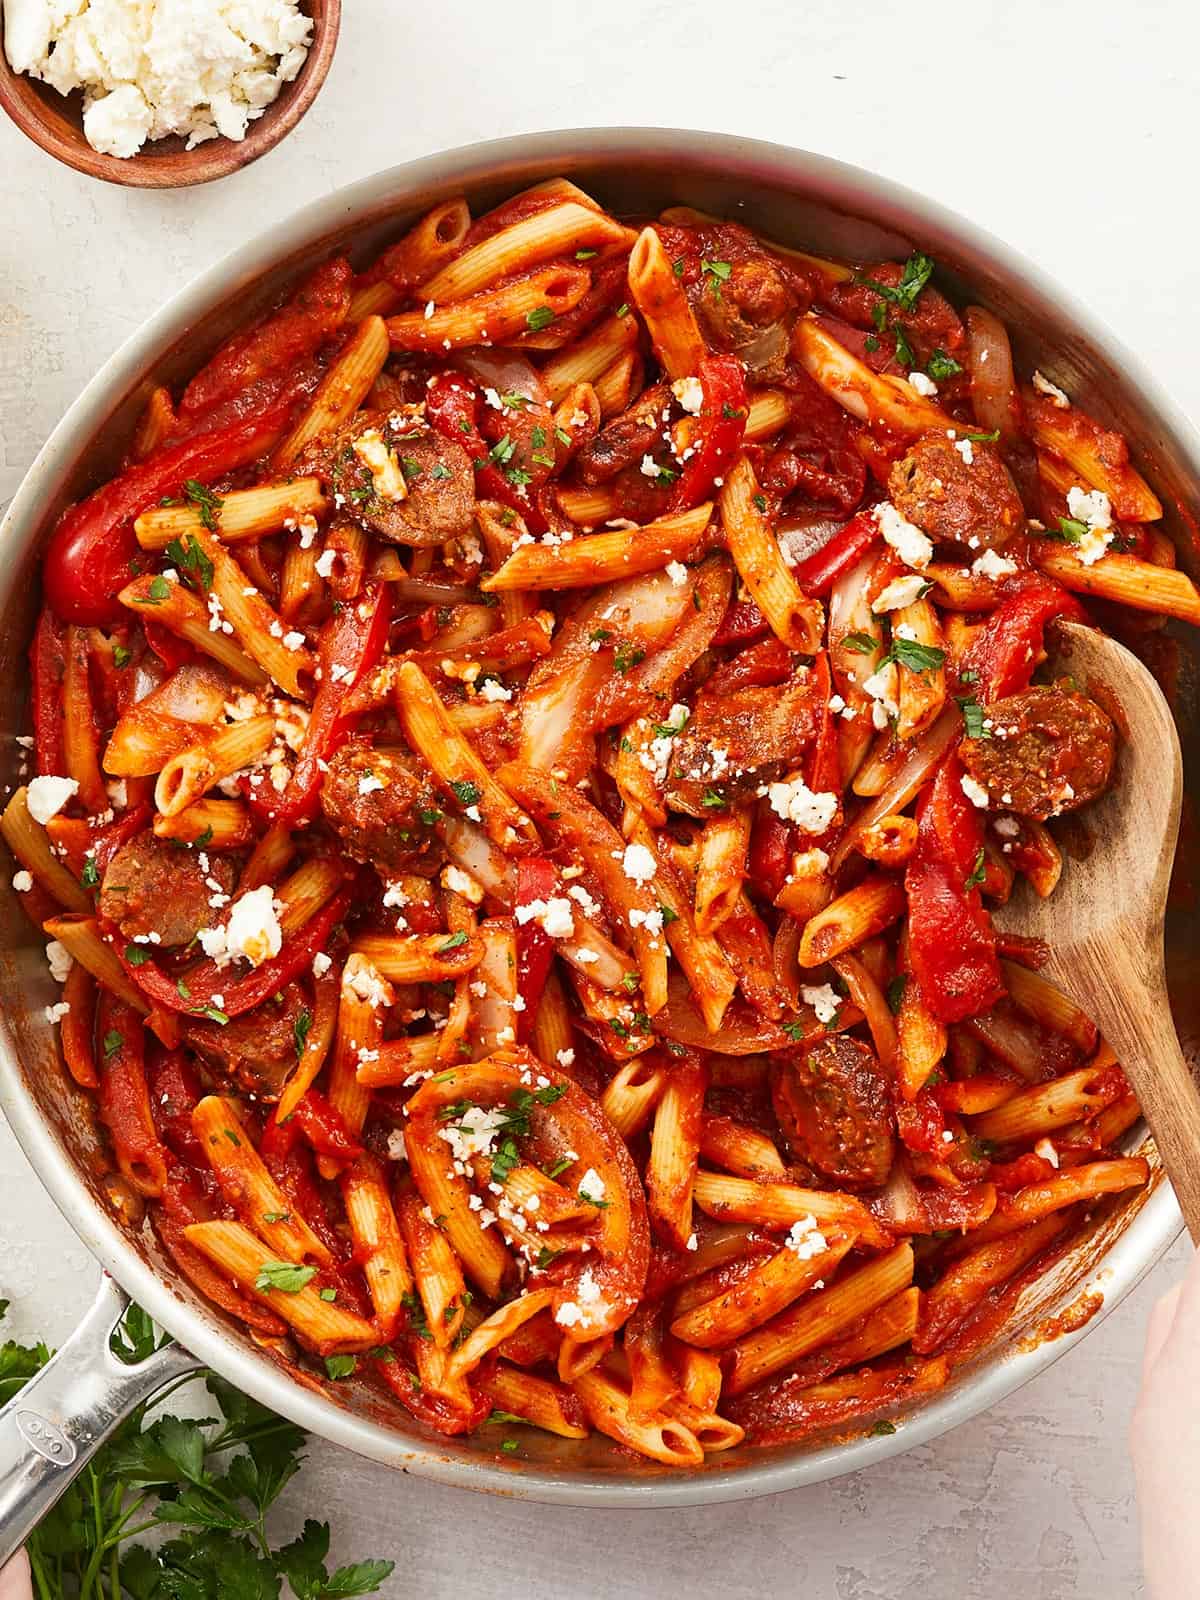
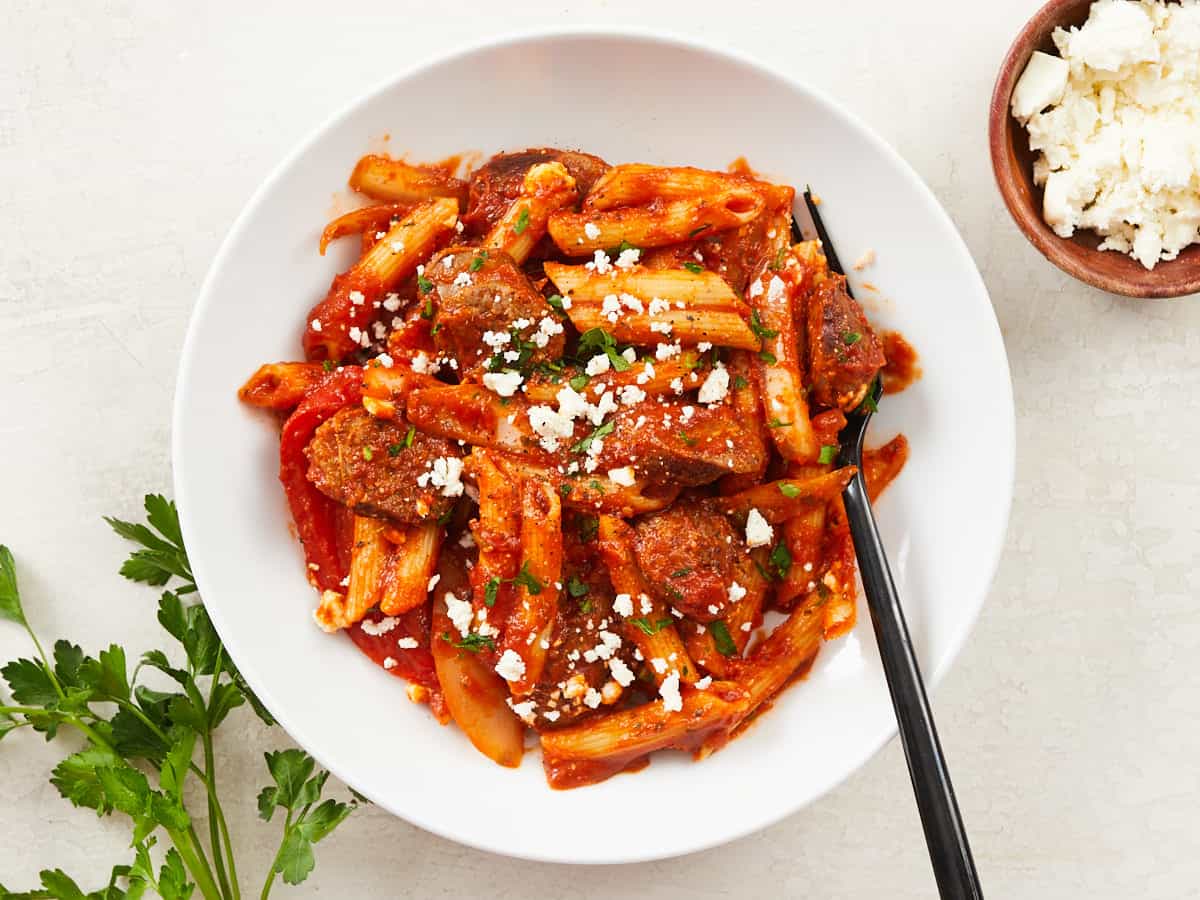
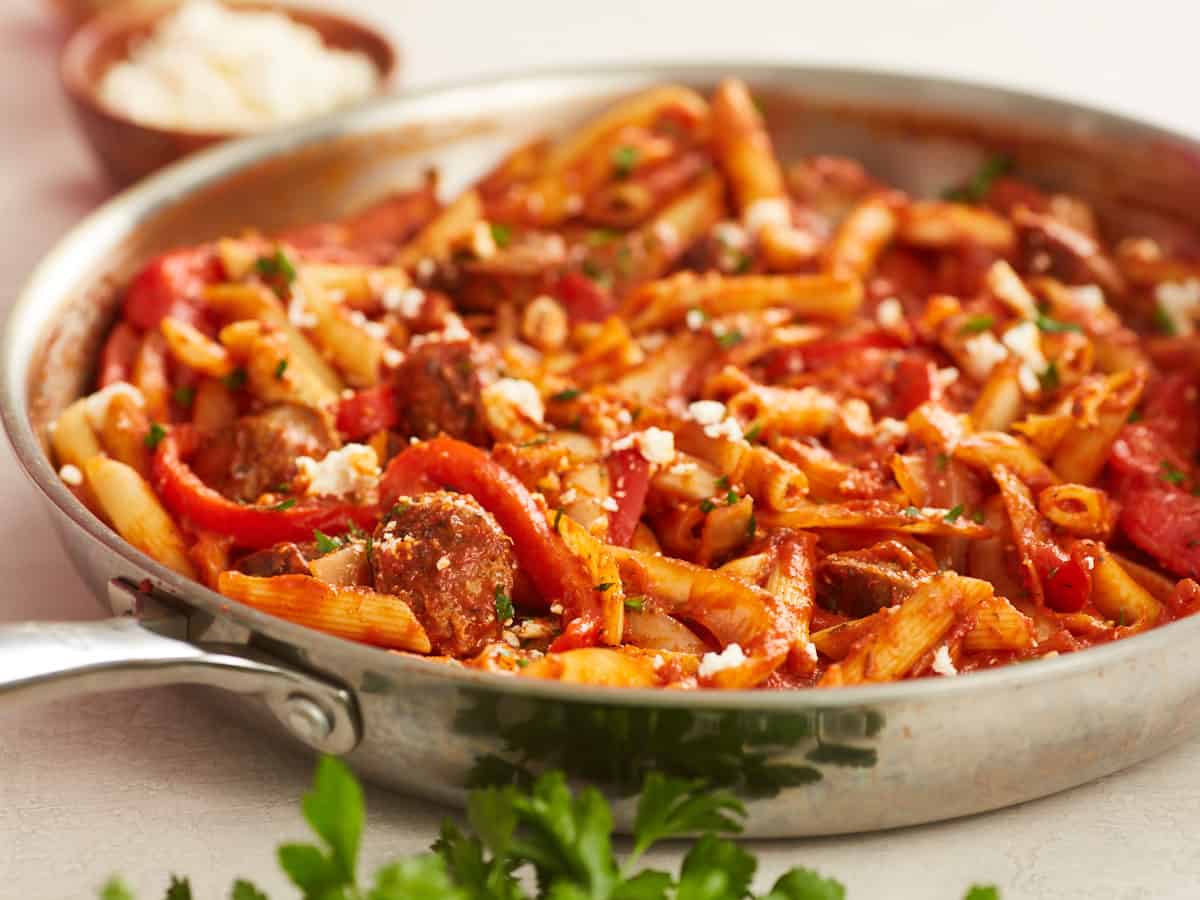
Simple pasta dinners are kind of my specialty and this easy pasta with sausage and peppers is definitely one of my favorites. It’s a super quick meal, the leftovers are great for lunch the next day (or the next *few* days), and it’s surprisingly hearty for just how simple it is. So the next time you need a quick dinner fix, give this pasta with sausage and peppers a try. I think you’re going to love it!
What’s in Pasta with Sausage and Peppers
One of the main reasons that I love this recipe is that it’s incredibly simple. The Italian sausage is already chock-full of herbs and spices, so you don’t have to add a whole lot more to the skillet to make everything flavorful. Here’s all you’ll need to make this awesome pasta dish:
Italian Sausage: makes this dish hearty and adds TONS of flavor to the meal.
Onion and Bell Peppers: these vegetables add color, texture, and a slight sweetness to the meal, which perfectly balances the rich sausage and spicy red pepper.
Seasonings: I kept the seasonings simple since the sausage will add so much flavor. All you need is some fresh garlic, basil, oregano, and crushed red pepper. But you could totally use an Italian seasoning blend in place of the individual herbs.
Pasta: I like to use penne pasta for this dish because the shape pairs well with the size of the sausage and peppers, and the ribbed texture helps grab onto the sauce.
Jarred Pasta Sauce: Using a store-bought sauce keeps this recipe incredibly simple and the ingredient list short. It’s a shortcut worth taking, IMHO!
Feta: a little sprinkle of feta cheese on top adds one last pop of flavor that really takes this dish to the next level! If you don’t have feta, a little grated Parmesan would also be awesome. ;)
What Kind of Sausage to Use
I think Italian sausage pairs best with this recipe and sweet, hot, or mild Italian sausage will all work fine. I prefer to use sausage in links so I can slice it into medallions, but you could also use loose Italian sausage if that’s what’s available.
If you prefer a chicken sausage to pork, you could definitely use that, just make sure it’s seasoned similarly to Italian sausage. You may also need to add a little extra fat to the skillet to make up for the fat that renders out of the pork sausage.
What Kind of Sauce to Use
I seriously love this dish with literally any kind of jarred pasta sauce, and for that reason I usually just reach for the most generic and inexpensive red sauce available. This time around I used Kroger’s Tomato + Basil tomato sauce. Nothing fancy, but still good, and definitely inexpensive! If you want to make your own sauce, you can try our simple Weeknight Pasta Sauce recipe (minus the ground beef).
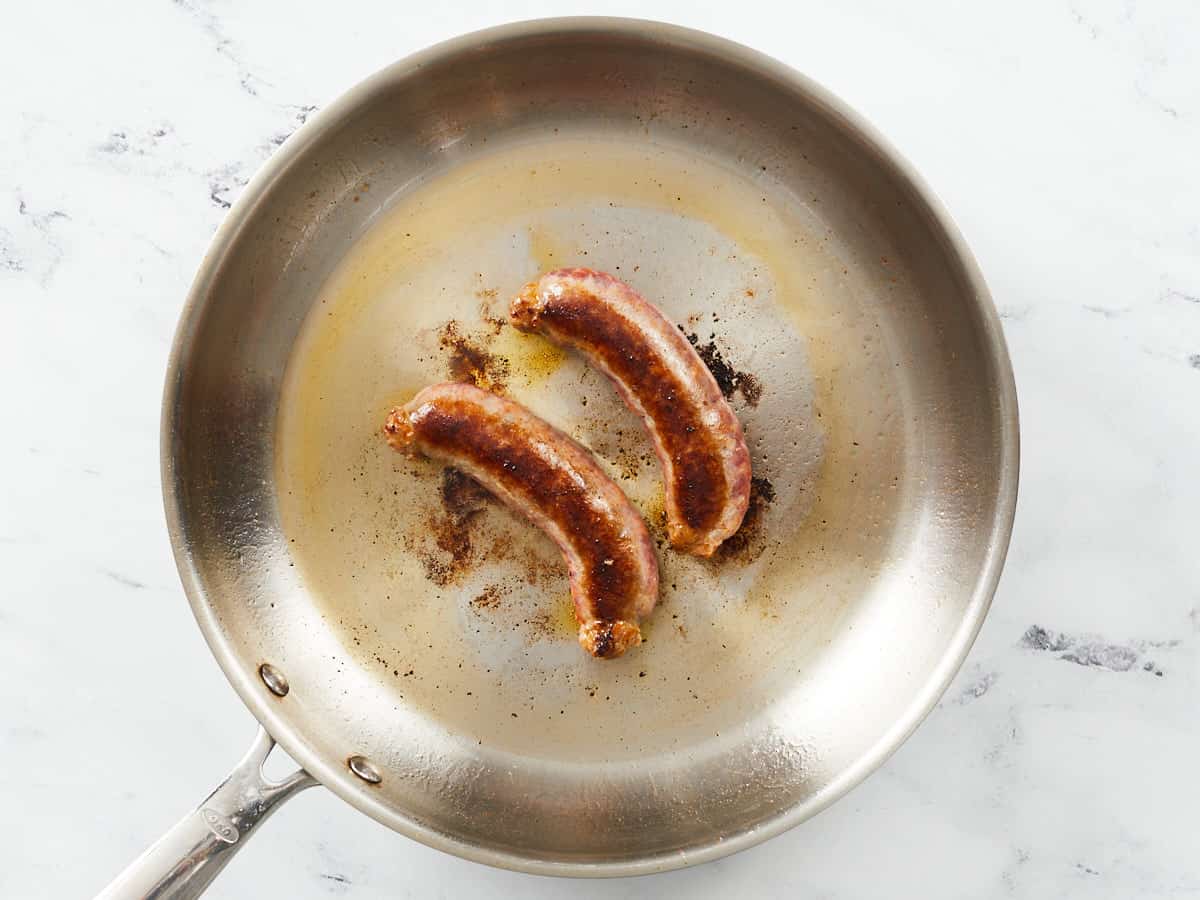
Heat a large skillet over medium. Add the cooking oil and sausage links to the skillet and cook the sausage for a few minutes on each side, or until well browned (it does not need to be cooked through at this point).
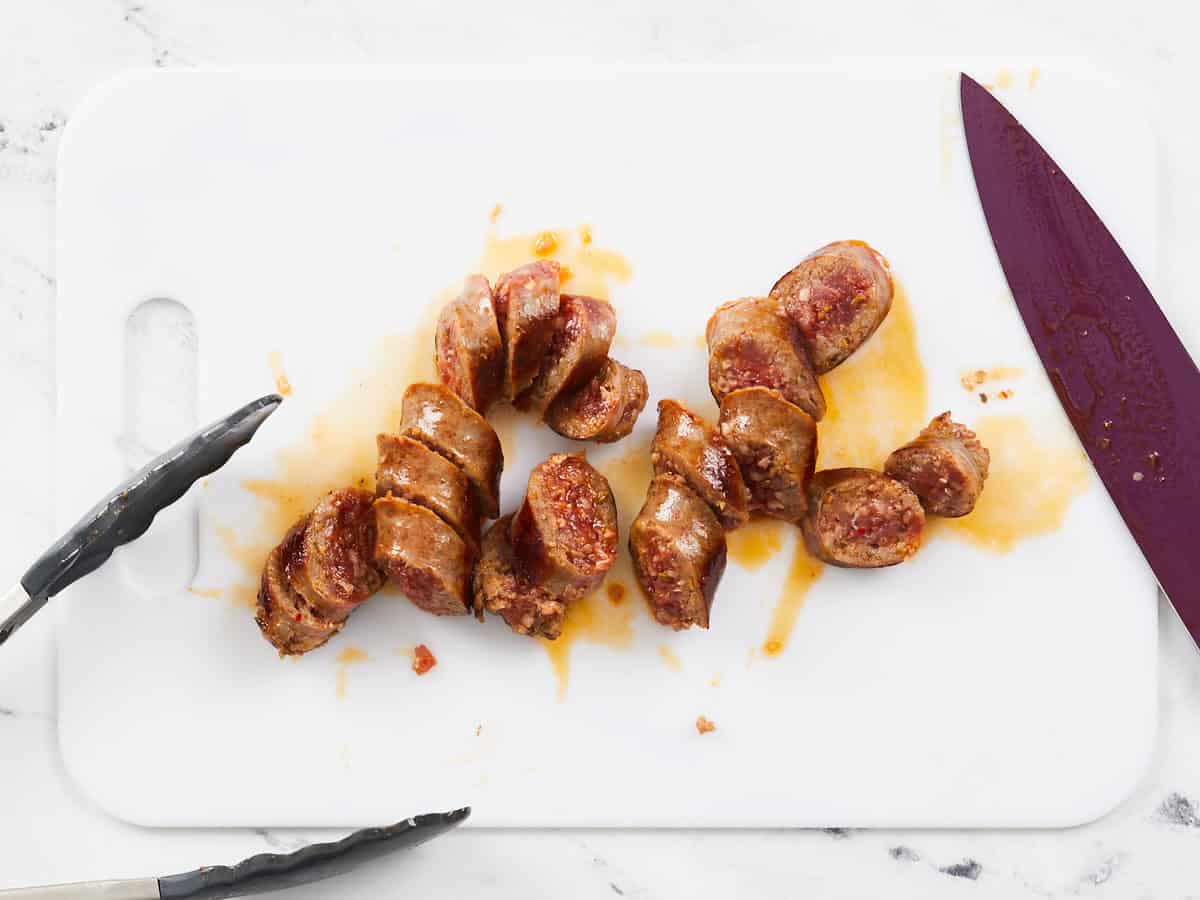
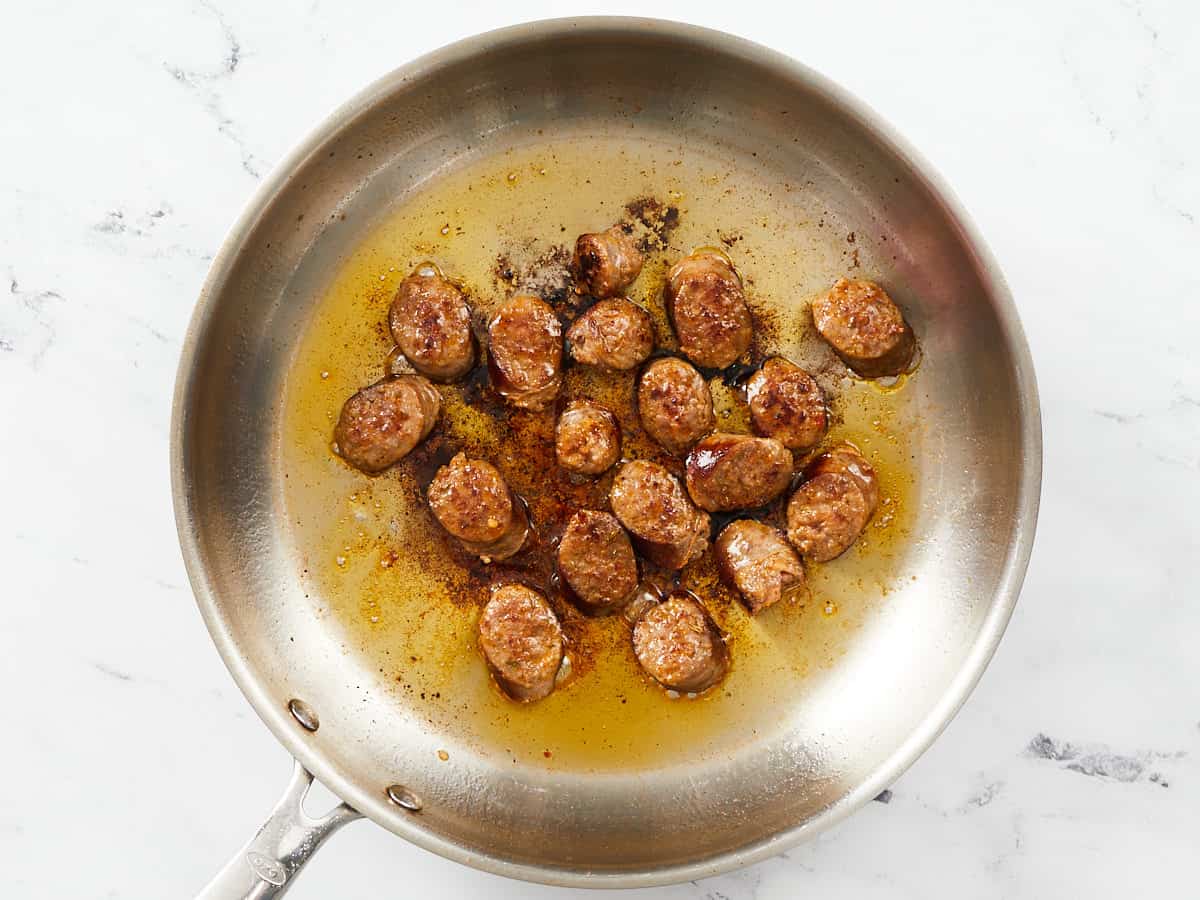
Remove the sausage to a clean cutting board and slice the sausage into medallions. Return the sausage to the skillet and continue to cook until the sausage is cooked through and browned on the cut sides. Remove the sausage to a clean plate.
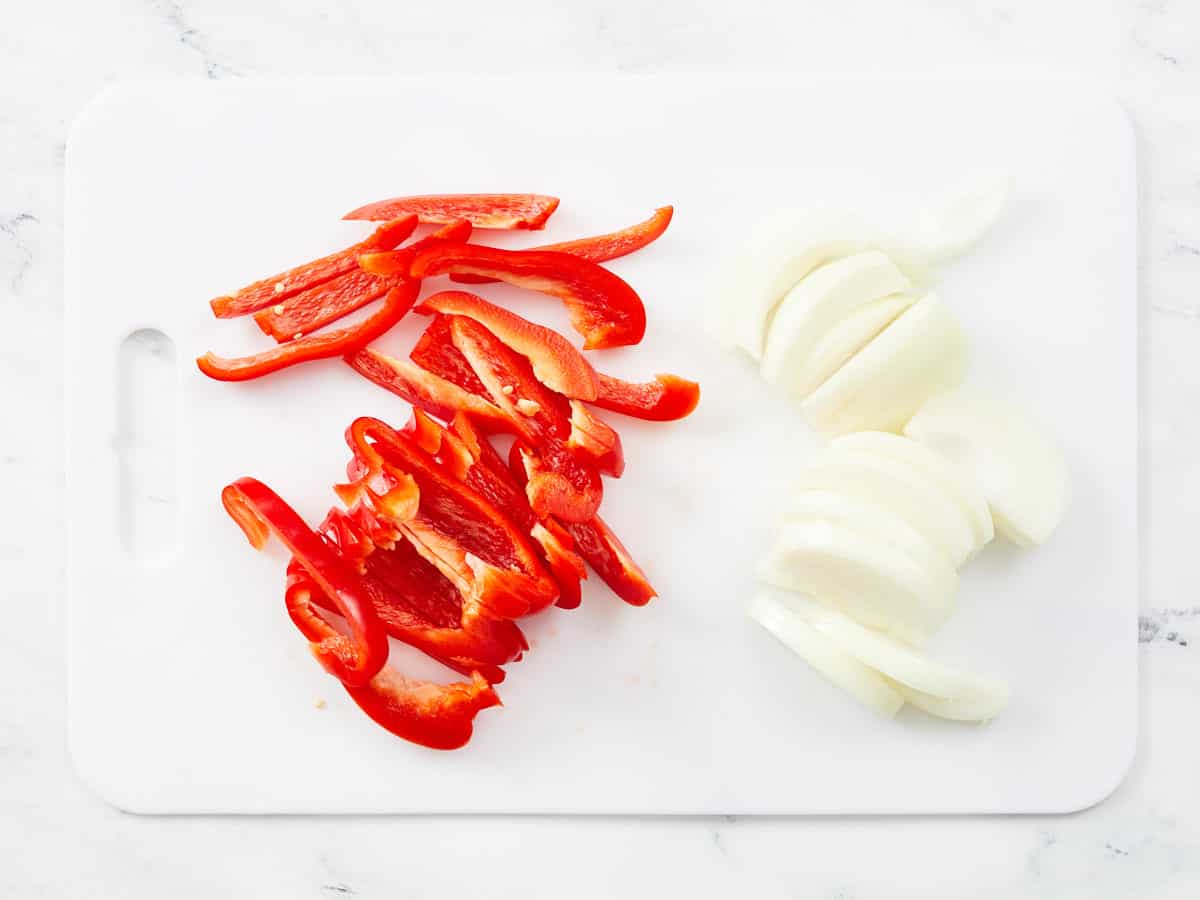
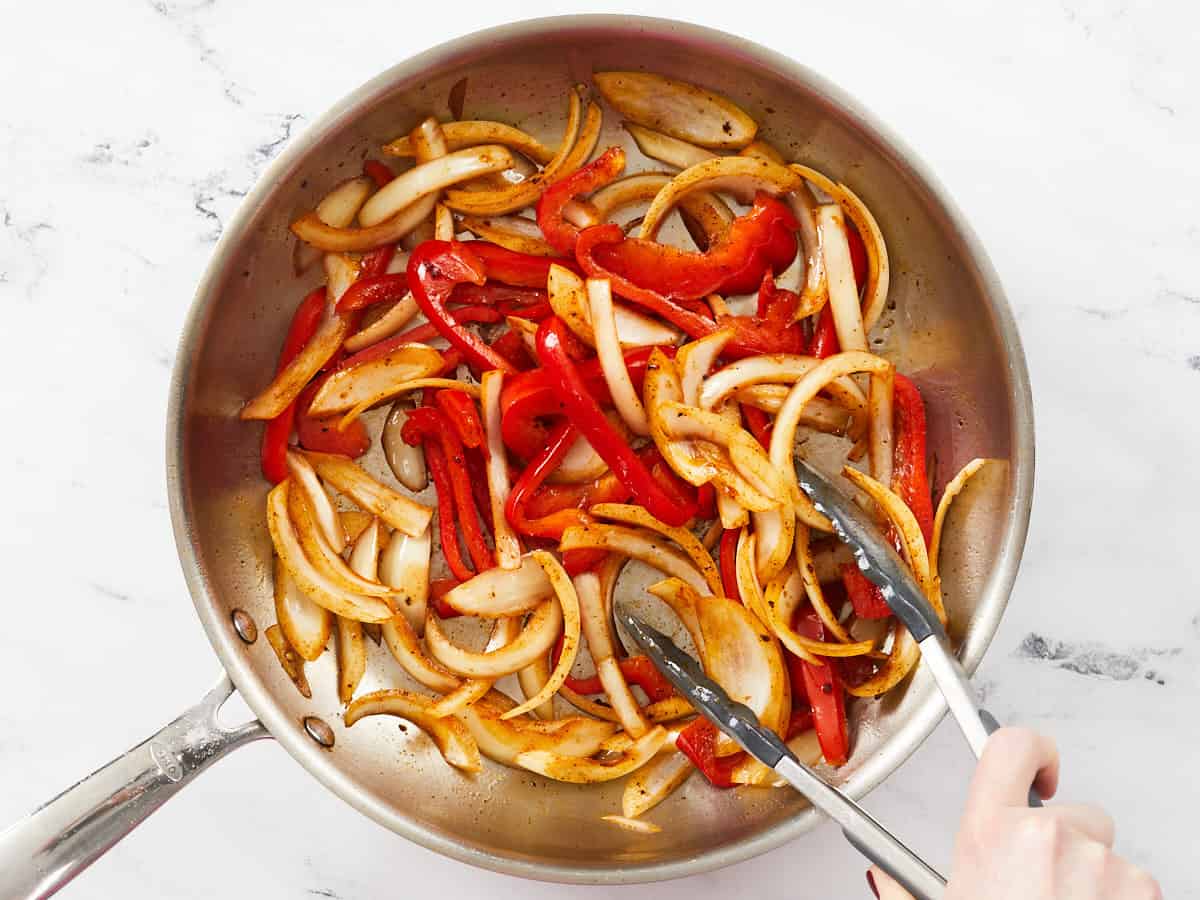
Meanwhile, slice the bell pepper and onion into thin strips. Add the sliced onion and bell pepper to the skillet after removing the sausage. Stir and cook the vegetables over medium heat, just until they begin to soften slightly.
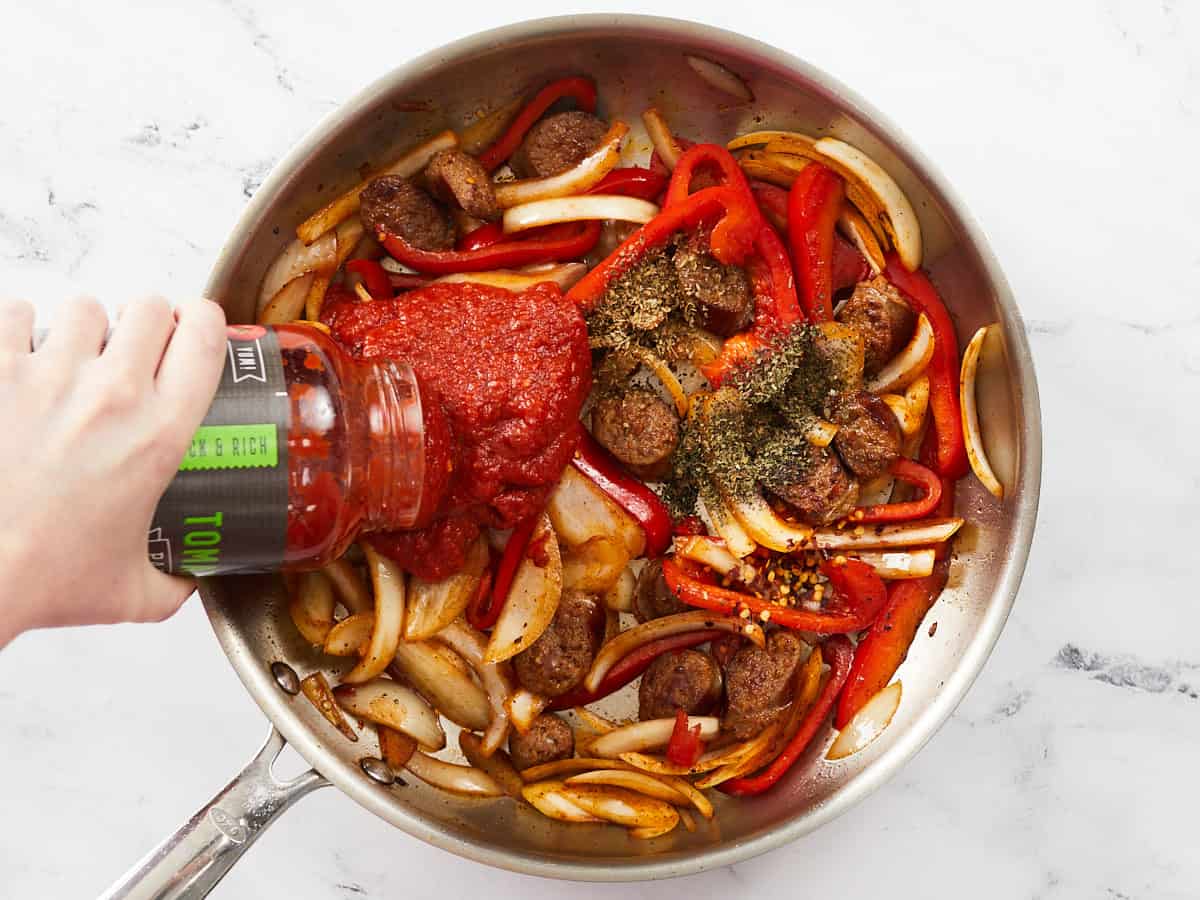
Add the sausage back to the skillet along with the pasta sauce, basil, oregano, and red pepper to the skillet. Stir everything to combine and heat through.
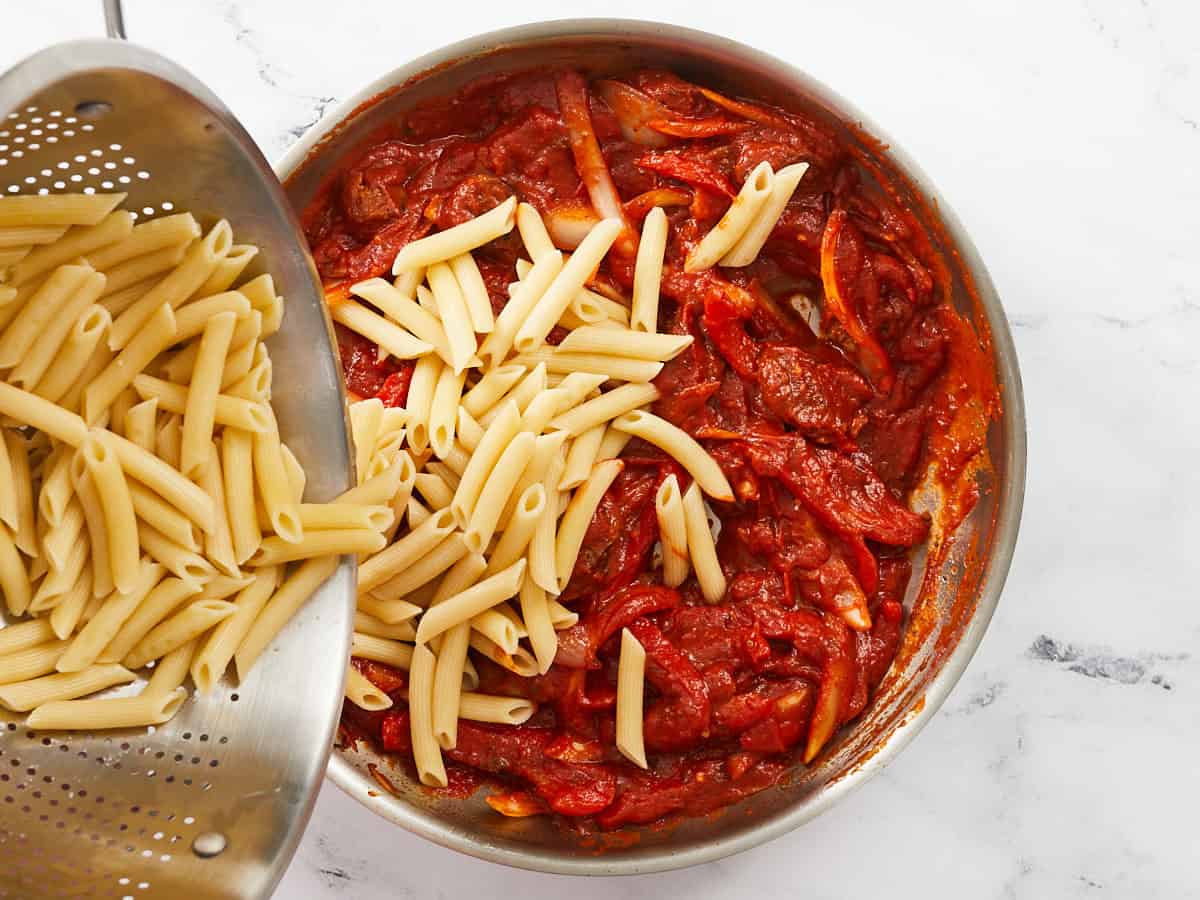
Bring a large pot of water to a boil for the pasta. Once boiling, add the pasta and continue to boil until tender (about 7 minutes). Drain the pasta in a colander, then add it to the skillet and stir to combine with the sauce.
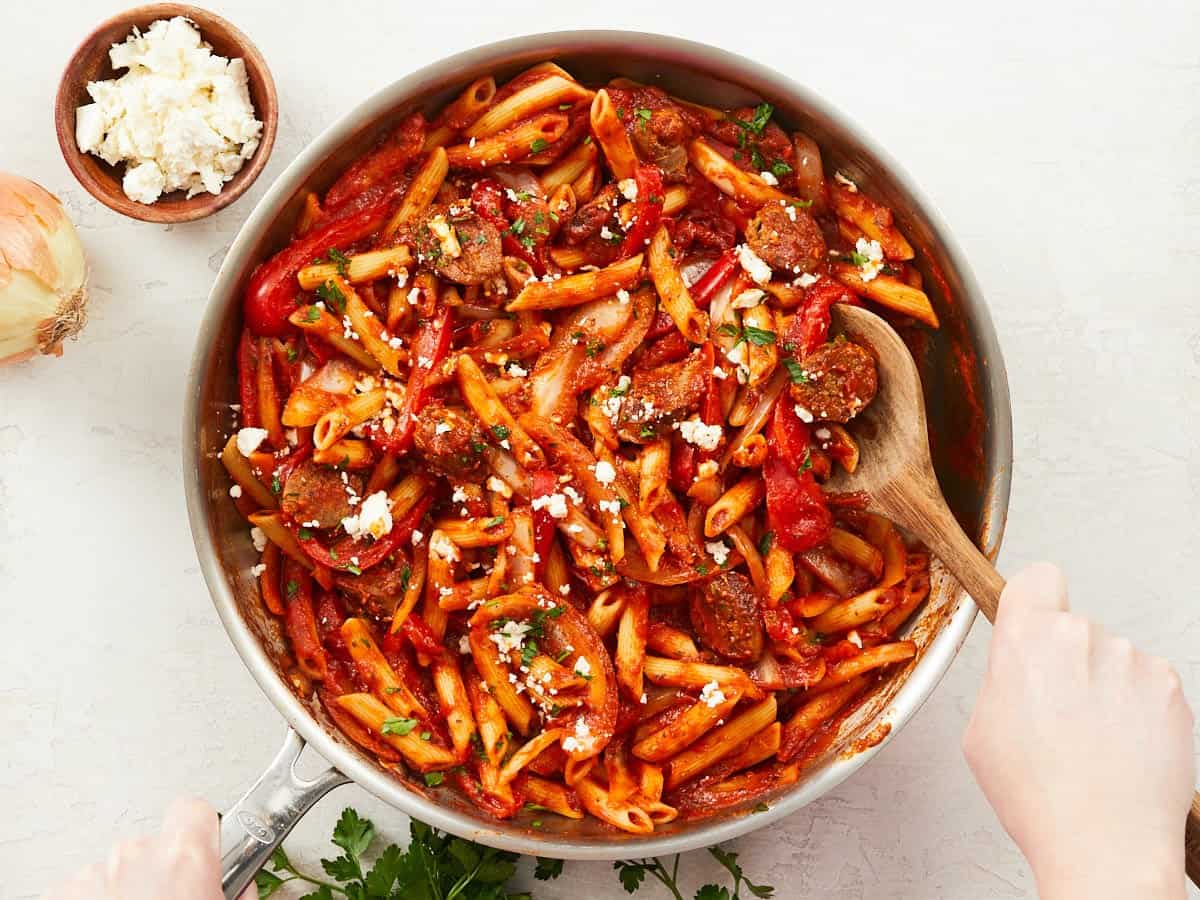
Top the skillet with crumbled feta and chopped parsley (if desired), then serve.
How to Make Pasta with sausage – Step by Step Photos
Heat 1 Tbsp cooking oil in a large skillet over medium. Once hot, add two Italian sausage links (about ½ lb. total) to the skillet and cook on each side until well browned. The sausage will not be cooked through at this point, but that’s okay.
Remove the partially cooked sausage to a cutting board and slice them into ¼-½ inch wide medallions.
Return the sliced sausage to the skillet and continue cooking over medium heat until the sausage is browned on the cut sides. Remove the cooked sausage to a clean bowl.
Meanwhile, slice one red bell pepper and one yellow onion into ¼-inch wide strips.
Add the sliced peppers and onions to the skillet with the remaining fat from the sausage. Continue to cook over medium heat until the peppers and onions just begin to soften. The moisture from the vegetables will help lift the browned bits from the sausage off the bottom of the skillet.
Add the cooked sausage back to the skillet along with one 24 oz. jar of pasta sauce, ½ tsp dried basil, ½ tsp dried oregano, and ¼ tsp crushed red pepper. Stir everything to combine and heat through.
Bring a pot of water to a boil for the pasta. Once boiling, add ½ lb. penne pasta and continue to boil until tender (about 7 minutes). Drain the penne in a colander, then add it to the skillet with the sauce. Stir to combine.
Sprinkle a small amount of crumbled feta (about 1 oz.) and a little chopped parsley (if desired) over top just before serving.
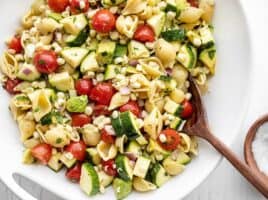
This Mediterranean pasta salad recipe is bursting with fresh flavor! Mix up a batch as an easy side dish or quick lunch.
Here’s a colorful, fresh recipe that’s ideal for summer or anytime: Mediterranean pasta salad recipe! This instantly became a favorite summer side dish with its zingy, bright flavors. Imagine: cool cucumber, juicy tomatoes and peppery arugula, mixed with chewy pasta and salty pops of feta cheese. Hearty sundried tomato gives it an even more irresistible quality to each bite. We served it at a cookout where it got rave reviews, and leftovers are equally as tasty as a lunch idea! This one quickly jumped to the top of our favorite pasta salad recipes.
Ingredients in Mediterranean pasta salad
The concept of pasta salad is an American invention. The first macaroni salad recipe was published in 1914, and it’s spawned loads of variations since then! Mediterranean pasta salad is a thoroughly American concept starring flavors inspired by the region: tomatoes, cucumber, and feta cheese. Here are the ingredients you’ll need for this Mediterranean pasta salad recipe:
Fusilli (spirals) or other short-cut pasta
Cucumber
Cherry tomatoes
Sundried tomatoes
Artichoke hearts
Red onion
Baby arugula
Feta cheese
Mediterranean dressing: lemon juice, red wine vinegar, garlic, Italian seasoning, olive oil
The basic idea is simple: boil the pasta, chop the veggies, then toss with a simple Mediterranean-style dressing. It takes about 30 minutes to whip up, and it’s well worth the time.
Use any type of short cut pasta
This Mediterranean pasta salad works with any type of short-cut pasta noodle. We like it best with spirals, but it’s just as good with bowties or penne. Whatever the case, make sure to cook the pasta to al dente (see below). Here are a few other pasta shape ideas for mixing it up with this pasta salad:
Spirals (fusilli)
Bowties (farfalle)
Penne
Shells (conchiglie)
Orecchiette
Gemelli
Gigli
Tips for cooking pasta to al dente
Al dente means “to the bite” in Italian: pasta that’s tender with a firm center. It’s extremely important to cook the pasta to al dente for a pasta salad: overcooked pasta turns out rubbery, soft and unappetizing. (Interestingly, it also has less nutrients and makes you less full.) Here are some tips on how to cook pasta to al dente:
Set your timer a few minutes before the package instructions indicate. The timing on many pasta packages indicates to cook the pasta too long. Start taste testing the pasta a few minutes before the package says to.
Taste test and look for small white fleck at the core. Catch it right when there’s a small white fleck at the core, or just when it disappears: then immediately drain the pasta. For pasta salad, we like to rinse the pasta in cool water until it cools down enough to make into the salad.
Make ahead and storage for Mediterranean pasta salad
This Mediterranean pasta salad recipe tastes best the day it is made, as as flavor-packed side dish. But you can also make it in advance and refrigerate until serving, or keep it refrigerated as a lunch idea to munch on throughout the week. Here are a few tips for storage:
Mediterranean pasta salad lasts for up to 5 days in the refrigerator. It’s ideal for making ahead or healthy lunches throughout the week.
Refresh the flavors before serving. Bring the salad to room temperature. Then stir in a drizzle of olive oil and a bit more crumbled feta cheese. You may or may not need an extra pinch of salt.
1 cup feta cheese crumbles (omit for vegan and add more salt)
Instructions
Start a large pot of well-salted water to boil. Boil the pasta until al dente according to the package instructions. Drain the pasta and run cool water over it until it’s room temperature.
Meanwhile, slice the cucumber and tomatoes, chop the sundried tomatoes and artichoke hearts, and slice the onion.
In a large bowl, whisk together the lemon zest, lemon juice, red wine vinegar, garlic, Italian seasoning, and kosher salt. Then whisk in the olive oil.
Once the pasta is done, add it to the large bowl of dressing and toss with the chopped vegetables. Add the feta cheese and fresh ground black pepper and stir to combine.
Taste and add more salt to taste if necessary. Serve immediately. Stores up to 5 days refrigerated (leftovers taste great; allow to come to room temperature and add a swirl more olive oil or a bit more salt as necessary).
We love flexible recipes around here and Frittatas definitely fit that bill. You can add whatever meat, vegetables, or cheese that you happen to have in your fridge, which not only makes them flexible, but the perfect vehicle for reducing food waste and keeping that grocery bill in check! So here’s a quick tutorial on how to make a simple frittata, so you can whip one up whenever you need a quick, inexpensive, and delicious meal.
What is a Frittata?
Frittatas are an Italian dish consisting of cooked eggs with other ingredients added in like meat, vegetables, or cheese. Unlike omelets and scrambled eggs, frittatas are not moved or folded over as they’re cooked. The frittata is cooked whole, without disturbing, in one large piece.
There are different methods for cooking frittatas, some being cooked entirely on the stovetop over low heat and others being finished in the oven. The method we use here starts on the stovetop to cook the add-ins, then finishes in the oven with gentle even heat.
The Frittata Formula
Frittatas are incredibly simple. For every six large eggs, you’ll want to mix in ¼ cup of milk or cream, ¼ cup of cheese, and about 3 cups of meat or vegetables. The small amount of milk and cheese keeps the eggs soft and creamy and the meat and vegetables give you endless options. You’ll also want to add a little salt and pepper just to make sure everything is well seasoned!
Frittatas in Five Simple Steps
This frittata method is so simple that it’s one of those recipes you’ll memorize in no time. Here are the five simple steps to making a frittata:
Whisk together eggs, milk, salt, and pepper.
Sauté meat and vegetables in a skillet.
Top with cheese then pour in the egg mixture.
Cook on the stovetop until the edges are set.
Transfer to the oven to finish cooking. Slice and serve!
Avoid Overcooking Your Frittata
One of the biggest mistakes people make when making frittatas is overcooking the eggs. Eggs are delicate souls and when overcooked they become rubbery and they weep with sadness. And no, that wasn’t figurative, they literally excrete water.
To avoid overcooking the frittata, make sure you don’t bake it too long. Keep an eye on your frittata and only leave it in the oven until the center is just barely set. It’s okay if it jiggles just a bit in the center, carryover cooking will finish the job in the first few minutes after the frittata is removed from the oven.
How to Serve Frittatas
Frittatas aren’t just for breakfast or brunch. Because they’re so easy to prepare, frittatas are one of my favorite quick lunch or dinner items. Just check your fridge for whatever needs to be used up, toss them into the frittata, then whip up a simple side salad as it bakes! Dinner is DONE!
Frittatas can be served either warm or cold, which makes them even more flexible. Bake one up on Sunday, then pack up the leftover slices for tomorrow’s lunch!
Other Frittata Flavor Ideas
We kept our frittata simple below with just some onion, spinach, tomatoes, and feta, but the flavor possibilities are endless! Here are some other flavor combination ideas:
Preheat the oven to 350ºF. In a large bowl, whisk together the eggs, milk, salt, and pepper. Set the eggs aside.
Dice on yellow onion. Heat a 10-inch oven-safe skillet over medium, then add the cooking oil and onion and sauté until the onions are soft and translucent.
Meanwhile, roughly chop the spinach and slice the tomatoes in half.
Add the spinach and tomatoes to the skillet and stir to combine with the onions.
Before the spinach has a chance to cook or wilt, pour in the egg mixture (it's okay if the eggs don't fully cover the vegetables). Top with the crumbled feta.
Let the frittata continue to cook over medium just until the eggs are set around the edges (about 3 minutes).
Transfer the frittata to the oven and bake for about 15 minutes, or just until the eggs are set in the center (total bake time will vary). Remove the frittata from the oven and let rest for 5 minutes before slicing and serving.
Preheat the oven to 350ºF. In a large bowl, whisk together six large eggs, ¼ cup milk, ½ tsp salt, and ¼ tsp pepper. Set the eggs aside.
Sauté your meat or vegetables in a 10-inch oven-safe skillet over medium heat. Because the frittata cooks quickly, you can leave some vegetables fresh instead of sautéing, if desired. For this frittata, we sautéed one yellow onion in 2 Tbsp cooking oil and added the rest of the vegetables fresh.
When using fresh spinach, it’s best to roughly chop it into smaller, bite-sized pieces to avoid large, stringy pieces of spinach in your frittata. We used 2 cups of packed spinach (about 4 oz.) for this frittata and one pint of grape tomatoes (sliced in half).
Add the chopped spinach and tomatoes to the skillet with the onions and stir briefly to combine.
Before the spinach has a chance to cook or wilt, pour in the egg mixture. It’s okay if the eggs don’t fully cover the vegetables. Top with the crumbled feta or cheese of choice.
Continue to cook the frittata over medium heat just until the eggs begin setting around the edges (this only takes a few minutes).
Transfer the frittata to the oven and bake for about 15 minutes, or just until the center is set. The total cooking time will vary slightly depending on the type of skillet used and how much the eggs had set while on the stovetop. It’s okay if the eggs still jiggle a little in the center; they will continue to cook through residual heat for a few minutes after it is removed from the oven. Avoid overcooking the frittata.
Remove the frittata from the oven and let rest for five minutes before slicing into six pieces and serving!
Welcome to another episode of “How can so few ingredients make such a delicious meal?!” One-pot meals are a miracle, my friends, and this Lemon Pepper Chicken with Orzo is the perfect example. This dish is packed with flavor thanks to a hefty dose of lemon pepper, chicken broth, juicy chicken thighs, and a pop of feta at the end. Plus, it’s fast, easy, and barely anything to clean up afterward. :)
Originally posted 8/5/2015, updated 8/15/2022.
What’s in Lemon Pepper Chicken with Orzo
For this skillet meal, I liberally seasoned some bone-in, skin-on chicken thighs with lemon pepper, then combined it with some orzo, chicken broth, and parsley. Everything gets cooked together in one pot so that orzo soaks up all the flavor from both the chicken thighs and the broth, and not a drop of flavor is lost. It’s so simple, yet so good. Add a quick little side salad with fresh greens and you’ve got a five-star dinner (and very few dishes to clean). Victory!
Can I Use Boneless Chicken?
I used bone-in, skin-on chicken thighs for this recipe, but you can use boneless thighs or breasts if you prefer. The chicken will cook a little faster if you use boneless and you might miss out on a little bit of the flavor that comes with bone-in chicken. Also, be aware that chicken breasts do tend to dry out faster than chicken thighs, so the end product won’t be quite as juicy.
Tips for Cooking One Pot Pasta
Getting one pot pasta meals to cook just right can take a little practice, but here are a few tips to make sure your pasta cooks evenly and all the way through without leaving too much liquid behind:
Use a heavy or thick-bottomed piece of cookware. Thin cookware doesn’t cook evenly and can leave some pasta undercooked and some pasta overcooked. A deep skillet or Dutch Oven will work well for this recipe.
Use a burner that is close in size to the bottom of your pot or pan. If the burner is a lot smaller than the width of the pan, you may have trouble getting the outside edges to cook evenly.
Make sure the broth is simmering the whole time. Heat settings on ranges can vary, so you may need to adjust the heat up or down slightly to maintain a simmer in the broth.
One Pot Lemon Pepper Chicken with Orzo
Lemon Pepper Chicken with Orzo is a zesty one-pot meal featuring juicy chicken thighs, orzo, feta, and lemon pepper for tons of flavor!
Course Dinner, Main Course
Cuisine American
Total Cost $7.54 recipe / $1.89 serving
Prep Time 10minutes
Cook Time 35minutes
Total Time 45minutes
Servings 4
Calories 612kcal
Author Beth - Budget Bytes
Ingredients
4chicken thighs*$3.74
2Tbsplemon pepper seasoning$0.60
1Tbspcooking oil$0.04
2clovesgarlic$0.16
2cupschicken broth$0.26
1/4cupchopped parsley$0.20
1.5cupsorzo$1.29
2oz.feta, crumbled$1.25
Instructions
Blot the chicken thighs dry with a paper towel, then season both sides liberally with lemon pepper seasoning (about 2 Tbsp lemon pepper total).
Heat a large deep skillet over medium. Once hot, add the cooking oil. Add the seasoned chicken thighs, skin side down, and let them cook undisturbed until browned (about 6-8 minutes for bone-in skin-on thighs). Flip the chicken thighs and cook until browned on the second side. The chicken will be cooked most of the way through at this point but will finish cooking when simmered with the orzo. Remove the chicken to a clean plate.
While the chicken is browning, roughly chop about 1/4 bunch of parsley and mince two cloves of garlic. After removing the chicken from the skillet, turn the heat down to low, add the minced garlic, and sauté the garlic in the residual fat for about a minute.
Add 2 cups of chicken broth to the skillet and stir to dissolve the crispy browned bits from the bottom of the pan.
Add the orzo and half of the chopped parsley. Stir to combine. Finally, return the chicken to the skillet, skin side up.
Place a lid on the skillet, turn the heat up to high, and let the broth come to a full boil. Once it reaches a boil, turn the heat down to low. Let the skillet simmer on low for about 15 minutes, or until most of the broth has been absorbed. Make sure it’s simmering the whole time. If it stops simmering, increase the heat slightly until it just starts to simmer again.
After about 15 minutes the orzo should be tender and most of the broth absorbed but there will still be a little sauce in the skillet.
Fluff the orzo around the chicken a bit with a fork, then top with the remaining parsley and the crumbled feta. Serve and enjoy!
Notes
*I used bone-in chicken thighs with skin, but you could use boneless and skinless, if preferred.
How to Make One Pot Chicken and Orzo – Step by Step Photos
Start by blotting four chicken thighs dry with a paper towel. Drying them helps the seasoning stick and helps them brown better in the skillet. I used bone-in thighs with skin, but you could use boneless, skinless if desired. Just keep in mind that boneless and skinless thighs are usually a bit more expensive and will cook faster. Season both sides of each thigh liberally with lemon pepper seasoning (about 2 Tbsp total).
Heat a large deep skillet over medium. Once hot, add 1 Tbsp cooking oil. Add the seasoned chicken thighs, skin side down, and let them cook undisturbed until browned (about 6-8 minutes for bone-in skin-on thighs). Flip the chicken thighs and cook until browned on the second side. The chicken will be cooked most of the way through at this point but will finish cooking when simmered with the orzo. Remove the chicken to a clean plate.
While the chicken is browning, roughly chop about 1/4 bunch of parsley and mince two cloves of garlic. Turn the heat down to low, add the minced garlic, and sauté the garlic in the residual fat for about a minute.
Add 2 cups of chicken broth to the skillet and stir to dissolve the crispy browned bits from the bottom of the pan.
The broth will turn a deep brown color as the drippings are dissolved into the mixture.
Add about half of the chopped parsley and 1.5 cups of orzo. Stir to combine.
Finally, return the chicken to the skillet, skin side up. Place a lid on the skillet, turn the heat up to high, and let the broth come to a full boil. Once it reaches a boil, turn the heat down to low. Let the skillet simmer on low for about 15 minutes, or until most of the broth has been absorbed. Make sure it’s simmering the whole time. If it stops simmering, increase the heat slightly until it just starts to simmer again.
After about 15 minutes the orzo should be tender and most of the broth absorbed but there will still be a little sauce in the skillet.
Fluff the orzo around the chicken a bit with a fork, then top with the remaining parsley and the crumbled feta. And that’s all it takes to make this simple Lemon Pepper Chicken with Orzo. I could seriously eat this orzo all day long. ALL. DAY. LONG.
Watermelon feta salad is the ultimate fresh summer treat! Sweet melon with salty cheese is laid back and perfect for the season.
Here’s the best recipe for when watermelon is in season, hands down: Watermelon Feta Salad! This classic combination of sweet juice melon and salty cheese is one of summer’s great pleasures. This summer salad has grown to massive popularity in recent years, and for good reason: it’s fast and easy to make, and has a lazy, laid-back vibe that screams flip flops, pool parties, and picnics.
What is watermelon feta salad?
Watermelon feta salad combines fresh cubed watermelon with feta cheese, and is often topped with olive oil or a quick vinaigrette. The origin of this salad may be Egyptian in origin, and it’s consumed in the Middle East and Mediterranean regions.
Why it works? It’s a refreshing dish for hot weather, and highlights the pairing of sweet fruit with salty cheese, an age old tradition in these cuisines. So while you may see it all over Pinterest: no, it was not invented by social media influencers!
Ingredients for watermelon feta salad
This watermelon feta salad recipe was the very first recipe we ever wrote for this website, back in August 2010. So much has changed since then, of course. But this salad recipe has grown massively in popularity! You’ll often see this type of recipe at summer potlucks and cookouts. Some recipes use a quick vinaigrette to dress the watermelon, but we like a simple drizzle of olive oil. Here are the watermelon feta salad ingredients:
Ripe watermelon
Feta cheese
Fresh herbs: basil or mint
Olive oil
Salt and pepper
The best part of this concept is you barely need to measure. Cube the watermelon, drizzle with oil, and sprinkle with herbs. It’s that easy! We prefer the fresh bite of a watermelon feta mint salad, but it’s nearly as delicious with fresh basil.
How to find a ripe melon (important!)
Because this watermelon feta salad is so simple, it’s important that you buy the best quality ingredients. An unripe watermelon tastes bitter and flat: not at all what you need for this salad! Here’s how to select a great ripe fruit:
Shop in watermelon season. It’s the only sure way we’ve found to get a great fruit.
Look for the field spot. Most watermelons should have a patch on the bottom, which is where they were resting on the ground before being picked. If the patch is yellow, the watermelon is ripe (if it’s white, it’s unripe).
Look for a watermelon that feels heavy for its size. That means there’s lots of juice inside! Honestly this one is hard to assess in the grocery, but keep it in mind when you’re shopping.
Buying the best feta cheese
Equally as important is the feta cheese you purchase. Skip the pre-crumbled stuff, and go for a block of full-fat feta cheese. This kind of feta has the best flavor, and it’s most like the feta served in Greece.
You also want to avoid feta that’s made from cow’s milk, as that’s not true feta. It crumbles more easily, which isn’t what you want. Feta from Greece has incredible flavor if you can find it! We’ve been able to locate Greek feta at our local grocery store.
Storage and make ahead instructions
This watermelon feta salad is best freshly made, so we have a few tips for making it ahead:
Cut the watermelon and store it separately. Cut watermelon releases a lot of liquid. So the best way to make this salad in advance is to cut the watermelon into cubes and store it separately. Then make up the salad right before serving.
Leftovers store up to 2 days. However, this salad is sub-optimal as leftovers because it releases so much juice. It does work, but it’s better for laid back lunches than impressing dinner guests.
Variations on watermelon feta salad
There are lots of variations on watermelon feta salad, swapping in different cheeses, herbs, and dressings. Here are a few options:
Mint and lime: This Watermelon Mint Salad is a favorite variation! Add lime juice and mint, and skip the feta entirely.
Onion: Add red onion slivers or minced shallot for a hint of savory spice
Baby arugula: Add baby arugula for a fluffy texture
More watermelon recipes
Watermelon feta salad is one of our top ideas for using this summery melon! But there are many more great ways to use this summer fruit. Here are some top watermelon recipes to try next:
Chop the watermelon and arrange it on a platter. Drizzle with olive oil. Sprinkle with feta crumbles, basil or mint, and kosher salt. Add lemon zest or black pepper if desired.
Serve immediately. If making ahead, refrigerate the cubed watermelon separately: it releases a large amount of water after it is cut. Then assemble the salad right before serving. Leftovers store for up to 2 days.
Category:Salad
Method:Raw
Cuisine:Salad
Diet:Vegetarian
Keywords: Watermelon feta salad, watermelon feta mint salad