Deprecated: trim(): Passing null to parameter #1 ($string) of type string is deprecated in /home/davecampbell/foodwatcher.com/wp-content/plugins/feedwordpress/feedwordpress.php on line 2022

Air Fryer Chicken Nuggets

These Air Fryer Chicken Nuggets are tender, juicy, easy to make, and perfect with your favorite dipping sauce!

The post Air Fryer Chicken Nuggets appeared first on Budget Bytes.

Am I the only one late to the Air Fryer club? I assumed it was just another kitchen appliance that I probably didn’t need taking up space on my countertop. Well I finally received an air fryer as a gift recently, and boy was I wrong! I’m loving the air fryer now, especially when it comes to making simple recipes like these Air Fryer Chicken Nuggets! They’re super easy to make, I can control the ingredients, and I can get about 2 dozen homemade chicken nuggets for half the cost compared to a fast food restaurant, #winning!

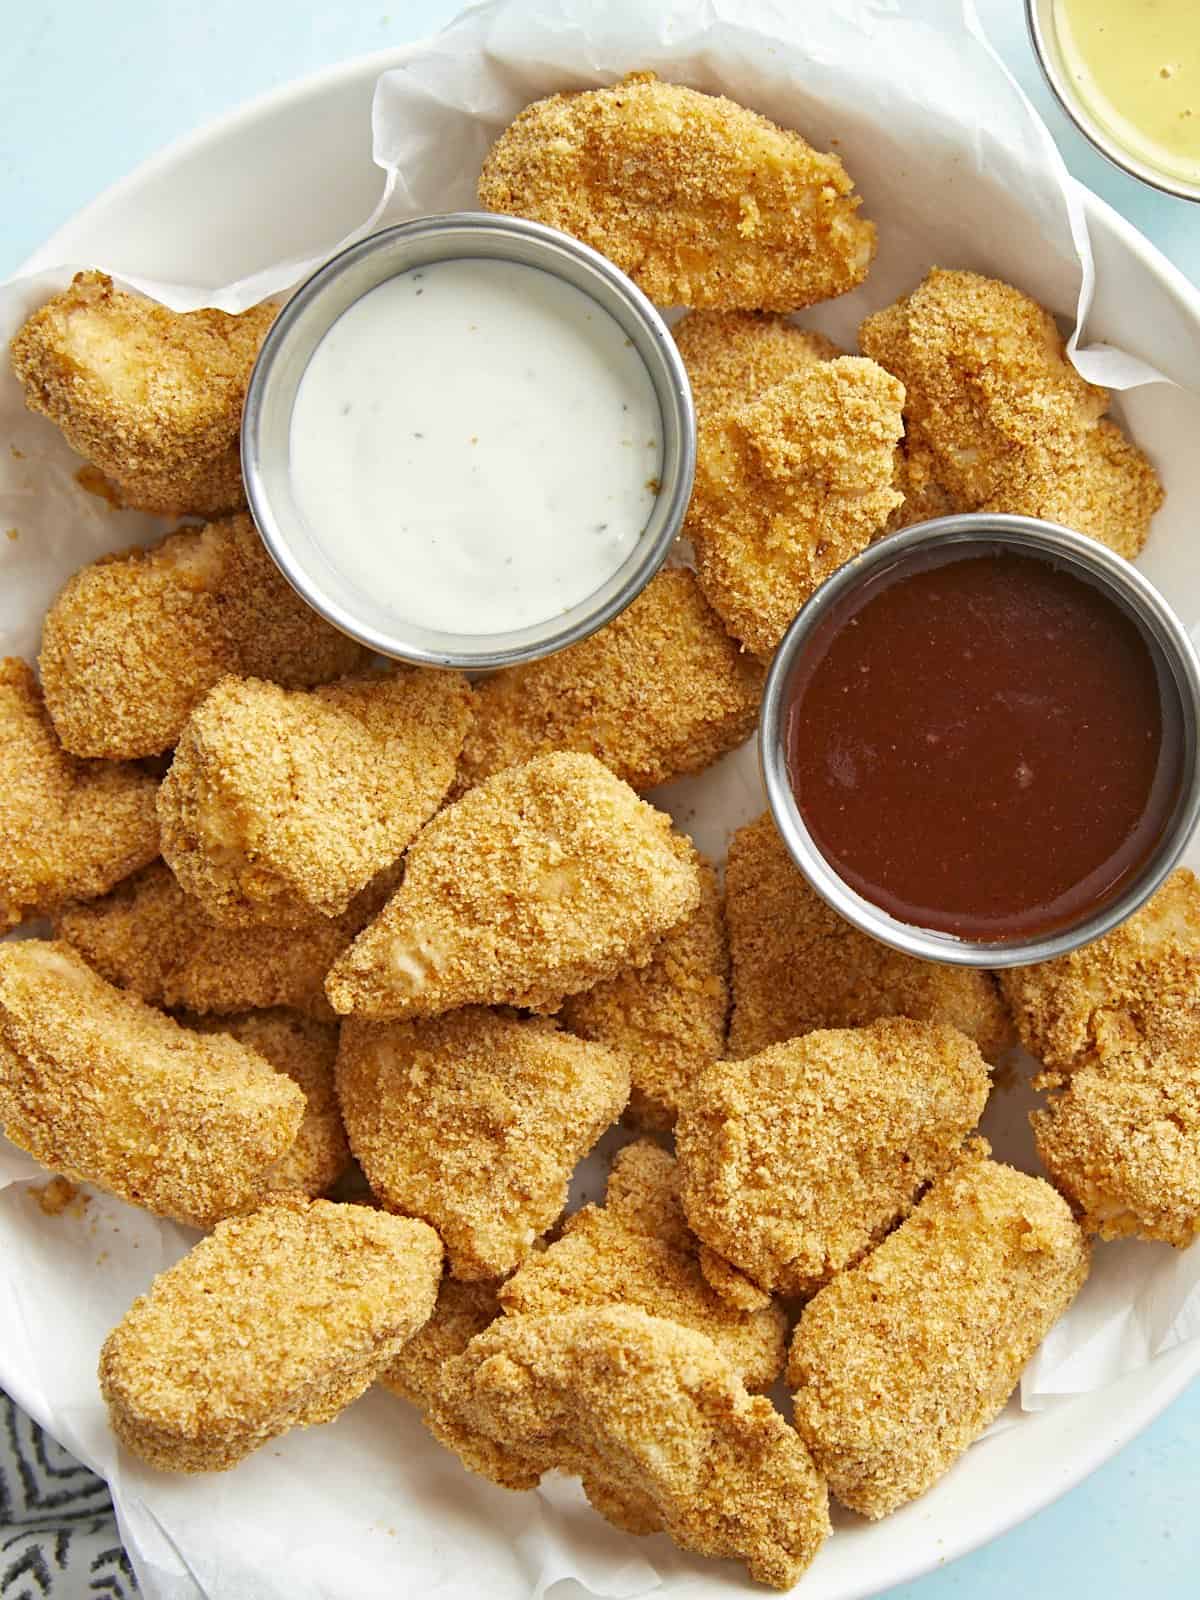
Air fryer chicken nuggets in a serving dish with BBQ and ranch dipping sauces.

What You’ll Need for Air Fryer Chicken Nuggets

When I say these nuggets are super easy to make, I mean you really only need a few ingredients:

  • Chicken – I’m a chicken breast girl so I’m using a boneless, skinless chicken breast for my nuggets. You can certainly use boneless, skinless chicken thighs, however I haven’t tested it with chicken thighs, so the cook time may vary.
  • All Purpose Flour – A light coating of flour helps the buttermilk to adhere to the chicken. 
  • Buttermilk – Thick buttermilk keeps the chicken tender & moist, and also helps the breadcrumbs adhere to the chicken nuggets. 
  • Breadcrumbs – Of course it wouldn’t be a chicken nugget without that iconic golden brown breading. We’re using regular plain breadcrumbs so we can season them to our liking.
  • Oil and Spices – A little bit of cooking oil to help the breadcrumbs crisp up and brown evenly. And a simple spice mix flavors the chicken.

Buttermilk Alternatives

Buttermilk is a common ingredient used in baked and fried chicken recipes, but you may not always have it on hand and it can sometimes be a little pricey. So here are some other alternatives:

  1. Milk + Vinegar or Lemon juice – Mix 1 Tbsp of vinegar or lemon juice with 1 cup of milk. Stir and let the mixture sit for 10 minutes. Proceed to use in the recipe in place of buttermilk.
  2. Greek yogurt – Plain greek yogurt, like buttermilk, is a cultured milk product that can also help keep the nuggets tender and moist. This is what we used in our Baked Chicken Nuggets recipe and they turned out great! In a small bowl add ⅓ cup greek yogurt, ⅛ tsp salt, and 3 Tbsp of water. Stir together until smooth, but still thick enough to coat the chicken. Proceed to use in the recipe in place of buttermilk.

Buttermilk is definitely the best option, so if you do have some on hand use that instead of an alternative.

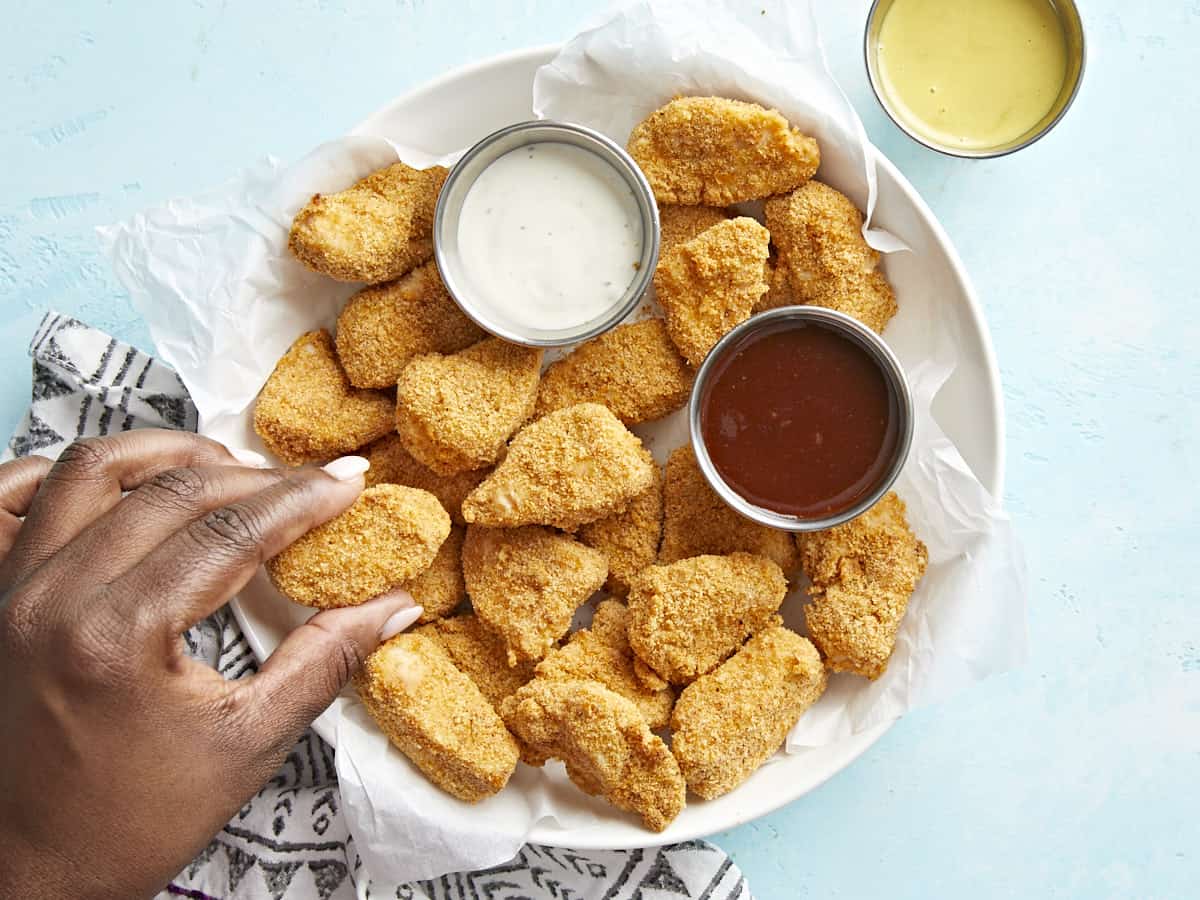
Plated air fryer chicken nuggets with one nugget being grabbed.

Recipe Tips For Success!

  1. Add the oil and spices to the breadcrumbs separately. Add the spices to the breadcrumbs first and give it a good mix, then add the oil and combine. This allows the spices to be evenly distributed.
  2. When adding the breading to the chicken, flip and press the nuggets into the breadcrumb mixture making sure it’s completely coated evenly all the way around.
  3. Remember to preheat the air fryer. Similar to preheating your oven, it’s a good idea to preheat your air fryer so the chicken nuggets can cook evenly and get crispy on the outside.
  4. Don’t crowd the basket. Space the nuggets out in an even layer so the hot air can circulate around the chicken. Cook in two separate batches if you need to.

How to Reheat Air Fryer Chicken Nuggets

If you have any leftover chicken nuggets the best way to reheat them to maintain their texture and flavor would be in the air fryer. Simply preheat the air fryer to 375°F, place the nuggets in the air fryer basket in a single layer, and cook for 2-3 minutes or until heated through, making sure they reach an internal temperature of 165°F.

What To Serve With Chicken Nuggets

What’s a chicken nugget without a great dipping sauce? Here are some of our favorites:

And if you’re looking for more side dish ideas to go with these chicken nuggets, try our Oven Baked Steak Fries, Homemade Mac and Cheese, a side of Simple Sautéed Vegetables, or a quick Pasta Salad!

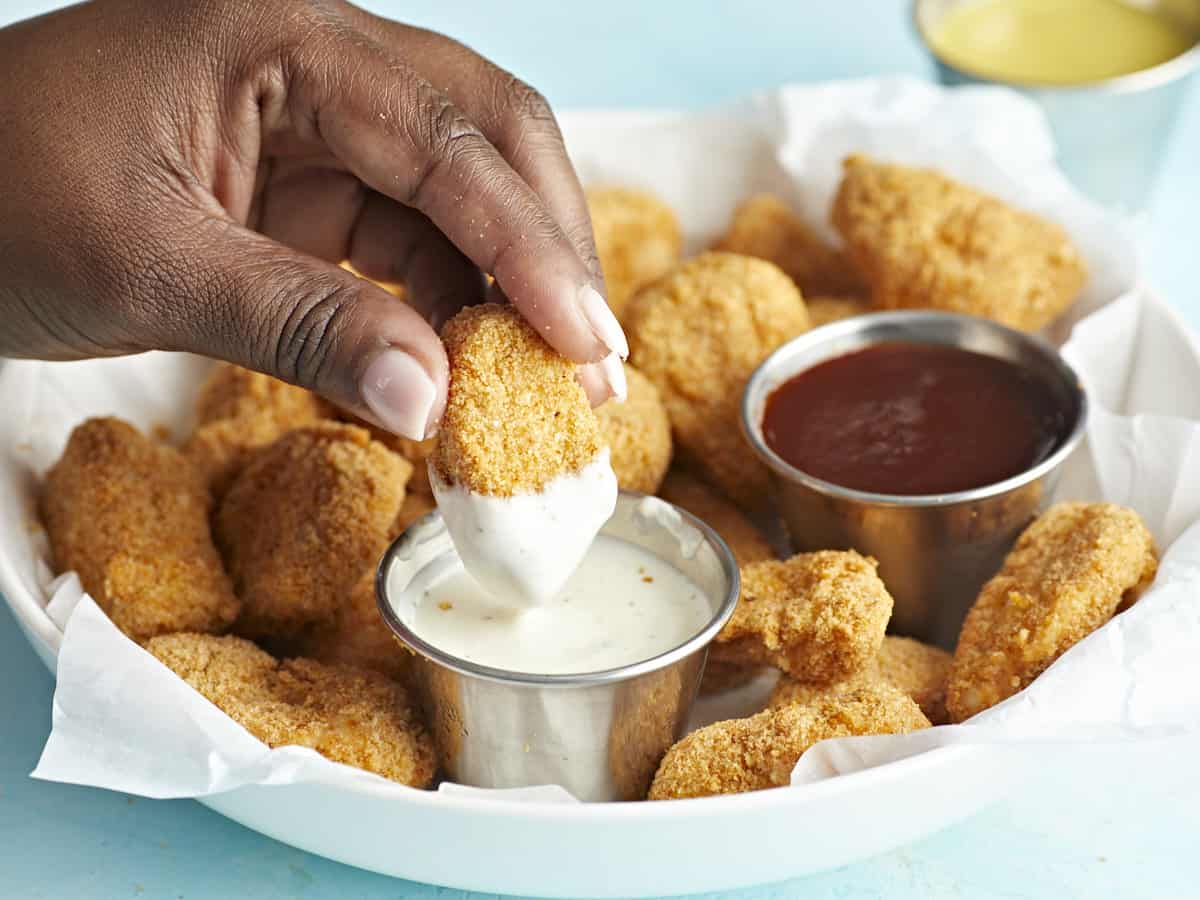
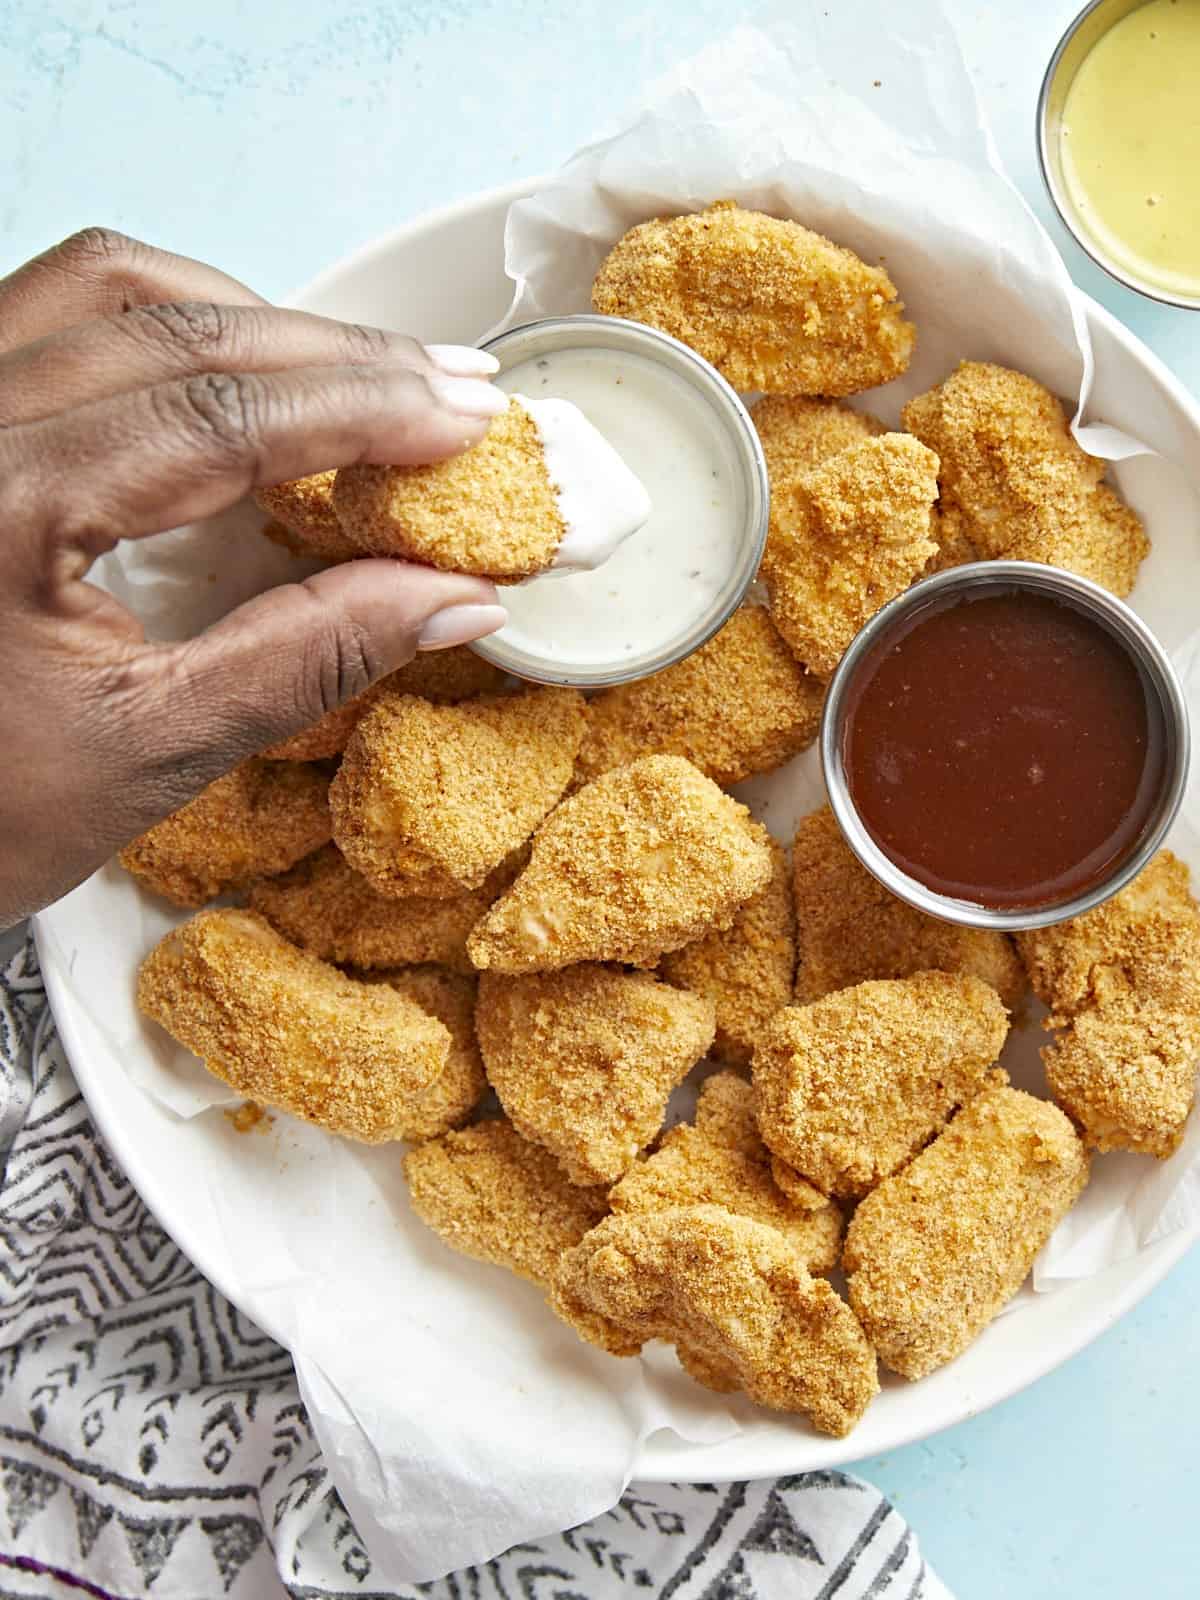
Plated air fryer chicken nuggets with one nugget being dipped in ranch dipping sauce.
Air fryer chicken nuggets plated in a serving dish with ranch and BBQ dipping sauces on the side.
Print

Air Fryer Chicken Nuggets

These Air Fryer Chicken Nuggets are tender, juicy, easy to make, and perfect with your favorite dipping sauce!
Course Dinner, Lunch
Cuisine American
Total Cost $5.64 recipe / $1.41 serving
Prep Time 15 minutes
Cook Time 8 minutes
Total Time 23 minutes
Servings 4 5-6 nuggets each
Calories 211kcal

Equipment

Ingredients

  • 1 boneless, skinless chicken breast (about 2/3 lb.) $4.50
  • 3/4 tsp salt, divided $0.05
  • 1 Tbsp all-purpose flour $0.02
  • 1 cup plain breadcrumbs $0.60
  • 1 tsp garlic powder $0.10
  • 1/2 tsp smoked paprika $0.05
  • 2 Tbsp cooking oil $0.08

Instructions

  • On a cutting board, cut the chicken breast into 3/4 inch pieces. You should get approximately 20-24 chicken nuggets depending on the size of your chicken breast.
  • Sprinkle ¼ tsp of salt evenly over the chicken pieces. Next sprinkle the flour over the chicken and toss to coat evenly.
  • In a small bowl add the breadcrumbs, garlic powder, smoked paprika, and ½ tsp salt. Mix seasoning into the breadcrumbs. Next add the cooking oil to the breadcrumbs and stir until the oil is evenly coating the breadcrumbs. It should look like damp sand.
  • In another small bowl add ½ cup buttermilk.
  • Now line up the chicken, buttermilk, and breadcrumbs. Using tongs or your hands, begin to coat the chicken nugget pieces by first dipping them in the buttermilk, then transfer them to the breadcrumbs and coat them evenly with the breadcrumbs. Set the coated chicken pieces to the side.
  • Preheat the air fryer to 400°F. Once preheated, place the chicken nuggets in the air fryer basket in a single layer. Try not to overcrowd the basket. You can cook the chicken nuggets in 2 batches if needed. Air fry for 8 minutes, flipping the nuggets halfway through.
  • Remove chicken nuggets from the air fryer and let cool for 3-5 minutes, then serve with your favorite dipping sauce.

See how we calculate recipe costs here.

Nutrition
Serving: 1serving | Calories: 211kcal | Carbohydrates: 22g | Protein: 10g | Fat: 9g | Sodium: 667mg | Fiber: 1g

How to Make Air Fryer Chicken NUggets – Step by Step Photos

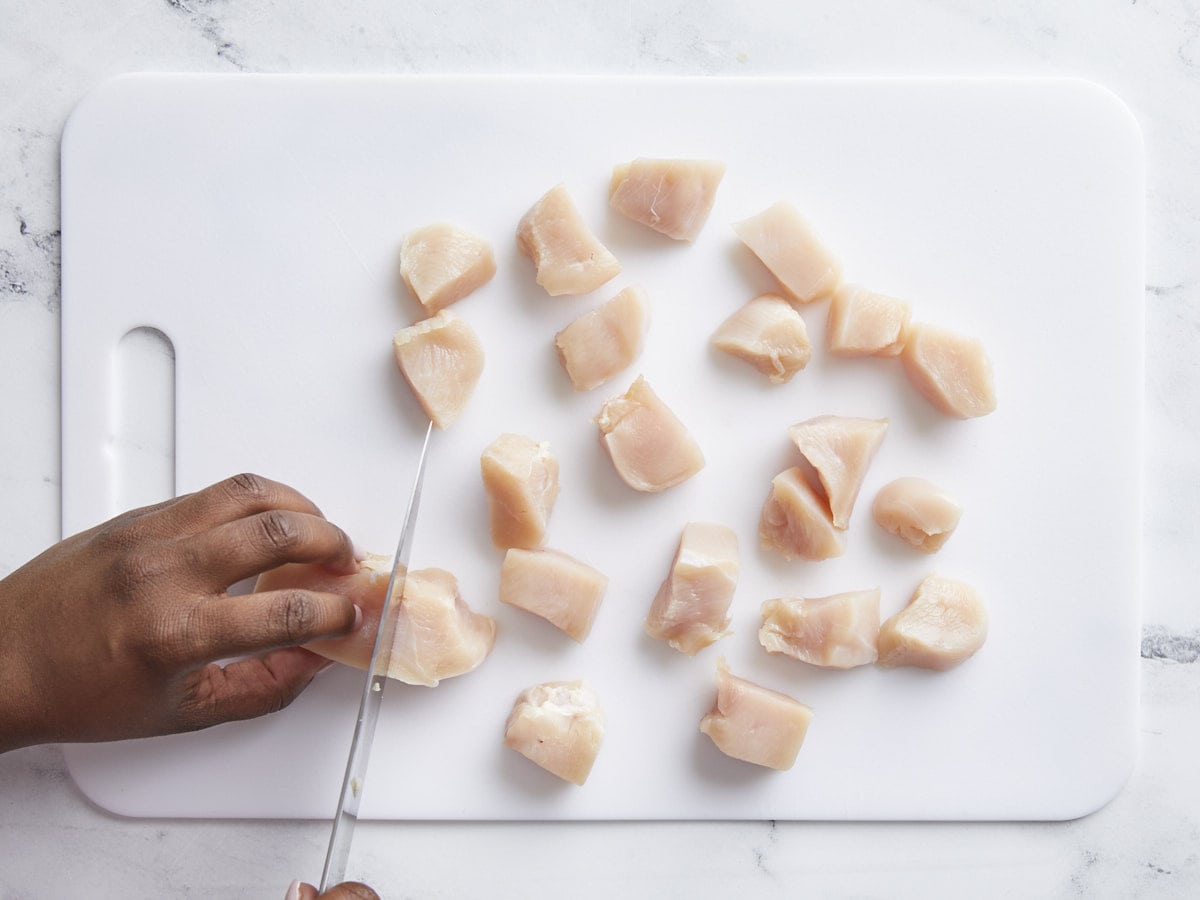
Chicken breast being cut into 1 inch pieces on a cutting board

On a clean cutting board, cut the chicken breast into 3/4 inch pieces. You should get approximately 20-24 chicken nuggets depending on the size of your chicken breast.

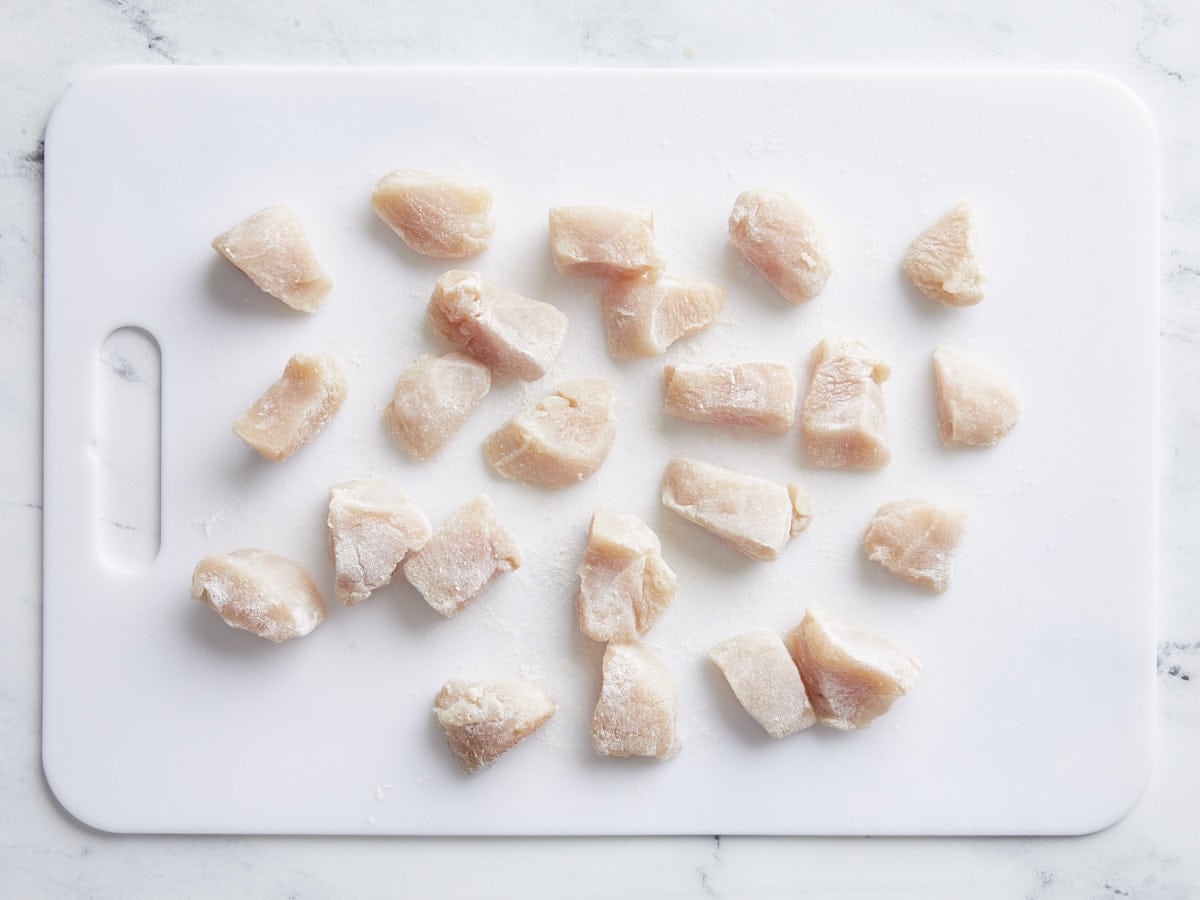
Chicken breast nuggets seasoned with salt and dusted with flour.

Season the chicken by adding ¼ tsp of salt evenly over the chicken pieces. Next sprinkle 1 Tbsp all purpose flour over the chicken pieces. Toss the chicken to coat evenly.

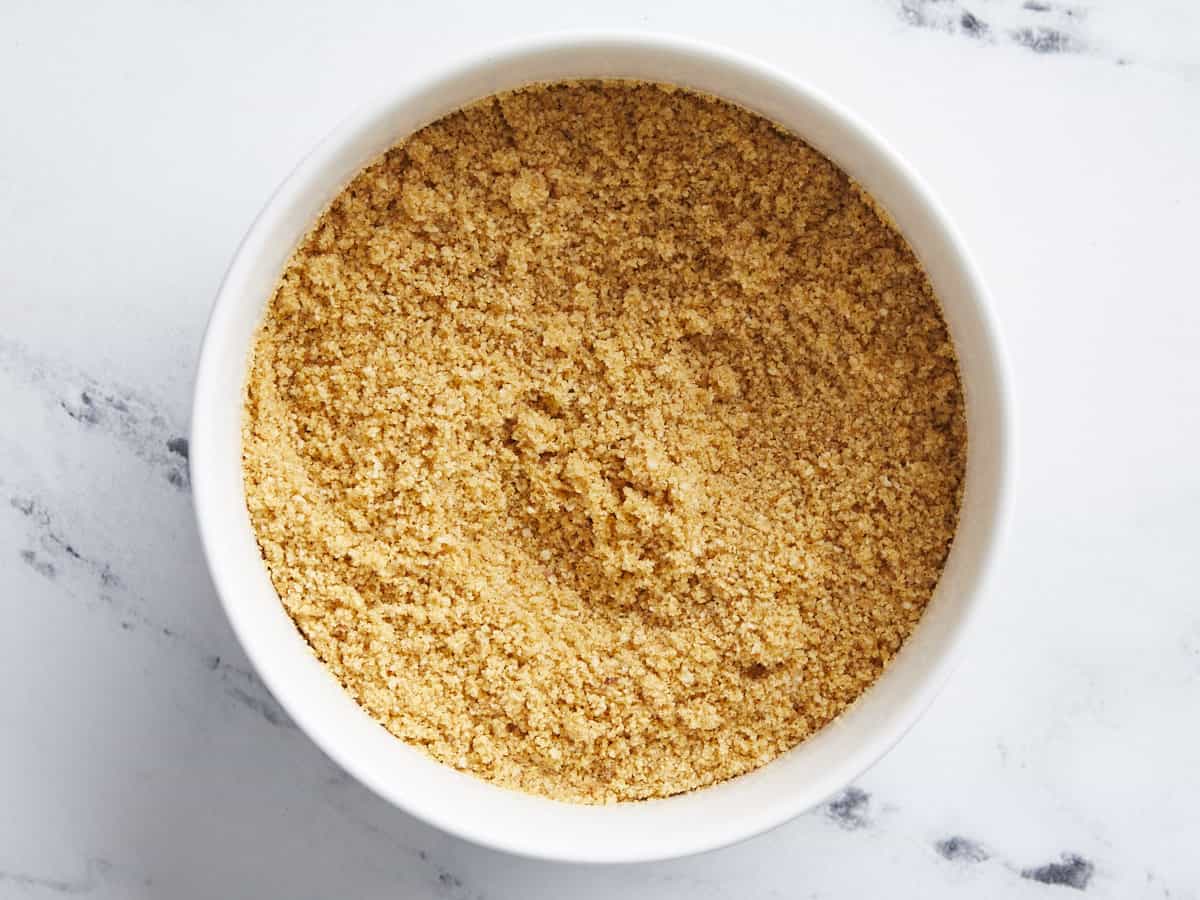
Breadcrumbs with seasoning and oil mixed together.

In a small bowl add 1 cup of plain breadcrumbs, 1 tsp garlic powder, ½ tsp smoked paprika, and ½ tsp salt. Mix seasoning into breadcrumbs. Next add 2 Tbsp of cooking oil to the breadcrumbs and stir until the oil is evenly coating the breadcrumbs. It should look like damp sand.

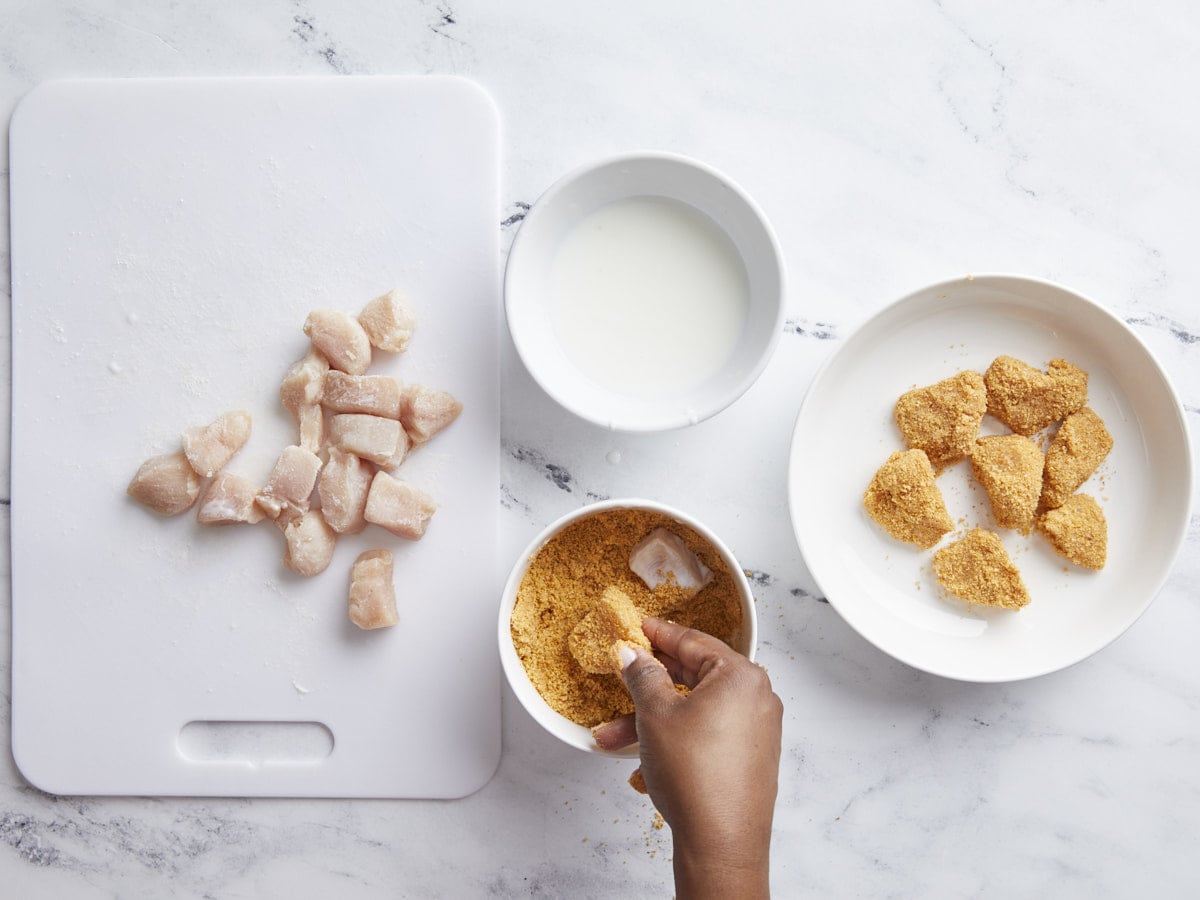
Chicken nugget assembly line with chicken pieces on the left, buttermilk and breadcrumbs in the middle, and coated chicken nuggets on the right.

In another small bowl add ½ cup buttermilk. Line up the chicken, buttermilk, and breadcrumbs. Using tongs or your hands, begin to coat the chicken nugget pieces by first dipping them in the buttermilk, then transfer them to the breadcrumbs and coat them evenly with the breadcrumbs.

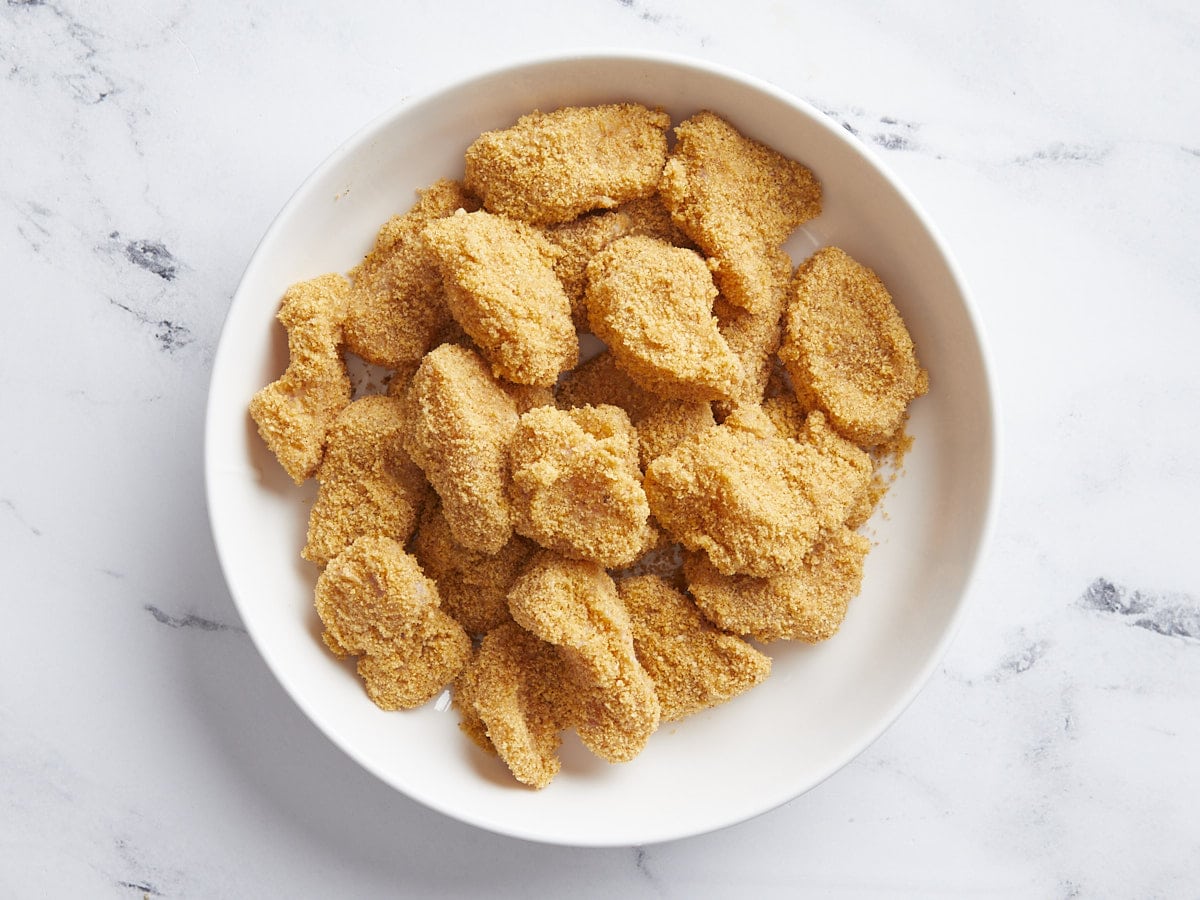
Breaded chicken nuggets

Set the coated chicken pieces to the side.

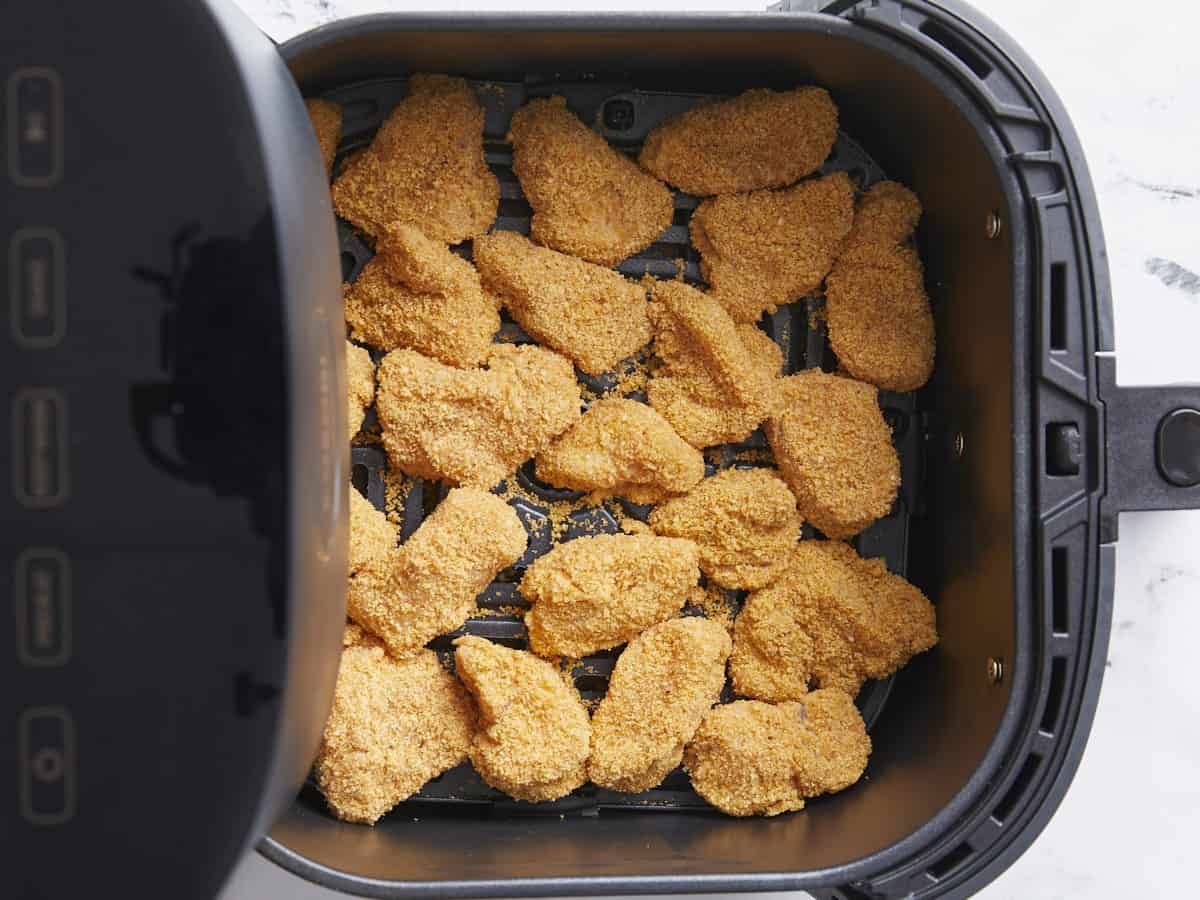
Breaded chicken nuggets added to air fryer basket.

Preheat the air fryer to 400°F. Once preheated, place the chicken nuggets in the air fryer basket in a single layer. Try not to overcrowd the basket. You can cook the chicken nuggets in 2 batches if needed.

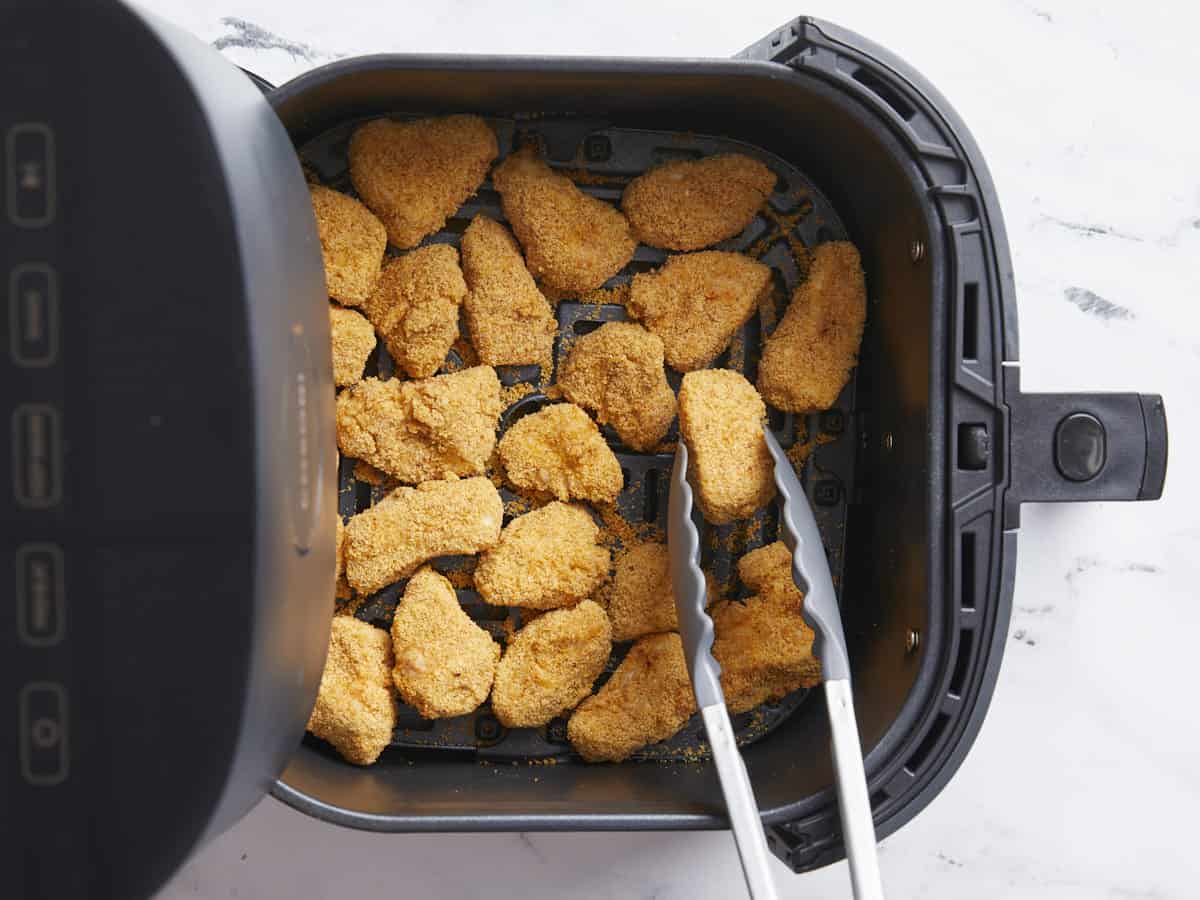
Cooked chicken nuggets in the air fryer basket with one being lifted with tongs.

Air fry for 8 minutes, flipping the nuggets halfway through.

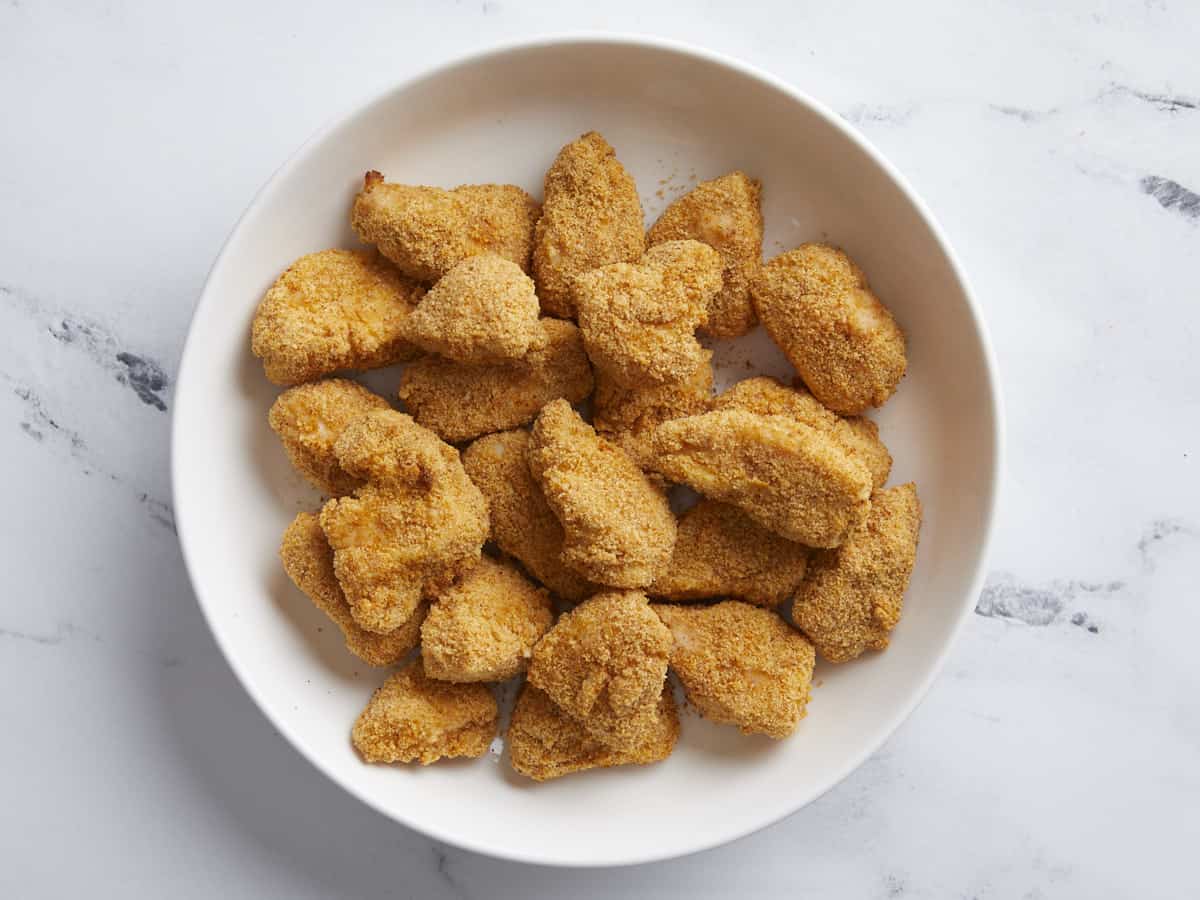
Cooked Air Fryer Chicken Nuggets plated in a serving dish.

Remove the chicken nuggets from the air fryer and let cool for 3-5 minutes, then serve with your favorite dipping sauce. Enjoy!

Plated Air Fryer Chicken Nuggets with one nugget being dipped into ranch sauce.

The post Air Fryer Chicken Nuggets appeared first on Budget Bytes.

Creamy Chicken and Gnocchi

Creamy Chicken and Gnocchi is a one-pot meal that’s full of flavor and comfort and is also a quick and easy weeknight dinner.

The post Creamy Chicken and Gnocchi appeared first on Budget Bytes.

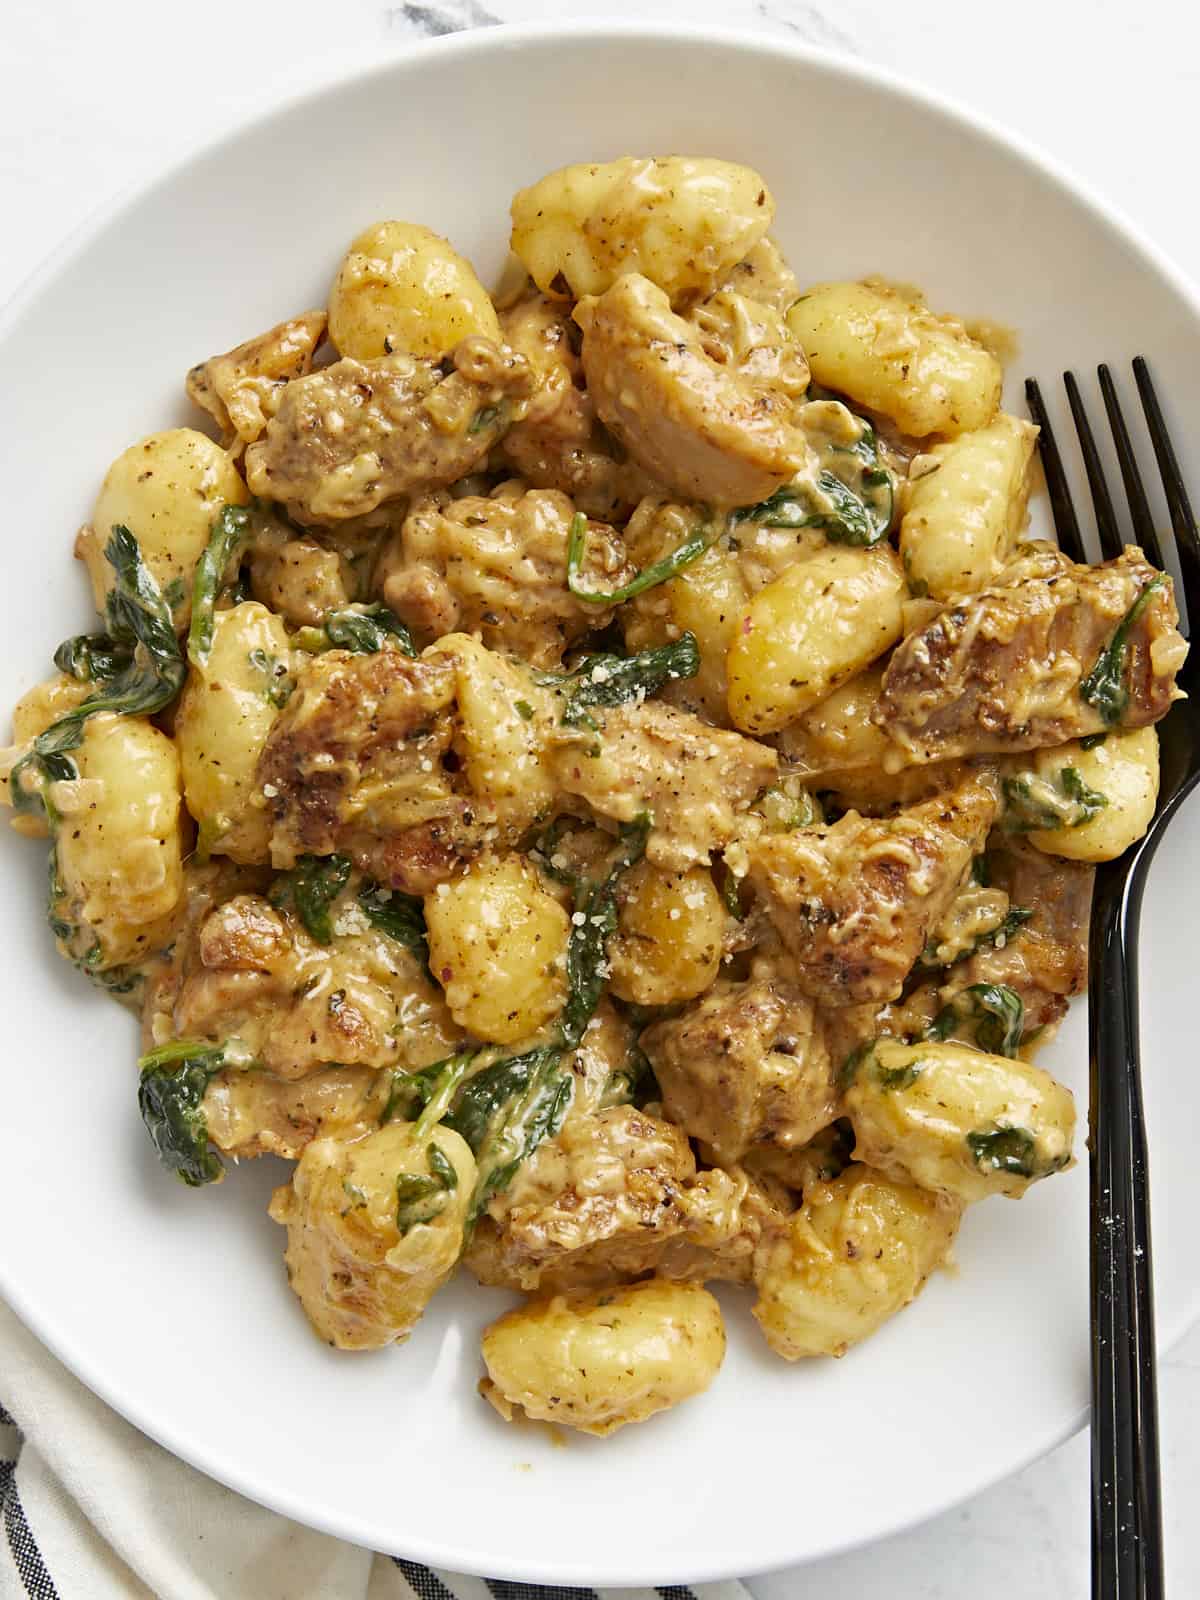
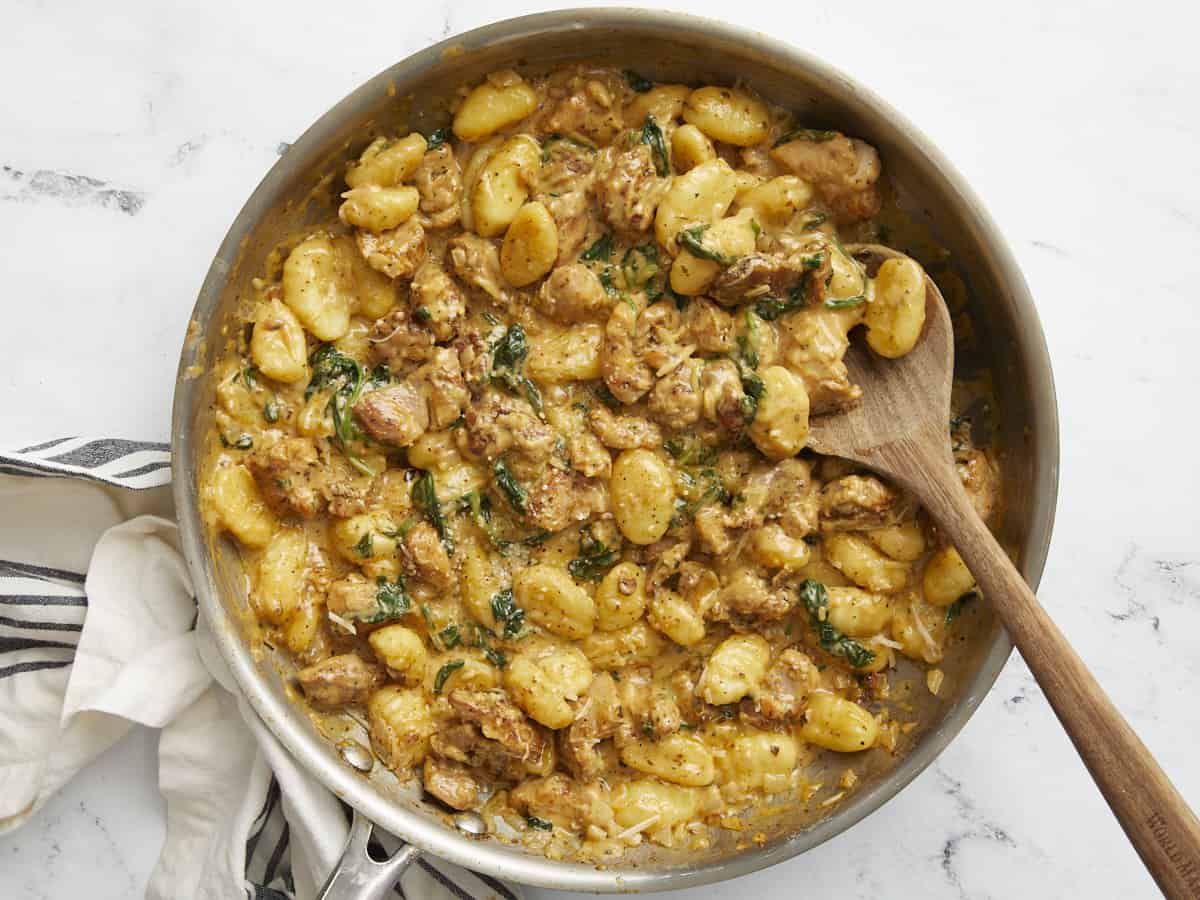
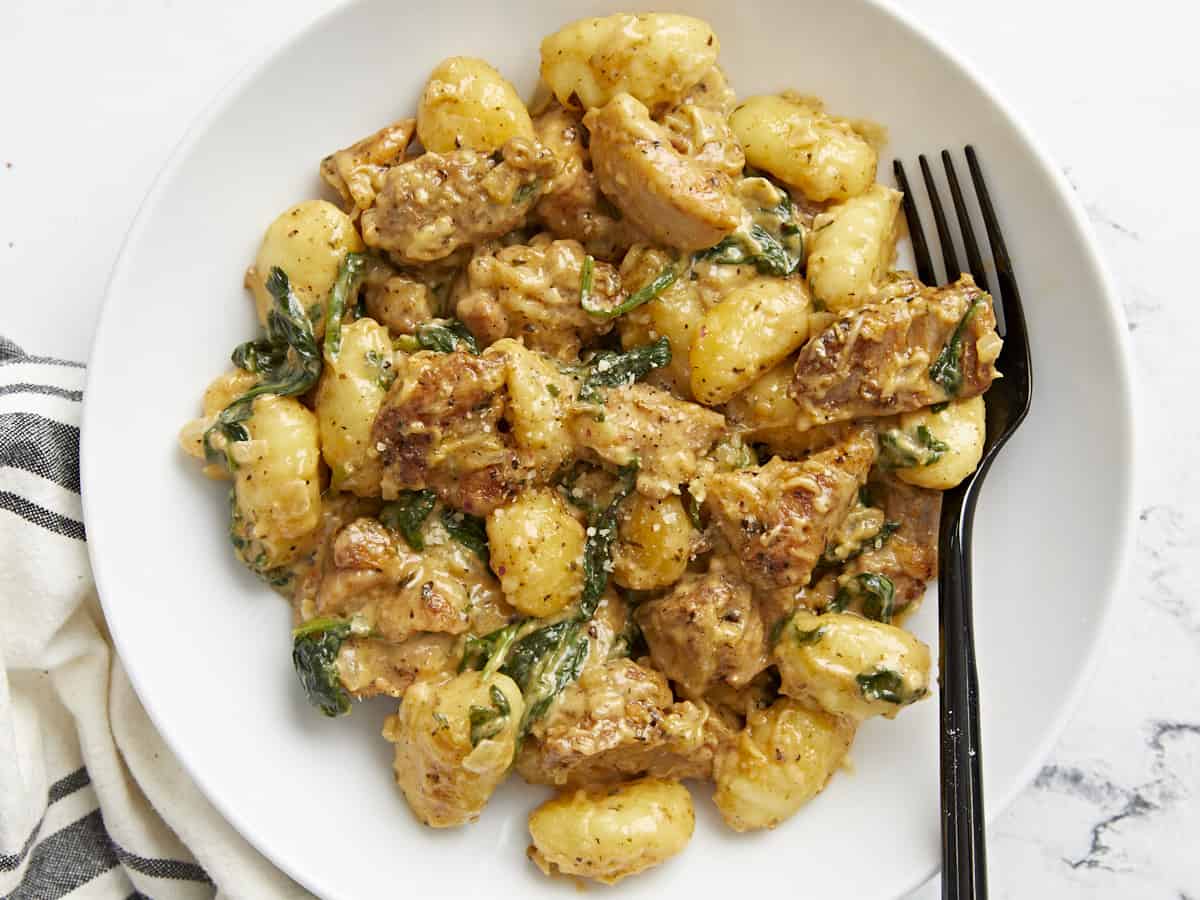
This velvety Creamy Chicken and Gnocchi recipe is one of my favorite one-pot meals because it’s easy, you can make it in under thirty minutes, it’s filling, and it’s big-time delicious. Like I’m-not-going-to-stop-eating-this-until-it’s-all-done delicious. Pillowy gnocchi drenched in a rich buttery cream sauce, with pops of juicy chicken and earthy spinach? Ummm, yeah. You’re going to love this one!

What Is Gnocchi?

Gnocchi are small two-inch dumplings made with mashed potatoes, flour, and eggs. They are served sauteed with butter, tomato, or cream-based sauce. In this dish, we pair gnocchi with diced chicken thighs in a buttery cream sauce. It’s basically an elevated meat and potatoes dish, with spinach thrown in because Beth says we need to cook more veggies.

What You’ll Need

You won’t need loads of time or pots and pans, that’s for sure. Everything in this dreamy, silky dish comes together in one skillet in under thirty minutes! Here’s what you’ll need to make Creamy Chicken And Gnocchi:

  • Gnocchi – you can find them frozen or fresh, but I prefer the dried ones as they are more economical, plus I have more room in my pantry than I do in my freezer. You’ll find them in the pasta section of your grocery store.
  • Chicken Thighs– You can also use chicken breast, but be careful not to overcook it, as you want juicy chicken, not dry, chicken-flavored cotton balls. In a pinch, sub the thighs with Italian sausage and skip the seasoning.
  • Heavy cream and Butter– this is a cream sauce, so it is dairy-heavy. You need the fat found in these ingredients to create the velvety sauce that brings everything together. You can substitute the heavy cream with full-fat coconut cream and the butter with vegan butter
  • Parmesan– does double duty, adding savory saltiness to the sauce while also thickening it. Asioago or feta make great substitutions. If you can’t do dairy, use a couple of tablespoons of nutritional yeast, but keep in mind that your sauce will be much looser.
  • Vegetable broth– is used to hydrate the dried gnocchi and helps create the base of our cream sauce. Substitute it with chicken broth or in a pinch, with a cup of water with a tablespoon of tomato sauce mixed in.
  • Onion and Garlic– these aromatics are fried in the chicken thigh fat and help flavor the gnocchi. You can substitute the onion with one tablespoon of onion powder and the garlic with 1/4 teaspoon of garlic powder.
  • Spinach- brings earthiness and a beautiful color to the dish. You can substitute spinach with kale, though it will take a little longer to soften.
  • Italian seasoning – creates an easy flavor base. If you don’t have Italian seasoning, substitute it with one teaspoon of dried oregano, one teaspoon of dried thyme, and one teaspoon of dried rosemary.
  • Smoked paprika – using this spice is optional, but I use it to add a dank, smoky note that helps round out the sharpness of the Italian seasoning. It also lends a golden hue to the sauce.

What To Serve With Creamy Chicken and Gnocchi

This dish is heavy, so pair it with a Simple Side Salad or Panzanella. You can also lean into the heaviness and make Garlic Bread to sop up all the creamy sauce. (It is AMAZING with garlic bread. And garlic counts as a vegetable!)

Storing and Reheating

Because you make this dish with a cream-based sauce, I don’t recommend freezing it, as the cream gets grainy when it thaws. Keep leftovers in an airtight container in the refrigerator for up to 3 days. Reheat in a microwave until steaming.

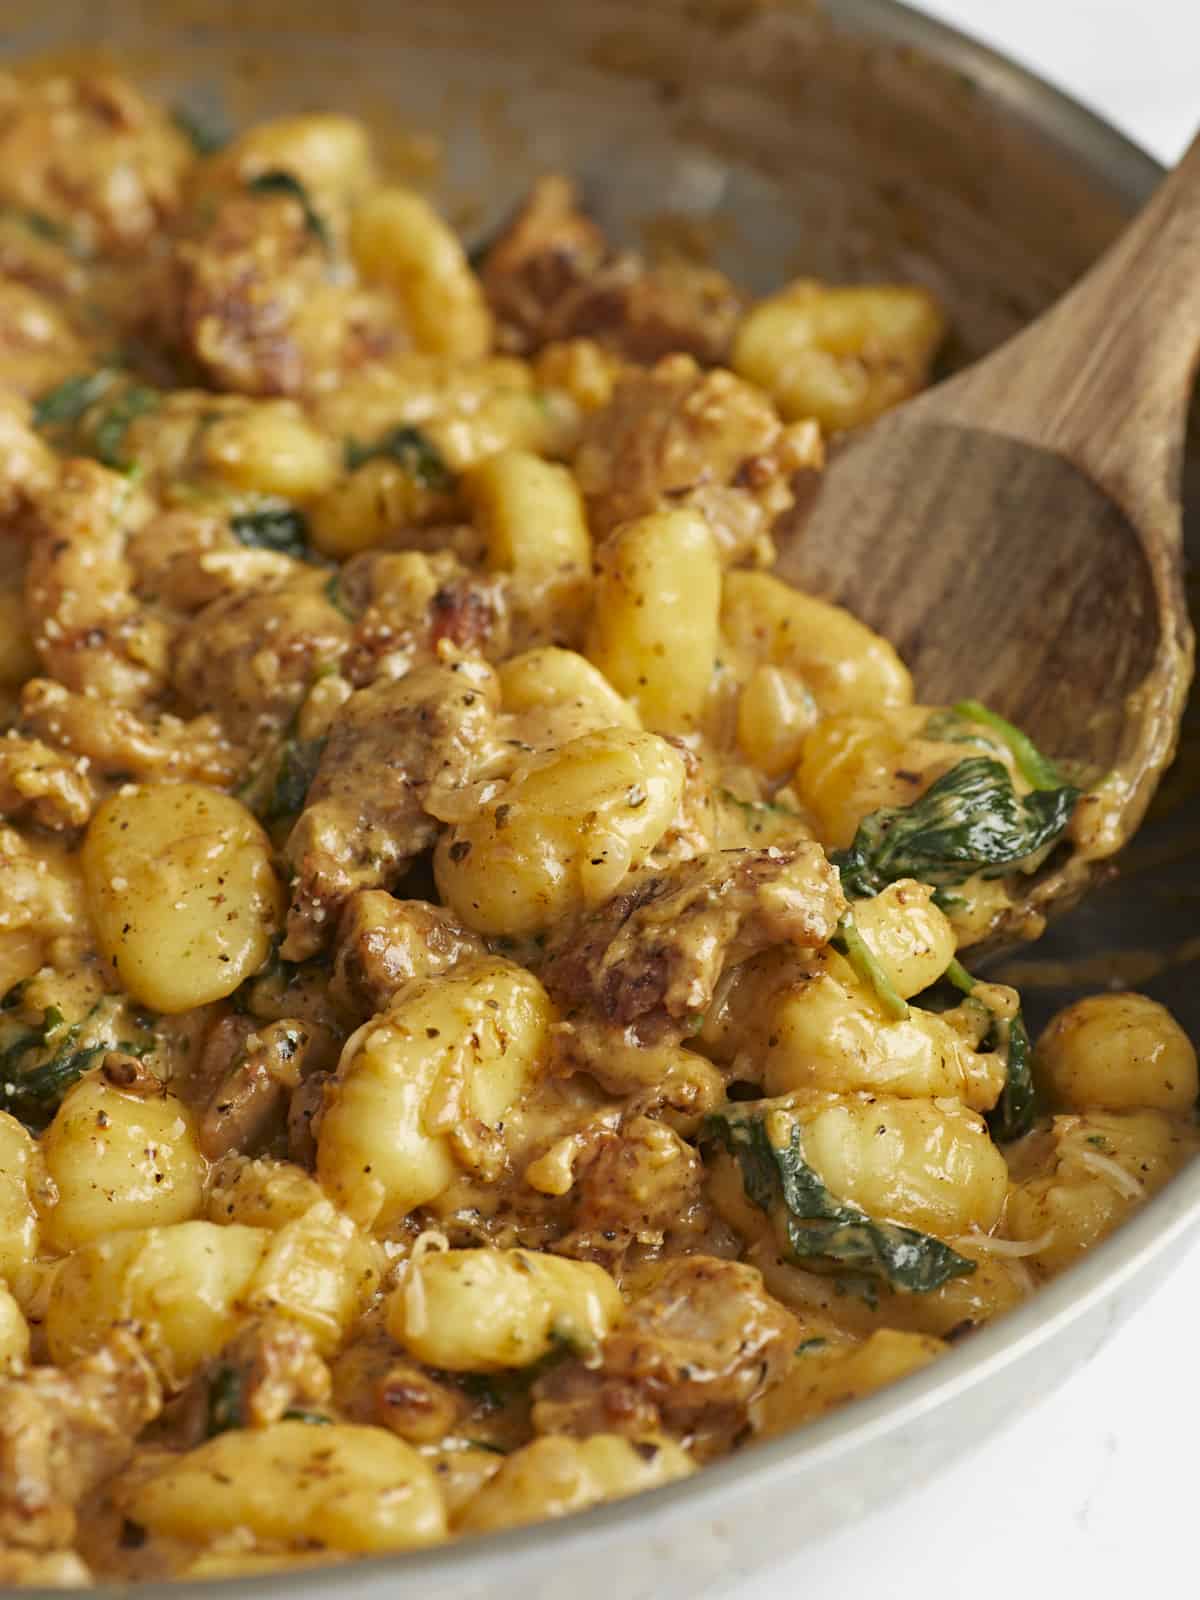
Side shot of Creamy Chicken and Gnocchi in a silver skillet with a wooden spoon in it.
Print

Creamy Chicken and Gnocchi

This delicious dish is full of pillowy gnocchi drenched in a rich buttery cream sauce, with pops of juicy chicken and earthy spinach. Plus it's so easy, you can make it in under thirty minutes!
Course Dinner, Lunch
Cuisine American, Italian
Total Cost $8.41 recipe / $2.10 serving
Prep Time 5 minutes
Cook Time 20 minutes
Total Time 25 minutes
Servings 4 servings
Calories 756kcal

Ingredients

  • 1.25 lbs chicken thighs (4 to 5 thighs) $4.23
  • 1 Tbsp Italian Seasoning $0.30
  • 1/2 tsp smoked paprika $0.05
  • 1/2 tsp salt $0.04
  • 1/4 tsp pepper $0.02
  • 2 Tbsp cooking oil $0.08
  • 1 medium yellow onion, diced $0.32
  • 2 garlic cloves $0.11
  • 1 lb potato gnocchi (dry) $1.13
  • 2 cups fresh spinach $0.60
  • 1 cup vegetable broth $0.08
  • 1/2 cup heavy cream $0.71
  • 2 Tbsp salted butter $0.30
  • 1/4 cup Parmesan $0.44

Instructions

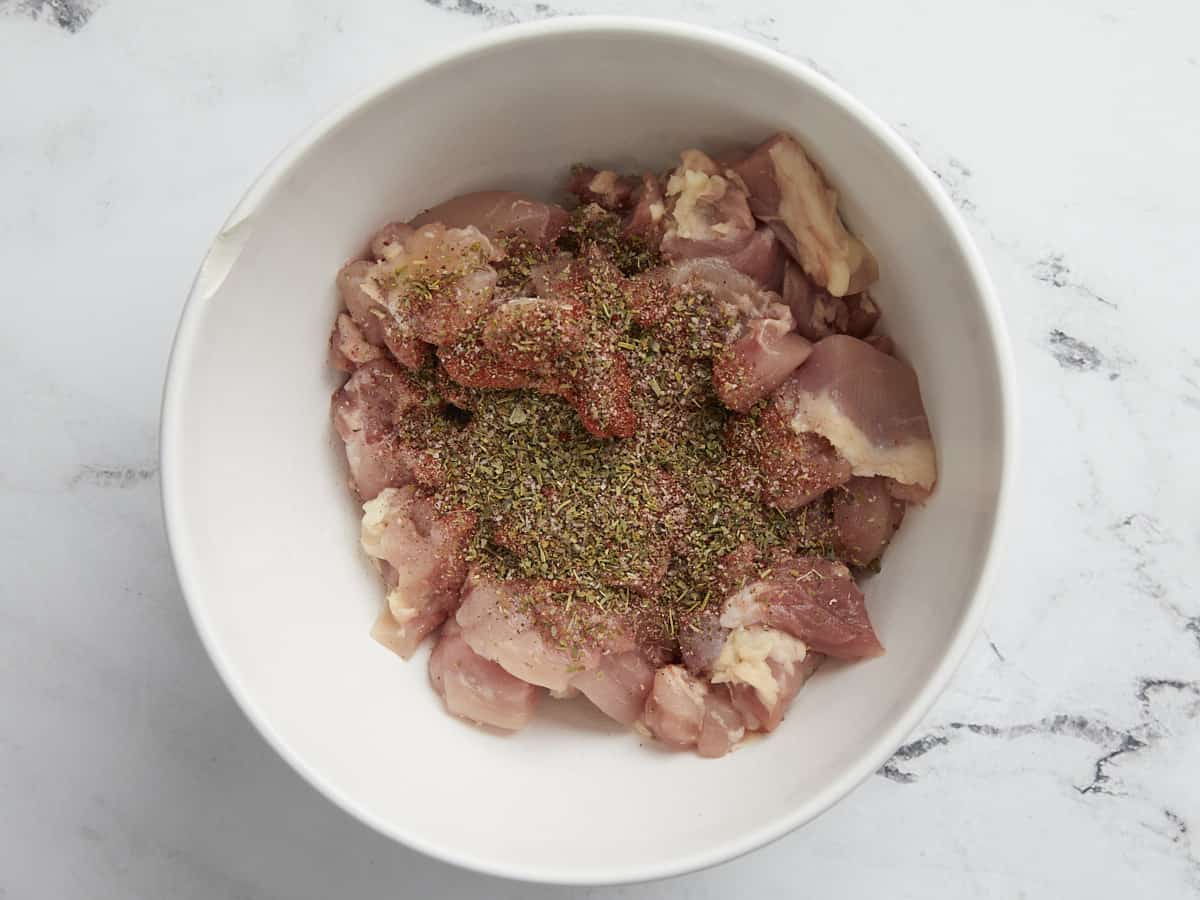
  • Dice the chicken thighs into 2-inch pieces. Add the chicken to a bowl and top it with Italian seasoning, smoked paprika, salt, and pepper. Mix until combined.
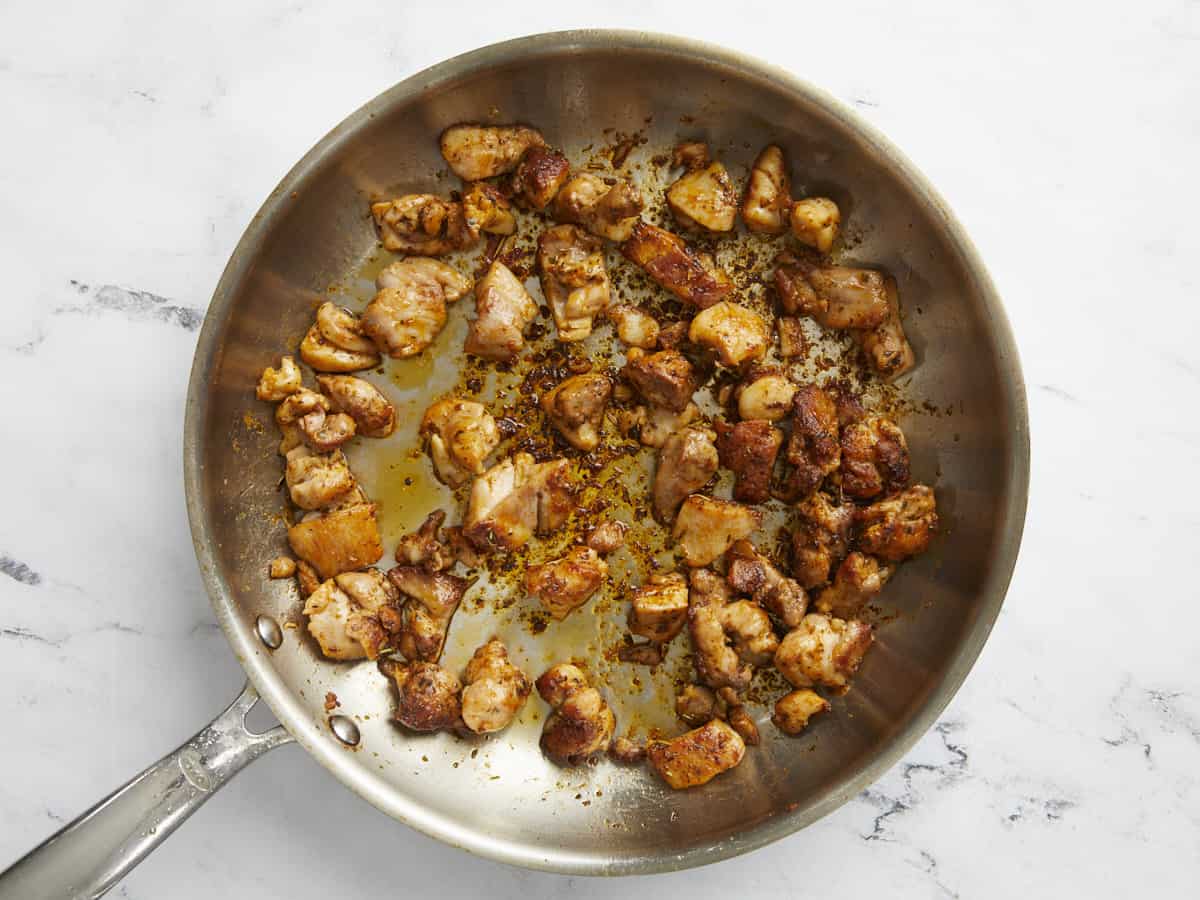
  • Place a large, deep skillet over medium heat and add the cooking oil. Once it's shimmering, add the chicken and cook undisturbed until well browned, about 3 minutes. Stir and brown on the other side, about 3 more minutes. Remove the chicken from the pan when it's cooked through and leave the fat in the pan.
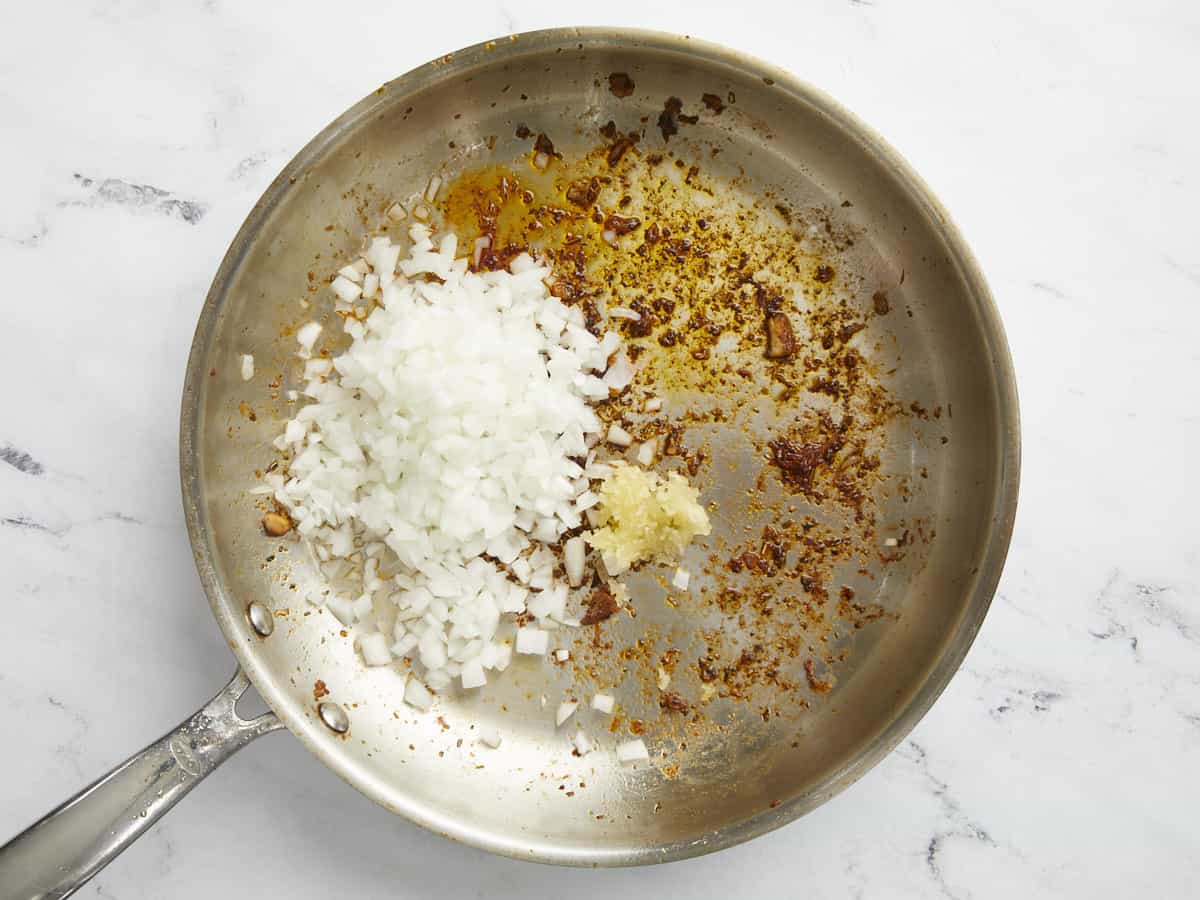
  • Add the onion and garlic to the skillet. Saute until the onions have softened and the garlic is fragrant, about 2 minutes
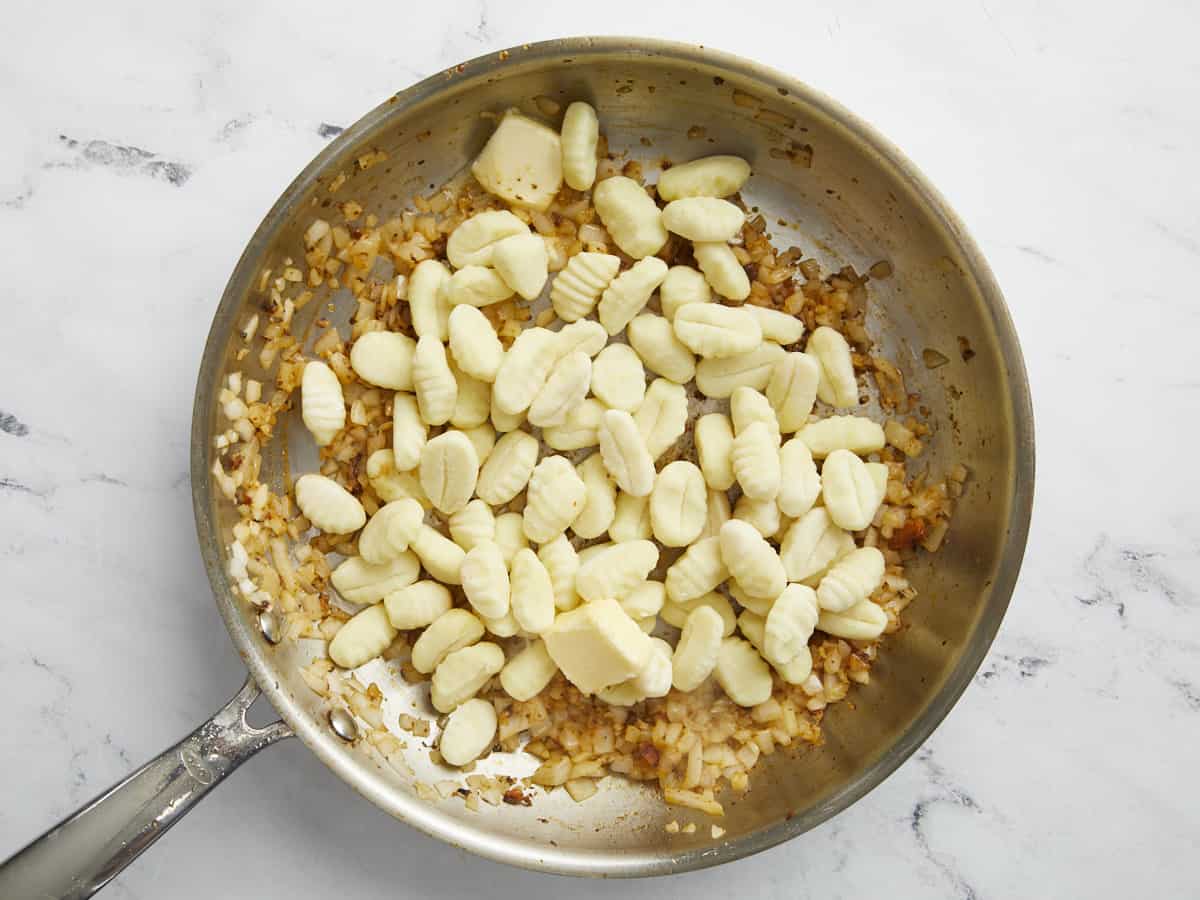
  • Add the gnocchi and butter to the skillet and brown for 2 minutes.
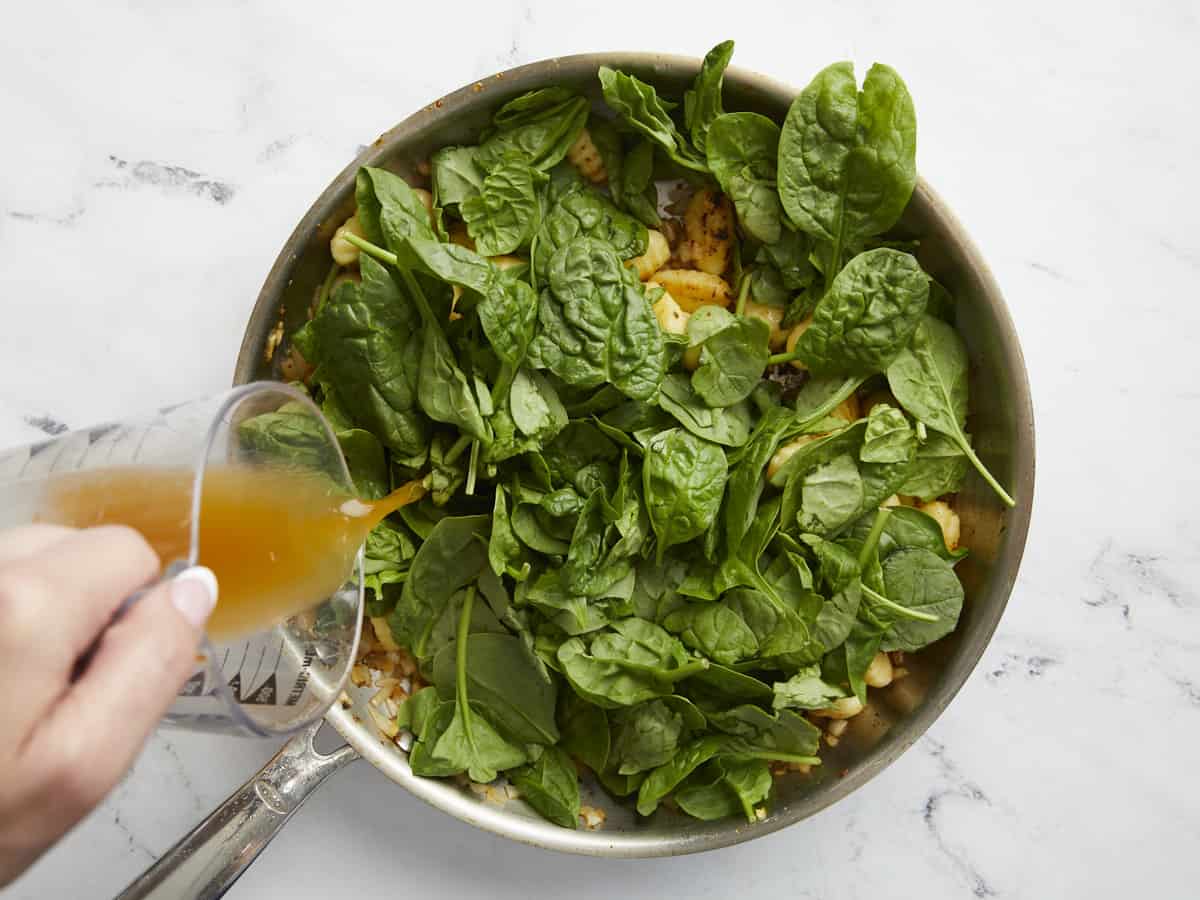
  • Add the spinach and the broth to the skillet. Cover the pan. Cook for 1 to 2 minutes until the spinach has wilted and the gnocchi has hydrated.
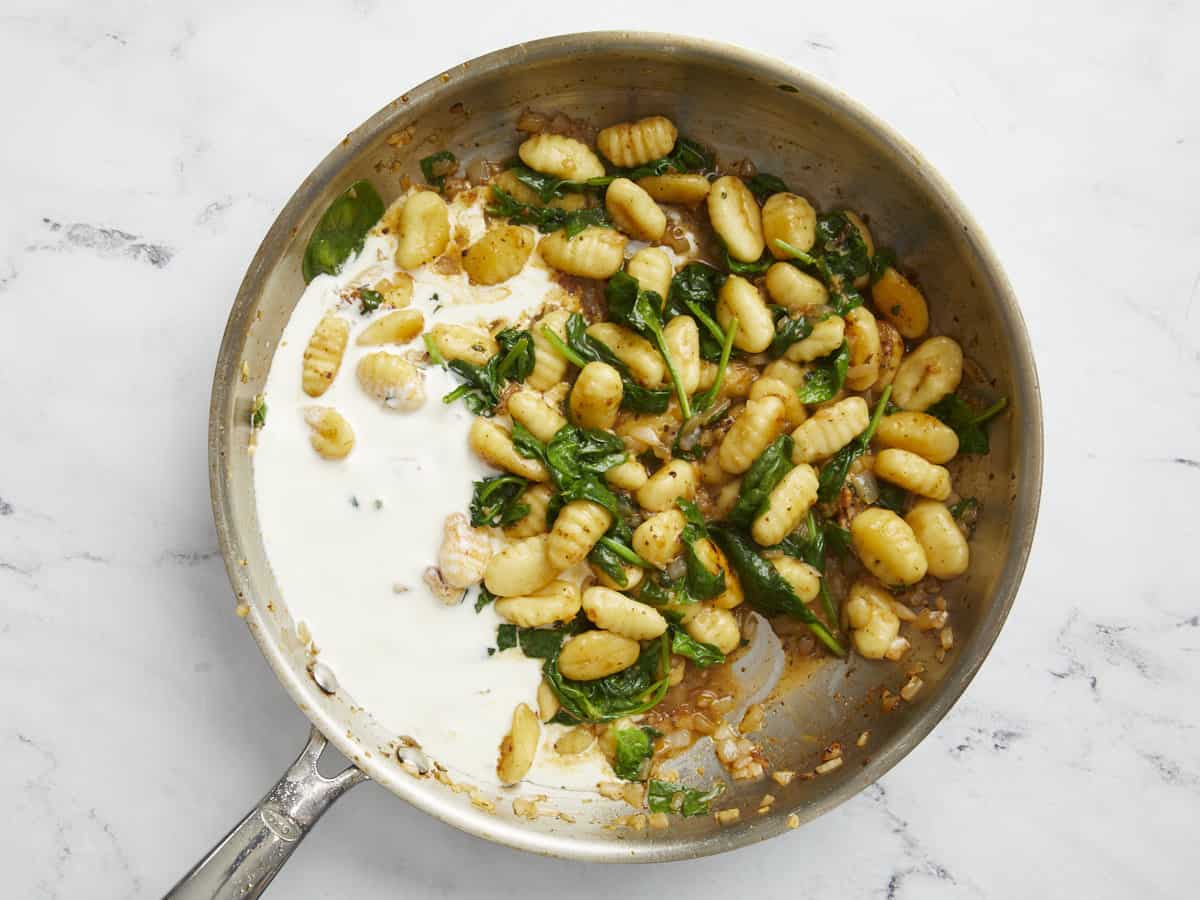
  • Add the heavy cream and salted butter to the skillet. Stir until the butter has melted and the cream is steaming hot but not boiling.
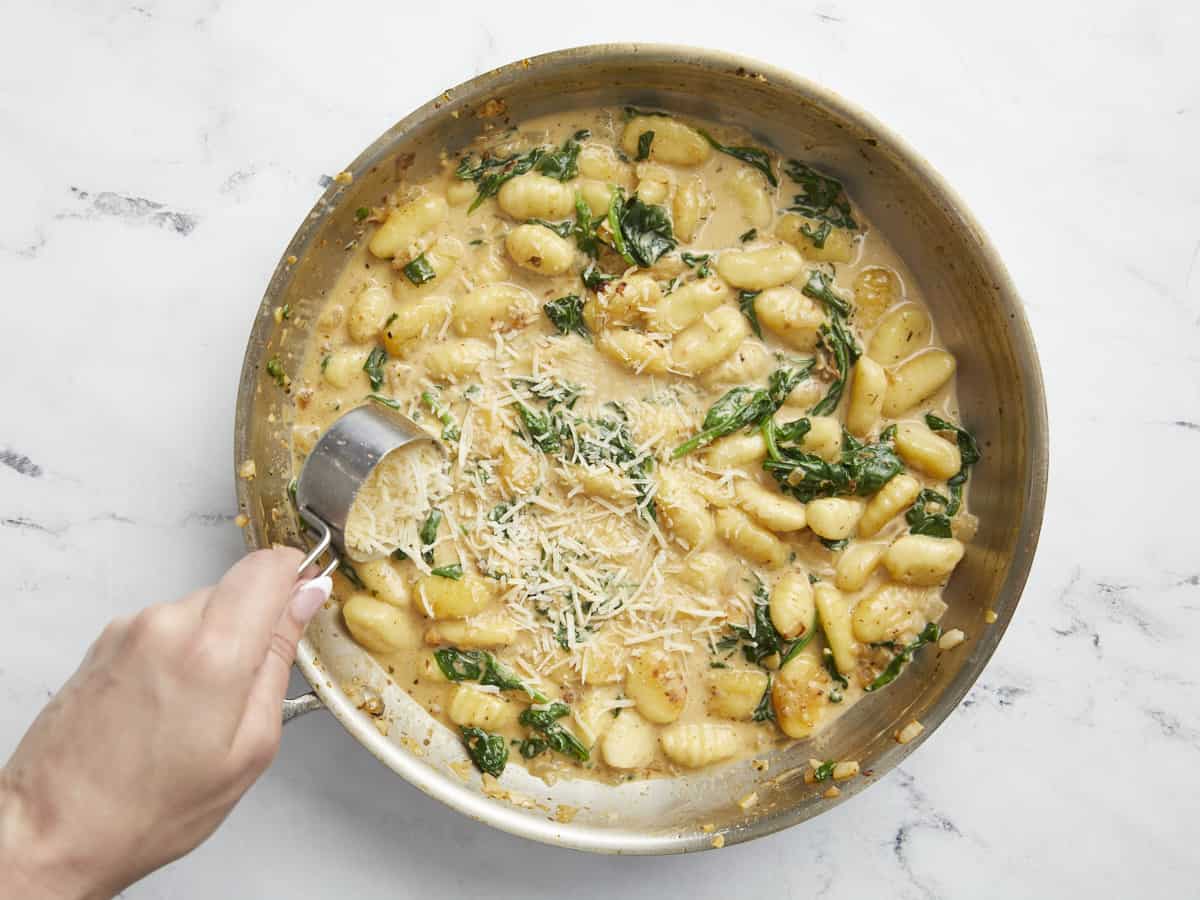
  • Take the skillet off the heat. Add the parmesan to the pan and stir until it melts, creating a velvety sauce.
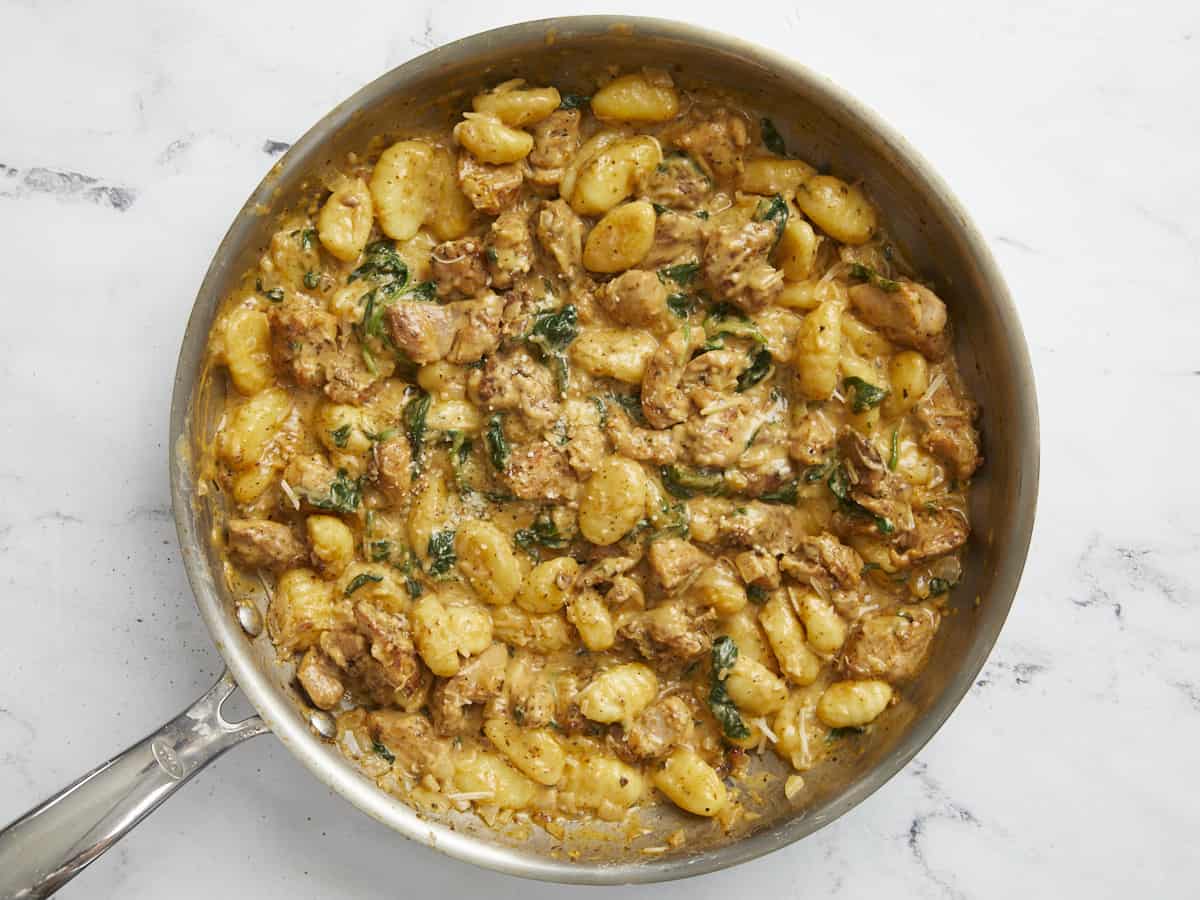
  • Finally, return the cooked diced chicken to the skillet. Mix gently into the gnocchi and cream sauce. If desired, garnish with parsley.

See how we calculate recipe costs here.

Nutrition

Serving: 1.25cups | Calories: 756kcal | Carbohydrates: 47g | Protein: 32g | Fat: 50g | Sodium: 1186mg | Fiber: 4g

How to Make Creamy Chicken And Gnocchi – Step by Step Photos

Dice 1.25 pounds of chicken thighs (about 4 to 5 thighs) in 2-inch pieces. Add the chicken to a bowl and top it with 1 tablespoon of Italian seasoning, 1/2 teaspoon of smoked paprika, 1/2 teaspoon of salt, and 1/4 teaspoon of pepper. Mix until combined.

Set a large deep skillet over medium heat and add 2 tablespoons of cooking oil. When the oil is shimmering, add the chicken and cook undisturbed until well browned, about 3 minutes. Stir and brown on the other side, about 3 minutes more. Remove the chicken from the pan when it’s cooked through and has reached an internal temperature of 160°F. Leave the rendered fat in the pan.

Add 1 diced onion and 2 cloves of minced garlic to the skillet. Saute until the onions have softened and the garlic is fragrant, about 2 minutes.

Add 1 pound of dry potato gnocchi and 2 tablespoons of salted butter to the skillet. Brown the gnocchi for 2 minutes.

Add 2 cups of spinach and 1 cup of vegetable broth to the skillet. Cover the pan. Cook for 1 to 2 minutes until the spinach has wilted and the gnocchi has hydrated.

Add 1/2 cup of heavy cream and 2 tablespoons of salted butter to the skillet. Stir until the butter has melted and the cream is steaming hot, but not boiling. You’re about to add cheese to the sauce, and cheese curdles at high temperatures, so make sure it isn’t boiling.

Take the pan off the heat. Add 1/4 cup of parmesan to the pan and stir until it melts, creating a velvety sauce.

Finally, return the cooked diced chicken to the skillet. Mix gently into the gnocchi and cream sauce. If desired, garnish with parsley. Serve this dish piping hot, then sit back and enjoy what took you less than a half hour to make!

More Easy One Pot Meals

The post Creamy Chicken and Gnocchi appeared first on Budget Bytes.

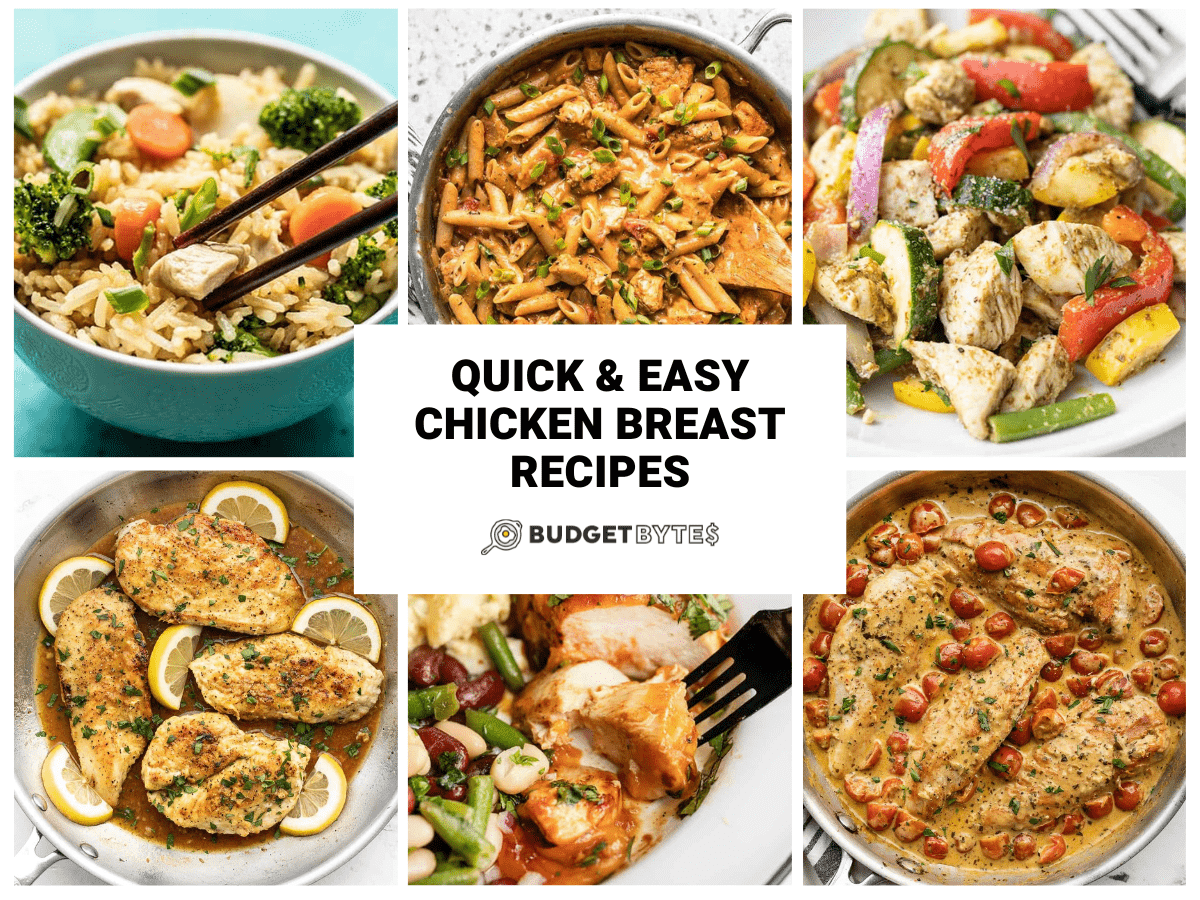
Quick & Easy Chicken Breast Recipes

For a quick lunch or easy dinner, try these budget-friendly, quick and easy chicken breast recipes to mix it up and never get bored!

The post Quick & Easy Chicken Breast Recipes appeared first on Budget Bytes.

Oh, chicken breast, how do I love thee? Let me count the ways! They’reIt’s good served hot or cold. You can poach, saute, bake, or fry them. Best of all, their mild flavor and versatility make them the perfect vehicle for all sorts of flavor combinations and ingredients. Whether you’re craving a hearty salad for lunch, a saucy stovetop dinner, an oven-baked family dinner, or a delicious, indulgent one-pot dish — you can count on the humble chicken breast to be the absolute star in your weekly meal plan! And with this roundup of Quick & Easy Chicken Breast Recipes, you will never tire of them. 

A collage of chicken breast recipes, from top left to right: one-pot chicken teriyaki and rice, one-pot cajun chicken pasta, pesto chicken and vegetables, creamy pesto chicken, bbq cheddar baked chicken, and easy lemon pepper chicken.

Easy CHICKEN SALADS

Boneless, skinless chicken breast is one of the best, budget-friendly sources of protein available at the supermarket. And since chicken breasts are great served hot or cold, they’re a meal prep mainstay! Picking up a store-bought rotisserie chicken is a simple, time-saving way to eat a meal without spending all night at the stove. Here are three classic chicken salad recipes that transform chicken into a satisfying meal in just 15 minutes: 

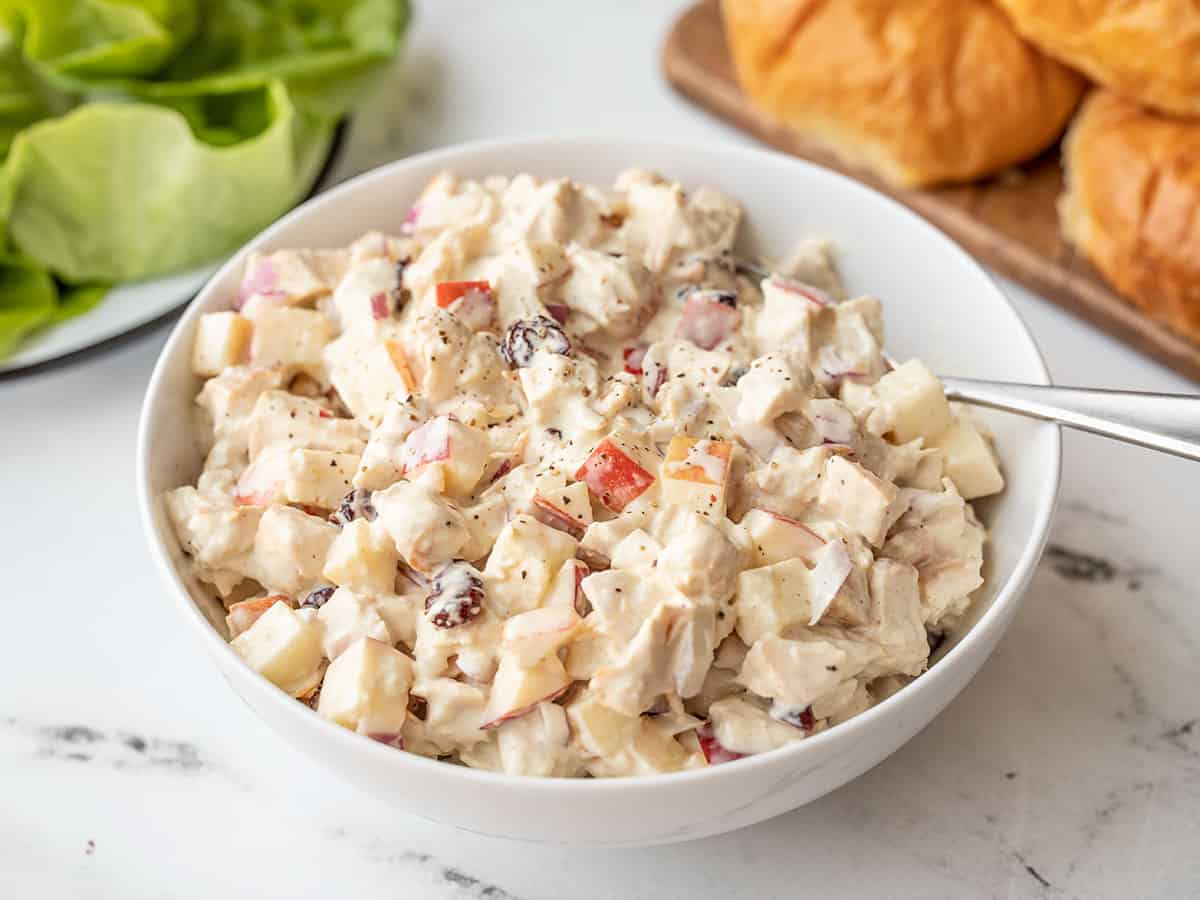
Chicken Salad with Apples

Side view of a bowl of chicken salad with apples, croissants in the background
This chicken salad is packed with sweet and crunchy apples, tart dried cranberries, and a light and creamy homemade dressing.
4.85 from 20 votes
$10.35 recipe / $2.59 serving Get the Recipe

This Chicken Salad with Apples and cranberries is such a classic way to serve chicken. It makes a perfect lunch, or light and easy dinner. It’s easy to prepare, super filling, and the perfect cold meal. It’s full of different textures and flavors, and is easy to switch up depending on your taste!

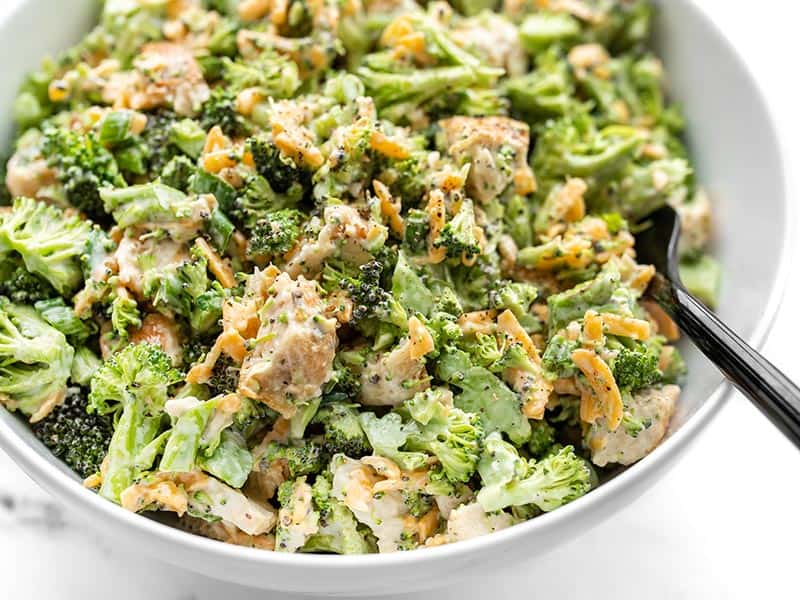
Broccoli Cheddar Chicken Salad

Close up side view of a bowl of Broccoli Cheddar Chicken Salad
This chunky chopped Broccoli Cheddar Chicken Salad is a great fresh salad that can be eaten on its own or turned into several different easy lunch ideas!
4.88 from 24 votes
$4.84 recipe / $1.61 serving Get the Recipe

Broccoli is a lot like chicken breast. It’s filling, versatile, and can be prepared and served in so many ways! Next time you have some fresh broccoli on hand, you’ve got to try out this Broccoli Cheddar Chicken Salad! It’s so good, you’ll be singing broccoli’s praises as you devour every last bite. 

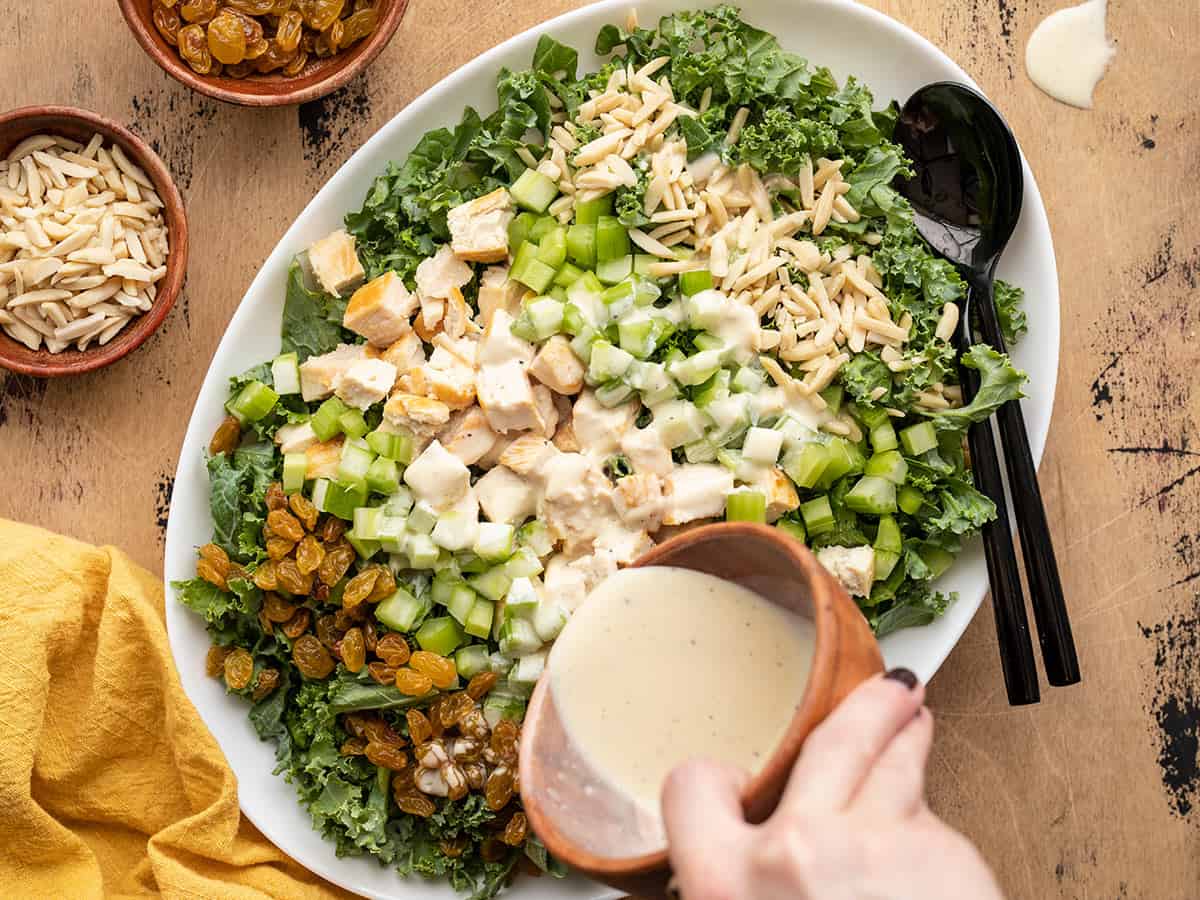
Crunchy Kale and Chicken Salad

dressing being poured over kale and chicken salad
This Crunchy Kale and Chicken Salad is full of flavor, texture, and a tangy-sweet homemade dressing. It's perfect for your weekly meal prep!
4.94 from 15 votes
$6.19 recipe / $1.55 serving Get the Recipe

Kale is super yummy on its own, but pairing it with a ton of other flavors and ingredients as we do in this Crunchy Kale and Chicken Salad is a great way to turn it into a satisfying meal! That being said, if you’re not a fan of kale, you can swap it with whatever crunchy green you like best. This recipe also includes a wonderfully easy honey mustard vinaigrette that will amp up the flavor of almost any salad in your arsenal. 

Easy SKILLET and BAKED CHICKEN recipes

Cooking chicken breast on the stovetop or in the oven is an excellent way to get dinner on the table in around 30 minutes. They thaw and cook quickly. And since almost everything is good with chicken, it’s the easiest choice to pair with whatever other ingredients you have on hand. Check out these easy chicken dinners to shake up your weekly meal plan: 

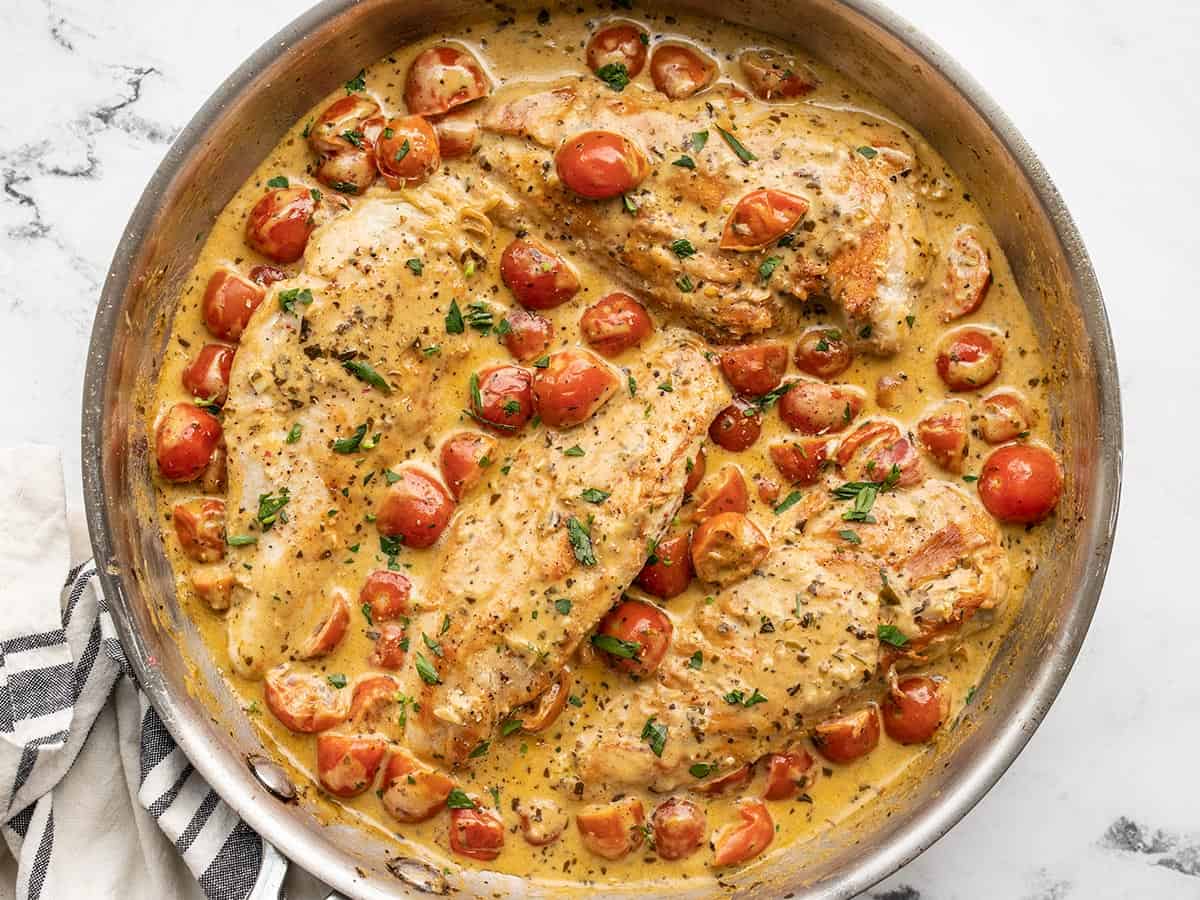
Creamy Pesto Chicken

Overhead view of a skillet full of creamy pesto chicken.
Creamy pesto chicken is a fast, easy, and impressive main dish for dinner, whether you just want to treat yourself or impress guests!
4.92 from 59 votes
$10.70 recipe / $2.68 serving Get the Recipe

You can put pesto on just about anything, but it is particularly delicious with chicken breast! This Creamy Pesto Chicken has a super lush, decadent sauce, and you won’t want to waste a single drop! Make sure to serve it with garlic bread, or spoon it over pasta or rice to soak it all up.

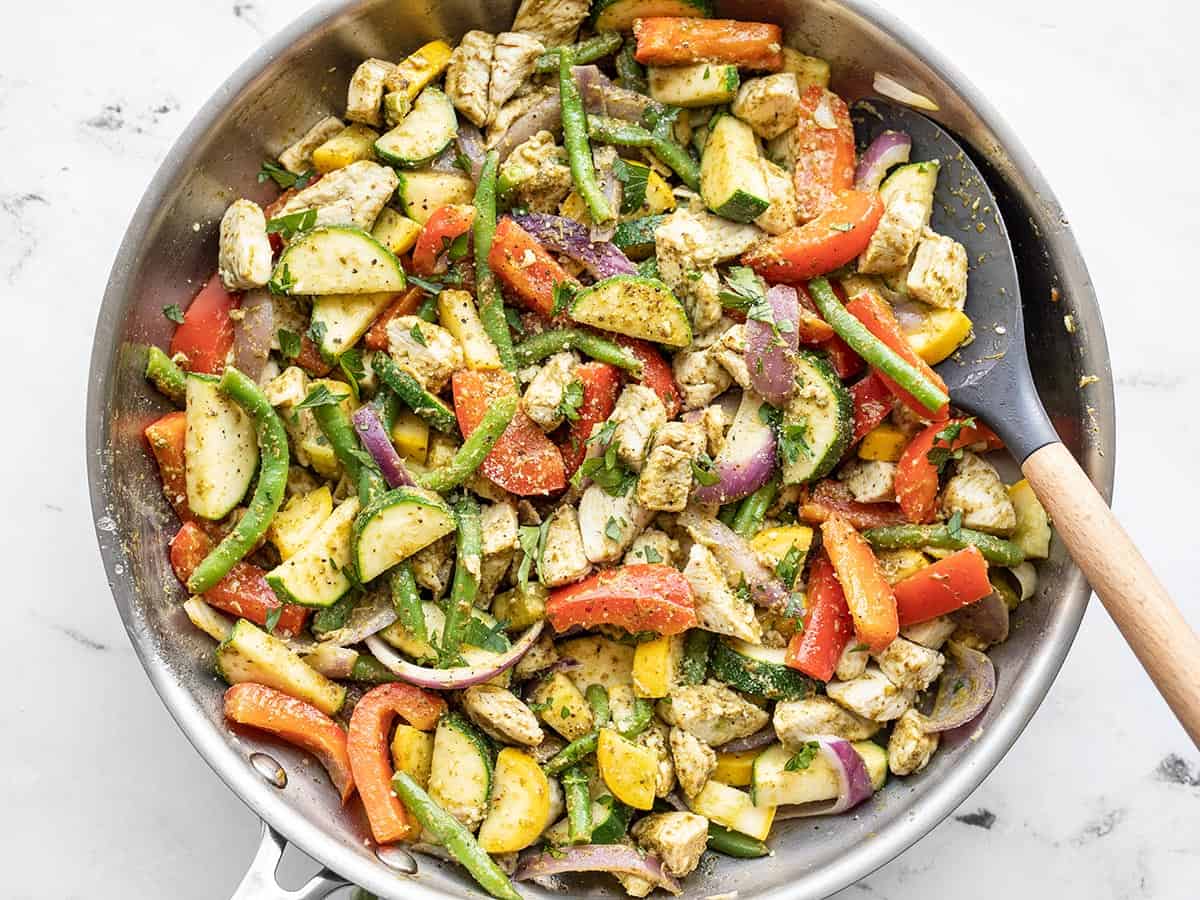
Easy Pesto Chicken and Vegetables

Easy pesto chicken and vegetables in a skillet with a spatula
This Easy Pesto Chicken and Vegetables meal prep is super fast and easy, and holds up well in the fridge for tasty lunches all week!
4.84 from 24 votes
$11.07 recipe / $2.77 serving Get the Recipe

Pesto is a super versatile ingredient and makes a great sauce for more than just pasta! So add a dollop to your next stir fry! This Easy Pesto Chicken and Vegetables is a lighter dish, but is absolutely bursting with flavor. Since the variety of vegetables you can add to this recipe is nearly endless, it’s the perfect way to clean out the fridge!

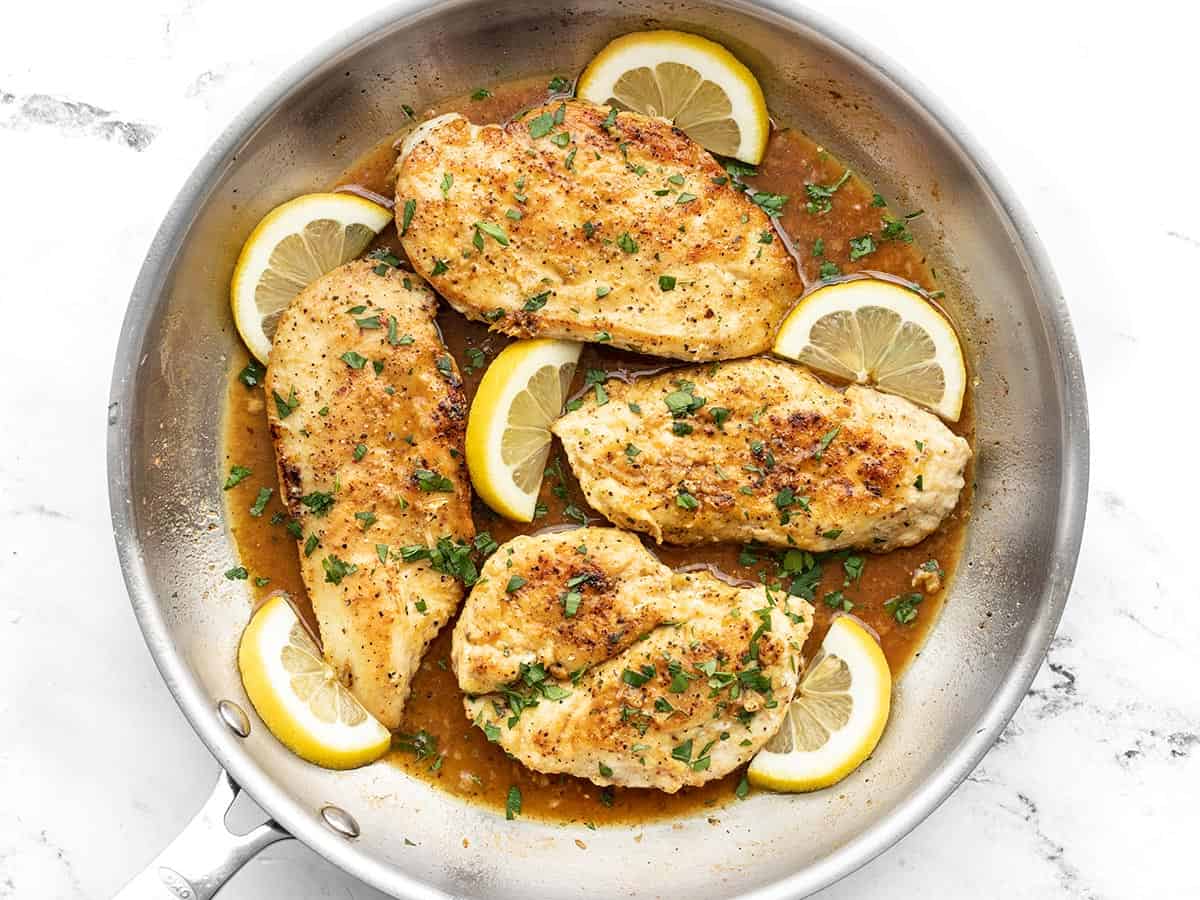
Easy Lemon Pepper Chicken

Overhead view of lemon pepper chicken in the skillet with lemon slices
These Easy Lemon Pepper Chicken Breasts are so tender and juicy, and you'll want to spoon that delicious pan sauce over EVERYTHING. 
5 from 36 votes
$7.58 recipe / $1.90 serving Get the Recipe

The best way to keep chicken breast feeling fresh in your dinner rotation is to pair it with punchy ingredients, like lemon, to really make it shine. The best part about this Easy Lemon Pepper Chicken? There’s no need for fresh lemons! Instead, we use budget-friendly alternatives that are easier to always have on hand.

BBQ Cheddar Baked Chicken

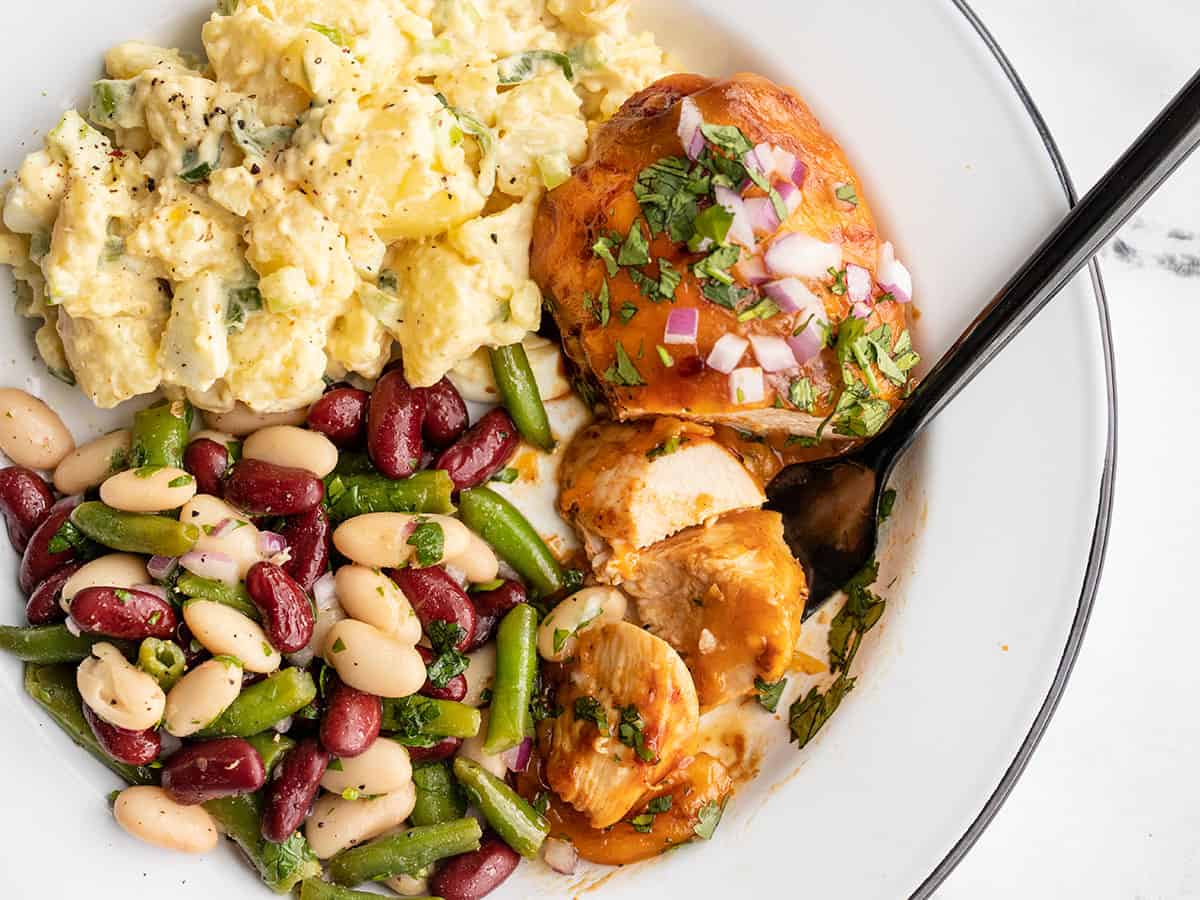
BBQ Cheddar Baked Chicken on a plate with potato salad and bean salad, a fork grabbing a slice of chicken
Forget boring or bland baked chicken breasts, this BBQ Cheddar Baked Chicken is going to be the star of your dinner plate.
5 from 9 votes
$8.89 recipe / $2.22 serving Get the Recipe

Want to talk about an iconic chicken dinner recipe? It’s this BBQ Cheddar Baked Chicken. There’s absolutely no better, easier way to serve up chicken breast baked in the oven than smothering it in your favorite barbeque sauce and cheddar cheese. Sending it on a trip to the oven ensures it gets sticky, caramelized, and decadent.

ONE-POT chicken recipes

Cooking one-pot meals is “like riding a bike.” Once you learn how to make them, they really are that easy. Here are a few of our most popular one-pot recipes with chicken breast: 

One Pot Creamy Cajun Chicken Pasta

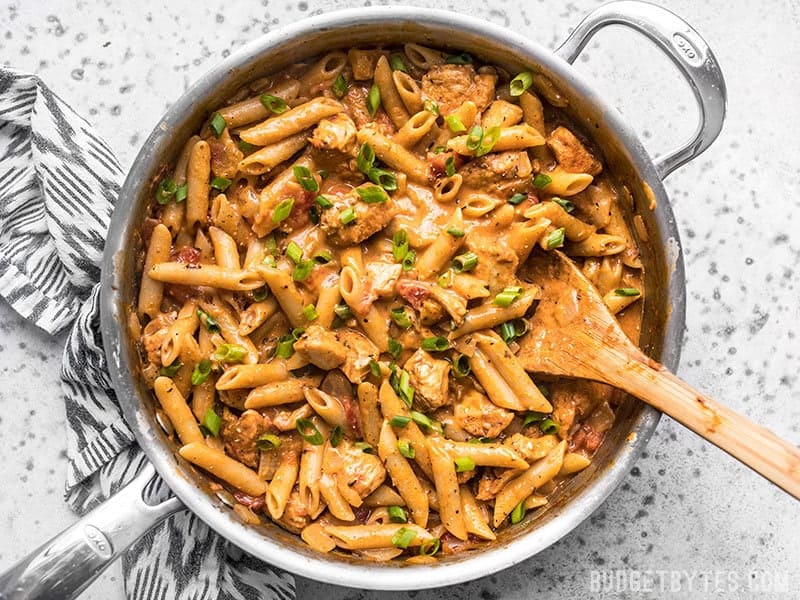
One Pot Creamy Cajun Chicken Pasta in the pan.
Cook a complete dinner in one pot with this Creamy Cajun Chicken Pasta, using mostly pantry-stable items. Perfect for busy weeknights! 
4.68 from 293 votes
$9.41 recipe / $2.35 serving Get the Recipe

If there was a Budget Bytes Recipe Hall of Fame, this One-Pot Creamy Cajun Chicken Pasta would absolutely be one of them! This fantastic recipe unites our foolproof one-pot methods with classic Cajun spices. The heat level of this dish is very moderate, so it’s approachable for everyone, but feel free to kick it up a notch if that’s what you like! 

One Pot Creamy Pesto Chicken Pasta

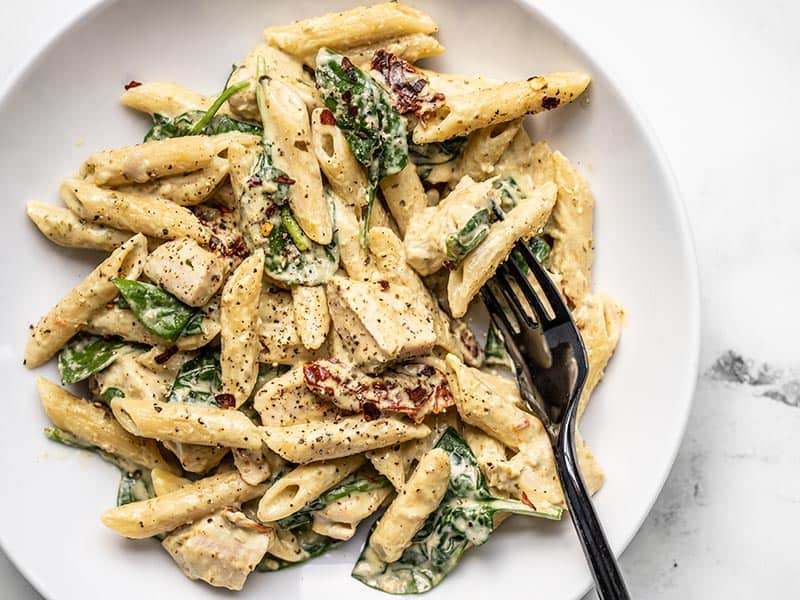
Close up of one pot creamy pesto chicken pasta in a shallow bowl with a black fork.
This super lush and Creamy Pesto Chicken Pasta is perfect for busy weeknights. Everything cooks in one pot and is done in under 30 minutes! 
4.83 from 153 votes
$10.41 recipe / $2.60 serving Get the Recipe

One of our go-to ways to cook chicken breast is simmering it in a creamy, decadent pesto sauce. Add whatever veggies we have on hand to round it out into a full meal. Since serving it with pasta is an obvious choice, we might as well cook it in one pot! While this One-Pot Creamy Pesto Chicken Pasta won’t do the dishes for you, but it really helps!

One Pot Teriyaki Chicken and Rice

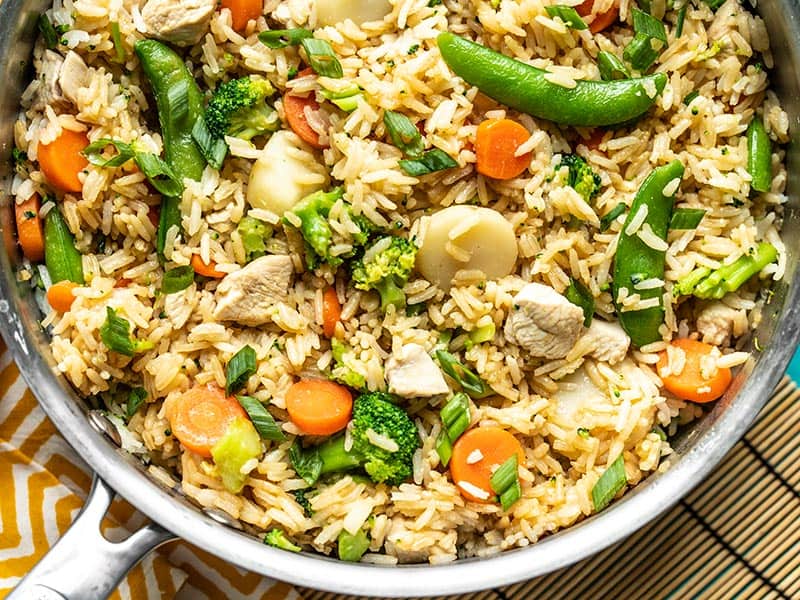
Close up of One Pot Teriyaki Chicken and Rice in the skillet.
This One Pot Teriyaki Chicken and Rice is an easy and satisfying meal that the whole family will love. It also meal preps well for lunches all week! 
4.49 from 39 votes
$6.26 recipe / $1.57 serving Get the Recipe

This Asian-inspired One-Pot Teriyaki Chicken and Rice is packed with veggies but requires very little chopping. The leftovers are also amazing, which makes it an easy choice for meal prep. Don’t be deterred if you’re a rice-cooking novice, you can always prepare the rice in a separate pot! 


The post Quick & Easy Chicken Breast Recipes appeared first on Budget Bytes.

Pesto Chicken and Broccoli Salad

Chicken, broccoli, onion, and a creamy pesto dressing make this quick salad a delicious new lunchtime staple!

The post Pesto Chicken and Broccoli Salad appeared first on Budget Bytes.

Last year I made an amazing Broccoli Cheddar Chicken Salad that was just to die for, and ever since I’ve wanted to try a pesto-based version. Well, that day has finally come and I’m here to say that it’s just as easy and totally delish! So if you need another quick and filling refrigerator salad to make for lunches, this Pesto Chicken and Broccoli Salad is it!

Close up side view of pesto chicken broccoli salad in a bowl.

What Kind of Chicken to Use

This Pesto Chicken and Broccoli Salad is the perfect recipe for store-bought rotisserie chicken, but if that’s not your jam you can totally cook your own boneless, skinless chicken breast or thighs. You’ll need about one cup of chopped cooked chicken (the amount is flexible), which will be about one chicken breast or two chicken thighs.

What Kind of Pesto to Use

I like the freshness of a basil pesto for this recipe. The herbal flavor really lightens up the dish. Pesto can be on the pricey side, but there are several brands that are a bit more affordable. Look for Alessi, Barilla, Classico, or Filippo Berio. And don’t let the rest of that jar of pesto go to waste! Check out our pesto recipe archives for ways to make sure every last drop gets put to good use.

Is the Broccoli Raw??

Yes, this salad is made with raw broccoli. The extra crunchy broccoli gives this salad tons of texture and helps it hold up well in the refrigerator for days. If you absolutely can not do raw broccoli, the next best option would probably be very lightly steamed broccoli, so that it still has some texture but that edge of raw flavor has been taken off.

How to Serve Pesto Chicken and Broccoli Salad

You can eat this salad alone in a bowl, stuff it into a pita, scoop some on top of a green salad, or wrap it up in a tortilla. There are so many options!

Pesto Chicken and Broccoli Salad in a pita.
Close up side view of Pesto Chicken and Broccoli Salad in a bowl.

Pesto Chicken and Broccoli Salad

Chicken, broccoli, onion, and a creamy pesto dressing make this quick salad a delicious new lunchtime staple!
Course Lunch, Salad
Cuisine American
Total Cost $6.18 recipe / $1.55 serving
Prep Time 15 minutes
Total Time 15 minutes
Servings 4 1 cup each
Calories 257kcal
Author Beth – Budget Bytes

Ingredients

  • 1 cup chopped cooked chicken* $3.50
  • 1 lb. fresh broccoli (about 2 cups chopped) $1.25
  • 1/4 cup chopped red onion $0.08
  • 1/4 cup basil pesto $1.00
  • 1/4 cup mayonnaise $0.29
  • 1 Tbsp lemon juice $0.04
  • 1/4 tsp freshly cracked black pepper $0.02

Instructions

  • Chop the chicken and broccoli into small, bite-sized pieces. Finely dice the red onion.
  • In a bowl, stir together the pesto, mayonnaise, and lemon juice.
  • Add the chicken, broccoli, and red onion to a large bowl. Pour the creamy pesto over top, and add the freshly cracked pepper. Stir to combine.
  • Taste the salad and add salt or pepper to your liking. Serve immediately or refrigerate until ready to eat.

Notes

*You can use store-bought rotisserie chicken, or cook your own chicken breast in a skillet.

Nutrition

Serving: 1cup | Calories: 257kcal | Carbohydrates: 10g | Protein: 15g | Fat: 18g | Sodium: 298mg | Fiber: 3g
Overhead view of a bowl of pesto chicken and broccoli salad.

How to Make Pesto Chicken and Broccoli Salad – Step by Step Photos

Cooked chicken breast in a skillet.

You’ll want about one cup (give or take some) of chopped cooked chicken for this recipe. The easiest option is to use store-bought rotisserie chicken. But, if you aren’t using a rotisserie chicken, you can cook one chicken breast or two chicken thighs to use for this recipe. If you need instructions for cooking chicken breast in a skillet, see my tutorial here. Make sure to let the chicken cool before using it in the recipe.

Creamy pesto dressing in a bowl with a spoon.

To make the creamy pesto dressing, stir together ¼ cup basil pesto, ¼ cup mayonnaise, and 1 Tbsp lemon juice.

Chopped broccoli on a cutting board.

Chop about two cups of broccoli into small bite-sized pieces. Making sure to chop the broccoli small enough is key to making this salad work. They should be small enough that a few pieces could fit onto a fork.

Chopped chicken on a cutting board.

Chop the chicken into small ¼-½ inch pieces (the cutting board pictured above is quite small, for reference)

Broccoli, chicken, and red onion in a bowl.

Finely dice ¼ cup red onion. Place the broccoli, chicken, and onion in a bowl.

Pesto dressing being poured over the salad.

Pour the creamy pesto dressing over the ingredients in the bowl. Add about ¼ tsp freshly cracked pepper.

Finished pesto chicken and broccoli salad in the bowl.

Stir everything together, give it a taste, and add salt or pepper to taste.

Pesto chicken and broccoli salad in pita pockets on a plate.

Enjoy in a bowl, stuffed into a pita, or on a green salad!

The post Pesto Chicken and Broccoli Salad appeared first on Budget Bytes.

How to Cook Chicken Breast in a Pan

Learn how to cook tender, juicy, and flavorful boneless chicken breasts in a pan. Perfect for quick dinners and meal prep!

The post How to Cook Chicken Breast in a Pan appeared first on Budget Bytes.
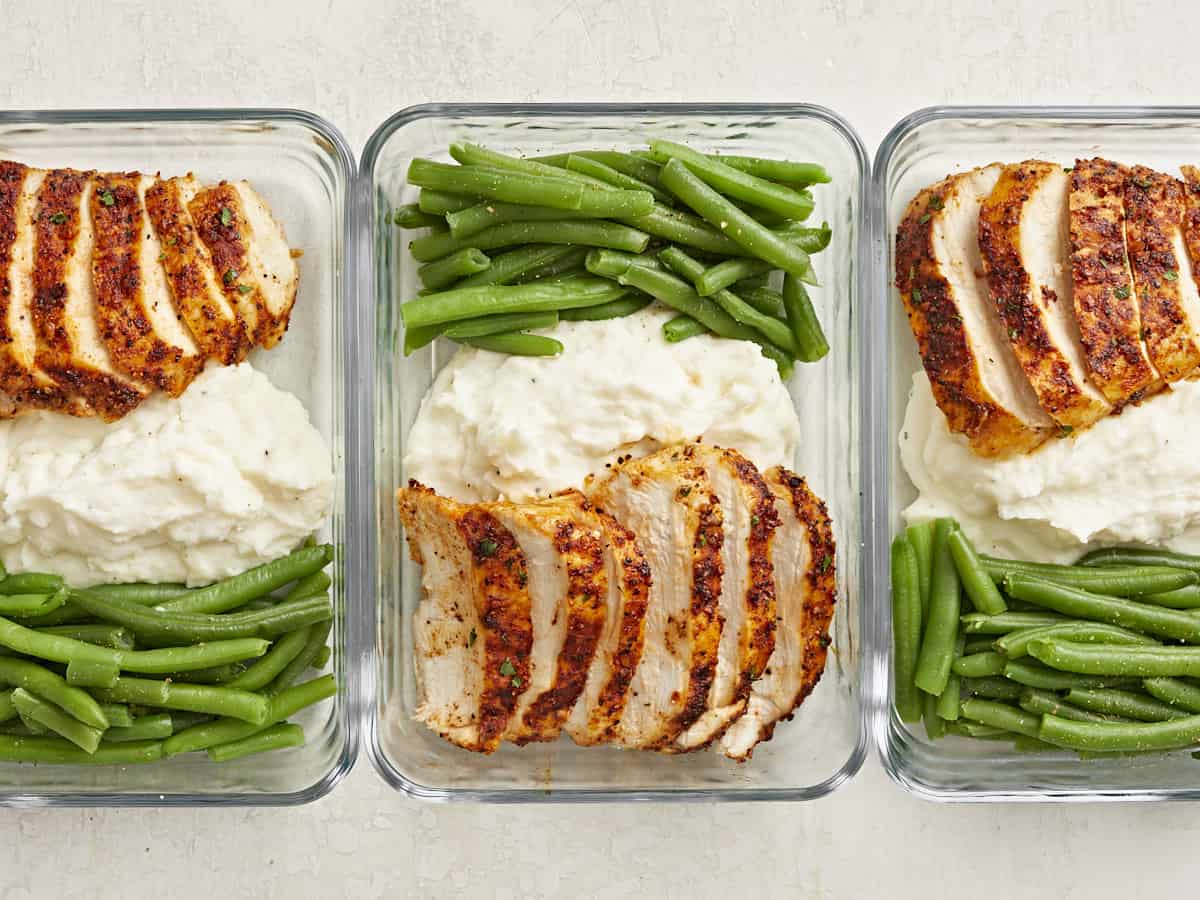
The last two times I bought chicken breast at the grocery store, the cashiers asked me how to cook them (I had to wonder if they secretly knew what I did for a living 😅). While it can seem like a simple process, it can definitely go wrong if not done properly. And I’m not about to let you big $$$ dry, tasteless chicken breasts. So here is my full tutorial on how to cook chicken breast in a pan so that it stays juicy, flavorful, and tender.

Two chicken breasts in a skillet garnished with parsley

Why I Love Pan Seared Chicken Breasts

This has become my go-to method for cooking chicken breasts. Not only is it super fast and easy, but you get a lot of delicious browning on the outside of the meat, which is something that doesn’t happen in the gentle heat of an oven. Plus, you can change the seasoning and make it taste like something new every time!

I’ve begun cooking a couple of chicken breasts at the beginning of each week, slicing them up, then storing them in the refrigerator to add to salads, pasta, sandwiches, and bowls over the next few days. It’s only a few minutes of prep and then I’ve got an easy protein ready to add to any meal. Here is a roundup of flexible recipes that are perfect for adding any protein, like pan-seared chicken breasts.

Cooking Boneless vs. Bone-in Chicken Breasts

The cooking technique below is for boneless chicken breasts (with or without skin). Bone-in chicken breasts take much longer to cook through, so you’ll want to utilize the oven to make sure the breast heats through completely without burning on the outside. For bone-in chicken breasts, I suggest using the method outlined in my Herb Roasted Chicken Breast recipe.

How Long to Cook Chicken Breasts in a Skillet

The amount of time needed to cook a chicken breast in a pan will vary depending on the thickness of the chicken breast, the amount of heat used, and the type of cookware used. To take the guesswork out of how long to cook the chicken breasts, I suggest using an instant-read meat thermometer to make sure the internal temperature of the chicken breast has reached 165ºF.

Thick Chicken Breasts

Thick chicken breasts take longer to cook through than thin chicken breasts, so I like to use lower heat (medium-low) and a longer cook time, which allows time for the meat to heat through without the outside burning. For a boneless chicken breast that is about one inch thick, I cook for about 8 minutes per side over medium-low heat.

Thin Chicken Breasts

If you buy thin cut breasts, fillet the chicken breasts yourself, or use a mallet to pound the chicken breasts to ½-inch thick, they will cook much faster. You’ll want to increase the heat to medium so you can still achieve some browning on the outside with a shorter cook time. For thinner breasts, I cook for about 4-5 minutes per side.

How to Season Chicken Breasts

I used a very classic smoky seasoning for the chicken breasts in the recipe below, but there are so many other delicious options. Here are some other ways you can season your pan-seared chicken breasts:

side view of chicken breasts in a skillet
close up of cooked chicken breasts in the skillet

Pan Seared Chicken Breasts

Learn how to cook tender, juicy, and flavorful boneless chicken breasts in a pan. Perfect for quick dinners and meal prep! 
Course Dinner, Lunch, Main Course
Cuisine American
Total Cost $7.27 recipe / $0.91 serving
Prep Time 5 minutes
Cook Time 15 minutes
Total Time 20 minutes
Servings 4
Calories 229kcal
Author Beth – Budget Bytes

Ingredients

  • 2 tsp steak seasoning $0.20
  • 1/2 tsp smoked paprika $0.05
  • 1/2 tsp sweet paprika $0.05
  • 2 boneless, skinless chicken breasts (1.3 lbs. total) $6.79
  • 1 Tbsp cooking oil $0.08
  • 1 Tbsp butter (optional) $0.10

Instructions

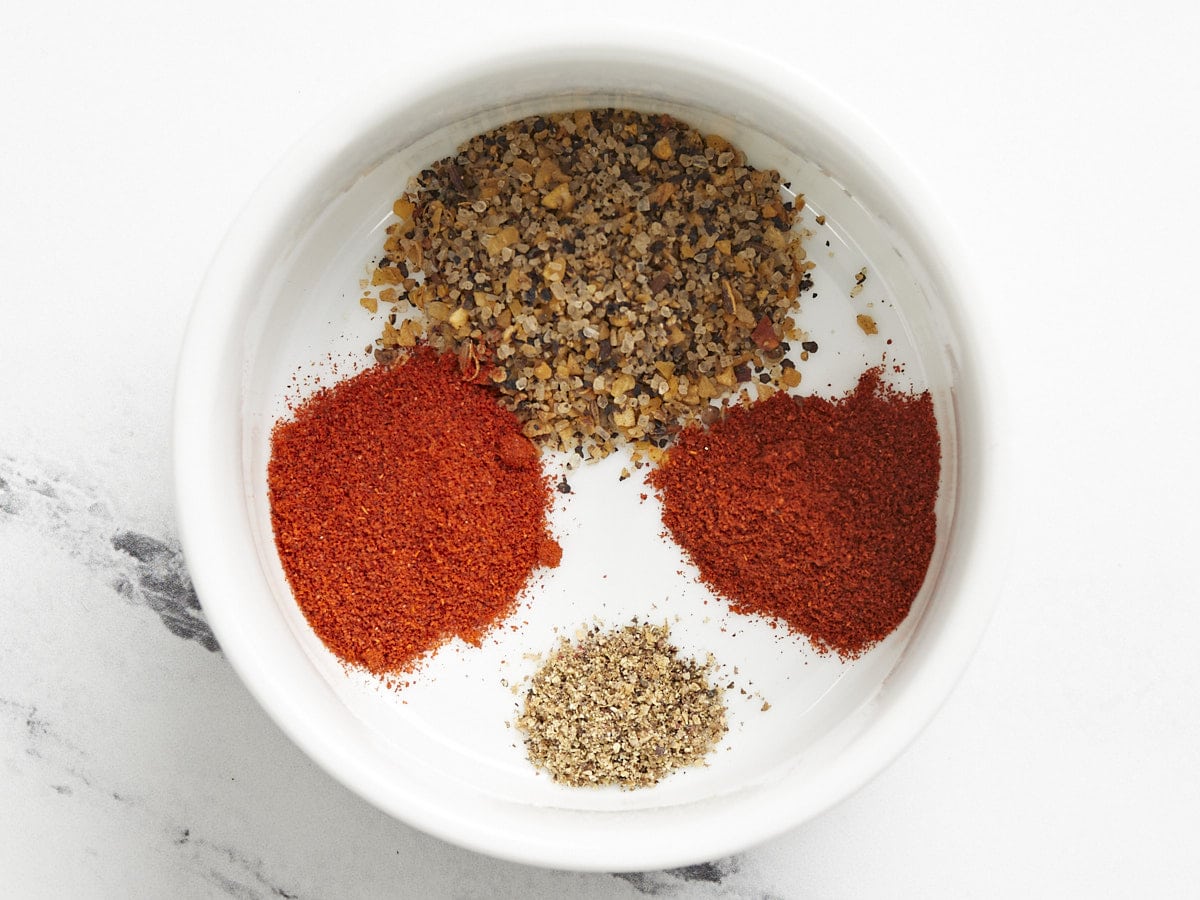
  • Combine the steak seasoning, smoked paprika, and sweet paprika in a bowl. Coat the chicken breasts liberally with the seasoning on all sides.
  • Add the cooking oil to a large skillet and heat over medium-low (or medium for thin-cut breasts). Once hot, swirl the oil to coat the skillet.
  • Add the chicken breasts to the skillet and cook for about 8 minutes without flipping (5 minutes for thin-cut breasts). Flip the chicken and then cook on the second side until well browned and cooked through (internal temperature of 165ºF).
  • For extra luscious chicken, add a tablespoon of butter to the skillet, allow it to melt, then flip the chicken a couple of times to coat in the melted butter.
  • Transfer the chicken to a clean cutting board and allow it to rest for five minutes before slicing and serving.

Nutrition

Serving: 1serving | Calories: 229kcal | Carbohydrates: 1g | Protein: 31g | Fat: 10g | Sodium: 197mg | Fiber: 1g
close up side view of sliced chicken breasts

How to Make Cook Chicken Breasts in a Pan – Step by Step Photos

Seasoned chicken breasts on a cutting board

Begin by seasoning the chicken breast liberally on each side. I used a mix of 2 tsp steak seasoning, ½ tsp smoked paprika, and ½ tsp sweet paprika. The steak seasoning contains salt, so no extra salt was needed in my mix.

oil being added to the skillet

Add a tablespoon or so of your favorite cooking oil to a large skillet. Heat the skillet over medium-low (or medium heat for thin cut breasts).

Cooked Chicken breasts in the skillet

Once hot, swirl the oil in the skillet to coat the surface, then add the chicken breasts. Let the chicken breasts cook for 8 minutes without flipping (or 5 minutes for thin cut breasts). Flip once and cook until well browned on the second side and cooked through.

Butter added to the skillet

To make the chicken breasts extra luscious, add a tablespoon of butter to the skillet, allow it to melt, then flip the chicken a couple of times to coat. The butter will help dissolve some of the flavor off the bottom of the skillet to further coat the chicken.

Sliced chicken breasts

Transfer the cooked chicken to a clean cutting board and allow it to rest for five minutes before slicing and serving.

close up of cooked chicken breasts in the skillet

The post How to Cook Chicken Breast in a Pan appeared first on Budget Bytes.
Easy Pesto Chicken and Vegetables

This Easy Pesto Chicken and Vegetables meal prep is super fast and easy, and holds up well in the fridge for tasty lunches all week!

The post Easy Pesto Chicken and Vegetables appeared first on Budget Bytes.
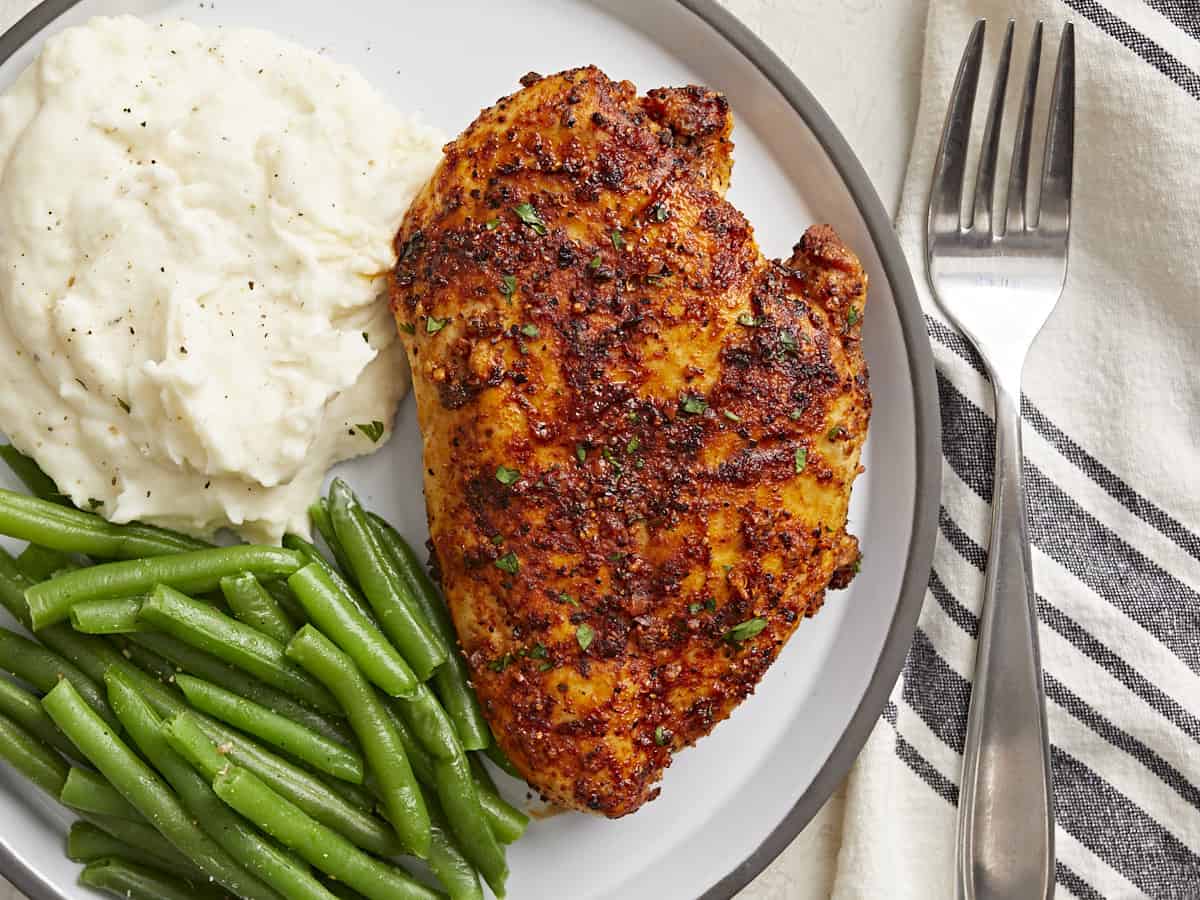
Are you ready for this? Because I wasn’t quite ready for how easy and delicious this meal was. When I sat down to eat my first bowl of these Pesto Chicken and Vegetables I was like, “Oh yes, I’m going to make this every single week.” It’s the perfect light, flavorful, and fast recipe for meal prep. And it’s just SO SIMPLE.

Pesto chicken and vegetables in a skillet

Vegetable Options

I used a summery mix of yellow squash, zucchini, red bell pepper, green beans, and red onion for this quick sauté, but there are a lot of options when it comes to the vegetables. Here are some other vegetables you could add:

  • Broccoli
  • Carrots
  • Grape tomatoes
  • Mushrooms
  • Fresh corn
  • Asparagus
  • Spinach

The key thing to keep in mind when using different vegetables is when to add them to the skillet. For this recipe you don’t want to fully cook the vegetables. They should be just tender-crisp. So, keeping that in mind, add sturdy vegetables first and tender vegetables later to make sure they don’t get overcooked.

Can I Substitute the Chicken?

Yes, there are options for that, too! I think shrimp would be absolutely awesome in this recipe, as would tofu. If using tofu, I would do a cornstarch coating and fry it separately (see the technique used in this recipe) before tossing it together with the vegetables and pesto at the end.

How to Serve Pesto Chicken and Vegetables

I ate this dish as-is, just a bowl of flavorful chicken and vegetables. But there are more options! You could eat this over a bowl of rice, stir in some cooked orzo or quinoa, or even add them to a bed of greens. Honestly, I would probably even add them to a flat bread and top with mozzarella as a sort of vegetable pizza!

How Long Does it Stay Good?

I got about four days out of my pesto chicken and vegetables, but this can vary depending on the conditions in your refrigerator, freshness of the ingredients, and how long you cook the vegetables. As I mentioned above, you want to barely cook the vegetables for this recipe. Just make them tender-crisp so they don’t get too wilted. Not only does this give them great texture and a fresh, bright flavor, but they last a little longer in the fridge, too.

side view of a bowl full of pesto chicken and vegetables
Easy pesto chicken and vegetables in a skillet with a spatula

Easy Pesto Chicken and Vegetables

This Easy Pesto Chicken and Vegetables meal prep is super fast and easy, and holds up well in the fridge for tasty lunches all week!
Total Cost $11.07 recipe / $2.72 serving
Prep Time 15 minutes
Cook Time 15 minutes
Total Time 30 minutes
Servings 4 1.5 cups each
Calories 369.33kcal
Author Beth – Budget Bytes

Ingredients

  • 1 red bell pepper $1.50
  • 1 zucchini $0.60
  • 1 yellow squash $0.50
  • 1/2 red onion $0.19
  • 1.3 lbs. boneless, skinless chicken breast $6.67
  • 2 Tbsp cooking oil $0.08
  • 1 cup frozen green beans $0.67
  • 1/3 cup pesto* $0.73
  • 1/8 tsp salt* $0.01
  • 1/8 tsp freshly cracked pepper* $0.01
  • 1 Tbsp grated Parmesan* $0.11

Instructions

  • Chop the bell pepper, yellow squash, and zucchini, and slice the red onion. I like to make different shapes for each vegetable, but aim to make the pieces all around the same size.
  • Cube the chicken breasts into ½-inch pieces.
  • Add the cooking oil to a large skillet and heat over medium-high. Once the skillet and oil are very hot, add the chicken and sauté until the chicken pieces are opaque (3-5 minutes – the chicken will continue to cook as you add vegetables).
  • Add the green beans to the skillet and sauté for 1-2 minutes more, or just until thawed.
  • Add the bell pepper and red onion to the skillet. Sauté for 1-2 minutes more. If water is beginning to pool in the skillet, turn the heat up slightly. It should be hot enough that the water released from the vegetables evaporates quickly.
  • Add the yellow squash and zucchini to the skillet and continue to sauté 2-3 minutes more, or just until the squash softens slightly.
  • Turn the heat off, add the pesto to the skillet, and stir until everything is coated. Give the vegetables a taste and add salt, pepper, or more pesto if desired. Top with a light sprinkle of Parmesan just before serving.

Notes

*You may need more or less pesto, salt, pepper, or Parmesan depending on the volume of your vegetables and your personal taste. 

Nutrition

Serving: 1.5cups | Calories: 369.33kcal | Carbohydrates: 11.68g | Protein: 36.8g | Fat: 19.2g | Sodium: 423.15mg | Fiber: 3.43g
Pesto chicken and vegetables in glass meal prep containers lined up side by side

How to Make Pesto Chicken and Vegetables – Step by Step Photos

Chopped vegetables on a cutting board

Chop the vegetables first so they’re ready to go. Chop one red bell pepper, one yellow squash, one zucchini, slice ½ of one red onion and measure 1 cup frozen green beans. I like to do different shapes for the vegetables, but aim to keep them roughly the same size.

Cubed chicken breast on a cutting board

Cut 1.3 lbs. boneless, skinless chicken breast into ½-inch pieces.

Cooked chicken in the skillet, frozen green beans being poured in

Add 2 Tbsp cooking oil to a large skillet and heat over medium-high. Once very hot, add the cubed chicken and sauté just until the chicken is opaque (3-5 minutes – it will continue to cook as you add more vegetables). Next, add the frozen green beans and sauté for a couple of minutes more, or just until thawed.

Red bell pepper and red onion added to the skillet

Next add the bell pepper and red onion. Continue to sauté a couple of minutes more. If you see water pooling in the skillet, turn the heat up higher. The heat should be high enough that any moisture released by the vegetables evaporates quickly.

zucchini and yellow squash added to the skillet

Finally, add the yellow squash and zucchini to the skillet. Sauté just a couple of minutes more, or just until the raw edge is taken off the squash.

Pesto being added to the skillet

Turn the heat off. Add about ⅓ cup pesto to the skillet and stir until everything is coated.

Finished pesto chicken and vegetables

Give the vegetables a taste and add salt, pepper, or more pesto if needed (I added a pinch of each).

pesto chicken and vegetables in a bowl topped with a pinch of parmesan

Top with a light sprinkle of Parmesan just before serving.

Three glass meal prep containers full of pesto chicken and vegetables

Perfect for meal prep!!

The post Easy Pesto Chicken and Vegetables appeared first on Budget Bytes.
Easy Lemon Pepper Chicken

These Easy Lemon Pepper Chicken Breasts are so tender, juicy, and flavorful, you’ll want to spoon that delicious pan sauce over EVERYTHING.

The post Easy Lemon Pepper Chicken appeared first on Budget Bytes.
Are you in a chicken rut? Cooking the same ol’ boring chicken breast week after week? Yeah, then you need to try this Easy Lemon Pepper Chicken ASAP. It’s savory, tart, and peppery, and has a delicious pan sauce that you’ll want to spoon over your entire plate! This one is so quick and flavorful, I know it’s going to go into your regular rotation. ;)

Overhead view of lemon pepper chicken in the skillet, garnished with lemon slices

What Kind of Chicken Should I Use?

This quick skillet cooking method requires thin chicken pieces that cook quickly, like boneless skinless chicken breasts (cut into thinner pieces), chicken tenders, thin-cut chicken breast, or chicken thighs. This method is not suitable for bone-in chicken.

Do I Need Fresh Lemon?

Nope! While I did garnish this dish with some fresh lemon slices (I had those leftover from another dish), you actually don’t need fresh lemon to make this lemon pepper chicken! Most of the lemon flavor comes from the potent lemon pepper seasoning. The small amount of lemon juice added to the pan sauce can be bottled.

What Is Lemon Pepper Seasoning?

The lemon pepper seasoning I used to flavor this recipe is a mix of lemon zest, pepper, citric acid, and salt. Most major spice brands in the U.S. as well as many major generic store brands make their own lemon pepper seasoning, so it should be easy to find in just about any grocery store in the U.S. If you can’t find lemon pepper at your local store, there are plenty of recipes online for homemade lemon pepper seasoning.

Make sure to check if the lemon pepper seasoning you have contains salt. If it does not, you may need to add more salt to the recipe below.

What to Serve with Lemon Pepper Chicken

I went full-on lemon and served my Lemon Pepper Chicken with Lemon Parsley Pasta, but it would also go great with some Sautéed Vegetables, Roasted Broccoli, Spinach Rice with Feta, or Spanish Chickpeas and Rice.

A sliced piece of lemon pepper chicken on a plate with pasta.
Overhead view of lemon pepper chicken in the skillet with lemon slices

Easy Lemon Pepper Chicken

These Easy Lemon Pepper Chicken Breasts are so tender and juicy, and you'll want to spoon that delicious pan sauce over EVERYTHING. 
Total Cost $7.58 recipe / $1.90 serving
Prep Time 10 minutes
Cook Time 20 minutes
Total Time 30 minutes
Servings 4
Calories 253.4kcal
Author Beth – Budget Bytes

Ingredients

  • 2 boneless skinless chicken breasts (about 1.3 lbs. total) $6.79
  • 2 Tbsp all-purpose flour $0.02
  • 1 Tbsp lemon pepper seasoning $0.30
  • 1 Tbsp cooking oil $0.04
  • 1 clove garlic, minced $0.08
  • 1/2 cup chicken broth $0.07
  • 1 Tbsp butter $0.14
  • 1 tsp lemon juice $0.02
  • 1 Tbsp chopped fresh parsley (optional) $0.10
  • 1/8 tsp freshly cracked black pepper $0.02

Instructions

  • Use a sharp knife to carefully fillet the chicken breasts into two thinner peices (or use thin-cut chicken breasts).
  • Combine the flour and lemon pepper seasoning in a bowl. Sprinkle the mixture over both sides of the chicken breast pieces and then rub it in until the chicken is fully coated.
  • Heat the cooking oil in a large skillet over medium. When the skillet and oil are very hot, add the chicken and cook on each side until golden brown (about 5 minutes per side). Remove the cooked chicken to a clean plate and cover to keep warm.
  • Add the butter and minced garlic to the skillet and sauté for about one minute.
  • Add the chicken broth to the skillet and whisk to dissolve all the browned bits from the bottom of the skillet. Add the lemon juice and allow the sauce to simmer in the skillet for 3-5 minutes, or until it has reduced slightly. Taste the sauce and add salt if needed (I did not add any).
  • Finally, return the chicken to the skillet and spoon the sauce over top. Allow the chicken to heat through. Season with a little freshly cracked pepper and fresh chopped parsley (optional), then serve.

Nutrition

Serving: 1serving | Calories: 253.4kcal | Carbohydrates: 3.53g | Protein: 34.45g | Fat: 10.43g | Sodium: 656.68mg | Fiber: 0.15g
Pan sauce being spooned over a piece of lemon pepper chicken in the skillet

How to Make Lemon Pepper Chicken – Step by Step Photos

Two chicken breasts cut into thinner fillets

Use a sharp knife to carefully fillet two boneless, skinless chicken breasts into thinner pieces (or use thin-cut chicken breasts).

lemon pepper flour being sprinkled over the chicken pieces

Combine 2 Tbsp all-purpose flour and 1 Tbsp lemon pepper seasoning in a bowl. Sprinkle the mixture over both sides of the chicken pieces.

Coated chicken breasts on the cutting board

Smear the flour mixture over both sides of the chicken until they’re evenly coated.

Browned chicken breasts in the skillet

Heat 1 Tbsp cooking oil in a skillet over medium. Once hot, add the chicken pieces and cook on both sides until golden brown (about 5 minutes per side). Remove the cooked chicken to a clean plate and cover to keep warm.

Butter and garlic added to the skillet

Add 1 Tbsp butter and one minced clove of garlic to the skillet. Sauté the garlic for about one minute.

Chicken broth being poured into the skillet

Pour ½ cup chicken broth into the skillet and whisk to dissolve all the browned bits off the bottom. Add 1 tsp lemon juice to the broth, then let the broth simmer in the skillet for 3-5 minutes, or until it has reduced just slightly. Taste the sauce and add salt if needed (I did not add any, but this will depend on the salt content of your lemon peppers seasoning and broth).

Chicken returned to the skillet, pan sauce being spooned over top

Return the chicken to the skillet and spoon the sauce over top. Allow the chicken to heat through (a few minutes).

Finished lemon pepper chicken in the skillet topped with parsley

Top the chicken off with some freshly cracked pepper and chopped parsley (optional), then serve!

A fork lifting a slice of lemon pepper chicken from the plate

The lemon helps keep the chicken extra tender, juicy, and flavorful! Enjoy!

The post Easy Lemon Pepper Chicken appeared first on Budget Bytes.
One Pot Lemon Artichoke Chicken and Rice

As this unusual summer draws to a close, it’s time to start moving into new routines for fall. Having a routine dinnertime can be so helpful when the world feels like it has turned upside down. Connecting with your loved ones over a great meal on a regular basis can help provide a sense of […]

The post One Pot Lemon Artichoke Chicken and Rice appeared first on Budget Bytes.
As this unusual summer draws to a close, it’s time to start moving into new routines for fall. Having a routine dinnertime can be so helpful when the world feels like it has turned upside down. Connecting with your loved ones over a great meal on a regular basis can help provide a sense of stability, normalcy, and gratitude for the simple things in life. Easy recipes like this One Pot Lemon Artichoke Chicken and Rice will make getting back into a dinnertime routine a breeze. 30 minutes, one pot, and you’re done! And don’t forget to get your family or roommates involved—the cooking process can be just as fun and therapeutic as the meal itself!

This post is sponsored by ALDI. Ingredient prices and availability may vary. Find an ALDI store near you here, or visit ALDI on Facebook, Twitter, Pinterest, or Instagram.

One Pot Lemon Artichoke Chicken and Rice in the skillet with lemon and garlic on the side

Grocery shopping at ALDI has been crucial to helping me get back into a routine among all the chaos this year. The small size of the store makes it easy to just get in, get out, and on my way, all without sacrificing selection. They’ve got all my grocery basics, tons of fresh produce (organics, too), and plenty of fun specialty and seasonal ingredients that inspire me to make delicious and flavorful meals, like this Lemon Artichoke Chicken and Rice.

For this easy one pot meal I combined the briny flavor of artichokes with bright fresh lemon, a pinch of red pepper flakes for a little kick, and a light sprinkle of salty feta to give every bite a little pop. And yes, you can get all of these ingredients at ALDI, even the artichoke hearts and feta (their specialty cheese selection is top notch)! It’s the classic and comforting combination of chicken and rice dish with an elevated flavor twist. 

What Type of Pot Should I Use?

You will need a pot or skillet that has a tight fitting lid for this recipe. I used a 3 quart covered deep skillet, but a Dutch oven will also work well. You could even make this in a rice cooker, if your stove top rice cooking skills still need a little work! Just add everything to your rice cooker, give it a brief stir, and set it to the regular rice cooking cycle.

Tips for One Pot Rice Recipes

As with all “one pot” recipes, having good cookware is key. Using a good quality pot or pan that heats evenly will ensure that your rice cooks thoroughly and evenly without burning. Avoid thin or lightweight cookware as these can tend to cause hot and cold spots that don’t cook evenly.

Make sure to let the chicken and rice “rest” for about 5 minutes after turning off the heat. This allows the steam to redistribute throughout the rice, producing a more even texture and loosening any grains from the bottom of the pot.

Use a pot or pan that is close in size to your burner. Using a pot that is too wide for the burner may cause the outside edges to under cook.

What Can I Serve on the Side?

I consider this a “one pot meal” that is filling and diverse enough that it wouldn’t necessarily require a side dish, but if you want to up the vegetable content of your meal, a simple side salad of mixed greens, grape tomatoes, and a light vinaigrette would be a perfect light side. And yes, you can get all the ingredients for an awesome side salad like that at ALDI! ;)

A bowl of one pot lemon artichoke chicken and rice with a fork in the side

 
Finished one pot lemon artichoke chicken in the skillet

One Pot Lemon Artichoke Chicken and Rice

Get back into routines with this easy One Pot Lemon Artichoke Chicken and Rice dinner. 30 minutes, one pot, and you're done!
Total Cost $7.39 recipe / $1.85 serving
Prep Time 5 minutes
Cook Time 25 minutes
Total Time 30 minutes
Servings 4
Calories 409.48kcal
Author Beth - Budget Bytes

Ingredients

  • 1 fresh lemon $0.43
  • 1 lb. Kirkwood Fresh Chicken Breasts (boneless, skinless) $2.49
  • 2 Tbsp Carlini Extra Virgin Olive Oil $0.23
  • 4 cloves garlic $0.16
  • 1 tsp Stonemill Dried Oregano $0.10
  • 1/4 tsp Stonemill Crushed Red Pepper $0.02
  • ¼ tsp salt $0.02
  • 1 12oz. jar Tuscan Garden Quartered Artichoke Hearts $2.59
  • 1 cup Earthly Grains Long Grain White Rice $0.25
  • 1.5 cups Chef's Cupboard Chicken Broth $0.45
  • 1 oz. Emporium Selection Feta Cheese Crumbles $0.55

Optional Garnish

  • 2 Tbsp chopped parsley $0.10

Instructions

  • Zest and juice the lemon. You'll need about 2 Tbsp lemon juice and ½ tsp lemon zest (plus some for garnish).
  • Drain and roughly chop the artichoke hearts. Mince the garlic. Cut the chicken breast into ½-inch pieces.
  • Add the olive oil to a deep skillet or Dutch oven and heat over medium. Once hot, add the chicken pieces and sauté over medium for about 2 minutes (it will not be fully cooked at this point).
  • Add the minced garlic, oregano, red pepper, and salt to the skillet with the chicken. Continue to sauté for about one minute more.
  • Finally, add the artichoke hearts, uncooked rice, chicken broth, 2 Tbsp lemon juice, and ½ tsp lemon zest to the skillet. Stir briefly to combine, place a lid on top, then turn the heat up to medium-high.
  • Allow the broth to come up to a full boil, then turn the heat down to low or just above low to reduce the broth to a simmer. Let the chicken and rice simmer for 15 minutes without lifting the lid or stirring. After 15 minutes, remove the skillet from the heat and let it rest, undisturbed, for five minutes more.
  • Finally, lift the lid, fluff the rice with a fork, and gently redistribute the chicken and artichoke hearts throughout the rice. Top the skillet with crumbled feta, another pinch of lemon zest, and chopped parsley (if desired). Serve hot and enjoy!

Notes

*Ingredient prices and availability may vary.

Nutrition

Serving: 1g | Calories: 409.48kcal | Carbohydrates: 43.65g | Protein: 31.73g | Fat: 11.65g | Sodium: 880mg | Fiber: 4.25g

Find more easy one pot recipes that you can make with ALDI ingredients in our One Pot Meals category.

How to Make One Pot Lemon Artichoke Chicken and Rice – Step by Step Photos

One Pot Lemon Artichoke Chicken and Rice Ingredients

Here is everything you need to make this super simple One Pot Lemon Artichoke Chicken and Rice (all purchased from ALDI!).

Zest and juice a lemon

Start by zesting and juicing a fresh lemon. You’ll need about 2 Tbsp lemon juice (that’s about half the lemon) and ½ tsp lemon zest, plus some for garnishing.

Chopped artichoke hearts

Drain one 12oz. jar of quartered artichoke hearts, then roughly chop them into smaller bite-sized pieces. Mince four cloves of garlic.

Chopped chicken breast

Cut one pound boneless, skinless chicken breast into ½-inch pieces.

Cooked chicken in the skillet with spices.

Add 2 Tbsp olive oil to a large skillet or Dutch oven and heat over medium. Once hot, add the chicken pieces and sauté for about 2 minutes (the chicken will not be fully cooked at this point). Add the minced garlic, 1 tsp dried oregano, ¼ tsp crushed red pepper, and ¼ tsp salt to the skillet with the chicken. Continue to sauté for one minute more.

Artichokes, rice, and broth added to the skillet

Add 1 cup uncooked long grain white rice, the chopped artichoke hearts, 1.5 cups chicken broth, 2 Tbsp lemon juice, and ½ tsp lemon zest to the skillet. 

Ingredients in the skillet stirred before cooking.

Stir the ingredients briefly to combine.

Cooked lemon artichoke chicken and rice in the skillet before fluffing

Place a lid on the skillet, turn the heat up to medium-high, and allow the broth to come up to a boil. Once it reaches a boil, turn the heat down to low or just above low to lower the broth to a simmer. Allow it to simmer for 15 minutes without lifting the lid or stirring. After 15 minutes, remove the skillet from the heat and let it rest with the lid in place for 5 more minutes.

Finished and garnished lemon artichoke chicken and rice in the skillet

After allowing the chicken and rice to rest for five minutes, lift the lid, fluff the rice, and gently stir to redistribute the chicken and artichokes throughout the rice. Garnish with another pinch of lemon zest and some chopped parsley, if desired.

Finished one pot lemon artichoke chicken in the skillet

Serve hot and enjoy!

The post One Pot Lemon Artichoke Chicken and Rice appeared first on Budget Bytes.
Creamy Pesto Pasta with Chicken and Broccoli

I’m all about the quick skillet meals because, let’s face it, sometimes after a long day of work you don’t really want to cook anything… but you still gotta eat. This super quick Creamy Pesto Pasta with Chicken and Broccoli combines the vibrant flavors of basil pesto with tangy cream cheese to make a deliciously […]

The post Creamy Pesto Pasta with Chicken and Broccoli appeared first on Budget Bytes.
I’m all about the quick skillet meals because, let’s face it, sometimes after a long day of work you don’t really want to cook anything… but you still gotta eat. This super quick Creamy Pesto Pasta with Chicken and Broccoli combines the vibrant flavors of basil pesto with tangy cream cheese to make a deliciously rich sauce to smother the pasta, chicken, and broccoli. The pesto provides all the garlic and herbal flavor needed, so there’s no need to even dice an onion, mince garlic, or measure any herbs and spices—it’s already in the sauce! The whole dish cooks very quickly so you can have this one on the dinner table in about 30 minutes.

Originally posted 11-24-2013, updated 8-9-2020.

Creamy pesto pasta with chicken and broccoli in the skillet, viewed from above

Can I Use a Different Pasta Shape?

Yep! Any short shaped pasta, like penne, rotini, or even macaroni will work fine for this recipe. You can use a longer type pasta, like fettuccine or linguine, but it’s a little harder to stir chunky ingredients, like the chicken and broccoli, into long pasta. Sometimes breaking it in half before cooking can help.

What Kind of Pesto Do You Use?

I used basil pesto from ALDI for this recipe because it’s super affordable. If you don’t have an ALDI store near you, Classico brand pesto and Barilla brand pesto also tend to be very affordable. 

Can I Substitute the Cream Cheese?

If you’re not into cream cheese, you can make a similar creamy sauce by substituting the cream cheese with about a ½ cup heavy cream, or replace both the chicken broth and cream cheese with 1 cup half and half. The sauce will be nice and creamy, but it won’t have that tangy cream cheese flavor that some people are not a fan of. You may need to add a pinch or two of salt at the end if you’re skipping the chicken broth.

Make it a Vegetarian Creamy Pesto Pasta

This Creamy Pesto Pasta can easily be made vegetarian. Just use a little extra broccoli, substitute vegetable broth for the chicken broth, and you’re good to go!

Front view of a bowl of creamy pesto pasta with chicken and broccoli, a fork lifting one bite

 
A bowl full of creamy pesto pasta with chicken and broccoli, a black fork on the side

Creamy Pesto Pasta with Chicken and Broccoli

A super fast creamy pesto sauce drenches tender pasta, chicken breast, and broccoli for an easy weeknight dinner.
Total Cost $5.48 recipe / $1.37 serving
Prep Time 5 minutes
Cook Time 20 minutes
Total Time 25 minutes
Servings 4
Calories 606.33kcal
Author Beth - Budget Bytes

Ingredients

  • 8 oz. bow tie pasta $0.67
  • 8 oz. frozen broccoli florets $1.00
  • 1 Tbsp olive oil $0.12
  • 1 lb. boneless, skinless chicken breast $2.49
  • 1/3 cup basil pesto $0.73
  • 1/2 cup chicken broth $0.07
  • 4 oz. cream cheese $0.40

Instructions

  • Bring a large pot of water to boil for the pasta. Once it reaches a full boil, add the pasta and continue to boil just until the pasta is tender, but still slightly firm in the center (7-8 minutes). Once the pasta is tender, add the frozen broccoli florets to the water with the pasta and continue to cook for 2-3 more minutes, or until the broccoli is tender. Drain the pasta and broccoli in a colander.
  • While the pasta is cooking, cut the chicken breast into ½-inch pieces. Heat one tablespoon of olive oil in a large skillet over medium heat. Once hot, add the chicken and continue to cook until the outside of the chicken pieces are white, but they're still tender in the center (they will continue to cook as more ingredients are added).
  • Add the chicken broth to the skillet with the chicken and allow it to heat through. Once hot, add the cream cheese (cut into small pieces) and pesto. Continue to stir and cook until the cream cheese has melted and created a smooth, creamy sauce with the pesto and chicken broth.
  • Finally, add the cooked and drained pasta and broccoli to the skillet and stir to coat it in the cream sauce. If the sauce becomes too dry or thick, add another splash of chicken broth to loosen it up. Serve hot.

Nutrition

Serving: 1Serving | Calories: 606.33kcal | Carbohydrates: 53.58g | Protein: 37.18g | Fat: 28.33g | Sodium: 725.78mg | Fiber: 7.15g

How to Use Your Leftover Pesto

Not sure what to do with the rest of the jar of pesto? Try these recipes:

How to Make Creamy Pesto Pasta with Chicken and Broccoli – Step by Step Photos

Bring a pot of water to a boil for the pasta. Once boiling, add 8oz. bowtie pasta and continue to boil for 7-8 minutes, or just until it’s tender with a little firmness in the center. Add ½ lb. frozen broccoli florets and continue to cook for 2-3 minutes more or just until the broccoli is tender. Drain the pasta and broccoli in a colander.

Diced chicken breast on an orange cutting board

While the pasta and broccoli are cooking, cut one pound of boneless, skinless chicken breast into ½-inch chunks.

Broth being poured into a skillet with cooked chicken pieces.

Add 1 Tbsp olive oil to a large skillet and heat over medium. Once hot, add the diced chicken and cook for about 2-3 minutes, or until the chicken is white on the outside, but still slightly tender inside (it will continue to cook as more ingredients are added). Add ½ cup chicken broth to the skillet and allow it to heat through.

pesto and cream cheese added to the skillet with the chicken and broth

Add 4oz. cream cheese (cut into small chunks) and ⅓ cup basil pesto to the skillet. 

Smooth and creamy pesto sauce in the skillet

Stir and cook over medium heat until the cream cheese has melted and created a smooth sauce with the pesto and broth. The cream cheese might look a little chunky as it’s melting, but keep stirring and cooking, it will smooth out once fully melted.

Finished creamy pesto pasta with chicken and broccoli in the skillet with a spatula

Finally, add the cooked and drained pasta and broccoli to the skillet and stir until it is all coated in the creamy pesto sauce. If the sauce becomes too dry or too thick, add another splash of chicken broth to loosen it up.

A bowl full of creamy pesto pasta with chicken and broccoli, a black fork on the side

And that’s that! So easy! If you like ranch flavored foods, I think this tangy, garlicky sauce almost tastes ranch-like. So yum!

The post Creamy Pesto Pasta with Chicken and Broccoli appeared first on Budget Bytes.

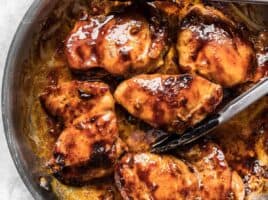
Quick BBQ Chicken

We get a lot of feedback from readers who are trying to cook for families who all have different dietary needs and preferences, especially families with both vegetarians and meat eaters. So I wanted to make a series of a la carte proteins that can be cooked quickly and separately from a meal and added […]

The post Quick BBQ Chicken appeared first on Budget Bytes.
We get a lot of feedback from readers who are trying to cook for families who all have different dietary needs and preferences, especially families with both vegetarians and meat eaters. So I wanted to make a series of a la carte proteins that can be cooked quickly and separately from a meal and added for those who want it. This Quick BBQ Chicken is an easy and tasty main dish that cooks up in under 30 minutes and is great for either serving as a main dish or topping several other dishes.
Overhead view of a plate with Quick BBQ Chicken, mac and cheese, and collard greens

What to Serve with Quick BBQ Chicken

BBQ Chicken is so versatile. I have it pictured above with mac and cheese and collard greens (recipe coming soon), but it also goes great with Cowboy Caviar, Potato Salad, Spicy Sweet Potato Fries, Creamy Coleslaw, or Roasted Broccoli. You can also slice it up and use it to make a BBQ chicken pizza, BBQ chicken quesadilla, use it to top a loaded mashed potato bowl, or a salad.

What Kind of Chicken Can I Use?

This recipe is designed for boneless, skinless chicken breasts OR thighs. It works great with both, but thighs are definitely my favorite, since they are just so tender and crisp up nicely on the edges because of their extra fat. Since this recipe uses a quick skillet cooking method, it isn’t appropriate for bone-in chicken. Bone-in chicken takes much longer to cook, so it’s better for baking, braising, and slow cooking.
How Much Does This Recipe Make?

This recipe is good for about 1 lb. of chicken pieces, give or take a little. If you’d like to double the recipe, just make sure to cook the chicken in batches to prevent overcrowding the skillet, which will prevent the nice browning action that you want.

What Kind of BBQ Sauce Should I Use?

You can use whatever kind of BBQ sauce you prefer. I am not picky when it comes to BBQ sauce, so I just used a Kroger brand hickory smoke BBQ sauce that I happened to have on hand. Sweet Baby Ray’s tends to have pretty good BBQ sauces that are very affordable, too.

A Quick BBQ Chicken Breast on a cutting board with tongs, half sliced.

 
BBQ sauce being brushed onto chicken in a skillet

Quick BBQ Chicken

This Quick BBQ Chicken is an easy and tasty main dish that cooks up in under 30 minutes and can be paired with any number of sides. Perfect for weeknights!
Total Cost $4.98 recipe / $1.25 serving
Prep Time 10 minutes
Cook Time 15 minutes
Total Time 25 minutes
Servings 4 ¼ lb. each
Calories 255kcal
Author Beth - Budget Bytes

Ingredients

  • 1 tsp smoked paprika $0.10
  • 1/2 tsp garlic powder $0.05
  • 1/4 tsp salt $0.02
  • 1/4 tsp freshly cracked black pepper $0.03
  • 1 lb. boneless, skinless chicken* $4.63
  • 1 Tbsp cooking oil $0.04
  • 1/4 cup BBQ sauce $0.11

Instructions

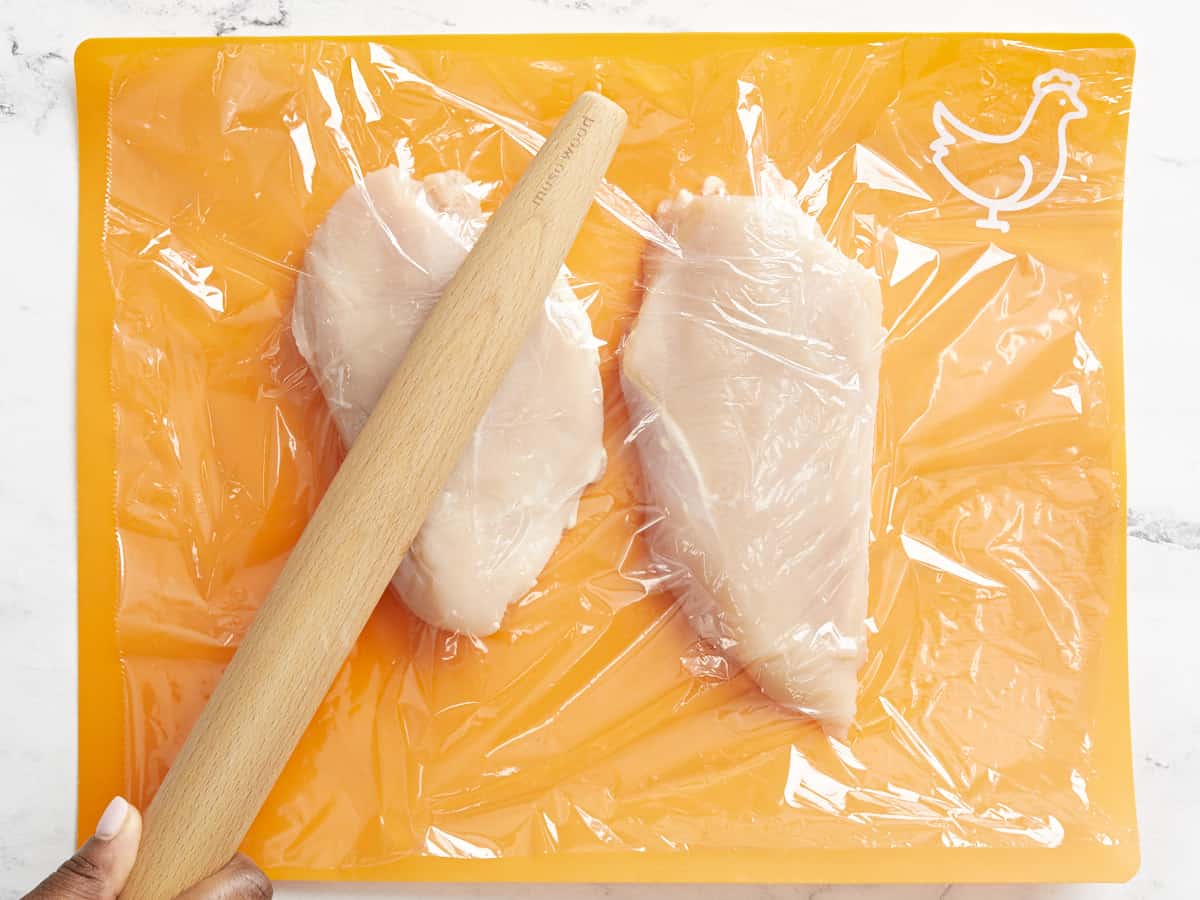
  • If using chicken breasts, pound them to an even thickness to ensure quick and even cooking. To pound the breast, place them on a cutting board and cover with a piece of plastic wrap. Use a mallet or rolling pin to pound the thicker areas to an even ½ to ¾-inch thickness. There is no need to pound chicken thighs.
  • Combine the smoked paprika, garlic powder, salt, and pepper in a small bowl. Season both sides of the chicken pieces with the spice blend.
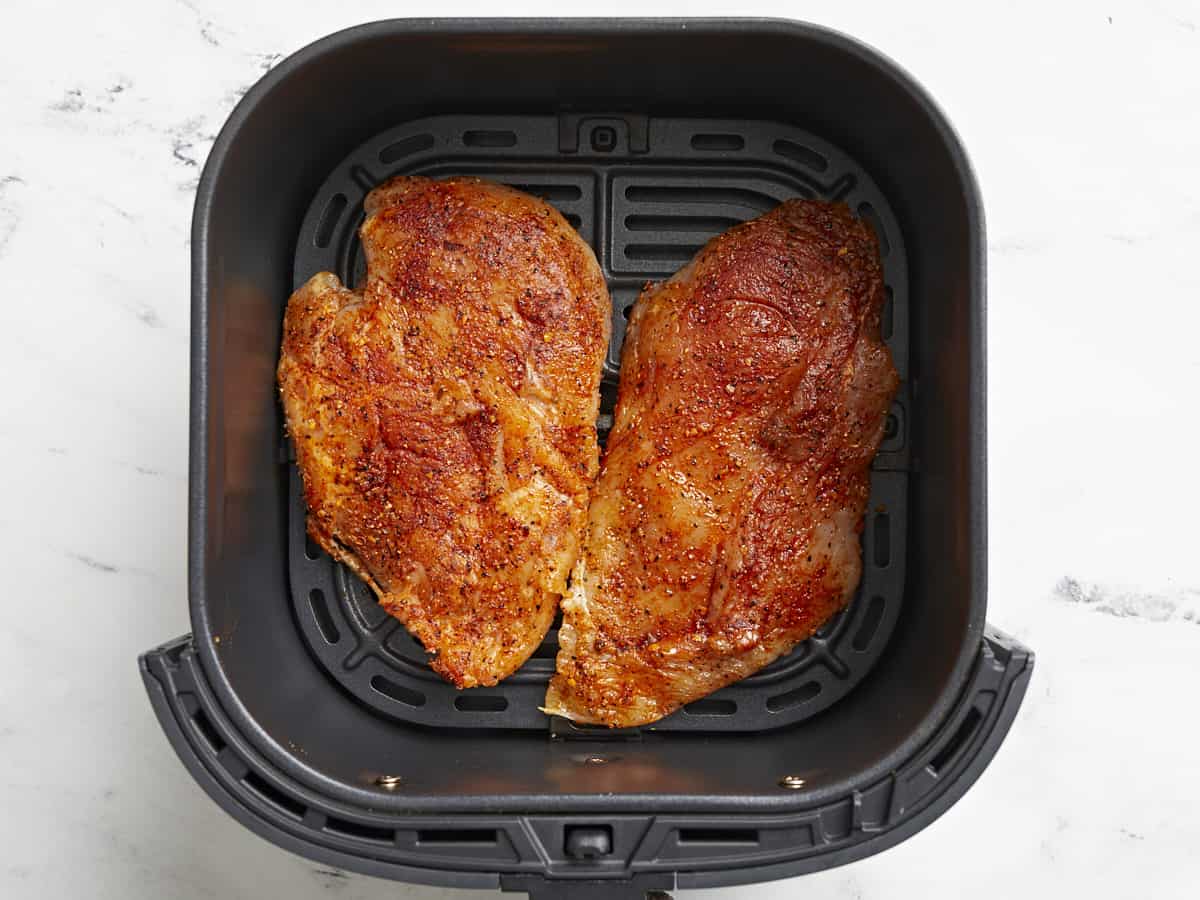
  • Heat a large skillet over medium heat. Once hot, add the cooking oil and swirl to coat the surface of the skillet. Add the seasoned chicken and cook on each side until well browned and cooked through (an internal temperature of 165ºF), about 5-7 minutes on each side.
  • Turn the heat off and brush both sides of the chicken with BBQ sauce. Let the chicken rest five minutes before slicing and/or serving.

Notes

*You can use either chicken breast or thighs for this recipe. I used both in the step by step photos below, so you can see each type of chicken through the process.

Nutrition

Serving: 0.25lb. chicken | Calories: 255kcal | Carbohydrates: 1.08g | Protein: 27.25g | Fat: 15.65g | Sodium: 1165mg | Fiber: 0.23g

How to Make Quick BBQ Chicken – Step by Step Photos

Chicken breast on a cutting board covered with plastic, pounded with a rolling pin

This recipe can be made with one pound of boneless, skinless chicken breast, boneless, skinless chicken thighs, or a mix of both. If you are using chicken breasts, you’ll want to pound them to an even thickness of about 1/2 to 3/4-inch thick to make sure they cook quickly and evenly. To do this, place the chicken on a cutting board, cover with plastic to prevent splatter, then gently pound with a rolling pin or mallet until the thick end is even with the thinner end.

seasoning for bbq chicken in a small wooden bowl

Prepare the seasoning for the chicken by stirring together 1 tsp smoked paprika, 1/2 tsp garlic powder, 1/4 tsp salt, and 1/4 tsp pepper.

seasoned chicken pieces on a cutting board

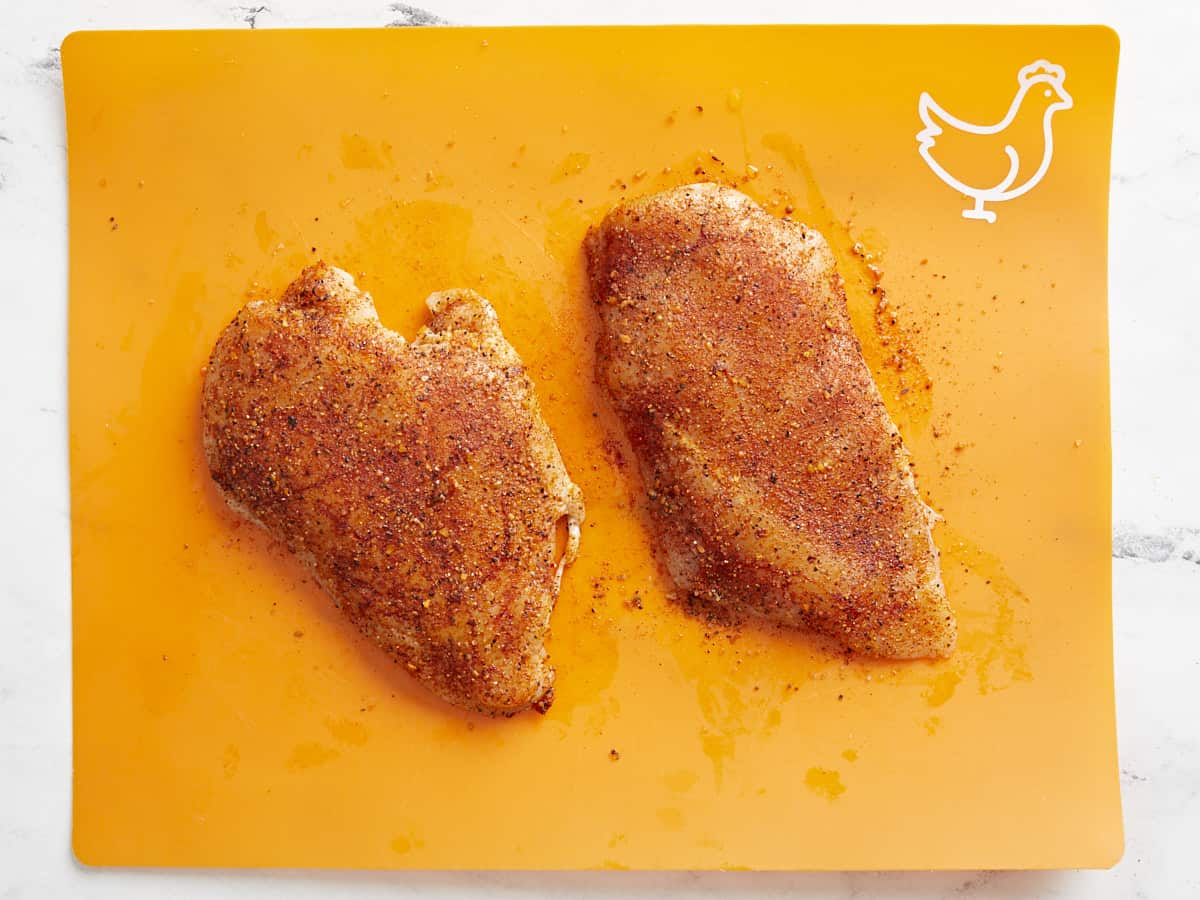
Season both sides of the chicken with the prepared seasoning blend. 

Chicken cooked in the skillet

Heat a large skillet and heat over medium. Once hot, add 1 Tbsp cooking oil, swirl the oil to coat the surface of the skillet, then add the seasoned chicken pieces. Cook the chicken on each side until well browned and cooked through (internal temperature of 165ºF), about 5-7 minutes each side.

BBQ sauce being brushed onto chicken in a skillet

Turn the heat off and brush each side of the chicken with BBQ sauce.

BBQ chicken thigh on a plate with mac and cheese and collard greens

Let the chicken rest for about 5 minutes before serving, or slicing. Enjoy!

The post Quick BBQ Chicken appeared first on Budget Bytes.