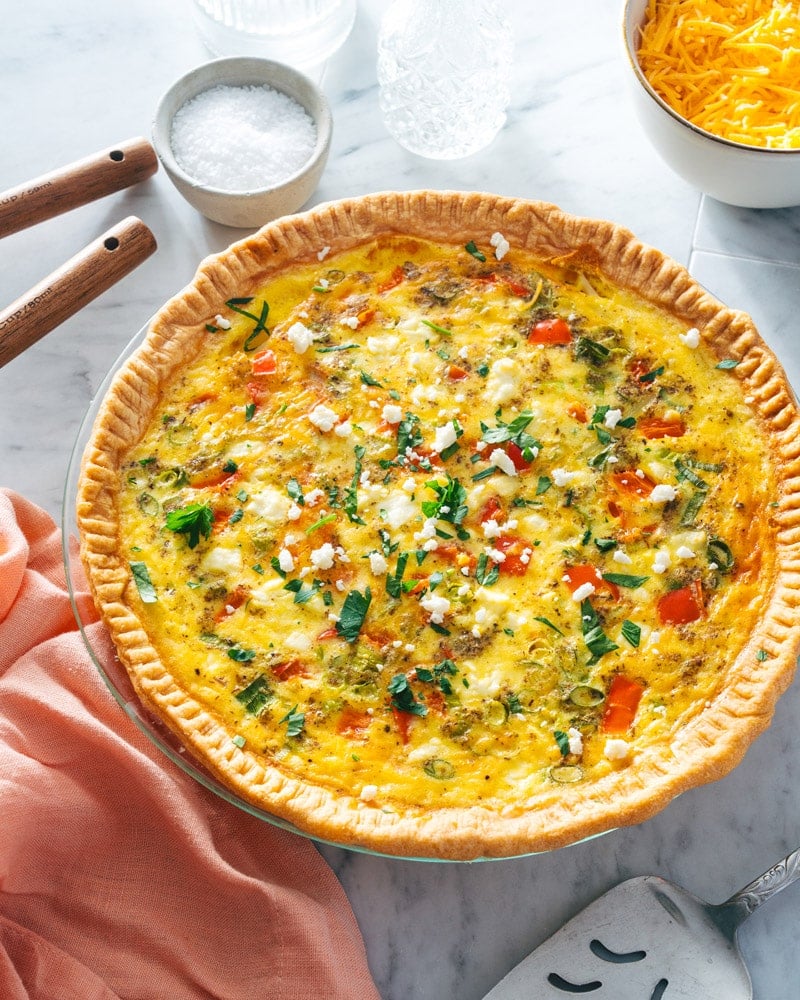
This breakfast quiche recipe is hearty and easy, starring a well-seasoned filling of hashbrowns and vegetables encased in pastry crust!

Looking for a standout quiche recipe to make mornings more delicious? Try this easy Breakfast Quiche! We’ve become positive quiche experts over here, trying every different flavor. This one has come out on top! Hearty hashbrowns, bell peppers, and feta cheese for a perfectly-seasoned savory filling. Encase it all in a flaky pastry crust, and it’s simple to bake up as a make-ahead breakfast or fancy brunch. Here’s how to do it!
Ingredients in this breakfast quiche
A quiche is a French pastry filled with a custard and savory fillings. Many quiche recipes you can eat for breakfast, brunch, lunch or dinner, making them extremely versatile! You can also eat them warm or cold, making leftovers a great snack or simple dinner. This breakfast quiche we created with ease in mind: the ingredients are simple and evocative of a breakfast casserole. Here’s what you’ll need:
- Quiche crust: 1 homemade recipe or refrigerated pie dough*
- Eggs
- Milk
- Heavy cream
- Dried mustard, dried oregano, garlic powder, salt and pepper
- Cheddar cheese
- Feta cheese
- Frozen or refrigerated hashbrowns
- Green onions
- Red bell pepper
For the crust: purchased is quickest
The best way to make a quiche recipe is with homemade quiche crust! But with a breakfast quiche, you may want to learn towards purchased crust to make preparation simpler. For this recipe, we used a purchased crust! Here are the pros and cons to each method:
- Homemade crust holds its shape better and tastes better. This quiche crust tastes so much better than store-bought: it’s more buttery and flaky. It can also hold a crimped crust better.
- Purchased crust is faster. Purchased crust works too: especially for this breakfast quiche. We’ve had some issues with refrigerated pie dough holding its shape in a crimped pattern. For refrigerated or frozen crusts, we recommend using the decoration where you press the fork tines into the crust (see the photos).

Tips for blind baking
The biggest key to making this breakfast quiche? Blind bake the crust! This means you bake the pastry crust without the filling first to avoid a soggy bottom. This is essential with quiche because the filling is so liquid (but not required with say, apple pie which has a chunkier filling). Here’s how to blind bake a crust:
- Prick holes with a fork all over the crust. This is called docking: it helps keep the crust from puffing up while in the oven without filling.
- Add parchment paper then pie weights, dried beans, or rice! Pour them right into the crust. We use two sets of these pie weights. Bake for 12 minutes at 400°F, then reduce the heat to 350°F.
- Remove the pie weights. Remove the weights and bake 20 to 25 more minutes until the crust is golden.
For the pie crust shield
For this breakfast quiche recipe, you’ll also need to use a pie crust shield. This prevents the pie crust from burning in the oven by covering just the crust, allowing the filling to bake uncovered. There are two options for a pie crust shield:
- Make a pie crust shield with aluminum foil. Cut a hole in the center of a large sheet of foil that’s the diameter of your pie plate. The foil will rest on the crust, but allow the filling to bake uncovered. Here’s a video with instructions for more details.
- Or, buy a metal pie crust shield. Here’s a link to buy a pie crust shield online.

Breakfast quiche filling ideas
There are lots of ways to make a breakfast quiche! This one is flavored similar to our hashbrown breakfast casserole. But you can swap in different seasonings or filling ingredients to your liking! Here are a few ideas and tips:
- Don’t overfill the quiche. Try to keep the approximate volume of vegetables similar to the recipe below.
- Try other sauteed vegetables like very small broccoli florets, mushrooms, or onions.
- Add fresh vegetables like sundried tomatoes, finely diced bell pepper, or frozen and thawed spinach (with all liquid squeezed out).
- Vary the cheese. Try adding smoked gouda or smoked mozzarella in place of the cheddar cheese, or add grated Parmesan.
More quiche recipes
Love a good quiche? Here are a few other recipes you might enjoy:
- Go for this Basic Quiche or Easy Quiche
- Grab a Broccoli Cheddar Quiche
- Try a Classic Spinach Quiche, or remove the crust for Crustless Quiche with Spinach
- Grab an Classic Asparagus Quiche


This breakfast quiche recipe is…
Vegetarian.

Breakfast Quiche
-
 Prep Time: 45 minutes
 -
Cook Time: 45 minutes
-
Total Time: 1 hour 30 minutes
-
 Yield: 8
Description
This breakfast quiche recipe is hearty and easy, starring a well-seasoned filling of hashbrowns and vegetables encased in pastry crust!
Ingredients
- 1 Homemade Quiche Crust (made through Step 4) or 1 refrigerated pie dough*
- 4 large eggs
- ¾ cup milk
- ½ cup heavy cream
- 1 teaspoon dried mustard
- 1 teaspoon dried oregano
- 1 teaspoon garlic powder
- 1 teaspoon kosher salt
- Fresh ground black pepper
- ¾ cup shredded mild cheddar cheese
- ¼ cup feta cheese crumbles
- 1 cup (4 ounces) frozen or refrigerated hashbrowns
- 2 green onions, sliced (white, light and dark green portions)
- ¼ cup finely diced red pepper
Instructions
- Prepare the crust: If using Homemade Quiche Crust, prepare it in the pie pan using the steps in the linked recipe. If using refrigerated pie dough, transfer the dough to the pie pan (make sure it is standard and not deep dish). Fold the overhanging dough backwards and seal it to form a rim. With refrigerated crust, it’s easiest to press in the tines of the fork to decorate the edges (like in the photos; it’s harder to get the crimped edges to keep their shape while baking). Use a fork to gently prick holes in the bottom and sides of the crust (which helps it to not puff up while blind baking).
- Freeze the crust: Freeze the crust in the pan for 15 minutes.
- Preheat the oven: Preheat the oven to 400°F.
- Blind bake the crust at 400°F: Place a sheet of parchment paper on top of the crust. Fill the dough with pie weights (we used two sets of these), dry beans, or dry rice. Bake for 12 minutes.
- Reduce the oven temperature and blind bake at 350°F: Reduce the oven temperature to 350°F and carefully remove the parchment and weights. Bake 20 to 25 minutes until the bottom is lightly browned (or more if necessary for refrigerated pie crust). Remove from the oven and add the filling once it is ready.
- Make the filling: In a medium bowl, whisk together the eggs, milk, cream, dried mustard, dried oregano, garlic powder, kosher salt, and several grinds black pepper. Place the cheddar cheese in the bottom of the crust, then add the hashbrowns. Pour the egg mixture over the top. Sprinkle the top with green onions and diced red pepper. Add feta and another handful of shredded cheese.
- Bake: Add a pie crust shield (purchased or homemade with foil**). Bake at 350°F for 40 to 50 minutes minutes, until the center is set and the top is lightly browned. Cool at least 30 minutes, then serve or refrigerate. Re-warm in a 200 degree oven for 20 minutes. (You can also serve it cold.) Leftovers stay for 5 days refrigerated.
Notes
*Typically we recommend a homemade quiche crust, but to keep this breakfast quiche simple we used purchased crust.
**To make your own crust shield, cut a hole in the center of a large sheet of foil that’s the diameter of your pie plate. The foil will rest on the crust but let the pie filling be uncovered. Here’s a video with instructions for more details
 Category: Breakfast
 Method: Baked
 Cuisine: French inspired
- Diet: Vegetarian
Keywords: Breakfast quiche, breakfast quiche recipe


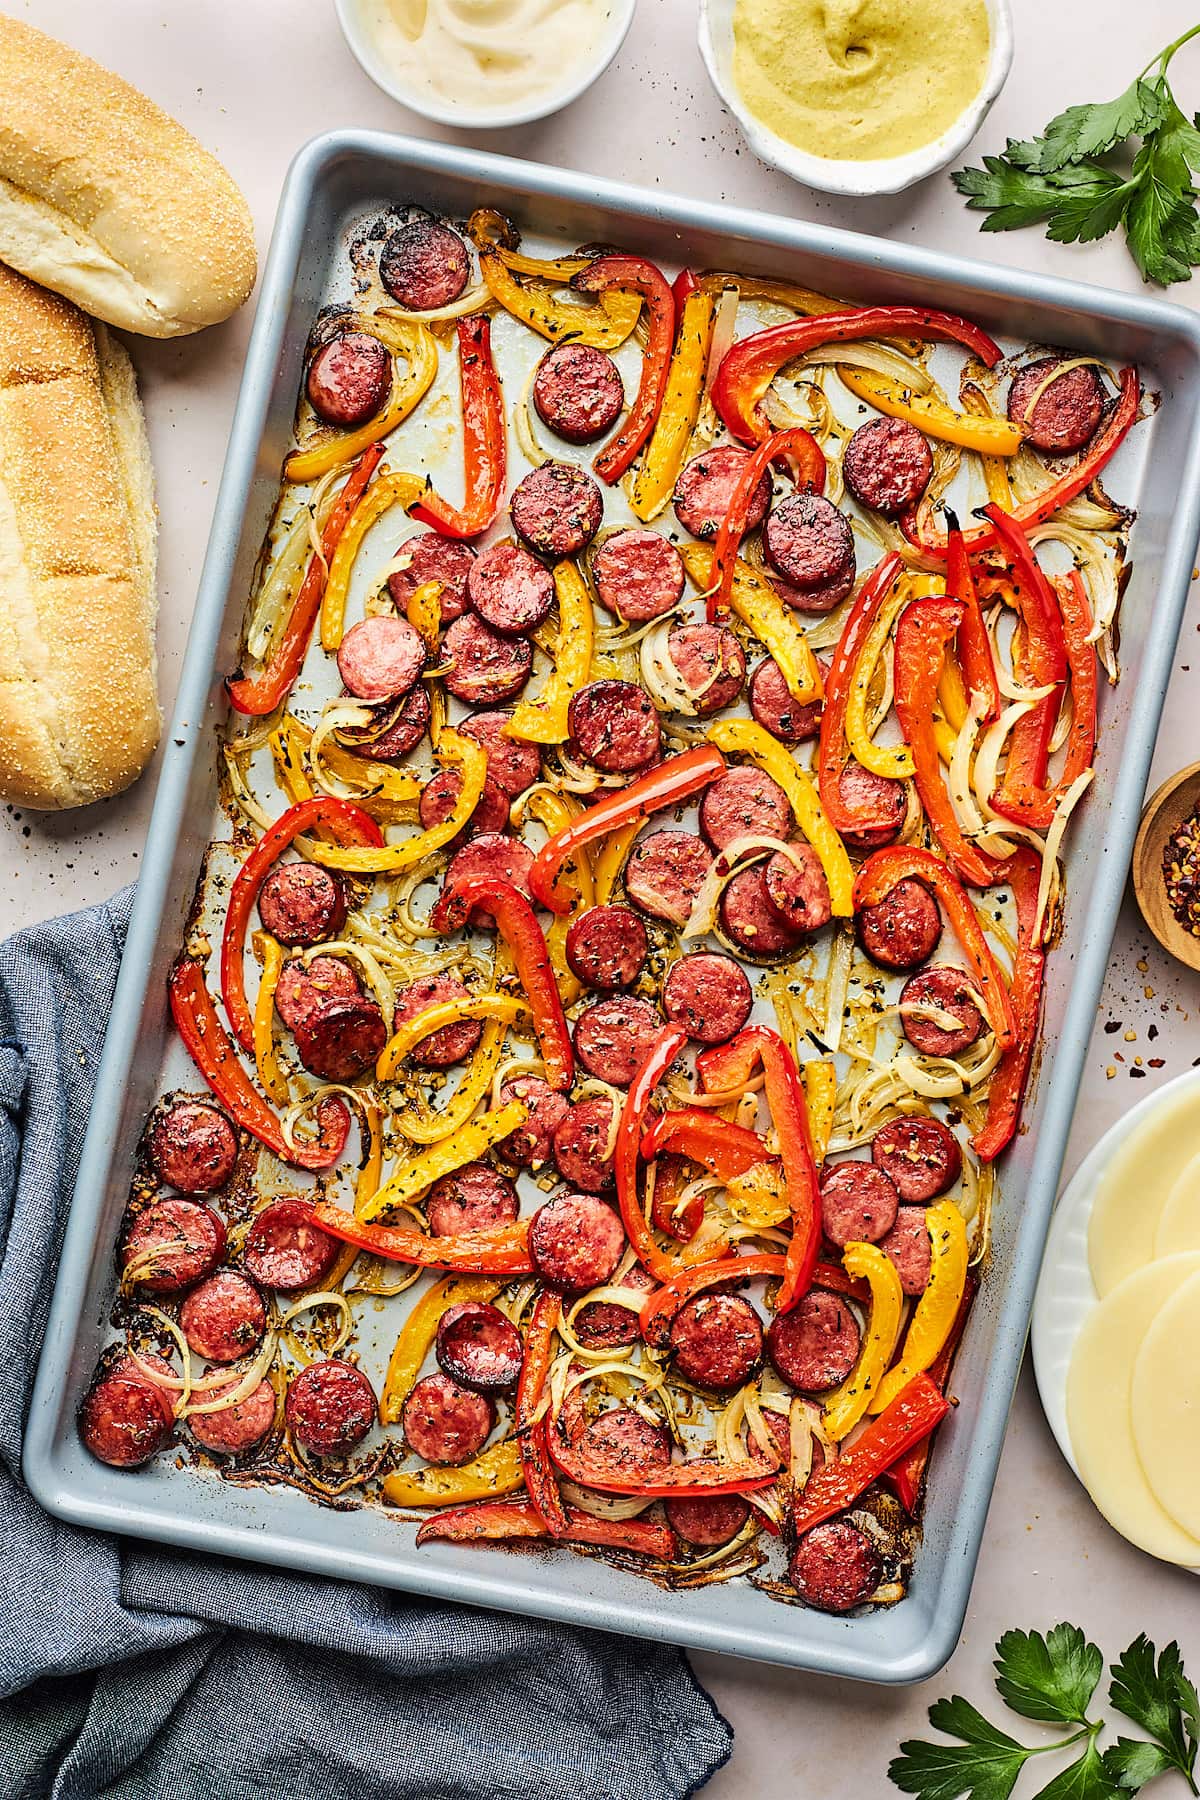 If you are looking for a quick and easy weeknight meal, you have come to the right place. This Sheet Pan Sausage and Peppers recipe only takes 25 minutes to make and is always a dinner winner. Sheet pan meals are the BEST! I love that dinner is made on ONE pan, easy to make…