Postre de Hojaldre con Forma de Corona de Navidad

Adentro: Aprenda a preparar un delicioso postre de hojaldre con forma de corona de Navidad utilizando masa de filo Impresionarás a tu familia y amigos con este delicioso plato. Aprenderás …

The post Postre de Hojaldre con Forma de Corona de Navidad appeared first on My Latina Table.

Adentro: Aprenda a preparar un delicioso postre de hojaldre con forma de corona de Navidad utilizando masa de filo Impresionarás a tu familia y amigos con este delicioso plato. Aprenderás qué es la masa de filo y qué rellenos puedes utilizar para que tu corona sea única.

READ IN ENGLISH

postre de hojaldre de corona denavidad

Con la llegada de las fiestas navideñas, ¡no hay mejor momento para probar suerte con un postre delicioso y sorprendente!

Esta corona de Navidad es un postre delicioso que utiliza las capas hojaldradas de la masa filo.

Le encantarán las capas doradas y finas como el papel que prometen una delicia crujiente y hojaldrada, perfecta para estas temporadas de navidad.

Siguiendo nuestras instrucciones paso a paso, usted también puede aprender a preparar un postre navideño que será una obra maestra de arte y sabor, una deliciosa pieza central para su celebración festiva.

¿Qué es la masa filo?

La masa filo es un tipo de masa que se utiliza en diversas cocinas mediterráneas y de Oriente Medio. Las láminas de masa filo son finas capas de esta masa que vienen envasadas y pueden utilizarse para crear una gran variedad de platos dulces y salados.

Estas láminas suelen venderse congeladas y hay que descongelarlas antes de usarlas. La delgadez de las hojas de masa filo permite crear capas delicadas y crujientes al hornearlas. Muchos platos populares, como el baklava, el spanakopita y diversos aperitivos, utilizan la pasta filo para conseguir una textura escamosa y ligera.

Al trabajar con hojas de pasta filo, es esencial manipularlas con cuidado, ya que son finas y delicadas.

Las hojas de pasta filo ofrecen una opción versátil y práctica para crear platos impresionantes y sabrosos con una textura deliciosa.

Cómo hacer una corona de Navidad de hojaldre

Ingredientes:

  • 1 paquete de hojas de pasta filo
  • 1 taza de mantequilla sin sal derretida para untar
  • Sirope de arce o miel
  • Flan de vainilla y limón :
  • 1/4 taza de mantequilla sin sal
  • 3/4 de taza de azúcar
  • Cáscara de un limón
  • 1 taza de arrurruz en polvo o maicena o Maizena elija su favorito.
  • 3 tazas de leche
  • 1 lata de leche evaporada
  • 1 cucharada de vainilla

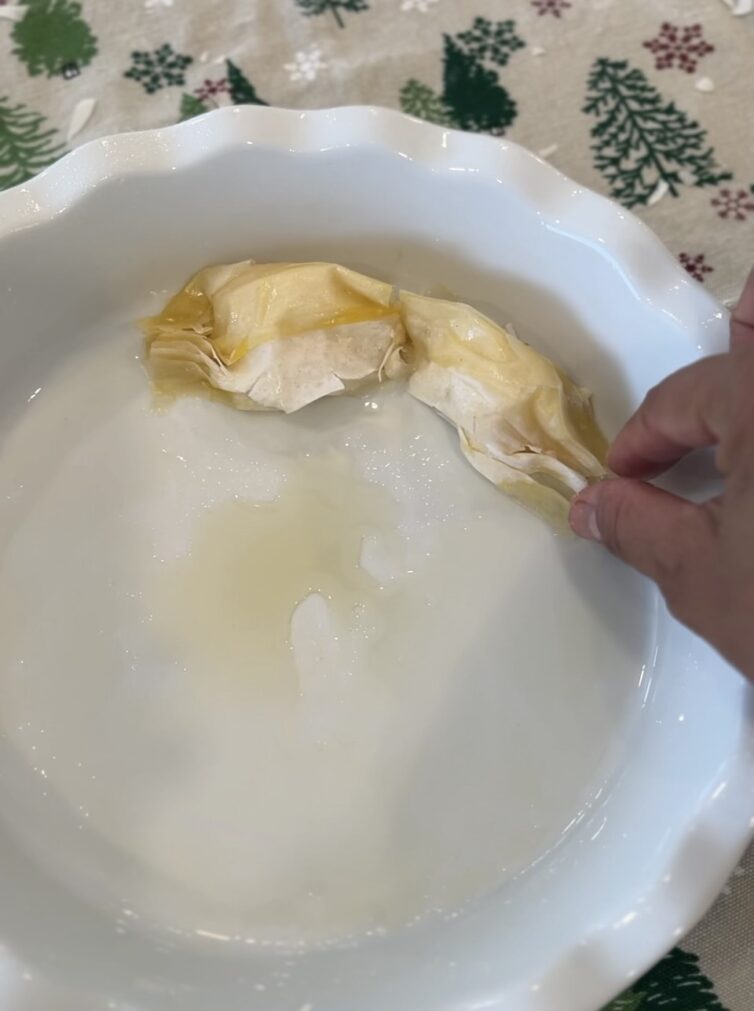
foliding phyllo dough for christmas pastry

christmas wreath pastry before decorating it

Christmas wreath pastry decorated with cranberries

Instrucciones:

  • Derretir la mantequilla añadir el azúcar, y la cáscara de limón
  • Verter la leche evaporada y mezclar
  • En una taza grande mezclar la maicena y las 3 tazas de leche fría hasta que no queden grumos
  • Verter la leche y batir constantemente a fuego medio y seguir batiendo hasta que las natillas espesen
  • Apartar para que se enfríe

*Yo sigo el tiempo de horneado de la caja del hojaldre y el mio solo tardo 18 minutos.

Cómo doblar la masa

  • Coloca una hoja de masa filo verticalmente y úntala con mantequilla, luego coloca otra hoja encima y úntala con mantequilla
  • Coloque una cucharada de crema pastelera (o relleno de su elección) en la parte inferior derecha.
  • Pon una cucharada de crema en la parte inferior izquierda y otra en el centro
  • Doble la masa filo sobre las natillas y séllela presionando hacia abajo
  • Vuelve a doblar y recoge los lados, y dobla una vez más hacia arriba
  • Arruga el exceso de masa filo y dobla el paquete de hojaldre para que quede en la parte superior y dale la vuelta.
  • Cortar en tres círculos con una tijera y apretar bien los extremos. Repita la operación.
  • Colóquelo en un molde para tartas y úntelo con mantequilla
  • Hornear durante unos 18-20 minutos
  • Retire del horno y vierta el almíbar frío sobre la masa y dispóngala en forma de corona.
postre de hojaldre de corona denavidad
Print

Postre de Hojaldre con Forma de Corona De Navidad

Aprenda a preparar un delicioso postre de hojaldre con forma de corona de Navidad utilizando masa de filo Impresionarás a tu familia y amigos con este delicioso plato.
Course Dessert
Cuisine Mediterranean
Keyword christmas, dessert, phyllo dough
Prep Time 5 minutes
Cook Time 20 minutes
Total Time 25 minutes
Servings 8
Calories 538kcal

Ingredients

  • 1 paquete Masa Filo
  • 1 taza Mantequilla derretida
  • Miel o miel de maple

Vanilla- lemon Custard :

  • 1/4 taza mantequilla sin sal
  • 3/4 taza azucar
  • cascara de 1 limon
  • 1 taza maizena
  • 3 tazas leche
  • 1 lata leche evaporada
  • 1 cucharada extracto de vainilla

Instructions

Para hacer el relleno de crema

  • Derretir la mantequilla añadir el azúcar, y la cáscara de limón
  • Verter la leche evaporada y mezclar
  • En una taza grande mezclar la maicena y las 3 tazas de leche fría hasta que no queden grumos
  • Verter la leche y batir constantemente a fuego medio y seguir batiendo hasta que las natillas espesen
  • Apartar para que se enfríe

Como doblar la masa

  • Coloca una hoja de masa filo verticalmente y úntala con mantequilla, luego coloca otra hoja encima y úntala con mantequilla
  • Coloque una cucharada de crema pastelera (o relleno de su elección) en la parte inferior derecha.
  • Pon una cucharada de crema en la parte inferior izquierda y otra en el centro
  • Doble la masa filo sobre las natillas y séllela presionando hacia abajo
  • Vuelve a doblar y recoge los lados, y dobla una vez más hacia arriba
  • Arruga el exceso de masa filo y dobla el paquete de hojaldre para que quede en la parte superior y dale la vuelta.
  • Cortar en tres círculos con una tijera y apretar bien los extremos. Repite
  • Colóquelo en un molde para tartas y úntelo con mantequilla
    Hornear durante unos 18-20 minutos
  • Retire del horno y vierta el almíbar frío sobre la masa y dispóngala en forma de corona.

Nutrition

Serving: 1serving | Calories: 538kcal | Carbohydrates: 56g | Protein: 6g | Fat: 33g | Saturated Fat: 20g | Polyunsaturated Fat: 1g | Monounsaturated Fat: 9g | Trans Fat: 1g | Cholesterol: 83mg | Sodium: 217mg | Potassium: 164mg | Fiber: 1g | Sugar: 23g | Vitamin A: 977IU | Vitamin C: 0.2mg | Calcium: 126mg | Iron: 1mg

The post Postre de Hojaldre con Forma de Corona de Navidad appeared first on My Latina Table.
The Best Creamy Cranberry Dip Recipe – A Holiday Appetizer

Inside: If you are looking for an amazing and unique appetizer to take your next holiday party, look no further – this creamy cranberry dip is easy to make and …

The post The Best Creamy Cranberry Dip Recipe – A Holiday Appetizer appeared first on My Latina Table.
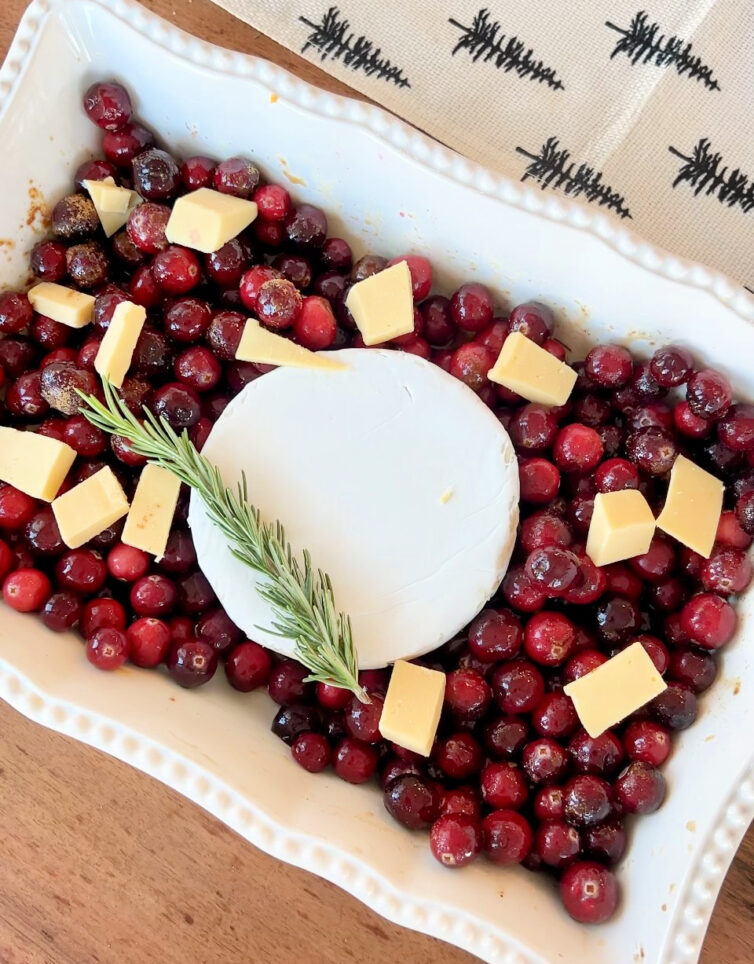
Inside: If you are looking for an amazing and unique appetizer to take your next holiday party, look no further – this creamy cranberry dip is easy to make and sure to be a hit. 

cranberries in a baking dish with gouda, brie, and rosemary

​We are at the time of year where holiday gatherings are starting and everyone is rushing to think of what foods to take to share with friends and family. It can be hard to think of something unique that people will like, but this festive dip that I am going to share today fits the bill. 

When most people think of cranberries during the holidays, they think of fresh cranberry sauce. Even though it is a common food to share at Thanksgiving, a lot of times there is a lot of leftovers since it isn’t always the most popular dish. Today, I am going to share a recipe for another recipe that uses fresh cranberries, but that is combined with delicious brie and gouda cheeses which makes for a creamy dip that everyone will love. 

What is Cranberry Dip? 

Cranberry dip is one of many cranberry recipes that you can make for holiday parties. This particular easy dip recipe combines fresh ingredients, like tart cranberries, coconut sugar, cinnamon, orange juice and orange zest, with brie and gouda cheeses. It is then baked in the oven and served with crackers. This is a perfect appetizer, because it is easy to make and easy to share. People can scoop it up onto their plate and enjoy it with their favorite crackers or even just with a spoon. 

A common variation is to use cream cheese if you prefer that over brie and gouda, but I find that these decadent cheeses make a huge difference and everyone seems to love it! If you have all the ingredients, you can even make it at the last minute, because it doesn’t take long at all to through together. 

How do you make this Cranberry Dip?

To make this perfect holiday party appetizer, you will gather the following simple ingredients:

  • 1 bag of fresh cranberries (you can use frozen cranberries if that is what you have)
  • 4 Tbsp of coconut sugar
  • 1/4 teaspoon of ground cinnamon
  • Juice from one orange
  • 1/2 tbsp of orange zest
  • Brie cheese
  • Smoked Gouda, cut into cubes (optional)
  • Fresh rosemary

You will start by preheating the oven to 350 degrees fahrenheit. In a small bowl combine the coconut sugar and cinnamon and set aside.

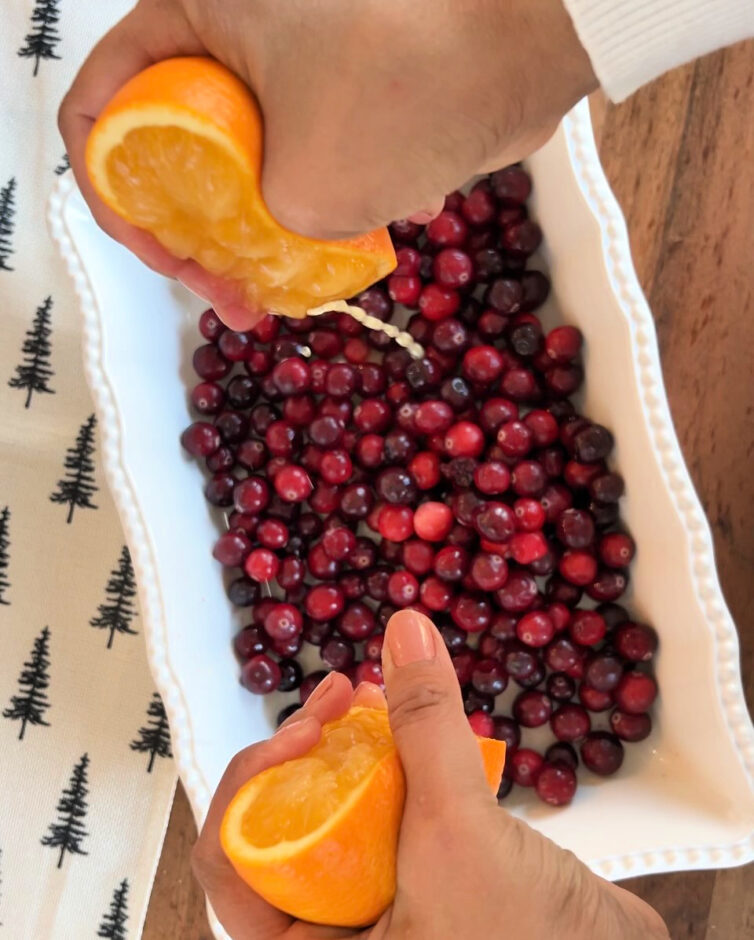
Next, in a 9×13 inch baking dish combine cranberries, coconut sugar and cinnamon mixture, and the fresh orange juice and zest, and stir well. 

Cranberries in a baking dish with a person squeezing orange juice into it

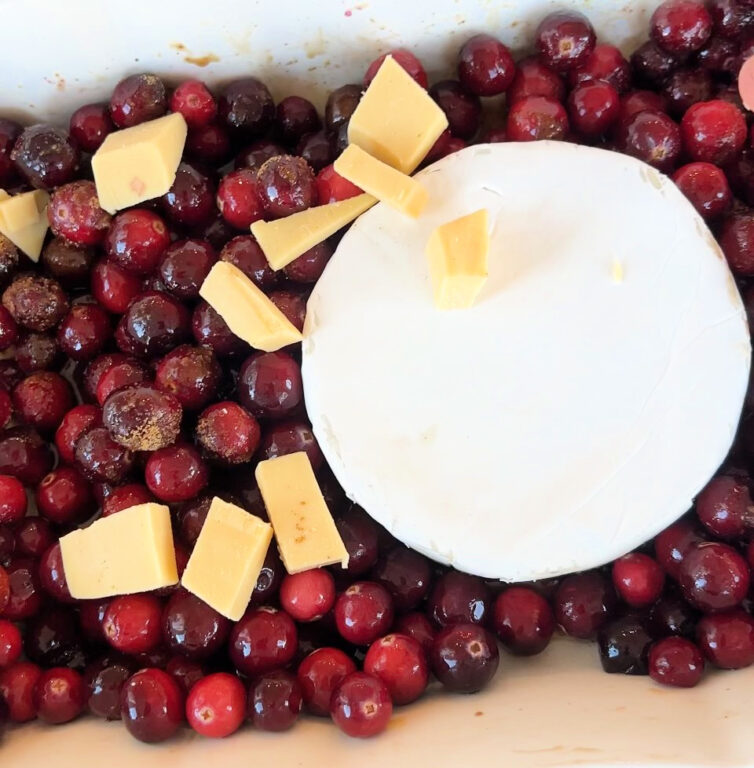
Finally, add the round of brie cheese to the middle of the dish and add the cubes of smoked gouda and the rosemary. Place in the preheated oven and bake for 30 minutes. 

cranberry dip with brie and gouda

Once cooked, remove from the oven, give it a quick stir, and serve with and assortment of crackers, tortilla chips, pretzel crisps, or pita chips. 

If you don’t have brie cheese, you can replace it with a block of cream cheese and it will still have a similar creamy texture and taste. 

This recipe is great right out of the oven, but you can also save any leftover dip for the next day. Just keep it in an airtight container, or in the same serving dish with plastic wrap over the top and it will be ready to continue enjoying later. 

​The delicious seasonal flavors of this dip make it a perfect option for family gatherings any time of year, and it is my new favorite way to use cranberries. 

Check out these other holiday favorite recipes

cranberries in a baking dish with gouda, brie, and rosemary
Print

The Best Creamy Cranberry Dip

If you are looking for an amazing and unique appetizer to take your next holiday party, look no further - this creamy cranberry dip is easy to make and sure to be a hit
Course Appetizer
Cuisine American
Keyword christmas, cranberries, dip, Thanksgiving
Prep Time 5 minutes
Cook Time 30 minutes
Total Time 35 minutes
Servings 12 servings
Calories 112kcal

Ingredients

  • 1 bag cranberries
  • 4 tbsp coconut sugar
  • 1/4 tsp ground cinnamon
  • 1 orange juice
  • 1/2 tbsp orange zest
  • 1 round brie cheese
  • 2 oz smoked gouda in cubes
  • fresh rosemary

Instructions

  • Preheat oven to 350 F
  • Combine the cinnamon and coconut sugar in a small bowl, set aside.
  • Combine the cranberries, cinnamon and coconut sugar mixture, orange juice and orange zest in a 9x13 baking dish.
  • Add the round of brie in the middle and top with the cubes of smoked gouda and fresh rosemary
  • Bake for 30 minutes and serve with crackers.

Nutrition

Serving: 1Serving | Calories: 112kcal | Carbohydrates: 9g | Protein: 5g | Fat: 7g | Saturated Fat: 4g | Polyunsaturated Fat: 0.2g | Monounsaturated Fat: 2g | Cholesterol: 24mg | Sodium: 166mg | Potassium: 77mg | Fiber: 1g | Sugar: 5g | Vitamin A: 181IU | Vitamin C: 10mg | Calcium: 75mg | Iron: 0.2mg

The post The Best Creamy Cranberry Dip Recipe – A Holiday Appetizer appeared first on My Latina Table.
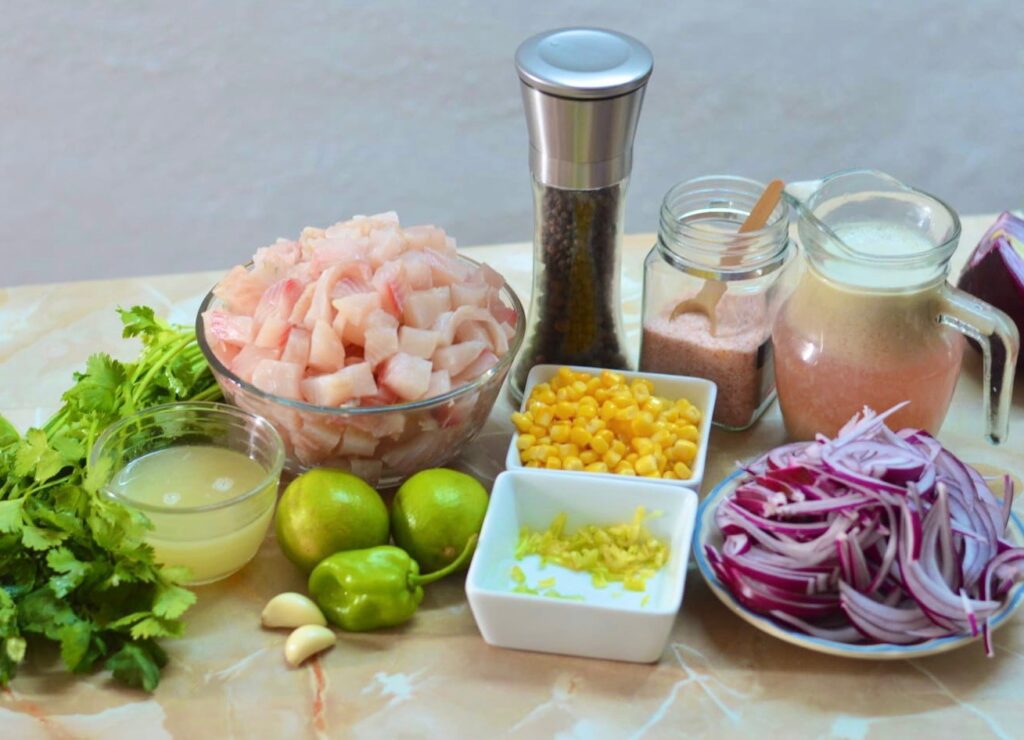
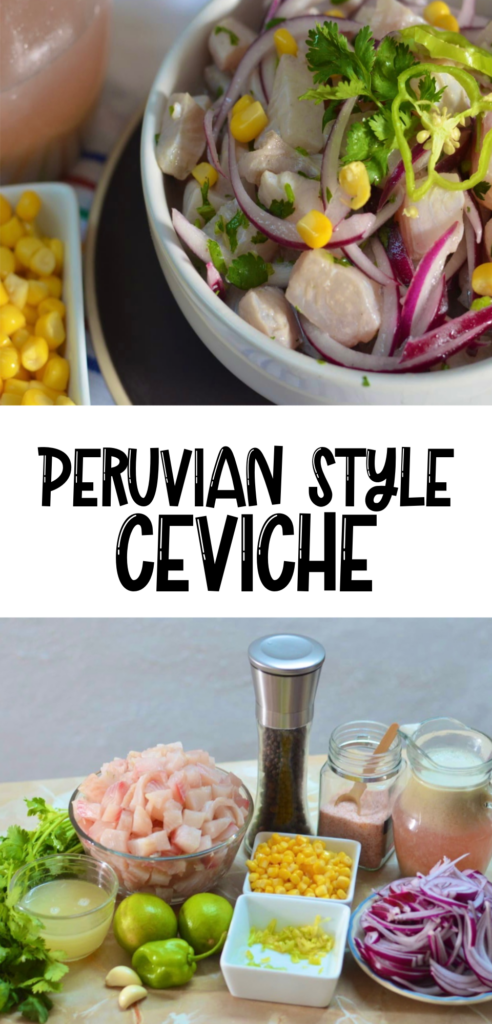
Peruvian Style Ceviche

Inside: Learn what makes up Peruvian Style Ceviche and how to combine all the delicious flavors into a flavorful dish full of rich cultural history. Few dishes can match the …

The post Peruvian Style Ceviche appeared first on My Latina Table.

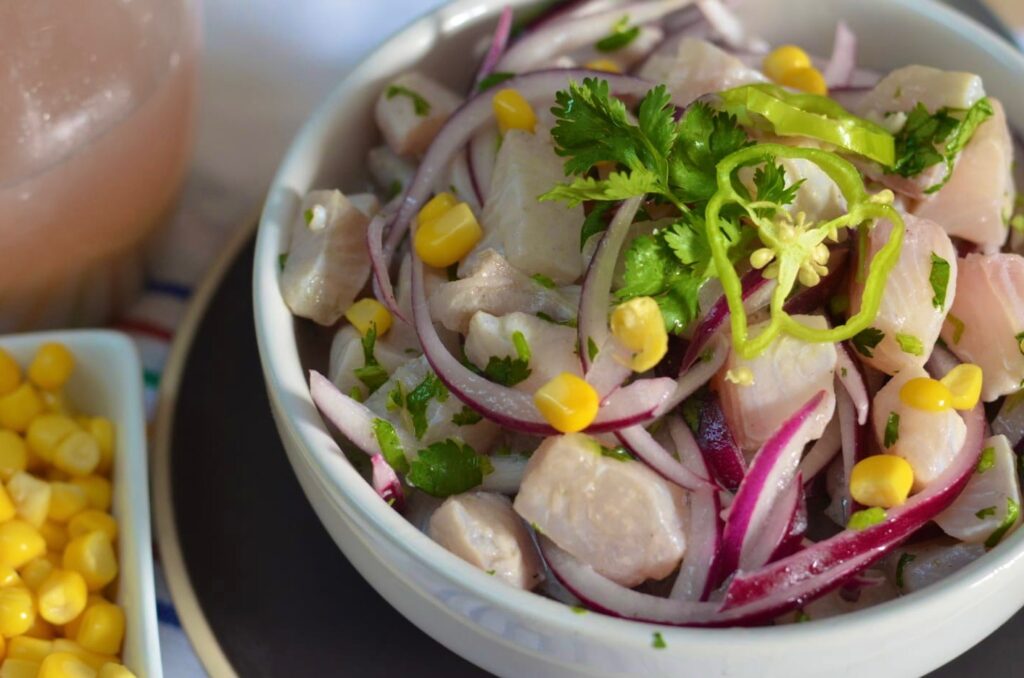
Inside: Learn what makes up Peruvian Style Ceviche and how to combine all the delicious flavors into a flavorful dish full of rich cultural history.

Few dishes can match the exquisite charm of Peruvian Style Ceviche.

With its vibrant colors, bold flavors, and a rich cultural history, ceviche is more than just a dish; it’s a celebration of Peru’s diverse culinary heritage.

What is Peruvian Ceviche?

Peruvian ceviche, also known as “ceviche peruano,” is a popular and iconic dish in Peru.

It is a type of seafood salad made primarily from fresh raw fish or seafood, which is marinated and “cooked” by the acidity of lime or sour orange juice.

The dish is known for its vibrant flavors, refreshing taste, and the skill required to balance its ingredients.

What is in Peruvian Ceviche?

The star of Peruvian Style Ceviche is undoubtedly the seafood.

Here are the key components that make up Peruvian ceviche:

Fresh Seafood

 The most common seafood used in Peruvian ceviche includes white fish like sea bass or sole, shrimp, squid, and octopus. It’s crucial to use the freshest seafood available to ensure the best flavor and texture.

Tiger’s Milk (Leche de Tigre)

 This is the marinade that “cooks” the seafood. It is made by combining freshly squeezed lime or sour orange juice with finely chopped red onions, aji (chili pepper), cilantro, and a touch of fish stock or broth.

The acidity of the citrus juice essentially cures the seafood, giving it a slightly firm texture and infusing it with the zesty and spicy flavors of the other ingredients.

What can you serve with Peruvian Ceviche?

Peruvian ceviche is often served with a variety of accompaniments. These can include slices of sweet potato (camote), choclo (giant kernel corn), and avocado. Cancha, which is toasted corn kernels, is often sprinkled on top for added crunch.

A garnish of fresh cilantro leaves and a slice of lime on top of the ceviche is a common finishing touch.

How to make Peruvian Ceviche

INGREDIENTS:

500g white fish fillet (tilapia, curvina, sea bass, etc.)
1 large red onion
1 cup of tiger’s milk
1 cup lemon juice (seedless lemon)
1 habanero chili or Peruvian ají limo
1 clove garlic
½ stick of celery
Chopped fresh cilantro to taste
Salt and pepper to taste
Corn/choclo to accompany (optional)

Tiger Milk:

1 cup fish broth/water
1 fish fillet, cubed
2 large celery stalks
1 large piece of fresh ginger
4 large garlic
1 habanero chili or Peruvian ají limo
½ cup fresh lemon juice (seedless lemon)
½ Red onion/Purple onion hearts (the one we remove from the onion we fillet for the ceviche)
Coriander leaves to taste
Salt to taste

PREPARATION:

1. We begin by washing the fish very well, let it drain a little and separate one of the fillets and set it aside.

2. We prepare the tiger’s milk. We cut the fish fillet that we reserved into medium cubes and place it in the blender glass, we do the same with the celery stalks and the habanero chili or ají limo if you had it and we place it in the blender, we peel the piece of ginger and We place it together with the other ingredients, add the 4 cloves of garlic, the lemon juice, the fish broth and salt to taste. We grind to integrate all the ingredients, immediately after we add the onion hearts and fresh cilantro, we grind again for about 10 seconds. (if we grind it for more than 10 seconds, the cilantro becomes a little bitter). We strain the preparation to separate the liquid. (This resulting liquid is called tiger’s milk). We remove the foam that forms on top and reserve.

3. We take the cleaned and drained fish fillets and cut them into bite-sized cubes, place them in a bowl and season with salt and pepper to taste and let them marinate for a while while we prepare the other ingredients.

4. Peel the garlic and crush or finely chop it and add it to the sliced ​​fillets and mix a little.

5. We cut the lemons without seeds and extract the juice until we obtain ½ cup of juice. (you should not squeeze the lemon completely only 80% in a first extraction since, if we squeeze too much, we would be reaching the white part of the lemon and the juice will become bitter)

6. Pour the ½ cup of lemon into the bowl, stir well and let it marinate for about 10 minutes.

7. We take the red onion, remove the center (heart) and slice it into feather or thin julienne shapes, set aside for a moment.

8. We also chop the habanero chili or ají limo and half a stick of celery into thin julienne strips and set aside.

9. Finely chop the fresh cilantro sprigs and set aside.

10. When we have all the ingredients prepared, it is time to prepare our ceviche.

In the bowl of the fish, place the sliced ​​onion, the habanero chili or Ají limo, the celery, the finely chopped fresh cilantro and the cup of leche de tigre, stir the ingredients well and adjust the seasoning.

11. Ready, it’s time to serve the ceviche, you can accompany it with roasted sweet potato and Peruvian choclo (corn kernels) and toast or crackers.

Print

Peruvian Style Ceviche

Learn what makes up Peruvian Ceviche and how to combine all the delicious flavors into a flavorful dish full of rich cultural history.
Few dishes can match the exquisite charm of Peruvian Style Ceviche.
With its vibrant colors, bold flavors, and a rich cultural history, ceviche is more than just a dish; it's a celebration of Peru's diverse culinary heritage.
Course Appetizer
Cuisine seafood
Servings 6 people
Calories 90kcal

Ingredients

  • 500 g white fish fillet tilapia, curvina, sea bass, etc.
  • 1 large red onion
  • 1 cup of tiger’s milk
  • 1 cup lemon juice seedless lemon
  • 1 habanero chili or Peruvian ají limo
  • 1 clove garlic
  • ½ stick of celery
  • Chopped fresh cilantro to taste
  • Salt and pepper to taste
  • Corn/choclo to accompany optional
  • Tiger Milk:
  • 1 cup fish broth/water
  • 1 fish fillet cubed
  • 2 large celery stalks
  • 1 large piece of fresh ginger
  • 4 large garlic
  • 1 habanero chili or Peruvian ají limo
  • ½ cup fresh lemon juice seedless lemon
  • ½ Red onion/Purple onion hearts the one we remove from the onion we fillet for the ceviche
  • Coriander leaves to taste
  • Salt to taste

Instructions

  • We begin by washing the fish very well, let it drain a little and separate one of the fillets and set it aside.
  • We prepare the tiger’s milk. We cut the fish fillet that we reserved into medium cubes and place it in the blender glass, we do the same with the celery stalks and the habanero chili or ají limo if you had it and we place it in the blender, we peel the piece of ginger and We place it together with the other ingredients, add the 4 cloves of garlic, the lemon juice, the fish broth and salt to taste. We grind to integrate all the ingredients, immediately after we add the onion hearts and fresh cilantro, we grind again for about 10 seconds. (if we grind it for more than 10 seconds, the cilantro becomes a little bitter). We strain the preparation to separate the liquid. (This resulting liquid is called tiger’s milk). We remove the foam that forms on top and reserve.
  • We take the cleaned and drained fish fillets and cut them into bite-sized cubes, place them in a bowl and season with salt and pepper to taste and let them marinate for a while while we prepare the other ingredients.
  • Peel the garlic and crush or finely chop it and add it to the sliced ​​fillets and mix a little.
  • We cut the lemons without seeds and extract the juice until we obtain ½ cup of juice. (you should not squeeze the lemon completely only 80% in a first extraction since, if we squeeze too much, we would be reaching the white part of the lemon and the juice will become bitter)
  • Pour the ½ cup of lemon into the bowl, stir well and let it marinate for about 10 minutes.
  • We take the red onion, remove the center (heart) and slice it into feather or thin julienne shapes, set aside for a moment.
  • We also chop the habanero chili or ají limo and half a stick of celery into thin julienne strips and set aside.
  • Finely chop the fresh cilantro sprigs and set aside.
  • When we have all the ingredients prepared, it is time to prepare our ceviche.
  • In the bowl of the fish, place the sliced ​​onion, the habanero chili or Ají limo, the celery, the finely chopped fresh cilantro and the cup of leche de tigre, stir the ingredients well and adjust the seasoning.
  • Ready, it’s time to serve the ceviche, you can accompany it with roasted sweet potato and Peruvian choclo (corn kernels) and toast or crackers.

Nutrition

Calories: 90kcal | Carbohydrates: 3g | Protein: 17g | Fat: 2g | Saturated Fat: 1g | Polyunsaturated Fat: 0.3g | Monounsaturated Fat: 0.4g | Cholesterol: 42mg | Sodium: 44mg | Potassium: 297mg | Fiber: 0.1g | Sugar: 1g | Vitamin A: 4IU | Vitamin C: 16mg | Calcium: 12mg | Iron: 1mg

Peruvian ceviche is not just a dish; it’s a culinary masterpiece that reflects the rich cultural heritage and breathtaking flavors of Peru.

Its fresh, zesty, and vibrant taste has captivated the hearts and palates of people around the world, making it a beloved symbol of Peruvian cuisine.

Other recipes you may enjoy:

The post Peruvian Style Ceviche appeared first on My Latina Table.
Best Pumpkin Bread Recipe

Inside: Learn how to make the most perfectly moist, flavorful and delicious pumpkin bread. This recipe is a fall-time favorite that everyone will love! As the leaves change colors and …

The post Best Pumpkin Bread Recipe appeared first on My Latina Table.
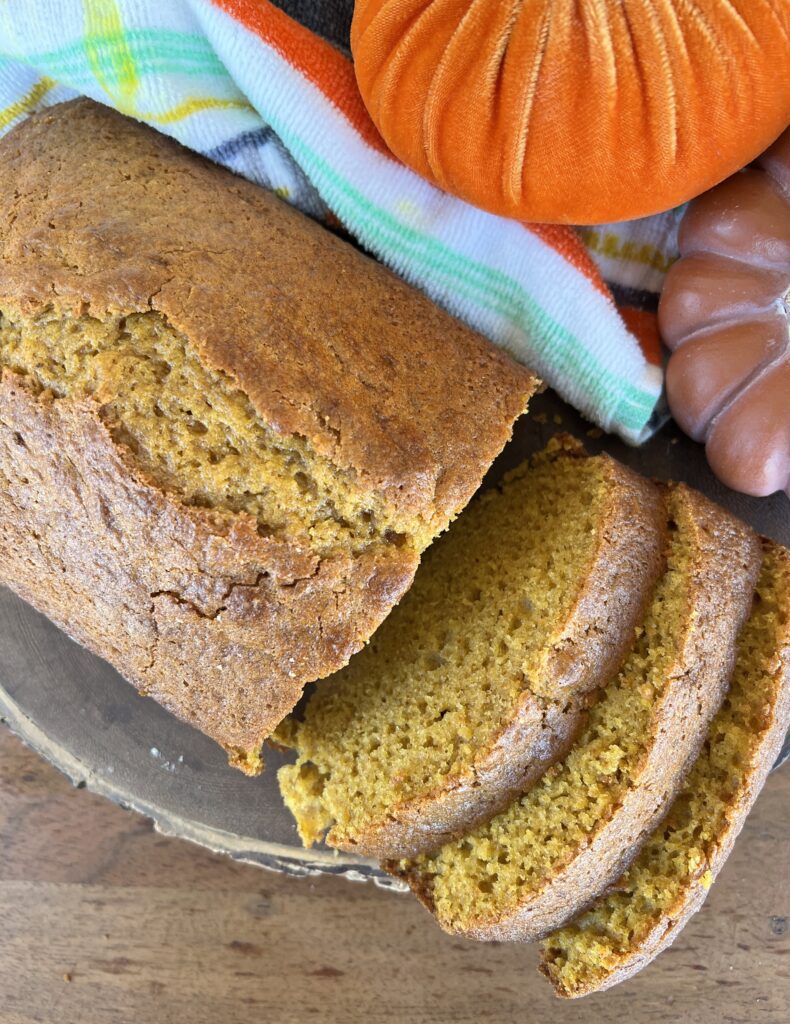
Inside: Learn how to make the most perfectly moist, flavorful and delicious pumpkin bread. This recipe is a fall-time favorite that everyone will love!

As the leaves change colors and the air turns crisp, there’s no better way to embrace the cozy spirit of fall than with a slice of homemade pumpkin bread.

Moist, spiced, and subtly sweet, this classic treat is a beloved staple of the autumn season.

Pumpkin bread is often associated with the fall season. Its warm, spicy aroma and rich, comforting flavor evoke feelings of coziness and nostalgia.

Many people look forward to enjoying pumpkin bread as a tradition during the cooler months. It is often associated with holidays like Thanksgiving and Halloween, making it a special treat during these festive times- but I admit I love making it year round!

I can’t wait to guide you through the steps to create the best pumpkin bread you’ve ever tasted. Get ready to fill your home with the warm aroma of pumpkin and spices, and delight in each delicious bite.

How to make the Best Pumpkin Bread

Ingredients

1 1/4 cup of flour 

1 1/4 cup of sugar

1/2 cup of oil 

2 eggs 

1/2 teaspoon of salt. 

1 teaspoon of pumpkin pie spice 

1/2 teaspoon of ground cinnamon 

1/3 teaspoon of baking powder 

1/2 teaspoon of baking soda 

1/3 cup of milk 

1 cup of Pumpkin pure 

1/4 cup of chocolate chips optional 

Instructions: 

Preheat Your Oven: Begin by preheating your oven to 350°F (175°C). Grease and flour a 9×5-inch loaf pan, ensuring the bread won’t stick.

Mix Dry Ingredients: In a medium-sized bowl, add the all-purpose flour, baking soda, baking powder, salt, and spices. This step ensures that the dry ingredients are well combined and eliminates any lumps.

Add in wet ingredients: Add the eggs, oil, milk and then, gently mix in the canned pumpkin puree and any add-ins (like chocolate chips) if desired.

Pour into Loaf Pan: Pour the batter into your prepared loaf pan, spreading it out evenly.

Bake to Perfection: Place the pan in the preheated oven and bake for approximately 45 minutes, or until a toothpick inserted into the center comes out clean. Keep a close eye on it in the final minutes to avoid overbaking.

Cool and Enjoy: Once done, remove the pumpkin bread from the oven and allow it to cool in the pan for about 10 minutes. Then, transfer it to a wire rack to cool completely.

Slice and Savor: After the bread has cooled, slice it into thick, aromatic pieces. Serve it with a pat of butter, a drizzle of honey, or simply enjoy it as is.

What can you add to pumpkin bread?

Pumpkin bread is versatile and can be adapted to suit various tastes.

You can add ingredients like chocolate chips, nuts, dried fruit, or even a cream cheese swirl to enhance the flavor and texture according to your preferences.

How long can you store pumpkin bread?

Homemade pumpkin bread can last for varying lengths of time depending on how it’s stored. Proper storage is key to preserving its freshness.

Room Temperature

Pumpkin bread can be kept at room temperature for about 2 to 4 days if stored in an airtight container or wrapped tightly in plastic wrap. However, its shelf life can be influenced by factors like humidity and temperature. If it’s particularly humid or warm, it’s best to err on the side of caution and refrigerate or freeze it sooner.

Refrigerator

Storing pumpkin bread in the refrigerator can extend its freshness. When refrigerated in an airtight container or wrapped tightly in plastic wrap, pumpkin bread can stay good for up to 7 to 10 days. Just be sure it’s well covered to prevent it from drying out.

Freezer

For long-term storage, pumpkin bread freezes exceptionally well. To freeze pumpkin bread, wrap it tightly in plastic wrap, then place it in an airtight freezer bag or container. Properly frozen, it can last for 2 to 3 months.

When you’re ready to enjoy frozen pumpkin bread, allow it to thaw at room temperature for a few hours or overnight in the refrigerator. You can also gently reheat individual slices in the microwave or oven for a warm and fresh taste.

Print

The Best Pumpkin Bread Recipe

Learn how to make the most perfectly moist, flavorful and delicious pumpkin bread. This recipe is a fall-time favorite that everyone will love!
Course bread
Cuisine American
Cook Time 45 minutes
Servings 10
Calories 170kcal

Ingredients

  • 1 1/4 cup of flour
  • 1 1/4 cup of sugar
  • 1/2 cup of oil
  • 2 eggs
  • 1/2 teaspoon of salt.
  • 1 teaspoon of pumpkin pie spice
  • 1/2 teaspoon of ground cinnamon
  • 1/3 teaspoon of baking powder
  • 1/2 teaspoon of baking soda
  • 1/3 cup of milk
  • 1 cup of Pumpkin pure
  • 1/4 cup of chocolate chips optional

Instructions

  • Preheat Your Oven: Begin by preheating your oven to 350°F (175°C). Grease and flour a 9×5-inch loaf pan, ensuring the bread won’t stick.
  • Mix Dry Ingredients: In a medium-sized bowl, add the all-purpose flour, baking soda, baking powder, salt, and spices. This step ensures that the dry ingredients are well combined and eliminates any lumps.
  • Add in wet ingredients: Add the eggs, oil, milk and then, gently mix in the canned pumpkin puree and any add-ins (like chocolate chips) if desired.
  • Pour into Loaf Pan: Pour the batter into your prepared loaf pan, spreading it out evenly.
  • Bake to Perfection: Place the pan in the preheated oven and bake for approximately 45 minutes, or until a toothpick inserted into the center comes out clean. Keep a close eye on it in the final minutes to avoid overbaking.
  • Cool and Enjoy: Once done, remove the pumpkin bread from the oven and allow it to cool in the pan for about 10 minutes. Then, transfer it to a wire rack to cool completely.
  • Slice and Savor: After the bread has cooled, slice it into thick, aromatic pieces. Serve it with a pat of butter, a drizzle of honey, or simply enjoy it as is.

Nutrition

Serving: 10g | Calories: 170kcal | Carbohydrates: 37g | Protein: 3g | Fat: 1g | Saturated Fat: 0.4g | Polyunsaturated Fat: 0.2g | Monounsaturated Fat: 0.4g | Trans Fat: 0.01g | Cholesterol: 33mg | Sodium: 188mg | Potassium: 54mg | Fiber: 0.5g | Sugar: 25g | Vitamin A: 56IU | Vitamin C: 0.02mg | Calcium: 24mg | Iron: 1mg

Remember that these are general guidelines, and the actual shelf life may vary depending on factors like the specific recipe, ingredients used, and how well it’s wrapped or stored. Always use your best judgment and check for any signs of spoilage, such as mold, off smells, or changes in texture, before consuming any stored pumpkin bread.

Check Out These Other Recipes

The post Best Pumpkin Bread Recipe appeared first on My Latina Table.
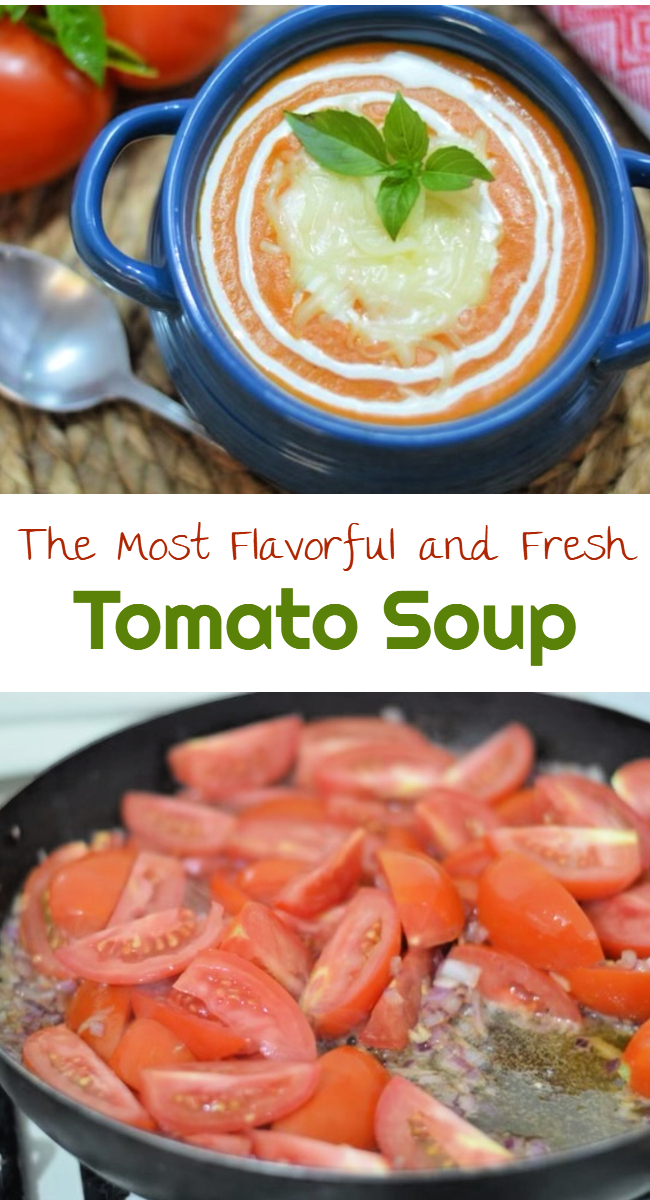
The Most Flavorful And Fresh Tomato Soup Recipe

Inside: ​Check out this delicious, flavorful, and easy to make tomato soup recipe which is an easy option for an appetizer or a meal on its own.  ​If you are like …

The post The Most Flavorful And Fresh Tomato Soup Recipe appeared first on My Latina Table.

Inside: ​Check out this delicious, flavorful, and easy to make tomato soup recipe which is an easy option for an appetizer or a meal on its own. 

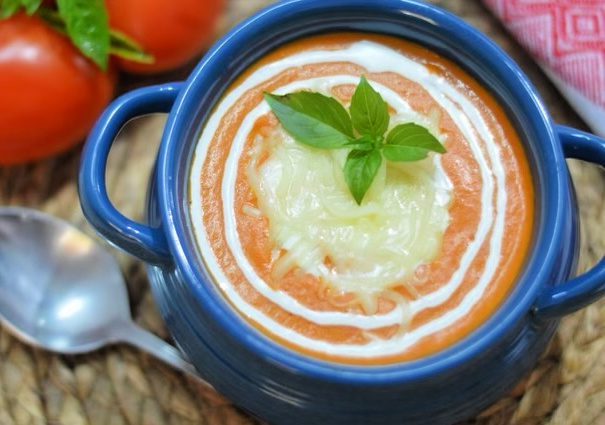
Homemade tomato soup in a bowl with cream and cheese on top

​If you are like me, there are some nights where you just want to hunker down with a hot bowl of tomato soup. Of course you can always just open a can of soup from the store, but it is so much better for you and tastier as well if you make the soup with fresh ingredients and from scratch. 

The delicious recipe I am going to share today may have a lot of ingredients, but it is easy to make and you will love it! It includes fresh herbs, fresh ripe tomatoes, garlic cloves, and other simple ingredients that will give it so much flavor. 

Why you will love this homemade tomato soup more than the store-bought version

Tomato soup in a can is a pantry staple that many people have, but once you have tried this homemade version, you will not go back! Instead of having processed ingredients from the version you buy at the store, this recipe has only fresh ingredients and is made from scratch. I know it may seem daunting, but it is really easy to make. 

The combination of flavors from the herbs, tomatoes, and other ingredients will have you going back for more. You can serve this as an appetizer or a side dish to go along with a tasty grilled cheese sandwich, or you can serve it as a main dish. No matter how you eat it, you will not be disappointed, and I am sure you will agree this is the best tomato soup recipe you have tried. 

What ingredients do you need to make homemade tomato soup?

I mentioned above that this recipe has fresh ingredients. This is important so that you can know what you are putting in your body and so that you get the best flavors possible. 

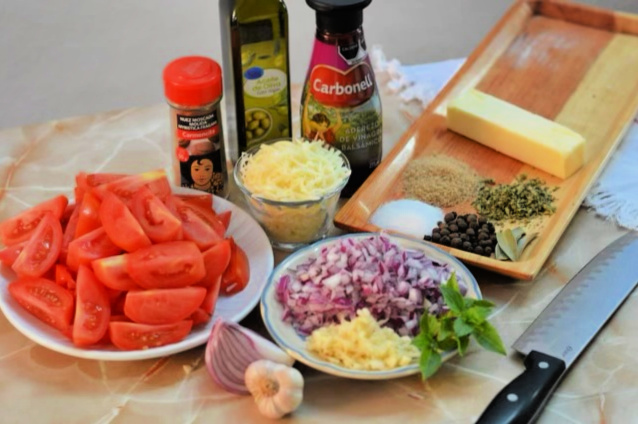
ingredients for this soup on a cutting board

To make this recipe, start by gathering the following ingredients:

  • 2 lbs of ripe, fresh tomatoes (roma tomatoes or other types of tomatoes will work)
  • 1 medium onion (red)
  • 3 garlic cloves
  • 1-2 fresh basil leaves
  • 2 bay leaves
  • 1 tsp of dried oregano
  • 1 tsp of nutmeg
  • 1 tbsp of brown sugar
  • 1 tsp of balsamic vinegar
  • 1/2 cup of white wine
  • 1 tbsp of olive oil
  • 1/4 stick of butter
  • salt and pepper to taste
  • 1/8 cup heavy cream
  • Mozzarella cheese
  • Croutons

How do you make this tomato soup recipe?

Now that you have gathered the ingredients, it is time to make the recipe. It is important to wash all of the vegetables and herbs before cooking, so do that first. 

Next, you will chop the tomatoes, onion, and garlic cloves and set them aside separately for a later step. 

Heat a large skillet over medium-high heat and add 1/2 tbsp of olive oil and butter until the butter just melts. Then add the chopped garlic and onions and let cook until the onions are transparent. 

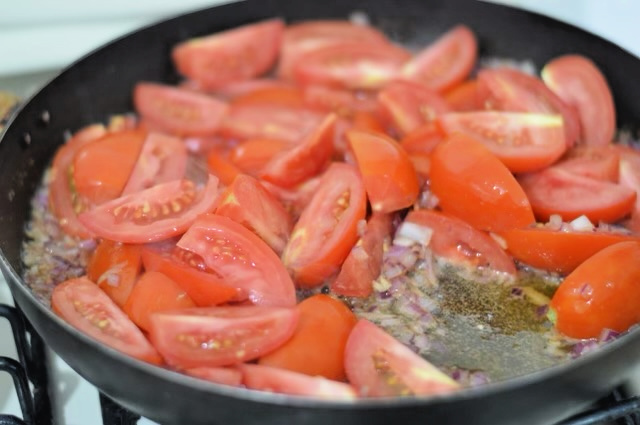
The next step is to add the tomatoes and to continue cooking for 2-3 minutes before adding the salt, pepper, oregano, nutmeg, bay leaves, and basil. Reduce to medium-low heat and stir well. At this point, add the brown sugar, stir well, and cook for about 2 minutes.

tomatoes cooking with the other ingredients in a large skillet

After 2 minutes have passed, add the balsamic vinegar and stir well. You can add additional salt and pepper if it is needed at this point. Add everything from the skillet to a blender and blend until smooth, but thick. You can also use an immersion blender at this stage, but I usually just use a traditional blender. 

In the same skillet, add another 1/2 tbsp of olive oil and heat over medium heat before adding the blended mixture back to the skillet. 

Add the white wine and let cook for 5 minutes.

At this point, the soup is ready, so you can serve it in a bowl topping with a little bit of heavy cream, the cheese, and the croutons. 

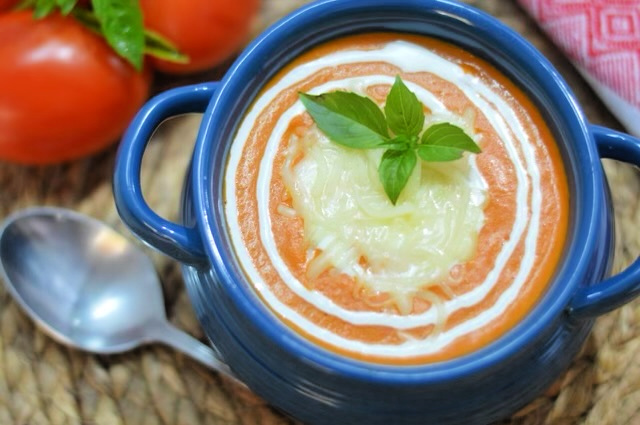
tomato soup in a blue bowl with a spoon and vine ripened tomatoes next to it

​How to use this recipe for pizza or pasta sauce.

This recipe is mainly made for soup, however you can make some slight modifications to it so that you can use it for pizza or pasta! The only modification that you need to make for this recipe is to omit the white wine. This will give it a thicker consistency which is perfect for adding to your favorite homemade pizza recipe. You can also use it as an easy sauce for pasta with meat or without meat. You will find that this adds a great flavor to any of your favorite pasta or pizza recipes, so I definitely recommend it. 

When I use it for that purpose, sometimes I will add some red pepper flakes to add a bit of heat, but only if I am making it for my husband and me, since some of the kids don’t quite like spicy food yet. 

Check out these other soup recipes

This homemade tomato soup recipe is a hit around our house and is a great way to incorporate healthy ingredients into your diet. The kids love it also, especially when you serve it with tasty cheese sandwiches. I always make a large pot of this when we have it, and there is almost nothing left every time. 

It has a mild, but delicious tomato flavor and  is great for any time of year.

Let me know in the comments below how it turns out!

tomato soup in a blue bowl with a spoon and vine ripened tomatoes next to it
Print

Fresh Homemade Tomato Soup Recipe

Check out this delicious, flavorful, and easy to make tomato soup recipe which is an easy option for an appetizer or a meal on its own. 
 
Course Appetizer, Side Dish
Cuisine American, Italian
Keyword fresh, soup, tomato soup
Prep Time 10 minutes
Cook Time 15 minutes
Total Time 25 minutes
Servings 8 1/2 cup servings
Calories 116kcal

Ingredients

  • 2 lbs ripe tomatoes
  • 1 red onion
  • 3 garlic cloves
  • 1-2 basil leaves
  • 2 bay leaves
  • 1 tsp dried oregano
  • 1 tsp ground nutmeg
  • 1 tbsp brown sugar
  • 1 tsp balsamic vinegar
  • 1/2 cup white wine
  • 1 tbsp olive oil
  • 1/4 stick butter
  • salt to taste
  • pepper to taste

Accompaniments

  • 1/8 cup heavy cream
  • 1/4 cup mozzarella cheese
  • 1/4 cup croutons

Instructions

  • Chop the tomatoes, onion, and garlic cloves and set them aside separately for a later step. 
    2 lbs ripe tomatoes, 1 red onion, 3 garlic cloves
  • Heat large skillet over medium-high heat and add 1/2 tbsp of olive oil and butter until the butter just melts. Then add the chopped garlic and onions and let cook until the onions are transparent. 
    1/4 stick butter, 1 tbsp olive oil
  • The next step is to add the tomatoes and to continue cooking for 2-3 minutes before adding the salt, pepper, oregano, nutmeg, bay leaves, and basil. Reduce to medium-low heat and stir well. At this point, add the brown sugar, stir well, and cook for about 2 minutes.
    1-2 basil leaves, 2 bay leaves, 1 tsp dried oregano, 1 tsp ground nutmeg, 1 tbsp brown sugar, salt, pepper
  • After 2 minutes have passed, add the balsamic vinegar and stir well. You can add additional salt and pepper if it is needed at this point. Add everything from the skillet to a blender and blend until smooth, but thick. You can also use an immersion blender at this stage, but I usually just use a traditional blender. 
    1 tsp balsamic vinegar
  • In the same skillet, add another 1/2 tbsp of olive oil and heat over medium heat before adding the blended mixture back to the skillet. 
    1 tbsp olive oil
  • Add the white wine and let cook for 5 minutes.
    1/2 cup white wine
  • Serve with cream, mozzarella cheese, and croutons
    1/8 cup heavy cream, 1/4 cup croutons, 1/4 cup mozzarella cheese

Nutrition

Serving: 11/2 cup serving | Calories: 116kcal | Carbohydrates: 9g | Protein: 2g | Fat: 7g | Saturated Fat: 3g | Polyunsaturated Fat: 0.5g | Monounsaturated Fat: 3g | Trans Fat: 0.1g | Cholesterol: 15mg | Sodium: 60mg | Potassium: 319mg | Fiber: 2g | Sugar: 5g | Vitamin A: 1120IU | Vitamin C: 17mg | Calcium: 46mg | Iron: 1mg

The post The Most Flavorful And Fresh Tomato Soup Recipe appeared first on My Latina Table.
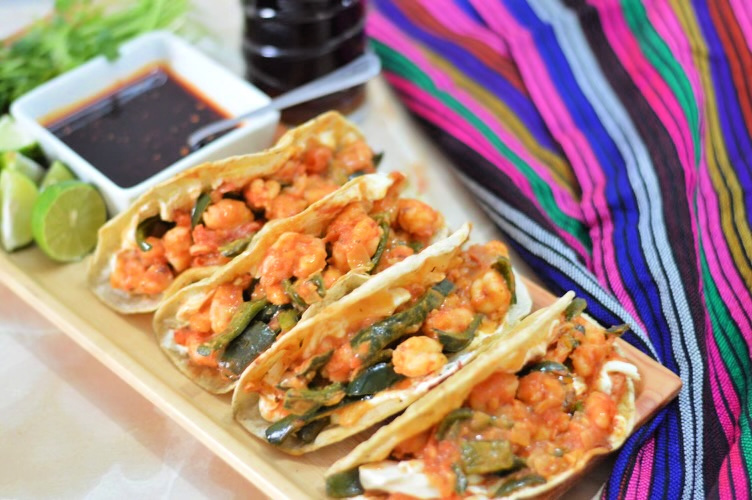
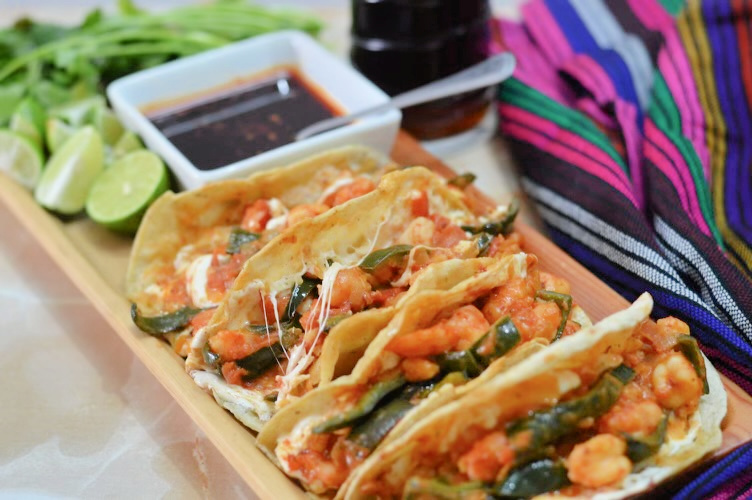
Best Spicy Shrimp Tacos with Creamy Chipotle Salsa

Inside: ​These spicy shrimp tacos with creamy chipotle salsa are so easy to make and a perfect option for your next taco tuesday.  One of my favorite proteins to include in …

The post Best Spicy Shrimp Tacos with Creamy Chipotle Salsa appeared first on My Latina Table.
Inside: ​These spicy shrimp tacos with creamy chipotle salsa are so easy to make and a perfect option for your next taco tuesday. 

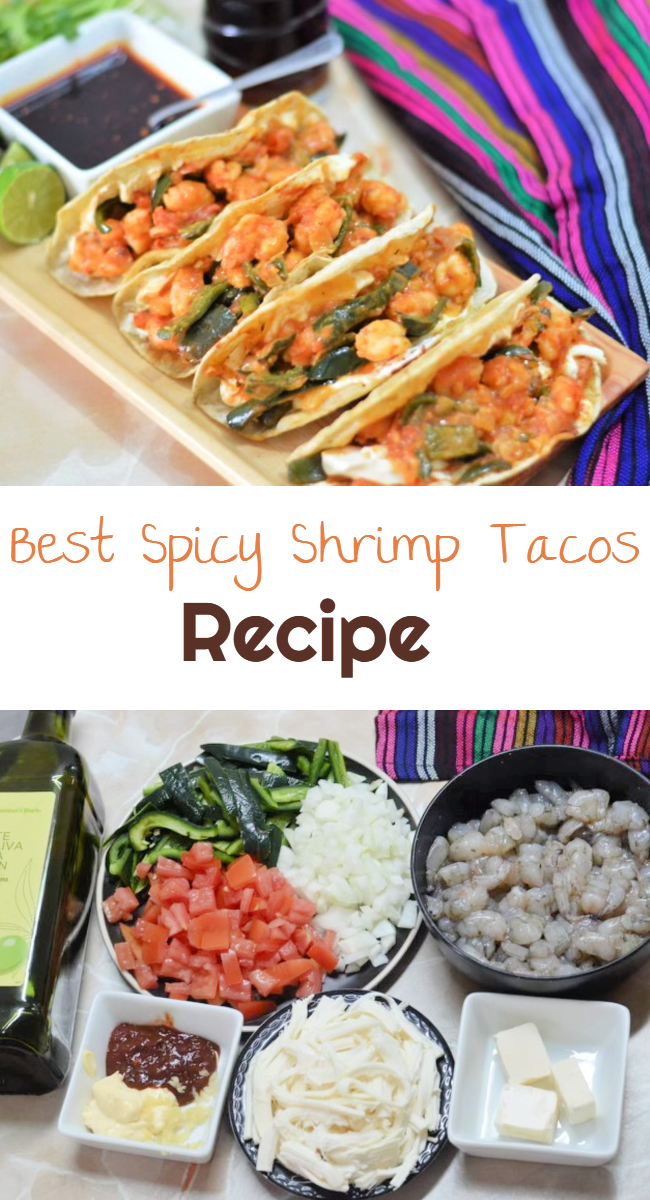
4 spicy shrimp tacos on a plate with salsa macha and lime wedges

One of my favorite proteins to include in my recipes is shrimp. It is such a versatile ingredient and can be used in so many different recipes, including as crunchy shrimp, ceviche, in a garlic sauce, and a la diabla. Today, I am going to share a recipe for easy spicy shrimp tacos that you will love. In my opinion, these are the best shrimp tacos, because they have the perfect amount of heat from the poblano peppers and the creamy sauce made with chipotle peppers and mayonnaise. 

This is one of my favorite recipes for taco night, or any other night when I need to make something in a hurry that I know everyone will love. This is also a great recipe for your next cinco de mayo party and you can be certain that your guests will be satisfied!  

What kind of Shrimp Should You Use For Spicy Shrimp Tacos?

My favorite kind of shrimp to use for this recipe are smaller shrimp. While I love jumbo shrimp for other types of recipes, using small or medium shrimp for tacos is the best option since you can get more pieces in each bite and I find it easier to eat. If all you have are plump shrimp or larger shrimp, then you can definitely use them, but if you can find something smaller, that is what I recommend for this easy shrimp taco recipe. If you do use the larger shrimp, you should cut them up into smaller pieces for this recipe. 

I always use fresh shrimp, which is why my next recommendation is to start with raw shrimp that you can then cook. You can always use pre-cooked shrimp from the store, but I think it is affects the flavors and juiciness a bit, so I try to avoid that. 

How do you make shrimp tacos?

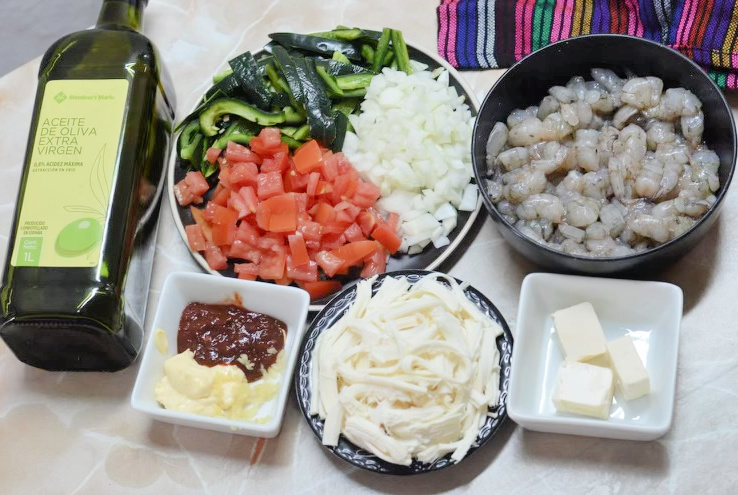
For this recipe, you will start by gathering all of the ingredients that you will use first. Those ingredients are listed below:

  • 1 pound of raw shrimp
  • 1 poblano pepper
  • 2 medium tomatoes
  • 1 medium onion
  • 2 fresh garlic cloves
  • 1 tsp dried oregano
  • 1/4 stick of butter
  • 1 tsp olive oil
  • 2 tbsp mayonnaise 
  • 2 chipotle peppers in adobo 
  • Warm tortillas (Corn Tortillas or Flour Tortillas will work)
  • Melting cheese (manchego, oaxaca, mozzarella, etc.)
  • Salt to Taste

ingredients for shrimp tacos like shrimp, tomatoes, cheese, chipotle, butter, and oil

You should also use a hot sauce, like salsa macha or something else along with lime to accompany the tacos. 

Start by cleaning the shrimp and then cutting them into smaller pieces. Like I mentioned above, if you are using larger shrimp, you will want to cut them up into smaller pieces. Add the shrimp to a medium bowl and season with salt and set aside while you move onto the next step. 

Next, slice the poblano pepper, dice the onions, and set aside. 

Chop up the chipotle peppers and add them along with the adobo sauce and mayonnaise to a small bowl. Add one minced garlic clove to the same bowl and mix well. Set aside. 

Place a large skillet on your stovetop over  medium high heat  and add the butter and olive oil. Immediately add the poblano pepper and onion and cook for about 5 minutes over medium heat. Add the remaining minced garlic and cook for 1 more minute. 

The next step is to add the tomatoes, oregano, and a pinch of salt to the hot pan and combine with the ingredients from the previous step. 

The final step for cooking the shrimp is to add the chopped up shrimp to the pan and cook for two minutes (or until slightly pink) before adding the chipotle-mayonnaise mixture. Mix well and cook for two more minutes before removing from the heat. 

To prepare the tacos, warm a tortilla on a frying pan on both sides and then add a small amount of oil to the pan. Add some cheese to the top side of the tortilla and top with the shrimp mixture. Fold in half like a quesadilla and then remove from the pan to a plate lined with a paper towel. Serve with your favorite toppings, like salsa, lime wedges, fresh cilantro, shredded cabbage or fresh pico de gallo. 

4 spicy shrimp tacos with chipotle sauce

This recipe is sure to be a hit and is perfect for any day of the week. Every single time that I make it, people are asking for the recipe, so that is why I am sharing it here. 

Let me know how this turns out in the comments below!

Check out these other taco recipes that you will love

4 spicy shrimp tacos on a plate with salsa macha and lime wedges
Print

Spicy Shrimp Tacos with Creamy Chipotle Sauce

These spicy shrimp tacos with creamy chipotle salsa are so easy to make and a perfect option for your next taco tuesday. 
Course Main Course
Cuisine Mexican
Keyword mexican food, shrimp, shrimp tacos, spicy
Prep Time 10 minutes
Cook Time 15 minutes
Total Time 25 minutes
Servings 12 Tacos
Calories 165kcal

Ingredients

  • 1 lb raw shrimp small or medium
  • 1 poblano pepper
  • 2 roma tomatoes
  • 1 onion
  • 2 cloves garlic
  • 1 tsp oregano dried
  • 1/4 stick butter
  • 1 tbsp olive oil
  • 2 chipotle peppers in adobo
  • 2 tbsp mayonnaise
  • salt to taste
  • 12 corn tortillas
  • 1 cup mozzarella cheese shredded

Instructions

  • Clean the shrimp well and chop into smaller pieces, and season with salt in a medium bowl. Set aside.
    1 lb raw shrimp, salt
  • Chop the chipotle peppers and add to a small bowl with the mayonnaise and some of the adobo sauce from the can of chipotle peppers
  • Slice the poblano peppers and dice the onions and set aside.
    1 poblano pepper, 1 onion
  • Dice the roma tomatoes and set aside separately from the peppers and onions.
    2 roma tomatoes
  • Heat a large skillet over medium heat and add the butter and olive oil and then immediately add the poblano peppers and onions. Cook for about 5 minutes and then add one minced garlic clove and cook for one more minute.
    1 poblano pepper, 2 cloves garlic, 1/4 stick butter, 1 tbsp olive oil, 1 onion
  • Add the tomato, oregano, a pinch of salt, and mix well and cook for another couple of minutes.
    2 roma tomatoes, 1 tsp oregano, salt
  • Add the shrimp and cook for two more minutes. Then add the chipotle-mayonnaise mixture and mix everything well. Cook for two more minutes and then remove from the heat.
    2 chipotle peppers in adobo, 2 tbsp mayonnaise, 1 lb raw shrimp
  • Add a small amount of olive oil to a hot pan and add a corn tortilla. Add the cheese to the top and then top with the shrimp mixture. Fold over like a quesadilla and remove from the heat to a plate with a paper towel.
  • Serve with lime, salsa, and your other favorite toppings.

Nutrition

Serving: 1Taco | Calories: 165kcal | Carbohydrates: 15g | Protein: 9g | Fat: 8g | Saturated Fat: 3g | Polyunsaturated Fat: 2g | Monounsaturated Fat: 3g | Trans Fat: 0.1g | Cholesterol: 61mg | Sodium: 315mg | Potassium: 159mg | Fiber: 2g | Sugar: 1g | Vitamin A: 318IU | Vitamin C: 10mg | Calcium: 97mg | Iron: 1mg

The post Best Spicy Shrimp Tacos with Creamy Chipotle Salsa appeared first on My Latina Table.
How to Make Homemade Crunchy Fried Shrimp

Inside: Learn how to make the most delicious and easy homemade crunch fried shrimp recipe.  It is no secret that I love seafood. I grew up on the eastern coast of …

The post How to Make Homemade Crunchy Fried Shrimp appeared first on My Latina Table.
Inside: Learn how to make the most delicious and easy homemade crunch fried shrimp recipe. 

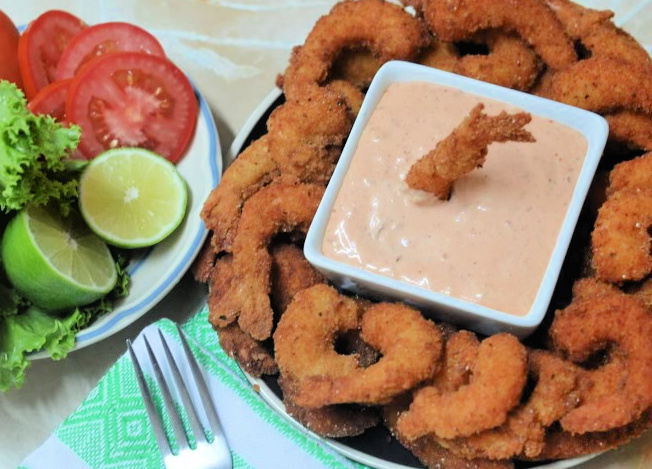
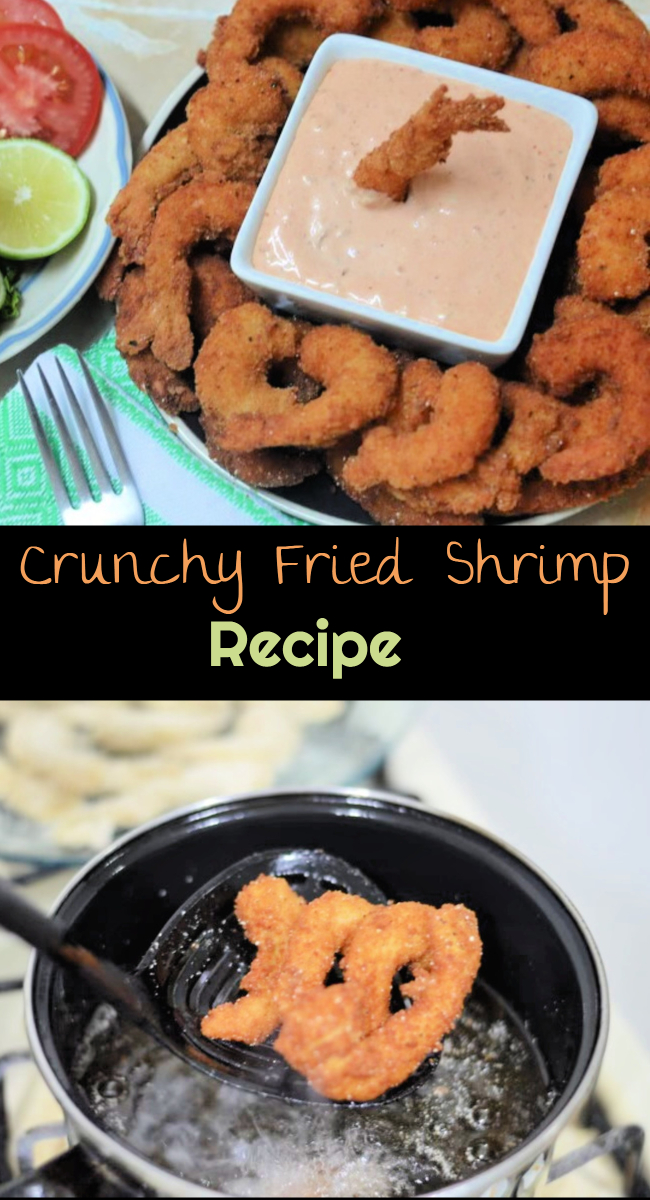
crunchy fried shrimp recipe

It is no secret that I love seafood. I grew up on the eastern coast of Mexico where it is easy to find fresh seafood in many different varieties. One of my favorites of course is shrimp! 

Shrimp is such a versatile protein, and I love to make it in different ways, including with a garlic sauce, a la diabla, and in ceviche! While I have gotten my kids to really like shrimp in different ways, and it has grown on my husband too, the most popular way to make it at my house is as crispy crunchy fried shrimp. 

The combination of fresh shrimp with seasonings like black pepper, garlic powder, onion powder, and more, which is then fried to golden brown perfection is amazing! This crispy shrimp recipe can be used as a main dish accompanied by french fries, or as a side dish. 

This crispy fried shrimp recipe is also one of our favorites to make on game day when we have a crowd over to watch our favorite teams. It is also perfect for other special occasions like birthdays. I always like to serve it with a good dipping sauce as well, which you can make yourself or buy at the store. Just regular hot sauce makes for a great dipping sauce as well if you want to add a little bit of heat. 

This recipe is perfect for seafood lovers and people that don’t love seafood and makes for an easy dinner any day of the week.  

​How Do You Make Crunchy Fried Shrimp?

This is such an easy recipe to make and won’t take you long at all. The good thing is that you can use whatever kind of shrimp you have on hand. I personal like to use larger shrimp, like jumbo shrimp or extra-large shrimp, but you can use smaller ones as well if that is what you have. My preference is to use wild caught shrimp, but again, that is up to your personal preference. 

To make this recipe, you will start by gathering the following simple ingredients:

  • 1 pound of raw shrimp
  • 1 cup of flour
  • 1 1/2 cups of bread crumbs (you can use pank bread crumbs if you prefer)
  • 3 eggs
  • 1 teaspoon of garlic powder
  • 1 teaspoon of onion powder
  • Black pepper
  • Salt to taste
  • Oil for frying (vegetable oil, canola oil, or avocado oil all work well)

To make this recipe, you will want to clean and devein the shrimp, season with a little bit of salt and set aside in a medium bowl. 

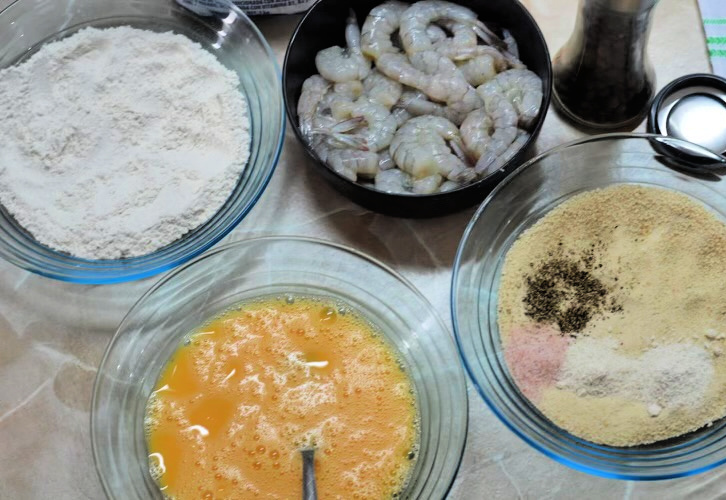
ingredients ready to make crunchy shrimp

Next, add the flour to another bowl and put it next to the bowl with the Shrimp. Add the eggs to a third bowl with the black pepper, and beat to form the egg mixture. Finally, in a fourth bowl, add the rest of the dry ingredients and combine. 

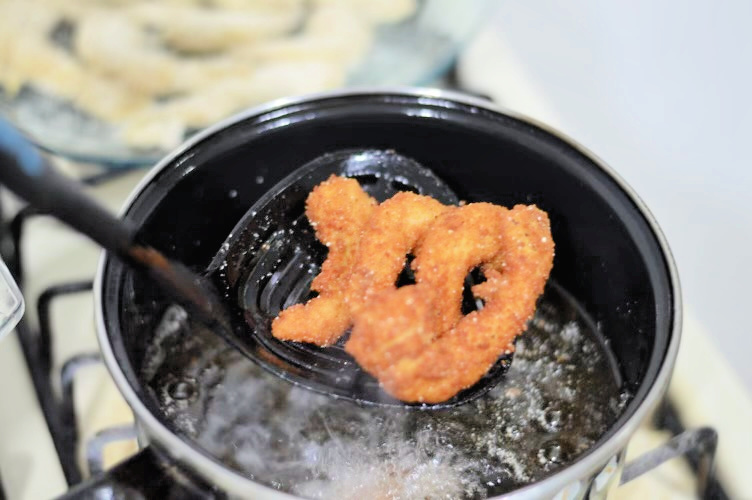
At this point, you will want to heat enough oil in a large pot over medium-high heat to fry the shrimp. You need hot oil for this recipe to make sure you have a very crispy texture. You can use a deep fryer as well if you have one and that may make it easier.  

When the oil is hot, coat the shrimp in the flour, and then dredge it in the egg wash, before coating with the breadcrumb mixture. Immediately place shrimp in the hot oil and let the shrimp cook for approximately 2-3 minutes, flipping over half way through if needed to ensure an even cook. 

four pieces of shrimp being fried in a deep pot of hot oil

You will want to monitor the temperature of the oil so it doesn’t get too hot, but so that it is still hot enough to fry the shrimp. Once cooked through, place each fried shrimp on a plate lined with paper towels to get rid of the excess grease. You can also put the paper towels under a wire rack and place the shrimp on that to let the grease drain and to allow the shrimp to cool down more quickly. 

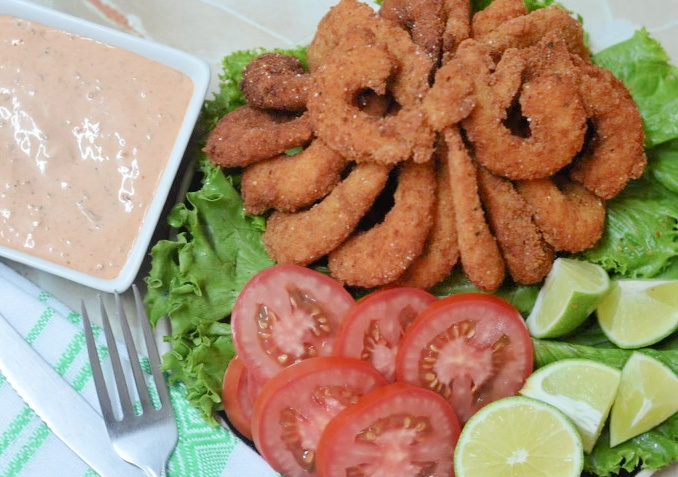
recently cooked fried shrimp on a plate with garnishes such as tomatoes, lime wedges and creamy sauce

In no time at all, you will have a plate full of delicious crunchy shrimp to share with your friends and family. You can now serve it with cocktail sauce, tartar sauce, a sour cream based sauce, and also with lemon wedges. This recipe has never failed to please my family and friends and I hope you enjoy it as well. You can store leftover fried shrimp in an airtight container, but it is always best when recently cooked. 

Let me know in the comments below how this turns out!

crunchy fried shrimp recipe
Print

Homemade Crunchy Fried Shrimp Recipe

Learn how to make the most delicious and easy homemade crunch fried shrimp recipe. 
Course Appetizer, Main Course
Cuisine American, seafood
Keyword Crunch Shrimp, Fried Shrimp, shrimp
Prep Time 15 minutes
Cook Time 12 minutes
Total Time 27 minutes
Servings 20 Shrimp
Calories 106kcal

Ingredients

  • 1 Pound Jumbo Shrimp
  • 1 Cup All Purpose Flour
  • 1 1/2 Cup Breadcrumbs
  • 3 Eggs
  • 1 Tsp Garlic Powder
  • 1 Tsp Onion Powder
  • 1/2 Tsp Black Pepper
  • Salt To Taste
  • 1 Cup Canola Oil

Instructions

  • Clean and Devein Shrimp and set aside in a bowl
    1 Pound Jumbo Shrimp
  • In another bowl, add the all purpose flour
    1 Cup All Purpose Flour
  • In a third bowl, add the eggs with the black pepper and beat to form an egg wash.
    3 Eggs, 1/2 Tsp Black Pepper
  • In a fourth bowl, add the rest of the dry ingredients and mix well.
    1 1/2 Cup Breadcrumbs, 1 Tsp Garlic Powder, 1 Tsp Onion Powder, Salt
  • Coat each shrimp in flour, and then dredge in the egg wash before coating with the breadcrumb mixture.
  • Heat the oil to medium-high heat in a large pot or deep fryer, and fry each shrimp for 2-3 minutes, or until golden brown.
    1 Cup Canola Oil
  • Remove to a plate or wire rack with paper towels and let cook. Serve soon with your favorite sauce.

Nutrition

Serving: 1Shrimp | Calories: 106kcal | Carbohydrates: 11g | Protein: 6g | Fat: 4g | Saturated Fat: 1g | Polyunsaturated Fat: 1g | Monounsaturated Fat: 2g | Trans Fat: 0.02g | Cholesterol: 53mg | Sodium: 197mg | Potassium: 61mg | Fiber: 1g | Sugar: 1g | Vitamin A: 77IU | Vitamin C: 0.03mg | Calcium: 32mg | Iron: 1mg

The post How to Make Homemade Crunchy Fried Shrimp appeared first on My Latina Table.

Spanish Omelette Recipe (Tortilla Española)

Inside: Learn how to make a traditional Spanish omelette, also known as a tortilla espanola, which is a classic recipe that is perfect to serve to a large crowd. Today …

The post Spanish Omelette Recipe (Tortilla Española) appeared first on My Latina Table.
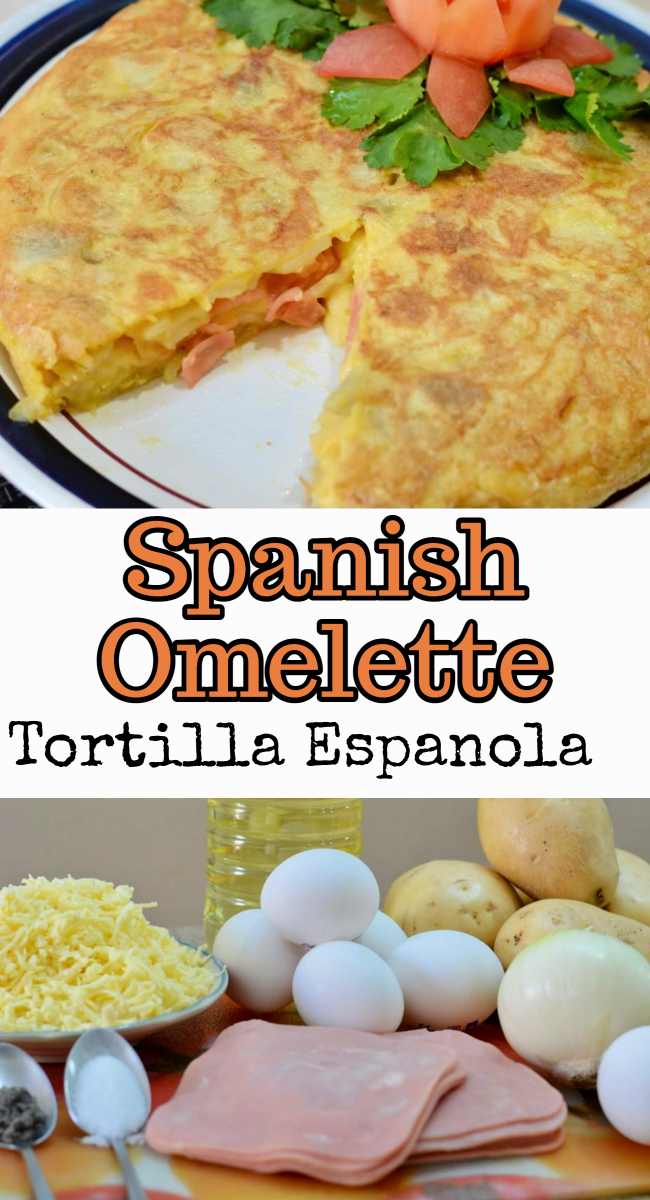
Inside: Learn how to make a traditional Spanish omelette, also known as a tortilla espanola, which is a classic recipe that is perfect to serve to a large crowd.

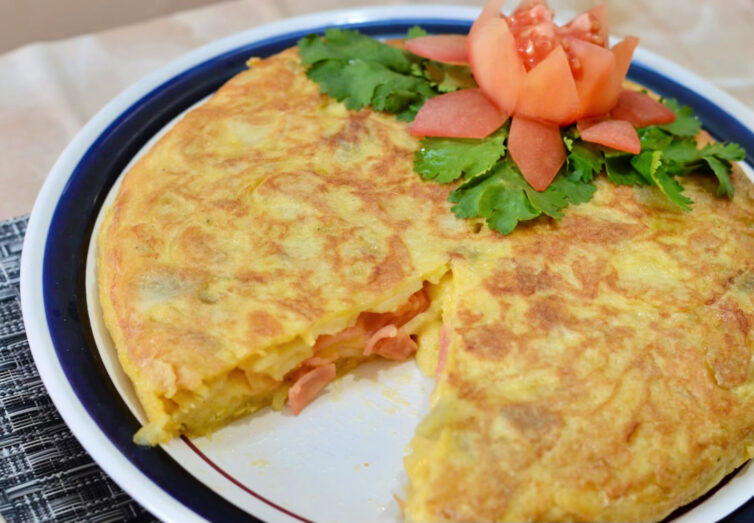
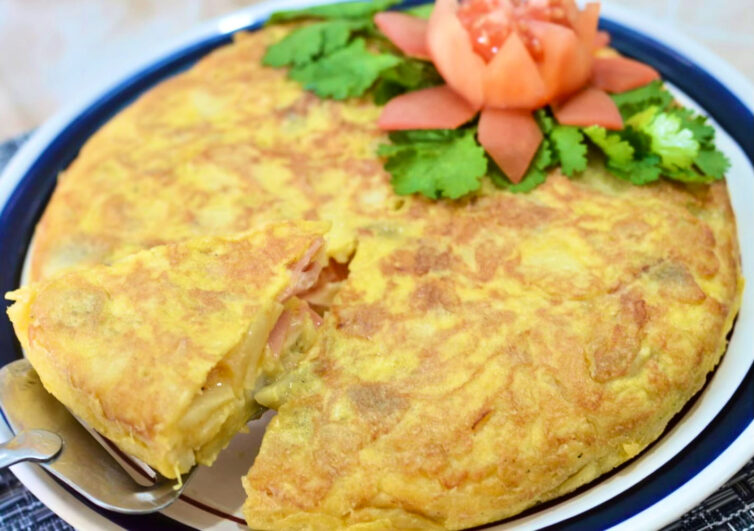
Spanish omelette with a slice cut out of it

Today we are going to make a journey across the Atlantic to Spain as we learn how to make a classic Spanish potato omelette. Of course, in Spain this is not called an omelette, but instead a tortilla. Some other names are tortilla de patatas and tortilla española. In most of the rest of the world, it resembles what we know as an omelette since it is made up of an egg mixture, combined with potatoes and other tasty ingredients.

Also, at least in Mexico and the United States, when you think of a tortilla, you probably think of the classic flour or corn based tortilla that is so popular with many other recipes. With that said, this easy Spanish omelette is an amazing main dish that is perfect to serve for breakfast, lunch, or dinner.

What is a Spanish Omelette or Tortilla Española?

The basic Spanish tortilla recipe is an authentic Spanish dish that consists of beaten eggs, sliced potatoes, and sliced onions. It is then combined and cooked to form a tasty, thick omelette that can be sliced and served as an appetizer or a main dish.

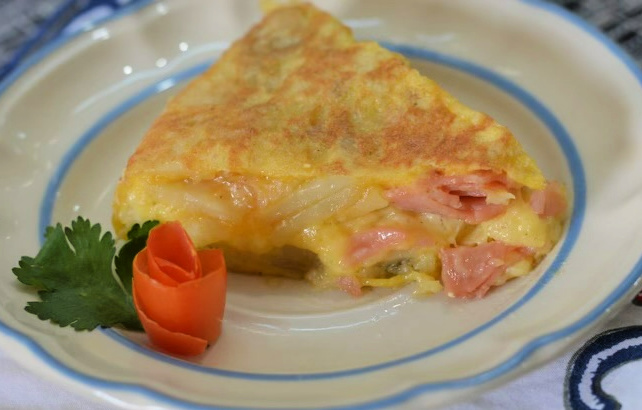
Tortilla española on a plate

The version that I am making today includes a few other ingredients like ham and cheese, which I think gives it some great additional flavor and protein. This classic dish is often served at room temperature as tapas. If you don’t know what tapas are, they are basically small plates of food that are served as appetizers or together as a full meal.

How do you make a Spanish Omelette?

While I am sure there are different ways to make this, I am gonig to show you the way that I make them. This recipe is not difficult, but you will want to to follow the instructions to get perfect results.

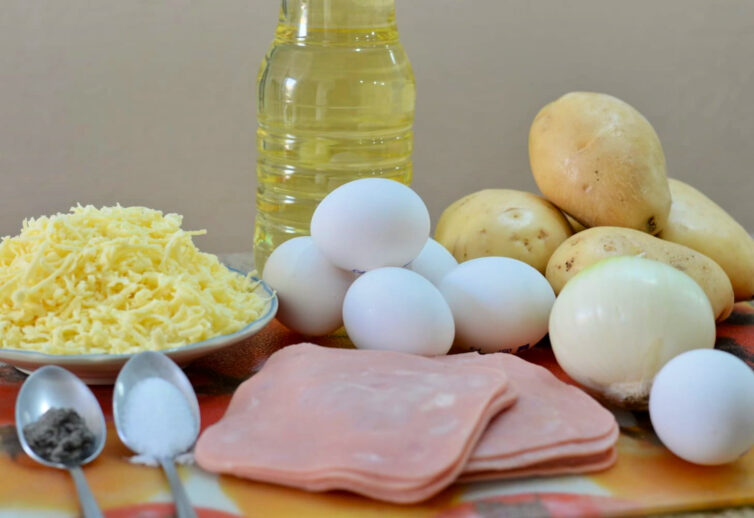
To start, gather the following ingredients:

  • 3 Large Potatoes (russet or yukon gold potatoes work well)
  • 6 Large Eggs
  • 1 Onion
  • 1 Cup of Shredded Cheese (mozzarella, gouda, or manchego)
  • 1 Cup of Chopped Ham
  • 1 1/2 Cups of Oil (olive oil or avocado oil work well)
  • 1 Dash of Black Pepper
  • Salt to Taste

Spanish Omelette Ingredients

Start by washing and peeling the potatoes, before cutting them into thin slices and set them aside. I like to cut them into half-moon shapes, but this is a personal preference.

Next, slice the onions and set them aside.

In a large, deep pot, add the oil and heat over medium-low heat. Add the potatoes and let cook for 5 minutes. Through this process the oil shouldn’t heat up too much so that the potatoes are not being fried, but instead becoming soft, juicy, and slighly translucent.

After 5 minutes, add the onion and a little bit of salt. Stir constantly so that nothing burns and let the whole mixture continue cooking for about 10 minutes or until the potatoes are softe and slightly brown.

Remove from the heat and strain the excess oil. Set the potato mixture aside for the next step.

Add the eggs to a large bowl and beat well. Add the pepper and additional salt and beat again. Once the potatoes and onions have cooled slightly, add them to the mix and mix well.

In a medium cast iron pan, heat a tablespoon of oil over medium heat and then add half of the egg mixture and make sure it spreads to the edges. Immediately add an even layer of cheese and ham and then add the rest of the egg mixture to the top.

Lower the heat and let cook for about a minute or two before carefully flipping the omelette and allowing the other side to cook to a golden brown color. A trick for flipping it is to place a large plate on top of the pan, and flip it onto the plate, then you can carefully place it back into the pan. The omelette should cook for about 3-4 minutes on each side.

Once it is cooked through, put the omelette on a plate and let it cool before slicing and serving!

Serving a tortilla española

Let me know in the comments below how this great recipe turns out for you!

Spanish omelette with a slice cut out of it
Print

Spanish Omelette (Tortilla Espanola)

Learn how to make a traditional Spanish omelette, also known as a tortilla espanola, which is a classic recipe that is perfect to serve to a large crowd.
Course appetizers, tapas
Cuisine Spanish
Keyword spanish omelette, tapas, tortilla espanola
Prep Time 15 minutes
Cook Time 15 minutes
Total Time 30 minutes
Servings 10 Servings
Calories 172kcal

Ingredients

  • 3 Potatoes
  • 6 Eggs
  • 1 Onion
  • 1 Cup Manchego Cheese Shredded
  • 1 Cup Ham Diced
  • 1 1/2 Cups Olive Oil
  • 1 Dash Black Pepper
  • Salt to Taste

Instructions

  • Start by washing and peeling the potatoes, before cutting them into thin slices and set them aside.
  • Slice the onions and set them aside.
  • In a large, deep pot, add the oil and heat over medium-low heat. Add the potatoes and let cook for 5 minutes. Through this process the oil shouldn't heat up too much so that the potatoes are not being fried, but instead becoming soft, juicy, and slighly translucent.
  • After 5 minutes, add the onion and a little bit of salt. Stir constantly so that nothing burns and let the whole mixture continue cooking for about 10 minutes or until the potatoes are softe and slightly brown.
  • Remove from the heat and strain the excess oil. Set the potato mixture aside for the next step.
  • Add the eggs to a large bowl and beat well. Add the pepper and additional salt and beat again. Once the potatoes and onions have cooled slightly, add them to the mix and mix well.
  • In a medium cast iron pan, heat a tablespoon of oil over medium heat and then add half of the egg mixture and make sure it spreads to the edges. Immediately add an even layer of cheese and ham and then add the rest of the egg mixture to the top.
  • Lower the heat and let cook for about a minute or two before carefully flipping the omelette and allowing the other side to cook to a golden brown color. A trick for flipping it is to place a large plate on top of the pan, and flip it onto the plate, then you can carefully place it back into the pan. The omelette should cook for about 3-4 minutes on each side.
  • Remove from the pan and serve on a large plate. Let it cool before slicing and serving.

Nutrition

Serving: 1Serving | Calories: 172kcal | Carbohydrates: 1g | Protein: 9g | Fat: 14g | Saturated Fat: 5g | Polyunsaturated Fat: 1g | Monounsaturated Fat: 6g | Trans Fat: 0.01g | Cholesterol: 119mg | Sodium: 273mg | Potassium: 93mg | Fiber: 0.2g | Sugar: 1g | Vitamin A: 205IU | Vitamin C: 1mg | Calcium: 139mg | Iron: 1mg

The post Spanish Omelette Recipe (Tortilla Española) appeared first on My Latina Table.
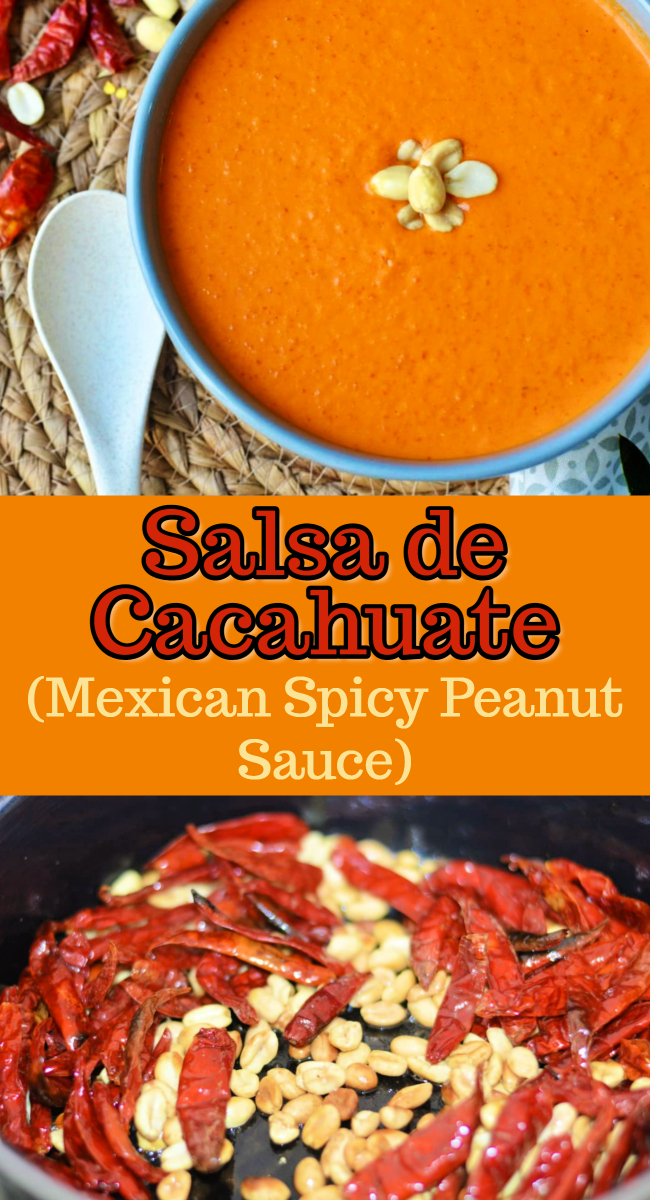
Authentic Salsa de Cacahuate (Mexican Spicy Peanut Salsa)

Inside: This spicy peanut salsa (salsa de cacahuate) is not for the faint of heart with its spicy, but delicious flavor. Learn how to make it today! Spicy peanut salsa, …

The post Authentic Salsa de Cacahuate (Mexican Spicy Peanut Salsa) appeared first on My Latina Table.
Inside: This spicy peanut salsa (salsa de cacahuate) is not for the faint of heart with its spicy, but delicious flavor. Learn how to make it today!

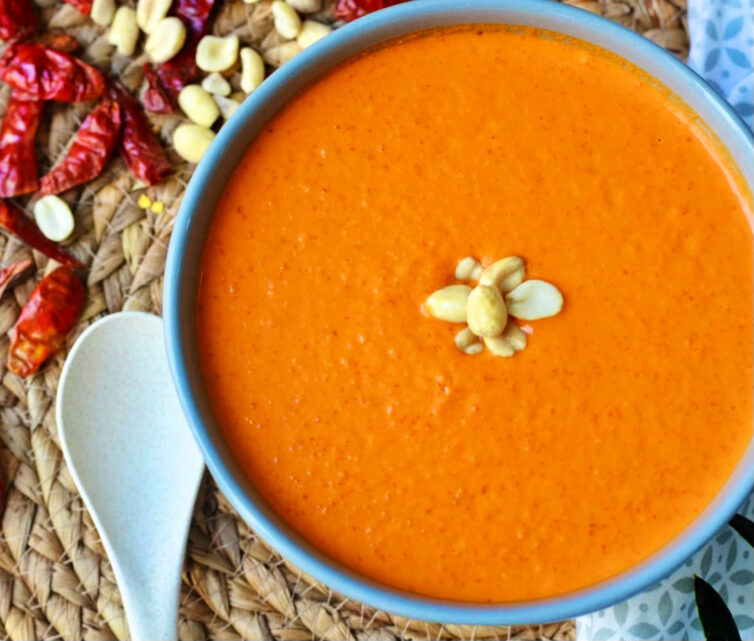
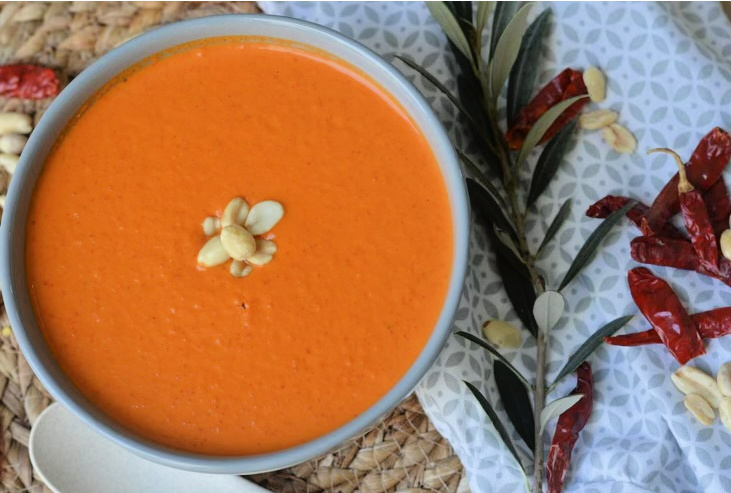
Authentic Spicy Peanut Salsa in a bowl

Spicy peanut salsa, or salsa de cachuate in Spanish, is one of the many different types of spicy salsas that Mexico is known for, like this salsa macha. Of course there are mild salsas also, and most can be made more mild depending on how many chilies you add. For example, this salsa verde can be made very spicy or quite mild depending on how many and what type of peppers you add.

This one, however, is going to be pretty spicy no matter what because of the addition of arbol chiles, which are at least 6 times hotter than a jalapeno.

If you are a fan of spicy food and spicy salsas, then this is for you and you will love the smoky flavor and creamy texture.

What is Spicy Peanut Salsa (Salsa de Cacahuate)?

Spicy peanut salsa is a spicy, creamy salsa that goes perfectly with your favorite Mexican “antojitos” or street food. For example, this goes great with tostadas, empanadas, flautas, or just as a spicy dipping sauce with freshly cooked tortilla chips.

Salsa de cacahuate in a bowl on a table

This sauce gets its spicy and smoky flavor from the chile de arbol, which is a super spicy pepper that measures between 15,000 and 60,000 on the scoville scale! It has a deep, smoky flavor as well which just takes this recipe to the next level.

This traditional salsa also include roasted peanuts which serve to control the heat a little bit of this spicy salsa.

How do you make Mexican spicy peanut sauce?

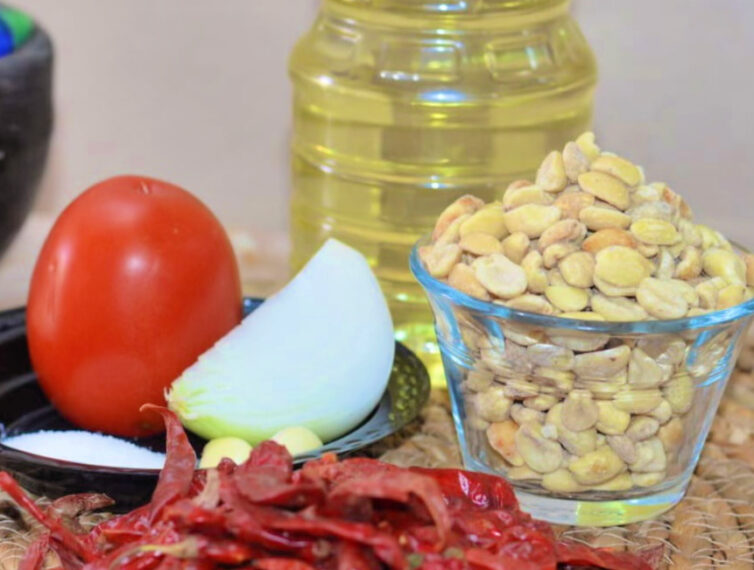
Spicy peanut salsa is made with a combination of spicy and smoky ingredients, that are roasted in a skillet before being blended together to form a perfectly creamy and spicy salsa. To make it, you will need to gather the following ingredients:

  • Unsalted peanuts
  • Chiles de arbol, dried arbol chiles. You can vary how much you use depending on how hot you want it.
  • Garlic cloves
  • White onion
  • Roma tomato
  • Vegetable oil, olive oil, or another neutral oil
  • Chicken bouillon
  • Salt
  • A cup of water

Ingredients for spicy peanut sauce (mexican salsa de cacahuate)

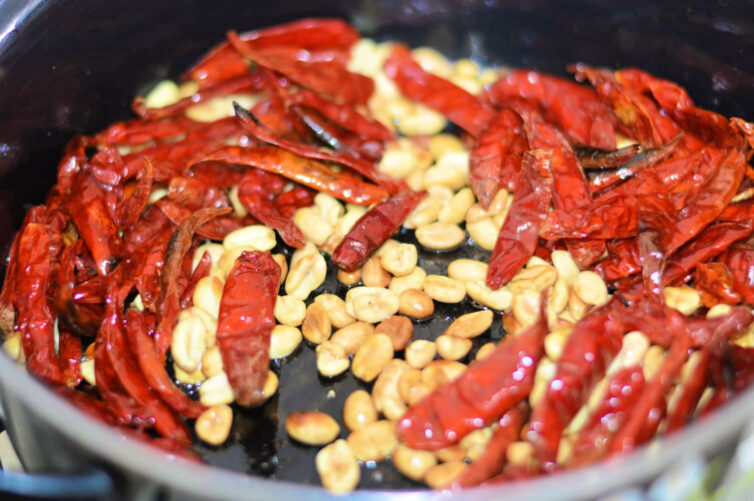
Start by heating a large skillet over medium heat and add a squirt of oil. Add the peanuts to the hot oil and fry them for about 5 minutes, moving them constantly so they don’t burn. Next, add the chiles de árbol until they start to change color. You will notice that they have a very pungent smell. I recommend doing this step with the windows up and if you have a vent hood, make sure it is turned on high. The smell can be difficult for people who are roasting arbol chilies for the first time, but if you follow my advice, you should be fine.

Chiles de arbol and peanuts in a skillet

After a few minutes, remove the peanuts and chiles from the heat and set aside.

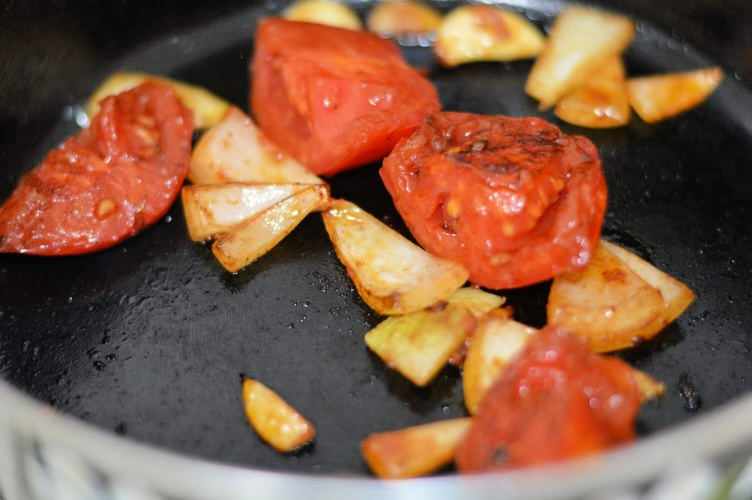
In the same pan, add the tomato, that you have cut into 4 pieces, and then add the onion and garlic also. Cook until softened and then add to a blender or food processor with the chiles and peanuts, chicken bouillon, salt, and water and blend until it reaches your desired consistency. If you do not have chicken bouillon, you can replace it and the water with a cup of chicken broth.

tomatoes and onions being cooked for the peanut sauce

Add the resuulting salsa to a bowl and serve immediately. You can also store it in the refrigerator in an airtight container for about a week if you want to cook it in advance.

This is definitely one of my favorite recipes when I am looking for a spicy salsa. If it has too much heat, go ahead and use less arbol chiles. You can also replace them with a milder chile like the guajillo chile, ancho chiles, or chipotle chiles, but this will change the flavor a little bit.

Check out these other Mexican Salsa recipes

Authentic Spicy Peanut Salsa in a bowl
Print

Authentic Spicy Peanut Salsa (Salsa de Cacahuate)

This spicy peanut salsa (salsa de cacahuate) is not for the faint of heart with its spicy, but delicious flavor. Learn how to make it today!
Course Appetizer, salsa, Side Dish
Cuisine Mexican
Keyword authentic salsa, hot salsa, peanuts, spicy
Prep Time 5 minutes
Cook Time 10 minutes
Total Time 15 minutes
Servings 16 Tablespoons
Calories 34kcal

Ingredients

  • 1/4 Cup Peanuts Unsalted
  • 1 Handful Chile de arbol
  • 2 Garlic Cloves
  • 1/4 White Onion
  • 1 Roma Tomato Large
  • 1 Tbsp Oil
  • 1 Tsp Chicken Bouillon
  • 1 Tsp Salt
  • 1 Cup Water

Instructions

  • Heat a large skillet over medium heat and add the oil.
  • Add the peanuts and toast for about 5 minutes, moving them around constantly so they don't burn.
  • Add the chiles de arbol and continue cooking for a few more minutes until they take on a slightly darker color. Remove from the heat and set aside.
  • Cut the tomato into four pieces and add to the pan where you cooked the peanuts and chiles with the onion and garlic and cook for about 2-3 minutes.
  • Add all of the ingredients to a blender and blend until it reaches your desired consistency. If you want a thinner salsa, you can add additional water.
  • Serve with your favorite foods or just with tortilla chips.

Nutrition

Serving: 1Tablespoon | Calories: 34kcal | Carbohydrates: 3g | Protein: 1g | Fat: 2g | Saturated Fat: 0.3g | Polyunsaturated Fat: 1g | Monounsaturated Fat: 1g | Trans Fat: 0.004g | Cholesterol: 0.02mg | Sodium: 180mg | Potassium: 95mg | Fiber: 1g | Sugar: 2g | Vitamin A: 951IU | Vitamin C: 2mg | Calcium: 6mg | Iron: 0.3mg

The post Authentic Salsa de Cacahuate (Mexican Spicy Peanut Salsa) appeared first on My Latina Table.
Authentic Mexican Hot Dogs

Inside: These Mexican hot dogs are filled with cheese, wrapped in a strip of bacon, and topped with delicious ingredients like pico de gallo and caramelized onions. When you think …

The post Authentic Mexican Hot Dogs appeared first on My Latina Table.

Inside: These Mexican hot dogs are filled with cheese, wrapped in a strip of bacon, and topped with delicious ingredients like pico de gallo and caramelized onions.

Mexican hot dogs with toppings

When you think of Mexican food, your mind probably doesn’t go directly to hot dogs. In fact, when people think of hot dogs, they probably think of it more as an American classic or something that you eat in Germany. With that said, hot dogs are very popular in Mexico, and of course, we have our own unique way of making them!

These Mexican style hot dogs are so good and so easy to make. Whenever I make them for my family, they tell me that they are the best hot dogs they have every tried. These not so ordinary hot dogs are sold by street vendors throughout Mexico and have many variations. The good thing though, is that you can make them at home very easily as well for a nice easy meal on a weeknight.

What are Mexican street dogs?

Mexican hot dogs are different from a classic hot dog, because of the unique way of making and topping them. For example, I always slice them down the middle and fill them with cheese, before wrapping them in bacon and grilling them. This alone gives them something extra even before I add my favorite toppings like pico de gallo, yellow mustard, grilled onions, ketchup, and chiles en vinagre (escabeche). It is important to have a nice soft buns as well to keep it all together.

Mexican hot dogs in a row ready to eat

What kind of toppings do you put on a Mexican-style hot dog?

The sky is the limit with this delicious recipe. Many Mexicans really like spicy food, so it is normal to see different types of peppers like jalapenos, serrano peppers, habanero peppers, and more. With that said, you can omit those if you don’t like it spicy. If you still want some similar, you can add a mild pepper like green, yellow, or red bell peppers. These have a great flavor and give the hot dogs the classic look of Mexican food.

Here are some examples of toppings you can find on these tasty hot dogs:

  • Pico de gallo
  • grilled white onions or red onion
  • cotija cheese
  • queso fresco
  • hot sauce
  • fresh salsa
  • mexican crema

Those are just some examples, but the important thing that makes a hot dog Mexican is that it has a lot of tasty toppings!

How do you make Mexican hot dogs?

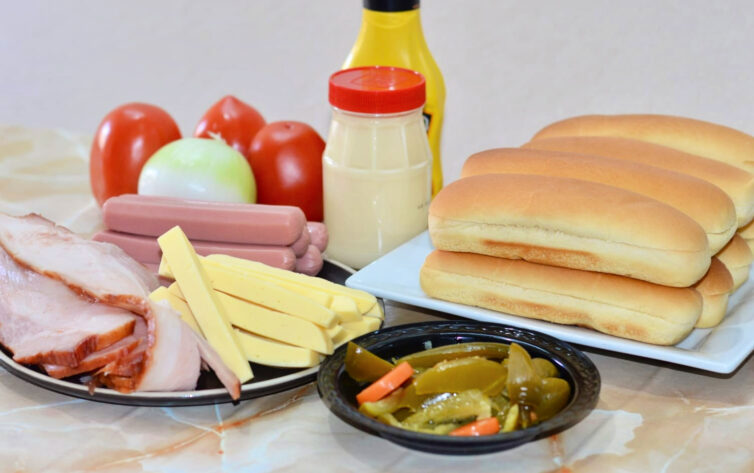
Like many great recipes, these hot dogs are simple to prepare. Start by gathering the following ingredients to cook the hot dogs:

  • Hot dog buns
  • Hot dogs (all beef or whatever variety you prefer)
  • Bacon
  • Mozzarella, manchego, or gouda cheese sticks
  • Tomatoes
  • White Onion
  • Jalapenos
  • Worcestershire Sauce
  • Salt
  • Vegetable oil
ingredients for perros calientes

Mexican hot dog ingredients

Now that you have those ingredients, you will dice the tomatoes, and slice the jalapenos and onions, setting them aside. Next, slice the hot dogs down the middle (don’t cut all the way through), and add a slice of cheese in the middle. Then wrap each hot dog in bacon. You can use toothpicks to keep them in place while cooking if desired.
sausages wrapped in bacon and filled with cheese being grilled

Heat a large skillet over medium heat and add a squirt of oil. Add the hot dogs and cook them for a few minutes on each side until the bacon is cooked. Remove from the skillet and set aside on a plate with a paper towel.

In the same skillet, add the tomatoes, jalepenos, worcestershire sauce and salt and cook until the onions are caramelized. Remove from the heat and set aside.
Now it is time to put the hot dogs together. Grab a soft bun from the bag and heat it if desired, and then add a hot dog to each one. Next, you will top with the caramelized onion, tomato, and jalapeno mixture. At this point, you can add whatever toppings you want. I included a list of options above, but you should decide what you want to add based on your own tastes. It is normal to add ketchup, mayo (or crema) and mustard on the top, but that is up to you!
Mexican hot dogs with ketchup, mayo, and ketchup

There you have it – a Mexican hot dog. The first time you try this, I am sure you will fall in love. Let me know in the comments below how it turns out.

Mexican hot dogs in a row ready to eat
Print

Mexican Hot Dogs

These Mexican hot dogs are filled with cheese, wrapped in a strip of bacon, and topped with delicious ingredients like pico de gallo and caramelized onions.
Course Main Course, street food
Cuisine American, Mexican
Keyword Mexican hot dogs, street food
Prep Time 5 minutes
Cook Time 8 minutes
Total Time 13 minutes
Servings 8 Hot Dogs
Calories 524kcal

Ingredients

  • 8 Hot Dog Buns
  • 8 Hot Dogs
  • 8 Slices Bacon
  • 8 Mozzarella Cheese Sticks Mozzarella, manchego, or Gouda
  • 2 Roma Tomatoes
  • 1 Onion
  • 2 Jalapeno Peppers
  • 1 Tbsp Worcestershire Sauce
  • Salt To taste

Toppings

  • 1 cup Escabeche
  • Mayonnaise
  • Ketchup
  • Mustard
  • Onions diced
  • Hot sauce

Instructions

  • Dice the tomatoes and slice the jalapenos and onions, set aside
  • Cut each hot dog down the middle, being careful not to cut all the way through.
  • Fill each hot dog with a cheese stick and then wrap in bacon, using a toothpick to keep it in place while cooking if needed.
  • Add the vegetable oil to a large skillet and set at medium heat. Grill each hot dog until the bacon is cooked and then remove and set aside.
  • In the same skillet, add the tomatoes, jalapenos, and onions and cook until the onions are carmelized. Set aside.
  • Warm the buns and then prepare the hot dog by adding one to each bun and topping with the caramelized onion mixture from above.
  • Add your favorite toppings and serve hot.

Nutrition

Serving: 1Hot Dog | Calories: 524kcal | Carbohydrates: 54g | Protein: 21g | Fat: 26g | Saturated Fat: 10g | Polyunsaturated Fat: 5g | Monounsaturated Fat: 8g | Trans Fat: 0.04g | Cholesterol: 51mg | Sodium: 1392mg | Potassium: 580mg | Fiber: 5g | Sugar: 14g | Vitamin A: 506IU | Vitamin C: 27mg | Calcium: 152mg | Iron: 4mg

The post Authentic Mexican Hot Dogs appeared first on My Latina Table.