Brownie Batter Hummus
This brownie batter hummus is a healthy dessert dip that tastes just like brownie batter! Made with chickpeas, cocoa powder…
This brownie batter hummus is a healthy dessert dip that tastes just like brownie batter! Made with chickpeas, cocoa powder…
Simple & Fresh Cottage Cheese Salad Cottage cheese has become extremely popular because it’s high in protein, but I have always been a cottage cheese fan. I eat it almost every single day. I am currently loving this simple Cottage Cheese Sala…
This easy sheet pan dinner is filled with healthy vegetables and fresh flavor! Throw it all in the oven while…
This Homemade Falafel recipe packs chickpeas, fresh herbs, and spices into a flavorful, Middle-Eastern-inspired patty that’s quick, easy, and delicious.
The post Easy Homemade Falafel appeared first on Budget Bytes.
This healthy vegetarian buffalo chicken dip is a lighter spin using chickpeas to make an irresistibly creamy, spicy appetizer! Everyone…
If you’re on the lookout for a hearty, nourishing, and flavorful soup, look no further than this Creamy Coconut Ginger Sweet Potato Soup with Chickpeas and Kale. This vegan soup is not only incredibly satisfying but also loaded with wholesome ing…
Craving a hearty, rich, yet redeeming soup? This creamy tomato soup laden with chickpeas is the answer. I cannot get enough of it! There’s nothing better than hot tomato soup on a chilly day, and this one is substantial enough to feel like a meal. If you’re a fan of my classic tomato soup, you’re…
The post Chickpea Tomato Soup appeared first on Cookie and Kate.
Dinnertime just got a whole lot easier! With this premade meal plan take the stress out of meal time. Each recipe is ready in 30 minutes or less to save you time and money while being inspired to try new recipes!
 Sweet Potato Curry with Chickpeas and Spinach is an easy one-pot meal you can make for weeknight dinners and meal prep! It’s comforting, flexible, and loaded with flavor. Craving more easy curry recipes? You’ll have to try my Thai Red Curry, Easy Vegan Curry, and Vegan Thai Green Curry recipes as well! When you’re searching…
This spicy hummus is a spin on the classic dip with a little heat! It comes out ultra creamy and…
 This Lemon Chicken and Chickpea Stew is a hearty dish that brings together delicious, rich, Greek-inspired flavors like lemon, oregano,…
The post Lemon Chicken and Chickpea Stew appeared first on The Defined Dish.
Learn how easy it is to make delicious Vegan Eggplant Meatballs from scratch! Serve as classic spaghetti and meatballs, or add them to your favorite hoagie and make an epic Vegan Meatball Sub. All you need is 10 simple ingredients, plus spices!
The post Vegan Eggplant Meatballs appeared first on Sweet Simple Vegan.
I love roasted cauliflower and chickpeas together. My roasted cauliflower chickpea tacos are a blog favorite and this roasted cauliflower chickpea salad is so flavorful. I also love making these Roasted Cauliflower Chickpea Wraps. The wraps have bold f…
 This Lemon Chicken, Orzo, and Chickpea Salad is the perfect blend of light and fresh while still being hearty and…
The post Lemon Chicken, Orzo, and Chickpea Salad appeared first on The Defined Dish.
Quick and healthy, these Crispy Air Fryer Chickpeas are a satisfying snack that are crunchy, flavorful, and packed with protein! Plus, they’re incredibly easy to make with just three simple ingredients. Why I Love This Recipe Chickpeas, also known as garbanzo beans, are a powerhouse snack packed with protein and fiber. These air fryer crispy…
The post Crispy Air Fryer Chickpeas appeared first on Weelicious.
These veggie nuggets are so delicious and made with a simple combination of vegetables, oats, and flavorful spices. Everyone loves…
If you are looking for a great dinner salad, this delicious BBQ ranch chickpea salad is a perfect choice. While this salad does not have meat (although don’t let that stop you from adding thick-cut sliced bacon if you like), chickpeas are a fanta…
This vegan chickpea salad sandwich (no mayo!) is the perfect tuna salad alternative. Served with avocado and roasted carrots, it’s a great meal prep idea that’s full of tangy flavor. Gluten-free, oil-free, super easy. We’re going back to basics today,…
Chickpea salads are some of my very favorite salads to make and eat. I make my Easy Chickpea Salad, Chipotle Chickpea Corn Salad, and Chickpea, Avocado, & Feta Salad all of the time. Whenever I want to impress my family and friends or just want a R…
Make our favorite hummus recipe to whip up this creamy, flavorful dip at home! Discover how to make this Middle…
This vibrant, flavorful and simple Italian Chopped Salad recipe is perfect for a quick lunch, a light dinner, or a side dish that will steal the show at any gathering. If you love my Mediterranean Chopped Salad, add this chopped salad to your list! Why I Love This Recipe Chopped Salad Ingredients *For a full list of ingredients…
The post Italian Chopped Salad appeared first on Weelicious.
These DIY salad bar ideas are easy to prep for a satisfying meal! Load up a plate with salad toppings…
Chickpea Salad is a healthy & hearty dish, perfect for lunch or light dinner any day of the week! Or, bring it to a potluck or a backyard BBQ to impress a crowd!
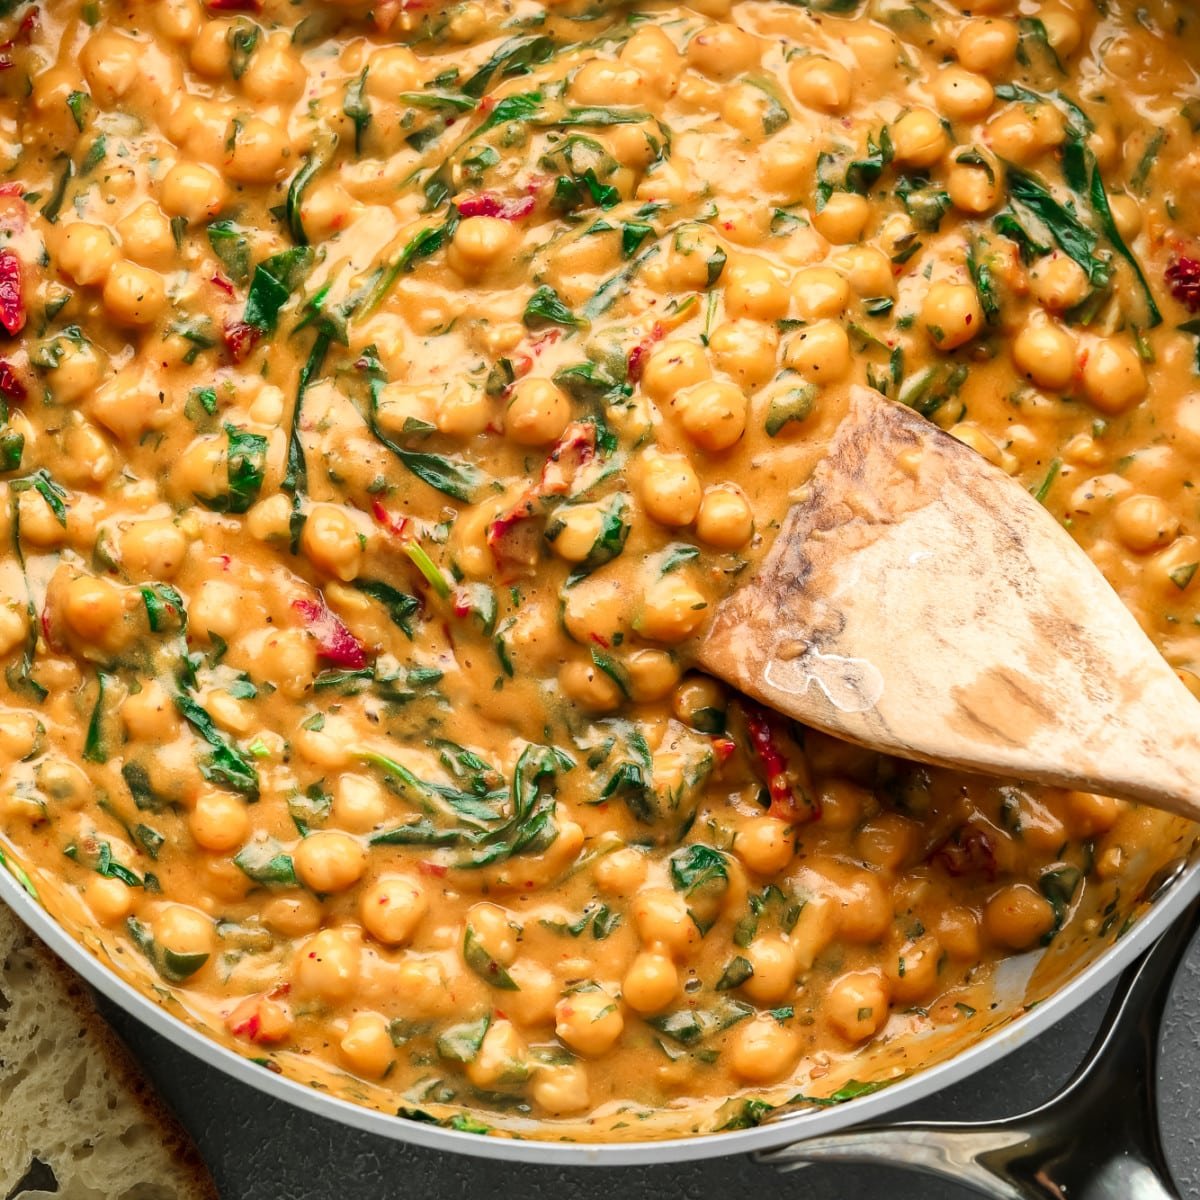 This one-pan Marry Me Chickpeas recipe puts a vegan twist on the viral comfort food, Marry Me Chicken! Get ready to fall in love with this indulgent 15-minute meal. For more easy ways to use the canned chickpeas in your cupboard, check out my Chickpea Salad Sandwich, Italian Chickpea Soup, Chickpea Burger, and Biscuit Topped…
Dinnertime just got a whole lot easier! With this premade meal plan take the stress out of meal time. Save time and money while being inspired to try new recipes!