Easy Honey Garlic Sauce

This honey garlic sauce recipe is simple to make and works with anything! Try it on salmon, chicken, stir fries,…

This honey garlic sauce recipe is simple to make and works with anything! Try it on salmon, chicken, stir fries, and more.

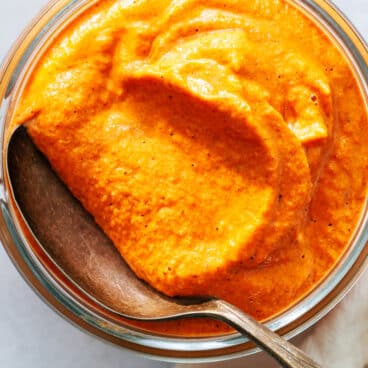
Honey Garlic Sauce with spoon in bowl.

Need a simple, homemade sauce that will dress up any meal? Try this Honey Garlic Sauce recipe! It comes together with just 8 ingredients in less than 10 minutes, making it an easy, no-hassle sauce for quick meals.

You’ll want to paint a swath of this sticky, flavor-popping sauce on just about anything! It’s great for salmon, chicken, stir fries, and more. We first made it for our Honey Garlic Salmon, which was so good we’ve been making the sauce ever since.

“Just made this for some salmon. I followed the recipe to a T. Wow! This is my new sauce for everything.” -Rick

Ingredients in honey garlic sauce

This honey garlic sauce has a short ingredient list of mostly pantry ingredients, which magically come together into a sticky, thick glaze. It’s great for stir fries, though we love it best painted on a lovely fillet of salmon. Even our 5 year old son loves it, which is a big win in our book! Here are the ingredients you’ll need for this simple recipe:

  • Soy sauce: We like using regular soy sauce for the most full flavor (not low sodium). Substitute tamari for gluten-free.
  • Honey: Honey brings a nuanced sweetness. For vegan, substitute maple syrup.
  • Rice vinegar: Rice vinegar is a vinegar made with fermented rice that’s often used in Asian cuisine; it has a lightly sweet, tangy flavor. 
  • Olive oil: Olive oil is our preferred cooking oil, but you can substitute with any neutral oil. Sesame oil would work well here.
  • Garlic and garlic powder: For a flavor packed sauce, use both fresh garlic (not jarred) and garlic powder.
  • Ginger root: Ginger root packs spicy, zingy flavor to this sauce. You can leave it out if it’s not a refrigerator staple for you, but it adds a depth that we think is absolutely worth the purchase.
  • Cornstarch: Cornstarch gives a shiny, thick body to the sauce (arrowroot powder works as a good substitute).

Pro tip

Use a microplane for easy grating! You can use it for both the garlic and ginger: you don’t even need to peel the ginger!

Honey garlic sauce in bowl.

How to make honey garlic sauce: step by step

This honey garlic sauce is so quick and simple to make: it will take you longer to read about it than actually make the recipe itself! Here’s what to do:

Step 1: In a small saucepan, combine the soy sauce, honey, rice vinegar, oil, garlic powder, grated ginger and grated garlic over medium heat. Bring to a simmer and then reduce the heat to low.

Step 2: In a small bowl, whisk together the water and cornstarch. Pour the mixture into the saucepan and whisk until the sauce thickens, about 1 minute. Remove from the heat.

More about the cornstarch slurry

This honey garlic sauce recipe uses a cornstarch slurry, which is a mix of cornstarch and water (or another room temperature liquid). Here’s why:

  • If dry cornstarch is added directly to heated foods, it clumps up. It’s best to add it to sauces and stir fries mixed with a little liquid first.
  • Cornstarch must be heated to around 203°F for the thickening to occur. It’s called “starch gelatinization”: the process where the the particles of cornstarch absorb water. You’ll notice that once you add the cornstarch slurry to the warm sauce, it immediately starts to thicken: the starch gelatinization has been activated!
Honey garlic sauce on salmon with green onions on platter.

Ways to use honey garlic sauce

How do you plan to use your honey garlic sauce? This recipe is extremely versatile and works with many different types of foods. Here are a few ideas:

Storing leftovers

This recipe is quick to whip up and stores well. Store homemade honey garlic sauce refrigerated for up to 2 weeks. After 2 weeks, it starts to lose some of the potency in flavor.

More sauce recipes

Love making homemade sauces? Here are a few sauce recipes to try:

Dietary notes

This honey garlic sauce recipe is vegetarian, plant-based, dairy-free and gluten-free. For vegan, use maple syrup or agave syrup instead of honey.

Frequently asked questions

What is honey garlic sauce made of?

This versatile sauce typically combines soy sauce, honey, garlic, ginger, and sometimes rice vinegar or sriracha for a touch of heat.

What does honey garlic sauce taste like?

It’s a beautiful balance of sweet and savory! The honey adds a touch of sweetness that complements the savory notes of soy sauce and the pungent kick of garlic and ginger.

What can I use honey garlic sauce for?

The possibilities are endless! Here are some ideas:
Marinade: Marinate chicken, fish, tofu, or tempeh for a flavorful and sticky glaze.
Dipping sauce: Perfect for dumplings, spring rolls, chicken wings, or anything that needs a delicious dip.
Stir-fry sauce: Toss your stir-fry veggies and protein in honey garlic sauce for a quick and flavorful meal.
Glaze: Brush honey garlic sauce on chicken, salmon, or tofu during the last few minutes of cooking for a sweet and sticky glaze.
Noodle sauce: Toss cooked noodles with honey garlic sauce for a simple and satisfying dish.

Can I make honey garlic sauce ahead of time?

Absolutely! This sauce keeps well in an airtight container in the refrigerator for up to 2 weeks.

How can I make my honey garlic sauce spicier?

Add a pinch of red pepper flakes, sriracha, or a chopped fresh chili pepper to the sauce while cooking.

Print
Honey garlic sauce

Easy Honey Garlic Sauce


5 Stars 4 Stars 3 Stars 2 Stars 1 Star

5 from 5 reviews

  • Author: Sonja Overhiser
  • Prep Time: 5 minutes
  • Cook Time: 3 minutes
  • Total Time: 8 minutes
  • Yield: ½ cup

Description

This honey garlic sauce recipe is simple to make and works with anything! Try it on salmon, chicken, stir fries, and more.


Ingredients

  • ¼ cup regular soy sauce
  • ¼ cup honey
  • 1 tablespoon rice vinegar
  • 1 tablespoon olive oil
  • ¼ teaspoon garlic powder
  • 2 garlic cloves, grated
  • ½ teaspoon fresh grated ginger
  • 1 tablespoon cornstarch
  • 6 tablespoons water

Instructions

  1. In a small saucepan, combine the soy sauce, honey, rice vinegar, oil, garlic powder, grated ginger and grated garlic over medium heat. Bring to a simmer and then reduce the heat to low.
  2. In a small bowl, whisk together the water and cornstarch. Pour the mixture into the saucepan and whisk until the sauce thickens, about 1 minute. Remove from the heat. Use immediately or refrigerate for up to 2 weeks.
  • Category: Sauce
  • Method: Stovetop
  • Cuisine: American
  • Diet: Vegetarian

Hugo Spritz

Cool down with a refreshing Hugo Spritz! This bubbly cocktail mixes elderflower liqueur, sparkling wine, and fresh mint for a…

Cool down with a refreshing Hugo Spritz! This bubbly cocktail mixes elderflower liqueur, sparkling wine, and fresh mint for a light and flavorful summer drink that’s easy to make at home.

Hugo Spritz cocktail with St-Germain bottle.

This cocktail might be the literal definition of refreshing. If you love bubbly spritzes, run don’t walk to try the Hugo Spritz cocktail! This Italian cocktail is a spin-off on the Aperol spritz and even better, in our opinion.

Why we love this recipe: A Hugo Spritz is made with delicate floral elderflower liqueur and bubbly Prosecco, which compliment each other perfectly. The bubbly combination transports you right to Northern Italy, where this cocktail was born and is popular to this day! It’s nuanced and lightly sweet, compared to the bold sweetness of an Aperol spritz.

What’s a Hugo Spritz?

The Hugo cocktail is a spritz cocktail made with Prosecco, elderflower syrup, and soda water. The drink was invented in 2005 by Roland Gruber in Northern Italy (the South Tyrol region just south of Austria). He created the drink as an alternative to the classic Aperol spritz, and it quickly spread across the country and into Europe.

Hugo Spritz ingredients

The Hugo Spritz cocktail is light and floral, accented with the delicate bubbles of Prosecco. Where the Aperol spritz is sweet and citrusy, this spin is sophisticated and even more refreshing. The original Hugo Spritz used elderflower syrup. Here in the US it’s easier to find a bottle of St Germain elderflower liqueur, so it’s a natural substitute. Here’s are the ingredients you need:

  • St-Germain liqueur: St-Germain is a liqueur made with elderflower, known for its floral flavor.
  • Prosecco: This Italian sparkling white wine is from the Veneto region, with a delicate flavor and light bubbles. You can use any type of champagne if desired.
  • Soda water: Use club soda or unflavored sparkling water (we use our SodaStream to make it at home). Avoid tonic water here, since it is flavored with quinine and lightly sweetened.
  • Fresh mint: Fresh mint as a garnish is what makes it a Hugo Spritz.

🍾 Tip: A 750 ml bottle of Prosecco is 25 ounces, enough for 8 drinks. If you’re making 2 drinks, a mini bottle is perfect—it holds 187 mL or about 6 ounces!

How to make a Hugo Spritz cocktail

The Hugo cocktail is so easy to make: you don’t even have to dirty a cocktail shaker! The spritz family of drinks is fantastic because you simply pour the ingredients into a glass.

The Hugo spritz is easy to make, and you can build the drink it right in the glass. This makes it a great choice for entertaining, especially as a summer cocktail. Here are the basic steps (or jump to the full recipe):

Step 1: Add St-Germain to a glass filled with ice and stir. Top with sparkling wine.

Step 2: Add soda water and garnish with mint.

Step 2: Add soda water. Garnish with fresh mint and serve.

More about St-Germain

The key to this Hugo spritz cocktail is the elderflower liqueur, which infuses a delicate floral flavor throughout the drink. St-Germain is one of our favorite unique liquors to stock. Here’s a bit more about it:

  • St-Germain is a liqueur that’s made with elderflowers, the small white flowers of an elderberry plant. The flavor is light, sweetly floral, and fragrant.
  • How do you say St Germain? The name is French, so say “Sahn-jer-MAHN” with your best French accent.
  • Fun fact: it’s relatively new to the scene. Get this: St Germain was invented in 2007! The vintage-looking bottle makes it seem like it has hundreds of years of history, but it’s a newcomer. (Here’s the story behind it.)
  • What cocktails can you make with St-Germain? Try the French Gimlet and all our top St Germain Cocktails.
Hugo Spritz cocktail with mint garnish.

Prosecco & more sparkling wines

Traditionally a Hugo spritz cocktail uses Prosecco, the Italian version of champagne. But you can use any type of sparkling wine you like! Make sure it is “Brut,” which means that it is dry. Here’s a breakdown of the major types of sparkling wine including Prosecco vs Champagne:

  • Prosecco: Italian sparkling wine. It’s a slightly sweeter than champagne and has lighter bubbles. It’s fruity and flowery, with notes of apple, pear and lemon.
  • Champagne: French sparkling wine. It tastes bubbly and fruity, with undertones of almond and orange. It’s typically the most expensive sparkling wine.
  • Cava: Spanish sparkling wine. It has more citrus notes, and is a little more savory and less fruity.

More spritz recipes

There are lots of members of the spritz family! The Aperol spritz is the most popular, but try these other types of spritz recipes to enjoy bubbly drinks all season long:

Frequently asked questions

What’s the difference between a Hugo Spritz and an Aperol Spritz?

Both are refreshing spritzes, but Aperol Spritz uses a bitter orange liqueur, while Hugo Spritz features the floral and delicate elderflower liqueur (like St-Germain).

I don’t have elderflower liqueur. What can I use instead?

St-Germain is the classic choice, but you can substitute with another elderflower liqueur or elderflower syrup. Elderflower is key the flavor here.

How can I customize my Hugo Spritz?

Get creative! Try adding muddled berries, a squeeze of citrus, or a sprig of rosemary for a unique twist.

Print
Hugo cocktail

Hugo Cocktail


5 Stars 4 Stars 3 Stars 2 Stars 1 Star

No reviews

  • Author: Sonja Overhiser
  • Prep Time: 5 minutes
  • Cook Time: 0 minutes
  • Total Time: 5 minutes
  • Yield: 1 drink

Description

Cool down with a refreshing Hugo Spritz! This bubbly cocktail mixes elderflower liqueur, sparkling wine, and fresh mint for a light and flavorful summer drink that’s easy to make at home.


Ingredients

  • 1 ounces (2 tablespoons) St Germain liqueur (chilled if possible)
  • 3 ounces (6 tablespoons) Prosecco or other sparkling wine, chilled
  • 1 ounce (2 tablespoons) soda water
  • Ice, for serving (try clear ice!)
  • For the garnish: fresh mint

Instructions

  1. Add the St Germain to a glass filled with ice and stir.
  2. Top with the sparkling wine and soda water. Add mint and serve. 
  • Category: Drink
  • Method: Stirred
  • Cuisine: European
  • Diet: Vegan

Easy Strawberry Compote

This strawberry compote recipe makes a thick, sweet sauce that’s perfect for drizzling over ice cream, waffles, cheesecake and more!…

This strawberry compote recipe makes a thick, sweet sauce that’s perfect for drizzling over ice cream, waffles, cheesecake and more!

Strawberry Compote in a jar with spoon.

Got ripe berries? Here’s a quick and fun way to use them: make strawberry compote! Cooking down strawberries with a bit of sugar reduces it into glossy, luxurious tangy sauce that’s like an amped version of taking a bite into this sweet berry.

Why we love this recipe: This strawberry compote is outrageously tangy and bursting with sweet berry flavor! Alex and I love whipping this up as a versatile topping for ice cream, pancakes, waffles, or oatmeal. A compote is a great way to use fruit that’s almost overripe, but there’s no need to wait for that for this recipe. Anytime is the perfect excuse!

Ingredients for strawberry compote

A compote is a fruit sauce where the fruit is cooked with water, sugar, and seasonings until thickened. Compote works as a sweet sauce for desserts, or to spoon over breakfast items like yogurt, oatmeal and waffles. This strawberry compote has a minimal ingredient list and comes together in just 15 minutes! Here’s what you’ll need:

  • Fresh strawberries: Both fresh strawberries and frozen berries work in a compote. It’s quick to make with either and there’s no thawing required.
  • Granulated sugar: This type of sugar brings out the most intense sweet tart flavor and helps to make a thick, syrupy compote. You can also substitute pure maple syrup or honey as natural sweeteners, and the taste is comparable.
  • Lemon zest: Fresh lemon zest brings a pop to the flavor; the acidity of the lemon is almost like salt in a savory dish. While it’s optional, we highly recommend it!
  • Cornstarch: Using cornstarch makes a thick, glossy body to this sauce. A good cornstarch substitute is arrowroot powder.
  • Vanilla extract and salt: These ingredients around out the flavor.
Strawberries in container.

How to make strawberry compote (basic steps)

Strawberry compote is quick and simple to make: you’ll need about 5 minutes to prep the strawberries and 5 minutes to cook them. Here are the basic steps (or jump to the full recipe):

Step 1: Add the strawberries to a small saucepan with the sugar, lemon zest, and 2 tablespoons of the water. Cook over medium heat, stirring occasionally while it bubbles gently.

Step 2: After 5 to 7 minutes when strawberries start to break down, whisk 2 tablespoons water with 1 tablespoon cornstarch. Pour the mixture into the pan and stir until thickened, 1 minute. Reduce the heat. Mash the strawberries with a potato masher or fork.

Step 3: Remove from the heat and stir in the salt and vanilla. Taste and add additional sweetener, depending on the ripeness of your berries. The compote will thicken as it cools. Serve warm or cooled slightly.

Using a cornstarch slurry

This strawberry compote recipe uses a cornstarch slurry: a mix of cornstarch and water (or another room temperature liquid). If dry cornstarch is added directly to a dish, it clumps up. So, it’s best to add it to sauces and stir fries mixed with a little liquid first.

Cornstarch must be heated to around 203°F for the thickening to occur. It’s called “starch gelatinization,” which is a fancy word for the process where the the particles of cornstarch absorb water. Once you add the cornstarch slurry to the warm sauce, it immediately starts to thicken: the starch gelatinization has been activated!

Strawberry Compote in jar with spoon and strawberries.

Storage info

How long does homemade strawberry compote last? Store it refrigerated for up to 2 weeks. Or, you can freeze it in a freezer safe container for up to 6 months.

Compote becomes very thick when it’s cooled, so make sure to bring to room temperature or warm it on the stovetop before serving. This is especially important if you’re serving with a warm food like pancakes or waffles.

Strawberry Compote in a jar with gold spoon.

Ways to serve strawberry compote

There are so many ways to serve strawberry compote! This fruit sauce is versatile enough to work with desserts or breakfast food items. Here are a few ideas for how to serve fruit compote:

More strawberry recipes

Got more berries? Here are a few more strawberry recipes to try:

Dietary notes

This strawberry compote recipe is vegetarian, vegan, plant-based, dairy-free and gluten-free.

Frequently asked questions

What’s the difference between strawberry compote and strawberry jam?

Compote is a looser and fresher-tasting fruit sauce compared to jam. It uses less sugar and cooks the strawberries for a shorter time, preserving their shape and some of their natural texture.

Can I use frozen strawberries for compote?

Absolutely! Thaw frozen strawberries completely before using them in the compote. They might release more liquid, so adjust the cooking time slightly to achieve the desired consistency.

What are some other fruits I can use for compote?

The possibilities are endless! Berries like blueberries, raspberries, or blackberries work well. You can also try stone fruits like peaches, plums, or cherries. Try our Blueberry Compote, Peach Compote, Easy Raspberry Compote, or Rhubarb Compote.

Print
Strawberry Compote

Easy Strawberry Compote


  • Author: Sonja Overhiser
  • Prep Time: 5 minutes
  • Cook Time: 10 minutes
  • Total Time: 15 minutes
  • Yield: 1 ½ cups

Description

This strawberry compote recipe makes a thick, sweet sauce that’s perfect for drizzling over ice cream, waffles, cheesecake and more!


Ingredients

  • 1 pound fresh strawberries
  • ¼ cup granulated sugar
  • ½ teaspoon lemon zest
  • ¼ cup water, divided
  • 1 tablespoon cornstarch
  • 1 pinch kosher salt
  • 1 teaspoon vanilla extract

Instructions

  1. Clean, hull and quarter the strawberries.
  2. Add the strawberries to a small saucepan with the sugar, lemon zest, and 2 tablespoons of the water. Cook over medium heat, stirring occasionally while it bubbles gently.
  3. After about 5 to 7 minutes when strawberries start to break down, whisk 2 tablespoons water with 1 tablespoon cornstarch. Pour the mixture into the pan and stir until thickened, about 1 minute. Reduce the heat. Mash the strawberries to the desired texture with a potato masher or fork.
  4. Remove from the heat and stir in the salt and vanilla. Taste and add additional sugar if desired, depending on the ripeness of your berries. The compote will thicken as it cools. If it’s too thick, add a little water.
  5. Serve warm or cooled slightly. Store in a sealed container refrigerated for up to 2 weeks (or cool and freeze up to 6 months). Warm on the stovetop before serving.
  • Category: Sauce
  • Method: Stovetop
  • Cuisine: Sauce
  • Diet: Vegetarian

Keywords: Strawberry compote, strawberry compote recipe

Best Kale Smoothie

Want to sneak more greens into your diet? Here’s how to make a refreshing kale smoothie! We’ll show how to…

Want to sneak more greens into your diet? Here’s how to make a refreshing kale smoothie! We’ll show how to balance the flavor of kale with fruits and add-ins for a creamy and satisfying green drink you’ll actually crave.

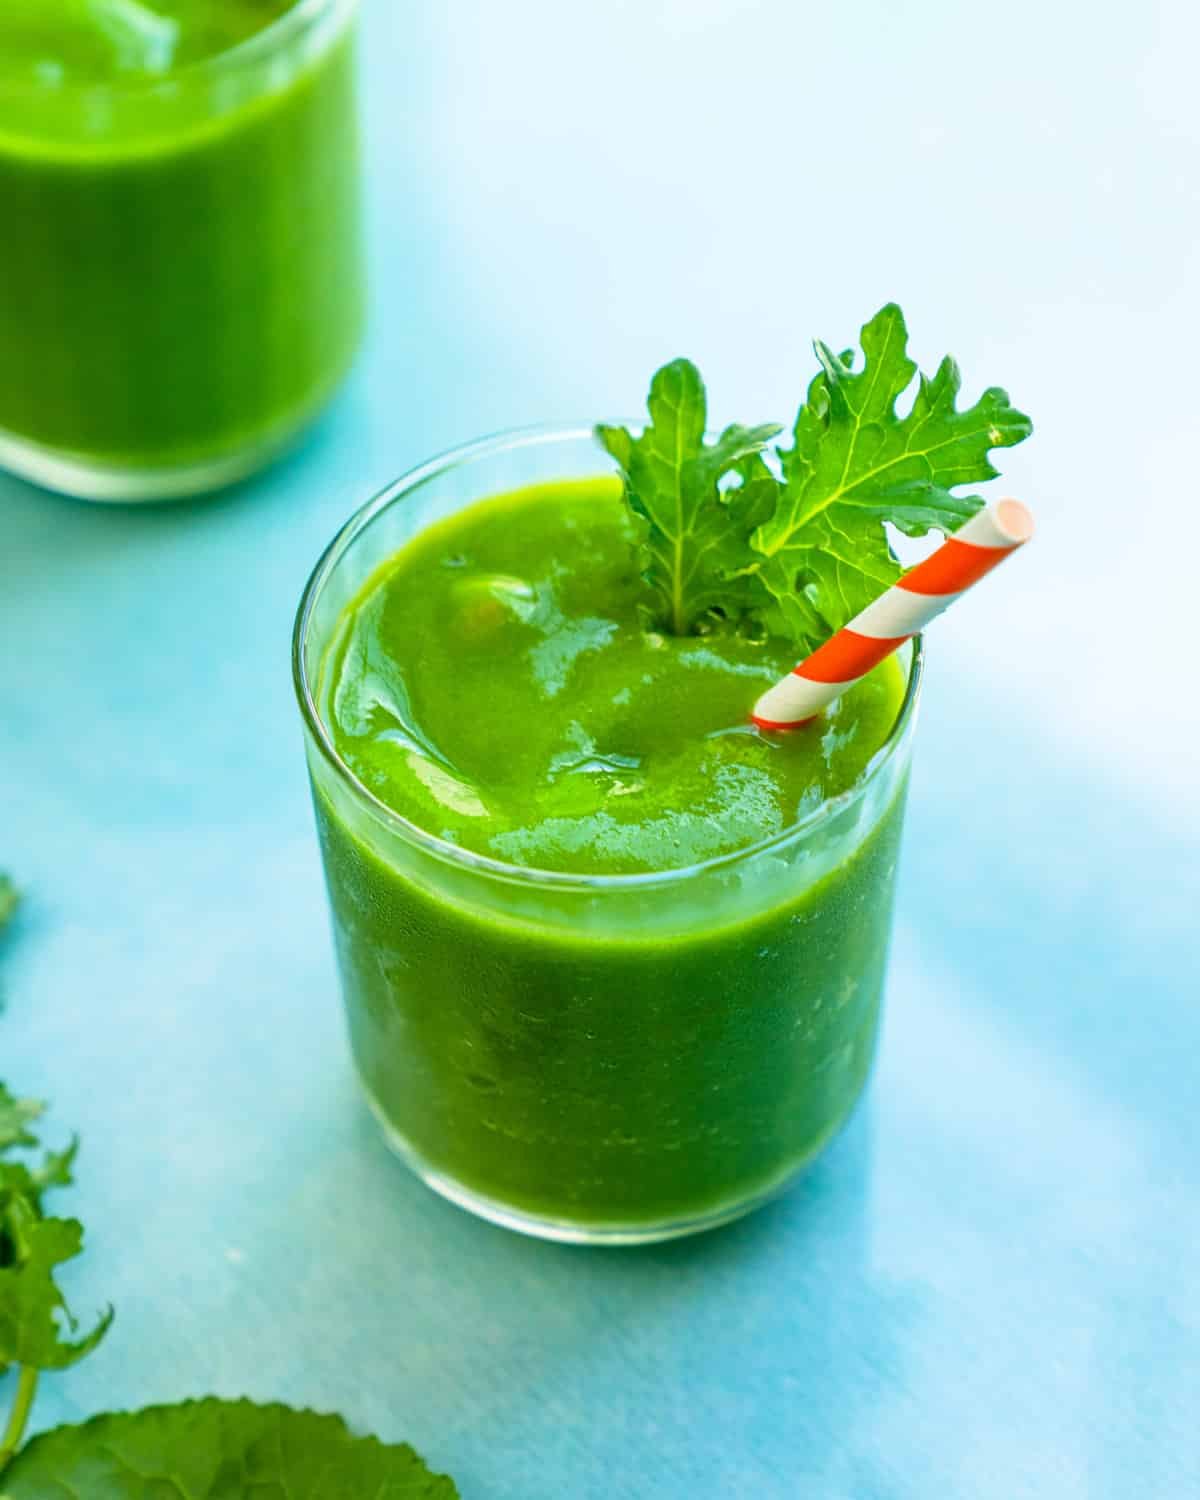
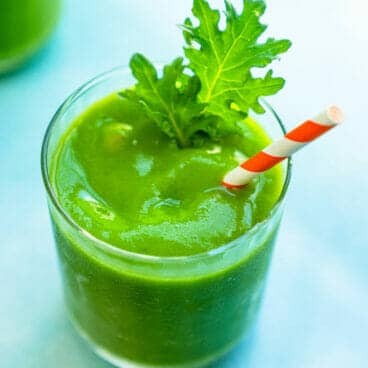
Kale Smoothie in a glass with straw and kale leaf garnish.

Here’s a smoothie so good, you’ll want to make it every day. Meet our favorite kale smoothie! Yes, we know. “Kale smoothie” sounds like it would be intensely bitter. This one is anything but!

This kale smoothie is full of fruity flavor from green apple, pineapple and banana. It tastes heavenly, yet at the same time you’re getting a big dose of nutrients from leafy greens. True story: this is one of the only ways we get our son to eat kale—and he begs us for more kale smoothie. Here’s how to make it!

Why we love this kale smoothie recipe

This kale smoothie is lusciously creamy, a satisfying drink you’ll actually crave. This is saying something, because we’ve made lots of kale smoothies that are too bitter, too thick, or too icy. This one has all the right ingredients to make an irresistibly tasty green puree. Here’s why to make it:

  • It’s has a pure, sweet tart flavor and a silky smooth, frosty texture. It’s irresistibly tasty and just the right thickness for sipping!
  • It’s full of healthy ingredients. There are no added sugary juices to make it taste good.
  • It’s plant-based. There’s no need to use milk or yogurt here, it’s all fruit and leafy greens.
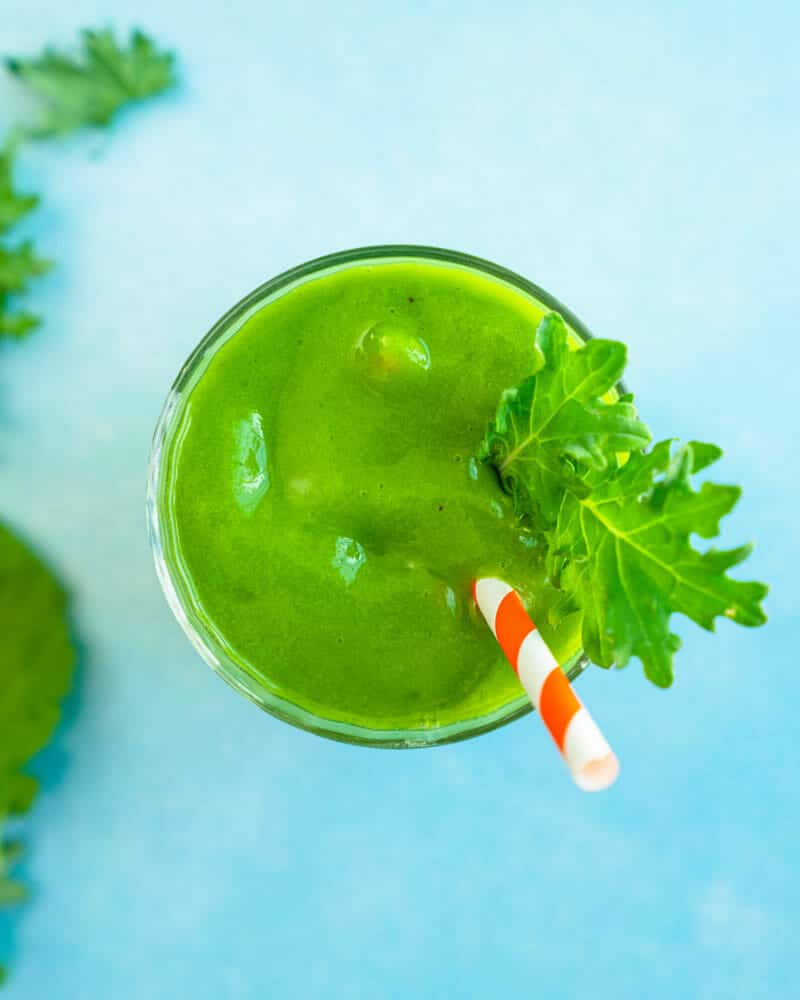
Kale Smoothie recipe in a glass with straw and kale leaf garnish.

Ingredients for this kale smoothie

This short ingredient list of a kale smoothie is all you need to make this beautiful, bright green puree! Here’s what you need:

  • Kale: Use either baby kale or Tuscan kale. We prefer baby kale since the flavor is sweeter and milder, but you can use Tuscan kale roughly chopped and loosely packed. Curly kale has a spicier flavor, so we’d recommend starting with less than the specified amount in the recipe.
  • Green apple: Apple is the key to a great kale smoothie; it brings in a bright, sweet tart flavor.
  • Banana: Banana features in many of our smoothie recipes to make a creamy texture and add natural sweetness.
  • Frozen pineapple or mango: Frozen pineapple seals the deal with its icy texture and beautiful fruity flavor.
  • Lemon juice, water and ice: Lemon juice accentuates the fruity flavors, and ice helps add texture and body. A little water is all you need to get it to blend.
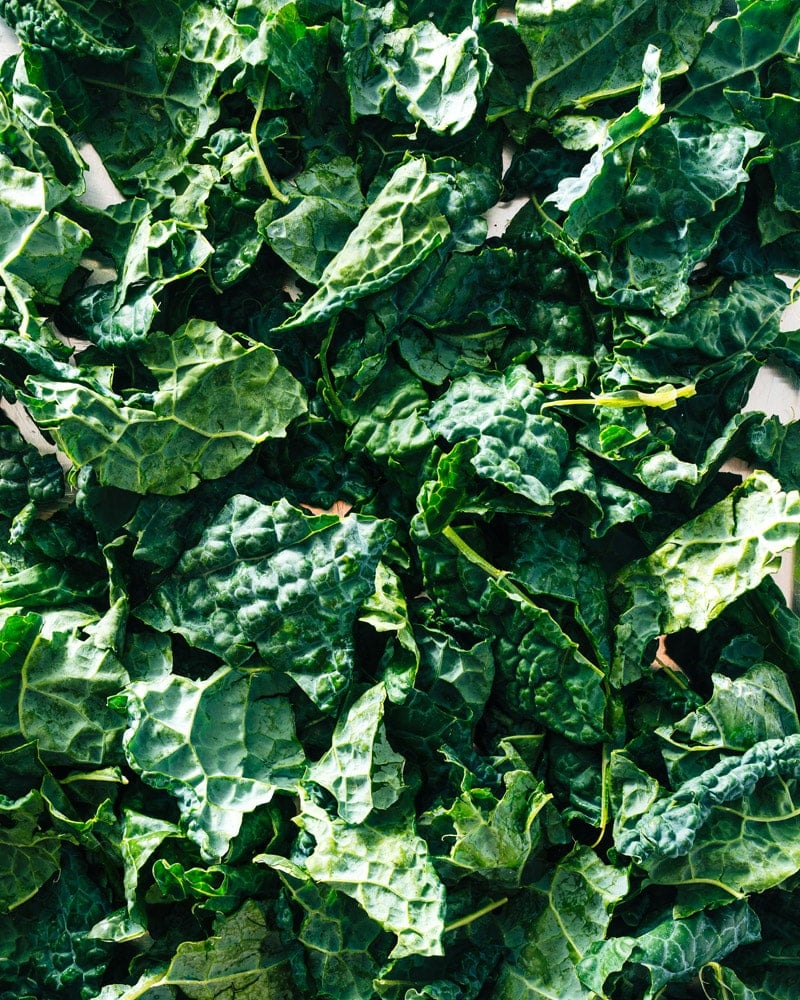
Tuscan kale leaves.

Types of kale

There are several types of kale that you can use in this smoothie. Here’s a breakdown of each type:

  • Baby kale: Baby kale works well in a smoothie because it has a sweeter, mild flavor. It’s a young version of kale, harvested before it matures. You can find it sold in boxes at the grocery or bags at your local farmers market.
  • Tuscan kale: Tuscan kale is the next best option: it’s got a mild flavor and flat, dark green leaves. It’s also labeled as dinosaur kale or Lacinato kale.
  • Curly kale: Curly kale works, but it has a spicy flavor that’s more bitter than the other two. If you use this variety, you may want to start with less and add it to taste.

The trick to blending

Here’s a trick to blending this kale smoothie. First, blend the softer room temperature fruits and liquid. In this case, it’s the banana, apple, kale and water. Then add in the frozen ingredients: the frozen pineapple and ice. This helps it to blend easier: so you won’t need to endlessly stop, scrape, and start again!

Two kale smoothies.

Add-ins & variations

This kale smoothie is delicious as is, but you can always mix it up with tasty additions! Here are a few options:

  • Ginger: Add ½ teaspoon grated ginger to the mix for a spicy finish.
  • Mint or basil. Add a few fresh mint or basil leaves for an herbaceous spin.
  • Chia seeds. Chia seeds add fiber and some protein; add 1 to 2 tablespoons to your taste.
  • Coconut. A handful of shredded coconut adds a tropical flair.

Smoothie storage

Smoothies are best eaten immediately. But this kale smoothie actually lasts 1 to 2 days refrigerated, stored in a sealed container or a mason jar with the lid on. It may separate, which is perfectly natural. Just shake it up and you’re good to go!

A few favorite smoothies

We’ve got lots more where this came from! Here more smoothie recipes to try:

Dietary notes

This kale smoothie recipe is vegetarian, vegan, plant-based, dairy-free, and gluten-free.

Frequently asked questions

Won’t my kale smoothie taste bitter?

Not necessarily! This post offers tips on choosing the right kale variety (baby kale is less bitter) and using masking ingredients like bananas, mangoes, or pineapples to balance the flavor.

What kind of milk is best for a kale smoothie?

This kale smoothie recipe uses water, but you can also use milk. Any milk you enjoy works! Popular choices include dairy milk, almond milk, oat milk, or coconut milk. Consider dietary restrictions and the desired texture when choosing your milk.

Do I need a fancy blender for a kale smoothie?

A high-powered blender is ideal for achieving a smooth and creamy consistency. However, many regular blenders can handle kale smoothies with the addition of some extra liquid.

Can I make kale smoothies ahead of time?

Yes, but be aware that the color may darken slightly, and the texture might thicken a bit and separate over time. This smoothie is best eaten within 1 day, but it does store up to 2 days.

How can I make my kale smoothie more filling?

Adding protein powder, nut butters, chia seeds, or even rolled oats can make your smoothie more filling and keep you satisfied for longer.

Print
Kale smoothie

The Best Kale Smoothie


  • Author: Sonja Overhiser
  • Prep Time: 5 minutes
  • Cook Time: 0 minutes
  • Total Time: 5 minutes
  • Yield: 2 smoothies

Description

Want to sneak more greens into your diet? Here’s how to make a refreshing kale smoothie, a creamy and satisfying green drink you’ll actually crave.


Ingredients

  • 1 large green apple
  • 1 banana
  • 2 cups baby kale leaves, loosely packed (or Tuscan or curly kale*, roughly chopped)
  • ½ cup water (or milk of choice)
  • 10 ice cubes
  • 2 cups frozen pineapple or mango
  • 1 tablespoon fresh squeezed lemon juice

Instructions

  1. Chop the apple, leaving the skin on. Break the banana into pieces and place them both in the blender. Add the water and baby kale leaves. Blend until smooth.
  2. Add the ice, frozen pineapple or mango, and lemon juice. Blend again until smooth.

Notes

*Our preference for the type of kale to use in a smoothie is baby kale. Tuscan kale is a second choice. Curly kale can work, but it has a spicy flavor and is more bitter than the other two. If you use this variety, you may want to start with less and add it to taste. 

  • Category: Drink
  • Method: Blended
  • Cuisine: American
  • Diet: Vegan

Keywords: Kale smoothie, kale smoothie recipe

Limoncello Spritz

Here are the secrets to making a limoncello spritz, a delightful Italian cocktail bursting with sunshine lemon flavor and a…

Here are the secrets to making a limoncello spritz, a delightful Italian cocktail bursting with sunshine lemon flavor and a delightful fizz. It’s easy to prepare and guaranteed to transport you to a carefree summer state of mind.

Limoncello spritz in stemmed glass with mint.

Here’s an Italian cocktail that’s bubbly and flavored with pure lemon: the Limoncello Spritz! Limoncello is a liqueur that’s often sipped for after-dinner shots, but this ultra strong lemon elixir shines in mixed drinks, too.

Why we love this recipe: This spin on the popular Aperol spritz is full of bright lemon flavor from the limoncello. As two cocktail experts and certified mixologists, we think it’s even better than the original! It’s bubbly and effervescent, with a searing citrus bite.

What’s a spritz?

The spritz is a drink invented in Italy that combines three ingredients: liqueur, sparkling wine (usually Prosecco) and soda water. You can make a spritz of any type using these two ingredients and any mixer of your choosing. The basic spritz ratio is 3 parts sparkling wine, 2 parts liqueur, 1 part soda water.

Ingredients in a limoncello spritz

The limoncello spritz is a spin on the popular Aperol spritz, an Italian aperitif. While the spritz concept has been around for hundreds of years, it wasn’t until the 1950’s that the Aperol spritz took the form it has today. The limoncello spritz just substitutes limoncello for Aperol, an Italian amaro.

Spritzes are trending in popularity, so it’s not a surprise that this sunny spin is a top choice when it comes to summer cocktails. Here’s what you need to make a limoncello spritz:

  • Limoncello: A sweet, lemon-flavored liqueur originating from southern Italy.
  • Prosecco: A sparkling white wine from Italy’s Veneto region, known for its delicate flavor and light bubbles. You can use any type of champagne if desired.
  • Soda water: Use club soda or unflavored sparkling water (we use our SodaStream to make it at home). Avoid tonic water, since it is flavored with quinine and lightly sweetened.

🍾 Tip: A 750 ml bottle of Prosecco is 25 ounces, enough for 8 drinks. If you’re making 2 drinks, a mini bottle is perfect—it holds 187 mL or about 6 ounces!

How to make a limoncello spritz

The limoncello spritz is an incredibly easy to make drink! The spritz requires no cocktail shaker or juicing of citrus: you can build the drink it right in the glass. This makes it a great choice for entertaining, especially in the summer. Here are the basic steps for how to make a limoncello spritz:

Step 1: Add the limoncello to a glass with ice. Add Prosecco and soda water.

Step 1: Stir 2 oz limoncello in a glass with ice to make it cold. Add 3 oz Prosecco and 1 oz soda water.

Step 2: Garnish with mint and serve the limoncello spritz.

Step 2: Garnish with fresh mint and serve.

More about limoncello

If you’ve ever visited Italy, you know limoncello. But what actually is it this ultra strong yellow liquid?

  • Limoncello is an Italian lemon liqueur made by infusing lemon peels into vodka or other neutral spirits. It’s got a searing, straightforward lemon flavor and is the second most popular liqueur in Italy after Campari. You can get it everywhere in Italy, and it’s often served as shots after a big meal.
  • How much does limoncello cost? Limoncello has become very popular in the US, so you should be able to find it easily at your local liquor store. It costs about $20.
  • What else can limoncello be used for? The most popular use for limoncello is drinking it as shots, but it’s equally as good in cocktails! Try it in a Limoncello Mojito with lime and rum, or a Limoncello Martini with vodka and lemon juice.

Step it up: try clear ice!

Want to take your limoncello spritz to the next level? Try making clear ice! This type of ice is crystal clear and looks like what you’d get at a fancy bar. But you can make it at home! All you need is a cooler and 24 hours. Go to How to Make Clear Ice.

Limoncello spritz in stemmed glass with mint.

Other spritz recipes

The spritz is one of the most refreshing cocktails of all time! There are lots of different styles of spritz recipes to try after you try this limoncello spritz:

More lemon cocktails

Lemon flavored cocktails are some of the most refreshing alcoholic drinks! They’ve earned a place in our hearts for their forward citrusy flavor. Here are a few more lemon cocktails if you love limoncello:

Frequently asked questions

What is a Limoncello Spritz?

This refreshing Italian cocktail is a delightful blend of limoncello, prosecco, and soda water. It’s a close cousin to the Aperol Spritz, but with a brighter lemon flavor.

Is a Limoncello Spritz strong?

Compared to some cocktails, it’s on the lighter side. The prosecco has a lower alcohol content than some spirits, and the limoncello typically has less alcohol than rum or vodka. However, always drink responsibly.

What’s the ideal ratio for a Limoncello Spritz?

The classic ratio is 3 parts prosecco, 2 parts limoncello, and 1 part soda water. Feel free to adjust these proportions to your taste preference.

Do I need a special glass for a Limoncello Spritz?

Not at all! A stemmed wine glass or a tumbler filled with ice works perfectly.

What are some fun garnishes for a Limoncello Spritz?

A lemon wedge is a classic and refreshing choice. You can also get creative with a sprig of fresh mint, a few raspberries, or even a thin slice of orange.

Print
Limoncello spritz

Limoncello Spritz


  • Author: Sonja Overhiser
  • Prep Time: 5 minutes
  • Cook Time: 0 minutes
  • Total Time: 5 minutes
  • Yield: 1 drink

Description

Want a bubbly citrus cocktail? Try the limoncello spritz! Here are the secrets to making this delightful Italian cocktail, bursting with sunshine lemon flavor and a delightful fizz. It’s easy to prepare and guaranteed to transport you to a carefree summer state of mind.


Ingredients

  • 2 ounces (4 tablespoons) limoncello, chilled if possible
  • 3 ounces (6 tablespoons) Prosecco or other sparkling wine, chilled
  • 1 ounce (2 tablespoons) soda water
  • Ice (try clear ice!)
  • For the garnish: mint, lemon rounds

Instructions

  1. Add the limoncello to a glass filled with ice and stir.
  2. Top with the sparkling wine and soda water. Add mint and serve. 
  • Category: Drink
  • Method: Poured
  • Cuisine: Cocktails
  • Diet: Vegan

Keywords: Limoncello spritz

Simple Sauteed Broccoli

Make your broccoli taste amazing in just 10 minutes! This easy sauteed broccoli highlights its fresh flavor and comes out…

Make your broccoli taste amazing in just 10 minutes! This easy sauteed broccoli highlights its fresh flavor and comes out perfectly crisp tender.

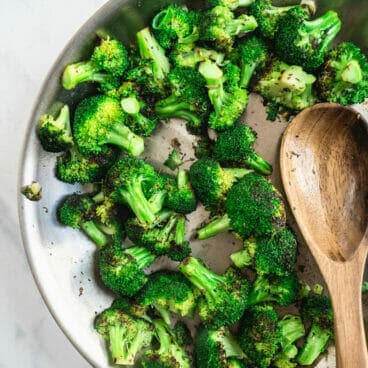
Sauteed broccoli in pan.

In need of a healthy and easy side dish? Here’s a “recipe” that’s more of an idea than anything: sauteed broccoli! It might sound basic, but you’ll be surprised at the amount of flavor it’s possible to get from perfectly cooking this vegetable!

Why we love this recipe: Broccoli is often overcooked, leaving it soggy and without flavor. Here Alex and I will show you our go-to simple sauteed broccoli recipe: how to cook it so it’s lightly browned but perfectly crisp tender and flavorful!

🥦 Other favorite ways to cook broccoli? Try our steamed broccoli, roasted broccoli, and roasted broccoli and carrots recipes, or head to How to Cook Broccoli for more!

Sauteed Broccoli in pan with spoon.

How to make sauteed broccoli…the right way!

Broccoli is basic, right? But so many home cooks cook it way beyond the point of no return. Overcooked broccoli is the worst: it’s limp and lifeless. Instead, you’ll want to cook it just to the point where it’s tender, but still bright green and crisp. Even better: it takes less time! There’s no reason to spend the time extra overcooking it (ha!). Here are our tips on how to make the best sauteed broccoli:

Step 1: Chop the broccoli into florets.

Step 1: Chop into medium-sized florets. Try to leave a good amount of the stem to make a lovely shape, so the broccoli doesn’t look stubby! Chop them into medium-sized pieces: not so small they disintegrate, but not so large they’re too tough to cut.

Step 2: Saute the broccoli in a large skillet.

Step 2: Heat olive oil in a large skillet over medium heat. Add the broccoli and sauté for 5 minutes. Watch the pan and stir so the broccoli doesn’t get too browned. Stir in the seasonings (salt, spices, etc).

Step 3: Cover the broccoli and steam.

Step 3: Cover and cook 2 minutes more. Covering the broccoli at the end locks in the moisture and steams it, helping it to get fully cooked through and tender instead of more browned.

And that’s it! Perfectly seasoned sauteed broccoli in just 10 minutes.

Ways to season sauteed broccoli

The key to great tasting sauteed broccoli is the seasonings! First and foremost, make sure to salt it perfectly to taste. Then to accessorize, we used sliced green onion, Italian seasoning, and garlic powder (see the recipe below). If you have a lemon, topping with lemon zest gives it the perfect zing! Here are a few more ideas for flavoring:

  • Grated Parmesan or Pecorino Romano cheese
  • Feta cheese or goat cheese crumbles
  • Rice vinegar, soy sauce (in place of the last ¼ teaspoon salt), and sesame seeds
  • A drizzle of balsamic reduction
  • Slivered toasted almonds
  • Minced garlic
  • Grated ginger
  • Panko and dried herbs

A bit on broccoli nutrition

Broccoli is a super nutritious cruciferous vegetable! It’s high in fiber (with 2.4 grams per 1 cup), which is helpful for keeping you full and helping with digestion. It also has relatively high protein for a vegetable (2.5 grams per 1 cup), and is high in Vitamin C, K and iron. Read more broccoli nutrition facts here.

Main dishes to pair with it!

Of course, there’s no end to dishes to pair with this sauteed broccoli! It’s so versatile that it literally goes with anything (like a perfect pair of jeans!). Here are a few ideas for mains that would pair nicely:

Dietary notes

This sauteed broccoli recipe is vegetarian, vegan, plant-based, dairy-free, and gluten-free.

Frequently asked questions

What’s the best type of broccoli for sauteing?

Fresh broccoli florets are ideal. Look for firm, deep green florets with tight buds. Avoid broccoli with yellowing florets or a mushy texture.

Can I use frozen broccoli?

We don’t recommend it. Frozen broccoli florets have a softer texture and may release more water during cooking.

Steamed or sautéed? What’s the difference?

Steaming broccoli preserves its vibrant green color and slightly more nutrients. Sautéing allows for browning and caramelization, developing a deeper and more complex flavor.

Do I need to blanch broccoli before sauteing?

Blanching (briefly boiling) broccoli florets for a minute or two before sauteing can help soften them slightly and ensure even cooking. However, it’s not essential, especially if you prefer your broccoli with a bit of a bite.

What can I add to my sauteed broccoli for extra flavor?

The possibilities are endless! Popular additions include garlic, shallots, ginger, red pepper flakes, soy sauce, lemon juice, toasted nuts, or even a sprinkle of parmesan cheese.

Print
Sauteed broccoli

Simple Sauteed Broccoli


  • Author: Sonja Overhiser
  • Prep Time: 3 minutes
  • Cook Time: 7 minutes
  • Total Time: 10 minutes
  • Yield: 4

Description

Make your broccoli taste amazing in just 10 minutes! This easy sauteed broccoli highlights its fresh flavor and comes out perfectly crisp tender.


Ingredients

  • 1 1/2 pounds (2 large heads) broccoli 
  • 2 green onions
  • 2 tablespoons olive oil
  • 2 teaspoons Italian seasoning
  • ⅛ teaspoon garlic powder
  • ½ teaspoon kosher salt, plus more to taste
  • Optional: 1 teaspoon lemon zest
  • Dress it up: Add a sprinkle of shredded Parmesan cheese or feta cheese!

Instructions

  1. Chop the broccoli into medium sized florets (leave a good amount of the stem for a nice shape; see the photo). Thinly slice the green onions.
  2. In a large skillet over medium heat, heat the olive oil. Add the broccoli florets and sauté for 5 minutes, stirring occasionally (the broccoli will lightly brown in parts). Stir in the green onion, Italian seasoning, garlic powder, and kosher salt.
  3. Cover and cook for 2 to 3 minutes more, until crisp tender but still bright green. Taste and add a few pinches of salt if needed (make the flavor pop!) and fresh ground pepper. Remove the broccoli to a bowl and serve immediately. Sprinkle with the lemon zest, if using.
  • Category: Side Dish
  • Method: Sauteed
  • Cuisine: Vegan

Keywords: Sauteed Broccoli

Blueberry Margarita

Calling all berry lovers! This blueberry margarita recipe combines fresh berries with classic margarita ingredients for a refreshingly sweet and…

Calling all berry lovers! This blueberry margarita recipe combines fresh berries with classic margarita ingredients for a refreshingly sweet and tart cocktail bursting with flavor. Impress your guests with this unique twist!

Blueberry margarita in rocks glass with blueberries and lime wedge.

Want a berry-based spin on your favorite drink? Try the blueberry margarita! As two cocktail experts we’ve made margarita recipes of every color of the rainbow, and one is solidly a favorite.

What we love about this recipe: This blueberry margarita has a beautifully sweet tart flavor and a fluorescent pink-purple hue. It’s great for impressing friends for a summer party or barbecue, or for mixing up a single drink to sip on the patio. Alex and I make a lot of margaritas, and outside of the classic margarita recipe this is one of our favorite fruity spins!

Ingredients in a blueberry margarita

The margarita is one of the most popular classic cocktails of all time, invented in Mexico in the 1930’s. The standard recipe is just 3 ingredients: tequila, orange liqueur (Triple Sec or Cointreau), and lime juice. For a blueberry margarita, all you need to do is muddle some fresh blueberries before shaking up the drink! To offset the tartness of the berries, you’ll need a hint of simple syrup. Here are the ingredients you’ll need:

Can you use frozen blueberries?

This blueberry margarita works with either fresh or frozen blueberries. But we recommend thawing the berries first! This isn’t a frozen margarita, so it’s not blended in a blender. Instead, it’s shaken in a cocktail shaker with ice. The flavor is slightly fresher with fresh berries, but the difference is slight.

Blueberries

For the orange liqueur: Cointreau vs Triple Sec

What’s the best orange liqueur for a blueberry margarita: Cointreau or Triple Sec? You can use either, but we’ve got a favorite. Here’s what we recommend:

  • Top choice: Cointreau. Cointreau is a premium orange liqueur with a developed-orange perfume flavor. It has notes of oak and vanilla, which make it taste more sophisticated than Triple Sec.
  • Next choice: Triple Sec. Triple Sec is slightly less refined in flavor than Cointreau: it has a very straightforward orange essence (almost like orange vodka). But either work in a blueberry margarita.

How to make a blueberry margarita: step by step

Here are the basic steps for how to make a blueberry margarita! This margarita is muddled in a cocktail shaker: it’s not made in a blender like our strawberry margarita or raspberry margarita. Here are the basic steps (or jump to the full recipe):

  • Step 1: Cut a notch in a lime wedge, then run the lime around the rim of a glass. Dip the edge of the rim into a plate of salt (or for a festive look, use Margarita Salt).
  • Step 2: Place ¼ cup blueberries in the bottom of a cocktail shaker, and muddle them until fully mashed. Add the 1 ½ oz tequila, 1 oz Cointreau, ½ oz lime juice, and ½ oz simple syrup to a cocktail shaker and fill it with ice. Shake until cold.
  • Step 3: Strain the margarita into the glass with the salted rim. Fill the glass with ice and garnish with a lime wedge and extra blueberries.
Blueberry Margarita in rocks class with clear ice.

Make a blueberry margarita pitcher (8 servings)

Mixing up drinks for a crowd? You can easily make a blueberry margarita pitcher: just multiply this recipe times 4! You can make the recipe right in the pitcher; there’s no need to shake and strain. Here’s what to do:

  • Mash 2 cups blueberries and strain them into a pitcher.
  • Add 1 ½ cups tequila, 1 cup Triple Sec, ½ cup lime juice. and ½ ounce simple syrup.
  • Add 3 handfuls of ice and stir until cold. Pour into glasses and serve!

More margarita recipes

There are so many fruity ways to make a margarita! Here are some of our top margarita recipes:

Frequently asked questions

Fresh or frozen blueberries?

Fresh blueberries are ideal for the best flavor and texture. However, frozen blueberries can work in a pinch, but they will need to be thawed and may dilute the drink slightly.

Do I need to muddle the blueberries?

Yes, muddling the blueberries releases their juices and intensifies the flavor.

What type of tequila should I use?

A silver or blanco tequila is the most common choice for margaritas, including the blueberry version. It offers a clean and crisp base that allows the blueberry flavor to shine.

Can I use a different type of sweetener?

Yes! Simple syrup, agave nectar, or even honey can be used to sweeten your margarita to taste.

What can I add for a citrusy kick?

A splash of fresh lime juice will add a classic margarita element alongside the blueberry sweetness. You can also use a lime wedge for rimming the glass.

What’s the best way to rim the glass for a blueberry margarita?

For a unique touch, rim the glass with a sugar rim. For a festive twist, use a Tajin rim (chili-lime powder blend) for a sweet and spicy contrast.

What’s a fun way to garnish a blueberry margarita?

Fresh blueberries make a perfect and thematic garnish! A sprig of mint or a lime wedge also add a refreshing touch.

Print
Blueberry margarita

Fresh Blueberry Margarita


  • Author: Sonja Overhiser
  • Prep Time: 5 minutes
  • Cook Time: 0 minutes
  • Total Time: 5 minutes
  • Yield: 1 drink

Description

Calling all berry lovers! This blueberry margarita recipe combines fresh berries with classic margarita ingredients for a refreshingly sweet and tart cocktail bursting with flavor. Impress your guests with this unique twist!


Ingredients

  • ¼ cup fresh blueberries, plus more for the garnish
  • 1 ½ ounces* tequila blanco or reposado
  • 1 ounce Cointreau (or Triple Sec)
  • ½ ounce lime juice
  • ½ ounce simple syrup or agave syrup**
  • Kosher salt, for the rim (optional)
  • Ice, for serving (try clear ice)

Instructions

  1. Cut a notch in a lime wedge, then run the lime around the rim of a glass. Dip the edge of the rim into a plate of salt (or for a festive look, use Margarita Salt).
  2. Place the blueberries in the bottom of a cocktail shaker, and muddle them until fully mashed. Add the tequila, Cointreau, lime juice, and simple syrup to a cocktail shaker and fill it with ice. Shake until cold.
  3. Strain the margarita into the glass with the salted rim. Fill the glass with ice and garnish with a lime wedge and extra blueberries.
  4. Margarita pitcher variation: Mash 2 cups blueberries, then strain the juice into a pitcher. Add 1 ½ cups tequila, 1 cup Triple Sec, ½ cup lime juice. and ½ ounce simple syrup. Add 3 handfuls of ice and stir until cold. Pour into glasses and serve.

Notes

*To convert to tablespoons, 1 ounce = 2 tablespoons

**Maple syrup also works as a natural sweetener for margaritas; it adds a nuanced sweetness without tasting like maple. 

  • Category: Drink
  • Method: Shaken
  • Cuisine: Cocktails
  • Diet: Vegan

Keywords: Blueberry margarita, Blueberry margarita recipe

How to Steam Vegetables

Here’s how to steam vegetables to get them on the table fast! Use this method to avoid soggy and bland…

Here’s how to steam vegetables to get them on the table fast! Use this method to avoid soggy and bland veggies: here they turn out crisp tender and delicious every time.

How to steam vegetables: steamed broccoli in steamer

Want to steam vegetables? We’re here to help! Steaming one of the quickest vegetable cooking methods there is. It also has a bad rap, since if not done properly it can result in overcooked, bland, and soggy veggies.

But guess what? If you cook them until crisp tender and season them correctly, the veggies come out delicious every time! Here’s our master method for how to steam vegetables: the right way.

Vegetable steaming methods

First, you have a specific vegetable in mind, we’ve got several specific recipes for you. Pick from one of the methods below:

Gear required for steaming

You’ll need a steamer basket or steamer pan to make this recipe. Here’s a steamer basket you can buy online that works for any pan you have. In these photos, you’ll see we used a skillet with a custom steamer basket. It’s an option too, but not required for steaming!

How to steam vegetables: a tutorial

The most important thing to remember when steaming vegetables: don’t be tempted to overcook them. Steam the vegetables until they’re crisp tender. You’ll need to be ready to taste test, fork in hand! Cooking vegetables even a few minutes past the right timing makes them go from bright and crisp to faded and mushy. Here’s how to steam vegetables using a steamer basket:

Step 1: Chopping vegetables.

Step 1: Chop the vegetables into uniform bite-sized pieces, which helps them to cook evenly. The thicker the vegetable, the longer it will take to cook. (This is important for hard vegetables like carrots: the smaller the pieces, the shorter the cook time.)

Step 2: Steaming vegetables in steamer basket.

Step 2: Add 1 inch water to the bottom of the saucepan or pot, then place the steamer basket in the pot. The surface of the water should be just under the basket. Bring it to a boil. Once boiling, add the vegetables to the basket and cover with a lid.

Step 3: Taste testing steamed vegetables.

Step 3: Cook covered, until just tender when pricked with a fork. As a rule of thumb, broccoli takes 3 to 5 minutes, green beans and carrots 4 to 5 minutes, and cauliflower 10 to 12 minutes. (See the Vegetable Timing Chart below.) Taste test to be sure; the exact cook time varies based on the thickness and maturity of the vegetable.

Step 4: Carefully remove the veggies to a bowl, then toss with a bit of olive oil or butter and kosher salt. If you’d like, add flavor by using fresh lemon juice, fresh herbs, feta cheese crumbles, or other spices.

Vegetable timing chart

Each vegetable takes a different amount of time to steam. Here is a chart with the approximate timing for common vegetables:

  • Asparagus: 2 to 5 minutes
  • Broccoli: 3 to 5 minutes
  • Green Beans: 4 to 5 minutes
  • Carrots: 4 to 5 minutes, depending on how thick you cut them
  • Brussels sprouts: 6 to 7 minutes
  • Cabbage: 7 to 10 minutes
  • Cauliflower: 10 to 12 minutes
  • Baby potatoes: 10 to 15 minutes
  • Sweet potatoes: 25 to 35 minutes (halved, shorter for diced)
Steamed broccoli

More side dish ideas

Steaming vegetables is a fantastic way to make them into a quick and easy side dish! Here are a few more of our favorite side dish resources:

Frequently asked questions

What’s the difference between steaming and boiling vegetables?

Steaming uses steam to cook vegetables, preserving more nutrients and their vibrant colors compared to boiling. Boiling vegetables can leach out vitamins and minerals into the water.

Do I need a fancy steamer?

No! You can easily steam vegetables at home with basic kitchen equipment. A pot with a lid and a steamer basket or colander that fits snugly inside will do the trick.

What’s the best way to cut vegetables for steaming?

Cut vegetables into uniform, bite-sized pieces for even cooking. This ensures all pieces cook through at the same time.

How much water do I need for steaming?

You only need a small amount of water – about 1-2 inches – in the bottom of the pot. The vegetables steam from the rising steam, not by being submerged in water.

How long does it take to steam vegetables?

Cooking time depends on the type and thickness of the vegetables. Tender vegetables like asparagus or green beans will cook in just a few minutes, while denser vegetables like carrots or potatoes will take longer. See the Vegetable Timing Chart above!

How can I tell if my vegetables are done?

The vegetables should be tender-crisp, with a slight bite when pierced with a fork.

Can I steam frozen vegetables?

You can, but keep in mind the vegetables will come out with a soft texture. Shorten the cook time by a few minutes and taste test to assess doneness.

Print
Steamed broccoli

How to Steam Vegetables


  • Author: Sonja Overhiser
  • Prep Time: 5 minutes
  • Cook Time: 5 to 10 minutes
  • Total Time: 4 minute
  • Yield: Varies

Description

Here’s how to steam vegetables to get them on the table fast! Use this method to avoid soggy and bland veggies: here they turn out crisp tender and delicious every time.


Ingredients

  • Vegetable of your choice (broccoli, cauliflower, green beans, carrots)
  • Olive oil
  • Kosher salt
  • Freshly ground black pepper

Instructions

  1. Chop: Chop the vegetables into uniform pieces.
  2. Boil water: Place about 1 inch of water in a pot or saucepan. If using a steamer basket without a handle, add it to the pot now: the water surface should be right under the basket. Bring the water to a boil.
  3. Steam: Once boiling, add the vegetables (in the steamer basket, if it has a handle). Steam with the lid on until crisp tender, taste testing with a fork to assess doneness. Make sure not to overcook! Set a timer and taste at the low end of the timing. Use a guide of: 3 to 5 minutes for asparagus and broccoli, 4 to 5 minutes for carrots and green beans, 6 to 7 minutes for Brussels sprouts, 7 to 10 minutes for shredded cabbage, 10 to 12 minutes for cauliflower, 10 to 15 minutes for baby potatoes, and 25 to 35 minutes for halved sweet potatoes. 
  4. Season: Carefully remove the vegetables to a bowl. Toss with olive oil, kosher salt, and freshly ground black pepper to taste. If you’d like, add other flavors like dried or fresh herbs, spices, fresh lemon juice, or chopped herbs. 
  • Category: Side Dish
  • Method: Steamed
  • Cuisine: Vegetables

Keywords: How to Steam Vegetables

Beer Margarita

Beergarita, beerita: call it what you will! This beer margarita recipe is a refreshing twist on the classic, blending tangy…

Beergarita, beerita: call it what you will! This beer margarita recipe is a refreshing twist on the classic, blending tangy lime and tequila with the crispness of your favorite beer. It’s easy to make, perfect for parties, and guaranteed to be a crowd-pleaser.

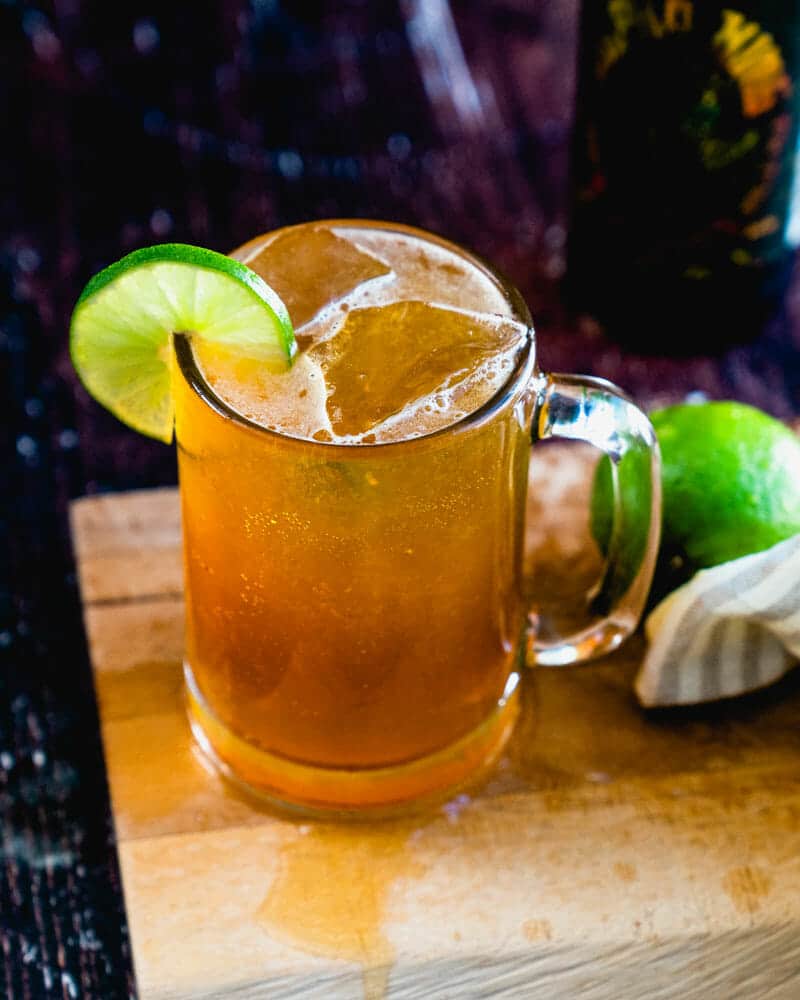
Beer Margarita in glass mug with lime.

Why not add a little lager to your margarita? Yes, a beer margarita is a fun spin on the classic margarita, also known as a beergarita or a beerita. Turns out, hops pair perfectly with the tart lime and orange perfume of a margarita.

Why we love this recipe: Many beer margarita recipes call for frozen limeade concentrate. But that’s not what a great cocktail is made of, is it? This beer margarita recipe has no limeade: just pure lime juice against the citrus and bitter notes of a beer. It became an instant favorite around here!

🍺 Want more beer cocktails? Try the Michelada or Chelada!

What’s in a beer margarita?

As the name suggests, a beer margarita is simply a margarita served with beer. The margarita itself is a classic alcoholic drink on the list of International Bartender Association’s IBA official cocktails. The beerita adds beer to the mix, along with a little simple syrup:

  • Tequila
  • Cointreau (orange liqueur)
  • Lime juice
  • Beer
  • Simple syrup

As mentioned above: most beer margarita recipes call for frozen limeade concentrate. For our take, we wanted to stick with the classic margarita: so we simply used our margarita recipe, plus beer and a hint of simple syrup. The flavor is so pure, tangy, and nuanced from the beer: it was an instant hit at our house!

Beer margarita recipe.

The type of beer for a beergarita

To make a great beer margarita, you can’t use just any old beer! There are a few options we recommend:

  • Use a lager for a classic flavor, like Corona since it’s a Mexican beer. Or,
  • Step it up Craft IPA! This is what we did for ours, and it really took it over the top. Choose a hoppy IPA with citrus notes.
  • Avoid strong or hoppy beers that might overpower the margarita flavors.

How to make a beer margarita

To mix up your own beer margarita, there’s not much to it! You don’t even need to use a cocktail shaker with this one, which makes it even easier. Here’s what to do:

  1. Rim the glass with salt. Salt enhances the sweet and sour flavors in the drink, and gives you that classic margarita flavor.
  2. Stir together in the serving glass. Take the tequila, lime juice, simple syrup, and Cointreau, and stir it together in a glass.
  3. Add ice and pour in the chilled beer. The beer adds just the right bubbly carbonation to this classic drink.
Beergarita in glass mug with lime and clear ice.

Ideas for the salt rim

For this beer margarita, we skipped the salt rim for a little variation. (Hey, we have 25 other margarita recipes and they all have a salt rim!) It’s not needed for the flavor. But if you love that classic margarita salty zing, feel free to add it prior to mixing up your beergarita.

The best salt for a salt rim? Use kosher salt or flaky sea salt, since they have the best coarse texture. If you want to make it look even more festive, try a batch of our margarita salt. The green and orange colors of lime and orange zest look beautiful against the glass.

Beerita in mug.
This beer margarita uses clear ice for a stunning look

How to serve a beer margarita

The beergarita is really perfect for anytime you’d serve a regular margarita! It’s great with Mexican-style food of all kinds: serve with shrimp tacos, guacamole, salsa, and grilled corn for a stellar meal.

More margarita recipes

We’ve got all sorts of variations on the margarita outside of this beerita! Pick from one of these fun and fruity margarita recipes.

Frequently asked questions

What is a beer margarita?

This unique cocktail combines the classic margarita flavors of tequila, lime juice, and orange liqueur with the crispness and fizz of your favorite beer.

Won’t it taste weird?

Surprisingly, no! The tartness of the margarita complements the bitterness of the beer, creating a refreshingly balanced drink.

What kind of beer is best for a beer margarita?

Light beers like lagers, pilsners, or wheat beers work best. Avoid strong or hoppy beers that might overpower the margarita flavors.

Should I build the drink or shake it?

Building the drink (layering ingredients) is the preferred method. Shaking it can create too much foam.

Do I need a special glass for a beer margarita?

Not at all! We suggest using a glass mug, pint glass, or mason jar for a more casual feel.

Print
Beer cocktails

Beer Margarita


  • Author: Sonja Overhiser
  • Prep Time: 5 minutes
  • Cook Time: 0 minutes
  • Total Time: 5 minutes
  • Yield: 1 drink

Description

Beergarita, beerita: call it what you will! Here’s the best beer margarita recipe: fresh and all natural with real lime and tequila.


Ingredients

  • 1 ½ ounces* tequila blanco or reposado*
  • 1 ounce Cointreau
  • 1 ounce fresh lime juice
  • ½ ounce simple syrup
  • 4 ounces chilled beer (lager for classic taste, hoppy IPA with citrus notes for something more interesting)
  • Ice, to serve
  • Garnish: lime wheel
  • Optional: kosher salt for salt rim

Instructions

  1. Optional: Cut a notch in a lime wedge, then run the lime around the rim of a glass. Dip the edge of the rim into a plate of flaky sea salt (or for a festive look, use our Margarita Salt).
  2. Add tequila, Cointreau, lime juice, and simple syrup to the serving glass and stir to combine.
  3. Add ice and pour beer over top. Garnish with a lime wheel.

Notes

*To convert to tablespoons, 1 ounce = 2 tablespoons. 

  • Category: Drinks
  • Method: Stirred
  • Cuisine: Cocktails
  • Diet: Vegan

Keywords: Beer margarita, Beer margarita recipe, Beergarita, Beerita

Strawberry Margarita

This strawberry margarita recipe is frosty, fruity and refreshing! It’s easy to make with frozen berries and a blender, a…

This strawberry margarita recipe is frosty, fruity and refreshing! It’s easy to make with frozen berries and a blender, a delightful balance of sweet and tart that’s perfect for parties.

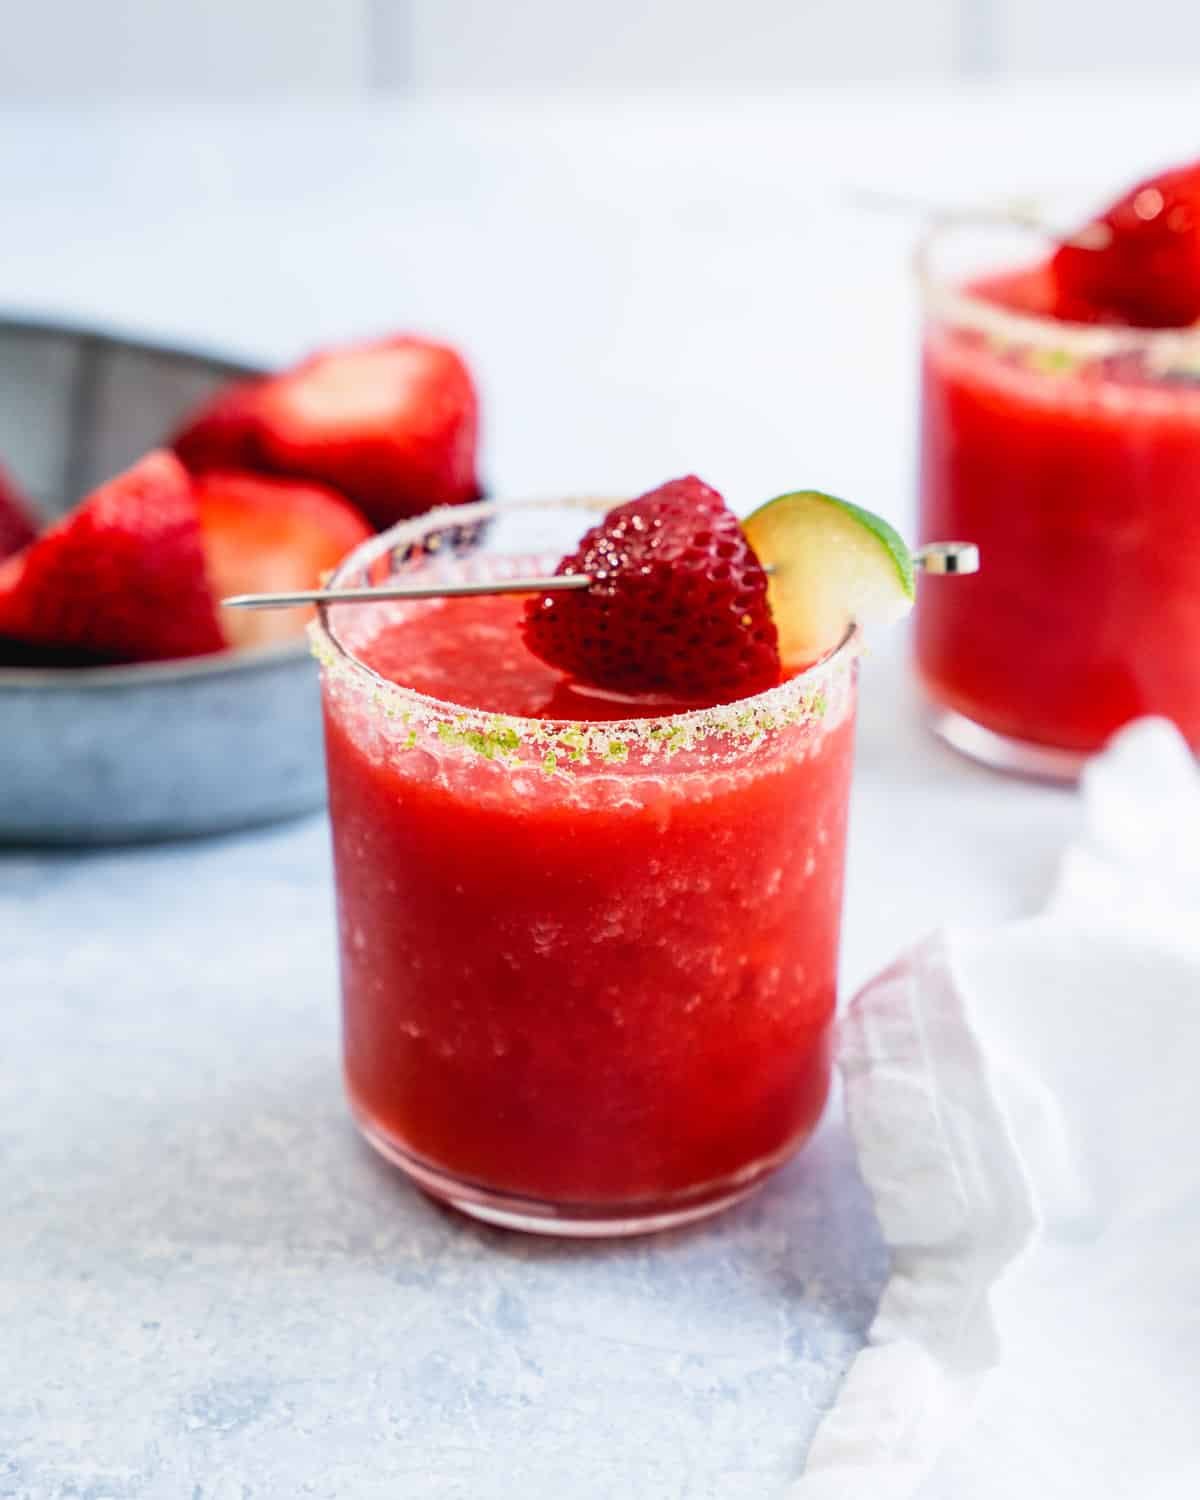
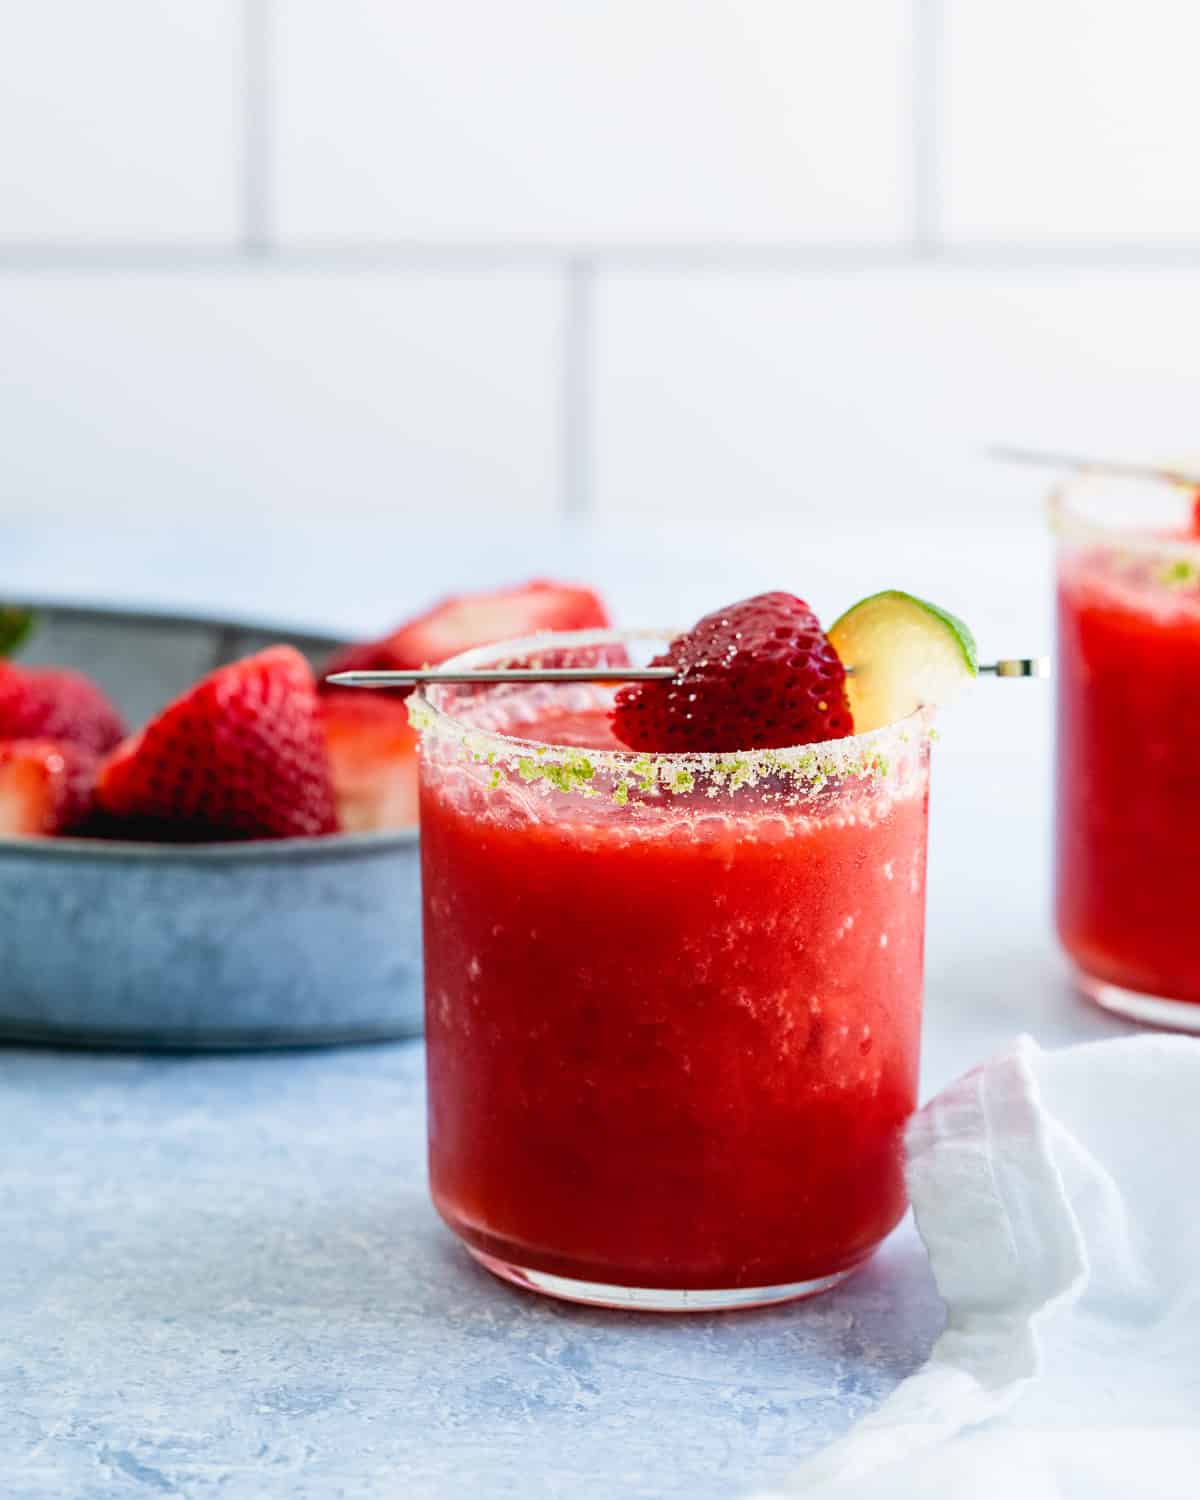
Strawberry Margarita in rocks glass with salt rim and strawberry garnish

Love margaritas but want a fruity spin? Try this tasty and refreshing Strawberry Margarita recipe! This one is frosty and fruity, full of sweet berry flavor and perfectly complimented with the zing of lime and tequila.

Why we love this recipe: The margarita pairs perfectly with fruit, and we’ve already got several fruity margarita recipes under our belt, like watermelon, mango and peach. But the strawberry margarita is our favorite! We’re 100% in love with its vibrant red color and sweet tart flavor.

Ingredients in a strawberry margarita

The margarita is one of the most popular cocktails of all time, and the classic definition has just three ingredients: lime juice, Cointreau, and tequila. That’s what’s in our classic margarita recipe, our very favorite of them all. This strawberry margarita is like a combination between the classic and a frozen margarita! It’s made in a blender, and comes out with a frosty texture. Here are the ingredients you’ll need:

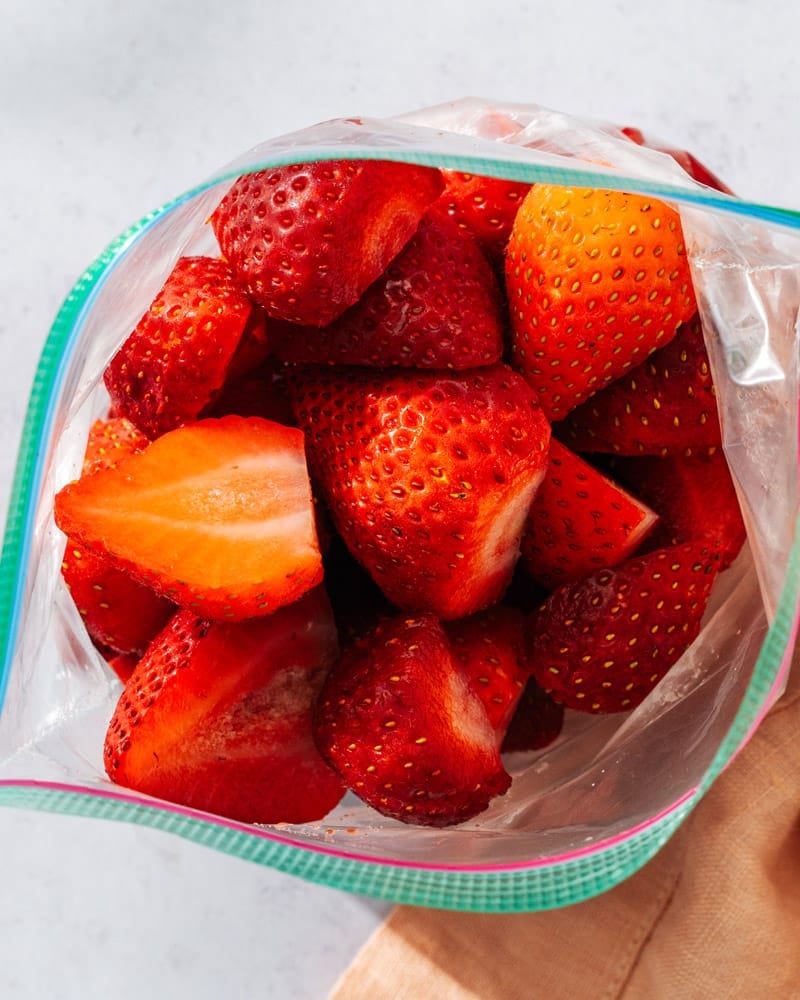
Frozen strawberries

How to make a strawberry margarita

The strawberry margarita is made in a blender, so it’s not the standard way to make a classic margarita. It’s actually even easier, since you don’t need a cocktail shaker! This strawberry margarita recipe makes two drinks, so you can drink with a friend or partner, or increase the amounts of a larger size. Here’s what to do (or go to the full recipe below):

  1. Step 1: A salted rim is a must: the salt enhances the sweet and sour flavors in the drink.
  2. Blend! Place all ingredients in a blender and blend until it’s full combined and creamy.

For a more liquid texture, keep on blending

The texture of this strawberry margarita is icy, but you can also make it more of a room temperature fruity margarita. Just keep blending it! If you blend for a few minutes, it will become less icy and have more of a blended, juice like texture.

  • Icy texture: Keep it frozen for a smoothie-like texture by blending just until it’s fully integrated and icy.
  • Juicy texture: If you keep blending for a few minutes, you can get to a texture that’s more like juice. It’s still cold, but you can taste the flavors even more when it’s not as icy.

Which texture do we prefer? Well, we like it both ways! Personally I like it a little warmer so I can taste the sweet berries and edge of the tequila. But keep it icy and it’s a perfect summer cocktail for a hot afternoon on the patio.

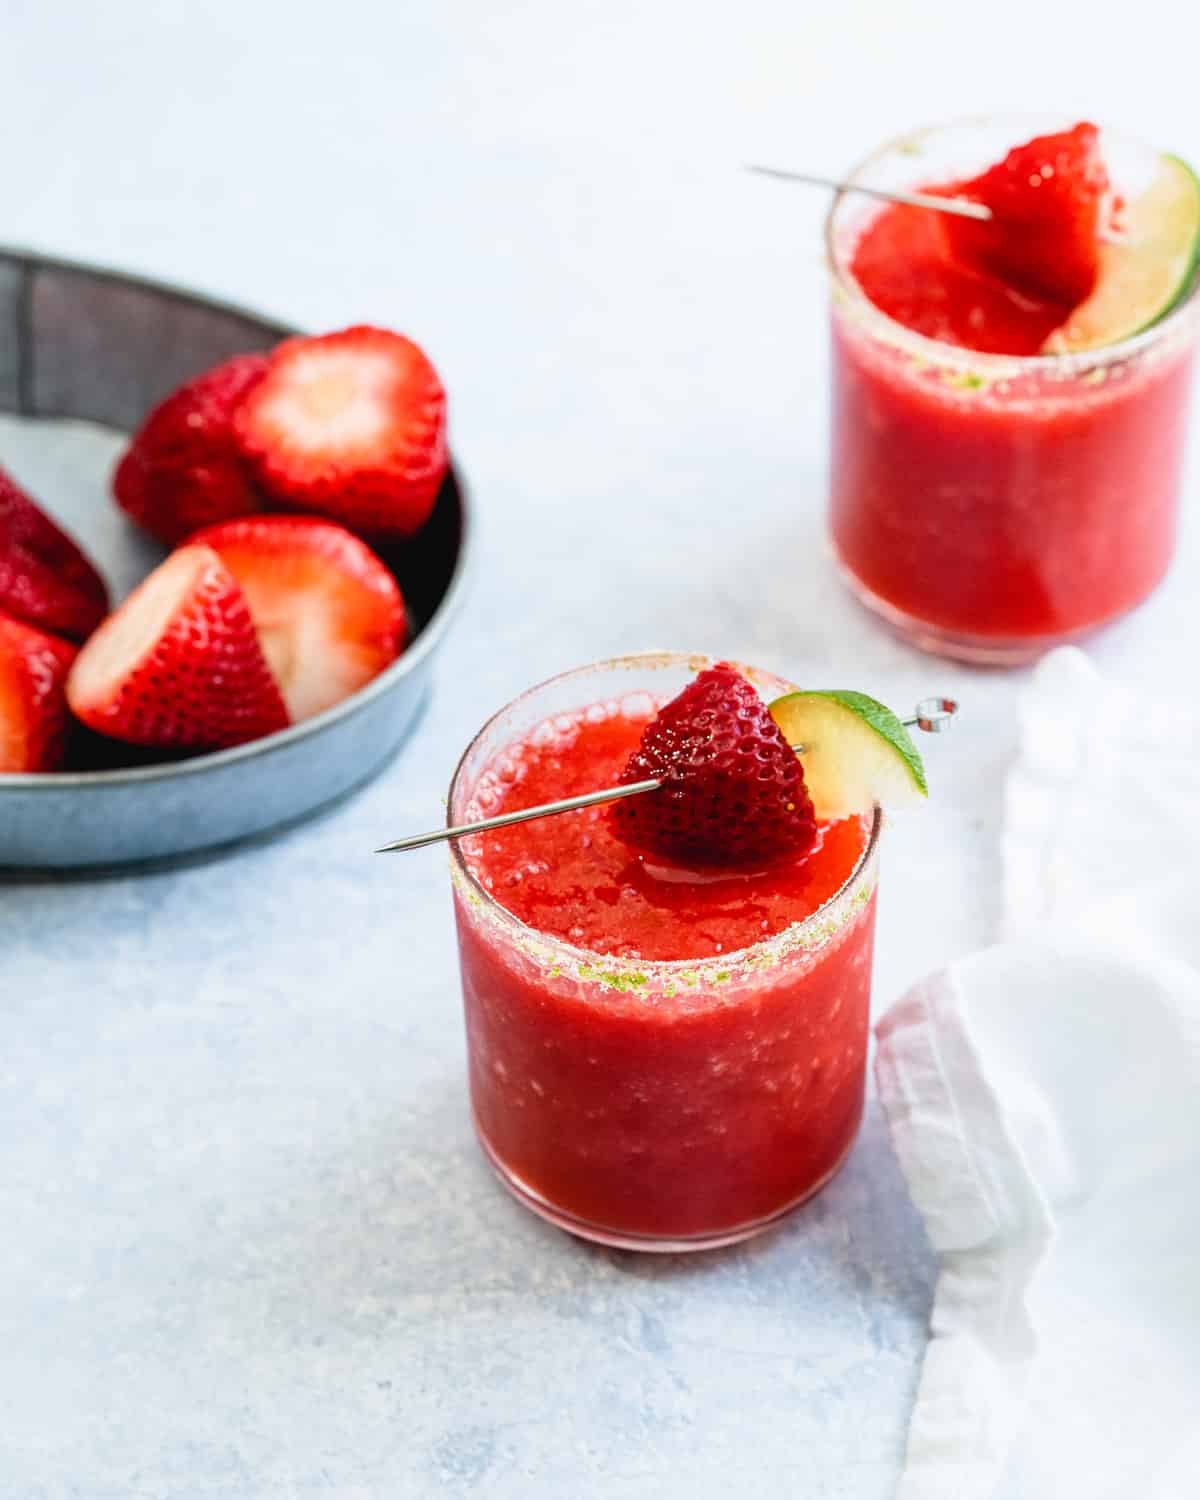
How to make a strawberry margarita: margarita glass with strawberry garnish

What tequila for strawberry margaritas?

You can use any type of tequila for this strawberry margarita, but keep the following in mind:

  • Buy at least mid-range tequila. This cocktail tastes only as good as the quality of alcohol. Look for 750 ml bottles in the range of $22 to $35.
  • Tequila blanco or reposado works, but fruity margaritas are best with tequila blanco. We love the nuance that comes with using tequila reposado (aged) in margaritas. But for this fruity margarita with an icy texture, you can use tequila blanco! Some brands we recommend are Espolon Blanco, El Tesoro Blanco, Patrón Silver, and Casamigos.

Can I use fresh strawberries instead of frozen?

You can use either ripe fresh strawberries or frozen strawberries in this strawberry margarita recipe! Using fresh berries, the texture will come out with the juicy texture mentioned above.

The advantage of using frozen berries is the icy texture, kind of like a strawberry daiquiri but not as thick. Frozen berries are also very easy to store, making it simple to whip up strawberry margaritas on demand!

🍓 Want more with strawberries? Try our Best Strawberry Cocktails.

Ideas for the salt rim

To take the drink presentation over the top, try our homemade margarita salt for the salt rim! You can even skip the orange zest and simply use lime (as shown). Tajín is another great option for the rim, a Mexican seasoning blend that adds a burst of tangy, spicy flavor.

Strawberry margarita recipe

More margarita recipes

We have lots of margarita recipes! We’ve got one for just about any occasion! Let us know if you find a favorite:

Frequently asked questions

What kind of strawberries are best for a margarita?

Frozen strawberries are ideal for this strawberry margarita recipe. Fresh strawberries can be used too, and they make for more of a juicy texture.

Do I need to muddle the strawberries?

This is a blender margarita recipe, so muddling is not needed!

What type of tequila should I use?

A silver or blanco tequila is the most common choice for margaritas, including the strawberry version. It offers a clean and crisp base that allows the strawberry flavor to shine.

Can I use a different type of sweetener?

Yes! Simple syrup, agave nectar, or even honey can be used to sweeten your margarita to taste.
What can I add for a spicy kick?

Add the slices of ¼ jalapeno pepper, deseeded, and blend to combine.

Print
Strawberry Margarita

Perfect Strawberry Margarita


  • Author: Sonja Overhiser
  • Prep Time: 5 minutes
  • Cook Time: 0 minutes
  • Total Time: 5 minutes
  • Yield: 2 drinks

Description

This strawberry margarita recipe is frosty, fruity and refreshing! It’s easy to make with frozen berries and a blender, a delightful balance of sweet and tart that’s perfect for parties.


Ingredients

  • 3 ounces (6 tablespoons) tequila*
  • 3 ounces (6 tablespoons) Cointreau
  • 2 ounces (4 tablespoons) fresh lime juice
  • 10 ounces (1 ½ cups) frozen whole strawberries (fresh work too!)
  • 1 tablespoon simple syrup, agave syrup, or maple syrup
  • 1 cup ice

Instructions

  1. Cut a notch in a lime wedge, then run the lime around the rim of two glasses. Dip the edge of each rim into a plate of salt (or for a festive look, use margarita salt).
  2. Place all ingredients in a blender. Blend until fully combined: you can blend until it’s an icy texture, or keep blending for a minute or so until it’s more liquid. Taste and add additional sweetener if desired. Pour into the glasses and serve.

Notes

*Easily doubles for 4 drinks or triples for 6 drinks, based on the size of your blender (use the 2x and 3x button). 
For a sweet margarita: Add make it with double the simple syrup or maple syrup, and add more to taste if desired.

For other fruit variations: Replace half of the frozen strawberries with frozen mangoes, peaches, or pineapple for different flavor combinations. Adjust the sweetener to taste.

For a spicy margarita: Remove the seeds from ¼ jalapeño pepper and roughly chop it. Add it to the blender and blend.

Rim variations: Try margarita salt or a Tajín rim, a Mexican seasoning blend of chili peppers, lime, and salt that adds a burst of tangy, spicy flavor.

  • Category: Drink
  • Method: Blended
  • Cuisine: Vegan
  • Diet: Vegan

Keywords: Strawberry margarita recipe, strawberry margarita