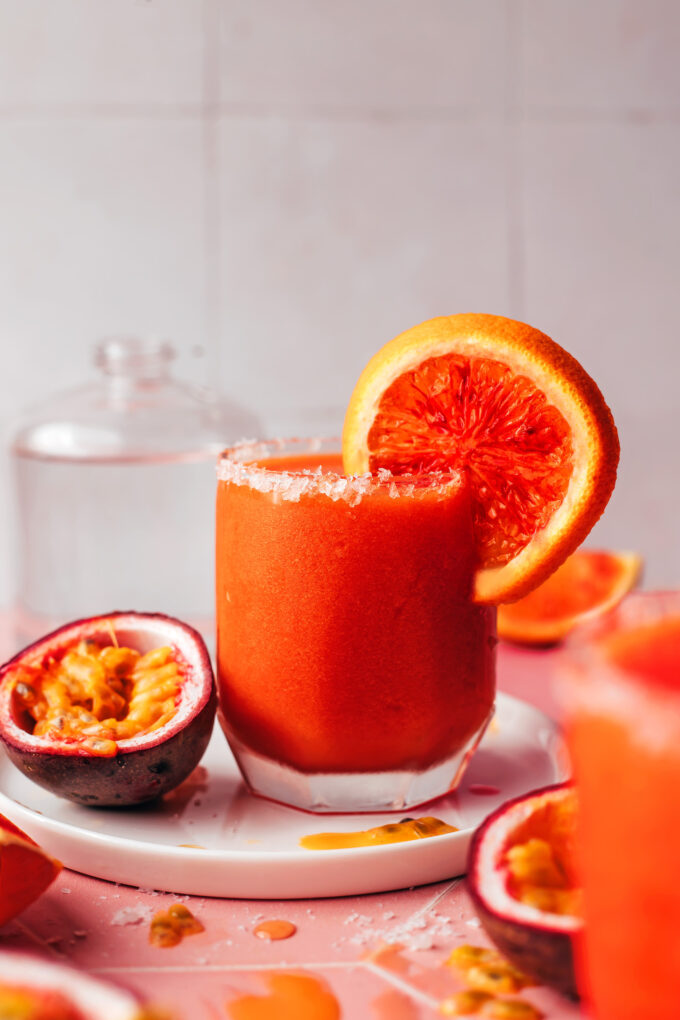
We love a margarita, but a mezcalita? Do tell. A mezcalita has the familiar sweet and tart elements of a margarita, but with the added smoky complexity of mezcal. This frozen version is SO refreshing and bursting with passion fruit for a fun and fruity…
We love a margarita, but a mezcalita? Do tell. A mezcalita has the familiar sweet and tart elements of a margarita, but with the added smoky complexity of mezcal. This frozen version is SO refreshing and bursting with passion fruit for a fun and fruity twist.
Bonus? It’s (ridiculously) quick and easy with just 4 ingredients and 5 minutes required. Let us show you how it’s done!
This Italian margarita recipe uses amaretto to give this classic cocktail a makeover! Fresh orange juice and almond liqueur bring…
This Italian margarita recipe uses amaretto to give this classic cocktail a makeover! Fresh orange juice and almond liqueur bring unique twist to the flavors that’s irresistible.
Want a simple makeover for your margarita? Try this Italian margarita recipe! Just like Mexican Pizza, this drink is a fusion of the best of Italian and Mexican cuisines: this time in cocktail form!
Why we love this recipe: This Mediterranean version of the classic cocktail swaps out orange liqueur for amaretto, and the almond essence adds a distinctly Italian vibe. Alex and I are big fans of traveling in Italy (Rome, Naples, and the Amalfi Coast are faves): so of course we had to try the Italian margarita!
Ingredients in an Italian margarita
An Italian margarita is a variation on a classic margarita that uses amaretto in place of the orange liqueur (Cointreau), in combination with orange juice, lime juice, and tequila. The flavor has notes of almond and citrus on the finish, but the beginning of the sip tastes like your favorite margarita. Think of it as a sophisticated version of a margarita, kind of like the Cadillac Margarita. Here’s what’s in an Italian margarita:
Tequila
Orange or blood orange juice
Amaretto
Lime juice
Use blood orange juice for the brilliant color
You can use orange juice from a standard navel orange and this Italian margarita turns out with a warm orange color. But for a brilliantly colored cocktail, use blood orange juice!
Blood oranges have sweet juice and a bright pink color. We love this spin on it because it’s so eye-catching, just like our blood orange margarita. If you can find blood oranges, they’re absolutely worth buying. You can also find bottled blood orange juice at many grocery stores.
Cheater tip: If you like the look but can’t find blood oranges, a drizzle of pomegranate juice or cranberry juice would work too!
What’s the best tequila to use?
Many people suggest using tequila blanco for margaritas, but generally we prefer the robust flavor of tequila reposado. Here’s what to know about the best tequila for margaritas
Tequila blanco (silver or white tequila) has been aged less than 2 months and has a strong, straightforward flavor.
Tequila reposado (“rested” in Spanish) is aged longer, from 2 to 12 months. It has a more nuanced flavor, with notes of oak and vanilla.
Either way, try to find a mid-price range tequila when you make an Italian margarita. Look for 750 ml bottles in the range of $22 to $35.
What is amaretto?
Amaretto is an almond liqueur that originates from Italy. Today it’s made around the world and is stocked in bars worldwide. It has a distinctive flavor that’s both sweet and bitter (amaretto means in Italian “little bitter”). You may know the flavor from the popular amaretto cookies, a popular Italian sweet.
The Italian margarita follows the typical margarita pattern: salt the rim, shake in a cocktail shaker, strain, garnish, serve. Shaking the drink allows it to get thoroughly chilled while slightly diluting the alcohol. Here’s an overview of how to make an Italian margarita (or jump to the recipe below):
Step 1: Rim the glass with salt. Our favorite way is to cut a notch in a lime wedge and run it around the glass. Then dip the glass into a plate of kosher salt or flaky sea salt and rotate until the rim is covered.
Step 2: Shake the tequila, orange juice, lime juice, and amaretto in a cocktail shaker with 4 ice cubes until cold.
Step 3: Strain into the glass and serve. Garnish with an orange and lime wedge. You’ve made your Italian margarita!
Food to serve with Italian margaritas
Quick note: what type of food would you serve with Italian margaritas? You can go either way: Mexican or Italian style!
The drink is pretty tequila-forward, so you could go Mexican and serve with chips, guacamole, and shrimp tacos.
Last note: here are a few ways to take this Italian margarita over the top! Alex and I love to make these when we have time:
Clear ice is artisanal ice that is perfectly clear (not cloudy), and looks like fancy ice you’d get in a bar. It’s absolutely game changing for your homemade cocktails!
This margarita salt with colorful orange and green of citrus zest is eye-catching and perfect for entertaining.
More margarita recipes
Alex and I are big margarita fans over here, so we’ve got lots of spins on this classic drink. Here are some of our favorite margarita recipes:
While amaretto is a key ingredient, an Italian Margarita offers a more complex flavor profile compared to a classic margarita. The amaretto adds a touch of almond sweetness that complements the tequila and lime.
What makes it “Italian”?
Amaretto, a sweet almond liqueur, is originally from Italy. This liqueur adds a distinctive Italian touch to the margarita.
Is it shaken or stirred?
An Italian Margarita is typically shaken with ice to create a frothy texture, similar to a classic margarita.
What’s the best way to rim the glass?
For an Italian touch, dip the rim of the glass in amaretto before coating it with sugar or a coarse salt like sea salt.
Do I have to use blood orange juice?
Not at all! You can use standard orange juice and the drink will be orange in color.
This Italian margarita recipe uses amaretto to give this classic cocktail a makeover! Fresh orange juice and almond liqueur bring unique twist to the flavors that’s irresistible.
Ingredients
2 ounces (4 tablespoons) tequila blanco or reposado*
1 ½ ounces (3 tablespoons) fresh squeezed orange juice or blood orange juice
Cut a notch in a lime wedge, then run the lime around the rim of a glass. Dip the edge of the rim into a plate of kosher or flaky sea salt.
Place all ingredients in a cocktail shaker with 4 ice cubes and shake until cold.
Strain the margarita into the glass with the salted rim. Fill the glass with ice and serve garnished with a lime wedge and orange slice. (Consider using our clear ice for an artisan touch.)
Notes
Using blood orange juice gives the drink a bright red color; you can also use fresh squeezed orange juice for an orange color. Both drinks taste similarly citrusy.
For fun rim ideas, try margarita salt (with orange and lime zest), or a spicy Tajin rim. You could also use superfine sugar for rimming to bring out the sweet notes in the amaretto.
This sweet and creamy custard-based ice cream is flavored with candied orange syrup and features a swirl of rich and chewy chocolate fudge and bits of candied orange peel studded throughout. Inspired by a particularly memorable cone of gelato from our travels, Crema del Doge is a flavor fit for a king: sweet cream with […]
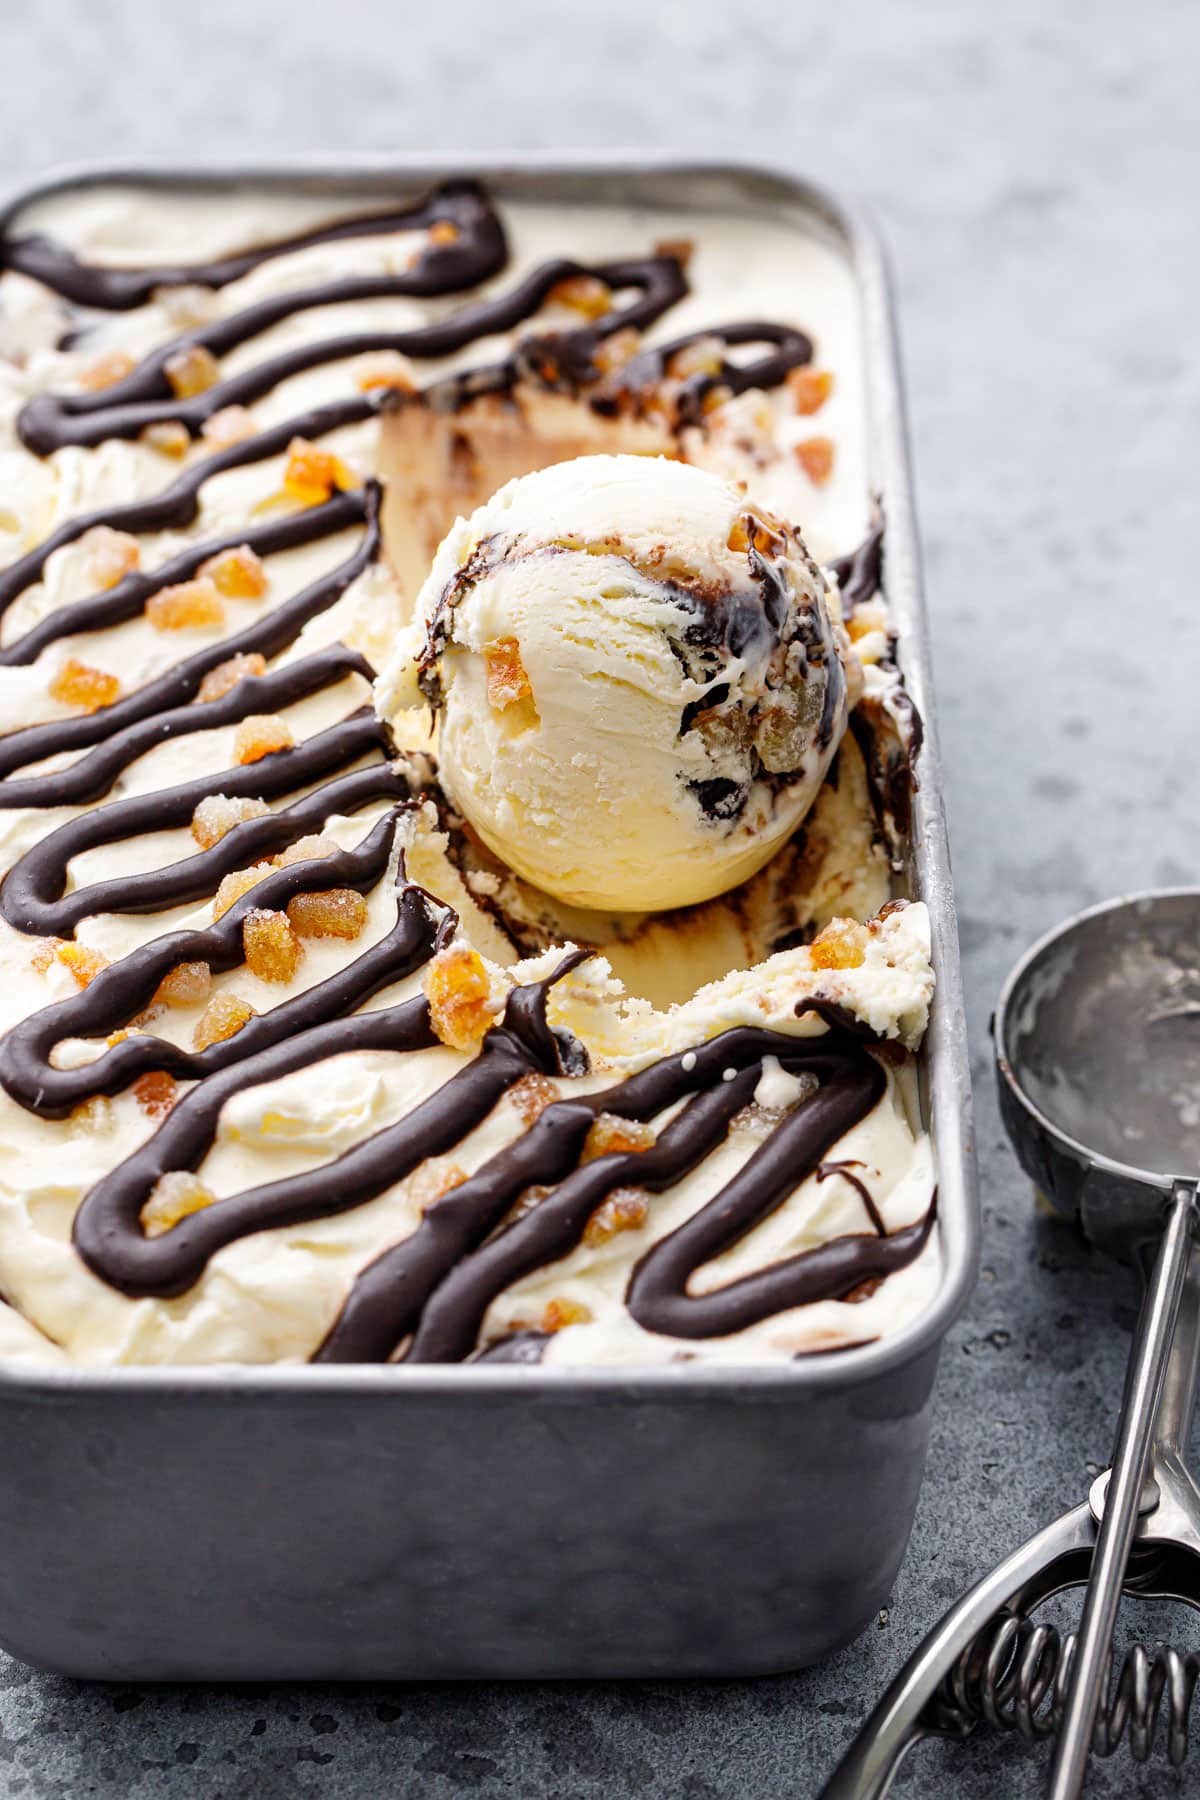
This sweet and creamy custard-based ice cream is flavored with candied orange syrup and features a swirl of rich and chewy chocolate fudge and bits of candied orange peel studded throughout.
Inspired by a particularly memorable cone of gelato from our travels, Crema del Doge is a flavor fit for a king: sweet cream with a hint of orange, with swirls of dark chocolate fudge and bits of bright candied orange peel mixed right in.
Sometimes, a single delicious bite from a trip is so memorable that you’re still thinking about it 7 years later.
This is one of those bites.
Ok, so we had quite a few memorable bites on our trip to Venice back in 2017, including a decadent pistachio cream and the always satisfying straciatella, but it was a mind-blowing scoop of chocolate-and-orange deliciousness dubbed Crema del Doge that embedded itself in my mind and refused to leave.
Crema del Doge is the signature flavor of Gelateria il Doge in Venice, Italy. (The Doge was the highest ranking leader in Venice from about the 7th to 18th centuries… so this gelato is fit for royalty, wouldn’t you agree?) If you ever find yourself in the Floating City, I highly recommend seeking out this particular gelateria as you won’t be disappointed (SuSo is the other one that’s an absolute must).
This particular flavor flavor features a sweet cream gelato base with a swirl of chocolate fudge and bits of candied orange peel, making for a lovely chocolate and orange combination that’s darn near perfection. It was one of those moments where I knew, shortly after taking that first lick, that this was a flavor I needed to recreate at home.
Try this vibrant radicchio salad, the perfect side dish! Sweet pears, crunchy almonds, tangy goat cheese, and a bright citrus vinaigrette dress up a colorful bed of greens.
Move over kale: there’s a new salad green in town (or, a new purple?). As cookbook authors who’ve made over 60 salad recipes, it’s hard to impress us with something new. But this radicchio salad is a vibrant explosion of flavors and textures that will send your tastebuds into overdrive! Bitter bright purple radicchio leaves are balanced by the sweetness of ripe pears, the satisfying crunch of toasted almonds, the creamy tang of goat cheese, and a zesty citrus vinaigrette that ties it all together. This isn’t your average salad!
What is radicchio?
It’s hard to believe that in a decade of writing recipes, we’ve barely scratched the surface on this leafy green. Radicchio is a bitter green that’s a member of the chicory family, known for its striking purple color and bitter flavor. It forms compact heads with deep red or maroon leaves that have contrasting white veins.
Radicchio’s bitterness comes from a compound called intybin, which mellows when cooking. Much like other bitter vegetables like Brussels sprouts and cauliflower, when it’s grilled, roasted, or braised, radicchio has a sweeter, more nuanced flavor profile. You might find charred radicchio on a restaurant menu, and the vegetable is common in Italian cuisine.
Ingredients for radicchio salad
Working with this ingredient in the past (in this endive salad, for example), we noticed one overriding characteristic: radicchio tastes bitter. To balance out the bitterness, we’ve prefer not to have an entire salad of the purple leaves: it’s much too strong. Instead, balance radicchio with other greens, like butter lettuce, baby arugula, mizuna, or other mild greens. Adding fruit like pears or apples also helps to balance with sweetness, and strong cheeses pair well too.
Here are the ingredients for this radicchio salad:
Radicchio
Butter lettuce, baby arugula, baby mizuna: You can use any type of mild green. We like the texture of baby arugula or baby mizuna, which is a green similar to arugula but not as peppery. Avoid mature arugula as it is much too spicy.
Pear: Use a ripe pear or substitute a green or red apple.
Shallot: The mild flavor of shallot pairs well here. Red onion works too.
Almonds: Making toasted almonds brings out their nutty flavor, or for a fancy salad use pine nuts.
Cheese: Goat cheese crumbles, feta, or gorgonzola cheese work well (we like goat cheese best). For a vegan salad, omit the cheese.
Herbs: Fresh mint bring a pop of fresh flavor.
Citrus vinaigrette: This homemade orange vinaigrette is essential to the flavor, as orange and radicchio are a common flavor pairing.
Why toasting the nuts makes a difference
You might not want to spend the 5 extra minutes toasting nuts, but here’s why it’s important (and required, in our opinion!). Toasting nuts brings out at nutty essence to the flavor that’s otherwise undetectable. You have to taste it to believe it, but there’s a huge difference between a raw nut and a toasted nut.
Over here, we always toast our nuts before adding them to salads and desserts. You can toast nuts on the stovetop or in the oven. For salad, we typically use the stovetop since it’s so quick and it’s just a small quantity. Here’s How to Toast Nuts (2 Best Ways!).
For the orange vinaigrette
This radicchio salad goes hand in hand with the homemade vinaigrette: it’s got just the right sweet tart, zingy citrus flavor to contrast the bitterness of the purple leaves. It uses simple ingredients you’ll likely already have on hand in your pantry and fridge, with the exception of an orange. You’ll need to zest the orange, which we like to do with a microplane grater: it’s quick and easy to use. The ingredients you’ll need are:
Zest of one orange
White wine vinegar
Dijon mustard
Maple syrup or honey
Olive oil
Alternative dressings
This radicchio salad is the perfect fall salad or winter salad to pair with cozy dishes, but it works in any season. It’s great with chicken, seafood, pasta, pizza, and more! A few other dressings can work with this radicchio salad, though we love the orange vinaigrette the most. Here are a few homemade salad dressings to consider:
There are so many different greens to highlight in salads: and it’s not just kale and spinach! Here are some of our favorite salads featuring different leafy greens:
Try this vibrant radicchio salad, the perfect side dish! Sweet pears, crunchy almonds, tangy goat cheese, and a bright citrus vinaigrette dress up a colorful bed of greens.
Ingredients
For the radicchio salad
1 head radicchio, washed, dried and torn into bite-sized pieces
1 head butter lettuce, washed, dried and torn into bite-sized pieces or 2 cups baby arugula or baby mizuna
Make the dressing: In a medium bowl, whisk together the white wine vinegar, Dijon mustard, orange zest, honey, and kosher salt. Gradually whisk in the olive oil 1 tablespoon at a time until a creamy dressing forms. Store refrigerated; the dressing will solidify when cooled so bring to room temperature before serving.
Prepare the radicchio, butter lettuce (if using), pear, shallot as noted above.
On a large platter or on salad plates, place the radicchio pieces and butter lettuce or baby arugula or mizuna. Add the pear slices, then sprinkle over the sliced shallot, toasted nuts, goat cheese crumbles, and mint leaves. Drizzle with the orange dressing and serve.
These tender, deeply chocolate cupcakes are made with extra virgin olive oil and freshly squeezed blood orange juice, topped with a swirl of flavorful blood orange buttercream and crowned with a jewel-like candied blood orange slice. The blood orange buttercream is the star of the show: with a punchy orange flavor and gorgeous pale pink […]
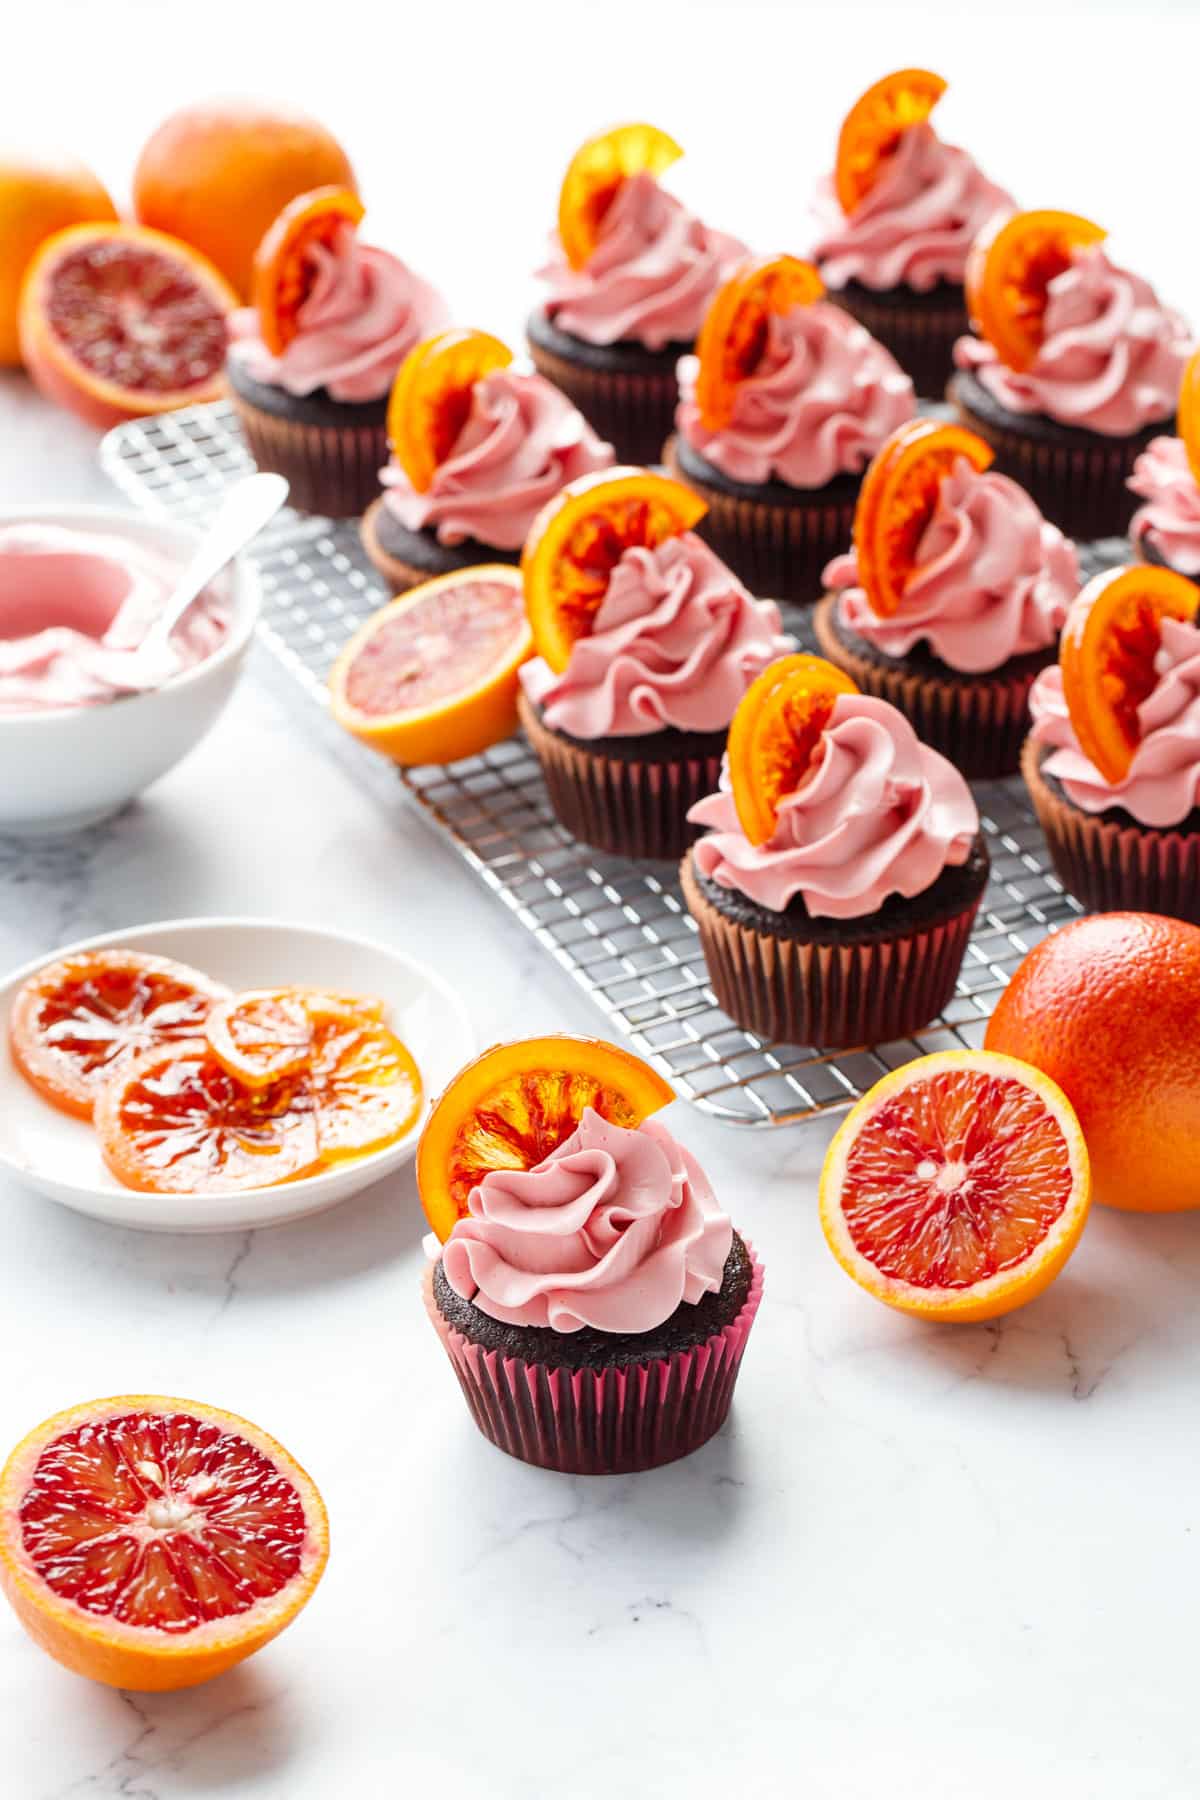
These tender, deeply chocolate cupcakes are made with extra virgin olive oil and freshly squeezed blood orange juice, topped with a swirl of flavorful blood orange buttercream and crowned with a jewel-like candied blood orange slice.
The blood orange buttercream is the star of the show: with a punchy orange flavor and gorgeous pale pink hue. The unique eggless mock meringue method produces a frosting that’s much creamier and less sweet than traditional American buttercreams.
This recipe was created in partnership with Amoretti (use coupon code LOVEANDOLIVEOILFREESHIP for free shipping on your order!) All opinions expressed here are my own.
Happy blood orange season to all who celebrate!
I am a big fan of blood oranges, more than any other kind of citrus. While you’ll rarely, if ever, see me sit down and eat a regular orange, I will devour a blood orange and even choose it as an afternoon snack over chips or chocolate (gasp! I know!) I just love the bright flavor, which is like a sweeter version of a classic orange, both sweet and tart at the same time, with underlying notes of red berries. Not to mention the vibrant red color makes me ever so happy.
Needless to say, you can be sure that when blood oranges appear for a few short weeks in the middle of winter, I’ll be there, eating my fill before they disappear for another year. You can also assume I’ll be cooking, baking, or canning something with blood oranges this time of year (assuming I have some left over after stuffing my face, that is). And sure enough, I’ve put out one new blood orange recipe pretty consistently every year (there’s also a Strawberry Blood Orange marmalade recipe you’ll only find in my book, trust me when I say it’s not to be missed).
This year, I decided to revisit an old favorite and re-make my favorite chocolate blood orange cupcakes. The sunset-hued buttercream and the moist chocolate cake spiked with blood orange flavor are, simply put, stunning in both taste and appearance. Add in some fruity extra virgin olive oil in place of the usual vegetable oil in the cupcake, and you have yourself one delicious treat.
This time around I topped my cupcakes with jewel-like slices of candied blood orange, which are as gorgeous as they are delicious, and add the perfect finishing touch to the swirl of pink buttercream frosting.
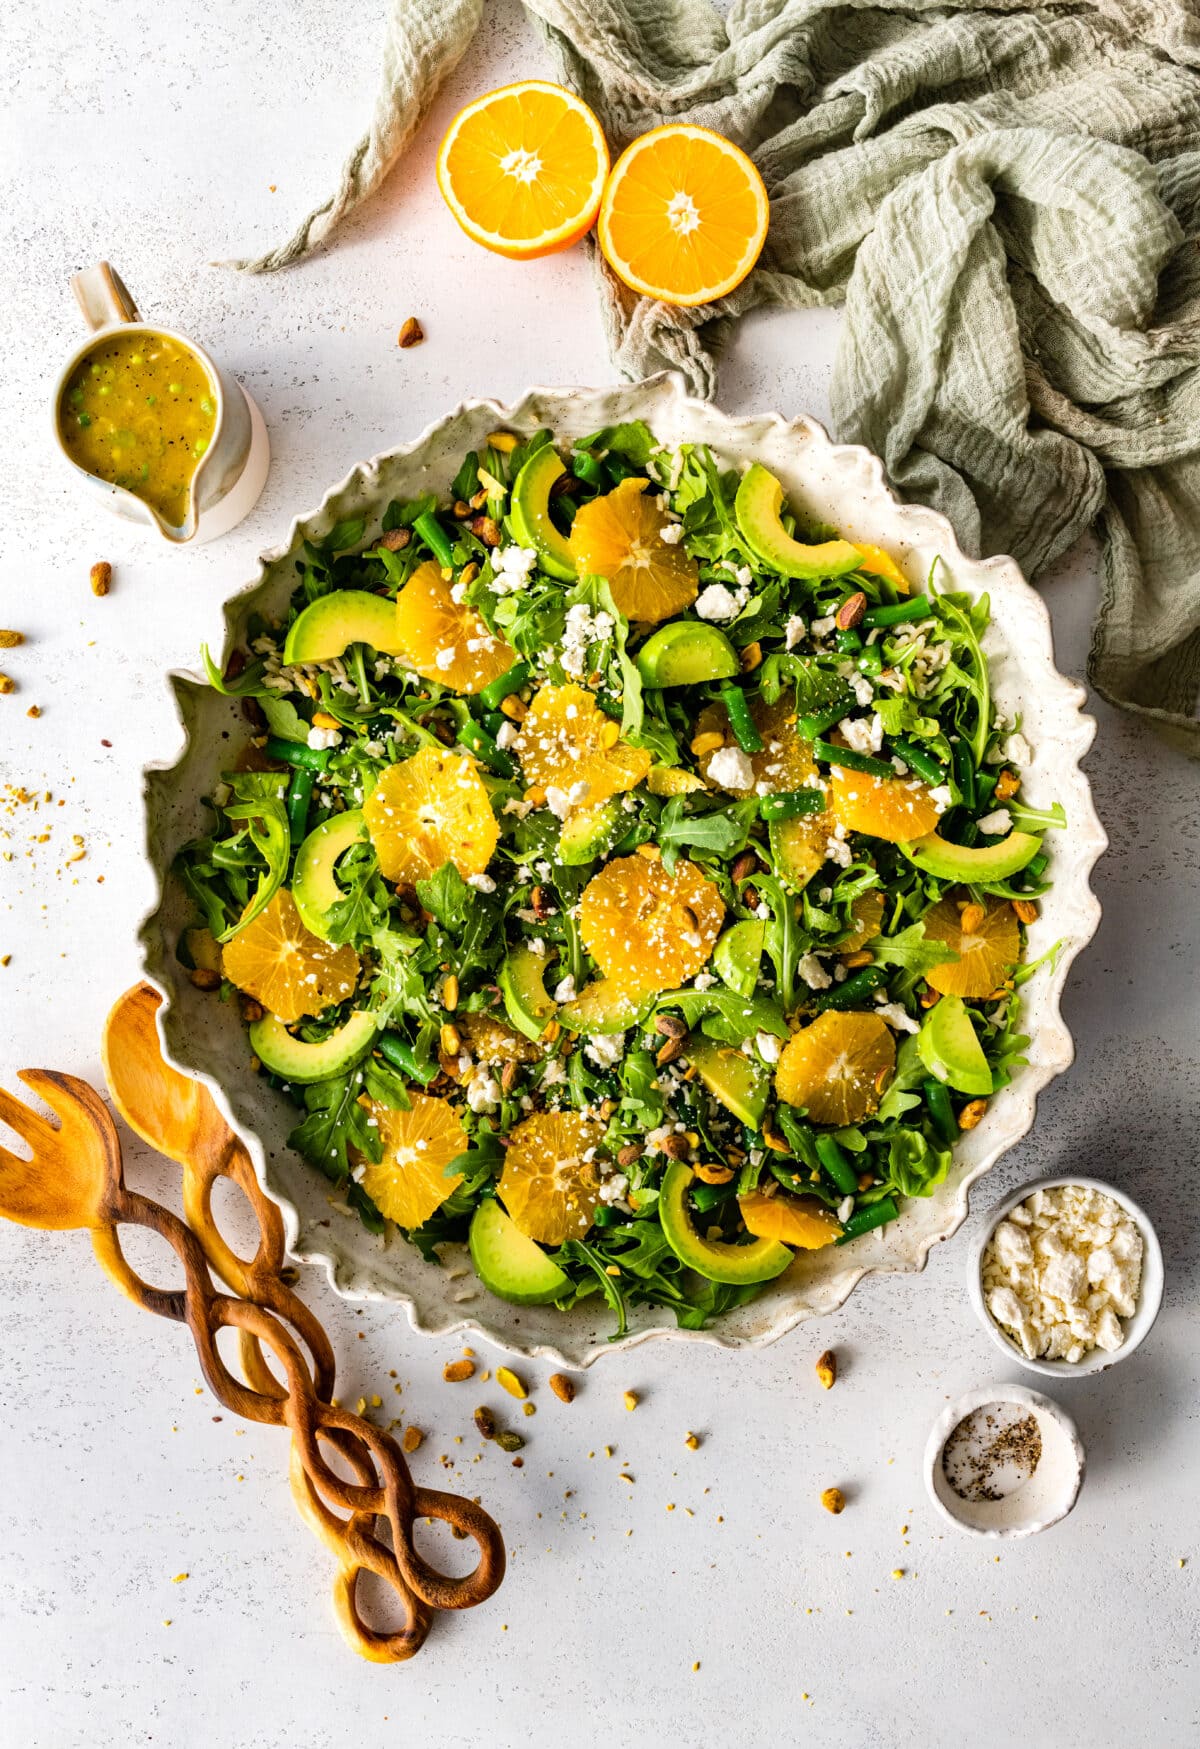
I love making salads that are satisfying and filled with delicious and nutritious ingredients. It is always fun to play around with different flavors, ingredients, and dressings. This Orange Arugula Salad is definitely a favorite. It is fresh, hearty, …
I love making salads that are satisfying and filled with delicious and nutritious ingredients. It is always fun to play around with different flavors, ingredients, and dressings. This Orange Arugula Salad is definitely a favorite. It is fresh, hearty, and filled with flavor! Sharp, peppery arugula is the base of the salad. I add brown…
If you are looking for an easy and healthy meal, I have a the perfect recipe for you! Honey Mustard Salmon with Citrus Salsa. I know it sounds a little gourmet, but this recipe is SO easy! It only takes about 20 minutes to make. You can’t beat th…
If you are looking for an easy and healthy meal, I have a the perfect recipe for you! Honey Mustard Salmon with Citrus Salsa. I know it sounds a little gourmet, but this recipe is SO easy! It only takes about 20 minutes to make. You can’t beat that! The honey mustard sauce is easy…
I love everything cranberry orange, cranberry orange bread, cranberry orange muffins, and cranberry orange scones, just to name a few! The flavors are SO good together, especially during the holiday months. I also love these Cranberry Orange Pistachio …
I love everything cranberry orange, cranberry orange bread, cranberry orange muffins, and cranberry orange scones, just to name a few! The flavors are SO good together, especially during the holiday months. I also love these Cranberry Orange Pistachio Shortbread Cookies. This recipe is from my friend Daniela, who took all of the cookie photos for…
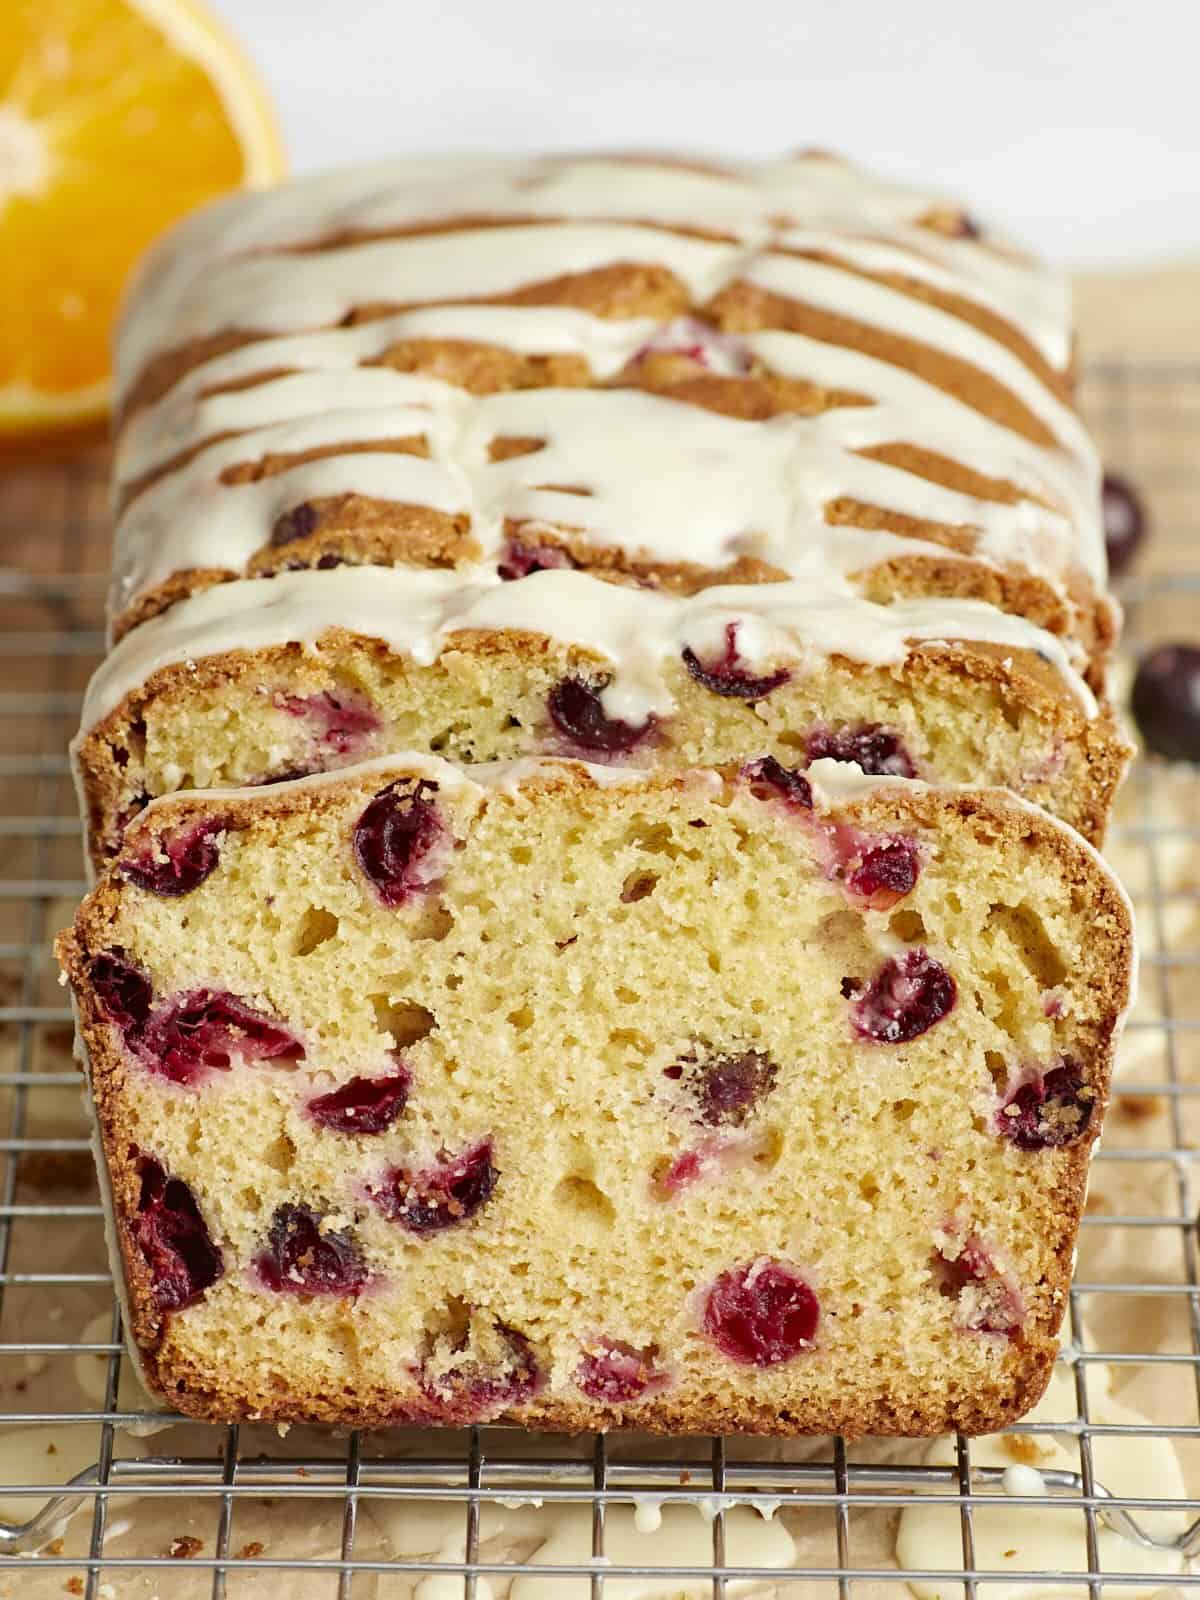
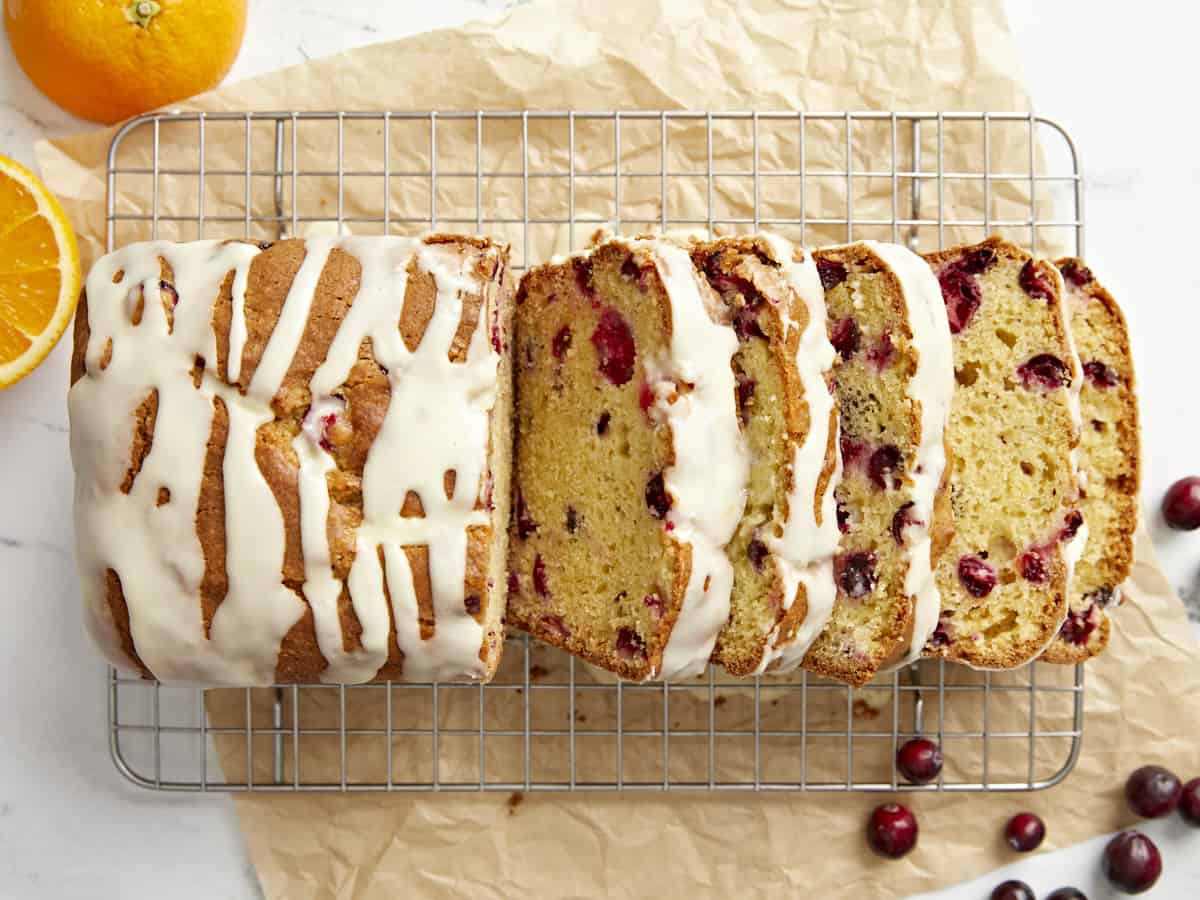
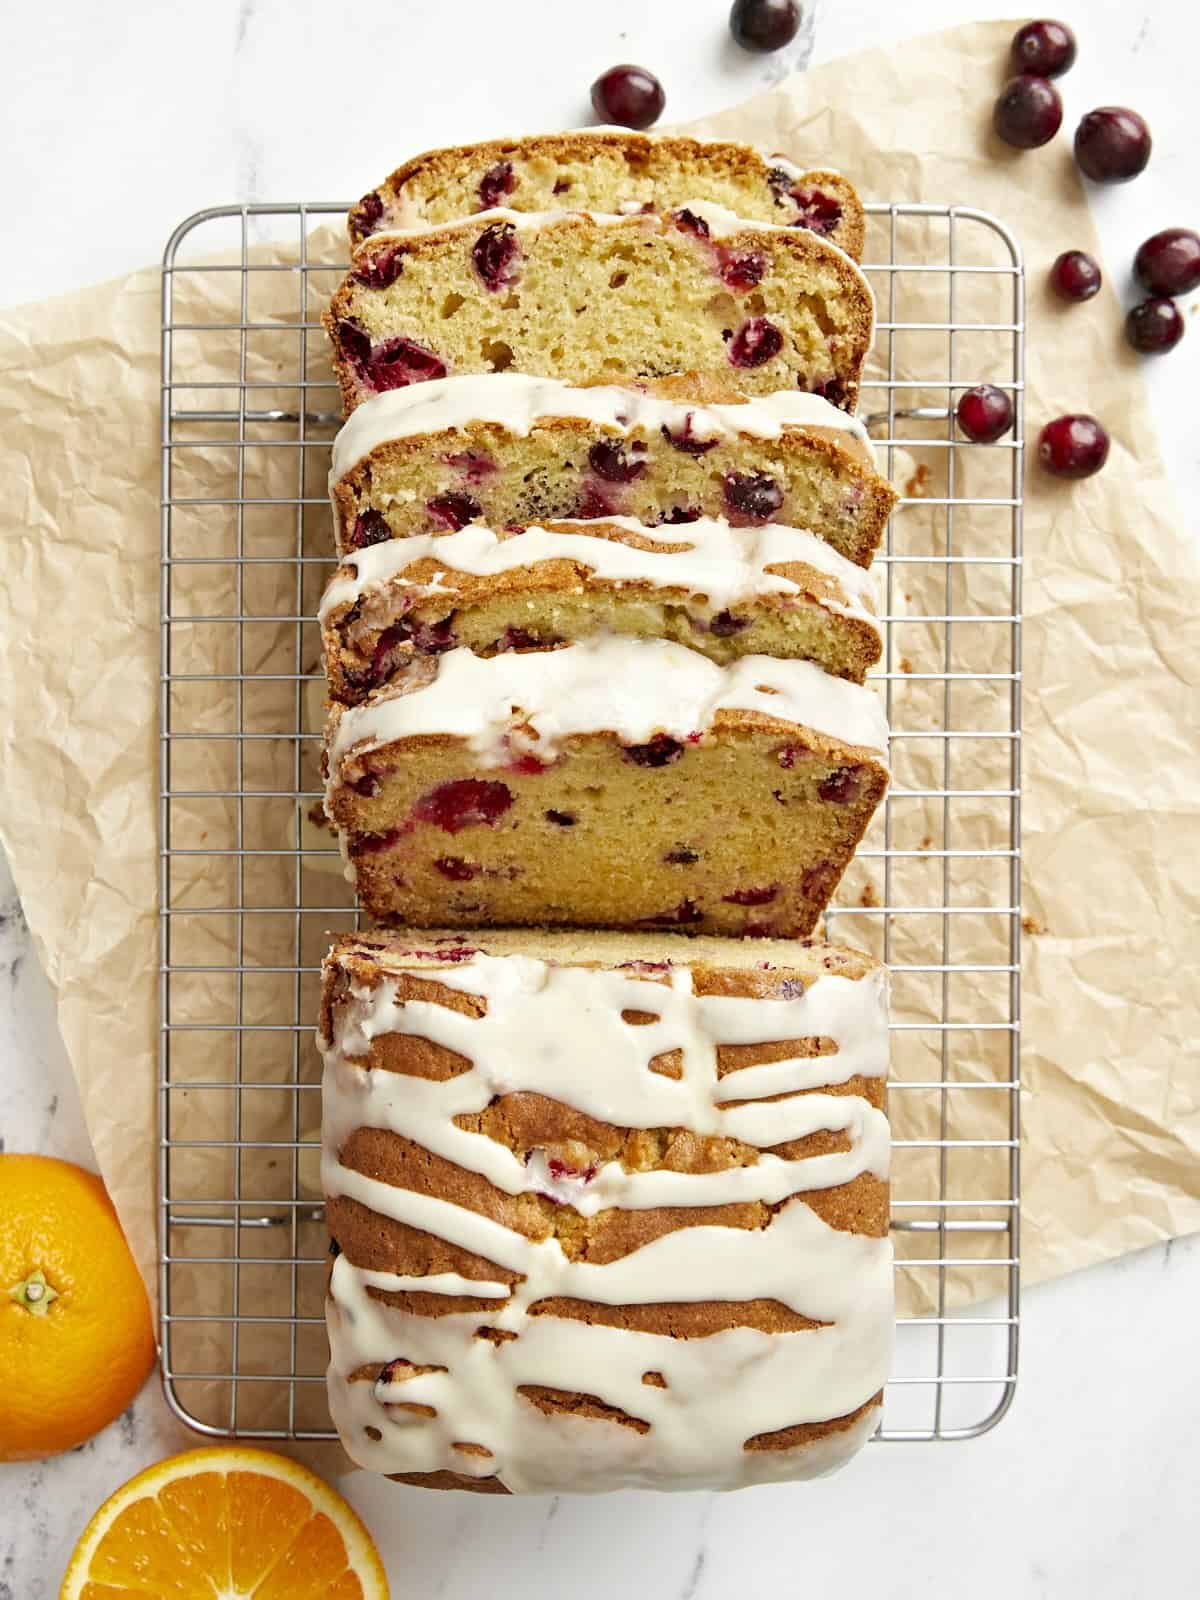
Cranberry Orange Bread is a wintertime classic. The tart cranberries and sweet citrus are both in season and they offer such a bright and welcome contrast to the usually heavy foods of winter. In our house, this was a staple every Thanksgiving and Christmas morning, but it’s great to have a slice with coffee any day of the year. And since this Cranberry Orange Bread freezes beautifully, you can take a slice out and warm it up whenever you need a little taste of sunshine. :)
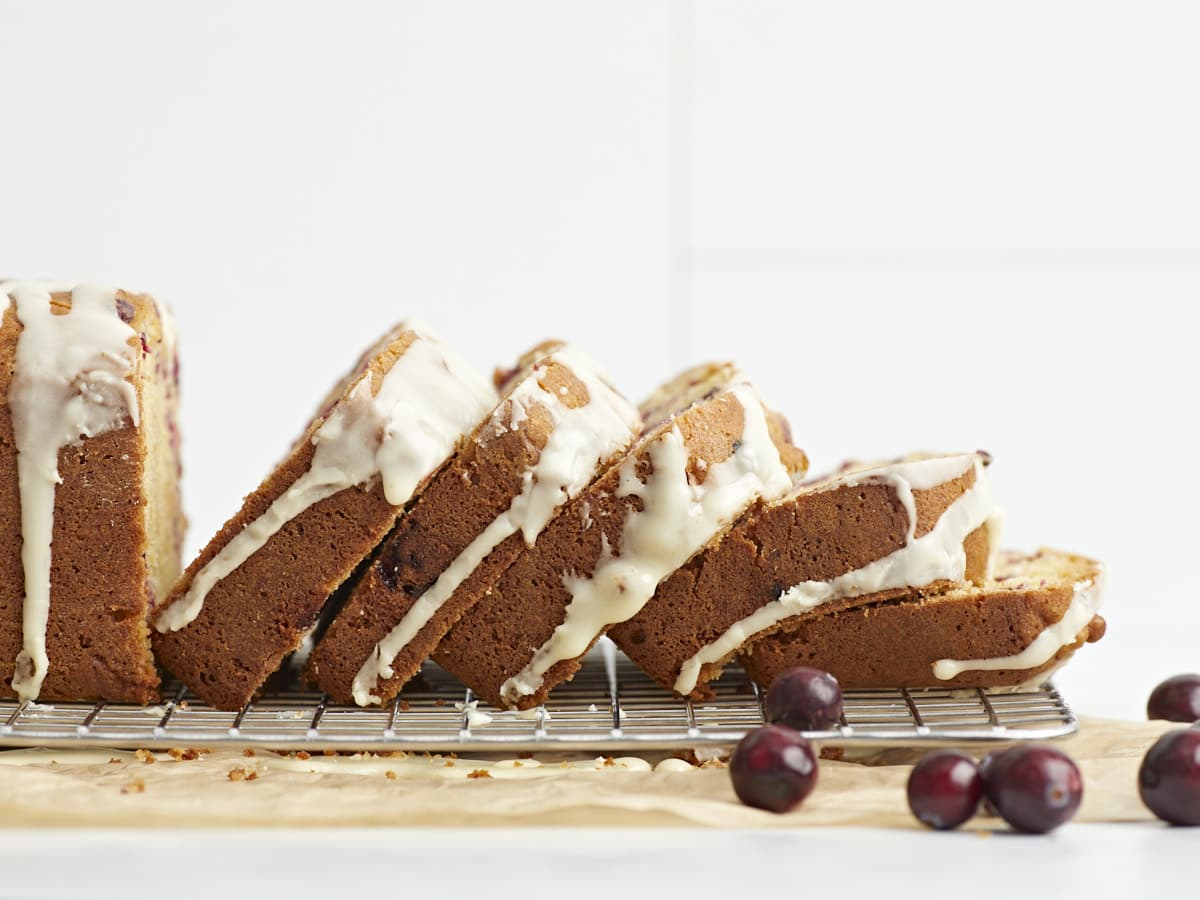
If you love to have a little sweet baked treat along with your homemade cup of coffee, this cranberry orange bread recipe is going to be your new fav. The loaf is sweet, rich, filled with orange essence, and dotted with fresh tart cranberries. The sweet glaze on top makes the perfect juxtaposition to the tart cranberries and the whole thing is absolutely addictive!
Ingredients for Cranberry Orange Bread
Here’s what you’ll need to make a loaf of this delicious cranberry orange bread:
Butter: Butter keeps the loaf rich, moist, and dessert-like. We use salted butter because it’s easier to keep just one kind of butter in your fridge!
Sugar: This recipe uses granulated sugar in the bread to sweeten everything up, and powdered sugar to create the thick orange glaze on top.
Eggs: Eggs help leaven the loaf and give it strength so it doesn’t collapse after baking.
Sour Cream: Sour cream is added to give the loaf moisture, richness, and even more flavor.
Orange: We use both the orange juice and zest in this bread, in the batter and in the icing that is drizzled over top.
All-Purpose Flour: Would it be “bread” without flour? Regular all-purpose flour is used to give the loaf body and strength.
Baking Powder & Baking Soda: Because of the acidic ingredients in the batter (sour cream, orange juice, and cranberries), we use a combination of both baking powder AND baking soda to leaven the bread.
Salt: A little salt always helps make the individual flavors pop and allows you to taste every element.
Cranberries: You can use fresh or frozen cranberries for this bread. If using frozen, allow them to thaw before folding into the batter.
How to Store Leftovers
This cranberry orange bread will stay good in the refrigerator for about five days, or you can freeze it for longer storage. To freeze, slice the bread and then stack the slices with parchment between each slice. Place the stacked bread in an air-tight container, like a freezer bag, and then store it in the freezer. You can take out one or as many slices as needed and thaw at room temperature for about 30 minutes before serving or microwave until warm.
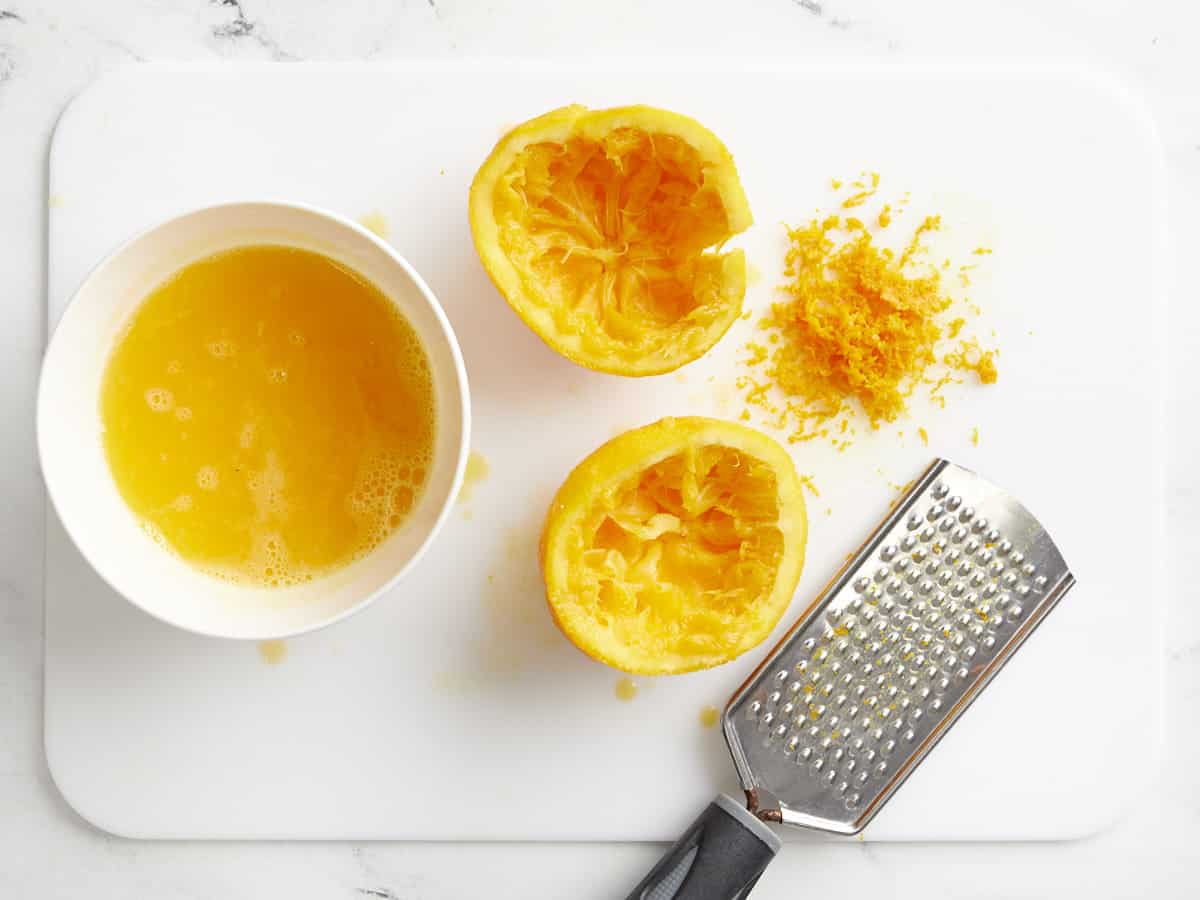
Preheat the oven to 350ºF. Zest and juice the orange. You'll need about ⅓ cup juice (divided) and a ¼ tsp zest for this recipe. Wash and slice the cranberries in half.
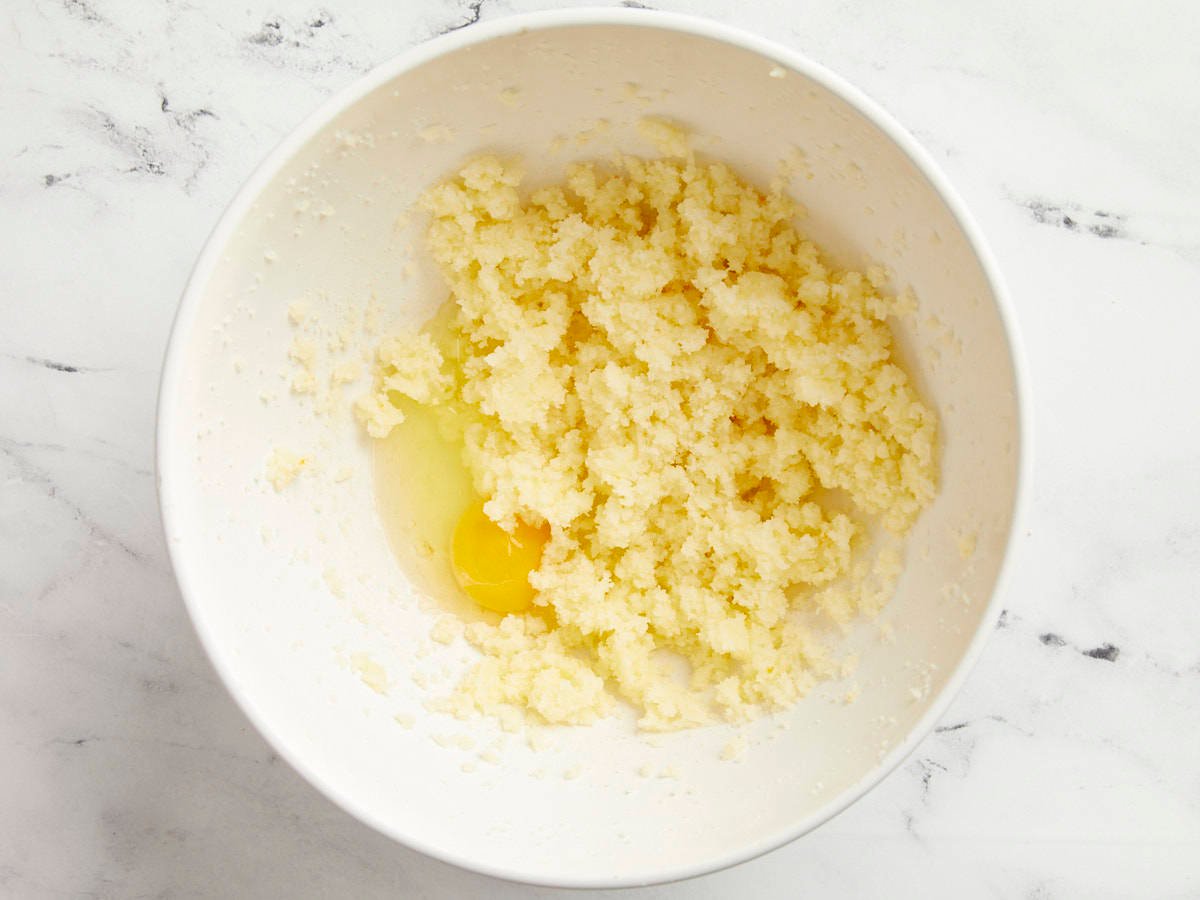
In a large bowl beat together the butter, sugar, and ¼ tsp orange zest with a hand mixer or stand mixer on high until the mixture is soft and fluffy (2-3 minutes). Add the egg and beat until the mixture is smooth and creamy (about 2 minutes).
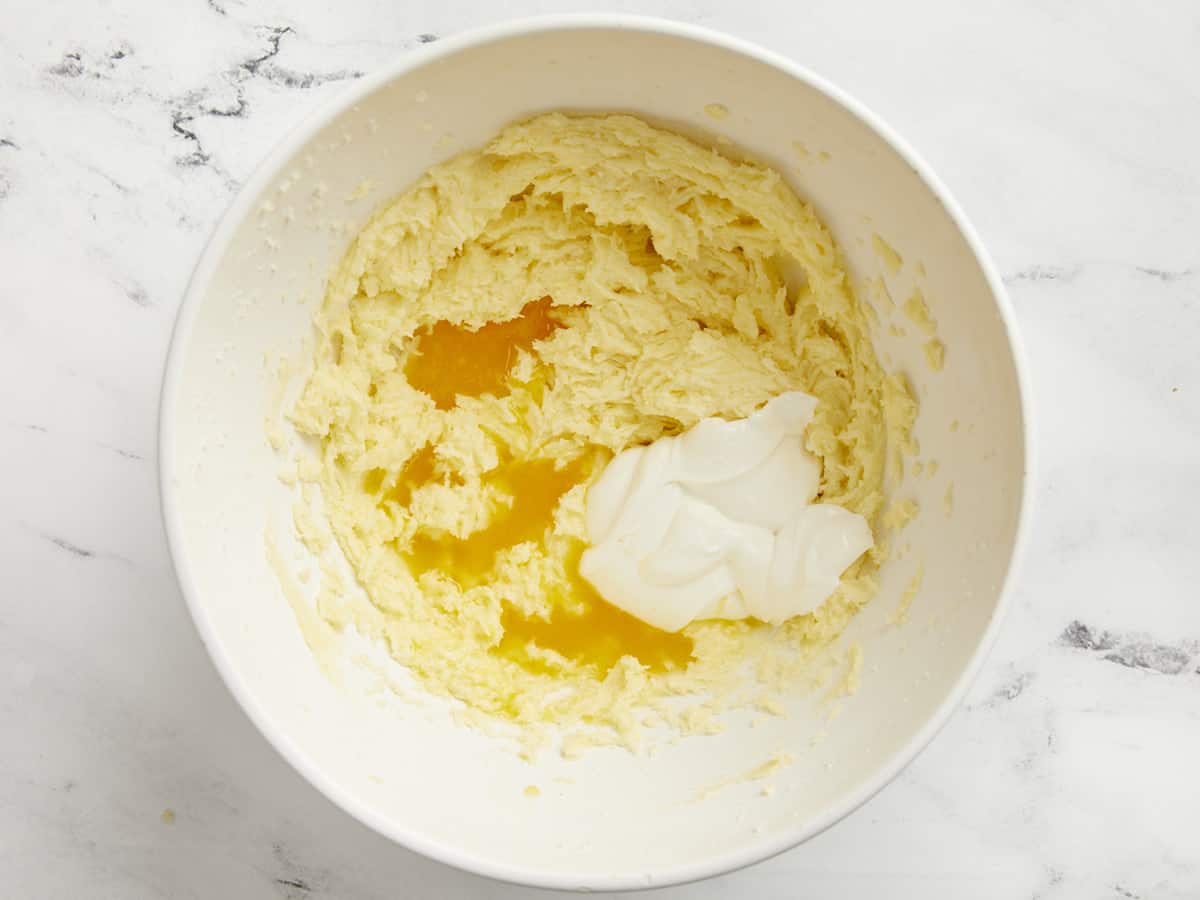
Add the sour cream and ¼ cup of the orange juice to the batter and beat again for about 2 minutes. Save the remainder of the orange juice to make the glaze later.
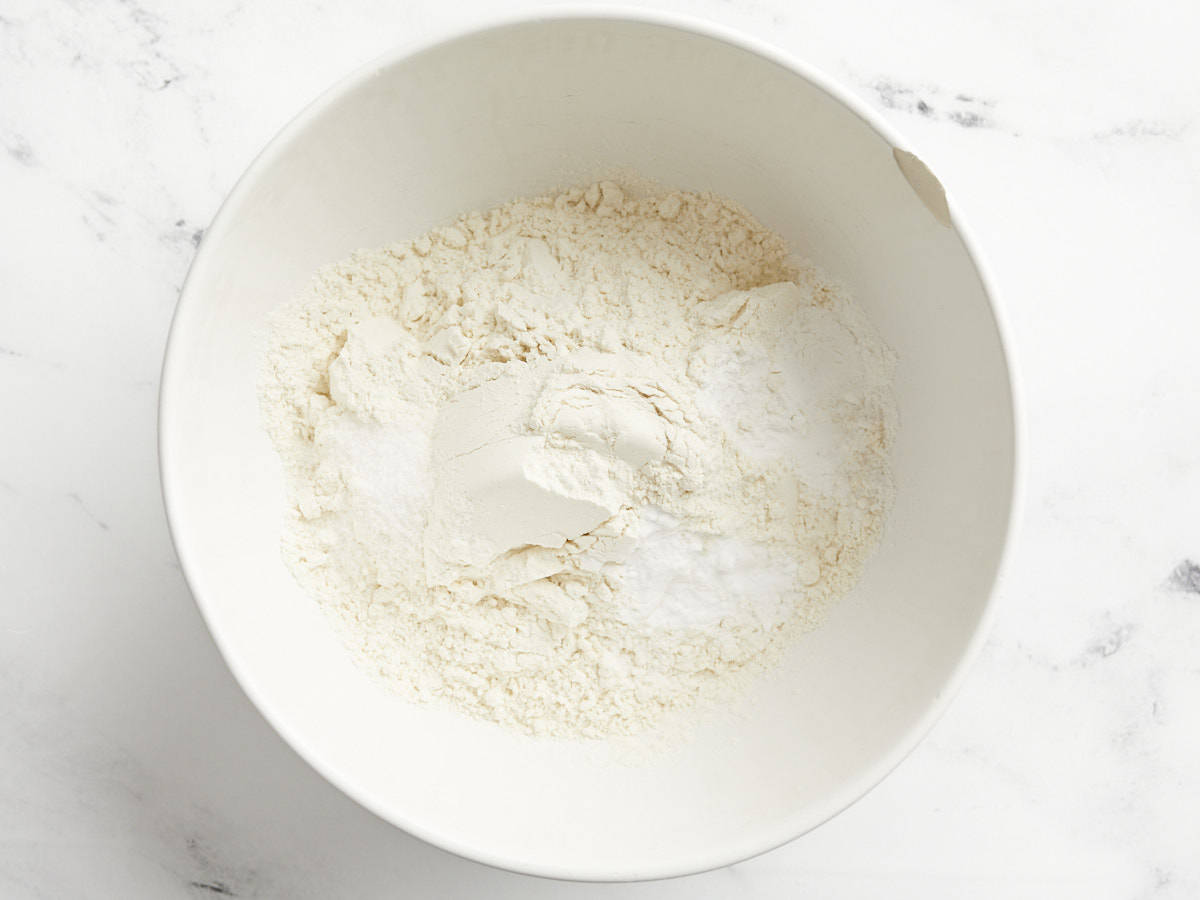
In a separate bowl, stir together the flour, salt, baking powder, and baking soda.
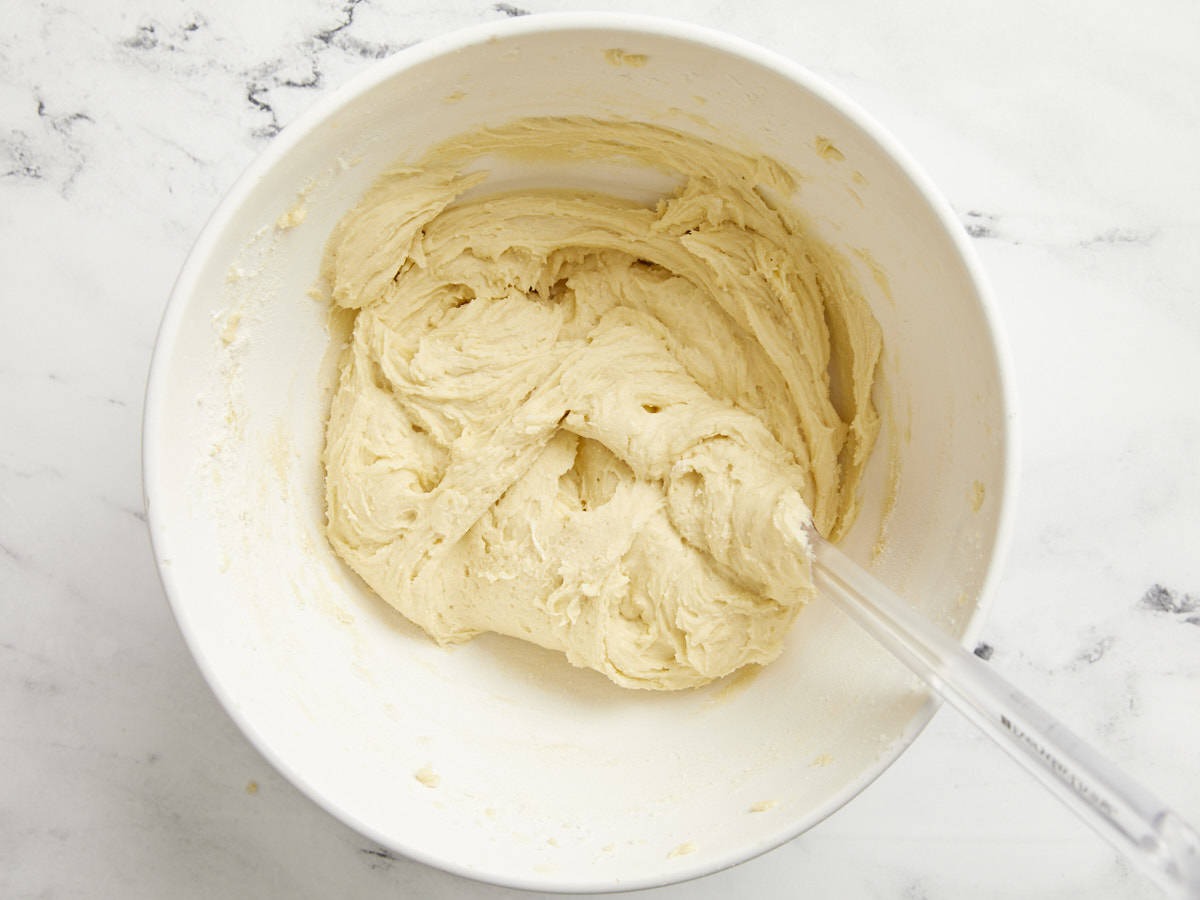
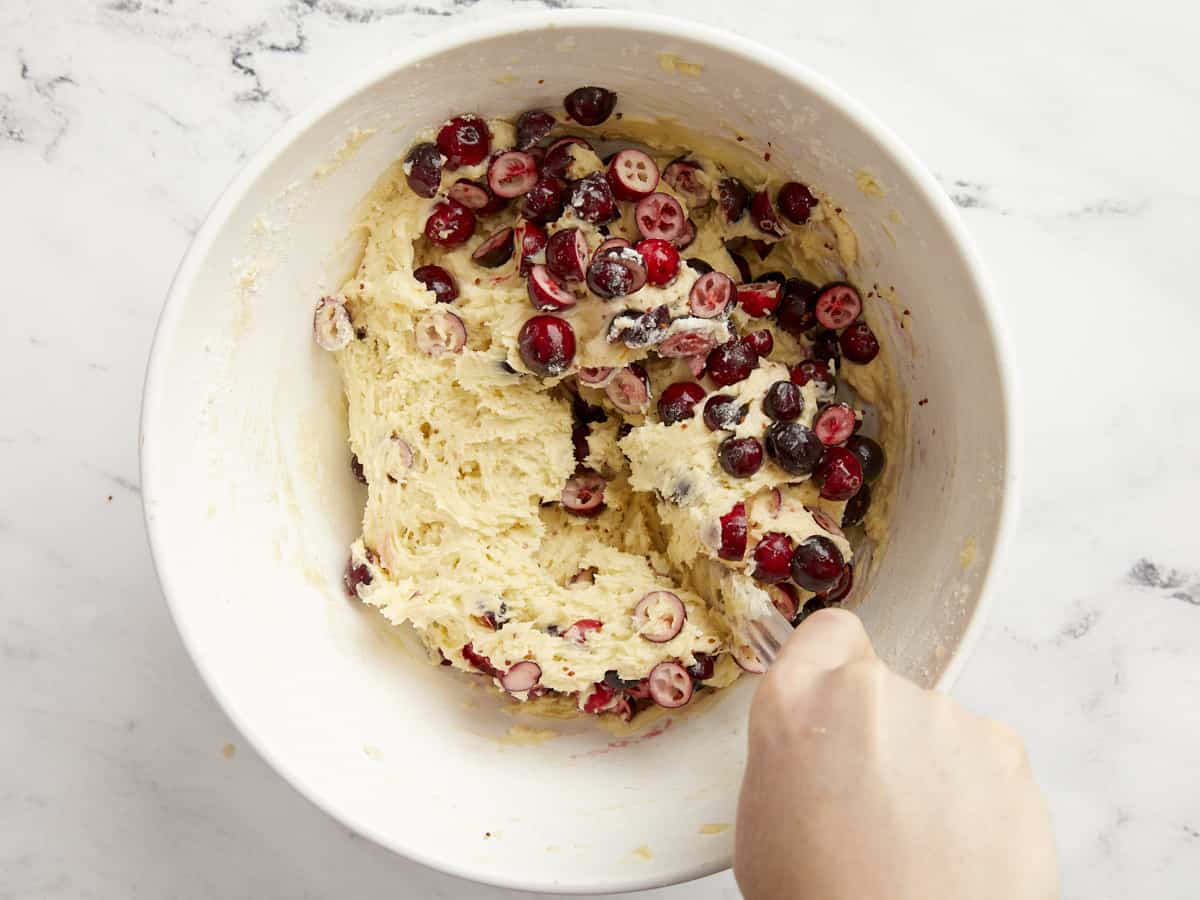
Add about half of the flour mixture to the butter mixture and beat with low speed until combined. Add the rest and beat until combined again. Finally, fold the sliced cranberries into the batter.
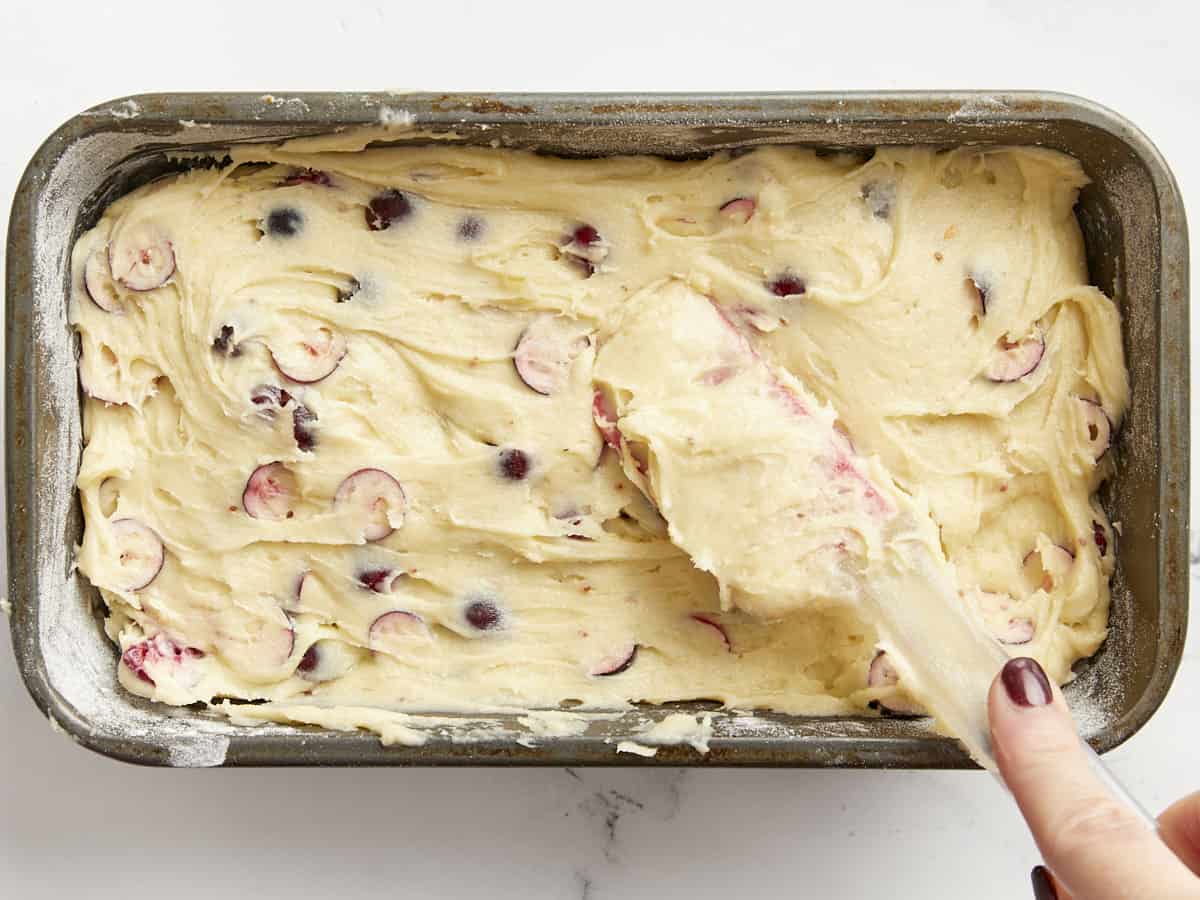
Grease an 8.5 x 4.5-inch bread pan and then dust lightly with flour. Spread the cranberry bread batter into the bread pan and smooth out the surface.
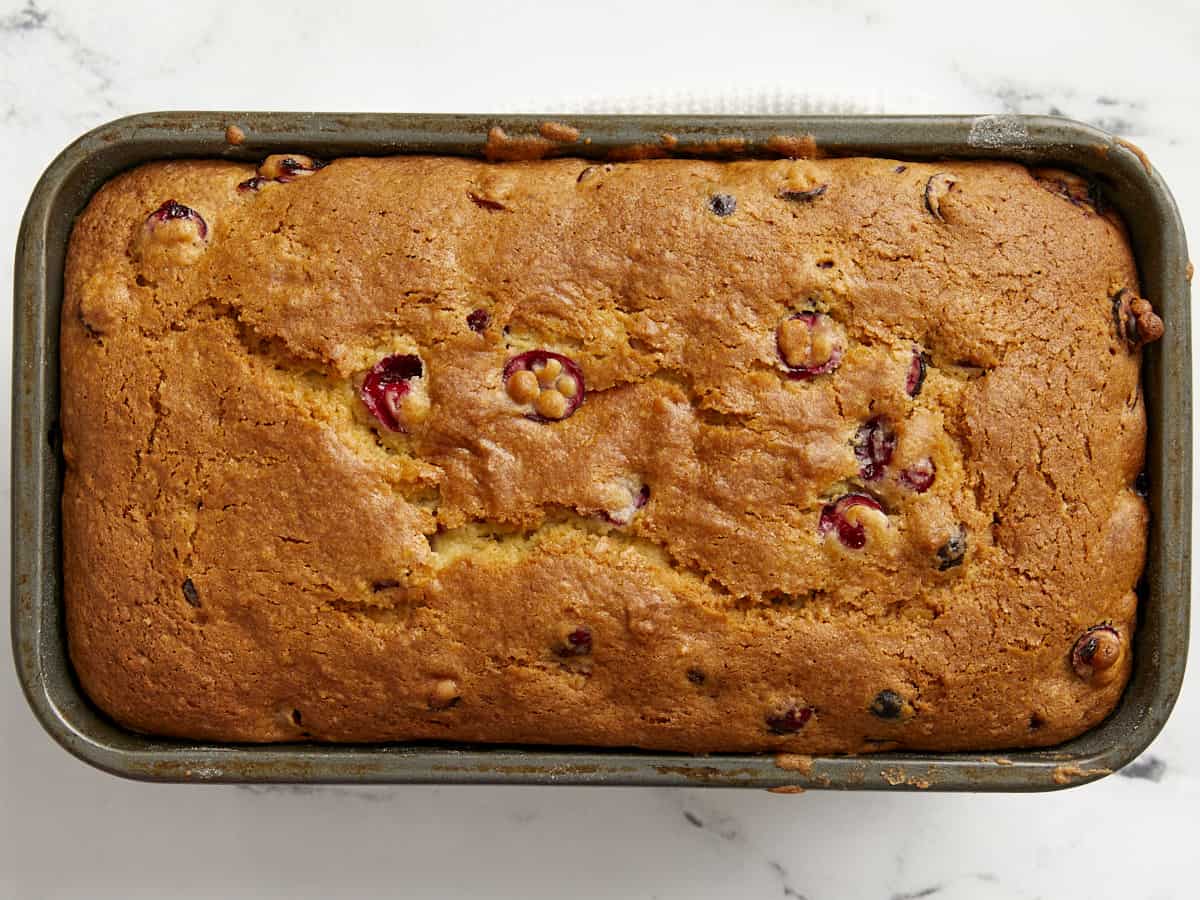
Bake the cranberry orange bread for 60 minutes in the preheated 350ºF oven, or until it is browned on top and a toothpick inserted into the center comes out clean (a few crumbs are okay, just no wet batter).
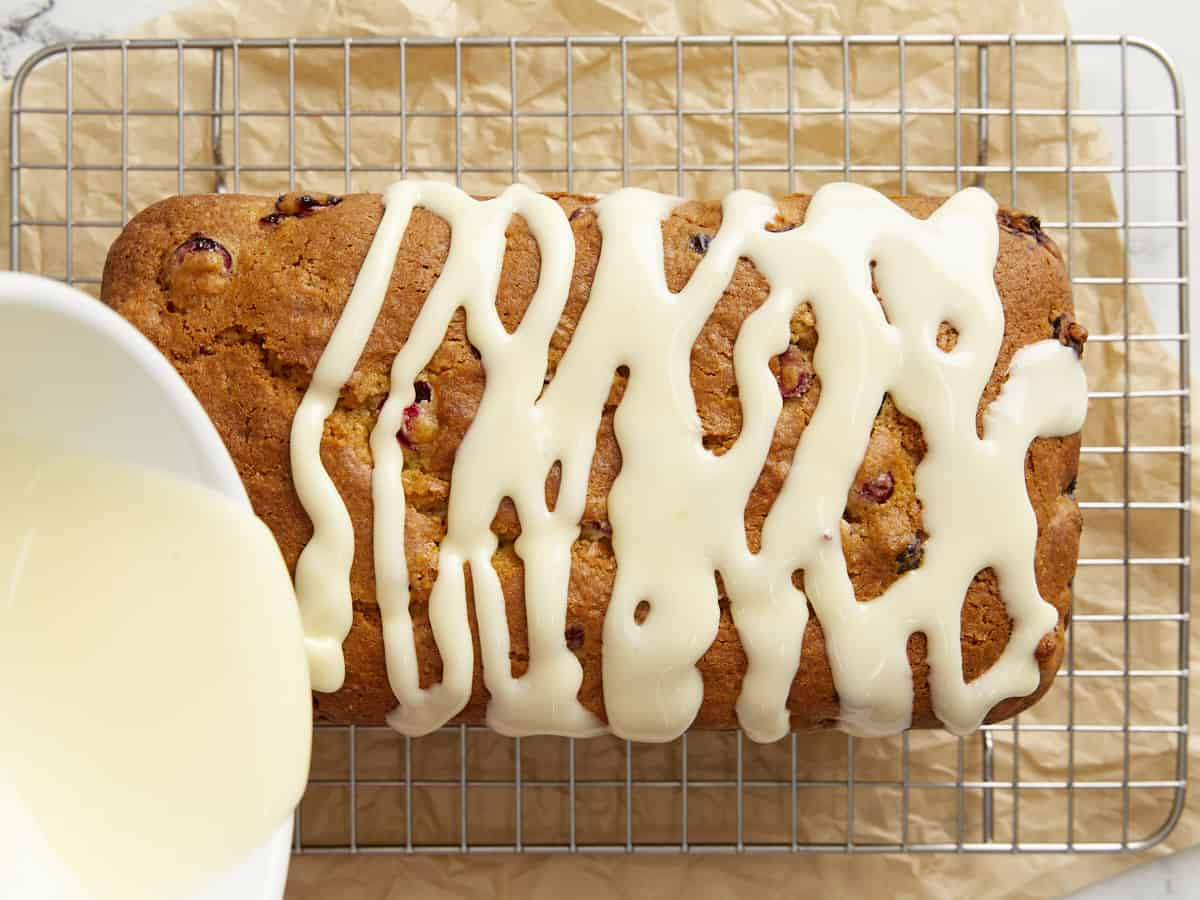
Allow the bread to cool in the bread pan while you make the glaze. Combine the powdered sugar with just enough orange juice to create a thick glaze (about 1.5 to 2 Tbsp). You can add a pinch of orange zest to the glaze, if desired.
When the bread has mostly cooled, use a knife to loosen the edges, then remove it from the bread pan. Drizzle the glaze over top, then slice and serve.
How to Make Cranberry Orange Bread – Step by Step Photos
Preheat the oven to 350ºF. Zest and juice one orange. For the bread batter and icing you’ll need about ⅓ cup juice (divided) and about ¼ tsp zest (or more if desired). Wash and slice 2 cups of fresh cranberries in half.
Use a hand mixer or stand mixer to beat together 8 Tbsp room-temperature salted butter, 1 cup granulated sugar, and ¼ tsp orange zest on high until soft and fluffy (2-3 minutes). Add one large egg and beat together until smooth and creamy (another 2 minutes).
Add ¼ cup orange juice and ½ cup sour cream, then beat together until smooth and creamy once again.
In a separate bowl, whisk together 2 cups of all-purpose flour, 1 tsp baking powder, ½ tsp baking soda, and ½ tsp salt.
Add about half of the dry ingredients to the wet ingredients and beat them together on low speed until incorporated. Add the remaining dry ingredients and beat on low speed until a smooth batter forms. Do not overmix.
Fold the sliced cranberries into the batter.
Grease an 8.5 x 4.5 inch loaf pan, then dust it lightly with flour. Spread the bread batter into the loaf pan.
Bake the bread in the preheated 350ºF oven for 60 minutes or until it is golden brown on top and a toothpick inserted into the center comes out clean (it may have a few crumbs but should not have wet batter coating it). Allow the cranberry bread to cool in the pan.
When the bread is mostly cool, prepare the icing. Stir together 1 cup powdered sugar with 1.5-2 Tbsp orange juice, and a pinch of orange zest if desired. Add just enough orange juice to create a thick glaze. Remove the bread from the pan, then drizzle the glaze over top.
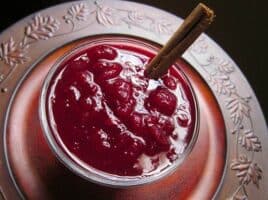
I guess I take pleasure in the little things because I get the most excited about this Homemade Cranberry Sauce recipe out of all the Thanksgiving food every year! The amount of flavor that comes out of just three simple ingredients is unreal. And because homemade cranberry sauce is this easy to make, I’ve started making it as a side dish for my dinners all winter long. It’s great with so many different meals!
Cranberry sauce is so incredibly easy to make that you’ll only need these simple ingredients:
Cranberries: You can use fresh or frozen cranberries to make this sauce. Make sure to look for plump and firm cranberries and pass on any that look dull, mushy, or wrinkled.
Sugar: Cranberries are incredibly tart on their own, so we’ll need a good dose of sugar to balance their tart flavor.
Water: A little water helps the cranberries boil and creates a saucy texture with the sugar.
Orange: This ingredient is optional, but I find that the addition of a little orange juice and a pinch of orange zest really adds a nice little dose of freshness on top of the bright cranberry flavor.
Sugar Substitutions
If you don’t want to use white sugar in your cranberry sauce, you can substitute the sugar with honey or maple syrup, keeping in mind that they will produce slightly different flavors and textures in the final sauce. And while I have seen recipes that use sugar-free sweeteners, like stevia or erythritol, I have not tried making cranberry sauce with these ingredients myself.
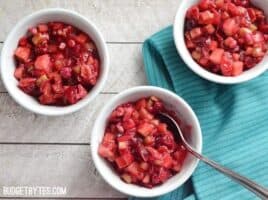
What Else Can I Add?
This simple cranberry sauce recipe can be modified in various ways to add other flavors. Here are some other ingredients you can add to cranberry sauce to make it your own:
Jalapeños
Red wine
Apples
Figs
Raspberries
Cinnamon or Nutmeg
Vanilla extract
Cloves
Ginger
Balsamic vinegar
How to Store Leftovers
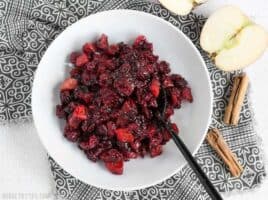
This cranberry sauce holds up beautifully in the refrigerator, so feel free to make it a day or two ahead of your Thanksgiving meal. It will stay good in the refrigerator for about 4-5 days, or you can freeze it for up to three months.
How to Use Cranberry Sauce
We all know and love cranberry sauce with Thanksgiving turkey, but it’s also awesome served in other ways! Try adding it to chicken, stirring it into your oatmeal, adding it on top of buttered toast or an English muffin, on top of a bagel with cream cheese, or even on some vanilla ice cream! And you can use it to make my favorite Cranberry Cream Cheese Dip for New Year’s Eve. ;)
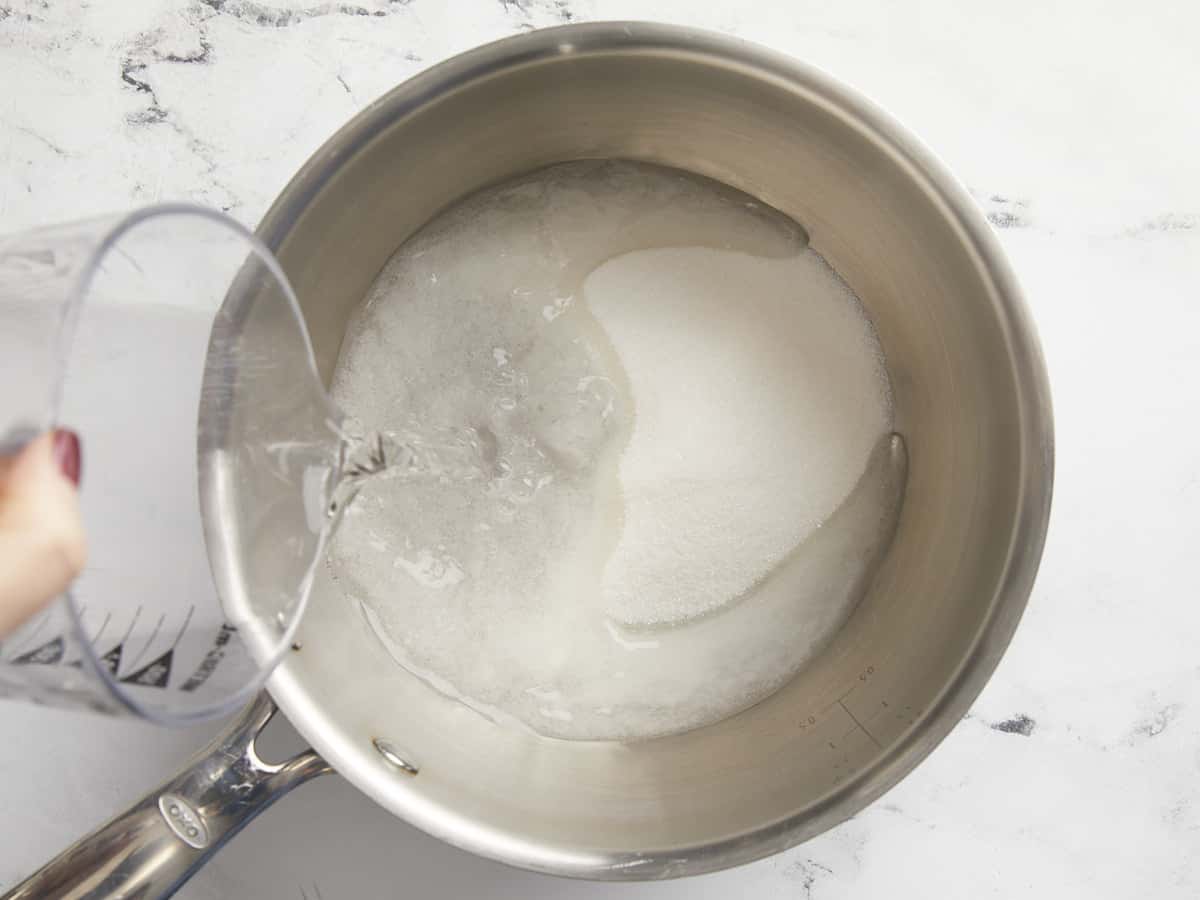
Add the sugar and water to a medium saucepot. Stir to combine. Bring the water to a boil over medium heat, stirring to dissolve the sugar.
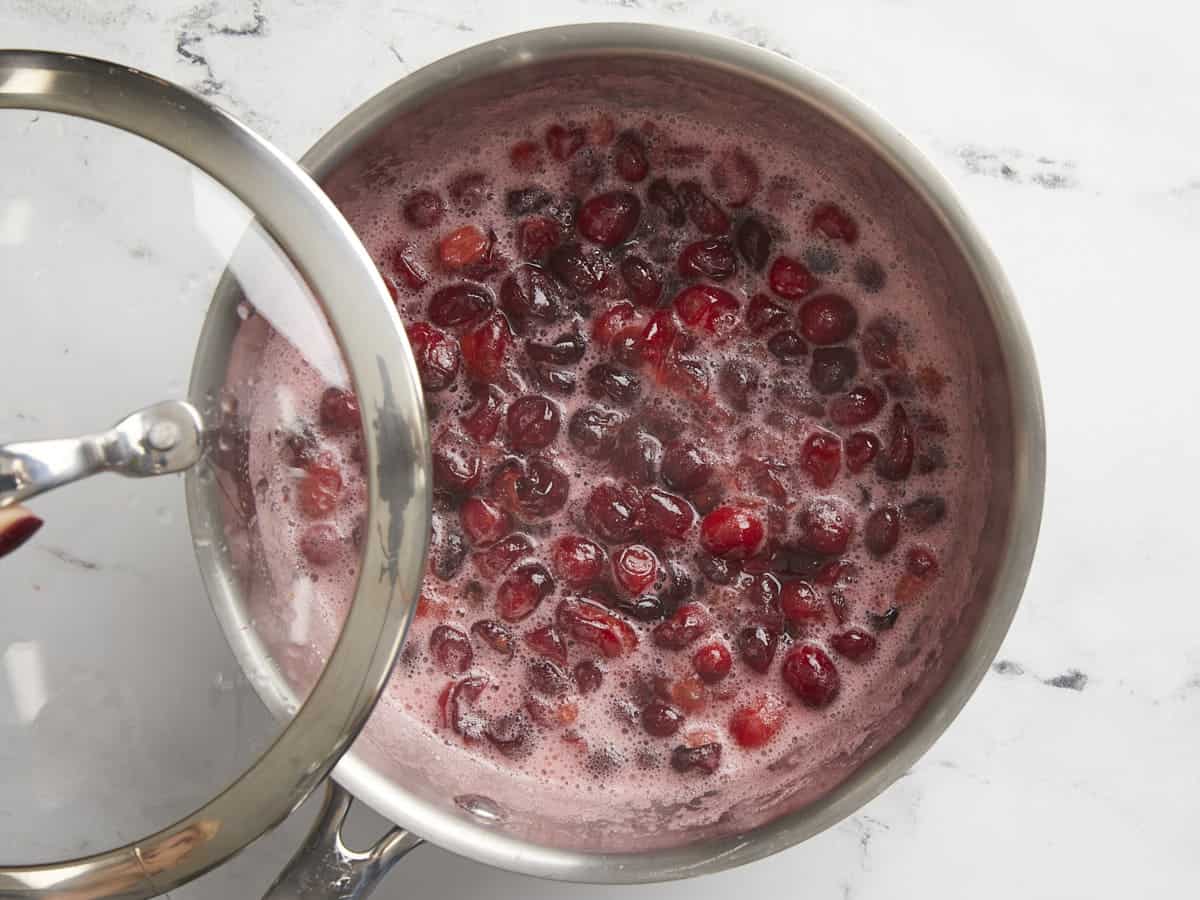
Rinse the cranberries, then add them to the boiling sugar water, and place a lid on top. Allow the water to come back up to a boil, at which point the cranberries will begin to pop.
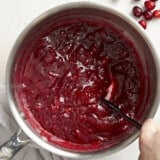
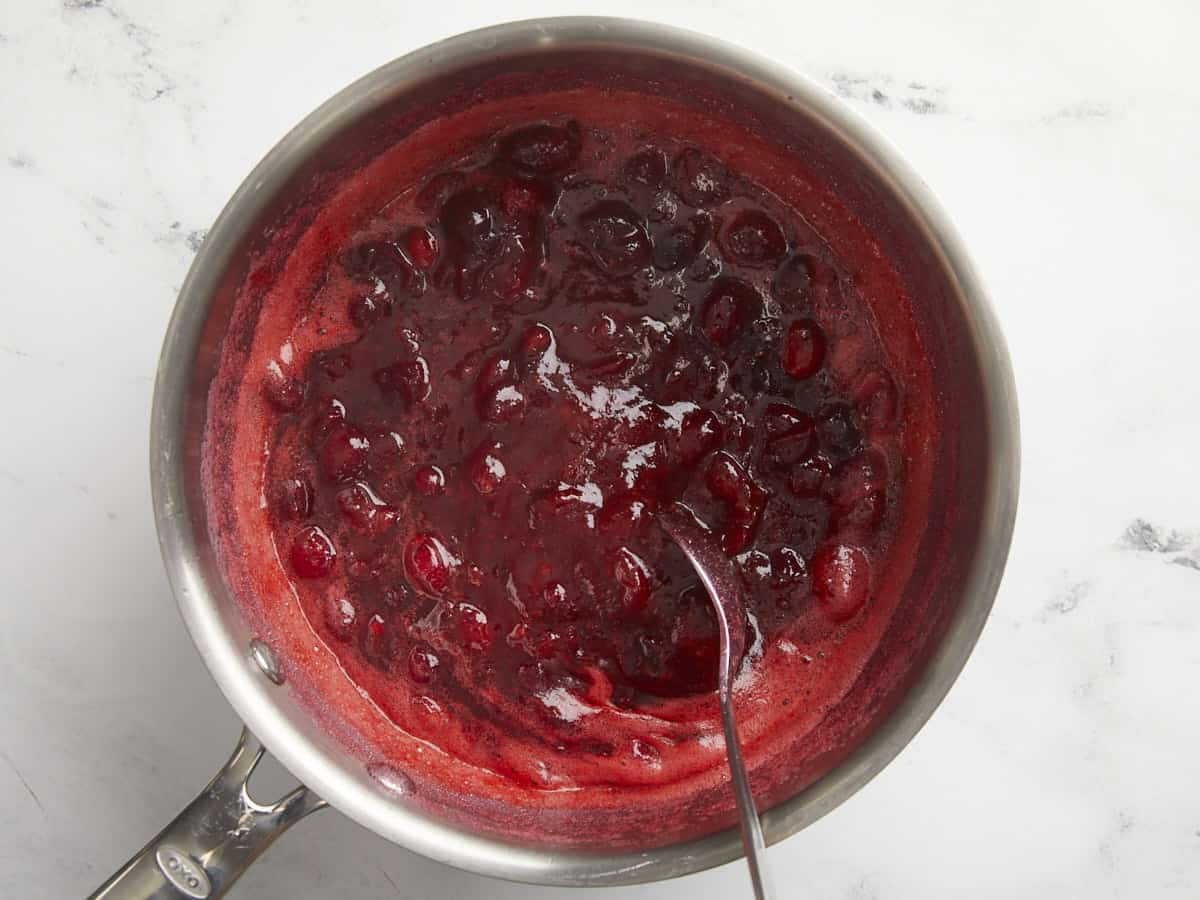
Once all the cranberries have popped, remove the lid, give it a stir, and turn the heat down to medium-low. Let the pot continue to simmer over medium-low heat for 5-7 minutes, stirring occasionally, or until the cranberries have completely broken down and the mixture has thickened. You can simmer longer if you prefer an extra thick cranberry sauce.
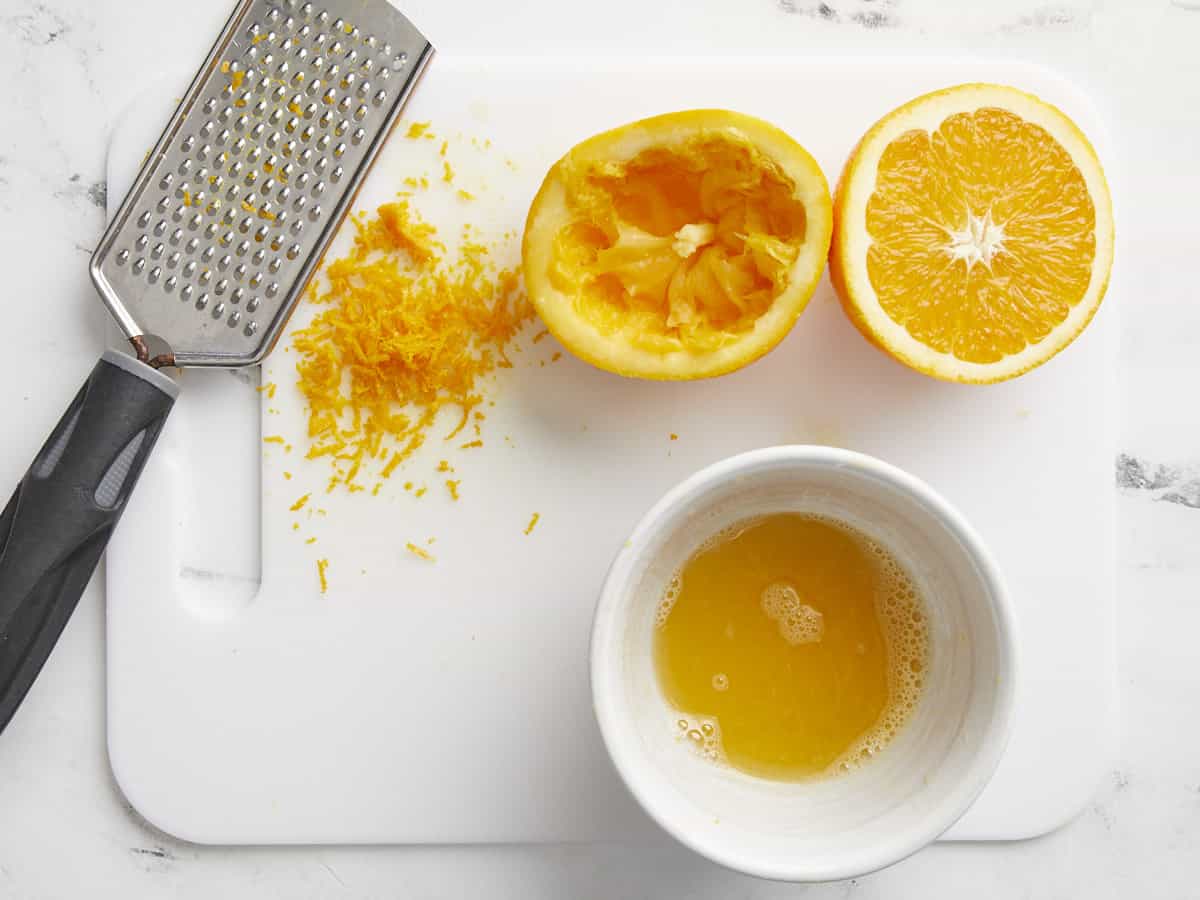
While the cranberries simmer, zest and juice the orange
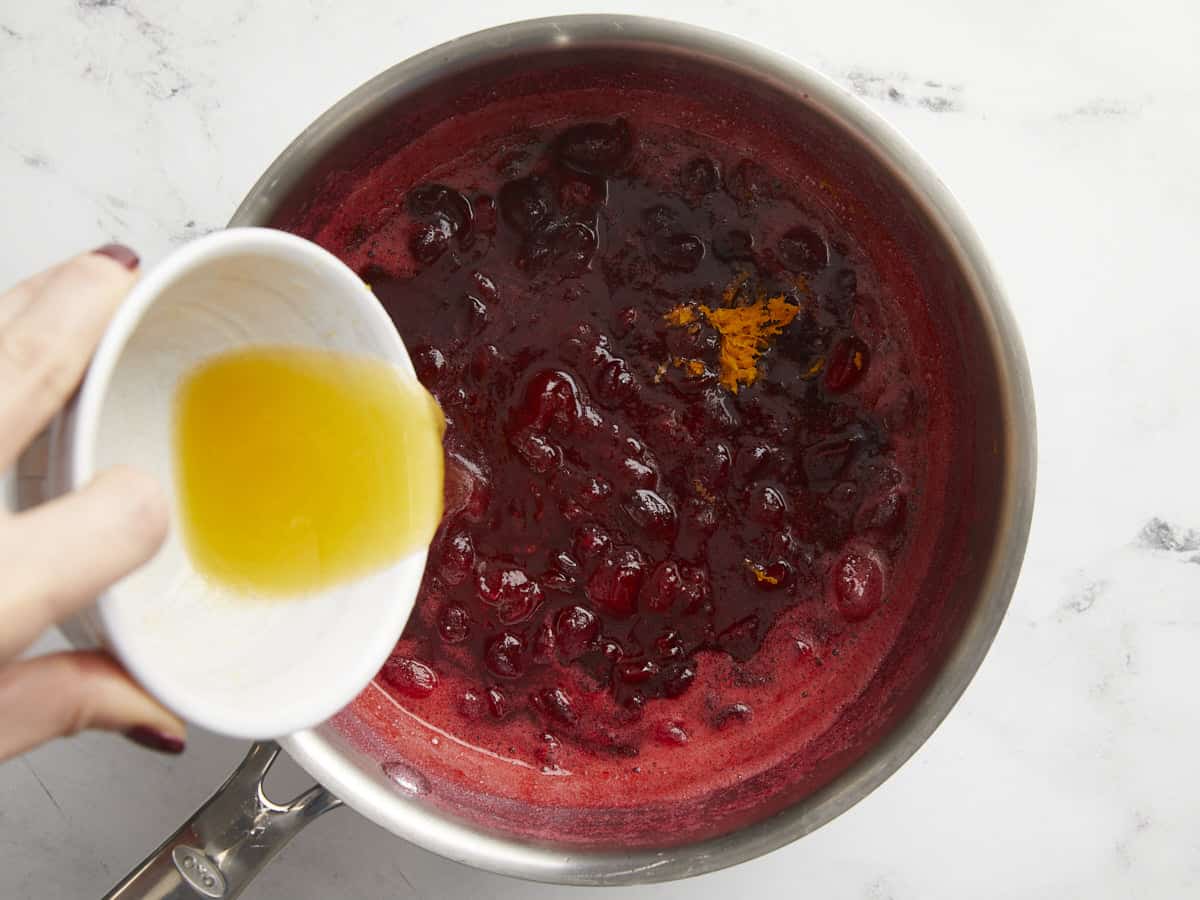
Once the cranberry sauce has thickened, remove it from the heat and stir in2 Tbsp orange juice and 1/4 tsp zest to the sauce. Allow the sauce to cool slightly, then serve.
Try serving this homemade cranberry sauce over a wheel of baked brie for an extra special holiday treat!
How to Make Homemade Cranberry Sauce – Step by Step Photos
Start by adding 1/2 cup sugar and 1 cup water to a medium sauce pot. Stir to combine, then place the pot over medium heat and allow it to come to a boil.
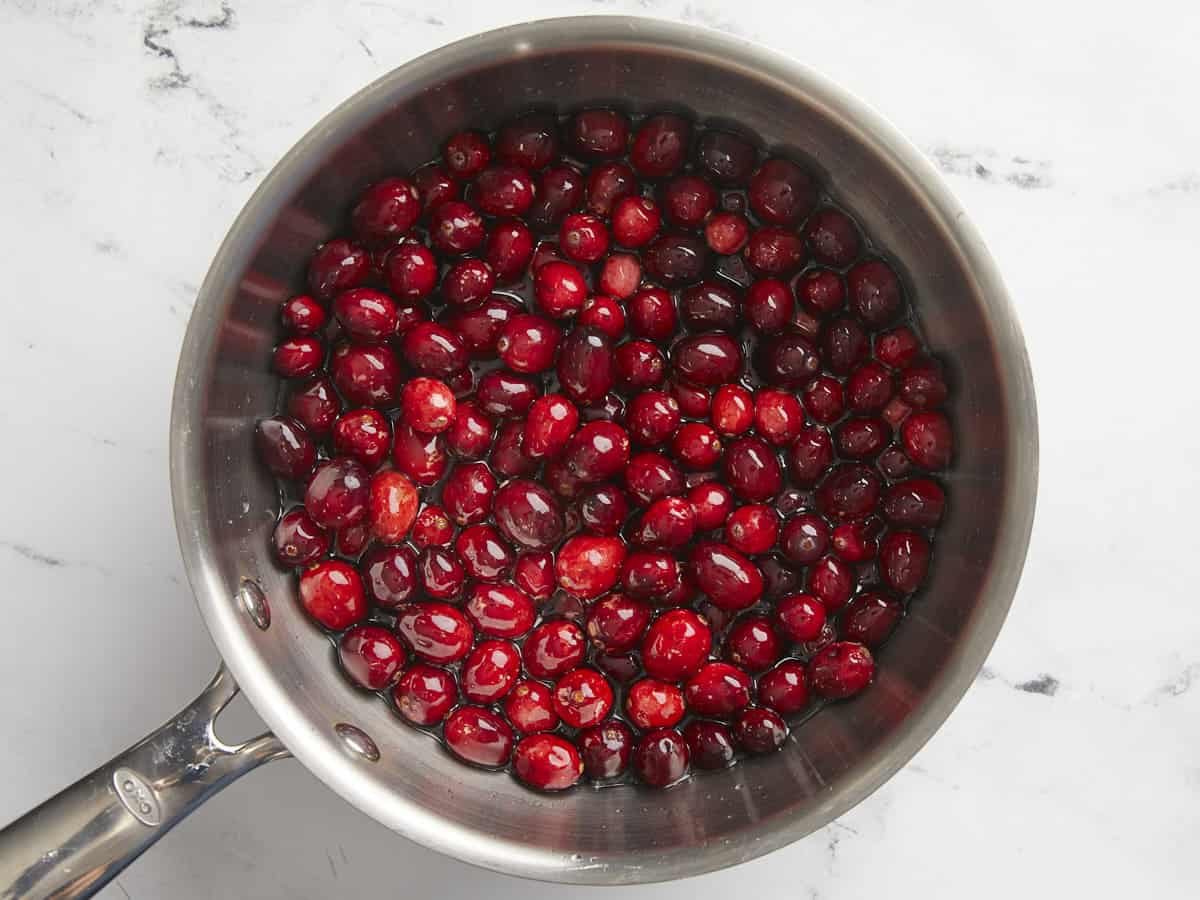
While waiting for the water and sugar to boil, rinse one 12oz. package of fresh cranberries. You can actually use either fresh or frozen cranberries for this recipe. If using frozen, just allow them to thaw first. Add the rinsed cranberries to the boiling sugar water. Place a lid on top and allow it to return to a boil.
When the pot returns to a boil the cranberries will begin to pop (that’s why you need a lid). Once all of the cranberries have popped, remove the lid, give it a good stir, and reduce the heat to medium-low.
Continue to let the cranberries simmer over medium-low, without a lid, until they have broken down and thickened (about 5-7 minutes). Stir the mixture occasionally as it simmers.
While the cranberries are simmering, zest and juice one small orange. You’ll only need about ¼ tsp zest and 2 Tbsp juice unless you really like citrus and then you can measure with your heart!
Stir the juice and zest into the cooked cranberry sauce.
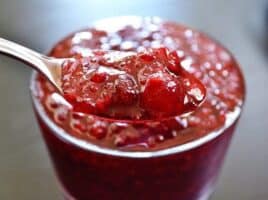
Stir everything together then let it cool slightly (it will thicken as it cools). Then it’s ready to serve! You can make this a day or two ahead of time if needed.
Fresh cranberry sauce is so delicious and you can put it on just about anything. Of course, it is good on all of the usual Thanksgiving items but don’t forget it on your turkey sandwich the next day! Because it is so jam-like it’s also amazing on a piece of toast with butter in the morning. Try it over ice cream too! What do you put your cranberry sauce on?


 I love making salads that are satisfying and filled with delicious and nutritious ingredients. It is always fun to play around with different flavors, ingredients, and dressings. This Orange Arugula Salad is definitely a favorite. It is fresh, hearty, and filled with flavor! Sharp, peppery arugula is the base of the salad. I add brown…
 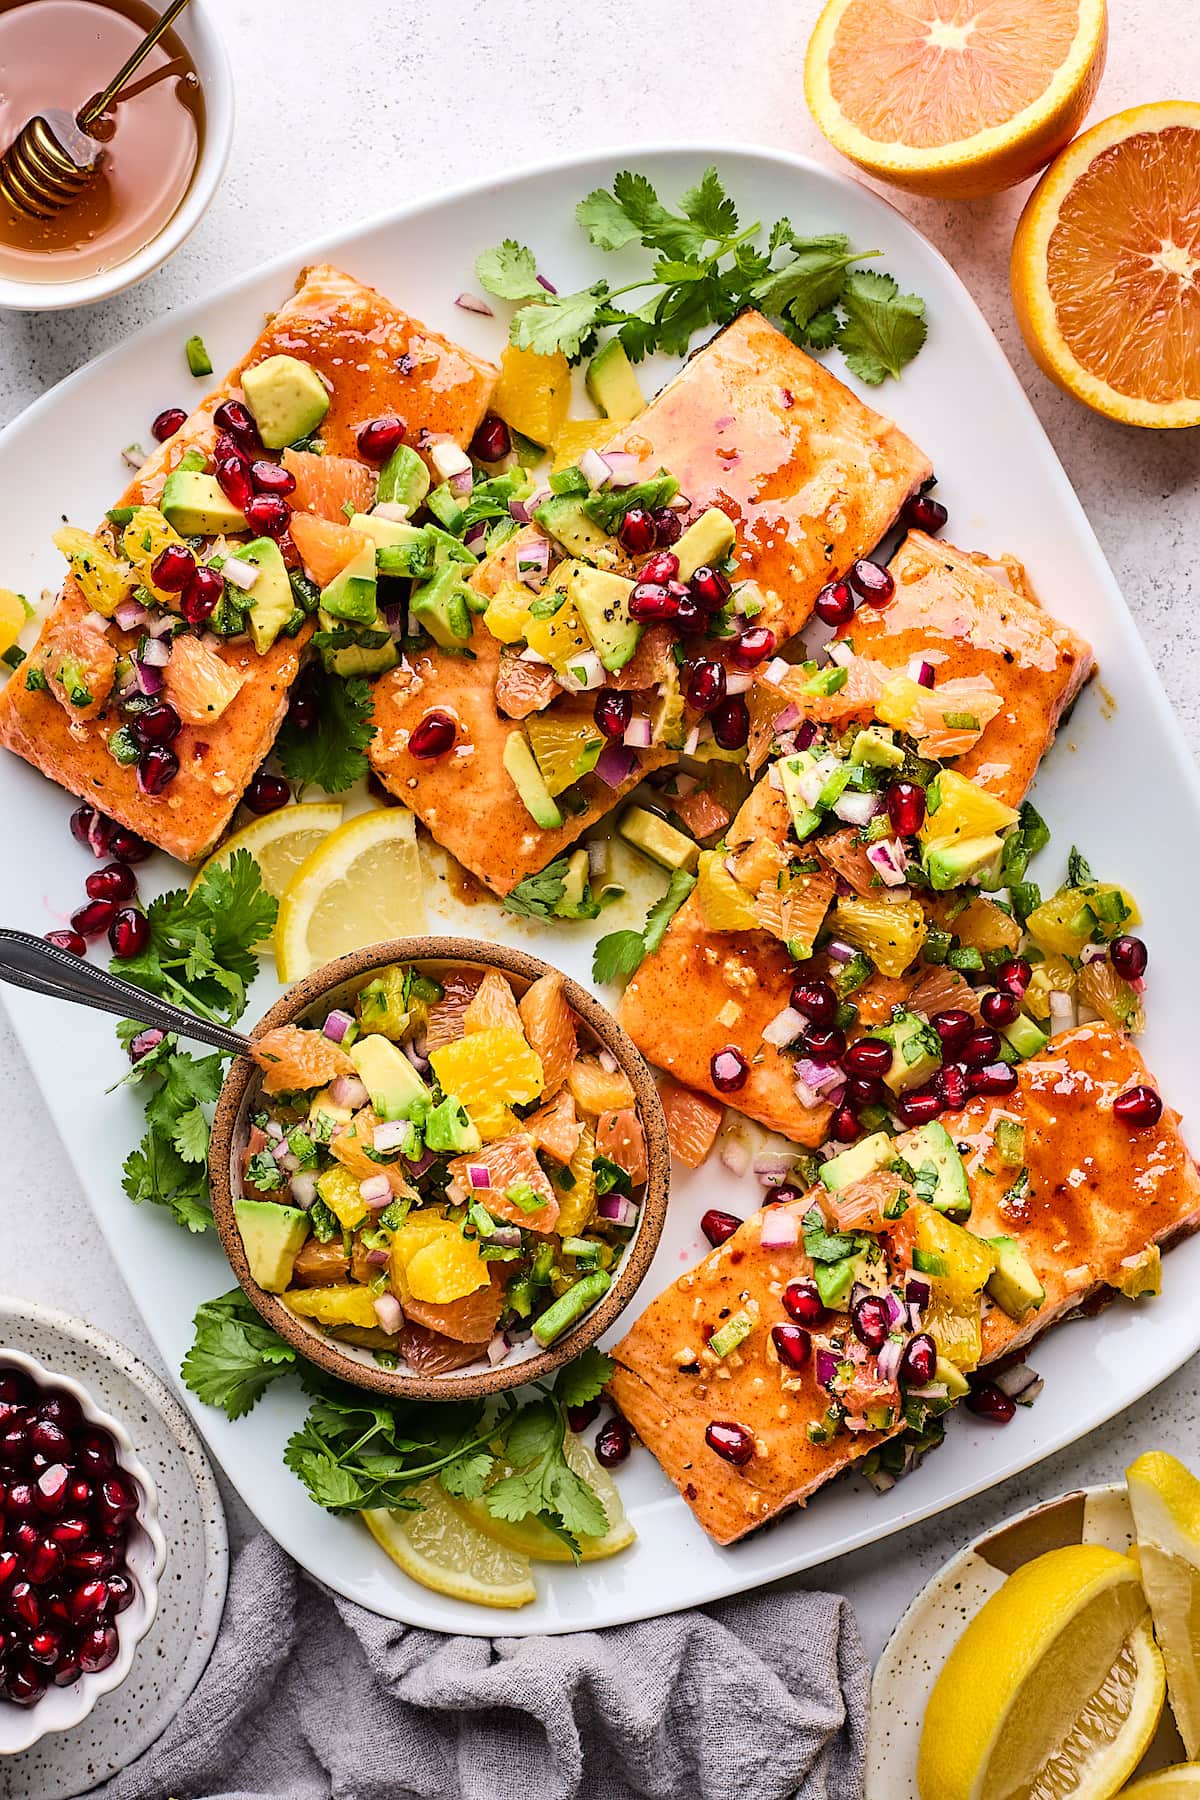 If you are looking for an easy and healthy meal, I have a the perfect recipe for you! Honey Mustard Salmon with Citrus Salsa. I know it sounds a little gourmet, but this recipe is SO easy! It only takes about 20 minutes to make. You can’t beat that! The honey mustard sauce is easy…
 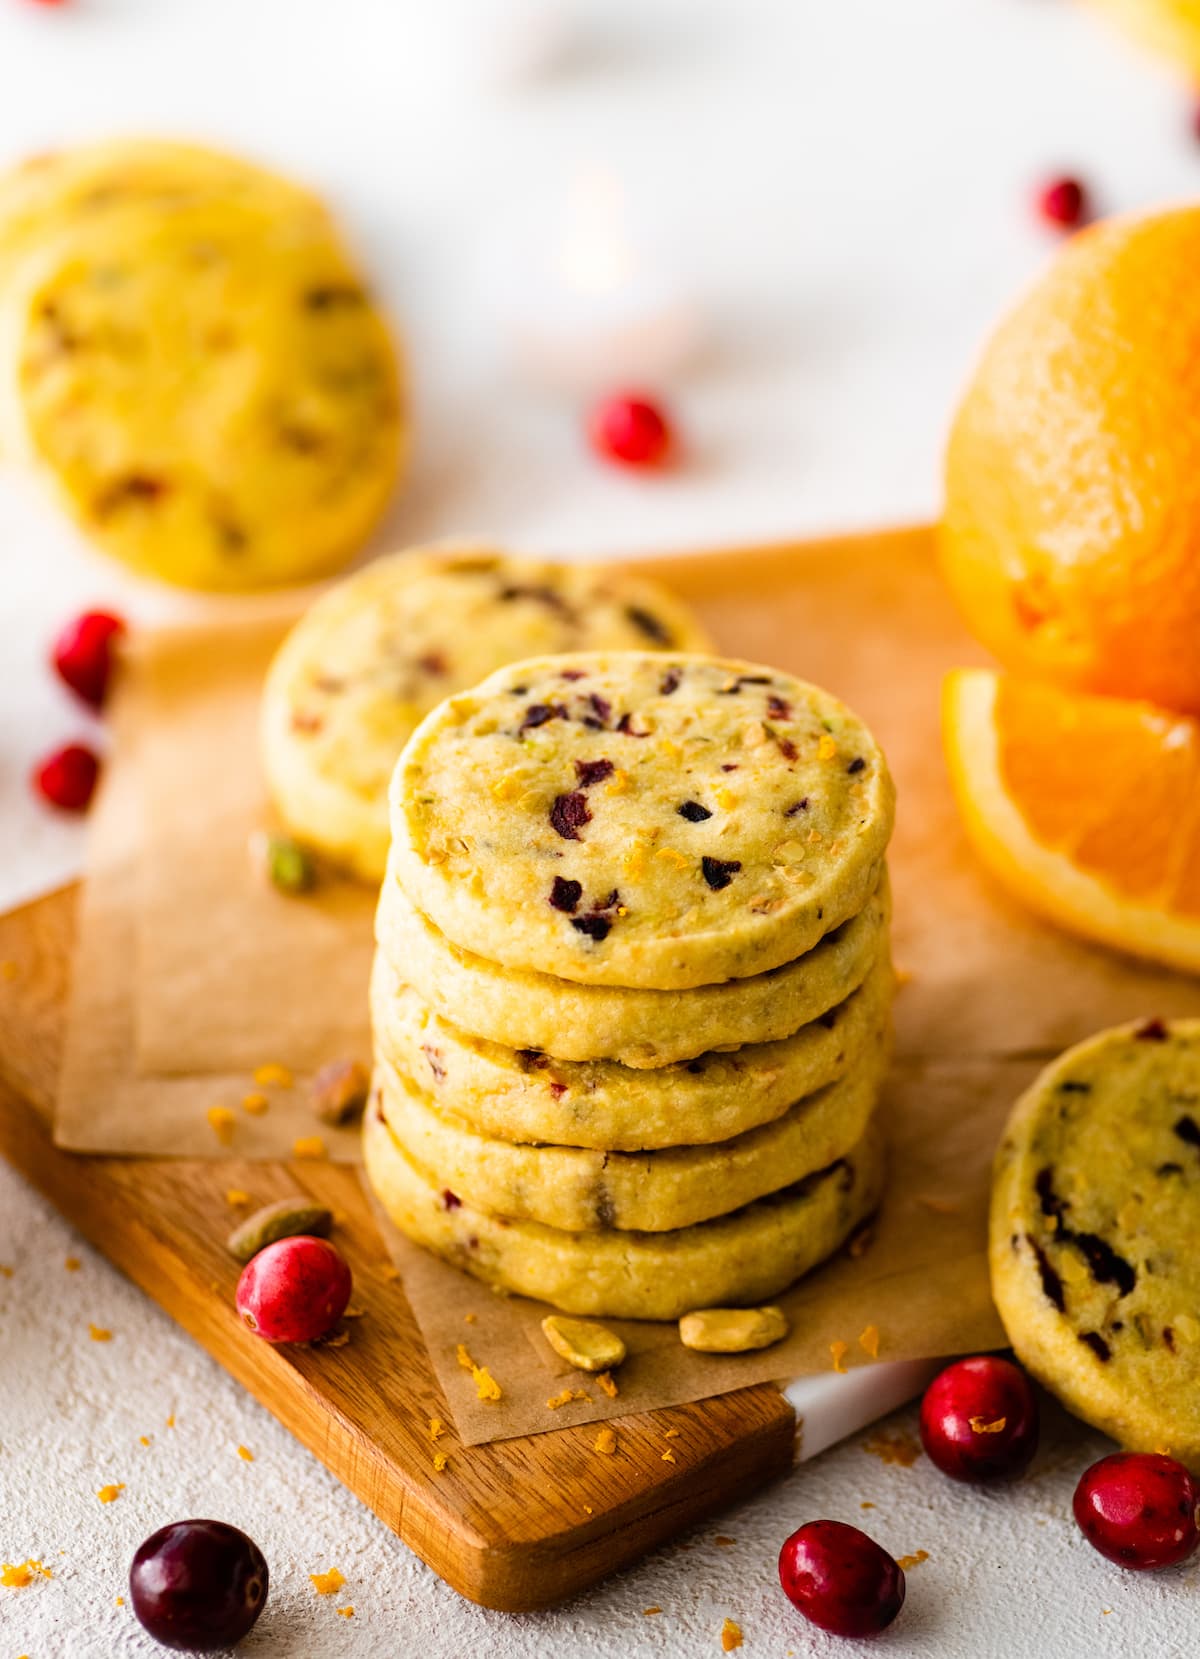 I love everything cranberry orange, cranberry orange bread, cranberry orange muffins, and cranberry orange scones, just to name a few! The flavors are SO good together, especially during the holiday months. I also love these Cranberry Orange Pistachio Shortbread Cookies. This recipe is from my friend Daniela, who took all of the cookie photos for…