Lightened Up Spaghetti Carbonara

Love classic spaghetti carbonara but want a healthier, lighter version? You’re in for a treat! This Lightened Up Spaghetti Carbonara recipe uses lighter ingredients without sacrificing that rich, creamy texture. Plus, it’s ready in under 30 minutes, making it perfect for busy weeknights! Why You’ll Love This Recipe The Ingredients *For a full list of…

The post Lightened Up Spaghetti Carbonara appeared first on Weelicious.

Love classic spaghetti carbonara but want a healthier, lighter version? You’re in for a treat! This Lightened Up Spaghetti Carbonara recipe uses lighter ingredients without sacrificing that rich, creamy texture. Plus, it’s ready in under 30 minutes, making it perfect for busy weeknights!
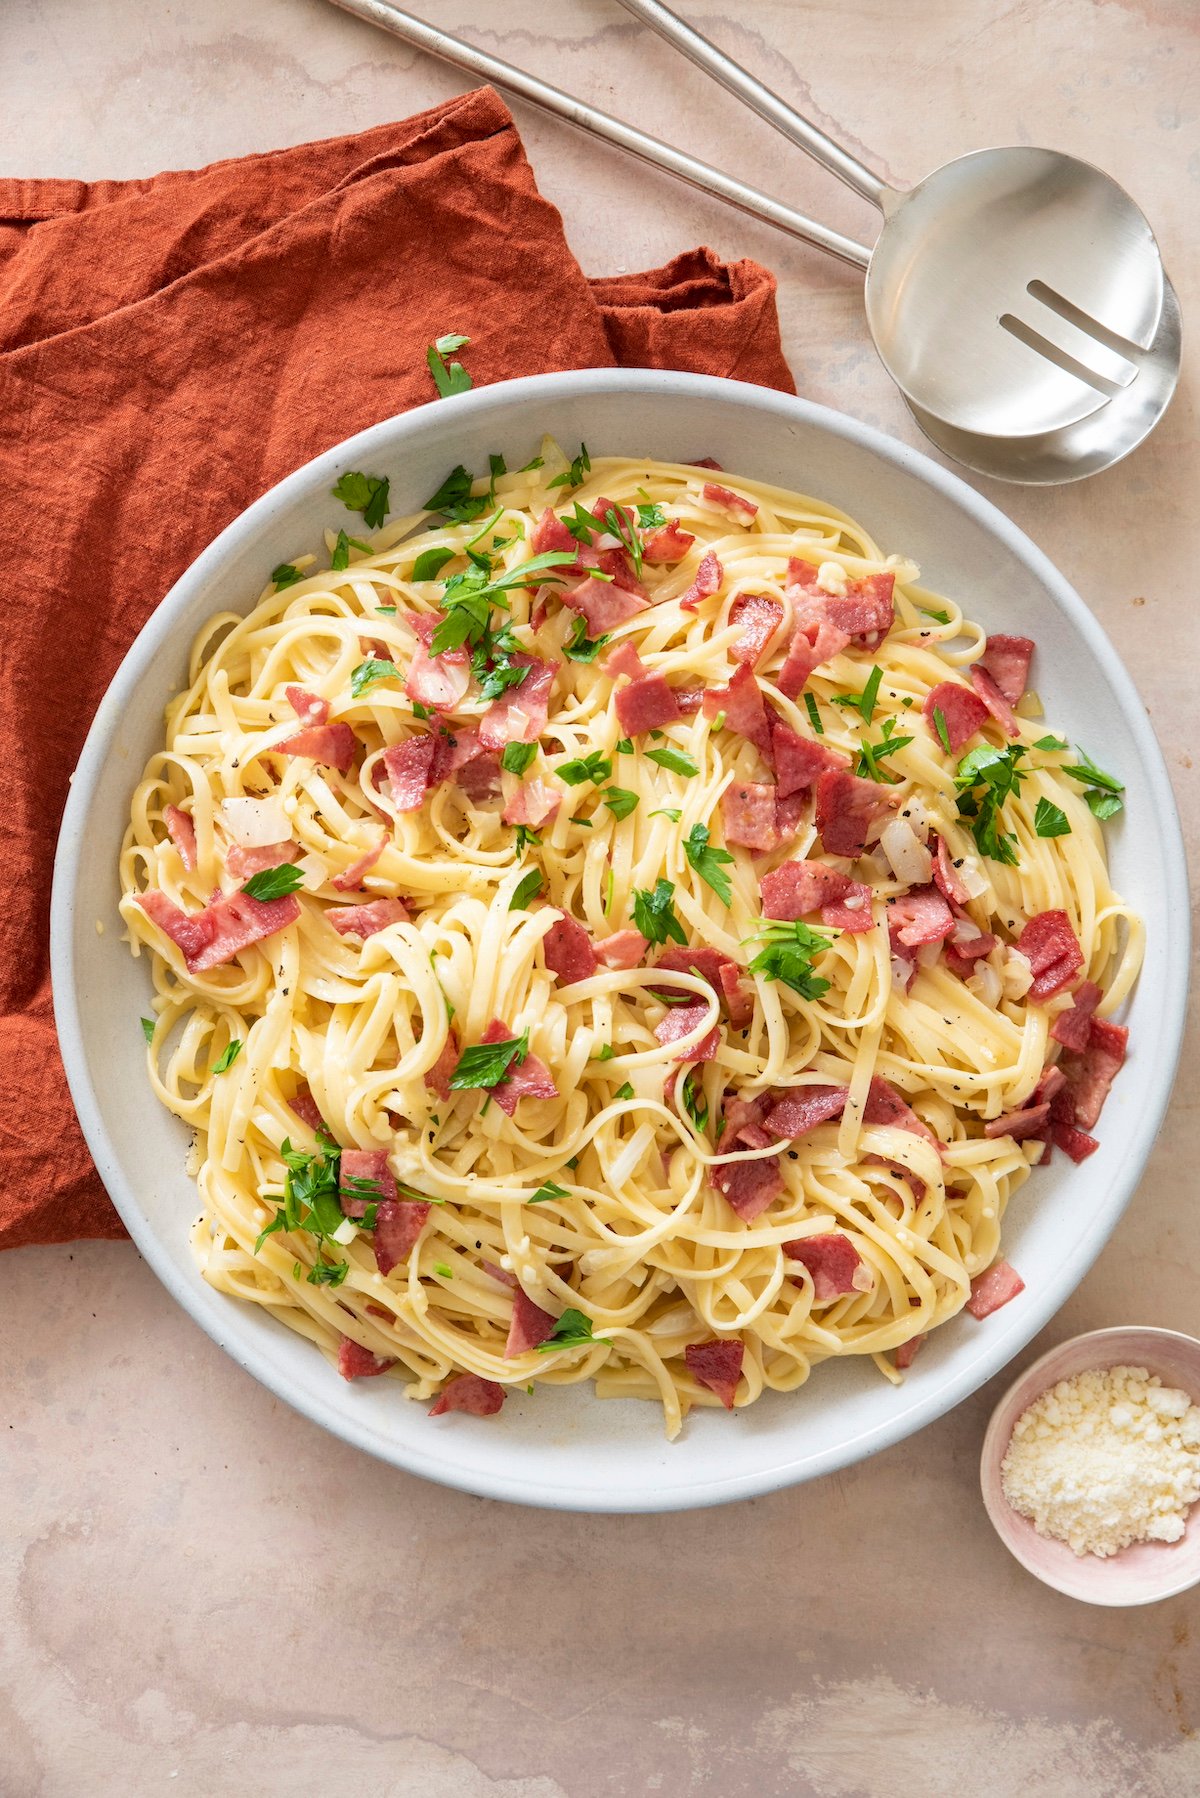
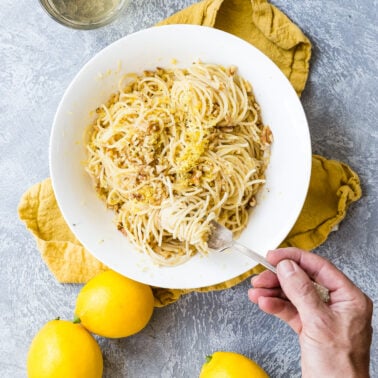
Lightened Up Spaghetti Carbonara in large serving bowl.

Why You’ll Love This Recipe

  • Healthier Alternative: Using turkey bacon reduces fat without losing the delicious smoky flavor. Instead of substitutions, I simply use less of the indulgent ingredients (except cream, which I do skip). Combining eggs and pasta water retains the creamy texture of classic carbonara.
  • Quick and Easy: This carbonara recipe is ready in under 30 minutes making it perfect for a quick yet satisfying meal.
  • Comfort Food: Despite being lighter, this carbonara remains creamy, comforting, and absolutely delicious! Want another healthy yet comforting recipe? Try my Roast Vegetable Pasta recipe!
  • Family-Friendly: Kids and adults alike love this delicious pasta dish! It feels indulgent without the guilt and is a total crowd pleaser.

The Ingredients
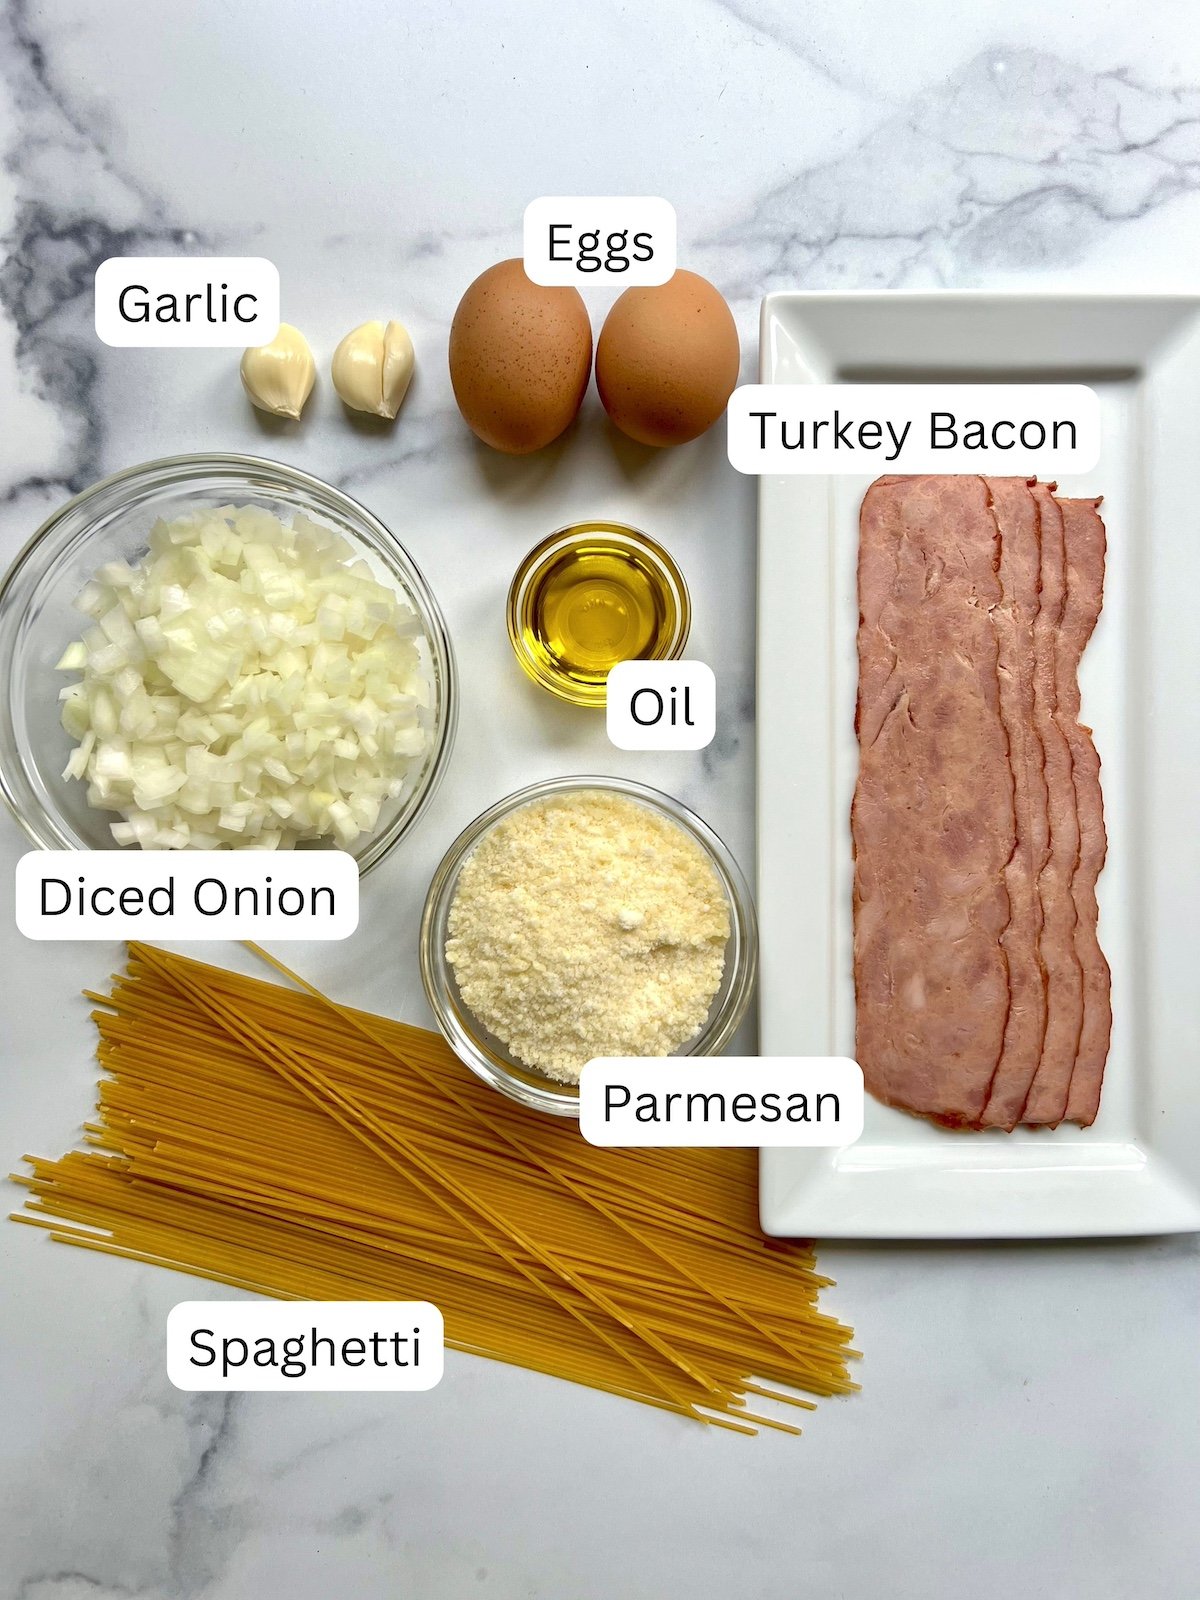
Lightened Up Spaghetti Carbonara Ingredients.
  • Spaghetti: Spaghetti is the heart of the dish, providing the perfect base for picking up the creamy sauce.
  • Turkey bacon: I opt for this leaner bacon option that still provides the essential smoky taste.
  • Small onion: Sautéed diced onion adds flavor and a touch of sweetness to the dish
  • Garlic cloves, minced: No pasta is complete without garlic – the aromatic, savory note that complements the bacon and cheese.
  • Large eggs: Eggs are what creates the rich, creamy sauce that binds the dish together.
  • Grated Parmesan cheese: Grated parmesan adds a nutty, salty flavor and is the ingredient that helps thickens the sauce.

*For a full list of ingredients and instructions see the recipe card below*

Variations and Substitutions

  • Cheese Options: Try Pecorino Romano instead of Parmesan for a sharper flavor.
  • Add Veggies: Feel free to incorporate peas or sautéed spinach for added nutrients and color.
  • Gluten-Free: You can use your favorite gluten-free pasta to make this dish if you want to!

How to Make Lightened Up Spaghetti Carbonara
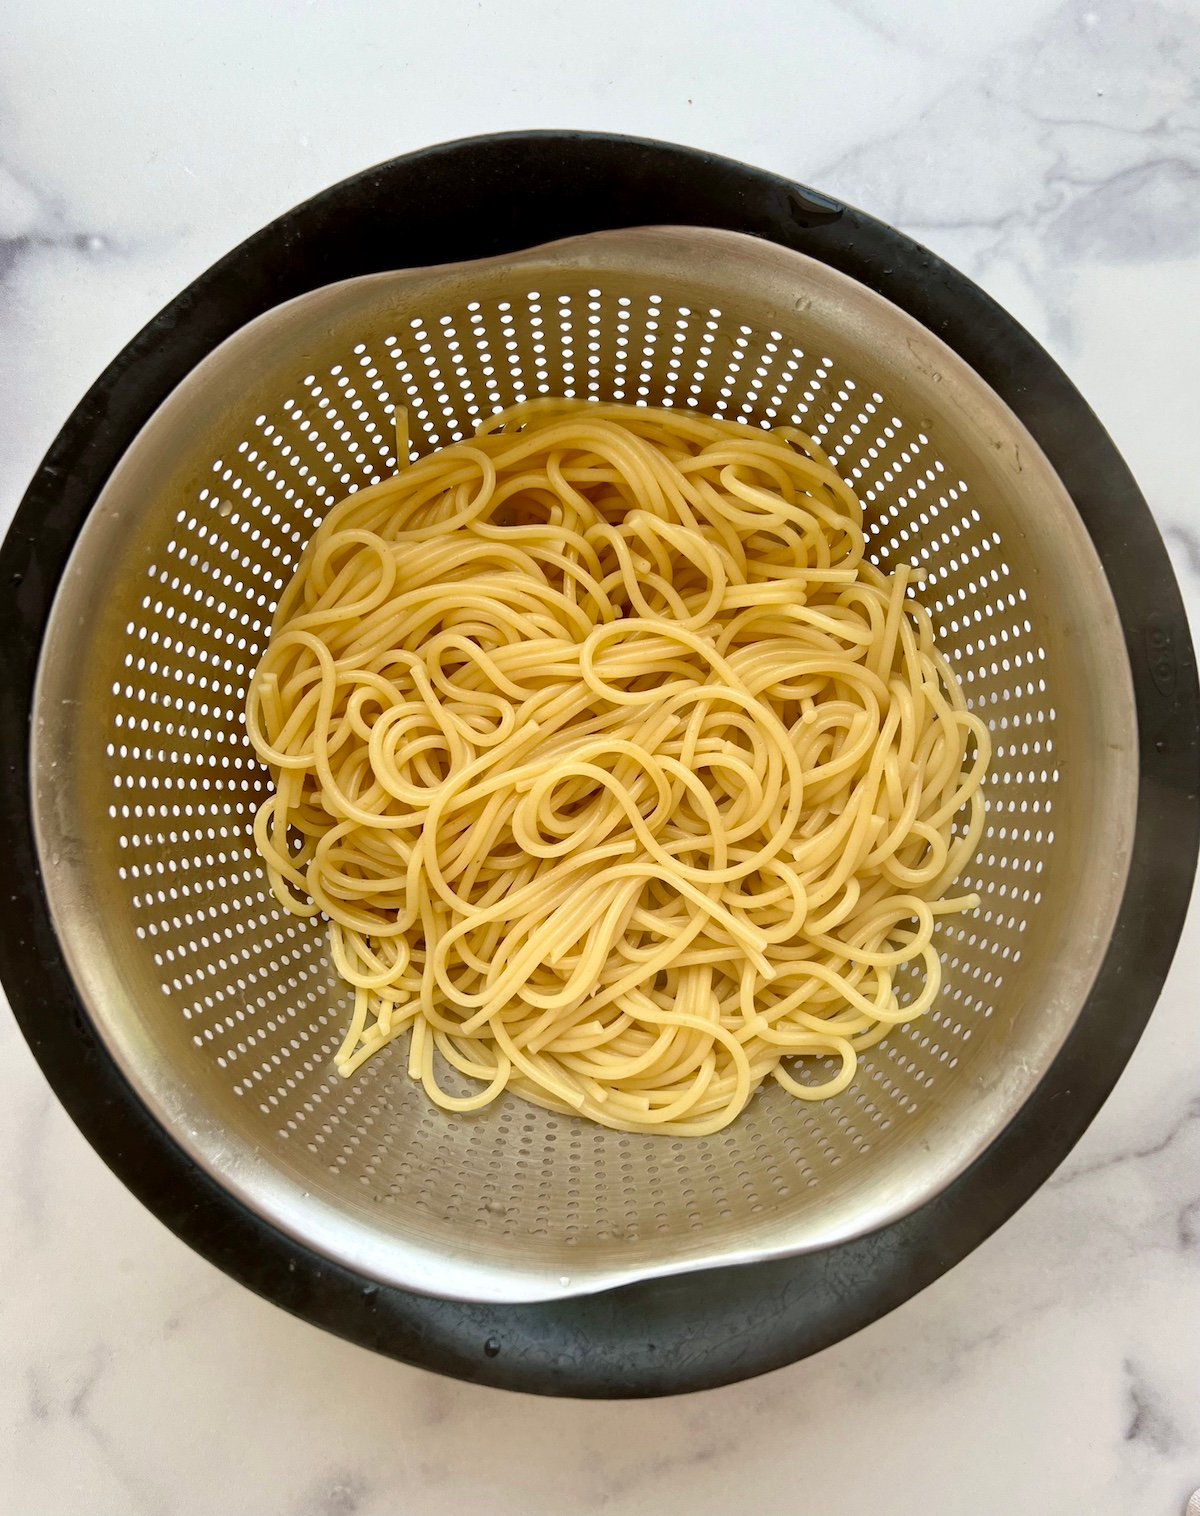
Cooked spaghetti noodles in strainer.

Step 1: Bring a large pot of salted water to a boil. Add the spaghetti and cook according to the package directions. Drain, reserving 1 cup of the pasta cooking water. Return the pasta to the pot. 
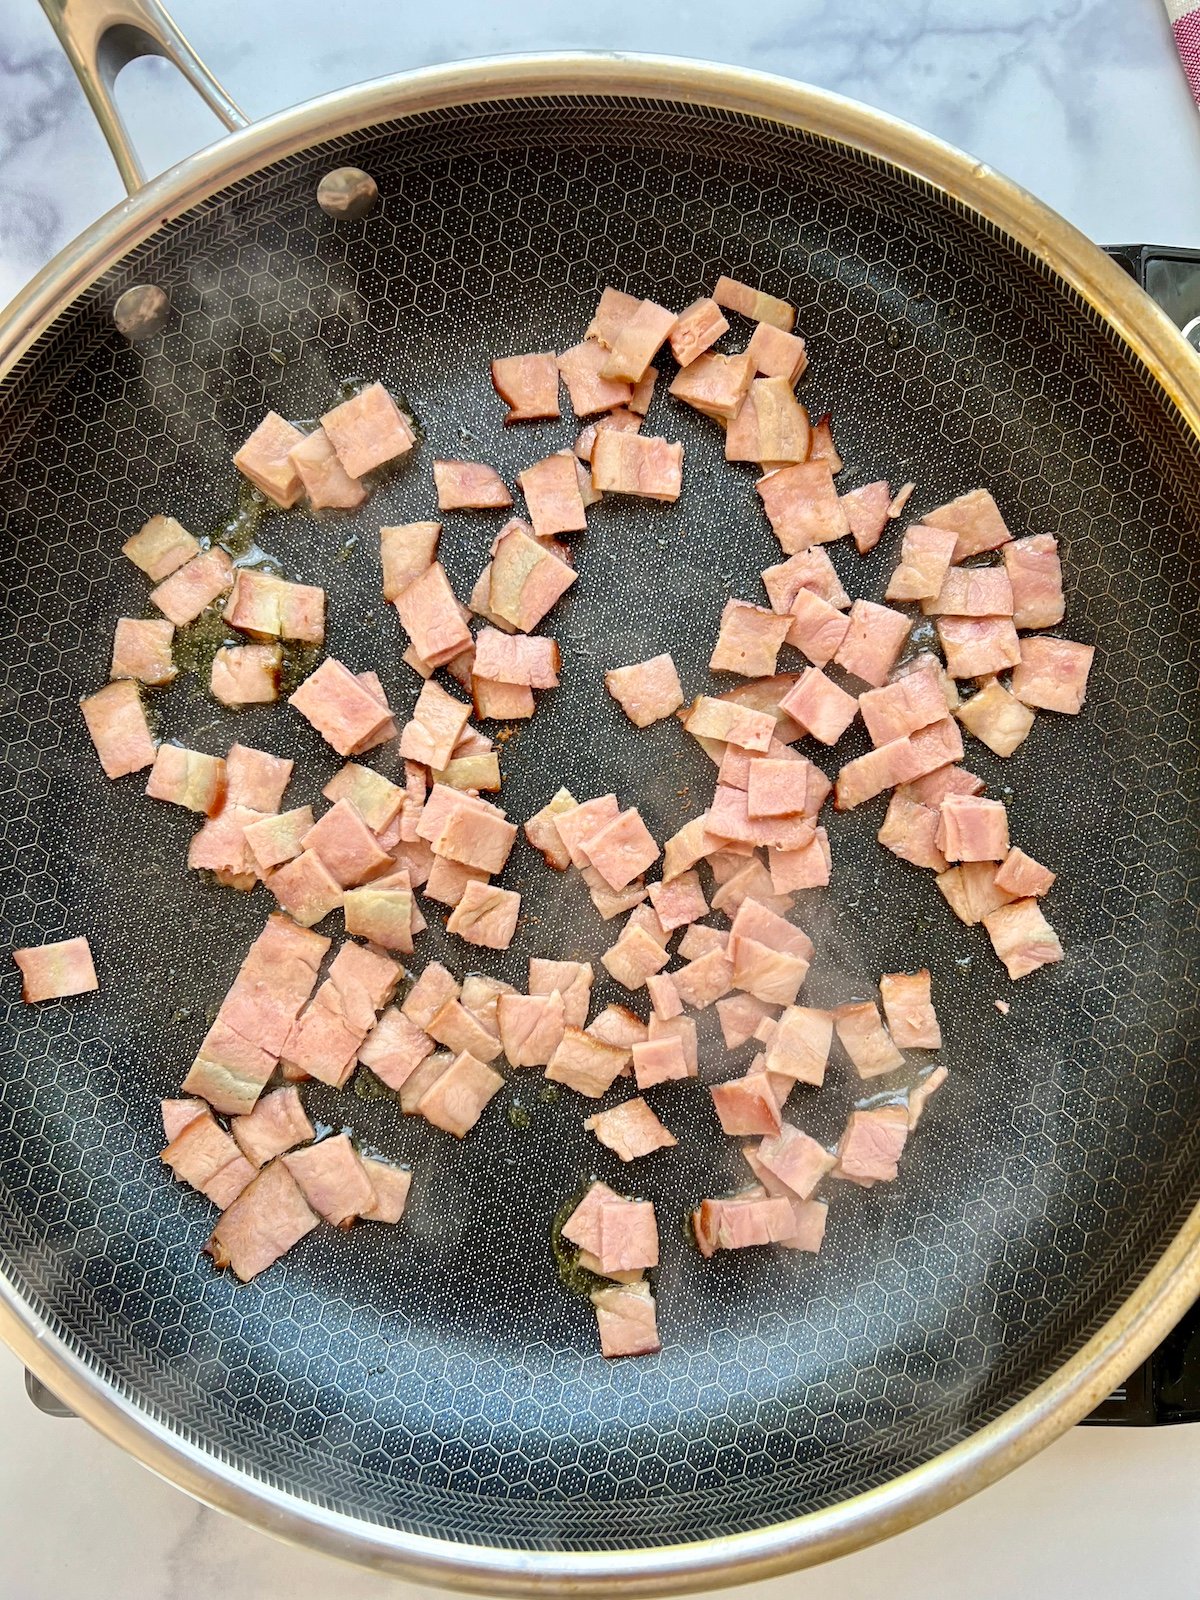
Chopped turkey bacon in sauté pan.

Step 2: While the pasta is cooking, heat the oil in a large skillet over medium heat. Add the bacon and cook, stirring occasionally so it cooks evenly, about 5 minutes.

Sautéed onions and chopped turkey bacon in sauté pan.

Step 3: Add the onions and garlic and cook, stirring occasionally, until the onions are soft, about 3 minutes.
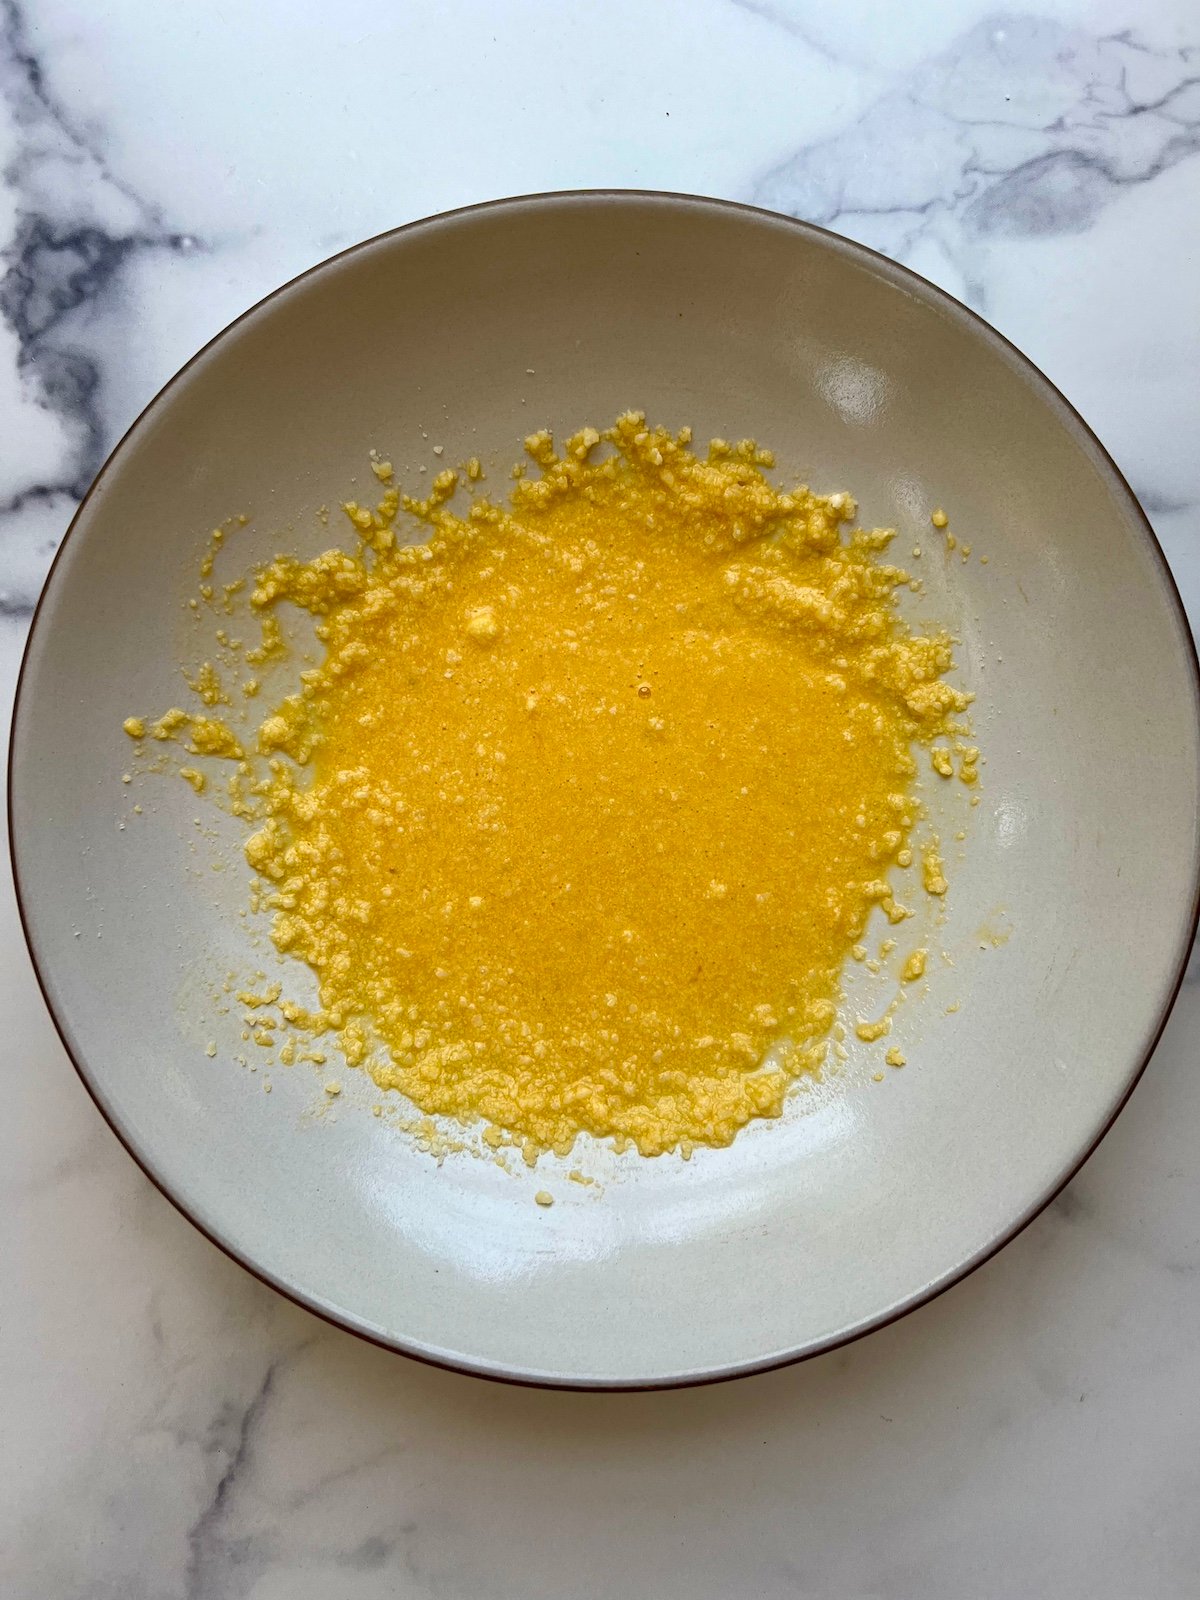
Whisked eggs and grated parmesan cheese in a bowl.

Step 4: Whisk together the eggs and cheese in a small bowl.
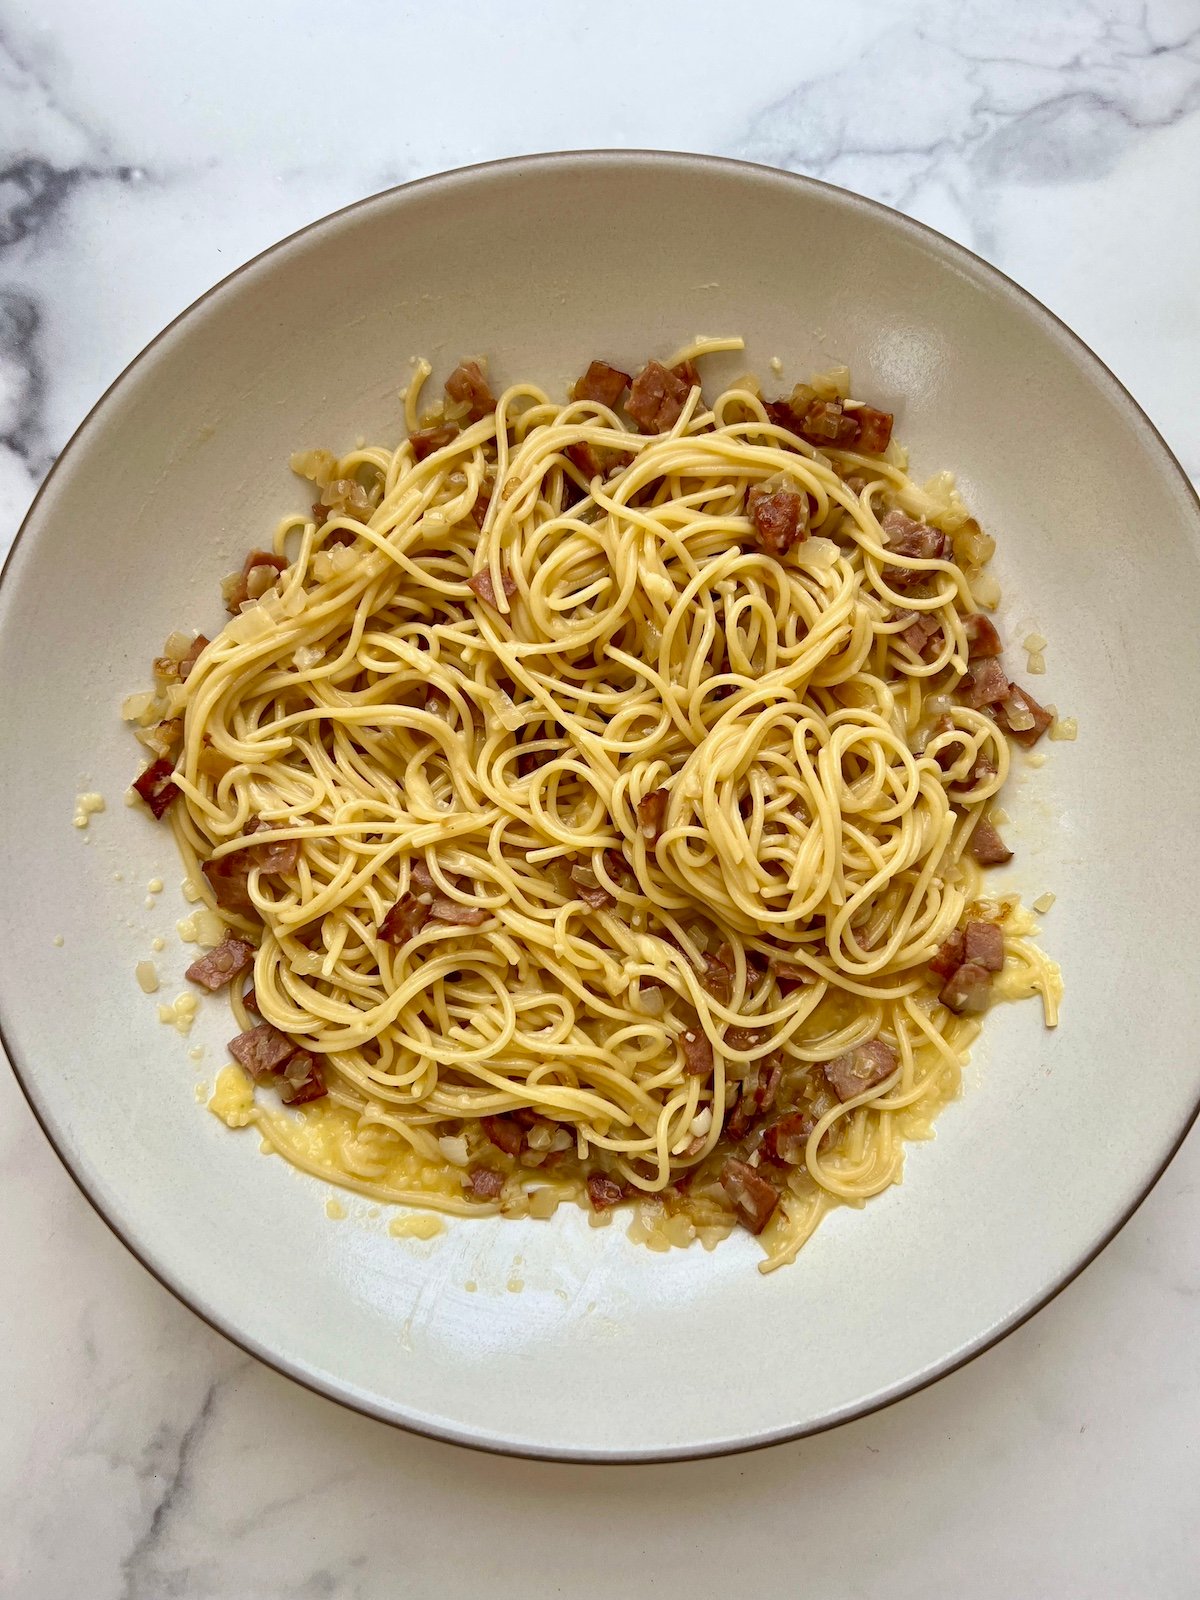
Lightened up spaghetti carbonara on serving platter.

Step 5: Add cooked pasta to the egg mixture and stir immediately (so the eggs don’t curdle). Add the sautéed bacon and onions and 1/2 cup of the reserved pasta water*. Toss to combine and serve immediately. (*see cook’s note in recipe card below). 

Tips and Tricks

  • Prevent Curdling: Make sure to add the egg and cheese mixture to the hot pasta off the heat to prevent the eggs from scrambling.
  • Reserve Pasta Water: Don’t forget to save the pasta water! It’s crucial for achieving the right sauce consistency.
  • Serve Immediately: Carbonara is best enjoyed right away while the sauce is at its creamiest. If you’re not planning to serve immediately, toss with the remaining 1/2 cup warm pasta water just before serving.

FAQs

Is it safe to eat raw eggs in spaghetti carbonara?

The heat from the pasta and bacon mixture cooks the eggs enough to be safe to eat. However, if you’re concerned, use pasteurized eggs.

Can I make this dish ahead of time?

Carbonara is best enjoyed fresh. However, if you need to make it ahead, keep the pasta and sauce separate and combine them just before serving, using some reserved pasta water to loosen the sauce.
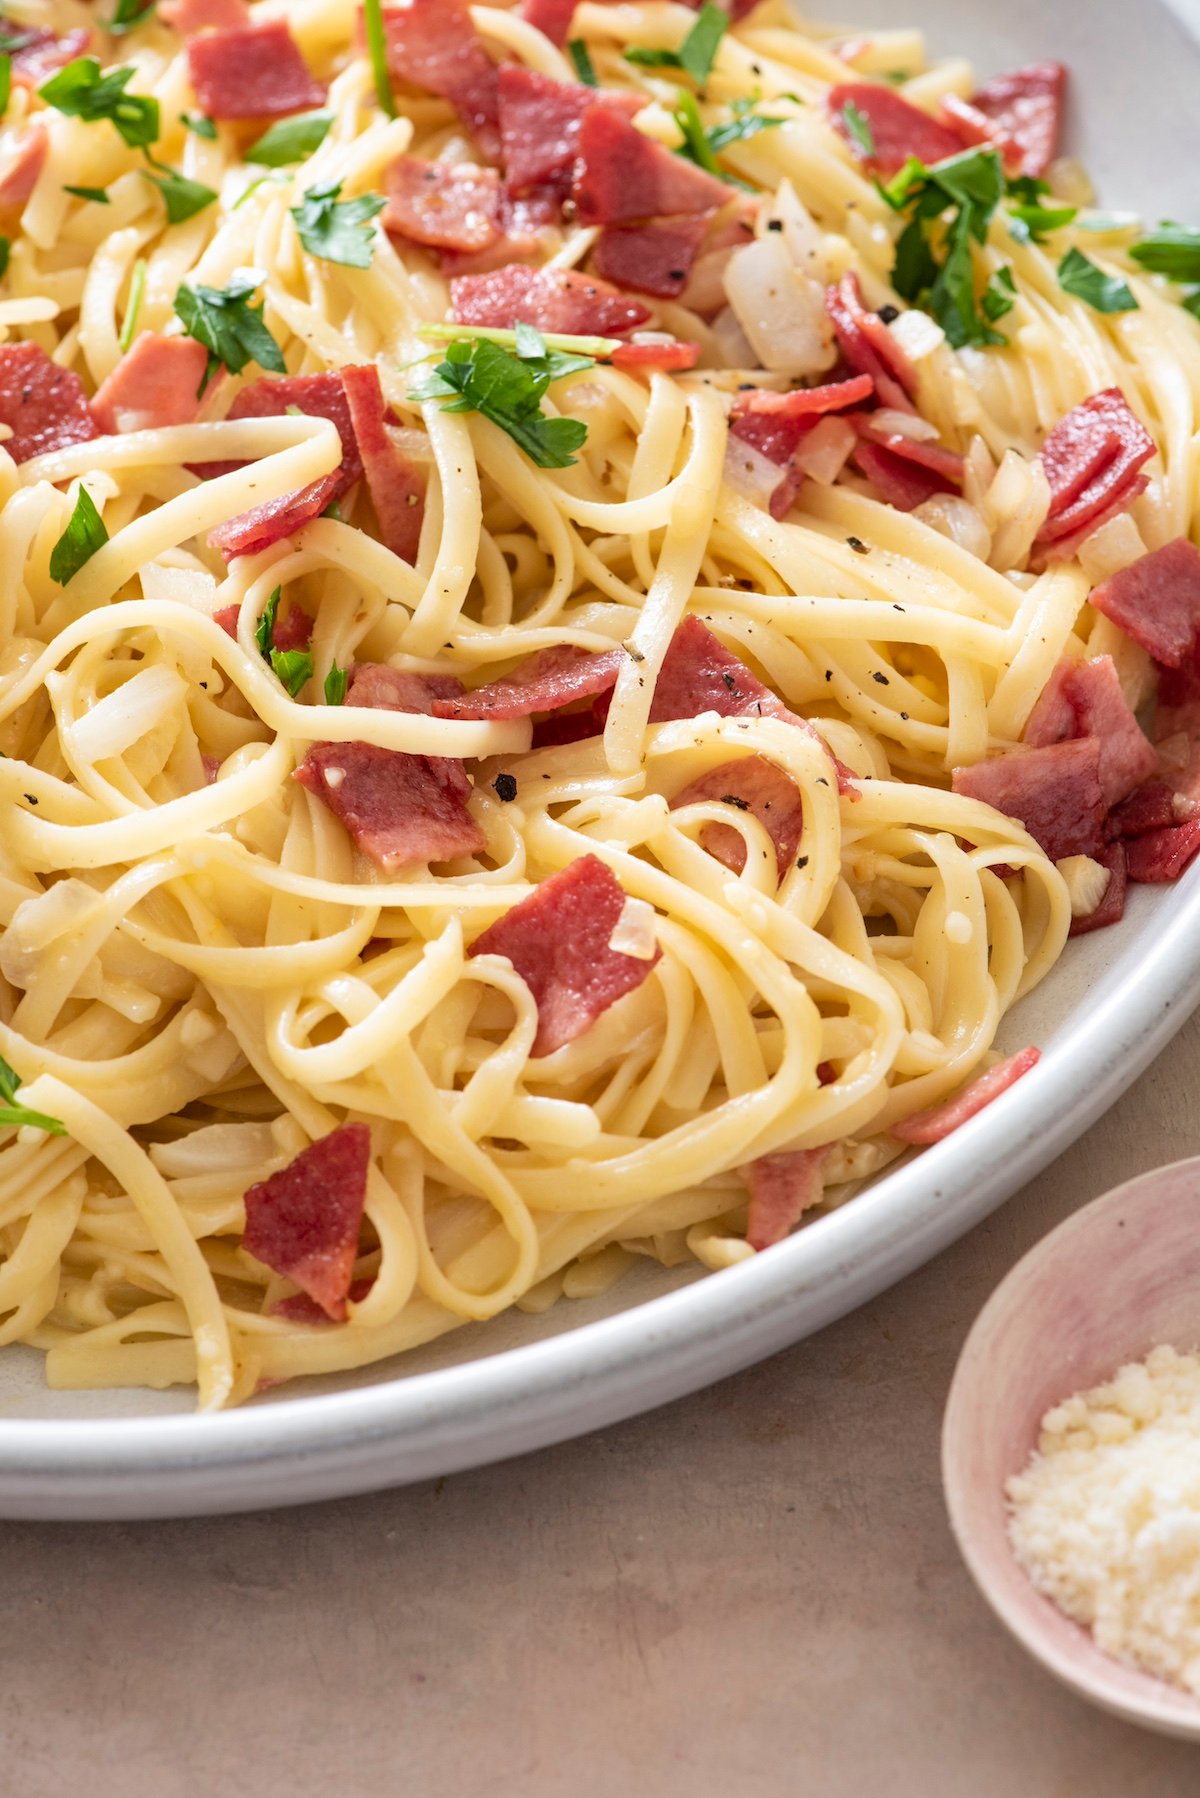
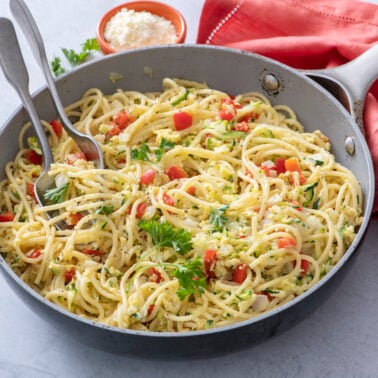
Lightened Up Spaghetti Carbonara plated.

More Light Pasta Dishes

I know you’re going to love this healthier version of spaghetti carbonara! It’s easy to make and totally delicious without the guilt. Let me know what you think of this recipe by leaving a rating and comment below.

Want more WeeliciousSubscribe to my newsletter and follow me on InstagramFacebook and TikTok for all the newest recipes!

Print

Lightened Up Spaghetti Carbonara

This Lightened Up Spaghetti Carbonara recipe uses lighter ingredients without sacrificing that rich, creamy texture. Plus, it's ready in under 30 minutes, making it perfect for busy weeknights!
Course Dinner
Cuisine American, Italian
Prep Time 10 minutes
Cook Time 15 minutes
Total Time 25 minutes
Servings 4
Calories 510kcal

Equipment

  • heavy bottomed pot
  • large sauté pan

Ingredients

Instructions

  • Bring a large pot of salted water to a boil. Add the spaghetti and cook according to the package directions. Drain, reserving 1 cup of the pasta cooking water. Return the pasta to the pot. 
  • While the pasta is cooking, heat the oil in a large skillet over medium heat. Add the bacon and cook, stirring occasionally so it cooks evenly, about 5 minutes.
  • Add the onions and garlic and cook, stirring occasionally, until the onions are soft, about 3 minutes.
  • Whisk together the eggs and cheese in a small bowl. Add it to the pasta and immediately (so it doesn't curdle) stir and toss together.
  • Add the bacon, onions and 1/2 cup of the reserved pasta water*. Toss to coat well and serve immediately (see Cook's Note).

Notes

Cook’s Note: The pasta will absorb some of the liquid as it sits, so if not serving right away, toss with the remaining 1/2 cup warm pasta water just before serving.
Prevent Curdling: Make sure to add the egg and cheese mixture to the hot pasta off the heat to prevent the eggs from scrambling.
Reserve Pasta Water: Don’t forget to save the pasta water! It’s crucial for achieving the right sauce consistency.

Nutrition

Calories: 510kcal | Carbohydrates: 60g | Protein: 27g | Fat: 18g | Cholesterol: 50mg | Sodium: 1080mg | Fiber: 3g | Sugar: 3g

The post Lightened Up Spaghetti Carbonara appeared first on Weelicious.
Arroz con Leche

Arroz con Leche receta in a bowl with a dusting of cinnamon sugar and topped with some raisins.Our creamy Arroz con Leche recipe is the epitome of comfort food and so easy to make with simple pantry ingredients. We enjoy it hot or cold! If you love pudding recipes, this Panna Cotta, Banana Pudding, and Tapioca Pudding are some of my favorites! How to make Arroz con Leche: Cook Rice in Milk:…

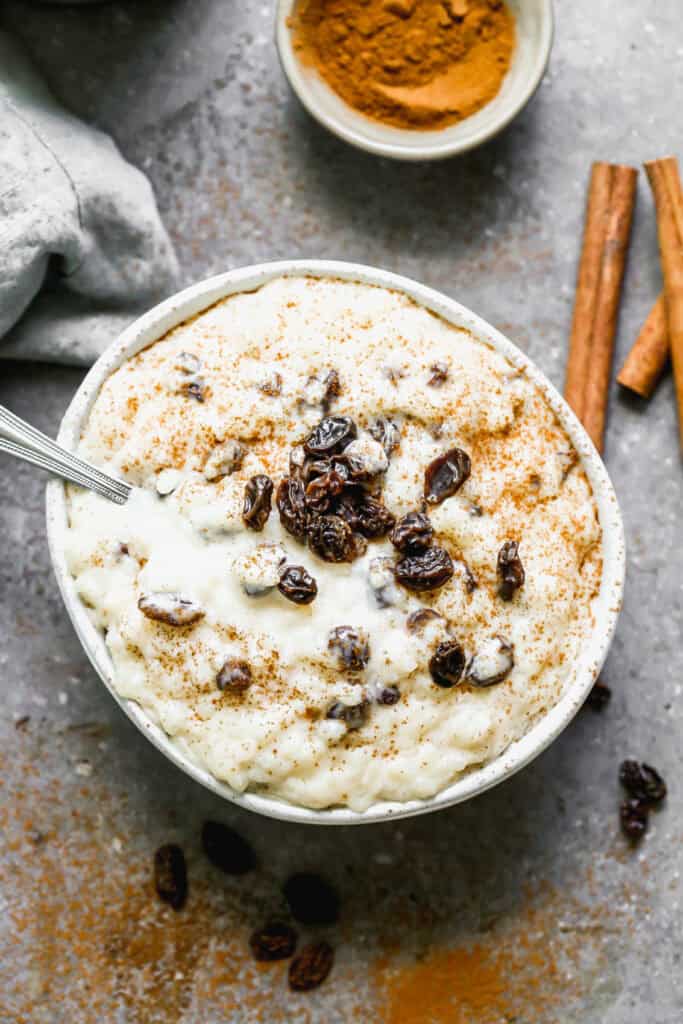
Arroz con Leche receta in a bowl with a dusting of cinnamon sugar and topped with some raisins.

Our creamy Arroz con Leche recipe is the epitome of comfort food and so easy to make with simple pantry ingredients. We enjoy it hot or cold!

If you love pudding recipes, this Panna Cotta, Banana Pudding, and Tapioca Pudding are some of my favorites!

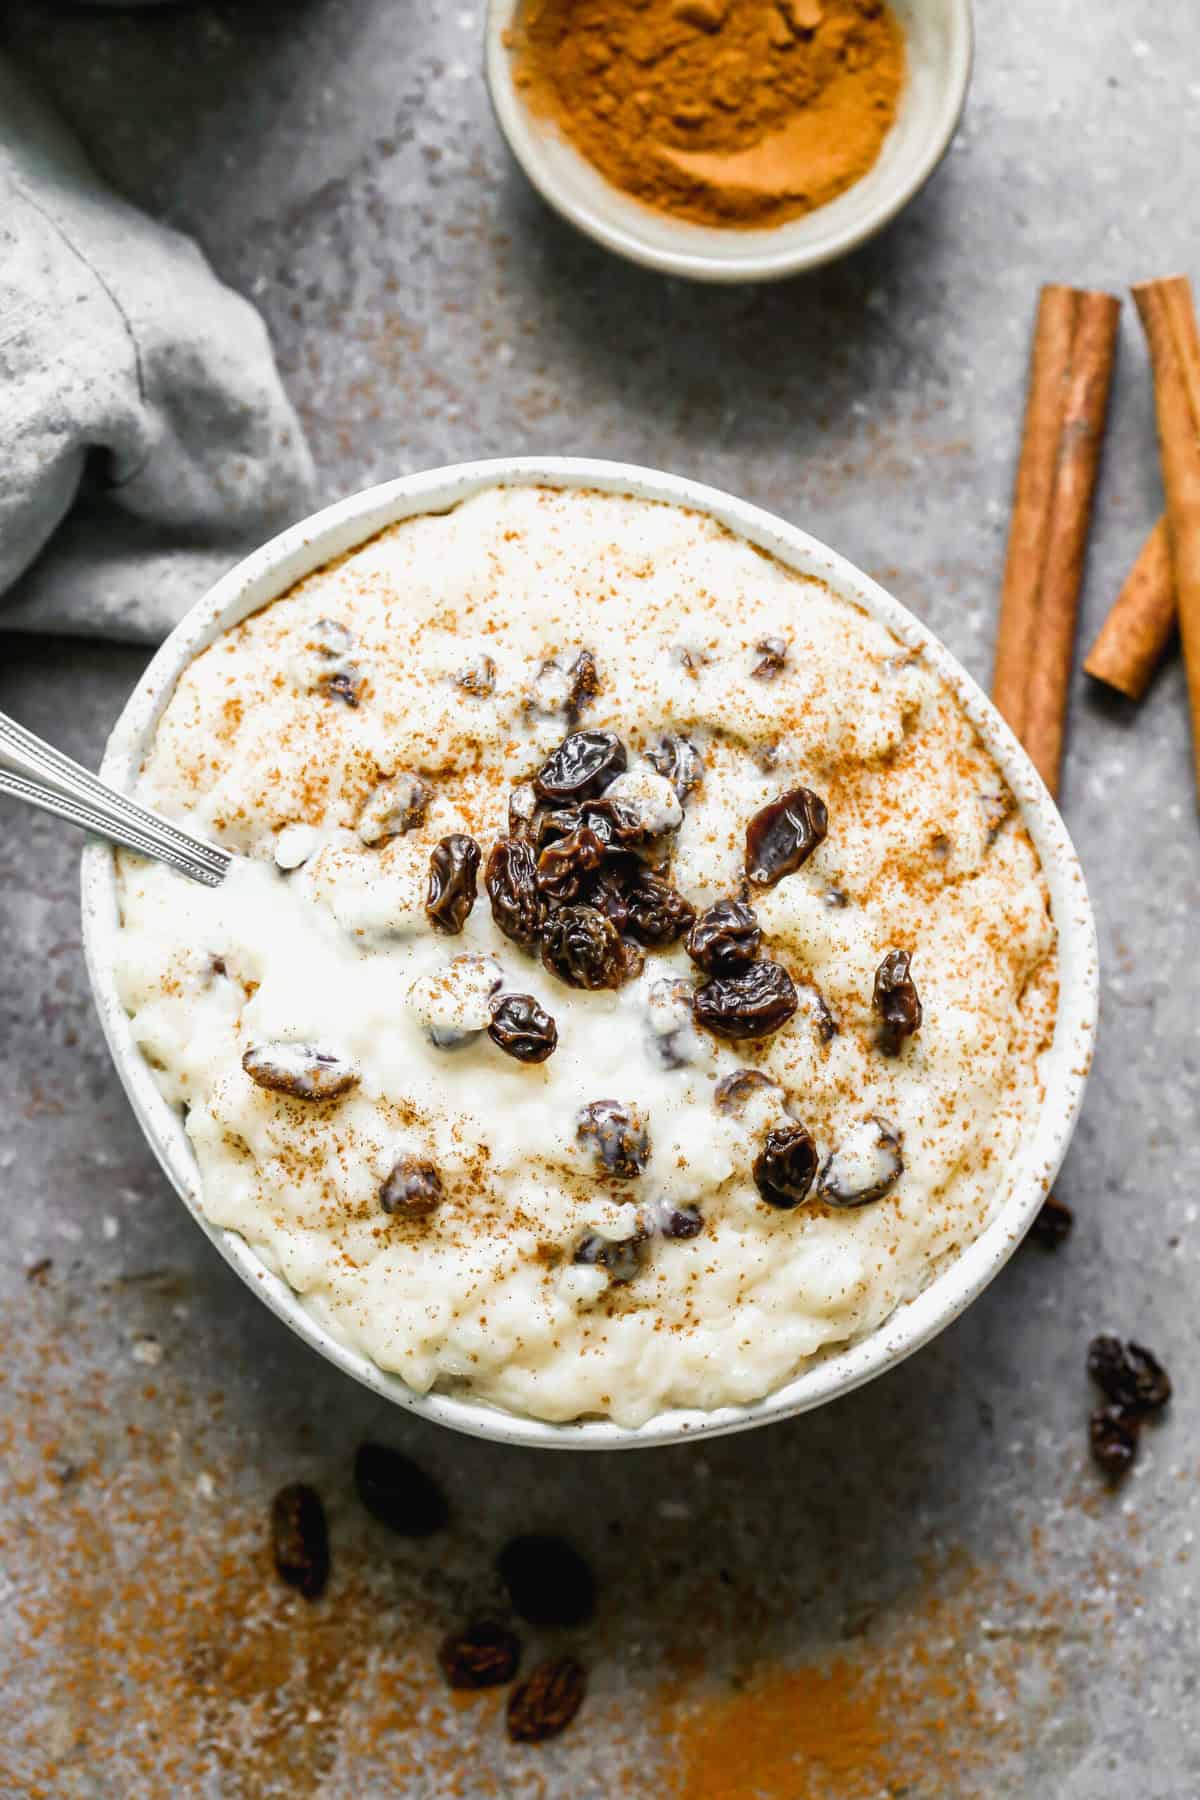
Arroz con Leche receta in a bowl with a dusting of cinnamon sugar and topped with some raisins.

Enjoy the Warmth of Creamy Arroz con Leche!
During my first Spanish class in middle school my teacher taught us a song called “arroz con leche” and made us some to try. I think of her every time I make this recipe.

I’m a huge rice pudding fan, and love both the American-style baked rice pudding and this Mexican rice pudding. The biggest difference between them is the way the rice is cooked. American rice pudding typically uses leftover rice and is baked or cooked on the stove. Arroz con leche is made with raw rice that cooks right in the creamy, cinnamon milk mixture and often contains sweetened condensed milk.

How to make Arroz con Leche:

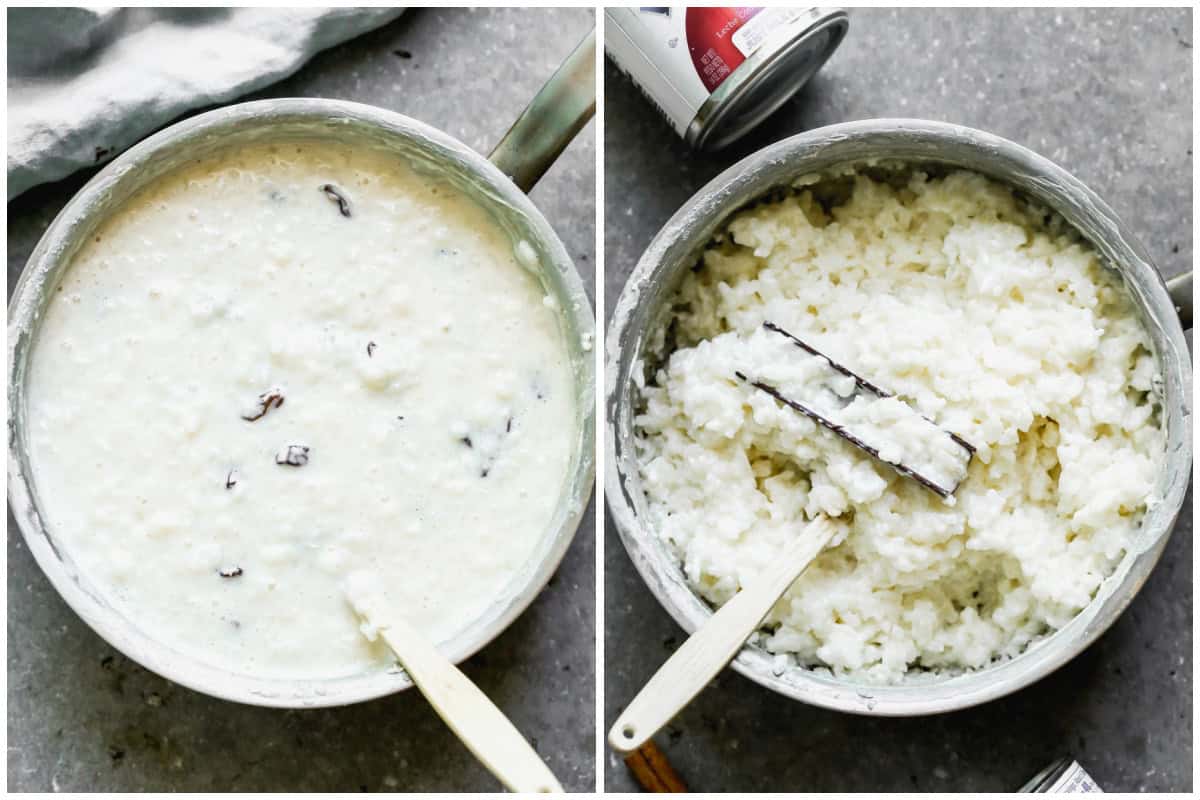
Cook Rice in Milk: Wash rice until water runs clear (to remove the outer starch layer). Combine milk, cinnamon stick, and salt in a medium saucepan over medium heat then bring to a low boil. Add rice and simmer, stirring occasionally, until rice is tender, about 1 hour and 15 minutes. Add raisins to a bowl then cover with very hot water to allow them to “plump” for a few minutes. Drain and set aside.

Two images showing how to make arroz con leche by simmering the ingredients in a saucepan, before and after it's thickened.

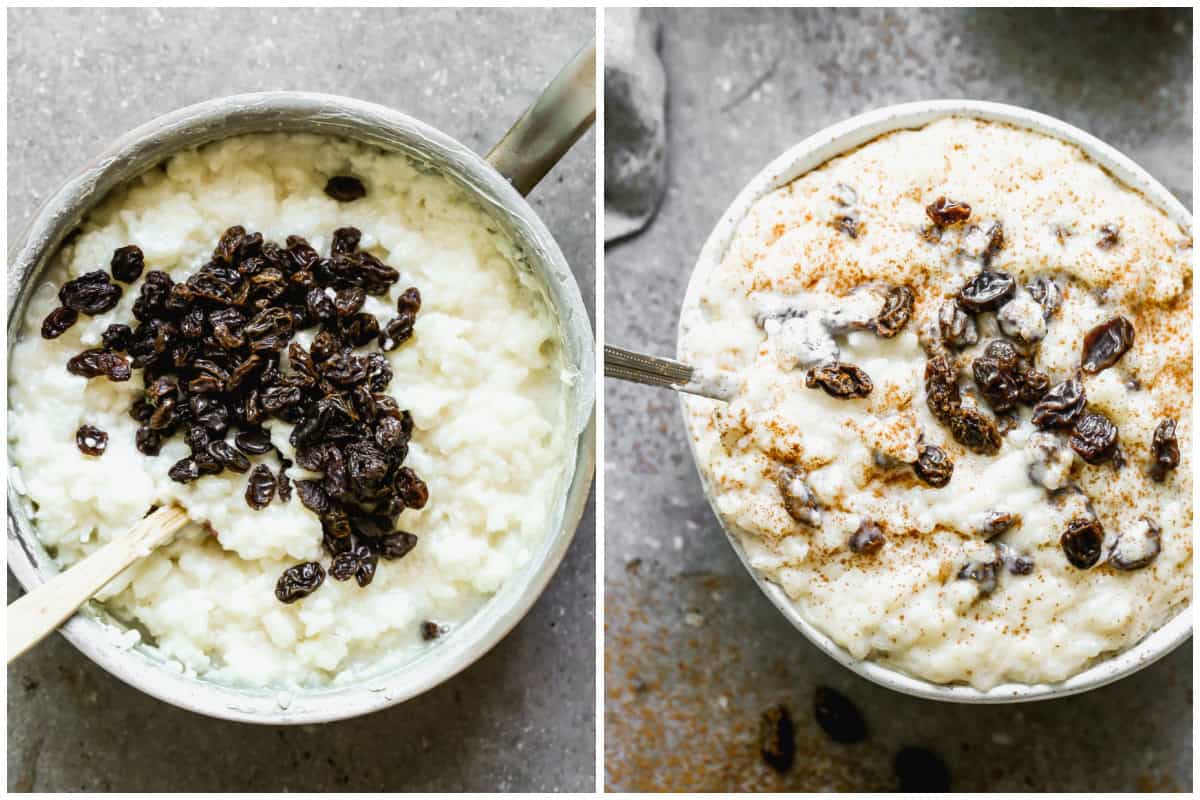
Finish: Remove cinnamon stick from cooked rice mixture. Stir in sugar and raisins then cook for 10-15 minutes more, stirring often to avoid burning. Remove from heat then stir in butter, condensed milk, and vanilla. Serve warm or cold, sprinkled with ground cinnamon on top!

Two images showing raisins being mixed into an easy arroz con leche recipe and then after it's done and ready to serve.

Storing Instructions:

To Store: This Mexican rice pudding can be kept in the fridge in an airtight container for up to 3 days. For best results, reheat on low in a pot on the stove. Add a splash of milk if it’s too thick.

Recipe Variations:

  • Use leftover rice: Heat 3 cups of cooked rice, 2 cups whole milk, and 1 can sweetened condensed milk in a saucepan.  Boil and simmer 15 minutes then remove from heat and stir in raisins, vanilla, and 1 tsp cinnamon.
  • Cuban style arroz con leche– Stir in zest from 1 lemon.
  • Mix-Ins: stir in coconut, nuts, or dried fruit.
  • Brown Rice: Follow my instructions for my Brown Rice Pudding.

Follow me for more great recipes

Arroz con Leche receta in a bowl with a dusting of cinnamon sugar and topped with some raisins.
Print

Arroz con Leche

This creamy and delicious Arroz con Leche recipe is made with simple pantry ingredients, and impressive enough to serve guests. It's the epitome of comfort food, served hot or cold.
Course Dessert
Cuisine Mexican, Spanish
Prep Time 5 minutes
Cook Time 1 hour 30 minutes
Total Time 1 hour 35 minutes
Servings 8
Calories 341kcal
Cost 5

Ingredients

  • 1 cup short or medium grain rice
  • 4 1/2 cups whole milk
  • 12 oz can evaporated milk
  • pinch of salt
  • 1 Mexican cinnamon stick
  • 1/2 cup granulated sugar or sub brown sugar or honey
  • 1/2 cup raisins
  • 1 Tablespoon butter
  • 1/4 cup sweetened condensed milk
  • 1 teaspoon vanilla extract

Instructions

  • Wash rice until the water runs clear.
  • To a medium saucepan over medium heat add milk, cinnamon stick, and salt. Bring to a low boil. Add rice and simmer, stirring occasionally, until rice is tender, about 1 hour 15 minutes.
  • Plump raisins: Add raisins to a bowl and cover with very hot water to allow them to “plump” for a few minutes. Drain and set aside.
  • Finish: Remove cinnamon stick from cooked rice mixture. Stir in sugar and raisins and cook for 10-15 minutes more, stirring often to avoid burning. If it seems too runny, continue cooking and it will thicken further.  If you would like it creamier, stir in a few tablespoons of milk.
  • Remove from heat then stir in butter, condensed milk and vanilla. Serve warm or cold, sprinkled with ground cinnamon on top.
  • Store leftovers in the fridge for a few days. Reheat on low in a pot on the stove. Add a splash of milk it needed, to thin it out.

Video

Notes

Mix-In Ideas: Add your choice of coconut, nuts, or dried fruit.
Brown Rice: Follow my instructions for my Brown Rice Pudding.

Nutrition

Calories: 341kcal | Carbohydrates: 59g | Protein: 11g | Fat: 7g | Saturated Fat: 4g | Polyunsaturated Fat: 0.3g | Monounsaturated Fat: 2g | Trans Fat: 0.1g | Cholesterol: 25mg | Sodium: 127mg | Potassium: 481mg | Fiber: 1g | Sugar: 29g | Vitamin A: 459IU | Vitamin C: 1mg | Calcium: 323mg | Iron: 2mg

Follow Me

Get recipe ideas weekly!

I originally shared this recipe April 2020. Updated April 2022 and June 2024.

Best Veggie Burgers

Are you on the lookout for a delicious, nutritious, and kid-friendly veggie burger recipe? Look no further! These are the Best Veggie Burgers packed with wholesome ingredients, full of flavor, and sure to be a hit with both kids and adults. If you love my black bean burgers and lentil chickpea burgers, you’ve got to…

The post Best Veggie Burgers appeared first on Weelicious.

Are you on the lookout for a delicious, nutritious, and kid-friendly veggie burger recipe? Look no further! These are the Best Veggie Burgers packed with wholesome ingredients, full of flavor, and sure to be a hit with both kids and adults. If you love my black bean burgers and lentil chickpea burgers, you’ve got to try these next!

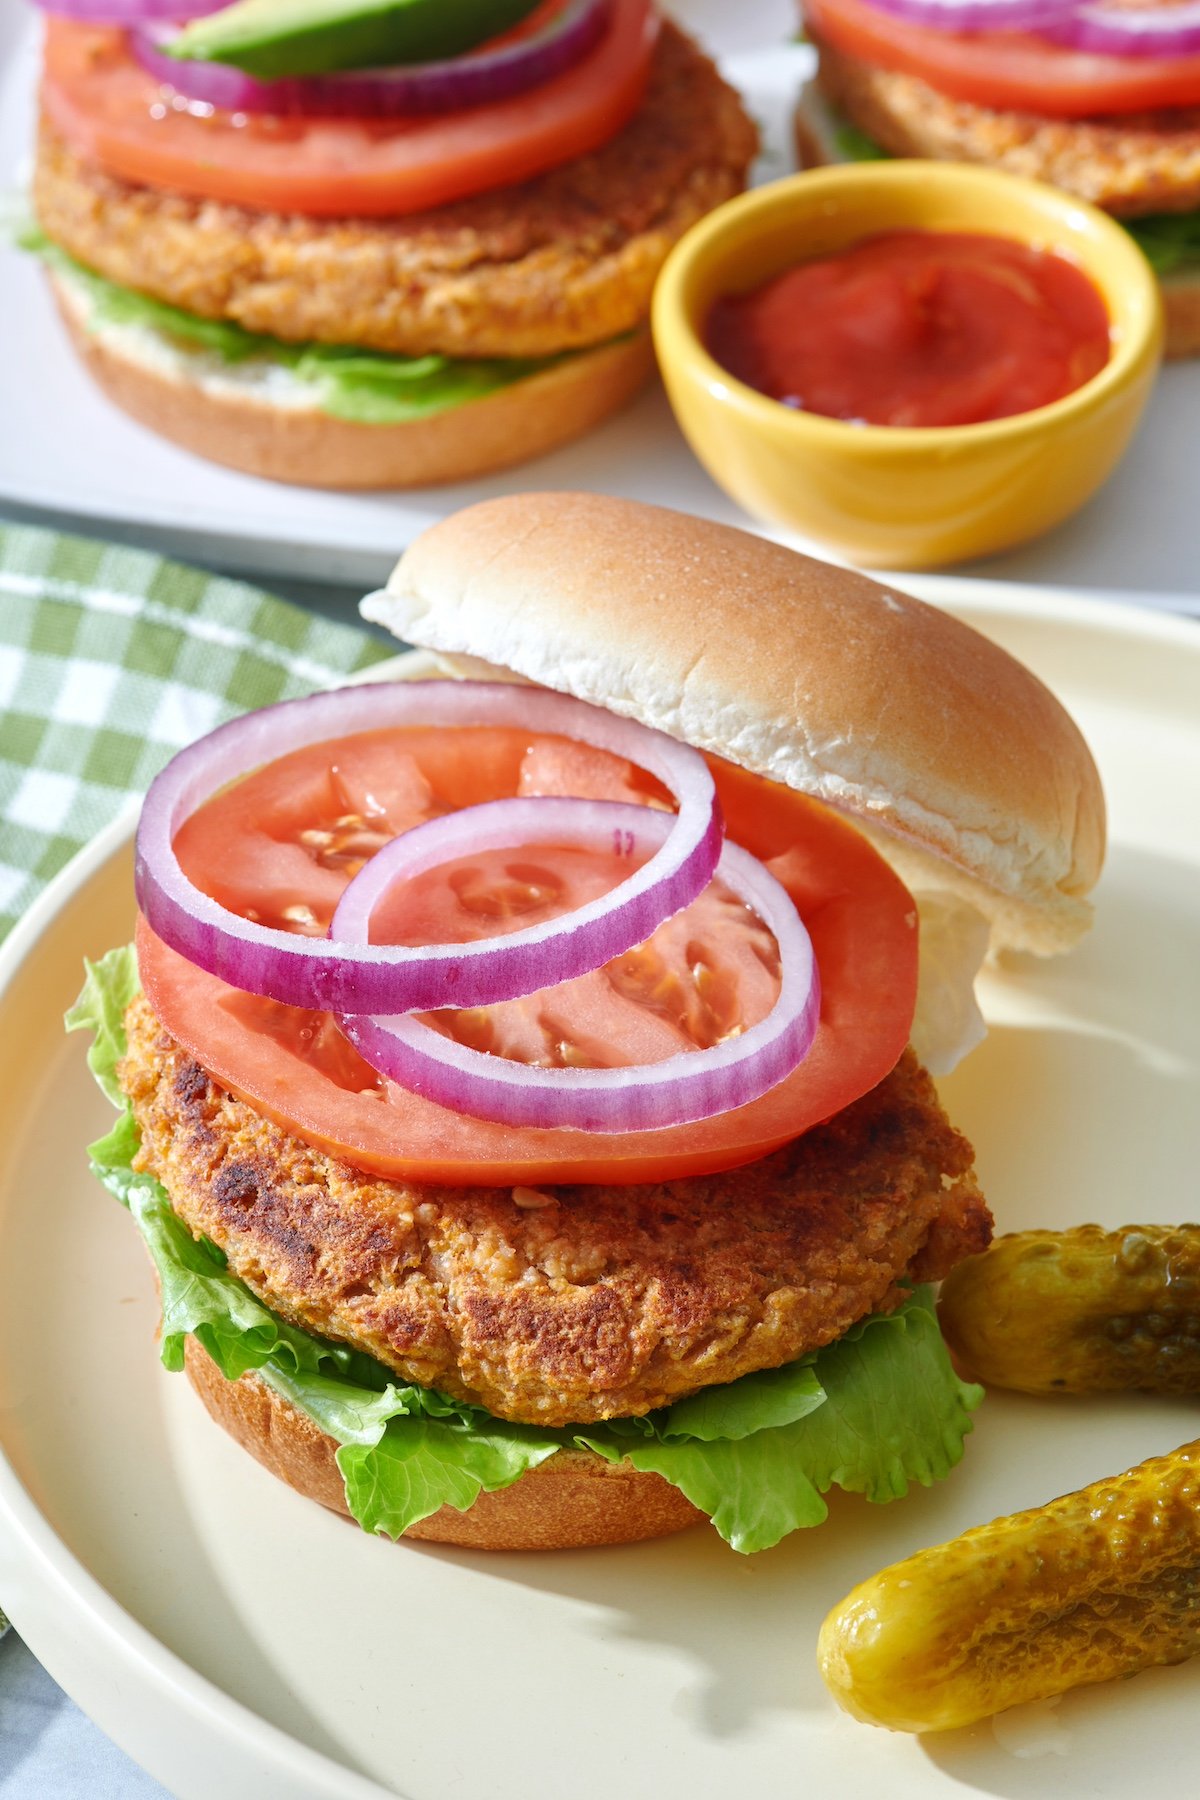
The best veggie burger topped with lettuce, onion and tomato on a serving plate.

Why You’ll Love This Recipe

  • Nutritious: Packed with bulgur wheat, pinto beans, and carrots, these burgers are a good source of protein, fiber, and vitamins. You can feel good about feeding these to your little ones.
  • Easy to Make: With simple ingredients and only a few steps, this recipe is perfect for busy parents that need dinner on the table ASAP.
  • Kid-Approved: These veggie burgers are mild in flavor and have a great texture that kids love.
  • Freezer-Friendly: This veggie burger recipe freezes beautifully making it a great recipe to prep ahead of time for an easy weeknight dinner. Keep a batch in the freezer ready for when you need something quick, delicious and healthy.

The Ingredients

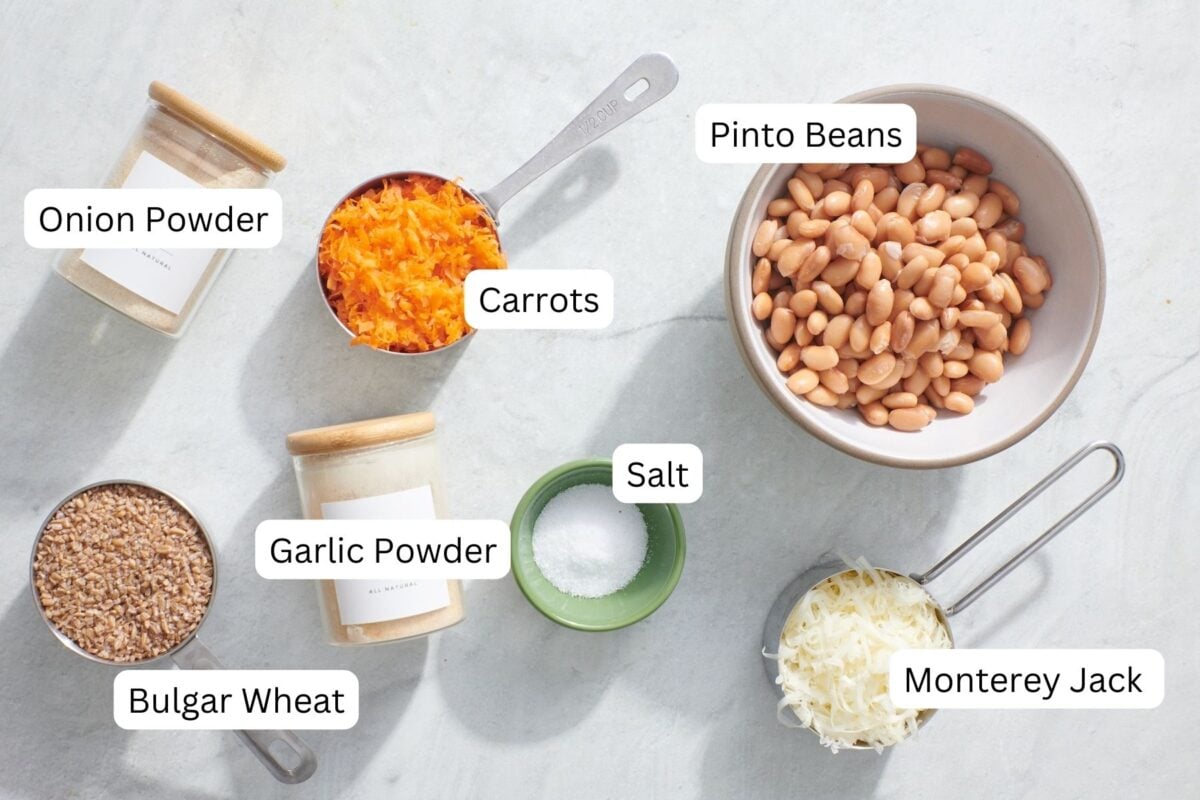
Veggie burger ingredients.
  • Bulgur wheat: Bulgar wheat is a nutritious whole grain that provides a chewy texture and nutty flavor to the burgers, along with fiber and protein – super important for vegetarian eaters!
  • Pinto beans: Beans are a great source of plant-based protein and fiber, giving the burgers a hearty texture and taste.
  • Monterey Jack cheese: The cheese adds a creamy texture and extra flavor while helping bind the burger patties together.
  • Carrot: Grated carrots add a slight sweetness, vibrant color, and extra vitamins like beta-carotene.
  • Seasonings: This recipe calls for garlic powder, onion powder and salt to enhance the overall flavor of the burgers.

*For a full list of ingredients and instructions, see the recipe card below*

Variations and Substitutions

  • Cheese: Feel free to substitute the Monterey Jack with cheddar or mozzarella cheese. You could also sub a dairy-free cheese to make these burgers vegan.
  • Beans: Swap pinto beans for black beans if that’s what you have on hand.
  • Spices: You can customize the flavor by adding different seasonings like cumin, smoked paprika, or even chili powder if your kids can handle a little heat.
  • Gluten-Free: Use quinoa or brown rice instead of bulgur wheat for a gluten-free option.

How to Make the Best Veggie Burgers

Cooked bulgar wheat in a pot.

Step 1: Place the bulgar wheat and water in a pot. Bring to a boil, cover then reduce to a simmer for 13 minutes. After the bulgur has cooked, place in a bowl and let cool.

Pulsed pinto beans in food processor.

Step 2: Place the pinto beans in a food processor and pulse until finely chopped.

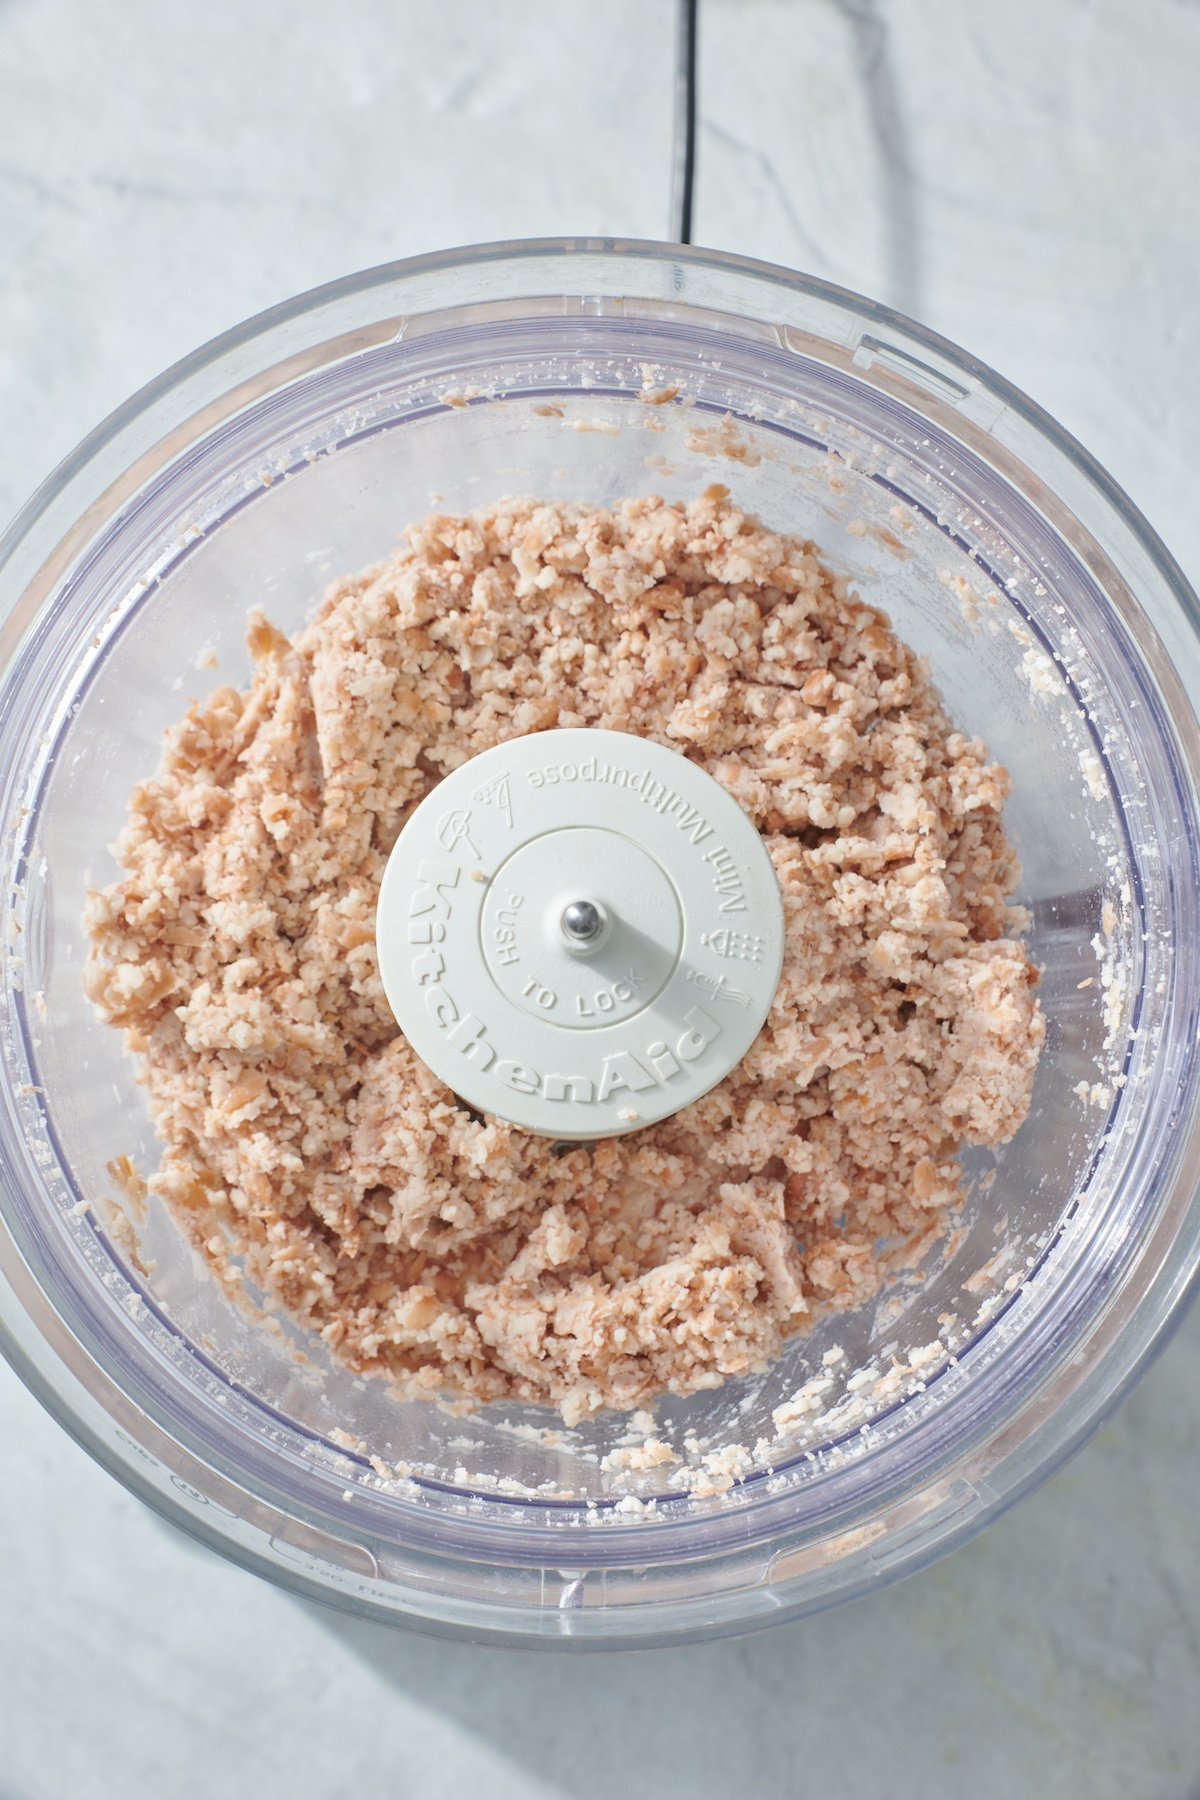
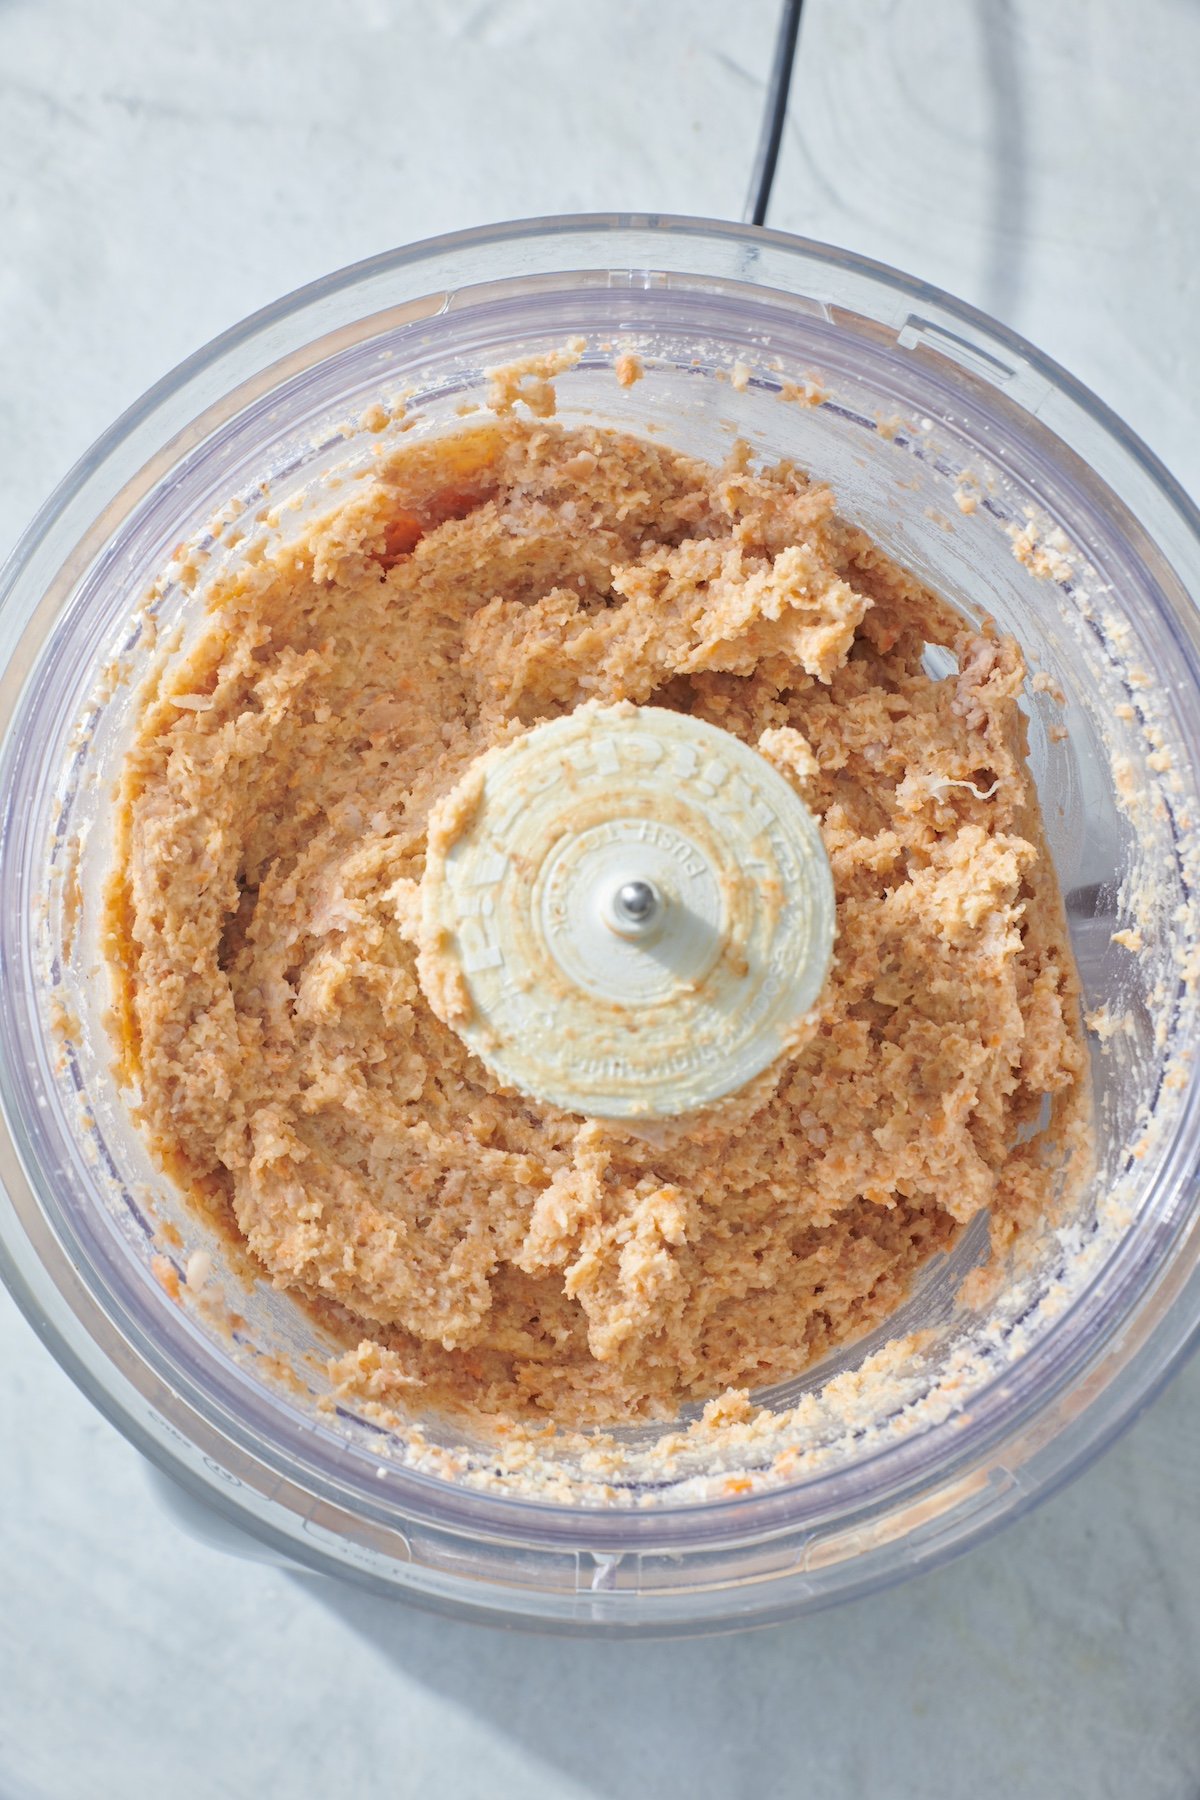
Veggie burger mixture in food processor.

Step 3: Add the cooked bulgur wheat, cheese, carrot, salt, garlic and onion powder to the beans in the food processor and pulse to combine.

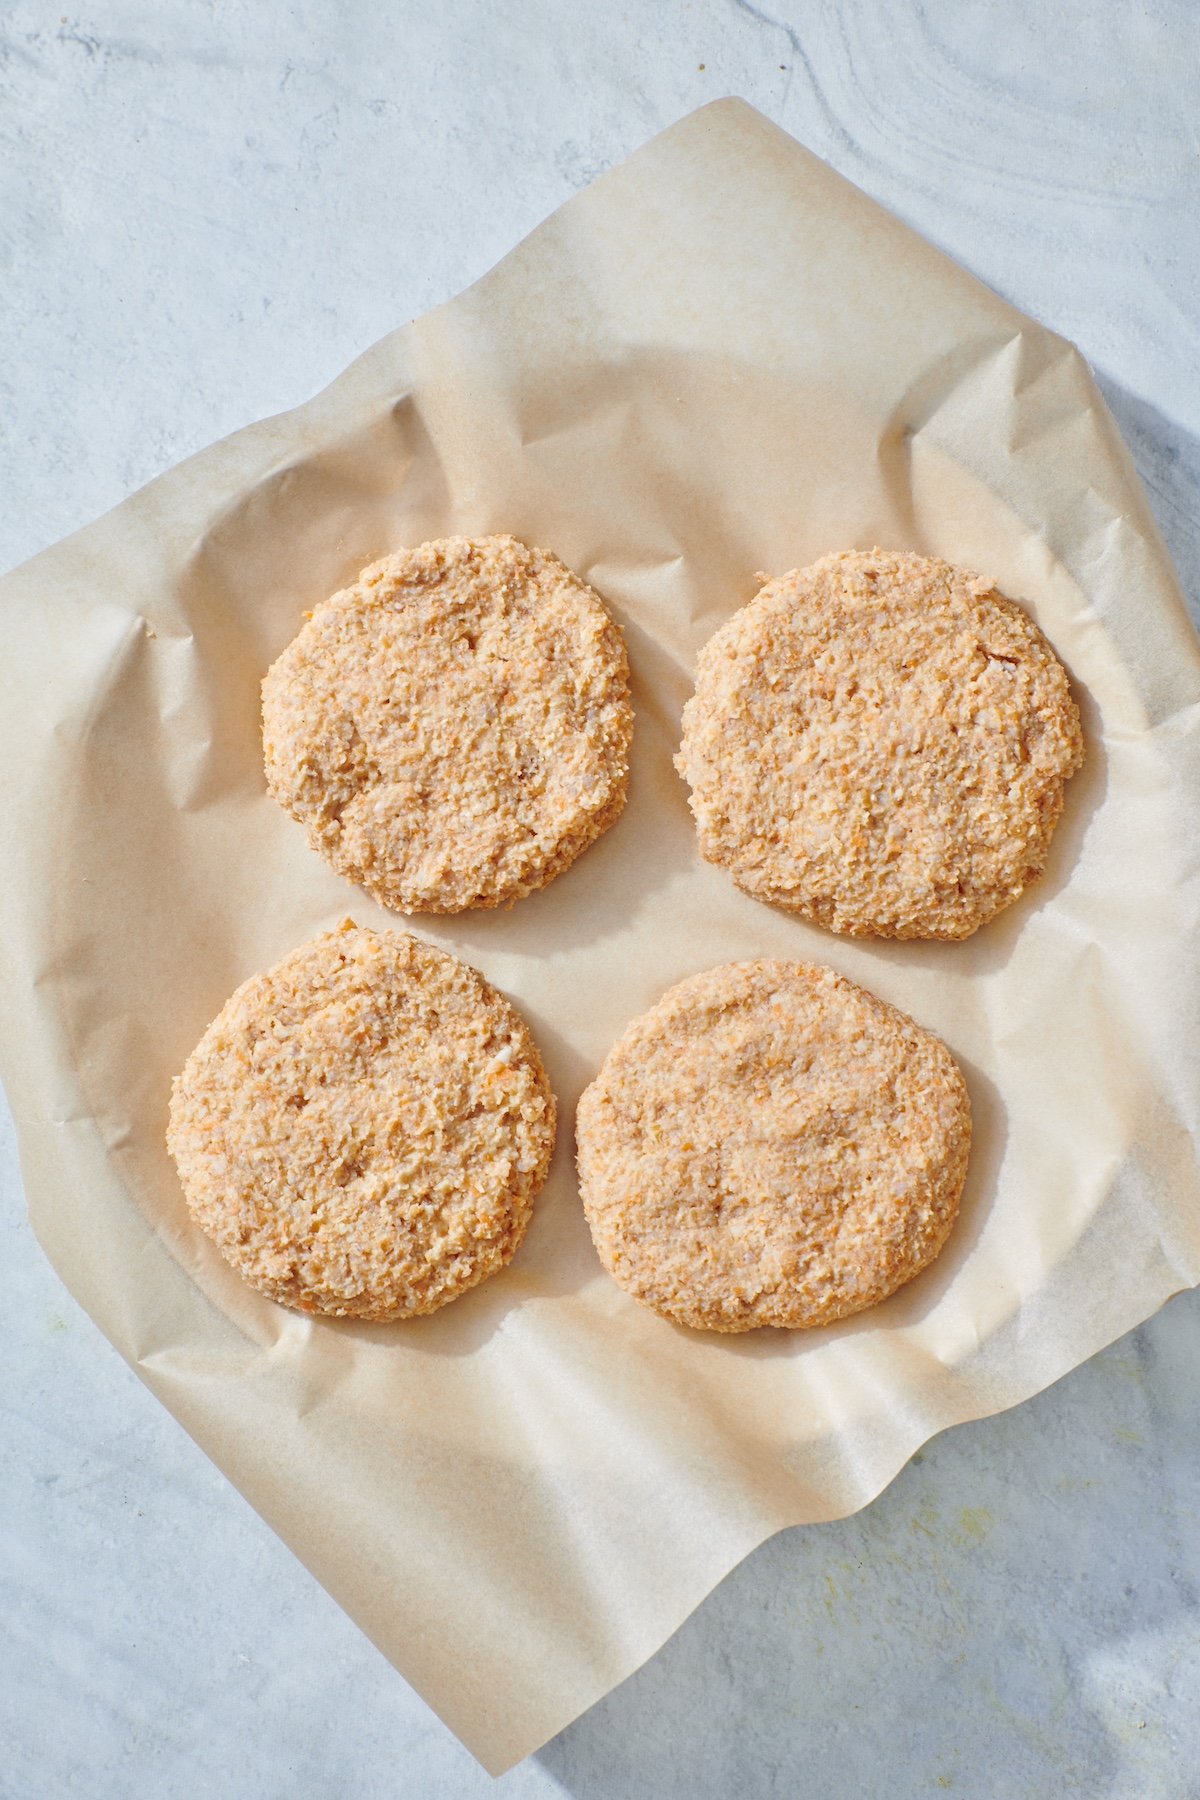
Four veggie burger patties on plate before being cooked.

Step 4: Form mixture into 4 evenly sized patties.

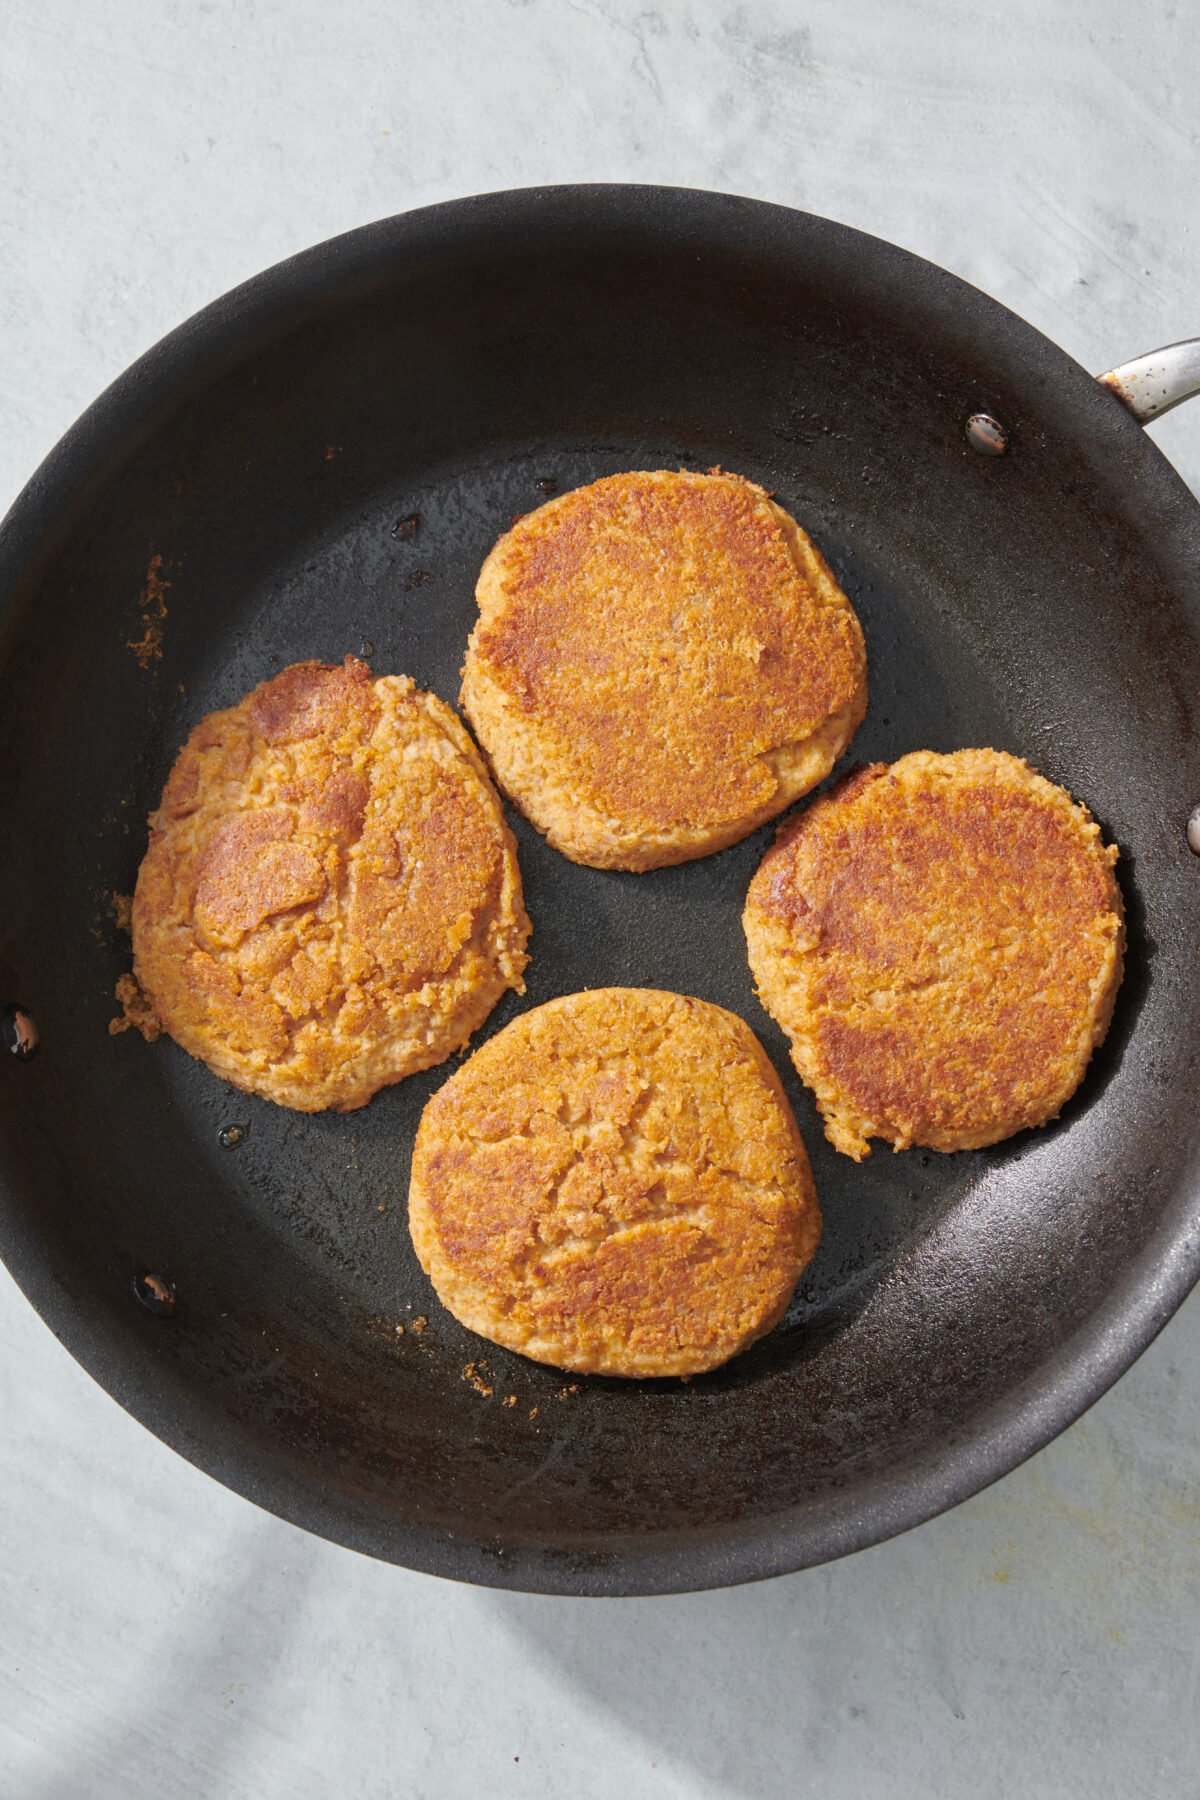
Four veggie burgers in saute pan.

Step 5: Heat oil in a large sauté pan over medium heat and cook the burgers for 3-4 minutes on each side.

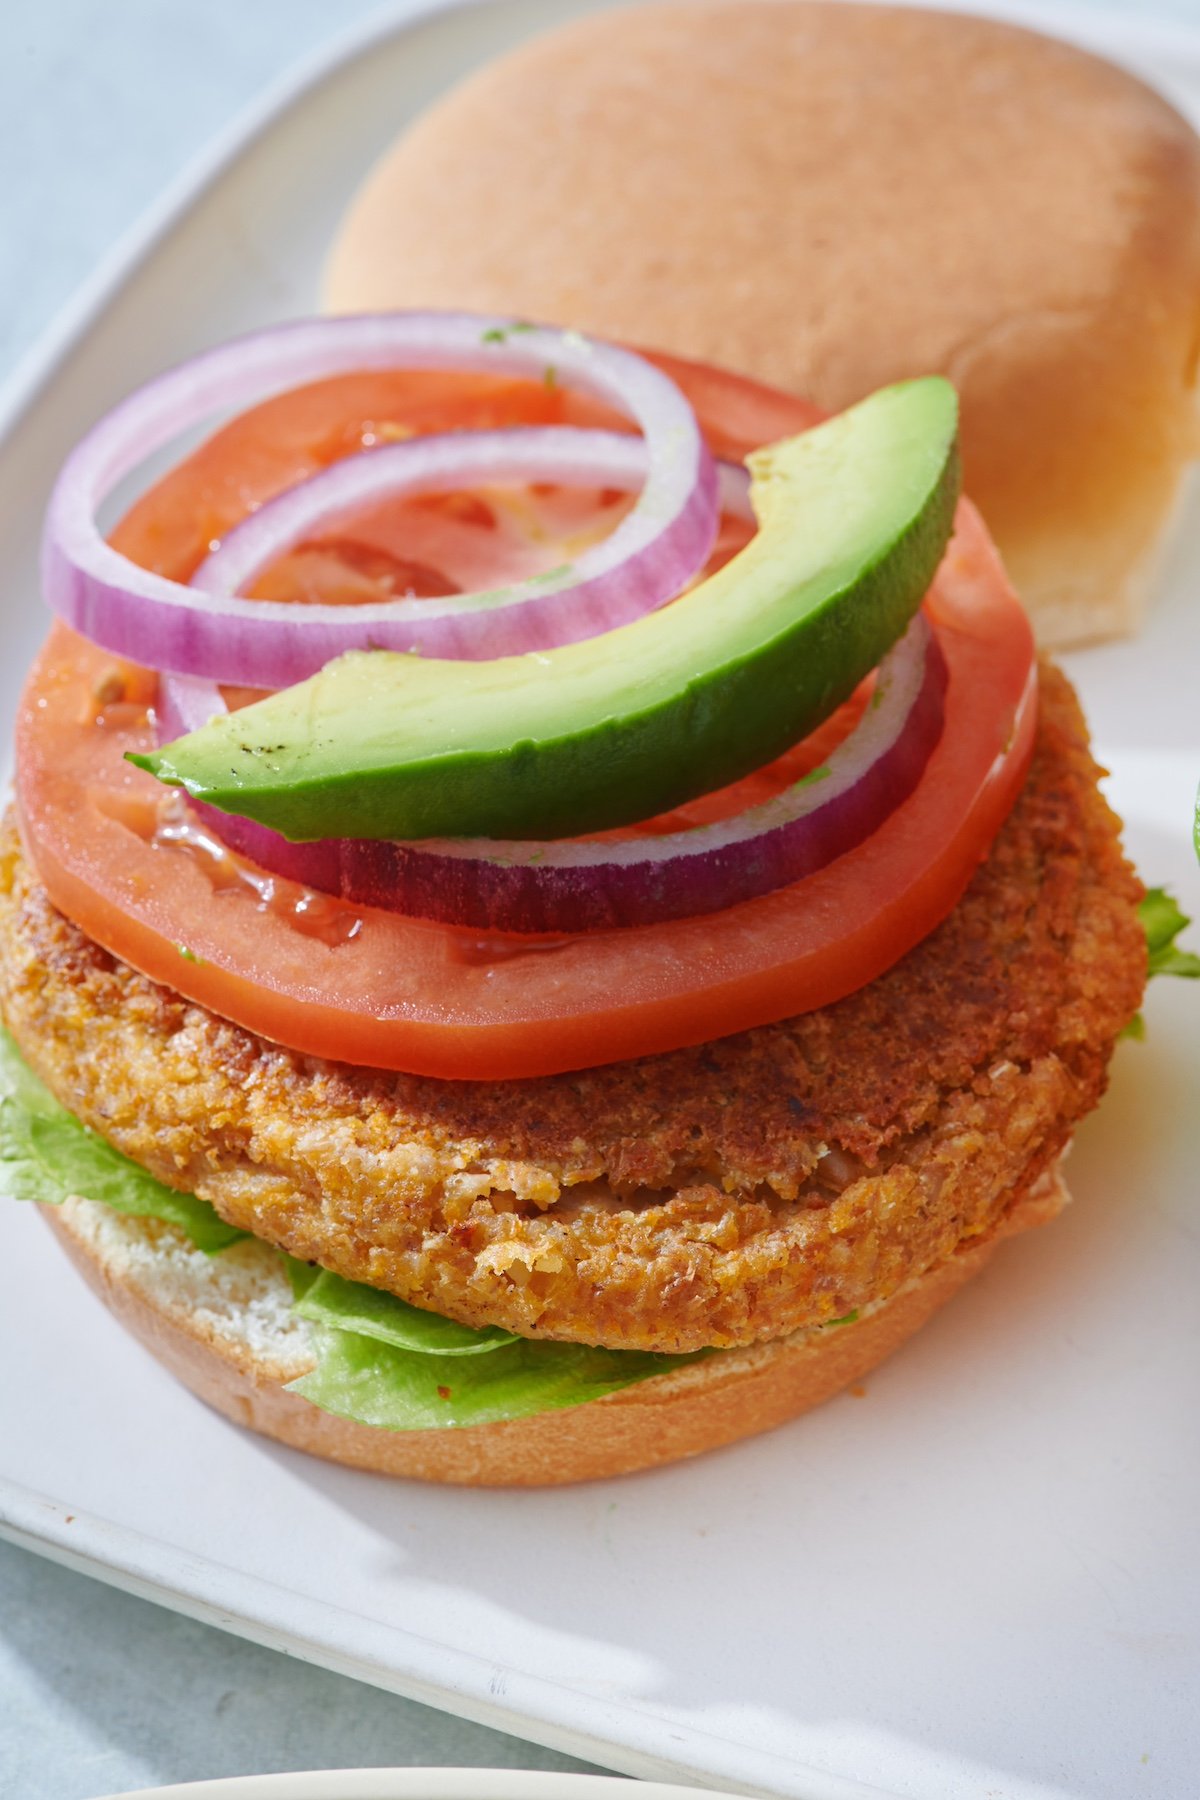
Veggie burger on bun topped with lettuce, tomato, onion and avocado.

Step 6: Place patties on buns, add desired toppings and serve.

Tips & Tricks

  • Don’t Over-blend: When you food process the beans and other ingredients, try not to over-blend. The mixture should be combined but still have some texture to it.
  • Chill the Patties: For firmer patties, chill them in the refrigerator for about 30 minutes before cooking.
  • Oil the Pan: Make sure the oil is hot before adding the patties to prevent sticking and to get that nice crispy exterior.

Serving Suggestions Veggie Burgers

Veggie burgers pair well with tons of sides. Make the perfect meal for the whole family and serve your veggie burgers with any of these delicious, easy side dishes

FAQs

Can I make veggie burgers ahead of time?

Yes! You can prep veggie burger patties ahead of time and keep them in the fridge for up to 24 hours or freeze for longer storage.

How do I freeze veggie burgers?

After forming the patties and before cooking, place them on a baking sheet in the freezer for 1 hour. Then transfer to a zippered bag or other freezer safe airtight container. Defrost in the refrigerator before cooking.

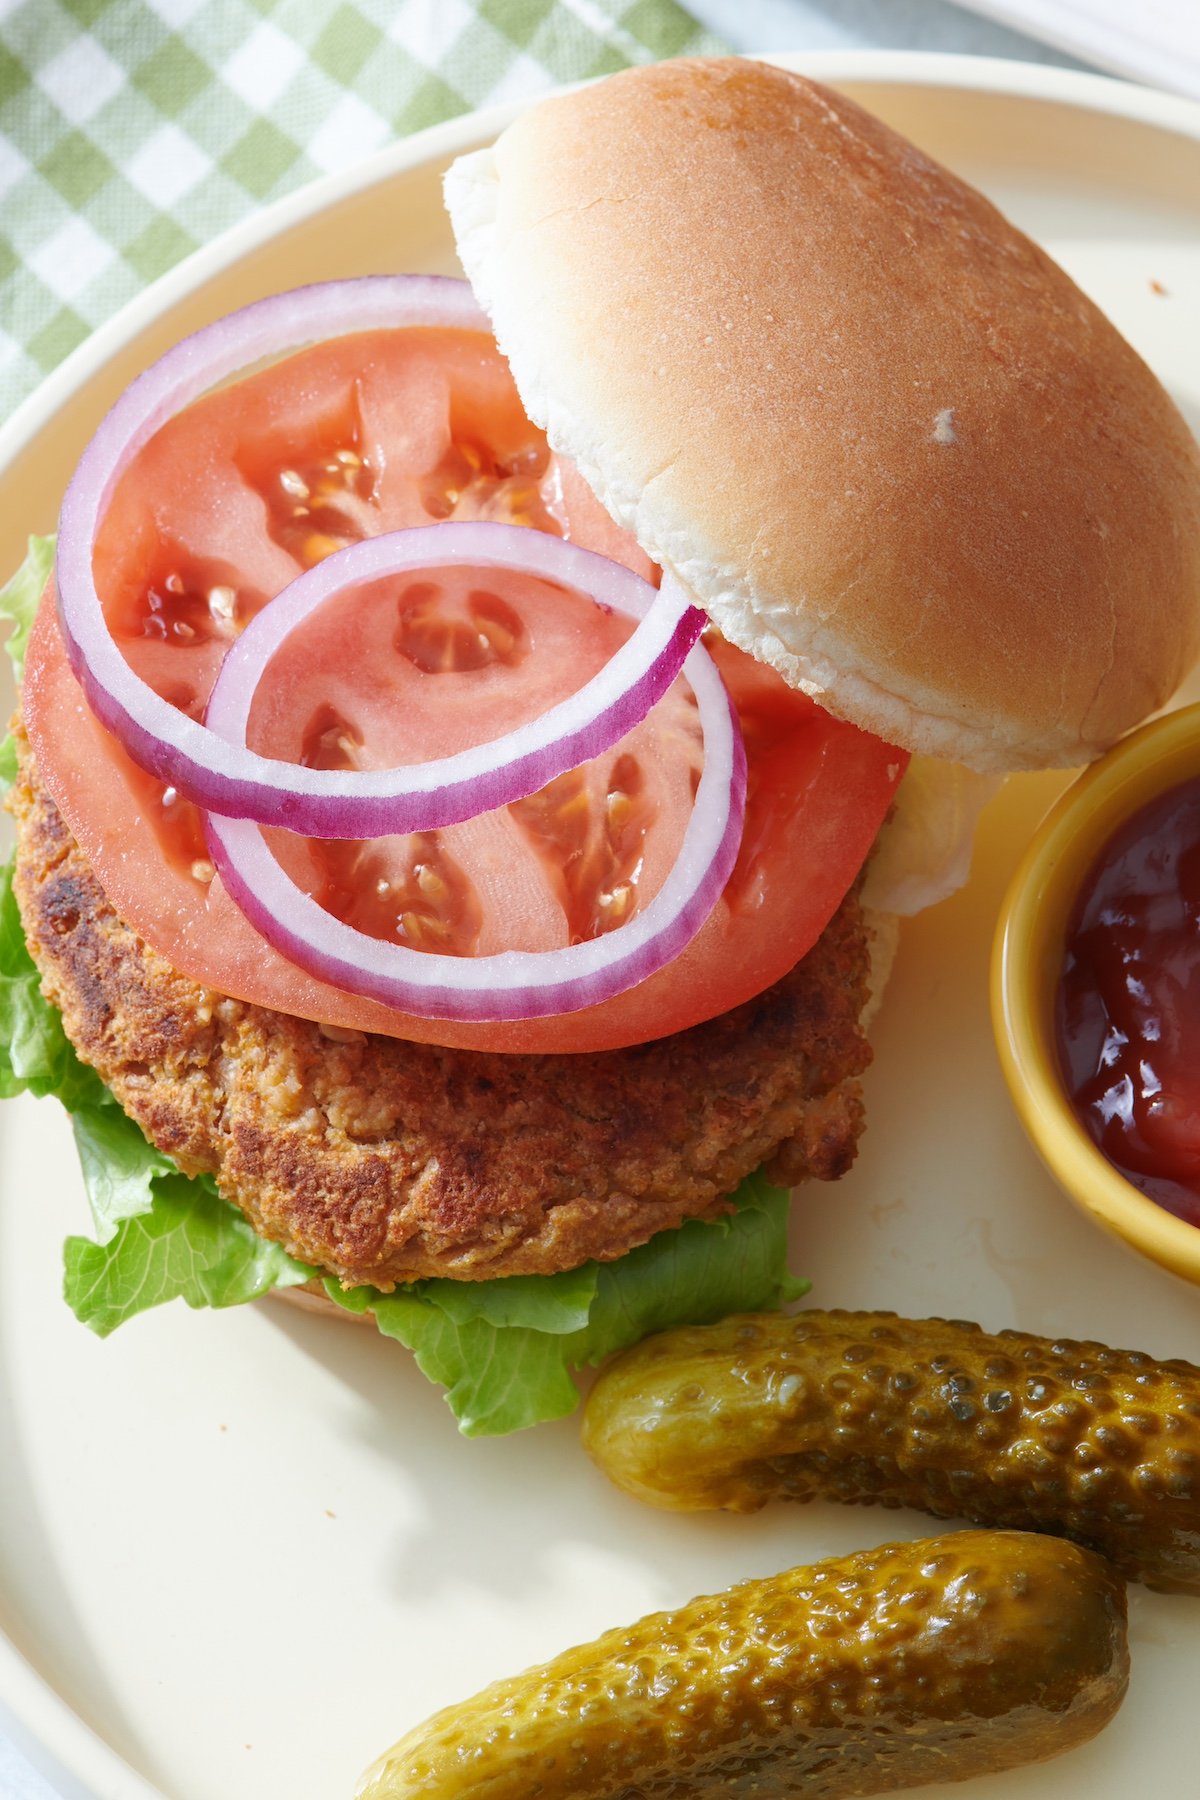
Veggie burger with tomato, red onion and lettuce on a plate.

More Vegetarian Burger Recipes

These are the best veggie burgers you can make! They’re super easy, delicious and kids will love them. If you make these burgers let me know what you think by leaving a rating and comment below!
Want more WeeliciousSubscribe to my newsletter and follow me on InstagramFacebook and TikTok for all the newest recipes!

Print

Veggie Burgers

This is the best veggie burger packed with wholesome ingredients, full of flavor, and sure to be a hit with both kids and adults.
Course Dinner
Cuisine American
Prep Time 20 minutes
Cook Time 8 minutes
Total Time 28 minutes
Servings 4
Calories 358kcal

Equipment

  • Food Processor
  • saute pan or cast iron skillet

Ingredients

  • 1/2 cup bulgur wheat
  • 1 cup water
  • 15 ounce can pinto beans, rinsed and drained
  • 1/2 cup grated Monterey Jack cheese
  • 1/2 cup grated carrot
  • 1/2 teaspoon kosher salt
  • 1/2 teaspoon garlic powder
  • 1/2 teaspoon onion powder
  • 1 tablespoon olive oil
  • 4 burger buns
  • toppings of choice (ketchup, mustard, lettuce, tomato and red onion are some of our favorites)

Instructions

  • Place the bulgar wheat and water in a pot. Bring to a boil, then reduce to a simmer and cover for 13 minutes.
  • After the bulgur has cooked, place in a bowl and let cool.
  • Place the pinto beans in a food processor and pulse until finely chopped.
  • Add the cooked bulgur, cheese, carrot, salt, garlic and onion powder to the beans in the food processor and pulse to combine.
  • Form mixture into 4 equal patties.
  • Heat oil in a large sauté pan over medium heat and cook the burgers for 3-4 minutes on each side.
  • Place burgers on buns with desired toppings and serve.

Video

Notes

To Freeze: After forming patties and before cooking, place patties on a baking sheet in the freezer for 1 hour, then transfer to a zippered bag or other food-safe freezer container. Defrost in the refrigerator then follow recipe directions for cooking.
Prep ahead: You can prep veggie burger patties ahead of time and keep them in the fridge for up to 24 hours before cooking.
Don’t Over-blend: When you food process the beans and other ingredients, ensure you don’t over-blend. The mixture should be combined but still have some texture to it.
Chill the Patties: For firmer patties, chill them in the refrigerator for about 30 minutes before cooking.
Oil the Pan: Make sure the oil is hot before adding the patties to prevent sticking and to get that nice crispy exterior.

Nutrition

Calories: 358kcal | Carbohydrates: 53g | Protein: 15g | Fat: 10g | Saturated Fat: 4g | Polyunsaturated Fat: 2g | Monounsaturated Fat: 4g | Cholesterol: 13mg | Sodium: 889mg | Potassium: 480mg | Fiber: 9g | Sugar: 5g | Vitamin A: 2408IU | Vitamin C: 2mg | Calcium: 231mg | Iron: 4mg

The post Best Veggie Burgers appeared first on Weelicious.

Shroom Burgers

These vegetarian Shroom Burgers will rock your world! Take a crispy fried portobello mushroom with loads of melted cheese, add your toppings and be ready to say “YUM!”. Vegetarians and meat-eaters alike will love this delicious shroom burger recipe. Why You’ll Love This Recipe The Ingredients For the Shroom Burgers: For the Faux ShackSauce: *For…

The post Shroom Burgers appeared first on Weelicious.

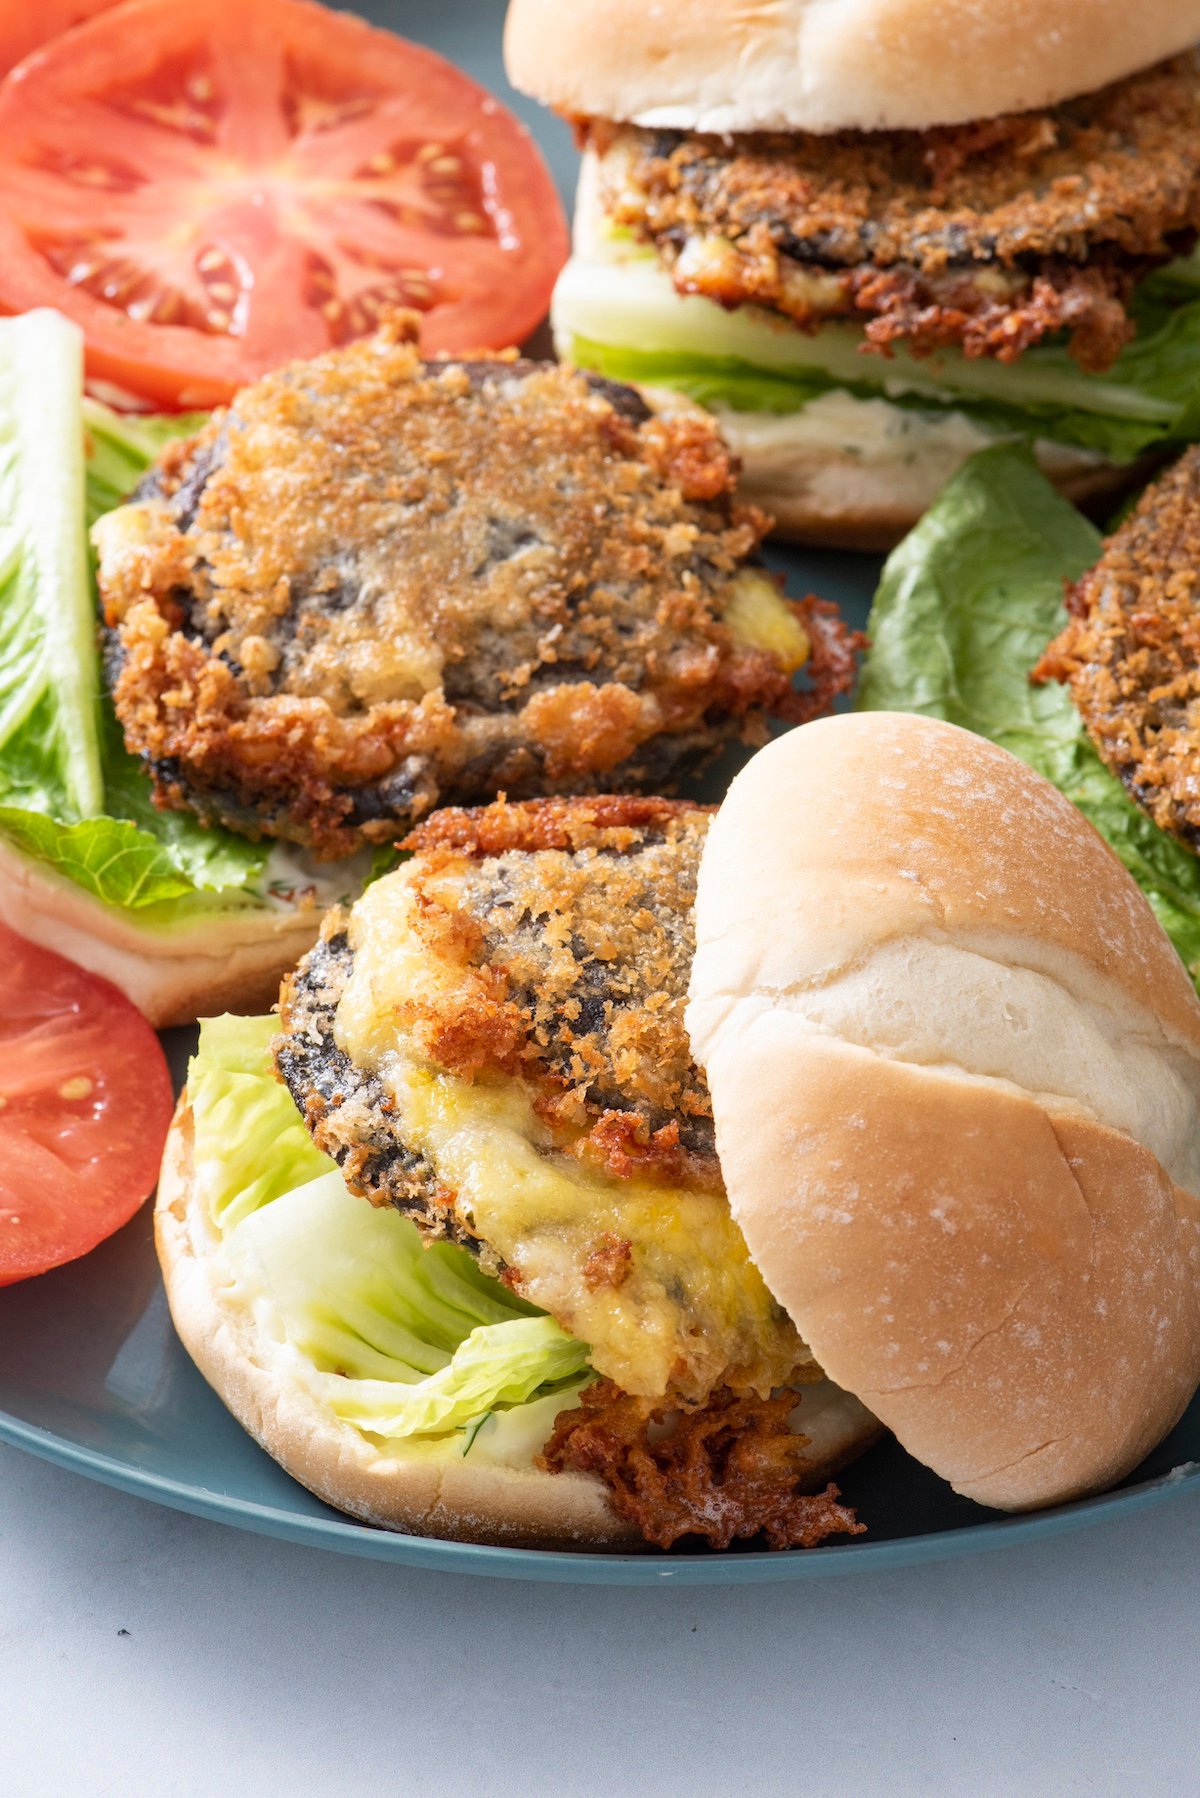
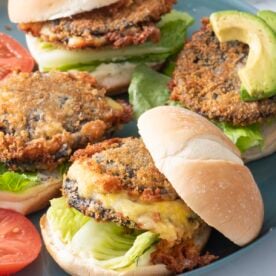
These vegetarian Shroom Burgers will rock your world! Take a crispy fried portobello mushroom with loads of melted cheese, add your toppings and be ready to say “YUM!”. Vegetarians and meat-eaters alike will love this delicious shroom burger recipe.

Shroom burgers on a plate.

Why You’ll Love This Recipe

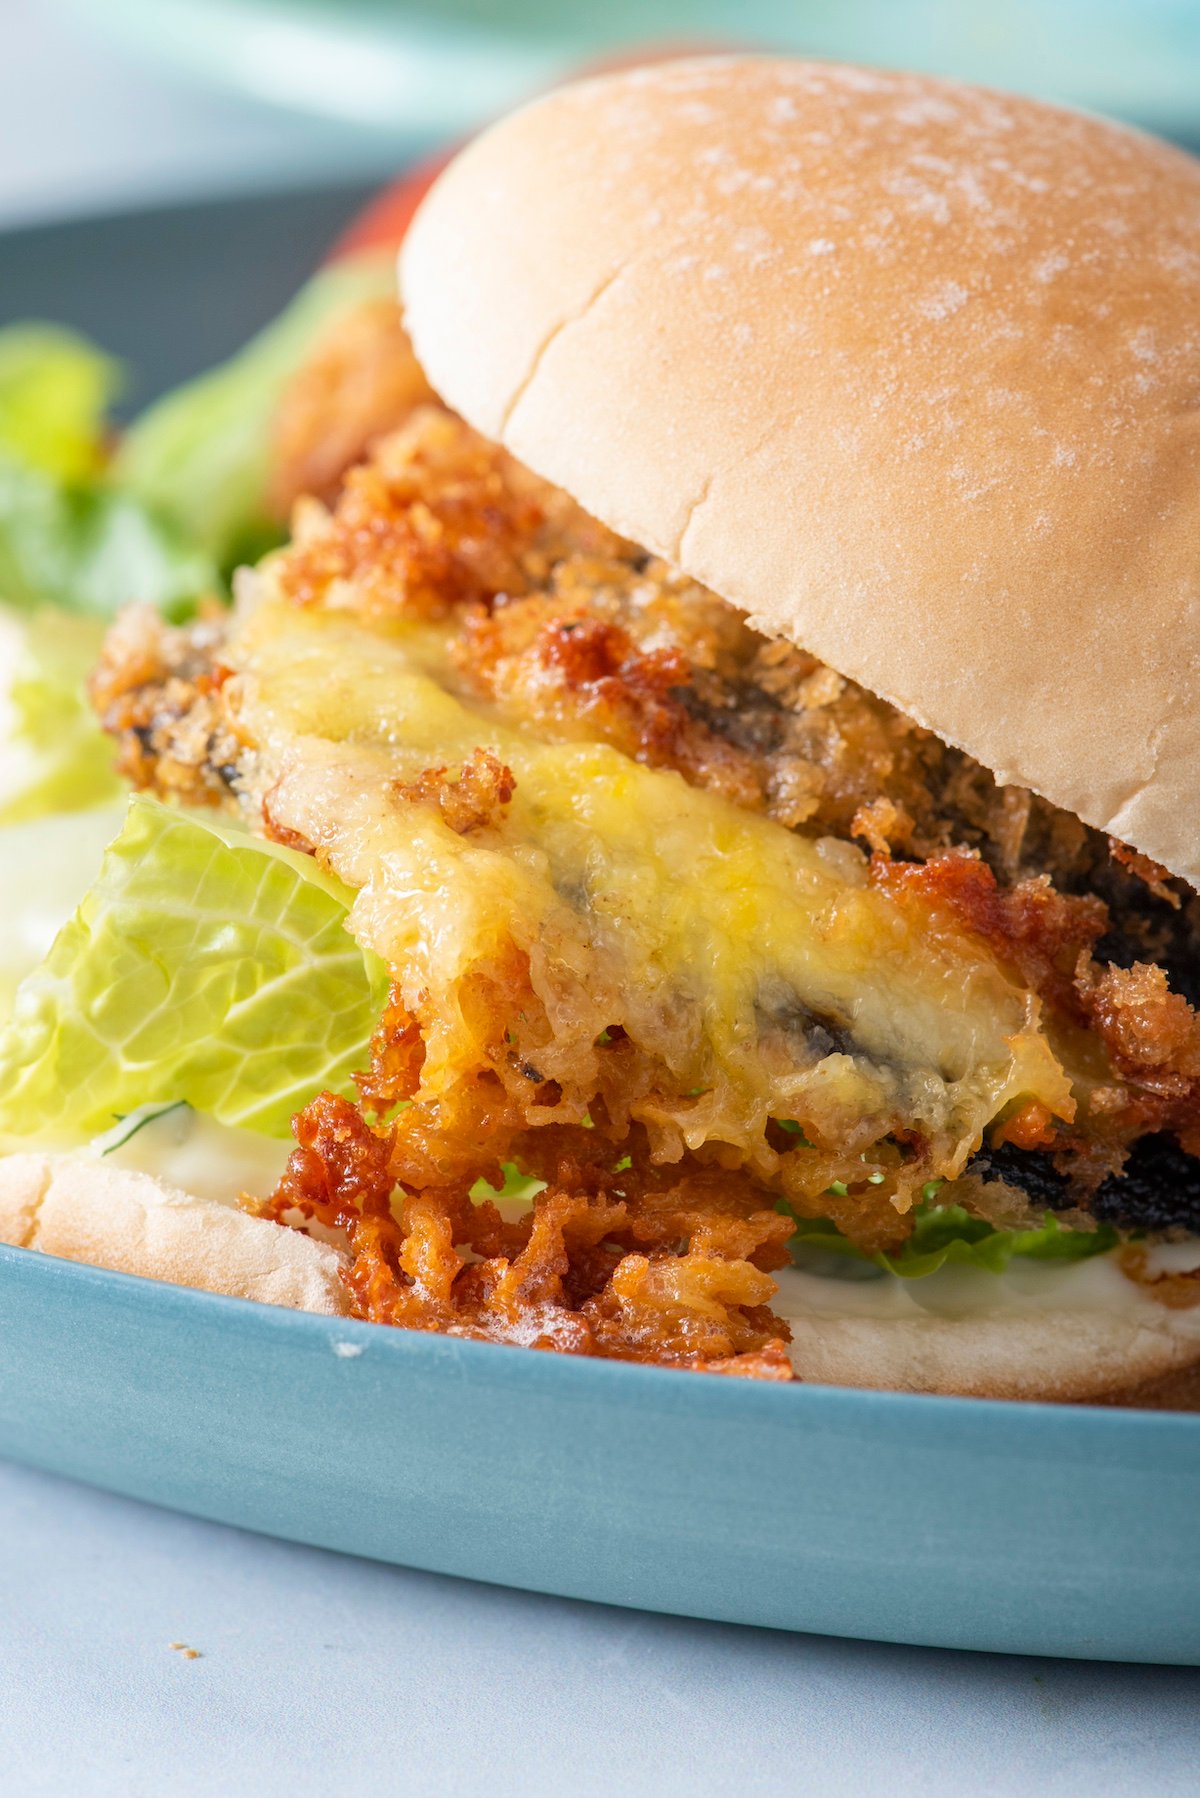
  • Flavor Explosion: The panko coated, crispy-fried portobello mushroom gives a satisfying crunch, but the absolute best part is the explosion of melty cheese you get after you take your first bite.
  • Perfect for Vegetarians: This vegetarian burger is a hearty, satisfying burger that both vegetarians and meat-eaters will love! I guarantee it. Pair these with Air Fryer French Fries for the perfect dinner combo!
  • Easy to Customize: You can make these shroom burgers your own by adding your favorite toppings and sauces just like you would any regular beef burger. Our favorites are lettuce, tomato and some avocado slices.
  • Shake Shack at Home: My vegetarian son recreated his favorite Shake Shack burger – the Shroom Burger – for a family cook-off one year, and it turned out amazing! Now we get to enjoy the iconic taste of Shake Shack at home whenever we want. P.S. Don’t forget the homemade ShackSauce (recipe below)!

The Ingredients

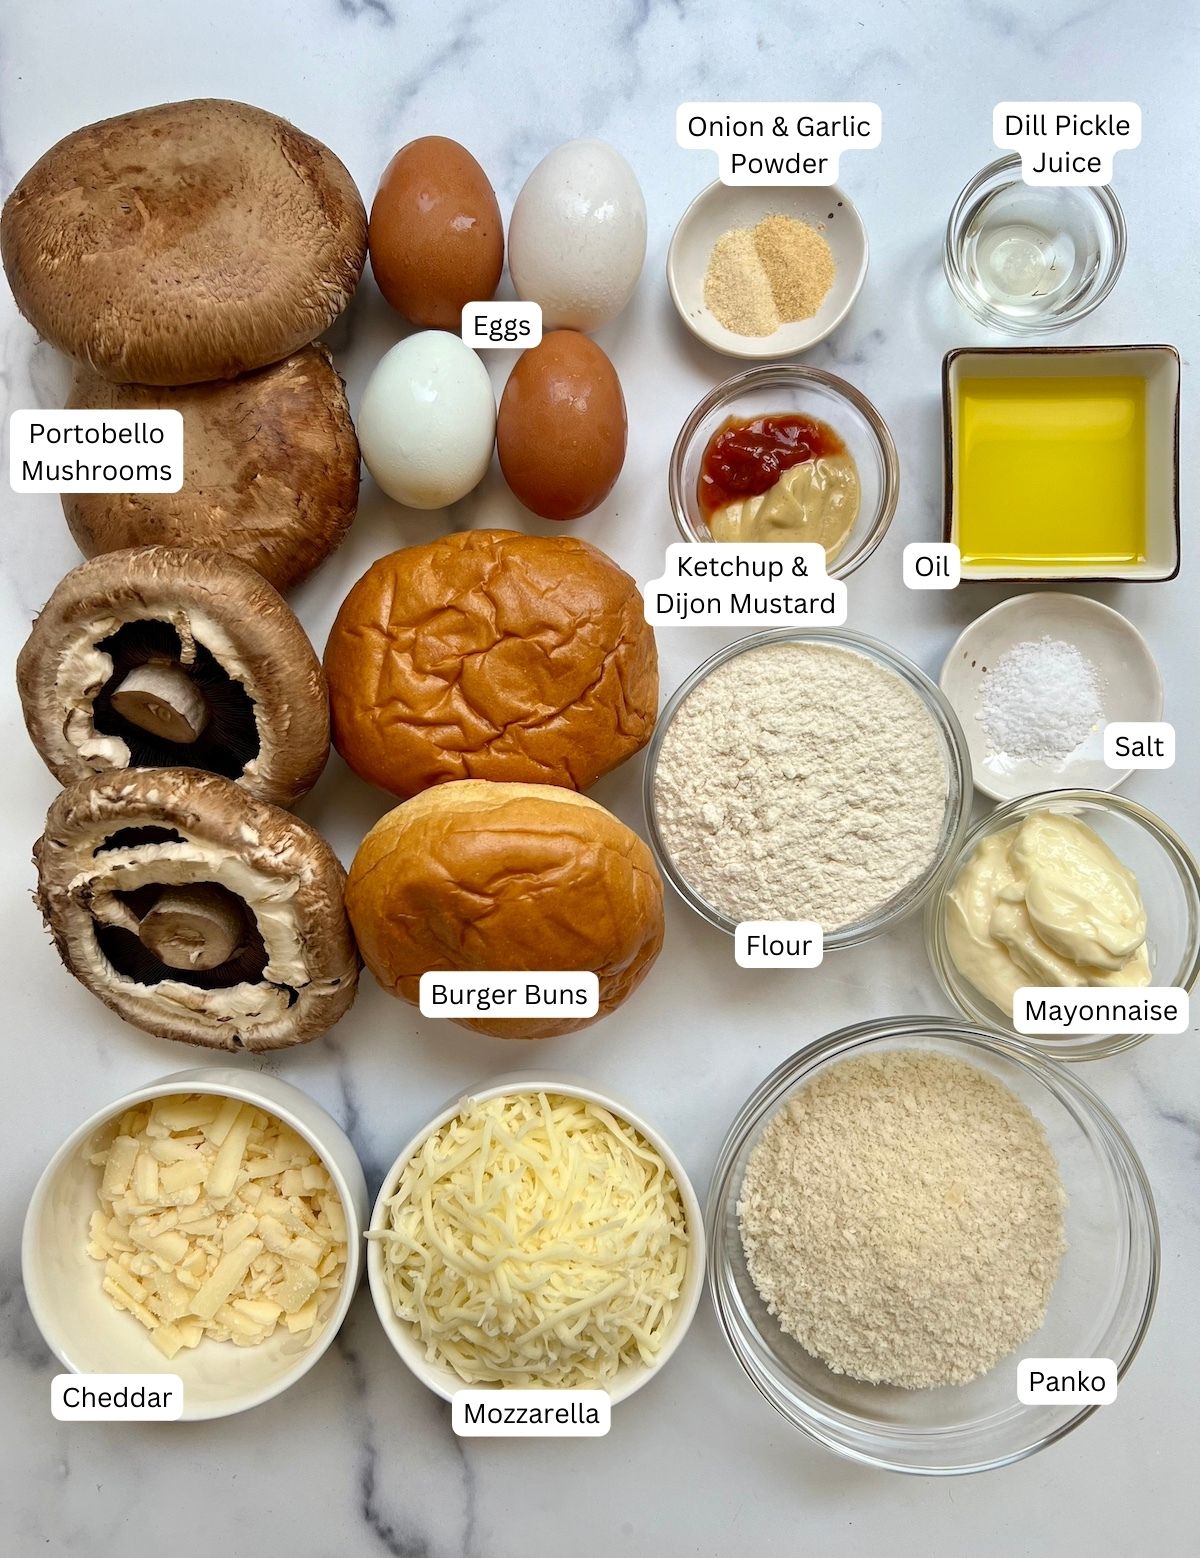
Ingredients for shroom burgers and copycat ShackSauce.

For the Shroom Burgers:

  • Portobello mushroom caps: Portobello mushrooms have a meaty, dense texture that holds up well in cooking. Their flavor is rich, earthy, and slightly umami, making them a satisfying substitute for meat in many recipes like these burgers.
  • Oil: Any high smoke point oil (olive, avocado, vegetable or canola oil) will work for shallow frying these shroom burgers. 
  • All purpose flour: The flour provides a dry surface that helps the egg adhere better to the burger during the breading process. Without the flour, the egg might slide off the mushroom’s slick surface.
  • Large eggs: Eggs serve as a binding agent, helping the breadcrumbs stick to the burgers to create a thicker and more even coating. They’re also used in the cheese filling to help it stick together.
  • Panko breadcrumbs: Coating the mushrooms in panko gives the shroom burgers their irresistible crispy, crunchy and golden brown exterior.
  • Mozzarella & cheddar cheese: Ooey gooey cheese in the center of every shroom burger creates a melty cheese explosion you’ll love.
  • Onion powder, garlic powder & salt: These seasonings are mixed with the cheese mixture to add extra flavor to the burgers.

For the Faux ShackSauce:

  • Mayonnaise (or vegan mayonnaise): This creamy base gives the sauce its rich and smooth texture.
  • Dijon Mustard: Adds a tangy, slightly spicy flavor that enhances the sauce’s complexity.
  • Ketchup: Brings a touch of sweetness and tomato flavor to balance the tanginess.
  • Dill Pickle Juice: Pour straight from your jar of pickles in the refrigerator for a zesty, briny kick.

*For a full list of ingredients and instructions see the recipe card below*

Variations and Substitutions

  • Regular breadcrumbs can be used, but panko makes the crust even crunchier.
  • Any grated melting cheese like Monterrey Jack, gruyere or even gouda can be used in place of the cheddar cheese if desired. Feel free to experiment with different cheeses.

How to Make Shroom Burgers

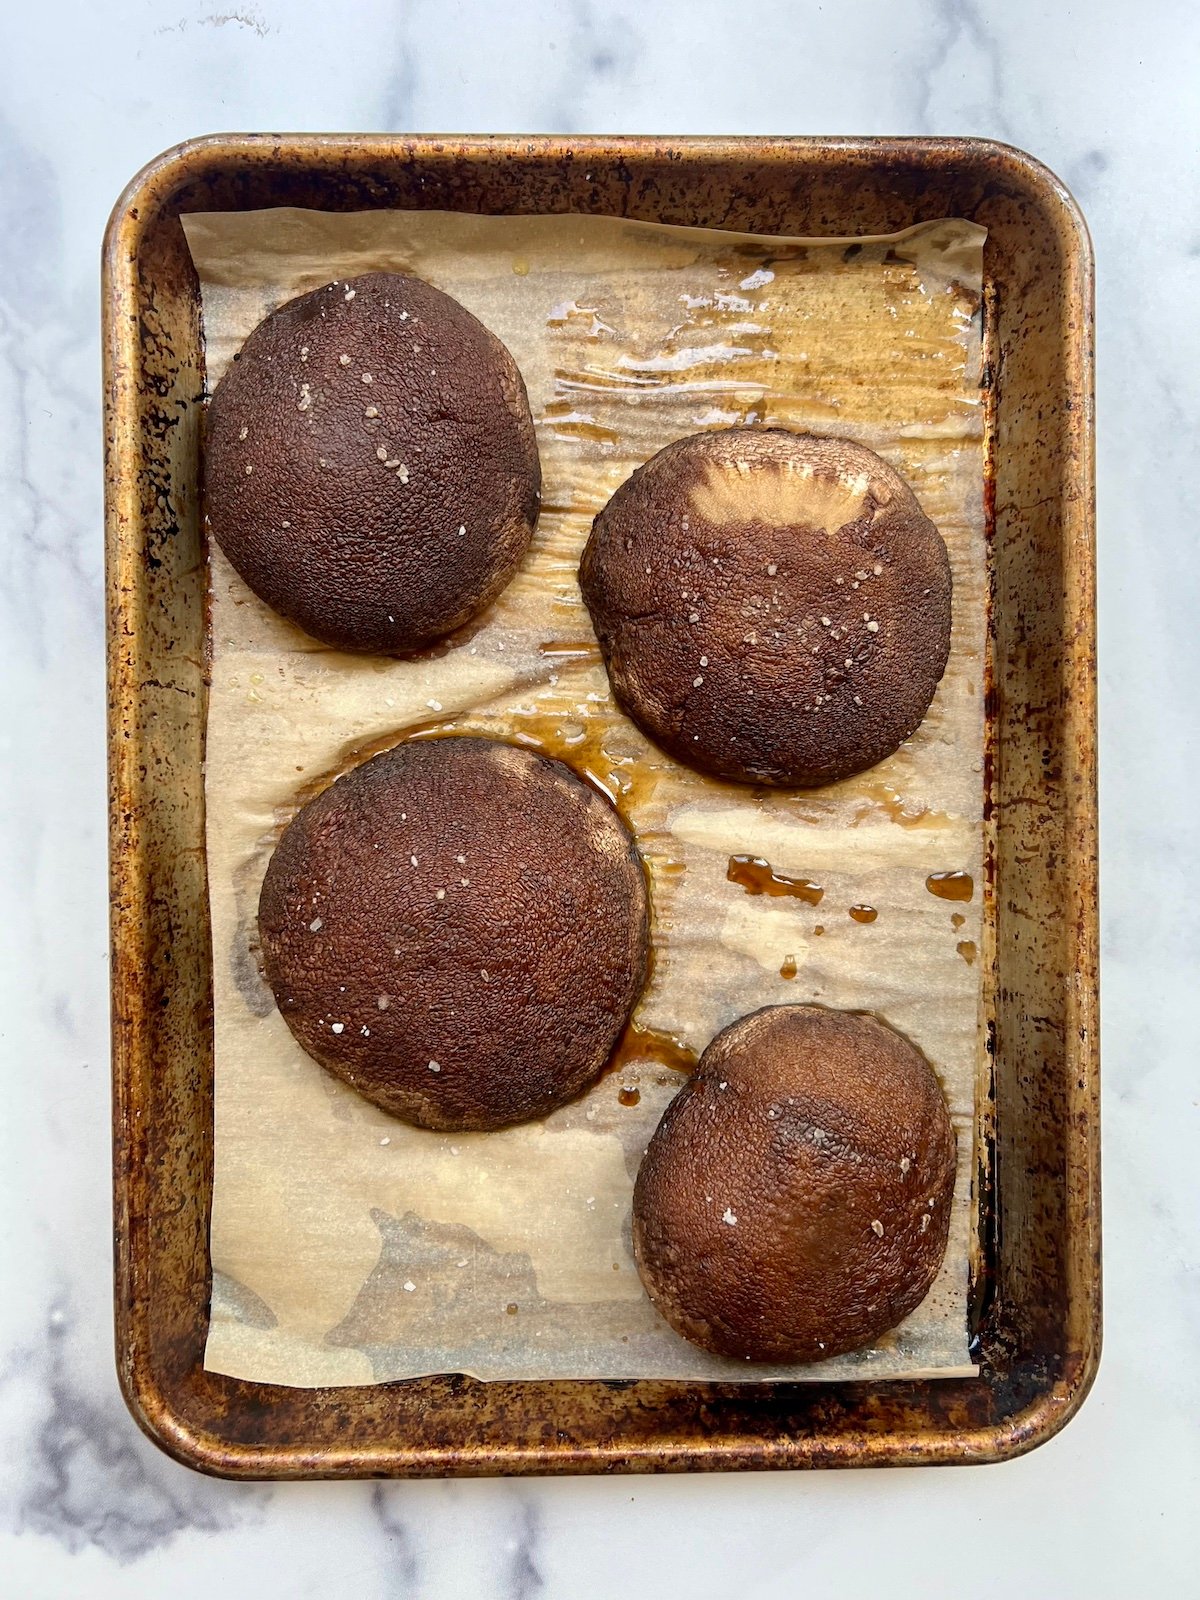
Four portobello mushrooms on baking sheet.

Step 1: Preheat oven to 375°F. Place the mushrooms on a parchment lined baking sheet, rub with oil and sprinkle with salt on both sides. Place mushrooms gill side down and roast for 30-35 minutes or until slightly golden. Remove from oven and allow to cool. 

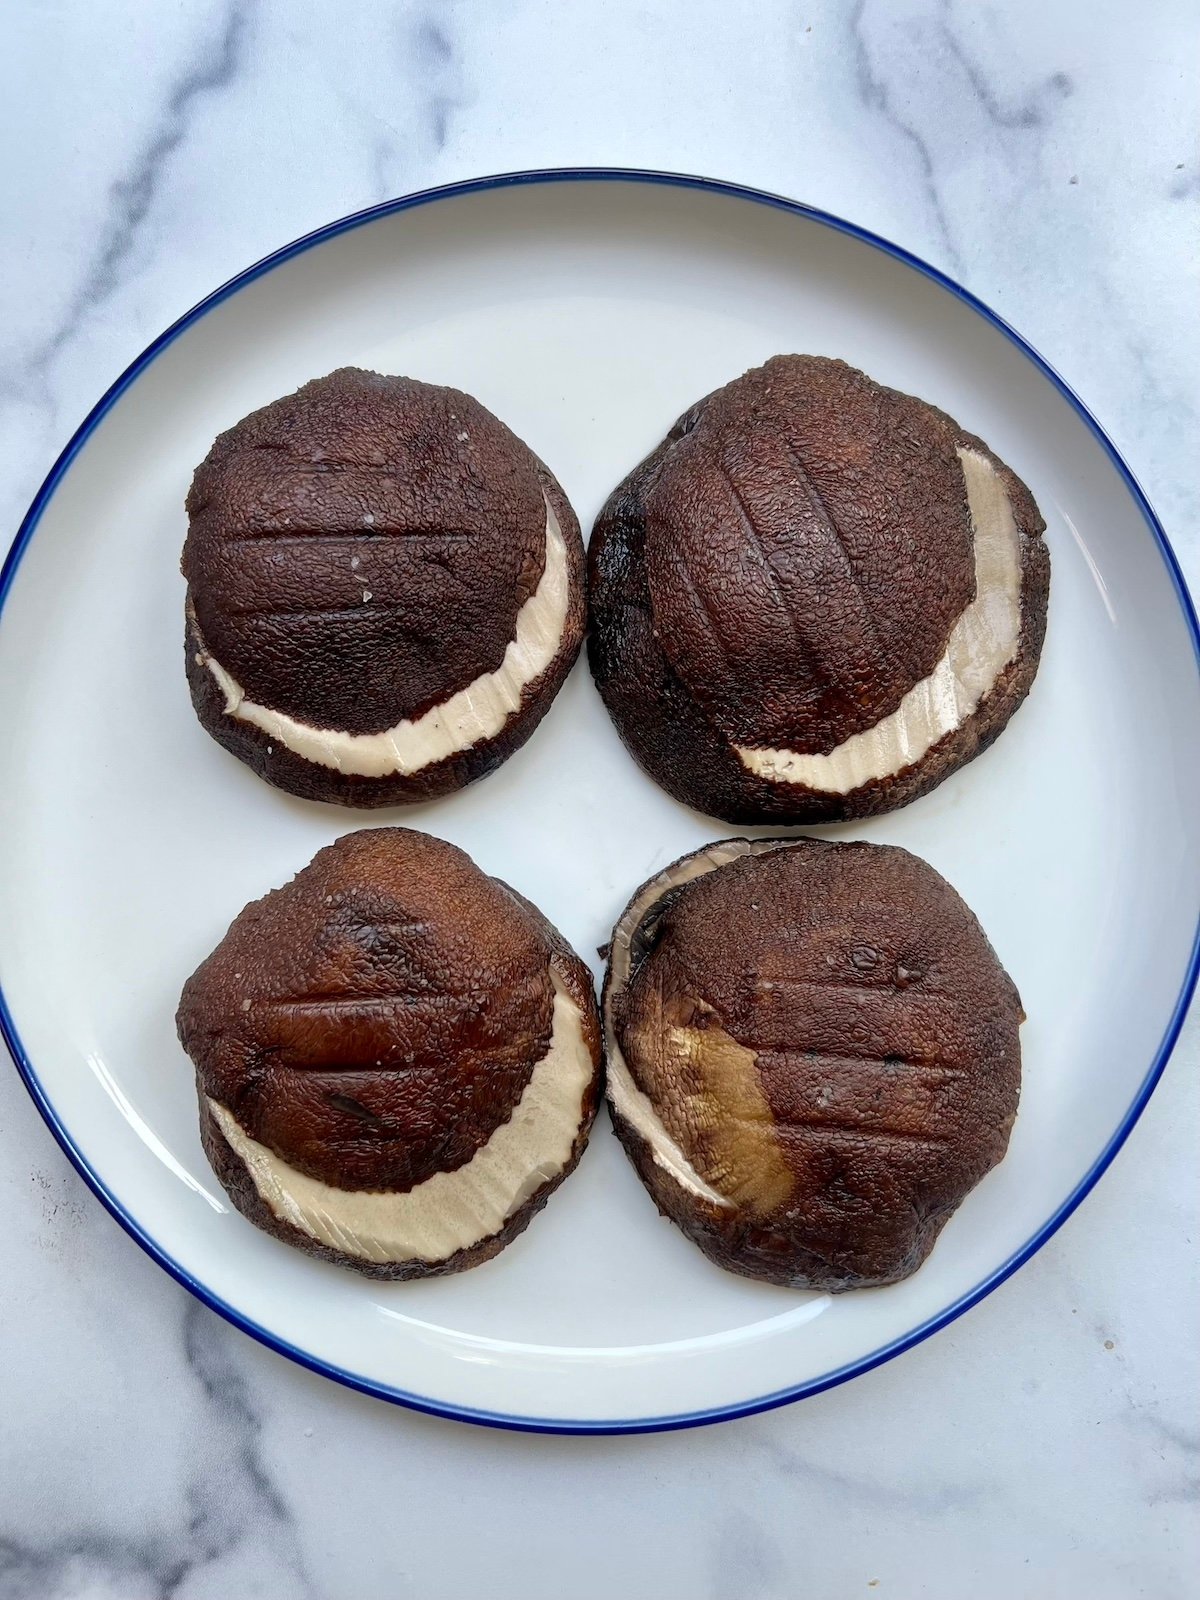
Portobello mushrooms sliced horizontally on a plate.

Step 2: Slice the mushroom caps horizontally being careful to make sure to cut directly through so both sides are even. 

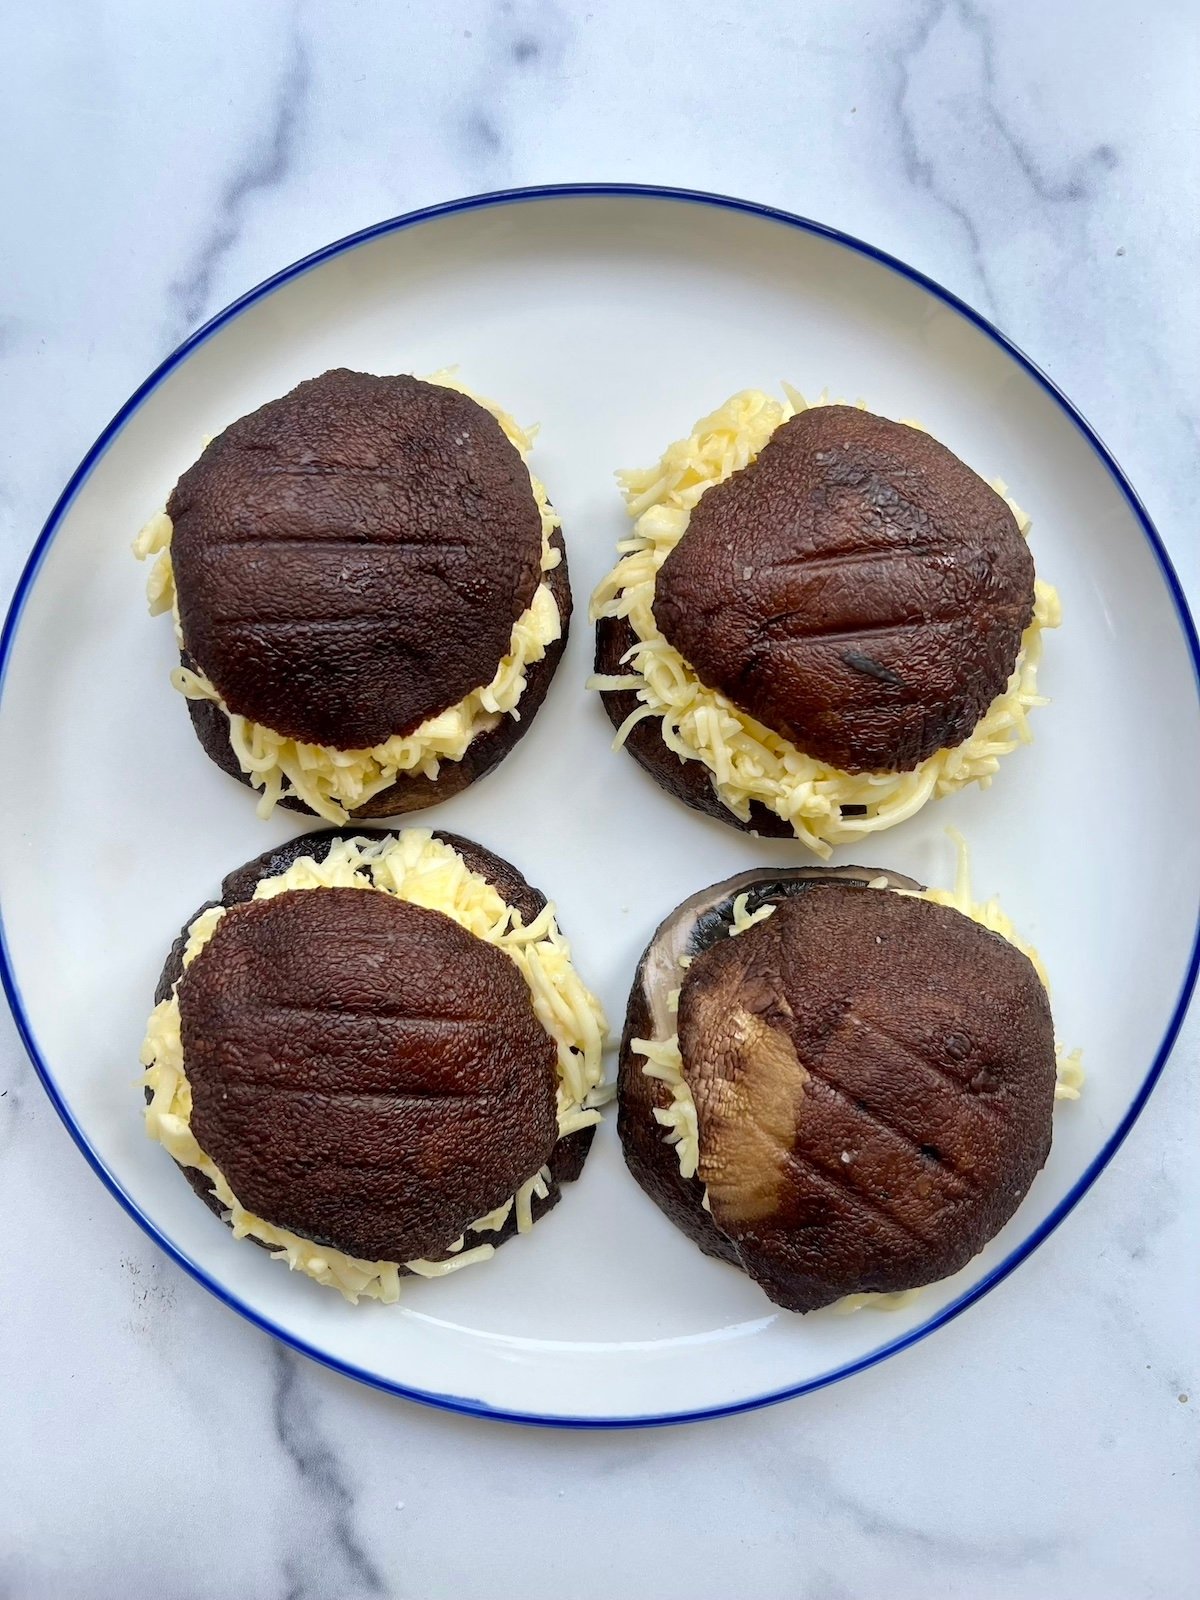
Portobello mushrooms stuffed with cheese on a plate.

Step 3: For the cheese filling, place the cheeses, onion and garlic powder and one egg in a medium sized bowl and stir to throughly combine. Form the mixture into 4 even sized disks just smaller than the mushrooms. Place a disk of the cheese in between each mushroom to create a sandwich and press to secure. Refrigerate until ready to use.

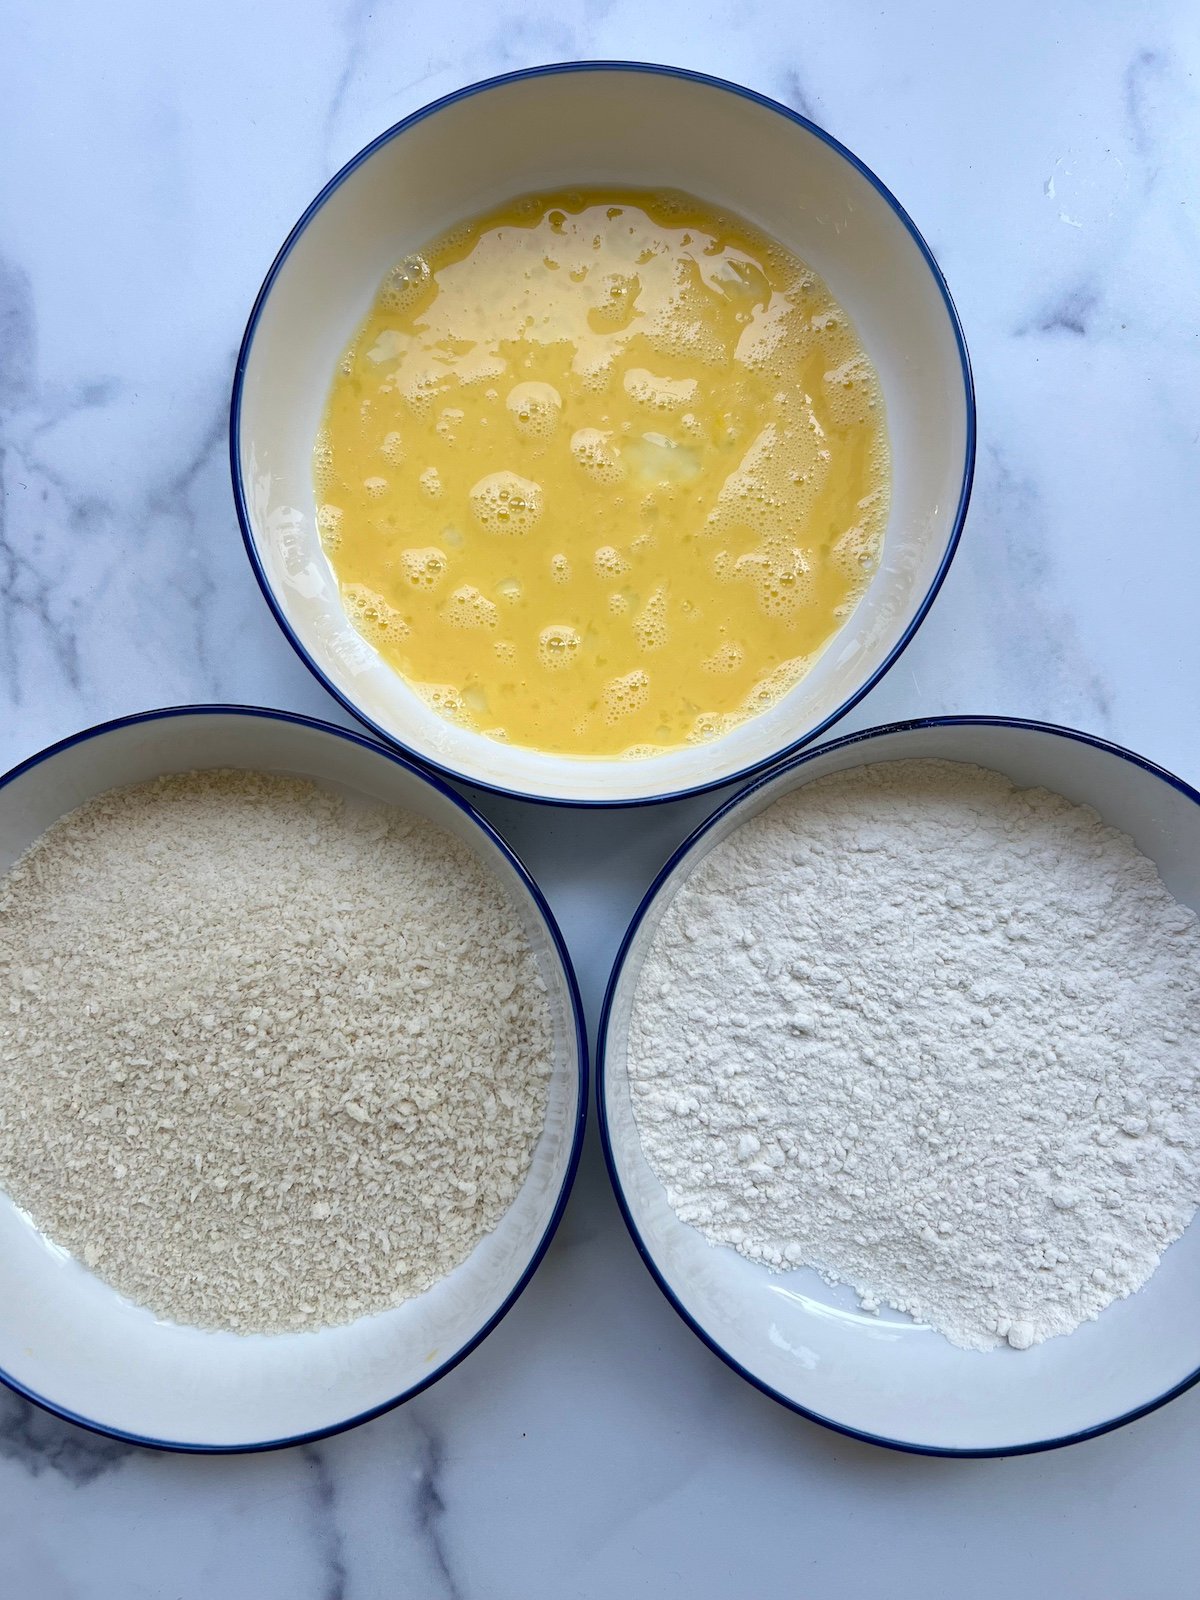
Three bowls. One with panko, one with whisked eggs, and the third with flour.

Step 4: Create a breading station. Place the flour in a deep bowl or pie plate. Whisk 3 of the eggs in a similar sized bowl and the panko in a third bowl.

Breaded, cheese stuffed portobello mushrooms.

Step 5: Dredge each stuffed mushroom in the flour, then the whisked eggs and finally coating with the panko, pressing to adhere.

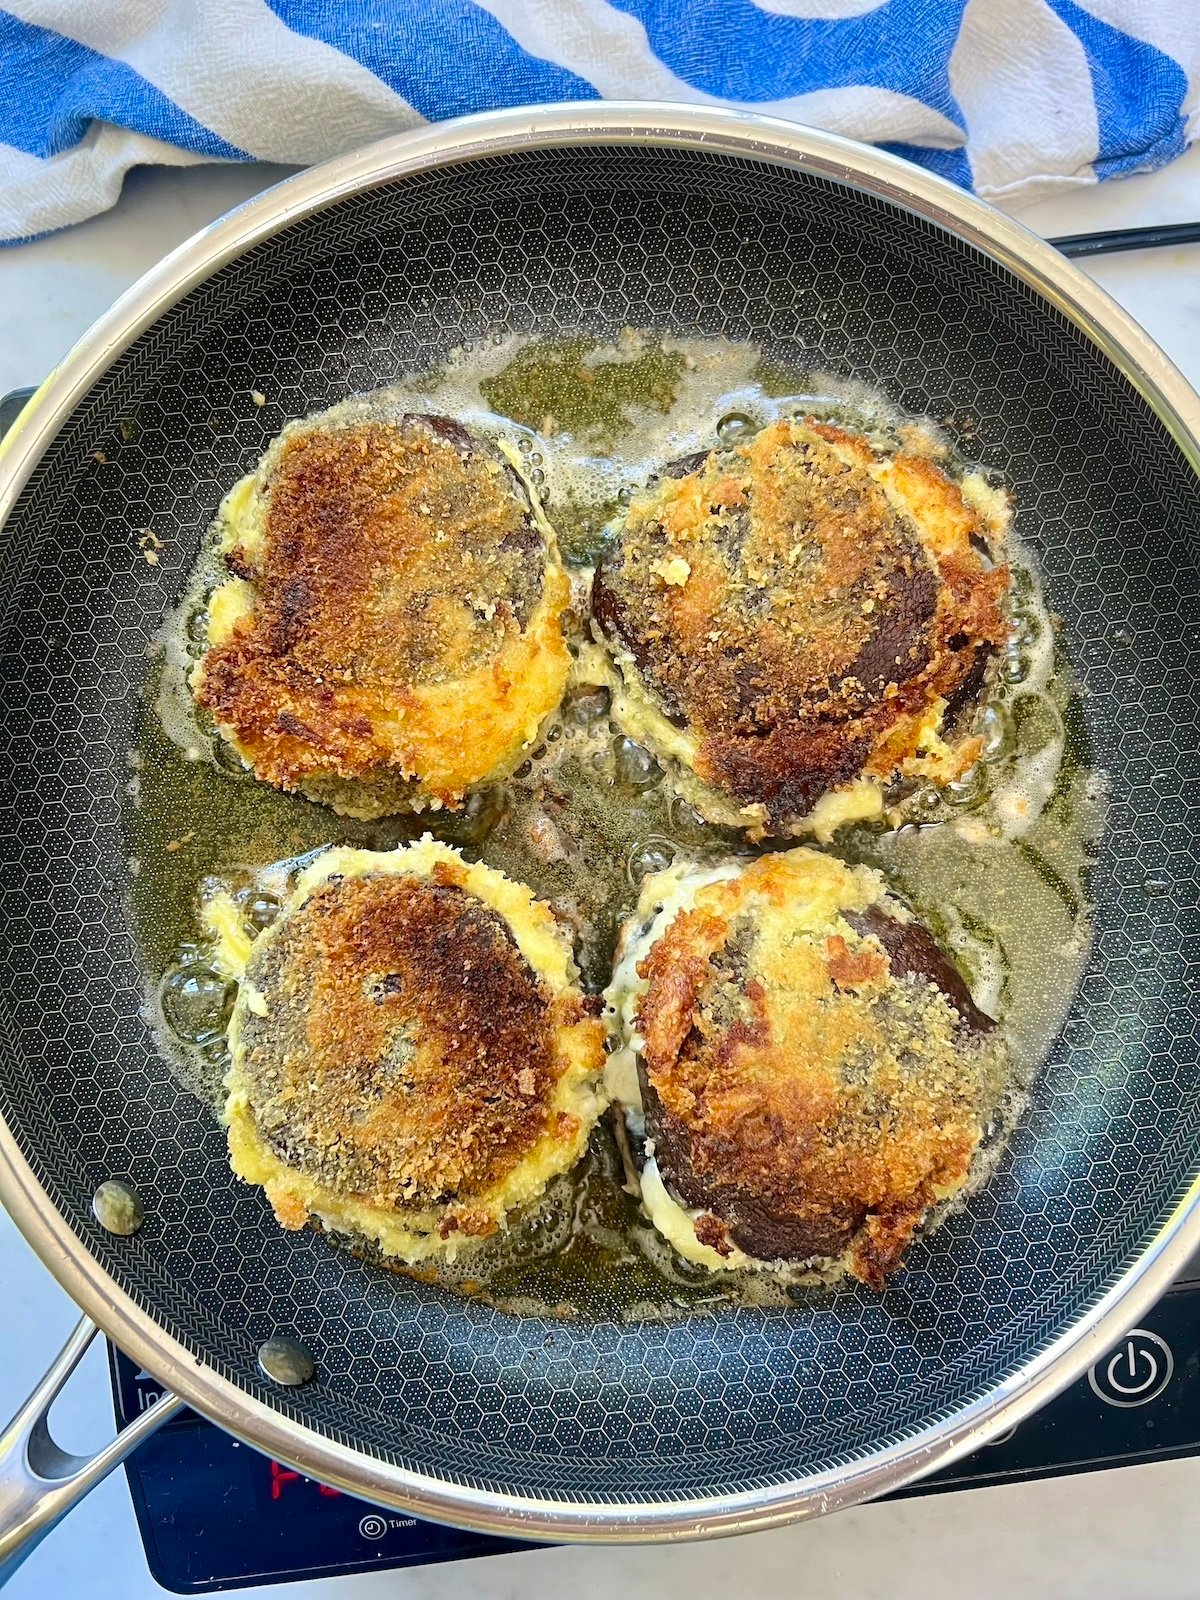
Shroom Burgers in saute pan.

Step 6: Heat a large sauté or cast-iron pan with 1/2 inch of oil over medium high heat (if using a candy thermometer it should read 350 degrees). Fry the burgers on each side for 3-4 minutes or until golden and crisp. Transfer the burgers to a paper towel lined plate to remove excess oil.

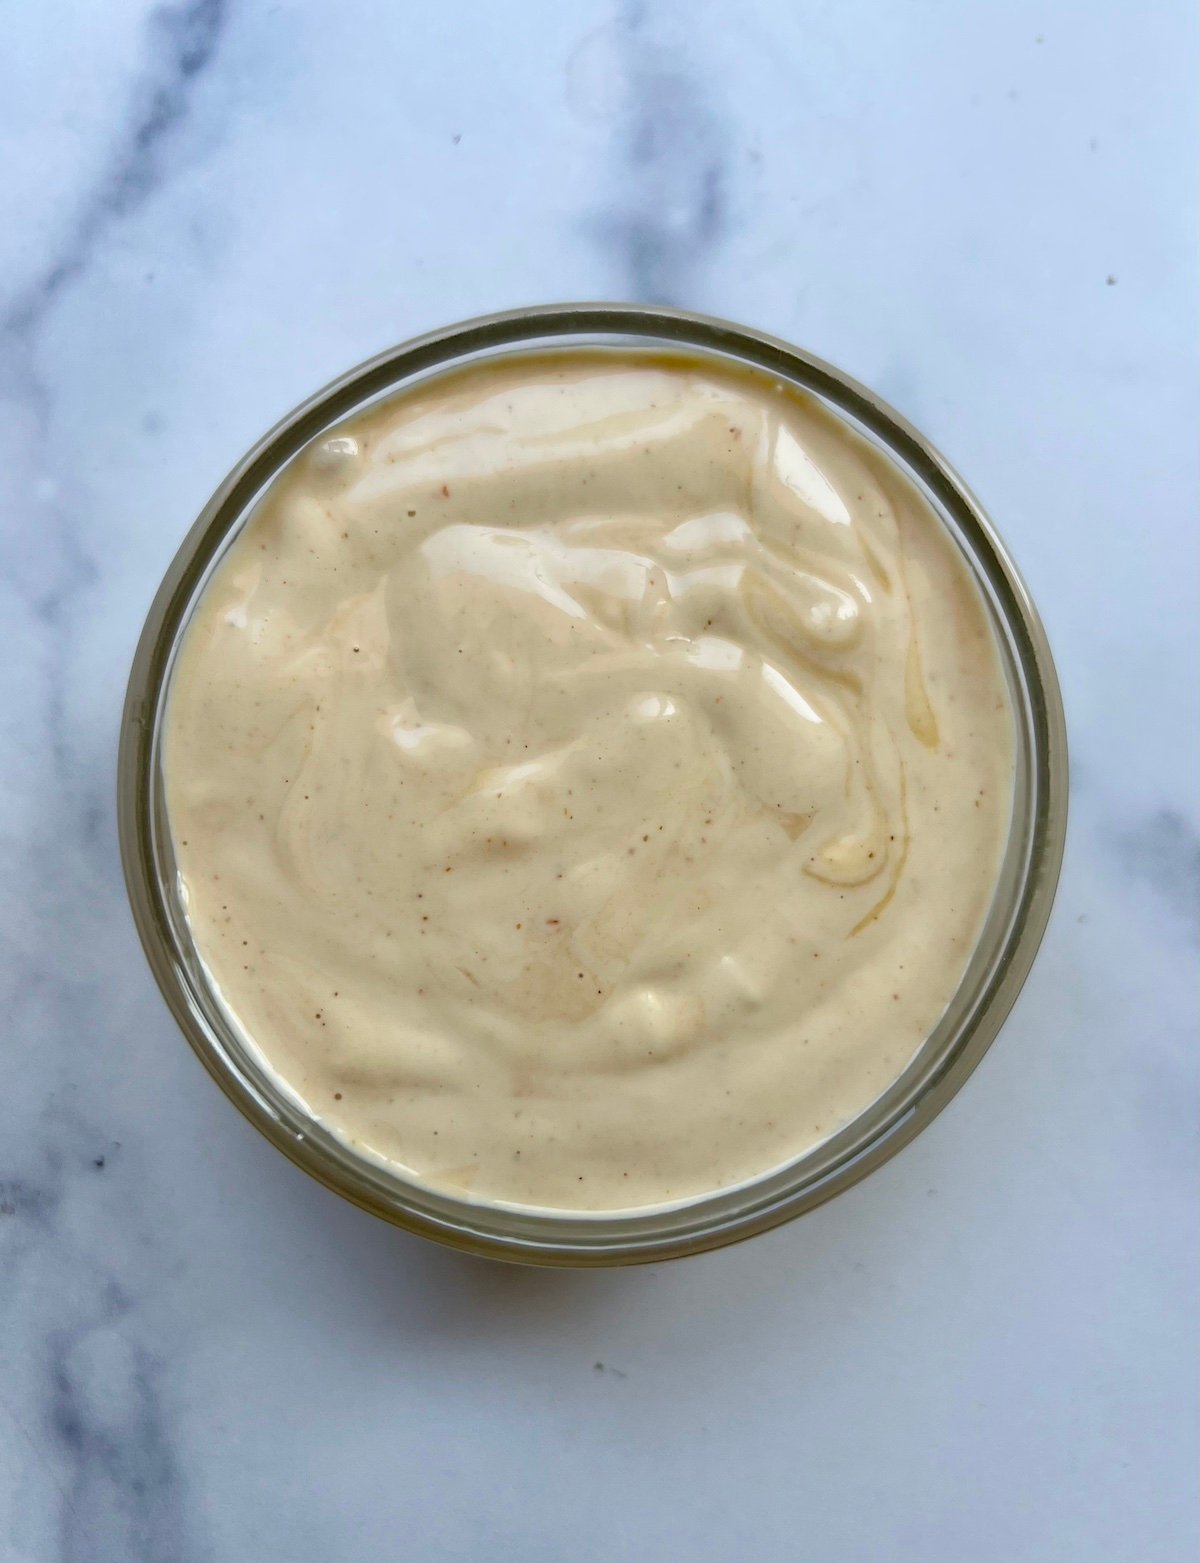
Faux shacksauce in mixing bowl.

Step 7: Make the faux ShackSauce. Place the sauce ingredients in a bowl and stir to combine.

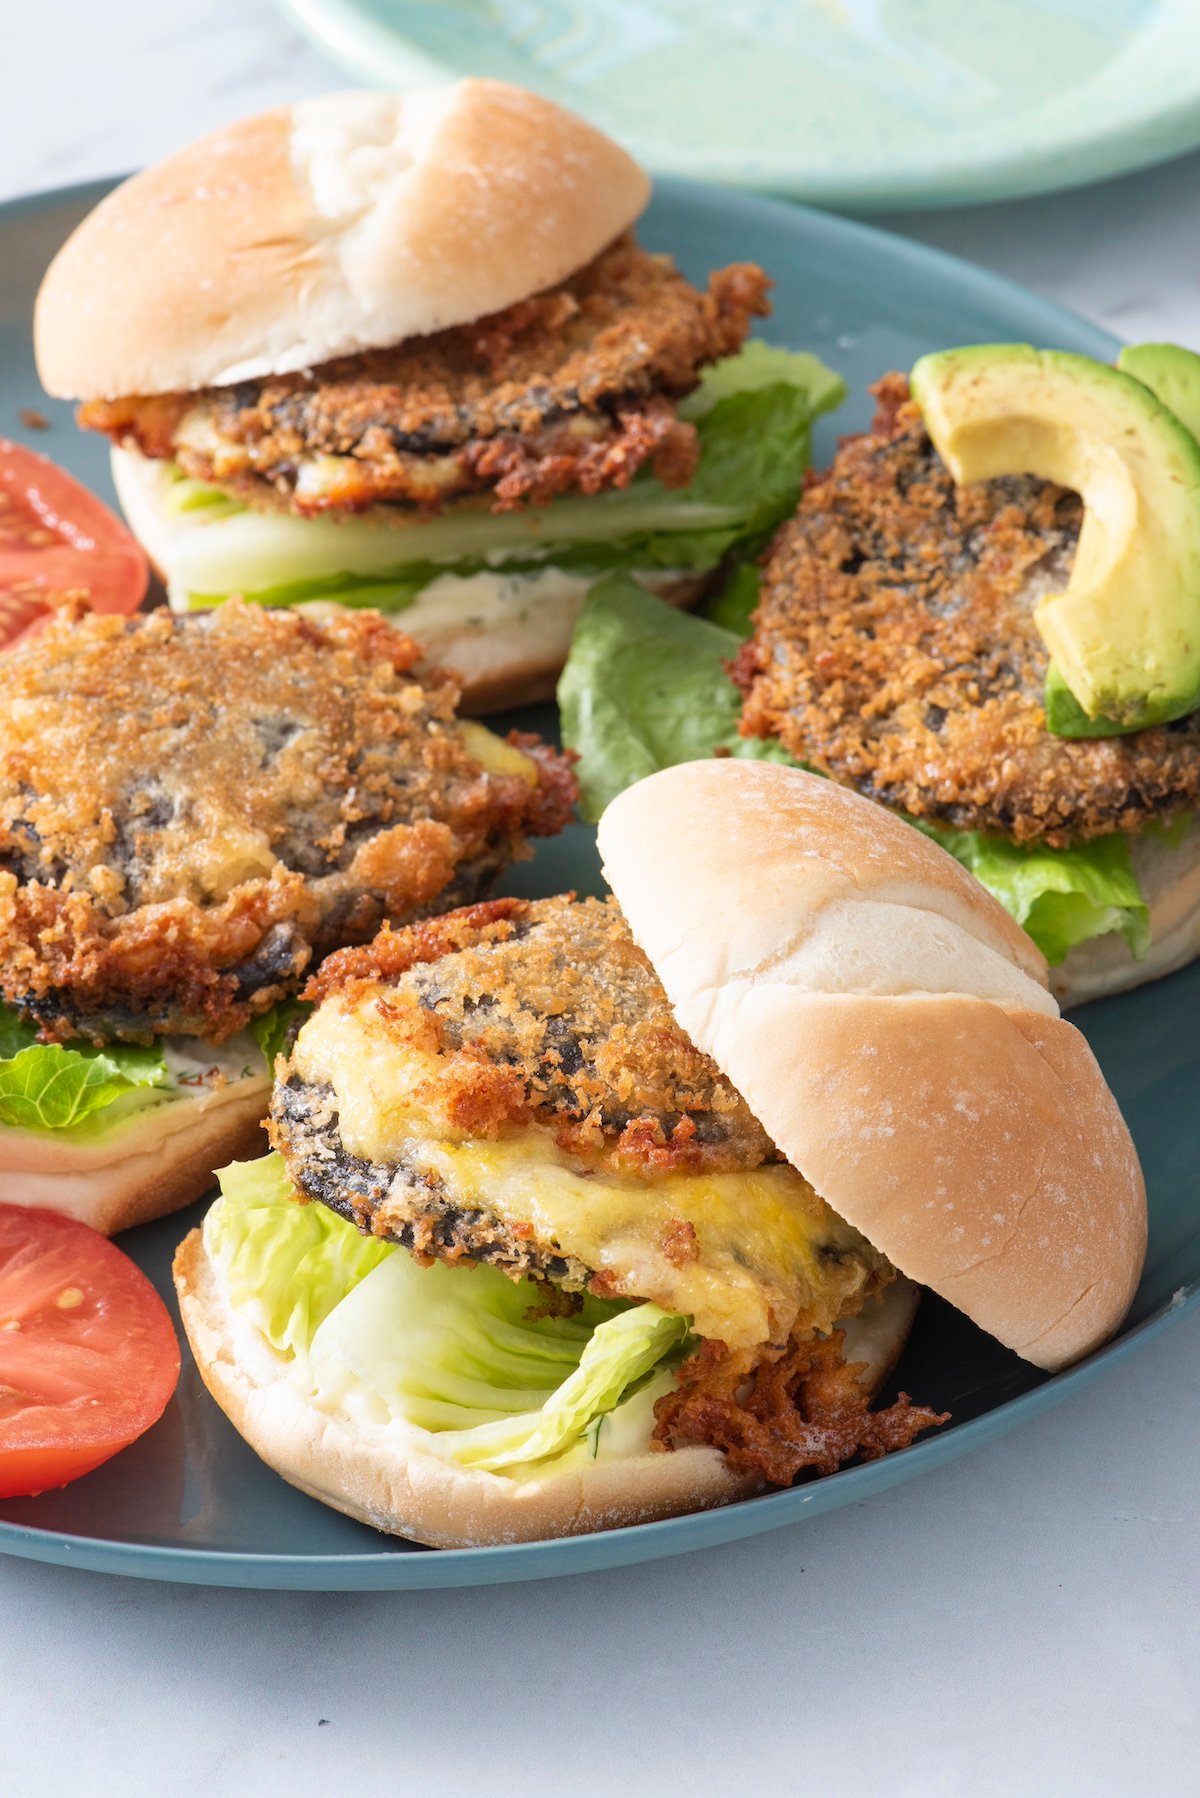
Shroom burgers with toppings on blue plate.

Step 8: Place a shroom burger on the bottom a bun, top with avocado slices, tomato, lettuce and ShackSauce (if desired) add the top bun.

Shroom Burger Tips & Tricks

  • Oil Temperature: Ensure your oil is hot enough before frying to get that perfect crispy coating without soaking up too much oil.
  • Refrigerate The Cheese-Stuffed Mushrooms: Once you build the mushroom patties with the cheese filling, pop them in the refrigerator for a bit before breading.
  • Tips for Making Ahead of Time
    • Portobellos can be roasted up to 3 days ahead of time and stored in the refrigerator. Slice when ready to fill and cook.
    • The breaded burger patties can be and stored in the refrigerator for 24 hours and then cooked as instructed.

FAQs

Can I air fry shroom burgers?

Yes! Spray or brush both sides of the burgers well with oil and air fry at 400°F for 13-15 minutes or until golden outside and the cheese is melted and bubbly.

How do I store leftover shroom burgers?

Store any leftover fried mushrooms in an airtight container in the refrigerator for up to 3 days. Reheat in the oven or air fryer to retain crispiness.

What sides can I serve with shroom burgers?

Serve shroom burgers with a side of Air Fryer French FriesOven Baked Fries or Sweet Potato Fries! You can’t go wrong with a burger and fries combination. Or opt for a fresh salad with citrus herb vinaigrette.

Shroom burger on a plate.

More Non-Beef Burger Recipes

With their crispy exterior, gooey cheesy center, and customizable toppings, these homemade Shroom Burgers are sure to become a family favorite in your household. If you make this recipe and love it, leave a rating and comment below!

Want more WeeliciousSubscribe to my newsletter and follow me on InstagramFacebook and TikTok for all the newest recipes!

Shroom burgers with toppings on blue plate.
Print

Shroom Burgers

These Vegetarian Shroom Burgers will rock your world! Take a crispy fried portobello mushroom with loads of melted cheese, add your toppings and be ready to say "YUM!".
Course Dinner
Cuisine American
Prep Time 20 minutes
Cook Time 40 minutes
Refrigerator Time: 15 minutes
Total Time 1 hour 15 minutes
Servings 4
Calories 670kcal

Equipment

  • Baking sheet
  • saute pan or cast iron skillet

Ingredients

For the Shroom Burgers:

Faux ShackSauce:

  • 1/2 cup mayonnaise (or vegan mayonnaise)
  • 1 tablespoon dijon mustard
  • 1 teaspoon ketchup
  • 1 teaspoon dill pickle juice (from jar of pickles)
  • 1 pinch cayenne pepper (optional)

Topping Ideas:

  • 1 ripe tomato , sliced into 4 – 1/4 inch slices
  • 1/2 ripe avocado , peeled and cut into 1/4 inch slices
  • 4 pieces romaine or other crisp lettuce

Instructions

  • Preheat oven to 375°F. Place the mushrooms on a parchment lined baking sheet, rub with oil and sprinkle with salt on both sides. Place mushrooms gill side down and roast for 30-35 minutes or until slightly golden. Remove from oven and allow to cool. 
  • Slice the mushroom caps horizontally being careful to make sure to cut directly through so both sides are even. 
  • For the cheese filling, place the cheeses, onion and garlic powder and one egg in a medium sized bowl and stir to throughly combine. Form the mixture into 4 even sized disks just smaller than the mushrooms. Place a disk of the cheese in between each mushrooms to create a sandwich and press to secure. Refrigerate until ready to use.
  • Create a breading station. Place the flour in a deep bowl or pie plate. Whisk 3 of the eggs in a similar sized bowl and the panko in a third bowl.
  • Dredge each stuffed mushroom in the flour, then the whisked eggs and finally coating with the panko, pressing to adhere.
  • Heat a large sauté or cast-iron pan with 1/2 inch of oil over medium high heat (if using a candy thermometer it should read 350 degrees). Fry the burgers on each side for 3-4 minutes or until golden and crisp. Transfer the burgers to a paper towel lined plate to remove excess oil.
  • Make the faux ShackSauce. Place the sauce ingredients in a bowl and stir to combine.
  • Place a shroom burger on the bottom of a bun, top with avocado slices, tomato, lettuce and ShackSauce (if desired) then top with second bun.

Notes

Oil Temperature: Ensure your oil is hot enough before frying to get that perfect crispy coating without soaking up too much oil.
Refrigerate The Cheese-Stuffed Mushrooms: Once you build the mushroom patties with the cheese filling, pop them in the refrigerator for a bit before breading.
Tips for Making Ahead of Time:
  • Portobellos can be roasted up to 3 days ahead of time and stored in the refrigerator. Slice when ready to fill and cook.
  • The breaded burger patties can be and stored in the refrigerator for 24 hours and then cooked as instructed.

Nutrition

Calories: 670kcal | Carbohydrates: 75g | Protein: 33g | Fat: 27g | Saturated Fat: 11g | Polyunsaturated Fat: 4g | Monounsaturated Fat: 9g | Trans Fat: 0.02g | Cholesterol: 233mg | Sodium: 1447mg | Potassium: 762mg | Fiber: 6g | Sugar: 9g | Vitamin A: 1076IU | Vitamin C: 7mg | Calcium: 470mg | Iron: 6mg

The post Shroom Burgers appeared first on Weelicious.

Ice Cream Sandwiches

Three homemade Ice Cream Sandwiches, two of them with chocolate ice cream and one vanilla, stacked on top of each other, ready to enjoy.This homemade Ice Cream Sandwiches recipe will put anything store-bought to shame, with outer layers chewy chocolate sandwich and your favorite ice cream in the center. Frozen treats hit the spot every single time! Try our Chocolate Milkshake, Healthy Frozen Yogurt, Homemade Fruit Pops, or Mochi Ice Cream! How to make Ice Cream Sandwiches: Brownie…

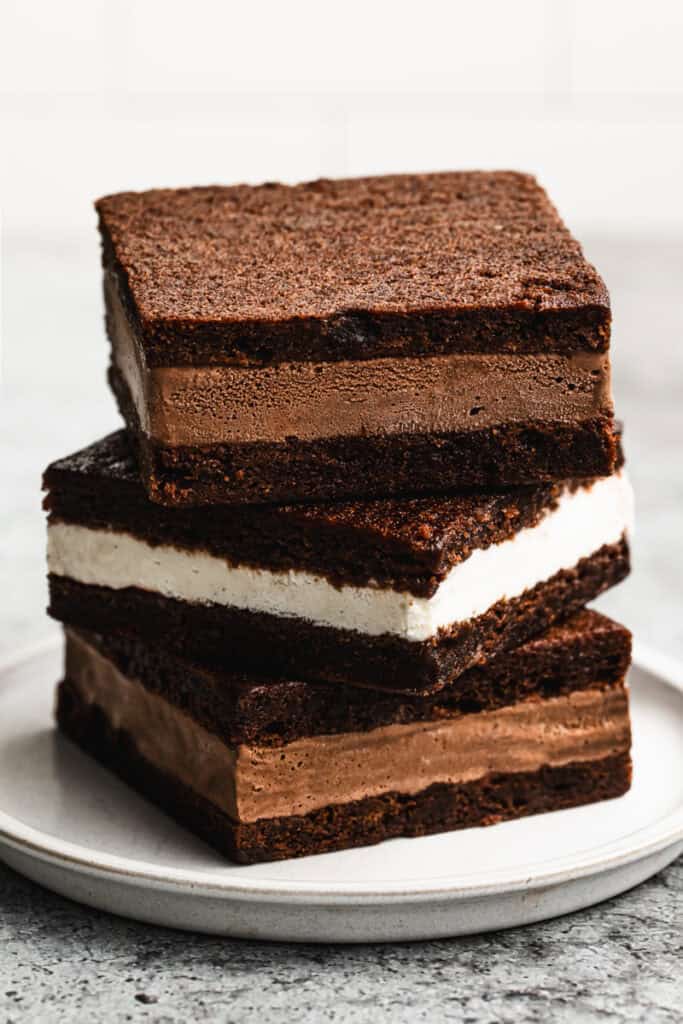
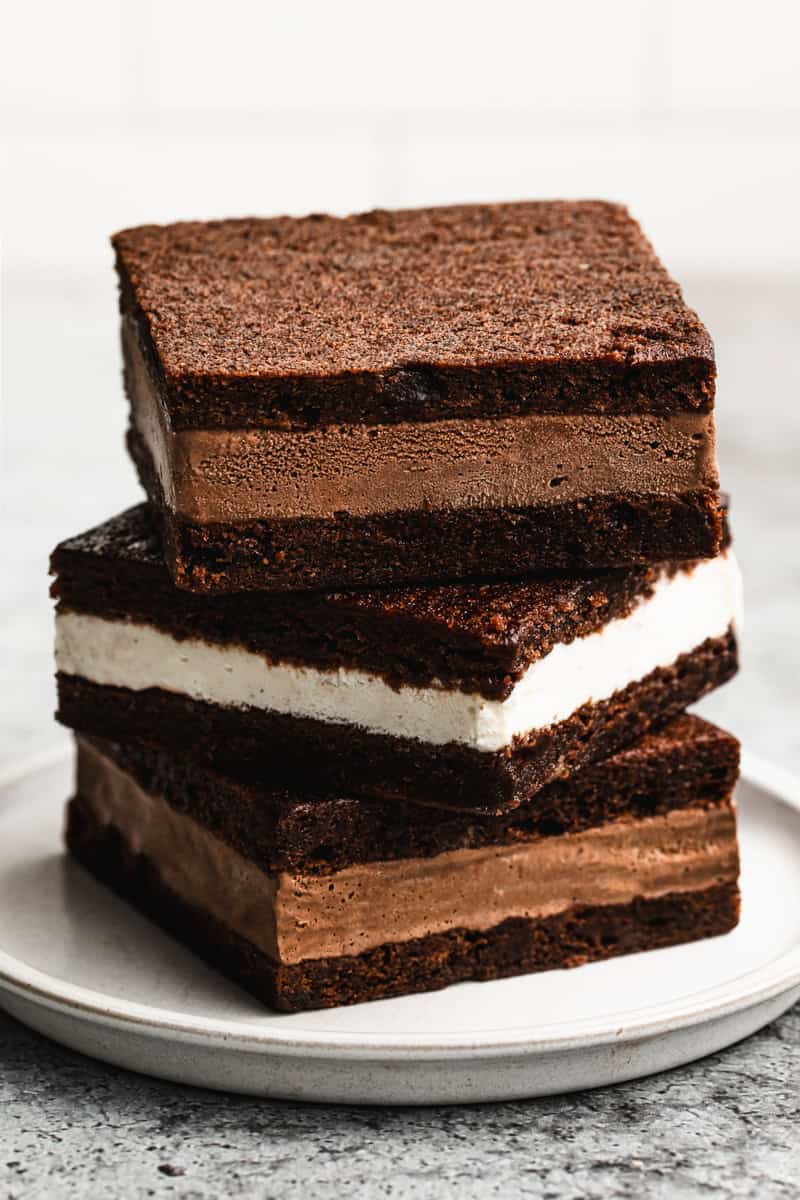
Three homemade Ice Cream Sandwiches, two of them with chocolate ice cream and one vanilla, stacked on top of each other, ready to enjoy.

This homemade Ice Cream Sandwiches recipe will put anything store-bought to shame, with outer layers chewy chocolate sandwich and your favorite ice cream in the center.

Frozen treats hit the spot every single time! Try our Chocolate Milkshake, Healthy Frozen Yogurt, Homemade Fruit Pops, or Mochi Ice Cream!

Three homemade Ice Cream Sandwiches, two of them with chocolate ice cream and one vanilla, stacked on top of each other, ready to enjoy.

I bet Homemade Ice Cream Sandwiches will be your new Summer addiction

My tweenager says these homemade ice cream sandwiches are the absolute “GOAT” (greatest of all time). Picture outer layers of chewy chocolate brownie, with your favorite ice cream flavor sandwiched in the middle. You could even press sprinkles, mini chocolate chips, crushed Oreos etc around the outsides. They are so easy and FUN to make, plus you can store them in the freezer all summer long.

How to make Ice Cream Sandwiches:

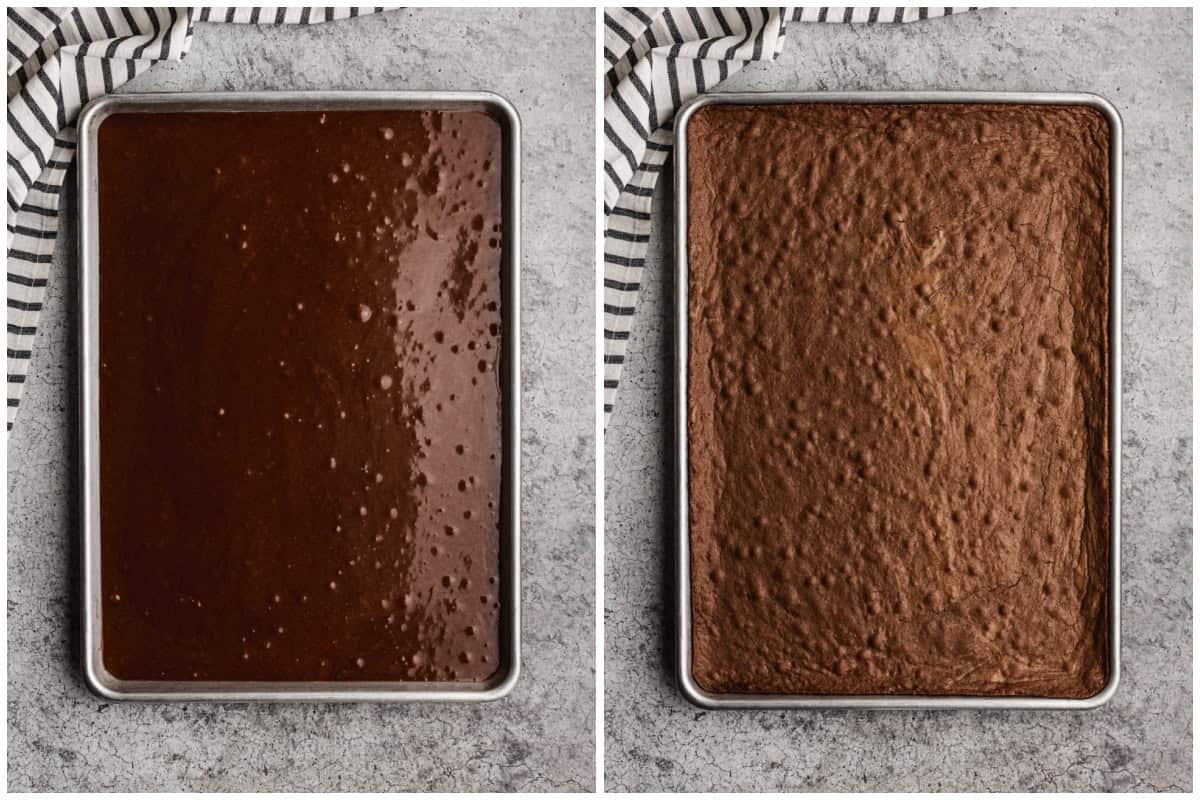
Brownie Layer: Place a sheet of parchment paper on a half sheet size pan (18″x13″) and spray lightly with cooking spray. Pour brownie batter into an even layer in the pan then bake at 350 degrees F for 15-20 minutes, or until a toothpick comes out clean. Allow to cool completely.

Two images showing brownies being baked in a half sheet pan to use for the best ice cream sandwiches.

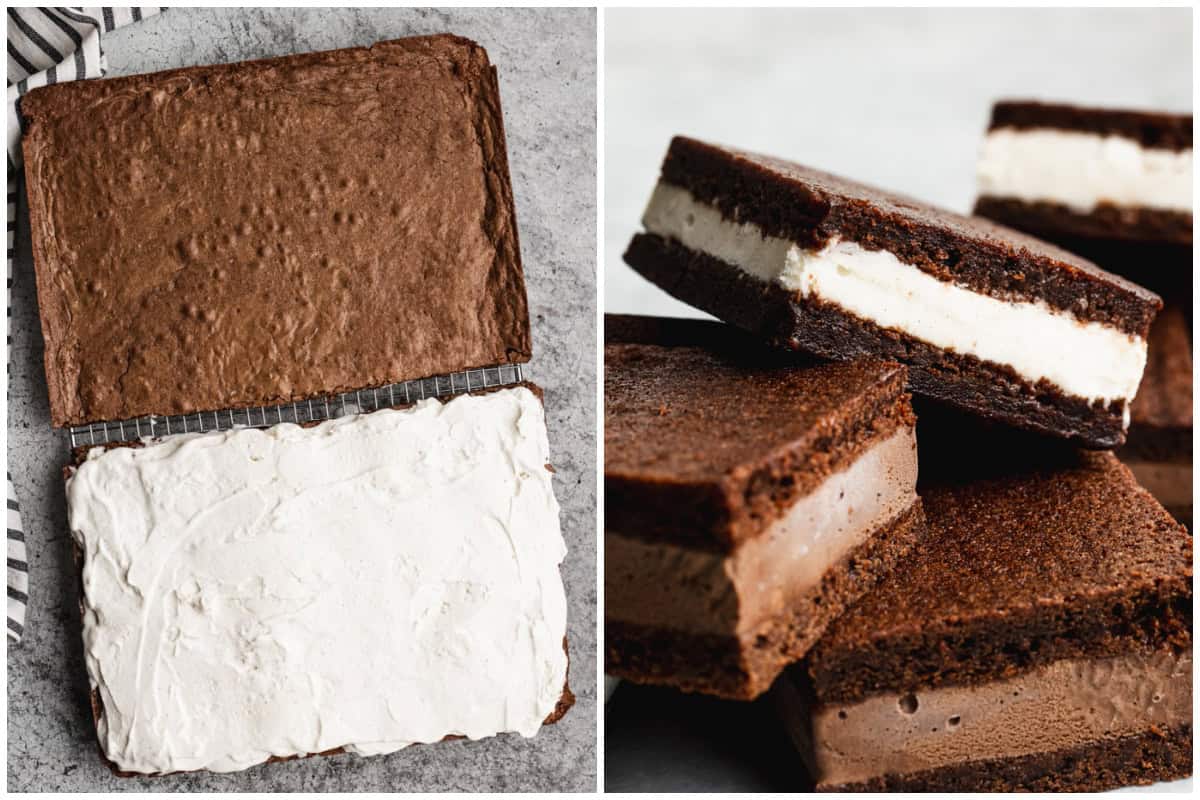
Assemble: After brownies have cooled, carefully lift parchment paper from the pan and cut a line down the center, hamburger-style, so there are two large, equal-size sides. Spread softened ice cream over the top of one of the layers then add the other layer on top, creating a brownie ice cream sandwich. Freeze for several hours before cutting into squares.

Two images showing vanilla ice cream being spread on top of half of a pan of brownies then after the chocolate and vanilla ice cream sandwiches are cut and ready to serve.

Make Ahead and Freezing Instructions:

The best part about this summer dessert is that it keeps well in the freezer for 2-3 months. You can freeze the whole pan, covered tightly with plastic wrap and aluminum foil, or store the cut ice cream sandwiches in an airtight container or freezer bag.

More Ice Cream Recipes:

Follow me for more great recipes

Three homemade Ice Cream Sandwiches, two of them with chocolate ice cream and one vanilla, stacked on top of each other, ready to enjoy.
Print

Ice Cream Sandwiches

This homemade Ice Cream Sandwich recipe will put anything store-bought to shame, with chewy chocolate sandwich layers and your favorite ice cream flavor in the center. Make a big batch and enjoy them all Summer long!
Course Dessert
Cuisine American
Prep Time 20 minutes
Cook Time 20 minutes
Freeze 3 hours
Total Time 3 hours 40 minutes
Servings 15
Calories 304kcal
Cost 6

Ingredients

Instructions

  • Preheat oven to 350 degrees F. Line a bakers half sheet size pan (18’’x13’’) with parchment paper and spray lightly with cooking spray.
  • Chocolate Sandwich Batter: In a mixing bowl, add sugar and oil stir until combined. Add eggs one at a time, mixing well after each addition. Add cocoa powder and mix. Stir in salt, flour, and vanilla then stir until combined. Pour batter into prepared pan and spread into an even layer.
  • Bake at 350 degrees F for 15-20 minutes, or until a toothpick inserted in the center comes out clean. Remove from oven and cool completely.
  • Remove ice cream from fridge about 20 minutes before assembling.
  • Assemble: Lift parchment paper to remove brownies from the pan. Cut the pan of brownies in half, creating two large rectangles of equal size. Use scissors to cut the parchment paper down the middle. Spread softened ice cream over the top of one of the layers. Flip the other chocolate layer on top. Cover with palstic wrap and freeze for several house.
  • Cut into ice cream sandwiches. Serve and enjoy.

Video

Notes

Freezing Instructions: You can freeze the whole pan, covered tightly with plastic wrap and aluminum foil, or store the cut ice cream sandwiches in an airtight container or freezer bag, for 2-3 months.

Nutrition

Calories: 304kcal | Carbohydrates: 37g | Protein: 3g | Fat: 17g | Saturated Fat: 2g | Polyunsaturated Fat: 4g | Monounsaturated Fat: 10g | Trans Fat: 0.1g | Cholesterol: 44mg | Sodium: 173mg | Potassium: 62mg | Fiber: 1g | Sugar: 27g | Vitamin A: 64IU | Calcium: 11mg | Iron: 1mg

Follow Me

Get recipe ideas weekly!

I originally shared this recipe June 2019. Updated May 2024.

Pupusas

We love making Pupusas from home with a simple bean and cheese filling and served with curtido and salsa roja. One of our favorite ways to “travel” as a family is cooking International Inspired recipes for dinner at home, like Chicken Shawarma Bowls, Gallo Pinto, or this Bánh Mì Sandwich. How to make Pupusas: Make…

We love making Pupusas from home with a simple bean and cheese filling and served with curtido and salsa roja.

One of our favorite ways to “travel” as a family is cooking International Inspired recipes for dinner at home, like Chicken Shawarma Bowls, Gallo Pinto, or this Bánh Mì Sandwich.

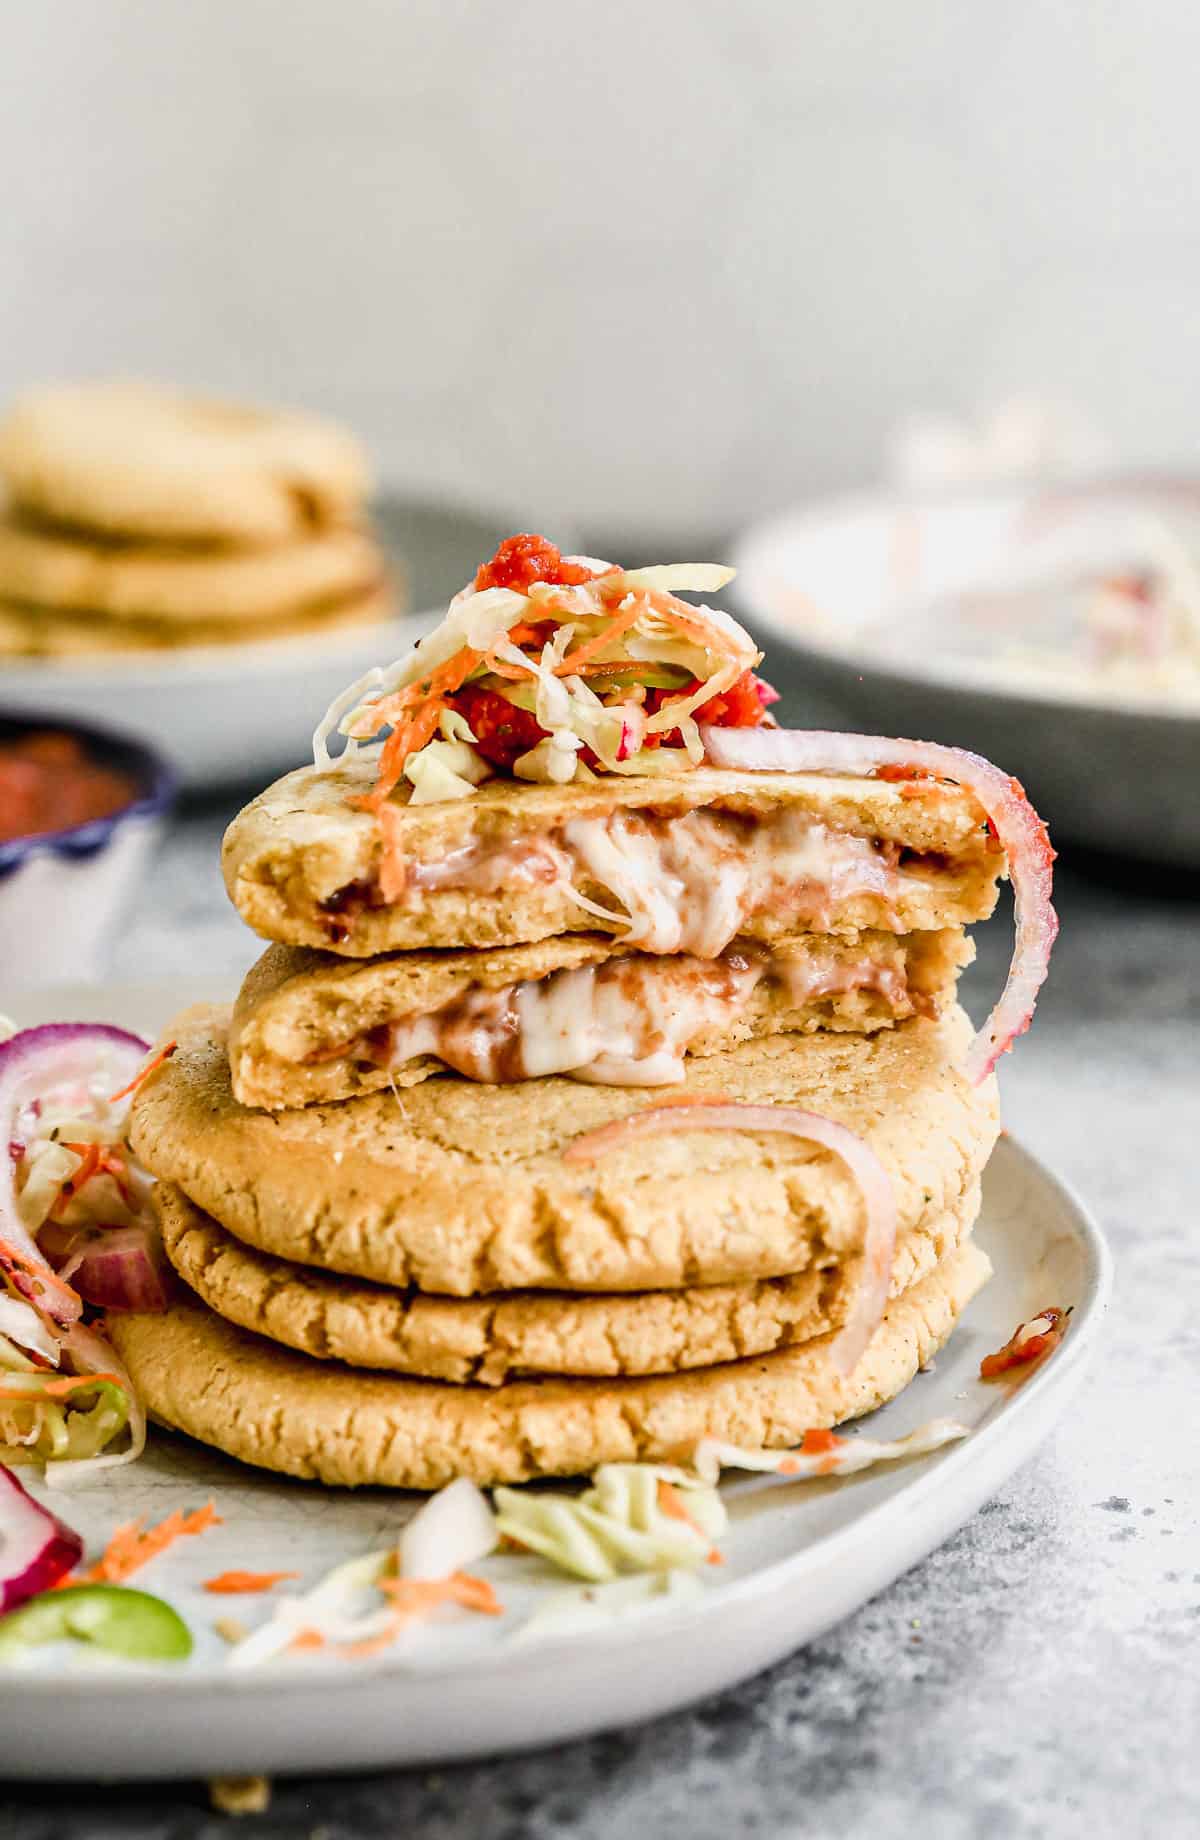
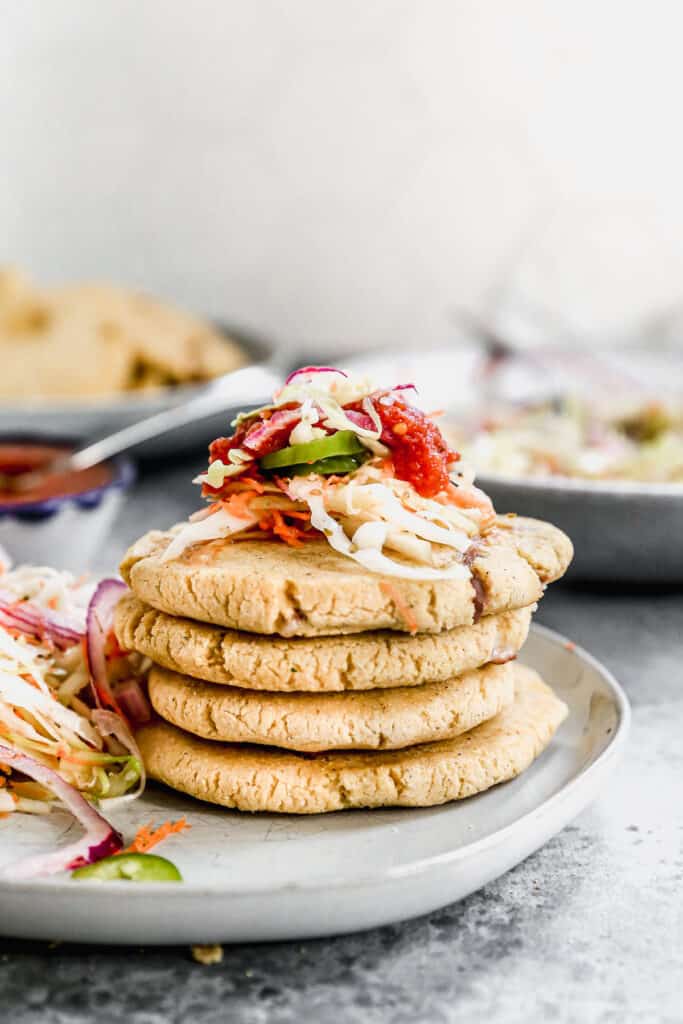
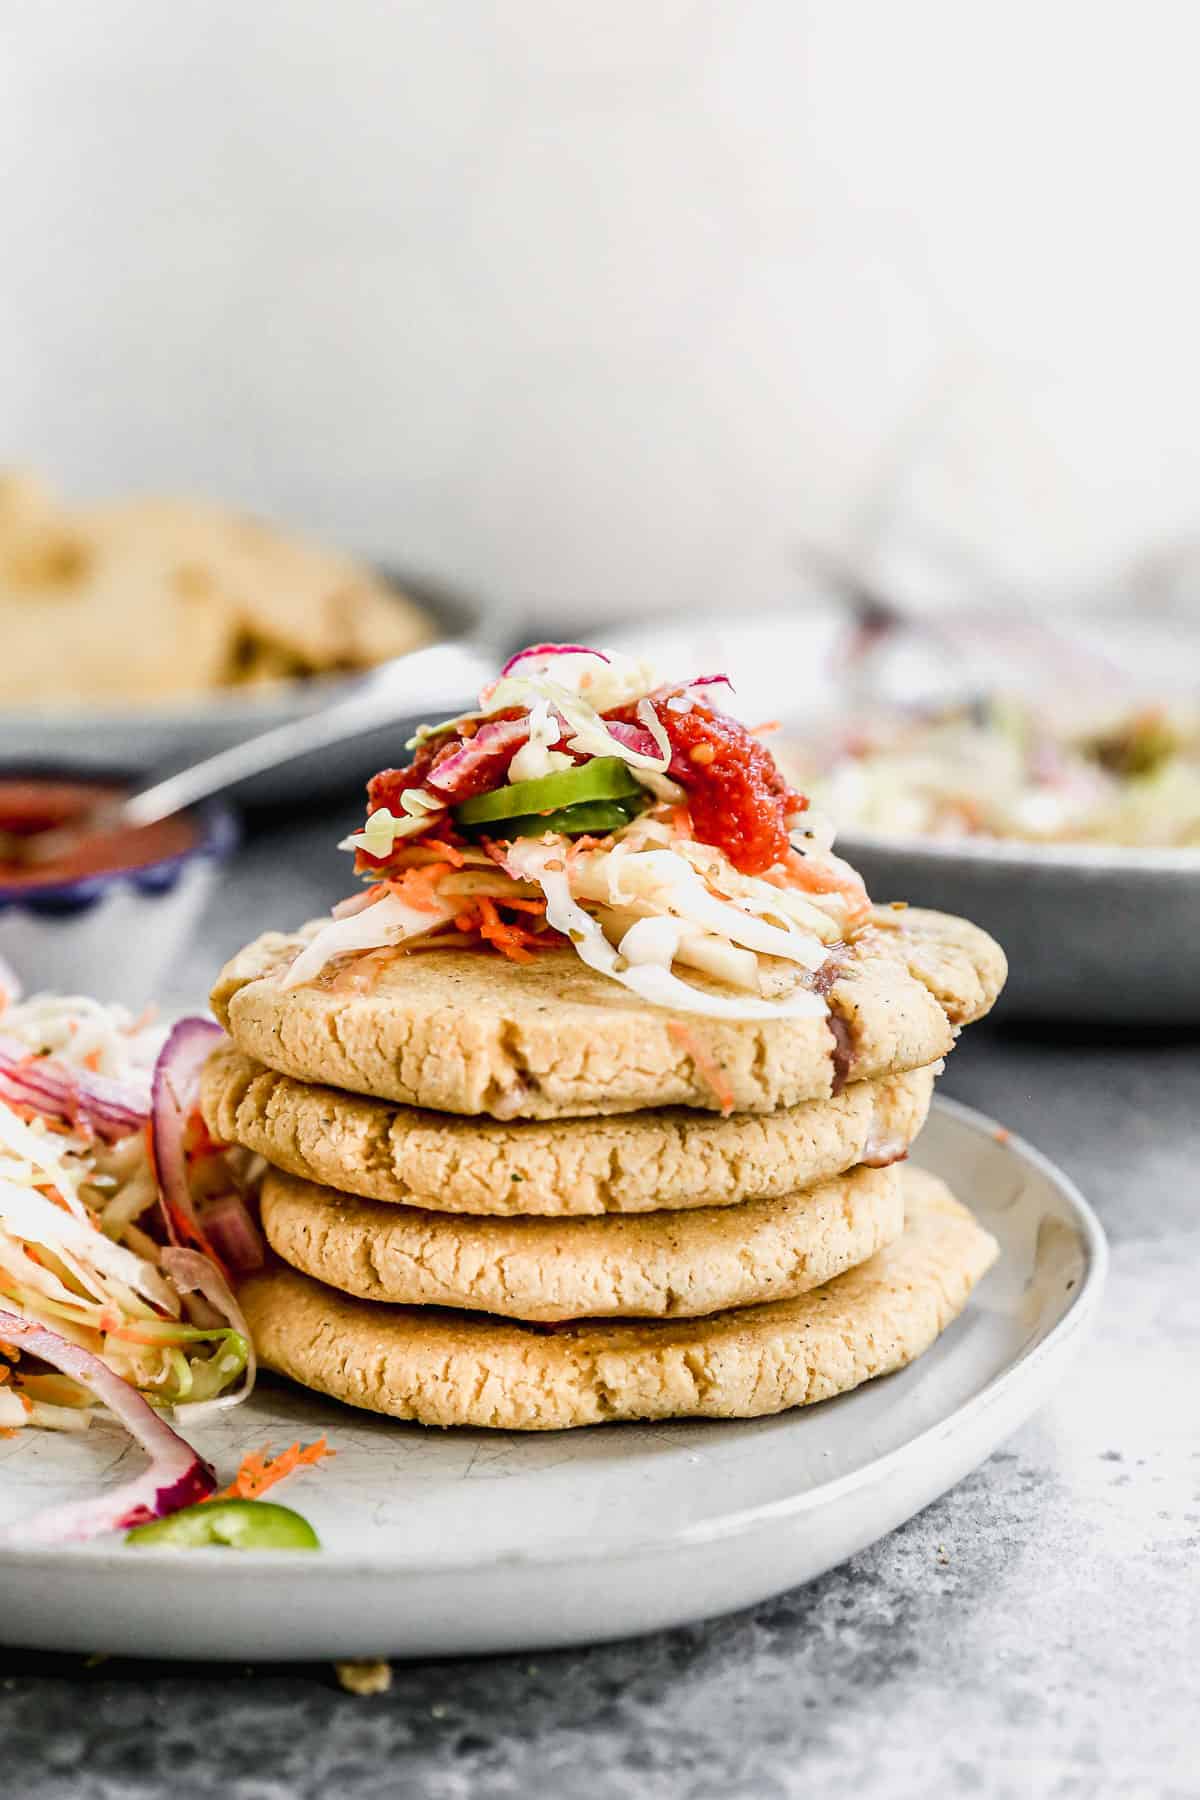
A stack of four homemade Pupusas topped with curtido and salsa roja, ready to enjoy.

Pupusas are King of Salvadoran street food

I always ask my kids to help me in the kitchen but when Pupusas are on the menu, they all volunteer! I can’t say this recipe is 100% authentic but it’s one of those fun, hands-on foods that provide an opportunity to teach them about other cultures, through food. And you absolutely have to make curtido and salsa roja to serve with pupusas!

How to make Pupusas:

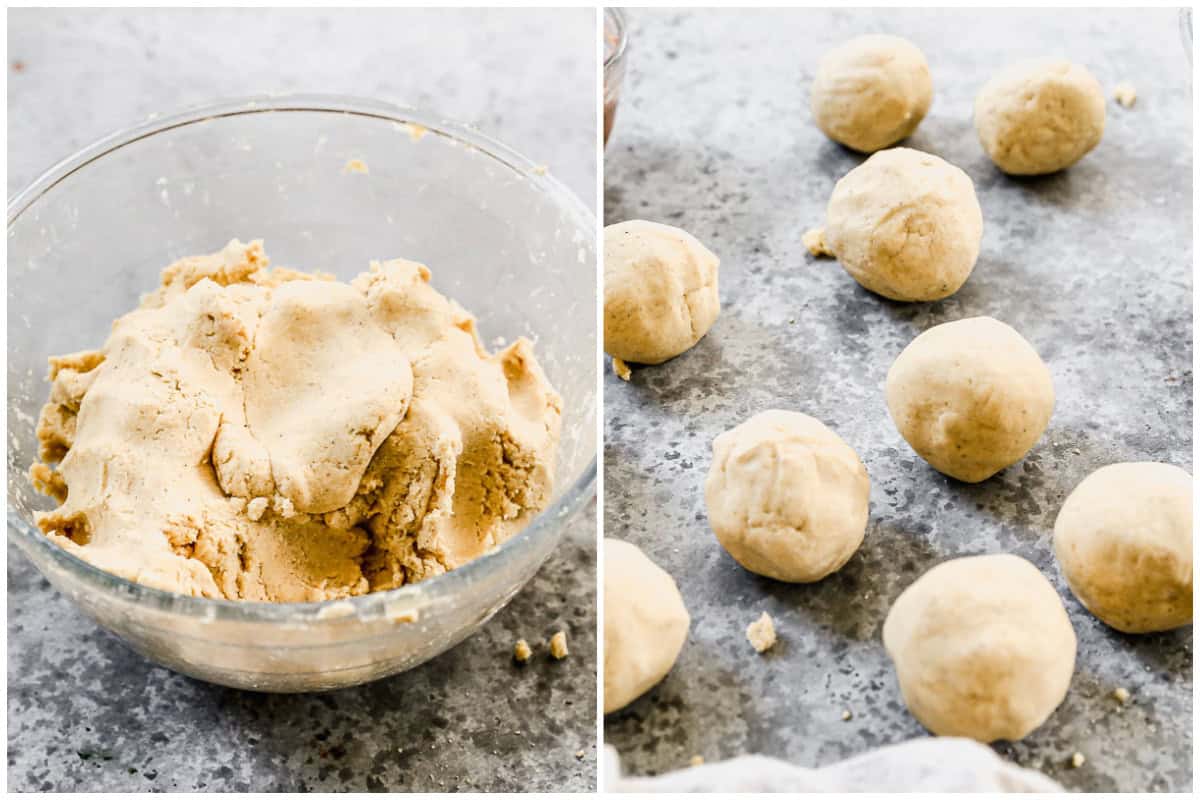
Make Dough: Add masa harina (corn flour) and salt to a large mixing bowl then add the warm water, little by little, while mixing the dough with your hand until you get the consistency of a soft play dough. Add butter and chicken bouillon if you’d like, for extra flavor. Scoop dough into golf-ball-size portions, dipping your hands in an oil and water mixture as needed if the masa is sticking to your hands.

Two images showing pupusas dough after it's made, then when it's portioned and rolled into balls.

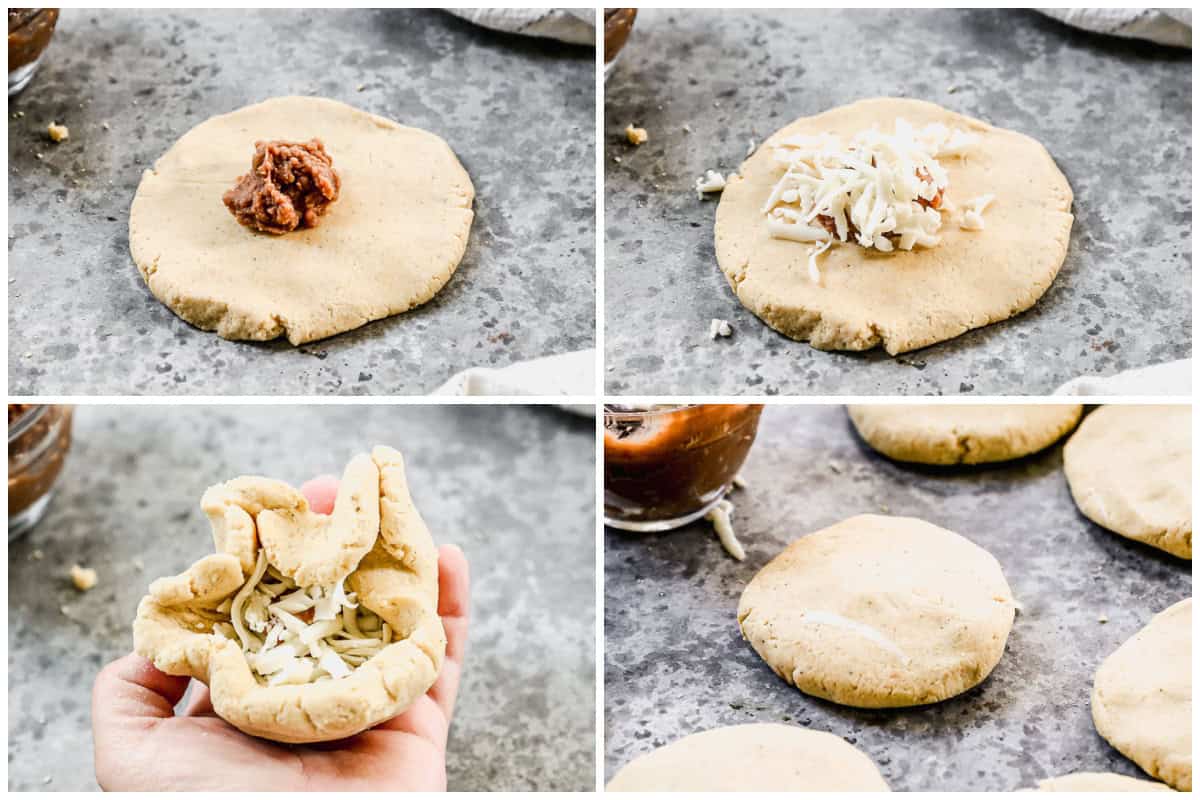
Assemble: Pat the dough into a pancake in your hand, about 4 inches in diameter. Add a Tablespoon of refried beans in the center and a sprinkle of shredded cheese. Fold the edges up and pinch to close into a ball. Gently pat/slap the dough back and forth between your palms to form it back into a thin pancake.

Four images showing how to form and fill pupusas.

Cook and Serve: Place pupusas on a hot, dry griddle or skillet and cook for 2-4 minutes on each side, until golden. Serve immediately, topped with curtido and salsa roja.

A stack of bean and cheese pupusas with one of them cut in half to show the melted cheese.

Storage and Freezing Instructions:

Store leftover masa dough can be stored in the refrigerator in an airtight bag or container for 1-2 days. Add a little more warm water to it, as needed, to make it soft before using. Store leftover cooked pupusas in an airtight container in the fridge, and reheat on a hot griddle or skillet.

To Freeze uncooked pupusas, “flash freeze” them on a baking sheet for 30 minutes, then store in an air-tight container, separated by parchment, for up to 3 months. Thaw completely in the fridge before cooking and serving.

Recipe Variations:

  • Filling: Feel free to try different filling combinations. It is popular to include beans, meat, and cheese.

Follow me for more great recipes

Print

Pupusas

Homemade Pupusas are so easy to make, stuffed with refried beans and cheese and topped with salsa roja and curtido slaw.
Course Main Course
Cuisine Salvadorian
Prep Time 30 minutes
Cook Time 5 minutes
Total Time 35 minutes
Servings 25
Calories 108kcal
Cost 5

Equipment

Ingredients

Pupusas:

Filling:

  • 15 oz can refried beans , or homemade
  • 2 cups shredded mozzarella cheese , or Oaxaca cheese

Topping:

Instructions

  • Make Dough: Add masa harina (corn flour) and salt to a large mixing bowl then add the warm water, little by little, while mixing the dough with your hand until you get the consistency of a soft play dough. Stir in butter and chicken bouillon.
  • Scoop dough into golf-ball-size portions, dipping your hands in an oil and water mixture as needed if the masa is sticking to your hands. Keep dough balls covered with a damp cloth as you work, to keep from drying out.
  • Form Pupusas: Pat the dough into a pancake in your hand, about 4 inches in diameter. Add a Tablespoon of refried beans in the center and a sprinkle of shredded cheese. Fold the edges up and pinch to close into a ball. Gently pat the dough back and forth between your palms to form it back into a thin pancake.
  • Cook: Heat a large un-greased skillet or pan over medium heat. Place pupusas on the hot pan and cook for about 2-4 minutes on each side. You will know the pupusas are ready to flip when the edges are set and the bottom is lightly golden.
  • Serve immediately, topped with Curtido and Salsa Roja.

Video

Notes

Bouillon: I prefer bouillon paste, or use chicken granulated bouillon or one cube.
Filling: Feel free to try different filling combinations. It is popular to include beans, meat, and cheese.
Store leftover masa dough in the refrigerator in an airtight bag or container for 1-2 days. Add a little more warm water to it, as needed, to make it soft before using. Store leftover cooked pupusas in an airtight container in the fridge, and reheat on a hot griddle or skillet.
To Freeze uncooked pupusas, “flash freeze” them on a baking sheet for 30 minutes, then store in an air-tight container, separated by parchment, for up to 3 months. Thaw completely in the fridge before cooking and serving.
 

Nutrition

Calories: 108kcal | Carbohydrates: 15g | Protein: 4g | Fat: 4g | Saturated Fat: 2g | Polyunsaturated Fat: 0.4g | Monounsaturated Fat: 1g | Trans Fat: 0.04g | Cholesterol: 9mg | Sodium: 189mg | Potassium: 55mg | Fiber: 2g | Sugar: 0.4g | Vitamin A: 136IU | Vitamin C: 0.001mg | Calcium: 75mg | Iron: 1mg

Follow Me

Get recipe ideas weekly!

I originally shared this recipe May 2019. Updated August 2022 and May 2024.

Baked Zucchini Slices

Do you know a zucchini naysayer? Well, make them these crunchy, light, and delicious Baked Zucchini Slices and watch them change their tune in an instant! Breading and baking zucchini coins creates the perfect side dish or appetizer that the whole family will love. Why I Love This Recipe The Ingredients *For a full list…

The post Baked Zucchini Slices appeared first on Weelicious.

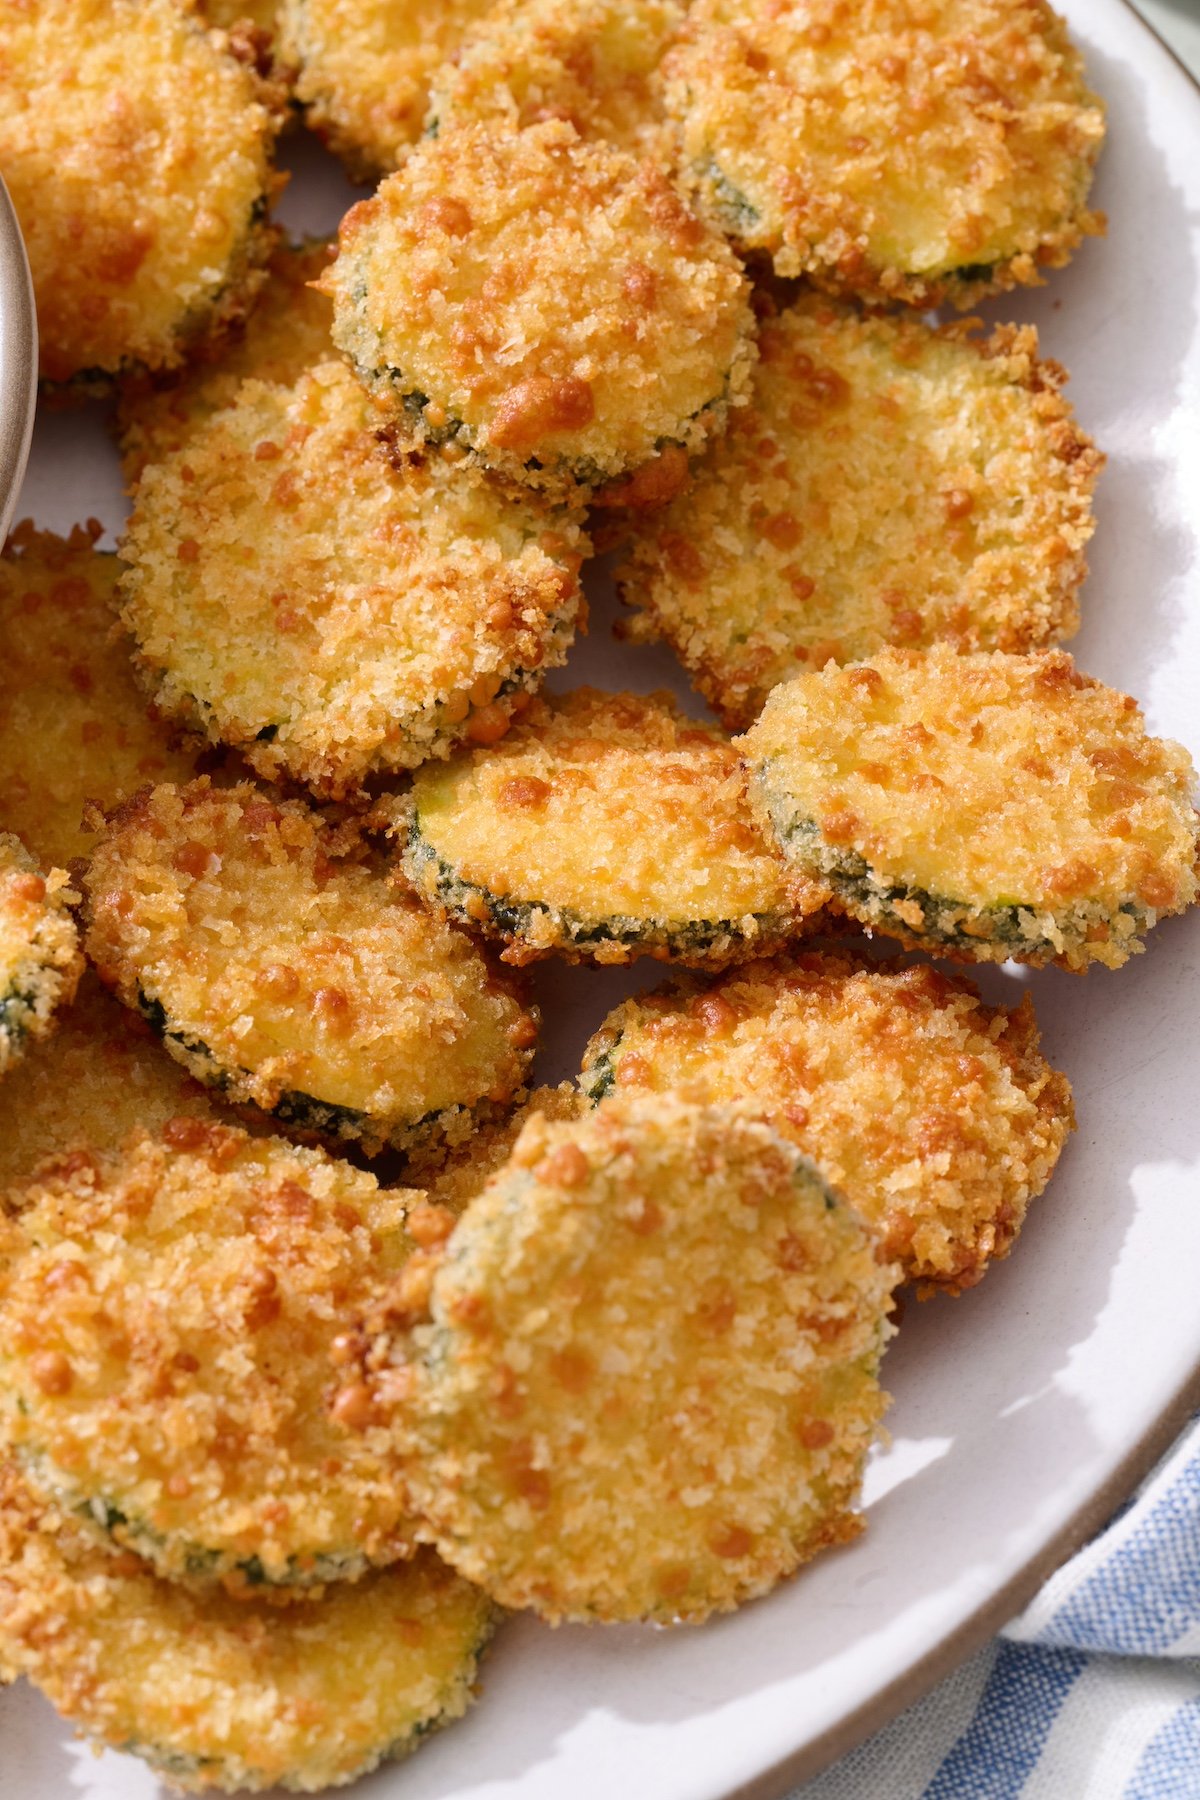
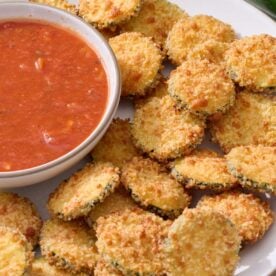
Do you know a zucchini naysayer? Well, make them these crunchy, light, and delicious Baked Zucchini Slices and watch them change their tune in an instant! Breading and baking zucchini coins creates the perfect side dish or appetizer that the whole family will love.

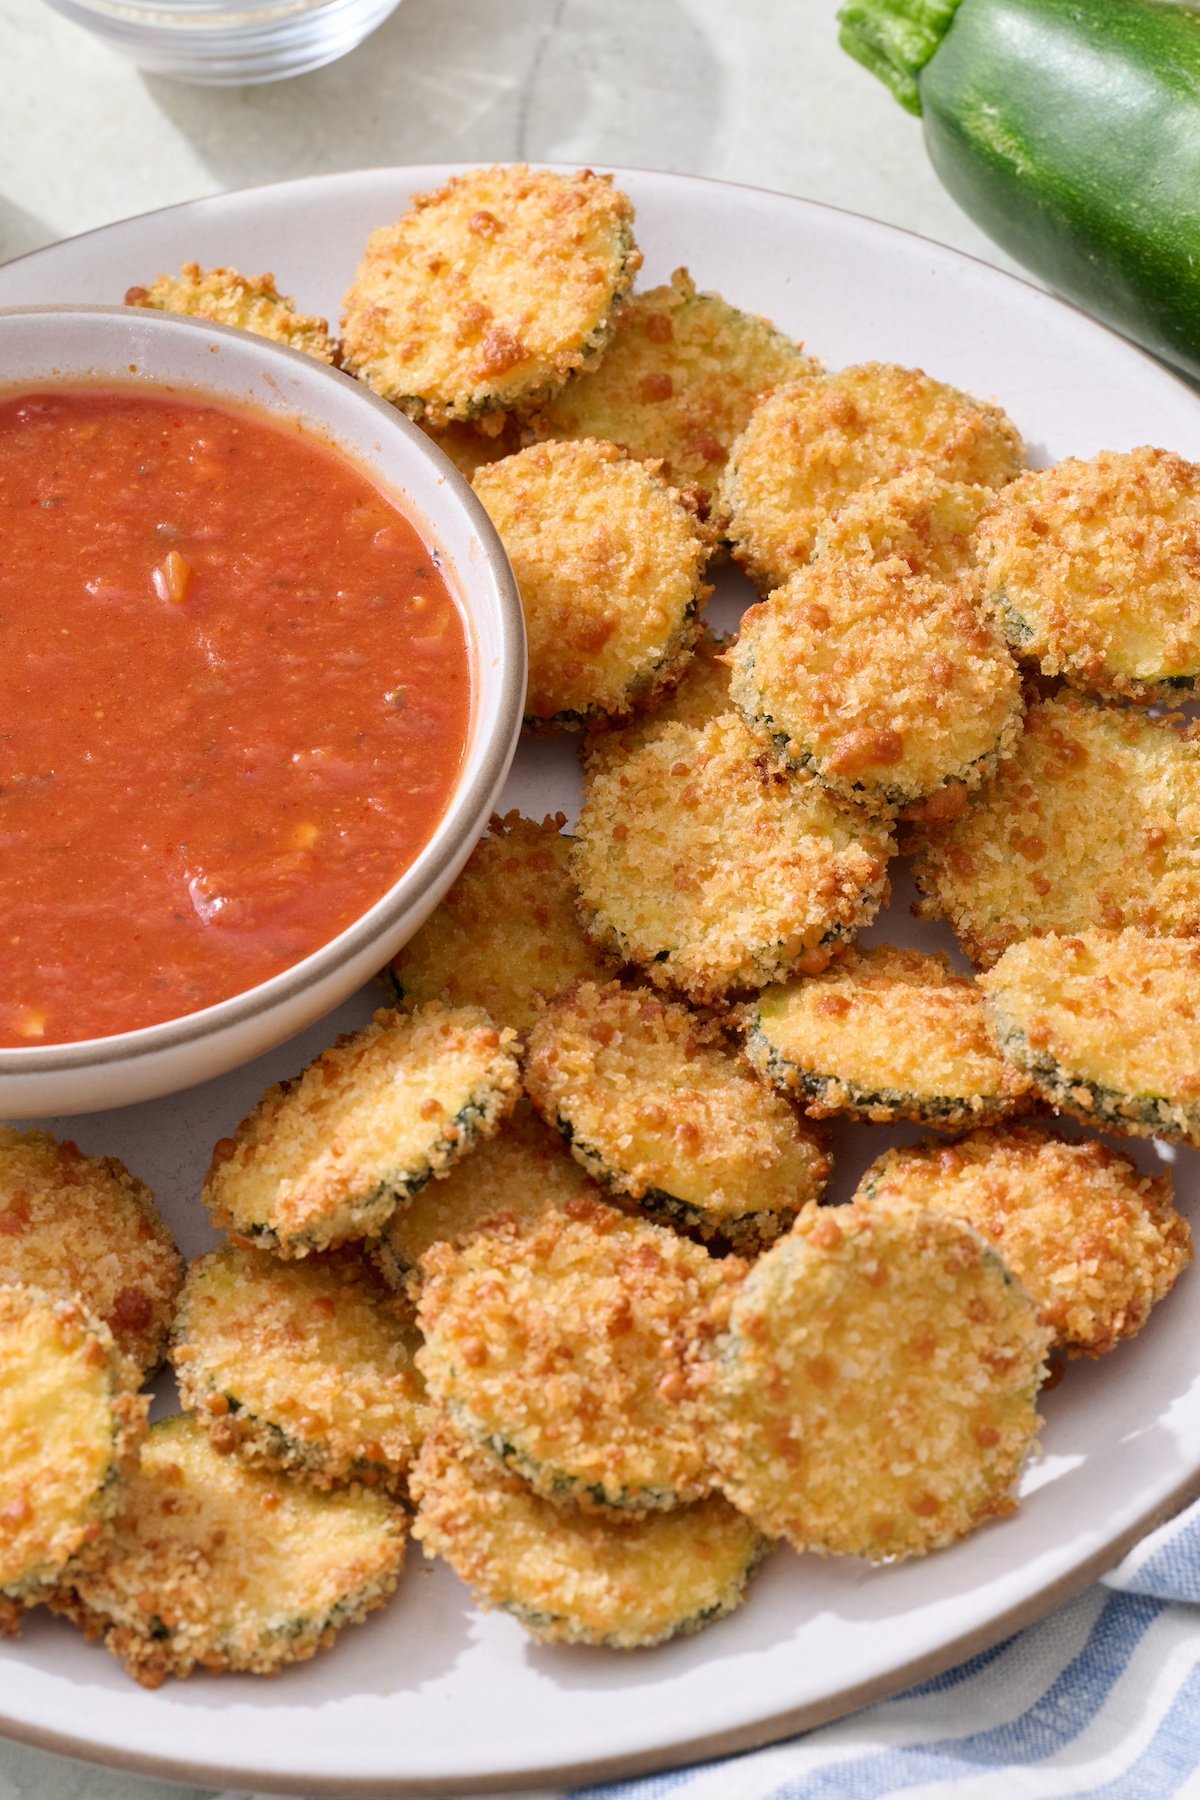
Baked zucchini coins on serving platter with marinara sauce in a bowl on the side.

Why I Love This Recipe

  • Kid-Friendly Zucchini Recipe: Many people steam zucchini, but it often turns out limp and soggy, which kids don’t usually like. This baked zucchini slices recipe is the perfect way to get kids to enjoy this vegetable. They come out crispy, crunchy, and absolutely delicious.
  • Tasty and Healthy: Since this recipe is baked, it’s a healthy way to enjoy crispy breaded zucchini without the hassle of having to deep fry the zucchini slices in tons of oil.
  • Versatile: Serve these baked zucchini coins as an appetizer with some marinara sauce or ranch for dipping or as a side with any of your favorite mains dishes like Chicken Meatballs with Mini Wheel Pasta, Perfect Roast Chicken or Southern Style Pork Tenderloin to name a few.

The Ingredients

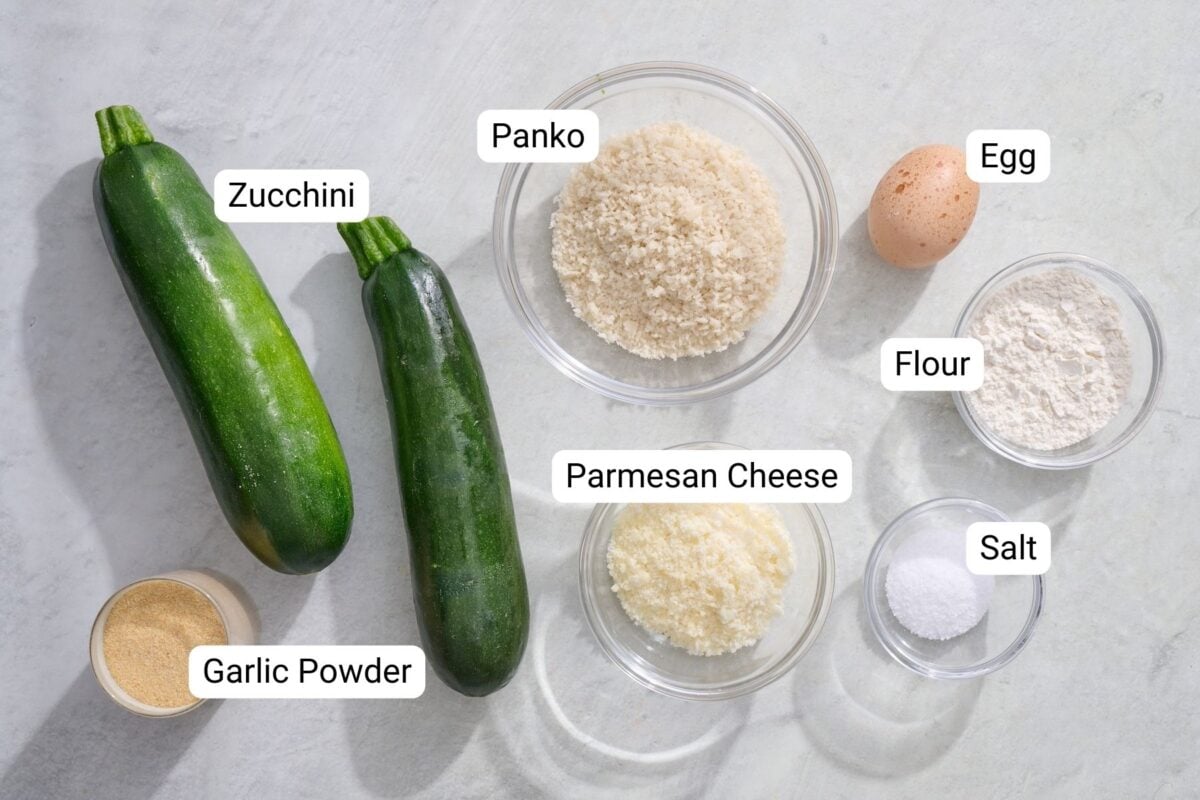
Baked zucchini slices ingredients.
  • Zucchini: Fresh zucchinis are the star of this recipe. Choose firm, medium-sized zucchinis with shiny skin for the best texture and flavor. Zucchinis are packed with vitamins A and C, potassium, and antioxidants.
  • Breadcrumbs (panko or regular): Breadcrumbs provide the perfect crunchy coating for the zucchini slices. Panko breadcrumbs, which are lighter and flakier, give an extra crispy texture (my preference), while regular breadcrumbs offer a more traditional crunch. Either type will be perfect!
  • Grated parmesan cheese: Parmesan cheese adds flavor and richness to the breading making these baked zucchini slices even more delicious.
  • Flour: Flour is the secret ingredient in the breading process that helps create an extra-crispy coating for the zucchini coins.
  • Egg: The egg acts as the binding agent, helping the breadcrumb mixture adhere to the zucchini slices.

*For a full list of ingredients with measurements see the recipe card below*

Baked Zucchini Recipe Tips

  • Evenly Slice Zucchini: For consistent cooking, try to slice the zucchini into even 1/4-inch rounds. Using a sharp knife or a mandoline slicer can help you with achieving uniform slices. This ensures that the zucchini coins cook evenly and crisp up uniformly in the oven.
  • Have a wet hand and a dry hand: If you’ve made Crispy Chicken Parmesan or Eggplant Parmesan Sticks you know breading can get a little messy at times. To help, use one hand for dunking zucchini slices in egg wash and transferring to the panko mixture (your wet hand), then switch to a dry hand for coating and placing them on the baking sheet.
  • Don’t forget the oil: Drizzle or spray your breaded zucchini slices with oil before baking them. The oil is what creates that beautiful golden color when they bake.
  • Don’t crowd the baking sheet: Cook the zucchini coins in and even layer with a little space between each one. If you overcrowd the baking sheet they’ll steam in the oven and won’t get nice and crispy.

How to Make Baked Zucchini Slices

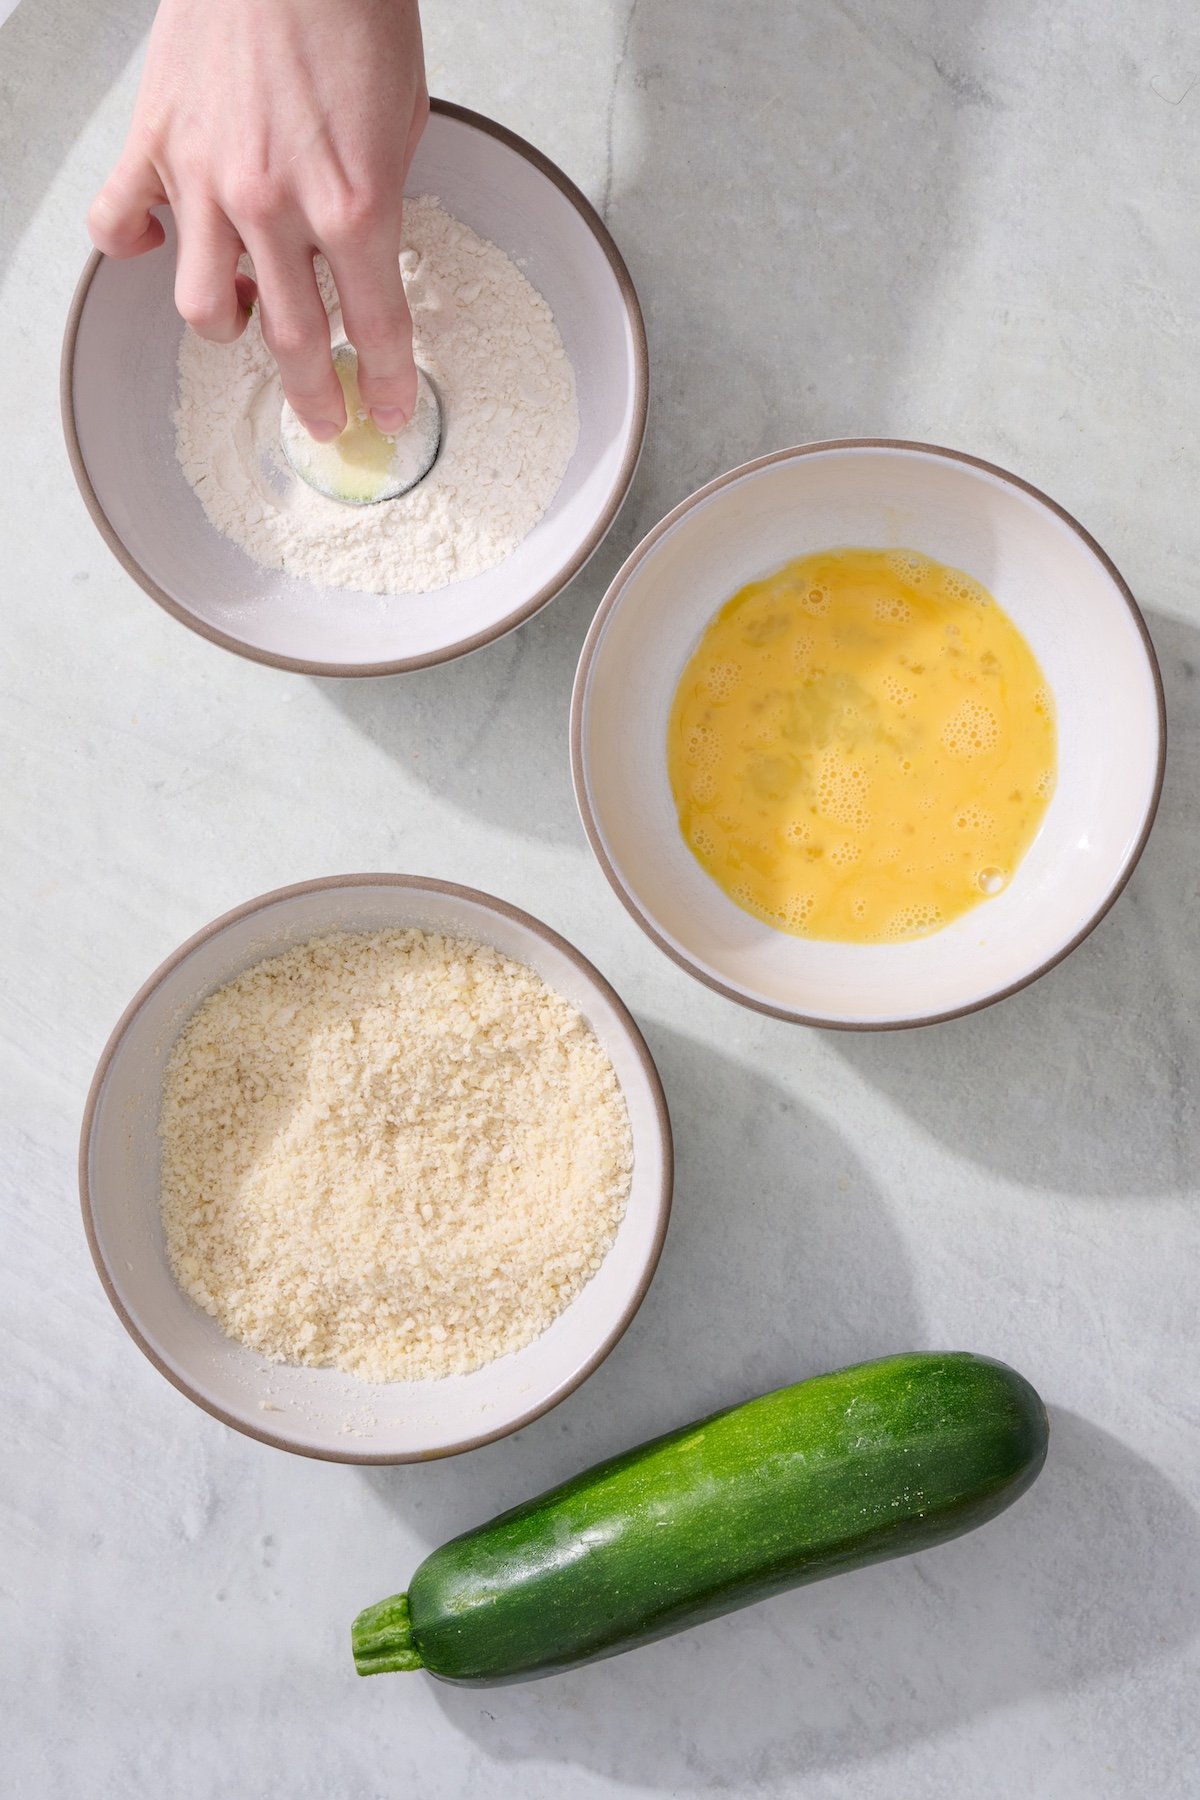
Three bowls. One with flour, another with beaten egg and the third with panko breading. A hand is dipping a zucchini coin in the flour bowl.

Step 1: Mix the breadcrumbs, parmesan cheese, garlic powder and salt in a shallow bowl. Whisk the egg in a separate bowl. Place the flour in a third bowl.

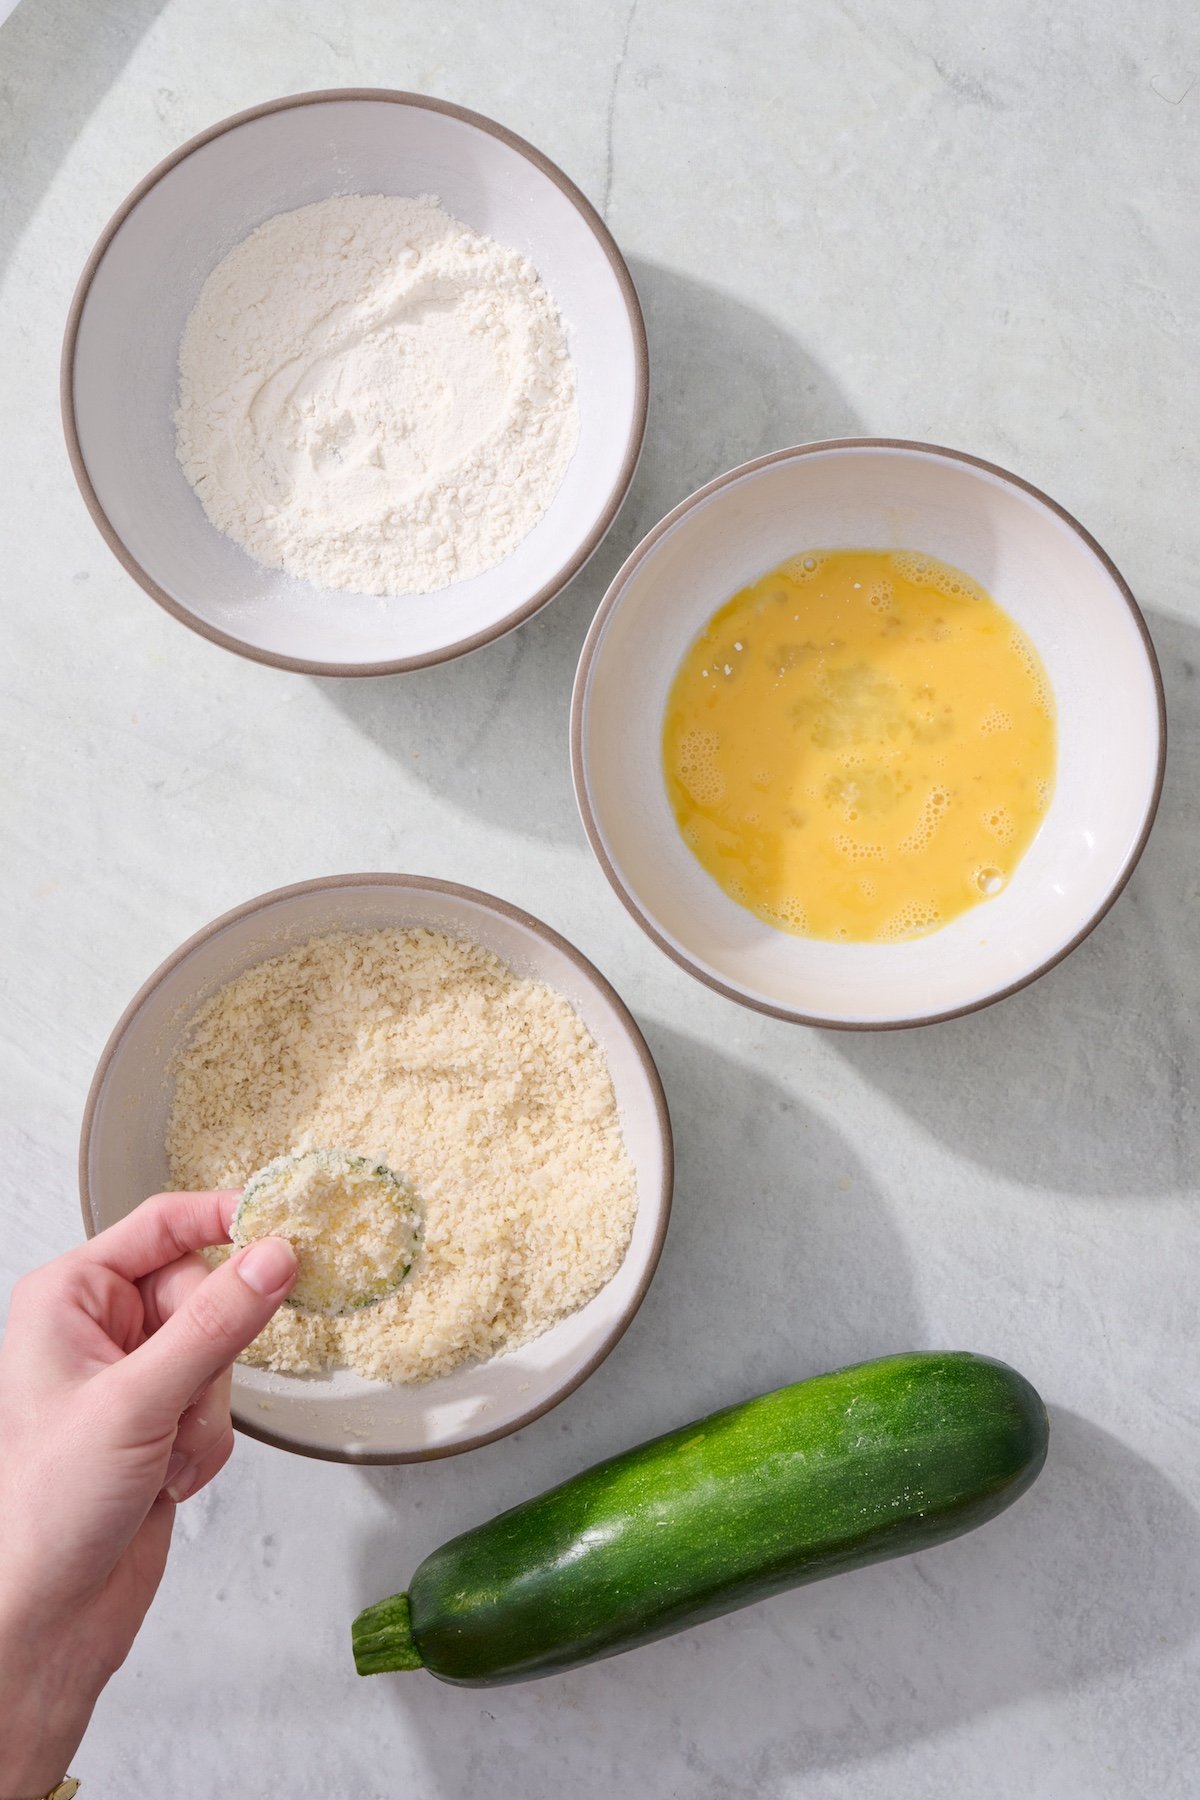
Hand holding a breaded zucchini coin with the breading station bowls.

Step 2: Make an assembly line with the bowls, and first dip the zucchini coins into the flour, then the egg and finally into the bread crumb mixture, coating evenly and repeating with all the zucchini coins.

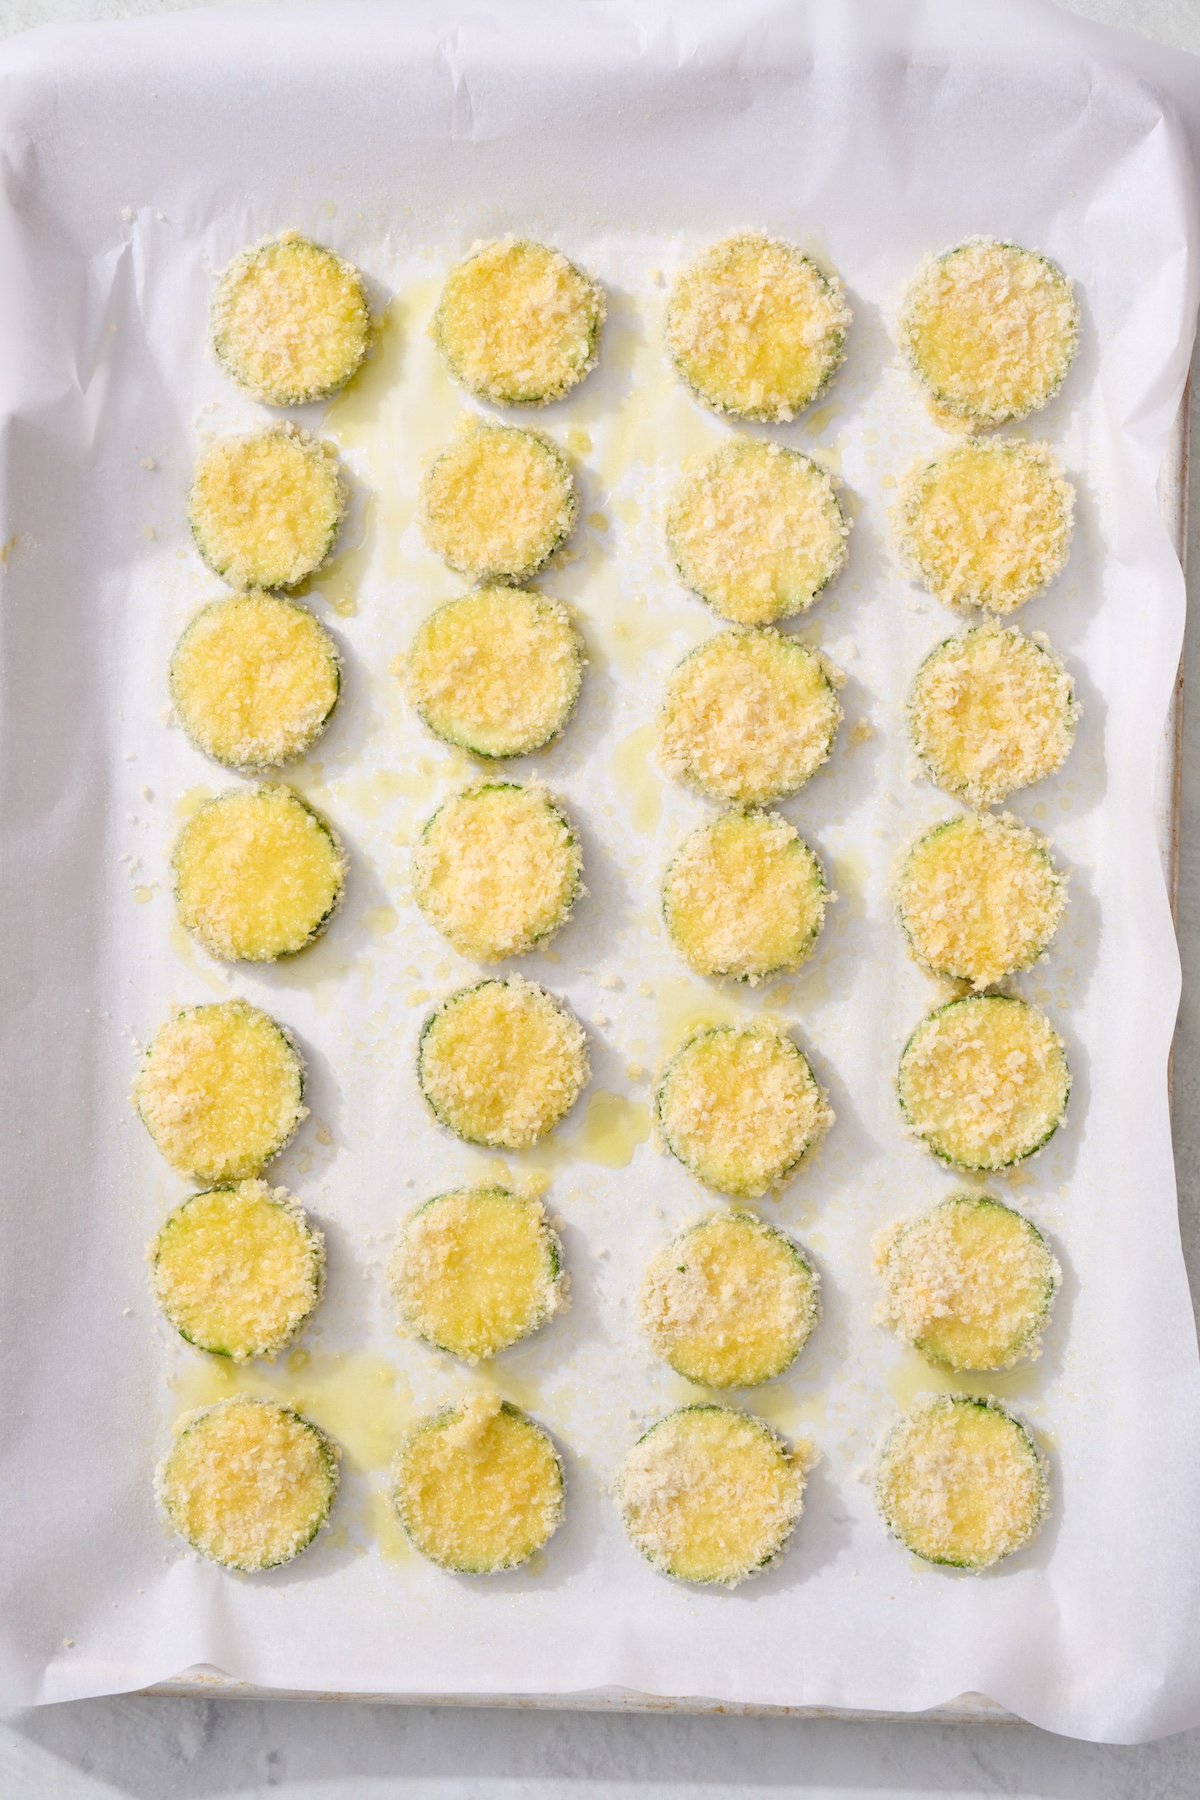
Breaded zucchini coins on baking sheet.

Step 3: Place all of the coins on the baking sheet. Arrange so they’re not touching and spray with cooking oil.

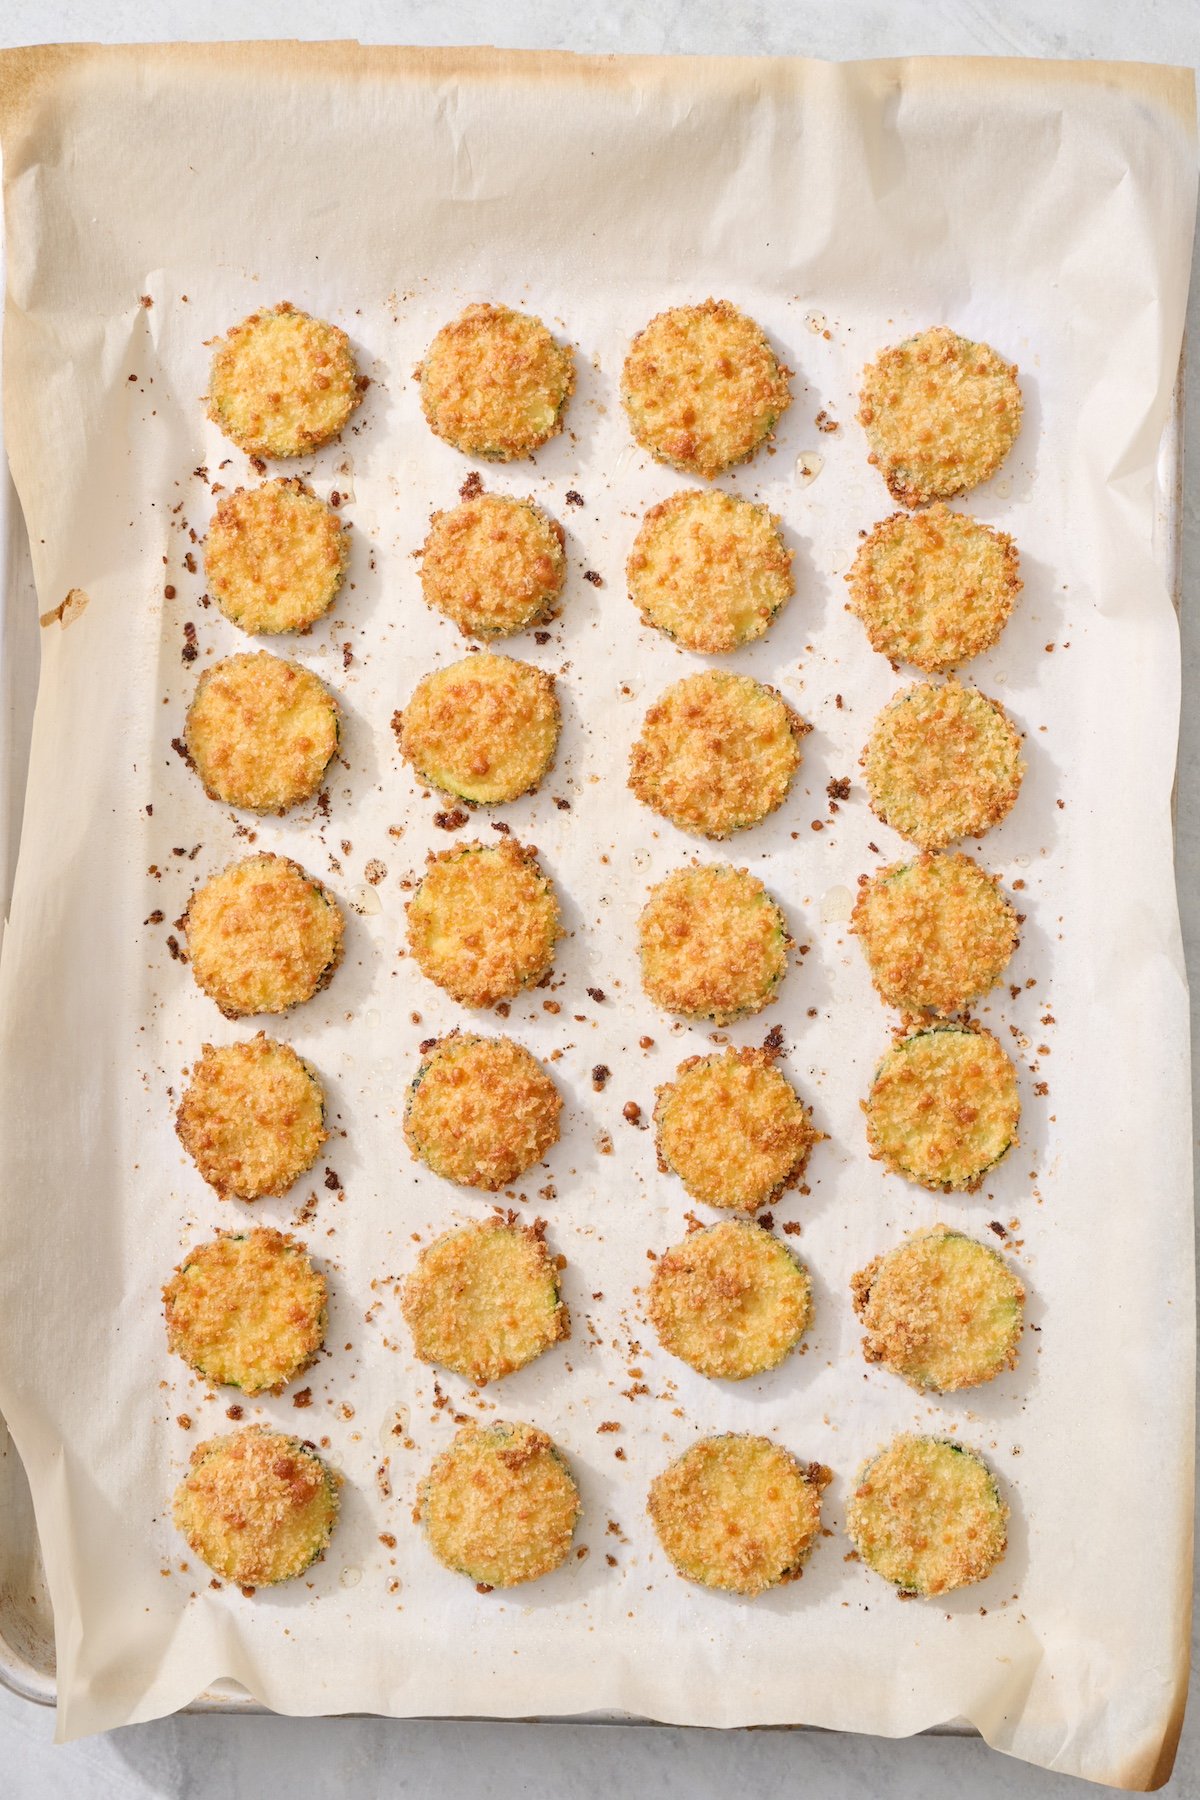
Baked zucchini coins on baking sheet.

Step 4: Bake for 18-20 minutes or until the breadcrumbs are golden. Serve as a side dish or on their own with favorite dipping sauces.

FAQs

Can I air fry zucchini slices?

Yes! You know I love my air fryer. To air fry these breaded zucchini coins, simply heat your air fryer to 400°F and cook for 8-10 minutes, or until golden brown. Be sure to arrange them in a single layer with a bit of space between each piece of zucchini for even cooking

Can I freeze leftover baked zucchini slices?

Yes! I would recommend freezing after the zucchini coins are baked. To freeze, allow them to cool completely, then transfer them to a single layer on a baking sheet and freeze until solid. Once frozen, transfer the zucchini coins to a resealable freezer bag or airtight container. When ready to enjoy, reheat the frozen zucchini coins in a preheated oven at 375°F for 10-15 minutes, or until heated through and crispy.

Baked zucchini coins on serving platter.

More Easy Zucchini Recipes

These Baked Zucchini Coins are a delicious, healthy, and kid-friendly recipe that everyone will love. Easy to prepare and incredibly versatile, they make the perfect addition to any meal. Whether you’re looking to introduce more vegetables into your family’s diet or just want a tasty new way to enjoy zucchini, this recipe is a must-try. Let me know what you think of this recipe by leaving a rating and comment below!

Want more WeeliciousSubscribe to my newsletter and follow me on InstagramFacebook and TikTok for all the newest recipes!

Baked zucchini coins on serving platter with marinara sauce in a bowl on the side.
Print

Baked Zucchini Slices

These Baked Zucchini Slices are a delicious, healthy, and kid-friendly recipe that everyone will love. Easy to prepare and incredibly versatile, they make the perfect addition to any meal.
Course Appetizer, Side
Cuisine American
Prep Time 15 minutes
Cook Time 20 minutes
Total Time 35 minutes
Servings 4
Calories 120kcal

Equipment

  • Baking sheet
  • Chef's Knife or Mandoline

Ingredients

Instructions

  • Preheat oven to 450°F and coat a large baking sheet with cooking spray or line with parchment paper.
  • Mix the breadcrumbs, parmesan cheese, garlic powder and salt in a shallow bowl.
  • Whisk the egg in a separate bowl.
  • Place the flour in a third bowl.
  • Make an assembly line with the bowls, and first dip the zucchini coins into the flour, then the egg and finally into the bread crumb mixture, coating evenly and repeating with all the zucchini coins.
  • Place all of the zucchini coins on the baking sheet. Arrange so they’re not touching, spray with cooking oil and bake for 18-20 minutes or until the breadcrumbs are golden.
  • Serve as a side dish or on their own with favorite dipping sauces.

Video

Notes

Evenly Slice Zucchini: For consistent cooking, try to slice the zucchini into even 1/4-inch rounds. Using a sharp knife or a mandoline slicer can help you with achieving uniform slices. This ensures that the zucchini coins cook evenly and crisp up uniformly in the oven.
Have a wet hand and a dry hand: Use one hand for dunking zucchini slices in egg wash and transferring to the panko mixture (your wet hand), then switch to a dry hand for coating and placing them on the baking sheet.
Don’t forget the oil: Drizzle or spray your breaded zucchini slices with oil before baking them. The oil is what creates that beautiful golden color when they bake.
Don’t crowd the baking sheet: Cook the zucchini coins in and even layer with a little space between each one. If you overcrowd the baking sheet they’ll steam in the oven and won’t get nice and crispy.
To Air Fry: heat your air fryer to 400°F and cook for 8-10 minutes, or until golden brown. Be sure to arrange them in a single layer with a bit of space between each piece of zucchini for even cooking
To Freeze: Allow zucchini slices to cool completely, then transfer them to a single layer on a baking sheet and freeze until solid. Once frozen, transfer the zucchini coins to a resealable freezer bag or airtight container. When ready to enjoy, reheat the frozen zucchini coins in a preheated oven at 375°F for 10-15 minutes, or until heated through and crispy.

Nutrition

Calories: 120kcal | Carbohydrates: 16g | Protein: 6g | Fat: 4g | Saturated Fat: 2g | Polyunsaturated Fat: 1g | Monounsaturated Fat: 1g | Trans Fat: 0.01g | Cholesterol: 52mg | Sodium: 481mg | Potassium: 312mg | Fiber: 2g | Sugar: 3g | Vitamin A: 318IU | Vitamin C: 18mg | Calcium: 93mg | Iron: 1mg

The post Baked Zucchini Slices appeared first on Weelicious.

Classic Hamburger Recipe

A juicy hamburger recipe with cheese, lettuce, tomatoes, pickles, and red onions ready to enjoy.Our delicious Hamburger recipe is restaurant-worthy, and so easy to make from home using a simple burger seasoning and piled high with your favorite toppings. We never get sick of making different kinds of burgers, like our Greek Burgers with Feta Aioli, French Onion Burgers, Quinoa Burger, and the Best Black Bean Burger. How to…

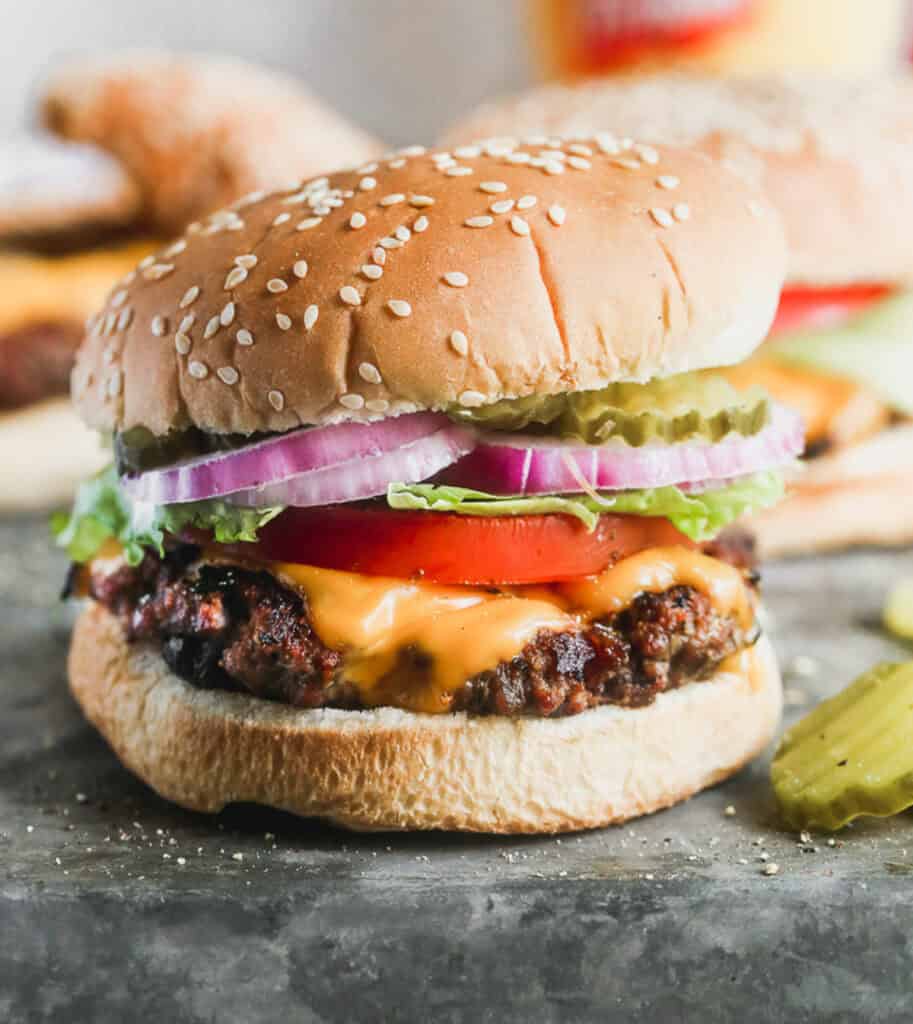
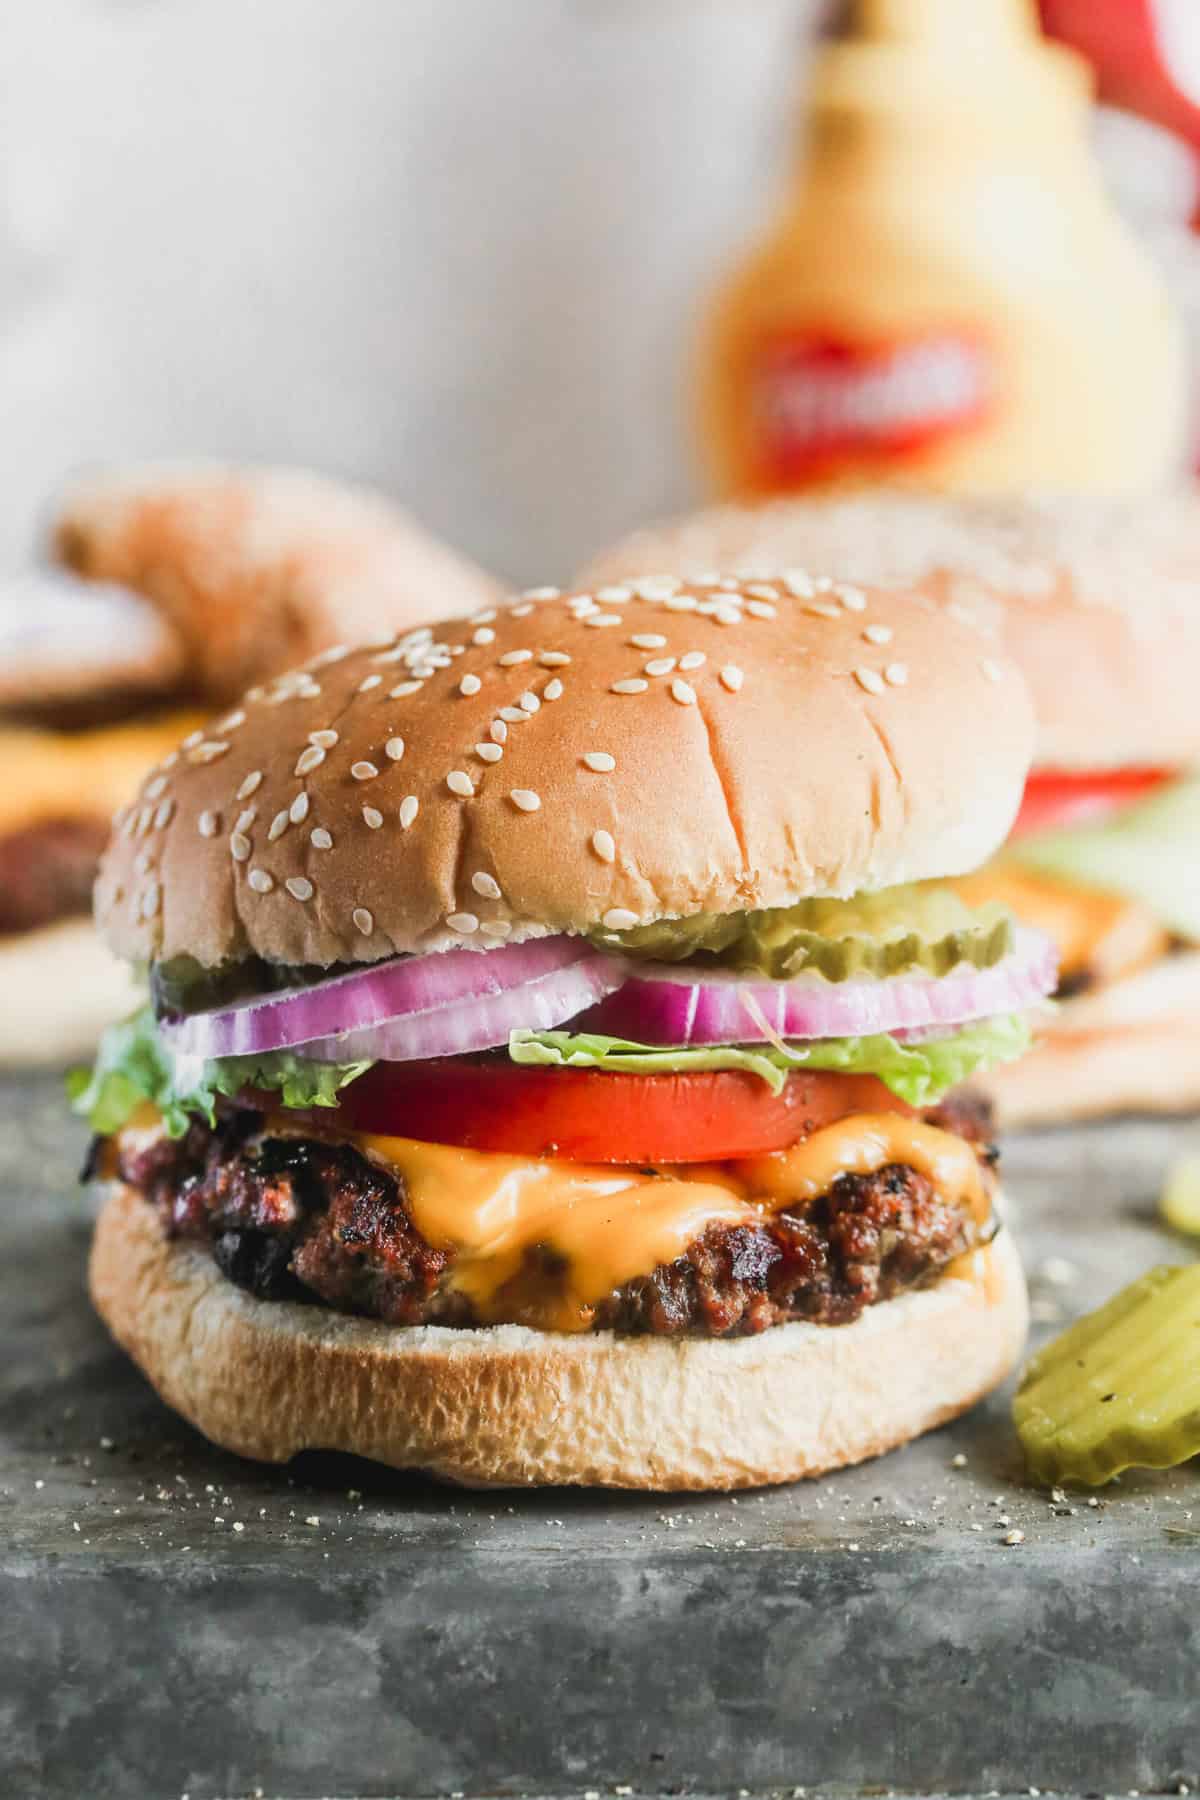
A juicy hamburger recipe with cheese, lettuce, tomatoes, pickles, and red onions ready to enjoy.

Our delicious Hamburger recipe is restaurant-worthy, and so easy to make from home using a simple burger seasoning and piled high with your favorite toppings.

We never get sick of making different kinds of burgers, like our Greek Burgers with Feta Aioli, French Onion Burgers, Quinoa Burger, and the Best Black Bean Burger.

A juicy homemade hamburger recipe with cheese, lettuce, tomatoes, pickles, and red onions, ready to enjoy.

These Burgers are Bangin’!

When it comes to making a killer homemade Hamburger there are a few simple tricks that make all the difference. The quality and fat content of the meat, the seasonings used, and how the patties are formed and cooked are all essential (and easy!), and when done correctly, you’ll look like a grill master.

Serve the hamburgers traditional style, or over a salad like my favorite Cheeseburger Salad. And be sure to pair with some delicious sides, like Grilled Corn on the Cob, Watermelon Salad, Macaroni Salad, or Baked Beans.

How to Make a Perfect Hamburger:

Make Seasoning by mixing all dry spices in a small bowl. Set aside.

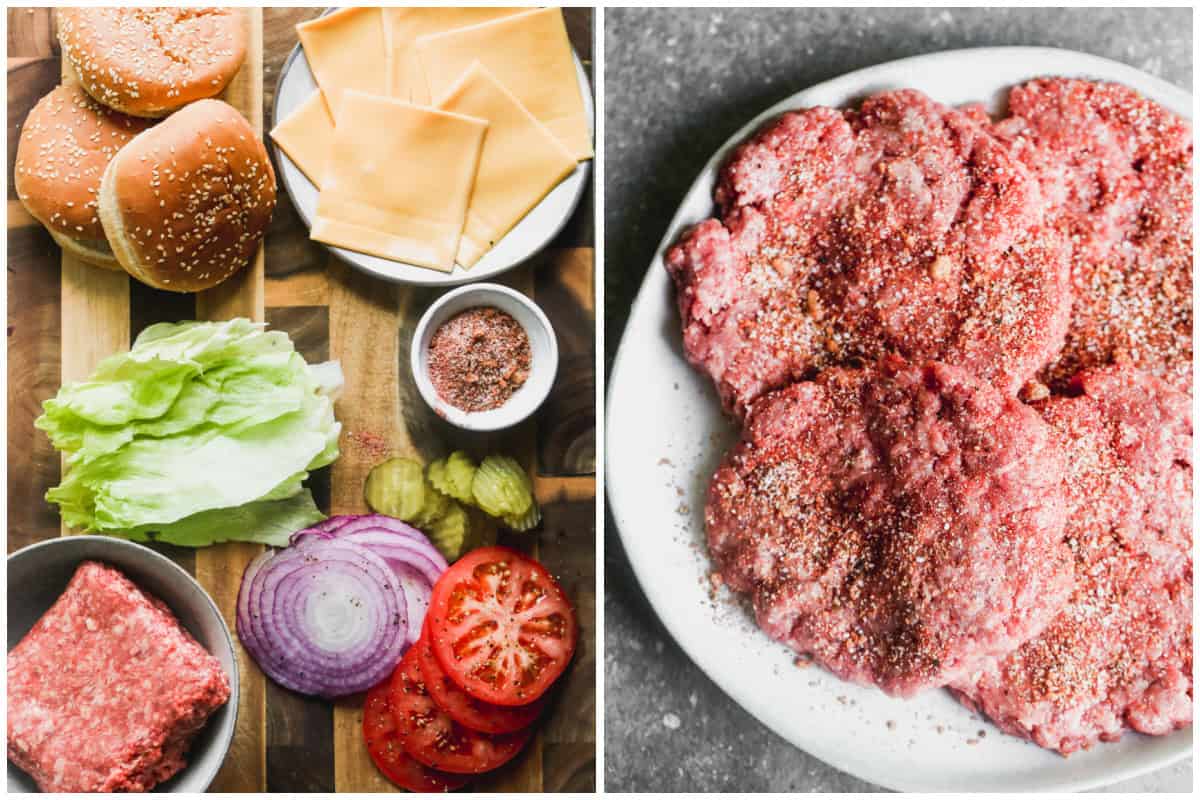
Form Patties: Divide ground chuck into 6 equal portions and form into ½ inch thick patties that are wider than the burger buns (they will shrink). Don’t over handle the meat. Touching the meat too much will make it tougher. Be very gentle shaping them, and be careful not to flatten them. Use your thumb to press an indentation into the center of each patty. Cover and set aside.

Two images showing all the ingredients for the best hamburger recipe for grilling then uncooked patties with the best burger spices.

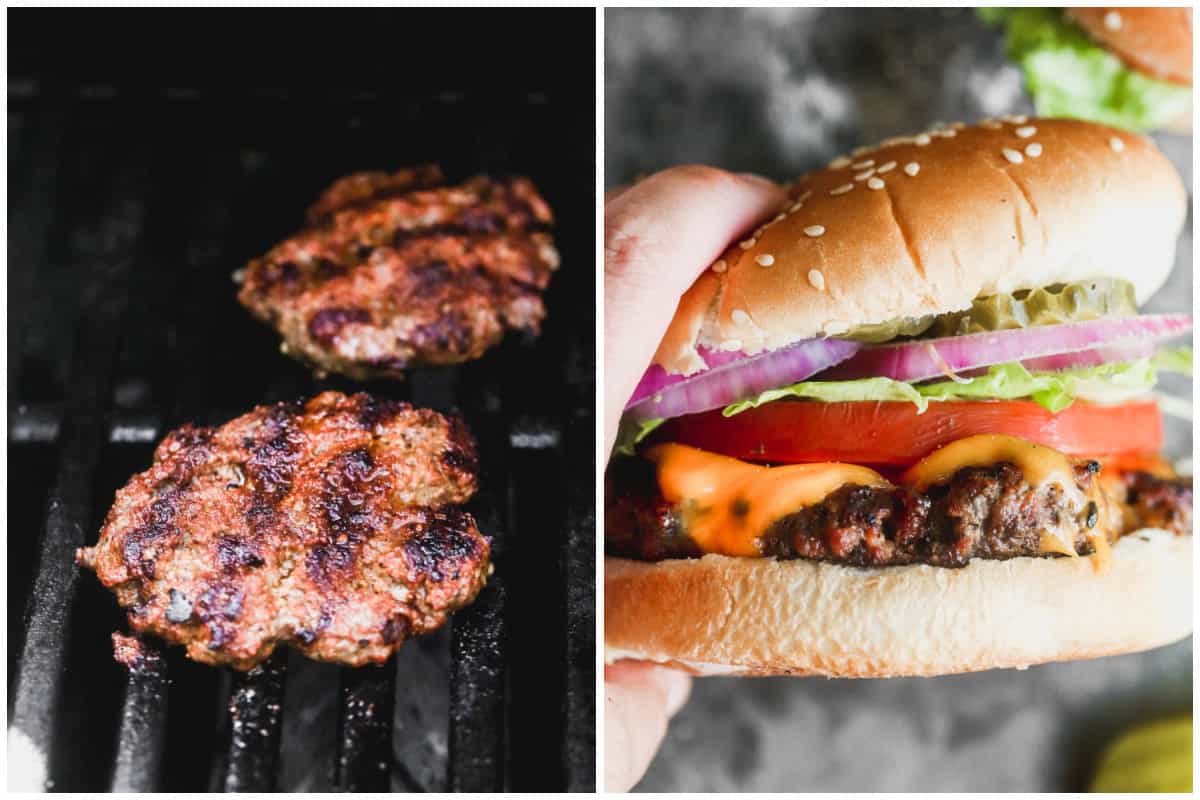
Grill: Just before cooking, sprinkle seasoning over the patties, then place on hot grill, indent-side up. Close grill lid and cook for 3-4 minutes (for medium rare), until the bottom of the burger is seared and juices are accumulating on top of the burger. Flip and cook an additional 3-4 minutes or until the beef reaches 160 degrees F. If adding cheese, place cheese slices on burgers during the last minute of cooking.

Two images showing homemade burger patties being grilled then the burger all assembled and ready to eat.

Serve: Place patties on a plate and allow to rest for a few minutes before serving in a bun, with toppings, and your favorite condiments like ketchup, mustard, BBQ sauce, Thousand island dressing, Ranch dressing, or homemade Chick-fil A Sauce.

Make Ahead And Freezing Instructions:

To Make Ahead: Place parchment paper between raw burger patties and refrigerate for 1-2 days ahead, depending on freshness of the meat.

To Freeze: Store raw burger patties in an air-tight container and freeze for up to 3 months, with parchment paper between layers. Thaw completely before grilling.

Follow me for more great recipes

A juicy hamburger recipe with cheese, lettuce, tomatoes, pickles, and red onions ready to enjoy.
Print

Hamburger recipe

An easy Hamburger recipe that is juicy, tender, and restaurant-worthy! It's made with ground chuck and has the best burger seasoning, piled high with your favorite toppings. Check out all my tips for the perfect burgers!
Course Main Course
Cuisine American
Prep Time 15 minutes
Cook Time 10 minutes
Total Time 25 minutes
Servings 6
Calories 497kcal
Cost 10

Ingredients

Toppings:

  • 6 hamburger buns , toasted, if desired
  • 6 slices American cheese* , or your favorite cheese
  • 6 lettuce leaves
  • 1 beefsteak tomato , thinly sliced
  • ½ of a red or white onion , thinly sliced
  • 6 Pickle slices
  • Other topping ideas: sautéed mushrooms, grilled onions, jalapeños, bacon, onion rings
  • Condiments: ketchup, mustard, BBQ sauce, Thousand island dressing, Ranch dressing, or homemade Chick-fil A Sauce.

Instructions

  • Make burger seasoning by combining all spices in a bowl. Set aside.
  • Form Patties: Divide ground chuck into 6 equal portions and gently form into ½ inch thick patties that are wider than the burger buns, since the meat will shrink as it cooks. (Don't over-handle the meat, or it will make it tough).
  • Indent: Use your thumb to press a gentle indentation into the center of each patty, which will help them cook evenly and not puff up in the center. Cover and set aside while preheating grill. (Ice cube trick: Some chefs will put an ice cube on top of each indentation on the patties until they’re ready to cook, so they don't dry out.)
  • Grill: Preheat grill to medium high heat. Just before cooking, sprinkle burger seasoning over the patties, then place on hot grill, indent-side up. Close grill lid and cook for 3-4 minutes, until the bottom of the burger is seared and juices are accumulating on top of the burger. Flip and cook an additional 3-4 minutes, or until the beef reaches 160 degrees F.
  • Add cheese on top of burger patties during the last minute of cooking. Remove to a plate and allow to rest for a few minutes before serving on a bun, with desired toppings.

Video

Notes

Meat: Choose ground chuck over ground beef, if possible, or a combo of 60% ground chuck and 40% brisket. If using ground beef, make sure it’s at least 20% fat, or for lean ground beef, add some chopped bacon or a tablespoon of olive oil to the meat.
Cheese: American Cheese is traditional for hamburgers because it melts so well. Be sure to get it sliced fresh from the deli counter, and not “Kraft” singles “American cheese” squares. 
To cook on the stove: Heat a cast iron skillet over medium high heat. Add enough oil to thinly coat the bottom of the pan. Once hot, add the burger patties and cook for 3-5 minutes on each side, or until 160 degrees F.
Cooking Time: 160 degrees F for medium doneness (about 3-4 minutes on each side), or a few minutes less for medium rare, or more for well done.
Make Ahead Instructions:form burger patties and place parchment paper between patties, to separate them. Cover and store in fridge for 1-2 days, depending on freshness of the meat. 
Freezing Instructions: Raw burger patties can be frozen for up to 3 months. Place parchment paper between patties and store in an airtight container. Thaw completely before grilling. 

Nutrition

Calories: 497kcal | Carbohydrates: 26g | Protein: 29g | Fat: 30g | Saturated Fat: 12g | Polyunsaturated Fat: 2g | Monounsaturated Fat: 12g | Trans Fat: 1g | Cholesterol: 98mg | Sodium: 854mg | Potassium: 587mg | Fiber: 2g | Sugar: 5g | Vitamin A: 2798IU | Vitamin C: 13mg | Calcium: 225mg | Iron: 4mg

Follow Me

Get recipe ideas weekly!

I originally shared this recipe June 2020. Updated May 2024.

BBQ Menu Ideas

A collage image showing 5 images for the main dish for bbq party menu ideas.We’re excited to offer 5 complete BBQ Party Menu Ideas that will impress any guests! Choose from Chicken Kabobs, Hamburgers, BBQ Chicken Drumsticks, Grilled Pizza, or Pulled Pork Sandwiches, each thoughtfully paired with side dishes and desserts to serve with. Did I mention our 5 pre-made BBQ menus also come with a free shopping list?…

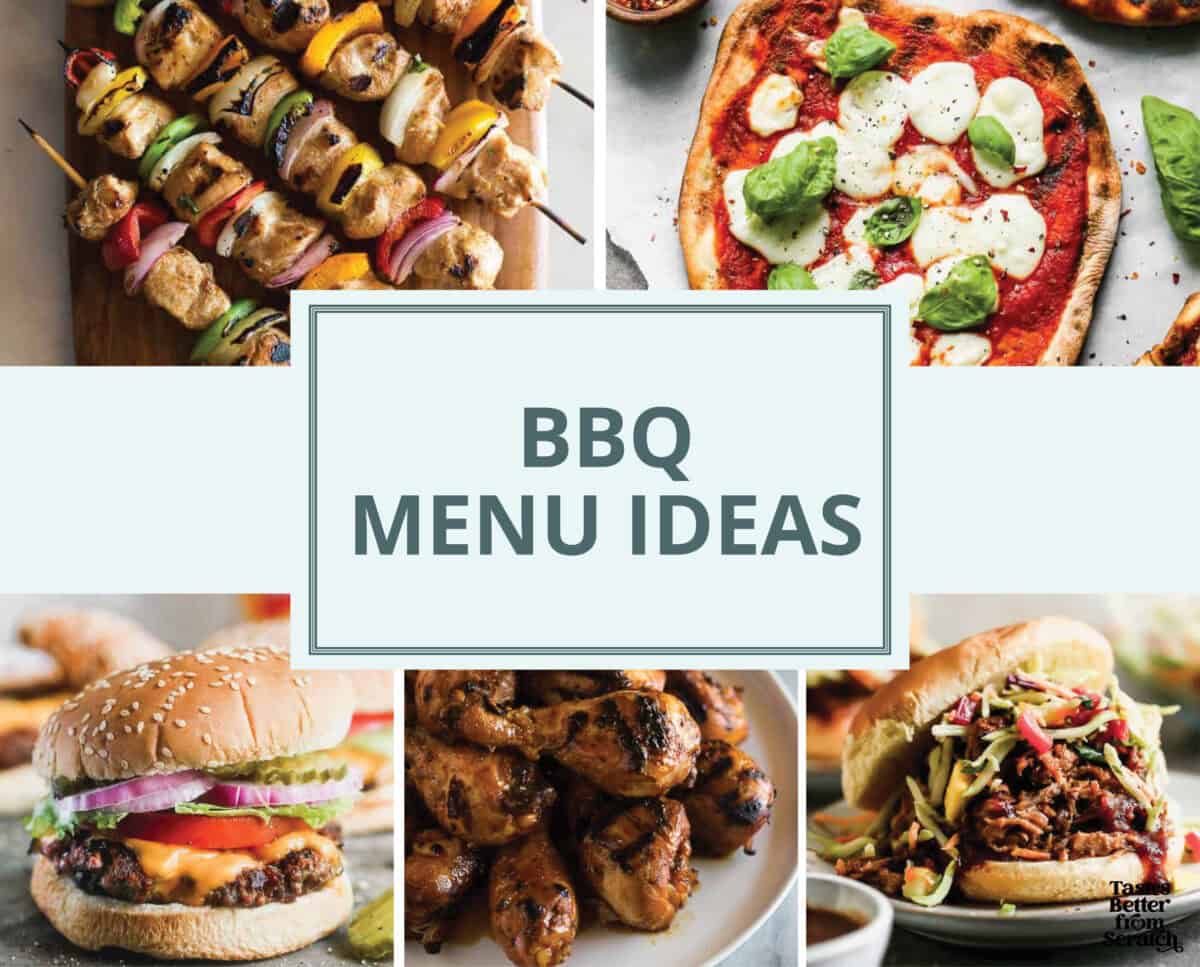
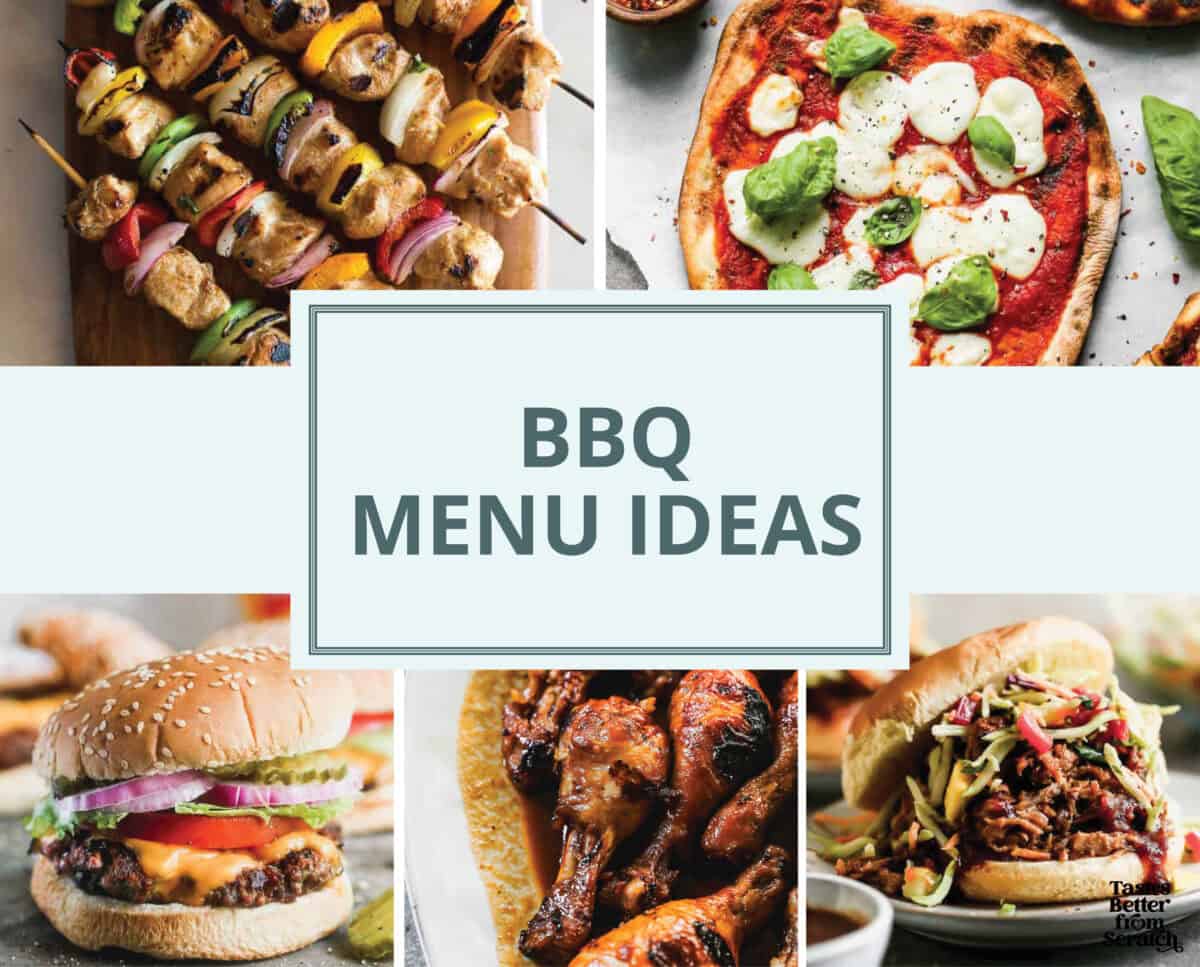
A collage image showing 5 images for the main dish for bbq party menu ideas.

We’re excited to offer 5 complete BBQ Party Menu Ideas that will impress any guests! Choose from Chicken Kabobs, Hamburgers, BBQ Chicken Drumsticks, Grilled Pizza, or Pulled Pork Sandwiches, each thoughtfully paired with side dishes and desserts to serve with.

Did I mention our 5 pre-made BBQ menus also come with a free shopping list? Save or customize any menus by creating a FREE account.

Collage of four BBQ dinner ideas.

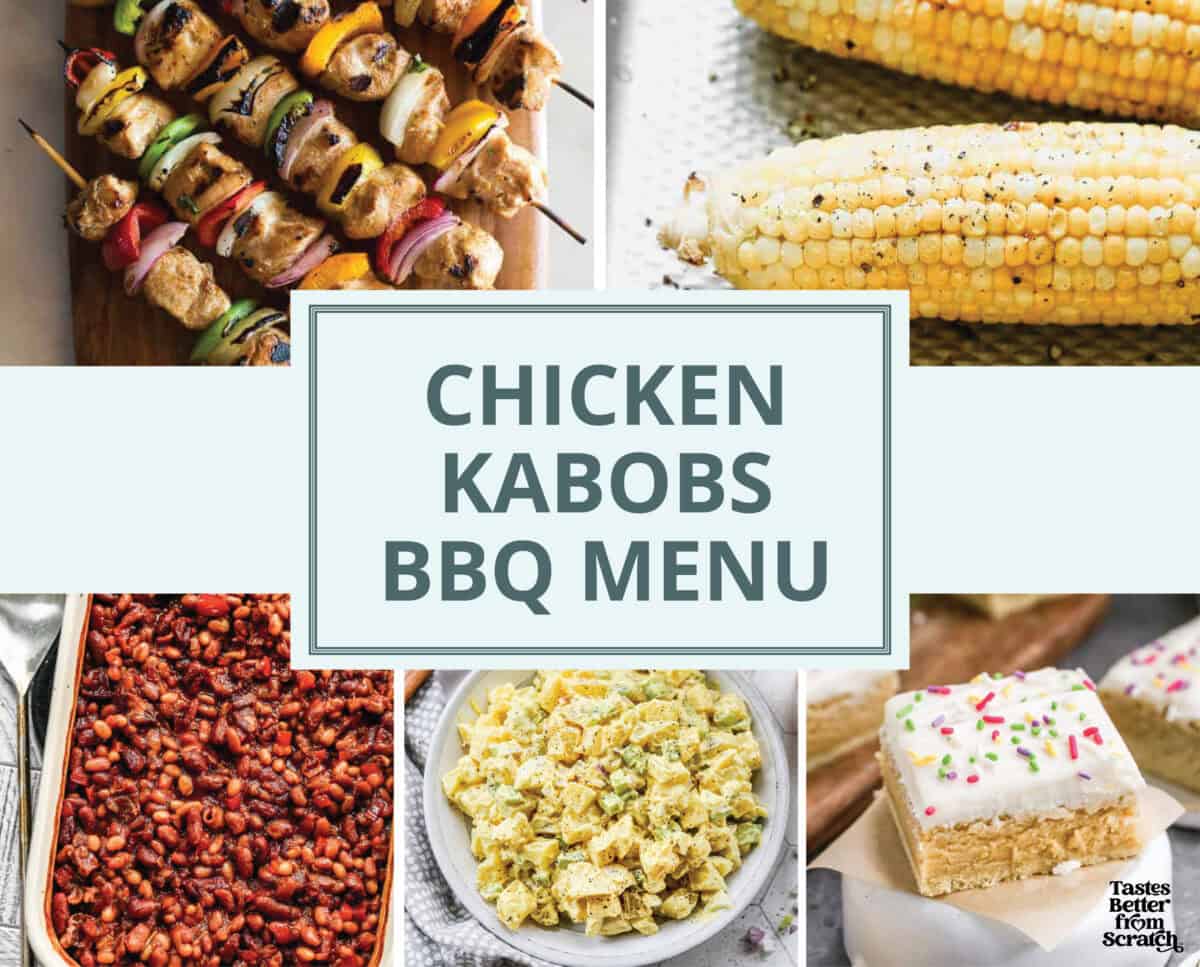
Option 1: Chicken Kabobs

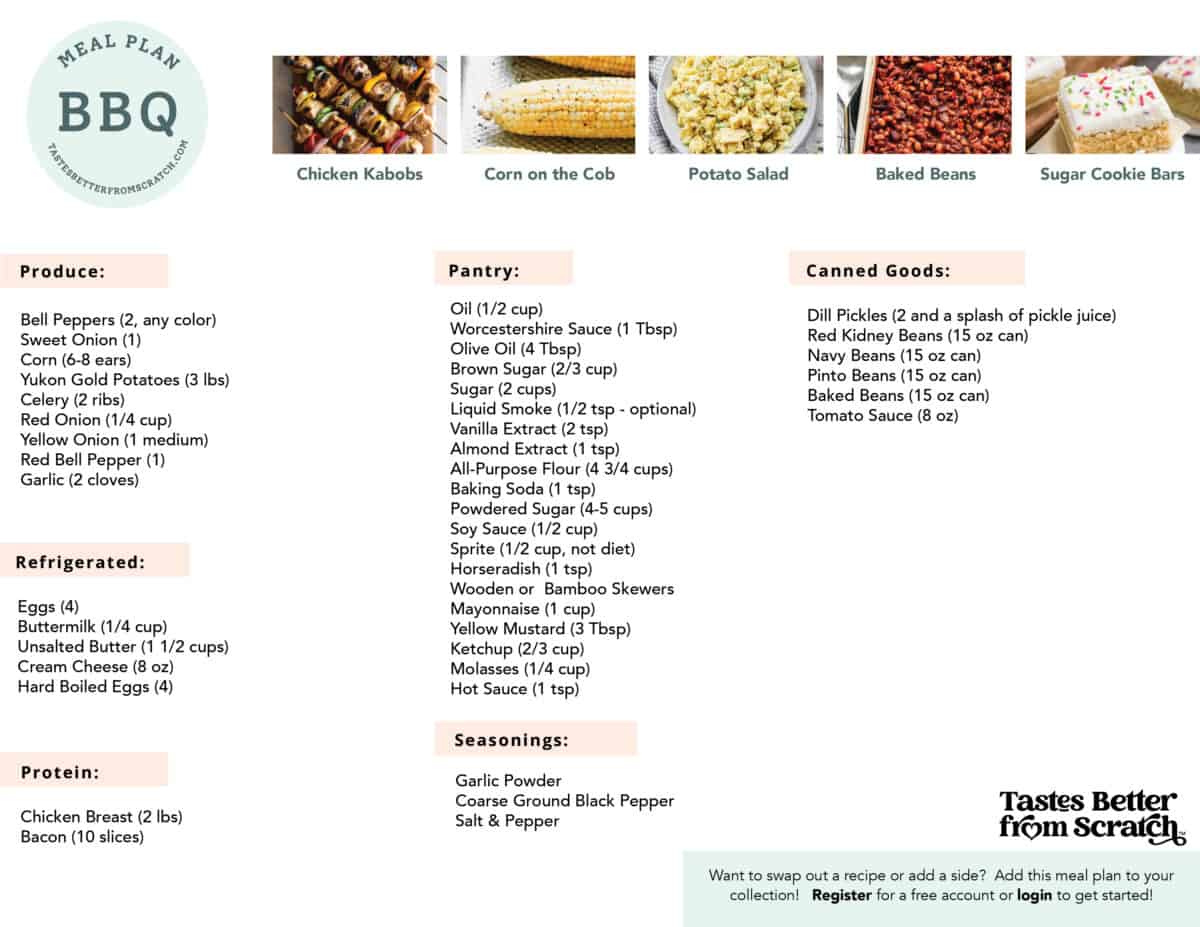
Print Shopping List

A collage showing a complete BBQ Menu idea featuring Chicken Kabobs with sides and dessert included.
shopping list for the Chicken Kabob BBQ meal plan.

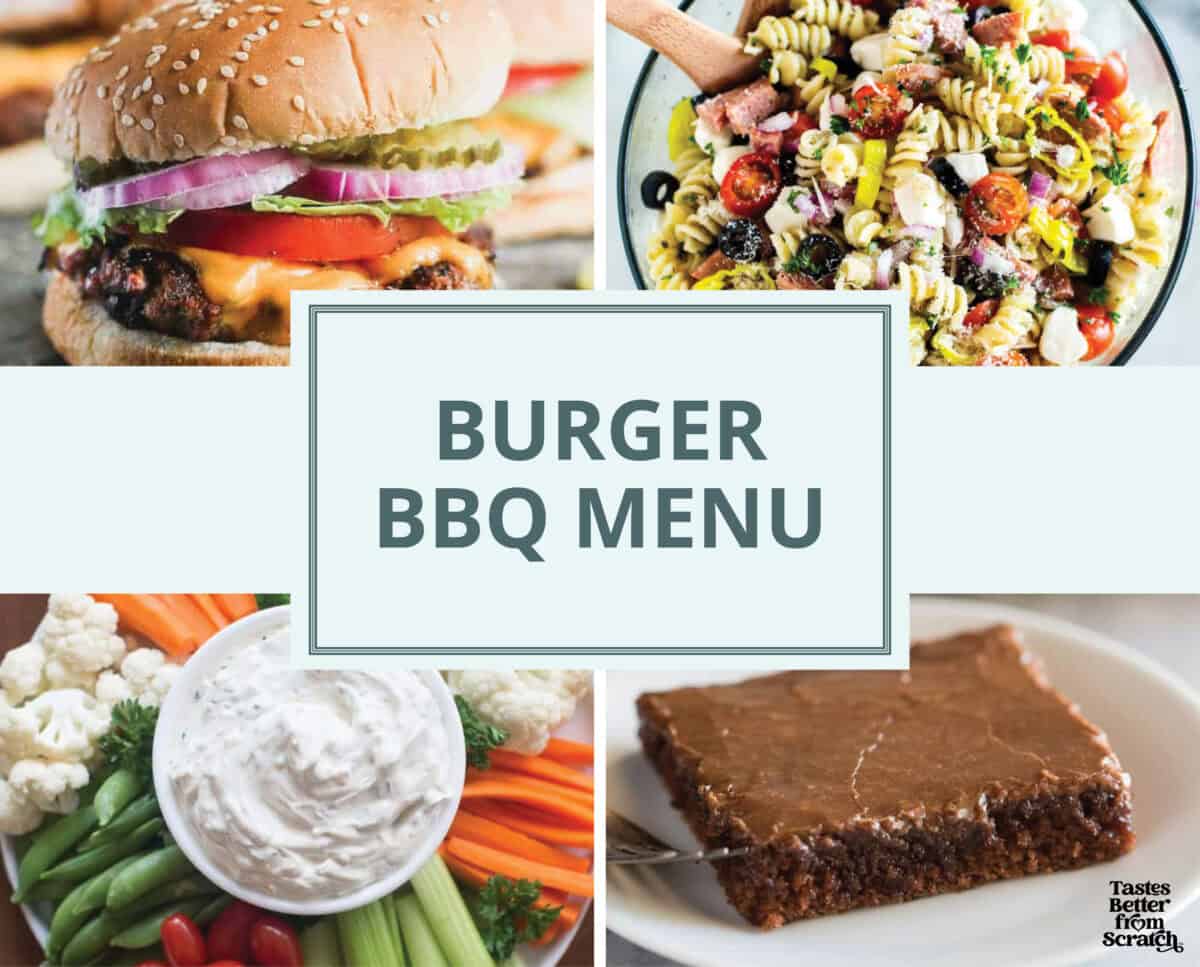
Option 2: Classic Hamburger Menu

Save or customize this menu by creating a FREE account.

A collage image showing a simple bbq menu idea with burgers, Italian pasta salad, veggies and dip, and texas sheet cake for dessert.

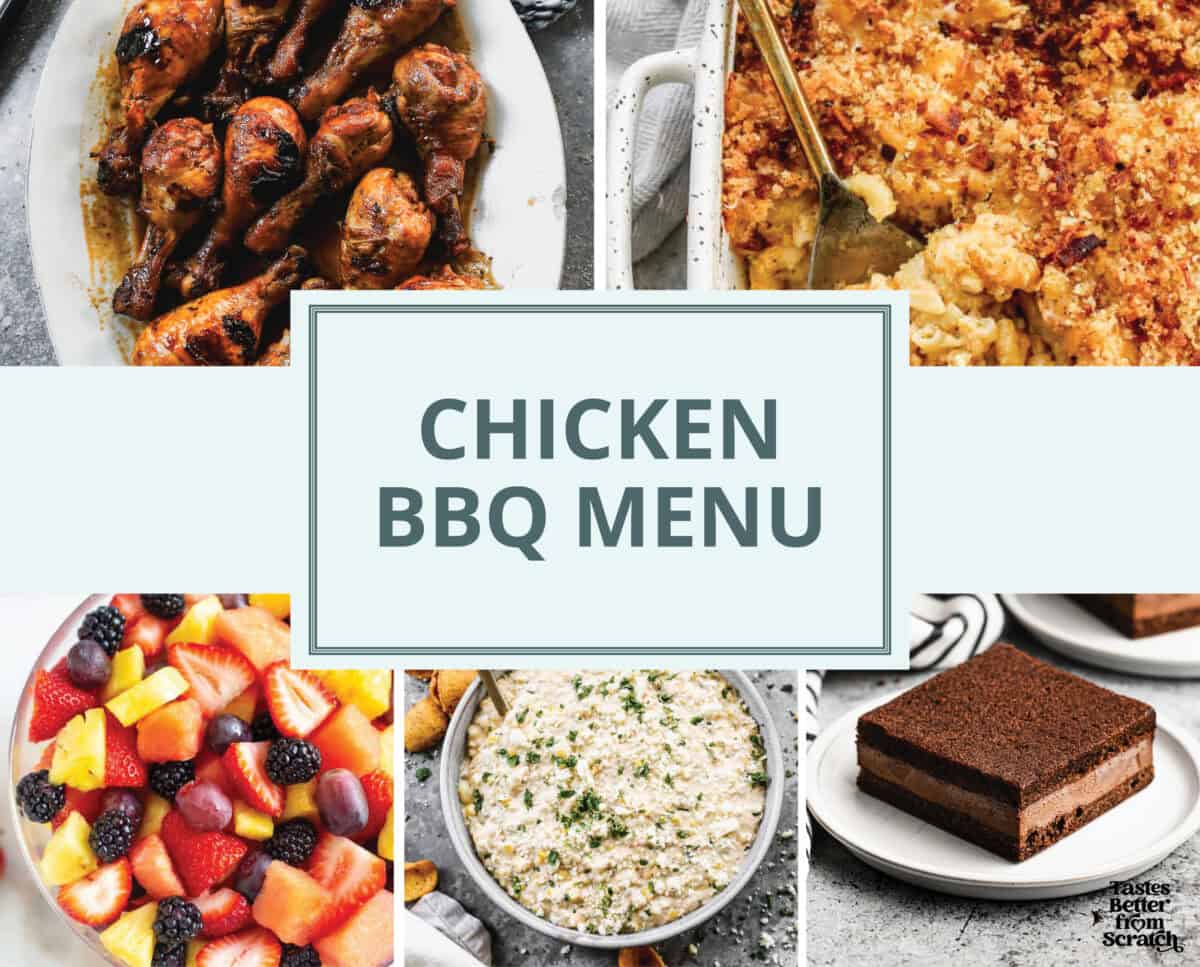
Option 3: BBQ Chicken Drumsticks Menu

Save or customize this menu by creating a FREE account.

A collage image highlighting BBQ Chicken Drumsticks, baked mac and cheese, fruit, and homemade ice cream sandwiches for dessert.

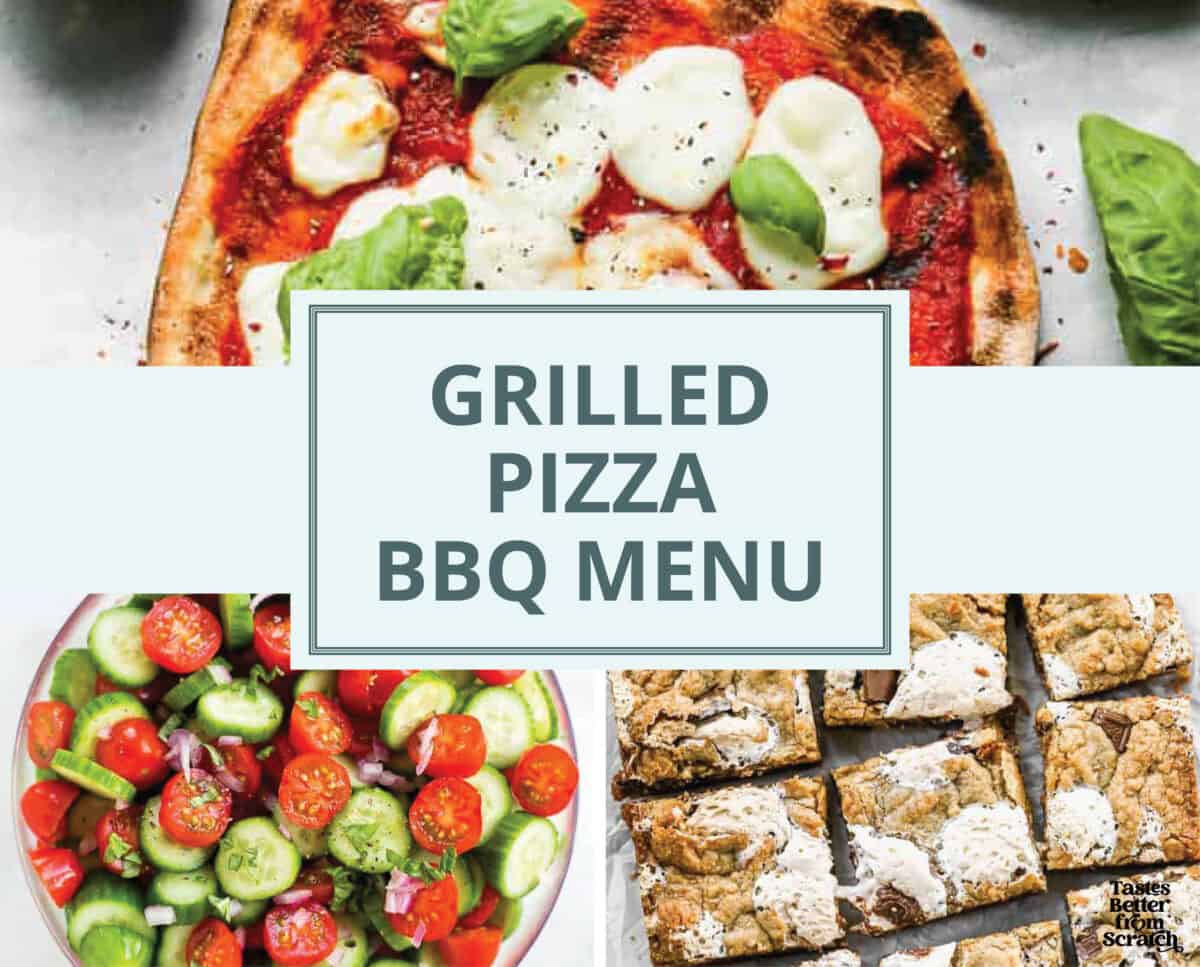
Option 4: Grilled Pizza Menu

Save or customize this menu by creating a FREE account.

A collage image for a simple BBQ menu idea with grilled pizza, tomato cucumber salad, and s'mores bars.

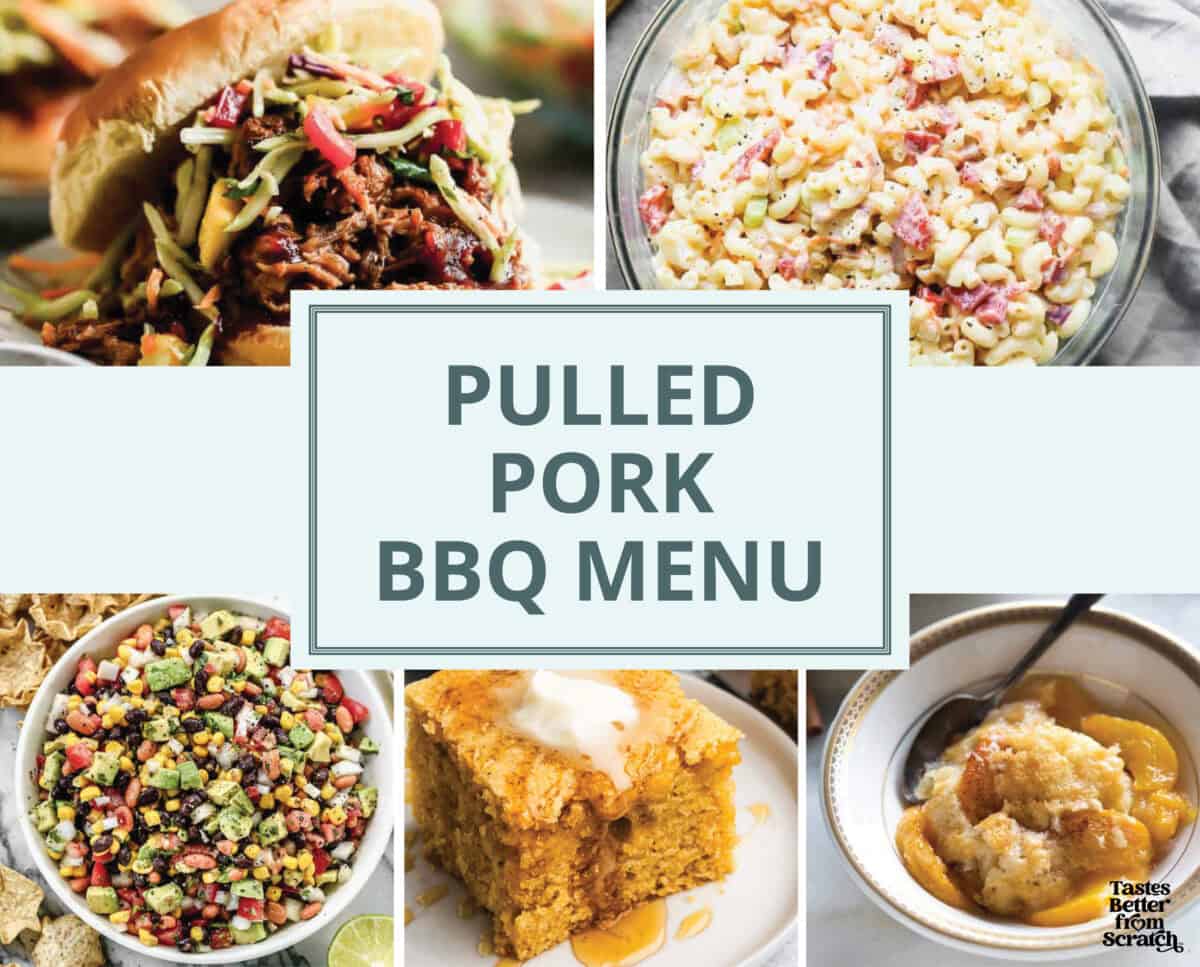
Option 5: BBQ Pulled Pork Sandwiches Menu

Save or customize this menu by creating a FREE account.

A collage image showing a bbq restaurant menu idea that will wow any guests with pulled pork sandwiches, macaroni salad, buttermilk cornbread, and peach cobbler for dessert.

Want Your Own Shopping List?

Did you know you can customize any of these meal plans and make your own shopping list? Register for a free account or login to get started!

Sign Up For FREE Weekly Meal Plans

Each 5-day meal plan includes a printable grocery shopping list with budget information, to help save time and money!

Yes, I want free meal plans!
cropped-Hawaiiian-Bowls-Web-8.jpgDay 1
Day 2
Mongolian beef on a plate with rice and chopped green onion on top.Day 3
Chicken Fajita Pasta served in a skillet with a scoop of salsa on top.Day 4
Five chicken taquitos lined on a plate with a bowl of salsa on the side.Day 5

Follow me for more great recipes

Cottage Cheese Pancakes

These fluffy Cottage Cheese Pancakes are protein packed, quick to make and absolutely delicious. Take your breakfast routine to the next level and start your morning feeling satisfied and energized to take on the day ahead. The best part? Kids love them too! Why I Love These Cottage Cheese Pancakes Ingredients How to Make Cottage…

The post Cottage Cheese Pancakes appeared first on Weelicious.

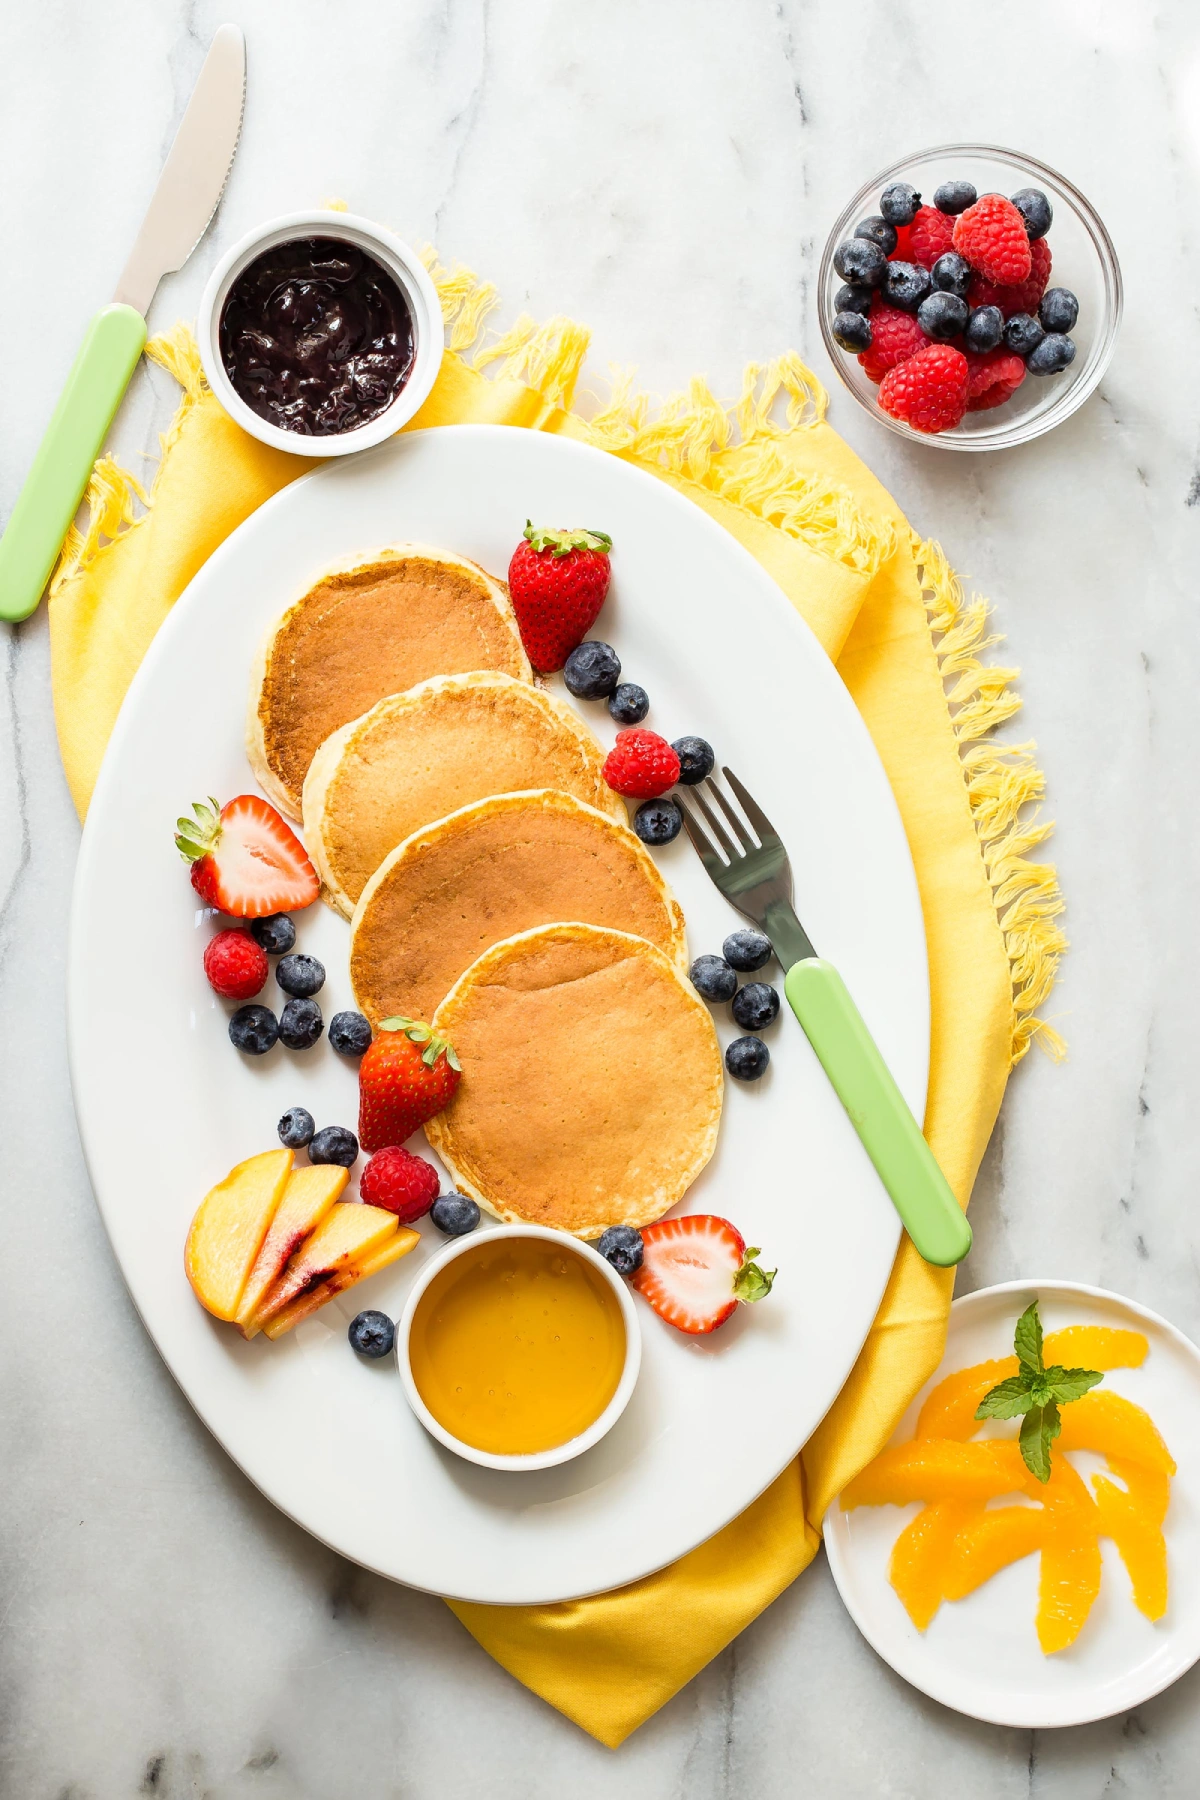
These fluffy Cottage Cheese Pancakes are protein packed, quick to make and absolutely delicious. Take your breakfast routine to the next level and start your morning feeling satisfied and energized to take on the day ahead. The best part? Kids love them too!

cottage cheese pancakes

Why I Love These Cottage Cheese Pancakes

  • Healthy: Packed with protein thanks to the cottage cheese, these pancakes are a great breakfast that will satisfy your cravings for pancakes while keeping you sustained for the day ahead!
  • Easy to Make: There’s no extra fuss when it comes to making this Cottage Cheese Pancakes recipe. They’re just as quick and easy to make as classic pancakes. 
  • Kid-Friendly: Even kids who may have an aversion to cottage cheese love these pancakes. You’d never guess they have cottage cheese in them. The taste and texture is masked entirely. It’s always a win when a pancake recipe can be part of a healthy and balanced breakfast for kids.
  • Versatile and Customizable: A cottage cheese pancake is the perfect canvas for adding your favorite toppings or mix-ins. Customize them to suit your tastes.
ingredients for cottage cheese pancakes

Ingredients

  • Large eggs: Eggs keep everything together and add some richness to the pancakes. Plus, they also contribute some protein and essential nutrients.
  • Cottage cheese: The star of the show! Cottage cheese adds creaminess and a subtle tang to the pancakes. It’s also a great source of protein. Feel free to use full fat or low fat cottage cheese. 
  • Vanilla extract: Adding vanilla extract enhances the flavor of the pancakes.
  • Honey or Agave: These natural sweeteners add a touch of sweetness to the pancakes without overpowering their flavor. You can use either one you prefer.
  • All purpose flour: Flour serves as the base of the pancake batter. I haven’t tested other flours, but I’m sure you could substitute whole wheat or a gluten free cup for cup flour if you want.
  • Baking powder: Baking powder helps the pancakes rise and become light and fluffy.
  • Kosher salt: A touch of salt helps balance out the overall flavor of the pancakes. 
  • Oil or Butter: You only need oil or butter to grease the pan.
cottage cheese pancakes recipe

How to Make Cottage Cheese Pancakes

1. Whisk Wet Ingredients:

  • In a bowl, combine the first 4 ingredients—eggs, cottage cheese, vanilla extract, and honey (or agave). Whisk until combined.

2. Prepare Dry Ingredients:

  • In a different bowl, whisk together the dry ingredients—flour, baking powder, and salt—until evenly mixed.

3. Combine Wet and Dry Ingredients:

  • Pour the dry mixture into the bowl of wet mixture. Stir gently until just combined, being careful not to overmix. The batter should be slightly lumpy.

4. Preheat and Grease:

  • Heat a large sauté pan or griddle over medium heat. Lightly coat the surface with oil or butter to prevent sticking.

5. Cook Pancakes:

  • Pour about 2 tablespoons of the batter onto the preheated griddle for each pancake. Cook for approximately 2 minutes on the first side. You should see bubbles on the surface before you flip.

6. Flip and Cook:

  • Carefully flip the pancakes using a spatula and cook for an additional 2 minutes on the other side, or until they are golden brown and cooked through.

7. Serve:

  • Once cooked, transfer the pancakes to a serving plate. Serve warm with your favorite toppings and enjoy!
Cottage Cheese Pancakes

The Right Cottage Cheese for Pancakes

Like I mentioned before, cottage cheese is a good source of protein – about 25 grams per cup! When it comes to choosing which kind of cottage cheese for pancakes, there’s no right or wrong answer. You can use full fat or low fat, small curd or large curd. Pick your favorite brand and get to making these pancakes ASAP!

Tips for Making Cottage Cheese Pancakes

  1. Mix Gently: Combine your wet and dry ingredients gently until they’re just mixed. A few lumps are okay! Overmixing the batter can leave you with tough, chewy pancakes. 
  2. Let the Batter Rest: Allow the batter to rest a bit before making the pancakes so that baking powder has a little time to activate. This will ensure you get light, fluffy and delicious pancakes. 
  3. Grease the Pan Between Each: Use any oil you prefer to grease the pan – olive, avocado, or vegetable work great. Just make sure you keep reapplying between each batch of pancakes to prevent sticking, ensure even cooking and get those crispy edges we all love. 
  4. Flip Carefully: Cook your pancakes over medium heat, and don’t flip them until bubbles form on the surface for that perfect golden brown finish.
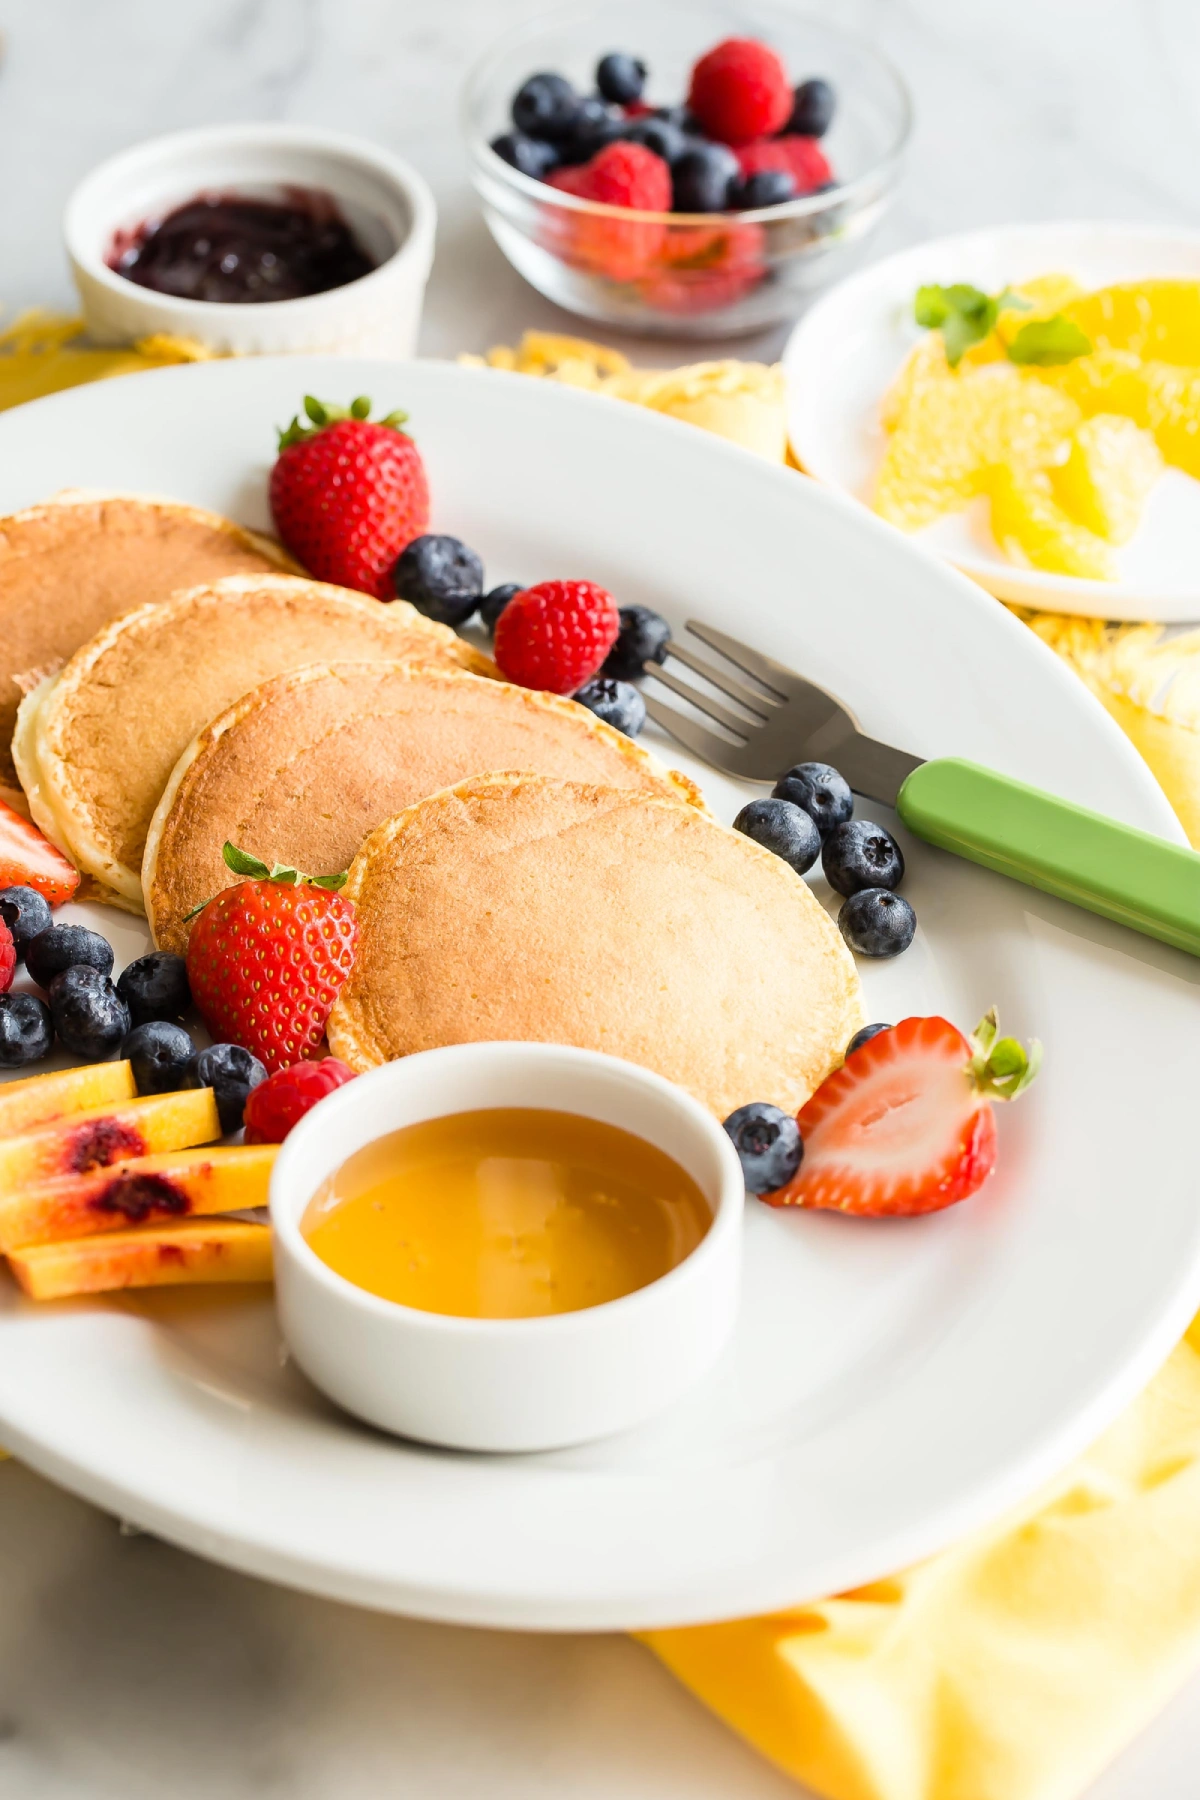
pancakes with cottage cheese

Toppings

Pancakes, in general, have always been a blank canvas for adding delicious toppings, and these pancakes with cottage cheese are no different. Here are some topping ideas:

  • Maple syrup, a tried and true classic pancake topping
  • Fresh berries
  • Sliced bananas
  • Greek yogurt or a drizzle of nut butter for an extra bump of protein

Additions You Can Add to Your Pancakes

Get creative by adding in additional ingredients to your pancake recipe with cottage cheese. Here are some ideas:

  • Chopped nuts, such as pecans or walnuts
  • Chocolate chips for a little extra sweetness
  • Shredded coconut
  • Your favorite fruit like blueberries or bananas
  • Lemon zest
pancakes cottage cheese oatmeal

Storage and Reheating

To Store: Leftover pancakes can be stored in an airtight container in the refrigerator for up to 3 days. 

To Freeze: Allow pancakes to come to room temperature, place in a ziploc bag, label and store in the freezer for up to 3 months.

To Reheat: To reheat pancakes, warm them in the toaster, oven or microwave until warmed through.

More Tasty Pancake Recipes

Incorporating cottage cheese into your favorite recipes is a really easy way to get some extra protein into your diet! These pancakes are a great recipe to start with as they’re easy to make, tasty and super kid-friendly so the whole family can enjoy them! Let me know in the comments if you have any questions and tag me on social media if you make these healthy cottage cheese pancakes! 

Images by Gerry Speirs

Cottage Cheese Pancakes
Print

Cottage Cheese Pancakes

Cottage Cheese Pancakes are fluffy, protein packed delights that are quick and easy to make. Plus, kids love them! 
Course Breakfast
Prep Time 10 minutes
Cook Time 5 minutes
Total Time 15 minutes
Servings 10 pancakes
Calories 76kcal

Equipment

  • Large saute pan or griddle

Ingredients

Instructions

  • In a bowl, combine the first 4 ingredients—eggs, cottage cheese, vanilla extract, and honey (or agave). Whisk until combined.
  • In a different bowl, whisk together the dry ingredients—flour, baking powder, and salt—until evenly mixed.
  • Pour the dry mixture into the bowl of wet mixture. Stir gently until everything is just combined, being careful not to overmix. The batter should be slightly lumpy.
  • Heat a large sauté pan or griddle over medium heat. Lightly coat the surface with oil or butter to prevent sticking.
  • Pour about 2 tablespoons of the batter onto the preheated griddle for each pancake. Cook for approximately 2 minutes on the first side. You should see bubbles form before you flip.
  • Flip the pancakes and cook for 2 more minutes on the other side, or until they are golden brown and cooked through.
  • Serve warm with your favorite toppings and enjoy!

Notes

To Store: Leftover pancakes can be stored in an airtight container in the refrigerator for up to 3 days. 
To Freeze: Allow pancakes to come to room temperature, place in a ziploc bag, label and freeze up to 3 months.
To Reheat: To reheat pancakes, warm them in the toaster, oven or microwave until warmed through. 
Mix Gently: Combine your wet and dry ingredients gently until they’re just mixed. A few lumps are okay! Overmixing the batter can leave you with tough, chewy pancakes. 
Let the Batter Rest: Allow the batter to rest a bit before making the pancakes so that baking powder has a little time to activate. This will ensure you get light, fluffy and delicious pancakes. 
Grease the Pan Between Each: Use any oil you prefer to grease the pan – olive, avocado, or vegetable work great. Just make sure you keep reapplying between each batch of pancakes to prevent sticking and ensure even cooking.  
Flip Carefully: Cook your pancakes over medium heat, and don’t flip them until bubbles form on the surface for that perfect golden brown finish.

Nutrition

Calories: 76kcal | Carbohydrates: 9g | Protein: 5g | Fat: 2g | Saturated Fat: 1g | Polyunsaturated Fat: 0.3g | Monounsaturated Fat: 1g | Trans Fat: 0.01g | Cholesterol: 53mg | Sodium: 186mg | Potassium: 50mg | Fiber: 0.2g | Sugar: 4g | Vitamin A: 101IU | Vitamin C: 0.02mg | Calcium: 50mg | Iron: 1mg

The post Cottage Cheese Pancakes appeared first on Weelicious.