Experience the irresistible blend of flavors with our Hawaiian Roll Garlic Bread, where the sweetness of Hawaiian rolls meets savory garlic and cheese. This easy-to-make side dish transforms light, fluffy rolls with garlic-herb butter, baking them to g…
Experience the irresistible blend of flavors with our Hawaiian Roll Garlic Bread, where the sweetness of Hawaiian rolls meets savory garlic and cheese. This easy-to-make side dish transforms light, fluffy rolls with garlic-herb butter, baking them to golden perfection. It’s a unique take on cheesy garlic bread that will elevate any meal. Served garlic rolls alongside Italian Pastina Soup, Honey...
It’s almost time for the biggest football game of the year! And whether you’re rooting for your favorite team or just tuning in to watch the commercials and halftime show🫣, the best part about Super Bowl Sunday is definitely the food! So today we’re sharing over 25 budget-friendly Super Bowl Recipes that are perfect for small gatherings or for feeding a crowd; including buffalo chicken dip, sliders, chicken wings, and more. No matter the final score, we’re certain everyone will have a good time with these crowd-pleasing game day recipes!
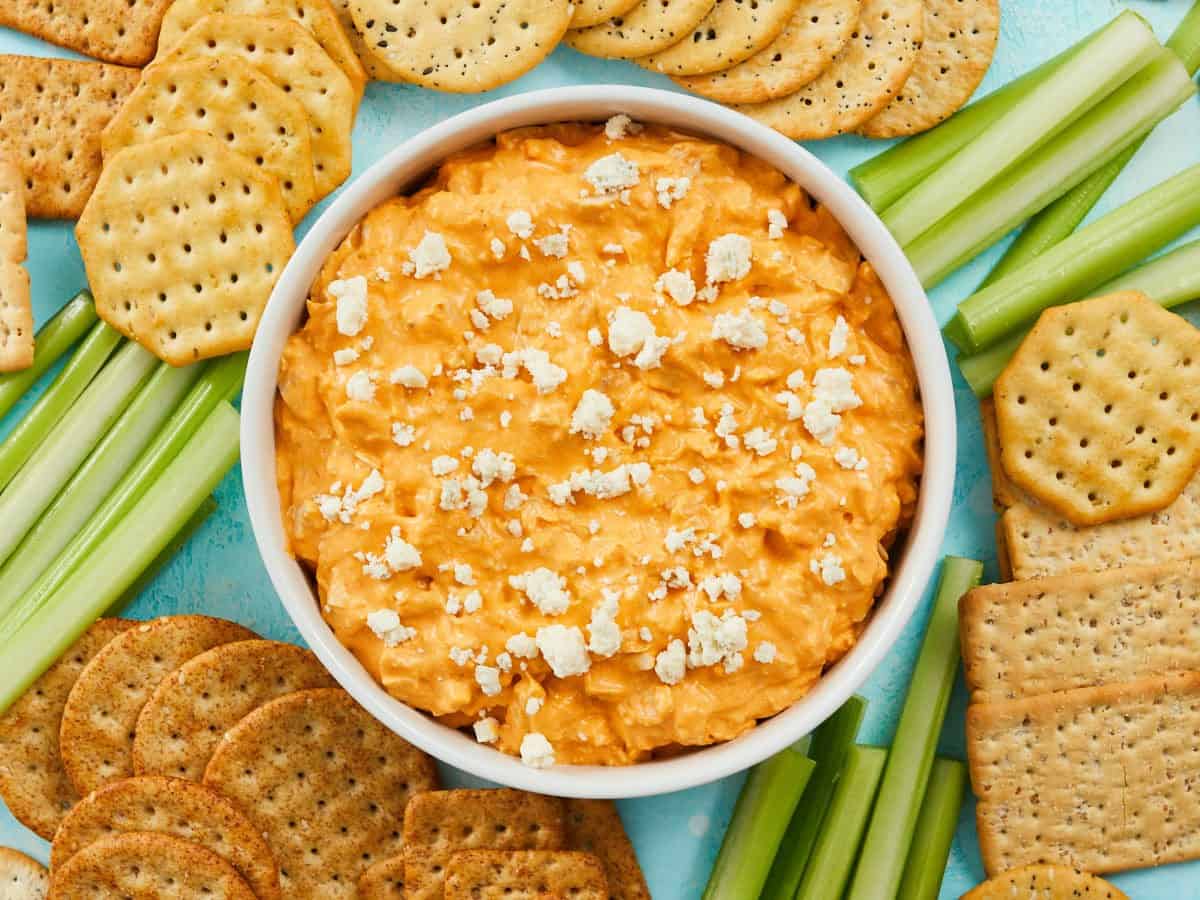
We’re kicking things off with the ultimate fan-favorite Super Bowl recipe, Buffalo Chicken Dip! It’s a classic, must-have, party appetizer that’s always popular at football games and family gatherings. You only need a few simple ingredients to make it and its great served with chips, crackers, or even veggies!
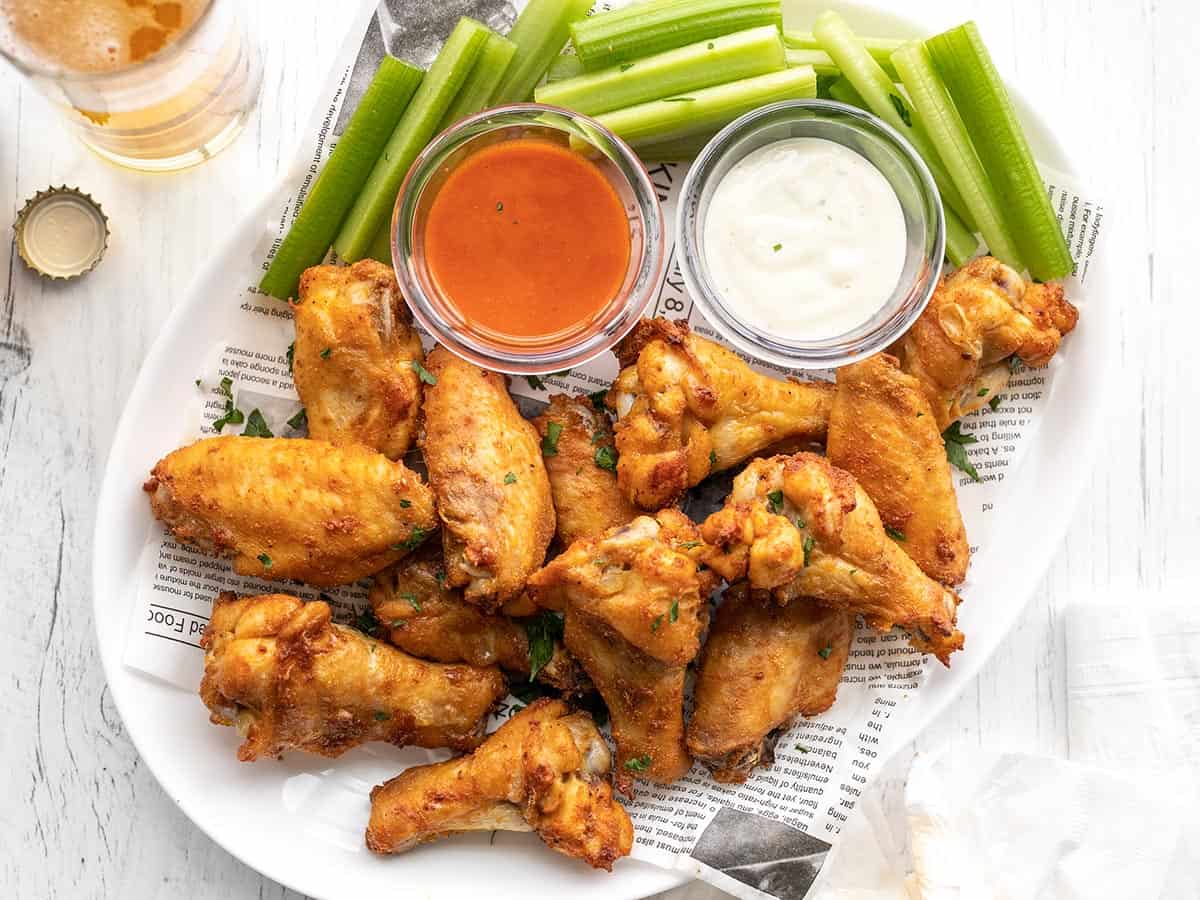
Of course you’ve gotta have some classic recipes for the big game like these Buffalo Wings! They’re spicy, saucy, and baking them in the oven makes the process so easy!
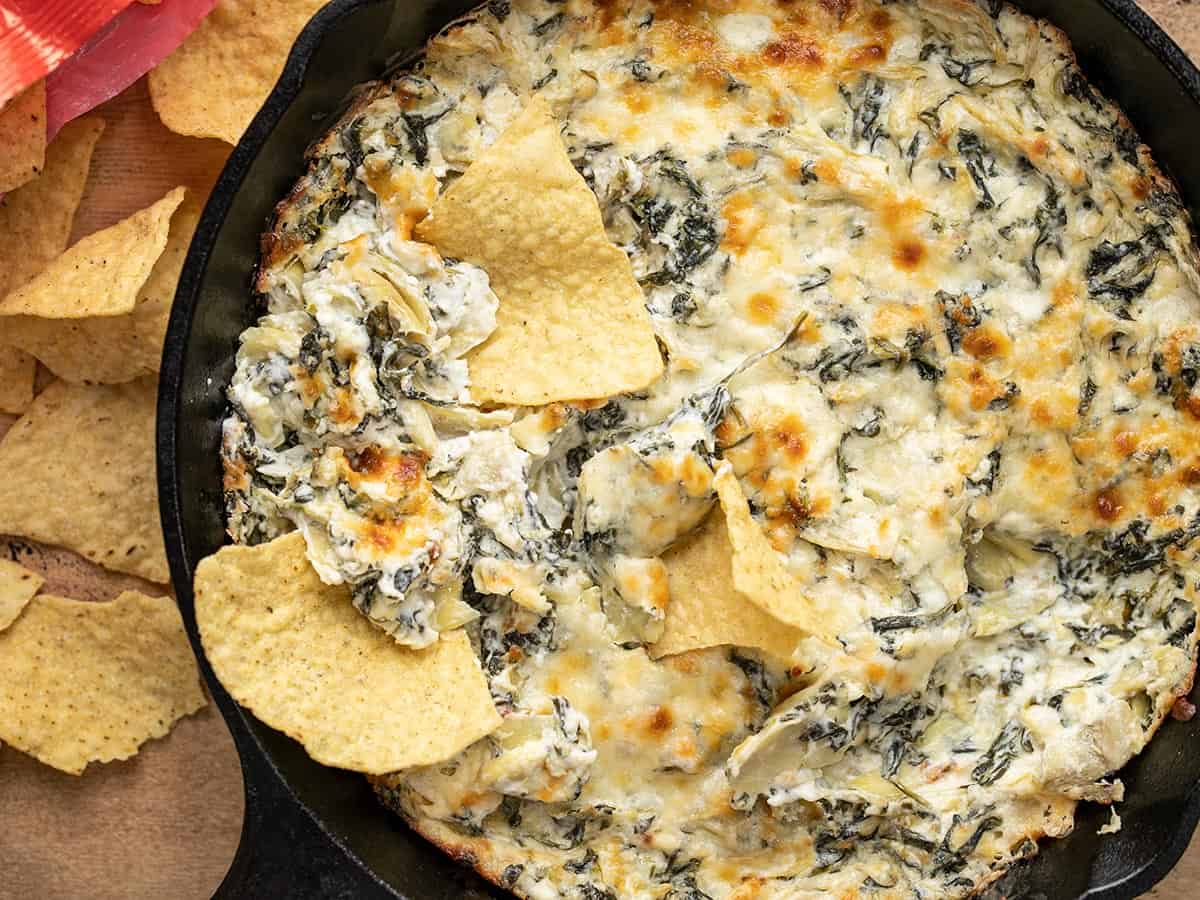
Seriously, who doesn’t love a good spinach dip appetizer?! This Spinach Artichoke Dip is made with lots of cheese, a creamy homemade sauce, and a little splash of hotness to tingle your taste buds. It’s SO good and a must-have for game day!
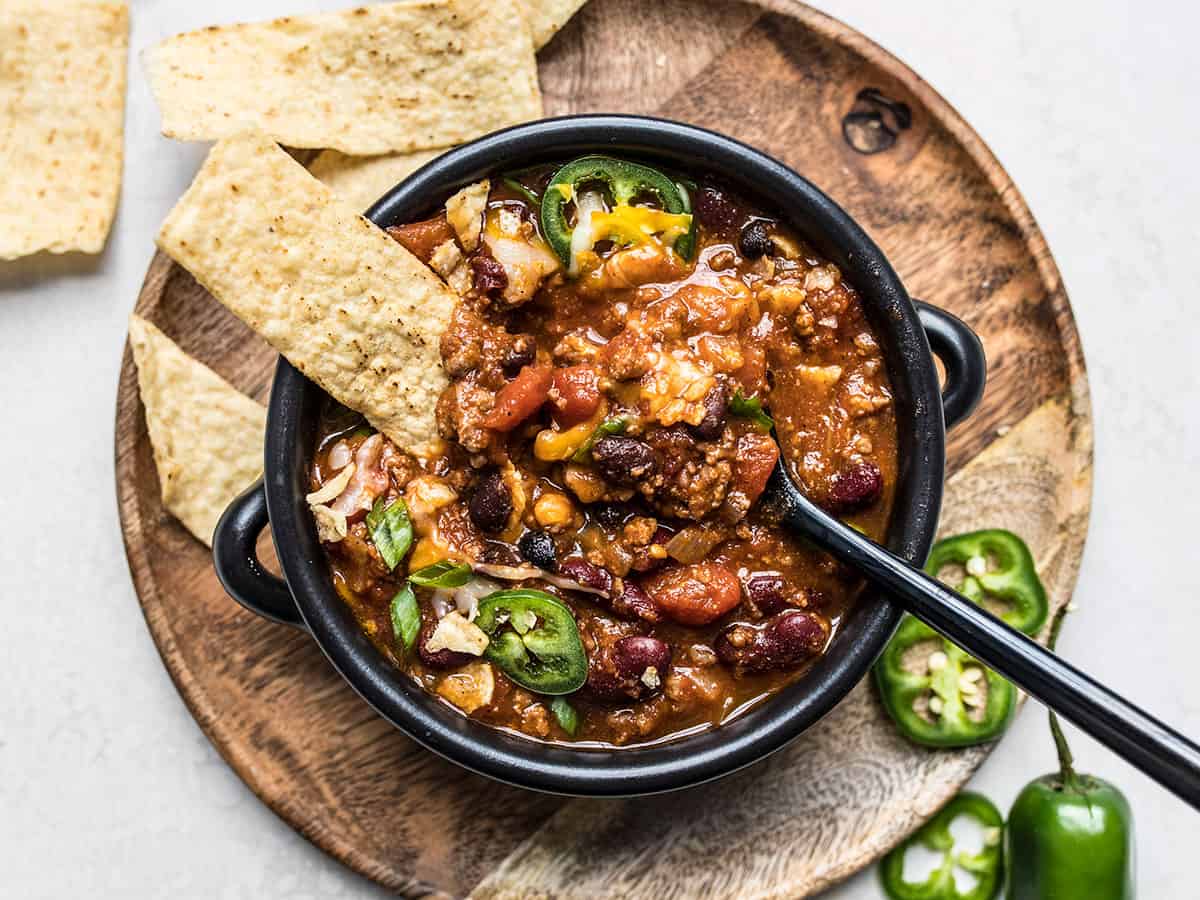
Everyone loves a good Homemade Chili recipe to enjoy while watching football games. It’s easy to serve at parties and you can allow guests to customize it with their own toppings!
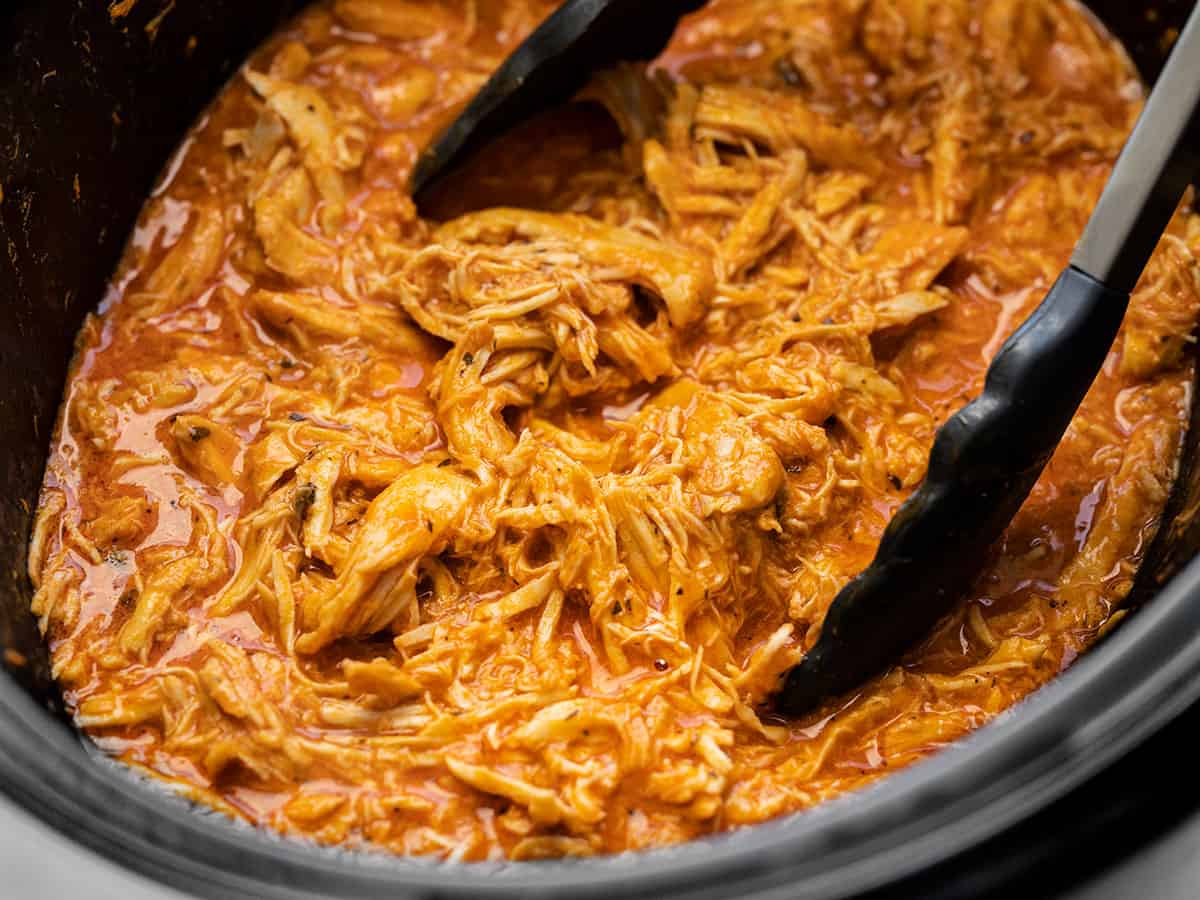
This Slow Cooker Buffalo Chicken is always a favorite at potlucks and parties. Our version goes a step further and uses ranch seasoning which adds a huge burst of flavor to the sauce and makes it even more delicious!
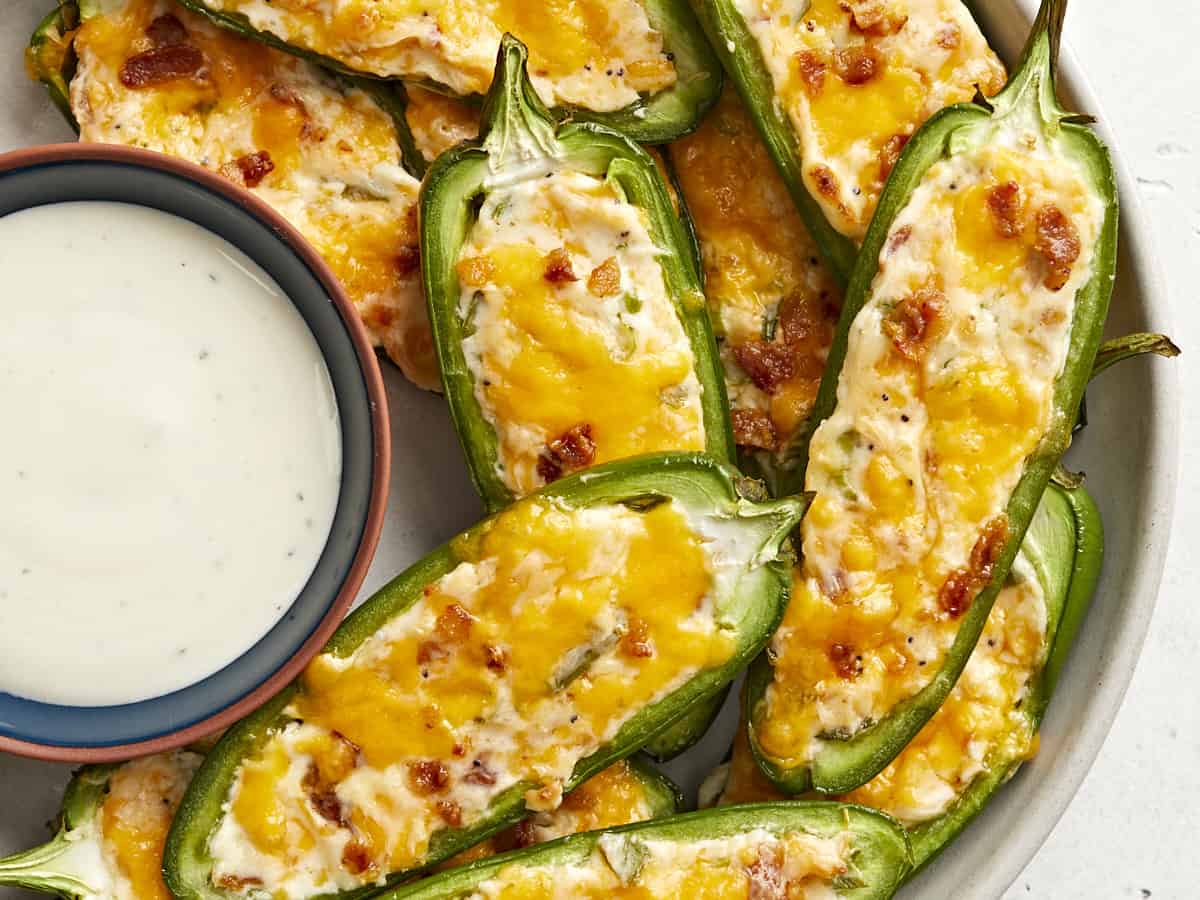
Is there anything better than a cheesy, creamy, spicy flavor combo? I think not. These Jalapeño Poppers are easy enough for a beginner to make (no deep frying!) and delicious enough that you’ll have no regrets.
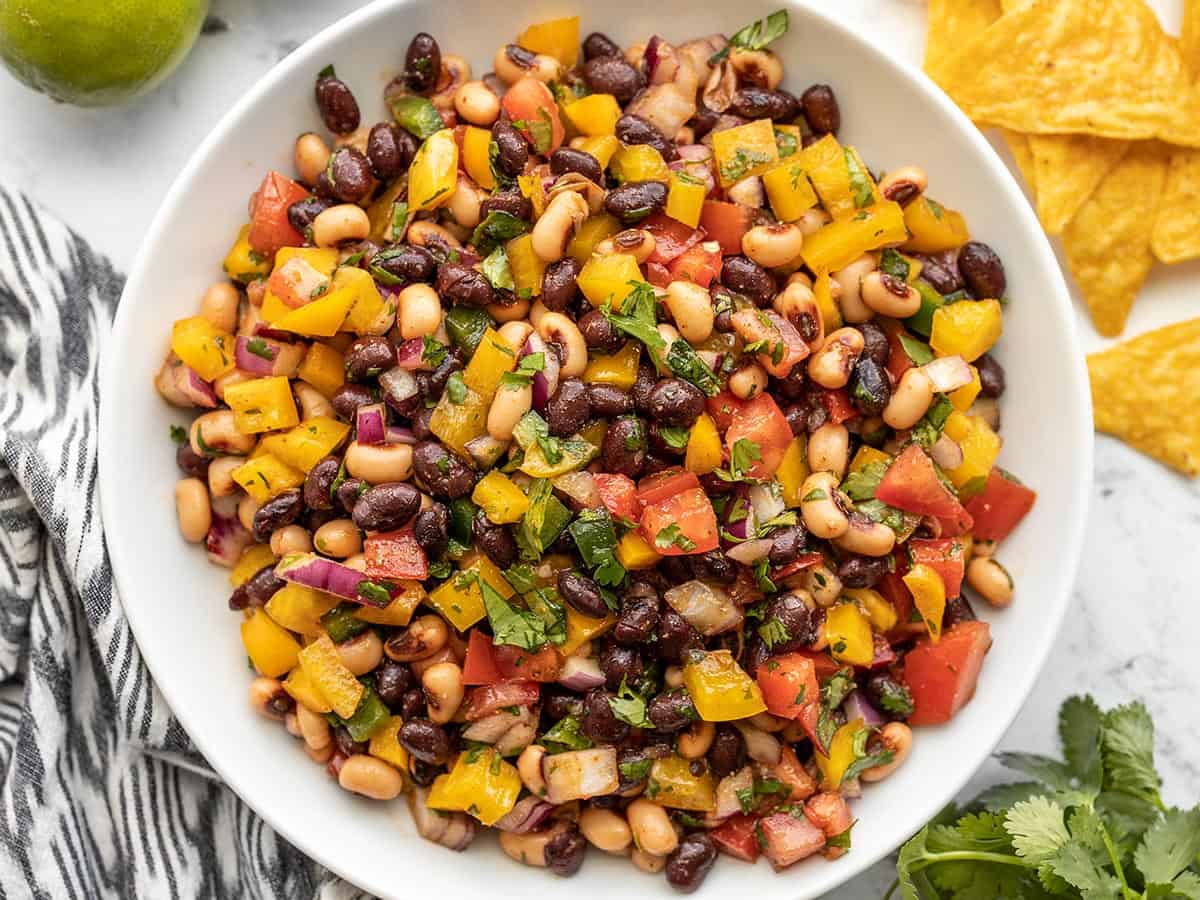
You’ll definitely steal the show at the party when you make this super fresh and colorful Cowboy Caviar! It’s an easy salsa-type salad that can be served as a chunky dip with chips and only takes 20 minutes to prep!
If you’ve never had smashed potatoes before, let’s just say you’re totally missing out! These Loaded Smashed Potatoes are boiled, smashed, and baked until crispy, then loaded with all of your favorite toppings.
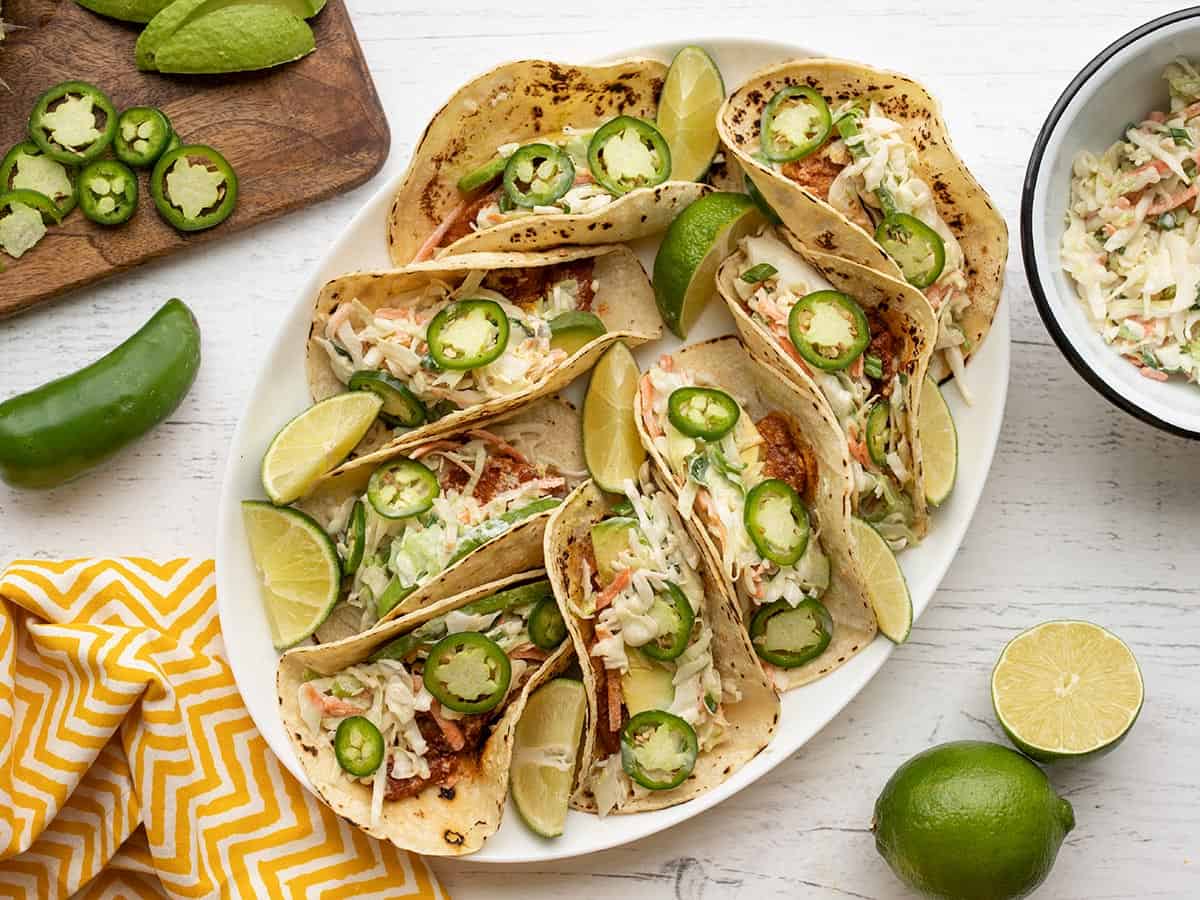
Make sure you give your guests plenty of options to choose from and make these Easy Fish Tacos to add to your menu for the big game! They’re easy, fresh, and so delicious!
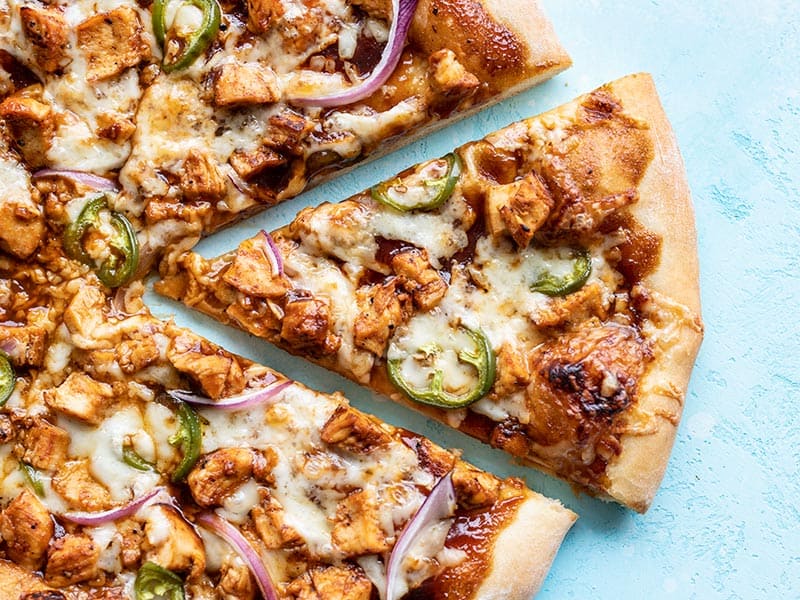
BBQ Chicken Pizza is a classic party food with its sweet and tangy BBQ sauce, bits of juicy chicken, creamy cheese, and savory onions. And it can be sliced into different serving sizes for your guests.
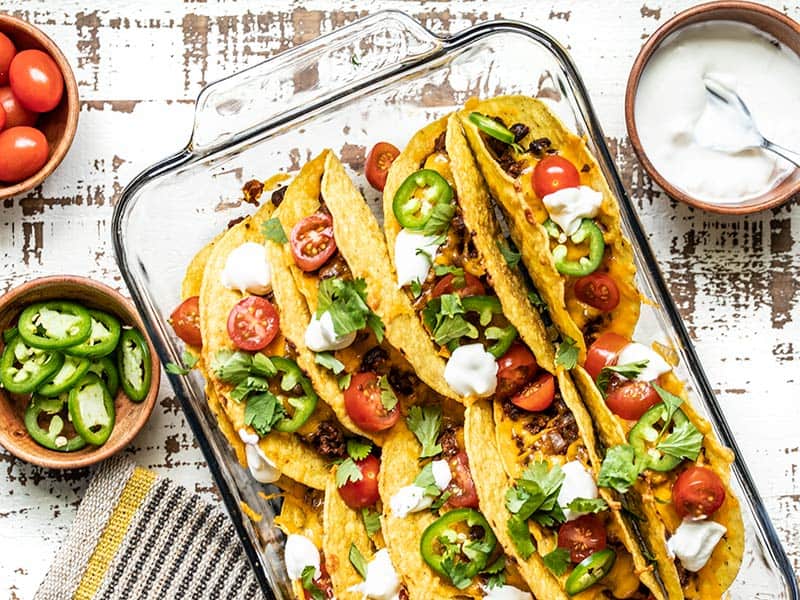
Listen, you had me at tacos!! Tacos are one of my absolute favorite foods and these Baked Beef Tacos with seasoned beef and black bean filling will be the first thing I grab on game day!
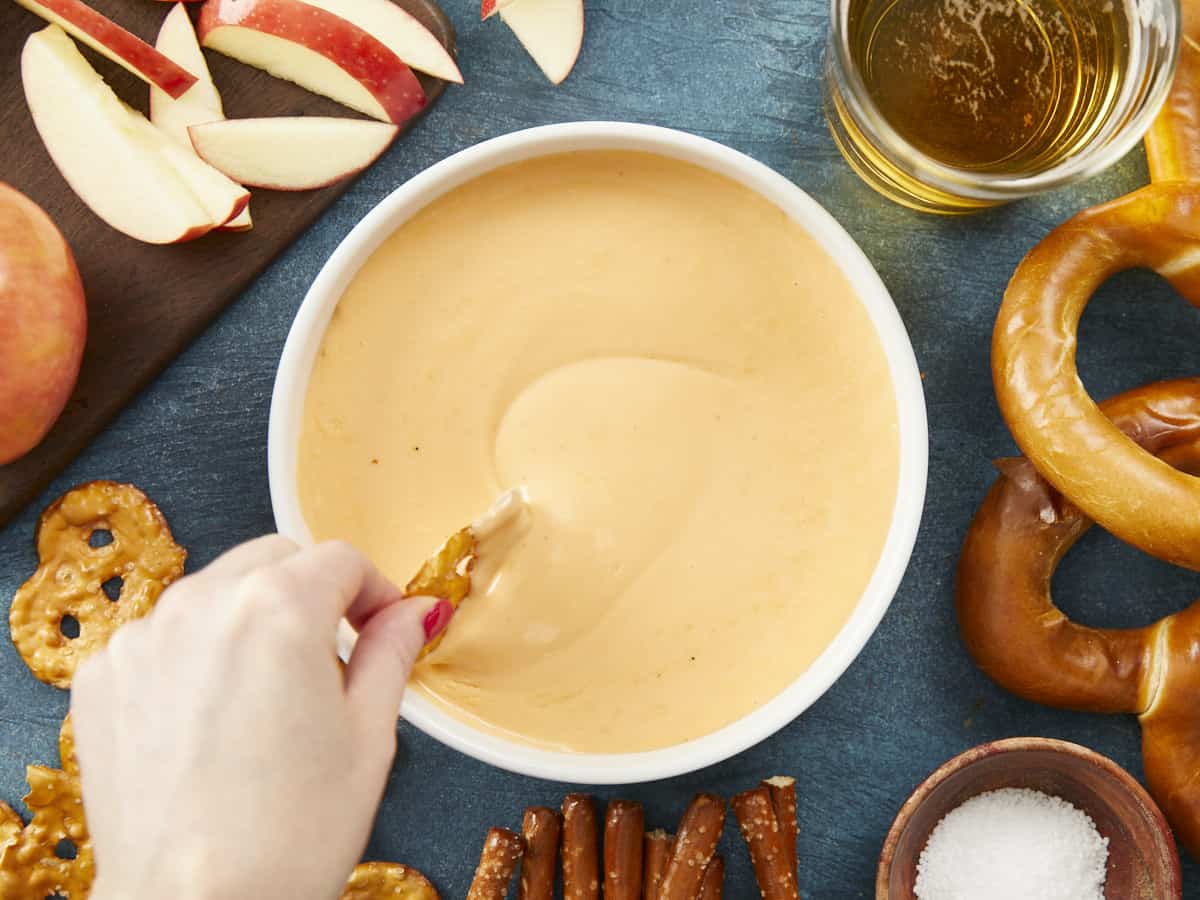
If you're looking for a smash hit appetizer that's easy to make and feeds loads of people, you definitely need to try this simple recipe for unctuous Queso Fundido.
If there’s one recipe that’s sure to bring a crowd together, it’s definitely a good cheese dip! Queso Fundido is a simple recipe made with Mexican chorizo and melted cheese and is always a hit!
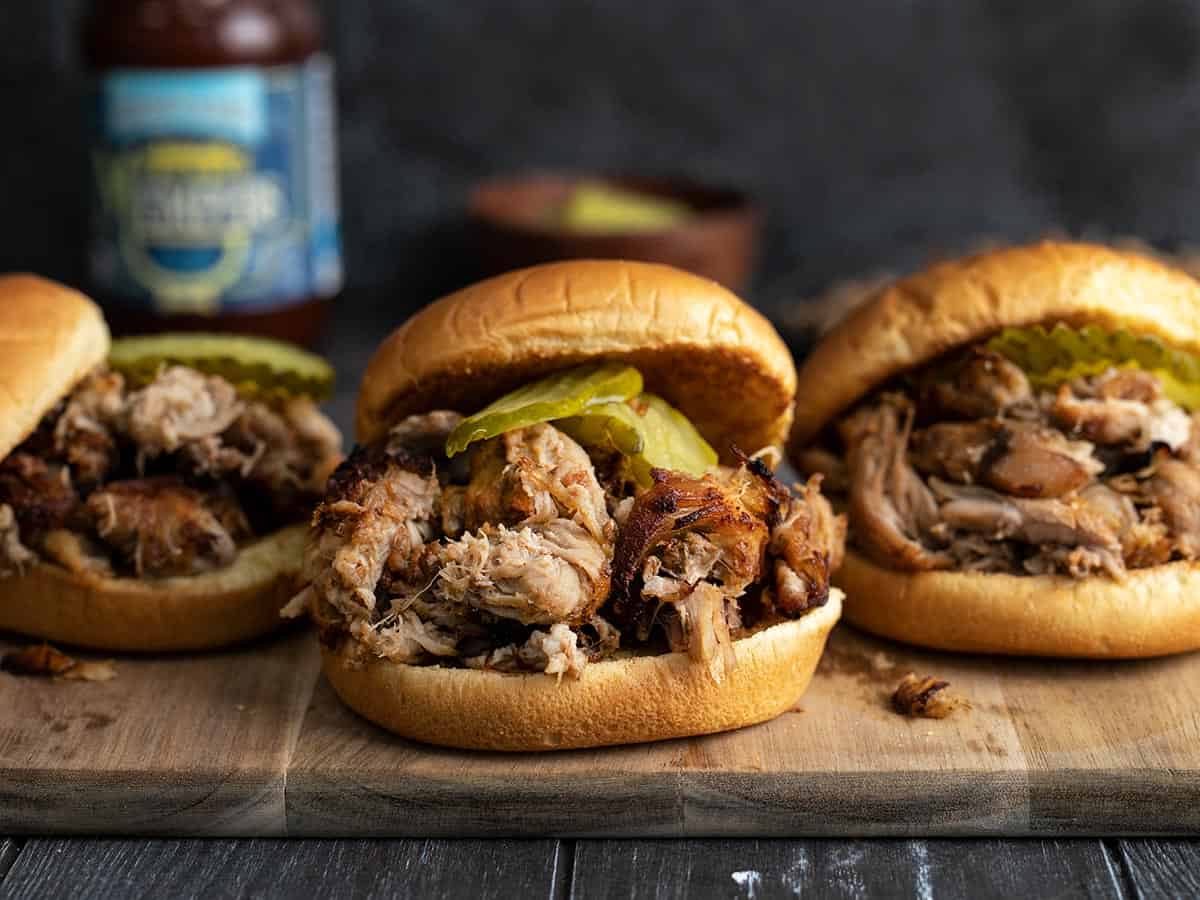
You’ll be surprised just how tender and juicy this Slow Cooker Pulled Pork recipe is after it’s cooked low and slow. It’s perfect for BBQ sandwiches, nachos or any potluck or party meal.
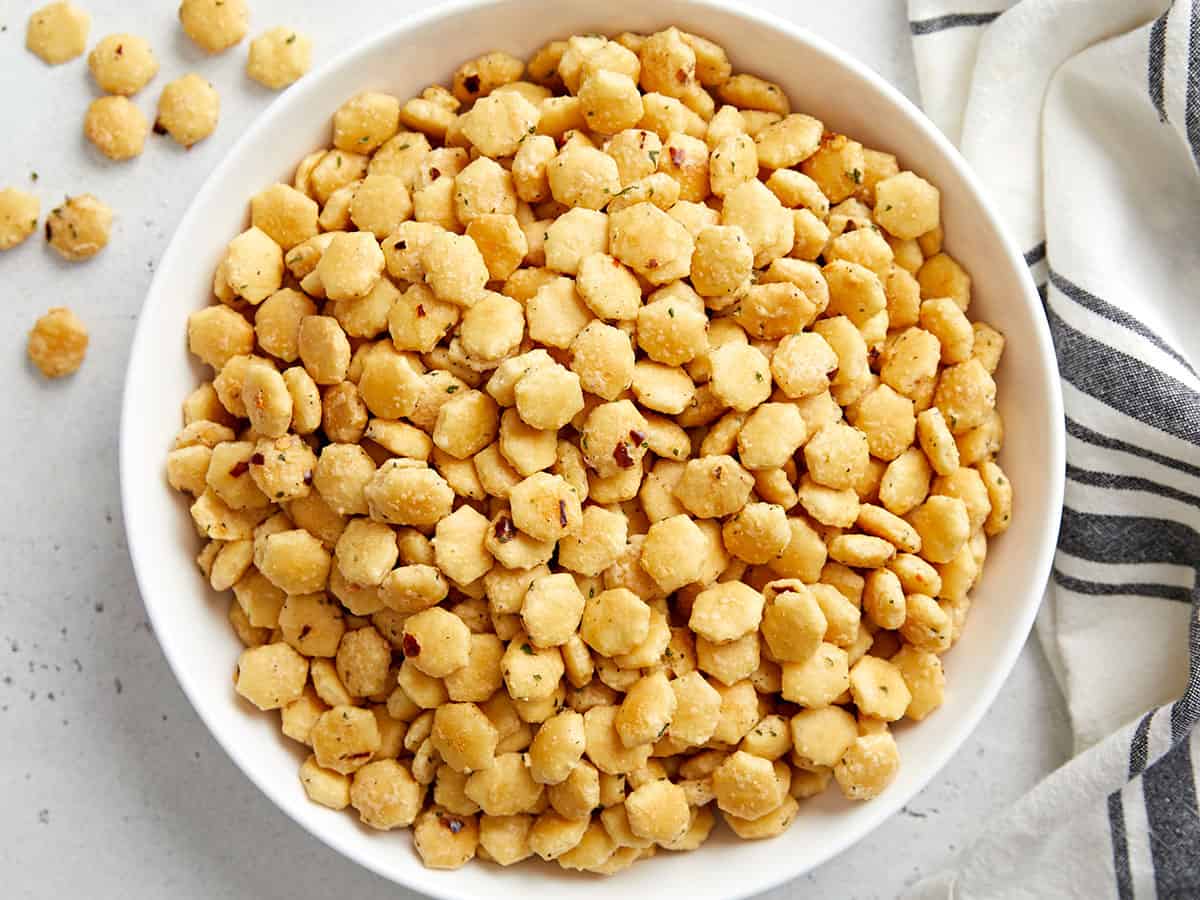
Heads up…you’ll probably want to make a double batch of these rich & buttery Ranch Oyster Crackers! This small and delicious snack is made with just 5 ingredients, it’s absolutely perfect for parties, and will be gone in minutes. Trust me!
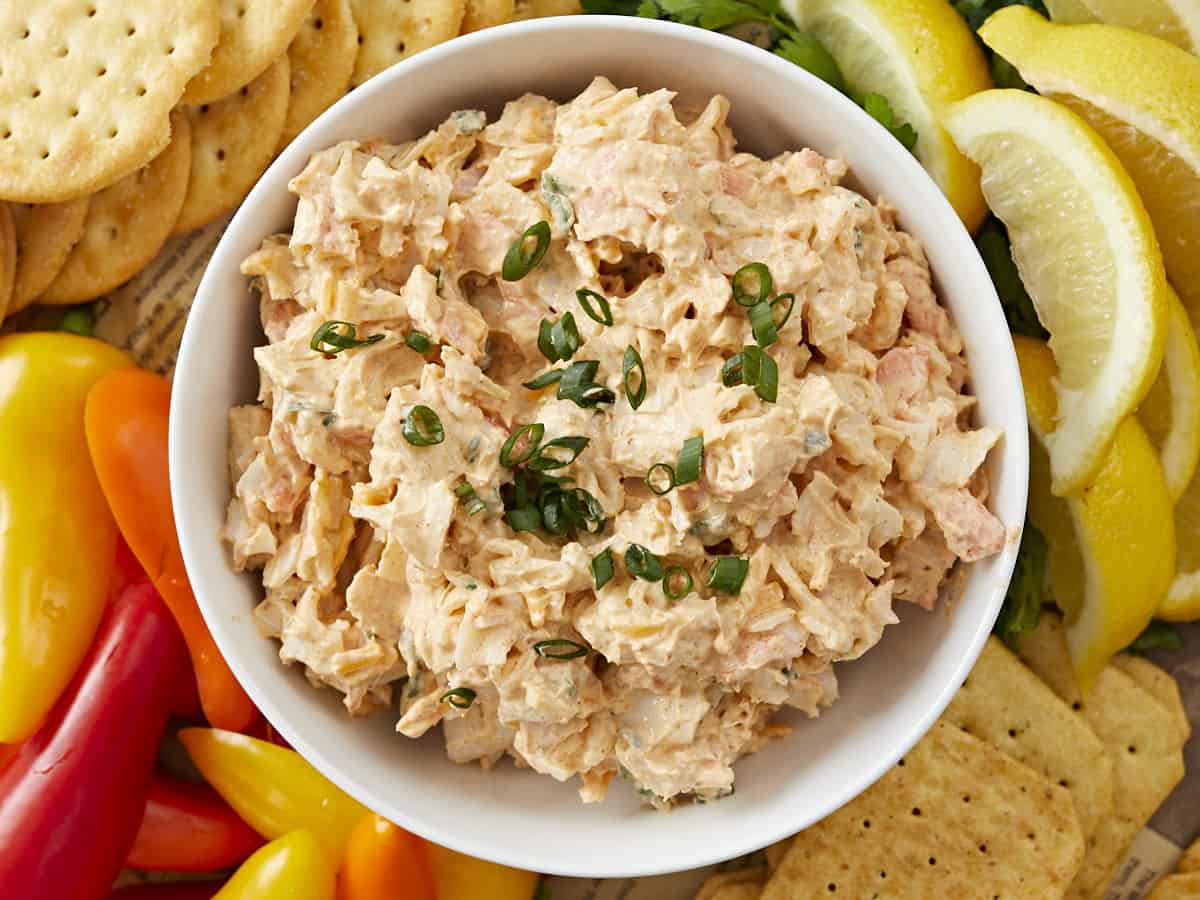
This creamy, spicy crab dip is so good you'll be pushing a cracker into the corners of your serving dish to scoop up the last schmear! It comes together in three easy steps and you can serve it hot or cold.
Ten minutes is all you’ll need to make this super simple Crab Dip recipe. It can be served hot or cold and goes great with crackers, toasted bread, chips, and raw vegetables.
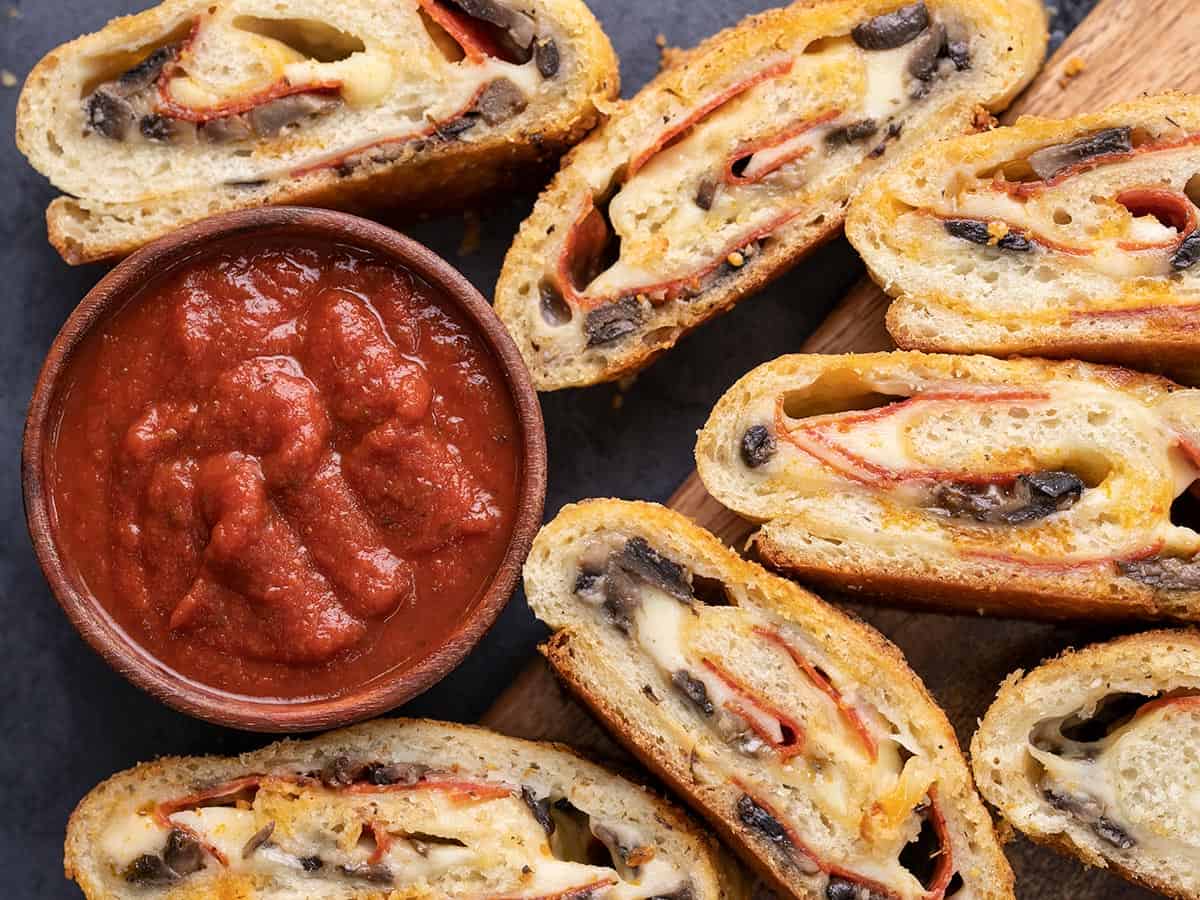
You’ve gotta have some type of pizza on the menu for game day! This Stromboli is a great party appetizer and that’s fun to eat plain or dipped into your favorite marinara sauce.
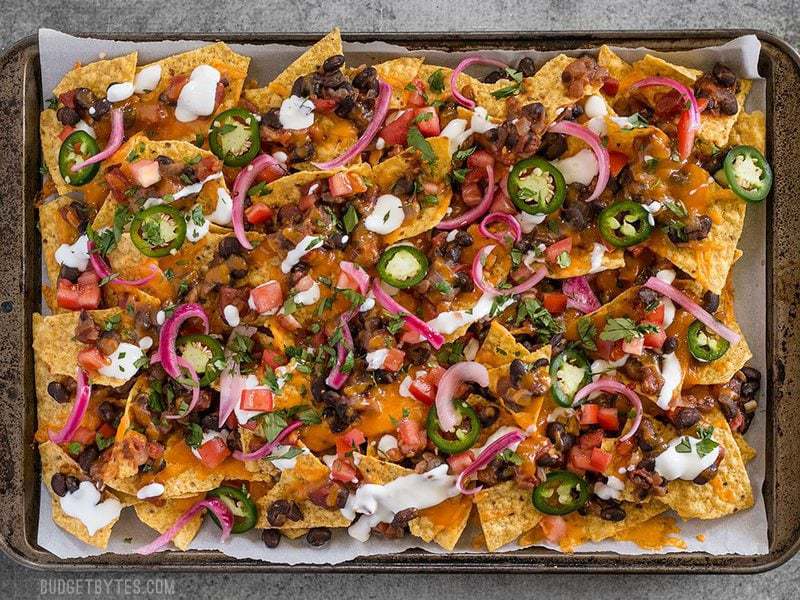
Spicy Baked Black Bean Nachos – Crispy tortilla chips are topped with seasoned black beans and your favorite toppings for a simple, easy, black bean recipe that’s perfect for parties and gatherings!
Homemade Chex Mix is a classic salty, crunchy party snack that’s super easy to make and way less expensive than store-bought Chex mix. It’s also easy to customize and a simple grab-and-go finger food at parties!
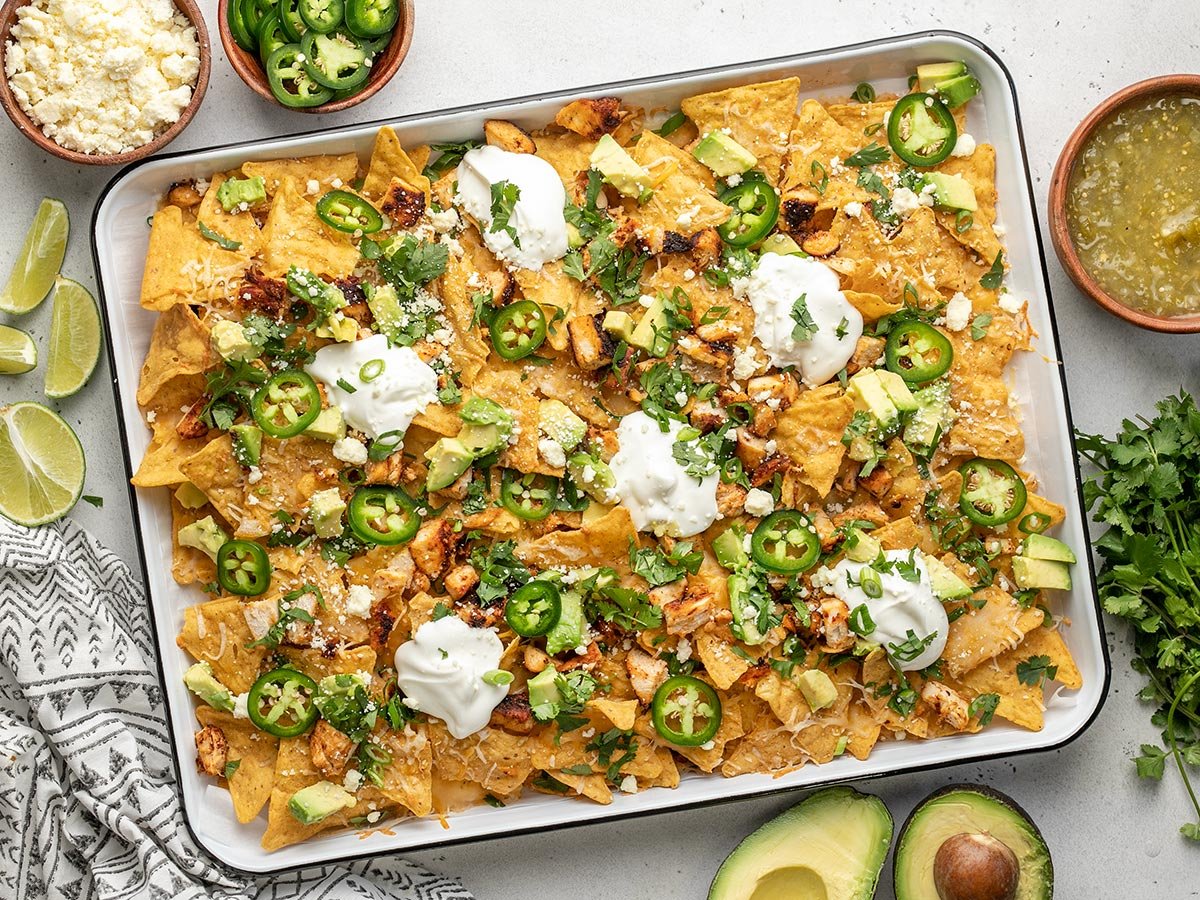
Yes to these crunchy, salty, and cheesy Chicken Nachos!! It includes crispy corn chips, succulent chicken breast, tangy melted cheese and sour cream. What’s not to love?!
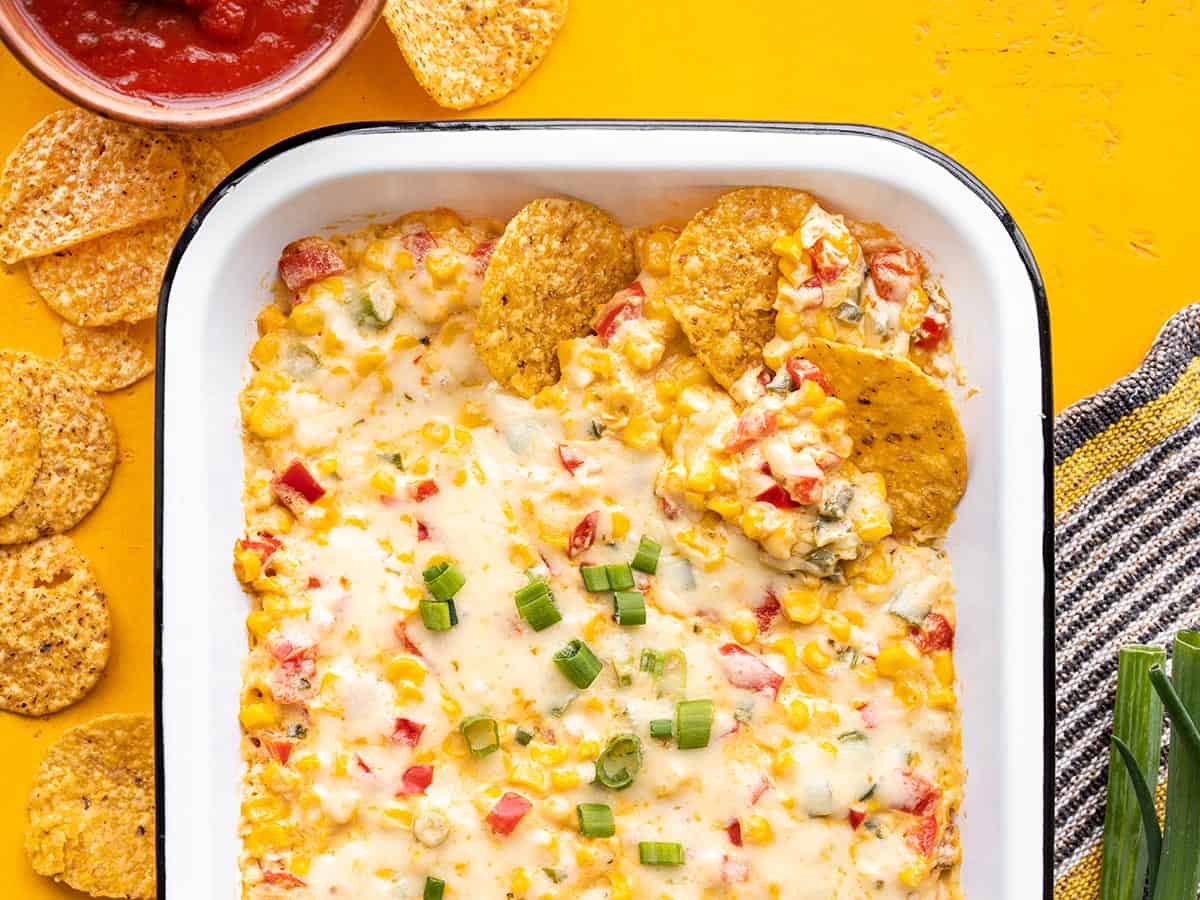
If you like chips and queso, then you’re going to love this Hot Corn Dip. It’s a super creamy, cheesy, slightly spicy dip that you won’t be able to stop dunking chips into.
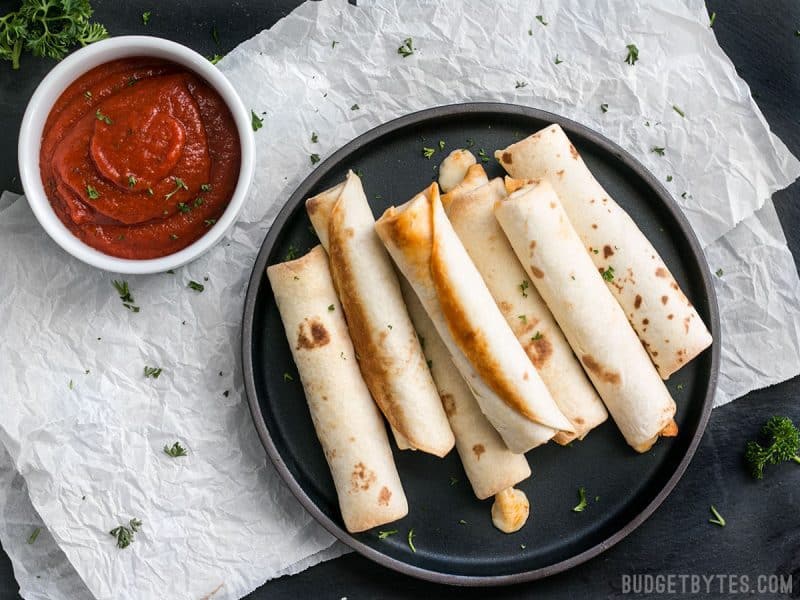
I mean who doesn’t love a good tortilla roll up at parties? These Pizza Roll Upsare perfect as a last minute appetizer and you can get creative by adding your favorite pizza toppings!
When I was making plans to visit Lubbock, a friend gave me some advice. “Go to Orlando’s Italian restaurant, and order the mafia queso,” she said. “It’s outstanding.” Lubbock, Texas…
Source
When I was making plans to visit Lubbock, a friend gave me some advice. “Go to Orlando’s Italian restaurant, and order the mafia queso,” she said. “It’s outstanding.” Lubbock, Texas...
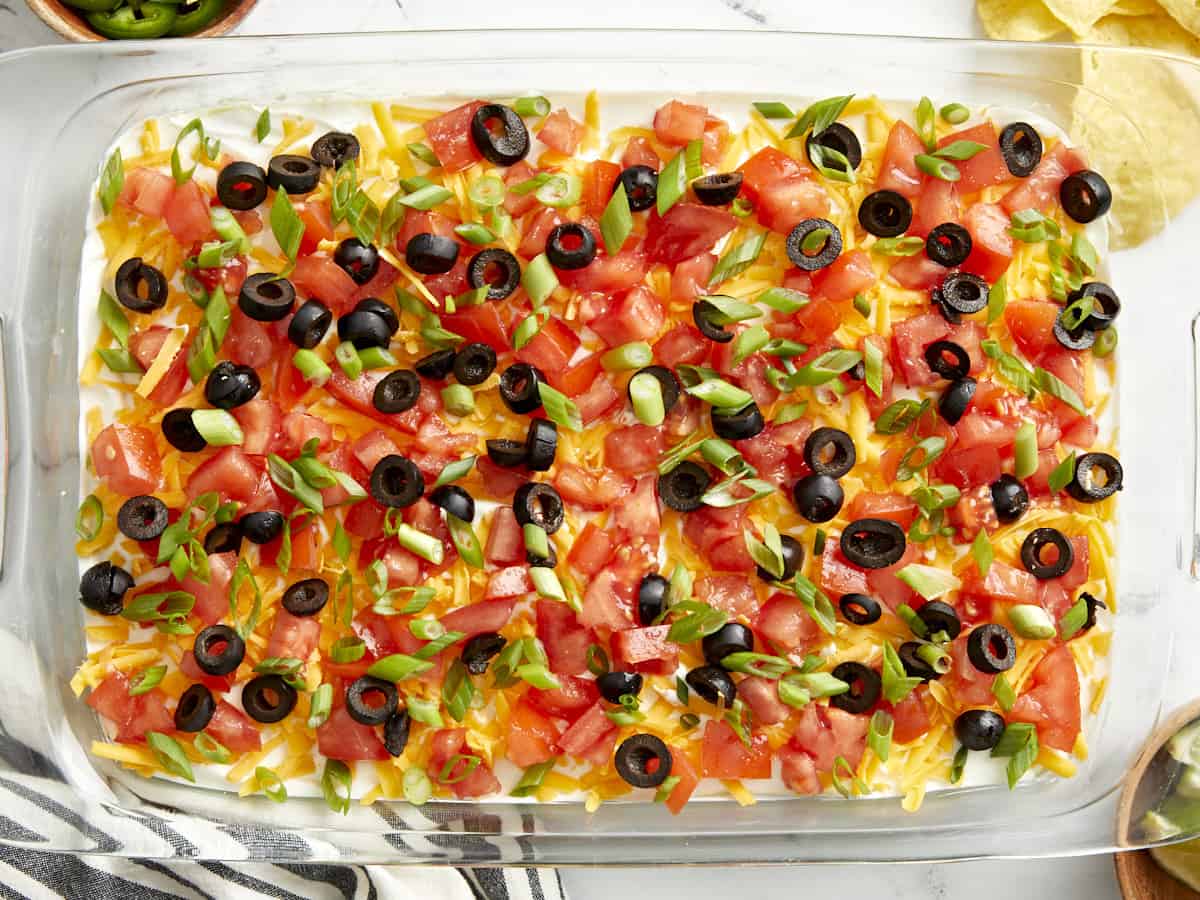
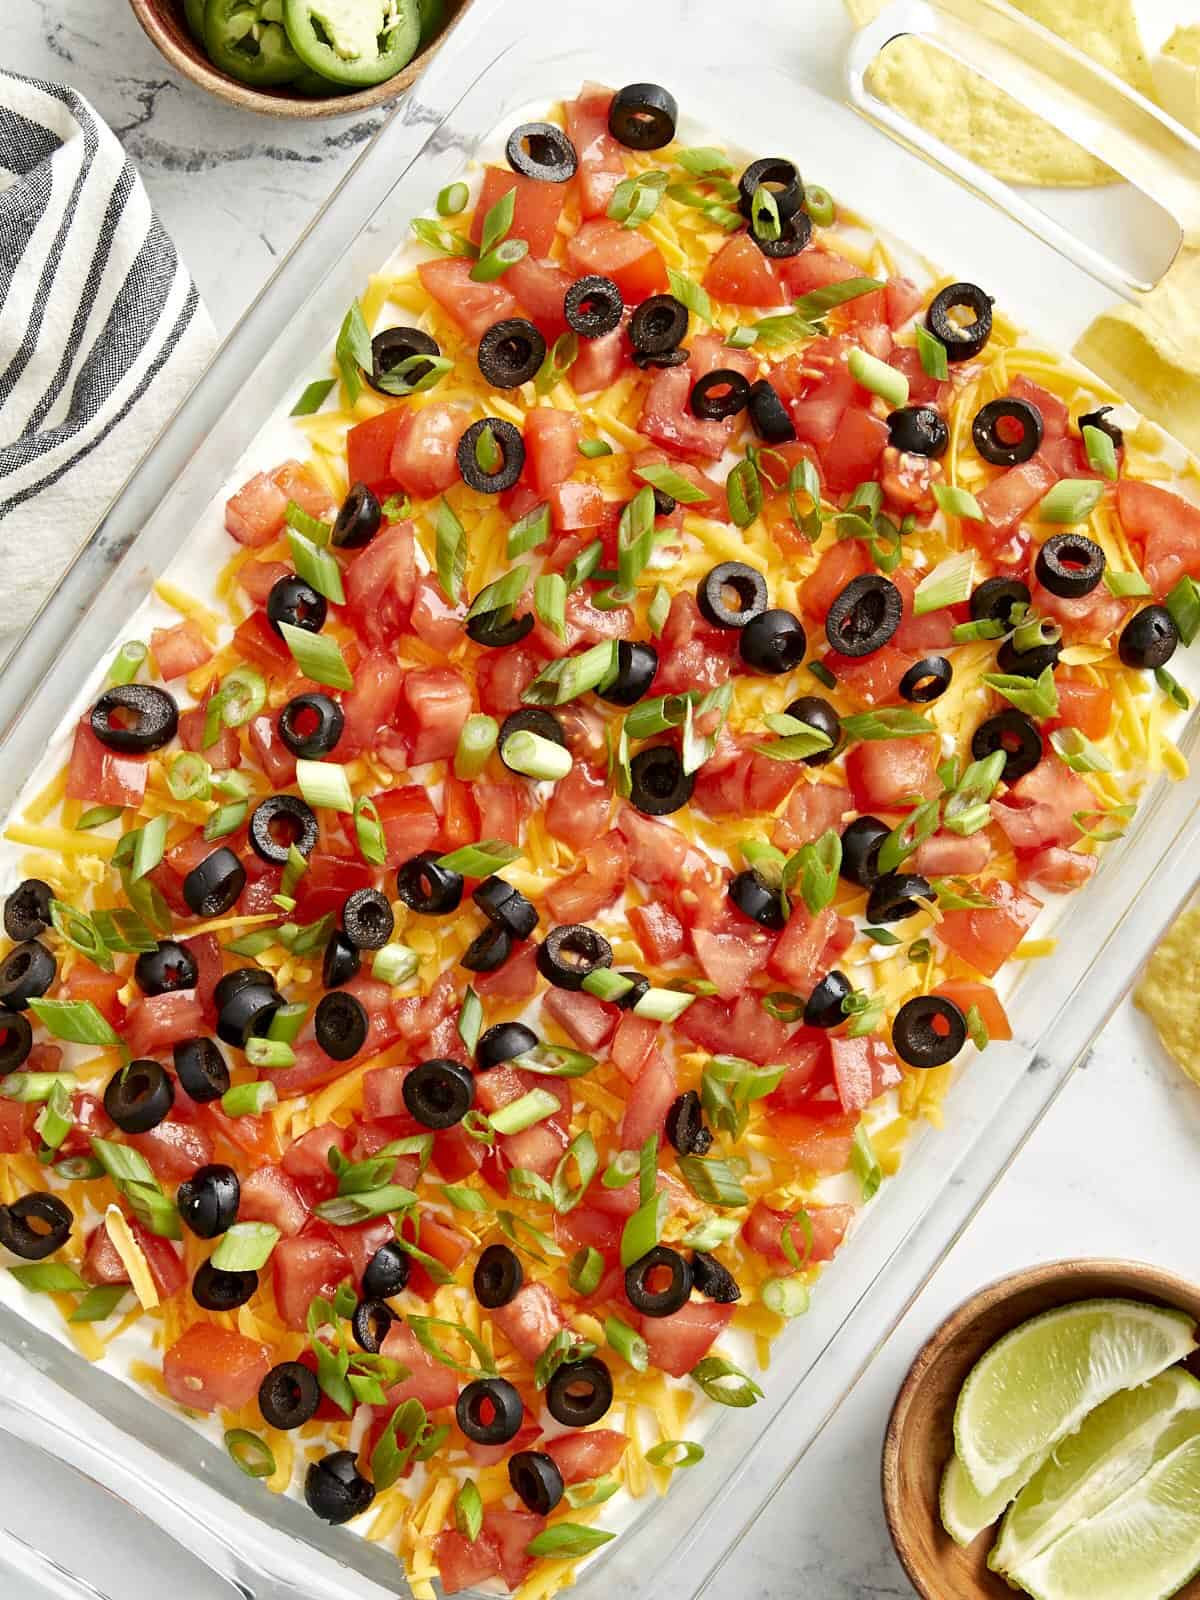
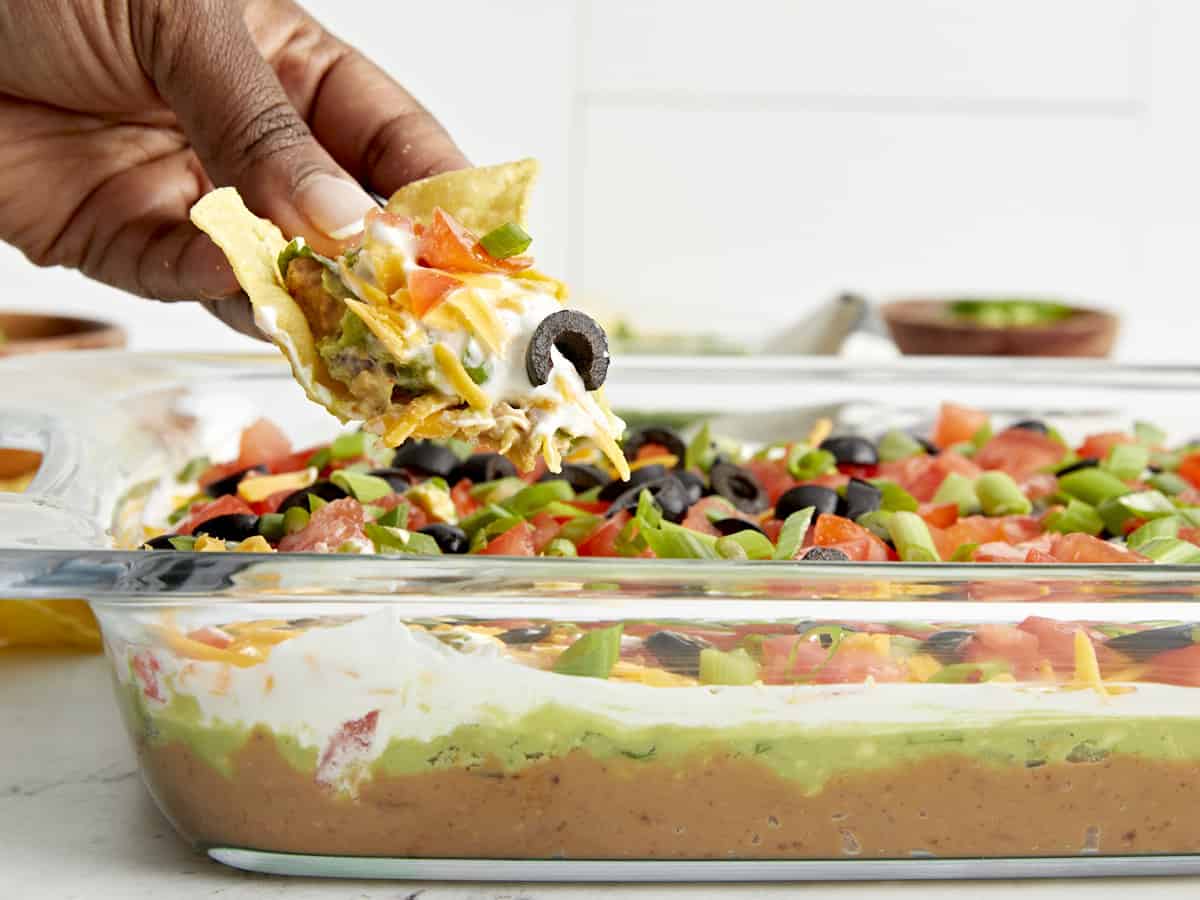
When you need a quick party appetizer that tastes good, is easy to make, and feeds a large crowd…this 7 Layer Dip is the one to make! It has all of my favorite Tex-Mex flavors in one dish and it’s perfect for serving at potlucks, football parties, and family gatherings. I’m always down for any type of chips and dip, but this 7 layer dip takes dips to a whole new level! I’m not sure which part I love the most, the fact that I don’t have to cook anything over a stove to make this recipe or that it comes in at just over $1 per serving. Either way, I highly recommend adding this 7 layer dip recipe to your Super Bowl menu this weekend.😉
What Is 7 Layer Dip?
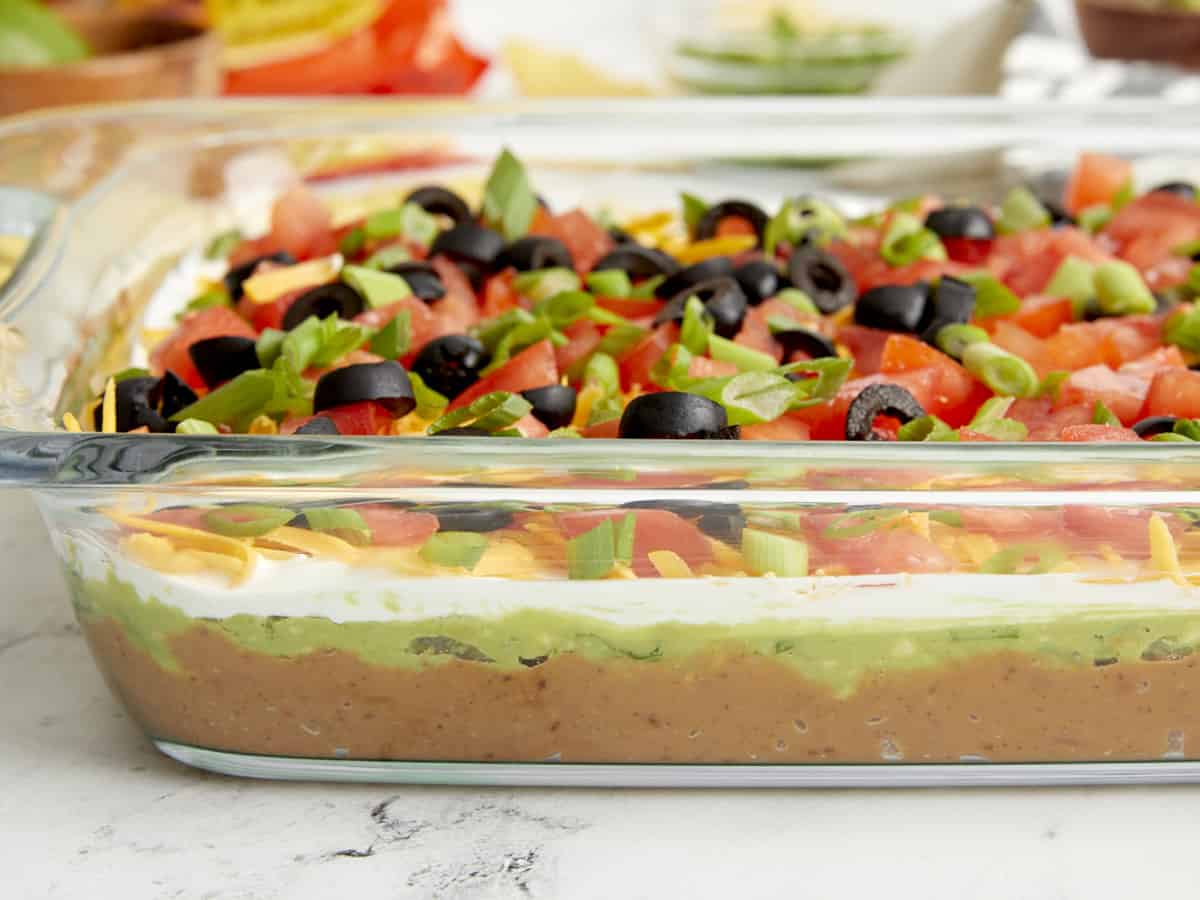
7 layer dip is an easy party appetizer that’s made by building layers of creamy, flavorful, ingredients like refried beans and guacamole into a 9×13” dish. It’s fun to serve at football parties and family gatherings, there’s no need to heat up a stove, and it’s perfect for feeding a crowd!
Ingredients For 7 Layer Dip
Here’s everything you need to make this easy 7 Layer Dip:
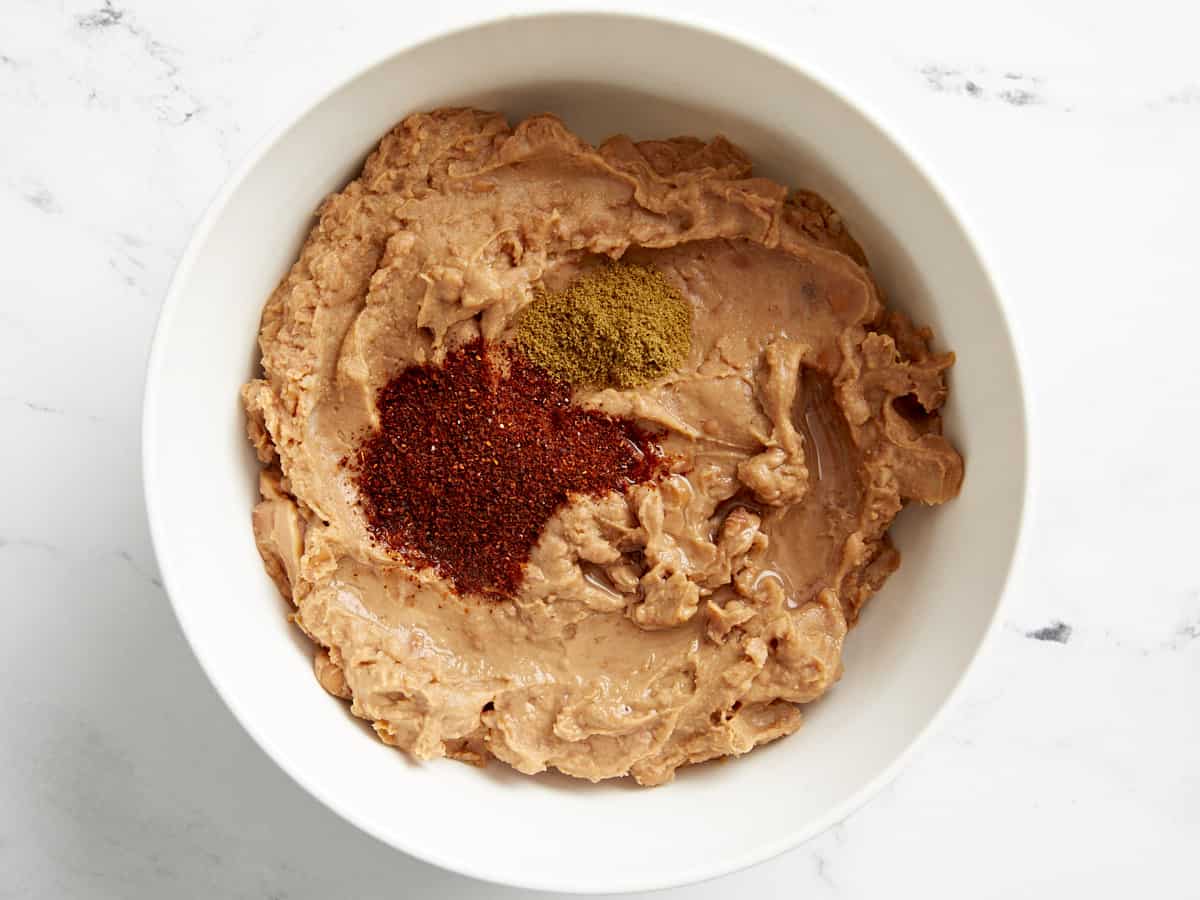
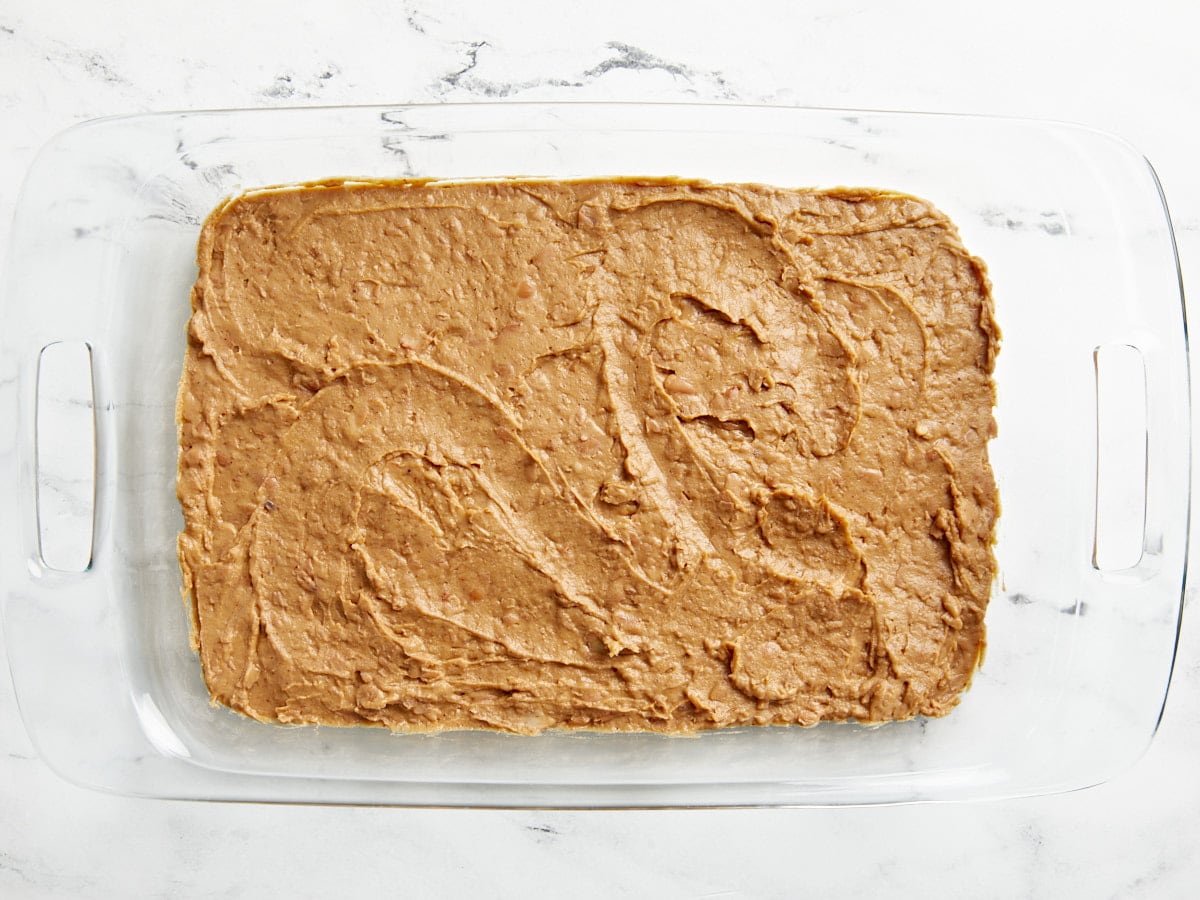
Refried Beans: You can certainly make your own refried beans, but to make things easy we used canned refried beans and seasoned it with a few spices.
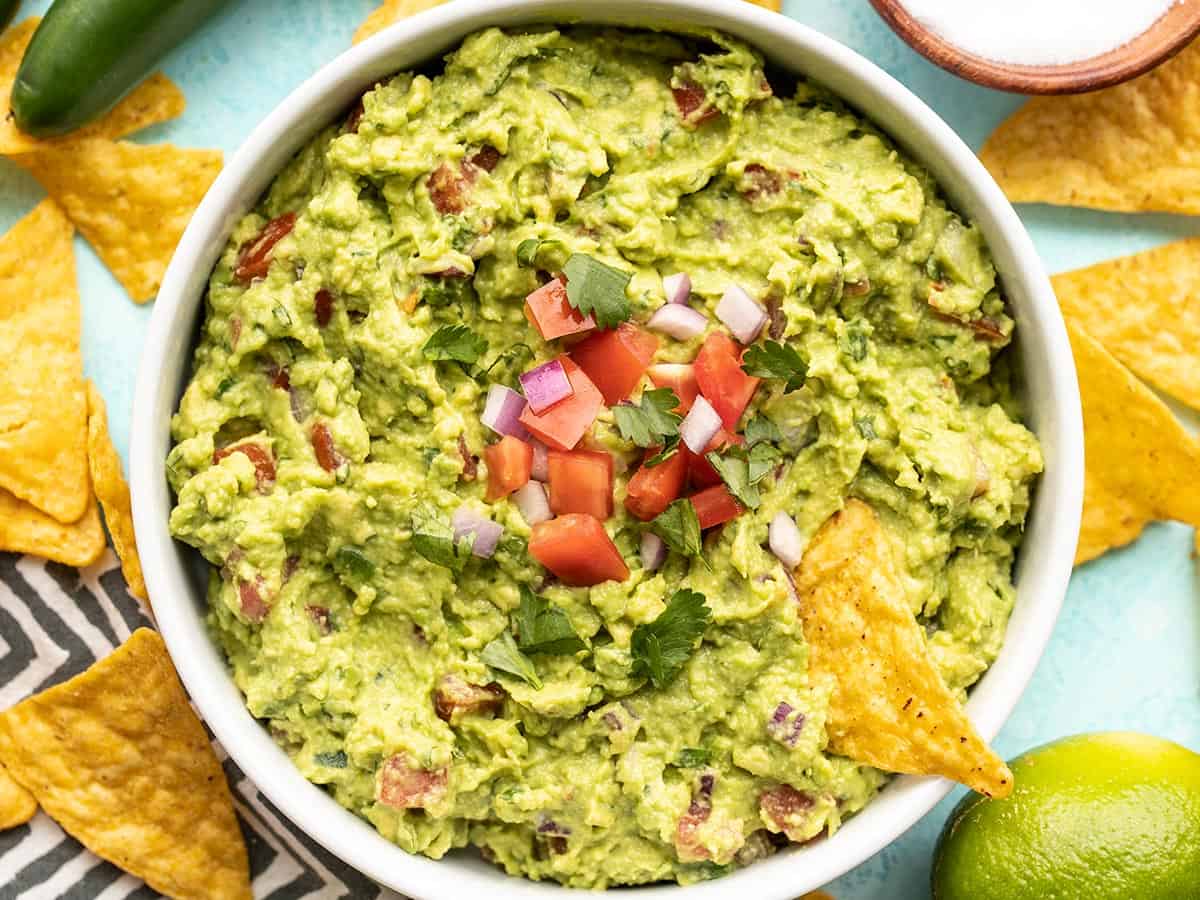
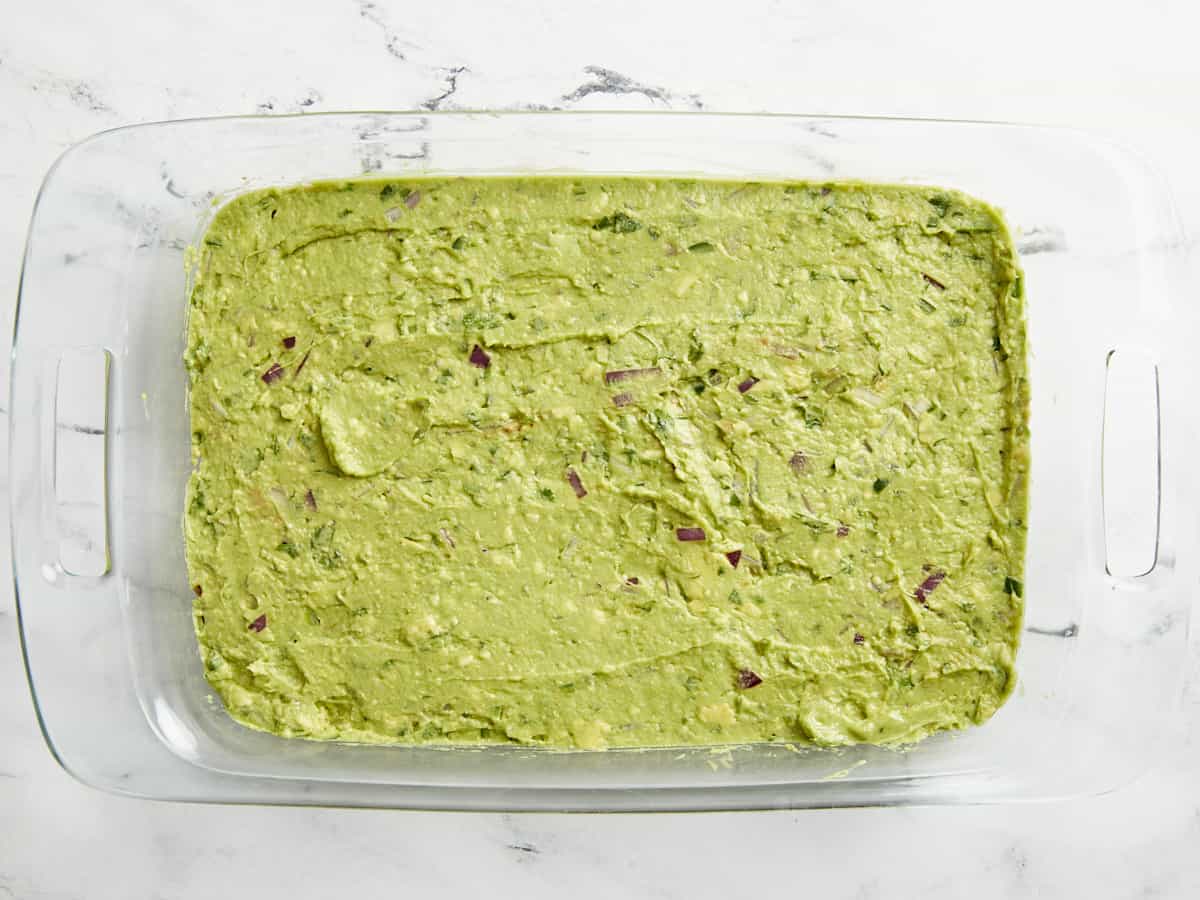
Guacamole: We made a quick batch of our homemade guacamole recipe, but to save time you can easily substitute with your favorite store-bought guacamole.
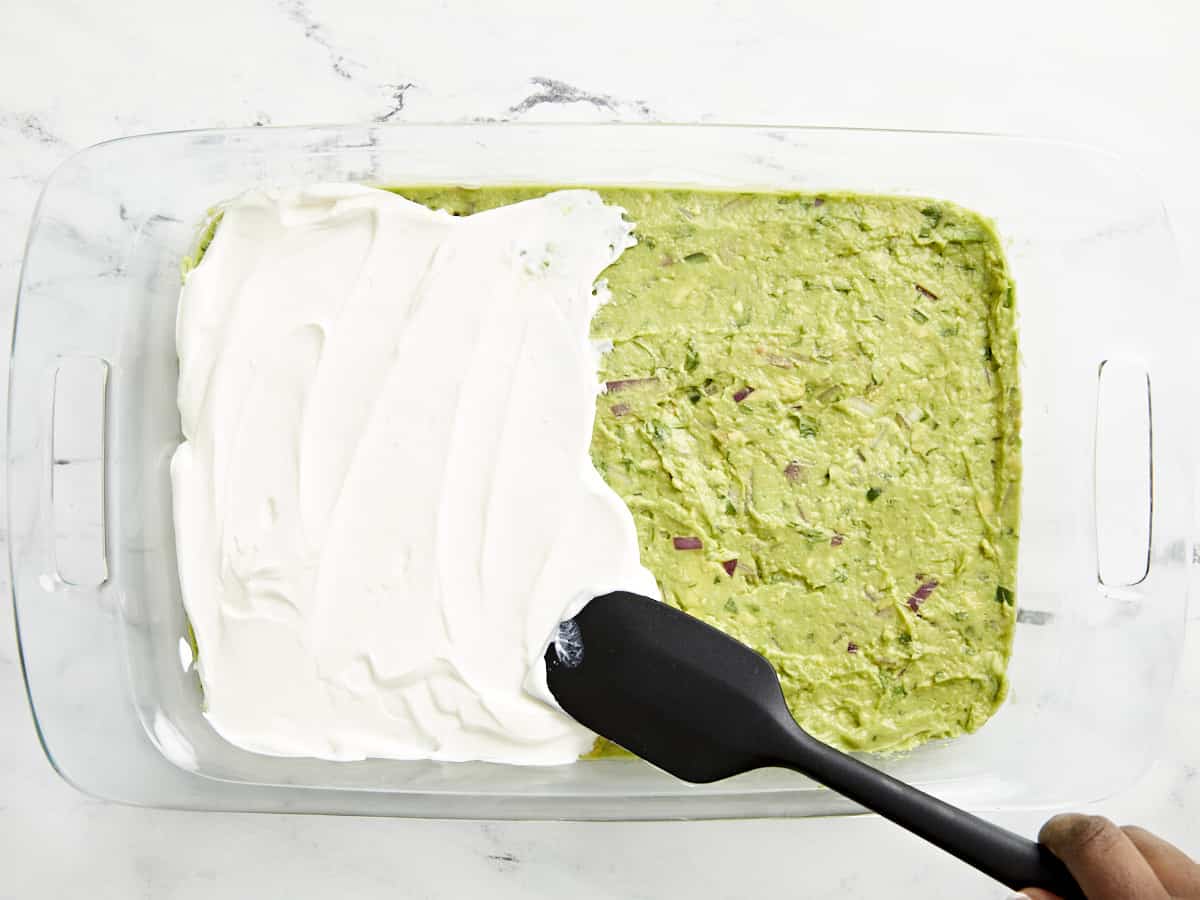
Sour Cream: No need to overthink this layer, just grab a tub of regular sour cream to spread on top of the guacamole. It adds the perfect creamy and tasty flavor to balance the beans and guacamole.
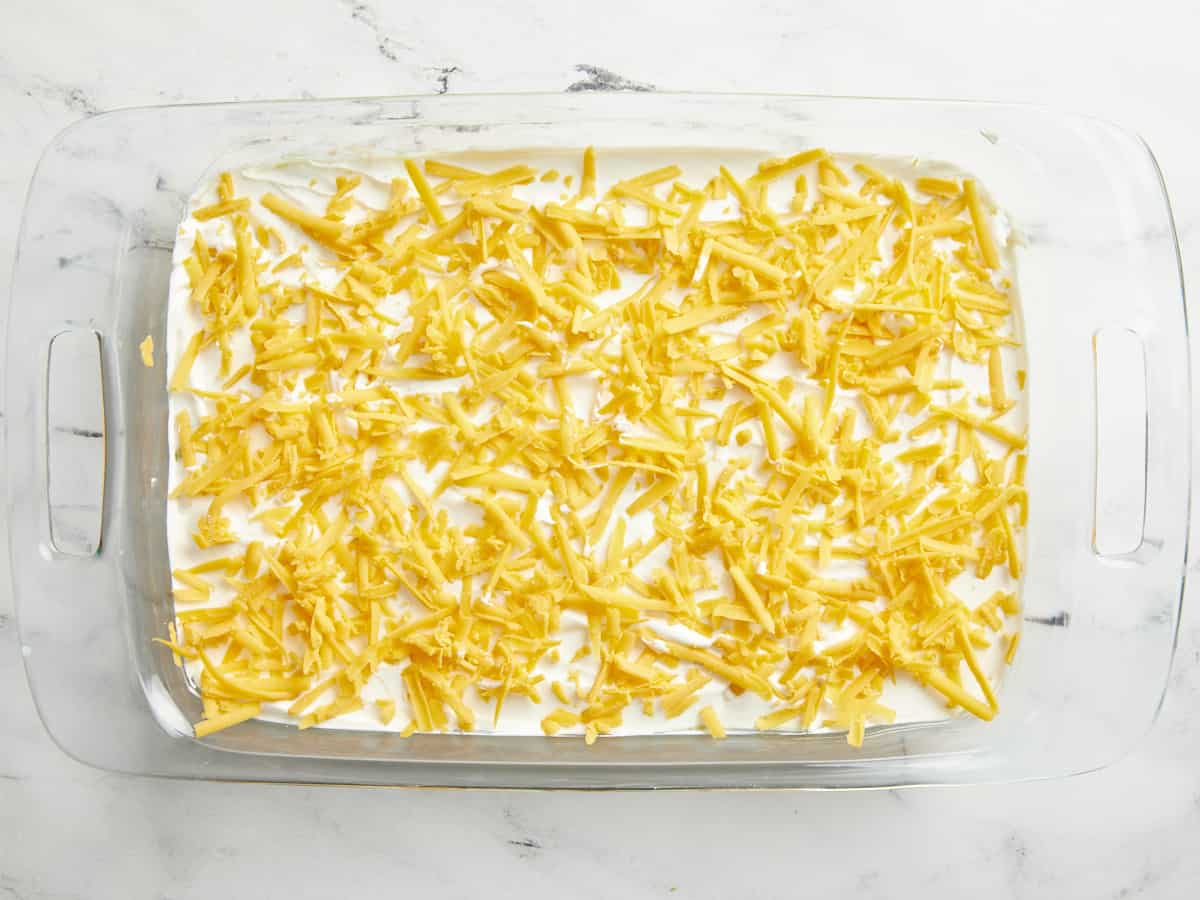
Cheddar Cheese: We used medium cheddar cheese but you can certainly use mild or a different flavor cheese if you prefer. And we highly recommend buying the cheese in block form and shredding it yourself for this recipe.
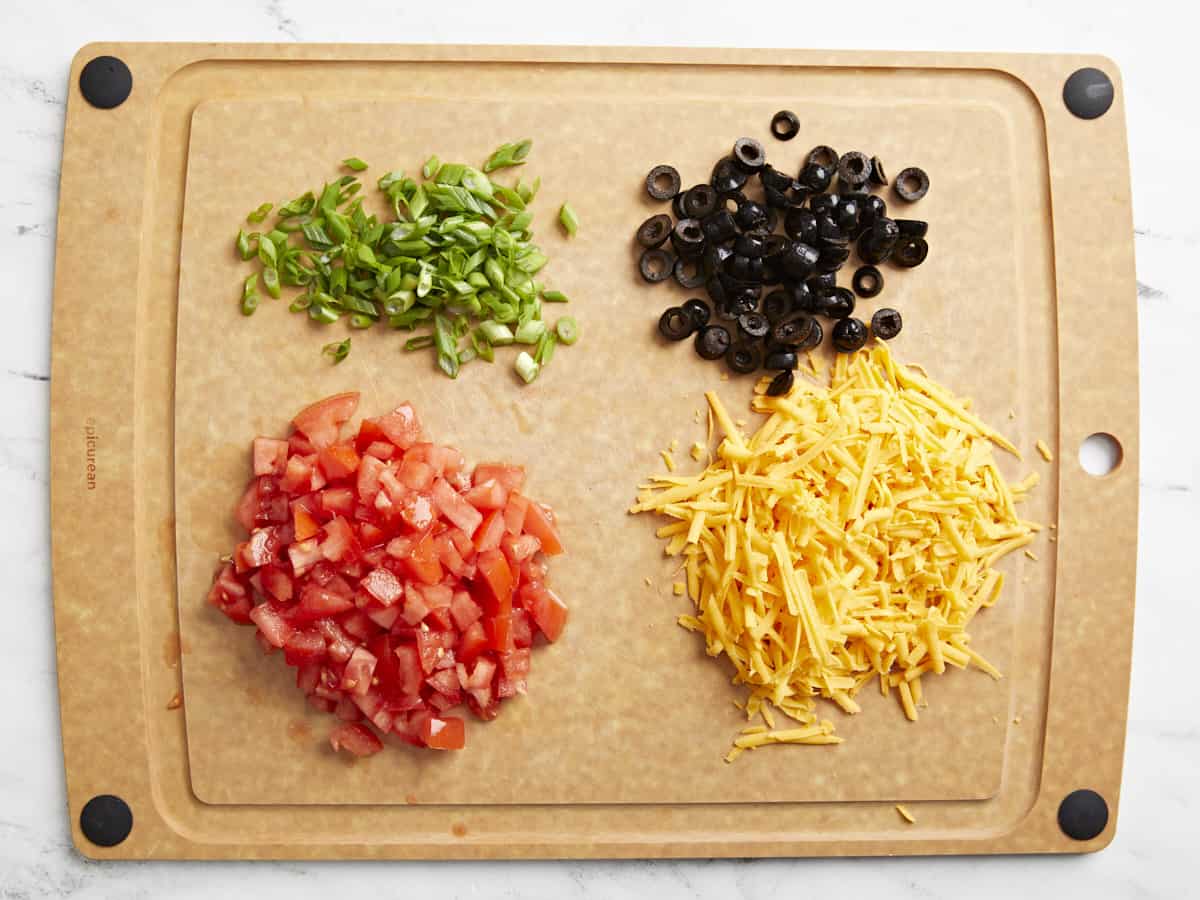
Tomatoes: Diced Roma tomatoes or vine-ripe tomatoes both work well and are added on top of the cheese layer.
Black Olives: Black olives add wonderful color, texture, and flavor to the dip. Because olives tend to be salty and tangy with bold flavors, you’ll only need a few of them for this 7 layer dip.
Green Onions: The final layer is a sprinkle of sliced green onions which add not only great flavor, but also a beautiful vibrant color to the dip!
Recipe Variations
Use taco seasoning – If you happen to have a batch of taco seasoning in your panty, use 1 ½ tablespoons of it instead of the chili powder, cumin, and salt to season your refried beans. This will give the beans even more flavor! You can also mix a little bit in to your sour cream to give it an extra boost of flavor.
Add seasoned ground meat – You can make this 7 layer dip even more filling by adding a layer of taco seasoned ground beef or ground turkey. I would add it right after the refried beans layer.
Add salsa – Your favorite thick salsa also works really well with this dip recipe. If you want to add it as a layer, just make sure to drain any excess liquid from the salsa to keep the dip from getting too soggy.
Storing LEftovers
This dip is definitely best served and eaten the same day it’s made, but if you happen to have leftovers, just store any leftovers covered tightly in the refrigerator for 3-4 days. The guacamole may start to brown slightly and the dip may get a bit watery around the edges, but it will still taste delicious!
Dice 2 tomatoes, shred 1 1/2 cups of cheddar cheese, drain 1/2 cup black olives, and slice 3 green onions. Set these ingredients to the side.
In a medium bowl add 2-16oz. cans of refried beans along with 1 Tbsp chili powder, 1/2 tsp cumin, 1/4 tsp salt, and 2 Tbsp water. Mix these ingredients together until well combined.
Spread the seasoned refried beans into the bottom of a 9×13” casserole dish.
Next spread 2 1/2 cups of guacamole evenly on top of the refried beans.
Then spread 1 1/2 cups of sour cream evenly on top of the guacamole mixture.
Sprinkle the shredded cheese evenly on top of the sour cream.
Now add the diced tomatoes, black olives, and green onions on top. Make sure everything is spread as evenly as possible.
Enjoy this tasty appetizer dip immediately with tortilla chips or cover and place in the refrigerator until ready to serve.
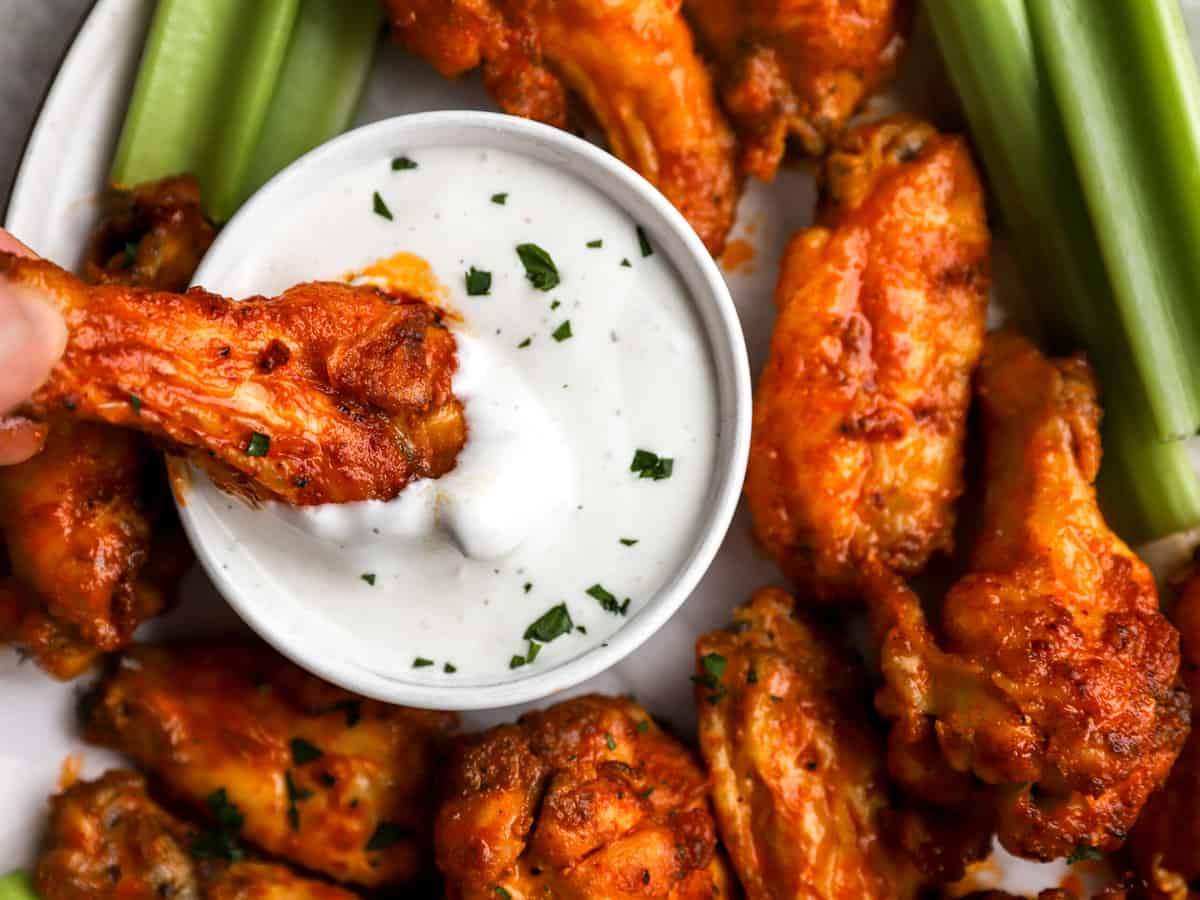
When it’s game day, there’s no food I crave more than spicy, saucy Buffalo Wings! I always thought they’d be such a pain to make, but baking them in the oven makes the process so easy. This buffalo wing recipe has all the great flavor of classic fried wings with none of the mess of deep frying.
Why Make Buffalo Wings?
Even on Wing Wednesday, buffalo wings can still be pricey. The price per wing really adds up, and I knew there must be a better and cheaper way. It turns out that making them at home was the solution to my wing woes! Seasoned with classic spices like paprika, garlic, and onion, these wings already have so much flavor. Once tossed in that creamy, buttery Buffalo Sauce, you’ll be wondering why you never made them at home before!
Ingredients for Buffalo Wings
Cornstarch: A bit of cornstarch helps keep the wings crispy.
Spices: Paprika, smoked paprika, onion powder, garlic powder, cayenne pepper, black pepper, and salt add so much flavor to the wings. Keep the garlic powder handy for the sauce, too!
Cooking Oil: You’ll need just enough to drizzle over the wings so they crisp up in the oven. Canola or vegetable oil both work well here.
Chicken Wings: Wings or drumettes both work for this recipe, so choose one type or both for variety.
Butter: Unsalted butter makes the sauce thick and creamy.
Franks RedHot Sauce: Hot sauce is the one ingredient you’ll want to splurge a bit on. It gives these wings their signature flavor and spice! Use the leftovers to make Spinach Artichoke Dip.
Worcestershire Sauce: This umami sauce adds depth to the buffalo sauce.
Pat the wings dry before seasoning them to remove excess moisture.
Don’t skip the cornstarch. Tossing the wings in cornstarch helps bring moisture to the surface, leading to ultra-crispy wings.
Bake the wings on a wire rack to allow the hot air to circulate evenly around them. This will crisp the wings on all sides!
If making ahead, wait to toss the wings in the sauce until just before serving.
How To Store Leftovers
Once baked and cooled, store leftover buffalo wings in an air-tight container in the refrigerator for up to 3 days. Freeze them in a single layer on a lined baking sheet until solid, about 1-2 hours, before transferring to an air-tight container to store for up to 3 months. Reheat on a wire rack set in a baking sheet in a 350°F oven for 7-10 minutes if refrigerated or 15-20 minutes if frozen.
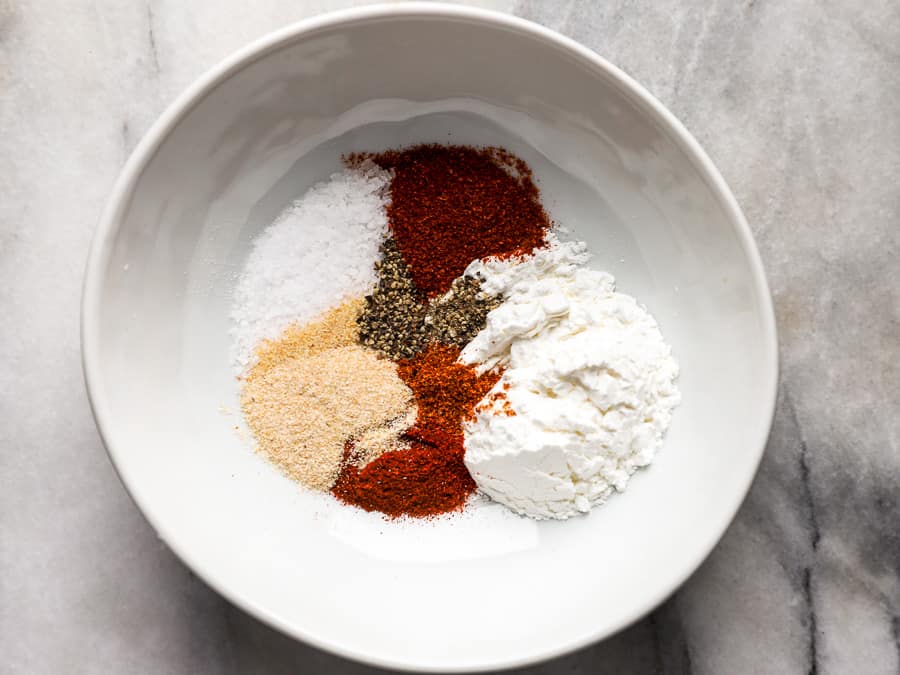
Preheat the oven to 400ºF. In a small bowl, combine the cornstarch, paprika, smoked paprika, garlic powder, onion powder, cayenne, pepper, and salt.
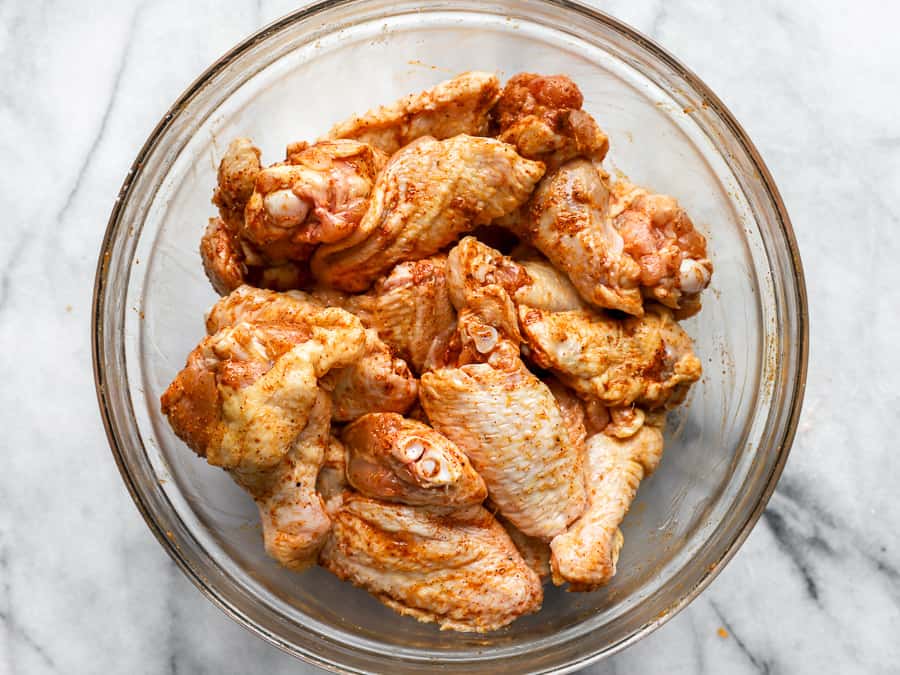
Pat the wings dry, then place them in a bowl. Drizzle the cooking oil over top, then toss until the wings are coated in oil. Add the cornstarch-seasoning mixture, then toss to coat again.
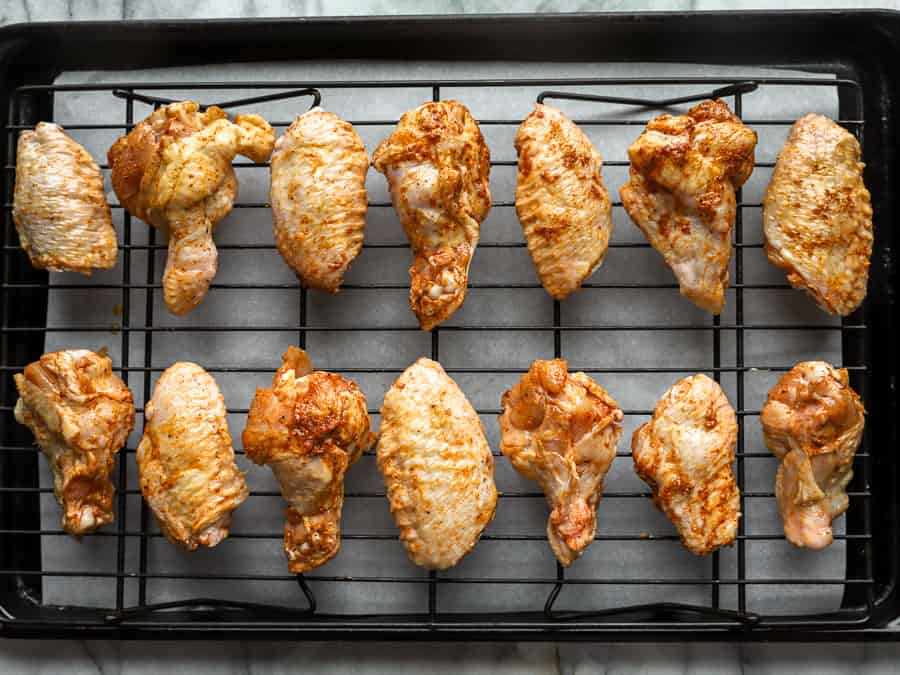
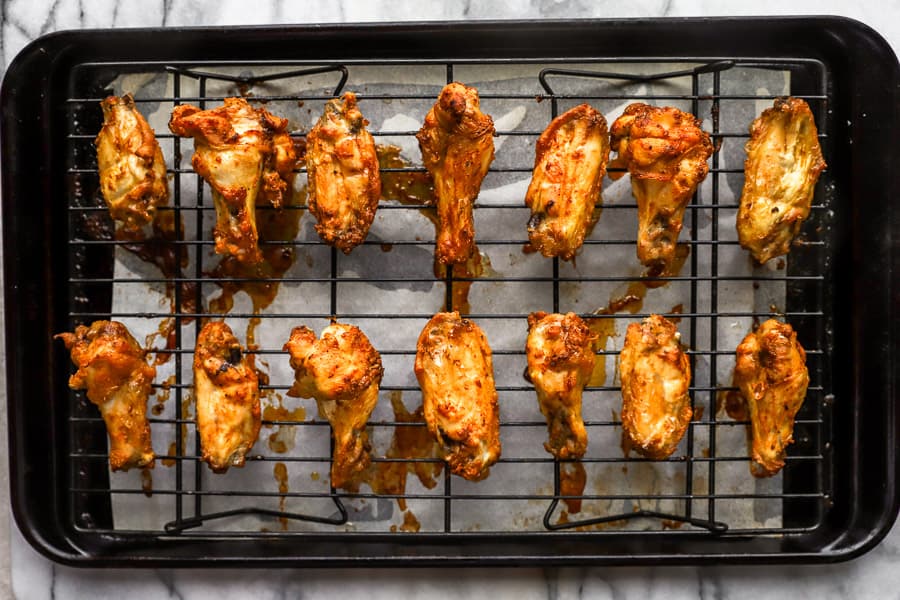
Line a baking sheet with parchment paper for easy cleanup, then place wire cooling racks on top. Place the seasoned chicken wings on the wire racks with space between each wing.
Bake the wings for 30 minutes, then flip and bake for 20-25 minutes, or until the wings have achieved the amount of browning desired (this will depend on the size of your wings).
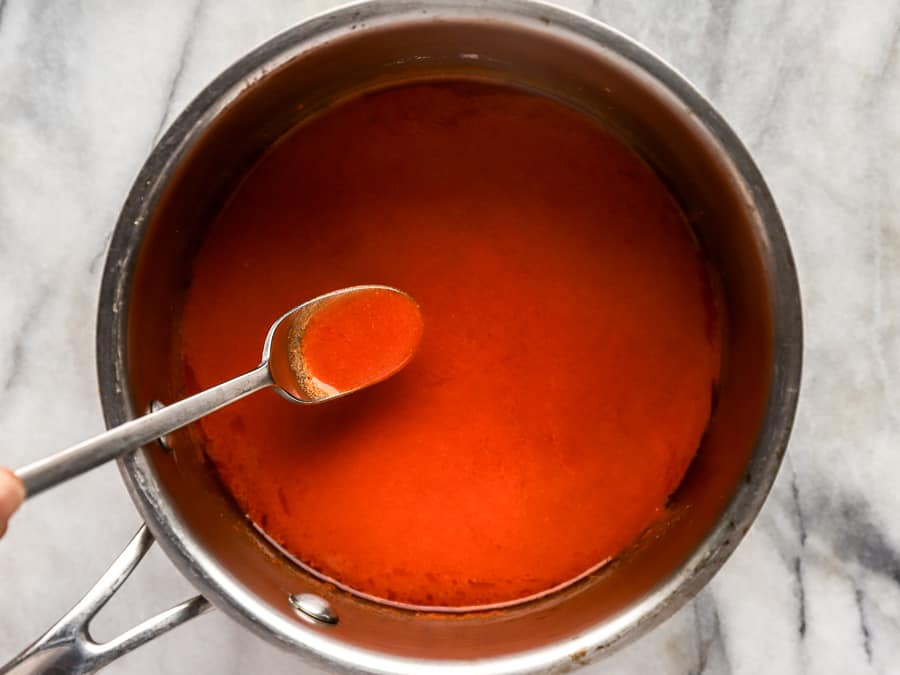
While the wings are in the oven, melt the butter in a small saucepot over medium heat, then add the remaining ingredients (hot sauce, Worcestershire, garlic powder).
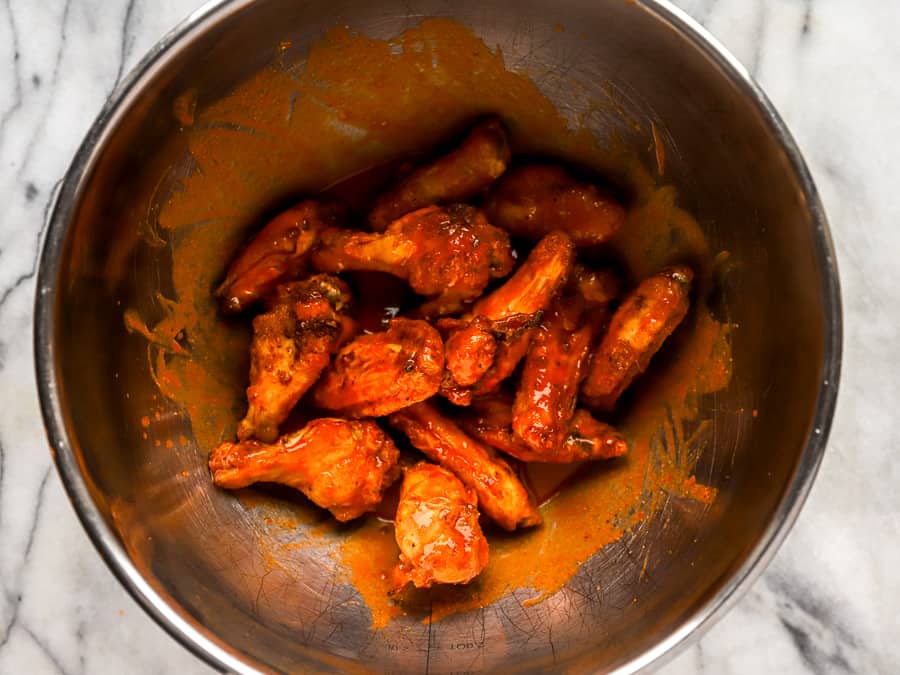
Transfer the wings to a large bowl. Pour the sauce over the wings and toss until fully coated.
Preheat the oven to 400ºF. In a small bowl, combine 1 Tbsp cornstarch, 1/2 tsp paprika, 1/2 tsp smoked paprika, 1/2 tsp garlic powder, 1/4 tsp onion powder, 1/8 tsp cayenne, 1/4 tsp pepper, and 1/2 tsp salt.
Pat 2.5 lbs. of chicken wings dry, then place them in a bowl. Drizzle 1 Tbsp cooking oil over top, then toss until the wings are coated in oil. Add the cornstarch-seasoning mixture, then toss to coat again.
Line a baking sheet with parchment paper for easy cleanup, then place wire cooling racks on top. Place the seasoned chicken wings on the wire racks with space between each wing.
Bake the wings for 30 minutes, then flip and bake for 20-25 minutes, or until the wings have achieved the amount of browning desired (this will depend on the size of your wings).
While the wings are in the oven, melt 4 Tbsp butter in a small saucepot over medium heat, then add the remaining ingredients (1/2 cup hot sauce, 1 tsp Worcestershire, 1/2 tsp garlic powder).
Transfer the wings to a large bowl. Pour the sauce over the wings and toss until fully coated.
These buffalo wings are crispy, spicy, and so delicious– everything you want in a wing recipe!
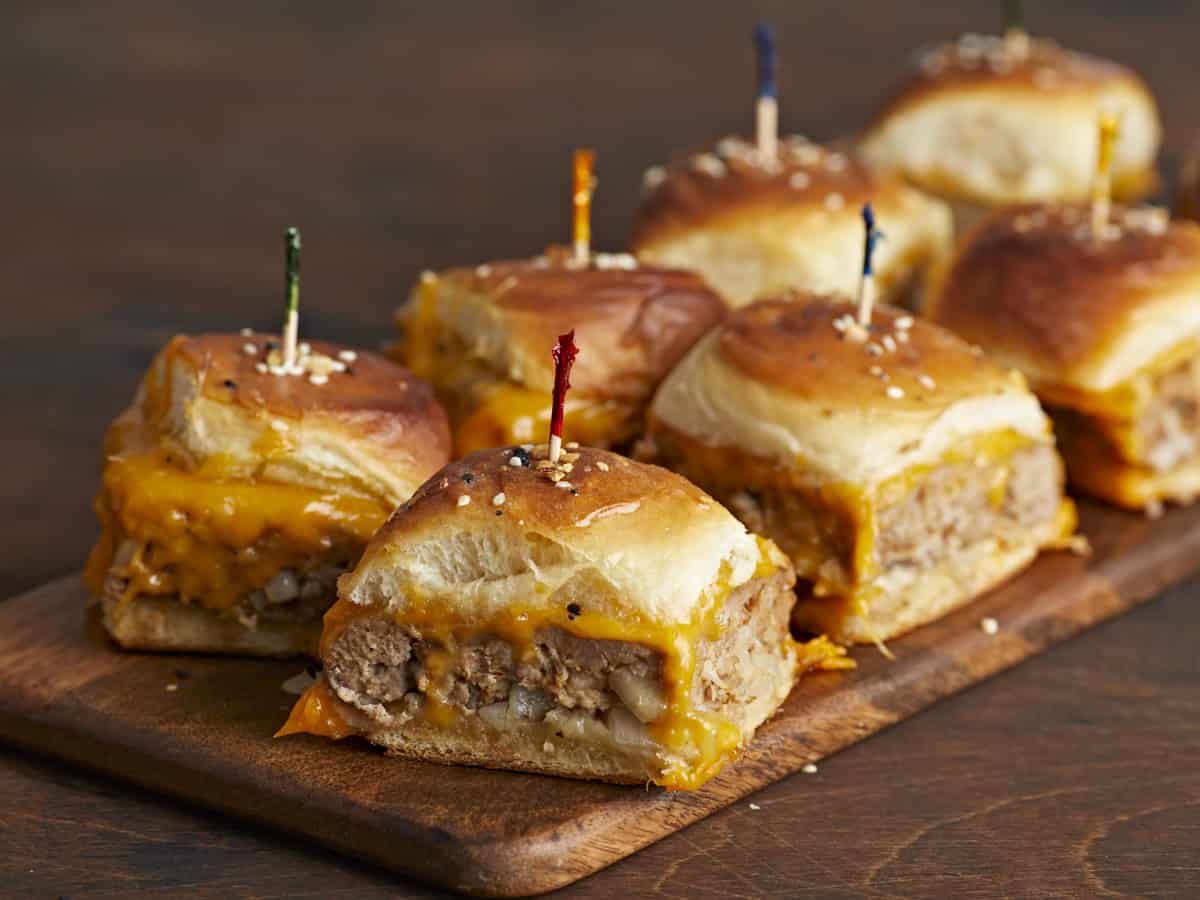
The Chopped Italian Sliders recipe has taken the internet by storm, becoming a viral sensation on TikTok. Packing classic Italian flavors into a compact, bite-sized delight, these mini sandwiches are the ultimate crowd-pleaser for game days and hearty …
The Chopped Italian Sliders recipe has taken the internet by storm, becoming a viral sensation on TikTok. Packing classic Italian flavors into a compact, bite-sized delight, these mini sandwiches are the ultimate crowd-pleaser for game days and hearty appetizer spreads. Each slider is a miniature chopped masterpiece, brimming with all those savory meats and rich...
Get ready to elevate your game-day spread with our top nine picks for this season’s most mouth-watering football dip recipes. Whether you’re
The post 9 Easy Game Day Party Dips appeared first on Salty Side Dish.
Get ready to elevate your game-day spread with our top nine picks for this season’s most mouth-watering football dip recipes. Whether you’re
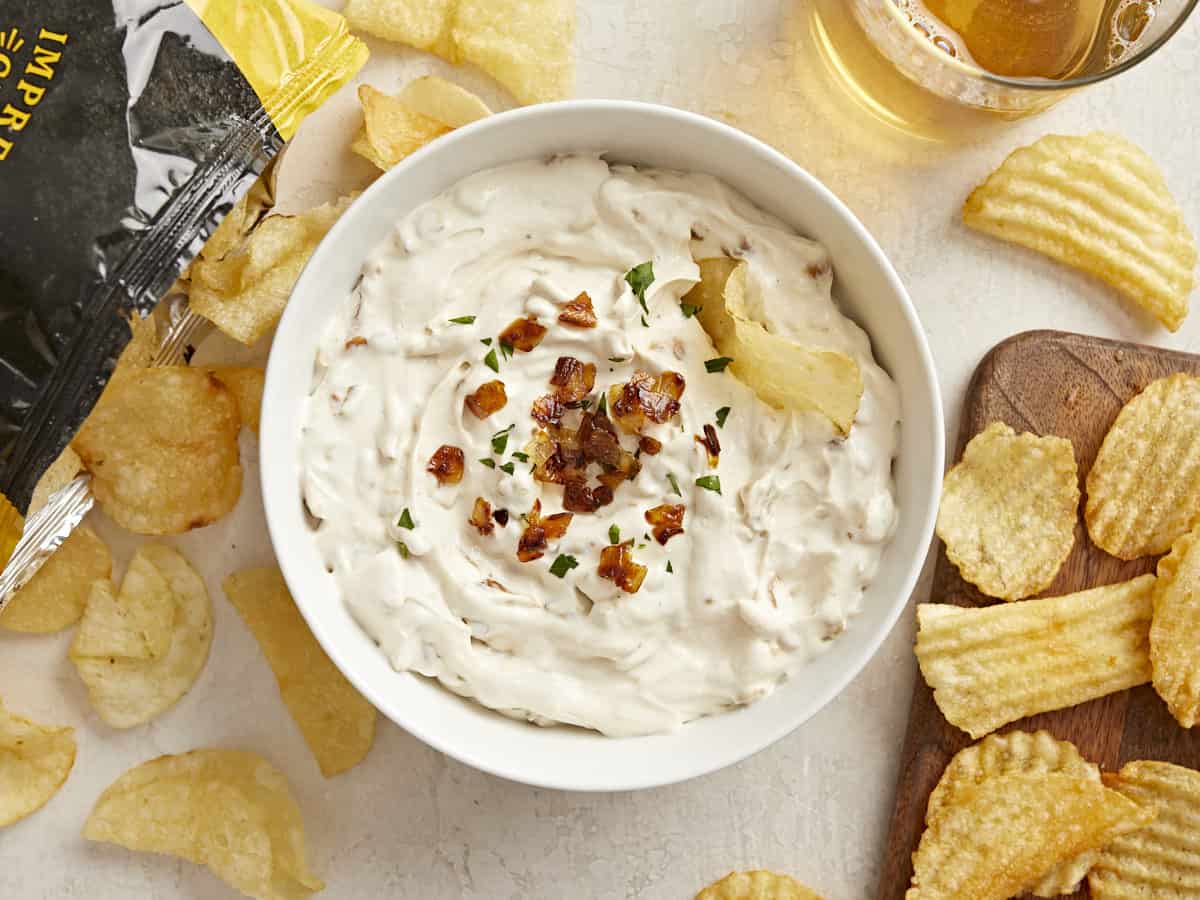
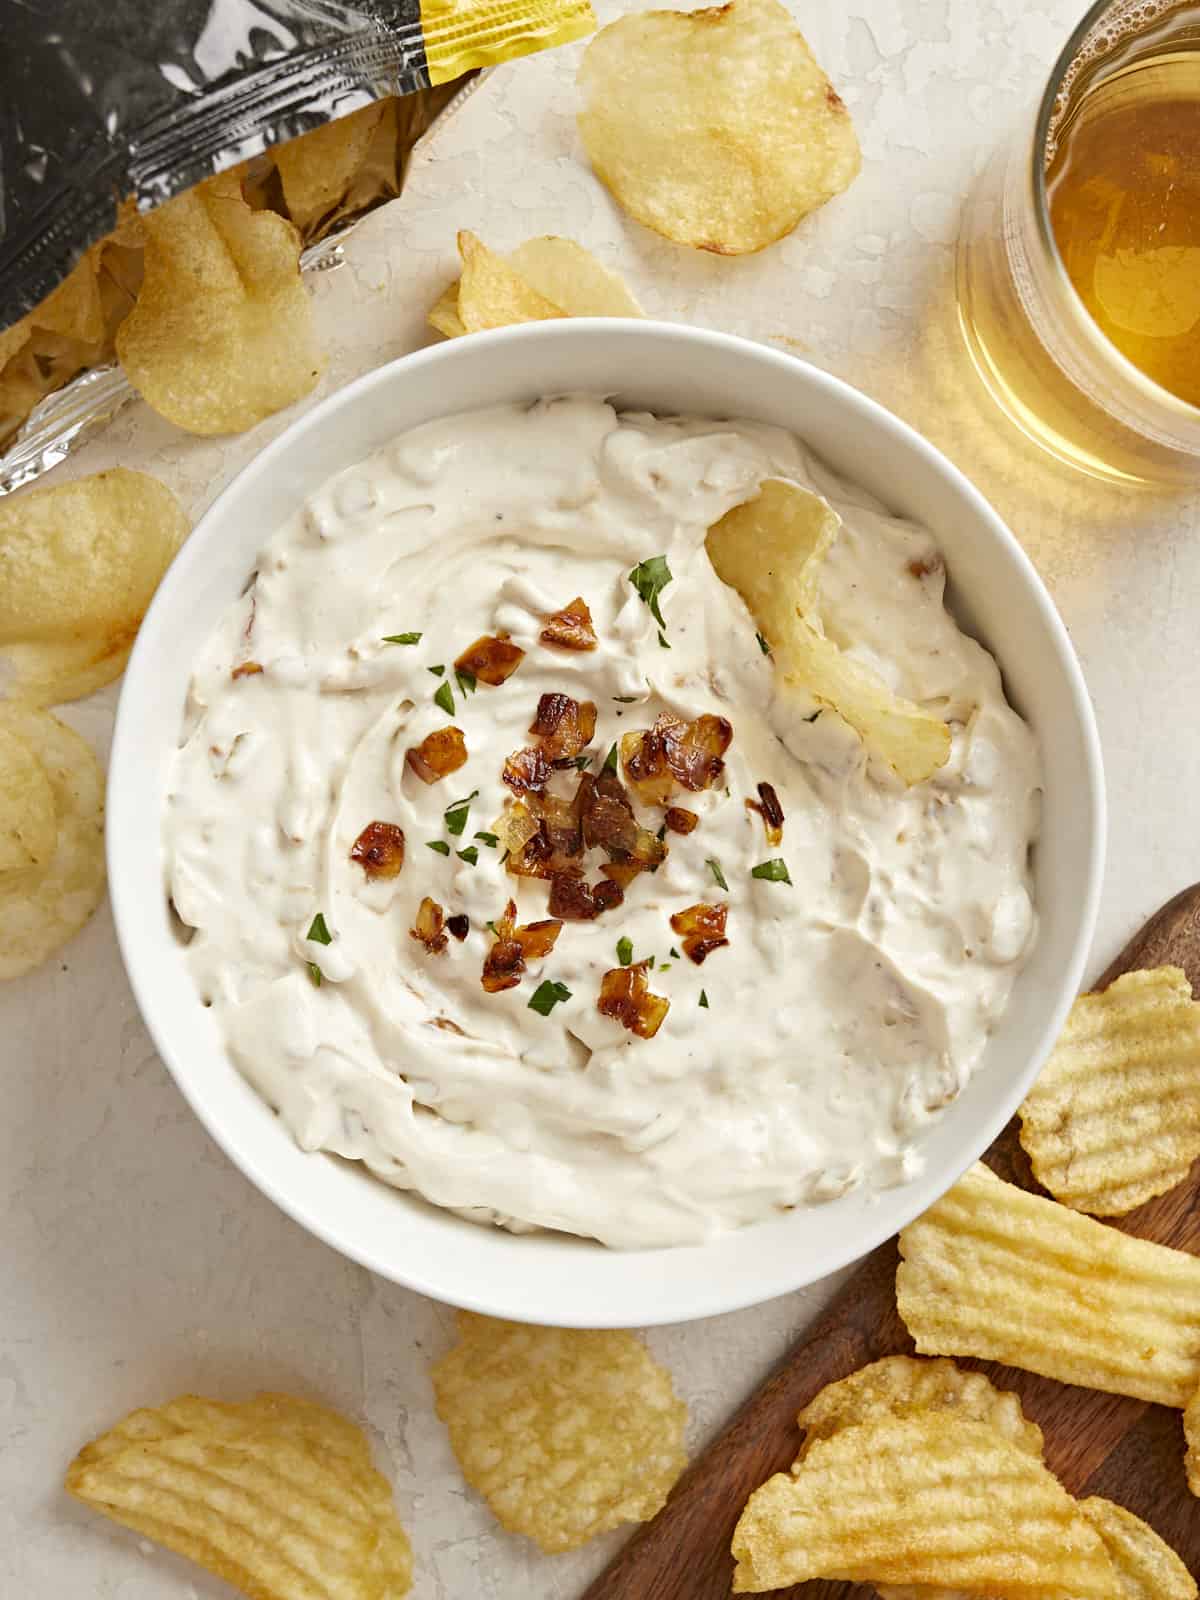
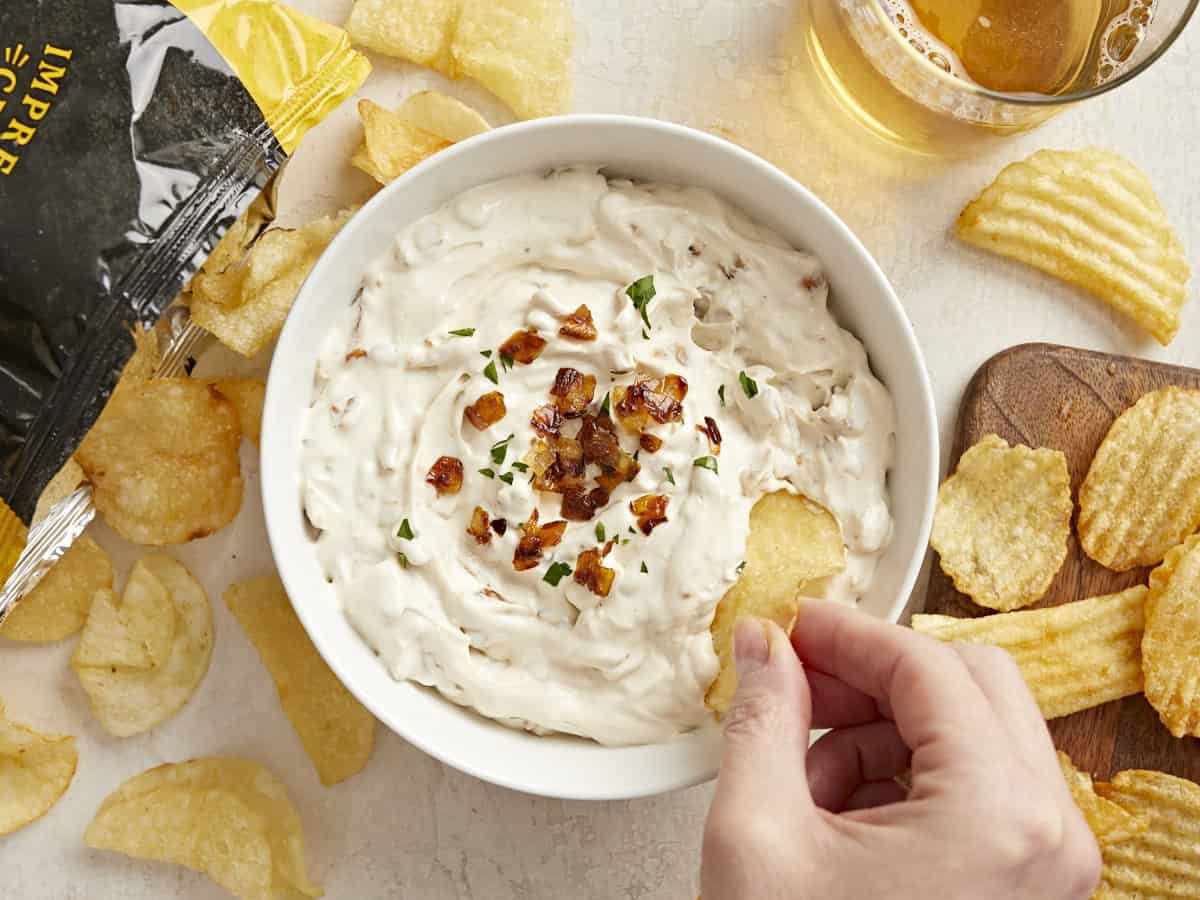
Caramelized onions are one of my favorite flavors EVER, so even though you can make a quick French Onion Dip made with just a packet of onion soup mix and sour cream, you know I’m going to try to make it from scratch instead! And this homemade French Onion Dip recipe is surprisingly easy! It only takes a few ingredients and it really lets the flavor of those caramelized onions shine. This dip is creamy, tangy, sweet, savory, and perfect for all your crunchy chips and crackers. Plus, it also makes an ah-maz-ing sandwich and burger spread, so even if you’re not a chip and dip person, you still need to try it!
What Is French Onion Dip?
French Onion Dip is a creamy and tangy dip for chips, crackers, vegetables, and more that has a flavor profile similar to French Onion Soup. The quick way to make French Onion Dip is to simply stir a packet of onion soup mix into a container of sour cream, but if you’re looking for more of a “from scratch” approach with that slow caramelized flavor, we’ve got you covered. And while caramelizing the onions does take a little bit of time, you don’t need many more ingredients to turn them into a really stellar dip!
Ingredients for French Onion Dip
Here’s what you’ll need to make a homemade French Onion Dip from scratch:
Onions: I just used plain ol’ yellow onions here, but if you want to get fancy you can go for a sweet onion like Vidalia or a Maui onion.
Butter: Butter makes the recipe extra rich and gives a slightly nutty flavor to the caramelized onions.
Cream Cheese: Cream cheese is the rich and tangy base for the dip.
Sour Cream: Sour cream lightens up the cream cheese just a touch and makes the dip much softer and dippable.
Worcestershire sauce: This gives the dip a savory note, similar to French onion soup.
Seasoning: I kept the seasonings simple so the flavor of the onions could shine through. All you’ll need is a bit of garlic powder, salt, and pepper. You can experiment with adding beef bouillon, but I found this to overwhelm the flavor of the dish, totally masking the delicately sweet flavor of the onions.
How to Serve French Onion Dip
French onion dip is classically served with potato chips, but it’s great for so much more! You can use it for crackers, on a vegetable platter (in place of ranch dip), or as a spread on sandwiches, wraps, or burgers. Try pairing this dip on a sandwich with thinly sliced roast beef, a slice of Swiss cheese, and spring mix. You won’t be disappointed! Or slather it onto a burger with some sautéed mushrooms. YES PLEASE.
How Long Does it Keep?
Homemade French Onion Dip will stay good in the refrigerator for about four to five days, but is not a good candidate for freezing. If your French Onion Dip has been in the refrigerator for a few days, make sure to give it a good stir before enjoying.
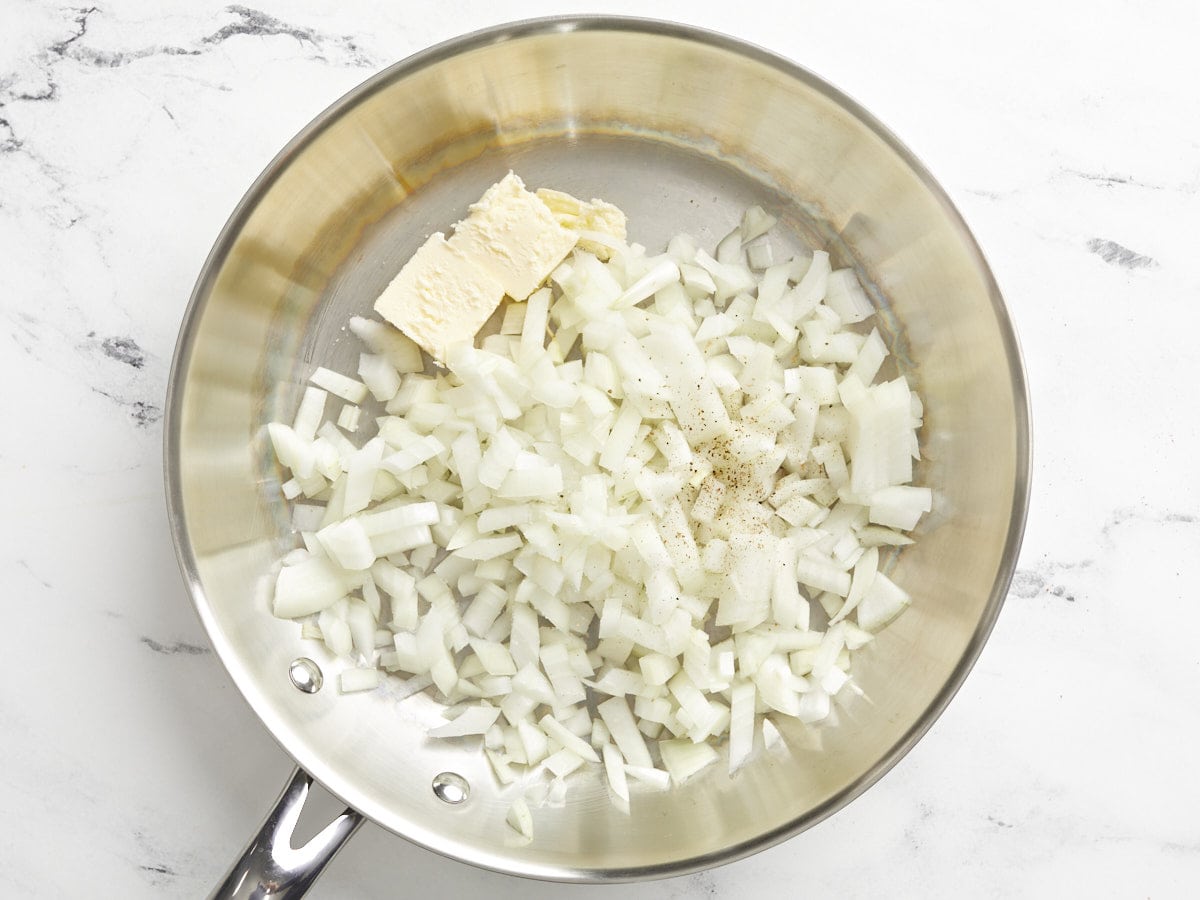
Dice the onions and place them in a skillet with the butter.
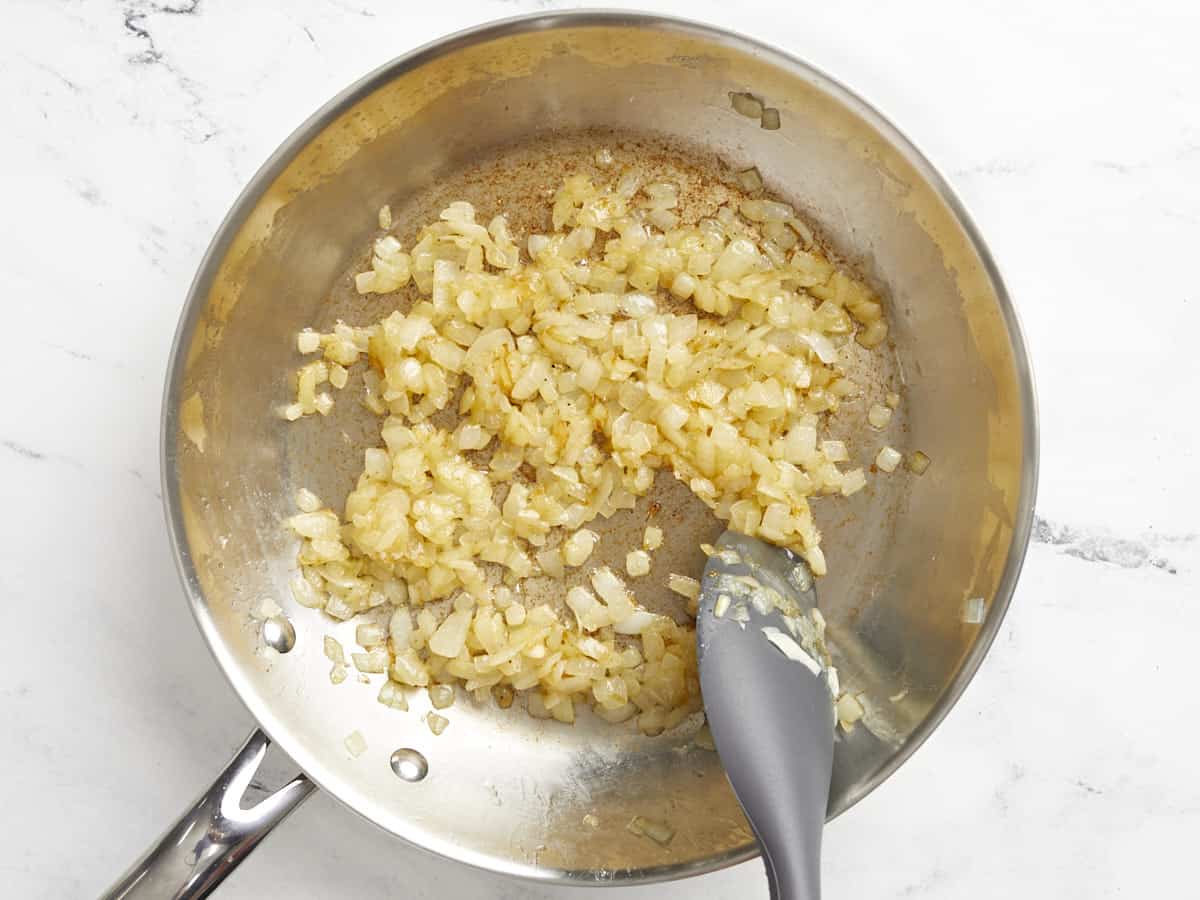
Cook the onions over medium-low heat, stirring occasionally, allowing them to soften and then slowly brown. Continue cooking for about 30 minutes, or until they achieve a deep copper brown color and jammy texture. If the skillet dries out too much as the onions cook, lower the heat slightly and add a tablespoon or two of water. On the flip side, if the onions are taking too long to cook, increase the heat slightly.
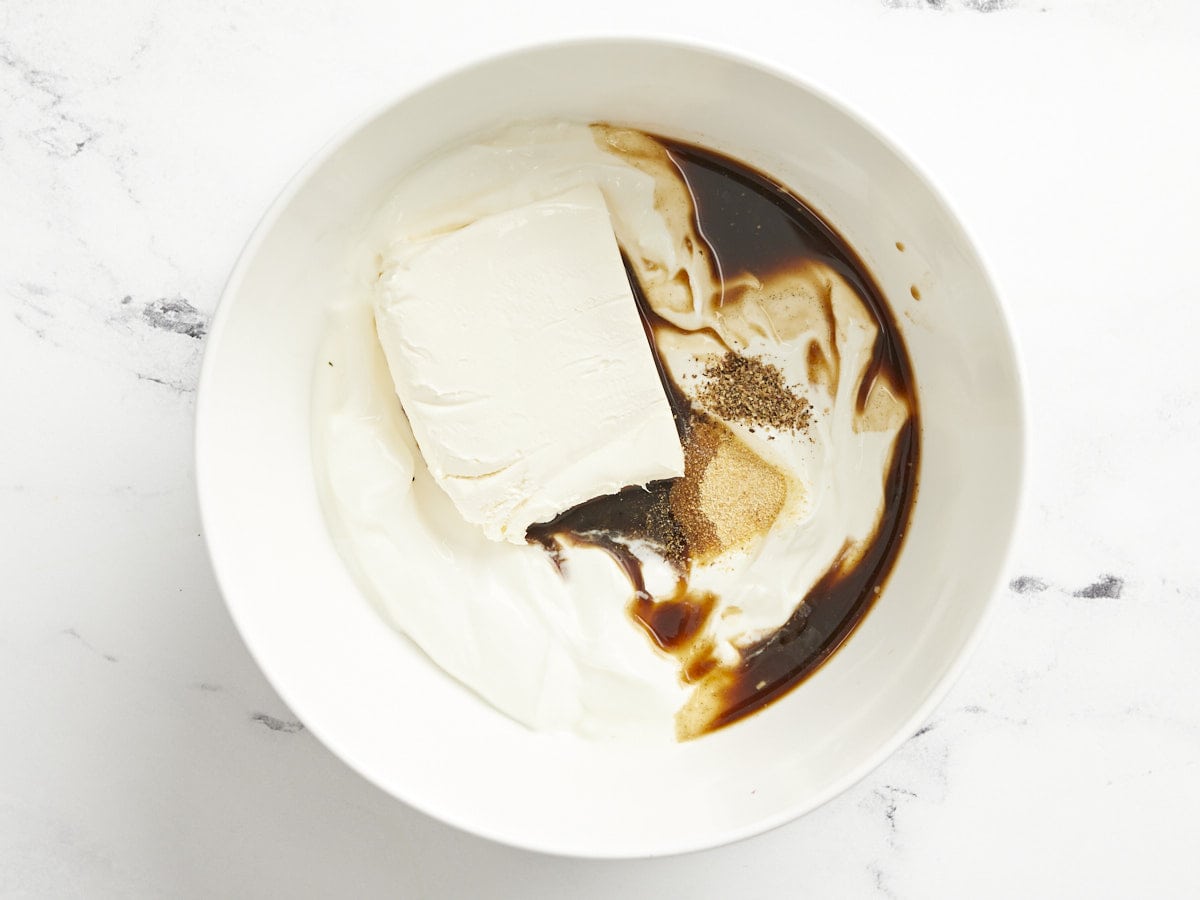
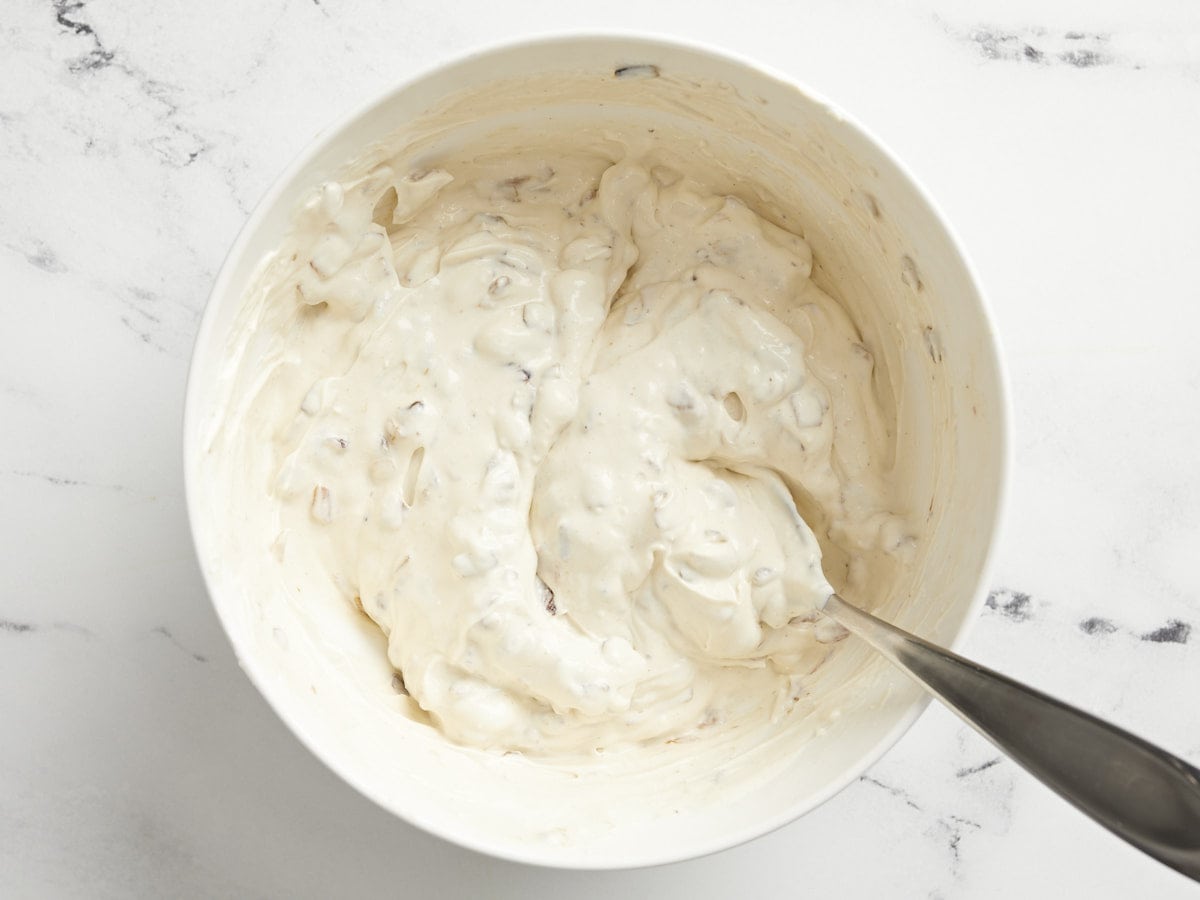
Meanwhile, stir together the cream cheese, sour cream, Worcestershire sauce, garlic powder, salt, and pepper in a bowl until smooth and evenly combined.
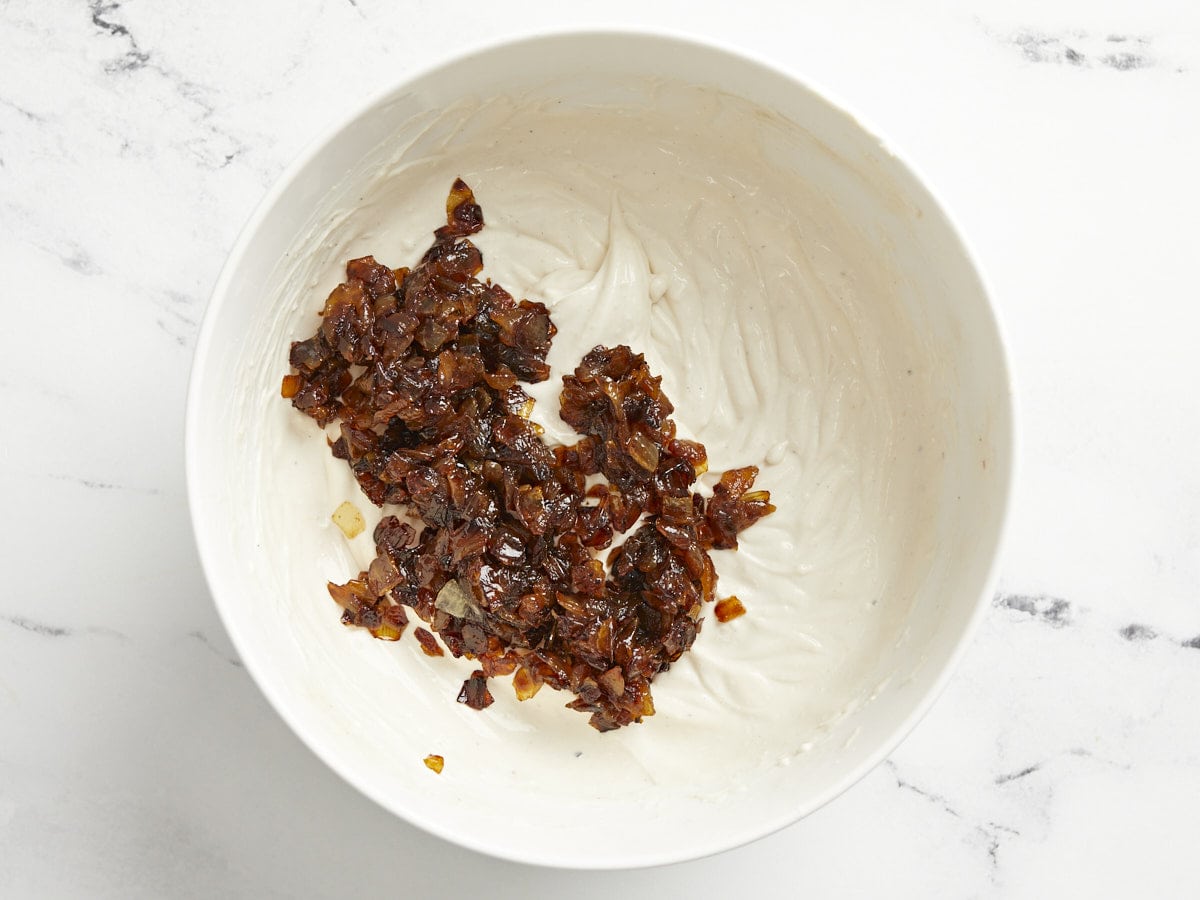
Once the onions are fully caramelized, stir them into the dip.
Allow the dip to sit for about 15 minutes for the flavors to blend, then taste and adjust the seasonings to your liking. Serve with your favorite chips or spread onto a sandwich and enjoy!
How to Make French Onion Dip – Step by Step Photos
Dice one pound of yellow onions (about two medium onions), then add them to a skillet with 2 tablespoons of butter.
Cook the onions over medium-low heat, stirring occasionally, allowing them to soften and then slowly brown. If the skillet gets too dry as the onions cook, turn the heat down slightly and add a tablespoon or two of water to the skillet to help dissolve the browned bits off of the bottom of the skillet. Or, if the onions are taking a very long time to cook down, you can increase the heat slightly.
When the onions are fully caramelized they should look like this—deep copper brown, translucent, and jammy in texture. The caramelization process should take about 30 minutes.
Meanwhile, combine 4oz. room temperature cream cheese, 1 cup sour cream, 1 tablespoon Worcestershire sauce, ¼ tsp garlic powder, ¼ tsp freshly cracked black pepper, and ¼ tsp salt in a bowl, stirring until the mixture is smooth.
Add the caramelized onions to the dip and stir to combine.
Allow the dip to sit for 15 minutes to allow the flavors to blend, then taste and adjust the seasonings to your liking.
Ready for Christmas parties and New Year’s trays, these boozy Christmas cherry bombs (chocolate-covered cherries soaked in vodka!) transform ordinary maraschino cherries
The post Boozy Christmas Cherry Bombs appeared first on Salty Side Dish.
Ready for Christmas parties and New Year’s trays, these boozy Christmas cherry bombs (chocolate-covered cherries soaked in vodka!) transform ordinary maraschino cherries
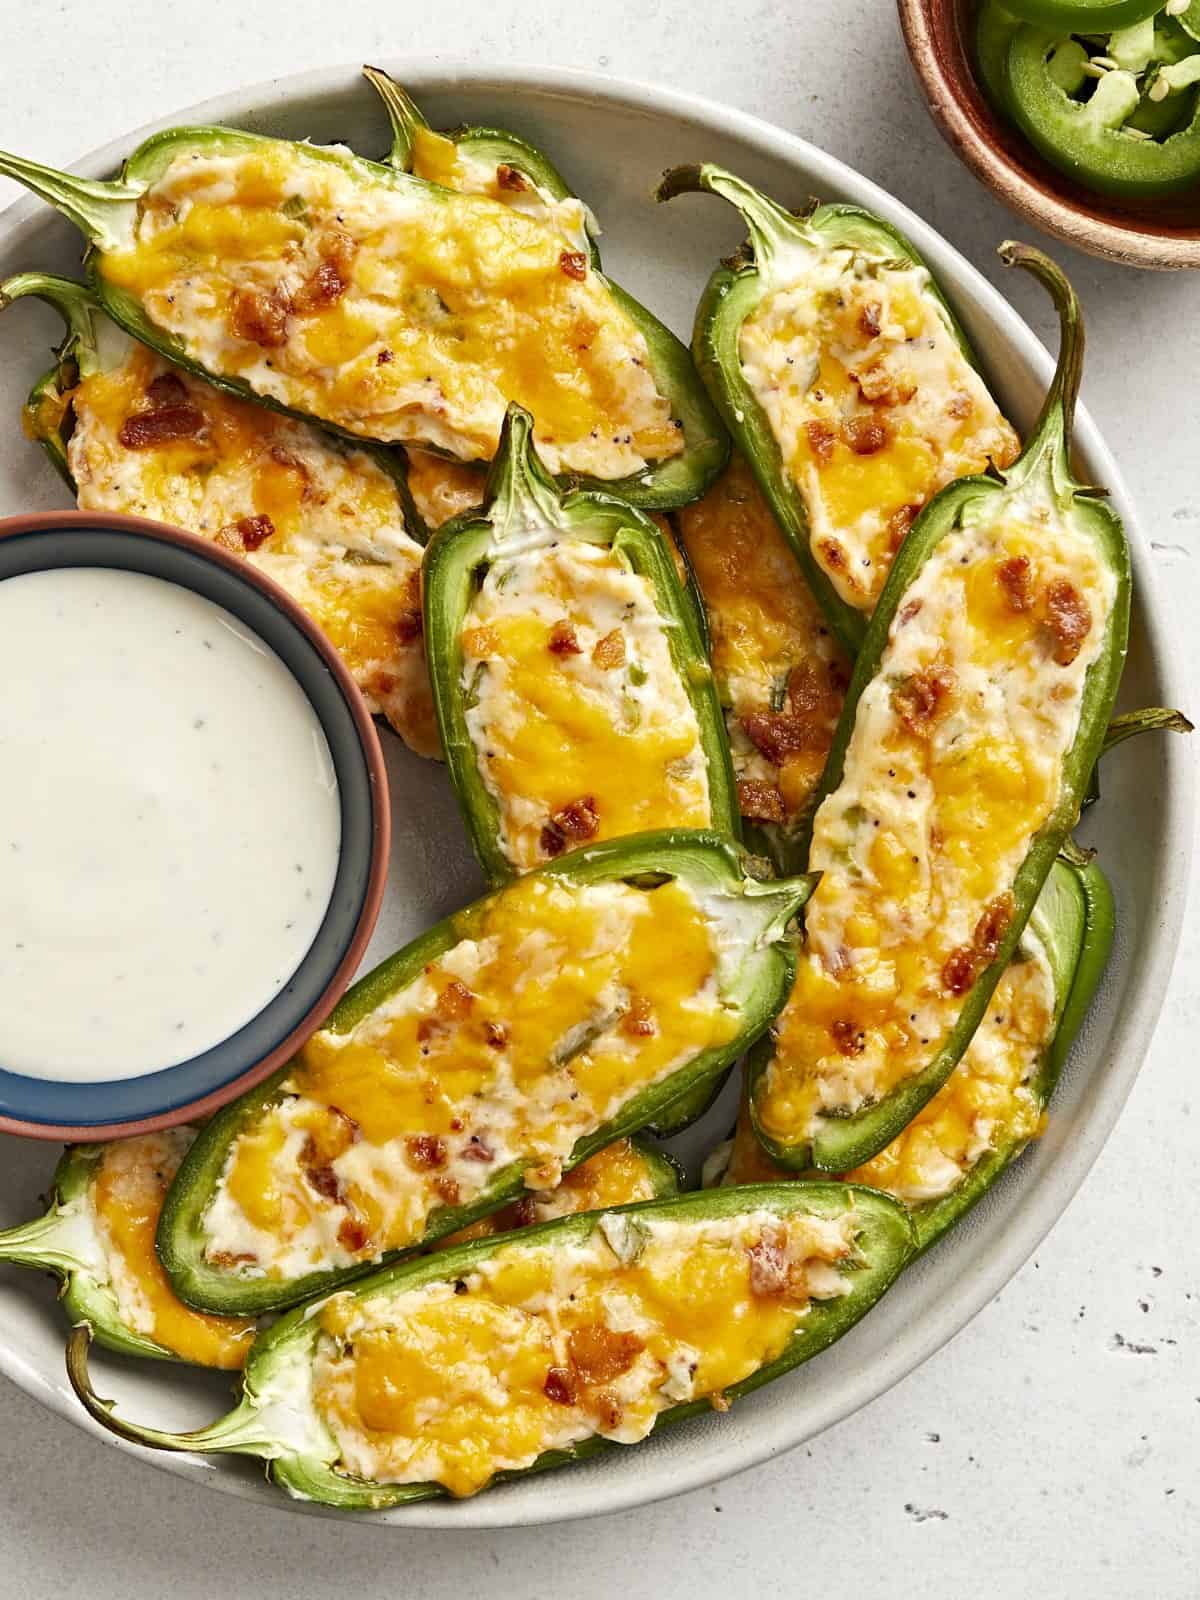
If you love spicy and you love cheesy, you’ll definitely love Jalapeño Poppers! This cute little appetizer recipe has New Year’s Eve written all over it, and it’s perfectly easy and delicious for football games as well. …Or, if you’re just as obsessed with them as I am, they’re also great for a regular Monday afternoon. 😜
What Are Jalapeño Poppers?
Jalapeño poppers are a staple in American pop food culture and are often served at sports bars or other fast-casual restaurants. They can take several forms, sometimes breaded and deep fried, sometimes baked, and sometimes wrapped in bacon, but they always consist of fresh jalapeño peppers stuffed with a flavorful mix of cheese for that spicy-cheesy-creamy flavor combo.
For this jalapeño popper recipe, we went the easy and budget-friendly route (obvi) and opted for baked poppers with just enough bacon added in to give great flavor without making them over-the-top expensive. These jalapeño poppers are easy enough for even a beginner to make, and tasty enough that you’ll be thankful you didn’t drop a ton of cash on ordering out!
Ingredients for Jalapeño Poppers:
Here’s what you’ll need to make this delicious jalapeño popper recipe at home:
Fresh Jalapeños: Luckily, jalapeños are usually some of the least expensive items in the produce aisle, but if you can’t find them for a good price at your local chain grocery store, look for a Hispanic or Latin grocery store where they’re guaranteed to be super affordable. Look for Jalapeños that are about 3 inches in length for this recipe.
Cheese: We used a mix of cream cheese and cheddar cheese for this recipe so we could get an ultra-creamy finish with a nice cheddar bite. You can also try using Monterey Jack or Pepper Jack (if you like it EXTRA spicy!).
Bacon: Bacon is a classic flavor in jalapeño poppers and it gives a nice smokey finish to the flavor profile. We use just enough to give these poppers flavor without driving up the price too high.
Seasoning: These jalapeño poppers are seasoned with garlic powder, Everything Bagel Seasoning, and green onions. They’re flavorful but not so complicated that you lose the flavor of the jalapeños and bacon. If you don’t have Everything Bagel Seasoning you can increase the garlic powder in the recipe to ½ tsp, and add ⅛ tsp of both salt and pepper.
Are Jalapeño Poppers Spicy?
Yes, jalapeño poppers are pretty spicy! Despite removing the seeds and ribs (the spiciest part of the jalapeño), some of the spicy oils remain in the jalapeño, giving these poppers just the right amount of spicy heat to balance the creamy cheeses. If you’re not a spicy foods fan you’ll probably want to skip this one!
How to Remove Jalapeño Oil From Your Hands
If you’ve ever cooked with jalapeños before, you know the horror of accidentally touching your eyes afterward. Jalapeños contain natural oils that can easily transfer from your hands to your eyes or any other delicate skin, causing an intense burning sensation, and sometimes just washing your hands isn’t enough to remove the oils. Here are a few extra steps you can take to reduce the burn:
Massage a teaspoon or two of cooking oil into your hands. The oil will help dissolve the spicy oils from the jalapeños that are stuck to your hands.
Wash your hands with dish soap instead of hand soap. Dish soap is formulated to break up oily residues whereas hand soaps are often designed to keep skin moisturized.
Rub your hands with an acidic substance, like lemon juice, vinegar, or tomato sauce. This can help break up any spicy oils left on the skin.
OR just wear gloves while working with the jalapeños and avoid the risk. ;)
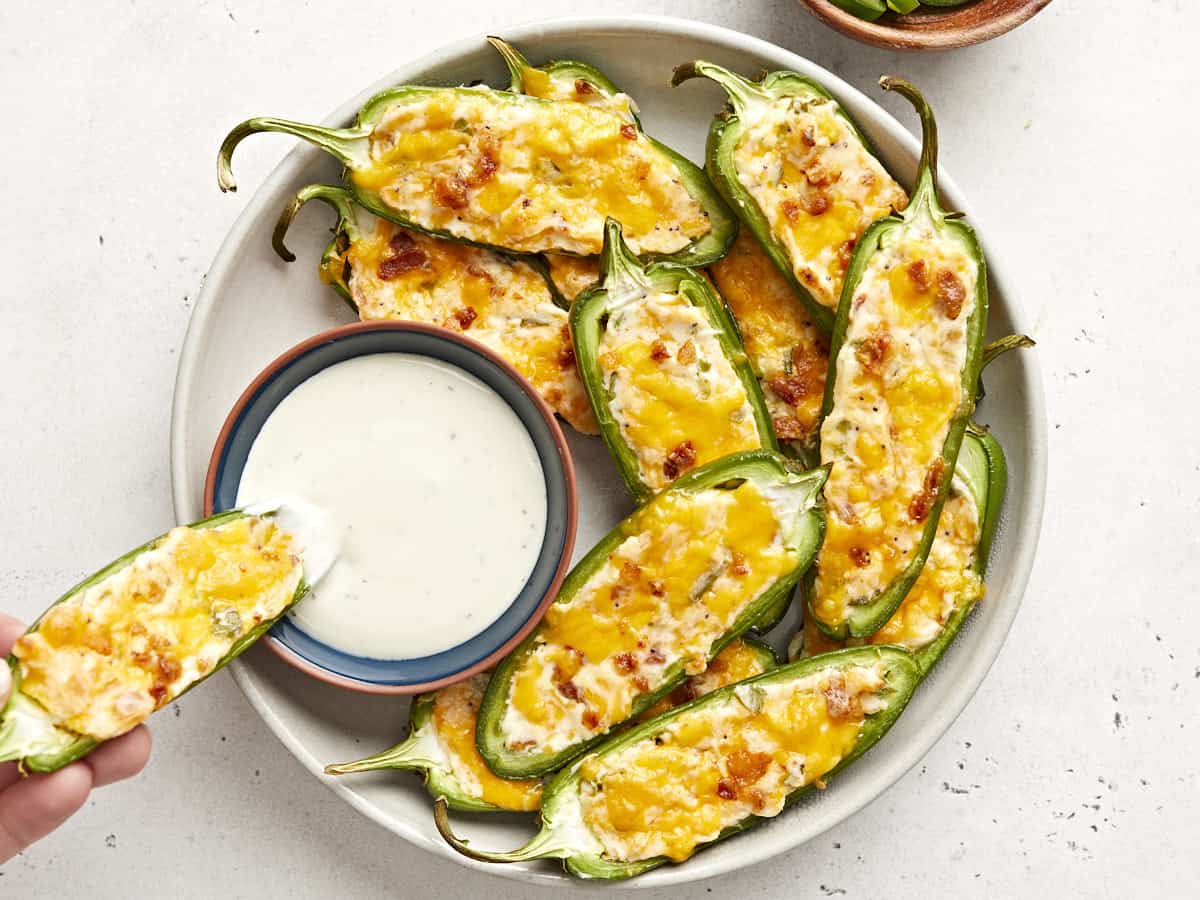
What to Serve with Jalapeño Poppers
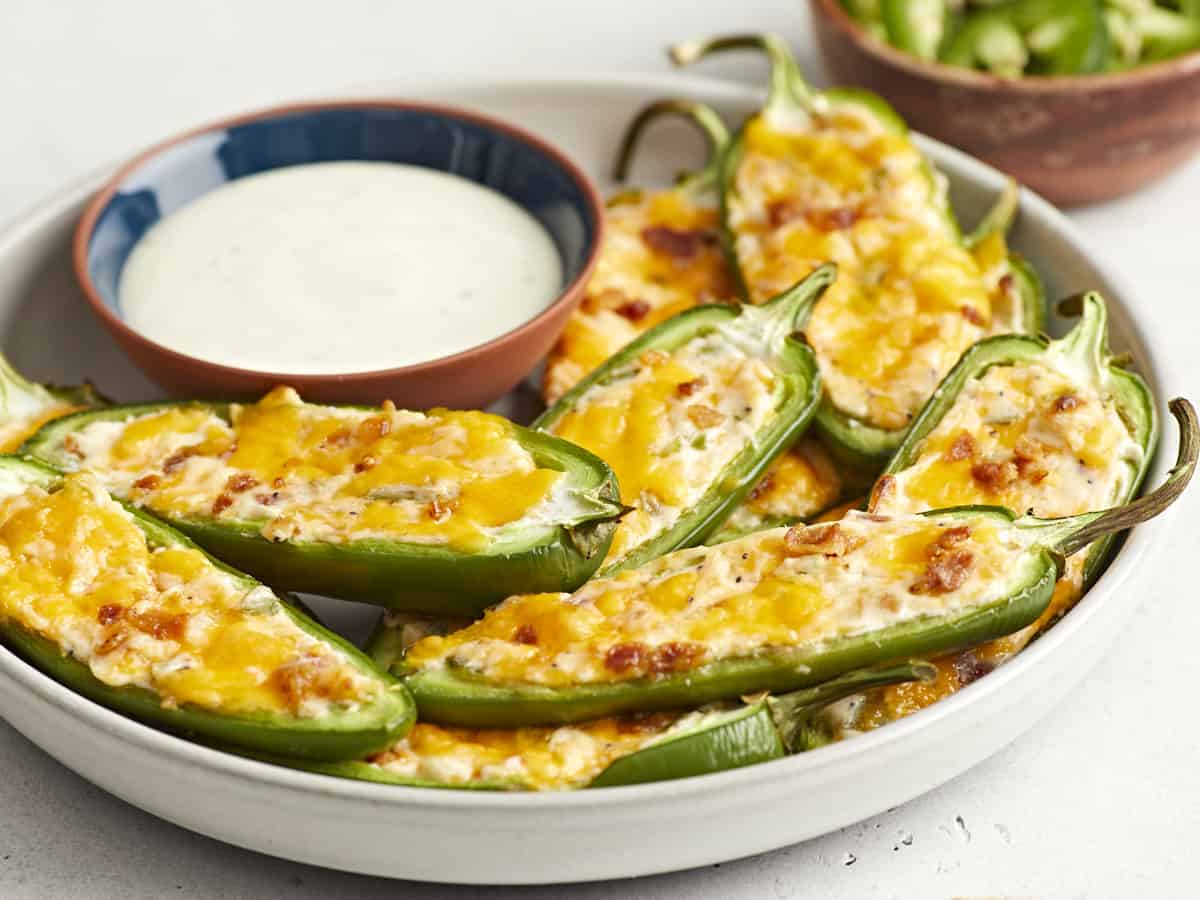
I love these little poppers on their own, but if you want a dipping sauce I would definitely recommend ranch dressing. I’m not usually a ranch person, but the flavor combination between the spicy jalapeño poppers and cooling ranch dressing is hard to beat! I’d also serve them with another starchy appetizer, maybe something like our Steak Fries or Loaded Smashed Potatoes.
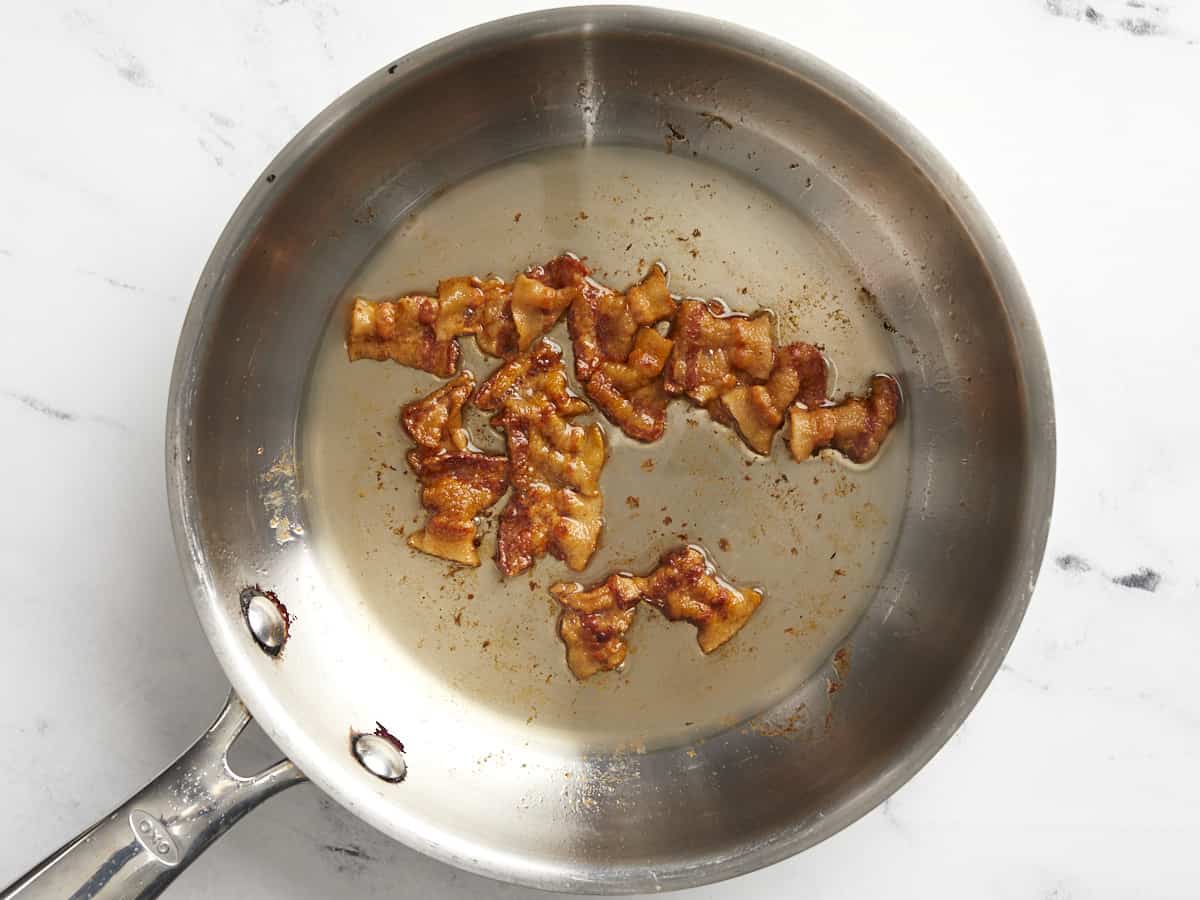
Preheat the oven to 425ºF. Cook the bacon in a skillet over medium heat until it is brown and crispy. Remove it from the pan and let it cool on a paper-towel-lined plate.
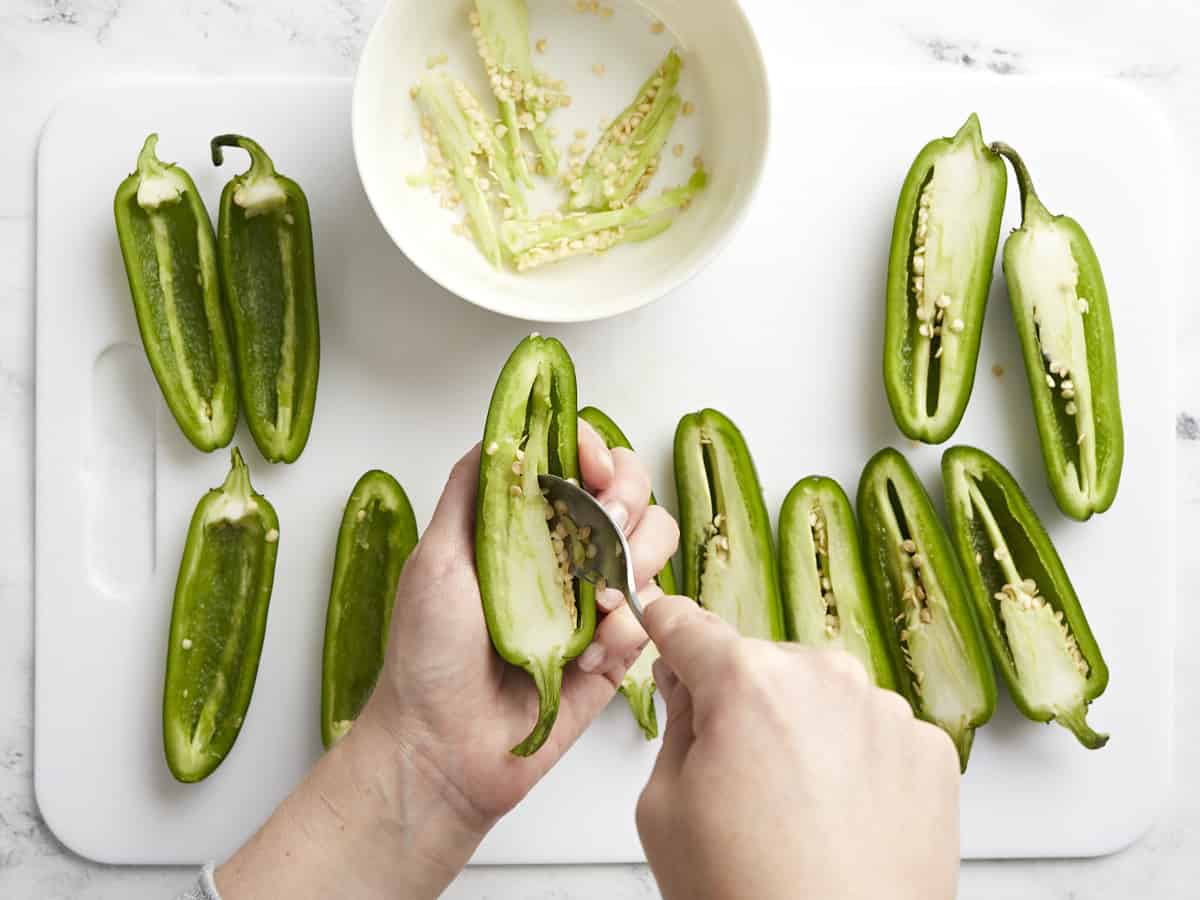
Slice the jalapeños in half lengthwise and then use a spoon to scoop out the seeds and white ribs, being careful not to tear or puncture the peppers.
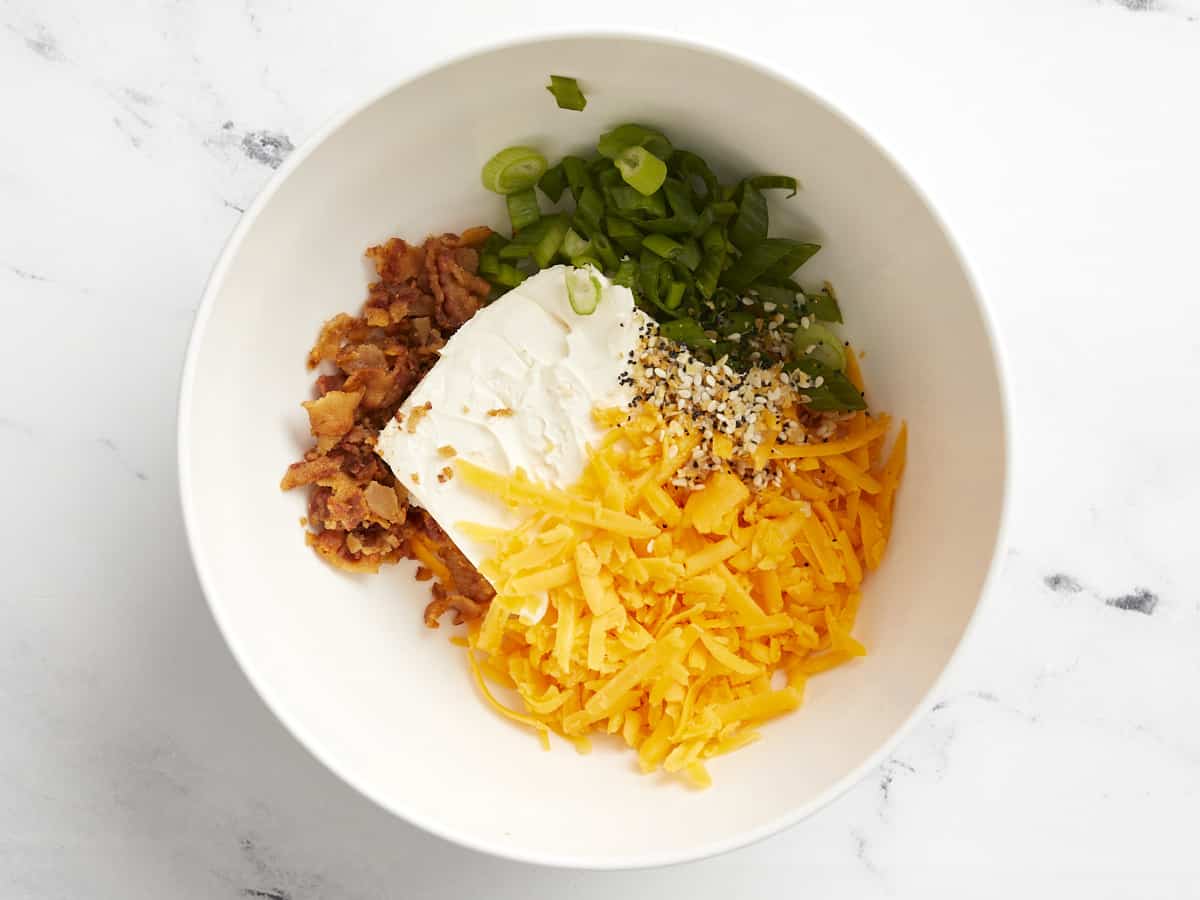
Once the bacon is cool, crumble it into tiny pieces and reserve about 1 tablespoon to use as a topping. Add the bacon to a bowl with the cream cheese, shredded cheddar (reserve a small amount for topping as well), sliced green onion, Everything bagel seasoning, and garlic powder. Mix the ingredients together until they're evenly combined.
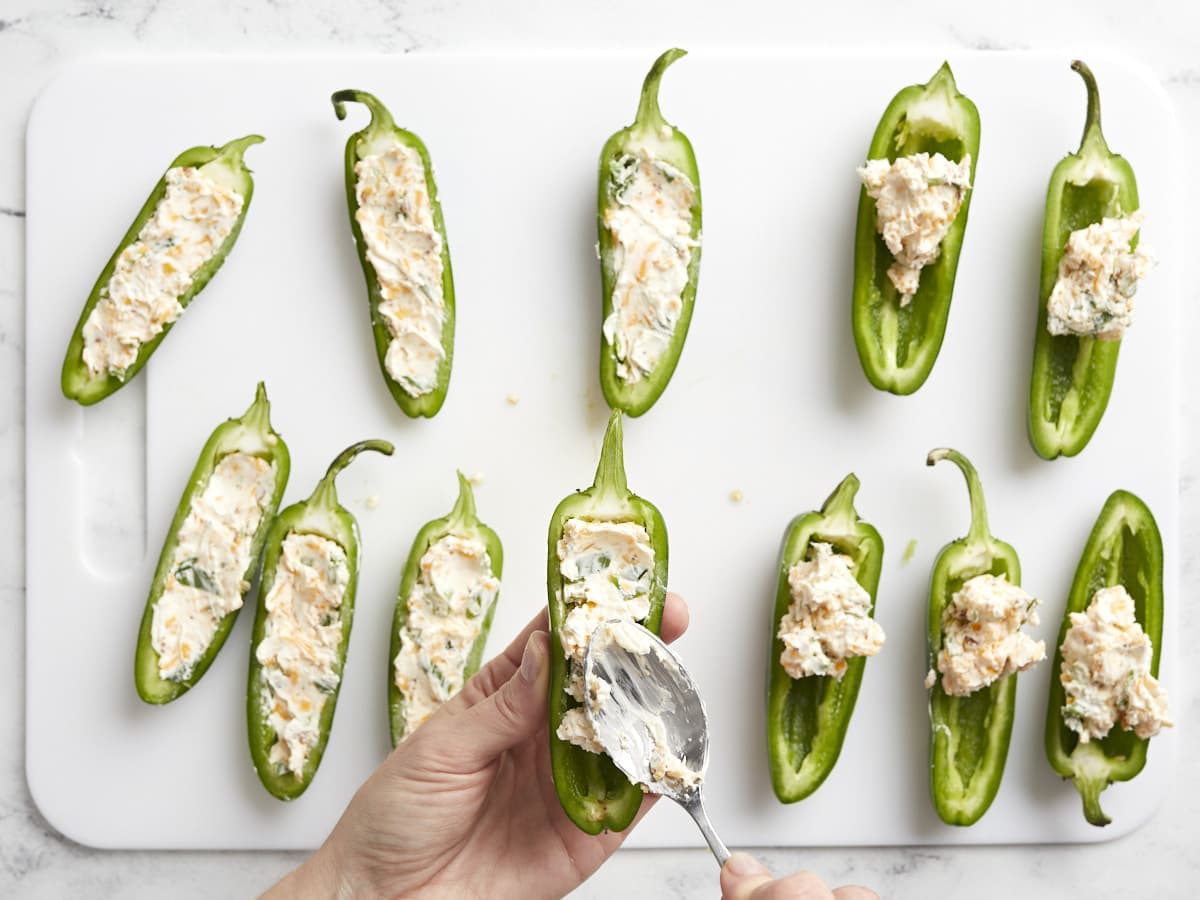
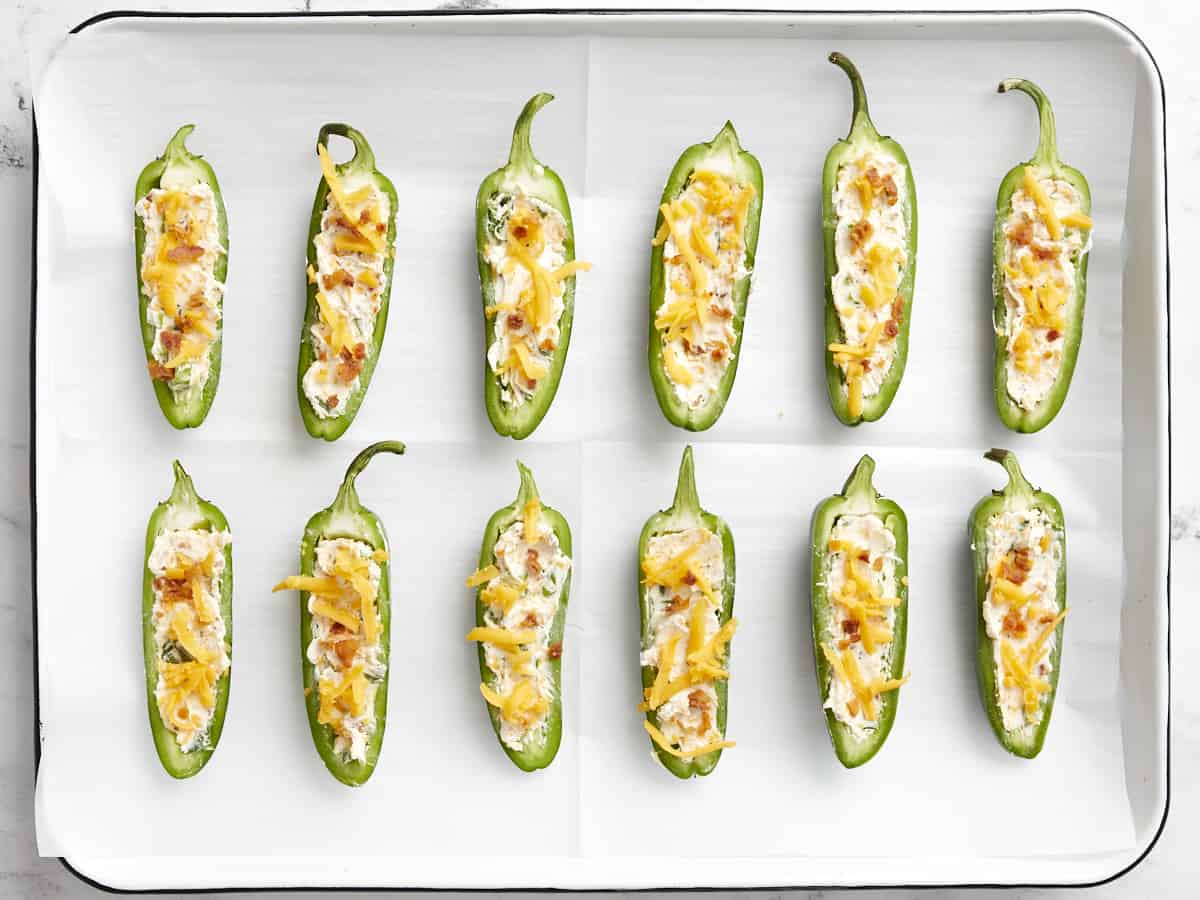
Divide the cheese filling between the 12 pepper halves and then spread it out to fill and smooth out the top.
Place the filled peppers on a large parchment-lined baking sheet then sprinkle the reserved crumbled bacon and cheddar cheese over the top.
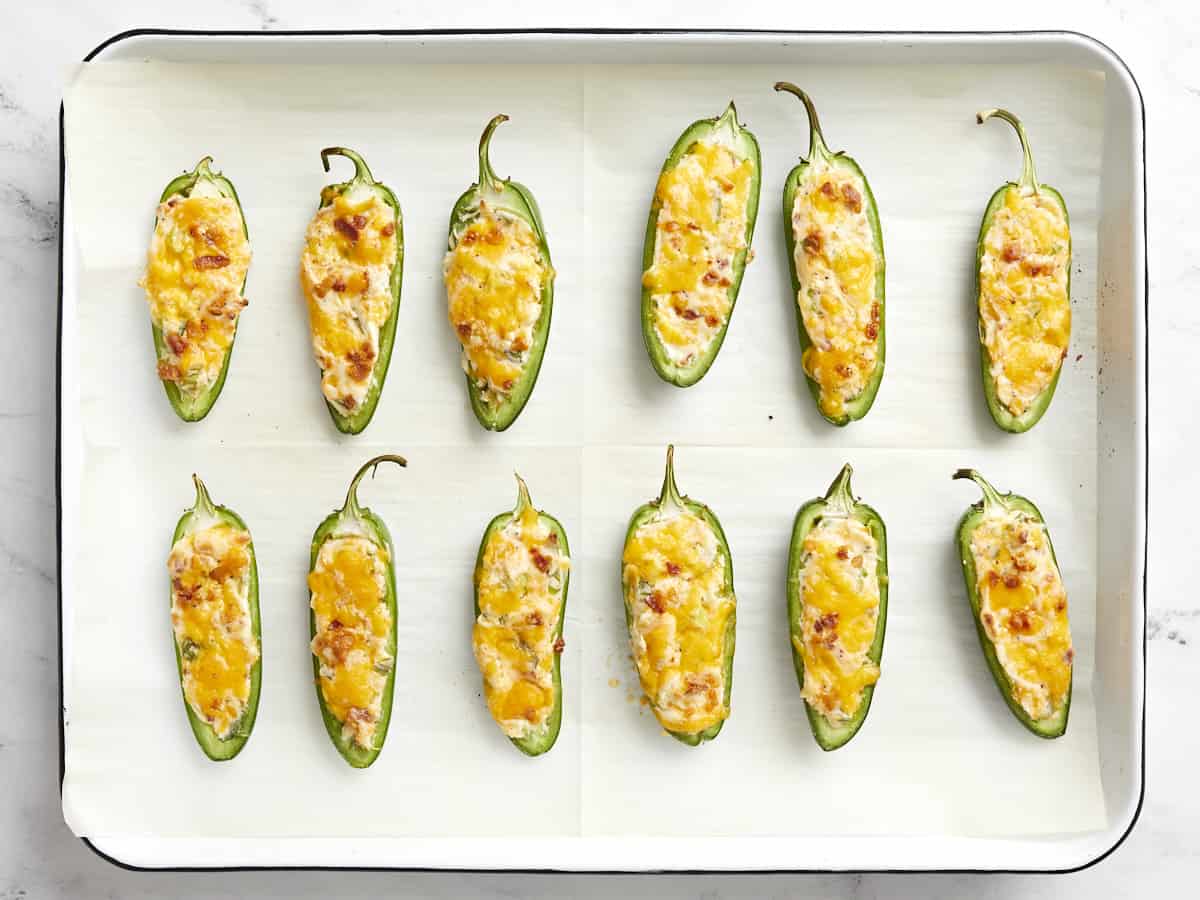
Bake the peppers for 15 minutes or just until the cheese is melted and slightly bubbly. Avoid over-baking the peppers or else they'll become too soft to pick up and enjoy. Allow the poppers to cool just enough to handle, then serve and enjoy!
How to Make Jalapeño Poppers – Step by Step Photos
Cook about 2 oz. of bacon (about 2 slices) in a skillet over medium heat until it is brown and crispy. Remove the bacon from the skillet and let it drain on a paper towel-lined plate as you prepare the rest of the dish.
Slice six jalapeño peppers in half length-wise, then scrape out the seeds and white ribs with a spoon, taking care not to tear the outside of the pepper. To prevent the transfer of spicy oils from your hands to your eyes, mouth, or nose, either use gloves while preparing the peppers or see our tips above for removing jalapeño oil from your hands.
Once the bacon is cool enough to touch, crumble it into tiny pieces. Reserve about 1 teaspoon of the bacon to use as a topping, then add the rest to a bowl with 4 oz. of room-temperature cream cheese, ½ cup shredded cheddar cheese (reserve about 2 Tbsp for topping), 1 sliced green onion, 1 teaspoon Everything Bagel Seasoning, and ¼ teaspoon garlic powder. Mix these ingredients together until evenly combined.
Divide the cheese mixture evenly between the 12 jalapeño halves, then spread it out to fill the peppers, smoothing out the top.
Place the filled jalapeños on a large parchment-lined baking sheet, then sprinkle the reserved bacon bits and shredded cheddar over top.
Bake the jalapeño poppers in the preheated 425ºF oven for 15 minutes, or just until the cheese is melted and bubbly on top. Avoid overcooking the poppers or else the peppers will get too soft to pick up and eat. Allow the peppers to cool just enough to handle, then serve and enjoy!