Easy Oven Fried Chicken

Easy Oven Fried Chicken.Learn how to make the best easy oven fried chicken recipe with a handful of ingredients for a healthier comfort food!

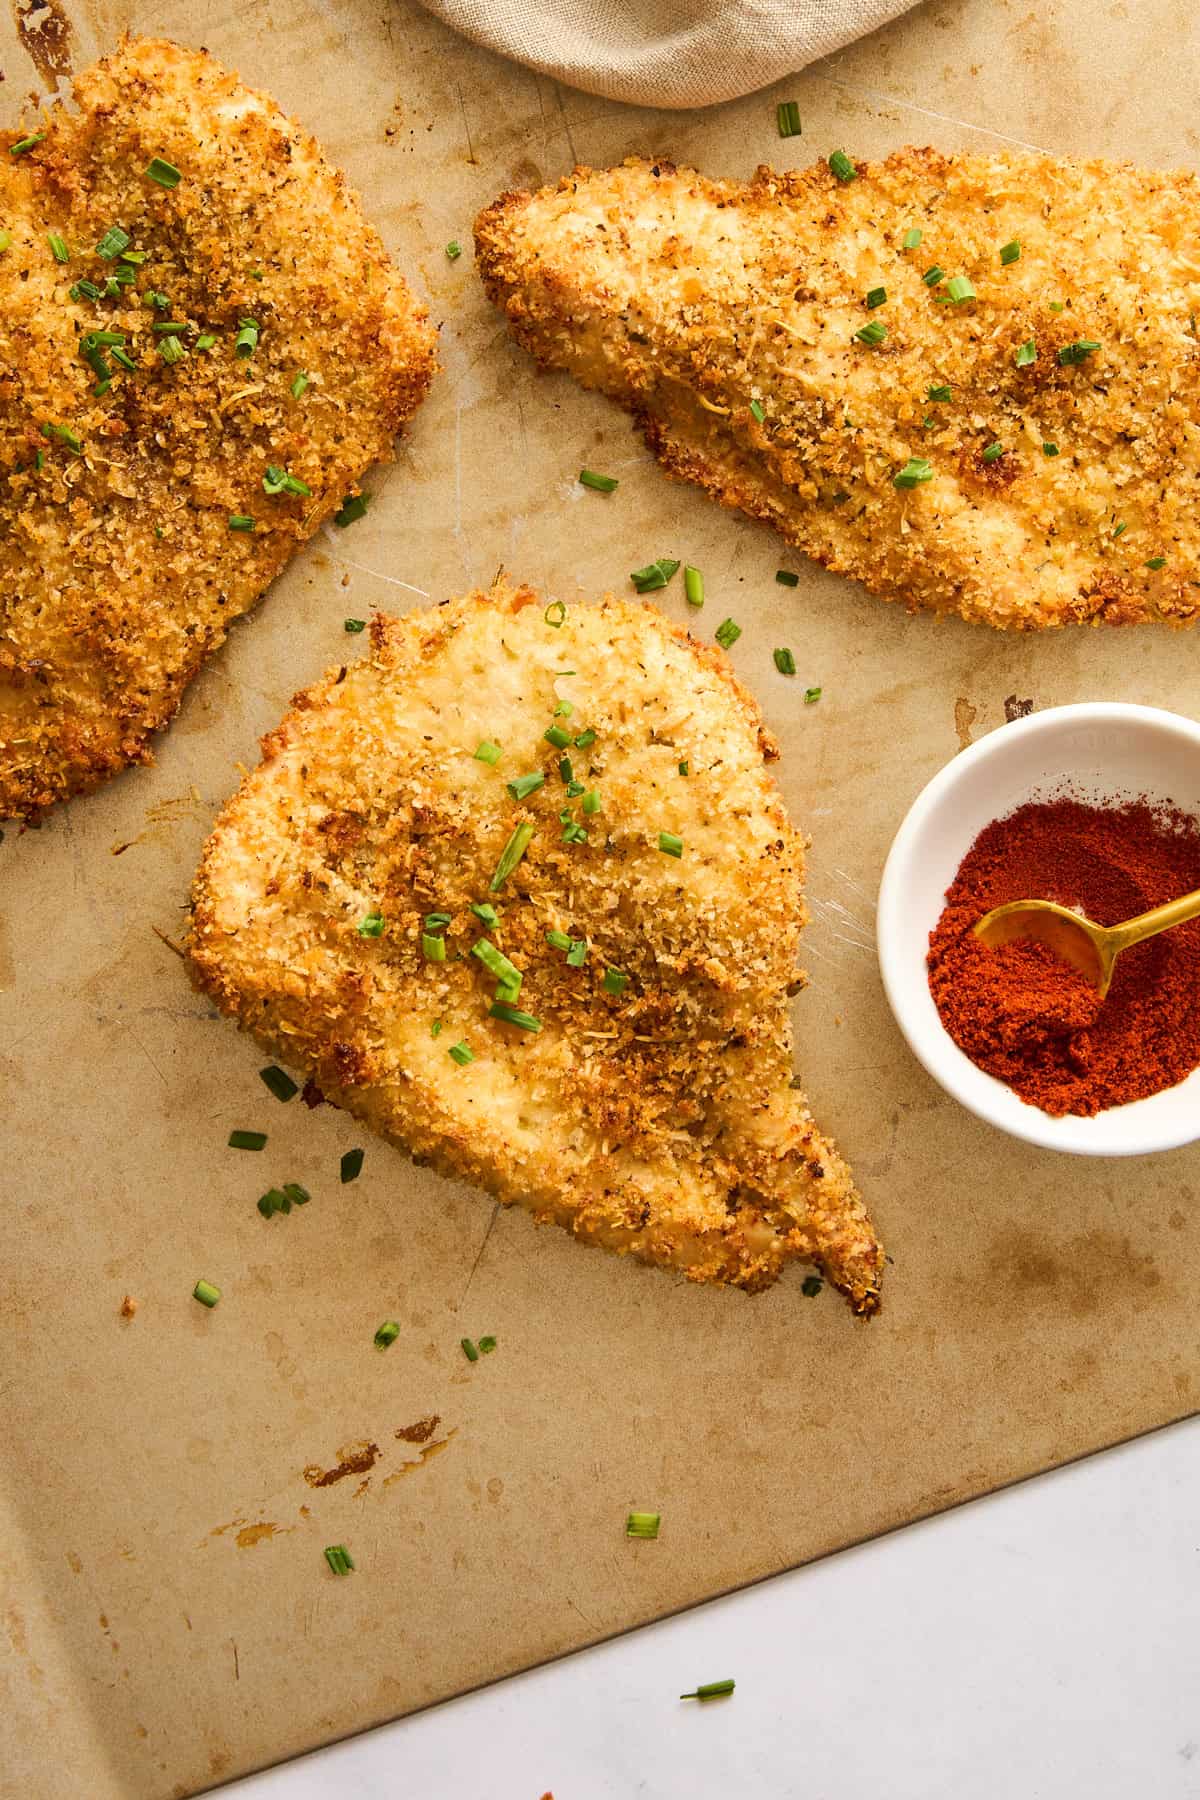
Easy Oven Fried Chicken.

Craving the crunch of fried chicken but want something healthier? This Oven Fried Chicken is crispy, full of flavor, and so simple to make—perfect for a quick and satisfying meal.

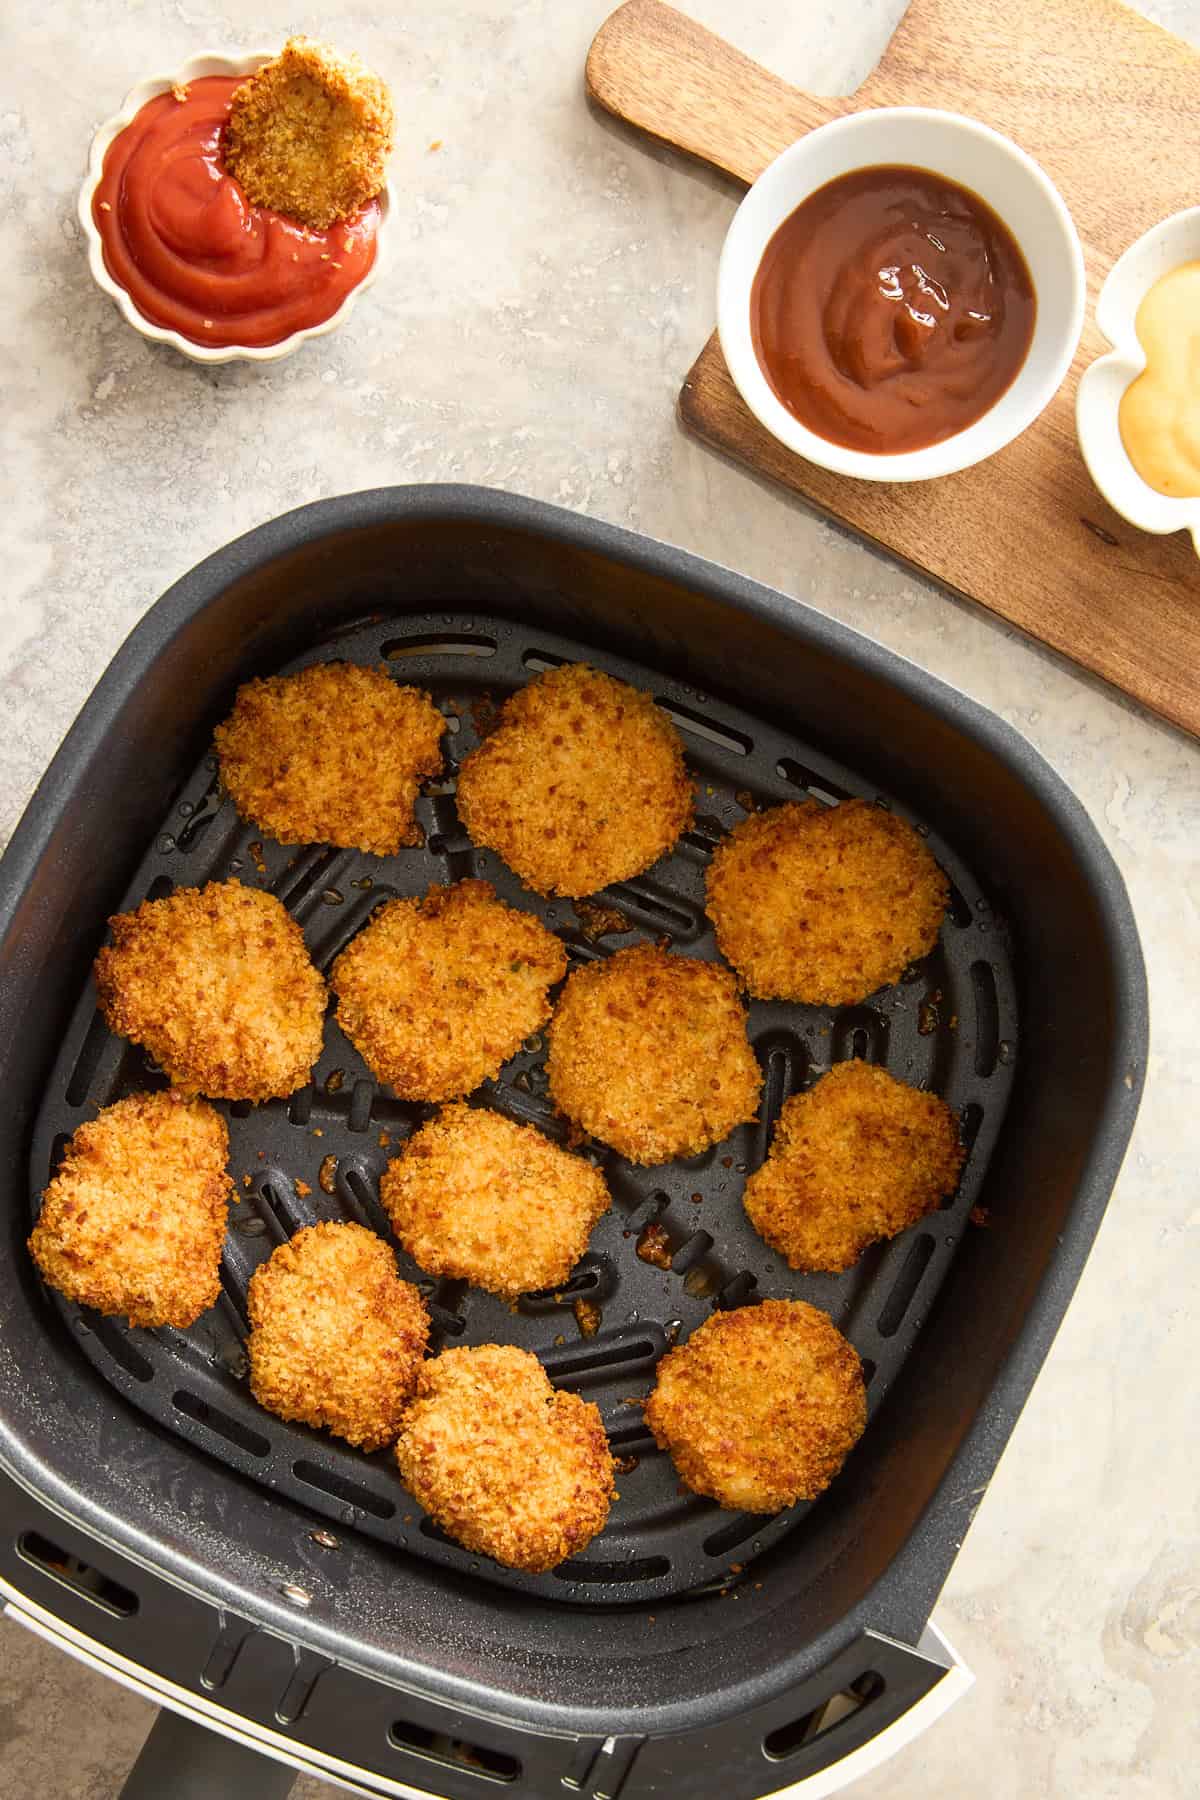
Easy Oven Fried Chicken pieces.

What is Oven Fried Chicken?

Oven fried chicken is a lighter take on the traditional fried chicken recipe, delivering all the crunchy goodness without the need for deep frying. By baking the chicken in the oven, you can achieve that golden, crispy crust with just a drizzle of oil and a flavorful breadcrumb coating. This technique gives you all the satisfaction of fried chicken but with fewer calories and less mess.

This recipe uses panko bread crumbs for extra crunch, along with parmesan and a blend of seasonings that adds layers of flavor to each bite. By baking at a high temperature, the chicken gets perfectly crisp on the outside while staying juicy and tender inside. It’s an easy and delicious way to enjoy “fried” chicken without the extra grease!

Ingredients You Need

  • Boneless Skinless Chicken Breasts – Slice these in half lengthwise for quick cooking and even breading. 
  • Panko Bread Crumbs – We love panko because it adds an airy crunch that regular breadcrumbs don’t have.
  • Grated Parmesan Cheese – Parmesan melts into the breading, adding a rich, savory flavor to the breading.
  • Dried Italian Seasoning – This mix of herbs gives the chicken its savory depth.
  • Paprika – This spice adds a hint of warmth and color to the breading and balances the flavors perfectly.
  • Egg – The egg is whisked and used to coat the chicken and help the breading stick.
  • Olive Oil – A light drizzle adds extra crispiness to the breaded chicken as it bakes.
  • Cooking Spray – Use this to lightly coat your baking sheet so that the chicken doesn’t stick as it bakes.

How to Make Oven Fried Chicken

  1. Prepare the Breading. Add the panko bread crumbs, grated Parmesan, Italian seasoning, and paprika to a bowl and stir until evenly mixed.
  2. Coat the Chicken in Egg. In another bowl, whisk the egg and dip each piece of chicken to coat thoroughly.
  3. Bread the Chicken. Dredge each egg-coated chicken piece in the panko mixture, pressing gently to ensure the crumbs stick. Arrange the breaded chicken pieces on the prepared baking sheet.
  4. Bake the Chicken. Pour a small amount of olive oil over each chicken piece to help them crisp up. Bake, then flip halfway through to make sure both sides get golden and crispy.

Variations

  • Cheese – Try grated cheddar or pecorino for a different cheesy twist on the breading.
  • Spice – Mix in cayenne pepper or chili powder for a spicier version of this crispy chicken.
  • Fresh Herbs – Finely chopped parsley or basil in the breading adds a fresh, bright flavor.
  • Buttermilk – For extra tenderness, marinate the chicken in buttermilk before breading.
  • Gluten-Free – Substitute gluten-free panko bread crumbs for a gluten-friendly meal.
  • Thighs – Use boneless, skinless chicken thighs for a juicier, richer flavor.
  • Lemon Zest – Grate a little lemon zest into the breading for a subtle citrusy note.

Can I Store Leftovers?

Absolutely! However, stored leftovers may lose some of their crispiness as they sit. Pop them in the oven or air fryer to reheat.

Refrigerate any leftover chicken in an airtight container for up to 3 days.

For longer storage, freeze the breaded chicken pieces individually on a baking sheet, then transfer to a freezer bag for up to two months.

Common Questions about Oven Fried Chicken

How do I keep fried chicken crispy in the oven?

To keep the chicken crispy, use a wire rack on your baking sheet so the air circulates around each piece as it bakes. You can also do this in an oven at 200 degrees Fahrenheit to keep the chicken warm before serving.

Why is my chicken not crispy in the oven?

You may wind up with soggy breading if you don’t first pat the chicken dry before breading it. 

Should I coat chicken in flour before baking?

While we don’t take this step in this recipe, you can dredge the chicken in flour before breading. That can help to keep the moisture in the chicken.

Does foil make chicken crispy?

Foil does not make chicken crispy. In order to get the best crispy results, the chicken should be cooked uncovered in the oven. 

More Chicken Recipes

On the search for more easy chicken recipes? Take a look at these favorites!

Greek Chicken Souvlaki

Middle Eastern Chicken

Chicken Spinach Pasta Bake

Chicken Shawarma

Easy Oven Fried Chicken.
Print Recipe
No ratings yet

Oven Fried Chicken Recipe

Learn how to make the best easy oven fried chicken recipe with a handful of ingredients for a healthier comfort food!
Prep Time10 minutes
Cook Time30 minutes
Total Time40 minutes
Course: Main Course
Cuisine: American
Keyword: oven baked fried chicken, oven fried chicken, oven fried chicken recipe
Servings: 8 servings
Author: Food Dolls

Ingredients

  • Cooking spray
  • 1 cup panko bread crumbs
  • ¼ cup grated Parmesan cheese
  • 2 teaspoons dried Italian seasoning
  • 1 teaspoon paprika
  • 1 egg whisked
  • 4 boneless skinless chicken breasts about 8 ounces each, sliced in half lengthwise to make 8 pieces
  • Olive oil for drizzling

Instructions

Prep the Oven:

  • Preheat your oven to 450°F. Lightly coat a large baking sheet with cooking spray.
    Cooking spray

Prepare the Breading:

  • In a bowl, mix together the panko bread crumbs, Parmesan cheese, Italian seasoning, and paprika. Whisk the egg and add the chicken pieces to coat the chicken completely.
    1 cup panko bread crumbs, ¼ cup grated Parmesan cheese, 2 teaspoons dried Italian seasoning, 1 teaspoon paprika, 1 egg, 4 boneless skinless chicken breasts
    Seasoning mixture in a bowl.

Bread the Chicken:

  • Take each chicken and coat it with the breadcrumb mixture. Place the breaded chicken on the prepared baking sheet. Repeat with the remaining chicken pieces.
    Raw chicken being breaded.

Bake the Chicken:

  • Drizzle a bit of olive oil over each chicken piece. Bake in the preheated oven for 15 minutes, flip, and bake for an additional 10-15 minutes or until cooked through and reached an internal temp of 165°F.
    Olive oil
    Baked oven fried chicken pieces.

Nutrition

Serving: 1serving | Calories: 225kcal | Carbohydrates: 6g | Protein: 30g | Fat: 8g | Saturated Fat: 2g | Polyunsaturated Fat: 1g | Monounsaturated Fat: 3g | Trans Fat: 0.03g | Cholesterol: 188mg | Sodium: 284mg | Potassium: 490mg | Fiber: 1g | Sugar: 1g | Vitamin A: 253IU | Vitamin C: 2mg | Calcium: 72mg | Iron: 2mg

Sweet Potato Curry with Chickpeas

Sweet Potato Curry with Chickpeas served with white rice in a white bowl.Sweet Potato Curry with Chickpeas and Spinach is an easy one-pot meal you can make for weeknight dinners and meal prep! It’s comforting, flexible, and loaded with flavor. Craving more easy curry recipes? You’ll have to try my Thai Red Curry, Easy Vegan Curry, and Vegan Thai Green Curry recipes as well! When you’re searching…
Sweet Potato Curry with Chickpeas served with white rice in a white bowl.

Sweet Potato Curry with Chickpeas and Spinach is an easy one-pot meal you can make for weeknight dinners and meal prep! It’s comforting, flexible, and loaded with flavor.

Craving more easy curry recipes? You’ll have to try my Thai Red Curry, Easy Vegan Curry, and Vegan Thai Green Curry recipes as well!

Sweet Potato Curry with Chickpeas served with white rice in a white bowl.

When you’re searching for winter comfort foods, you’ll typically stumble on hearty stews and creamy soups, but I’m a bigger fan of curry recipes. They’re the ultimate cozy meal, with warm spices, creamy sauces, and loads of seasonal veggies in every bite. It’s everything you need in a winter meal!

That’s why you’ll find this Easy Sweet Potato Curry Recipe on my dinner menu almost weekly when it’s cold outside. I can’t get enough of the hearty sweet potatoes and protein-packed chickpeas swimming in the aromatic and creamy red curry sauce! It also doesn’t hurt that it quickly comes together in one pan.

Just like my Butternut Squash Curry, you can quickly throw this red curry recipe together for a comforting family dinner or during your Sunday meal prep. It stays fresh and flavorful for days and even freezes well!

Why you need to try this sweet potato curry recipe

  • A seasonal Thai-inspired curry recipe – Sweet potatoes give this Thai-inspired curry a fall and winter twist, while the spicy-ish curry sauce warms you up.
  • Quick, easy, and made in one pan! This has to be one of the easiest fall dinner recipes. All you have to do is toss everything in a skillet, simmer until the potatoes are tender, then serve!
  • Make it your own – Add more vegetables, swap the sweet potatoes for pumpkin, or tone down the heat. The ways to make this recipe your own are endless!
using a wooden spoon to scoop sweet potato curry in a black skillet.

Ingredients needed (with substitutions)

  • Vegetable oil
  • Garlic and ginger
  • Red curry paste – My favorite red curry paste is by Thai Kitchen because it’s vegan, full of flavor, and easy to find in most well-stocked grocery stores.
  • Ground turmeric
  • Sweet potatoes – The star of the curry! Use regular sweet potatoes, yams, or swap them for peeled and diced pumpkin or butternut squash to make a recipe that’s similar to my Butternut Squash Curry.
  • Coconut milk – Use canned full-fat coconut milk to make the curry super creamy. You can substitute plain yogurt or cashew cream, or even some sort of vegan cream like Ripple brand half and half.
  • Water – Or vegetable broth.
  • Chickpeas – I like to use canned chickpeas for convenience, but freshly cooked chickpeas are delicious here, too. Or, instead of using chickpeas, make the curry with pre-cooked or canned green or brown lentils.
  • Salt and pepper
  • Spinach – For a hint of green in the curry. Kale works, too.
  • Sugar – This is optional but balances the flavors very well.
  • Lime juice
ingredients for Sweet Potato Curry with Chickpeas in individual white bowls.

How to make sweet potato curry with chickpeas

Find the complete recipe with measurements in the recipe card below.

Start by sautĂ©ing the garlic and ginger in an oiled skillet over medium heat. 

cooking garlic in a black skillet.

Stir in the red curry paste and turmeric to coat the aromatics, then pour in the coconut milk and water/broth. Stir to combine and use a wooden spoon to loosen any bits of food stuck to the bottom of the pan.

stirring red curry sauce with a wooden spoon in a black skillet.

Add the sweet potatoes, chickpeas, salt, and pepper to the curry.

Heat to a boil, then lower the heat and simmer until the potatoes are fork tender.

For deeper layers of flavor, roast the sweet potatoes (tossed in a little olive oil) in a 400ÂşF oven for 30 to 45 minutes, then add them to the curry with the chickpeas and only simmer for 10 to 15 minutes.

stirring sweet potatoes into a red curry sauce with a wooden spoon in a black skillet.

To finish, stir the spinach, sugar, and lime juice into the curry and cook until the spinach is wilted. 

Take the skillet off the heat and serve the curry right away over cooked basmati rice with cilantro or Thai basil on top. Enjoy!

fresh spinach on top of red curry in a black skillet.

Frequently asked questions

What else can I add to vegan curry?

As with most curry recipes, you can add all kinds of different vegetables or plant proteins to make the recipe your own. Add fresh or frozen vegetables, swap the chickpeas for white beans, lentils, cauliflower florets, or broccoli florets, and/or add fried tofu cubes for extra protein.

Is red curry paste spicy?

Most red curry paste has a mild to medium level of heat, but it varies from brand to brand. In this recipe, most of the heat is tempered by the coconut milk, so you won’t set your mouth on fire.

If you’re still worried about it being too spicy, you can start with only 1 1/2 tablespoons of red curry paste, then gradually add more until you reach just the right amount of heat.

I can’t find red curry paste. What can I use instead?

Don’t use yellow curry paste or green curry paste as a substitute. They will completely change the flavor profile! Instead, replace the red curry paste with 1 tablespoon of garam masala, 2 teaspoons of curry powder, and 1/4 teaspoon of ground cumin. The flavor will be different but will complement the veggies and warm flavors well.

How do I store leftover sweet potato curry?

Wait for the curry to cool before transferring it to an airtight container. Store the leftovers in the fridge for 4 to 5 days or in the freezer for up to 3 months.

Sweet Potato Curry with Chickpeas served with white rice in a white bowl.
Print

Sweet Potato Curry with Chickpeas

Sweet Potato Curry with Chickpeas and Spinach is an easy one-pot meal you can make for weeknight dinners and meal prep! It’s comforting, flexible, and loaded with flavor.
Course Main Dish
Cuisine Thai-inspired
Prep Time 10 minutes
Cook Time 20 minutes
Total Time 30 minutes
Servings 5 servings
Calories 335kcal

Ingredients

Sweet Potato Curry

  • 2 tablespoons vegetable oil
  • 3 large cloves garlic minced
  • 1 tablespoon minced fresh ginger
  • 3 tablespoons red curry paste vegan friendly
  • 1/2 teaspoon ground turmeric
  • 2 medium sweet potatoes peeled and chopped into 1/2 inch chunks
  • 13.5 ounce can full fat coconut milk
  • 1/2 cup water
  • 15 ounce can chickpeas or lentils, drained and rinsed
  • 1 teaspoon salt
  • 1/4 teaspoon black pepper
  • 4 cups baby spinach or kale
  • 1 tablespoon granulated sugar optional
  • 2 tablespoons fresh lime juice

For Serving

Instructions

  • Heat the oil in a large skillet over medium heat. Once hot, add the garlic and ginger and cook, stirring frequently for 1-2 minutes.
  • Stir in the red curry paste and turmeric, then pour in the coconut milk and water. Stir to combine and scrape any stuck bits from the bottom.
  • To the pan, add the sweet potatoes, chickpeas or lentils, salt and pepper. Bring to a boil, then lower the heat and simmer for about 15 minutes, or until the sweet potatoes are fork tender.
  • Stir in the baby spinach, sugar and lime juice. Cook until the spinach is wilted, then remove from heat and serve over cooked rice with cilantro or basil.

Notes

  1. Any kind of sweet potato will work here, or yams. Pumpkin or squash would be a good substitute if you have it.
  2. If you don’t have red curry paste, you can substitute 1 tablespoon of garam masala, 2 teaspoons curry powder and 1/4 teaspoon ground cumin. The flavor will be quite different.
  3. You can leave out the chickpeas/lentils if desired. Add some cauliflower florets or even broccoli, instead.
  4. Nutritional information is an estimate only and does not include rice.

Nutrition

Serving: 1of 5 servings | Calories: 335kcal | Carbohydrates: 37g | Protein: 8g | Fat: 19g | Saturated Fat: 15g | Polyunsaturated Fat: 1g | Monounsaturated Fat: 1g | Sodium: 782mg | Potassium: 756mg | Fiber: 7g | Sugar: 7g | Vitamin A: 16509IU | Vitamin C: 13mg | Calcium: 113mg | Iron: 5mg

Peanut Butter Energy Balls

close up on peanut butter energy balls next to a small bowl of peanut butter on a parchment lined baking sheet.Need a boost of energy? Grab one of these no-bake Peanut Butter Energy Balls! They’re an easy 5-ingredient snack you can take on the go or freeze for later. If you’re looking for more easy and energizing snacks, you’ll also love my Vegan Chocolate Peanut Butter Bars, Vegan Granola, and Vegan No Bake Cookies. These…

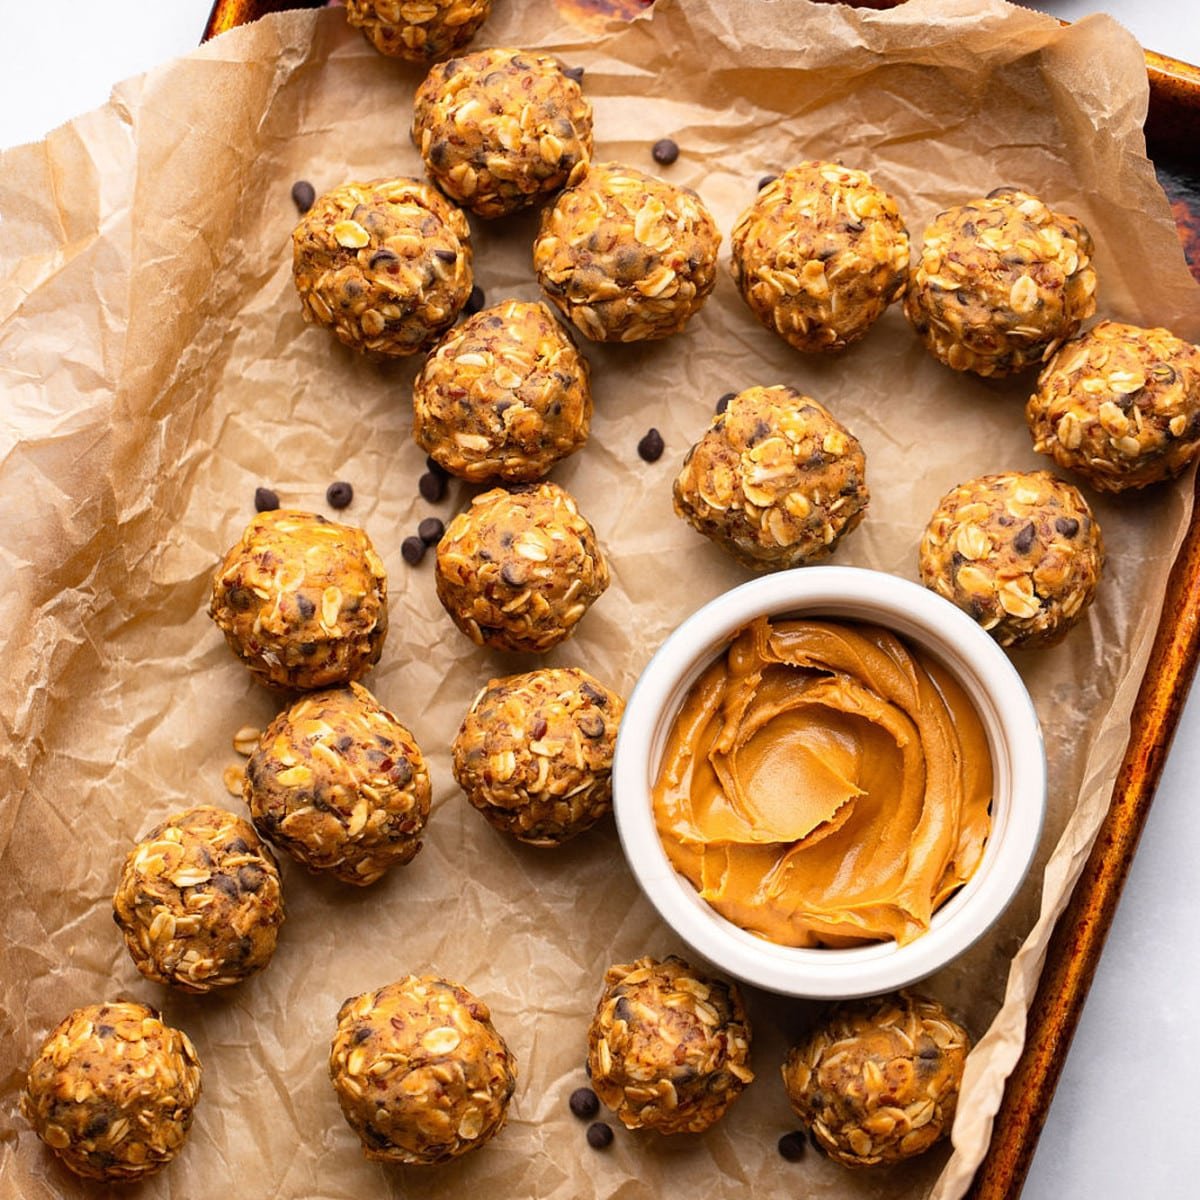
close up on peanut butter energy balls next to a small bowl of peanut butter on a parchment lined baking sheet.

Need a boost of energy? Grab one of these no-bake Peanut Butter Energy Balls! They’re an easy 5-ingredient snack you can take on the go or freeze for later.

If you’re looking for more easy and energizing snacks, you’ll also love my Vegan Chocolate Peanut Butter Bars, Vegan Granola, and Vegan No Bake Cookies.

peanut butter energy balls next to a small bowl of peanut butter on a parchment lined baking sheet.

These no-bake Peanut Butter Energy Balls taste like a mix between an oatmeal chocolate chip cookie and a peanut butter cookie! They’re just as chewy, sweet, and addictive, but a little better for you thanks to the 5 wholesome ingredients. Plus, as a no-bake recipe, they’re ready to eat in a matter of minutes.

You’ll always find a batch of peanut butter and oat balls in my fridge or freezer because they’re a convenient way to power me through a sleepy afternoon. One or two energy bites later, and I’m feeling like myself again!

I can’t get enough of the mix of peanut butter, old-fashioned oats, and vegan chocolate chips in each one, but you can easily put your own spin on the recipe with your favorite add-ins. Shredded coconut, protein powder, or warm spices are all welcome! Whatever you do, I know you’ll love this fun, easy, and energizing snack.

Why this is the best peanut butter energy balls recipe

  • An easy no-bake treat – Just stir the 5 feel-good ingredients together in one bowl, roll into bite-sized balls, and enjoy!
  • Perfect for an energy boost! Grab one or two chocolate chip energy balls whenever you need a quick pick-me-up (that isn’t a cup of coffee).
  • Make them your own – I’ve included a bunch of add-in ideas and flavor boosters to help you customize your energy bites.
close up on peanut butter energy balls next to a small bowl of peanut butter on a parchment lined baking sheet.

Ingredients needed

  • Creamy peanut butter: Or use crunchy if you’d like some texture. You can use natural peanut butter (the kind that needs to be stirred) but I prefer the no stir variety.
  • Old-fashioned rolled oats: I haven’t tried using quick oats as a substitute, but they should work. Use gluten free certified if needed.
  • Ground flaxseeds – Or chia or hemp seeds.
  • Maple syrup or agave
  • Mini vegan chocolate chips: Check out the other mix-in ideas below!
ingredients for Peanut Butter Energy Balls in individual white bowls.

How to make peanut butter energy balls

Find the complete recipe with measurements in the recipe card below.

Stir all of the ingredients together in a medium-sized mixing bowl until combined.

stirring the ingredients for Peanut Butter Energy Balls in a glass bowl.

Place the bowl in the fridge for 30 minutes so the oat mixture can chill and firm up slightly.

Afterward, use a cookie scoop or a spoon to roll the oat mixture into 1-inch balls. Enjoy the balls right away or chill them for later.

Are the oats sticking to your hands? Wet your hands with a little water to keep the oat mixture from sticking as much.

a glass bowl with an oat-peanut butter mixture beside rolled peanut butter energy balls on a white plate.

Variations

Put your own spin on this energy bites recipe with these variation ideas:

  • Peanut butter energy bars – Instead of rolling it into bite-sized balls, press the oat mixture into a parchment-lined 9×13 baking dish and chill until they’re solid. Cut into bars and enjoy!
  • Chocolate energy balls – Mix 1 tablespoon of cocoa powder with the oats and peanut butter.
  • Add protein powder – Add 1 scoop of peanut butter, vanilla, chocolate, or unflavored vegan protein powder. You may need to add a little more peanut butter or maple syrup if the mixture is dry.
  • Add warm flavor boosters – Add 1 teaspoon of vanilla extract for a little sweetness or 1 teaspoon of pumpkin pie spice for warmth.
  • More add-in ideas – Feel free to swap the chocolate chips with chopped nuts (almonds, peanuts, walnuts, etc.), dried fruit (dates, cranberries, raisins, etc.), rainbow sprinkles, or shredded coconut.
close up on peanut butter energy balls next to a small bowl of peanut butter on a parchment lined baking sheet.

Frequently asked questions

Are these peanut butter oat energy balls gluten-free?

Yes, these oat balls are naturally gluten-free as long as you use certified gluten-free rolled oats.

Do I have to use peanut butter?

Nope! You can use an equal amount of almond butter instead if you’d like. Or, for a nut-free alternative, use sunflower seed butter.

I don’t have flaxseed. What can I use instead?

An equal amount of chia seeds or hemp seeds will work just as well.

How do I store energy balls?

The rolled energy balls can be stored in an airtight container in the fridge for up to 1 week.

Can I freeze them?

Yes, the oat balls freeze very well! Flash-freeze them on a baking sheet until they’re solid, transfer them to an airtight container or large ziplock bag, and freeze for up to 3 months.

a peanut butter energy ball with a bite taken out of it on a parchment-lined baking sheet.
close up on peanut butter energy balls next to a small bowl of peanut butter on a parchment lined baking sheet.
Print

Peanut Butter Energy Balls

Need a boost of energy? Grab one of these no-bake Peanut Butter Energy Balls! They’re an easy 5-ingredient snack you can take on the go or freeze for later.
Course Snack
Cuisine American
Prep Time 15 minutes
Total Time 15 minutes
Servings 20 balls
Calories 148kcal

Ingredients

Instructions

  • In a medium sized bowl, stir all the ingredients together until well combined.
  • Place the bowl in the refrigerator for 30 minutes to chill. This makes rolling the balls easier.
  • Once chilled, roll into 1 inch balls. If it's too sticky, get your hands slightly damp every so often.
  • Store in the refrigerator for 1 week, or freeze them for longer.

Notes

  1. May use a combination of flax and chia seeds, or even hemp seeds if you want.
  2. Use almond butter instead of peanut for a different variation, or sunflower seed butter for nut allergy.

Nutrition

Serving: 1of 20 balls | Calories: 148kcal | Carbohydrates: 13g | Protein: 5g | Fat: 10g | Saturated Fat: 2g | Polyunsaturated Fat: 3g | Monounsaturated Fat: 4g | Cholesterol: 1mg | Sodium: 60mg | Potassium: 130mg | Fiber: 2g | Sugar: 6g | Vitamin A: 10IU | Vitamin C: 0.1mg | Calcium: 28mg | Iron: 1mg

Mason Jar Greek Salad with Tahini Dressing

Mason jar Greek salads.Make this mason jar Greek salad recipe with fresh veggies and creamy tahini dressing for a delicious, healthy meal prep option!

Mason jar Greek salads.

If you’re looking for a quick, fresh, and flavorful salad to prep ahead, this Mason Jar Greek Salad with tahini dressing is a must-try! It’s loaded with layers of crisp veggies, tangy feta, and a creamy tahini dressing that perfectly brings together all of the flavors of the salad.

Mason jar Greek salad jars.

What is Mason Jar Greek Salad with Tahini Dressing?

Mason jar Greek salad with tahini dressing is a portable, make-ahead version of a classic Mediterranean salad. Instead of tossing everything together in a bowl, the ingredients are layered into mason jars with the creamy tahini dressing at the bottom. This keeps the veggies crisp and fresh until you’re ready to eat, making it the perfect meal prep option for busy days. You simply pour the salad into a bowl, toss it together, and enjoy.

The salad is packed with crunchy vegetables like bell peppers, cucumbers, and romaine lettuce, alongside briny Kalamata olives, juicy grape tomatoes, and creamy feta cheese. The star of the show is the tahini dressing! It’s an irresistible blend of tahini, lemon juice, cumin, and sea salt. Each bite is a mix of vibrant flavors and satisfying textures that will leave you feeling both nourished and refreshed!

Ingredients You Need

  • Bell Peppers – We used a mix of red and yellow bell peppers for a pop of color and sweetness.
  • Kalamata Olives – These olives add a briny flavor that pairs perfectly with the tangy dressing.
  • Chickpeas – Chickpeas bring a hearty, nutty flavor and a boost of plant-based protein to the salad.
  • Persian Cucumbers – We love using these cucumbers for their crisp texture. 
  • Grape Tomatoes – These sweet little tomatoes add a burst of juicy flavor to every bite.
  • Feta Cheese Crumbles – In our opinion, no Mediterranean salad is complete without feta!
  • Romaine Lettuce – This lettuce is a great way to add even more crunch and freshness to the salad.

Tahini Dressing:

  • Tahini – This sesame paste gives the dressing a creamy, nutty base.
  • Lemon Juice – Freshly squeezed lemon juice brightens up the dressing with its zestiness.
  • Cumin – Cumin adds warm, earthy notes to balance the richness of the tahini.
  • Sea Salt – A pinch of sea salt brings out the flavors of the dressing and ties everything together.
  • Ground Black Pepper – A little black pepper adds a hint of spice and rounds out the flavors.
  • Water – We add water to thin the dressing to the perfect consistency.

How to Make Mason Jar Greek Salad with Tahini Dressing

  1. Make the dressing. Add the tahini, lemon juice, cumin, sea salt, and black pepper to a large bowl and whisk until smooth. If the mixture seems too thick, add water, one tablespoon at a time, until it reaches your desired consistency.
  2. Layer the jars. Begin by adding the tahini dressing to the bottom of the mason jars. Then, layer the salad ingredients in the following order: Kalamata olives, grape tomatoes, chickpeas, feta cheese, bell peppers, and romaine lettuce.
  3. Seal the jars. Secure the lids on the mason jars and refrigerate for up to 5 days.
  4. Serve the salad. When ready to eat, simply flip the contents of the jar into a bowl, toss everything together, and enjoy!

Variations

  • Chicken – For extra protein, top the salad with sliced grilled chicken. 
  • Cheese – Swap out the feta for goat cheese or even fresh mozzarella for a different flavor profile.
  • Greens – Instead of romaine, use baby spinach or arugula for a peppery bite.
  • Chickpeas – Roasted chickpeas will add a crunchy texture and a slightly nutty flavor to the salad.
  • Avocado – For a creamy, rich addition, layer in some sliced avocado just before serving.
  • Veggies – Add or substitute other vegetables like red onion, zucchini, or radishes for extra crunch and flavor.
  • Dressing – Add a pinch of cayenne pepper to the tahini dressing if you want a little heat.

Can I Store Leftovers?

Yes — that’s the beauty of this salad! You can store it all assembled without risking sogginess.

Refrigerating the jars will keep the salad fresh for up to 5 days.

We don’t recommend freezing this salad — the fresh vegetables won’t hold up well after thawing.

More Salad Recipes

Want more salads that are perfect for meal prep? Check out these other easy jarred salad recipes!

Mediterranean Quinoa Salad in a Jar

Mason Jar Salad

Healthy Rainbow Salad in a Jar

Mason Jar Salad with Mango

Mason jar Greek salads.
Print Recipe
No ratings yet

Mason Jar Greek Salad

Make this mason jar Greek salad recipe with fresh veggies and creamy tahini dressing for a delicious, healthy meal prep option!
Course: lunch, Main Course
Cuisine: American, greek
Keyword: mason jar greek salad
Servings: 3 servings
Author: Food Dolls

Ingredients

Tahini Dressing:

  • 1/3 cup tahini well stirred
  • Juice of 1 lemon
  • 1/2 teaspoon cumin
  • 1/2 teaspoon sea salt
  • 1/4 teaspoon ground black pepper
  • 2-3 Tablespoons water as needed

Greek Salad Jar:

  • 3/4 cup Kalamata olives
  • 1 cup sliced grape tomatoes
  • 1 (15 ounce) can chickpeas, rinsed and drained
  • 1/3 cup feta cheese crumbles
  • 1 cup chopped bell peppers we used a mix of red and yellow
  • 1 cup chopped Persian cucumbers
  • 1 cup shredded romaine lettuce

Instructions

  • In a bowl, whisk all the dressing ingredients until smooth. If the tahini thickens or appears curdled, don’t worry! Just add an extra tablespoon of water and keep whisking until creamy. Divide the dressing evenly into 3 mason jars.
    1/3 cup tahini, Juice of 1 lemon, 1/2 teaspoon cumin, 1/2 teaspoon sea salt, 1/4 teaspoon ground black pepper, 2-3 Tablespoons water

Layering:

  • Start with the tahini dressing at the bottom of each jar. Next, layer in the olives, tomatoes, chickpeas, feta cheese, bell peppers, cucumber, and finally, the romaine lettuce. Seal the jars and refrigerate for up to 5 days.
    3/4 cup Kalamata olives, 1 cup sliced grape tomatoes, 1 (15 ounce) can, 1/3 cup feta cheese crumbles, 1 cup chopped bell peppers, 1 cup chopped Persian cucumbers, 1 cup shredded romaine lettuce
  • When you’re ready to enjoy, simply flip the jar into

Nutrition

Serving: 1serving | Calories: 284kcal | Carbohydrates: 15g | Protein: 9g | Fat: 23g | Saturated Fat: 5g | Polyunsaturated Fat: 7g | Monounsaturated Fat: 10g | Cholesterol: 15mg | Sodium: 1122mg | Potassium: 473mg | Fiber: 5g | Sugar: 5g | Vitamin A: 2347IU | Vitamin C: 74mg | Calcium: 161mg | Iron: 2mg

Sausage and Egg Mini Frittatas

A stack of Sausage and Egg Mini Frittatas on a cream platter on a countertop.These Sausage and Egg Mini Frittatas are the perfect solution for a quick breakfast on the go! You can serve…

The post Sausage and Egg Mini Frittatas appeared first on The Defined Dish.

A stack of Sausage and Egg Mini Frittatas on a cream platter on a countertop.

These Sausage and Egg Mini Frittatas are the perfect solution for a quick breakfast on the go!

A finished Sausage and Egg Mini Frittata on a white plate with a silver fork. A bowl of blueberries is visible in the background.

You can serve them right away, or make a couple of batches and keep them in the fridge to enjoy a delicious, fluffy egg cup anytime during the week. By combining eggs with cottage cheese, you get a super moist texture that stays fresh even when reheated. 

A cream tray of five Sausage and Egg Mini Frittatas on a countertop.

Start with a simple base of eggs, cottage cheese, salt, and pepper, then feel free to get creative with your add-ins—sautéed veggies are a great way to keep it veggie-forward! You can toss in any veggies you have handy, so these mini frittatas can be whipped up with only a few staple ingredients.

ingredients:

  • Eggs
  • Cottage Cheese
  • Kosher Salt
  • Pepper
  • Breakfast Sausage
  • Spinach
A stack of Sausage and Egg Mini Frittatas on a cream platter on a countertop.

step-by-step:

step one: prepare the egg mixture

Preheat the oven to 350℉. In a large bowl, add the eggs, cottage cheese, salt, and pepper. Whisk until well combined.

step two: add the sausage, spinach, and egg mixture to the silicone muffin tin

Divide the sausage and spinach into the silicone muffin tins. Pour in the egg mixture about 3/4 full into each muffin tin.

step three: bake the frittatas

Bake until the eggs have just set, 30-35 minutes. Remove from oven, let cool, then carefully pop out each of the egg frittatas.

step four: serve and enjoy, or store for meal prep!

Once the egg bites are cooled a bit, these are perfect to eat right away! Or, you can store in an airtight container in the fridge for up to 4 days.

Three Sausage and Egg Mini Frittatas in the base of a clear airtight container ready for meal prep storage.

Recipe FAQs:

Do you have a recommendation for a silicone muffin tin to use for these frittatas?

Yes! I love this one from Amazon – it makes the frittatas the perfect size and keeps them from sticking to the pan!

are these mini frittatas easy to reheat if I store them in the fridge?

Super easy! I reheat mine in the air fryer for 3 to 4 minutes. You can also reheat in the microwave for 45 seconds to 1 minute.

Can I add other veggies to these?

Absolutely – this recipe is a great base, and it’s super easy to add in anything else you want! Sauteed veggies work great as add-ins for these frittatas.

These easy Sausage and Egg Mini Frittatas are sure to be a hit with the whole family. Let me know what you think after you try them!

Looking for more make-ahead breakfast ideas? Try these!

Copycat Starbucks Egg White Breakfast Wrap

Freezer Friendly Breakfast Sandwiches

Easy Paleo Chocolate Banana Bread

Gluten-Free Blueberry Scones

A top-down view of a platter of Sausage and Egg Mini Frittatas on a countertop. There's a dish of blueberries next to the platter.
Print

Sausage and Spinach Mini Frittatas

Servings 6
Calories 233kcal

Ingredients

  • 9 large eggs
  • 5 ounces cottage cheese
  • 1 teaspoon Kosher salt
  • ½ teaspoon pepper
  • 1/2 pound browned breakfast sausage
  • Handful of spinach wilted

Instructions

  • Preheat the oven to 350℉.
  • In a large bowl, add the eggs, cottage cheese, salt, and pepper. Whisk until well combined.
  • Divide the sausage and spinach into the silicone muffin tins.
  • Pour in the egg mixture about 3/4 full into each muffin tin. Bake until the eggs have just set, 30-35 minutes. Remove from oven, let cool, then carefully pop out each of the egg frittatas.

Nutrition

Calories: 233kcal | Carbohydrates: 1g | Protein: 17g | Fat: 17g | Saturated Fat: 6g | Polyunsaturated Fat: 3g | Monounsaturated Fat: 7g | Trans Fat: 0.1g | Cholesterol: 277mg | Sodium: 796mg | Potassium: 212mg | Fiber: 0.04g | Sugar: 1g | Vitamin A: 419IU | Vitamin C: 0.3mg | Calcium: 61mg | Iron: 2mg

Food Photography and Styling by Eat Love Eats.

The post Sausage and Egg Mini Frittatas appeared first on The Defined Dish.

Pumpkin Oatmeal

pumpkin oatmeal in a white bowl with a dollop of vegan yogurt on top.Start your day with a bowl of warm and cozy Vegan Pumpkin Oatmeal! It’s a quick, easy, and healthy breakfast made with 7 ingredients, like real pumpkin and pumpkin pie spice. Craving more vegan pumpkin breakfast recipes? You’ll also love my Vegan Pumpkin Waffles, Vegan Pumpkin Pancakes, and Pumpkin French Toast. As much as I…

pumpkin oatmeal in a white bowl with a dollop of vegan yogurt on top.

Start your day with a bowl of warm and cozy Vegan Pumpkin Oatmeal! It’s a quick, easy, and healthy breakfast made with 7 ingredients, like real pumpkin and pumpkin pie spice.

Craving more vegan pumpkin breakfast recipes? You’ll also love my Vegan Pumpkin Waffles, Vegan Pumpkin Pancakes, and Pumpkin French Toast.

pumpkin oatmeal in a white bowl with a dollop of vegan yogurt on top.

As much as I would love to eat a slice of vegan pumpkin pie for breakfast during the fall (and sometimes I do!), a bowl of this Pumpkin Spice Oatmeal is the next best thing and it’s a bit healthier. Luckily, it’s a sweet and ultra-cozy breakfast that tastes just like the classic fall dessert!

Pumpkin oats couldn’t be easier to make. Just combine the simple ingredients, like oats, pumpkin puree, pumpkin pie spice, and milk, in a pot on the stove and simmer until the oats are soft and creamy. Voila! You have a comforting fall breakfast that will keep you full and warm you up.

If you’re looking for a baked oatmeal recipe, try my Pumpkin Oatmeal Bake instead.

Why you’ll love this cozy fall breakfast

  • A perfect fall breakfast – Rolled oats are simmered with milk, pumpkin, and warm spices to give you a quick breakfast that will warm you from head to toe.
  • For pumpkin lovers – If you’ve been counting down the days to pumpkin season, then you’ve gotta enjoy this pumpkin oatmeal for breakfast, vegan pumpkin soup for lunch, and pumpkin gnocchi for dinner!
  • Quick, easy, and good for you – A bowl of this fiber-rich and warmly-spiced oatmeal will not only warm you up but also keep you full for hours.

How to make pumpkin spice oatmeal

Find the complete recipe with measurements in the recipe card below.

Combine the oats, pumpkin, milk, pumpkin pie spice, salt, and the sweetener of your choice in a small pot. Heat to a simmer over medium heat and cook until the oats are soft.

Serve the warm pumpkin oatmeal in bowls with a drizzle of maple syrup, chopped pecans or walnuts, a splash of non-dairy milk, vegan whipped cream, or vegan yogurt on top. Enjoy!

the ingredients for pumpkin oatmeal in a pot.

Variations

  • Gluten-free – Use certified gluten-free rolled oats to keep this recipe gluten-free. Not all oats are gluten-free, as some are processed in factories with other wheat products.
  • Nut-free – Instead of topping the oatmeal with chopped nuts, use pumpkin seeds or sunflower seeds instead.
  • Use quick oats – Use an equal amount of quick oats and cook them for slightly less time.
  • Instead of pumpkin – Use sweet potato or butternut squash puree or sweet potato as a substitute.

Frequently asked questions

Can I turn this recipe into overnight oats?

Yes, you can easily turn this into a pumpkin overnight oats recipe if you’d like to prepare it ahead of time or take your breakfast with you on the go. For overnight oats, stir all of the ingredients together in a large bowl, cover it with a lid or transfer the oats into individual mason jars, and place in the fridge to soak overnight.

The overnight oats can be refrigerated for up to 4 days. Before serving, heat up the oats in the microwave or enjoy them cold.

How long do the leftovers last?

The leftover cooked oats will keep for 3 to 4 days when stored in an airtight container in the fridge. I love making a double batch and saving the leftovers for quick and easy breakfasts.

Can you freeze pumpkin oatmeal?

Yes, pumpkin oatmeal freezes well for up to 3 months. After the leftovers cool to room temperature, transfer them to freezer-safe airtight containers or ziplock bags. Thaw the oatmeal in the refrigerator before reheating in the microwave or in a pot on the stove.

cooking pumpkin oatmeal in a pot.
pumpkin oatmeal in a white bowl with a dollop of vegan yogurt on top.
Print

Pumpkin Oatmeal

Start your day with a bowl of warm and cozy Vegan Pumpkin Oatmeal! It’s a quick, easy, and healthy breakfast made with 7 ingredients, like real pumpkin and pumpkin pie spice.
Course Breakfast
Cuisine American
Prep Time 5 minutes
Cook Time 5 minutes
Total Time 10 minutes
Servings 2 servings
Calories 283kcal

Ingredients

  • 1 cup rolled oats
  • 1/2 cup pumpkin puree
  • 1 1/2 cups soy milk or any other milk
  • 1 teaspoon pumpkin pie spice
  • 1/2 teaspoon pure vanilla extract
  • pinch of salt
  • 1-2 tablespoons brown sugar or pure maple syrup, to taste
  • Toppings chopped walnuts or pecans, more sweetener, more milk, yogurt or whipped topping

Instructions

  • Add the oats, pumpkin, milk, pumpkin pie spice, pinch of salt and sweetener of choice to a small pot.
  • Bring to a simmer over medium heat, and cook, stirring frequently, for about 3-4 minutes, until the oats are softened.
  • Serve in bowls topped with additional sweetener, nuts, milk, whipped topping or yogurt. Enjoy!

Notes

  1. The leftovers will keep for 3-4 days. I love making a double batch to have on hand for a few days. Simply reheat in the microwave or in a pot.
  2. For overnight oats, add all ingredients to a bowl with a lid and stir well to combine. Let it sit in the fridge overnight and up to 4 days. When ready to serve, you can either heat them up a bit in the microwave, or stir and enjoy cold.
  3. If you don’t have pumpkin pie spice mix, you can use the following spice mix instead: 3/4 teaspoon cinnamon, 1/4 teaspoon ground ginger, 1/8 teaspoon ground nutmeg.
  4. The nutrition information does not include any optional toppings.

Nutrition

Serving: 1of 2 servings | Calories: 283kcal | Carbohydrates: 45g | Protein: 11g | Fat: 6g | Saturated Fat: 1g | Polyunsaturated Fat: 3g | Monounsaturated Fat: 2g | Sodium: 96mg | Potassium: 539mg | Fiber: 7g | Sugar: 13g | Vitamin A: 10231IU | Vitamin C: 16mg | Calcium: 297mg | Iron: 4mg

Chocolate Chia Pudding

close up on a jar of chocolate chia pudding topped with berries and whipped cream.This Chocolate Chia Pudding recipe is blended so you don’t notice the seeds! An easy and healthy breakfast or snack made with only 5 ingredients. Want more vegan pudding recipes? My Vegan Chocolate Pudding, Vegan Banana Pudding, and Tofu Chocolate Mousse recipes are too good to miss. If the texture of chia pudding is what’s…

close up on a jar of chocolate chia pudding topped with berries and whipped cream.

This Chocolate Chia Pudding recipe is blended so you don’t notice the seeds! An easy and healthy breakfast or snack made with only 5 ingredients.

Want more vegan pudding recipes? My Vegan Chocolate Pudding, Vegan Banana Pudding, and Tofu Chocolate Mousse recipes are too good to miss.

close up on a jar of chocolate chia pudding topped with berries and whipped cream.

If the texture of chia pudding is what’s keeping you from enjoying this tasty and healthy treat, then you’ve gotta try my blended Chocolate Chia Pudding recipe. By blending the chia seeds with oat milk and a handful of other ingredients, you get an ultra-smooth and creamy treat perfect for a fiber-filled breakfast or snack.

A combination of chia seeds, maple syrup, cocoa powder and oat milk gives this dreamy chocolate delight a healthy boost so you can enjoy it for breakfast or snacks. Top it off with some fresh berries and a dollop of vegan whipped cream, and you have something that looks and tastes indulgent but always leaves you feeling great.

Why you’ll love this chia pudding recipe

  • A blended version of the classic – My chocolate chia pudding is as creamy and smooth, but you don’t have to blend it if you don’t want to. 
  • For chocolate lovers – Whether you’re craving something chocolatey for breakfast or dessert, this rich and decadent pudding has you covered.
  • Healthy, but you’d never know it – Chia seeds load this healthy dairy-free treat with omega-3 fatty acids and fiber, while maple syrup acts as a natural sweetener.
ingredients for chocolate chia pudding in a blender.

How to make blender chocolate chia pudding

Find the complete recipe with measurements in the recipe card below.

Add all of the chia pudding ingredients to a high-powered blender and blend until the mixture is smooth, creamy, and thick.

Pour the pudding into a container or multiple small containers, seal with a lid, and place it in the fridge for at least 2 hours.

You can serve the pudding immediately after blending, but it will be a little warm. I find that it’s much more enjoyable and has a thicker, more “pudding-like” consistency after chilling.

Serve the chia pudding for a healthy chocolate dessert or a grab-and-go breakfast and enjoy! 

blended chocolate chia pudding in a blender.

Topping ideas

The only way to make this sweet treat even better is with the right toppings. Before you dig into a bowl, top your healthy chocolate chia pudding with:

  • Raspberries, strawberries, or blueberries
  • Banana slices
  • A dollop of vegan whipped cream
  • Homemade granola
  • Chopped almonds, walnuts, hazelnuts, or pecans
  • Hemp seeds, ground flax, shredded coconut, or extra chia seeds
  • A drizzle of vegan salted caramel
  • Chocolate shavings or vegan chocolate chips

Frequently asked questions

Is vegan chia pudding good for you?

Yes, chia seed pudding is very good for you. Chia seeds are a great source of omega-3 fatty acids and fiber. It doesn’t hurt that this recipe is dairy-free and naturally sweetened with maple syrup, too!

Do I have to blend the chia seeds with the pudding ingredients?

No, you don’t have to. You can make this chocolate chia seed pudding the traditional way by simply stirring the seeds with the other ingredients in a medium bowl. Set the mixture aside for 15 minutes to thicken, then stir once more before chilling.

How long should chia seeds soak in chia pudding?

Blender chia pudding is thick as soon as it’s blended, so it really only needs to chill in the fridge for 2 hours to help it reach that perfect rich consistency. Classic chia pudding (see above) should be left to chill for at least 2 to 3 hours, or overnight.

How long will it last?

The leftover chia pudding, whether it’s stored in one large airtight container or individual sealed containers/jars, will last for up to 6 days in the refrigerator.

Can I freeze chia pudding?

Yes, chocolate chia pudding freezes well for about 2 months. Thaw individual servings in the fridge overnight, then enjoy!

close up on a jar of chocolate chia pudding topped with berries and whipped cream.
Print

Chocolate Chia Pudding

This Chocolate Chia Pudding recipe is blended so you don't notice the seeds! An easy and healthy breakfast or snack made with only 5 ingredients.
Course Snack
Cuisine American
Prep Time 5 minutes
Total Time 5 minutes
Servings 4 servings
Calories 249kcal

Ingredients

  • 1/2 cup chia seeds
  • 2 cups oat milk
  • 5 tablespoons pure maple syrup
  • 1/4 cup natural unsweetened cocoa powder
  • 1/2 teaspoon pure vanilla extract

Instructions

  • Add all ingredients to a high powered blender and blend on high speed until creamy and thick. Scrape down the sides of the blender as needed.
  • Transfer to a container (or portion into multiple small containers), cover and place in the refrigerator to chill for at least 2 hours, if possible. It can be enjoyed right away but it might be a little warm from blending and it will thicken as it chills. Serve with toppings like fruit or whipped cream.
  • It will keep in the refrigerator for about 6 days, making the perfect grab and go breakfast or snack.

Notes

  1. You may use another milk if you prefer – soy milk will add more protein which I like and coconut milk will make it even richer and creamier.
  2. You can simply stir the seeds with the other ingredients, then let thicken without stirring for 15 minutes. Stir once more before placing in the refrigerator to thicken for at least 2-3 hours. Then stir again and serve. I just prefer blended chia pudding personally.

Nutrition

Serving: 1of 4 servings | Calories: 249kcal | Carbohydrates: 41g | Protein: 7g | Fat: 9g | Saturated Fat: 1g | Polyunsaturated Fat: 5g | Monounsaturated Fat: 1g | Sodium: 63mg | Potassium: 284mg | Fiber: 10g | Sugar: 24g | Vitamin A: 258IU | Vitamin C: 0.3mg | Calcium: 341mg | Iron: 3mg

Mason Jar Instant Gochujang Noodles

A top-down view of two completed Mason Jar Instant Gochujang Noodles on a wooden serving board. Various other ingredients surround them in small dishes. The dishes are on a blue counter with a blue napkin.If you’re looking for a fun, make-ahead lunch idea to take to the office or just have in your fridge…

The post Mason Jar Instant Gochujang Noodles appeared first on The Defined Dish.

A top-down view of two completed Mason Jar Instant Gochujang Noodles on a wooden serving board. Various other ingredients surround them in small dishes. The dishes are on a blue counter with a blue napkin.

If you’re looking for a fun, make-ahead lunch idea to take to the office or just have in your fridge to make life easier on a busy day, these Mason Jar Instant Gochujang Noodles are just the thing!

Three completed Mason Jar Instant Gochujang Noodles on a wooden serving board. Various other ingredients surround them in small dishes. A fork is visible twirling some noodles.

It can be hard to find time to feed yourself nutritious food when you’re busy, but these Mason Jar Instant Gochujang Noodles are super simple to prep, and make for a delicious lunch option. By waiting to add the broth until right before eating, you ensure that lunch only takes a few minutes to put together and it’s ultra-fresh. No soggy noodles around here!

A top-down view of two completed Mason Jar Instant Gochujang Noodles on a wooden serving board. Various other ingredients surround them in small dishes. The dishes are on a blue counter with a blue napkin.

The rich flavors in these noodles are absolutely delicious, and are sure to make you excited to reach for your meal prep every day! Plus, between the chicken, bone broth, and edamame, this meal is packed with protein, so you’ll stay full throughout the day too.

Ingredients:

  • Toasted Sesame Oil
  • Gochujang Paste
  • Coconut Aminos
  • Rice Vinegar
  • Fish Sauce
  • Ginger
  • Garlic
  • Rotisserie Chicken
  • Frozen Edamame
  • Matchstick Carrots
  • Green Onions 
  • Maifun or Thin Vermicelli Rice Noodles
  • Baby Bok Choy
  • Cilantro
  • Black Sesame Seeds
  • Chicken Bone Broth (or sub chicken broth)
Three completed Mason Jar Instant Gochujang Noodles on a wooden serving board. Various other ingredients surround them in small dishes. The dishes are on a blue counter with a blue napkin.

step-by-step:

Step one: make the sauce

In the bottom of each mason jar, combine 1 teaspoon sesame oil, 1 tablespoon gochujang paste, 2 tablespoons coconut aminos, 1 teaspoon rice vinegar, 1 teaspoon fish sauce, ½ teaspoon minced ginger, 1 minced garlic clove. Whisk until well combined.

Step two: prep the mason jars

To each jar, add ½ cup of shredded chicken, 1/3 cup of shelled edamame, ¼ cup matchstick carrots, 1 sliced green onion, a bundle of rice noodles, ½ cup baby bok choy, 1 tablespoon cilantro, 1 teaspoon sesame seeds.

step three: store or serve!

Store in the fridge for up to 3 days in the fridge. When ready to eat, simply bring 2 cups of broth to a rolling boil on the stovetop (or heat in the microwave until it’s piping hot) and pour over the contents in mason jar, stir and let rest to slightly cool and so the noodles soften, 3 to 5 minutes!

Three completed Mason Jar Instant Gochujang Noodles on a wooden serving board. Various other ingredients surround them in small dishes. The dishes are on a blue counter. Broth is being poured into the mason jars from a clear glass measuring cup.

Recipe FAQs:

Can I use veggies other than the ones listed?

Absolutely! These noodles are super customizable based on the ingredients you have on hand. I also love adding shredded purple cabbage, thinly sliced bell pepper, a soft-boiled egg, or even some bean sprouts!

Can I add kimchi to these noodles?

I love to add chopped kimchi! But, if you don’t have it available, the gochujang paste adds a ton of quick, delicious flavor.

can I substitute chicken broth if I don’t have bone broth?

You sure can! I love using bone broth for the increased protein, but chicken or veggie broth work here, too!

I can’t wait to hear what you think about this fun lunch idea! Comment below after you try them.

Looking for more lunch ideas? Check these out!

Ultimate Chicken Taco Salad

Jalapeño Tuna Melt

Grilled Steak and Chimichurri Pasta Salad

A side view of two completed Mason Jar Instant Gochujang Noodles on a wooden serving board. Various other ingredients surround them in small dishes. The dishes are on a blue counter.
Print

Mason Jar Instant Gochujang Noodles

Servings 4 mason jars
Calories 620kcal

Ingredients

  • 4 teaspoons toasted sesame oil
  • 4 tablespoons gochujang paste
  • 8 tablespoons coconut aminos
  • 4 teaspoons rice vinegar
  • 4 teaspoons fish sauce
  • 2 teaspoons minced ginger
  • 4 garlic cloves minced
  • 2 cups shredded rotisserie chicken
  • 1 1/3 cup shelled frozen edamame
  • 1 cup matchstick carrots
  • 4 green onions sliced very thin on the diagonal
  • 6 ounces maifun or thin vermicelli rice noodles
  • 1 ½ cups roughly chopped baby bok choy
  • 4 tablespoons minced cilantro
  • 4 teaspoons black sesame seeds
  • 8 cups chicken bone broth or chicken broth

Instructions

  • In the bottom of each mason jar, combine 1 teaspoon sesame oil, 1 tablespoon gochujang paste, 2 tablespoons coconut aminos, 1 teaspoon rice vinegar, 1 teaspoon fish sauce, ½ teaspoon minced ginger, 1 minced garlic clove. Whisk until well combined.
  • To each jar, add ½ cup of shredded chicken, 1/3 cup of shelled edamame, ÂĽ cup matchstick carrots, 1 sliced green onion, a bundle of rice noodles, ½ cup baby bok choy, 1 tablespoon cilantro, 1 teaspoon sesame seeds.
  • Store in the fridge for up to 3 days in the fridge. When ready to eat, simply bring 2 cups of broth to a rolling boil on the stovetop (or heat in the microwave until it’s piping hot) and pour over the contents in mason jar, stir and let rest to slightly cool and so the noodles soften, 3 to 5 minutes!

Notes

For mason jars, I recommend these!
I use a carton of Kettle and Fire Bone Broth per each instant noodle, the size is exactly 2 cups, I love the flavor and it’s got a bonus in protein!

Nutrition

Calories: 620kcal | Carbohydrates: 59g | Protein: 58g | Fat: 17g | Saturated Fat: 3g | Polyunsaturated Fat: 2g | Monounsaturated Fat: 2g | Cholesterol: 114mg | Sodium: 1861mg | Potassium: 541mg | Fiber: 5g | Sugar: 5g | Vitamin A: 6698IU | Vitamin C: 20mg | Calcium: 127mg | Iron: 3mg

Food Photography and Styling by Eat Love Eats.

The post Mason Jar Instant Gochujang Noodles appeared first on The Defined Dish.

Mediterranean Chicken Marinade Recipes (4 Ways)

Four different flavored bags of marinating chicken.Find four different Mediterranean-inspired chicken marinade recipes to infuse your protein with vibrant, delicious flavor!

Four different flavored bags of marinating chicken.

If you’re looking to take your chicken game to the next level, these Mediterranean chicken marinade recipes will become your new best friends! Each has its own unique twists that’ll make your next chicken dish absolutely unforgettable.

Four bags of chicken marinading in different flavors.

What Is Chicken Marinade?

Chicken marinades are a flavorful blend of ingredients that not only tenderize your chicken but also infuse it with rich flavors. By soaking the chicken in these marinades, you ensure that every bite is super juicy and packed with spices, herbs, and other goodness that you marinate it in. Whether you’re aiming for a zesty, smoky, or slightly sweet profile, marinating your chicken is the secret to unlocking maximum flavor!

The beauty of a chicken marinade is how incredibly simple it is. You can whip it up in minutes with ingredients you probably already have on hand, and just let the marinade do its job overnight. Trust us — the results are worth the wait!

Ingredients You Need

Tzatziki Chicken Marinade

  • Greek Yogurt – Creamy and tangy, this yogurt tenderizes the chicken. You can purchase it or make your own Greek yogurt
  • Sour Cream – We love using sour cream for the extra layer of creaminess and subtle tang.
  • Olive Oil – Oil adds a rich flavor and helps the chicken retain moisture during cooking.
  • Persian Cucumber – Grated cucumber brings a refreshing crunch and lightness to the marinade.
  • Pickles – Grated pickles add a tangy, briny kick that complements the yogurt perfectly.
  • Fresh Dill – Dill adds a bright, herbal note that enhances the Mediterranean vibe.
  • Pickle Juice – This is a great way to add extra tang and depth to the flavor.
  • Garlic – Freshly grated garlic gives it that irresistible savory punch.

Honey Harissa Chicken Marinade

  • Olive Oil – Smooth and rich, olive oil helps the marinade adhere to the chicken and keeps it juicy.
  • Honey – Adds a touch of sweetness that balances out the spicy harissa.
  • Harissa Paste – We love using harissa paste because it brings a smoky, spicy heat to the marinade. We use Mina when we make this marinade.
  • Lemon Juice – Bright and zesty, lemon juice adds a little acidity to balance out the other ingredients.
  • Smoked Paprika – This spice adds a deep, smoky flavor that pairs perfectly with the harissa.
  • Garlic – Be sure to grate the garlic so it’s easy to mix it into the marinade evenly.
  • Sea Salt – Essential for bringing out the bold flavors in the marinade.

Hummus Marinated Chicken

  • Prepared Hummus – Hummus is a creamy, earthy base that coats the chicken beautifully! If you have a little extra time, you can whip up some homemade hummus instead of using a store-bought brand.
  • Smoked Paprika – This spice adds a smoky depth to the marinade.
  • Olive Oil – Oil helps to smooth out the marinade and keep the chicken moist.
  • Lemon Juice – Lemon adds a bright, citrusy note and adds a zesty punch.
  • Sea Salt – Just a pinch of salt brings out the other flavors and balances the richness of the hummus.
  • Black Pepper – A bit of black pepper adds a touch of heat and complexity to the marinade.
  • Garlic – Grated garlic infuses the chicken with its rich flavor.

Tahini Yogurt Marinated Chicken

  • Tahini Paste – Nutty and rich, tahini adds a unique depth of flavor to the marinade.
  • Olive Oil – We use olive oil to create just the right consistency. It also helps the chicken stay juicy.
  • Cumin – This spice adds a warm, earthy flavor that complements the nutty tahini.
  • Greek Yogurt – Creamy and tangy, yogurt helps tenderize the chicken while adding a silky texture.
  • Lime Juice – Citrus adds a fresh and zesty kick that brightens up the flavors.
  • Vinegar – This is a great way to add sharp acidity and balance the richness.
  • Sea Salt – Salt brings out all of the flavors of the other ingredients and makes them pop!
  • Black Pepper – Pepper adds a subtle heat that pairs well with the other spices.
  • Garlic – Freshly grated garlic gives the marinade a punch of flavor that ties everything together.

How to Make Mediterranean Chicken Marinades

No matter which marinade you’re making, the steps are the same!

  1. Combine ingredients. In a large bowl, mix all the marinade ingredients until they’re well combined and smooth.
  2. Coat the chicken. Add the chicken to the bowl, ensuring it’s fully coated with the marinade. Use your hands to massage the marinade into the chicken for even coverage.
  3. Marinate. Cover the bowl or place the chicken in a zip-top bag. Let it marinate in the fridge for 24 hours to soak up all the flavors. Be sure to discard the excess marinade.
  4. Cook. Whether you’re grilling, baking, or pan-searing, cook the marinated chicken until it’s tender and juicy.
  5. Serve. Allow the chicken to rest briefly before serving with your favorite side dishes!

Variations

  • Citrus – Try using orange or grapefruit juice for a different citrus twist.
  • Fresh Herbs – Basil, oregano, or thyme would bring an extra layer of fresh flavor.
  • Spice – Add chili flakes or cayenne pepper for a spicy marinade.
  • Yogurt – Use plain yogurt or labneh for a different creamy texture.
  • Experiment with oils – Swap olive oil for avocado oil or sesame oil for a unique flavor profile.
4 chicken marinades.

Can I Store Leftovers?

While you can store the leftover chicken for a few days, you cannot safely store or reuse any leftover marinade once you’ve removed the raw chicken from it. You can, however, make the marinade ahead of time and store it in the fridge or freezer until you’re ready to use it.

Refrigerate the cooked, marinated chicken in an airtight container for up to 3 days. The prepared marinades can also be stored in the refrigerator for about 3 days before using them.

You can freeze the cooked chicken for up to 2 months — just thaw it in the fridge overnight. The prepared marinades can be frozen for up to 3 months.

More Recipes To Jazz Up Your Meals

Whether you’re trying to elevate proteins, veggies, or starches, we’ve got your back with these super simple recipes!

Creamy Tahini Dressing

Easy Zhoug Sauce

Lebanese Garlic Sauce (Toum Recipe)

Baba Ganoush (Eggplant Dip)

4 bags of chicken marinades.
Print Recipe
No ratings yet

Mediterranean Chicken Marinade Recipes (4 Ways)

Find four different Mediterranean-inspired chicken marinades to infuse your protein with vibrant, delicious flavor!
Prep Time5 minutes
Marinade Time1 day
Total Time1 day 5 minutes
Course: Main Course, meal prep
Cuisine: Mediterranean
Keyword: chicken marinades, honey garlic chicken marinade, mediterranean chicken marinade
Servings: 16 servings
Author: Food Dolls

Equipment

Ingredients

Tzatziki Chicken Marinade:

  • 2 pounds chicken breasts
  • 1/4 cup Greek yogurt
  • 3 Tablespoons sour cream
  • 2 Tablespoons olive oil
  • 1/4 cup grated Persian cucumber
  • 2 Tablespoons grated pickles
  • 1 Tablespoon fresh dill
  • 2 Tablespoons pickle juice
  • 2 cloves grated garlic

Honey Harissa Chicken Marinade:

  • 2 chicken breasts
  • 2 Tablespoons olive oil
  • 1 Tablespoon honey
  • 1/4 cup harissa paste we used Mina
  • 2 Tablespoons lemon juice
  • 1 teaspoon smoked paprika
  • 3 cloves grated garlic
  • 1 teaspoon sea salt

Hummus Marinated Chicken:

  • 2 pounds chicken breasts
  • 1/2 cup prepared hummus
  • 1 teaspoon smoked paprika
  • 2 Tablespoons olive oil
  • 2 Tablespoons lemon juice
  • 1/2 teaspoon sea salt
  • 1/2 teaspoon black pepper
  • 2 cloves grated garlic

Tahini Yogurt Marinated Chicken:

  • 2 pounds chicken breasts
  • 3 Tablespoons tahini paste
  • 2 Tablespoons olive oil
  • 1 teaspoon cumin
  • 1/2 cup Greek yogurt
  • 2 Tablespoons lime juice
  • 1 Tablespoon vinegar
  • 1 teaspoon sea salt
  • 1/2 teaspoon black pepper
  • 3 cloves grated garlic

Instructions

Tzatziki Chicken Marinade:

  • Add all ingredients to a bowl.
    2 pounds chicken breasts, 1/4 cup Greek yogurt, 3 Tablespoons sour cream, 2 Tablespoons olive oil, 1/4 cup grated Persian cucumber, 2 Tablespoons grated pickles, 1 Tablespoon fresh dill, 2 Tablespoons pickle juice, 2 cloves grated garlic
    Chicken marinading in tzatziki sauce.
  • Marinate for 24 hours.

Honey Harissa Chicken Marinade:

  • Add all ingredients to a bowl.
    2 chicken breasts, 2 Tablespoons olive oil, 1 Tablespoon honey, 1/4 cup harissa paste, 2 Tablespoons lemon juice, 1 teaspoon smoked paprika, 3 cloves grated garlic, 1 teaspoon sea salt
    Chicken marinading in honey harissa sauce.
  • Marinate for 24 hours.

Hummus Marinated Chicken:

  • Add all ingredients to a bowl.
    2 pounds chicken breasts, 1/2 cup prepared hummus, 1 teaspoon smoked paprika, 2 Tablespoons olive oil, 2 Tablespoons lemon juice, 1/2 teaspoon sea salt, 1/2 teaspoon black pepper, 2 cloves grated garlic
    Raw chicken in hummus marinade.
  • Marinate for 24 hours.

Tahini Yogurt Marinated Chicken:

  • Add all ingredients to a bowl.
    2 pounds chicken breasts, 3 Tablespoons tahini paste, 2 Tablespoons olive oil, 1 teaspoon cumin, 1/2 cup Greek yogurt, 2 Tablespoons lime juice, 1 Tablespoon vinegar, 1 teaspoon sea salt, 1/2 teaspoon black pepper, 3 cloves grated garlic
    Raw chicken in tahini yogurt marinade.
  • Marinate for 24 hours.

Nutrition

Serving: 1serving | Calories: 342kcal | Carbohydrates: 6g | Protein: 45g | Fat: 15g | Saturated Fat: 3g | Polyunsaturated Fat: 3g | Monounsaturated Fat: 8g | Trans Fat: 0.02g | Cholesterol: 129mg | Sodium: 729mg | Potassium: 825mg | Fiber: 1g | Sugar: 2g | Vitamin A: 241IU | Vitamin C: 6mg | Calcium: 38mg | Iron: 1mg

Farro Salad with Spicy Peanut Dressing

farro salad dressed in peanut sauce in a large white bowl with a gold spoon on the side.This easy Farro Salad recipe tosses chewy farro, roasted sweet potatoes, and colorful veggies in the best peanut dressing. Make it for a healthy and filling lunch or flavor-packed side dish! For more hearty vegan salad recipes, be sure to check out my Lentil Salad, White Bean Salad, and Kale Caesar Salad recipes as well.…

farro salad dressed in peanut sauce in a large white bowl with a gold spoon on the side.

This easy Farro Salad recipe tosses chewy farro, roasted sweet potatoes, and colorful veggies in the best peanut dressing. Make it for a healthy and filling lunch or flavor-packed side dish!

For more hearty vegan salad recipes, be sure to check out my Lentil Salad, White Bean Salad, and Kale Caesar Salad recipes as well.

farro salad dressed in peanut sauce in a large white bowl with a gold spoon on the side.

This farro salad was inspired by a salad I used to get at a local health food store near me. It was so hearty and filling, I knew I had to recreate it one day. Nutty, chewy, and protein-packed farro is combined with hearty beans, roasted sweet potatoes, and fresh vegetables before it’s all tossed in a spicy peanut sauce. Incredibly satisfying and easy to put together, it will quickly become one of your new staples for lunch.

Why you’ll love this farro salad

  • Not your average salad – Roasted sweet potatoes, adzuki beans, edamame, and shredded cabbage are dressed in peanut sauce to give every bite an Asian-inspired twist.
  • Hearty and satisfying – As a fantastic source of protein and fiber, cooked farro makes this grain salad recipe super filling and satisfying. It’s perfect for healthy meal prep!
  • The best peanut sauce – My best-ever 5 Minute Peanut Sauce gets a zesty makeover and extra heat for this farro grain bowl!
ingredients for farro salad together in a large white bowl.

How to make a vegan farro salad 

Find the complete recipe with measurements in the recipe card below.

Cook the farro in a pot of boiling water until it’s tender but still chewy. Drain and set aside.

Check what type of farro you’re using: The 3 types of farro—pearled, semi-pearled, and whole—each have different cooking times. Double-check the package instructions to determine how long yours needs to boil before getting started. I used pearled.

Meanwhile, lay the diced sweet potatoes on a baking sheet and toss them in oil and salt. Roast the sweet potatoes until fork tender.

Whisk the spicy peanut sauce ingredients in a small bowl until smooth. 

Not a fan of spicy food? Feel free to omit the sriracha from the dressing if you’d like.

ingredients for farro salad and peanut sauce together in a large white bowl.

Transfer the cooked farro, roasted sweet potatoes, and the remaining salad ingredients to a large bowl. Pour the spicy peanut sauce over top and toss until everything is well coated.

Serve the salad right away or chill it in the refrigerator until it’s time to eat. Enjoy!

farro salad dressed in peanut sauce in a large white bowl with a gold spoon on the side.

Frequently asked questions

What is farro?

Farro is a whole grain with a chewy texture and nutty flavor. It’s commonly used in a Mediterranean diet, although it’s just as versatile as brown rice, quinoa, and other whole grains. And because it’s loaded with fiber and protein, you’ll want to use it everywhere!

How else can I use farro?

You can add farro to salads, soups, stews, grain bowls, and any other recipe that could use a nutty and chewy grain with heaps of protein and fiber. I recommend cooking a batch and keeping it in a sealed container in your fridge for up to 5 days. That way, you can easily toss it with leafy greens and a simple vinaigrette, with roasted vegetables and beans, or add it to a hearty vegan stew or vegan chili.

Can this salad be made without nuts?

Sure. Simply omit the cashews from the salad and replace the peanut butter in the peanut sauce with sunflower seed butter or tahini. The flavors will change slightly, but the salad will still be good.

Should this farro sweet potato salad be eaten warm or cold?

I find that this salad is best when it’s served chilled. Taking the time to chill it in the fridge for at least 30 minutes gives the flavors time to deepen, plus it’s so much easier to grab and go! However, if you’d rather eat it warm, feel free to warm up each serving in the microwave beforehand.

How long does the leftover farro salad last?

The leftover assembled salad can be stored in an airtight container in the fridge for 5 days. However, if you’d like to keep the veggies crisp and the farro chewy, store the assembled salad and peanut dressing in separate airtight containers.

farro salad dressed in peanut sauce in a large white bowl with a gold spoon on the side.
Print

Farro Salad with Spicy Peanut Dressing

This easy Farro Salad recipe tosses chewy farro, roasted sweet potatoes, and colorful veggies in the best peanut dressing. Make it for a healthy and filling lunch or flavor-packed side dish!
Course Salad
Cuisine Asian-inspired
Prep Time 20 minutes
Cook Time 15 minutes
Total Time 35 minutes
Servings 8 servings
Calories 318kcal

Ingredients

Farro Salad

  • 1 cup uncooked farro I used pearled farro
  • 1 medium sweet potato
  • 1 cup shredded red cabbage
  • 1 cup shredded carrots
  • 1/2 cup chopped green onions
  • 1/2 cup chopped cilantro
  • 1/2 cup shelled edamame thawed if frozen
  • 15 ounce can adzuki beans or chickpeas, red beans, drained and rinsed
  • 1/3 cup chopped roasted cashews

Spicy Peanut Dressing

Instructions

  • Cook farro – Bring about 3 cups of salted water to a boil, then add the farro and simmer for around 15 minutes until tender, but still chewy. Drain and set aside to cool.
  • Roast sweet potato – Meanwhile, preheat the oven to 425 degrees F. Peel and diced the sweet potato into 1/2 inch pieces, and add to a sheet pan. Drizzle with a little olive oil and sprinkle with salt. Toss to coat in the oil, then spread into an even layer and bake for around 25 minutes. Remove from the oven and set aside.
  • Make the dressing – In a small-medium bowl, add all sauce ingredients and whisk until smooth. Add a few tablespoons of warm water if it seems too thick.
  • Mix – In a large bowl, add the farro, sweet potato, and all other salad ingredients. Pour the sauce over the salad and toss until well combined.
  • Chill and serve – Cover and chill in the refrigerator until ready to serve. Enjoy!

Notes

  1. For nut free, omit the roasted cashews and use tahini or sunflower seed butter in the dressing.

Nutrition

Serving: 1of 8 servings | Calories: 318kcal | Carbohydrates: 48g | Protein: 12g | Fat: 10g | Saturated Fat: 2g | Polyunsaturated Fat: 3g | Monounsaturated Fat: 5g | Sodium: 321mg | Potassium: 561mg | Fiber: 9g | Sugar: 9g | Vitamin A: 6943IU | Vitamin C: 11mg | Calcium: 72mg | Iron: 3mg