Chocolate Cream Pie

This chocolate cream pie recipe features a silky chocolate cream filling, flakey pie crust, and a fluffy whipped cream topping.

The post Chocolate Cream Pie appeared first on Budget Bytes.

Get the chocolate fix of your dreams with this luscious and easy-to-make Chocolate Cream Pie! What’s not to love about velvety smooth chocolate cream filling encased in a crispy pie dough shell and topped with sweetened whipped cream!?!? P.S. Use store-bought pie crust and whipped cream topping to make this one of the easiest pies ever. Or try our 3-Ingredient Pie Crust and Homemade Whipped Cream for more of a challenge!
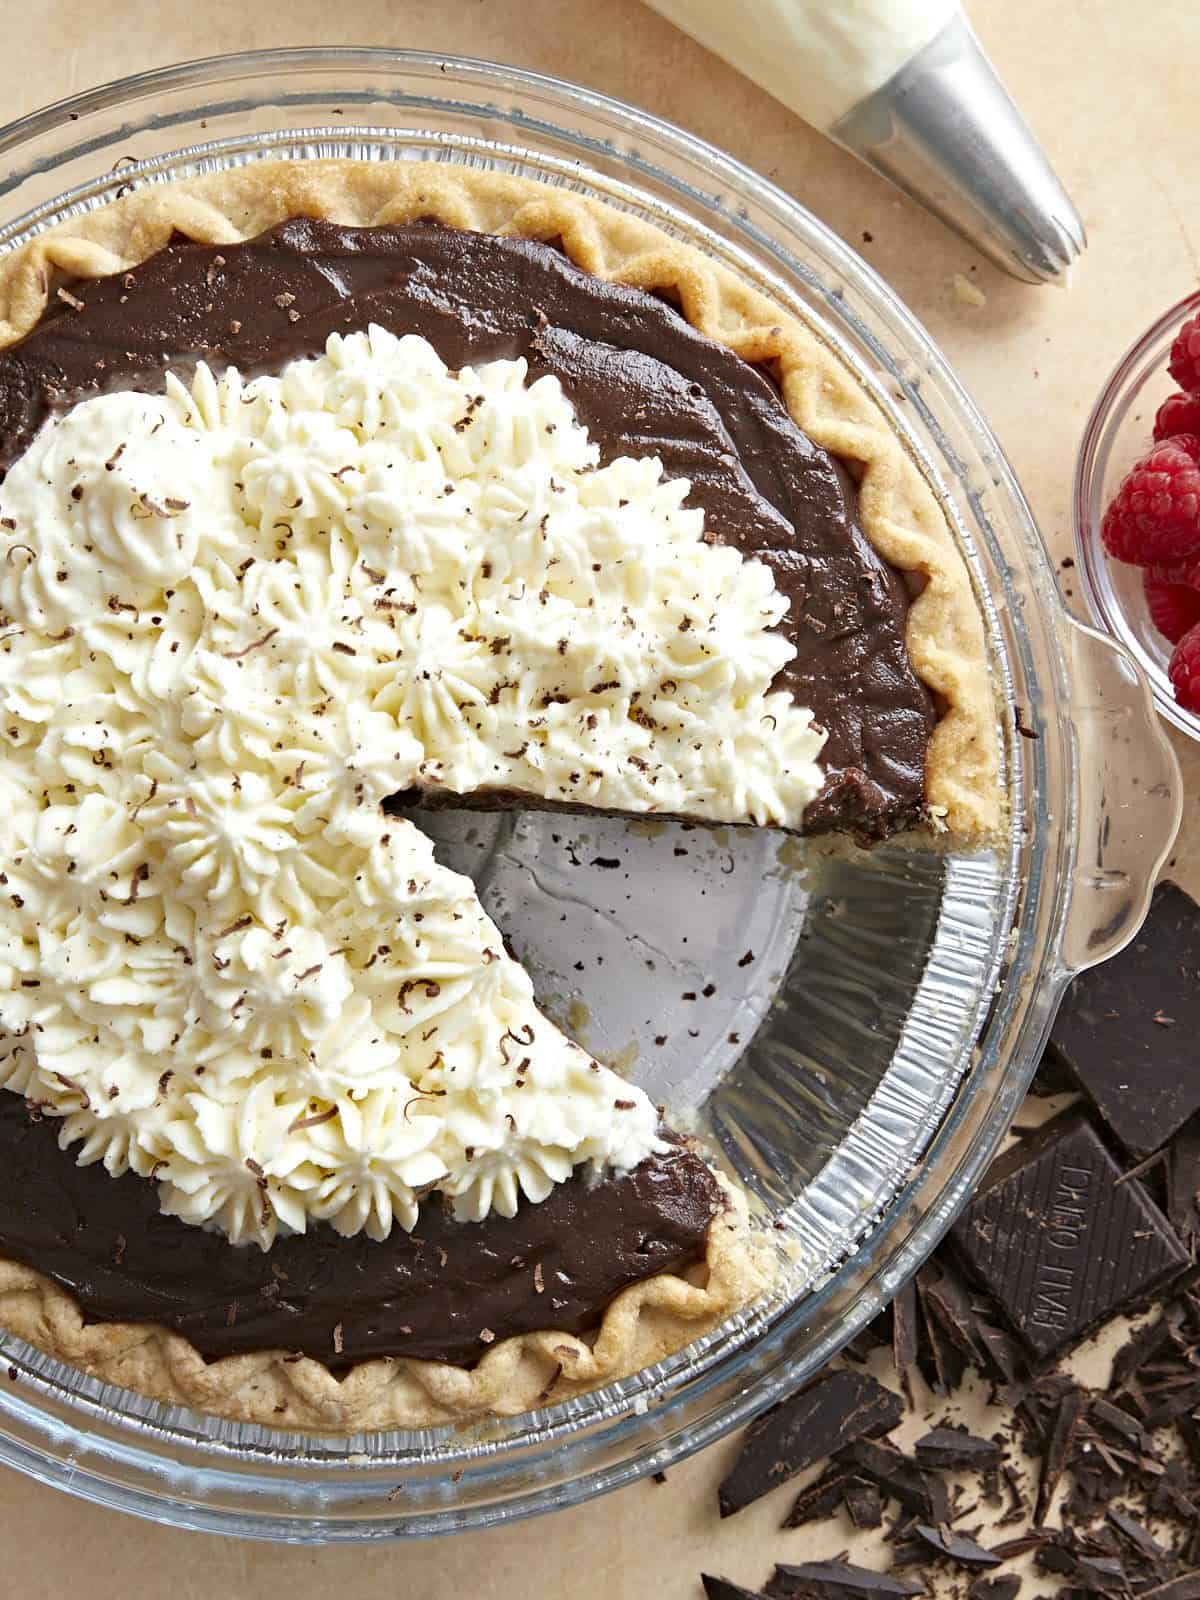
Close up overhead view of a chocolate cream pie topped with whipped cream.

What Is Chocolate Cream Pie?

Chocolate cream pie is a chocolate-based custard that’s thickened with eggs. The custard can be layered in a cookie crust (like the one in our Coconut Cream Pie Bars) or a traditional pie crust that’s baked ahead of time to prevent the dreaded soggy bottom. Chocolate Cream Pie is topped with whipped cream or meringue and can be garnished with fresh raspberries, mint, or a sprinkle of chocolate shavings.

Ingredients For Chocolate Cream Pie

  • Pie Crust: Use a store-bought deep dish 9-inch pie crust or half a recipe of our 3-Ingredient Pie Crust. Either way, you’ll have to blind-bake it, i.e., thoroughly bake it, before you fill it. Another option is to skip the baking altogether and make a cookie crust, like the one we use in our Coconut Cream Pie Bars.
  • Whole Milk: Milk helps thin out the chocolate and creates a pudding-like consistency. If you are plant-based, substitute with full-fat coconut milk.
  • Sugar: Sweetens the filling. You can substitute with brown sugar for deeper caramel notes.
  • Eggs: Create the custard base. They thicken the filling and give it a luxurious mouthfeel. 
  • Cornstarch: Helps thicken the custard and gives it a glossy finish.
  • Cocoa Powder: Deepens the chocolate notes in the filling. 
  • Semi-Sweet Baking Chocolate: This is the flavor base of our chocolate filling. It also helps to thicken the filling. For a pie with less sweetness, use bittersweet chocolate. Milk chocolate is not recommended for this recipe. Do not use chocolate chips, as these are designed not to melt. 
  • Salted Butter: Adds a glossy finish to the filling. If you don’t have salted butter, use unsalted, and add 1/8th teaspoon salt to the filling mixture. If you’re dairy-free, substitute with plant-based butter.
  • Whipped Cream Topping: Use store-bought whipped topping in a pressurized can for a stabilized cream that can take a little heat. Otherwise, make our Homemade Whipped Cream topping.

How To Serve Chocolate Cream Pie

If serving on a hot day, the whipped cream topping tends to melt and pool all over your chocolate custard. At these times, it’s best to top the pie with Meringue or Stabilized Whipped Cream. Whipped cream in a pressurized can holds up well, too. If you’re using Homemade Whipped Cream, top each slice with whipped cream as you serve. Or pipe the cream and freeze the pie. It will thaw quickly as you serve. Shaved chocolate is a wonderful and economical choice for garnish. If it’s in your budget, fresh raspberries and mint also make an incredible garnish. 

How To Store Chocolate Cream Pie

Because this pie refrigerates and freezes beautifully, it’s a perfect make-ahead dessert. Fill the crust with the custard, place plastic wrap or parchment paper directly on the surface, wrap in aluminum, and refrigerate until set. Then, freeze for up to 3 months. If making ahead, it’s best to freeze the pie and thaw just before serving. It will keep in the fridge for up to 2 days; then, the crust begins to get soggy.
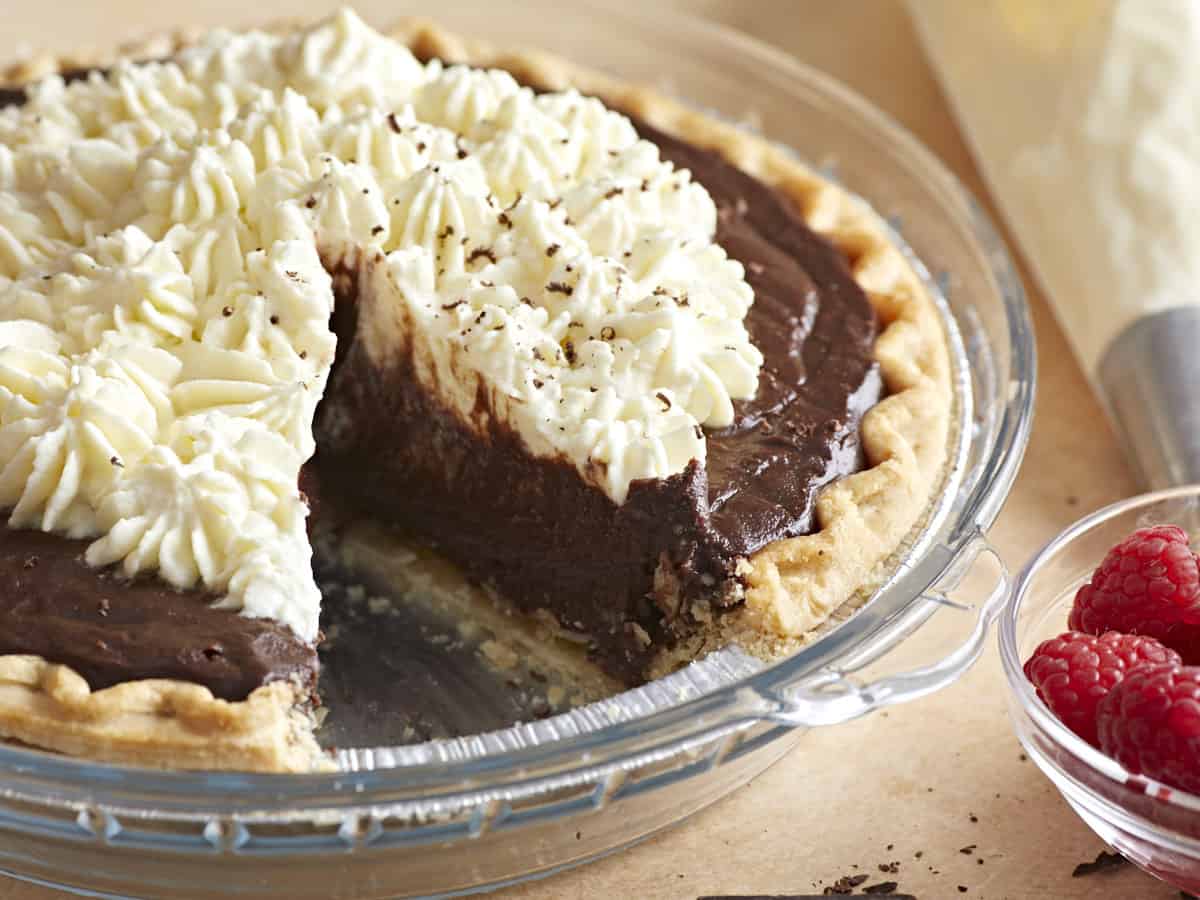
Side view of a chocolate cream pie with a slice removed.
Overhead view of a chocolate cream pie with whipped cream on top and a slice removed.
Print

Chocolate Cream Pie

This chocolate cream pie recipe features a silky chocolate cream filling, flakey pie crust, and a fluffy whipped cream topping. 
Course Dessert
Cuisine American
Total Cost $10.57 recipe / $1.32 serving
Prep Time 30 minutes
Cook Time 30 minutes
Chill Time 4 hours
Total Time 5 hours
Servings 8 slices
Calories 552kcal

Ingredients

  • 3 cups whole milk $0.75
  • 1 cup granulated sugar $0.36
  • 3 large eggs, beaten $0.40
  • 3 Tbsp cornstarch $0.15
  • 1/3 cup unsweetened cocoa powder $0.38
  • 3 Tbsp salted butter $0.37
  • 2 4oz. bars semi-sweet baking chocolate, finely chopped $4.98
  • 1 deep dish pie crust $1.40
  • 2 cups whipped cream $0.89

Instructions

  • Preheat the oven according to the pie crust directions. Poke the bottom of your pie crust a few times with a fork to create steam vents. Add a sheet of parchment paper and weigh down the parchment with about 2 cups of dry beans or pie weights. Cover the edge of the pie crust with foil or pie ring so it doesn't scorch.
  • Follow package directions and bake until crispy and golden. Remove weights and allow the crust to cool.
  • While the crust blind bakes set a large saucepan over medium heat. Add the milk and 2 cups of sugar and stir until combined. Bring this mixture slowly to a boil, stirring occasionally so none of the milk scalds.
  • In the meantime, in a small bowl, mix the remaining 1 cup of sugar, the beaten eggs, cornstarch, and cocoa powder until smooth.
  • Once the milk boils, take it off the heat. Then add 1/4 cup of the milk mixture to the egg mixture and stir. Add another 1/4 cup of the milk mixture to the egg mixture and stir.
  • Put the milk back on medium heat and add the warm egg mixture to it, whisking non-stop until the mixture thickens into a pudding-like consistency.
  • Once the mixture thickens, take it off the heat and whisk in the finely chopped semi-sweet chocolate.
  • Add the butter and whisk until smooth. Pass the chocolate filling through a fine mesh sieve into a large bowl.
  • Spray a piece of plastic wrap large enough to cover the bowl with cooking spray, then top the surface of the chocolate filling with the plastic wrap and refrigerate for an hour or until cool.
  • Once the filling has cooled, remove the plastic wrap and reserve. Pour the chocolate filling into the baked pie shell. Reuse the plastic wrap and place it directly on the surface of the filling. Chill the pie for an additional 3 hours.
  • Top the chocolate cream pie with whipped cream topping, slice, serve, and enjoy.

See how we calculate recipe costs here.

Nutrition
Serving: 1slice | Calories: 552kcal | Carbohydrates: 63g | Protein: 10g | Fat: 30g | Sodium: 203mg | Fiber: 4g
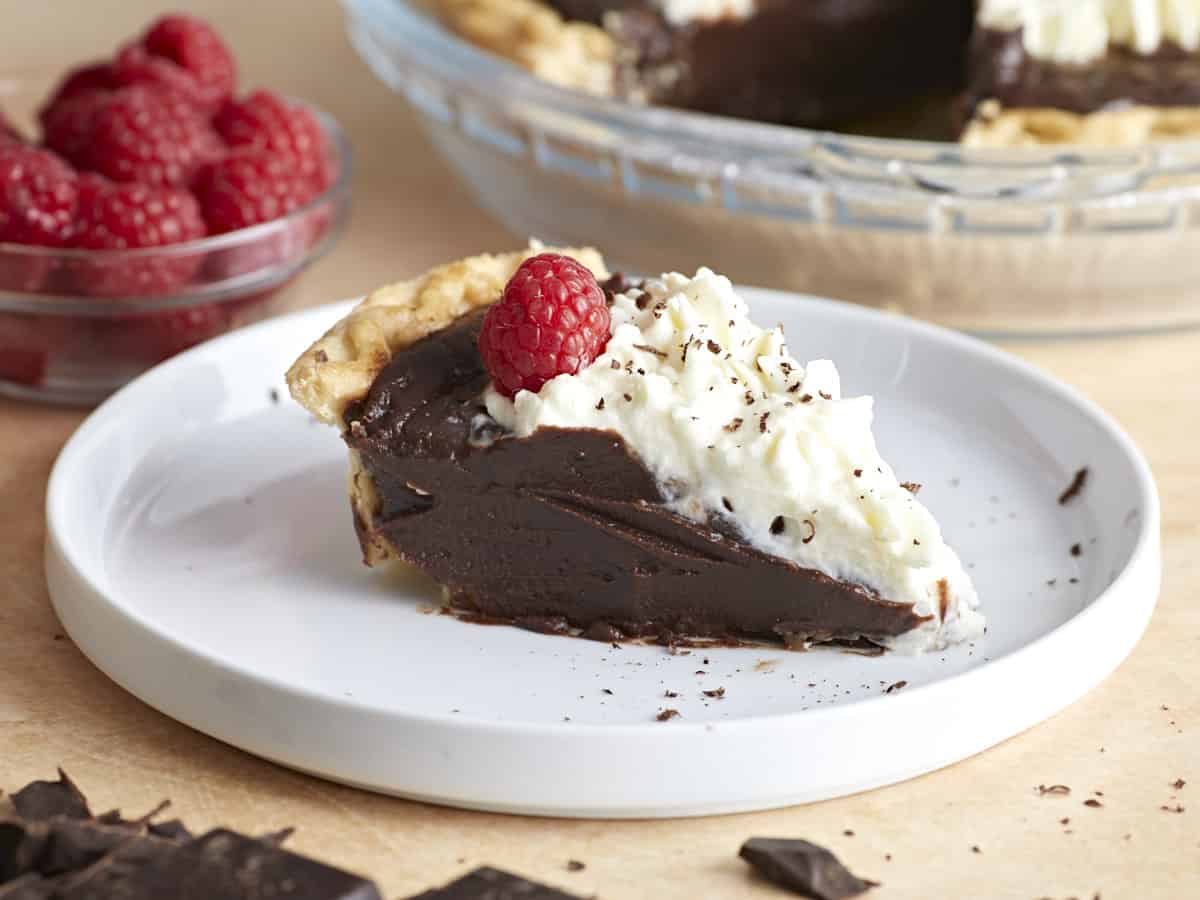
Side view of a slice of chocolate cream pie on a plate.

How to Make Chocolate Cream Pie – Step by Step Photos
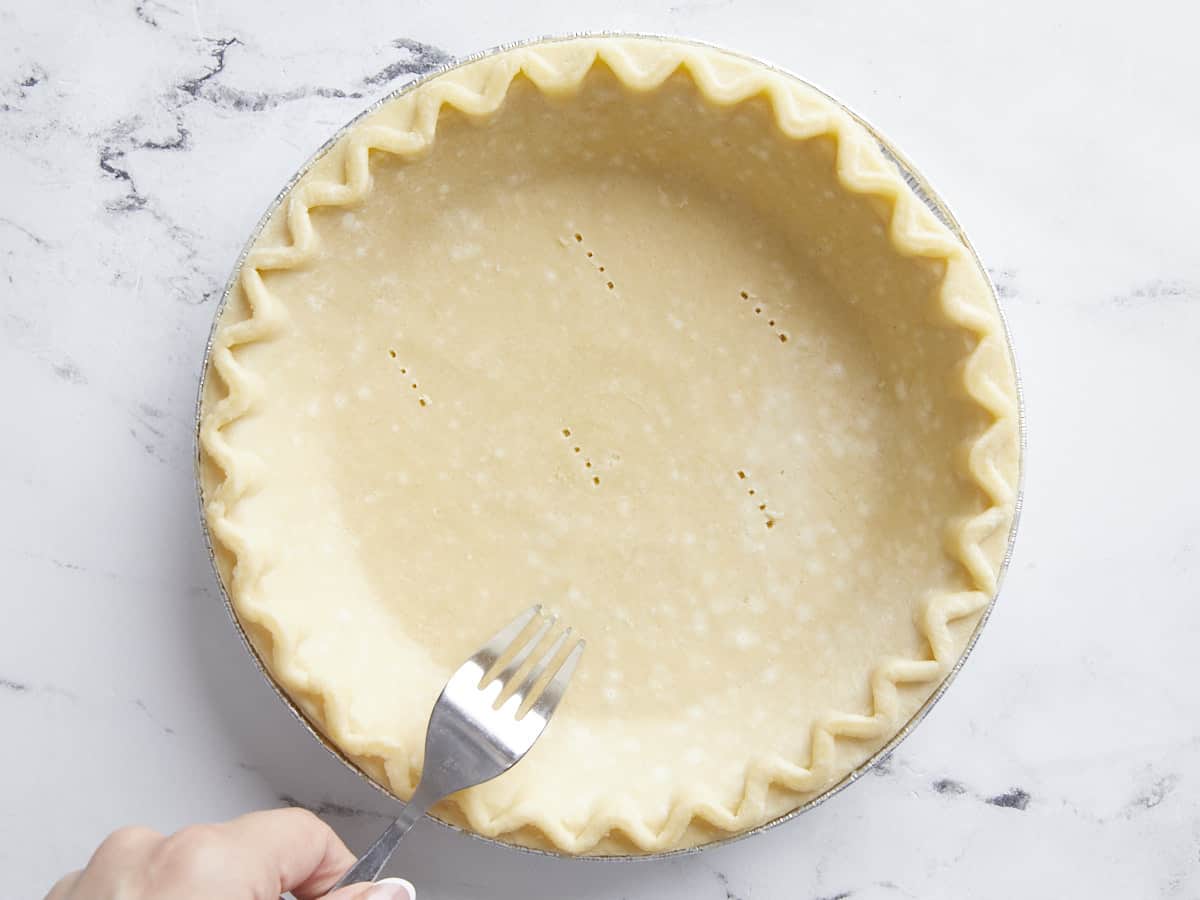
Pie crust being pricked with a fork.

Preheat the oven according to the pie crust directions. Poke the bottom of a deep dish pie crust a few times with a fork to create steam vents. Add a sheet of parchment paper and weigh down the parchment with about 2 cups of dry beans or pie weights. Cover the edge of the pie crust with a foil ring or pie ring so it doesn’t scorch. Follow package directions and bake until crispy and golden. Remove weights and allow the crust to cool.
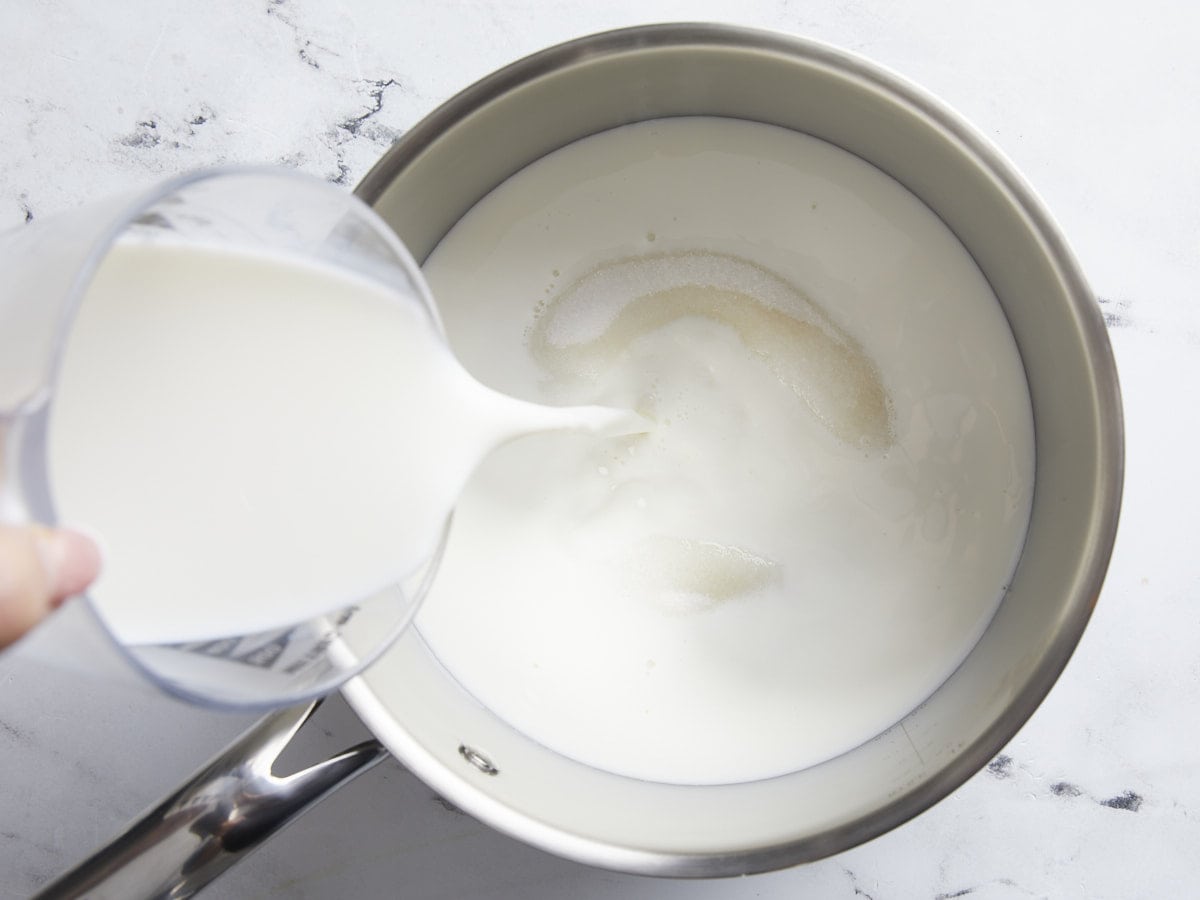
Milk pouring into a sauce pan with sugar.

While the crust blind bakes set a large saucepan over medium heat. Add 2 cups milk and 1 cup of sugar and stir until combined. Bring this mixture slowly to a boil, stirring occasionally so none of the milk scalds.
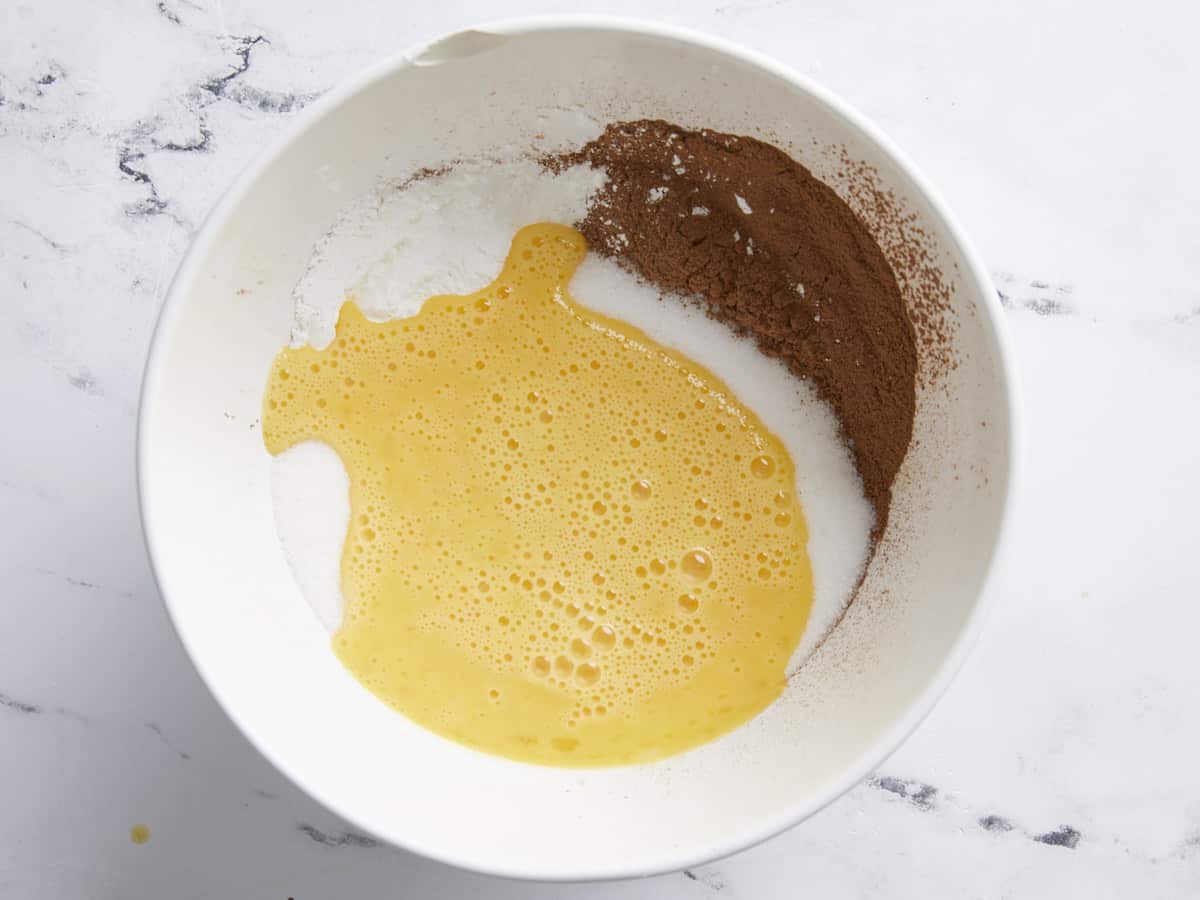
sugar, egg, and chocolate in a bowl.

In the meantime, in a small bowl, mix the remaining 1 cup of sugar, 3 large beaten eggs, 3 tablespoons of cornstarch, and 1/3 cup cocoa powder until smooth.
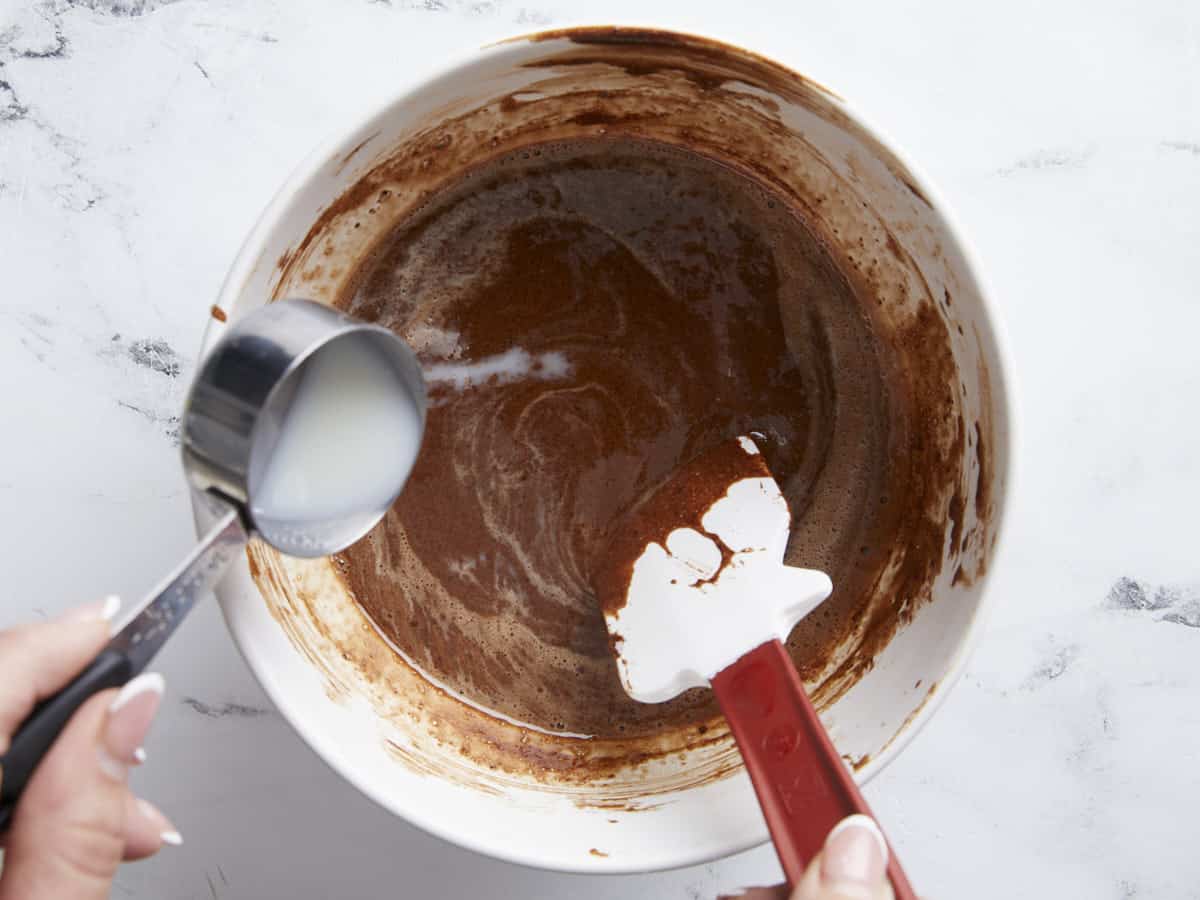
Milk being added to the chocolate mixture.

Once the milk boils, take it off the heat. Then add 1/4 cup of the milk mixture to the egg mixture and stir. Add another 1/4 cup of the milk mixture to the egg mixture and stir. 
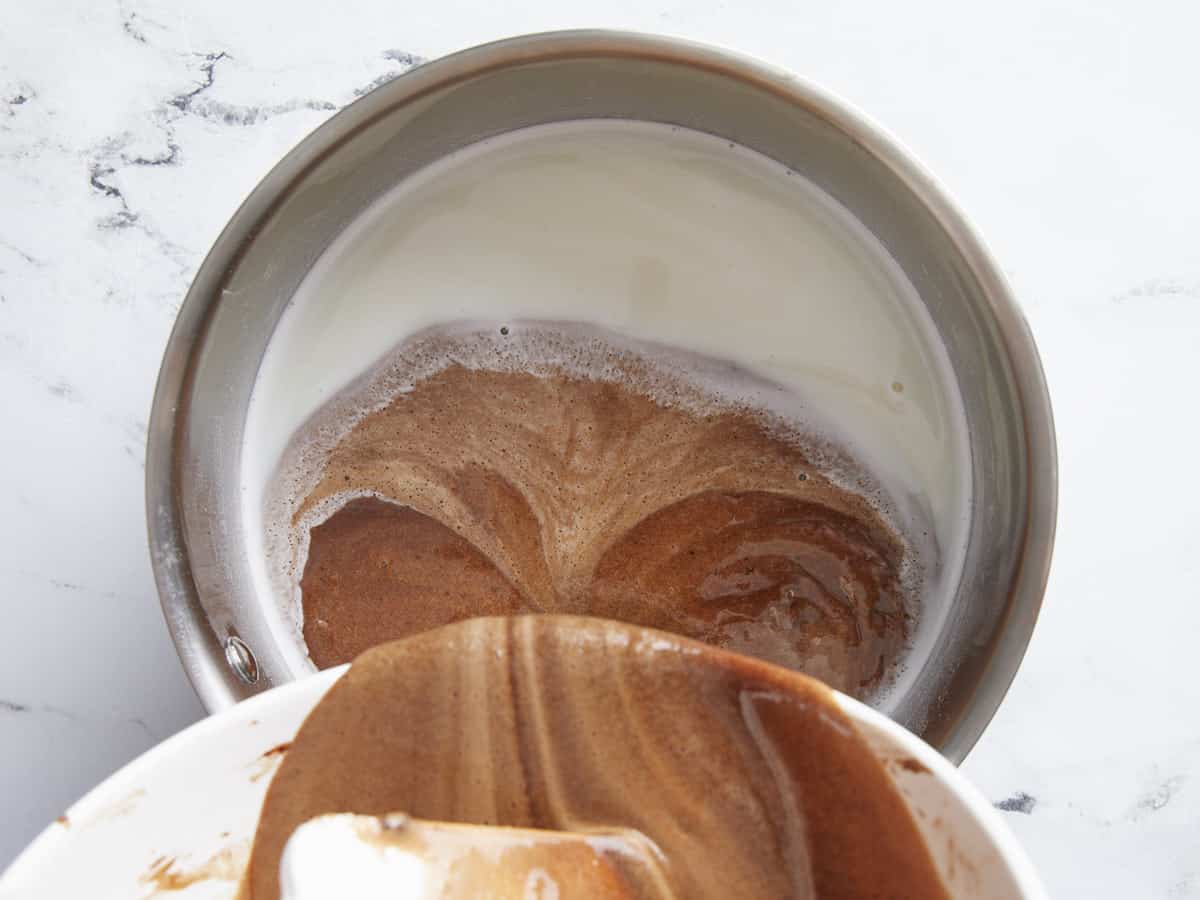
Chocolate mixture being poured into hot milk.

Put the milk back on medium heat and add the warm egg mixture to it, whisking non-stop until the mixture thickens into a pudding-like consistency.
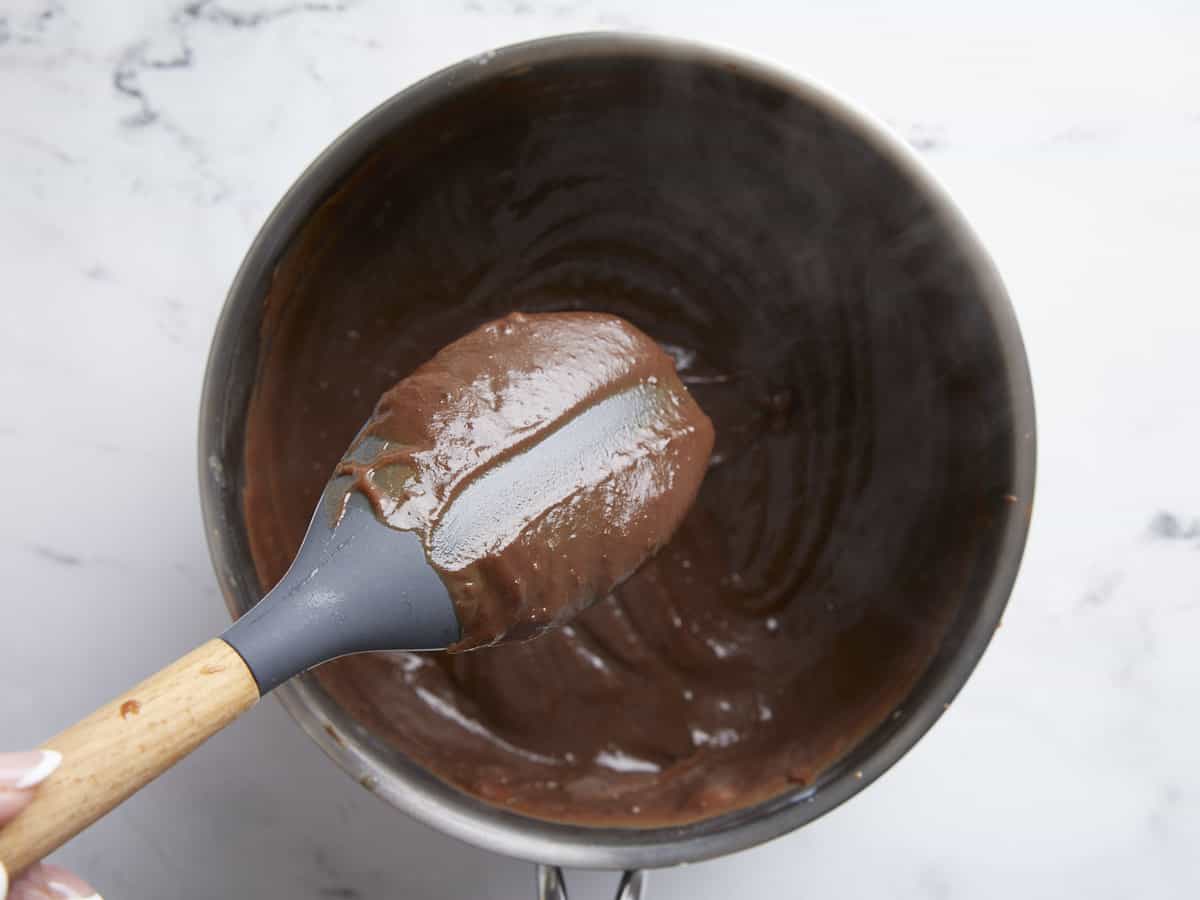
Thickened milk chocolate mixture.

The thickened chocolate mixture should look like this.
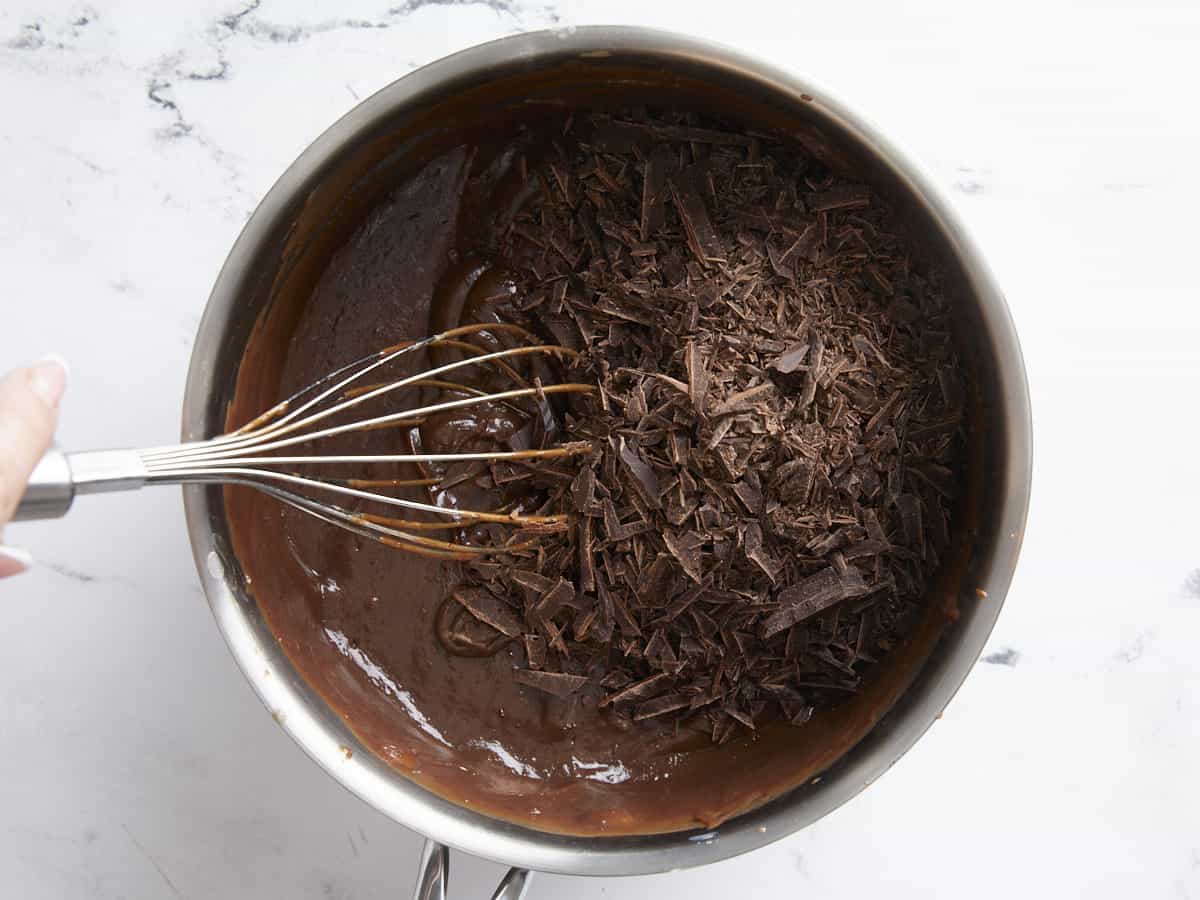
Chopped chocolate added to the saucepot.

Once the mixture thickens, take it off the heat and whisk in the 2 bars of finely chopped semi-sweet chocolate.
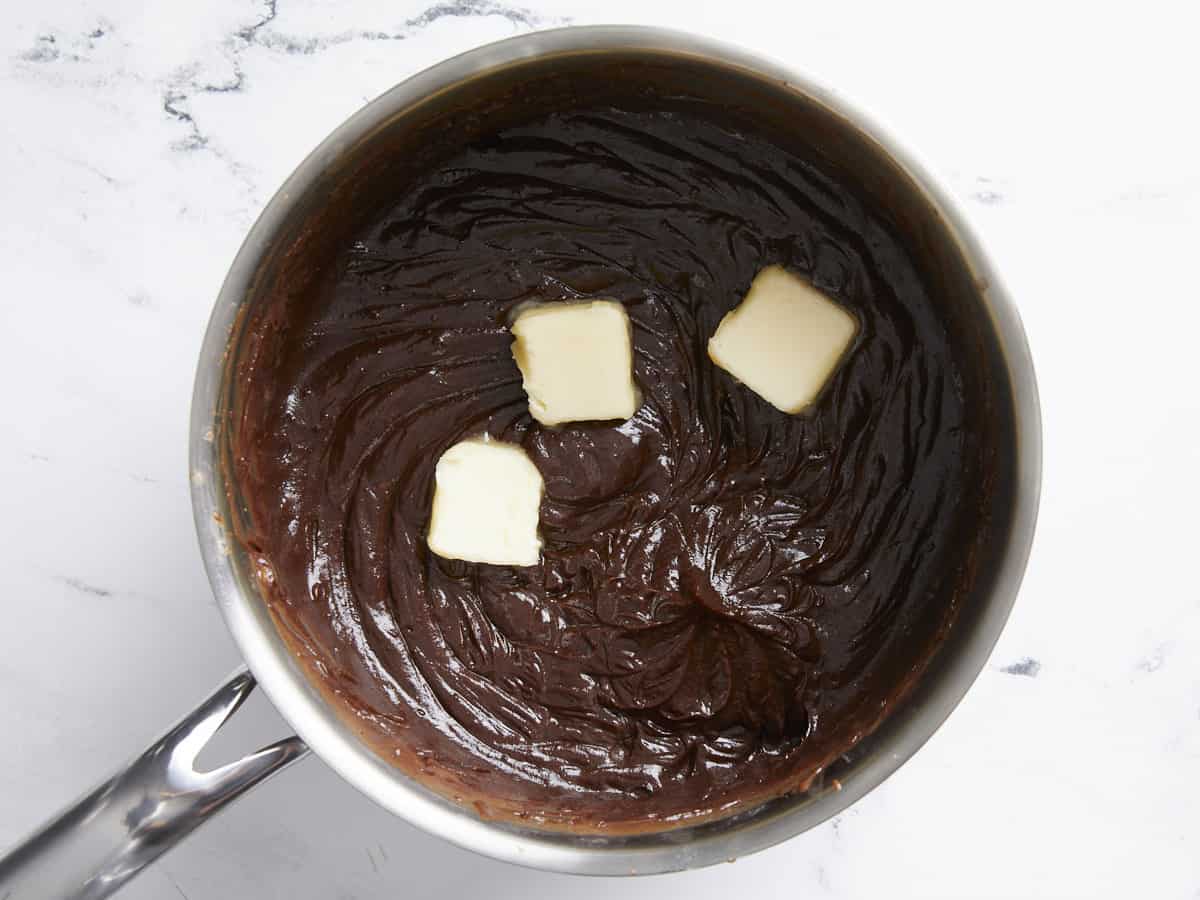
Butter added to the chocolate.

Add 3 tablespoons of butter. Whisk until smooth.
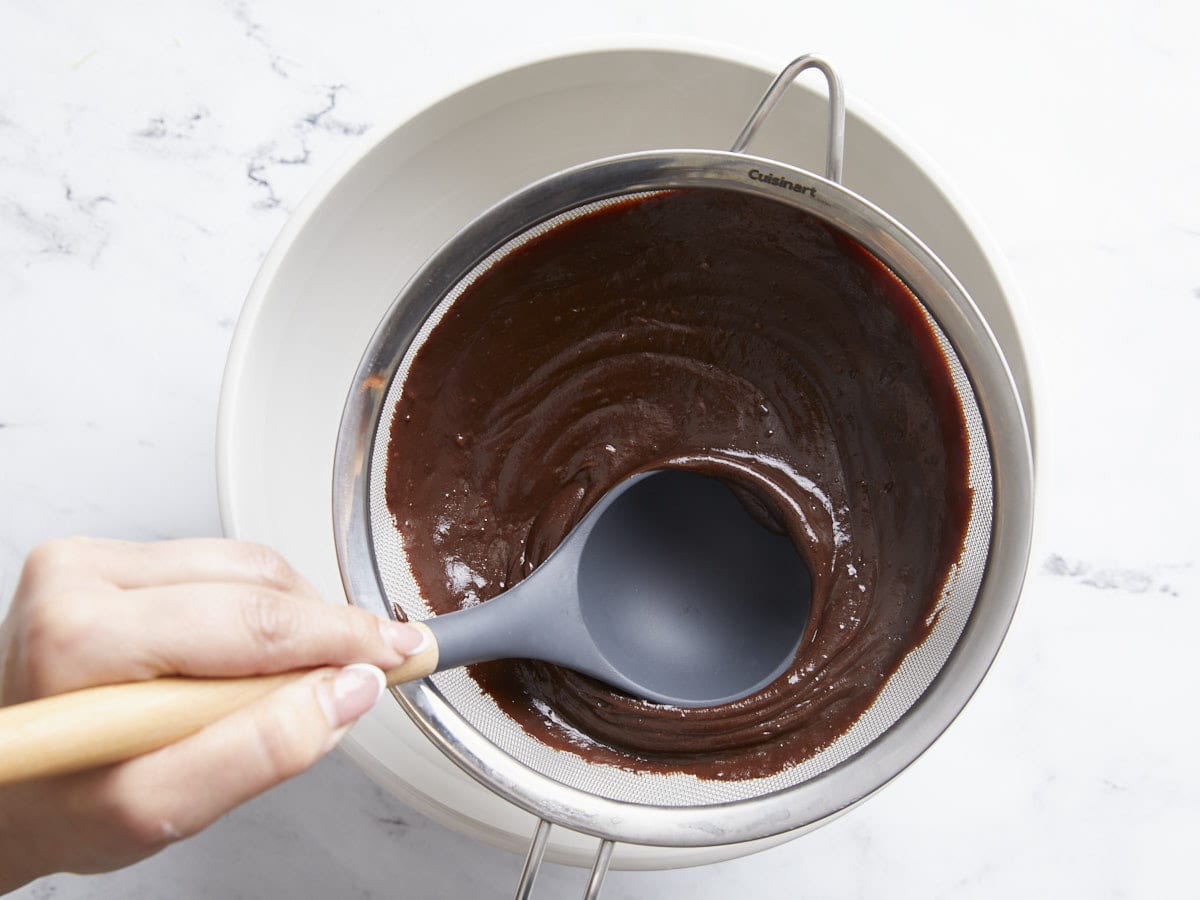
Chocolate being pushed through a sieve.

Pass the chocolate filling through a fine mesh sieve into a large bowl.
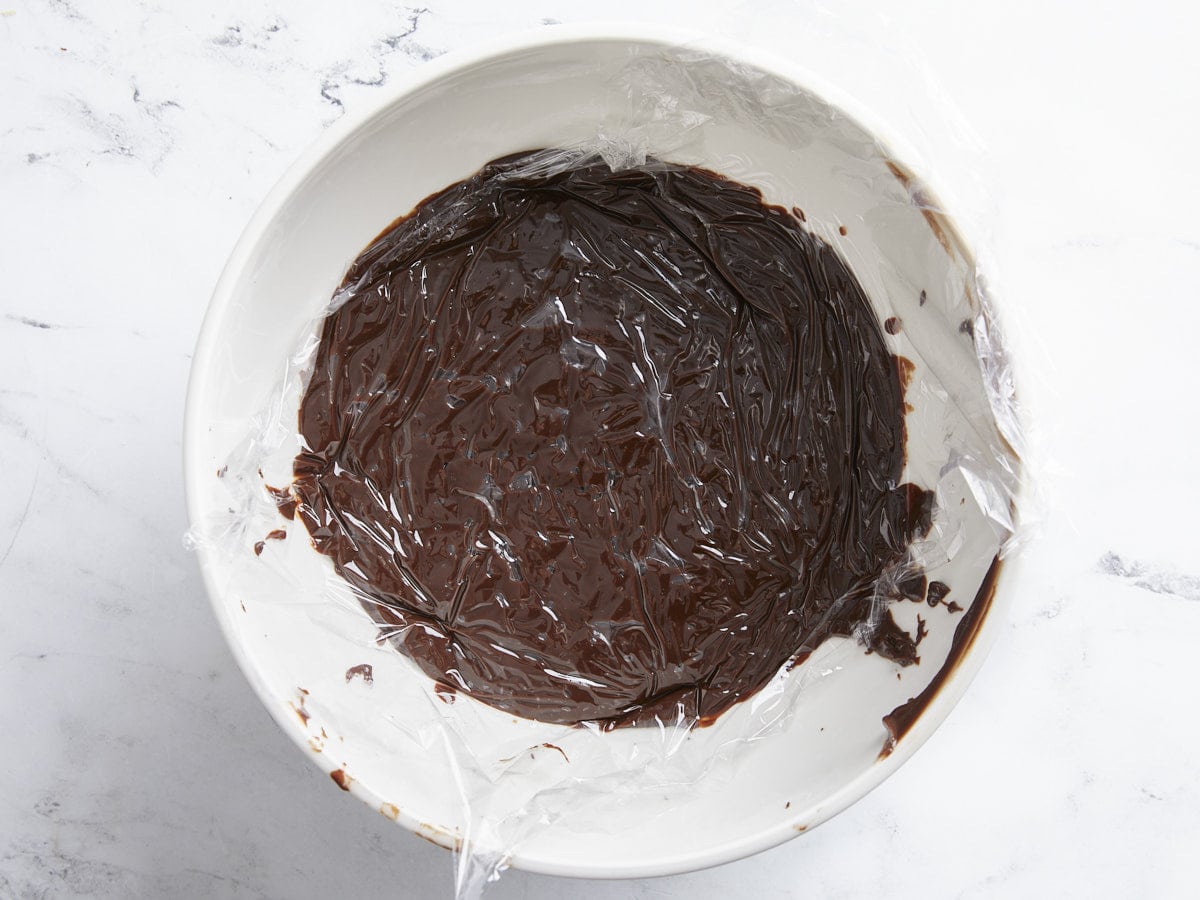
Chocolate in a bowl with plastic on top.

Spray a piece of plastic wrap large enough to cover the bowl with cooking spray, then top the surface of the chocolate filling with the plastic wrap and refrigerate for an hour or until cool. 
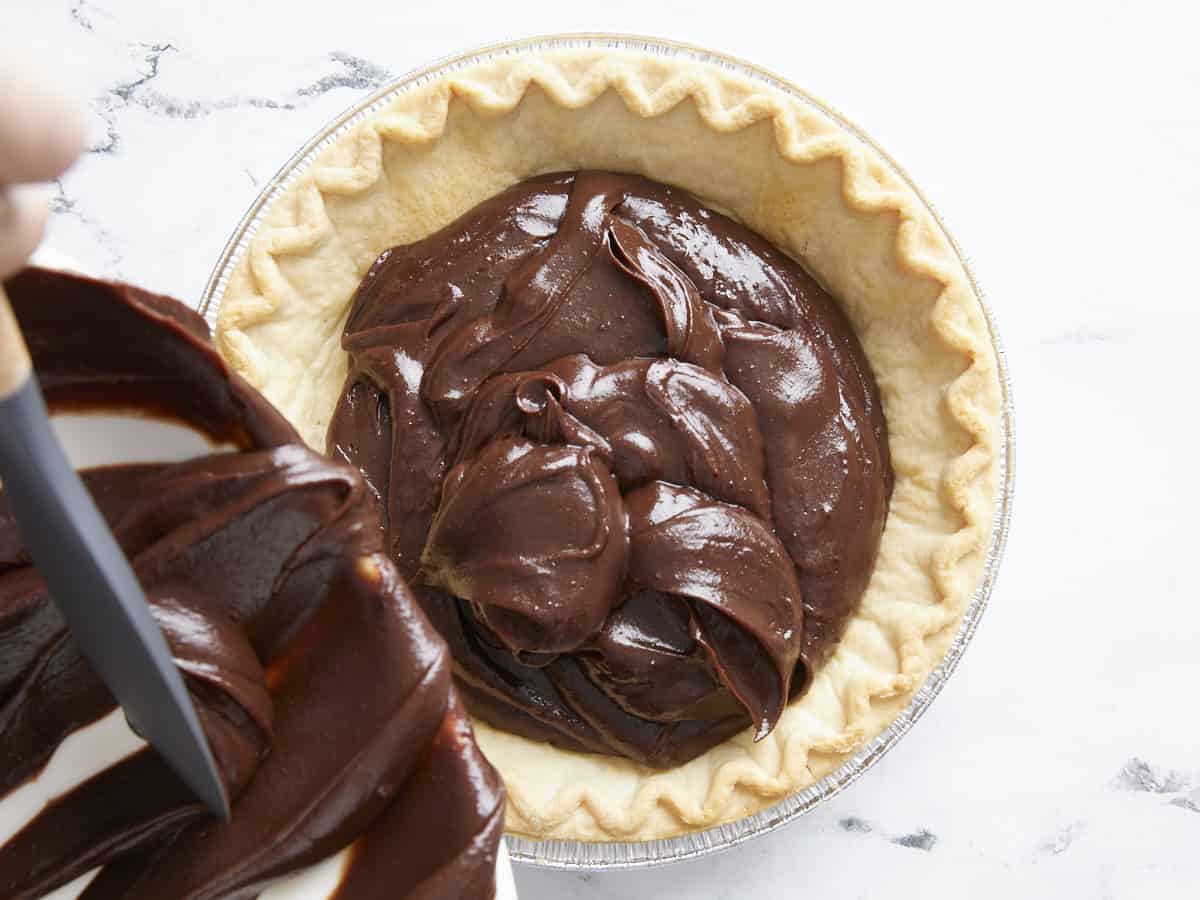
Chocolate cream mixture being poured into the pie crust.

Once the filling has cooled, remove the plastic wrap and reserve. Pour the chocolate filling into the baked pie shell. Reuse the plastic wrap and place it directly on the surface of the filling. Chill the pie for an additional 3 hours.
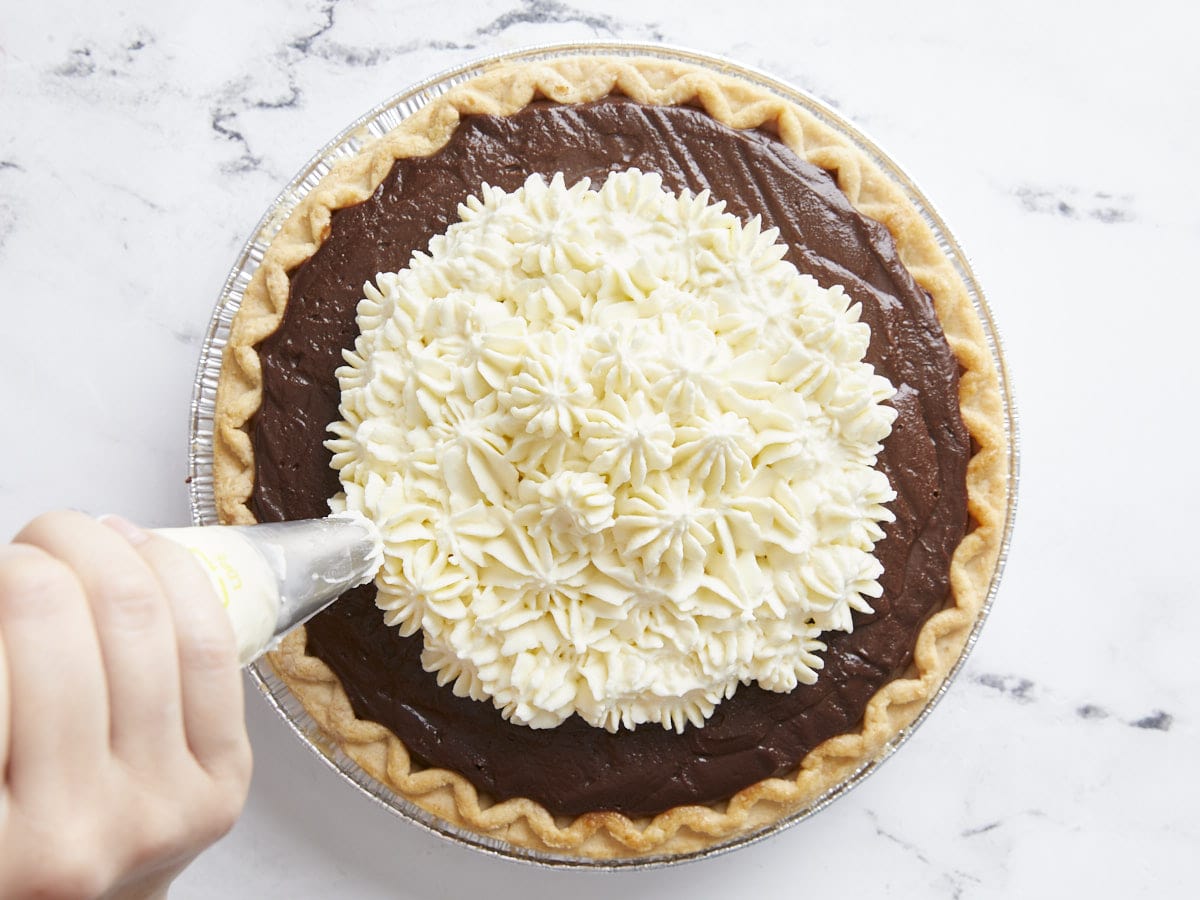
Whipped cream being piped onto the chocolate cream pie.

Top with whipped cream topping, slice into eight pieces, and enjoy!
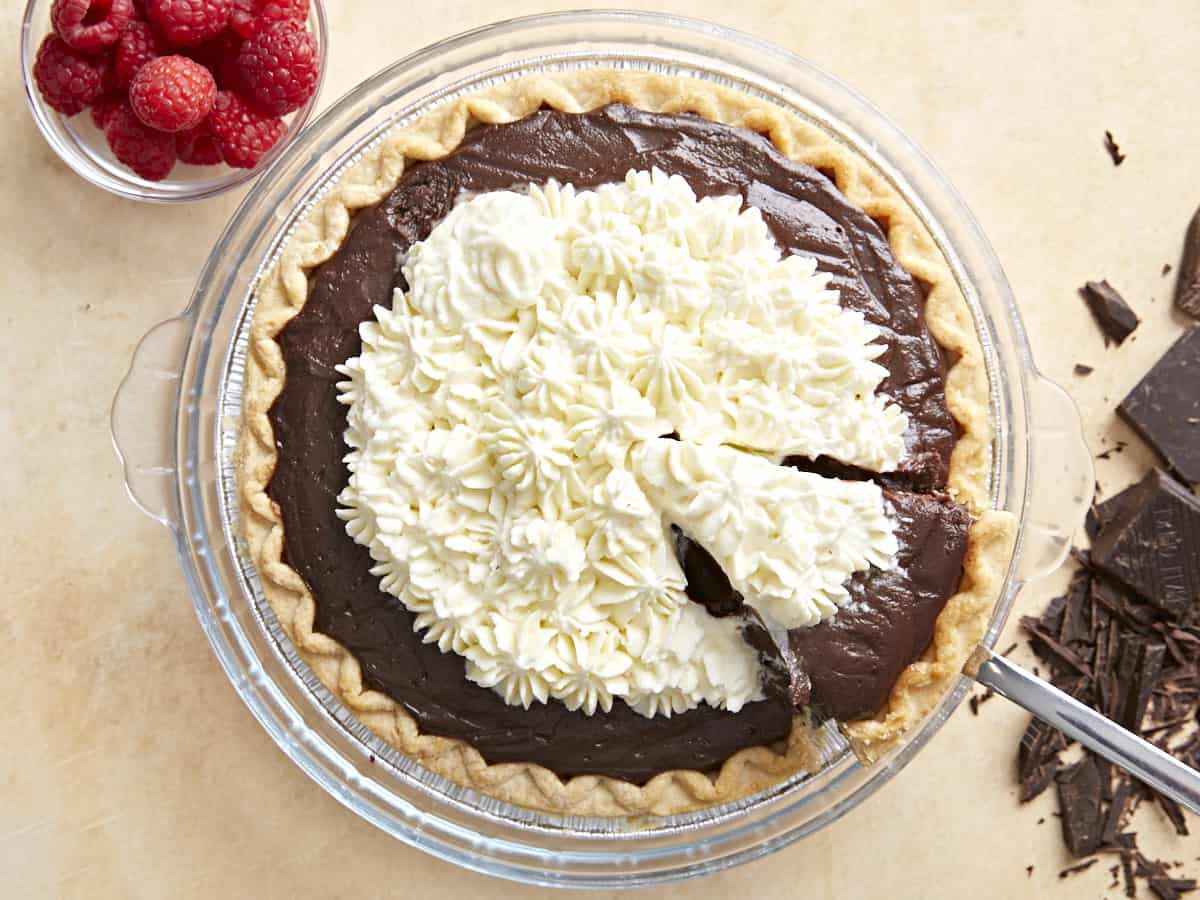
Finished chocolate cream pie with a piece being lifted out.

The post Chocolate Cream Pie appeared first on Budget Bytes.
Lasagna Roll Ups

Lasagna Roll Ups are a fun take on the classic Italian dish. Perfectly portioned for meal prep, customizable, and freezer-friendly!

The post Lasagna Roll Ups appeared first on Budget Bytes.

I love lasagna in all its forms, especially these cute little Lasagna Roll Ups that are perfectly portioned for meal prep. Stash a few portions of these in your freezer for a rainy day and you will THANK yourself later. Promise. Lasagna roll ups are flexible and you can fill them with whatever you like, sausage, beef, or even make them vegetarian as I have here with a light spinach-ricotta filling. No matter the flavor, they’re delicious and fun to eat!

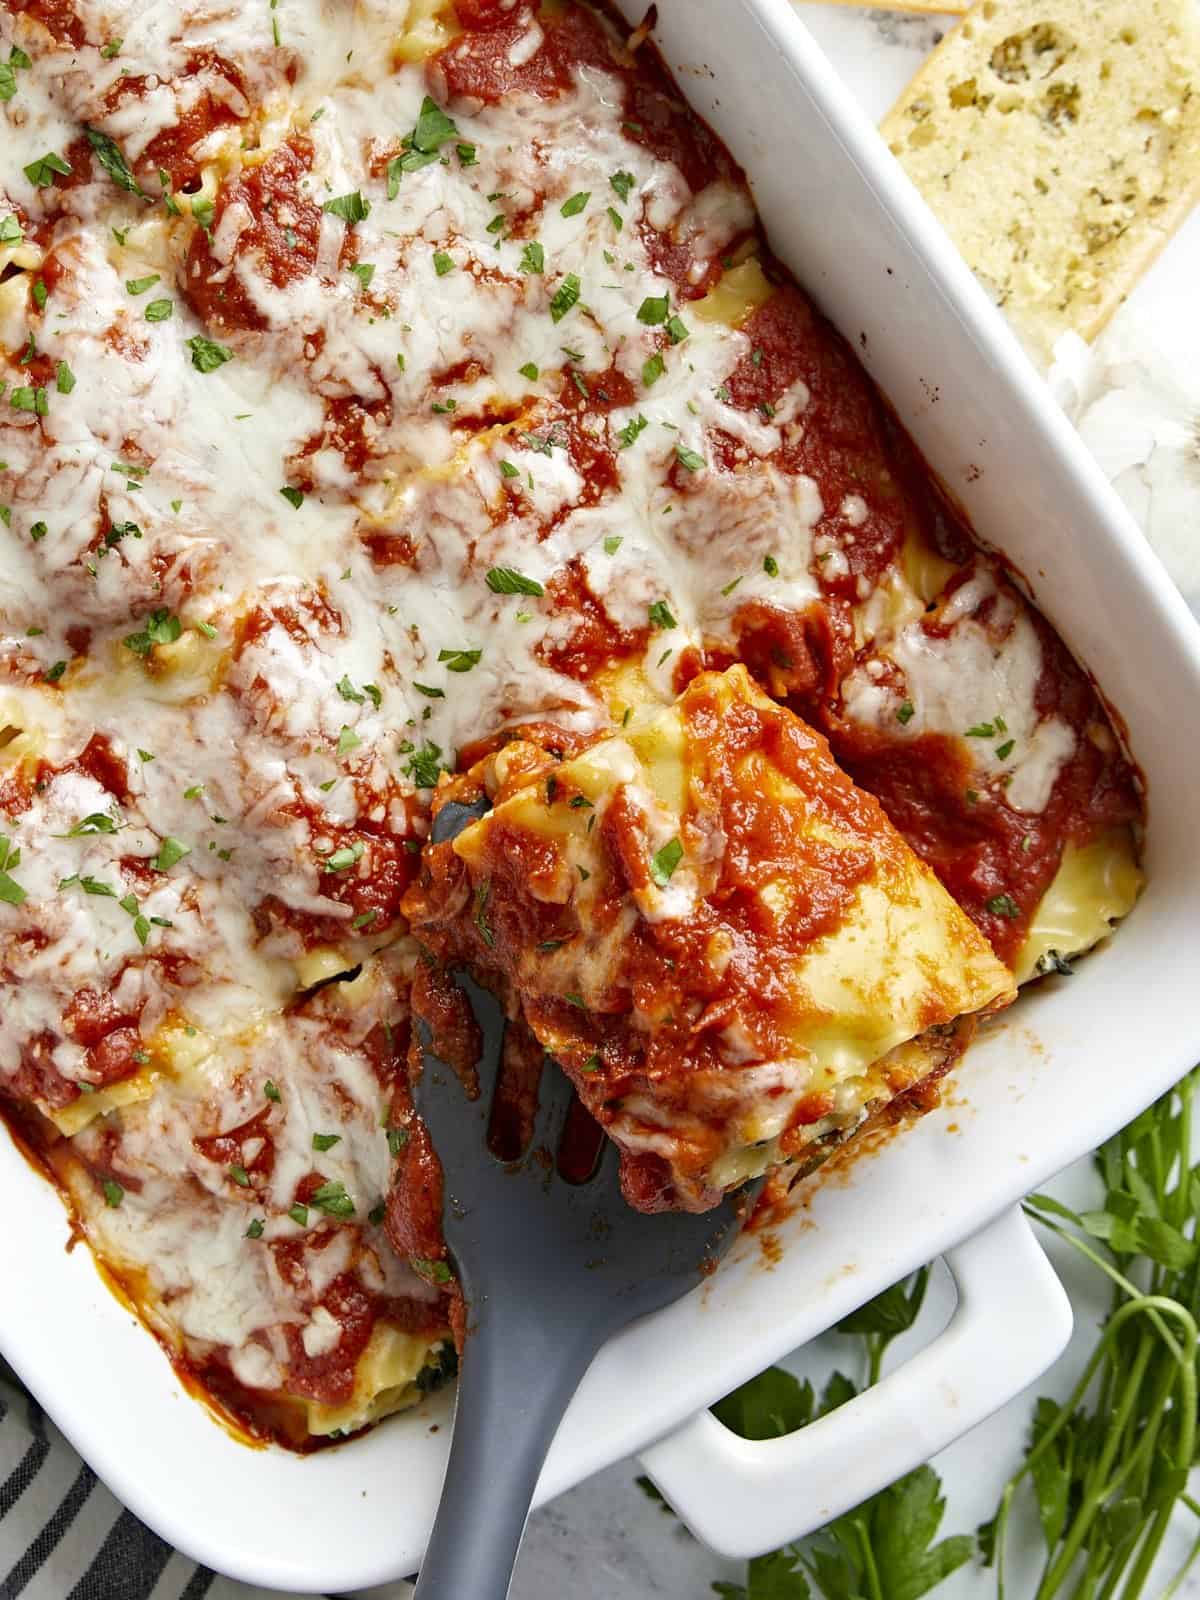
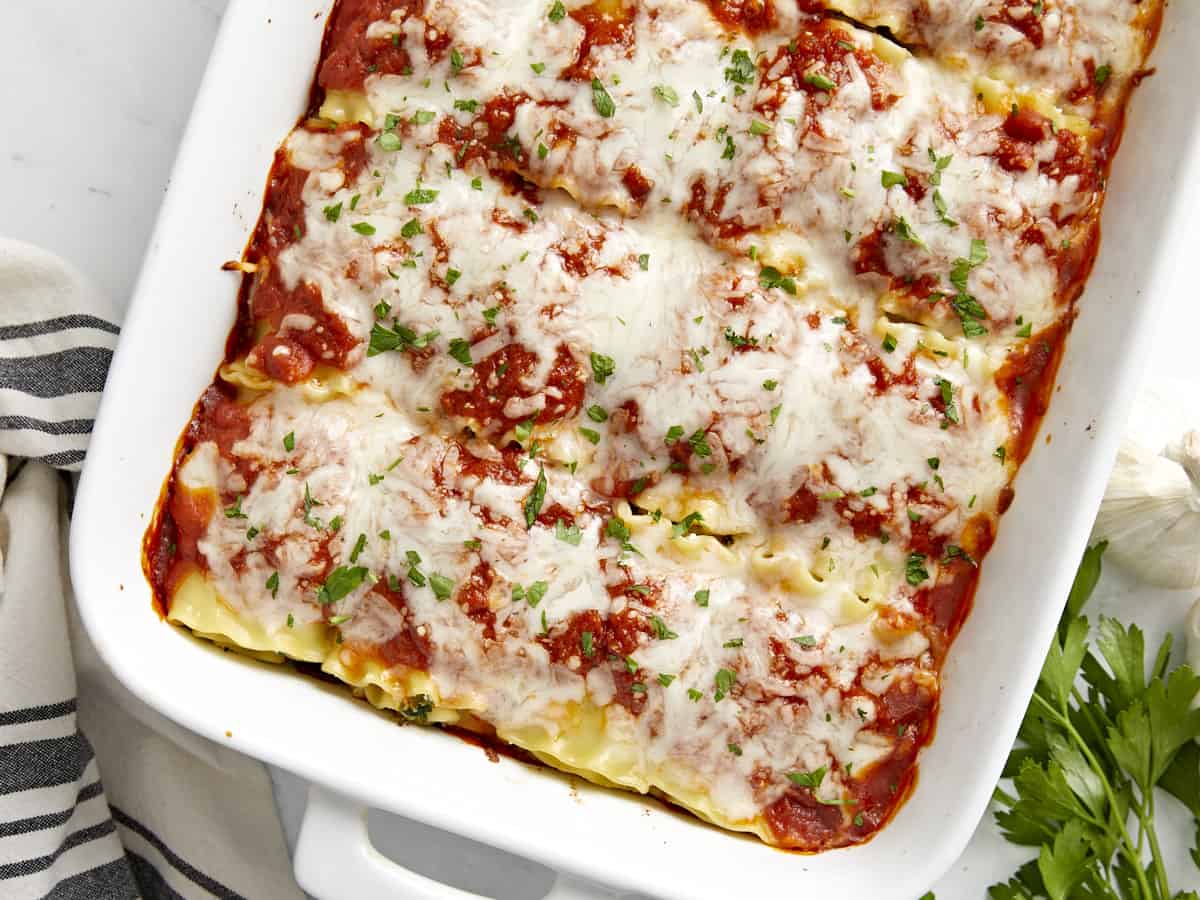
Overhead view of a lasagna roll up being lifted from the baking dish.

What Are Lasagna Roll Ups?

Lasagna roll ups have all the same components of lasagna, but they are combined in different form. Instead of layering the ingredients into a casserole dish, the filling is spread onto each lasagna noodle and then rolled into a perfect little portion. Sauce is poured over the top and then they’re baked to perfection!

Ingredients for Lasagna Roll Ups

As with traditional lasagna, the filling for these lasagna roll ups is quite flexible. Here is what you’ll need to make the vegetarian spinach and ricotta-filled version below:

  • Lasagna Noodles: Each lasagna noodle makes one bundle. I like to get the flutter edge noodles instead of flat noodles because they make the prettiest roll ups.
  • Cheese: We use a mix of ricotta cheese, mozzarella cheese, and Parmesan cheese to create the most flavorful filling for the roll ups.
  • Egg: Egg helps bind the cheese filling and keeps the filling moist and rich. I have, on occasion, forgotten the egg and the lasagna roll ups still turned out quite delicious, just not as moist.
  • Frozen Spinach: I chose to make a vegetarian version of lasagna roll ups to save on money, using an inexpensive block of frozen cut spinach, but you can swap for Italian sausage or ground beef if you want a meat version. Sautéed mushrooms also work well.
  • Pasta Sauce: To make this recipe extra easy, I used a simple jar of pasta sauce to drench the lasagna roll ups. If you prefer to make your own, you can use our Slow Cooker Spaghetti Sauce, or our quick Weeknight Pasta Sauce and have meat in addition to the spinach.

What to Serve with Lasagna Roll Ups

Some homemade garlic bread and a nice side salad would be perfect to pair with this meal and will add some color and freshness to the plate. But the roll ups are pretty filling on their own, so you won’t need to add much to make it a meal!

Meal Prep It!

These lasagna roll ups will stay good in the refrigerator for about five days, so make sure to portion them out into air-tight containers after cooking for quick grab-and-reheat meals for the rest of the week. After the portions are chilled in the refrigerator you can transfer some to the freezer for longer storage (up to three months).

To reheat the frozen lasagna roll ups, either let them thaw in the refrigerator over night before reheating in the microwave, or go straight from the freezer to the microwave, making sure to use the defrost function first.

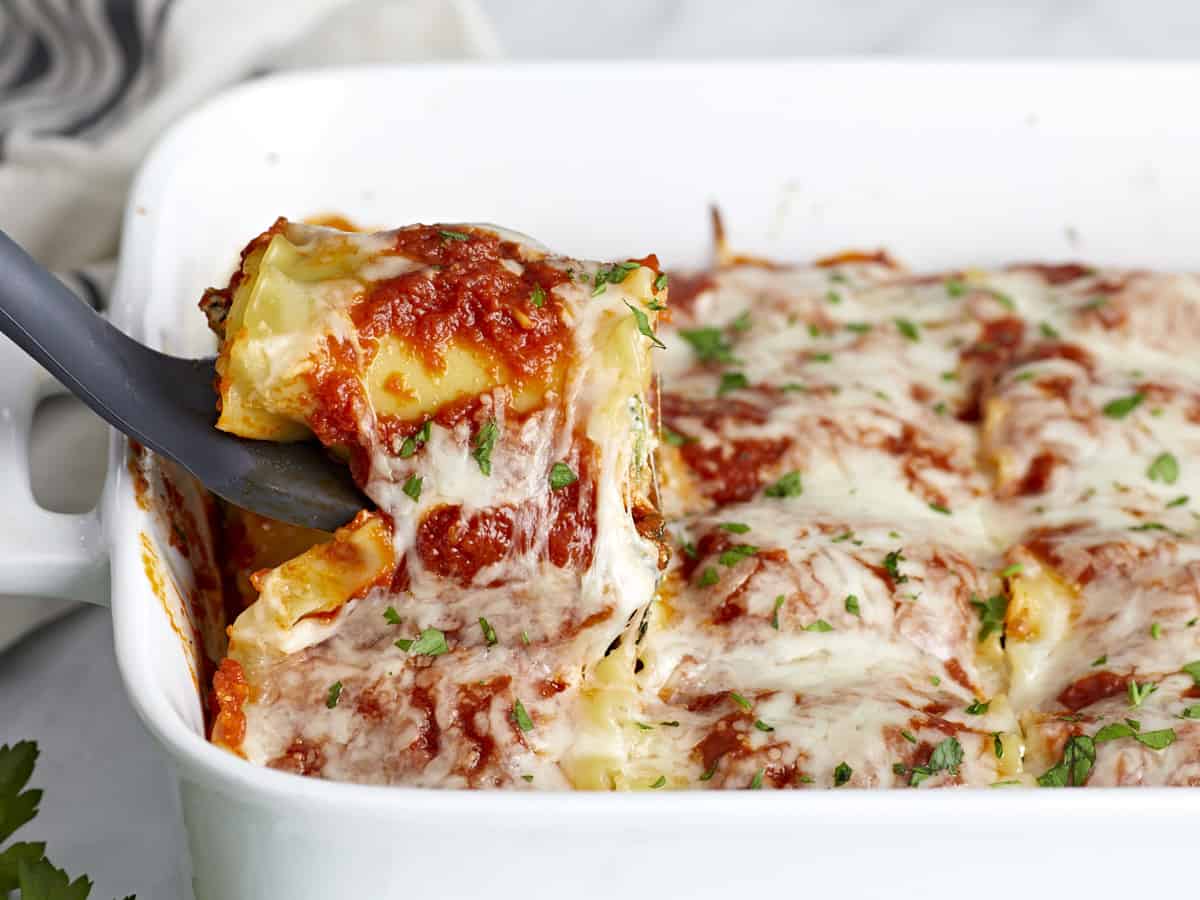
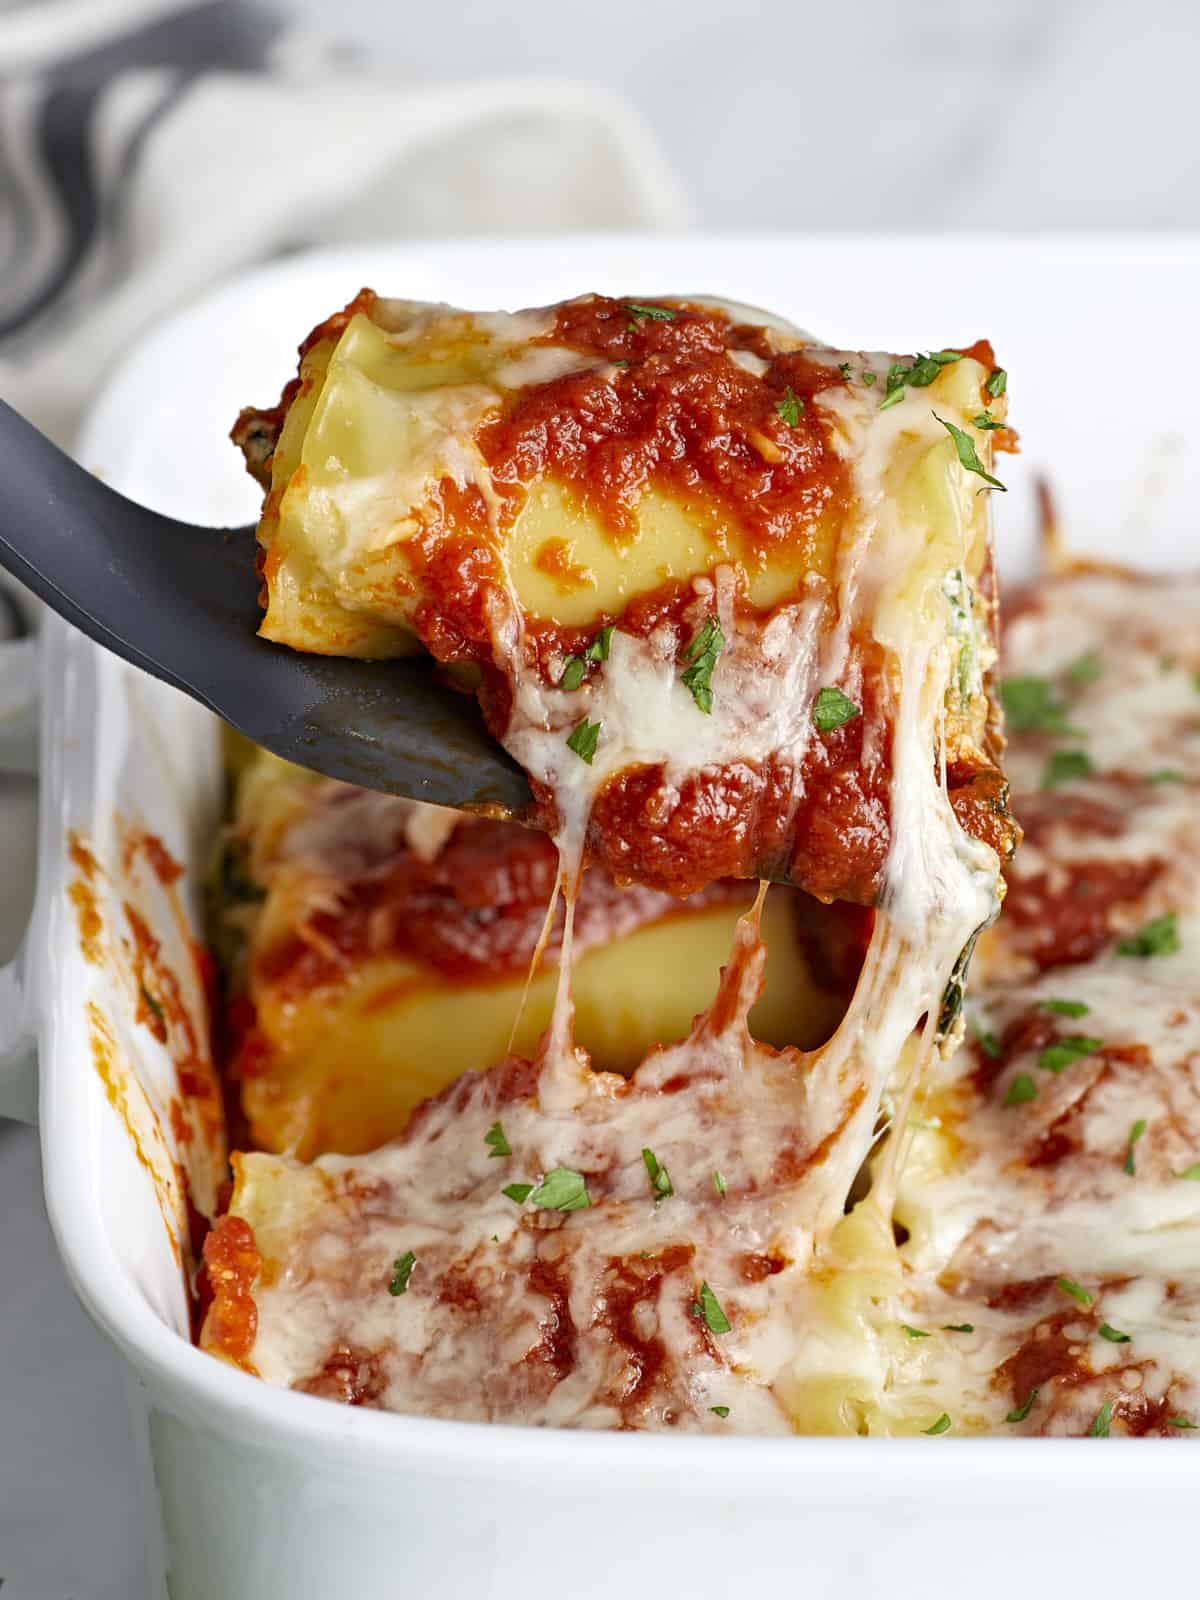
Side view of a lasagna roll up being lifted from the baking dish.
Overhead view of a pan full of lasagna roll ups with one being lifted out of the pan.
Print

Lasagna Roll Ups

Lasagna Roll Ups are a fun take on the classic Italian dish. Perfectly portioned for meal prep, customizable, and freezer-friendly!
Course Dinner, Main Course
Cuisine American
Total Cost $12.26 recipe / $1.53 serving
Prep Time 15 minutes
Cook Time 40 minutes
Total Time 55 minutes
Servings 8 (2 rolls each)
Calories 387kcal

Ingredients

  • 12 oz. lasagna noodles $2.19
  • 15 oz. whole milk ricotta cheese $3.39
  • 2 cups shredded mozzarella, divided $2.33
  • 1/4 cup grated Parmesan $0.38
  • 1 large egg $0.09
  • 1/4 tsp salt $0.02
  • 1/4 tsp freshly cracked black pepper $0.02
  • 10 oz. frozen spinach, thawed $1.20
  • 1 24oz. jar pasta sauce $1.99

Instructions

  • Preheat the oven to 400ºF. Bring a large pot of water to a boil over high heat. Once boiling, add 1 tsp salt to season the water, then add the lasagna noodles. Boil the noodles just until al dente (they become too delicate to roll if they are too soft). Drain the noodles in a colander.
  • While the noodles are boiling, drain the thawed spinach, squeezing out as much of the excess water as possible. Add the spinach to a bowl with the ricotta, 1 cup of the mozzarella, Parmesan, egg, salt, and pepper. Stir until everything is evenly combined.
  • Once the lasagna noodles have cooled enough to touch with your hands, lay a few noodles out onto a clean surface. Spread about ¼ cup of the spinach and cheese filling onto each noodle, spreading it from edge to edge. It's okay if the filling is thin or doesn't create a solid layer. Roll the noodles up, then place in a large casserole dish. Repeat with the remaining noodles until you've used all of the filling. You should get about 16 roll ups and you may have a few noodles left over (those will be back up in case any tear).
  • Once all of the noodles are filled, rolled, and placed in the casserole dish, pour the jar of pasta sauce over top. Top the lasagna roll ups with the remaining 1 cup of mozzarella cheese.
  • Cover the casserole dish with foil and bake the lasagna roll ups for 30 minutes in the preheated 400ºF oven. Serve hot and enjoy!

See how we calculate recipe costs here.

Nutrition

Serving: 2roll ups | Calories: 387kcal | Carbohydrates: 40g | Protein: 22g | Fat: 16g | Sodium: 788mg | Fiber: 4g
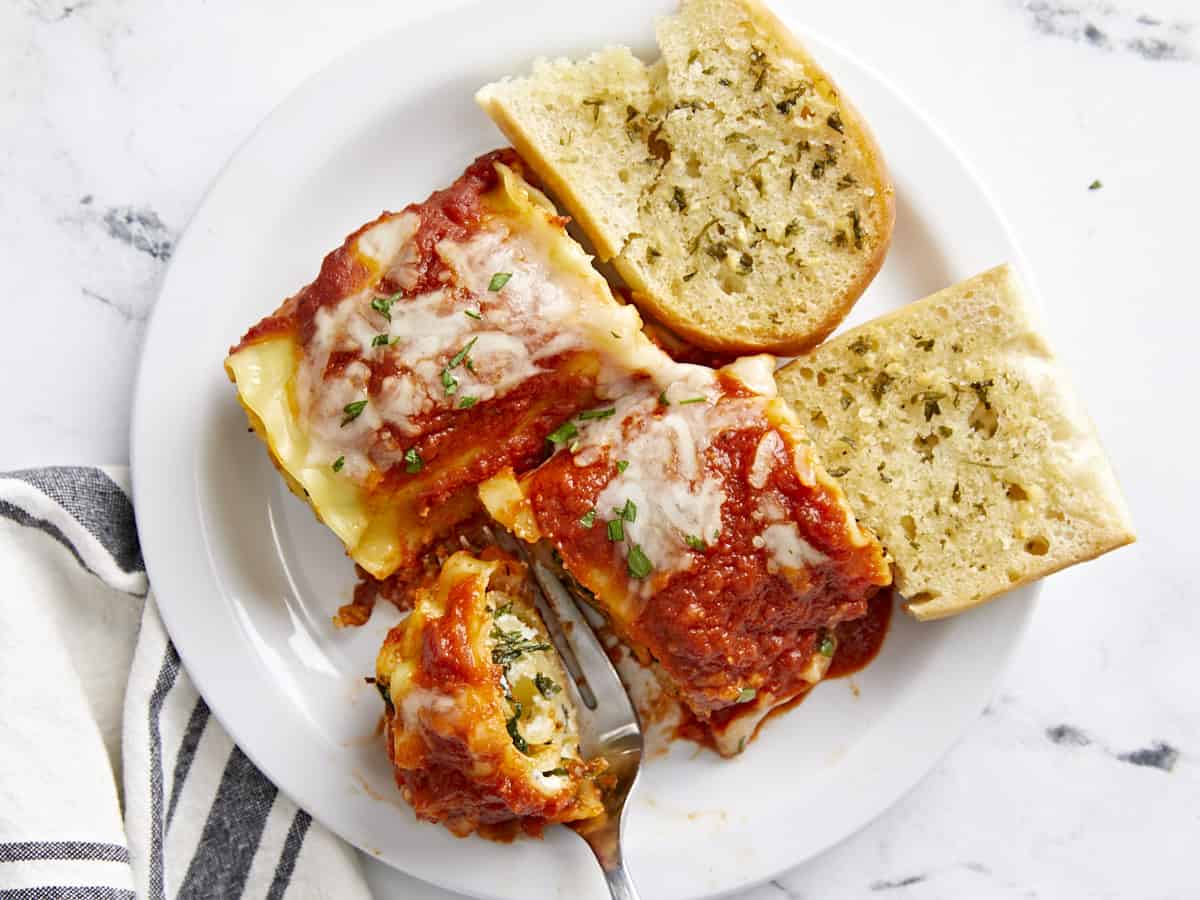
Lasagna roll ups on a plate with garlic bread, a fork cutting into one.

How to Make Lasagna Roll Ups – Step by Step Photos

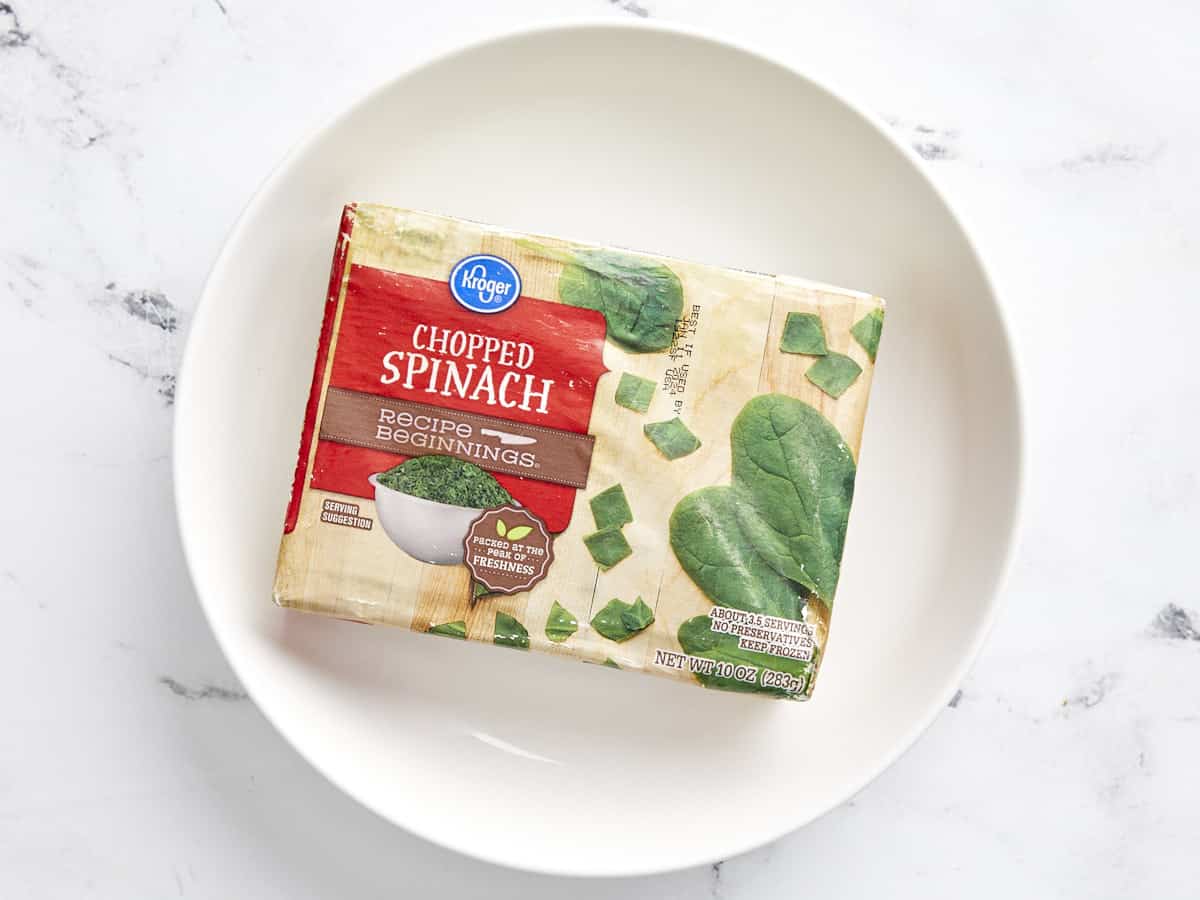
Frozen spinach package on a plate.

Thaw one 10oz. package of frozen chopped spinach (either use the defrost function on a microwave or transfer it to the refrigerator the day before to thaw). Preheat the oven to 400ºF.

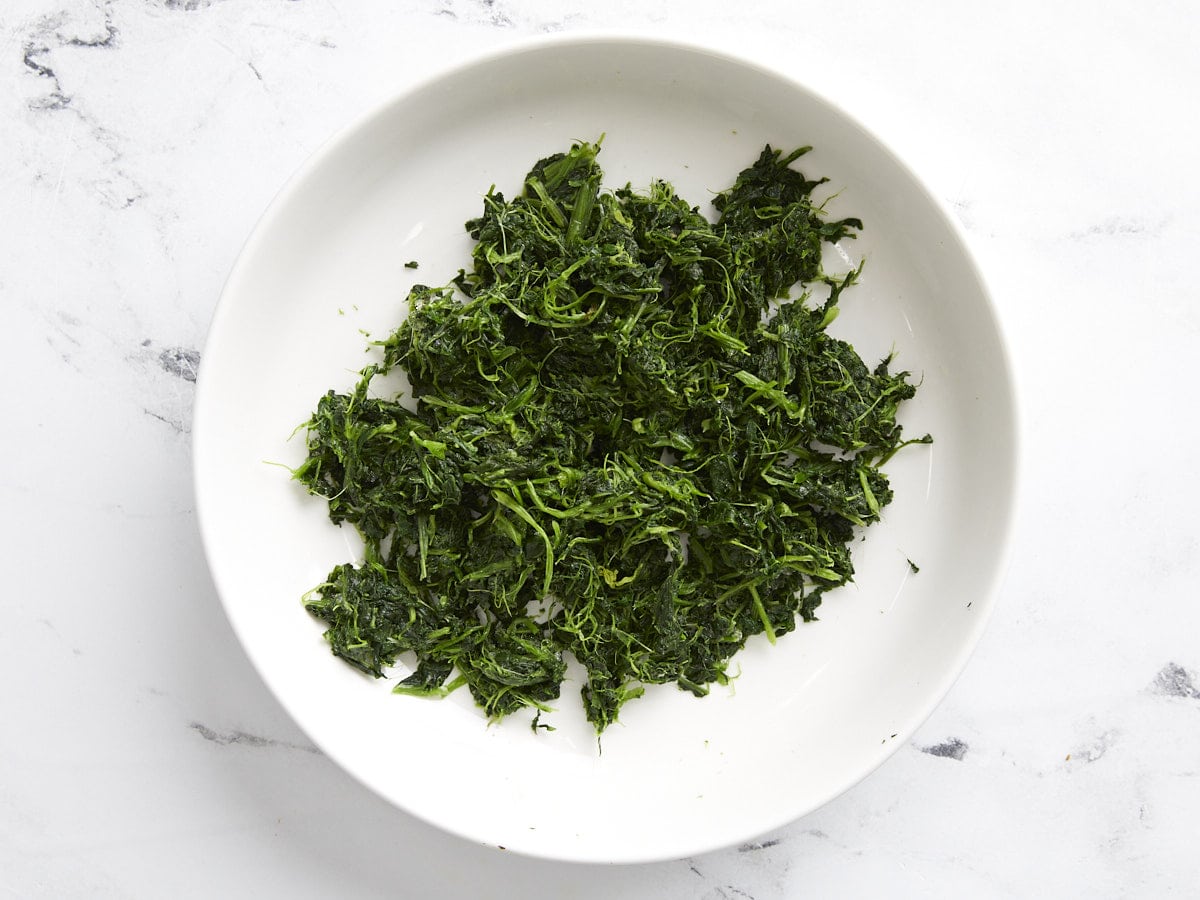
Thawed spinach squeezed dry in a bowl.

Once the spinach is fully thawed, squeeze out as much water as possible from the spinach. You should have about one cup tightly packed spinach after squeezing.

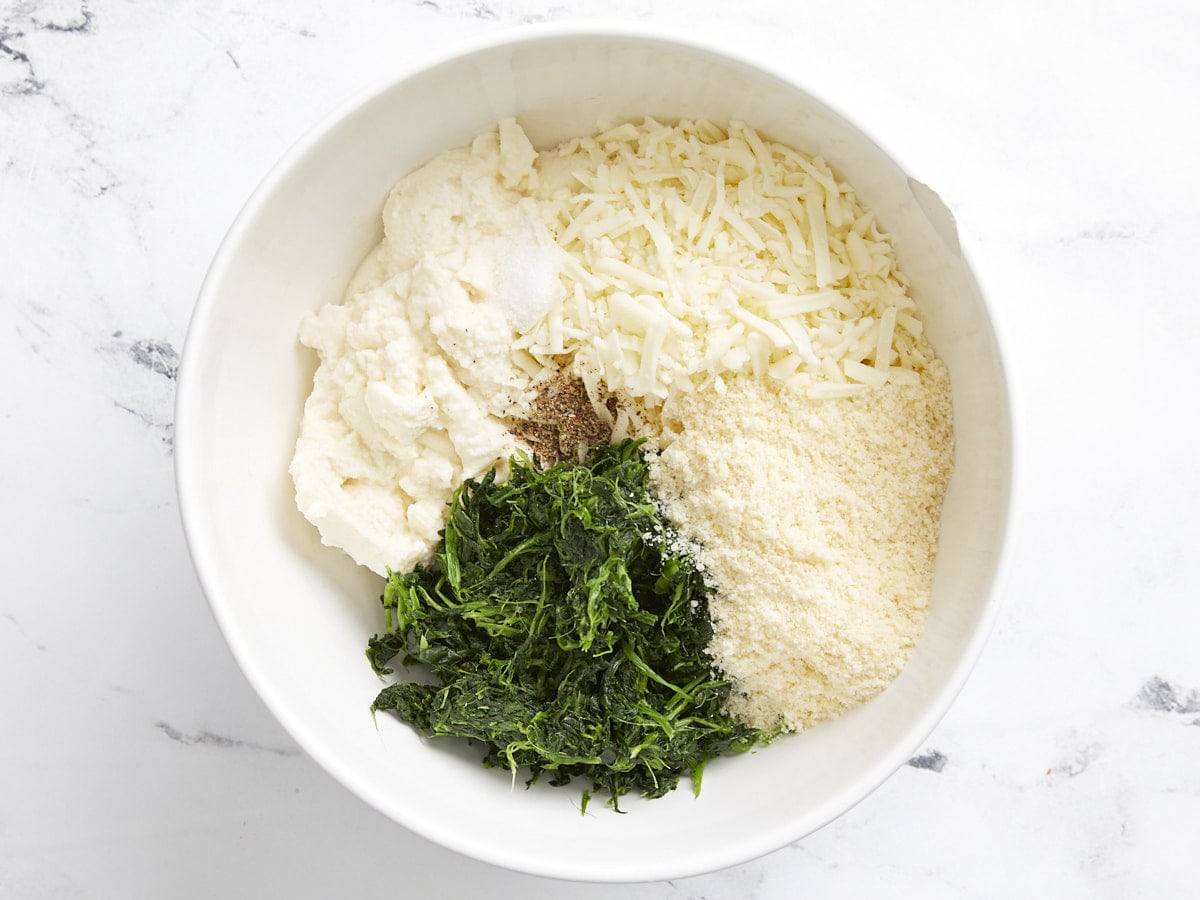
Spinach with cheese and eggs for filling in a bowl.

Add the spinach to a large bowl with one large egg, 15oz. ricotta cheese, 1 cup shredded mozzarella cheese, ¼ cup grated Parmesan cheese, ¼ tsp salt, and ¼ tsp pepper. Stir everything together until evenly combined.

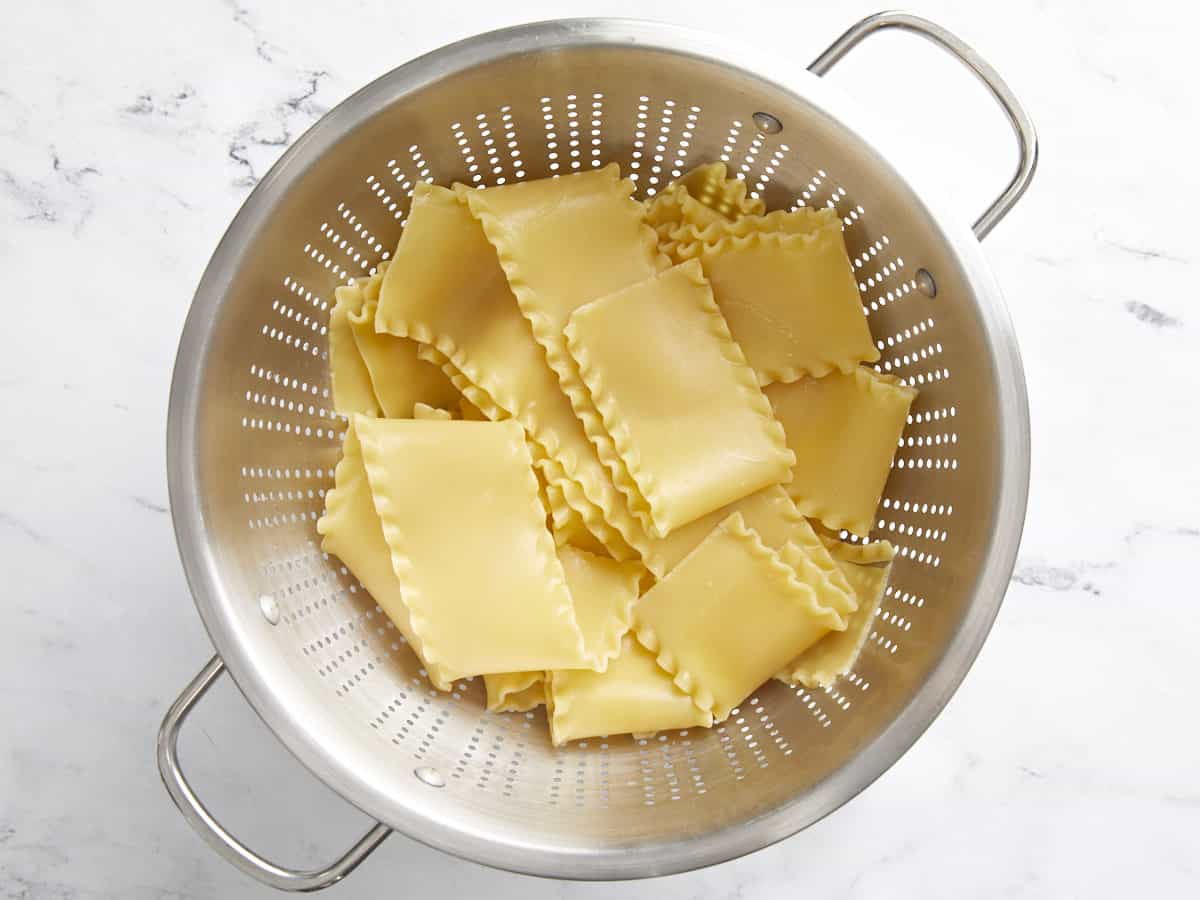
Boiled lasagna noodles in a colander.

Boil 12oz. lasagna noodles until al dente, then drain in a colander. Do not let the noodles overcook or they’ll be too delicate to work with. You’ll only need 12 noodles, but you’ll likely have a few more if you boil an entire 12oz. box. It’s always good to have a few back up in case they tear as you’re filling and rolling.

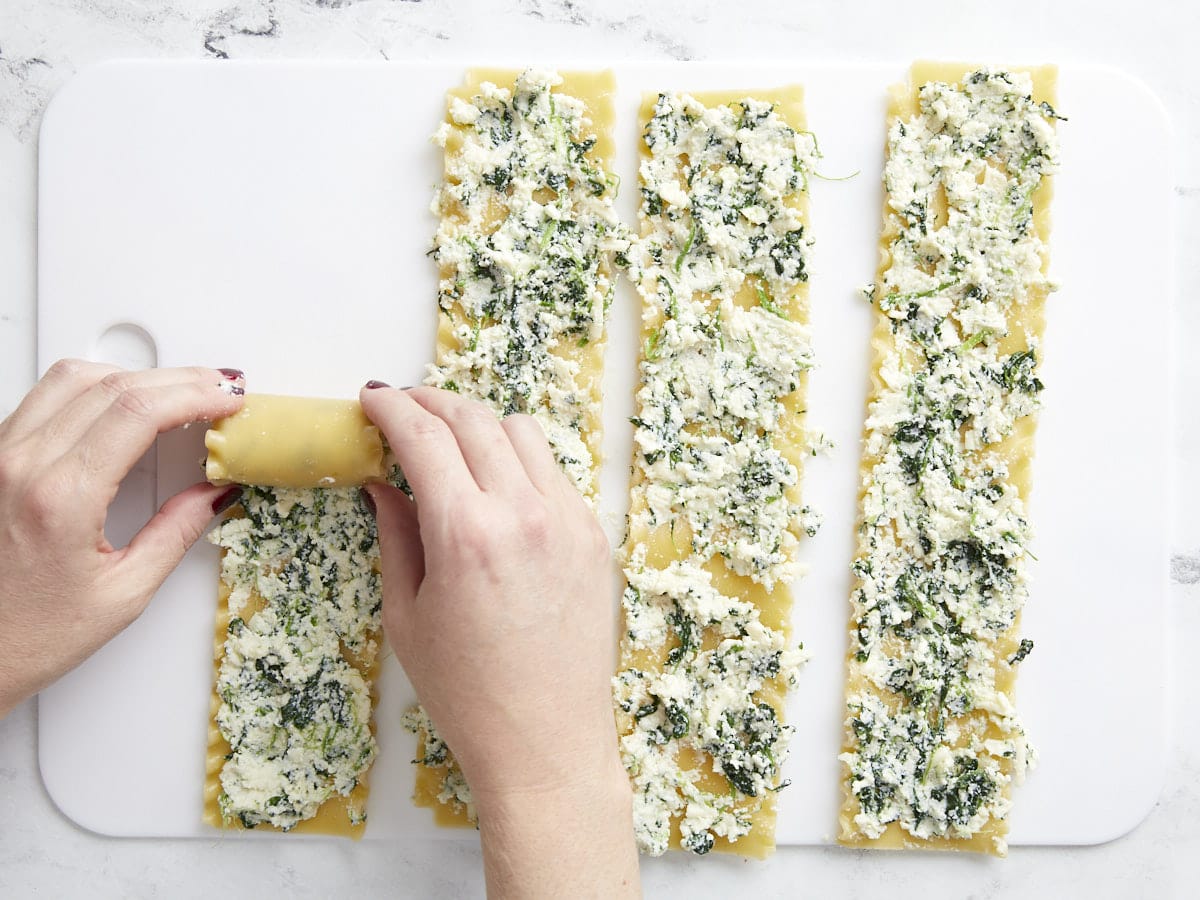
Lasagna noodles being filled and rolled.

Lay a few of the lasagna noodles out onto a clean surface and spread a thin layer of the cheese filling onto each noodle from edge to edge. The filling does not need to be thick or in a solid layer because it adds up when the noodles are rolled. I used heaping ¼ cup of filling per noodle.

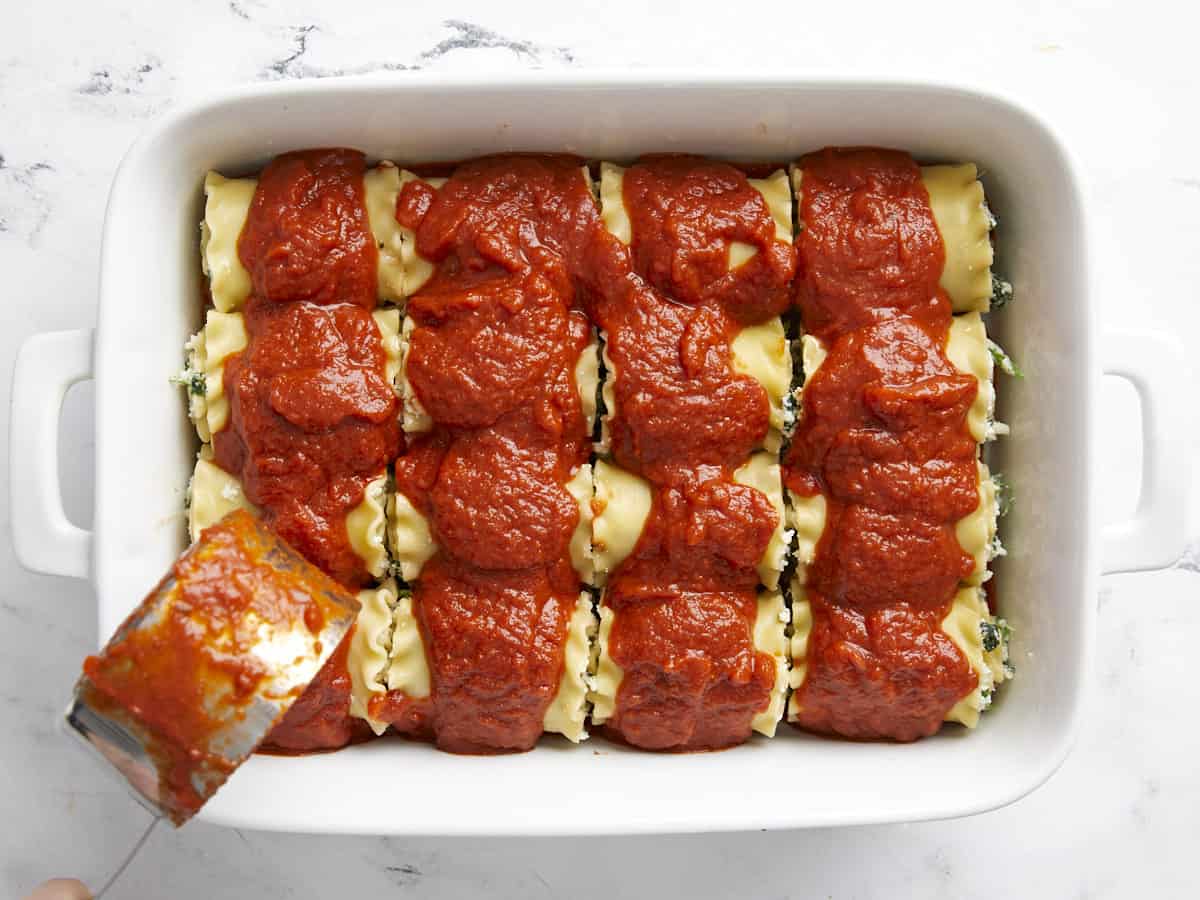
Sauce being poured over the lasagna roll ups in the baking dish.

As you fill and roll the noodles, place them in a large casserole dish. Pour one 24oz. jar of marinara sauce over the lasagna roll ups.

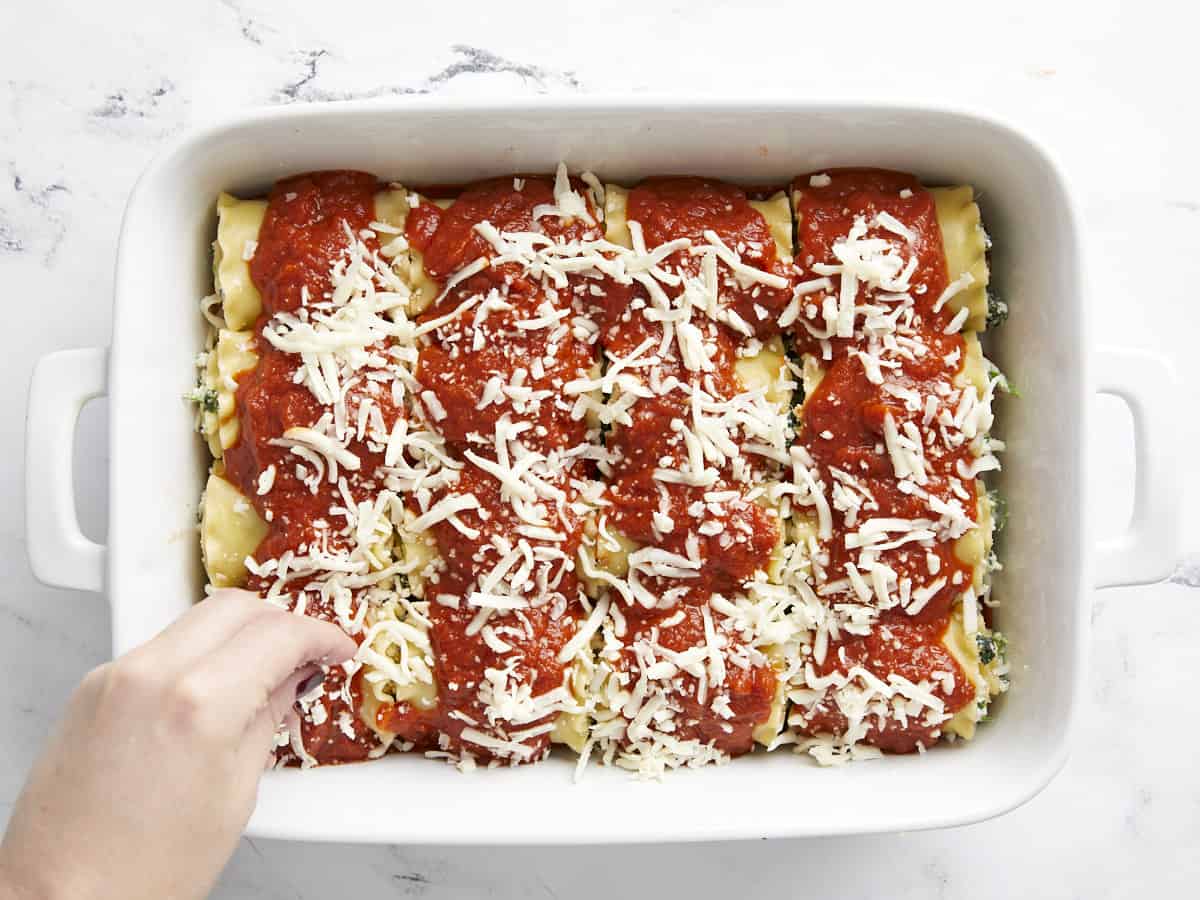
Cheese being sprinkled on top of the lasagna roll ups.

Sprinkle the remaining 1 cup of mozzarella over the lasagna roll ups.

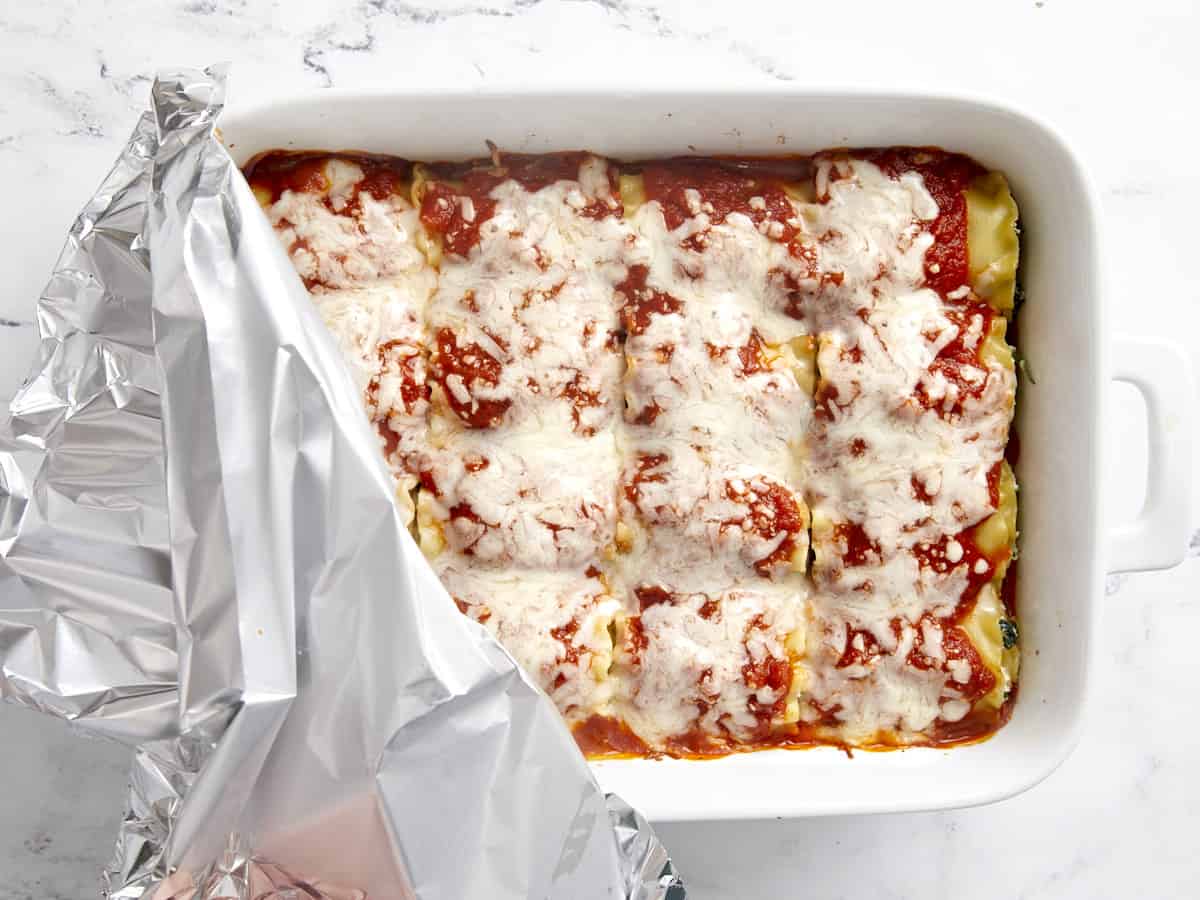
Baked lasagna roll ups with foil being pulled back from the baking dish.

Cover the baking dish and bake the roll ups for about 30 minutes in the preheated 400ºF oven, or until the sauce and cheese are bubbling up around the edges.

Finished lasagna roll ups in the baking dish, garnished with parsley.

Serve and enjoy! (Garnish with parsley for a little extra color, if desired.)

Side view of a lasagna roll up being lifted out of the baking dish.

The post Lasagna Roll Ups appeared first on Budget Bytes.

No-Bake Cheesecake

This No-Bake Cheesecake is sweet, rich, and tangy with a buttery graham cracker crust. The perfect easy dessert to satisfy your sweet tooth!

The post No-Bake Cheesecake appeared first on Budget Bytes.
This mouth-wateringly creamy No-Bake Cheesecake is the perfect dessert for when you’re craving something sweet but don’t want to spend much time in the kitchen. It truly doesn’t get much easier when it comes to creating a dessert that feels so extravagant; you’re just crushing cookies and mixing a few ingredients. That’s it! PS You can make this up to 4 days ahead!

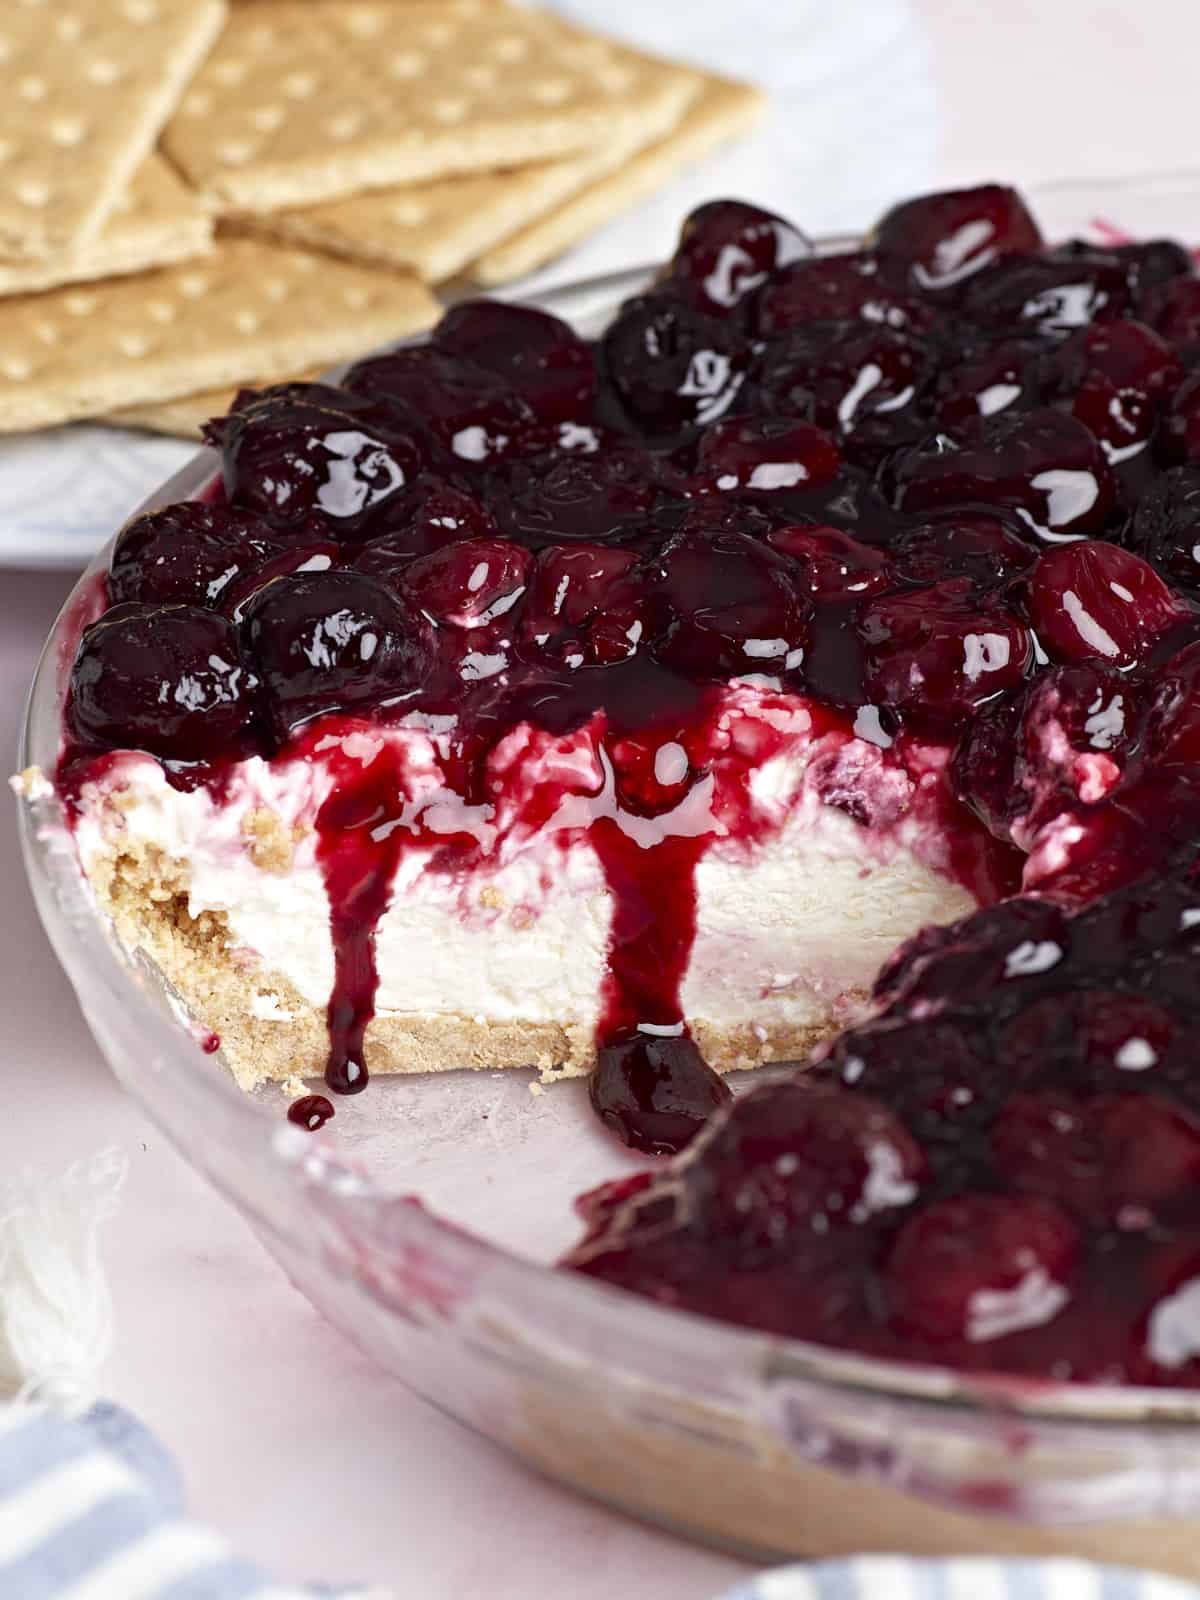
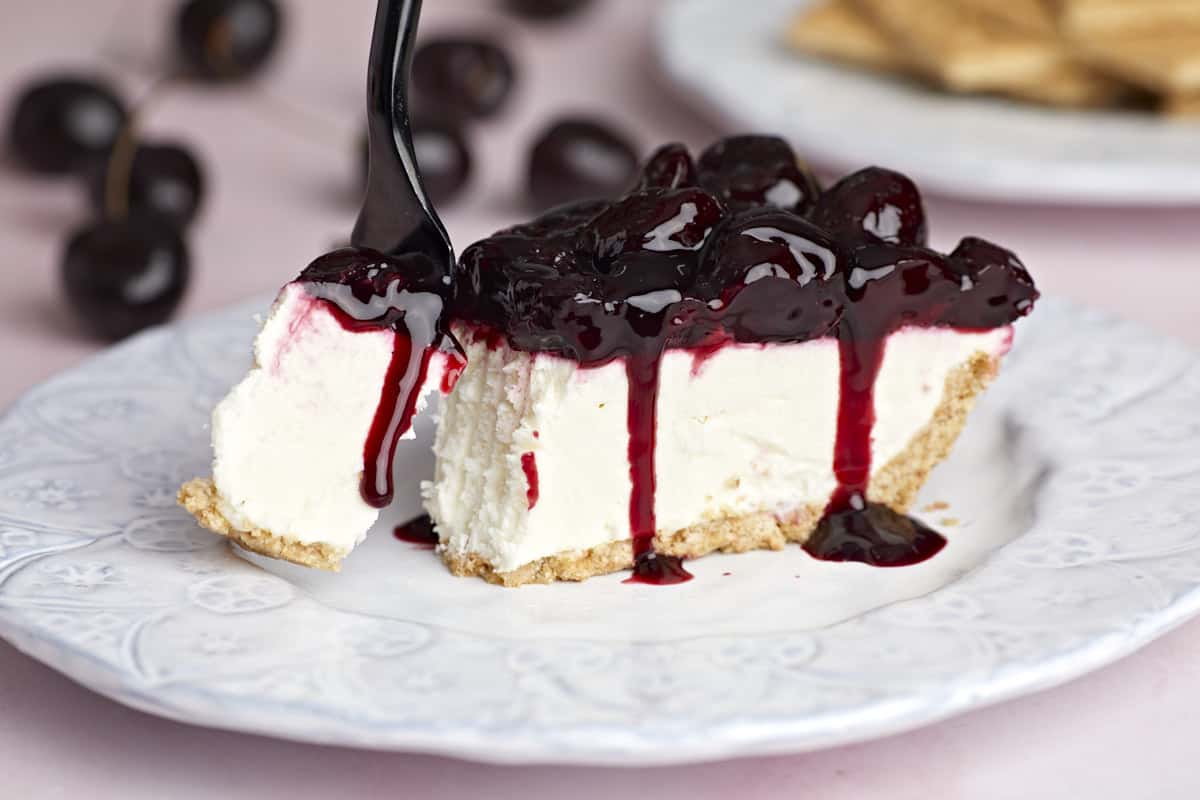
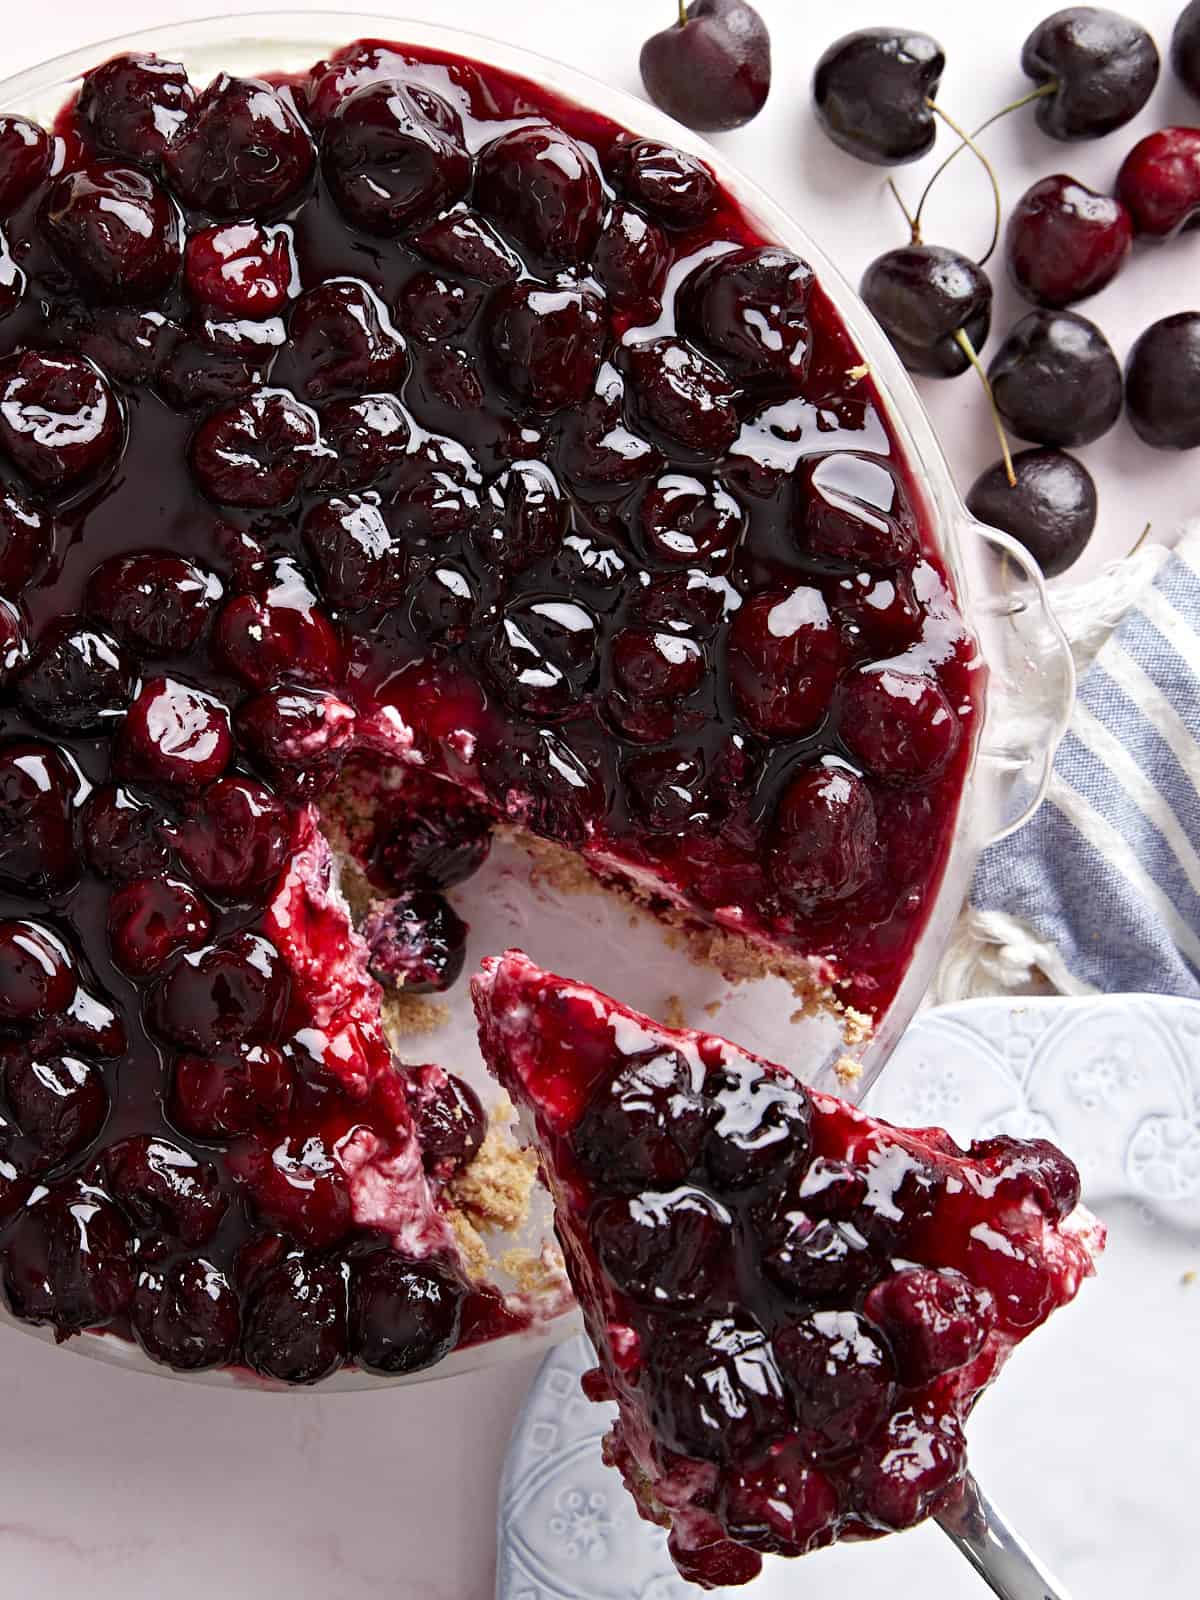
Side view of a no bake cheesecake with cherries on top, one slice removed.

What Is a No-Bake Cheesecake?

Most cheesecakes (like New York, Philadelphia, or Basque) are made with eggs and baked, which gives them a rich, velvety mouthfeel and firm texture. Making traditional cheesecake is a WHOLE THING. Which is why I love No-Bake Cheesecake! It’s regular cheesecake’s less fussy younger cousin. You don’t use eggs. Instead, you use whipped cream to create a much lighter texture than a traditionally baked cheesecake. It’s also really easy to go plant-based when you make a No-Bake Cheesecake!

Ingredients For No-Bake Cheesecake

This easy-to-make No-Bake Cheesecake comes together in fifteen minutes with just a handful of ingredients. My favorite kind of dessert! The hardest part is waiting for it to set. Here’s what you’ll need to get this No-Bake Cheesecake on your table:

  • Honey-Graham Crackers: These cookies are the base of our crust. If you don’t like graham crackers, use your favorite cookie here. Oreos (minus the filling) and Shortbread Cookies are great substitutions.
  • Salted Butter: Helps pull the crust together. If you don’t have salted butter, use unsalted, and add 1/8th teaspoon salt to the crust mixture. If you’re dairy-free, substitute with plant-based butter.
  • Brown Sugar: Helps sweeten the crust. Since cheesecake is served chilled, you won’t be able to taste the sugar as much as if it were a room-temperature dessert. So, we add a touch of sugar to the crumbled cookies to make sure the sweetness shows up. However, if you’re watching your sugar intake and want to leave it out, go for it. The crust will work without it.
  • Heavy Whipping Cream: Will be whipped to stiff peaks to lighten the cream cheese filling. If you’re plant-based, sub with unsweetened coconut cream.
  • Cream Cheese: Because what would a cheesecake be without it? You can use plant-based cream cheese as well.
  • Greek Yogurt: Adds a tanginess to the filling that helps develop a more intricate flavor profile without complicating things. You can substitute it with sour cream. For my dairy-free friends, use a plant-based sour cream or yogurt.
  • Powdered Sugar: Is the best option for sweetening, as it will dissolve immediately into the filling. Make your own by blending 1/2 cup granulated sugar with 1/2 tablespoon cornstarch until the mixture is powdery. You can also sweeten the filling with 1/3 cup of honey.
  • Vanilla: scents the filling and adds depth.

What To Serve With No-Bake Cheesecake 

This easy breezy dessert is perfect topped with our Strawberry Syrup, Lemon Curd, Cherry Sauce, or Blueberry Sauce. If you want to garnish with fruit, frozen and thawed blueberries or cherries are an easy and economical option. You can, of course, top this easy cheesecake with sliced fresh strawberries.

How To Store No-Bake Cheesecake 

This luscious cheesecake can be made up to four days ahead. If you have any leftovers (highly doubtful), wrap them well and store them in an air-tight container for up to five days in the fridge and three months in the freezer.

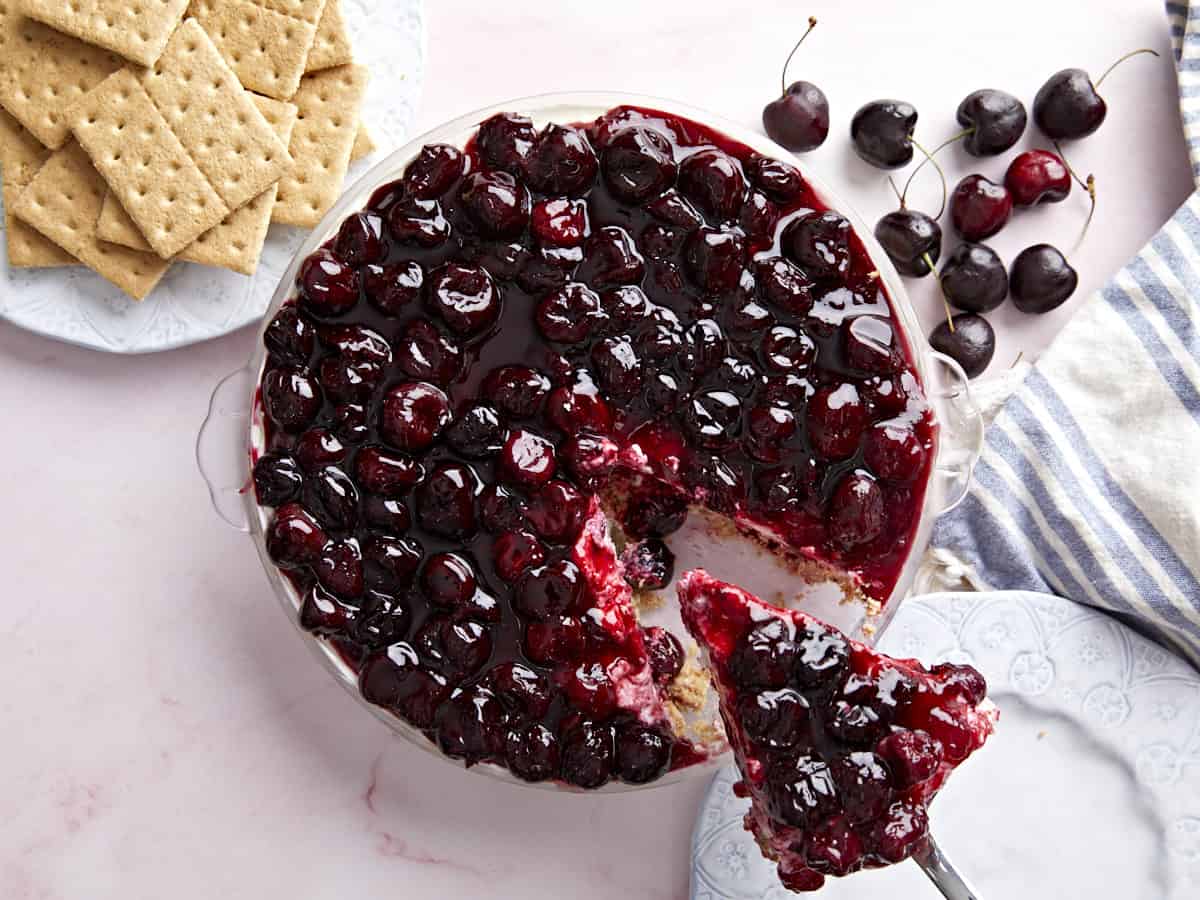
Overhead view of a no bake cheesecake topped with cherries, one slice being lifted out.
Side view of one slice of no bake cheesecake on a plate, a fork taking a bite.
Print

No-Bake Cheesecake

This No-Bake Cheesecake is sweet, rich, and tangy with a buttery graham cracker crust. The perfect easy dessert to satisfy your sweet tooth!
Course Dessert
Cuisine American
Total Cost $14.37 recipe / $1.79 serving
Prep Time 15 minutes
Chill Time 6 hours
Total Time 6 hours 15 minutes
Servings 8 slices
Calories 528kcal

Ingredients

Crust

  • 10 oz. honey graham crackers (2 cups crushed) $1.44
  • 10 Tbsp salted butter, melted $1.28
  • 2 Tbsp brown sugar $0.04

Filling

  • 1 cup heavy whipping cream $1.50
  • 1 cup powdered sugar $0.27
  • 2 8oz. blocks cream cheese, room temperature $4.38
  • 5 oz. non-fat Greek yogurt $1.00
  • 1 tsp vanilla extract $0.58

Topping (optional)

Instructions

Crust

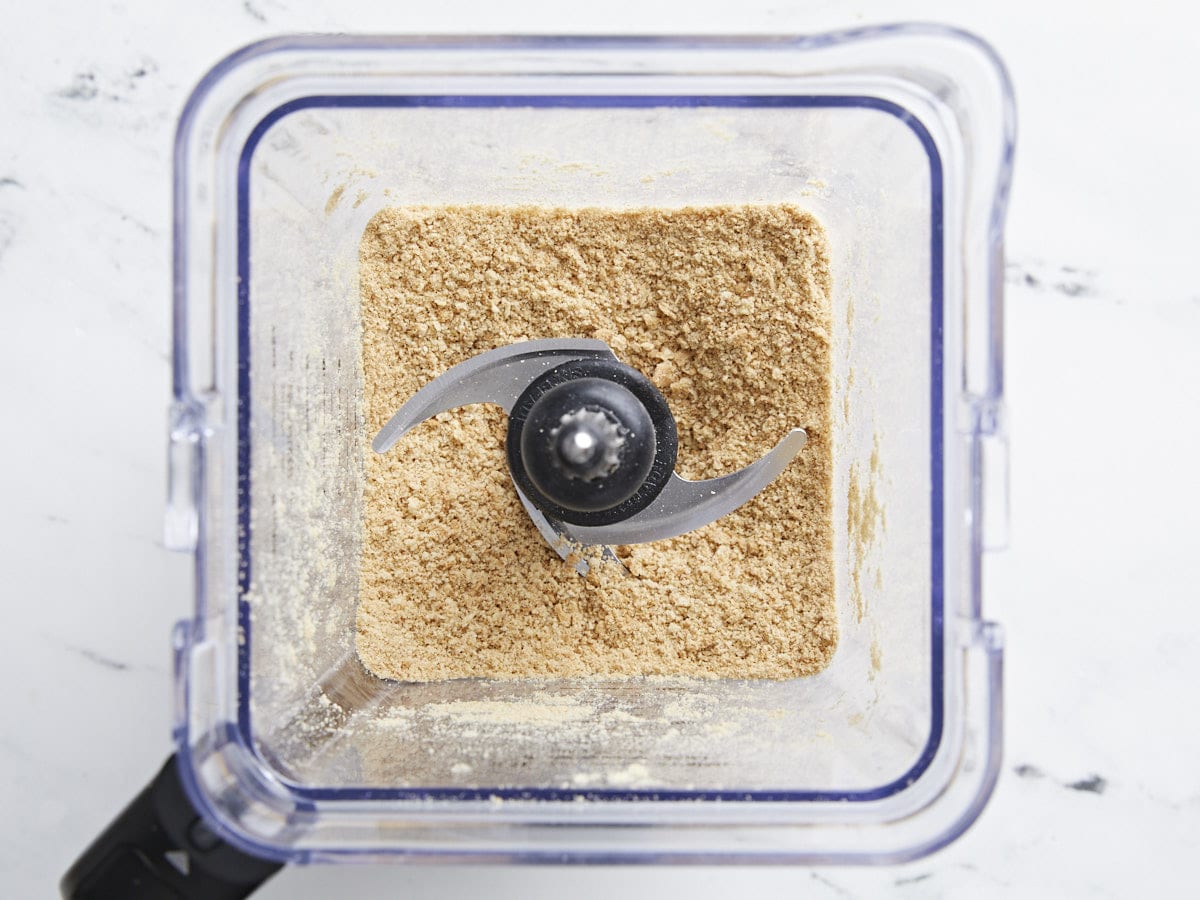
  • Crush the graham crackers to a fine powder in a blender or food processor and add to a medium bowl.
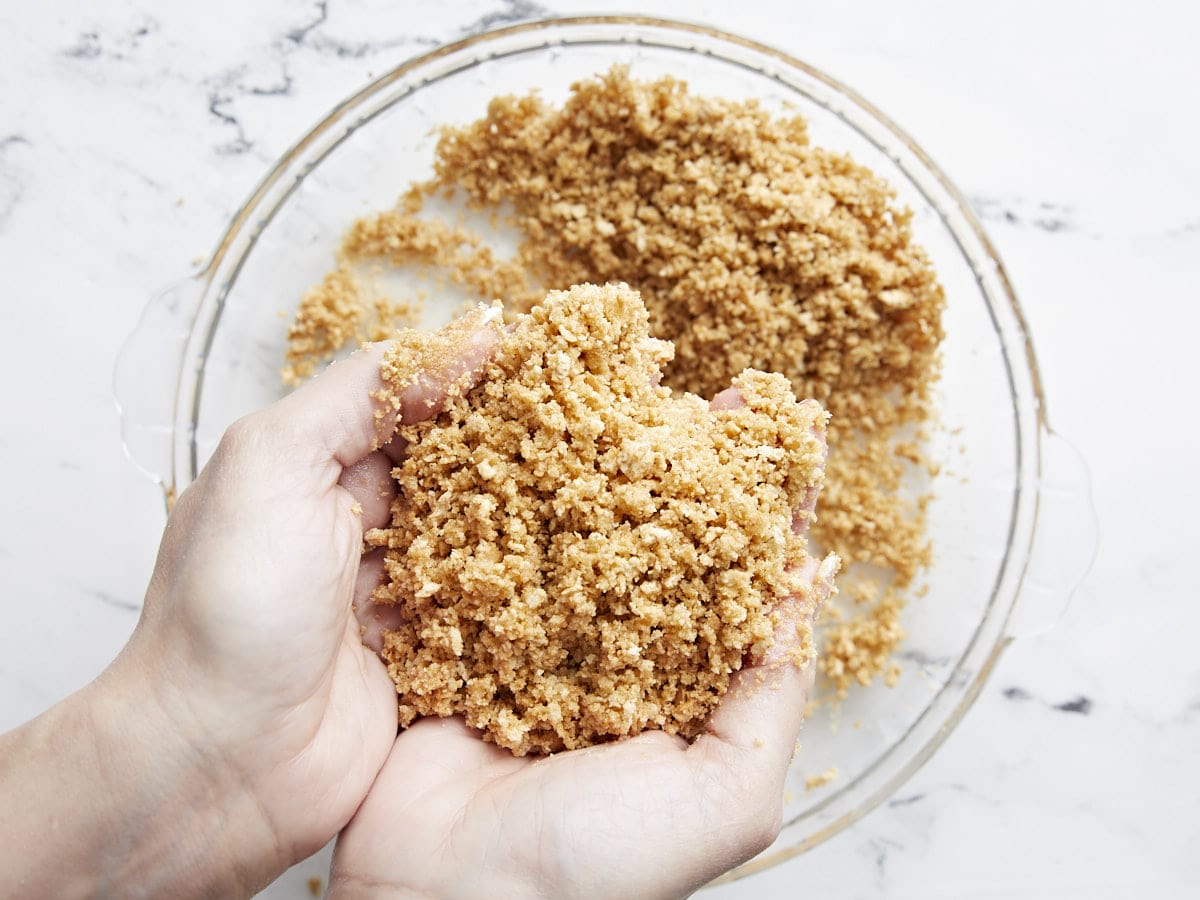
  • Mix the brown sugar into the graham cracker crumbs and then add the melted butter. Use your hands to mix the butter into the crumbs until a sand-like consistency is created.
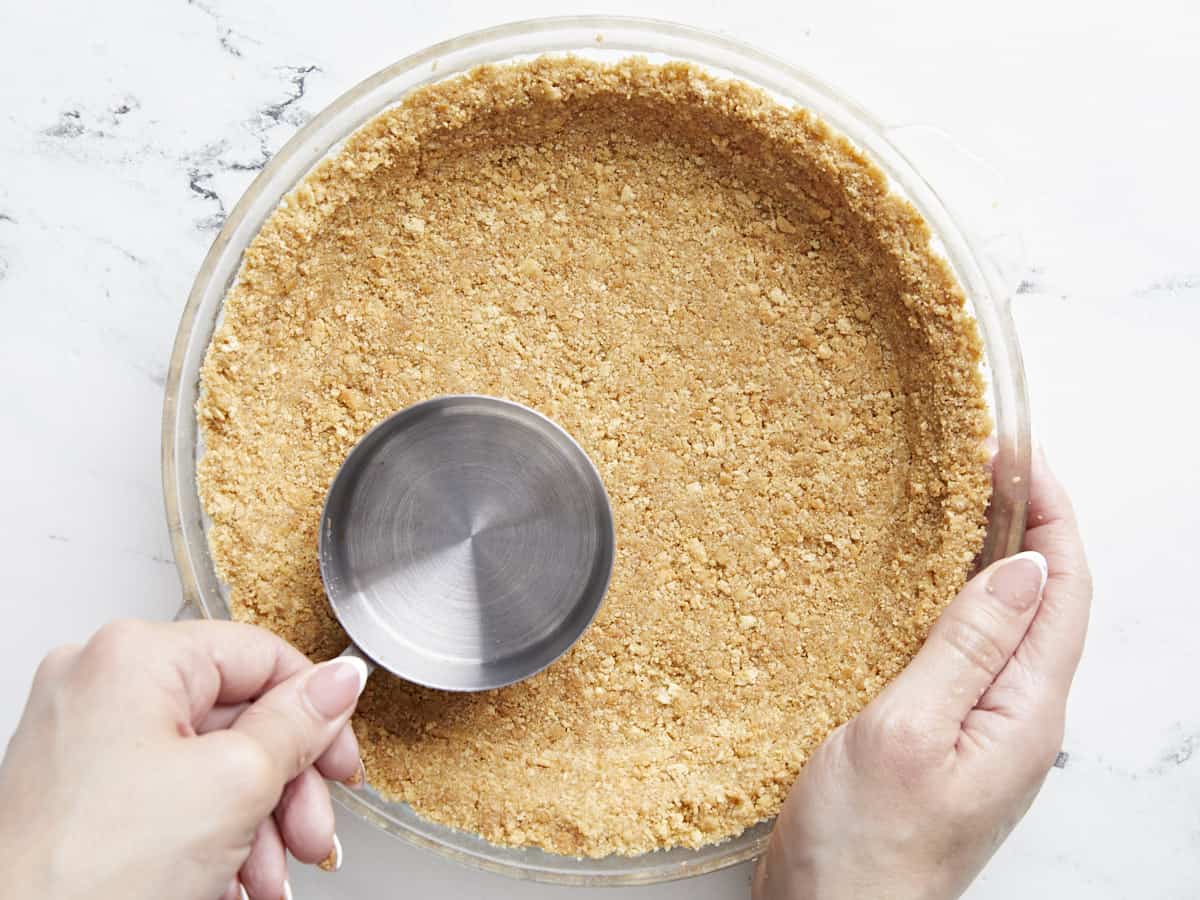
  • Pack the cookie crumb mixture into a 9.5-inch pie plate using the bottom of a measuring cup to press it in well and smooth it out. Press the crumbs from the center, out, and all the way up the sides. Place the pie plate in the freezer while you make the filling.

Filling

  • Whip the heavy whipping cream and powdered sugar to stiff peaks.
  • In a separate bowl, whip the softened room-temperature cream cheese, Greek yogurt, and vanilla until smooth and creamy.
  • Gently fold one-half of the whipped cream into the cream cheese mixture until fully incorporated. Repeat with the remaining whipped cream.
  • Add the filling to your frozen crust gently. Lift the pie plate off the counter a 1/4 inch and gently drop it a few times to remove large air bubbles. Use a spatula or large spoon to smooth out the top.
  • Cover the cheesecake with a sheet of plastic or parchment directly on the surface and then cover it in aluminum foil. Refrigerate for at least 6 hours or until the cheesecake sets and is firm to the touch.
  • Serve the cheesecake as is, or spoon a fruit sauce topping over it before serving. If the crust sticks to the pie plate, wet a dish towel with hot water, squeeze out the excess water, and place the pie plate on top of the towel for a minute to warm and loosen the crust. Enjoy the beauty of this incredible no-fuss dessert before it gets devoured!

See how we calculate recipe costs here.

Notes

*Try other toppings like our Blueberry Sauce, Lemon Curd, Strawberry Sauce, or any store-bought fruit sauce or pie filling.

Nutrition

Serving: 1slice | Calories: 528kcal | Carbohydrates: 63g | Protein: 6g | Fat: 29g | Sodium: 373mg | Fiber: 2g
Side view of one slice of no bake cheesecake on a plate, a fork taking a bite.

How to Make No-Bake Cheesecake – Step by Step Photos

Crushed graham crackers in a blender.

Crush 10 ounces of graham crackers (about 18 crackers) to a fine powder in a blender and add to a medium bowl. You’ll need 2 cups once crushed.

Graham cracker and butter mixture held in a pair of hands.

Mix two tablespoons of brown sugar into the cookie crumbs and then add 10 tablespoons of melted butter. Use your hands to mix the butter into crumbs until a sand-like consistency is created.

Cookie crumbs being pressed into a pie plate with the back of a measuring spoon.

Pack the cookie crumb mixture into a 9.5-inch pie plate using the bottom of a measuring cup to press it in well and smooth it out. Press the crumbs from the center, out, and all the way up the sides. Place the pie plate in the freezer while you make the filling.

Heavy cream whipped to stiff peaks in a white bowl.

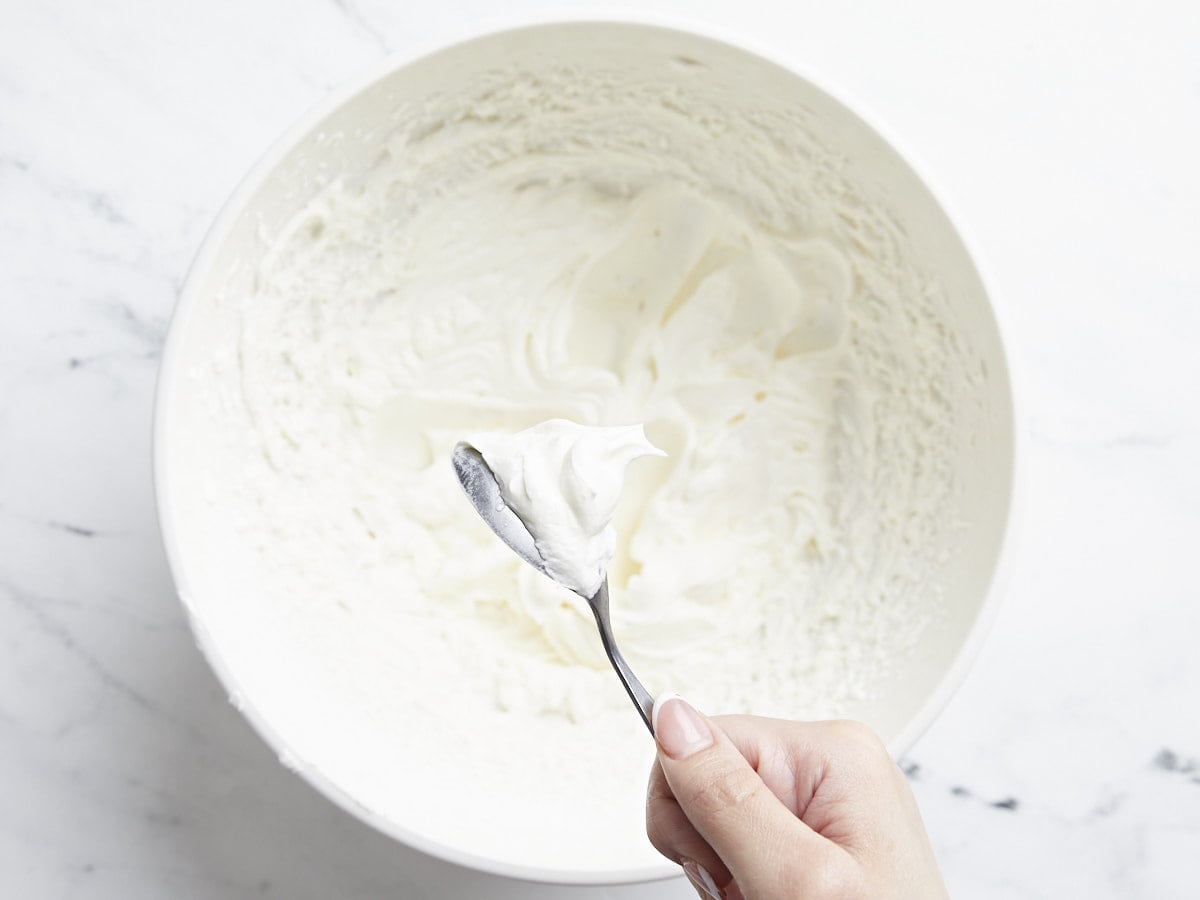
Whip 1 cup of heavy whipping cream and 1 cup of powdered sugar to stiff peaks.

Cream cheese, yogurt, and vanilla whipped in a bowl with a hand blender.

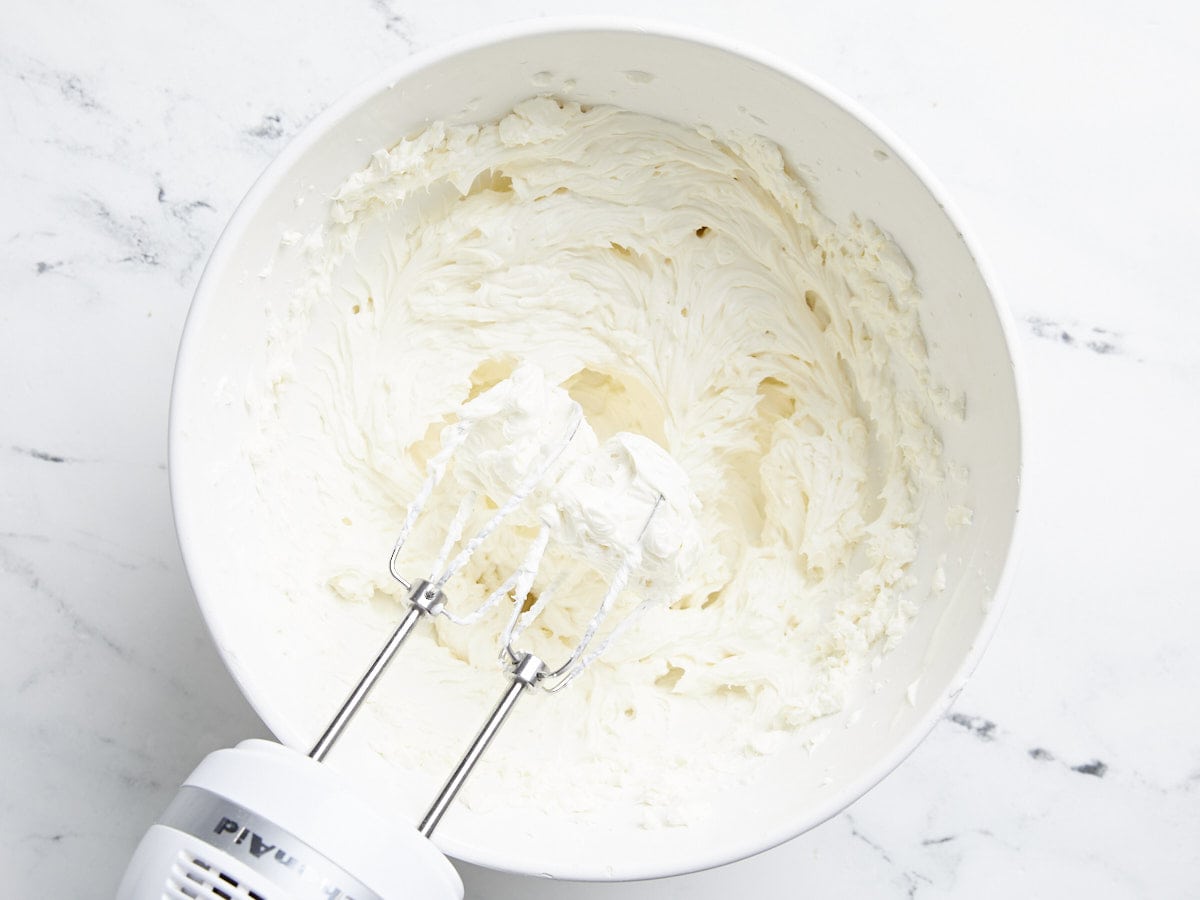
In a separate bowl, whip the two 8-ounce blocks of softened room-temperature cream cheese, 5 ounces of Greek yogurt, and 1 teaspoon of vanilla until smooth and creamy.

Cream cheese and whipped cream folded together.

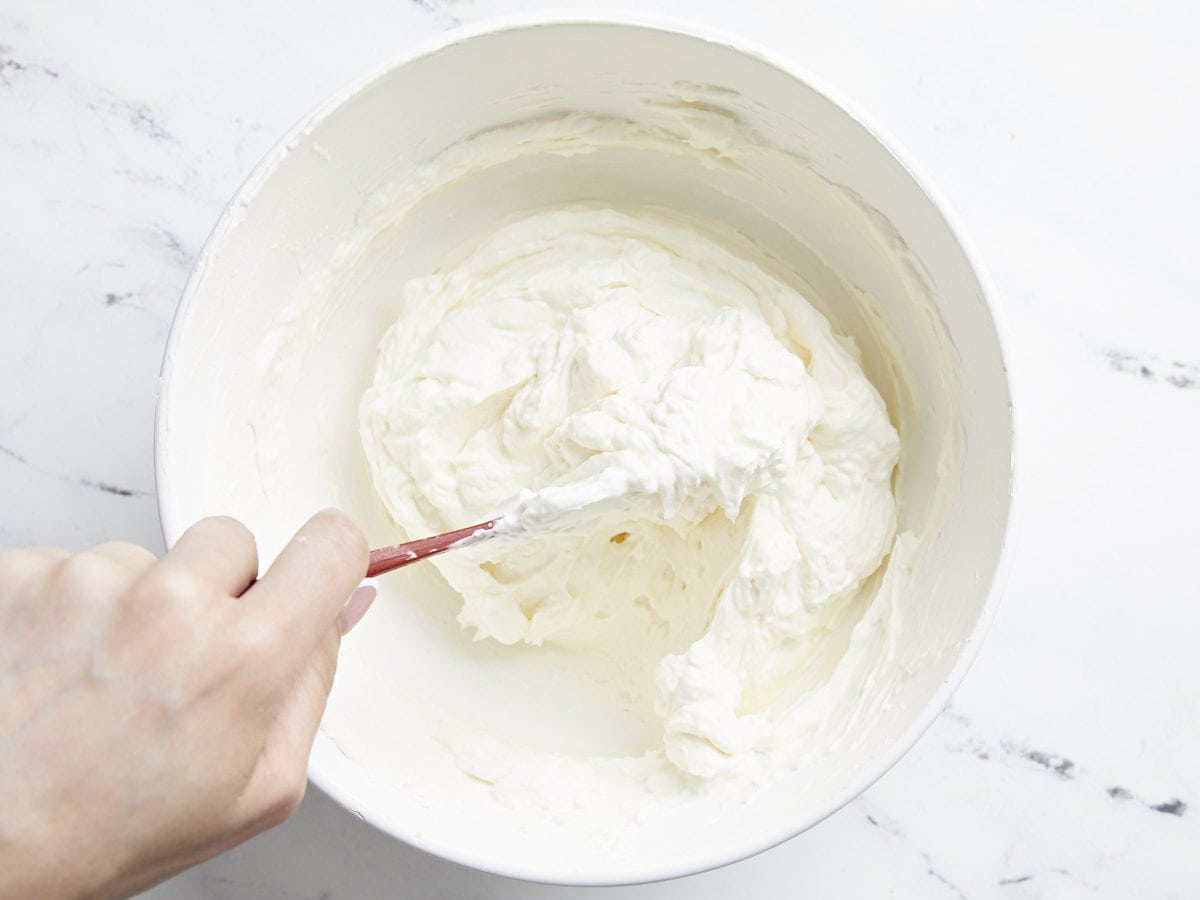
Gently fold one-half of the whipped cream into the cream cheese mixture until fully incorporated. Repeat with the remaining whipped cream.

Cheesecake mixture poured into the pie plate.

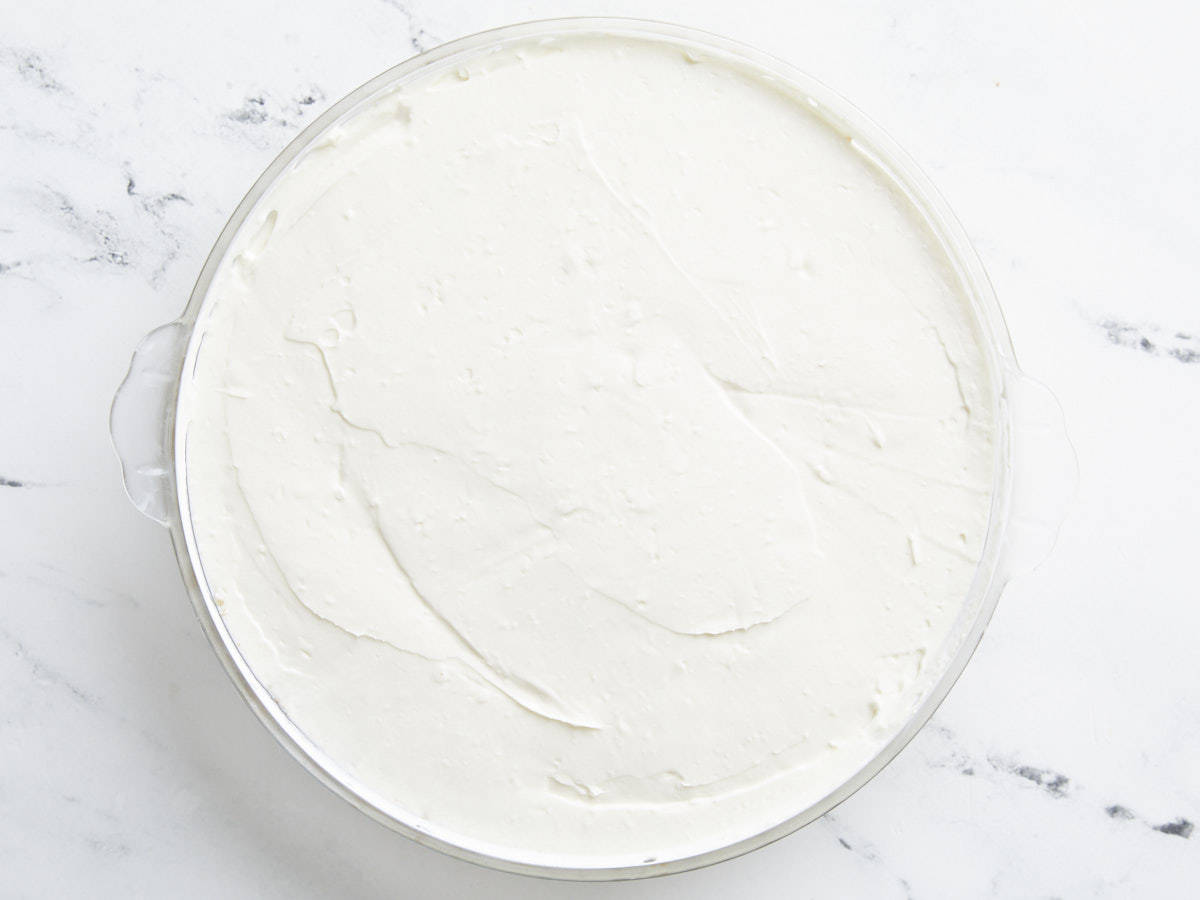
Add the filling to your frozen crust gently. Pick the pie plate up a 1/4 inch and gently drop it on the counter a few times to remove large air bubbles. Use a spatula or large spoon to smooth out the top. Cover the cheesecake with a sheet of plastic or parchment directly on the surface and then cover it in aluminum foil. Refrigerate for at least 6 hours or until the cheesecake sets and is firm to the touch.

Close up overhead view of a no bake cheesecake topped with cherries, one slice being removed.

Serve the cheesecake as is, or spoon a fruit sauce topping over it before serving. Try our Cherry Sauce, Blueberry Sauce, Lemon Curd, or Strawberry Sauce. If the crust sticks to the pie plate, wet a dish towel with hot water, squeeze out the excess water, and place the pie plate on top of the towel for a minute to warm and loosen the crust. Enjoy the beauty of this incredible no-fuss dessert before it gets devoured!

The post No-Bake Cheesecake appeared first on Budget Bytes.
Green Goddess Salad

This creamy, crunchy, and tangy Green Goddess salad is as delicious as it is easy to make, plus it’s ridiculously budget-friendly.

The post Green Goddess Salad appeared first on Budget Bytes.
This Green Goddess Salad recipe is so good every time I take a bite, I feel like screaming, “I can’t believe this is cabbage!”. If you’re looking for a delicious and refreshing salad that’s super easy to make and ridiculously budget-friendly (you will never pay for bagged salad again), then you need to try Green Goddess Salad. The creamy, herb-packed Green Goddess Dressing it’s made with is to die for.

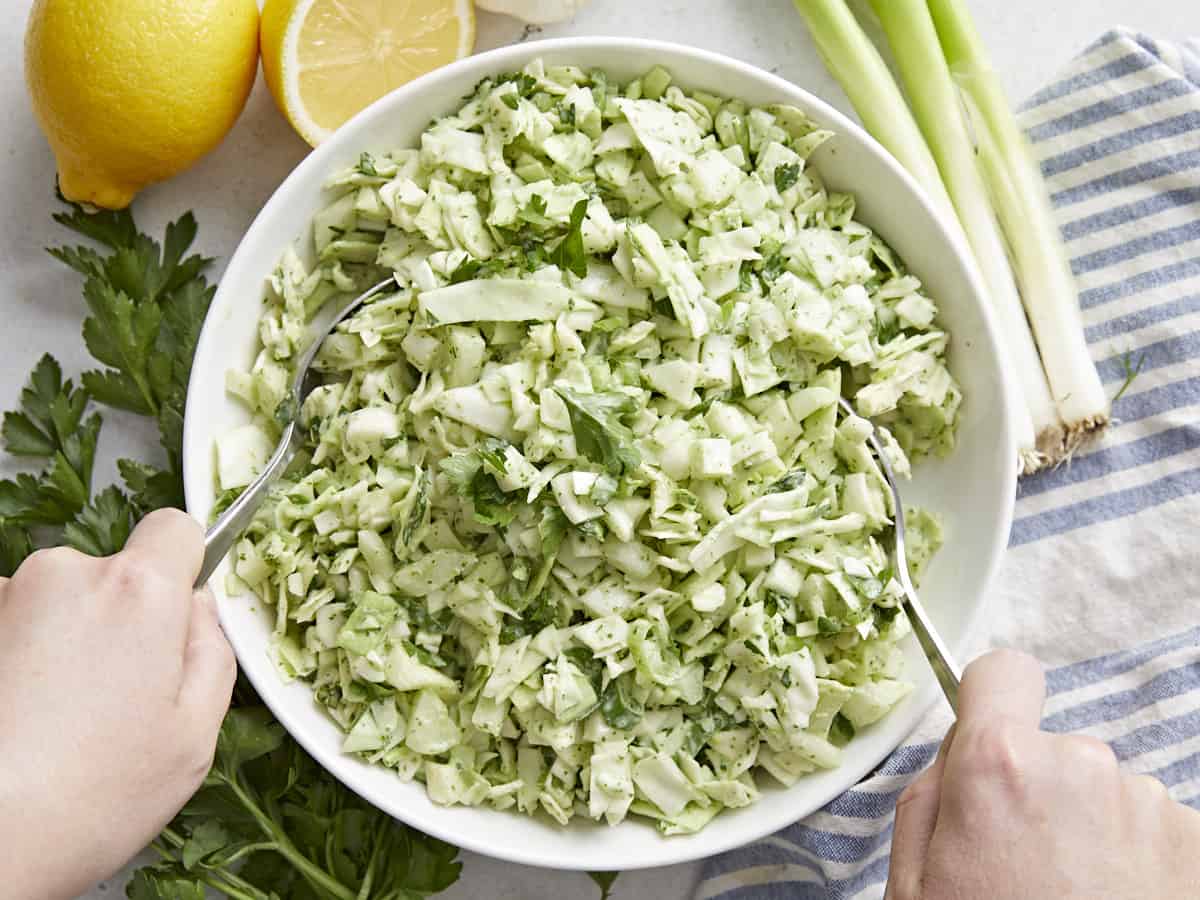
Overhead shot of Green Goddess Salad in a white bowl.

What Is Green Goddess Salad?

Green Goddess Salad is believed to have been created in the 1920s in San Francisco as an homage to an actor in the play The Green Goddess. It’s usually a mixture of leafy greens and a zesty, herbaceous Green Goddess Dressing.

Ingredients for Green Goddess Salad

My recipe for Green Goddess Salad uses cabbage as the primary green, so this salad keeps well, making it a perfect choice for potlucks. Though I keep things simple to keep this recipe budget-friendly, this salad is often served with croutons and grilled shrimp or chicken. Here’s what you’ll need to make Green Goddess Salad:

  • Green Cabbage: is the base of our salad. It’s very budget-friendly and has a great shelf life. But if cabbage isn’t your thing, you can def sub this cabbage with about 8 cups of your favorite chopped greens.
  • Fennel Bulb: adds the traditional black licorice note that Green Goddess is known for. You can substitute the fennel with a cup of fresh tarragon leaves. make sure to reserve the fronds for an addition to the Green Goddess Dressing or to use as a garnish.
  • Green Onions: add pungency to the mix. If you don’t have green onions, sub with half a small white onion.
  • Italian Parsley: adds deep green color to the salad and grassy notes. You can substitute it with curly parsley if you wish or fresh basil.
  • Green Goddess Dressing: this herbaceous concoction is fantastic when prepared fresh (definitely check out our easy recipe!), but you can also get it pre-made at most major supermarkets.
Overhead shot of Green Goddess Salad being tossed in a white bowl.

How To Store Green Goddess Salad

This salad keeps really well. Though you can mix the dressing into the greens and refrigerate the salad for up to 5 days, the flavors mellow considerably. If you’re going to premix, I recommend giving it a good stir, tasting the greens, and adding a few pinches of salt and maybe a crack or two of black pepper before serving. I do not recommend freezing this salad, as the textures of the greens will change considerably as they thaw.

What To Serve With Green Goddess Salad

This is a perfect salad to bring to a get-together because it travels really well. Its herbaceous tangy notes make it a perfect pairing for lighter dishes like Easy Fish Tacos with Cumin Lime Slaw, Salmorejo, Tuna Patties, or Chicken Lettuce Wraps. But it is also hearty enough to pair with bolder flavors like BBQ Ribs, Sausage Kebabs, Roasted Chicken, and Classic Homemade Meatloaf.

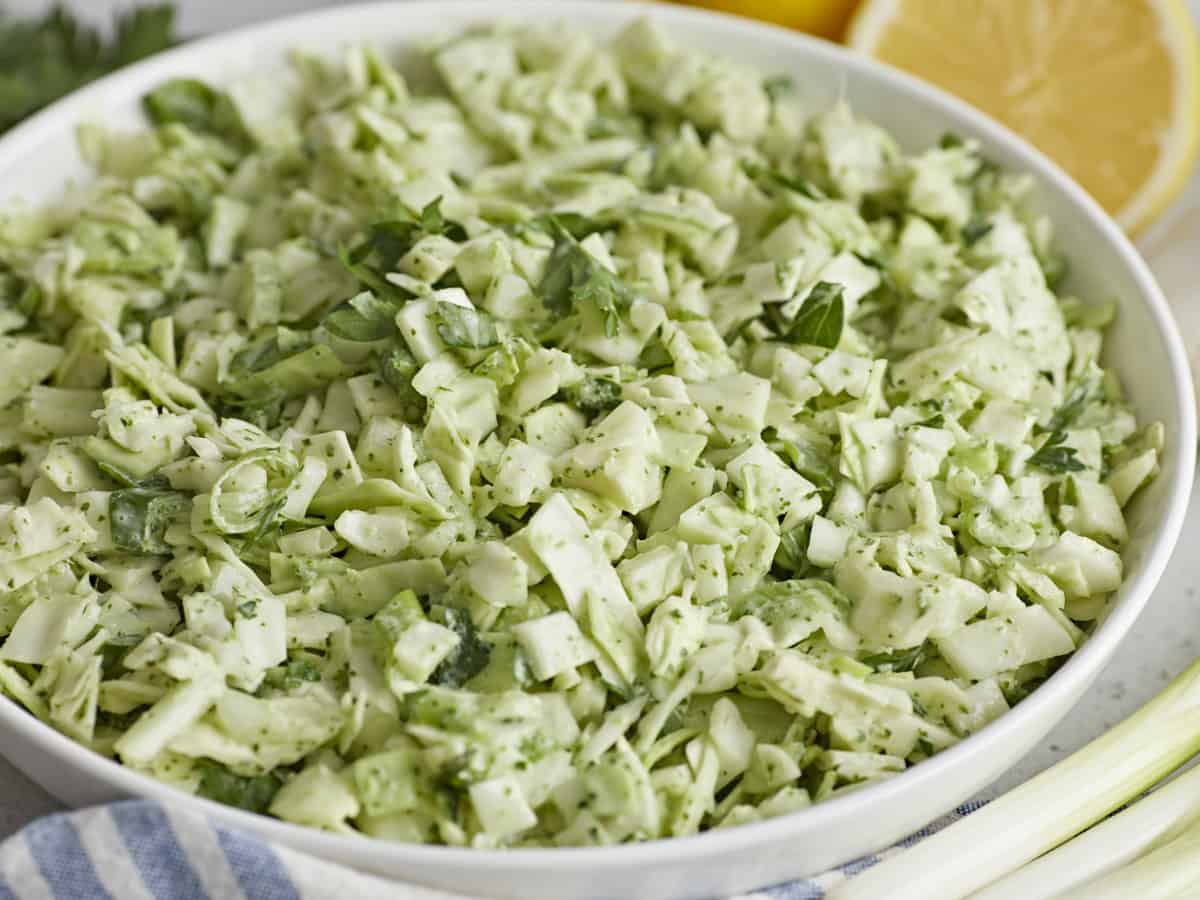
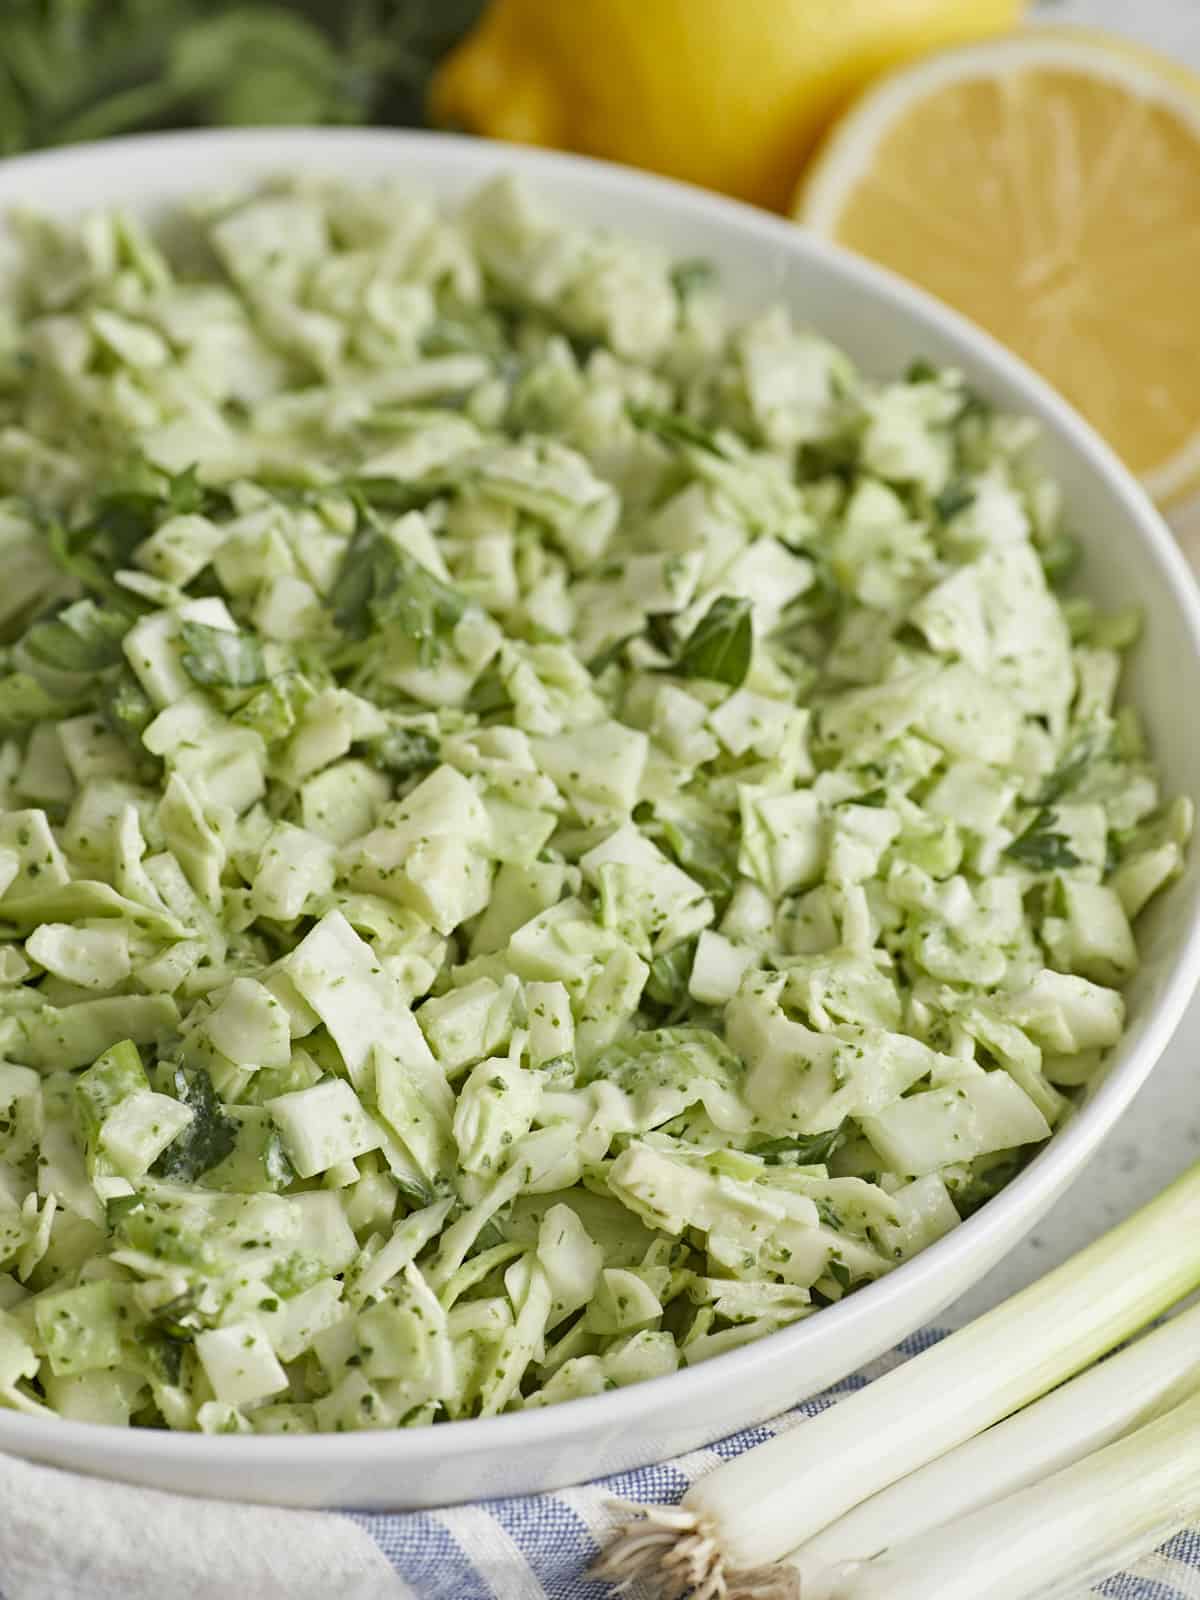
Side shot of Green Goddess Salad in a white bowl.
Overhead shot of Green Goddess Salad in a white bowl.
Print

Green Goddess Salad

This creamy, crunchy, and tangy Green Goddess salad is as delicious as it is easy to make, plus it's ridiculously budget-friendly.
Course Salad
Cuisine American
Total Cost ($13.69 recipe / $1.71 serving)
Prep Time 20 minutes
Total Time 20 minutes
Servings 8 2-cup servings
Calories 110kcal

Ingredients

  • 1 fennel bulb $3.49
  • 4 green onions $0.45
  • 1 green cabbage (about 3 lbs) $2.23
  • 1 cup Italian parsley leaves $0.79
  • 2 cups Green Goddess Dressing $6.73

Instructions

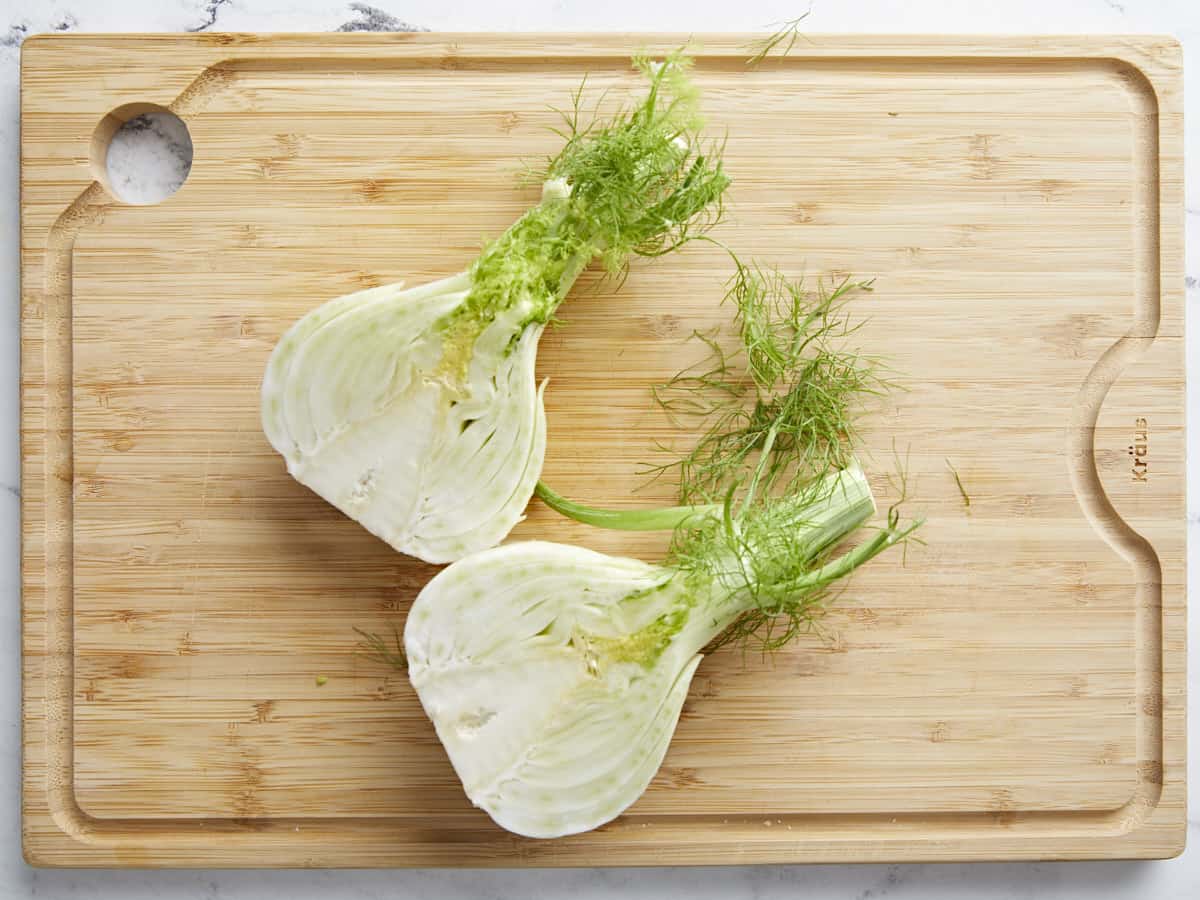
  • Rinse the fennel bulb under cool water. Slice the fennel bulb in half from root to stem. Trim off the stem, reserving the fennel fronds to use in the Green Goddess Dressing. If you've purchased pre-made dressing, use the fennel fronds as garnish.
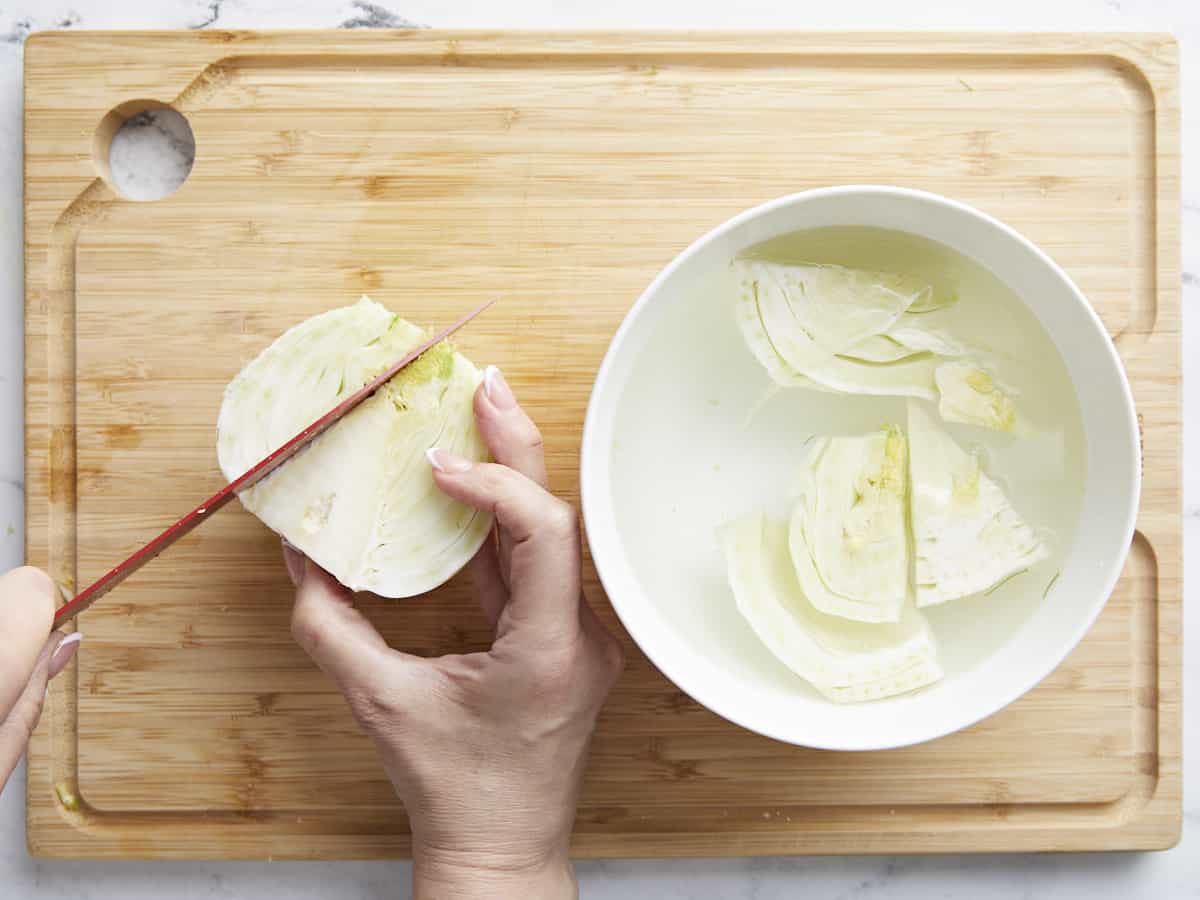
  • Slice around the triangle-shaped core of each fennel bulb half. Place each half in a bowl of water to prevent the fennel from browning. Then chop each fennel half into 1/4-inch thick slices. Finally, cut the fennel slices into 1/4-inch dice. Keep the diced fennel in the water until ready to use.
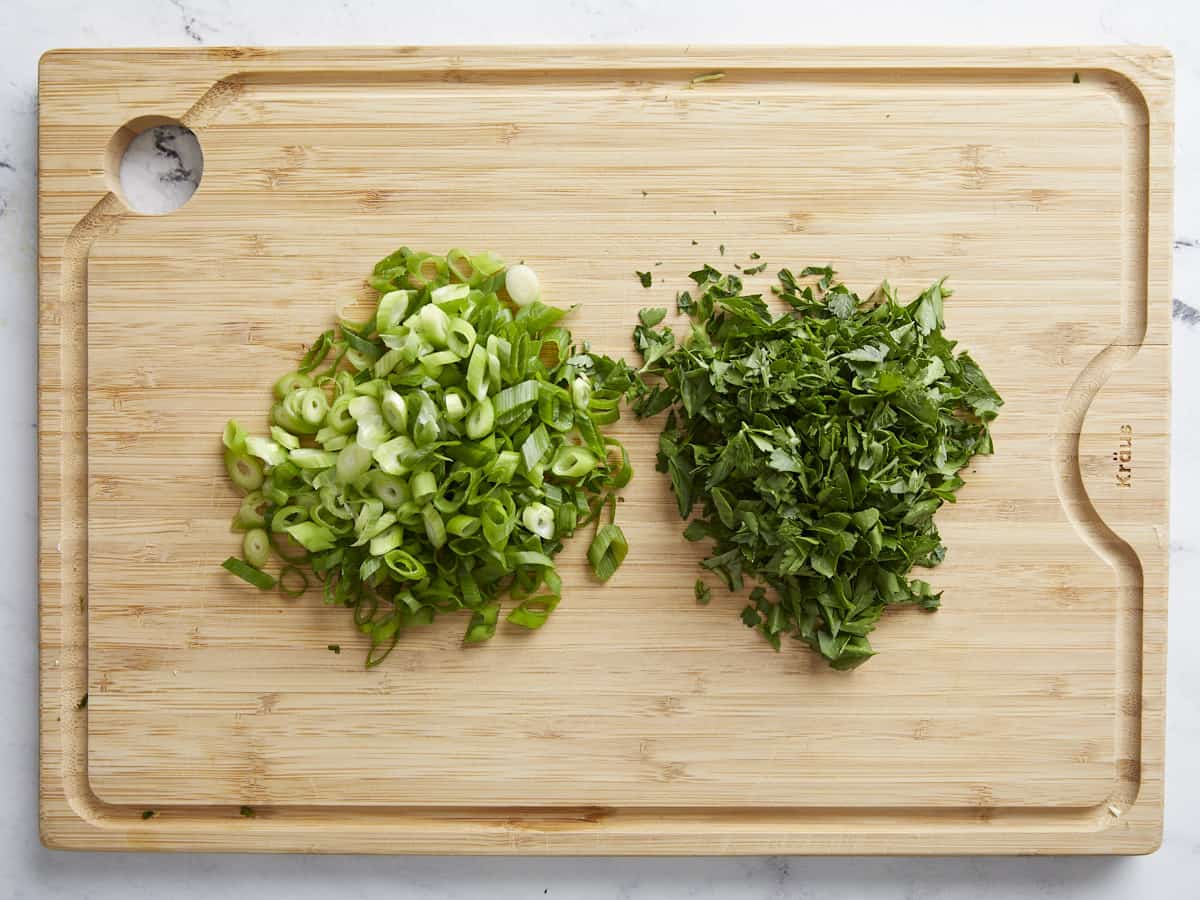
  • Remove the roots from the green onions and then slice in 1/8 inch slices on the diagonal. Rough chop the Italian Parsley leaves.
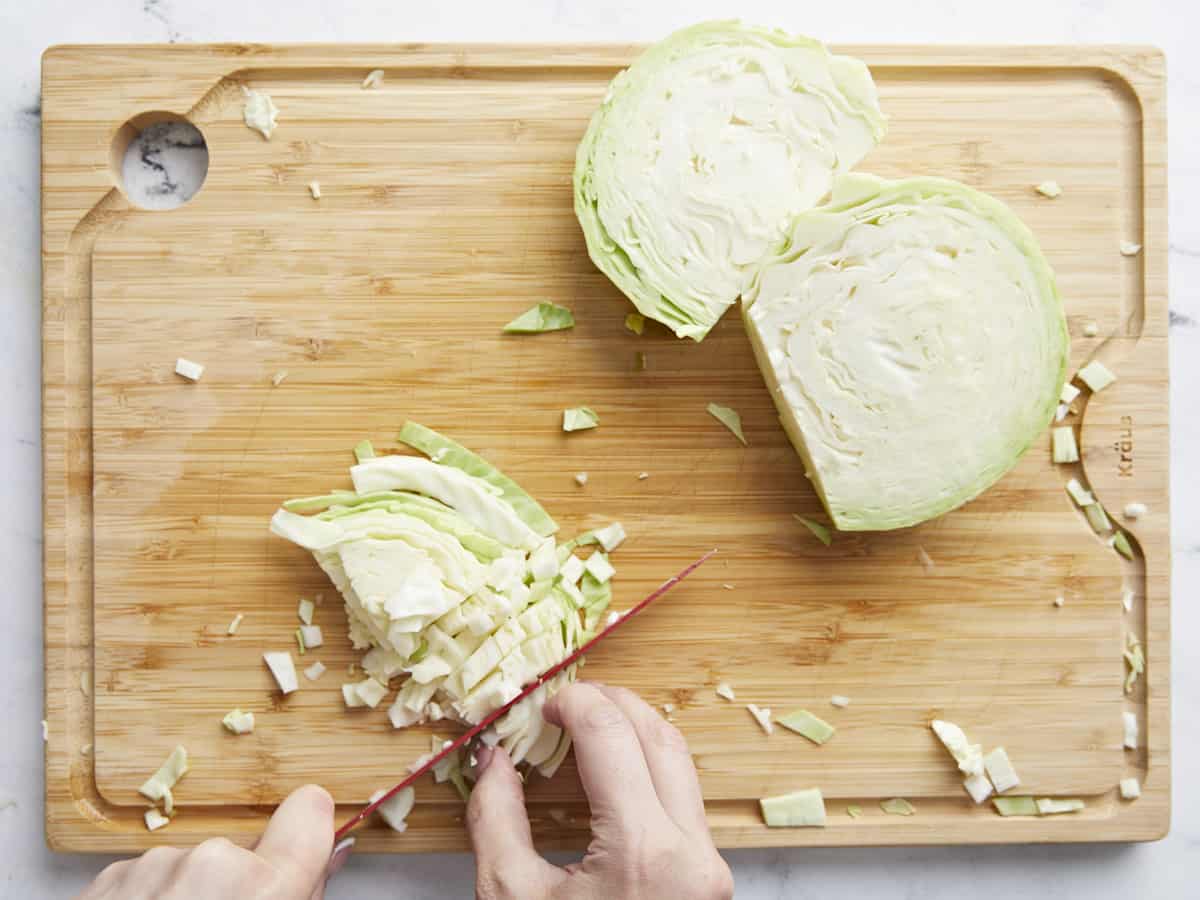
  • Slice the green cabbage in half, and cut around the core. Next, cut each cabbage half into 1/4-inch thick slices. Then cut each slice into 1/4-inch strips. Finally, cut each strip into 1/4-inch dice. You should have about 10 to 12 cups of chopped cabbage.
  • Place the cabbage, onions, Italian parsley, fennel fronds, and fennel in a large bowl. Top with the Green Goddess Dressing. Toss the greens in the dressing. 
  • Taste the greens about ten minutes after adding the dressing; if necessary, add salt and pepper. If you are preparing the salad ahead of time, give it a big stir before serving, and add salt and pepper if necessary.

See how we calculate recipe costs here.

Nutrition

Serving: 1serving | Calories: 110kcal | Carbohydrates: 14g | Protein: 4g | Fat: 6g | Sodium: 91mg | Fiber: 4g

How to Make Green Goddess Salad – Step by Step Photos

Overhead shot of a fennel bulb sliced in half on a wood cutting board.

Rinse 1 fennel bulb under cool water. Slice the fennel bulb in half from root to stem. Trim off the stem, reserving the fennel fronds to use in the Green Goddess Dressing. If you’ve purchased pre-made dressing, use the fennel fronds as garnish.

Overhead shot of a fennel bulb being sliced on a cutting board.

Slice around the triangle-shaped core of each fennel bulb half. Place each half in a bowl of water to prevent the fennel from browning. Then chop each fennel half into 1/4-inch thick slices. Finally, cut the fennel slices into 1/4-inch dice. (Squares of fennel slices that are 1/4 inch by 1/4 inch.) Keep the diced fennel in the water until ready to use.

Overhead shot of sliced green onions and parsley on a cutting board.

Remove the roots from 4 green onions and then slice in 1/8-inch slices on the diagonal. Rough chop 1 cup of Italian Parsley leaves.

Overhead shot of green cabbage being sliced on a cutting board.

Slice 1 green cabbage in half, and cut around the core. Next, cut each cabbage half into 1/4-inch thick slices. Then cut each slice into 1/4-inch strips. Finally, cut each strip into 1/4-inch dice. You should have about 10 to 12 cups of chopped cabbage.

Overhead shot of Green Goddess Dressing being added to chopped greens in a white bowl.

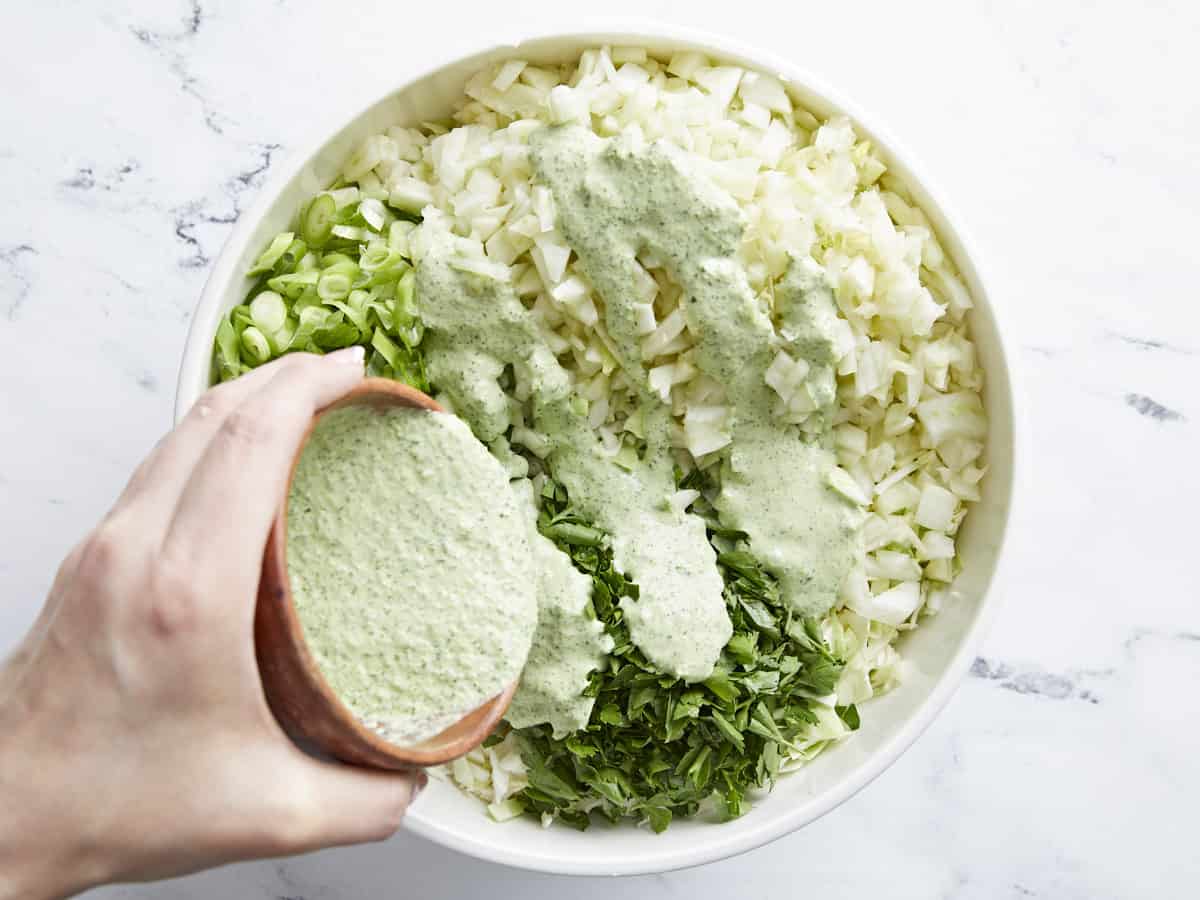
Place the cabbage, onions, Italian parsley, fennel fronds, and fennel in a large bowl. Top with 2 cups of Green Goddess Dressing. Toss the greens in the dressing.

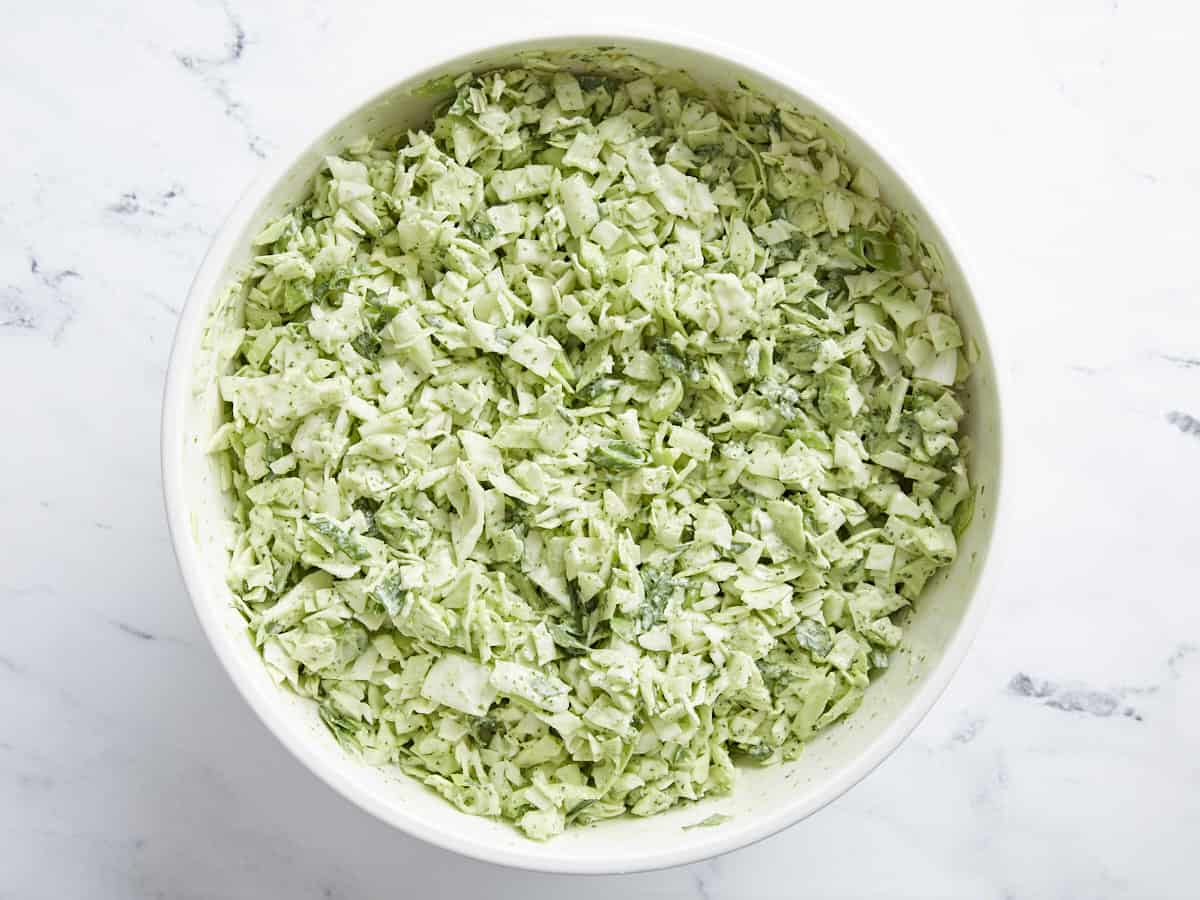
Overhead shot of Green Goddess Salad in a white bowl.

The dressing will add loads of flavor to the greens, but it will also extract some of their water. So taste them about ten minutes after adding the dressing, and if necessary, add salt and pepper to taste. If you are preparing the salad ahead of time, give it a big stir before serving, and add more salt and pepper if necessary. I hope you enjoy this one as much as we did! Beth and I both couldn’t stop eating it!

Side shot of Green Goddess Salad in a white bowl.

The post Green Goddess Salad appeared first on Budget Bytes.
BBQ Ribs

You don’t need a big fancy grill to get juicy, tender, fall-off-the-bone BBQ ribs. Your oven can produce lip-smackingly delicious ribs too!

The post BBQ Ribs appeared first on Budget Bytes.
For me, nothing says “Summer is here!” like a succulent rack of BBQ Ribs with All. Of. The. Sides. But maybe, like me, you don’t have a grill or a backyard, or any desire to stand out in the hot sun next to fire. First, I see you. Second, you don’t need a big fancy grill to get juicy, tender, fall-off-the-bone BBQ Ribs. All you need is a baking pan, some foil, and some patience to get oven-baked barbecue ribs on the table that’ll have your whole family asking for more! PS This is a great recipe for Father’s Day, the 4th Of July, or a summer barbecue. So make sure to save it!

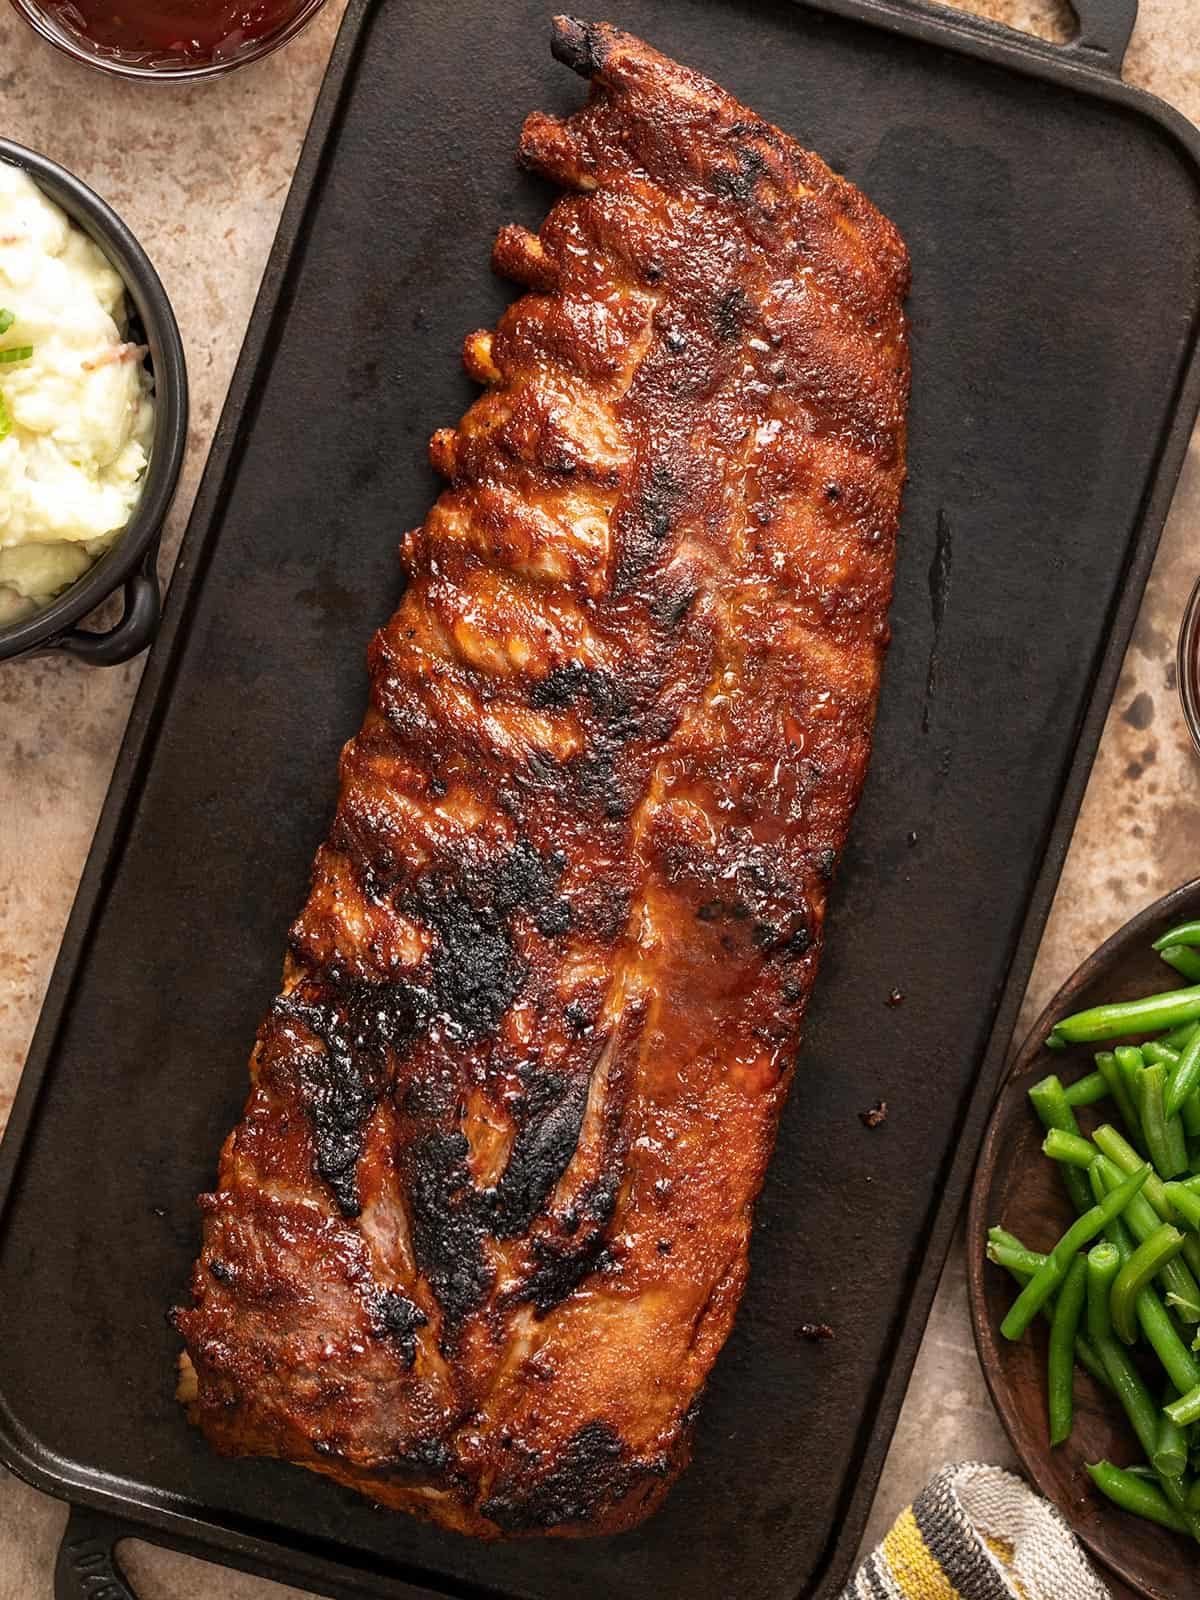
Baked ribs on a black plater.

What you need to make BBQ Ribs

Are you ready to skip the grill and fire up your oven? Here’s what you need to make delicious oven-baked barbecue ribs that leave you wishing you’d made a double batch!

  • Ribs– your choice: baby back, spare, short, St. Louis style, you name it. Though cook times will vary, you can make any 3-pound rack using this simple recipe.
  • Barbecue Sauce– we have a great recipe for Homemade BBQ Sauce if you want to make your own, but any BBQ sauce will do. Not only does the sauce add deep flavors, but it also helps caramelize the outer layer of ribs for mouth-wateringly sticky perfection.
  • Spices– a rub is a must if you want to add deep flavor to ribs. For this recipe, we will make our own rub with salt, pepper, garlic powder, onion powder, smoked paprika, brown sugar, cayenne, and mustard powder, but if you have a favorite brand, use 5 tablespoons.
  • Butter – mixing the dry rub with melted butter makes it easy for the seasoning to stick to your ribs as they bake. The butter also adds flavor and keeps your ribs from getting dry.
  • Liquid– placing liquid in the pan will help keep your ribs from drying out. You can use any liquid: water, chicken broth, and if you’re making pork ribs, apple juice works beautifully.

How To Pick Ribs

Here are a few helpful tips to keep in mind when picking ribs:

  1. Look for meaty ribs that are the same thickness from end to end. Press your finger down into the rib to get a feel for how much meat there is on the bone.
  2. Look for ribs marbled throughout with fat, which keeps them juicy and adds flavor. Pass on ribs with big clumps of fat, which adds to the weight and cost of the rack but has to be trimmed before baking.
  3. The ribs should be about the same size and thickness from end to end, which ensures even cooking. Of course, you’ll have some natural tapering at one end, but avoid racks with a considerable size difference from end to end.
  4. Plan on at least 3 to 4 ribs per serving and buy accordingly.
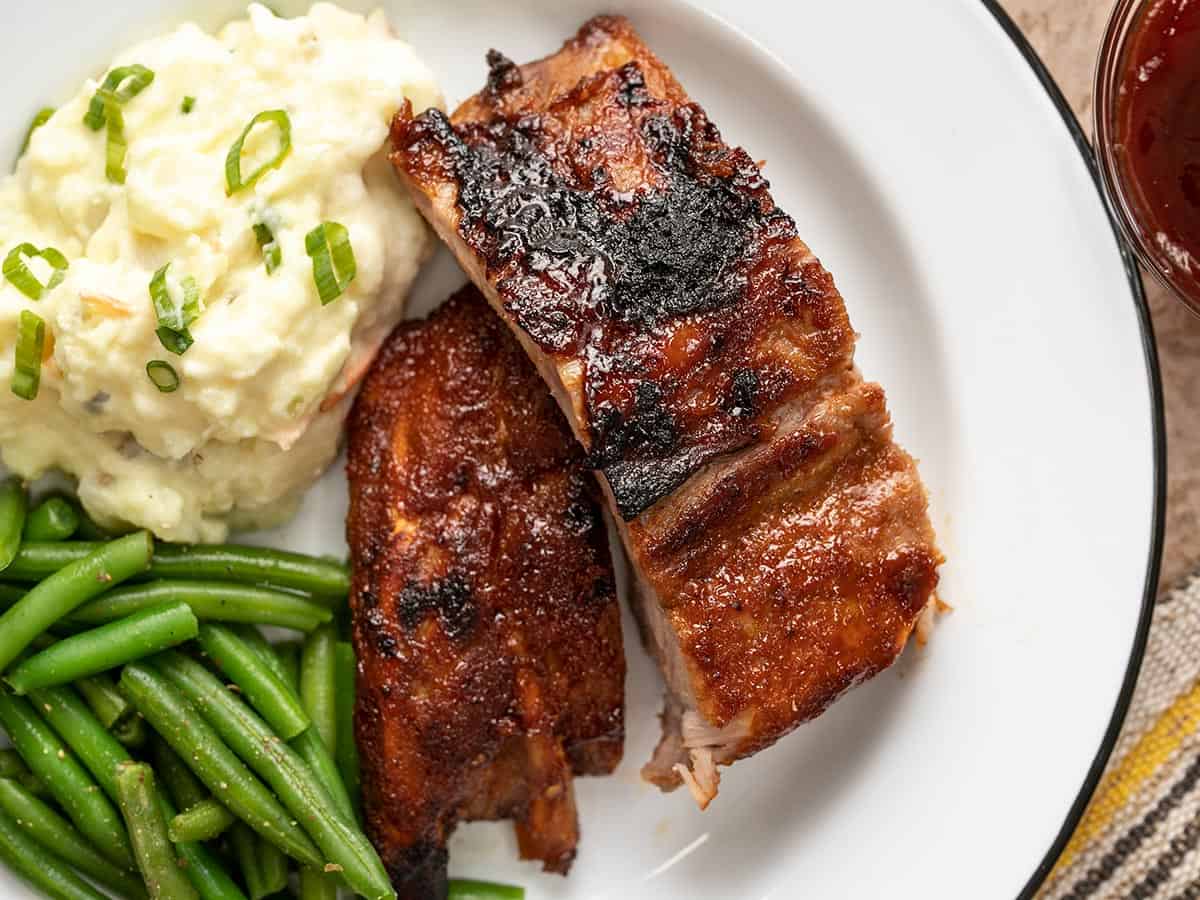
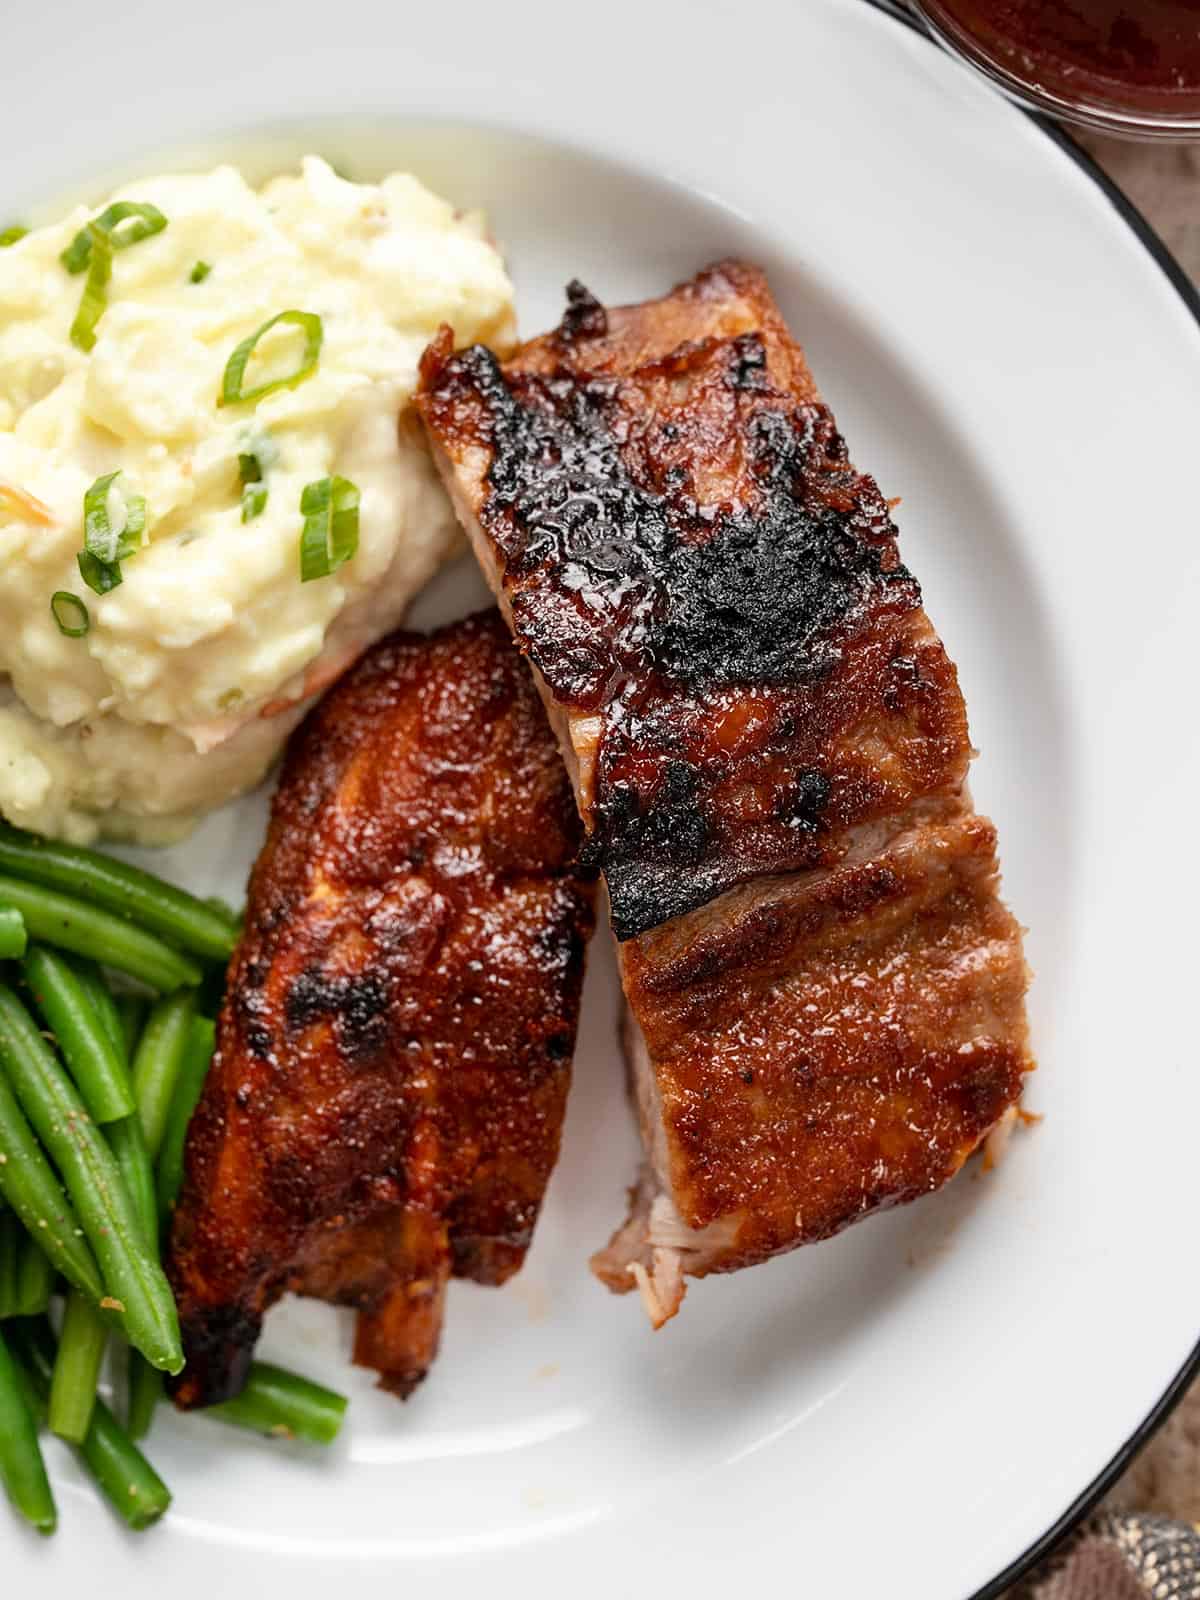
Cut ribs on a white plate with mashed potatoes and green beans.

What To Serve With BBQ Ribs

Kick up your BBQ Ribs 100 notches by serving them with delicious, easy-to-make Budget Bytes classics like:

How To Store And Reheat Ribs

Wrap ribs tightly in plastic or foil and place them in an airtight container. Store leftovers in the fridge for up to three days or in the freezer for up to three months. To reheat from frozen, thaw the ribs in your fridge overnight. When ready to cook, bring the ribs to room temperature while you preheat your oven to 250°F. Line a sheet pan with a rack and fill the pan with a few cups of water. Wrap the ribs in foil, place them on a sheet pan, and warm for about 20 to 30 minutes or until steaming.

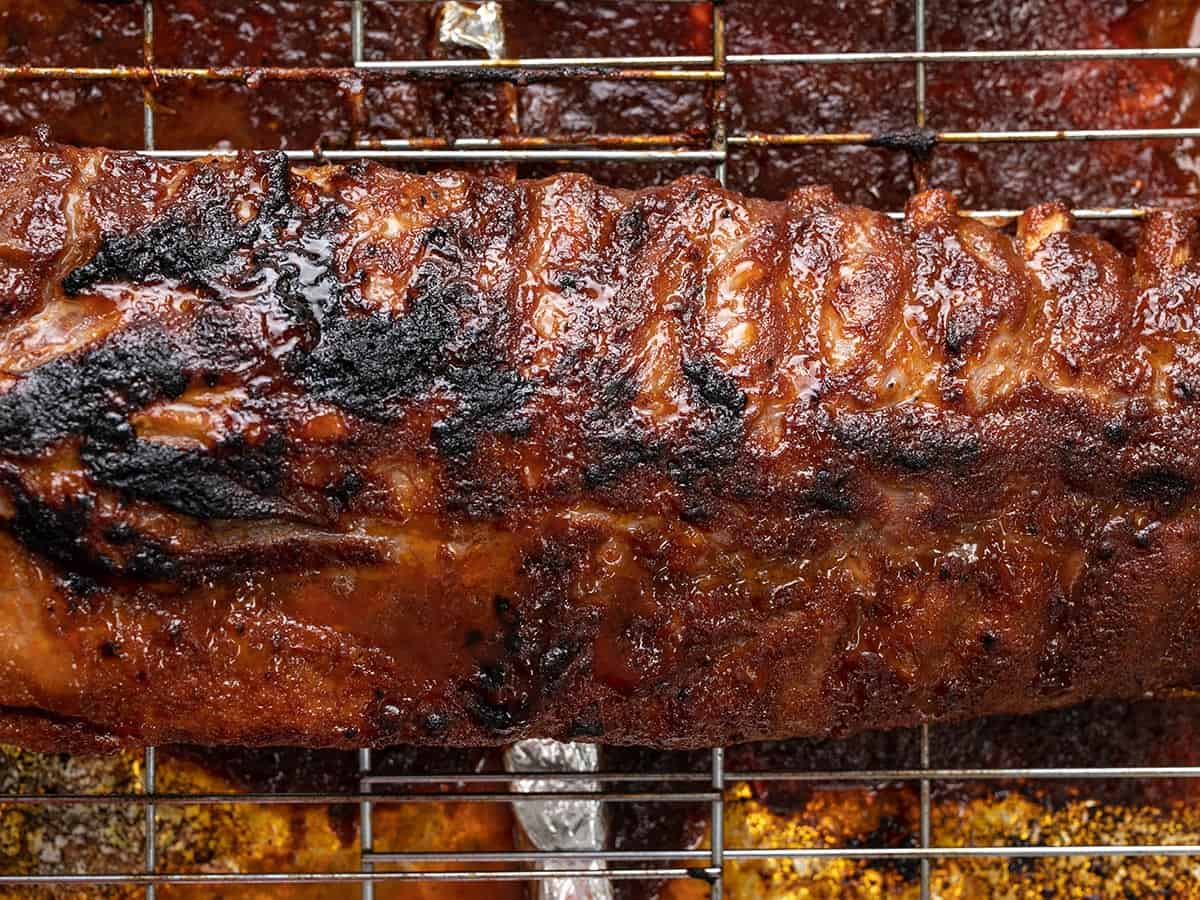
Baked ribs on a rack.
Print

BBQ Ribs

You don't need a big fancy grill to get juicy, tender, fall-off-the-bone BBQ ribs. Your oven can produce lip-smackingly delicious ribs too!
Course Dinner, Lunch
Cuisine American
Total Cost ($11.76 recipe / $2.94 serving)
Prep Time 10 minutes
Cook Time 2 hours
Resting Time 15 minutes
Total Time 2 hours 25 minutes
Servings 4 servings of 3-4 ribs
Calories 987kcal

Ingredients

  • 3 lbs pork ribs $8.82
  • 4 Tbsp butter, melted $0.37
  • 2 tsp salt $0.10
  • 1 tsp black pepper $0.10
  • 2 tsp garlic powder $0.20
  • 2 tsp onion powder $0.20
  • 2 tsp smoked paprika $0.20
  • 1 Tbsp brown sugar $0.04
  • 2 tsp cayenne $0.20
  • 2 tsp ground mustard $0.20
  • 3 cups chicken broth $0.39
  • 1 1/2 cups BBQ sauce $0.94

Instructions

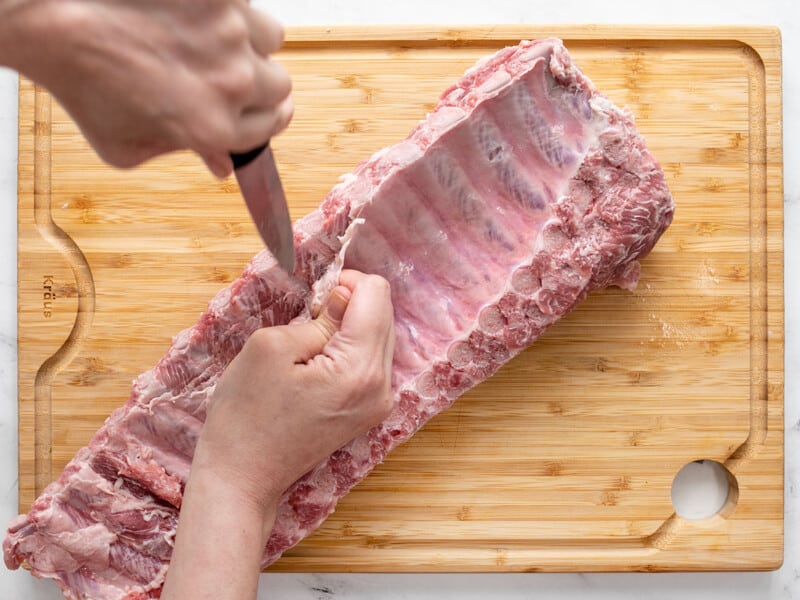
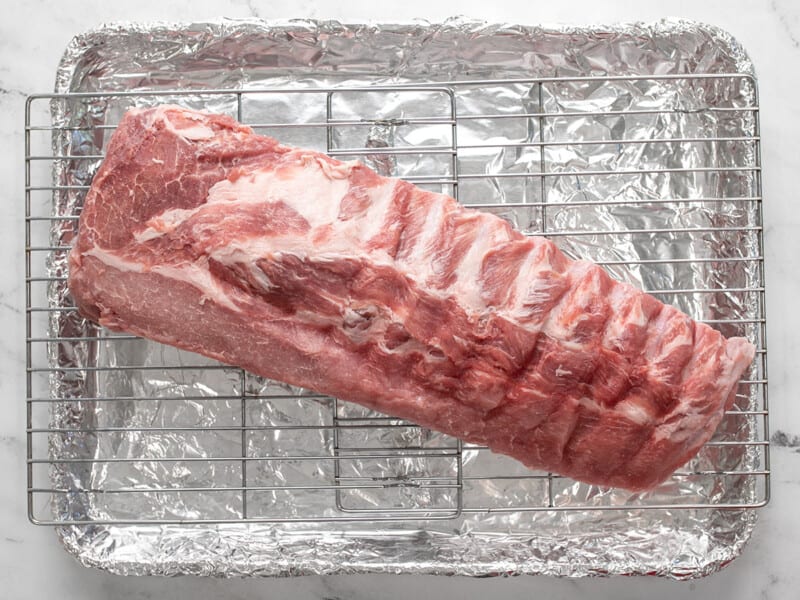
  • Place an oven rack in the center of the oven and preheat it to 300°F. Trim the ribs, removing excess fat. Trim the thicker end to even out the thickness. (Cook the trimmed meat with the ribs as a cook's bonus.) Turn the ribs over and remove the silvery membrane from the back of the ribs.
  • Line a sheet pan that's at least 2 inches deep with heavy-duty aluminum foil and place a wire cooling rack in it. If you do not have a cooling rack, crumple a long sheet of aluminum and roll it into a rack-sized donut that is at least 2 inches thick. Place the trimmed ribs on the rack. Pat off any excess moisture with a paper towel.
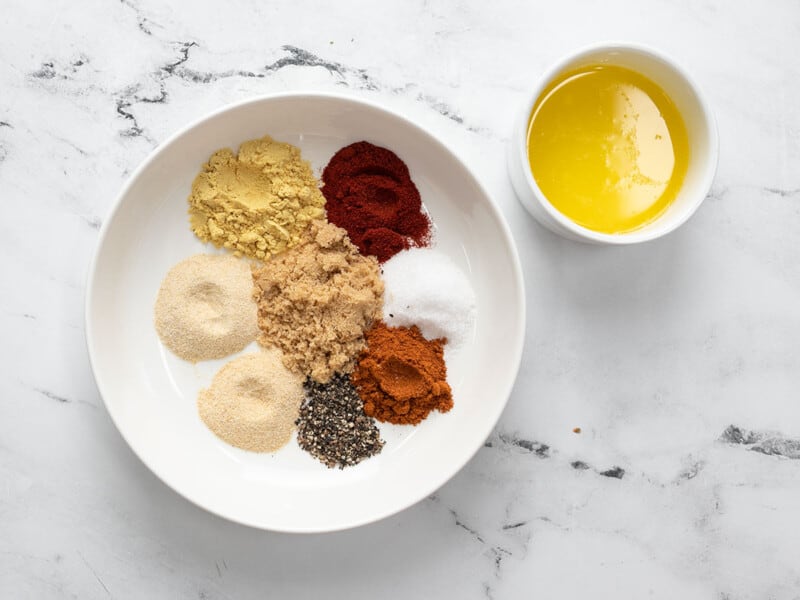
  • Make a rub by mixing salt, pepper, garlic powder, onion powder, smoked paprika, brown sugar, cayenne, ground mustard, and melted butter.
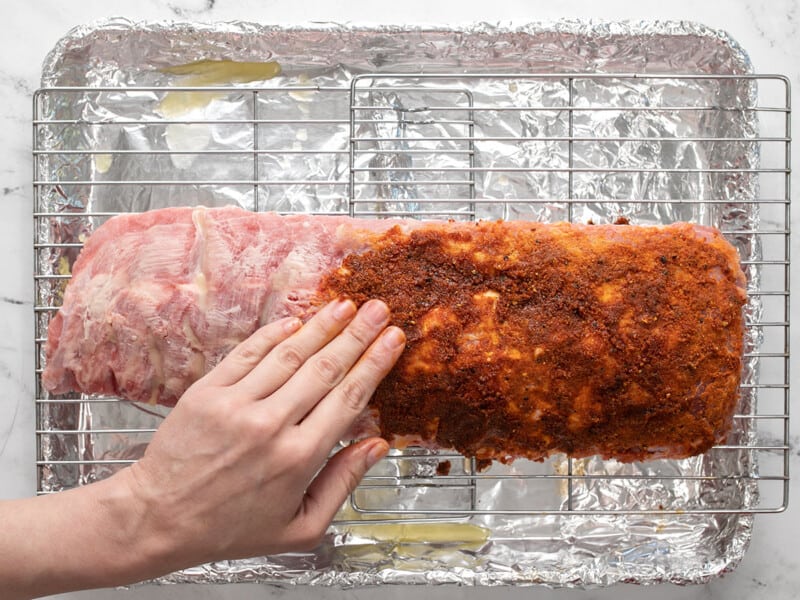
  • Rub the seasoning generously all over the meaty top of the ribs in a thick layer.
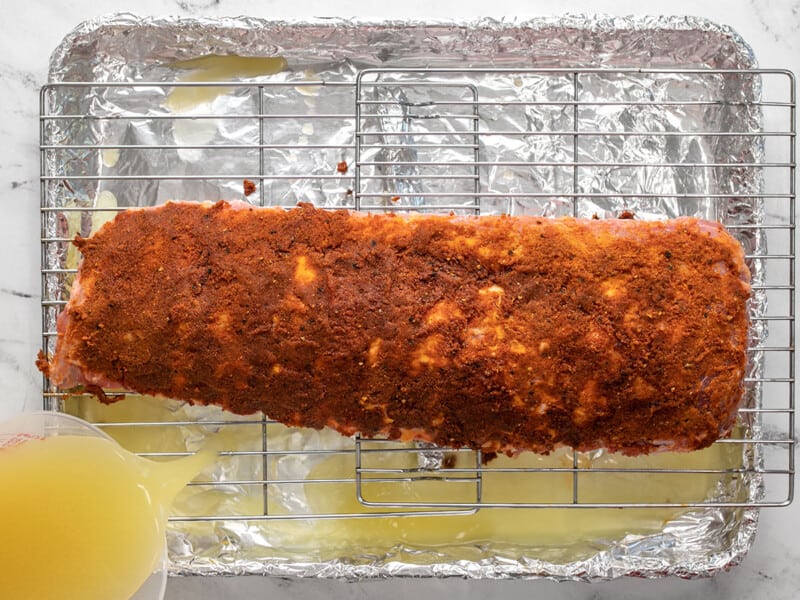
  • Pour chicken broth into the sheet pan, being careful not to pour it on the ribs. Place the sheet pan in the oven. Lower the temperature to 250°F. Bake uncovered for 30 minutes.
  • Cover the ribs in aluminum foil and bake for 60 minutes, rotating the sheet pan midway through.
  • Remove the aluminum foil and brush the ribs with 1 cup of bbq sauce. Bake for an additional 30 minutes or until tender. Every rack is different. The ribs are ready when a fork can easily pull the meat off the bone.
  • Turn the heat in the oven on broil. Brush the ribs with an additional 1/2 cup of bbq sauce and place under the broiler for a few minutes, just until a little char develops. Remove the ribs from the oven and rest for 15 minutes. Cut the ribs to your desired size, serve, and try not to lick your fingers!

See how we calculate recipe costs here.

Nutrition

Serving: 1serving | Calories: 987kcal | Carbohydrates: 51g | Protein: 40g | Fat: 69g | Sodium: 3208mg | Fiber: 2g
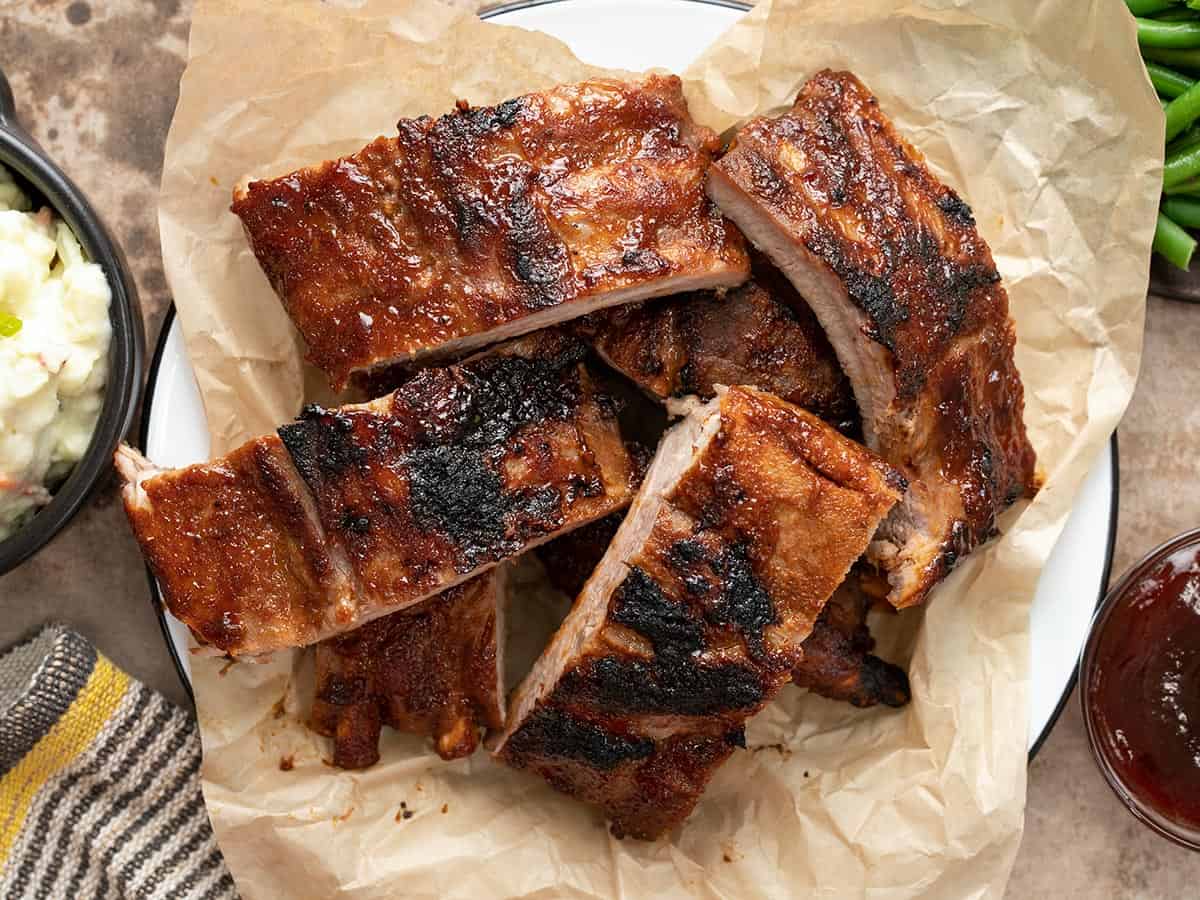
Cut ribs on a plate lines with parchment paper.

How to Make BBQ Ribs – Step by Step Photos

Trimming silver skin off the back of a rib rack.

Place a rack in the center of the oven and preheat it to 300°F. Trim the ribs, removing any big clumps of excess fat. Trim the thicker end to even out the thickness and cook the trimmed meat along with the ribs. Cook’s bonus! Turn the ribs over and remove the silvery membrane from the back of the ribs. It gets rubbery when cooked. Use a pairing knife or other sharp small knife to cut away at the skin while you pull it.

Trimmed ribs on a rack.

Line a sheet pan that’s at least 2 inches deep with heavy-duty aluminum foil and place a rack in it. Place the trimmed ribs on the rack. If you do not have a cooling rack, crumple a long sheet of aluminum and roll it into a rack-sized donut that is at least 2 inches thick. Place the trimmed ribs on the rack or aluminum donut. Pat off any excess moisture with a paper towel.

Ingredients for dry rub in a white bowl.

Make a rub by mixing 2 teaspoons of salt, 1 teaspoon of pepper, 2 teaspoons of garlic powder, 2 teaspoons of onion powder, 2 teaspoons of smoked paprika, 1 tablespoon of brown sugar, 2 teaspoons of cayenne, 2 teaspoons of mustard powder, and 4 tablespoons of melted butter.

Covering ribs with dry rub that are set on a rack.

Rub the seasoning generously all over the meaty top of the ribs.

Adding broth to a sheet pan with ribs on a rack.

Pour the chicken broth into the sheet pan, being careful not to pour it on the ribs. Place the sheet pan in the oven. Lower the temperature to 250°F. Bake uncovered for 30 minutes. Cover the ribs in aluminum foil and rotate the sheet pan front to back. Bake for another 30 minutes, then rotate the sheet pan again and bake for an additional 30 minutes.

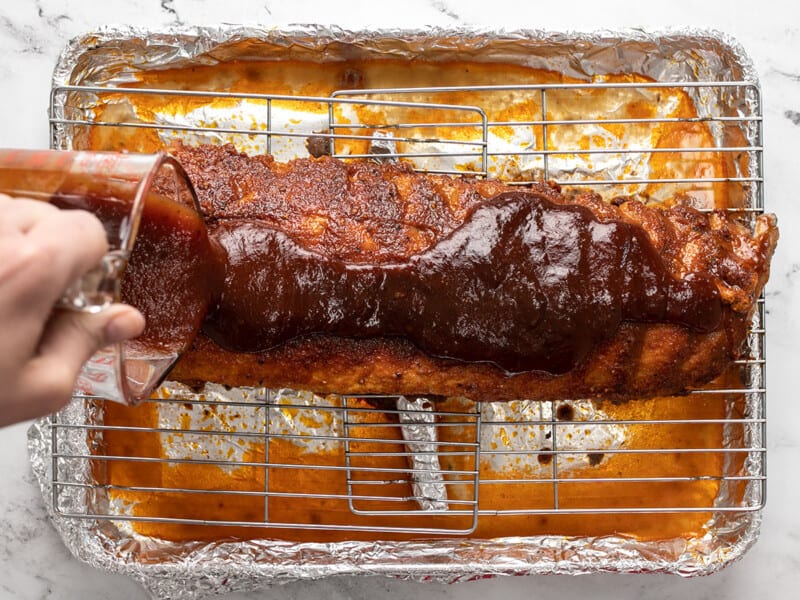
Adding BBQ sauce to baked ribs on a rack.

Remove the aluminum foil and brush the ribs with 1 cup of bbq sauce. Bake for an additional 30 minutes or until tender. Every rack is different. The ribs are ready when a fork can easily pull the meat off the bone.

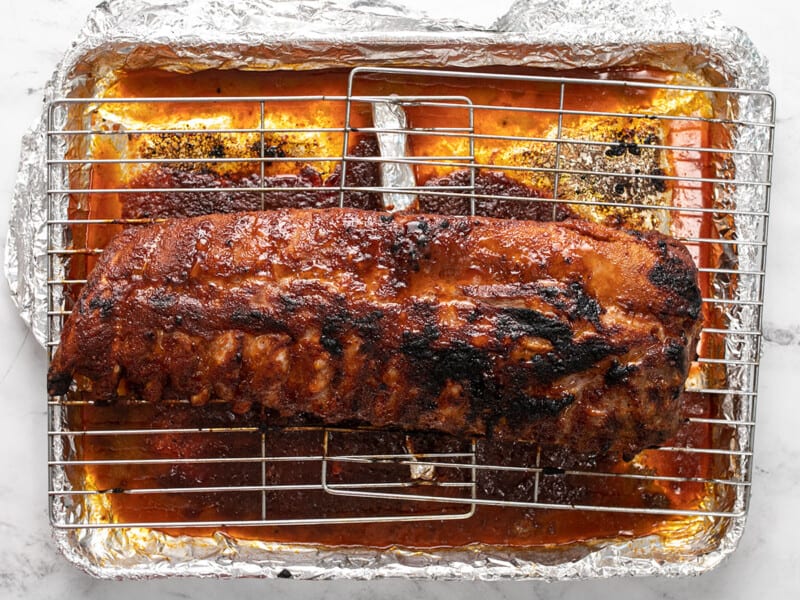
Finished baked ribs on a rack.

Turn the heat in the oven on broil. Brush the ribs with an additional 1/2 cup of bbq sauce and place under the broiler for a few minutes, just until a little char develops. Remove the ribs from the oven and rest for 15 minutes. Cut the ribs to your desired size, serve, and try not to lick your fingers!

Cut ribs on a white plate with mashed potatoes and green beans.

More Easy BBQ Recipes

The post BBQ Ribs appeared first on Budget Bytes.
Air Fryer Fried Chicken

Crispy on the outside and juicy on the inside, Air Fryer Fried Chicken delivers loads of texture and flavor without the fuss of deep frying.

The post Air Fryer Fried Chicken appeared first on Budget Bytes.
Crispy on the outside and juicy on the inside, Air Fryer Fried Chicken is the move if you want loads of texture and flavor without dealing with a pot of used oil and a greasy stovetop. It’s all of the yum with less of the fuss! The hardest thing about frying chicken in an air fryer is not eating the crunchy, golden skin before it hits the table.

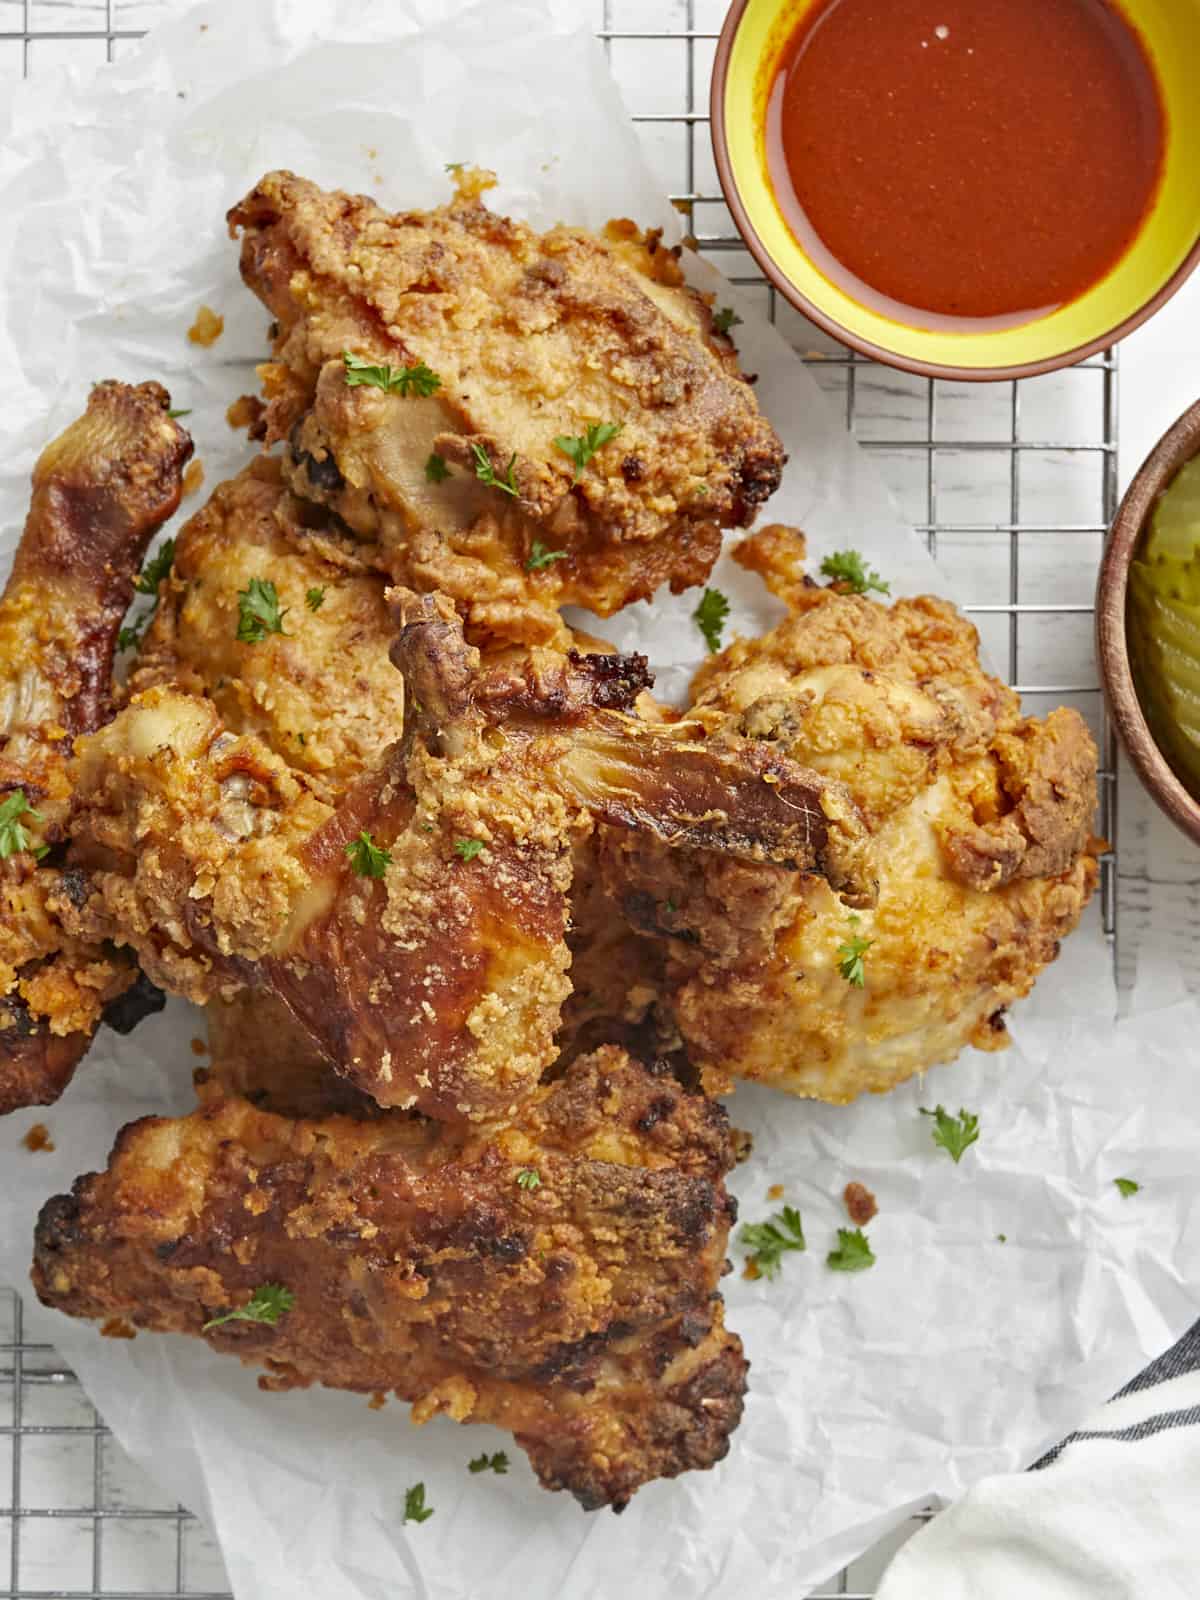
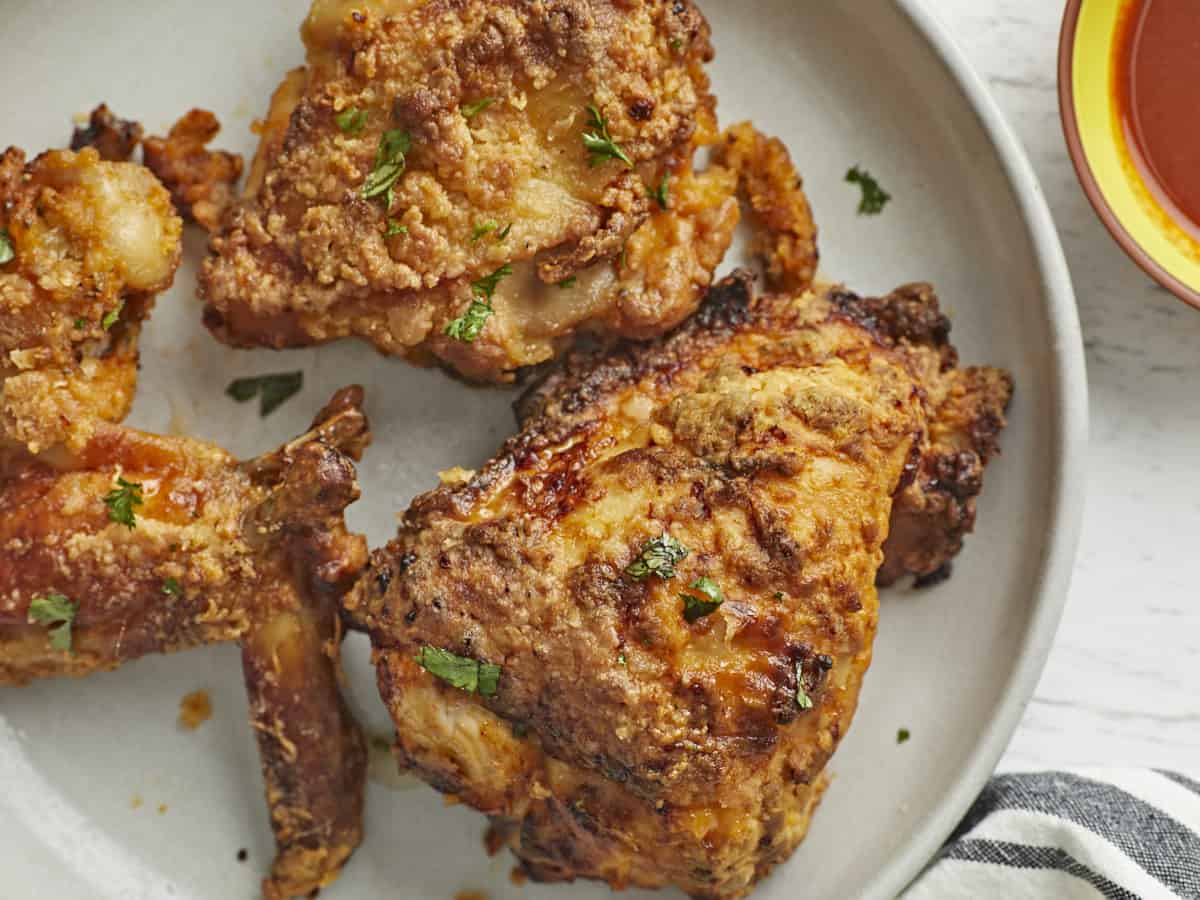
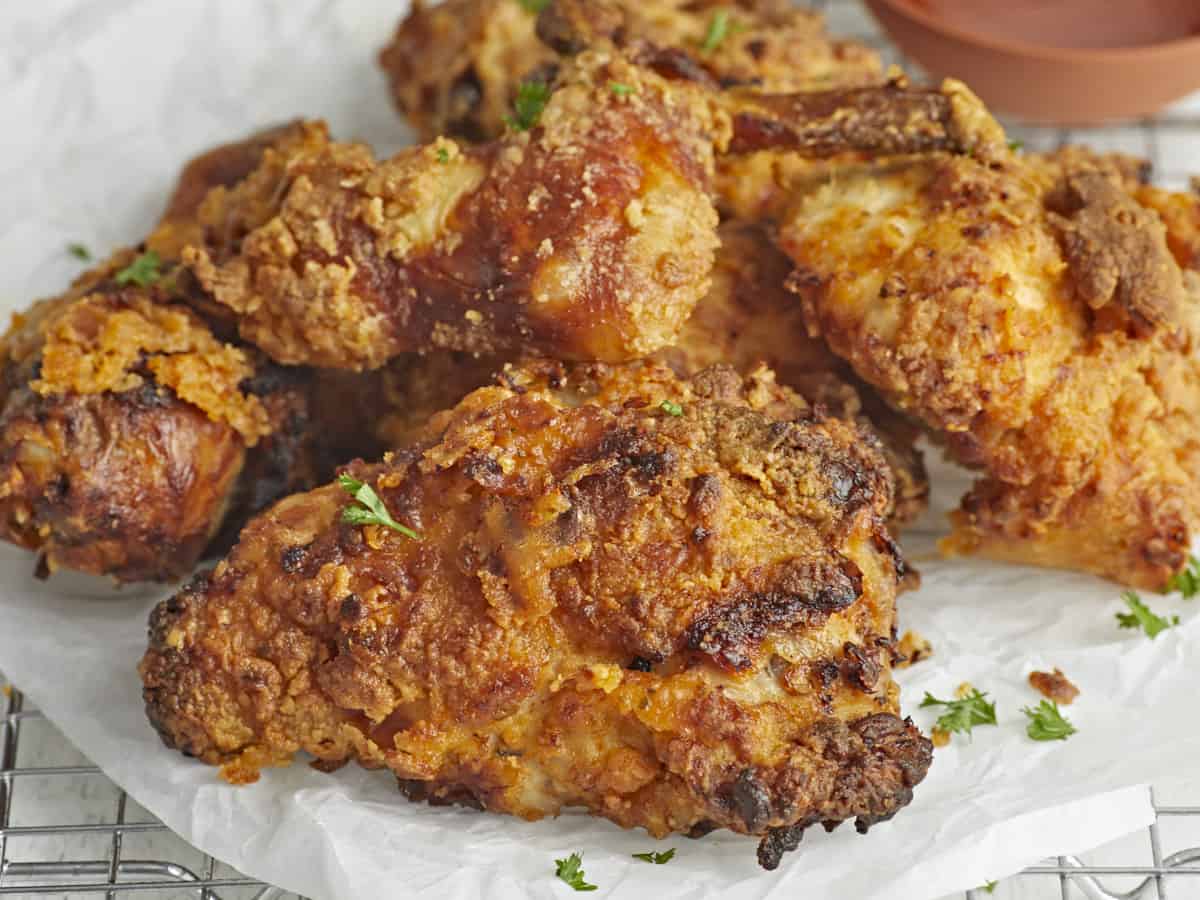
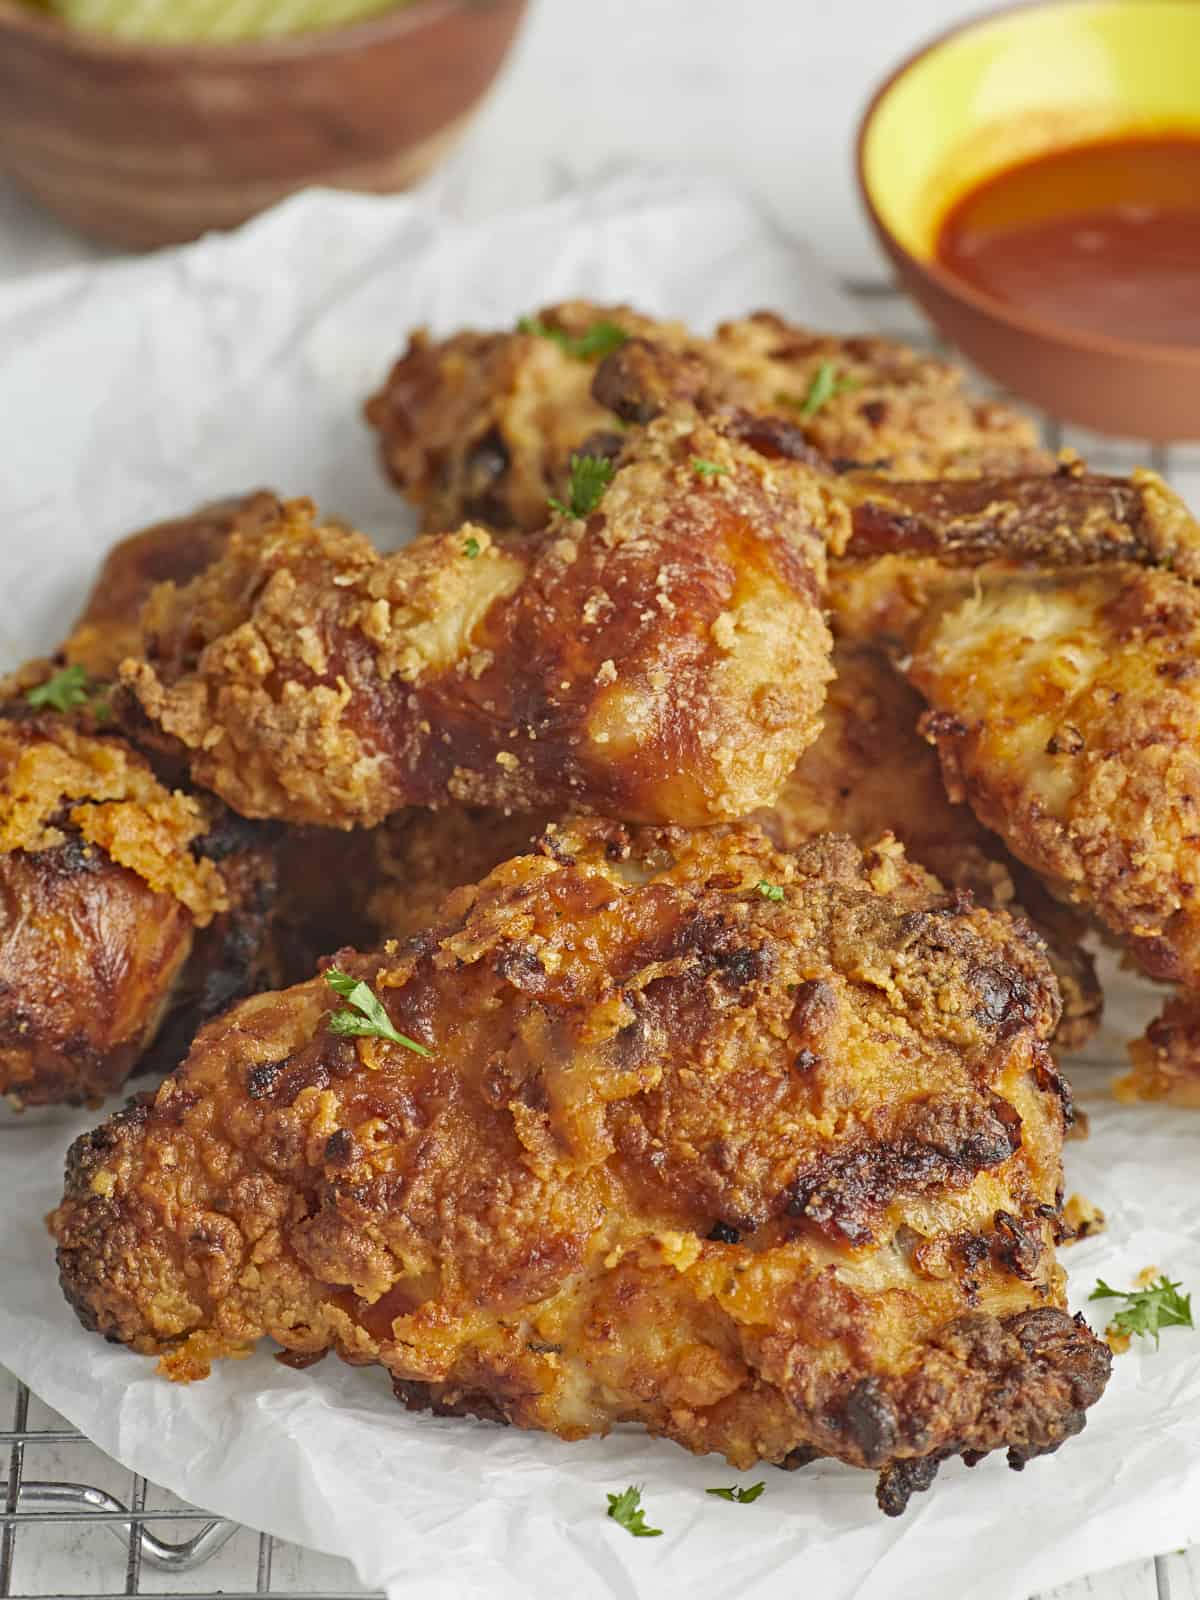
Overhead view of Air Fryer Fried Chicken resting on parchment paper and a cooling rack with a small bowl of hot sauce in the background.

Why Cook Chicken In An Air Fryer?

An air fryer is just a countertop convection oven with a cute name. It doesn’t actually fry food. Instead, it circulates hot air around whatever’s in the basket, creating a crispy outer layer while keeping the inside moist and tender. There’s no oil splatter all over your stove (or you), no grease-filled pot to scrub, and you only need a small fraction of the oil used in traditional frying. It’s the perfect vehicle for crispy chicken, and the results will absolutely blow your mind.

What You Need To Air Fry Chicken

I butcher a whole chicken because it’s cheaper, but you can fry any kind of chicken you want: wings, breasts, or thighs. Here’s what you’ll need to make crispy Air Fryer Fried Chicken:

  • Chicken – this recipe is for 3 pounds of chicken. Use whatever combination you like. If your air fryer basket is small, it’s best to fry similar-sized pieces in batches.
  • Buttermilk– is the foundation of your brine. It tenderizes your chicken while also adding tanginess.
  • Spices – help build earthy flavor and soft heat. I use smoked paprika, black pepper, garlic powder, onion powder, oregano, and cayenne pepper. Feel free to substitute this mix with three tablespoons of your favorite spice blend.
  • Egg – helps the flour mixture stick to your chicken.
  • Flour– Helps to build the iconic crispy outer layer of fried chicken.
  • Corn Starch– helps deepen the color of the batter as it cooks and creates a crispy texture.
  • Baking Powder– Helps create an airy batter with loads of crispy nooks and crannies.
  • Oil Spray – you need oil to fry chicken, even in an air fryer. If you don’t have oil spray, put corn oil or vegetable oil in a spray bottle, and use that.
Overhead view of Air Fryer Fried Chicken plated.

How To Fry Chicken In An Air Fryer

  1. For deep flavor and juicy, tender results, brine your chicken. Even a short thirty-minute dip will make a huge difference, but if you can, brine it for at least 2 hours.
  2. Preheat the air fryer. Your air fryer is a countertop oven; like most ovens, you need to preheat it. You may not need to do so for every recipe, but for crispy chicken that’s cooked throughout, it’s a must.
  3. When you’re ready to fry, shake off the excess brine and thoroughly dredge the chicken in seasoned flour mixed with cornstarch and baking soda. The last two ingredients will help crisp the skin.
  4. Spray the floured chicken with enough oil to cover it completely, once before cooking and once mid-cook.
  5. Use a lower temperature (300°F) to give the chicken time to cook without burning the batter, then increase the heat (400°F) to finish cooking the chicken and create a crispy, golden outer layer.
  6. Cook the chicken to 160°F. The chicken will continue to cook after it’s out of the air fryer and that carry-over cooking will take you to the recommended 165°F.

How Long Do I Air Fry Chicken?

Your cook time depends on the cuts of chicken used. The thicker the cut, the longer it takes to reach the required 165°F. Use a thermometer and pull the chicken once it hits 160°F. It will continue to cook outside of the air-fryer, and the temperature will reach 165°F. If you do not have a thermometer, cook the chicken until the juices run clear.

How To Reheat Air Fryer Fried Chicken

Try not to leave the chicken out at room temperature for longer than two hours. Harmful bacteria start to multiply soon after. Refrigerate fried chicken in an air-tight container for up to 3 days. Freeze it for up to 4 months, though the sooner you eat it, the tastier it will be. To reheat it, bring it up to room temperature. Preheat your air fryer to 350°F and cook the chicken until it’s steaming, about 5 minutes.

Overhead close up view of Air Fryer Fried Chicken on parchment paper and a cooling rack.
Print

Air Fryer Fried Chicken

Crispy on the outside and juicy on the inside, Air Fryer Fried Chicken delivers loads of texture and flavor without the fuss of deep frying.
Course Brunch, Dinner, Lunch
Cuisine American
Total Cost $10.39 recipe / $1.04 piece)
Prep Time 15 minutes
Cook Time 40 minutes
Brining Time 30 minutes
Total Time 1 hour 25 minutes
Servings 10 pieces
Calories 470kcal

Equipment

Ingredients

  • 3 lbs chicken, about 10 pieces* $7.10

For the brine:

  • 2 tsp smoked paprika $0.20
  • 1/2 tsp black pepper $0.05
  • 2 tsp garlic powder $0.20
  • 2 tsp onion powder $0.20
  • 2 tsp oregano $0.20
  • 1 tsp cayenne pepper $0.10
  • 1 Tbsp salt $0.15
  • 1 cup buttermilk* $0.32
  • 1 egg, beaten $0.17

For breading the chicken:

  • 2 cups all-purpose flour $0.28
  • 1/4 cup cornstarch $0.12
  • 2 tsp baking powder $0.12
  • 1 tsp salt $0.08
  • 1/2 tsp onion powder $0.05
  • 1/2 tsp garlic powder $0.05
  • 2 oz cooking spray $1.00

Instructions

  • Mix the smoked paprika, black pepper, garlic powder, onion powder, oregano, cayenne pepper, salt, buttermilk, and egg in a large bowl.
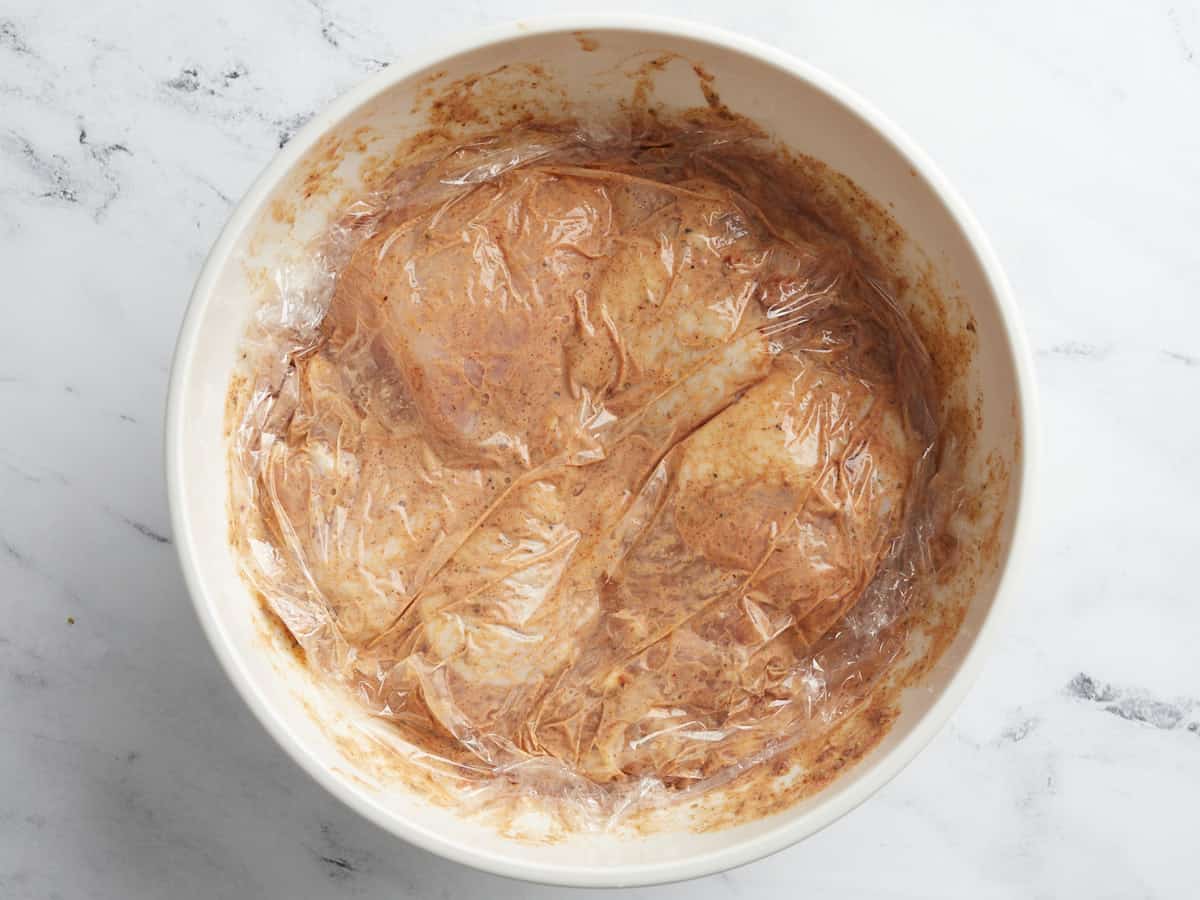
  • Place chicken in the bowl and mix until all of the chicken is covered. Place a piece of plastic wrap directly on the surface of the chicken. Marinate in the fridge for at least 30 minutes, preferably 2 hours.
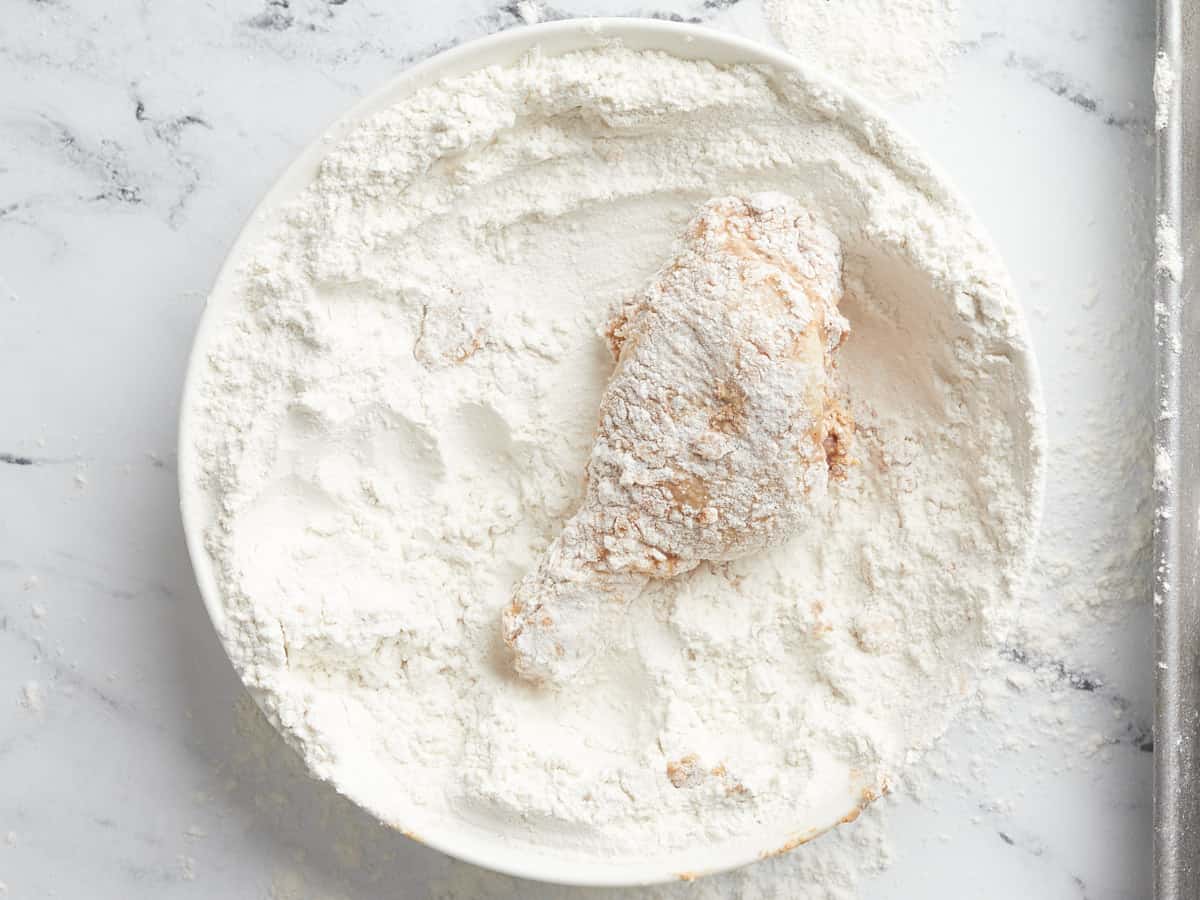
  • Preheat your air-fryer to 300°F. Mix flour, cornstarch, baking powder, salt, onion powder, and garlic powder in a large bowl. Remove one piece of chicken from the brine, shake off the excess brine, and dredge it in the flour mixture. Set it aside and repeat with the remaining pieces of chicken.
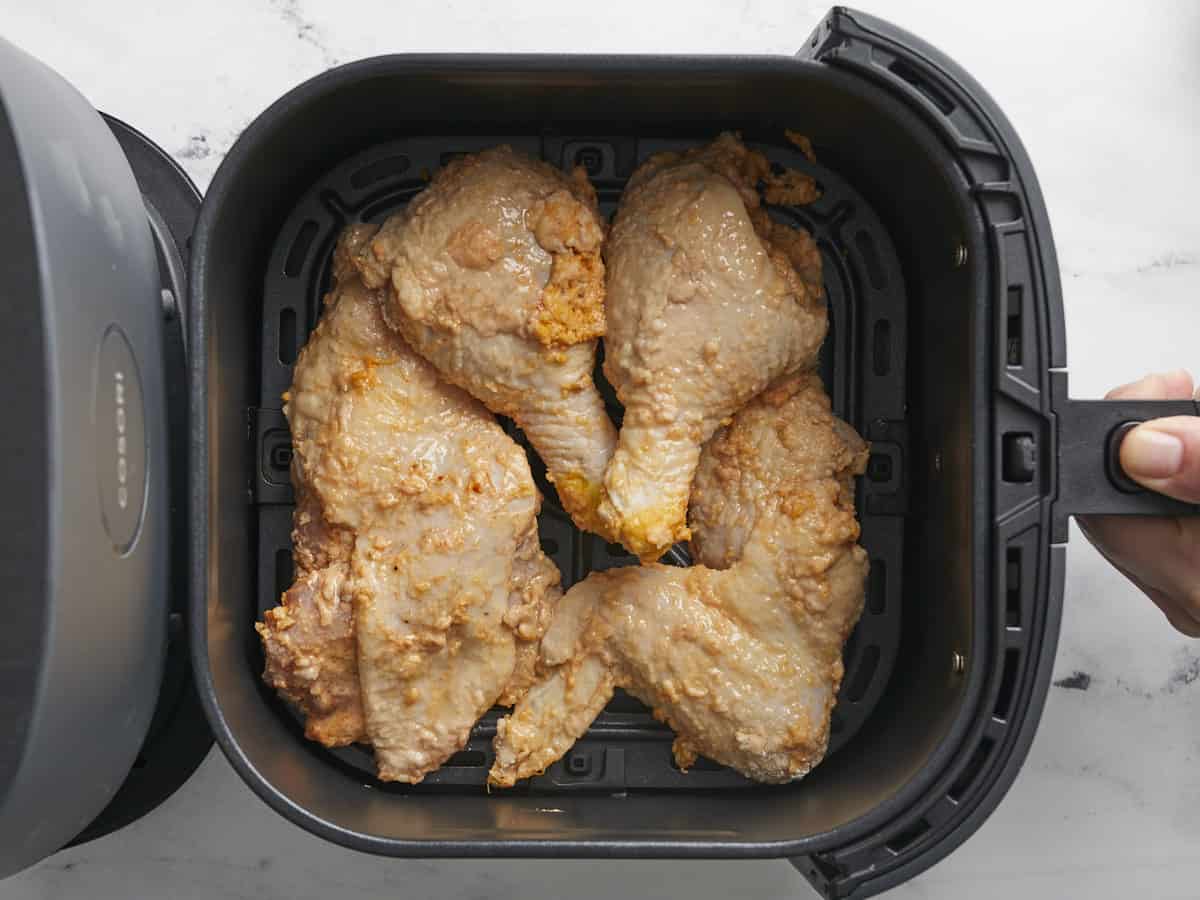
  • Spray cooking oil in your air fryer basket until it is completely covered. Place the chicken in the basket in a single layer, making sure no pieces overlap. Spray the top of the chicken with cooking oil until thoroughly covered. Cook for 20 minutes at 300°F.
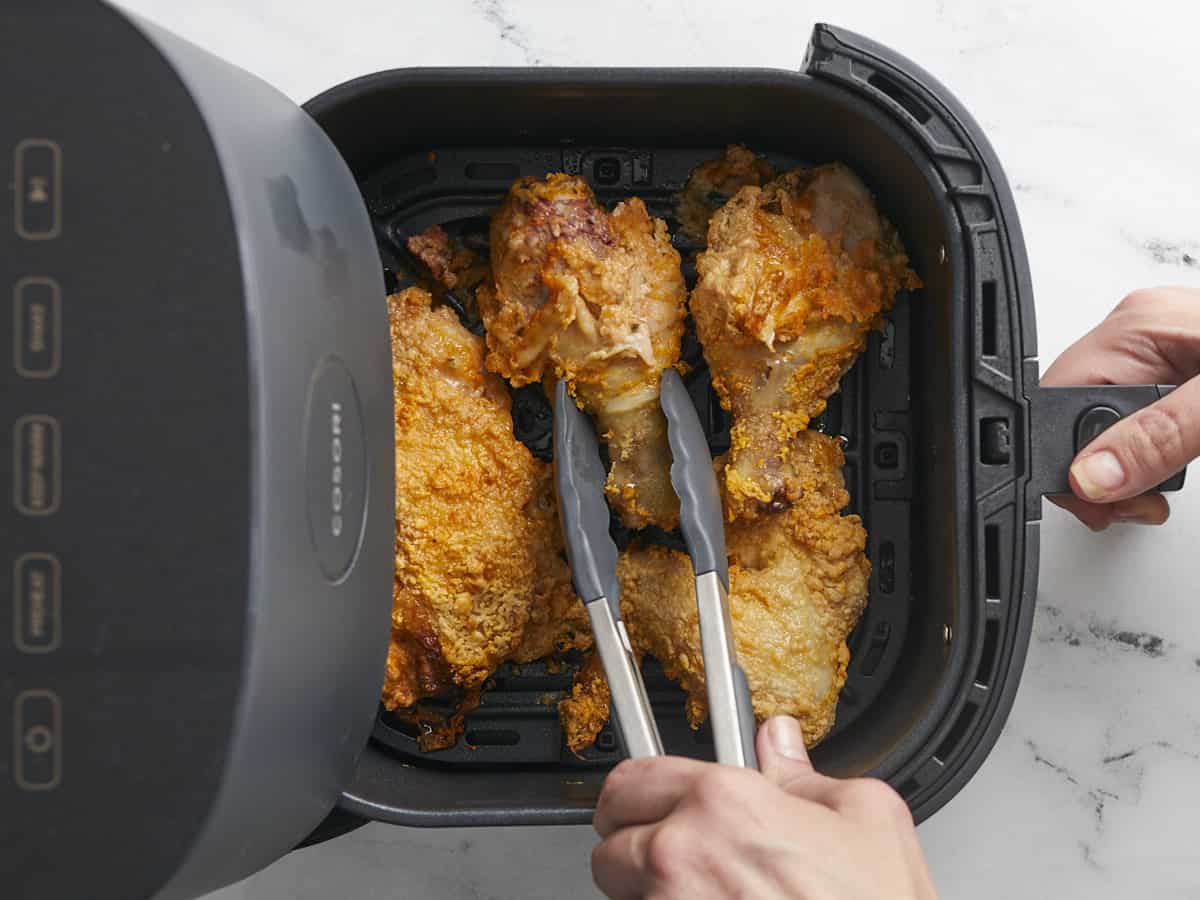
  • Carefully flip the chicken pieces so as not to destroy the crust. Spray the top surface of the chicken again with cooking oil until thoroughly covered.
  • Cook for 15 to 20 minutes at 400°F, or until chicken skin is crispy and golden and the internal temperature is 160°F. Insert the thermometer in the thickest part of the chicken without touching the bone. Then try not to eat that crispy skin before serving. Forgive yourself if you fail miserably!

See how we calculate recipe costs here.

Notes

*You can make your own buttermilk by mixing 1 cup of whole milk with 1 tablespoon of distilled white vinegar.
*We butchered a whole 3 pound chicken into 10 pieces, but feel free to use  3 pounds of whatever pre-cut chicken you desire, thighs, breasts, wings etc.

Nutrition

Serving: 1pieces | Calories: 470kcal | Carbohydrates: 26g | Protein: 30g | Fat: 27g | Sodium: 1147mg | Fiber: 1g
Overhead view of Air Fryer Fried Chicken plated.

How to Make Air Fryer Fried Chicken – Step by Step Photos

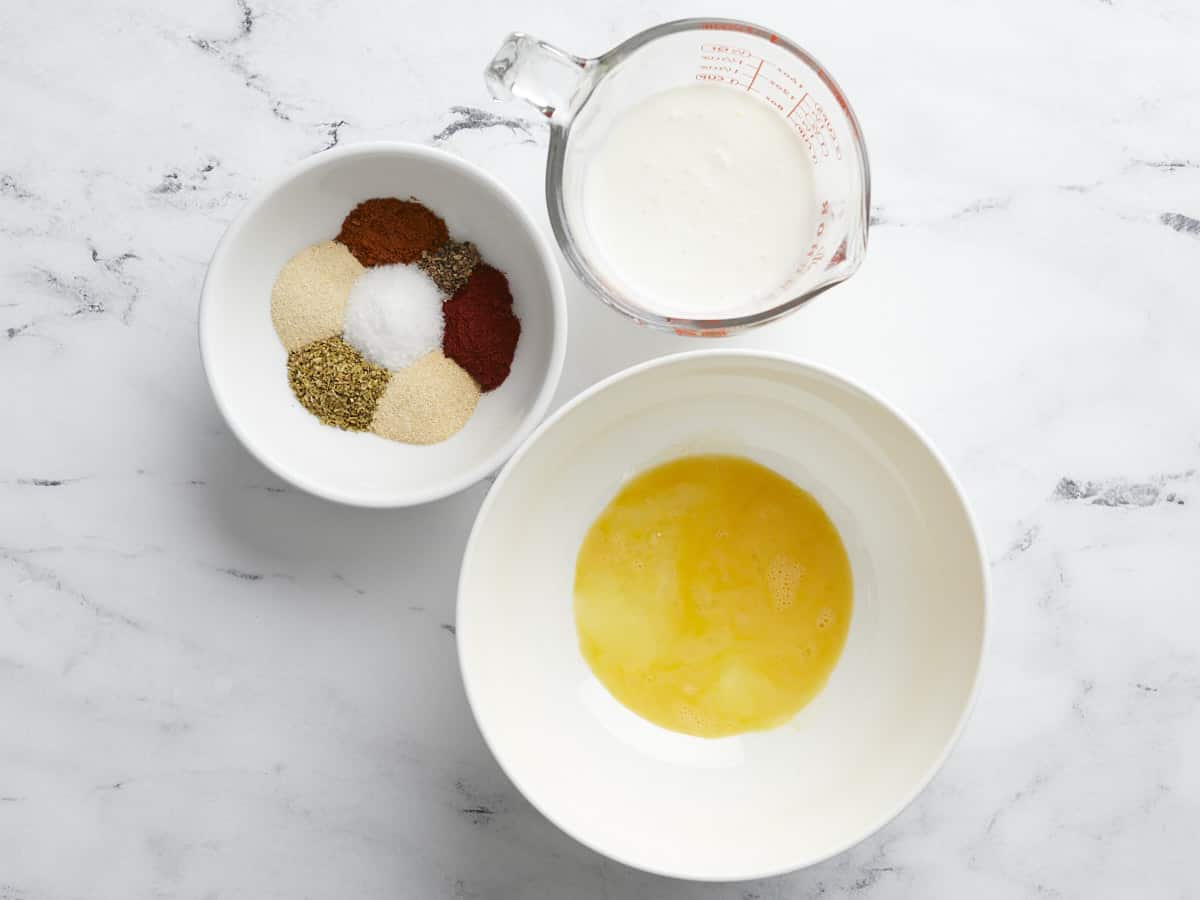
Overhead shot of ingredients for brine.

Mix 2 teaspoons smoked paprika, 1/2 teaspoon freshly ground black pepper, 2 teaspoons onion powder, 2 teaspoons garlic powder, 2 teaspoons oregano, 1 teaspoon cayenne pepper, 1 tablespoon salt, 1 cup buttermilk, and 1 beaten egg in a large bowl.

Overhead shot of chicken in a white bowl covered in buttermilk brine.

Place 10 pieces of chicken in the bowl and mix until all of the chicken is covered. Place a piece of plastic wrap directly on the surface of the chicken. Marinate in the fridge for at least 30 minutes, preferably 2 hours.

Overhead shot of brined chicken being placed in a white bowl full of flour.

Preheat your air-fryer to 300°F. Mix 2 cups all-purpose flour, 1/4 cup cornstarch, 2 teaspoons baking powder, 1 teaspoon salt, 1/2 teaspoon onion powder, and 1/2 teaspoon garlic powder in a large bowl. Remove one piece of chicken from the brine, shake off the excess brine, and dredge it in flour mixture. For a very thick layer of breading, dunk the chicken in the brine again and dredge it in the flour mixture, shaking off the excess. Set it aside and repeat with the remaining pieces of chicken.

Overhead shot of battered chicken placed in an air fryer.

Spray cooking oil in your air fryer basket until it is completely covered. Place the chicken in the basket in a single layer making sure no pieces are overlapping. Spray the top of the chicken with cooking oil until thoroughly covered. Cook for 20 minutes at 300°F.

Overhead shot of tongs flipping air fryer fried chicken in an air fryer basket.

Carefully flip the chicken pieces so as not to destroy the crust. Spray the top surface of the chicken again with cooking oil until thoroughly covered.

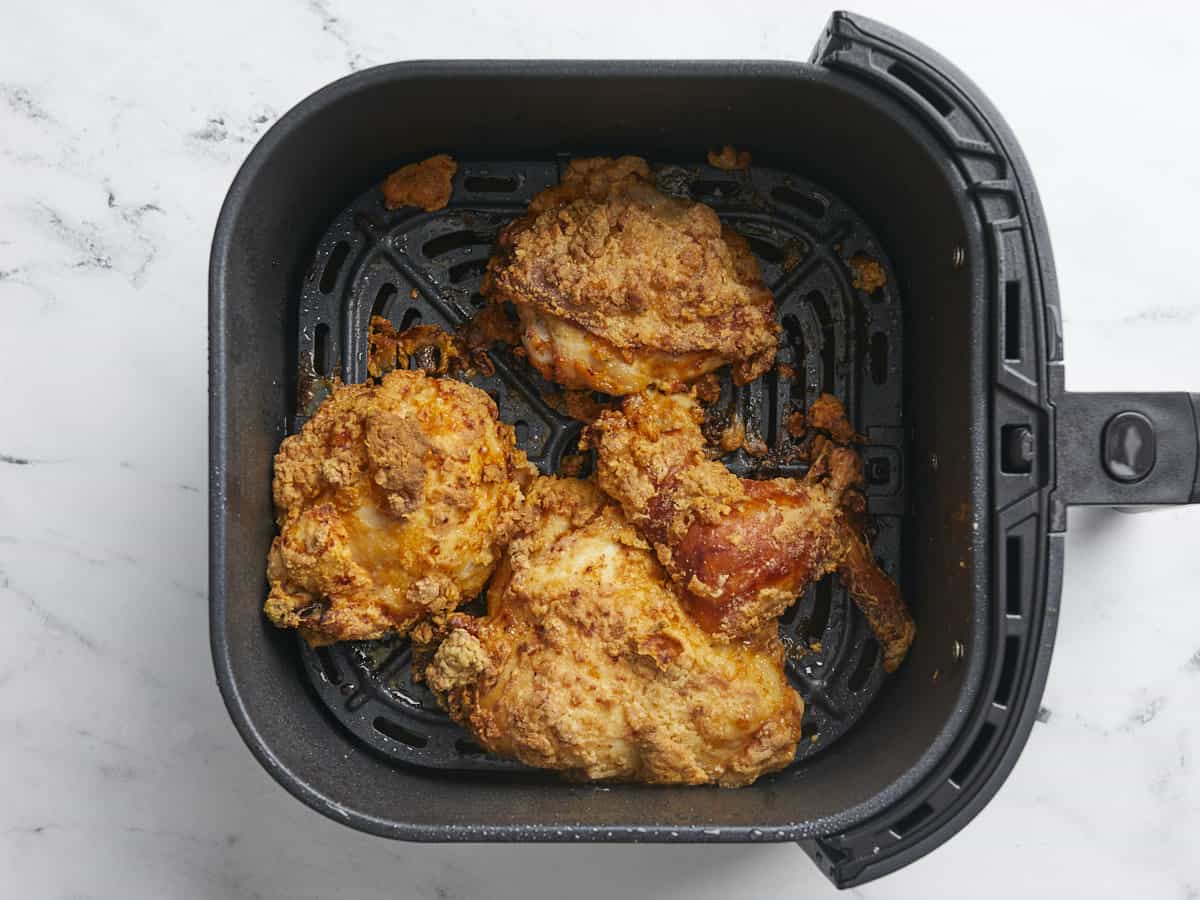
Overhead shot of finished air fryer fried chicken in an air fryer basket.

Cook for 15 to 20 minutes at 400°F, or until chicken skin is crispy and golden and the internal temperature is 160°F. It might take a few minutes longer, depending on the size of your air-fryer basket and the amount of chicken in the basket. Insert the thermometer in the thickest part of the chicken without touching the bone. Then try not to eat that crispy skin before serving. Forgive yourself if you fail miserably!

Side shot of air fryer fried chicken on parchment paper.

More Great Chicken Recipes

The post Air Fryer Fried Chicken appeared first on Budget Bytes.
Bolognese

Bolognese, the dreamy (and easy) Italian meat sauce, pairs with more than pasta. Work it into baked potatoes, bell peppers, rice, or nachos!

The post Bolognese appeared first on Budget Bytes.
There’s something incredibly satisfying about letting bolognese, the famous Italian meat sauce, simmer on the stove for hours, perfuming your whole house with its meaty aromas. Sigh! While this bolognese recipe is usually served with hearty pasta, you can also work it into baked potatoes, bell peppers, or nachos! I loved it so much that I ate it with rice. (Editor’s note: Dear Beth, have I ever said anything more Puerto Rican?)

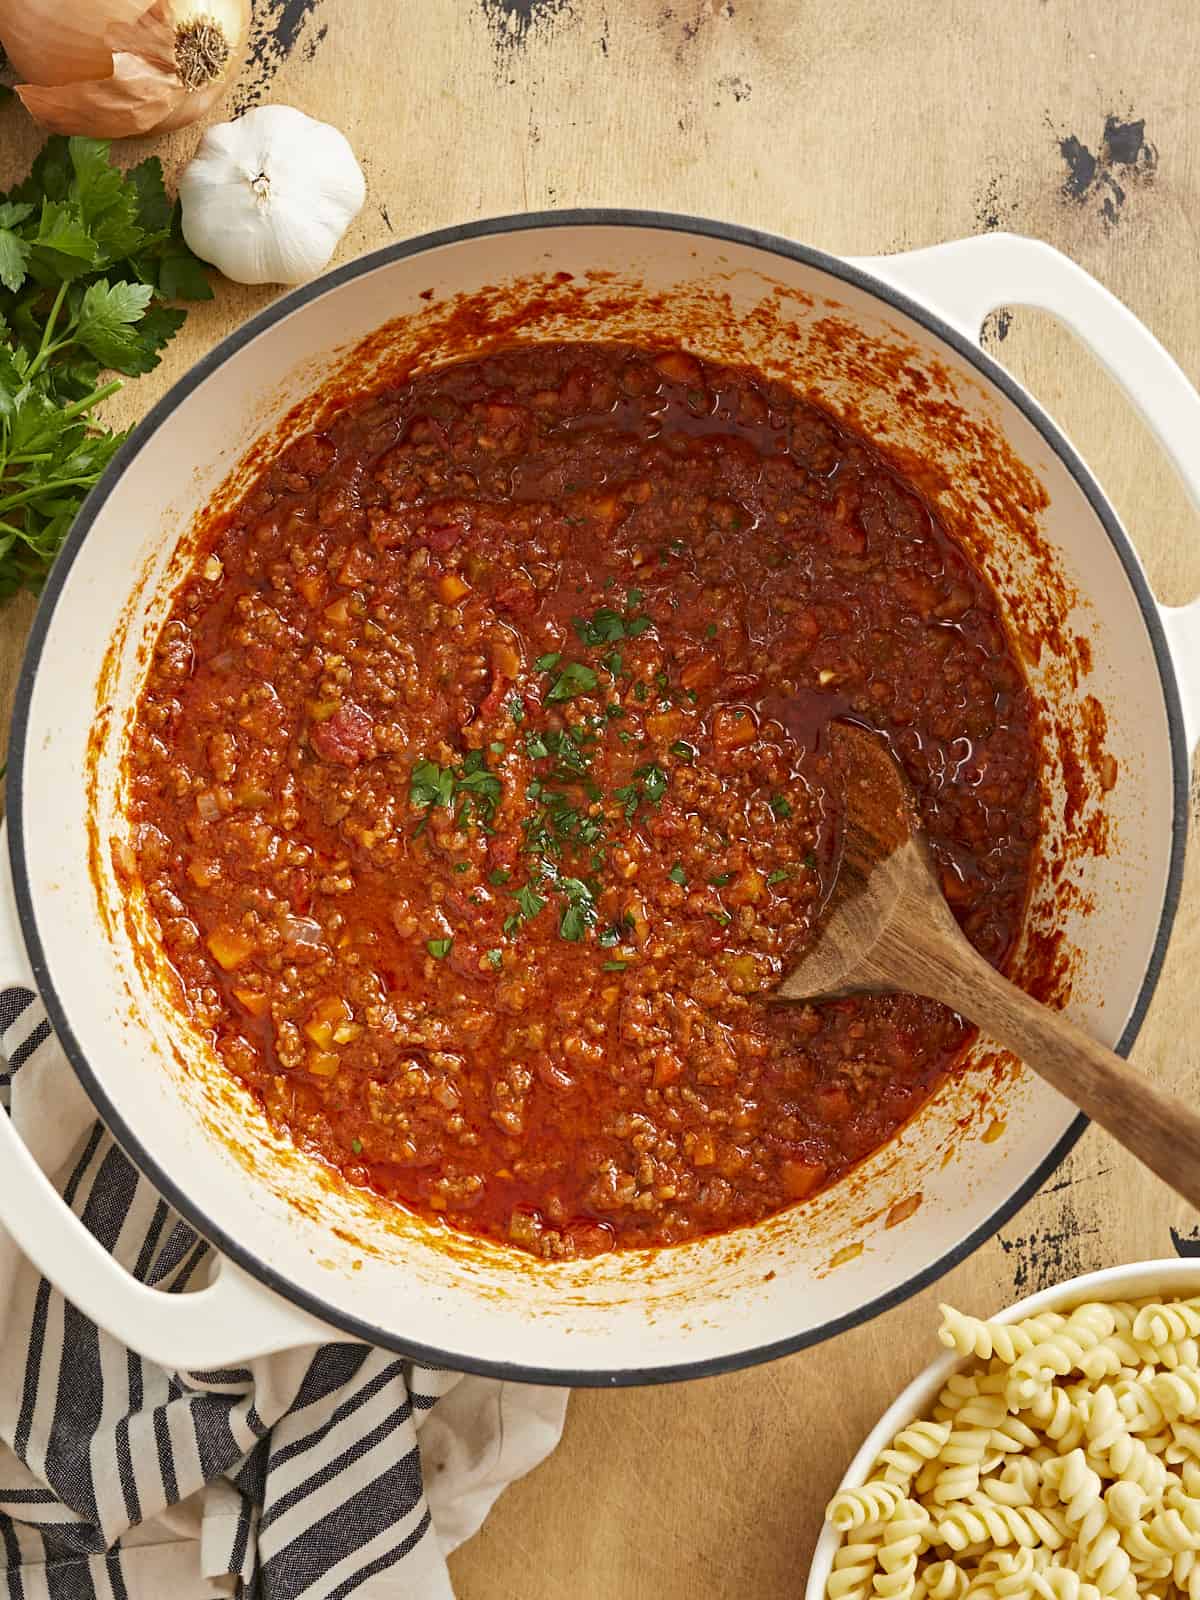
Overhead shot of bolognese in a beige Dutch oven with a wood spoon in it.

What Is Bolognese?

Bolognese is the traditional meat sauce of Bologna, Italy. It’s mostly ground beef with a bit of pork thrown in, stewed in tomatoes, with a touch of milk and butter added to round out the sauce’s acidity. You won’t find aromatics like rosemary, garlic, oregano, or bay leaves in traditional bolognese. Flavors are developed over a long simmer.

What You’ll Need

Our bolognese recipe is not traditional. To keep things budget-friendly, we omitted the pork that’s usually paired with ground beef. Instead, we used a bit of garlic to add depth. Here’s what you’ll need to make bolognese.

  • Soffritto– the lightly fried flavor base of many Italian dishes. It’s simply sauteed carrots, celery, and onion.
  • Ground Beef– because, after all, it is a meat sauce. The beef should be fatty. Lean beef does not work well for this recipe.
  • Milk and Butter– adding dairy to the sauce helps round out the acidity of the tomatoes.
  • Wine– you can use red or white. But if you use red, the sauce must cook much longer to mellow the flavor. White wine cooks down much faster, which is why I used it in this recipe. If you don’t want to use wine, substitute it with white grape juice with a bit of white vinegar.
  • Crushed Tomatoes– traditional bolognese uses pureed fresh tomatoes that take many hours to break down into a sauce. We opted for canned crushed tomatoes for time’s sake and for their budget-friendliness. But feel free to use fresh if you prefer.
  • Garlic– this is not a traditional ingredient. I added garlic to the recipe to create dimension since our sauce does not simmer all day and does not contain pork. If you want to keep it strictly traditional, omit the garlic, and let the sauce simmer for a few more hours.
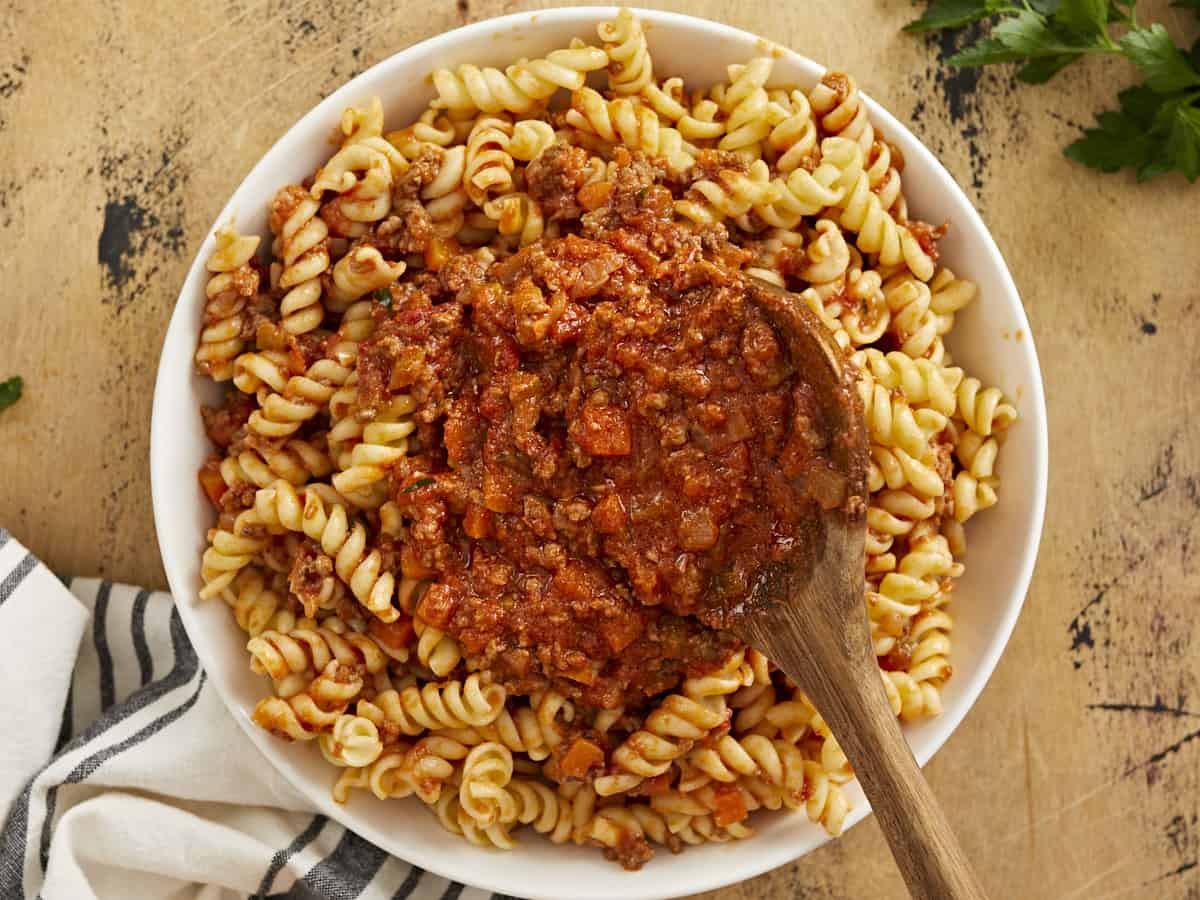
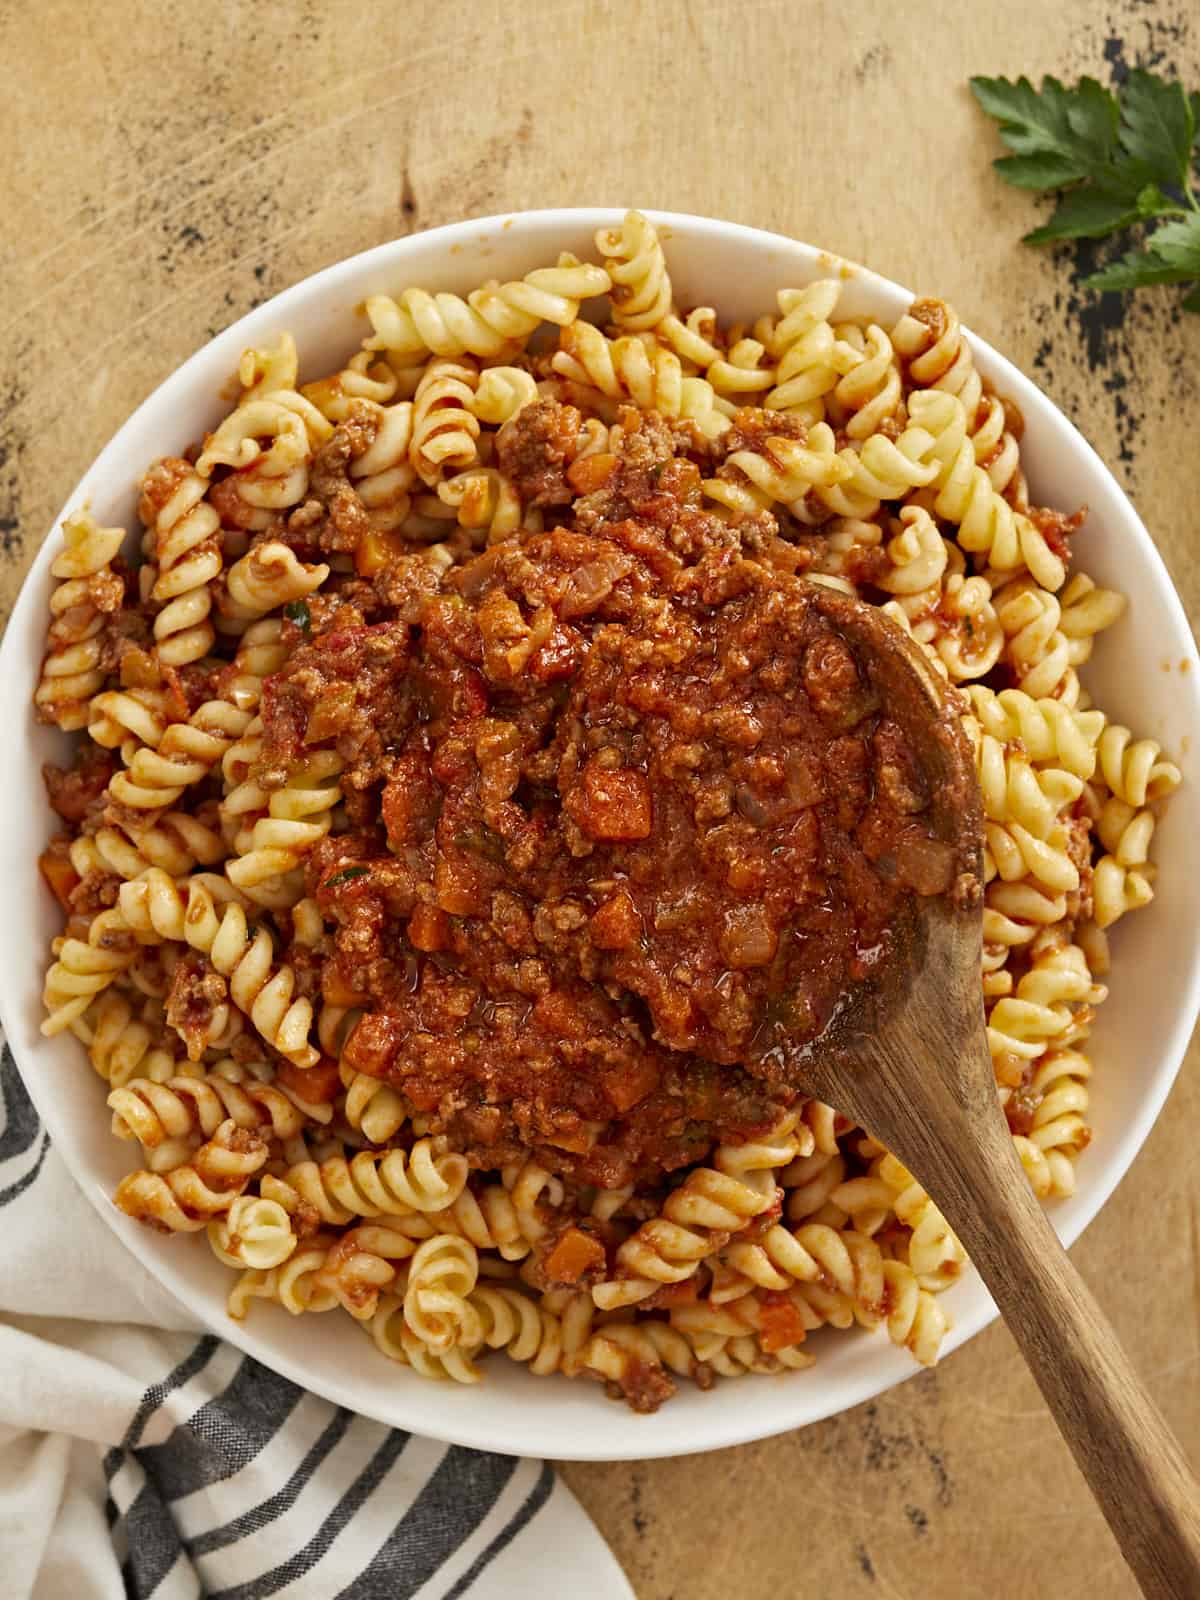
Overhead shot of bolognese served over rotini in a white bowl with a wood spoon in it.

What’s the Difference Between Bolognese and Meat Sauce?

The biggest difference between Bolognese and meat sauce is the ratio of meat to tomato. Bolognese is technically a meat sauce, or as they say in Italy, ragù. It differs from American meat sauce because it has a higher ratio of beef to tomato, making it much thicker. It’s also creamier as it’s made with a touch of milk.

How To Make Bolognese Taste Better

  • Use a large heavy-bottomed pot. A Dutch oven is perfect, as it retains heat and simmers ingredients without scorching them.
  • Chop the onions, carrots, and celery into small dice. Ensuring all veg is the same size helps them melt into the sauce and creates deeper flavor.
  • Be patient. Bolognese is a long game. Cook at a simmer for a minimum of 3 hours. Do not boil.
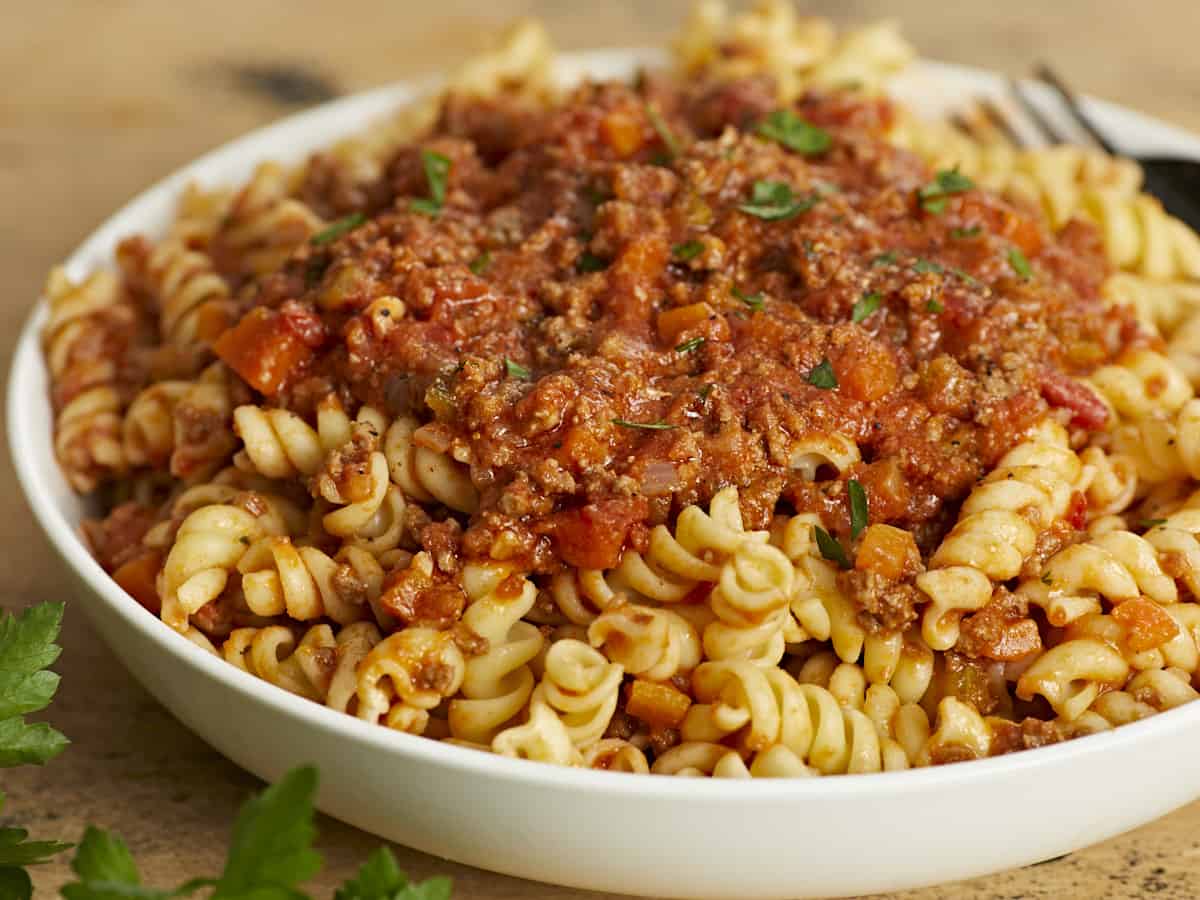
Side shot of bolognese served over rotini in a white bowl.

What To Serve With Bolognese

If you’re looking for some great budget-friendly dishes to serve with bolognese, I’ve got you covered! Try any of these Budget Bytes favorites:

How To Store Bolognese

Store the sauce in an airtight container, preferably glass or ceramic, as it stains plastic. It will keep in the fridge for up to 4 days and in the freezer for up to 3 months. If you’re freezing bolognese, try doing so in portions, so you only thaw it once. Reheat on the stovetop over medium heat, or in the microwave until it starts to steam. If microwaving it, top it with a paper towel over it so it doesn’t splatter everywhere.

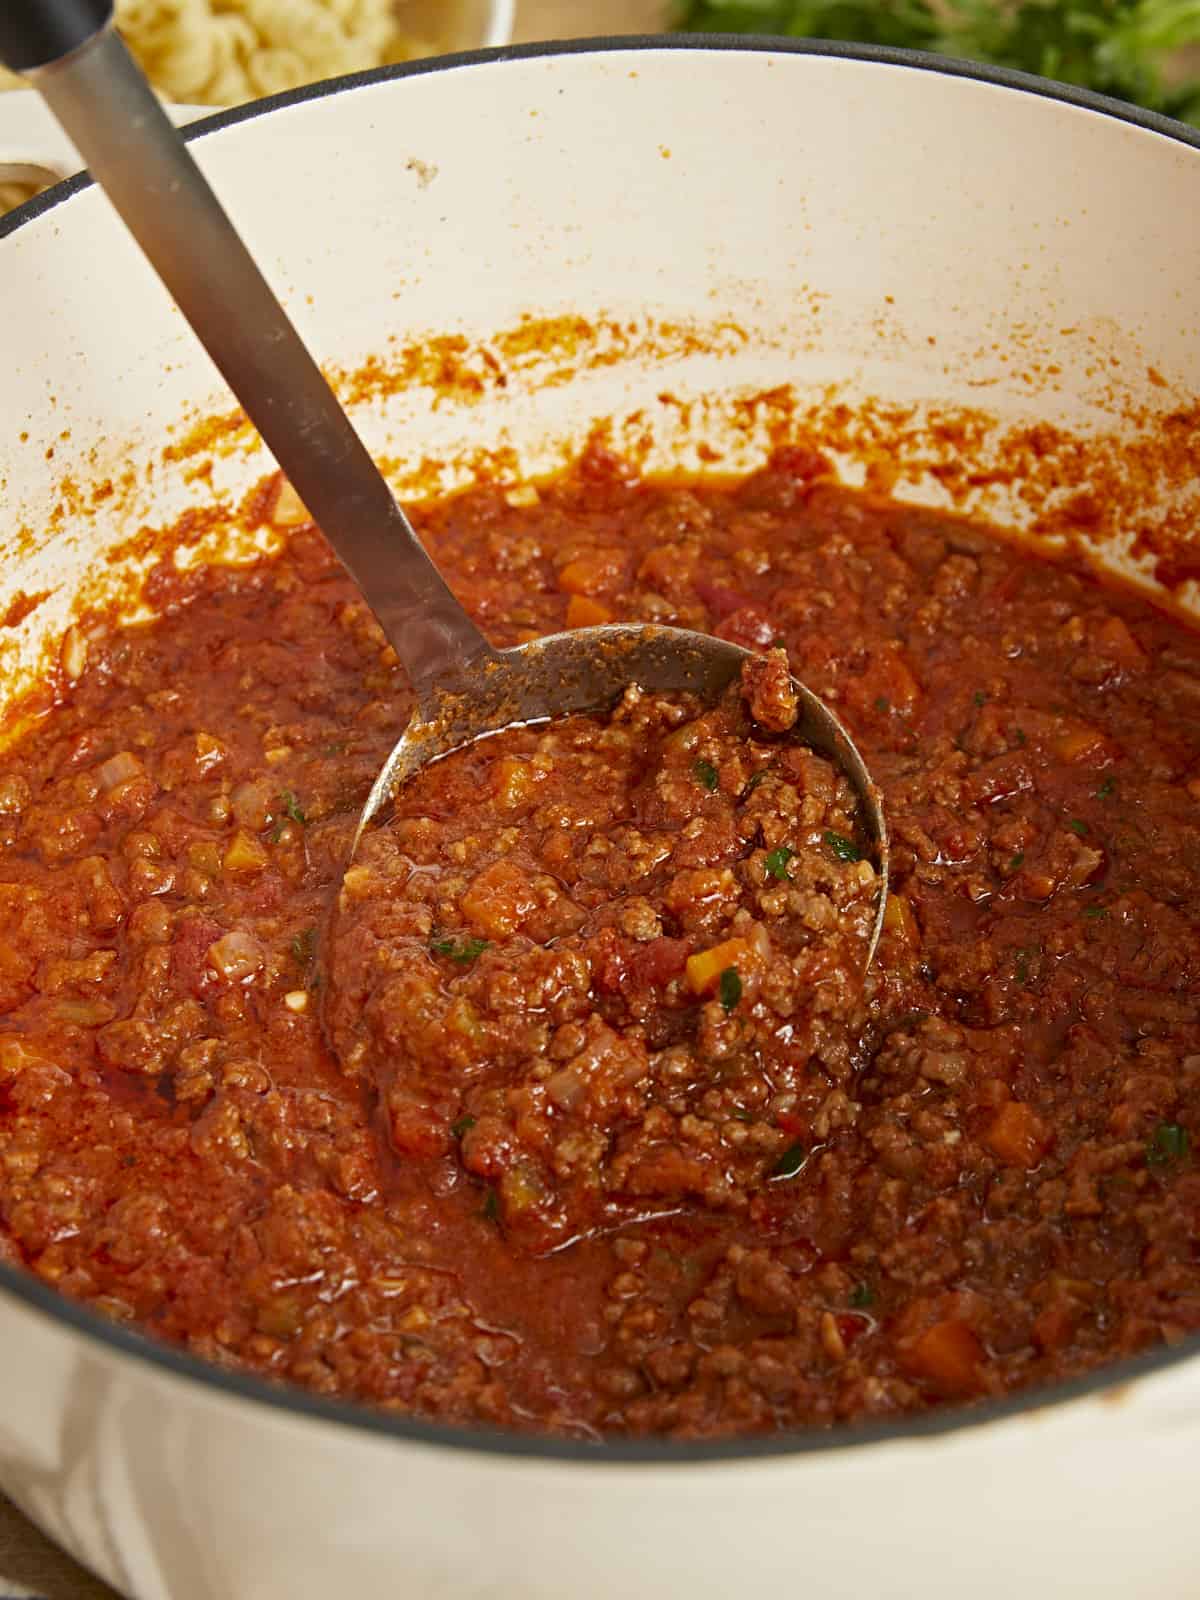
Side shot of bolognese in a beige Dutch oven with a metal spoon in it.
Overhead shot of bolognese in a beige Dutch oven with a wood spoon in it.
Print

Bolognese

Bolognese, the dreamy (and easy) Italian meat sauce, pairs with more than pasta. Work it into baked potatoes, bell peppers, rice, or nachos!
Course Dinner
Cuisine Italian
Total Cost $10.28 recipe / $1.29 serving
Prep Time 10 minutes
Cook Time 3 hours 20 minutes
Total Time 3 hours 30 minutes
Servings 8 cups
Calories 280kcal

Equipment

Ingredients

  • 4 Tbsp butter, divided $0.56
  • 1 medium onion, diced $0.38
  • 1/2 tsp salt, divided $0.01
  • 2 stalks celery, diced $0.48
  • 1 large carrot, diced $0.18
  • 2 cloves garlic, minced $0.11
  • 1 lb ground beef, 80/20 $5.49
  • 1/4 tsp pepper $0.01
  • 1 cup milk $0.23
  • 1 cup wine (red or white) $1.14
  • 28 oz crushed tomatoes $1.69

Instructions

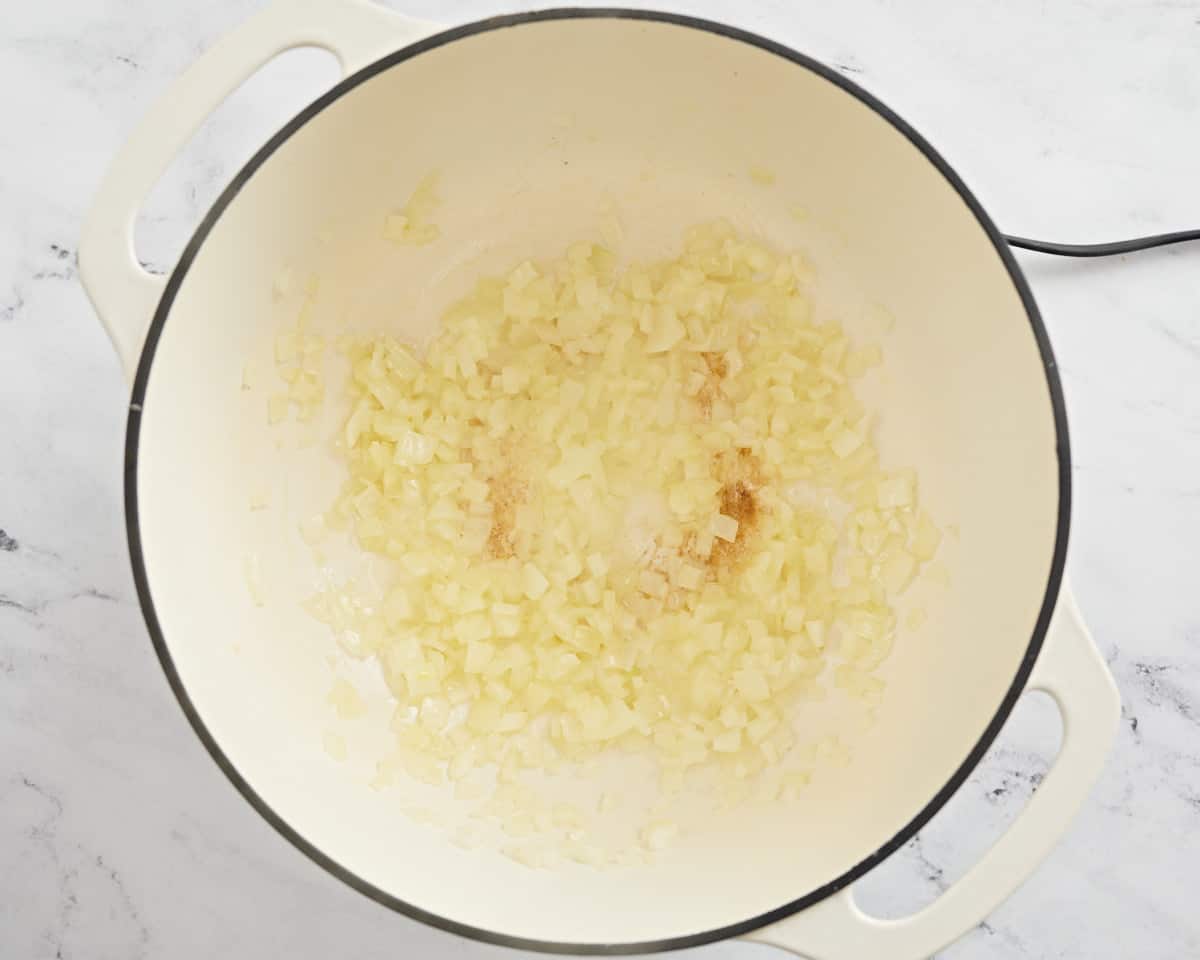
  • Place a heavy-bottomed pot over medium heat. Add butter to the pan. When the butter foams, add the onion and 1/4 teaspoon salt. Sautée until translucent.
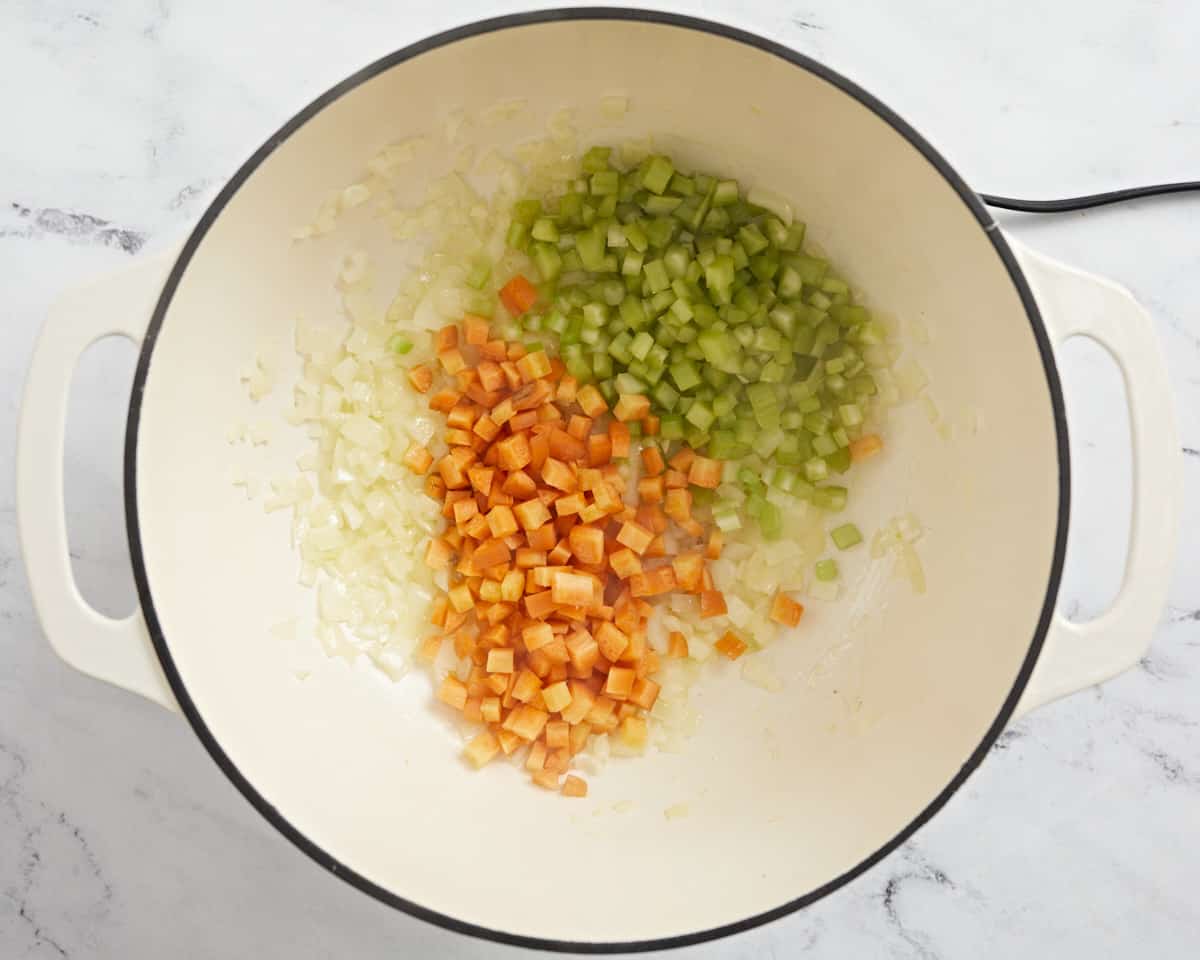
  • Add the celery and carrot and sautée for two minutes, until they have softened some.
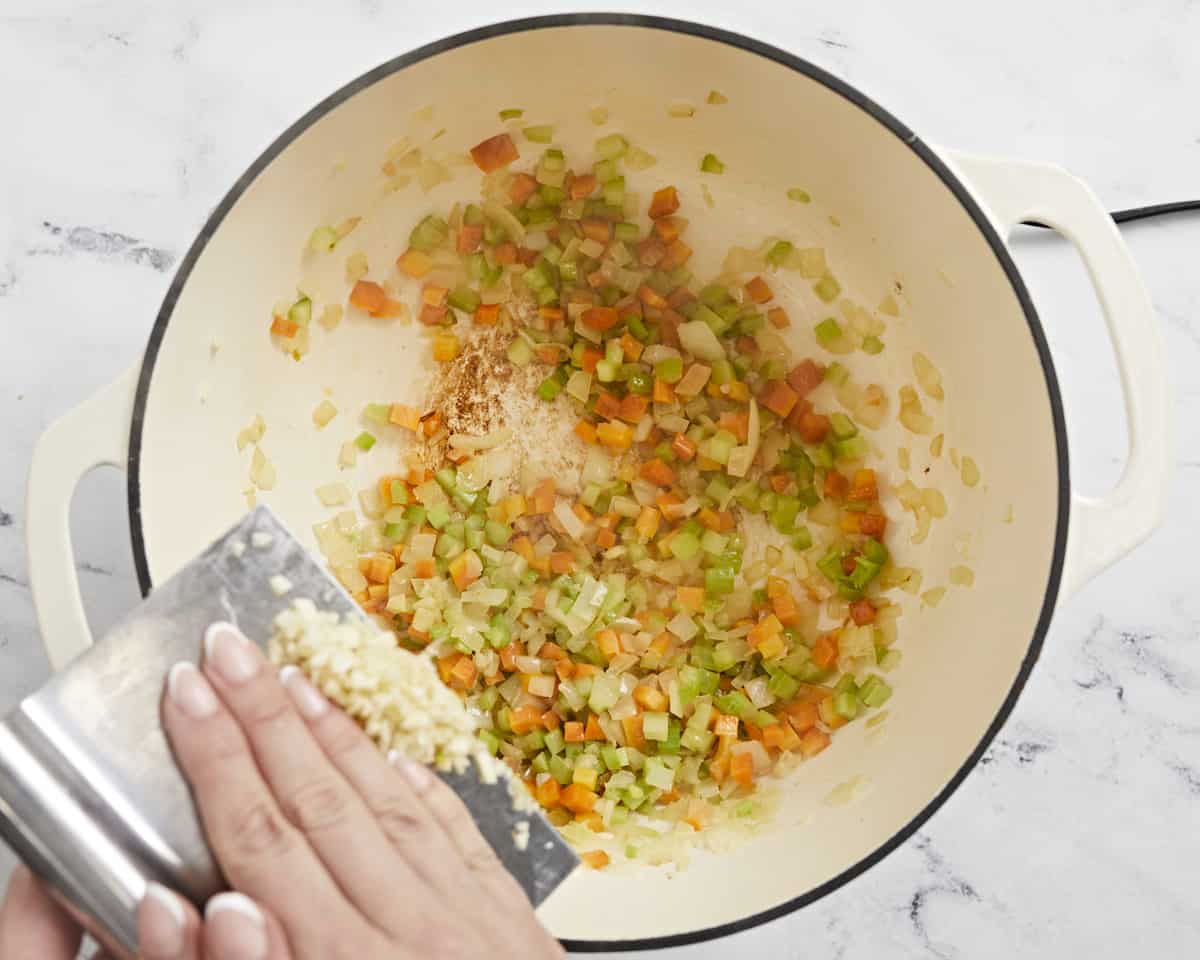
  • Next, add the garlic and sautée until fragrant, about 1 minute
  • Add the ground beef and pepper. Brown the beef, breaking it up with a wooden spoon as it cooks.
  • Once the beef has browned, add the milk, wine, and the remaining 1/4 teaspoon salt. Stir occasionally and simmer until the liquid has evaporated completely.
  • Add the crushed tomatoes. Mix until incorporated. Lower the heat as soon as the tomatoes come up to a boil.
  • Cook, uncovered, for 3 hours. Stir occasionally. If the sauce dries out, stir in a half cup of water. Once it is finished, taste for salt and pepper.

See how we calculate recipe costs here.

Nutrition

Serving: 1cup | Calories: 280kcal | Carbohydrates: 12g | Protein: 13g | Fat: 18g | Sodium: 386mg | Fiber: 3g
Overhead shot of bolognese served over rotini in a white bowl with a wood spoon in it.

How to Make Bolognese – Step by Step Photos

Overhead shot of onion in Dutch oven.

Place a heavy-bottomed pot (like a Dutch oven) over medium heat. Add 4 tablespoons of butter to the pan. When the butter foams, add 1 medium diced onion and 1/4 teaspoon salt. Sautée until translucent.

Overhead shot of celery, onion, and carrot in Dutch oven.

Add the 2 stalks of diced celery and the diced carrot and sautée for two minutes, until they have softened some.

Overhead shot of garlic being added to the veg.

Next, add the 2 cloves of minced garlic and sautée until fragrant, about 1 minute.

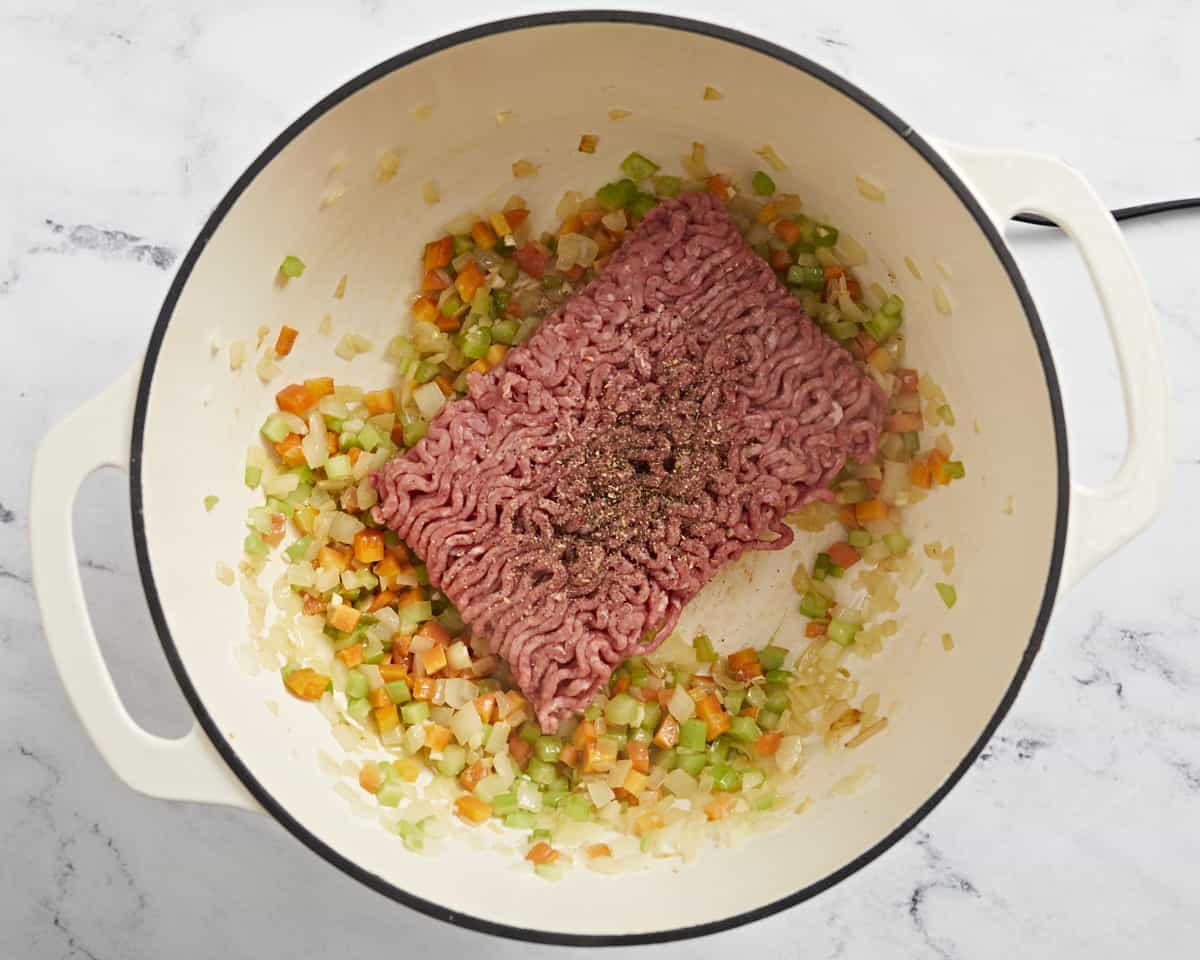
Overhead shot of sauteed veg with ground beef in it.

Add the pound of ground beef and 1/4 teaspoon of pepper. Brown the beef, breaking it up with a wooden spoon as it cooks.

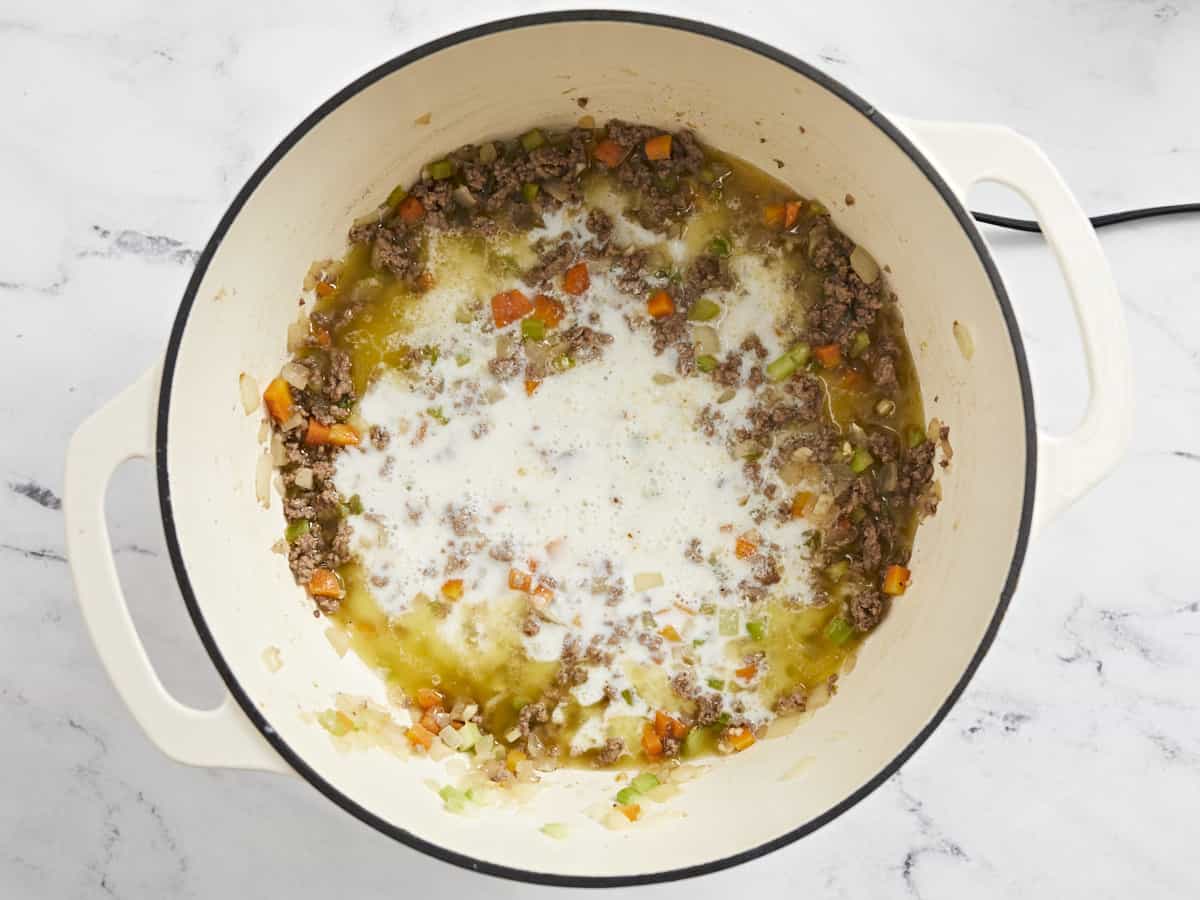
Overhead shot of sauteed beef and veg with milk in it.

Once the beef has browned, add the cup of milk, the cup of wine, and the remaining 1/4 teaspoon salt. Stir occasionally and simmer until the liquid has evaporated completely.

Overhead shot of crushed tomatoes being poured into the browned meat.

Add the 28-ounce can of crushed tomatoes. Mix until incorporated. Lower the heat as soon as the tomatoes come up to a boil.

Overhead shot of bolognese in a beige Dutch oven with a wood spoon in it.

Cook, uncovered, for 3 hours. Stir occasionally. If the sauce dries out, stir in a half cup of water. Once it is finished, taste for salt and pepper and adjust the seasoning. Serve this over hearty pasta like tagliatelle, pappardelle, or rotini. You can also pair it with a baked potato, stuff it into a bell pepper, or serve it over rice or nachos!

The post Bolognese appeared first on Budget Bytes.
Easy Quiche Lorraine

You’re going to love this silky, savory, and ridiculously Easy Quiche Lorraine! The puff pastry crust makes it absolutely effortless!

The post Easy Quiche Lorraine appeared first on Budget Bytes.
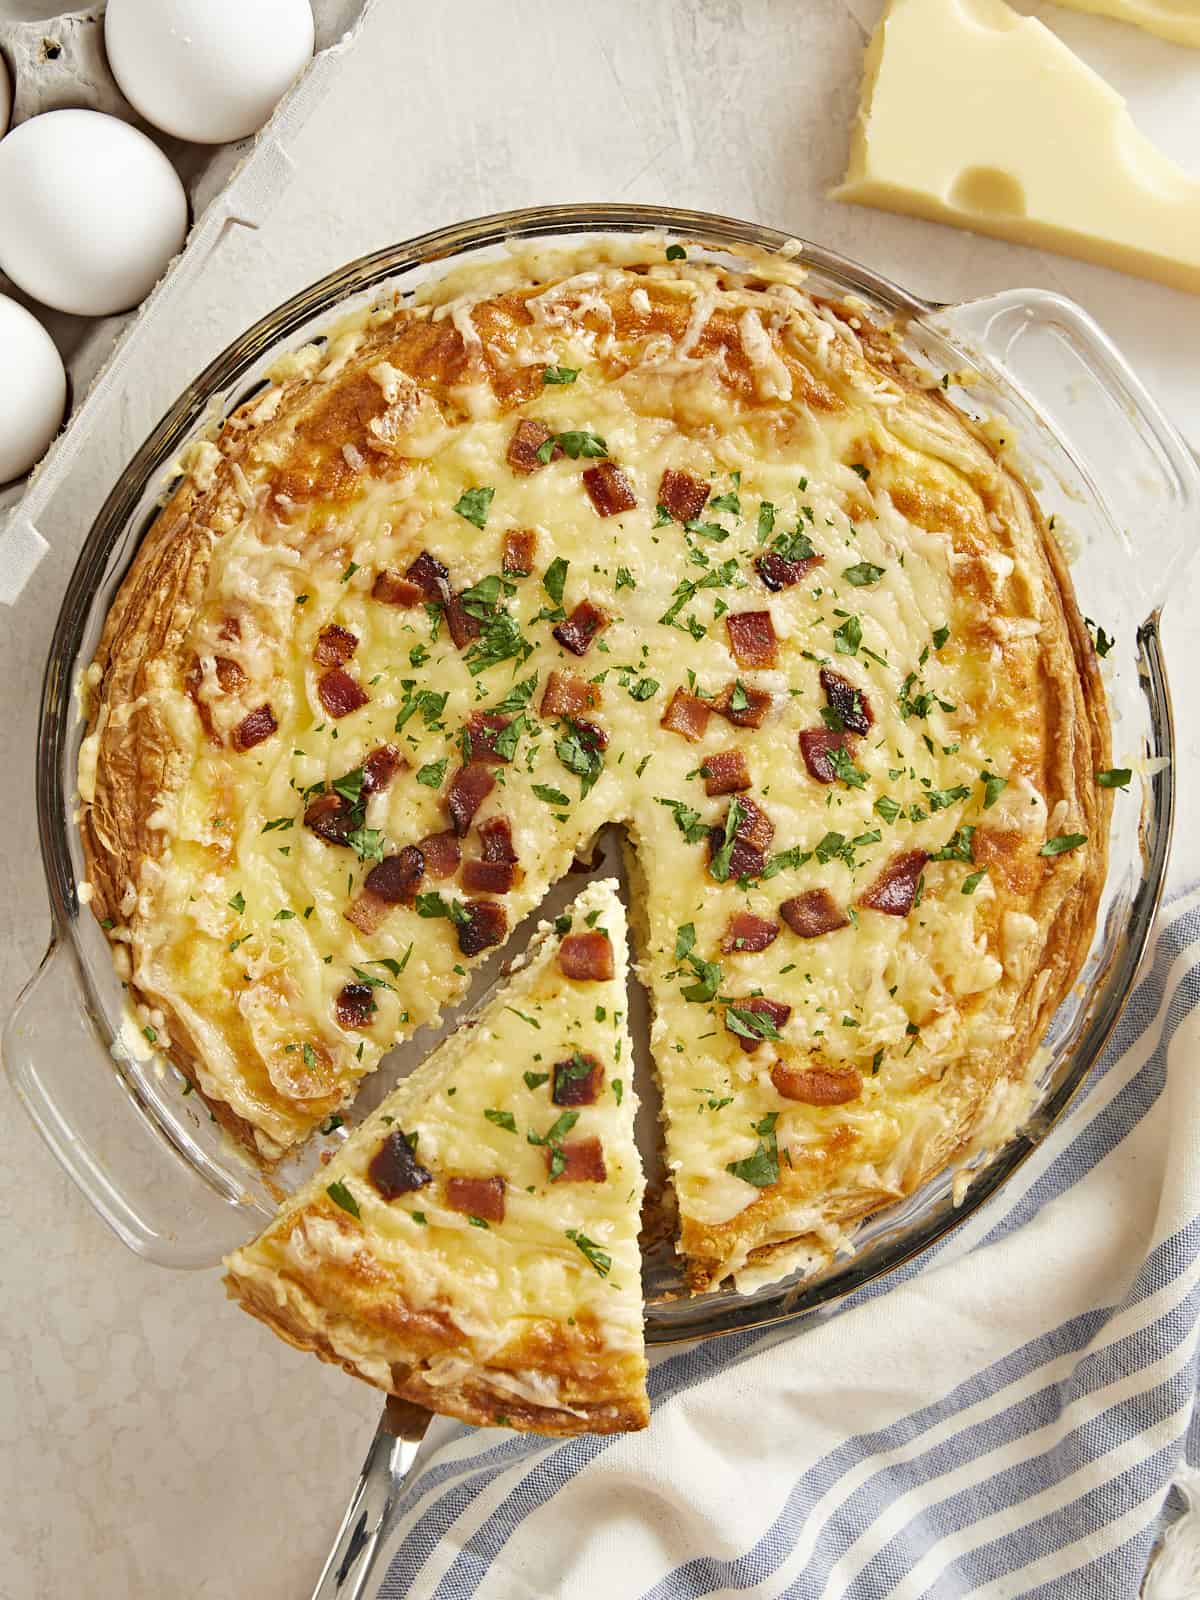
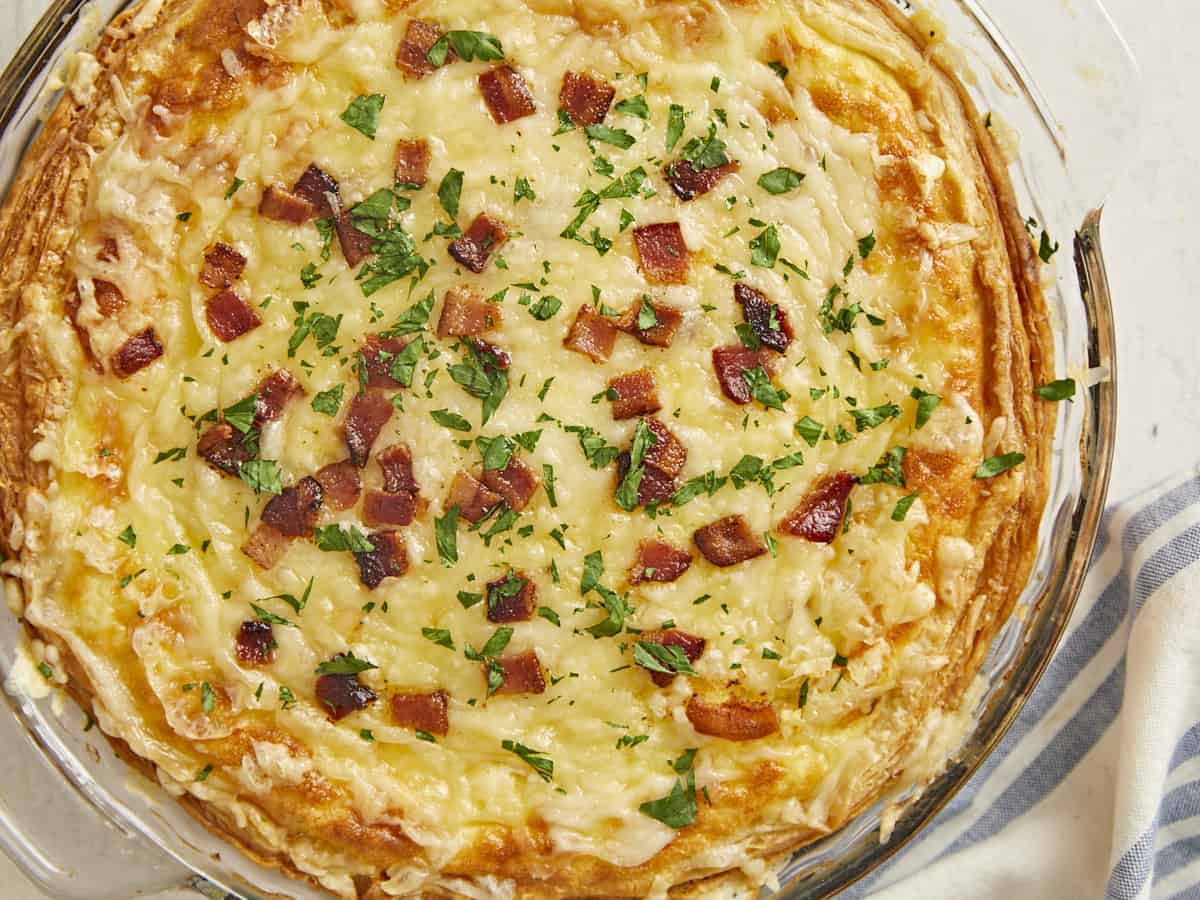
You’re going to love this silky, savory, and ridiculously Easy Quiche Lorraine! The puff pastry crust makes it absolutely effortless! Chock full of bacon and swiss cheese, this creamy custard baked in a pastry crust can be served hot or cold for breakfast, lunch, or brunch. Serve it with a side dish to make it a filling dinner. I love that you can prepare it a day ahead and that it takes almost no time to assemble. Just cook the bacon and aromatics, mix the custard ingredients, and go!

Overhead shot of a slice of Quiche Lorraine being lifted out of the pie plate.

What is Quiche Lorraine?

Quiche Lorraine is what my kid calls an egg pie. It’s a custard set in a pastry crust that gets its name from the Lorraine region in France. Traditionally it’s made with eggs, cream, bacon, and swiss cheese. But feel free to use the ingredients you have. It’s your kitchen!

What You’ll Need

The best part of making this Quiche Lorraine recipe is its versatility. If you’re not intent on keeping things traditional, you can substitute almost all ingredients to better fit your preferences.

  • Eggs – these create the custard necessary to bind all of the ingredients together. You can substitute eggs with a vegan egg alternative, like Just Egg.
  • Cream Cheese, Heavy Cream, and Milk– the fat in the cream cheese, heavy cream, and milk helps create a silky custard texture. You can substitute the heavy cream with all milk and two tablespoons of butter. Use plant-based cream cheese, heavy cream, and milk alternatives if you don’t do dairy.
  • Bacon– adds a big hit of smoky, salty savoriness. You can substitute it with ham, pancetta, salami, or your favorite meatless bacon alternative. If you don’t do pork, use diced roasted chicken or turkey.
  • Swiss Cheese – is the traditional choice for Quiche Lorraine, but use whatever cheese you have handy. Gouda, provolone, cheddar, and mozzarella are all excellent substitutions.
  • Puff Pastry – is the vehicle that holds the filling. Par-baking the puff pastry helps keep it from getting soggy as the liquid custard bakes. Pie crust is the traditional choice for quiche, and makes a great substitute for puff pastry. Of course, you can always make my Easy 3-Ingredient Pie Crust.
  • Onion and Garlic – these aromatics help flavor the custard. You can substitute them with leeks, green onions, or shallots. You can also replace the onion with one teaspoon of onion powder or one tablespoon of dried onion flakes and the garlic with one-eighth of a teaspoon of garlic powder. Add them to the custard when you add the nutmeg to prevent scorching.
  • Nutmeg– just a pinch helps enhance the creamy flavor of the custard. If you don’t have nutmeg, skip it.
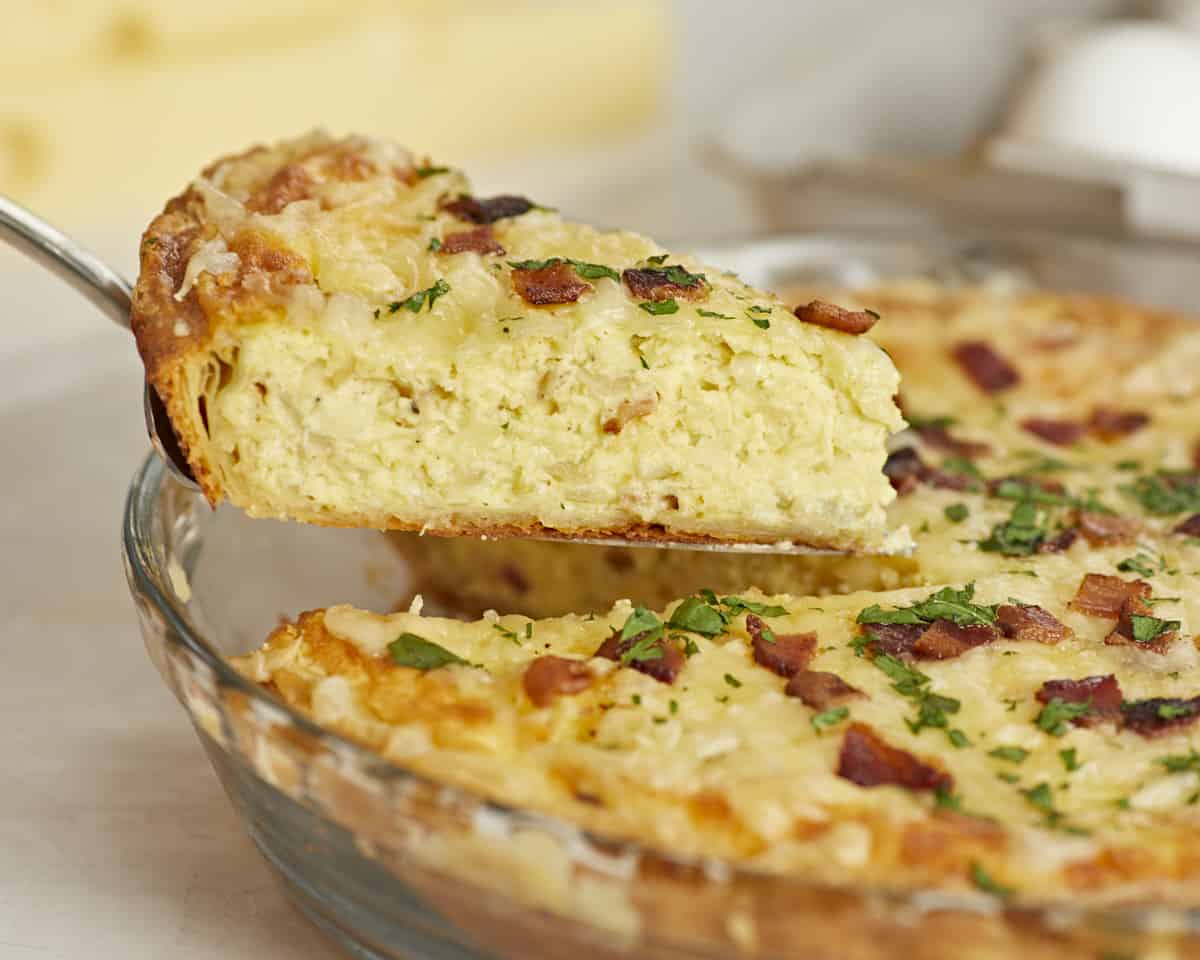
Side shot of a slice of Quiche Lorraine being lifted out of the pie plate.

What To Serve With Quiche Lorraine

You can take Quiche Lorraine from a light breakfast or lunch to a full-on dinner by pairing it with a soup, salad, or a veggie-based side dish. Try some of these Budget Bytes favorites!

How To Store Quiche Lorraine

Allow your quiche to cool completely before storing it in the fridge. If leaving it in the pie pan, cover leftovers with plastic wrap or aluminum foil and refrigerate for up to four days. You can also slice what’s left of the quiche and store the slices in an airtight container. To freeze leftovers, portion and wrap the pieces in aluminum foil, then place them in a freezer-safe container. They will remain fresh for up to a month.

How To Reheat Leftovers

Bring refrigerated slices to room temperature while you preheat your oven to 350°F. Thaw frozen slices overnight in the fridge. Then, cover the crust with aluminum foil or a pie shield and reheat for fifteen minutes or until steaming. In a pinch, you can reheat leftovers in your microwave, but be warned, the texture will become slightly rubbery.

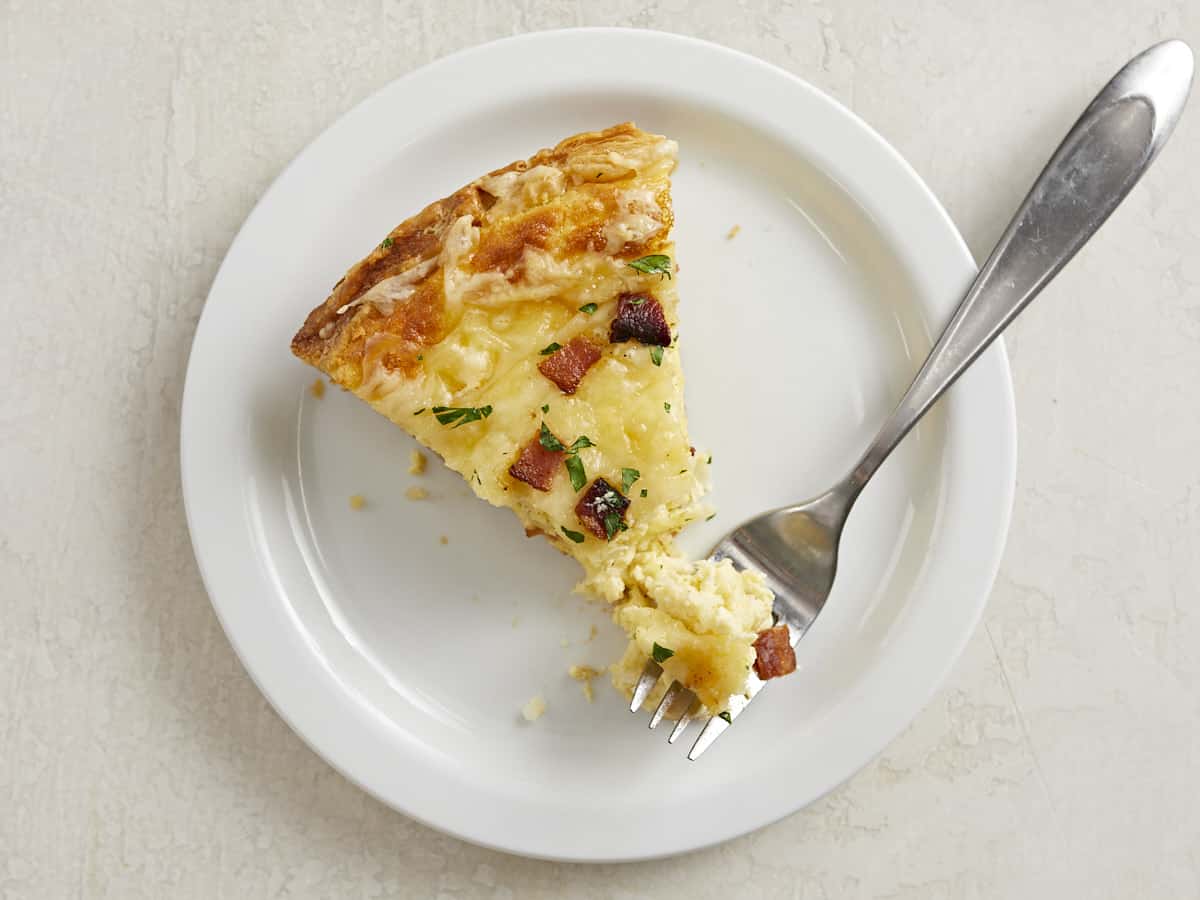
Overhead shot of a slice of Quiche Lorraine on a white plate with a fork in it.
Overhead shot of a slice of Quiche Lorraine being lifted out of the pie plate.
Print

Easy Quiche Lorraine

You're going to love this silky, savory, and ridiculously Easy Quiche Lorraine! The puff pastry crust makes it absolutely effortless!
Course Breakfast, Brunch, Dinner, Lunch
Cuisine French
Total Cost $10.13 recipe / $1.27 serving
Prep Time 10 minutes
Cook Time 35 minutes
Total Time 45 minutes
Servings 8 slices
Calories 446kcal

Ingredients

  • 1 sheet puff pastry $3.25
  • 4 strips bacon $1.00
  • 1 yellow onion, diced $0.41
  • 1 clove garlic, minced $0.08
  • 2 cups shredded Swiss cheese $2.15
  • 4 oz cream cheese $1.10
  • 1/4 cup heavy cream, plus more for brushing crust edges $0.42
  • 1/4 cup milk $0.17
  • 5 eggs, lightly beaten $1.33
  • 1/4 tsp ground nutmeg $0.10
  • 1/2 tsp salt $0.04
  • 1/4 tsp Freshly cracked black pepper $0.02
  • 2 Tbsp chopped fresh Italian parsley for garnish (optional) $0.06

Instructions

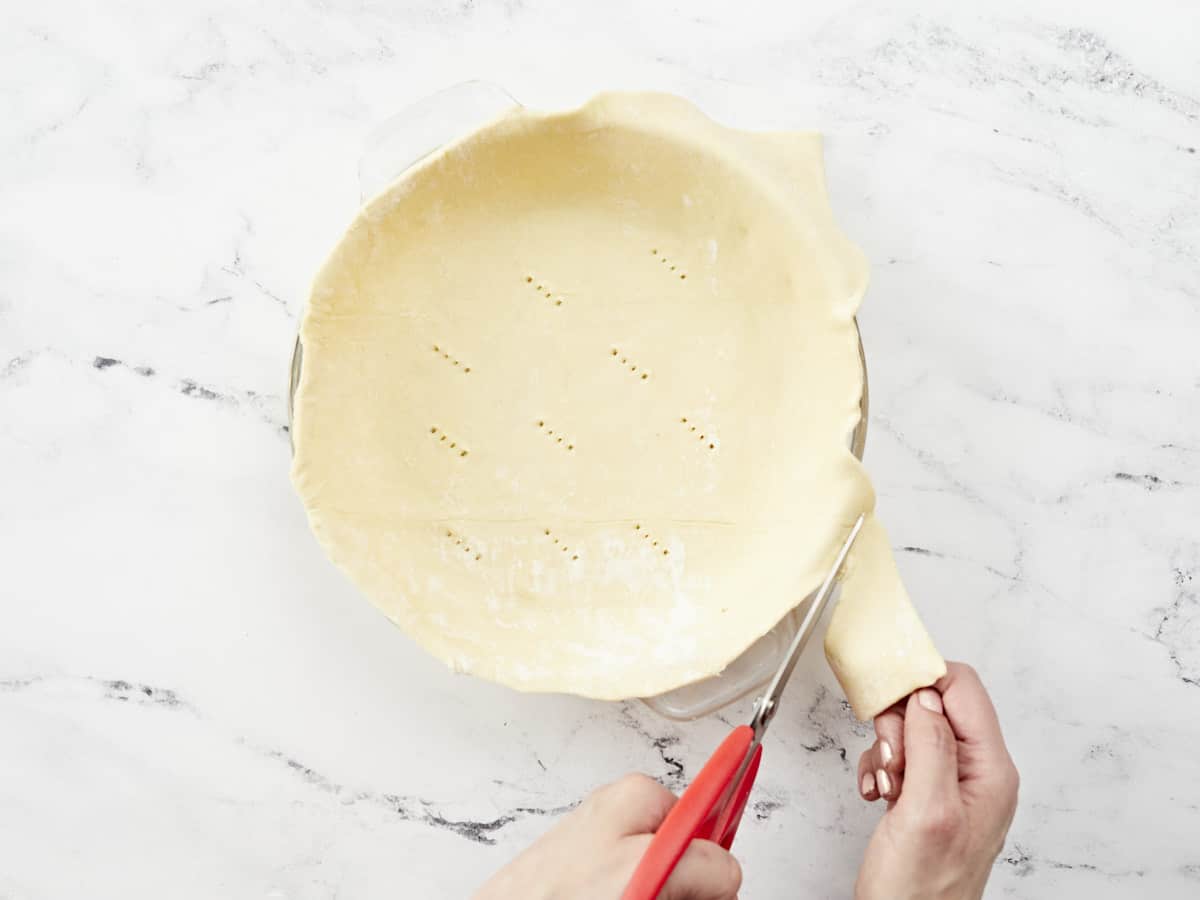
  • Set a rack in the middle of your oven and preheat it to 425°F. Next, roll the puff pastry into an 11-inch square and transfer it to a 9-inch diameter pie plate. Then puncture the bottom of the puff pastry a few times with a fork and trim the edges.
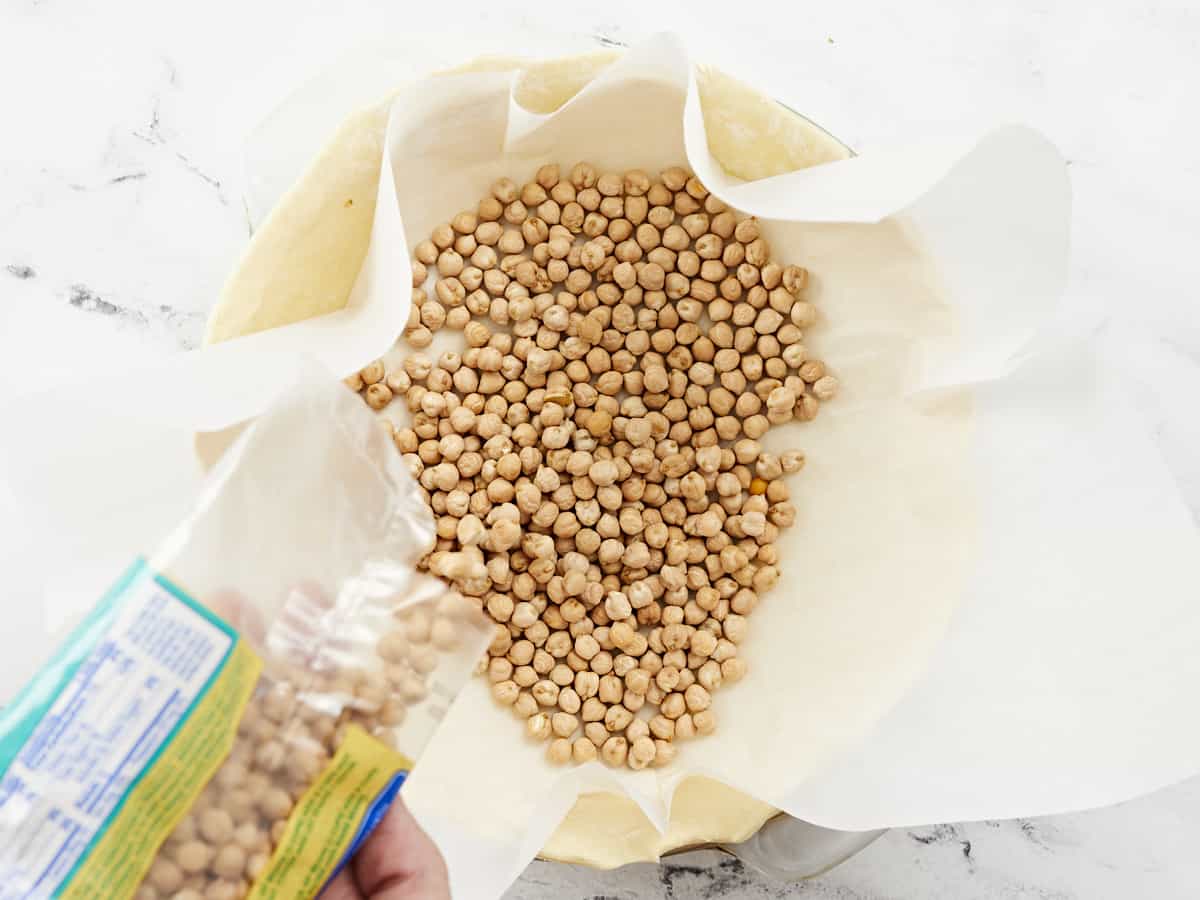
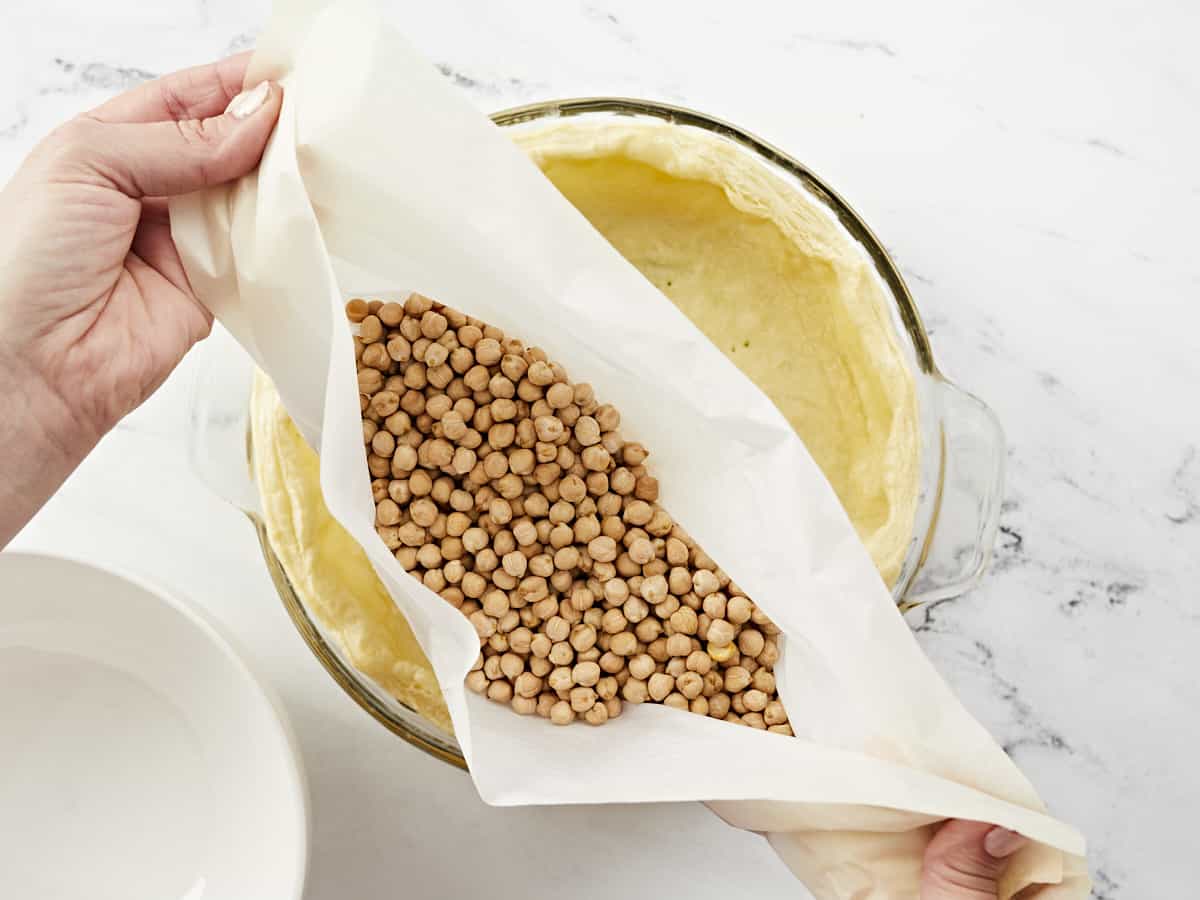
  • Cover the puff pastry with a sheet of parchment paper and add a pound of dry beans or pie weights. Then, cover the edges of the pastry with a pie shield or ring made of aluminum foil to prevent them from burning. Bake for fifteen minutes.
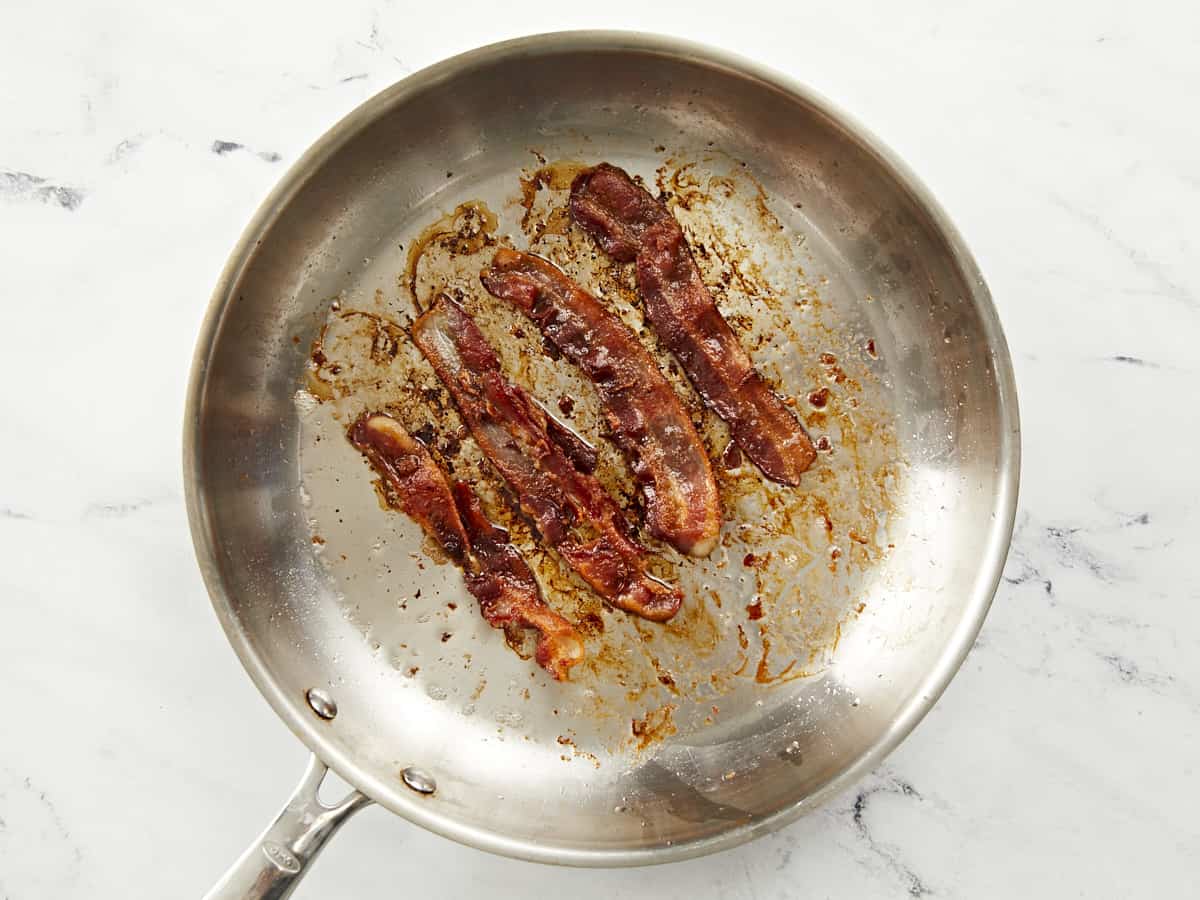
  • While the puff pastry par-bakes set a heavy-bottomed skillet over medium heat. Add the bacon strips and cook until crispy. Next, chop the bacon into bits. Set aside the chopped bacon and reserve the drippings.
  • Remove the puff pastry from the oven. Carefully remove the pie shield. Then carefully remove the parchment paper with the beans or pie weights.*
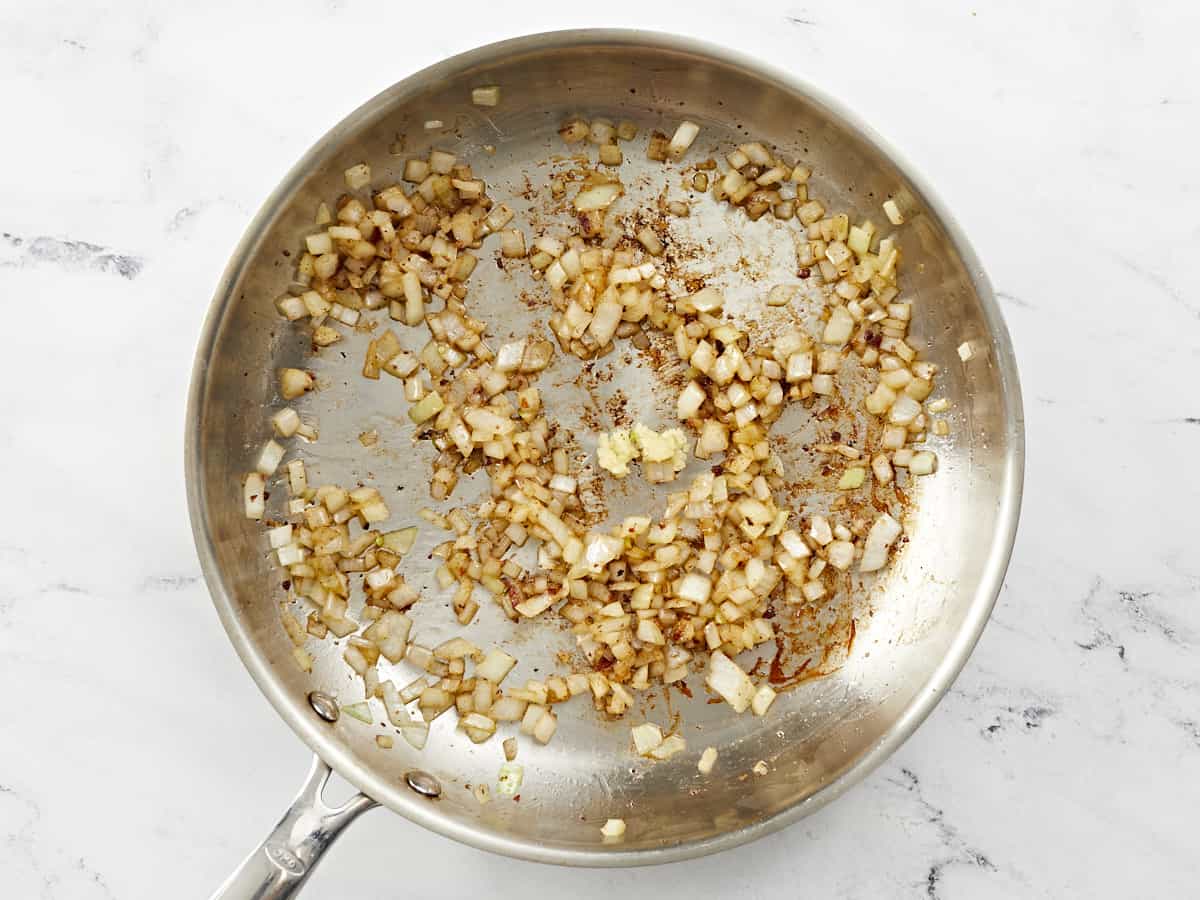
  • Cook the onion in the bacon drippings until translucent (about 2 minutes). Next, add the garlic clove and cook until fragrant (about 1 minute).
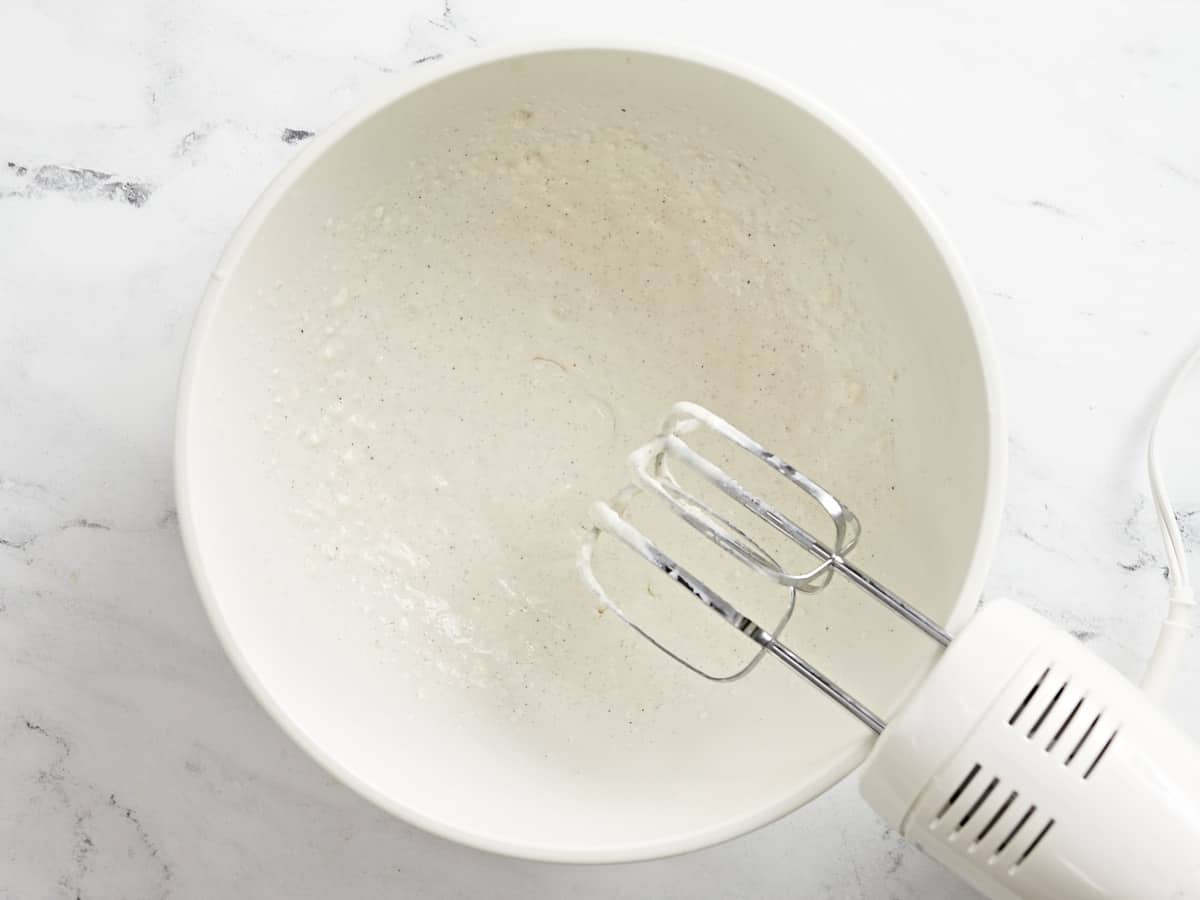
  • In a large bowl, beat the cream cheese, heavy cream, and milk until smooth.
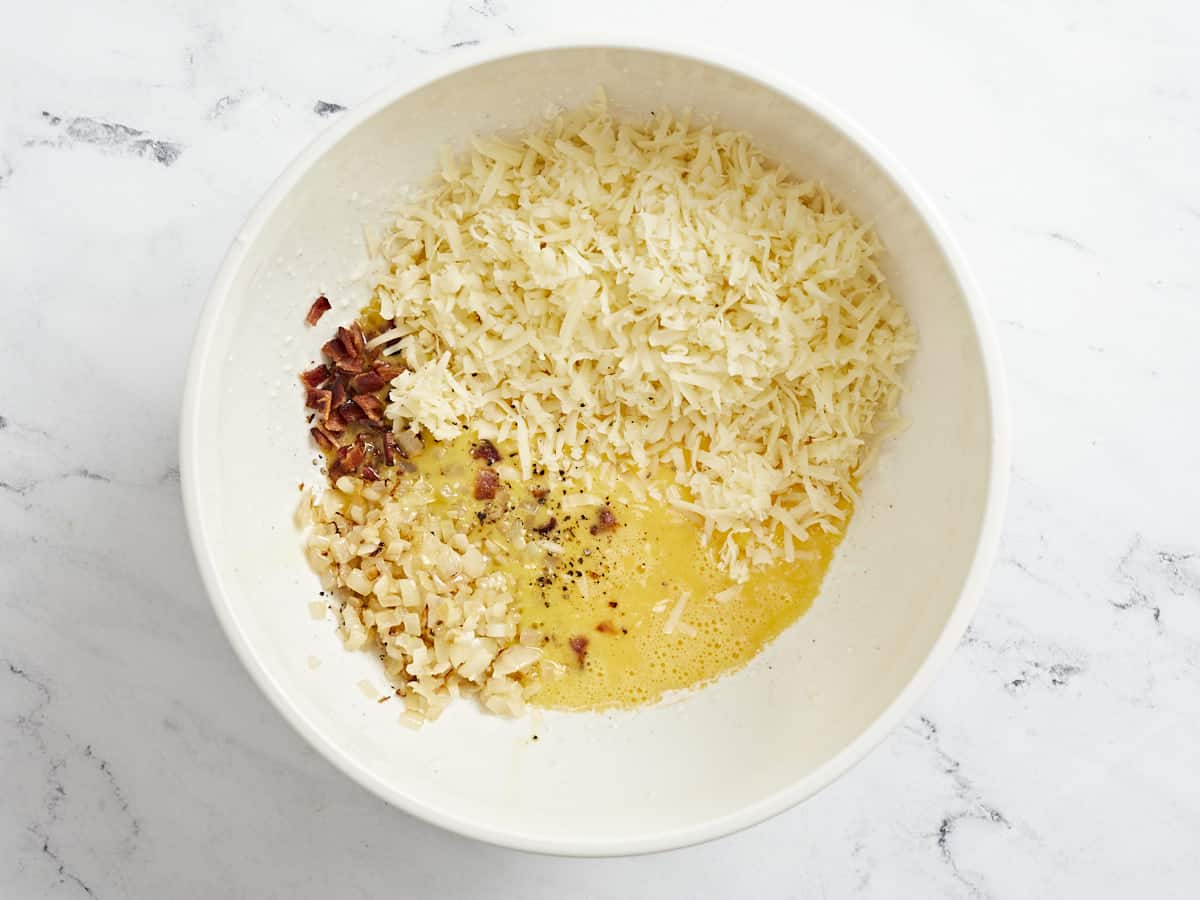
  • Add the eggs, nutmeg, salt, and freshly ground pepper. Finally, set aside 2 tablespoons of chopped bacon for garnish and add the rest to the filling.
  • Pour the filling into the prebaked crust. Brush the crust with 1 teaspoon of heavy cream.
  • Cover the edges of the quiche with a pie shield or aluminum foil ring. Bake until the crust is golden brown and the filling sets, about 25 minutes. Remove the pie shield and cool the quiche for 10 minutes before serving. Finally, garnish with remaining bacon bits and chopped Italian parsley.*

See how we calculate recipe costs here.

Notes

*Dry beans can be cooled, stored in an air-tight container, and reserved for future use as pie weights.
*You will know the quiche has set when you insert a toothpick in the center and it comes out clean.

Nutrition

Serving: 1slice | Calories: 446kcal | Carbohydrates: 17g | Protein: 16g | Fat: 35g | Sodium: 434mg | Fiber: 1g
Overhead shot of Quiche Lorraine in a pie plate.

How to Make Quiche Lorraine – Step by Step Photos

Overhead shot of puff pastry being trimmed.
Set a rack in the middle of your oven and preheat it to 425°F. Next, roll 1 sheet of puff pastry into an 11-inch square. Transfer the puff pastry to a 9-inch diameter pie plate. Trim the edges.
Overhead shot of dry beans/ pie weights being added to the parchment paper-lined sheet of puff pastry.

Cover the puff pastry with a sheet of parchment paper and add a pound of dry beans or pie weights. Next, cover the edges of the pastry with a pie shield or ring made of aluminum foil to prevent them from burning. Bake for fifteen minutes.

Overhead shot of bacon frying in a pan.

While the puff pastry par-bakes set a heavy-bottomed skillet over medium heat. Add the 4 strips of bacon and cook until crispy. Next, chop the bacon into bits. Set aside the chopped bacon and reserve the drippings.

Overhead shot of beans being removed from par-baked crust.

Remove the puff pastry from the oven and carefully remove the pie shield and the parchment paper with the dry beans/pie weights. The beans can be cooled, stored in an airtight container, and reused for future preparations.

Overhead shot of onions and garlic being cooked in a pan with bacon drippings.

Next, cook 1 diced yellow onion in the bacon drippings until translucent (about 2 minutes). Then, add 1 minced garlic clove and cook until fragrant (about 1 minute).

Overhead shot of whipped cream cheese, heavy cream, and milk.

In a large bowl, beat 4 ounces of cream cheese, 1/4 cup of heavy cream, and 1/4 cup of milk until smooth.

Overhead shot of quiche ingredients in a bowl.

Add the 5 eggs, ¼ teaspoon of nutmeg, ½ teaspoon of salt, and ¼ teaspoon of freshly ground pepper. Next, set aside 2 tablespoons of bacon for garnish and add the rest of the chopped bacon into the filling.

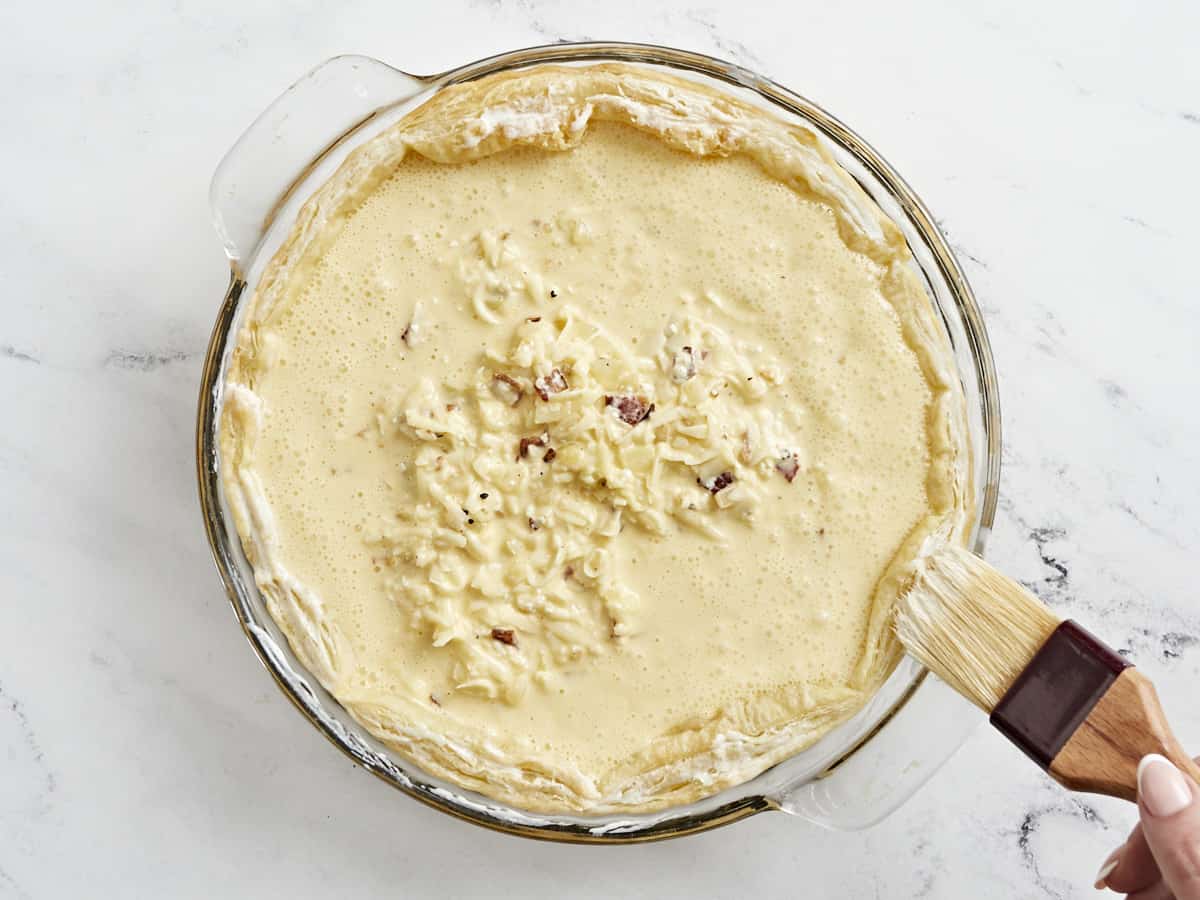
Overhead shot of cream being brushed on puff pastry.
Finally, pour the filling into the prebaked crust. Then, brush the edges of the crust with 1 teaspoon of heavy cream.
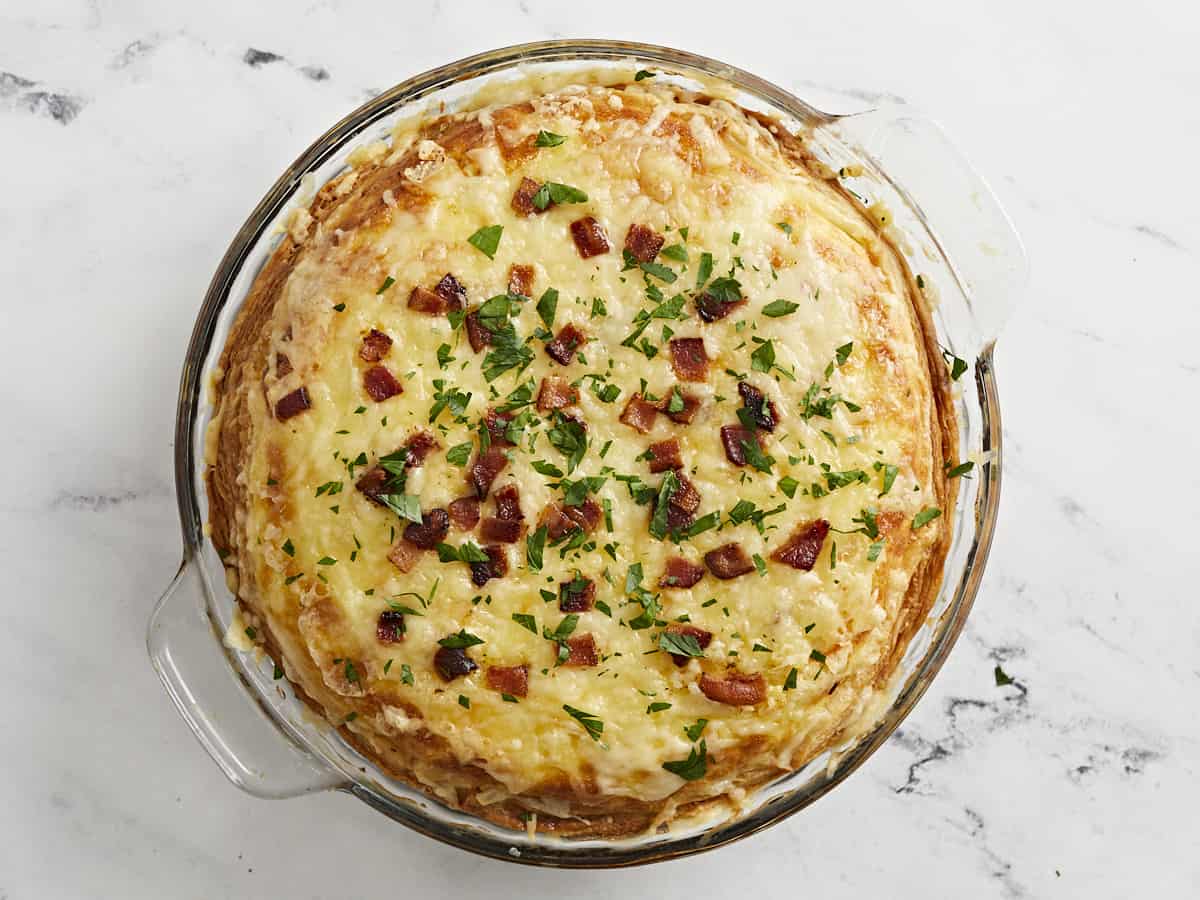
Overhead shot of Quiche Lorraine in a pie plate.
Cover the edges of the quiche with a pie shield or aluminum foil ring. Then bake until the crust is golden brown and the filling sets, about 25 minutes. You will know the filling has set when you insert a toothpick in the middle and it comes out clean. Cool for 10 minutes before serving. Finally, garnish with remaining bacon bits and chopped Italian parsley.
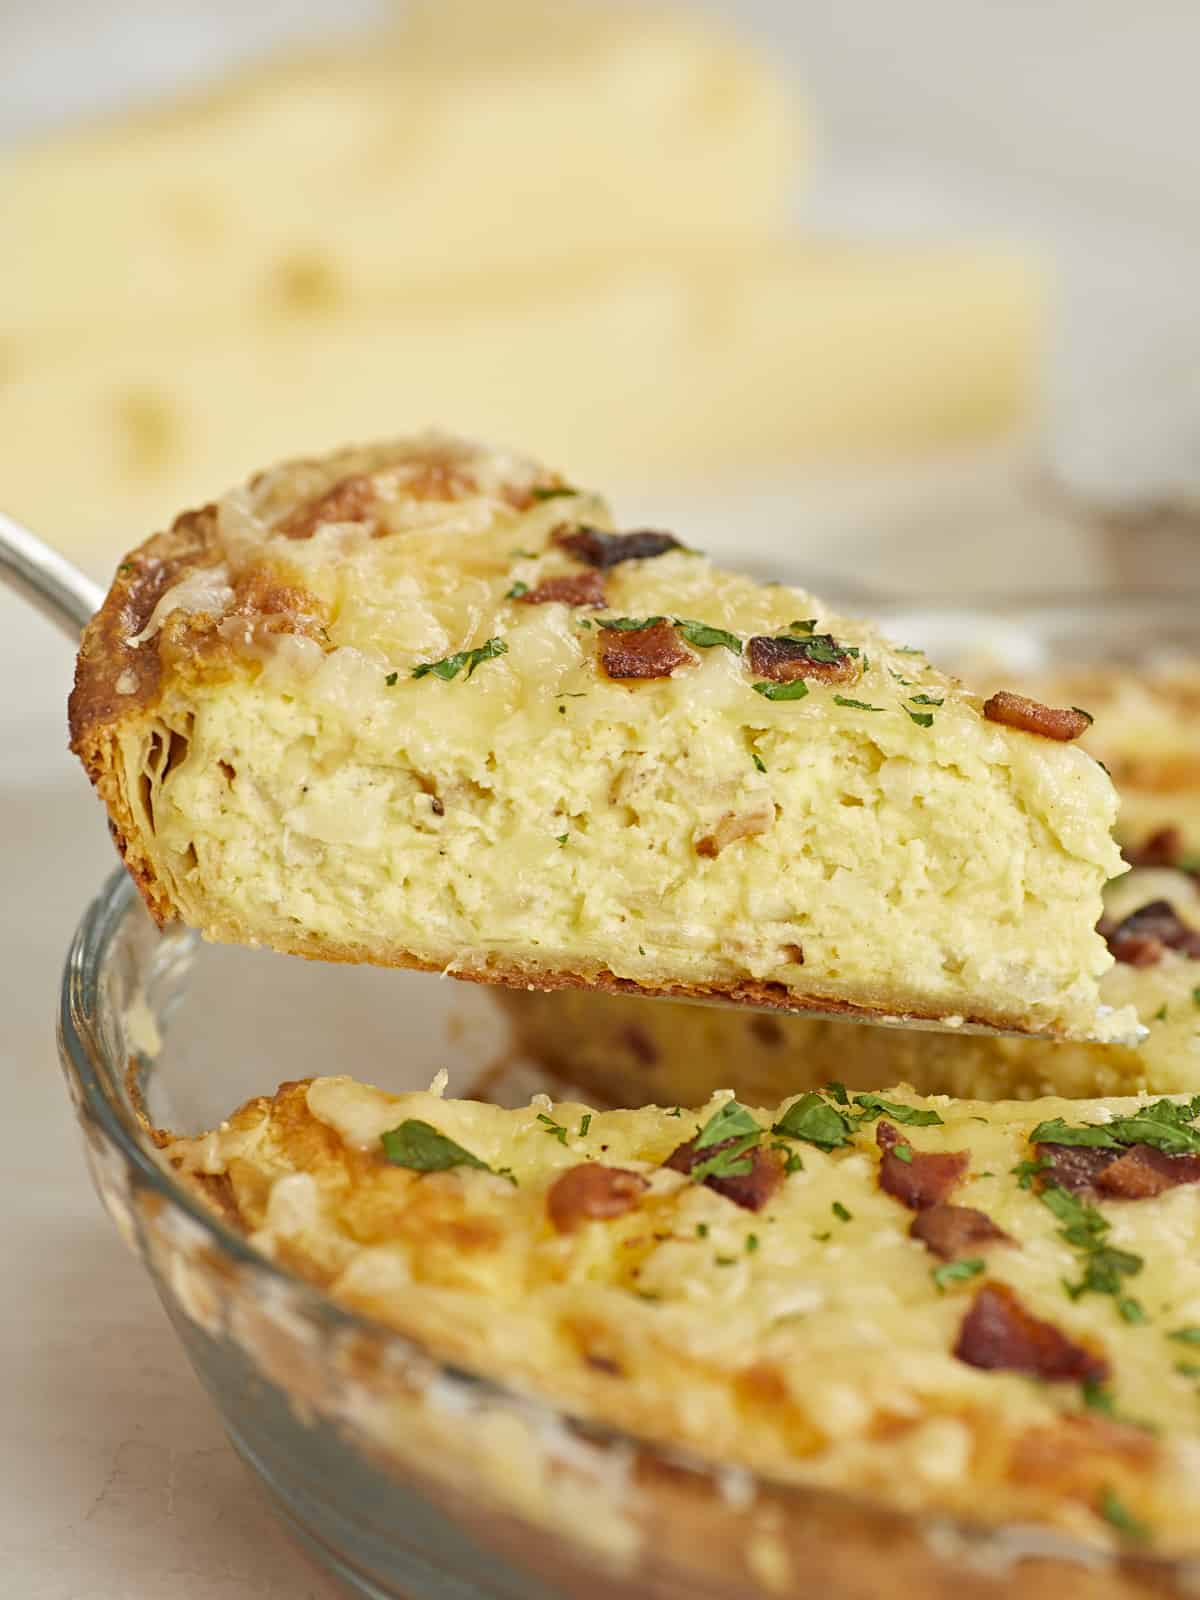
Side shot of a slice of Quiche Lorraine being lifted out of the pie plate.

More Easy Quiche and Frittata Recipes

The post Easy Quiche Lorraine appeared first on Budget Bytes.
Picadillo

Sweet, savory Puerto Rican-style Picadillo is a tomato-based ground beef stew that’s ridiculously delicious, versatile, and ready in thirty.

The post Picadillo appeared first on Budget Bytes.
Sweet and savory Puerto Rican-Style Picadillo is a ground beef stew that’s so ridiculously delicious it brings table talk to a complete stop because everyone’s too busy stuffing their face. This beef picadillo recipe is budget-friendly, comes together quickly, and is incredibly versatile. I don’t know any other way to say it: You. Need. To. Make. Picadillo.

A NOTE ON AUTHENTICITY

This is not a historically authentic recipe. We strive to create recipes that are accessible to everyone, which means ingredients need to be available at a mainstream budget grocery store. We test recipes using the least amount of steps, tools, and ingredients while still honoring the spirit of the recipe. I was born and raised in Puerto Rico and look forward to a time when our ingredients are available in mainstream markets. Until then, buen provecho!

What Is Picadillo?

Picadillo is a traditional sweet and savory Latin dish usually made with ground beef stewed in tomato sauce. In Puerto Rico, we cook it in a hearty tomato-based sauce with sofrito, adobo, olives, raisins, and sometimes diced potatoes. To the uninitiated, pairing raisins with beef sounds like blasphemy. But I promise you, IT WORKS.

What You’ll Need

Picadillo comes together in one pan in under 30 minutes. There’s a little chopping involved, and it takes about 7 minutes to assemble the recipe, but the rest of the time it simmers on the stovetop. I love a one-pot hands-off recipe! Don’t you?

  • Onion, Garlic, and Bell Pepper – this combination creates an aromatic and intensely flavored base
  • Sofrito – this is the flavor base of many Puerto Rican dishes. I have a simple recipe for you here, though you can definitely take it further if you have access to traditional ingredients like aji dulce and recao.
  • Sazón and Adobo – these seasoning blends go hand in hand to develop deep, earthy notes. The annatto in the sazón also deepens the color of the sauce. If these are hard to source, I have included recipes for both in the notes section of the recipe card.
  • Ground Beef – 80/20 is best as the fat adds flavor, but use what you have. You can also make this recipe with ground pork, chicken, lamb, or turkey. If you’re vegetarian or vegan, you can substitute ground beef with a plant-based alternative, chopped mushrooms, or black beans.
  • Green Olives – I prefer to use the sliced kind with pimento because it’s less work, but feel free to slice whole ones. If you can’t find Green Olives with Pimento (AKA Manzanilla or Spanish Olives), get pitted green olives and add a tablespoon of chopped roasted red pepper to the mix.
  • Raisins – though dark raisins are traditional, you can also use golden. I sometimes sub raisins with chopped prunes.
  • White Distilled Vinegar – helps cut through the fattiness of the ground beef and adds a sharp top note. Sub it with Apple Cider Vinegar.
  • Bay Leaves – have a mild tea-like flavor that sits in the background and helps enhance bolder flavors. Sub with a teaspoon of oregano.
  • Tomato Sauce – creates a liquid for the ground beef to stew in and adds acidic, fruity brightness.
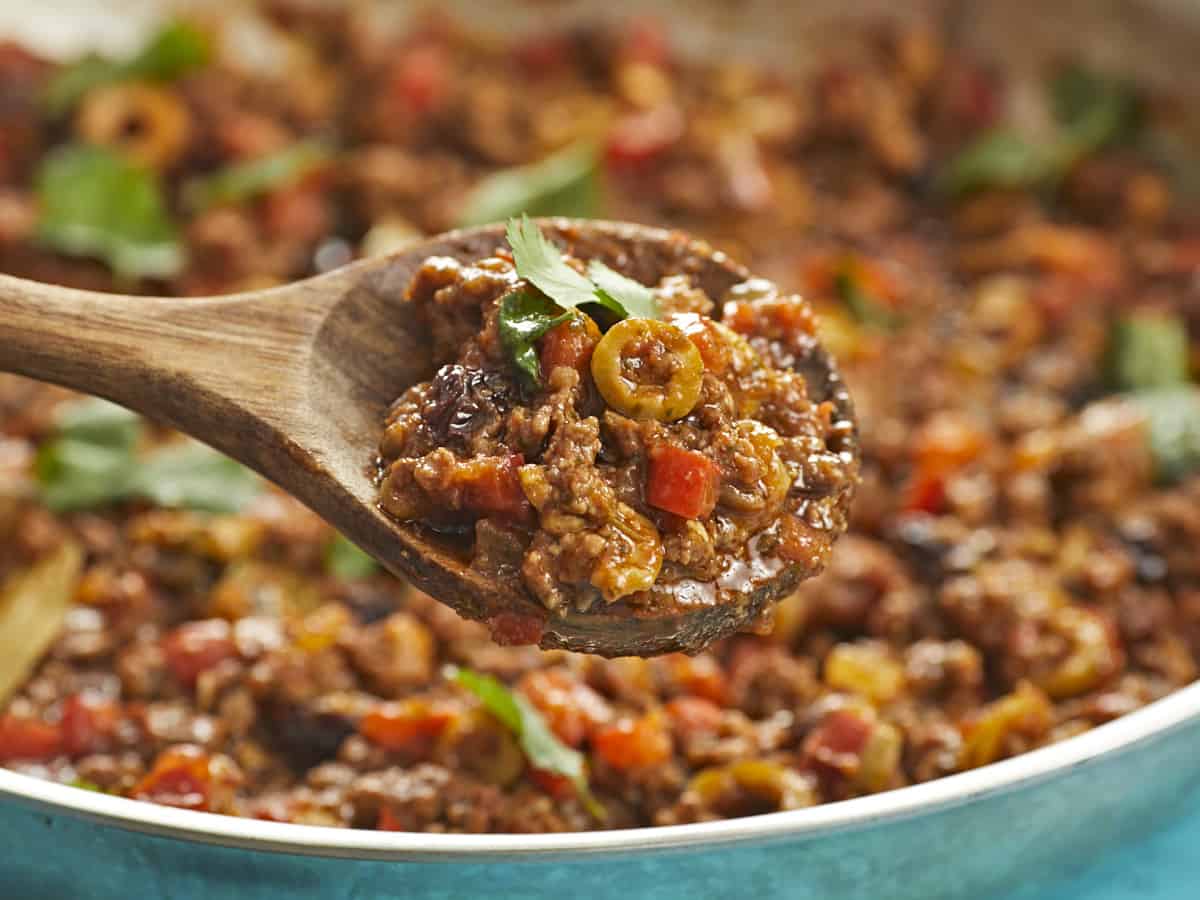
Wooden spoon full og picadillo in the foreground with picadillo in a silver skillet in the background.

What TO Serve With Picadillo

This sweet and savory ground-beef stew is a weeknight staple at my house because I can eat it as is, or served over rice and mashed potatoes. I can also stuff it into an empanada, a burrito, or a lettuce wrap. I’ve even added it to marinara for Puerto Rican-style spaghetti. Picadillo is all-purpose!

How To Store Picadillo

This is one of those recipes that tastes even better the next day. (I love those recipes.) Store cooled Picadillo in an airtight container with plastic film or wax paper directly on the surface. It keeps in the fridge for up to 5 days and in the freezer for up to 3 months. Thaw frozen Picadillo overnight in the refrigerator, then warm it in a pan set over medium heat or microwave it until steaming.

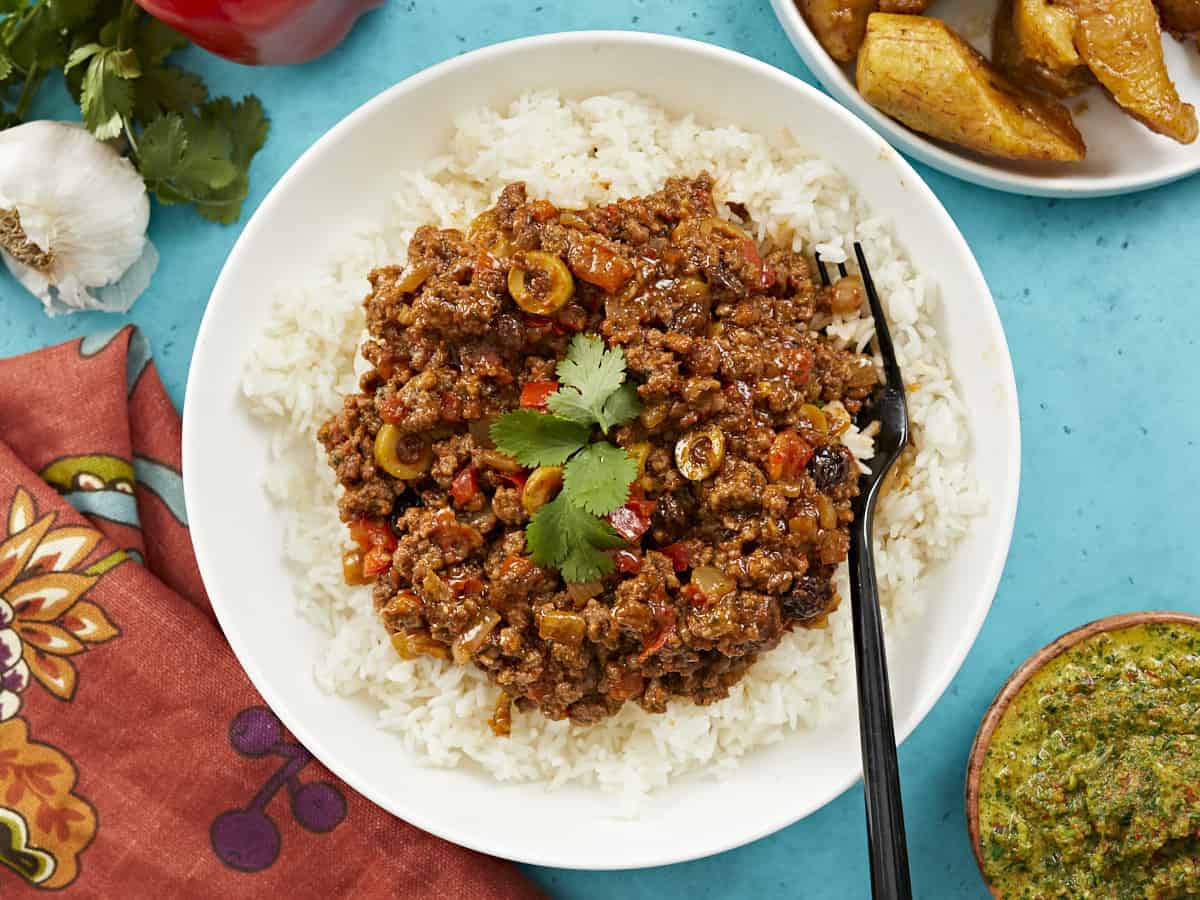
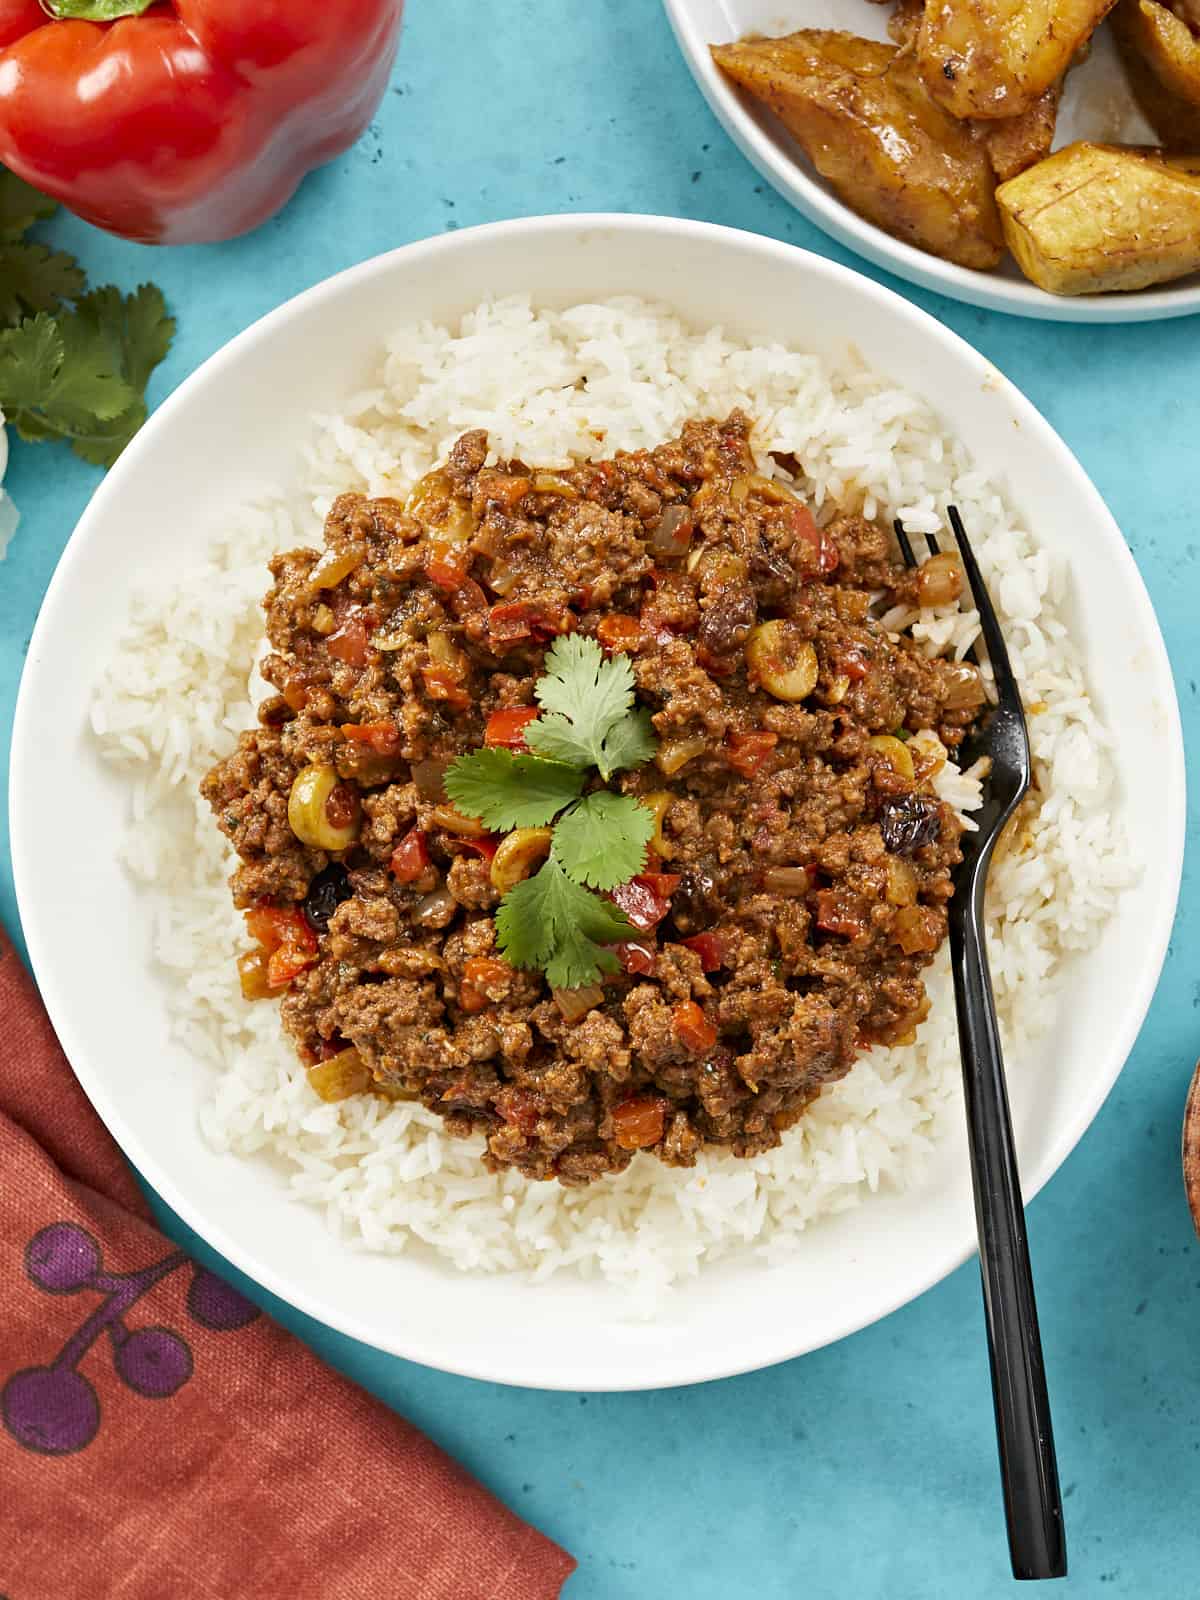
Picadillo served over white rice in a white bowl.
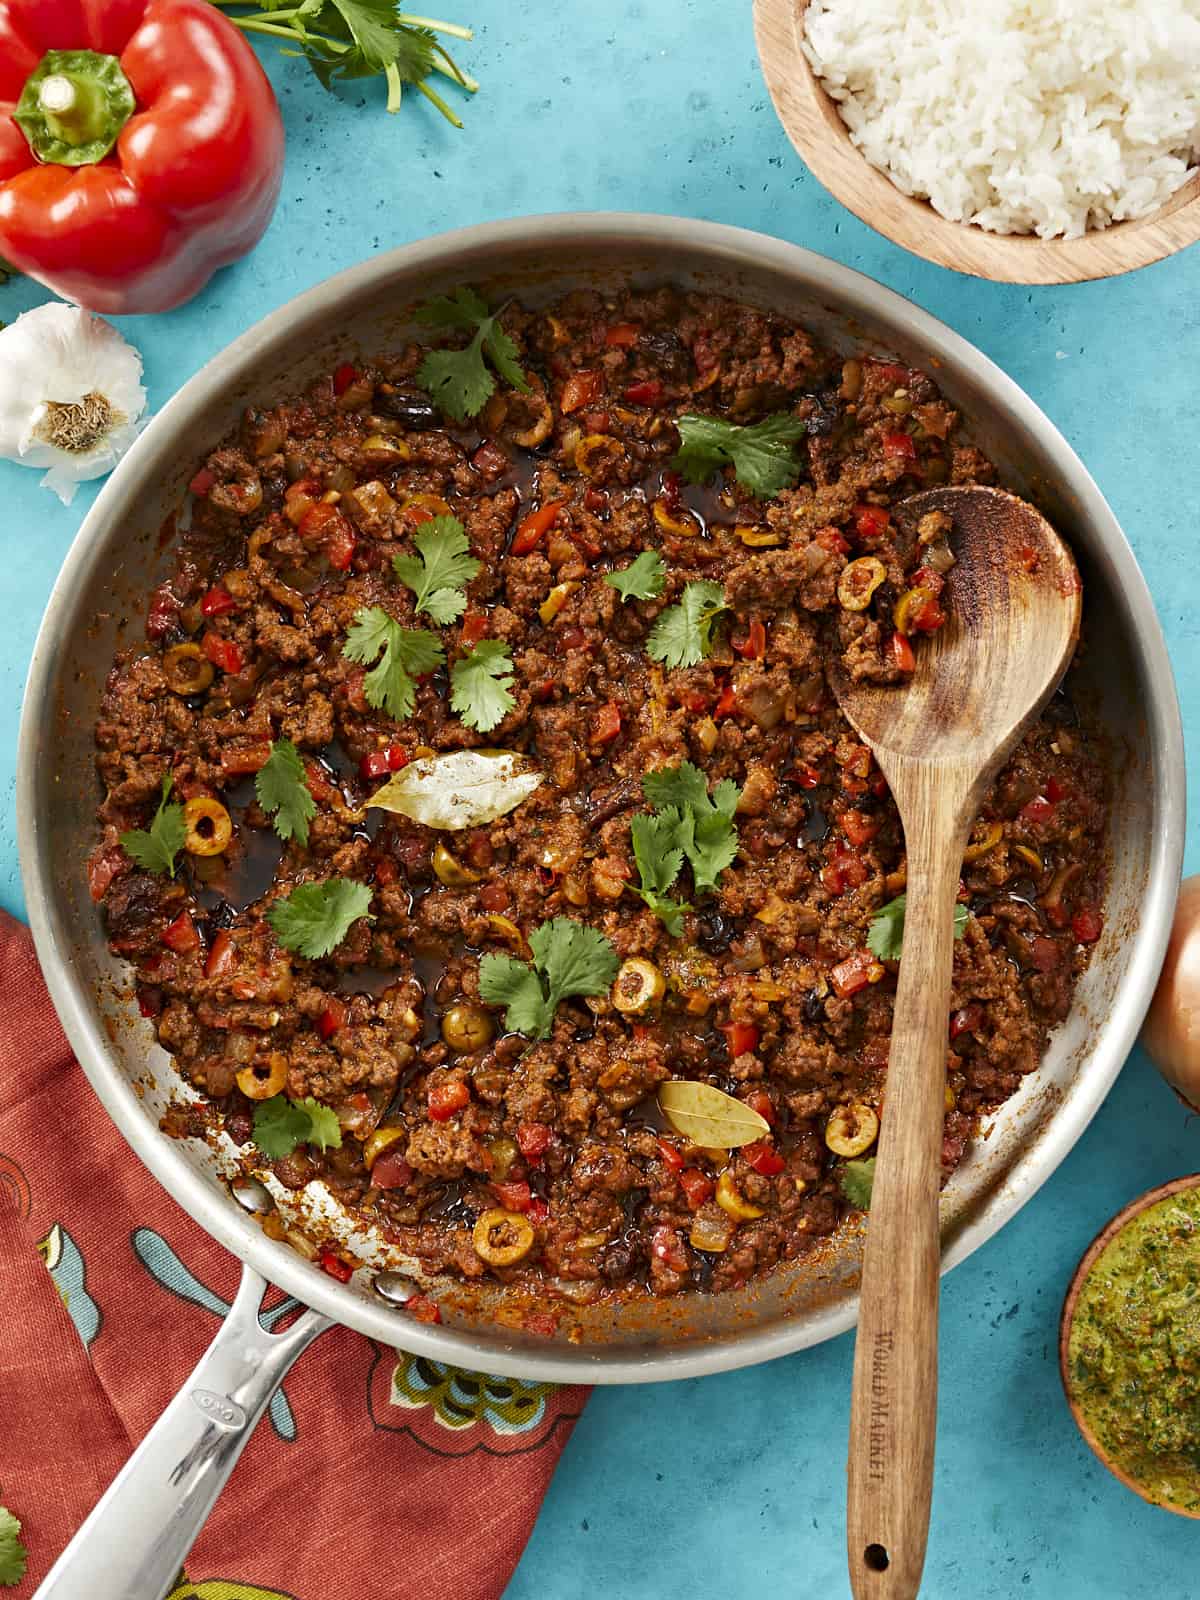
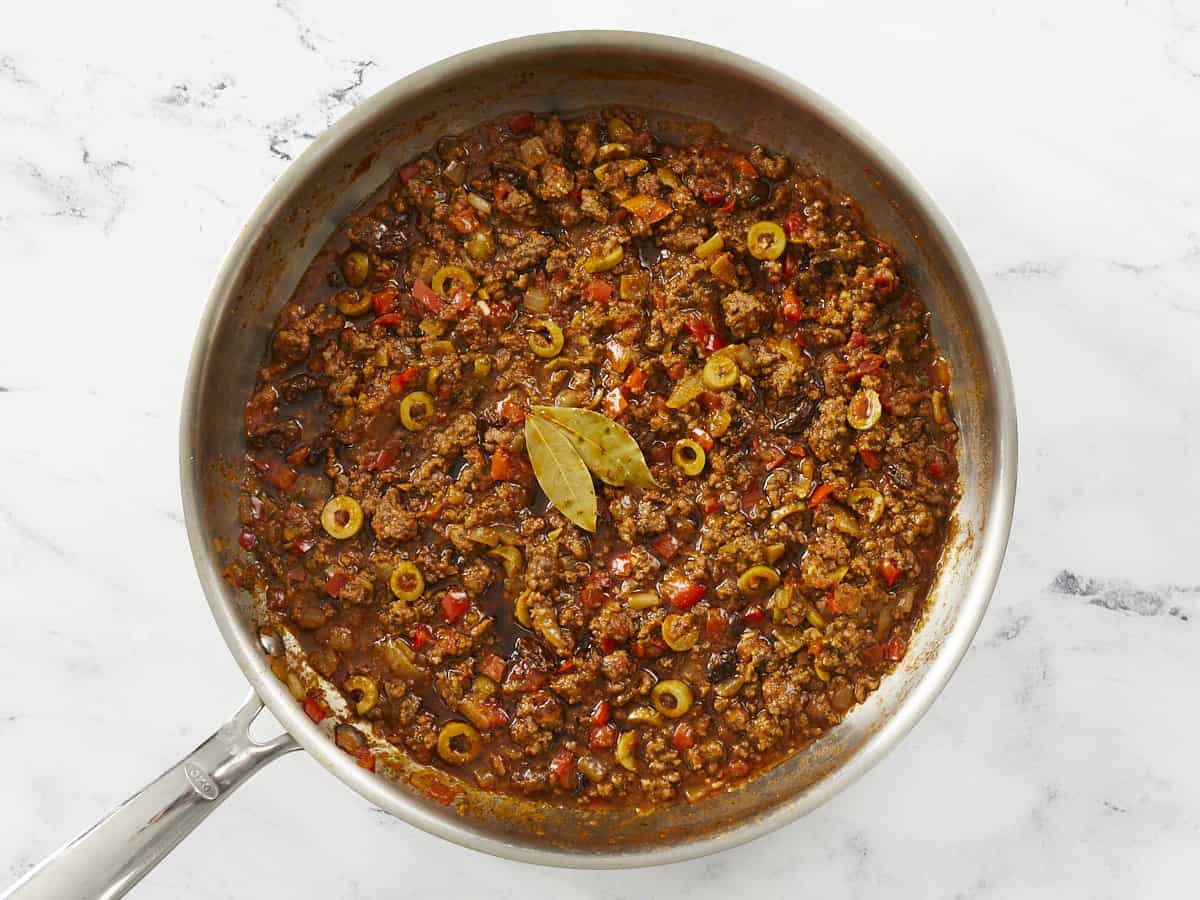
Overhead shot of picadillo in a silver skillet with a wooden spoon in it.
Print

Picadillo

Sweet, savory Puerto Rican-style Picadillo is a tomato-based ground beef stew that's ridiculously delicious, versatile, and ready in thirty.
Course Dinner, Lunch
Cuisine Latin, Puerto Rican
Total Cost ($11.44 recipe / $1.43 serving)
Prep Time 5 minutes
Cook Time 25 minutes
Total Time 30 minutes
Servings 8 cups
Calories 212kcal

Ingredients

  • 1 1/2 Tbsp olive oil $0.06
  • 1 yellow onion, small dice $0.42
  • 1 red bell pepper, small dice $1.59
  • 1 Tbsp tablespoon garlic, minced $0.14
  • 1 lb ground beef (80/20) $5.49
  • 1 tsp coarse salt* $0.04
  • 1 1/2 tsp sazón* (1 packet) $0.17
  • 1 tsp adobo* $0.04
  • 1/2 cup sofrito $0.72
  • 1/2 cup sliced pimento-stuffed green olives * $0.66
  • 1/4 cup raisins $0.87
  • 1/2 Tbsp white vinegar $0.04
  • 15 oz tomato sauce $1.00
  • 2 bay leaves $0.20
  • 1/4 cup water $0.00

Instructions

  • Place a large skillet over medium-high heat and add the olive oil. When the oil is hot, add the onions and peppers to the pan and cook until the onions are transparent.
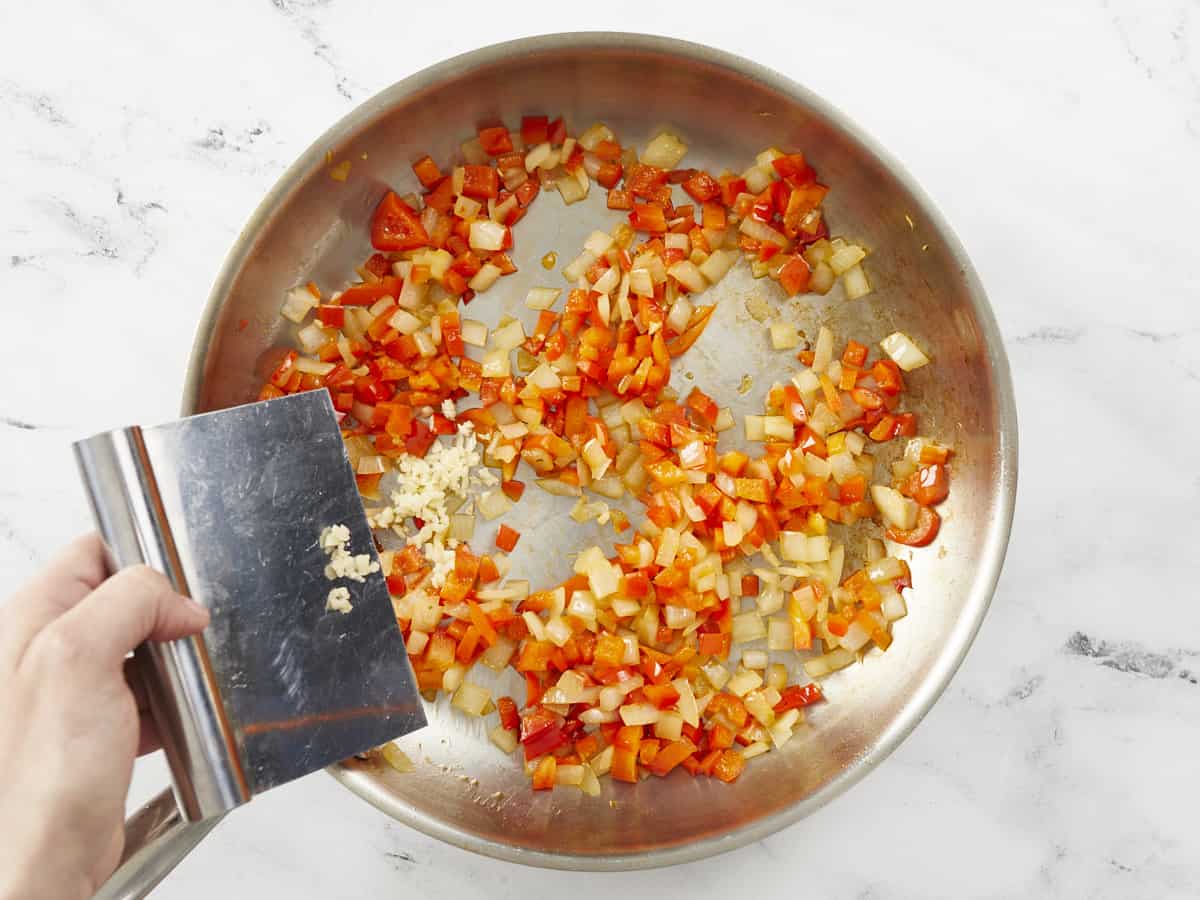
  • Add the garlic to the pan and cook until fragrant.
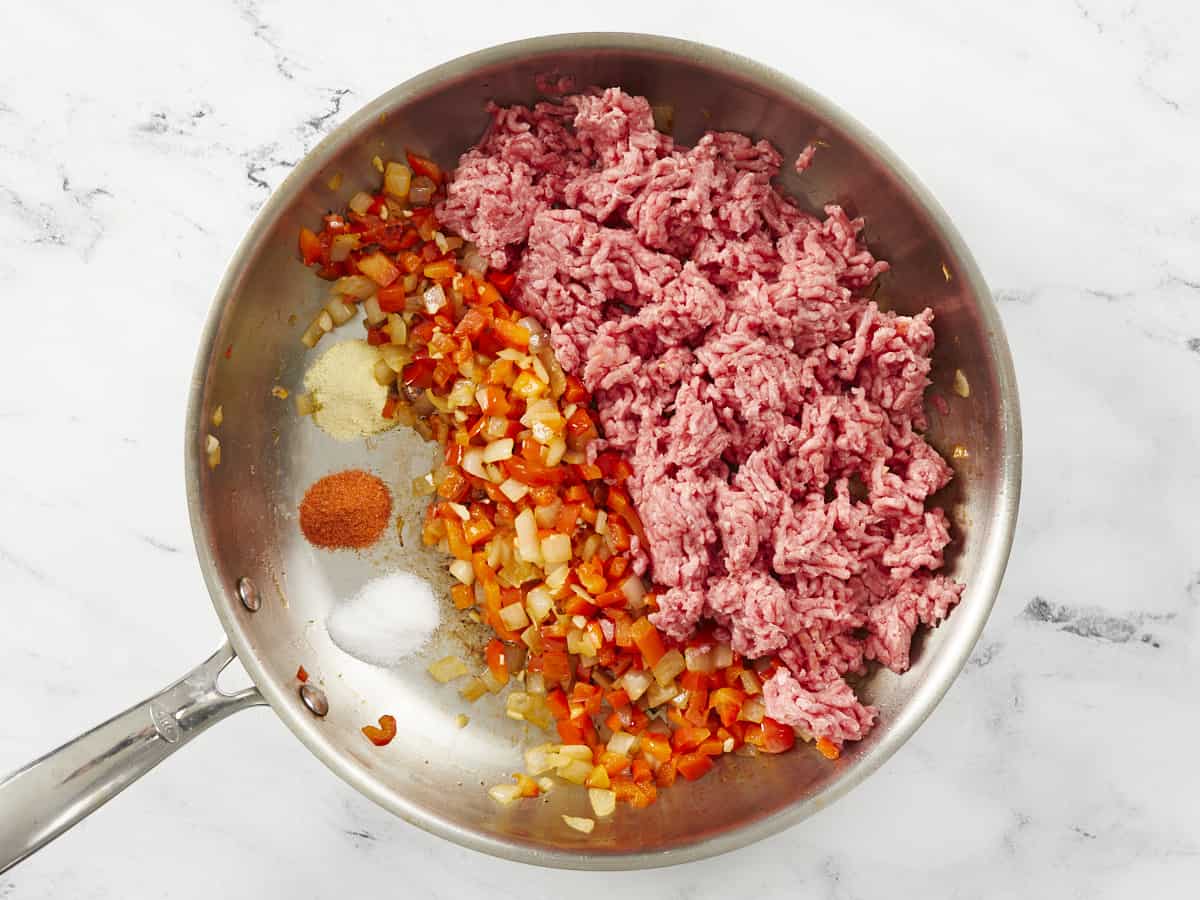
  • Add the beef to the pan and sprinkle with salt, sazón, and adobo. As the beef browns, break up big chunks with your spoon.
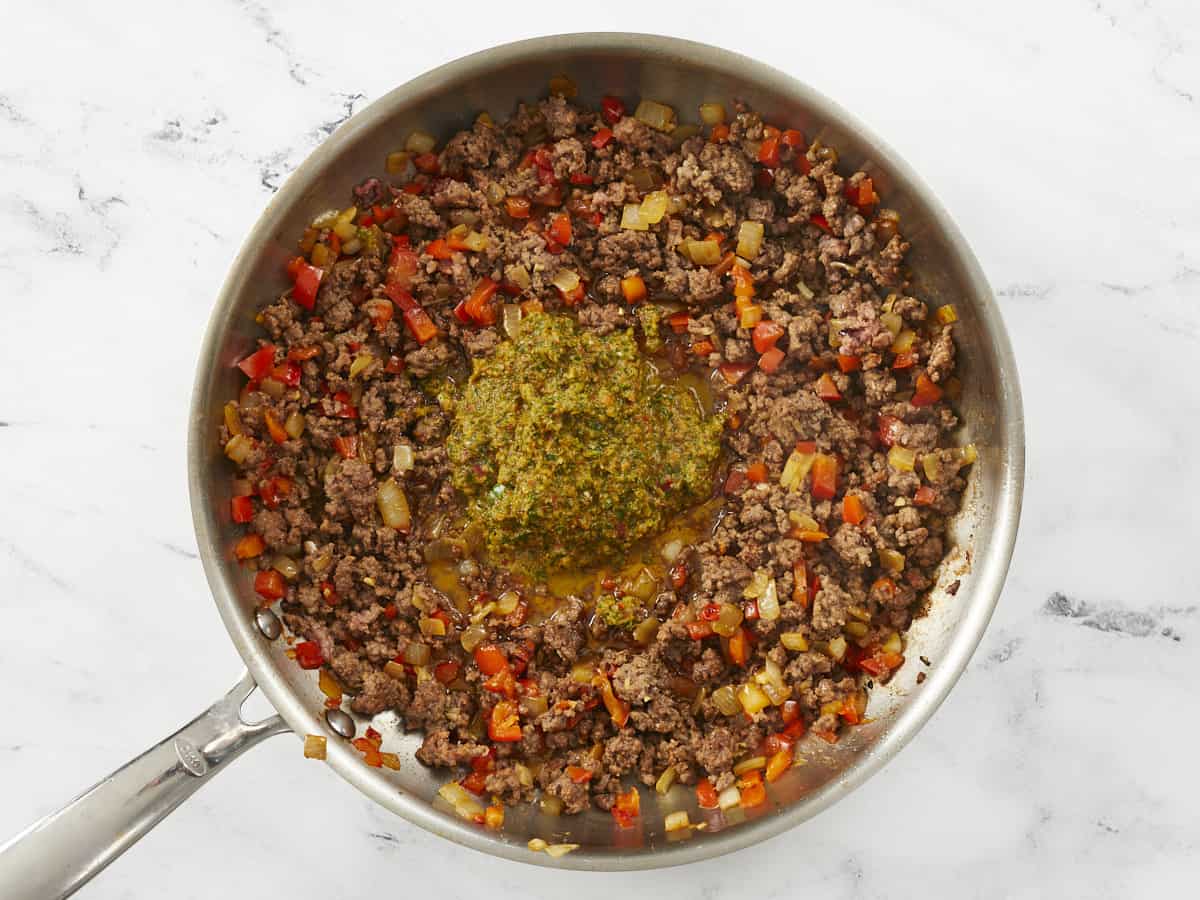
  • When the beef has browned, add the sofrito and cook, stirring constantly, until fragrant, about 2 minutes.
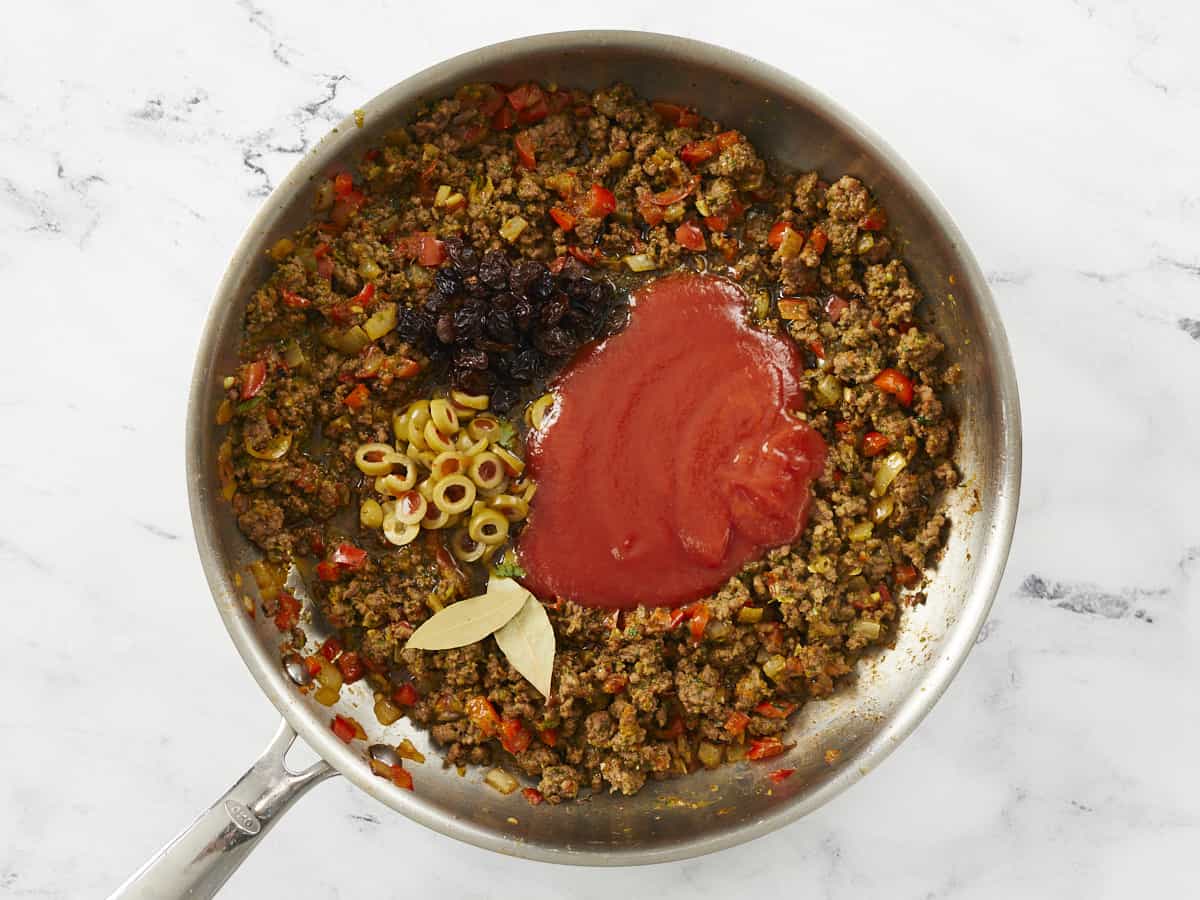
  • Add the olives, raisins, white vinegar, tomato sauce, bay leaves, and water. Continue to cook, occasionally stirring, for 10 minutes. Take the pan off the heat and allow it cool.

See how we calculate recipe costs here.

Notes

*If using fine salt, lower to 1/2 teaspoon.
*A packet of sazón contains about 1.5 teaspoons of sazón. If you cannot source sazón use the following:
1/4 teaspoon of garlic powder
1/4 teaspoon ground cumin
1/4 teaspoon ground coriander
1/3 teaspoon ground annatto
1/8 teaspoon turmeric
1/8 teaspoon ground oregano
*If you cannot source Adobo, mix your own and then use the amount called for in the recipe. Store the rest in an airtight container.
2 Tbsp salt
1 Tbsp garlic powder
1 tsp ground oregano
1 tsp onion powder
1 tsp black pepper
1 tsp ground cumin
1/2 tsp turmeric
*Pimento-stuffed green olives are also known as Spanish Olives or Manzanilla Olives.

Nutrition

Serving: 1cup | Calories: 212kcal | Carbohydrates: 7g | Protein: 11g | Fat: 16g | Sodium: 491mg | Fiber: 1g
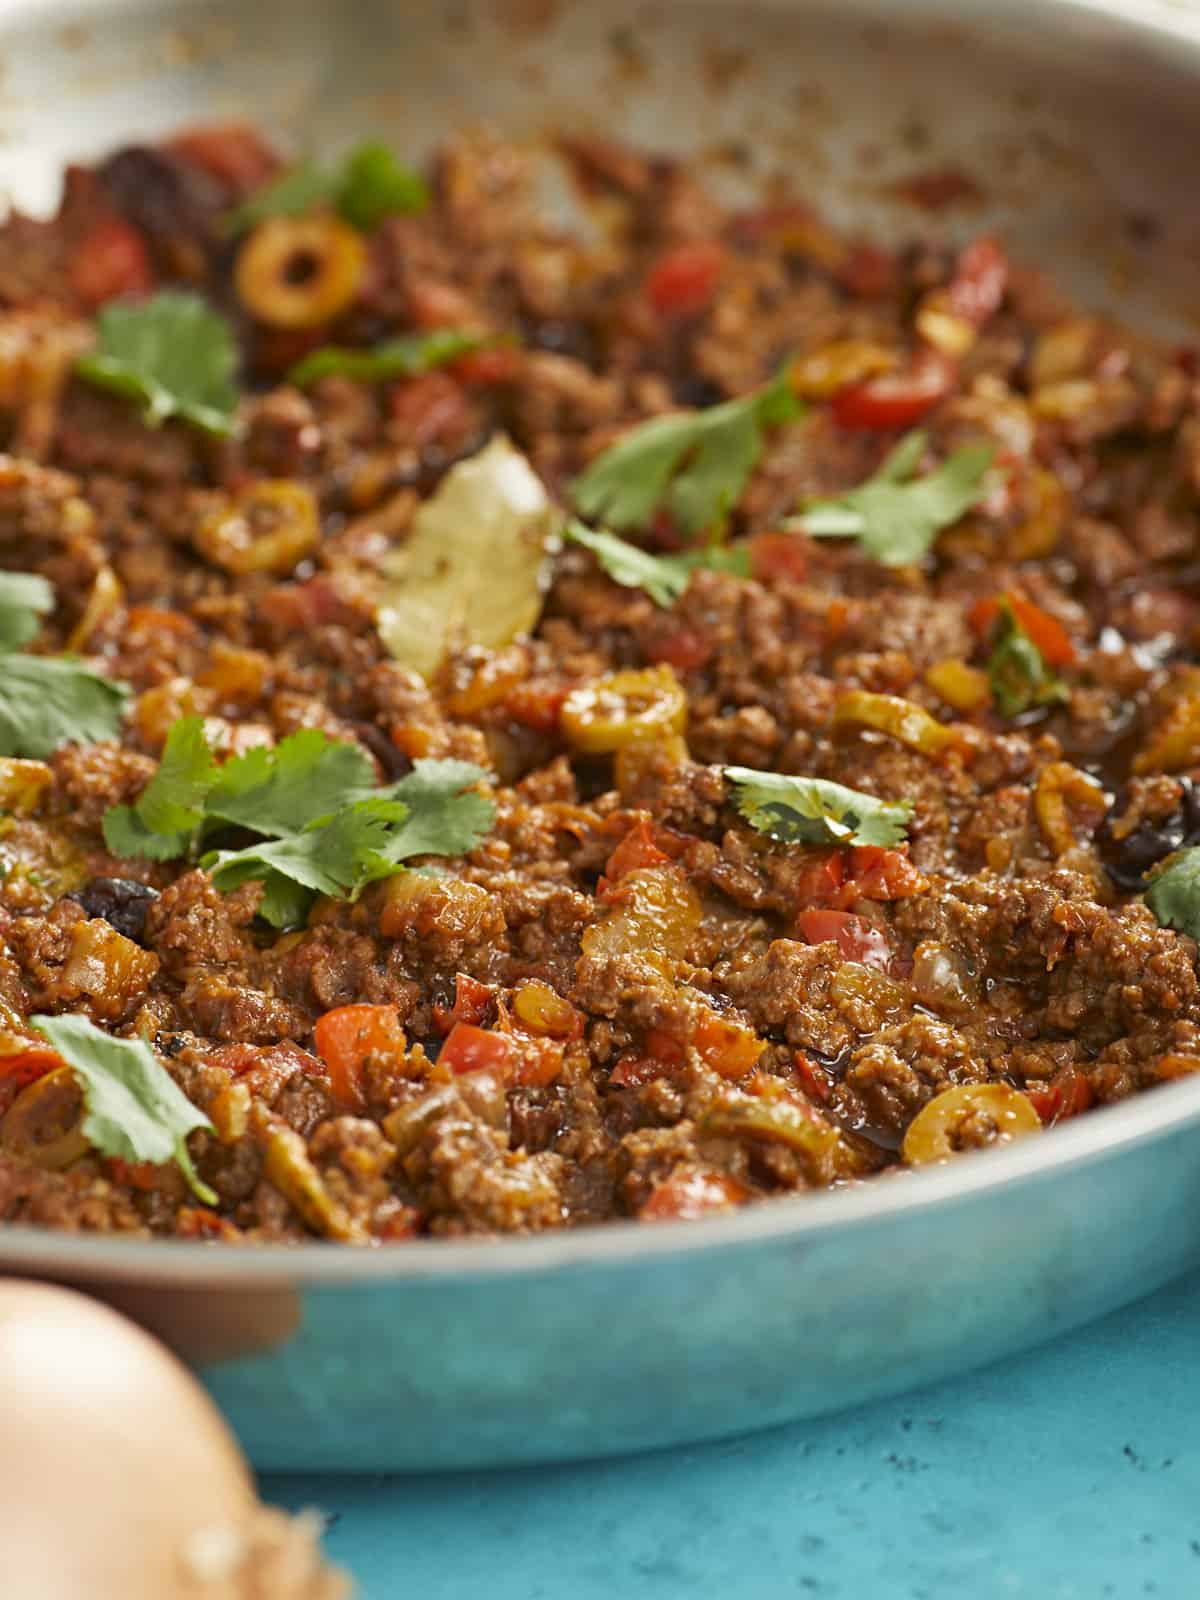
Side shot of picadillo in a silver skillet.

How to Make Picadillo – Step by Step Photos

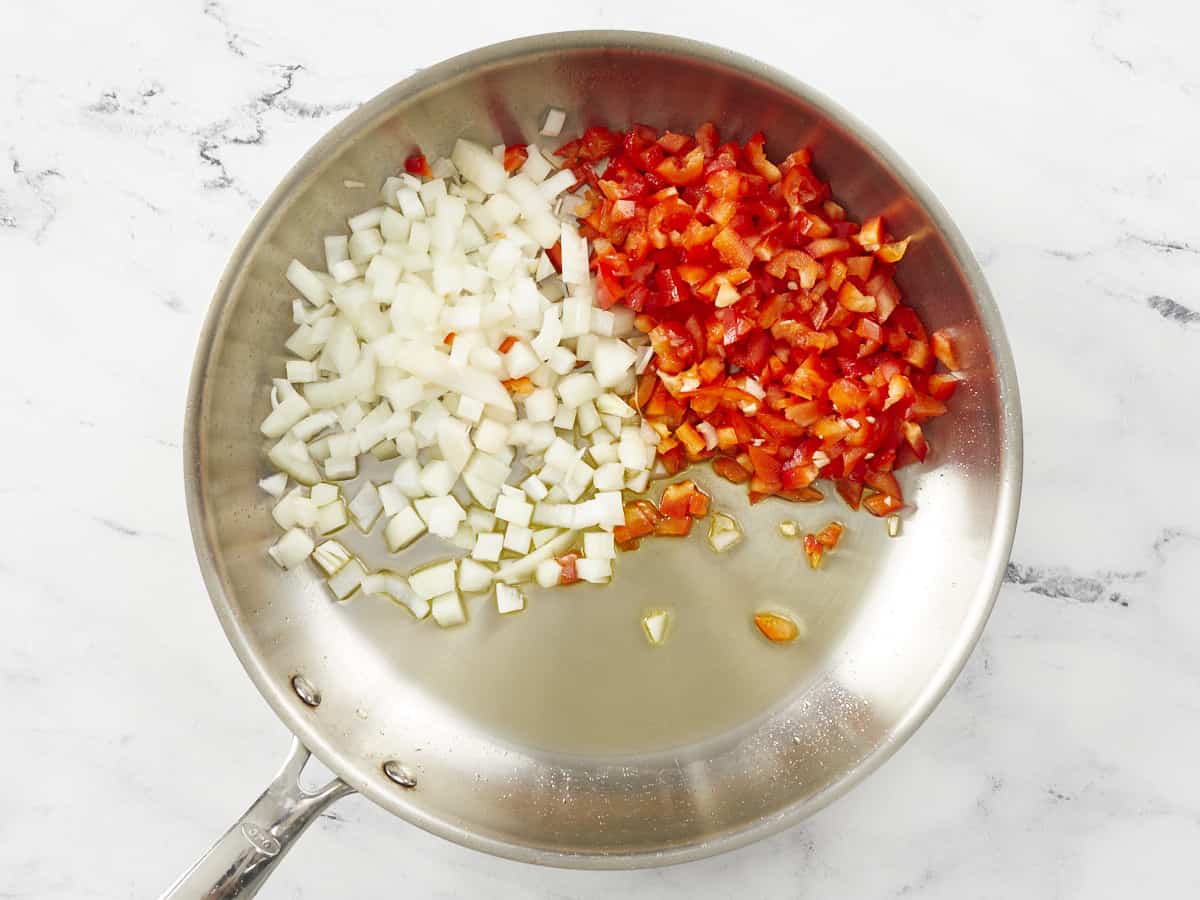
Onions and peppers in a silver pan.

Place a large saute pan over medium-high heat and add 1 1/2 tablespoons of olive oil. When the oil is hot, add 1 diced onion and 1 diced red bell pepper to the pan and cook until the onions are transparent.

Overhead shot of garlic being added to a pan of onions and peppers.

Add 1 tablespoon of minced garlic to the pan and cook until fragrant.

Meat being added to a pan of garlic, onions, and peppers.

Add the pound of ground beef to the pan and sprinkle with 1 teaspoon coarse salt, 1 and 1/2 teaspoons sazón, and 1 teaspoon adobo. As the beef browns, break up big chunks with your spoon.

Sofrito being added to a pan with browned meat in it.

When the beef has browned, add the 1/2 cup sofrito and cook, stirring constantly, until fragrant, about 2 minutes. Break up any remaining chunks of ground beef.

Tomato sauce, olives, and raisins added to a pan of browned meat and sofrito.

Add the 1/2 cup olives, 1/4 cup raisins, 1/2 tablespoon white vinegar, 15 ounces tomato sauce, 2 bay leaves, and 1/4 cup water.

Finished pan of picadillo.

Continue to cook, occasionally stirring, for 10 minutes. Take the pan off the heat and allow the Picadillo to cool slightly before serving. Tell me how long it takes for everyone to start talking again!

Picadillo served over white rice in a white bowl.

More Easy One-Pot Recipes

The post Picadillo appeared first on Budget Bytes.
Chicken Alfredo Bake

Transform stovetop Chicken Alfredo into a delicious, decadent casserole with this easy Chicken Alfredo Bake recipe!

The post Chicken Alfredo Bake appeared first on Budget Bytes.

This Chicken Alfredo Bake is the ultimate, crowd-pleasing casserole! This creamy and indulgent pasta bake will become one of your favorite dishes to prepare, too, because it’s super easy to make ahead and then assemble just before baking. Not to mention, it’s so cheesy and delicious that everyone will ask for seconds! (That’s right, no leftovers in sight!)

A golden brown chicken alfredo bake in a round, white enamel casserole dish on a wooden background surrounded by a yellow and gray striped dish towel in the bottom left, a wooden cutting board with shaved Parmesan cheese in the top left corner, a clove of garlic, sprigs of parsley, and small wooden bowl of breadcrumbs in the top right corner, and a small wooden bowl of uncooked pasta in the bottom right corner. The right side of the casserole has been stirred with a large wooden spoon that's resting in the dish.

What is a chicken alfredo bake?

This Baked Chicken Alfredo is a fun spin on one of our most popular dinner recipes: Chicken Alfredo. We take the stovetop version of this dish to the next level by sending it on a trip to the oven…blanketed with seasoned breadcrumbs and tons of shredded cheese! (Because what could be better?!) 

Ingredients & substitutions

  • Chicken: We used boneless, skinless chicken breasts in this recipe, but you could also use boneless, skinless chicken thighs or 2 cups of rotisserie chicken. 
  • Alfredo Sauce: We made a double batch of our Homemade Alfredo Sauce (what we call an “Ameri-fredo sauce”) in the same skillet we used to cook the chicken. It can also be substituted with around 3 cups (or 24 oz.) of store-bought alfredo sauce. (But I promise, ours is better!)
  • Pasta: We used rotini in our pasta bake because it grabs onto that creamy sauce oh-so-well! Any medium-sized pasta like fusilli, penne, macaroni, or rigatoni works, too.
  • Frozen Vegetables: We added some frozen broccoli because the dish needed something fresh to balance out all the other rich ingredients. If you don’t like broccoli, try frozen peas, or a frozen vegetable mix (like ones with diced carrots, peas, and corn).
  • Buttered Breadcrumbs: Making buttery, seasoned breadcrumbs from scratch with panko will ensure the topping is as crispy and delicious as possible. Seasoning them yourself also gives you full control over the flavor. But they could be replaced with store-bought, seasoned Italian breadcrumbs or fresh breadcrumbs if desired.

MAKE AHEAD & AVOID LEFTOVERS

This is one of the dreamiest recipes of all time…but it isn’t quite as creamy and dreamy once reheated. For that reason, we suggest making a half batch instead of planning on a lot of leftovers. On the other hand, since every individual element of this recipe can be made ahead and kept in the fridge for up to 4 days, you could still make up the whole recipe and just bake it up at different times! Here’s how to prepare this pasta bake ahead of time:

  • Mix up the prepared chicken, cooked pasta, and thawed broccoli. Split the mixture into smaller portions. Store each serving in a glass container separately from the alfredo sauce. (If you want to mix the sauce in ahead of time, I guess you could — but it may soak into the cooked pasta over time.)
  • When you’re ready to bake up a serving, let it sit a room temperature for a few minutes (to slightly warm the glass dish), mix in the alfredo sauce, and top with cheese and breadcrumbs.
  • Bake for 20-25 minutes, or until the center of the pasta bake reaches an internal temperature of 165℉, and the toppings achieve the same visual cues in the recipe).
A large serving of chicken alfredo bake in a flat, white bowl, and a black fork is resting on the right side of the bowl. The bowl is sitting on a wood background surround with a yellow and gray striped dish cloth, a dark wooden cutting board with Parmesan Cheese shavings on it, and a sprig of parsley and a bowl of untoasted breadcrumbs.

I swear, y’all….this recipe is SUPER EASY to throw together. (Despite the long ingredient list and the number of steps!) It’s also a great blueprint for making just about any pasta bake you can dream up!

A golden brown chicken alfredo bake in a round, white enamel casserole dish on a wooden background surrounded by a yellow and gray striped dish towel in the bottom left, a wooden cutting board with shaved Parmesan cheese in the top left corner, a clove of garlic, sprigs of parsley, and small wooden bowl of breadcrumbs in the top right corner, and a small wooden bowl of uncooked pasta in the bottom right corner.
Print

Chicken Alfredo Bake

Transform stovetop chicken alfredo into a super-cheesy, decadent casserole with this Chicken Alfredo Bake recipe! It’s super easy to make (or make ahead!), and so delicious there won’t be any leftovers!
Course Dinner, Pasta
Cuisine American, Italian
Total Cost $12.80 recipe / $2.13 serving
Prep Time 15 minutes
Cook Time 1 hour 10 minutes
Bake Time 30 minutes
Total Time 1 hour 55 minutes
Servings 6 1 cup each
Calories 829kcal

Ingredients

Parmesan Chicken:

  • 2 boneless, skinless chicken breasts (about 1 1/3 lbs. total) $3.89
  • 2 Tbsp olive oil, divided $0.26
  • 1 Tbsp grated Parmesan cheese $0.08
  • 1/2 tsp Italian seasoning $0.05
  • 1/2 tsp red pepper flakes $0.05
  • 1/2 tsp salt $0.01
  • 1/2 tsp black pepper $0.01
  • 3 Tbsp water $0.00

Buttered Breadcrumbs:

  • 2 Tbsp butter $0.30
  • 1/2 cup panko breadcrumbs $0.35
  • 1/4 tsp Italian seasoning $0.03
  • 1/4 tsp garlic powder $0.03
  • 1/4 tsp red pepper flakes $0.03
  • 1/4 tsp salt $0.01
  • 1/4 tsp black pepper $0.01

Alfredo Sauce/Pasta Bake:

  • 4 Tbsp butter $0.60
  • 4 cloves garlic, minced $0.30
  • 2 cups heavy cream $2.00
  • 2 cups Italian shredded cheese blend, divided $2.49
  • 1/4 tsp Italian seasoning $0.03
  • 1/4 tsp garlic powder $0.03
  • 1/4 tsp red pepper flakes $0.03
  • 1/4 tsp salt $0.01
  • 1/4 tsp black pepper $0.01
  • 8 oz. rotini, uncooked $0.66
  • 10 oz. frozen broccoli florets $1.49

Instructions

Parmesan Chicken:

  • Cut the chicken breasts into 1” chunks. Coat the chicken with 1 tablespoons of oil and season it with the grated Parmesan cheese, Italian seasoning, garlic powder, red pepper flakes, salt, and black pepper.
  • Heat 1 tablespoons of oil in a large skillet over medium heat. Sear the chicken until the bottom of each piece is brown and the sides start to turn white (about 5 minutes).
  • Add 3 tablespoons of water to the pan, releasing the chicken pieces from the bottom of the skillet, and flip each one. Continue cooking until the chicken is evenly browned on all sides and fully cooked in the center (about 5 minutes). Remove the chicken from the skillet, leaving behind any stuck-on bits of chicken to flavor the alfredo sauce.

Buttered Breadcrumbs:

  • Melt the butter in a small skillet over medium heat. Once the butter has completely melted, stir in the panko breadcrumbs, Italian seasoning, garlic powder, red pepper flakes, salt, and black pepper.
  • Toast the breadcrumbs, stirring occasionally, until all the butter is absorbed and the breadcrumbs are toasted and golden but not brown (about 5 minutes).
  • Transfer the breadcrumbs to a bowl to stop the cooking process and set them aside to cool.

Alfredo Sauce:

  • Melt the butter over medium heat in the same large skillet used to cook the chicken (without wiping it out). Add the minced garlic and sauté until fragrant (about 2 minutes).
  • Whisk in the heavy cream, Italian seasoning, garlic powder, red pepper flakes, salt, and black pepper. Let it come up to a boil, stirring occasionally (about 5 minutes).
  • Turn the heat down to low, and add 1.5 cups of shredded cheese a handful at a time, whisking until the cheese is fully melted before adding more (about 5 minutes). The alfredo sauce will continue to thicken as it cools.

Assembly:

  • Preheat the oven to 375℉. Thaw the frozen broccoli in a colander, breaking down any large florets into bite-size pieces. Set aside.
  • At the same time, boil a large pot of water on high heat. Once the water is rapidly boiling, add the rotini and cook until it is just tender (about 7 minutes). Do not overcook the pasta, as it will soften further in the oven. Drain the pasta in a colander and set aside.
  • Mix together the cooked chicken, cooked pasta, thawed broccoli, and alfredo sauce in a casserole dish. Top the casserole with ½ cup of shredded cheese and the toasted breadcrumbs.
  • Bake the casserole until all the cheese is melted and the breadcrumbs are golden brown (about 25-30 minutes).
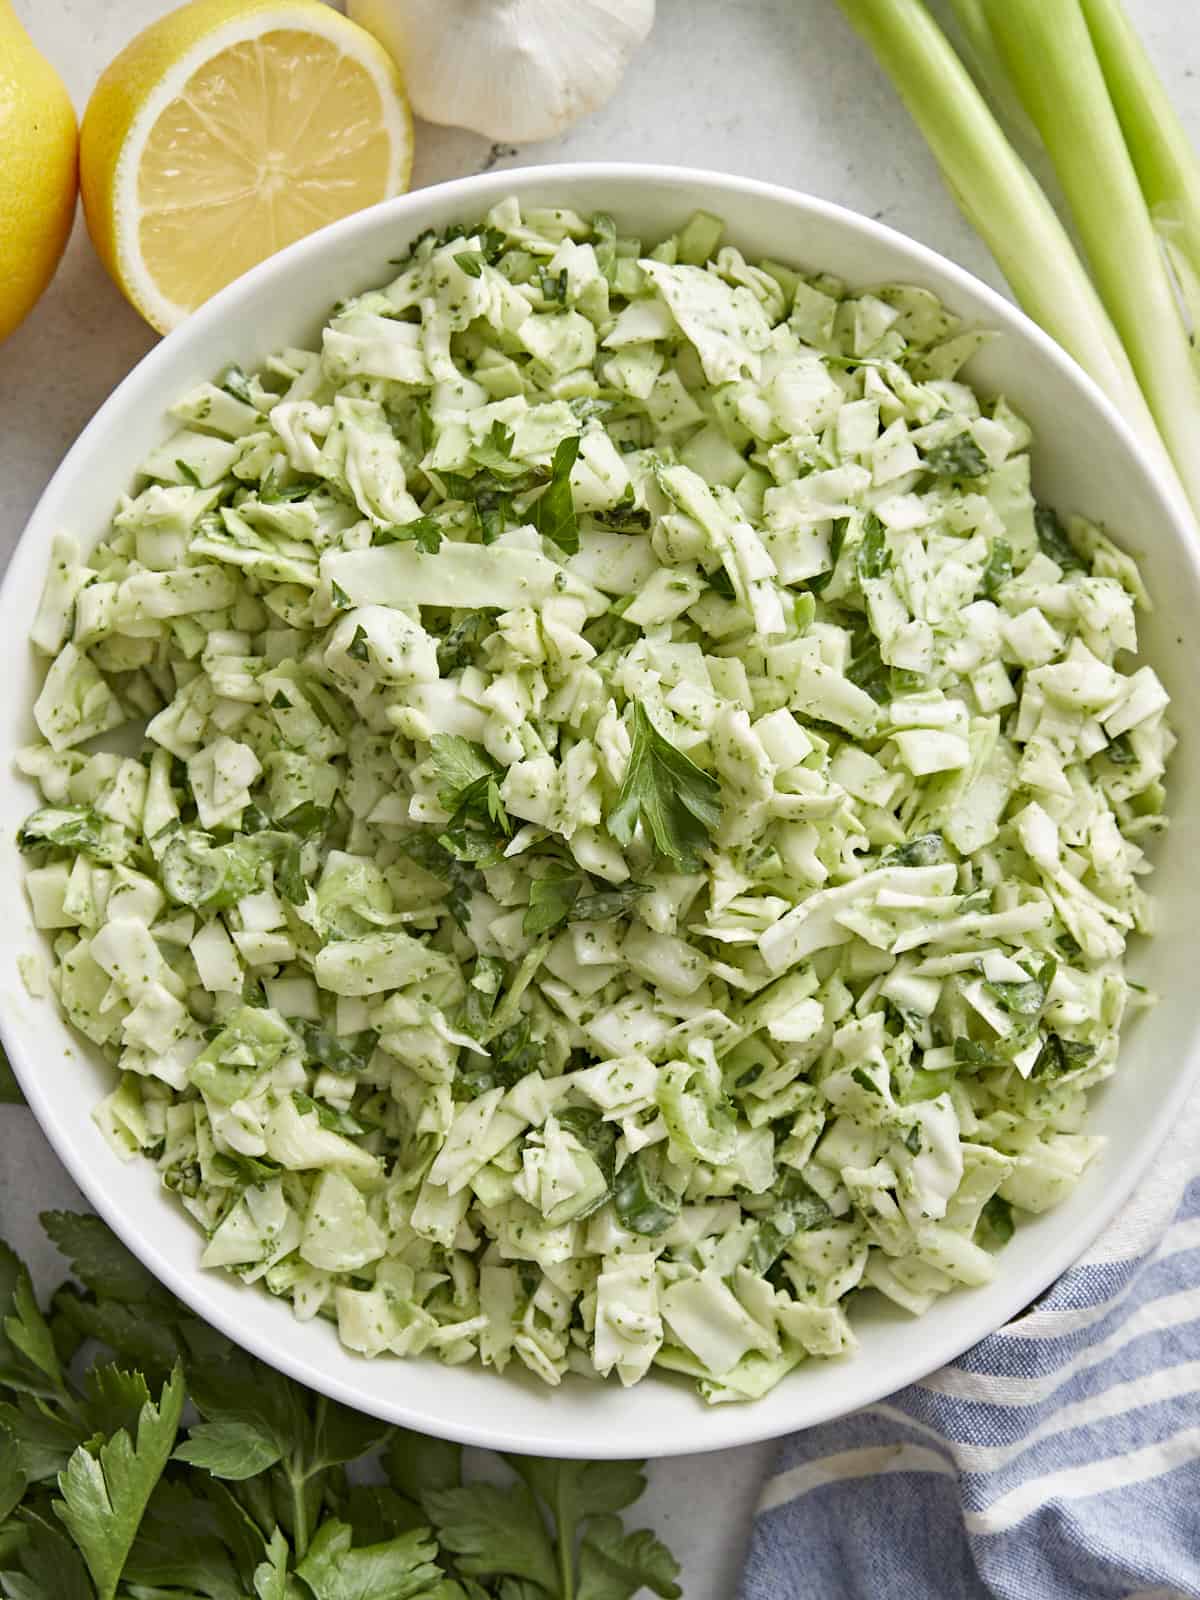
See how we calculate recipe costs here.

Nutrition

Serving: 1.5cups | Calories: 829kcal | Carbohydrates: 40g | Protein: 40g | Fat: 58g | Sodium: 760mg | Fiber: 3g
A side shot of a chicken alfredo bake with broccoli in a round, white enamel cast iron baking dish with a black rim. A wooden serving spoon is lifting out a heaping spoonful of the pasta slightly above the casserole dish. There is a yellow and gray striped dish cloth slightly visible in the bottom left side of the image, and blurred in the background are a black bowl of uncooked pasta and a bunch of Italian parsley.

How to Make Chicken Alfredo Bake – Step by Step Photos

A white bowl of uncooked chicken breast chunks seasoned with grated Parmesan cheese, salt, black pepper, Italian seasoning and red pepper flakes. The bowl is sitting on a marble background.
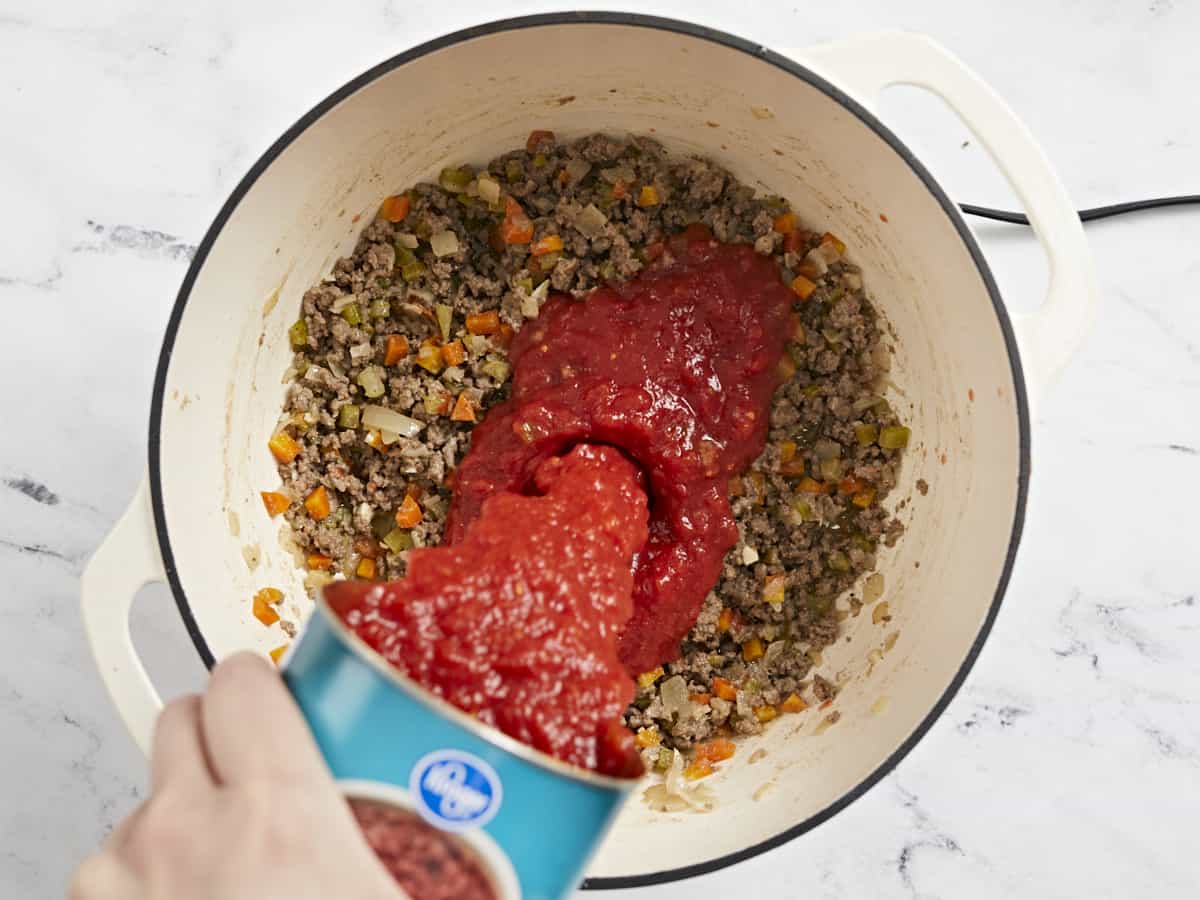
Cut 2 chicken breasts into 1” chunks. Combine 1 tablespoon of grated Parmesan cheese, 1/2 teaspoon of Italian seasoning, 1/2 teaspoon of garlic powder, 1/2 teaspoon red pepper flakes, 1/2 teaspoon of salt, and 1/2 teaspoon of black pepper. Coat the chunks of chicken in 1 tablespoon of olive oil and then toss them in the seasoning mixture.
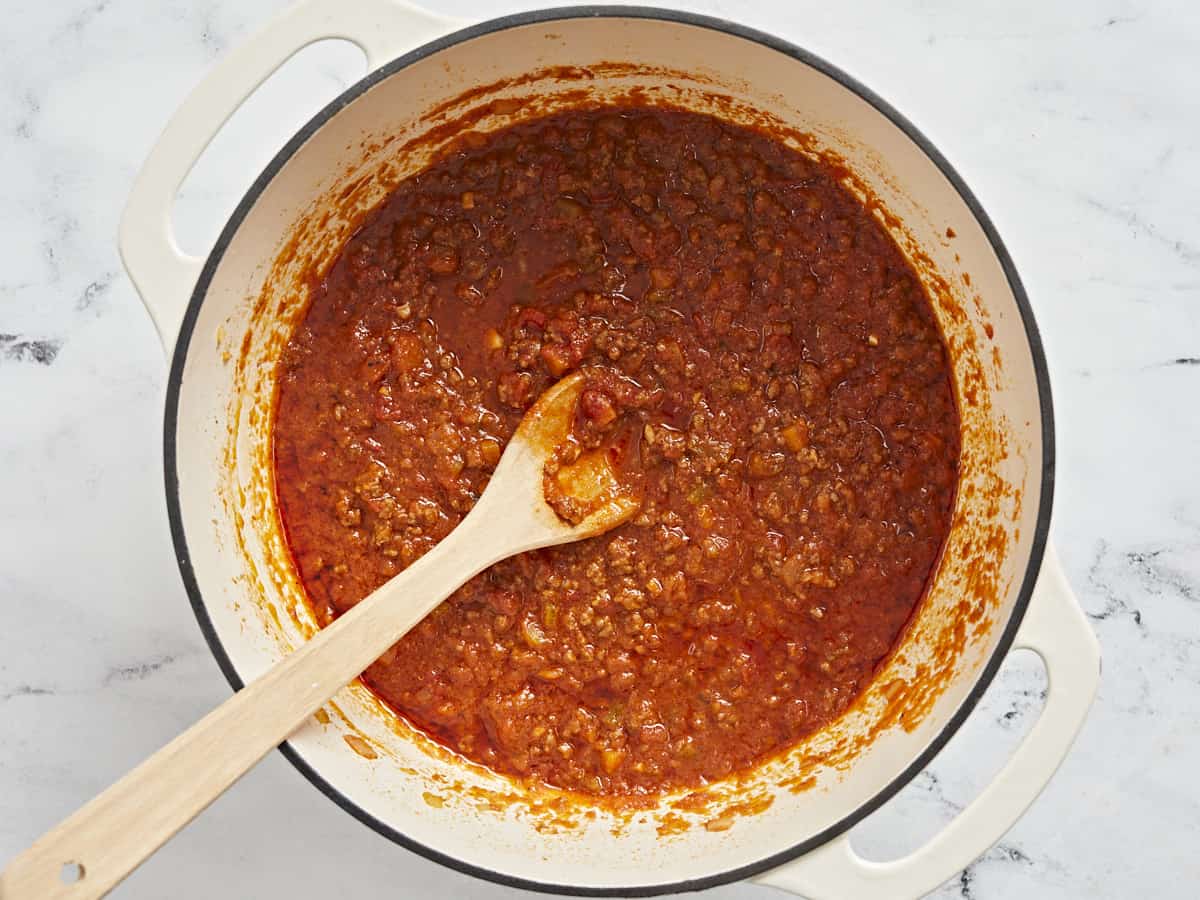
A large stainless steel skillet is sitting on a white marble background. In the skillet are chunks of cooked chicken breast and some olive oil.

Heat a large skillet over medium heat. Add 1 tablespoon of olive oil. Saute the chicken until the bottom of each piece is brown and the sides start to turn white (About 10 minutes). Add 3 tablespoons of water to release the chicken from the skillet, and flip each piece. Continue cooking the chicken until cooked through and no pink remains (About 5 minutes). Remove the chicken from the skillet and set aside to cool. Also, reserve the pan (without wiping it out!) to use when cooking the alfredo sauce.

A stainless steel skillet filled with toasted, seasoned Panko breadcrumbs sitting on a white marble background.

While the chicken is cooking, melt 2 tablespoons of butter in a small skillet over medium heat. Once the butter has completely melted, stir in 1/2 cup panko breadcrumbs, 1/4 teaspoon of Italian seasoning, 1/4 teaspoon of garlic powder, 1/4 teaspoon of red pepper flakes, 1/4 teaspoon of salt, and 1/4 teaspoon of black pepper. Toast the breadcrumbs, stirring occasionally, until all the butter is absorbed and the breadcrumbs are toasted and golden but not brown. (About 7 minutes.) Set aside to cool.

A large stainless steel skillet on a background of white marble. The skillet is covered with fond after cooking chicken and there is a chunk of unmelted butter in the center and a pile of minced garlic.

In the same large skillet used to cook the chicken (without wiping it out), melt 4 tablespoons of butter on medium heat. Add the minced garlic and saute until fragrant. (About 2 minutes.) Use a metal whisk to scrape up the stuck bits of chicken and seasonings left behind in the pan as you cook the garlic, which will infuse the alfredo sauce with tons of flavor!

A large stainless steel skillet with butter and sautéed garlic, and heavy cream being poured from a glass measuring cup into the skillet from the left side of the pan.

Whisk in 2 cups of heavy cream. Then add 1/4 teaspoon of Italian seasoning, 1/4 teaspoon of garlic powder, 1/4 teaspoon of red pepper flakes, 1/4 teaspoon of salt, and 1/4 teaspoon of black pepper. Let the cream come up to a boil, stirring occasionally. (About 5 minutes.)

A large stainless steel skillet filled with heavy cream mixed with sautéed garlic, butter and seasonings. Grated parmesan cheese is sprinkled across the top of the heavy cream mixture from a small white bowl by a hand hovering over the bottom right side of the skillet.

Turn the heat down to low, and add 1½ cups of shredded cheese a handful at a time, whisking until the cheese is fully melted. (About 5 minutes.)

A large stainless steel skillet on a white marble background. The skillet is filled with a finished homemade alfredo sauce, and a hand in visible in the bottom right of the image and is stirring the mixture with a metal balloon whisk.

The alfredo sauce will continue to thicken as it cools. 

A medium-size stainless steel pot filled with cloudy pasta water and cooked rotini. A wooden spoon with a gray, silicon spoon is being held above the pot to show that the pasta is fully cooked. The pot is sitting on a white marble backdrop.

Preheat the oven to 375℉. Thaw the frozen broccoli in a colander, breaking down any large florets into bite-size pieces. At the same time, boil a large pot of water on high heat. Once the water is rapidly boiling, add the rotini and cook until it is just tender. (About 7 minutes). Do not overcook the pasta, as it will soften further in the oven. Set the cooked pasta and broccoli aside.

A circular, white enamel cast iron with a black rim sitting on a marble background. The casserole dish is filled with a mixture of cooked pasta, cooked chunks of seasoned chicken breast, and broccoli florets. Homemade alfredo sauce is being poured over the mixture from a stainless steel skillet raised above the casserole from the left side of the frame.

Mix together the cooked chicken, cooked pasta, and thawed broccoli in a casserole dish. Pour over the alfredo sauce and stir well.

A round, white enamel cast iron baking dish with a black rim is sitting on a white marble background. The baking dish is filled with a mixture of cooked pasta, broccoli florets, cooked chunks of chicken breast and alfredo sauce. A hand in the lower right corner of the casserole dish is sprinkling toasted breadcrumbs over the pasta bake.

Top the casserole with ½ cup of shredded Italian cheese and then sprinkle over 1/2 cup of buttered breadcrumbs. 

A chicken alfredo bake with broccoli topped with melted cheese and golden brown toasted breadcrumbs in a round, white enamel baking dish with a black rim that's sitting on a white, marble background.

Bake the casserole until all the cheese is melted and the breadcrumbs are golden brown (About 25-30 minutes).

A large serving of chicken alfredo bake in a flat, white bowl, and a black fork is resting on the right side of the bowl. The bowl is sitting on a wood background surround with a yellow and gray striped dish cloth, a dark wooden cutting board with Parmesan Cheese shavings on it, and a sprig of parsley and a bowl of untoasted breadcrumbs.

I’m craving this meal again — just LOOKING at it! ~Marion :)

The post Chicken Alfredo Bake appeared first on Budget Bytes.