Soft Pretzel Bites

soft pretzel bites piled on top of each other with thick salt on top.These Soft Pretzel Bites have the best pretzel flavor with that golden brown outside and chewy soft texture. Homemade soft pretzels are really easy to make from scratch – and these little bites are so easy to eat! Homemade Soft Pretzel Bites I absolutely love the taste of these mall-style pretzels. You no longer need…

soft pretzel bites piled on top of each other with thick salt on top.

These Soft Pretzel Bites have the best pretzel flavor with that golden brown outside and chewy soft texture. Homemade soft pretzels are really easy to make from scratch – and these little bites are so easy to eat!

soft pretzel bites piled on top of each other with thick salt on top.

Homemade Soft Pretzel Bites

I absolutely love the taste of these mall-style pretzels. You no longer need to drive to get them because you can make them right at home! Pretzels seem complicated, but this recipe is the easiest one you’ll find. I love making these as an appetizer for sporting events, or to just snack on during the day. Never leave the house for pretzel bites again once you try this recipe!

ingredients in pretzel bites laid out on a white counter.

Ingredients Needed

  • Flour: I use all-purpose flour. You’ll need it in the pretzels, and to aid with kneading the dough.
  • Baking Soda: Added into the water to make a baking soda bath that will give these pretzels the classic taste.
  • Boiling Water: Used to boil the pretzel bite dough into the delicious bites.
  • Yeast: Using instant yeast makes this recipe super easy!
  • Butter: I use unsalted butter because the salt in the recipe is enough.
  • Sugar: Just a little bit of sugar is the perfect amount to sweeten up these bites.
  • Salt: Salt will go into the recipe, but coarse sea salt will go on top!

Secret to Soft Pretzels

The secret to making perfect homemade pretzels is the baking soda bath. Just like bagels, soft pretzels are boiled before baking – but it’s not just in water. The chemicals in the baking soda help give the pretzels their golden color. Without this step you’ll just have bread.

How to make Soft Pretzel Bites

process shots of soft pretzel bites being made.

1. Place 2 cups (248g) flour, yeast, sugar, and salt in the bowl of a stand mixer fitted with the paddle attachment. Whisk to combine.

process shots of soft pretzel bites being made.

2. Place water and butter in a microwave safe measuring cup. Heat in 30 second increments on high power until it reaches 120-130°F (the butter may not totally melt).

process shots of soft pretzel bites being made.

3. Add warm water to the yeast mixture and run the mixer on low to combine. Add additional 2 cups (248g) flour and run the mixer until dough starts to come together, then switch to the dough hook and run the mixer on medium-low speed

process shots of soft pretzel bites being made.

4. The dough should come together in a ball in the center of the mixer, after about 2-4 minutes. It will be slightly sticky and may leave traces on the sides of the bowl.

process shots of soft pretzel bites being made.

5. Lightly flour a work surface and add the dough from the bowl. Sprinkle the top with a bit of flour and knead the dough a few times, up to 2 minutes, adding more flour as needed so it doesn’t stick to the board, until the dough comes together in a cohesive ball.

process shots of soft pretzel bites being made.

6. Roll each piece of dough into a long rope that is approximately 14-inches long.

process shots of soft pretzel bites being made.

7. To create the pretzel bites, cut the rope in half, then cut each piece in half, etc. until you have 1-inch bites (you can also make them larger, if you wish).

process shots of soft pretzel bites being made.

8. Place bites on prepared cookie sheets.

process shots of soft pretzel bites being made.

9. Make baking soda bath and make sure the water is boiling over medium-high heat and place 6-8 pretzel bites in the water at a time (depending on size of your pot; you don’t want to crowd them). Boil no longer than 20 seconds each and remove with a slotted spoon, draining excess water, and place back on cookie sheet. Sprinkle with coarse salt. Repeat until all pretzels have been boiled. Once boiled, place on baking sheet and bake until dark golden brown.

Variations

  • Instead of granulated sugar in the dough you can swap light brown sugar.
  • I topped my bites with salt but you could also brush them with butter.
  • Use everything bagel seasoning or other spices in addition to the salt.
  • Make sweet pretzel bites by tossing in melted butter and cinnamon sugar.
soft pretzel bites piled on top of each other with thick salt on top.

Expert Tips

  • Read the entire recipe before starting for success.
  • This recipe is written for Instant Yeast – so make sure to use the correct kind.
  • There are so many different ways to serve these bites. I typically choose to serve them with a dip of some sort. Wether it is ranch, cheese sauce, or honey mustard, the choices are all delicious!

Storing

  • Store cooled pretzel bites in an airtight container at room temperature. They might weep a little over time.
  • You can freeze baked pretzel bites in an airtight container.
  • Dough can be made and refrigerated for up to 24 hours or frozen for up to a month (thaw before making pretzels).
  • Reheat pretzel bites in the air fryer!
soft pretzel bites piled on top of each other with thick salt on top.
Print

Soft Pretzel Bites Recipe

These soft pretzel bites are so easily made and they have a delicious flavor. Never be scared to make pretzel bites again with this simple recipe.
Course Dessert
Cuisine American
Prep Time 30 minutes
Cook Time 45 minutes
Resting Time 10 minutes
Total Time 1 hour 25 minutes
Servings 84 pretzels
Calories 44kcal
Cost $10

Ingredients

  • 4 cups (492g) all-purpose flour(you'll start with 2 cups and add more when mixing)
  • 1 envelope Instant Yeast (2¼ teaspoons)
  • 1 tablespoon (13g) granulated sugar
  • 1 ½ teaspoons salt
  • 1 ⅓ cups (316ml) water
  • 2 tablespoons (28g) unsalted butter, softened
  • 10 cups water
  • ¾ cup baking soda
  • Sea Salt or Coarse Salt for topping

Instructions

  • Place 2 cups (248g) flour, yeast, sugar, and salt in the bowl of a stand mixer fitted with the paddle attachment. Whisk to combine.
  • Place water and butter in a microwave safe measuring cup. Heat in 30 second increments on high power until it reaches 120-130°F (the butter may not totally melt).
  • Add warm water to the yeast mixture and run the mixer on low to combine. Add additional 2 cups (248g) flour and run the mixer until dough starts to come together, then switch to the dough hook and run the mixer on medium-low speed until the dough comes together in a ball in the center of the mixer, about 2-4 minutes. It will be slightly sticky and may leave traces on the sides of the bowl.
  • Lightly flour a work surface and add the dough from the bowl. Sprinkle the top with a bit of flour and knead the dough a few times, up to 2 minutes, adding more flour as needed so it doesn’t stick to the board, until the dough comes together in a cohesive ball. You know your dough is done kneading when it bounces back with 2 fingers when pressed.
  • Cover and allow the dough to rest for 10 minutes. Line two baking sheets with parchment paper or silicone baking mats. Preheat oven to 400°F.
  • Meanwhile, bring the water and baking soda to a boil in a large pot. Cover and keep it on a high simmer/low boil until you’re ready to boil the pretzels.
  • After the dough has rested for 10 minutes, divide the dough into 12 equal pieces (approximately 70g each, but this will vary).
  • Roll each piece of dough into a long rope that is approximately 14-inches long.
  • To create the pretzel bites, cut the rope in half, then cut each piece in half, etc. until you have 1-inch bites (you can also make them larger, if you wish). Place bites on prepared cookie sheets.
  • Make sure the water is boiling and place 6-8 pretzel bites in the water at a time (depending on size of your pot; you don’t want to crowd them). Boil no longer than 20 seconds each and remove with a slotted spoon, draining excess water, and place back on cookie sheet. Sprinkle with coarse salt. Repeat until all pretzels have been boiled.
  • Bake pretzels for 8-15 minutes, or until dark golden brown on top. Be sure to check them halfway through baking to see if you need to rotate your pans.
  • Cool slightly before eating. Serve warm or room temperature. Store in an airtight container for up to 2 days or freeze for up to one month.

Notes

  • If you want, you can skip salting before baking. Enjoy unsalted, or brush with melted butter and top with coarse salt after baking (like they do at the pretzel shop).
  • You can also make the dough through the resting step or the twisted step ahead of time, up to 24 hours for refrigeration or one month in the freezer. I don’t recommend boiling then freezing.
  • Thaw frozen dough or baked pretzels at room temperature.
  • To reheat thawed baked pretzels, heat in the air fryer or microwave.

Nutrition

Serving: 1serving | Calories: 44kcal | Carbohydrates: 9g | Protein: 1g | Fat: 0.4g | Saturated Fat: 0.2g | Polyunsaturated Fat: 0.1g | Monounsaturated Fat: 0.1g | Trans Fat: 0.01g | Cholesterol: 1mg | Sodium: 337mg | Potassium: 12mg | Fiber: 0.3g | Sugar: 0.2g | Vitamin A: 9IU | Calcium: 3mg | Iron: 1mg

Zucchini Cornbread

Zucchini Cornbread is a delightful twist on a classic cornbread recipe. Made with cornmeal and shredded zucchini, it is moist, fluffy, and slightly sweet.
The post Zucchini Cornbread appeared first on Southern Bytes.

Zucchini Cornbread is a delightful twist on a classic cornbread recipe. Made with cornmeal and shredded zucchini, it is moist, fluffy, and slightly sweet.

The post Zucchini Cornbread appeared first on Southern Bytes.

Easy Air Fryer Recipes

This collection of easy air fryer recipes covers everything from quick and easy snacks to air fryer dinner ideas and delicious desserts. The air fryer has absolutely revolutionized my cooking. Not only is it the appliance I use every single day, it&#8…

Easy Air Fryer Recipes
This collection of easy air fryer recipes covers everything from quick and easy snacks to air fryer dinner ideas and delicious desserts. The air fryer has absolutely revolutionized my cooking. Not only is it the appliance I use every single day, it’s cut down the cooking time of so many of the dishes I prepare...

Easy Air Fryer Recipes

Zucchini Bread

This Zucchini Bread recipe is super moist, flavorful, and the best way to use up extra zucchini during the summer or all year round!

The post Zucchini Bread appeared first on Budget Bytes.

I’m not saying you have to make zucchini bread this summer, but you HAVE to make this Zucchini Bread this summer!😄 It’s made with the simplest ingredients, is perfectly moist, and the best way to enjoy breakfast on the go for just $0.41 per slice! I was first introduced to this delicious zucchini bread recipe by my mom about 10 years ago and I’ve been in love with it ever since. It’s my favorite way to use up extra zucchini during the summertime. But I’ll be honest, this zucchini bread is so good it will have you wanting to make it all year long!

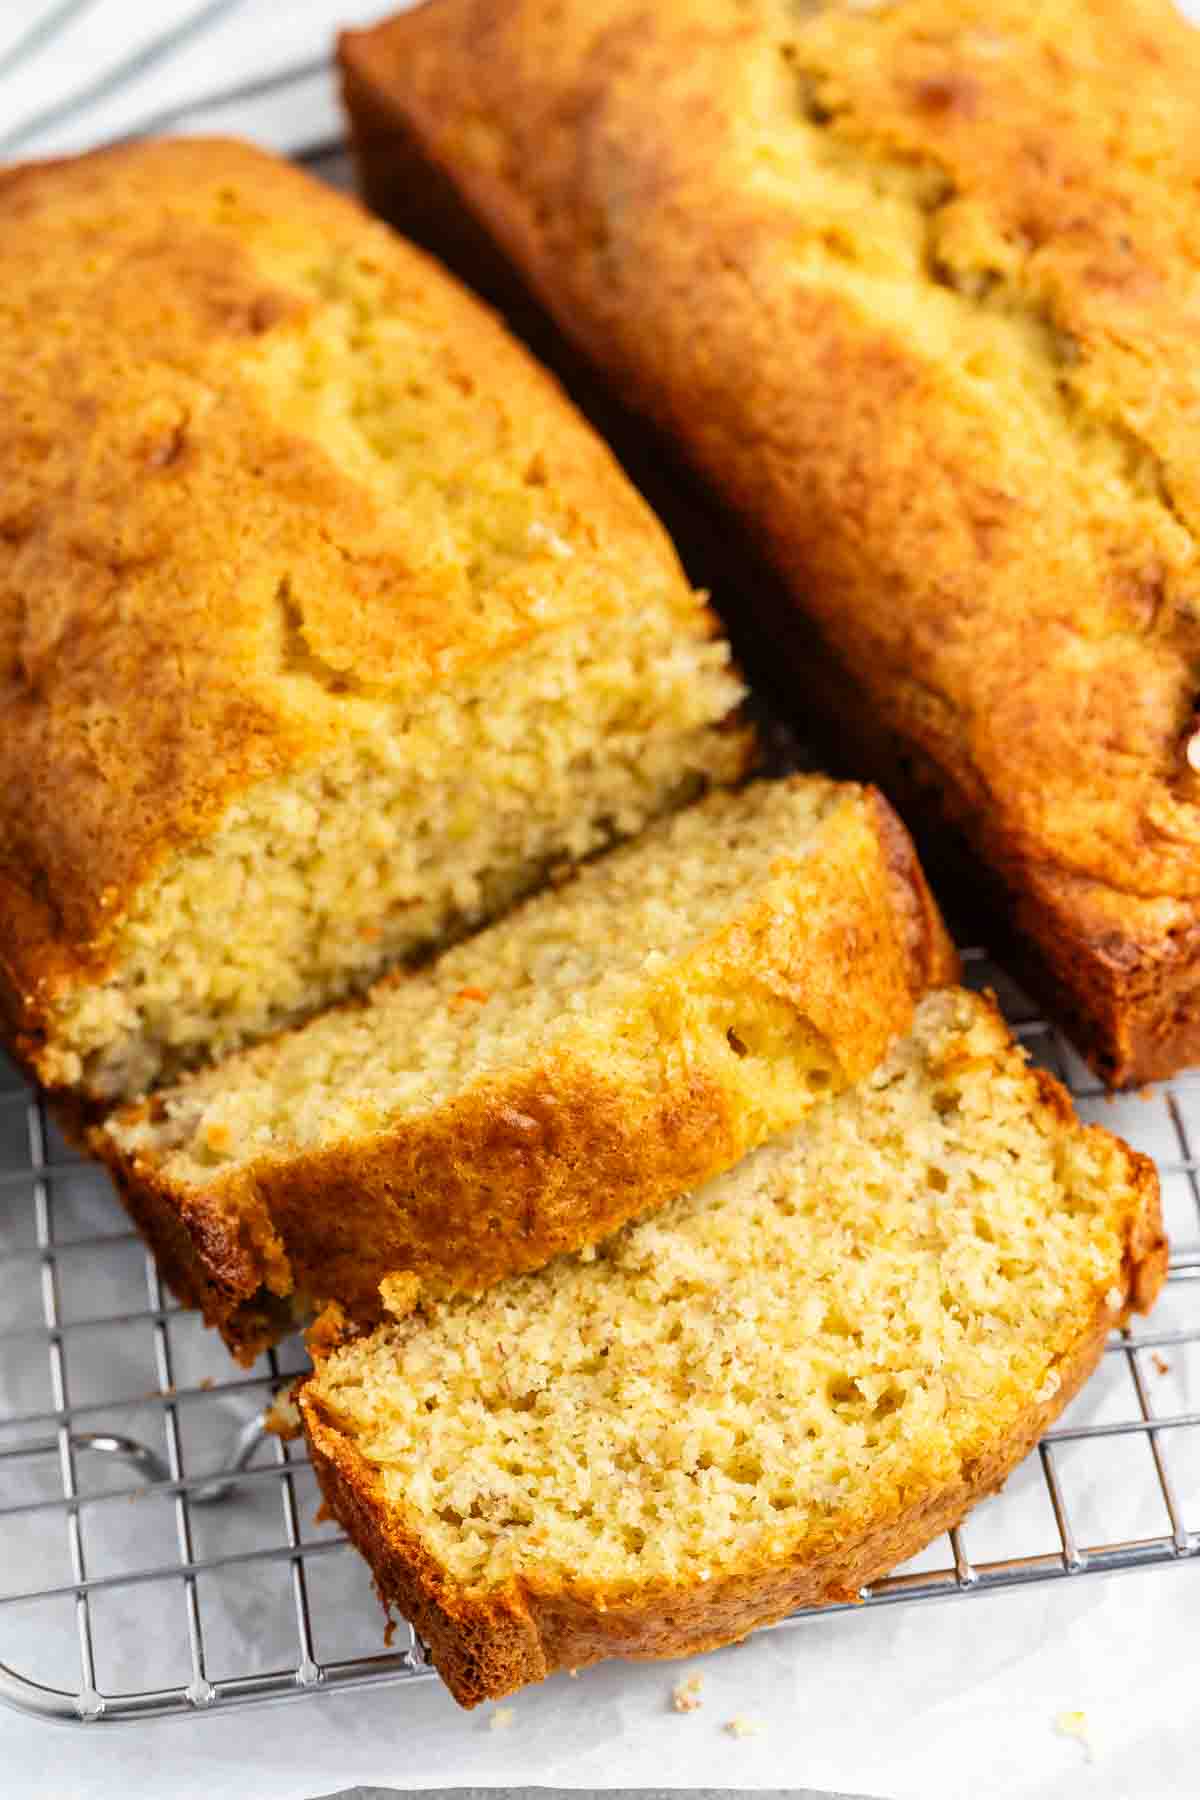
Overhead view of zucchini bread sliced on a cooling rack.

Why Make Zucchini Bread?

If you’re wondering what’s all the hype about zucchini bread, let me fill you in. Zucchini has a fairly neutral flavor and adapts very well to the warm spices, like cinnamon and vanilla, in this recipe. So it ends up being the perfect way to incorporate a green vegetable into a delicious homemade bread recipe. And because zucchini contains over 90% water it also makes this zucchini bread super moist and irresistible!

Ingredients You’ll Need

Here’s everything you need to make this easy zucchini bread recipe:

  • Zucchini: Zucchini naturally contains a lot of water, but there’s no need to pat or squeeze out the excess water for this recipe. In this case the extra liquid helps add moisture to the bread, saving you an extra step!
  • Flour: All-purpose flour gives the zucchini bread structure and body. 
  • Baking Soda & Baking Powder: Baking soda and baking powder are both leavening agents to help the bread rise into a pretty doamed loaf shape. I used both due to the extra acidity from the applesauce.
  • Eggs: Eggs help the ingredients bind together and help give the loaf strength. 
  • Sugar: I used a combination of both white and brown sugar to balance the sweetness, moisture and texture of the zucchini bread. 
  • Applesauce & Oil: The combination of both applesauce and oil keeps the bread moist, but not too oily and also adds wonderful flavor.
  • Cinnamon & Vanilla: Simple spices like cinnamon and vanilla extract adds the perfect amount of flavor and richness to this zucchini bread.
  • Walnuts: Chopped walnuts are optional, but I love the contrast in flavor and texture they add to the bread.

Do You Peel the Zucchini Before Grating It?

You don’t have to worry about peeling the zucchini before grating it, saving you another extra step. Just give it a good wash with your hands or a vegetable brush and you’ll be good to go!

Tips for The Best Zucchini Bread!

  1. Don’t overmix the batter. Overmixing will cause the bread to become rubbery and dense instead of light and fluffy. Mix the dry and wet ingredients together until they are just barely combined and there are no traces of dry flour left in the bowl.
  2. Grease your loaf pan well with butter or oil to prevent the bread from sticking to the pan.
  3. Extremely large zucchini tend to have an even higher water content than regular sized zucchini. So if you happened to grow some extra-large zucchini this year in your garden or picked up some from your local farmers market, you may need to squeeze out just a little bit of the excess water after it’s grated.

Storing Leftovers

This homemade zucchini bread makes the best grab-n-go breakfast! To store leftovers make sure the bread is completely cooled after baking, then cut it into thick slices. Place the zucchini bread in an airtight container or a gallon-sized storage bag in the fridge for up to 4 days. For longer storage, store in a freezer-safe storage bag for up to 3 months. Individual slices can be taken out and thawed at room temperature or briefly microwaved to warm through.

Two slices of zucchini bread on a white plate with butter spread on one slice.

If muffins are more your jam, don’t worry…this recipe also makes perfect, smaller-sized Zucchini Muffins!

Overhead view of zucchini bread sliced on a cooling rack.
Print

Zucchini Bread

This Zucchini Bread recipe is super moist, flavorful, and the best way to use up extra zucchini during the summer or all year round!
Course Breakfast, Dessert, Snack
Cuisine American
Total Cost $4.96 recipe / $0.41 serving
Prep Time 20 minutes
Cook Time 1 hour
Total Time 1 hour 20 minutes
Servings 12 slices
Calories 234kcal

Ingredients

  • 2 cups grated zucchini* (about 1 lb.) $1.49
  • 2 large eggs $0.33
  • 1/2 cup granulated sugar $0.20
  • 1/2 cup dark brown sugar $0.28
  • 1/3 cup sweetened applesauce $0.18
  • 1/4 cup cooking oil $0.16
  • 1 tsp vanilla extract $0.50
  • 2 cups all-purpose flour $0.40
  • 1 tsp baking powder $0.06
  • 1/2 tsp baking soda $0.02
  • 1/2 tsp salt $0.04
  • 1 tsp cinnamon $0.10
  • 1/2 cup chopped walnuts (optional) $1.20

Instructions

  • Preheat the oven to 350°F. Next wash the zucchini well, trim off the stem, then using the large holes on a box grater, grate the zucchini and set it to the side. You’ll need roughly 2 cups of grated zucchini.
  • In a large mixing bowl, whisk together the eggs, white sugar, brown sugar, applesauce, oil, and vanilla extract until well combined.
  • Add the grated zucchini to the bowl and stir until well combined.
  • Now in a separate mixing bowl, whisk together the flour, baking powder, baking soda, salt, and cinnamon until combined.
  • Pour the flour mixture into the bowl of wet ingredients and stir them together until just combined. Be careful not to overmix at this point.
  • Add the chopped walnuts to the bowl and gently fold them into the batter until just combined.
  • Grease a 8.5"x4.5" loaf pan with butter, then add the batter evenly into the pan.
  • Bake the zucchini bread in the preheated oven for 60 minutes or until it's deeply golden brown on top, has a crack down the center, and a toothpick inserted into the middle comes out clean (crumbs are okay, but wet batter is not).
  • Allow the loaf to cool for about 5 minutes in the pan, then gently remove it from the pan and allow it to finish cooling on a wire rack. Once cooled, slice, serve, and enjoy!

See how we calculate recipe costs here.

Notes

*If you have extra-large zucchini you may need to squeeze out a little bit of the excess water after it’s grated. Extremely large zucchini tend to have an even higher water content than medium-large sized zucchini.

Nutrition

Serving: 1slice | Calories: 234kcal | Carbohydrates: 36g | Protein: 4g | Fat: 9g | Sodium: 193mg | Fiber: 1g
Side view of zucchini bread on a cooling rack with a cup of coffee on the side.

How to Make Zucchini Bread – Step by Step Photos

Zucchini being grated on a box grater.

Preheat the oven to 350°F. Next wash the zucchini well, trim off the stem, then using the large holes on a box grater, grate 2 cups of grated zucchini and set it to the side.

Wet ingredients for zucchini bread.

In a large mixing bowl, whisk together 2 eggs, 1/2 cup granulated white sugar, 1/2 cup dark brown sugar, 1/3 cup sweetened applesauce, 1/4 cup cooking oil, and 1 tsp vanilla extract until well combined.

Grated zucchini added to wet ingredients.

Add the grated zucchini to the bowl and stir until well combined.

Dry ingredients for zucchini bread.

Now in a separate mixing bowl, whisk together 2 cups all-purpose flour, 1 tsp baking powder, 1/2 tsp baking soda, 1/2 tsp salt, and 1 tsp cinnamon until combined.

Zucchini bread batter in a large bowl.

Pour the flour mixture into the bowl of wet ingredients and stir them together until just combined. Be careful not to overmix at this point.

Chopped nuts added to zucchini bread batter.

Add 1/2 cup chopped walnuts to the bowl and gently fold them into the batter until just combined.

Zucchini bread batter added to a loaf pan.

Grease a 8.5″x4.5″ loaf pan with butter, then add the batter evenly into the pan.

Cooked zucchini bread in a loaf pan.

Bake the zucchini bread in the preheated oven for 60 minutes or until it’s deeply golden brown on top, has a crack down the center, and a toothpick inserted into the middle comes out clean (crumbs are okay, but wet batter is not).

Side view of zucchini bread on a cooling rack with a cup of coffee on the side.

Allow the loaf to cool for about 5 minutes in the pan, then gently remove it from the pan and allow it to finish cooling on a wire rack. Once cooled, slice, serve, and enjoy!

Slices of zucchini bread stacked on a white plate.

The post Zucchini Bread appeared first on Budget Bytes.

Blueberry Quick Bread

This Blueberry Bread is a fluffy and moist blueberry quick bread that’s so easy to make. It has a delicious blueberry flavor and is great for breakfast or a snack! Easy Blueberry Quick Bread My go-to baking treats are usually quick bread recipes; I love how easy they are and we love eating them for…

The post Blueberry Quick Bread appeared first on Crazy for Crust.

This Blueberry Bread is a fluffy and moist blueberry quick bread that’s so easy to make. It has a delicious blueberry flavor and is great for breakfast or a snack!

sliced bread with blueberries baked into the center.

Easy Blueberry Quick Bread

My go-to baking treats are usually quick bread recipes; I love how easy they are and we love eating them for breakfast and even for a snack and dessert!

This easy blueberry bread is full of fresh blueberries that you can taste throughout every single bite. We all enjoyed this moist quick bread; it’s like a blueberry muffin in a loaf pan! This blueberry quick bread recipe bakes up nice, moist and is the perfect spring or summer brunch recipe!

Note that this is not lemon blueberry bread – it’s just a fluffy sweet quick bread with juicy berries inside.

ingredients in blueberry bread laid out on a white counter.

Ingredients Needed

  • Vegetable Oil: The best ingredient to keep baked goods moist!
  • Milk: Any kind of milk is great with this recipe.
  • Sugar: I use granulated sugar in this recipe!
  • Blueberries: Fresh or frozen blueberries, but if using frozen make sure they aren’t too icy – thaw them completely and drain them well.

Click to see the recipe card below for full ingredients & instructions!

How to make Easy Blueberry Bread Recipe

  1. Preheat oven to 350°F. Spray an 8×4″ loaf pan with nonstick cooking spray.
  2. Whisk flour, baking powder, salt, and sugar in a large bowl.
  3. Whisk together oil, eggs, milk, and vanilla extract in a large measuring cup or medium bowl. Then mix the wet ingredients into the dry ingredients.
  4. Toss blueberries with some sugar and flour.
  5. Pour into prepared pan. Bake for 40-50 minutes, or until the loaf is browned and a toothpick comes out clean from the center. Cool at least 10 minutes before removing from pan and slicing.

Avoid Sinking Berries

Blueberries (and most fruit, when added to quick bread) are heavy and will sink in your cake batter. It’s important to toss them with a bit of flour before gently stirring into the batter, that way they’ll stay suspended in the bread. The flour keeps them “stuck” throughout the bread. This same trick works with blueberry muffins too.

I add a little sugar too because unless they’re perfectly in season, berries can be a bit sour.

sliced bread with blueberries baked into the center.

Expert Tips

  • I recommend using fresh blueberries or completely thawed and drained frozen berries. If you do not drain and dry your blueberries well then they can make the bread soggy.
  • Craving lemon blueberry flavor? Add a simple lemon glaze by mixing 1/2 cup powdered sugar with a tablespoon or so of fresh lemon juice.
  • Want crunch? Add some chopped walnuts or pecans to the bread (about 1/2 cup).
  • This same exact recipe will work with fresh strawberries, raspberries or blackberries.
  • You know when quick bread is done baking when a toothpick inserted in the center comes out clean.

Storage

On the counter, store in an airtight container. It will last a few days longer if stored in the refrigerator. Freeze this bread well wrapped in plastic wrap or freeze slices in sandwich bags for easy grab and go breakfasts!

sliced bread with blueberries baked into the center.
Print

Blueberry Bread Recipe

Blueberry Quick Bread – this easy bread recipe is full of blueberries and has less added sugar! It's the perfect breakfast; like a blueberry muffin but bread!
Course Breakfast
Cuisine American
Prep Time 30 minutes
Cook Time 1 hour
Total Time 1 hour 30 minutes
Servings 10 servings
Calories 199kcal
Cost 7

Ingredients

  • 1 ½ cups (186g) all purpose flour (plus 1 tablespoon for berries)
  • 1 ½ teaspoons baking powder
  • ½ teaspoon salt
  • 1 cup (200g) granulated sugar (plus 1 teaspoon for berries)
  • ¼ cup (59ml) vegetable oil
  • 2 large eggs
  • ½ cup (118ml) milk
  • 1 teaspoon vanilla extract
  • 1 cup (153g) blueberries (see note)

Instructions

  • Preheat oven to 350°F. Spray an 8×4″ loaf pan with nonstick cooking spray.
  • Whisk 1½ cups flour, baking powder, salt, and 1 cup sugar in a large bowl.
  • Whisk together oil, eggs, milk, and vanilla extract in a large measuring cup or medium bowl. Then mix the wet ingredients into the dry ingredients.
  • Toss blueberries with 1 tablespoon (8g) and 1 teaspoon sugar. Gently fold into the batter.
  • Pour into prepared pan. Bake for 40-50 minutes, or until the loaf is browned and a toothpick comes out clean from the center. Cool at least 10 minutes before removing from pan and slicing.

Notes

 
  • I recommend using fresh blueberries or completely thawed and drained frozen berries (make sure they’re thawed and drained well).
  • Store bread wrapped well for up to 3 days or freeze for up to 2 months.
  • This bread was originally made with Splenda. You can use 3/4 cup Splenda or Swerve in place of the granulated sugar.

Nutrition

Serving: 1serving | Calories: 199kcal | Carbohydrates: 31g | Protein: 4g | Fat: 7g | Saturated Fat: 1g | Polyunsaturated Fat: 2g | Monounsaturated Fat: 4g | Trans Fat: 0.03g | Cholesterol: 34mg | Sodium: 136mg | Potassium: 143mg | Fiber: 1g | Sugar: 14g | Vitamin A: 75IU | Vitamin C: 2mg | Calcium: 57mg | Iron: 1mg

Other Quick Bread Recipes

The post Blueberry Quick Bread appeared first on Crazy for Crust.

Apple Streusel Bread

Apple Streusel Bread is a simple quick bread stuffed with fresh apples! It has an cinnamon walnut streusel topping inside and on top, plus a melt in your mouth powdered sugar glaze. It’s one of our best apple recipes to make for the apple picking…

Apple Streusel Bread is a simple quick bread stuffed with fresh apples! It has an cinnamon walnut streusel topping inside and on top, plus a melt in your mouth powdered sugar glaze. It’s one of our best apple recipes to make for the apple picking season! You all know I’m a sucker for quick breads.…

The post Apple Streusel Bread appeared first on Tastes of Lizzy T.

Lemon Quick Bread

This Lemon Bread is a quick bread recipe with so much lemon flavor – There is lemon in every bite! It’s soft and tender with a lemon glaze – it’s the perfect breakfast, lunch, or dessert! Best Lemon Bread Recipe This lemon bread is a quick bread recipe, meaning it is bread made without yeast.…

The post Lemon Quick Bread appeared first on Crazy for Crust.

This Lemon Bread is a quick bread recipe with so much lemon flavor – There is lemon in every bite! It’s soft and tender with a lemon glaze – it’s the perfect breakfast, lunch, or dessert!

sliced lemon bread with a glaze on top on a drying rack.

Best Lemon Bread Recipe

This lemon bread is a quick bread recipe, meaning it is bread made without yeast. It’s not quite bread, but not quite cake – somewhere perfectly in the middle! With a super moist texture, it has a perfect lemon flavor throughout every bite! There are lemon zest and lemon extract and there is a simple lemon glaze!

One of the things I love the most is lemon! I can never get enough lemon in dessert or breakfast foods. Lemon muffins, lemon pie, lemon cookies…you name it I LOVE IT and so do you all! When you feel like lemon loaf but you want it for breakfast, it’s time to make my EASY Lemon Bread recipe.

ingredients in lemon bread laid out on a marble counter.

Lemon Quick Bread Ingredients

  • Flour: I always use all-purpose flour. Be sure to measure it correctly!
  • Baking Powder: This helps the bread rise.
  • Evaporated Milk: Be sure to buy evaporated, not sweetened condensed. It comes in a can in the baking aisle. It adds a richer flavor and some fat to the bread, making it nice and moist.
  • Oil: Vegetable oil or canola oil
  • Lemon Zest: This is where all the flavor is! Don’t skip it. Learn how to zest a lemon! A tablespoon of grated lemon adds so much flavor.
  • Lemon Extract: Always buy PURE extracts. The lemon extract pumps up the lemon flavor of this bread.
  • Powdered Sugar + Lemon Juice: You need these for the glaze. Be sure to use fresh lemon juice!

How to make Lemon Bread

process shot of lemon bread being made.
  1. Whisk together all purpose flour, baking powder, salt, and granulated sugar.
process shot of lemon bread being made.

2. Whisk together evaporated milk, lemon zest, lemon extract, oil, and eggs. Add the wet ingredients to the dry ingredients in a large bowl. Stir until combined.

process shot of lemon bread being made.

3. Add to an 8×4-inch loaf pan. Bake until a toothpick comes out with just a few crumbs.

process shot of lemon bread being made.

4. To make the icing, whisk powdered sugar and lemon juice and pour over the bread. This bread tastes like sunshine!

sliced lemon bread with a glaze on top on a drying rack.

Expert Tips

  • Make Glazed Lemon Bread by whisking powdered sugar with lemon juice for an delicious topping.
  • If you want your bread to be really lemony, don’t skip the lemon extract.
  • Don’t over bake this – when a toothpick comes out with just a few crumbs in the center, it’s done.
  • You can also bake this in 3 mini loaf pans. Bake time will be about half.
  • Turn this into lemon blueberry bread by adding fresh berries.
  • Make it gluten free by using 1:1 gluten-free flour.

FAQs

How to store quick bread – can you freeze it?

Store covered on the counter in an airtight container or freeze it for up to 3 months. Wrap the whole loaf in plastic or place slices in sandwich bags and seal, then place in freezer. Remove to counter to thaw.

sliced lemon bread with a glaze on top on a drying rack.
Print

Lemon Quick Bread Recipe

Lemon Quick Bread – this easy quick bread recipe is bursting with lemon flavor. It’s great for dessert or breakfast – with or without a lemon glaze!
Course Dessert
Cuisine American
Prep Time 15 minutes
Cook Time 45 minutes
Total Time 1 hour
Servings 12 servings
Calories 155kcal
Cost $8

Ingredients

  • 1 ½ cups (186g) all purpose flour
  • ¾ cup (150g) granulated sugar
  • 1 teaspoon baking powder
  • ½ teaspoon salt
  • 2 large egs
  • cup (79ml) oil
  • 5 ounces (75ml) evaporated milk
  • 1 teaspoon pure lemon extract optional
  • Zest of one large or two small lemons
  • ½ cup (57g) powdered sugar
  • 1-2 tablespoons (15-30ml) lemon juice

Instructions

  • Preheat oven to 350°F. Spray an 8.5” by 4.5” loaf pan with nonstick cooking spray (use the kind with flour if you have it). You can also use an 8”x4” loaf pan.
  • Whisk flour, sugar, baking powder, and salt in a large bowl.
  • Place eggs, oil, evaporated milk, extract, and zest in a large measuring cup or small bowl and whisk. (The extract is optional but gives that telltale lemon flavor.) Stir the wet ingredients into the dry ingredients and stir just until the batter forms.
  • Pour into prepared pan and bake for 35-45 minutes, or until a toothpick comes out mostly clean just slightly to one side of center. Cool before frosting.
  • Whisk powdered sugar and lemon juice (1 tablespoon at a time) until desired consistency, drizzle over the bread. The frosting is optional and makes it more sweet, but the bread is good without it as well.

Video

Notes

  • Make Glazed Lemon Bread by whisking powdered sugar with lemon juice for an delicious topping.
  • If you want your bread to be really lemony, don’t skip the lemon extract.
  • Don’t over bake this – when a toothpick comes out with just a few crumbs in the center, it’s done.

Nutrition

Serving: 1/12 loaf | Calories: 155kcal | Carbohydrates: 27g | Protein: 3g | Fat: 3g | Saturated Fat: 1g | Cholesterol: 33mg | Sodium: 118mg | Fiber: 1g | Sugar: 17g

Favorite Lemon Recipes

Last Updated on May 14, 2024

The post Lemon Quick Bread appeared first on Crazy for Crust.

Hawaiian Roll Garlic Bread

Experience the irresistible blend of flavors with our Hawaiian Roll Garlic Bread, where the sweetness of Hawaiian rolls meets savory garlic and cheese. This easy-to-make side dish transforms light, fluffy rolls with garlic-herb butter, baking them to g…

Experience the irresistible blend of flavors with our Hawaiian Roll Garlic Bread, where the sweetness of Hawaiian rolls meets savory garlic and cheese. This easy-to-make side dish transforms light, fluffy rolls with garlic-herb butter, baking them to golden perfection. It’s a unique take on cheesy garlic bread that will elevate any meal.  Served garlic rolls alongside Italian Pastina Soup, Honey...

The post Hawaiian Roll Garlic Bread appeared first on Salty Side Dish.

Homemade Banana Bread

This homemade Banana Bread recipe is super rich, moist, and melt-in-your-mouth delicious. It’s the perfect Saturday morning treat!

The post Homemade Banana Bread appeared first on Budget Bytes.

One day a friend was telling me about how she used to be so in love with the Starbucks banana bread and all I could think about was how the price for one slice is probably more than it costs to make a whole loaf, so I had to working on a dupe. It took about eight tries, but I finally made a homemade banana bread recipe that is super rich, moist, and totally melt-in-your-mouth delicious. And the best part? It ended up costing about $0.38 per slice. 😱 Take that, ‘bucks! Anyway, this banana bread was so good that I’ve been dreaming about it ever since. 🤤 So now the question is, is it wrong to make banana bread every single weekend??

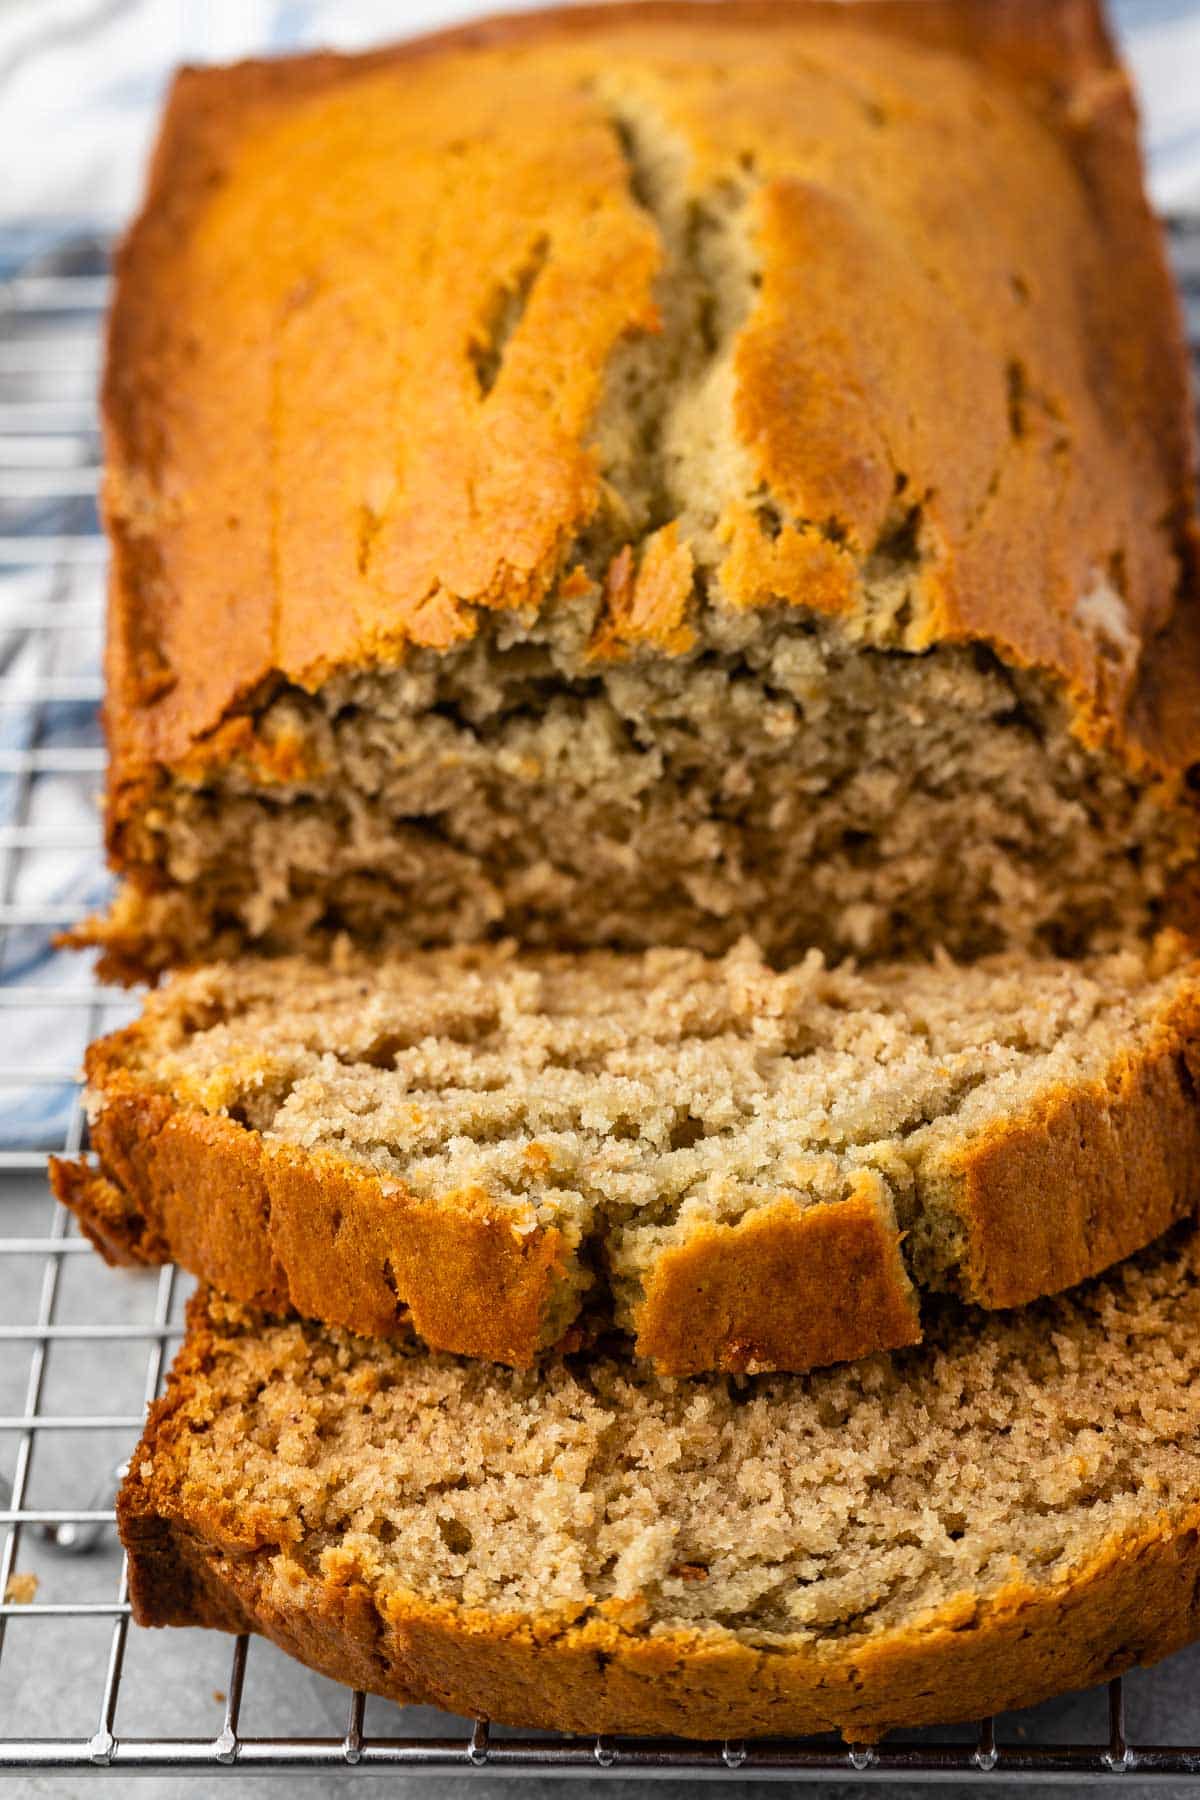
Front view of a sliced loaf of banana bread on a wooden cutting board.

There are so many different recipes for banana bread out there and they create loaves that vary quite a bit in color, size, shape, texture, and of course flavor. My goal for this homemade banana bread recipe was to create a loaf that was super soft and moist, had a really good pronounced banana flavor, the loaf had to rise to a nice doamed shape (not be a flat brick), and did not get too over-browned. It took a combination of ingredients and techniques, but we finally got the perfect loaf of banana bread.

Ingredients for Banana Bread

Here’s what you’ll need to make this incredibly moist and delicious banana bread:

  • Bananas: You must use very ripe bananas for banana bread. Like, half brown ripe. This will ensure they provide enough sweetness, moisture, and banana flavor to the bread. Underripe bananas will give you a dry, bland loaf.
  • Butter & Oil: I used a combination of butter and oil for this banana bread. Butter gives the bread a ton of rich flavor, while oil keeps the loaf super moist after it cools in a way that butter can not. It’s a one-two flavor-texture punch!
  • Eggs: Eggs help give the loaf strength, so it doesn’t crumble, and they also help leaven the loaf so that it bakes up nice and fluffy.
  • Sugar: Using a combination of brown and white sugar again maximizes the flavor and texture. Brown sugar adds a deep flavor and helps moisten the loaf, while white sugar sweetens without making the batter too heavy.
  • Flour: All-purpose flour provides strength and body to the banana bread.
  • Baking Soda: Baking soda helps leaven the loaf so it rises into a pretty doamed loaf shape.
  • Vanilla: A touch of vanilla extract adds richness to the flavor.
  • Spices: We add just a little bit of cinnamon, nutmeg, and salt to the batter to add complexity to the flavor without overpowering the banana. They’re supporting roles, not the main character.
  • Walnuts: Walnuts are optional, but I love the contrast in flavor and texture they add to the bread. You can also substitute in chocolate chips if that’s your jam!

How to Store Banana Bread

I could eat this whole loaf of banana bread within a few days by myself no problem, but if you’re not a champion eater like myself, here’s how to store the leftovers. Make sure the bread is completely cooled after baking, then cut it into thick slices. The sliced bread can be stored in the refrigerator in an air-tight container for 4-5 days, or it can be frozen for longer storage.

To freeze the banana bread, place sheets of parchment paper between the slices to prevent them from sticking, then place them in a gallon-sized freezer bag. Individual slices can be taken out and thawed at room temperature or briefly microwaved to warm through.

Tips for the Best Banana Bread

I made a LOT of loaves during the development of this recipe, so here are some tips that I found will help you get the absolute best banana bread ever:

  • Make sure your bananas are VERY ripe. The sugar content of bananas increases as they ripen, so the more ripe your bananas are the sweeter the bread and the more pronounced the banana flavor will be.
  • Don’t overmix the batter. Stirring the bread batter too much or too vigorously will create a rubbery texture in the banana bread. Fold the wet and dry ingredients together just until evenly combined.
  • Preheat the oven. This is a non-negotiable when baking. The sudden exposure to high heat (rather than a slow increase of a non-preheated oven) is what helps the loaf rise properly.

How to Make Banana Muffins

This banana bread recipe also bakes up really well as muffins. To make banana muffins simply prepare the batter as listed in the recipe below but divide the batter between 12 wells in a standard-size muffin tin. Bake the banana muffins in a preheated 350ºF oven for about 30 minutes, or until the muffins have risen all the way in the center, they’ve browned nicely, and a toothpick inserted into the center of the muffins comes out clean (crumbs but no wet batter).

Overhead view of a slice of banana bread with butter spread on it.
Print

Homemade Banana Bread

This homemade Banana Bread recipe is super rich, moist, and melt-in-your-mouth delicious. It's the perfect Saturday morning treat!
Course Breakfast, Dessert
Cuisine American
Total Cost $4.57 recipe / $0.38 slice
Prep Time 15 minutes
Cook Time 1 hour
Total Time 1 hour 15 minutes
Servings 12 slices
Calories 288kcal

Ingredients

  • 4 Tbsp salted butter, room-temperature $0.54
  • 1/4 cup cooking oil $0.16
  • 1/2 cup granulated sugar $0.18
  • 1/2 cup brown sugar $0.26
  • 1.5 cups mashed ripe bananas (about 3-4 bananas) $0.84
  • 2 large eggs $0.29
  • 1 tsp vanilla extract $0.60
  • 2 cups all-purpose flour $0.40
  • 1 tsp baking soda $0.04
  • 1/2 tsp salt $0.02
  • 1/4 tsp ground nutmeg $0.02
  • 1/4 tsp cinnamon $0.02
  • 1/2 cup chopped walnuts (optional) $1.20

Instructions

  • Preheat the oven to 350ºF. Add the room-temperature butter, cooking oil, granulated sugar, and brown sugar to a mixing bowl. Use a hand mixer or stand mixer to beat the ingredients together until they become light and creamy.
  • Mash the bananas well, then add them to the mixing bowl with the butter and sugar, along with the eggs and vanilla extract. Use the mixter again to beat the ingredients together until smooth.
  • In a separate mixing bowl, stir together the flour, baking soda, salt, nutmeg, and cinnamon until well combined.
  • Pour the flour mixture into the bowl of wet ingredients and fold them together just until combined. Do not overmix.
  • Add the chopped walnuts to the bowl and gently fold to combine again.
  • Grease an 8.5"x4.5" loaf pan with butter or oil, then add the batter and smooth it out evenly into the pan.
  • Bake the banana bread in the preheated 350ºF oven until it's deeply golden brown on top, has a crack down the center, and a toothpick inserted into the middle comes out clean (crumbs are okay, but wet batter is not).
  • Allow the loaf to cool for about 5 minutes in the pan, then gently remove it from the pan and allow it to finish cooling on a wire rack. Once cooled, slice, serve, and enjoy!

Banana Muffins Instructions

  • Prepare the batter as listed above, then divide it between 12 wells of a standard-size muffin tin.
  • Bake the banana muffins for 30 minutes in the preheated 350ºF oven or until they have risen all the way in the center, have browned nicely, and a toothpick inserted into the center comes out clean (crumbs are okay, but no wet batter).

See how we calculate recipe costs here.

Nutrition

Serving: 1slice | Calories: 288kcal | Carbohydrates: 40g | Protein: 4g | Fat: 13g | Sodium: 233mg | Fiber: 2g
Overhead view of a sliced loaf of banana bread.

How to Make Banana Bread – Step by Step Photos

Butter, oil, and sugar added to a mixing bowl.

Preheat the oven to 350ºF. Add 4 Tbsp of room-temperature salted butter, ¼ cup cooking oil, ½ cup white sugar, and ½ cup brown sugar to a mixing bowl.

Creamed butter and sugars in the mixing bowl.

Use a hand mixer or stand mixer to cream the butter, sugars, and oil together until it looks light and creamy.

Mashed bananas in a measuring cup with a fork.

Mash 3-4 bananas, or until you have 1.5 cups of mashed banana.

Banana, eggs, and vanilla added to the butter and sugar mixture.

Add the mashed banana, two large eggs, and 1 tsp vanilla extract to the bowl with the creamed butter and sugar. Use the mixer to mix the ingredients together until smooth.

Dry ingredients being poured into the bowl of wet ingredients.

In a separate bowl, stir together 2 cups of all-purpospe flour, 1 teaspoon baking soda, ½ teaspoon salt, ¼ tsp nutmeg, and ¼ tsp cinnamon until well combined. Pour the flour mixture into the bowl with the wet ingredients and then fold them together just until they form a wet batter. Do not overmix.

Chopped walnuts being folded into the banana bread batter.

Add ½ cup of chopped walnuts to the batter and fold briefly to combine.

Banana bread batter being smoothed into a bread pan.

Grease a standard 8.5″x4.5″ bread pan. Pour the batter into the pan and then spread it out evenly.

Baked banana bread in the bread pan.

Bake the bread for 60 minutes, or until golden brown on top, cracked in the middle, and a toothpick inserted into the center comes out clean. Allow the bread to cool for about 5 minutes in the pan, then gently remove it from the pan and allow it to finish cooling on a wire rack.

Stacked slices of banana bread on a plate.

Once cooled, slice the banana bread and enjoy!

Butter being smeared onto a slice of banana bread.

The post Homemade Banana Bread appeared first on Budget Bytes.