Disneyland Churros

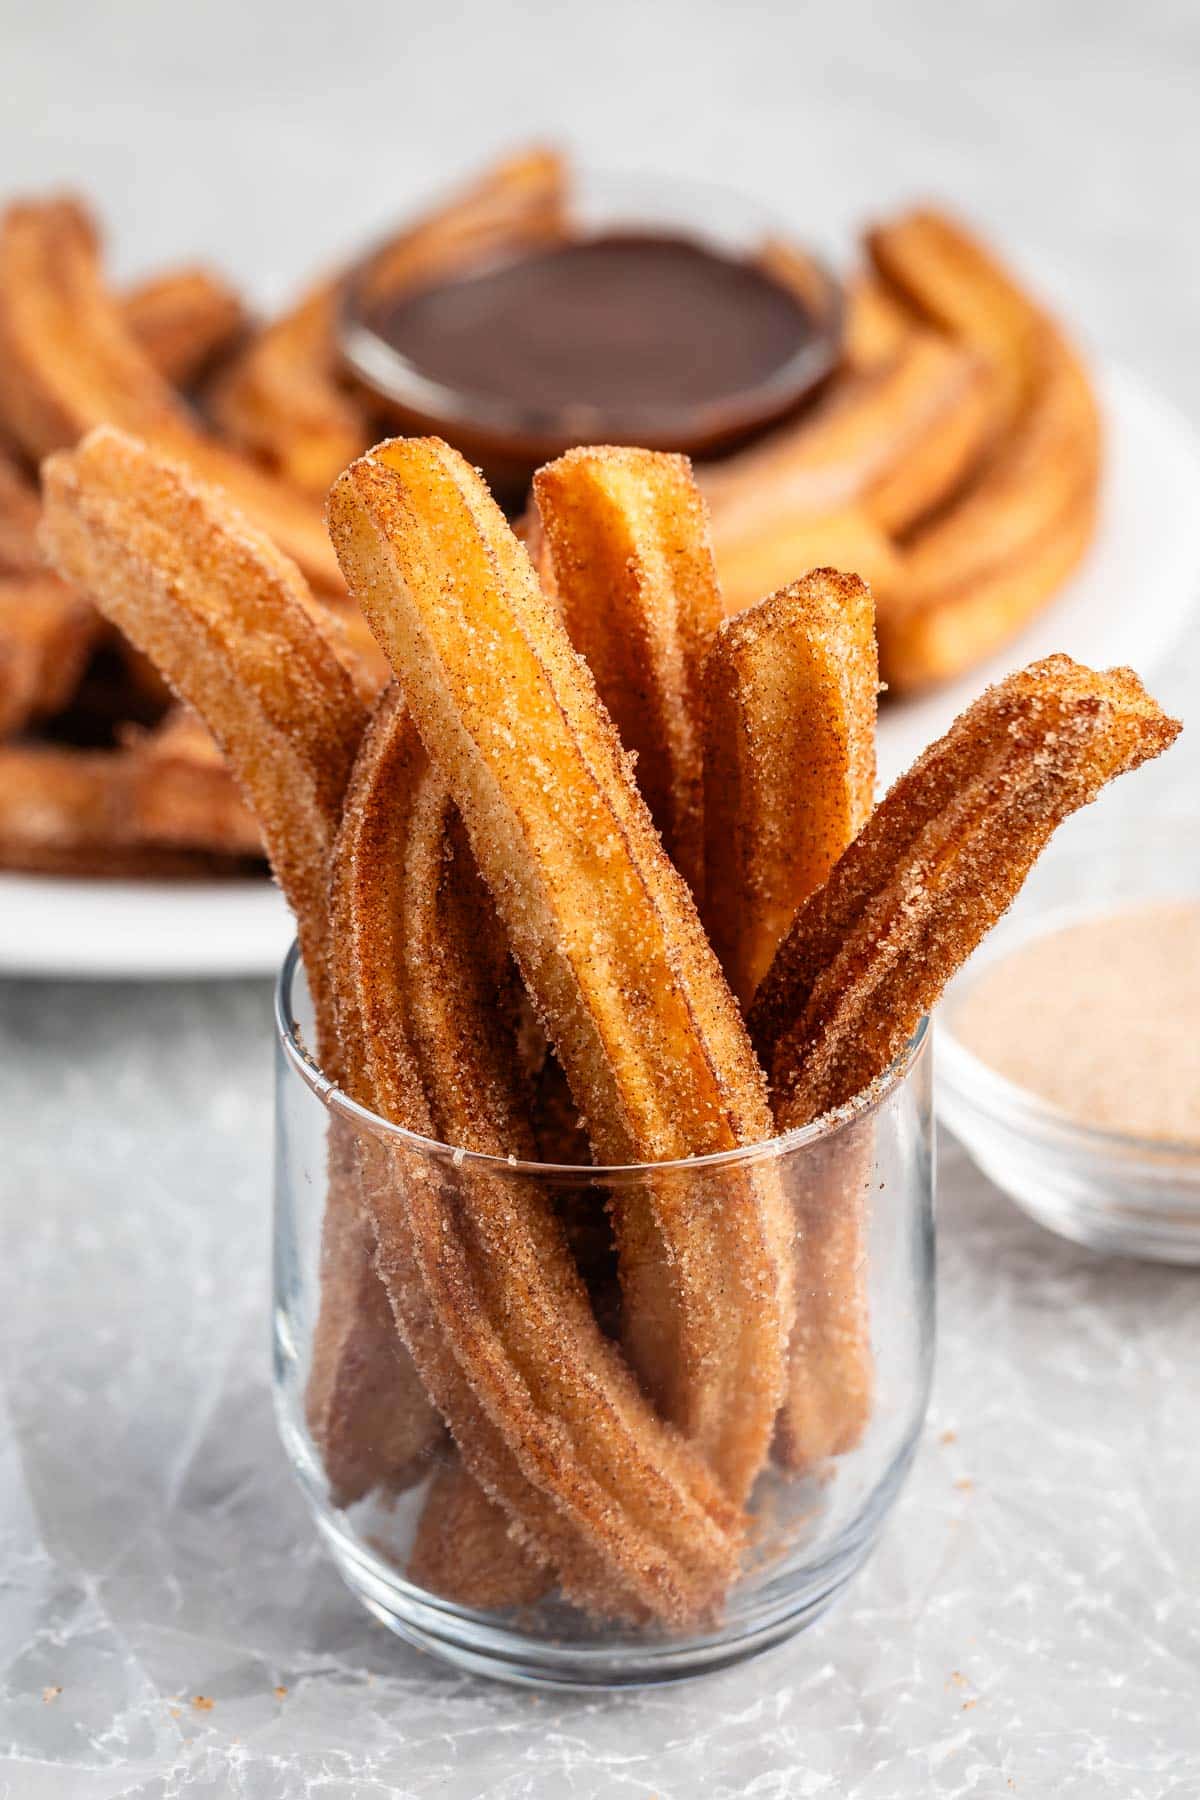
churros placed together in a clear bowl.This Churro Recipe is a copycat of the delicious churros from Disneyland. These fried churros with a cinnamon-sugar coating are easy to make and so good, you’ll be making them all the time – homemade churros are crunchy and sweet and perfect. Homemade Churro Recipe If you have ever been to a Disney park, you…

churros placed together in a clear bowl.

This Churro Recipe is a copycat of the delicious churros from Disneyland. These fried churros with a cinnamon-sugar coating are easy to make and so good, you’ll be making them all the time – homemade churros are crunchy and sweet and perfect.

churros placed together in a clear bowl.

Homemade Churro Recipe

If you have ever been to a Disney park, you most likely have had a churro – and you know they are top tier. These are a copycat of those churros, so you want can have them whenever you want! I’ve made Air Fryer Churros and Baked Churros but the original fried treat doesn’t even compare.

This easy fried churro-making recipe is way easier than you expect. The recipe starts Choux Pastry which is a cooked flour and butter mixture with eggs mixed in. This is the same dough that you use to make eclairs or cream puffs. Once the dough is made you can pipe the churros in any shape and coat them however you want!

ingredients in disneyland churros laid out on a white counter.

Ingredients Needed

  • Cinnamon-Sugar Mixture: Mix cinnamon and granulated sugar to dip the fried churros in.
  • Water, Butter, and All-Purpose Flour: This is the base of the choux pastry. Use unsalted butter whenever possible.
  • Granulated Sugar: Although they are coated in sugar – they have a little extra inside the base as well for a perfect sweetness.
  • Eggs: Large eggs – and be sure to follow the directions so the eggs don’t become “eggy” tasting in the batter.

How to Make This Churro Recipe

  1. Cook water, sugar, and butter until melted and bring to a boil.
  2. Remove the pan from the stove and stir in the flour – it’ll make a thick dough (almost like paste).
  3. Place the dough in the bowl of a stand mixer fitted with a paddle attachment. Allow it to sit for 1 minute to cool before adding eggs – add one at a time and mix well after each addition. Place the churro batter in a large piping bag fitted with a large open star tip (Wilton 1M).
  4. Heat vegetable oil in a large pot or skillet. You want at least 2 inches of oil in your pan. Use a candy thermometer to keep track of the oil temperature. Working in batches, pipe the churro dough into the hot oil (2-4 per batch, depending on size). Cook turning once, until golden brown and cooked through.
  5. Let sit a minute or so, until you can handle them, and toss in cinnamon sugar.
churros placed together on a white plate with a chocolate sauce.

Expert Tips

  • Although you can store these for a few days, they are best served immediately when they are hot.
  • You can get chocolate dipping sauce from the store to dip these churros in, or you can make homemade chocolate sauce or caramel sauce. You can even dip them in hot chocolate.
  • Do not skip the cooling steps in the recipe – they are so important so your mixture doesn’t turn eggy.
  • When piping the churros into the hot oil, use kitchen shears to cut the dough from the piping bag.

Storage

Store in an airtight container for just a few days. They’re best served hot. I do not recommend freezing cooked churros but you can freeze choux dough. Reheat cold churros in the air fryer.

FAQs

Why do my churros taste like egg?

Most likely you did not complete the cooling steps required in the recipe and the eggs cooked in the hot mixture.

churros placed together in a clear bowl.
Print

Churro Recipe (Disney Copycat)

The best churros ever – these are classic churros fried and dipped in cinnamon sugar – a copycat of the Disneyland churros!
Course Dessert
Cuisine American
Prep Time 20 minutes
Cook Time 25 minutes
Total Time 45 minutes
Servings 60 churros
Calories 49kcal
Cost $7

Ingredients

  • 2 cups (474ml) water
  • 2 tablespoons (28g) unsalted butter , softened
  • 2 tablespoons (25g) granulated sugar
  • 1 teaspoon vanilla extract
  • ½ teaspoon salt
  • 2 cups (248g) all-purpose flour
  • 2 large eggs

Coating

  • 2 cups granulated sugar
  • 2 tablespoons cinnamon

Instructions

  • Place water, 2 tablespoons softened butter, 2 tablespoons sugar, vanilla, and salt in a medium saucepan. Heat over medium heat until butter is melted and stir occasionally until mixture boils.
  • Turn off the heat and remove pan from the stove. Stir in the flour with a wooden spoon. A thick paste will form. Make sure to do this off the heat and off the stove, so that the mixture can cool as you stir it.
  • Transfer the dough to the bowl of a stand mixer and let sit 1 minute to cool. Attach the paddle attachment and add eggs, one at a time, mixing well after each addition (work fast to avoid cooking the eggs). You can also use a large bowl with a hand mixer but work fast.
  • Place the churro batter in a large pastry bag fitted with a star or 1M tip.
  • Heat oil to 350°F in a large pot or saucepan over medium-high heat. Use a thermometer to keep track of the temperature. Place paper towels on a cookie sheet near the stove. Stir together cinnamon and sugar for coating.
  • Pipe churros in desired size into the oil. Use kitchen scissors to cut the dough at the pastry tip, being careful of the hot oil. Cook 3-5 minutes, depending on size, using a slotted spoon to turn them carefully about halfway through. Make sure to monitor the temperature of the oil and adjust the stove heat throughout cooking, and do not crowd the pan. Depending on pan size you can fry 2-4 at the same time.
  • Remove from the oil with a slotted spoon and place on cookie sheet to drain. Cool slightly, or until you can handle them.
  • Toss the churros in cinnamon sugar. These are best served immediately.

Notes

Recipe adapted from Cooks Illustrated.
  • Be sure to monitor the oil temperature as you cook. If it’s too hot or too cold the churros will suck up the oil and not be cooked all the way through. Keep it as close to 350° as possible (no more than 400°). 
  • Storing and making ahead: Churro dough can be made a day ahead and stored in the refrigerator, but dough needs to come to room temperature to pipe easily. These are best served immediately while hot – they will soften as they cool. If you want to make them ahead of time, don’t coat them. Air fry to crisp them up and coat with cinnamon sugar right before serving.
To avoid the “eggy” taste you must:
  1. Make sure to remove your pan from the heat before mixing in flour. This will cool off the dough enough that you will avoid cooking the eggs.
  2. Transfer to mixing bowl and allow to sit for 1 minute.
  3. Mix in the eggs quickly, so that they do not cook.

Nutrition

Serving: 1churro | Calories: 49kcal | Carbohydrates: 10g | Protein: 1g | Fat: 1g | Saturated Fat: 0.3g | Polyunsaturated Fat: 0.1g | Monounsaturated Fat: 0.2g | Trans Fat: 0.02g | Cholesterol: 7mg | Sodium: 22mg | Potassium: 8mg | Fiber: 0.3g | Sugar: 7g | Vitamin A: 21IU | Vitamin C: 0.01mg | Calcium: 4mg | Iron: 0.2mg

Other Churro Recipes

Easy Homemade Breadsticks

A basket of Olive Garden Breadsticks, freshly homemade and ready to enjoy.Something about making Homemade Breadsticks is so rewarding, and they’re so simple, soft, and fluffy. We’ve got a variety of seasoning toppings you can use. If you love bread recipes, make sure to try the Best Homemade Rolls, Garlic Knots, Buttermilk Cornbread, Cinnamon Roll Biscuits. How to make Breadsticks: Make the Dough: Combine warm water,…

A basket of Olive Garden Breadsticks, freshly homemade and ready to enjoy.

Something about making Homemade Breadsticks is so rewarding, and they’re so simple, soft, and fluffy. We’ve got a variety of seasoning toppings you can use.

If you love bread recipes, make sure to try the Best Homemade Rolls, Garlic Knots, Buttermilk Cornbread, Cinnamon Roll Biscuits.

A basket of Olive Garden Breadsticks, freshly homemade and ready to enjoy.

Amaze breadsticks we serve with everything.

Now, there’s just no reason to be intimidated by making any type of bread (if you have a good recipe) and our homemade breadsticks are no exception. I’m telling you, they’re EASY, plus they’re cost effective, have the perfect soft texture, and go with every dish! To make it really worth your time, make a big batch of these and freeze the shaped dough or baked breadsticks for another day.

How to make Breadsticks:

Make the Dough: Combine warm water, sugar, and yeast in the bowl of a stand mixer and stir. Let it rest for 5 minutes until it starts to foam on top. (If using Instant yeast, skip this step and add all of the ingredients to the bowl.)

Knead: Add in 1 ½ cups flour, oil, and salt and mix until combined, on medium speed. Add another 1 ½ cups flour or so, until the dough begins to pull away from the sides of the bowl but still slightly sticky when touched. Add additional flour if needed. Knead in stand mixer for several minutes, or until dough is smooth and elastic

Two images showing yeast being proofed in the bowl of a stand mixer, then after the other ingredients are added to make it into a dough.

Rise and Shape: Cover bowl tightly with a dish towel and allow dough to rise until doubled in size, about 1 ½ hours. Punch the dough down, then divide into 12 equal sections. Roll each dough ball into a 9 inch rope. Transfer to a greased cookie sheet, cover with a dish towel and rise again for 1 hour.

Two images showing dough punched down after rising, then formed into a soft breadsticks recipe.

Bake at 425ºF for 10-12 minutes. Remove from oven, brush tops with butter, and place on wire cooling rack. Serve this soft breadsticks recipe with your favorite main dish or soup.

Two images showing a garlic breadsticks recipe after they are baked, then brushed with butter and ready to add toppings or enjoy.

Storage and Freezing Instructions:

Store leftover breadsticks in an airtight container on the counter for a day or two, or freeze them.

To Freeze Breadstick Dough: Follow the instructions for the dough, allowing it to complete the first rise, then shape into breadsticks and place on a baking sheet. Spray a piece of plastic wrap with cooking spray then wrap it lightly over dough. Place pan in freezer and “flash freeze” for 1 hour. Transfer breadsticks to a freezer safe bag and freeze for up to 3 months. When ready to bake it, place frozen breadstick dough on a greased cookie sheet, cover with a dry towel and allow breadsticks rise for several hours, until room temperature and risen bigger.

To Freeze Baked Breadsticks: Allow breadsticks to cool completely then transfer to a freezer safe bag and freeze for 2 months.

Breadstick Flavors Variations:

  • Garlic Butter Topping (Olive Garden style): Mix together ½ teaspoon garlic powder and 4 Tablespoons salted butter and spread over warm breadsticks.
  • Cheesy Breadsticks: Form breadsticks on baking sheet, brush with melted butter and sprinkle ½ cup finely shredded cheese on top (we do ¼ cup parmesan and ¼ cup mozzarella). Cover, rise, and bake as directed.
  • Little Caesars Crazy Bread: Brush warm-from-the-oven breadsticks with garlic butter topping (above) and sprinkle with powdered parmesan cheese.
  • Cinnamon Sugar Breadsticks: Form breadsticks on baking sheet, brush with 2 Tablespoons melted butter and sprinkle with cinnamon sugar (¼ cup granulated sugar + 1 ½ tsp cinnamon). Cover, rise, and bake as directed.

Serve With:

Follow me for more great recipes

A basket of Olive Garden Breadsticks, freshly homemade and ready to enjoy.
Print

Easy Homemade Breadsticks

Our soft and delicious Homemade Breadsticks are easy to make and go well with any meal.
Course bread, Side Dish
Cuisine American, Italian
Prep Time 2 hours 40 minutes
Cook Time 10 minutes
Total Time 2 hours 50 minutes
Servings 12 breadsticks
Calories 163kcal

Ingredients

Instructions

  • Proof Yeast: Add warm water, yeast and sugar to the bowl of a stand mixer and stir gently. Rest for 5 minutes. The yeast should lightly foam on top. If it doesn't, the yeast may not be fresh. (If using Instant Yeast, skip this step and add the yeast, water and sugar with the rest of the ingredients).
  • Add 1 ½ cups flour, salt and vegetable oil then mix on medium speed to combine.
  • Knead: Add another 1 ½ cups flour. The dough should pull away from the sides of the bowl but still be very slightly sticky to the touch. Add remaining ¼ cup of flour, only if needed. Knead mixture for 5-7 minutes. 
  • First Rise: Transfer dough to a large, greased bowl and cover with a dish towel. Allow to rest and rise until double in size, about 1.5 hours.
  • Shape Breadsticks: Once risen, punch dough down and divide into 12 equal parts. Roll each piece of dough into a 9-inch rope and transfer to a greased cookie sheet.
  • Second Rise: Cover with a dish towel and rise again for 1 hour.
  • Bake breadsticks at 425 degrees F for 10-12 minutes. Remove from oven, brush tops with butter, and transfer to a wire cooling rack. Enjoy!
  • Store leftover breadsticks in an airtight container on the counter for a day or two, or freeze them.

Video

Notes

Breadsticks Flavor Variations:
  • Garlic Butter Topping (Olive Garden style): Mix together ½ teaspoon garlic powder and 4 Tablespoons salted butter and spread over warm breadsticks.
  • Cheesy Breadsticks: Form breadsticks on baking sheet, brush with melted butter and sprinkle ½ cup finely shredded cheese on top (we do ¼ cup parmesan and ¼ cup mozzarella). Cover, rise, and bake as directed.
  • Little Caesars Crazy Bread: Brush warm-from-the-oven breadsticks with garlic butter topping (above) and sprinkle with powdered parmesan cheese.
  • Cinnamon Sugar Breadsticks: Form breadsticks on baking sheet, brush with 2 Tablespoons melted butter and sprinkle with cinnamon sugar (¼ cup granulated sugar + 1 ½ tsp cinnamon). Cover, rise, and bake as directed.
To Freeze Breadstick Dough: Follow the instructions for the dough, allowing it to complete the first rise, then shape into breadsticks and place on a baking sheet. Spray a piece of plastic wrap with cooking spray then wrap it lightly over dough. Place pan in freezer and “flash freeze” for 1 hour. Transfer breadsticks to a freezer safe bag and freeze for up to 3 months. When ready to bake it, place frozen breadstick dough on a greased cookie sheet, cover with a dry towel and allow breadsticks rise for several hours, until room temperature and risen bigger.
To Freeze Baked Breadsticks: Allow breadsticks to cool completely then transfer to a freezer safe bag and freeze for 2 months.
Gluten-Free Breadsticks: The texture will be a little different, but you can substitute gluten free baking flour cup for cup.
Vegan Breadsticks: These breadsticks are naturally vegan as long as you use vegan oil and vegan butter for topping.

Nutrition

Calories: 163kcal | Carbohydrates: 28g | Protein: 4g | Fat: 4g | Saturated Fat: 0.3g | Polyunsaturated Fat: 1g | Monounsaturated Fat: 2g | Trans Fat: 0.01g | Sodium: 293mg | Potassium: 40mg | Fiber: 1g | Sugar: 2g | Vitamin A: 1IU | Vitamin C: 0.001mg | Calcium: 6mg | Iron: 2mg

Follow Me

Get recipe ideas weekly!

*I originally shared this post September 2014. Updated April 2020 and August 2024.

Brown Butter Chocolate Chip Cookies

These Brown Butter Chocolate Chip Cookies are some of my favorite cookies ever! Bakery Style Chocolate Chip Cookies are full of delicious chocolate chips with a warm brown butter flavor. These huge cookies are a hit! Browned Butter Cookies Chocolate Chip Cookies never get old: they’re the gift that keeps on giving. I have a…

The post Brown Butter Chocolate Chip Cookies appeared first on Crazy for Crust.

These Brown Butter Chocolate Chip Cookies are some of my favorite cookies ever! Bakery Style Chocolate Chip Cookies are full of delicious chocolate chips with a warm brown butter flavor. These huge cookies are a hit!

chocolate chip cookies with chocolate chips baked into the center.

Browned Butter Cookies

Chocolate Chip Cookies never get old: they’re the gift that keeps on giving. I have a ton of recipes on this site and don’t plan to stop creating them anytime soon! This cookie is definitely one of the best chocolate chip cookie recipes I have made.

They are made with brown butter which gives the cookie a nutty aroma and toffee-like flavor. Why brown butter for chocolate chip cookies? It toasts the milk solids in the butter and adds so much flavor. If you’ve never tried it in cookies you must and these are a great cookie recipe to start with.

ingredients in brown butter cookies laid out on a white counter.

Ingredients & Variations

  • Unsalted Butter: Unsalted butter is a must because we are going to brown it. You don’t want to brown salted butter as it will concentrate the salty flavor.
  • Sugar: I use both brown and granulated sugar in the recipe. Brown sugar helps keep them soft. I normally use light brown sugar but dark brown sugar may be substituted.
  • Eggs: Eggs are important for the structure and texture of cookies and the fat from the egg yolk makes them rich and chewy.
  • Chocolate Chips: You can use regular size or mini semisweet chocolate chips or chocolate chunks. Milk chocolate can also be used but I love the chocolate flavor of semi-sweet chocolate chips best. Even dark chocolate would work!
  • Extras: Feel free to add some chopped walnuts or pecans (reduce the chocolate chips to 1 1/2 cups and add 1 cup chopped nuts). You can also sprinkle the warm cookies with some flaky sea salt – salted chocolate chip cookies are SO GOOD.

How to make Brown Butter Chocolate Chip Cookies

  • Browning butter is really easy. It melts easiest if you start with sliced butter. Cook over medium-low heat, stirring often, until the butter foams. Continue stirring and the butter will turn a dark caramel color.
  • You can use a stand mixer or hand mixer or stir by hand – just mix all the ingredients together in a large bowl.
  • Use a cookie scoop to scoop cookie dough balls onto a parchment paper lined cookie sheet. You can do 2-tablespoon size, 1-tablespoon size, or ¼ cup size for giant cookies. Chill in the fridge at least 30 minutes, longer if making giant cookies.
  • Preheat oven to 350°. Line baking sheets with parchment or silicone liners.
  • Bake 8-10 minutes for 1 tablespoon size cookies, 10-15 minutes for 2-tablespoon size, and approximately 15 minutes for giant cookies.
chocolate chip cookies with chocolate chips baked into the center.

Expert Tips

  • Brown the Butter: It’s easy, but you have to be careful. It’ll burn quick! You just melt your butter over medium-low heat and cook, stirring, until it turns golden brown and smells nutty. The butter will foam, and that’s okay. The foam will go away once it’s removed from the heat. Read my post to learn how to brown butter easily.
  • For an extra flavor boost add 1 teaspoon almond extract in addition to the vanilla.

Storing

Store these in an airtight container at room temperature for up to a week. You can freeze these cookies in the freezer for up to 3 months. Make sure they are sealed in an airtight container.

chocolate chip cookies with chocolate chips baked into the center.
Print

Brown Butter Chocolate Chip Cookie Recipe

These Bakery Style Chocolate Chip Cookies are gooey, chocolatey and filled with brown butter!
Course Dessert
Cuisine American
Prep Time 30 minutes
Cook Time 15 minutes
Chill Time 4 hours
Total Time 4 hours 45 minutes
Servings 16 cookies
Calories 432kcal

Ingredients

  • 1 cup (226g) unsalted butter
  • cup (134g) granulated sugar
  • 1 cup (200g) packed light brown sugar
  • 2 large eggs
  • 1 teaspoon vanilla extract
  • 1 teaspoon baking soda
  • 2 ½ cups (310g) all-purpose flour
  • ½ teaspoon salt
  • 2 cups (340g) chocolate chips

Instructions

  • Melt butter in a saucepan over medium heat. Cook, stirring often, about 6 minutes, until it becomes brown in color. It will foam, reduce, then foam again. Once it’s done cooking the foam is a light brown and it will dissipate after you remove it from the heat. Once it starts to brown, keep stirring so it doesn’t burn. Let sit for about 5 minutes to cool.
  • Pour into an electric mixer fitted with paddle attachment (or a large bowl if using a hand mixer or stirring by hand). While still hot, add both sugars and mix on low until combined. Let sit to cool for a few minutes.
  • While butter mixture is cooling, combine flour, baking soda, and salt in a medium bowl. Stir and set aside.
  • Turn mixer (with butter mixture bowl attached) on low. Add eggs, one at a time, mixing completely. Mix in vanilla extract and almond extract (optional, but it adds great flavor). Add flour mixture to the wet ingredients and mix until combined. Stir in chocolate chips.
  • Scoop cookie dough balls onto a parchment paper lined cookie sheet. You can do 2-tablespoon size, 1-tablespoon size, or ¼ cup size for giant cookies. Chill at least 30 minutes, longer if making giant cookies.
  • Preheat oven to 350°. Line cookie sheets with parchment or silpat liners.
  • Bake 8-10 minutes for 1 tablespoon size cookies, 10-15 minutes for 2-tablespoon size, and approximately 15 minutes for giant cookies.

Notes

  • Store in an airtight container on the counter for up to 3 days or freeze for up to 2 months.
  • I love adding a sprinkle of sea salt on top the freshly baked cookies.
  • It’s important to use unsalted butter for browning – browning concentrates the flavor and the butter will be too salty if using salted butter.

Nutrition

Serving: 1cookie | Calories: 432kcal | Carbohydrates: 62g | Protein: 5g | Fat: 19g | Saturated Fat: 11g | Polyunsaturated Fat: 1g | Monounsaturated Fat: 4g | Trans Fat: 1g | Cholesterol: 61mg | Sodium: 149mg | Potassium: 67mg | Fiber: 1g | Sugar: 38g | Vitamin A: 482IU | Vitamin C: 1mg | Calcium: 47mg | Iron: 2mg

Other Chocolate Chip Cookie Recipes

The post Brown Butter Chocolate Chip Cookies appeared first on Crazy for Crust.