Steak Fried Rice
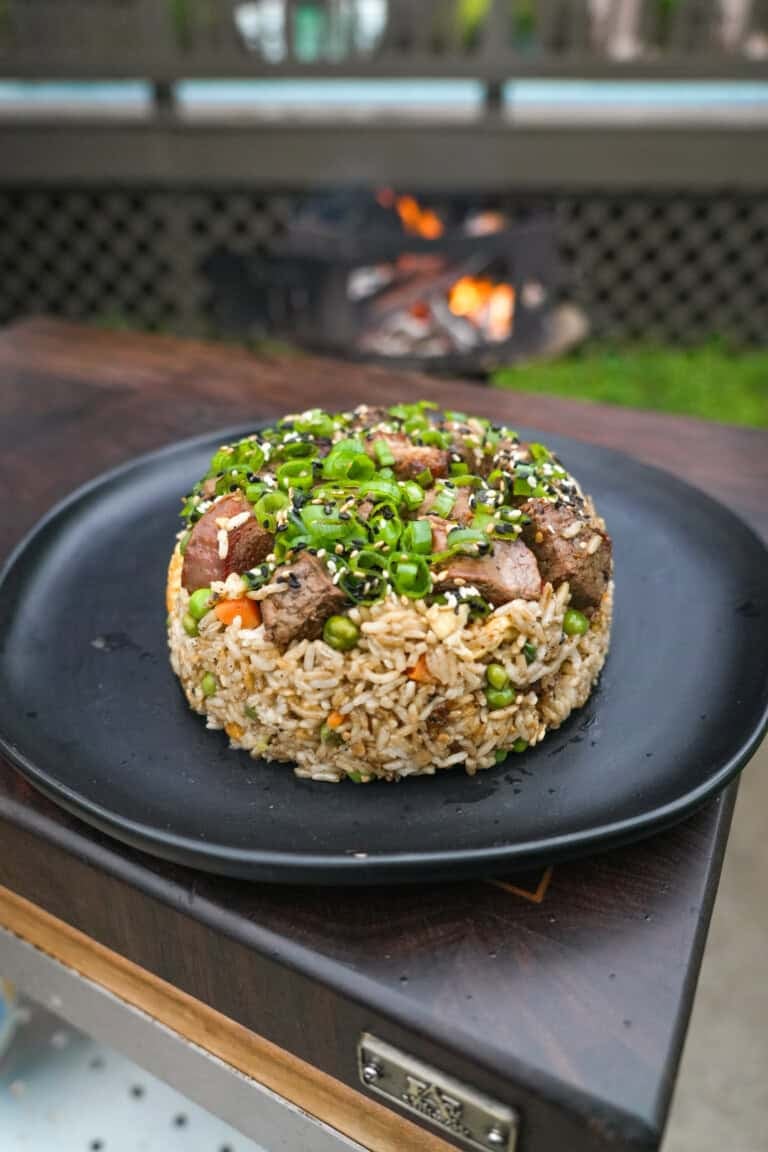
Sometimes the most freakin’ delicious meals come from leftovers. That’s exactly the case with this steak fried rice recipe. If…
The post Steak Fried Rice appeared first on Over The Fire Cooking.
Sometimes the most freakin’ delicious meals come from leftovers. That’s exactly the case with this steak fried rice recipe. If…
The post Steak Fried Rice appeared first on Over The Fire Cooking.
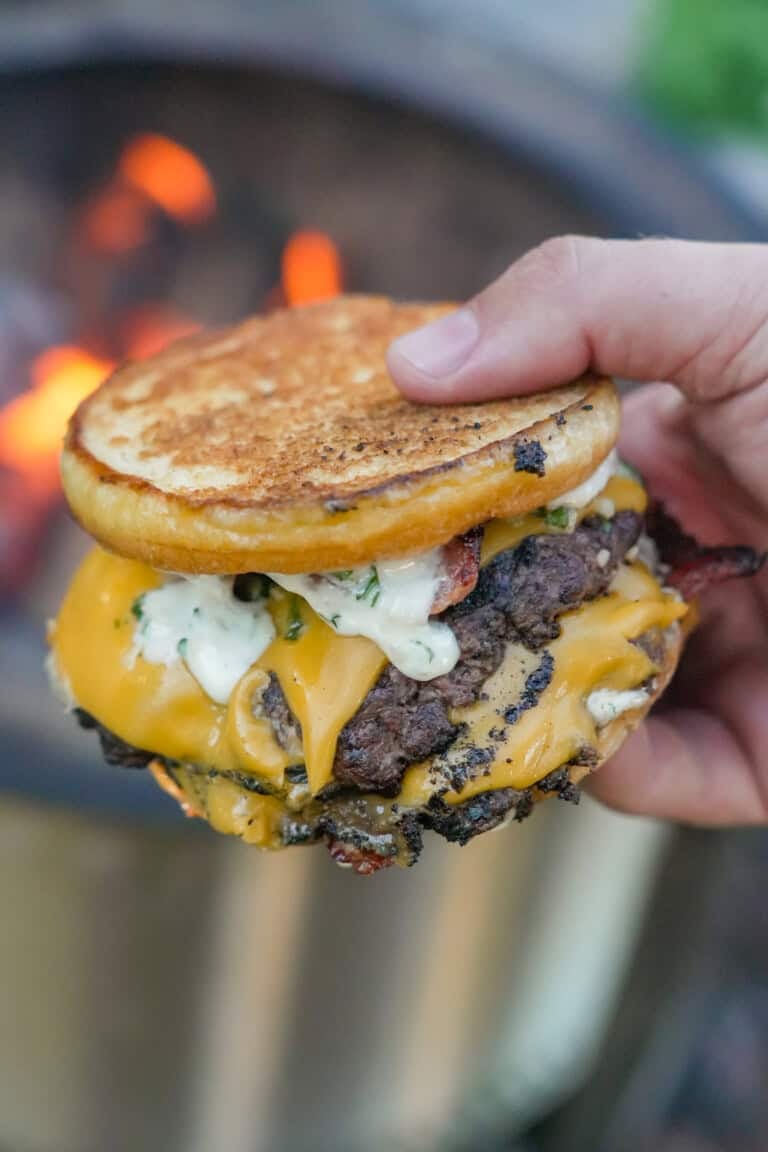
When it comes to homemade burgers, I’ve got a lot of favorites, but this Garlic Butter Burger is one at…
The post Garlic Butter Burger appeared first on Over The Fire Cooking.
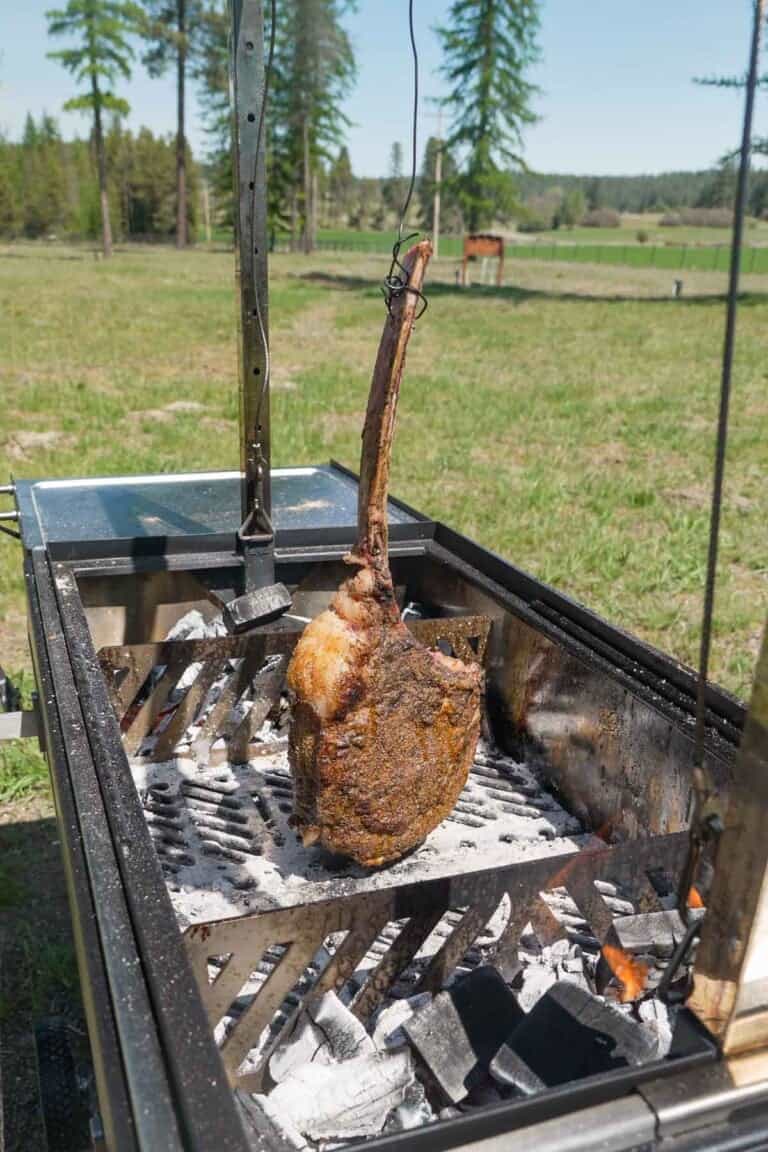
If you’re all about power tools, chopping wood, and dreaming of the perfect steak, then the hanging tomahawk steak is…
The post Hanging Tomahawk Steak appeared first on Over The Fire Cooking.
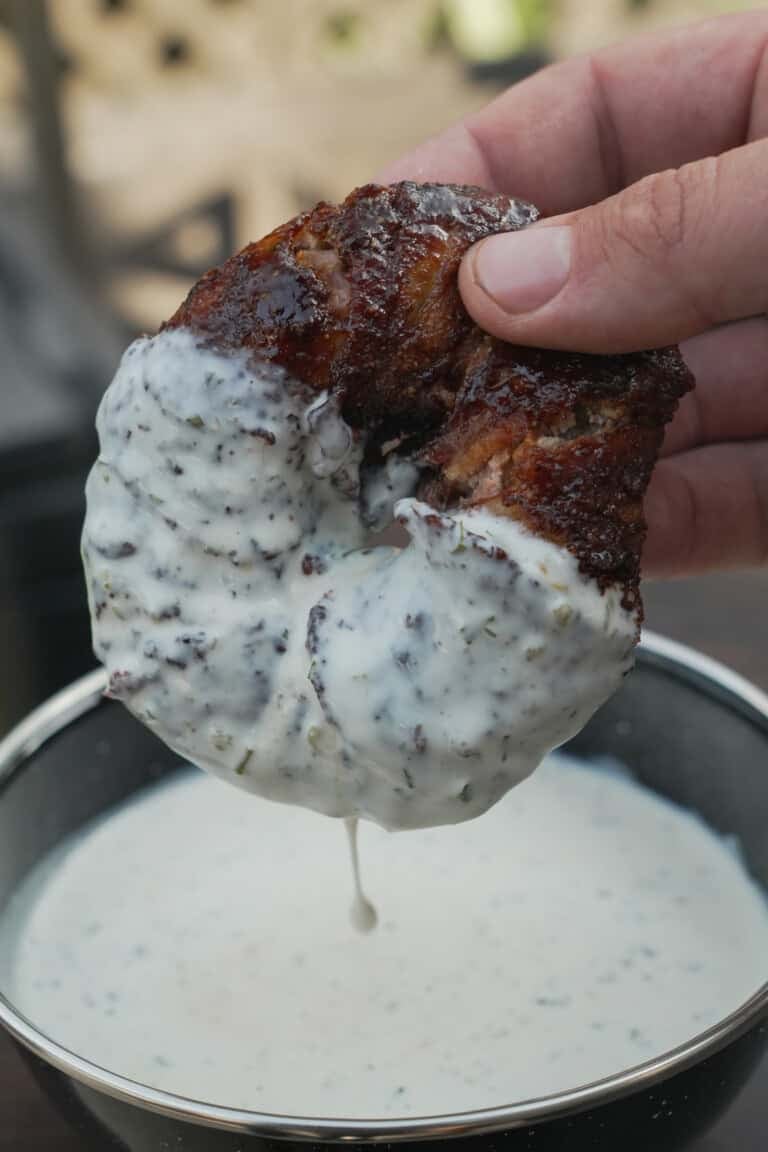
Texas Twinkies, cowboy candy — sounds like there’s a real sweet tooth happening, right? Wrong! What our friends in Texas…
The post Texas Twinkie Stuffed Onion Rings appeared first on Over The Fire Cooking.
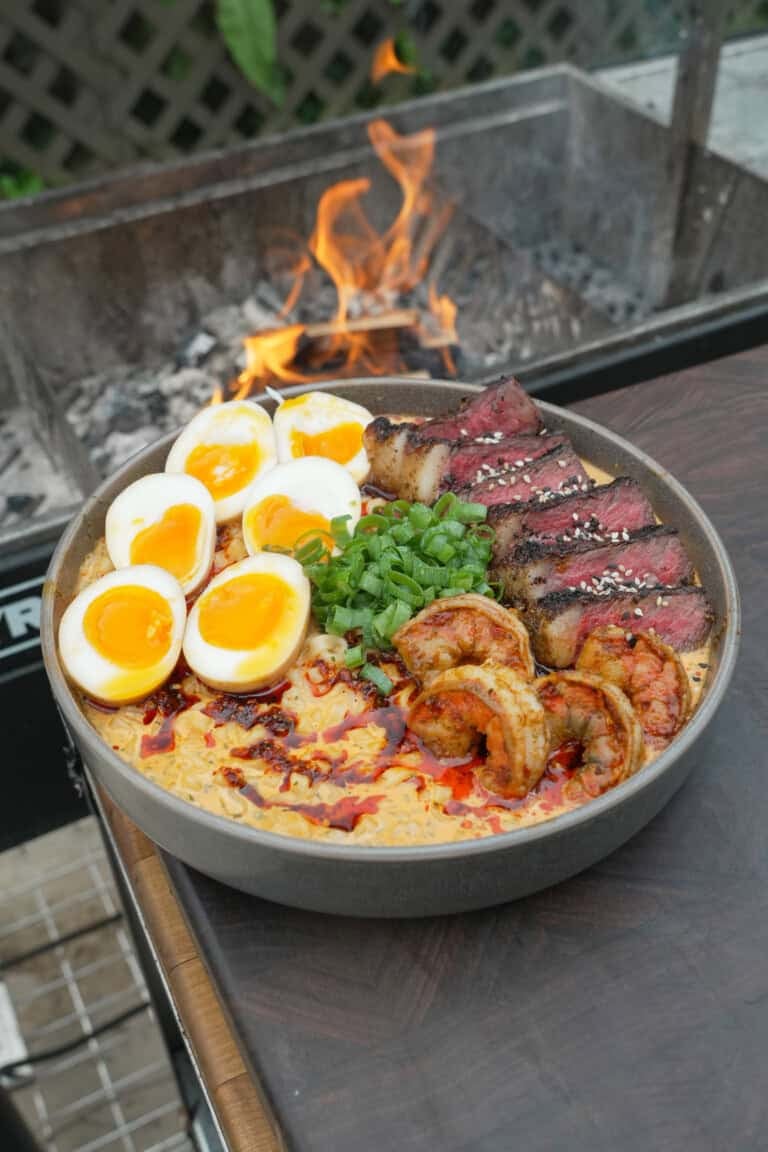
Ramen is such a versatile, satisfying dish. All those noodles and toppings and freakin’ delicious broth? Can’t go wrong. I…
The post Surf and Turf Ramen appeared first on Over The Fire Cooking.
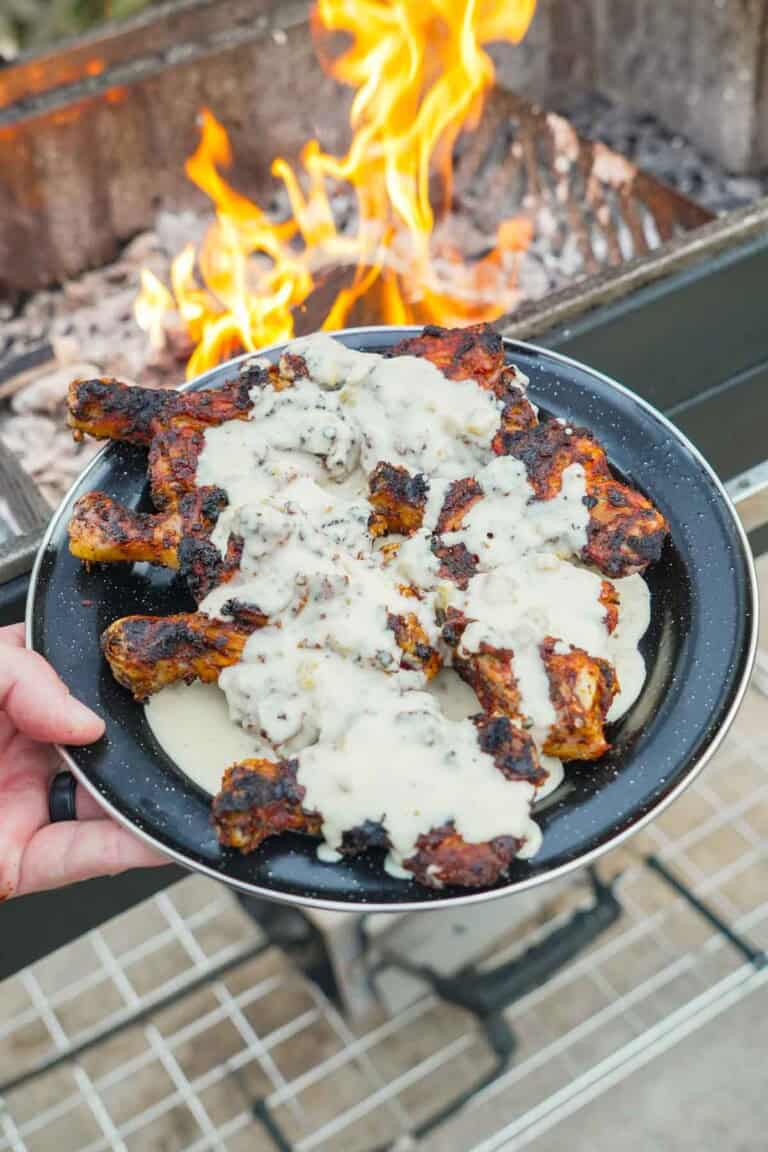
Grilled Butterflied Chicken Drumsticks with Queso are my kind of backyard classic. A bigger surface area for the chicken means…
The post Grilled Butterflied Chicken Drumsticks with Queso appeared first on Over The Fire Cooking.
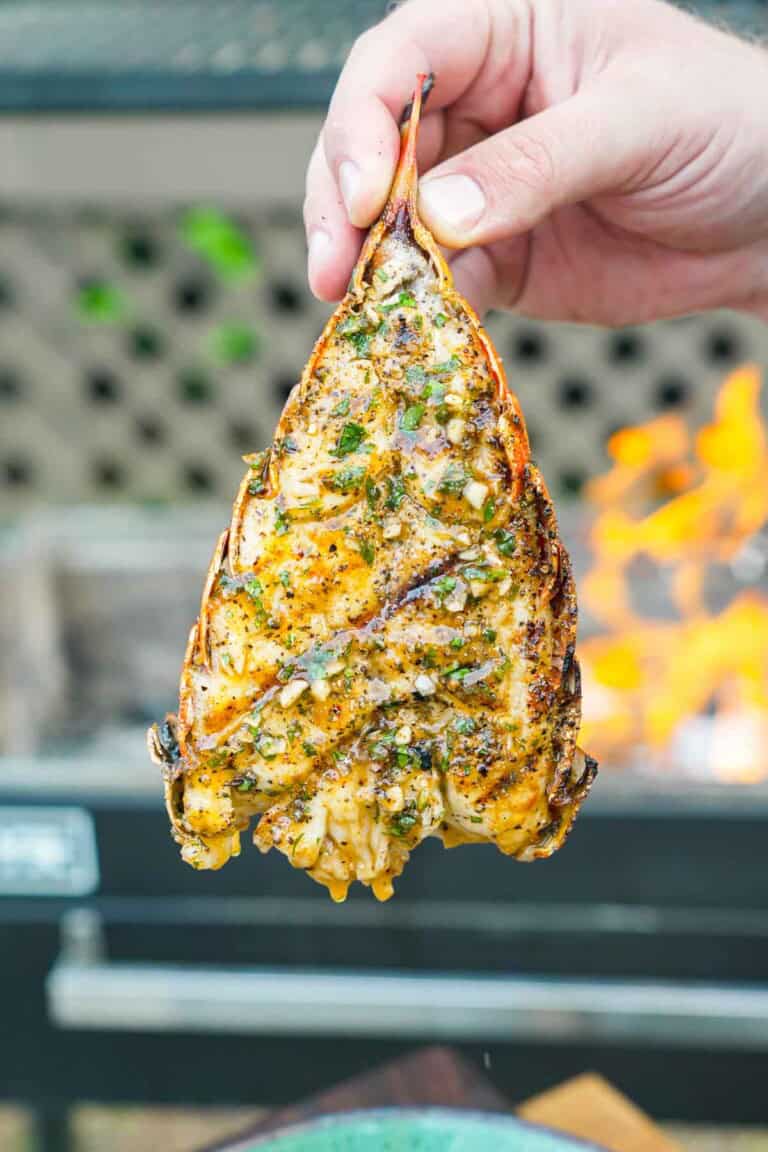
I make this grilled lobster tail recipe as one of my regular monthly cooks because of how much I love…
The post Grilled Lobster Tails with Honey Cajun Butter appeared first on Over The Fire Cooking.

Welcome to my Grilled Fish Roundup! Nothing beats the moment when freshly caught seafood hits the grill, with the crackle…
The post Grilled Fish Recipes appeared first on Over The Fire Cooking.
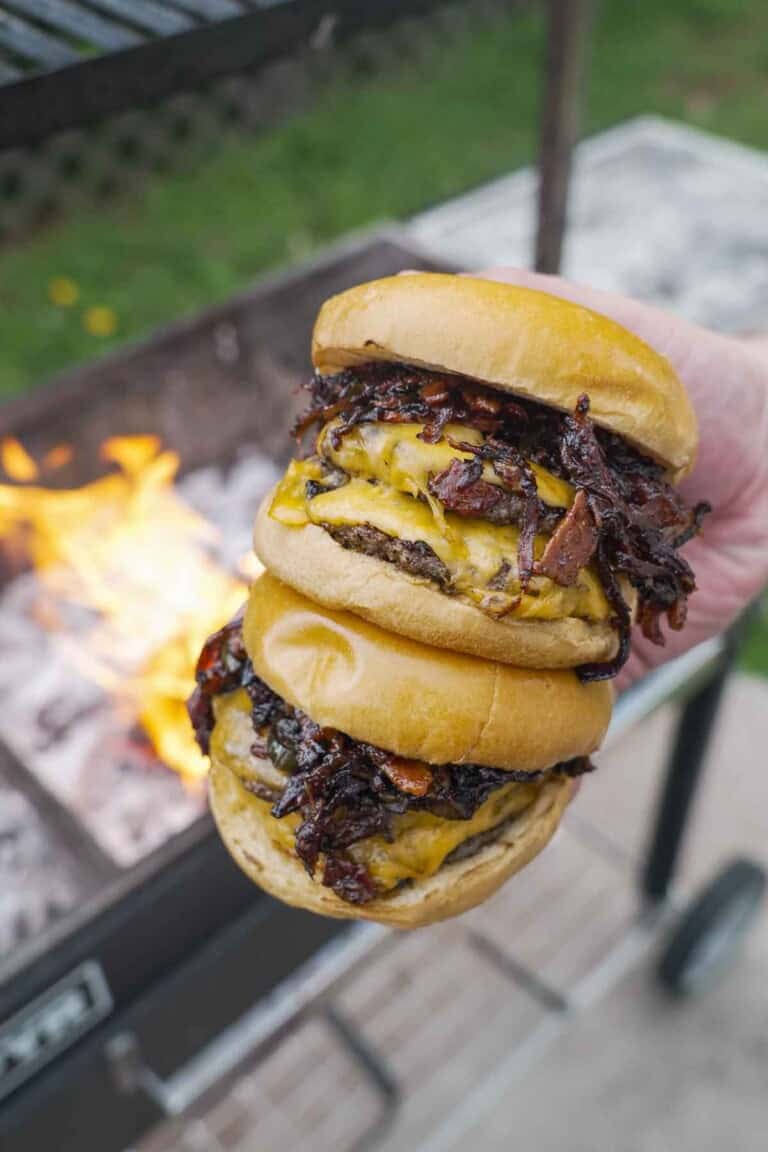
If you’re looking for a great burger, Bacon Jam Burgers with jalapenos are ready to take your backyard grilling to…
The post Bacon Jam Burgers appeared first on Over The Fire Cooking.
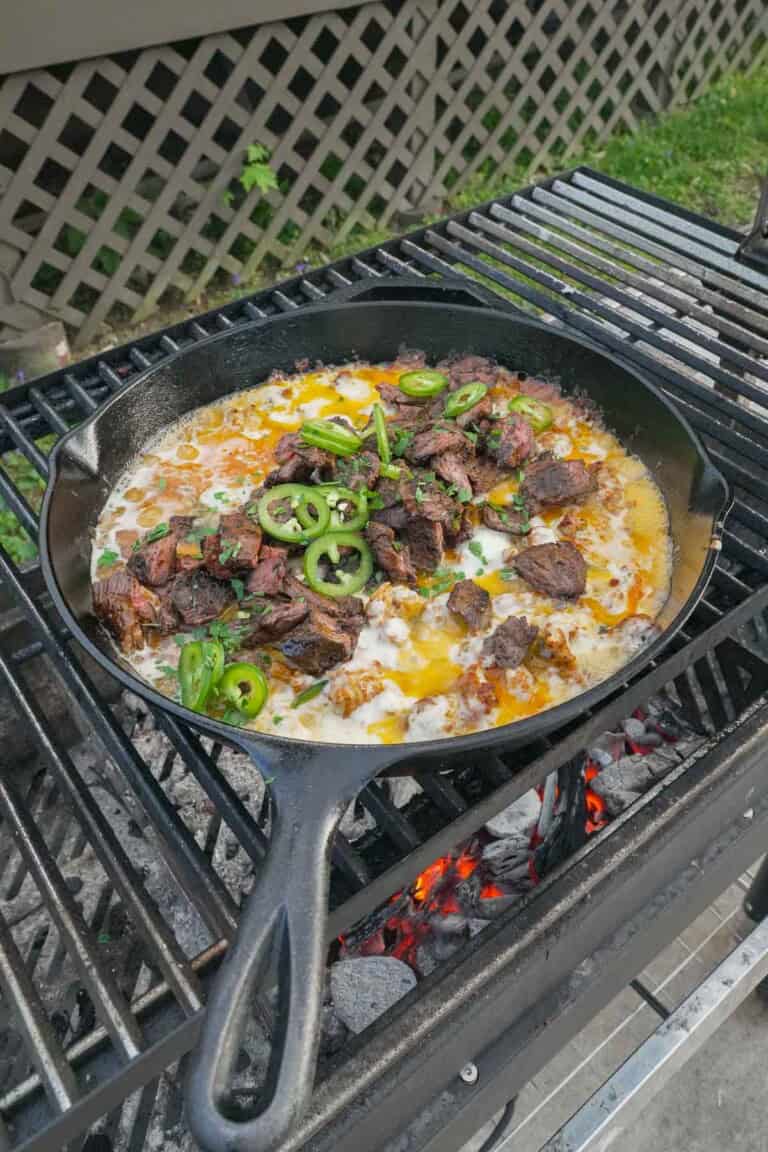
Ah, queso. There is just a certain level of happiness that comes along with a bowl of bubbling, melty cheese…
The post Queso Flameado appeared first on Over The Fire Cooking.
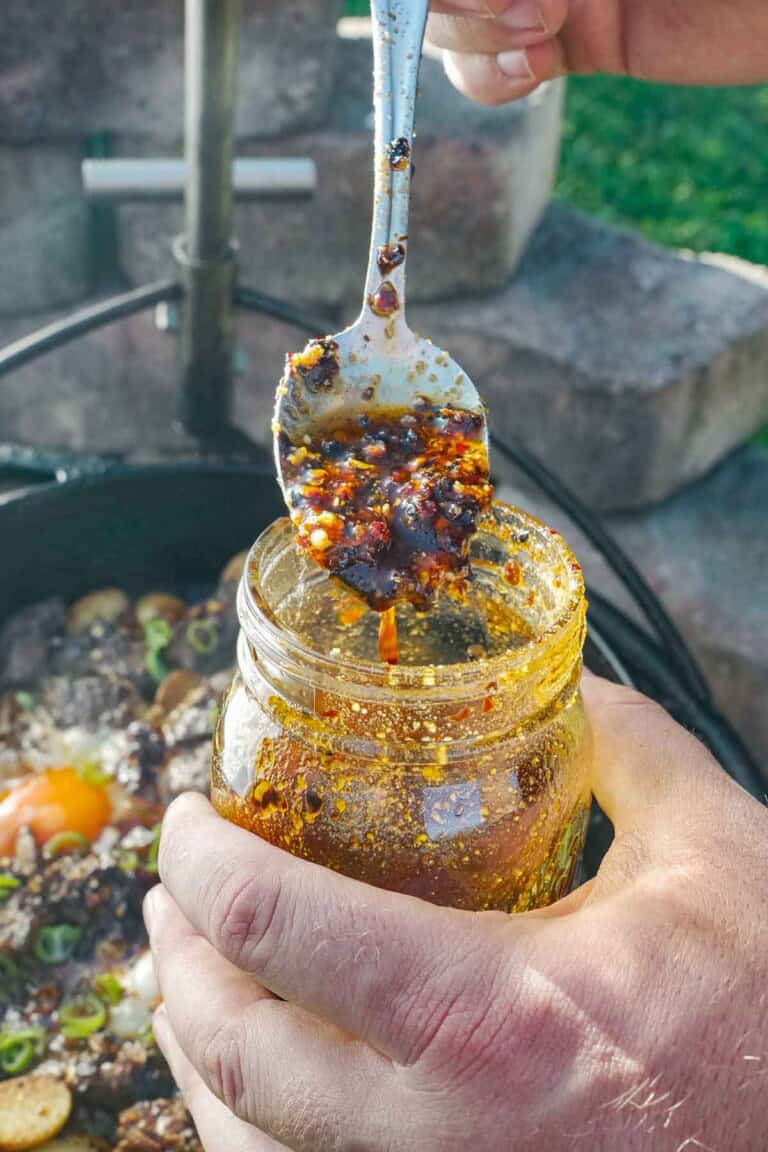
Let’s be real—sometimes the best part of a meal isn’t the main dish itself… it’s what you drizzle on top.…
The post Salsa Macha appeared first on Over The Fire Cooking.
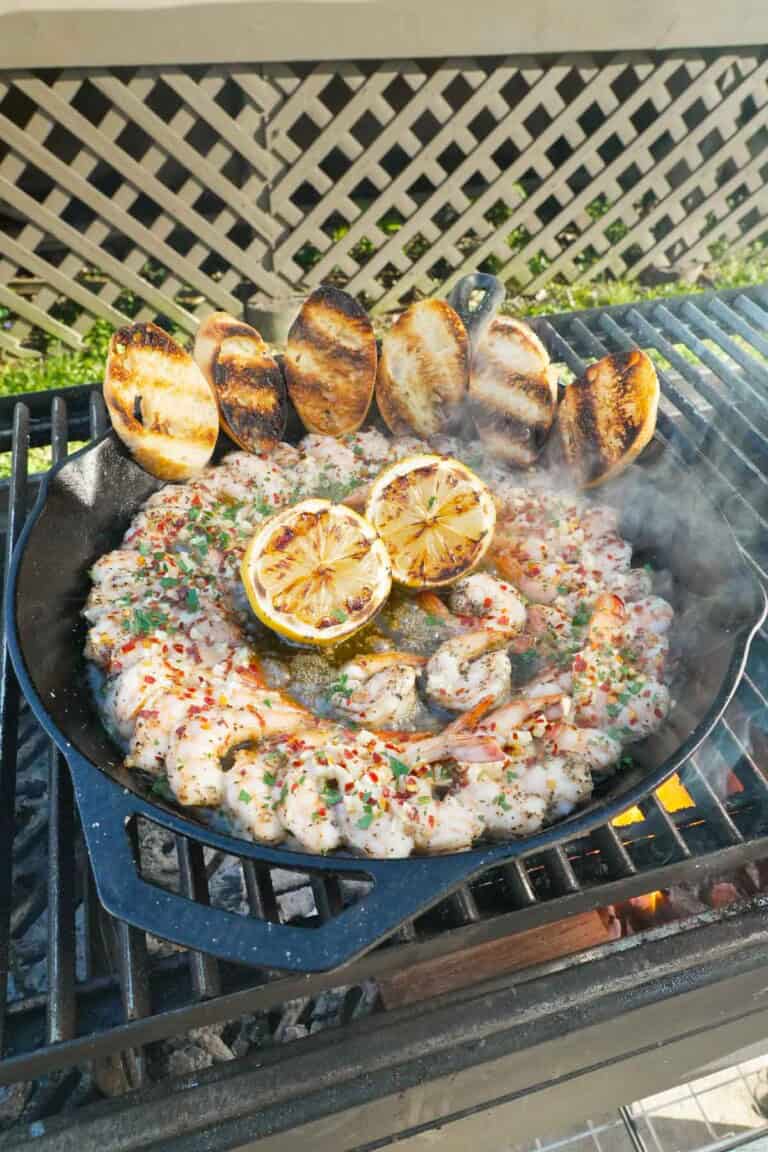
If you’re looking for a quick, easy, freakin’ delicious dinner for tonight, this garlic smoked shrimp recipe is IT. Everything…
The post Smoked Shrimp appeared first on Over The Fire Cooking.
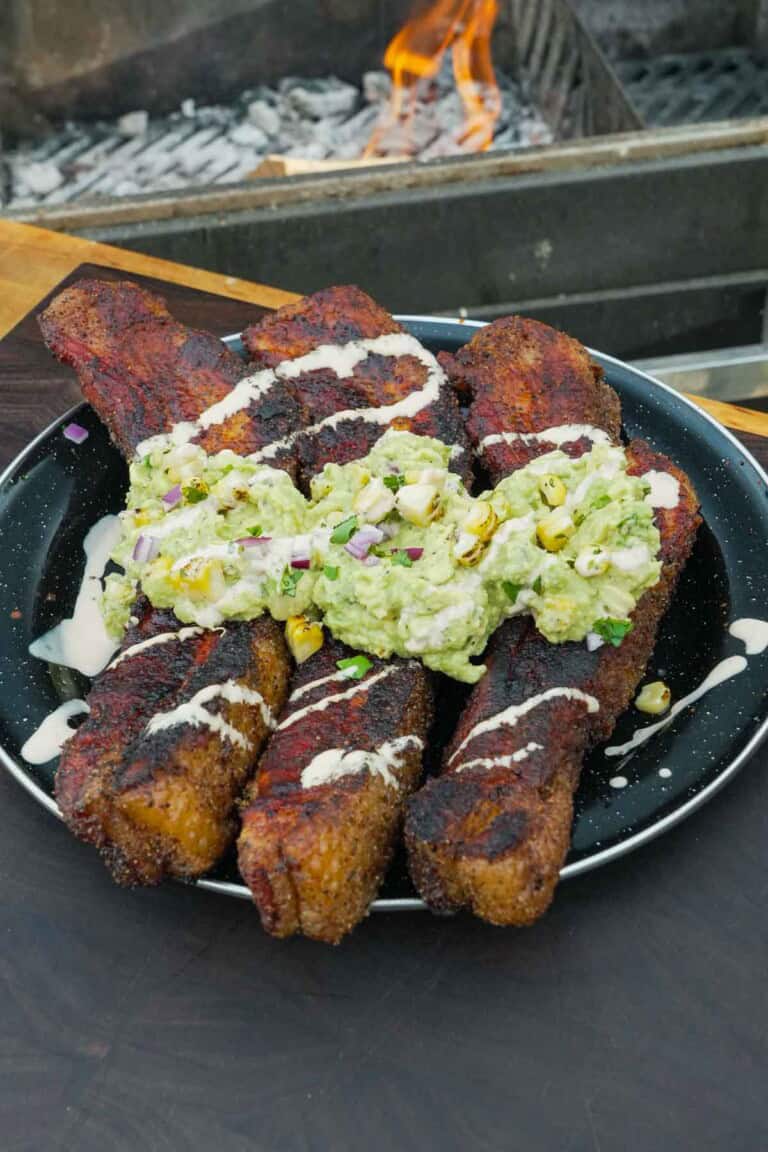
This elote pork belly recipe has got it all. It’s crispy and tender, rich and fresh at the same time,…
The post Elote Pork Belly appeared first on Over The Fire Cooking.
How to care for wood cutting boards may not seem like a thrilling topic, but it’s truly an important one…
The post How to Care for Wood Cutting Boards appeared first on Over The Fire Cooking.
If you’re looking for your next tasty app or perfect snack to crush at the next cookout, man, these Buffalo…
The post Buffalo Chicken Stuffed Onion Rings appeared first on Over The Fire Cooking.
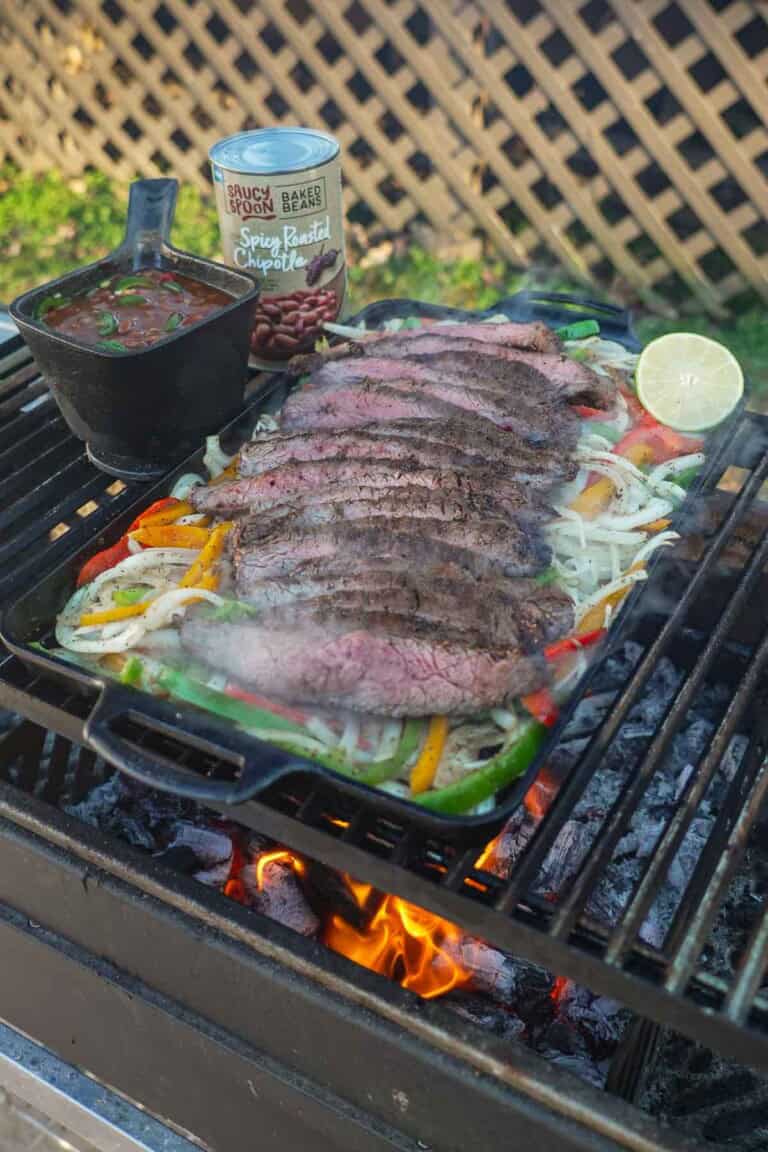
Steak fajitas are easy, fast, meaty and so freakin’ delicious — basically, the perfect dinner. We’re pairing this steak fajitas…
The post Steak Fajitas appeared first on Over The Fire Cooking.
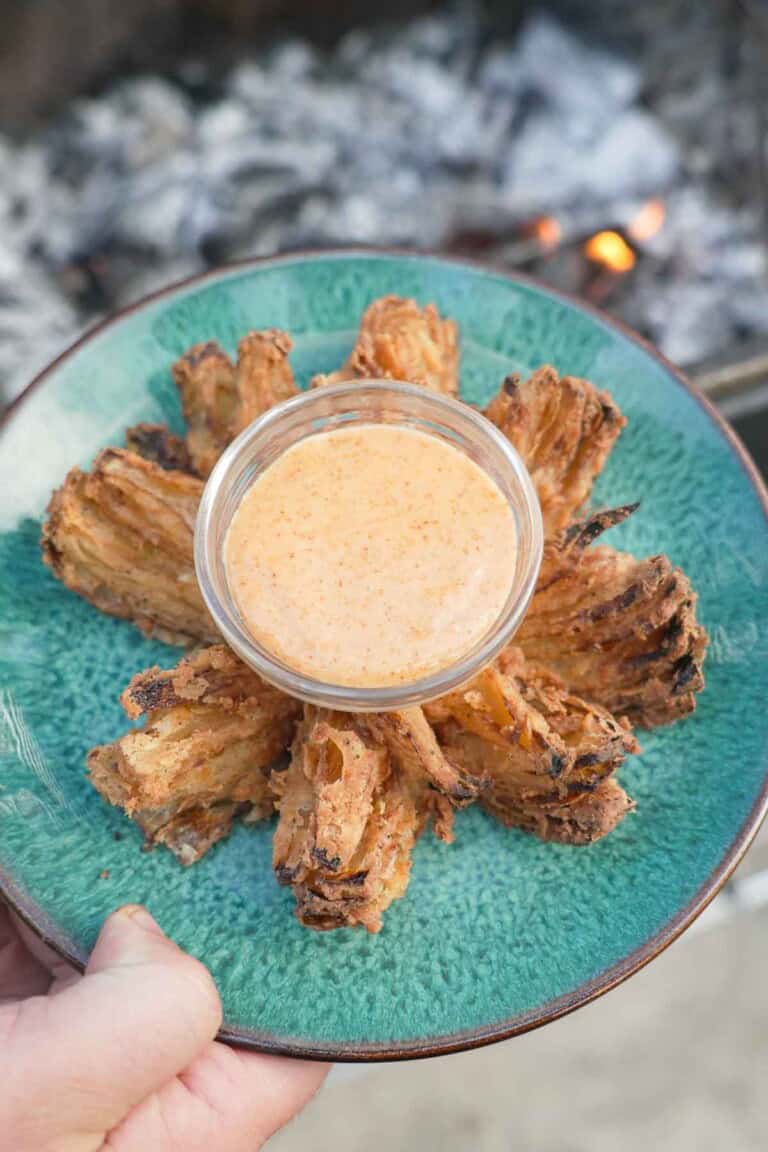
If you’re craving a killer app to go with your Outback Ribeye, then this Outback Bloomin’ Onion recipe is about…
The post Bloomin’ Onion Recipe appeared first on Over The Fire Cooking.
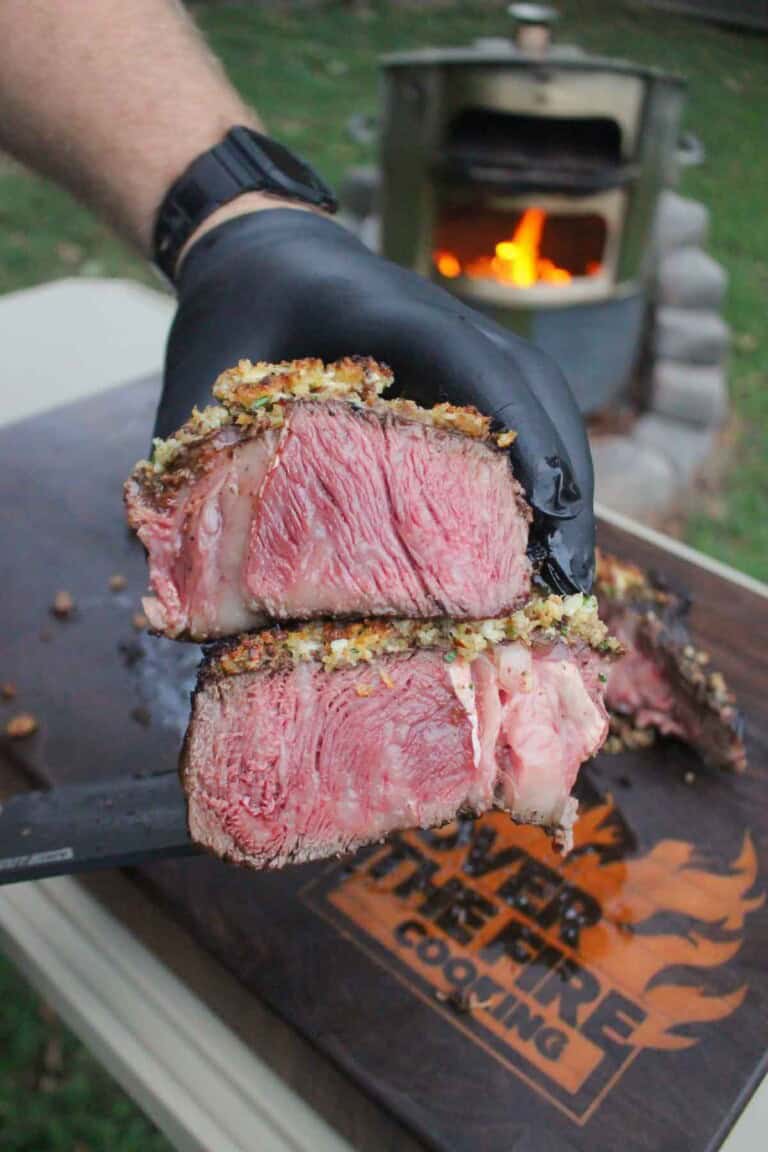
If you’ve ever craved the Outback ribeye but didn’t want to drop some serious coin, I got you. Today, we’re…
The post Outback Ribeye appeared first on Over The Fire Cooking.
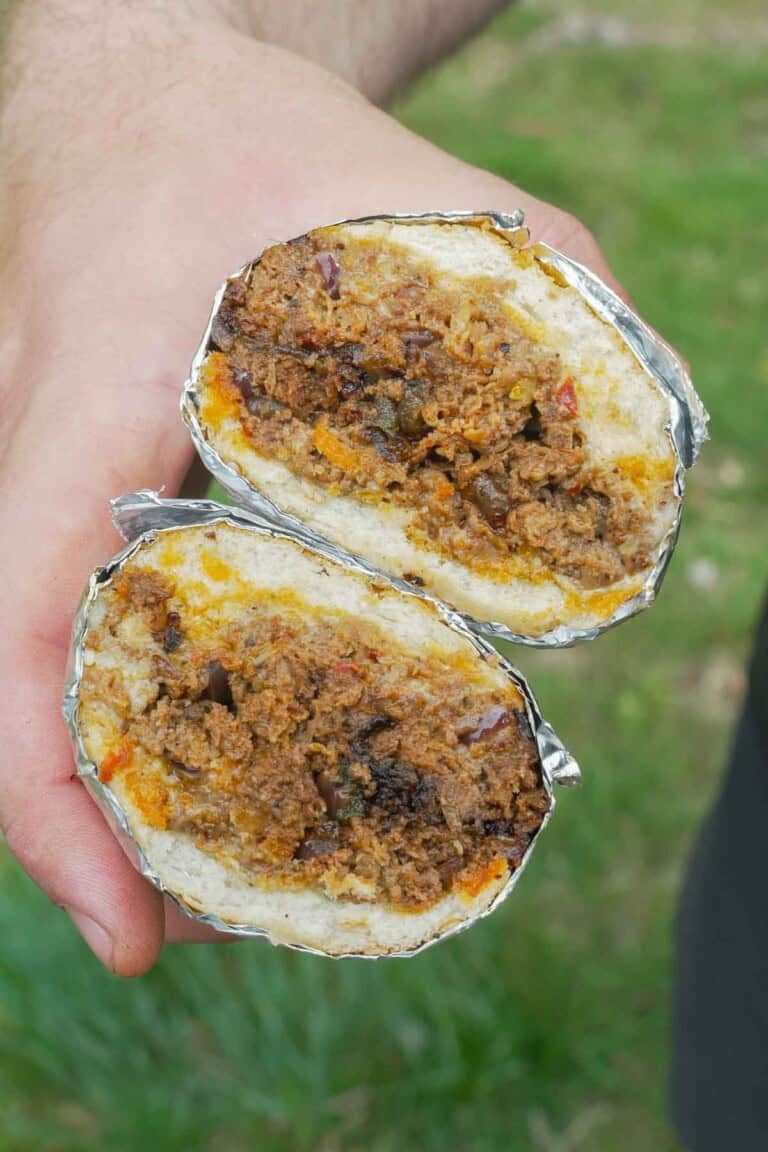
Nothing beats a good Chipotle Cheesesteak, and it doesn’t get any easier than making it on the Ninja FlexFlame. Get…
The post Chipotle Cheesesteak appeared first on Over The Fire Cooking.
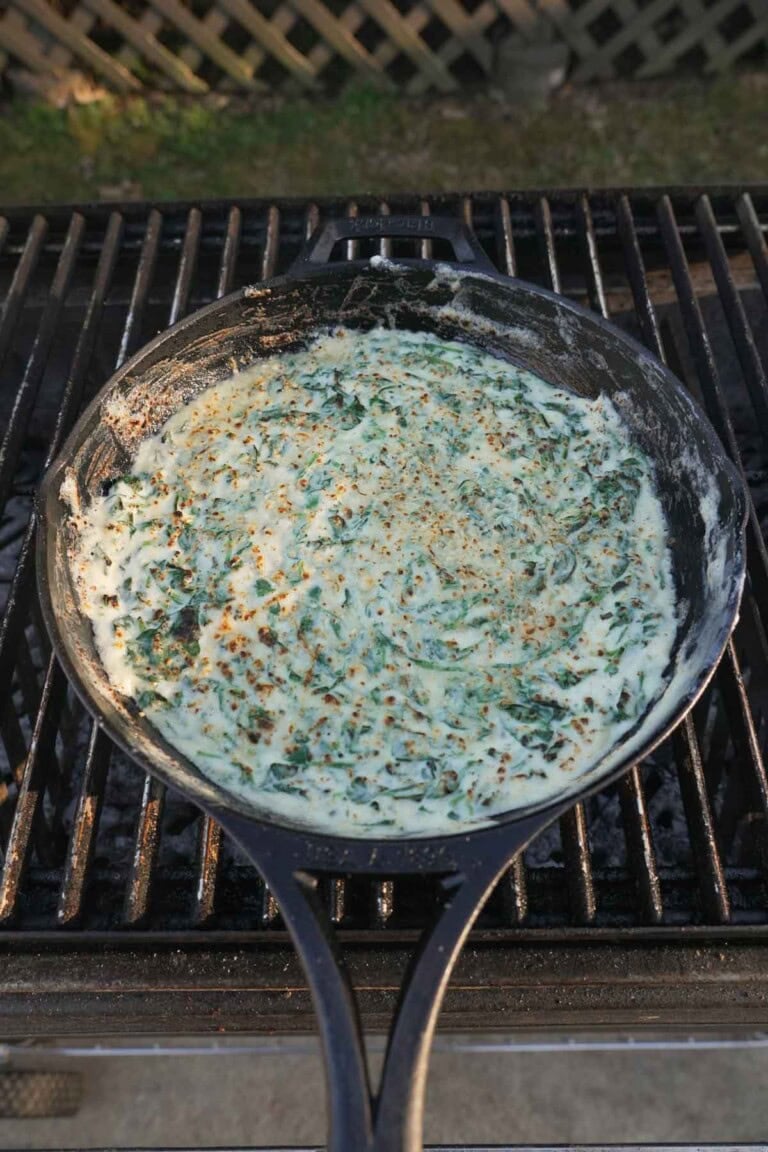
I love a juicy, mouthwatering steak at a restaurant like Ruth’s Chris Steakhouse, but sometimes a side dish emerges as…
The post Cream Spinach appeared first on Over The Fire Cooking.
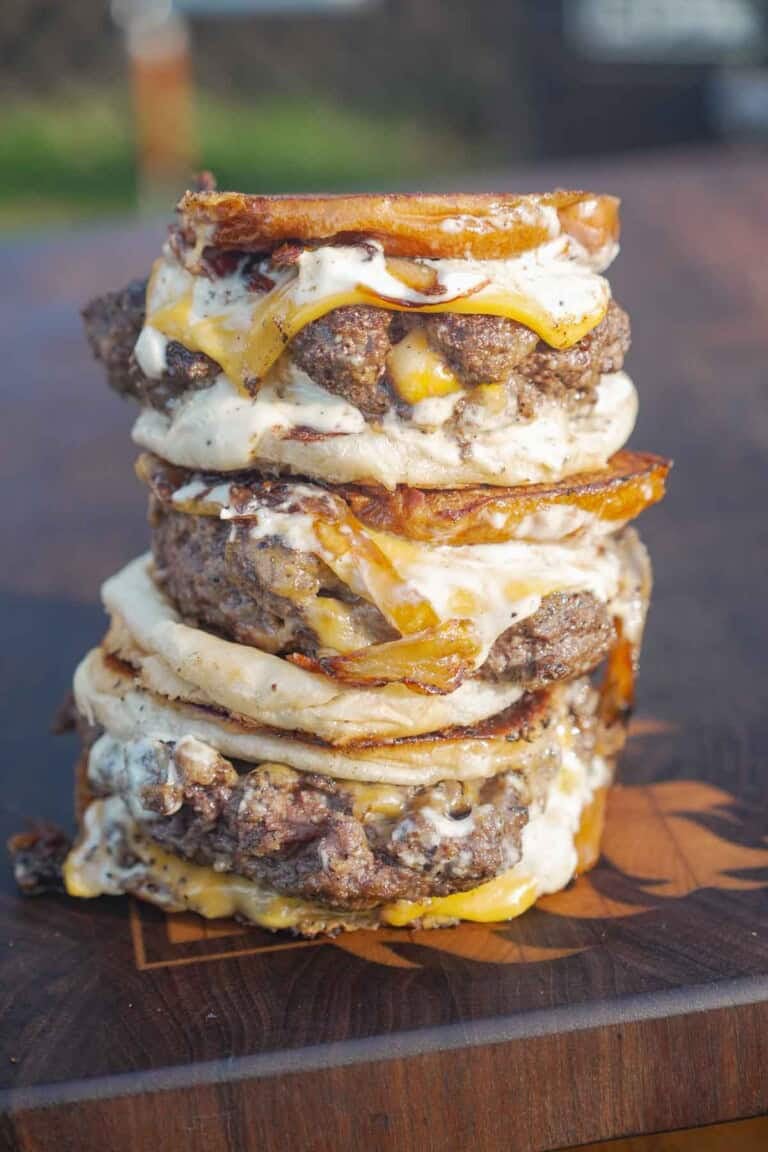
I’m guessing you’ve seen the viral trend of mixing cubed cheese into ground beef patties to make cheese-stuffed burgers. I…
The post Stuffed Patty Melt appeared first on Over The Fire Cooking.

If you’re craving an epic burger experience, this Wagyu Smash Burger recipe is exactly what you need. Made with Wagyu…
The post Wagyu Smash Burger appeared first on Over The Fire Cooking.
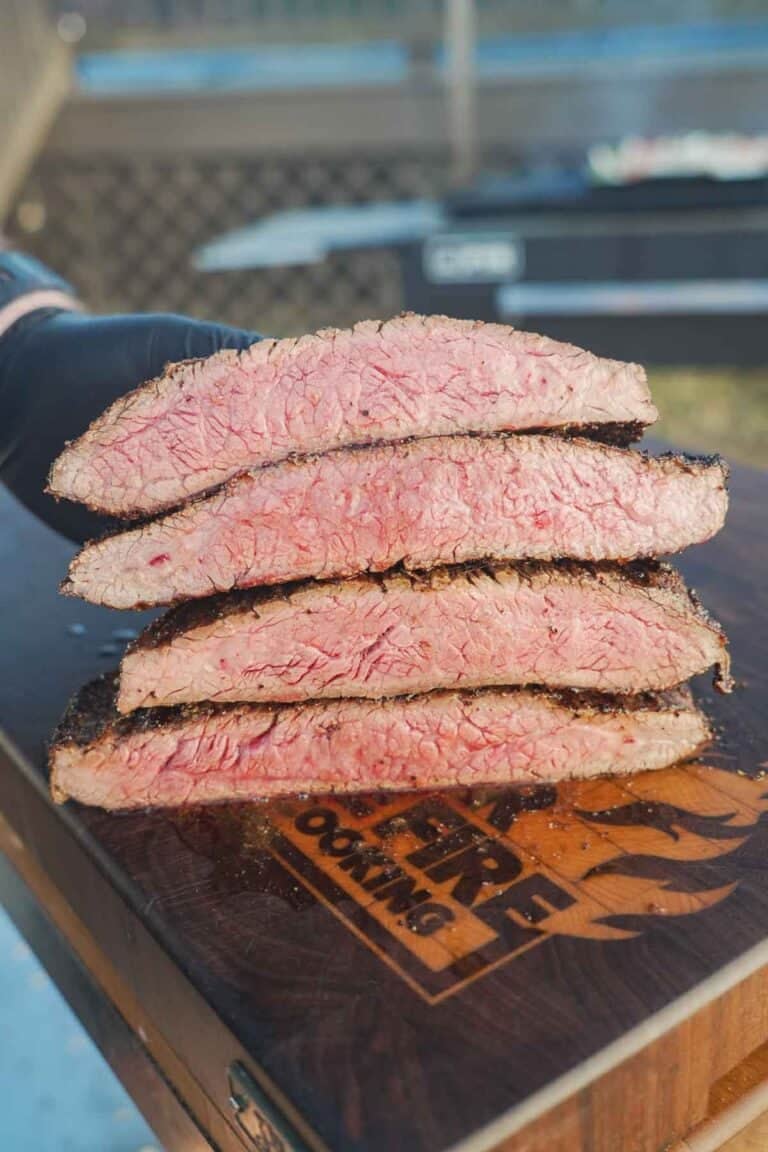
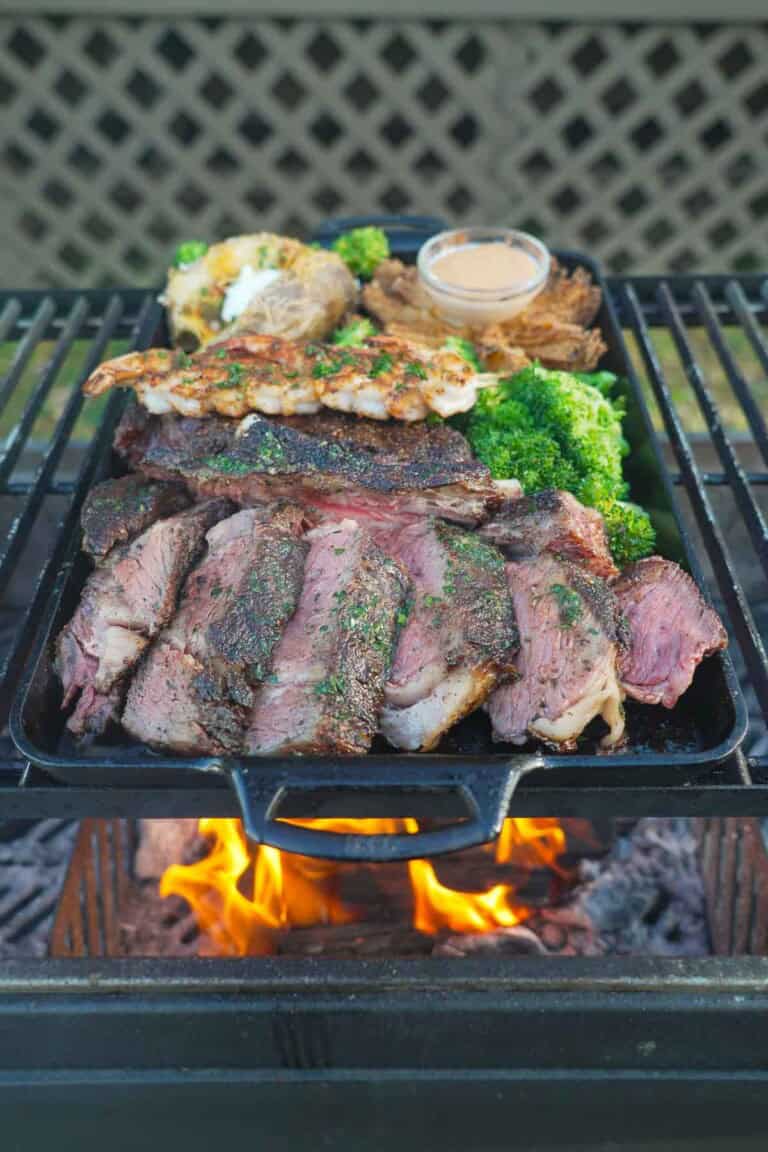
Wondering how to slice a steak? Because there definitely is a right way and a wrong way to do it.…
The post How to Slice Steak appeared first on Over The Fire Cooking.

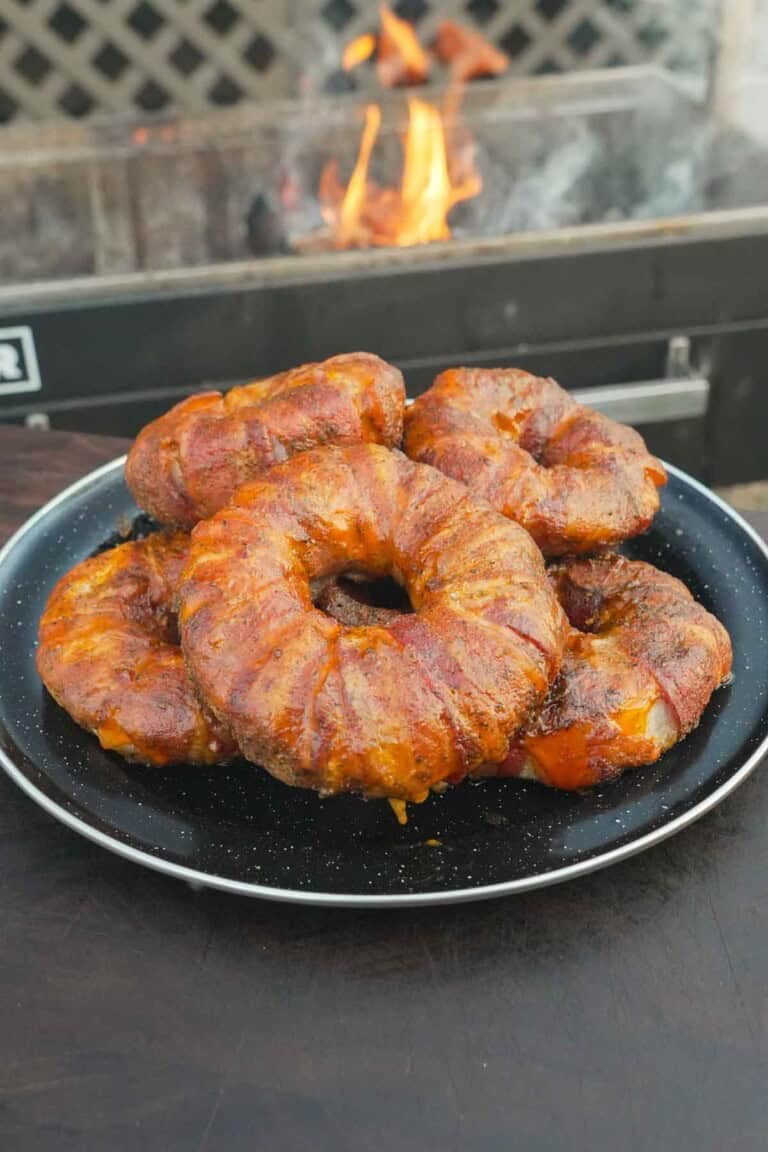
What’s the best way to level up any onion rings recipe? Stuffing those onion slices with freakin’ delicious ground meat!…
The post Chorizo Stuffed Onion Rings appeared first on Over The Fire Cooking.

If you’re searching for the ultimate Jalapeño Cornbread recipe, skip the cornbread mix and look no further. This side dish…
The post Jalapeño Cornbread appeared first on Over The Fire Cooking.