Black Beans with Eggs

Eggs poached in seasoned black beans served over a bed of rice with fresh onion and cilantro makes a fast, filling, and budget-friendly meal!

The post Black Beans with Eggs appeared first on Budget Bytes.

What are two of my favorite budget-friendly ingredients? Beans and eggs! And they come together perfectly to create a really simple and filling meal that’s great for breakfast, brunch, or just any time of the day (eggs all day every day, please!). And you really can’t beat the cost of this dish. Even with a few fancier toppings, my price per serving came in just over a dollar. 🙌
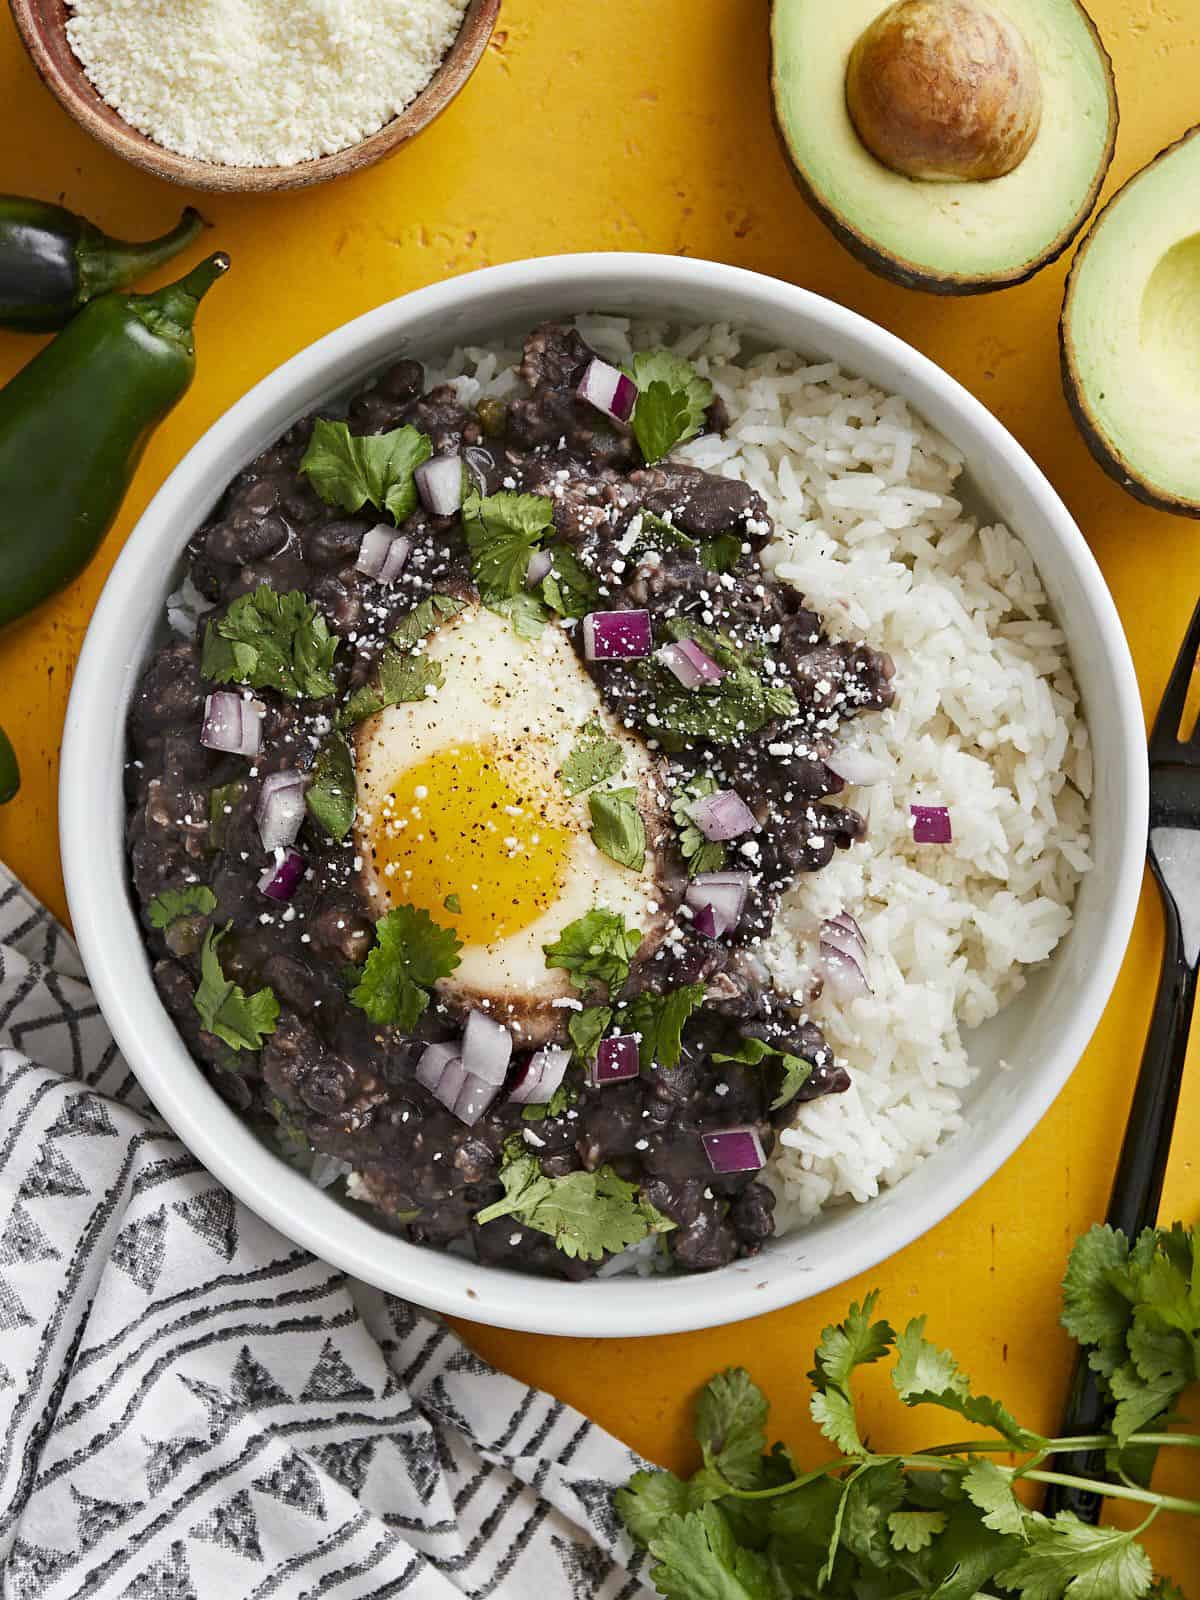
Overhead view of a bowl full of rice, black beans and eggs garnished with onion and cilantro.

I love turning an inexpensive can of beans into a delicious meal, so the other day I was thinking, “Hey, I wonder if you could cook eggs in some saucy beans like you do shakshuka?” So I tried it out and it worked! This recipe is super simple, satisfying, and you can make it as simple or as extravagant as you’d like, depending on how you top it.

Ingredients for Black Beans with Eggs

Here’s all you’ll need to make this super budget-friendly meal:

  • Garlic and Jalapeño: Sautéed fresh garlic and jalapeño create a super flavorful base for the beans, adding depth and a little spicy kick. If you don’t like spicy, you can skip the jalapeño. And you can totally “measure with your heart” for the garlic. ;)
  • Black Beans: Beans provide the bulk for this recipe, making it super filling while staying super cheap, AND adding tons of fiber and nutrients. Win! While you could potentially use any bean for this recipe, black beans definitely fit this flavor profile the best and have the best visual appeal.
  • Eggs: I used four large eggs, but you could certainly add more if you prefer. I chose to cook the eggs so the yolks were still a bit runny, but you can cook them longer if you prefer a solid yolk. Or, you could even scramble them separately and simply top your bowl of beans and rice after the fact!
  • Toppings: The toppings are totally customizable and can make this recipe super fancy or very simple. We used a combination of onion, cilantro, avocado, and Cotija cheese. See our list of other topping ideas below for more inspo!
  • Rice: I served the black beans and eggs over a bed of cooked rice, but you could also scoop them into a tortilla and enjoy them like an enchilada or burrito.

How to Store Leftovers

If you plan to eat your black beans and eggs over the course of a few days, do not pre-poach the eggs in the beans. Simply cook the seasoned beans and store the beans, rice, and toppings separately. Then cook a fresh egg each day to top the beans and rice. You can cook the egg using any method: scrambled, fried, soft-boiled, or hard-boiled.

Topping Ideas

This recipe is just asking for all sorts of fun toppings. You can really dress it up with tons of flavor and color, or keep it super simple and budget-friendly by drizzling some store-bought salsa over top. Here are some ideas for toppings other than what we used below:

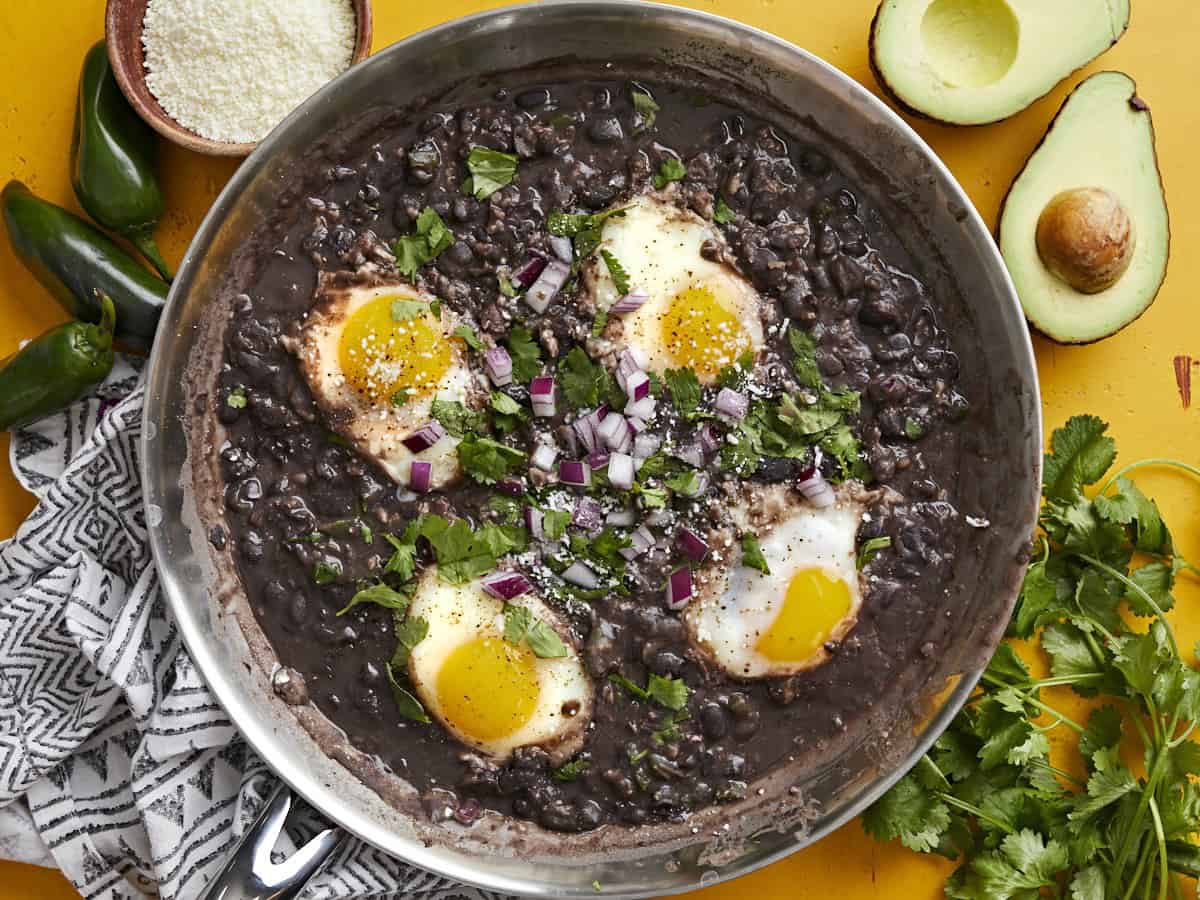
Overhead view of eggs poached in a skillet full of black beans garnished with cilantro and red onion.
Overhead view of a bowl of black beans with eggs over rice with sliced avocado on the side.
Print

Black Beans with Eggs

Eggs poached in seasoned black beans served over a bed of rice with fresh onion and cilantro make a fast, filling, and budget-friendly meal!
Course Breakfast, Brunch, Dinner, Lunch
Cuisine Mexican, Southwest
Total Cost $4.72 recipe / $1.18 serving
Prep Time 5 minutes
Cook Time 15 minutes
Total Time 20 minutes
Servings 4
Calories 529kcal

Ingredients

  • 2 cloves garlic $0.16
  • 1 jalapeño $0.25
  • 1 Tbsp olive oil $0.12
  • 2 15oz. cans black beans $1.58
  • 1 tsp cumin $0.10
  • 1/4 cup water $0.00
  • 4 large eggs $0.42

For Serving (optional)

  • 3 cups cooked rice $0.32
  • 1/4 red onion, diced $0.12
  • 1/4 cup chopped cilantro $0.20
  • 1 avocado, sliced $0.99
  • 1 oz. cotija, crumbled $0.46

Instructions

  • Mince the garlic and dice the jalapeño (seeds removed). Add the garlic and jalapeño to a large skillet with the olive oil and sauté over medium heat for about one minute, or just until the garlic softens a bit and becomes fragrant.
  • Add the canned beans (without draining) to the skillet along with the water and cumin. Stir to combine, then allow the beans to come up to a simmer.
  • Let the beans simmer, stirring often, for about five minutes. After the beans have softened slightly from simmering, use the back of a large spoon to smash some of the beans to thicken.
  • Turn the heat down to medium-low. Crack the eggs onto the beans. Partially cover the skillet with a lid and allow the eggs to simmer in the beans for 7-10 minutes, or until the eggs are cooked to your liking.
  • Top the skillet with your favorite ingredients (we used onion, cilantro, avocado, and cotija), and serve over a bed of warm rice. Enjoy!

See how we calculate recipe costs here.

Nutrition

Serving: 1serving | Calories: 529kcal | Carbohydrates: 70g | Protein: 23g | Fat: 18g | Sodium: 160mg | Fiber: 15g

How to Make Black Beans with Eggs – Step by Step Photos
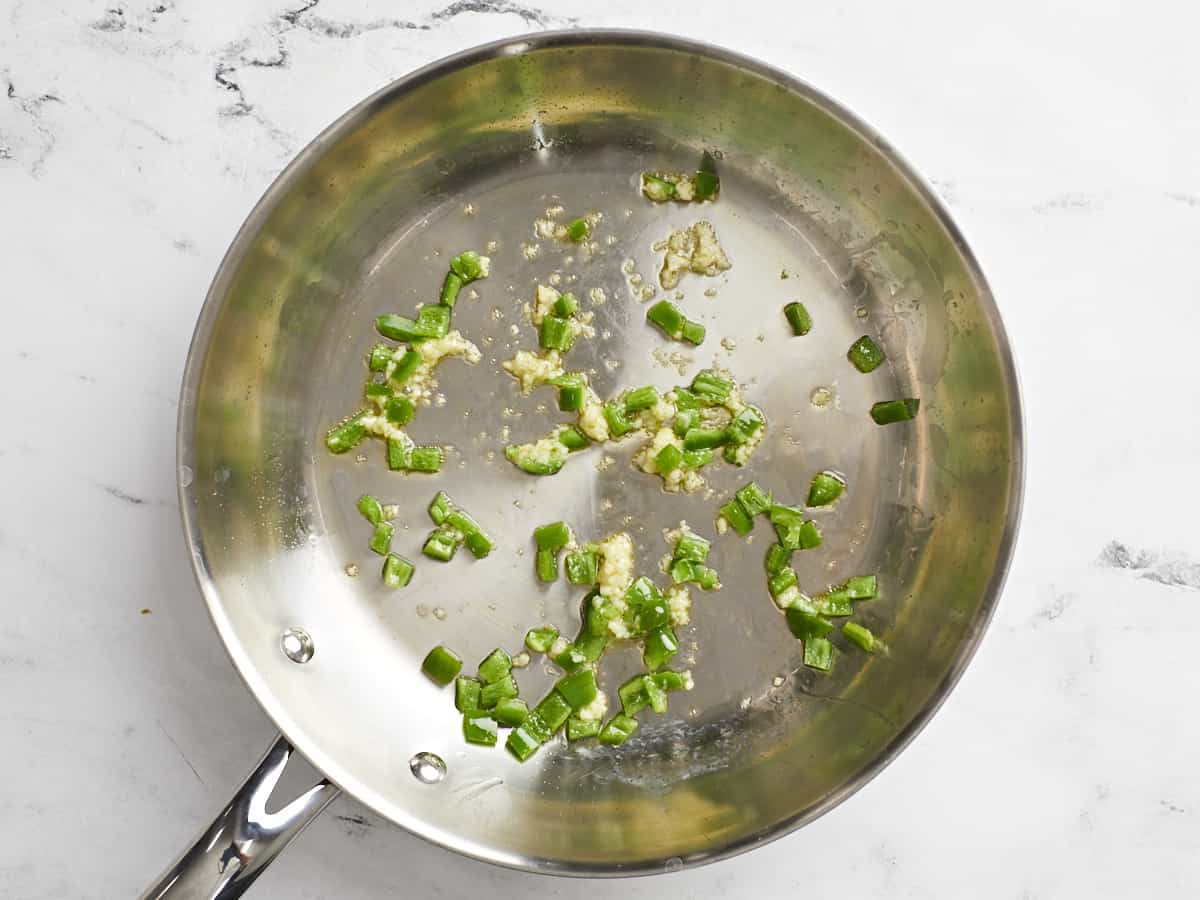
Sautéed garlic and jalapeño in a skillet.

Mince two cloves of garlic (or more, if you’d like!) and one jalapeño (seeds removed). Add the garlic and jalapeño to a large skillet with 1 Tbsp olive oil and sauté over medium heat for 1-2 minutes, or just until the garlic softens a bit and becomes very fragrant. Don’t let the garlic brown.
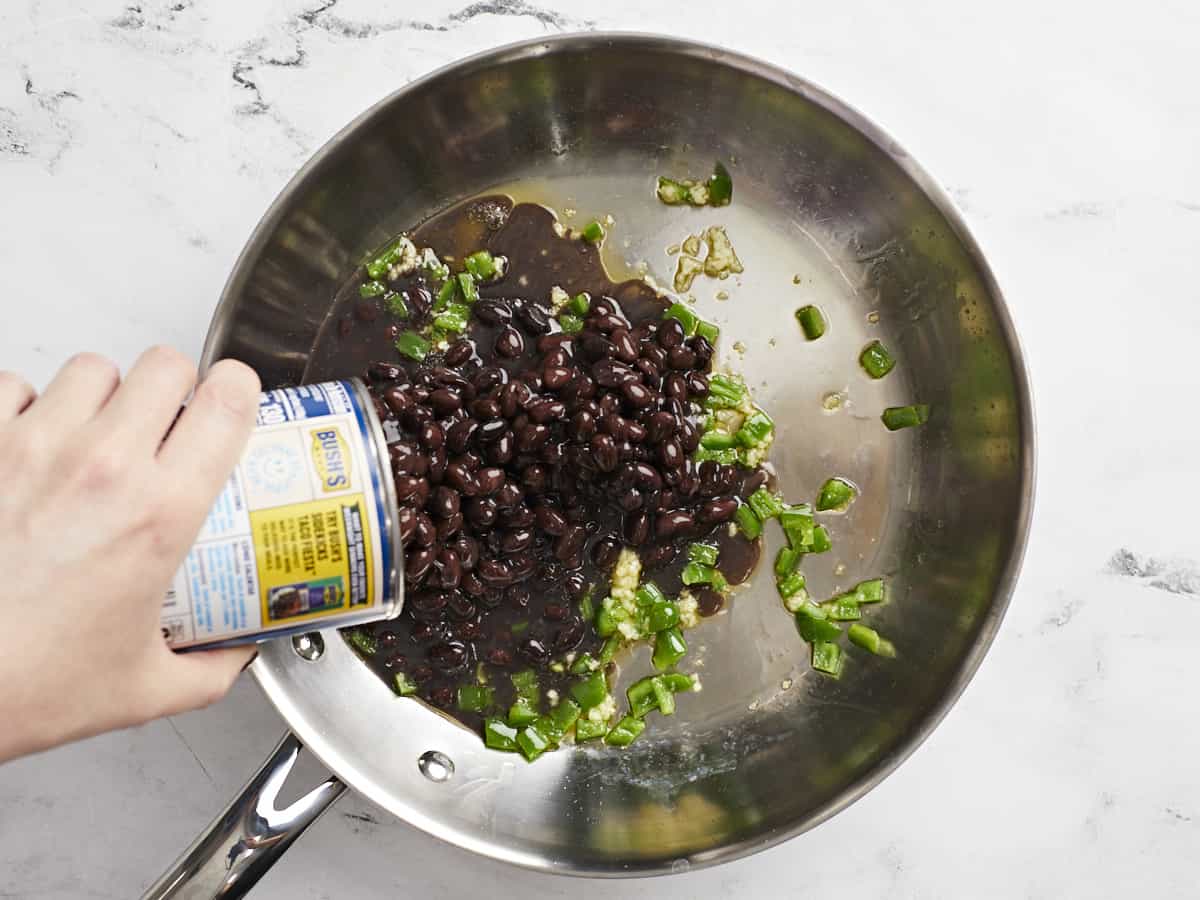
Black beans being poured into the skillet.

Add two undrained cans of black beans to the skillet along with ¼ cup water and 1 tsp cumin.
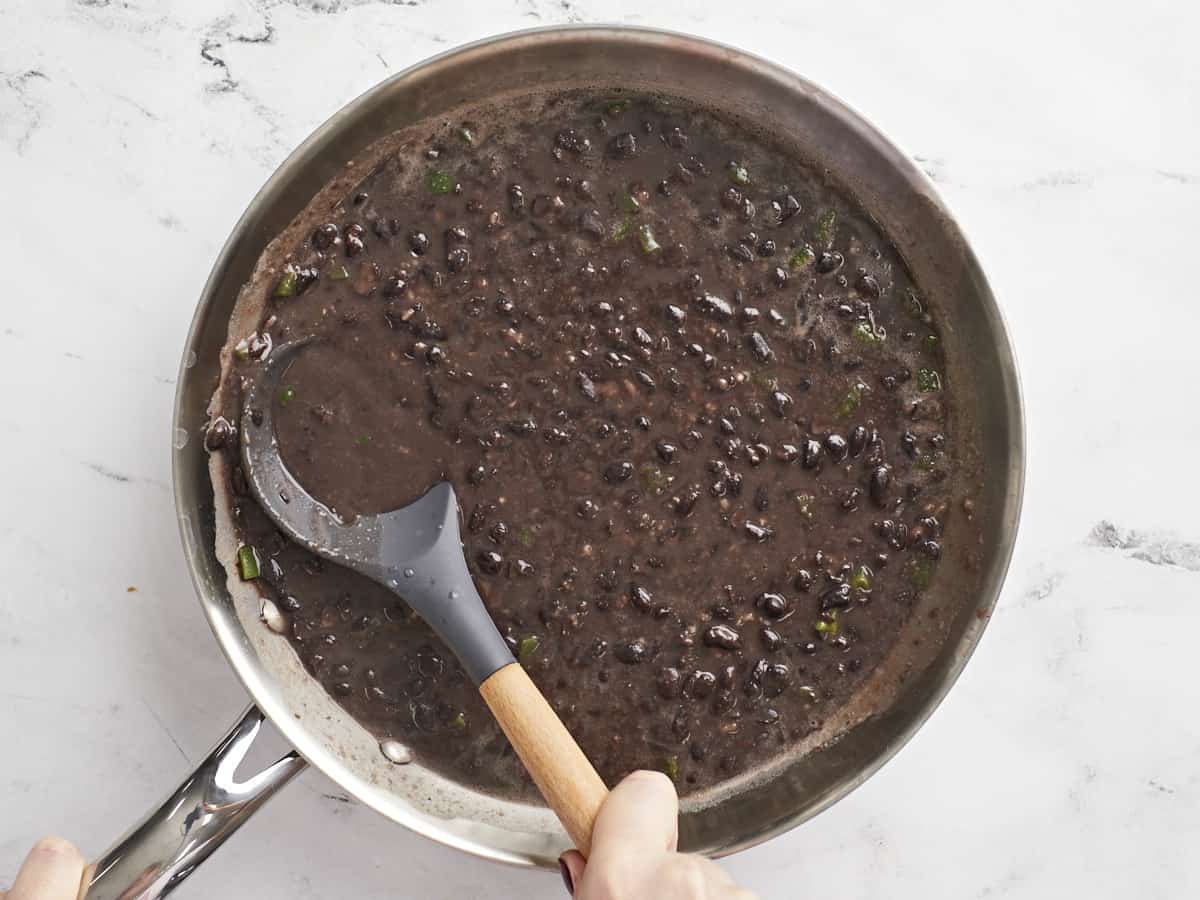
Simmered black beans in the skillet being smashed with the back of a spoon.

Stir everything to combine, then let the beans simmer over medium for about 5 minutes, stirring often to prevent the beans from sticking to the bottom of the skillet. After simmering for five minutes, use the back of a large spoon to smash some of the beans and thicken the sauce.
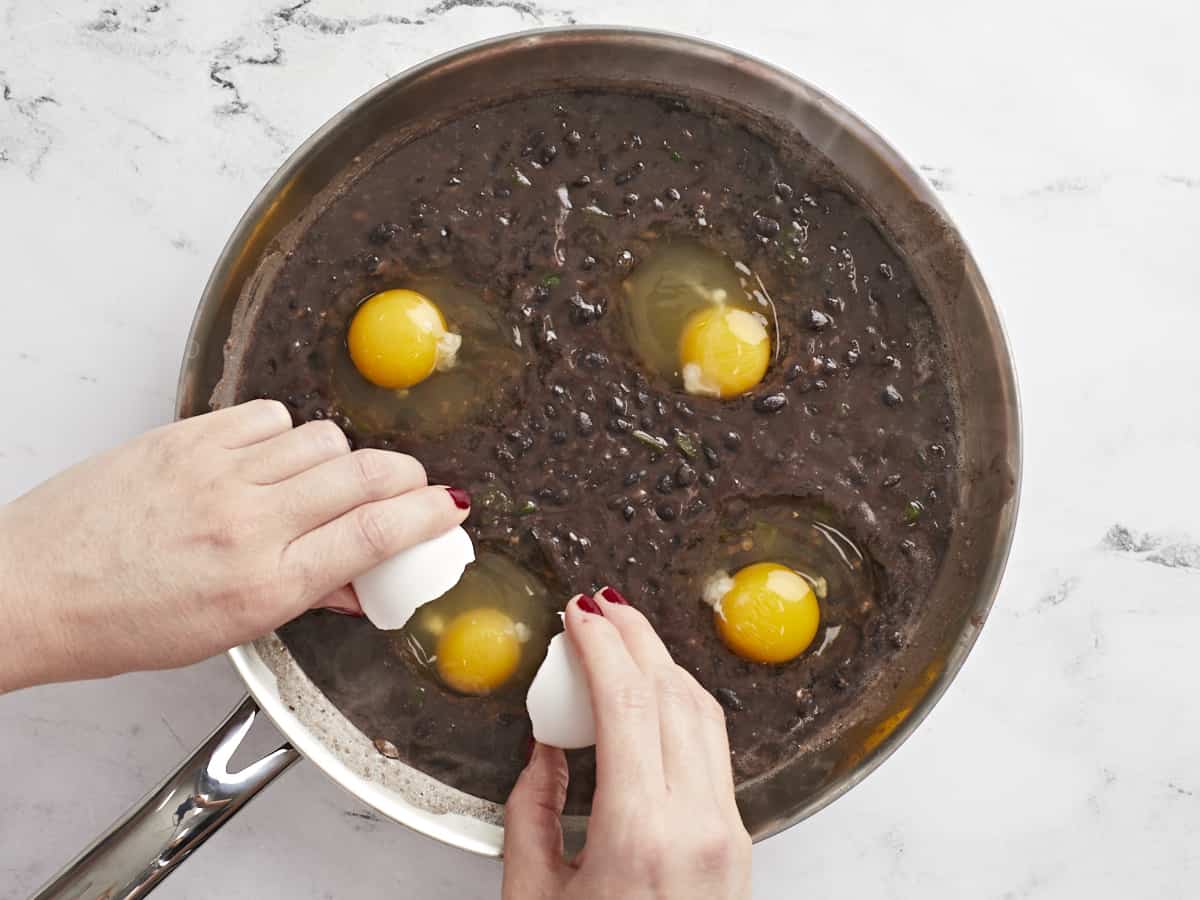
Eggs being cracked into the skillet of black beans.

Turn the heat down to medium-low and crack four large eggs onto the surface of the black beans.
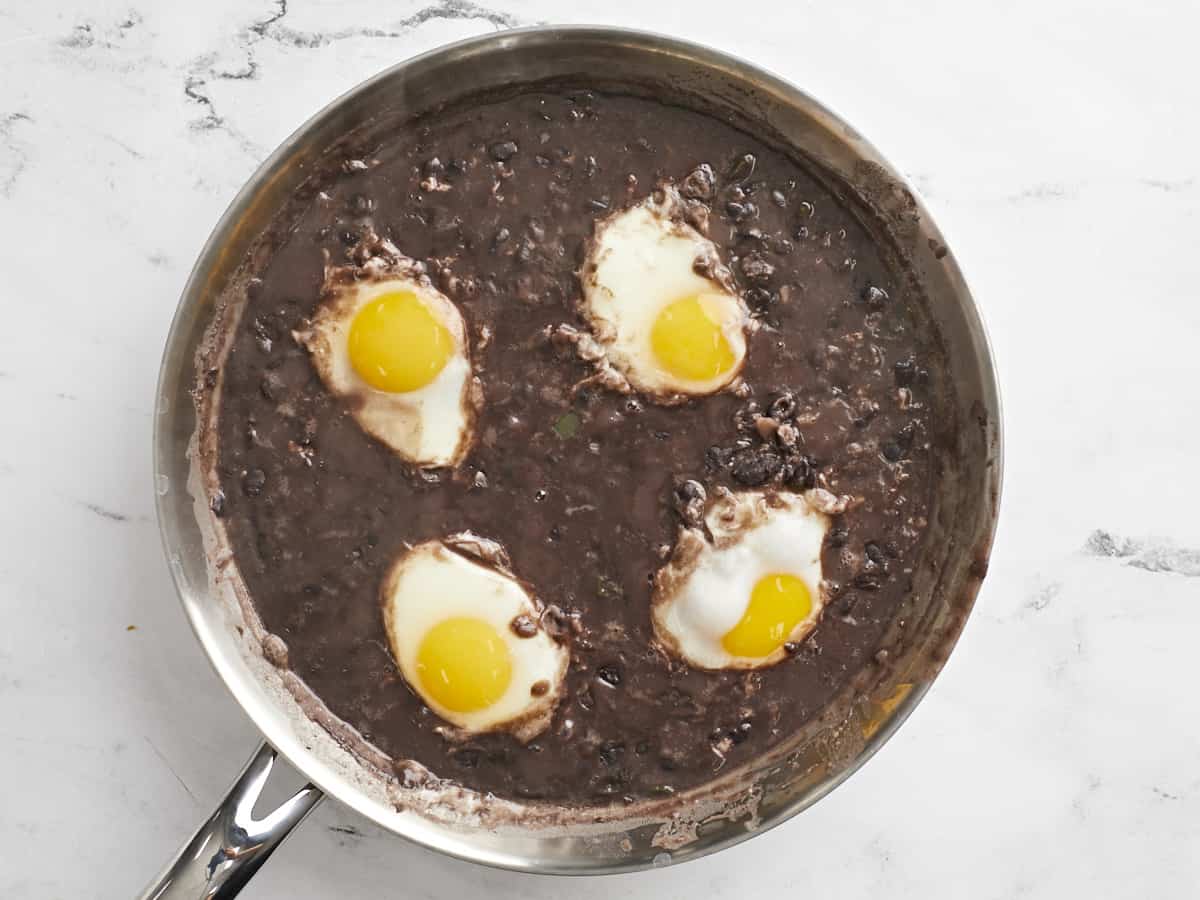
Cooked eggs in the black beans.

Partially cover the skillet with a lid and allow the eggs to simmer in the beans for 7-10 minutes, or until they are cooked to your liking (less time for runny yolks, more time for solid yolks). Cook time can vary depending on how hot the beans are and how cold the eggs are, so watch them closely.
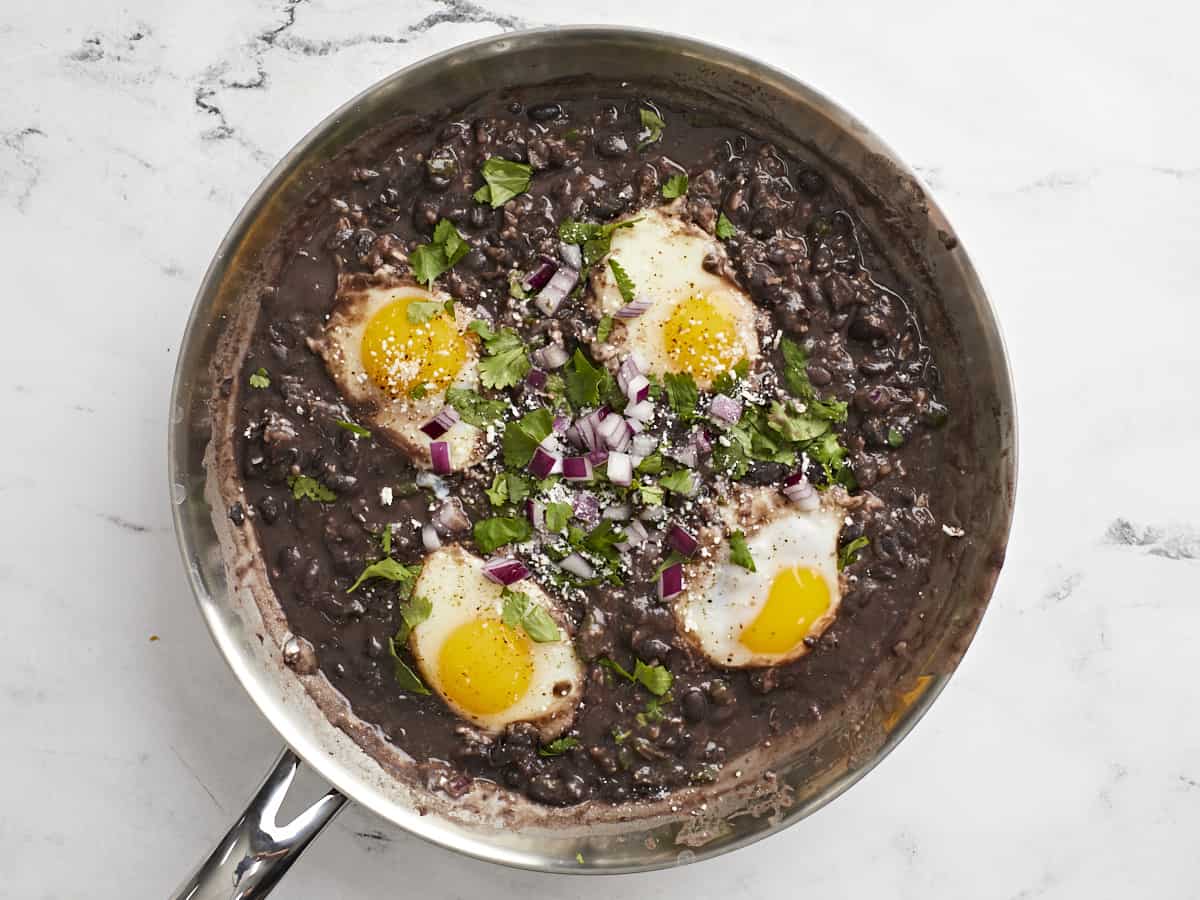
Eggs and beans topped with cilantro and onion.

Top the eggs and black beans with chopped cilantro, diced red onion, and crumbled cotija cheese, or the toppings of your choice.
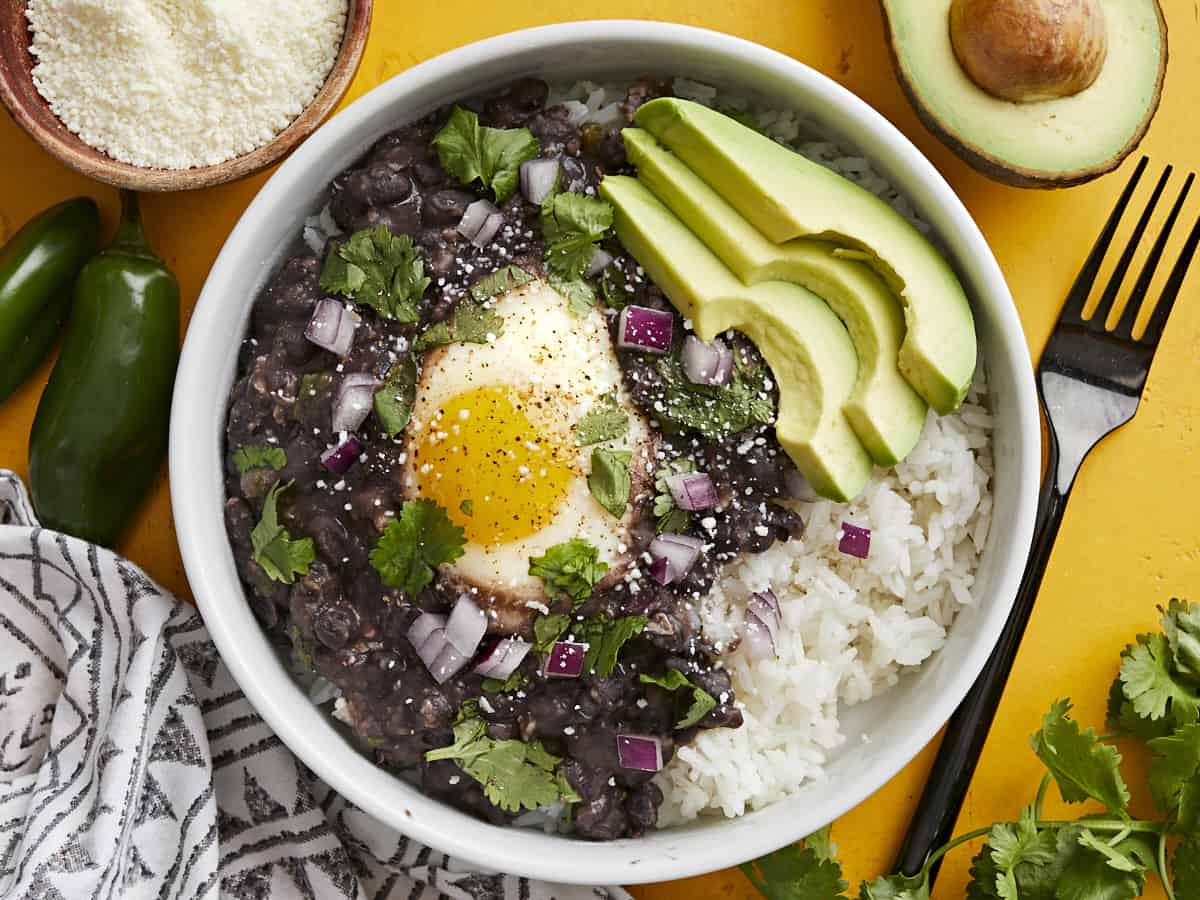
Overhead view of a bowl of black beans with eggs over rice with sliced avocado on the side.

Serve over cooked rice and enjoy!

The post Black Beans with Eggs appeared first on Budget Bytes.
Flan

This flan recipe is an easy-to-make creamy dessert that is budget-friendly and perfect to share with family and friends on any occasion.

The post Flan appeared first on Budget Bytes.

If you’re looking for an easy-to-make dessert that’s crazy delicious with an absolute knock-out wow factor—this creamy, citrusy Puerto Rican-style flan is where it’s at! You can make it up to a week ahead, and it’s ridiculously budget-friendly.  Are you ready for a new family favorite?

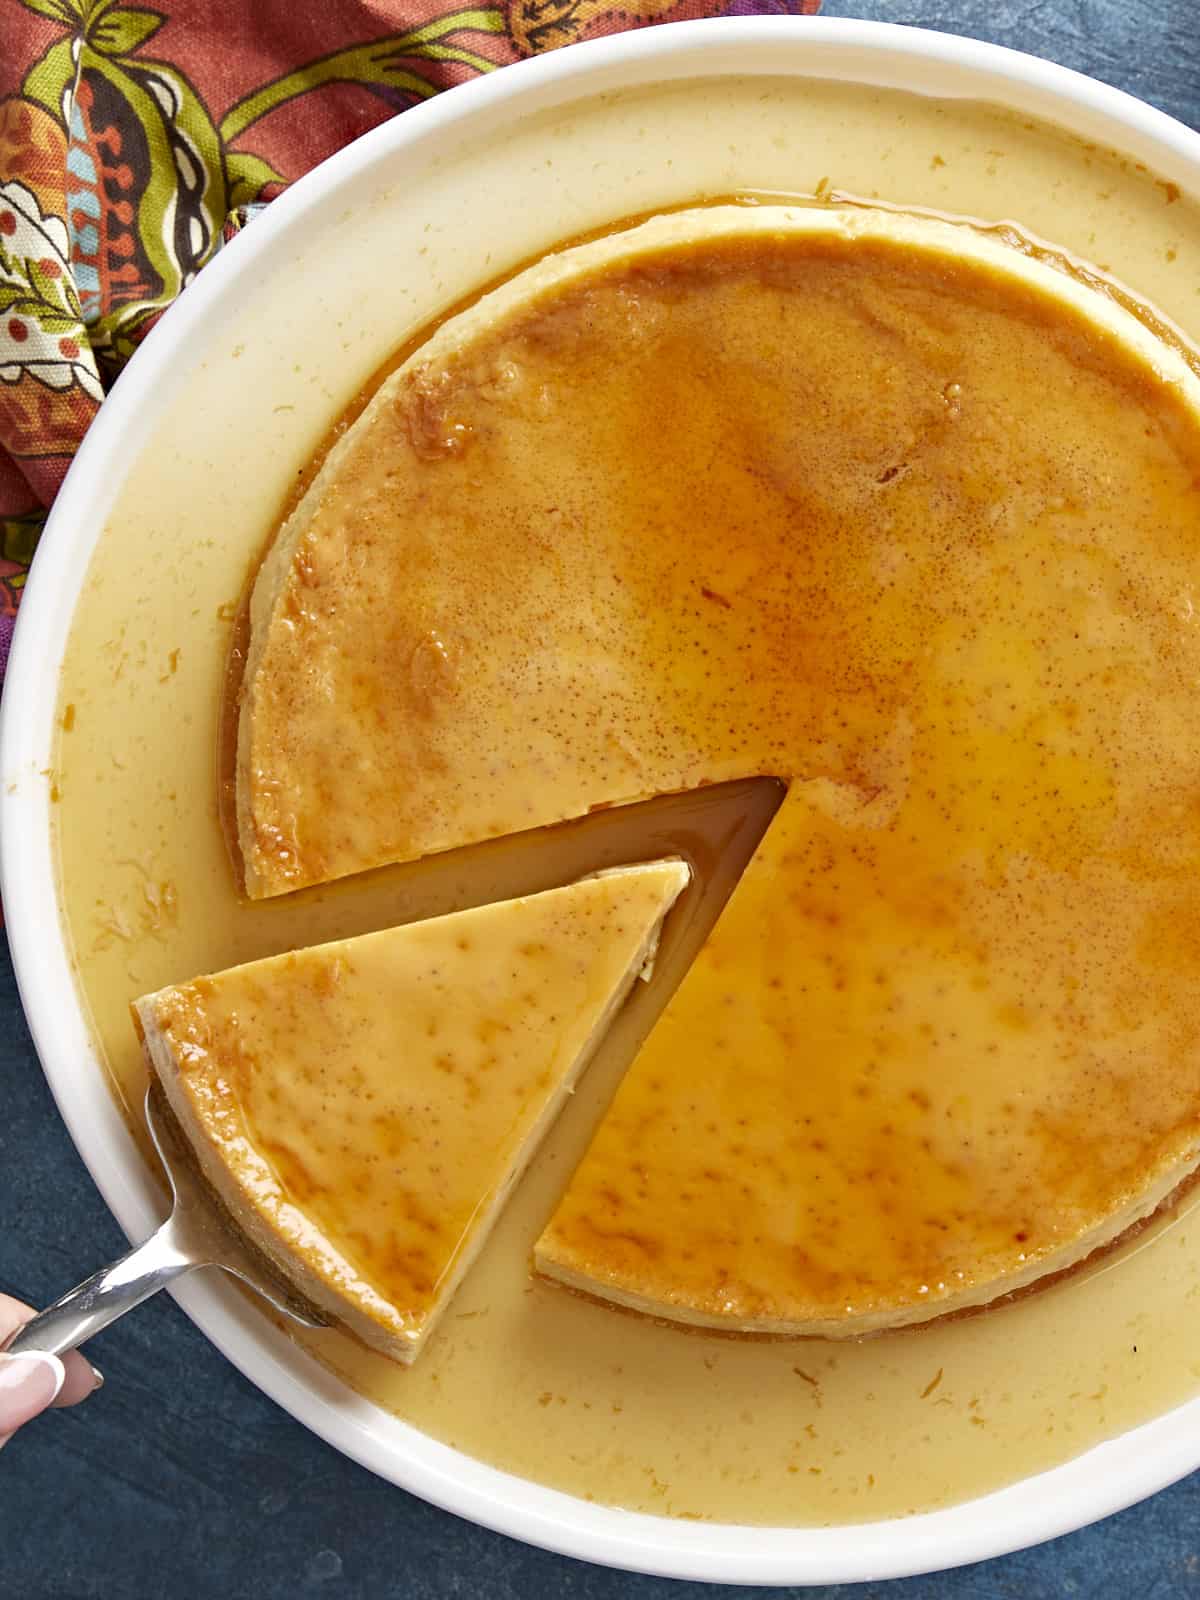
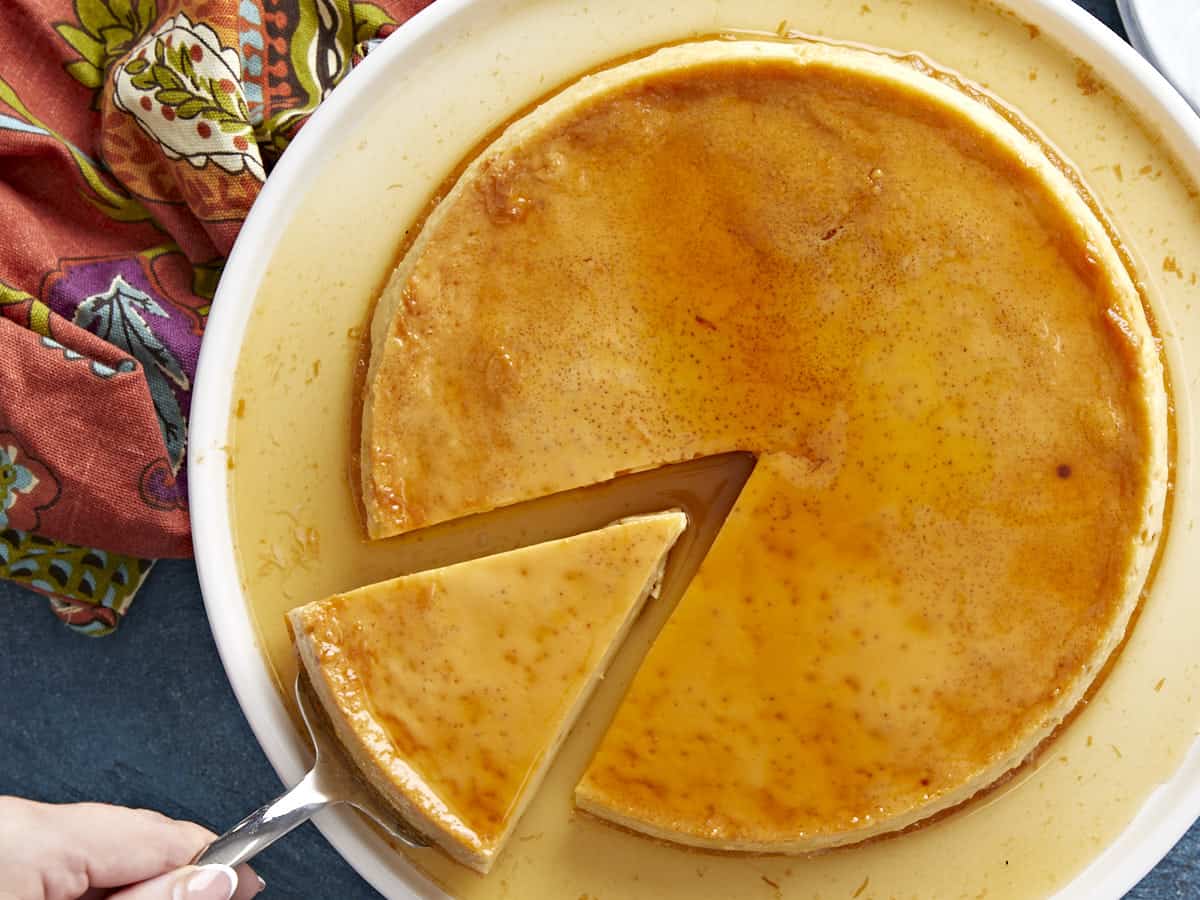
Overhead view of flan with one slice being lifted out.

What Is Flan? 

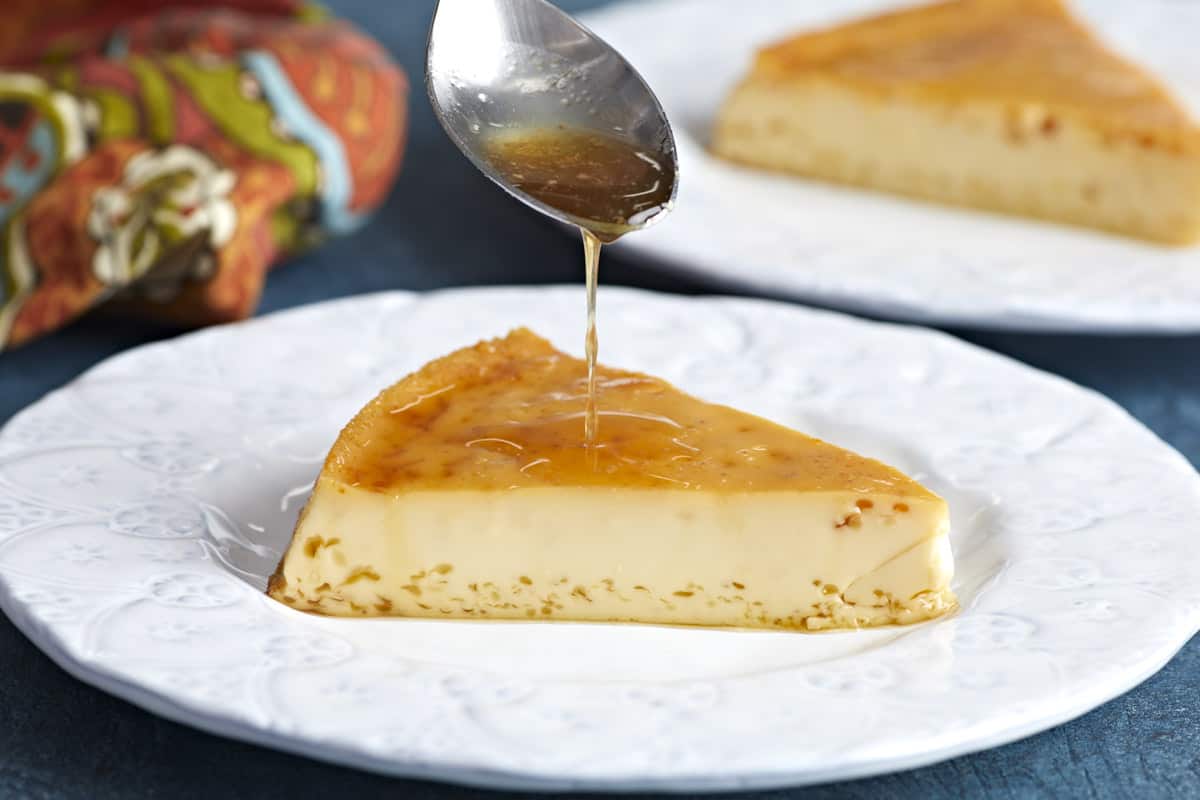
Puerto Rican-style flan is a chilled custard made with eggs, milk, sugar, and vanilla extract. The custard base is poured over a layer of caramelized sugar, and then baked in a water bath, ensuring even cooking and preventing the flan from cracking. Once the flan is baked, it’s cooled completely before being inverted onto a serving plate. The caramel sauce flows over the flan, creating a gorgeous, glossy presentation.

Ingredients for Flan

I love how truly simple this recipe is. You probably have everything you need right in your pantry! Here’s what you need to make my easy recipe for Puerto Rican-style flan:

  • White Sugar: Creates the caramel sauce for our flan.
  • Orange: The juice and zest of this fruit help flavor the custard.
  • Sweetened Condensed Milk and Evaporated Milk: Create the base of our custard. You can substitute with Sweetened Condensed Coconut Milk and Evaporated Coconut milk.
  • Heavy Cream: Adds a velvety mouthfeel to the custard. You can substitute it with unsweetened coconut cream.
  • Bay Leaf: Adds an earthy note to the custard to balance the sweetness. If you don’t have a bay leaf, skip it.
  • Eggs: Thicken the custard and give it a buttery yellow hue. You need eggs to make this an authentic flan. But if you are trying to make this a plant-based dessert, mix 1/2 cup of cornstarch in 3/4 cup of water and add it to the milk mixture.
  • Vanilla Extract: Adds a floral note to the custard and helps balance the sweetness.

What To Serve With Flan

In Puerto Rico, flan is usually served plain, but you can top yours with Homemade Whipped Cream or shaved chocolate. Citrus zest is also lovely with this recipe, as are sliced fresh berries. If you want to lean in on the fruit angle, Strawberry Sauce or Cherry Sauce are fantastic with it as well.

How To Store Flan

Flan shouldn’t be left at room temperature for more than two hours. Store leftovers in an airtight container with a sheet of plastic or parchment directly on the surface. It will keep for up to 2 days in the fridge. To freeze flan for up to 2 months, slice leftovers and wrap well, then place in an airtight container. Thaw overnight in the fridge.

Side view of a slice of flan on a plate with caramel being drizzled over top.
Side view of a piece of flan being lifted from the plate.
Print

Flan

This flan recipe is an easy-to-make creamy dessert that is budget-friendly and perfect to share with family and friends on any occasion.
Course Dessert
Cuisine Latin, Puerto Rican
Total Cost ($8.16 recipe / $1.02 serving)
Prep Time 15 minutes
Cook Time 1 hour 30 minutes
Chill Time 9 hours
Total Time 10 hours 45 minutes
Servings 8 slices
Calories 434kcal

Ingredients

  • 3/4 cup granulated sugar $0.18
  • 1 orange, zested into thick strips and juiced $0.78
  • 1 14oz. can sweetened condensed milk $1.99
  • 1 12oz. can evaporated milk $1.50
  • 1 cup heavy cream $1.50
  • 1 bay leaf $0.10
  • 1 pinch salt $0.01
  • 4 large eggs $0.36
  • 1 Tbsp vanilla extract $1.74

Instructions

  • Preheat the oven to 450°F. Find a baking sheet large enough to accommodate a 9-inch pie dish or cake round with a flat top. It must lay flat for the flan to come out of it and onto a serving dish without breaking.
  • Set a light-colored sauce pot over medium heat and add the sugar and 1/4 cup of orange juice. (If the orange didn’t release a ¼ cup of juice, make up the difference with water.) Heat the sugar and melt it until it turns light golden brown, then take the pot off the heat. The sugar will continue to brown off the heat. Do not stir the sugar, which can cause it to recrystallize and get grainy. Instead, swirl the pan.
  • Pour the hot sugar syrup into the 9-inch pie dish or cake round, coating the bottom in an even layer. Set aside.
  • Add the sweetened condensed milk, evaporated milk, heavy cream, bay leaf, strips of orange zest, and a pinch of salt to a medium pot. Heat until steaming, then take off the heat, cover, and steep for 20 minutes.
  • When the milk mixture has finished steeping, beat 4 eggs with 1 tablespoon of vanilla in a large bowl. Pour the steeped milk mixture through a fine mesh sieve into the egg mixture and mix. Do not whip; you don't want to incorporate air into the liquid.
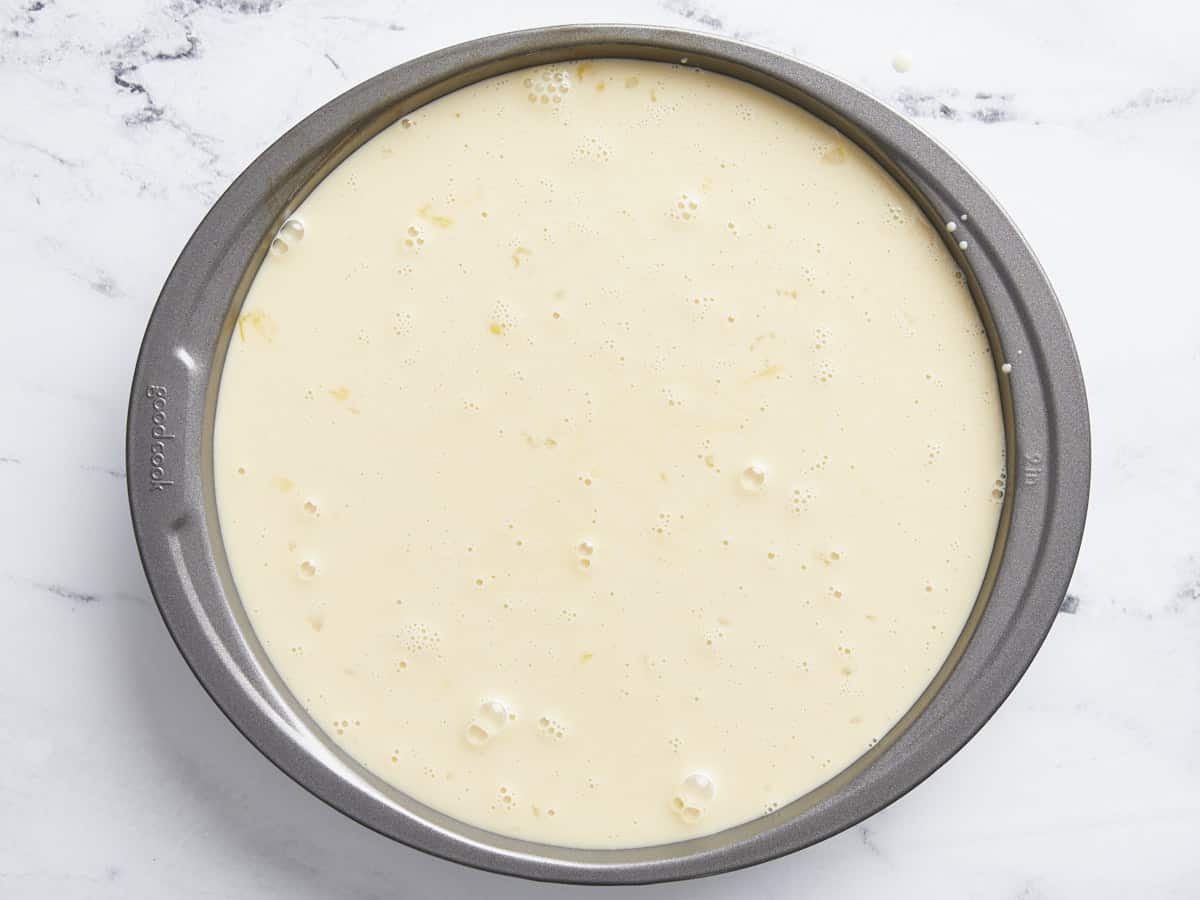
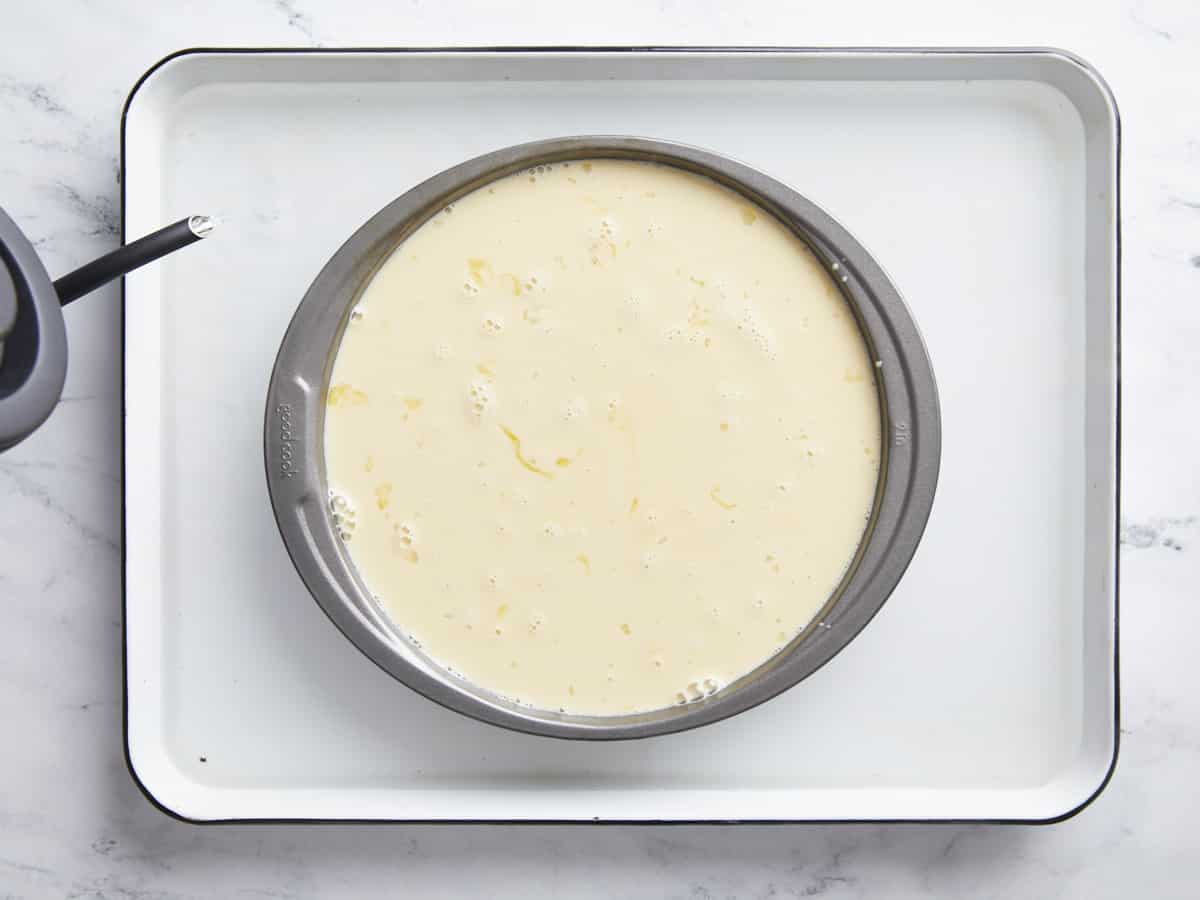
  • Meanwhile, bring 2 quarts of water to a boil for the water bath. Pour the milk and egg mixture into the prepared 9-inch pie dish or cake round, then place the pie dish or cake round onto the baking pan. Place the baking pan in the oven and fill halfway with boiling water to surround the pie dish or cake round, creating a water bath.
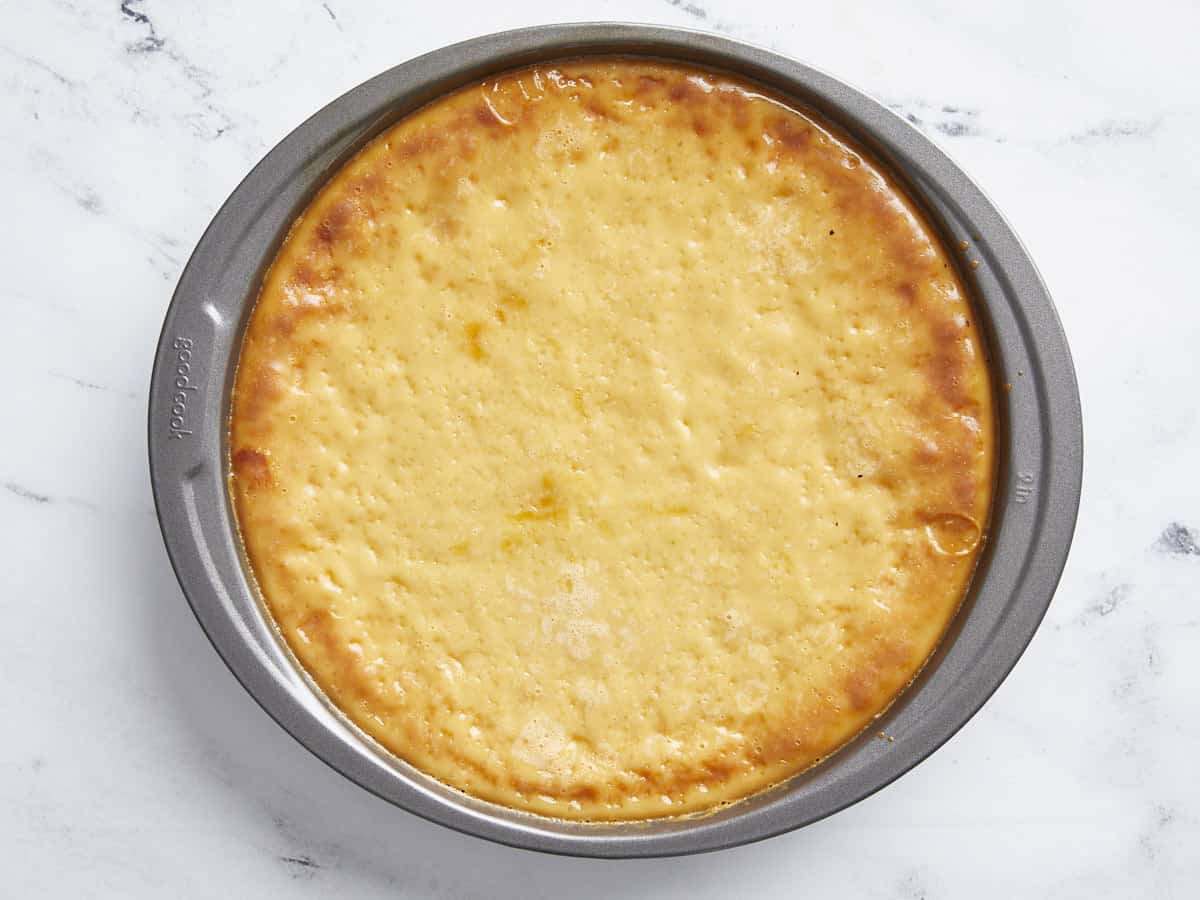
  • Lower the temperature of the oven to 350°F. Bake the flan for 60 to 70 minutes until the custard has set but still jiggles like thick lava in the middle. Let the flan cool completely. Then, place it in the fridge to set for at least 8 hours.
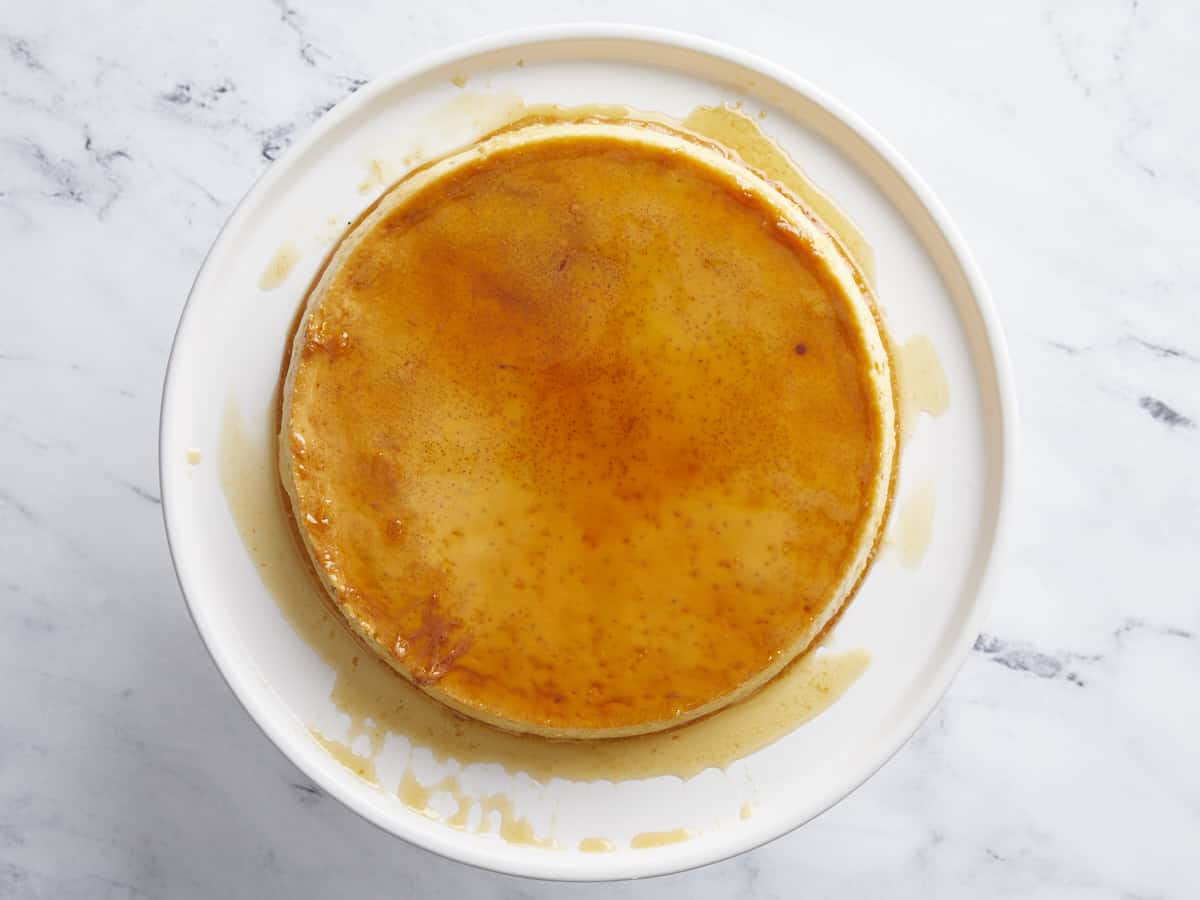
  • To serve the flan, run a knife around the edges of the pan. Then, top the 9-inch pie dish or cake round with the serving plate and carefully flip it over. Tap the baking dish gently to help the flan release. When you hear the flan release from the pie dish, remove the pie dish carefully and let caramel sauce flow over the flan.

See how we calculate recipe costs here.

Nutrition

Serving: 1slice | Calories: 434kcal | Carbohydrates: 52g | Protein: 11g | Fat: 21g | Sodium: 157mg | Fiber: 0.02g
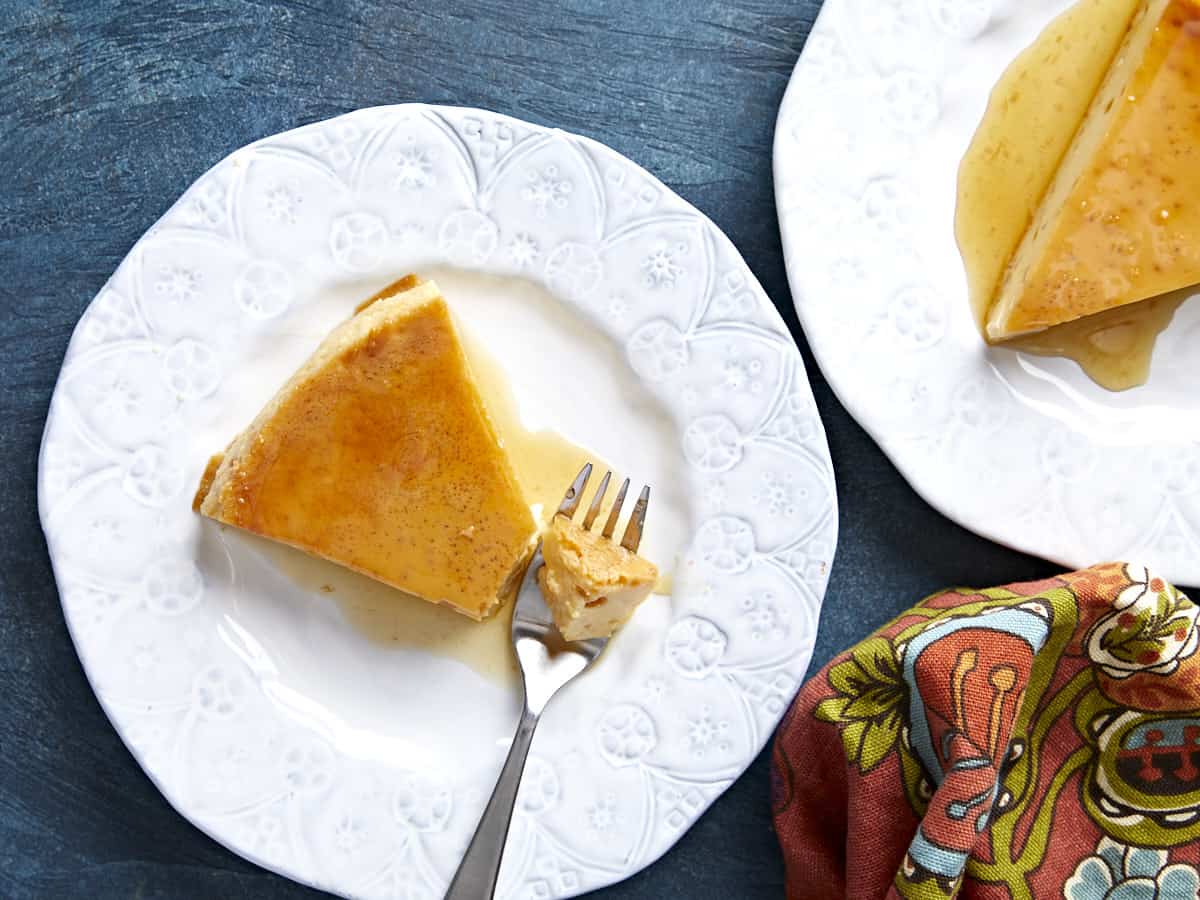
Two plates with slices of flan, a fork with a piece on the end.

How to Make Flan

Preheat the oven to 450°F. Find a baking pan large enough to accommodate a 9-inch pie dish or cake round with a flat top. It must lay flat for the flan to come out of it and onto a serving dish without breaking.

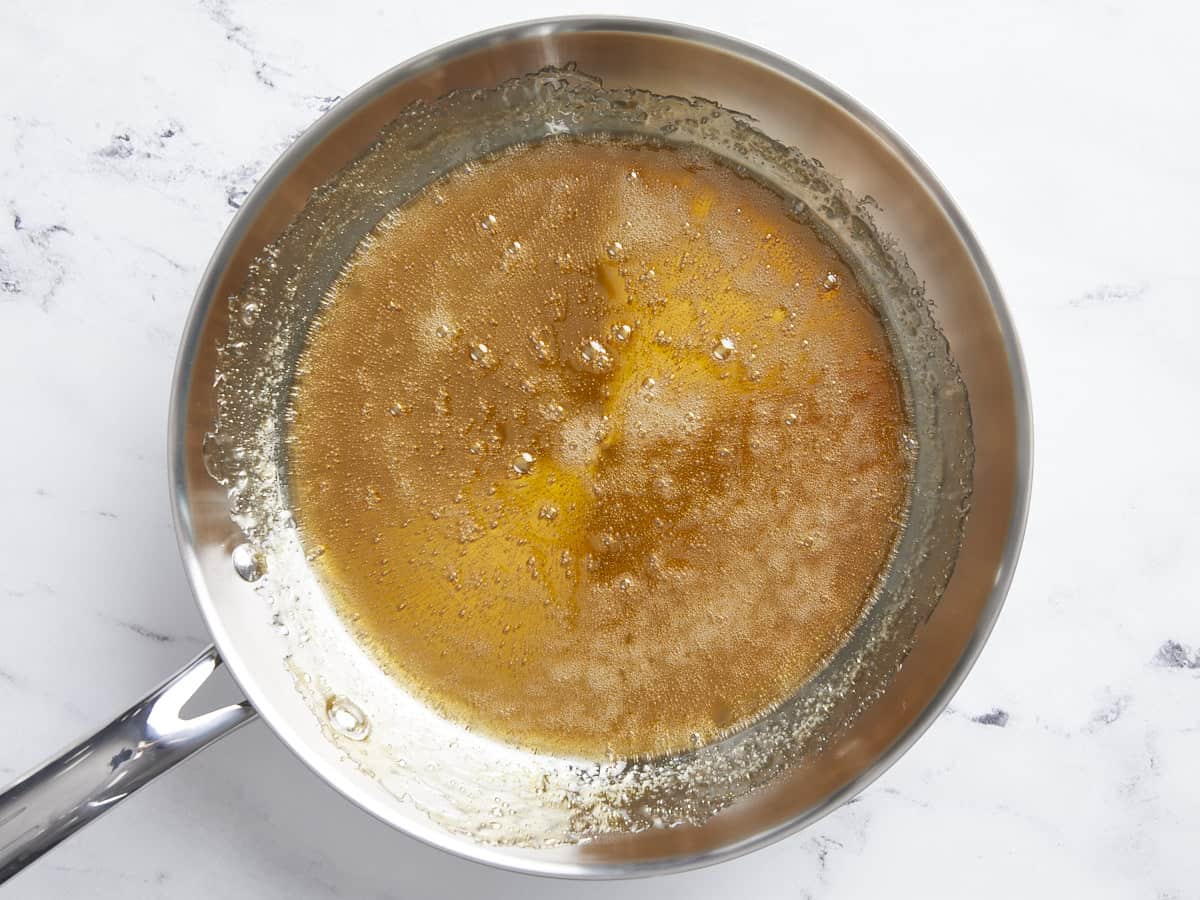
Caramelized sugar and orange juice in a skillet.

Set a light-colored pot or skillet over medium heat and add ¾ cup of sugar and 1/4 cup of orange juice. (If the orange didn’t release a ¼ cup of juice, make up the difference with water.) Heat the sugar and melt it until it turns light golden brown, then take the pot off the heat. The sugar will continue to brown off the heat. Do not stir the sugar, which can cause it to recrystallize and get grainy. Instead, swirl the pan.

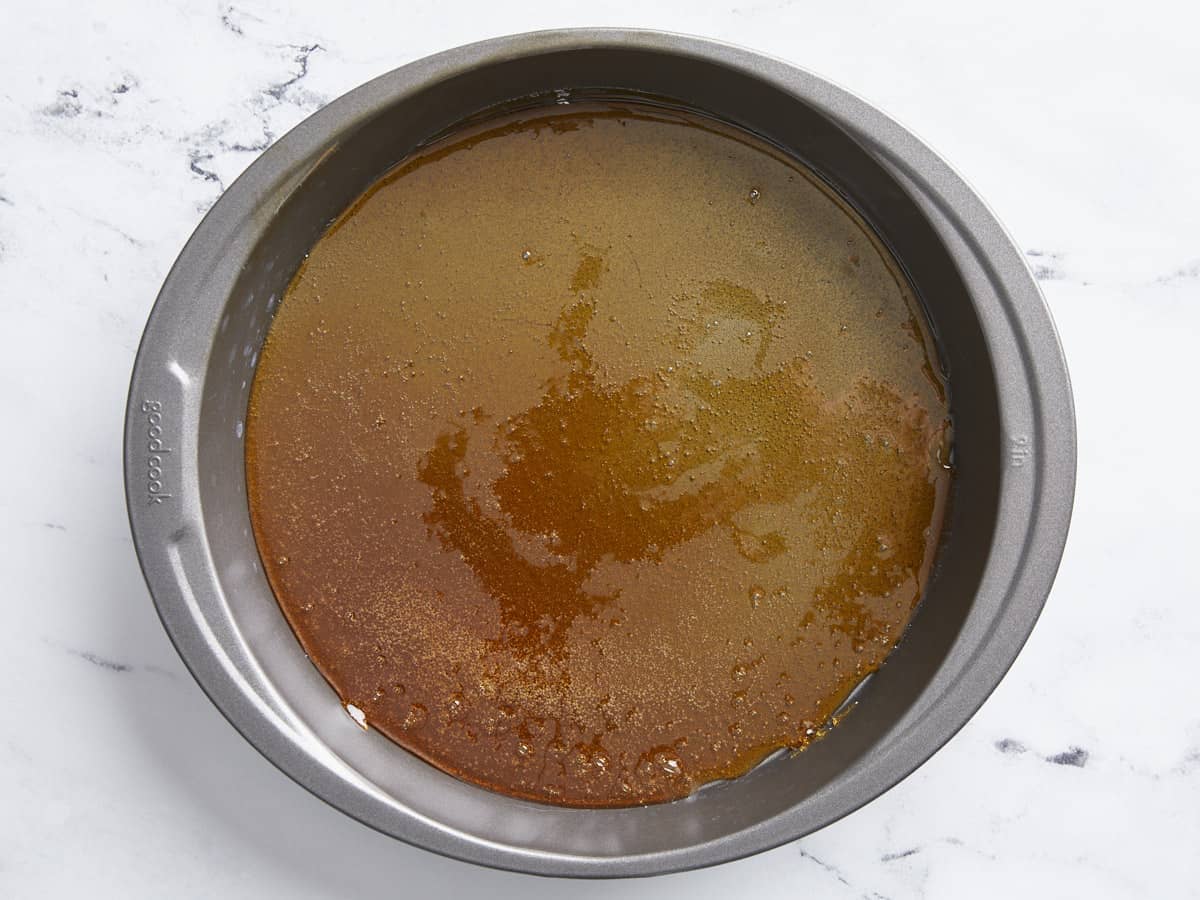
Caramel poured into the bottom of a cake pan.

Pour the hot sugar syrup into the 9-inch pie dish or cake round, coating the bottom in an even layer. Set aside.

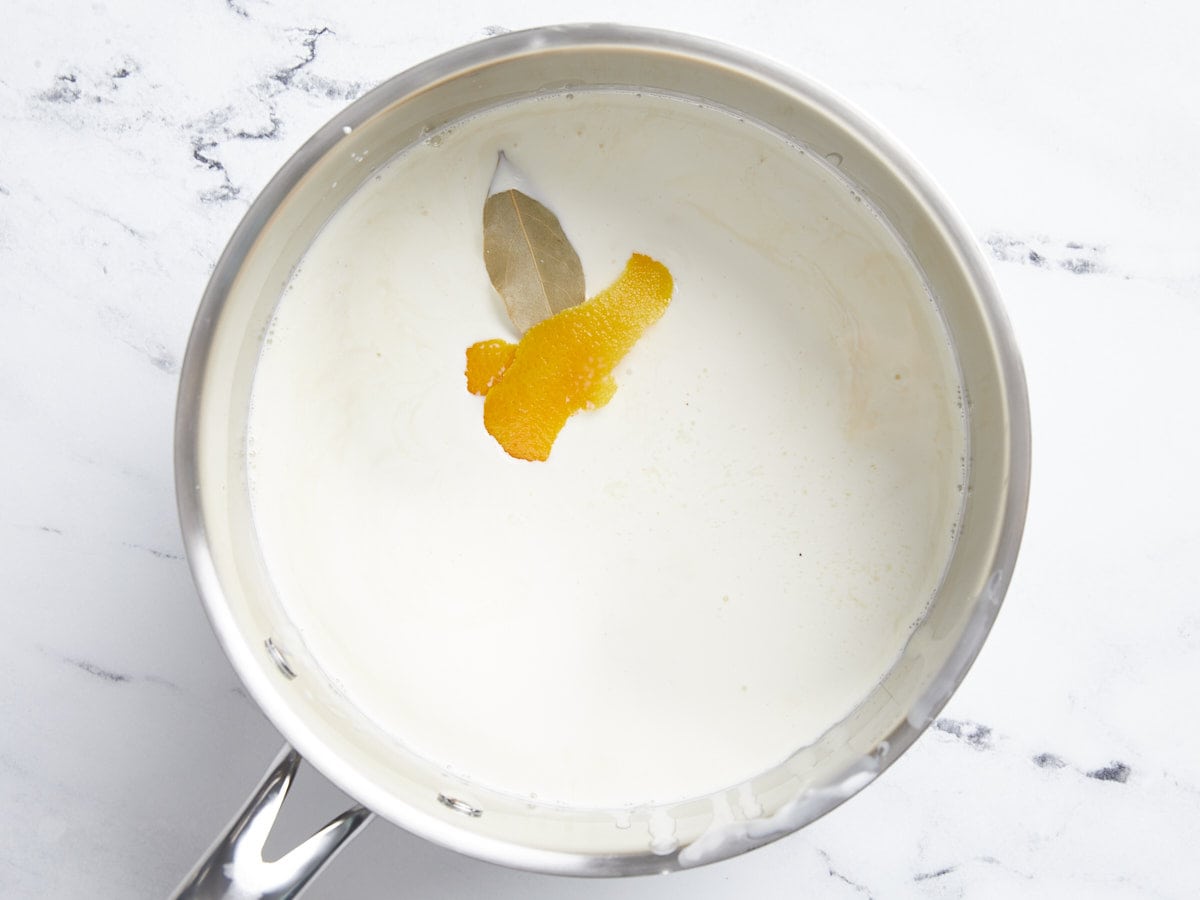
Milk, bay leaf, and zest in a pot.

Add one 14oz. can of sweetened condensed milk, one 12oz. can of evaporated milk, one cup heavy cream, one bay leaf, strips of zest of one orange, and one pinch of salt to a medium pot. Heat until steaming, then take off the heat, cover, and steep for 20 minutes.

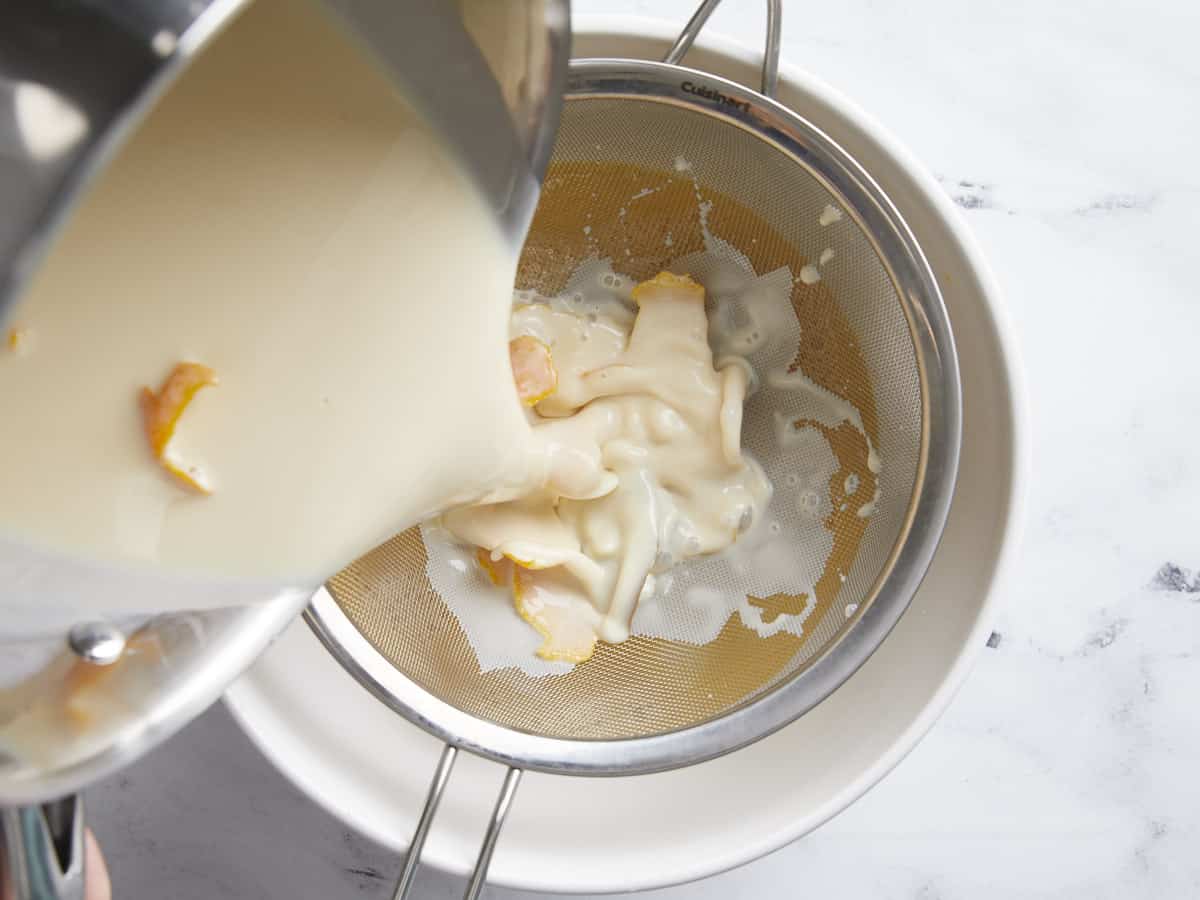
Steeped milk being poured through a sieve.

When the milk mixture has finished steeping, beat 4 eggs with 1 tablespoon of vanilla in a large bowl. Pour the steeped milk mixture through a fine mesh sieve into the egg mixture and mix. Do not whip; you don’t want to incorporate air into the liquid.

Milk mixture poured into a cake pan.

Pour the milk and egg mixture into the prepared 9-inch pie dish or cake round. Place the pie dish or cake round into the baking pan.

Boiling water being poured into a baking sheet around the cake pan.

Boil 2 quarts of water. Place the baking pan in the oven and fill halfway with boiling water to create a water bath around the pie pan. Lower the temperature of the oven to 350°F.

Baked flan in the cake pan.

Bake the flan for 60 to 70 minutes until the custard has set but still jiggles like thick lava in the middle. Let the flan cool completely. Then, place it in the fridge to set for at least 8 hours.

Finished flan flipped over onto a plate.

To serve the flan, run a knife around the edges of the pan. Then, top the 9-inch pie dish or cake round with the serving plate and carefully flip it over. Tap the baking dish gently to help the flan release. When you hear the flan release from the pie dish, remove the pie dish carefully and let caramel sauce flow over the flan.

Overhead view of flan being served, one slice being lifted.

The post Flan appeared first on Budget Bytes.

Scrambled Eggs with Rice

Scrambled Eggs with Rice is a simple and delicious budget-friendly meal that can be enjoyed for breakfast, lunch, or dinner!

The post Scrambled Eggs with Rice appeared first on Budget Bytes.

Rice is a quintessential budget-friendly ingredient, and my slogan has always been “put an egg on it!” So when I saw this recipe for Scrambled Eggs with Rice from the new cookbook The Simple Art of Rice: Recipes from Around the World for the Heart of Your Table by JJ Johnson and Danica Novgorodoff, I knew I had to make it. Not to mention, this recipe features the ingredient I currently can’t get enough of, gochujang! If you love fried rice, you’re going to love this recipe for scrambled eggs with rice. It’s just as easy, hearty, and delicious, plus it’s totally customizable. I’m definitely going to add this one to my budget-recipe rotation!

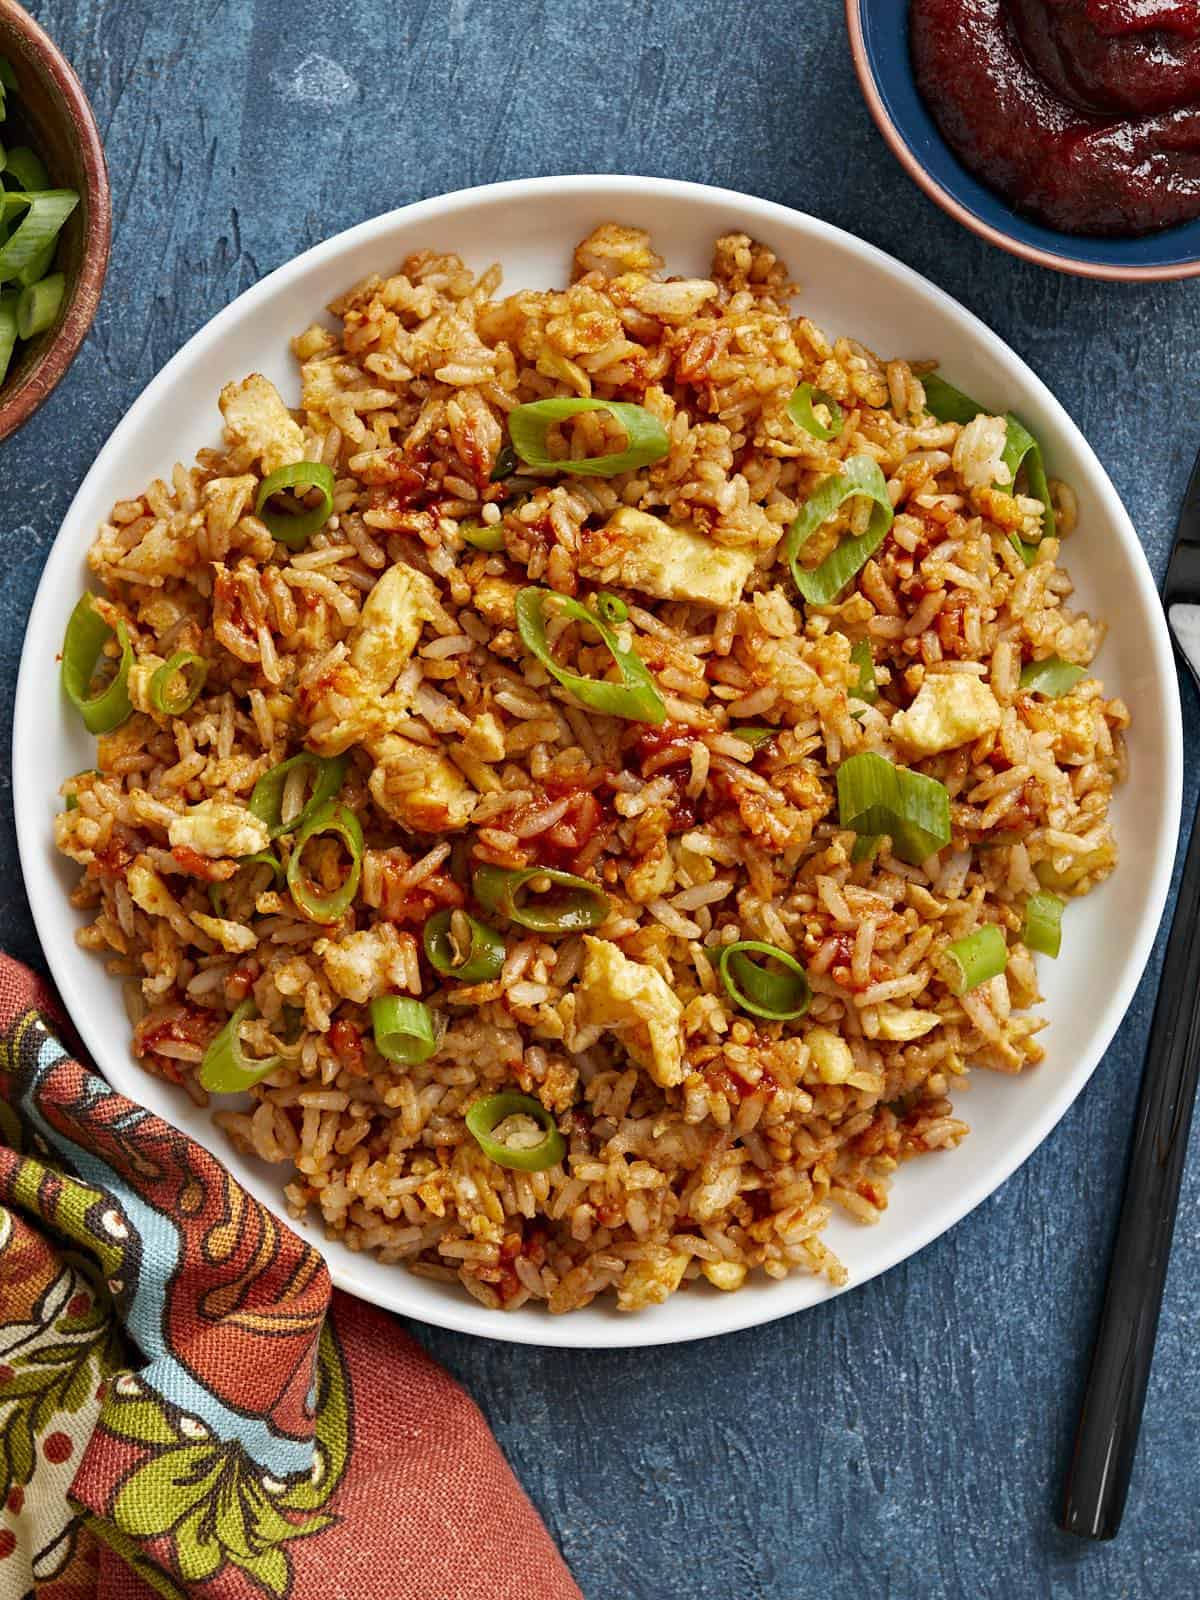
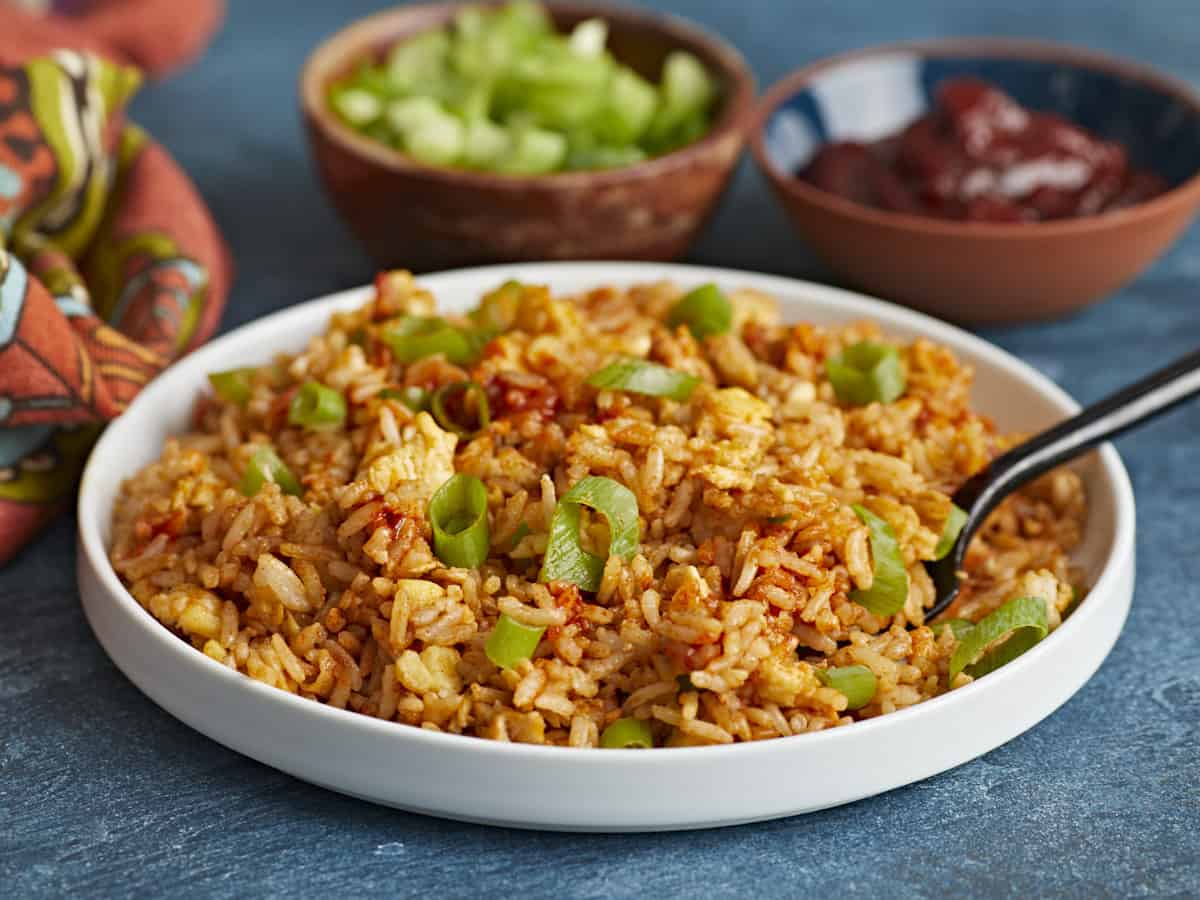
Overhead view of a plate full of scrambled eggs with rice, garnished with green onion.

Chef JJ mentions in his book that the recipe is inspired by breakfast dishes found in both Japanese and Korean cultures. This incredibly simple yet satisfying dish is similar to fried rice, but the ratio between the rice and egg are a bit more even and the rice is stirred into the egg before it’s fully cooked, which gives the dish a slightly creamy texture. Best of all, it’s super fast and easy, so you really can make it on a typical morning (provided you have some cooked rice stashed in the refrigerator). It’s the perfect recipe for using up the leftovers in your fridge!

Ingredients for Scrambled Eggs with Rice

Are you ready to see how easy this is? You’ll only need these simple ingredients to make scrambled eggs with rice:

  • Eggs: Eggs provide fat and protein to this dish, making it extra filling and satisfying. We used large eggs for this recipe. If you have smaller eggs, make sure to add a few more, or if you have extra large eggs, you can probably go with four.
  • Oil: Use your favorite cooking oil to lightly scramble the eggs.
  • Gochujang: This savory, sweet, and spicy Korean chile paste is having a moment in the U.S. right now, so you can probably find some at your local grocery store, although you’ll have a better selection at better prices if you shop at an Asian grocery store. If you can’t find gochujang, you can substitute chile oil or sriracha. The flavor will be different, but still delicious.
  • Rice: The original recipe, in The Simple Art of Rice: Recipes from Around the World for the Heart of Your Table, uses short-grain rice, which I’m sure would be even more spectacular, but we only had long grain on hand and it still made an amazing meal. You can use pretty much any type of rice for this flexible recipe. Whatever rice you’re using, make sure it’s pre-cooked and slightly warm.
  • Soy Sauce: A little soy sauce adds umami and depth to the flavor and enough salt for all of the flavors to pop.
  • Sesame Oil: toasted sesame oil adds a wonderfully nutty flavor to the dish, making it extra comforting and cozy.
  • Green Onions: Garnishing with sliced green onions adds a nice fresh pop of flavor to contrast the cozy meal.

What Else Can I Add?

Simple recipes like this are awesome because there is so much room for customization. Here are a few ideas for other add-ins that will take your scrambled eggs with rice to the next level:

  • Meat: Try sautéing some sliced ham, spam, shrimp, or smoked sausage in the skillet before cooking the eggs (remove from the skillet and stir back in at the end).
  • Vegetables: Just like with fried rice, you can add just about any vegetable to this dish. Onions, spinach, mushrooms, diced bell peppers, or even grape tomatoes would be awesome.
  • Toppings: I could go wild with fun toppings for this egg and rice dish. Cheddar cheese would be great, or how about some sliced avocado, kimchi, or furikake?

How to Store Leftovers

Thankfully, this recipe only takes minutes to whip up because it’s definitely best when freshly prepared. If you can’t eat it all in one sitting, store the rest in the refrigerator in an air-tight container for 2-3 days. Reheat using the microwave, sprinkling just a bit of water over top first (to help rehydrate the rice).

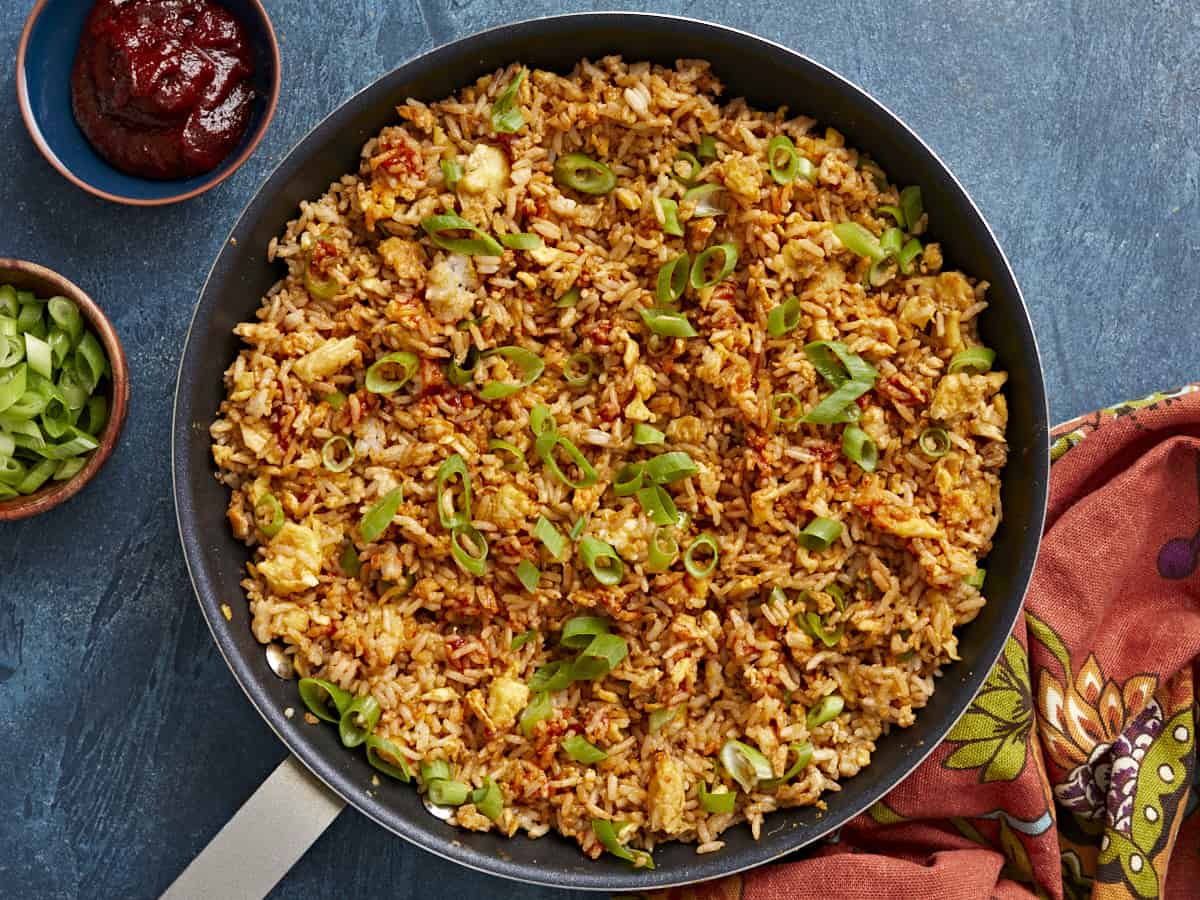
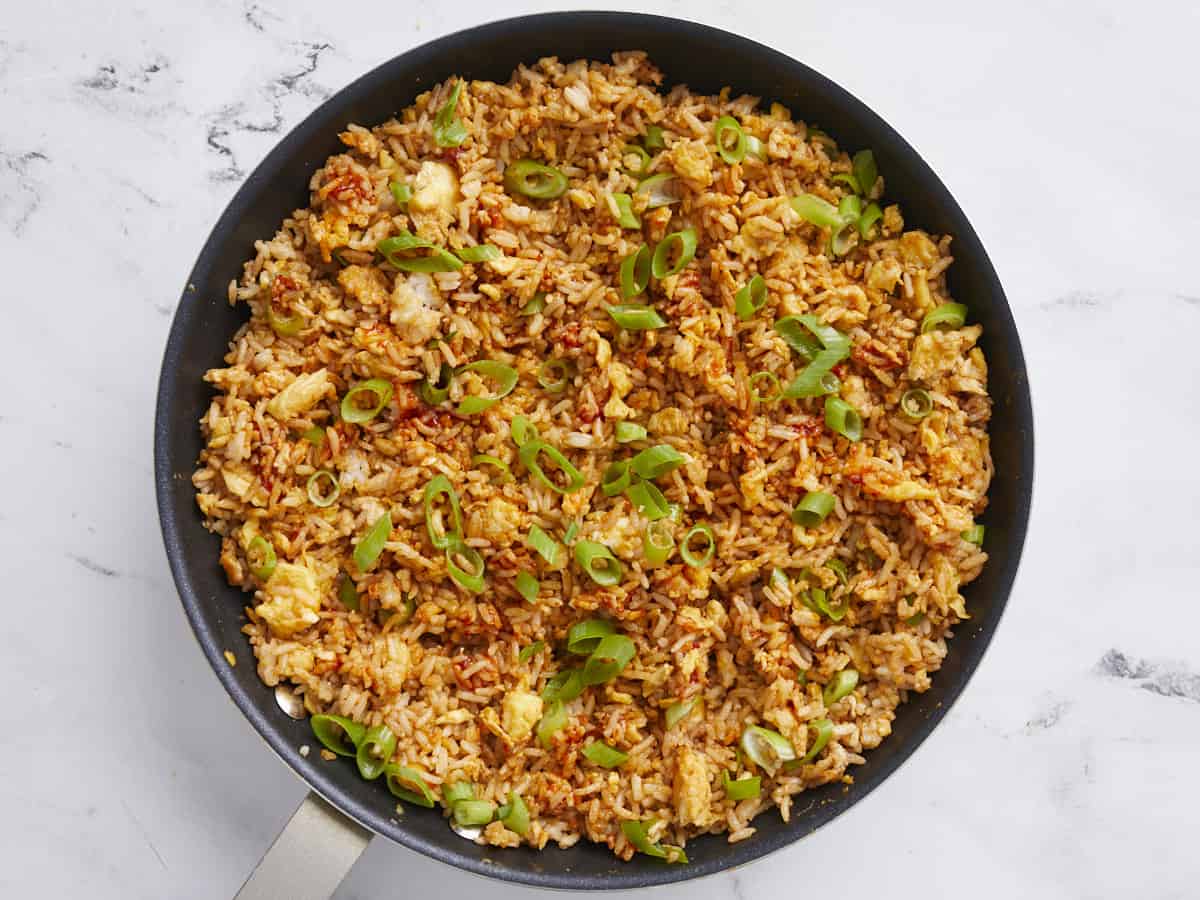
Overhead view of scrambled eggs with rice in the skillet.
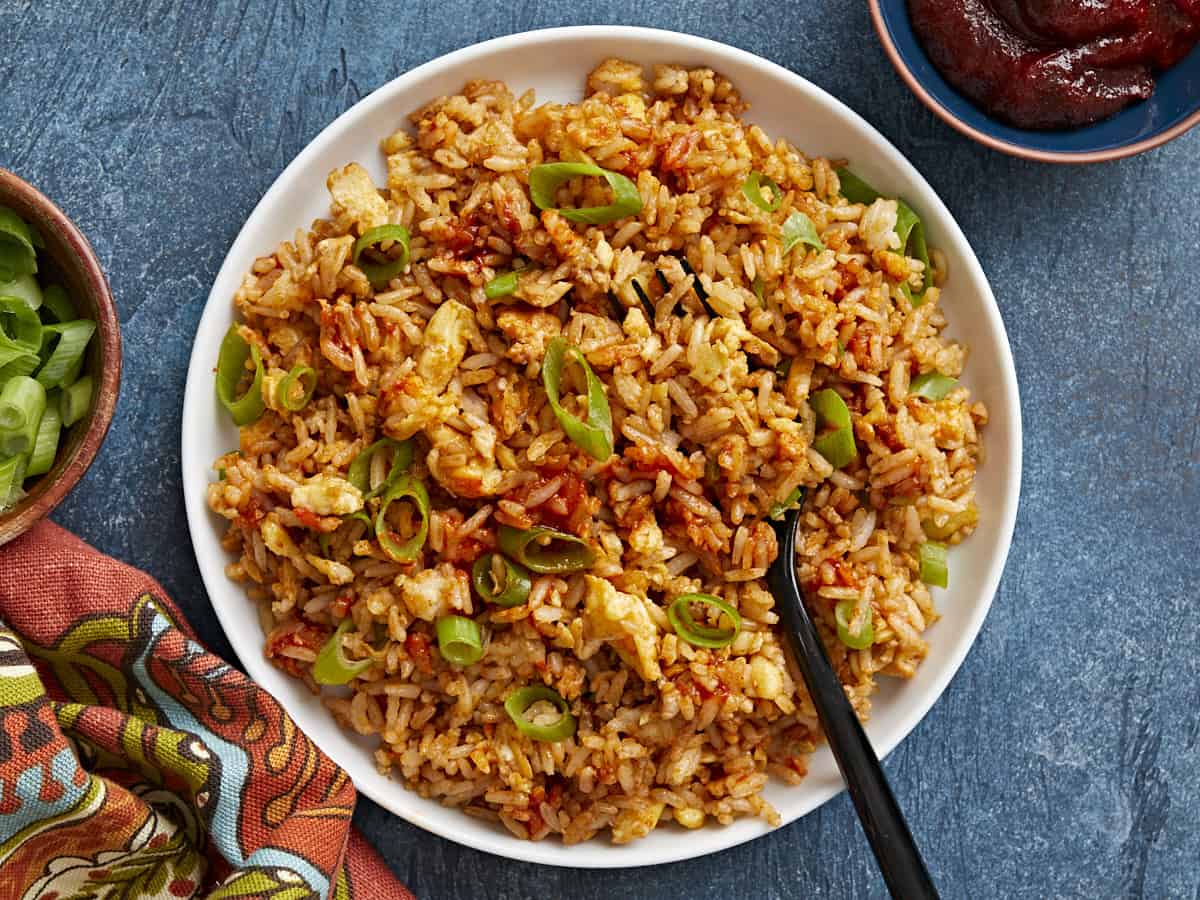
Overhead view of a plate full of scrambled eggs with rice, fork on the side.
Print

Scrambled Eggs with Rice

Scrambled Eggs with Rice is a simple and delicious budget-friendly meal that can be enjoyed for breakfast, lunch, or dinner!
Course Breakfast
Cuisine Japanese, Korean
Total Cost $2.28 recipe / $0.57 serving
Prep Time 5 minutes
Cook Time 10 minutes
Total Time 15 minutes
Servings 4
Calories 420kcal

Ingredients

  • 6 large eggs $0.63
  • 2 Tbsp cooking oil $0.08
  • 2 tsp gochujang (or to taste) $0.16
  • 4 cups cooked rice, warm $0.43
  • 3 Tbsp soy sauce $0.18
  • 1 Tbsp toasted sesame oil $0.30
  • 4 green onions, sliced $0.50

Instructions

  • Crack the eggs into a bowl and beat well with a fork.
  • Warm the vegetable oil in a large non-stick skillet over medium-low heat. Add the eggs and scramble them lightly, leaving them slightly runny. Toward the end of cooking, add the gochujang and stir until well incorporated.
  • Stir in the warmed rice, using a wooden spoon to break up any clumps. Cook for several minutes, until the rice is heated through, then stir in the soy sauce and sesame oil.
  • Serve hot, in individual bowls, topped with the sliced green onions.

See how we calculate recipe costs here.

Nutrition

Serving: 1serving | Calories: 420kcal | Carbohydrates: 47g | Protein: 15g | Fat: 18g | Sodium: 865mg | Fiber: 1g
Side view of a plate full of scrambled eggs with rice and a fork in the side.

How to Make Scrambled Eggs with Rice – Step by Step Photos

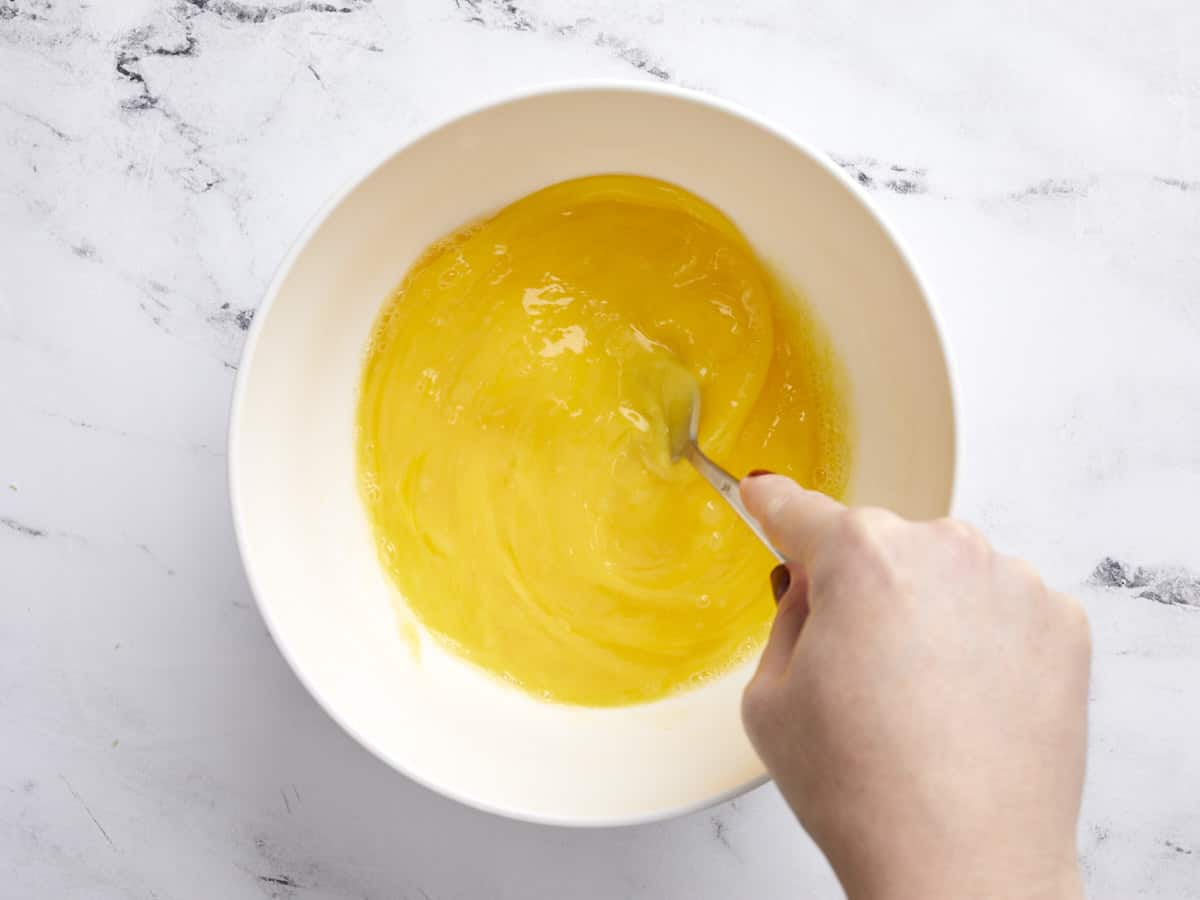
Eggs in a bowl being whisked with a fork.

Crack six large eggs into a bowl and whisk with a fork.

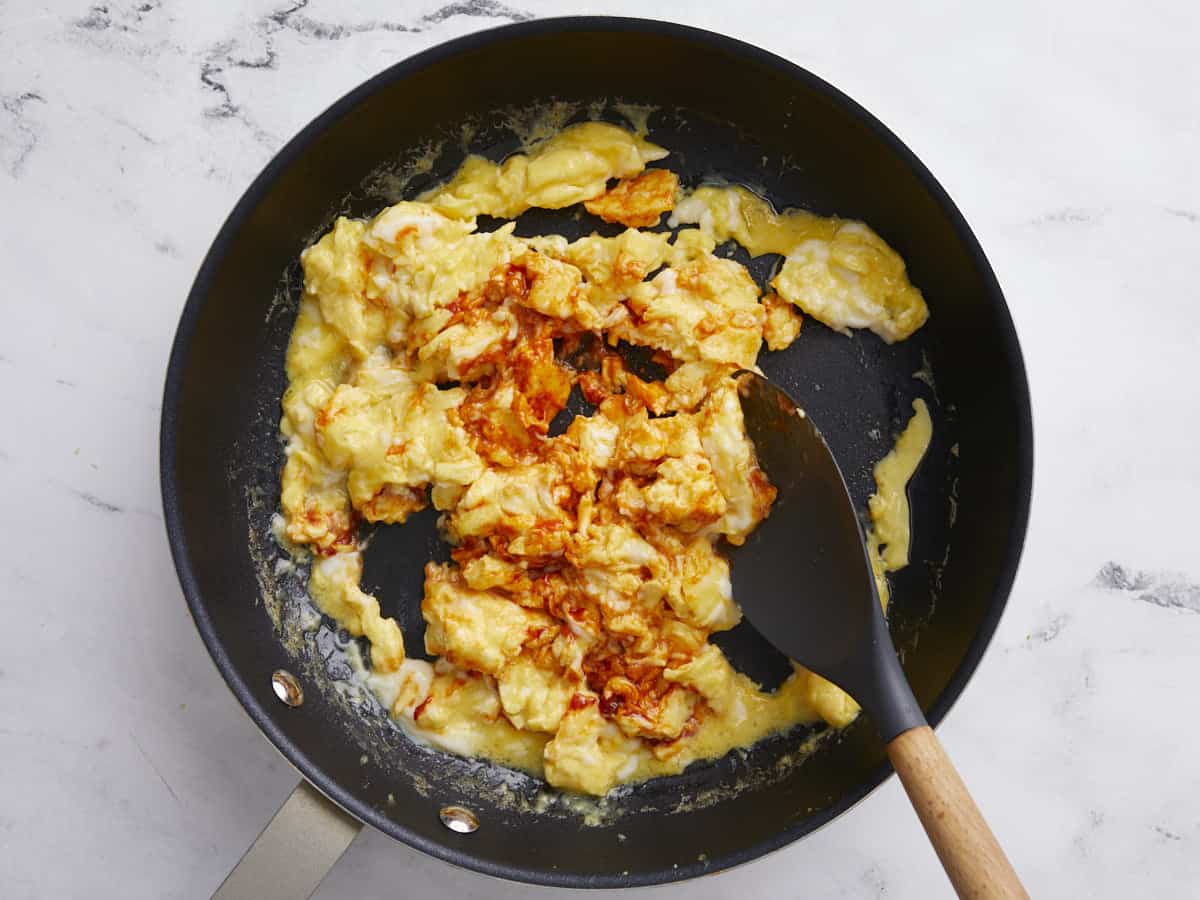
Half-scrambled eggs in a skillet with gochujang added.

Add 2 Tbsp cooking oil to a large skillet and heat over medium-low. Once hot, add the eggs and lightly scramble. When they’re mostly set, add 2 tsp gochujang and stir to combine.

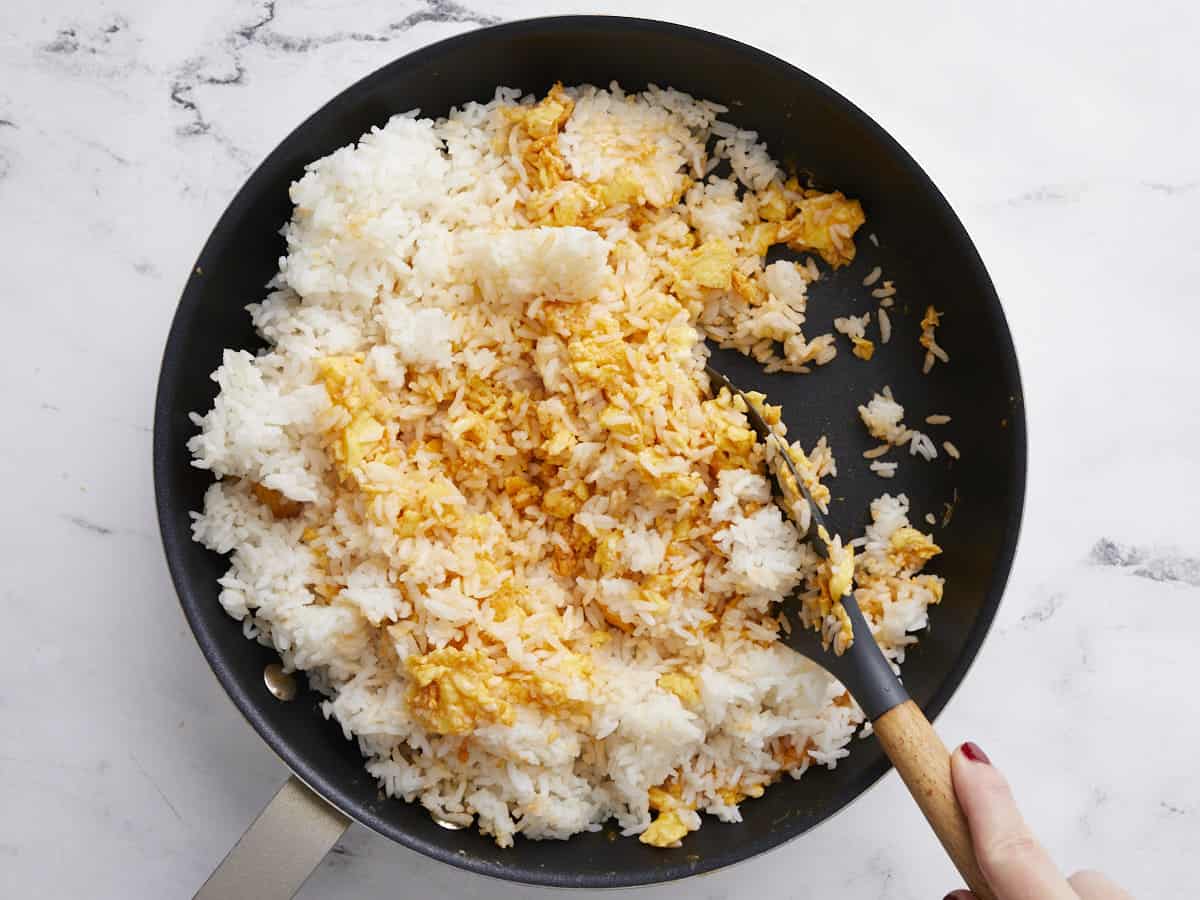
Rice being stirred into the eggs in the skillet.

Add four cups of warm pre-cooked rice and stir to combine.

Rice and eggs being seasoned with soy sauce.

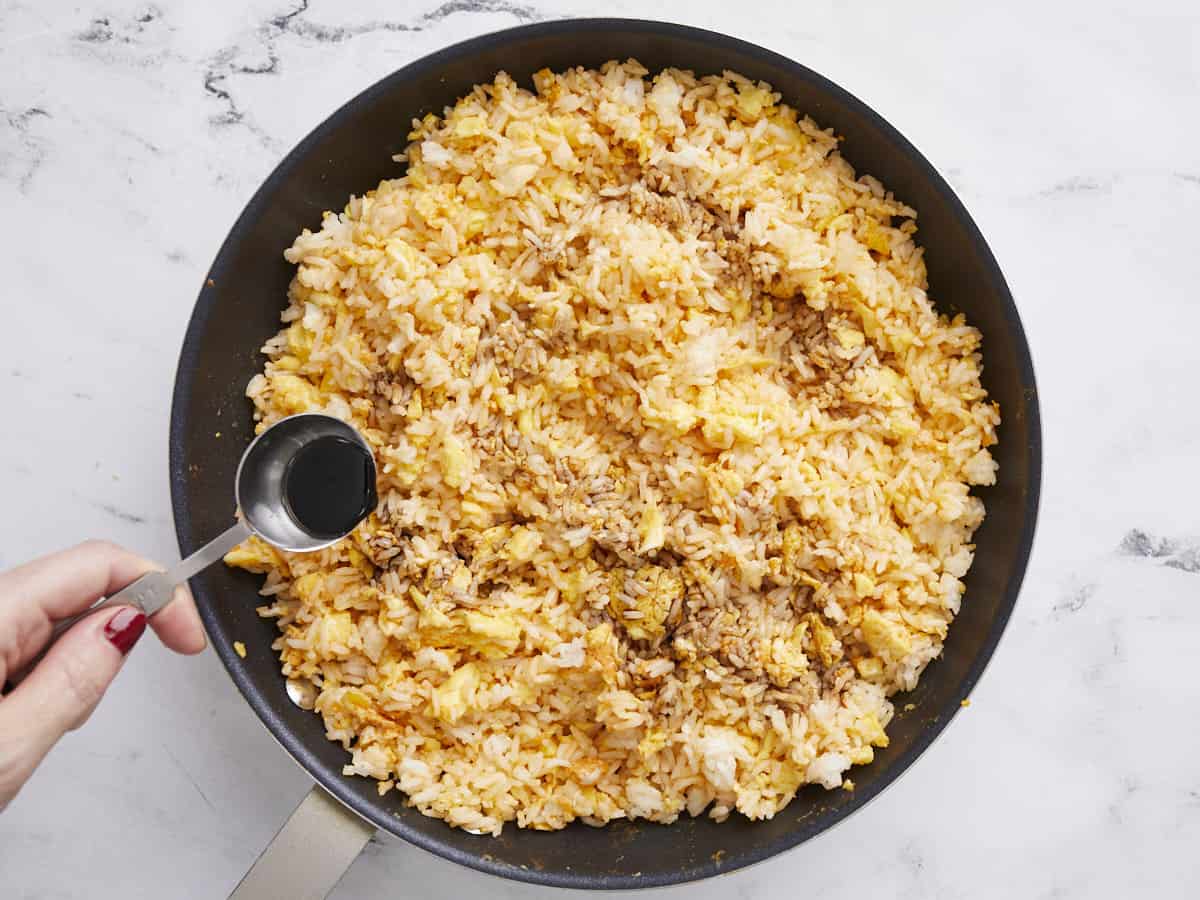
Season the eggs and rice with 3 Tbsp soy sauce and 1 Tbsp toasted sesame oil. Fold to incorporate. Give the mixture a taste and add more gochujang if desired (I like it spicy, so I added more).

Finished scrambled eggs with rice garnished with sliced green onion.

Garnish with sliced green onions and serve!

Overhead view of a plate full of scrambled eggs with rice, a fork in the side.

The post Scrambled Eggs with Rice appeared first on Budget Bytes.

Chickpea Spread with Caramelized Onions

This simple but elegant chickpea spread combines sweet caramelized onions with a creamy, savory puréed chickpea spread, the perfect appetizer for any occasion!

The post Chickpea Spread with Caramelized Onions appeared first on Budget Bytes.
Party season is just around the corner so it’s time to start bookmarking all the good appetizer recipes to bring to holiday gatherings! When I saw this simple but elegant (and budget-friendly!) Chickpea Spread with Caramelized Onions in Michal Korkosz’s new book, Polish’d: Modern Vegetarian Cooking from Global Poland, I knew I had to try it because I l-o-v-e turning a humble can of beans into something special. And guess what? This dip was every bit as delicious as it looked. So big thanks to Michal and his publisher for letting us share this amazing recipe with you today, just in time for the holidays!

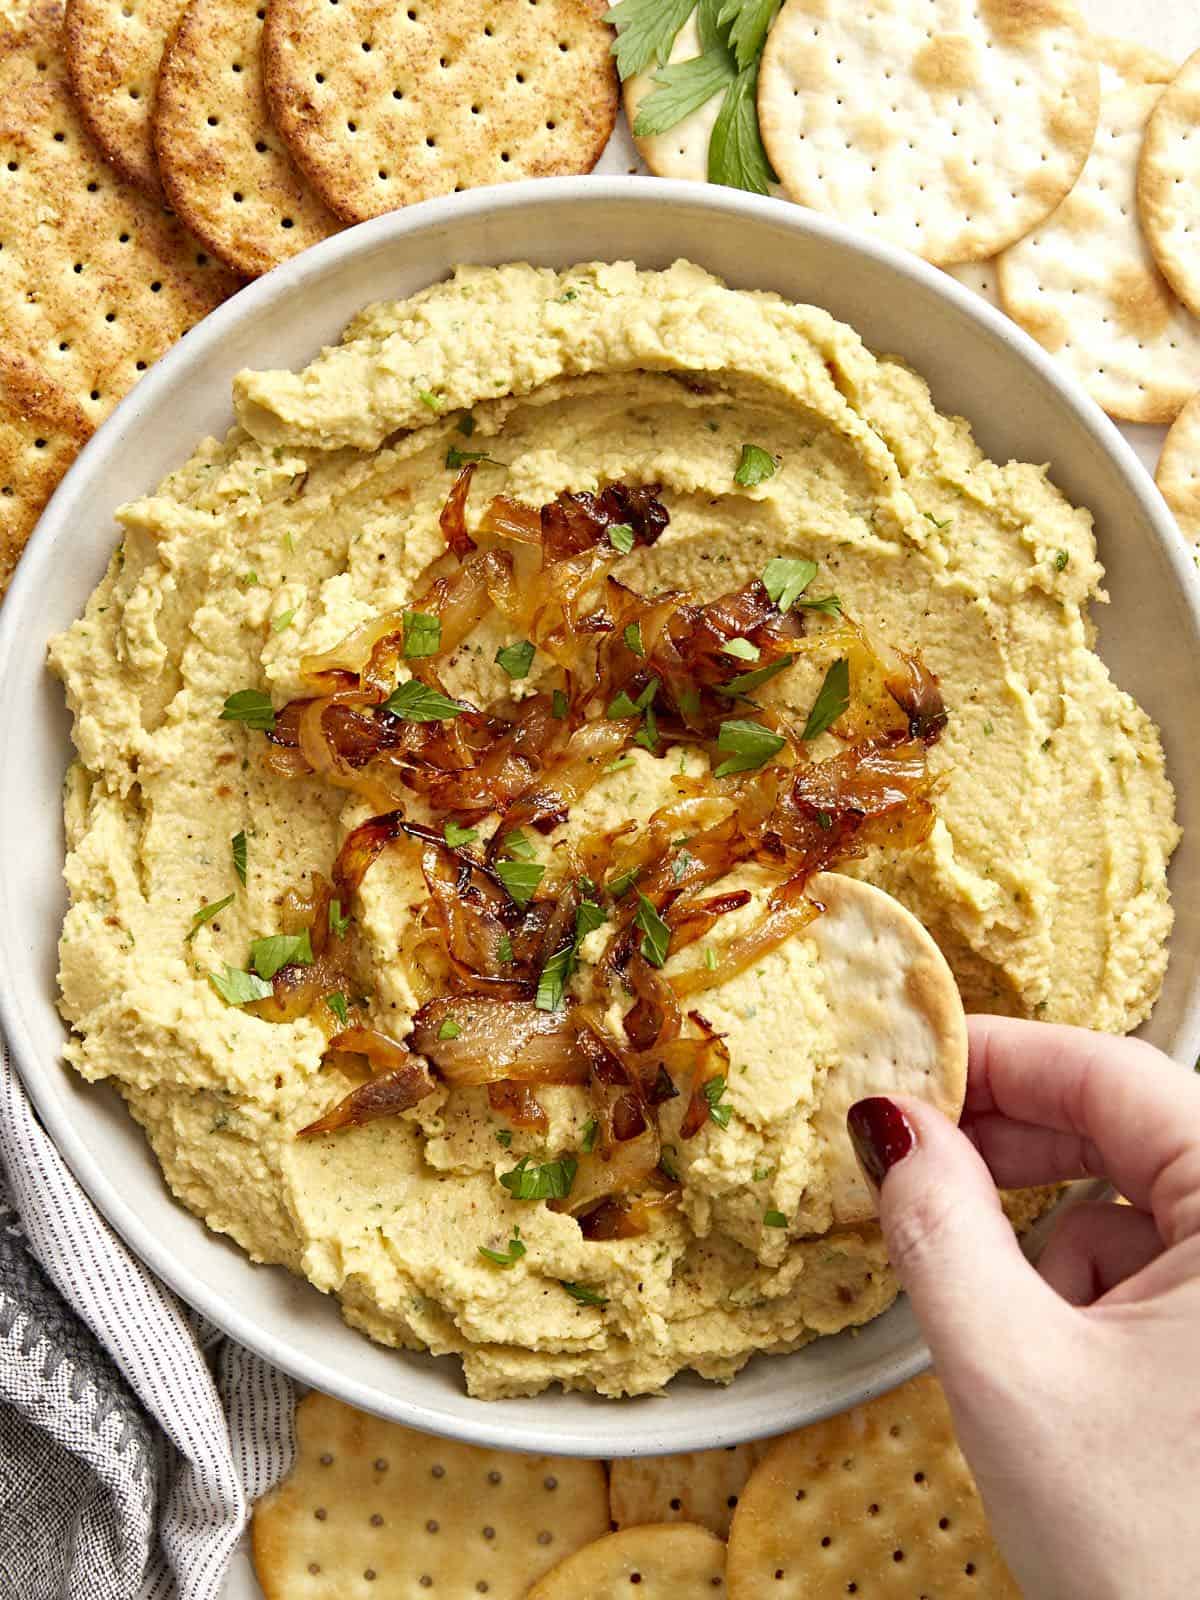
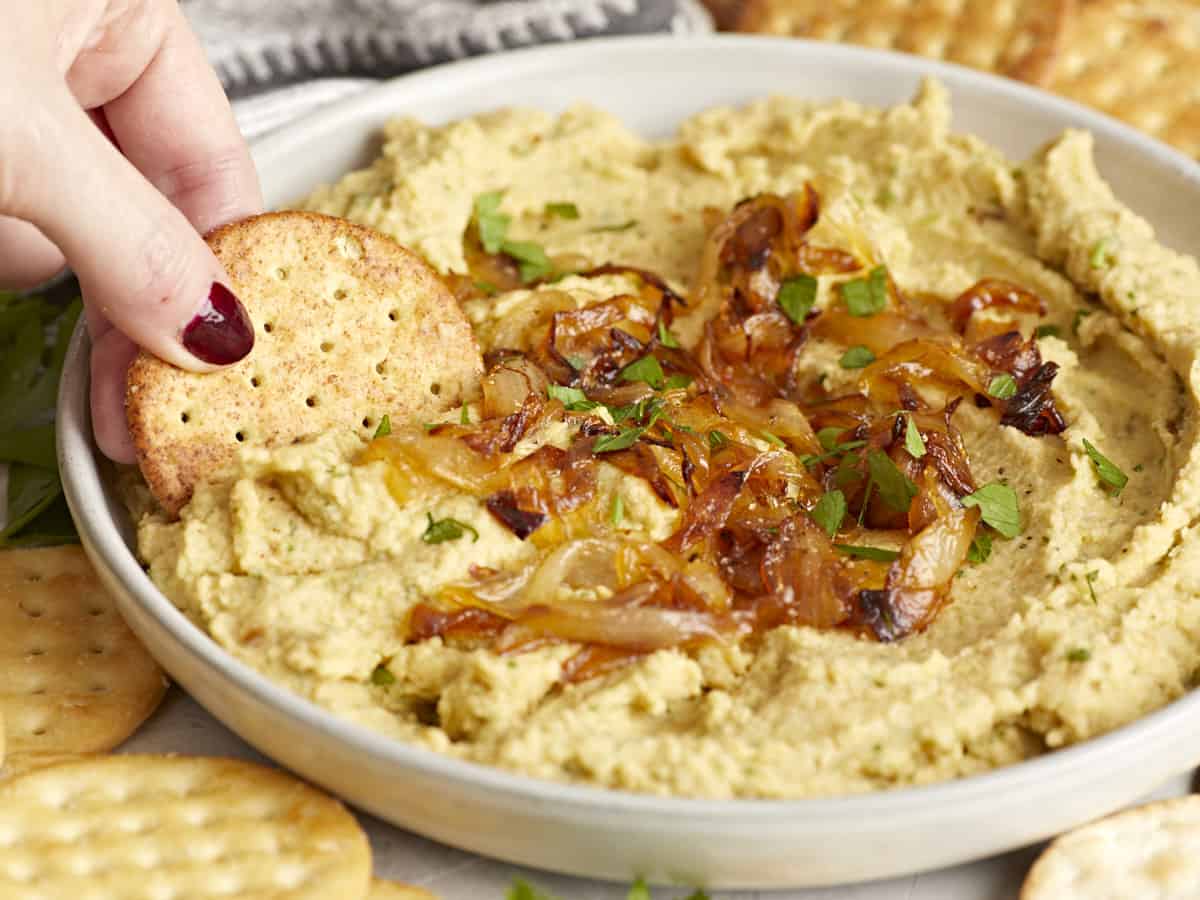
Close up overhead view of a bowl full of chickpea spread with caramelized onions, a cracker being dipped into the side.

What’s in This Chickpea Spread?

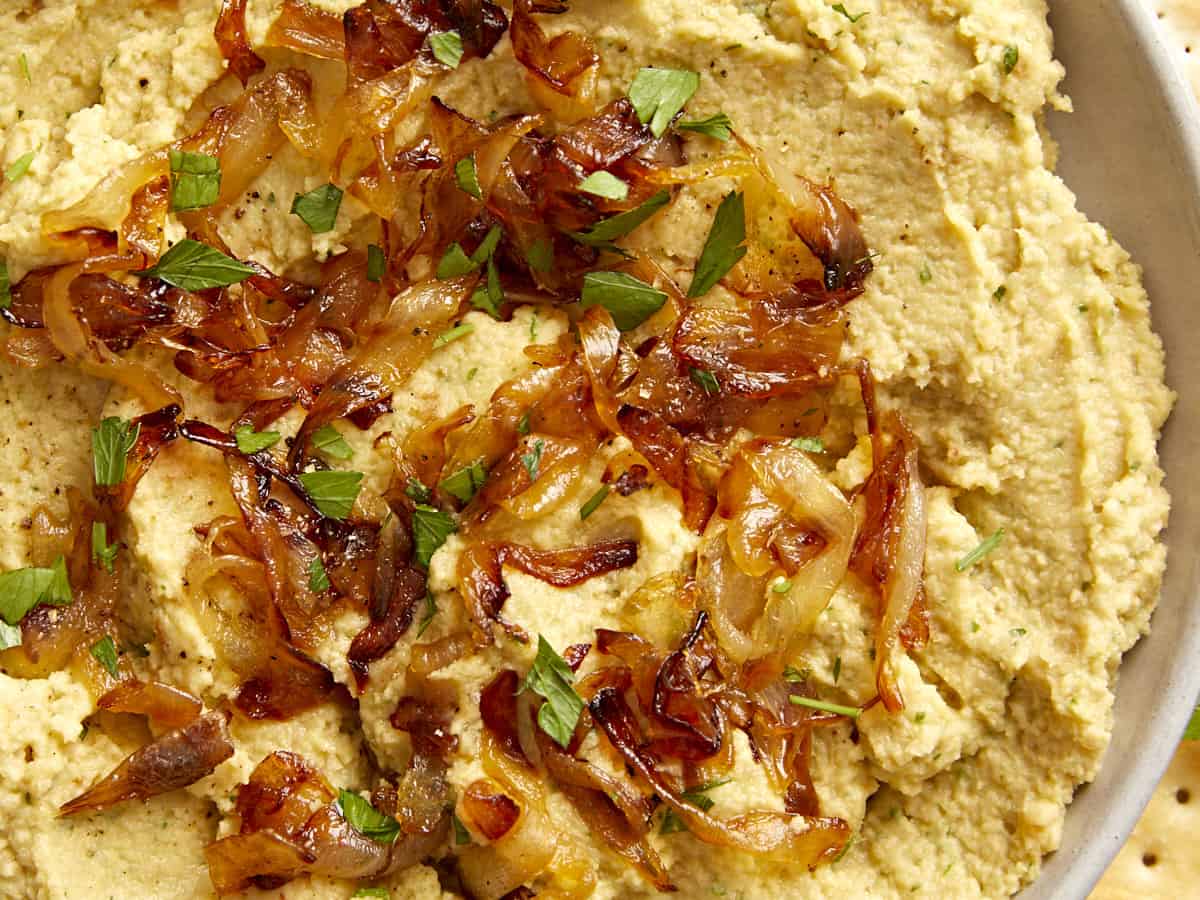
The base of the chickpea spread is simply chickpeas brightened up with a little lemon juice and puréed until smooth with cold water. To give the spread a boost of flavor, caramelized onions and fresh parsley are added to the mix. The caramelized onions give the chickpeas a subtly sweet and savory flavor, while the parsley adds a breath of freshness. The combination of flavors is absolutely divine and it will definitely have you coming back for dip after dip!

How to Serve the Chickpea Spread

This appetizer is best served with a variety of crackers or bread for dipping, but I think it would also make an amazing spread to add to sandwiches or even just a slice of toast. Michal notes in his book to serve with bread and dill pickles. Yum!

Storing Leftovers

The chickpea spread will stay good in the refrigerator for about 3-4 days, but the presentation is definitely best on the day it’s made when the caramelized onions are at their most beautiful. Caramelized onions do tend to get a little cloudy when refrigerated as they absorb moisture.

Close up overhead view of the caramelized onions on top of the chickpea dip.
Overhead view of a bowl full of chickpea spread with caramelized onions surrounded by crackers.
Print

Chickpea Spread with Caramelized Onions

This simple but elegant chickpea spread combines sweet caramelized onions with a creamy, savory puréed chickpea spread, the perfect appetizer for any occasion!
Course Appetizer, Snack
Cuisine Polish
Total Cost $3.58 recipe / $0.60 serving
Prep Time 15 minutes
Cook Time 25 minutes
Total Time 40 minutes
Servings 6 (¼ cup each)
Calories 175kcal

Ingredients

  • 1/4 cup olive oil $0.63
  • 1 lb. white onions $1.29
  • 3 bay leaves $0.45
  • 1 tsp salt, divided $0.05
  • 1/2 tsp brown sugar $0.01
  • 1 15oz. can chickpeas $0.79
  • 1/3 cup cold water $0.00
  • 1 Tbsp lemon juice $0.06
  • 1/4 cup fresh parsley $0.30

Instructions

  • Heat the oil in a large skillet over medium heat. Add the onions, bay leaves, ½ teaspoon of the salt, and the brown sugar. Cook over low heat, stirring occasionally, until golden brown and caramelized, about 25 minutes. Remove the bay leaves and discard.
  • Place the chickpeas in a food processor with the cold water and remaining ½ tsp salt. Blend until smooth, about 2 minutes. Add the caramelized onions (save some for the garnish) and the lemon juice and parsley. Pulse once or twice to combine. Season with pepper.
  • Transfer to a serving bowl. Top with the remaining caramelized onions and season with more pepper. Serve with your favorite bread and dill pickles.

See how we calculate recipe costs here.

Nutrition

Serving: 0.25cup | Calories: 175kcal | Carbohydrates: 17g | Protein: 4g | Fat: 10g | Sodium: 589mg | Fiber: 5g
Side view of a cracker being dipped into a bowl of chickpea spread with caramelized onions.

How to Make Chickpea Spread with Caramelized Onions

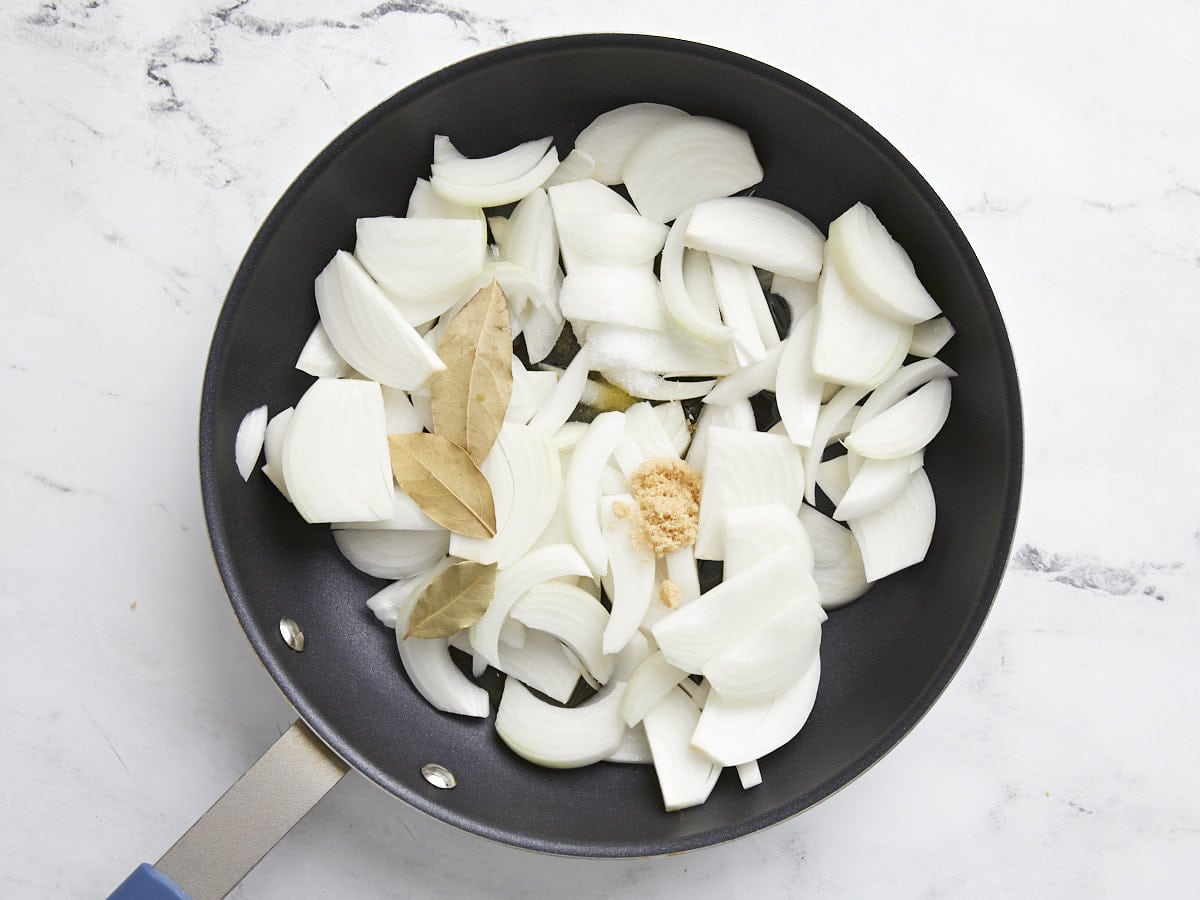
Sliced onions in a skillet with brown sugar and bay leaf.

Start caramelizing the onions first, as they’ll take about a half hour to cook. Slice one pound of white onions and add them to a skillet with ¼ cup olive oil, 3 bay leaves, ½ tsp salt, and ½ tsp brown sugar.

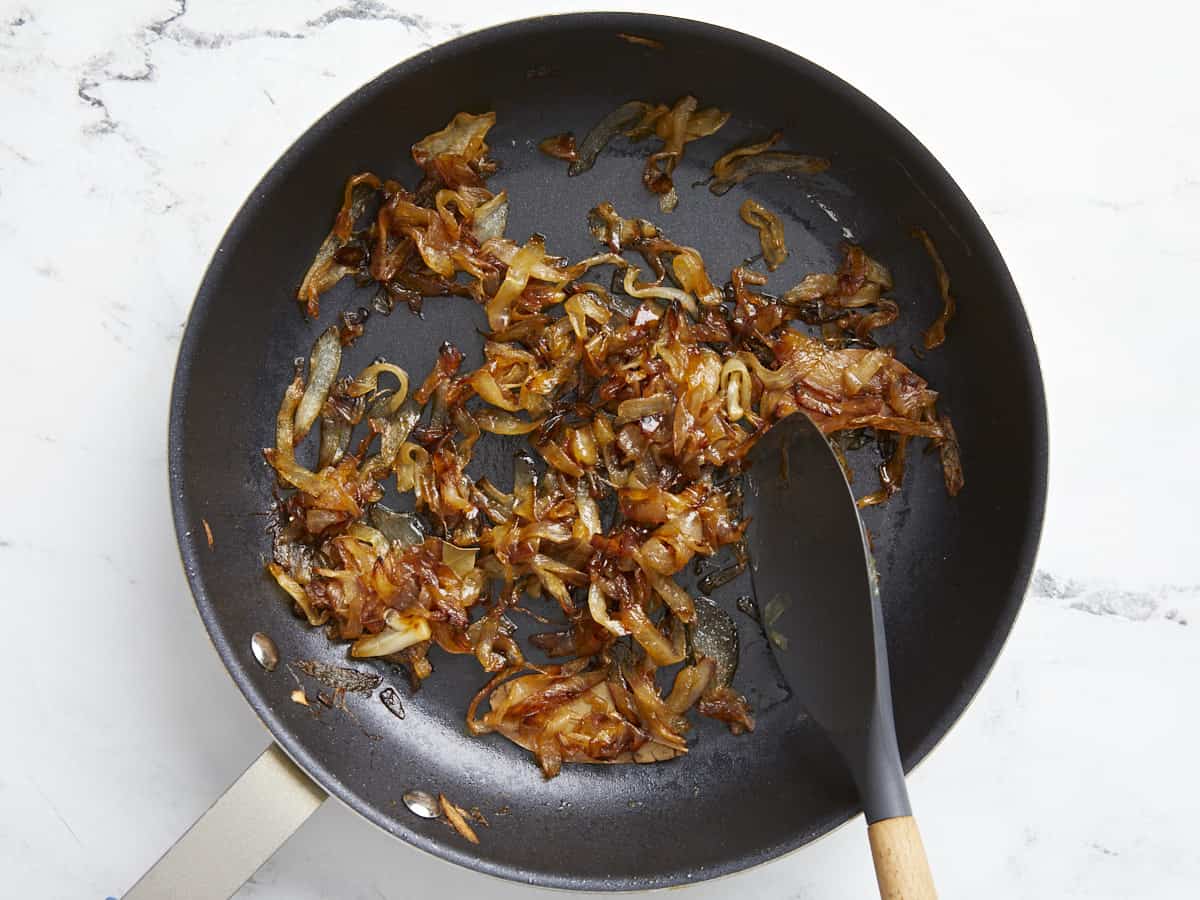
Caramelized onions in the skillet.

Cook the onions over low heat, stirring occasionally, until they deep golden brown and caramelized. You can increase the heat to medium-low if they are taking too long, just make sure to stir often. Discard the bay leaves.

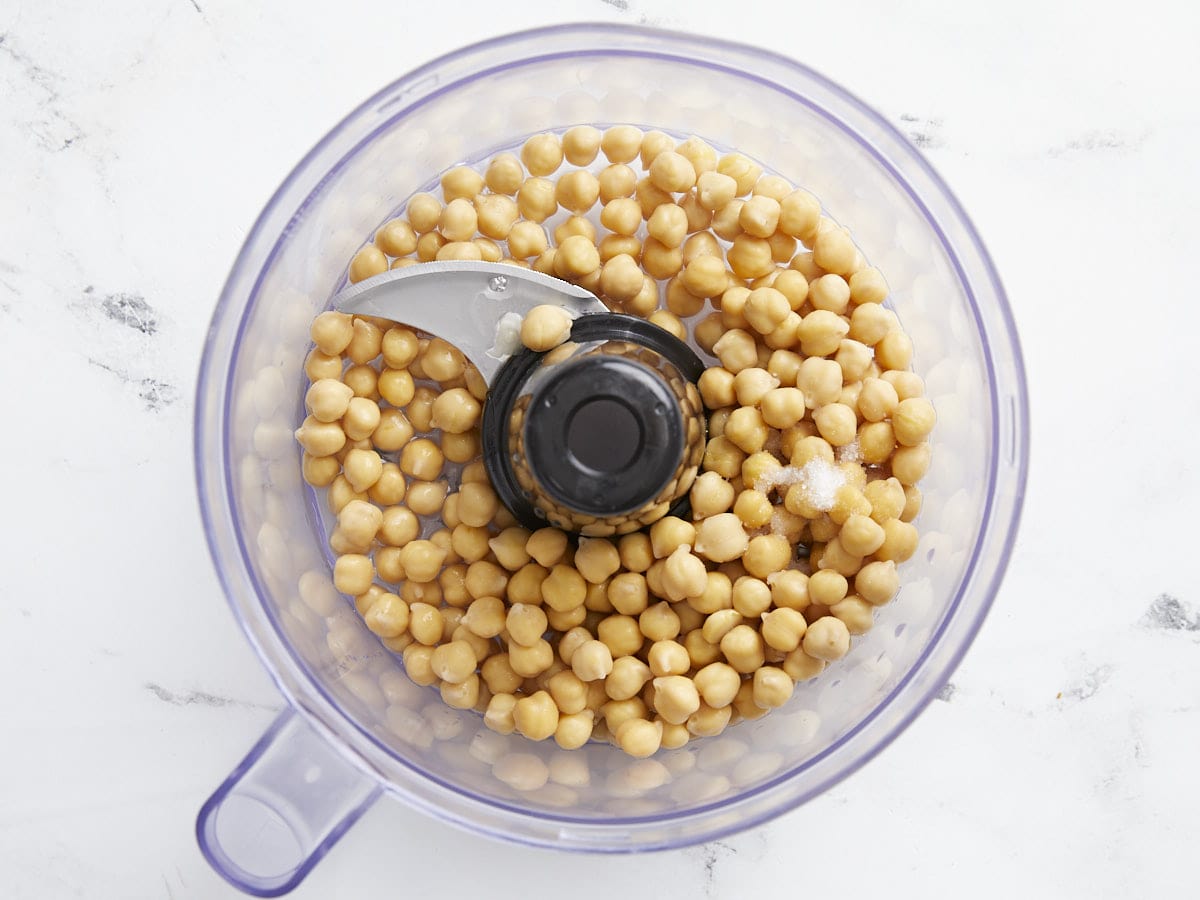
Chickpeas in a food processor with lemon juice, salt, and water.

Drain one 15oz. can of chickpeas and add them to a food processor with ½ tsp salt and ⅓ cup cold water.

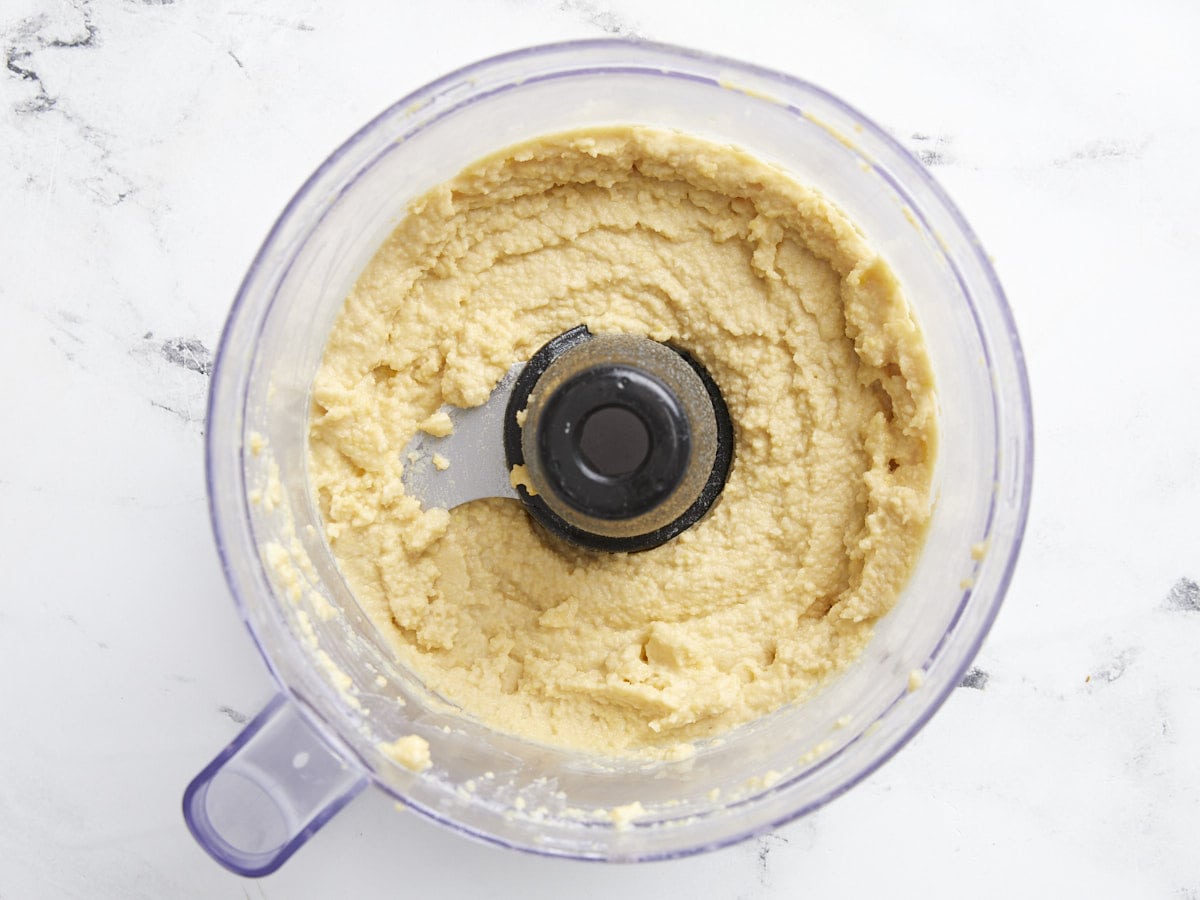
Puréed chickpeas in the food processor.

Purée the chickpeas until smooth. If the chickpeas seem dry, you can add a little extra water or olive oil until they blend smoothly.

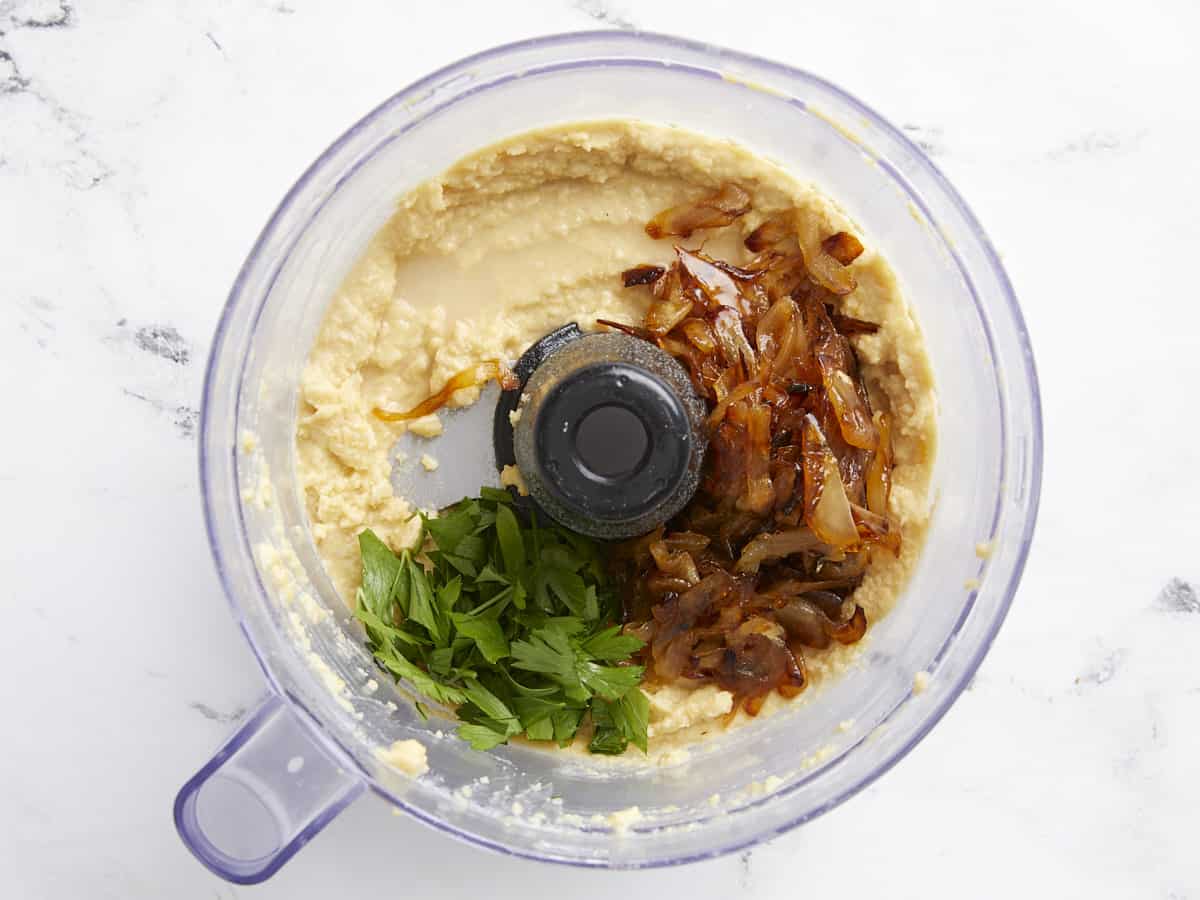
Caramelized onions and parsley added to the food processor.

Add 1 Tbsp lemon juice, half of the caramelized onions, and about ¼ cup fresh parsley to the food processor.

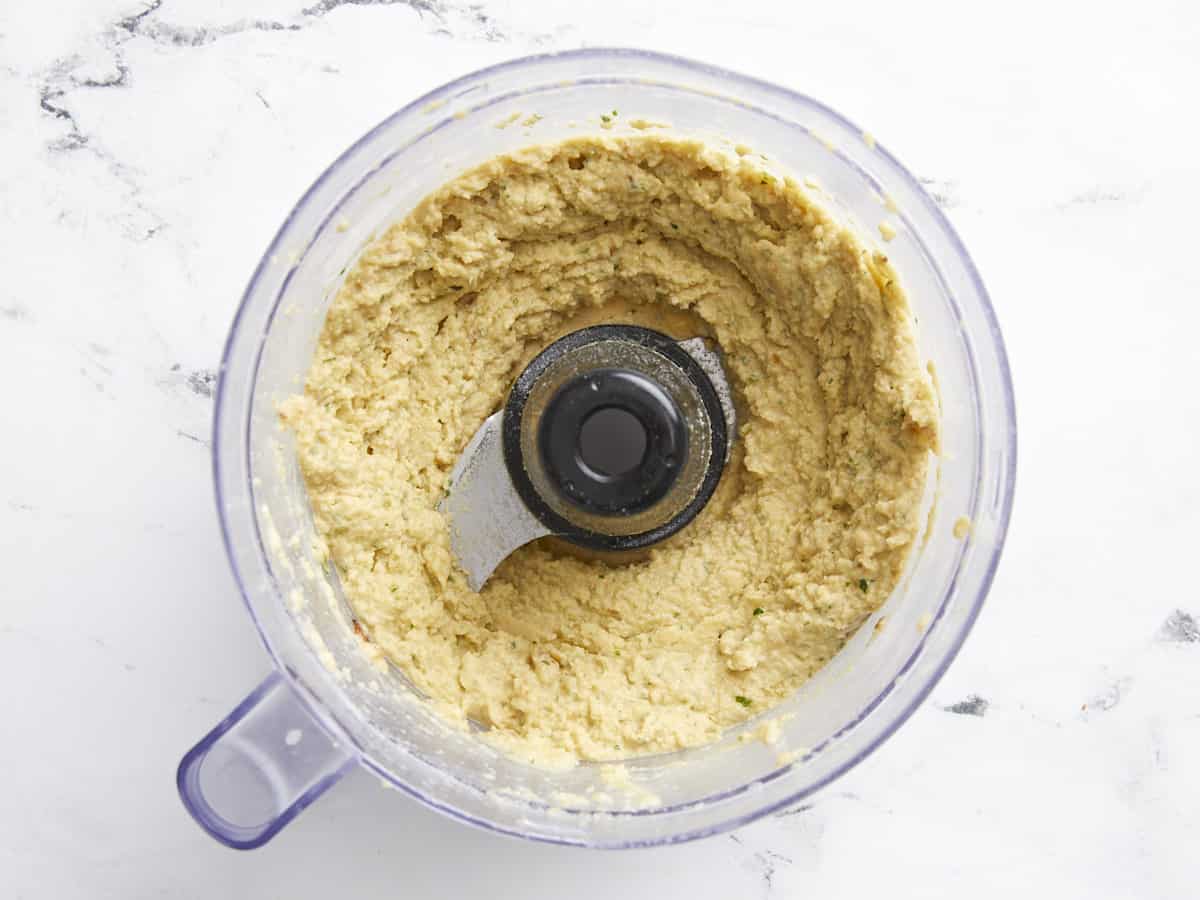
Finished chickpea spread in the food processor.

Pulse the chickpeas to combine with the parsley and caramelize onions. Give it a taste, season with pepper, and adjust the salt, lemon, or other ingredients to your liking.

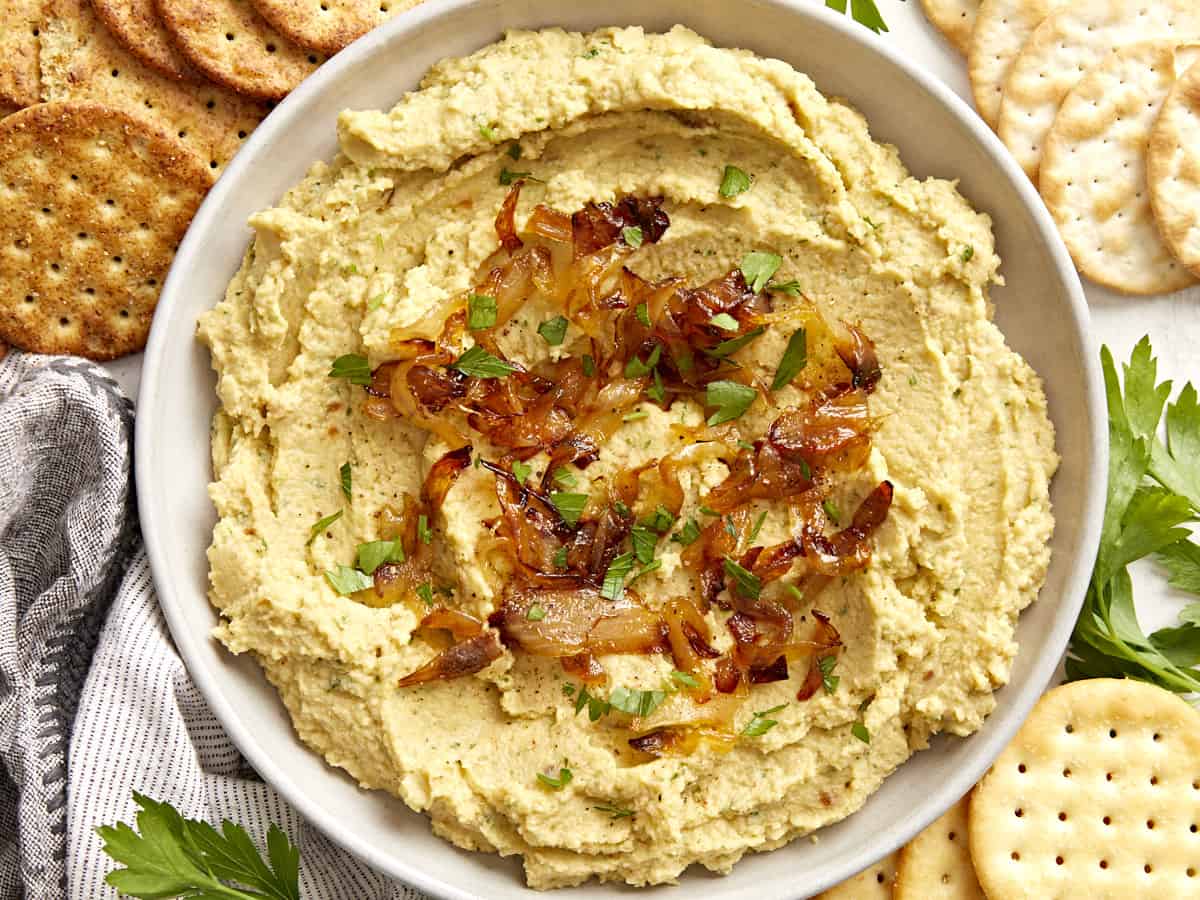
Overhead view of a bowl full of chickpea spread with caramelized onions surrounded by crackers.

Serve the chickpea spread in a bowl, topped with the remaining caramelized onions, and some freshly cracked pepper. Enjoy!

The post Chickpea Spread with Caramelized Onions appeared first on Budget Bytes.
Chipotle Chicken Tacos

Change up your Taco Tuesday with these spicy and smoky Chipotle Chicken Tacos. They’re a great weeknight meal or weekly meal prep!

The post Chipotle Chicken Tacos appeared first on Budget Bytes.
Kick up your Taco Tuesday recipe game with these fiery and deeply flavorful Chipotle Chicken Tacos! This easy recipe is fast, filling, and perfect for meal prep. It’s also a breeze to scale up, and you can even make it a little heartier by serving it with sides of Tomato Rice and Quick Seasoned Black Beans. Plus, it’s only a little over a dollar per serving.  I’m telling you, this one is clutch!  

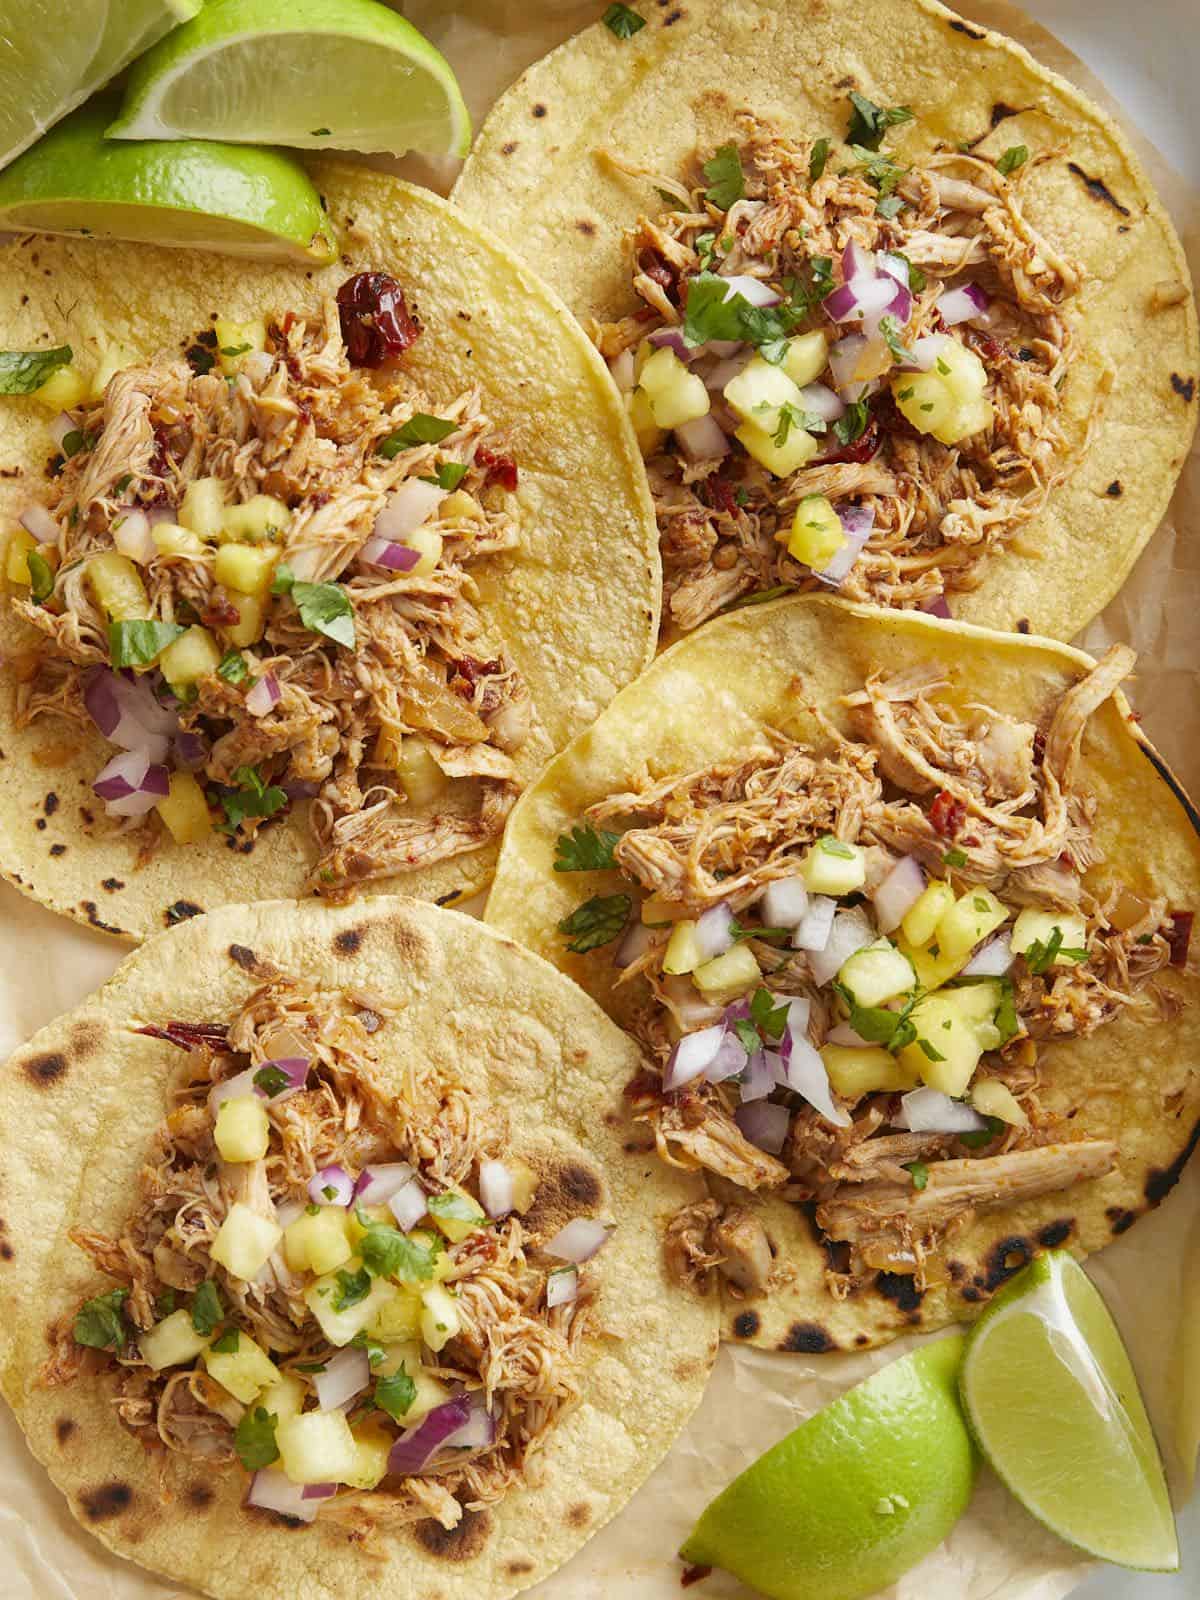
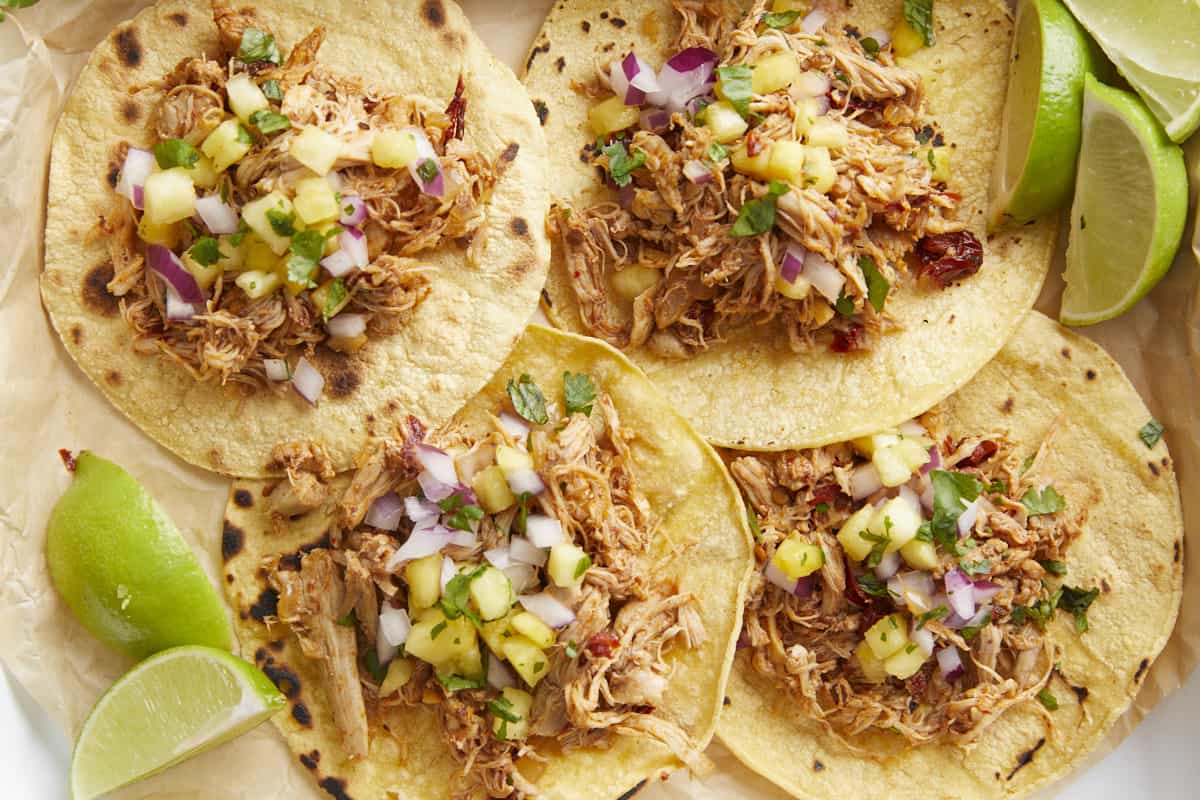
Close up overhead view of four chipotle chicken tacos on a tray with pineapple salsa.

What Are Chipotle Chicken Tacos? 

The base of this easy taco recipe is pulled chicken that’s been cooked in a fiery chipotle adobo sauce. A chipotle is a jalapeno pepper that’s smoked and dried. It has deep, earthy flavors and a bit of kick. When you buy chipotles in adobo, the adobo refers to the vinegary sauce the chiles are rehydrated in. 

While you can eat Chipotle Chicken Tacos as is, I pair them with Pineapple Salsa, which cuts beautifully through the fattiness of the chicken. Keep in mind that you can use this chicken for more than just tacos!  Mix pulled Chipotle Chicken into soups, rice, salads, and wraps. Use it as a topping for Nachos or Pizzas. There’s so much you can do with it.

Ingredients For Chipotle Chicken Tacos

Here’s what you’ll need to make Chipotle Chicken Tacos:

  • Chicken Thighs: Thighs are the cut of chicken we’re working with because they’re flavorful, fatty, and forgiving. Chicken breasts are more expensive, but they will still work here. I like to add a tablespoon of butter to the mix if I’m working with white meat to help keep it from drying out.
  • Garlic and Onion: Aromatics help scent and flavor our chicken. Substitute the garlic with ½ teaspoon of garlic powder and the onion with 1 tablespoon of onion powder or 3 tablespoons of onion flakes.
  • Bay Leaf: Adds depth to our braising broth, but feel free to skip it if you don’t have any.
  • Chipotles in Adobo: Add a spicy kick and deep smoky flavors to the sauce. If you want something with less kick, sub with our Enchilada Sauce recipe.
  • Corn tortillas: Are the base of our taco and hold everything together. Feel free to sub with flour tortillas or even pitas!
  • Pineapple Salsa: This tangy, fresh, and slightly sweet salsa pairs beautifully with the smoky and spicy flavors of the saucy chipotle chicken, as well as adding color and texture to the taco.

How To Serve Chipotle Chicken Tacos

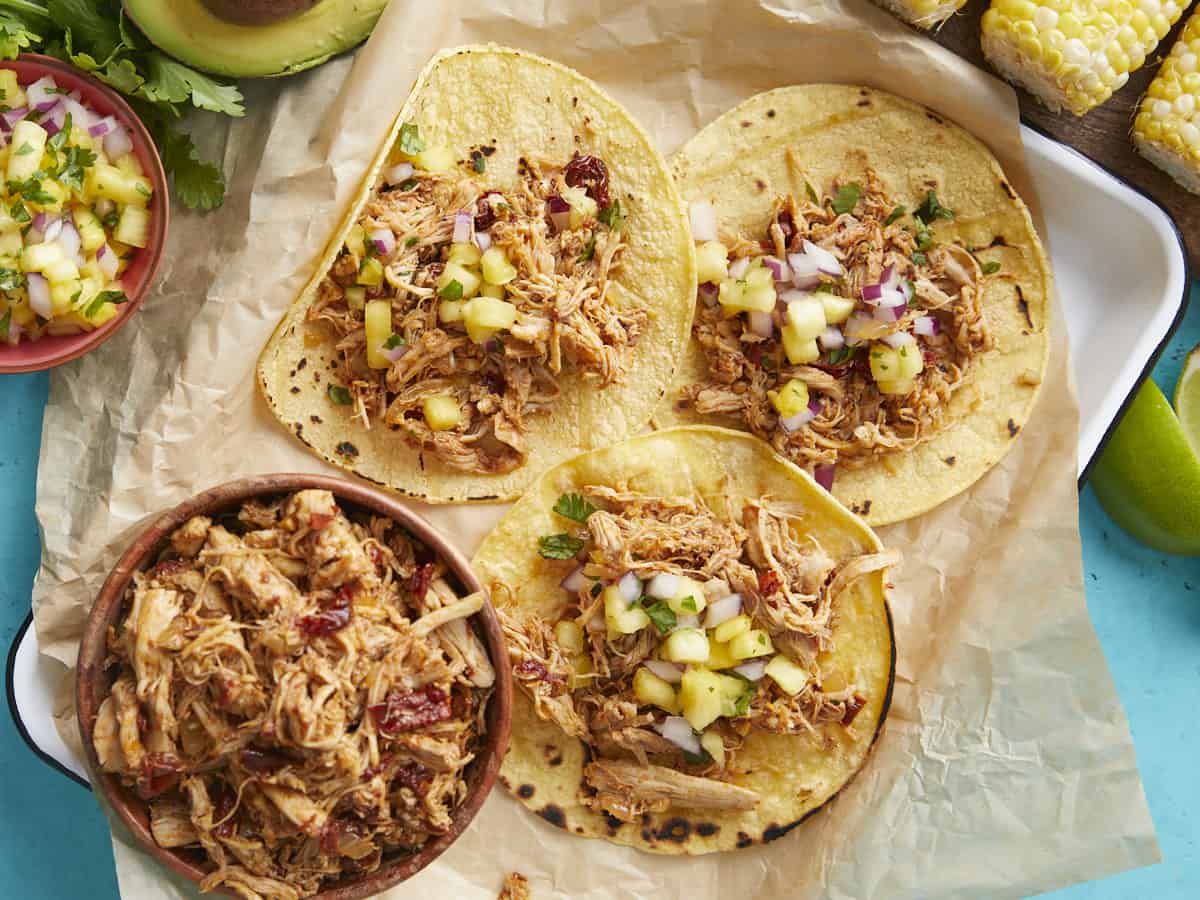
This recipe is one of my favorites for a family-style taco night. I load the table with a platter of warm tortillas, a big bowl of pulled chipotle chicken and smaller plates loaded with garnishes like fresh cilantro, radish slices, Sour Cream, Guacamole, and Pineapple Salsa! You can also serve Pico De Gallo or Cowboy Caviar. Make this an even heftier meal with Tomato Rice and Quick Seasoned Black Beans.

How To Store Chipotle Chicken Tacos

Store pulled chicken in an airtight container for up to three days. You can freeze the chicken in an airtight container with a sheet of parchment or plastic directly on the surface of the chicken for up to 3 months. Thaw overnight in the fridge before reheating in a microwave or a pan set over medium heat until steaming.

Overhead view of chicken tacos on a platter with a bowl of meat on the side.
Close up overhead view of chipotle chicken tacos with limes on the side.
Print

Chipotle Chicken Tacos

Change up your Taco Tuesday with these spicy and smoky Chipotle Chicken Tacos. They're a great weeknight meal or weekly meal prep!
Course Dinner, Lunch, Main Course
Cuisine American, Mexican
Total Cost $8.64 recipe / $1.44 serving
Prep Time 10 minutes
Cook Time 40 minutes
Total Time 50 minutes
Servings 12 tacos
Calories 186kcal

Ingredients

  • 4 boneless skinless chicken thighs $4.44
  • 4 cloves garlic, divided $0.32
  • 1 yellow onion, divided $0.33
  • 1 bay leaf $0.10
  • 4 peppercorns* $0.01
  • 1 tsp salt $0.05
  • 2 Tbsp olive oil $0.16
  • 2 oz. chipotle peppers in adobo** $0.49
  • 12 5-inch corn tortillas $0.72

Pineapple Salsa (optional)

  • 2 cups chopped pineapple (fresh or frozen) $0.75
  • 1/4 red onion, chopped $0.17
  • 1 jalapeño $0.11
  • 1 lime $0.59
  • 1/4 bunch cilantro (about ¼ cup) $0.35
  • 1 tsp salt (or to taste) $0.05

Instructions

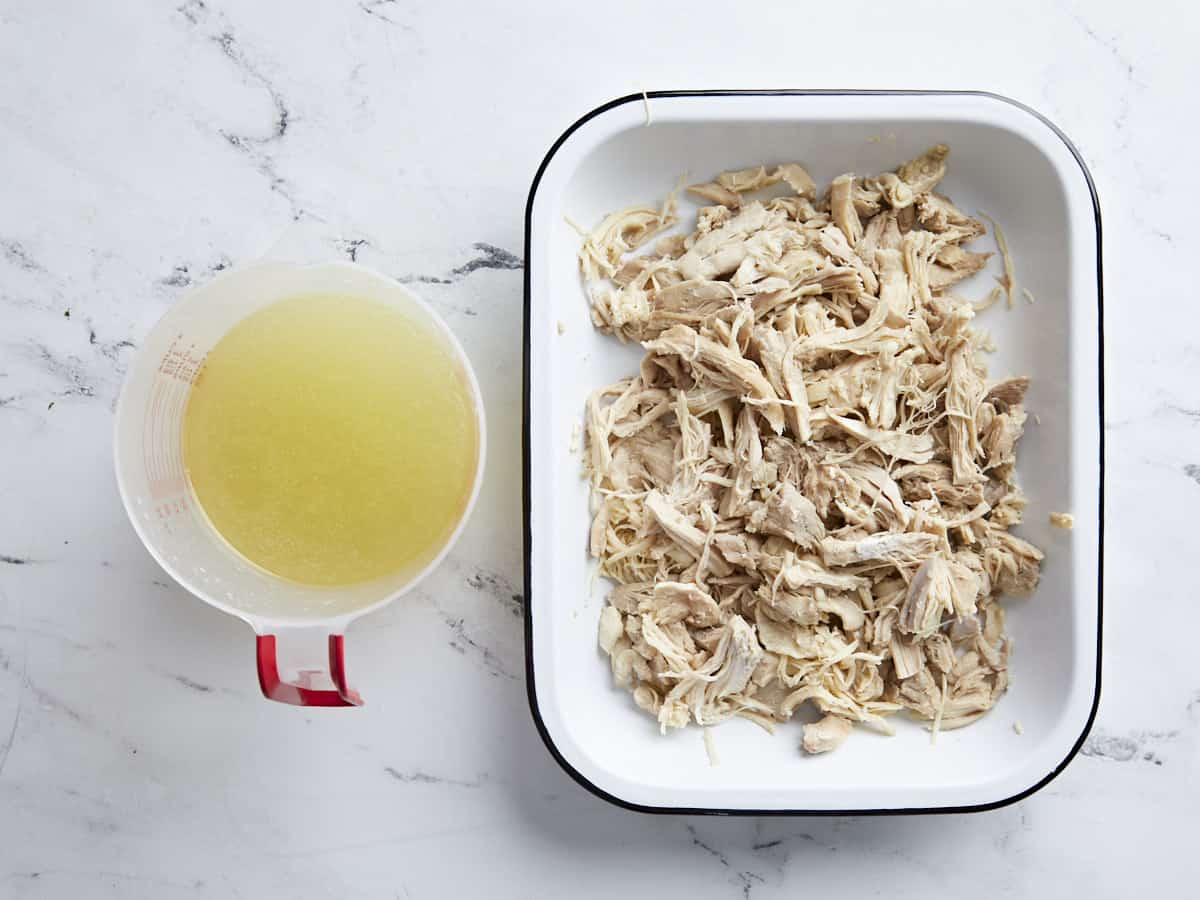
  • Add the chicken thighs, 2 cloves of garlic, 1/2 of the onion, bay leaf, peppercorns, and salt to a pan, then add water to cover (about 4 cups). Place the pan over medium heat. Cover it, and cook for 20 minutes, or until the chicken is at an internal temperature of 160°F and fork tender.
  • Remove the chicken thighs from the broth. Reserve the broth. Shred the chicken with two forks.
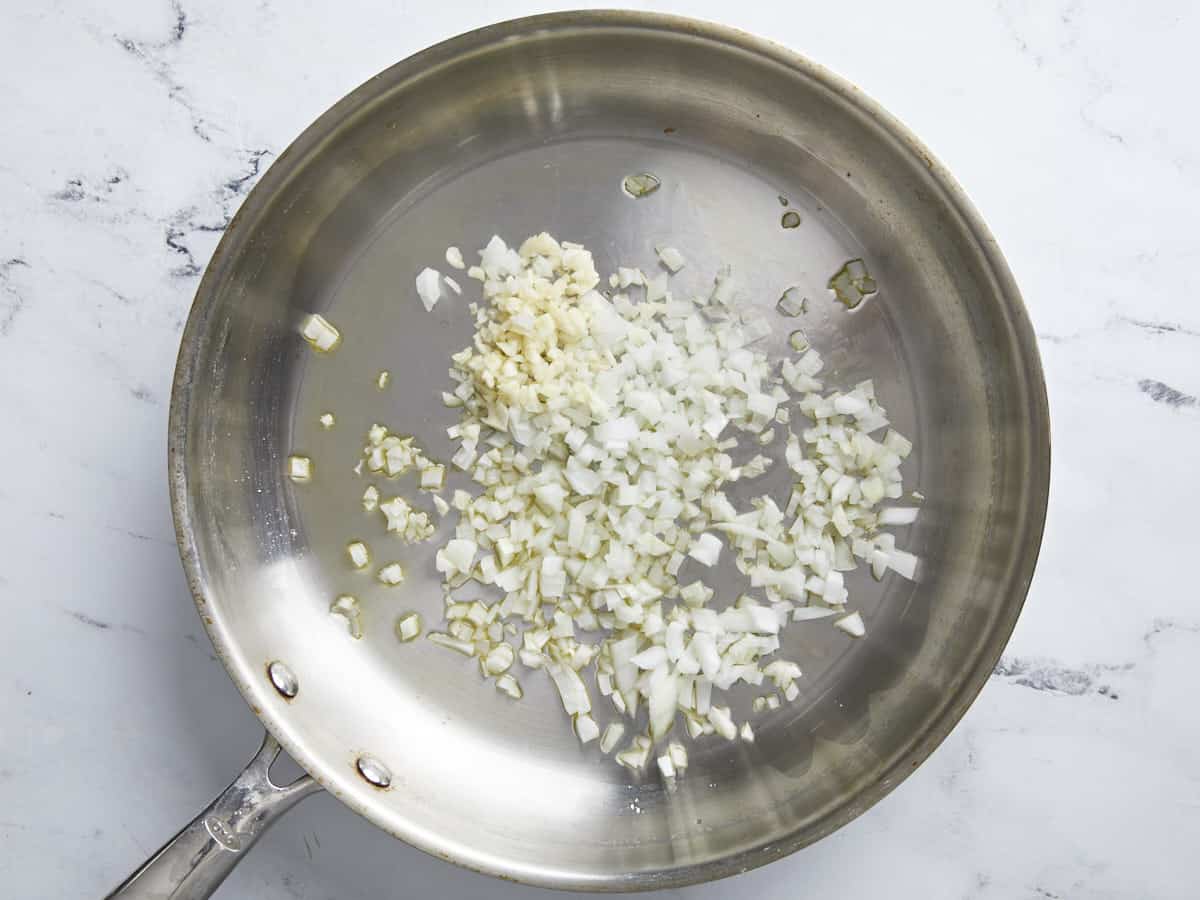
  • Add oil to a saucepan on medium heat. Dice the remaining ½ onion and add it to the pan. Mince the remaining 2 cloves of garlic and add to the pan. Cook for about 2 minutes, until the onions steam and the garlic is fragrant.
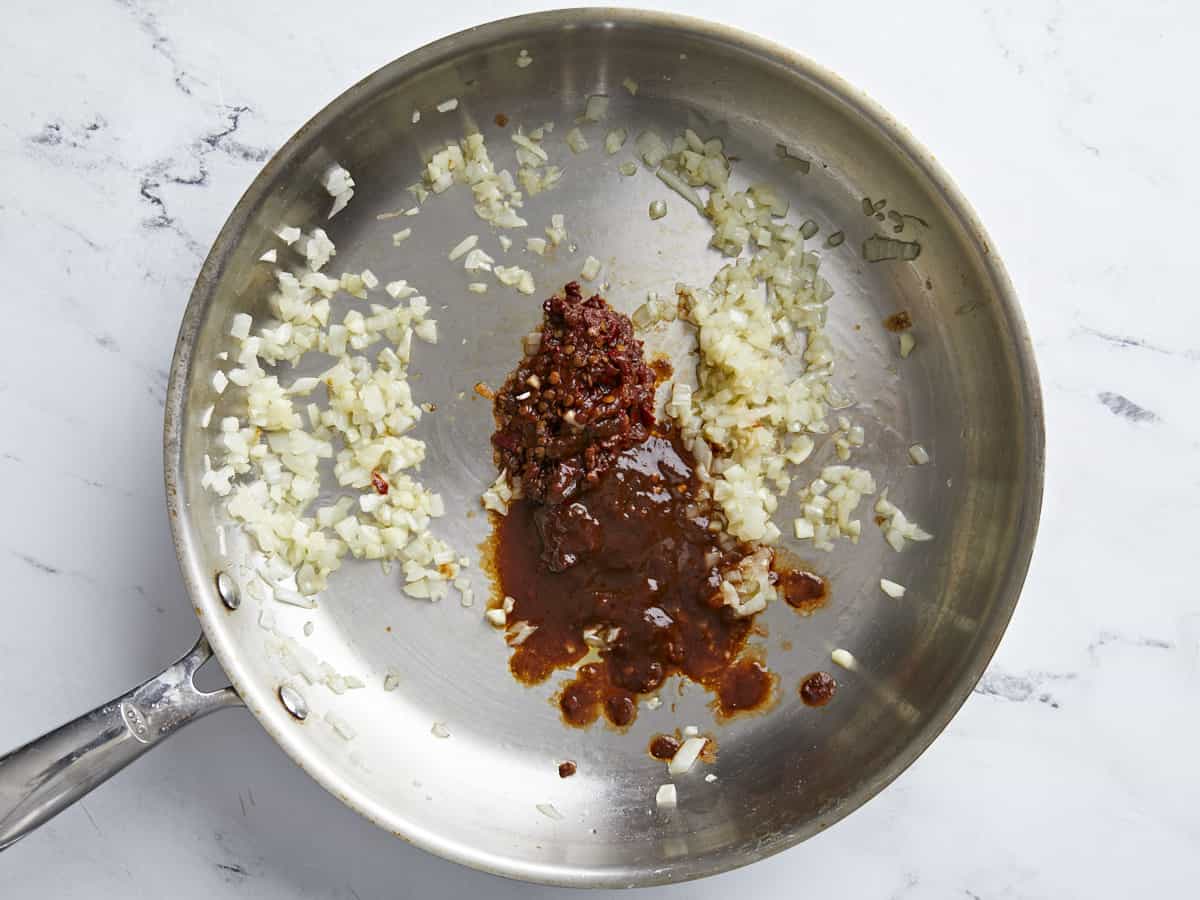
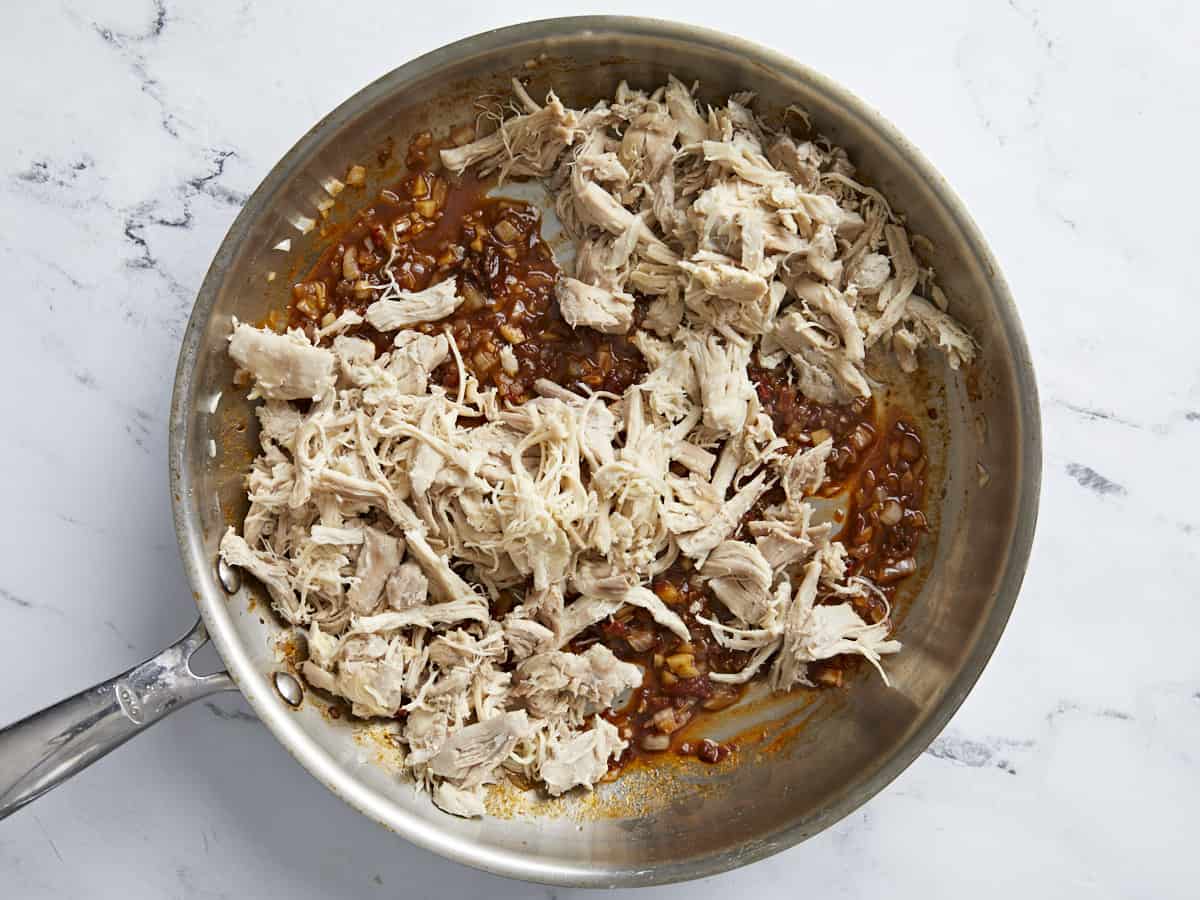
  • Once the onions and garlic are fragrant, chop the chipotles in their sauce and add them to the pan. Stir well to incorporate. Then add the pulled chicken and 1/4 cup of the reserved broth. Combine thoroughly and taste. For more heat, mix in more adobo sauce. For saucy pulled chicken, add a touch more of the broth and stir. Once the sauce has thickened to a velvety consistency, take the chicken off the heat.
  • To make the pineapple salsa, finely chop the pineapple, onion, jalapeño, and cilantro. Combine the chopped pineapple, onion, juice of one lime, cilantro, and salt to taste.
  • Assemble the tacos. Add 1/4 cup of pulled chicken to a corn tortilla and top with pineapple salsa. Serve these babies up and enjoy a weeknight win!

See how we calculate recipe costs here.

Notes

*If you have a pepper grinder, open it to retrieve individual peppercorns, or substitute with ⅛ tsp cracked pepper.
**This is about ⅓ of a 7oz. can.

Nutrition

Serving: 2tacos | Calories: 186kcal | Carbohydrates: 14g | Protein: 9g | Fat: 11g | Sodium: 433mg | Fiber: 2g
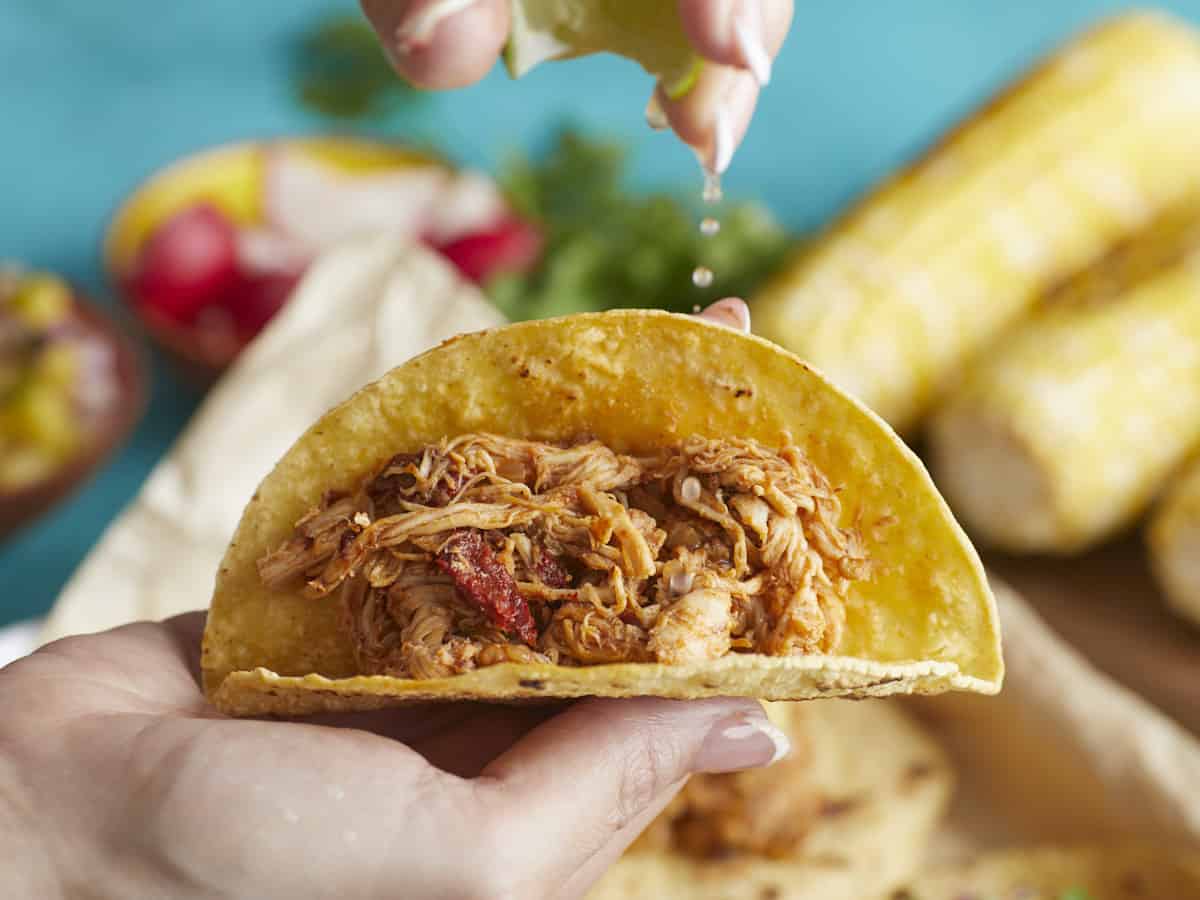
A taco held in a hand, lime being squeezed over top.

How to Make Chipotle Chicken Tacos – Step by Step Photos

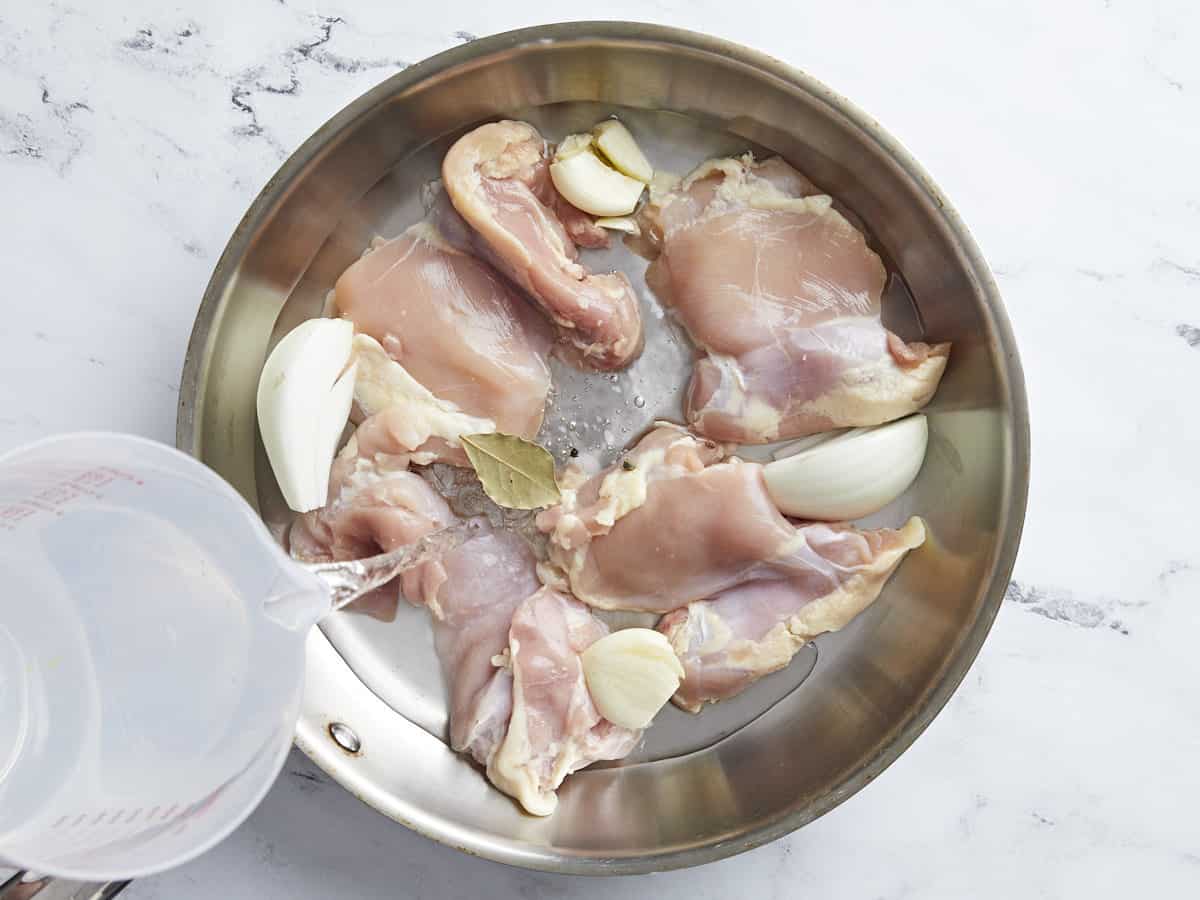
Chicken thighs in a pan with onion and garlic, water being poured in.

Add 4 boneless skinless chicken thighs, 2 cloves garlic, 1/2 of a yellow onion, 1 bay leaf, 4 peppercorns, and 1 teaspoon salt to a pan and add water to cover (about 4 cups). Place the pan over medium heat. Cover it, and cook for 20 minutes, or until the chicken is at an internal temperature of 160°F and fork tender.

Shredded chicken in a dish, a measuring cup with broth on the side.

Remove the chicken thighs from the broth. Reserve the broth. Shred the chicken with two forks.

Onion and garlic in a skillet.

Add oil to a saucepan on medium heat. Dice the remaining half onion and add it to the pan. Mince the remaining 2 cloves of garlic and add to the pan. Cook for about 2 minutes, until the onions steam and the garlic is fragrant.

Chipotle peppers added to the skillet with onion and garlic.

Once the onions and garlic are fragrant, chop 2 ounces of chipotles in their sauce and add them to the pan. Stir well to incorporate.

Pulled chicken added to the skillet with the chipotles.

Then add the pulled chicken and 1/4 cup of the reserved broth to the skillet. Combine thoroughly and taste. For more heat, mix in more adobo sauce. For saucy pulled chicken, add a touch more of the broth and stir.

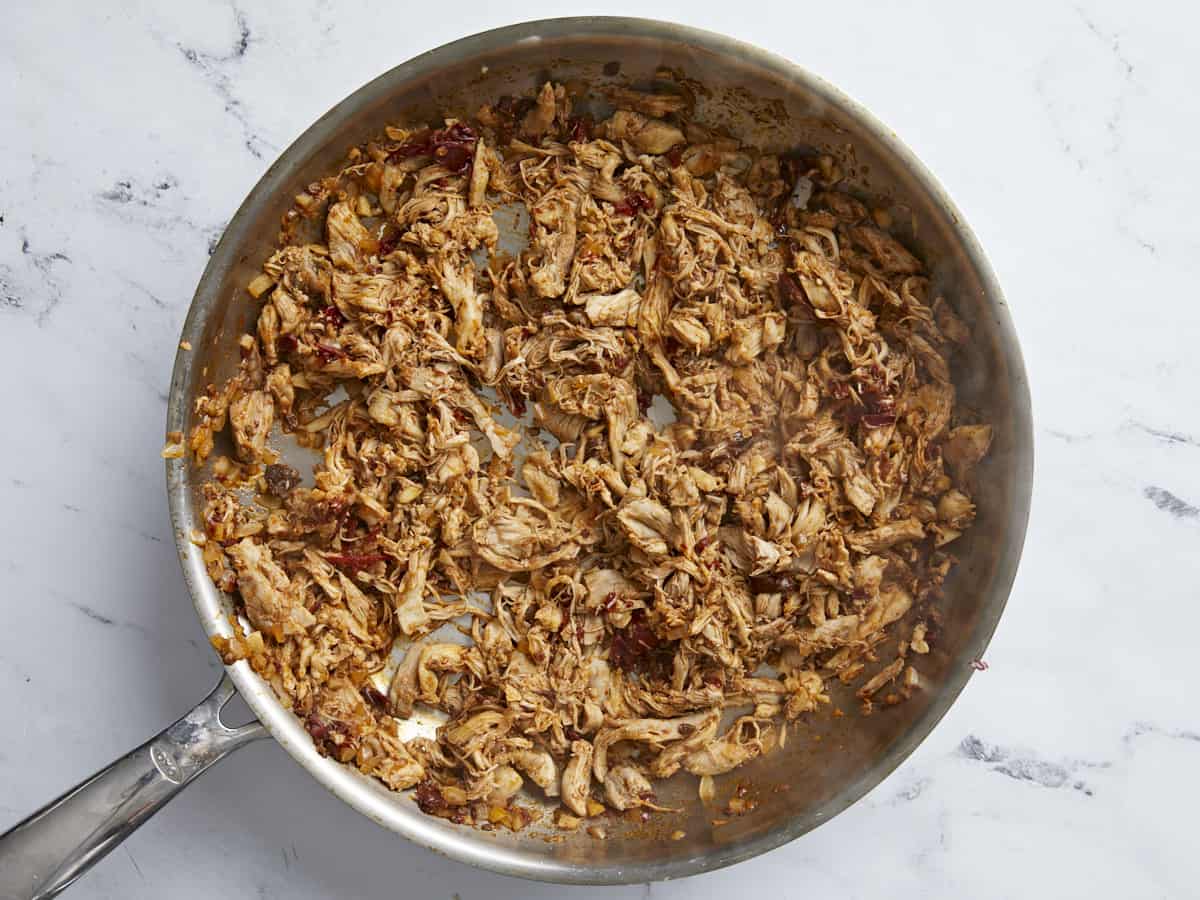
Finished chipotle chicken in the skillet.

Once the sauce has thickened to a velvety consistency, take the chicken off the heat.

Close up overhead view of chipotle chicken tacos with limes on the side.

The post Chipotle Chicken Tacos appeared first on Budget Bytes.
Kimchi Quesadillas

Kimchi quesadillas are an easy to make quick meal or snack that use only a few simple ingredients that pack a huge flavor punch.

The post Kimchi Quesadillas appeared first on Budget Bytes.
A couple of years ago I ate an appetizer at a restaurant that really wowed me — kimchi pimento cheese dip. I wouldn’t have ever thought about pairing kimchi and cheese together, but ever since I had it I’ve been obsessed with that combo. And since kimchi and eggs also go great together, it only made sense for me to start adding kimchi to my egg and cheese quesadillas (my favorite go-to quick meal). These kimchi quesadillas are the perfect mix of flavors and textures, they’re SO FAST to make, and all of the ingredients last a long time in the fridge, so they’ve quickly become my favorite low-effort, high-reward meal.

Cheese Quesadillas on a plate with a bowl of kimchi on the side.

Why I’m Obsessed with Kimchi Quesadillas

These kimchi quesadillas are incredibly simple to make and only require five simple ingredients: eggs, oil or butter (to cook the eggs), tortillas, cheese, and kimchi. You can make one at a time or more, but I promise, once you eat one you’re going to want seconds. ;) The way the cheese stays gooey on the inside, crisps up with the tortilla on the outside, and the kimchi makes everything a little tangy and spicy… it’s just perfection.

What is Kimchi?

Kimchi is a traditional Korean side dish made with fermented vegetables, like cabbage, radish, scallions, garlic, ginger, and sometimes other vegetables depending on the recipe. It’s flavored with gochugaru (a Korean chili powder) and salted seafood. The flavor is savory, tangy, spicy, salty, and full of umami. It’s served with almost every meal as a small side dish or condiment. The tangy, spicy, salty flavor of kimchi really adds a ton of flavor and dimension to whatever you eat it with, including an egg and cheese quesadilla!

Where to Find Kimchi

Although Kimchi is a staple in Korean cuisine, it is growing in popularity in the U.S. and most major grocery stores now carry at least one brand of kimchi. Because it’s a fermented food containing live cultures, you’ll usually find it in the refrigerated section of grocery stores, near other fermented products like yogurt, fresh sauerkraut, and pickles, or even sometimes near tofu and tempeh.

Even better yet, if you have an Asian grocery store near you, you’ll be able to find several types of authentic kimchi for really good prices compared to large chain U.S. grocery stores.

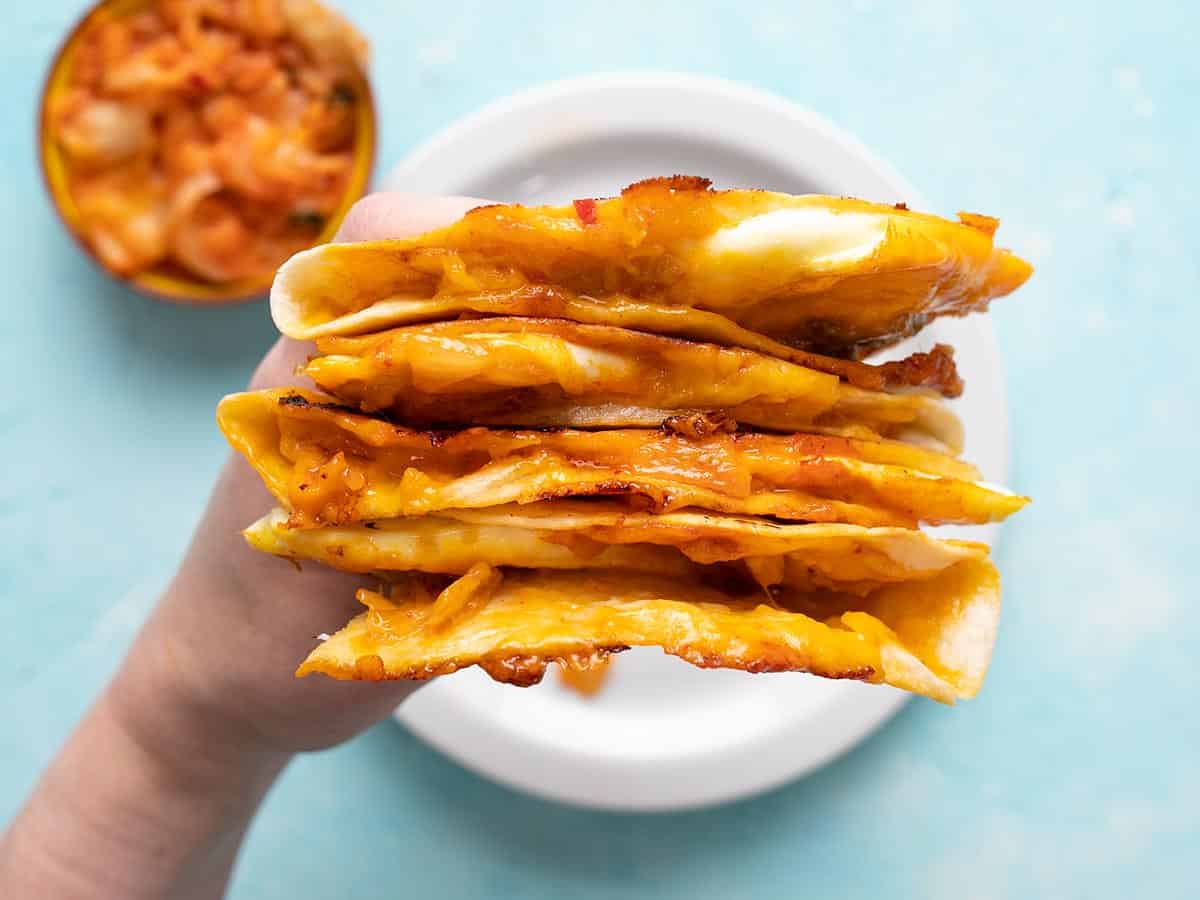
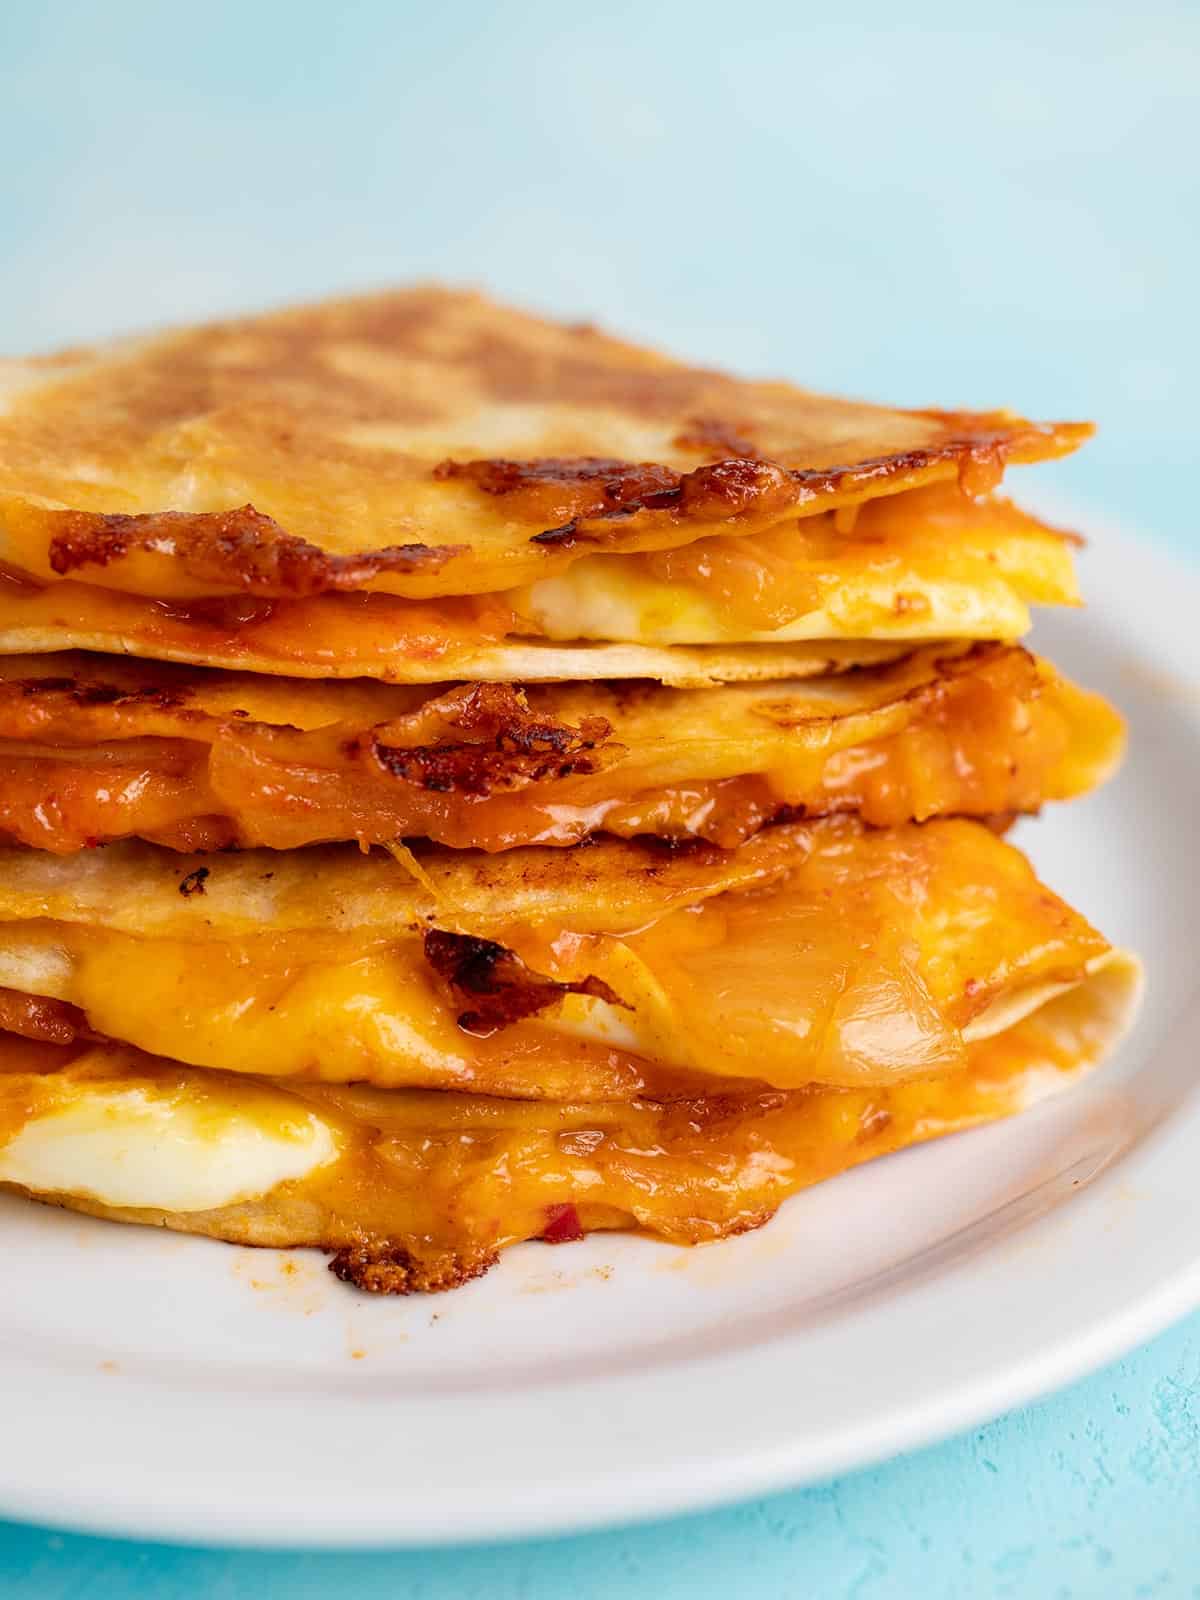
A hand holding a stack of kimchi quesadillas showing the cheese and filling.
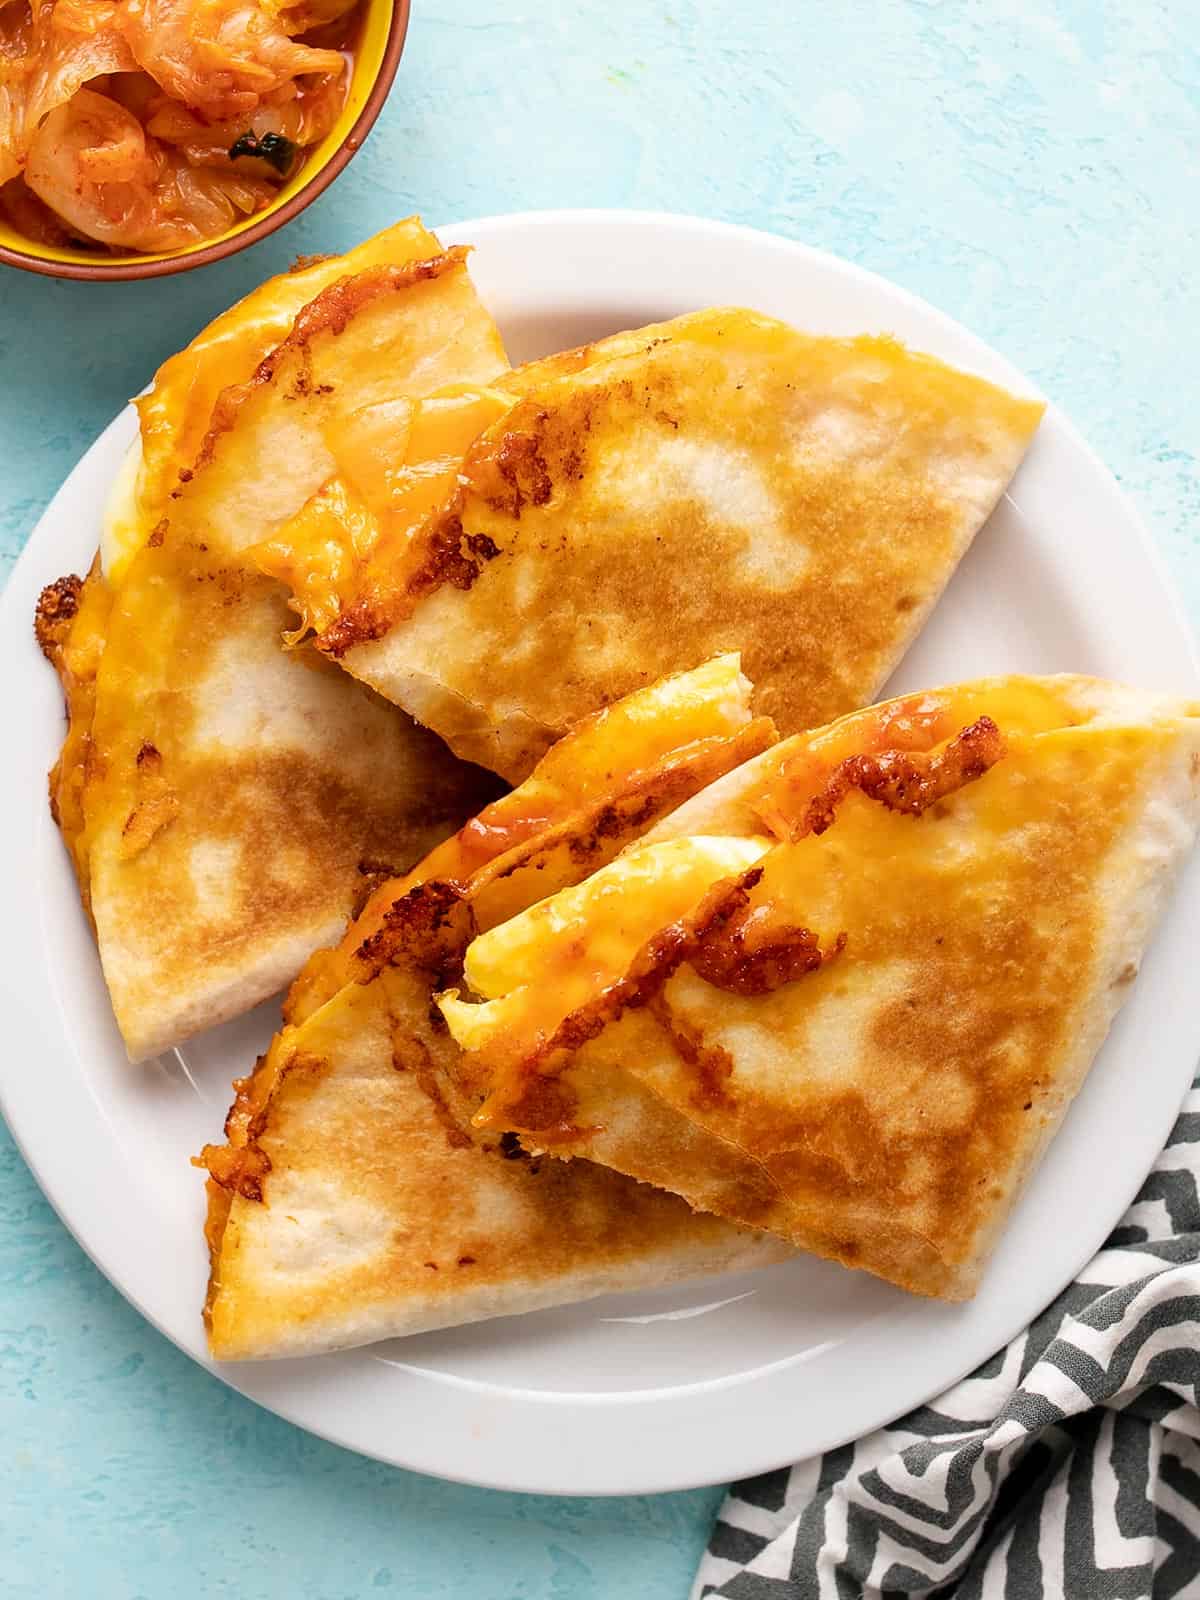
Overhead view of sliced kimchi quesadillas on a plate.
Print

Kimchi Quesadillas

Kimchi quesadillas are an easy to make quick meal or snack that use only a few simple ingredients to pack a huge flavor punch.
Course Breakfast, Lunch, Snack
Cuisine American, Korean
Total Cost $1.90 recipe / $0.95 serving
Prep Time 5 minutes
Cook Time 15 minutes
Total Time 20 minutes
Servings 2 (1 quesadilla each)
Calories 331kcal

Ingredients

  • 1/4 cup kimchi $0.78
  • 1/2 cup shredded cheddar cheese $0.58
  • 2 flour tortillas (8" diameter) $0.40
  • 1 Tbsp butter or oil $0.04
  • 2 large eggs $0.18

Instructions

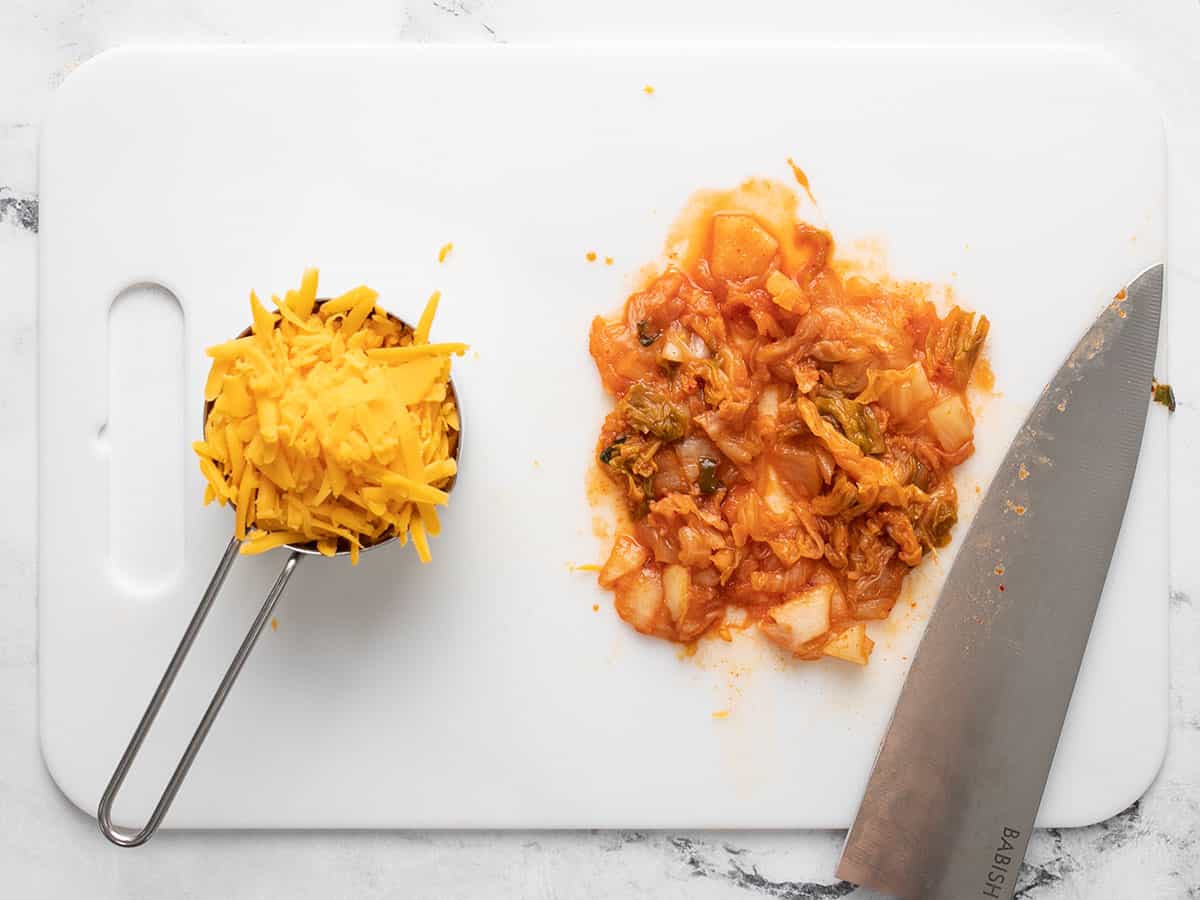
  • Roughly chop the kimchi into smaller pieces. Cover half of each tortilla with shredded cheddar cheese, then add the chopped kimchi on top.
  • Heat a large skillet over medium, then add the butter or oil. Fry or scramble the eggs in the butter or oil until they reach your desired doneness (I like over-medium).
  • Transfer the cooked eggs to the tortillas, placing them on top of the kimchi. Fold the empty side of the tortilla over the filled side to close.
  • Transfer the folded quesadillas back to the same skillet used to cook the eggs and continue to cook over medium heat until the cheese is melted and the tortilla is browned and crispy on each side.
  • Slice the cooked kimchi quesadillas in half and enjoy!

See how we calculate recipe costs here.

Nutrition

Serving: 1quesadilla | Calories: 331kcal | Carbohydrates: 16g | Protein: 16g | Fat: 23g | Sodium: 593mg | Fiber: 1g
Side view of a stack of kimchi quesadillas on a plate.

How to Make Kimchi Quesadillas – Step by Step Photos

Chopped kimchi on a cutting board with shredded cheddar in a measuring cup on the side.

To make two kimchi quesadillas, roughly chop ¼ cup of kimchi into smaller pieces. Measure ½ cup of shredded cheddar cheese.

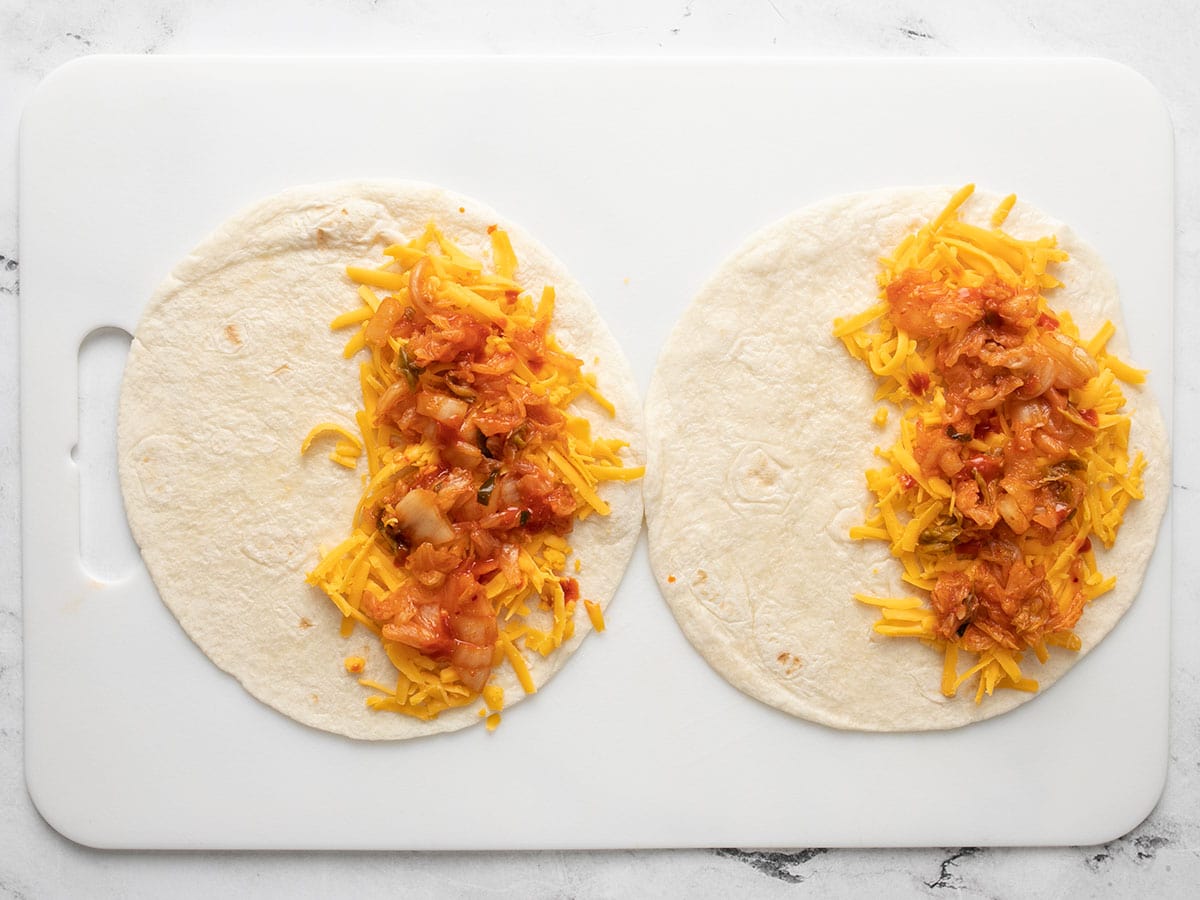
Cheese and kimchi covering half of two tortillas.

Divide the cheese and kimchi between two 8-inch flour tortillas, covering only one side of each tortilla (the empty side will be folded over top to close).

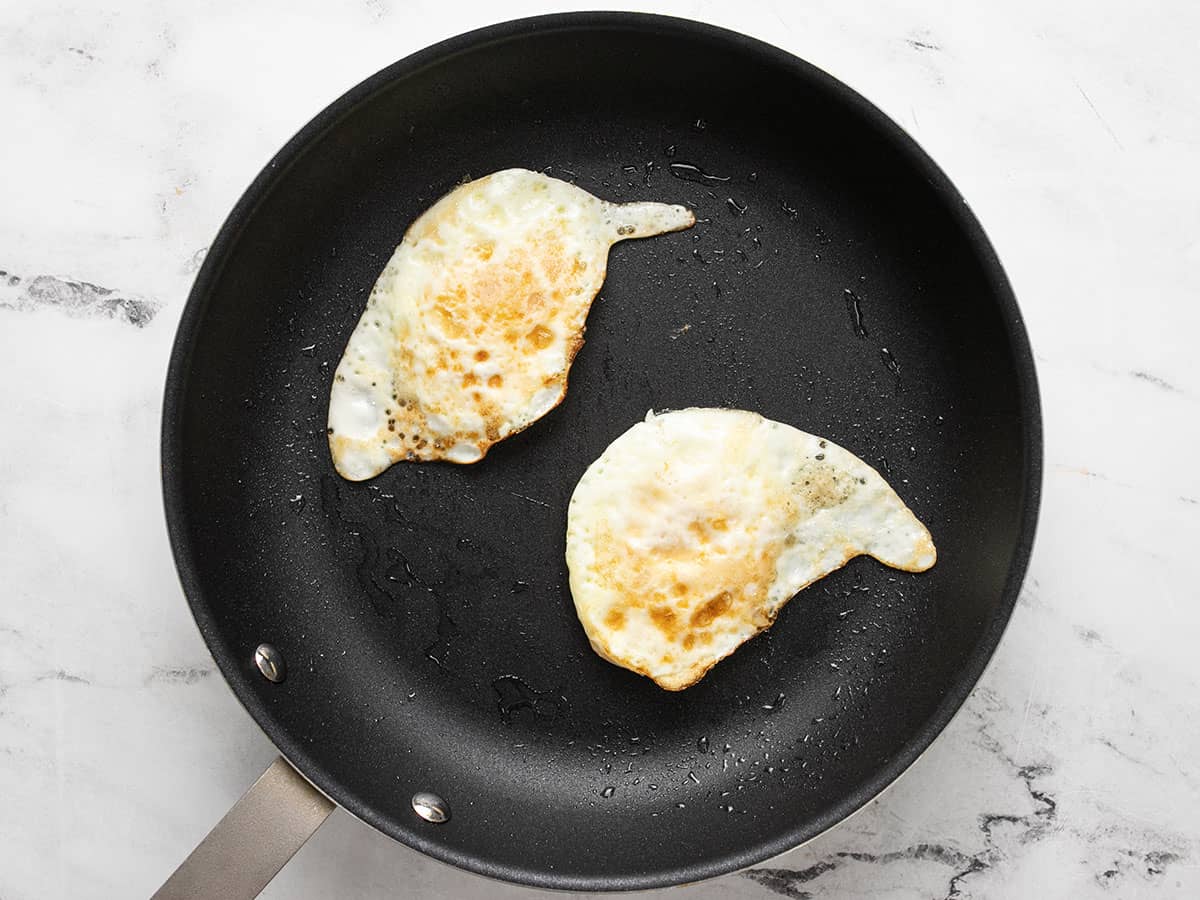
Two fried eggs in a skillet.

Next, fry two large eggs in a skillet with a tablespoon of oil or butter. I like to fry my eggs over medium for quesadillas, but you could also scramble them if that’s easier.

Eggs added on top of cheese and kimchi in the tortillas.

Place one fried egg on top of the cheese and kimchi in each quesadilla. Fold the empty half of the tortilla over the filled side to close.

Toasted quesadillas in the skillet.

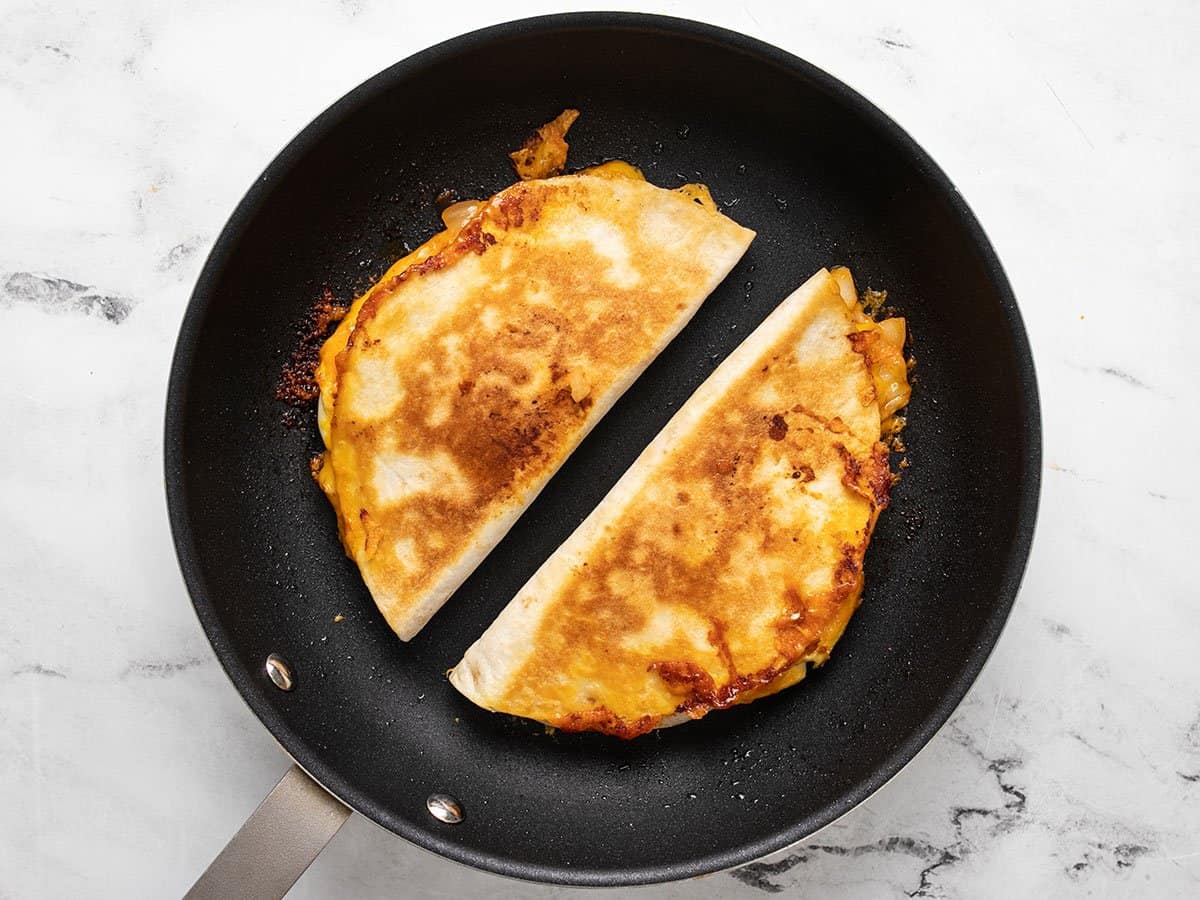
Return the folded quesadillas to the skillet used to cook the eggs and continue to cook over medium heat until the cheese is melted and the tortillas are golden brown and crispy on each side. Don’t worry if some of the cheese spills out, that will just create extra crispy goodness!

Sliced quesadillas on a cutting board.

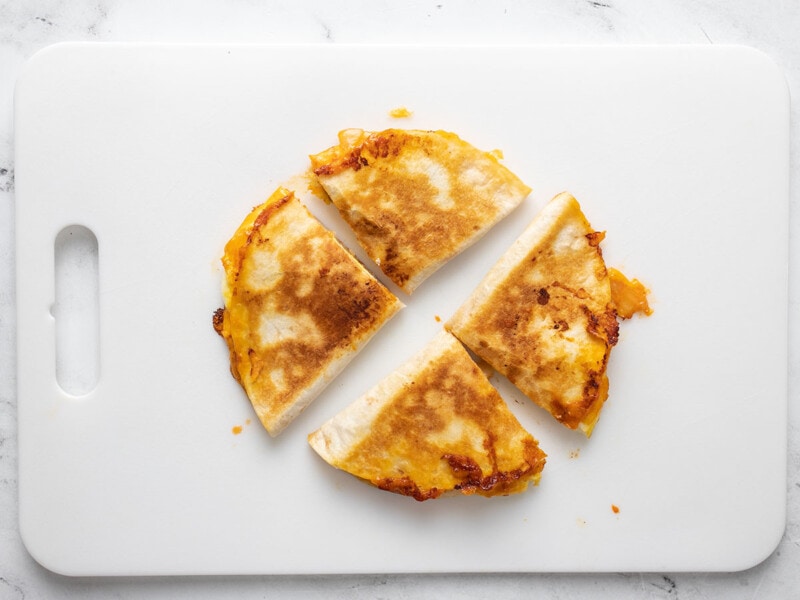
Transfer the cooked quesadillas to a cutting board, slice in half, and enjoy! To keep the filling from spilling out when you cut them, use a pizza cutter or large knife and cut from the outside edge in toward the folded side.

Close up side view of a stack of kimchi quesadillas.

Soooo cheesy, sooo tangy!

The post Kimchi Quesadillas appeared first on Budget Bytes.
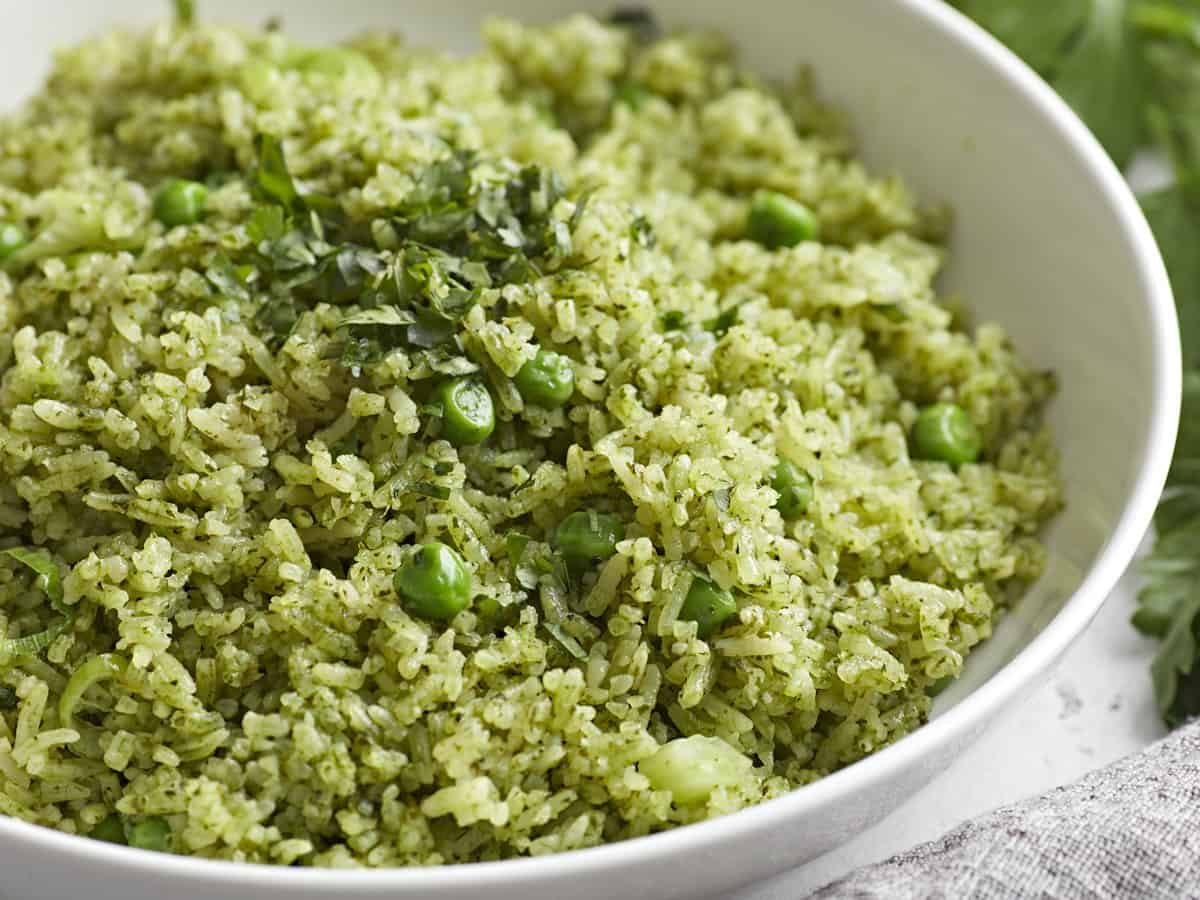
Arroz Verde (Green Rice)

Arroz Verde is a vibrant Mexican green rice dish that’s easy to make, budget-friendly, and infused with lots of earthy, herby flavors!

The post Arroz Verde (Green Rice) appeared first on Budget Bytes.
Rice is one of our favorite budget-friendly side dishes, so when we saw the recipe for Arroz Verde in Karla Salinari’s new book, Abuela’s Plant-Based Kitchen: Vegan Cuisine Inspired by Latin & Caribbean Family Recipes, we knew we had to give it a try! This simple Arroz Verde (Green Rice) recipe is bright, full of earthy flavor, and the perfect way to use up any herbs or leafy greens in your fridge! So if you’re looking for a new tasty way to enjoy this weeknight staple side dish, then definitely give this green rice recipe a try!

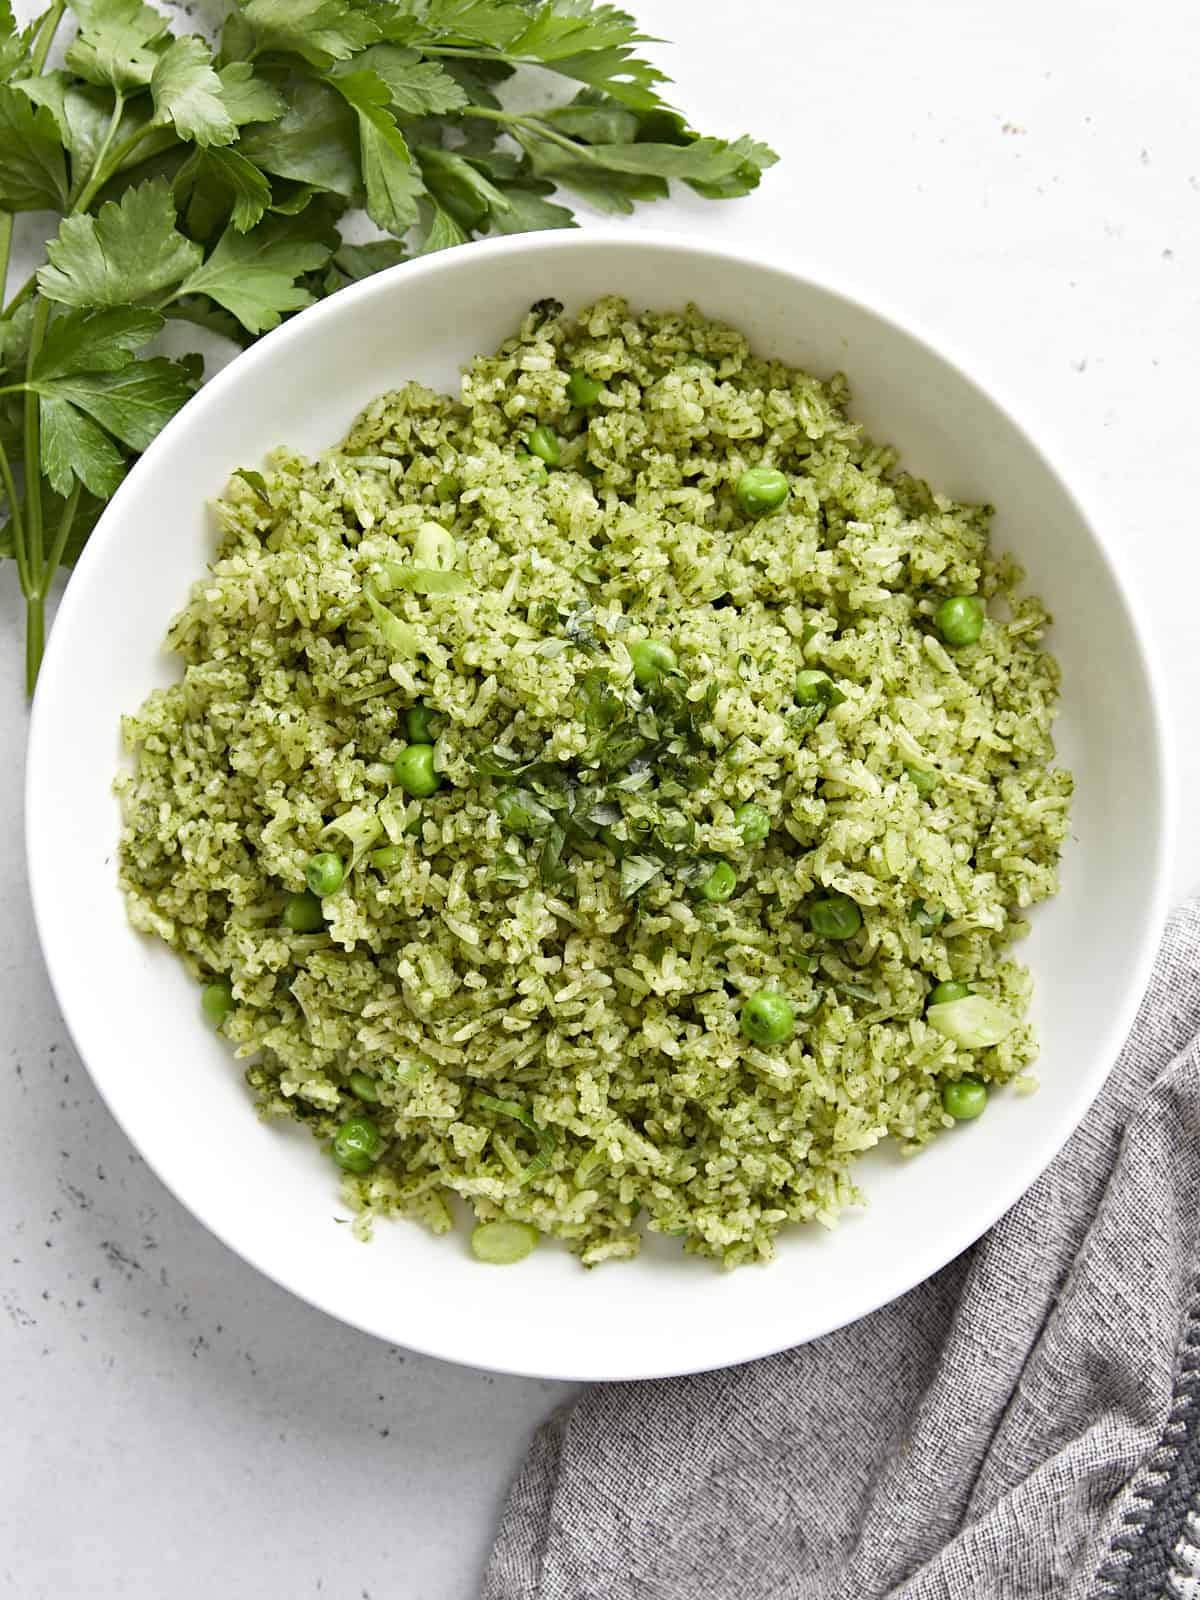
Overhead view of a white bowl full of Arroz Verde with parley and a grey napkin on the side.

What is Arroz Verde?

Arroz Verde is a popular Mexican and Latin American green rice dish that’s known for its vibrant green color and herby flavors. It’s often made by cooking rice in a blended herb and leafy greens puree until it’s fluffy and infused with lots of earthy flavor.

INGREDIENTS FOR ARROZ VERDE

This green rice recipe includes lots of vegetables and packs a ton of flavor! Here’s what you need to make this simple rice dish:

  • Basmati Rice – Basmati rice, which is fragrant and fluffy, is the base for this recipe. We used jasmine rice, which is also fragrant because that is what we had on hand, but feel free to use any long-grain white rice that fits your budget.
  • Green Leafy Vegetables – Lots of earthy green leafy vegetables and herbs are used in this arroz verde recipe including Swiss chard, spinach, parsley, and cilantro. It makes the rice bright and super flavorful! If you can’t find Swiss chard, simply substitute it with more spinach.
  • Olive oil and Garlic – Both of these are added with the leafy vegetables to create a green powerhouse blended mixture. The pureed mixture is then sautéed to release some of its fragrance before being cooked with the rice.
  • Green Peas and Scallions – Cooked green peas and sliced scallions give the dish more color, texture, and flavor, making this an anything-but-boring side dish.

What to serve with Arroz Verde?

Arroz Verde would pair nicely with Easy Cilantro Lime Chicken, Garlic Butter Baked Cod, Pan Seared Chicken Breasts, or even with a side of Seasoned Black Beans! Other Mexican-inspired dishes like Cheese Enchiladas or Black Bean and Avocado Enchiladas would also go great with this rice dish!

Side front view of a bowl full of Arroz Verde.
Overhead view of a white bowl full of Arroz Verde with parley and a grey napkin on the side.
Print

Arroz Verde (Green Rice)

Arroz Verde is a vibrant Mexican green rice dish that’s easy to make, budget-friendly, and infused with lots of earthy, herby flavors!
Course Dinner
Cuisine Latin
Total Cost $5.49 recipe / $0.92 serving
Prep Time 10 minutes
Cook Time 35 minutes
Total Time 45 minutes
Servings 6 about 1 cup each
Calories 404kcal

Ingredients

  • 1 cup Swiss chard, stems removed* $1.50
  • 1 cup fresh spinach $0.28
  • 1 cup parsley $0.39
  • 1/2 cup cilantro $0.29
  • 1/2 cup olive oil $1.28
  • 3 cloves garlic $0.24
  • 2 cups long grain white rice, washed & rinsed $0.84
  • 2 cups boiling water $0
  • Salt to taste $0.01

For Serving

  • 1/2 cup cooked green peas $0.31
  • 1/4 cup scallions, thinly sliced $0.35

Instructions

  • Add the Swiss chard, spinach, parsley, cilantro, olive oil, and roughly chopped garlic to a food processor. Process on high until mixture reaches a paste-like consistency.
  • Place a medium size pot over medium-high heat. Once hot, transfer the green vegetable mixture to the pot and sauté until fragrant, 2-3 minutes.
  • Add the rice to the pot and mix to combine coating the rice with the green mixture.
  • Add boiling water and salt to taste to the pot and let the mixture come to a boil. Once boiling, reduce the heat to a simmer and cover with a tight lid. Cook for 20 min or until the rice is tender.
  • Once done remove the pot from the heat and using a fork fluff the rice. Add the cooked green peas and scallions and combine. Serve and enjoy!

See how we calculate recipe costs here.

Notes

*If you can not find Swiss chard, you can substitute with more spinach.

Nutrition

Serving: 1serving | Calories: 404kcal | Carbohydrates: 53g | Protein: 6g | Fat: 19g | Sodium: 38mg | Fiber: 2g
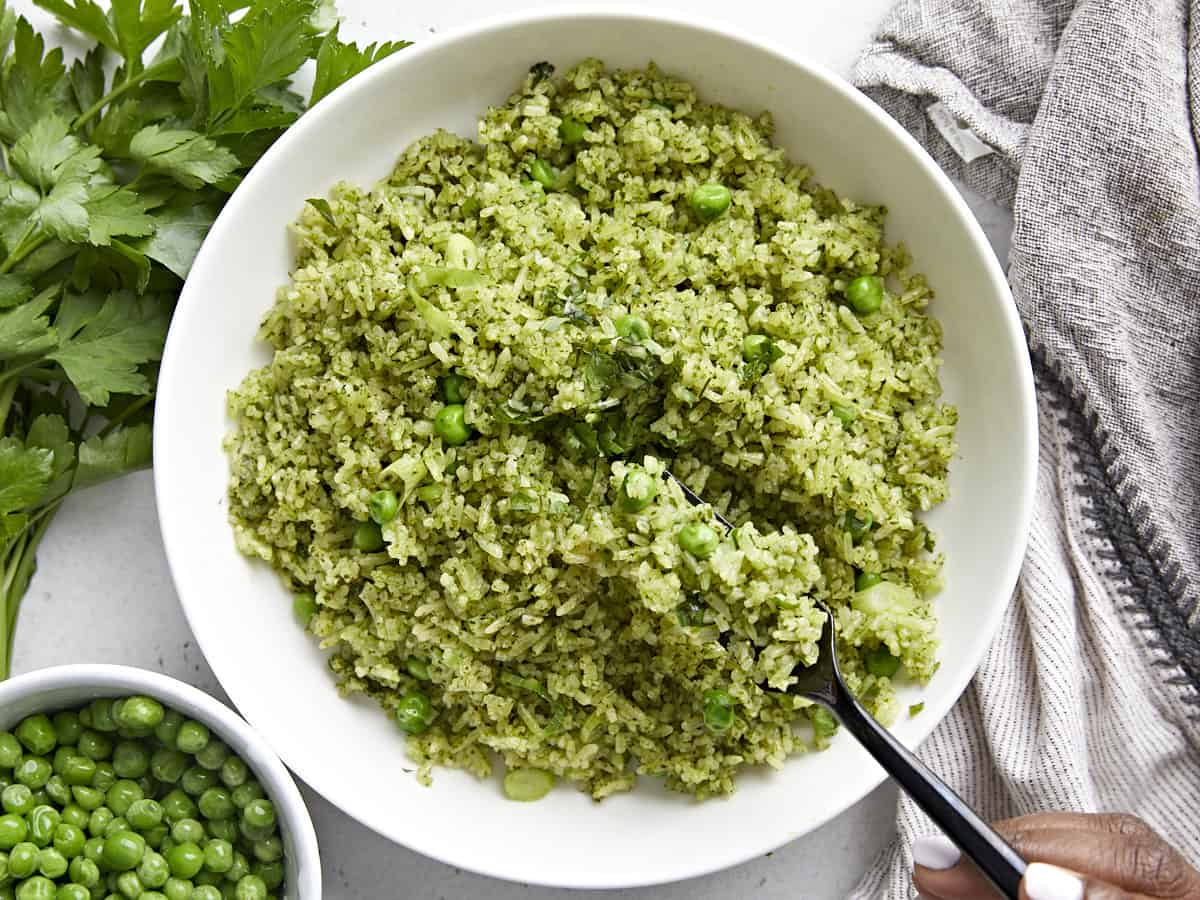
Overhead view of a bowl of Arroz Verde with a black fork lifting some out. Parsley and cooked peas garnished on the side.

How to Make Arroz Verde – Step by Step Photos

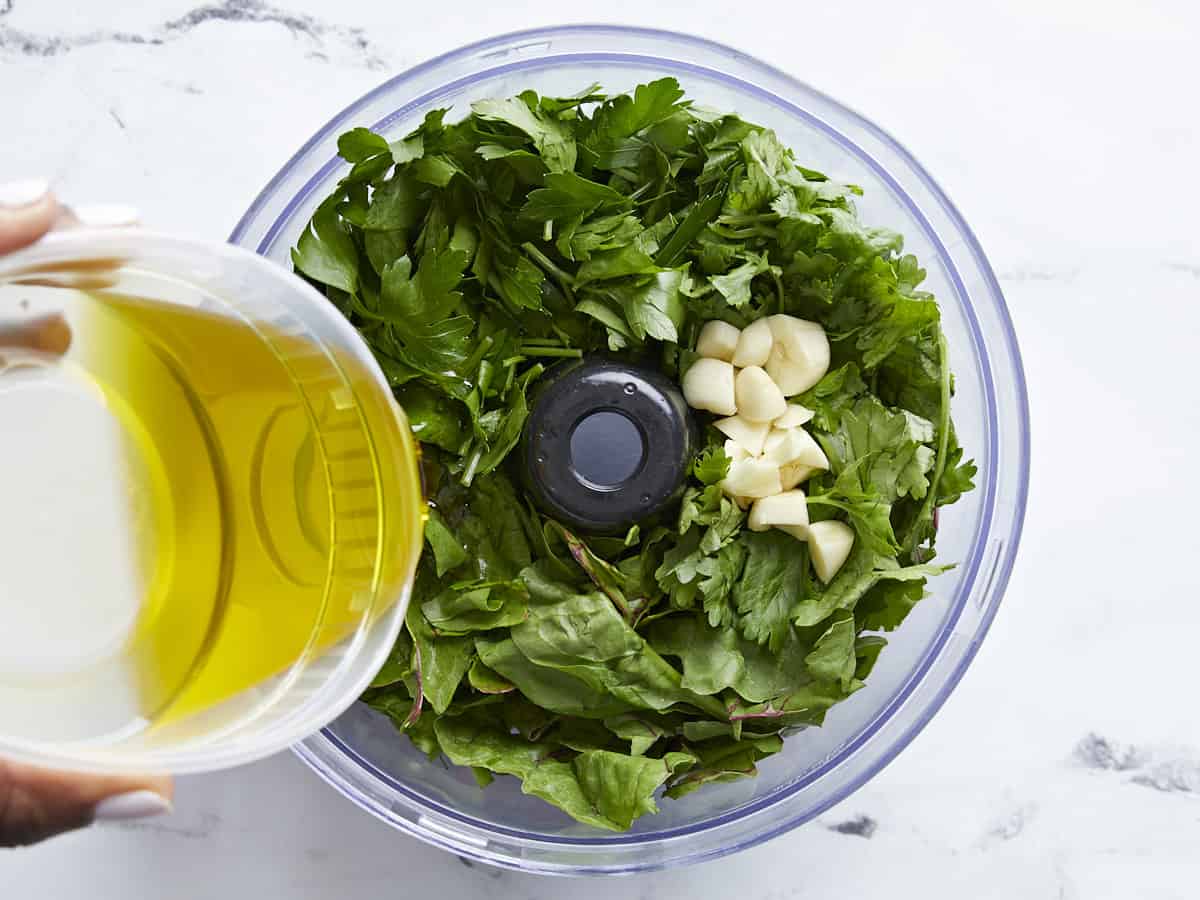
Swiss chard, Spinach, parsley, cilantro, and garlic added to a food processor with olive oil being poured in.

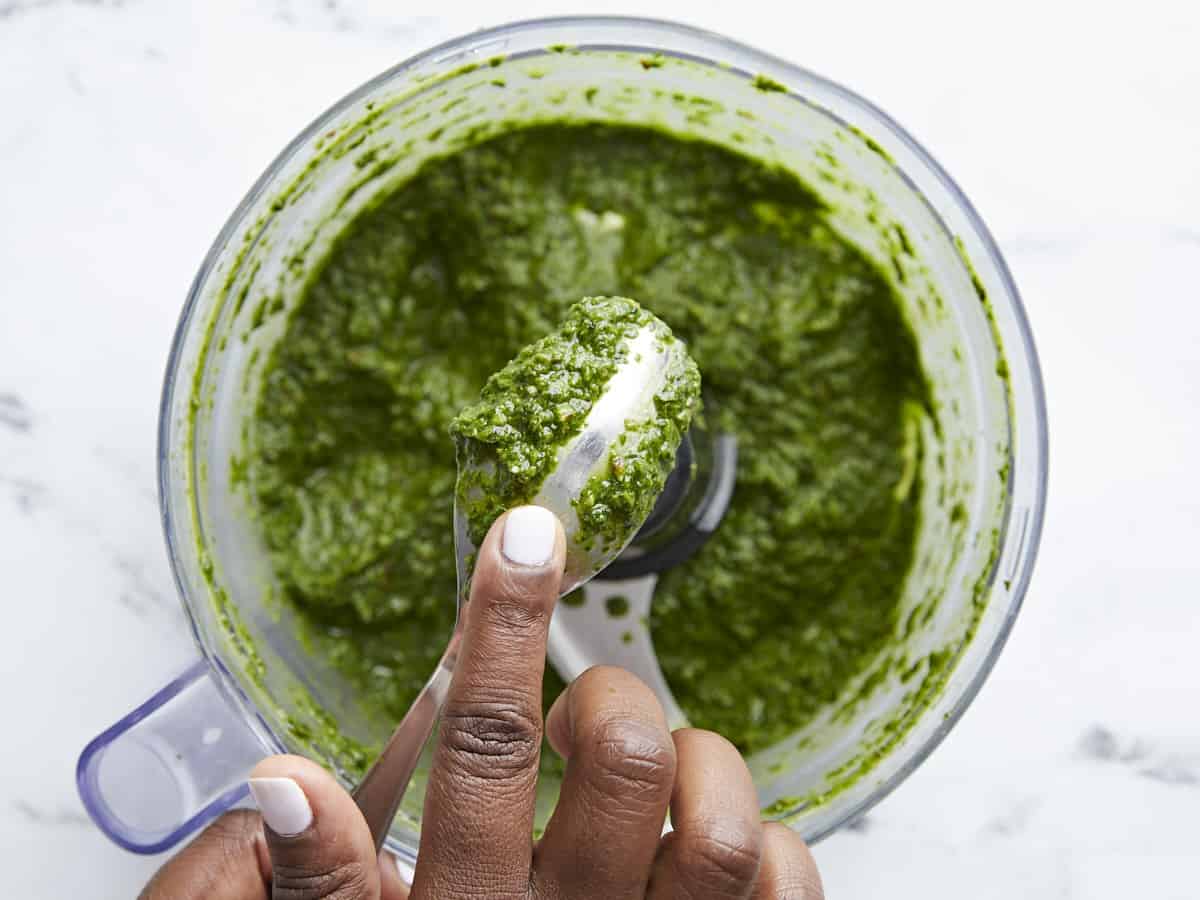
Add 1 cup of chopped Swiss chard, 1 cup fresh spinach, 1 cup parsley, 1/2 cup cilantro, 1/2 cup olive oil, and 3 garlic cloves (roughly chopped) to a food processor.

Green vegetable ingredients blended in food processor.

Process on high until mixture reaches a paste-like consistency.

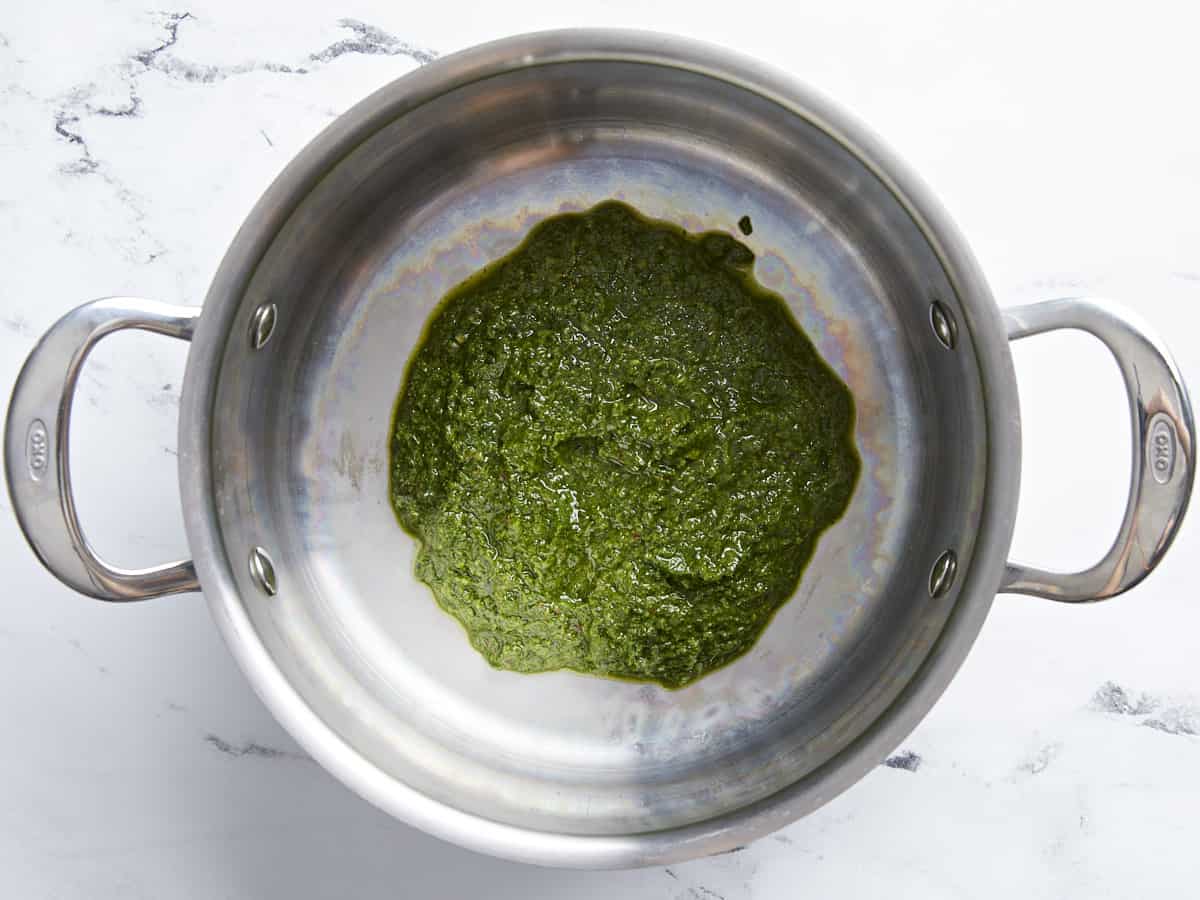
Green vegetable mixture added to a large pot

Place a medium size pot over medium-high heat. Once hot, transfer the green vegetable mixture to the pot and sauté until fragrant, 2-3 minutes.

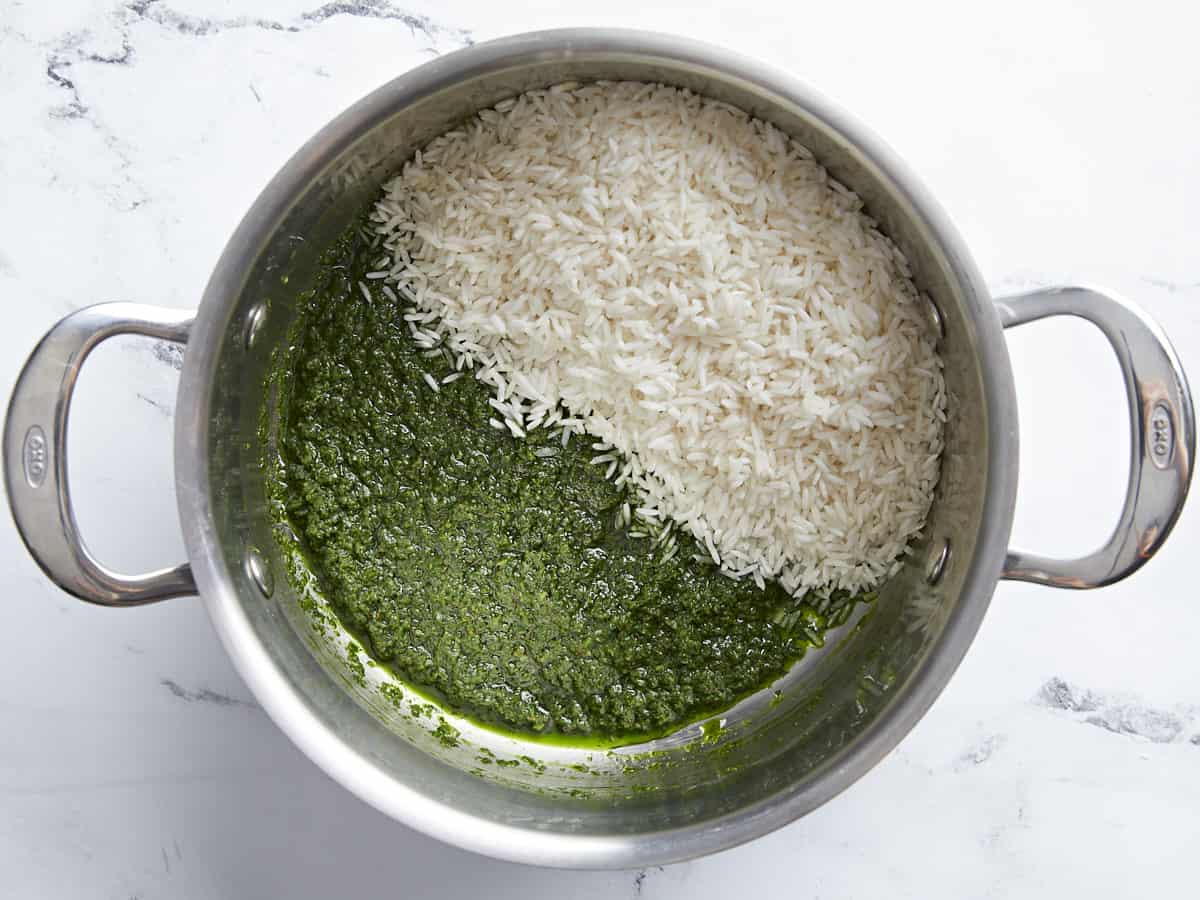
White rice added to green vegetable mixture in the pot

Add 2 cups long-grain white rice (washed & rinsed) to the pot and mix to combine, coating the rice with the green mixture.

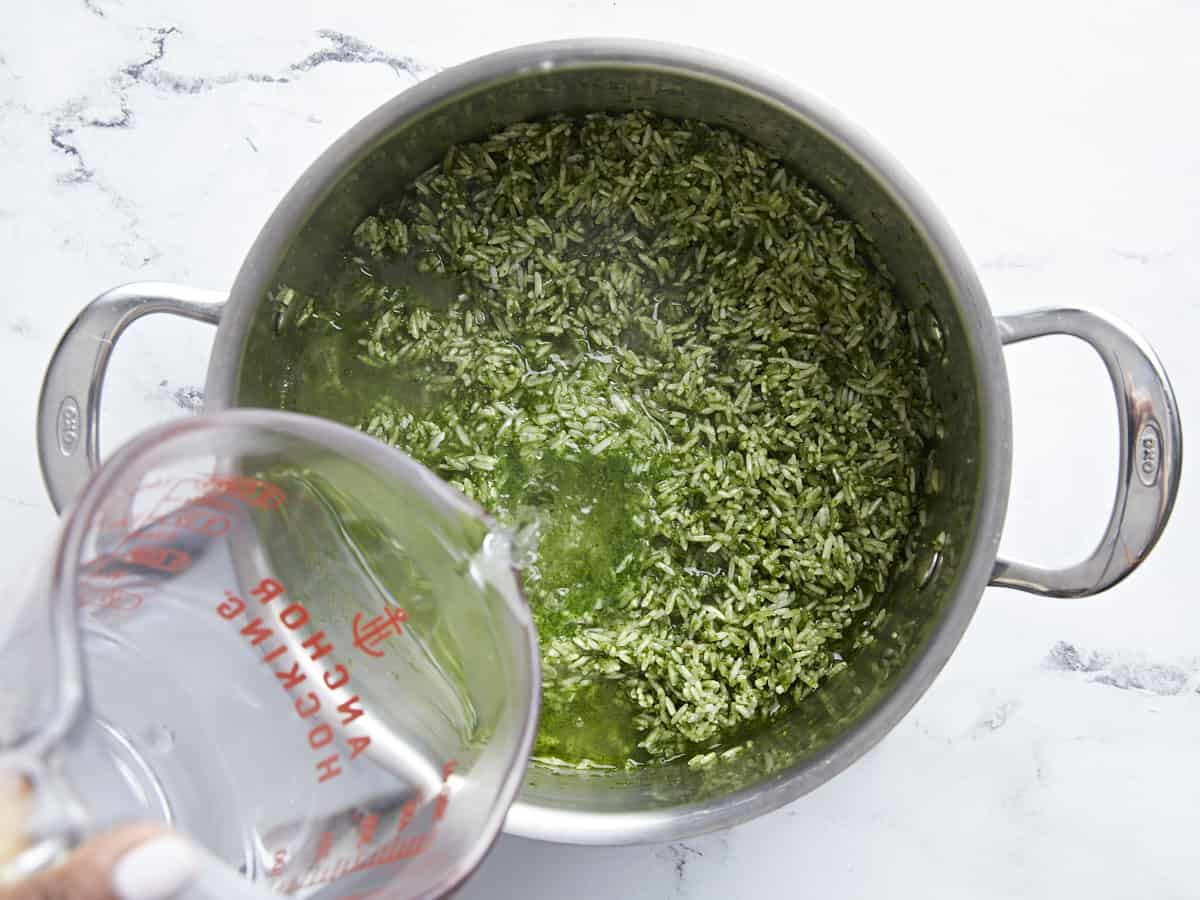
Boiling water being added to rice and green vegetable mixture inside the pot

Add 2 cups of boiling water and salt to taste to the pot, then let the mixture come to a boil. Once boiling, reduce the heat to a simmer and cover with a tight lid. Cook for 20 min or until the rice is tender.

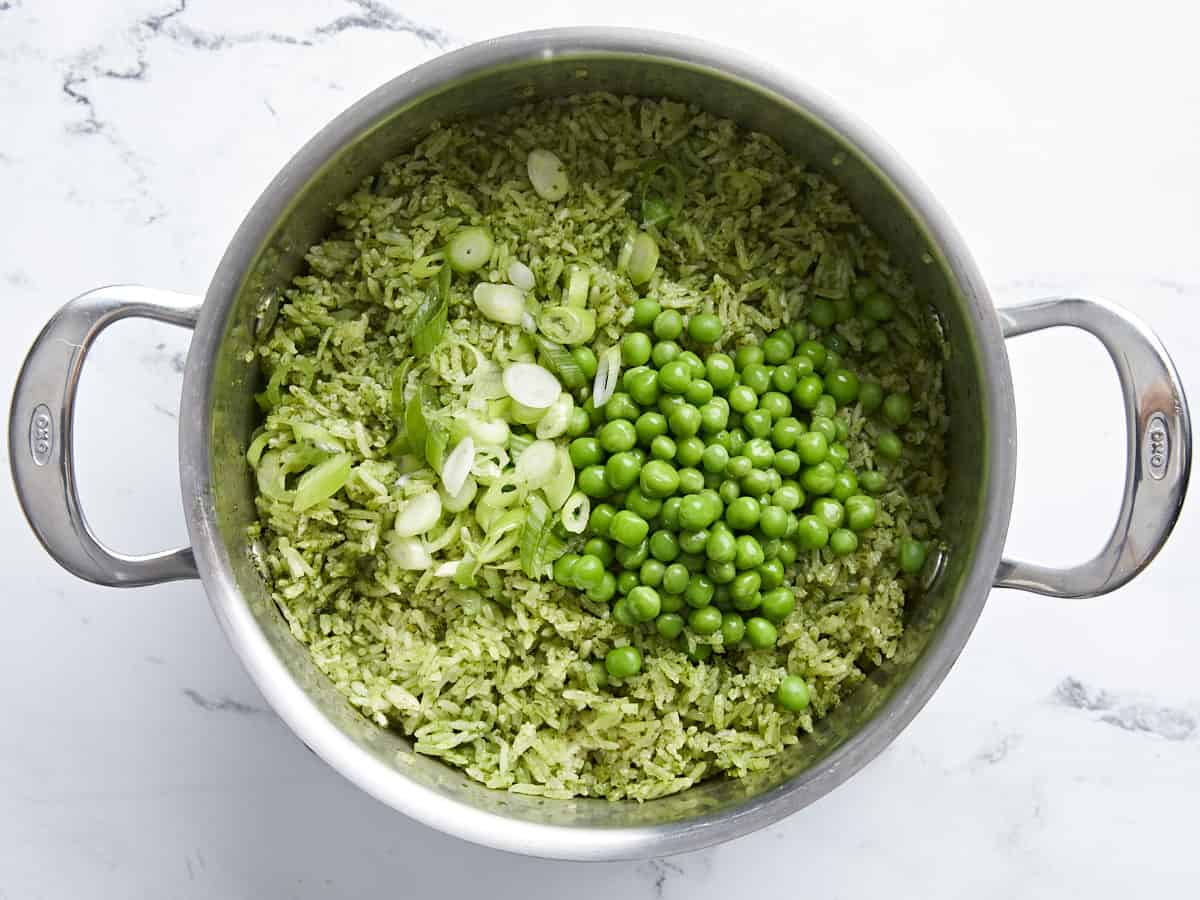
Cooked green rice with cooked peas and sliced green onions added in.

Once done remove the pot from the heat and using a fork fluff the rice. Add 1/2 cup cooked green peas and 1/4 cup sliced scallions and combine.

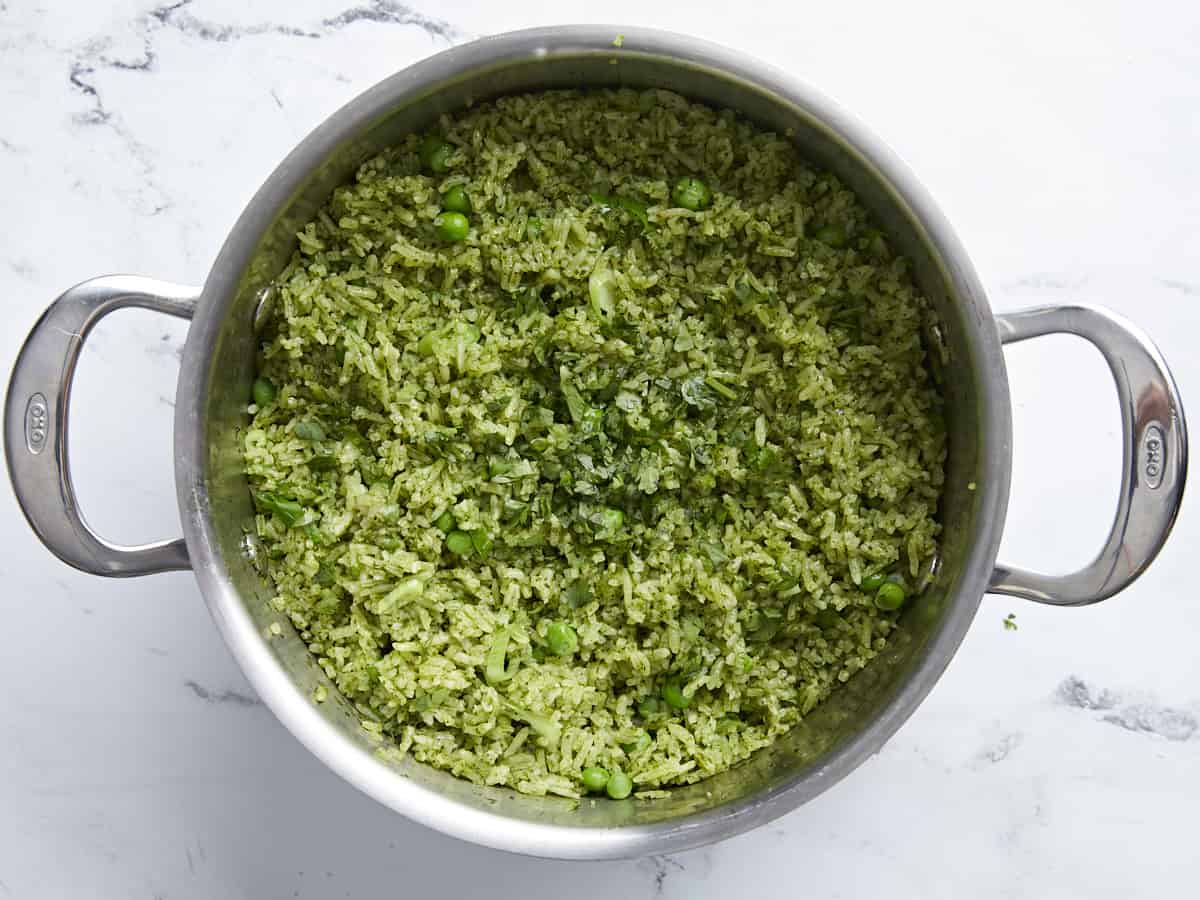
Finished Arroz Verde dish with finely chopped cilantro on top.

Serve and garnish with fresh chopped cilantro if desired. Simple and delicious! Enjoy!

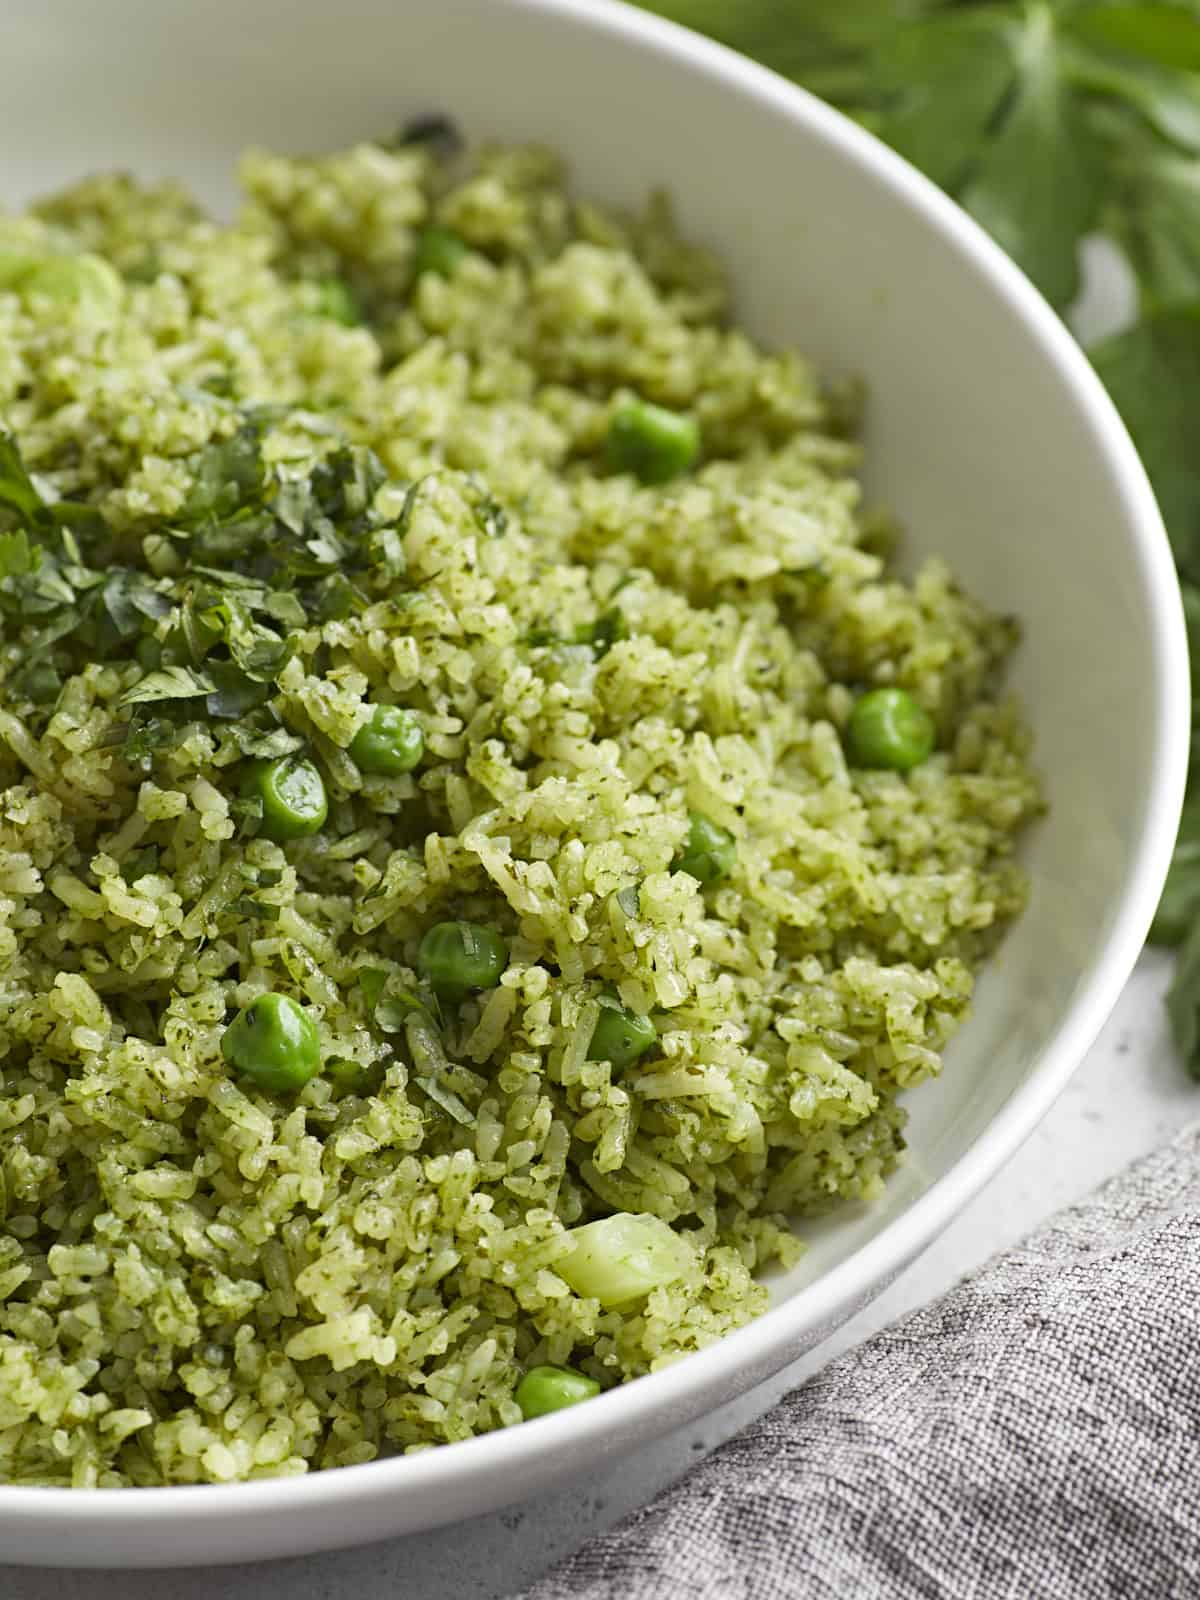
Close up side view of Arroz Verde in a serving bowl.

The post Arroz Verde (Green Rice) appeared first on Budget Bytes.
Tostones (Fried Green Plantain)

Tostones are the crispy, salty snack of your dreams! These slices of twice-fried green plantain are perfect for dipping and so easy to make.

The post Tostones (Fried Green Plantain) appeared first on Budget Bytes.
Tostones, or fried green plantains, are the tasty, crispy, salty snack of your dreams! Though they might look intimidating, they’re easy to make. PS They’re more delicious than french fries! (In my humble Puerto Rican opinion, which is OBVIOUSLY super biased.) Made from thick slices of twice-fried green plantain, this delicious Latin American side dish is a great snack and a total must-have side dish whenever you’re serving island food.

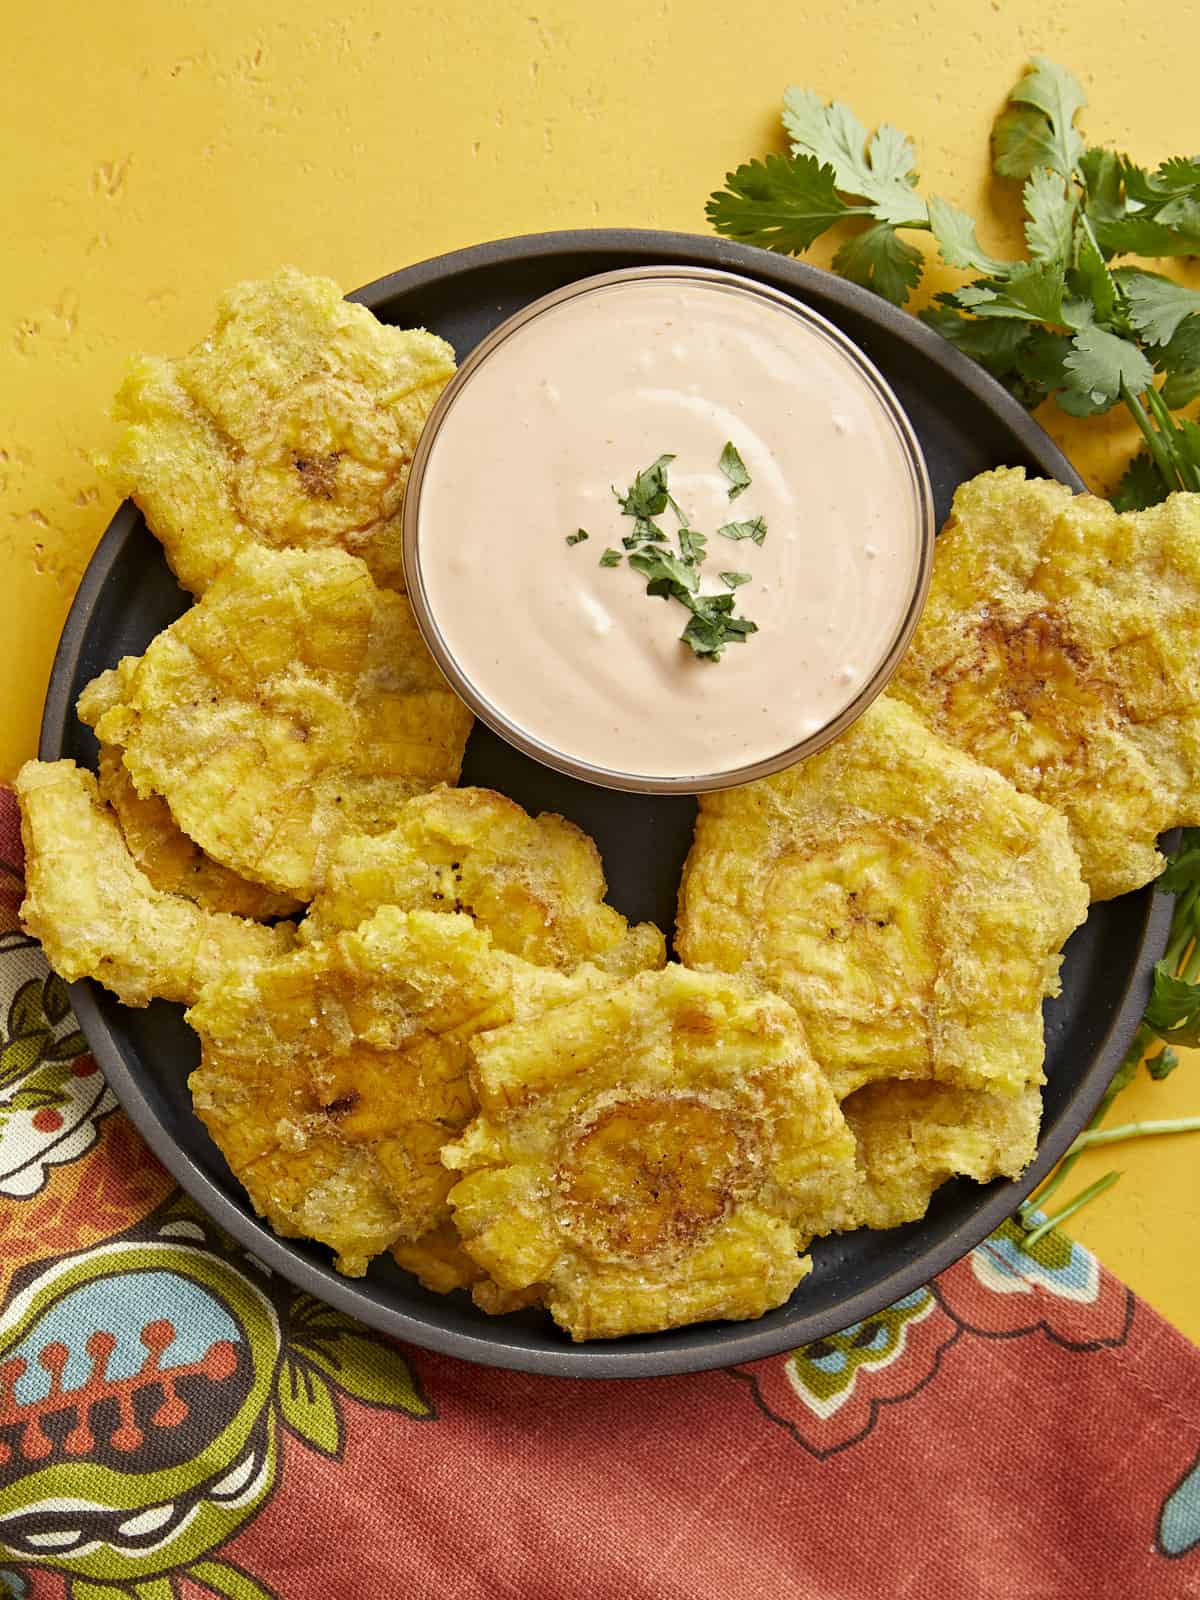
Overhead shot of fried tostones in a black bowl with mayo-ketchup sauce in the middle of the bowl.

What Are Tostones?

Tostones are delicious, crispy, thick slices of fried green plantain, usually served as a snack or side dish with a dipping sauce. The name “tostones” comes from the Spanish word “tostar,” which means “to toast.” This is because the plantains are “toasted” twice (i.e., fried twice) during cooking. Think of them as Puerto Rican french fries. Though, of course, they’re popular in most Latin cuisines, not just my little island. They can be served as a snack or a side dish and are lovely with a dipping sauce.

Ingredients For Tostones

The first time you make tostones, you might be slightly intimidated by the process. But don’t worry; as you’ll see, it’s actually quite simple. Here’s what you’ll need to make the best tostones:

  • Green Plantains: are the star of the show. Look for plantains that are firm to the touch and have unblemished dark pea-green skin with no yellowing. If the plantains are ripe, they’ll be too soft and won’t hold their shape when you fry them. Be warned- green plantains have sap that will stain anything it touches. If you don’t want dark stains on your hands, wear gloves. It’s also a good idea to wear an apron.
  • Cooking Oil: any type will do, but you’ll need plenty of it. Tostones are best deep fried, which means filling your medium-sized pot with at least 4 cups of oil. To cut costs, reach for a smaller pot to fry in. Though you’ll have to fry in smaller batches, you’ll need less oil.
  • Vinegar: like potatoes, plantains oxidize and turn gray when they are exposed to air. Vinegar helps to stop the plantains from browning, but anything acidic will do. Lime juice is an excellent (though more expensive) substitution.
  • Garlic Powder: is used in the water bath for the tostones to add flavor. If you don’t have garlic powder, garlic salt is a great substitution. You can also smash a few cloves of fresh garlic and let them work their magic.
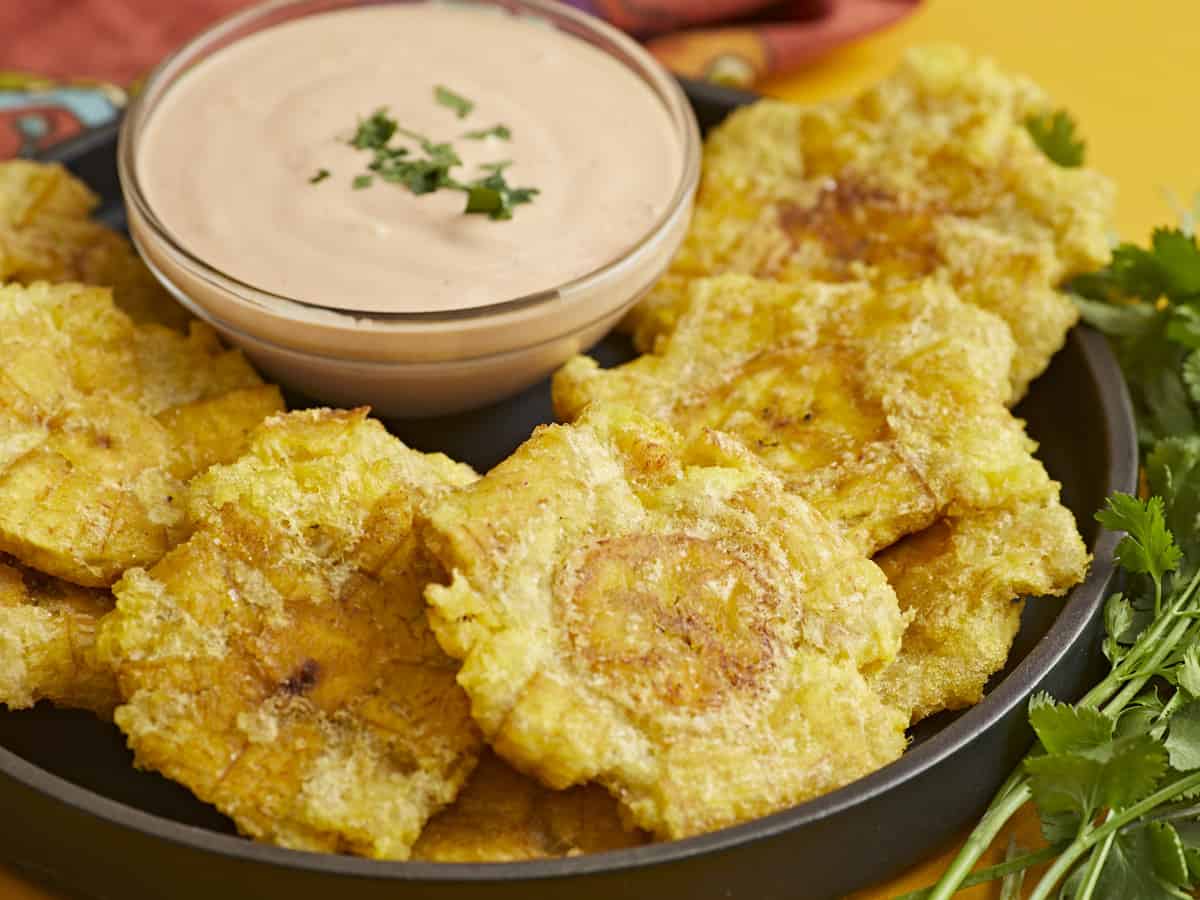
Side shot of fried tostones in a black bowl with mayo-ketchup sauce in the middle of the bowl.

What Can I Serve With Tostones?

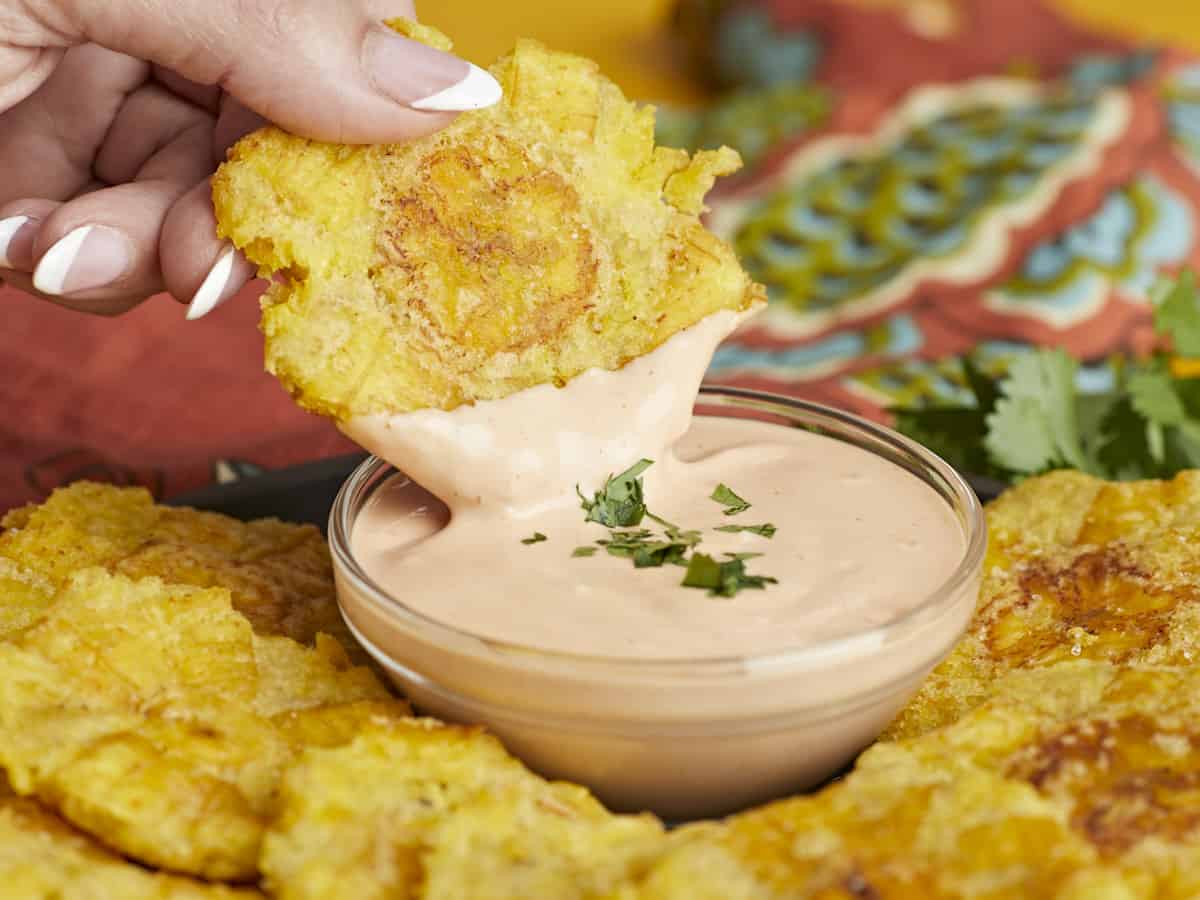
Serve tostones with your favorite dipping sauce. Traditionally, they are served with Puerto Rican Mayo Ketchup sauce, a blend that can be as simple as 1 part ketchup to 2 parts mayo. But I also love them with Guacamole, Lime Crema, and even Comeback Sauce.

While fantastic on their own, Tostones are incredible when served as a side dish with Puerto Rican Rice and Beans, Arroz Con Pollo (Puerto Rican Chicken and Rice), Pollo Guisado (Puerto Rican Chicken Stew), Chuletas Guisadas (Puerto Rican Stewed Pork Chops), Pinchos de Pollo (Puerto Rican Chicken Skewers) or Arroz Con Salchichas, (Puerto Rican Rice With Sausage).

Making Tostones Ahead Of Time

Tostones are best served still piping hot from the frying pan, so they don’t store well after their final fry. However, they prep beautifully. To prep tostones, fry them once and mash them. Then cool them and store them in an airtight container layered with parchment paper. Tostones will stay fresh in the fridge for up to 3 days and in the freezer for up to 3 months. Finally, thaw them, give them a quick dunk in salt water, and fry them again.

What Do I Do With Leftover Oil?

Cool the oil to room temperature and then strain it into a resealable air-tight container. You can store it for another day of fabulous Tostones making or use it for other recipes that require cooking oil. Try making our Coconut Chicken Strips With Sweet Chili Sauce, Turkey Meatballs, Sweet Potato Corn Cakes, or Chilaquiles.

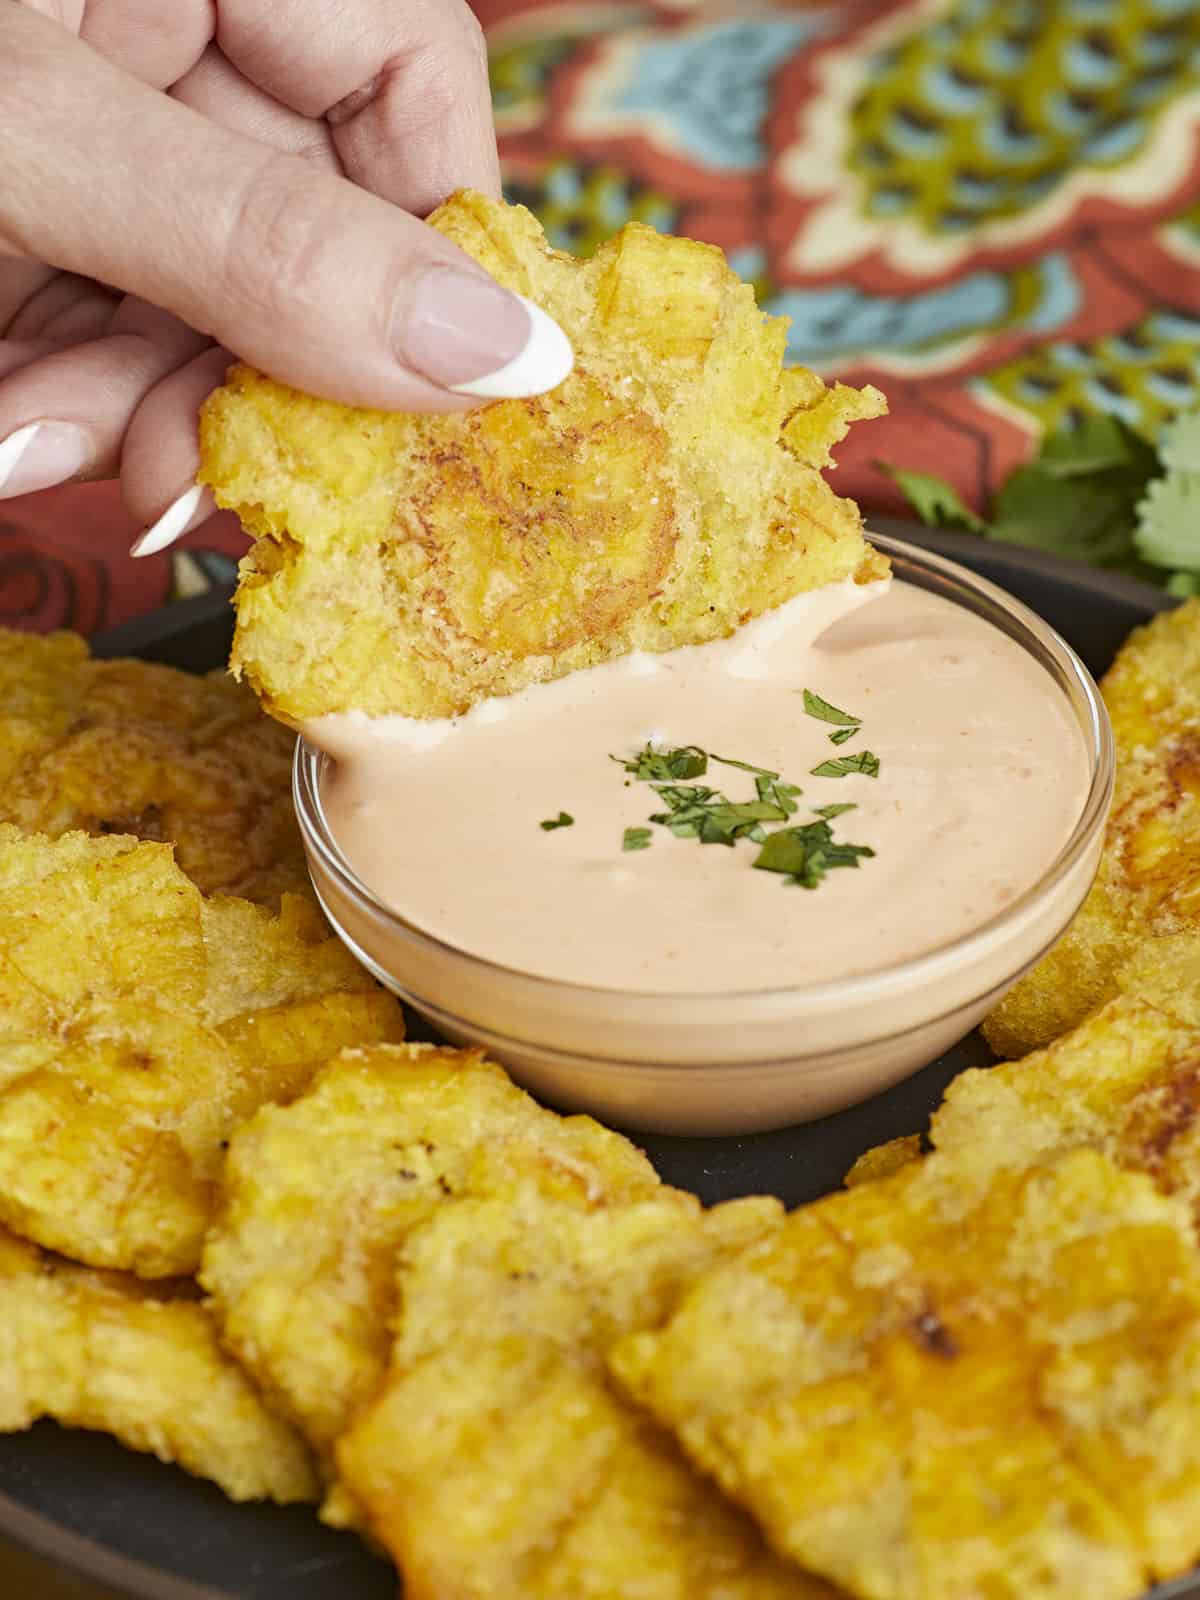
Side shot of a hand dipping a toston in mayo-ketchup sauce.
Overhead shot of fried tostones in a black bowl with mayo-ketchup sauce in the middle of the bowl.
Print

Tostones

Tostones are the crispy, salty snack of your dreams! These slices of twice-fried green plantain are perfect for dipping and so easy to make.
Course Appetizer, Side Dish
Total Cost $4.42 recipe / $1.06 servving)
Prep Time 6 minutes
Cook Time 8 minutes
Soaking Time 1 minute
Total Time 15 minutes
Servings 4 servings
Calories 2118kcal

Ingredients

  • 4 cups cooking oil $2.79
  • 2 green plantain $1.38
  • 1/4 tsp garlic powder $0.03
  • 1 Tbsp vinegar $0.03
  • 1/8 tsp salt $0.01

Instructions

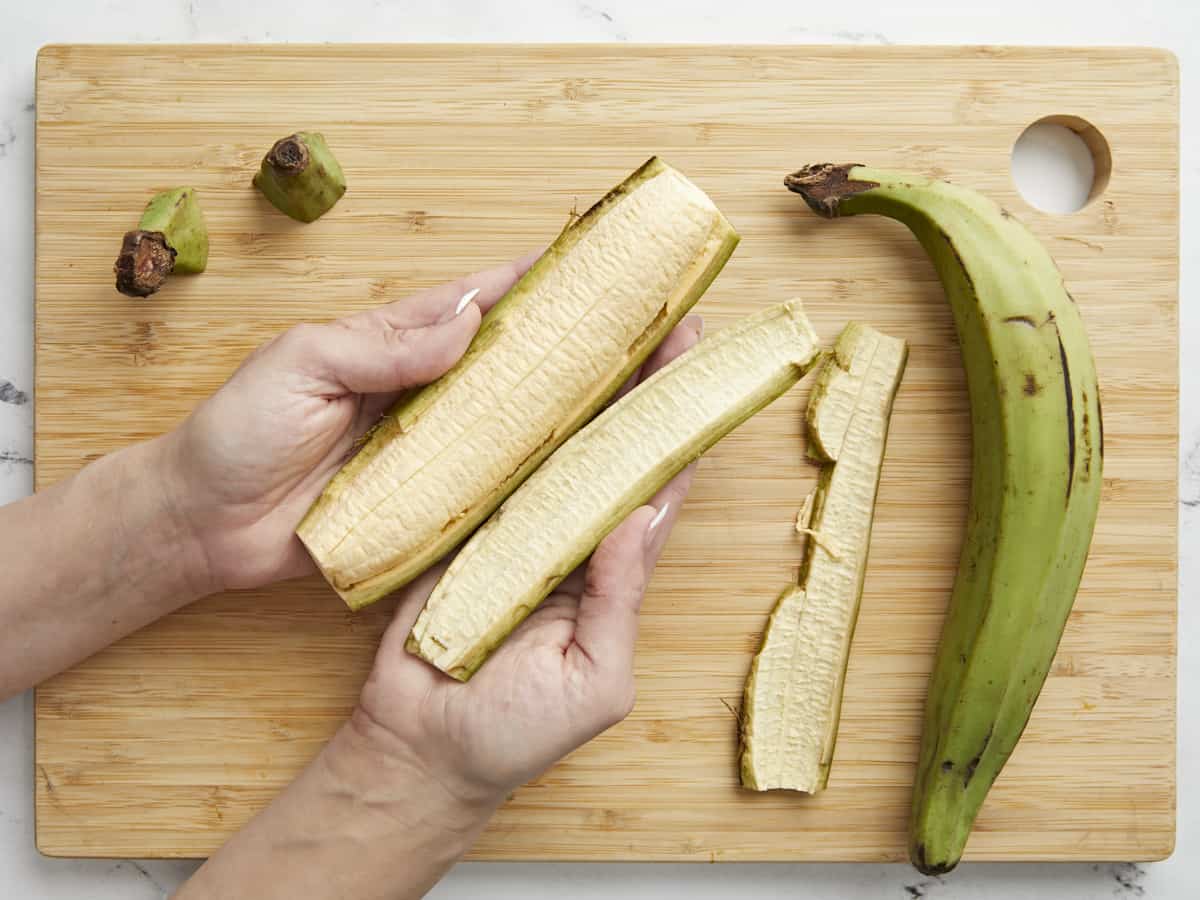
  • Fill a medium heavy-bottomed pot with cooking oil and place it over medium heat. Trim off both ends of the green plantain, then make three lengthwise cuts through the skin, each about two inches apart. Peel the skin off the plantains.
  • Slice the plantains into 1 1/2-inch thick rounds.
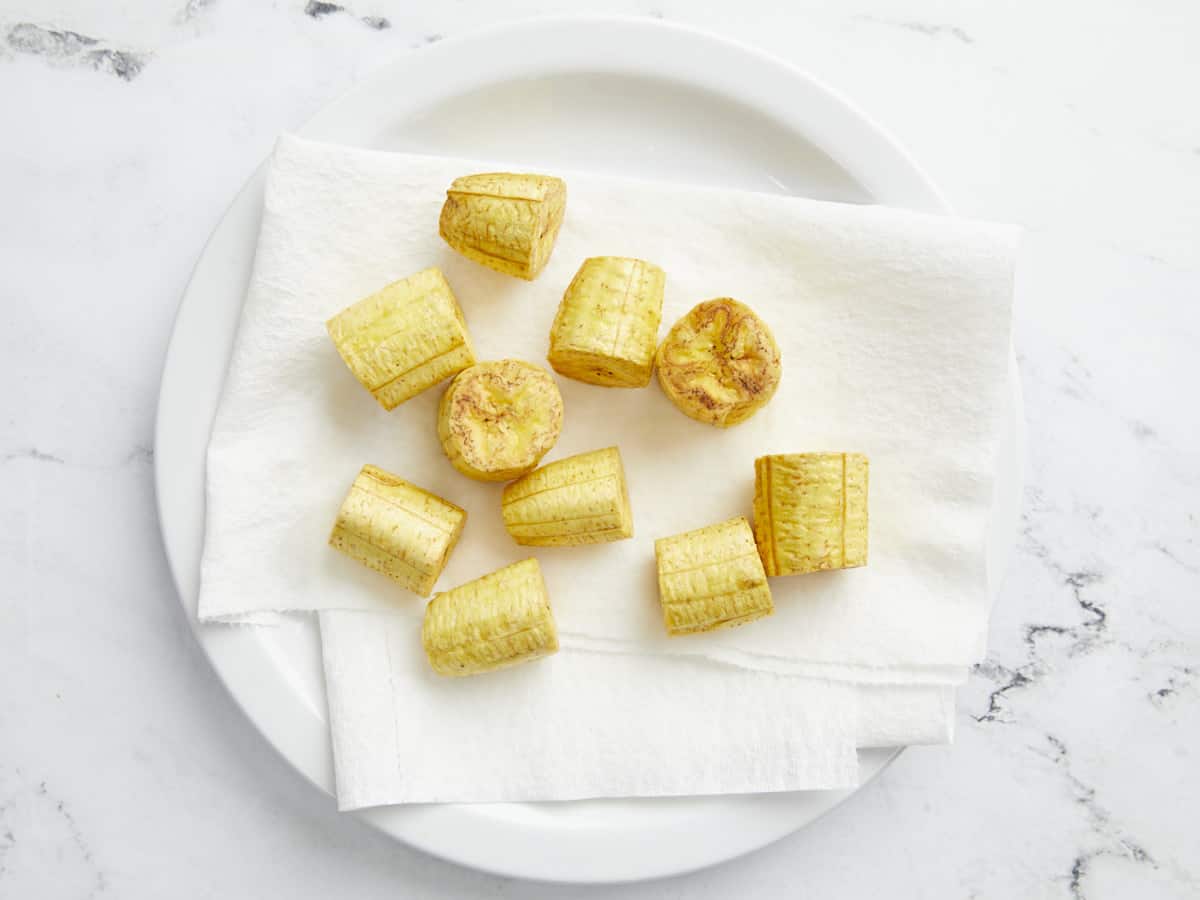
  • When the oil is at 350°F, add the sliced plantains, working in batches to not crowd the pot. When the plantain slices change in color from bone white to a golden yellow (about 3 to 4 minutes) remove them from the pot and drain them on a paper towel-lined plate.
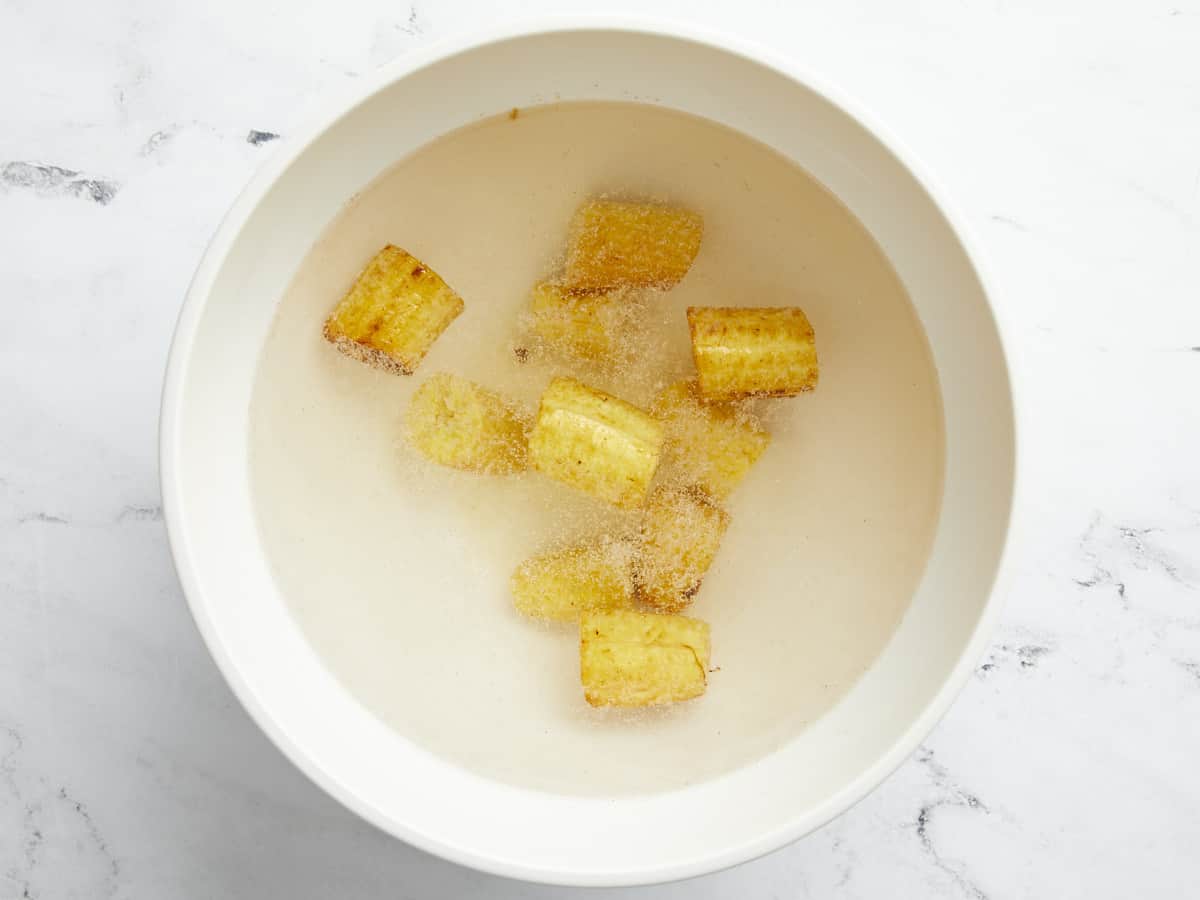
  • Add about 4 inches of water to a bowl large enough to hold the plantains. Add the garlic powder and the vinegar to the water and mix. Soak the fried plantains for 1 minute and dry them on the paper towel-lined plate.
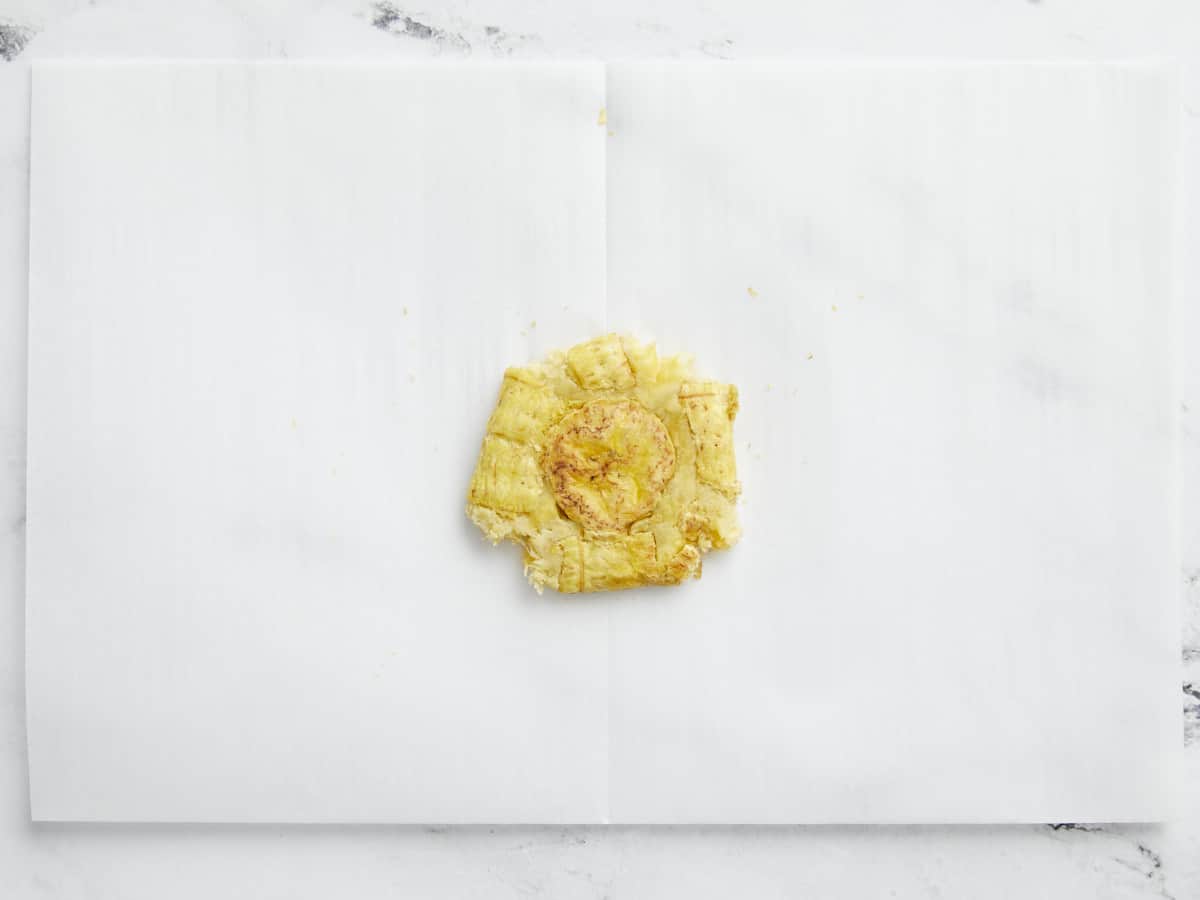
  • Add two sheets of parchment to your work surface and ready a heavy skillet. Place one slice of fried plantain on one sheet of parchment, then top it with the second piece of parchment. Use the heavy skillet to smash the plantain flat, about 1/4 inch thick. Set aside and repeat with the remaining slices.
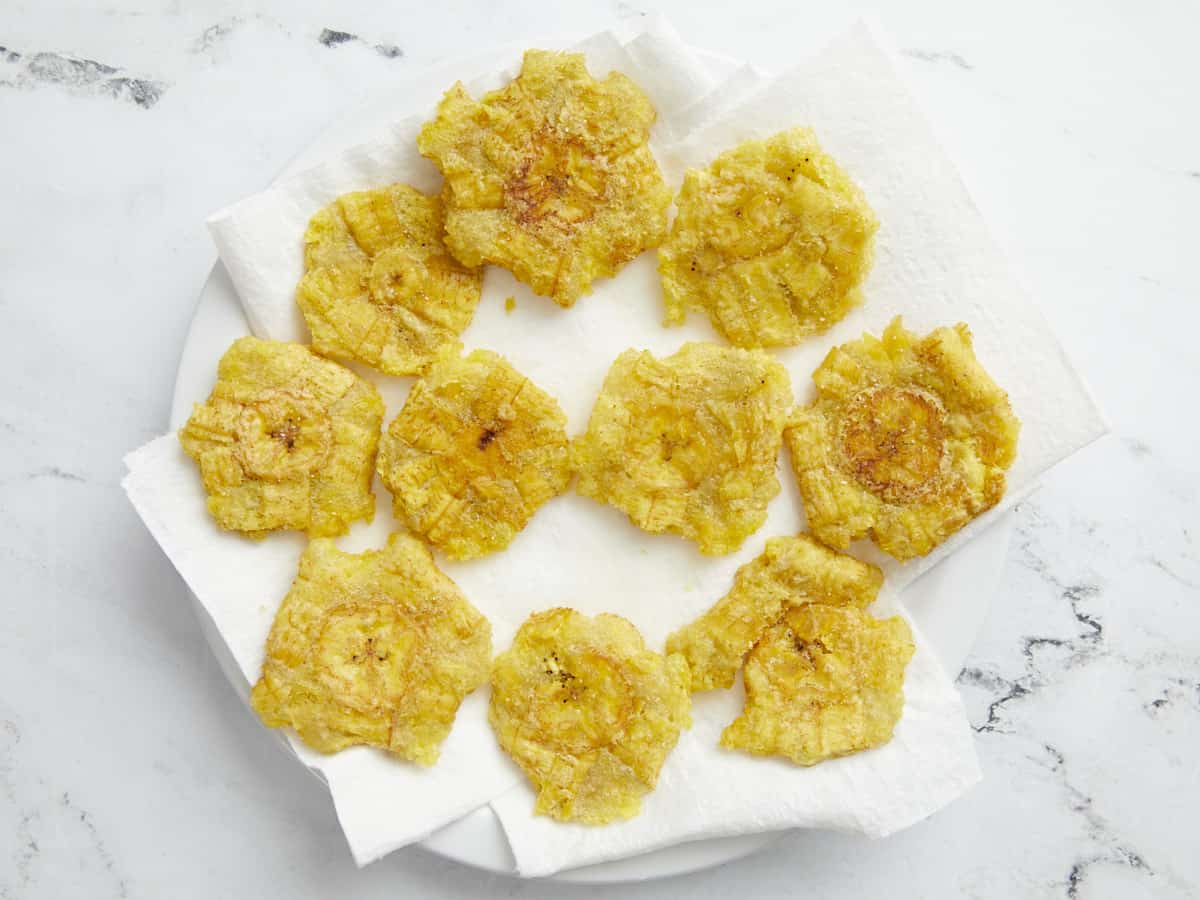
  • Turn the heat up on the oil. When the oil has reached 375°F, fry the plantains again, working in batches so the pot isn't crowded. Fry the tostones until golden and crispy, about 3 minutes. Drain on the paper towel-lined plate and sprinkle with 1/8 teaspoon salt immediately. Serve with your favorite dipping sauce and enjoy!

See how we calculate recipe costs here.

Nutrition

Serving: 1g | Calories: 2118kcal | Carbohydrates: 33g | Protein: 1g | Fat: 224g | Sodium: 147mg | Fiber: 2g

How to Make X – Step by Step Photos

Overhead shot of green plantain being peeled on a wood cutting board.

Fill a medium heavy-bottomed pot with 4 cups of oil and place it over medium heat. Trim off the ends of 2 green plantains, then make three lengthwise cuts through the skin, each about two inches apart. Make them deep enough to cut through the 1/4 inch thick skin, but not so deep you cut the flesh. The skin doesn’t peel down like a banana. Instead, peel from the side, pushing the skin away from the flesh, using a spoon or butter knife to help start the process.

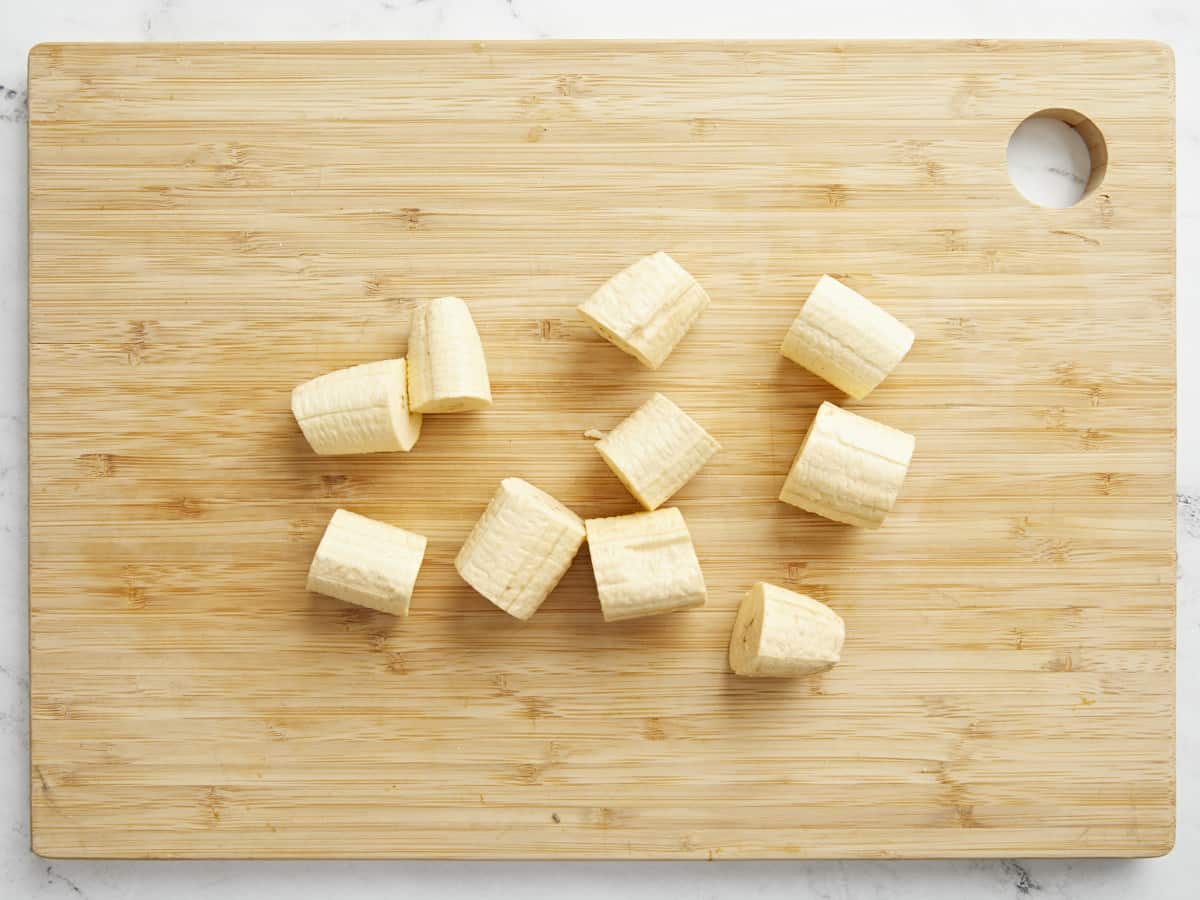
Overhead shot of slices of green plantain on a wood cutting board.

Discard the skin and slice the plantains into 1 1/2-inch thick rounds.

Overhead shot of slices of green plantain that have been fried once.

When the oil is at 350°F, add the sliced plantains, working in batches to not crowd the pot. If you do not own a fry thermometer, the oil is ready when a small piece of plantain sizzles softly when it hits the oil. Turn the plantain slices occasionally to ensure they fry evenly. When the plantain slices change in color from bone white to a golden yellow (about 3 to 4 minutes) remove them from the pot and drain them on a paper towel-lined plate.

Overhead shot of slices of fried green plantain soaking in a salt water bath.

Add about 4 inches of water to a bowl large enough to hold the plantains. Add 1/4 teaspoon garlic powder and 1/4 teaspoon vinegar to the water and mix. Soak the fried plantains for 1 minute and dry them on the paper towel-lined plate. (For my traditionalists, you can also dip the plantains for 10 to 15 seconds after they have been smashed, but I find the tostones can get water-logged doing it that way, causing the oil to bubble furiously and the tostones to break apart during the second fry. You do you!)

Overhead shot of smashed green plantain on white parchment paper.

Add two sheets of parchment to your work surface and ready a heavy skillet. Place one slice of fried plantain on one sheet of parchment and top it with the second piece of parchment. Use the heavy skillet to smash the plantain flat, about 1/4 inch thick. Set aside and repeat with the remaining slices.

Overhead shot of fried tostones on paper towel-lined plate.

Turn up the heat on the oil. When the oil has reached 375°F, carefully place the tostones in the frying oil, working in batches so the pot isn’t crowded. If you don’t own a thermometer, the oil is ready when a small piece of plantain bubbles furiously when it hits the oil. Fry the tostones until golden and crispy, about 3 minutes. Drain on the paper towel-lined plate and sprinkle with 1/8 teaspoon salt immediately. Serve with your favorite dipping sauce, and enjoy!

Side shot of hand dipping a fried toston in mayo-ketchup sauce.

More Puerto Rican Vegetarian Recipes

The post Tostones (Fried Green Plantain) appeared first on Budget Bytes.
Pinchos De Pollo (Puerto Rican Chicken Skewers)

Smoky, mouth-watering Pinchos De Pollo, AKA Puerto Rican Chicken Skewers, are a beloved island street food that’s easy to make at home!

The post Pinchos De Pollo (Puerto Rican Chicken Skewers) appeared first on Budget Bytes.
If you’re looking for an easy, budget-friendly treat everyone at the BBQ will love (especially your Boricua friends), you have to make smoky, mouth-watering Pinchos De Pollo, AKA Puerto Rican Chicken Skewers! This beloved island street food is easy to recreate at home, even if you don’t have a grill!

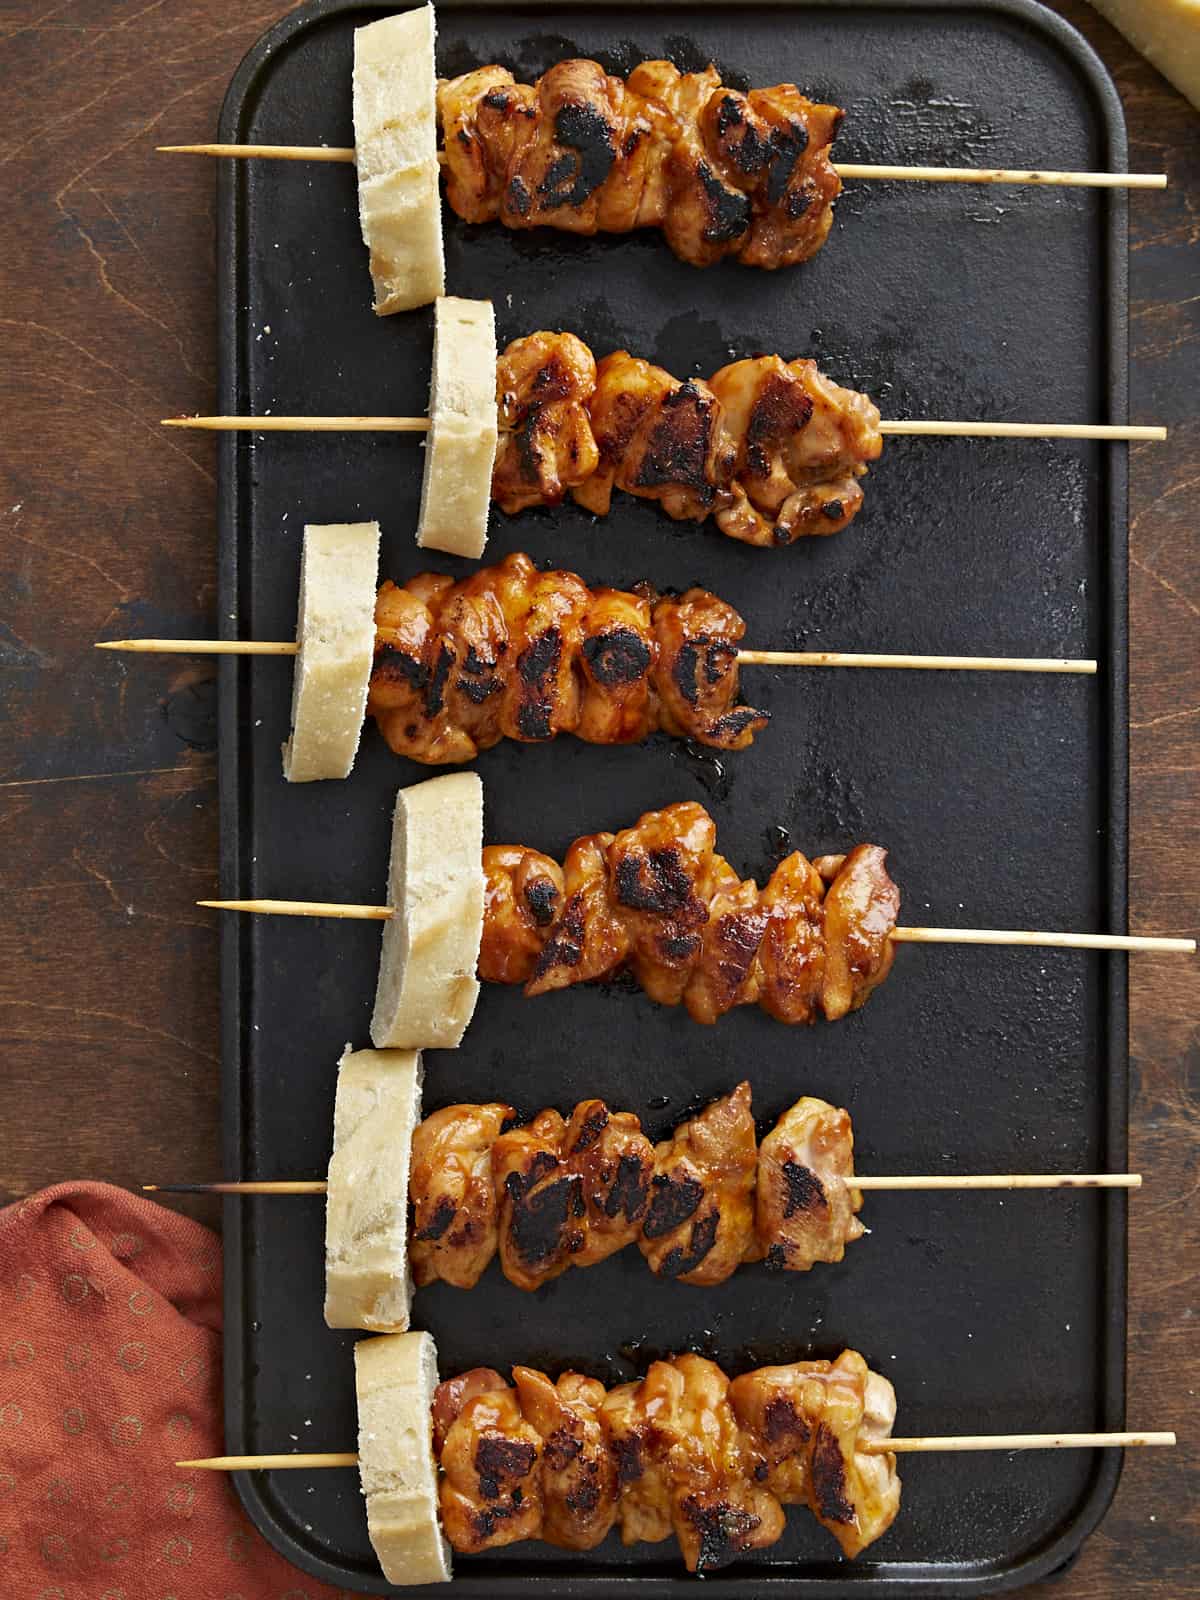
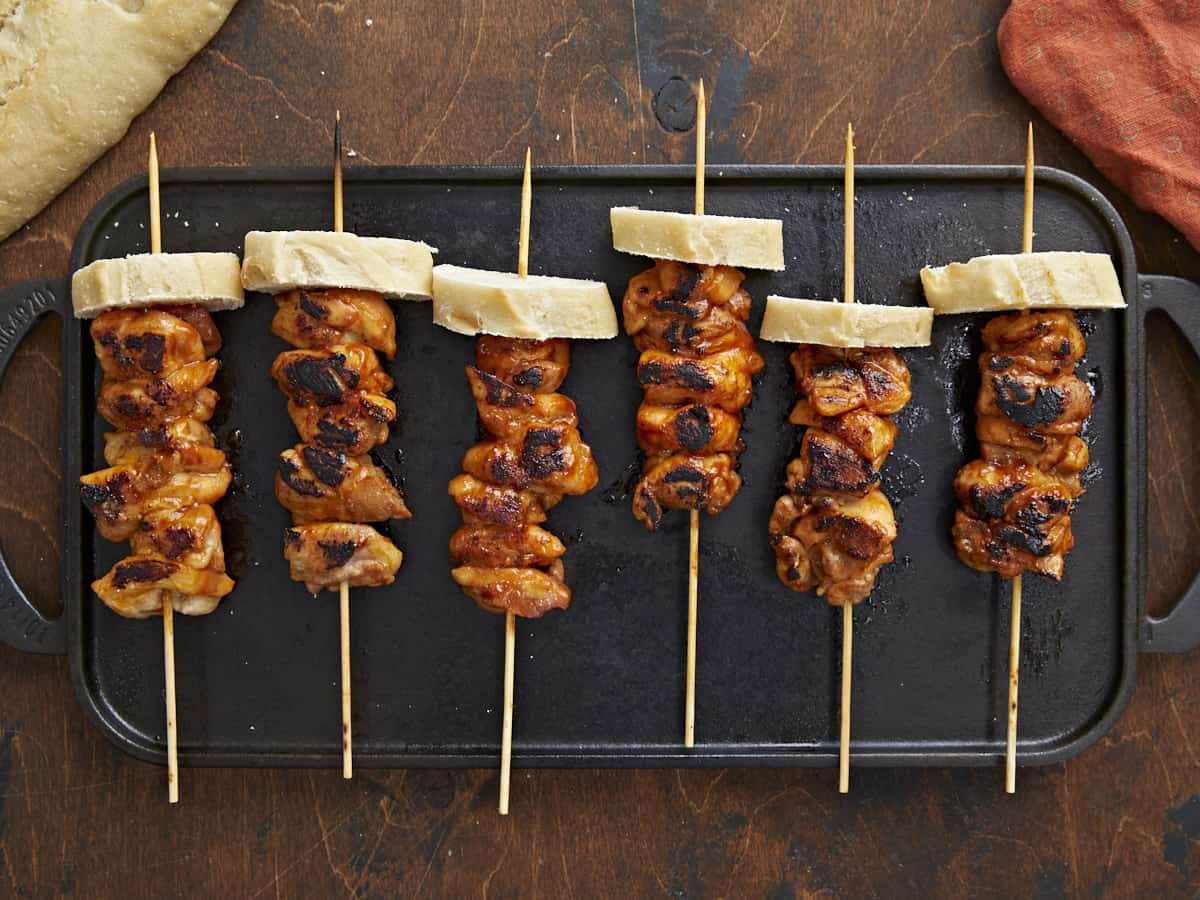
Overhead shot of Pinchos de Pollo on a black grill plate.

What Are Pinchos?

Pinchos is Spanish for “spikes” and refers to Puerto Rican meat skewers, one of the island’s most famous street foods. They are a late-night favorite of folks who’ve spent a little too much time at the bar and need to eat their way back to reality. Boricuas make Pinchos with many different types of meat (and sometimes veggies), but the most popular choices are chicken and pork. The meat is chopped, marinated, skewered, grilled over charcoal, and topped with a piece of bread or Tostones, AKA fried green plantain.

Ingredients For Pinchos De Pollo

Grilling Pinchos De Pollo over charcoal is traditional. However, I’m an avid indoors person and don’t like being exposed to the elements, so I made these on a grill plate. You should def open all of the windows or plan on explaining to the fire department that you’re grilling inside. (This happened to me a few days ago when I couldn’t get my smoke alarm to turn off and my security system automatically summoned my local firefighters… during a live virtual cooking demo. Not mortifying at all.) Here’s what you’ll need to make Pinchos De Pollo:

  • Chicken Thighs– have enough fat in them to withstand heavy grilling without drying out. You can, of course, substitute chicken thighs with whatever meat your heart desires. Bits of chopped marinated pork and beef are popular choices, as are shrimp. If you’re a veg head, try this recipe with whole baby bella mushrooms. Cooking times are different for different cuts of meat and veggies, so if you choose to change up the star of the show, use a thermometer to help you know when things are cooked through.
  • Adobo and Sazón– these Puerto Rican spice blends are heavy-duty flavor bombs and work quickly to infuse your chicken with earthy, tangy, notes. If you don’t have Adobo or Sazón, I’ve included recipes for you in the recipe card below.
  • BBQ Sauce– glazes the chicken, adds deep flavor, and helps create char marks. Use your favorite brand, though I’d steer clear of anything too sweet, as it will change the flavor profile and accelerate the charring. You can always make our easy recipe for Homemade BBQ Sauce, which is perfect for Pinchos De Pollo.
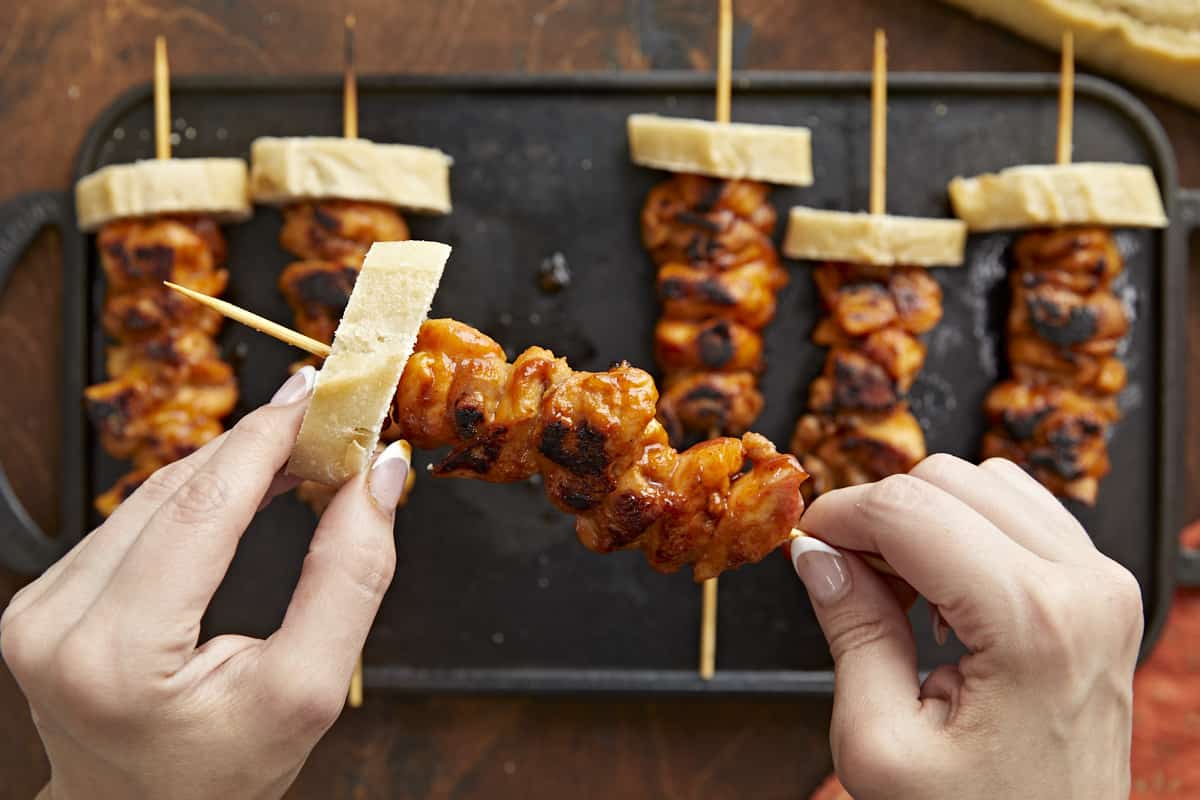
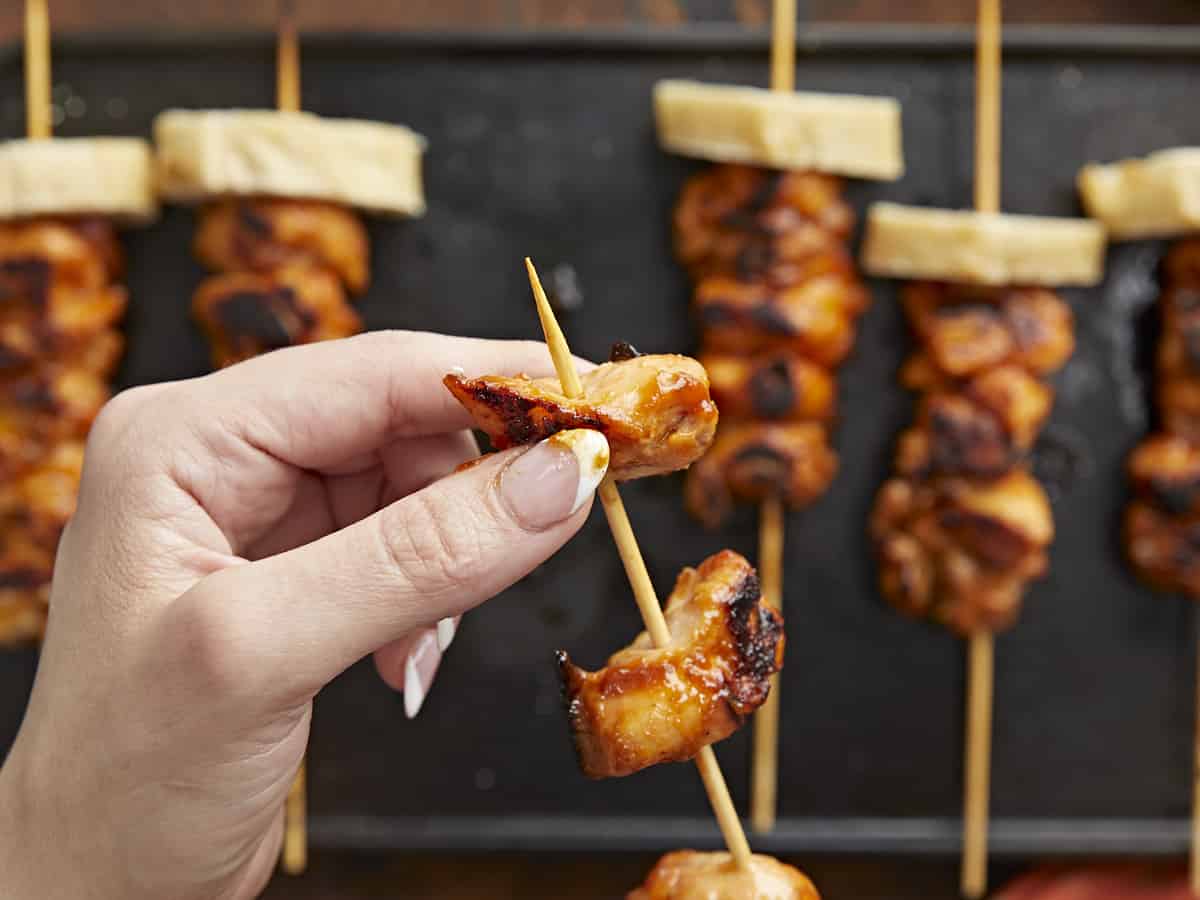
Over head shot of hand lifting Pinchos De Side shot of hand lifting Pinchos de Pollo on a black grill plate.

What Can You Serve With Pinchos De Pollo?

These Pinchos de Pollo pair beautifully with Arroz Con Habichuelas (Puerto Rican Rice And Beans) and Tostones (Fried Green Plantain). You can also serve them with Ensalada De Aguacate (Avocado Salad) and Yuca En Escabeche (Pickled Yuca Root).

How To Store Pinchos

When it comes to chicken left at room temperature, you should eat it or store it within 2 hours before harmful bacteria start to form. That time frame reduces to 1 hour if temperatures are above 90°F. Store leftover Pinchos De Pollo in an air-tight container with as much air removed as possible. Refrigerate for up to 3 days. Freeze for up to 3 months. Reheat in a 350°F oven or a microwave until steaming.

Over head shot of hand lifting Pinchos de Pollo on a black grill plate.
Overhead shot of Pinchos De Pollo on a black grill plate.
Print

Pinchos De Pollo

Smoky, mouth-watering Pinchos De Pollo, AKA Puerto Rican Chicken Skewers, are a beloved island street food that's easy to make at home! Get ready for a little piece of heaven!
Course Appetizer
Cuisine Latin, Puerto Rican
Total Cost ($7.67 recipe / $1.28 serving)
Prep Time 15 minutes
Cook Time 20 minutes
Marinating Time 1 hour
Total Time 1 hour 35 minutes
Servings 6 skewers
Calories 623kcal

Ingredients

  • 3 lbs boneless and skinless chicken thighs, about 5 to 6 $5.97
  • 2 tsp adobo* $0.10
  • 1 1/2 tsp sazón** $0.19
  • 2 tsp salt $0.16
  • 2 Tbsp cooking oil, plus a touch more for greasing $0.09
  • 1 cup BBQ Sauce $1.16

Instructions

  • Pat chicken thighs dry with a paper towel. Then chop the chicken into bite-size pieces (about 5 to 6 pieces per thigh).
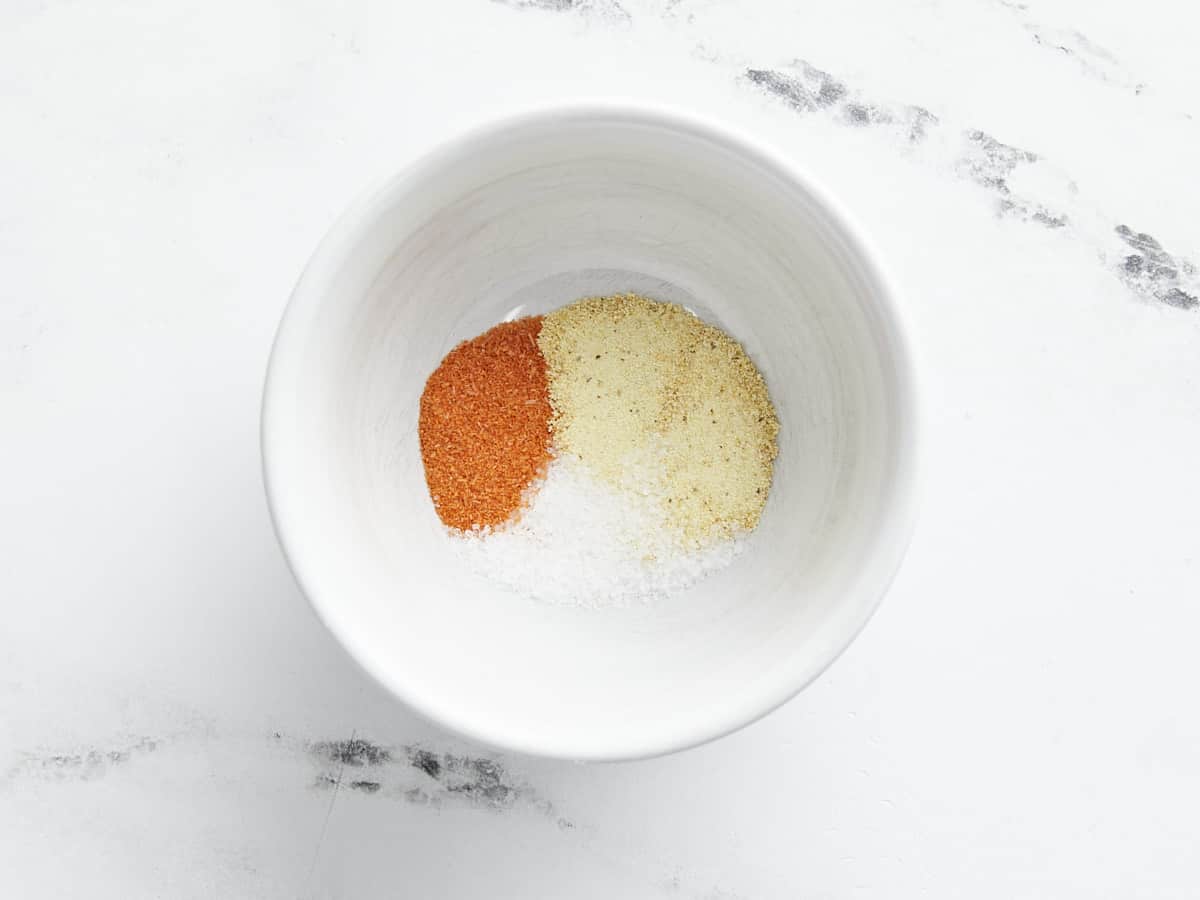
  • Add the adobo, sazón, and salt to a large bowl and mix.
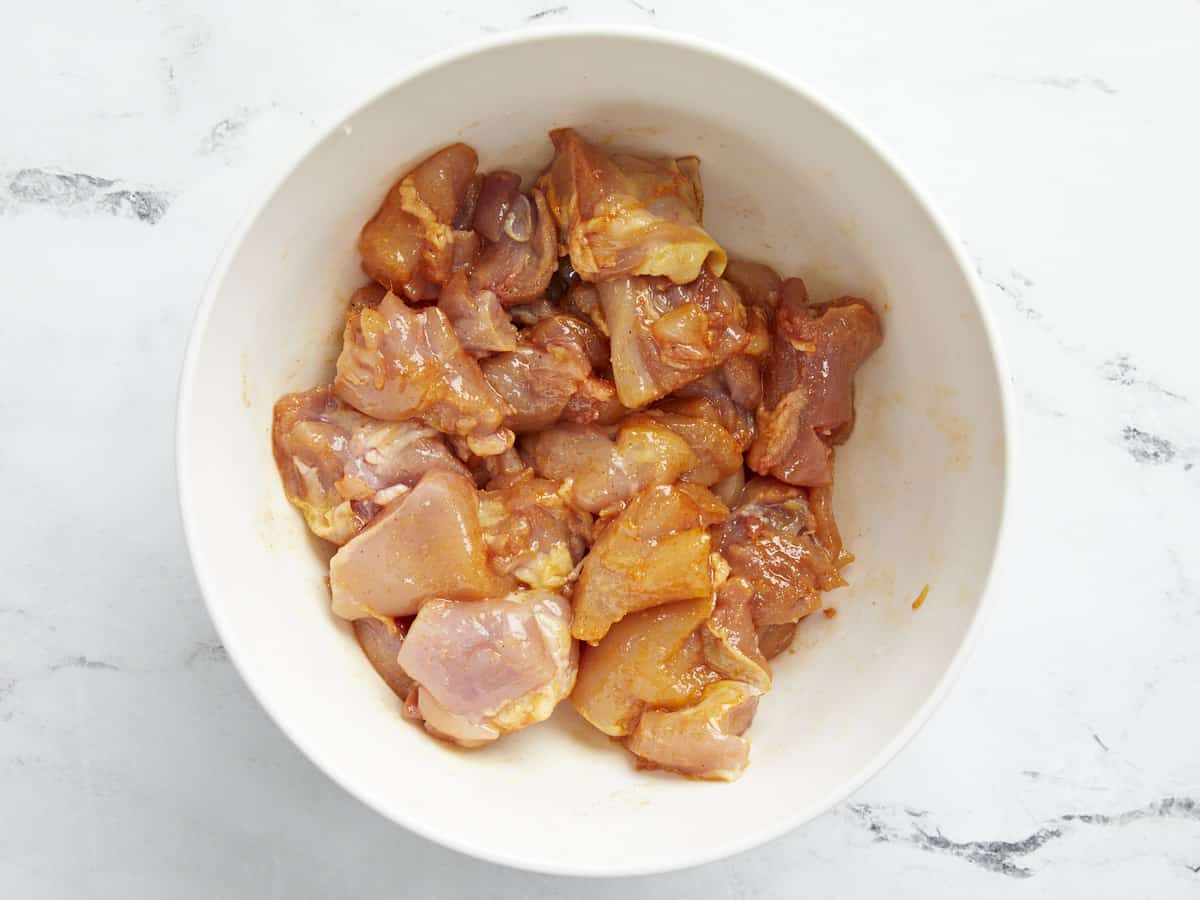
  • Add the chopped chicken thighs to the bowl along with the cooking oil and mix until the chicken is thoroughly covered. Cover with plastic wrap or parchment directly on the surface of the chicken and marinate for at least an hour, but preferably overnight.
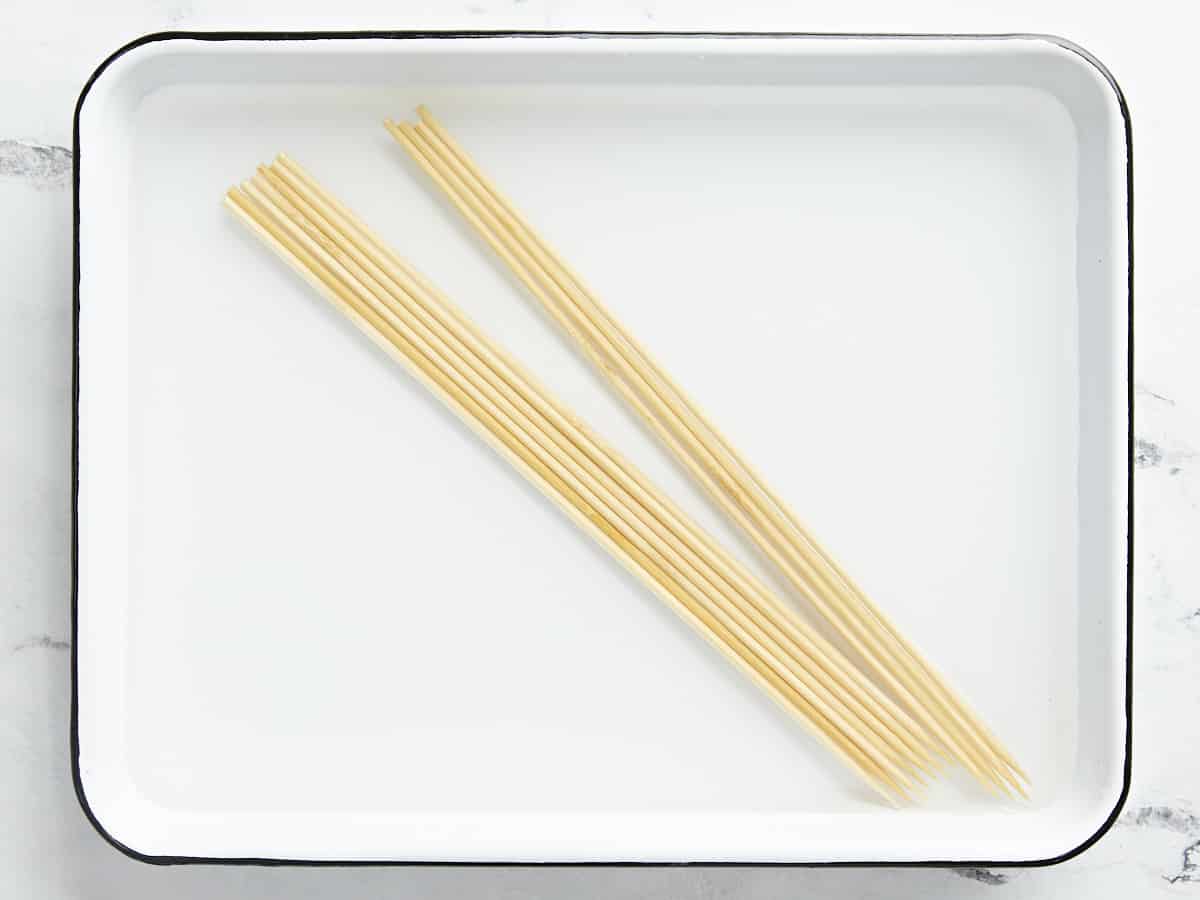
  • Half an hour before you pull the chicken, soak at least 6 wood skewers in water so they don't burn. It's best to soak a few extra skewers just in case one of them breaks.
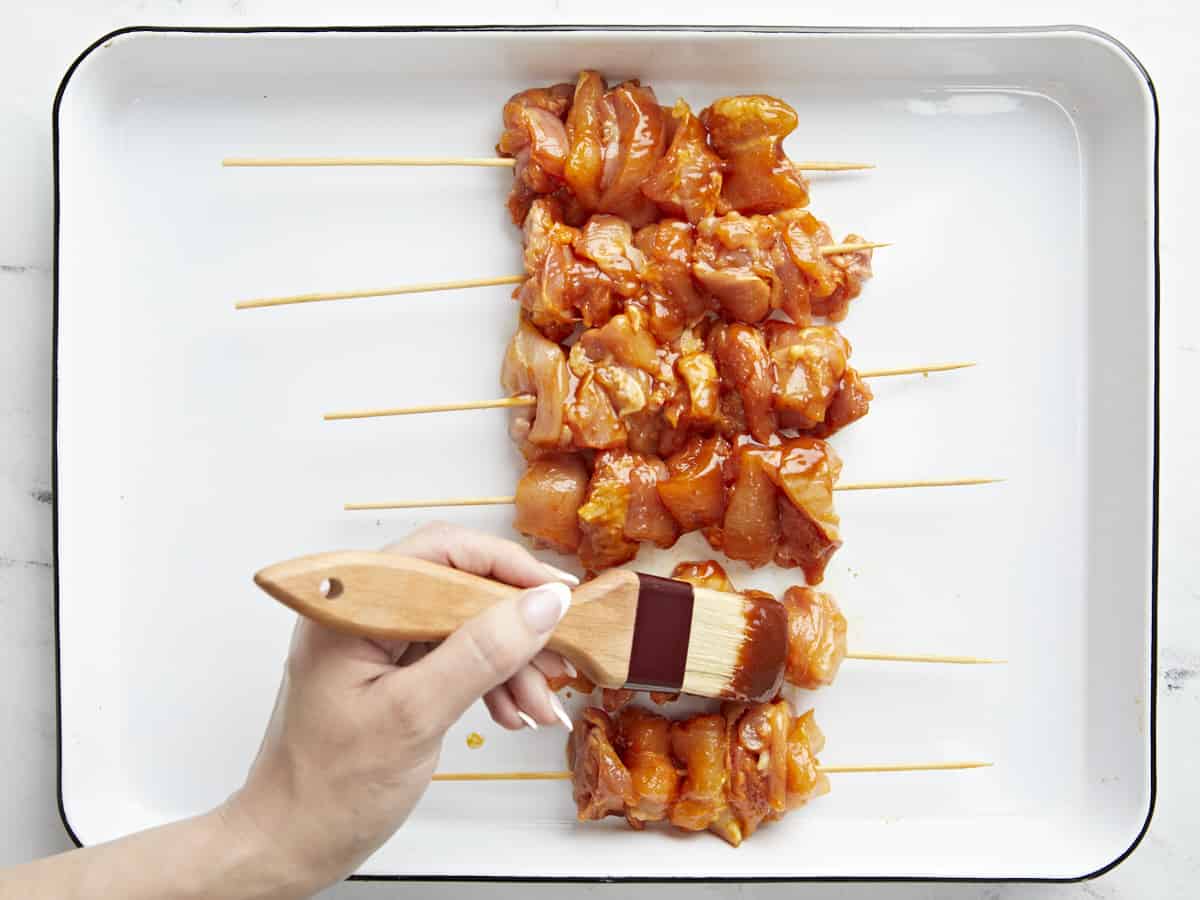
  • When you're ready to cook, preheat a grill pan on high. Then thread a thigh's worth of chicken pieces on each skewer, about 5 or 6 chunks. You want the chicken chunks close but not pressed tightly against each other. Brush both sides of each skewer with BBQ sauce, about 1/2 cup total.
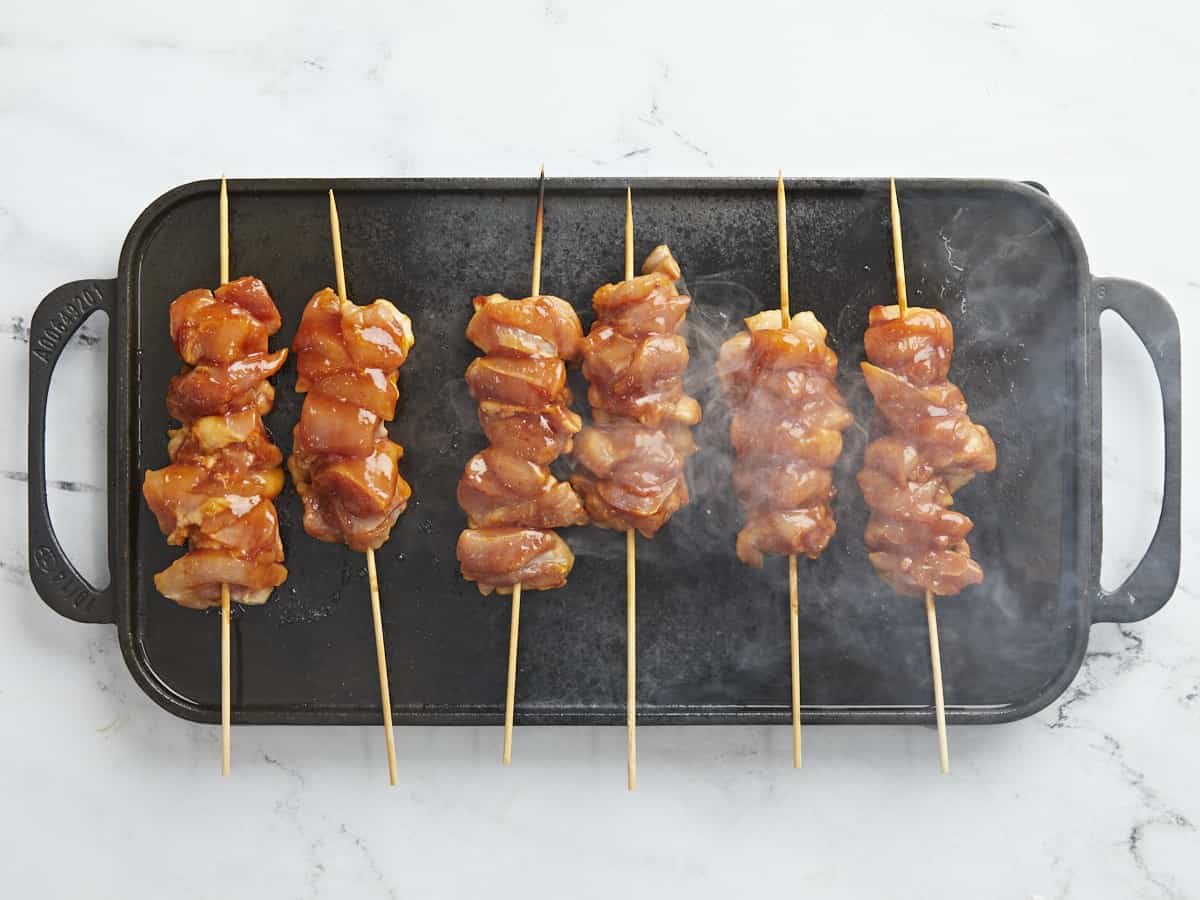
  • When the grill pan is smoking hot, brush it with a touch of cooking oil. Then, place the skewers on the grill pan, making sure not to crowd the pan or place the skewers too close to each other.
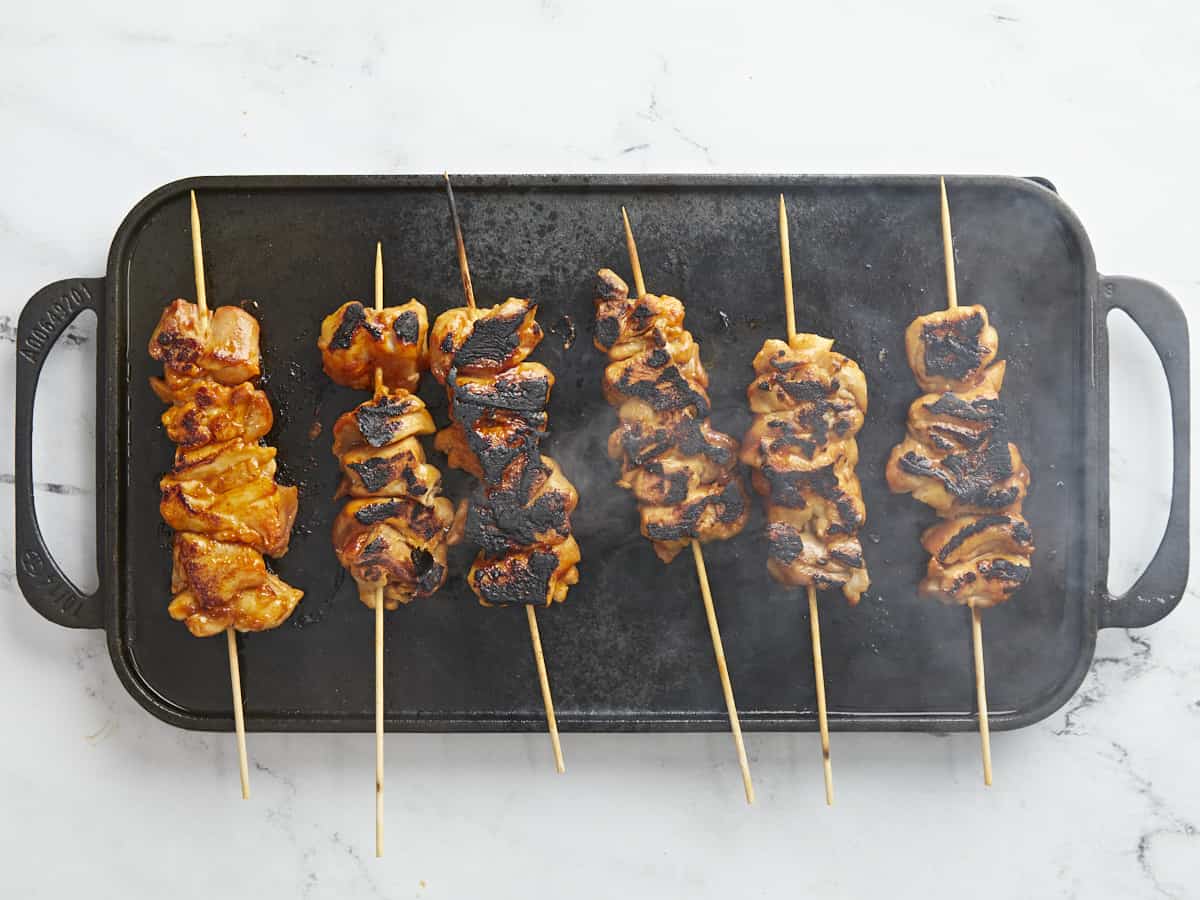
  • After 5 minutes, brush 1/4 cup of BBQ sauce on the top surface of the chicken. Next, flip the chicken, and brush another 1/4 cup of BBQ sauce on the top layer. Cook for 5 more minutes, until char develops and the internal temperature of the chicken registers at 160°F. Now all you have left to do is eat! Buen provecho!

See how we calculate recipe costs here.

Notes

*If you cannot source adobo, mix your own and then use the amount called for in the recipe. Store the rest in an airtight container.
2 Tbsp salt
1 Tbsp garlic powder
1 tsp ground oregano
1 tsp onion powder
1 tsp black pepper
1 tsp ground cumin
1/2 tsp turmeric
**A packet of sazón contains about 1.5 teaspoons of sazón. If you cannot source sazón, use the following:
1/4 teaspoon onion powder
1/4 teaspoon garlic powder
1/4 teaspoon ground cumin
1/4 teaspoon ground coriander
1/3 teaspoon ground annatto
1/8 teaspoon turmeric
1/8 teaspoon ground oregano
Sazón and adobo share a lot of similar ingredients but are used at different points in the cooking process and will develop slightly different colors and flavors.

Nutrition

Serving: 1skewer | Calories: 623kcal | Carbohydrates: 21g | Protein: 37g | Fat: 43g | Sodium: 1531mg | Fiber: 1g
Overhead shot of Pinchos De Pollo on a black grill plate.

How to Make Pinchos De Pollo – Step by Step Photos

Overhead shot of cut chicken thighs on a wood cutting board.

Pat 3 pounds of chicken thighs (about 5 to 6 thighs) dry with a paper towel. Then chop the chicken into bite-size pieces (about 5 to 6 pieces per thigh). You don’t have to line up your chicken obsessively as I did. For the record, I’m jealous of your freewheeling ways.

Overhead shot of spices to make Pinchos de Pollo in a white bowl.

Add 1 1/2 teaspoons adobo, 2 teaspoons sazón, and 2 teaspoons salt to a large bowl and mix.

Overhead shot of cut chicken marinating in a white bowl.

Add the chopped chicken thighs to the bowl along with the 2 tablespoons of cooking oil and mix until the chicken is thoroughly covered. Cover with plastic wrap or parchment directly on the surface of the chicken and marinate for at least an hour, but preferably overnight.

Overhead shot of wood skewers soaking in water in a white sheet pan.

Half an hour before you pull the chicken, soak at least 6 wood skewers in water so they don’t burn. Soak a few extra skewers just in case the skewer gods decide to bless you with weak wood.

Overhead shot of Pinchos De Pollo being brushed with BBQ sauce.

When you’re ready to cook, preheat a grill pan on high. Then carefully thread a thigh’s worth of chicken pieces on each skewer, about 5 or 6 chunks. You want the chicken chunks close but not pressed tightly against each other, so leave room for Jesus. Otherwise, the chicken won’t cook evenly. Brush both sides of each skewer with BBQ sauce, about 1/2 cup total.

Overhead shot of Pinchos De Pollo cooking on a black grill plate.

When the grill pan is smoking hot, and I mean LITERAL smoke is billowing from it, brush it with a touch of cooking oil. Then, place the skewers on the grill pan, making sure not to crowd the pan or place the skewers too close to each other. (Did you open those windows???)

Overhead shot of Pinchos De Pollo cooking on a black grill plate.

After 5 minutes, brush 1/4 cup of BBQ sauce on the top surface of the chicken. Next, flip the chicken and brush another 1/4 cup of BBQ sauce on the top layer. Cook for 5 more minutes, until char develops and the internal temperature of the chicken registers at 160°F. Now all you have left to do is eat! Buen provecho!

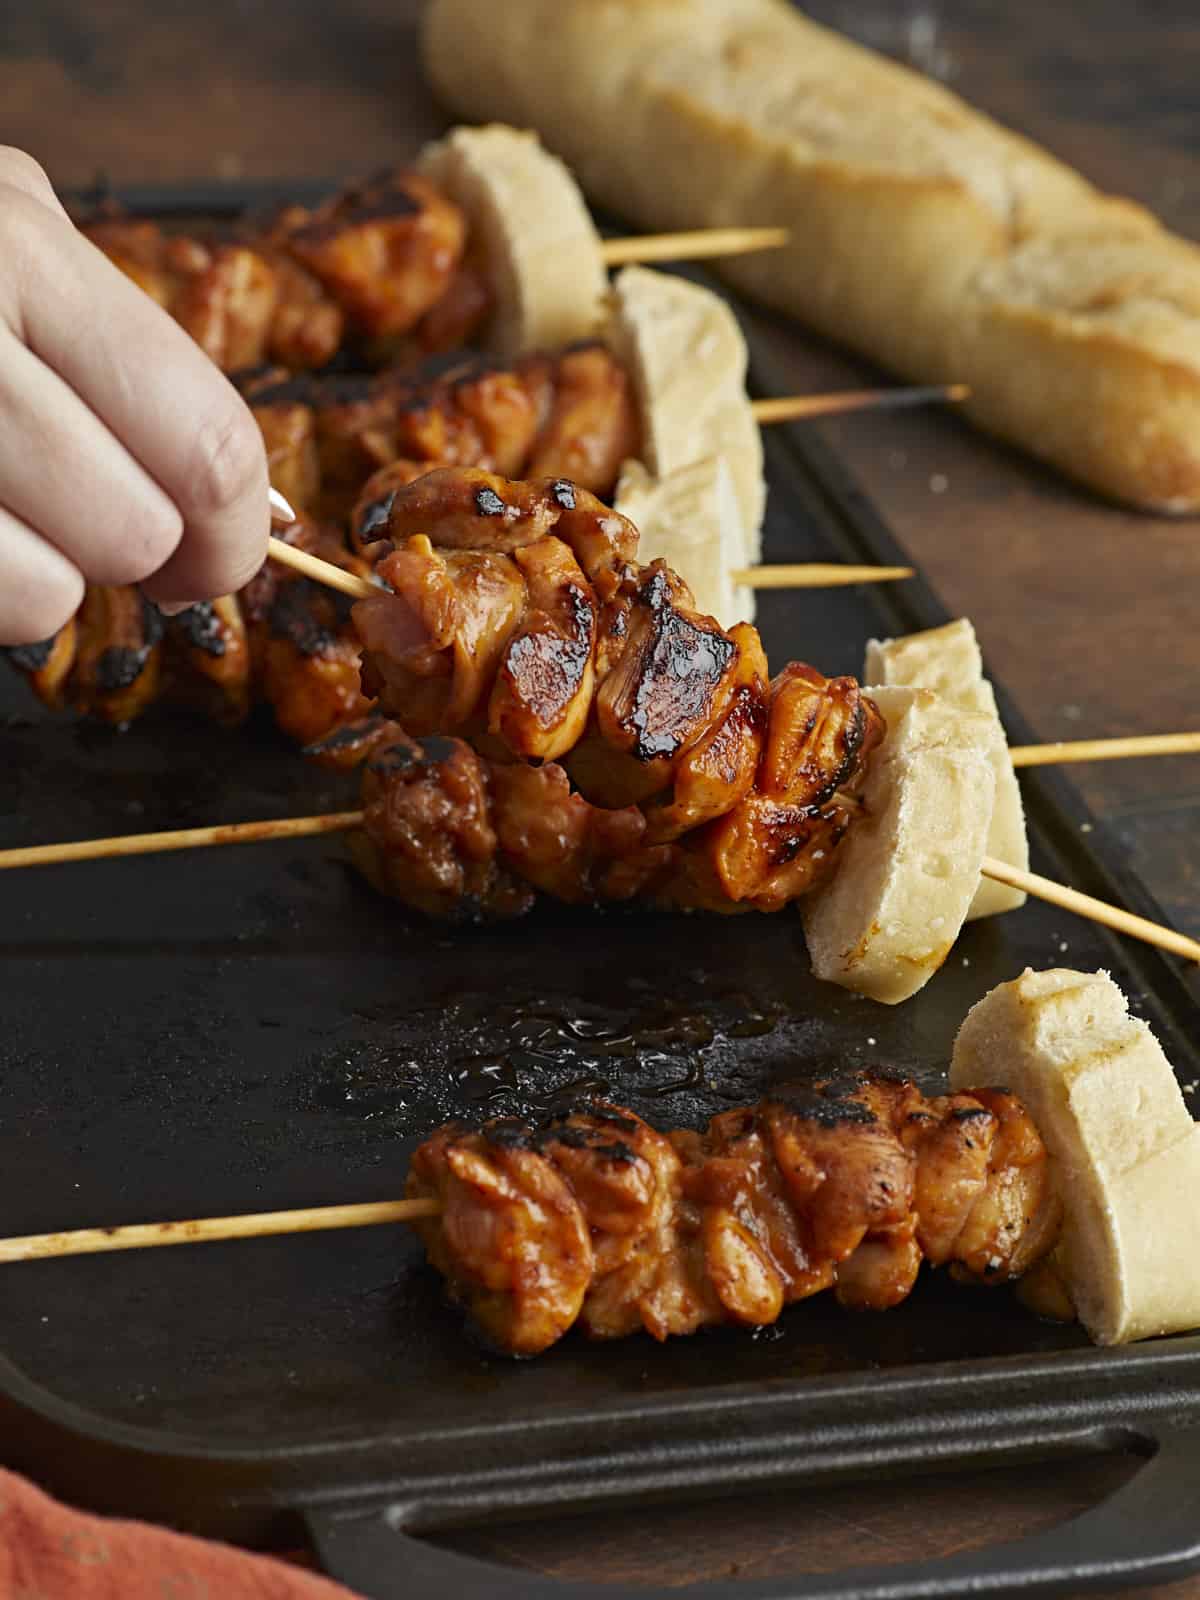
Side shot of hand lifting Pinchos de Pollo on a black grill plate with a loaf of bread in the back ground.

Will you look at that savory, succulent, meaty, mouth-watering goodness?! Sigh. I want some right now!!!! Serve the Pinchos De Pollo as is. Or go the traditional route and top the skewers with slices of bread or Tostones (AKA fried green plantains). PS If you want my easy recipe for Tostones, let me know in the comments!

More Easy Puerto Rican Recipes

The post Pinchos De Pollo (Puerto Rican Chicken Skewers) appeared first on Budget Bytes.

Coconut Curry Chickpeas

Coconut Curry Chickpeas are flavorful and filling easy weeknight dinner packed with chickpeas, kale, and a flavorful creamy curry sauce!

The post Coconut Curry Chickpeas appeared first on Budget Bytes.

Quick curries are my favorite kind of weeknight dinner because they’re incredibly flavorful, require very little effort, and the leftovers are even better the next day. Plus, that creamy curry sauce makes everything taste good, so you can pack them with all sorts of nutrient-dense goodies, like chickpeas and kale. So basically, what I’m trying to say is, you need to make these Coconut Curry Chickpeas ASAP!

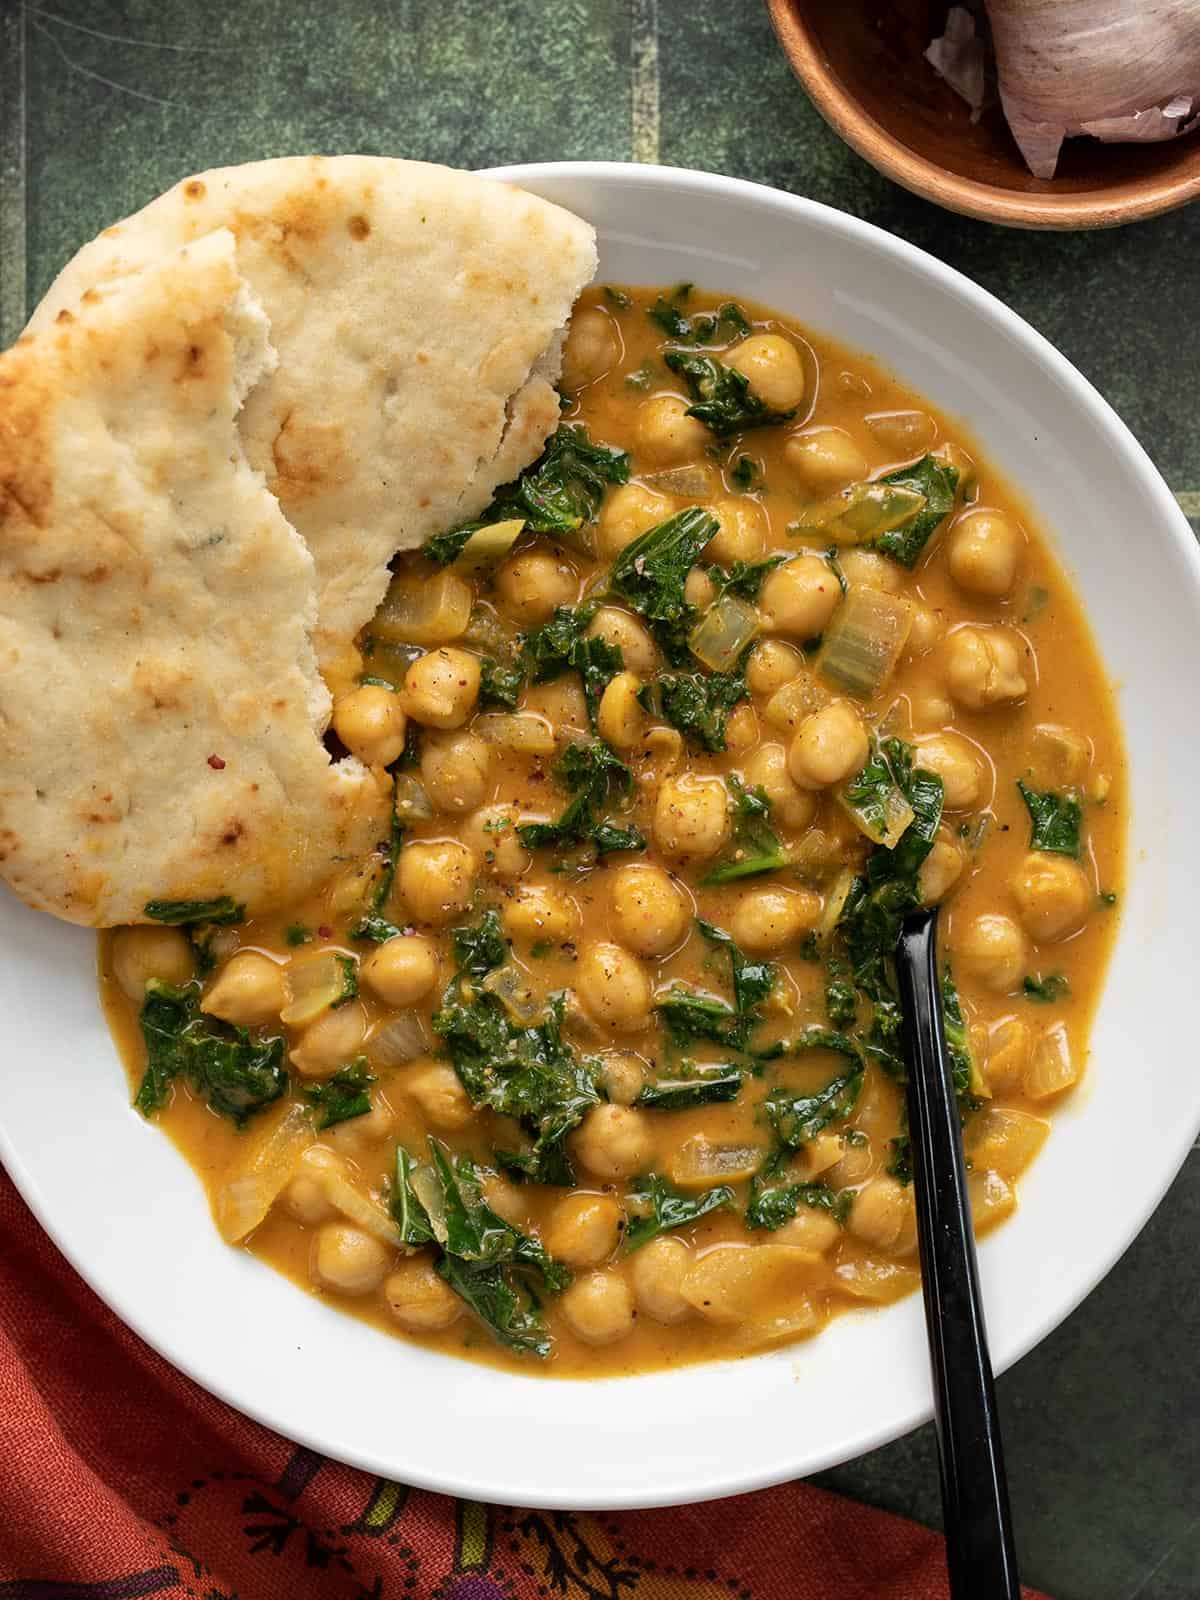
Close up overhead view of a bowl full of coconut curry chickpeas with naan bread on the side.

What’s in Coconut Curry Chickpeas

You’ll only need a handful of ingredients to make this warm and hearty dish, most of which you can keep on hand for last-minute dinners. Here are the ingredients you’ll need to make coconut curry chickpeas:

  • Aromatics: onion, garlic, and ginger create a powerful flavor base for this dish.
  • Spices: Curry powder and cumin. If you want a hot curry, you can always add a bit of cayenne pepper, too!
  • Tomato sauce: a little bit of tomato sauce adds just the right amount of acidity to the dish to balance the creamy coconut.
  • Coconut milk: full-fat coconut milk gives the curry sauce a ton of body and provides a creamy base to balance the potent flavors of the spices and aromatics.
  • Chickpeas: Inexpensive chickpeas fill out this dish, providing tons of belly-filling power and good-for-you fiber.
  • Kale: kale adds a little more variety in texture, color, and flavor to this dish. If you’re not into kale, you can substitute with fresh spinach.

What Kind of Curry Powder to Use

Curry powders can vary quite a bit in flavor from brand to brand, so make sure you experiment to find one that you enjoy. I’ve never met a curry powder that I didn’t like, so I don’t have one particular brand to suggest, but you definitely want to make sure it’s fresh! Old spices that have been sitting in your pantry a while begin to lose flavor and become dull and bland with time.

You also have the option to use either hot or mild curry powder. If you enjoy spicy foods you can use a hot curry powder, OR simply add some crushed red pepper or cayenne pepper to the dish when adding the curry powder and cumin.

How to Serve Coconut Curry Chickpeas

This warm and saucy dish is great over rice, or crusty bread or naan for dipping. You definitely want some sort of starchy goodness to soak up all of that sauce! You can also experiment with topping your chickpeas with fresh cilantro or even a squeeze of lime. Something light and refreshing, like Creamy Cucumber Salad, would also pair nicely with these curry chickpeas.

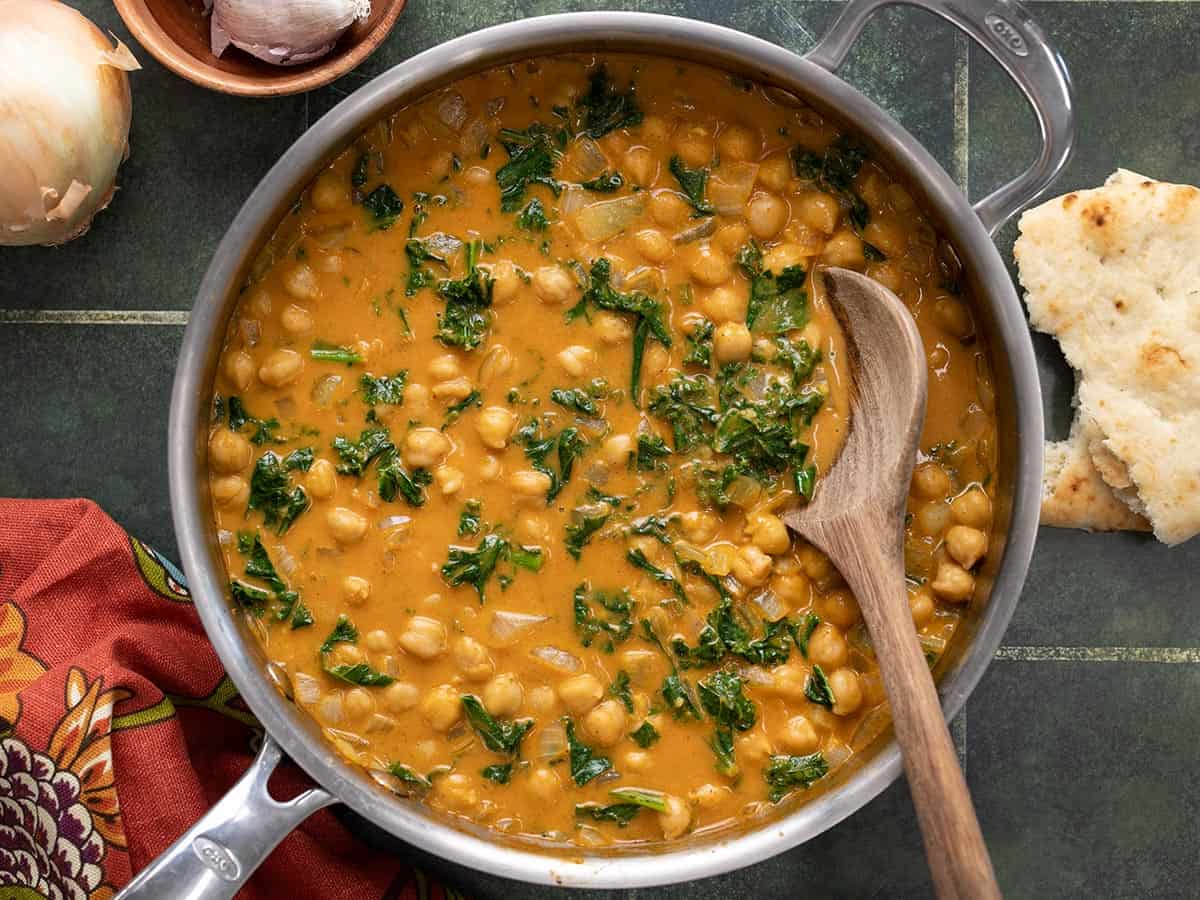
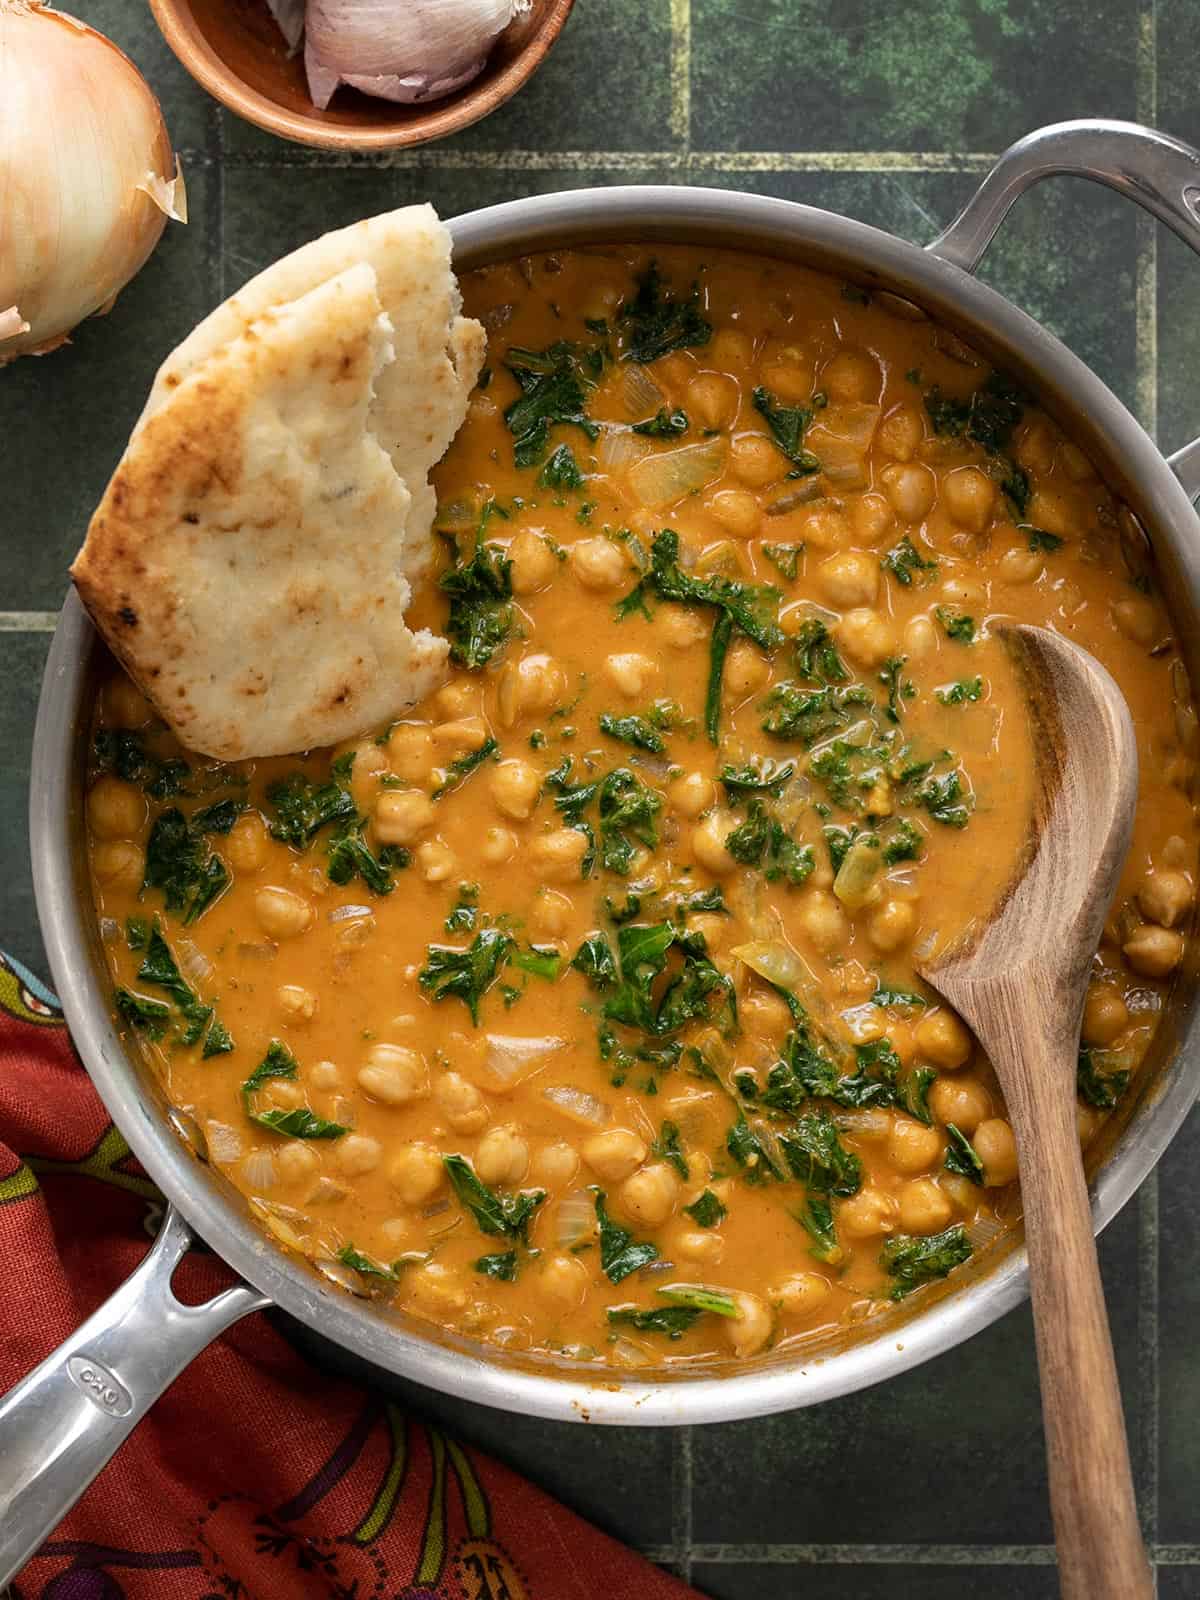
Overhead view of a skillet full of coconut curry chickpeas with a wooden spoon.
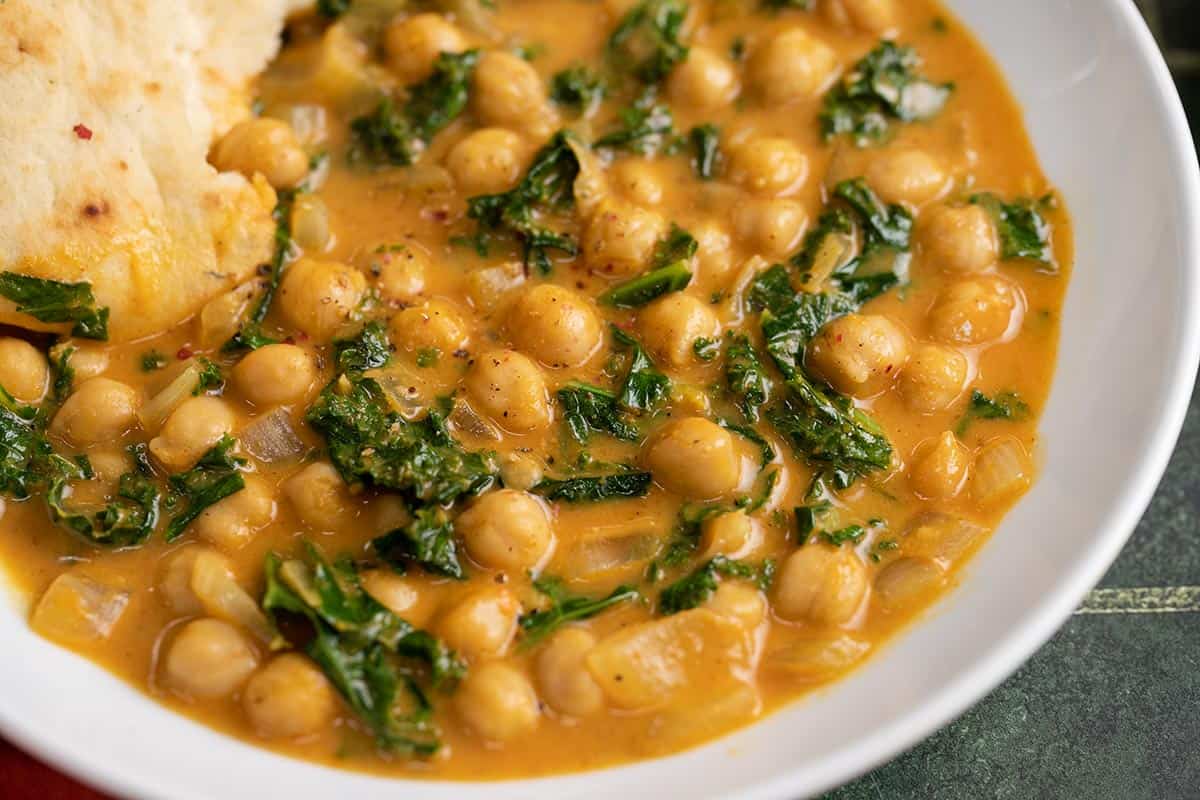
Overhead view of a bowl full of coconut curry chickpeas with a piece of naan.
Print

Coconut Curry Chickpeas

Coconut Curry Chickpeas are flavorful and filling easy weeknight dinner packed with chickpeas, kale, and a flavorful creamy curry sauce!
Course Dinner, Main Course
Cuisine Indian
Total Cost $7.44 recipe / $1.86 serving
Prep Time 10 minutes
Cook Time 25 minutes
Total Time 35 minutes
Servings 4 1.5 cups each
Calories 615kcal

Ingredients

  • 1 yellow onion $0.38
  • 2 cloves garlic $0.16
  • 1 tsp grated fresh ginger $0.10
  • 1.5 Tbsp curry powder $0.45
  • 1 tsp cumin $0.10
  • 2 15oz. cans chickpeas, drained $1.58
  • 1 8oz. can tomato sauce $0.50
  • 1 13.5oz. can full-fat coconut milk $2.99
  • 4 oz. chopped kale (about 3 cups) $0.75

Instructions

  • Dice the onion, mince the garlic, and grate the ginger. Add the onion, garlic, and ginger to a large deep skillet along with the olive oil. Sauté the aromatics over medium-low heat for about five minutes, or until the onions are soft and translucent.
  • Add the curry powder and cumin to the skillet and continue to stir and cook for about one minute more to toast the spices.
  • Drain the chickpeas, then add them to the skillet along with the tomato sauce and coconut milk. Stir everything to combine.
  • Turn the heat up to medium-high to bring the sauce up to a simmer. Once simmering, turn the heat back down to medium-low and allow the curry to continue to simmer for 15 minutes, stirring occasionally.
  • Add the kale and stir it into the sauce. Continue to cook and stir until the kale has wilted to your desired tenderness (I cook for about 5 minutes more). Finally, taste the curry and add salt to taste (about ½ tsp). Serve hot with rice or bread for dipping!

See how we calculate recipe costs here.

Nutrition

Serving: 1.5cups | Calories: 615kcal | Carbohydrates: 73g | Protein: 23g | Fat: 29g | Sodium: 316mg | Fiber: 22g
Close up side view of a bowl full of coconut curry chickpeas.

How to Make Coconut Curry Chickpeas – Step by Step Photos

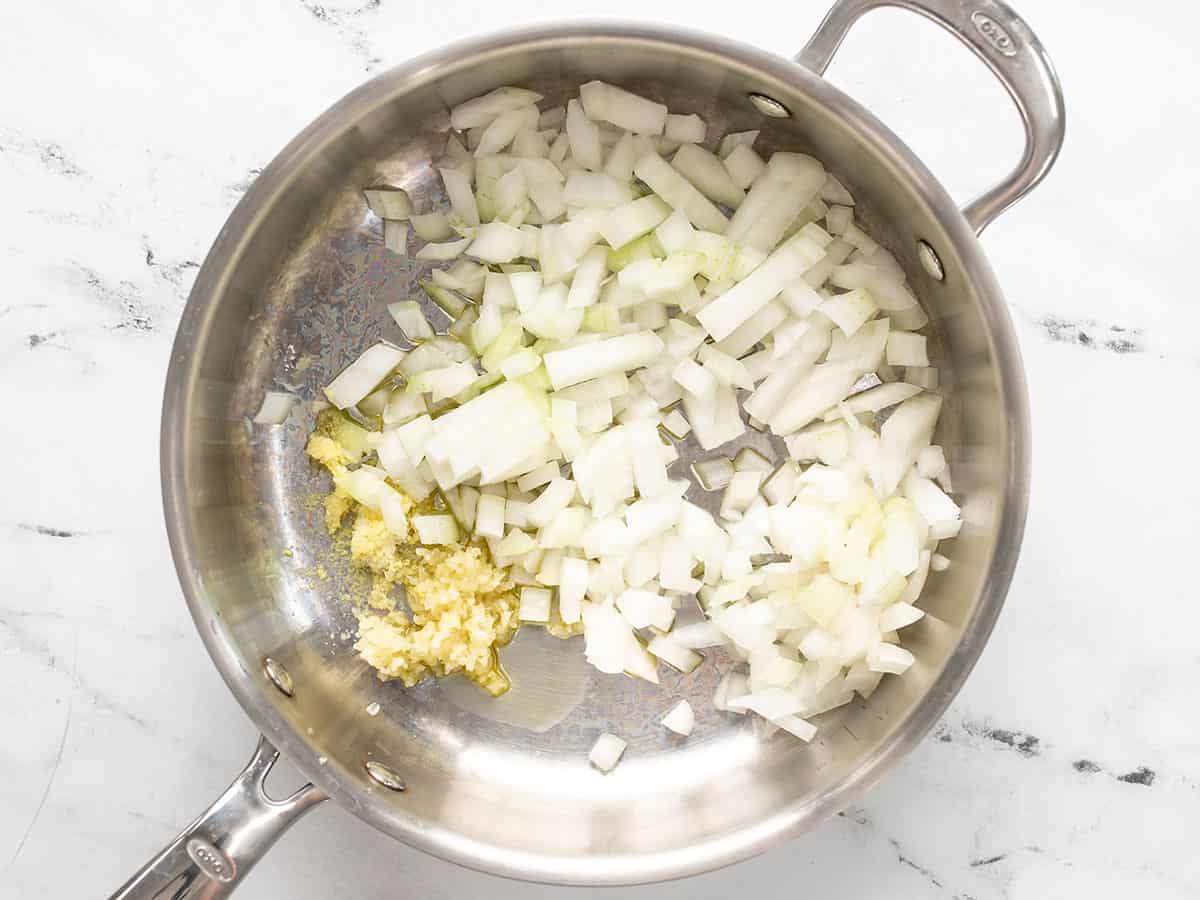
Diced onion, minced garlic, and grated ginger in a deep skillet.
Dice one yellow onion, mince two cloves of garlic, and grate about one teaspoon of fresh ginger. Add the onion, garlic, and ginger to a deep skillet along with 2 Tbsp olive oil. Sauté the aromatics over medium-low heat for about five minutes, or until the onion is soft and translucent.

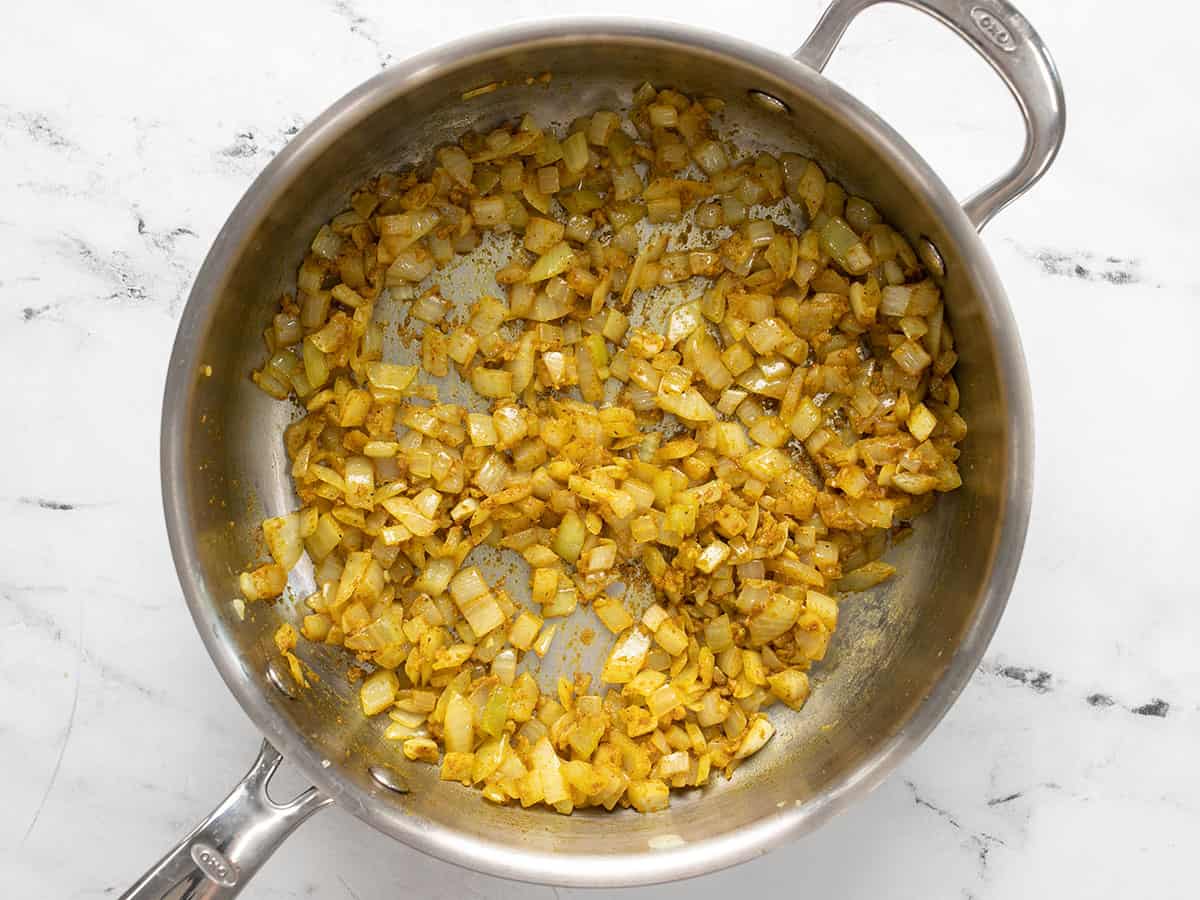
Spices added to the skillet with onions, garlic, and ginger.

Add 1.5 Tbsp curry powder and 1 tsp cumin to the skillet. Continue to stir and cook for about one minute more to toast the spices.
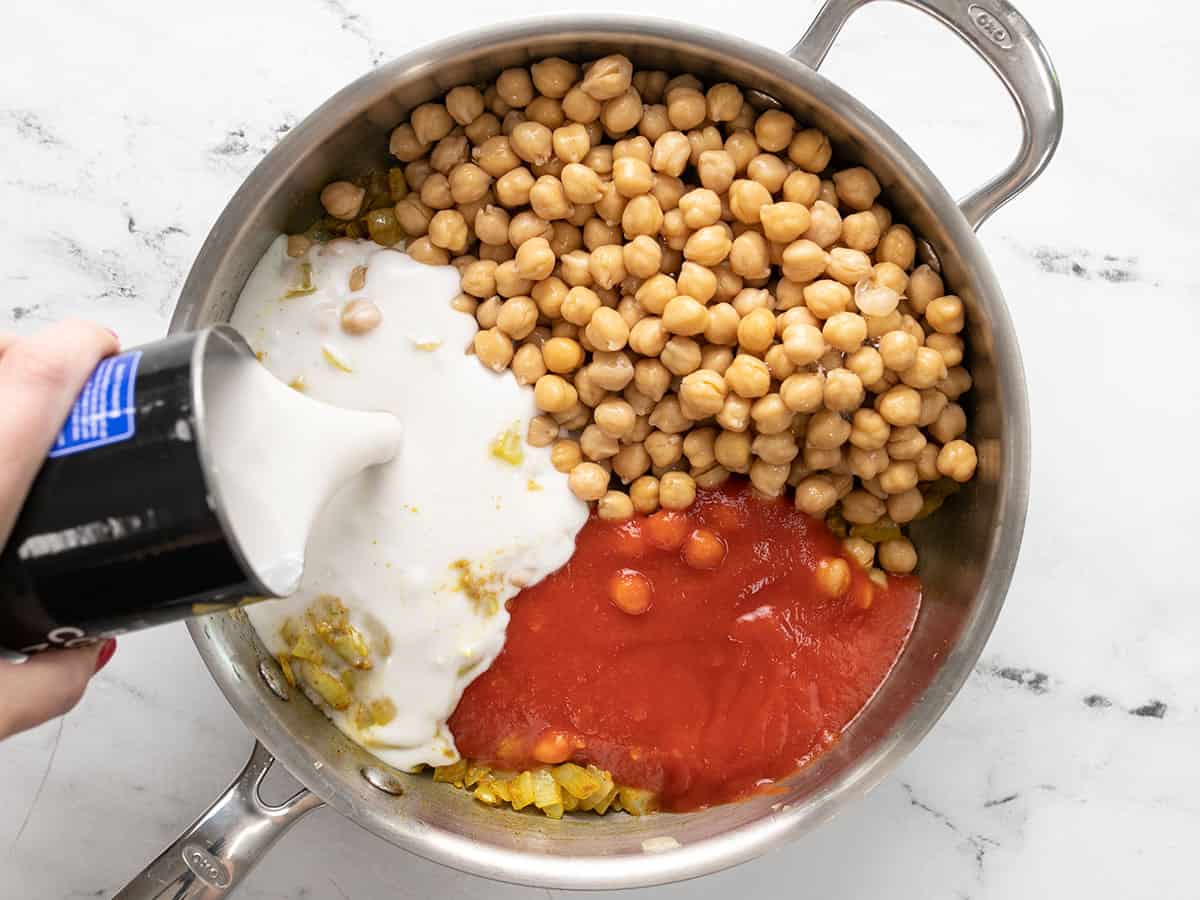
Chickpeas, tomato sauce, and coconut milk added to the skillet.

Drain two cans of chickpeas, then add them to the skillet along with 8 oz. tomato sauce and a 13.5 oz. can of coconut milk (full fat).

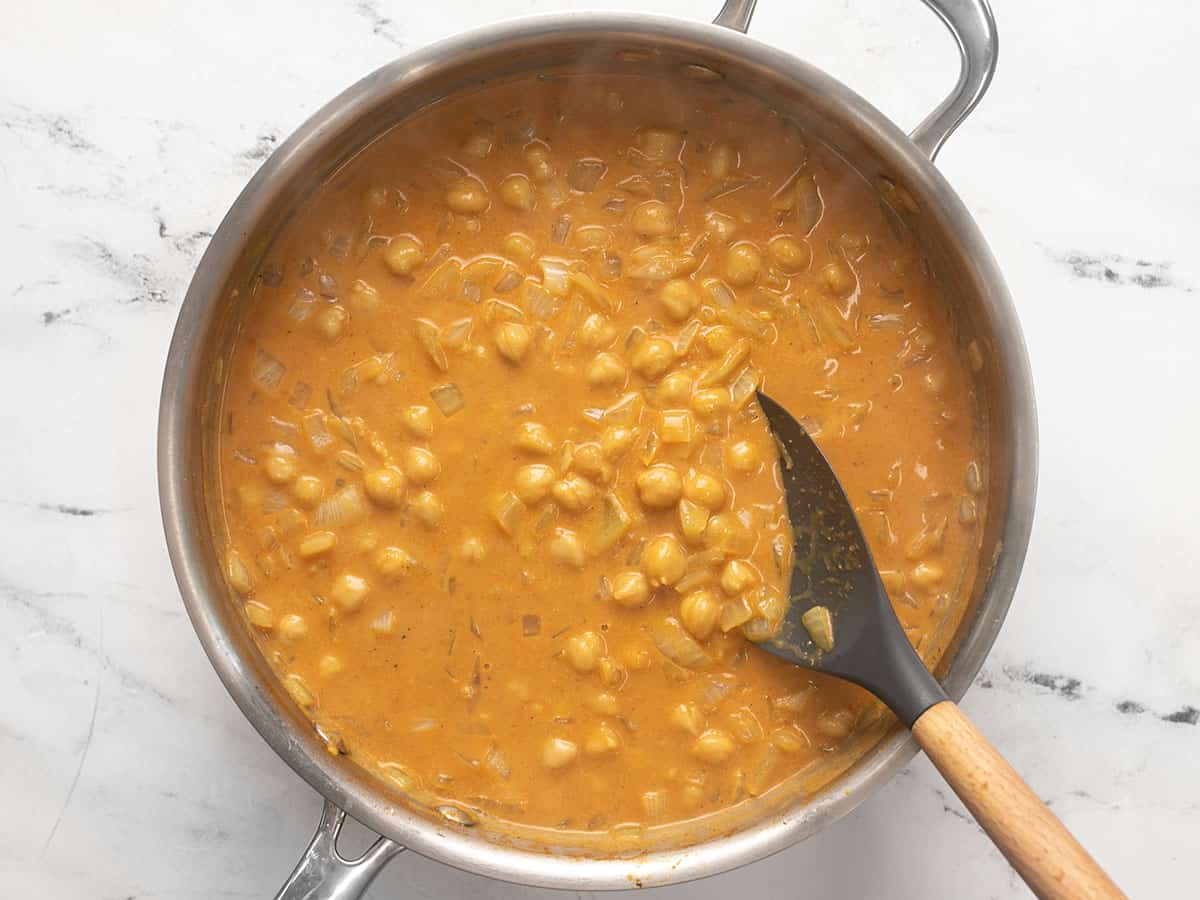
Simmered chickpeas in curry sauce.

Stir until everything is evenly combined, turn the heat up to medium-high, and allow the sauce to come up to a simmer. Once simmering, turn the heat down to medium-low and let it continue to simmer for 15 minutes, stirring occasionally.

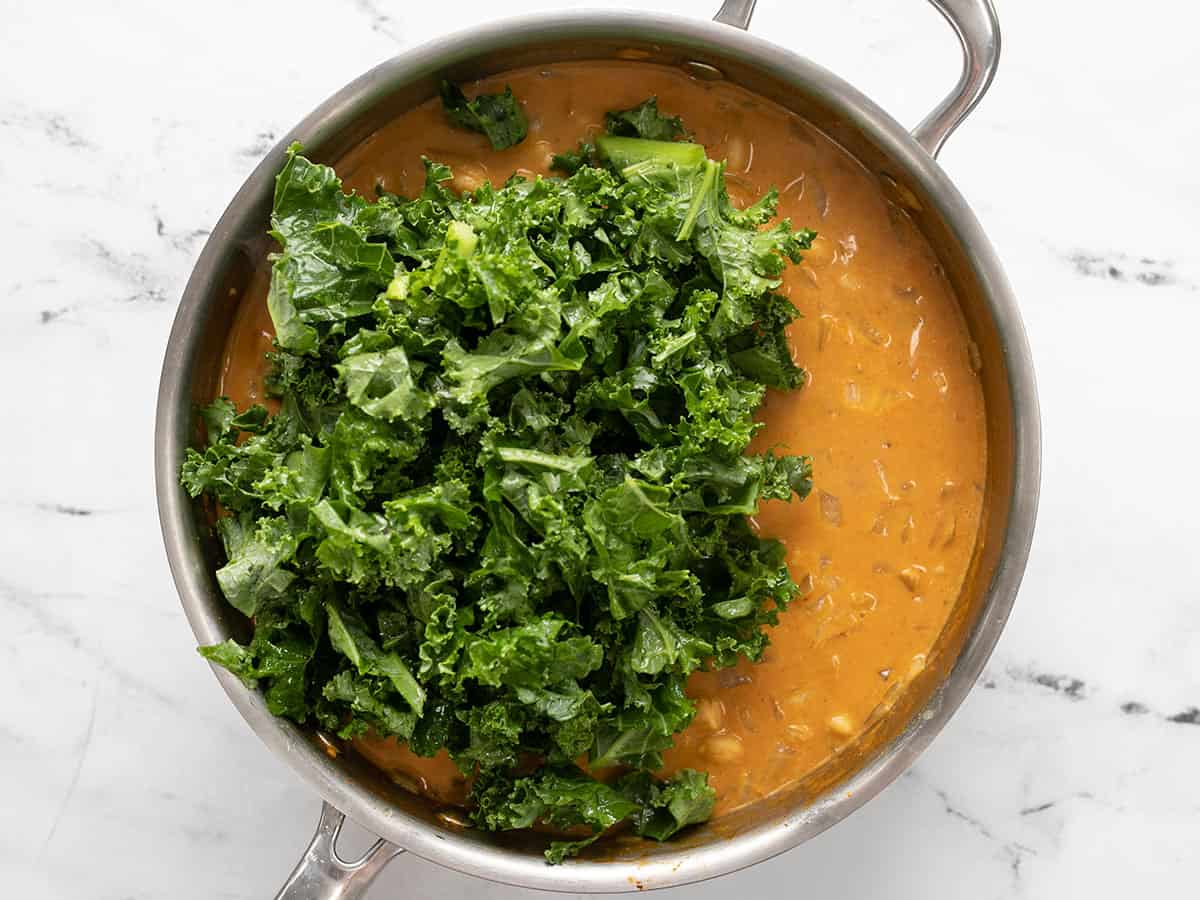
Fresh kale added to the skillet.

Add 4 oz. (about three cups) of fresh chopped kale to the skillet. I buy the pre-chopped bagged kale to make this easier.

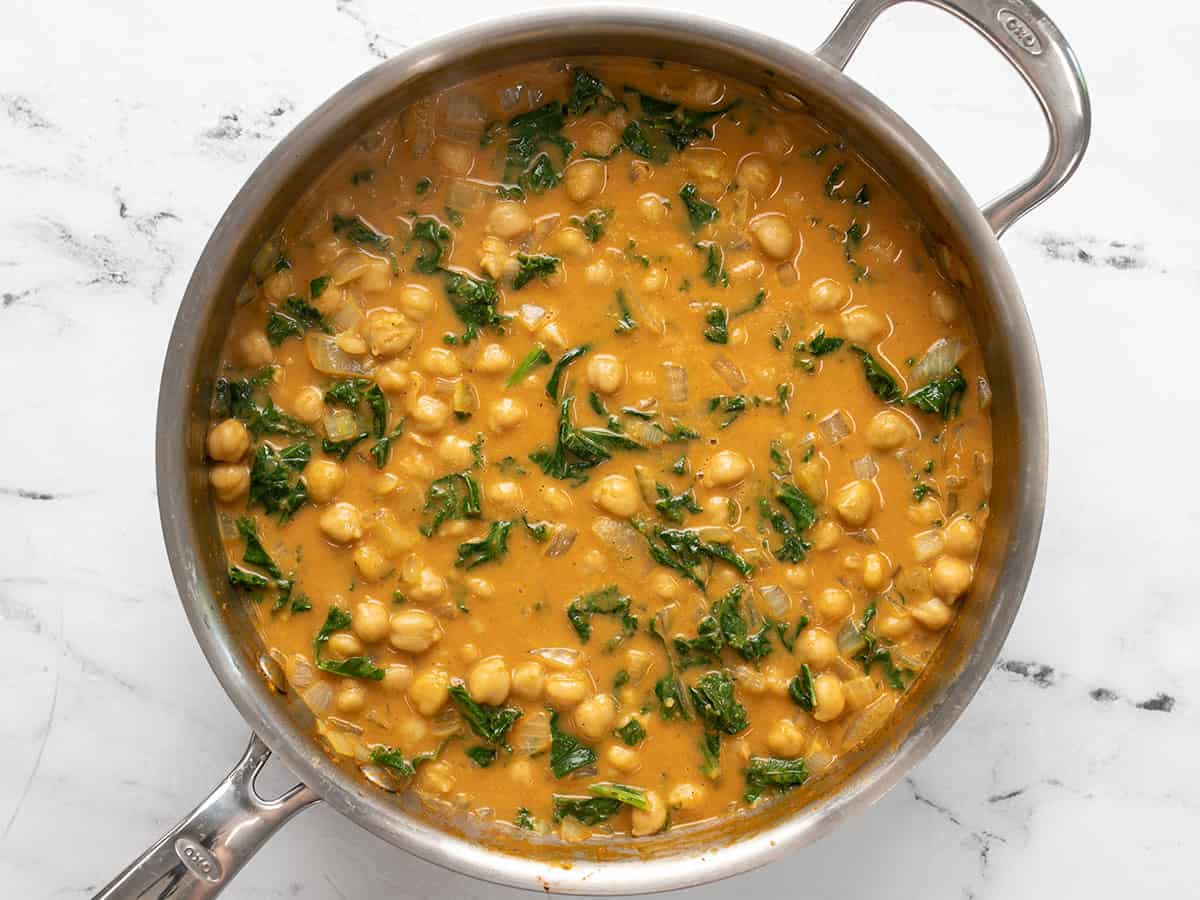
Finished coconut curry chickpeas with wilted kale.

Continue to cook and stir until the kale has wilted to your desired tenderness. I enjoy the kale with a bit more texture, so I only simmer for a few minutes more. Taste the curry and add salt to taste to help the flavors pop (about ½ tsp).
Finished skillet full of coconut curry chickpeas with naan and a wooden spoon.

The post Coconut Curry Chickpeas appeared first on Budget Bytes.