Homemade Biscotti

Homemade biscotti are a simple sweet treat that are endlessly customizable and are the perfect companion for a hot cup of homemade coffee.

The post Homemade Biscotti appeared first on Budget Bytes.

I’m sure we all know by now that making coffee at home instead of hitting the drive-through can save you a TON of money over time, but those little side treats and baked goods also add up! So let’s make some homemade biscotti to elevate your entire homemade coffee experience and squash that temptation to go to the drive-through once and for all. These Homemade biscotti can be made into a million different flavors, they’re super easy, and freezer-friendly so you can work your way through a batch over time. Budget WIN!
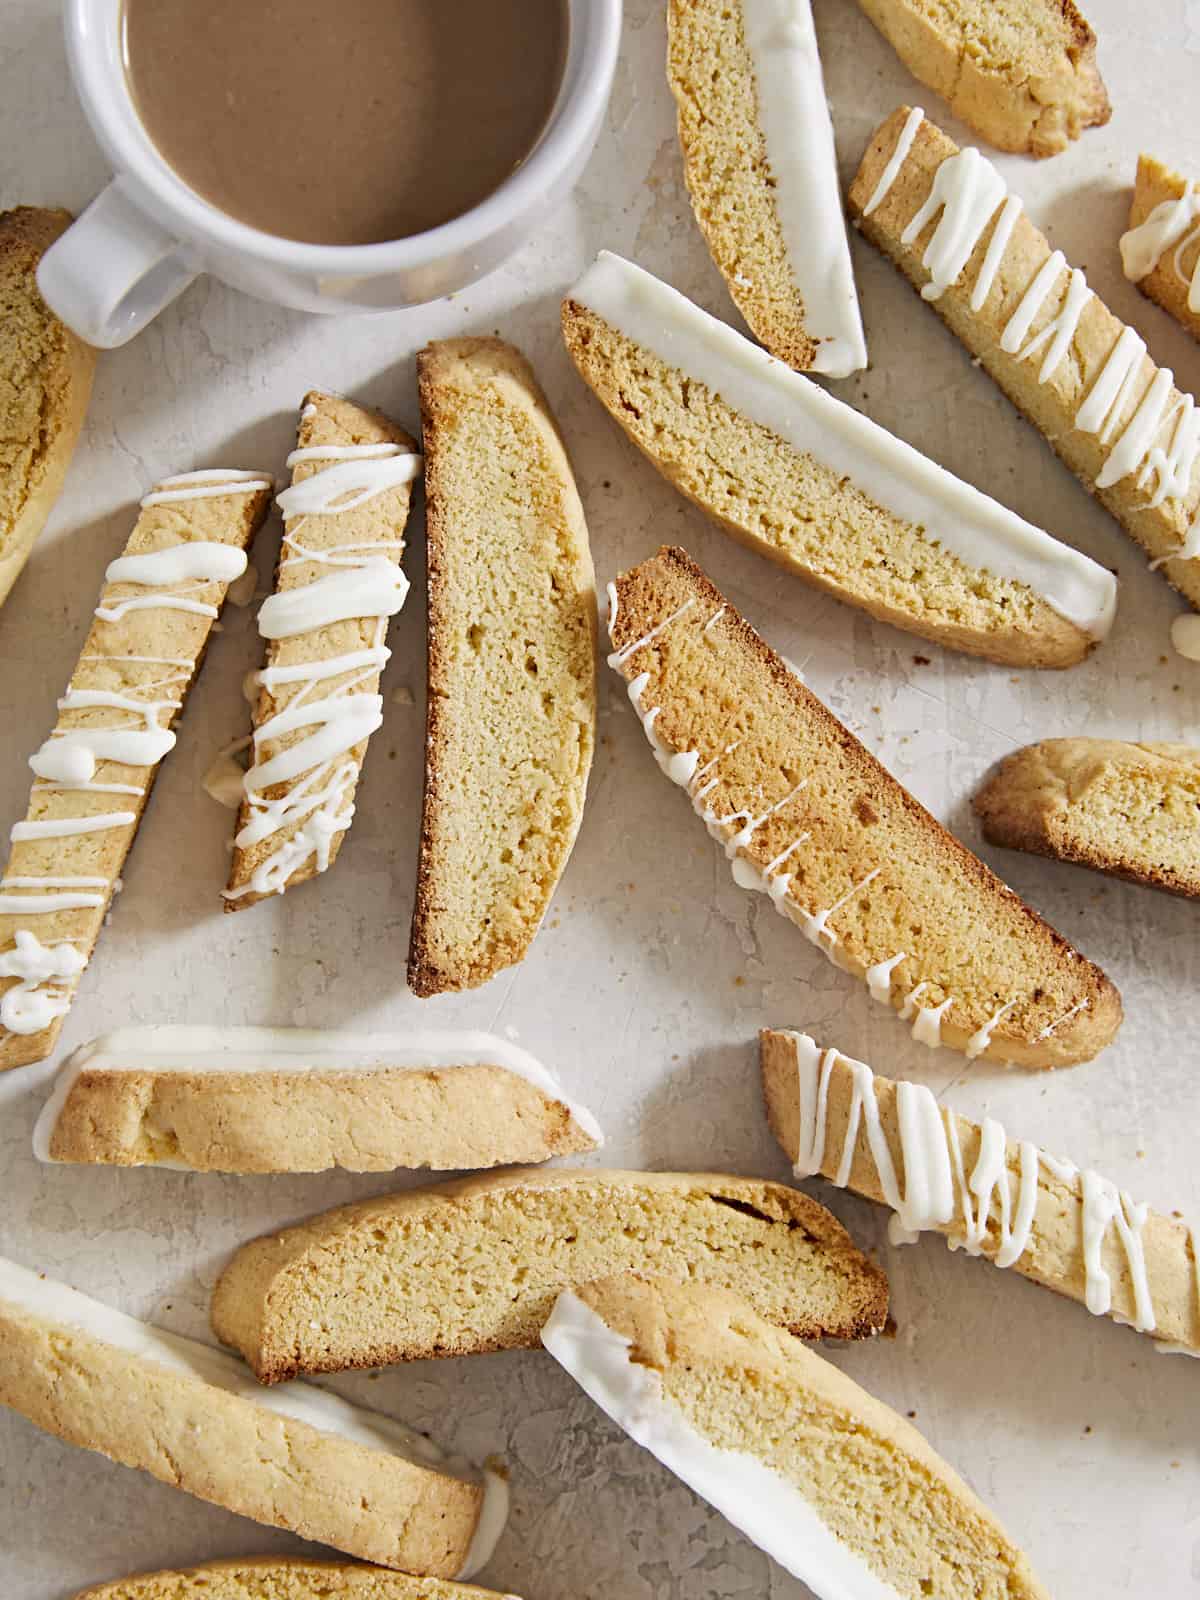
Scattered biscotti on a surface with a cup of coffee.

What is Biscotti?

Biscotti, also known as cantucci, are Italian biscuits (or cookies) that are baked twice to yield a deliciously crunchy texture that is perfect for dunking into your favorite hot beverage. The American version of biscotti are typically slightly softer and sweeter than traditional Italian biscotti, they come in a variety of flavors, and are often dipped in chocolate. The recipe we have here today is definitely an American-style biscotti, similar to what you’d find in coffee shops across the U.S.

Ingredients for Biscotti

You really don’t need much to make biscotti, just a few pantry staples, which means they’re typically going to be very budget-friendly (about $0.20 each!). To make a simple homemade biscotti you’ll need the following ingredients:

  • Flour: the base for any biscuit or cookie! We used all-purpose flour to keep the recipe simple. If you experiment with a different type of flour, keep in mind that you may need to adjust the amount of flour to keep the same moisture ratio in the dough.
  • Baking Powder: this is the leavening agent for the dough. Biscotti are not a super light and airy cookie, so not a lot of leavening is needed.
  • Sugar: American biscotti are a little on the sweet side, but not quite as sweet as a typical cookie. We use white granulated sugar to provide sweetness and keep a crispy texture.
  • Butter: using butter as the fat in the biscotti provides a lot of flavor and helps keep the texture nice and crispy.
  • Eggs: eggs act as a binder for the biscotti and provide a little moisture to the dough, so they stay just a little bit soft in the center.
  • Vanilla or Almond Extract: a little bit of extract gives the biscotti just a hint of flavor. Almond is typical, but we’ve used vanilla which goes nicely with the white chocolate we used for decorating.
Biscotti lined up in a row showing different decorations.

What Else Can I Add?

This is where making homemade Biscotti gets FUN. You can add so many different ingredients and make a million different fun flavor combinations. Here are some other ingredients you can add to flavor biscotti:

  • Chocolate chips or cocoa powder (stir into the flour)
  • Dried fruit
  • Chopped nuts
  • Cinnamon, cardamom, or other ground spices
  • Citrus zest
  • Instant coffee
  • Matcha
  • Other flavor extracts (lemon, orange, peppermint, etc.)
  • Dip the biscotti into melted chocolate or drizzle with a flavored icing

Need some flavor combination ideas? Try Almond Apricot Biscotti, Cinnamon Spice Biscotti, Cranberry Almond Biscotti, double chocolate (cocoa dough with chocolate chips), cranberry pecan, dark chocolate orange, coconut matcha, pumpkin spice, white chocolate cranberry, or chocolate peppermint.

How to Store Biscotti

Make sure to allow your homemade biscotti to cool completely to room temperature before storing to avoid trapping any steam or moisture. Once cooled, store your biscotti in an air-tight container for up to two weeks. Biscotti can also be wrapped tightly and frozen for longer storage. Thaw frozen biscotti at room temperature for about 10 minutes before serving.
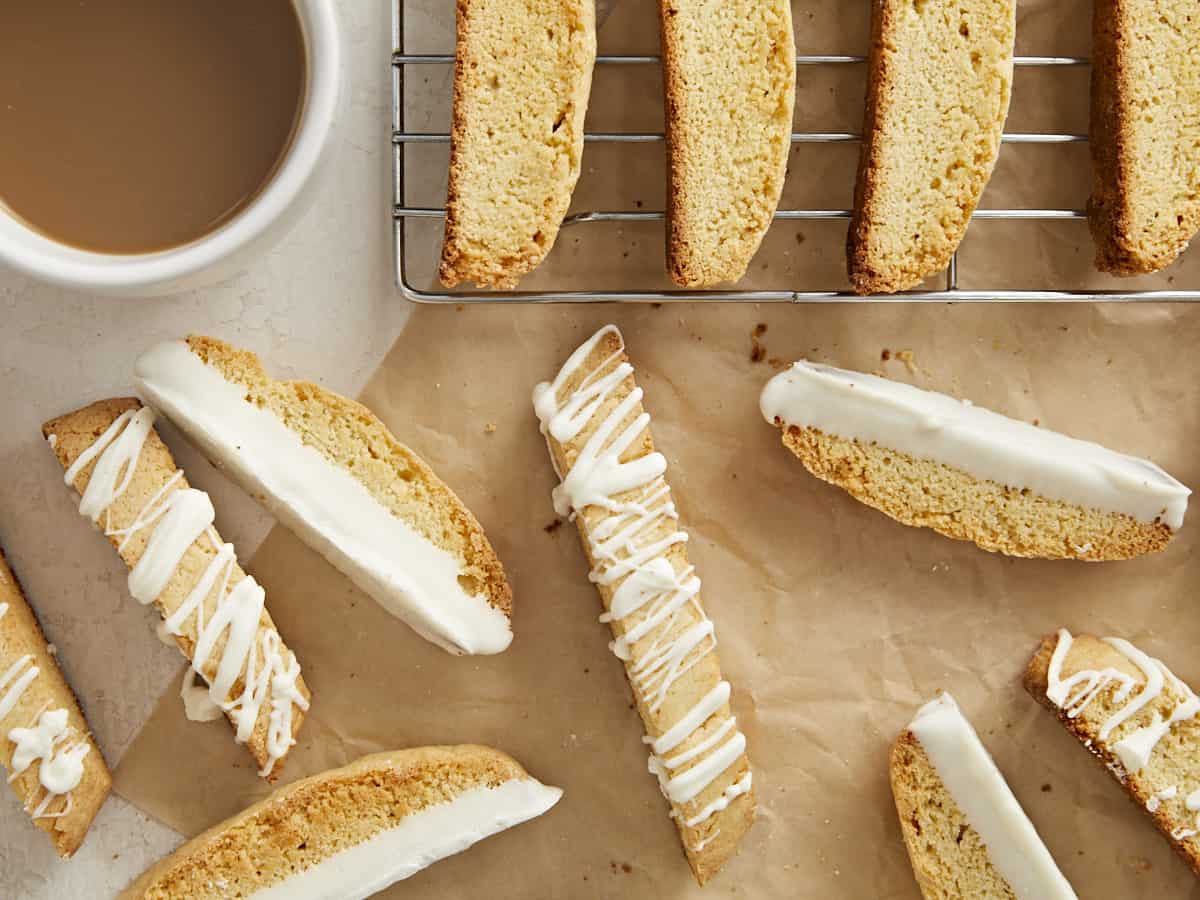
biscotti scattered on a surface with a cooling rack and cup of coffee.
Biscotti lined up in a row showing different decorations.
Print

Homemade Biscotti

Homemade biscotti are a simple sweet treat that are endlessly customizable and are the perfect companion for a hot cup of homemade coffee.
Course Dessert
Cuisine American, Italian
Total Cost $3.46 recipe / $0.19 each
Prep Time 20 minutes
Cook Time 35 minutes
Total Time 55 minutes
Servings 18 biscotti
Calories 158kcal

Ingredients

  • 2 cups all-purpose flour $0.28
  • 1 tsp baking powder $0.06
  • 1/4 tsp salt $0.02
  • 1/4 tsp nutmeg $0.02
  • 1 cup granulated sugar $0.39
  • 4 Tbsp butter, room temperature $0.62
  • 2 large eggs $0.78
  • 1/2 tsp vanilla or almond extract $0.29
  • 1/4 lb. white chocolate (optional for decorating) $1.00

Instructions

  • Preheat the oven to 350ºF. In a large mixing bowl, stir together the flour, baking powder, salt, and nutmeg.
  • In a separate bowl, beat together the sugar, butter, eggs, and vanilla extract with a mixer until mostly smooth (a few small lumps of butter is okay).
  • Add the dry ingredients to the bowl of wet ingredients and stir together until it forms a ball of dough.
  • Divide the dough into two and shape each one into a flattened log about eight inches long and 2-3 inches wide. Place the logs on a parchment-lined baking sheet.
  • Bake the biscotti logs for about 25 minutes, or until lightly golden on the edges and there are a few cracks in the top of the dough.
  • Remove the biscotti from the oven and carefully transfer to a cutting board. Use a finely serrated bread knife to slice the biscotti, on a diagonal, into ½-inch wide slices.
  • Place the slices back onto the baking sheet, laying flat, and bake for another 5 minutes. Remove the baking sheet, flip the biscotti, and bake for an additional 5 minutes, or until golden brown.
  • Remove the biscotti from the oven and allow them to cool completely before decorating with melted chocolate (if desired). Enjoy with a hot cup of coffee!

See how we calculate recipe costs here.

Nutrition

Serving: 1biscotti | Calories: 158kcal | Carbohydrates: 26g | Protein: 3g | Fat: 5g | Sodium: 90mg | Fiber: 0.4g

How to Make Biscotti – Step by Step Photos
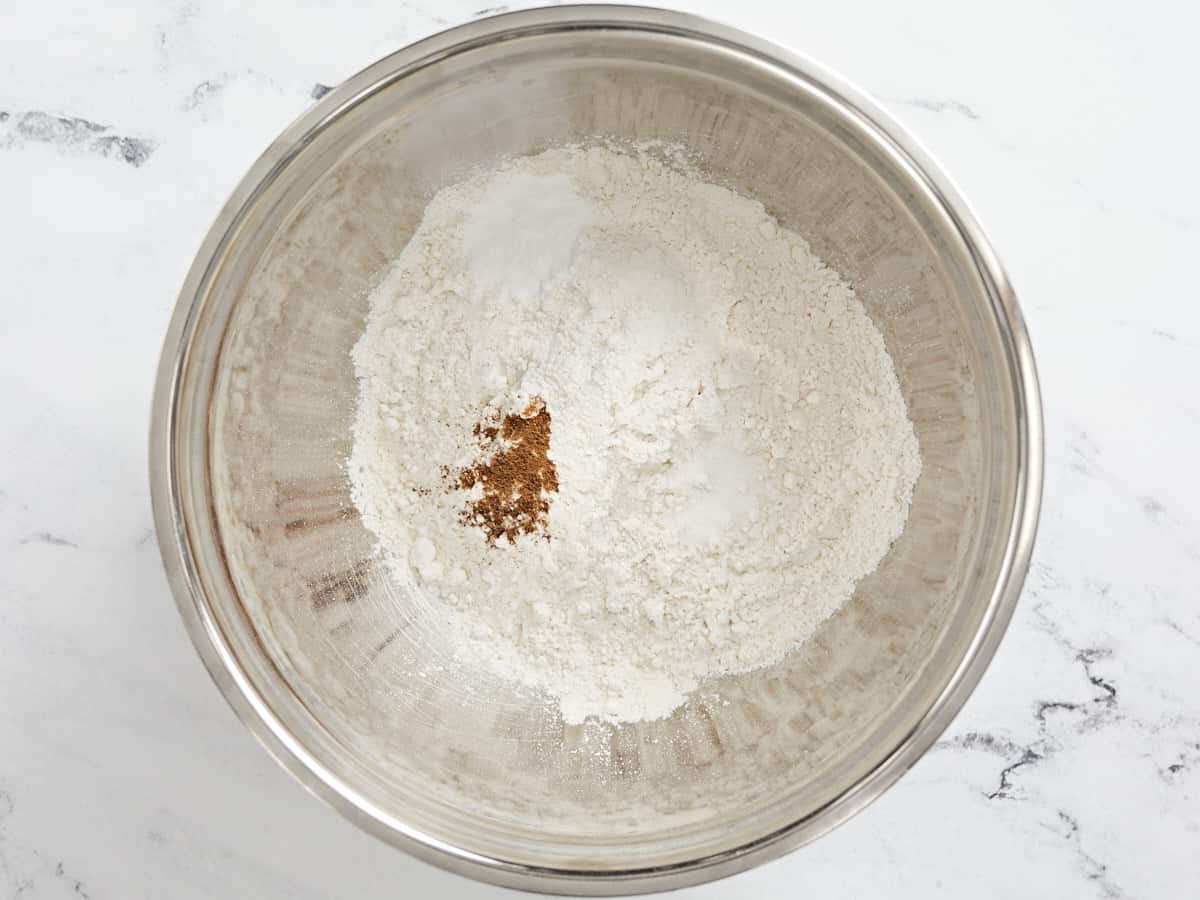
Dry ingredients for biscotti in a bowl.

Preheat the oven to 350ºF. Combine 2 cups all-purpose flour, 1 tsp baking powder, ¼ tsp salt, and ¼ tsp nutmeg in a large bowl. Stir until well combined.
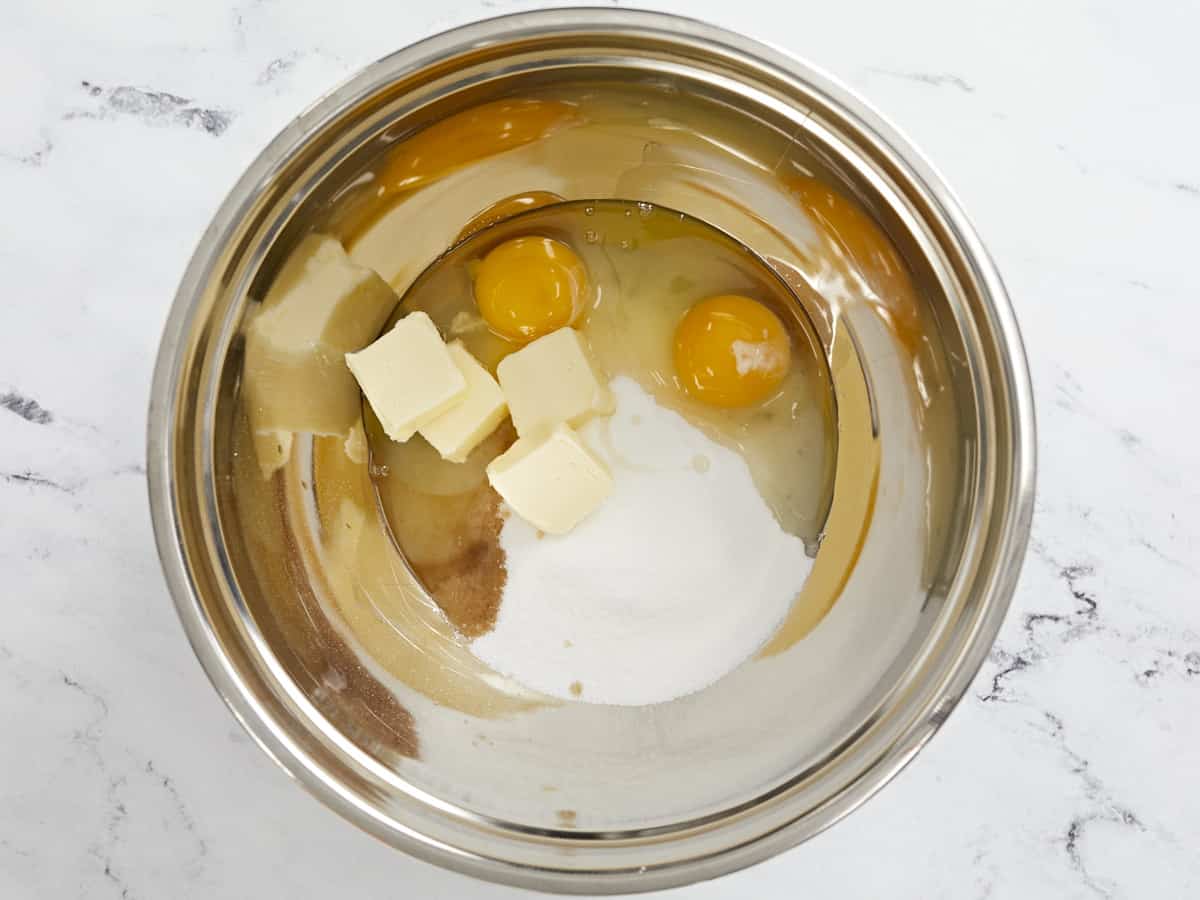
wet ingredients for biscotti in a mixing bowl, not yet mixed.

In a separate mixing bowl, add 1 cup sugar, 4 Tbsp room temperature butter, 2 large eggs, and ½ tsp vanilla extract.
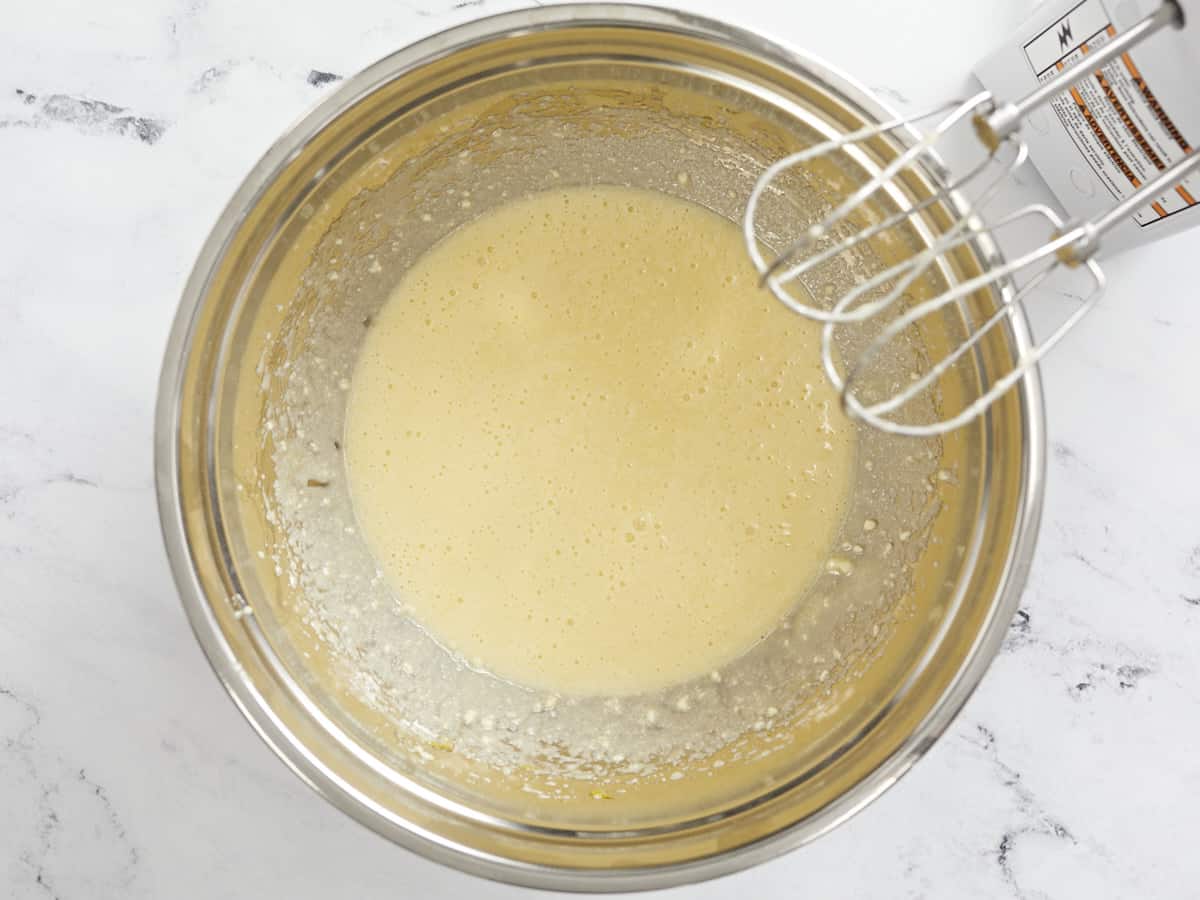
Mixed wet ingredients in the bowl with a hand mixer.

Use a mixer to combine the wet ingredients until mostly smooth (there may still be a few small pieces of butter).
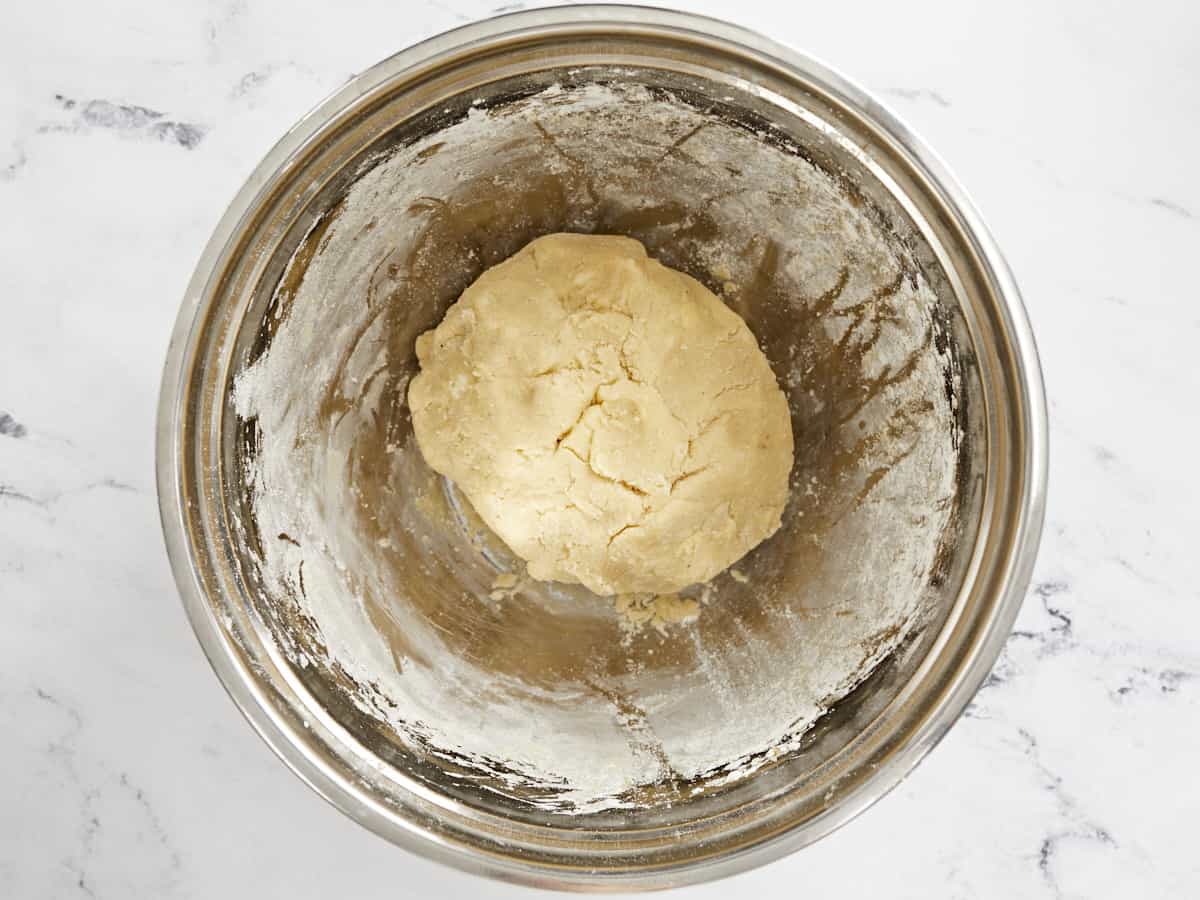
Wet and dry ingredients combined into a ball of dough.

Add the dry ingredients to the bowl of wet ingredients and stir until it forms a ball of dough.
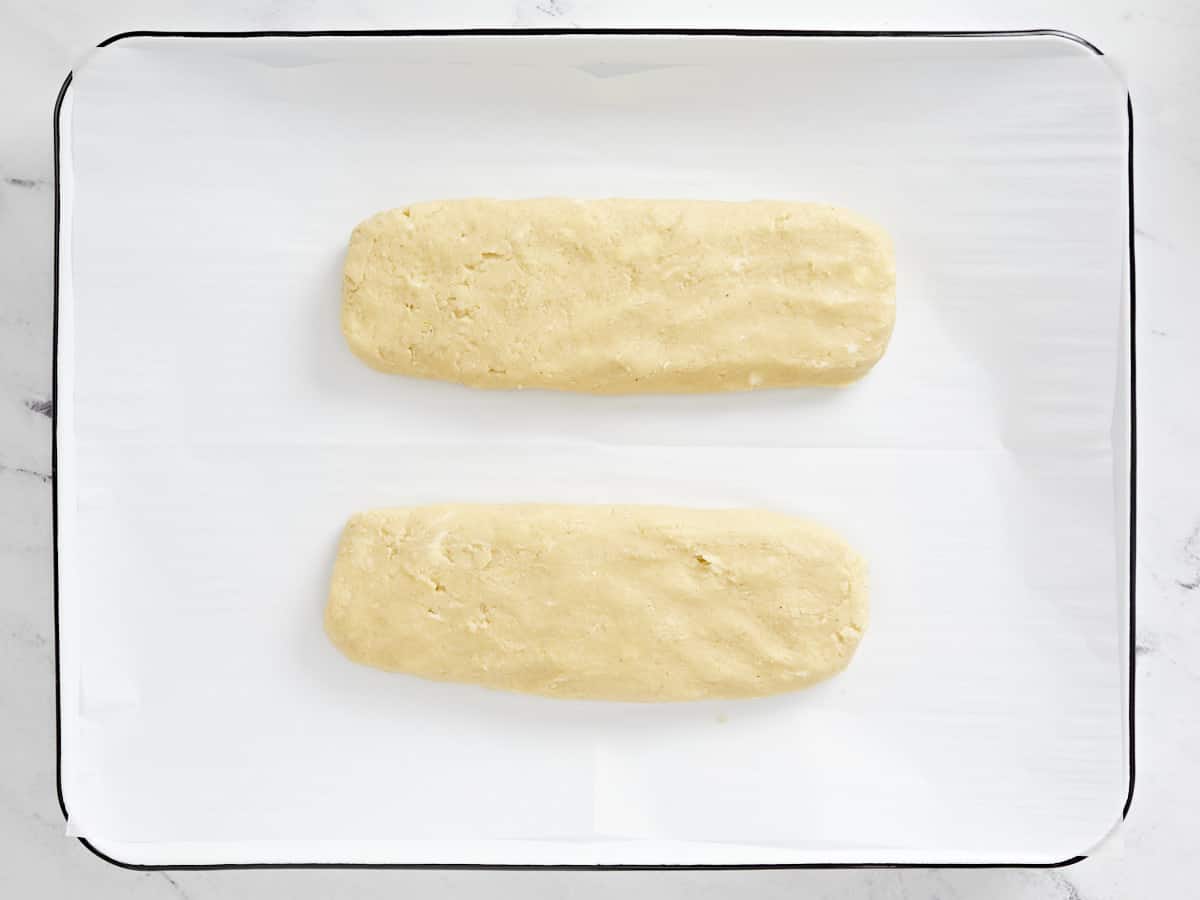
Divided and shaped biscotti dough on a baking sheet.

Divide the dough in half and form each half into a flattened log about 8 inches long and 2-3 inches wide. Place the logs on a parchment-lined baking sheet.

Half-baked biscotti on the baking sheet.

Bake the biscotti logs for about 25 minutes, or just until the edges are slightly golden brown and the tops have small cracks.
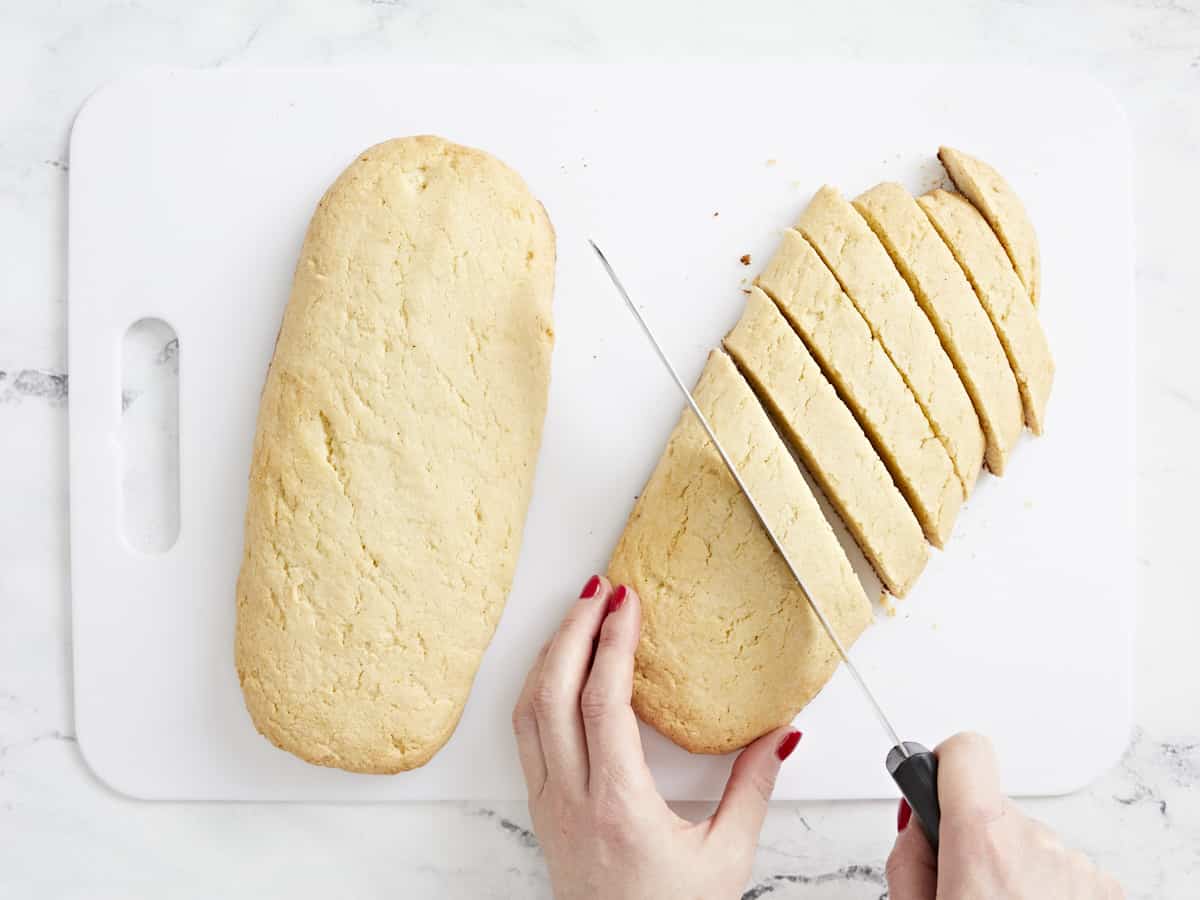
Biscotti being sliced.

Carefully transfer the biscotti logs to a cutting board and use a finely serrated bread knife to slice the biscotti on a diagonal into ½-inch wide pieces.
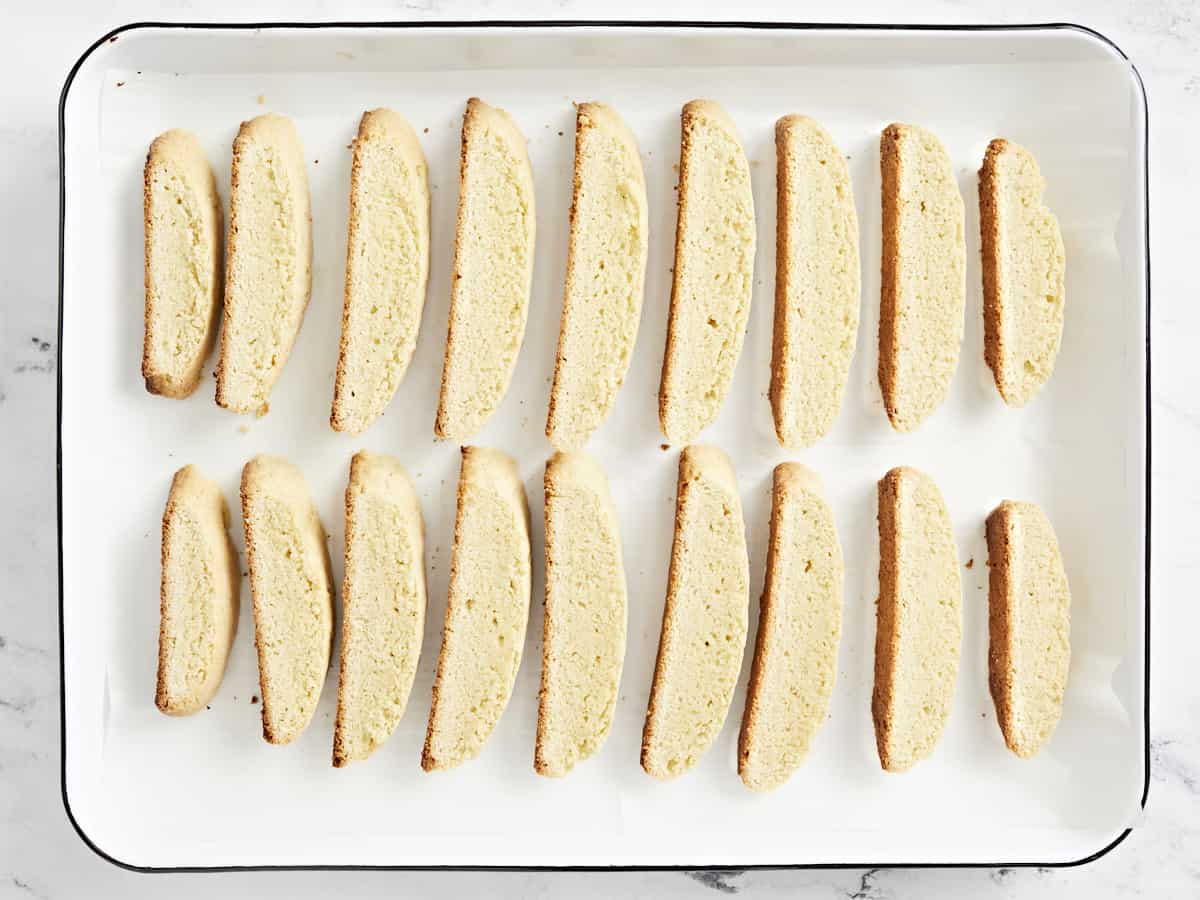
sliced biscotti on the baking sheet.

Place the sliced biscotti back on the baking sheet, laying flat, and place it back into the oven for five minutes.
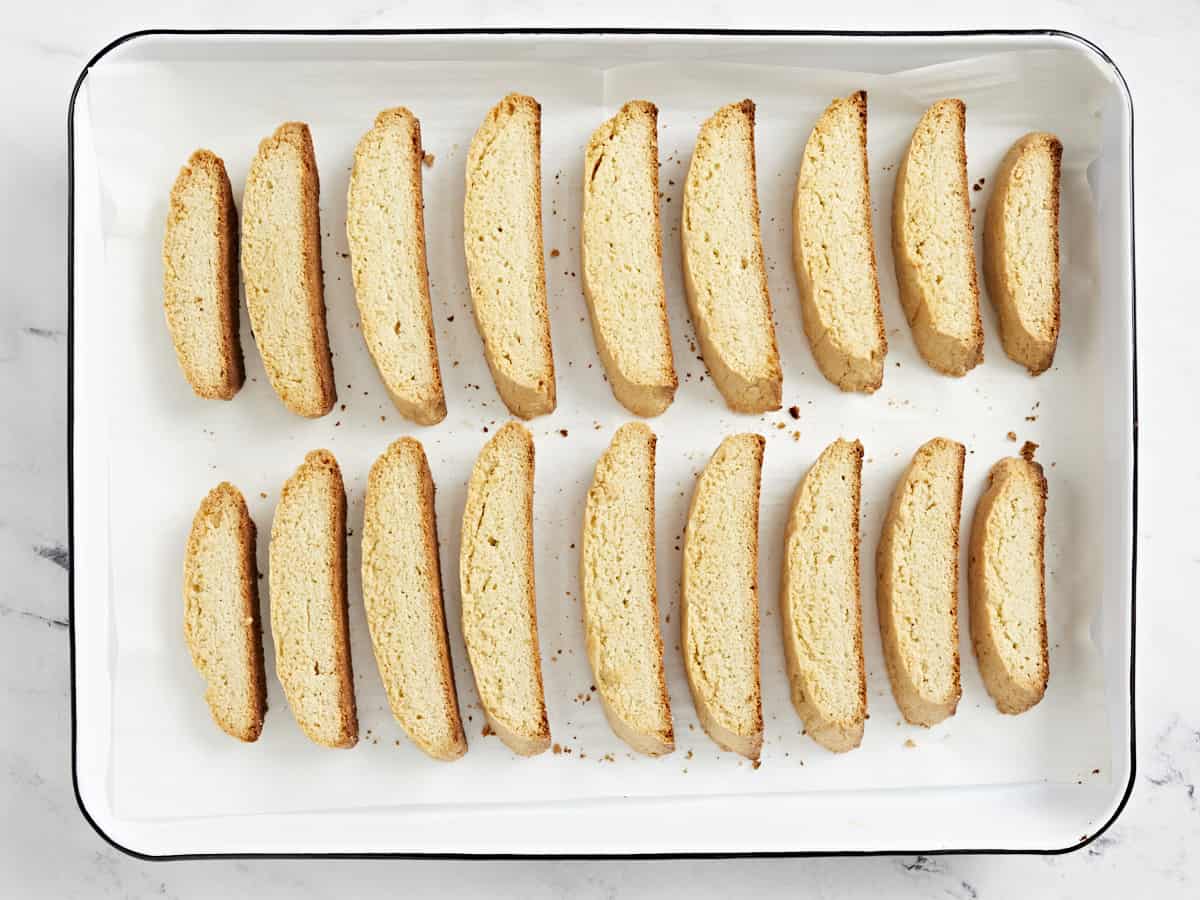
Fully baked biscotti on a baking sheet.

Remove the biscotti from the oven, flip them over to the other side, and then bake for an additional 5 minutes or until golden brown on both sides.
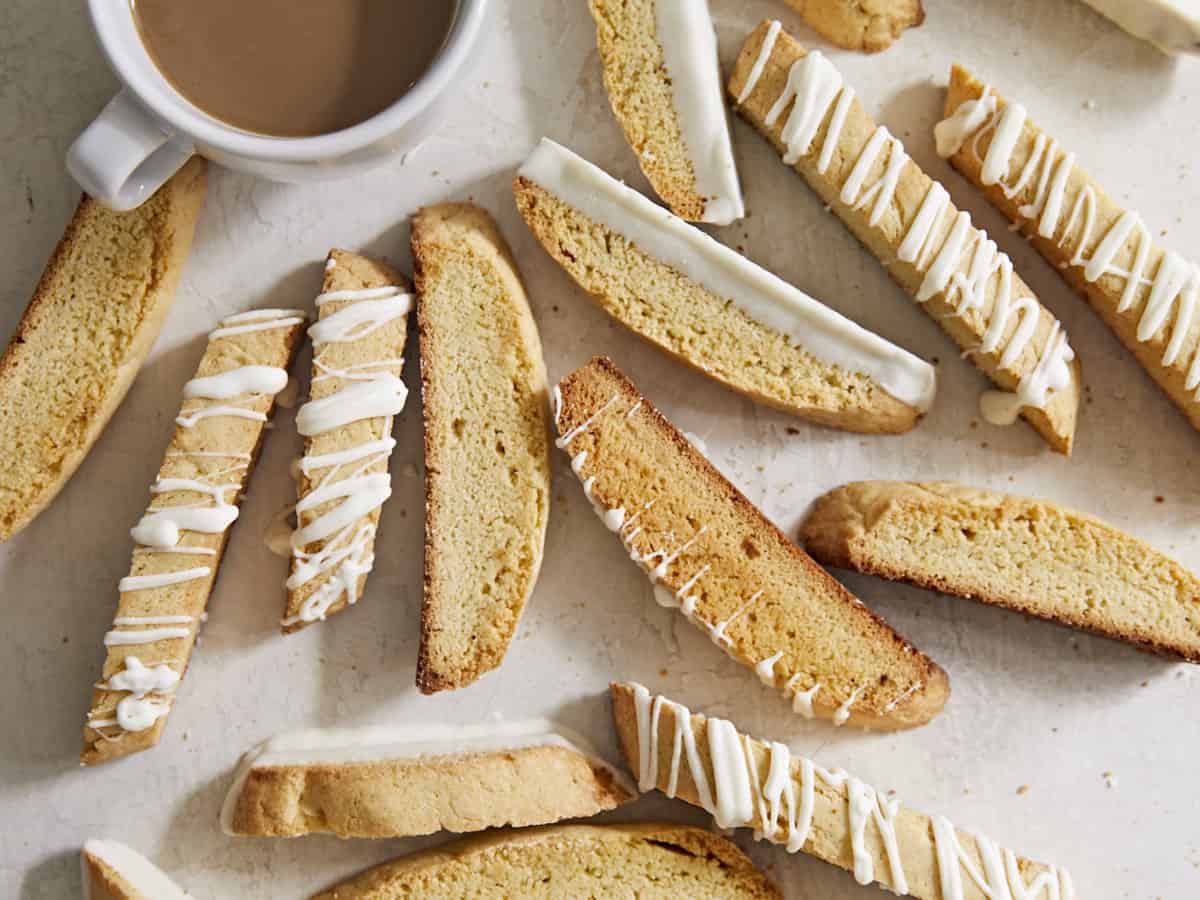
Decorated biscotti scattered next to a coffee cup.

Allow the biscotti to cool completely, decorate with melted chocolate or icing if desired, then serve with a hot cup of coffee!

The post Homemade Biscotti appeared first on Budget Bytes.

Peanut Noodles with Chicken

These Peanut Noodles with Chicken are an easy meal with a rich, creamy, sweet, and savory flavor that is completely addictive.

The post Peanut Noodles with Chicken appeared first on Budget Bytes.
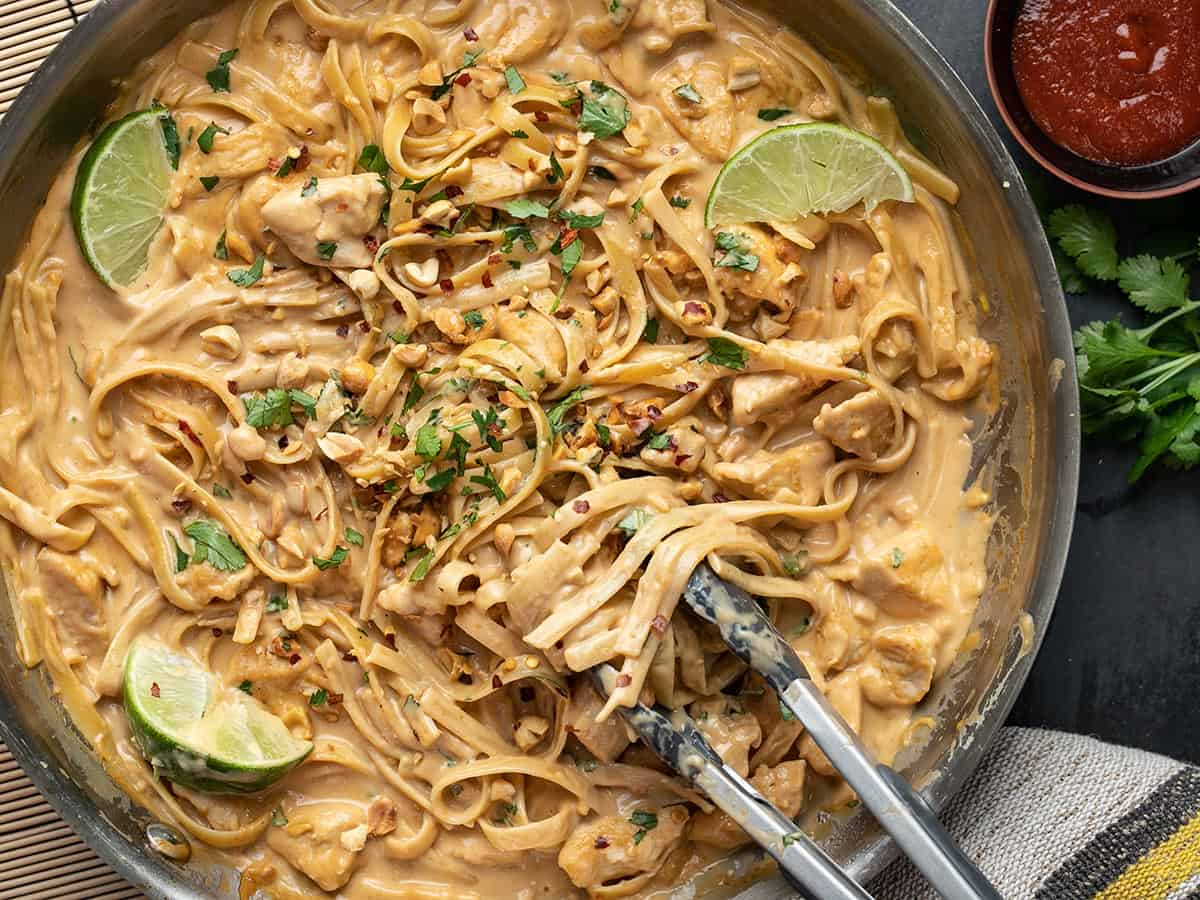
Are you looking for a quick, creamy, lusciously rich, and easy dinner? I got you. These Peanut Noodles with Chicken are straight-up addictive with their sweet-savory-spicy-rich sauce and tender chunks of chicken breast. Plus, the whole recipe comes together in a cinch, so this is a great last-minute meal for those days when you just need something easy and GOOD. I think you’re going to love this one!

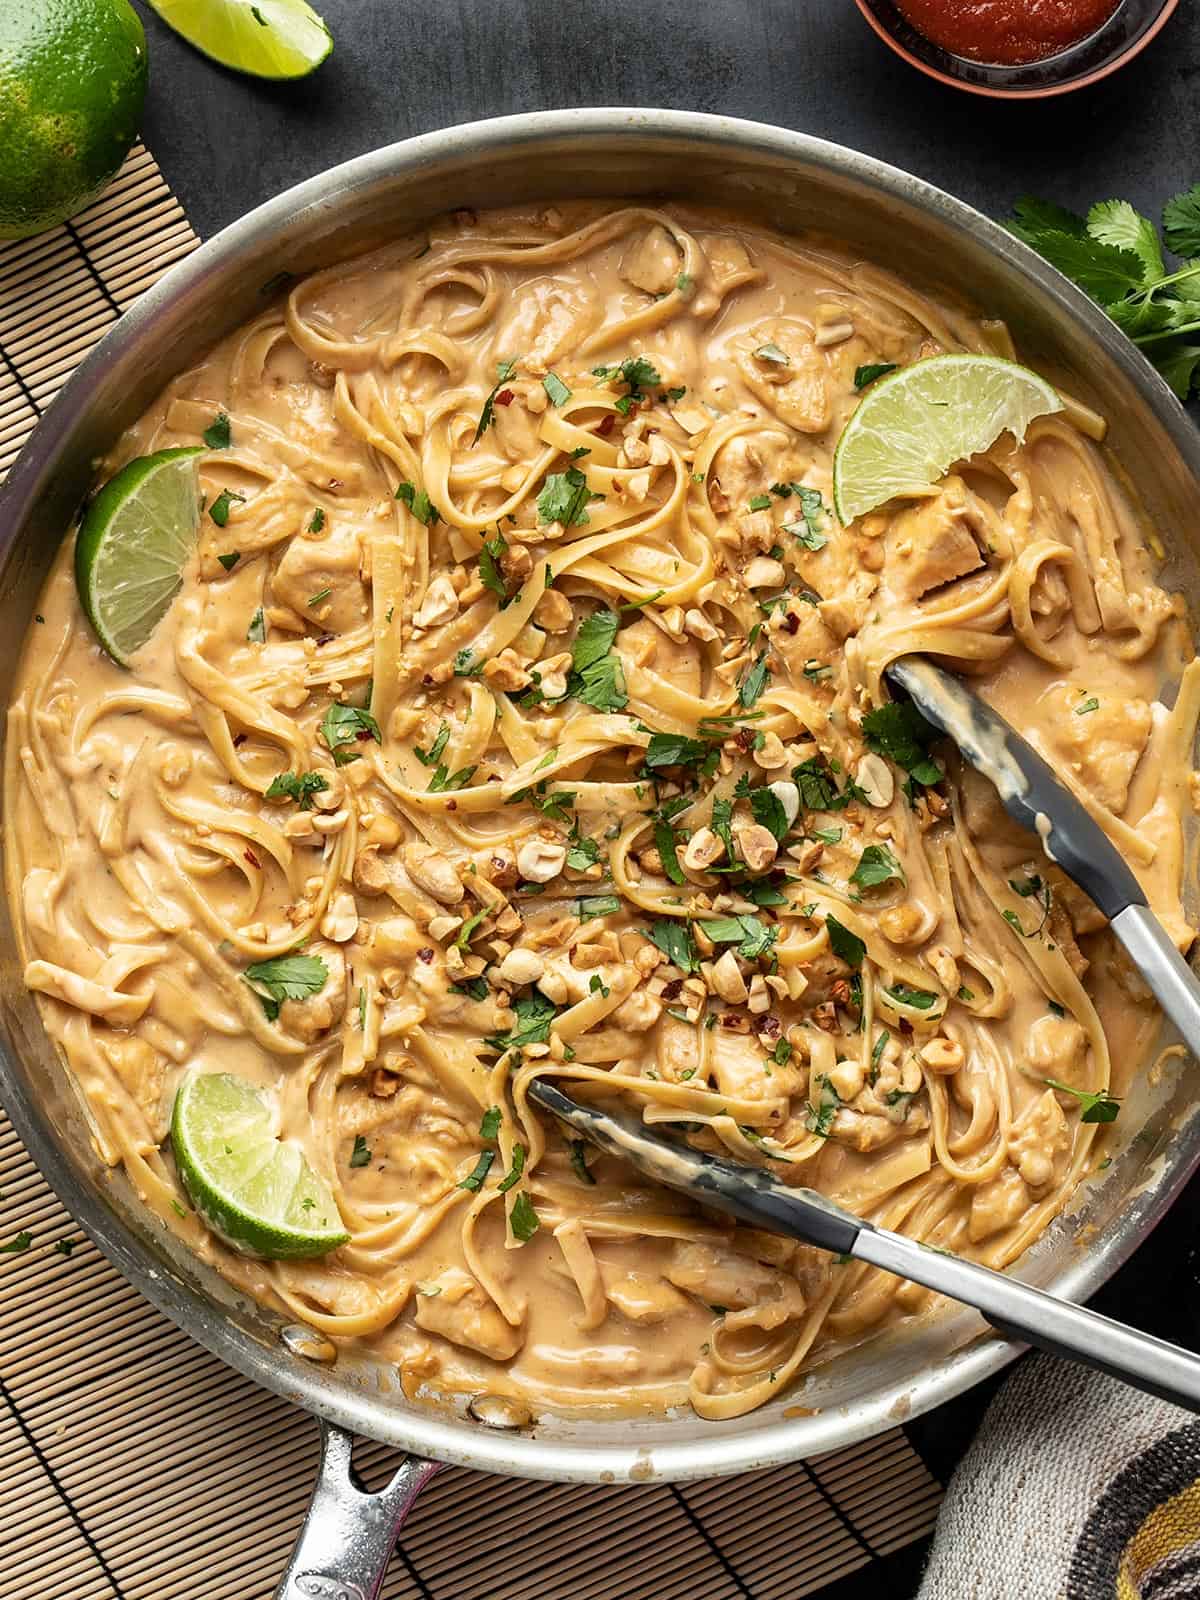
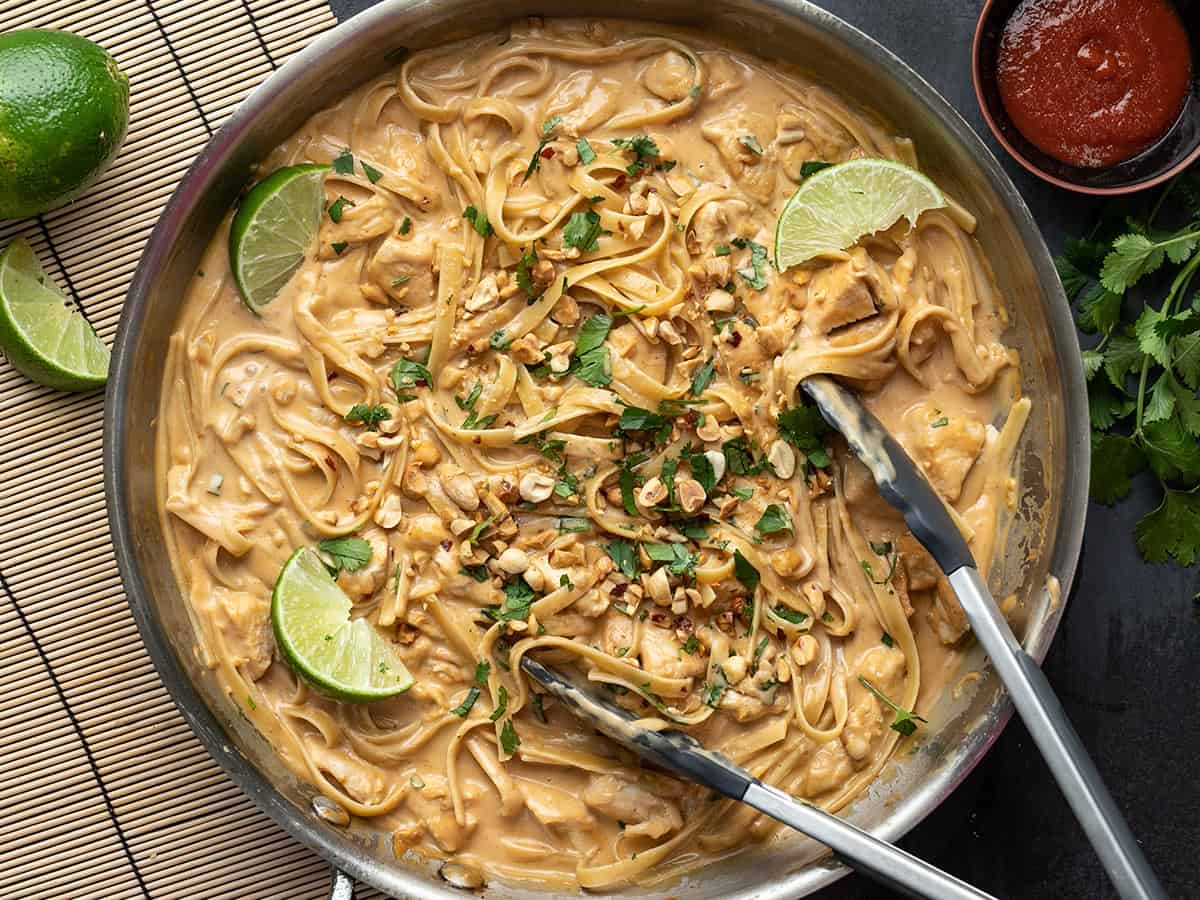
Overhead view of peanut noodles with chicken in a skillet with tongs.

What Are Peanut Noodles

This dish features noodles (any kind) and small bites of tender chicken breast drenched in a creamy sauce that’s inspired by Thai peanut sauce. The sauce is a rich mix of creamy coconut milk, savory peanut butter, spicy sriracha sauce, fresh garlic and ginger, a little soy sauce and brown sugar, and a splash of lime juice to keep everything bright. This easy sauce is absolutely divine and you’re going to want to spoon it over everything!

Can I Sub the Chicken?

Absolutely! If you’re not a chicken fan you can easily substitute it with shrimp, cubed tofu, or even just leave it out and enjoy the noodles plain. It’s all about that sauce, anyway. ;)

What to Serve with Peanut Noodles

I would consider these peanut noodles a meal in and of themselves, but if you’re a side dish kind of person I would suggest pairing these rich noodles with something super light. Try Sesame Cucumber Salad, Sesame Slaw, or Roasted Broccoli Salad with Almonds.

How Are the Leftovers?

This dish is definitely the best when eaten right away because the creamy, luscious sauce tends to get soaked up by the noodles when it’s stored in the refrigerator. That being said, I probably wouldn’t turn down a plate of these noodles after reheating, but I also wouldn’t expect them to be as saucy and creamy. So if you’re big on texture making a half batch might be a better option than counting on eating the leftovers.

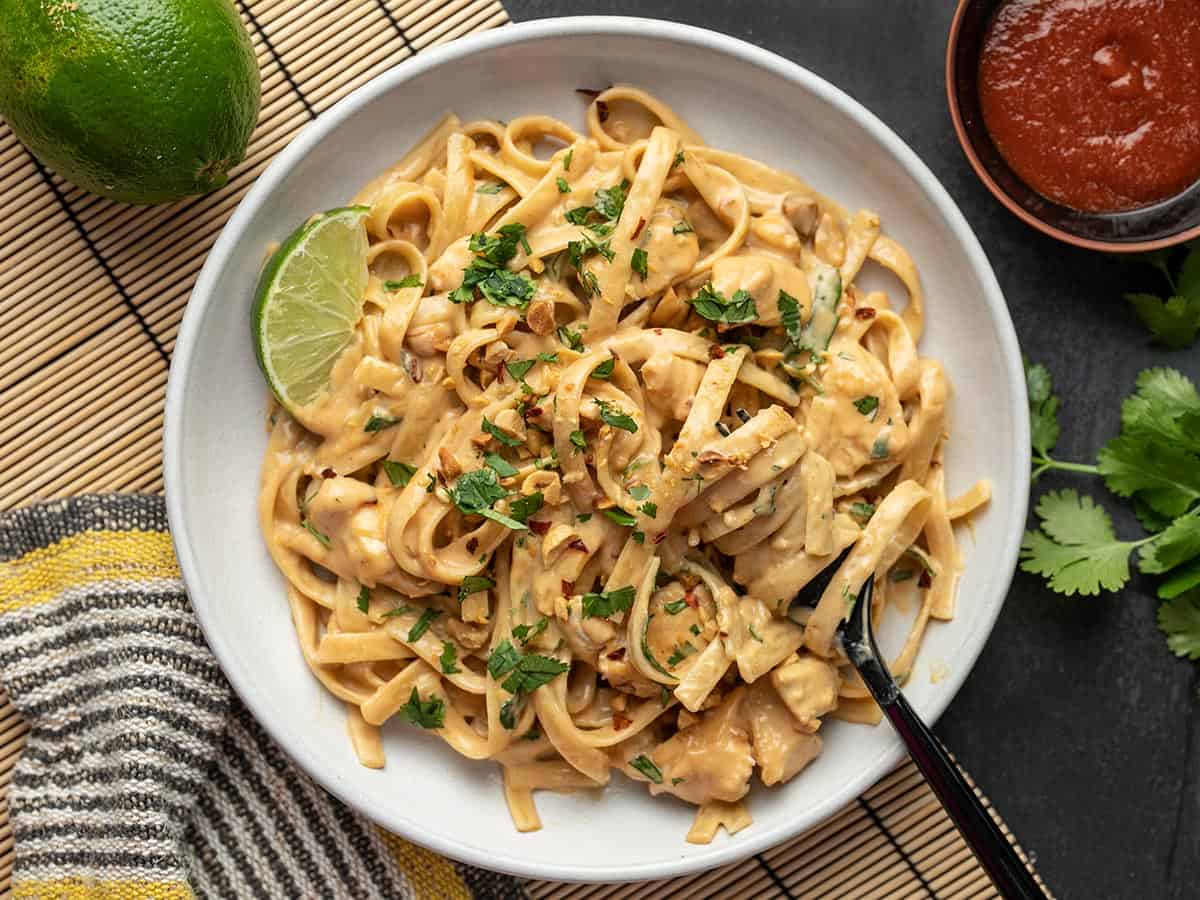
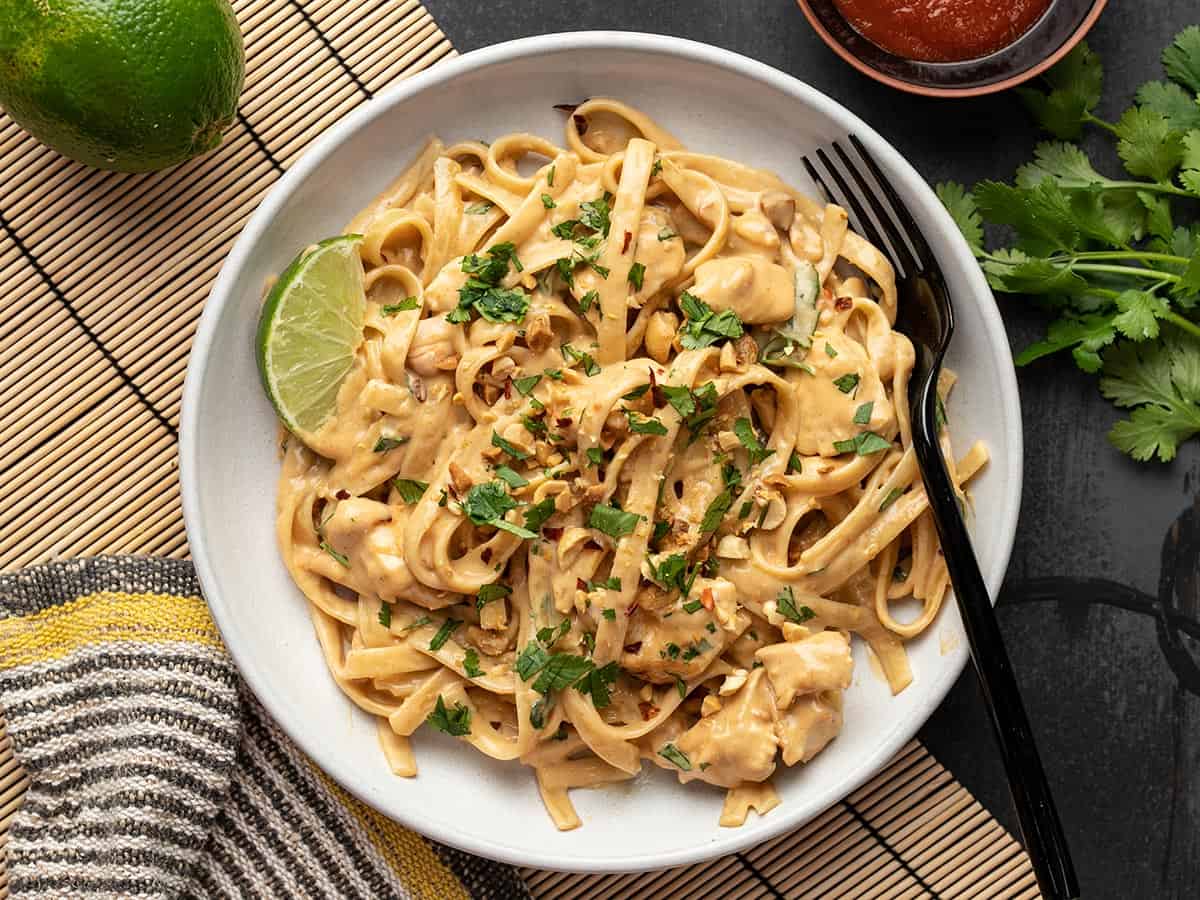
Peanut noodles on a plate with a fork twirled in the noodles.
Close up overhead view of peanut noodles in the skillet with tongs.
Print

Peanut Noodles with Chicken

These Peanut Noodles with Chicken are an easy meal with a rich, creamy, sweet, and savory flavor that is completely addictive.
Course Dinner, Lunch
Cuisine American, Thai
Total Cost $9.20 recipe / $2.30 serving
Prep Time 10 minutes
Cook Time 15 minutes
Total Time 25 minutes
Servings 4
Calories 727kcal

Ingredients

  • 1/3 cup smooth natural-style peanut butter $0.40
  • 2 Tbsp sriracha $0.23
  • 2 Tbsp brown sugar $0.08
  • 1 fresh lime (2 Tbsp juice) $0.59
  • 1 Tbsp soy sauce $0.06
  • 1 clove garlic, minced $0.08
  • 1 tsp grated fresh ginger $0.10
  • 1 13.5oz. can coconut milk $2.99
  • 1 boneless, skinless chicken breast (about ⅔ lb.) $3.33
  • 1 Tbsp cooking oil $0.04
  • 8 oz. noodles* $0.89
  • 1/4 cup chopped peanuts $0.19
  • 1/4 cup chopped cilantro $0.22

Instructions

  • Prepare the peanut sauce first. In a medium bowl, whisk together the peanut butter, sriracha, brown sugar, soy sauce, 2 Tbsp lime juice, soy sauce, minced garlic, and grated ginger.
  • Add the coconut milk to the peanut sauce and whisk until smooth again.
  • Cut the chicken breast into small ½ to 1-inch sized pieces.
  • Heat a large skillet over medium-high. Once hot, add the cooking oil and swirl to coat the surface of the skillet. Add the chicken and cook until browned on all sides. Be careful not to overcook the chicken.
  • Add the prepared peanut sauce into the skillet, turn the heat down to medium-low, and stir to dissolve any browned bits off the bottom of the skillet. Let the chicken simmer in the sauce over low, stirring occasionally, while you cook the noodles.
  • Cook your noodles according to the package directions, then drain in a colander.
  • Add the cooked and drained noodles to the skillet with the peanut sauce and chicken. Toss until everything is evenly mixed and coated in sauce.
  • Top the noodles with chopped peanuts and cilantro, then enjoy!

See how we calculate recipe costs here.

Notes

*We used fettuccine for this dish but you can use any type of long noodle like spaghetti, rice noodles, or ramen noodles. 

Nutrition

Serving: 1serving | Calories: 727kcal | Carbohydrates: 56g | Protein: 34g | Fat: 43g | Sodium: 632mg | Fiber: 4g
Close up overhead view of peanut noodles in the skillet with tongs.

How to Make Peanut Noodles with Chicken – Step by Step Photos

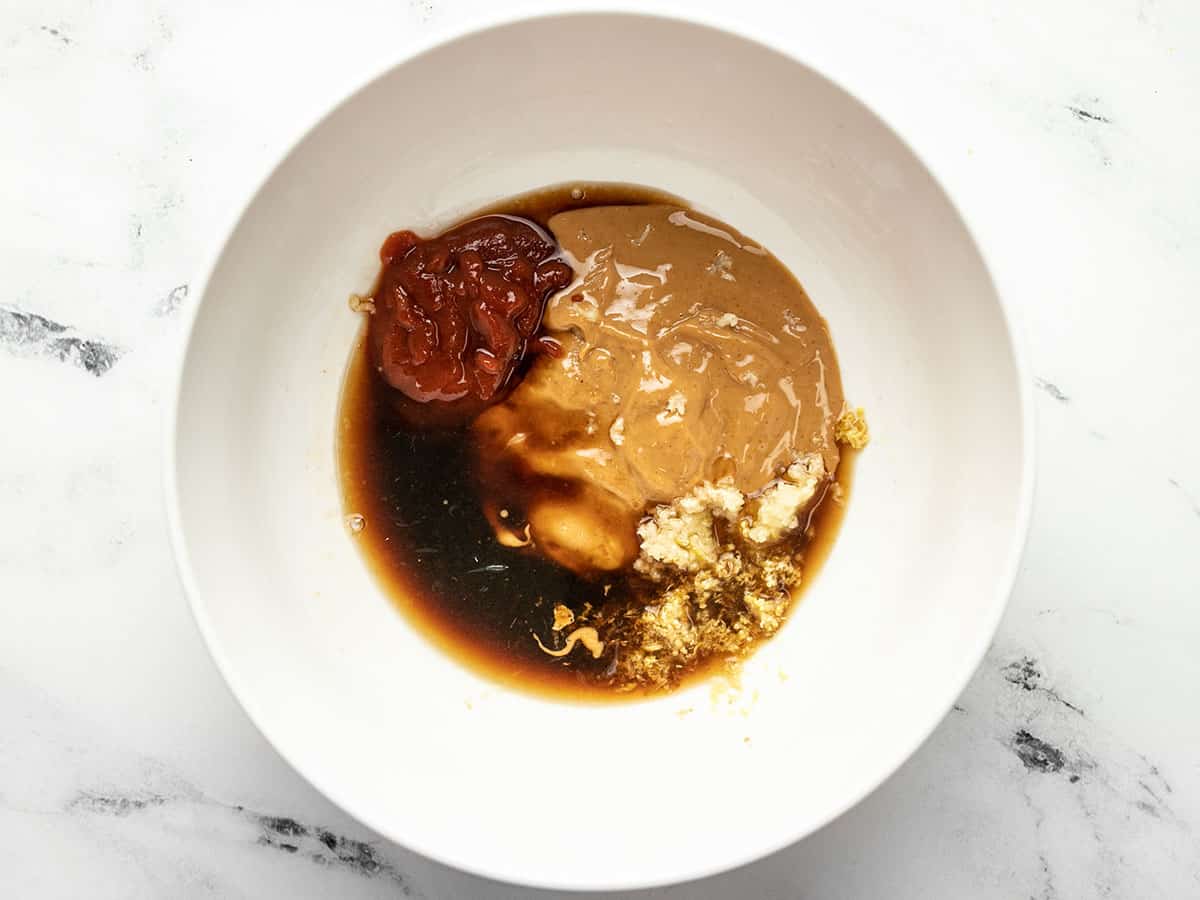
Peanut sauce ingredients in the bowl, not mixed together.

Make the peanut sauce first so the ingredients have a few minutes to mingle and the sauce is ready to go when you need it later. Add ⅓ cup smooth natural-style peanut butter, 2 Tbsp sriracha, 2 Tbsp brown sugar, 1 Tbsp soy sauce, 1 clove of garlic (minced), 1 tsp grated fresh ginger, and 2 Tbsp lime juice to a bowl.

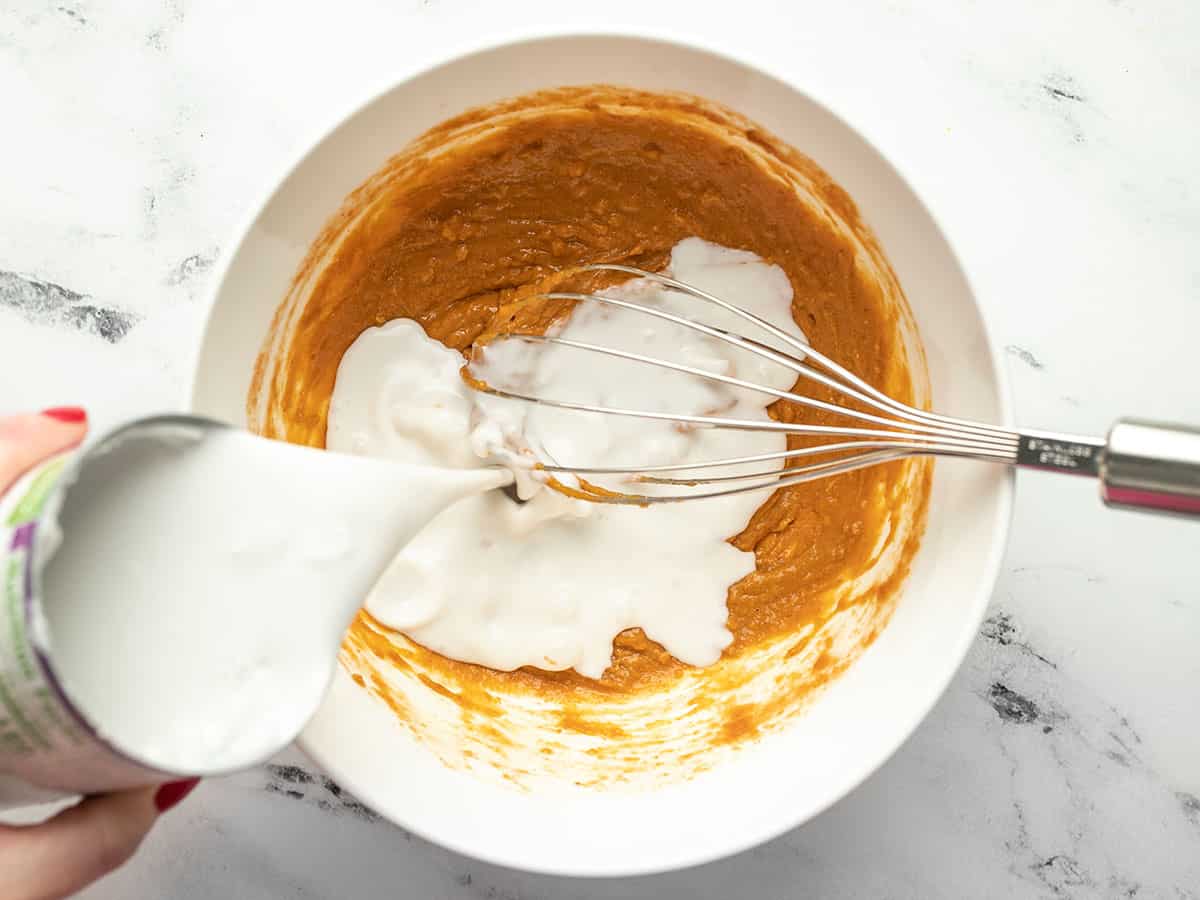
Coconut milk being poured into the peanut sauce.

Whisk the ingredients together until smooth, then add in one 13.5 oz. can of coconut milk. Whisk until smooth again and then set the sauce aside.

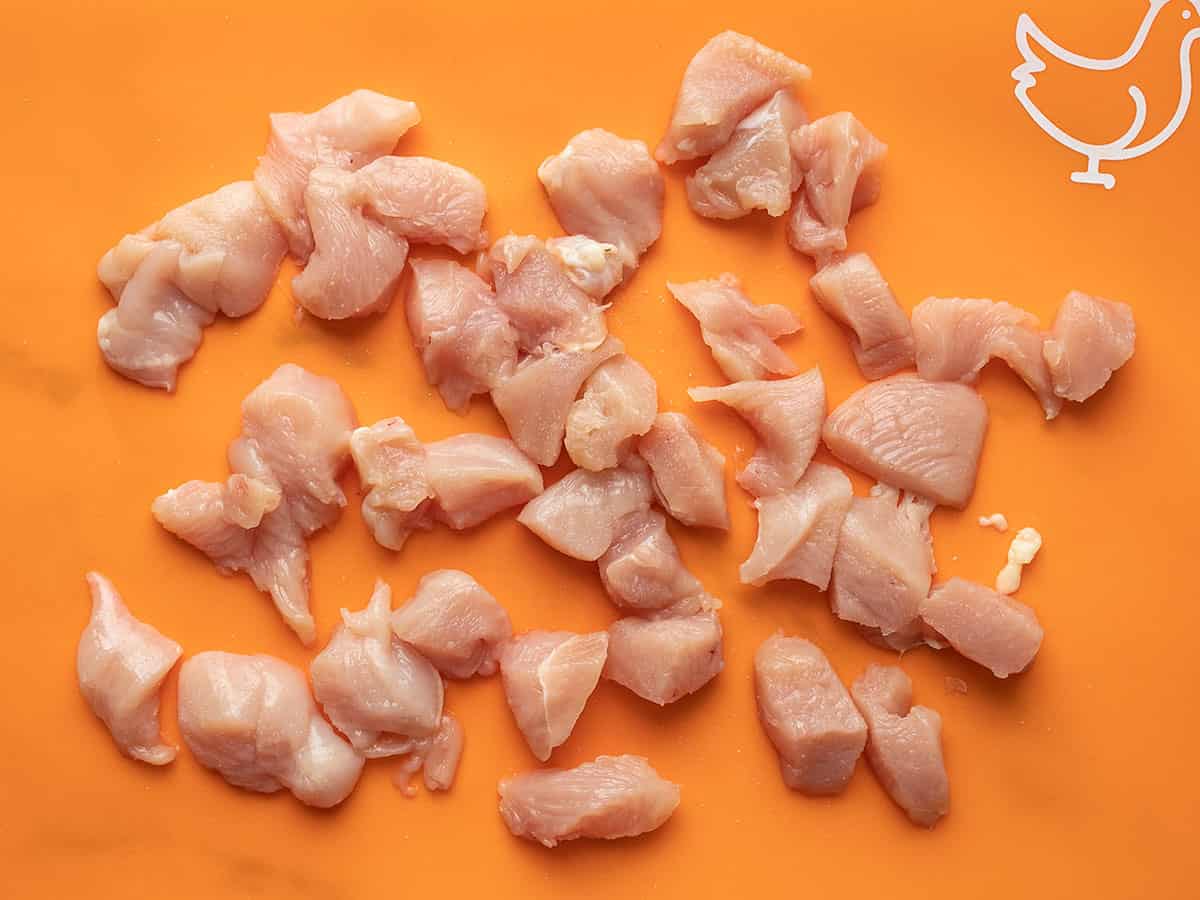
Chicken cut into chunks on an orange cutting board.

Cut one large boneless, skinless chicken breast (about ⅔ lb.) into small ½ to 1-inch chunks.

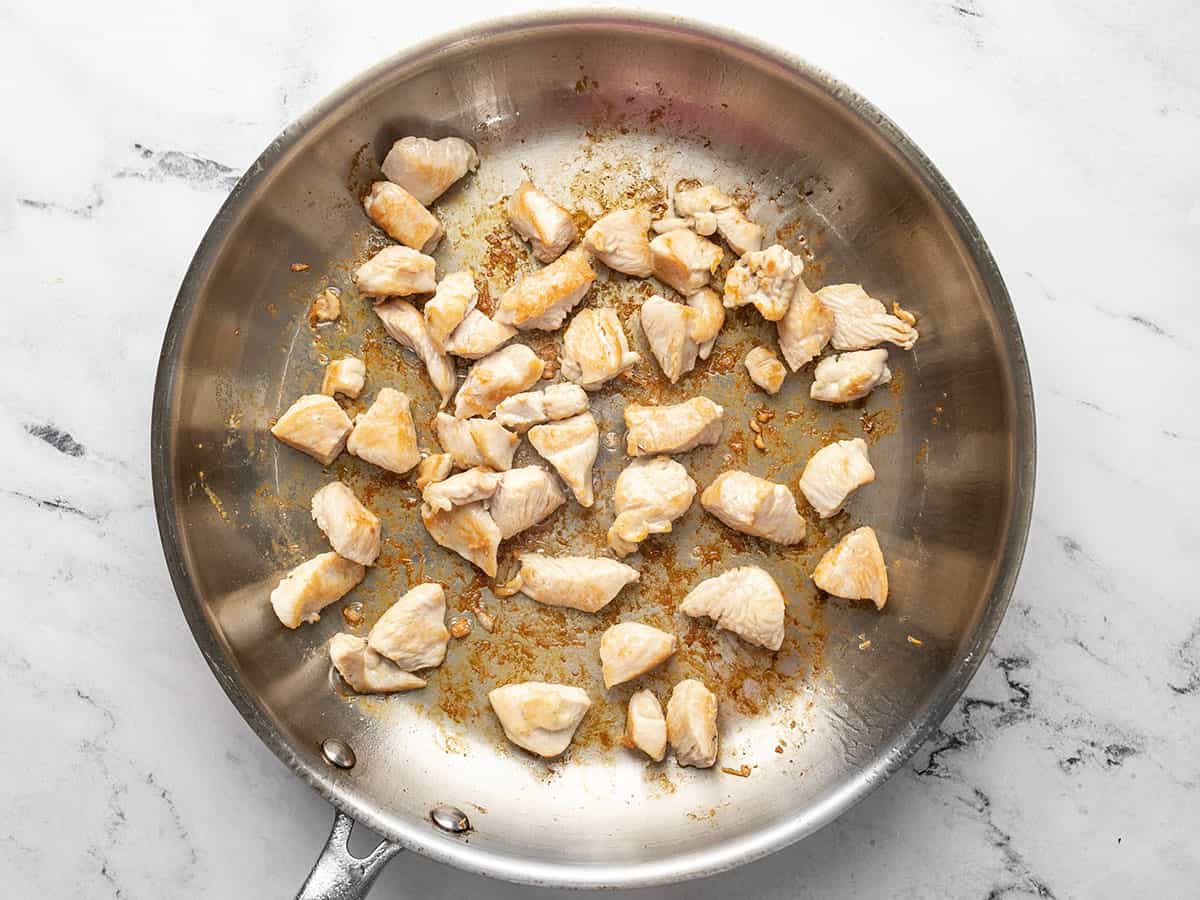
Cooked chunks of chicken in a skillet.

Heat 1 Tbsp cooking oil in a large skillet. Once hot, add the chicken and cook until browned on all sides. It’s okay if the chicken isn’t cooked through at this point. Avoid overcooking the chicken or it will become tough.

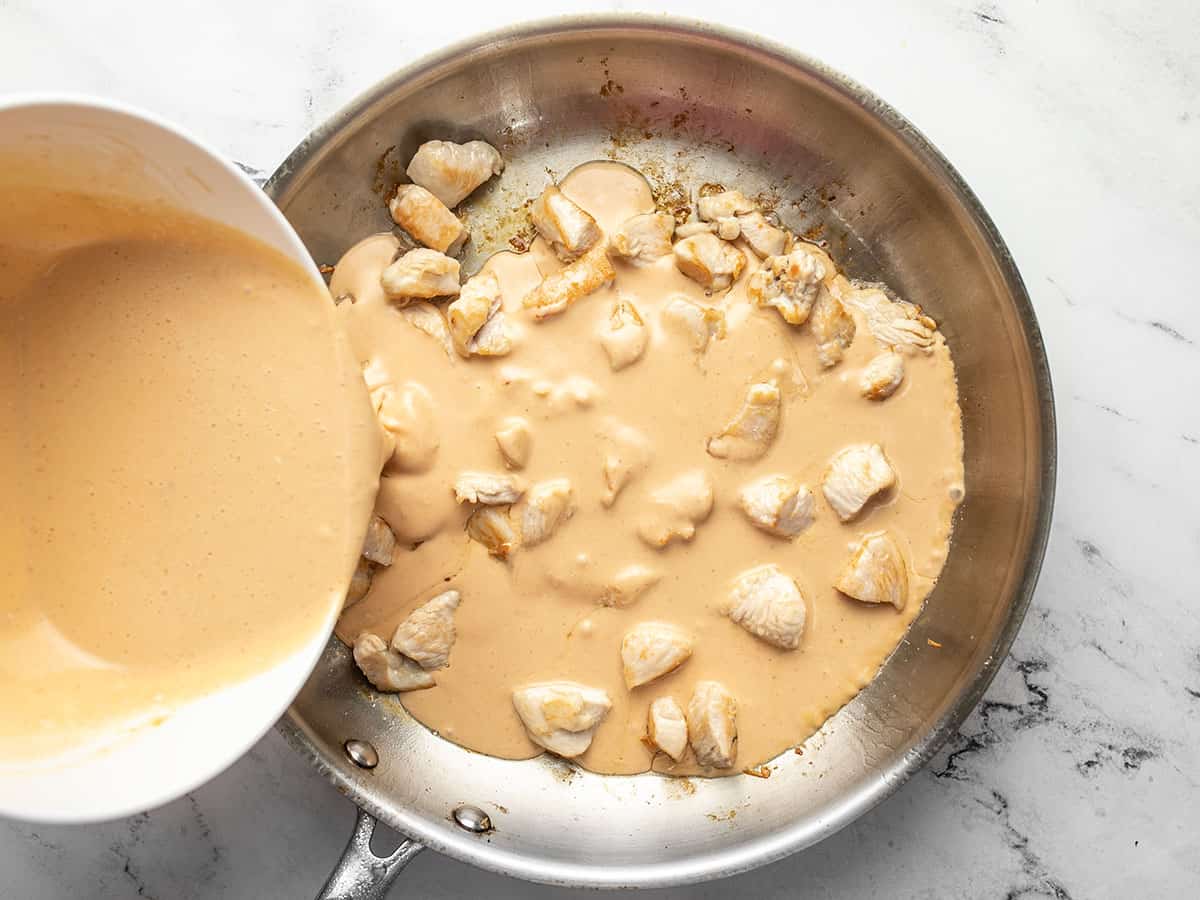
Peanut sauce being poured into the skillet with the chicken.

Pour the prepared peanut sauce into the skillet with the chicken. Turn the heat down to low and stir to dissolve any browned bits off the bottom of the skillet. Let the chicken simmer in the sauce over low, stirring occasionally, as you cook the noodles.

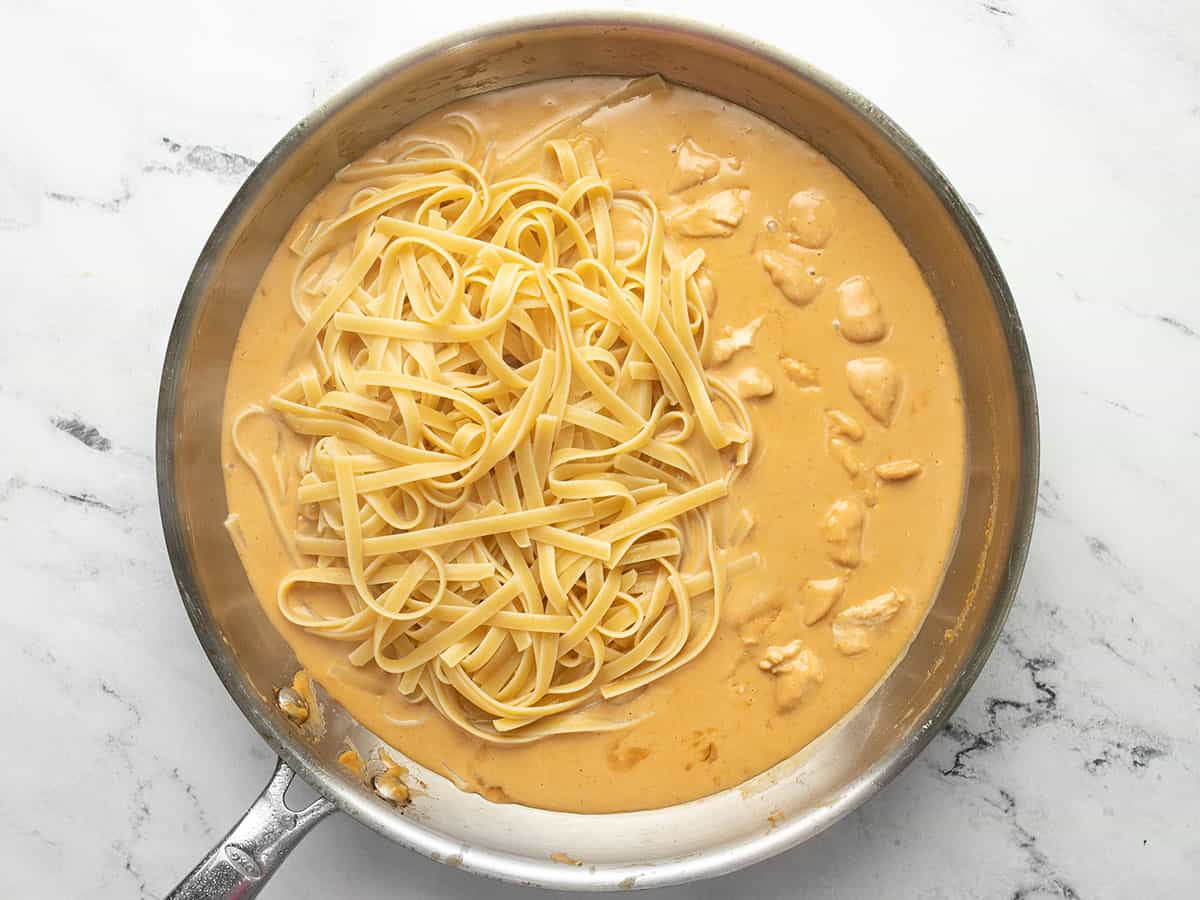
Cooked linguine added to the skillet.

Cook 8 oz. noodles according to their package direction, then drain in a colander. You can use linguine, spaghetti, rice noodles, ramen noodles, or any kind of long noodle.

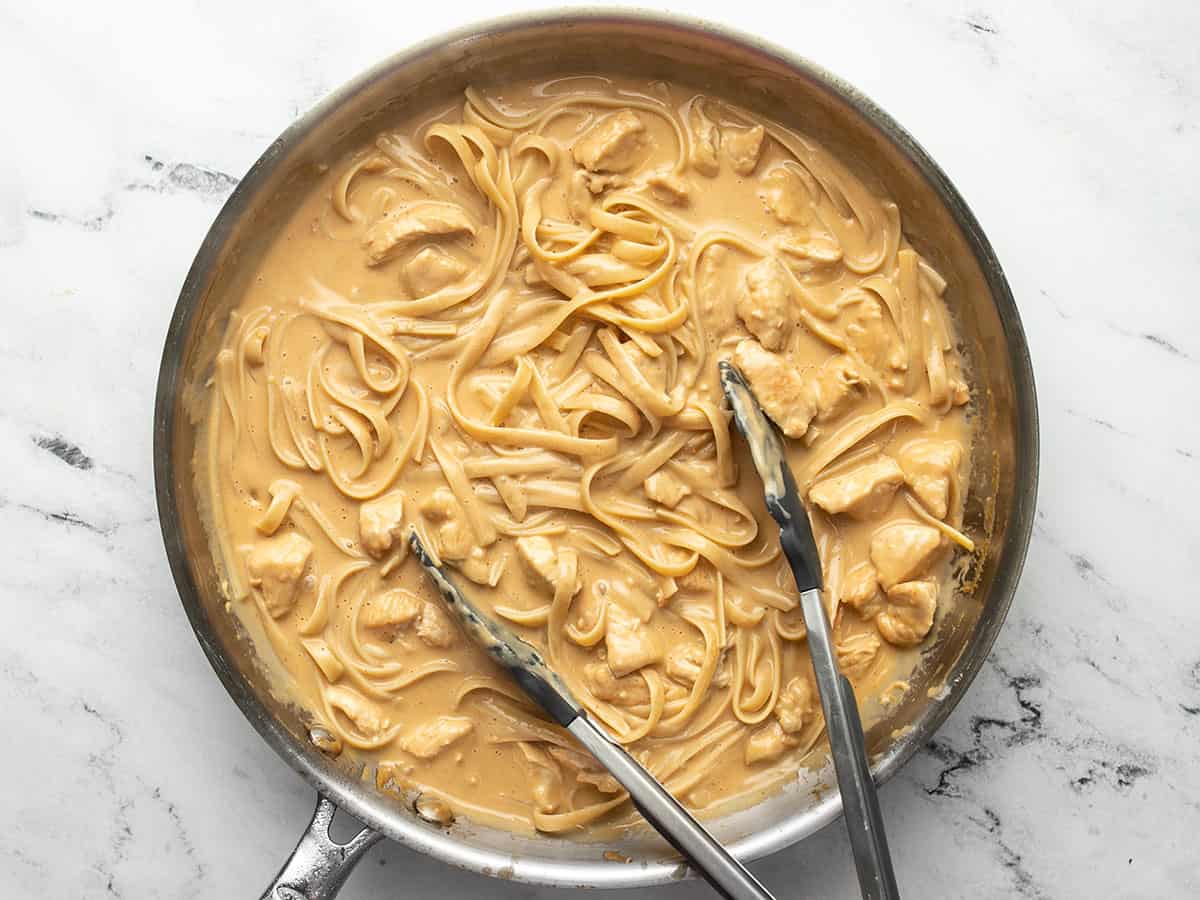
Finished peanut noodles in the skillet without toppings.

Add the cooked and drained noodles to the skillet and stir to combine.

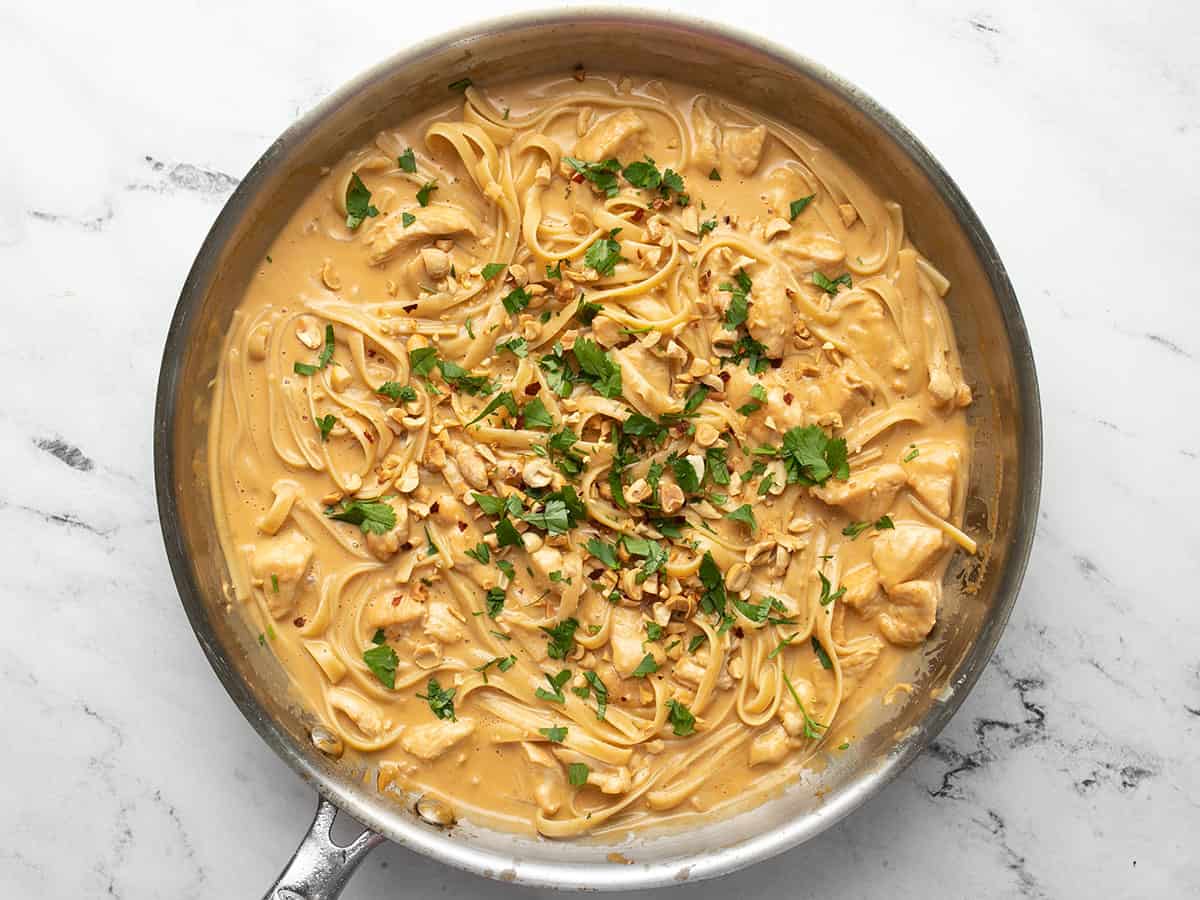
Peanut noodles in the skillet topped with chopped peanuts and cilantro.

Top the peanut noodles with ¼ cup chopped peanuts and ¼ cup chopped fresh cilantro.

Overhead view of a plate full of peanut noodles with a fork on the side.

Enjoy the peanut noodles hot. If you have any leftover lime, cut it into wedges and squeeze a bit over top just before eating.

Overhead view of peanut noodles in the skillet with open tongs.

SO GOOD.

The post Peanut Noodles with Chicken appeared first on Budget Bytes.
Picadillo

Sweet, savory Puerto Rican-style Picadillo is a tomato-based ground beef stew that’s ridiculously delicious, versatile, and ready in thirty.

The post Picadillo appeared first on Budget Bytes.
Sweet and savory Puerto Rican-Style Picadillo is a ground beef stew that’s so ridiculously delicious it brings table talk to a complete stop because everyone’s too busy stuffing their face. This beef picadillo recipe is budget-friendly, comes together quickly, and is incredibly versatile. I don’t know any other way to say it: You. Need. To. Make. Picadillo.

A NOTE ON AUTHENTICITY

This is not a historically authentic recipe. We strive to create recipes that are accessible to everyone, which means ingredients need to be available at a mainstream budget grocery store. We test recipes using the least amount of steps, tools, and ingredients while still honoring the spirit of the recipe. I was born and raised in Puerto Rico and look forward to a time when our ingredients are available in mainstream markets. Until then, buen provecho!

What Is Picadillo?

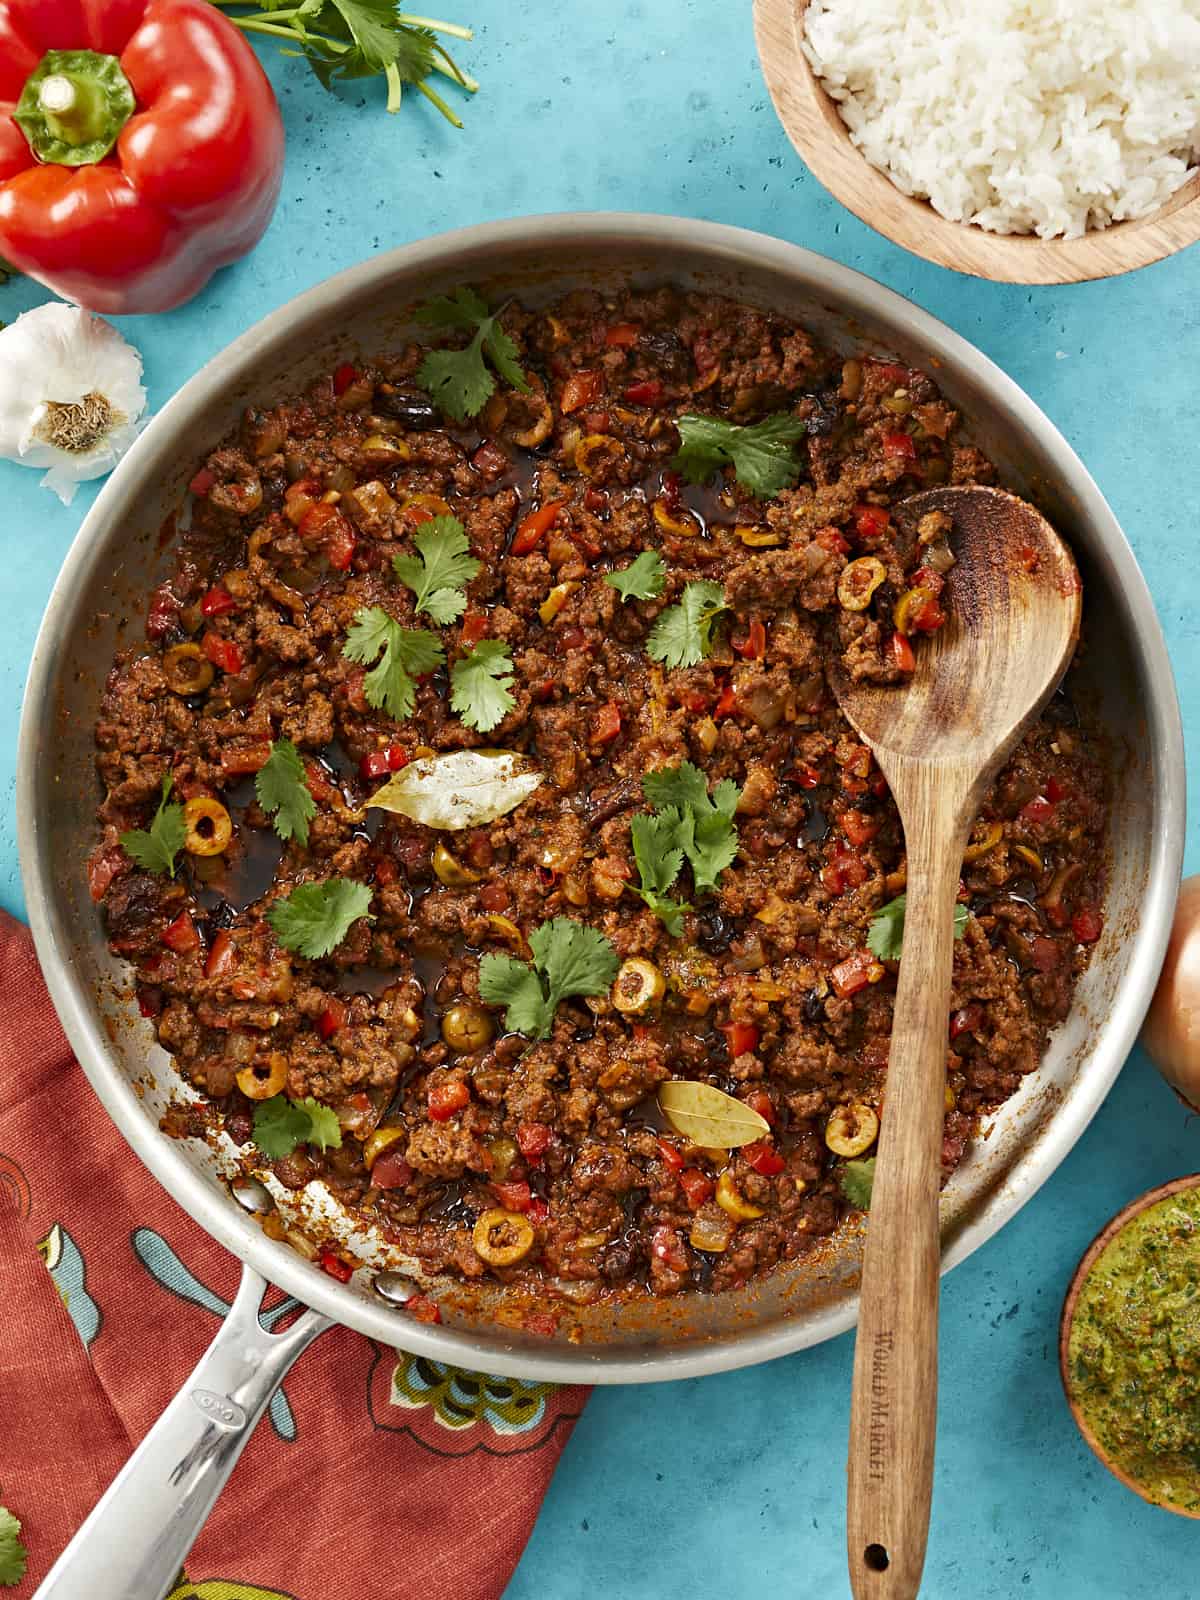
Picadillo is a traditional sweet and savory Latin dish usually made with ground beef stewed in tomato sauce. In Puerto Rico, we cook it in a hearty tomato-based sauce with sofrito, adobo, olives, raisins, and sometimes diced potatoes. To the uninitiated, pairing raisins with beef sounds like blasphemy. But I promise you, IT WORKS.

What You’ll Need

Picadillo comes together in one pan in under 30 minutes. There’s a little chopping involved, and it takes about 7 minutes to assemble the recipe, but the rest of the time it simmers on the stovetop. I love a one-pot hands-off recipe! Don’t you?

  • Onion, Garlic, and Bell Pepper – this combination creates an aromatic and intensely flavored base
  • Sofrito – this is the flavor base of many Puerto Rican dishes. I have a simple recipe for you here, though you can definitely take it further if you have access to traditional ingredients like aji dulce and recao.
  • Sazón and Adobo – these seasoning blends go hand in hand to develop deep, earthy notes. The annatto in the sazón also deepens the color of the sauce. If these are hard to source, I have included recipes for both in the notes section of the recipe card.
  • Ground Beef – 80/20 is best as the fat adds flavor, but use what you have. You can also make this recipe with ground pork, chicken, lamb, or turkey. If you’re vegetarian or vegan, you can substitute ground beef with a plant-based alternative, chopped mushrooms, or black beans.
  • Green Olives – I prefer to use the sliced kind with pimento because it’s less work, but feel free to slice whole ones. If you can’t find Green Olives with Pimento (AKA Manzanilla or Spanish Olives), get pitted green olives and add a tablespoon of chopped roasted red pepper to the mix.
  • Raisins – though dark raisins are traditional, you can also use golden. I sometimes sub raisins with chopped prunes.
  • White Distilled Vinegar – helps cut through the fattiness of the ground beef and adds a sharp top note. Sub it with Apple Cider Vinegar.
  • Bay Leaves – have a mild tea-like flavor that sits in the background and helps enhance bolder flavors. Sub with a teaspoon of oregano.
  • Tomato Sauce – creates a liquid for the ground beef to stew in and adds acidic, fruity brightness.
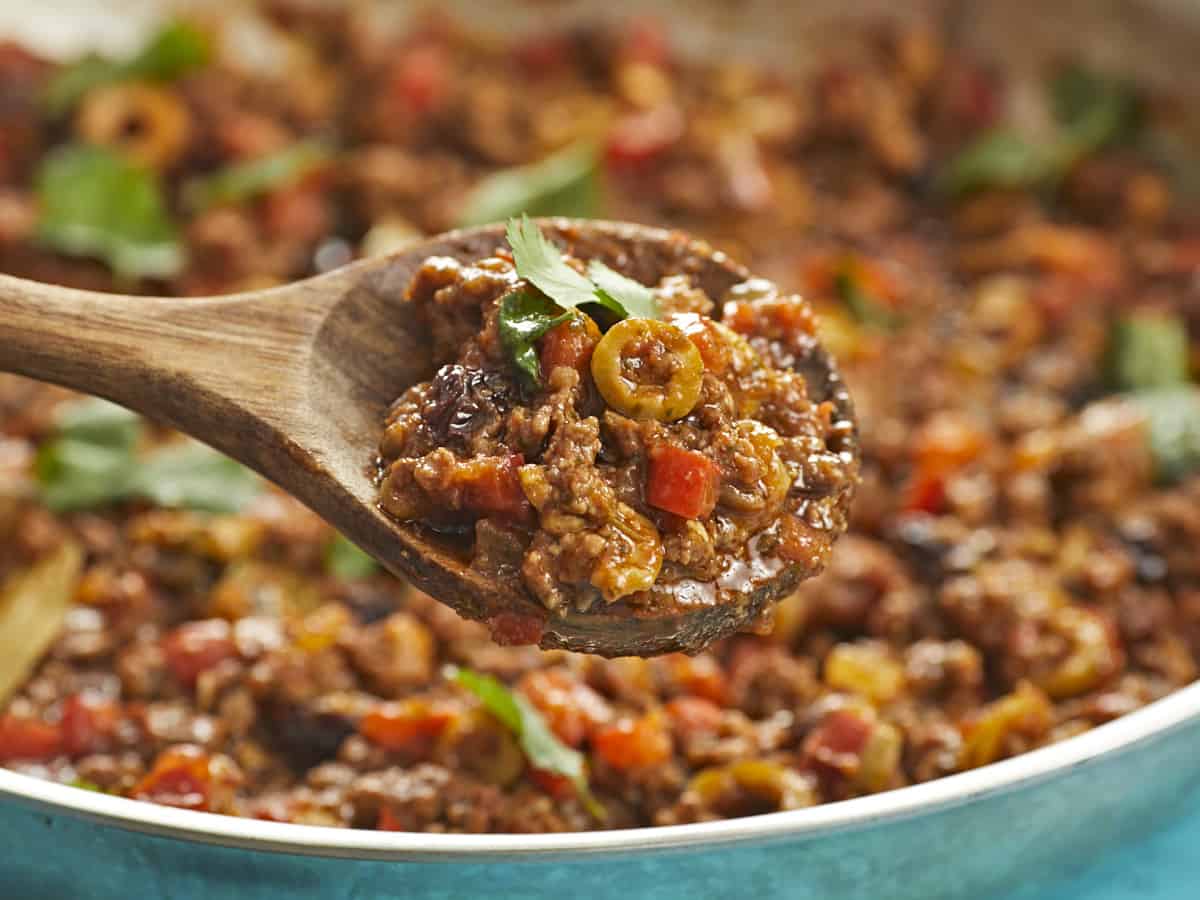
Wooden spoon full og picadillo in the foreground with picadillo in a silver skillet in the background.

What TO Serve With Picadillo

This sweet and savory ground-beef stew is a weeknight staple at my house because I can eat it as is, or served over rice and mashed potatoes. I can also stuff it into an empanada, a burrito, or a lettuce wrap. I’ve even added it to marinara for Puerto Rican-style spaghetti. Picadillo is all-purpose!

How To Store Picadillo

This is one of those recipes that tastes even better the next day. (I love those recipes.) Store cooled Picadillo in an airtight container with plastic film or wax paper directly on the surface. It keeps in the fridge for up to 5 days and in the freezer for up to 3 months. Thaw frozen Picadillo overnight in the refrigerator, then warm it in a pan set over medium heat or microwave it until steaming.

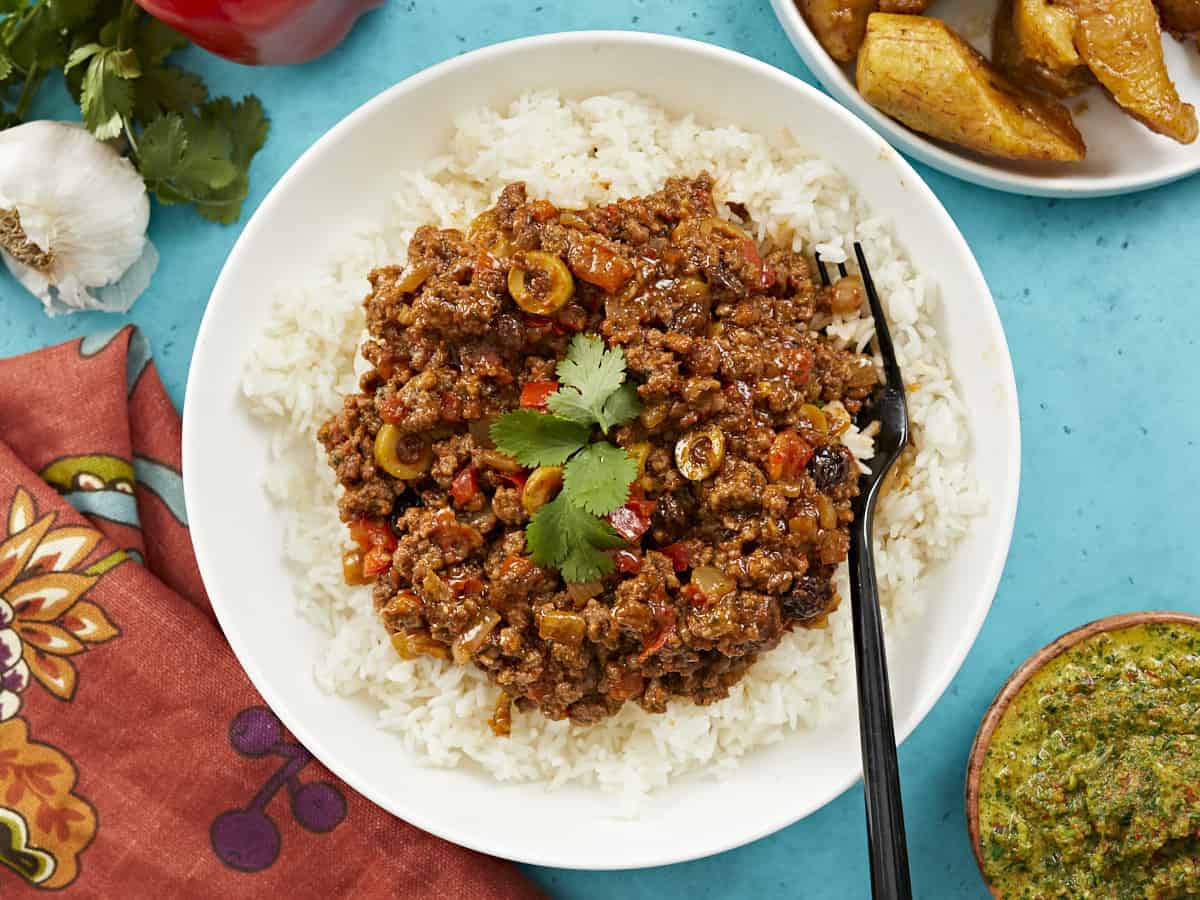
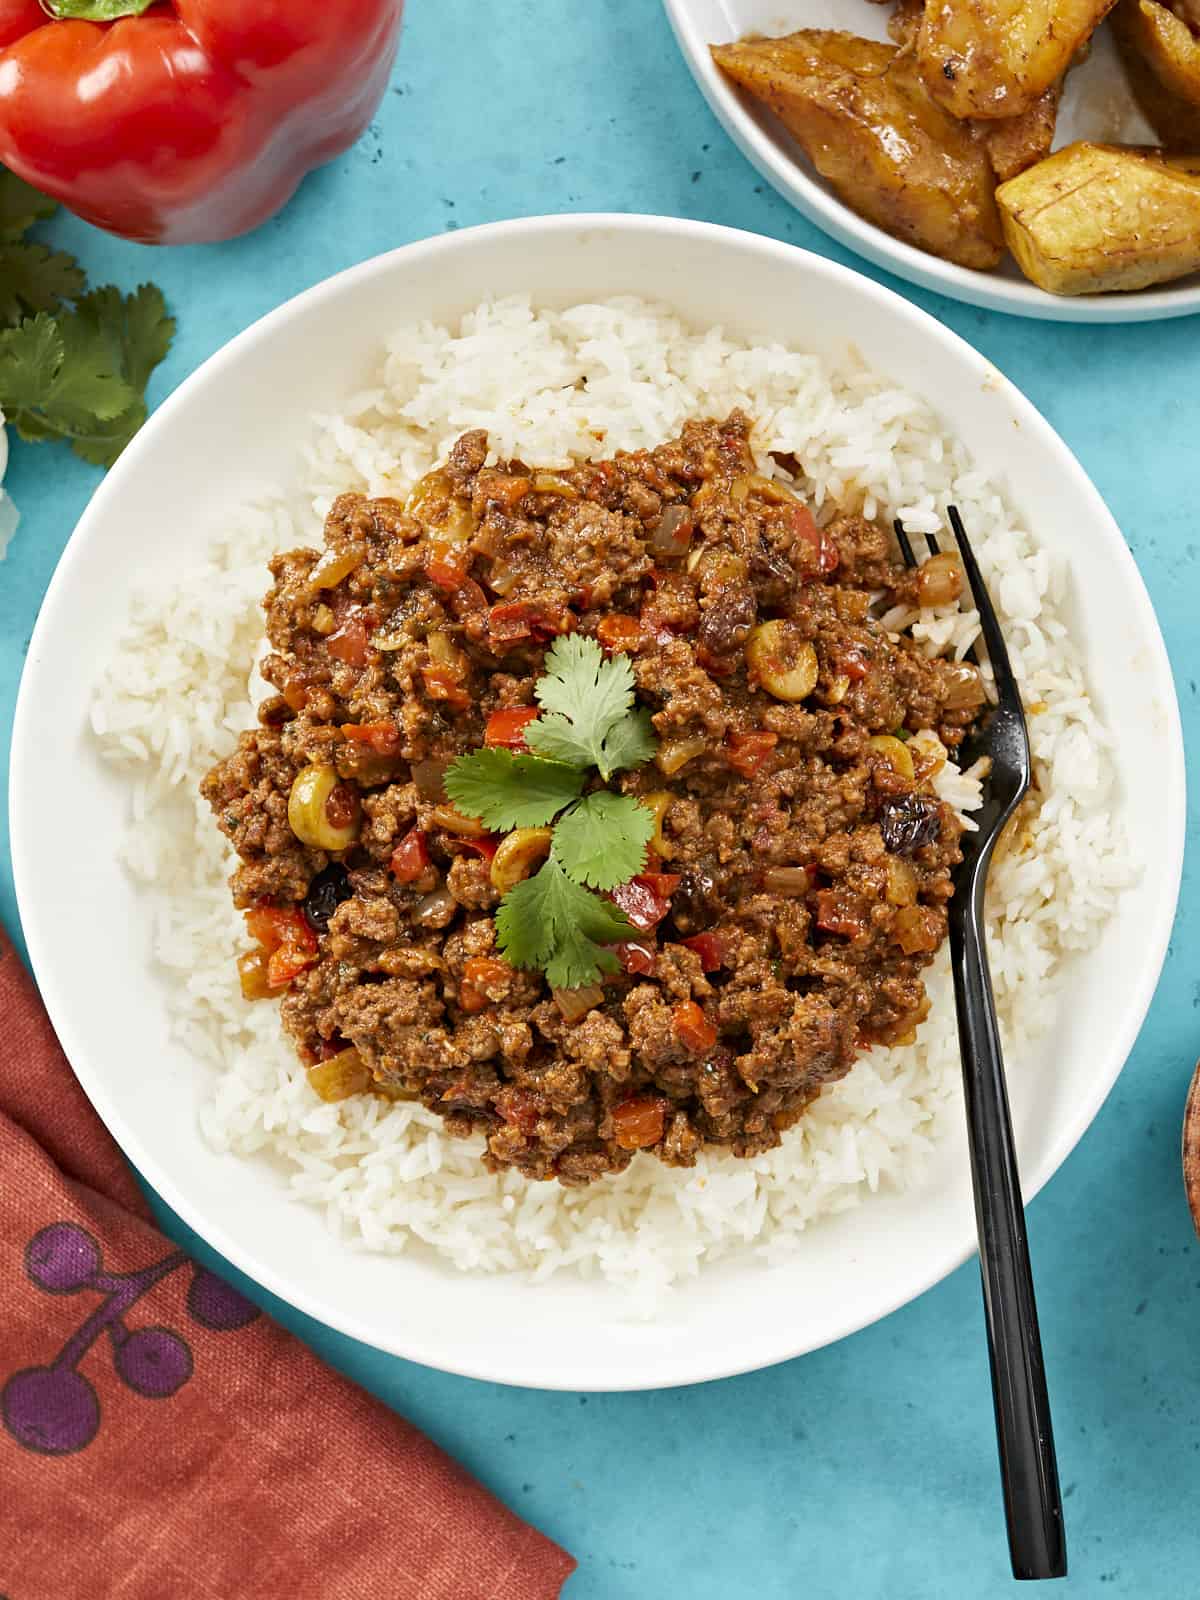
Picadillo served over white rice in a white bowl.
Overhead shot of picadillo in a silver skillet with a wooden spoon in it.
Print

Picadillo

Sweet, savory Puerto Rican-style Picadillo is a tomato-based ground beef stew that's ridiculously delicious, versatile, and ready in thirty.
Course Dinner, Lunch
Cuisine Latin, Puerto Rican
Total Cost ($11.44 recipe / $1.43 serving)
Prep Time 5 minutes
Cook Time 25 minutes
Total Time 30 minutes
Servings 8 cups
Calories 212kcal

Ingredients

  • 1 1/2 Tbsp olive oil $0.06
  • 1 yellow onion, small dice $0.42
  • 1 red bell pepper, small dice $1.59
  • 1 Tbsp tablespoon garlic, minced $0.14
  • 1 lb ground beef (80/20) $5.49
  • 1 tsp coarse salt* $0.04
  • 1 1/2 tsp sazón* (1 packet) $0.17
  • 1 tsp adobo* $0.04
  • 1/2 cup sofrito $0.72
  • 1/2 cup sliced pimento-stuffed green olives * $0.66
  • 1/4 cup raisins $0.87
  • 1/2 Tbsp white vinegar $0.04
  • 15 oz tomato sauce $1.00
  • 2 bay leaves $0.20
  • 1/4 cup water $0.00

Instructions

  • Place a large skillet over medium-high heat and add the olive oil. When the oil is hot, add the onions and peppers to the pan and cook until the onions are transparent.
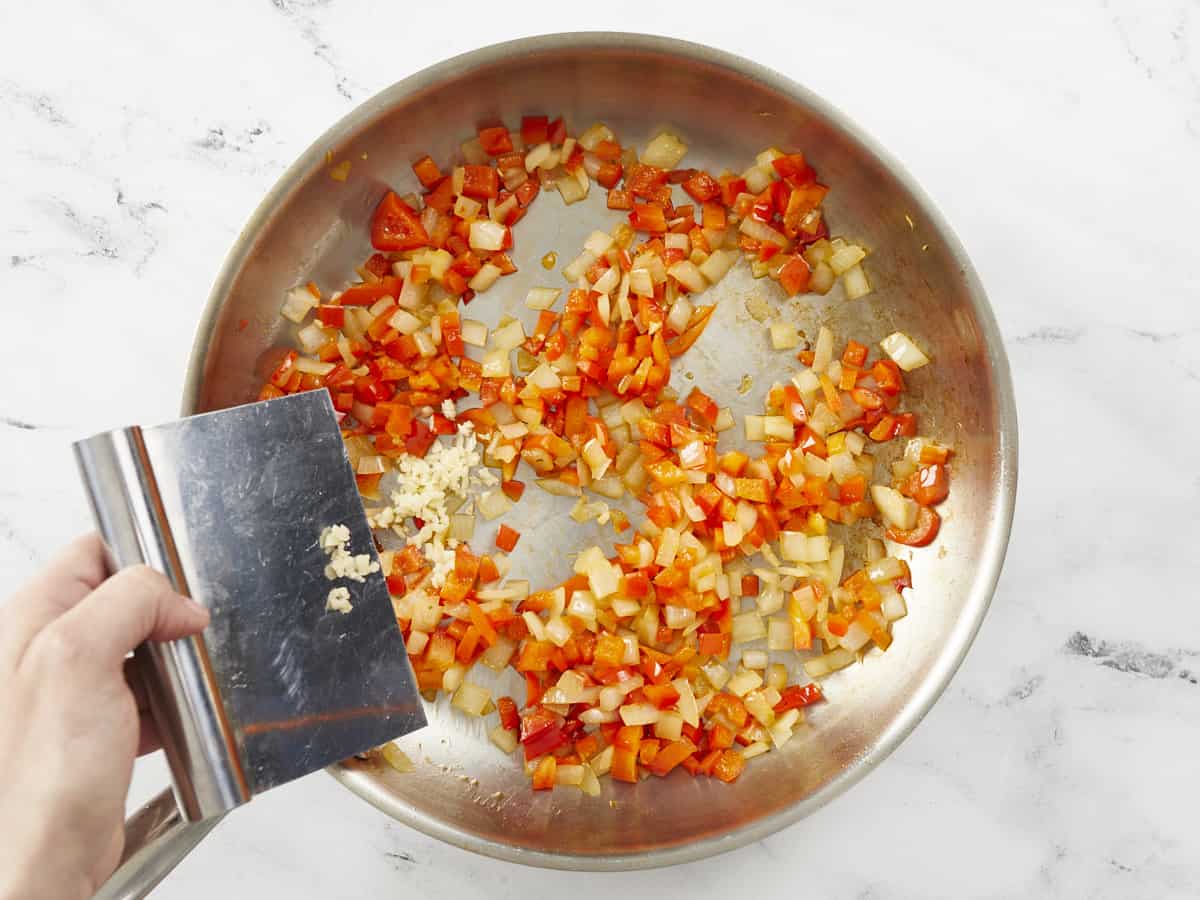
  • Add the garlic to the pan and cook until fragrant.
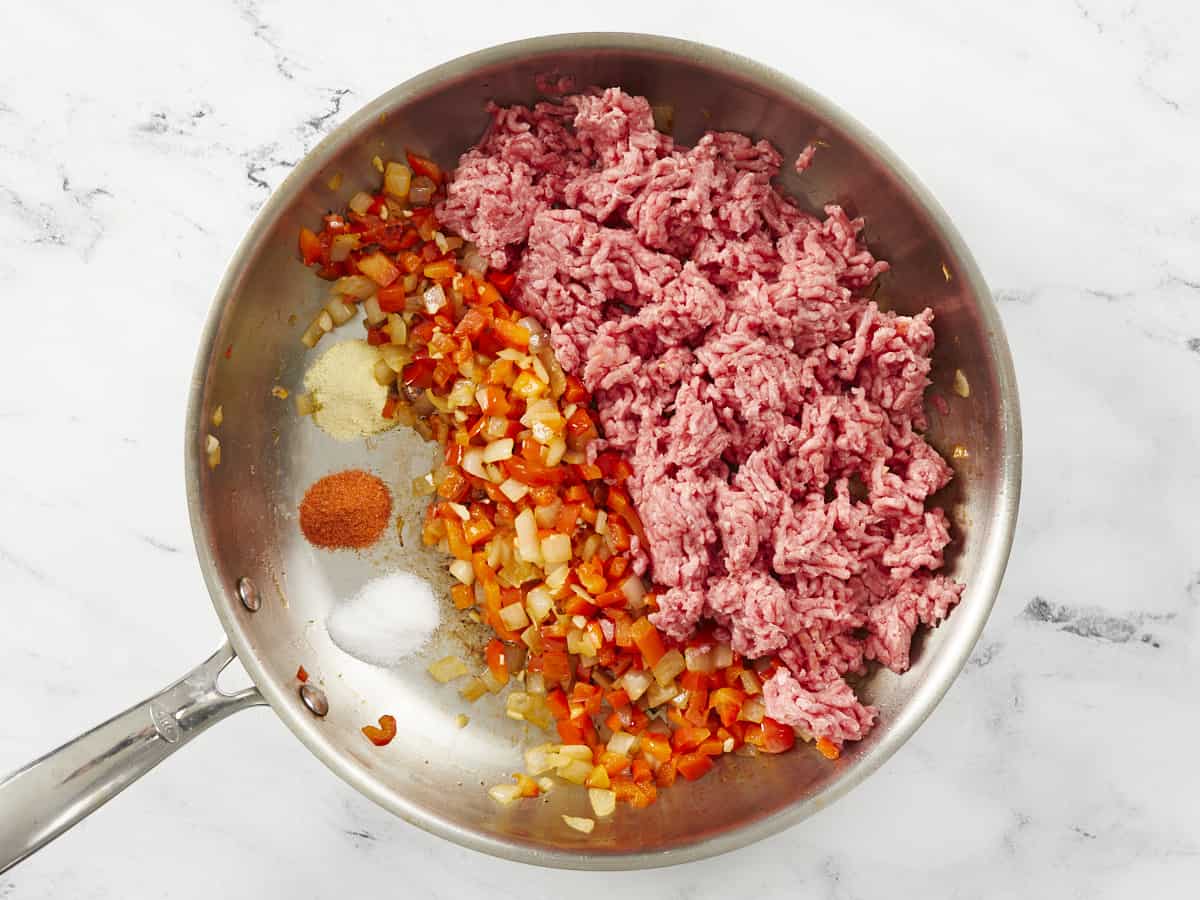
  • Add the beef to the pan and sprinkle with salt, sazón, and adobo. As the beef browns, break up big chunks with your spoon.
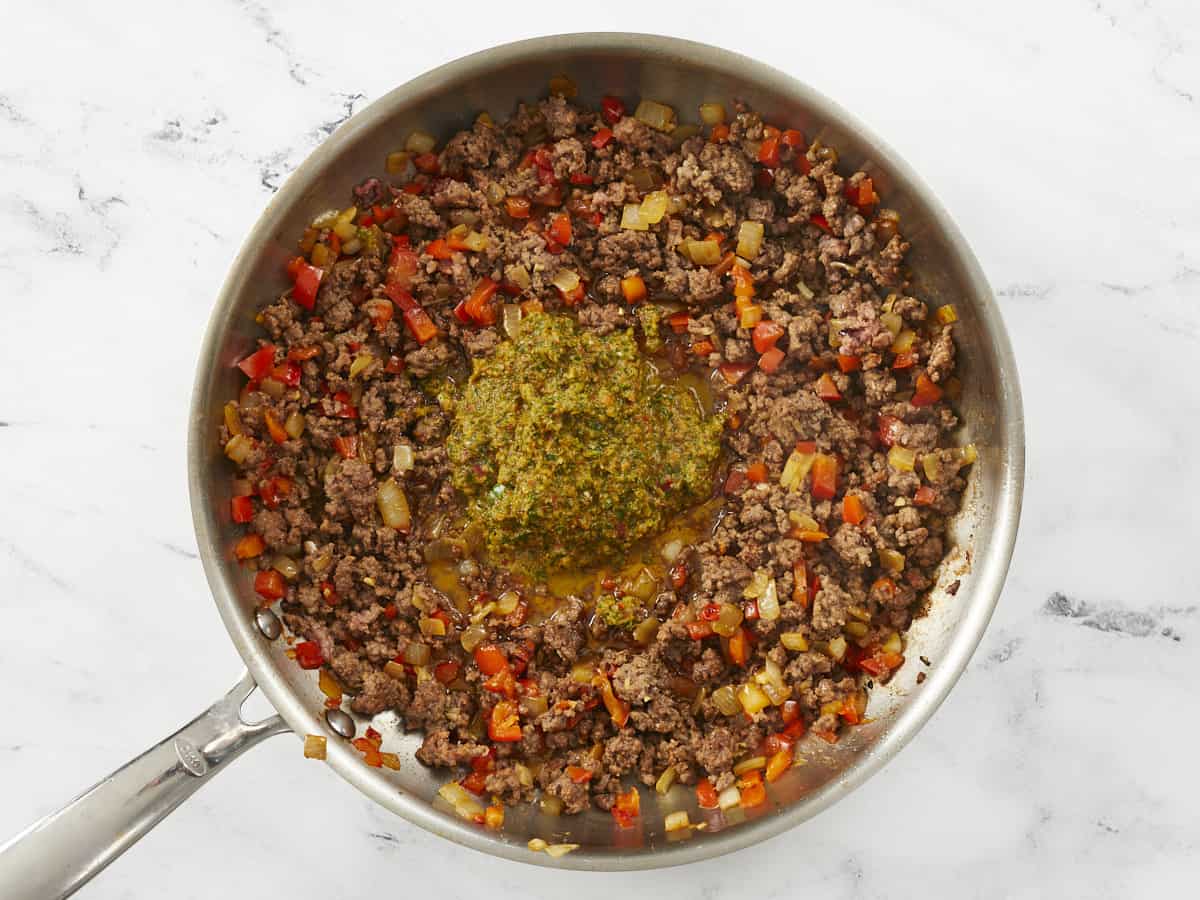
  • When the beef has browned, add the sofrito and cook, stirring constantly, until fragrant, about 2 minutes.
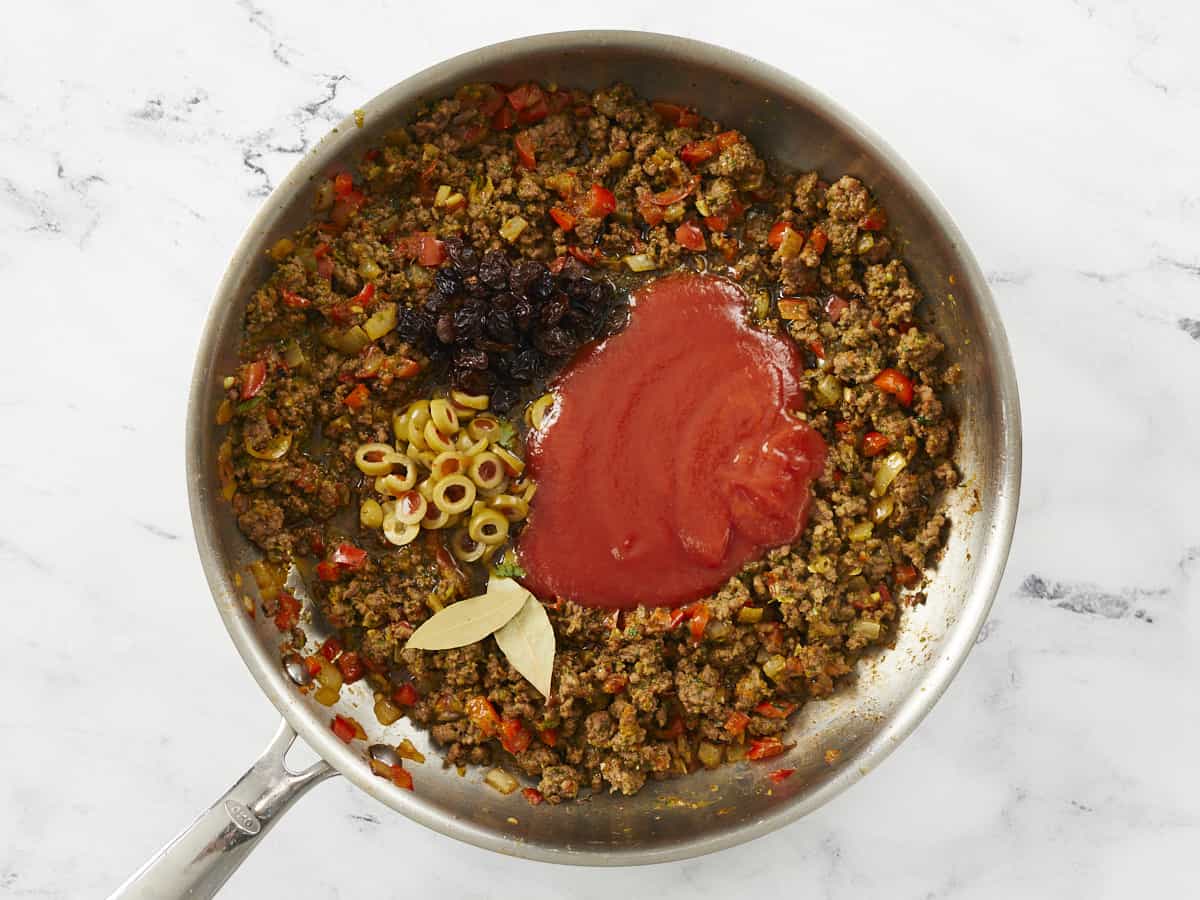
  • Add the olives, raisins, white vinegar, tomato sauce, bay leaves, and water. Continue to cook, occasionally stirring, for 10 minutes. Take the pan off the heat and allow it cool.

See how we calculate recipe costs here.

Notes

*If using fine salt, lower to 1/2 teaspoon.
*A packet of sazón contains about 1.5 teaspoons of sazón. If you cannot source sazón use the following:
1/4 teaspoon of garlic powder
1/4 teaspoon ground cumin
1/4 teaspoon ground coriander
1/3 teaspoon ground annatto
1/8 teaspoon turmeric
1/8 teaspoon ground oregano
*If you cannot source Adobo, mix your own and then use the amount called for in the recipe. Store the rest in an airtight container.
2 Tbsp salt
1 Tbsp garlic powder
1 tsp ground oregano
1 tsp onion powder
1 tsp black pepper
1 tsp ground cumin
1/2 tsp turmeric
*Pimento-stuffed green olives are also known as Spanish Olives or Manzanilla Olives.

Nutrition

Serving: 1cup | Calories: 212kcal | Carbohydrates: 7g | Protein: 11g | Fat: 16g | Sodium: 491mg | Fiber: 1g
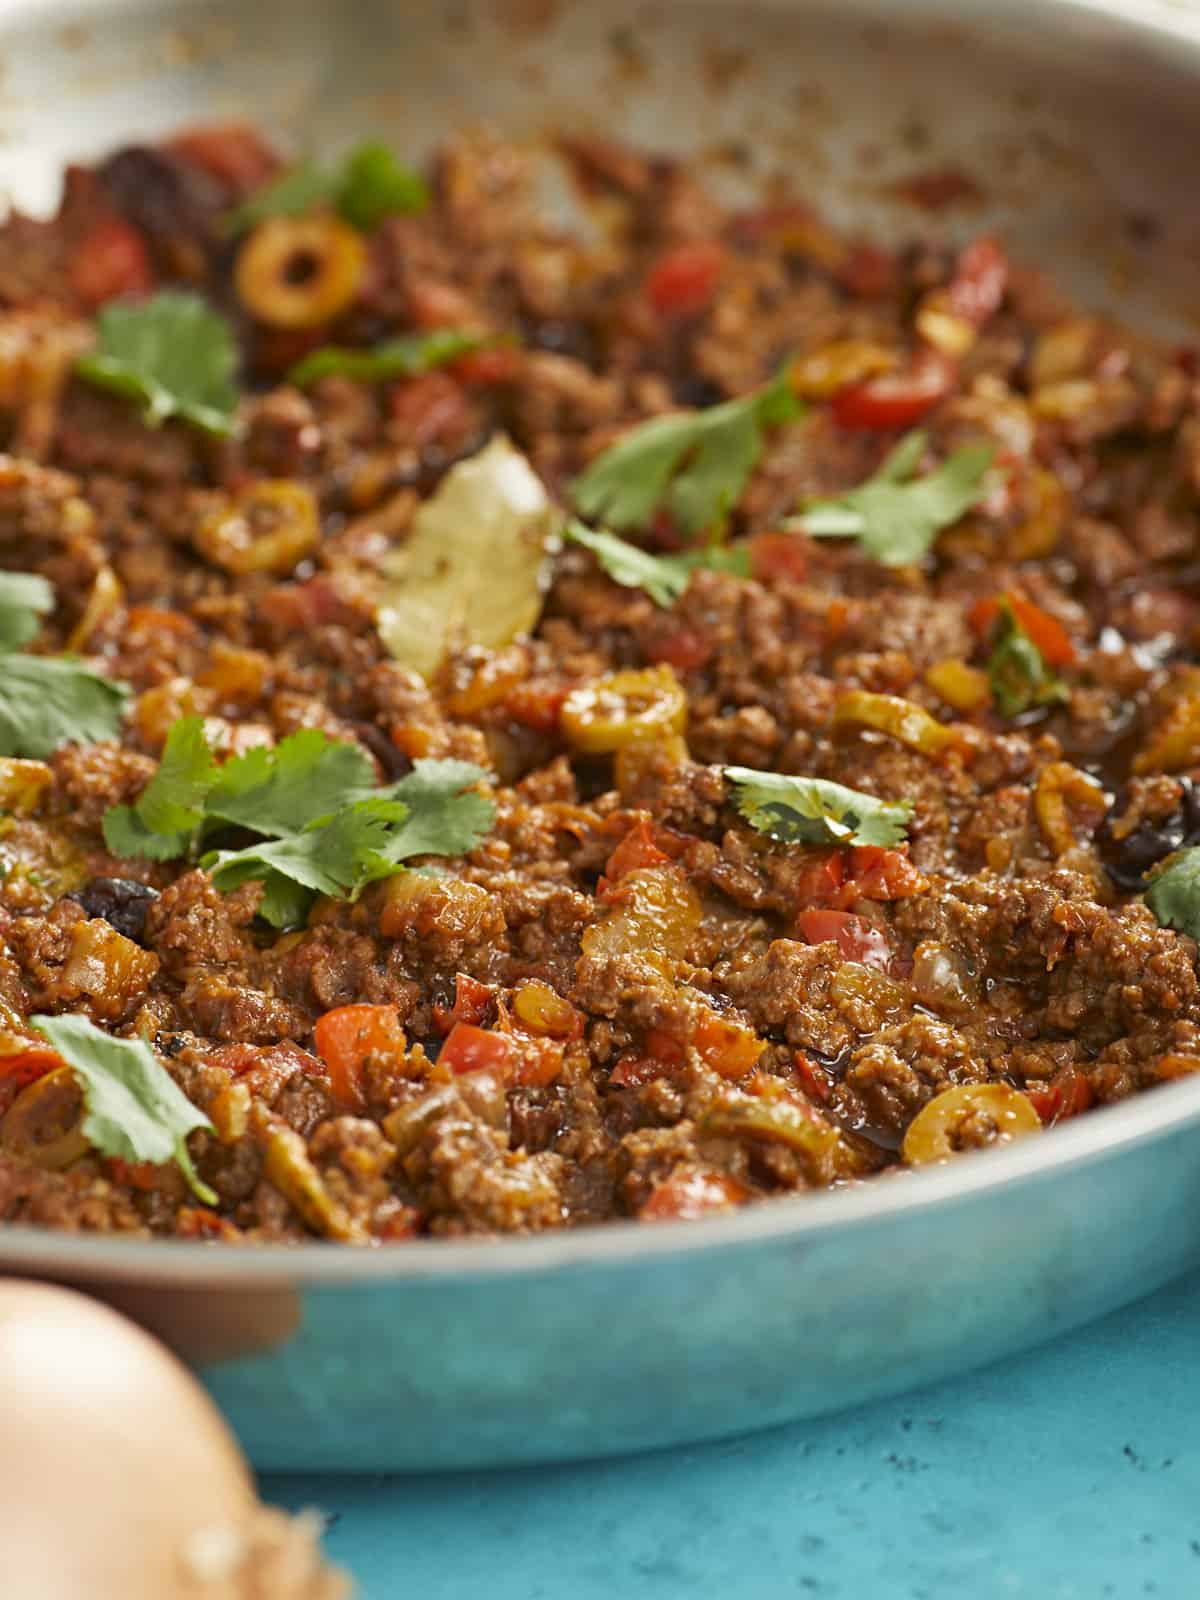
Side shot of picadillo in a silver skillet.

How to Make Picadillo – Step by Step Photos

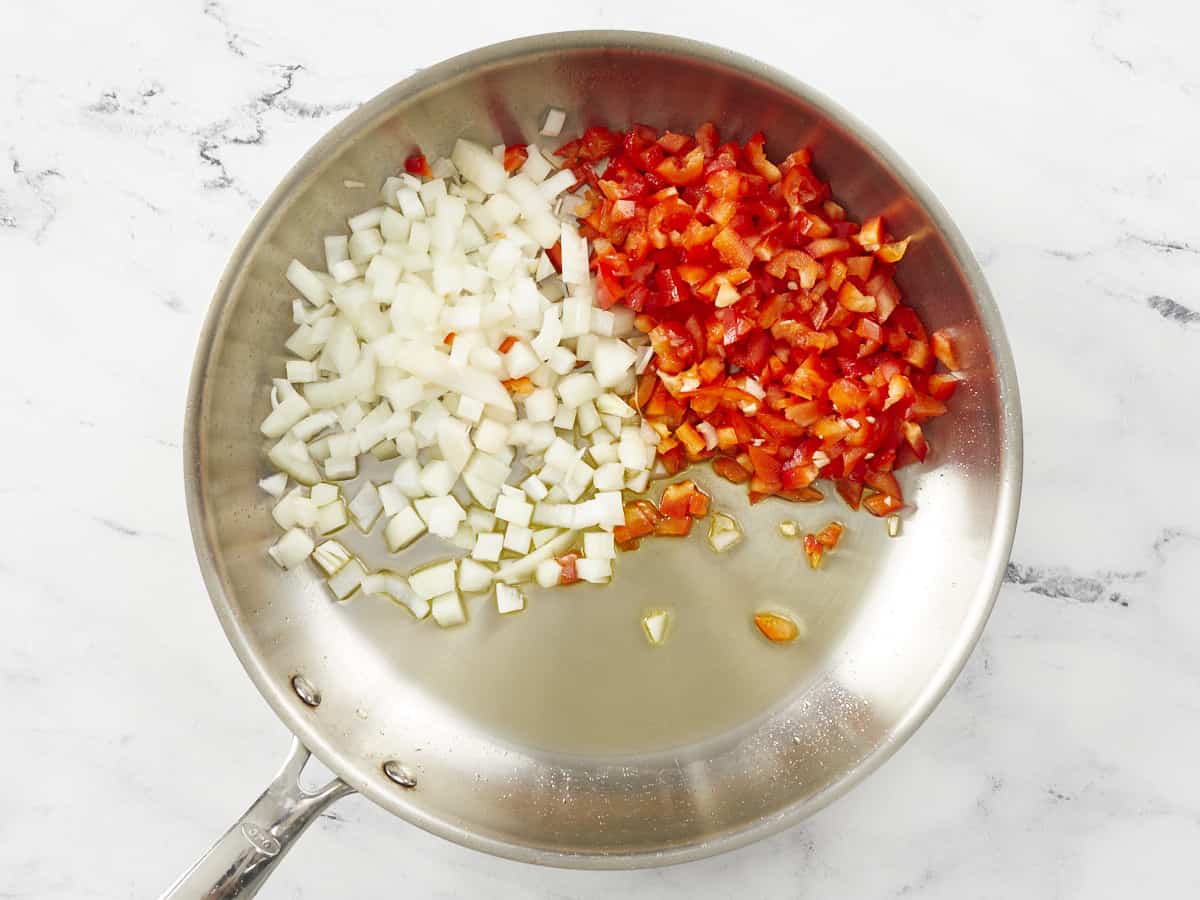
Onions and peppers in a silver pan.

Place a large saute pan over medium-high heat and add 1 1/2 tablespoons of olive oil. When the oil is hot, add 1 diced onion and 1 diced red bell pepper to the pan and cook until the onions are transparent.

Overhead shot of garlic being added to a pan of onions and peppers.

Add 1 tablespoon of minced garlic to the pan and cook until fragrant.

Meat being added to a pan of garlic, onions, and peppers.

Add the pound of ground beef to the pan and sprinkle with 1 teaspoon coarse salt, 1 and 1/2 teaspoons sazón, and 1 teaspoon adobo. As the beef browns, break up big chunks with your spoon.

Sofrito being added to a pan with browned meat in it.

When the beef has browned, add the 1/2 cup sofrito and cook, stirring constantly, until fragrant, about 2 minutes. Break up any remaining chunks of ground beef.

Tomato sauce, olives, and raisins added to a pan of browned meat and sofrito.

Add the 1/2 cup olives, 1/4 cup raisins, 1/2 tablespoon white vinegar, 15 ounces tomato sauce, 2 bay leaves, and 1/4 cup water.

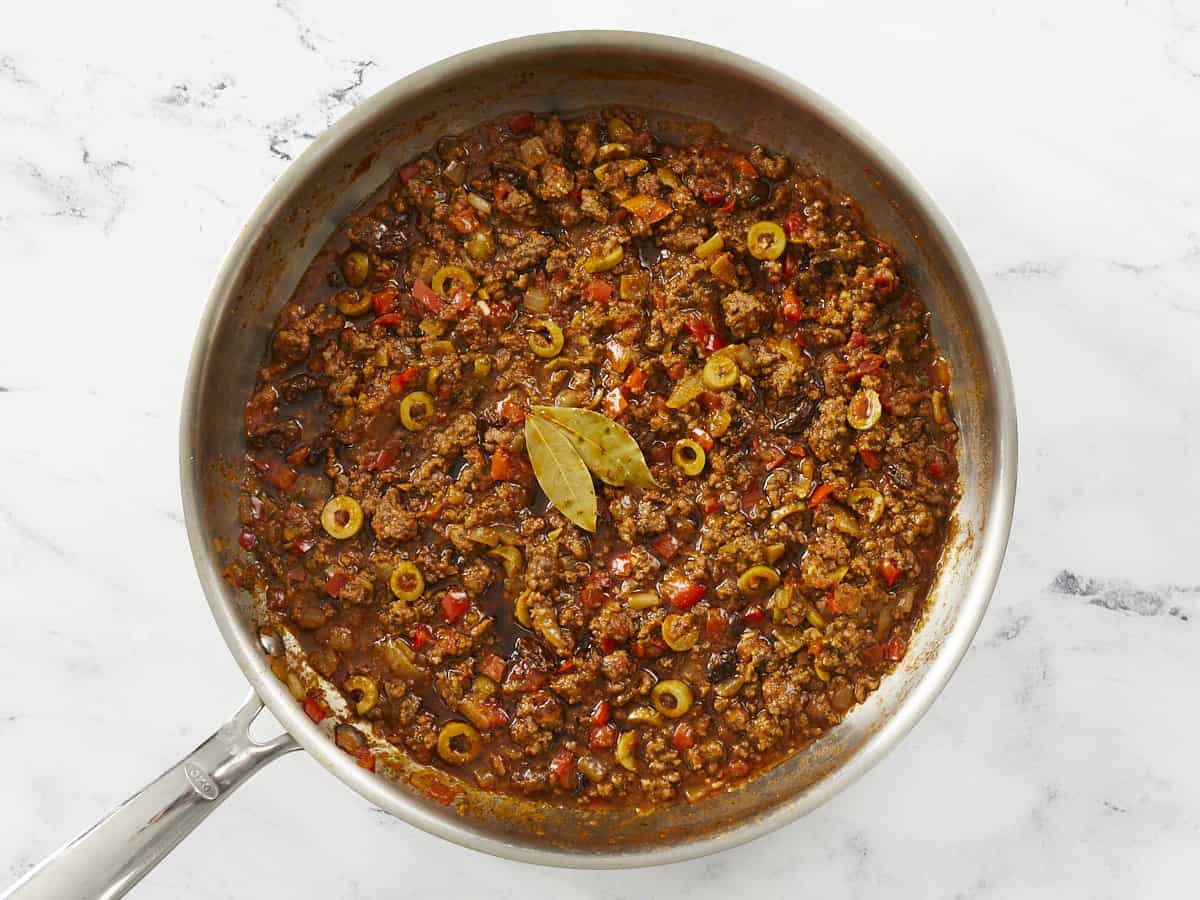
Finished pan of picadillo.

Continue to cook, occasionally stirring, for 10 minutes. Take the pan off the heat and allow the Picadillo to cool slightly before serving. Tell me how long it takes for everyone to start talking again!

Picadillo served over white rice in a white bowl.

More Easy One-Pot Recipes

The post Picadillo appeared first on Budget Bytes.
Homemade Alfredo Sauce

This thick, creamy Homemade Alfredo Sauce recipe is a quick and easy way to make a delicious, budget-friendly dinner in less than 30 minutes!

The post Homemade Alfredo Sauce appeared first on Budget Bytes.
Ditch the jar sauce and whip up your own batch of Homemade Alfredo Sauce from scratch! (And have dinner on the table in less than 30 minutes!) This easy recipe will help you make deliciously creamy pasta dishes that are way better, and cheaper, than anything you can order at Olive Garden. The best part is this recipe for Homemade Alfredo Sauce can be made ahead of time and stored in the fridge for up to 4 days!

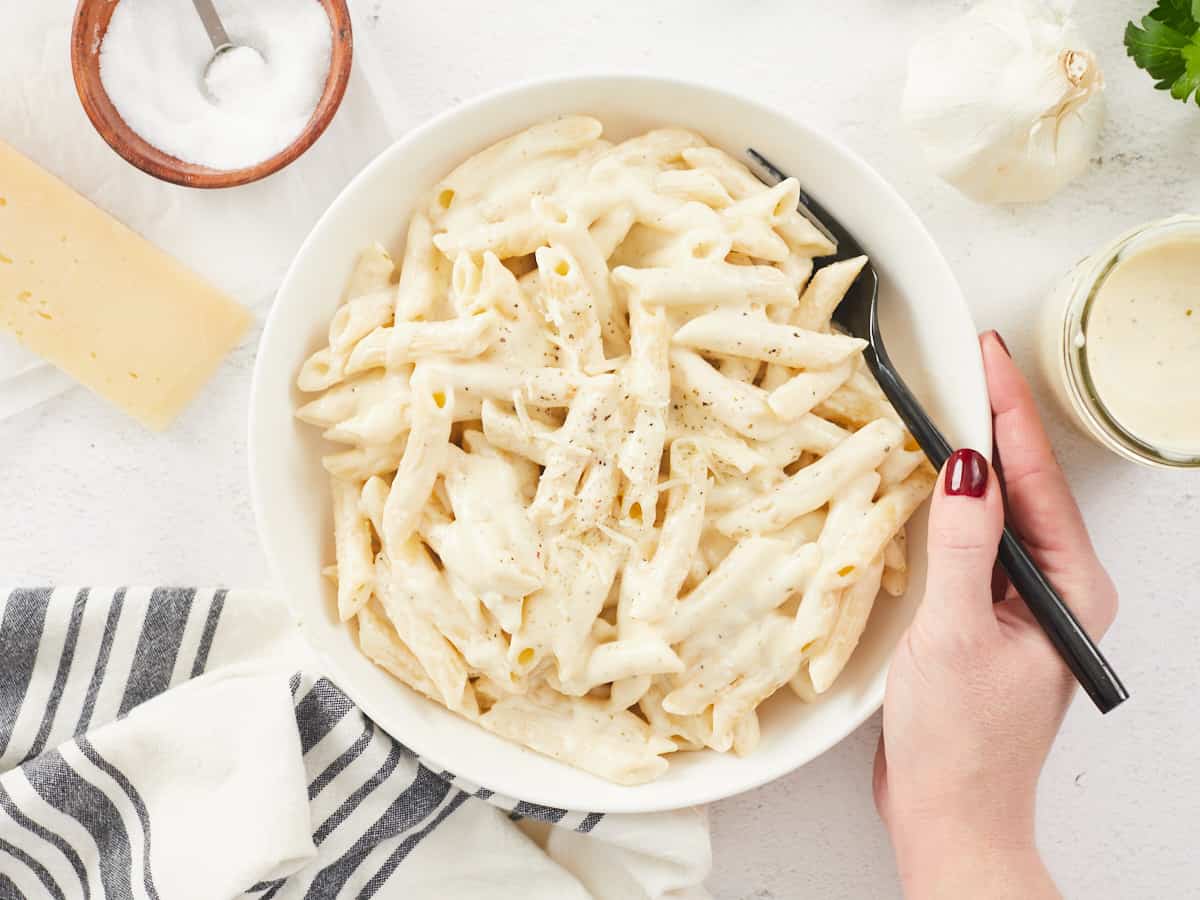
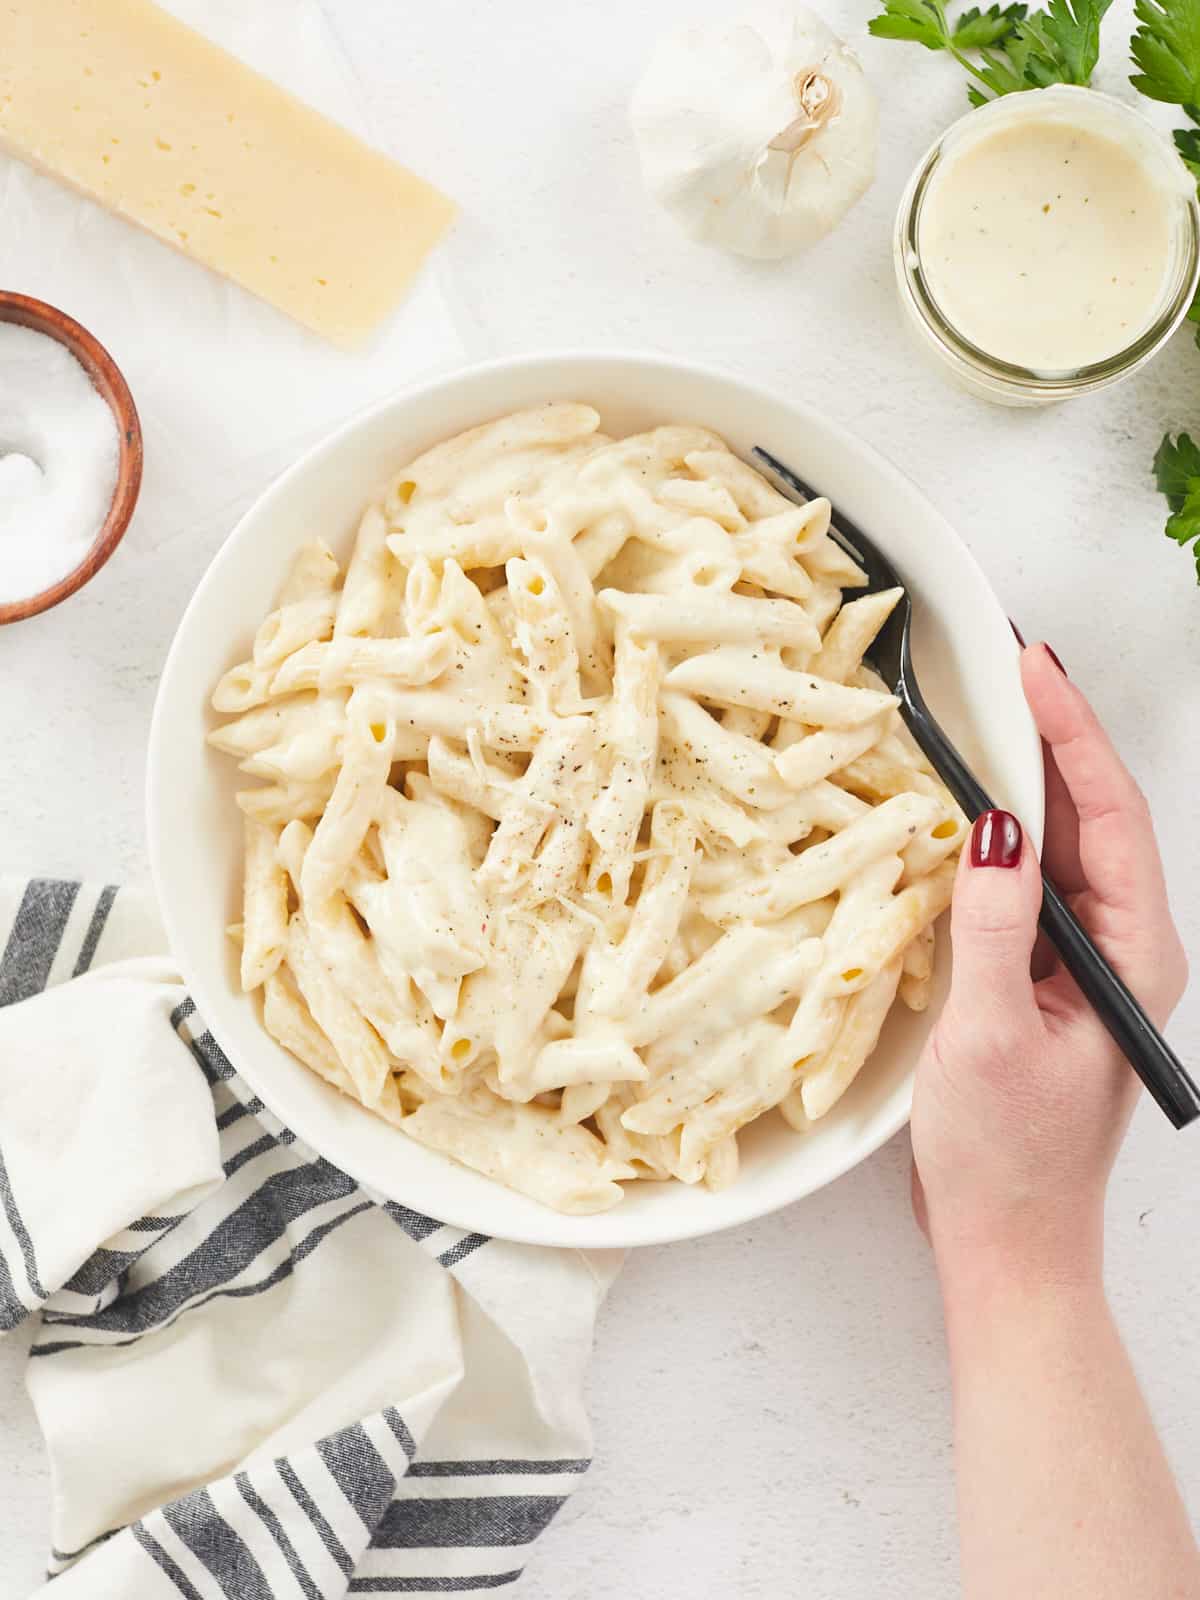
A large white bowl filled with cooked penne pasta dressed with homemade alfredo sauce, a hand is holding the right side of the bowl and a black metal fork, various props surround the bowl including a grey striped dish cloth, a block of parmesan cheese, a wooden bowl of salt and a mason jar of alfredo sauce.

WHAT IS ALFREDO SAUCE?

This thick, creamy Alfredo Sauce—what we like to call an “Amerifredo” or an American-style alfredo sauce—is a decadent pasta sauce made with butter, garlic, heavy cream, and tons of Parmesan cheese. Authentic Roman alfredo sauce does not include any heavy cream or garlic, and it derives all of its creaminess and flavor from the butter and really good Parmesan. But if you’re used to the “alfredo” served in American restaurants or bought in a jar in U.S. grocery stores, that’s what this recipe delivers.

CAN I USE MILK INSTEAD OF CREAM?

To make Homemade Alfredo Sauce that is thick, creamy, and delicious, you need to use heavy cream. Using whole milk or half & half will not work as well because the high water content in these ingredients will not allow the Parmesan to emulsify and melt smoothly into the sauce. The sauce will end up runnier, it may not cling to the pasta as well, and it will likely be a little clumpy or gritty in texture.

#1 Tip for success? heat control.

Make sure the heat is on low before stirring in the Parmesan cheese—even taking the pot off of the burner for a minute so the cream is no longer boiling—otherwise, the sauce could break. High heat separates the proteins and fats in cheese, which will give you a lumpy, unappetizing sauce. Waiting until the cream is no longer boiling will also help prevent it from sticking to the bottom of the pot and not melting into the sauce properly.

What kind of parmesan is best for alfredo sauce?

We tested this recipe using grated Parmesan cheese (the kind in a can). It’s the most budget-friendly option, and will still give you insanely-delicious results! If you have the money to splurge, freshly shredded Parmesan will make the most creamy, dreamy Alfredo Sauce you’ve ever tasted.

tip: save your parmesan rind!

Dropping big bucks on a block of Parmesan cheese is absolutely not necessary (see above), but I do enjoy working it into my budget now and then. To make the most of every single morsel, SAVE THE RIND! Stash it in the freezer for your next soup or stew. Simply toss it in the pot while everything’s simmering and infuse the broth with rich, Parmesan flavor! (Remove it before serving…or sneak a bite when no one’s looking.) Add a leftover Parmesan rind to these soup and stew recipes:

EAT LEFTOVERS ALL WEEK!

One of the best parts about this recipe is that you can make it ahead. No more terrible re-heated leftover creamy pasta! Instead, let the alfredo sauce cool and store it in a tightly sealed container in the refrigerator for up to 4 days. Then gently reheat and add to freshly cooked pasta. 

WHAT TO SERVE WITH HOMEMADE ALFREDO SAUCE

Drench this ultra-rich sauce over plain pasta or add some chicken, shrimp, and hearty vegetables even use it in a decadently cheesy pasta bake. And make sure to serve some garlic bread and a simple side salad on the side!

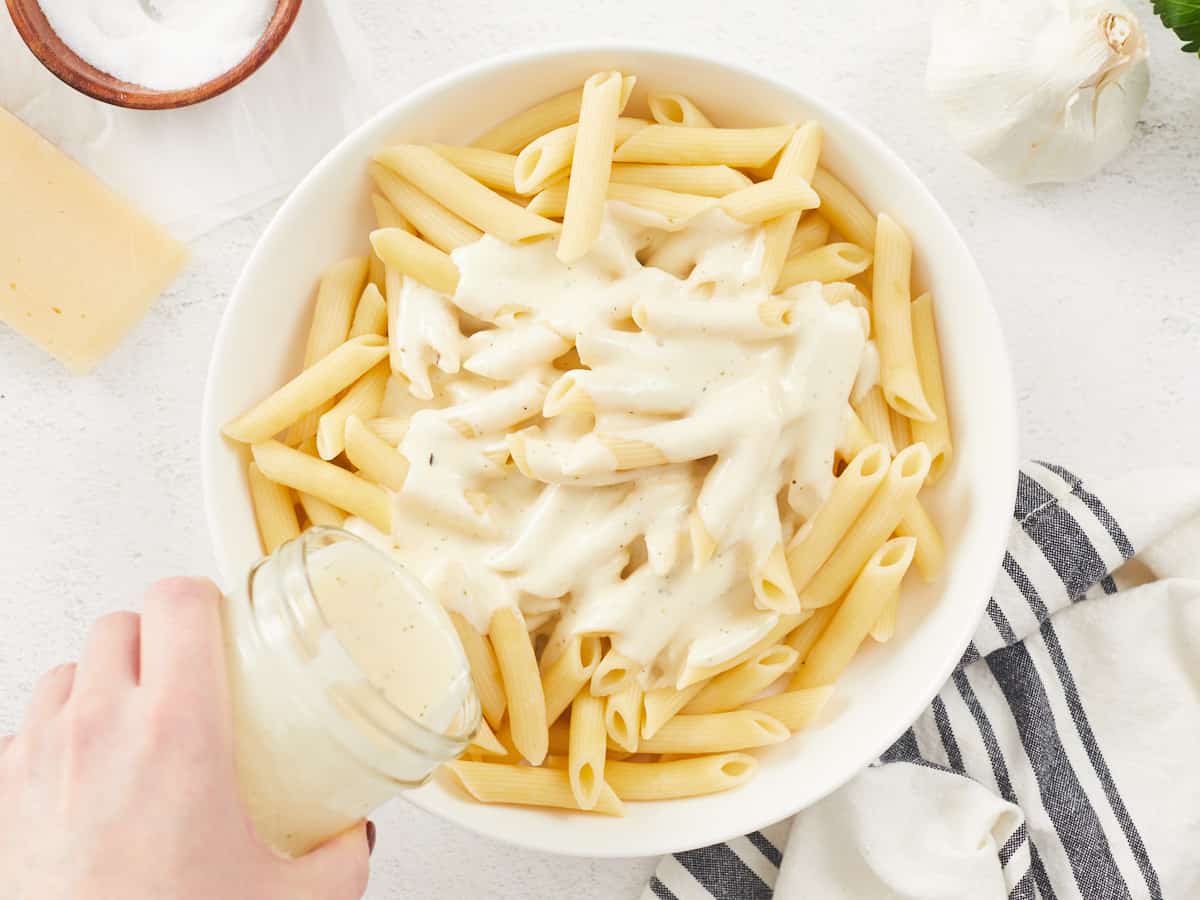
A large white bowl filled with cooked penne pasta, a hand is pouring alfredo sauce in the center of the bowl from a glass mason jar in the lower left side of the image, and there are various ingredients around the bowl mostly out of frame.
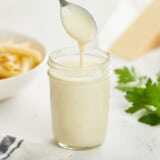
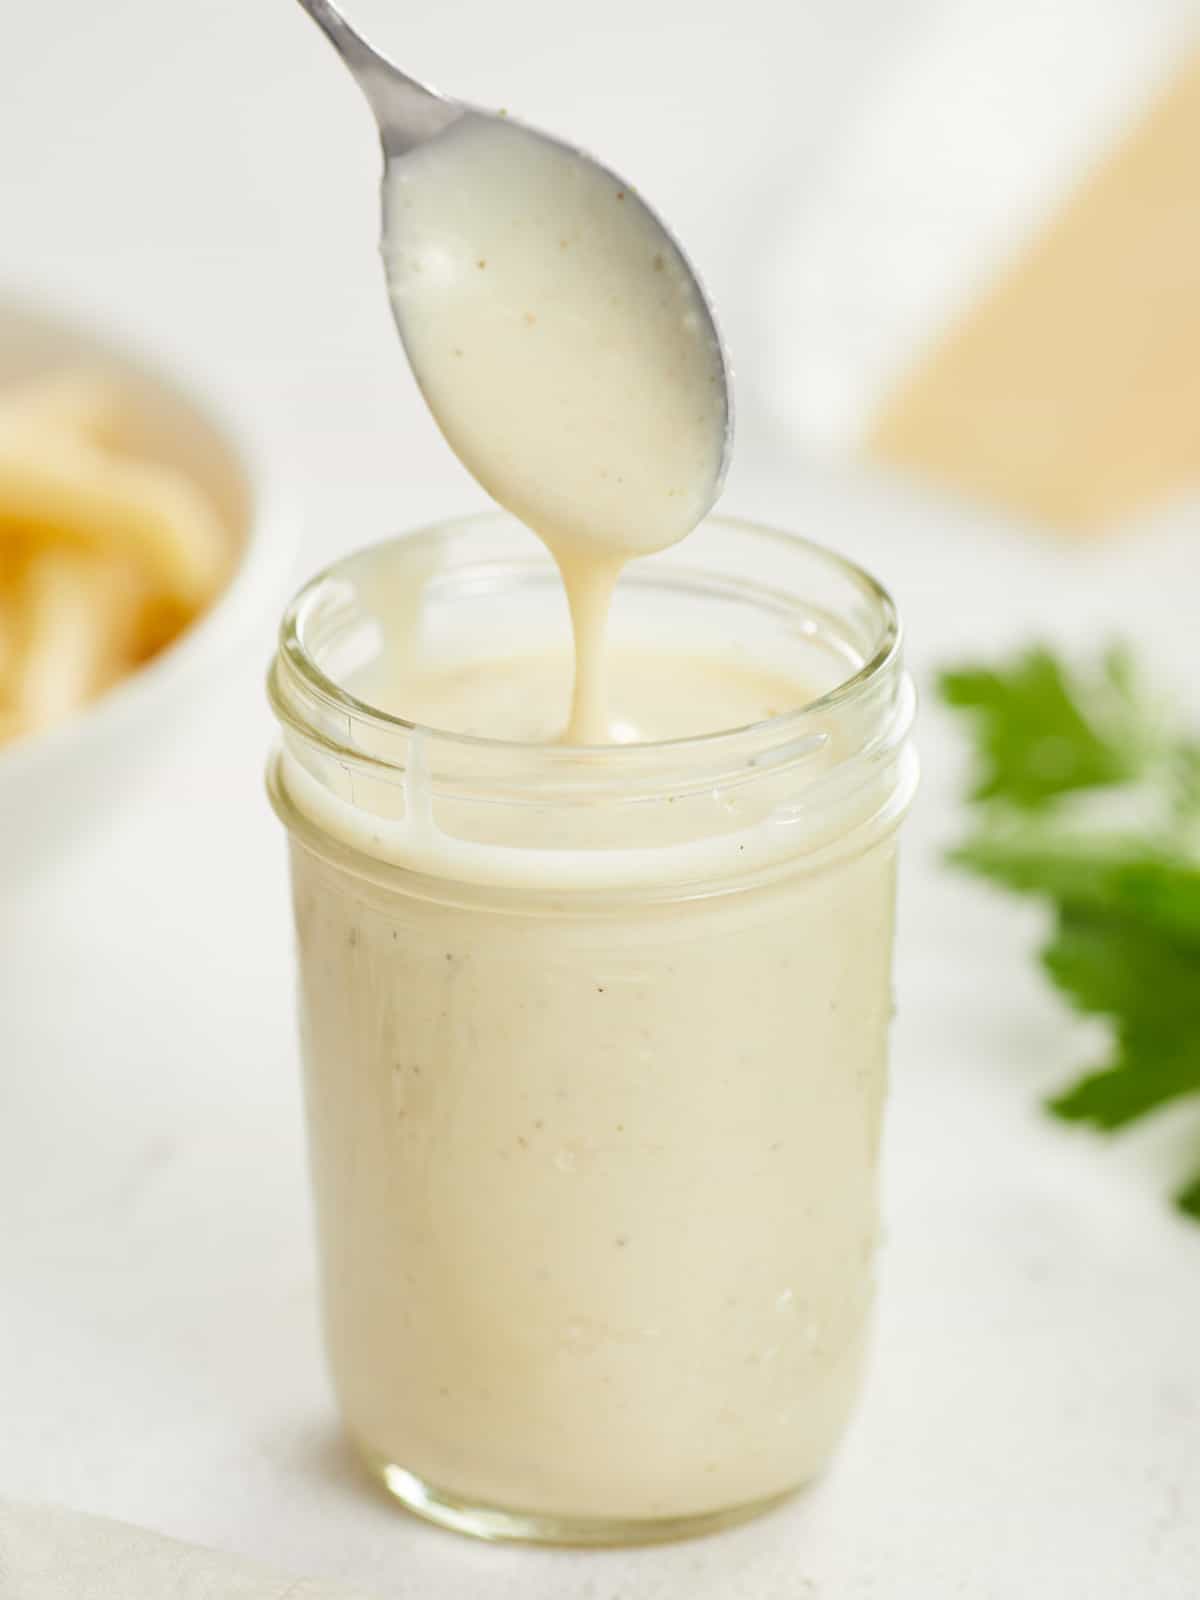
A mason jar filled with alfredo sauce and a metal spoon raised above the jar after it's been dipped into the sauce so it's dripping off, and blurred in the background is a block of parmesean cheese, a bowl of uncooked pasta and some fresh italian parsley.
Print

Homemade Alfredo Sauce

This thick, creamy Homemade Alfredo Sauce recipe is a quick and easy way to make a delicious, budget-friendly dinner in less than 30 minutes!
Course Dinner, Sauce
Cuisine American, Italian
Total Cost $2.67 RECIPE / $ 0.67 SERVING
Prep Time 5 minutes
Cook Time 10 minutes
Total Time 15 minutes
Servings 4
Calories 335kcal

Ingredients

  • 2 Tbsp salted butter $0.30
  • 2 cloves garlic $0.15
  • 1 cup heavy cream $1.00
  • 1/2 tsp Italian seasoning $0.05
  • 1/2 tsp salt $0.01
  • 1/2 tsp black pepper $0.01
  • 3/4 cup Parmesan cheese $1.15

Instructions

  • Melt the butter in a medium saucepot over medium heat. Add the minced garlic and saute for two minutes or until the garlic becomes fragrant.
  • Whisk in the heavy cream, Italian seasoning, salt, and pepper.
  • Allow the cream to come up to a boil. Once boiling, reduce the heat to low and stir in the Parmesan cheese. Continue to stir the mixture until all the cheese has melted and the sauce thickens.
  • Serve over your favorite pasta, chicken, vegetables, and more!

See how we calculate recipe costs here.

Nutrition

Serving: 0.33cup | Calories: 335kcal | Carbohydrates: 5g | Protein: 7g | Fat: 32g | Sodium: 680mg | Fiber: 0.2g
A large white bowl filled with cooked penne pasta dressed with homemade alfredo sauce, a hand is holding the right side of the bowl and a black metal fork, various props surround the bowl including a grey striped dish cloth, a block of parmesan cheese, a wooden bowl of salt and a mason jar of alfredo sauce.

How to Make Homemade alfredo sauce – Step by Step Photos

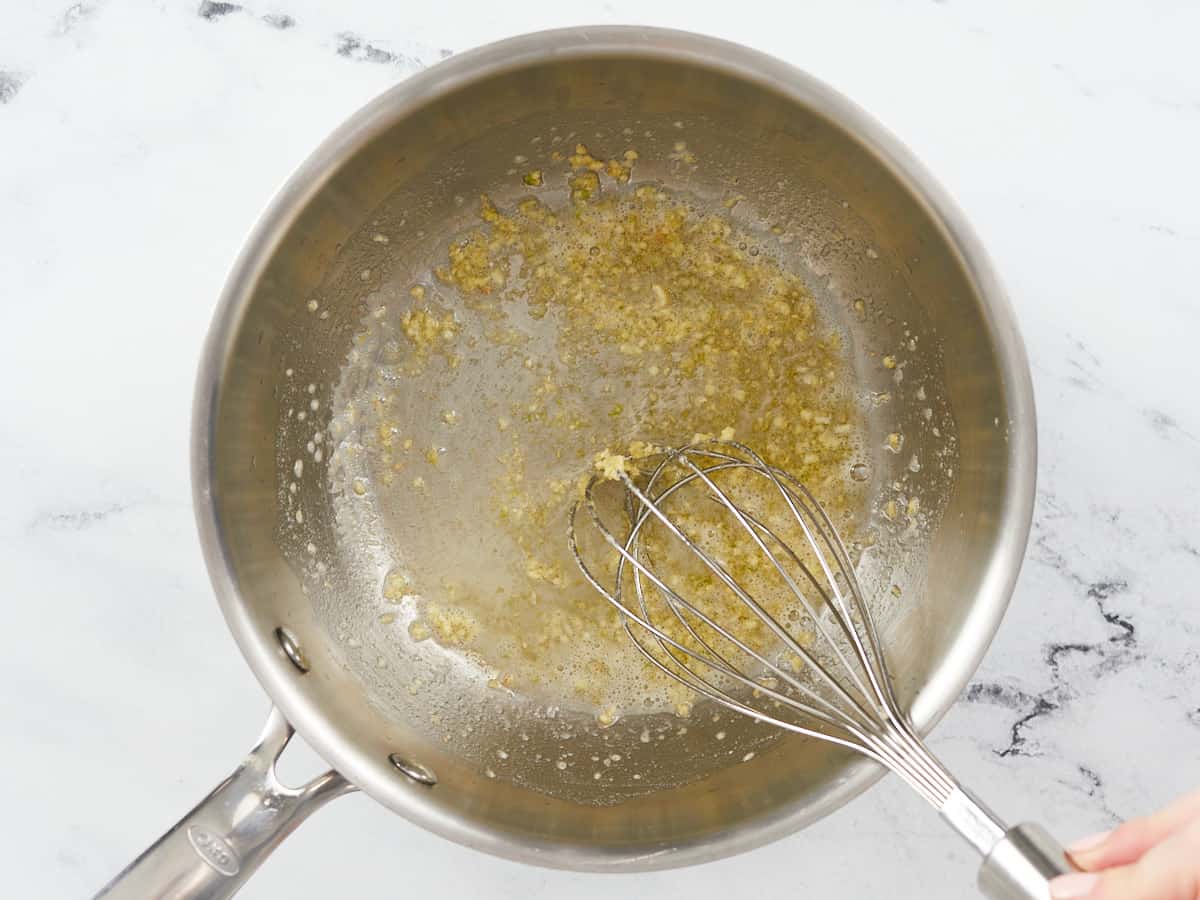
Garlic being sautéed in melted butter and stirred with a balloon whisk in a stainless steel skillet on a white marble backdrop.

Melt 2 Tablespoons of butter in a medium saucepot over medium heat. Add 2 minced garlic cloves and saute for two minutes or until the garlic becomes fragrant.

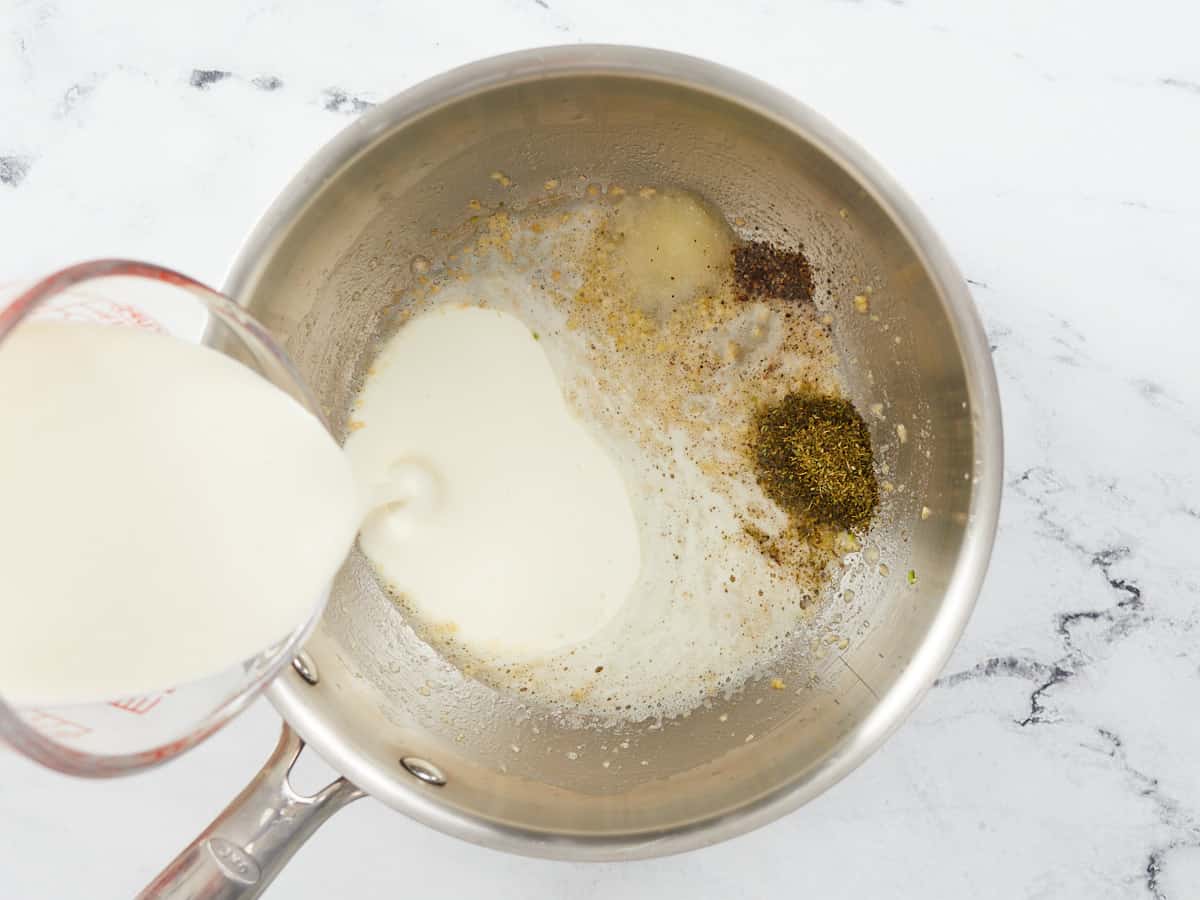
Heavy cream being poured into the left side of a stainless steel skillet with sauteed garlic, salt, pepper and italian season in seperate piles on the right side of the skillet.

Whisk in 1 cup of heavy cream, 1/2 teaspoon of Italian seasoning, 1/2 teaspoon of salt, and 1/2 teaspoon of freshly-cracked black pepper into the sauteed garlic. Allow the cream to come up to a boil. (About 5 minutes.)

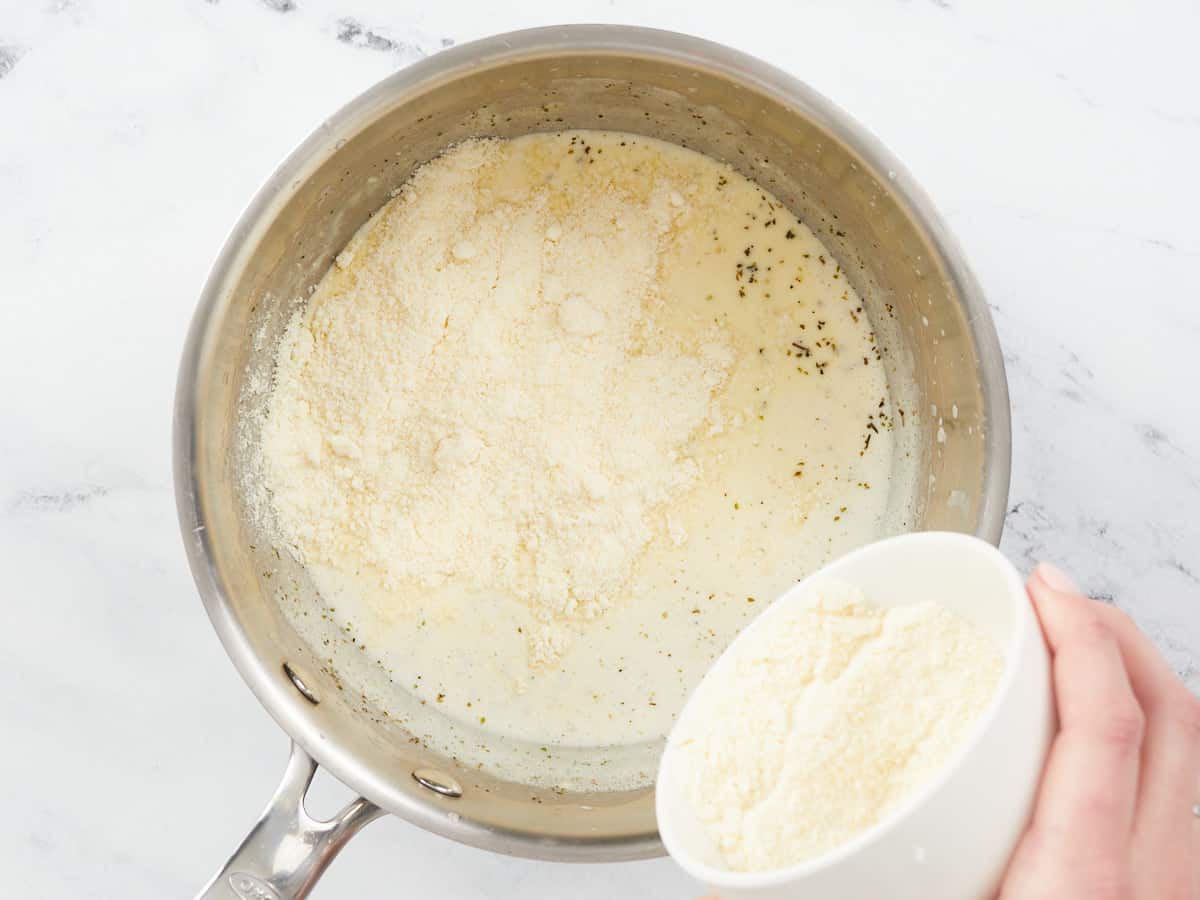
A hand dumping parmesan cheese from a small white bowl into the bottom right hand side of a stainless steel skillet that contains mixed heavy cream, melted butter, sauteed garlic and spices.

Once the cream is boiling, reduce the heat to low. and stir in the Parmesan cheese. If needed, take the pot off of the hot burner for a minute so the cream is no longer boiling. (High heat could cause the cheese to separate.)

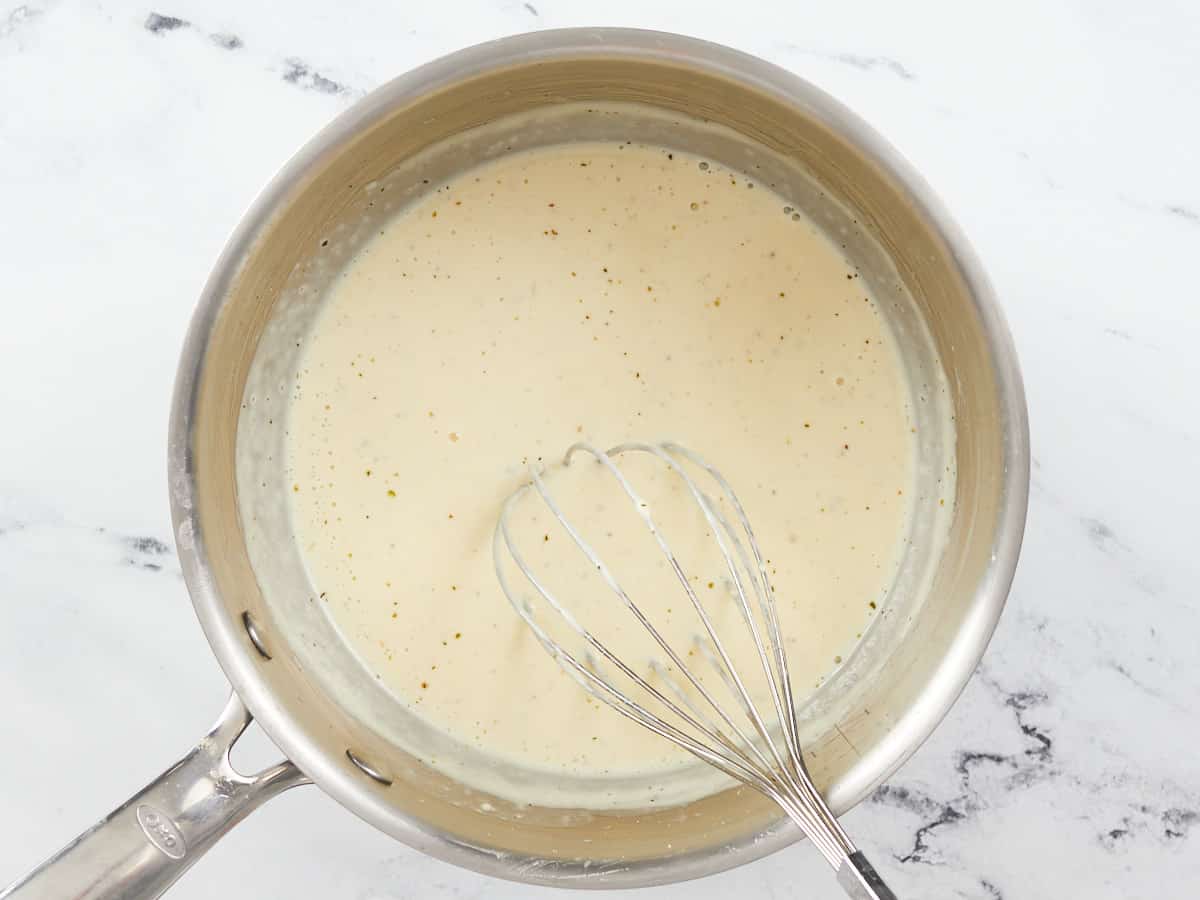
A whisk sitting in a stainless steel skillet after it was used to combine parmesan cheese with heavy cream, garlic, melted butter and spices to create alfredo sauce.

Continue to stir the mixture until all the cheese has melted and the sauce thickens. (About 5 minutes.)

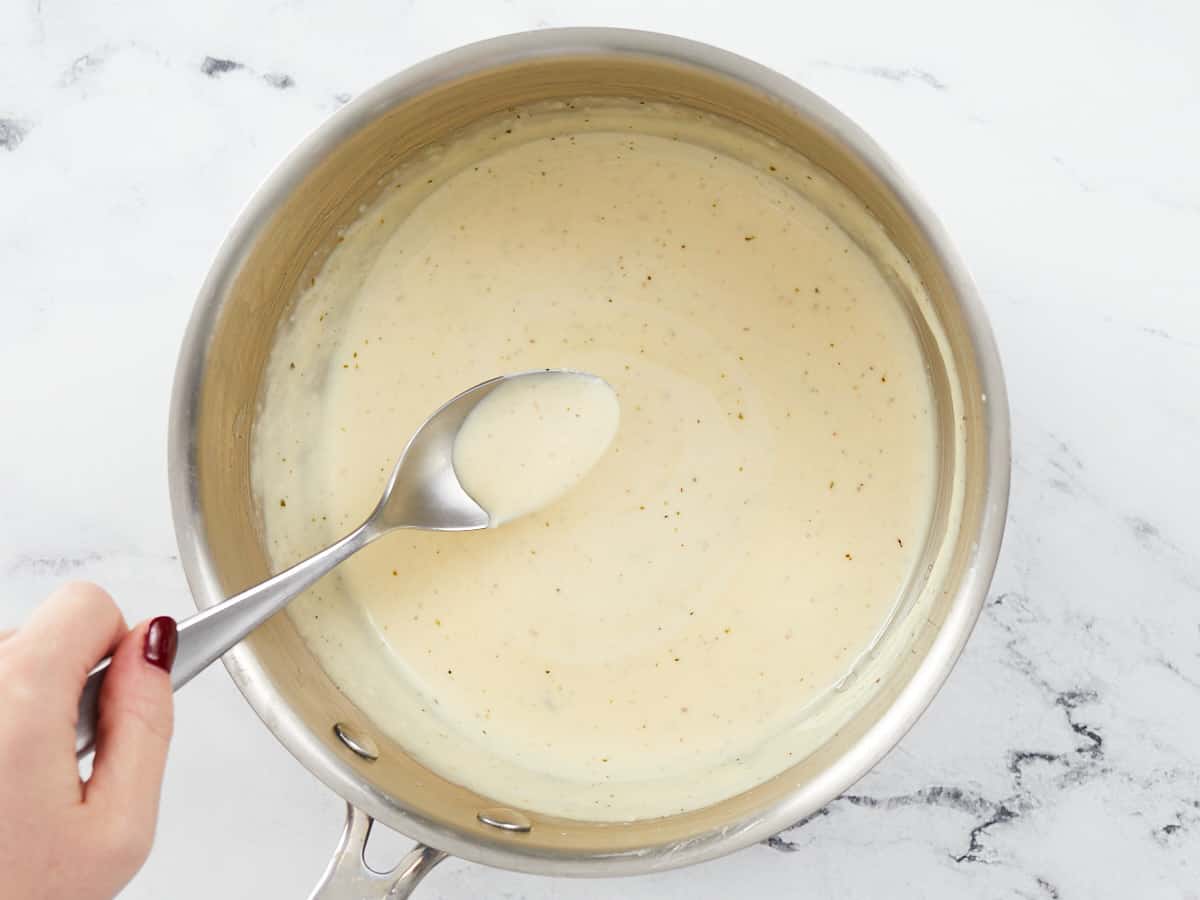
A hand is holding a metal serving spoon over a skillet of homemade alfredo sauce to show the thickness and consistency of the sauce once it has reduced and cooled slightly.

Serve over your favorite pasta, chicken, vegetables, or more! This homemade alfredo sauce can also be stored in an airtight container and refrigerated for up to 4 days.

A mason jar filled with alfredo sauce and a metal spoon raised above the jar after it's been dipped into the sauce so it's dripping off, and blurred in the background is a block of parmesean cheese, a bowl of uncooked pasta and some fresh italian parsley.

Oh, heck yeah! Who’s eating pasta all week?! (We definitely did!) ~ Marion :)

The post Homemade Alfredo Sauce appeared first on Budget Bytes.
Sheet Pan Pizza

Sheet-Pan Pizza is a low-effort recipe guaranteed to make any occasion special and satisfy cravings for take-out pizza at half the cost.

The post Sheet Pan Pizza appeared first on Budget Bytes.
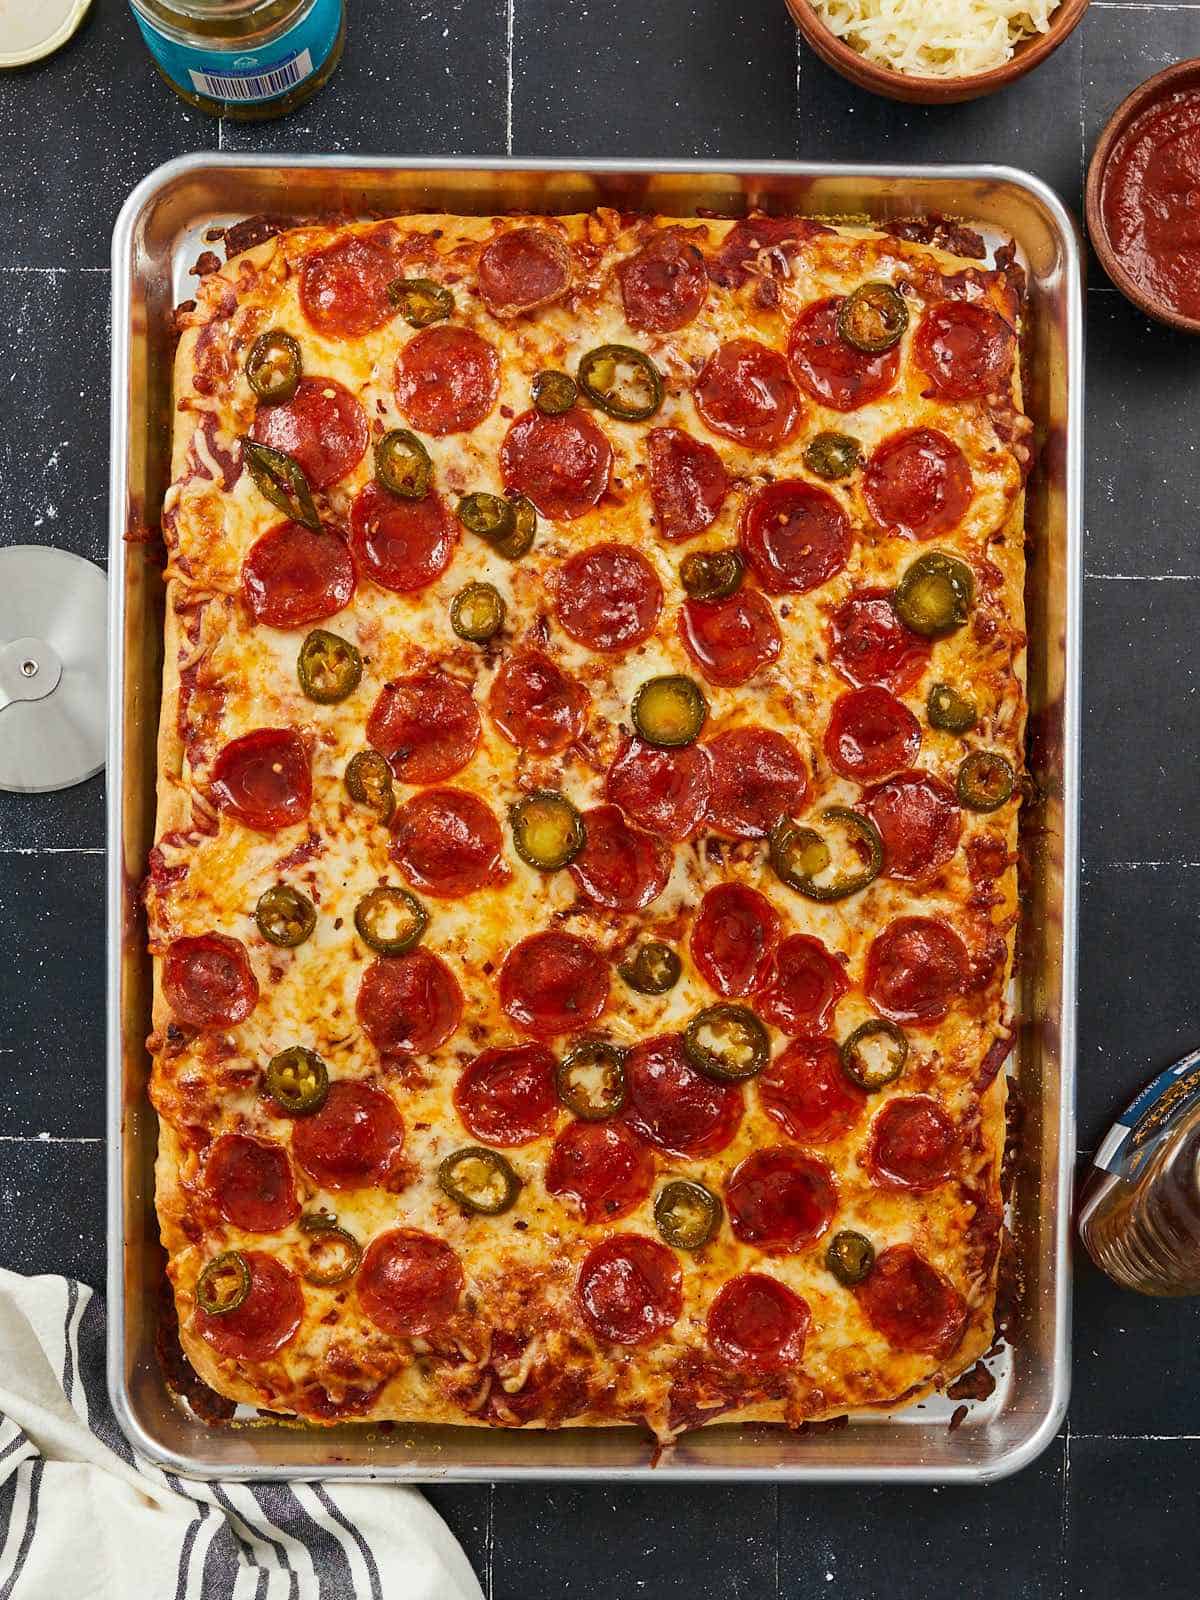
Sheet Pan Pizza is the solution for anyone hoping to make crave-worthy, restaurant-quality pizza at home—at half the cost of carry-out! Our recipe for Sheet Pan Pizza will level up any casual date night in, make for an unforgettable family dinner, or serve as an interactive party dish where everyone helps pick the toppings. Sheet Pan Pizza is not just for special occasions. It’s also the perfect “take-out fake out” meal for two that will yield enough leftovers to check off some weekly meal prep!

A vertical image of a baked sheet pan pizza topped with pizza sauce, cheese, pepperonis, pickled jalepenos and honey that is not sliced.

WHAT IS SHEET PAN PIZZA?

This recipe for Sheet Pan Pizza combines my two favorite kinds of take-out pizza. The crust is a sturdy Foccacia bread, typically used for Sicilian-style “Grandma Pie,” that is baked and then covered edge-to-edge with tons of cheese and toppings—sort of like a Detroit-Style pizza—and then baked again! Sheet Pan Pizza is a fun way to feed a crowd and can easily be divided into sections so everyone in the family gets to have a few slices with their favorite sauce and toppings.

WHAT YOU NEED TO MAKE A SHEET PAN PIZZA:

  • A SHEET PAN: We suggest using a standard 18” x 13” rimmed metal baking sheet or the 16″ x 12.5″ x 1″ enamelware pan in our Shop.
  • PIZZA DOUGH: Our No-Knead Focaccia is oh-so-tasty on its own, but next level as the base of a giant pizza. Totally worth the extra time to make it from scratch! (You can also use store-bought pizza dough—see note below.)
  • OLIVE OIL: We used as little olive oil as possible to make this recipe budget-friendly. (Feel free to use a bit more!) You can substitute or mix it with plain cooking oil to reduce costs even more, but the pizza crust will lack the distinctive taste olive oil provides.
  • STORE-BOUGHT SAUCE: We chose a store-bought, traditional pizza sauce in order to keep things simple. You can totally make your own homemade pizza sauce! Or swap it out for a jar of alfredo sauce, vodka sauce, prepared pesto, or BBQ sauce!
  • TONS OF SHREDDED CHEESE: You need a good amount of cheese for this recipe, but it’s totally worth the extra ingredients to balance out all the bread, sauce, and toppings. 
  • YOUR FAVORITE PIZZA TOPPINGS: Keep it classic or mix it up—anything goes when it comes to Sheet Pan Pizza!
An extreme close up of a single slice of sheet pan pizza raised above the rest of the pizza with a spatula.

DO I HAVE TO MAKE MY OWN CRUST?

I would highly suggest making the pizza crust in this recipe – our shockingly-easy No-Knead Homemade Focaccia. It pretty much does the work on its own! You can substitute the homemade crust with 1 lb. of store-bought pizza dough for this Sheet Pan Pizza recipe (and start with the second set of instructions on the recipe card), but the results will be slightly different from the pizza we made.

TIP: Making Two Pizzas

  • If doubling the recipe: Prepare a doubled amount of pizza dough at once in a very large mixing bowl. Slice the large ball of dough in half (after the first ferment), and transfer each to its own 1/2 sheen pan for the second rise. Follow the recipe as written, also rotating and flipping the baking sheets halfway through both bakes so both pizzas cook evenly.
  • Alternatively, when making two smaller pizzas: Slice the risen ball of dough in half and transfer each to its own 1/4 sheet pan for the second rise. Split the remaining ingredients between the pizzas, and reduce both baking times by about 5 minutes each (also relying on the visual cues as a guide to prevent over-baking or under-baking the crust).

MAKE AHEAD & MAKE IT EASIER

  • You can make the dough for this Sheet Pan Pizza ahead and store it tightly covered in the fridge for up to 24 hours before baking it. Let it sit out at room temperature for about 30 minutes before transferring it to the sheet pan.
  • You can also pre-bake the pizza crust up to 8 hours ahead. Let the bread cool completely before covering it to keep it from getting soggy. When you’re ready to eat, just top the crust with sauce and toppings and bake it again for 10-15 minutes.
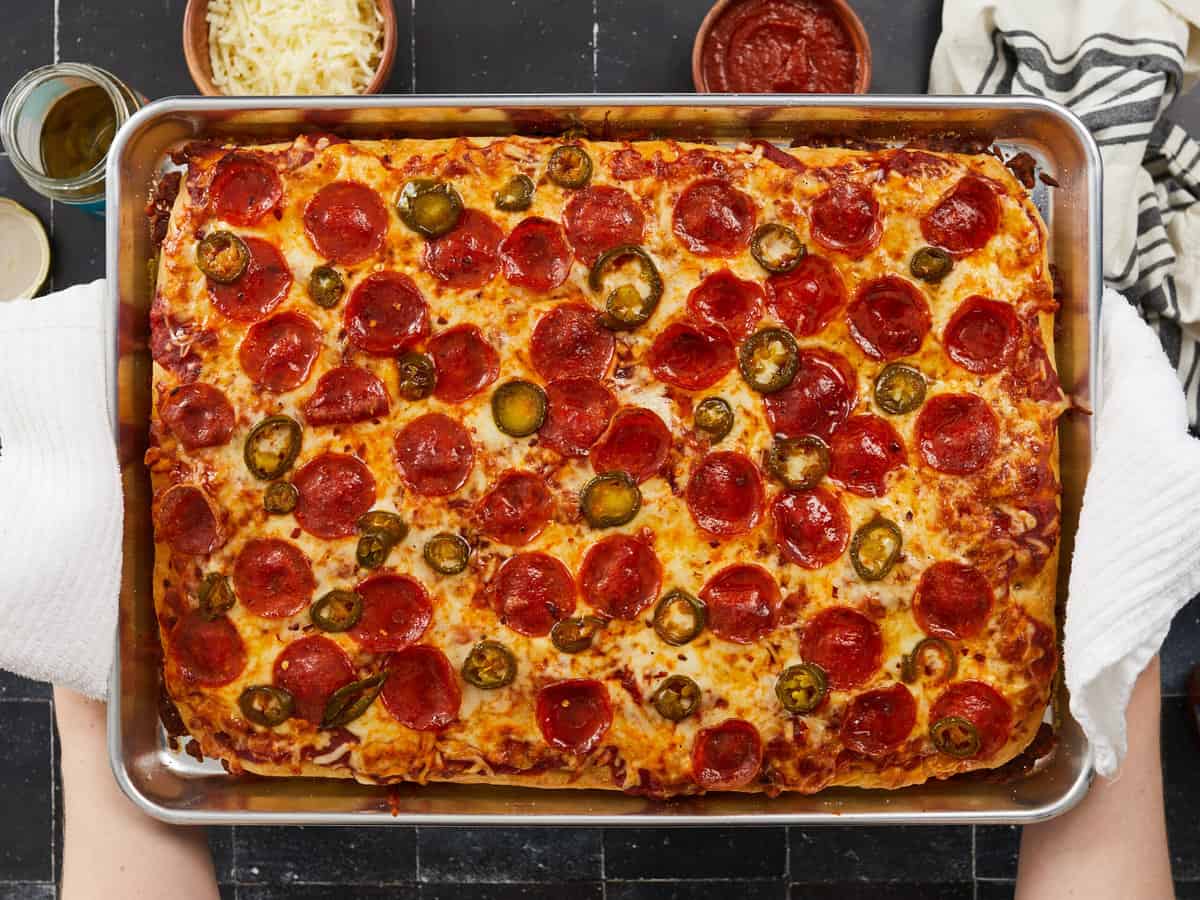
A horizontal image of a fully baked sheet pan pizza topped with pizza sauce, shredded cheese, pepperonis, jalepenos and honey that's held up with two white dish towels.
A vertical image of a baked sheet pan pizza topped with pizza sauce, cheese, pepperonis, pickled jalepenos and honey sliced and a spatula is removing the bottom right slice.
Print

Sheet Pan Pizza

Sheet Pan Pizza is a low-effort recipe guaranteed to make any occasion special and satisfy cravings for take-out pizza at half the cost.
Course Dinner, Main Course, Meal Prep
Cuisine American, Italian
Prep Time 30 minutes
Cook Time 45 minutes
Resting Time 2 hours 45 minutes
Total Time 4 hours
Servings 7 people
Calories 539kcal
Cost $9.98 RECIPE / $1.41 SERVING

Equipment

Ingredients

Crust:

  • 4 cups all-purpose flour $0.61
  • 2 cups water $0.00
  • 1 1/2 tsp salt $0.03
  • 2 tsp instant yeast 0.48
  • 2 Tbsp cornmeal $0.03
  • 1 Tbsp olive oil* $0.15

Pizza:

  • 3 Tbsp olive oil, divided* $0.45
  • 1/2 tsp salt $0.01
  • 1/2 tsp Freshly cracked black pepper $0.02
  • 1/2 tsp Italian seasoning $0.05
  • 1/2 tsp red pepper flakes $0.05
  • 1 14oz. jar pizza sauce $1.59
  • 2 cups shredded mozzarella $2.49
  • 1/2 cup Parmesan cheese, shredded or grated $0.75
  • 1/2 cup pepperoni slices (about 3 oz.) $1.50
  • 1/3 cup sliced pickled jalapeños $0.66
  • 2 Tbsp honey $0.38

Instructions

Crust:

  • In a large mixing bowl, combine the flour, water, salt, and instant yeast. Stir until just combined and no streaks of flour remain.
  • Drizzle 1 tablespoon of olive oil around the sides of the bowl, and lift the dough with your hands to make sure the bottom and sides of the bowl are well-coated with the oil.
  • Cover the bowl and let the dough rise in a warm, dry place for 2 hours, or in the refrigerator for up to 24 hours. The dough should double in size and appear bubbly, wet, and very fluffy.**
  • Coat your fingers with a few drops of olive oil and then scrape the dough from the sides of the bowl, turning it over a few times to form a ball. Rest the dough for 5 minutes.

Pizza:

  • Brush 1 tablespoon of olive oil on the bottom and sides of 1 rimmed baking sheet and then sprinkle 2 tablespoons of cornmeal evenly on the bottom of the pan.
  • Coat the ball of pizza dough with 1 tablespoon of oil and flip it out of the bowl (oil side down) on the rimmed baking sheet, using a spatula to scrape any oil left in the bowl on top of the dough.
  • Gently press down the center of the dough and push it outward toward each corner of the pan. Let the dough rest again, uncovered, until it rises slightly and spreads to fill the sheet pan completely (About 30-45 minutes). While the dough rests, preheat the oven to 425℉.
  • Coat your fingers with oil and make dimples all over the dough, also pushing the dough into the corners again if needed. Brush the dough with the remaining 1 tablespoon of olive oil and sprinkle over the salt, fresh-cracked black pepper, Italian seasoning, and red pepper flakes. Bake the crust for 25 minutes, or until the surface of the bread is evenly golden brown.
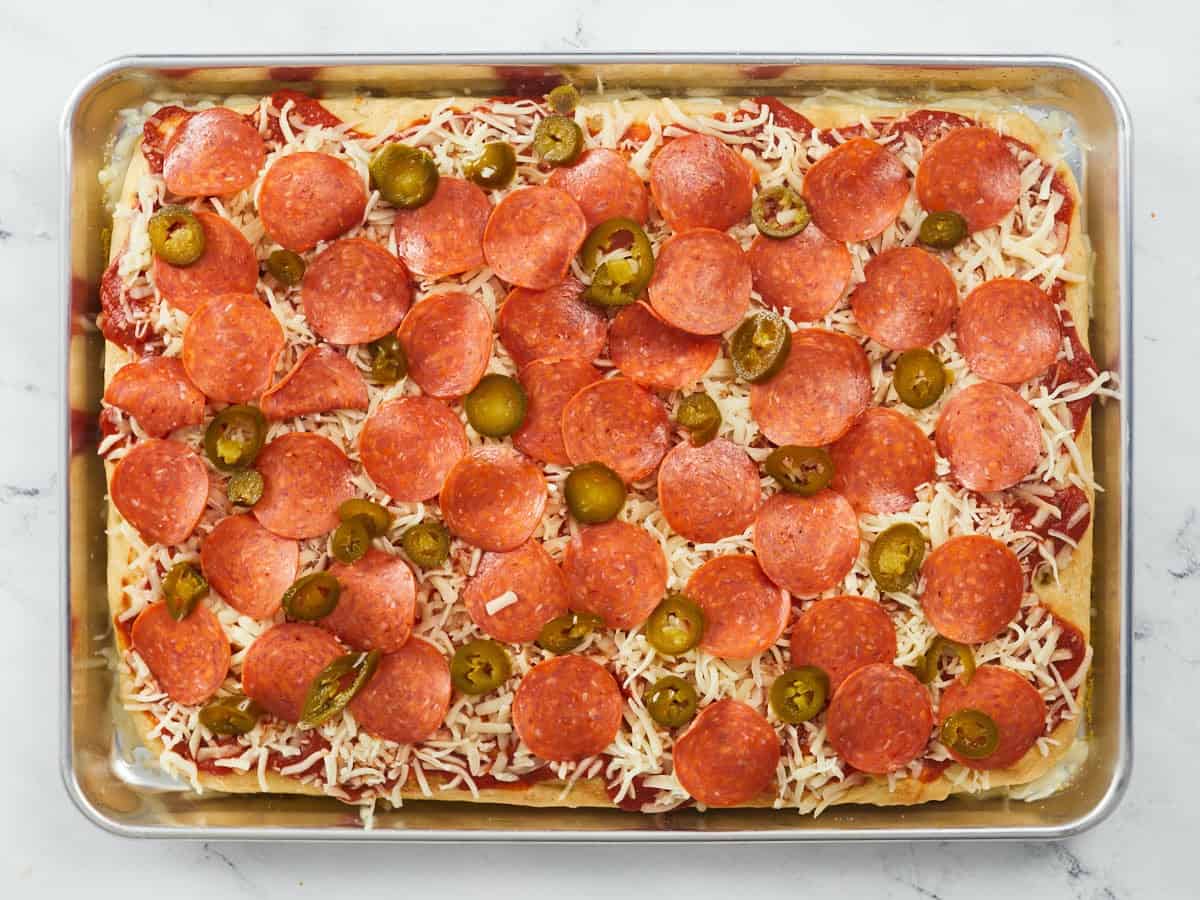
  • Remove the crust from the oven and carefully spread the pizza sauce on top from edge to edge. Then top with the mozzarella cheese, parmesan cheese, pepperoni, pickled jalapenos, and if desired, a pinch of salt, pepper, and other seasonings
  • Bake the pizza for another 10-15 minutes or until the cheese has melted and started to brown.
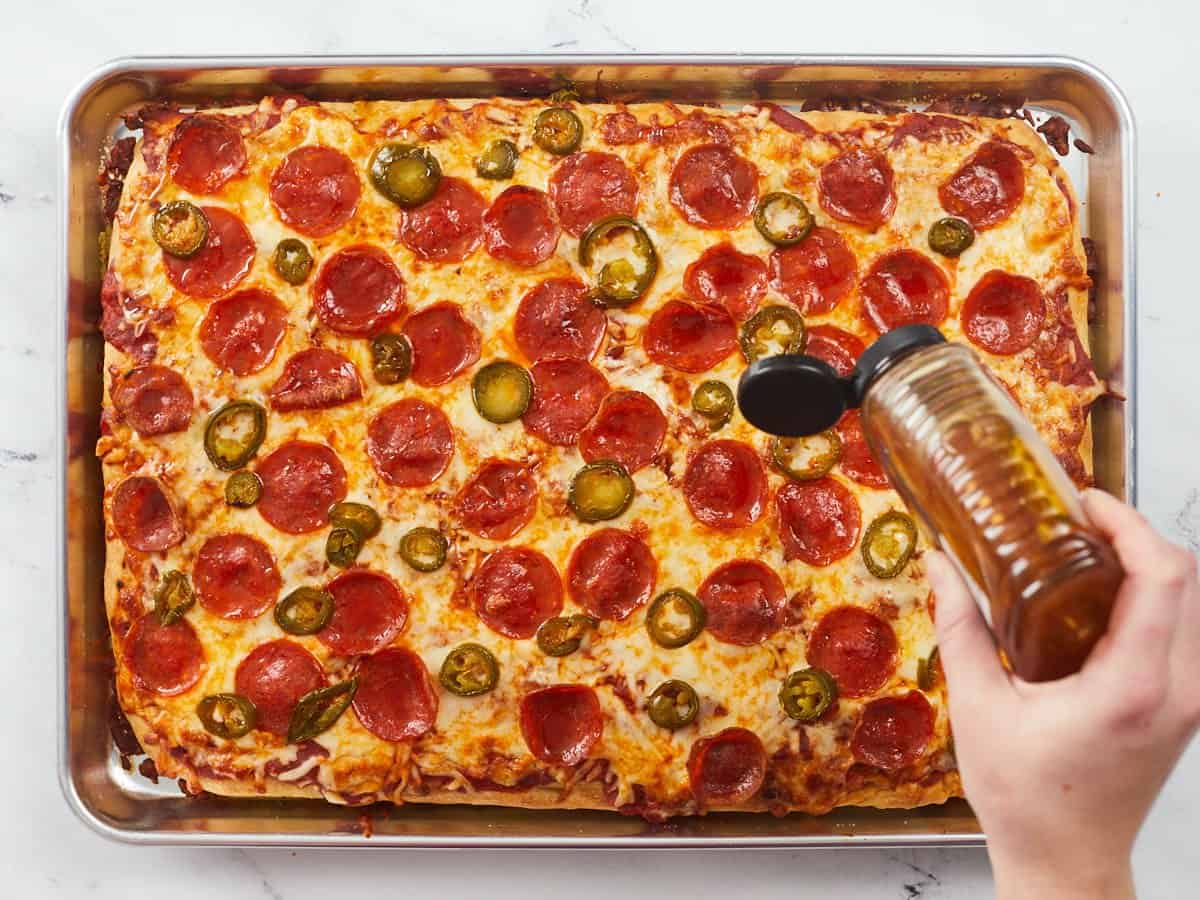
  • Remove the pizza from the oven and drizzle the entire surface lightly with honey. Let it cool for 5 minutes and then slice the pizza into 15 squares. Serve each slice topped with more parmesan cheese and fresh-cracked black pepper.

See how we calculate recipe costs here.

Notes

* Olive oil will add a distinct flavor to the pizza crust but can be substituted (or mixed) with cooking oil to make this recipe more budget-friendly. 
** The dough may need more time to rise in the sheet pan if coming out of a cold refrigerator. 

Nutrition

Serving: 2slices | Calories: 539kcal | Carbohydrates: 65g | Protein: 20g | Fat: 22g | Sodium: 1225mg | Fiber: 3g

How to Make Sheet Pan pIzza – Step by Step Photos

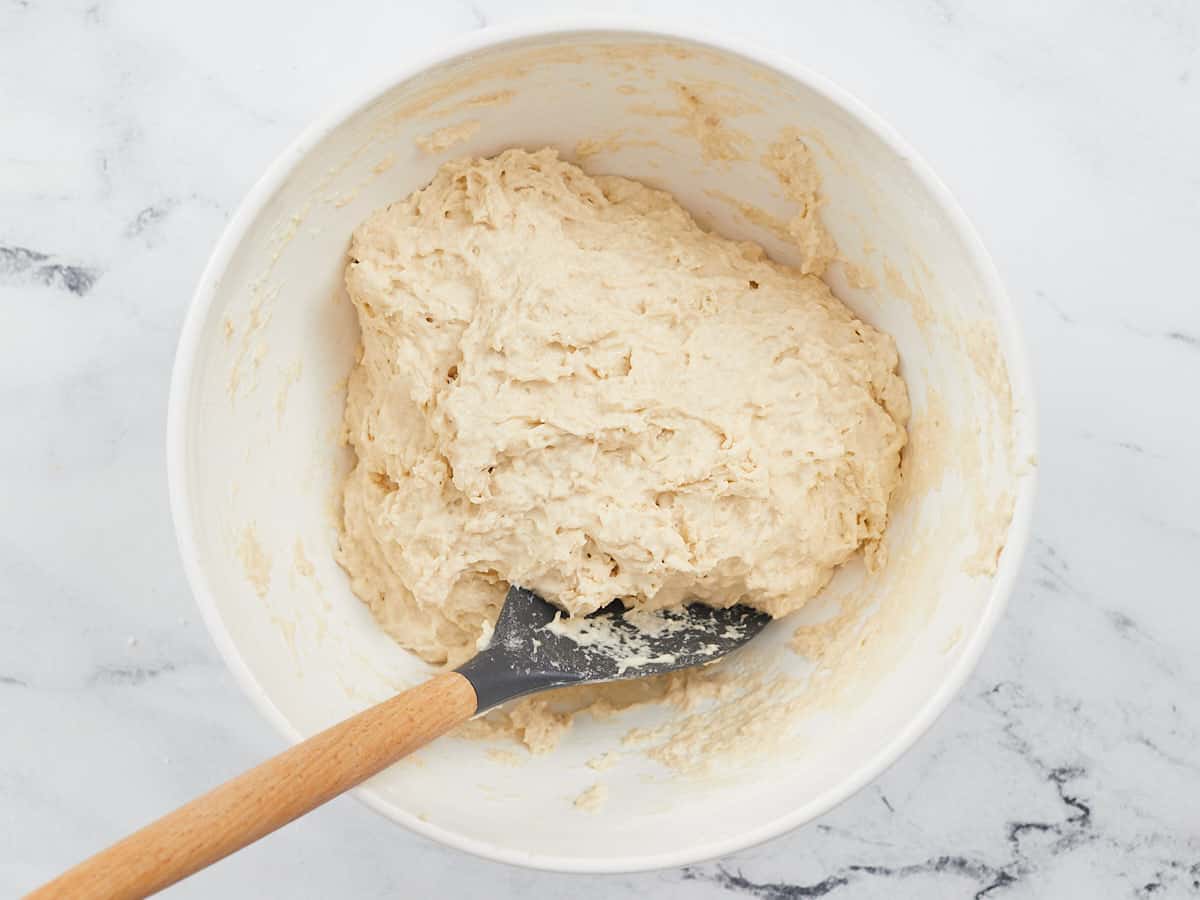
Ingredients for a foccacia-style pizza crust mixed together in a white bowl with a wooden spatula sticking out of the bottom left side of the bowl.

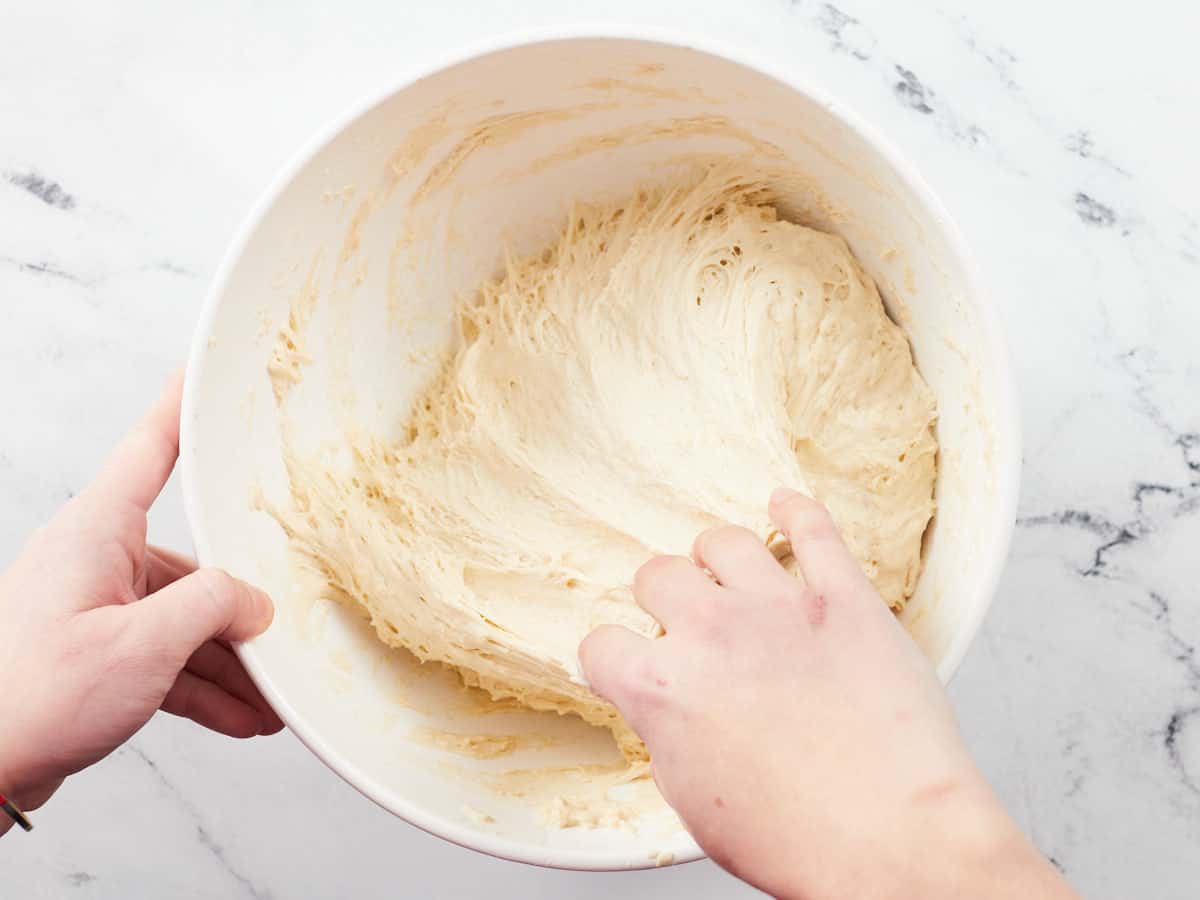
Combine 4 cups of all-purpose flour, 2 cups of water, 1 ½ teaspoons of salt, and 2 teaspoons of instant yeast in a large bowl. (If using a single-serving packet of yeast, which contains about 2 1/4 teaspoons, you can use the whole thing!) Stir until just combined and no streaks of flour remain. Drizzle 1 tablespoon of olive oil around the sides of the bowl, and lift the dough with your hands to make sure the bottom is also coated. Cover the bowl and let it ferment in a warm, dry place for 2 hours or in the refrigerator for up to 24 hours. (If coming from the fridge, the dough may need an additional 30 minutes of resting time at room temperature.)

Ingredients for a no-knead focaccia style pizza crust after they have fermented for two hours in a white bowl. A left hand is stablizing the bowl with the right hand pulls the dough away from the side of the bowl.

After the first ferment, the dough should roughly double in size and appear bubbly, wet, and very fluffy. Scrape the dough off the sides of the bowl with your hands, turning it over a few times to form a ball. Let it rest in the bowl for about 5 minutes to prevent the dough from tearing. Brush the bottom and sides of the sheet pan with 1 tablespoon of olive oil and sprinkle 2 tablespoons of cornmeal evenly on the bottom.

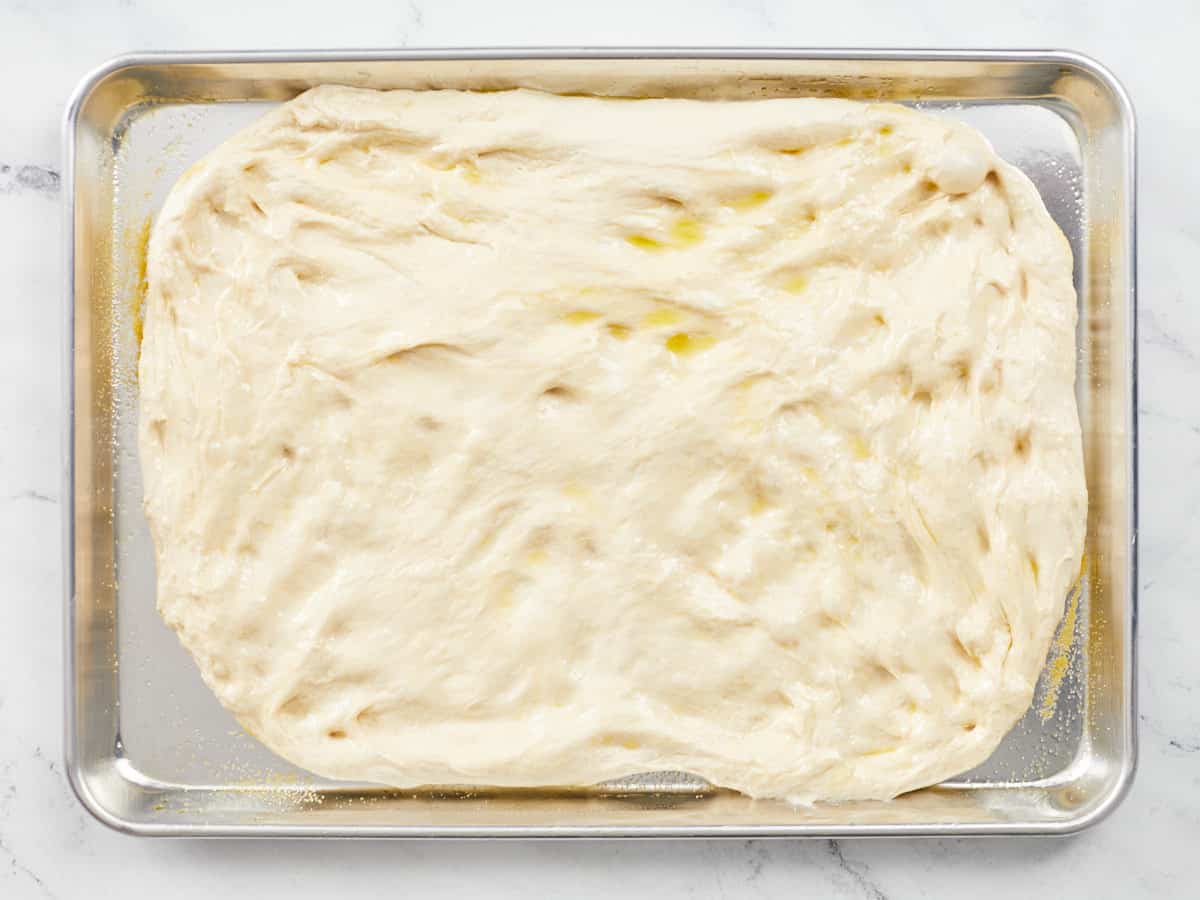
Raw pizza dough that has been fermented once and turned out onto a rimmed baking sheet and pressed out into a rectangle for a second ferment.

Coat the ball of pizza dough with 1 tablespoon of olive oil and flip it out of the bowl onto the prepared sheet tray (oil side down), using a spatula to scrape any oil left in the bowl on top of the dough. Gently press down the center of the dough and push it outward toward each corner of the pan. Let the dough rest again, uncovered, until it spreads to fill the sheet pan completely (about 30-45 minutes). Preheat the oven to 425℉.

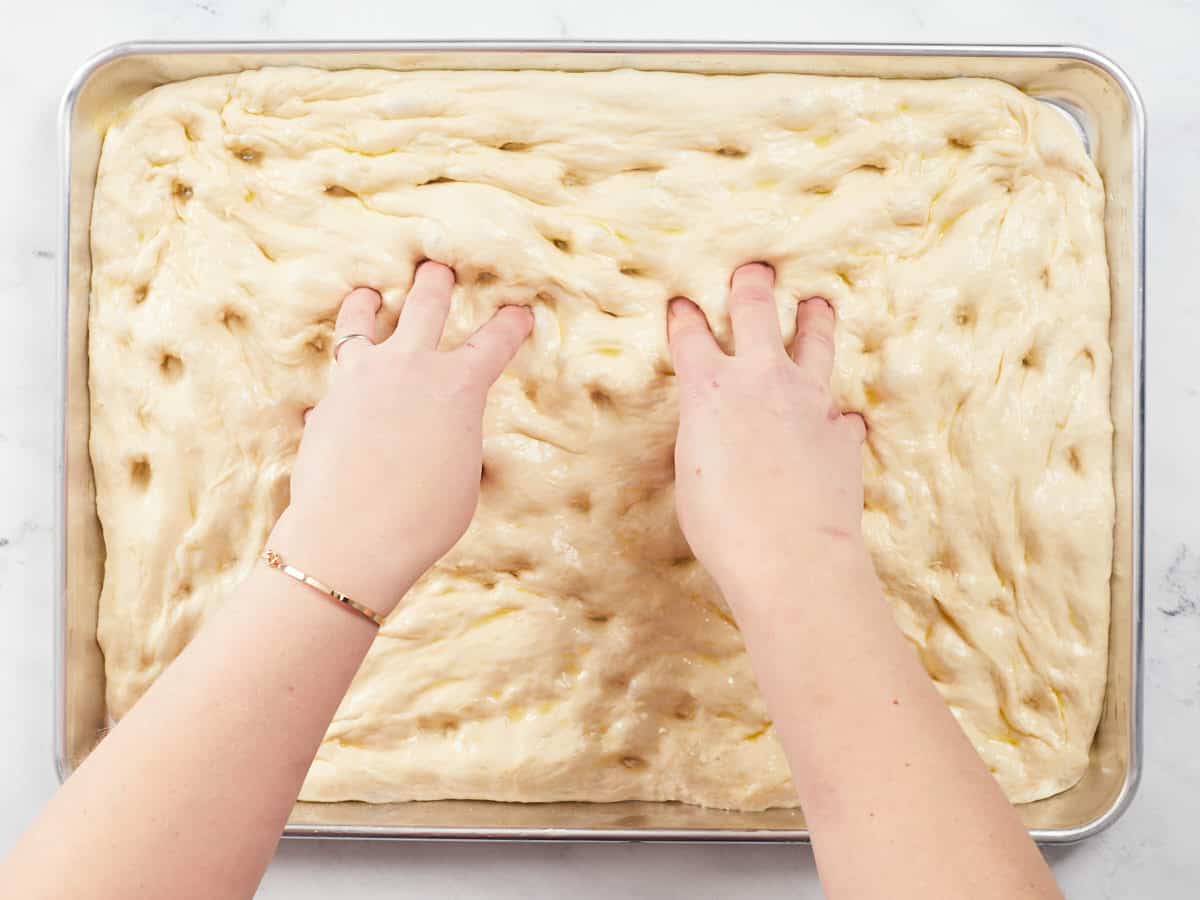
A raw pizza dough that has fermented for a second time on a rimmed baking tray, two hands are pressing dimples into the center of the dough.

Coat your fingers with oil and make dimples all over the dough, also pushing the dough into the corners again if needed. Brush the dough with the remaining 1 tablespoon of olive oil and sprinkle over a 1/2 teaspoon of salt, 1/2 teaspoon of freshly-cracked black pepper, 1/2 teaspoon of Italian seasoning, and 1/4 teaspoon of red pepper flakes.

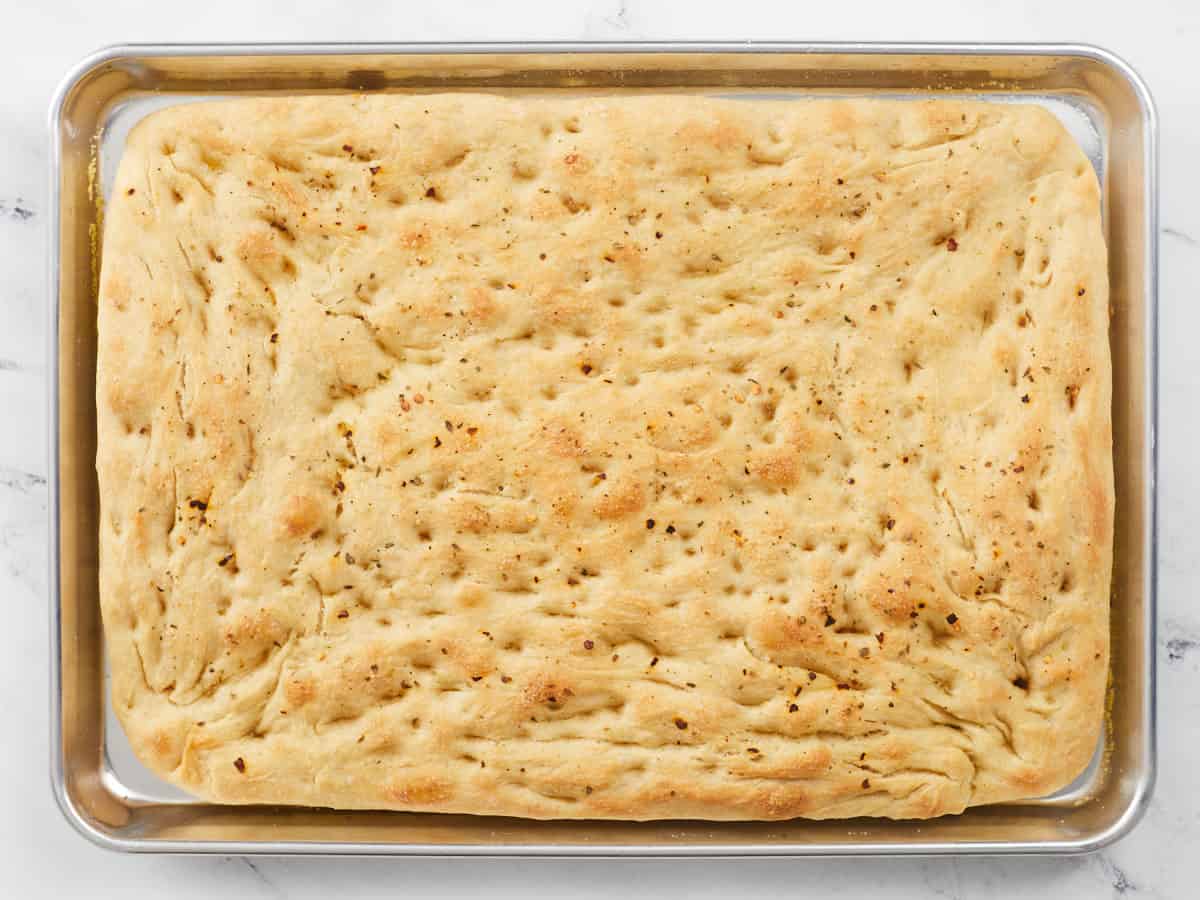
A lightly golden pizza crust that was topped with olive oil, salt, pepper, italian seasoning and red pepper flakes and then baked.

Bake the crust for 25 minutes, or until the surface of the bread is lightly golden brown and has developed a still-tender, but firm crust. When pressed lightly (And carefully, don’t burn yourself!), the center of the crust should spring back and should look and feel fully cooked – not squish and soft.

A par-baked pizza crust on a rimmed baking tray that's topped with pizza sauce, shredded mozzarella cheese, parmesan cheese, pepperonis and pickled jalapeño slices that needs to be baked again.

Top the fully-baked pizza crust evenly from edge-to-edge with 1 1/2 cups of prepared pizza sauce (from a 14 oz. jar), 2 cups of shredded mozzarella cheese, 1/2 cup of shredded or grated parmesan cheese, 1/2 cup of pepperoni slices (about 3 oz. or half a standard package), 1/3 cup of pickled jalapenos (about 1/3 of a standard jar), and if desired, another pinch of salt, pepper, and other seasonings.

A fully baked sheet pan pizza that is golden brown and topped with crispy pepperonis, melted cheese and pickled jalapeño slices and a hand is drizzling honey on the right center of the pizza.

Bake the pizza for another 10-15 minutes or until the cheese has melted and started to brown. Remove the pizza from the oven and drizzle the entire surface lightly with honey. Let it cool for about 5 minutes (so the toppings don’t slide off), and slice the pizza into 15 squares. Serve each slice topped with more parmesan cheese and fresh-cracked black pepper.

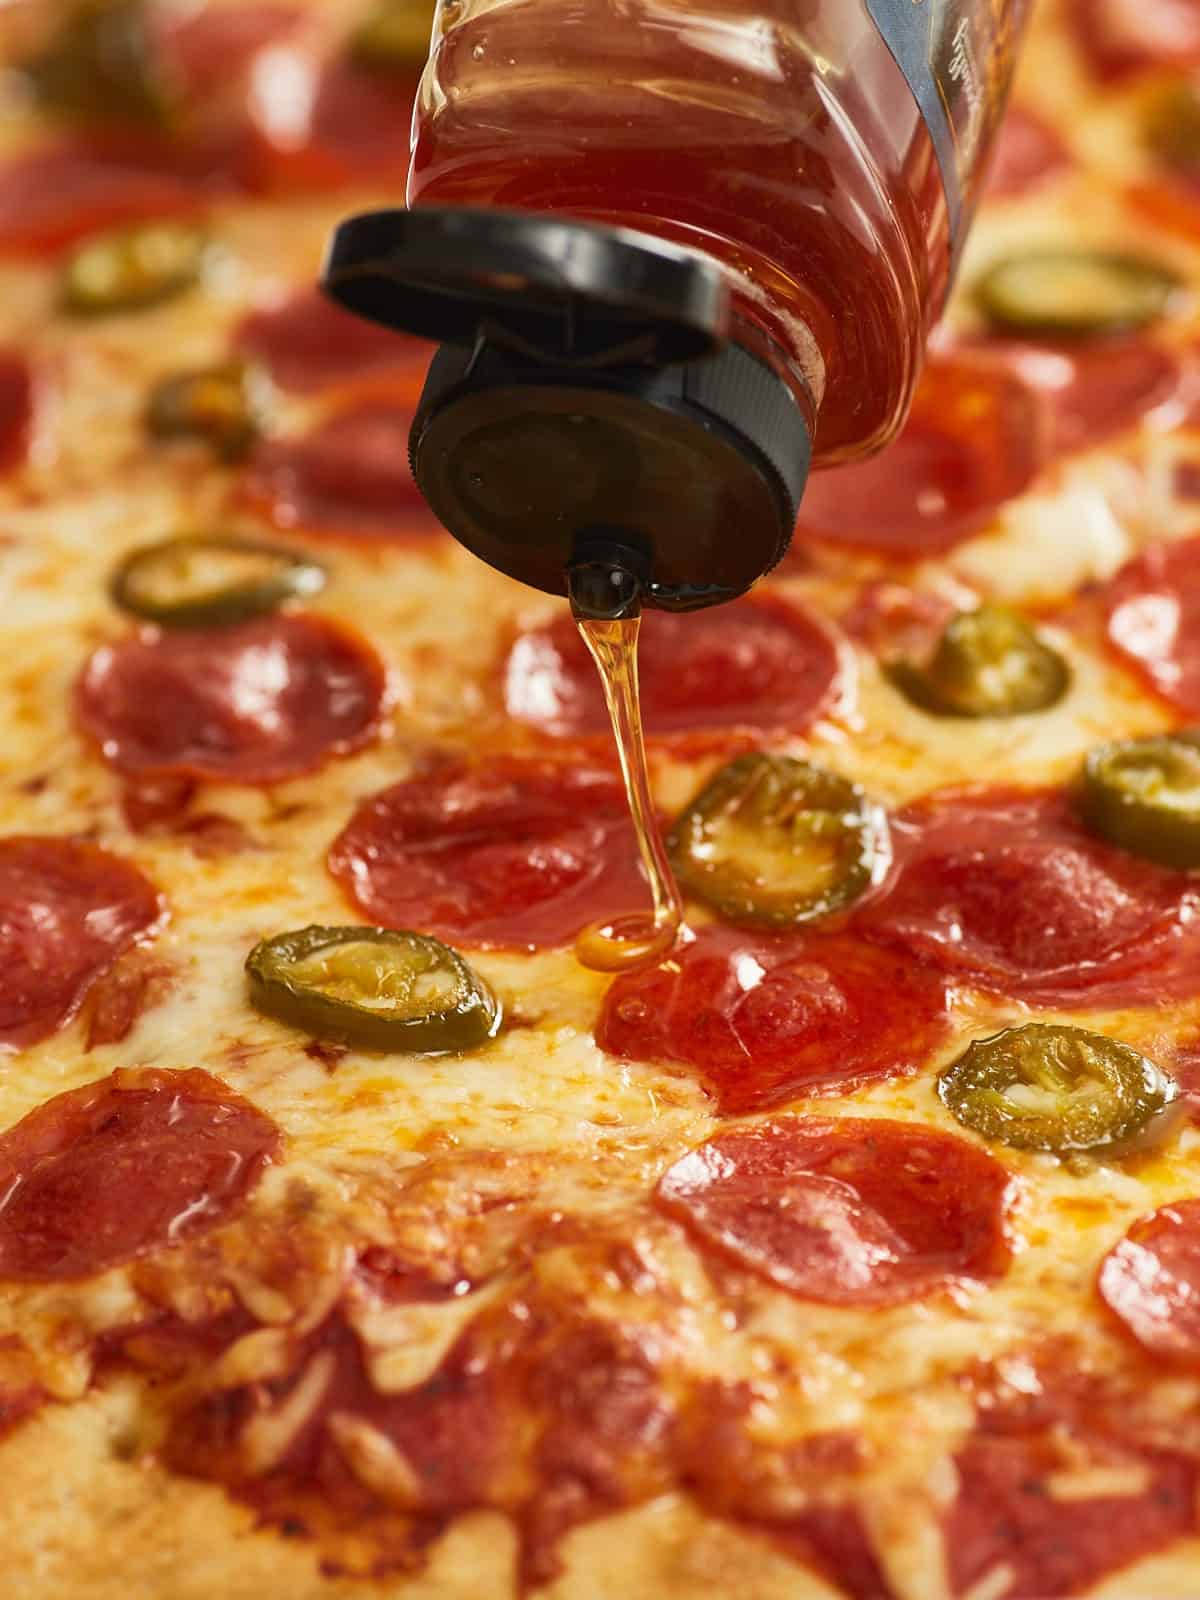
An extreme close up of baked sheet pan pizza topped with pepperonis and jalepenos that's being drizzled with honey.

Y’all, I love the combo of sweet & spicy toppings we used in this recipe, but I’m always looking for new ideas for my next Sheet Pan Pizza Party! What sauces and toppings will you put on your Sheet Pan Pizza? Tell us in the comments! ~ Marion :)

The post Sheet Pan Pizza appeared first on Budget Bytes.
Easy Dumpling Soup

Easy Dumpling Soup is the perfect quick lunch or dinner because it’s endlessly versatile, insanely budget-friendly, and can be made in 15 minutes.

The post Easy Dumpling Soup appeared first on Budget Bytes.
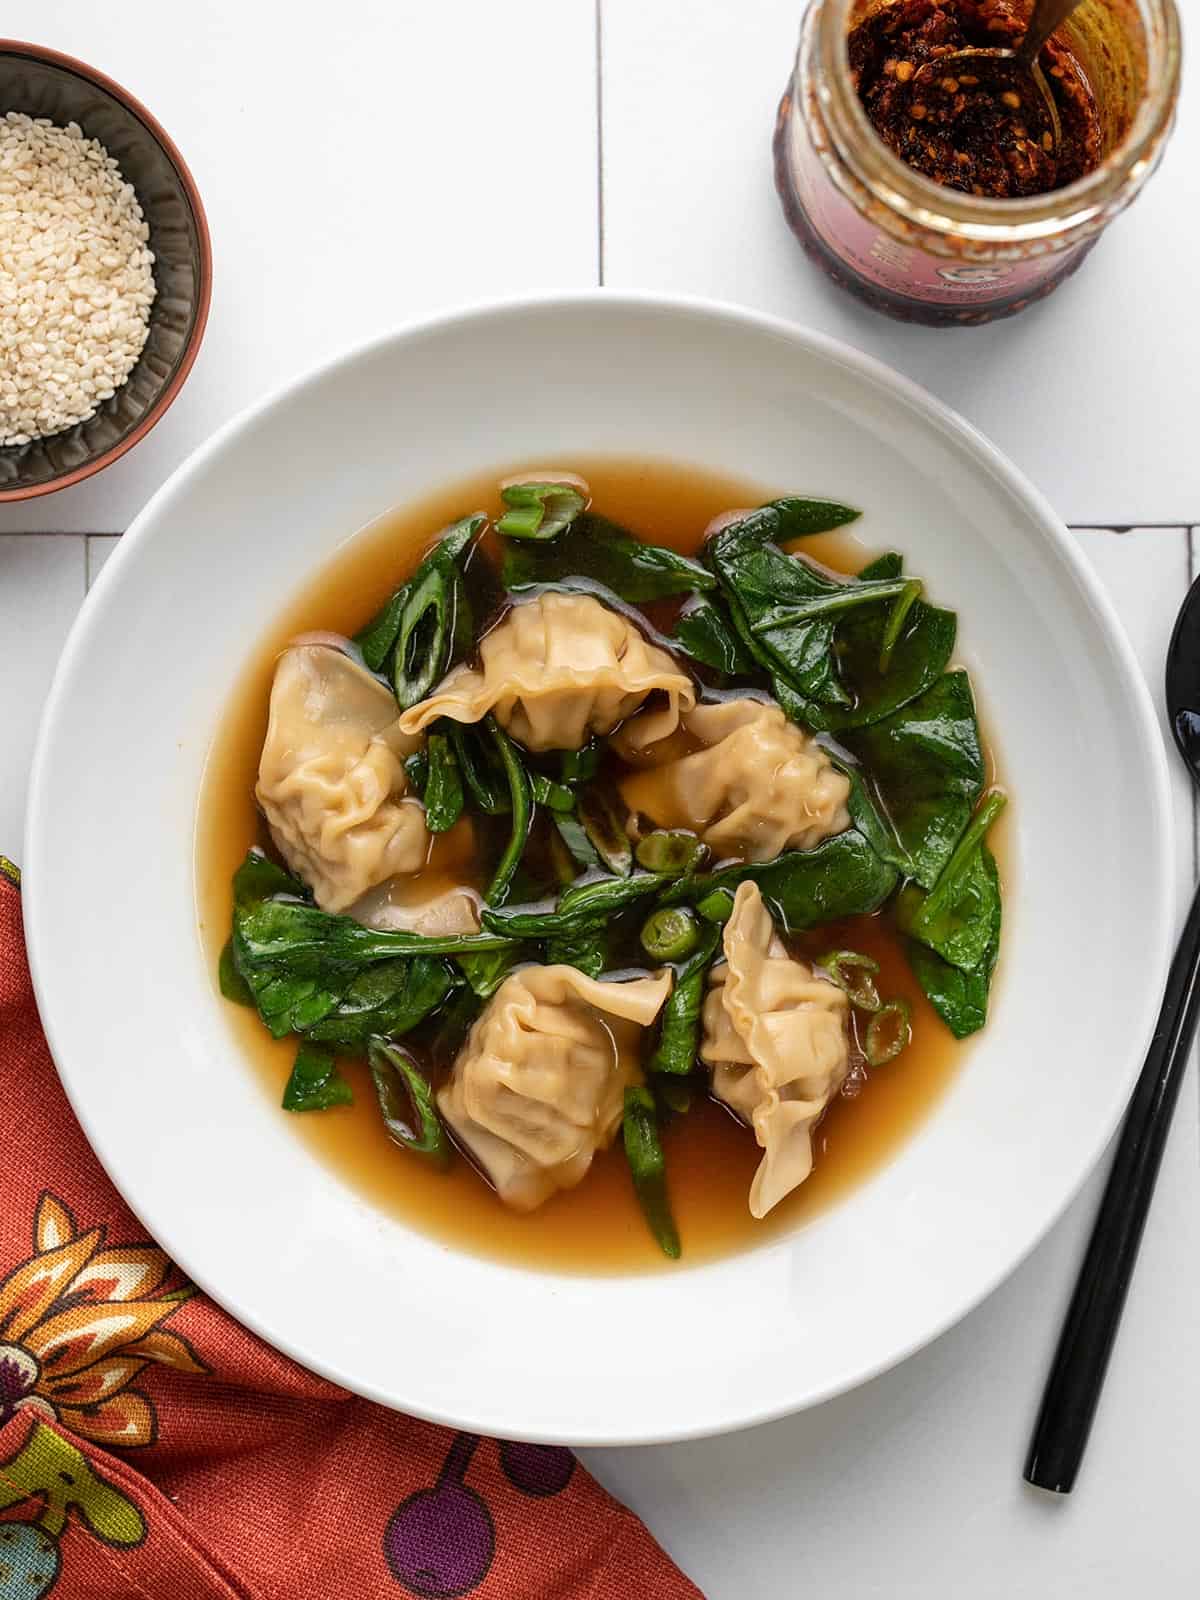
Easy Dumpling Soup is one of my absolute favorite things to throw together if I want a quick-and-simple homemade lunch or an effortless dinner that’s still wholesome, comforting, and budget-friendly. I’ve designed this recipe to be as versatile as possible, dressing up mostly store-bought ingredients, in order to scratch that “itch” for whatever takeout favorite I’m craving when ordering out isn’t on the menu.

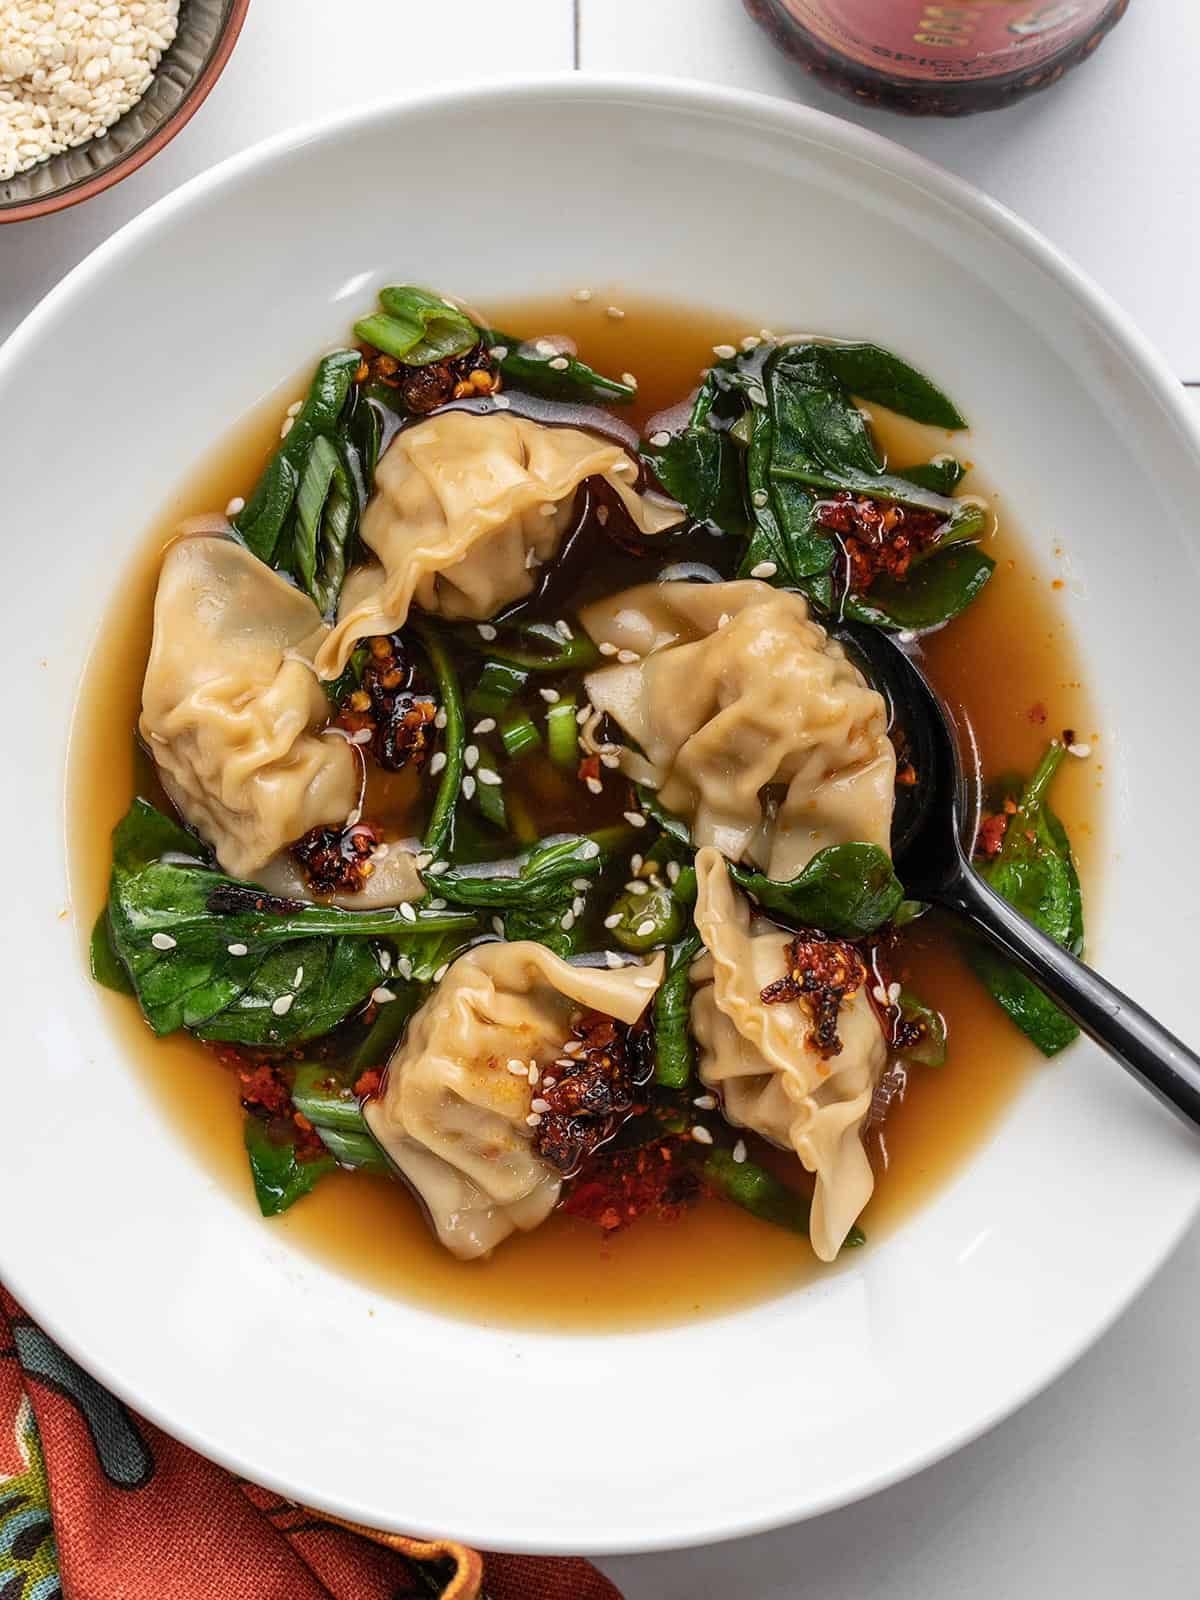
A large white bowl filled with dumpling soup and surrounded by a small bowl of white sesame seeds, an open jar of chili crisp and an orange decorative towel.

What is dumpling soup?

Our version of dumpling soup is a quick, semi-homemade soup inspired by dumpling soups found in Chinese, Korean and Japanese cuisines. The soup features a savory clear broth, delicate meat-filled dumplings, fresh greens, and an array of condiments to sprinkle on top. Here’s what you need for this Easy Dumpling Soup:

  • Frozen dumplings — You can find Asian-style dumplings in the freezer section, usually filled with pork, vegetables, shrimp, or a combination of those ingredients.
  • Broth — We fortified our vegetable broth with soy sauce and toasted sesame oil!
  • A handful of fresh greens — like sliced green onions, fresh spinach, or baby bok choy
  • Condiments — Use anything your heart desires! Try chili crisp, sesame seeds, black vinegar, cilantro, and more!

Is this an authentic recipe?

No, this is not an authentic dumpling soup, but we highly encourage you to read more about the wide variety and rich culture surrounding dumplings. Also, check out these recipes for authentic Chinese potstickers and Xiaolongbao (soup dumplings), Korean mandu, and Japanese gyoza.

What kind of dumplings to buy

Most grocery stores offer a variety of frozen dumplings options of different sizes, shapes, and fillings (usually pork, vegetable, shrimp, or a combination of those flavors)—and any type of frozen dumpling will work for this recipe. If you’re operating on an extra-tight budget, visiting an Asian grocery store is a great place to find a wider selection, larger quantities, and even lower prices.

How to know the dumplings are fully cooked:

Frozen dumplings are usually on the smaller side, so they cook quickly when added to boiling broth. However, since our suggested cook time is only based on the handful of brands we’ve tried (and there are so many others!), I highly recommend consulting the package directions on your dumplings to ensure you are cooking them long enough—as well as checking the suggested serving size to make sure you are preparing enough for two people.

Are the leftovers ANY good?

I would not recommend saving these leftovers. As it sits, the dumplings will keep soaking up the broth until they bloat and then fall apart. Instead, just make the amount you think you will eat, which is why I’ve developed the recipe for two servings rather than four. Since it comes together so quickly, it wouldn’t be the end of the world if you decided to make it twice in one night! 

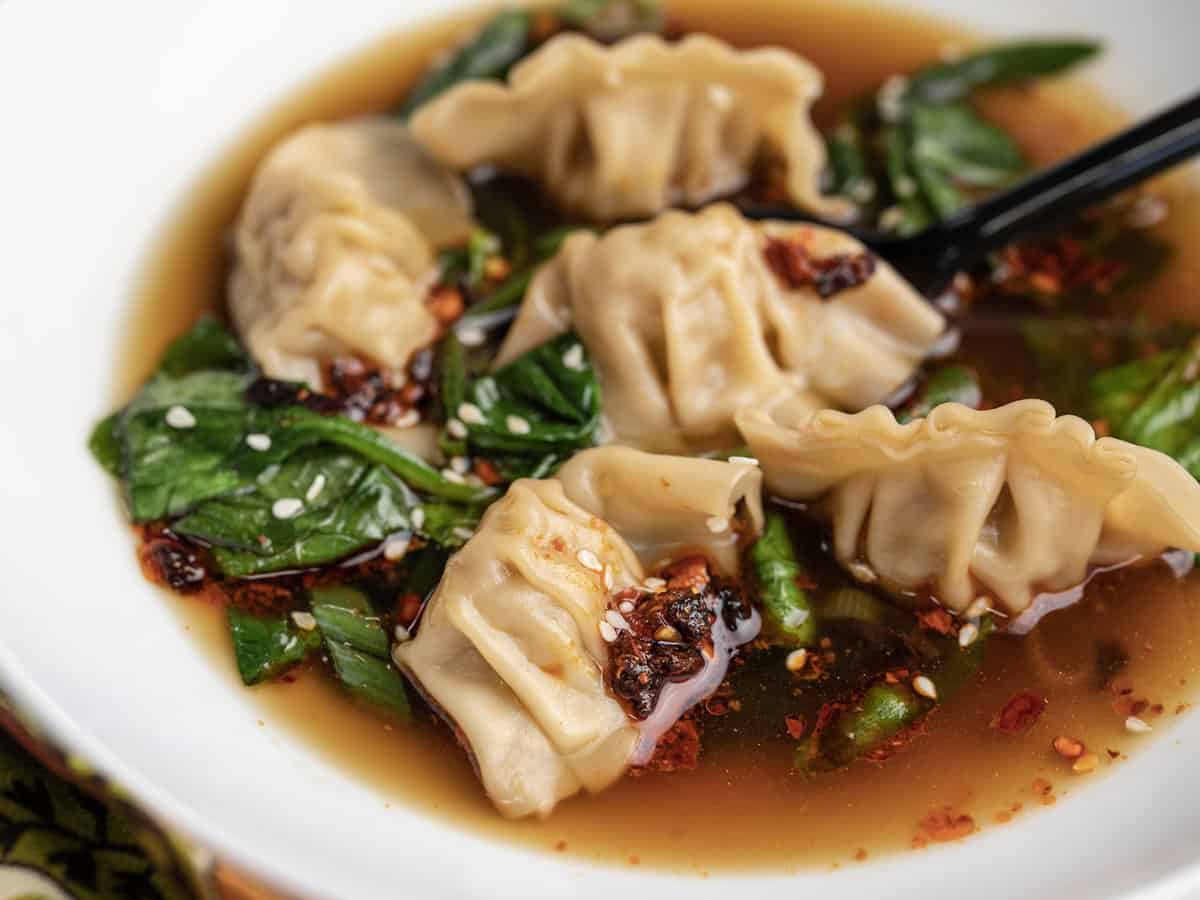
A close up view of dumpling soup in a white bowl topped with white sesame seeds and chili crisp.

Take your Dumpling Soup to the next level

Some great flavor and topping additions for this soup are: 

  • Cubed tofu, cooked chicken, or another prepared protein
  • Mushrooms, or other fresh or frozen vegetables
  • Half of a hard-boiled egg
  • Fish sauce
  • Kimchi
  • Cilantro
  • Mirin 
  • Rice Vinegar or Lime Juice
  • Miso paste
  • A prepared sauce like Scheuzan chili oil, chili garlic sauce, sriracha, teriyaki sauce, or a prepared “dumpling sauce”
  • Sesame seeds, crushed nori, or a store-bought Furikake blend

My go-to Topping combinations

Plan to add any extra condiments and toppings directly to each serving bowl, so each person can mix and match them to suit their tastes. My go-to topping combinations are (per bowl): 
  • 1 Tbsp kimchi + handful of torn cilantro 
  • ¼ tsp Szechuan chili oil + hardboiled egg 
  • Sliced mushrooms + nori + sesame seeds
A close up view of dumpling soup in a white bowl topped with white sesame seeds and chili crisp.
Print

Easy Dumpling Soup

Easy Dumpling Soup is the perfect quick dinner because it’s endlessly versatile, insanely budget-friendly, and can be made in 15 minutes.
Course Dinner, Lunch
Cuisine Asian, Chinese, Japanese, Korean
Total Cost $2.98 RECIPE / $1.49 SERVING
Prep Time 5 minutes
Cook Time 10 minutes
Servings 2 bowls
Calories 290kcal

Ingredients

  • 10 frozen dumplings* $2.00
  • 2 cups vegetable broth** $0.24
  • 1 Tbsp soy sauce $0.06
  • 1 tsp toasted sesame oil $0.06
  • 1 green onion, thinly sliced, white and green parts separated $0.11
  • 1/2 cup fresh spinach*** $0.15

Garnishes, optional

Instructions

  • Combine the vegetable broth, soy sauce, toasted sesame oil, and the white parts of a sliced green onion in a medium-sized pot. (If using, also add the fish sauce, pre-cooked proteins or tofu, and any fresh or frozen vegetables that need time to soften.)
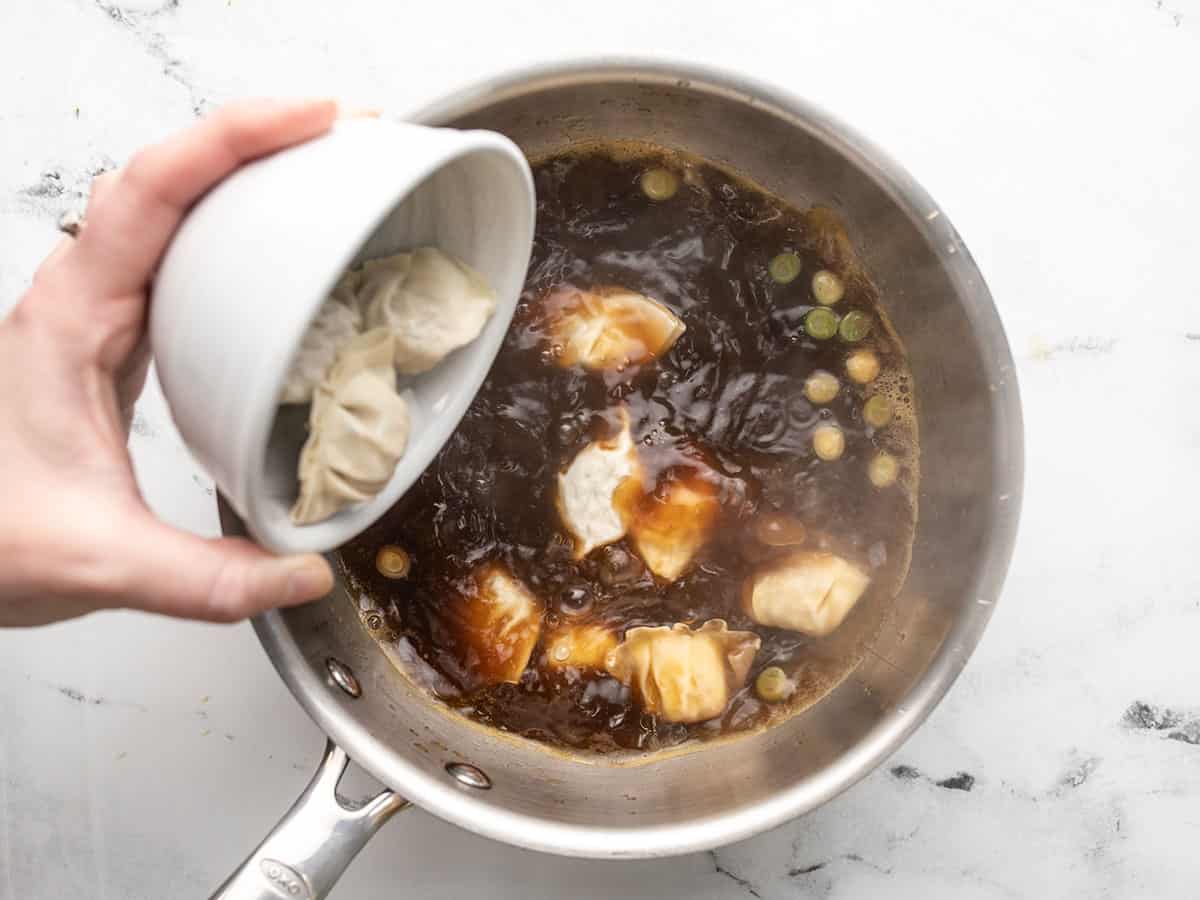
  • Bring the broth up to a boil on medium-high heat. Once boiling, add the dumplings.
  • Cover the pot and allow the soup to come back up to a boil. Boil the dumplings for about 2 minutes or until they are cooked through. (Consult package directions.)
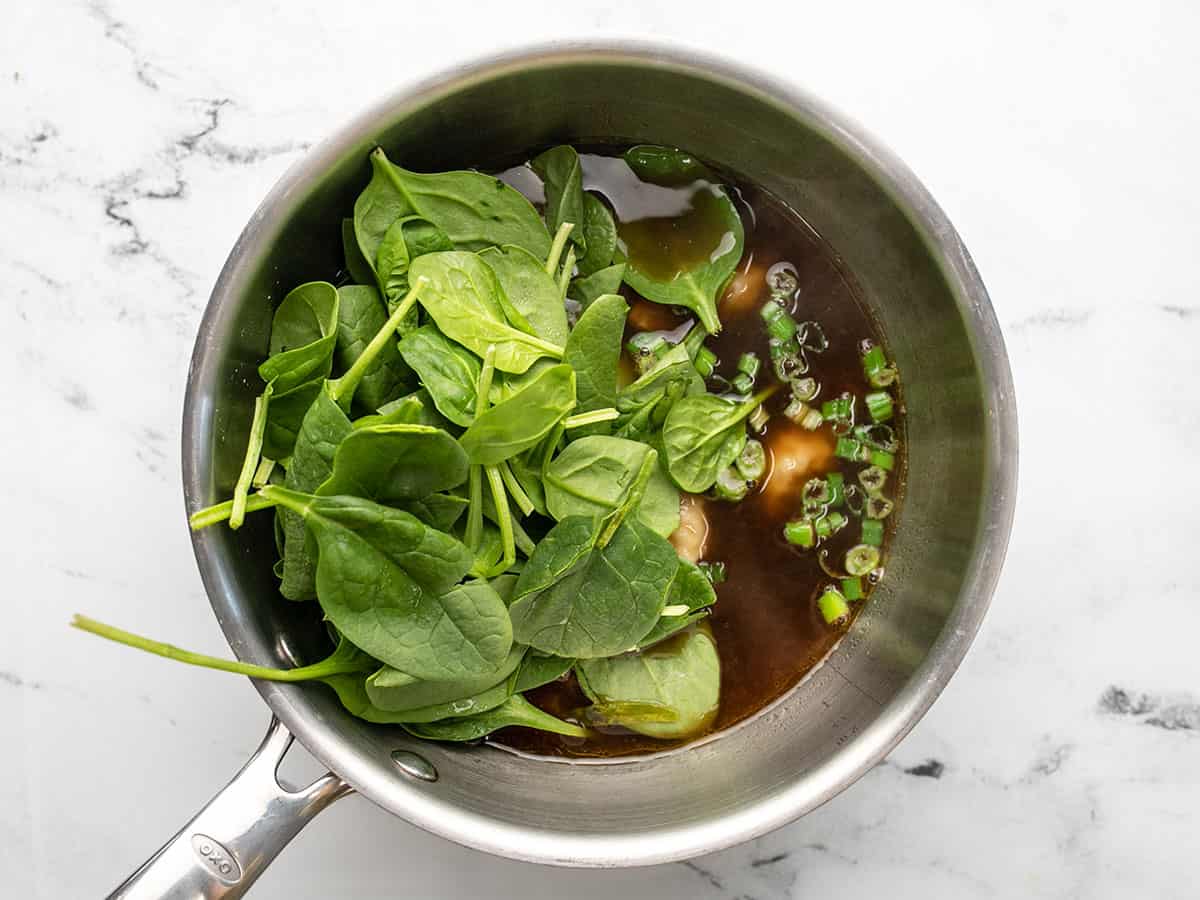
  • Turn off the heat and stir in the green parts of the sliced green onion and a handful of spinach.
  • Split the soup into 2 serving bowls and top with any desired condiments.

See how we calculate recipe costs here.

Notes

*You can use any flavor (pork, vegetable, chicken, etc.), but I prefer ones with pork and vegetables.
**We use Better Than Bouillon mixed to make all of our broths. If substituted with a low-sodium broth, the final dish may need more salt. 
***or baby bok choy

Nutrition

Serving: 1bowl of soup | Calories: 290kcal | Carbohydrates: 46g | Protein: 8g | Fat: 9g | Sodium: 1809mg | Fiber: 3g
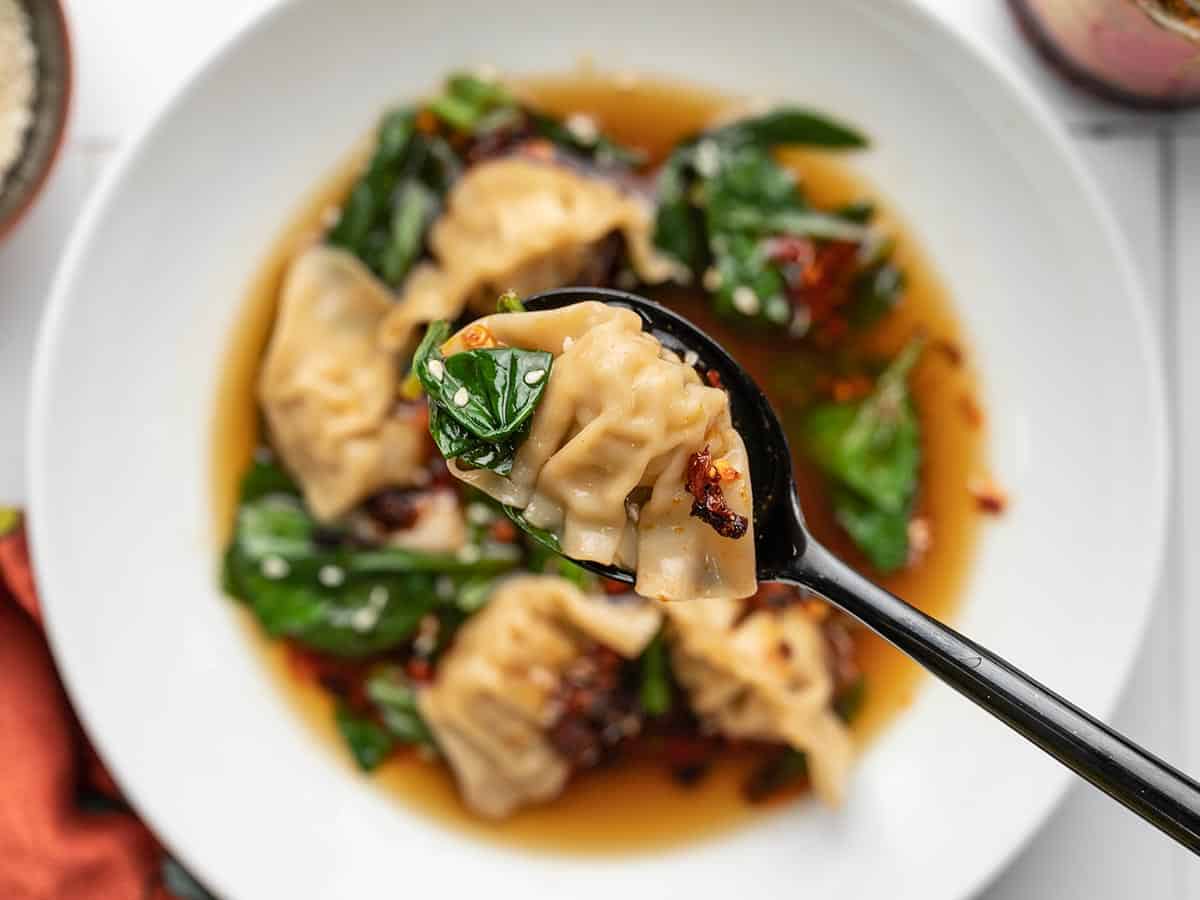
A single dumpling parcel on a black spoon raised above a large white bowl filled with dumpling soup topped with white sesame seeds and red chili crisp and an orange decorative towel.

How to Make easy dumpling soup – Step by Step Photos

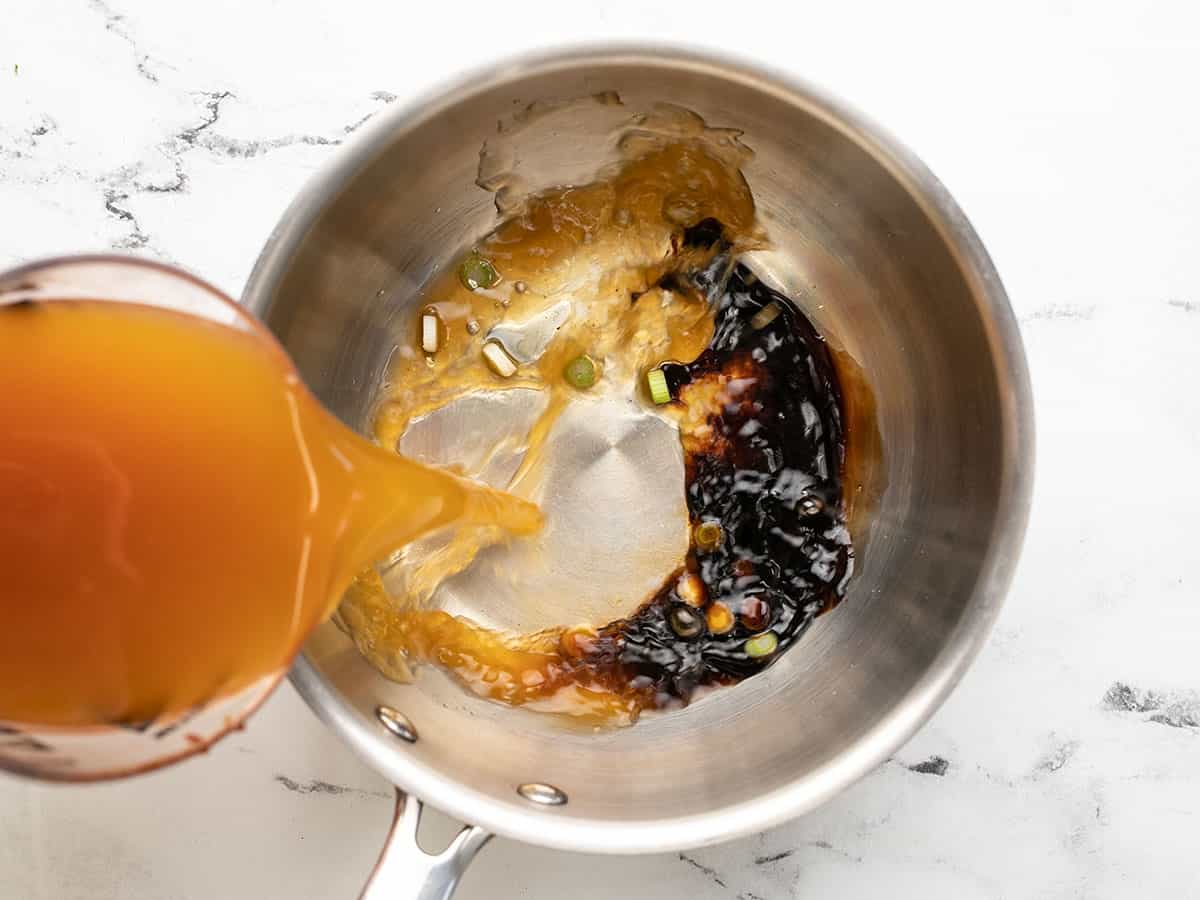
A measuring cup of soup is poured into a small saucepan containing soy sauce, toasted sesame oil and the white parts of a green onion.

In a medium-sized pot, combine 2 cups of vegetable broth, 1 Tablespoon of soy sauce, 1 teaspoon of toasted sesame oil, and the white parts of a thinly sliced green onion (set the green parts aside for garnish), and cook over medium-high heat. You should also add the fish sauce now, if using — as well as any other extra ingredients that require some cooking time, like leftover cooked proteins from the fridge, tofu, mushrooms, or any other fresh or frozen vegetables that need time to soften.

Frozen dumplings in a white bowl being poured into a pot of boiling broth.

Bring the broth up to a boil on medium-high heat. Once boiling, add 10 frozen dumplings. Cover and allow the soup to come back up to a boil. Boil the dumplings for about 2 minutes or until they are cooked through. (Check out the suggested cooking time on your dumpling packaging to insure this will be enough time to cook them all the way through — at the same time, also check the nutrition label to make sure you add the correct amount for two servings.)

A pile of fresh spinach sitting on top of a pot full of warm dumpling soup.

Turn off the heat and stir in 1/2 cup of fresh spinach and the reserved green onion slices.

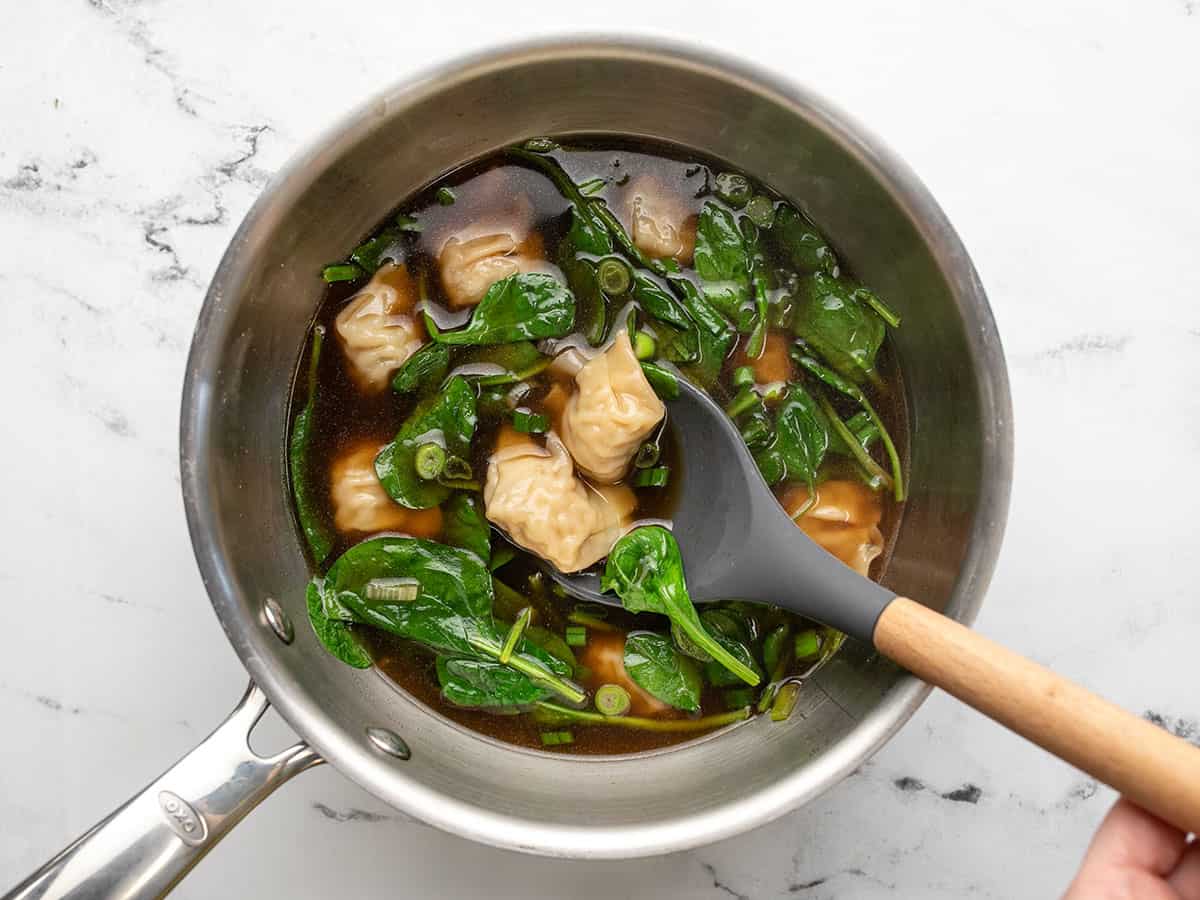
A medium-sized pot of finished dumpling soup.

Split the soup into two serving bowls and top each bowl with your desired garnishes. We chose to sprinkle ours with a few sesame seeds and a heaping spoonful of Sichuan Chili Crisp!

A close up view of dumpling soup in a white bowl topped with white sesame seeds and chili crisp.

GET IN MY BELLY!

The post Easy Dumpling Soup appeared first on Budget Bytes.