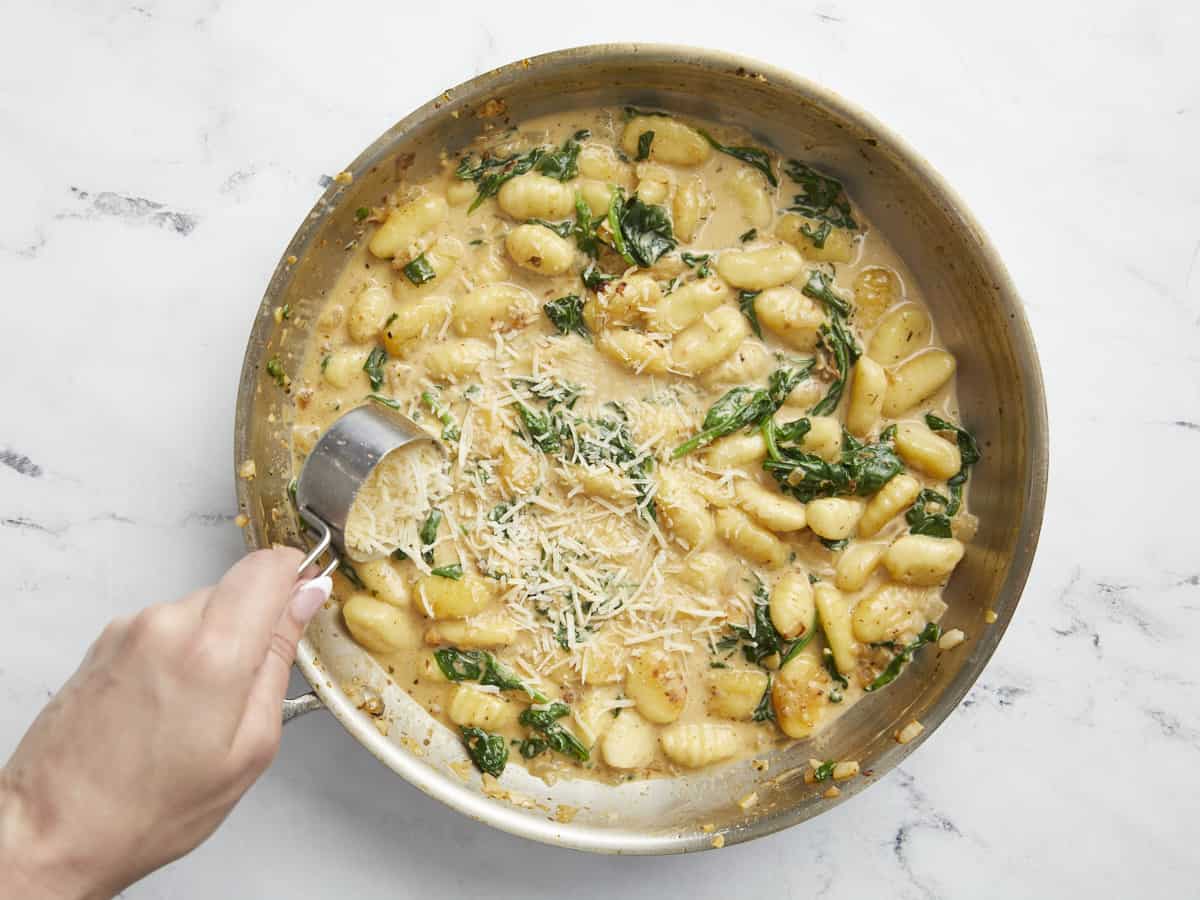
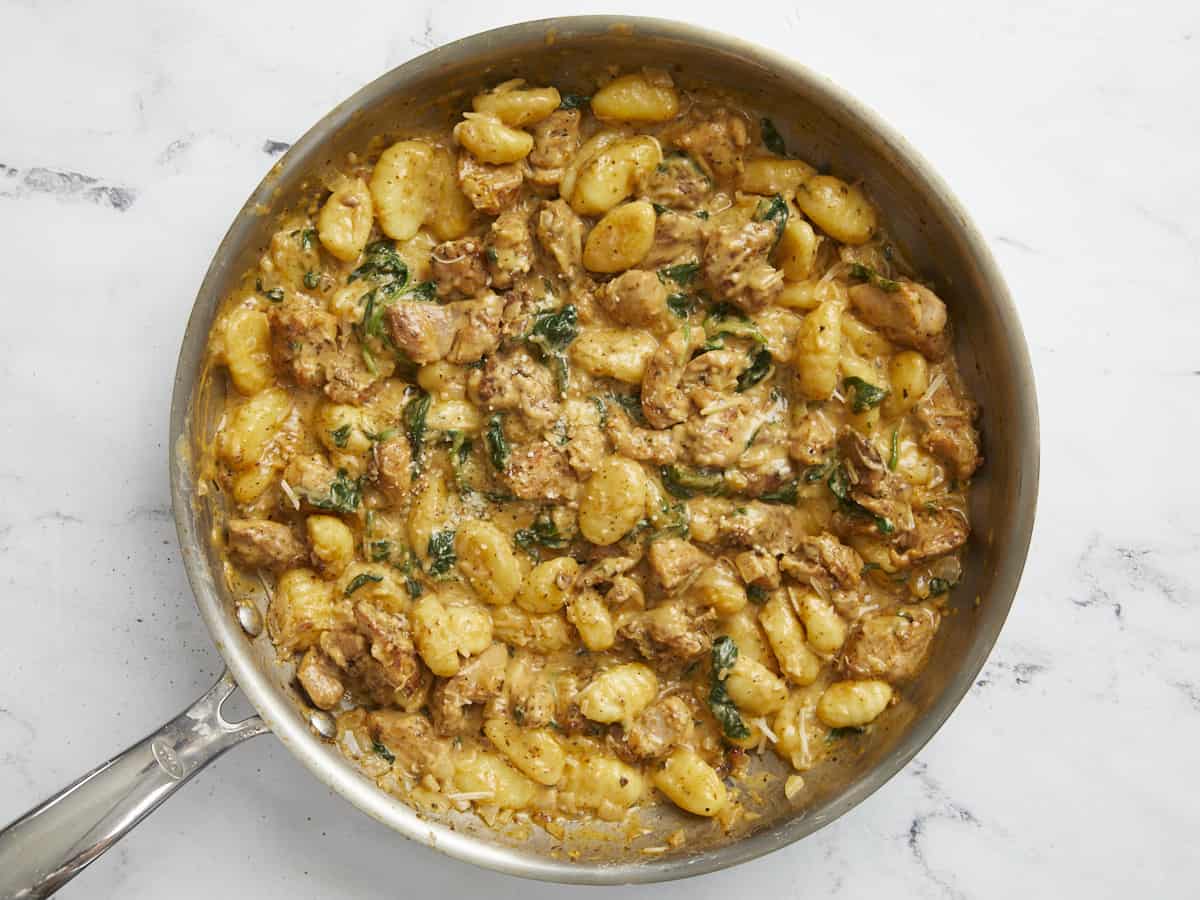
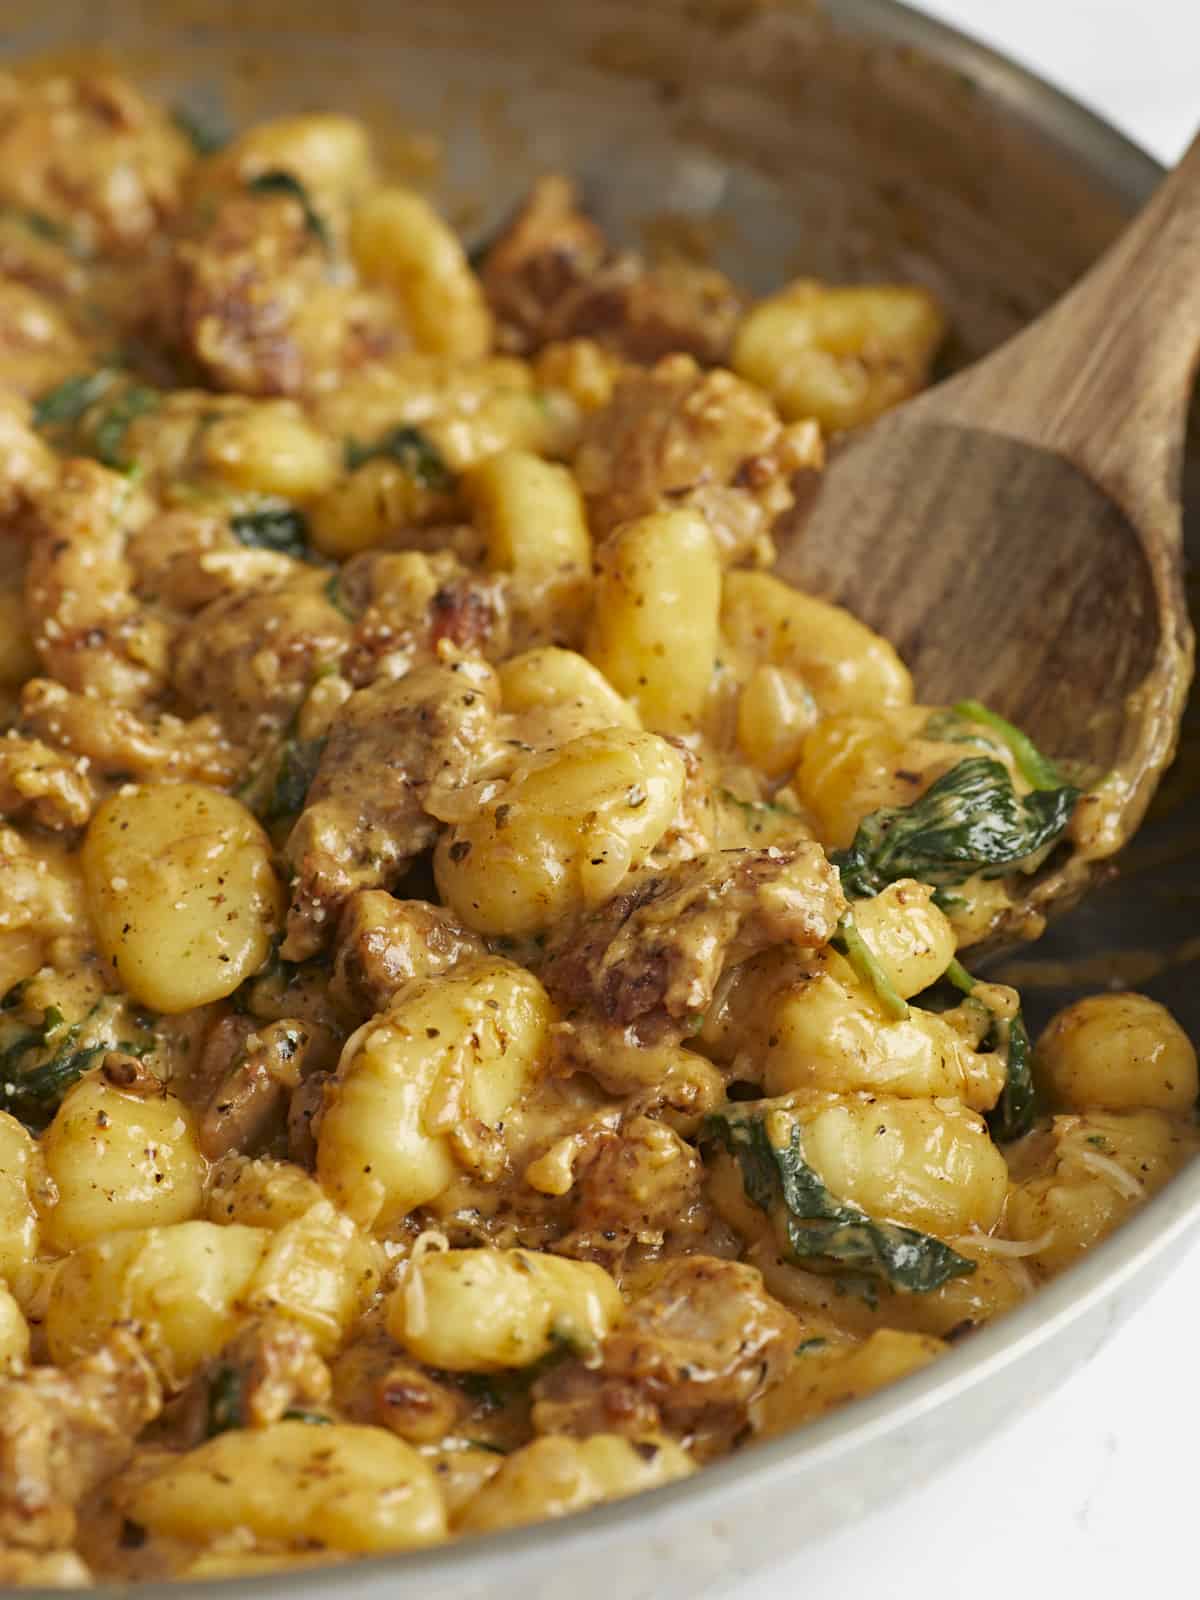
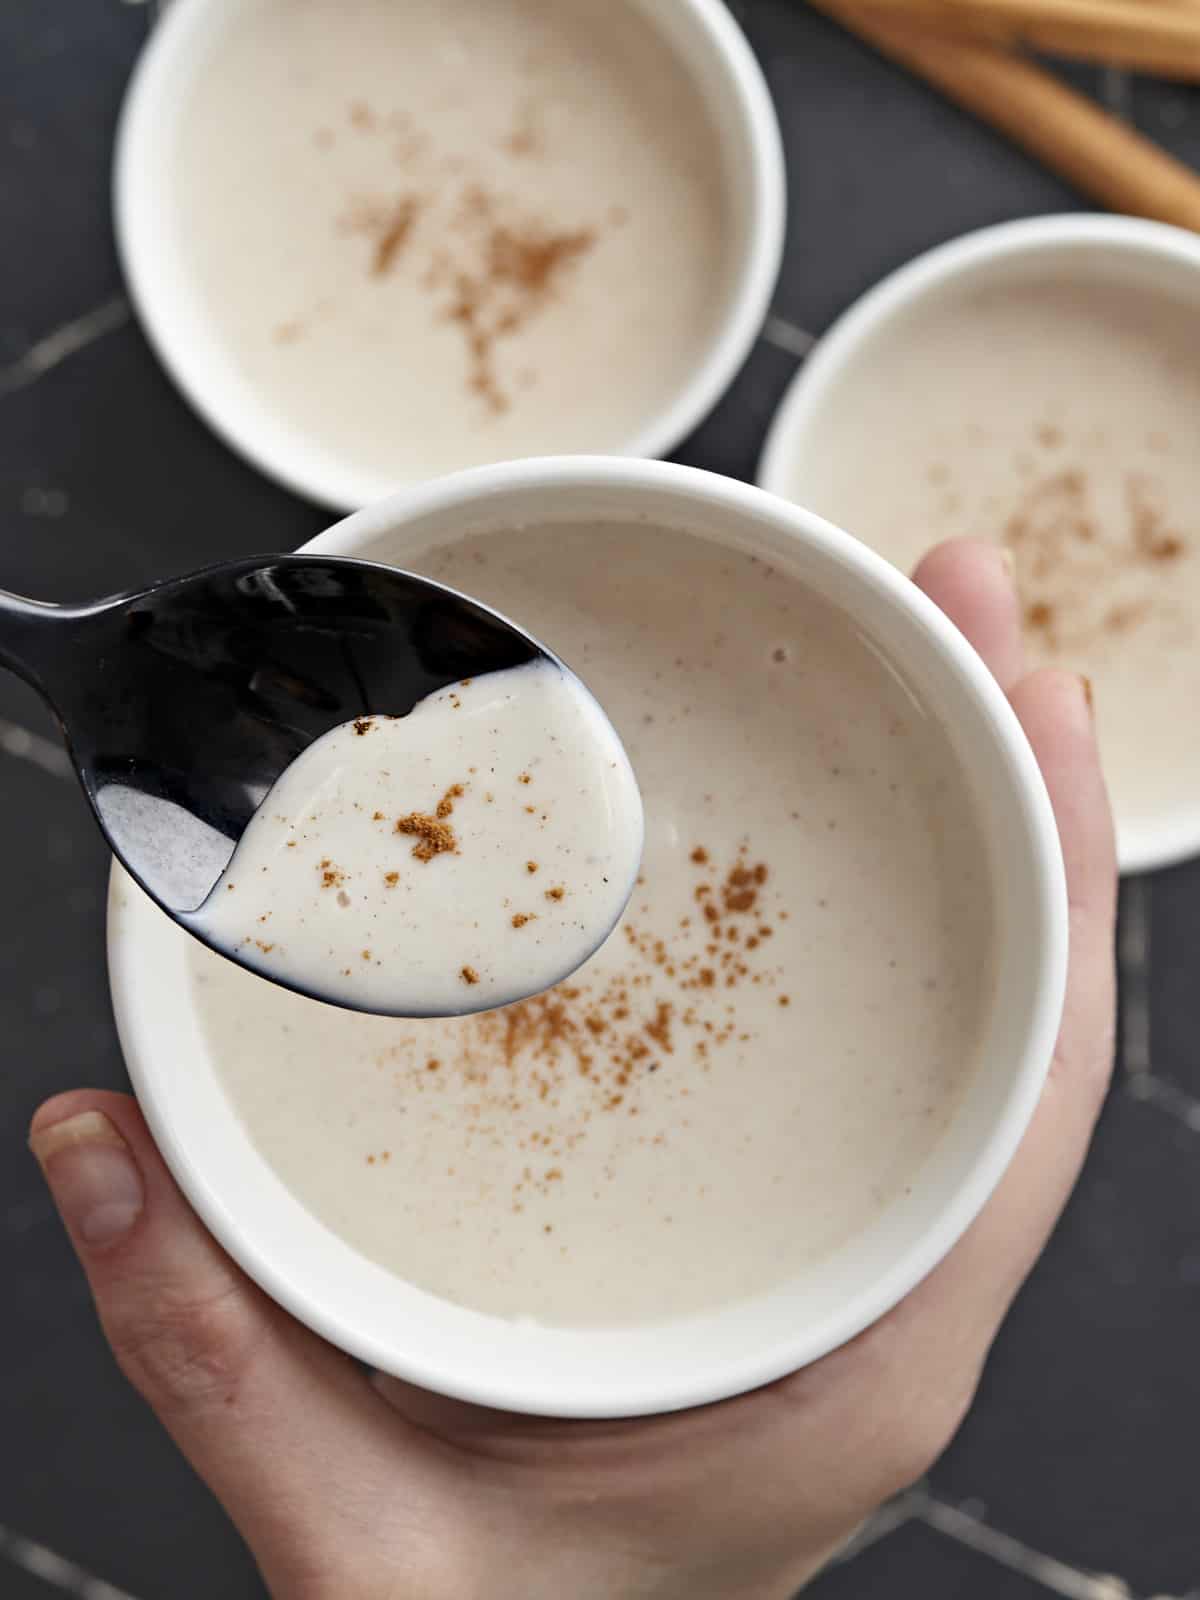
Pinchos De Pollo (Puerto Rican Chicken Skewers)

Smoky, mouth-watering Pinchos De Pollo, AKA Puerto Rican Chicken Skewers, are a beloved island street food that’s easy to make at home!

The post Pinchos De Pollo (Puerto Rican Chicken Skewers) appeared first on Budget Bytes.

If you’re looking for an easy, budget-friendly treat everyone at the BBQ will love (especially your Boricua friends), you have to make smoky, mouth-watering Pinchos De Pollo, AKA Puerto Rican Chicken Skewers! This beloved island street food is easy to recreate at home, even if you don’t have a grill!
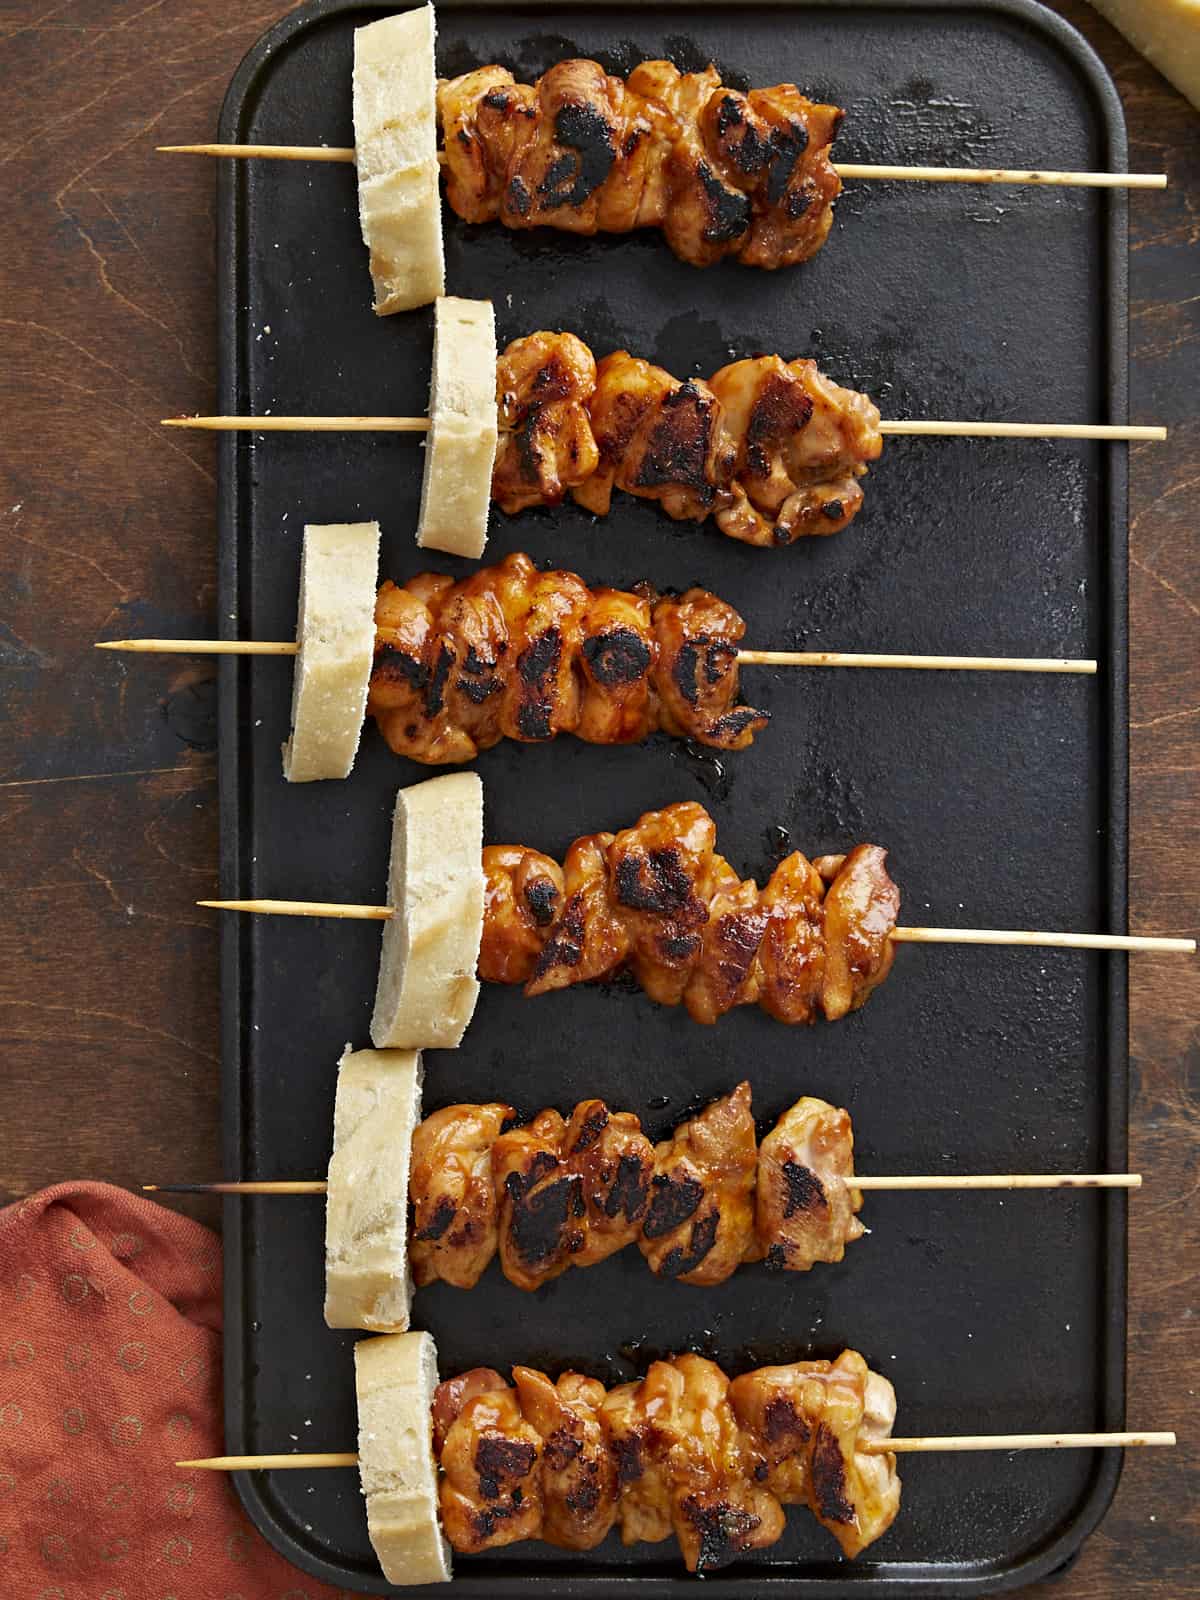
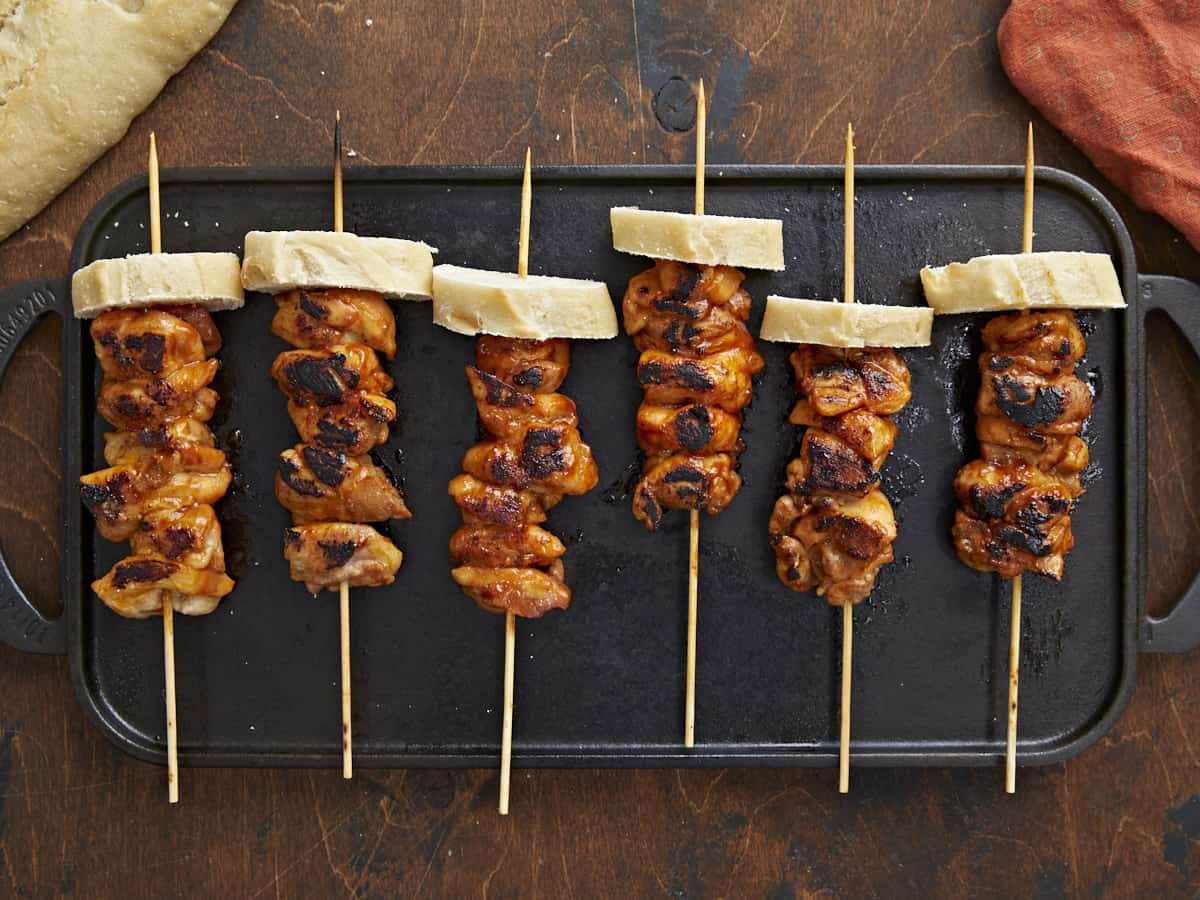
Overhead shot of Pinchos de Pollo on a black grill plate.

What Are Pinchos?

Pinchos is Spanish for “spikes” and refers to Puerto Rican meat skewers, one of the island’s most famous street foods. They are a late-night favorite of folks who’ve spent a little too much time at the bar and need to eat their way back to reality. Boricuas make Pinchos with many different types of meat (and sometimes veggies), but the most popular choices are chicken and pork. The meat is chopped, marinated, skewered, grilled over charcoal, and topped with a piece of bread or Tostones, AKA fried green plantain.

Ingredients For Pinchos De Pollo

Grilling Pinchos De Pollo over charcoal is traditional. However, I’m an avid indoors person and don’t like being exposed to the elements, so I made these on a grill plate. You should def open all of the windows or plan on explaining to the fire department that you’re grilling inside. (This happened to me a few days ago when I couldn’t get my smoke alarm to turn off and my security system automatically summoned my local firefighters… during a live virtual cooking demo. Not mortifying at all.) Here’s what you’ll need to make Pinchos De Pollo:

  • Chicken Thighs– have enough fat in them to withstand heavy grilling without drying out. You can, of course, substitute chicken thighs with whatever meat your heart desires. Bits of chopped marinated pork and beef are popular choices, as are shrimp. If you’re a veg head, try this recipe with whole baby bella mushrooms. Cooking times are different for different cuts of meat and veggies, so if you choose to change up the star of the show, use a thermometer to help you know when things are cooked through.
  • Adobo and Sazón– these Puerto Rican spice blends are heavy-duty flavor bombs and work quickly to infuse your chicken with earthy, tangy, notes. If you don’t have Adobo or Sazón, I’ve included recipes for you in the recipe card below.
  • BBQ Sauce– glazes the chicken, adds deep flavor, and helps create char marks. Use your favorite brand, though I’d steer clear of anything too sweet, as it will change the flavor profile and accelerate the charring. You can always make our easy recipe for Homemade BBQ Sauce, which is perfect for Pinchos De Pollo.
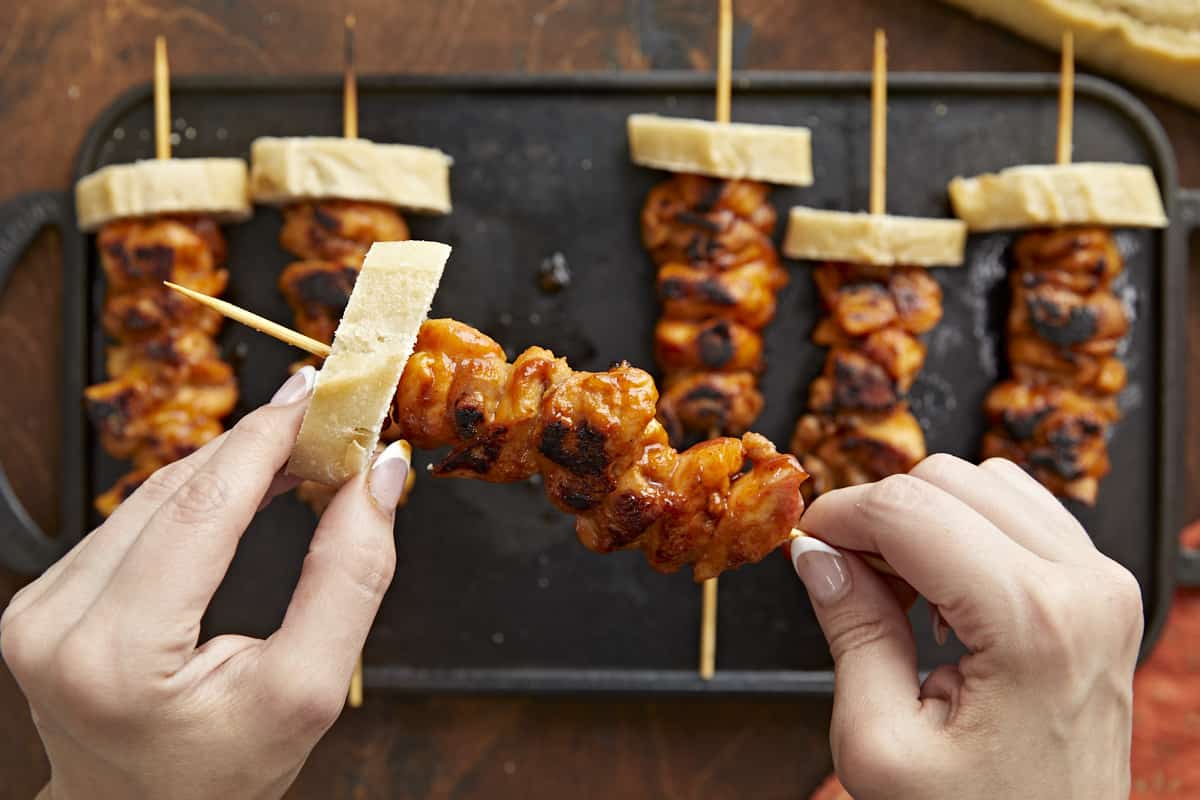
Over head shot of hand lifting Pinchos De Side shot of hand lifting Pinchos de Pollo on a black grill plate.

What Can You Serve With Pinchos De Pollo?

These Pinchos de Pollo pair beautifully with Arroz Con Habichuelas (Puerto Rican Rice And Beans) and Tostones (Fried Green Plantain). You can also serve them with Ensalada De Aguacate (Avocado Salad) and Yuca En Escabeche (Pickled Yuca Root).

How To Store Pinchos

When it comes to chicken left at room temperature, you should eat it or store it within 2 hours before harmful bacteria start to form. That time frame reduces to 1 hour if temperatures are above 90°F. Store leftover Pinchos De Pollo in an air-tight container with as much air removed as possible. Refrigerate for up to 3 days. Freeze for up to 3 months. Reheat in a 350°F oven or a microwave until steaming.

Over head shot of hand lifting Pinchos de Pollo on a black grill plate.
Overhead shot of Pinchos De Pollo on a black grill plate.
Print

Pinchos De Pollo

Smoky, mouth-watering Pinchos De Pollo, AKA Puerto Rican Chicken Skewers, are a beloved island street food that's easy to make at home! Get ready for a little piece of heaven!
Course Appetizer
Cuisine Latin, Puerto Rican
Total Cost ($7.67 recipe / $1.28 serving)
Prep Time 15 minutes
Cook Time 20 minutes
Marinating Time 1 hour
Total Time 1 hour 35 minutes
Servings 6 skewers
Calories 623kcal

Ingredients

  • 3 lbs boneless and skinless chicken thighs, about 5 to 6 $5.97
  • 2 tsp adobo* $0.10
  • 1 1/2 tsp sazón** $0.19
  • 2 tsp salt $0.16
  • 2 Tbsp cooking oil, plus a touch more for greasing $0.09
  • 1 cup BBQ Sauce $1.16

Instructions

  • Pat chicken thighs dry with a paper towel. Then chop the chicken into bite-size pieces (about 5 to 6 pieces per thigh).
  • Add the adobo, sazón, and salt to a large bowl and mix.
  • Add the chopped chicken thighs to the bowl along with the cooking oil and mix until the chicken is thoroughly covered. Cover with plastic wrap or parchment directly on the surface of the chicken and marinate for at least an hour, but preferably overnight.
  • Half an hour before you pull the chicken, soak at least 6 wood skewers in water so they don't burn. It's best to soak a few extra skewers just in case one of them breaks.
  • When you're ready to cook, preheat a grill pan on high. Then thread a thigh's worth of chicken pieces on each skewer, about 5 or 6 chunks. You want the chicken chunks close but not pressed tightly against each other. Brush both sides of each skewer with BBQ sauce, about 1/2 cup total.
  • When the grill pan is smoking hot, brush it with a touch of cooking oil. Then, place the skewers on the grill pan, making sure not to crowd the pan or place the skewers too close to each other.
  • After 5 minutes, brush 1/4 cup of BBQ sauce on the top surface of the chicken. Next, flip the chicken, and brush another 1/4 cup of BBQ sauce on the top layer. Cook for 5 more minutes, until char develops and the internal temperature of the chicken registers at 160°F. Now all you have left to do is eat! Buen provecho!

See how we calculate recipe costs here.

Notes

*If you cannot source adobo, mix your own and then use the amount called for in the recipe. Store the rest in an airtight container.
2 Tbsp salt
1 Tbsp garlic powder
1 tsp ground oregano
1 tsp onion powder
1 tsp black pepper
1 tsp ground cumin
1/2 tsp turmeric
**A packet of sazón contains about 1.5 teaspoons of sazón. If you cannot source sazón, use the following:
1/4 teaspoon onion powder
1/4 teaspoon garlic powder
1/4 teaspoon ground cumin
1/4 teaspoon ground coriander
1/3 teaspoon ground annatto
1/8 teaspoon turmeric
1/8 teaspoon ground oregano
Sazón and adobo share a lot of similar ingredients but are used at different points in the cooking process and will develop slightly different colors and flavors.

Nutrition
Serving: 1skewer | Calories: 623kcal | Carbohydrates: 21g | Protein: 37g | Fat: 43g | Sodium: 1531mg | Fiber: 1g
Overhead shot of Pinchos De Pollo on a black grill plate.

How to Make Pinchos De Pollo – Step by Step Photos
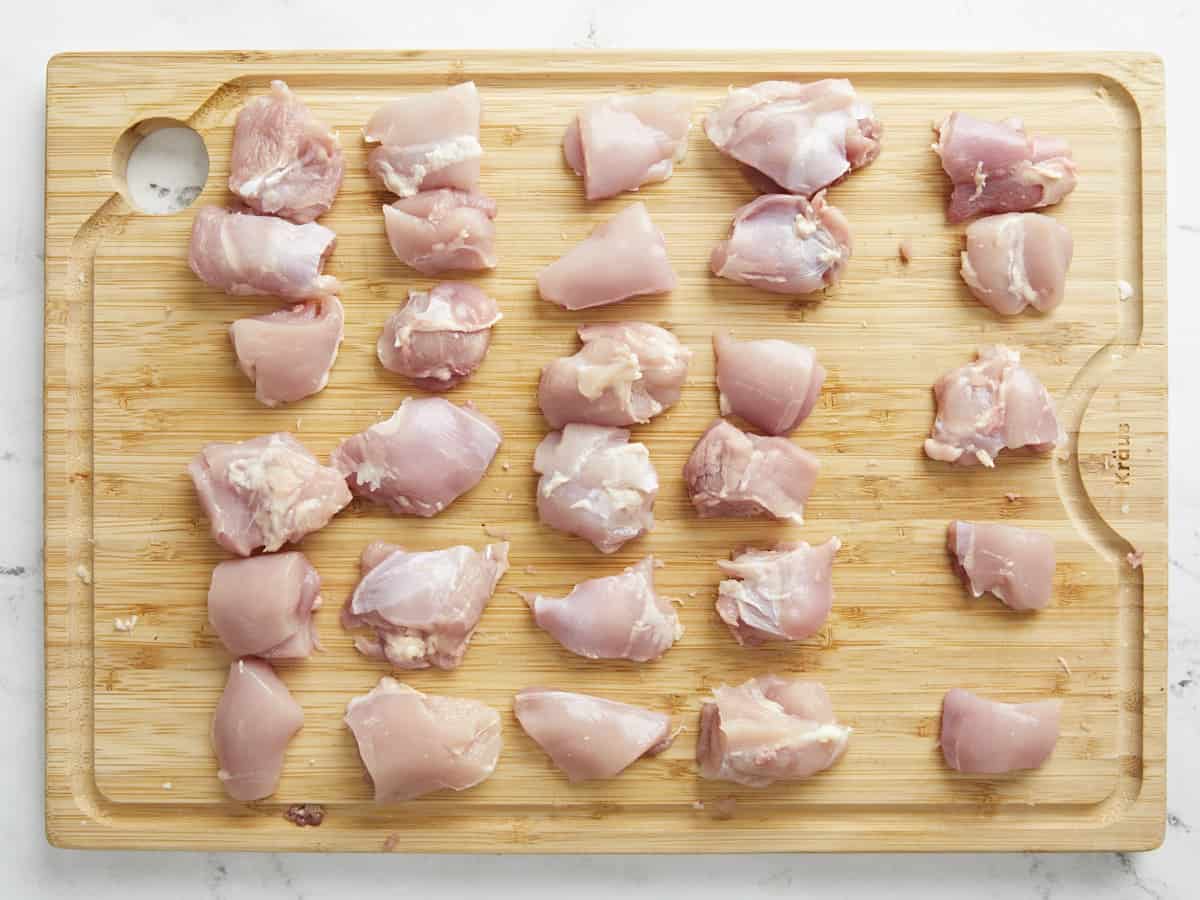
Overhead shot of cut chicken thighs on a wood cutting board.

Pat 3 pounds of chicken thighs (about 5 to 6 thighs) dry with a paper towel. Then chop the chicken into bite-size pieces (about 5 to 6 pieces per thigh). You don’t have to line up your chicken obsessively as I did. For the record, I’m jealous of your freewheeling ways.
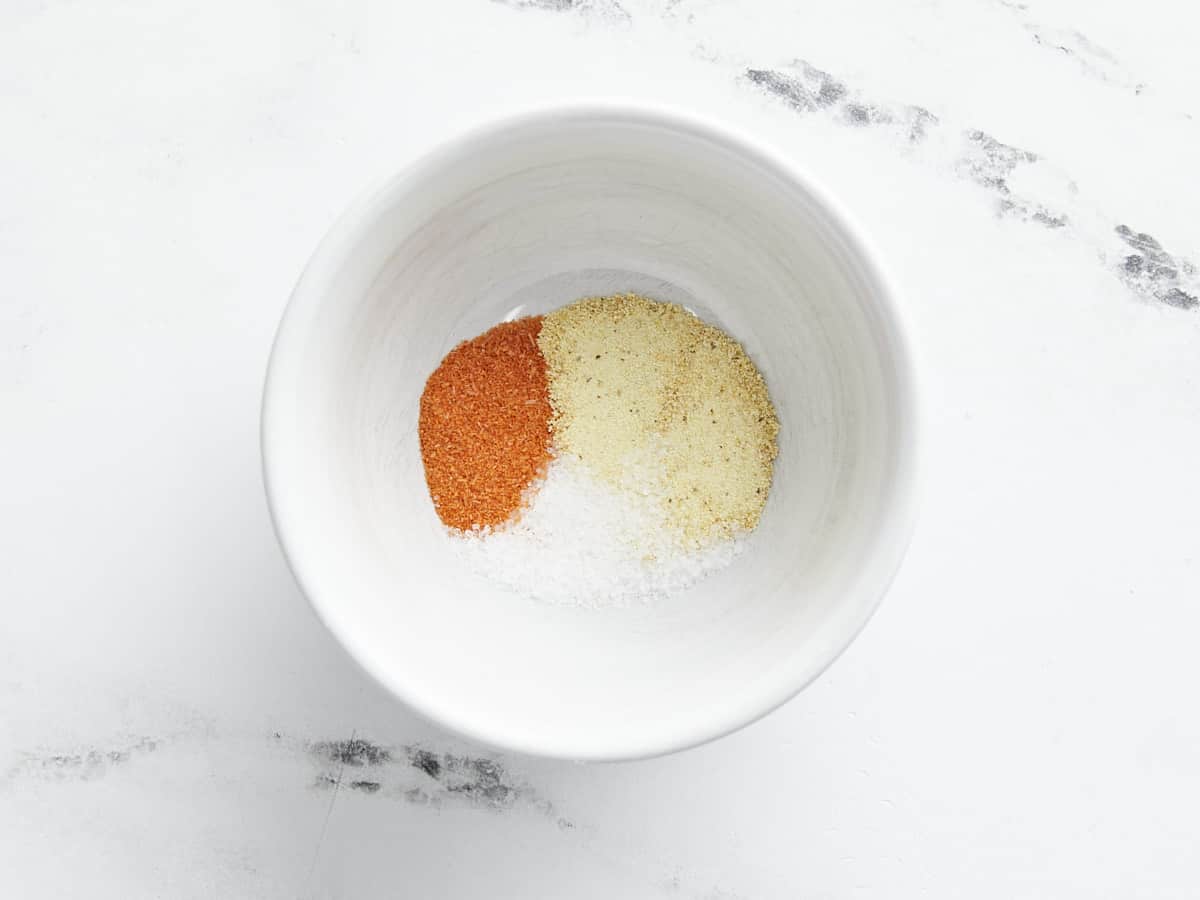
Overhead shot of spices to make Pinchos de Pollo in a white bowl.

Add 1 1/2 teaspoons adobo, 2 teaspoons sazón, and 2 teaspoons salt to a large bowl and mix.
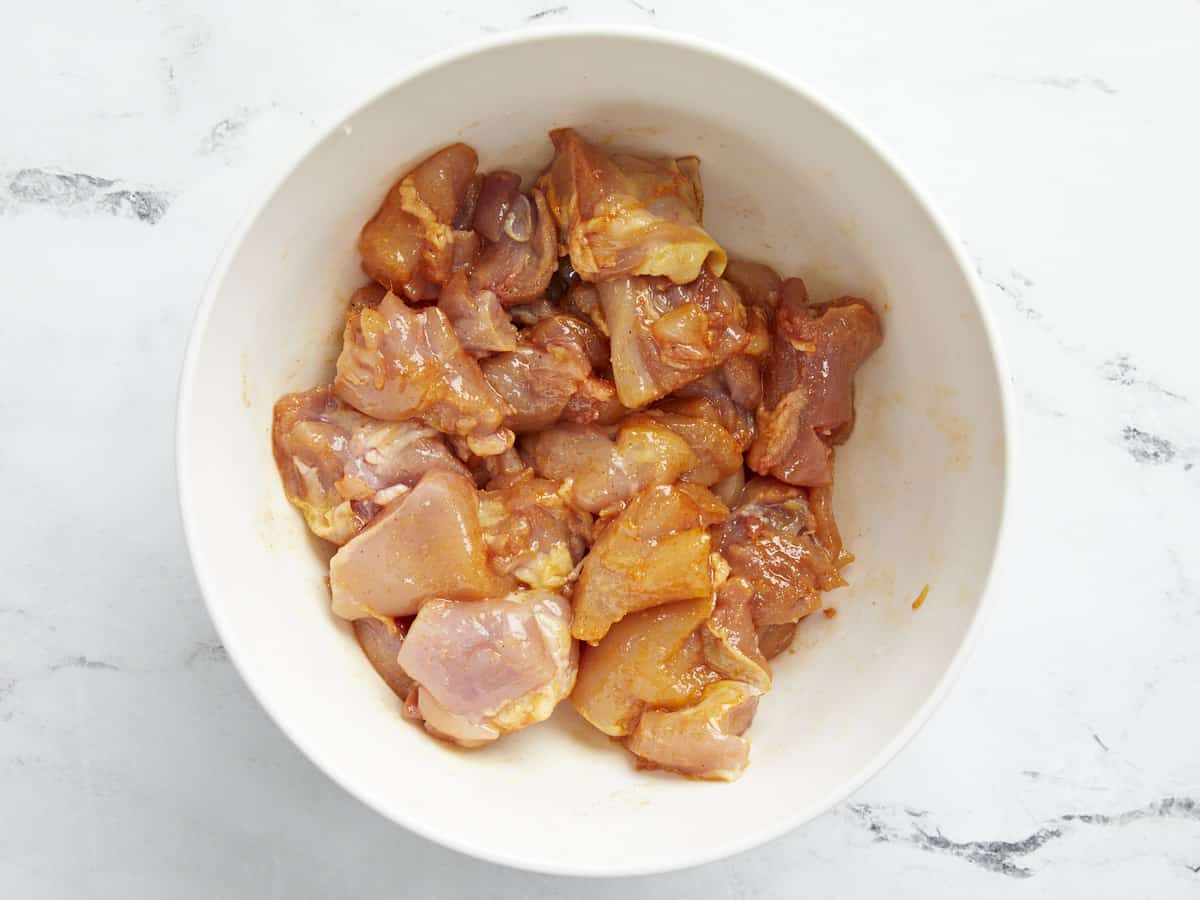
Overhead shot of cut chicken marinating in a white bowl.

Add the chopped chicken thighs to the bowl along with the 2 tablespoons of cooking oil and mix until the chicken is thoroughly covered. Cover with plastic wrap or parchment directly on the surface of the chicken and marinate for at least an hour, but preferably overnight.
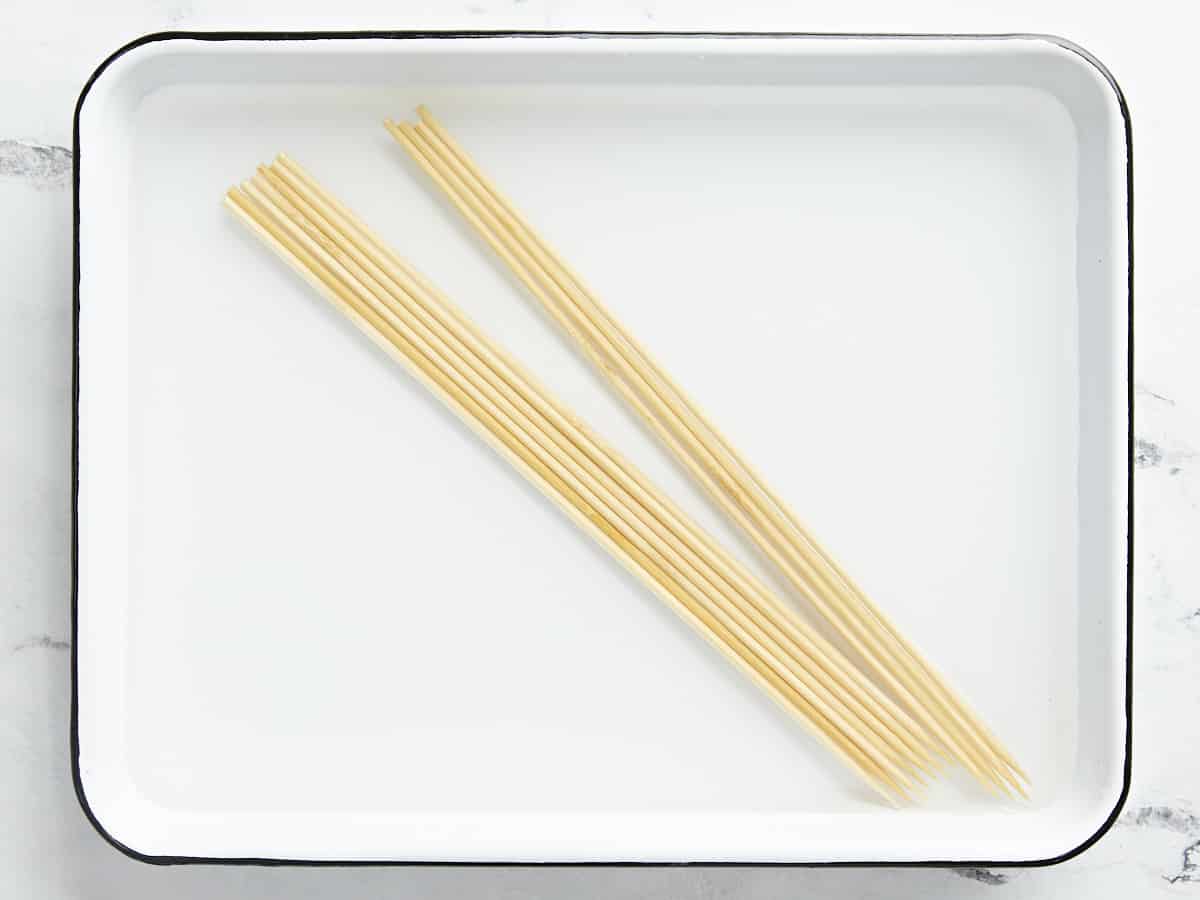
Overhead shot of wood skewers soaking in water in a white sheet pan.

Half an hour before you pull the chicken, soak at least 6 wood skewers in water so they don’t burn. Soak a few extra skewers just in case the skewer gods decide to bless you with weak wood.
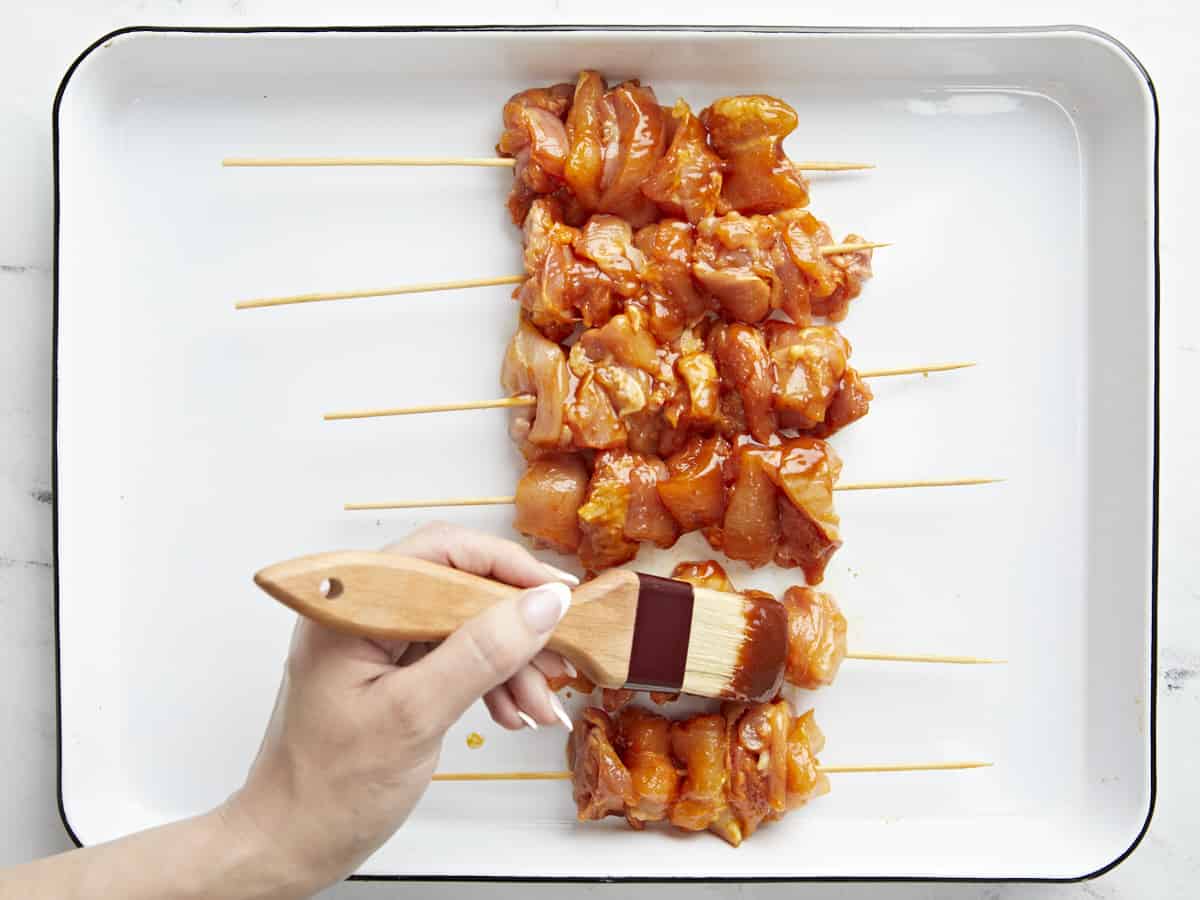
Overhead shot of Pinchos De Pollo being brushed with BBQ sauce.

When you’re ready to cook, preheat a grill pan on high. Then carefully thread a thigh’s worth of chicken pieces on each skewer, about 5 or 6 chunks. You want the chicken chunks close but not pressed tightly against each other, so leave room for Jesus. Otherwise, the chicken won’t cook evenly. Brush both sides of each skewer with BBQ sauce, about 1/2 cup total.
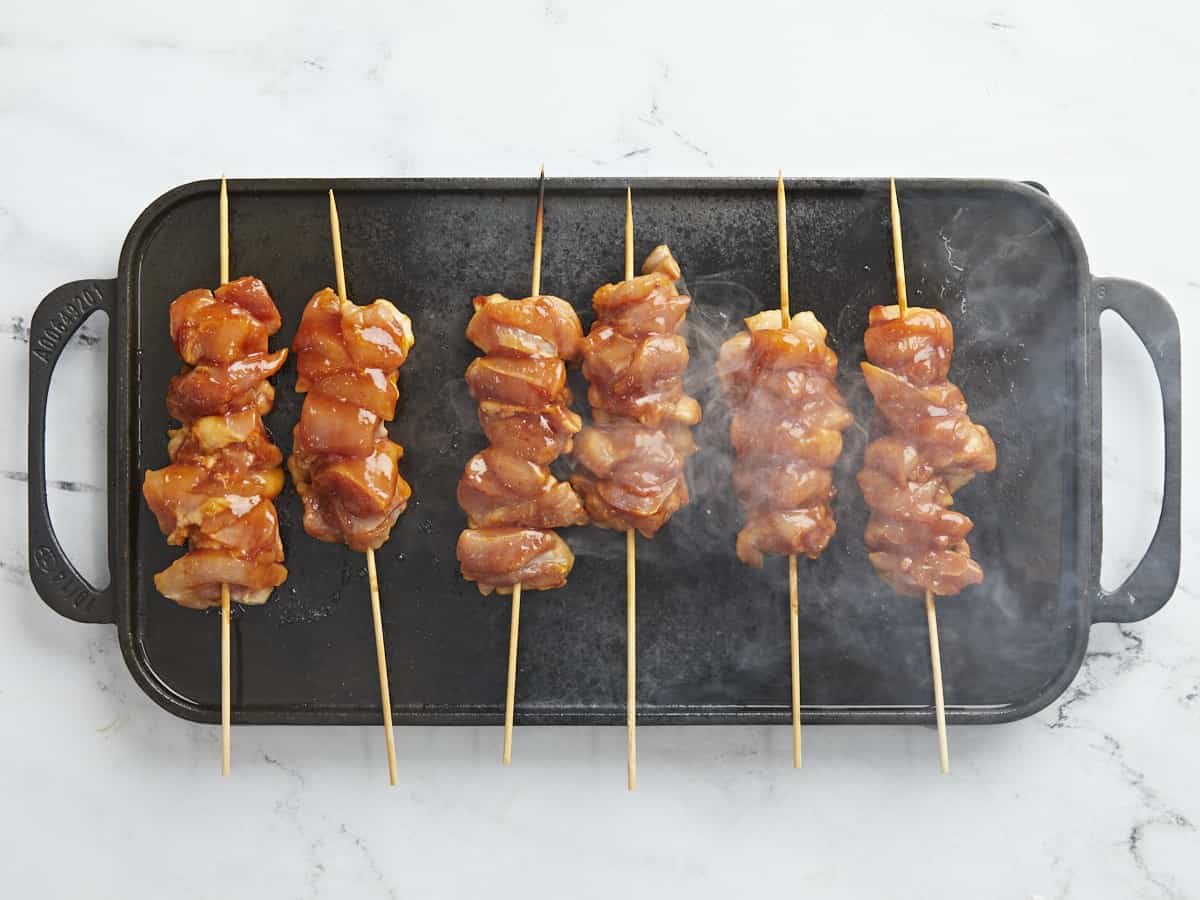
Overhead shot of Pinchos De Pollo cooking on a black grill plate.

When the grill pan is smoking hot, and I mean LITERAL smoke is billowing from it, brush it with a touch of cooking oil. Then, place the skewers on the grill pan, making sure not to crowd the pan or place the skewers too close to each other. (Did you open those windows???)
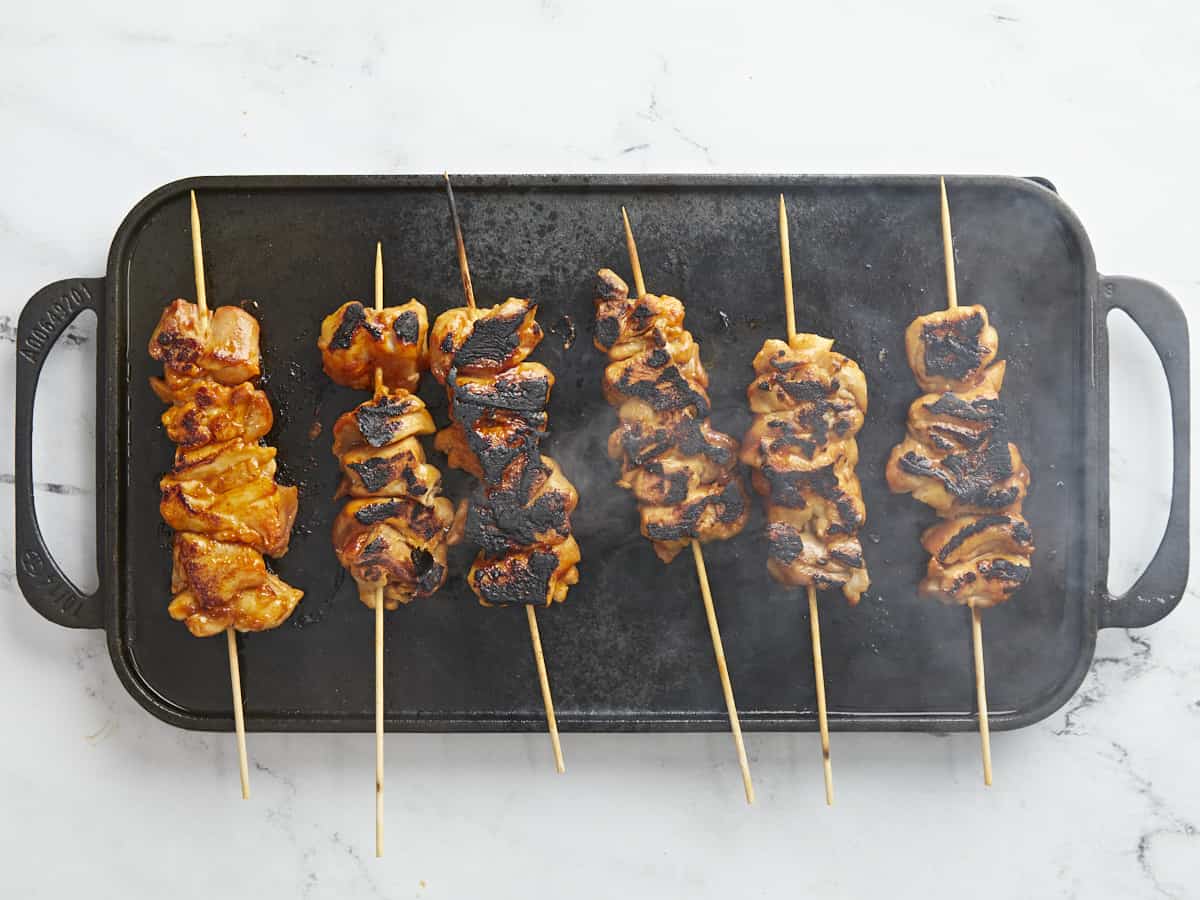
Overhead shot of Pinchos De Pollo cooking on a black grill plate.

After 5 minutes, brush 1/4 cup of BBQ sauce on the top surface of the chicken. Next, flip the chicken and brush another 1/4 cup of BBQ sauce on the top layer. Cook for 5 more minutes, until char develops and the internal temperature of the chicken registers at 160°F. Now all you have left to do is eat! Buen provecho!

Side shot of hand lifting Pinchos de Pollo on a black grill plate with a loaf of bread in the back ground.

Will you look at that savory, succulent, meaty, mouth-watering goodness?! Sigh. I want some right now!!!! Serve the Pinchos De Pollo as is. Or go the traditional route and top the skewers with slices of bread or Tostones (AKA fried green plantains). PS If you want my easy recipe for Tostones, let me know in the comments!

More Easy Puerto Rican Recipes

The post Pinchos De Pollo (Puerto Rican Chicken Skewers) appeared first on Budget Bytes.

Coconut Curry Chickpeas

Coconut Curry Chickpeas are flavorful and filling easy weeknight dinner packed with chickpeas, kale, and a flavorful creamy curry sauce!

The post Coconut Curry Chickpeas appeared first on Budget Bytes.

Quick curries are my favorite kind of weeknight dinner because they’re incredibly flavorful, require very little effort, and the leftovers are even better the next day. Plus, that creamy curry sauce makes everything taste good, so you can pack them with all sorts of nutrient-dense goodies, like chickpeas and kale. So basically, what I’m trying to say is, you need to make these Coconut Curry Chickpeas ASAP!

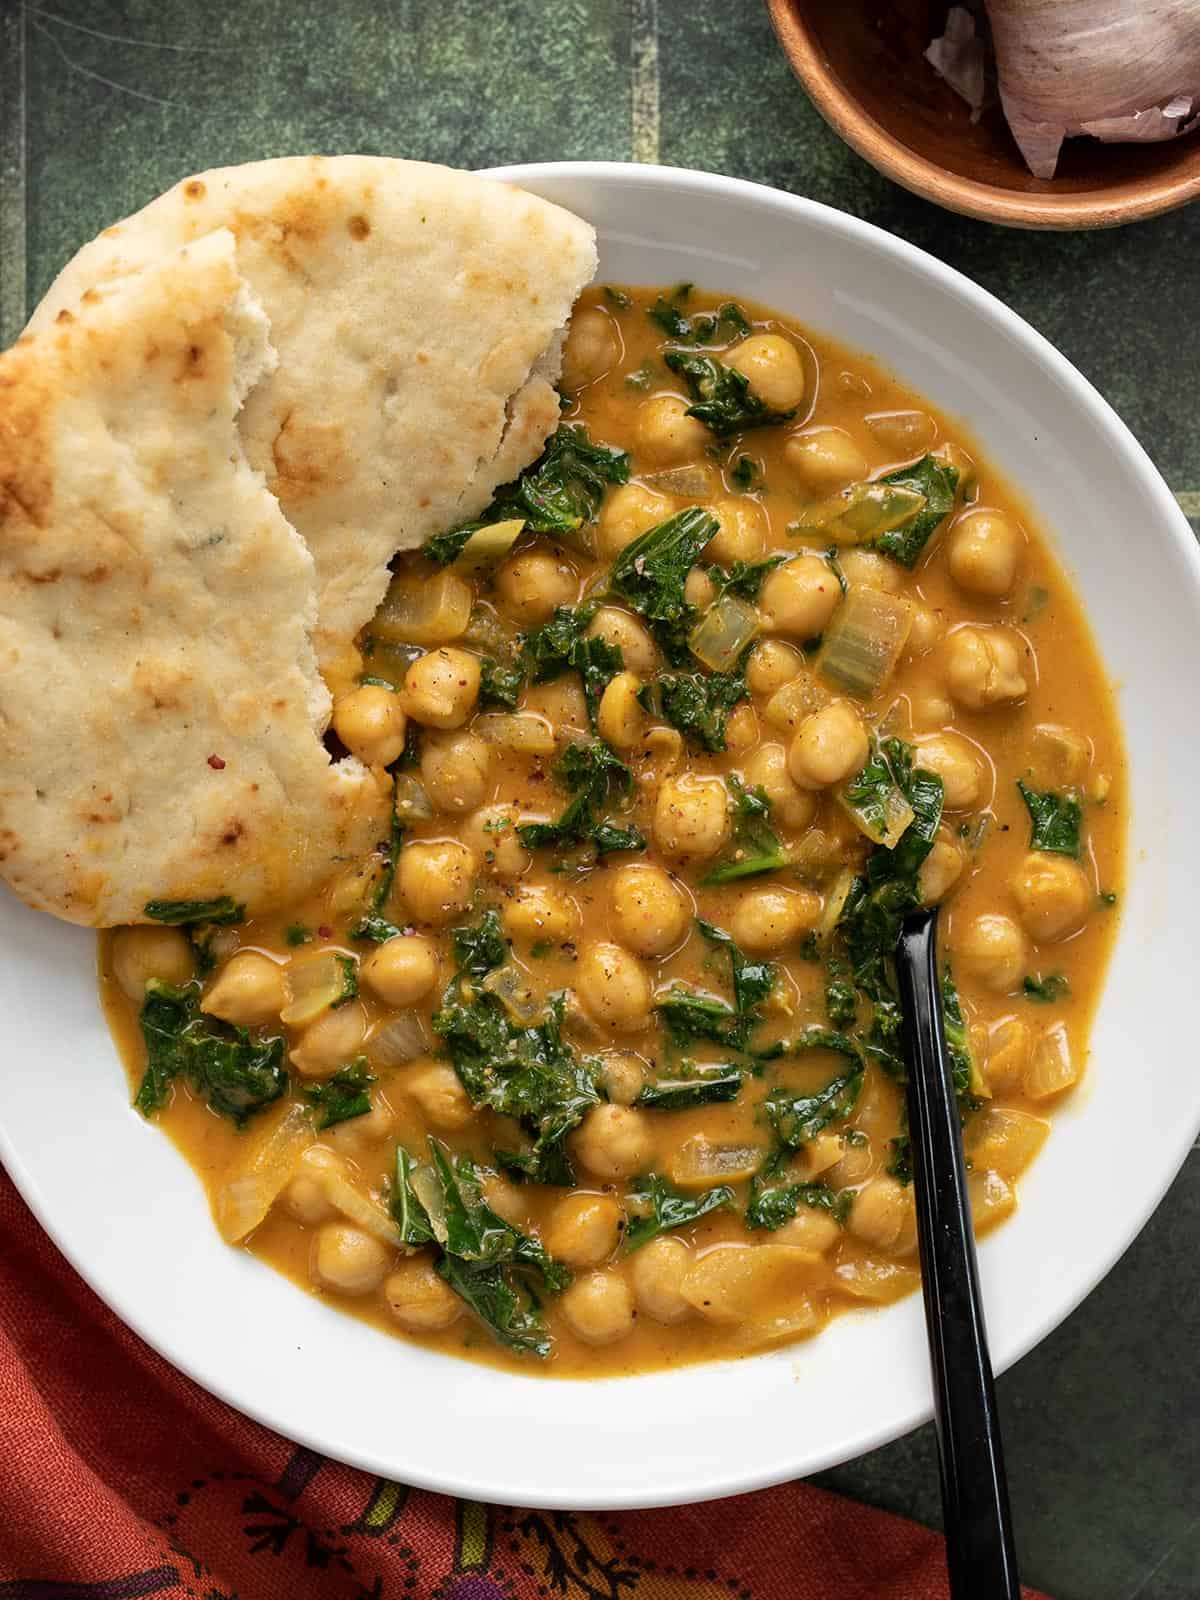
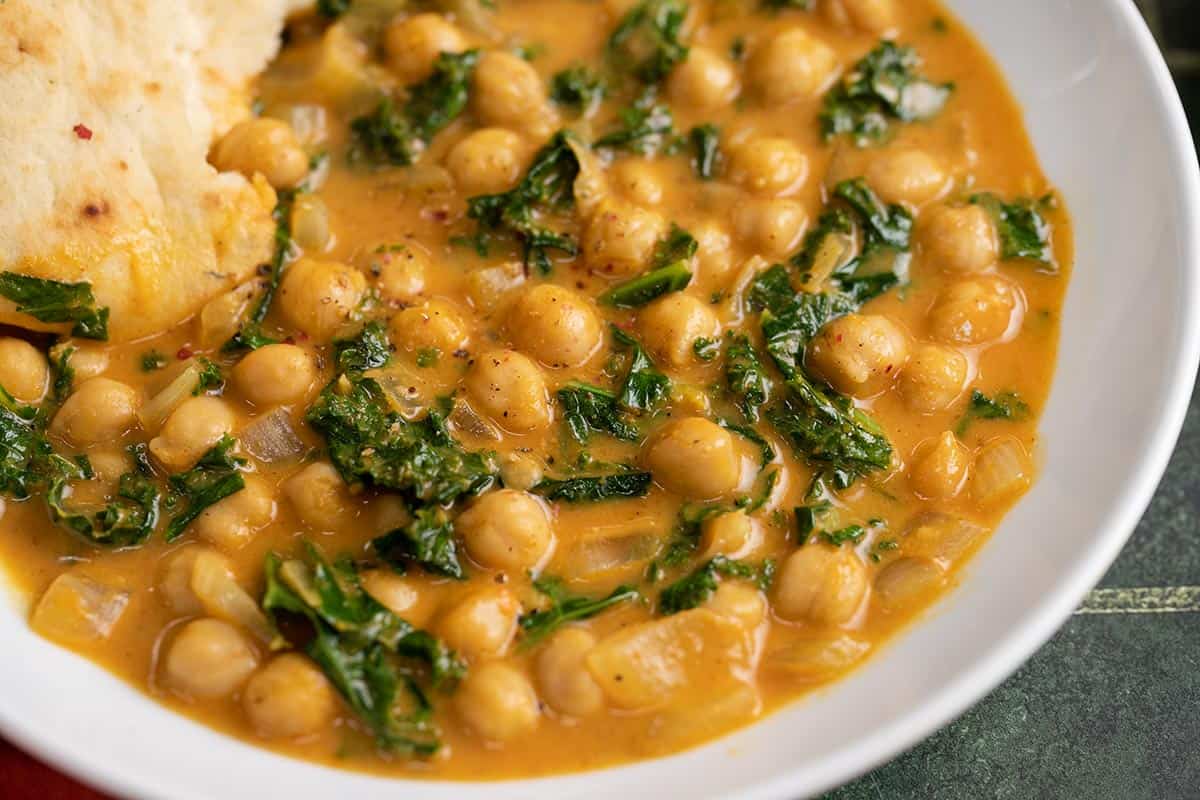
Close up overhead view of a bowl full of coconut curry chickpeas with naan bread on the side.

What’s in Coconut Curry Chickpeas

You’ll only need a handful of ingredients to make this warm and hearty dish, most of which you can keep on hand for last-minute dinners. Here are the ingredients you’ll need to make coconut curry chickpeas:

  • Aromatics: onion, garlic, and ginger create a powerful flavor base for this dish.
  • Spices: Curry powder and cumin. If you want a hot curry, you can always add a bit of cayenne pepper, too!
  • Tomato sauce: a little bit of tomato sauce adds just the right amount of acidity to the dish to balance the creamy coconut.
  • Coconut milk: full-fat coconut milk gives the curry sauce a ton of body and provides a creamy base to balance the potent flavors of the spices and aromatics.
  • Chickpeas: Inexpensive chickpeas fill out this dish, providing tons of belly-filling power and good-for-you fiber.
  • Kale: kale adds a little more variety in texture, color, and flavor to this dish. If you’re not into kale, you can substitute with fresh spinach.

What Kind of Curry Powder to Use

Curry powders can vary quite a bit in flavor from brand to brand, so make sure you experiment to find one that you enjoy. I’ve never met a curry powder that I didn’t like, so I don’t have one particular brand to suggest, but you definitely want to make sure it’s fresh! Old spices that have been sitting in your pantry a while begin to lose flavor and become dull and bland with time.

You also have the option to use either hot or mild curry powder. If you enjoy spicy foods you can use a hot curry powder, OR simply add some crushed red pepper or cayenne pepper to the dish when adding the curry powder and cumin.

How to Serve Coconut Curry Chickpeas

This warm and saucy dish is great over rice, or crusty bread or naan for dipping. You definitely want some sort of starchy goodness to soak up all of that sauce! You can also experiment with topping your chickpeas with fresh cilantro or even a squeeze of lime. Something light and refreshing, like Creamy Cucumber Salad, would also pair nicely with these curry chickpeas.

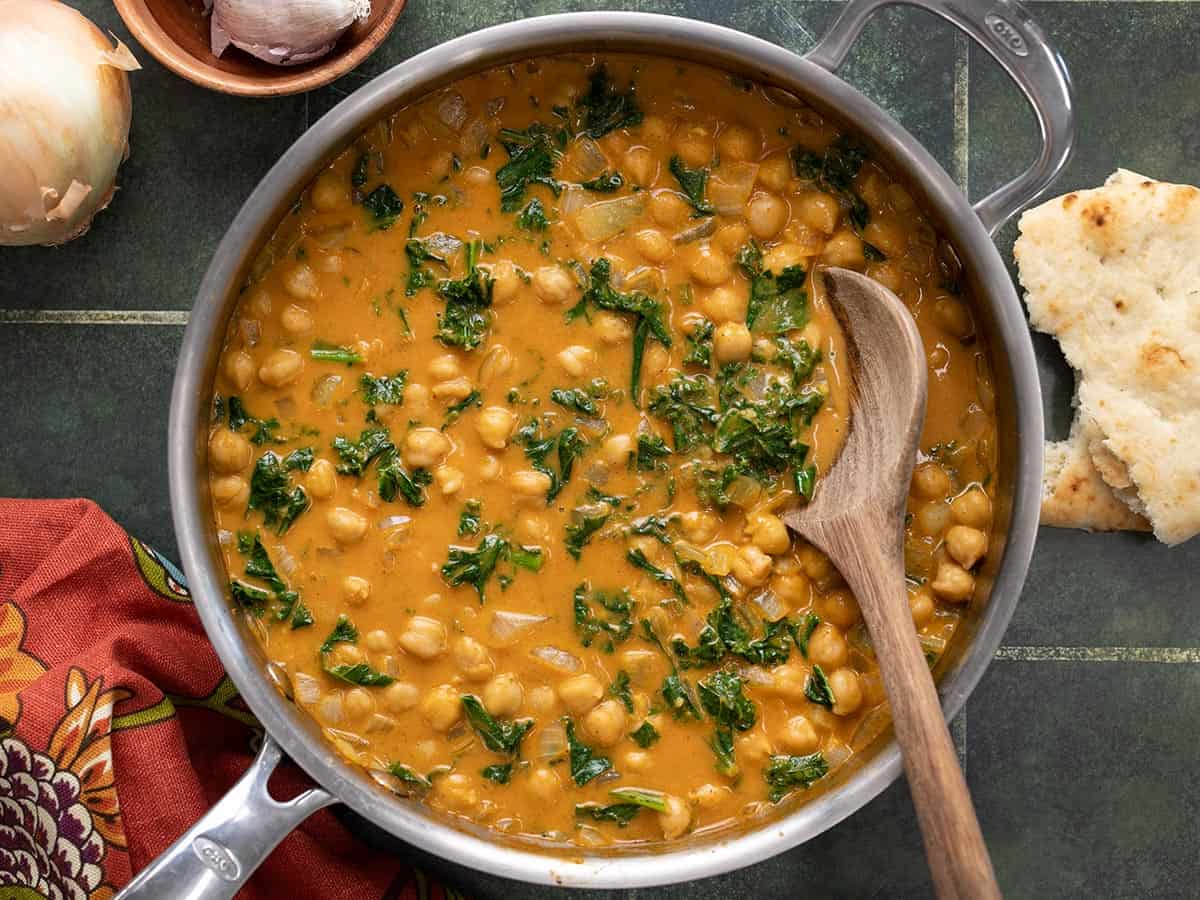
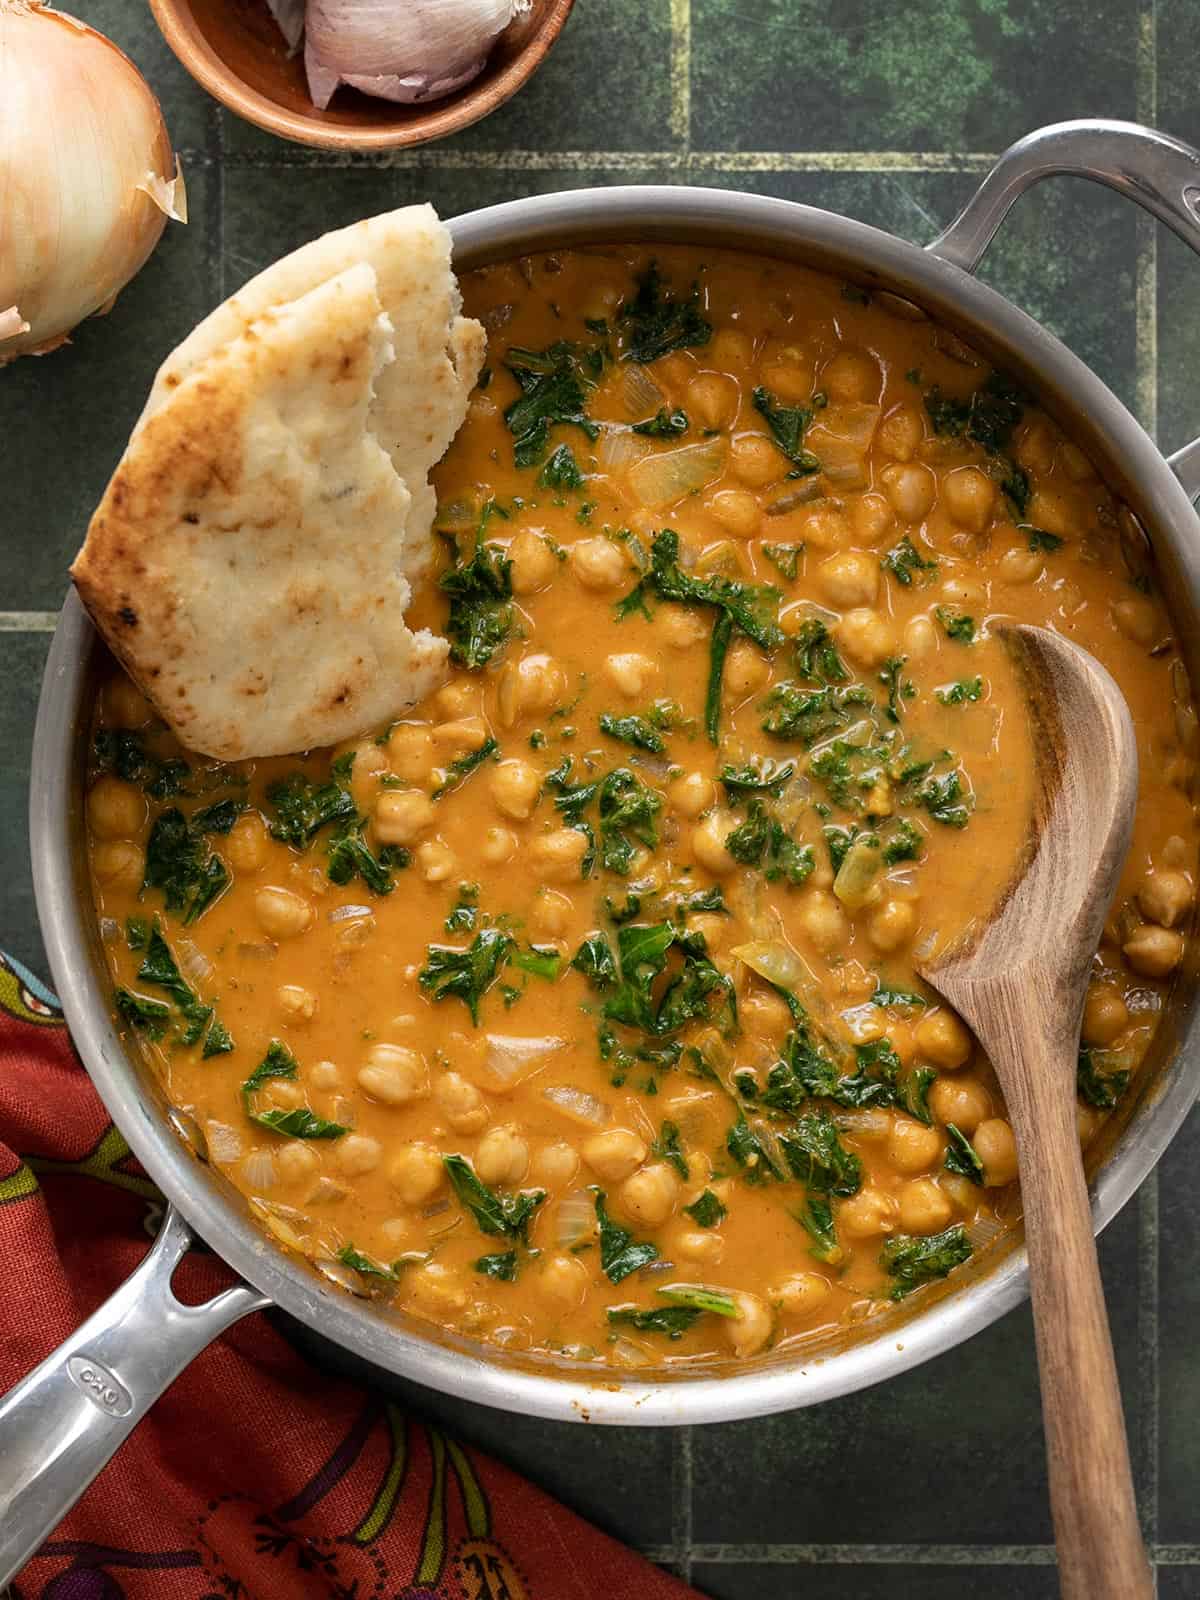
Overhead view of a skillet full of coconut curry chickpeas with a wooden spoon.
Overhead view of a bowl full of coconut curry chickpeas with a piece of naan.
Print

Coconut Curry Chickpeas

Coconut Curry Chickpeas are flavorful and filling easy weeknight dinner packed with chickpeas, kale, and a flavorful creamy curry sauce!
Course Dinner, Main Course
Cuisine Indian
Total Cost $7.44 recipe / $1.86 serving
Prep Time 10 minutes
Cook Time 25 minutes
Total Time 35 minutes
Servings 4 1.5 cups each
Calories 615kcal

Ingredients

  • 1 yellow onion $0.38
  • 2 cloves garlic $0.16
  • 1 tsp grated fresh ginger $0.10
  • 1.5 Tbsp curry powder $0.45
  • 1 tsp cumin $0.10
  • 2 15oz. cans chickpeas, drained $1.58
  • 1 8oz. can tomato sauce $0.50
  • 1 13.5oz. can full-fat coconut milk $2.99
  • 4 oz. chopped kale (about 3 cups) $0.75

Instructions

  • Dice the onion, mince the garlic, and grate the ginger. Add the onion, garlic, and ginger to a large deep skillet along with the olive oil. Sauté the aromatics over medium-low heat for about five minutes, or until the onions are soft and translucent.
  • Add the curry powder and cumin to the skillet and continue to stir and cook for about one minute more to toast the spices.
  • Drain the chickpeas, then add them to the skillet along with the tomato sauce and coconut milk. Stir everything to combine.
  • Turn the heat up to medium-high to bring the sauce up to a simmer. Once simmering, turn the heat back down to medium-low and allow the curry to continue to simmer for 15 minutes, stirring occasionally.
  • Add the kale and stir it into the sauce. Continue to cook and stir until the kale has wilted to your desired tenderness (I cook for about 5 minutes more). Finally, taste the curry and add salt to taste (about ½ tsp). Serve hot with rice or bread for dipping!

See how we calculate recipe costs here.

Nutrition

Serving: 1.5cups | Calories: 615kcal | Carbohydrates: 73g | Protein: 23g | Fat: 29g | Sodium: 316mg | Fiber: 22g
Close up side view of a bowl full of coconut curry chickpeas.

How to Make Coconut Curry Chickpeas – Step by Step Photos

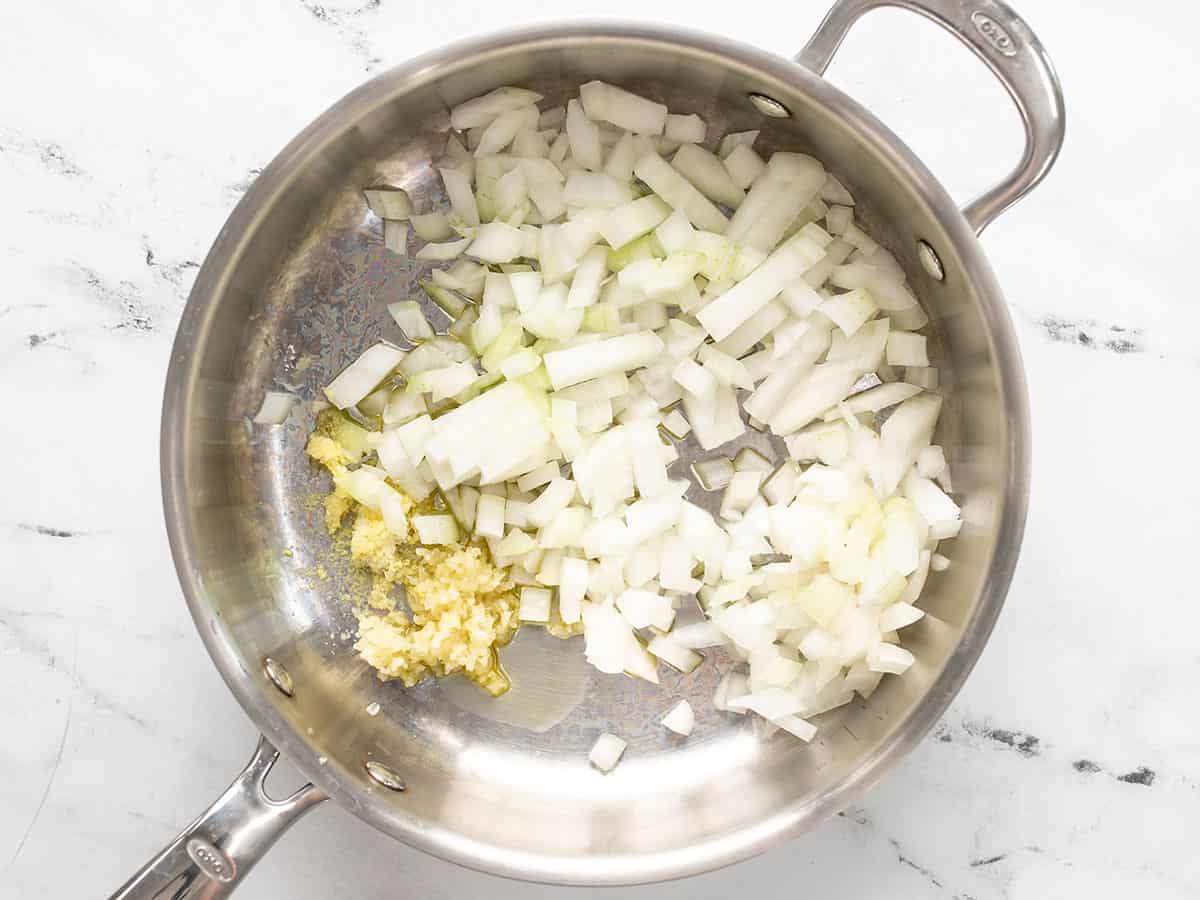
Diced onion, minced garlic, and grated ginger in a deep skillet.

Dice one yellow onion, mince two cloves of garlic, and grate about one teaspoon of fresh ginger. Add the onion, garlic, and ginger to a deep skillet along with 2 Tbsp olive oil. Sauté the aromatics over medium-low heat for about five minutes, or until the onion is soft and translucent.

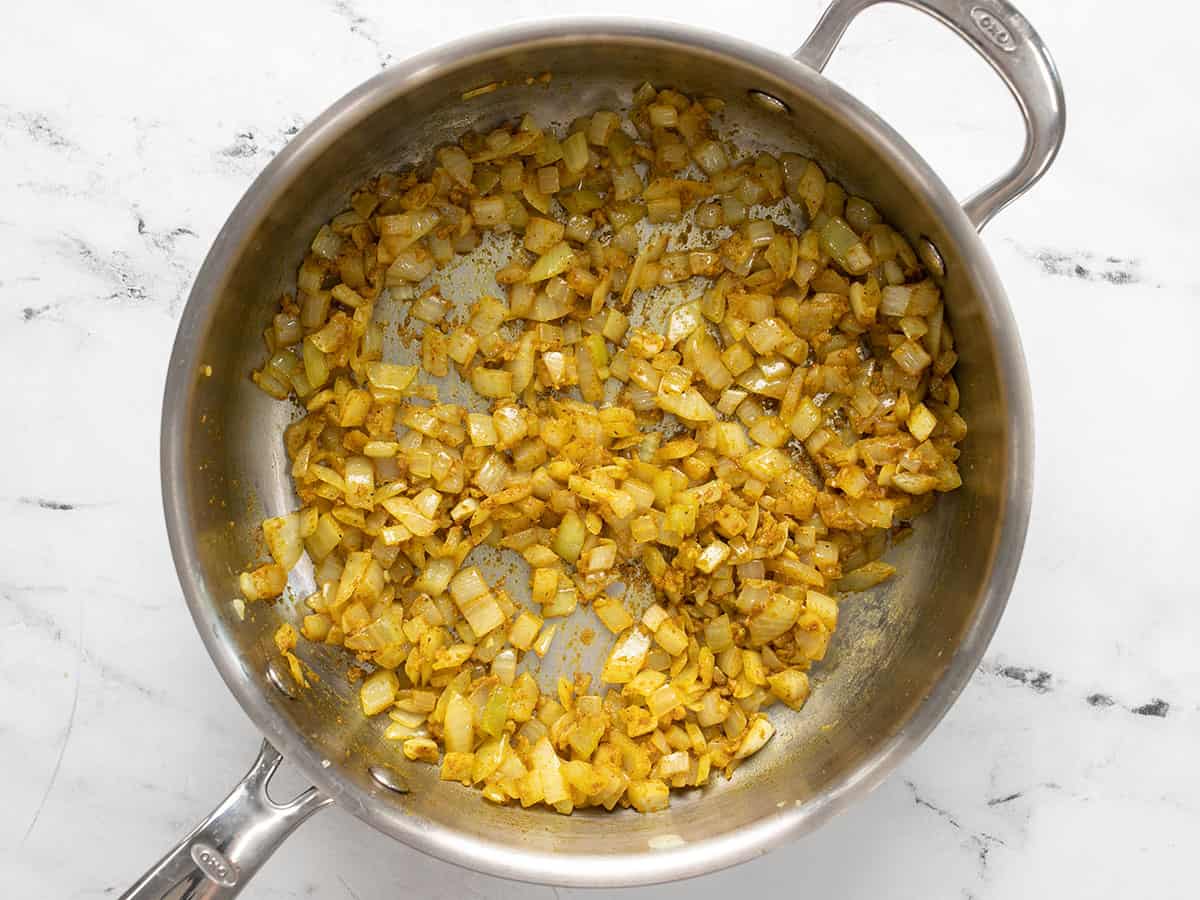
Spices added to the skillet with onions, garlic, and ginger.

Add 1.5 Tbsp curry powder and 1 tsp cumin to the skillet. Continue to stir and cook for about one minute more to toast the spices.

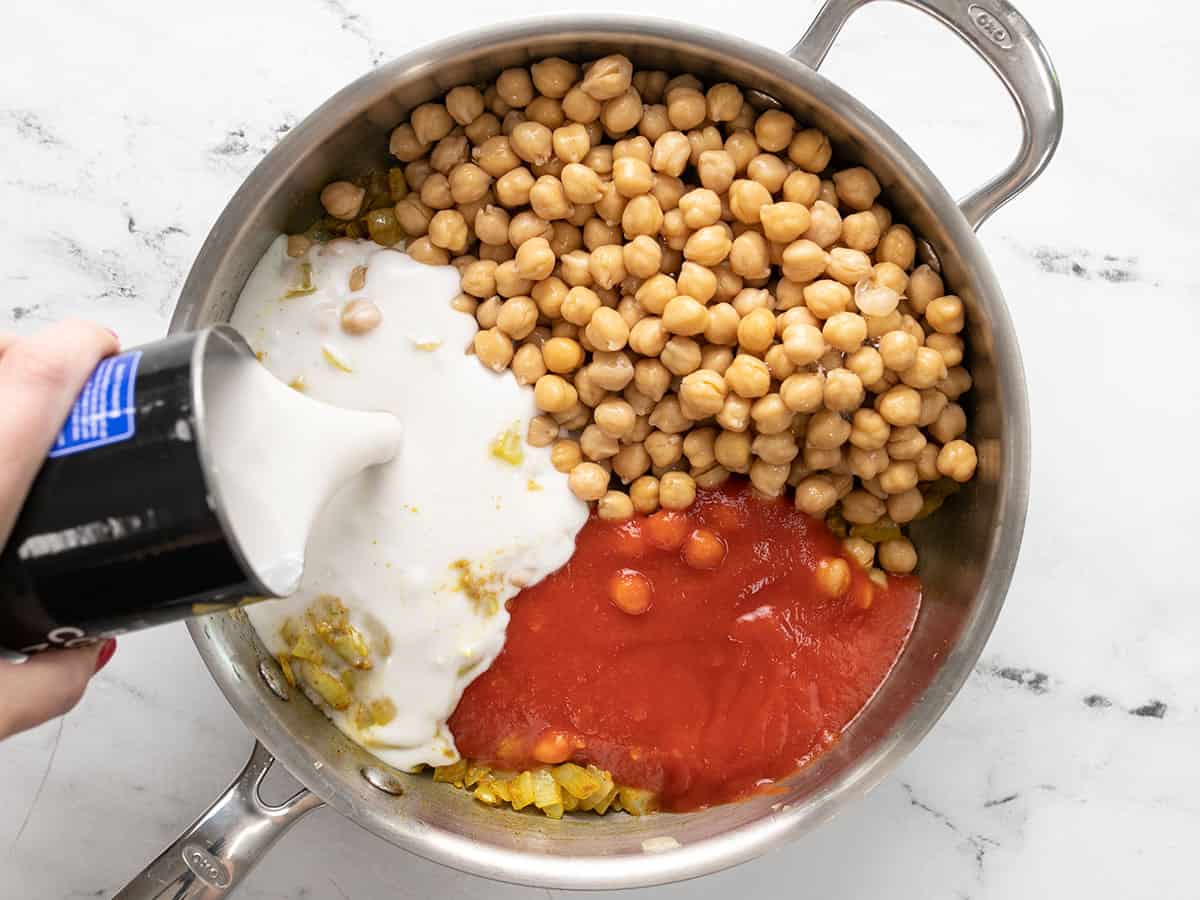
Chickpeas, tomato sauce, and coconut milk added to the skillet.

Drain two cans of chickpeas, then add them to the skillet along with 8 oz. tomato sauce and a 13.5 oz. can of coconut milk (full fat).

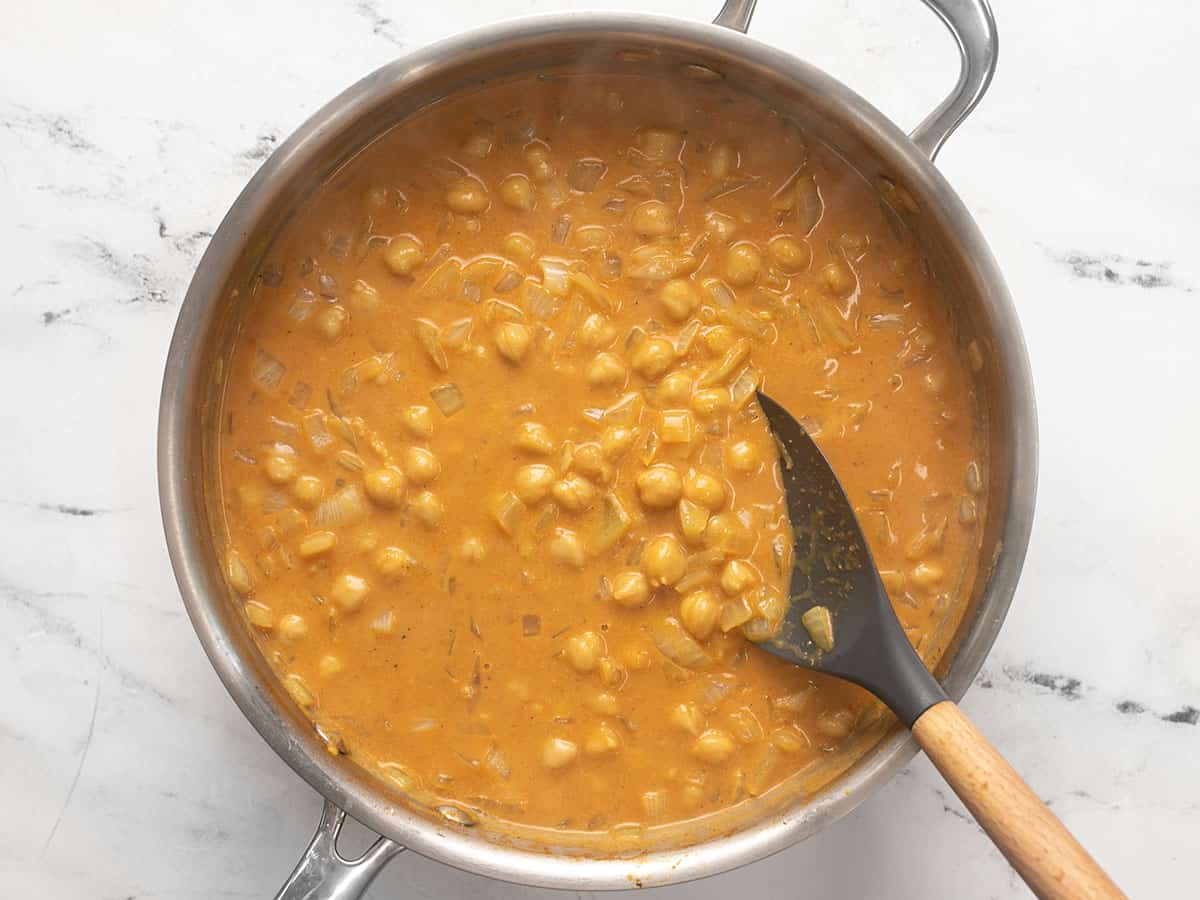
Simmered chickpeas in curry sauce.

Stir until everything is evenly combined, turn the heat up to medium-high, and allow the sauce to come up to a simmer. Once simmering, turn the heat down to medium-low and let it continue to simmer for 15 minutes, stirring occasionally.

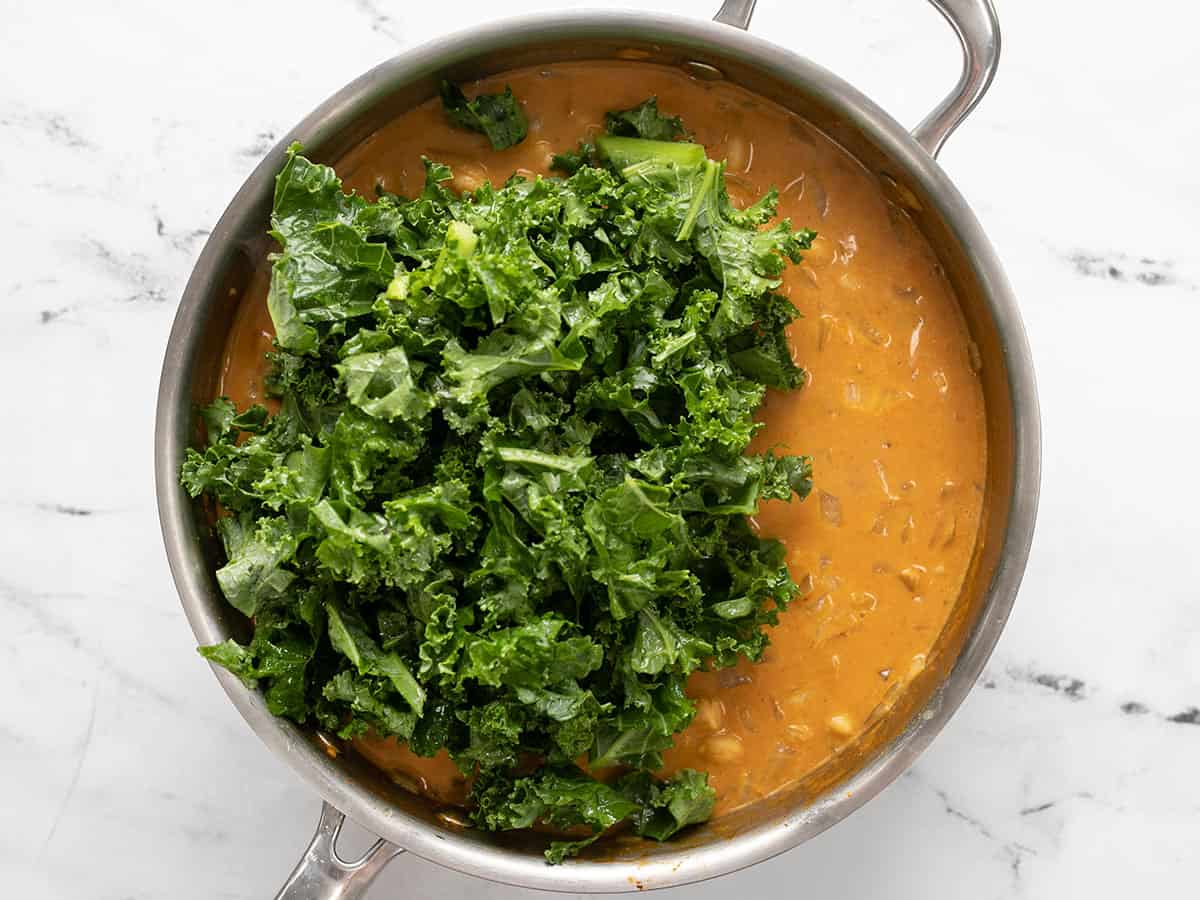
Fresh kale added to the skillet.

Add 4 oz. (about three cups) of fresh chopped kale to the skillet. I buy the pre-chopped bagged kale to make this easier.

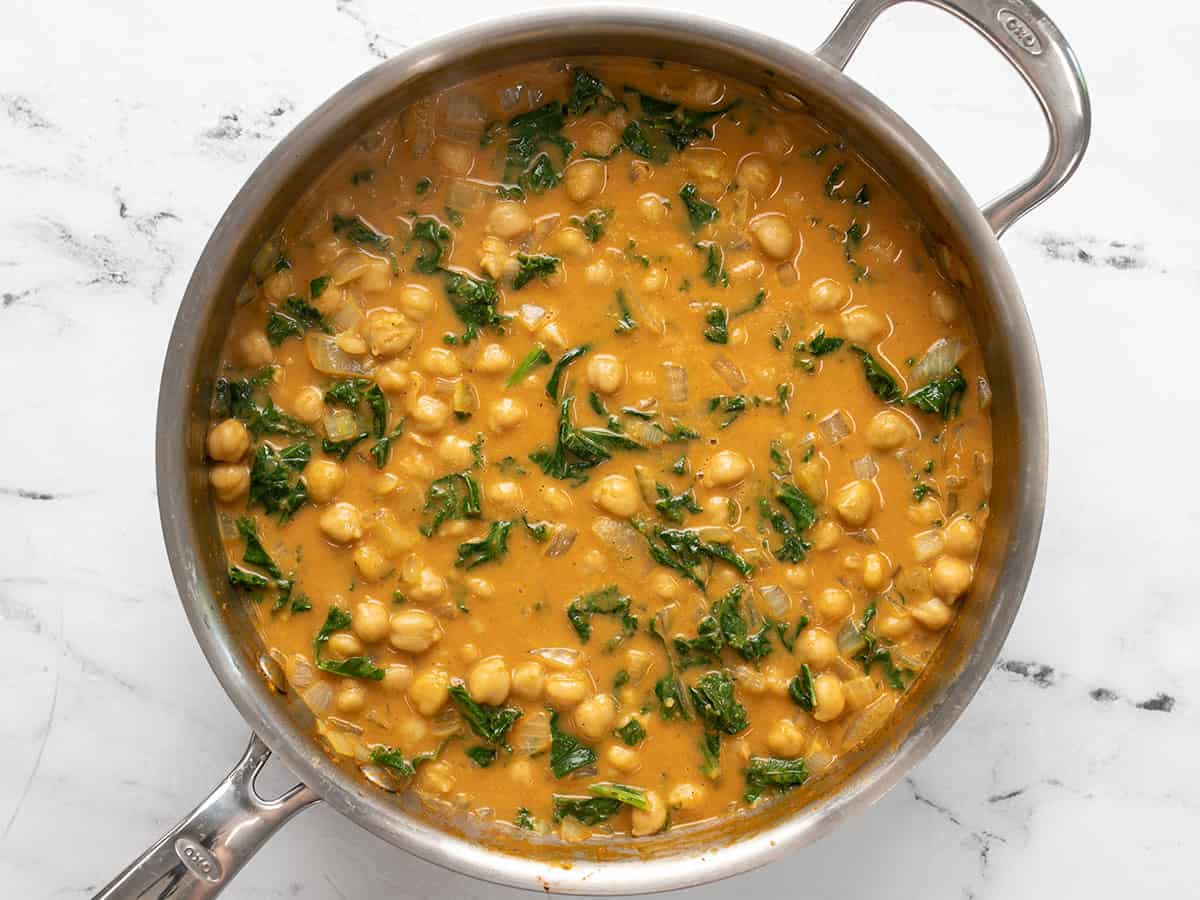
Finished coconut curry chickpeas with wilted kale.

Continue to cook and stir until the kale has wilted to your desired tenderness. I enjoy the kale with a bit more texture, so I only simmer for a few minutes more. Taste the curry and add salt to taste to help the flavors pop (about ½ tsp).

Finished skillet full of coconut curry chickpeas with naan and a wooden spoon.

The post Coconut Curry Chickpeas appeared first on Budget Bytes.

Salmorejo

Salmorejo is a cold Spanish soup that’s delicious, creamy, easy to make, and a great way to use up summer tomatoes and day-old bread!

The post Salmorejo appeared first on Budget Bytes.

Salmorejo is a classic chilled Spanish soup that’s delicious, creamy, and a fabulous way to use up summer tomatoes and day-old bread! I had it for the first time in Barcelona and was hooked as soon as I tasted its tangy, velvety perfection. Because it’s an absolute breeze to put together and incredibly elegant, this Salmorejo recipe is often my first choice when throwing a summer dinner party, especially when I don’t want to spend loads of money or any time in a sweltering kitchen.

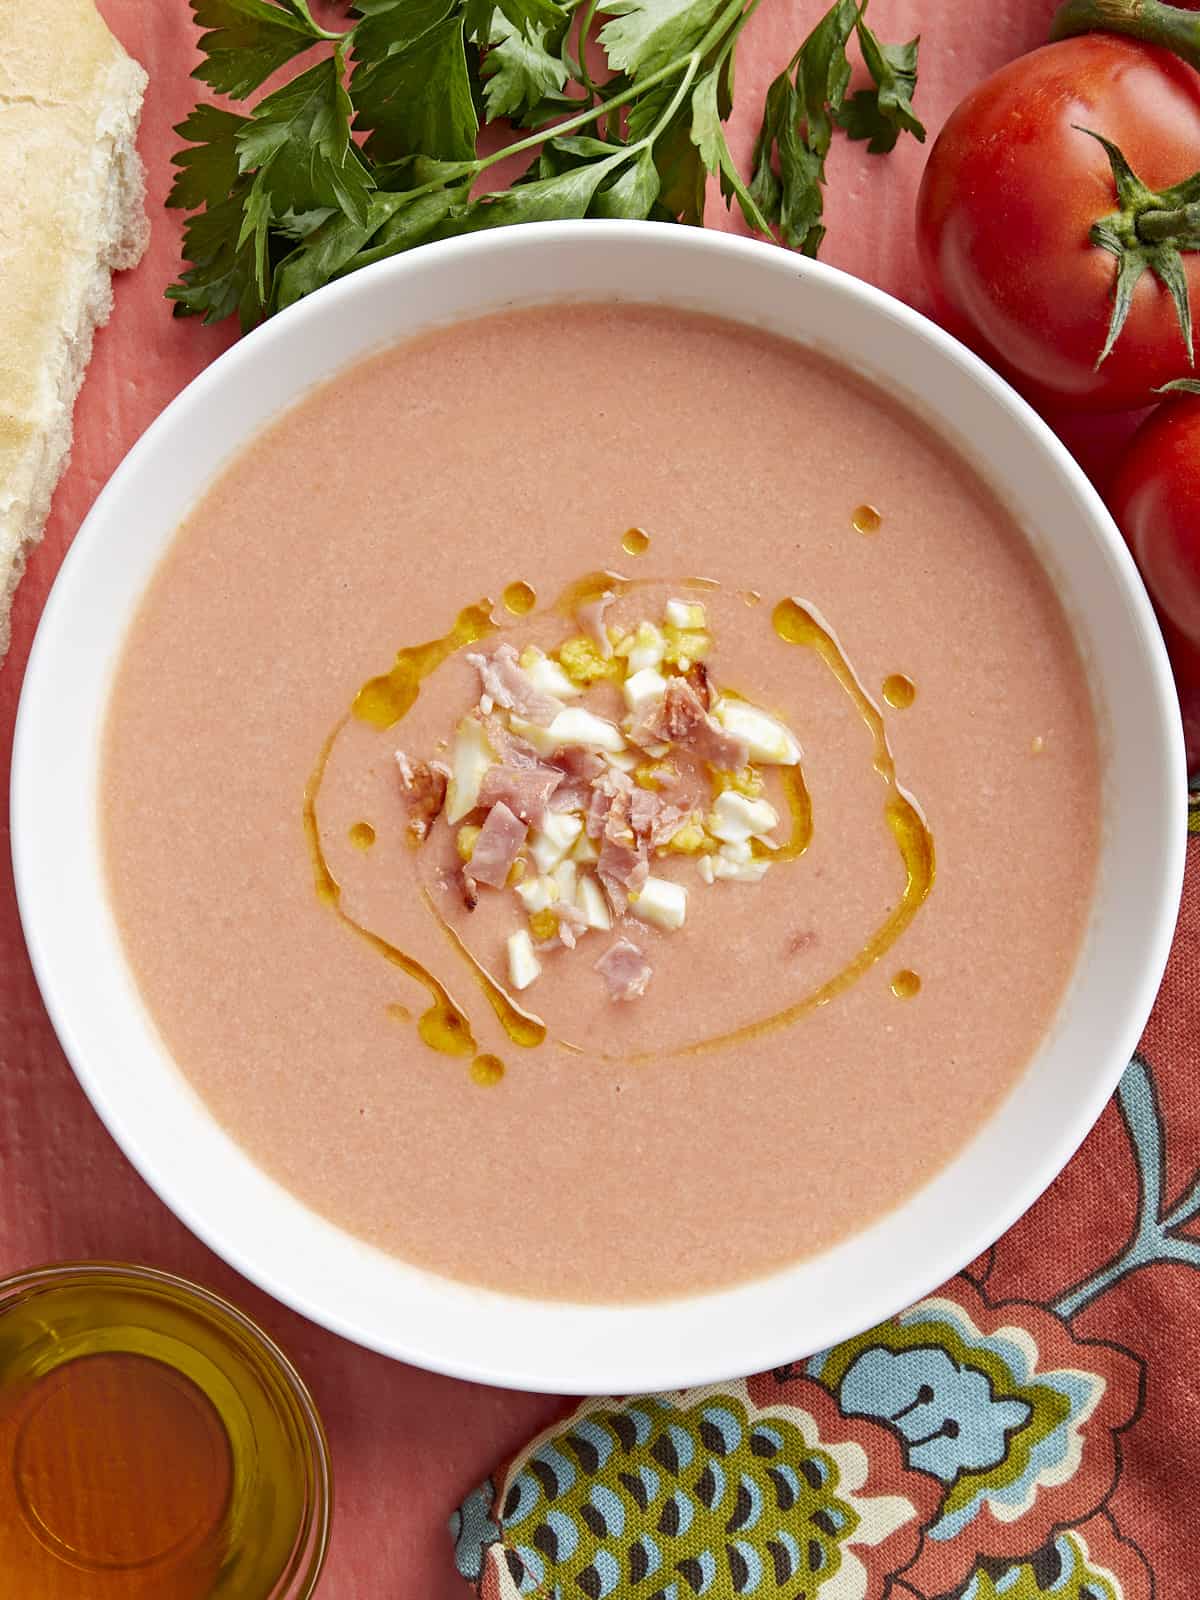
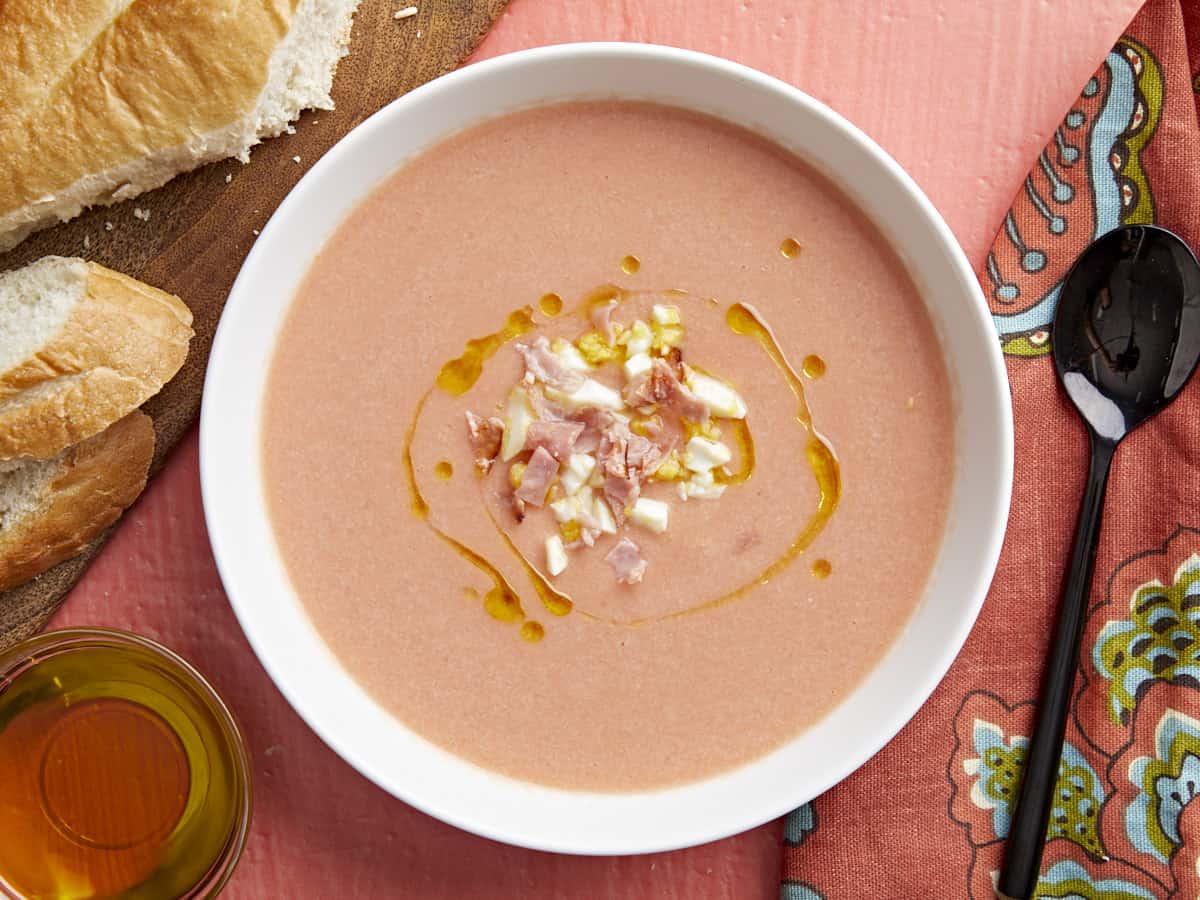
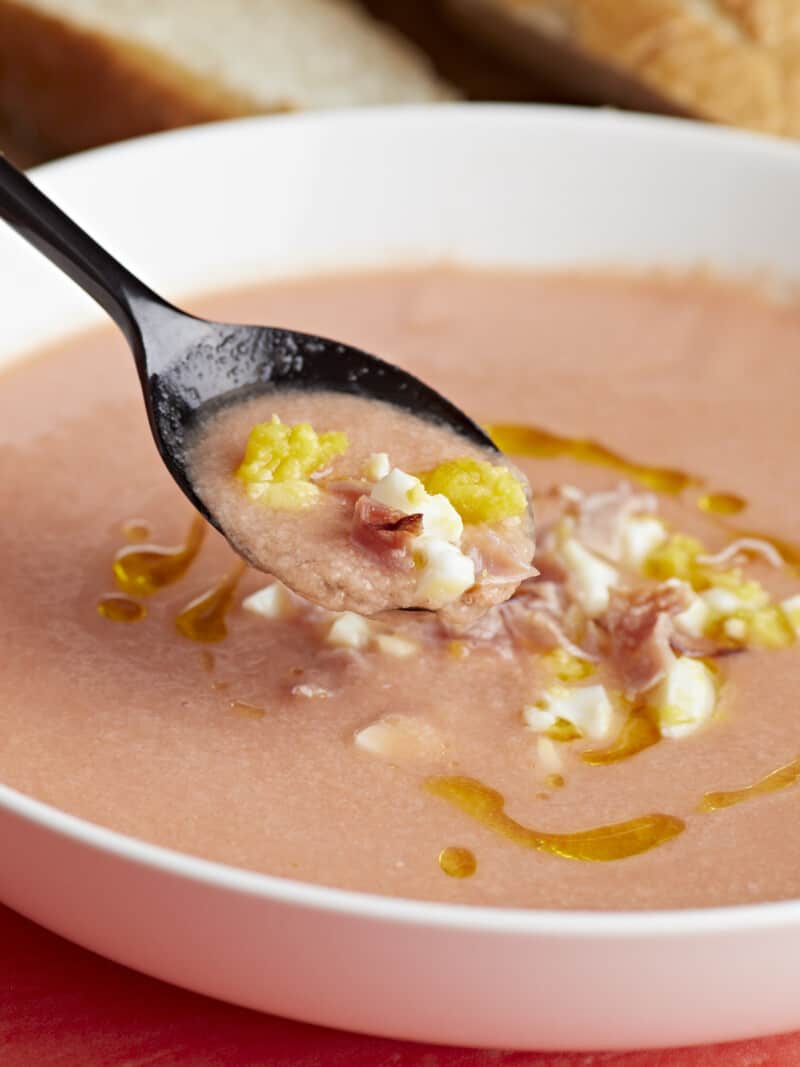
Overhead shot of a white bowl of Salmorejo garnished with a drizzle of olive oil, chopped hard-boiled eggs, and crispy ham crumbles.

What Is Salmorejo?

Salmorejo is a traditional cold tomato soup from Spain. Traditionally, Salmorejo is garnished with a simple drizzle of olive oil but it can also be garnished with chopped hard-boiled eggs and ham. If you want to keep things plant-based, it’s also wonderful when garnished with diced strawberries, watermelon, and fresh summer basil. You can also garnish with chopped fresh zucchini and summer squash with Italian parsley.

What Is The Difference Between Gazpacho and Salmorejo?

Like Gazpacho, Salmorejo is made with ripe tomatoes, garlic, and olive oil. The big difference is that the tomatoes are blended with day-old bread and then strained, giving this cold summer soup a velvety body and silky mouthfeel.

Ingredients For Salmorejo

It’s hilarious how excited I am to share this recipe with you! I love it so much I’m making 350 portions this coming week for a fancy food festival in Portland. Since the soup has just a few ingredients, you’ll want to make sure you get the best you can afford. Here’s what you’ll need to make Salmorejo:

  • Tomatoes – are the base of this cold summer soup. Any tomato will do as long as it is flavorful and ripe. To create depth, I often blend different types like grape, cherry, plum, heirloom, and beefsteak tomatoes. I don’t recommend making this recipe if you don’t like tomatoes.
  • Day-Old Crusty White Bread – adds body and texture to the soup. Use a Baguette, Ciabatta, Boule, or a Country Loaf. Don’t use sliced white or wheat bread, as the dough’s preservatives and stabilizers will make the soup gummy. If your bread is fresh, remove the crust, chop it into large cubes, put it in a sheet pan, and dry it in a 250°F oven for ten to fifteen minutes or until it hardens.
  • Olive Oil -helps flavor the soup and creates its signature velvety mouth feel. If you don’t like how your olive oil tastes by itself, don’t use it in this recipe. With so few ingredients, there won’t be any way to mask the flavor. You can get fabulous olive oil at the grocery store on a budget. Just know what to look for: cold-pressed, extra-virgin, and packaged in a dark glass container or, better yet, a metal container. California Olive Ranch, Trader Joe’s, 365, Simple Truth, and Bertolli are wonderful budget-friendly choices.
  • Vinegar – Adds a hit of acidity. Use rounder, softer vinegar like sherry, red wine, or apple cider. If your tomatoes are very tangy and acidic then skip the vinegar.
  • Garlic – Adds loads of intense flavor. If you don’t like garlic, you can skip it, though the soup will taste flat. Try blending a tablespoon of raw onion into the soup instead.
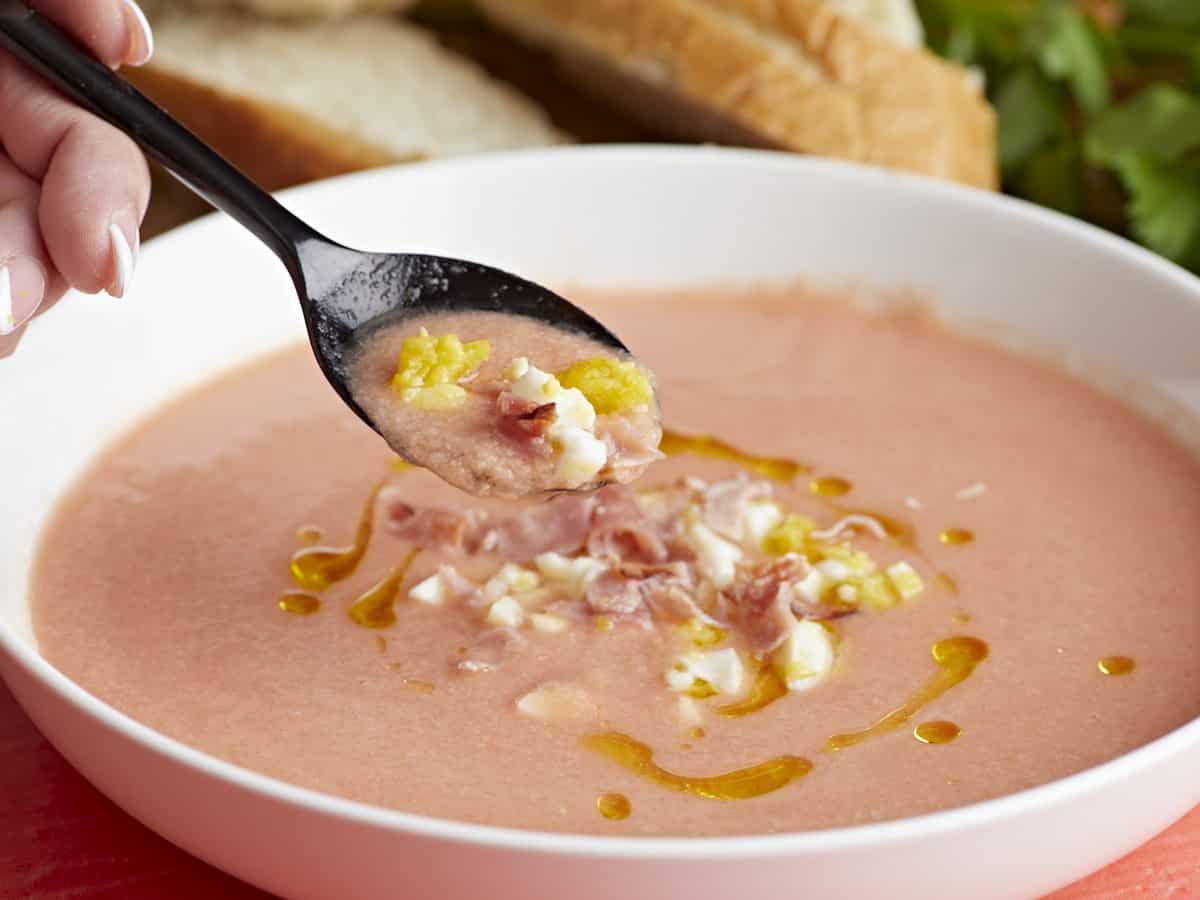
Side shot of a white bowl of Salmorejo garnished with a drizzle of olive oil, chopped hard-boiled eggs, and crispy ham crumbles with a black spoon coming out of it.

Tips For Making Salmorejo

  1. Use ripe tomatoes. The riper the tomatoes, the sweeter and more flavorful the soup will be. Ripe tomatoes are fragrant, heavy for their size, and have firm flesh with a little give.
  2. Use day-old bread. Fresh bread will make your soup gummy, so dry it in a 250°F oven if necessary.
  3. Don’t over-blend the soup, which will make it gummy. 
  4. Experiment with different garnishes. While a simple drizzle of olive oil or hard-boiled eggs and chopped ham are traditional, try garnishing with other summer produce. Salmorejo pairs well with strawberries, watermelon, avocado, zucchini, summer squash, bell peppers, and fresh herbs like basil, parsley, cilantro, and thyme. Get creative and have fun!

What To Serve With Salmorejo

Salmorejo is incredible served with light summer salads like Creamy Cucumber Salad, Summer Sweet Corn Salad, and Panzanella. You can also serve it with heartier dishes like Tortellini Salad, Pasta Primavera, or Bruschetta Pasta.

How To Store Salmorejo

Store salmorejo in an air-tight container in the refrigerator for up to 3 days. You can freeze salmorejo, but it will dull the flavor a touch. While it will keep for up to 6 months in the freezer, the longer it’s frozen, the more flavor it loses. The components will separate during freezing, so blend again before serving. Do not heat the soup to thaw it. Leave it on the counter or thaw for no more than two hours or let it thaw overnight in the fridge.

Overhead shot of a white bowl of Salmorejo garnished with a drizzle of olive oil, chopped hard-boiled eggs, and crispy ham crumbles.
Print

Salmorejo

Salmorejo is a cold Spanish soup that's delicious, creamy, easy to make, and a great way to use up summer tomatoes and day-old bread! On a hot summer day, it's pure tangy, velvety, perfection.
Course Appetizer, Dinner, Lunch
Cuisine Spanish
Total Cost ($9.78 recipe / $1.22 serving)
Prep Time 15 minutes
Total Time 15 minutes
Servings 8 cups
Calories 216kcal

Ingredients

  • 3 lps tomatoes $6.57
  • 1/4 cup extra-virgin olive oil $0.72
  • 1 lb crusty white bread $2.00
  • 3 cloves garlic $0.24
  • 1 Tbsp apple cider vinegar $0.06
  • 1/2 cup water $0.00
  • 1/4 tsp salt $0.01
  • 1 Tbsp extra-virgin olive oil (optional garnish) $0.18

Instructions

  • Core the tomatoes by cutting them in quarters and removing the hard white center. Then chop them roughly. Roughly chop the garlic cloves. Add the vinegar to the water. Remove the crust from the bread and cut into large cubes.
  • Place the water, tomatoes, garlic, and bread in a blender. Puree until smooth. Do not over-blend, as it will create a gummy texture. If working with a smaller blender, divide the ingredients in half and blend in batches.
  • With the blender on low speed, slowly drizzle in the olive oil, then season with salt. Blend for a second or two and, if necessary, add more salt to taste. Cover and chill the soup in the refrigerator for at least 30 minutes before serving.
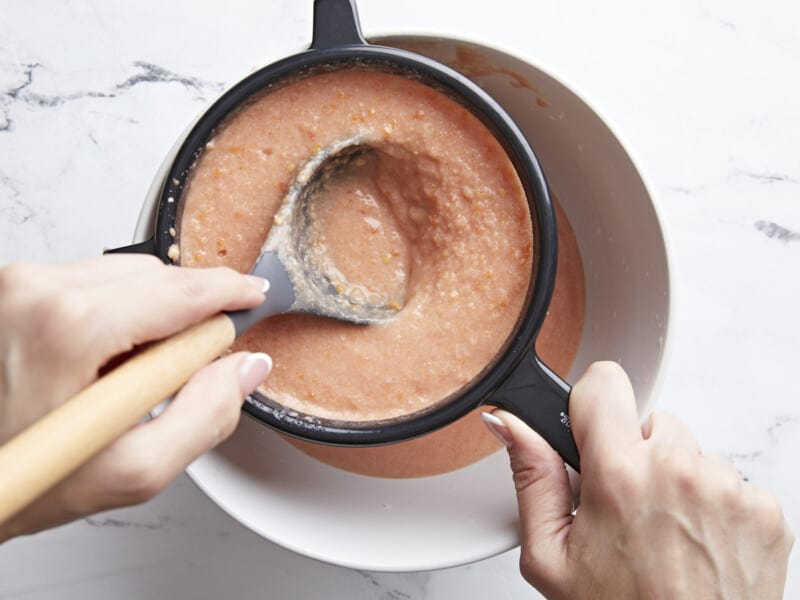
  • Strain the soup through a fine mesh sieve before plating. Use the back of a ladle to make quick work of it. Discard solids in the sieve.
  • Garnish with a drizzle of olive oil and get ready to enjoy your new favorite summer soup!

See how we calculate recipe costs here.

Nutrition

Serving: 1cup | Calories: 216kcal | Carbohydrates: 30g | Protein: 6g | Fat: 8g | Sodium: 415mg | Fiber: 1g

How to Make Salmorejo – Step by Step Photos

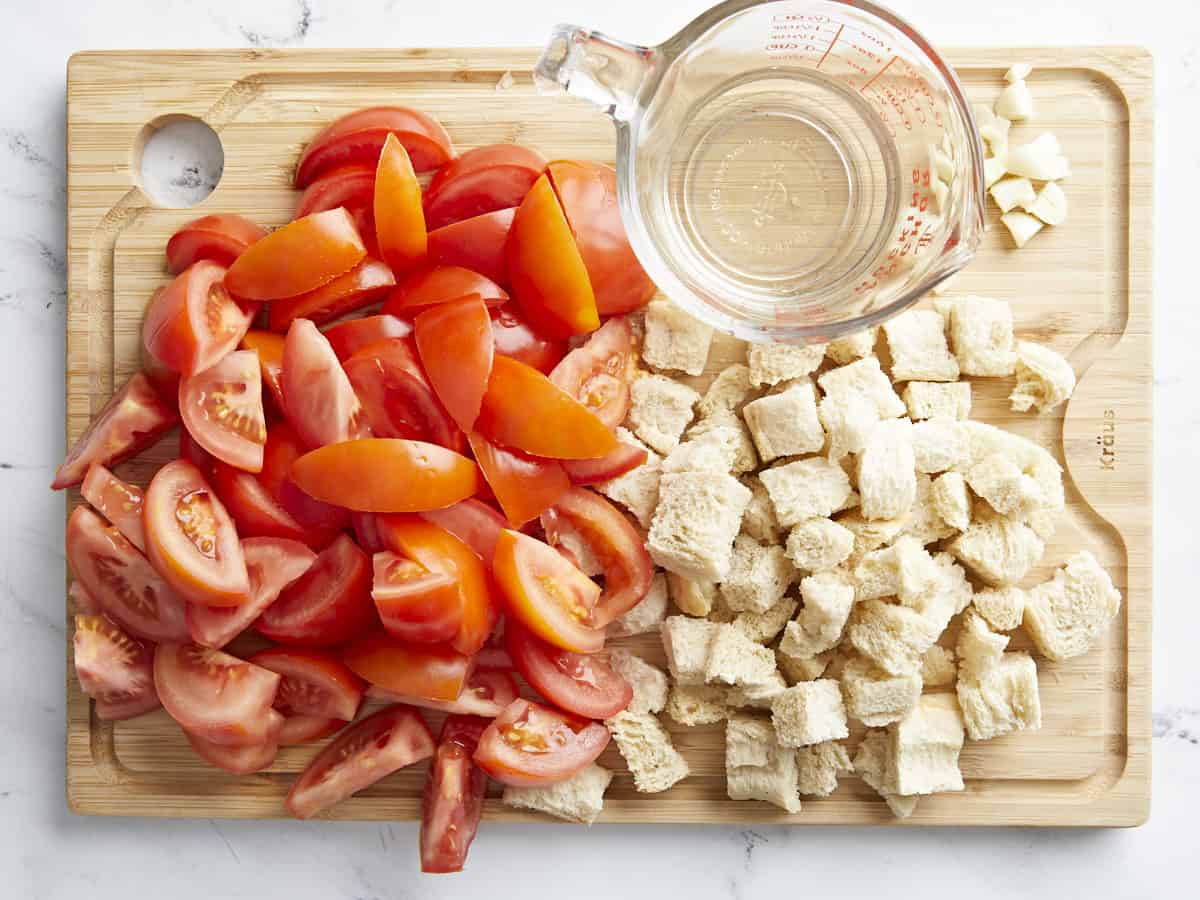
Overhead shot of Salmorejo's main ingredients: chopped fresh tomato, chopped day-old bread, and water, on a wood cutting board.

Core 3 pounds of tomatoes by cutting them in quarters and removing the hard white center. Then chop them roughly. Roughly chop 2 large garlic cloves. Add 1 tablespoon of vinegar to 1/2 cup of water. Remove the crust from the pound of crusty white bread and cut it into large cubes. If it’s fresh bread, toast the cubes in a 250°F oven for 10 to 15 minutes or until it hardens.

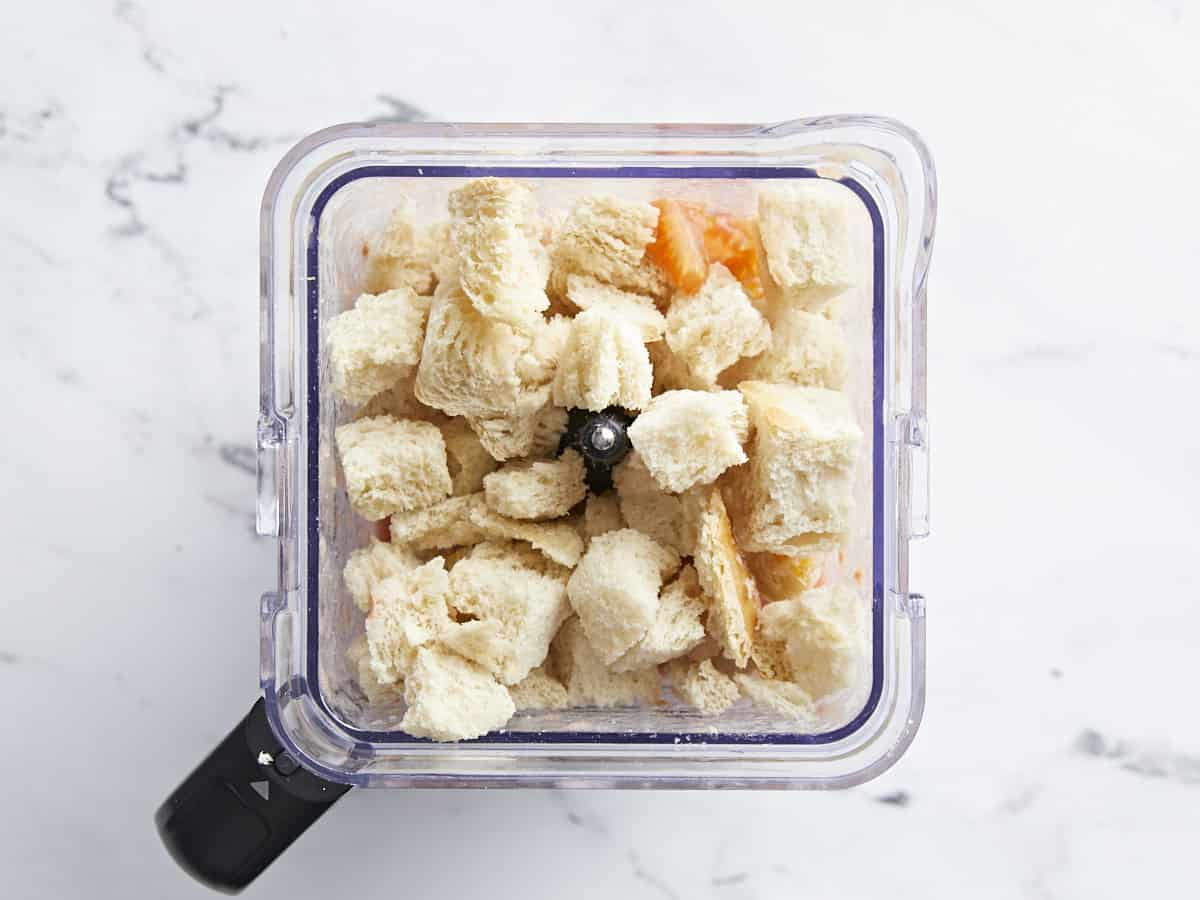
Overhead shot of Salmorejo ingredients topped with cubed bread in a blender jar.

Place the vinegar water, chopped tomatoes, chopped garlic, and cubed bread in a blender. Puree until smooth. Do not over-blend, as it will create a gummy texture. If working with a smaller blender, divide the ingredients in half and blend in batches.

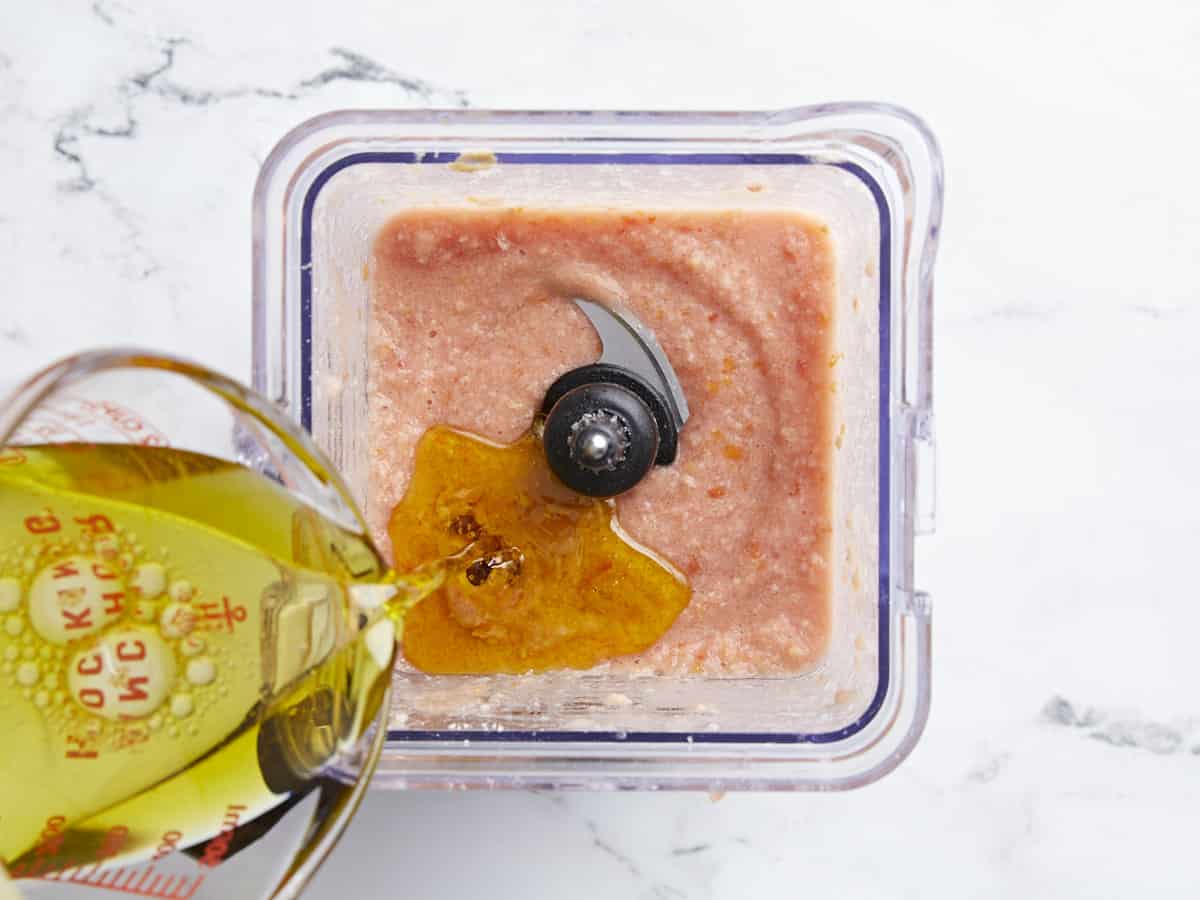
Overhead shot of olive oil being drizzled into a blender jar full of pureed tomato and bread.

With the blender on low speed, slowly drizzle in the 1/4 cup of olive oil, then season with 1/4 teaspoon of salt. Blend for a second or two and, if necessary, add more salt to taste. Cover and chill the soup in the refrigerator for at least 30 minutes before serving.

Overhead shot of a hand using a gray ladle to push Salmorejo through a fine mesh sieve with a black handle into a white bowl.

Strain the soup through a fine mesh sieve and into a large bowl before plating. Use the back of a ladle to make quick work of it. Discard the solids in the sieve.

Side shot of a white bowl of Salmorejo garnished with a drizzle of olive oil, chopped hard-boiled eggs, and crispy ham crumbles with a black spoon coming out of it.

Finally, plate the Salmorejo, garnish with a drizzle of the remaining tablespoon of olive oil, and get ready to enjoy your new favorite summer soup! It’s optional, but I love to also garnish my Salmorejo with a chopped, hard-boiled egg and sliced ham. You can also garnish with chopped fresh summer produce like bell peppers, zucchini, strawberries, watermelon, and fresh herbs like basil and Italian parsley.

More Easy Tomato Soup Recipes

The post Salmorejo appeared first on Budget Bytes.

Cheese Danish

This buttery, flaky, and budget-friendly Cheese Danish recipe is ridiculously easy to make and can be on your table in under a half hour.

The post Cheese Danish appeared first on Budget Bytes.

This buttery, flaky, vanilla-scented Cheese Danish recipe is so ridiculously delicious that Beth hasn’t stopped talking about it since I made it for her. This is one of my all-time favorite recipes because this breakfast pastry is a total breeze to put together, is ready in under a half hour, and it’s incredibly budget-friendly. PS I’m going to show you how to make this easy Cheese Danish at home for a third of what you’d pay at the fancy bakery. (Seriously. They sell them for $18 for a half dozen on Gold Belly.)

Overhead shot of cheese danish on a cooling rack with a small bowl of icing and a sup of coffee next to them.

What Is Cheese Danish?

Cheese Danish is a classic Danish breakfast treat made with a flaky puff pastry dough and a lightly flavored cream cheese filling. This easy Cheese Danish is also perfect for brunch or a quick after-dinner dessert and will score all of the compliments at the potluck or work party. (Pro Tip: Whip up a quick batch of Cheese Danish when a loved one has a bad day and get ready to collect All. Of. The. Hugs.)

What You Need To Make Cheese Danish

This is one of those recipes I use all of the time, so I stockpile the ingredients because when it comes to dessert, I stay ready. PS Once you make it, you will stockpile them too. TRUST. Here’s what you’ll need to make my easy recipe for Cheese Danish:

  • Puff Pastry – this buttery dough forms the base of flaky Cheese Danish. Find it in the frozen aisle section of most grocery stores. If you don’t have puff pastry, I don’t recommend making this recipe.
  • Cream Cheese – forms the filling of Cheese Danish. It must be at room temperature for you to mix it easily with other ingredients. In a pinch, leave it in its airtight foil wrapper and place it in a bowl of warm water for a few minutes to raise its temperature quickly straight from the fridge. If you don’t have cream cheese, I don’t recommend making this recipe.
  • Powdered Sugar – sweetens the filling and the icing. If you don’t have powdered sugar, use 1/4 cup of granulated sugar and mix it into the cream cheese until completely dissolved. You will need to skip the powdered sugar icing. Instead, thin out 2 tablespoons of your favorite jam with 1 teaspoon water and spoon over the pastry.
  • Vanilla – helps to flavor and lightly scent the cream cheese filling and the icing. If you don’t have vanilla, use 1/8 teaspoon of cinnamon or 1/4 teaspoon of lemon zest for the filling. You can omit the vanilla from the icing and substitute it with 1 tablespoon of melted butter.
  • Egg– You will use the egg yolk to help bind and add color and a velvety texture to the filling. You will use the egg white to brush on the puff pastry to seal it and add a golden sheen.
  • Milk– creates a velvety icing and helps thin it.
Overhead shot of a hand holding a cheese danish dressed with icing and strawberry jam in the foreground and three other cheese danish on a cooling rack in the background.

Tips For Making The Best Cheese Danish

  1. Thaw the puff pastry in the fridge for an hour or two, or it will crack when you try to cut it. Don’t thaw it at room temperature, as the butter will melt into the dough, and you won’t get the flaky finish puff pastry is known for.
  2. Add a teaspoon of lemon or orange zest to the filling to boost flavor.
  3. Use an oven thermometer to ensure the oven is at the correct temperature.
  4. Rotate the baking sheet, front to back, halfway through cooking to ensure even baking.
  5. Mix a tablespoon of melted butter into the icing to add flavor and an even more velvety finish.
  6. Cool the Cheese Danish before adding the icing so it doesn’t melt into the pastry. To get lines of icing instead of pools of icing, use a fork, not a spoon, to drizzle the icing.

How To Store Cheese Danish

Cool the Cheese Danish completely in an airtight container with wax or parchment paper between layers and over the top surface. Store in the fridge for up to seven days or in the freezer for up to two months. Thaw in the fridge before serving or reheat in a 350°F oven, until warm, about 5 minutes.

Overhead shot of cheese danish on a cooling rack with a small bowl of icing and a sup of coffee next to them.
Overhead shot of three cheese danish on a cooling rack.
Print

Cheese Danish

This buttery, flaky, and budget-friendly Cheese Danish recipe is ridiculously easy to make and can be on your table in under a half hour.
Course Breakfast, Brunch, Dessert
Cuisine European
Total Cost ($6.07 recipe / $1.01 serving)
Prep Time 10 minutes
Cook Time 15 minutes
Total Time 25 minutes
Servings 6 danish
Calories 438kcal

Ingredients

Cheese Danish

  • 8 oz. cream cheese, softened $2.19
  • 1/3 cup powdered sugar $0.11
  • 1 tsp vanilla extract $0.58
  • 1 pinch salt $0.01
  • 1 sheet puff pastry, thawed $2.75
  • 1 egg, yolk and white separated $0.09

Icing

Instructions

  • Line a baking sheet with parchment paper. Place your oven's rack in the center and preheat it to 400°F. Mix the cream cheese, powdered sugar, vanilla, egg yolk, and salt until smooth and light in texture.
  • Unfold the sheet of puff pastry, dust off excess flour, and place it on the baking sheet. Cut down the seams of the folds so you have three equal-sized strips. Cut the strips into halves.
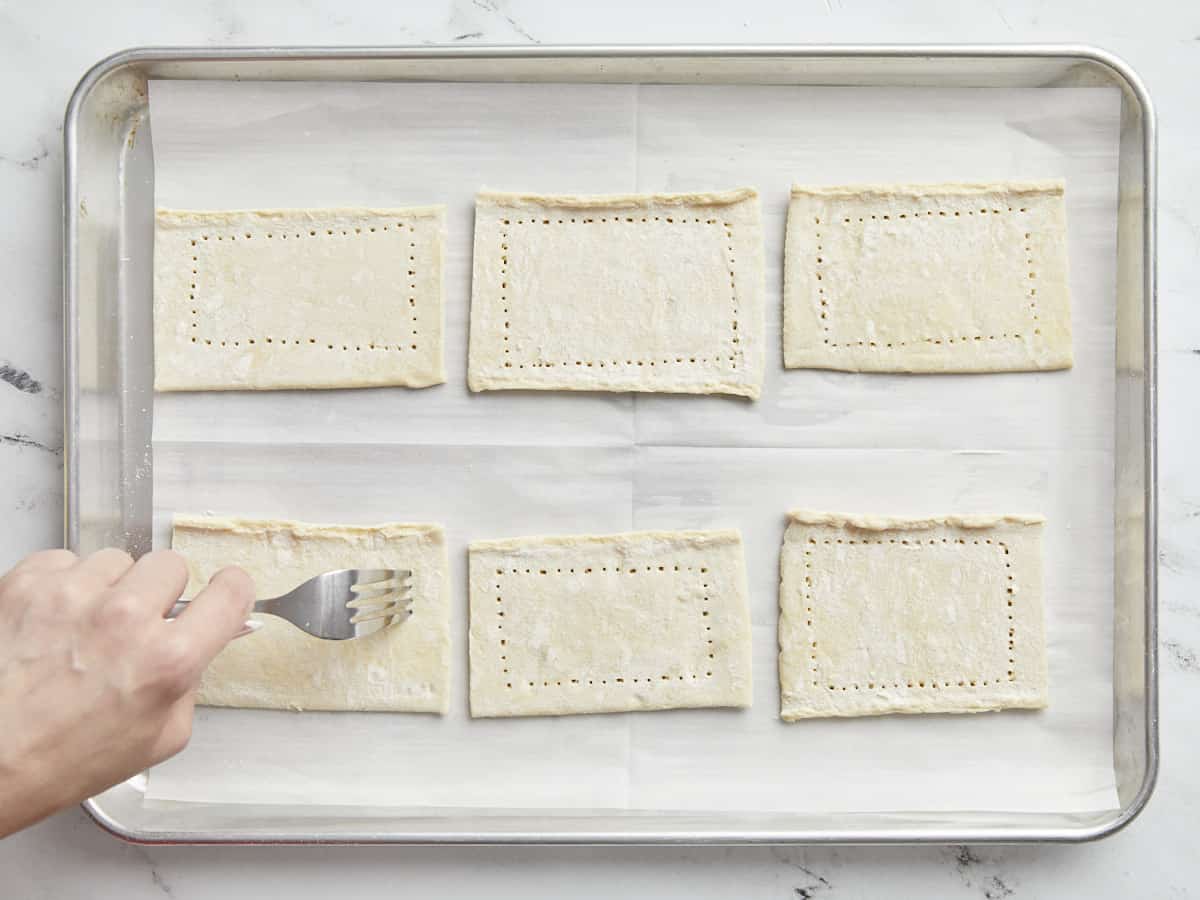
  • Use a fork to perforate around the sides of each puff pastry rectangle, leaving a half-inch border. This prevents the puff pastry from rising in the middle.
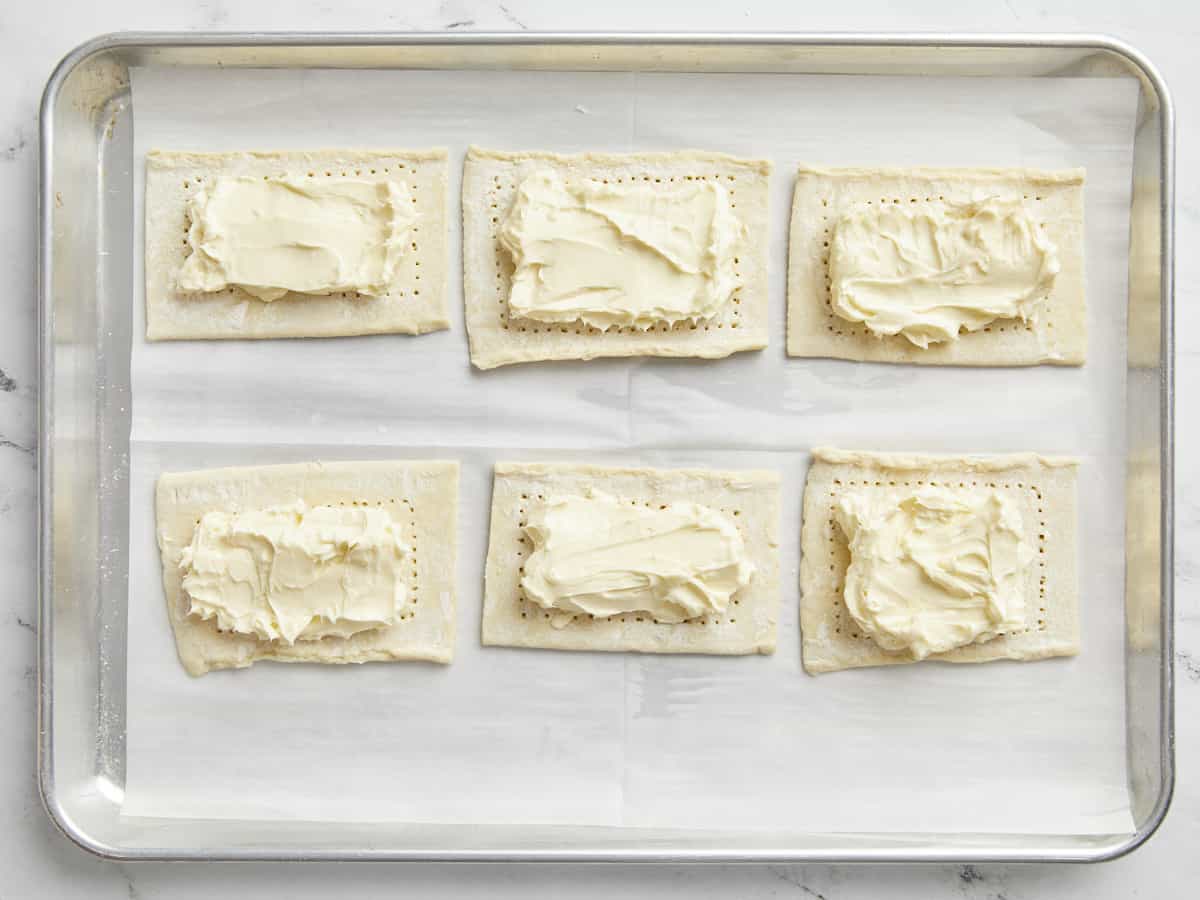
  • Add 2 heaping tablespoons of your cream cheese mixture to each square. Spread evenly, making sure to leave the borders clean.
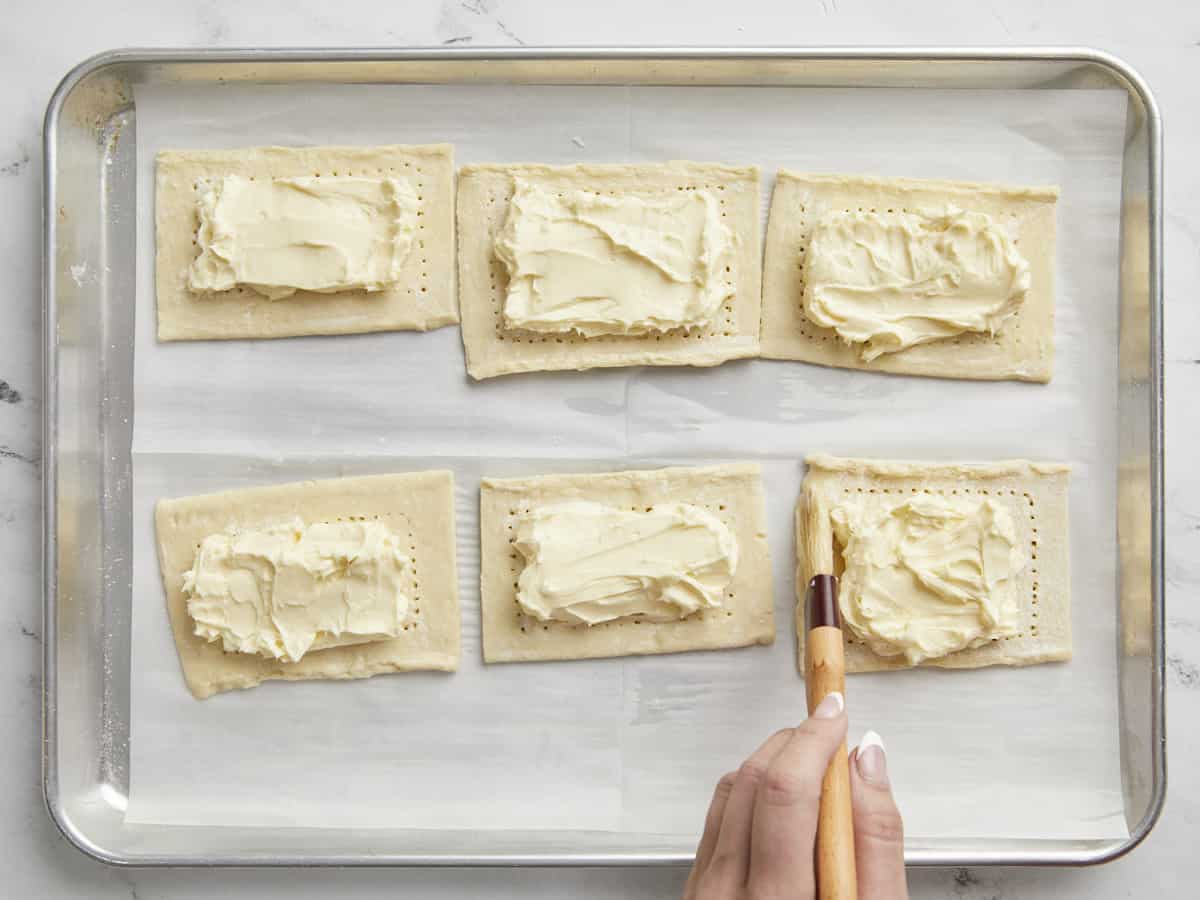
  • Beat the egg white until frothy. Dip a pastry brush into the beaten egg white and trace lightly along the borders. This will give the puff pastry a glossy finish and golden color.
  • Bake at 400°F for 10 minutes then rotate the baking sheet, front to back. Continue to bake for 5 to 10 minutes, or until the borders of the puff pastry have risen and are golden brown. Use a spatula to remove the pastries from the sheet pan and cool on a rack.
  • In a separate bowl, mix the powdered sugar, vanilla, and milk. Finally, drizzle over cooled Cheese Danish and watch your loved ones gobble them down! Optional: drizzle with 2 tablespoons of strawberry jam thinned with 1 teaspoon of water.

See how we calculate recipe costs here.

Nutrition

Serving: 1danish | Calories: 438kcal | Carbohydrates: 38g | Protein: 6g | Fat: 29g | Sodium: 240mg | Fiber: 1g
Overhead shot of cheese danish on a cooling rack with a small bowl of icing and a silver fork next to them.

How to Make Cheese Danish – Step by Step Photos

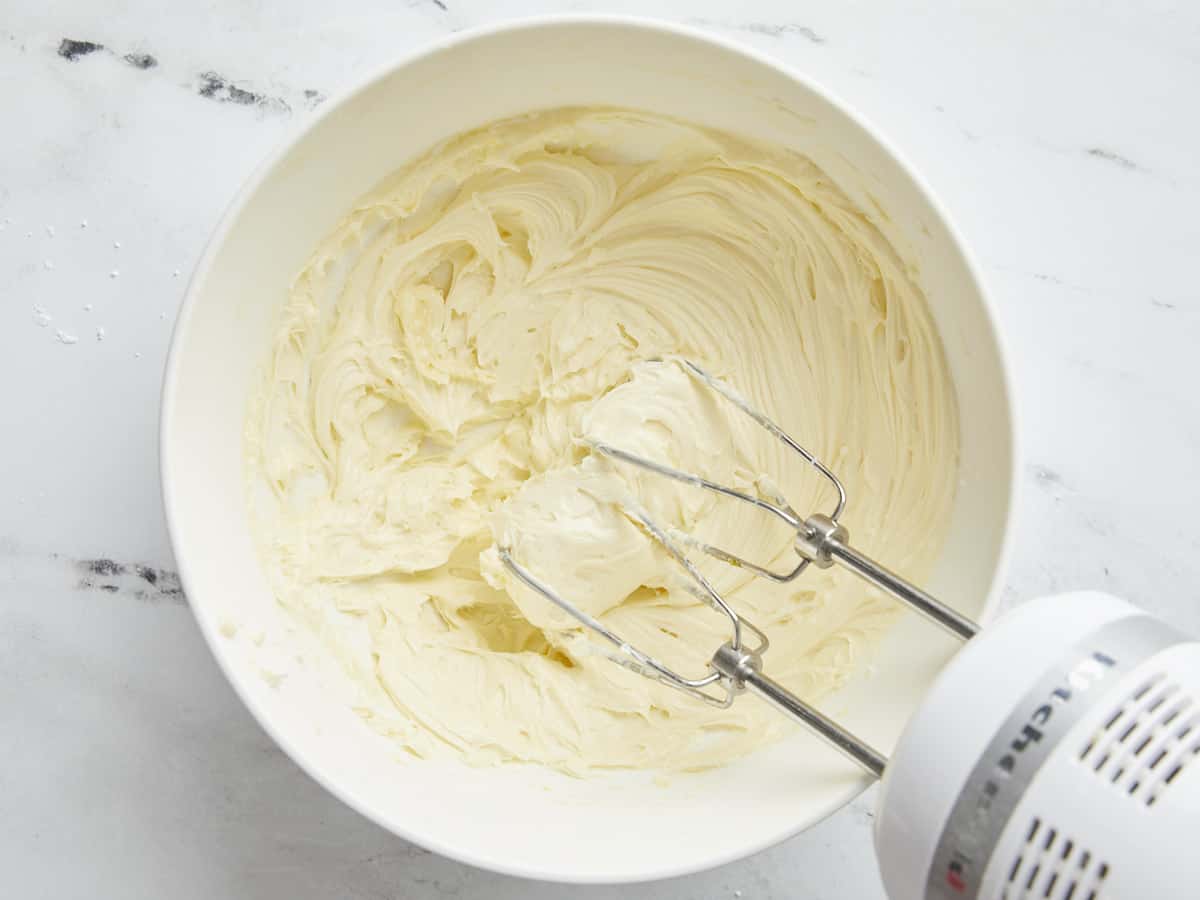
Overhead shot of filling mixed with a hand beater in a shite bowl.

Line a baking sheet with parchment paper. Place your oven’s rack in the center and preheat it to 400°F. Mix 8 ounces of cream cheese, 1/3 cup powdered sugar, 1 teaspoon vanilla, 1 egg yolk, and 1 pinch of salt until smooth and light in texture.

Overhead shot of sheet of puff pastry cut into six rectangles.

Unfold 1 sheet of puff pastry, dust off excess flour, and place it on the baking sheet. Then, cut down the seams of the folds so you have three equal-sized strips. Cut the strips into halves. Do not pull your knife through the dough, as it will make it lose its shape. Just press down.

Overhead shot of puff pastry rectangles being docked with a fork.

Use a fork to perforate around the sides of each puff pastry rectangle, leaving a half-inch border. This prevents the puff pastry from rising in the middle.

Overhead shot of of filling added to the puff pastry rectangles.

Add two heaping tablespoons of the cream cheese mixture to each square. Then, spread the mixture evenly, making sure to leave the borders clean.

Overhead shot of egg wash being brushed on puff pastry.

Beat 1 egg white until frothy. Then, dip a pastry brush (in a pinch, just use your finger) into the beaten egg white and trace lightly along the borders. This will give the puff pastry a glossy finish and golden color.

Overhead shot of 6 baked cheese danish on.a sheet pan.

Bake at 400°F for 10 minutes, then rotate the baking sheet, front to back. Continue to bake for 5 to 10 minutes, or until the borders of the puff pastry have risen and are golden brown. Next, use a spatula to remove the pastries from the sheet pan and cool on a rack.

Overhead shot of cheese danish being spinkled with icing.

Then, in a separate bowl, mix 1/2 cup powdered sugar, 1/4 teaspoon vanilla, and 2 tablespoons milk. Finally, drizzle over cooled Cheese Danish.

Side shot of cheese danish on a cooling rack with a small bowl of icing next to them wit hone danish being dressed with strawberry jam.

It’s optional, but I love to drizzle the Cheese Danish with 2 tablespoons of strawberry jam thinned with 1 teaspoon of water. Now all you have left to do is chow down and collect compliments!

You can easily double this recipe to use both sheets of puff pastry that come in the package (especially if you’re serving the Cheese Danish for brunch because they will go fast!). You can also use the second sheet of puff pastry to make our Easy Quiche Lorraine or Spinach Pie!

More Easy Dessert Recipes

The post Cheese Danish appeared first on Budget Bytes.

Arroz Con Salchichas (Puerto Rican Rice With Sausage)

This Puerto Rican Arroz Con Salchichas recipe is a budget-friendly quick weeknight meal of rice and sausage that’s filling and flavorful!

The post Arroz Con Salchichas (Puerto Rican Rice With Sausage) appeared first on Budget Bytes.

Arroz Con Salchichas, or Puerto Rican Rice and Sausage, is one of my favorite pantry meals because it’s comforting, easy to make, and packed with flavor. As Beth would say, just put an egg on it and then eat until you hate yourself. (OK… that last part is all me.) PS It comes in under a dollar per serving and can be made in under an hour!

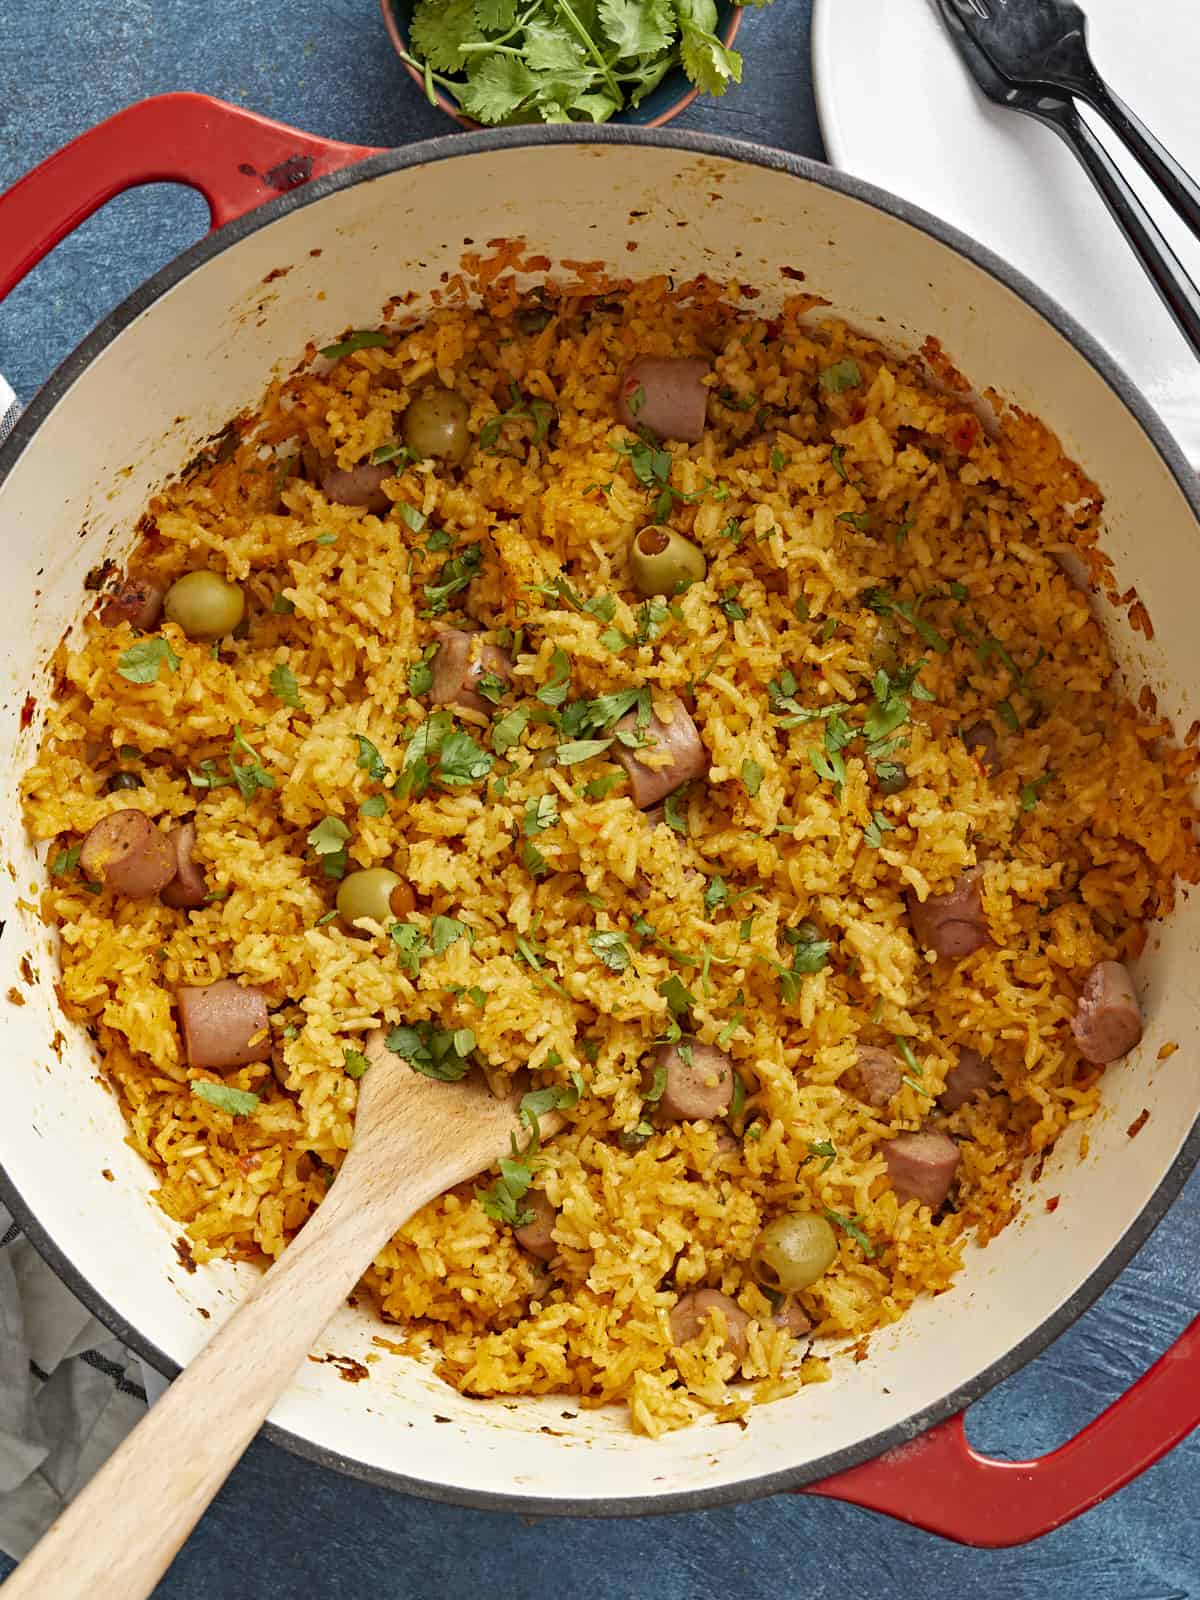
Overhead shot of wooden spoon in a red Dutch oven full of Arroz Con Salchichas.

A Note On Authenticity

This is not a historically authentic recipe. We strive to create recipes that are accessible to everyone, which means ingredients need to be available at a mainstream budget grocery store. We test recipes using the least amount of steps, tools, and ingredients while still honoring the spirit of the recipe. I was born and raised in Puerto Rico and look forward to a time when our ingredients are available in mainstream markets. Until then, buen provecho!

What Is Arroz Con Salchichas?

Arroz con salchichas, or rice with sausage, is a classic comfort food in many Latin American cultures. In Puerto Rico, it’s a staple weeknight meal traditionally made with canned Vienna sausages cooked in a flavorful sofrito sauce and yellow rice studded with briny olives and capers. Sometimes corn is added as well.

Ingredients for Arroz Con Salchichas

My recipe for Arroz Con Salchichas is pretty traditional. I keep it budget friendly by skipping the corn and the salt pork that’s present in many of my little island’s rice dishes. But if you’d like to add them in, fry about a 1/4 cup of diced salt pork before the sofrito hits the pan, and add about 1 1/2 cups of frozen, fresh, or drained canned corn when you add the olives. Here’s what you’ll need to make my easy Arroz Con Salchichas.

  • Sofrito – this powerful Puerto Rican blend of aromatics is the flavor base of many of our savory dishes. Canned sofrito is available, but fresh will always be better. Check out my simple recipe for a basic Puerto Rican Sofrito.
  • Adobo and Sazón– these spice blends give the rice a beautiful golden color and add earthy notes to the dish. If you can’t find adobo and sazón in your neck of the woods, I’ve included basic recipes in the notes section of the recipe card.
  • Tomato Sauce– helps add acidity and color to the dish.
  • Onion, Garlic, and Cilantro – these aromatics add earthy notes to the dish. Substitute the onion with 1 tablespoon of onion powder and the garlic with 1/4 teaspoon of garlic powder. If you don’t have cilantro, substitute it with fresh Italian parsley or just skip it.
  • Vienna Sausages– these small open-ended canned sausages taste a little like hot dogs, though they are softer in texture. They bulk up the rice and add deep meaty flavors. Substitute them with any sausage or hot dog.
  • Rice – traditionally, in Puerto Rico, medium-grain white rice is used. But in the Budget Bytes kitchen, we use long-grain Jasmine Rice. Feel free to use whatever rice you prefer, just follow the package directions for cooking times and cooking liquid amounts.
  • Olives and Capers– this mixture is known as Alcaparrado and delivers a pop of acidic brininess to every bite! If you don’t have olives or capers, just skip them and add two tablespoons of distilled white vinegar instead.
Overhead shot of wooden spoon serving rice out of a red Dutch oven onto a white plate.

Arroz Con Salchichas Variations

One of my favorite things about Arroz con Salchichas is how easy it is to customize. You can use brown rice or wild rice. Just follow the package directions for cook time and adjust your liquid. Add corn or other veggies you have on hand to bulk it up. Though it’s not traditional, I sometimes add peas, carrots, or diced tomatoes. If you don’t have Vienna sausages try:

  • Hot Dogs
  • Chorizo
  • Kielbasa
  • Spam
  • Chicken Sausage

What To Serve with Arroz Con Salchichas

Arroz Con Salchichas pairs beautifully with Ensalada de Aguacate (Avocado Salad), Yuca En Escabeche (Pickled Yuca), or the beans in this easy Puerto Rican Rice and Beans recipe. It’s also fantastic with Fried Eggs.

How To Store Leftovers

Refrigerate any leftover Arroz Con Salchichas in an airtight container for up to 5 days. You can also portion the rice and freeze it in a freezer-safe container for up to 6 months. Reheat in a microwave until steaming.

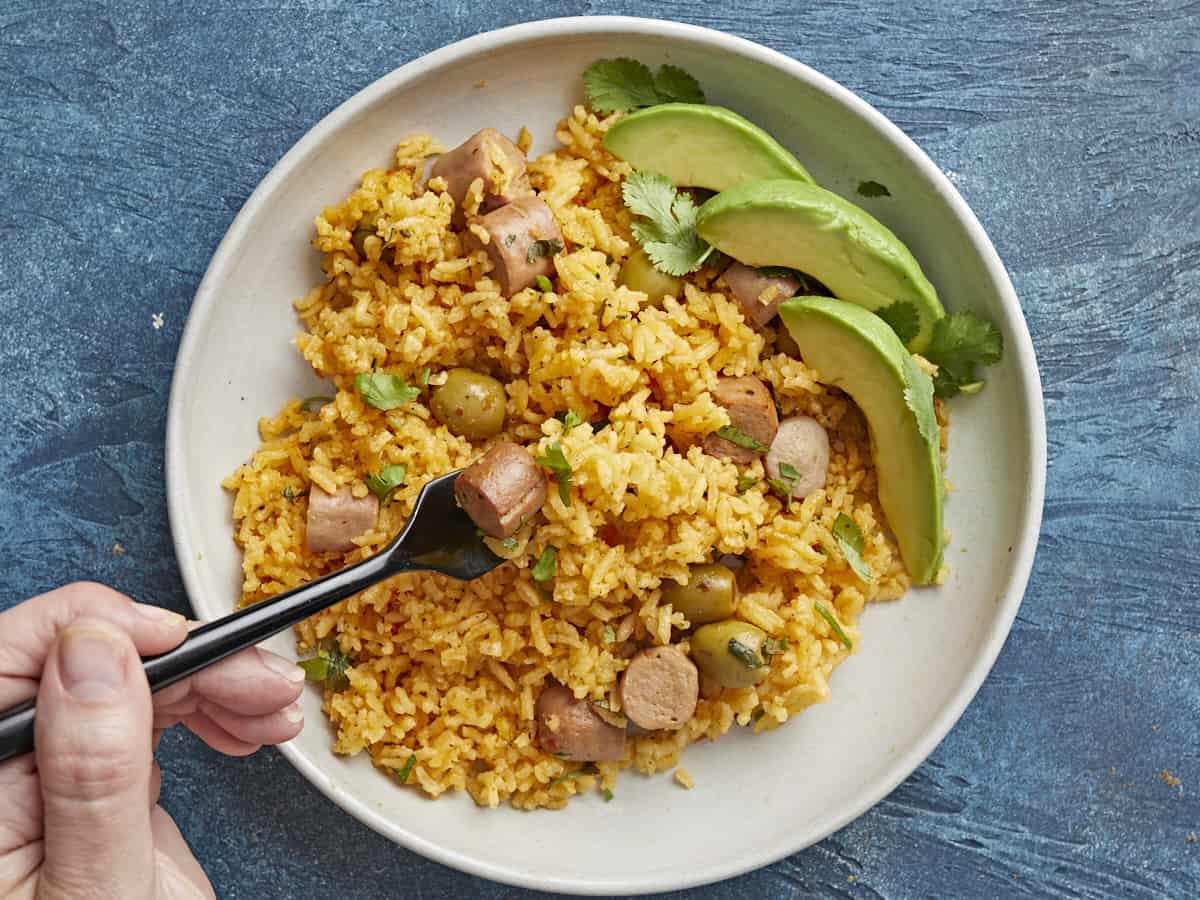
Overhead shot of Arroz Con Salchichas on a plate with a hand holding a forkful.
Overhead shot of wooden spoon in a red Dutch oven full of Arroz Con Salchichas.
Print

Arroz Con Salchichas

This Puerto Rican Arroz Con Salchichas recipe is a budget-friendly quick weeknight meal of rice and sausage that's both filling and flavorful. Make it once and you'll put it in heavy rotation!
Course Dinner, Lunch
Cuisine Latin
Total Cost $5.39 recipe / $0.90 serving
Prep Time 5 minutes
Cook Time 30 minutes
Resting Time 10 minutes
Total Time 45 minutes
Servings 6 about 1.5 cups each
Calories 376kcal

Equipment

Ingredients

  • 1 Tbsp cooking oil $0.04
  • 1 Tbsp adobo* $0.30
  • 1 packet sazón** $0.19
  • 1/4 cup diced yellow onion $0.19
  • 1 Tbsp minced garlic $0.24
  • 1/4 cup sofrito $0.36
  • 2 Tbsp tomato sauce $0.06
  • 2 Tbsp pimiento stuffed Spanish olives $0.29
  • 2 tsp capers $0.21
  • 2 5oz. cans Vienna sausages $1.50
  • 2 cups long-grain white rice $0.74
  • 2 1/2 cups chicken broth, boiling $1.12
  • 1 tsp salt $0.04
  • 1/4 cup chopped cilantro leaves for garnish $0.11

Instructions

  • Add the cooking oil to a large heavy-bottomed pot set over medium-high heat. Add the adobo and sazón and cook until fragrant, about 30 seconds. Add the diced yellow onion and cook until translucent, about 2 minutes. Add the minced garlic and cook until fragrant, about 30 seconds.
  • Add the sofrito, tomato sauce, green olives, and capers to the pot, and cook until fragrant, about 2 minutes. In the meantime, slice the Vienna sausages into 1/2-inch-thick rounds and rinse the rice until the water runs clear, making sure to drain off all excess water after rinsing.
  • Add the sliced Vienna sausages to the pot and sauté until browned. Finally, add the rinsed rice, salt, and boiling chicken broth to the pot. Stir and bring to a hard boil, with large bubbles breaking through the surface of the rice. Stir once more, turn the heat to low, and cover the pot.
  • Simmer the rice over low until the rice is tender, about 15 minutes. Take the pot off the heat, but leave it covered. Let it rest, covered, for 10 minutes. Uncover, stir the rice, taste, and adjust the seasoning to your liking. Stir in cilantro leaves then serve yourself a big bowl full and prepare to chow!

See how we calculate recipe costs here.

Notes

*If you cannot source adobo, mix your own and then use the amount called for in the recipe. Store the rest in an airtight container.
  • 2 Tbsp salt
  • 1 Tbsp garlic powder
  • 1 tsp ground oregano
  • 1 tsp onion powder
  • 1 tsp black pepper
  • 1 tsp ground cumin
  • 1/2 tsp turmeric
**A packet of sazón contains about 1.5 teaspoons of sazón. If you cannot source sazón, use the following:
1/4 teaspoon garlic powder
  • 1/4 teaspoon garlic powder
  • 1/4 teaspoon ground cumin
  • 1/4 teaspoon ground coriander
  • 1/3 teaspoon ground annatto
  • 1/8 teaspoon turmeric
  • 1/8 teaspoon ground oregano
  •  
 Sazón and adobo share a lot of similar ingredients but are used at different points in the cooking process and will develop slightly different colors and flavors.

Nutrition

Serving: 1serving | Calories: 376kcal | Carbohydrates: 54g | Protein: 11g | Fat: 13g | Sodium: 1328mg | Fiber: 1g

How to Make Arroz Con Salchichas – Step by Step Photos

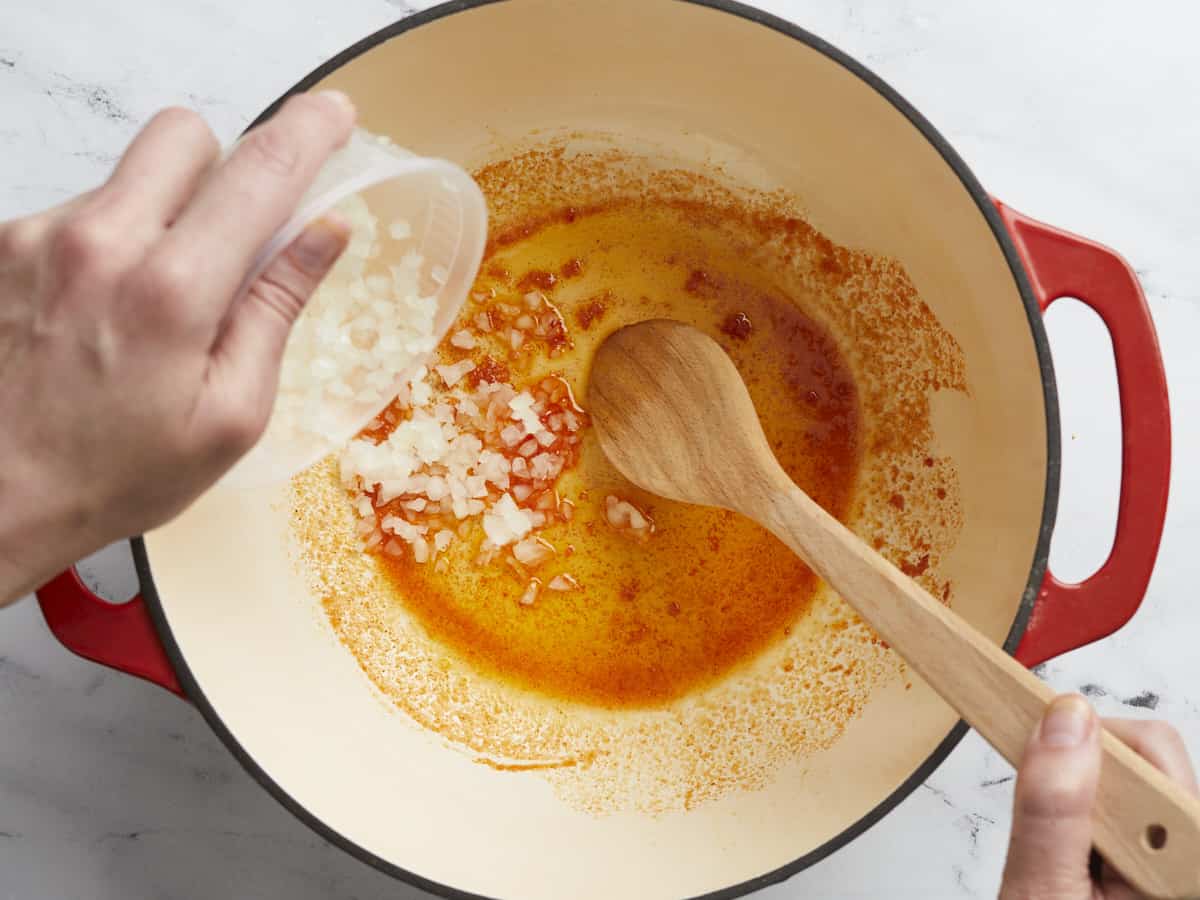
Overhead shot of a hand adding onion to a red Dutch oven while a second hand stirs with a wooden spoon.

Add 1 tablespoon of cooking oil to a large heavy-bottomed pot set over medium-high heat. Add the 1 tablespoon adobo and 1 packet of sazón and cook until fragrant (about 30 seconds). Then, add the 1/4 cup of diced yellow onion and cook until translucent, about 2 minutes. Next, add 1 tablespoon of minced garlic and cook until fragrant, about 30 seconds.

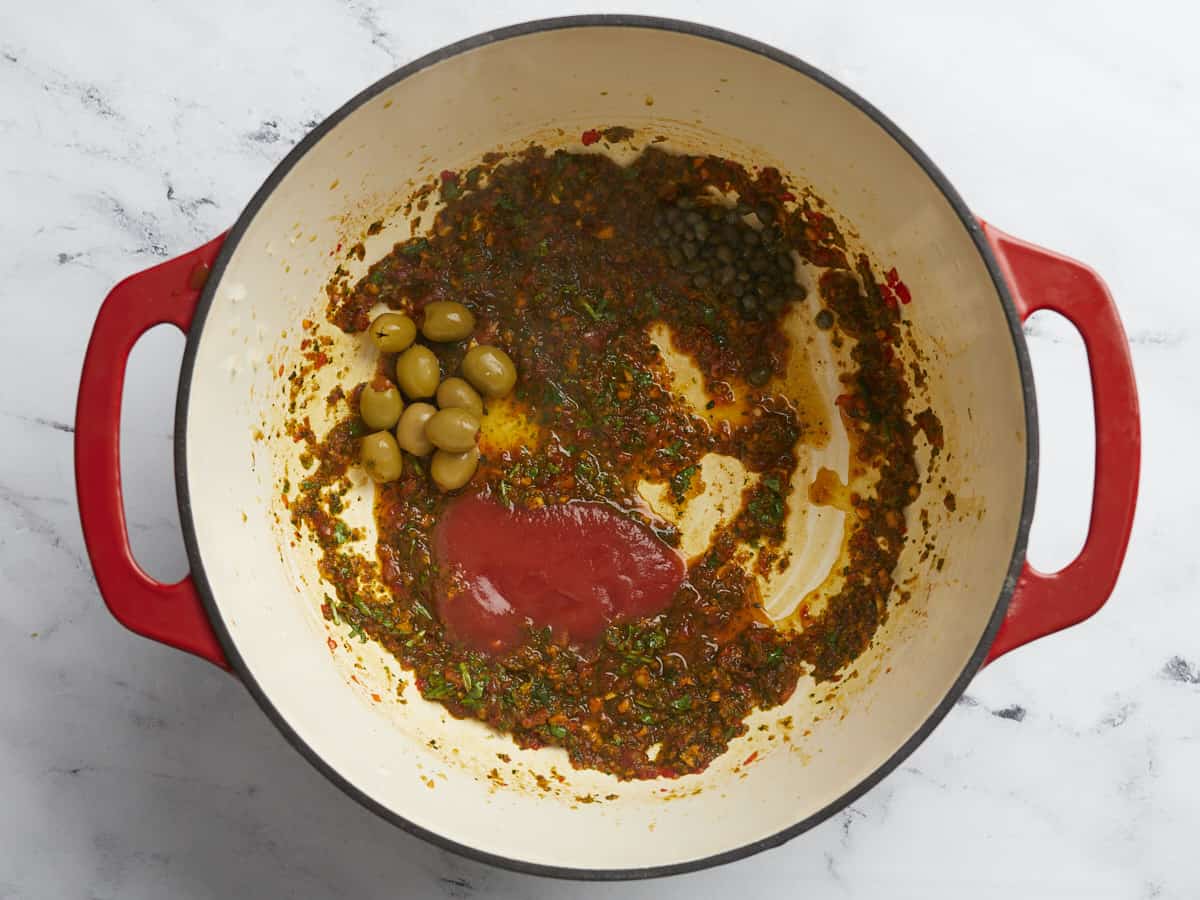
Overhead shot of sofrito, tomato sauce, olives and capers in a red Dutch oven.

Add the 1/4 cup of sofrito, 2 tablespoons of tomato sauce, 2 tablespoons of green olives, and 2 teaspoons of capers, and cook until fragrant, about 2 minutes. If you are planning to add corn or other veggies, put them in the pot now as well.

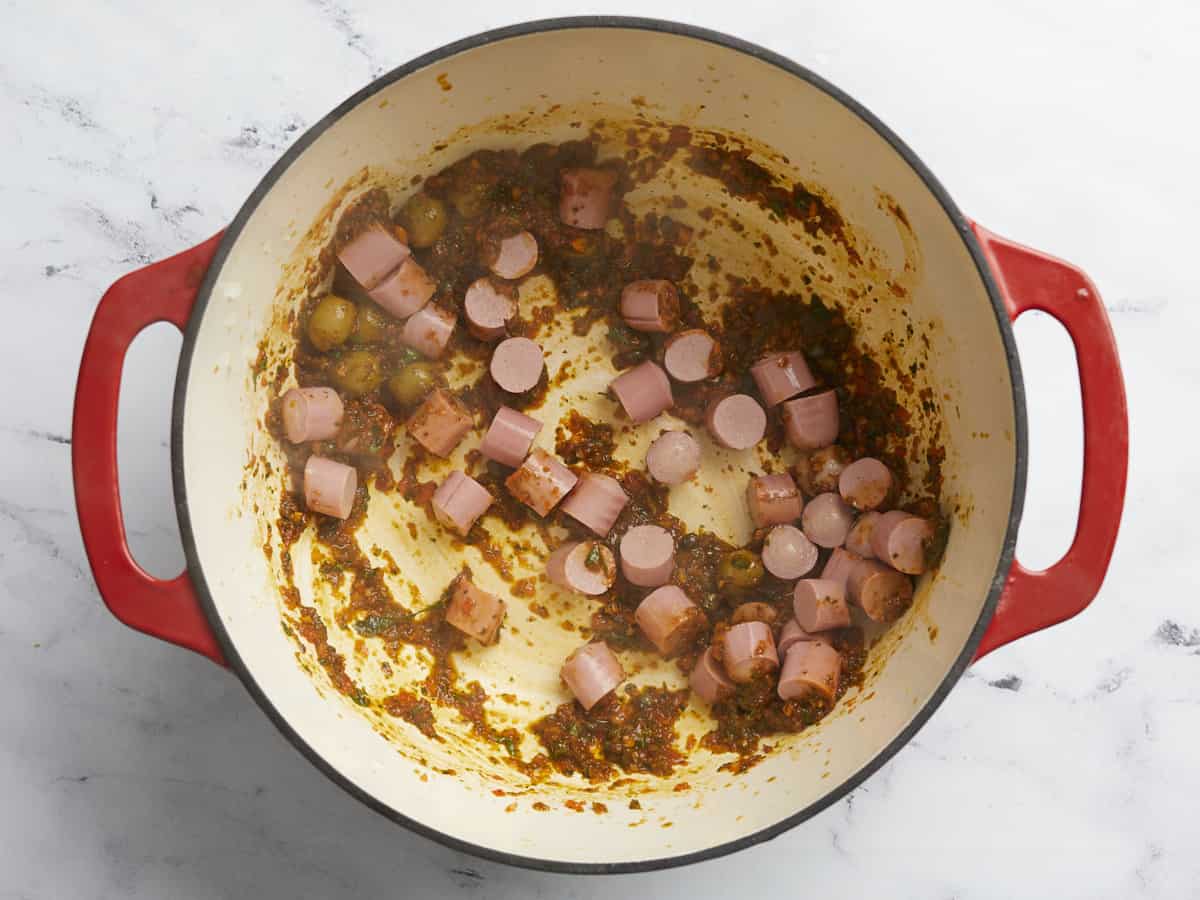
Overhead shot of salchichas added to sofrito, tomato sauce, olives and capers in a red Dutch ov

Add two 5-ounce cans of drained and sliced Vienna sausages and saute until browned. Finally, add 2 cups of rice, 1 teaspoon of salt, and 2 1/2 cups of boiling chicken broth. Stir and bring to a hard boil, with large bubbles breaking through the surface of the rice. Stir once more, turn the heat to low, and cover the pot.

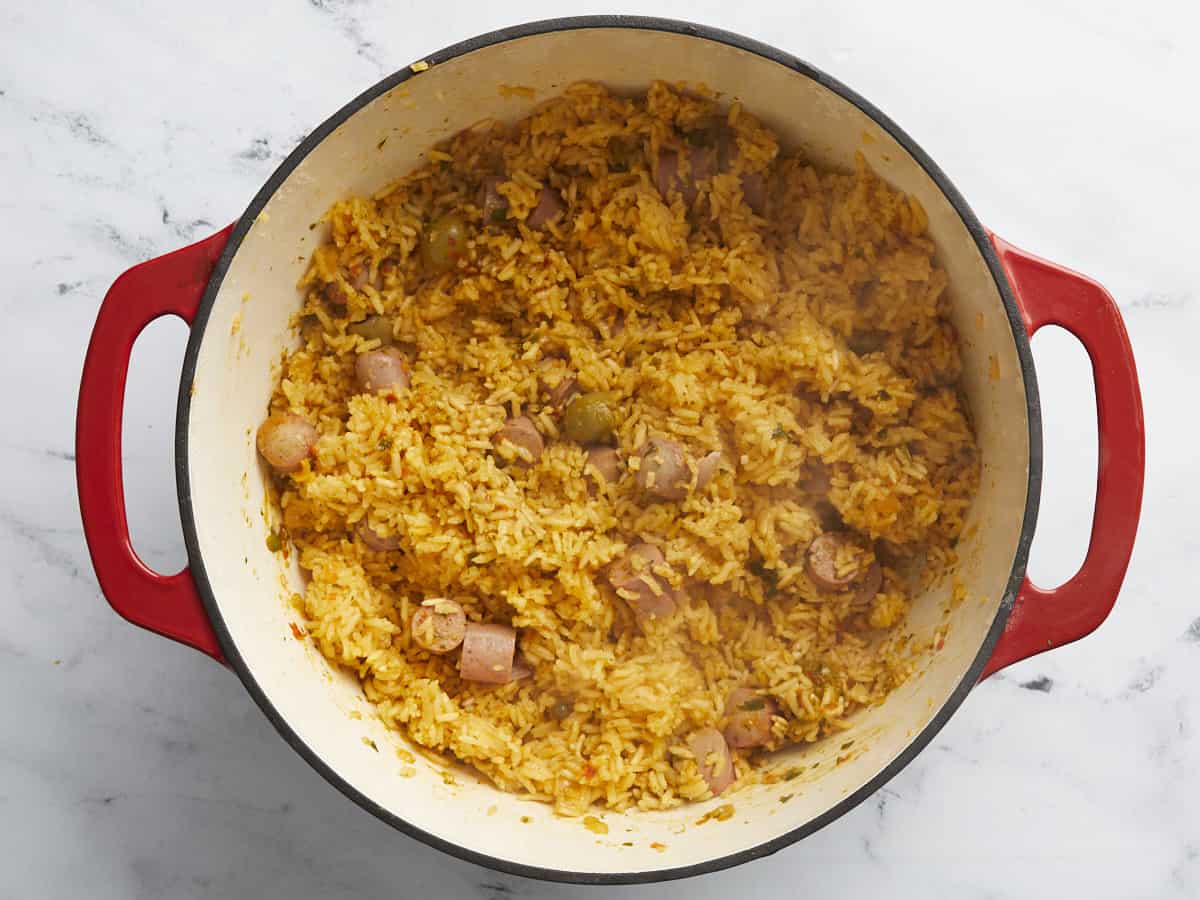
Overhead shot of Arroz Con Salchichas in a red Dutch Oven.

Simmer the rice over low heat until the rice is tender, about 15 minutes. Take the pot off the heat, but leave it covered. Let it rest, covered, for 10 minutes. Uncover, stir the rice, taste, and adjust the seasoning to your liking, if needed. Stir in 1/4 cup chopped cilantro leaves.

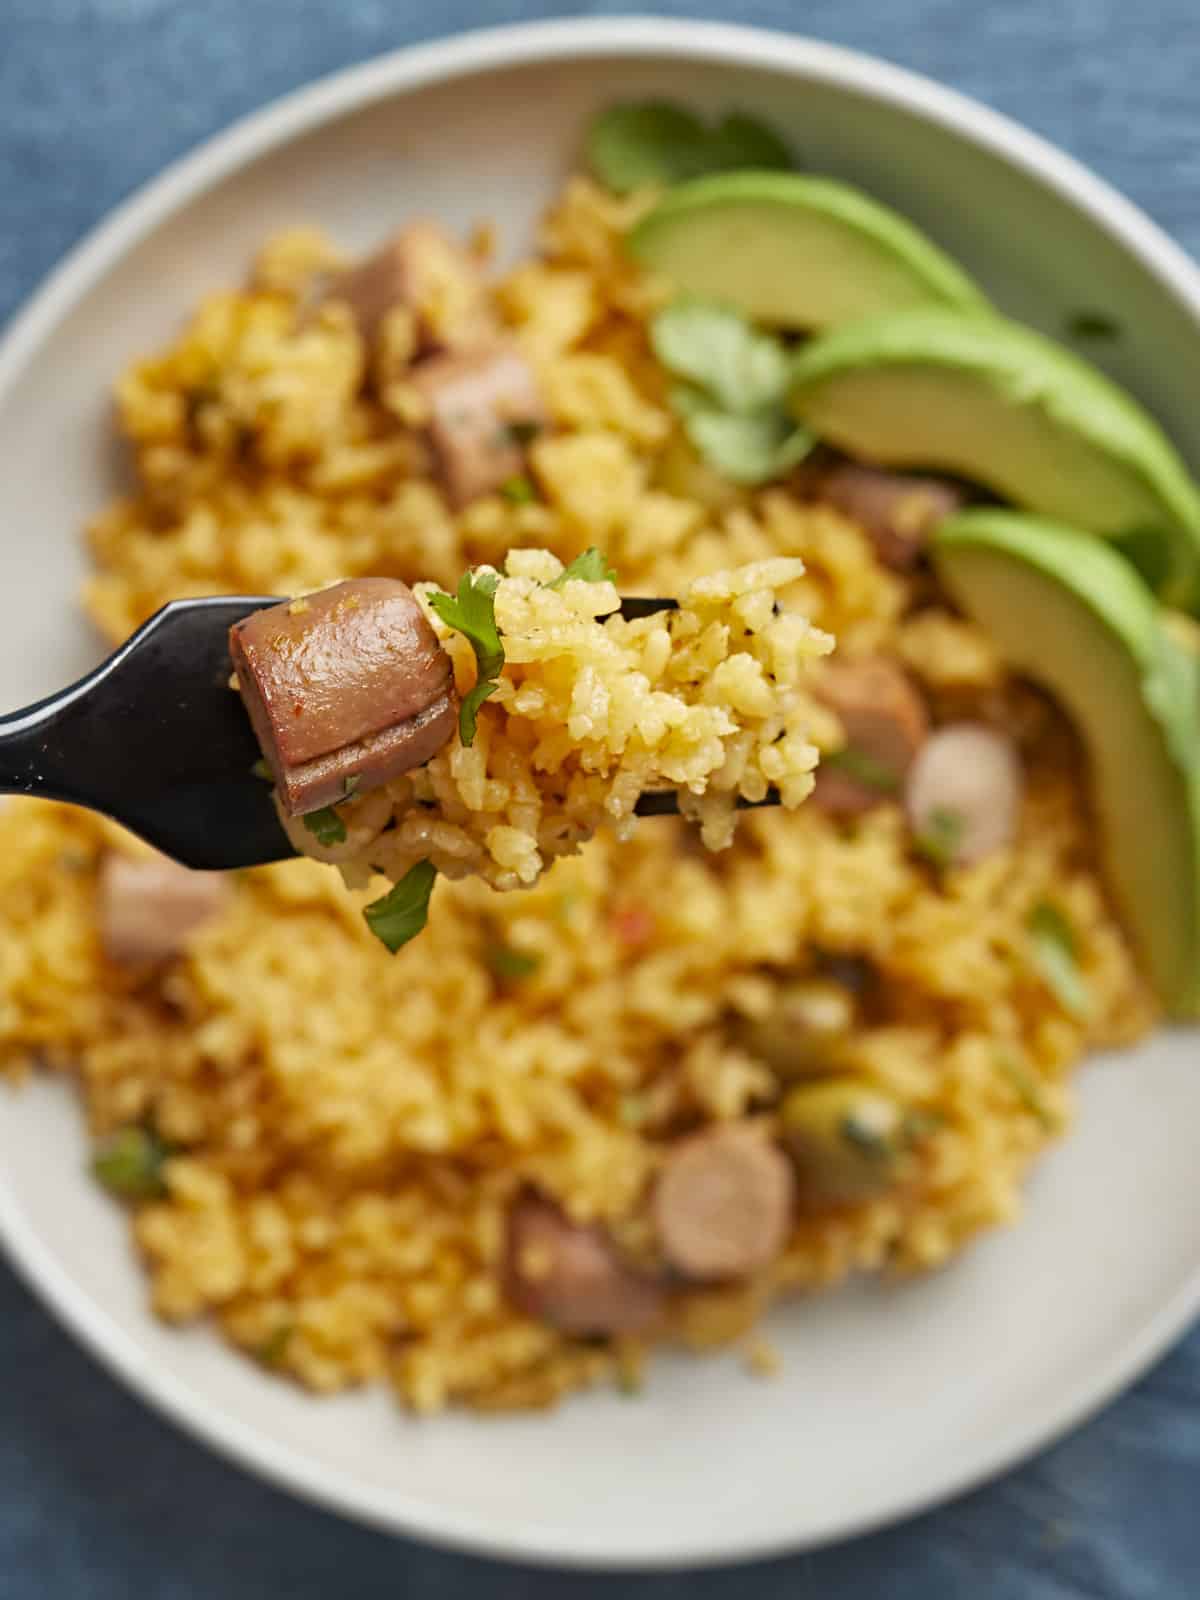
Overhead shot of Arroz Con Salchichas on a plate in the background with a fork holding some in the foreground.

Then serve yourself a big bowl full! You can garnish, like I did, with freshly sliced avocado. I also prepare for a happy belly, by undoing the top button of my jeans, but you do you. As we say in Puerto Rico, “Buen provecho!”

More Easy Puerto Rican Recipes

The post Arroz Con Salchichas (Puerto Rican Rice With Sausage) appeared first on Budget Bytes.
Chilaquiles

These budget-friendly Chilaquiles are made with crispy, homemade tortilla chips soaked in a flavorful red enchilada sauce and served with loads of toppings.

The post Chilaquiles appeared first on Budget Bytes.
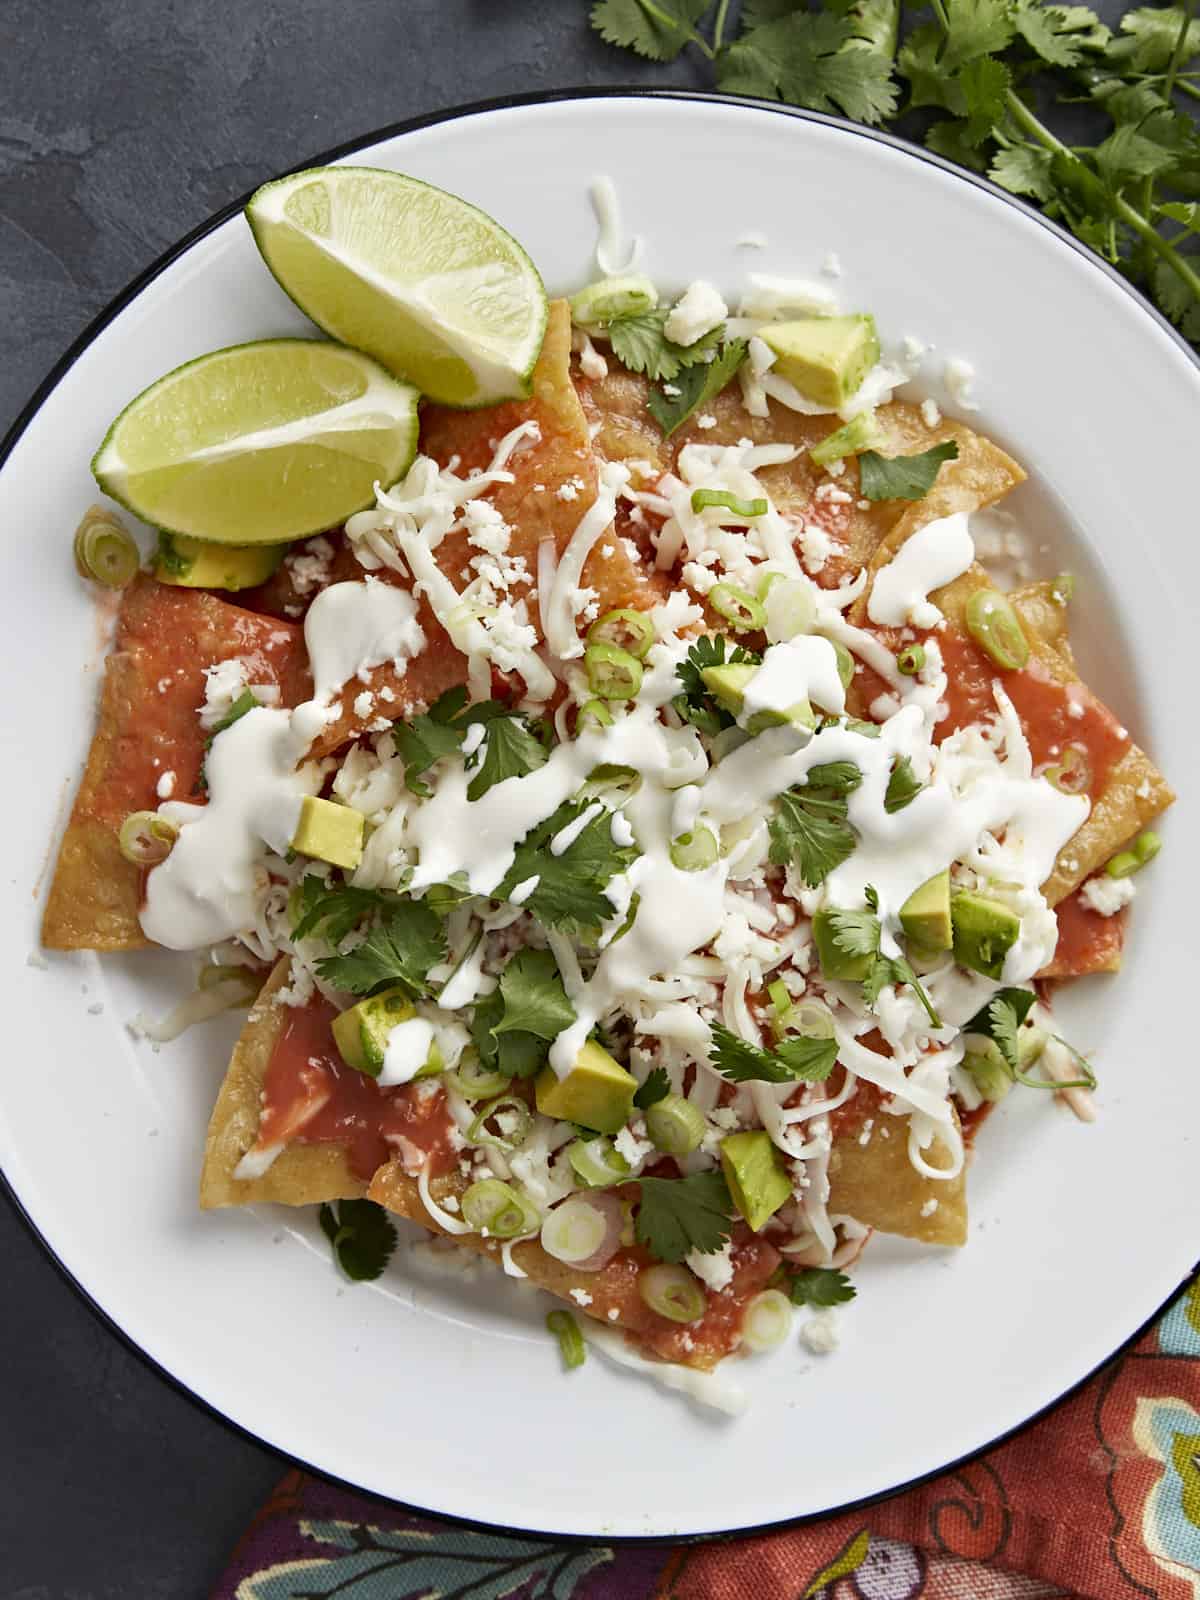
Chilaquiles are a hearty, delicious, and easy-to-make Mexican breakfast dish that’ll knock your socks off! These budget-friendly bad boys are made with crispy tortilla chips soaked in a flavorful red enchilada sauce and served with loads of toppings. While cheese, cilantro, avocado, sour cream, and eggs are traditional toppings for a Chilaquiles recipe, you can also clean out your fridge and use leftover veggies or meats. Budget win! This recipe is adapted from my friend Yvette Marquez Shapnack’s new cookbook, Muy Bueno Fiestas.

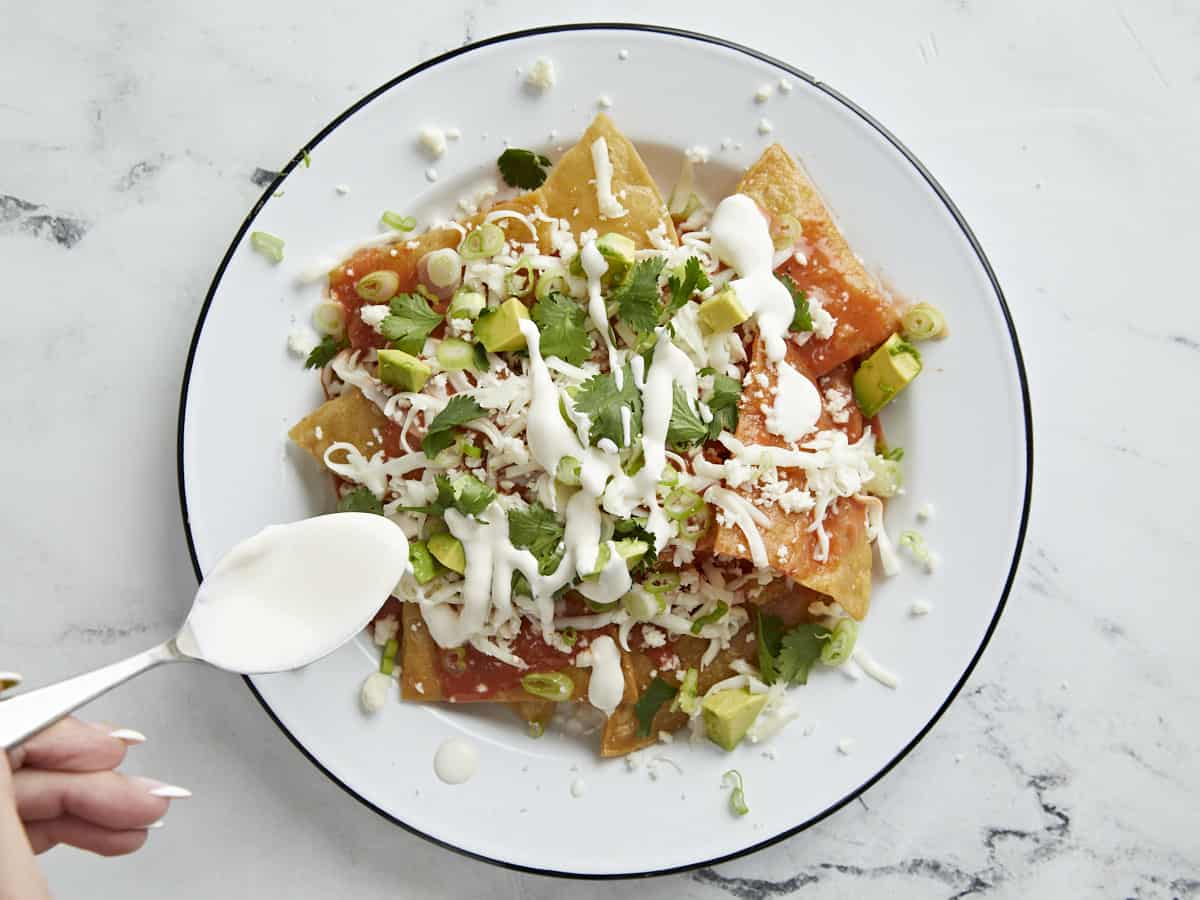
Overhead shot of chilaquiles served on a white plate.

What Are Chilaquiles?

The word “chilaquiles” comes from the Nahuatl word “chīlliaquilitl,” which means “chili-soaked.” The freshly fried tortilla chips that this recipe calls for are lightly soaked in a chili sauce. Traditionally the fried tortillas are cooked in this salsa which softens the chips, but Yvette prefers her chips crunchier, so she drizzles the sauce on them instead. You can top chilaquiles with whatever your heart desires! When I was testing the recipe, I had a little bit of rotisserie chicken left (the back part that no one ever seems to want to eat), and I pulled it and topped my Chilaquiles with it. Delicious!

What You Need To Make Chilaquiles

The best thing about Chilaquiles is that you can top them with whatever you want and adjust the toppings to create a lighter or heartier dish. Yvette’s recipe keeps things pretty traditional. To make these Chilaquiles, you’ll need the following ingredients:

  • Tortilla chips – You’ll need thick tortilla chips that can withstand getting soaked in a sauce without getting soggy. This usually means frying your own, which is super easy and budget-friendly. But if you can find really thick, restaurant-style tortilla chips, you can use those to speed up the preparation process.
  • Cooking oil- You’ll use this to fry the tortilla chips in, and any neutral-flavored oil will do. Use corn oil, vegetable oil, or canola oil.
  • Enchilada sauce – You can find this premade smoky red chile sauce in the Latin section of most grocery stores. Yvette also has a great recipe, which I’ve included in the notes section of the recipe card below.
  • Your choice of toppings– For this recipe, we topped our chilaquiles with sliced green onions, fresh cilantro leaves, diced avocado, shredded Oaxaca cheese, and crumbled queso fresco. If you can’t source Oaxaca cheese, use a pre-shredded Mexican cheese blend. We also use Mexican crema, which can be replaced with sour cream. We skipped the eggs in this recipe to keep it budget-friendly, but if you’d like to make it a heartier breakfast, top it with fried eggs.
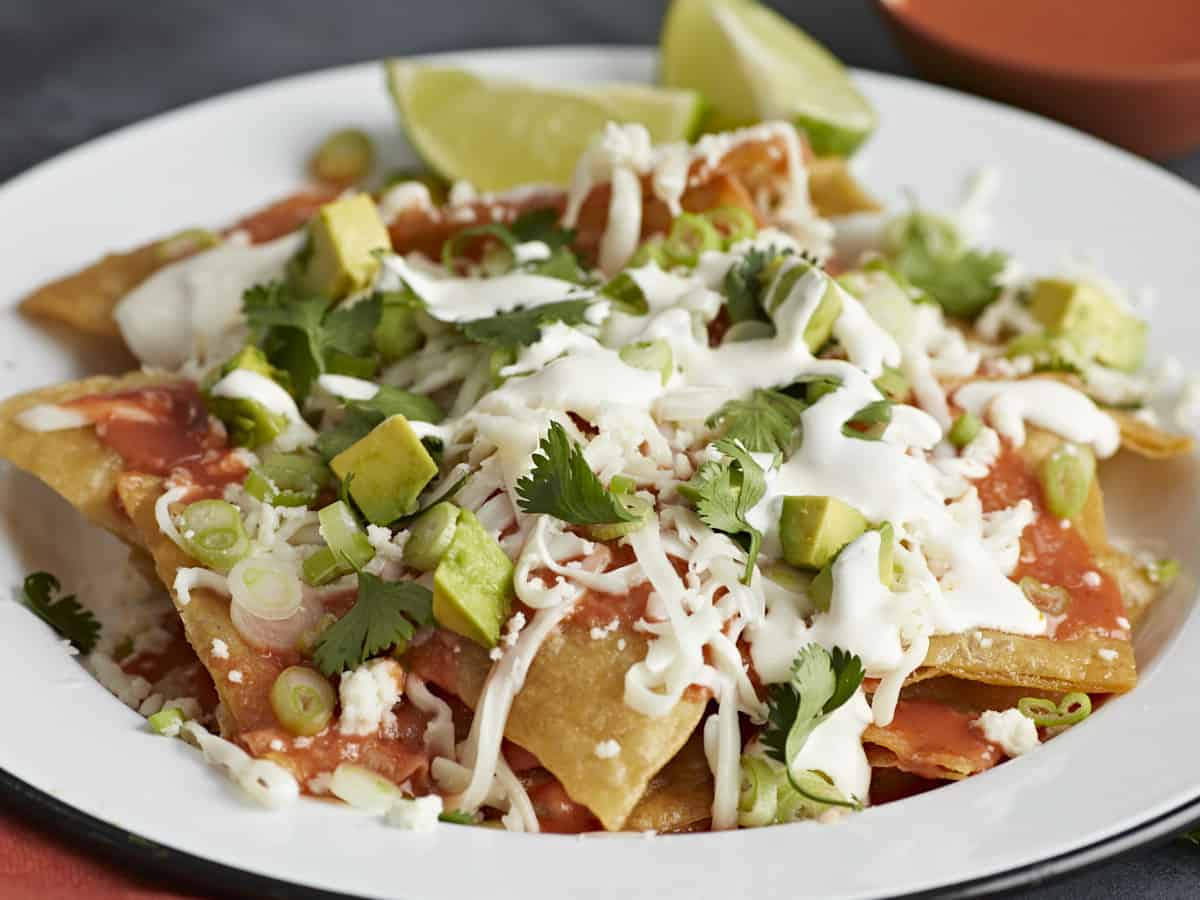
Side shot of chilaquiles served on a white plate.

Tips For Making Chilaquiles

Chilaquiles are delicious and versatile, but there are a few tricks to getting them just right.

  1. Make sure the oil you are frying the tortillas in is hot enough so they don’t end up soggy. Add a small piece of tortilla to the hot oil. If you’re at the right temperature, it will bubble and sizzle then turn golden in about 40 to 50 seconds.
  2. Drain freshly fried tortilla chips on a large paper towel-lined plate or sheet pan. The paper towels will soak up excess oil, which helps keep the tortilla chips crispy. Salt the chips while they are still hot.
  3. Prep toppings before you add sauce to the tortilla chips, so they don’t get soggy while you cut herbs and veggies.
  4. If serving a larger group, make the tortilla chips in advance. If you’re making the sauce from scratch, make that in advance as well. Instead of topping the Chilaquiles with cheeses and veggies etc., serve toppings in small bowls so guests can create their perfect combinations. It’ll save you loads of time.

What To Serve With Chilaquiles

While chilaquiles can be a stand-alone breakfast dish, you can make them part of a bigger meal by adding side dishes. Serve Chilaquiles with our Cheesy Pinto Beans, Guacamole, Cowboy Caviar, or Tomato Rice. And don’t forget, they’re amazing with Fried Eggs!

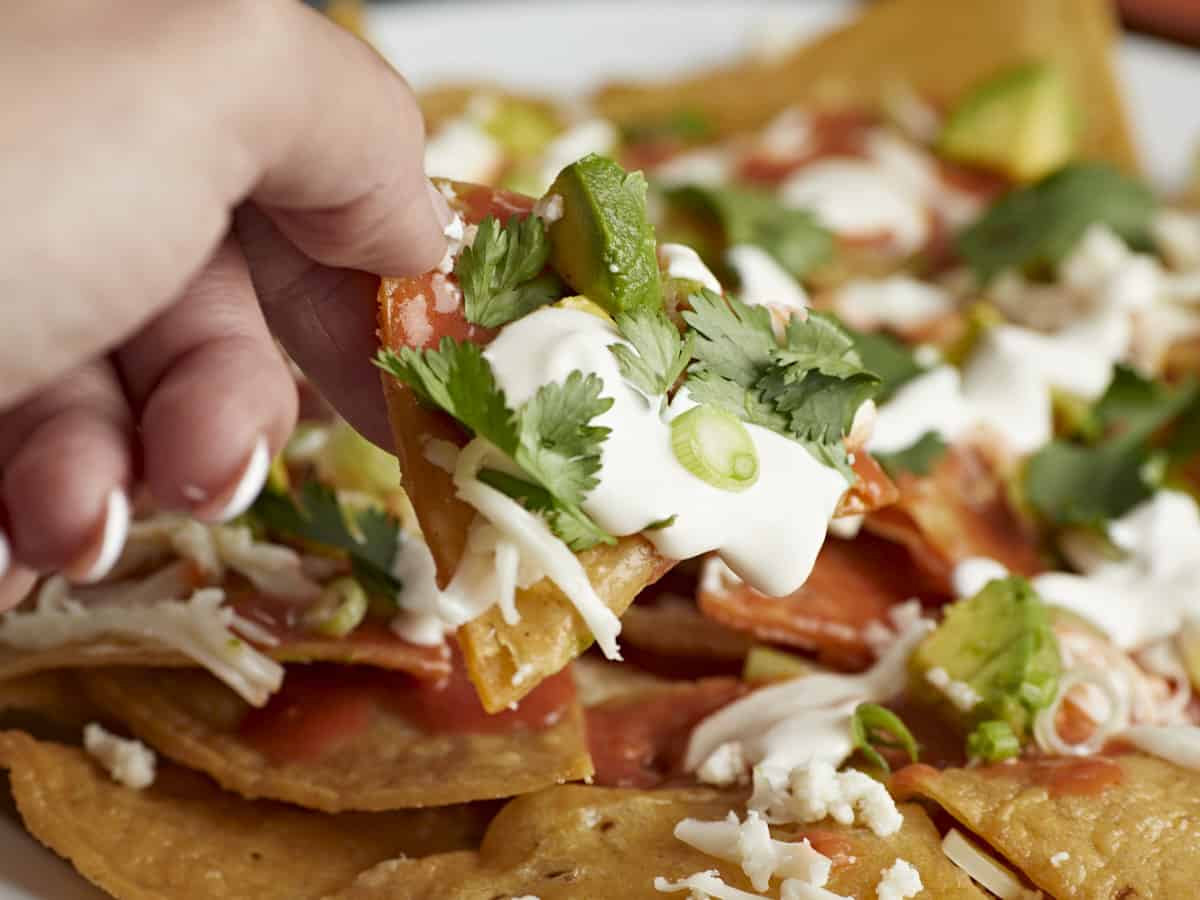
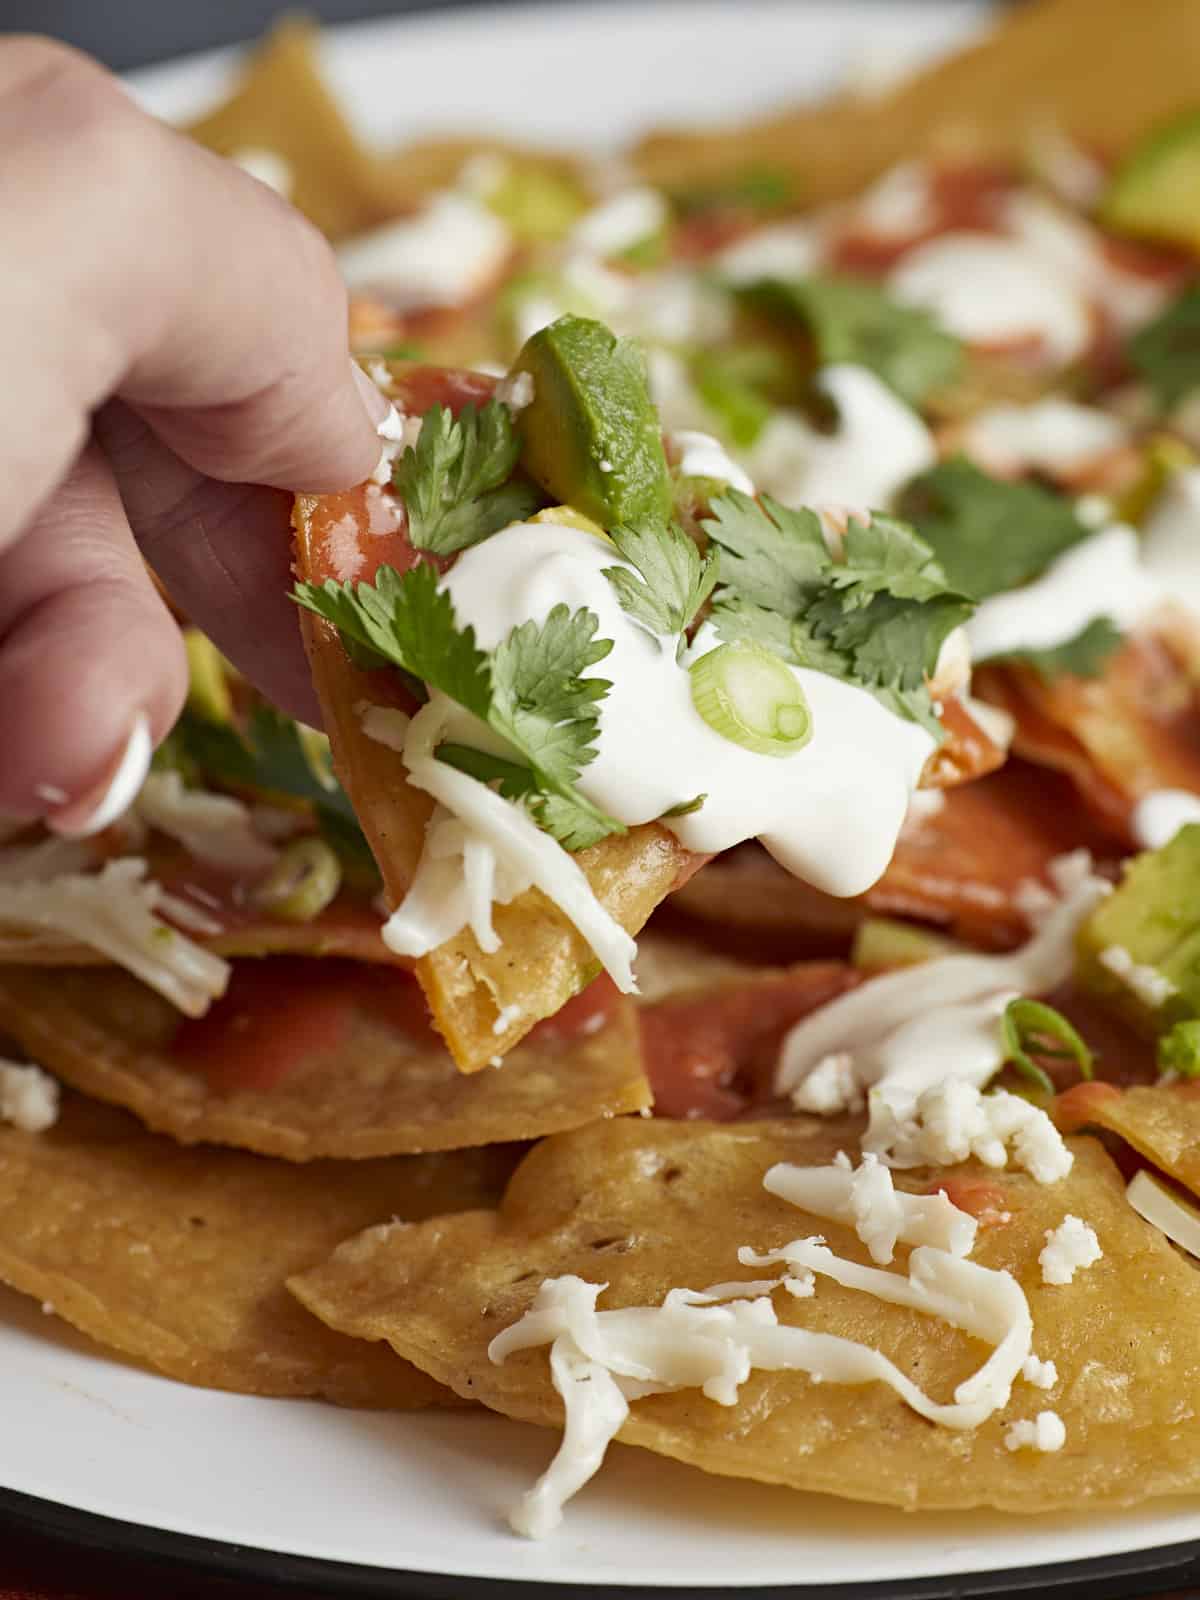
Side shot of a hand picking up a chilaquile served on a white plate.
Overhead shot of chilaquiles served on a white plate.
Print

Chilaquiles

These budget-friendly bad boys are made with crispy, homemade tortilla chips soaked in a flavorful red enchilada sauce and served with loads of toppings.
Course Breakfast
Cuisine Latin
Total Cost $5.75 recipe/ $2.89 serving)
Prep Time 5 minutes
Cook Time 10 minutes
Total Time 3 minutes
Servings 2 servings
Calories 546kcal

Ingredients

  • 1/4 cup cooking oil $0.16
  • 8 white or yellow corn tortillas (8-inch) $0.07
  • 1/4 tsp salt $0.02
  • 1 10oz. can red enchilada sauce* $2.49
  • 1/4 cup crumbled queso fresco $0.50
  • 1/2 cup shredded Oaxaca cheese $0.80
  • 1/4 cup fresh cilantro leaves $0.11
  • 1/3 cup sliced green onions $0.35
  • 1 avocado, diced $0.99
  • 2 Tbsp Mexican crema $0.25

Instructions

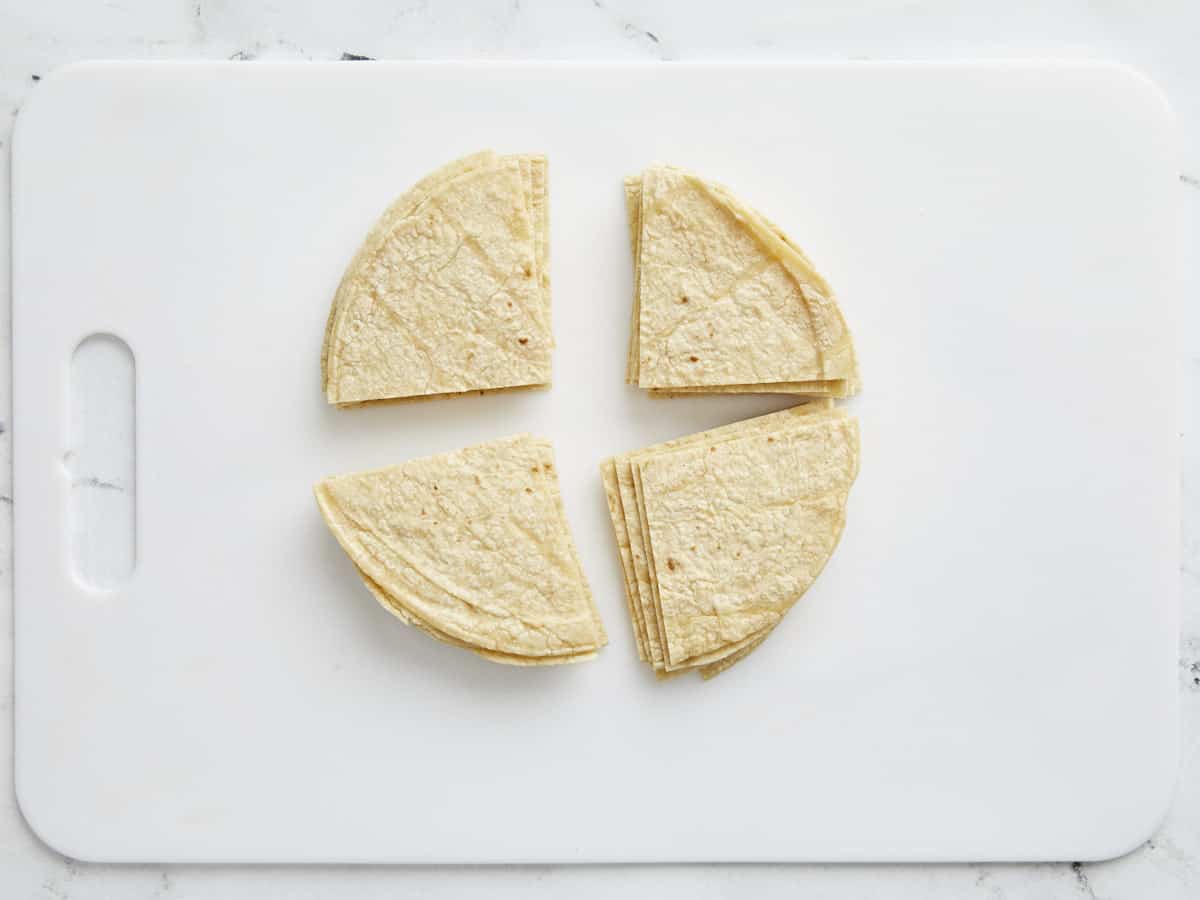
  • Line a sheet pan or large plate with paper towels. Stack 8 corn tortillas and cut them into quarters.
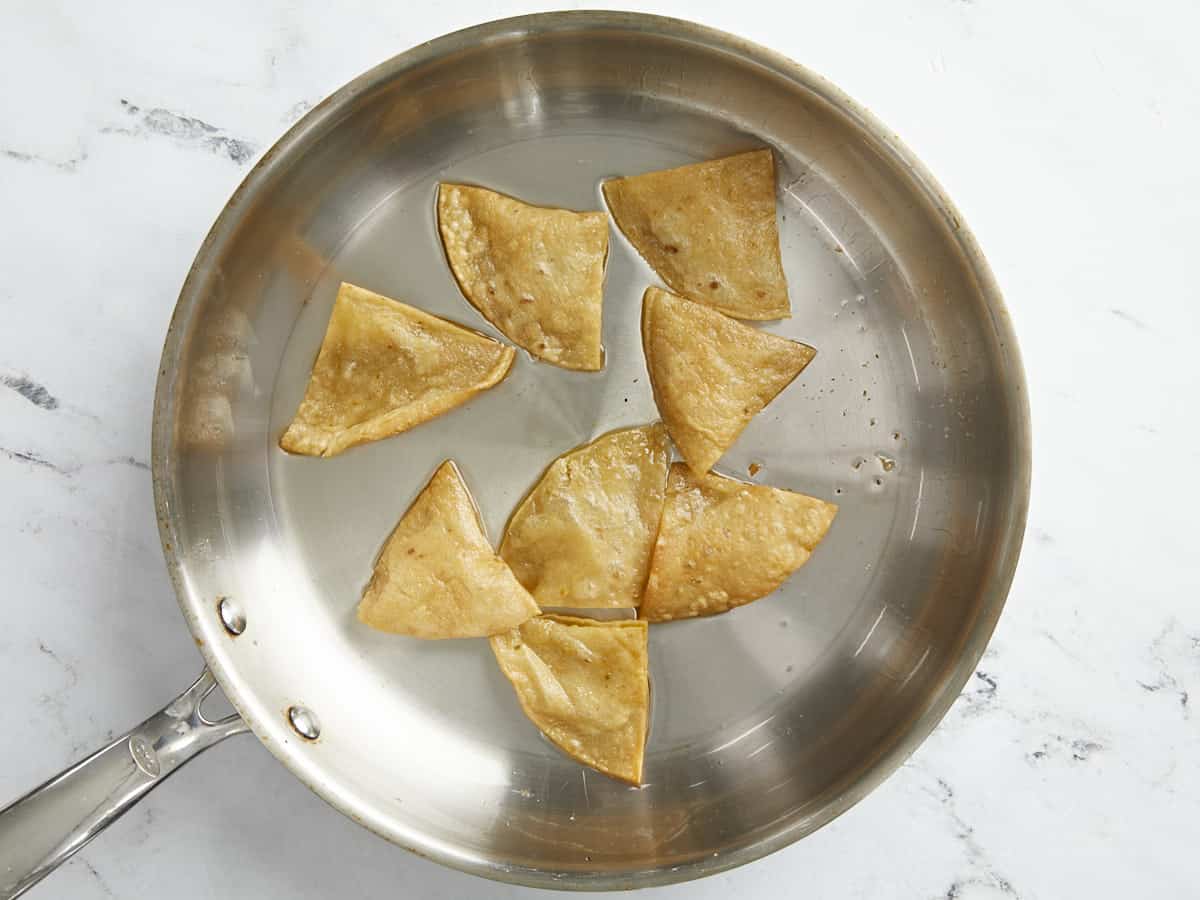
  • In a large skillet set over medium heat, warm the cooking oil until shimmering. Add two layers of tortilla quarters at a time and fry, turning as needed, until lightly browned and slightly crunchy, about 1 minute on each side. Transfer the tortilla quarters to the paper towel-lined plate to drain. Repeat with the remaining tortilla quarters.
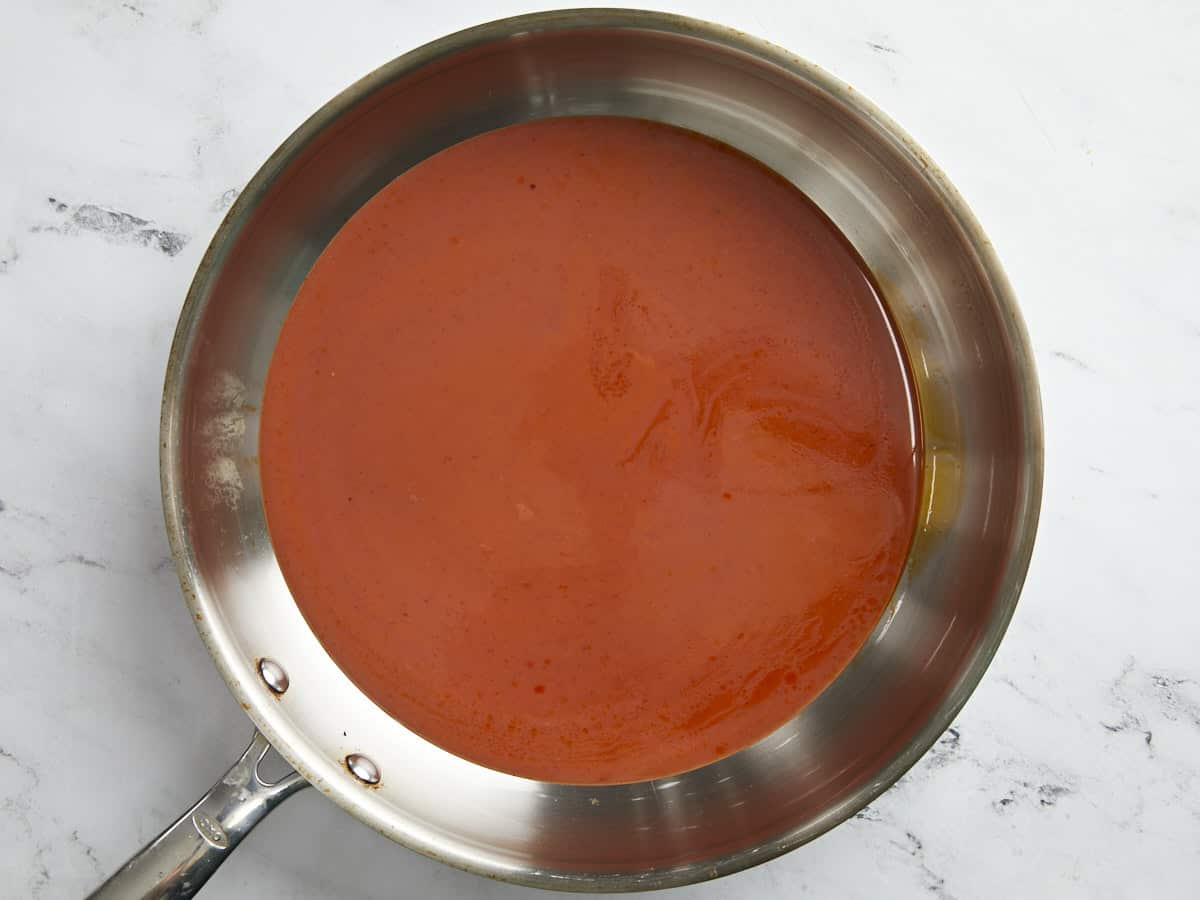
  • Warm the red enchilada sauce* in a large saucepan.
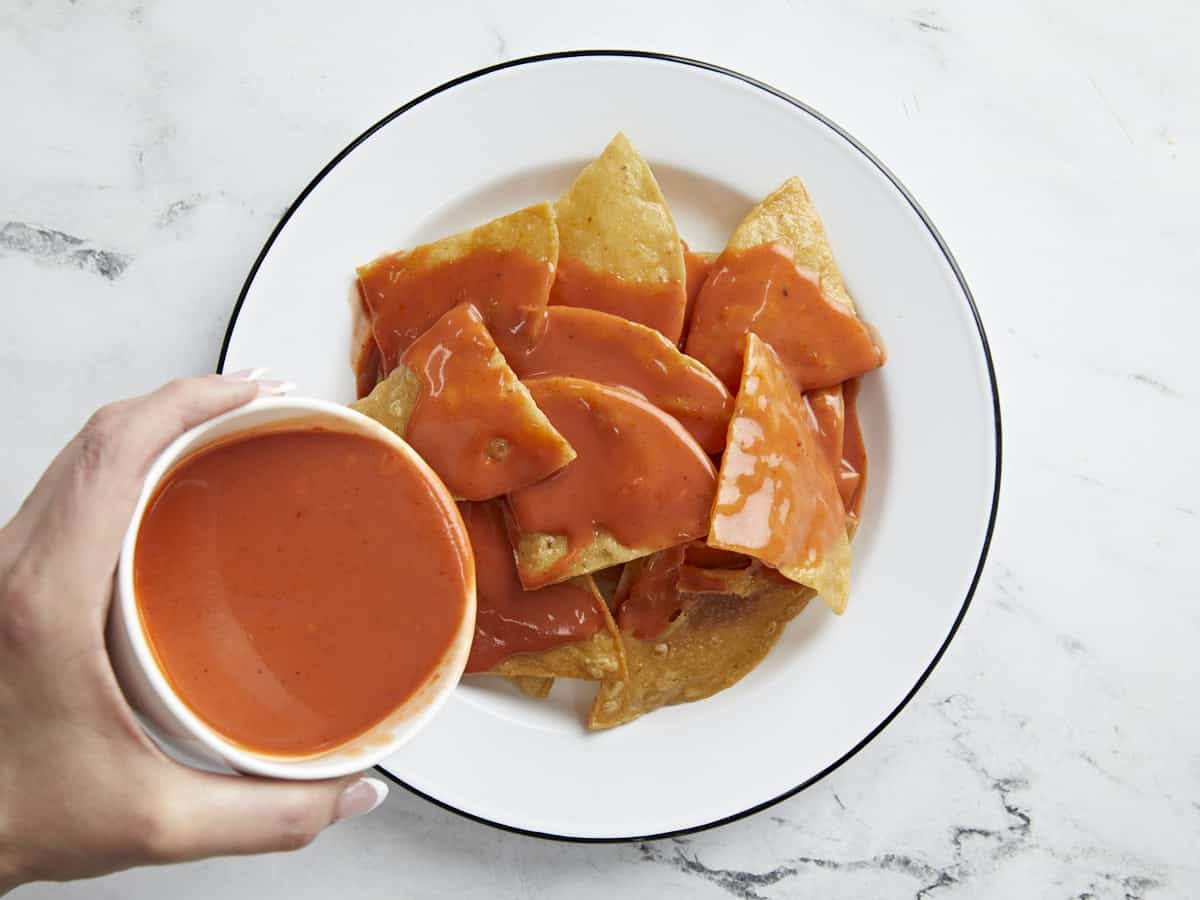
  • Divide tortilla chips between two large plates. Divide the warm sauce equally, drizzling it over the tortilla chips on each plate.
  • Sprinkle each plate equally with the shredded Oaxaca cheese, crumbled queso fresco, fresh cilantro leaves, sliced green onions, diced avocado, and Mexican crema. Enjoy the ridiculously yummy contrasting flavors, textures, and temperatures immediately!

See how we calculate recipe costs here.

Notes

*Yvette Marquez-Shapnack’s recipe for Red Chile Sauce
 
Ingredients
1⁄4 lb dried California or New Mexico red chiles
3 cups water
3 tablespoons all-purpose flour
2 cloves garlic, coarsely chopped
11⁄2 teaspoons salt
Olive oil, for cooking
Directions
Remove the stems, seeds, and veins from the chiles, then put them into a colander and rinse well under cool running water.
In a saucepan over high heat, combine the chiles with water to cover and bring to a boil. Reduce the heat to medium, cover, and simmer for 10 minutes.
Using tongs, turn the chiles over so they will soften evenly, re-cover, and continue to simmer until softened, about 10 minutes longer. Drain well, discard the water, and let cool for several minutes before blending.
In a blender, combine the cooled chiles, water, flour, garlic, and salt and purée until smooth. Pass the sauce through a fine-mesh sieve set over a bowl to remove the skins and seeds. Discard the solids in the sieve. Use immediately, or transfer to an airtight container and store in the refrigerator for up to 1 week or in the freezer for up to 6 months.

Nutrition

Serving: 1serving | Calories: 546kcal | Carbohydrates: 7g | Protein: 17g | Fat: 51g | Sodium: 1005mg | Fiber: 1g
Side shot of chilaquiles served on a white plate.

How to Make Chilaquiles – Step by Step Photos

Overhead shot of quartered tortillas on a white cutting booard.

Line a sheet pan or large plate with paper towels. Stack 8 corn tortillas and cut them into quarters.

Overhead shot of tortilla slices being fried in a silver pan.

In a large deep skillet set over medium heat, warm 1/4 cup cooking oil until shimmering. Add two layers of tortilla quarters at a time (8 quarters) and fry, turning as needed, until lightly browned and slightly crunchy, about 1 minute on each side. Transfer the tortilla quarters to the paper towel-lined plate to drain. Sprinkle with a pinch of salt. Repeat with the remaining tortilla quarters.

Overhead shot of red sauce "salsa roja" in a silver sauce pan.

Warm the 10 ounces of enchilada sauce in a large saucepan. If you’d like to make your own enchilada sauce, you will find Yvette’s recipe in the notes section of the recipe card.

Overhead shot of fried tortillas served on a white plate with red sauce being drizzled on top.

Divide tortilla chips between two large plates. Divide the warm enchilada sauce equally, drizzling it over the tortilla chips on each plate.

Overhead shot of chilaquiles served on a white plate with sour cream being drizzled on top.

Next, divide the 1/2 cup shredded Oaxaca cheese, 1/4 cup crumbled queso fresco, 1/4 cup fresh cilantro leaves, 1/3 cup green onions, 1 diced avocado, and 2 tablespoons of Mexican crema. between two plates.

Side shot of a hand picking up a chilaquile served on a white plate.

That’s it! I told you it was easy. Enjoy the ridiculously yummy contrasting flavors, textures, and temperatures immediately. Woot! And another one. (Said in my best DJ Khaled.)

More Recipes With Tortillas

The post Chilaquiles appeared first on Budget Bytes.
Limber

A limber is a refreshing and delicious Puerto Rican tropical fruit puree popsicle that’s the perfect budget-friendly option for cooling down on a hot day.

The post Limber appeared first on Budget Bytes.
No, this isn’t a recipe for how to warm up for exercise! A limber is a refreshing and delicious Puerto Rican frozen tropical fruit puree popsicle that you can make for next to nothing. Limbers are the perfect way to cool down on a sweltering hot day. And, trust me, island people know all about keeping things chill when temperatures hit the triple digits. This one will become a summer favorite!

Overhead shot of four mango limbers on a sheet pan filled with ice.

What Are Limbers?

Limbers are a popular frozen treat in always hot Puerto Rico. Tropical fruit purees or creamy milks are served in the small plastic cups they are frozen in. They’re named after the famous pilot Charles A. Lindbergh, who was obsessed with the icy fruit pops. My favorite flavor is mango, which is what we’re making today.

What Do You Need To Make Limbers?

This recipe is ridiculously easy and has an incredibly simple ingredient list. The hardest thing about it is waiting for the pops to freeze! Here’s what you need to make Mango Limbers:

  • Mango– preferably fresh. You can, of course, use frozen but you might need to up the amount of sugar you put in the mix, as it won’t be as flavorful as fresh. In a pinch, mango nectar or juice are good options too.
  • Sugar – helps sweeten the limber, as mango can sometimes be acidic, especially if they aren’t ripe. You can use your favorite sweetener here, to taste. Honey, agave nectar, brown sugar, and artificial sugars all work well.
  • Lime juice – this isn’t a must, but it’s nice to have that citrus note.
  • Ginger – fresh or powdered. Also not a must. But it adds a great pop of flavor.

How To Pick A Ripe Mango

When mangoes are ripe they should be aromatic and have some give when you press a finger into the skin. For limbers, I prefer to use small champagne mangoes, also known as Ataúlfo, Adaulfo, young, baby, yellow, or honey mangoes. They aren’t as fibrous as other mangoes and have a naturally deeply sweet flavor.

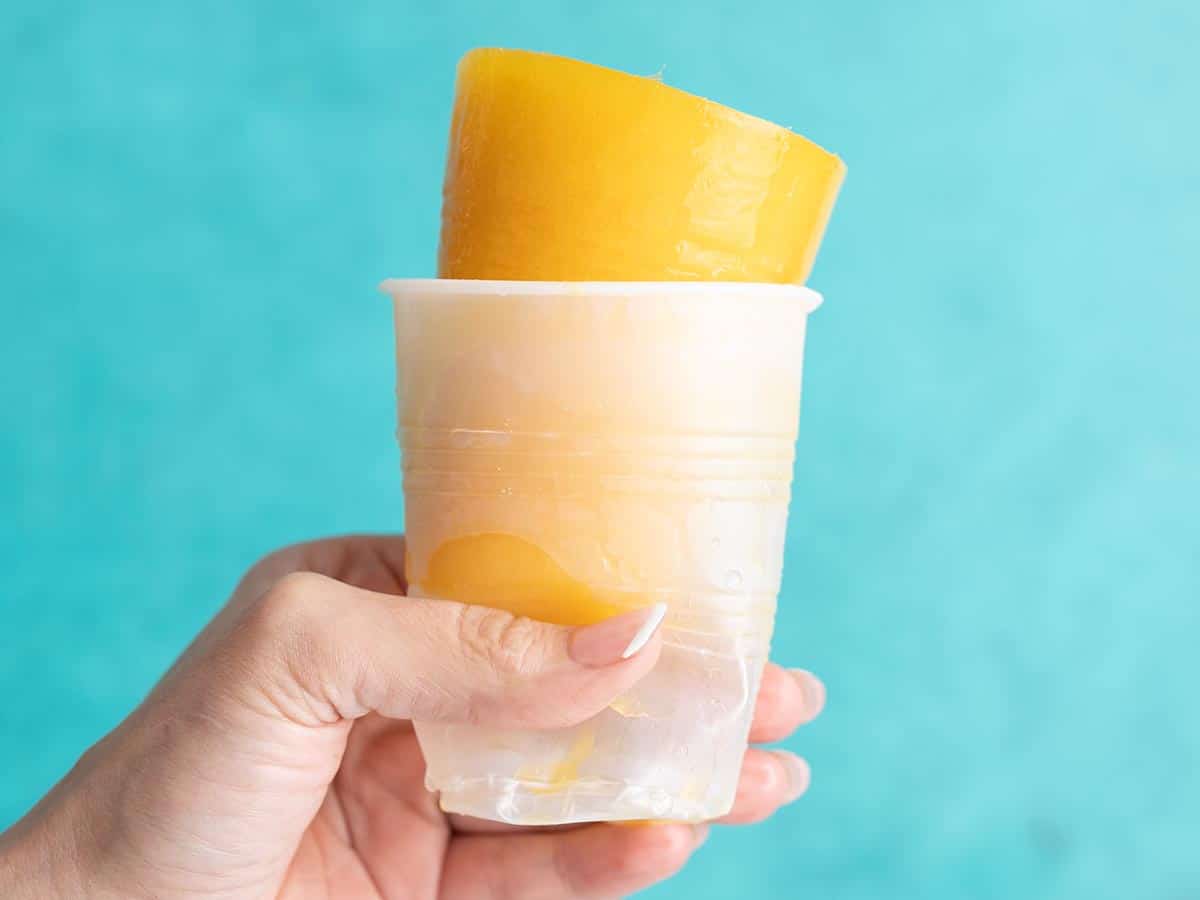
Side shot of hand holding a plastic cup with a mango limber poking out of it.

What DO You Freeze LimberS In?

Traditionally, limbers are frozen in small, usually 6-ounce, plastic cups. But single waste plastic isn’t our favorite at the Budget Bytes kitchen, so we used popsicle molds. You can use pretty much any squeezable freezer-safe container as your mold, and simply push the limber out once it;s frozen. If the limber is stuck in the container, just run warm water over the mold until the limber loosens.

Other Traditional Limber Flavors

If mango isn’t your thing, don’t miss out on this frozen treat! You can make it with almost any pureed fresh fruit or fruit juice and add sugar to taste. There are also creamy options. Try:

  • Coconut Milk with a little cinnamon
  • Tamarind Puree
  • Orange, Lemon, or Lime Juice
  • Pineapple
  • Condensed Milk with a little cinnamon
  • Guava Juice
  • Passion Fruit Juice
Overhead shot of four mango limbers on a sheet pan filled with ice.
Overhead shot of hand holding a mango limber with a white handle.
Print

Limbers

A limber is a refreshing and delicious Puerto Rican tropical fruit puree popsicle that's the perfect budget-friendly option for cooling down on a hot day.
Course Dessert
Cuisine Latin, Puerto Rican
Total Cost ($4.57 recipe / $0.76 serving)
Prep Time 10 minutes
Freezing Time 6 hours
Total Time 6 hours 10 minutes
Servings 6 limbers
Calories 24kcal

Equipment

Ingredients

  • 4 whole champagne mangoes, fresh $4.00
  • 1/2 cup water $0.01
  • 3 Tbsp sugar $0.05
  • 1 whole lime, juiced (optional) $0.50
  • 1/8 tsp powdered ginger (optional) $0.01

Instructions

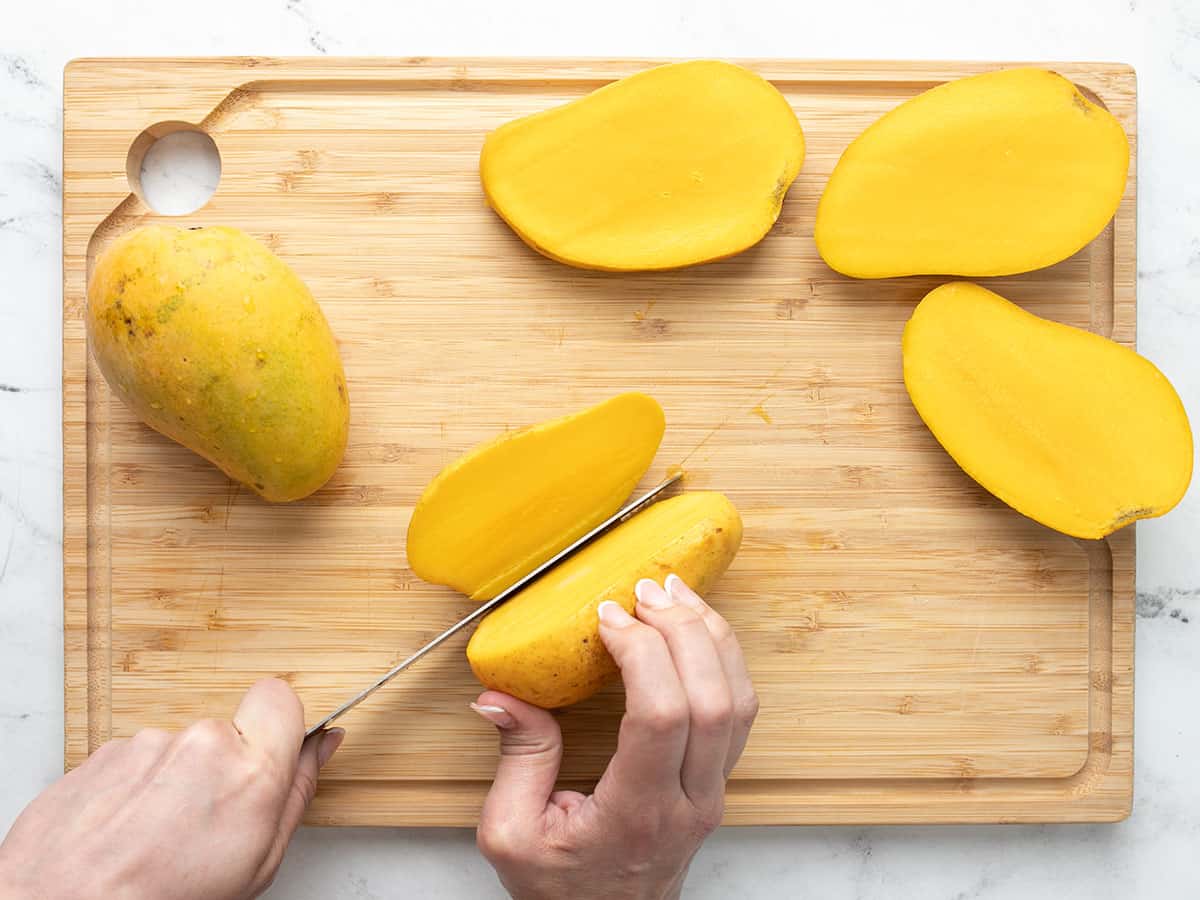
  • Slice around the seed of the mangoes by making two cuts all the way through each mango, each just off-center.
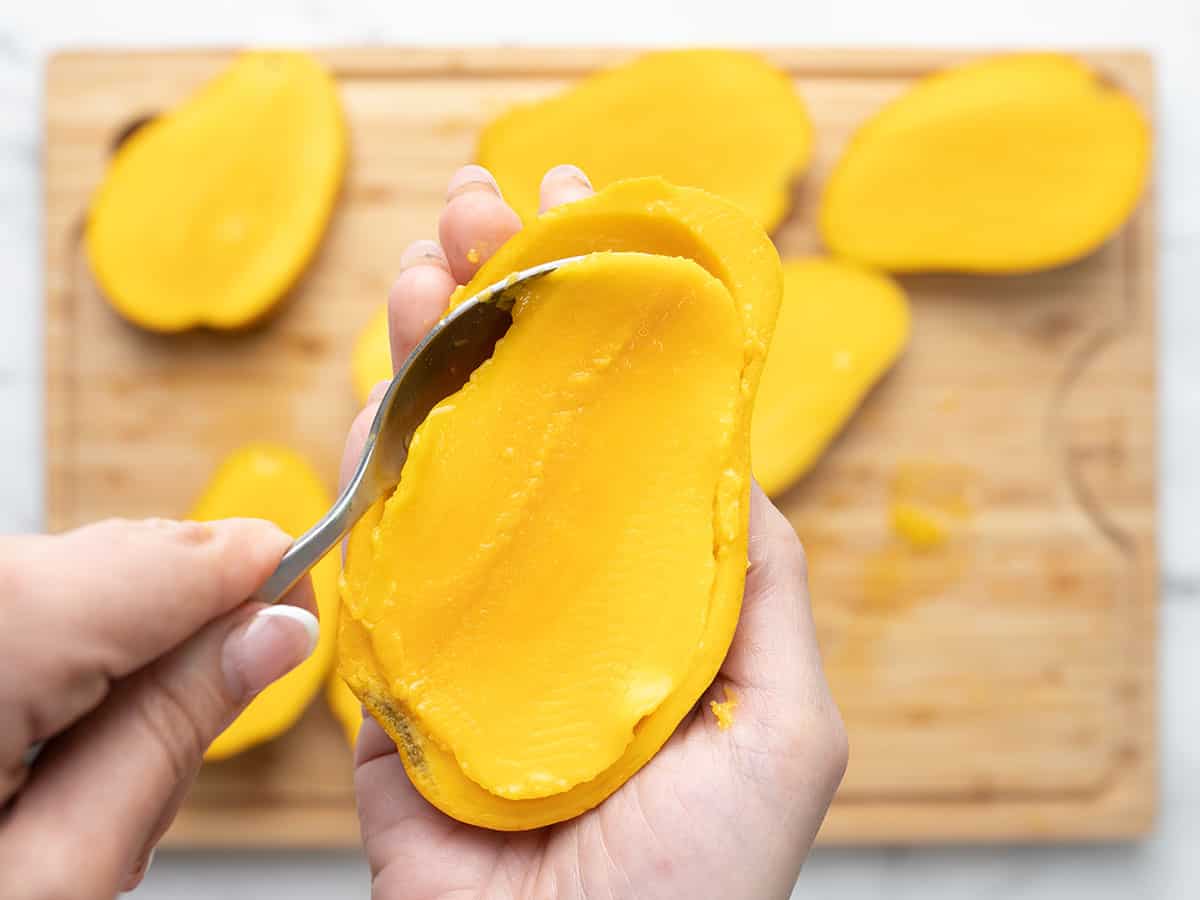
  • Use a large spoon to scoop out the mango flesh from the mango halves. Rough chop the mango flesh.
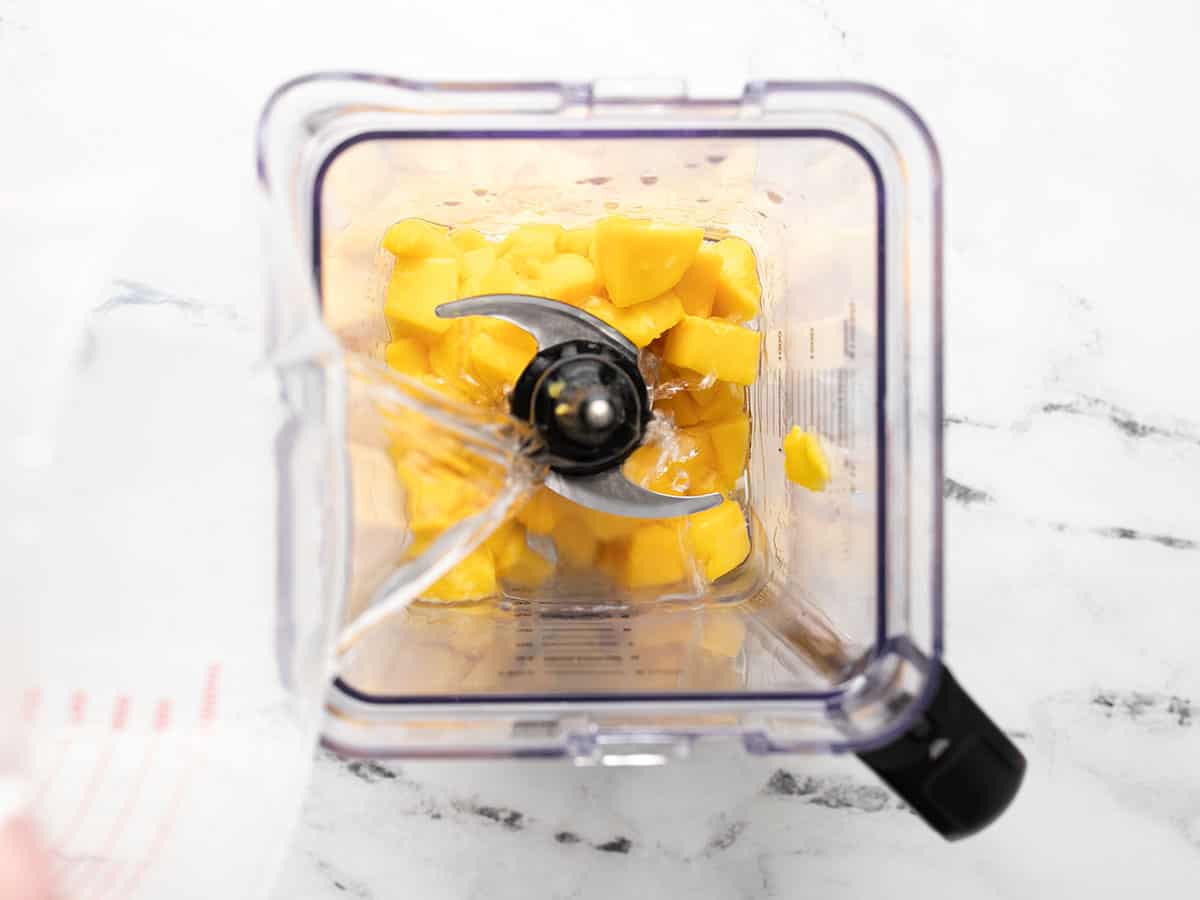
  • Add the diced mango, water, and sugar to a blender. Hold the seed over the blender and run the spoon over the seed to extract any extra flesh and juice. Optional: Add lime juice and powdered ginger.
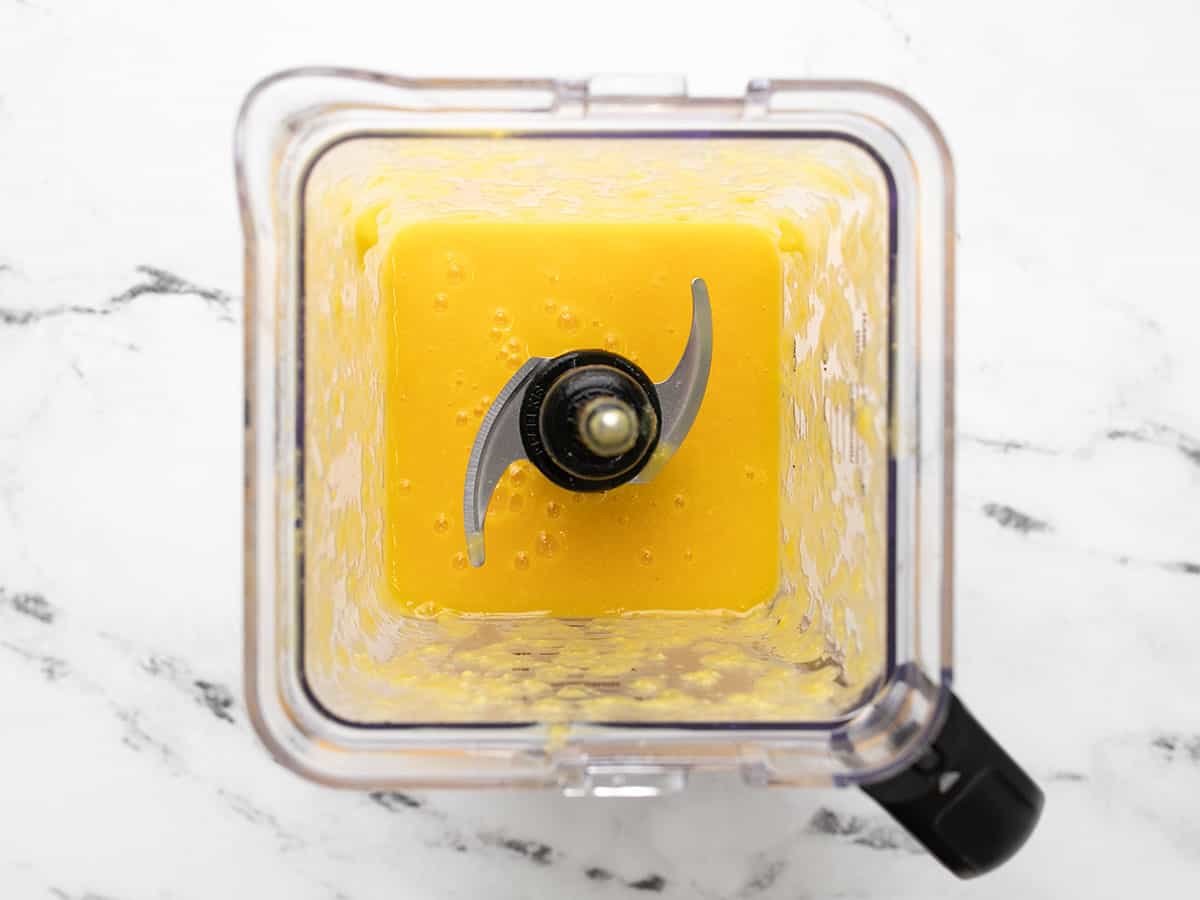
  • Blend until a smooth puree forms. It should have the consistency of ketchup. If necessary, add a touch more water to thin out the puree. You should have about 3 cups of puree.
  • Fill the ice pop molds, small freezer-safe glassware, or 6-ounce plastic cups, but not all the way up as the filling expands as it freezes.
  • Freeze for 6 hours. Make it easy to unmold by dipping them in warm water. And then all you have left to do is to enjoy the most refreshing thing you'll have all day!

See how we calculate recipe costs here.

Nutrition

Serving: 1limber | Calories: 24kcal | Carbohydrates: 6g | Protein: 0.01g | Fat: 0.02g | Sodium: 1mg | Fiber: 0.02g

How to Make Mango Limbers – Step by Step Photos

Overhead shot of one hand holding a mango while the other hand slices it on a wooden cutting board. There are other mango slices on the board.

Slice around the seeds of the 4 mangoes by making two cuts through each mango from the stem to the tip. Each cut should be just off-center.

Hand holding a mango half and scooping out the flesh with a spoon.

Use a large spoon to scoop out the mango flesh from each mango half. Rough chop the mango flesh.

Overhead shot of mango and other ingredients in a blender.

Add the chopped mango, 1/2 cup water, and 3 tablespoons of sugar to a blender. Hold the seeds over the blender and run the spoon over the seeds to extract any extra flesh and juice. Optional: Add the juice of 1 lime and 1/8 teaspoon powdered ginger.

Overhead shot of blended limber in a blender.

Blend until a smooth puree forms. It should have the consistency of ketchup. If necessary, add a touch more water to thin out the puree. You should have about 3 cups of puree.

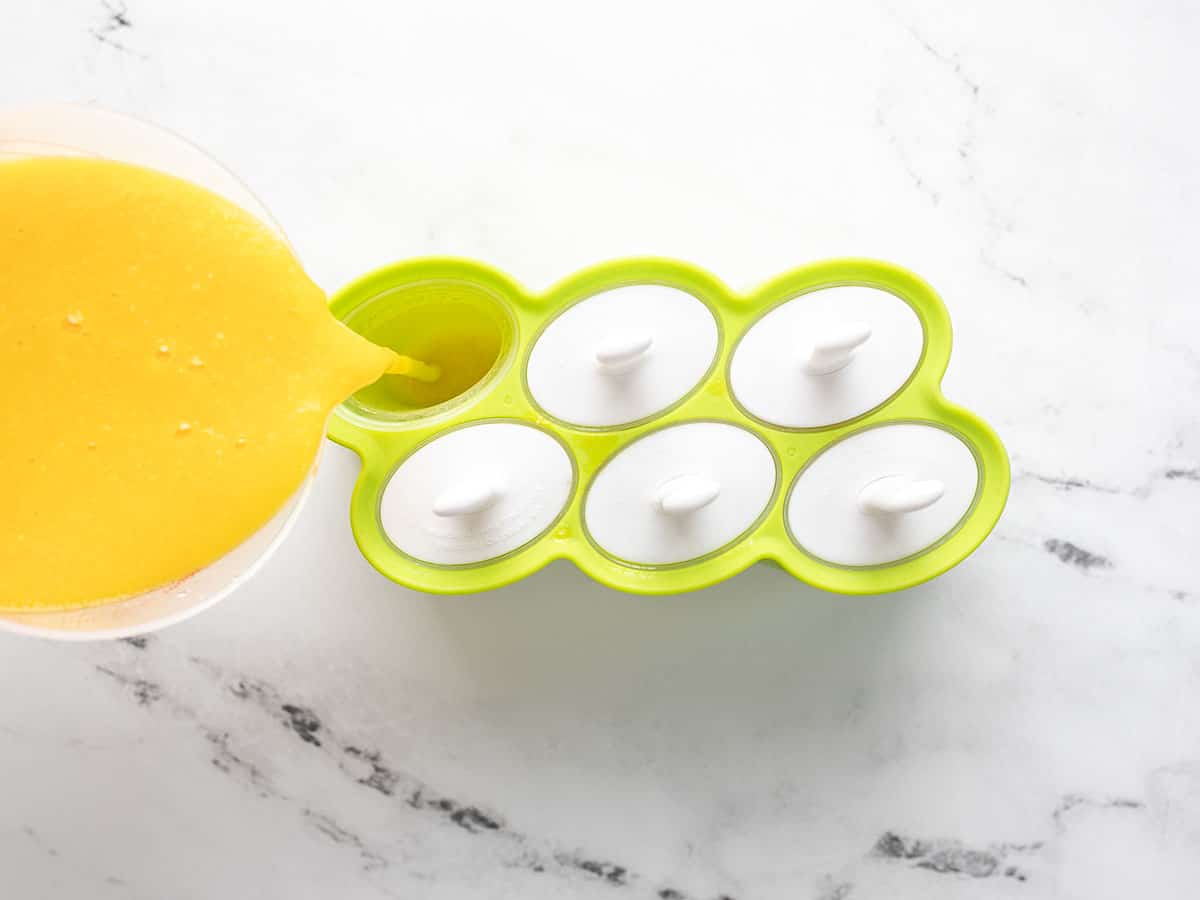
Overhead shot of mango puree being poured into popsicle molds.

Fill the ice pop molds, small freezer-safe glassware, or 6-ounce plastic cups, but not all the way up as the filling expands as it freezes.

Overhead shot of mango limber with a white handle.

Freeze for 6 hours. Make it easy to unmold by dipping them in warm water. And then enjoy the most refreshing thing you’ll have all day, guaranteed!

More Easy Frozen Treats

The post Limber appeared first on Budget Bytes.
Ensalada de Aguacate (Avocado Salad)

Ensalada de Aguacate, a Puerto Rican-style Avocado Salad, is a quick and easy summer salad you can make for about a dollar a serving.

The post Ensalada de Aguacate (Avocado Salad) appeared first on Budget Bytes.
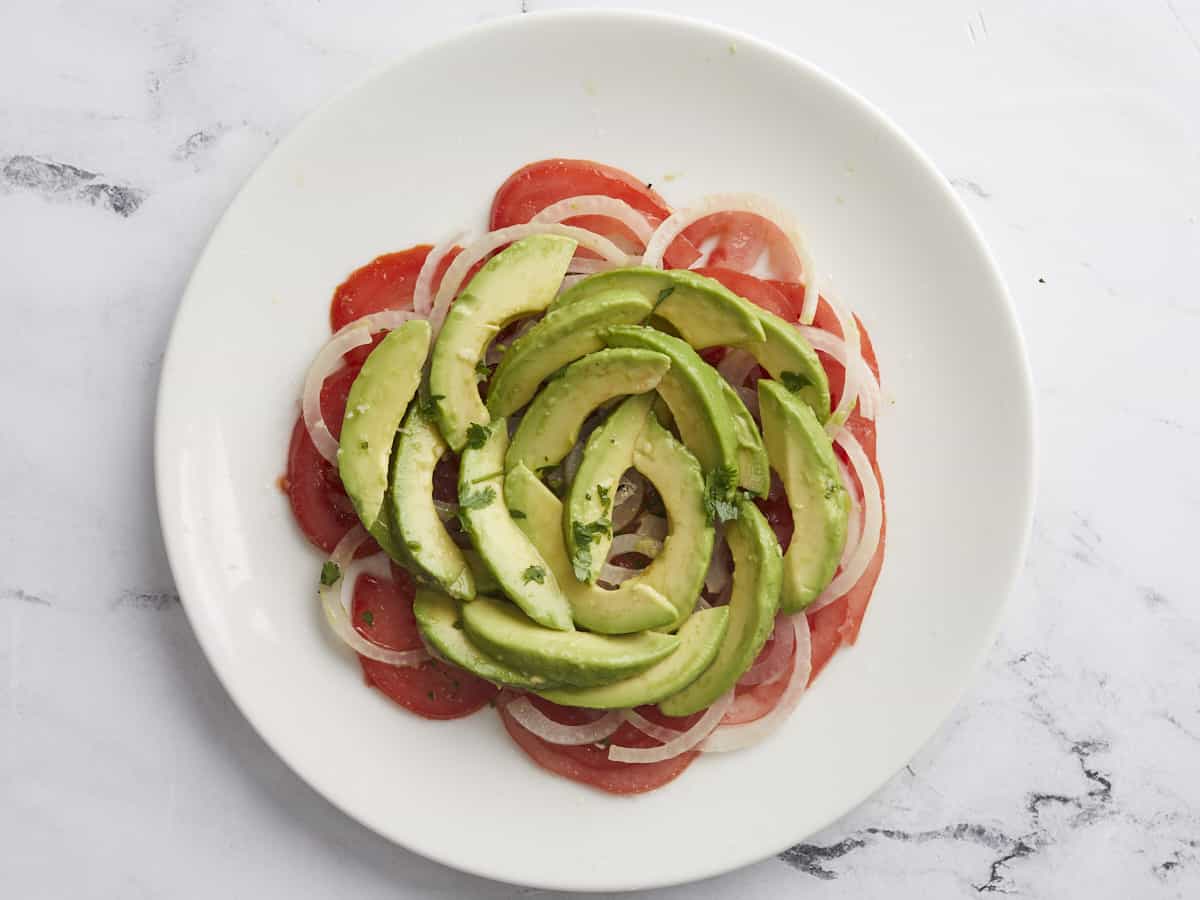
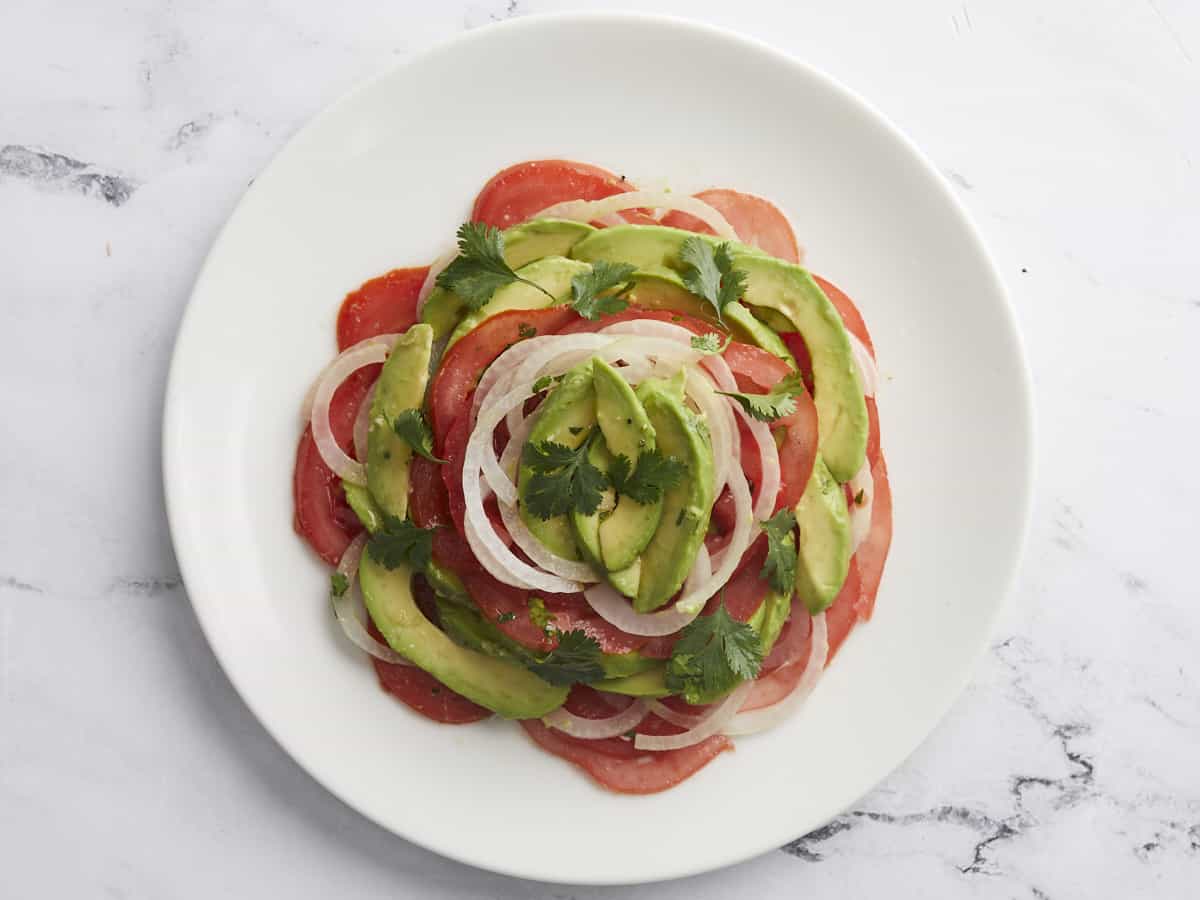
Ensalada de Aguacate, a Puerto Rican-style Avocado Salad, is a quick and easy summer salad that’s so tasty and refreshing you’ll find yourself craving it on sweltering days. To bulk up the salad, I layer the creamy avocado with cooling slices of tomato. So technically, it’s an Ensalada de Aguacate y Tomate (Avocado and Tomato Salad), but who wants to type all of that out 150 times? Not this girl. Oh yeah- it comes in at under a dollar a serving! #win

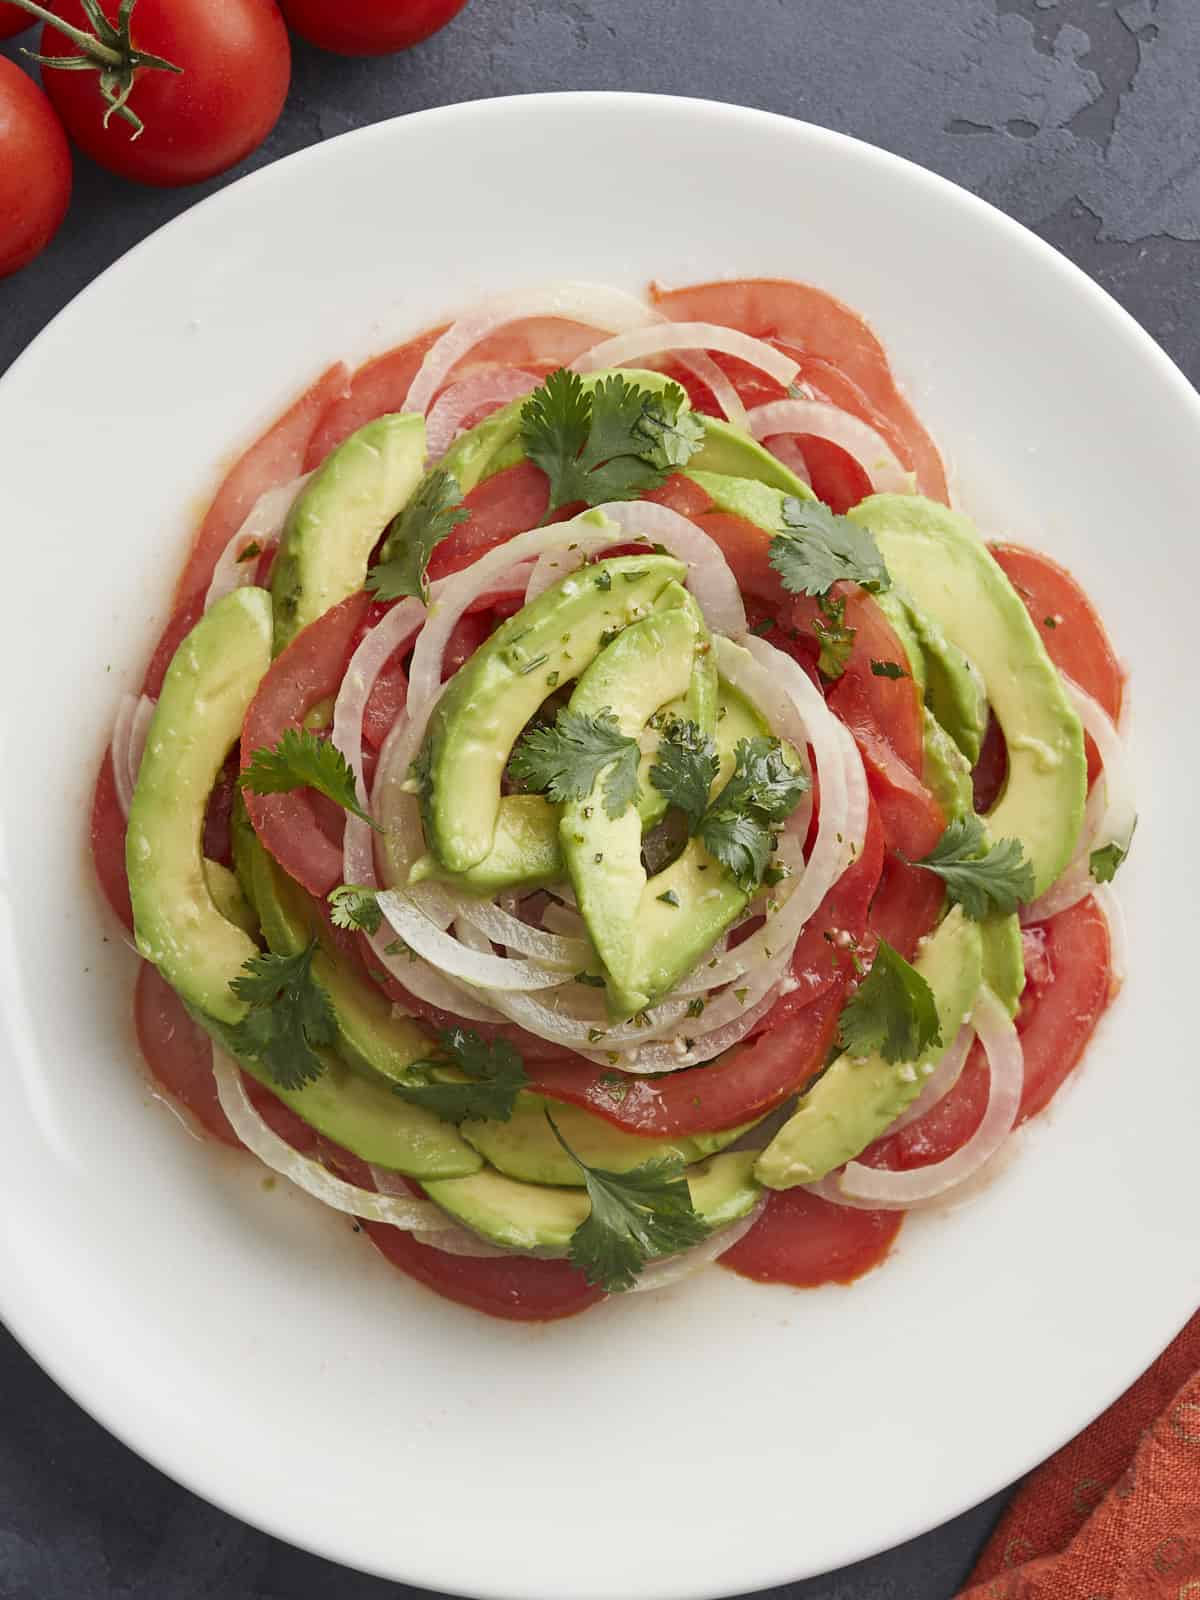
Overhead shot of Ensalada de Aguacate on a white plate.

What Is Ensalada De Aguacate?

This avocado salad is a very popular Latin dish, and every family has their own spin on it. It’s slices of creamy avocado, pungent onions, and in this case, tangy tomatoes dressed in a very simple mix of oil and vinegar. Some versions also include vegetables like bell peppers and radishes, fruit like mango and grapefruit, cheeses like Queso Fresco or Mozzarella, or proteins like chicken, walnuts, or sliced hard-boiled eggs.

What You’ll Need

This Avocado Salad makes for a beautifully composed salad, but you don’t have to go crazy with it as I did here. I love salad with a wow factor, and taking a few extra minutes to layer the components makes for a beautiful presentation. You can present the salad in a bowl, but do your best to mix it gently, or the avocado will fall apart faster than a reality show housewife. Here’s what you’ll need to make Ensalada de Aguacate:

  • Avocado: This fruit is the star of the show and adds creamy and slightly nutty notes to our salad, along with a creamy texture. I know someone, somewhere, will ask me what to substitute for the avocado in the avocado salad because they hate avocado. And to them, I say, just leave it out and enjoy a tasty tomato salad. (Editor’s note: Beth, please check out my lack of sarcasm and my extra-large serving of helpful advice. I’ve grown!)
  • Yellow Onion: This has an assertive spiciness that helps cut through the fatty avocado. You can sub it with any onion you have on hand, including green onion. If you use red onion, make sure to soak it for a minute in cold water to make it less pungent. If you’re not about that onion life, skip it.
  • Tomato: This fruit adds a sweet tartness to the salad and helps bulk it up to keep it budget-friendly. Use any ripe tomato you have on hand. If you’re not a fan of tomatoes, substitute them with cucumber, grapefruit, or mango.
  • Olive Oil: This is the fat in our simple dressing. In a pinch, substitute the olive oil with canola, sunflower, or any nut oil. Just be aware the flavor profile will change significantly.
  • Distilled White Vinegar and Apple Cider Vinegar: These are the acids in our dressing. I mix them to create deeper flavors but feel free to use either one on its own. You can also use any other clear or lightly-colored vinegar, though the punchier it is, the better.
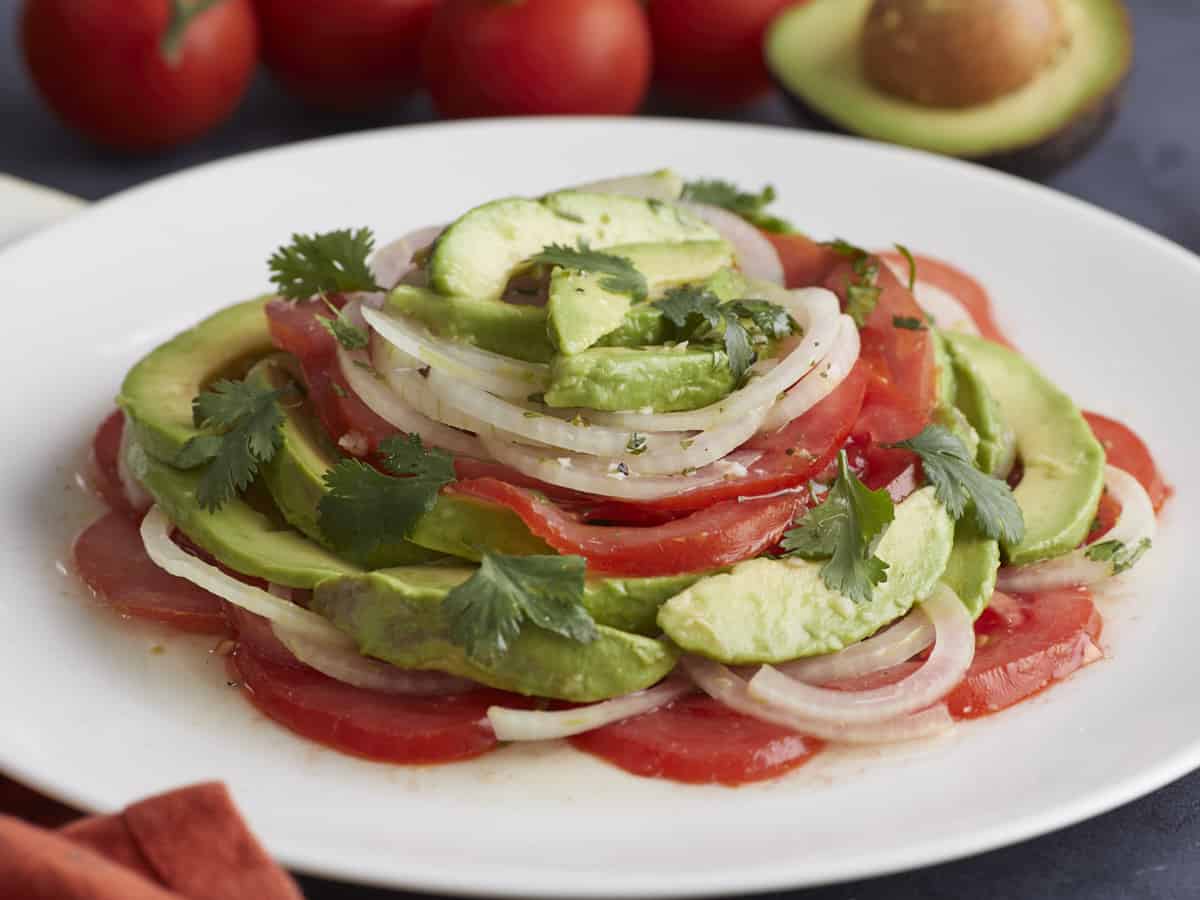
Side shot of Ensalada de Aguacate on a white plate.

How To Pick Avocados

  1. Look for blackish-dark-green skin, which signals that the avocado has ripened. Bright green skin means they aren’t ready.
  2. When you gently press a finger into the avocado skin, the flesh should give slightly. If it’s mushy, its time has passed.
  3. Flick off what’s left of the stem at the top of the avocado. If it loosens easily and reveals a lime green top, it’s ripe. If it doesn’t flick off, it’s not ripe. If it flicks off and the top is black, it’s too ripe for a salad but might work for guacamole.

How To Ripen Avocados

To help ripen an avocado quickly, place it in a paper bag with an apple or a banana. Close the bag and leave it at room temperature. The natural gases released by the apple or banana will help your avocado mature faster. Some Tik-Tok folks think you can use a microwave to ripen an avocado, but all you’re doing is cooking the avocado, which softens it but will still taste like an unripe avocado.

What To Serve With Avocado Salad

This Ensalada de Aguacate pairs beautifully with other Puerto Rican dishes like Puerto Rican Rice and Beans, Arroz Con Pollo, Chuletas Guisadas, or Pollo Guisado. However, you don’t have to have a Latin spread to enjoy it! Add it as a side at your next cookout. It pairs wonderfully with BBQ Ribs, Sausage Kebabs, Smash Burgers, or Marinated Portobello Mushroom Burgers

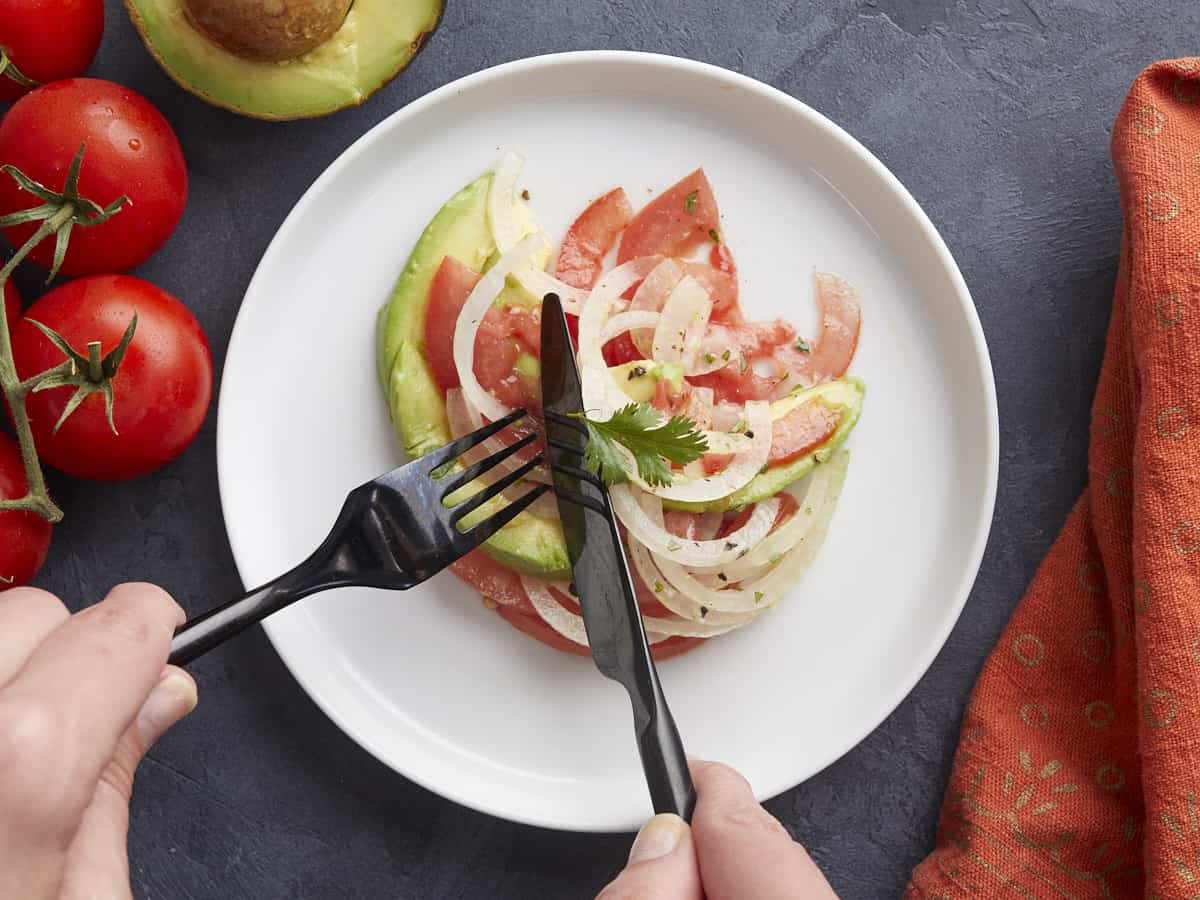
Overhead shot of Ensalada de Aguacate on a white plate with a black fork and knife cutting into it.
Overhead shot of Ensalada de Aguacate on a white plate.
Print

Ensalada De Aguacate (Avocado Salad)

Ensalada de Aguacate, a Puerto Rican-style Avocado Salad, is easy, ready in just ten minutes, and the kind of summer salad that's so refreshing and tasty you'll find yourself craving it on sweltering days.
Course Dinner, Lunch, Salad
Cuisine Latin
Total Cost $3.56 recipe / $0.89 serving
Prep Time 10 minutes
Total Time 10 minutes
Servings 4 cups
Calories 205kcal

Ingredients

Dressing

Salad

  • 2 medium tomatoes $0.90
  • 1/2 medium yellow onion $0.38
  • 2 medium avocados $1.98
  • 3/8 tsp salt, divided $0.02

Instructions

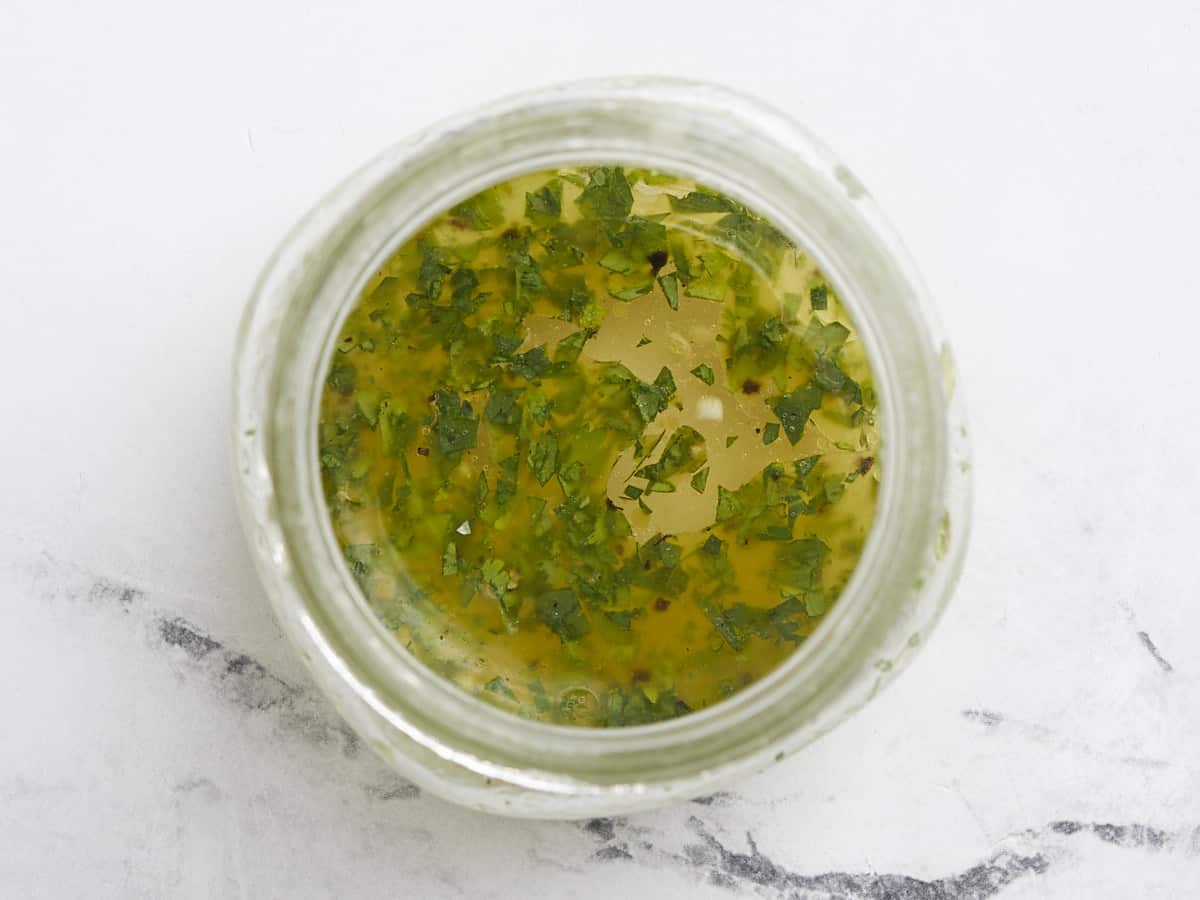
  • Make the dressing. In a mason jar, add white vinegar, apple cider vinegar, olive oil, finely chopped cilantro, salt, and pepper. Cover and give it a good shake.
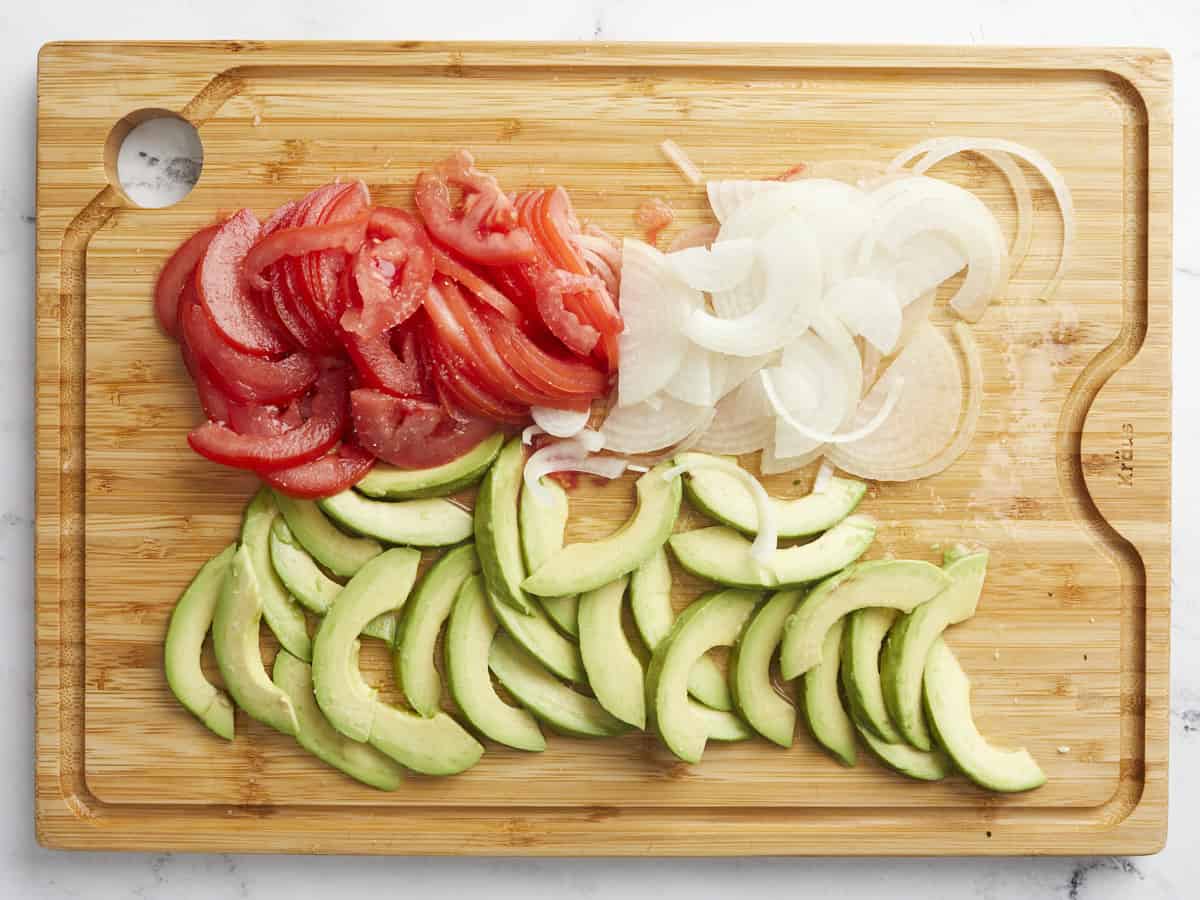
  • Slice the tomatoes into 1/4-inch thick rounds, then slice the rounds into halves. Slice the yellow onion into 1/4-inch thick half-moons. Slice the avocados into 1/4-inch thick half moons. If the avocados are large, then slice the half-moons in half.
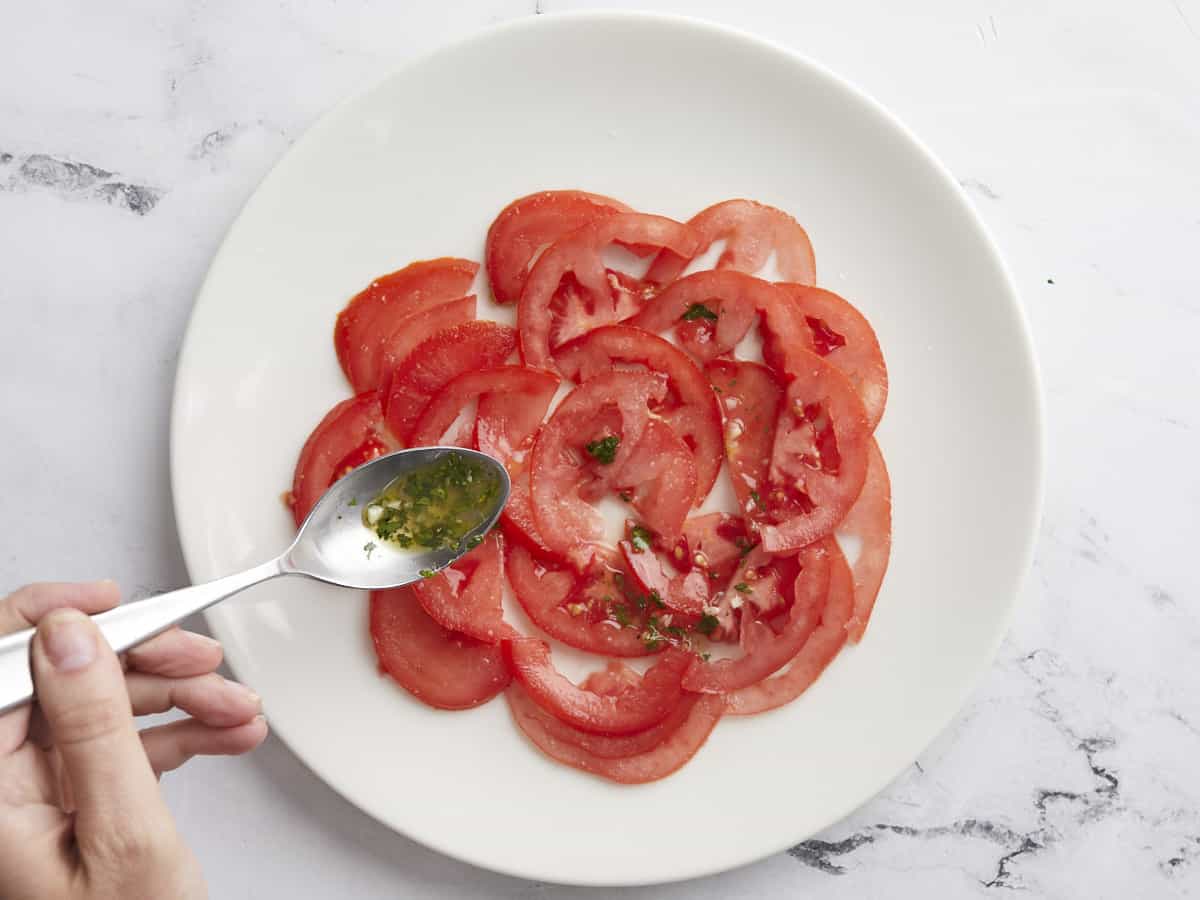
  • Add half the tomato slices to a large dinner plate in one layer. Spoon 2 teaspoons of the dressing on the tomatoes and sprinkle with 1 pinch of salt.
  • Add half the onions in a single layer and drizzle with 2 teaspoons of dressing and a pinch of salt. Add half of the avocado slices in a single layer, and follow with 2 teaspoons of dressing and a pinch of salt.
  • Repeat the layering process with the remaining slices of tomatoes, onions, and avocados. Garnish with a few cilantro leaves and serve.

See how we calculate recipe costs here.

Nutrition

Serving: 1cup | Calories: 205kcal | Carbohydrates: 11g | Protein: 2g | Fat: 18g | Sodium: 300mg | Fiber: 7g

How to Make Ensalada De Aguacate – Step by Step Photos

Overhead shot of dressing in a small mason jar.

Make the dressing. In a mason jar, add 2 tablespoons white vinegar, 1 tablespoon apple cider vinegar, 1 tablespoon olive oil, 2 tablespoons finely chopped cilantro, 1/8 teaspoon salt, and a pinch of black pepper. Cover and give it a good shake.

Overhead shot of slice avocados, tomatoes, ad onions on a wood cutting board.

Slice two medium tomatoes into 1/4 inch rounds, then slice the rounds into halves. Then cut half a medium yellow onion into 1/4 inch into half moons. Finally, slice two medium avocados into 1/4-inch half moons. Add a touch of the dressing to the surface of the avocados to keep them from turning brown.

Overhead shot of tomatoes on a white plate with dressing being spooned over them.

Add half the tomato slices to a large dinner plate in one layer. Spoon 2 teaspoons of the dressing on the tomatoes and sprinkle with a pinch of salt.

Overhead shot of the first layer of tomatoes, avocados, and onion in Ensalada de Aguacate on a white plate.

Add half the onions in a single layer on top of the avocado and drizzle with 2 teaspoons of dressing and a pinch of salt. Next, add half of the avocado slices in a single layer on top of the sliced onion, and follow with 2 teaspoons of dressing and a pinch of salt.

Overhead shot of finished Ensalada de Aguacate on a white plate.

Repeat the layering process with the remaining tomato, onion, and avocado slices. Garnish with a few cilantro leaves and serve. Guaranteed this will be one of the most refreshing summer salads you’ve ever had!

More Easy Summer Salads

The post Ensalada de Aguacate (Avocado Salad) appeared first on Budget Bytes.
Creamy Chicken and Gnocchi

Creamy Chicken and Gnocchi is a one-pot meal that’s full of flavor and comfort and is also a quick and easy weeknight dinner.

The post Creamy Chicken and Gnocchi appeared first on Budget Bytes.
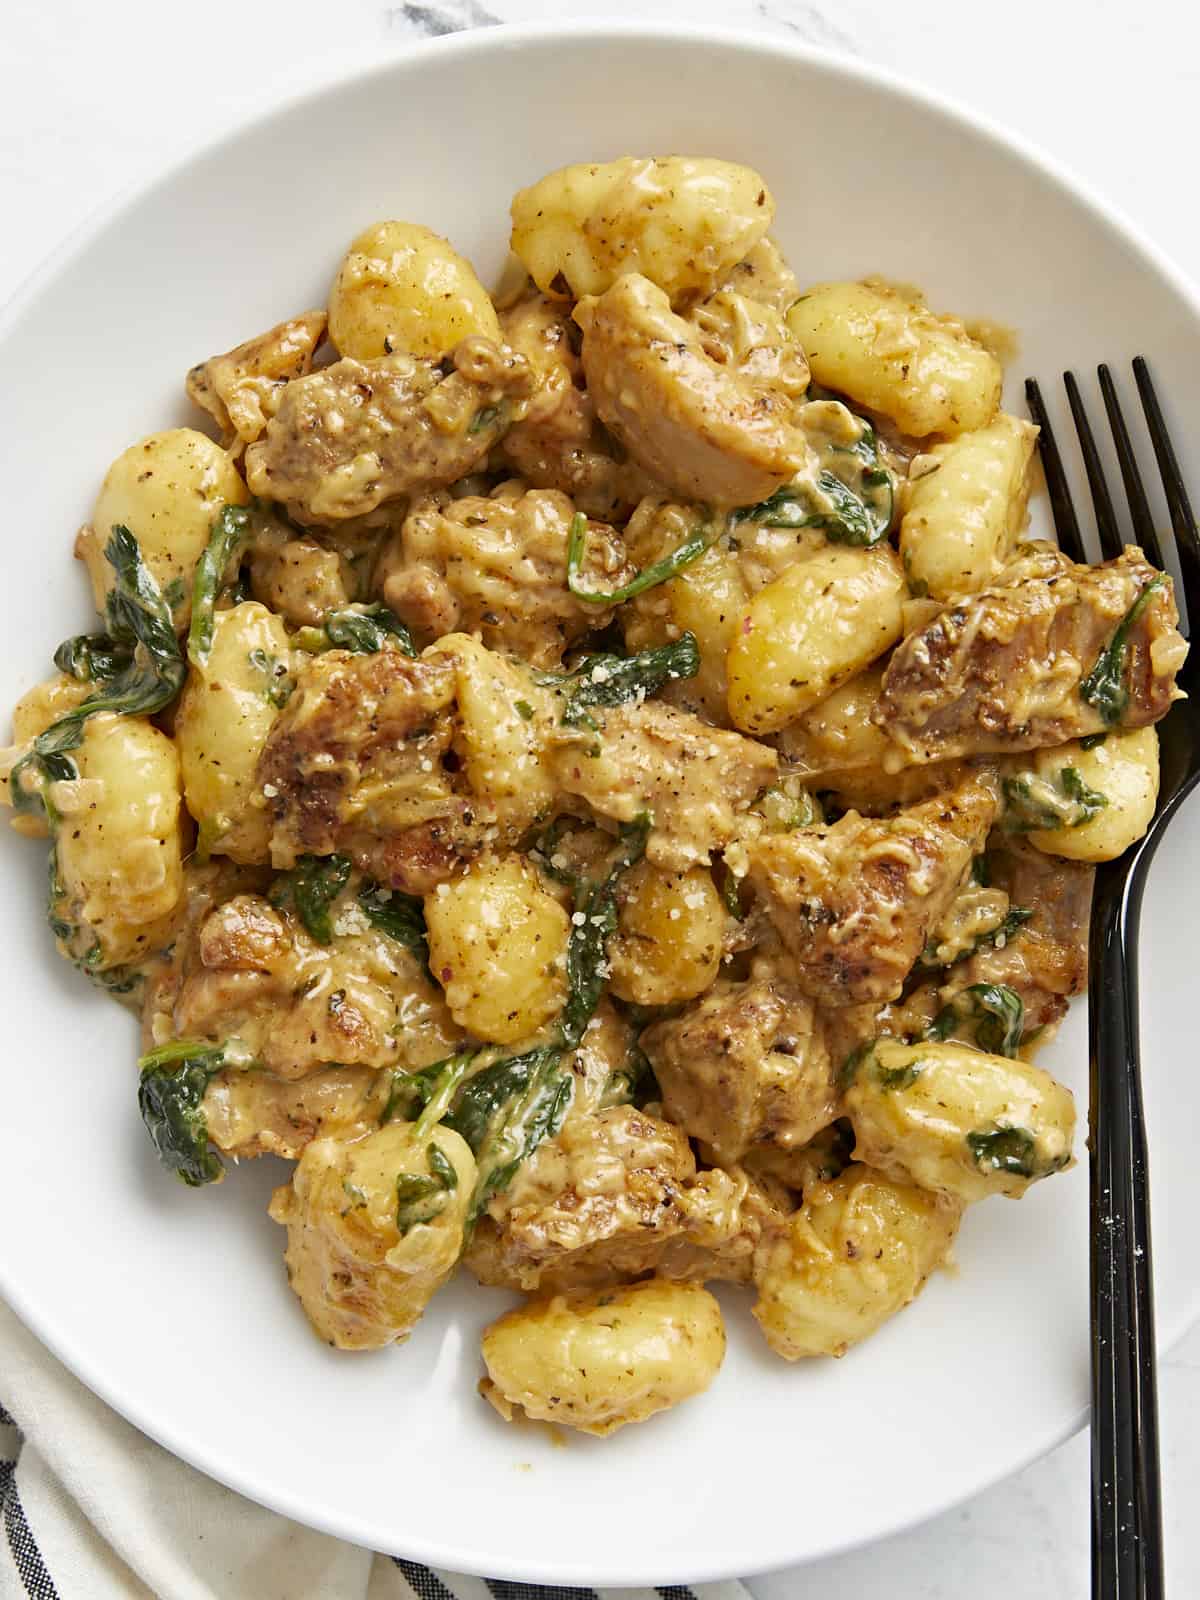
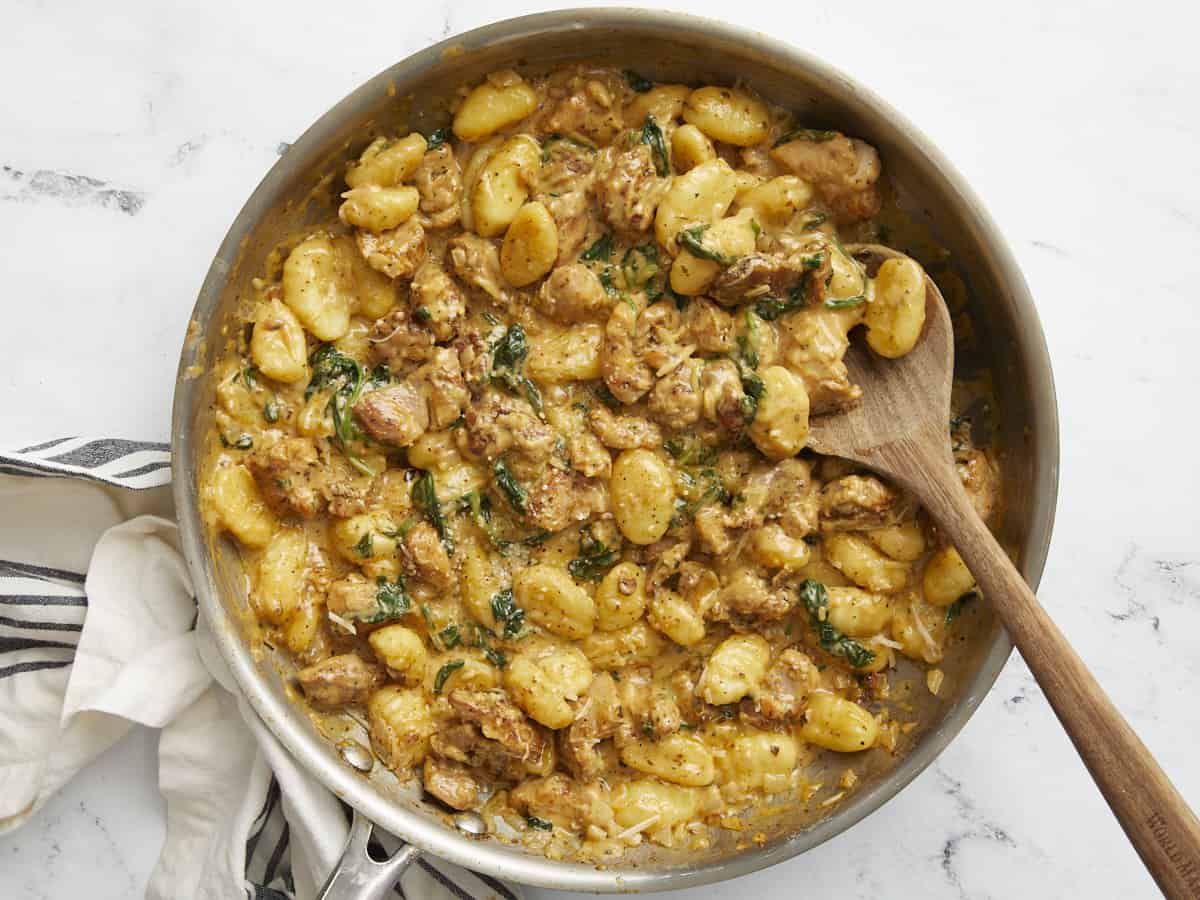
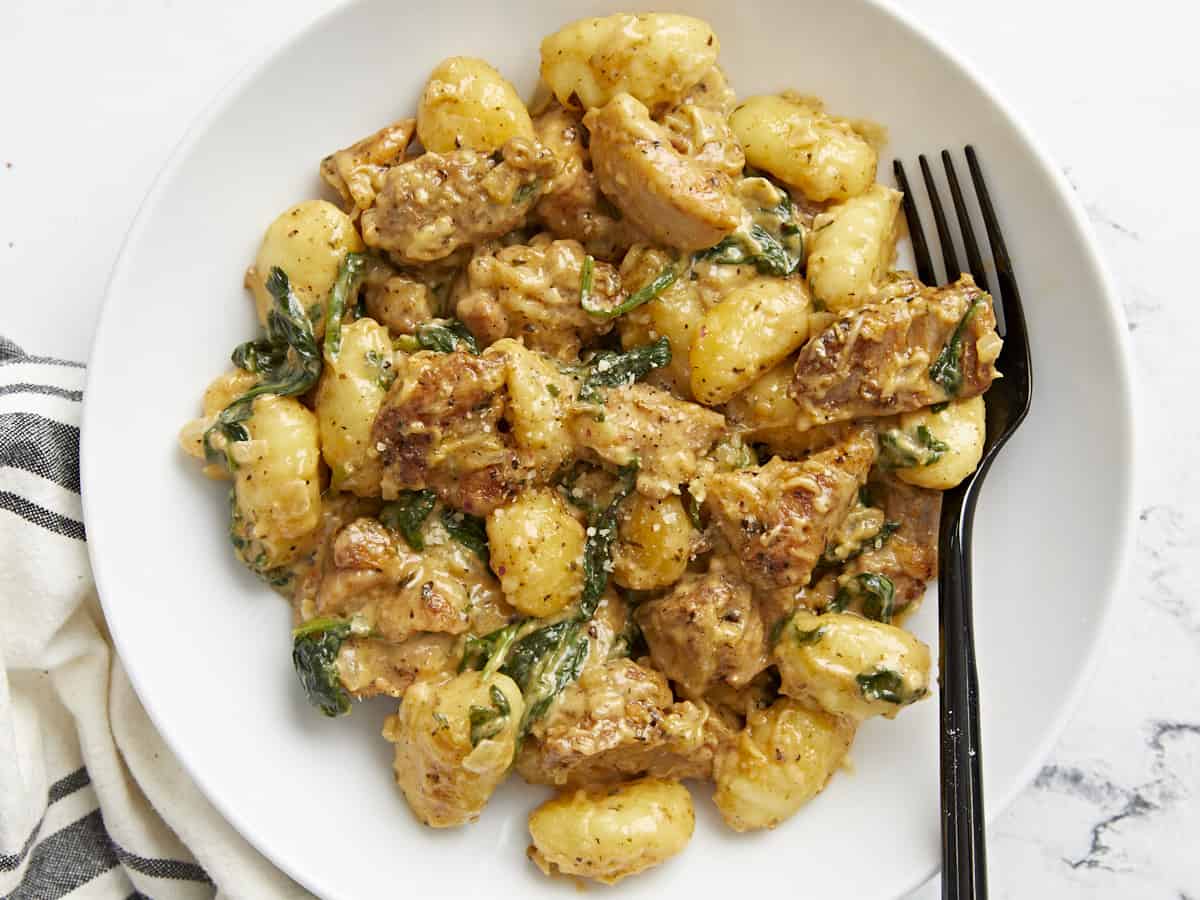
This velvety Creamy Chicken and Gnocchi recipe is one of my favorite one-pot meals because it’s easy, you can make it in under thirty minutes, it’s filling, and it’s big-time delicious. Like I’m-not-going-to-stop-eating-this-until-it’s-all-done delicious. Pillowy gnocchi drenched in a rich buttery cream sauce, with pops of juicy chicken and earthy spinach? Ummm, yeah. You’re going to love this one!

What Is Gnocchi?

Gnocchi are small two-inch dumplings made with mashed potatoes, flour, and eggs. They are served sauteed with butter, tomato, or cream-based sauce. In this dish, we pair gnocchi with diced chicken thighs in a buttery cream sauce. It’s basically an elevated meat and potatoes dish, with spinach thrown in because Beth says we need to cook more veggies.

What You’ll Need

You won’t need loads of time or pots and pans, that’s for sure. Everything in this dreamy, silky dish comes together in one skillet in under thirty minutes! Here’s what you’ll need to make Creamy Chicken And Gnocchi:

  • Gnocchi – you can find them frozen or fresh, but I prefer the dried ones as they are more economical, plus I have more room in my pantry than I do in my freezer. You’ll find them in the pasta section of your grocery store.
  • Chicken Thighs– You can also use chicken breast, but be careful not to overcook it, as you want juicy chicken, not dry, chicken-flavored cotton balls. In a pinch, sub the thighs with Italian sausage and skip the seasoning.
  • Heavy cream and Butter– this is a cream sauce, so it is dairy-heavy. You need the fat found in these ingredients to create the velvety sauce that brings everything together. You can substitute the heavy cream with full-fat coconut cream and the butter with vegan butter
  • Parmesan– does double duty, adding savory saltiness to the sauce while also thickening it. Asioago or feta make great substitutions. If you can’t do dairy, use a couple of tablespoons of nutritional yeast, but keep in mind that your sauce will be much looser.
  • Vegetable broth– is used to hydrate the dried gnocchi and helps create the base of our cream sauce. Substitute it with chicken broth or in a pinch, with a cup of water with a tablespoon of tomato sauce mixed in.
  • Onion and Garlic– these aromatics are fried in the chicken thigh fat and help flavor the gnocchi. You can substitute the onion with one tablespoon of onion powder and the garlic with 1/4 teaspoon of garlic powder.
  • Spinach- brings earthiness and a beautiful color to the dish. You can substitute spinach with kale, though it will take a little longer to soften.
  • Italian seasoning – creates an easy flavor base. If you don’t have Italian seasoning, substitute it with one teaspoon of dried oregano, one teaspoon of dried thyme, and one teaspoon of dried rosemary.
  • Smoked paprika – using this spice is optional, but I use it to add a dank, smoky note that helps round out the sharpness of the Italian seasoning. It also lends a golden hue to the sauce.

What To Serve With Creamy Chicken and Gnocchi

This dish is heavy, so pair it with a Simple Side Salad or Panzanella. You can also lean into the heaviness and make Garlic Bread to sop up all the creamy sauce. (It is AMAZING with garlic bread. And garlic counts as a vegetable!)

Storing and Reheating

Because you make this dish with a cream-based sauce, I don’t recommend freezing it, as the cream gets grainy when it thaws. Keep leftovers in an airtight container in the refrigerator for up to 3 days. Reheat in a microwave until steaming.

Side shot of Creamy Chicken and Gnocchi in a silver skillet with a wooden spoon in it.
Print

Creamy Chicken and Gnocchi

This delicious dish is full of pillowy gnocchi drenched in a rich buttery cream sauce, with pops of juicy chicken and earthy spinach. Plus it's so easy, you can make it in under thirty minutes!
Course Dinner, Lunch
Cuisine American, Italian
Total Cost $8.41 recipe / $2.10 serving
Prep Time 5 minutes
Cook Time 20 minutes
Total Time 25 minutes
Servings 4 servings
Calories 756kcal

Ingredients

  • 1.25 lbs chicken thighs (4 to 5 thighs) $4.23
  • 1 Tbsp Italian Seasoning $0.30
  • 1/2 tsp smoked paprika $0.05
  • 1/2 tsp salt $0.04
  • 1/4 tsp pepper $0.02
  • 2 Tbsp cooking oil $0.08
  • 1 medium yellow onion, diced $0.32
  • 2 garlic cloves $0.11
  • 1 lb potato gnocchi (dry) $1.13
  • 2 cups fresh spinach $0.60
  • 1 cup vegetable broth $0.08
  • 1/2 cup heavy cream $0.71
  • 2 Tbsp salted butter $0.30
  • 1/4 cup Parmesan $0.44

Instructions

  • Dice the chicken thighs into 2-inch pieces. Add the chicken to a bowl and top it with Italian seasoning, smoked paprika, salt, and pepper. Mix until combined.
  • Place a large, deep skillet over medium heat and add the cooking oil. Once it's shimmering, add the chicken and cook undisturbed until well browned, about 3 minutes. Stir and brown on the other side, about 3 more minutes. Remove the chicken from the pan when it's cooked through and leave the fat in the pan.
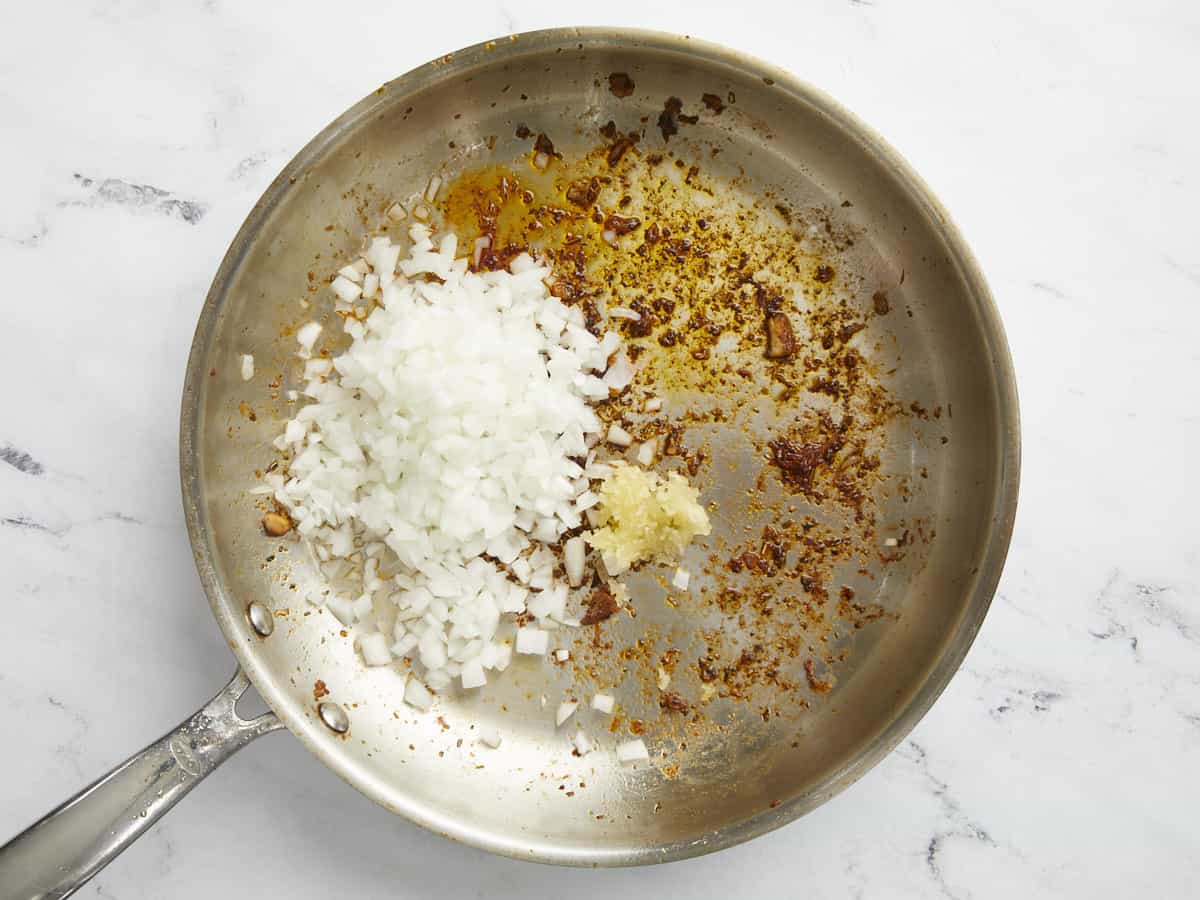
  • Add the onion and garlic to the skillet. Saute until the onions have softened and the garlic is fragrant, about 2 minutes
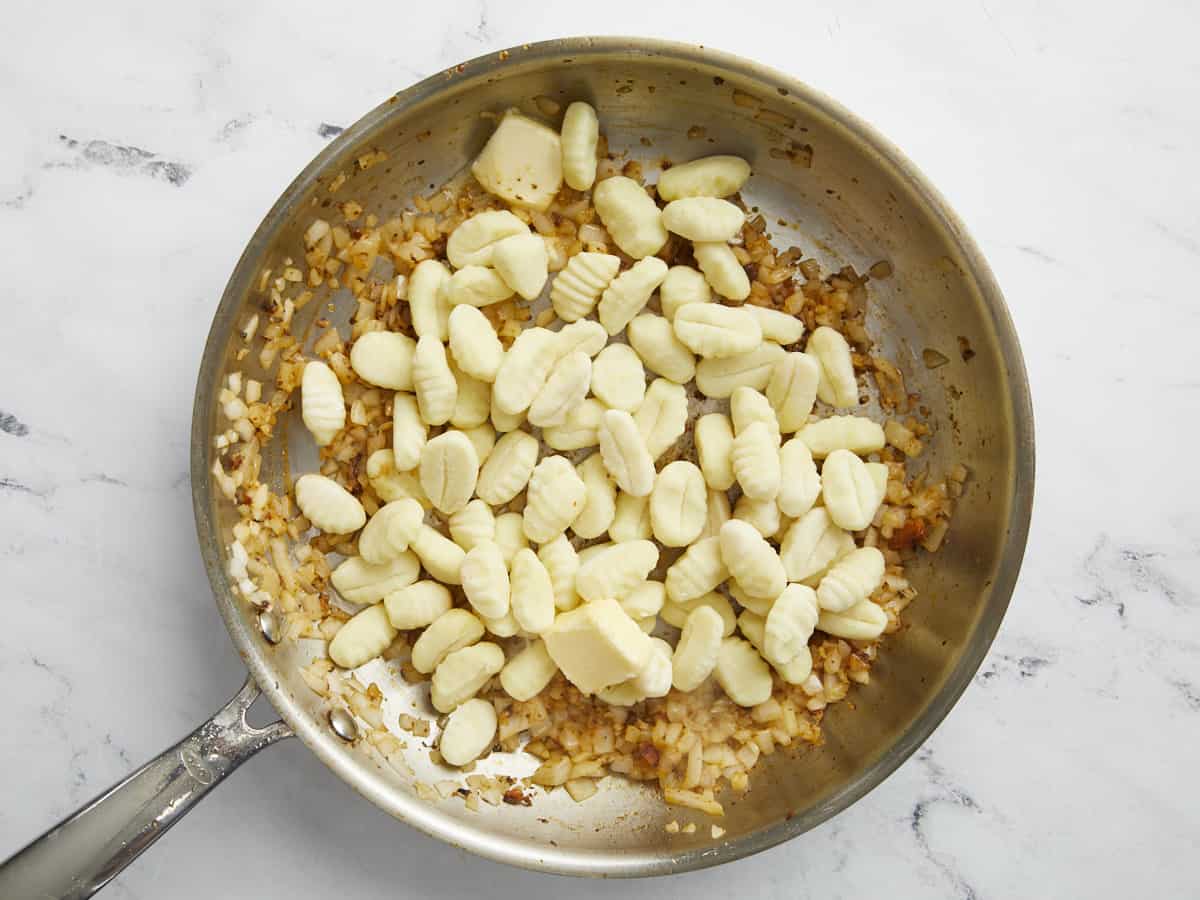
  • Add the gnocchi and butter to the skillet and brown for 2 minutes.
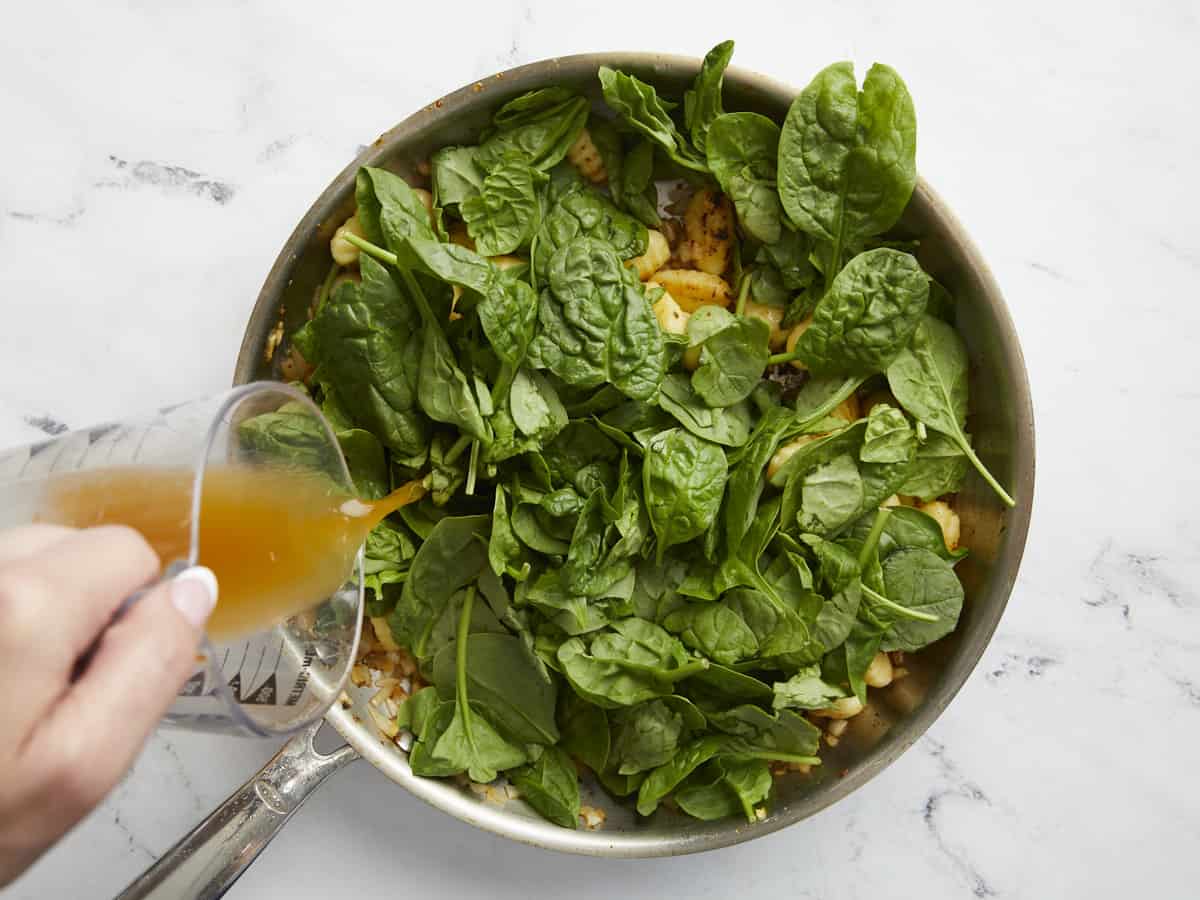
  • Add the spinach and the broth to the skillet. Cover the pan. Cook for 1 to 2 minutes until the spinach has wilted and the gnocchi has hydrated.
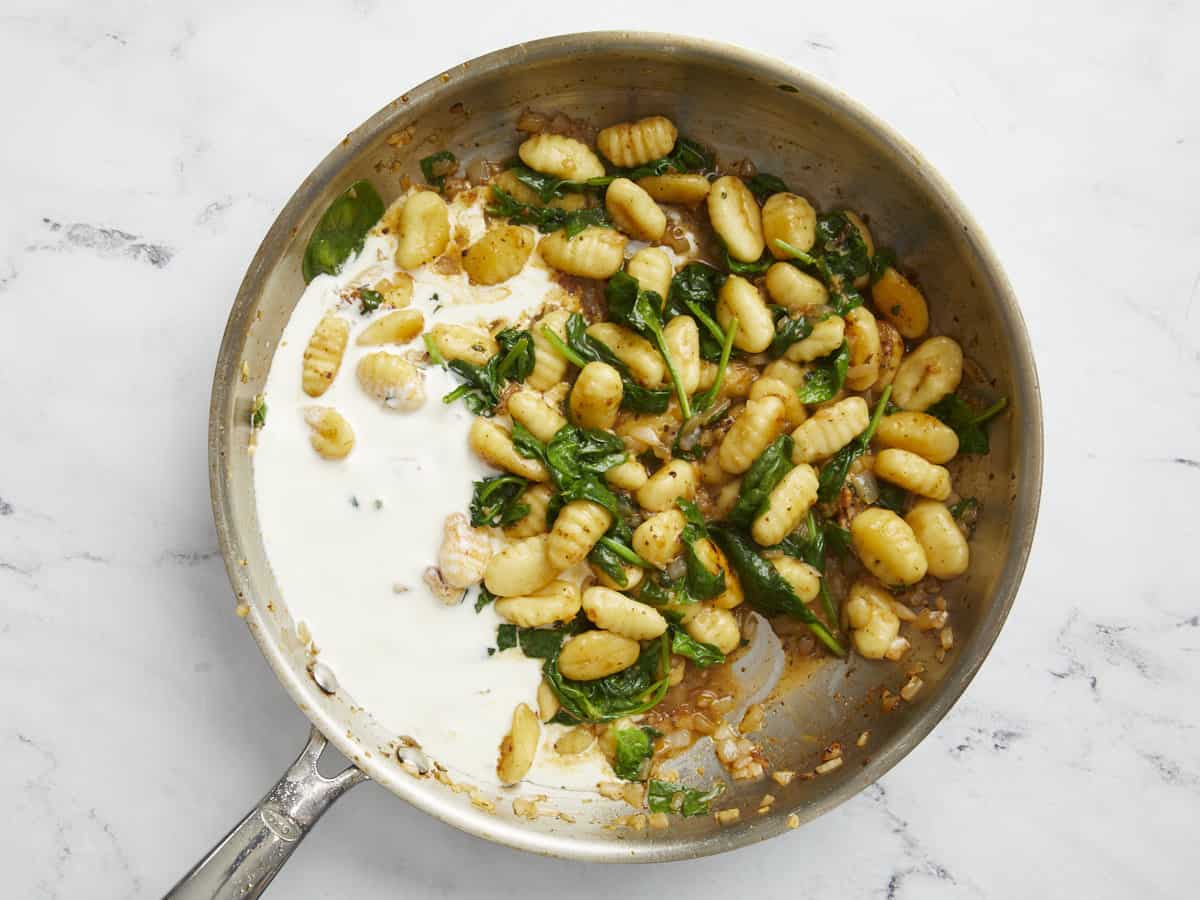
  • Add the heavy cream and salted butter to the skillet. Stir until the butter has melted and the cream is steaming hot but not boiling.
  • Take the skillet off the heat. Add the parmesan to the pan and stir until it melts, creating a velvety sauce.
  • Finally, return the cooked diced chicken to the skillet. Mix gently into the gnocchi and cream sauce. If desired, garnish with parsley.

See how we calculate recipe costs here.

Nutrition

Serving: 1.25cups | Calories: 756kcal | Carbohydrates: 47g | Protein: 32g | Fat: 50g | Sodium: 1186mg | Fiber: 4g

How to Make Creamy Chicken And Gnocchi – Step by Step Photos

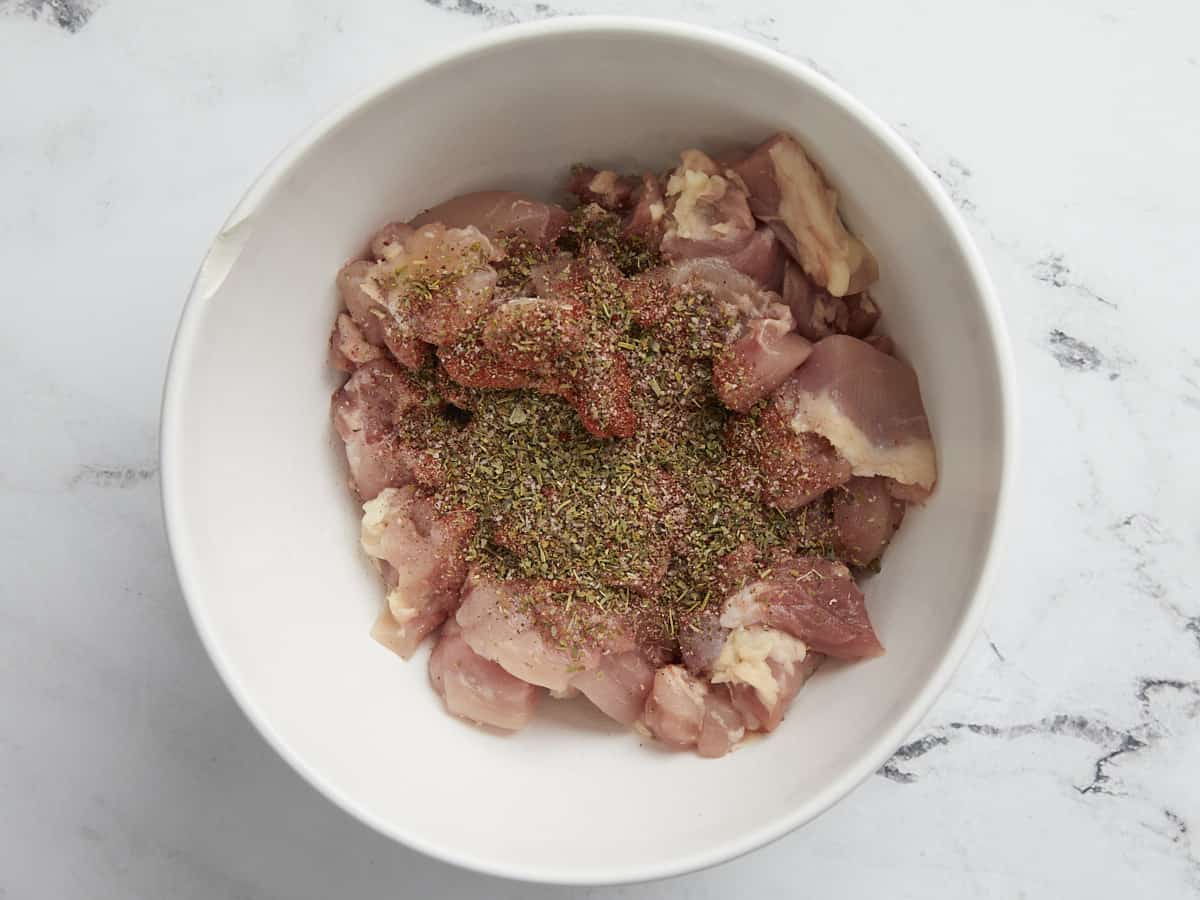
Dice 1.25 pounds of chicken thighs (about 4 to 5 thighs) in 2-inch pieces. Add the chicken to a bowl and top it with 1 tablespoon of Italian seasoning, 1/2 teaspoon of smoked paprika, 1/2 teaspoon of salt, and 1/4 teaspoon of pepper. Mix until combined.

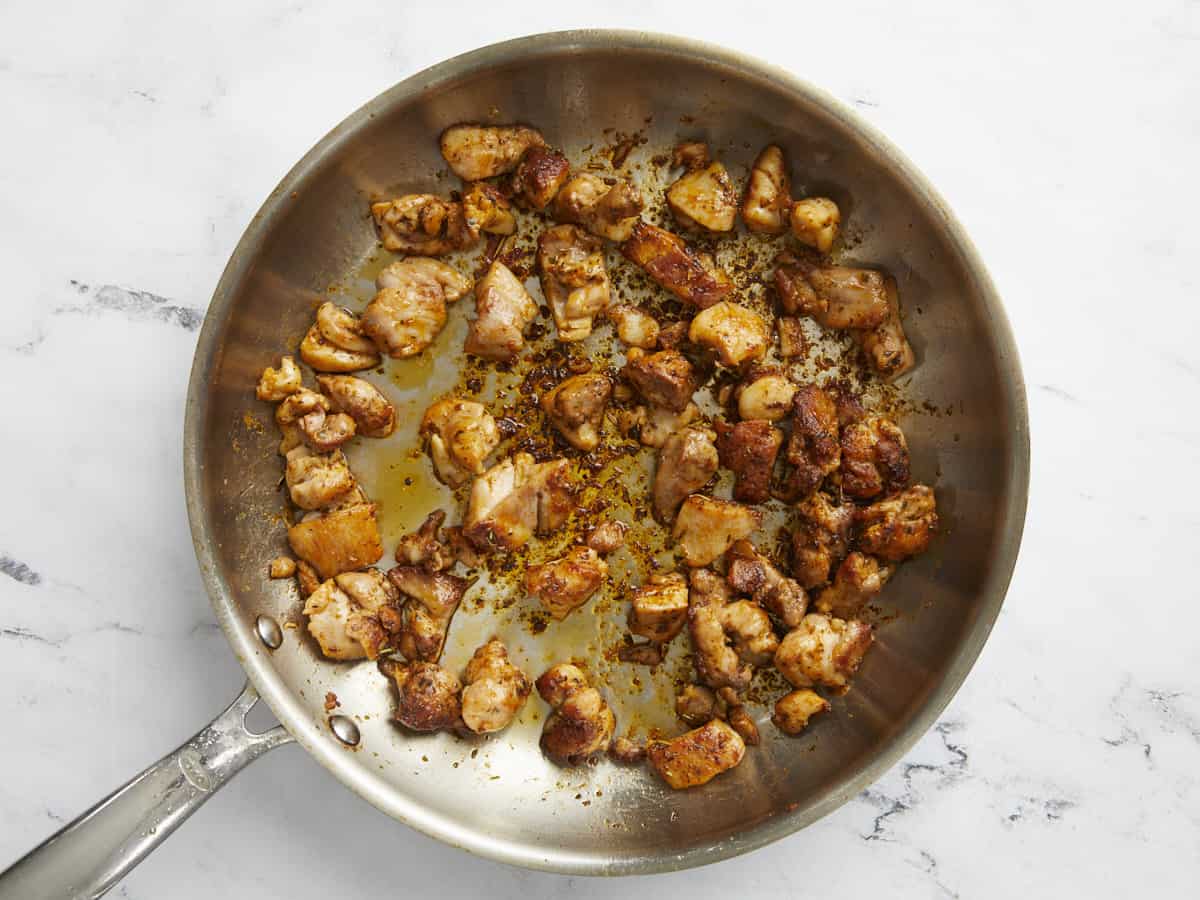
Set a large deep skillet over medium heat and add 2 tablespoons of cooking oil. When the oil is shimmering, add the chicken and cook undisturbed until well browned, about 3 minutes. Stir and brown on the other side, about 3 minutes more. Remove the chicken from the pan when it’s cooked through and has reached an internal temperature of 160°F. Leave the rendered fat in the pan.

Add 1 diced onion and 2 cloves of minced garlic to the skillet. Saute until the onions have softened and the garlic is fragrant, about 2 minutes.

Add 1 pound of dry potato gnocchi and 2 tablespoons of salted butter to the skillet. Brown the gnocchi for 2 minutes.

Add 2 cups of spinach and 1 cup of vegetable broth to the skillet. Cover the pan. Cook for 1 to 2 minutes until the spinach has wilted and the gnocchi has hydrated.

Add 1/2 cup of heavy cream and 2 tablespoons of salted butter to the skillet. Stir until the butter has melted and the cream is steaming hot, but not boiling. You’re about to add cheese to the sauce, and cheese curdles at high temperatures, so make sure it isn’t boiling.

Take the pan off the heat. Add 1/4 cup of parmesan to the pan and stir until it melts, creating a velvety sauce.

Finally, return the cooked diced chicken to the skillet. Mix gently into the gnocchi and cream sauce. If desired, garnish with parsley. Serve this dish piping hot, then sit back and enjoy what took you less than a half hour to make!

More Easy One Pot Meals

The post Creamy Chicken and Gnocchi appeared first on Budget Bytes.

Maizena

Maizena is a silky, vanilla-and-cinnamon-scented Puerto Rican breakfast pudding that’s budget-friendly and comes together in minutes!

The post Maizena appeared first on Budget Bytes.

Maizena is a delicious, silky, vanilla-and-cinnamon-scented Puerto Rican breakfast pudding that’s ready in minutes! It’s also ridiculously easy on your wallet and comes in under a dollar a serving. My mother used to make it for me when times were really, really tight. It was so mouthwateringly luscious I had no idea it wasn’t a fancy treat.

Overhead shot of three white bowls of Maizena with cinnamon sprinkled on top with one bowl in the foreground being held by a hand and with a black spoon being dipped into it.

What Is Maizena?

Maizena is a popular Latin milk-based breakfast pudding that gets its name from the brand of cornstarch it’s thickened with. It’s flavored lightly with vanilla and cinnamon and sweetened with granulated sugar. Like any pudding, you can eat it cold, but it’s traditionally consumed while steaming hot. The Maizena I grew up eating was a stark white color. I mix cinnamon and a touch of nutmeg into mine while it cooks to deepen its flavors. This gives my recipe for Maizena a creamier color.

What You Need To Make Maizena

You can get this easy, budget-friendly, and ridiculously delicious breakfast pudding on your table in no time! Here’s what you’ll need:

Whole Milk– is preferred because the fat content helps create a silky mouth feel. But you can use evaporated milk or plant-based milk. If going the plant-based route, make sure you use fatty milk like coconut, soy, or macadamia. It helps create the velvety texture Maizena is known for.

Heavy Cream- adds a satiny finish. If you don’t have cream, just substitute it with a cup of whole milk and a tablespoon of butter. You can also substitute heavy cream with unsweetened coconut cream if you don’t do dairy.

Sugar– granulated sugar is the standard but feel free to use your favorite sweetener. Honey, brown sugar, and agave are all great options.

Cinnamon, Nutmeg, and Vanilla – add earthy flavor, floral notes, and depth. If you want to steer from traditional flavors, you can also use apple pie spice, pumpkin pie spice, orange zest, lemon zest, or mix in some chocolate syrup.

Cornstarch– thickens the pudding and gives it a beautiful glossy finish. If you don’t have cornstarch, you can use double the amount of flour, but the consistency won’t be as silky, and you’ll have to cook it longer to get the taste of raw flour out of the mix.

Storing Maizena

Maizena is best eaten hot and fresh, but you can store it and reheat it. It will last up to 5 days in the fridge. Freezing is not recommended. Place Maizena in an air-tight container with a sheet of plastic or parchment directly on the surface to prevent a thick skin from forming. Before reheating it, mix in a tablespoon of milk per cup to help loosen it. You can warm it in a microwave in 30-second increments until steaming.

Side shot of three white bowls of Maizena with cinnamon sprinkled on top with one bowl in the foreground being held by a hand and with a black spoon being dipped into it.
Overhead shot of three white bowls of Maizena with cinnamon sprinkled on top with one bowl one the forground being held by a hand and with a black spoon being dipped into it.
Print

Maizena

This delicious, silky, vanilla-and-cinnamon-scented Puerto Rican breakfast pudding comes together in minutes and is ridiculously easy on your wallet.
Course Breakfast
Cuisine Latin, Puerto Rican
Total Cost ($2.87 recipe / $0.72 serving)
Prep Time 4 minutes
Cook Time 6 minutes
Total Time 10 minutes
Servings 4 bowls
Calories 431kcal

Ingredients

Instructions

  • Place a large heavy-bottomed pot over medium heat. Add the milk, sugar, cinnamon, nutmeg, salt, and vanilla. Mix to incorporate.
  • Add the cream to a bowl and mix in the cornstarch until no lumps remain.
  • Whisk the cornstarch mixture into the milk mixture little by little.
  • Bring the mixture to a boil and continue to whisk until the milk is pudding consistency and coats the back of a wooden spoon, about 3 to 5 minutes.
  • Serve hot with a bit of cinnamon sprinkled on top.

See how we calculate recipe costs here.

Nutrition

Serving: 1bowl | Calories: 431kcal | Carbohydrates: 33g | Protein: 10g | Fat: 29g | Sodium: 119mg | Fiber: 0.3g
Overhead shot of three white bowls of Maizena with cinnamon sprinkled on top.

How to Make Maizena – Step by Step Photos

Overhead shot of Maizena ingredients in a silver pot.

Place a large heavy-bottomed pot over medium heat. Add the 4 cups of milk, 1/4 cup sugar, 1/2 teaspoon cinnamon, a pinch of nutmeg, a pinch of salt, and 1/2 teaspoon vanilla. Mix to incorporate.

Overhead shot of cornstarch being added to milk.

Add 1 cup of heavy cream to a bowl and mix in the 1/4 cup of cornstarch until no lumps remain.

Overhead shot of cornstarch slurry being whisked into a silver pot.

Whisk the cornstarch mixture into the milk mixture little by little.

Overhead shot of Maizena in a silver pot with a wook=den spoon in the foreground showing the Maizena's consistency.

Bring the mixture to a boil and continue to whisk until the milk is pudding consistency, about 3 to 5 minutes. The pudding should coat the back of a wooden spoon and have clearly defined edges when a finger is run through it.
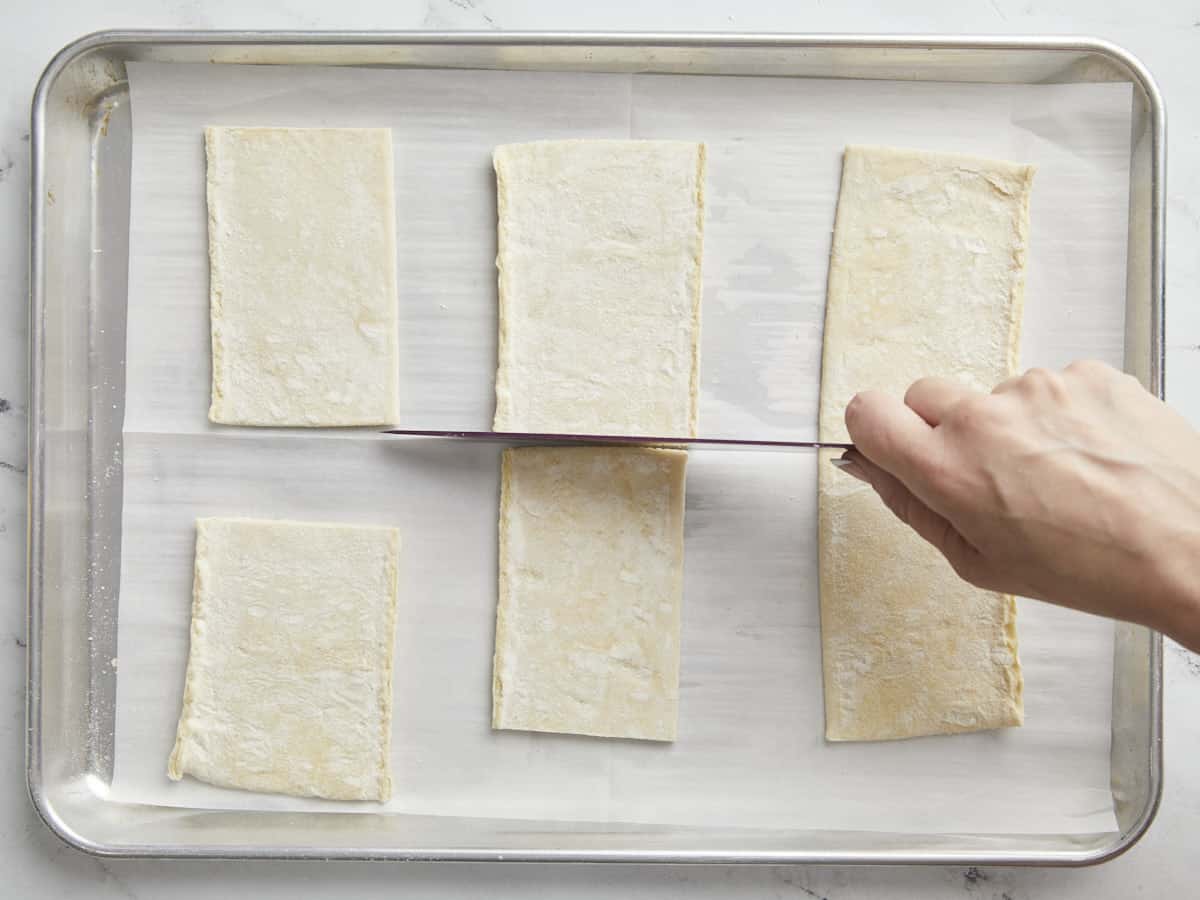
Overhead shot of finished Maizena in a white bowl with cinnamon sprinkled on top.
Serve Maizena hot with a bit of cinnamon sprinkled on top. Then give yourself a pat on the back for making a delicious breakfast from scratch without breaking the bank!

Overhead shot of three white bowls of Maizena with cinnamon sprinkled on top with one bowl in the foreground being held by a hand and with a black spoon being dipped into it.

More Easy Breakfast Recipes

The post Maizena appeared first on Budget Bytes.