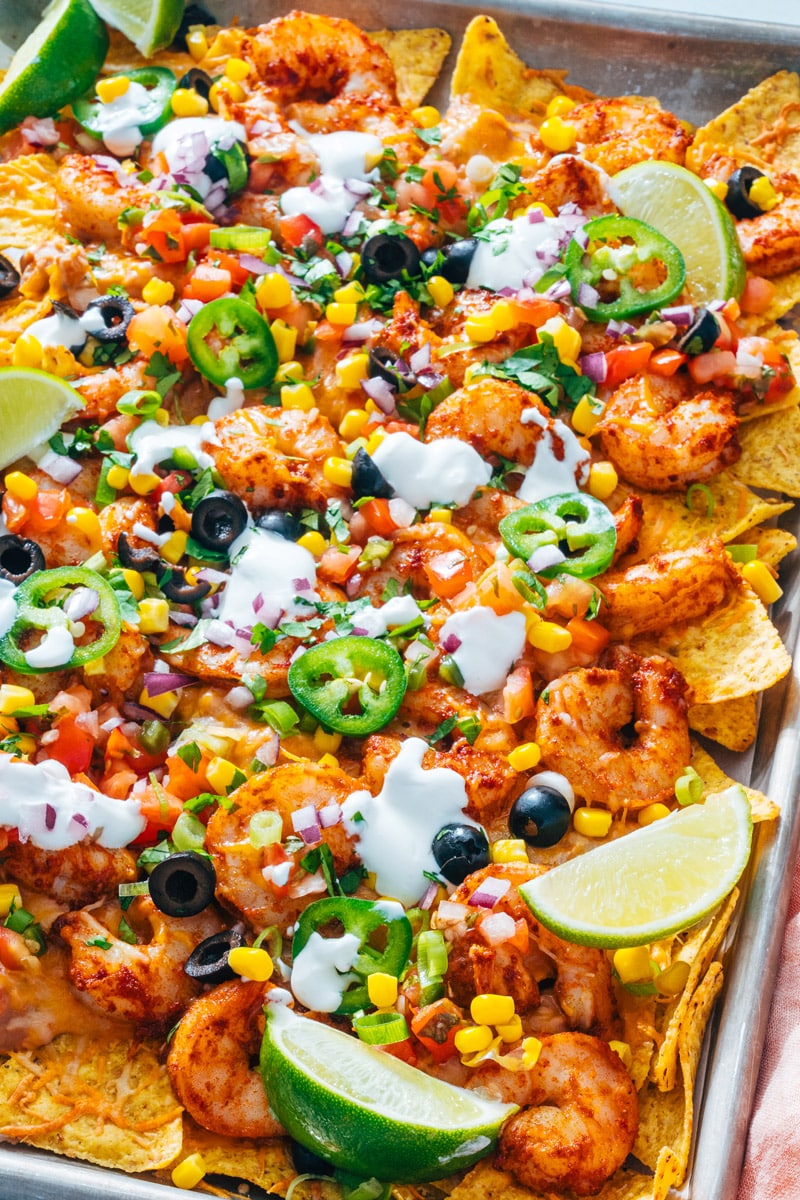
These shrimp nachos are bursting with flavor, starring juicy seafood and a confetti of toppings! They’re a fun appetizer or simple dinner.
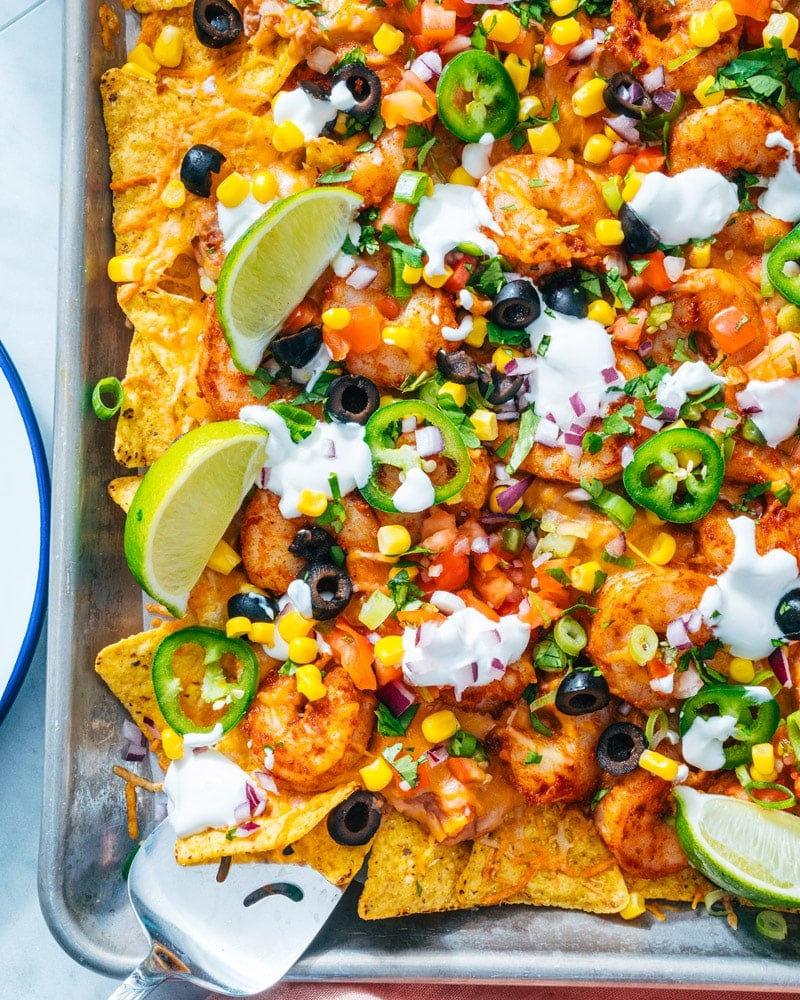
It’s hard to find someone who will turn down nachos, and here’s a fun variation starring our favorite seafood: Shrimp Nachos! We’re big fans of this succulent seafood, and it makes the best fun appetizer or simple dinner atop crunchy tortilla chips with a confetti of colorful toppings. You don’t even need to cook the shrimp separately: throw them on top of the chips and bake! We love these for dinner with a good margarita, and our son gobbles them up too.
Ingredients in shrimp nachos
Nachos are always a hit, so if you’re a shrimp fan, they’re even better with juicy seasoned shrimp! Just like sheet pan nachos, you can throw everything onto a baking sheet, then throw on toppings once the shrimp is cooked through. The best part about it all is the toppings, of course! But here’s what you’ll need for the base recipe:
- Medium shrimp
- Olive oil
- Cumin, smoked paprika, garlic powder, onion power, and salt
- Refried beans
- Pico de gallo
- Corn chips
- Mexican blend or Colby Jack cheese

Best chips to use for nachos
Of course, you can use any type of chips you like for these shrimp nachos! But we’ve found there are a few things to look for to have the best experience:
- Avoid the very thin chips. These get soggy and tend to break when loaded with nacho toppings.
- Look for organic chips with a short ingredient list. Grab organic corn chips that have only 3 ingredients: corn, oil, and salt! Check the back of the package.
Tips for buying shrimp
There’s also a lot of variation when it comes to buying shrimp for this recipe! There are many different sizes and types of shrimp that you can buy at the store. Here’s what we recommend here:
- Medium shrimp: Medium shrimp is our favorite size for a dish like this, though you could also use small shrimp if you prefer. Medium is labeled as 41 to 50 count (the number of shrimp per pound).
- Wild caught: Fish that is wild caught in your country is usually a sustainable choice. There are also quality options in well-regulated farms; see Seafood Watch Consumer Guide.
- Peeled and deveined: Tail on shrimp looks nice, but it’s too hard to eat for nachos. Use fully peeled shrimp for the best experience.
- Fresh or frozen: Frozen shrimp can be as high quality as fresh, if it’s frozen as soon as it’s caught. Make sure to thaw the shrimp before you start!

Shrimp nachos toppings
The best part of shrimp nachos? The tasty toppings! You can make or break your nachos with the toppings you choose. They’ve got to add great flavor but also have a variety of color and texture! Here’s what we think are absolutely
- Pico de gallo: use purchased or substitute salsa
- Corn: canned corn adds sweet pops of flavor
- Red onion: we like the purple color that it adds to the mix
- Green onions: the onion-y flavor and bright green color are essential
- Black olives: They’re optional, but give a fun Tex Mex vibe
- Sour cream: Sour cream is an absolute must! Serve on the side if you’re serving for a crowd. For vegan and dairy free, use cashew cream.
- Cilantro: You can go either way, but we’re cilantro people over here
- Jalapeño peppers: If you like heat, pickled jalapeños are perfection
- Guacamole: Same idea: feel free to serve on the side for dipping, or dollop on the entire pan
Ways to serve them
We like to serve these shrimp nachos as a simple dinner recipe, along with a tasty margarita recipe or Mexican-style green salad. But they also work as a fun appetizer! The hard part about serving nachos as part of an appetizer spread is that they do become soggy over time. We suggest serving them as fresh from the oven as possible. They’re great for a 4 to 6 person dinner party as a starter, and maybe less suited for an appetizer table where they’ll sit out for hours.
More shrimp recipes
These shrimp nachos are a fun way to eat this succulent sea food! Here are a few more great shrimp recipes we love:
- Make Sauteed Shrimp or Grilled Shrimp
- Go for Easy Shrimp and Rice Skillet
- Try zingy and refreshing Shrimp Ceviche
- Make classic Shrimp Scampi


This shrimp nachos recipe is…
Gluten-free and pescatarian.
Print
Shrimp Nachos
-
 Prep Time: 20 minutes
 -
Cook Time: 10 minutes
-
Total Time: 30 minutes
-
 Yield: 4 to 6
Description
These shrimp nachos are bursting with flavor, starring juicy seafood and a confetti of toppings! They’re a fun appetizer or simple dinner.
Ingredients
For the shrimp
- 1 pound medium shrimp, deveined (tail on or peeled, wild caught if possible)
- 1 tablespoon olive oil
- 1 teaspoon each cumin and smoked paprika
- ½ teaspoon each garlic powder and onion powder
- ½ teaspoon kosher salt
For the nachos
- 15-ounce can refried beans
- 1 cup salsa or pico de gallo, divided
- 6 ounces organic corn chips (approximately 1 sheet pan)
- 2 cups shredded Colby Jack or Mexican blend cheese (or Vegan Nacho Cheese for dairy free)
- ¼ cup canned corn, drained
- 2 tablespoons minced red onion
- 1 green onion, thinly sliced
- 1 tablespoon cilantro, chopped
- 1 handful sliced black olives (optional)
- 1 jalapeño pepper, thinly sliced or ¼ cup pickled jalapeños
- Sour cream, for garnish (optional)
- Guacamole, for garnish (optional)
Instructions
- Preheat the oven to 400°F.
- In a medium bowl, stir together shrimp with the olive oil and seasonings.
- Mix the refried beans with ½ cup of the pico de gallo. Taste and add a few pinches kosher salt if desired.
- Line a standard-sized baking sheet with parchment paper. Place the chips in a single layer on top (to avoid soggy chips, you can also pre-bake them for about 3 minutes until they are toasted and fragrant). Add a sprinkle of cheese (this also helps to keep them less soggy). Then add a layer of the beans, then the remaining cheese and shrimp. Bake 5 to 10 minutes until the cheese melts and shrimp are opaque and cooked through, then remove from the oven (or until the internal temperature of the shrimp is 120°F when measured with a food thermometer).
- Top the nachos with the remaining ½ cup pico de gallo, then add the corn, red onion, green onion, cilantro, black olives, and jalapeños. Dollop with sour cream and guacamole and serve.
 Category: Appetizer or Main Dish
 Method: Baked
 Cuisine: Tex Mex
- Diet: Gluten Free
Keywords: Shrimp nachos, shrimp nachos recipe