How to use a Cheesecake Water Bath

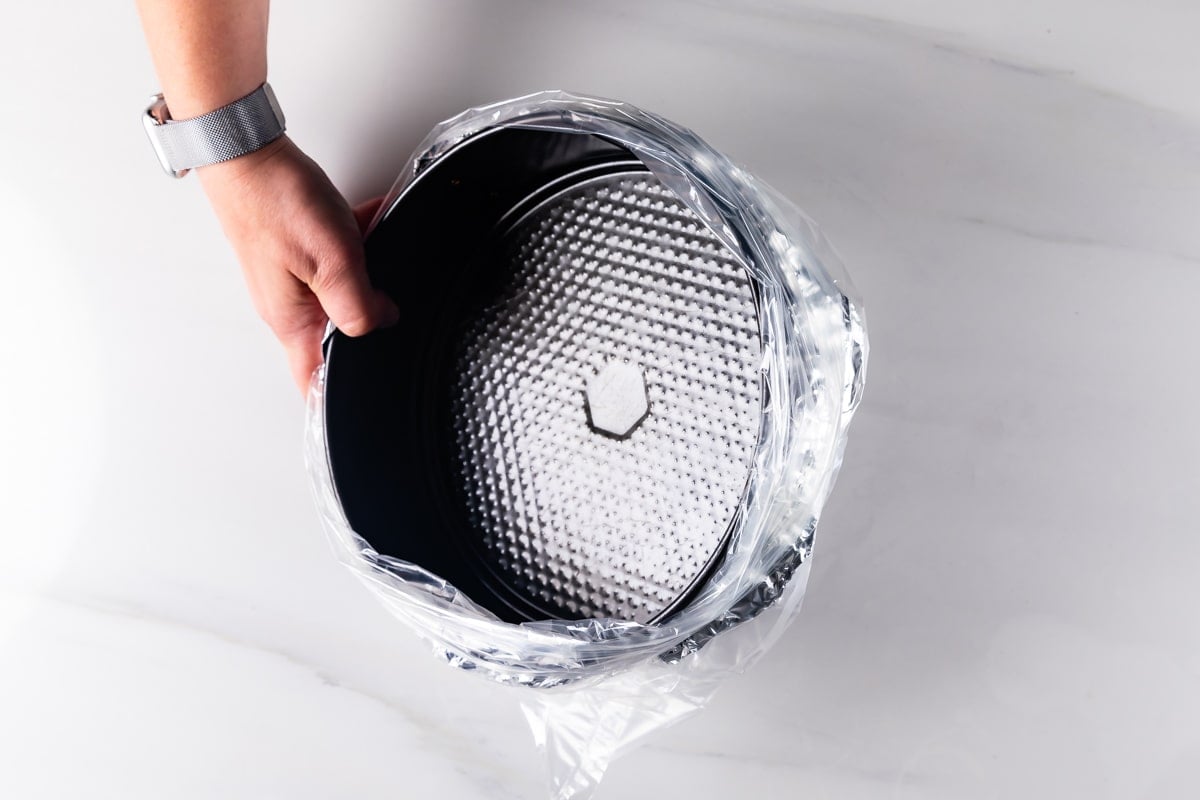
hand holding pan wrapped with foil and place in a bag.Let’s talk about how to make a cheesecake water bath! No matter what kind of baked cheesecake you’re making, using a water bath will ensure a creamy smooth cheesecake without cracks. It may seem daunting but it’s the best way to bake any cheesecake recipe! What is a water bath? A cheesecake water bath is…
hand holding pan wrapped with foil and place in a bag.

Let’s talk about how to make a cheesecake water bath! No matter what kind of baked cheesecake you’re making, using a water bath will ensure a creamy smooth cheesecake without cracks. It may seem daunting but it’s the best way to bake any cheesecake recipe!

lemon cheesecake with slice missing on plate.

What is a water bath?

A cheesecake water bath is when you place your cheesecake pan in a larger pan (i.e. a roasting pan) and add it to your oven, then add water to the larger pan. The water surrounds the cheesecake pan while the cheesecake is baking. Cheesecake is a custard and it can be finicky if not baked in the just right conditions – a cheesecake water bath helps get the oven conditions just right so you get a perfect result.

Why bake cheesecake in a water bath?

  1. Allows the cheesecake to bake with even heat: the even heat of the water helps the cheesecake cook evenly so there are no hot spots or overly done areas.
  2. Prevents excess browning: without a water bath the cheesecake will cook faster around the edges. This is often why cheesecakes crack.
  3. Texture: the steam from the water bath creates a moist environment and keeps the cheesecake nice and creamy.

Items Needed

  • Springform Pan: This is the pan that you bake your cheesecake in. It’s round with a removable bottom, which means the seams aren’t tight. If you don’t prepare your pan properly the water from the bath will leak into your cheesecake and ruin it. If you’re using a water bath for your cheesecake but don’t prepare your pan adequately the pan will leak, causing a soggy cheesecake.
  • Aluminum Foil: I like using heavy duty foil. I use about 3-4 sheets of foil to be sure and have a barrier to block the water from getting into the seam of the pan.
  • Roasting Bag or Slow Cooker Bags: This is your insurance item – I never used to use this until I started having issues with leakage so now I always wrap the foil lined pan in an oven bag: large or turkey size is best, or you can use a slow cooker bag.
  • Roasting Pan or Large Pan: It needs to fit the springform pan, with room.
  • Hot Water: To fill the pan with (it needs to be hot or boiling when you add it to the pan in the oven).

How to Make a Cheesecake Water Bath

  1. I use 2 or 3 layers of heavy duty aluminum foil. Lay them out on your counter and place the springform pan in the center (BEFORE you add your cheesecake).
  2. Wrap the pan as shown, up the sides of the pan at least 2 inches. It’s very important that the foil is the same all the way around the sides – with no “low” spots – so the water doesn’t leak in.
  3. Place the wrapped pan in your oven bag or slow cooker bag. If there is excess bag, tie it in a knot to tighten around so it’s not loose.

How to Use a Water Bath for Cheesecake

  1. After you’ve prepared your pan, add your crust and cheesecake batter.
  2. Place the pan in the large pan or roasting pan. Meanwhile, bring water to a boil in a kettle or the microwave.
  3. Place the pan in the oven on a center rack. Carefully pour the hot water into the large pan being careful not to get it inside the plastic/foil or springform pan.
  4. Bake the cheesecake as directed.

Expert Tips

  • I prefer heavy duty foil but if you’re using regular foil, you may want to use a few extra layers.
  • You can use any large pan that is bigger than your springform pan (a turkey pan, large roasting pan, even a large skillet).
  • Don’t pour the hot water into the roasting pan until it’s in the oven. It’s very hard (and dangerous) to carry a pan full of boiling water so don’t do that – place the pan in the oven first.
  • Don’t be scared – if you follow these directions you’ll end up with the perfect cheesecake every time!

FAQs

How much water do you need for a water bath?

It depends on the size of your larger pan: you want to fill it up about 1 inch around your springform pan, so I’d say at least 4 cups, probably more. Just fill up your kettle and you’ll have enough.

How you know your cheesecake is done?

You never want to overbake your cheesecakes or it will be dry. Your cheesecake should pass the wiggle test: it should wiggle a bit in the center (like Jell-O) when it’s done. The outer part of the cheesecake won’t move – the wiggle test is just for the center. If the cheesecake ripples or wiggles entirely, then it’s not done.

What happens if a water bath gets in cheesecake?

Unfortunately, if you don’t prepare your pan properly, water will get into your cheesecake and ruin it. The water will soak the graham cracker crust and make it soggy. This is why it’s so important to use layers of foil and the oven bag.

cheesecake in pan with foil and bag.
Print

How to make a Cheesecake Water Bath

A cheesecake water bath ensures a creamy, silky, perfectly baked cheesecake without cracks!
Course Dessert
Cuisine American
Prep Time 15 minutes
Total Time 15 minutes
Servings 1 cheesecake
Calories 1kcal
Cost $10

Ingredients

  • Cheesecake
  • Hot Water

Instructions

  • Lay out several strips of foil on the counter. Make sure they're larger than your springform pan.
  • Wrap the foil up the sides of the pan, being sure the layers reach over halfway to the top.
  • Place the foil covered pan in a large oven bag or slow cooker liner. If there is excess bag, tie it in a knot at one side, being sure the bag comes all the way to the top of the pan, covering all the foil.
  • Make cheesecake as directed and add it to the prepared pan.
  • Bring several cups of water to a boil in a kettle or pot or in the microwave.
  • Place your cheesecake in a larger roasting pan or skillet (it needs to be larger than your springform pan).
  • Place the large pan in a preheated oven.
  • Carefully pour boiling water into the larger pan, being careful not to get it in the oven bag or springform pan.
  • Bake cheesecake as directed.

Nutrition

Serving: 1serving | Calories: 1kcal

Favorite Cheesecake Recipes

How to Make Buttermilk

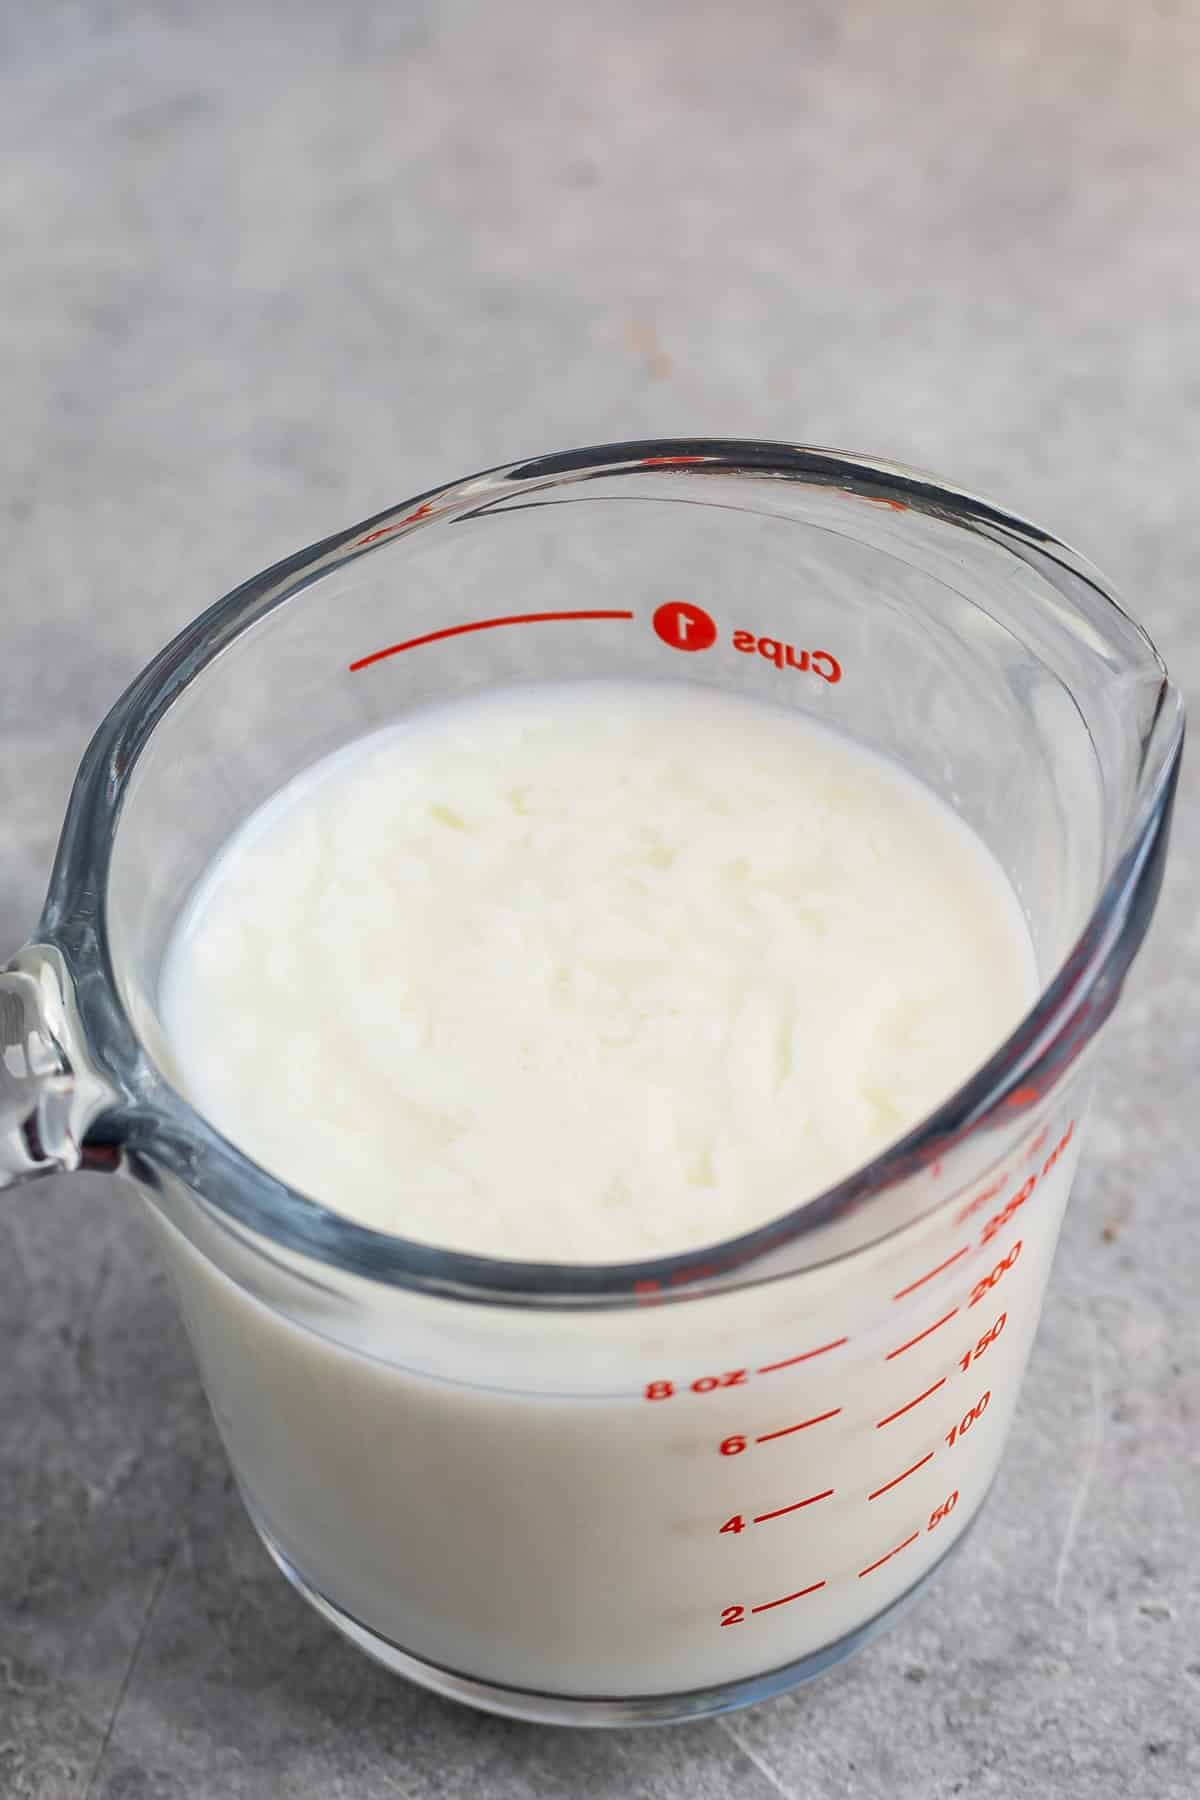
glass measuring cup of buttermilk.Knowing how to make buttermilk at home has saved me so many times. I constantly forget to buy it at the store leaving me with two options when I’m baking: make my own or run to the store. This is probably the EASIEST kitchen hack you’ll ever learn! Learn all the different ways to substitute…

glass measuring cup of buttermilk.

Knowing how to make buttermilk at home has saved me so many times. I constantly forget to buy it at the store leaving me with two options when I’m baking: make my own or run to the store. This is probably the EASIEST kitchen hack you’ll ever learn! Learn all the different ways to substitute for buttermilk in cake, banana bread, or anything you’re baking.

glass measuring cup of milk next to a carton of milk.

Buttermilk adds so much flavor to so many recipes but it’s not just important for that tangy flavor: it’s actually a really important ingredient in baking because it’s an acid that activates baking soda. When called for together in a recipe the acid in buttermilk actually make the baking soda do it’s job, resulting in fluffy baked goods. (This is also why many baked goods call for sour cream or yogurt; the acid in those does a similar job to buttermilk.)

If a recipe calls for buttermilk it often will not work properly without it, so you can’t just omit or use regular milk. What’s great is it’s easy to make a substitute and, while using store-bought buttermilk performs best, using acidified buttermilk (liquid + acid from vinegar or similar) will work in most recipes and you probably have everything you need already.

Buttermilk Substitutes

To substitute for 1 cup buttermilk:

  • 1 cup milk + 1 tablespoon white vinegar or fresh lemon juice
  • 1 cup regular yogurt
  • 1/4 cup milk + 3/4 cup yogurt
  • 1/2 cup milk + 1/2 cup Greek yogurt
  • 1/4 cup milk + 3/4 cup sour cream
  • 1 cup milk + 1 3/4 teaspoons cream of tartar
  • 1 cup water + 4 tablespoons powdered buttermilk

When using milk, you can use whole milk, fat free milk or 2% skim milk. Be sure to use a liquid measuring cup for this (see the difference between measuring cups).

glass measuring cup of buttermilk.

How to make Buttermilk

  1. Add 1 tablespoon lemon juice or vinegar to a measuring cup.
  2. Fill up the milk to the 1 cup mark.
  3. Let the mixture sit for 5 minutes.
  4. If using sour cream or plain yogurt you’ll want to measure the proper amounts and stir them together before adding to your recipe.

Vegan Buttermilk or Dairy-Free Buttermilk Substitutes

My solution: make it as stated in the recipe below (1 tablespoon vinegar or lemon juice + 1 scant cup almond milk, coconut milk, soy milk or other nondairy milk) and just add it to the recipe. This will ensure the leavening works as it’s supposed to.

Note that this method won’t look “curdled” because nondairy milk doesn’t have the same properties dairy milk does, but the acid in the vinegar or lemon juice will do it’s job.

glass measuring cup of buttermilk with a whisk.

Buttermilk Uses

There are many ways to use buttermilk for flavor, like in my Yellow Cake recipe, ranch dressing or other vinaigrettes, and often fried chicken is soaked in it to make it tender.

When it’s called for in recipes on my site, it’s often required so use this homemade buttermilk recipe to make some of my favorite baked goods:

Storing Buttermilk

Often you’ll buy a carton of buttermilk and have tons left over. It will last in the fridge until the expiration date, but you can also freeze it! Transfer to an airtight container before placing in the freezer. Or if you think you’ll just need little bits occasionally, pour into an ice cube tray and freeze that way (once frozen, place in an airtight container). I do not recommend freezing homemade buttermilk – use that immediately.

glass measuring cup of buttermilk.
Print

Homemade Buttermilk Recipe

Knowing how to make buttermilk at home will save you time and money! Plus learn about all the subsitutes you can use for buttermilk.
Course Drinks
Cuisine American
Prep Time 5 minutes
Total Time 5 minutes
Servings 1 cup
Calories 3kcal
Cost $2

Ingredients

  • 1 tablespoon white vinegar or lemon juice
  • 1 scant cup milk 2% or nonfat, whole is fine

Instructions

  • Add vinegar or lemon juice to a measuring cup. Add milk to the 1 cup line. Let sit for 5 minutes. Use in place of buttermilk.

Video

Notes

Other substitutions:
  • 1 cup milk + 1 tablespoon white vinegar or lemon juice
  • 1 cup regular yogurt
  • 1/4 cup milk + 3/4 cup yogurt
  • 1/2 cup milk + 1/2 cup Greek yogurt
  • 1/4 cup milk + 3/4 cup sour cream
  • 1 cup milk + 1 3/4 teaspoons cream of tartar
  • 1 cup water + 4 tablespoons powdered buttermilk
Use homemade buttermilk right away for best results.
To make dairy-free buttermilk, simply swap any nondairy milk for the milk called for in the recipe.

Nutrition

Serving: 1cup | Calories: 3kcal | Carbohydrates: 1g | Protein: 1g | Fat: 1g | Saturated Fat: 1g | Cholesterol: 1mg | Sodium: 1mg | Sugar: 1g

Baking Tips

Summer Fruit Recipes

It’s summer! Whether you’re in or outdoors, hopefully for all of you there are beautiful summer fruits and berries to be had, and I hope that you’re able to get your hands on as many of them as you can. I am loading (actually, overloading…) myself up at the market. While a good portion on the fresh fruit gets eaten just as-is, some of it…

It’s summer! Whether you’re in or outdoors, hopefully for all of you there are beautiful summer fruits and berries to be had, and I hope that you’re able to get your hands on as many of them as you can. I am loading (actually, overloading…) myself up at the market. While a good portion on the fresh fruit gets eaten just as-is, some of it goes into the following dessert recipes that I continue to make year after year. Others go into jam, which is a great way to preserve all those summer fruits and berries, and make them last through fall and winter.

Cherry season is behind most of us (sniff…sniff…), but if they are still lingering where you live, you can type “cherry” or “cherries” into the search engine at the top right corner of the page to find cherry recipes. (And we don’t get a bountiful array of fresh raspberries and blackberries here, so I don’t have many recipes that use them on the blog.) But for nectarines, strawberries, peaches, plums and other summer fruits, here are some of my favorite recipes on the blog…

Summer Fruit Galette with Frangipane

I’ve seen so many galettes this year on social media, that it’s tempting to already call galettes The Dessert of the Year. (Okay, there were plenty of Banana Breads as well. And it’s hard to knock Banana Bread, even my low(er) fat one.) But for the bang-for-the-buck, it’s hard to beat the silly-easy galette, made with a fail-safe dough that gets rolled out, topped with fresh fruit, and baked until ripe ‘n ready. Mine has a layer of frangipane under the fruit to keep some of those juices away from the bottom crust, so it stays crisp. It also tastes good, too! Apricots work especially well in this one but you can use nectarines, plums, peaches, or…

Strawberry Rhubarb Galette

…rhubarb and strawberries! Yes, the classic combo works well as a galette, too. But don’t let tradition stand in the way of deliciousness and you can swap out cherries, raspberries, or blackberries for the strawberries.

Apricot Jam

When I was a cook in upstate New York back in the 1980s (!) I remember someone brought us a (as in 1) basket of fresh apricots from California, which I’d never seen before. I made a simple tart with them and only eight lucky customers could get a taste of it. (Or maybe I cut it into ten?) Fast-forward to today, summer brings a cavalcade of fresh apricots to the markets and toward the end of the season, I don’t have time to shed any tears as I’m piling apricot jam into pots, to save them for the coming months. It’s Romain’s favorite jam so I make sure there’s enough to keep him happy, because I’ve learned what happens when I don’t : 0

Summer Fruit Tart (with frangipane)

Another summer fruit favorite, yes, with more almond cream than the galettes above, this is that classic French tart that you’ll find in many pastry shops all year round, using everything from pears to pineapple. Don’t love almonds, or want to take it in a different direction? Replace the almonds with hazelnuts for a special treat.

Plum-Strawberry Jam

While apricots are Romain’s favorite for jam, I am 100% on team plum. The luscious tang of juicy plum, and the high natural pectin content, makes this one of the easiest jams to make. And it’s not too difficult to eat, either.

Plum Sorbet

While I miss the purple Santa Rose and Elephant Heart plums we got in California, France has its own special selection of delectable plums, including Mirabelles, quetsches, and even wild plums. While the wild plum trees that we used to pick/glean from have been pruned by the absentee owners (phooey!) we found another source last summer. And the only thing better than free plums is free wild plums, which come in an array of snazzy colors and are extra tangy, perfect for those of us that like some pucker in our pastries.

Plum Flaugnarde

The cousin of clafoutis, this flaugnarde features a jumble of plums baked in a silky custard. They’re so pretty I almost hate to bake them. But then, when I pull it out of the oven, I’m happy to have a beautiful baked gratin dish of custardy plums for dessert on a warm summer night.

Plum-Rhubarb Crisp

Two tart fruits come together, baked under a buttery blanket of streusel. If these two bedfellows are available at the same time where you live, you’re doubly lucky!

Mirabelle Jam

The elusive Mirabelle plums have a cult-like following and while some mistakenly think they aren’t available in the U.S. (they were briefly banned a few years ago), if you’re lucky, you can indeed find them. They’re intensely flavored and sweeter than other plums, and make a wonderful confiture with jewel-like fruits suspended in a shimmering jelly, which are lovely heaped on toast in the morning. (If you want to get a taste of Mirabelles but can’t find them, Bonne Maman makes a golden plum Mirabelle jam that’s exported from France.)

Angel Food Cake

While I wasn’t a fan of Angel Food Cake growing up, which my mother usually made to accompany strawberries, I became a convert as a grown-up. Perhaps it had to do with writing an ice cream book and having an overload of egg whites to use up. (And Angel Food Cake is an express route to doing that.) Nevertheless it’s a treat along with summer fruits and berries, either baked as a compote or fresh, tossed in a little sugar and perhaps a dash of crème de cassis. The spongy cake is an ideal way to make sure you get every drop of the fruit syrup that’s surrounding the airy slab. It’s French cousin, Gâteau de savoie, is equally enjoyable, and doesn’t require an Angel Food Cake pan.

Roasted Strawberry Miso Ice Cream

Roasting strawberries is lesser-known way of coaxing out their flavor, but works well when making ice cream as it concentrates them and reduced the water, so the ice cream stays creamier. Adding a touch of salty miso provides a curious contrast to the berries juicy sweetness, and a little umami to boot.

Strawberry Spritz

Once you make the (very) easy base for this Strawberry Spritz, you can use it to make Strawberry Margaritas, too. (And if you’ve got a hankering for a classic Spritz, I’ve got you covered there, too.) But this Spritz is a great, light apéritif to enjoy all season long. I was drinking lots of these a few weeks ago when strawberries were at their peak. If they available where you live, go infuse some in vermouth blanc for a great spring/summer sipper.

Spiced Plum Cake with Toffee Glaze

Toffee glaze is one of those things you could put on an old sneaker, and it would make those dilapidated Reeboks taste great. Even better (and more recommended) is this spiced plum cake, which isn’t too rich or too sweet. Crunchy toasted almonds on top are a nice contrast to the buttery glaze.

Peach Shortcakes with Butterscotch Sauce

Speaking of buttery sauces, butterscotch with peaches is a natural. Grammar-correct keeps asking me: A natural what? But I think you can figure that out. If not, give them a try together and you’ll see what I’m talking about.

Vin de pêche

If you’re fortunate enough to have a peach tree or can get some of the leaves, they lend a delicate almond-like flavor to this intriguing apéritif wine. I try to make a few bottles every year and serve chilled glasses as the season’s change, reminding me of summer, and reminding me that the light almond flavor of peach leaves in wine is something to put on my calendar for the following year.

Bourbon Peach Cooler

Peaches and bourbon are natural partners, and they don’t mind sharing space in a tumbler with the classic French apéritif, Bonal. But not to worry if you don’t have it; I offer some substitutes that you might already have on your liquor shelf. This cocktail isn’t just pretty, it’s also a pretty effective way to beat the heat. (Yup, nectarines or plums could replace the peaches, if you’re so inclined.)

Nectarine-Berry Popsicles

A vintage metal popsicle mold that was a find at a flea market prompted these summer ‘sicles. You can load ’em up with berries and since I used white nectarines, the popsicles were extra-pretty in pink. But anyone would say “yes” to them in yellow, if you go with standard nectarines.

Mixed Berry Shortcakes

Mixed berry anything automatically makes something my favorite dessert. I love, love, love the juicy tumble of strawberries, blueberries, blackberries, red currants, or whatever else you’ve got. Bring the berries on!

Blueberry Cobbler

While I am nostalgic for the overload of blueberries that I grew up with New England, when I do find myrtilles, I try to keep them as close to their pure state as possible. Topped with crumbly drop biscuits, all that’s needed is a scoop of vanilla ice cream to complete the picture, but white chocolate-fresh ginger ice cream would also be welcome…and appreciated, on this cobbler.

Mango Frozen Yogurt with Blueberry Compote

While everyone’s mind is on peaches and nectarines, don’t forget mangoes, their tropical counterpart, which go just as well with summer berries. Blueberries particularly come to mind but raspberries and strawberries could fill in for them.

Strawberry Frozen Yogurt

With pretty swirls of crispy meringue, this tangy frozen yogurt can be part of a composed dessert, which I like to serve in the summer, being generous with the fresh fruit…and filling in the blanks with frozen yogurt and meringues.

Blueberry Buckle with Lemon Syrup

I don’t know if blueberries get any better than in this buckle, which do indeed “buckle” under the weight of almost too many blueberries…if that’s even possible. A dousing with tart lemon syrup keeps things moist and tangy. You can skip the cream with this one. It’s great on its own.


How to Cream Butter and Sugar

Learn how to cream butter and sugar with a mixer or by hand. Creaming is an important step in many baking recipes like cookies and cakes. It’s not complicated but knowing what to look for and the best creaming technique will make a big difference in your baked goods. What is Creaming? In a nutshell,…

The post How to Cream Butter and Sugar appeared first on Crazy for Crust.

Learn how to cream butter and sugar with a mixer or by hand. Creaming is an important step in many baking recipes like cookies and cakes. It’s not complicated but knowing what to look for and the best creaming technique will make a big difference in your baked goods.

bowl of creamed butter and sugar.

What is Creaming?

In a nutshell, creaming is combining a softened fat (like butter) with sugar until it turns creamy, light and fluffy.

Creaming is such a critical step in baking recipes – when it’s not done correctly your cookies and cakes may turn out flat, soggy or even greasy. Done properly, you’ll get fluffy cakes and puffy cookies with a wonderful tender crumb.

Creaming can be done by hand with a bowl, spoon, and fork, or with a stand mixer or handheld mixer. Doing it by hand definitely takes more effort, but it’s helpful to know in case you’re ever without a mixer and need to make an emergency batch of cookies (it could happen!)

When you cream butter and sugar together, you’re accomplishing one thing: incorporating lots of air pockets into the mixture which will help naturally leaven your baked goods and create a tender crumb.

3 spoons with different creamed butters showing stages of creaming.

How long does it take to cream butter and sugar?

How long to cream butter and sugar will vary depending on whether you’re doing it by hand or with a mixer. With a mixer it will take between two and three minutes. By hand, it will take longer. It is easier to use a mixer so that is my recommended method.

Whether you cream with a mixer or by hand, the best way to know if your butter and sugar are creamed is by looking at it.

After just a minute, you might think it’s creamed enough but if the mixture still looks grainy or you can see any sugar crystals, then you’ve not creamed it enough.

As more air is incorporated into the mixture you will notice the color will lighten and the texture will turn fluffy. You know you’ve reached the right stage when the mixture is pale yellow and soft but with enough structure to hold soft peaks.

It is possible to over-cream butter and sugar. If creamed too long the mixture will turn white and, if you use it, will give your baked goods a dense, almost gluey, texture. Unfortunately, there isn’t a way to correct over-creamed butter and sugar.

finger pressing into butter stick

Softened Butter

Starting with room-temperature softened butter is an important part of the process. If the butter is too cold it will be hard to incorporate air and your mixture will be too dense. If it’s too hot the mixture will not have enough air and will be oily. In both cases, your cakes and cookies will have a dense texture instead of the light and tender crumb.

butter and sugar creamed in stand mixer showing paddle attachment.

How to cream butter and sugar with a mixer

  • Place your softened butter and sugar into the bowl of a stand mixer (or a large mixing bowl if using an electric hand mixer). You’ll want to use the paddle attachment.
  • Mix on medium speed (high speed will add too many air bubbles) for approximately 3-4 minutes, or until your mixture is fluffy. Be sure to scrape the sides of the bowl during creaming.

How to Cream Butter and Sugar by Hand

  • First, it helps to cut the softened butter into thin pieces and mixing them with the sugar before you start creaming them together.
  • Using a fork, press the tines into the butter and sugar to fully combine them. When combined, the mixture resembles a paste.
  • Grab a wooden spoon or rubber spatula and beat the butter and sugar together using the same motion you would to scramble eggs. If it’s easier, you can also use the fork to cream them. 
  • Be sure to scrape the bowl a few times.
  • Depending on how fast you can mix, it will take three to five minutes to achieve the right color (pale yellow, remember?) and a fluffy texture. There should be no streaks of butter in the mixture – all of it should be well combined.
sugar cookie with white frosting and pink and blue sprinkles.

Recipes that call for creaming

Last Updated on June 5, 2024

The post How to Cream Butter and Sugar appeared first on Crazy for Crust.