Kimchi Quesadillas

Kimchi quesadillas are an easy to make quick meal or snack that use only a few simple ingredients that pack a huge flavor punch.

The post Kimchi Quesadillas appeared first on Budget Bytes.

A couple of years ago I ate an appetizer at a restaurant that really wowed me — kimchi pimento cheese dip. I wouldn’t have ever thought about pairing kimchi and cheese together, but ever since I had it I’ve been obsessed with that combo. And since kimchi and eggs also go great together, it only made sense for me to start adding kimchi to my egg and cheese quesadillas (my favorite go-to quick meal). These kimchi quesadillas are the perfect mix of flavors and textures, they’re SO FAST to make, and all of the ingredients last a long time in the fridge, so they’ve quickly become my favorite low-effort, high-reward meal.

Cheese Quesadillas on a plate with a bowl of kimchi on the side.

Why I’m Obsessed with Kimchi Quesadillas

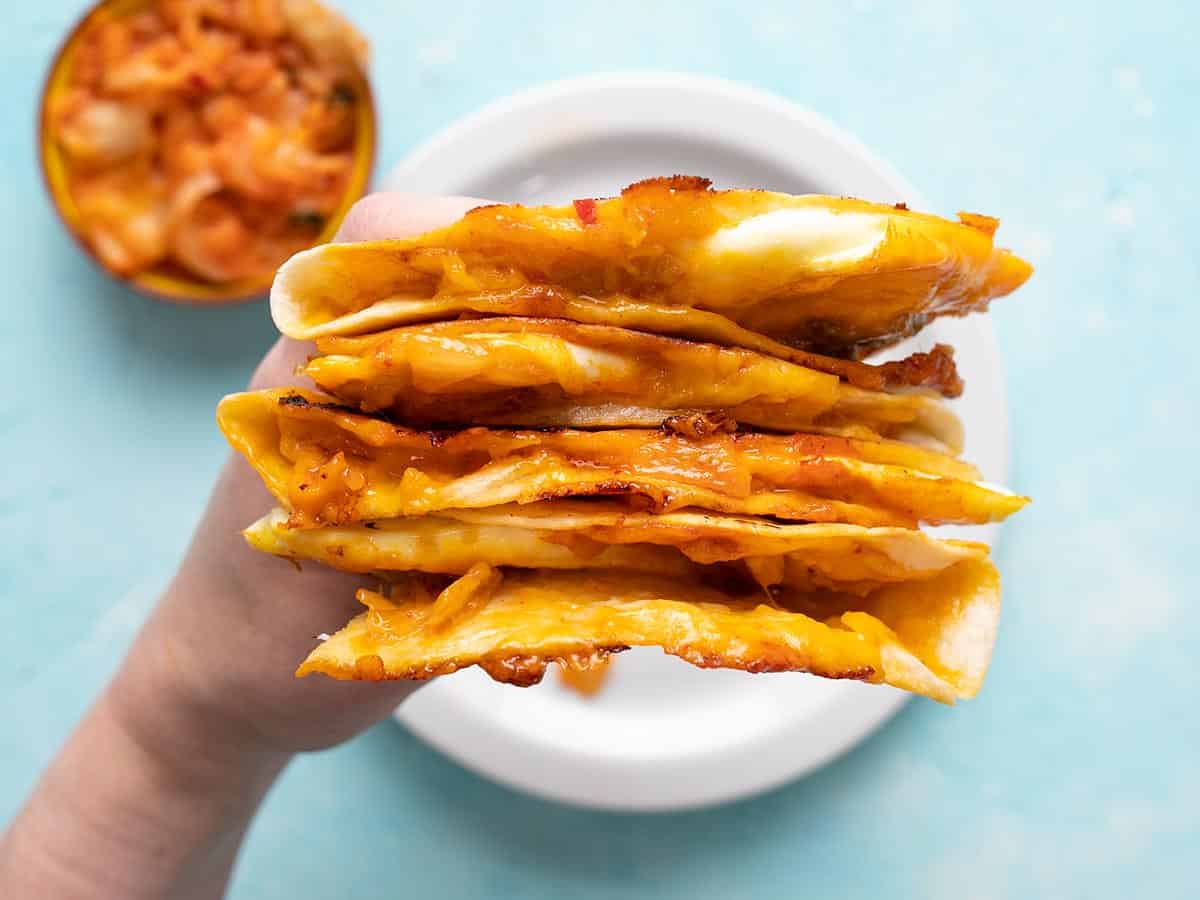
These kimchi quesadillas are incredibly simple to make and only require five simple ingredients: eggs, oil or butter (to cook the eggs), tortillas, cheese, and kimchi. You can make one at a time or more, but I promise, once you eat one you’re going to want seconds. ;) The way the cheese stays gooey on the inside, crisps up with the tortilla on the outside, and the kimchi makes everything a little tangy and spicy… it’s just perfection.

What is Kimchi?

Kimchi is a traditional Korean side dish made with fermented vegetables, like cabbage, radish, scallions, garlic, ginger, and sometimes other vegetables depending on the recipe. It’s flavored with gochugaru (a Korean chili powder) and salted seafood. The flavor is savory, tangy, spicy, salty, and full of umami. It’s served with almost every meal as a small side dish or condiment. The tangy, spicy, salty flavor of kimchi really adds a ton of flavor and dimension to whatever you eat it with, including an egg and cheese quesadilla!

Where to Find Kimchi

Although Kimchi is a staple in Korean cuisine, it is growing in popularity in the U.S. and most major grocery stores now carry at least one brand of kimchi. Because it’s a fermented food containing live cultures, you’ll usually find it in the refrigerated section of grocery stores, near other fermented products like yogurt, fresh sauerkraut, and pickles, or even sometimes near tofu and tempeh.

Even better yet, if you have an Asian grocery store near you, you’ll be able to find several types of authentic kimchi for really good prices compared to large chain U.S. grocery stores.

A hand holding a stack of kimchi quesadillas showing the cheese and filling.
Overhead view of sliced kimchi quesadillas on a plate.
Print

Kimchi Quesadillas

Kimchi quesadillas are an easy to make quick meal or snack that use only a few simple ingredients to pack a huge flavor punch.
Course Breakfast, Lunch, Snack
Cuisine American, Korean
Total Cost $1.90 recipe / $0.95 serving
Prep Time 5 minutes
Cook Time 15 minutes
Total Time 20 minutes
Servings 2 (1 quesadilla each)
Calories 331kcal

Ingredients

  • 1/4 cup kimchi $0.78
  • 1/2 cup shredded cheddar cheese $0.58
  • 2 flour tortillas (8" diameter) $0.40
  • 1 Tbsp butter or oil $0.04
  • 2 large eggs $0.18

Instructions

  • Roughly chop the kimchi into smaller pieces. Cover half of each tortilla with shredded cheddar cheese, then add the chopped kimchi on top.
  • Heat a large skillet over medium, then add the butter or oil. Fry or scramble the eggs in the butter or oil until they reach your desired doneness (I like over-medium).
  • Transfer the cooked eggs to the tortillas, placing them on top of the kimchi. Fold the empty side of the tortilla over the filled side to close.
  • Transfer the folded quesadillas back to the same skillet used to cook the eggs and continue to cook over medium heat until the cheese is melted and the tortilla is browned and crispy on each side.
  • Slice the cooked kimchi quesadillas in half and enjoy!

See how we calculate recipe costs here.

Nutrition

Serving: 1quesadilla | Calories: 331kcal | Carbohydrates: 16g | Protein: 16g | Fat: 23g | Sodium: 593mg | Fiber: 1g
Side view of a stack of kimchi quesadillas on a plate.

How to Make Kimchi Quesadillas – Step by Step Photos

Chopped kimchi on a cutting board with shredded cheddar in a measuring cup on the side.

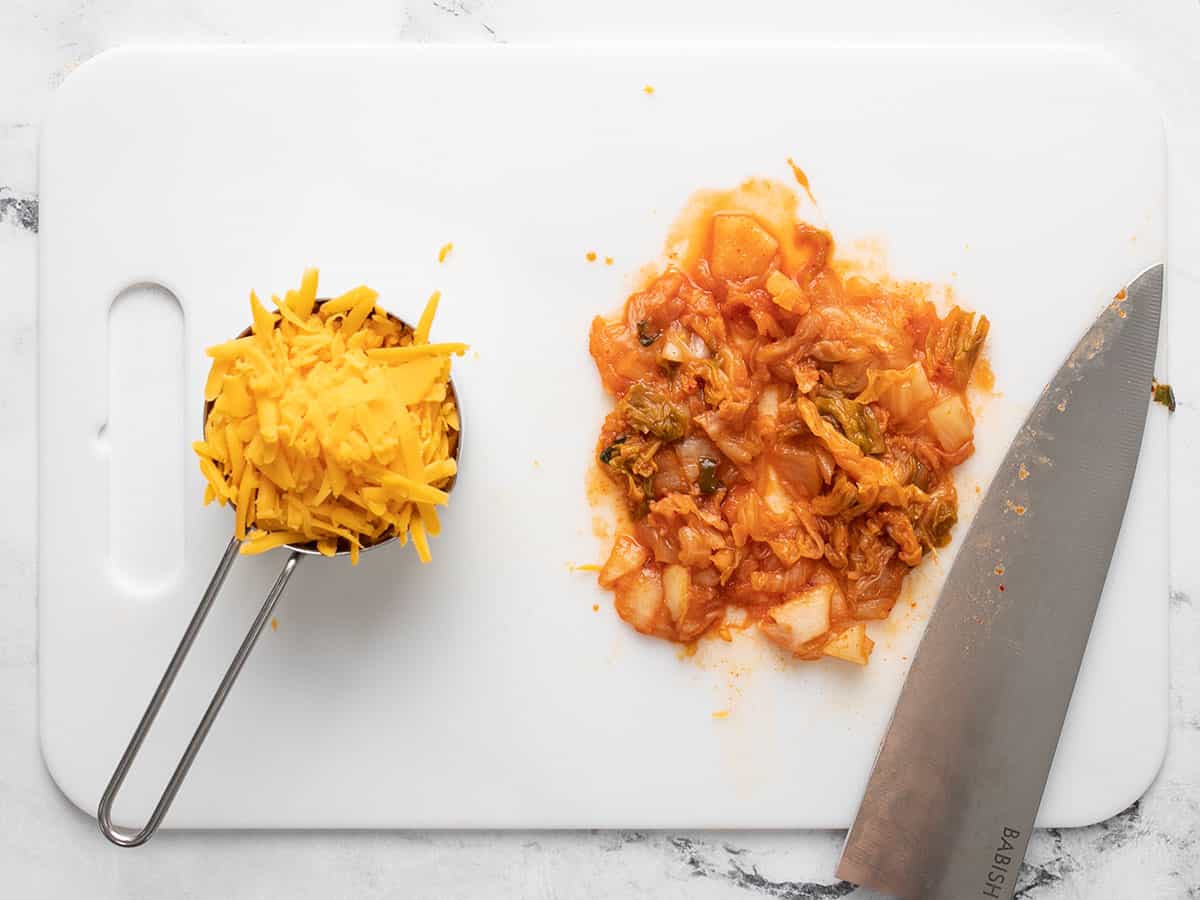
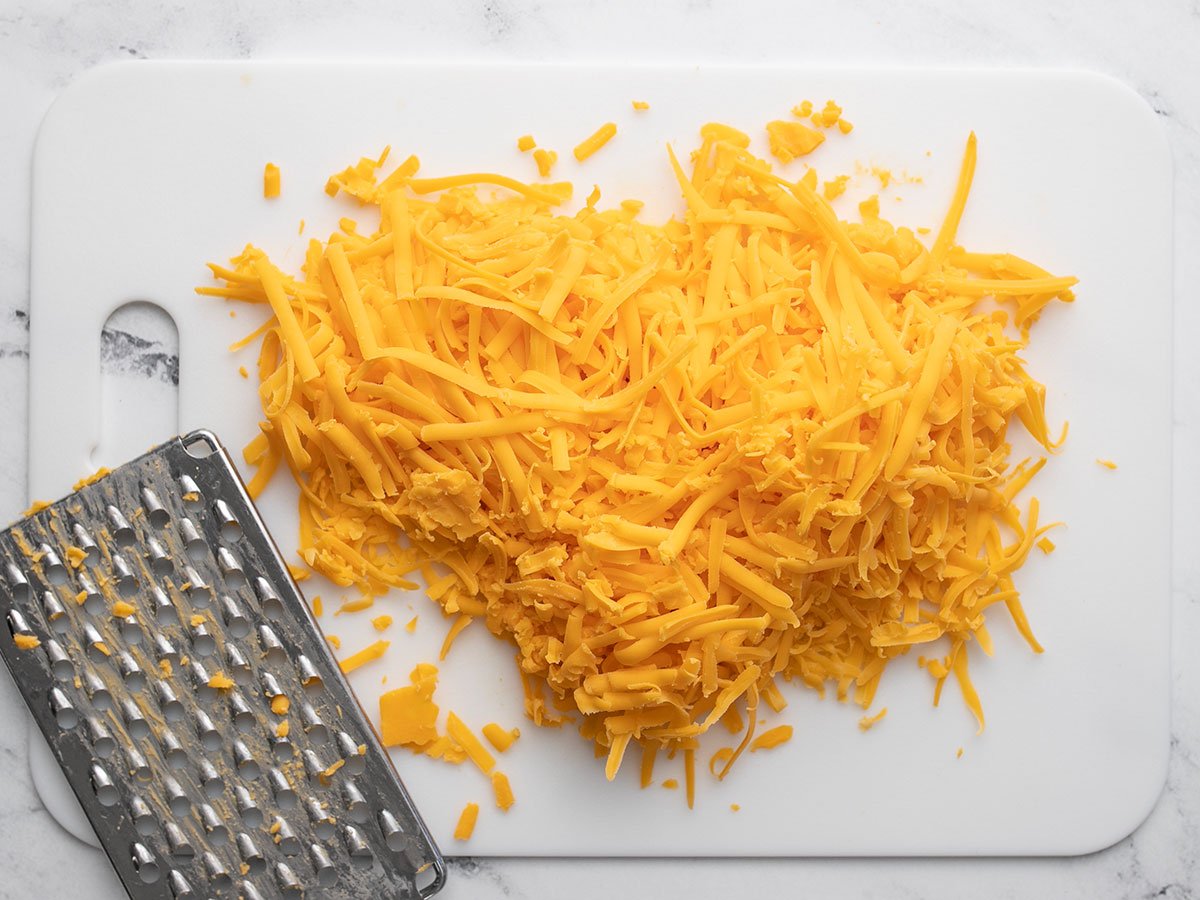
To make two kimchi quesadillas, roughly chop ¼ cup of kimchi into smaller pieces. Measure ½ cup of shredded cheddar cheese.

Cheese and kimchi covering half of two tortillas.

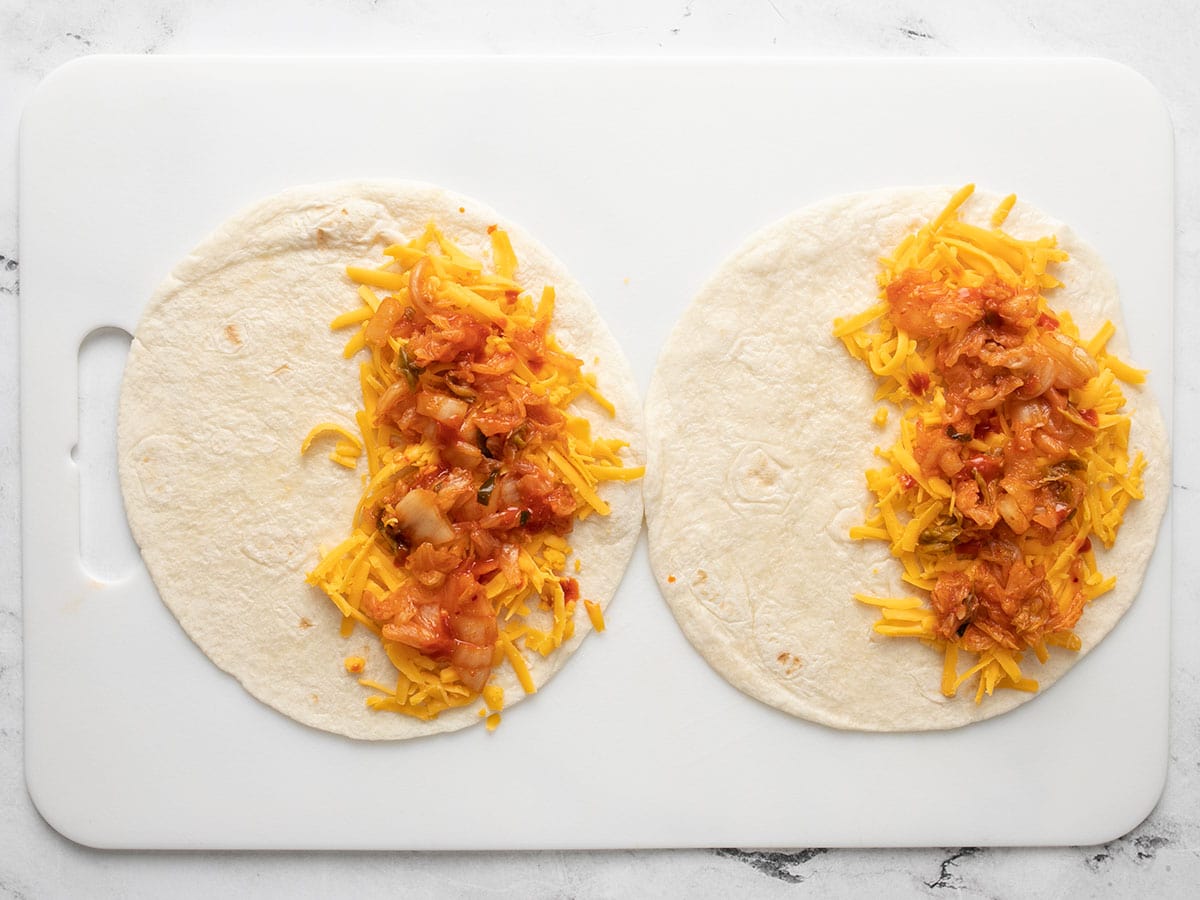
Divide the cheese and kimchi between two 8-inch flour tortillas, covering only one side of each tortilla (the empty side will be folded over top to close).

Two fried eggs in a skillet.

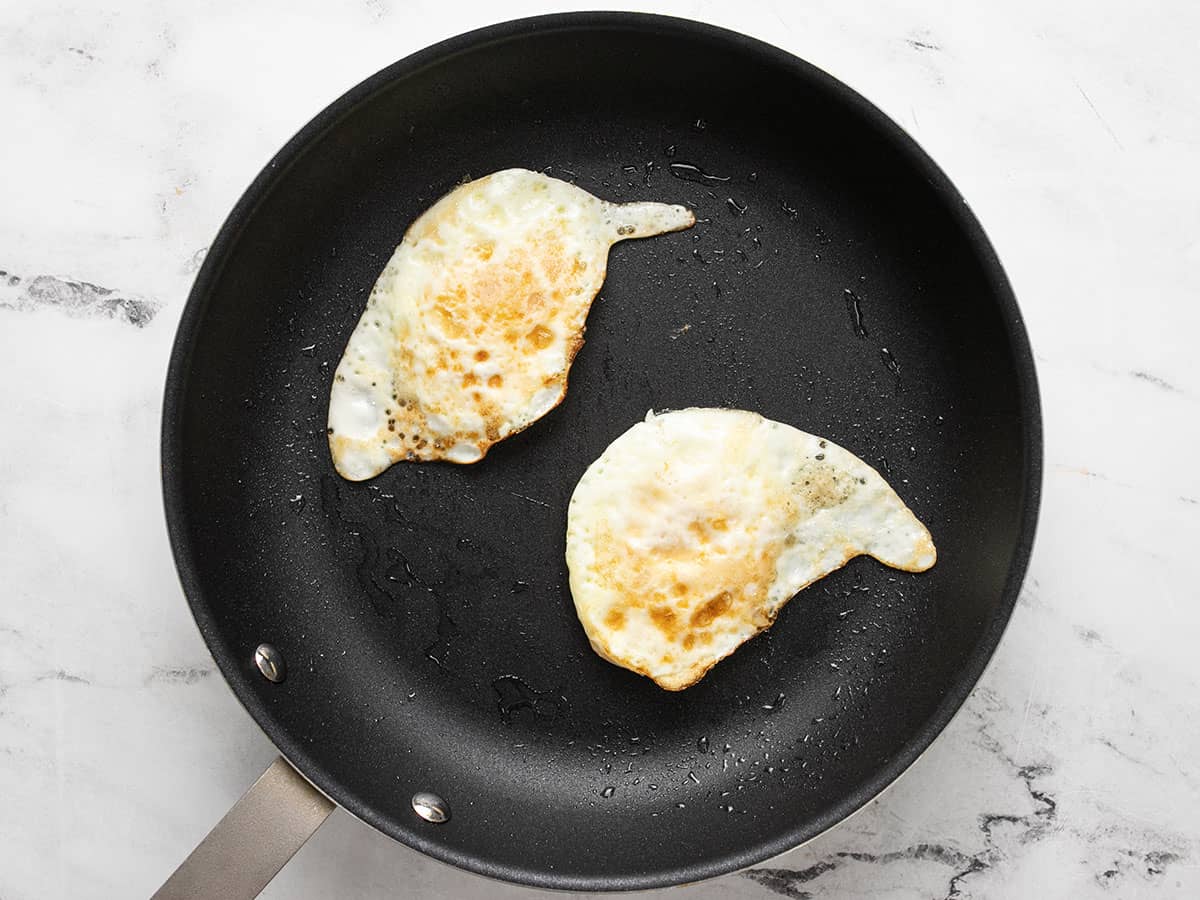
Next, fry two large eggs in a skillet with a tablespoon of oil or butter. I like to fry my eggs over medium for quesadillas, but you could also scramble them if that’s easier.

Eggs added on top of cheese and kimchi in the tortillas.

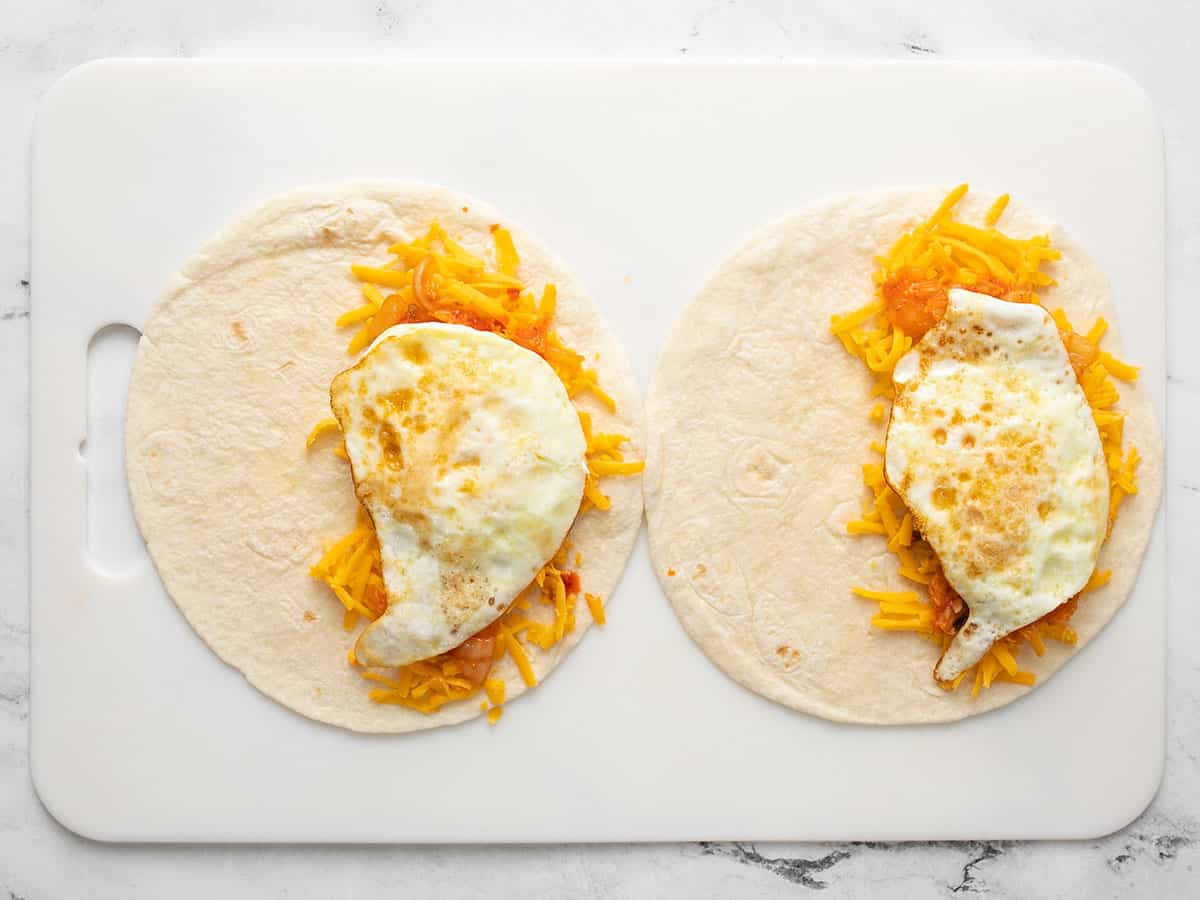
Place one fried egg on top of the cheese and kimchi in each quesadilla. Fold the empty half of the tortilla over the filled side to close.

Toasted quesadillas in the skillet.

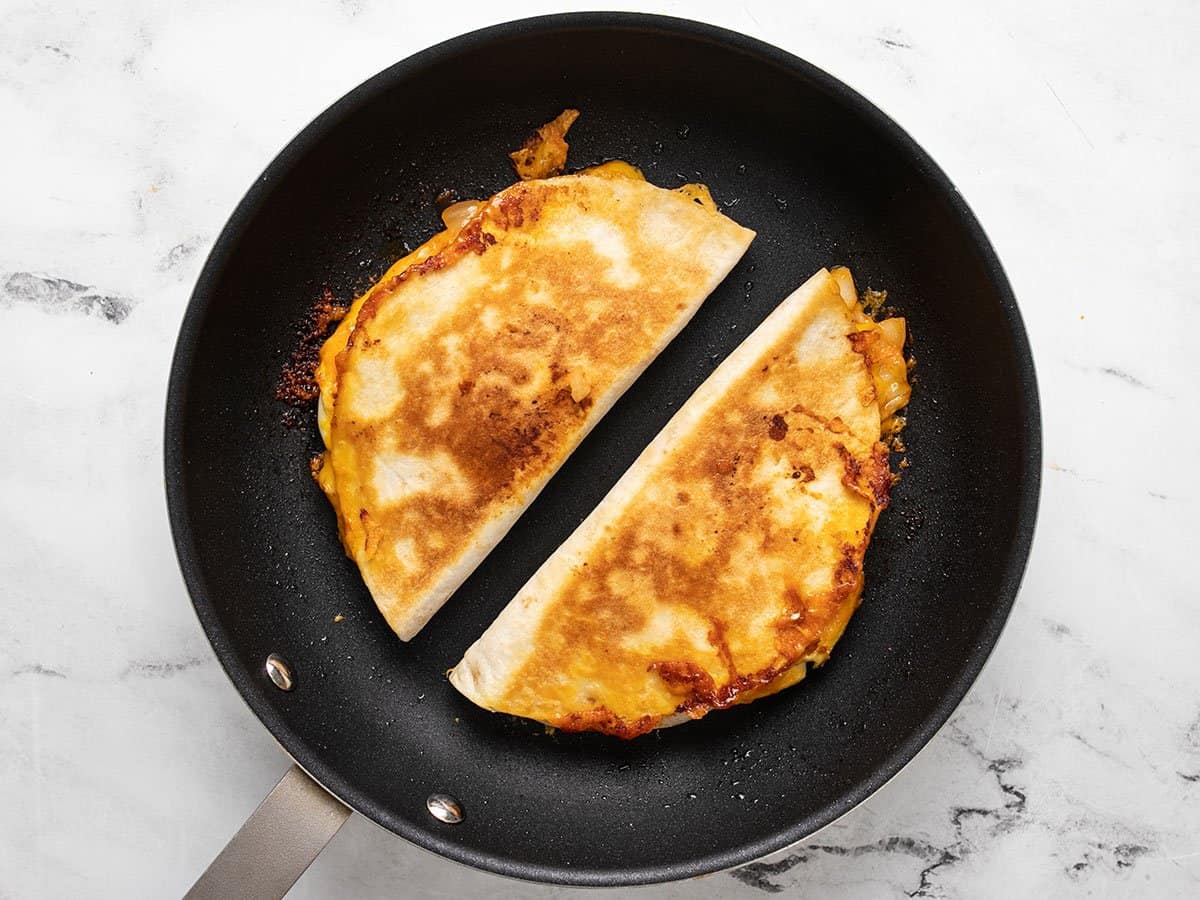
Return the folded quesadillas to the skillet used to cook the eggs and continue to cook over medium heat until the cheese is melted and the tortillas are golden brown and crispy on each side. Don’t worry if some of the cheese spills out, that will just create extra crispy goodness!

Sliced quesadillas on a cutting board.

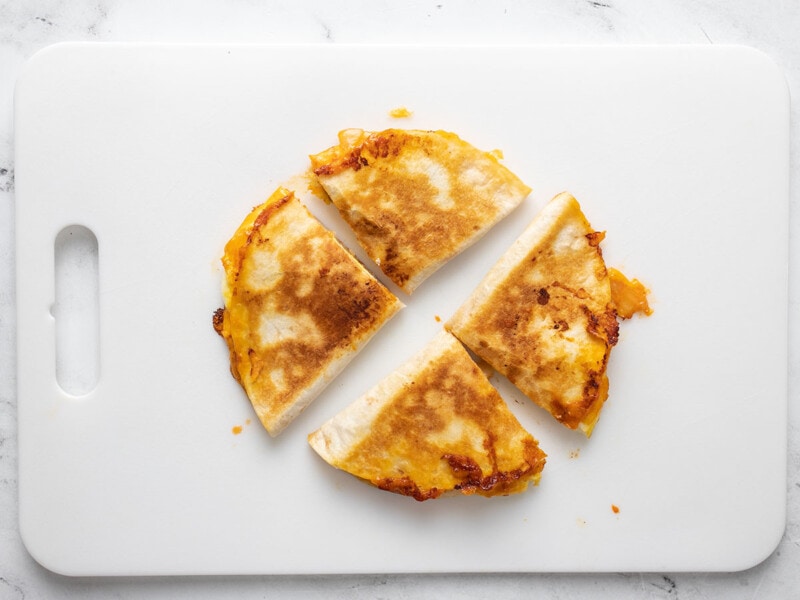
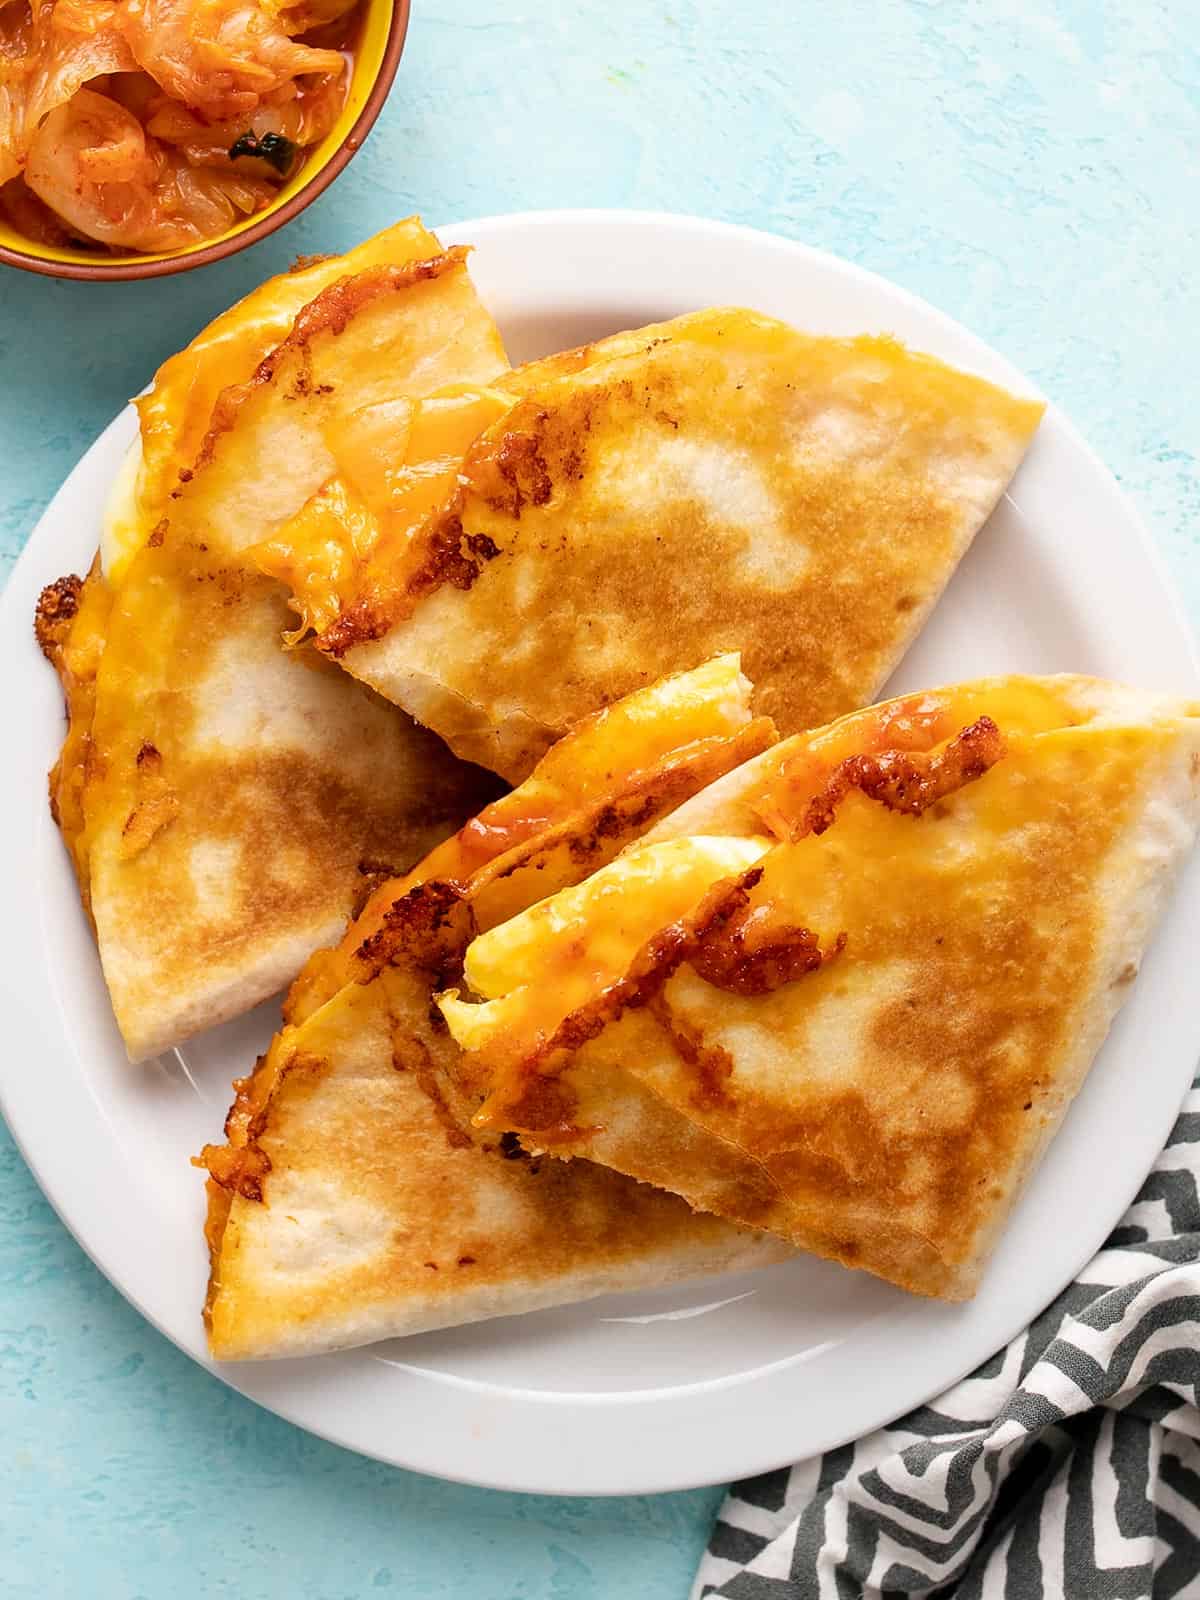
Transfer the cooked quesadillas to a cutting board, slice in half, and enjoy! To keep the filling from spilling out when you cut them, use a pizza cutter or large knife and cut from the outside edge in toward the folded side.

Close up side view of a stack of kimchi quesadillas.

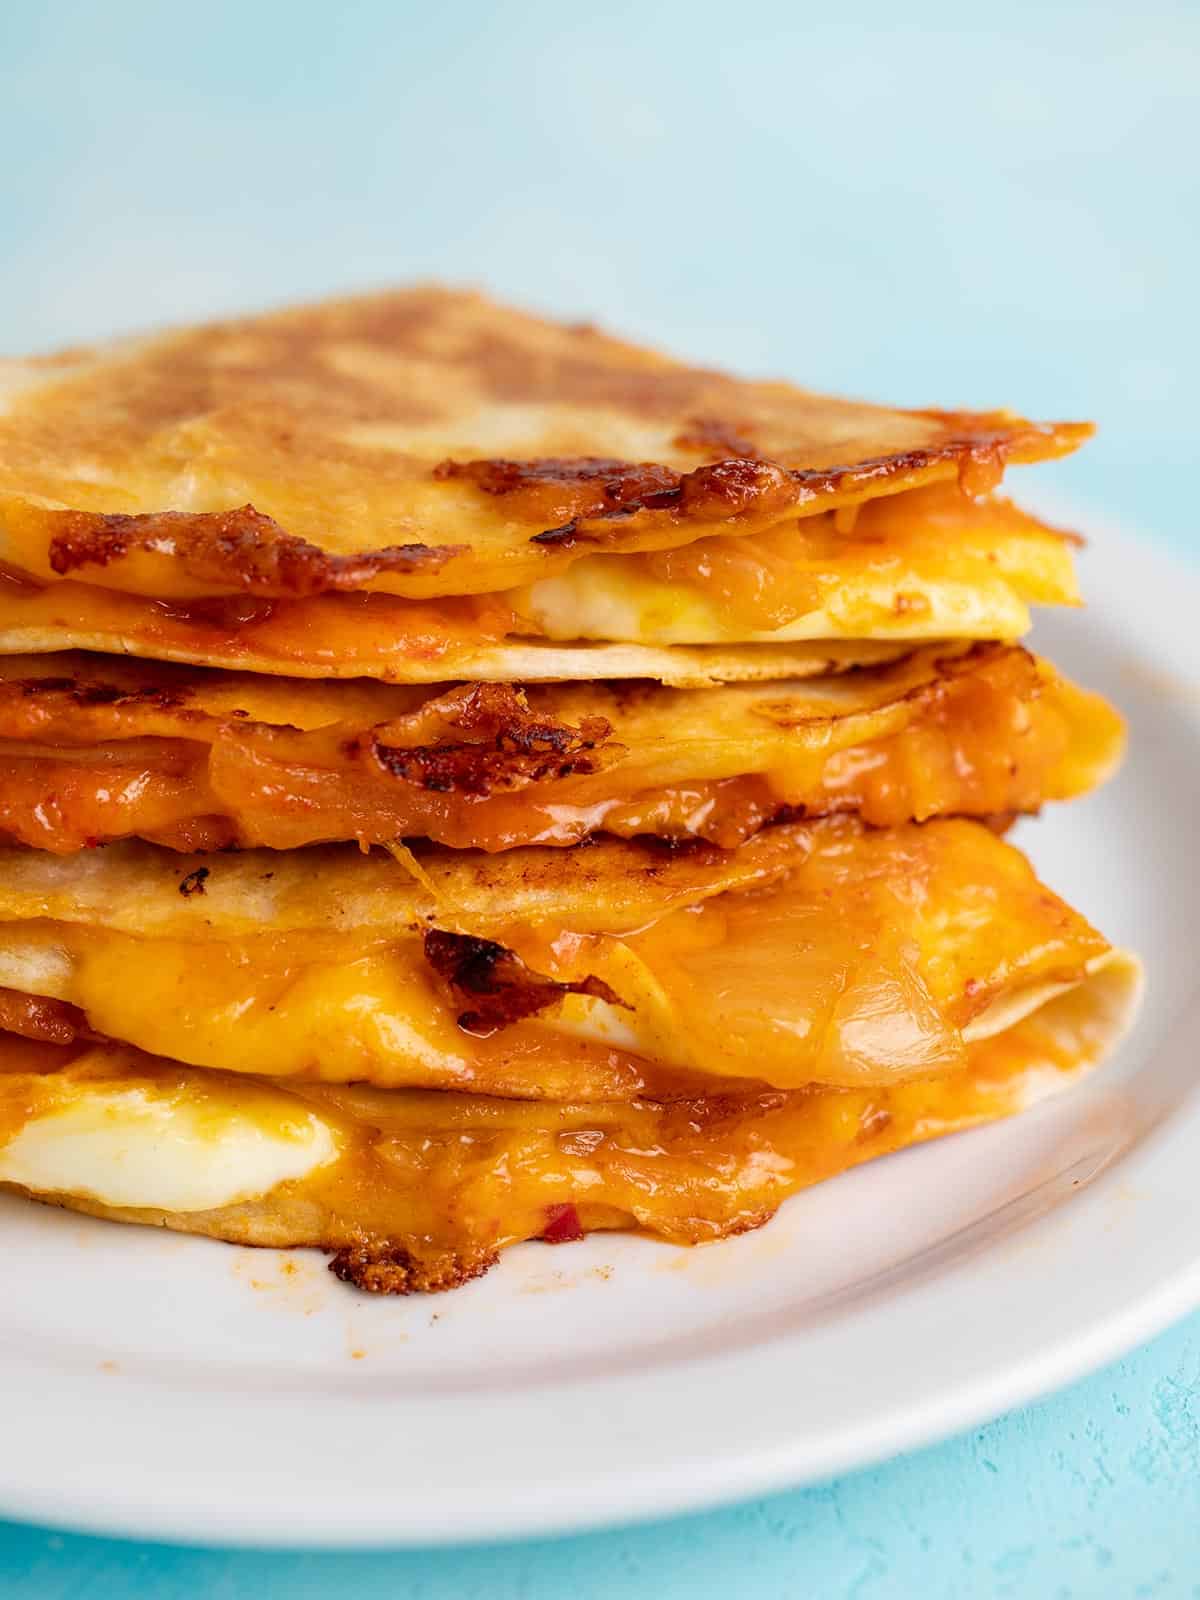
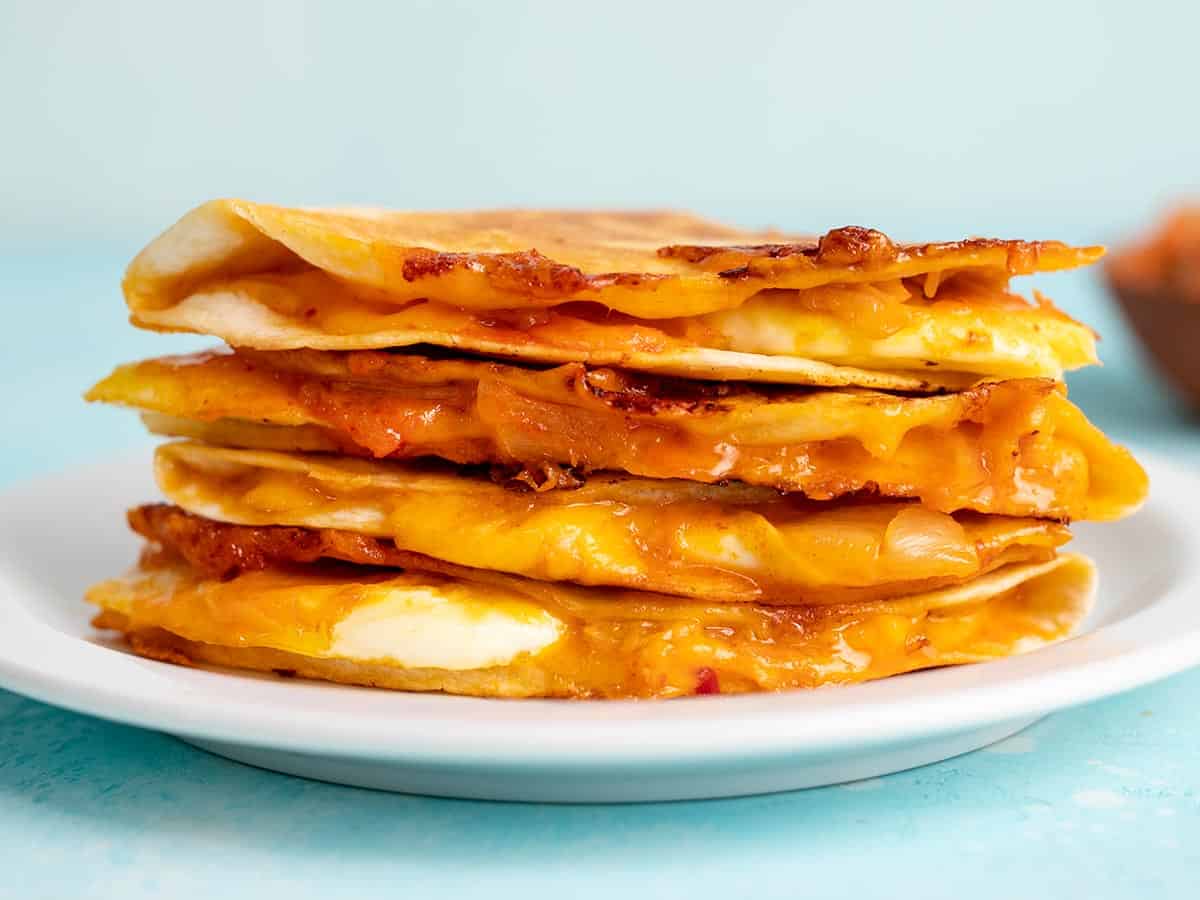
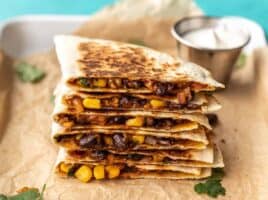
Soooo cheesy, sooo tangy!

The post Kimchi Quesadillas appeared first on Budget Bytes.

Beer Cheese Dip

Looking for a melted cheese appetizer that’s sure to be the hit of the party? You’ll love the unique taste cheddar gives this Beer Cheese Dip!

The post Beer Cheese Dip appeared first on Budget Bytes.

This quick and easy Beer Cheese Dip recipe combines two casual party staples (Beer! Cheese!) into one creamy, decadent cheese dip. This ooey-gooey melted cheese appetizer is similar to queso. But the Cheddar cheese we use gives it a sharp, slightly-tangy flavor that makes it really unique (in a good way!). This funky twist on fondue is the perfect thing to serve up the next time you want to impress without the stress. 

A large white bowl filled with beer cheese dip on a blue background surrounded by different types of pretzels, a wooden cutting board with apple slices and a glass cup of beer.

WHAT IS BEER CHEESE?

This Beer Cheese Dip is precisely what it sounds like: a saucy cheese dip made with beer. The beer is simmered to reduce its alcohol content but still maintains its tangy flavor. Then it’s melded with a combo of cream cheese and extra-sharp cheddar cheese to create an ultra-rich and decadent dip. We also added Worcestershire sauce, Dijon mustard, and seasonings to round out the flavors.

This dish, which originated in Kentucky, shouldn’t be confused with the German cow’s milk cheese Bierkäse, which literally translates to “beer cheese.” It’s also very different from Obatzda, an authentic German cheese spread made with super-funky soft cheese that’s served cold alongside Bavarian-style soft pretzels. 

CHEESE OPTIONS

You can use almost any kind of cheese to make this recipe, but some will be more successful than others. We used a block of extra-sharp, store-brand cheddar cheese since it’s the most traditional and budget-friendly option. It’s also super flavorful (but not too funky!). Here are some more tips to consider when using different types of cheese:

  • Make sure the cheese and beer taste good together — and are ones you enjoy! (Since both heavily impact the sauce’s final flavor, color, and texture.)
  • For the grated cheese, reach for a semi-firm cheese (like Cheddar, Edam, or Gouda) or a semi-soft cheese (like Mozzarella, Jack, Fontina, and Munster). Both types of cheese will shred easier when cold. Hard cheeses and ones that are “aged” or “extra-sharp” can also be used, but don’t melt as easily as their softer, milder counterparts.

BEER OPTIONS

It doesn’t matter what kind of beer you use for this recipe – just pick one you like to drink! We used Pabst Blue Ribbon, a budget-friendly light beer with a mild, malty taste that wouldn’t compete with the flavor of our sharp cheddar cheese. 

  • Light Beers: Considered best for beer cheese. Light beers are usually milder in taste. So they’re less likely to overpower easy-to-melt cheeses like basic Cheddar. Fruity wheat beers pair especially well with cheese!
  • Dark Beers: Stouts and porters also make a great beer cheese sauce, but are best paired with a sharp, funky cheese that can stand up to their strong, rich flavors. 
  • Super-hoppy IPAs: If you love this style of beer, go for it. (They’re truly an “acquired taste!”) But if you don’t like drinking them, you probably won’t enjoy the lingering, bitter aftertaste they give your beer cheese sauce either!

Why is my beer cheese lumpy or grainy?

It’s important not to overheat your cheese dip. High heat makes the proteins and fat in the cheese separate, causing the sauce to “break” and turn into a lumpy mess. If this happens, it can be difficult (or impossible) to repair. You might be able to fix the cheese sauce by adding more cream cheese or Dijon, which are both emulsifying ingredients. Add these ingredients a little at a time, stirring vigorously to incorporate them before adding any more. 

DOES BEER CHEESE CONTAIN ALCOHOL?

Boiling beer reduces the alcohol content a lot but doesn’t eliminate it entirely. I promise, no one will get “drunk” from eating too much beer cheese! If consuming alcohol isn’t part of your lifestyle, you can substitute it with a non-alcoholic beer! Or try one of our other easy cheese sauce recipes, like:

eat it fresh & keep it warm

This recipe is best eaten right after it’s prepared. The leftovers probably won’t stay as smooth and creamy, so I’d suggest reducing the serving size of the recipe to avoid wasted ingredients.

serving suggestions

Serve this decadent dip with an assortment of pretzels and crackers, apple slices, or a vegetable party tray. Our Beer Bread and Easy Soda Bread are also great vehicles for this cheese sauce!

A side view of giant Bavarian pretzel that's just been half-dipped in beer cheese is hovering over a large white bowl filled of the dip and is surrounded by an assortment of other pretzels and a glass cup of beer.
An overhead view of a hand swirling a pretzel crisp into a white bowl of beer cheese dip that's surrounded by an assortment of pretzels, a glass cup of beer, a wooden cutting board topped with apple slices, and a small bowl of pretzel salt.
Print

Beer Cheese Dip

Looking for a melted cheese appetizer that's sure to be the hit of the party? You'll love the unique taste cheddar gives this Beer Cheese Dip!
Course Appetizer, Dip, Side Dish
Cuisine American, German
Total Cost $3.95 RECIPE / $0.66 SERVING
Prep Time 5 minutes
Cook Time 15 minutes
Total Time 20 minutes
Servings 6 1/3 cup each
Calories 210kcal

Ingredients

  • 1 cup beer $0.92
  • 1 Tbsp warm water $0.00
  • 1 Tbsp cornstarch $0.03
  • 2 oz. cream cheese $0.44
  • 2 cups sharp cheddar cheese, shredded $2.49
  • 1 tsp Worcestershire sauce $0.02
  • 1 tsp Dijon mustard $0.03
  • 1/2 tsp salt $0.01
  • 1/2 tsp black pepper $0.01

Instructions

  • Heat the beer in a saucepan on medium-high heat. While the beer heating up, whisk together the cornstarch and warm water in a small bowl to make a slurry.
  • Once the beer comes to a rolling boil, let it continue to boil for about 5 minutes. Add the cornstarch slurry to the boiling beer, whisking constantly to fully incorporate it. Allow the beer to come back up to a boil, at which point the cornstarch slurry will slightly thicken the beer.
  • Turn the heat down to low. Cut the cream cheese into chunks, then whisk it into the beer until fully melted.
  • Add the shredded cheese a handful at a time, continuing to whisk until the cheese is fully melted before adding more.
  • Whisk in the Worcestershire sauce, Dijon mustard, salt, and pepper. Taste the cheese dip and adjust the salt or other seasonings to your liking.
  • Cover the cheese dip and keep the pot sitting over low heat so it stays warm and melted (or transfer it to a small chafing dish, crockpot, or electric fondue pot). Stir the cheese dip occasionally to prevent a thick skin from forming on the surface.

See how we calculate recipe costs here.

Nutrition

Serving: 0.33cup | Calories: 210kcal | Carbohydrates: 4g | Protein: 10g | Fat: 16g | Sodium: 494mg | Fiber: 0.1g
A overhead view of a white bowl of cheese dip sprinkled with black pepper that is surrounded by an assortment of pretzels, a bowl of pretzel salt, a wooden cutting board of apples and a glass cup of beer.

How to Make beer cheese dip – Step by Step Photos

A small saucepot being filled with beer from a glass measuring cup held above the bottom right corner of the pot.

Heat 1 cup (8 oz.) of beer in a saucepan over medium-high heat. Once the beer comes to a rolling boil, let it boil for about 5 minutes. While the beer heating up, combine 1 tablespoon of cornstarch and 1 tablespoon of warm water in a small bowl.

A cornstarch slurry is being poured into the left side of a small saucepot of beer, and a whisk is resting in the bottom right corner of the pot.

Add the cornstarch slurry to the boiling beer, whisking constantly to fully incorporate it. Bring the beer back up to a boil, at which point the cornstarch slurry will slightly thicken the beer.

A small saucepot of boiled beer with chunks of unmelted cream cheese in the right side of the pot ready to be mixed into the beer.

Turn the heat down to low. Cut 2 ounces of cream cheese into chunks, and then whisk them into the beer until fully melted.

A hand is sprinkling shredded sharp cheddar cheese into a small saucepot containing a mixture of beer, cornstarch, and cream cheese.

Add 2 cups of shredded cheese to the saucepot a handful at a time. Continue whisking after each addition until all the cheese has melted before adding the next handful.

A hand is pouring Worcestershire sauce into a small saucepot of melted cheese, and there are small piles of unmixed salt and black pepper sitting on the surface.

Add 1 teaspoon of Worcestershire sauce, 1 teaspoon of Dijon mustard, 1/2 teaspoon of salt, and 1/2 teaspoon of black pepper. Whisk to combine. Taste the cheese dip and adjust the salt or other seasonings to your liking. 

A small saucepot of finished beer cheese dip.

Cover the cheese dip and keep it over low heat so it stays warm and melted. You could also transfer it to a small chafing dish, crockpot, or electric fondue pot. Stir it occasionally to prevent a thick skin from forming on the surface of the cheese sauce. 

An extreme close up of a giant Bavarian soft pretzel that's just been dipped into a white bowl filled with melted cheese sauce, and an assortment of pretzels and a glass cup of beer are blurred in the background.

There’s nothing quite like a vat of melted cheese and a soft pretzel as big as your face, amirite?! ~ Marion :)

The post Beer Cheese Dip appeared first on Budget Bytes.

Beer Bread

Transform a can of beer into a tasty loaf of Beer Bread! This easy, no-knead bread recipe is packed with flavor and only takes an hour.

The post Beer Bread appeared first on Budget Bytes.

Looking for a way to use that random can of beer hanging out in the back of the fridge? Transform it into a loaf of deliciously-cheesy Beer Bread! Thanks to the beer, this super-easy quick bread recipe still delivers on the classic, yeasty flavor of a long-fermented loaf, but comes together in a fraction of the time. Best of all, there’s no kneading required.

A loaf of beer bread with three slices overlapping on a long wooden cutting board surrounded by glass jars filled with beer, a PBR can, a wooden bowl of shredded cheese and a small metal dish of soft butter and a small butter knife.

WHAT IS BEER BREAD?

Beer Bread is a type of “quick bread” that uses the flavor and carbonation in beer to create a fluffy, buttery, tangy loaf in just an hour. Unlike most homemade bread recipes, this one doesn’t require any kneading, resting time, or additional yeast. We also included some shredded cheddar cheese to make our loaf extra rich and flavorful! 

BEST BEERS FOR BEER BREAD

We chose a budget-friendly, light beer for our loaf, but almost any kind of beer can be used to make this recipe. Keep in mind: the beer you choose will influence the flavor of the bread, so make sure to pick something you like! How to choose the best beer for beer bread:

  • Light beers – Generally, light beers will create a light-colored loaf with an airy texture and a more subtle, malty flavor.
  • Dark beers – Darker beers like stouts and porters will give the bread a slightly darker color and more robust flavor than light beer.
  • Hoppy beers & IPAs – Since pale ales tend to be very bitter, they aren’t an ideal choice. That intense flavor will carry over and may give the bread a lingering sour aftertaste.

HOW TO STORE LEFTOVERS

Once fully cooled, wrap the loaf in plastic wrap or aluminum foil. Store the bread in the pantry or on the counter (for 1-2 days) or in the fridge (for 4-5 days). This bread also freezes beautifully. Tightly wrap the loaf in a layer of plastic wrap and aluminum foil and freeze for up to 3 months.

serving suggestions

This beer bread lands somewhere between a regular, sliceable loaf of bread and a savory, ultra-rich loaf cake. So the possibilities are kind of endless!

A close up shot of long wooden cutting board with a half a loaf of beer bread in the left corner of the frame, two slices on the upper right corner of the frame and in between a slice is being covered with salted homemade butter with a small metal butter knife.
A side shot of a loaf of beer bread on a wooden cutting board with three slices slightly overlapping in the foreground of the image, and behind the cutting board is a small wooden bowl filled with shredded cheese and a glass cup of beer is visible in the upper right corner of the frame.
Print

Beer Bread

Transform a can of beer into a tasty loaf of Beer Bread! This easy, no-knead bread recipe is packed with flavor and only takes an hour.
Course Bread, Easy, Side Dish
Cuisine American, German
Total Cost $2.35 RECIPE / $0.29 SERVING
Prep Time 10 minutes
Cook Time 50 minutes
Total Time 1 hour
Servings 8 1 slice each
Calories 269kcal

Ingredients

  • 3 cups all-purpose flour $0.30
  • 1 Tbsp sugar $0.06
  • 1 Tbsp baking powder $0.12
  • 2 tsp salt $0.04
  • 1/2 cup shredded sharp cheddar cheese* $0.62
  • 4 Tbsp butter, divided** $1.20
  • 12 oz. beer (one regular-sized can) $0.92

Instructions

  • Preheat the oven to 375℉. In a large bowl, combine the flour, sugar, baking powder, salt, and shredded cheese. Mix well.
  • Melt the butter in a small sauce pot. Use a pastry brush to coat the inside of a 9×5 loaf pan with butter. Set the remaining butter aside.
  • Add the beer to the flour mixture and stir until a thick batter forms. Transfer the batter to the prepared bread pan, making sure to spread it out evenly inside the bread pan.
  • Pour the rest of the melted butter on top of the bread dough.
  • Bake the bread for 45-50 minutes, or until deeply golden brown on top.
  • Once slightly cool (about 10 minutes), run a butter knife around the inside edge of the pan gently to loosen the edges, and then turn the bread onto a cutting board to slice and serve.

See how we calculate recipe costs here.

Notes

* or Parmesan cheese
** If using unsalted butter, you may want to add an additional ¼ teaspoon of salt with the rest of the dry ingredients or sprinkle the same amount on top of the loaf just before baking.

Nutrition

Serving: 1slice | Calories: 269kcal | Carbohydrates: 39g | Protein: 7g | Fat: 9g | Sodium: 834mg | Fiber: 1g
An overhead shot of a half-sliced loaf of beer bread on a long, wooden cutting board surrounded by glass cups of beer, a can of beer, a butter dish and knife, and bowl of cheese, and a grey and white striped dish cloth.

How to Make BEER BREAD – Step by Step Photos

A white ceramic mixing bowl filled with piles of unmixed flour, sugar, baking powder, salt, sugar and shredded cheddar cheese.

Preheat the oven to 375℉. In a large bowl, combine 3 cups of all-purpose flour, 1 tablespoon of sugar, 1 tablespoon of baking powder, 2 teaspoons of salt, and 1/2 cup of shredded cheese.

An overhead shot of two hands preparing a metal loaf pan with a pastry brush next to a small skillet of melted butter.

Melt 4 tablespoons of butter in a small sauce pot or skillet. Use a pastry brush to coat the inside of a 9×5″ loaf pan with about 1/2 tablespoon of the melted butter. Set the rest of the butter aside.

A white, ceramic mixing bowl filled with the mixed dry ingredients to make beer bread, a spatula is resting in the right side of the bowl and beer is being poured into the left side of the bowl from a glass liquid measuring cup.

Pour 12 oz. (1 1/2 cups) of beer into the flour mixture. Mix until a thick batter forms and no clumps of dry ingredients remain. Transfer the batter to the prepared loaf pan, making sure to spread it out evenly. Tap it on the counter a few times to help eliminate any air pockets.

A metal loaf pan filled with unbaked bread dough is being covered with melted butter poured from a small, white bowl on the left side of the frame.

Pour the rest of the melted butter (about 3 1/2 tablespoons) on top of the bread dough. 

A horizonal image of a baked loaf of bread with a golden-brown, crunchy top in metal loaf pan.

Bake the beer bread for 45-50 minutes, or until the top is evenly golden brown and crispy. Let the bread cool slightly (about 10 minutes) in the loaf pan. Run a butter knife around the inside edge of the pan to loosen the edges, then flip the bread out onto a cutting board to slice and serve.

A vertical close up of a loaf of bread on a wooden cutting board with three slices slightly overlapping in the foreground of the image, and behind the cutting board is a small wooden bowl filled with shredded cheese and a can of beer is visible in the upper right corner of the frame.

As one of my favorite TikTok creators (@tanaradoublechocolate) would say: “It ain’t gonna slide down easy if it ain’t cheesy!” Hope y’all love this Easy Beer Bread as much as we do! ~Marion :)

The post Beer Bread appeared first on Budget Bytes.

Easy Nacho Cheese

This easy no-roux nacho cheese sauce recipe is smooth, melty, and absolutely fool-proof. Great for nachos, vegetables, and more!

The post Easy Nacho Cheese appeared first on Budget Bytes.

Our original 5-Minute Nacho Cheese Sauce has been a reader favorite for years, but the traditional cheese sauce method using a flour and butter roux can be a bit tricky for new cooks. But everyone deserves to have a ooey-gooey cheese sauce, even if you’re new in the kitchen. 😉 So here’s a super simple no-roux nacho cheese sauce that only requires a few simple ingredients and is guaranteed to bee smooth and delicious every time. Promise!

A plate of nachos with pickled jalapeño and a hand taking one chip.

The Science of Cheese Sauces

Cheese sauces can be tricky for new cooks because the fat in cheese and the water in milk tend to repel each other, making it difficult for them to melt together into a smooth sauce. To get around this oil and water conundrum you can do two things: use an emulsifier (a molecule that attracts both water and oil) or use a milk product with very little water content so the fat isn’t repelled.

Traditional cheese sauces use a mix of flour and butter that act as the emulsifier, but this technique can be a little tricky. For this nacho cheese sauce recipe, we just eliminate most of the water to begin with by using evaporated milk instead of whole milk. The fat and proteins in the evaporated milk combine seamlessly with the fat in the cheese, making a smooth and creamy sauce with no special tricks needed!

Do I Have to Use Evaporated Milk?

The low water content of the evaporated milk is what allows the cheese to melt into the sauce smoothly without using an emulsifier. Another low-water option to use in place of the evaporated milk is heavy cream, although that will create an extremely rich cheese sauce. Regular milk is far too watery and will not work for the method presented below. Instead, in order to make nacho cheese with milk you’ll need to use the technique used in our 5-Minute Nacho Cheese Sauce.

What Kind of Cheese Is Best for Nacho Cheese

Sharp cheddar gets my vote for nacho cheese. It melts smoothly without being stringy, while having a nice flavorful punch. You can use mild or medium cheddar if you prefer, but the flavor will be a bit blander. Monterey jack and pepper jack also melt really well into sauces and make a great white nacho cheese sauce.

And ALWAYS buy block cheese and shred it yourself for cheese sauces rather than buying pre-shredded cheese, which is coated in anti-caking agents and will not melt as smoothly.

How to Serve Nacho Cheese

On nachos, of course! But you can also use this thick and smooth cheese sauce on many other dishes. Dry pouring it over vegetables (like broccoli or asparagus), bowl meals, mashed, roasted, or baked potatoes, or even pasta for a quick mac and cheese dupe!

Can It Be Reheated?

One of the other benefits of using evaporated milk is that it makes this cheese sauce very stable. This sauce reheats well over low heat without separating (just don’t over heat it or the cheese will break!). You can also keep it warm for parties using the low setting on a slow cooker.

close up side view of a plate of nachos with jalapeños.
Overhead view of a plate of nachos with a hand stealing one chip.
Print

Easy Nacho Cheese

This easy no-roux nacho cheese sauce recipe is smooth, melty, and absolutely fool-proof. Great for nachos, vegetables, and more!
Course Appetizer
Cuisine American
Total Cost $3.62 recipe / $0.45 serving
Prep Time 5 minutes
Cook Time 10 minutes
Total Time 15 minutes
Servings 8 ¼ cup each
Calories 160kcal

Equipment

Ingredients

  • 8 oz. sharp cheddar $2.49
  • 1 cup evaporated milk $1.00
  • 1/4 tsp chili powder $0.02
  • 1 Tbsp pickled jalapeño brine (optional) $0.10
  • 1/8 tsp salt $0.01

Instructions

  • Shred the cheddar cheese.
  • Add the evaporated milk and chili powder to a sauce pot and heat over medium. Allow the evaporated milk to come up to a simmer.
  • Reduce the heat to low and start adding the shredded cheese, one handful at a time, stirring it in until fully melted before adding another handful. Continue until all of the cheese has been melted into the sauce.
  • Add the pickled jalapeño brine and stir to combine. Give the nacho cheese a taste and add a pinch of salt, if needed. Enjoy the cheese poured over your favorite foods!

See how we calculate recipe costs here.

Nutrition

Serving: 0.25cup | Calories: 160kcal | Carbohydrates: 4g | Protein: 9g | Fat: 12g | Sodium: 284mg | Fiber: 0.02g
Nacho cheese running off a spoon into a saucepot.

How to Make Nacho Cheese – Step by Step Photos

Shredded cheddar cheese on a cutting board with the cheese grater.

Start by shredding an 8 oz. block of sharp cheddar cheese. Using block cheese that you shred yourself instead of pre-shredded cheese makes a much better sauce.

Evaporated milk and spices in a saucepot being stirred.

Add one cup of evaporated milk to a sauce pot along with ¼ tsp chili powder. Heat and stir over medium-high until it comes to a simmer.

Shredded cheese being added to the evaporated milk.

When it reaches a simmer, turn the heat down to low. Begin adding the shredded cheese, one handful at a time, stirring it in until completely melted before adding the next handful.

Finished nacho cheese sauce being stirred with a spoon.

Continue adding cheese until it has all been added to the sauce. Finally, stir in 1 Tbsp brine from pickled jalapeños. Give the cheese a taste and add a pinch of salt, if needed.

Overhead view of a plate of nachos with jalapeños.

Pour your nacho cheese sauce over a plate of chips, your favorite vegetables, or just about anything. Cheese makes everything better. :P

The post Easy Nacho Cheese appeared first on Budget Bytes.

Crab Dip

This creamy, spicy crab dip is so good you’ll be pushing a cracker into the corners of your serving dish to scoop up the last schmear.

The post Crab Dip appeared first on Budget Bytes.

This creamy, spicy crab dip is so good you’ll be pushing a cracker into the corners of your serving dish to scoop up the last schmear. At least that’s what Beth and I did when we annihilated it in the Budget Bytes Kitchen (In the name of research, of course, 😂 ). It’s so easy that it comes together in three steps. And you can serve it hot or cold! Get ready for your new favorite thing to bring to the party.

Overhead shot of crab dip in a white bowl surrounded by veggies.

What You’ll Need

This crab dip comes together in ten minutes. You should chill it before serving to thicken the cream cheese base, but you don’t have to if you’re low on time. Just serve it in a container set over ice. You can also bake it for a few minutes if you prefer to serve it hot.

Crab Meat – the real stuff is expensive, so we used imitation crab meat, and the results were divine. Choose your own adventure, but my money’s on the fish forgery. If you use real crab, drain it well, or your dip will end up runny.

Cream Cheese – acts like a binder and helps keep everything together. It also thickens the consistency of your dip.

Sour cream – adds an undeniable tang and smooth mouth feel.

Cheddar Cheese – the shreds will add texture and a sharp, earthy flavor.

Old Bay Seasoning – this blend of celery salt, red and black pepper, mustard powder, cayenne, and paprika adds a citrusy heat that doesn’t overpower the sweetness of the crab meat. You can substitute it with Cajun seasoning or Crab Boil seasoning.

Garlic Powder – raw garlic has a robust flavor that takes over a crab dip. Instead, use garlic powder which has mellow, roasted notes.

Hot Sauce – adds a smoky heat. Use as much (or as little) as your heart desires. You can substitute hot sauce with red pepper flakes or cayenne.

Lemon Juice – you need this hit of acid to break through the fattiness of the cream cheese and sour cream. If you don’t have lemon, use any white vinegar.

Scallions -add a soft onion flavor, texture, and freshness. You can also garnish with chopped Italian parsley or finely chopped raw onion. Soak raw onion in cold water for a minute to decrease its sharpness.

Crackers, Toasted Bread, Chips, Raw Veggies – lean into plain or lightly flavored crackers, so they don’t overpower the crab. Toasted bread and chips should be sturdy so they don’t break when dipped. Sweet peppers, celery sticks, and carrots sticks are all easy and economical choices.

Hand dipping cracker in crab dip.

Do I Serve Crab Dip Hot or Cold?

You can do both! If you want to prepare a hot version, sprinkle an additional 1/4 cup of shredded cheddar over the top and then warm in a 350°F oven until the cheese has melted and the crab dip is bubbly—about fifteen minutes. To serve cold, chill it in the fridge for at least a half hour. If you’re low on time, place the crab dip container over a bed of ice and serve right away.

What Goes With Crab Dip?

Crackers, toasted bread, chips, and raw vegetables are the traditional items served with crab dip. But you can also use it as a spread on toast or chicken. Drizzle it on fried eggs or french fries. Try to stick with milder flavors that won’t overpower the sweetness of the crab.

How To Store Leftovers

Place leftovers in an air-tight container with plastic film or wax paper directly over the surface of the dip. Refrigerate for up to five days and freeze for up to 3 months. Thaw frozen crab dip in the refrigerator overnight. Reheat thawed crab dip that you’d like to serve hot in a 350°F oven.

Hand squeezing lime on crab dip.
Overhead shot of crab dip.
Print

Crab Dip

This creamy, spicy crab dip is so good you'll be pushing a cracker into the corners of your serving dish to scoop up the last schmear! It comes together in three easy steps and you can serve it hot or cold.
Course Appetizer
Cuisine American
Total Cost ($5.07 recipe / $0.63 serving)
Prep Time 10 minutes
Servings 8 1/4 cup servings
Calories 109kcal

Ingredients

  • 4 oz cream cheese, softened $1.10
  • 1/4 cup sour cream $0.31
  • 1 tsp Old Bay Seasoning $0.16
  • 1 1/2 tsp lemon juice, freshly squeezed $0.39
  • 2 tsp hot sauce $0.04
  • 1/2 tsp garlic powder $0.04
  • 2 green onions, sliced in 1/8th inch rounds $0.22
  • 8 oz imitation crab, chopped $2.50
  • 1/4 cup sharp cheddar cheese* , shredded $0.31

Instructions

  • In a medium bowl, mix the cream cheese and sour cream until smooth.
  • Mix in Old Bay Seasoning, lemon juice, hot sauce, garlic powder, and green onions.
  • Mix in crab meat and cheddar cheese.
  • Refrigerate for at least 30 minutes and serve.*

See how we calculate recipe costs here.

Notes

*Use 1/4 cup more shredded cheddar to melt on top of the dip if you are serving it hot
*If you are serving the crab dip hot, top it with an additional 1/4 cup of shredded cheddar cheese and warm it in a 350°F oven until the cheese has melted and the crab dip is bubbly, about fifteen minutes.

Nutrition

Serving: 0.25cup | Calories: 109kcal | Carbohydrates: 7g | Protein: 4g | Fat: 8g | Sodium: 256mg | Fiber: 0.4g
Cracker in a bowl of crab dip.

How to Make Crab Dip – Step by Step Photos

Overhead shot of cream cheese and sourcream.

In a medium bowl, mix the 4 ounces of cream cheese and 1/4 cup of sour cream until smooth.

Overhead shot of spices in a bowl.

Mix in 1 1/2 teaspoons of Old Bay Seasoning, 1 1/2 teaspoons of fresh lemon juice, 2 teaspoons of hot sauce, 1/2 teaspoon of garlic powder, and 2 green onions sliced in 1/8th inch rounds (about 2 tablespoons).

Overhead shot of crab and cheese in a white bowl.

Mix in 8 ounces of imitation crab and 1/4 cup of shredded cheddar cheese.

Overhead shot of finished crab dip.

Refrigerate for at least 30 minutes and serve with crackers, bread, chips, or raw veggies. If you’re running low on time, place the serving dish over a bed of ice and serve right away. Get ready for this incredible crab dip to steal the show!

Overhead shot of crab dip.

More Easy Dips

caption

The post Crab Dip appeared first on Budget Bytes.

Butternut Squash Mac and Cheese

This butternut squash mac and cheese recipe strikes the perfect weeknight balance. It’s creamy, it’s cheesy, it’s comforting and completely delicious. This mac and cheese is not…

The post Butternut Squash Mac and Cheese appeared first on Cookie and Kate.

butternut squash mac and cheese overhead

This butternut squash mac and cheese recipe strikes the perfect weeknight balance. It’s creamy, it’s cheesy, it’s comforting and completely delicious. This mac and cheese is not so rich that you’ll get a belly ache or fall asleep immediately after dinner.

This recipe is redeeming, too—it’s full of luscious roasted butternut squash, which amps up the golden hue without overwhelming the flavor. This mac and cheese is a real crowd pleaser. Our toddler loves it and so do we.

butternut squash before and after roasting

The cooking method is a thrill. This pasta comes together in one pot. You don’t ever strain the pasta. You don’t have to fuss with a béchamel sauce. You don’t have to get out the blender for the butternut.

If you roast your squash in advance, this recipe comes together in about 30 minutes. This is a unicorn of a pasta dish and I’m so excited to hear how it turns out in your kitchen.

Continue to the recipe...

The post Butternut Squash Mac and Cheese appeared first on Cookie and Kate.