Garlic Noodles
 One bite of these 15-minute Garlic Noodles and you’ll be hooked! An incredibly easy recipe perfect for quick weeknight dinners or anytime you’re craving a garlicky, flavor-packed dish. Add tofu, vegetables, or anything else you like! Craving more slurpalicious noodles? These Teriyaki Noodles are deceptively simple, my Thai Peanut Noodles taste as good as they…
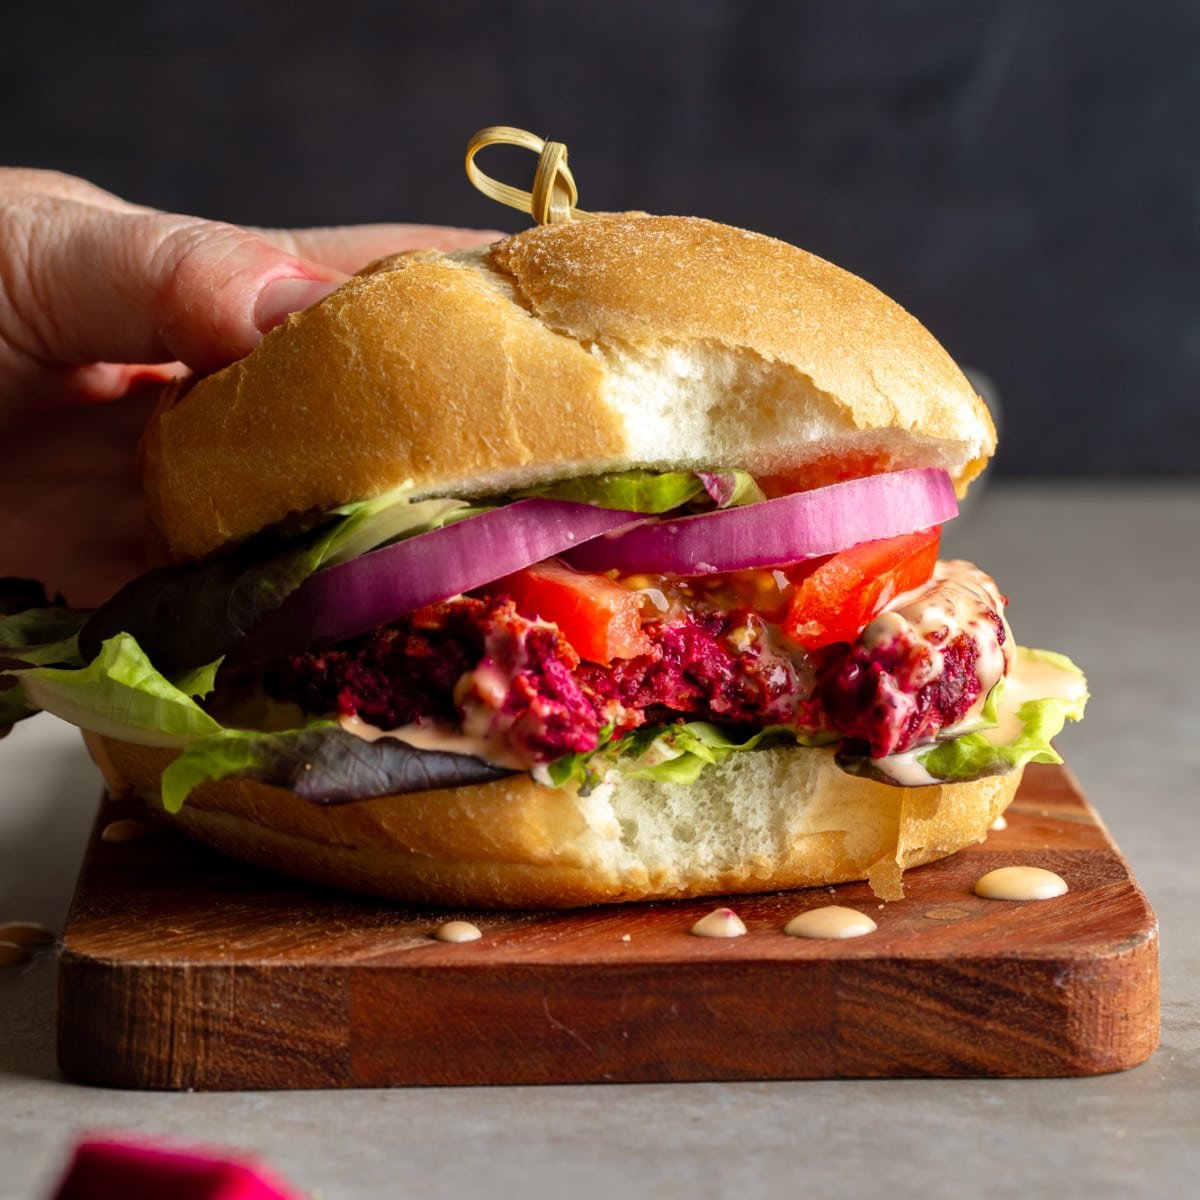 These gorgeous Kidney Beet Burgers are so easy to make and jam-packed with flavor! A budget-friendly mix of canned beans, shredded beets, oats, and seasonings makes each bite tender and meaty. If you love homemade veggie burgers, you’ll also enjoy my Sweet Potato Black Bean Burgers, Chickpea Burgers, and Best Veggie Burgers as well! I’ve…
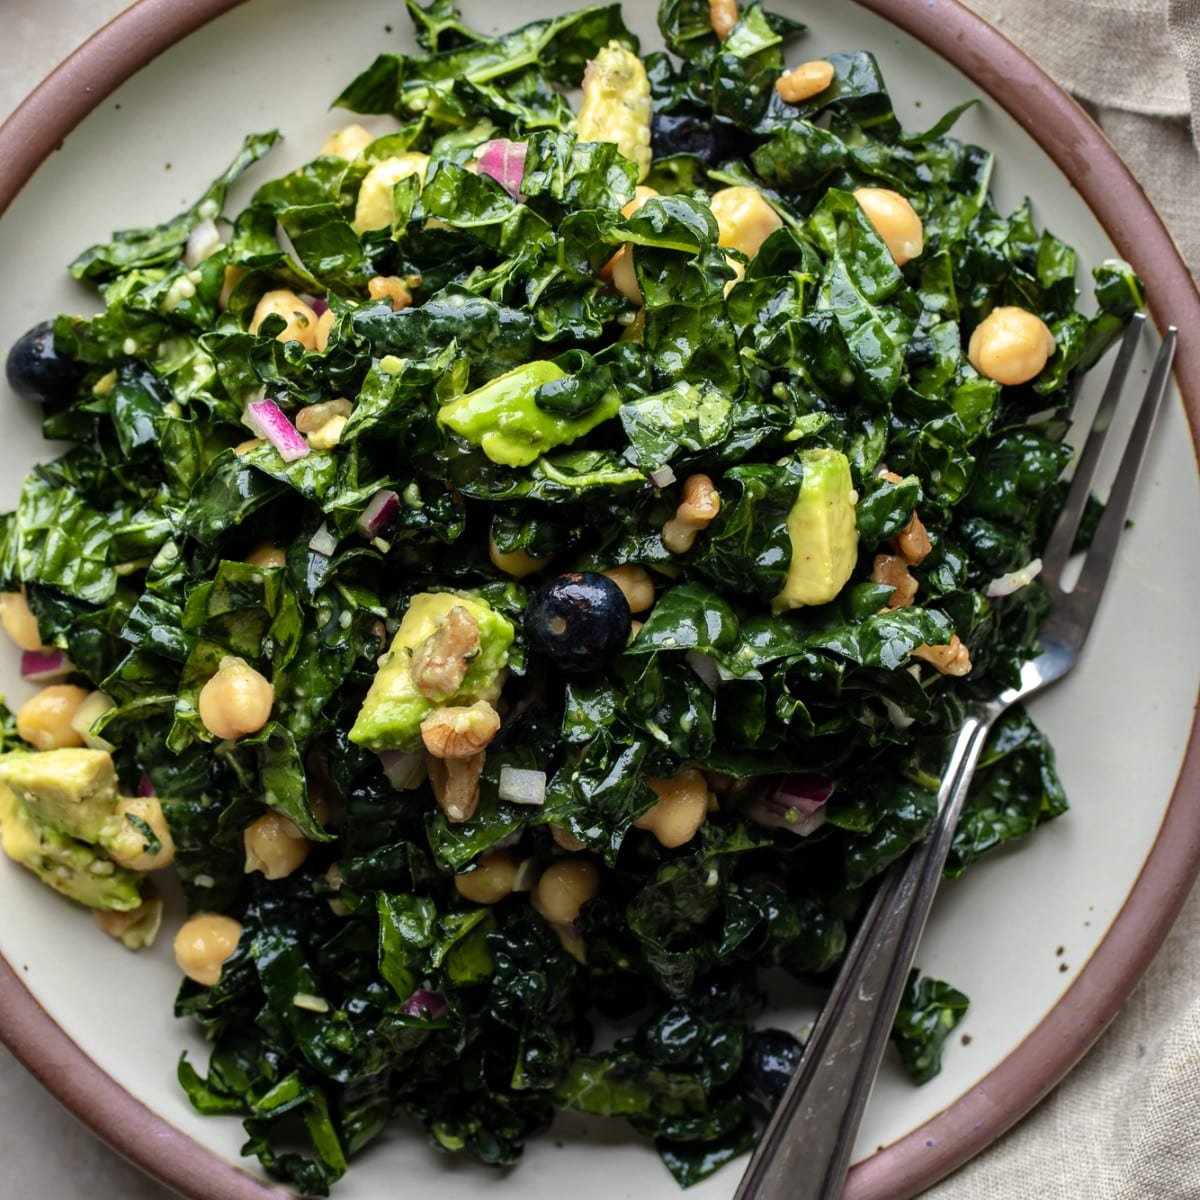 This is THE kale salad I make all the time! A mix of kale, fresh veggies, fruits, and nuts is tossed in a bright lemon dressing to leave you with the perfect light lunch or simple side dish. Do you have leftover fresh kale? Use it to make this Kale Caesar Salad for everyday dinners,…
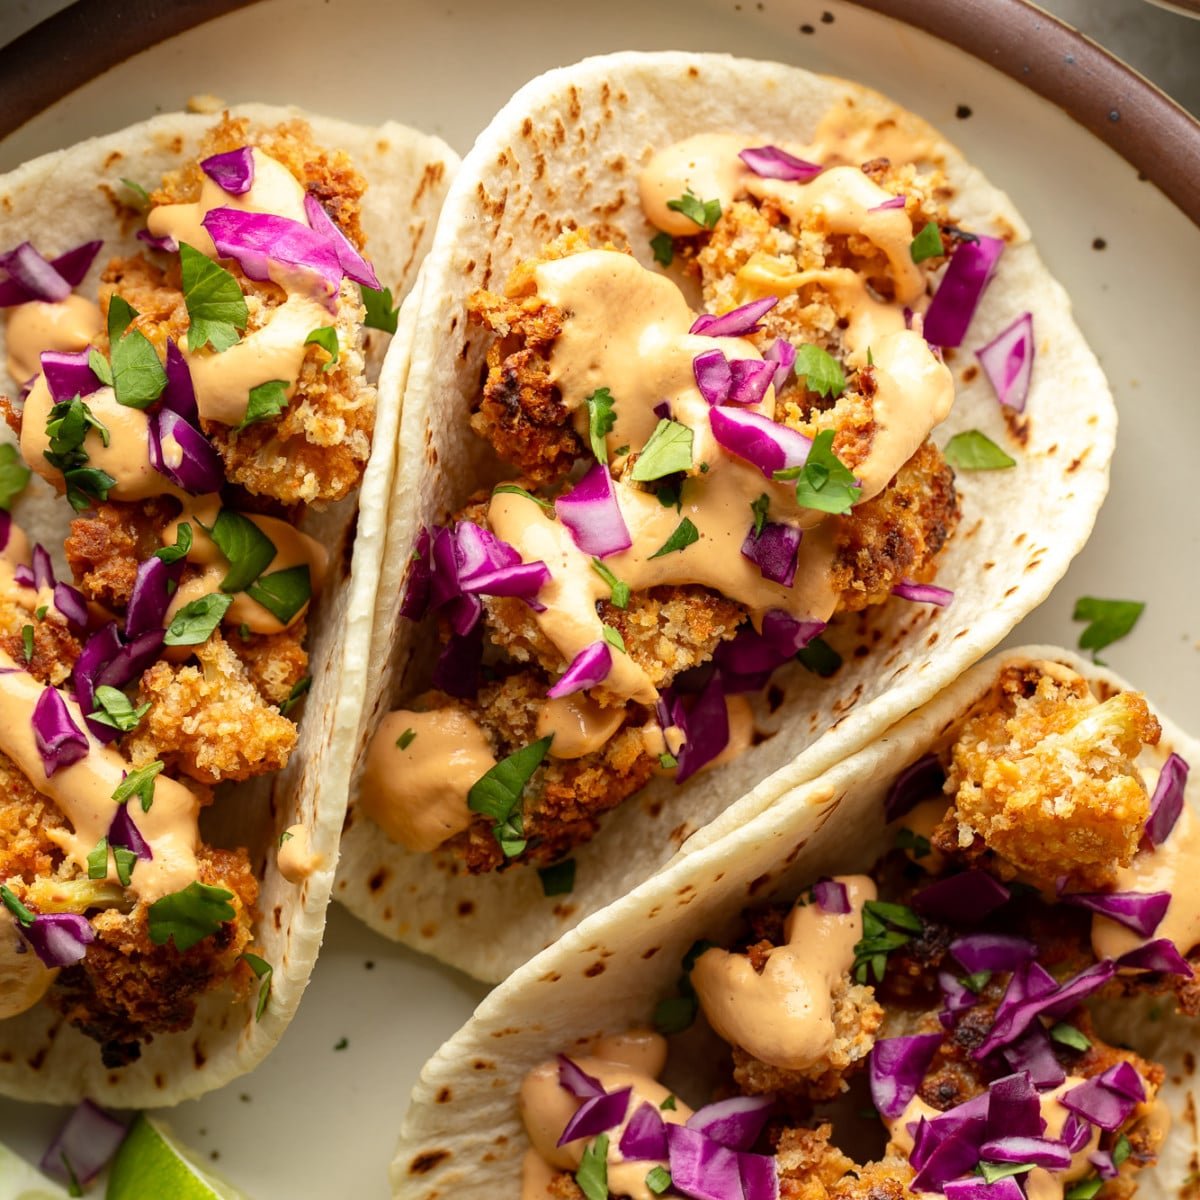 Cauliflower goes from ‘blah’ to ‘yum!’ in these Crispy Cauliflower Tacos! Panko-coated cauliflower is roasted until golden, then drizzled with chipotle cream to make this easy taco recipe a must-try for weeknight meals and Taco Tuesday. Looking for more plant-based taco recipes? You’ll also love these Shredded Tofu Tacos, Spicy Potato Tacos, and Jackfruit Tacos!…
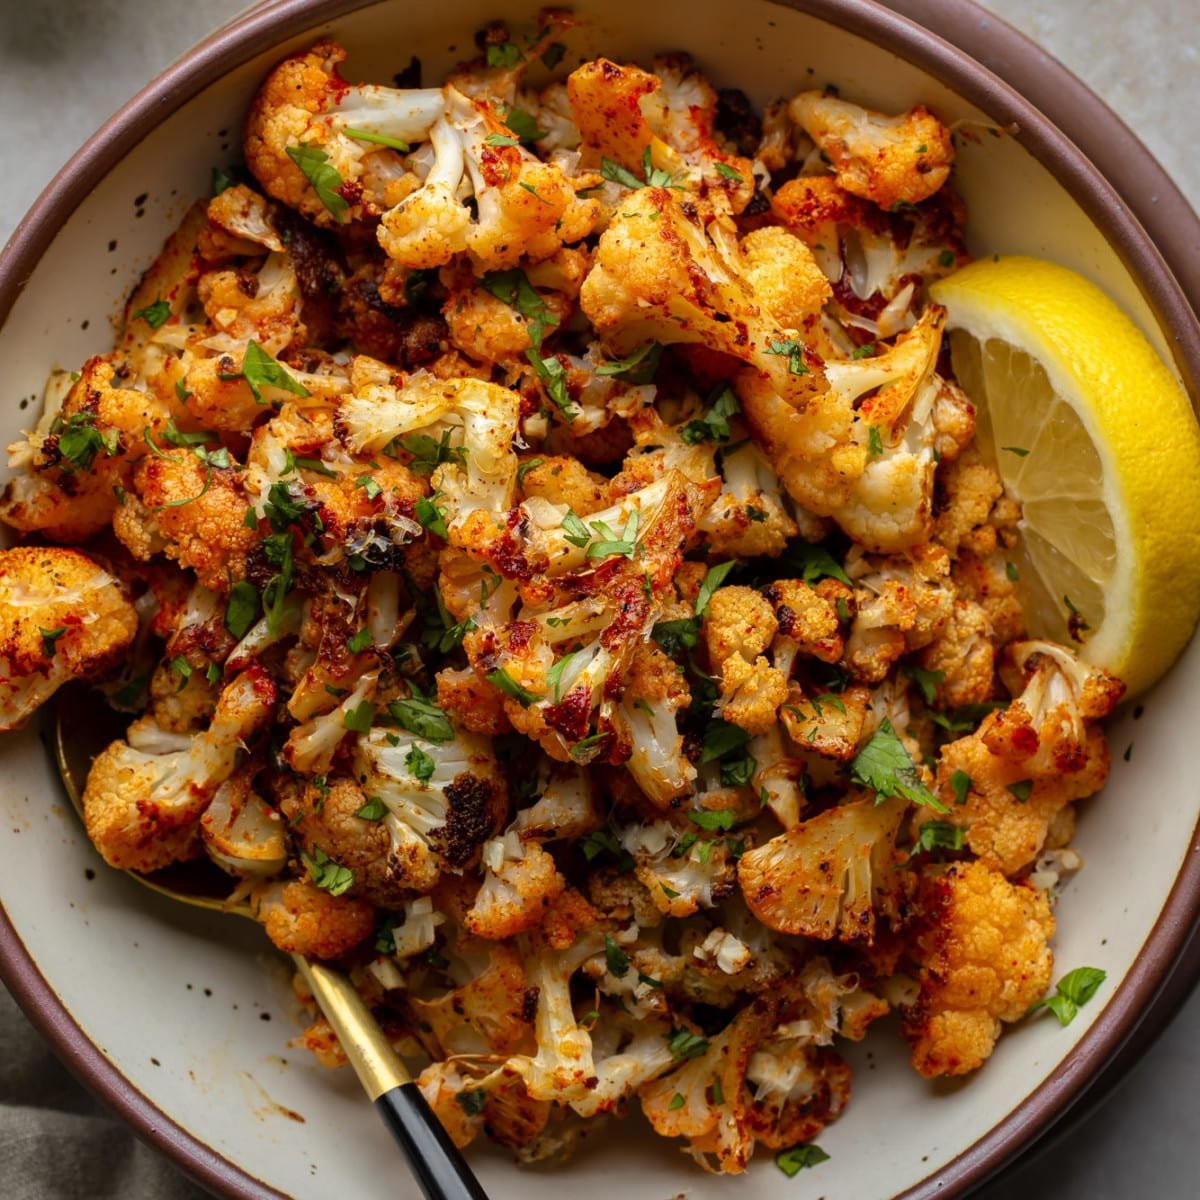 This is my favorite way to make roasted cauliflower and it’s the best vegetable side dish to complete any meal! Boring raw cauliflower transforms in the oven into a golden, crispy, flavor-packed deliciousness. A squeeze of fresh lemon juice after roasting takes it to the next level. Want even more ideas for roasted vegetable side…
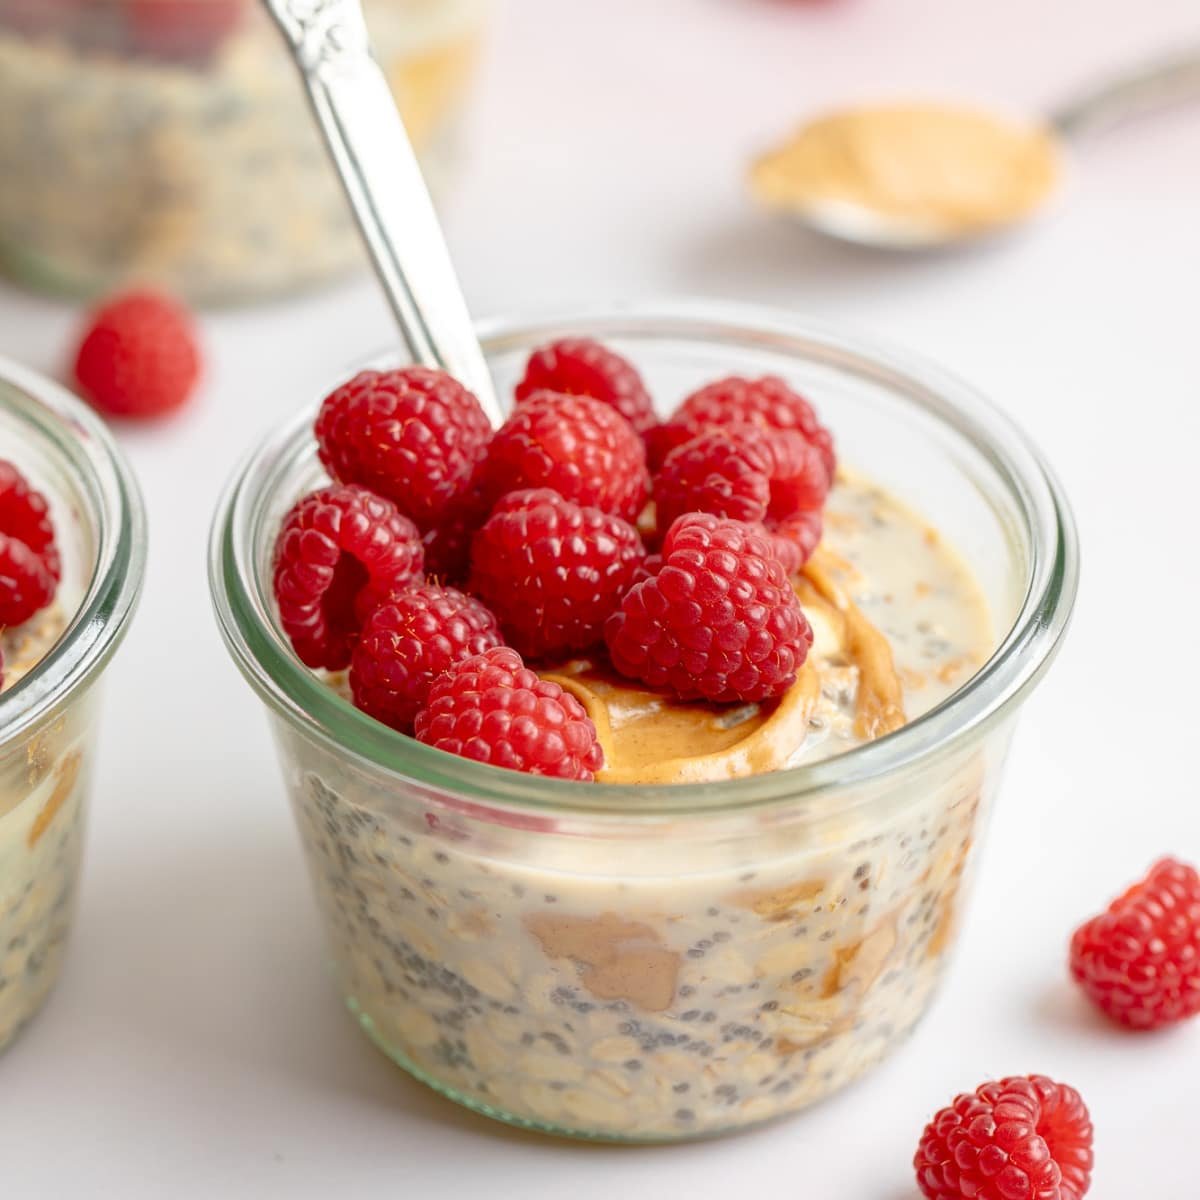 Make these Peanut Butter Overnight Oats for an easy, make-ahead, and protein-rich breakfast! They’re incredibly satisfying and stay super creamy for days. Want more easy vegan breakfast recipes you can make ahead of time? Check out my Vegan Breakfast Sandwich, Pumpkin Oatmeal Bake, and Chocolate Chia Pudding recipes while you’re here! Peanut butter: It’s not…
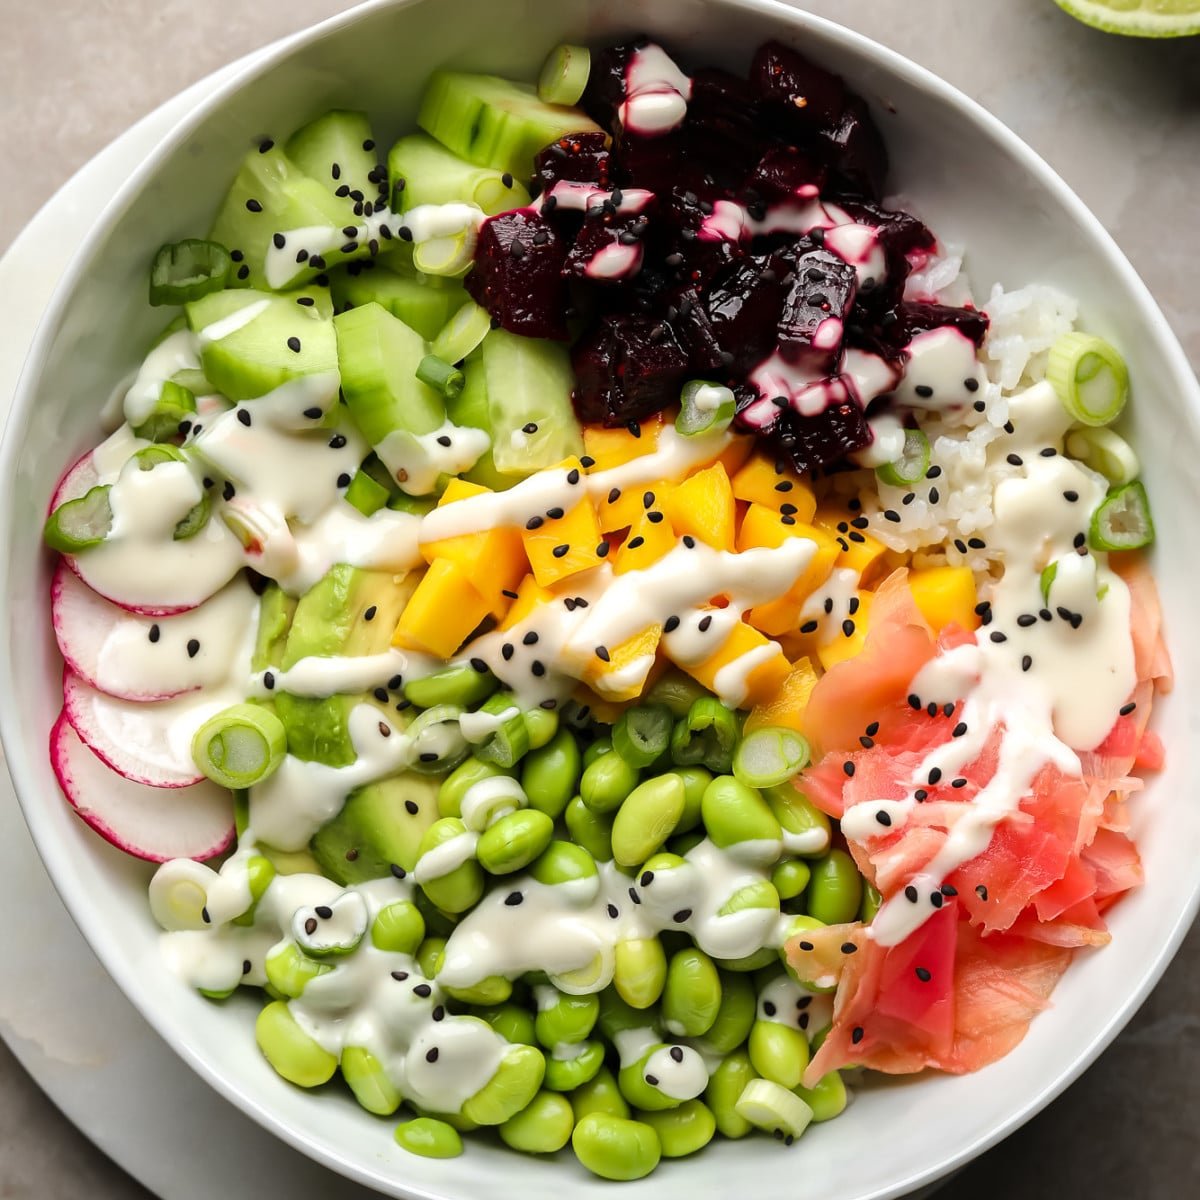 Learn how to make vegan poke bowls with beets! These Beet Poke Bowls are made with marinated beet poke, fresh vegetables, and wasabi mayo to give you a refreshing and incredibly flexible rice bowl that doesn’t skimp on flavor. For more easy vegan grain bowls, check out my Vegan Buddha Bowl, Vegan Burrito Bowl, and…
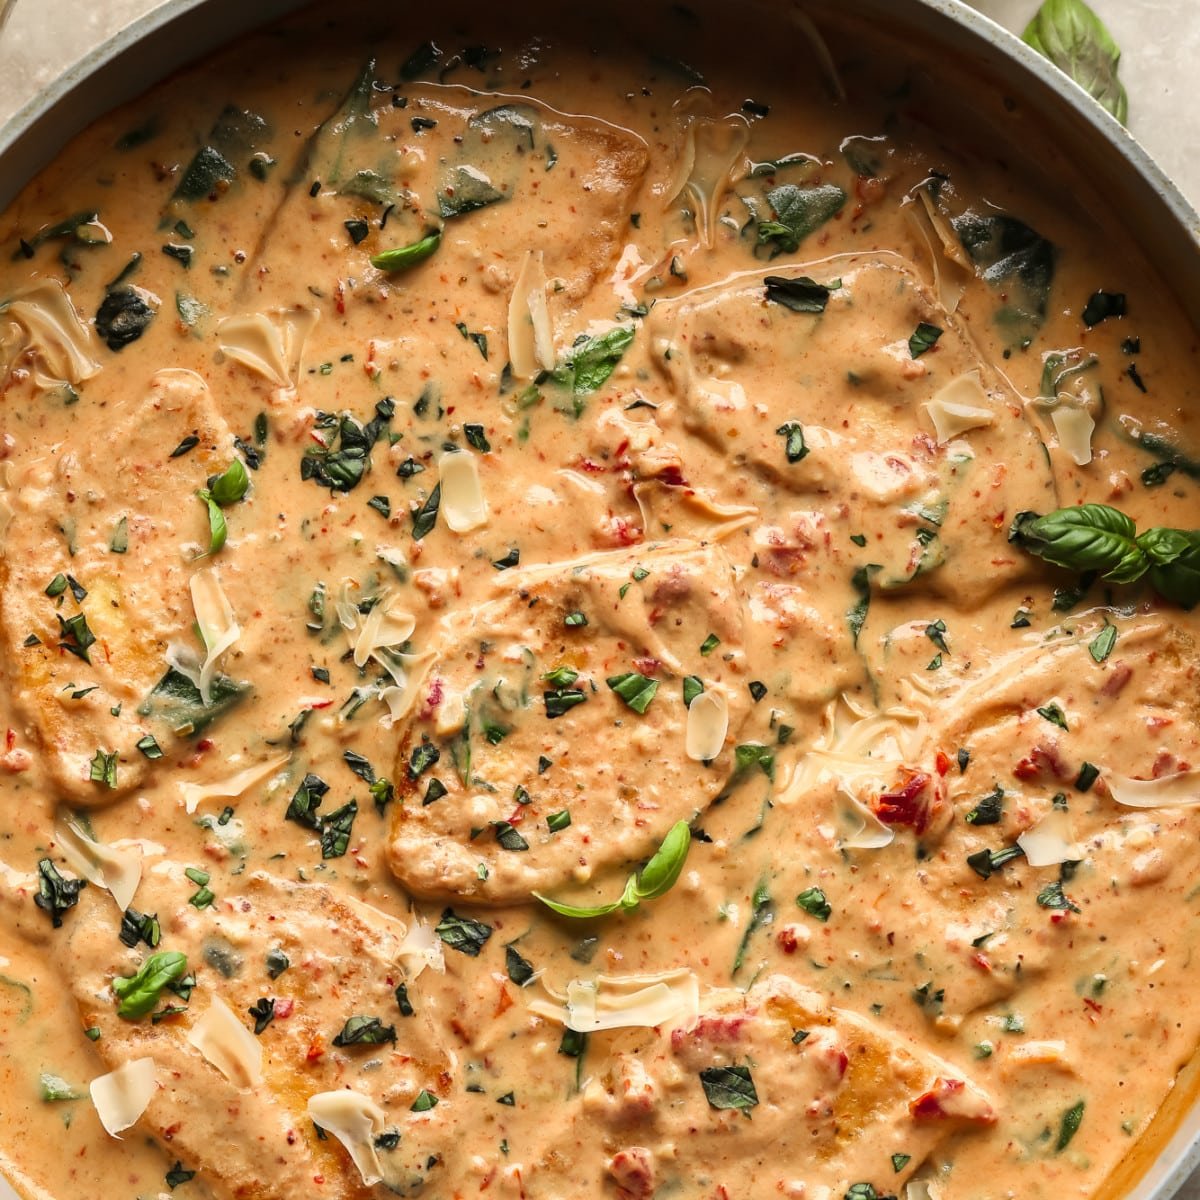 This vegan Marry Me Tofu recipe is a rich, creamy, and luxurious tofu dish with garlic, sun dried tomatoes and spinach! A surprisingly quick and easy one-pan meal that’s ready in 30 minutes. Looking for more mouthwatering tofu dinner recipes? Check out my Creamy Lemon Tofu, Shredded Tofu Tacos, and Easy Teriyaki Tofu recipes while…
 My one-pot Vegan Lasagna Soup takes everything you love about lasagna and puts it in soup form! It’s a whole lot easier to make than a pan of lasagna and is ready in less than 30 minutes. For more comforting vegan soups, check out my Instant Pot Butternut Squash Soup, Vegan Chicken Noodle Soup, Vegan…
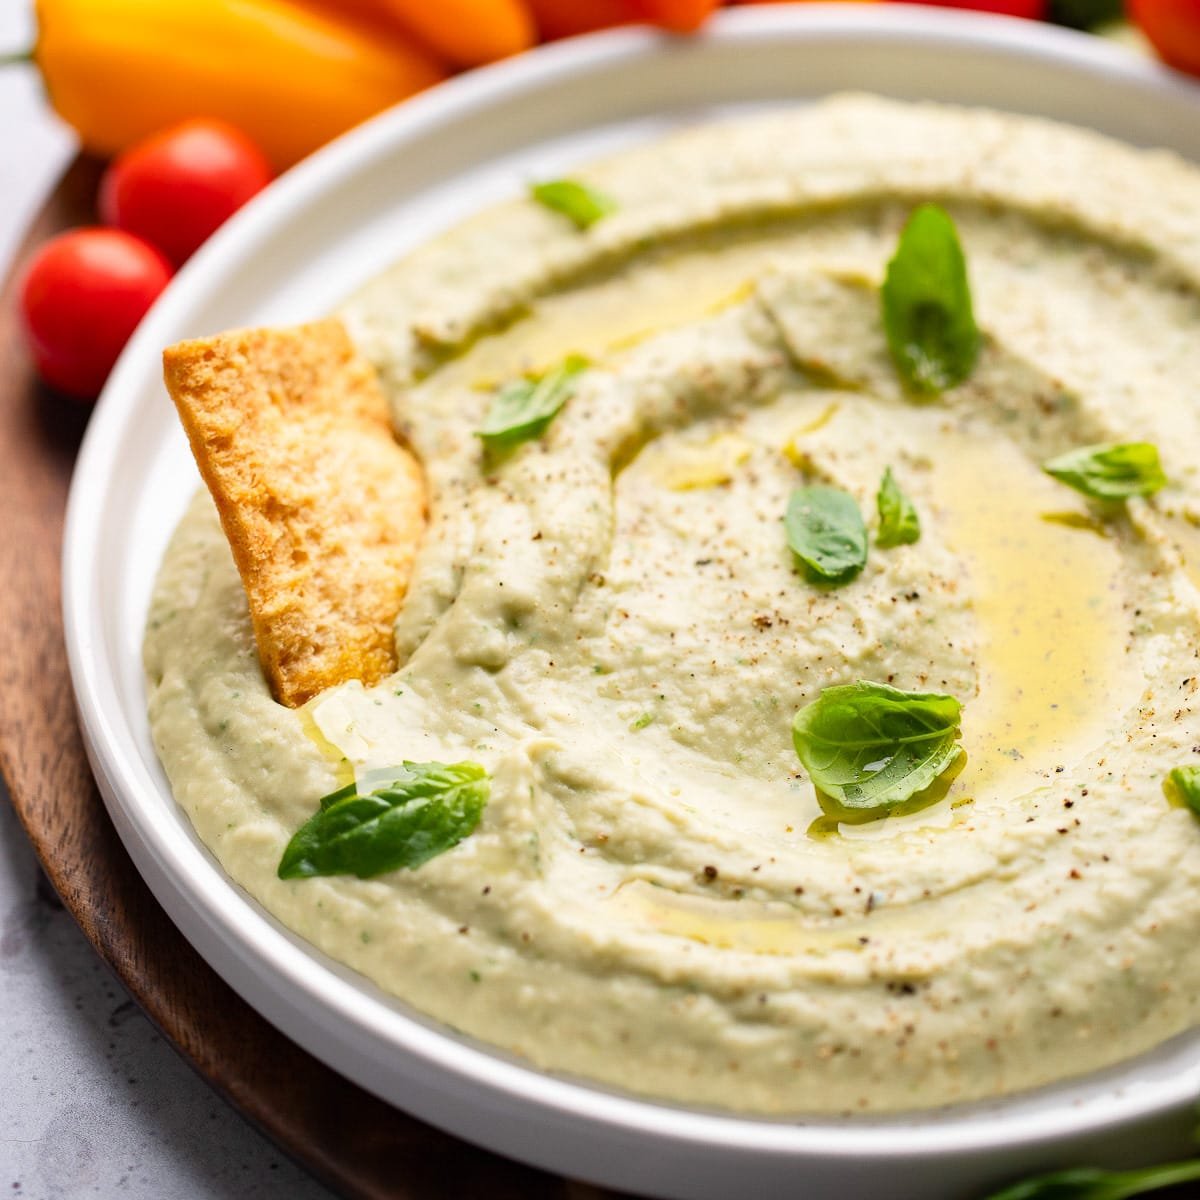 This White Bean Dip is so good, you’ll want to eat it by the spoonful! Top it with pine nuts and serve with vegetables and pita for an addictively delicious snack or appetizer. Looking for more easy and creamy vegan dip recipes? Check out The Best and Easiest Hummus, 5 Ingredient Vegan Queso, Beet Hummus,…
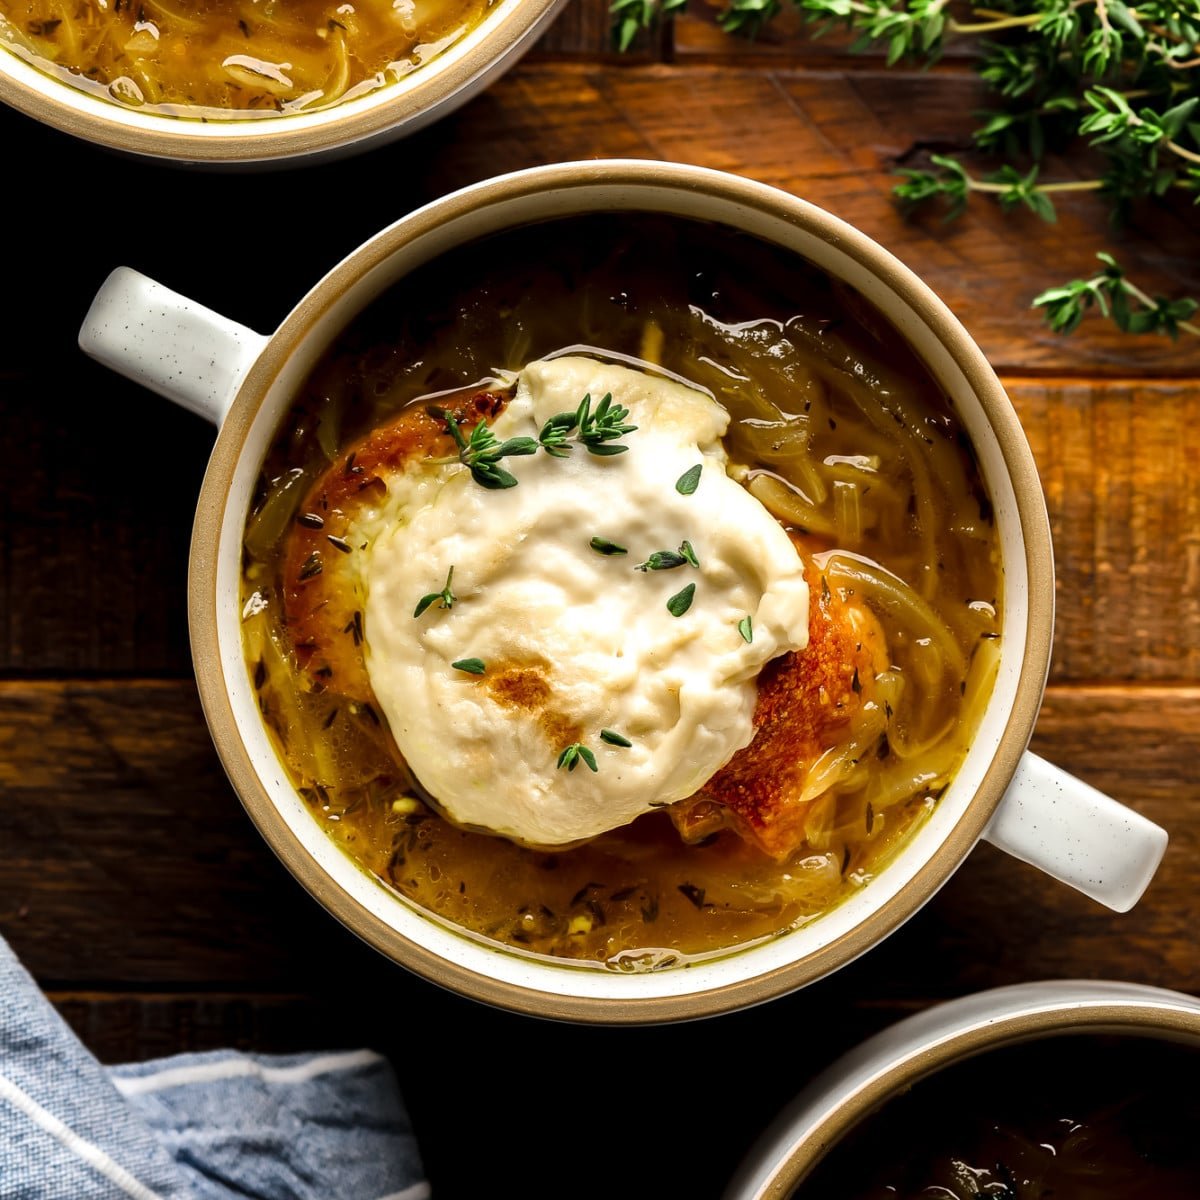 Warm up with a steaming hot bowl of Vegan French Onion Soup topped with toasted bread and stretchy, gooey vegan cheese. It’s easy to fall in love with this savory, caramelized onion-packed comfort food! Treat yourself to more warm and cozy vegan soup recipes, like my Vegan Broccoli Cheddar Soup, Spicy Peanut Soup, and Vegan…
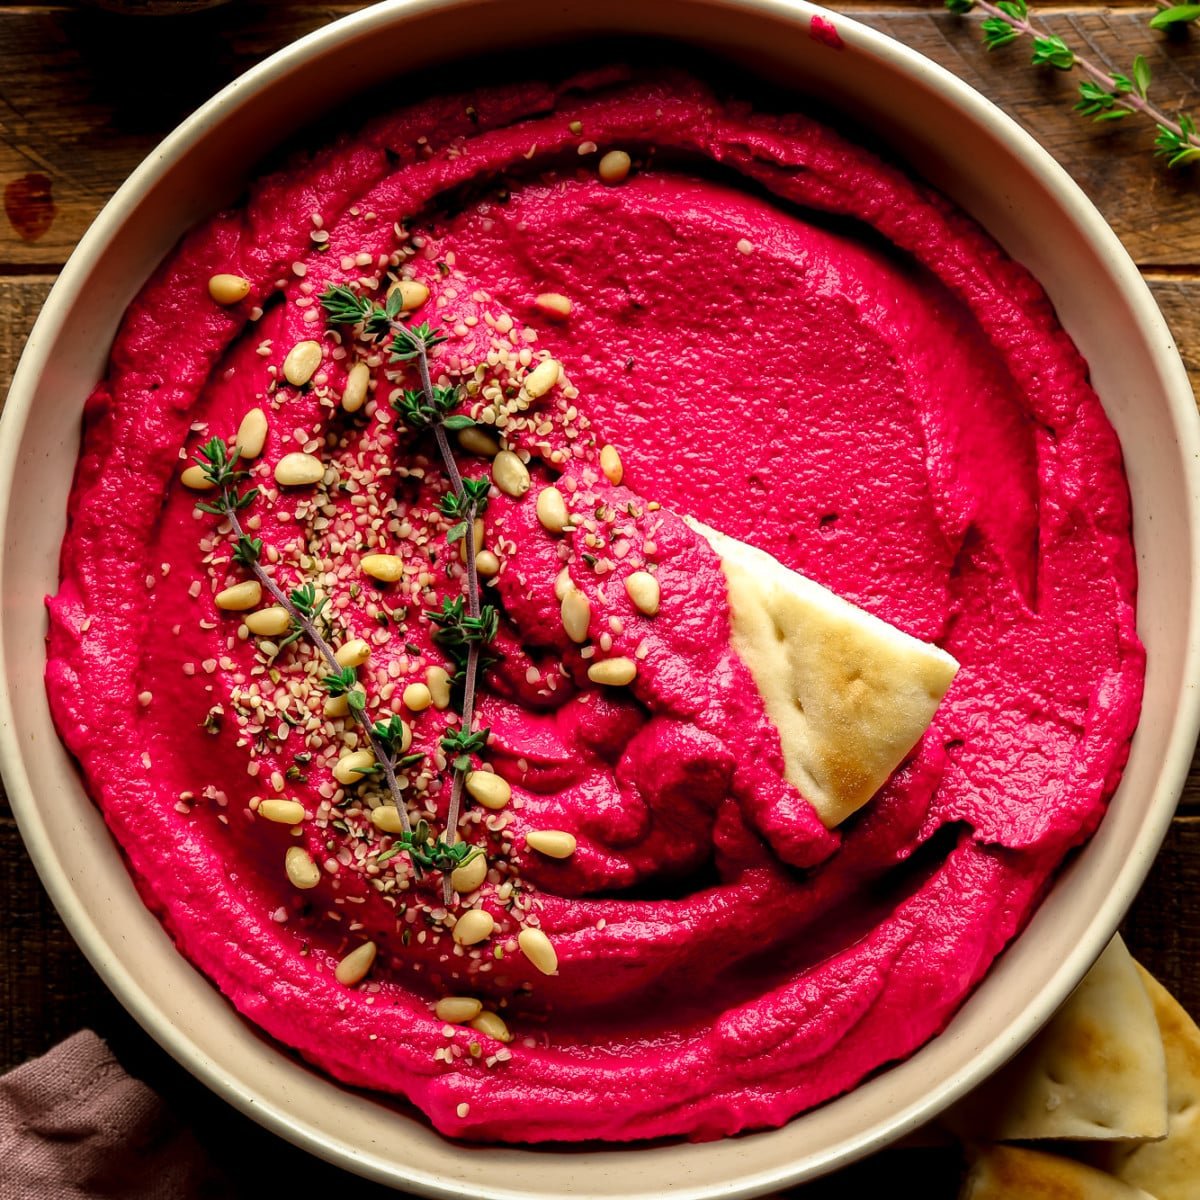 This Beet Hummus brings a pop of color and a burst of flavor to your snacking board! It’s an easy and creamy dip made by blending roasted beets with classic hummus ingredients. Craving more crowd-pleasing creamy dips? Give my Vegan Spinach Artichoke Dip, Vegan Queso, and Lemon Dill Hummus recipes a try! Good luck walking…
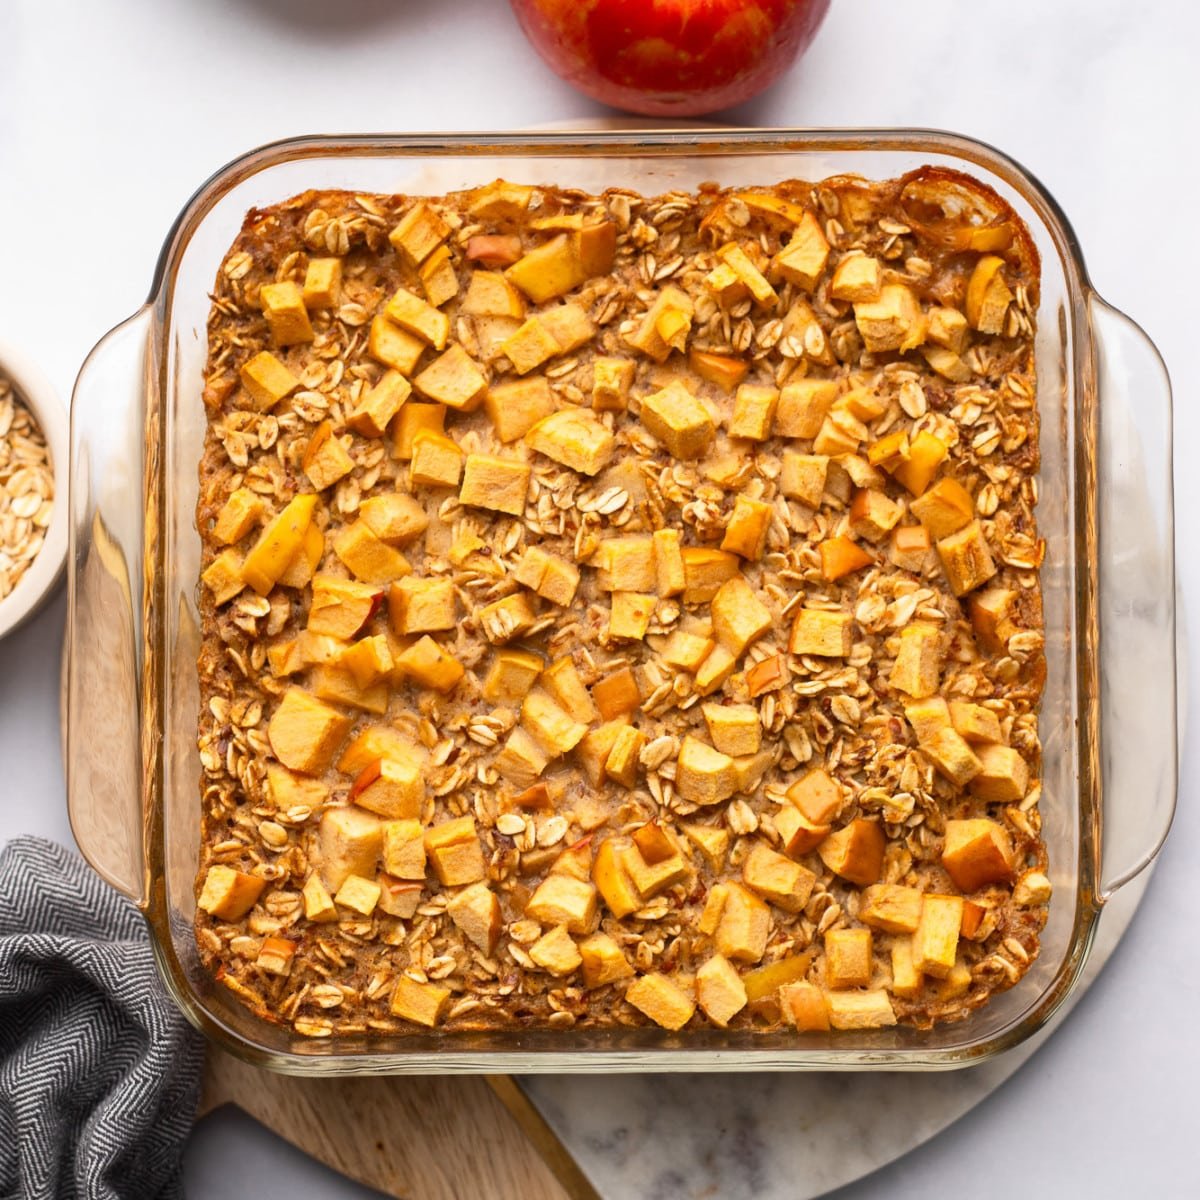 This Cinnamon Apple Baked Oatmeal is an easy breakfast casserole made with oats, cinnamon apples, maple syrup, and walnuts. Prep it the night before baking for a quick make-ahead breakfast! Are you searching for more easy vegan make-ahead breakfast recipes? Check out my Vegan Breakfast Casserole, Vegan French Toast Casserole, and Vegan Breakfast Burritos. In…
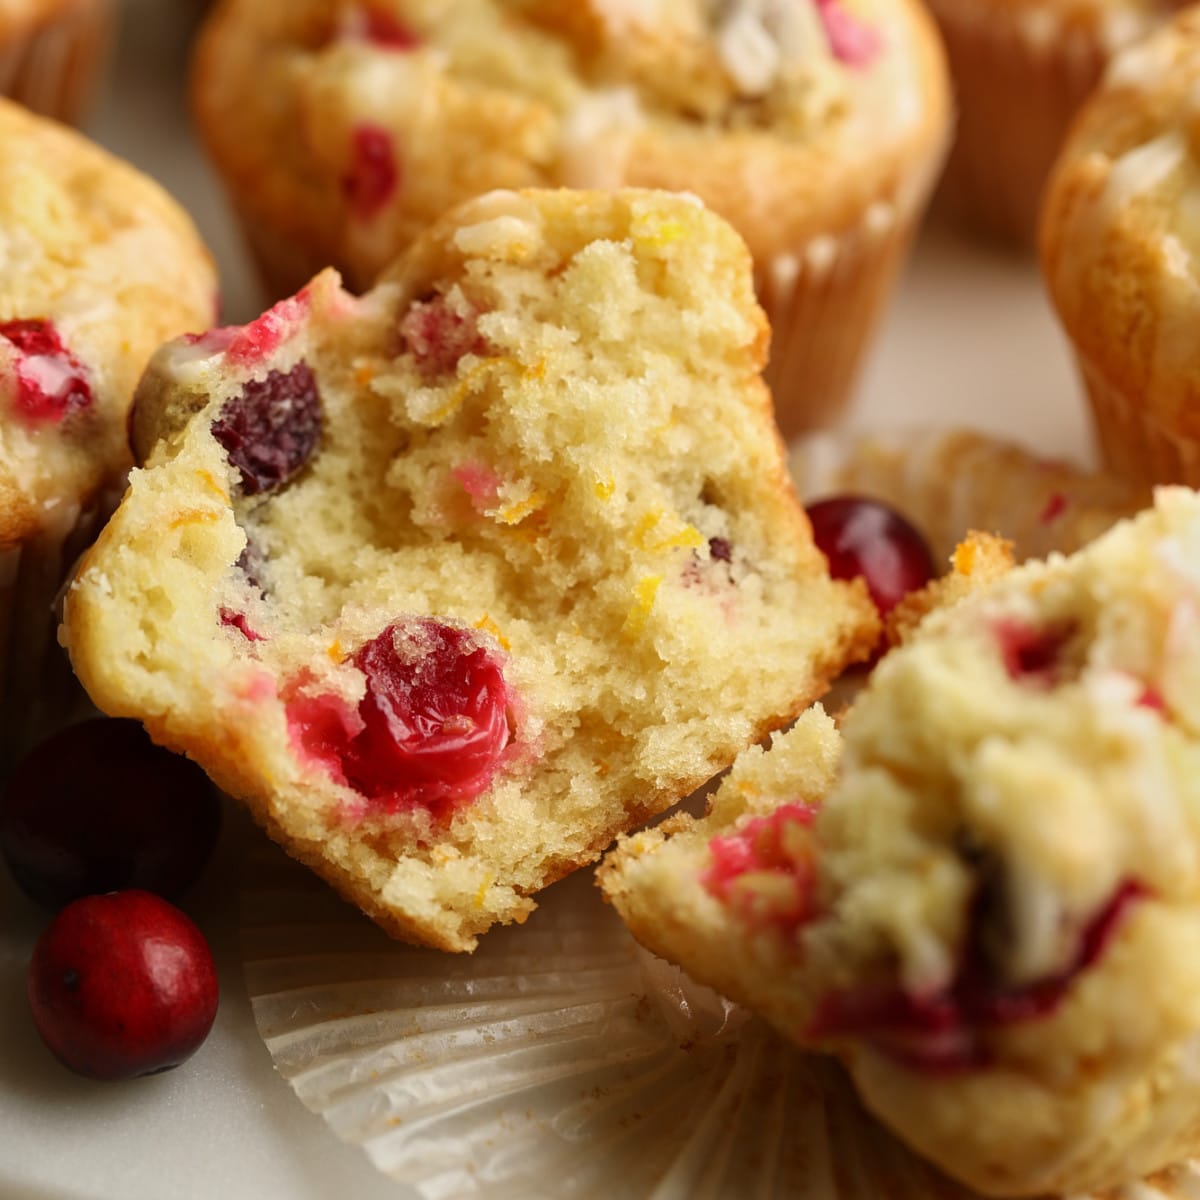 These soft and fluffy Cranberry Orange Muffins are studded with fresh cranberries, bursting with zesty orange flavors, and decorated with a sweet orange glaze. An easy festive treat made in one bowl! If you love muffins, you’ll also love my 1 Bowl Pumpkin Muffins, Best Ever Apple Muffins, and Vegan Chocolate Chip Muffins. Like peanut…
 Take your dinner to the next level with this Mushroom Gravy recipe! Made with fresh mushrooms, aromatics, herbs, and broth, it’s an easy yet sophisticated condiment you’ll want to drizzle on everything. For more holiday dinner essentials, check out my Vegan Dinner Rolls, Creamy Vegan Mashed Potatoes, and Vegan Stuffing recipes as well. I love…
 This Whole Roasted Cauliflower Recipe serves a mouthwatering harissa-glazed cauliflower head over a creamy white bean puree. Enjoy it as a flavor-packed side or main dish! For more impressive vegan cauliflower recipes, check out my Roasted Cauliflower Steaks, Buffalo Cauliflower Wings, and Easy Bang Bang Cauliflower! You’ve never seen cauliflower like this before! This Whole…
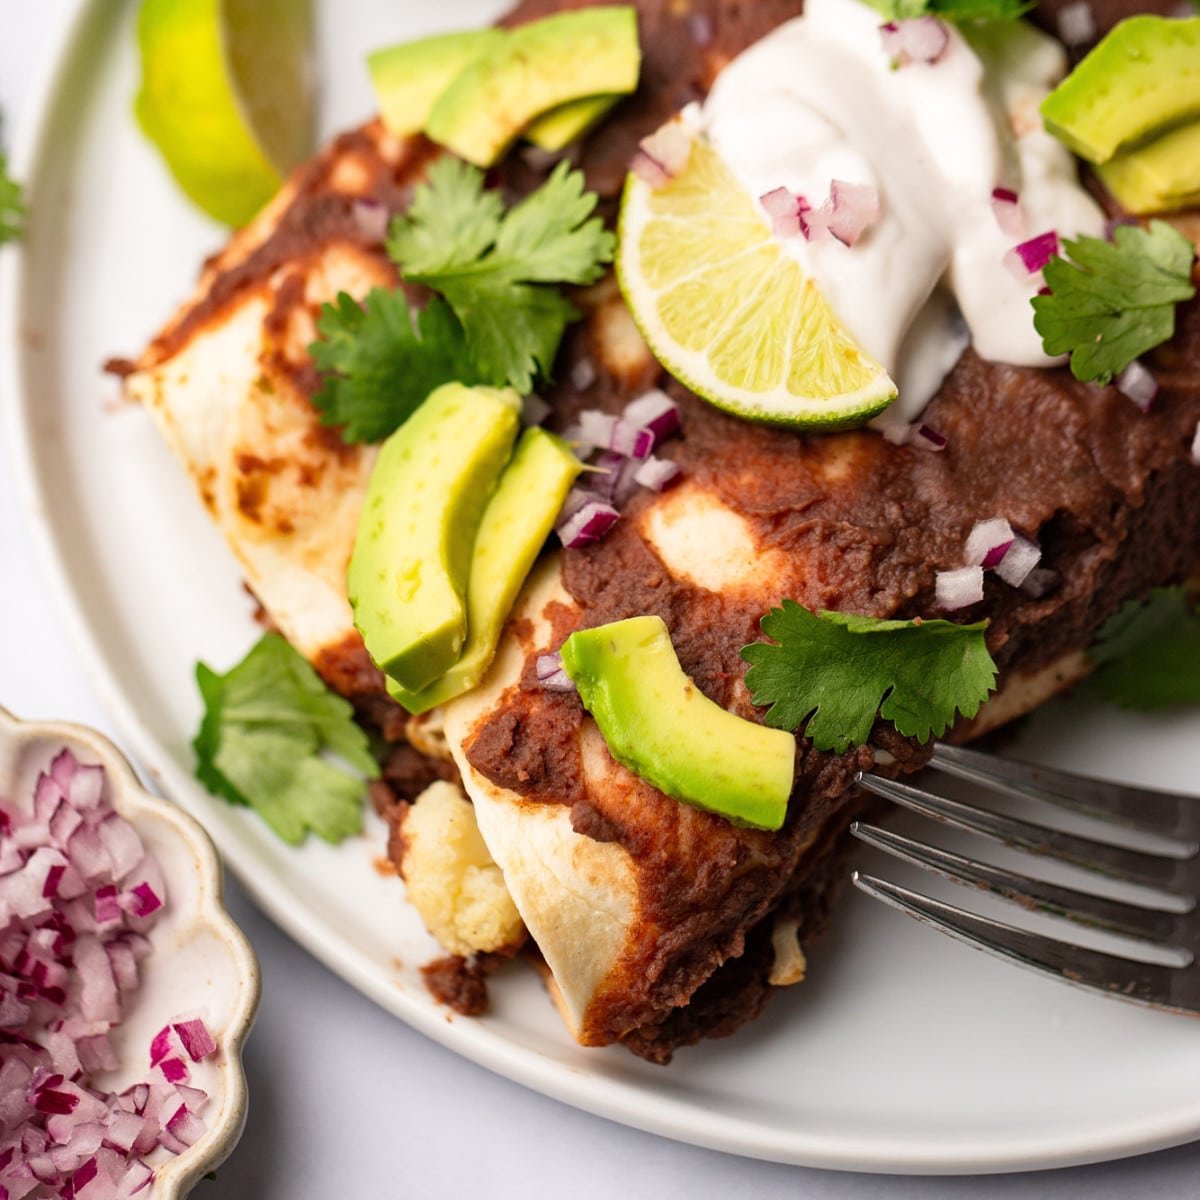 These Roasted Veggie Enchiladas are packed with roasted vegetables and drenched in a chipotle garlic black bean sauce. Best served with sour cream, crushed tortilla chips or strips, avocado chunks, red onion and a squeeze of lime juice. For more fun and delicious vegan enchilada recipes, check out my Skillet Enchiladas, Vegan Sour Cream Enchiladas,…