Sweet and perfectly spiced pumpkin coffee syrup is a delicious way to dress up your coffee right at home. But don’t stop there! This luscious syrup is equally amazing on pancakes and waffles, drizzled over ice cream, or as a topping for cheesecake.
TikTok got me yet again with this one, but I can’t even be mad about it because this stuff is so good.
A couple weeks ago, Stephie sent me a TikTok of someone making an amazing-sounding pumpkin marshmallow coffee syrup. She knows how much I love a Starbucks-at-home kind of moment, and she was right that I was gonna flip for this recipe.
I tracked the recipe back to its original creator, The Thrift Witch, and gave it a try pretty much the next day.
I’m basically obsessed with it. It’s my new favorite way to dress up my iced shaken espressos, and I might have spent some time drizzling it over basically every dessert I’ve eaten.
If you are the type that spends a lot of time at the coffee shop every fall because you’re a pumpkin spice latte person, this pumpkin coffee syrup is one you need to make immediately.
Our seasonal Pumpkin Spice Eggnog is my new favorite twist on the classic. It’s creamy, thick, and better than anything you can get at the store. Looking for more pumpkin recipes? Try Healthy Pumpkin Muffins, Pumpkin Cupcakes, Pumpkin Snickerdoodles, Pumpkin Pancakes, or Pumpkin Chocolate Chip Bread! How to make Pumpkin Spice Eggnog: Simmer Milk: In…
Our seasonal Pumpkin Spice Eggnog is my new favorite twist on the classic. It’s creamy, thick, and better than anything you can get at the store.
Pumpkin Eggnog is the fall staple you didn’t know you needed.
I love any excuse to eat eggnog before Christmas, and I may even like this pumpkin spice eggnog even more than our traditional eggnog! Both are liquid gold, easy to make and taste so much better than store-bought. If you don’t think you like eggnog, then you haven’t had it homemade.
How to make Pumpkin Spice Eggnog:
Simmer Milk: In a medium saucepan add sugar, cream, milk, pumpkin puree, pumpkin pie spice, nutmeg and salt then stir. Cook over medium heat until mixture reaches a bare simmer.
Temper Eggs: Whisk egg yolks in a medium bowl. Scoop a ladle-full of the hot milk mixture and slowly drizzle it into the egg mixture, while stirring, to gradually heat the eggs. Repeat with another spoonful of simmering milk.
Combine: Add egg mixture to saucepan on the stove then whisk for a few seconds, until it reaches 160 degrees F on a thermometer. Remove from heat then stir in vanilla (and alcohol, if using). Pour the eggnog through a fine mesh strainer into a pitcher or other container, cover and refrigerate until chilled. If you’d like a thinner eggnog, stir a little extra milk in before serving.
Serve pumpkin spice eggnog with a dollop of fresh whipped cream and a sprinkle of cinnamon on top, if desired.
Make Ahead Instructions:
To Make Ahead: Prepare as instructed and store in the fridge for up to one week. Pour in a serving glass and top with a dollop of fresh whipped cream and a sprinkle of cinnamon, if desired.
Creamy and delicious homemade Pumpkin Spice Eggnog is better than anything you can get at the store, and is my favorite way to welcome the fall season. Serve it non-alcoholic or alcoholic.
Simmer Milk: In a medium saucepan add cream, milk, sugar, pumpkin puree, pumpkin pie spice, nutmeg and salt and stir. Cook over medium heat until mixture reaches a bare simmer.
Temper Eggs: Scoop a ladle-full of the hot milk mixture and slowly drizzle it into the beaten egg yolks, while stirring, to gradually heat the eggs. Repeat with another ladle-full of simmering milk.
Combine: Pour the mixture back into the saucepan on the stove. Whisk for a few seconds, until it reaches 160 degrees F on a thermometer. Remove from heat and stir in vanilla (and alcohol, if using). Pour the eggnog through a fine mesh strainer into a pitcher or other container and cover with plastic wrap.
Refrigerate until chilled. If you’d like a thinner eggnog, stir a little extra milk in before serving.
Serve with a dollop of fresh whipped cream and a sprinkle of cinnamon on top, if desired.
Store in the fridge for up to one week.
Notes
Yield: about 4 cups Serving size: about 1 cupAlcohol: Stir in ¼ cup brandy, bourbon, rum or whisky when removing the pan from heat. Add more to taste, if desired.
This Melon Juice is a Filipino cantaloupe juice recipe made from three simple ingredients – sweet melon, water, and simple syrup! It’s simply the best, fresh juice for sharing on a hot summer day. Pour yourself a tall glass and enjoy with your favorite vegan filipino food!
This Melon Juice is a Filipino cantaloupe juice recipe made from three simple ingredients – sweet melon, water, and simple syrup! It’s simply the best, fresh juice for sharing on a hot summer day. Pour yourself a tall glass and enjoy with your favorite vegan Filipino food!
Filipino melon juice, or melon sa malamig, is a popular beverage in the Philippines, known for its refreshing coolness. It differs from your typical cold-pressed juices in that the fiber in the fruit is not removed. Instead, shredded cantaloupe is added directly to the juice pitcher and ladled into the drinking glass, adding a unique texture to the juice (similar to orange juice with pulp!).
If you visit the Philippines, you’ll find melon sa mamamig is a staple street food throughout, especially during the warmer seasons. Once you try this homemade version, we think this Filipino juice will quickly become one of your favorite drinks!
Ingredients You’ll Need
Cantaloupe: For the best, sweet flavor, use a ripe cantaloupe. The riper the fruit, the easier it will be to shred the flesh, too!
Water: Dilutes the strong, concentrated flavors in the melon while keeping this fruit juice sweet and flavorful.
Simple syrup: Adds sweetness to the juice without overpowering the flavor in the melon. We recommend making our homemade simple syrup, or opt for another liquid sweetener that is mild in flavor such as agave.
Non-dairy milk: While optional, adding creamy milk to fruit juices is a common practice in Filipino cuisine. It adds a natural creaminess and enhances the sweetness of the melon. Any non-dairy milk of choice works well, including our Homemade Almond Milk or even our Vegan Evaporated Milk for an extra sweet and creamy finish!
Scoop the flesh and juice out of the cantaloupe. Halve the cantaloupe, then remove and discard the melon seeds. Using a coconut shredder, scrape out all of the flesh, saving all the juice you can. Transfer the melon flesh to a large pitcher as you go. Stop scraping once you get close to the green melon rind, as the rind is bitter.
Combine ingredients in a large pitcher. Add the shredded cantaloupe to the pitcher with the filtered water and simple syrup. Mix well to combine, then taste and adjust the sweetness or water, as desired.
Refrigerate for 1 hour. This will help the juice’s flavors meld together and sufficiently chill before serving.
Serve. Serve the melon juice over ice, ensuring some of the shredded cantaloupe ends up in the glass. Add a splash of non-dairy milk, if desired. Enjoy!
Recipe FAQs
I don’t have a coconut shredder. What else can I use?
It is important to shred the flesh into small pieces to infuse the juice with melon flavor. If you do not have a coconut shredding tool, you can use the tines of a fork and a spoon to scoop out the flesh. Or, cut the fruit away from the rind with a sharp knife. Transfer the melon flesh to a cutting board and finely chop it.
Why does my melon juice taste bitter?
If your melon juice is bitter, it’s most likely that the fruit itself was not ripe and sweet enough, or you cut too close to the rind. If bits of rind make it into the juice, it can cause the overall juice to taste bitter. Before making, taste the fruit and ensure it’s ripe and juicy. The better the fruit, the better the juice!
Leftover melon juice will keep for up to 5 days in an airtight pitcher in the refrigerator. Avoid adding ice cubes to the pitcher so the juice does not get watered down.
You can also freeze leftover melon juice, but note that it may slightly change the texture of the melon. To freeze, pour the melon juice between ice cube trays or silicone molds.
Transfer the cubes to the freezer and freeze for up to 3 months. Allow to thaw completely in the fridge before enjoying.
Make sure you tag us on Instagram @sweetsimplevegan and @consciouschris and hashtag #sweetsimplevegan if you make this recipe. We love to see your photos!
This Melon Juice is a Filipino cantaloupe juice recipe made from three simple ingredients – sweet melon, water, and simple syrup! It’s simply the best, fresh juice for sharing on a hot summer day. Pour yourself a tall glass and enjoy with your favorite vegan Filipino food!
Scoop the flesh and juice out of the cantaloupe. Halve the cantaloupe, then remove and discard the melon seeds. Using a coconut shredder, scrape out all the flesh, saving all the juice you can. Transfer the melon flesh to a large pitcher as you go. Stop scraping once you get close to the green melon rind, as the rind is bitter.
Combine ingredients in a large pitcher. Add the shredded cantaloupe to the pitcher with the filtered water and simple syrup. Mix well to combine, then taste and adjust the sweetness or water, as desired.
Refrigerate for 1 hour. This will help the juice’s flavors meld together and sufficiently chill before serving.
Serve. Serve the melon juice over ice, ensuring some of the shredded cantaloupe ends up in the glass. Add a splash of non-dairy milk if desired. Enjoy!
Notes
Storage: Leftovers will keep for up to 5 days in an airtight pitcher in the refrigerator. Avoid adding ice cubes to the pitcher so the juice does not get watered down.
Freezing: You can also freeze leftover melon juice, but note that it may slightly change the melon’s texture. To freeze, pour the melon juice between ice cube trays or silicone molds. Transfer the cubes to the freezer and freeze for up to 3 months. Allow to thaw completely in the fridge before enjoying.
Coconut Shredder/Grater: If you do not have a melon/coconut grater, you can use a fork to shred the melon and a spoon to scoop out the shredded pieces.
Ice: We suggest only adding ice when serving so it does not get too watered down while storing.
Our 4-ingredient Oreo Milkshake recipe is thick, creamy, and everyone’s favorite dessert! Looking for more frozen treats? I’ve got you covered with Ice Cream Sandwiches, Frozen Hot Chocolate, Chocolate Milkshake, and Strawberry Cheesecake Ice Cream! How to make an Oreo Milkshake: Blend: Add ice cream, milk, chocolate sauce, and Oreos to a blender and blend…
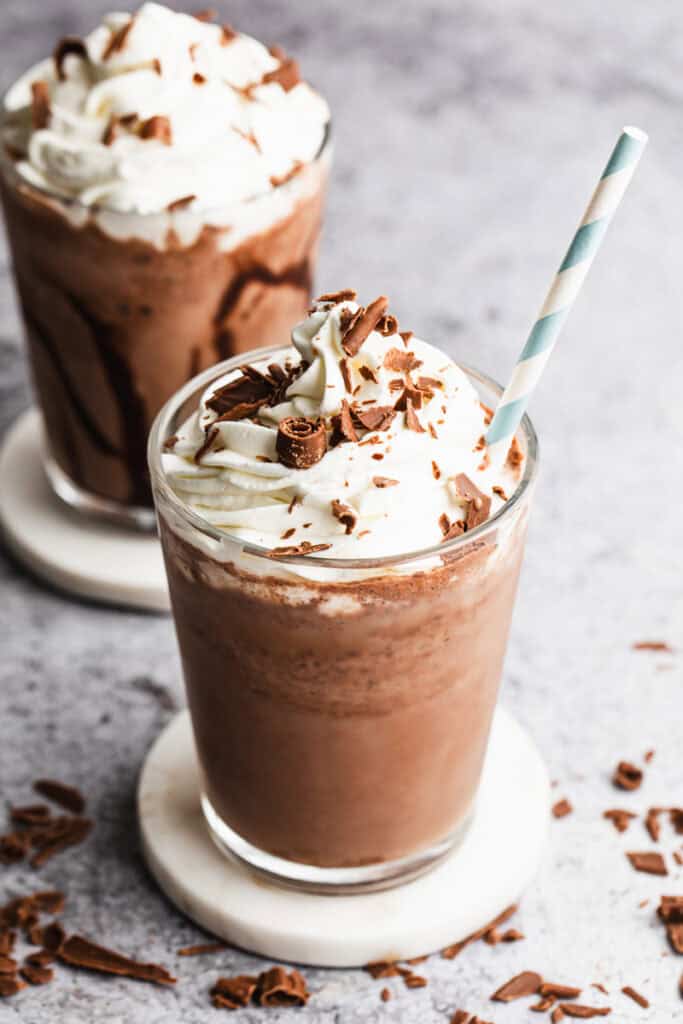
Our 4-ingredient Oreo Milkshake recipe is thick, creamy, and everyone’s favorite dessert!
My husband is not a cook, but Oreo milkshakes have been his thing since before I knew him. You wouldn’t think a recipe is needed for them, but I love how he creates the perfect thickness and balance of chocolate vs Oreo, so I asked him to measure out the ingredients so I could share this recipe. And now my kids can make “Dad’s” drive-thru worthy Oreo Milkshakes with this recipe as their guide.
How to make an Oreo Milkshake:
Blend: Add ice cream, milk, chocolate sauce, and Oreos to a blender and blend until desired consistency. If you like your homemade Oreo milkshakes chunkier, blend all of the ingredients except the Oreos. Add the Oreos briefly at the end, or crush them by hand and stir them in. Top with whipped cream and enjoy!
Other Shake Variations:
Healthier Oreo Shake: Use slow churn vanilla ice cream, skim milk and only 6 Oreos.
Vegan Oreo Shake: Use vegan vanilla ice cream and almond milk. Omit whipping cream.
Caramel Oreo Milkshake: Add a few Tablespoons caramel sauce.
Banana Oreo Shake: Add a frozen banana.
Double Chocolate Oreo Shake: Swap vanilla ice cream for chocolate.
Refreshing, fruity, and the perfect balance of tart and sweet, this blueberry lemonade is sure to become a summertime favorite.
Even as someone who cooks and bakes from scratch on a regular basis, I fall back way too often on coffee shop drinks or bottled lemonades from the store.
Last summer I was all about my watermelon lemonade and this year I’m all about this blueberry lemonade. It’s got a great blueberry flavor and is just the right amount of tart and sweet.
There’s nothing better than a cold glass of this lemonade while hanging out next to the pool!
This Ginger Shots recipe is ready in just 10 minutes and costs a small fraction of what it does at the store. It’s fresh, flavorful, and delicious! If you also love yummy drinks to start your day, you have to try our Green Smoothie, Strawberry Banana Smoothie, Vanilla Protein Shake, or Chocolate Protein Shake! How…
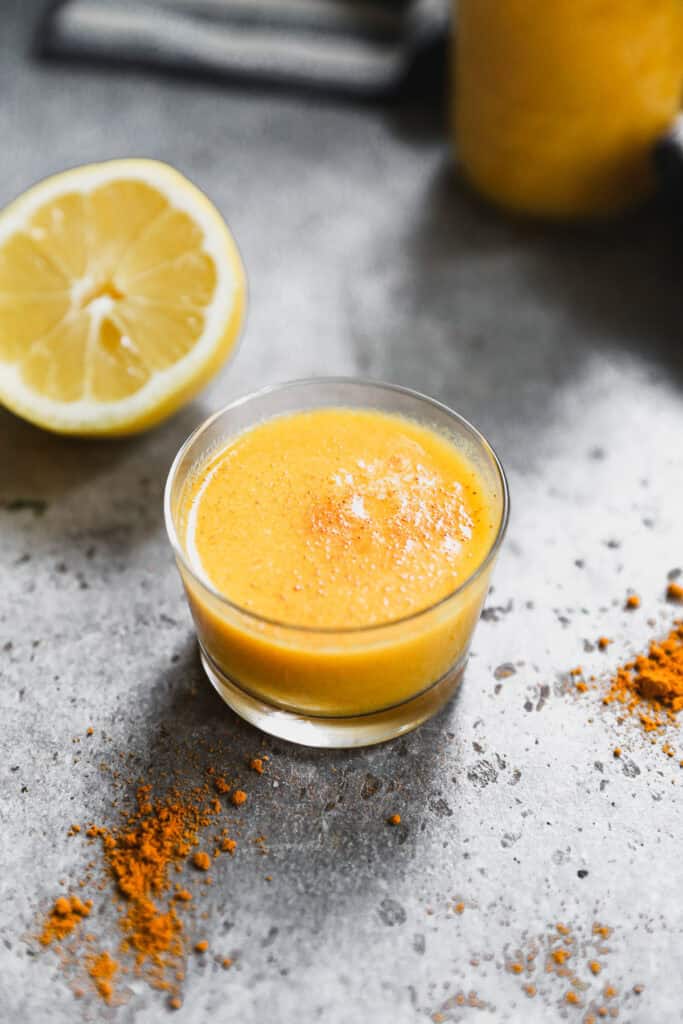
This Ginger Shots recipe is ready in just 10 minutes and costs a small fraction of what it does at the store. It’s fresh, flavorful, and delicious!
Homemade Ginger Shots: Your Secret Weapon Against Overpriced Wellness
We’re a little obsessed with these Ginger Shots that give your immune system a healthy boost (you can read what the experts have to say about why Ginger Shots are good for you, here), and our homemade recipe is SO much more affordable. These are often $3 each at the grocery store. With this recipe, you can make five days of ginger shots for a fraction of the cost. Plus, no fancy juicer needed; just a blender and strainer and you’ll be enjoying your ginger shot in 10 minutes. You just became your own wellness boss.
How to make Ginger Shots:
Blend: Add pineapple, ginger, and water to a blender and blend on high speed until smooth.
Strain through a fine mesh strainer. Stir in lemon juice, ground turmeric, and add a dash of cayenne, if you like a little kick of heat. Enjoy homemade ginger shots in a 2 oz portion, 1x daily. Store leftovers in the fridge for up to 7 days.
Storage Instructions:
To Store: Keep leftovers in the fridge for up to 7 days. Enjoy a 2oz portion each day.
We love starting our day with these homemade Ginger Shots, made in just 10 minutes and they cost a small fraction of the store-bought counterpart. What a flavorful and delicious way to boost your immune system.
Add pineapple, ginger, and water to a blender and blend on high speed until smooth. Strain through a fine mesh strainer. Stir in lemon juice, ground turmeric, and add a dash of cayenne, if desired.
To serve, enjoy a 2 oz portion, 1x daily. Store leftovers in the fridge for up to 7 days.
Notes
Yield: 10oz (1 ¼ cups) Serving Size: 2oz (makes 5, two oz portions)
Learn how easy it is to make your own simple syrup! Add it to your favorite cocktails, coffee, iced tea, desserts, or and cold drinks that need a boost of sweetness.
Learn how easy it is to make your simple syrup! Add it to your favorite cocktails, coffee, iced tea, desserts, or cold drinks that need a boost of sweetness.
If you’re acting as a home bartender this summer, you need a basic homemade simple syrup recipe in your back pocket. It’s the easiest way to sweeten your favorite cocktail recipes without overpowering the flavor, and it will stay in the fridge for weeks. After we perfected our Homemade Strawberry Syrup for our Strawberry Mojito Mocktail, we knew we wanted to add a regular simple syrup to the blog that can be used in virtually any recipe.
Here, we’ll show you the perfect simple syrup ratio, how to make it in 5 minutes, and several ways to use it. It’s so simple that you’ll never want to buy sweet syrup at the store again!
Ingredients You’ll Need
Making simple syrup at home is as easy as it gets! You’ll need a simple 1:1 ratio of just two ingredients:
1/2 cup of sugar: Classic simple syrup is clear. To create this at home, it’s important to use white sugar. Once dissolved, it has a clear color and a great neutral flavor that won’t overpower the taste. We recommend Wholesome Sweet’s Organic Fair Trade Cane Sugar.
1/2 cup of water: Serves as the solvent to dissolve the sugar and helps prevent the sugar from burning to the bottom of the pot.
Can I add different flavors to this syrup?
This recipe is a standard simple syrup recipe and is plain. If you’re interested in trying different flavor profiles, try one of these variations on the basic recipe:
Brown sugar syrup: Swap the cane sugar with either light or dark brown sugar. This will create a caramel-like syrup.
Vanilla syrup: Add 1/2 tablespoon of vanilla extract after you remove the hot simple syrup from the heat.
Thicker syrup: As is, this simple syrup recipe is slightly thinner than maple syrup. If you’d like to make a rich simple syrup similar in thickness to honey syrup, use a 2:1 ratio with 1 cup sugar and 1/2 cup water.
Berry syrup: Make sure to try our Strawberry Simple Syrup! We’ve included some berry flavor variations you may enjoy in that post.
Combine the sugar and water. Add one part water and one part sugar to a small pot or small saucepan over medium heat.
Heat until the sugar is dissolved. Stir the mixture until the sugar has completely dissolved.
Remove from the heat. When the sugar has dissolved, remove the small pot from the heat and set aside to cool completely.
Refrigerate. Once cooled, transfer the simple syrup to an airtight glass jar and refrigerate until ready.
How to Use Simple Syrup
Simple syrup is often used to sweeten beverages like coffee, tea, or cocktails. It helps to add a neutral sweetness to cold beverages without granules of sugar sinking to the bottom of the drink like turbinado sugar would. Give it a try in one of the following ways:
Sweeten Cocktails and Mocktails
Like pure maple syrup, agave syrup, or a similar liquid sweetener, this simple syrup can be used to sweeten homemade cocktails and mocktails at any stage of the drink-making process.
I typically sweeten my morning Matcha Latte recipe with a tablespoon of agave, but an equal tablespoon of simple syrup is the perfect alternative if I’m out. If coffee is your morning beverage, add it to any of your favorite coffee drinks – try it with cold brew, lattes, iced coffee, and more. You can even use it to sweeten our Homemade Almond Milk.
Sweetening Desserts
Simple syrup isn’t just useful in sweetening beverages. It can also be used to sweeten desserts in several ways.
First and foremost, you can swap it 1:1 for another liquid sweetener. For example, if a dessert recipe calls for maple syrup or agave, this traditional simple syrup is a great alternative.
It can also be brushed or drizzled over our Vegan Vanilla Cake to help keep the cake layers moist. Or brush it over baked goods for a sweet, shiny coating!
Recipe FAQs
How long does simple syrup last?
When refrigerated in an airtight container such as a mason jar, this simple syrup will last for about three weeks. Unlike store-bought simple syrups, which are made with preservatives that prevent bacterial growth, this homemade recipe cannot be kept at room temperature.
Do I need to boil the mixture?
Nope! In fact, you do not want to bring this sugar-water mixture to a boil. If it begins to boil, the water in the recipe will begin to evaporate, and the simple syrup will thicken and potentially burn. Instead, heat the mixture just warm enough so that the sugar dissolves but not so much that it simmers or boils. Once the sugar is fully dissolved, immediately remove it from the heat and set aside.
I don’t have a stovetop. Can I use hot water?
If you do not have a stovetop, you can make this simple syrup at home by whisking the sugar with hot water. Just make sure the water is warm enough to dissolve the sugar. We recommend heating water in a water kettle or in the microwave until warm enough!
Make sure you tag us on Instagram @sweetsimplevegan and @consciouschris and hashtag #sweetsimplevegan if you make this recipe. We love to see your photos!
Learn how easy it is to make your own simple syrup! Add it to your favorite cocktails, coffee, iced tea, desserts, or and cold drinks that need a boost of sweetness.
Ingredients
½ cup water
½ cup sugar
Instructions
Combine the sugar and water. Add one part water and one part sugar to a small pot or saucepan over medium heat.
Heat until the sugar is dissolved. Stir the mixture until the sugar has completely dissolved and the mixture is no longer cloudy.
Remove from the heat. When the sugar has dissolved, remove the small pot from the heat and set aside to cool completely.
Refrigerate. Once cooled, transfer the simple syrup to an airtight glass jar and refrigerate until ready.
Notes
Storage: Refrigerate in an airtight container for about 3 weeks. This homemade recipe cannot be kept at room temperature.
Brown sugar syrup: Swap the cane sugar with either light or dark brown sugar. This will create a caramel-like syrup.
Vanilla syrup: Add 1/2 tablespoon of vanilla extract after you remove the hot simple syrup from the heat.
Thicker syrup: As is, this simple syrup recipe is slightly thinner than maple syrup. If you’d like to make a rich simple syrup similar in thickness to honey syrup, use a 2:1 ratio with 1 cup sugar and 1/2 cup water.
Berry syrup: Make sure to try our Strawberry Simple Syrup! We’ve included some berry flavor variations you may enjoy in that post.
This Frozen Strawberry Daiquiri is what summer dreams are made of. Made with real strawberries, homemade simple syrup, white rum, and fresh lime juice, anyone can make this classic daiquiri cocktail recipe! No triple sec, limeade concentrate, or orange liqueur required.
This Frozen Strawberry Daiquiri is what summer dreams are made of. Anyone can make this classic daiquiri cocktail recipe with real strawberries, homemade simple syrup, white rum, and fresh lime juice! No triple sec, limeade concentrate, or orange liqueur required.
If you’re hosting a pool party or simply planning on sitting poolside all summer, this stunning strawberry recipe is the perfect hot summer day companion. It’s a fun homemade beverage that you can whip up with just a few simple ingredients and a powerful blender, yet it will impress any guest!
Make enough for just 1 or 2, or blitz together a full blender’s worth to serve a crowd. No one will complain with this boozy, refreshing slushy in hand!
Ingredients You’ll Need
Ice: If you have the option, crushed ice or nugget ice cubes are better than regular ice from ice cube trays or standard fridge ice cubes. They blend faster, resulting in a smoother, more uniform slushy texture.
Strawberries: For the best consistency, we recommend using a mix of fresh and frozen strawberries. If you only have fresh strawberries on hand, freeze 1/2 cup 2-3 hours ahead of time.
White rum (light rum): The classic choice in any daiquiri recipe! Bacardi and Havana Club are our top choices.
Simple syrup: Either regular simple syrup or strawberry simple syrup works well in this frozen cocktail. We highly recommend making one of our homemade recipes—it’s so simple!
Lime juice: Freshly squeezed lime juice adds a nice acidity and brightness that balances the sweetness in the fresh fruit and simple syrup. For the best flavor, fresh lime juice is highly recommended over bottled.
Blend until smooth. Pulse the blender until thoroughly blended and a slushy-like consistency.
Adjust to taste. Taste the strawberry daiquiri and adjust to taste. If you want it a bit sweeter, add additional simple syrup. If you want it a bit stronger, add additional white rum.
Serve immediately. Pour the frozen daiquiri into your favorite coupe, martini, or margarita glass. Garnish with lime slices and a fresh strawberry, and enjoy immediately with the perfect slushy consistency!
Recipe FAQs
Can I make this cocktail in a food processor?
A food processor is the next best thing if you do not have a high-speed blender or a blender strong enough to break down ice into a slushy texture. For best results, use a large cup food processor. Mini-food processors are not ideal and are likely to overflow.
Can I make this recipe a virgin daiquiri?
We haven’t tested a virgin version of this frozen cocktail, but if you’d like to try one, blend the ingredients together without the rum. Then, when the daiquiri mix has a slushy texture, stir in either lemon-lime soda or lime seltzer. Alternatively, you might enjoy this Strawberry Mojito Mocktail instead!
Will this homemade strawberry daiquiri work with dark rum?
We find that a light rum is the best rum as it complements the sweet strawberry flavor, but if you only have a dark rum or aged rum on hand, it will work. The difference will be a darker, more spiced flavor profile.
Quick Tips
Use in-season strawberries! Fresh strawberries are always sweeter during strawberry season at their peak ripeness. If you make this frozen strawberry daiquiri recipe during the off-season, buy frozen strawberries and defrost four of them to use as fresh ripe strawberries. Frozen strawberries are always picked during their peak ripeness and will be as sweet as possible.
Don’t overblend! While it sounds counterintuitive, it is possible to overblend a frozen cocktail. As a blender works, its base begins to heat up. If you over-blend, you risk melting the ingredients, which can lead to a watery texture. Instead, pulse the blender until just combined!
Use a powerful blender. A high-speed blender is best, as it will blend the ingredients together fast enough without melting. We recommend our Vitamix blender, which we use to make many recipes!
Make sure you tag us on Instagram @sweetsimplevegan and @consciouschris and hashtag #sweetsimplevegan if you make this recipe. We love to see your photos!
This Frozen Strawberry Daiquiri is what summer dreams are made of. Made with real strawberries, homemade simple syrup, white rum, and fresh lime juice, anyone can make this classic daiquiri cocktail recipe! No triple sec, limeade concentrate, or orange liqueur required.
Blend until smooth. Pulse the blender until thoroughly blended and a slushy-like consistency.
Adjust to taste. Taste the strawberry daiquiri and adjust to taste. If you want it a bit sweeter, add additional simple syrup. If you want it a bit stronger, add additional white rum.
Serve immediately. Pour the frozen daiquiri into your favorite coupe, martini, or margarita glass. Garnish with lime slices and a fresh strawberry, and enjoy immediately with the perfect slushy consistency!
Bring on the nostalgia with this homemade orange julius recipe! This thick and creamy drink is a cross between a milkshake and a smoothie and tastes like an orange creamsicle. No need to head to the mall to grab one of these – they’re easy to make at home with just a handful of ingredients. …
Bring on the nostalgia with this homemade orange julius recipe! This thick and creamy drink is a cross between a milkshake and a smoothie and tastes like an orange creamsicle. No need to head to the mall to grab one of these – they’re easy to make at home with just a handful of ingredients.
I love the way food can bring a flood of memories coming back.