French Onion Steak Crostini
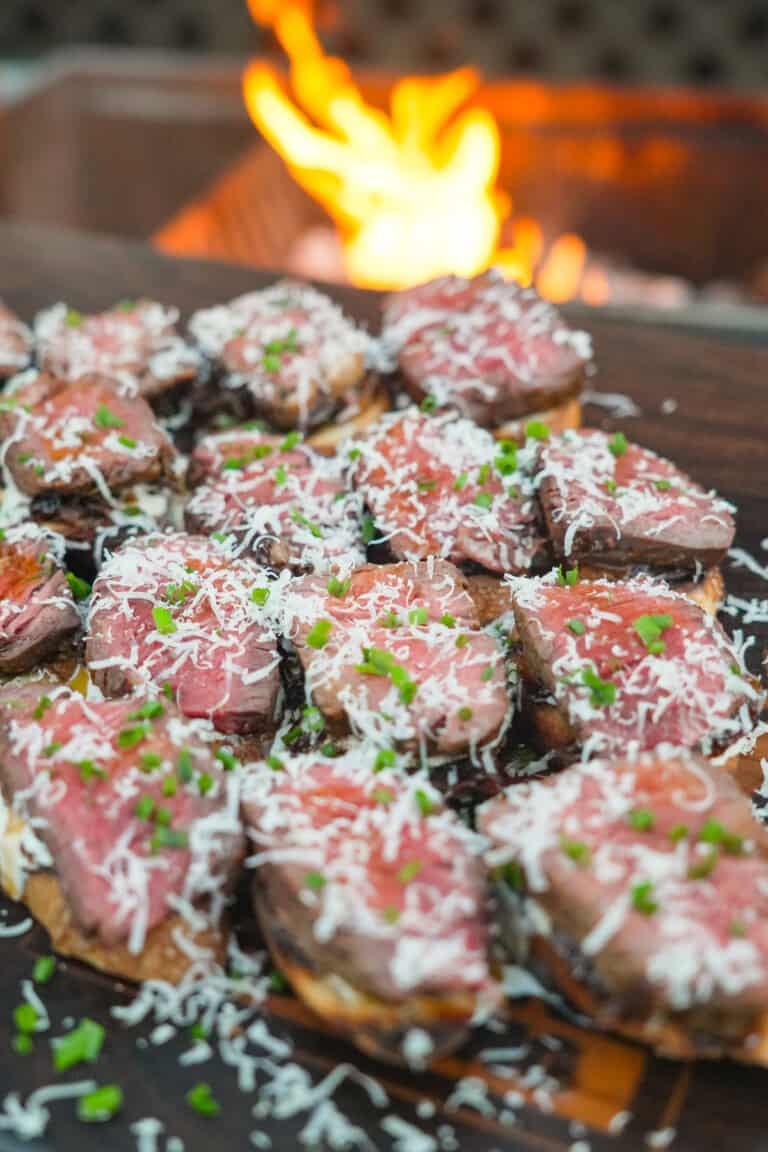
Just in time for the holidays, when cozy and comforting are must-haves on the menu, these French Onion Steak Crostini…
The post French Onion Steak Crostini appeared first on Over The Fire Cooking.
Just in time for the holidays, when cozy and comforting are must-haves on the menu, these French Onion Steak Crostini…
The post French Onion Steak Crostini appeared first on Over The Fire Cooking.

When you start with quality ingredients, you don’t have to do much to create a freakin’ delicious recipe. That’s why…
The post Grilled Salmon Fillets with Cowboy Butter appeared first on Over The Fire Cooking.
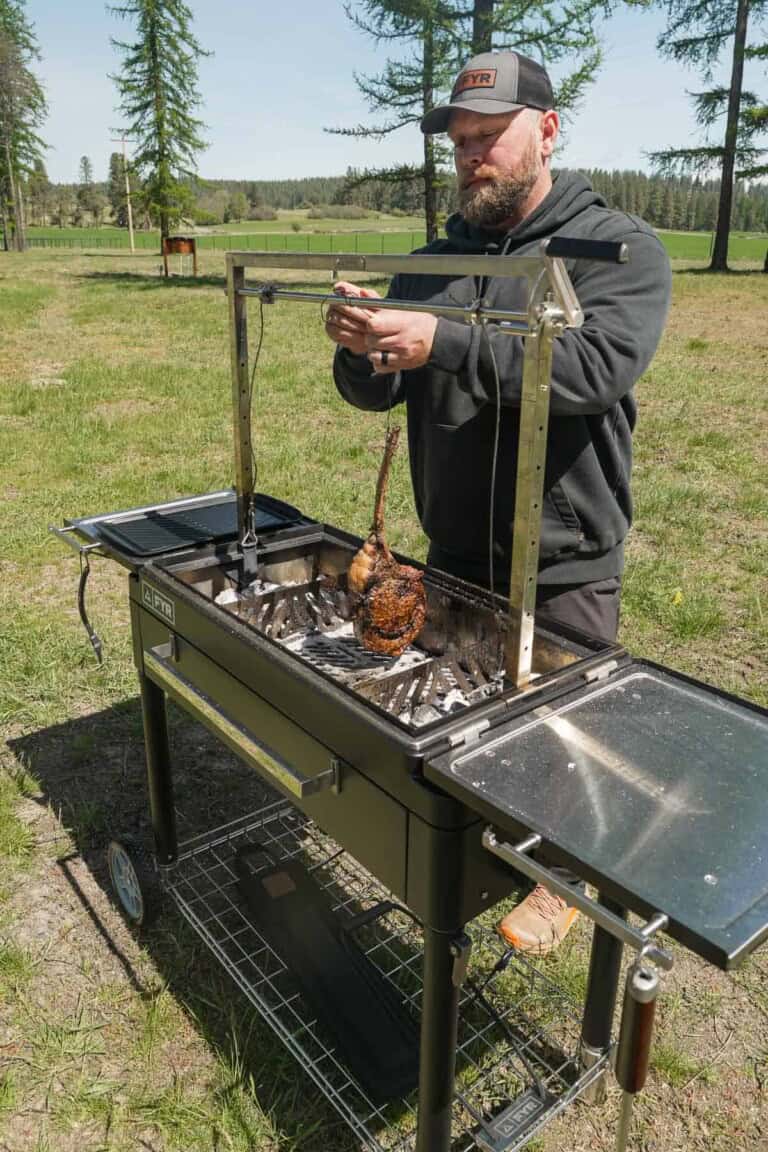
I have had a truly outrageous amount of fun cooking FYR Grill recipes over the last year. We spent so…
The post FYR Grill Recipes appeared first on Over The Fire Cooking.
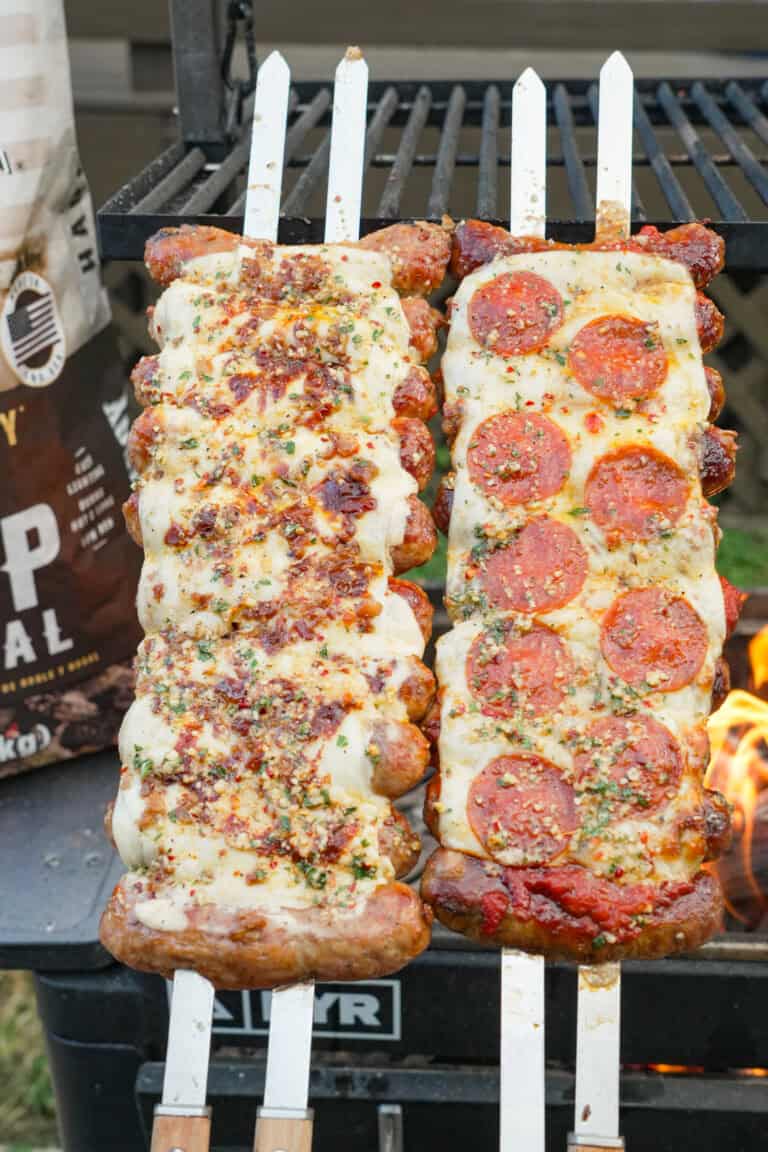
When it comes to pizza, are you a classic red sauce and pepperoni person? Or is white sauce more your…
The post Pizza Sausage Skewers appeared first on Over The Fire Cooking.

Ready to be the boss of your next tailgate? Behold: jalapeño popper pigs in a blanket. With this recipe, you’ll…
The post Jalapeño Popper Pigs in a Blanket appeared first on Over The Fire Cooking.
Let’s just say it: Steak Mac and Cheese is the kind of dish that makes grown men tear up with joy. We’re…
The post Steak Mac and Cheese appeared first on Over The Fire Cooking.
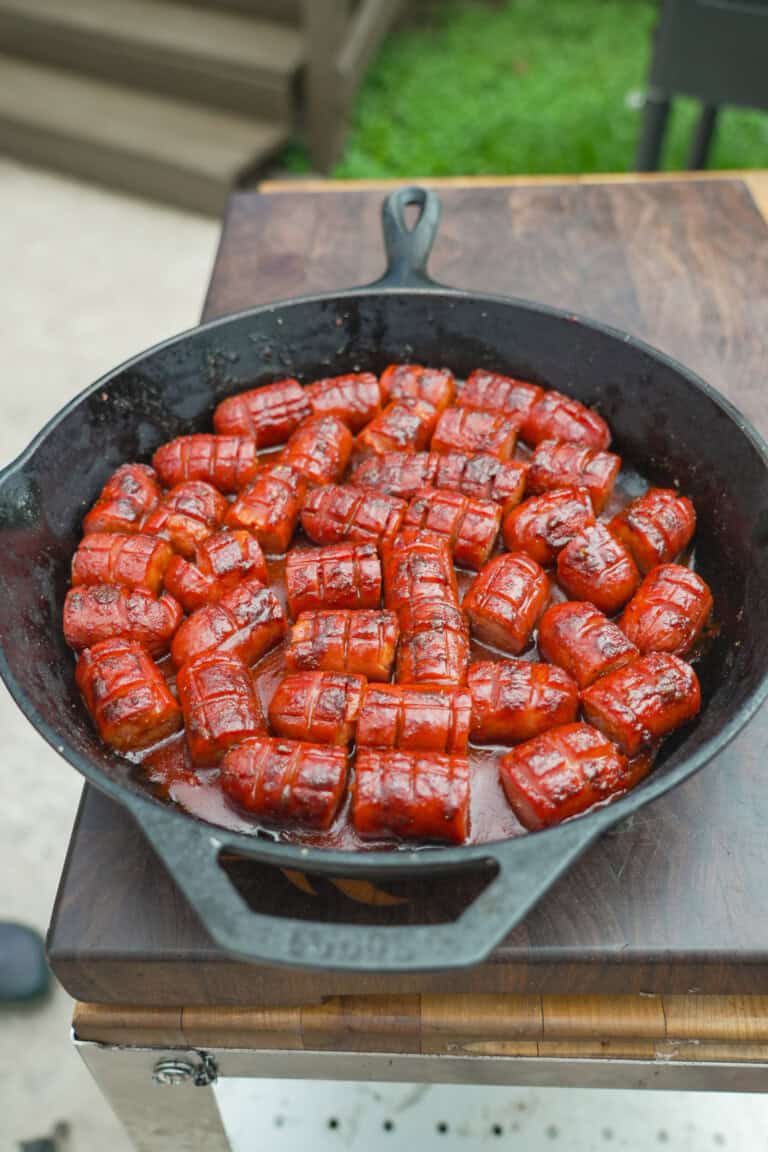
If you’re looking for a spicy, smoky, and bite-sized twist on the classic backyard frank, these Rattlesnake Hot Dog Bites…
The post Hot Dog Bites appeared first on Over The Fire Cooking.
Garlic. Parmesan. Chicken. Sounds like the best dinner ever, right? And this garlic Parmesan chicken skewers recipe lives up to…
The post Garlic Parmesan Chicken Skewers appeared first on Over The Fire Cooking.
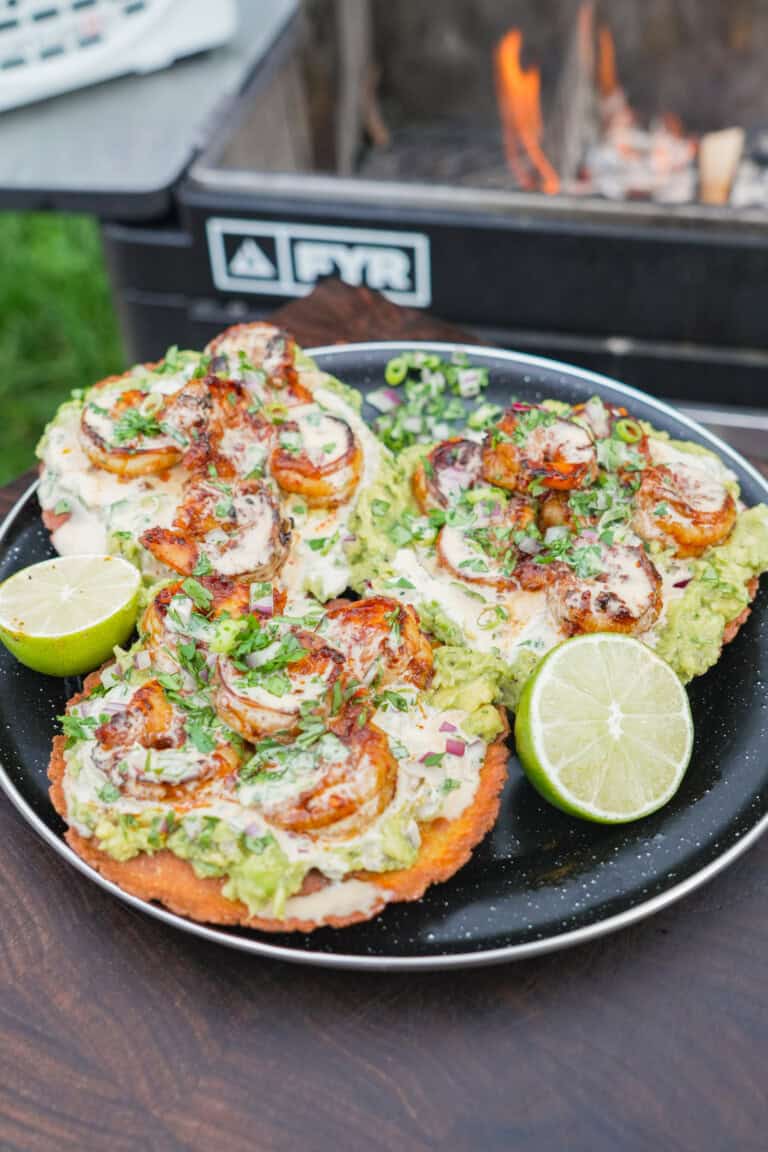
Want crunch from crispy tortillas, satisfaction from juicy shrimp and and incredible flavor from sauce and garnishes? Then I’ve got…
The post Shrimp Tostadas appeared first on Over The Fire Cooking.
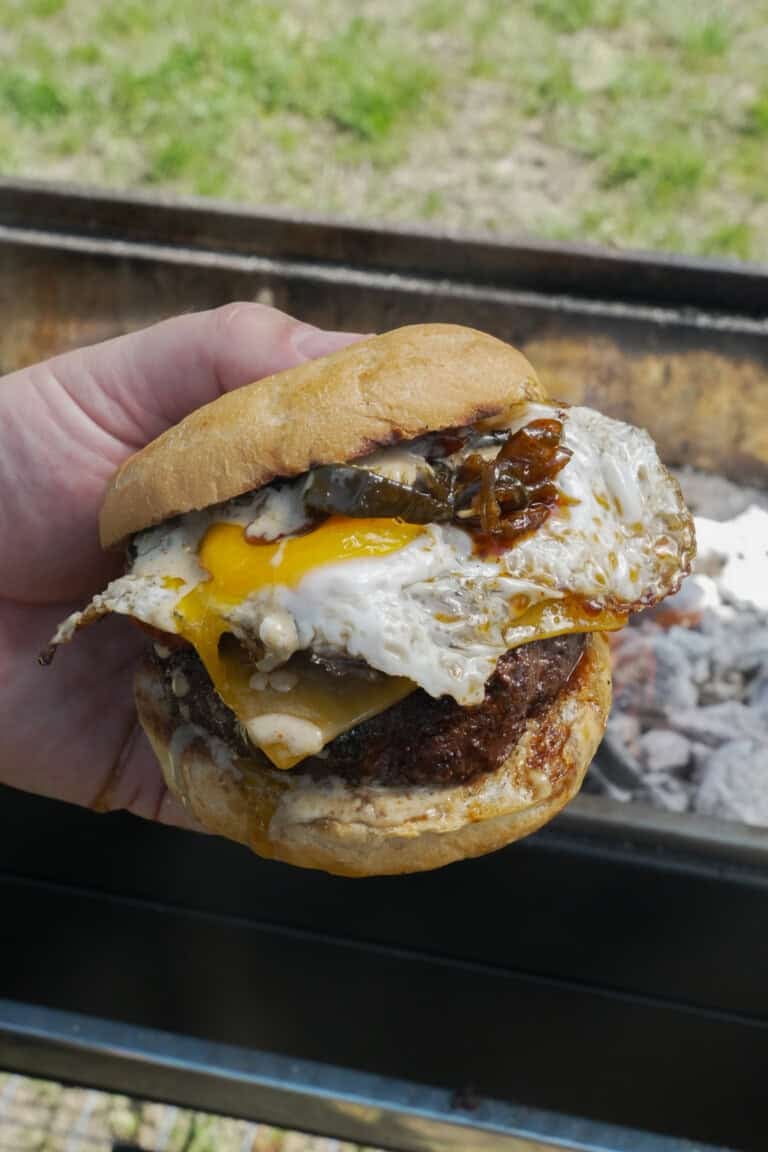
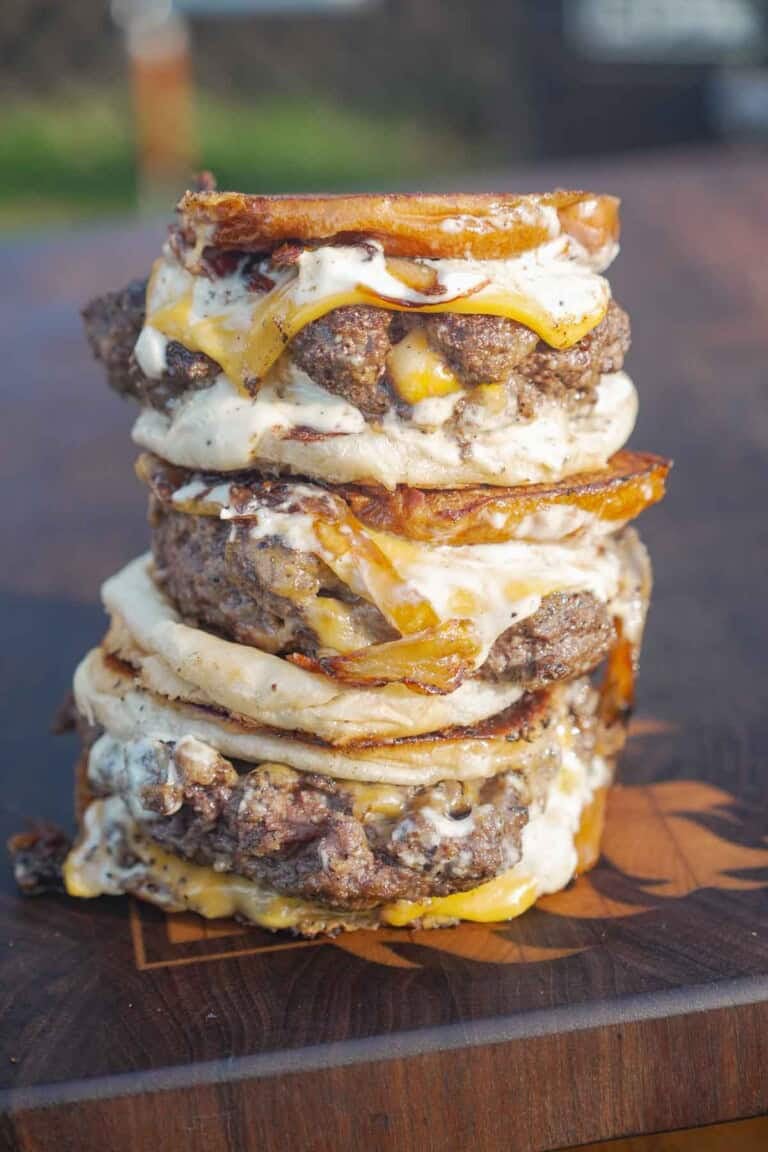
When it comes to burgers, I’m always chasing new favorite ways to take the bold and craveable to a whole…
The post Cowboy Candy Burger appeared first on Over The Fire Cooking.

When it comes to making the magic happen on the smoker, Cowboy Candy Party Ribs are an unbeatable recipe. They…
The post Cowboy Candy Party Ribs appeared first on Over The Fire Cooking.
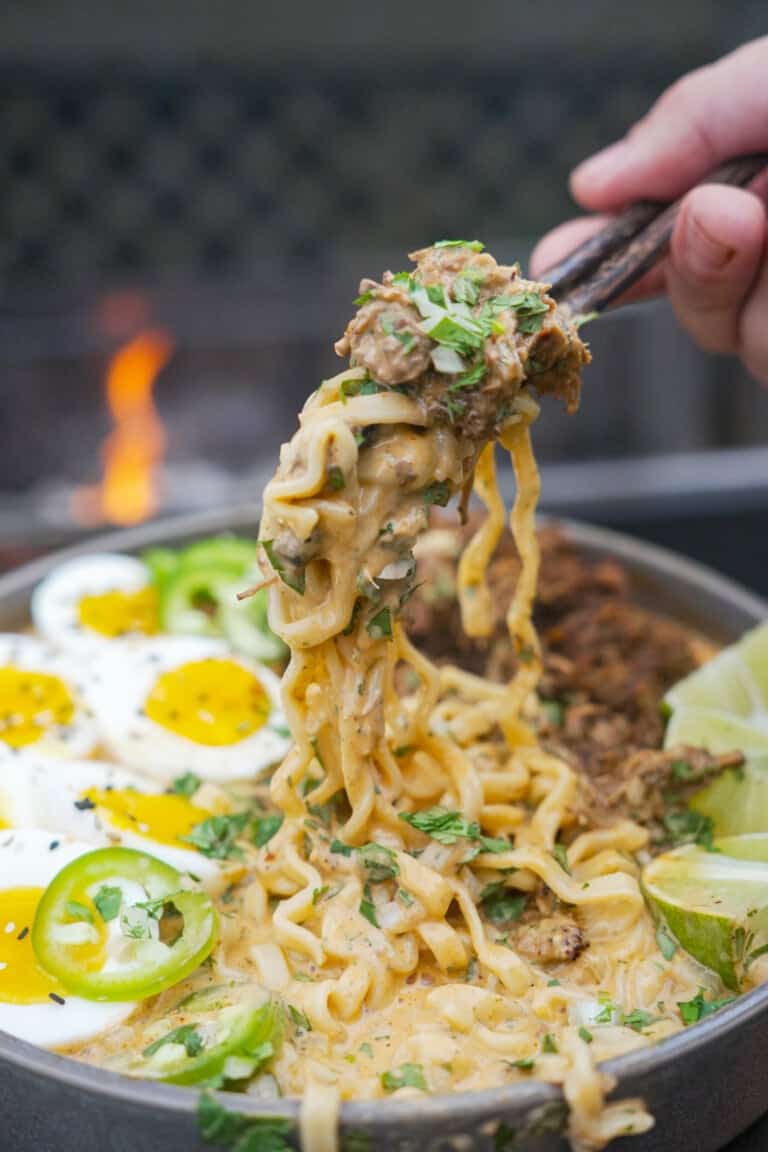
Looking to kick back next to your grill for the day and enjoy an absolutely freakin’ delicious meal at the…
The post Birria Ramen appeared first on Over The Fire Cooking.
I’m guessing you’ve seen the viral trend of mixing cubed cheese into ground beef patties to make cheese-stuffed burgers. I…
The post Stuffed Patty Melt appeared first on Over The Fire Cooking.
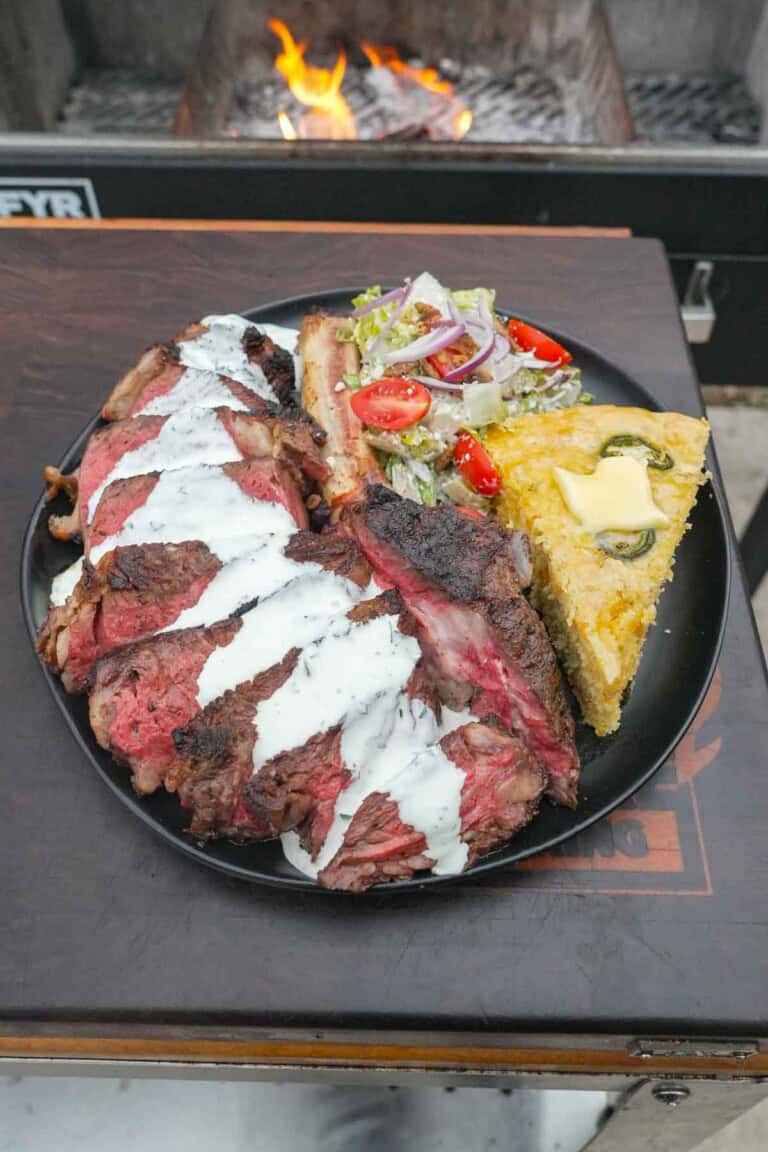
If you’re obsessed with ranch dressing and craving a beefy flavor that hits hard, this cowboy Ranch Steak is calling…
The post Ranch Steak appeared first on Over The Fire Cooking.

I love traveling for lots of reasons. One of the biggest benefits: all the ideas I get for meals I…
The post Grilled Raclette appeared first on Over The Fire Cooking.
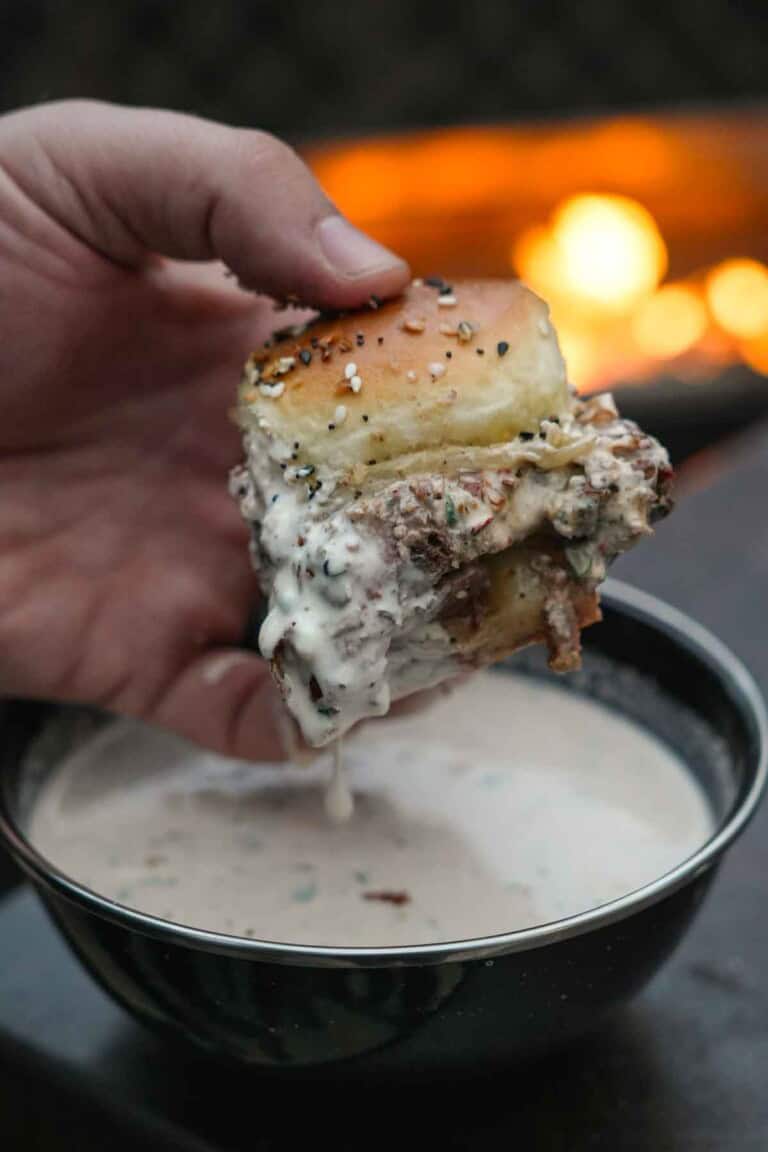
Don’t get me wrong, I enjoy Marry Me Chicken… But what if we make Marry Me Steak?! These Marry Me…
The post Marry Me Steak Sliders appeared first on Over The Fire Cooking.
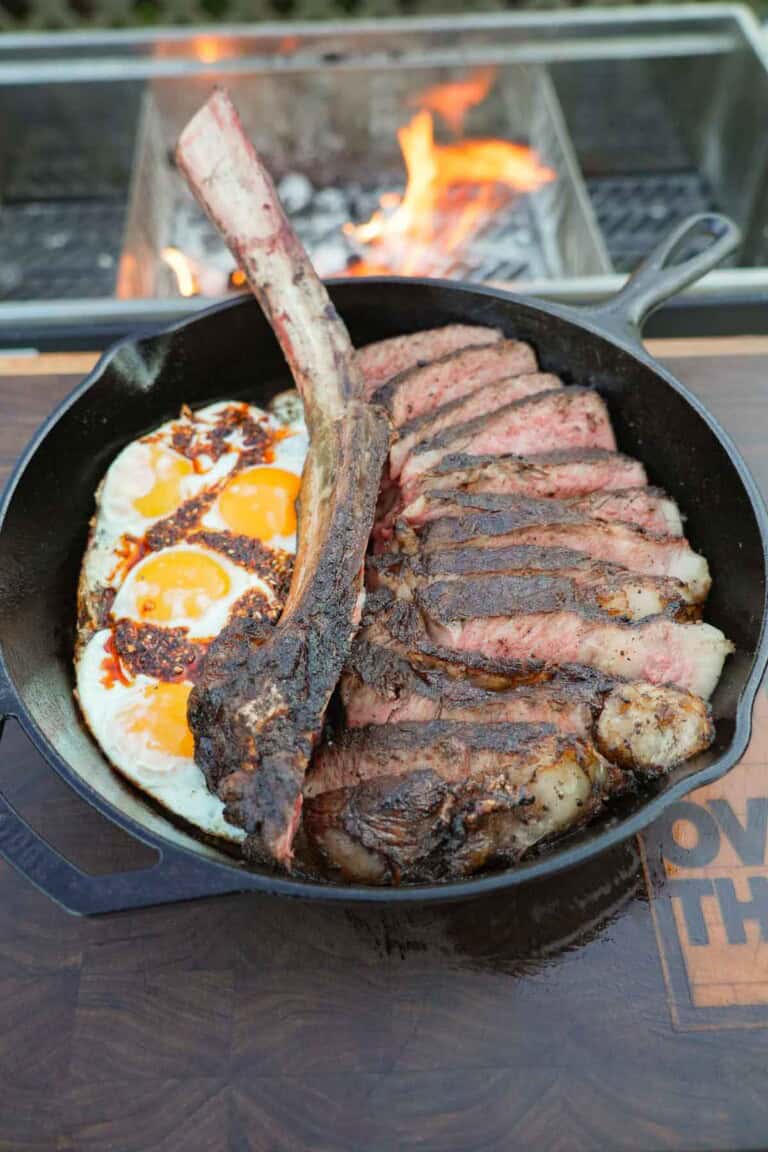
I’m stoked for the New Year and sharing new recipes like this Triple Seared Steak. Inspired by my buddy Brad…
The post Triple Seared Steak appeared first on Over The Fire Cooking.
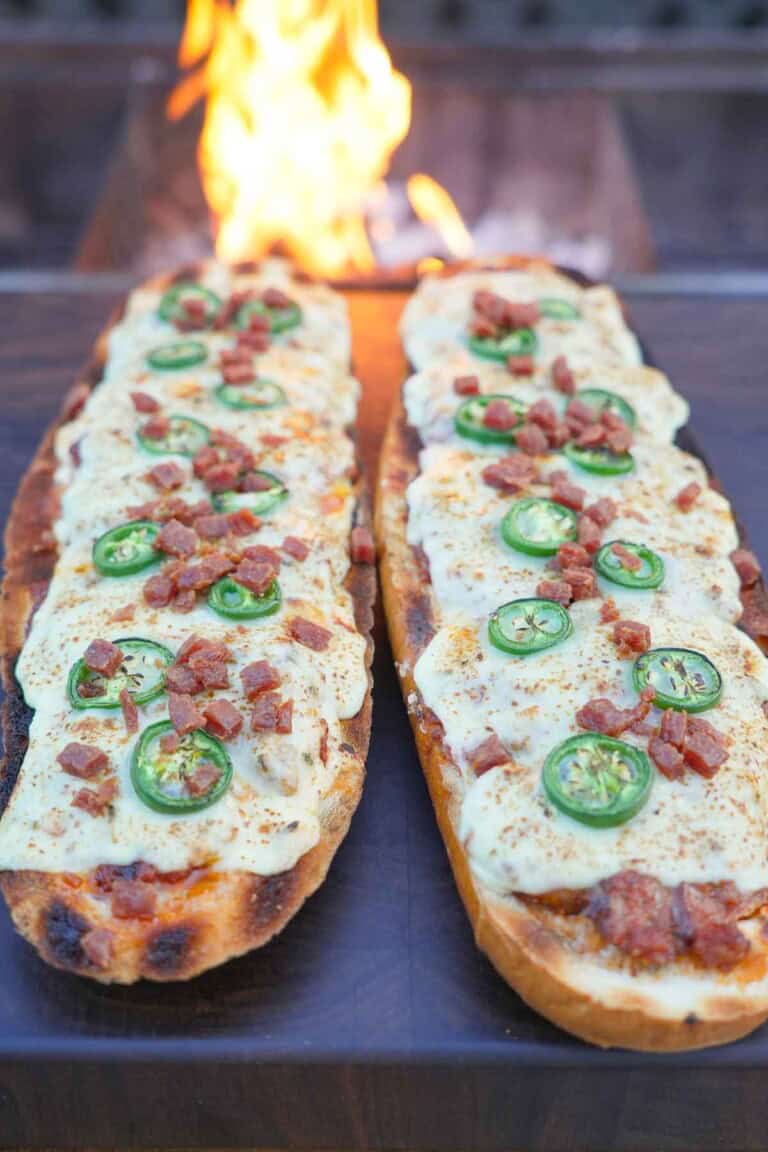
Cheesy, spicy, and ridiculously satisfying, this Jalapeño Popper Bread is the stuffed cheesy bread of your dreams. It’s the perfect…
The post Jalapeño Popper Bread appeared first on Over The Fire Cooking.
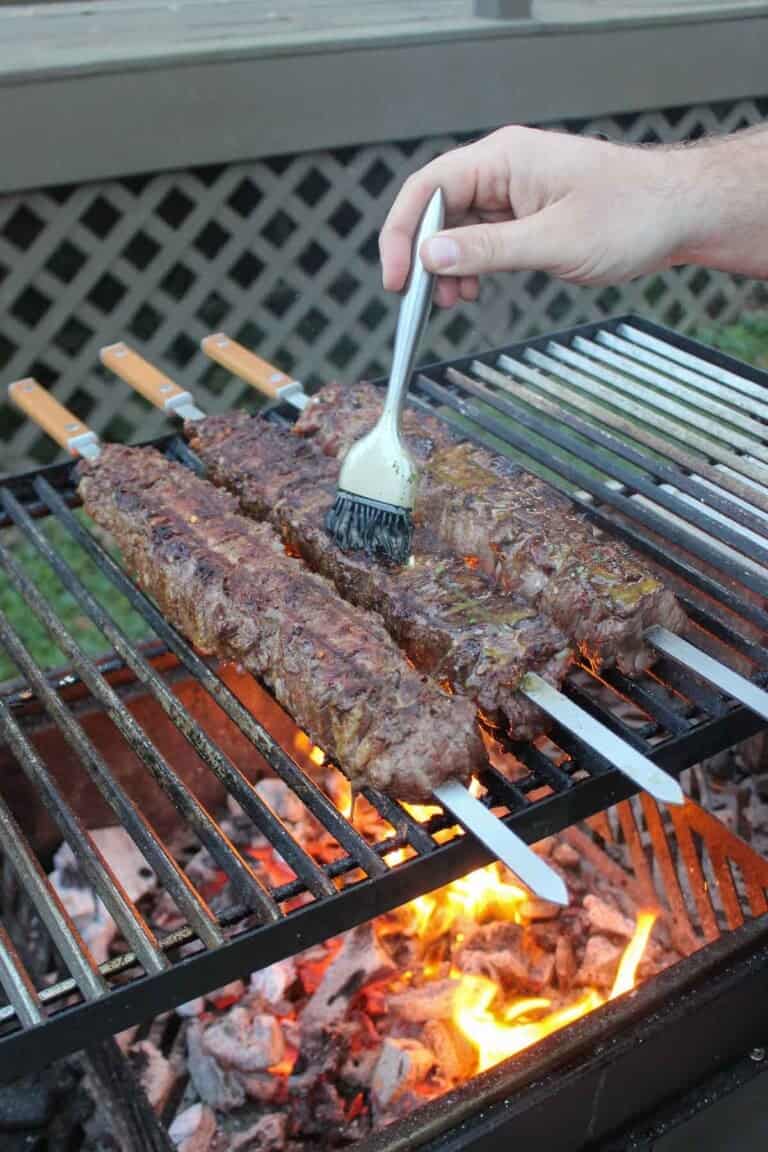
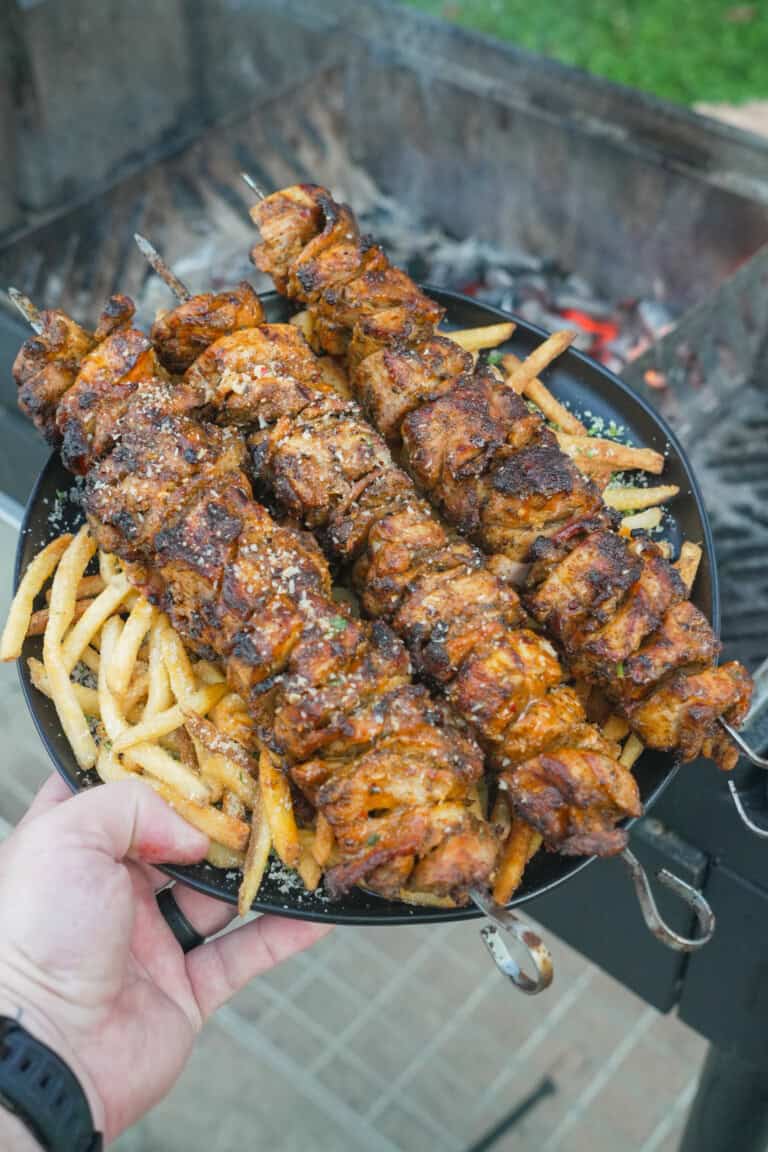
If you’re a fan of shawarma or other skewered meats, you’re going to love these flake steak skewers, I found…
The post Flake Steak Skewers appeared first on Over The Fire Cooking.
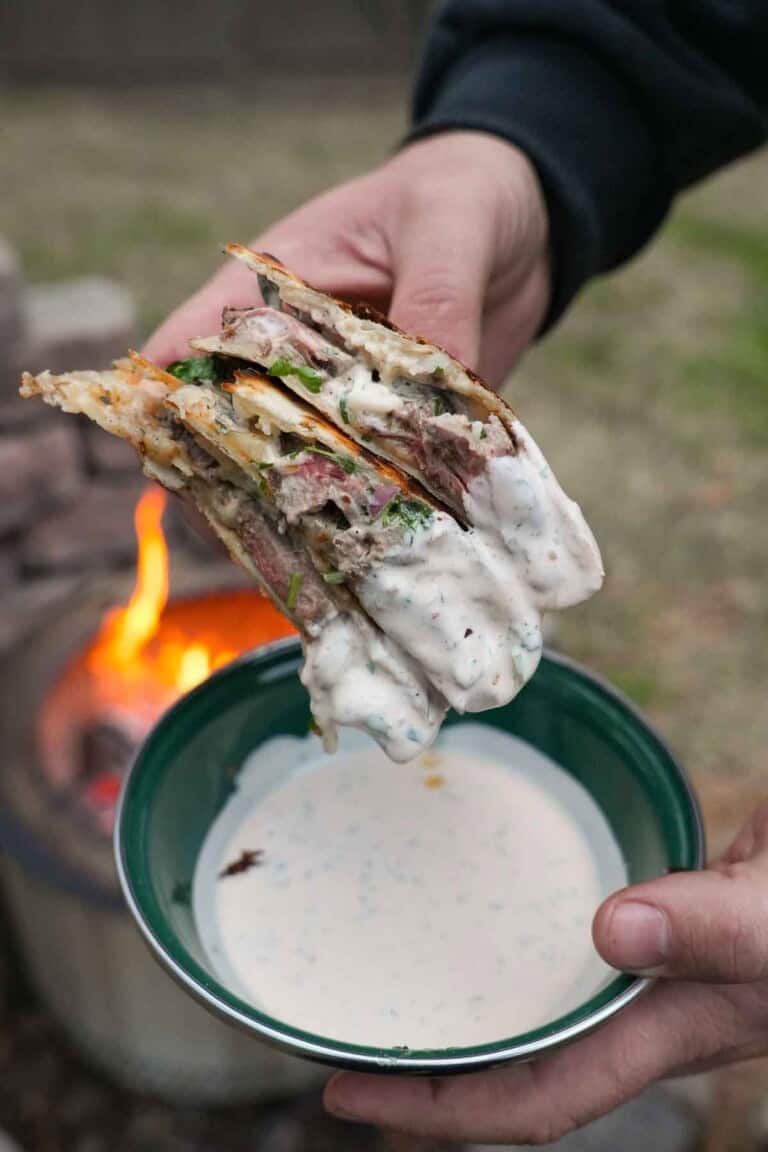
If you’ve been craving that viral Chipotle quesadilla @Keith Lee raved about on TikTok, my Chipotle Ranch Steak Quesadilla recipe…
The post Chipotle Ranch Steak Quesadilla appeared first on Over The Fire Cooking.
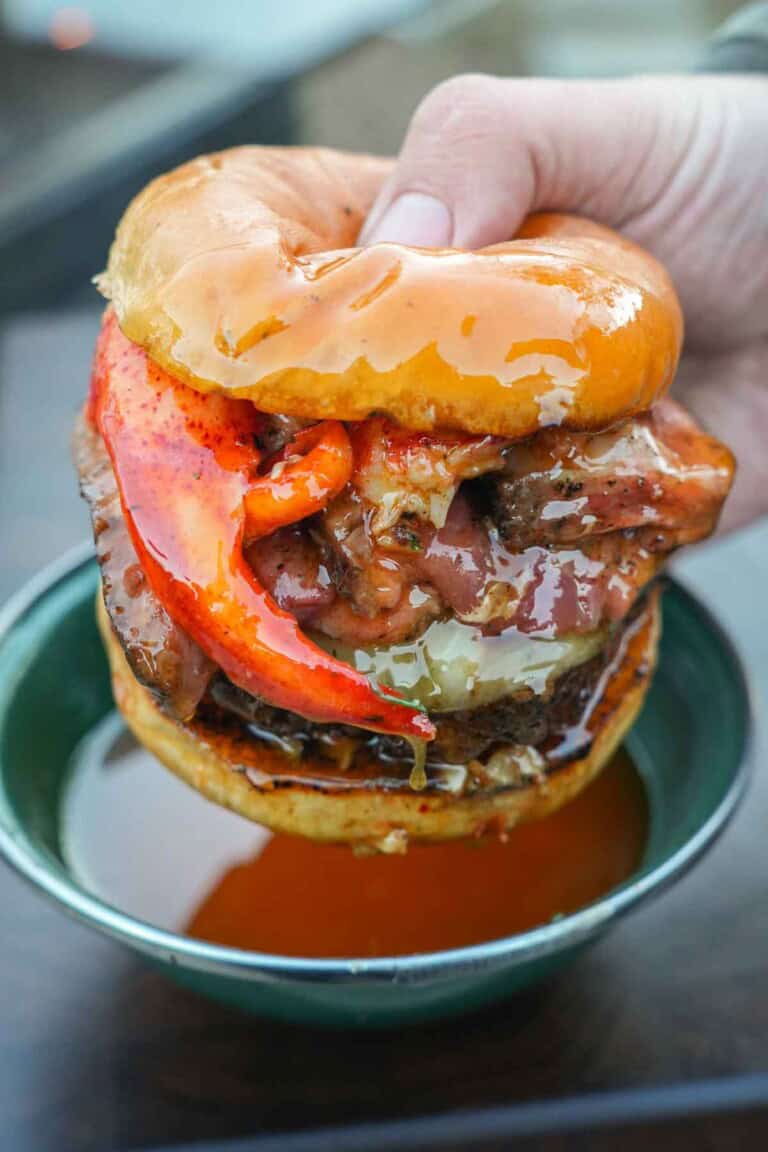
If you love juicy burgers and rich seafood flavors, these Surf and Turf Burgers are a must-try. This recipe combines…
The post Surf and Turf Burgers appeared first on Over The Fire Cooking.
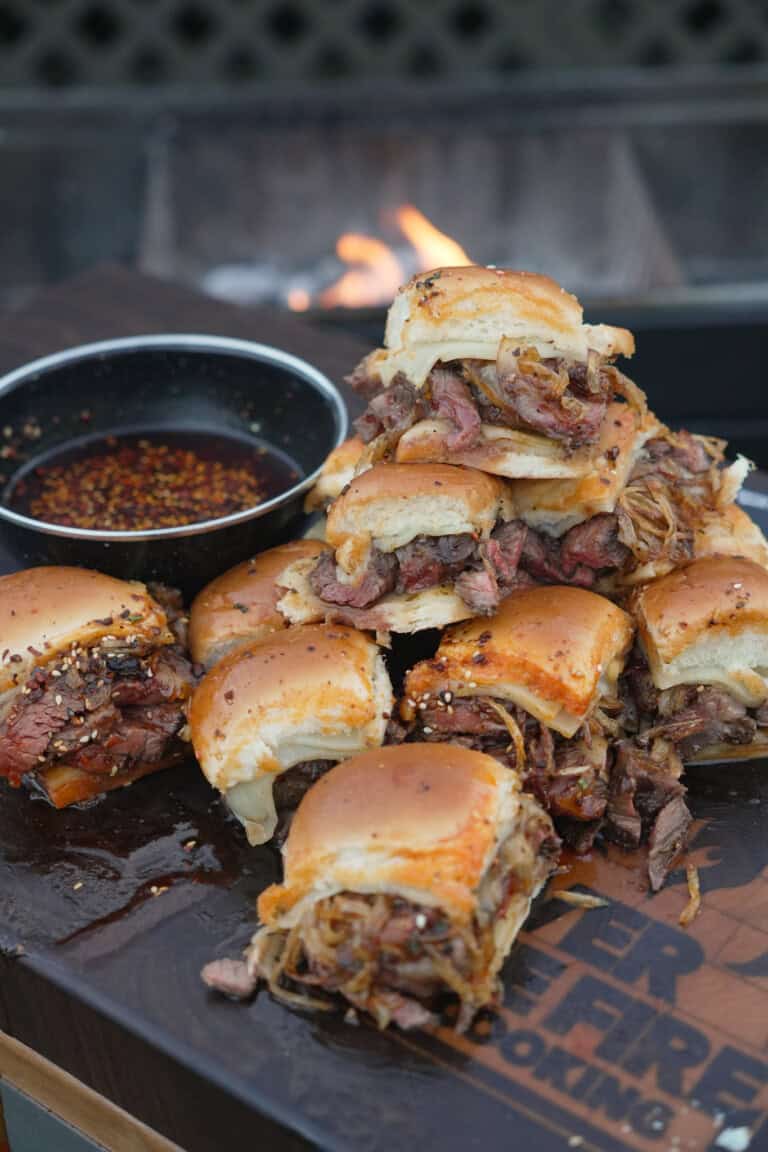
Hot honey is all the rage these days, and no wonder — it’s so freakin’ delicious. This recipe for hot…
The post Hot Honey Steak Sliders appeared first on Over The Fire Cooking.
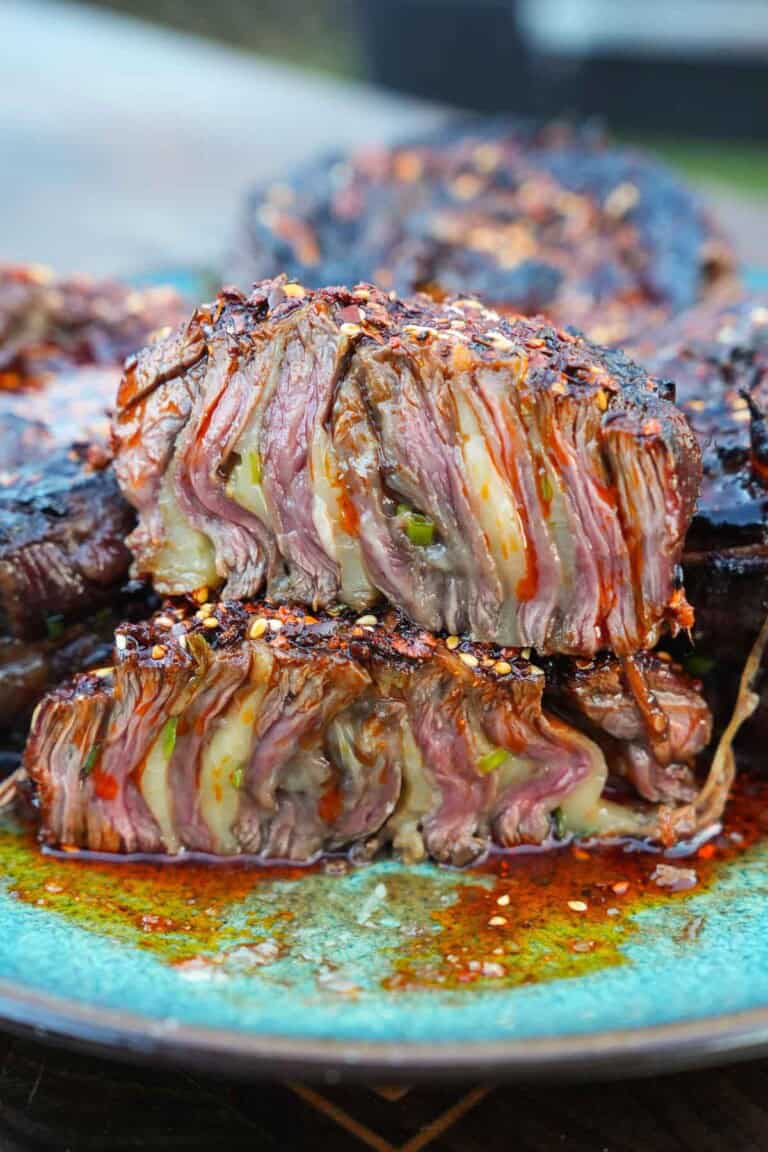
If you’ve been here a while, you know I love pinwheels. And you know I love chili oil. So, it…
The post Chili Oil Steak Pinwheels appeared first on Over The Fire Cooking.
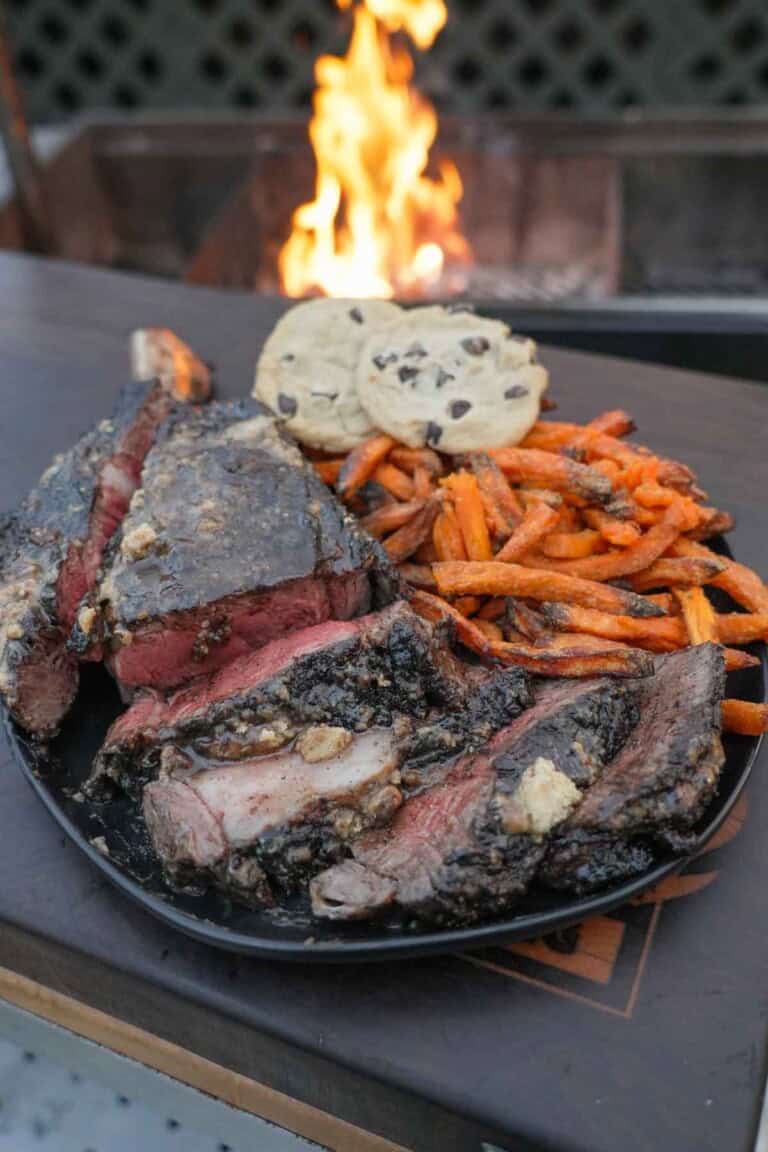
This season, I’m taking Steak Night to the next level by adding a sweet holiday twist with my Cookie and…
The post Coffee Crusted Steak appeared first on Over The Fire Cooking.
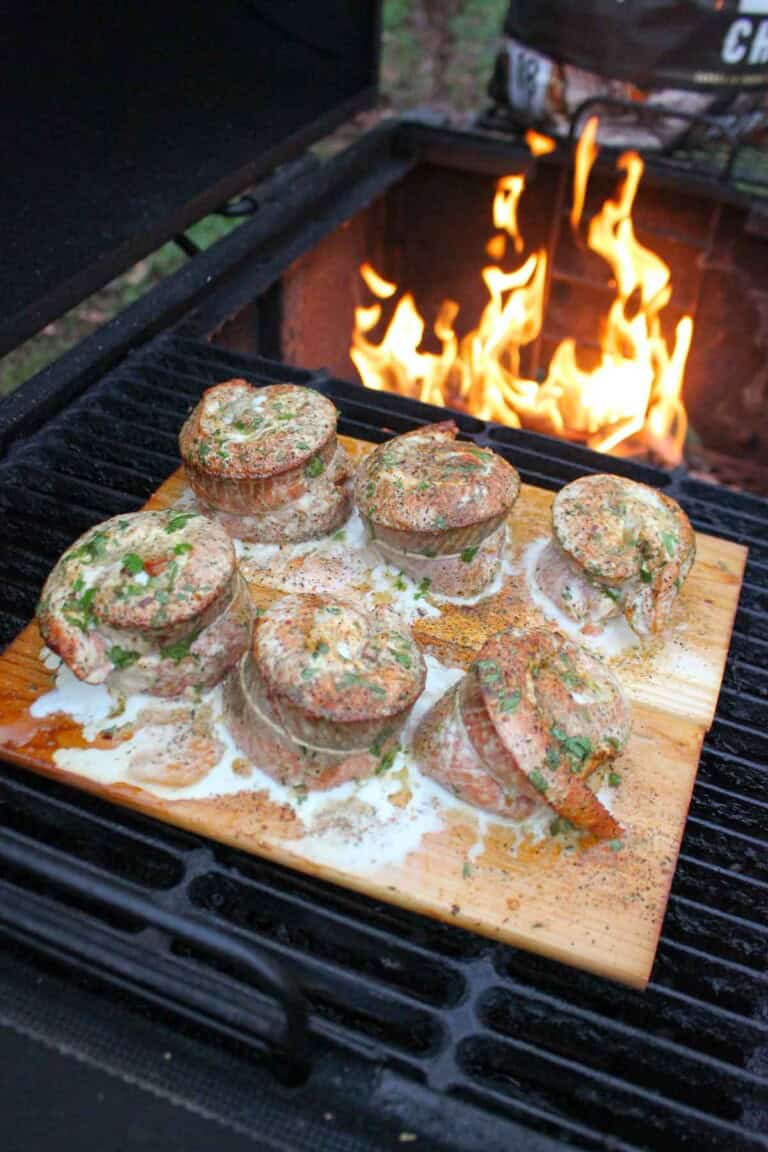
If you like salmon then you will, without a doubt, love these smoked salmon pinwheels. We’re cooking with a whole…
The post Smoked Salmon Pinwheels appeared first on Over The Fire Cooking.