Chicken Chili Supper: A Guide to Making the Perfect Meal

Warm, hearty, and just spicy enough – this dinner is bound to become a winter time staple!

chicken chili supper featuredWarm, hearty, and just spicy enough - this dinner is bound to become a winter time staple!

Brazilian Style Picanha

Tasty and succulent Brazilian Style Picanha steak is served with traditional Egg Farofa.

If you’re looking for a food adventure and tender cut of beef to grill tonight, Brazilian Style Picanha is where…

The post Brazilian Style Picanha appeared first on Over The Fire Cooking.

Tasty and succulent Brazilian Style Picanha steak is served with traditional Egg Farofa.

If you’re looking for a food adventure and tender cut of beef to grill tonight, Brazilian Style Picanha is where it’s at! This cut, also known as rump cover, is a favorite at any Brazilian steakhouse. But today, I’ll show you how to make it right here in the United States in your own backyard with the best Cowboy Lump Charcoal.

Post sponsored by Cowboy Charcoal
Tasty and succulent Brazilian Style Picanha steak is served with traditional Egg Farofa.

If this is your first time meeting the coulotte steak, the picanha cut of beef is rich, juicy, and packed with flavor thanks to the large fat layer. If you want more information on this cut, check out my What is Picanha? article! Paired with zesty salsa and some homemade egg farofa, this masterpiece takes you straight to South America without leaving home.

Why You’ll Love Brazilian Picanha

Picanha, whether you call it rump cap, culotte steak, or top sirloin cap steaks, is one freakin’ delicious cut of meat. It’s easy to cook and loaded with flavor. The thick fat cap bastes the meat as it cooks, keeping everything juicy and tender. This cut is typically prepared with minimal seasoning—just some sea salt—because the meat itself is so flavorful. Whether you’re a home cook or a seasoned grill master, picanha is sure to be a new favorite in your grilling roster. It’ll be one of your family’s favorite cuts too, for good reason!

If you want to join me in my picanha obsession, check out How to Cook Picanha, Picanha Steak Sandwich, Steakhouse Picanha, and Rotisserie Picanha with Parmesan Crust.

Brazilian Style Picanha Ingredients

Before you fire up the grill, here’s your grocery list:

  • Picanha – Picanha meat is easy to source from your local butcher or local grocery stores. Add on some kosher salt and canola oil for the simple seasonings.
  • Salsa – Grab the freshest tomatoes, red onion, jalapeño, parsley, and lemon you can find. Then, make sure you have some good champagne vinegar and olive oil.
  • Egg Farofa – For this surprisingly satisfying side dish, you’ll need some cassava flour, unsalted butter, a white onion, fresh eggs, and scallions.

With these straightforward ingredients in your shopping cart, you’re already halfway to the most fantastic picanha recipe you’ve ever tasted.

Which kind of Cowboy Charcoal should I get to grill picanha?

For the best-grilled picanha, Cowboy Oak & Hickory Hardwood Lump Charcoal is the way to go. It burns hot and fast, giving you that perfect sear while adding a deep, smoky flavor. Plus, it’s all about controlling the heat, so lump charcoal gives you more flexibility for those quick adjustments. Perfect for nailing that crispy fat cap!

The Brazilian Style Picanha steak has a thick fat cap, which renders out and leaves the meat tender, juicy, and flavorful.

How to Make Brazilian-Style Picanha

Let’s get down to business and start cooking this flavorful steak, which is as close to traditional picanha as I can get. We’ve also got the fresh salsa and farofa as fun side items that also bring Brazilian tradition to this meal.

Prep the Meat

Start by slicing your whole picanha into thick steaks, making sure to cut across the grain of the meat (this helps make it more tender). Leave that fat cap intact—it’s what makes this juicy cut of beef so flavorful.

The thick cap steaks are prepped for grilling over the fire, sliced into steaks with a sharp knife.

Once your steaks are cut, bend them into a crescent shape and skewer them onto large metal skewers or long metal skewers. If you’ve got a rotisserie like the one I have on my new FYR Grill, that’s even better!

I like to use a knife to create a hole for the rotisserie spit. As you can see above, I plunge the knife down the middle of the picanha so that it slides easier onto the rotisserie spit. Then, rub the picanha with canola oil and generously season the steaks with coarse sea salt.

Fire up the Grill

Now for the fun part! Preheat your grill for indirect heat around 300 degrees F. Rip open your Cowboy Charcoal bag and make space for the hot charcoal on one side to create a two-zone heat source. This allows the picanha to slow-cook without burning the outside too quickly.

The Brazilian steaks are sliced with a sharp knife and then skewered for grilling.

Once the hot grill is ready, get your skewered picanha on there and let them roast over the hot coals. Cook the steaks until they reach an internal temperature of 120 degrees F for medium-rare, which should take about 45-60 minutes. A meat thermometer is helpful to ensure that the steak reaches the perfect temperature. After cooking, rest the meat for 15-20 minutes before slicing.

Mix the Fresh Salsa

For a bright, zesty salsa, combine diced tomatoes, red onion, jalapeño, and then the parsley in a bowl. Drizzle with olive oil, splash in some champagne vinegar, and squeeze the juice of a lemon. Season with kosher salt to taste, and your salsa is ready to go. You can prepare this while the picanha is on the rotisserie.

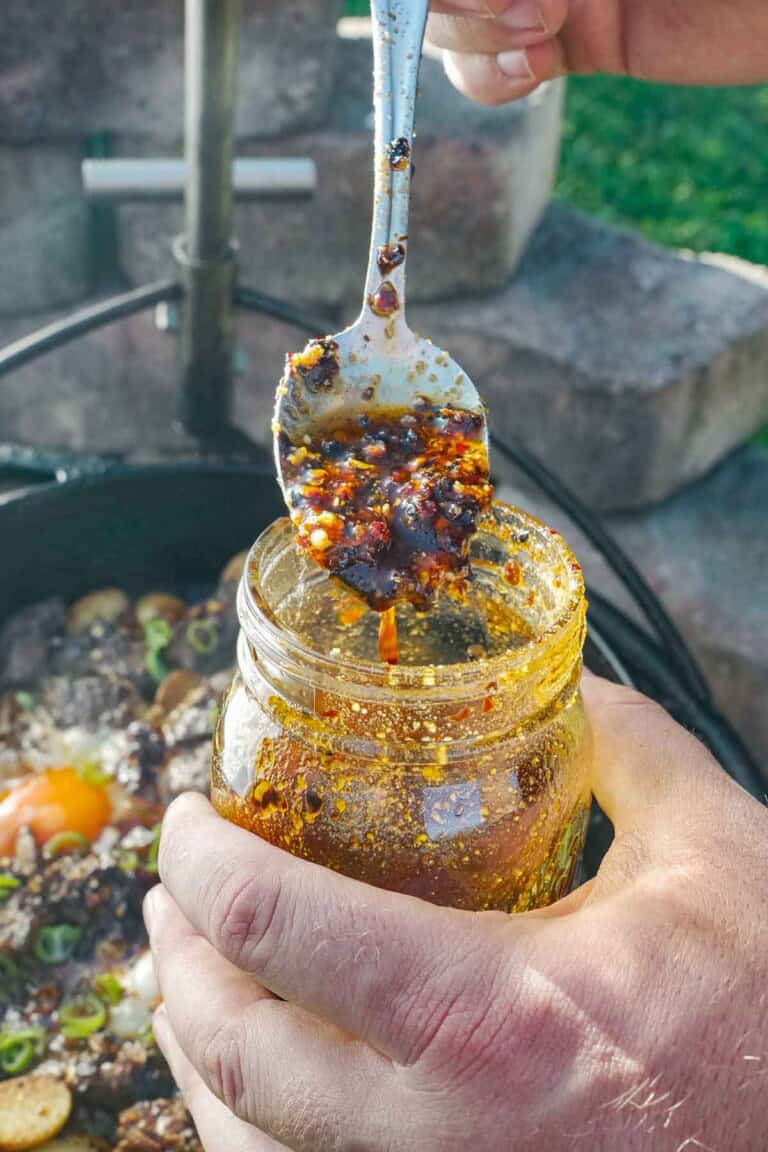
The salsa for the Brazilian Style Picanha is prepared in a Mason jar and the egg farofa cooks in a cast iron pan.

Make the Egg Farofa

After the our Brazilian Style Picanha is cooked, you can move to preparing the farofa. Melt some butter in a cast iron skillet and then toss in the sliced onions. Sauté them for a few minutes until they’re soft, then scramble the eggs right in the pan. When the eggs are almost set, stir in the cassava flour and season to taste with salt. Garnish with scallions, and voila, your savory egg farofa is ready!

Serve it Up

Once your picanha has rested, slice it straight off the skewers or into thin slices. Serve with a spoonful of salsa on top and a side of egg farofa. Remember, this flavorful steak is perfect for any special occasion, and your guests are sure to fall in love with this flavorful cut of beef. 

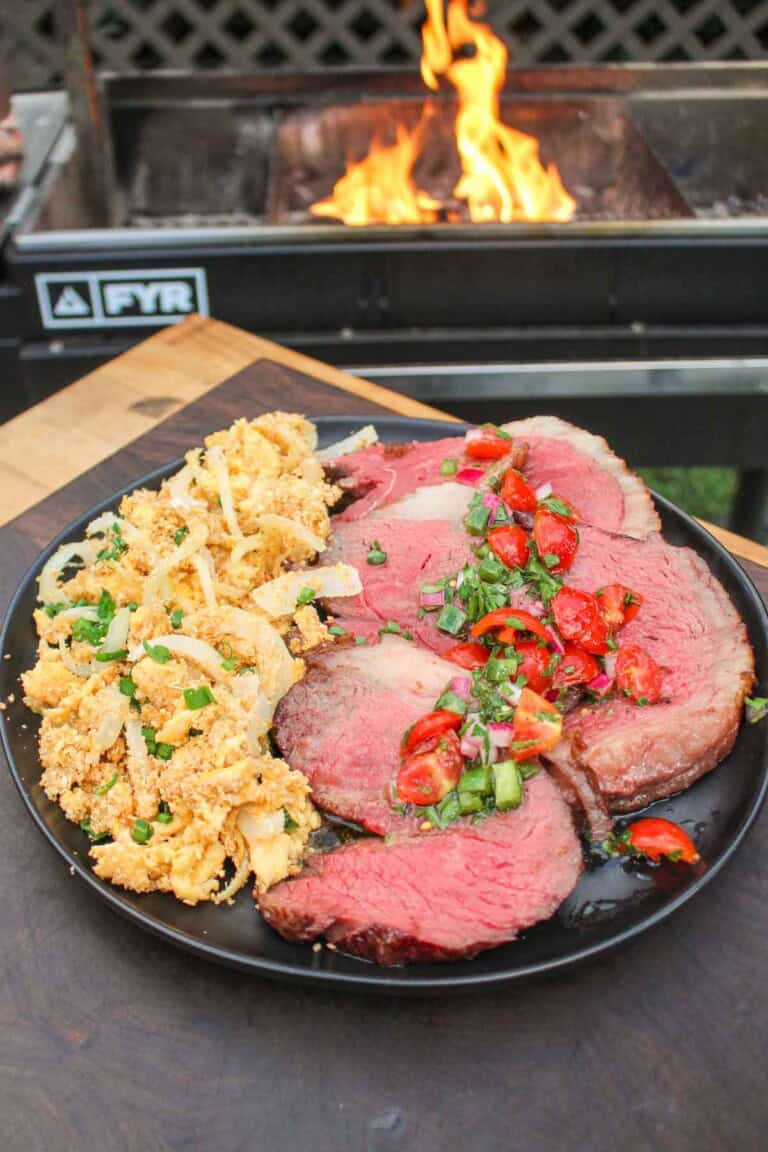
After the steaks rest up, they are covered in our fresh homemade salsa and served with the egg dish.

What to Serve with Brazilian Style Picanha

Picanha is a showstopper on its own, but if you want to go all out, serve it with some traditional Brazilian sides like black beans, grilled vegetables, or garlic rice. Also, a cold Caipirinha pairs perfectly with this beef cut, making it the ultimate special occasion meal.

How to Store Leftovers & Reheating Instructions

Got leftovers? Heck yes! Store any extra picanha in an airtight container in the fridge for up to 3 days. Reheat the slices in a cast iron pan over medium-high heat on the grill for a few minutes on each side and serve with your favorite sides.

More Picanha

FAQs for Brazilian Style Picanha

What is Egg Farofa anyway? 

Egg Farofa is a Brazilian side dish made by toasting cassava flour and mixing it with scrambled eggs, onions, and garlic. It’s got a crunchy texture and is usually served with grilled meats or stews. You can also toss in some bacon or veggies if you’re feeling creative.

Do I have to use a rotisserie for the best picanha?

No! You can cook picanha directly on the grill using long skewers. The key is to keep that fat side up so the fat melts down into the meat as it cooks.

Can I use a gas grill for picanha?

Absolutely. Just make sure you create a two-zone setup, where one side of the grill is hot for searing and the other is cooler for indirect cooking.

Get The Cookbooks!

Flavor X Fire & FOOD X Fire

By Derek Wolf

All the major tastes—salty, sour, sweet, bitter, and umami—are explored in depth, along with an investigation of other components you should consider when it comes to flavor, such as aroma, heat, and texture.

Tasty and succulent Brazilian Style Picanha steak is served with traditional Egg Farofa.
Print

Brazilian Style Picanha

Skewered Brazilian Style Picanha is a recipe that honors traditional picanha as best I know how. Add in some fresh homemade salsa and farofa, and you've got an epic meal!
Course Dinner
Cuisine American, Brazilian
Prep Time 30 minutes
Cook Time 1 hour 30 minutes
Total Time 2 hours
Servings 4 people
Calories 484kcal
Author Derek Wolf

Ingredients

Steak:

  • 2-3 Whole Picanha cut into steaks
  • 1 tbsp Large Grain Kosher Salt
  • Canola Oil as needed

Fresh Salsa:

  • 1 cup Diced Tomatoes
  • ¼ cup Red Onion diced
  • 1 Whole Jalapeño diced
  • 2.5 tbsp Chopped Parsley
  • 1.5 tbsp Champagne Vinegar
  • 1 medium Lemon juiced
  • Olive Oil as needed
  • Kosher Salt to taste

Egg Farofa:

  • 1 cup Toasted Cassava Flour
  • 2 tbsp Unsalted Butter
  • ½ White Onion sliced
  • 4 Fresh Eggs scambled
  • Chopped Scallions garnish
  • Salt to taste

Instructions

  • Begin by slicing your picanha into steaks going from edge to edge instead of top to tail.
  • Once sliced, carefully form them into a “C” shape and skewer them onto the rotisserie spike.
  • Lather in oil and generously season with the Coarse Sea Salt.
  • Preheat your grill for indirect rotisserie cooking around 300F (aka two zone).
  • Add your picanha to the rotisserie and start cooking. Cook for about 45-60 minutes until they are 120F internal for medium rare. Then, pull off and let rest for 15 minutes.
  • Add a skillet to the grill along with the onions and butter. Saute for 2-3 minutes until softened, then add in your eggs and cook until almost done. When close to done, add the cassava flour, salt and scallions. Mix together and then pull off.
  • Next, add all the ingredients into a bowl for your Fresh Salsa. Mix and set to the side.
  • Slice your picanha either on the skewer or off. Top with the Fresh Salsa and serve with the Egg Farofa. Enjoy!

Notes

Which kind of Cowboy Charcoal should I get to grill picanha?
For the best-grilled picanha, Cowboy Oak & Hickory Hardwood Lump Charcoal is the way to go. It burns hot and fast, giving you that perfect sear while adding a deep, smoky flavor. Plus, it’s all about controlling the heat, so lump charcoal gives you more flexibility for those quick adjustments. Perfect for nailing that crispy fat cap!

Nutrition

Calories: 484kcal | Carbohydrates: 32g | Protein: 30g | Fat: 26g | Saturated Fat: 12g | Polyunsaturated Fat: 2g | Monounsaturated Fat: 11g | Trans Fat: 0.2g | Cholesterol: 248mg | Sodium: 1957mg | Potassium: 581mg | Fiber: 3g | Sugar: 4g | Vitamin A: 754IU | Vitamin C: 31mg | Calcium: 116mg | Iron: 5mg

The post Brazilian Style Picanha appeared first on Over The Fire Cooking.

Taco Bake – Cheesy Casserole

Easy taco bake has all the delicious flavor of a hard shell taco, with the ease of a casserole. Boldly seasoned ground beef is layered with refried beans, salsa, tortilla chips, and cheese in a hearty crowd pleasing dish.

Easy taco bake has all the delicious flavor of a hard shell taco, with the ease of a casserole. Boldly seasoned ground beef is layered with refried beans, salsa, tortilla chips, and cheese in a hearty crowd pleasing dish.

Mexican Lasagna

If you’re looking for a quick, comforting meal with a Mexican twist, this Mexican Lasagna recipe is the perfect choice! Layered with rows of tortillas, chicken, cheese and salsa, this dish is full of flavor and the perfect recipe for an easy weeknight dinner. Plus, kids love it! Why I Love This Recipe The Ingredients…

The post Mexican Lasagna appeared first on Weelicious.

If you’re looking for a quick, comforting meal with a Mexican twist, this Mexican Lasagna recipe is the perfect choice! Layered with rows of tortillas, chicken, cheese and salsa, this dish is full of flavor and the perfect recipe for an easy weeknight dinner. Plus, kids love it!

Mexican Lasagna in baking dish.

Why I Love This Recipe

  • So Simple: Just like my Mexican Enchiladas recipe, this dish comes together super fast, especially if you use a rotisserie chicken from the grocery store. It’s ideal for those nights when you need a delicious dinner ASAP.
  • Kid-Friendly: When it comes to lasagna, whether it’s this dish, Vegetarian Skillet Lasagna or Lasagna Rolls, part of the fun is layering the dish. It’s a great way to get kids involved in the kitchen and encourage them to try new foods! Let the little ones place the tortillas while you handle the chicken and cheese.
  • Great for a Crowd: This Mexican Lasagna recipe is great if you’re looking to feed a crowd. It also freezes beautifully, so you can enjoy it any time. Or put leftovers in your kid’s school lunch with some avocado slices and call it a day!
  • Customizable: You can easily swap in ingredients or add extras like black beans, sautéed veggies, or different cheeses.

The Ingredients

Mexican lasagna ingredients.
  • Corn tortillas: Tortillas replace lasagna noodles in this casserole with a Mexican inspired twist.
  • Egg: Helps bind the ingredients together for a rich, hearty filling.
  • Milk: Adds a bit of moisture and creaminess to the filling.
  • Sour cream: Brings a tangy, creamy element that makes the lasagna extra delicious.
  • Chunky salsa: Choose your favorite mild salsa for a boost of flavor—chunky is best for texture!
  • Chicken breast, cooked and shredded: Using a rotisserie chicken is a great time-saver, or you can make your own Slow Cooker Mexican Chicken and shred it.
  • Cream cheese: These little cubes melt into the lasagna, adding pockets of creamy goodness.
  • Fresh cilantro: Brightens up the flavors and adds a pop of freshness.
  • Scallions: Provide a mild onion flavor that complements the other ingredients.
  • Mexican cheese blend (or Monterey Jack & Mild Cheddar): Melty cheese is a must in lasagna, and this blend gives just the right cheesy goodness!

Variations and Substitutions

This Mexican Lasagna recipe is super flexible, so feel free to mix it up with these variations!

  • Switch the Protein: Swap out the chicken for ground beef, turkey, or even a vegetarian option like cubed firm tofu, sautéed vegetables, black beans or your favorite sautéed plant based meat substitute.
  • Add Veggies: Try layering in sautéed bell peppers, zucchini, or corn for extra color and nutrition.
  • Use Flour Tortillas: If you prefer, you can use flour tortillas instead of corn. The texture will be softer, but just as delicious!
  • Spice it Up: Want more heat? Use a medium or hot salsa, or add diced jalapeños into the chicken mixture.

How to Make Mexican Lasagna

Tortillas spritzed with cooking oil on a baking sheet.

Step 1: Preheat oven to 350°F. Place the tortillas on an oil sprayed baking sheet, then spray the tops with additional oil. Bake for 8-10 minutes, remove and set aside.

Chicken mixture for Mexican lasagna in a mixing bowl.

Step 2: In a large bowl, whisk one egg. Add the milk, sour cream, salsa, shredded chicken, cubed cream cheese, cilantro, scallions and salt. Stir to combine.

Tortillas, chicken mixture and shredded cheese layered in baking dish.

Step 3: Arrange half of the par-baked tortillas on the bottom of an oil sprayed 7×11 baking dish. Layer half the chicken mixture on top of the tortillas, then layer 1 cup of the cheese blend on top.

Layered mexican lasagna in baking dish.

Step 4: Continue to layer the rest of the tortillas on top, followed by the remaining chicken mixture and cheese.

Mexican Lasagna topped with sliced avocado.

Step 5: Bake uncovered for 35 minutes. Serve.

Tips and Tricks

  • Par-bake the tortillas: This step is key to keeping the layers from becoming soggy.
  • Make it ahead: Assemble the lasagna up to a day ahead, then cover and refrigerate until ready to bake.
  • Freezing: You can freeze the lasagna either before or after baking. If freezing before, simply bake from frozen, adding an extra 10-15 minutes of cook time.

FAQs

Can I use flour tortillas instead of corn tortillas for Mexican Lasagna?

Absolutely! Flour tortillas work just as well and can be swapped 1:1.

What’s the best salsa for this recipe?

Especially if you are serving this to kids, a mild, chunky salsa works best to balance the flavors, but if you like a little more heat, feel free to use medium or hot salsa.

A serving of Mexican lasagna on a plate next to the casserole dish.

More Mexican Inspired Entrées

This Mexican Lasagna recipe is a family favorite in my kitchen! It’s quick to make, full of flavor, and super customizable. Whether you’re serving it for a weeknight dinner or meal-prepping for the week, this dish is sure to be a hit! Let me know what you think by leaving a comment and rating below!

Want more WeeliciousSubscribe to my newsletter and follow me on InstagramFacebook, and TikTok for all the newest recipes!

Mexican Lasagna in baking dish.
Print

Mexican Lasagna

Layered with rows of tortillas, chicken, cheese and salsa, Mexican Lasagna is the perfect recipe for an easy weeknight dinner that's full of flavor!
Course Main Dish
Cuisine Mexican
Prep Time 10 minutes
Cook Time 35 minutes
Total Time 45 minutes
Servings 6
Calories 330kcal

Ingredients

  • cooking oil spray
  • 6 corn tortillas
  • 1 large egg
  • 1/4 cup milk
  • 1/4 cup sour cream
  • 1 cup mild chunky salsa
  • 1 pound chicken breast, cooked and shredded
  • 4 ounces cream cheese, cubed
  • 2 tablespoons fresh cilantro, chopped
  • 3 scallions, chopped
  • 1 teaspoon kosher salt
  • 2 cups Mexican cheese blend (or a blend of Monterey Jack and Mild Cheddar), divided

Instructions

  • Preheat oven to 350°F.
  • Place the tortillas on an oil sprayed baking sheet, then spray the tops with additional oil.
  • Bake for 8-10 minutes, remove and set aside.
  • In a large bowl, whisk one egg. Add the milk, sour cream, salsa, shredded chicken, cubed cream cheese, cilantro, scallions and salt. Stir to combine.
  • Arrange half of the par-baked tortillas on the bottom of an oil sprayed 7×11 baking dish. Layer half the chicken mixture on top of the tortillas, then layer 1 cup of the cheese blend on top.
  • Continue to layer the rest of the tortillas on top, followed by the remaining chicken mixture and cheese.
  • Bake uncovered for 35 minutes.

Notes

  • Par-bake the tortillas: This step is key to keeping the layers from becoming soggy.
  • Make it ahead: Assemble the lasagna up to a day ahead, then cover and refrigerate until ready to bake.
  • Freezing: You can freeze the lasagna either before or after baking. If freezing before, bake from frozen, adding an extra 10-15 minutes of cook time.

Nutrition

Calories: 330kcal | Carbohydrates: 13g | Protein: 22g | Fat: 22g | Cholesterol: 85mg | Sodium: 760mg | Fiber: 2g | Sugar: 2g

The post Mexican Lasagna appeared first on Weelicious.

Breakfast Nachos

This simple Breakfast Nachos recipe is a delicious and savory twist to add to your mornings. With crispy tortilla chips, melty cheese, eggs and all your favorite toppings, they’re the perfect way to start your day with a hearty and flavorful meal that takes under 20 minutes to make! Why Make Breakfast Nachos? My friend introduced me to this…

The post Breakfast Nachos appeared first on Weelicious.

This simple Breakfast Nachos recipe is a delicious and savory twist to add to your mornings. With crispy tortilla chips, melty cheese, eggs and all your favorite toppings, they’re the perfect way to start your day with a hearty and flavorful meal that takes under 20 minutes to make!

breakfast nachos on large plate with salsa on the side

Why Make Breakfast Nachos?

My friend introduced me to this breakfast hack, and I’m hooked. We’ve been making breakfast nachos nonstop lately, and here’s why you should too:

  • Easy: Breakfast nachos come together fast with tortilla chips, eggs, cheese, and your favorite toppings.
  • Budget-Friendly: Save money by using leftover ingredients like cooked bacon, sausage, or last night’s air fryer vegetables as toppings. It’s a great way to cut down on food waste!
  • Customizable: Perfect for picky eaters! Let kids choose their own toppings, and they’ll feel like mini chefs.
  • Tasty & Filling: Packed with protein from the Crispy Fried Egg, carbs, and cheesy goodness, these nachos are a fun, satisfying way to start your day.

The Ingredients

Breakfast Nachos Ingredients.
  • Tortilla Chips – You can’t have nachos without some delicious, crispy tortilla chips. Use your favorite store bought brand or make your own tortilla chips in the oven!
  • Mozzarella cheese – Of couse, any cheese will work. My kids just prefer mozzarella. Feel free to use cheddar, Monterey jack or a combination of any of your favorites!
  • Olive oil or butter – You only need a couple teaspoons of either of these to fry your egg.
  • Eggs – This recipe calls for fried eggs, but if you prefer scrambled, go for it!
  • Toppings: Nachos are nothing without their toppings. Feel free to use what you have on hand. Guacamole, tomatillo salsa, chopped tomatoes, cooked bacon or breakfast sausage, cooked pinto, refried or black beans, or leftover air fryer vegetables are some ideas to get you started!

Want Breakfast Nachos for a Crowd?

Making this recipe for a crowd is super simple! Just increase the ingredients to fit your groups size and use a half or full size sheet pan. Top with the eggs and toppings as usual, and you’ve got a perfect breakfast or brunch recipe for a crowd!

How to Make Breakfast Nachos

Tortilla chips on baking sheet topped with shredded cheese.

Step 1: Preheat your oven or toaster oven to 350°F. Place the chips on a parchment lined quarter sheet pan or toaster tray, top with cheese and bake for 10 minutes or until cheese begins to melt.

Fried egg in a pan.

Step 2: While the chips are baking, heat olive oil or butter in a large suite pan over medium heat. Gently crack the eggs into the skillet and cook for 2-3 minutes, flipping hallway through if desired. You could also scramble the eggs if you prefer.

Breakfast nachos with toppings on a sheet tray.

Step 3: Remove chips and melted cheese from the oven, top with egg and desired toppings.

Get Your Kids Involved

Getting your little ones involved in the kitchen is the easiest way to get them to be good eaters. For this recipe, let them help you sprinkle the cheese and choose what toppings they want to add. They’ll feel more empowered and inspired to try new things if they can help!

pulling a chip from serving of breakfast nachos topped with fried egg

More Easy Mexican Inspired Breakfasts

Breakfast Nachos are a departure from the usual breakfast foods like cereal or oatmeal and can be a great way to mix things up and try something new! Let me know in the comments what toppings you’re adding to your breakfast nachos and leave a rating if you love this recipe idea!

Want more WeeliciousSubscribe to my newsletter and follow me on InstagramFacebook, and TikTok for all the newest recipes!

Print

Breakfast Nachos

With crispy tortilla chips, melty cheese, eggs and all your favorite toppings, breakfast nachos are the perfect way to start your day with a hearty and flavorful meal.
Course Breakfast
Cuisine Mexican, Tex-Mex
Prep Time 5 minutes
Cook Time 10 minutes
Total Time 15 minutes
Servings 2
Calories 868kcal

Ingredients

Topping Ideas:

  • guacamole
  • salsa
  • chopped cilantro
  • crumbled cooked bacon or breakfast sausage
  • cooked pinto, refried or black beans
  • any cooked leftover vegetables on hand

Instructions

  • Preheat oven or toaster to 350°F.
  • Place the chips on a parchment lined quarter sheet pan or toaster tray, top with cheese and bake for 10 minutes or until cheese begins to melt.
  • While the chips are baking, heat olive oil or butter in a large suite pan over medium heat. Gently crack the eggs into the skillet and cook for 2-3 minutes, flipping hallway through if desired.
  • Remove chips and melted cheese from the oven, top with a fried egg and desired toppings.

Notes

For a Crowd: Making this recipe for a crowd is super simple! Just increase the ingredients to fit your groups size and use a half or full size sheet pan. Top with the eggs and toppings as usual, and you’ve got a perfect breakfast or brunch recipe for a crowd!

Nutrition

Calories: 868kcal | Carbohydrates: 84g | Protein: 27g | Fat: 49g | Saturated Fat: 13g | Polyunsaturated Fat: 15g | Monounsaturated Fat: 18g | Trans Fat: 0.1g | Cholesterol: 208mg | Sodium: 1003mg | Potassium: 546mg | Fiber: 9g | Sugar: 3g | Vitamin A: 818IU | Vitamin C: 4mg | Calcium: 442mg | Iron: 3mg

The post Breakfast Nachos appeared first on Weelicious.

Smoked Salsa Verde

Smoked Salsa Verde

Grilling up some Smoked Salsa Verde in your backyard is one of the best ways to celebrate the art of…

The post Smoked Salsa Verde appeared first on Over The Fire Cooking.

Smoked Salsa Verde

Grilling up some Smoked Salsa Verde in your backyard is one of the best ways to celebrate the art of homemade salsas. If it’s your first time making your own tomatillo salsa verde, buckle up. This is one of my favorite creative outdoor cooking recipes.

Smoked Salsa Verde is ready to eat.

The great flavor of this easy recipe will blow your mind. It’s all about those heaps of fresh flavor with a hint of smokiness that’ll make you rethink store-bought green salsa.

Now that your taste buds are fired up, let’s fire up the grill and get this fiesta started. This is a freakin’ delicious and flavorful salsa that I happen to love drizzling over my spiced flank steak and eggs.

Why You’ll Love Smoked Salsa Verde

So, why should you be stoked about this smoked salsa verde recipe? First off, it’s unlike any salsa you’ve ever tasted. Undoubtedly, my favorite part of the recipe is the charring process on my FYR Grill. The fire caramelizes the veggies and brings out their natural smokiness without any artificial flavors. Plus, adding a lump of coal at the end is pure fun. This amps up the smokiness to another level.

The green sauce is drizzled over sliced flank steak and eggs and served with rice and beans.

If you need some more inspiration about how to use your smoky green sauce, check out these recipes: Cheesy Skewered Skirt Steak with Salsa Verde, Steak Tacos with Corn Salsa, Steak and Egg Tacos, Grilled Steak Burrito Bowl, and Easy Steak Quesadilla. All of which are great candidates to substitute or add these smoked salsa verde to!

Salsa Verde Sauce Ingredients Roundup 

Okay, so before jumping into the full recipe, let’s go through the list of items you need from the local grocery store. Make sure to snag the freshest and best ingredients for this salsa verde recipe. You’ll need tomatillos, a white onion, a couple of jalapeño peppers, garlic cloves, fresh cilantro, green onions, fresh lime juice, and a bit of vegetable oil. Don’t forget to grab some kosher salt or sea salt to season everything just right. Simple, right?

What kind of charcoal should I use to put into the salsa for the smoke?

For the best smoky flavor, I recommend using Cowboy Charcoal. It burns hot and clean, giving your salsa a great smoky taste without any unwanted chemicals or flavors. Just make sure to use a small, smoldering piece to avoid overpowering the salsa.

How to Make Smoked Salsa Verde

Alright, let’s get to the fun part – making the salsa! First things first, preheat your grill to a high heat temperature, around 400 degrees F. We want it nice and hot to get a good char on those veggies.

While the grill is heating up, remove the husks from your tomatillos. Once your grill is ready, place the tomatillos, quartered onion, and jalapeno peppers directly on the grates. Let them char until they’re blackened and caramelized. Trust me, this step is crucial for developing that smoky flavor that makes this salsa verde recipe stand out.

The fresh vegetables are grilled on the FYR Grill.

Once your veggies are nicely charred, pull them off the grill and let them cool for a bit. Then, add them to your food processor (or immersion blender) along with the garlic cloves, lime juice, and a bit of water. Blend everything until you reach the consistency of your salsa preference. Some folks like it chunky, others smooth. In the end, it’s totally up to you!

The grilled veggies are blended for the perfect texture.

After blending, mix in the chopped cilantro and green onion, which add even more flavor to your homemade salsa.

Now, for the smoky twist – place your salsa in a Mason jar and add a smoldering coal from the grill. Cover it quickly to trap the smoke, then set it aside to marinate for about 20-30 minutes.

Next, all you need to do is enjoy. Cheers!

The green sauce is literally smoked with charcoal.

What to Serve with Smoked Salsa Verde

This flavorful salsa is perfect with some crunchy tortilla chips, but don’t stop there! It’s also fantastic on top of grilled meats like flank steak or spare ribs or as a tangy topping for tacos and burritos. The touch of smoke and fresh ingredients make it versatile enough to complement a wide range of dishes.

The steak, eggs, rice, and beans are plated and drizzled with the Smoked Salsa Verde.

How to Store Leftover Salsa

If you have any leftover smoked salsa verde, store it in an airtight container in the refrigerator. It should keep its fresh flavor for about 3-5 days. Give it a good sniff before serving to ensure it’s still fresh. You can also freeze it in ice cube trays if you want to save small portions for later.

For More Smoked Sauces

FAQs

What are Tomatillos Anyway?

Tomatillos are small, green fruits that are a staple in Mexican cuisine. They look like little green tomatoes, but they have a tangy, slightly citrusy flavor that’s perfect for making green salsa. They come with a papery husk that you need to remove before cooking. 

If I don’t have tomatillos can I use Roma tomatoes instead? 

You can, but keep in mind that Roma tomatoes will give you a different flavor profile. Tomatillos have a tangy, slightly citrusy taste that’s pivotal for that classic salsa verde flavor. 

How can I make my sauce spicier?

If you like a bit of heat, add more jalapeno peppers or even throw in some serrano peppers. Adjust the amount to suit your taste.

Get The Cookbooks!

Flavor X Fire & FOOD X Fire

By Derek Wolf

All the major tastes—salty, sour, sweet, bitter, and umami—are explored in depth, along with an investigation of other components you should consider when it comes to flavor, such as aroma, heat, and texture.

Smoked Salsa Verde
Print

Smoked Salsa Verde

Get ready to make my absolute favorite Smoked Salsa Verde. it's a fun way to add a genuine smoky flavor to all your foods, even when you don't have a smoker.
Course Sauce
Cuisine American, Mexican
Prep Time 5 minutes
Cook Time 30 minutes
Total Time 35 minutes
Servings 4 people
Calories 71kcal
Author Derek Wolf

Ingredients

Smoked Salsa Verde Ingredients

  • 5-6 Tomatillos husks removed
  • 1 White Onions quartered
  • 2-3 Jalapeno Peppers
  • 2-3 Garlic Cloves
  • 1/2 cup Chopped Cilantro
  • ¼ cup Chopped Green Onions
  • 2 Limes juiced
  • ¼ cup Water
  • Kosher Salt to taste
  • 1 tbsp Vegetable Oil

Instructions

  • Preheat your grill to high heat temperature (around 400F).
  • Add your tomatillos, onion and jalapenos to the grill to char until blackened. Pull off once done.
  • Add all the ingredients (but the cilantro and green onion) to a food processor and blend until the consistency that you like. Mix in the green onion and cilantro at the end.
  • Add the salsa to a mason jar along with a smoldering coal from the fire (ideally white hot). Cover quickly to encapsulate the smoke, then set to the side to marinate for 20-30 minutes.

Notes

What kind of charcoal should I use to put into the salsa for the smoke?
For the best smoky flavor, I recommend using Cowboy charcoal. It burns hot and clean, giving your salsa a great smoky taste without any unwanted chemicals or flavors. Just make sure to use a small, smoldering piece to avoid overpowering the salsa.

Nutrition

Calories: 71kcal | Carbohydrates: 10g | Protein: 1g | Fat: 4g | Saturated Fat: 1g | Polyunsaturated Fat: 2g | Monounsaturated Fat: 1g | Trans Fat: 0.02g | Sodium: 130mg | Potassium: 236mg | Fiber: 3g | Sugar: 4g | Vitamin A: 391IU | Vitamin C: 20mg | Calcium: 31mg | Iron: 1mg

The post Smoked Salsa Verde appeared first on Over The Fire Cooking.

Tostadas

These tostadas made with mashed pinto beans are piled high with salsa, veggies, and cheese for a satisfying (and fun!) weeknight meal.

The post Tostadas appeared first on Budget Bytes.

With the sun working overtime during these hot summer months, I’ve got tacos on my mind (and tortillas in my fridge) 24/7. I love how balanced and fresh Mexican-inspired cuisine can be, and these tostadas are no exception! Crispy tortillas are piled high with mashed pinto beans, salsa, veggies, and cheese for a different spin on your typical taco night. Plus, I love that I can use up any leftover tortillas I have on hand so nothing goes to waste! These are super customizable based on your family’s preferences, so you can add or omit just about anything you want.

close up of a hand holding a tostada.

What Is A Tostada?

The word “tostada” translates to “toasted” in reference to the crispy toasted tortilla shell that serves as the base of the dish. It’s sort of like a flattened taco piled high with filling. It’s also a great way to use up the last of those leftover tortillas that are starting to go stale!

Ingredients

Here’s what you’ll need to make these tostadas:

  • Onion: I used white onion because it was on sale, but yellow or Vidalia will also work well in this recipe.
  • Jalapeño: Adds a bit of heat to the filling.
  • Olive Oil: Helps the filling cook without burning. Neutral cooking oils like canola or vegetable also work well.
  • Pinto Beans: Create a mushy, refried bean-like texture. If you have some leftover, our favorite (Not) Refried Beans can also work well in this recipe!
  • Taco Seasoning: An easy way to add classic Mexican flavors.
  • Water: Helps make the beans easier to mash.
  • Salsa: Adds freshness to the tostadas. I love this Fire Roasted Salsa, but store-bought works just fine.
  • Tostada Shells: These small, crunchy corn tortillas are like a flat hard taco shell. A Mexican open-faced sandwich, if you will!
  • Radishes: Add a delightful, fresh crunch!
  • Slaw Mix: A cheap and easy hack to add extra veggies to this dish.
  • Sour Cream: Adds creaminess and tanginess.
  • Cilantro: Adds a pop of freshness and color.
  • Avocado: Adds a creamy texture. Guacamole also works well.
  • Queso Fresco: Can’t find queso fresco or cotija cheese? Cheddar cheese will do just fine, or omit it altogether.

What Is the Difference Between A Tostada and a Tortilla?

A tostada is a tortilla that has been baked or fried until it is crispy. You can purchase ready-made tostada shells from popular brands like Old El Paso, or you can make your own by baking 6-inch corn tortillas until toasted and crispy.

How to Eat A Tostada

Tostadas are finger foods, so use your hands, not a fork and knife! I like the two-handed method of holding the edges of the tostada and taking bites like a slice of toast. I also like to crack the tostadas into smaller pieces and eat it in smaller bites that way.

side view of tostadas on a piece of parchment paper on a blue table.
holding a tostada over a table topped with tostadas.
Print

Tostadas

These tostadas made with mashed pinto beans are piled high with salsa, veggies, and cheese for a satisfying (and fun!) weeknight meal.
Course Appetizer, Main Course
Cuisine Mexican
Prep Time 20 minutes
Cook Time 20 minutes
Total Time 40 minutes
Servings 4 servings
Calories 535kcal

Ingredients

  • 1 Tbsp olive oil $0.20
  • 1/2 white onion, diced $0.45
  • 1 jalapeño, seeded and diced $0.24
  • 1 1-oz. packet taco seasoning $0.59
  • 2 15-oz. cans pinto beans, drained and rinsed $1.78
  • 1 cup water $0.00
  • 8 tostada shells $0.88
  • 1/2 cup salsa $0.49
  • 3 radishes, julienned $0.37
  • 1/2 14-oz. bag pre-chopped slaw mix $0.99
  • 1/4 cup sour cream $0.31
  • 2 Tbsp chopped fresh cilantro $0.12
  • 1 avocado, sliced $0.99
  • 2 Tbsp crumbled queso fresco $0.35

Instructions

  • Add the olive oil, onions, jalapeño, and taco seasoning mix to a skillet. Stir to combine and cook over medium heat until the onions are soft and glossy.
  • Add the drained and rinsed pinto beans to the skillet with 1 cup of water and simmer for 5-8 minutes, until the beans start to dissolve and break down and the liquid reduces to about 1/2.
  • Remove from the heat and mash the bean mixture together. Set aside.
  • Crumble queso fresco, julienne or slice radishes, mince cilantro, thinly the avocado, and gather your premixed cabbage and salsa of choice.
  • Spread out tostada shells on a cookie sheet and toast in the oven at 350°F for 5 minutes. This makes the tostadas extra crunchy!
  • Assemble tostadas: The tostada shell will be on the bottom, topped with mashed pinto beans.
  • Then, add all other toppings; divide the pre-chopped slaw mix, salsa, sour cream, chopped fresh cilantro, avocado, and crumbled queso fresco between all tostadas. Enjoy!

See how we calculate recipe costs here.

Notes

This recipe is easily made vegan by leaving off the sour cream and cheese. There are amazing vegan substitutes available for both of those ingredients nowadays, too!

Nutrition

Serving: 2tostadas | Calories: 535kcal | Carbohydrates: 69g | Protein: 16g | Fat: 24g | Sodium: 1649mg | Fiber: 19g

how to make Tostadas – step by step photos

onion, jalapeno, and taco seasoning in a frying pan.

Add the 1 Tbsp olive oil, 1/2 diced white onion, 1 seeded and diced jalapeño, and 1 oz. packet of taco seasoning mix to a skillet. Stir to combine and cook over medium heat until the onions are soft and glossy.

step 2: add beans and water

Add the 2 cans of drained and rinsed pinto beans to the skillet with 1 cup of water and simmer for 5-8 minutes, until the beans start to dissolve and break down and the liquid reduces by about 1/2.

step 4: mash the beans

Remove from the heat and mash the bean mixture together.

step 6: chopped veggies on cutting board

Crumble 2 Tbsp queso fresco, julienne or slice 3 radishes, mince 2 Tbsp cilantro, thinly slice the avocado, and gather your premixed cabbage and salsa of choice.

step 6 lay out tostadas and toast

Spread out 8 tostada shells on a cookie sheet and toast in the oven at 350°F for 5 minutes. This makes the tostadas extra crunchy!

step 7: add beans to tostatdas

Assemble tostadas: The tostada shell will be on the bottom, topped with mashed pinto beans.

8 add all the toppings 1 by 1 to tostadas

Then, add all other toppings; divide the 1/2 bag of pre-chopped slaw mix, 1/2 cup salsa, 1/4 cup sour cream, 2 Tbsp chopped fresh cilantro, 1 sliced avocado, and 2 Tbsp crumbled queso fresco between all tostadas. Enjoy!

overhead view of tostadas on a piece of parchment paper on a blue table.

More Recipes with Tortillas

The post Tostadas appeared first on Budget Bytes.

Taco Dip

This 4-ingredient Taco Dip is creamy, super easy to make, and has the perfect amount of spice. It’s great for parties or to treat yourself!

The post Taco Dip appeared first on Budget Bytes.

I’m that person who always chooses queso or spinach dip when I go out to my favorite restaurants. Dips are my absolute favorite appetizer and they’re perfect for sharing at parties and family gatherings. This 4-ingredient Taco Dip is creamy, super easy to make, and has the perfect amount of spice. Toppings are optional but I loved adding some tomatoes, jalapeños and sliced green onions on top of mine. And you don’t have to wait until the next big event to make this taco dip recipe…treat yourself this weekend to some chips & dip, you deserve it!😉

Overhead view of a serving bowl full of taco dip, topped with cherry tomatoes and jalapenos and chips served on the side.

What’s In Taco Dip?

When I say this dip recipe is super easy, I really mean it. It’s one of those recipes you can memorize after making it one time and it’s easy to keep all the ingredients on hand for whenever you want to whip up a quick batch. For this taco dip we simply used cream cheese, sour cream, taco seasoning, and a little bit of salsa. That’s it! You can customize it by adding your favorite toppings or keep it simple and enjoy with lots of tortilla chips!

Can I Add Meat?

Oftentimes you may see taco dip made similar to our 7 layer dip recipe with ground beef added and layered with lots of veggies. I opted for a simpler version that can be made quickly with fewer ingredients, but still packs in lots of those Mexican-inspired flavors that I love. With that being said, you can definitely add some seasoned taco meat if you want to make this dip more filling. I suggest adding ½ lb. of seasoned ground beef on top of the cream cheese layer, then finish with your favorite toppings.

Topping Ideas

I love adding my favorite nacho-style toppings to this creamy dip. You can keep things simple like we did with a few tomatoes, sliced jalapeños, and sliced green onions or have fun adding any of these toppings listed below:

Making It Ahead & Storing Leftovers

You can easily make this taco dip ahead of time and just wait to add on any extra toppings. Follow the recipe listed below then cover the dip tightly with plastic wrap or in an airtight container and place it in the refrigerator until you’re ready to serve. Store any leftovers covered tightly in the refrigerator for up to 3 days.

Side view of a hand scooping some taco dip with a tortilla chip.
Overhead view of Taco Dip in a serving bowl with a chip scooping some out.
Print

Taco Dip

This 4-ingredient Taco Dip is creamy, super easy to make, and has the perfect amount of spice. It’s great for parties or to treat yourself!
Course Appetizer, Dip
Cuisine American
Total Cost $3.98 recipe / $0.40 serving
Prep Time 10 minutes
Total Time 10 minutes
Servings 10 (about 1/4 cup each)
Calories 128kcal

Equipment

Ingredients

  • 8 oz. cream cheese, softened* $1.85
  • 1 cup sour cream $1.12
  • 2 Tbsp taco seasoning** $0.59
  • 1/4 cup salsa $0.42

Instructions

  • In a large bowl combine the softened cream cheese, sour cream, taco seasoning, and salsa.
  • Using a hand mixer blend all the ingredients together until completely smooth and the cream cheese is fully incorporated.
  • Add the taco dip to a serving dish and top with your favorite toppings. I topped mine with some grape tomatoes, sliced jalapeño, and sliced green onions. Enjoy!

See how we calculate recipe costs here.

Notes

*Make sure your cream cheese is softened so the ingredients can blend easily and smoothly.
**You can use our homemade taco seasoning recipe or a store-bought taco seasoning packet. The store-bought packets are about 3 Tbsp of seasoning mix. You can use the entire packet for a more intense flavor or measure out 2 Tbsps and save the rest for later. I tested this recipe with 2 Tbsp of seasoning mix vs. the entire seasoning packet, and 2 Tbsp was definitely the way to go!

Nutrition

Serving: 1serving | Calories: 128kcal | Carbohydrates: 3g | Protein: 2g | Fat: 12g | Sodium: 161mg | Fiber: 0.2g

How to Make Taco Dip – Step by Step Photos

Taco Dip ingredients in a white bowl.

In a large bowl combine 8 oz. softened cream cheese, 1 cup sour cream, 2 Tbsp taco seasoning, and 1/4 cup salsa. I like using chunky mild salsa.

Taco Dip mixed together in a white bowl.

Using a hand mixer blend all the ingredients together until completely smooth and the cream cheese is fully incorporated.

Taco Dip spread out in a serving bowl.

Transfer the taco dip to a serving dish or bowl and top with your favorite toppings. I topped mine with some grape tomatoes, sliced jalapeño, and sliced green onions.

Overhead view of Taco Dip in a serving bowl with a chip scooping some out.

Now just grab a bag or tortilla chips and enjoy by yourself or with your family and friends!

The post Taco Dip appeared first on Budget Bytes.

Crock Pot Salsa Chicken

This delicious Crock Pot Salsa Chicken is an easy and versatile option for busy weeknight dinners, plus it’s perfect for meal prep!

The post Crock Pot Salsa Chicken appeared first on Budget Bytes.

Meal prepping is probably the only way I make it through the holidays (or any month of the year, TBH) without losing it. 😅 So here’s a really easy bulk meal prep protein that you can use for multiple meals throughout the week. This Crock Pot Salsa Chicken recipe is such a classic, it’s incredibly easy (no chopping!), and only takes a handful of ingredients to prepare. Plus, there are several ways you can customize salsa chicken if you want to change it up a bit! Bookmark this one, folks, because you’re going to want to make it again and again!

Close up overhead view of salsa chicken in the crock pot with tongs.

Crock pot salsa chicken has been around for ages. In fact, a fancier version of it has been a reader favorite on Budget Bytes since 2011, but you need to know that in its most basic form, it’s still amazing. It’s just too good and too easy to not share. Just wait until you see all the ways you can use this saucy, spicy, super-flavorful shredded chicken!

Ingredients for Salsa Chicken

When I say this salsa chicken recipe is simple, I mean it! Here are the only ingredients you’ll need to make Crock Pot Salsa Chicken:

  • Chicken Breast: I love the way white meat chicken breast shreds, but if you’re more of a thigh person you can definitely do this with thighs, too. Thighs are a bit more forgiving with the cooking time and the sauce will be extra rich!
  • Salsa: This is the main flavor component for this recipe, so make sure you use a really good salsa. I love to use a smoky salsa to add even more depth of flavor. I used Kroger’s Private Selection brand Taqueria Style Salsa, but you can use different salsa flavors to switch it up!
  • Chili Powder: A one-stop shop for flavor, basic chili powder brings a lot of bang for your buck and really deepens the flavor in the sauce.
  • Onion Powder & Garlic Powder: To add even more depth to the flavor, I added a little dose of onion and garlic powder for good measure. Using these two ingredients helps round out the flavor without having to chop a single vegetable!
A plate full of three salsa chicken tacos.

How to Use Crock Pot Salsa Chicken

One of the reasons I love this salsa chicken so much is that you can make one batch and then use it for multiple meals throughout the week. I love to use this shredded salsa chicken for tacos, bowl meals (with rice, cheese, beans, etc.), nachos, burritos, salads, in casseroles, to top a baked potato, or even as a base for a soup!

Salsa Chicken Add-Ins

The simplicity of Salsa Chicken makes it perfect for customizing with add-ins. Here are some other ingredients you can add to make it different every time:

  • Beans: Try adding a drained can of beans, like black beans, pinto beans, or even kidney beans.
  • Vegetables: Add more color and texture to the mix with diced onion, jalapeño, bell peppers, or corn.
  • Cream Cheese or Sour Cream: Give your salsa chicken a creamy finish by stirring in some cream cheese or sour cream after cooking.
  • Lime & Cilantro: Stir fresh lime juice and cilantro into the salsa chicken after cooking for a fresh finish.
  • Spices: Switch up the spices and add something smoky like chipotle chile powder, or your favorite taco seasoning mix.

And don’t forget, you can change the flavor of salsa chicken by using different kinds of salsa! Try a spicy mango salsa, salsa verde, or even a smoky peach salsa for fun!

How to Store Leftovers

This salsa chicken recipe is perfect for meal prep. It stays good in the refrigerator for 3-4 days, but it can also be frozen! To freeze, chill it completely in the refrigerator first, then transfer to the freezer and store for up to three months. I like to divide it into single portions before freezing so I can thaw only the amount I need each time. Thaw the salsa chicken overnight in the refrigerator, then reheat either in a sauce pan over medium, stirring frequently, or in the microwave.

Close up side view of salsa chicken in the crock pot with tongs.
Print

Crock Pot Salsa Chicken

This delicious Crock Pot Salsa Chicken is an easy and versatile option for busy weeknight dinners, plus it's perfect for meal prep!
Course Dinner
Cuisine American
Total Cost $9.60 recipe / $1.60 serving
Prep Time 10 minutes
Cook Time 2 hours 30 minutes
Total Time 2 hours 40 minutes
Servings 6 (¾ cup each)
Calories 90kcal

Equipment

Ingredients

Instructions

  • Place the chicken breasts in the slow cooker. Sprinkle the chili powder, garlic powder, and onion powder over the chicken, then pour the salsa on top.
  • Place the lid on the slow cooker and cook on high for 2.5 hrs or low for 5 hours.
  • Test the chicken to make sure it's tender enough to pull apart with a fork. If not, replace the lid and cook for an additional 30 minutes on high or one hour on low.
  • Shred the chicken with two forks and stir to combine with the salsa and liquid in the pot. Serve hot or refrigerate until ready to use. Add the salsa chicken to your favorite tacos, burritos, nachos, salads, and more!

See how we calculate recipe costs here.

Notes

*If using frozen chicken breast, be sure to thaw it completely before adding to the slow cooker.

Nutrition

Serving: 0.75cup | Calories: 90kcal | Carbohydrates: 6g | Protein: 13g | Fat: 2g | Sodium: 573mg | Fiber: 2g
A plate full of nachos made with salsa chicken.

How to Make Crock Pot Salsa Chicken

Chicken breasts in a crock pot with spices sprinkled over top.

Place three boneless, skinless chicken breasts in a crock pot and sprinkle 2 tsp chili powder, ½ tsp garlic powder, and ½ tsp onion powder over top.

A jar of salsa being poured over top of chicken in the slow cooker.

Pour 16oz. of your favorite salsa over the chicken in the crock pot. (I used Kroger’s Private Selection brand Taqueria Style Salsa).

Cooked salsa chicken in the slow cooker before shredding.

Place the lid on the crock pot and cook on high for 2.5 hours, or low for 5 hours. Test the chicken to make sure it’s tender enough to pull apart with a fork. If not, replace the lid and cook for an additional 30 minutes on high or one hour on low. After cooking it will look a little watery, but don’t worry! Once the chicken is shredded it turns into a nice sauce that coats everything.

Chicken being shredded in the slow cooker with two forks.

Use two forks to shred the chicken and stir it into the sauce in the slow cooker.

Finished shredded salsa chicken in the crock pot.

Once the chicken is shredded, give it a taste and adjust the seasonings if needed. And that’s it! The crock pot salsa chicken recipe is complete and you’re ready to eat!

A burrito bowl made with salsa chicken.

A bowl meal with rice, cheese, and any other fun toppings you have on hand is such a great budget-friendly meal!

The post Crock Pot Salsa Chicken appeared first on Budget Bytes.