Pumpkin Muffins

These pumpkin muffins are moist, subtly sweet, full of warm spices and have a hidden dollop of sweet cream cheese in the center.

The post Pumpkin Muffins appeared first on Budget Bytes.

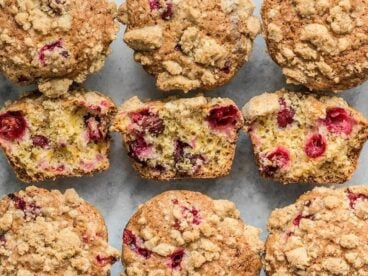
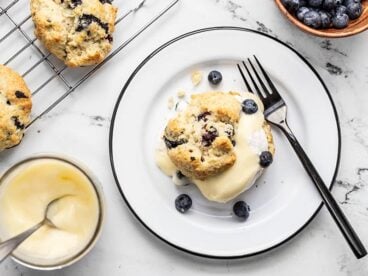
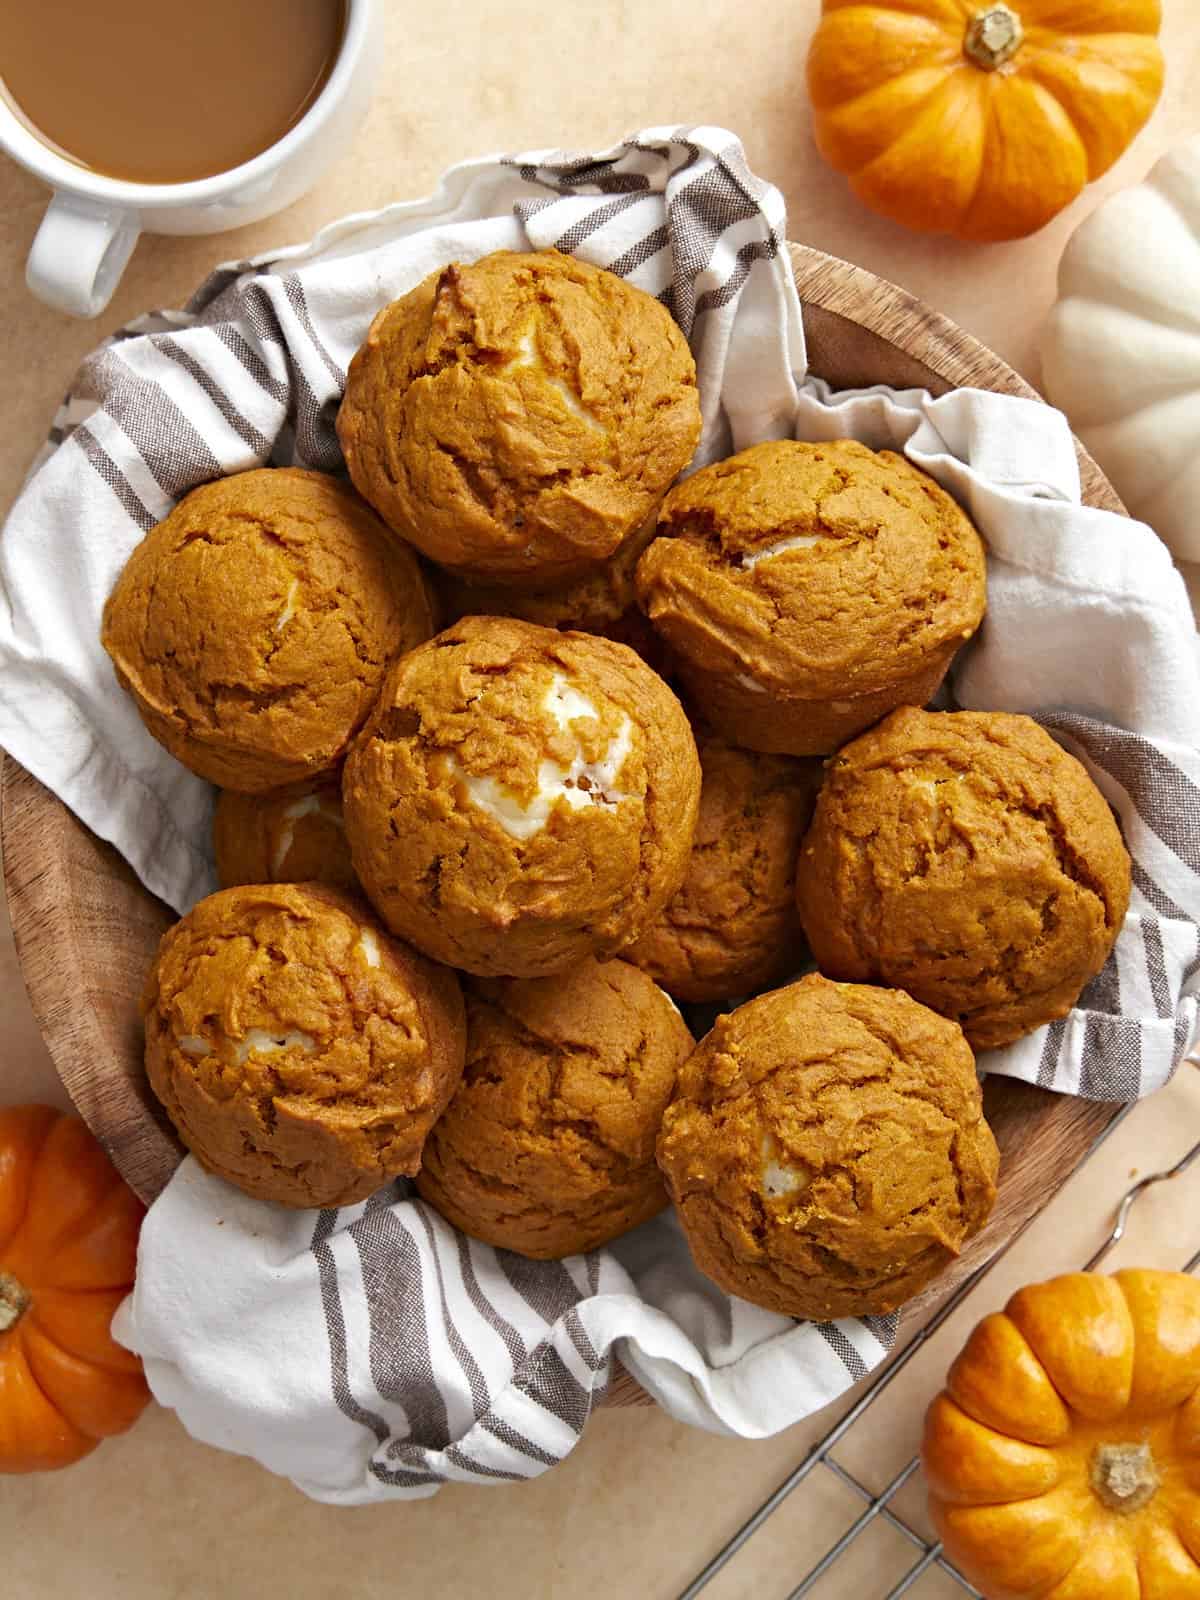
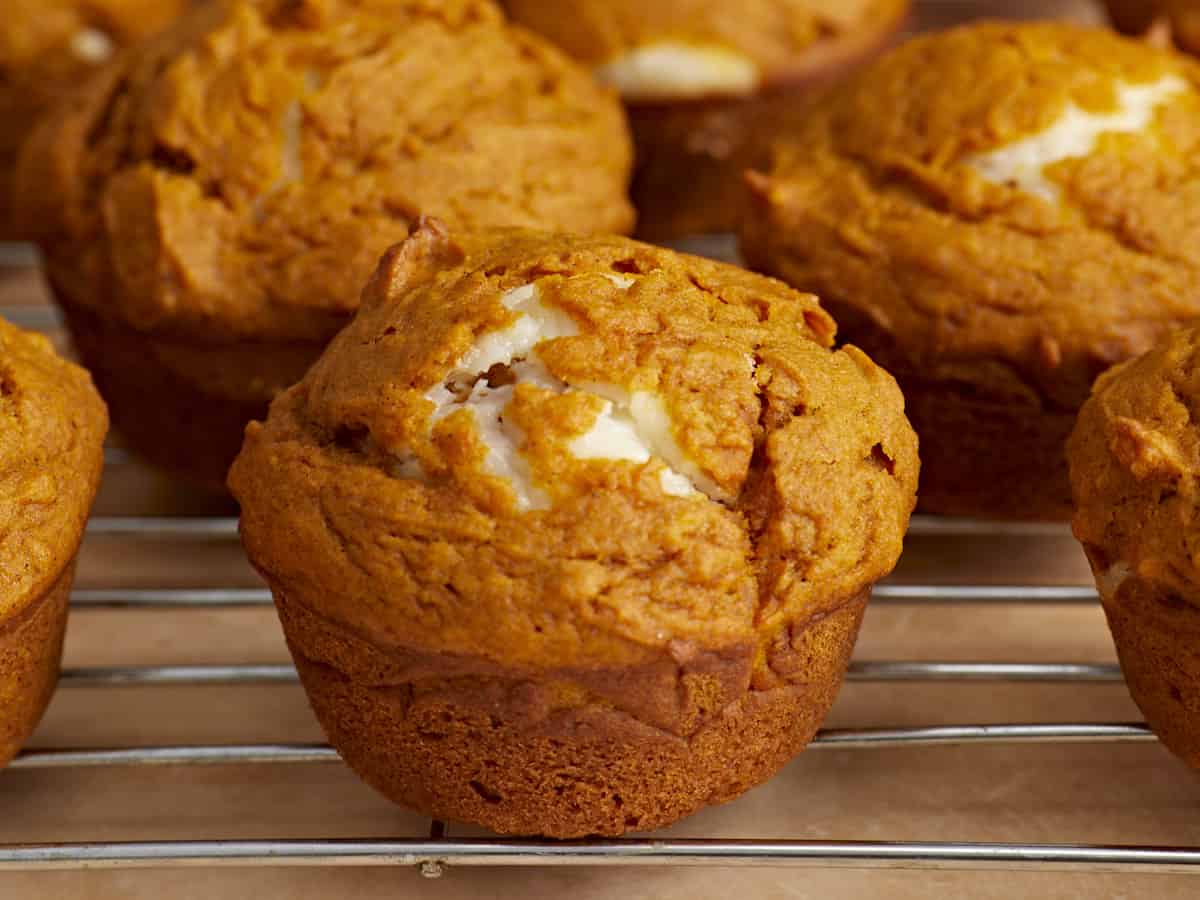
Want a more budget-friendly way to get your pumpkin spice fix than going to Starbucks for a PSL? Then you’ve got to make a batch of these Pumpkin Muffins. These muffins are moist, subtly sweet, full of warm spices, and have a hidden dollop of sweet cream cheese in the middle. They’re totally indulgent and you get a whole batch of twelve pumpkin muffins for about the price of one pumpkin spice latte. Plus, they’re freezer-friendly so you thaw one at a time to have with your morning coffee from now until the end of pumpkin season! 🙌

Overhead view of pumpkin muffins in a basket with a tea towel.

What Are Pumpkin Muffins Like?

Pumpkin purée is kind of magic because it can be added to both sweet and savory dishes, and it attracts moisture, which helps keep baked goods super soft, tender, and moist. The pumpkin flavor is slightly earthy with a subtle sweetness that, when paired with the warm pumpkin pie spice, is absolutely COZY. Bake up a batch of these pumpkin muffins on a weekend morning to make your house smell amazing and have the coziest of cozy fall experiences. 🥰

Ingredients for Pumpkin Muffins

Here’s what you’ll need to make this incredible pumpkin muffin recipe:

  • All-Purpose Flour: Flour gives the batter strength and body. It’s the vehicle for all that pumpkin-y goodness!
  • Baking Powder & Baking Soda: These muffins get a one-two punch of leavening to help them bake up light and airy, despite the density of the pumpkin purée.
  • Pumpkin Pie Spice and Vanilla: A simple mix of pumpkin pie spice and warm vanilla extract is all you need to flavor these delicious muffins.
  • White Sugar & Brown Sugar: A combination of white sugar and brown sugar gives the muffins sweetness with a slightly warm richness from the molasses in the brown sugar. The sugars also help keep the muffins moist.
  • Eggs: Eggs also help leaven baked goods when the water in the eggs turn to steam in the oven. When the egg solidifies as it bakes, it helps the muffins hold their puffed shape.
  • Pumpkin Purée: Pumpkin purée provides color, flavor, and moisture to the muffins. It’s the star of the show!
  • Cooking Oil: Oil helps the muffins stay moist and tender, and gives the muffin an extra rich flavor.
  • Cream Cheese & Sugar: A little dollop of sweetened cream cheese in the center of each muffin makes them extra special! But you can skip the cream cheese filling and make plain pumpkin muffins if you prefer.

How to Store Leftovers

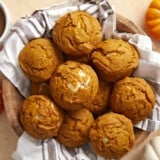
This recipe makes a batch of 12 muffins, but that’s no reason to not make them for yourself if you live alone. Simply let the muffins cool completely to room temperature, then transfer to an air-tight food storage container. They’ll last about three days in the refrigerator, or you can freeze them for about three months. Thaw and reheat the frozen muffins with a quick 30 seconds in the microwave, or let them thaw at room temperature for about 15 minutes. Quick, easy, homemade muffins on demand!

Pumpkin Muffin Variations

You can take this basic pumpkin muffin batter and add so many different twists. Here are a couple of fun ideas for making this recipe your own:

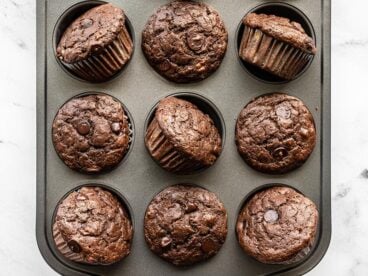
  • Skip the cream cheese center and fold in chocolate chips
  • Top the muffins with a mixture of coarse sugar and cinnamon
  • Add chopped pecans to the batter or on top of each muffin
  • Make a quick cinnamon sugar glaze (powdered sugar + cinnamon + milk) to drizzle over the muffins (I did this during testing and while it didn’t look so pretty, it made them taste like cinnamon-coated donuts!)
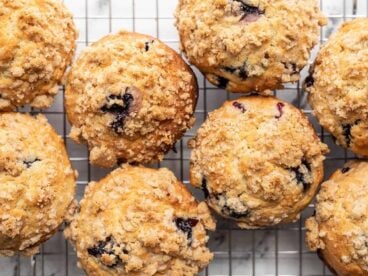
  • Add a streusel topping
Side view of pumpkin muffins on a wire cooling rack.
Overhead view of a basket full of pumpkin muffins with coffee and pumpkins on the sides.
Print

Pumpkin Muffins

These pumpkin muffins are moist, subtly sweet, full of warm spices and have a hidden dollop of sweet cream cheese in the center. 
Course Breakfast, Dessert
Cuisine American
Total Cost $5.43 recipe / $0.45 each
Prep Time 15 minutes
Cook Time 24 minutes
Total Time 39 minutes
Servings 12 muffins
Calories 292kcal

Equipment

Ingredients

Cream Cheese Filling (optional)

  • 4 oz. cream cheese, room temperature $1.10
  • 2 Tbsp granulated sugar $0.04

Instructions

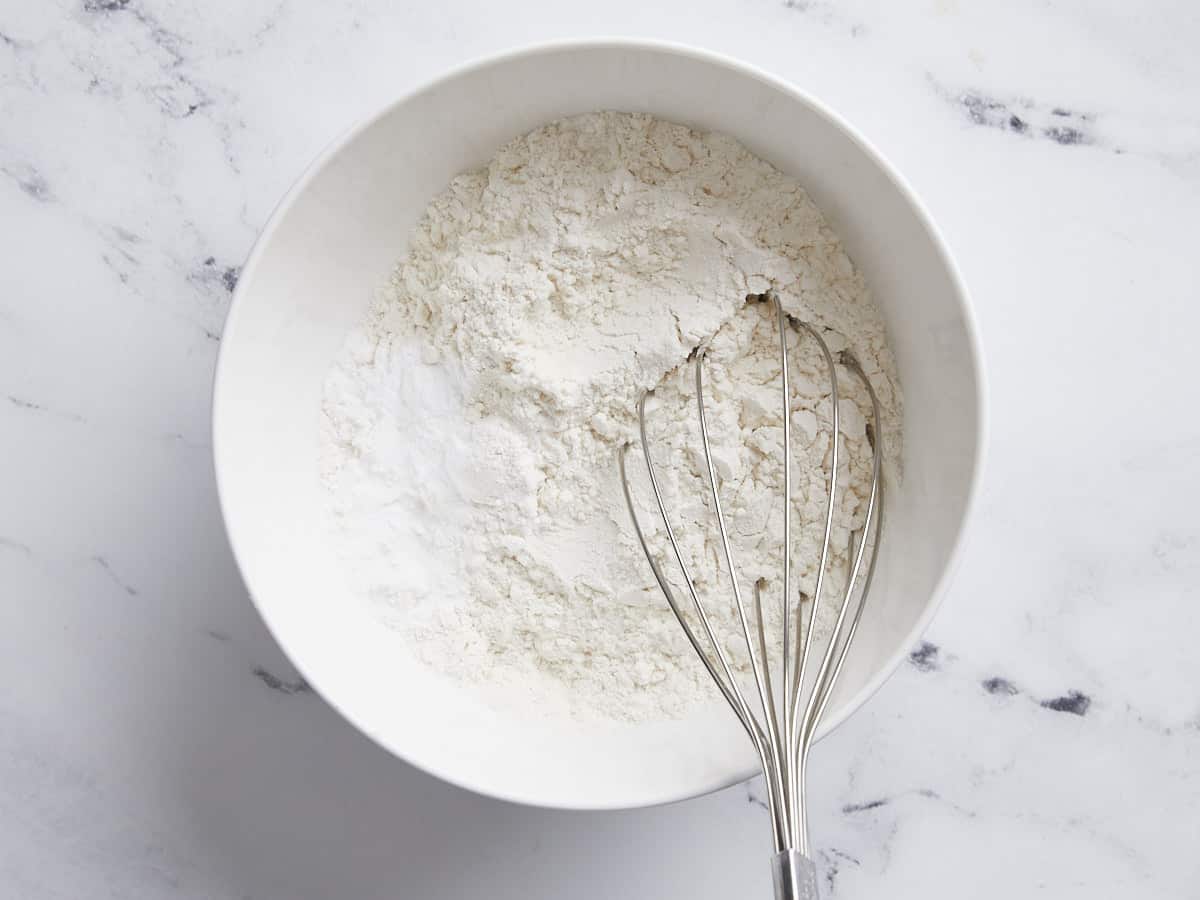
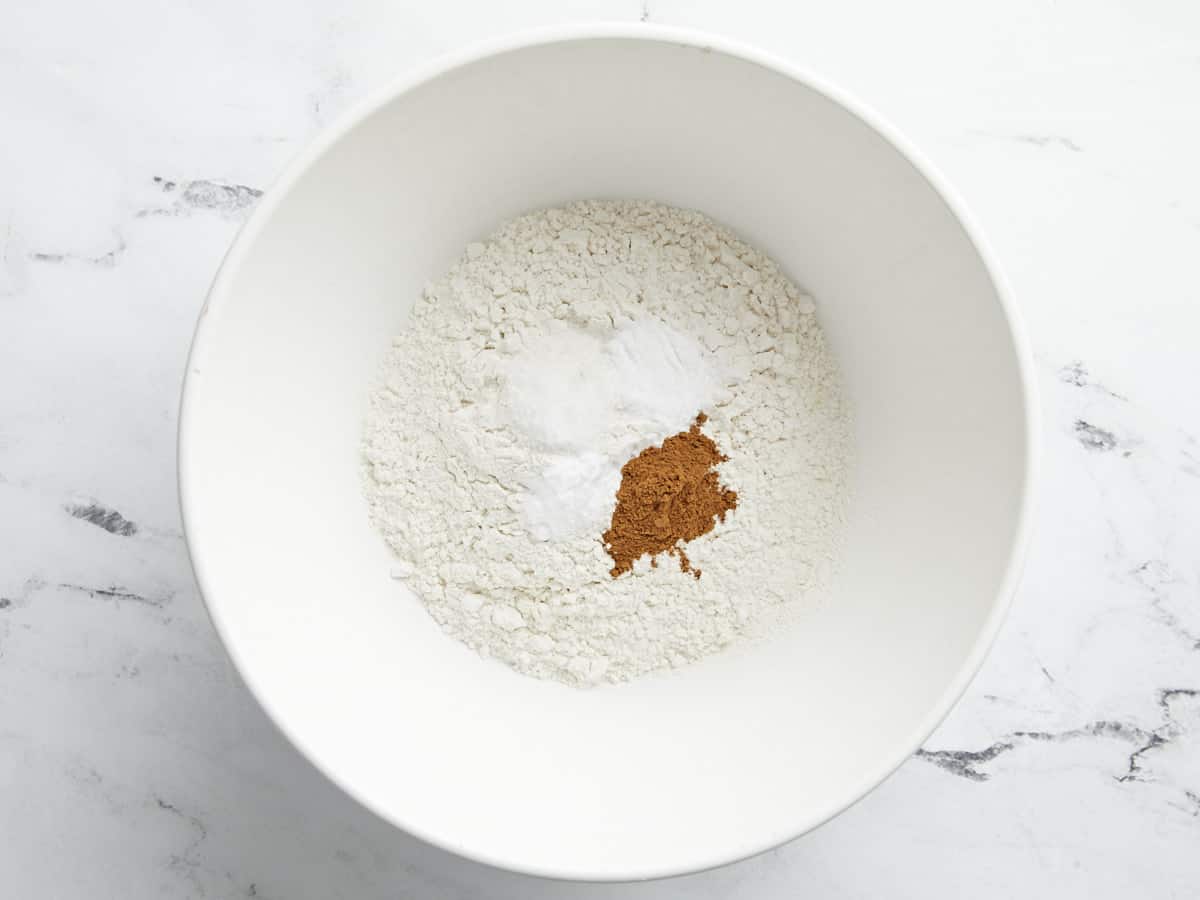
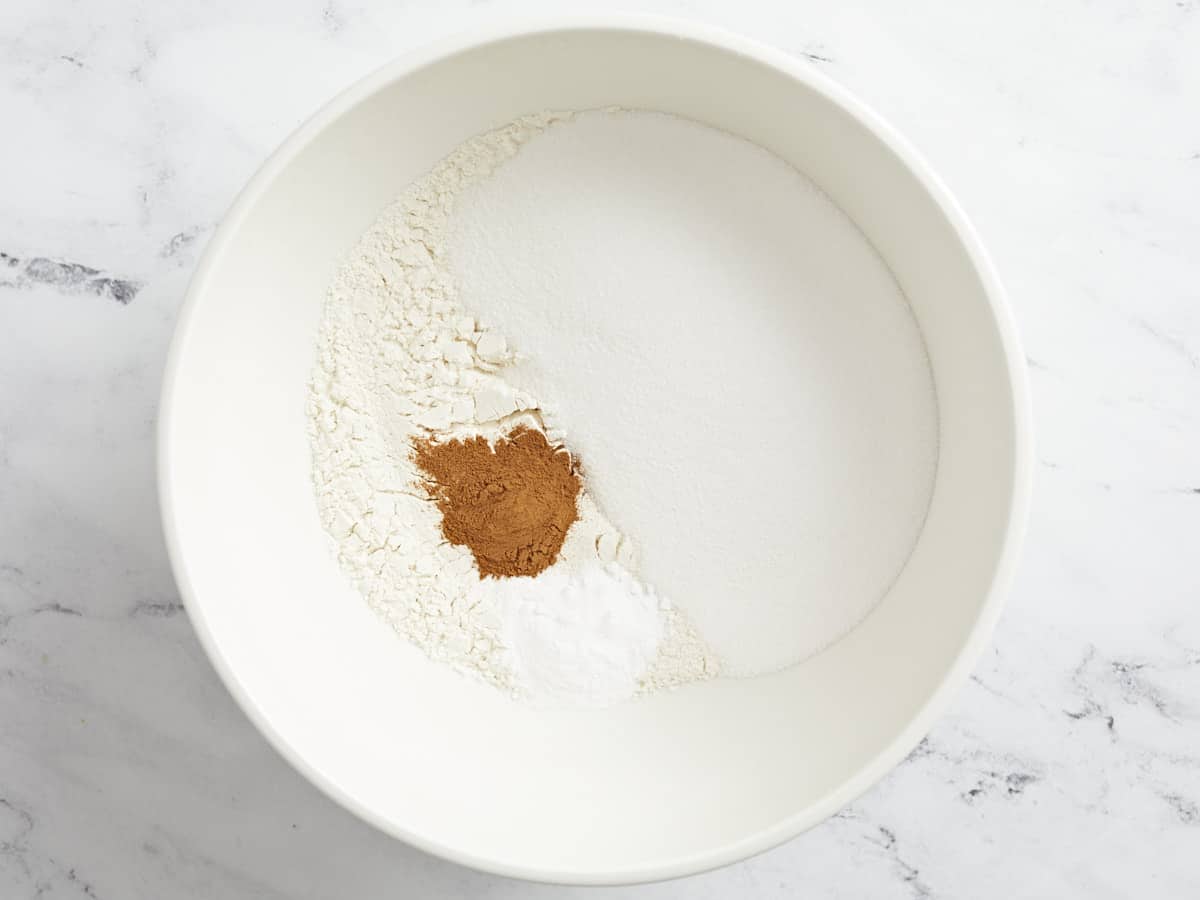
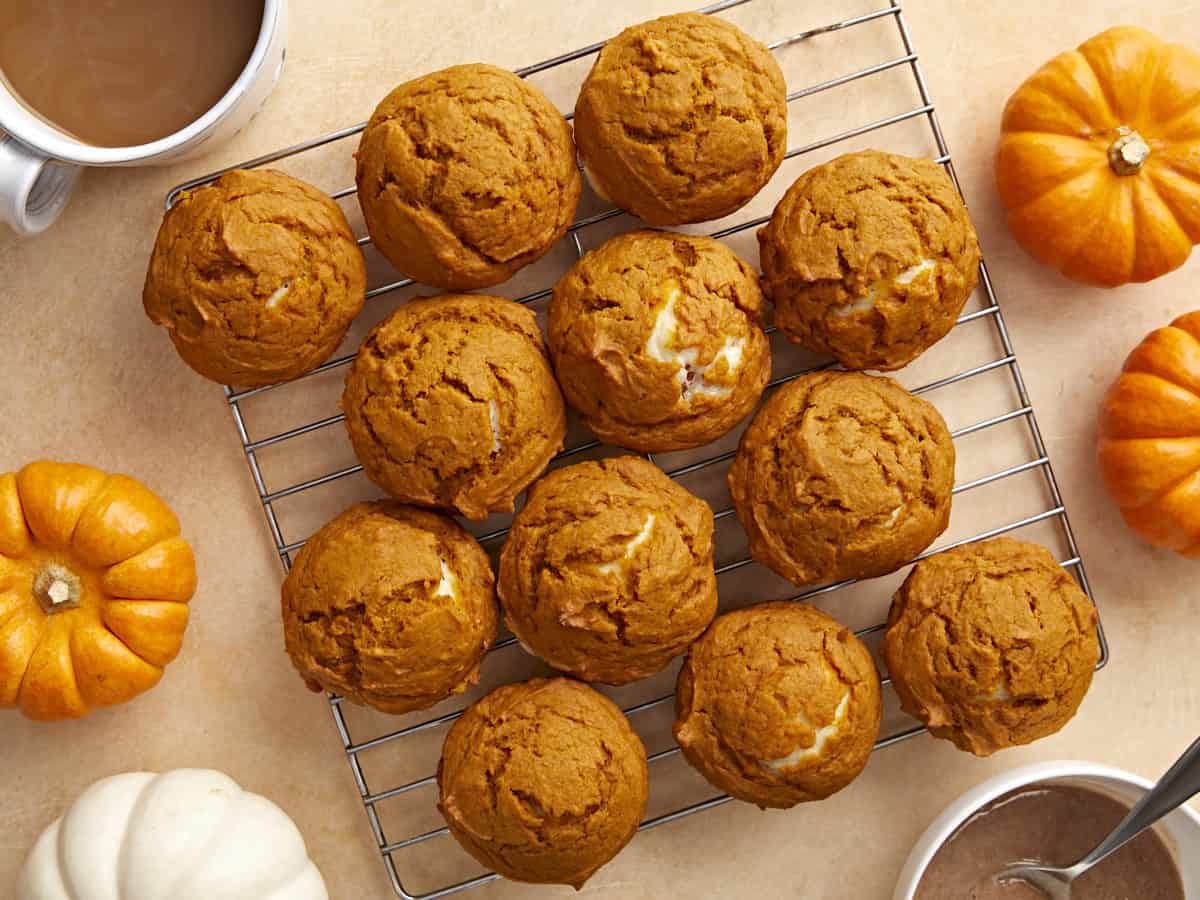
  • Preheat the oven to 350ºF. In a medium bowl, stir together the flour, baking powder, baking soda, salt, and pumpkin pie spice.
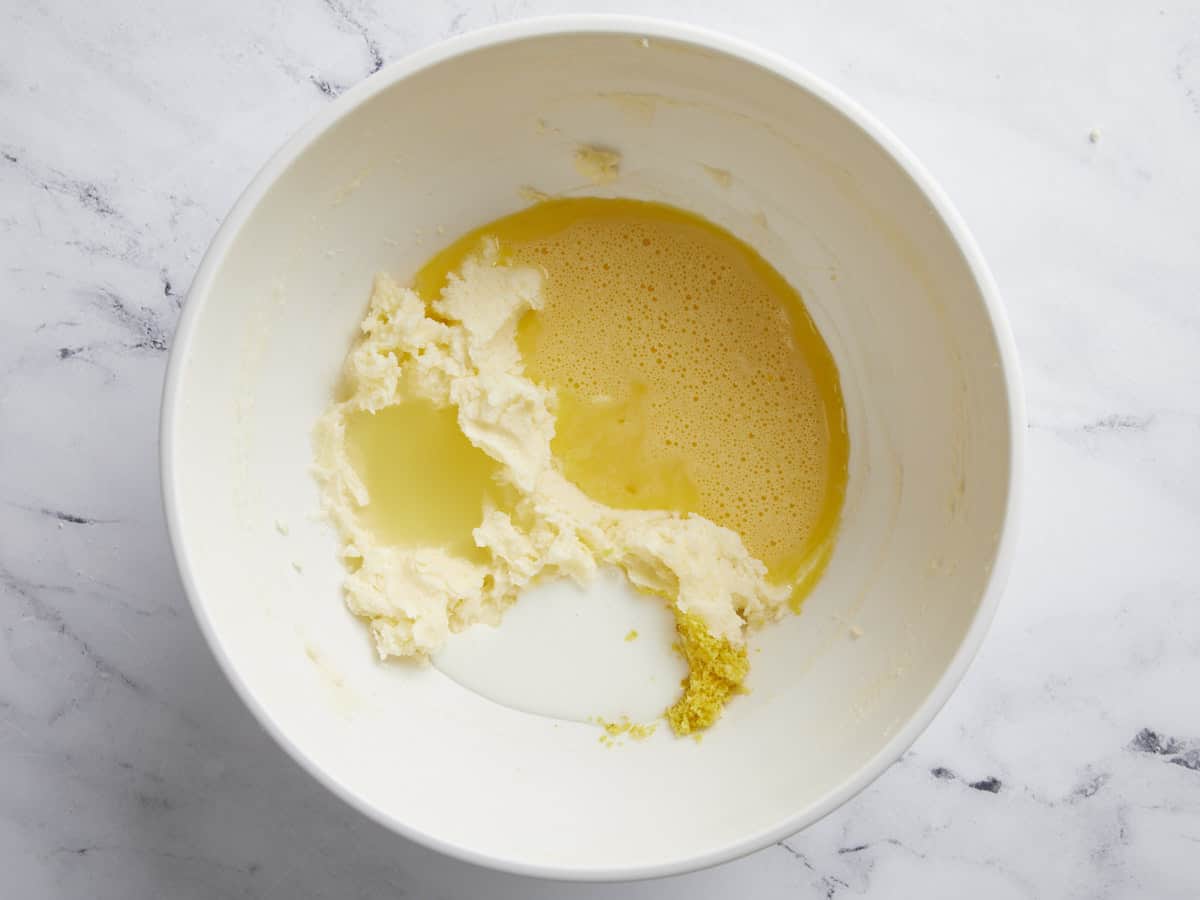
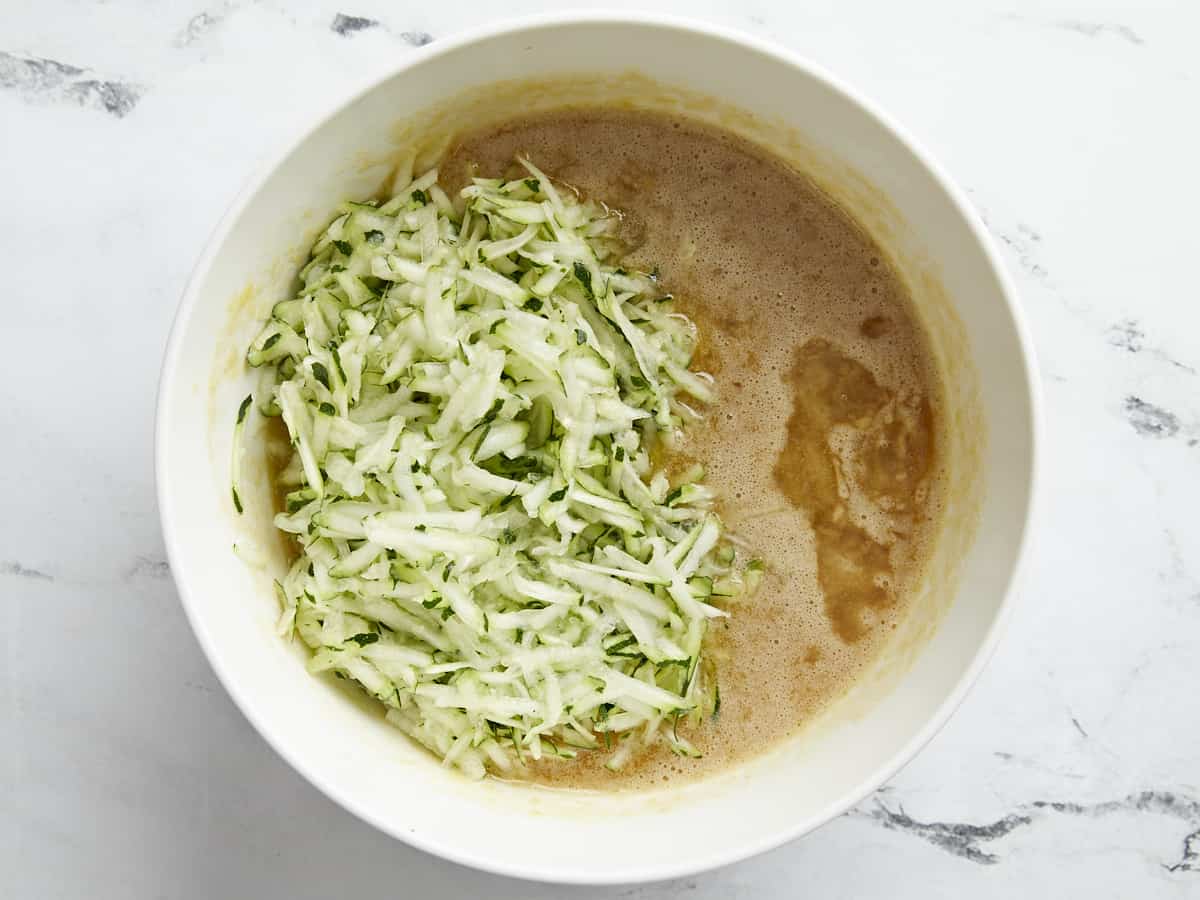
  • In a separate large bowl, whisk together the eggs, granulated sugar, brown sugar, pumpkin purée, oil, and vanilla extract.
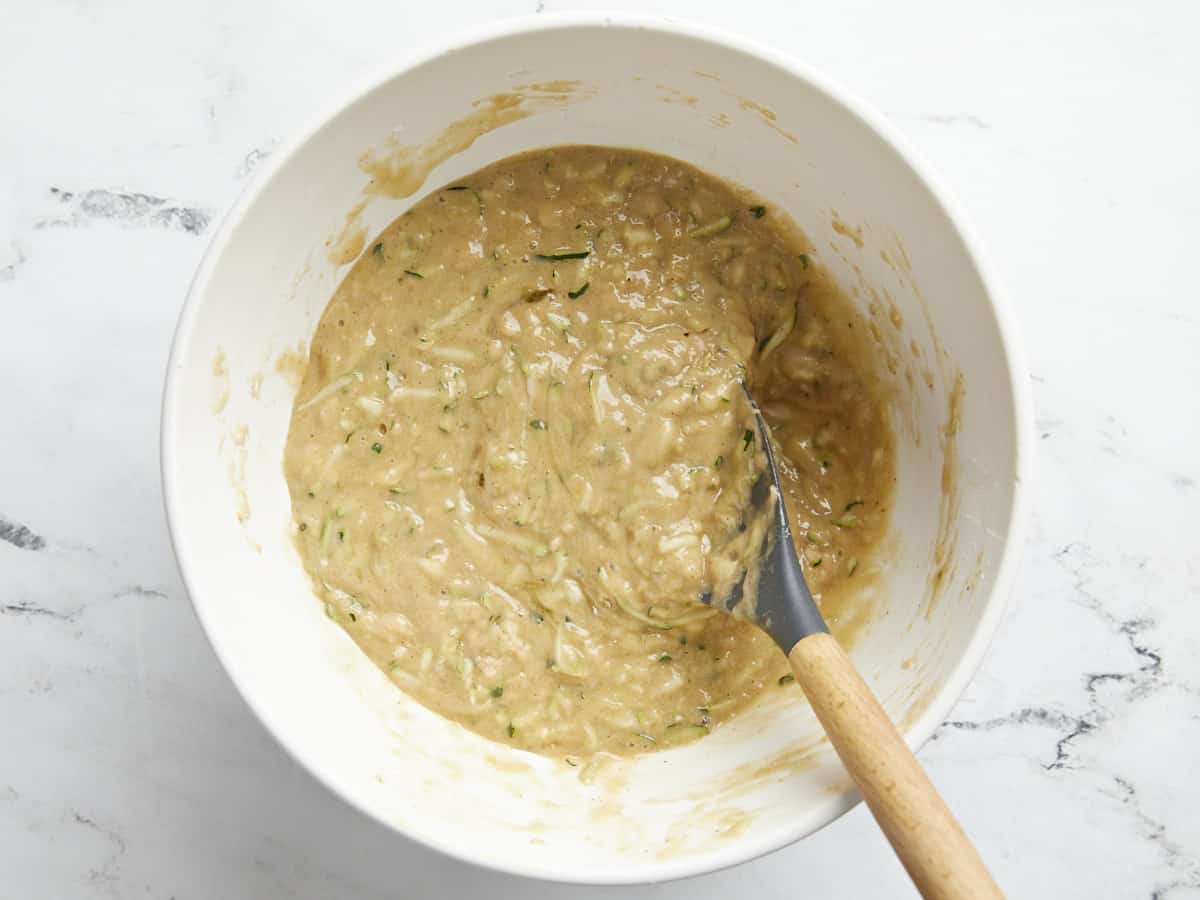
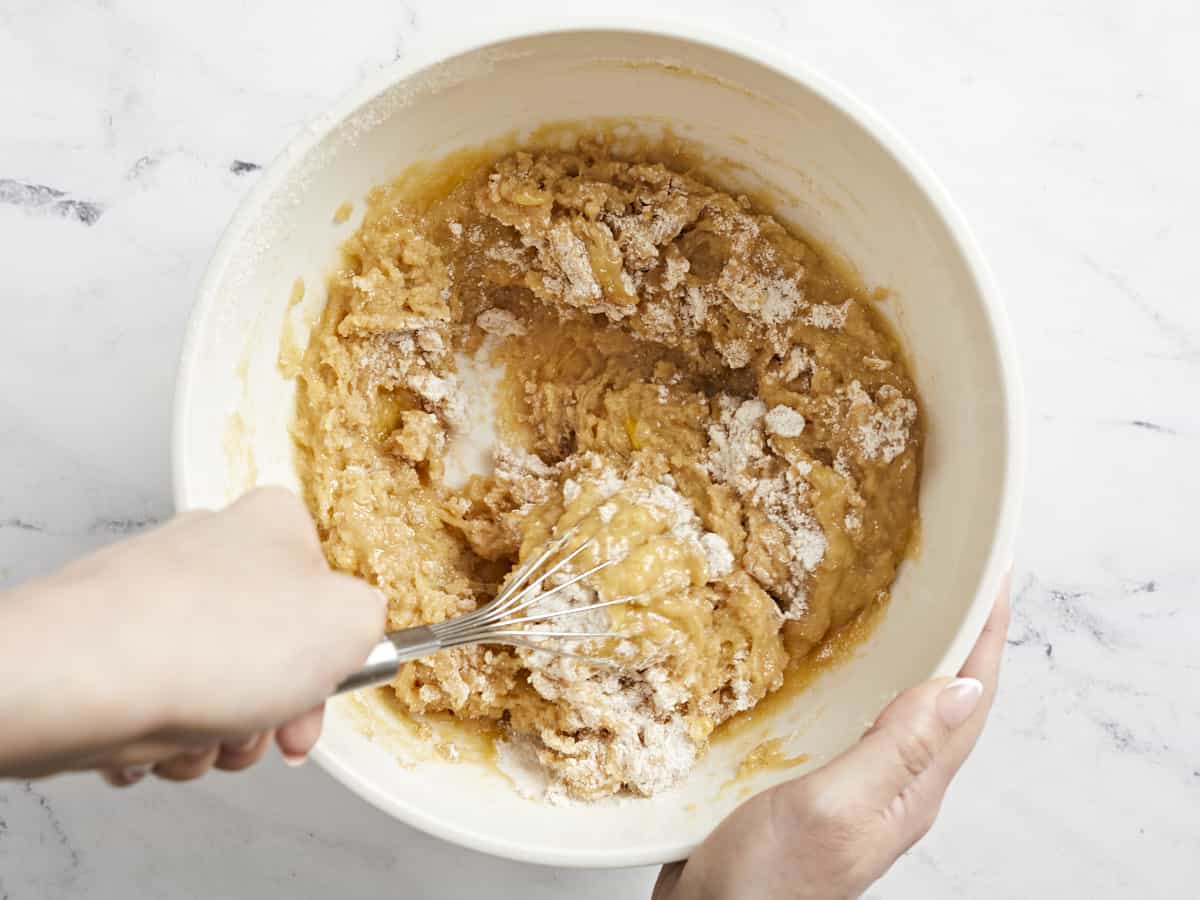
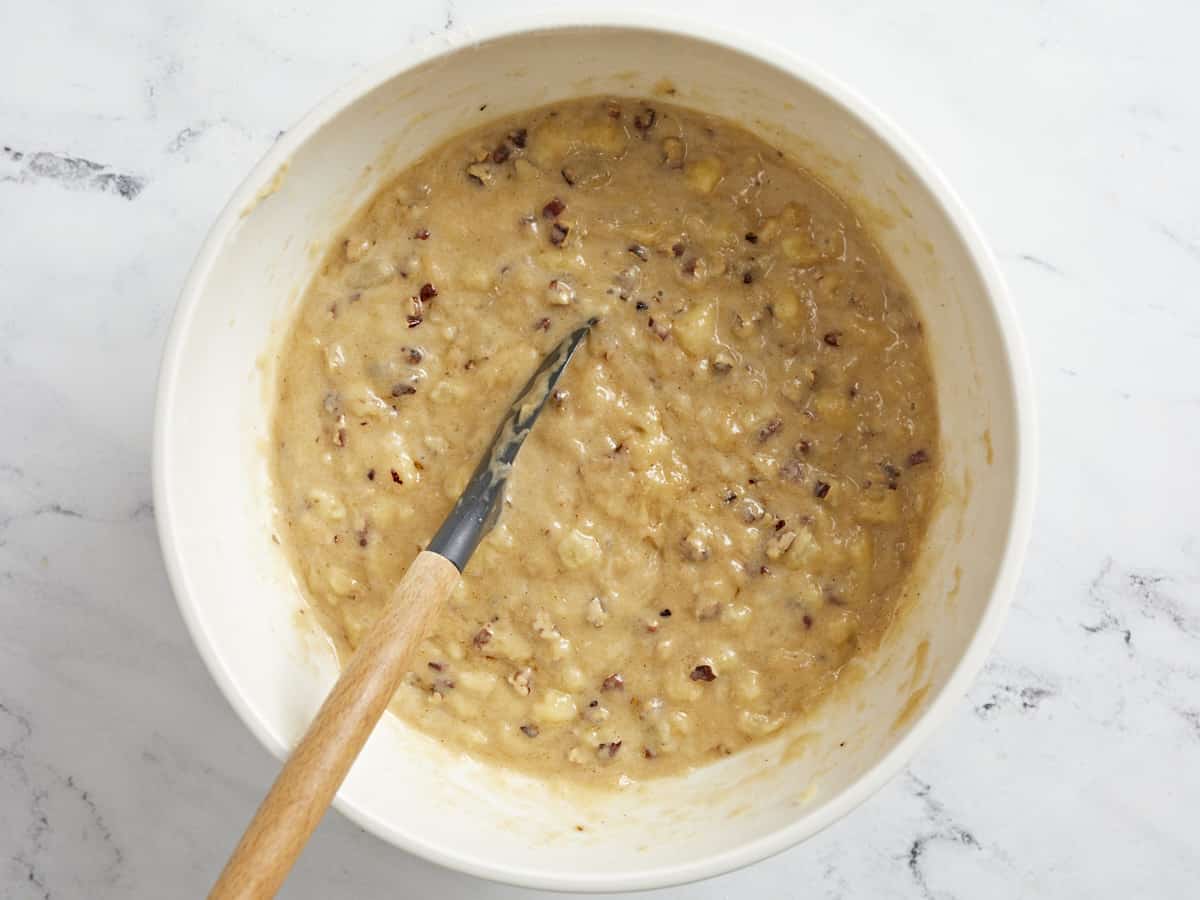
  • Pour the bowl of dry ingredients into the bowl of wet ingredients and stir together just until combined. A few small lumps are okay, just try not to overmix.
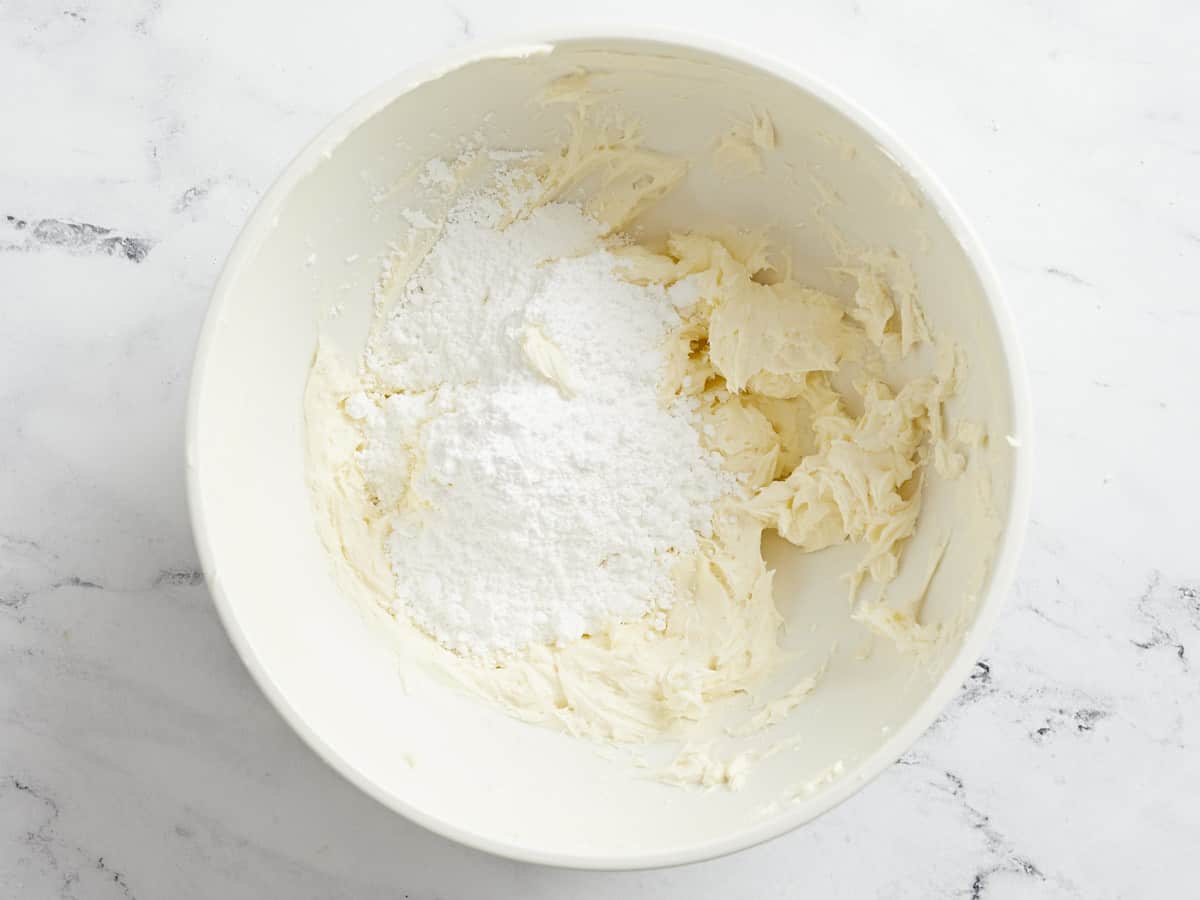
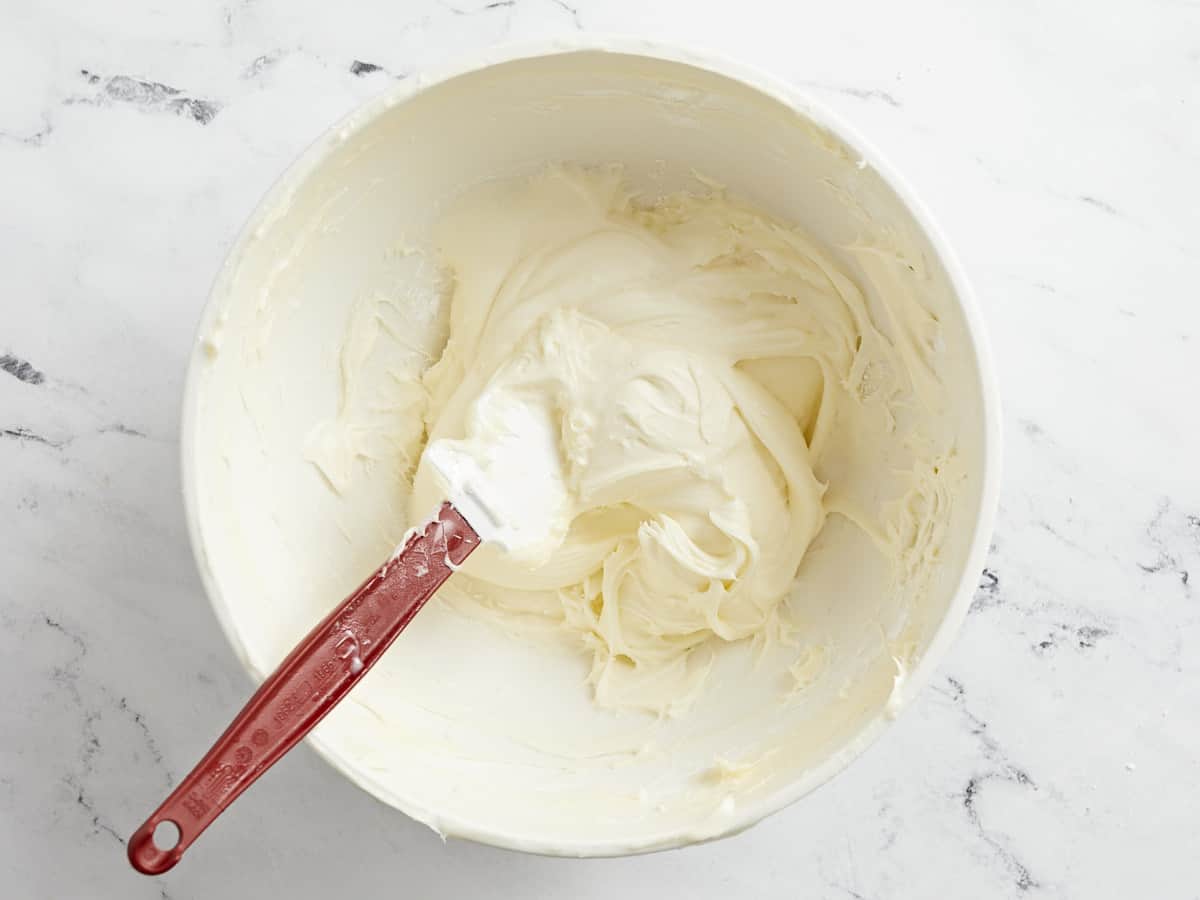
  • In a separate small bowl, stir together the cream cheese and sugar for the cream cheese filling.
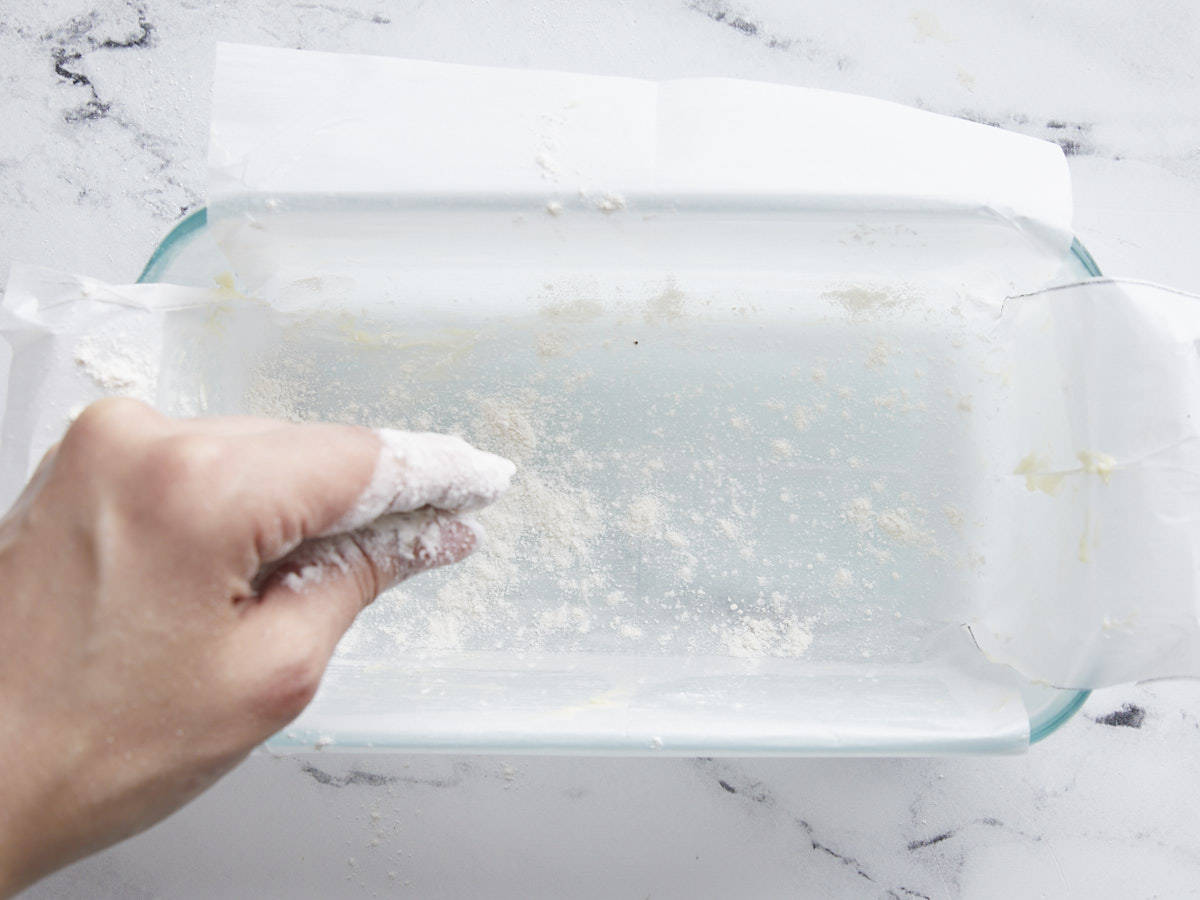
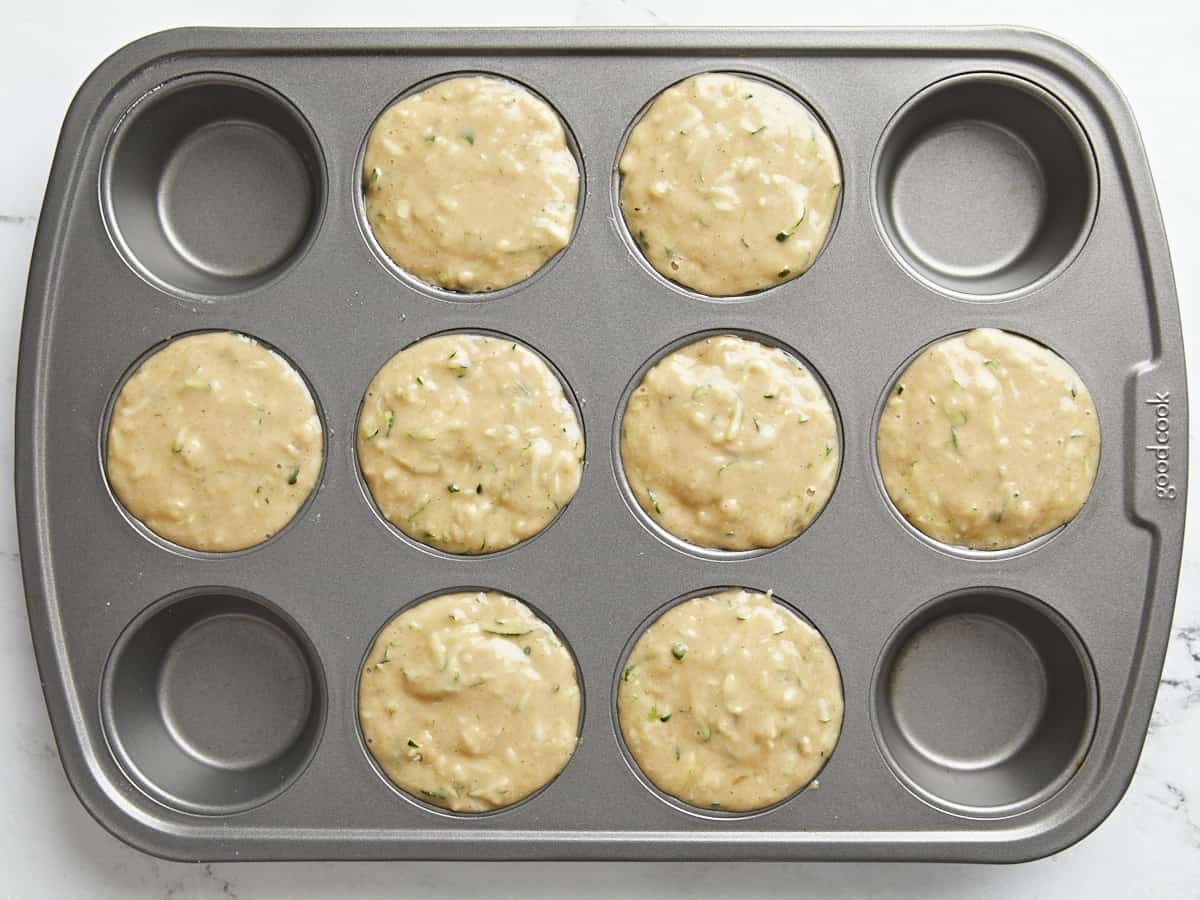
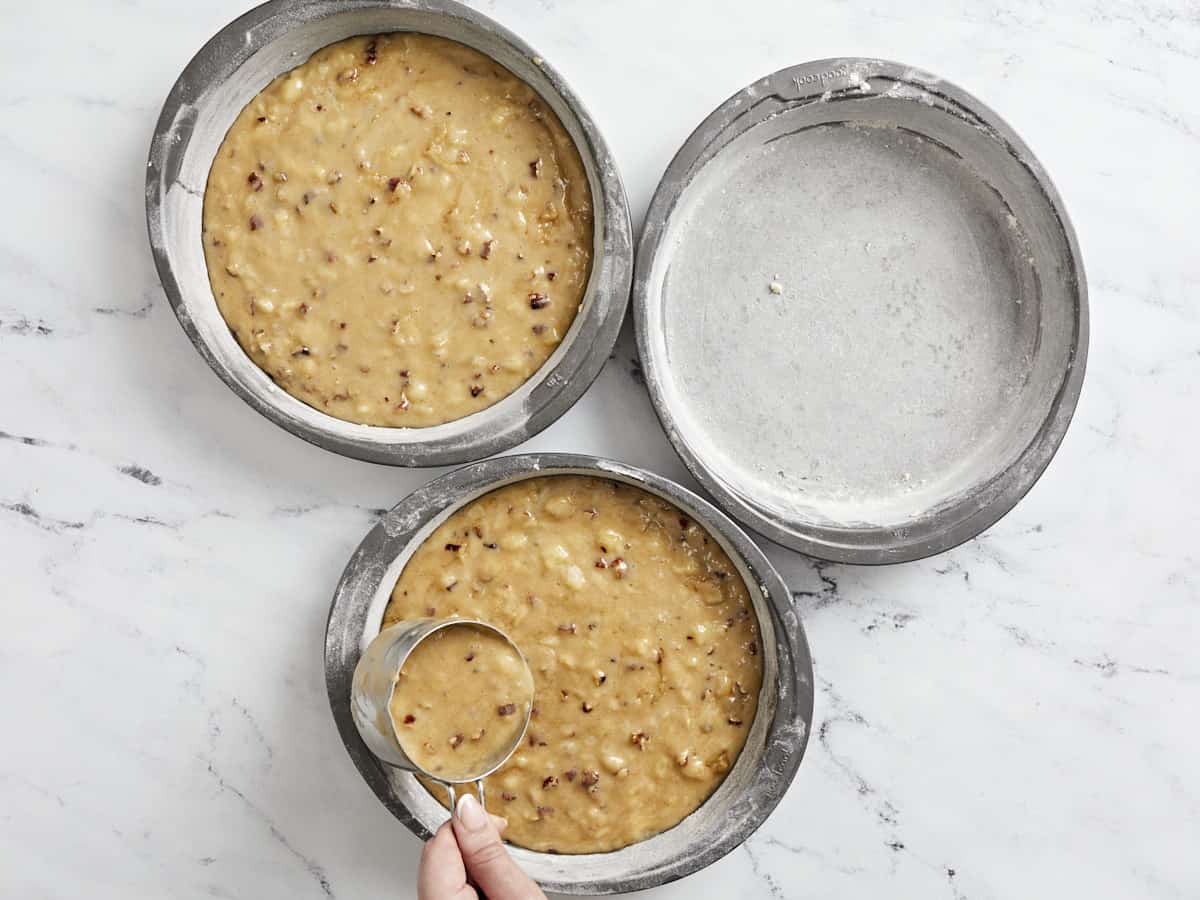
  • Grease a muffin tin or line with muffin liners. Fill each well in the muffin pan about ⅓ full. Add a small dollop of the cream cheese to each well, in the center of the muffin batter. Divide the remaining muffin batter between each well, covering the cream cheese. Each well in the muffin pan should be filled about ¾ full.
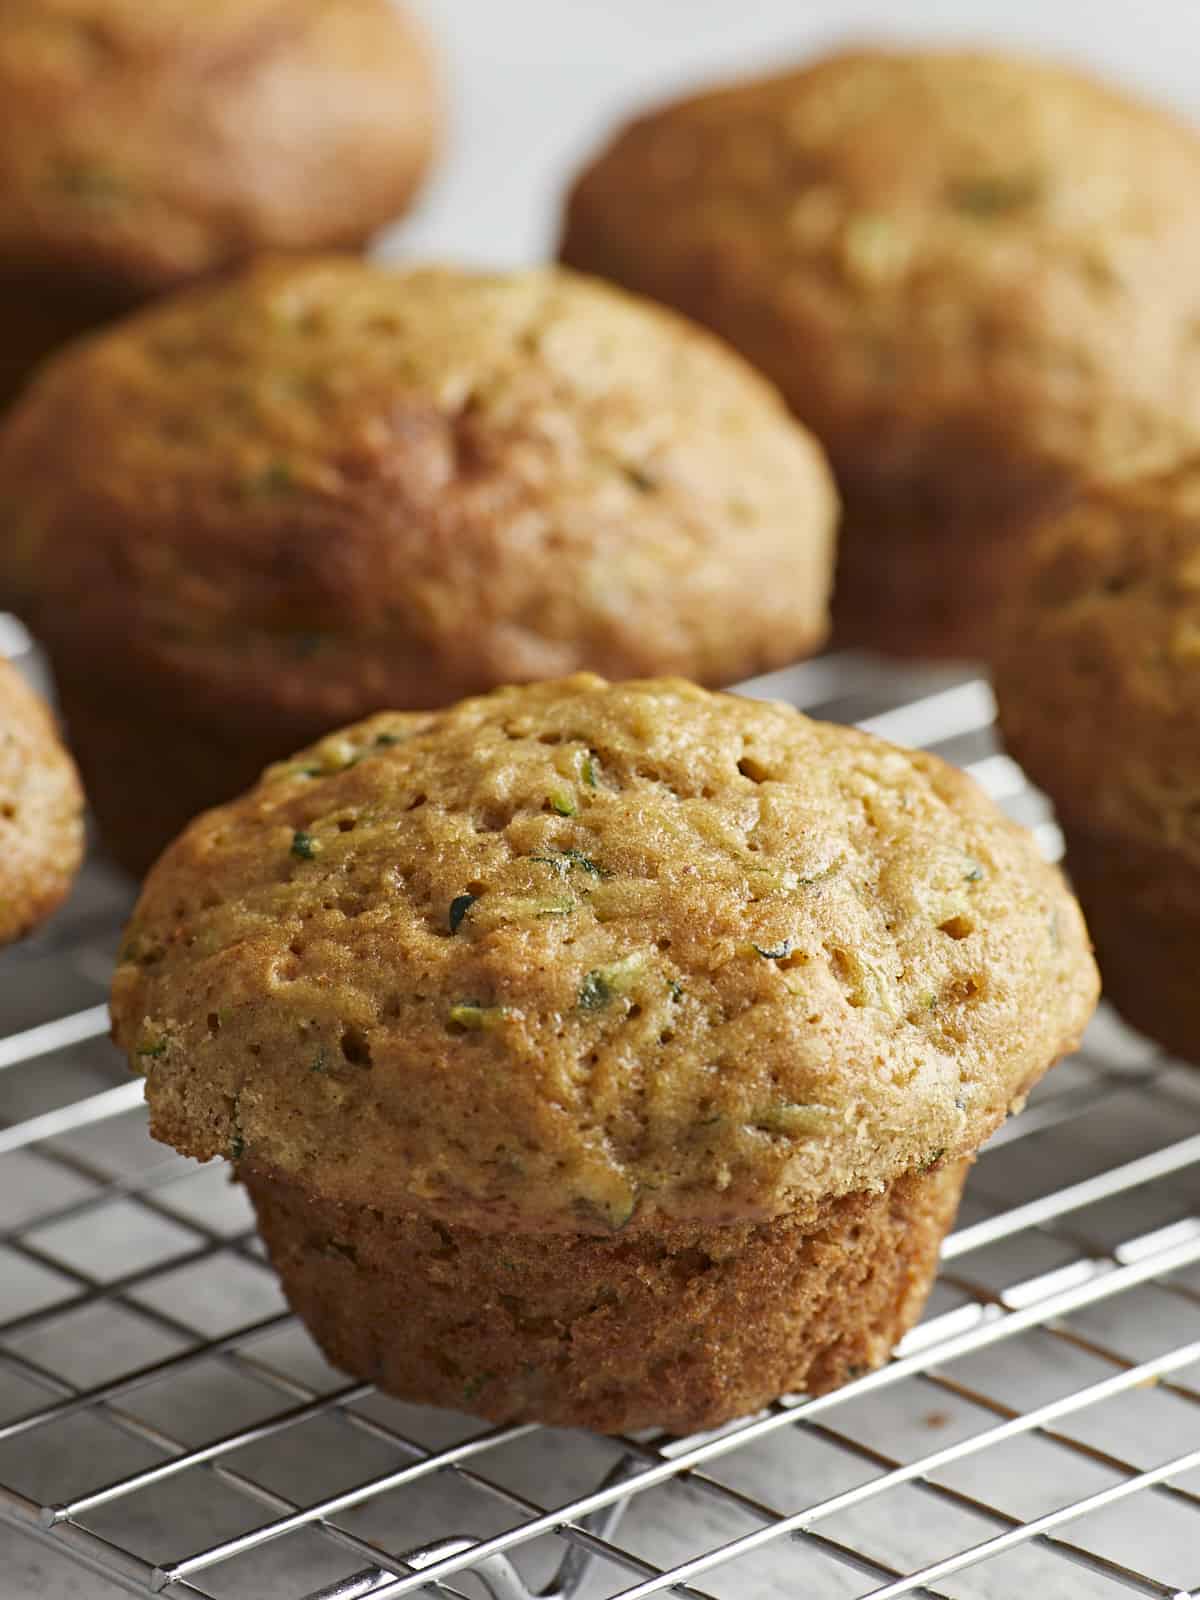
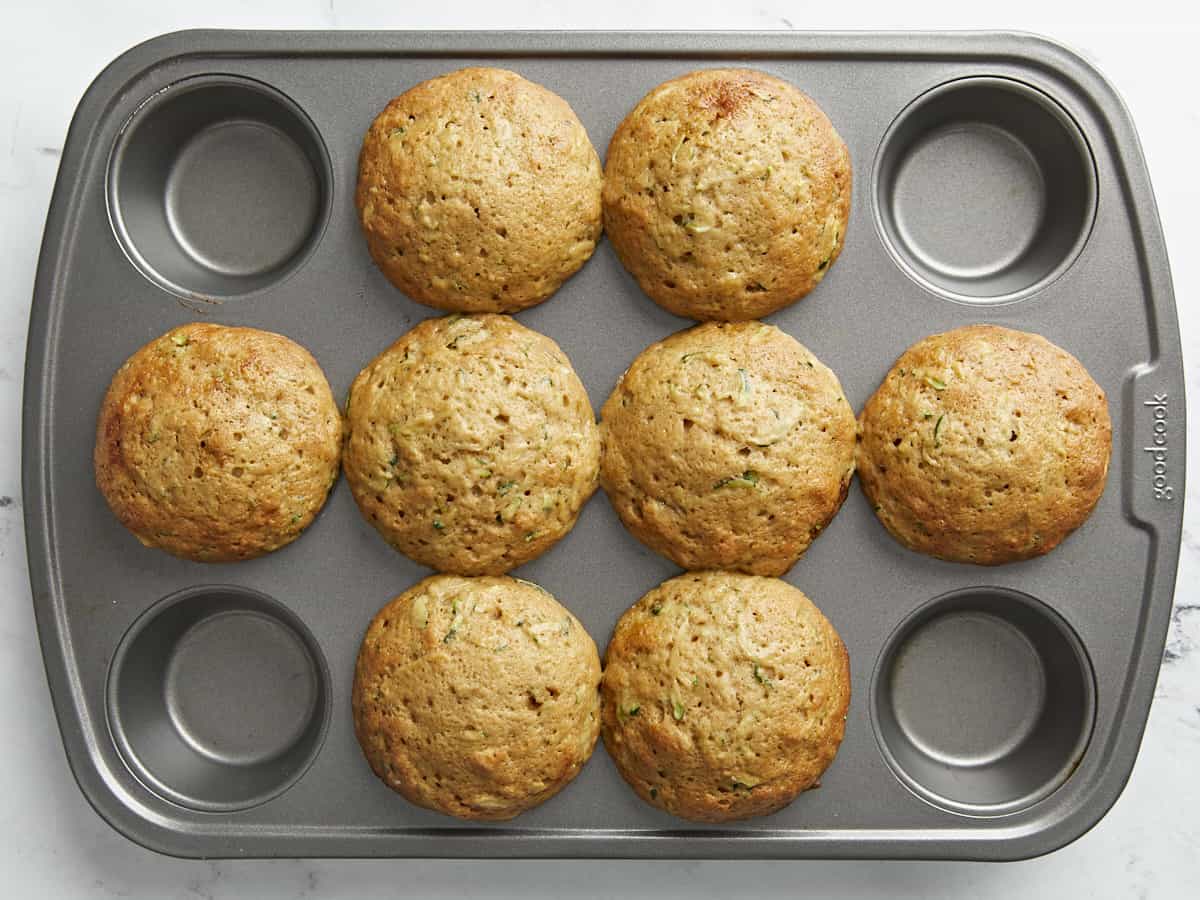
  • Bake the muffins for about 24 minutes, or until fully puffed in the center and slightly cracked on top.
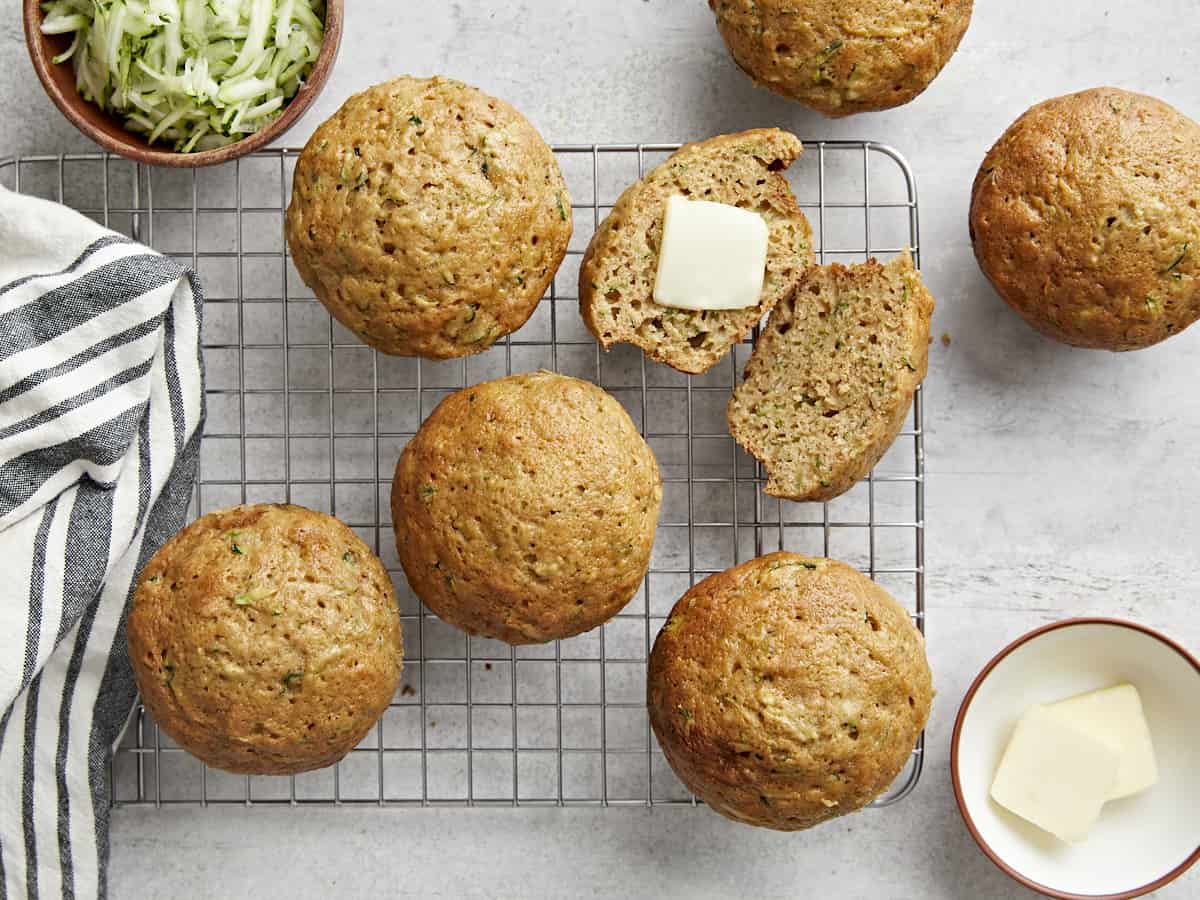
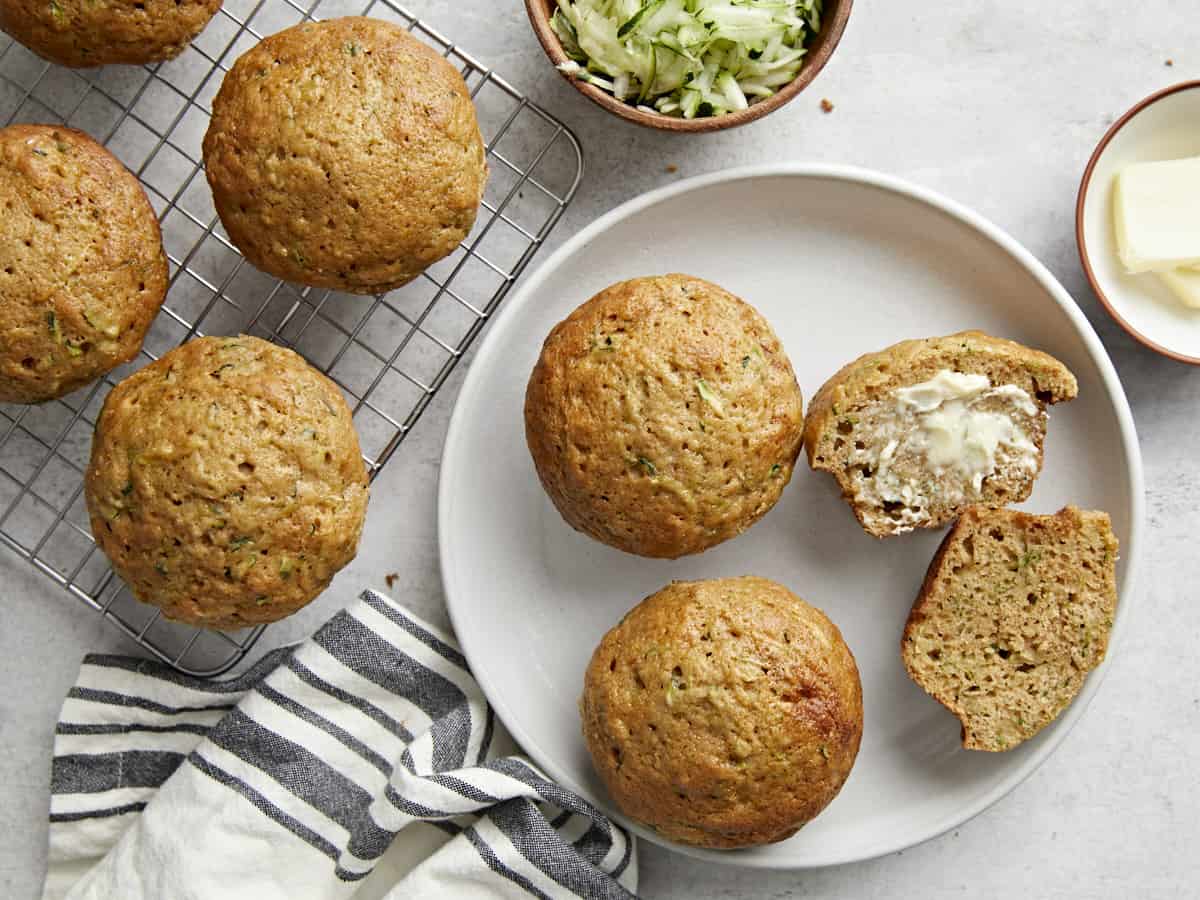
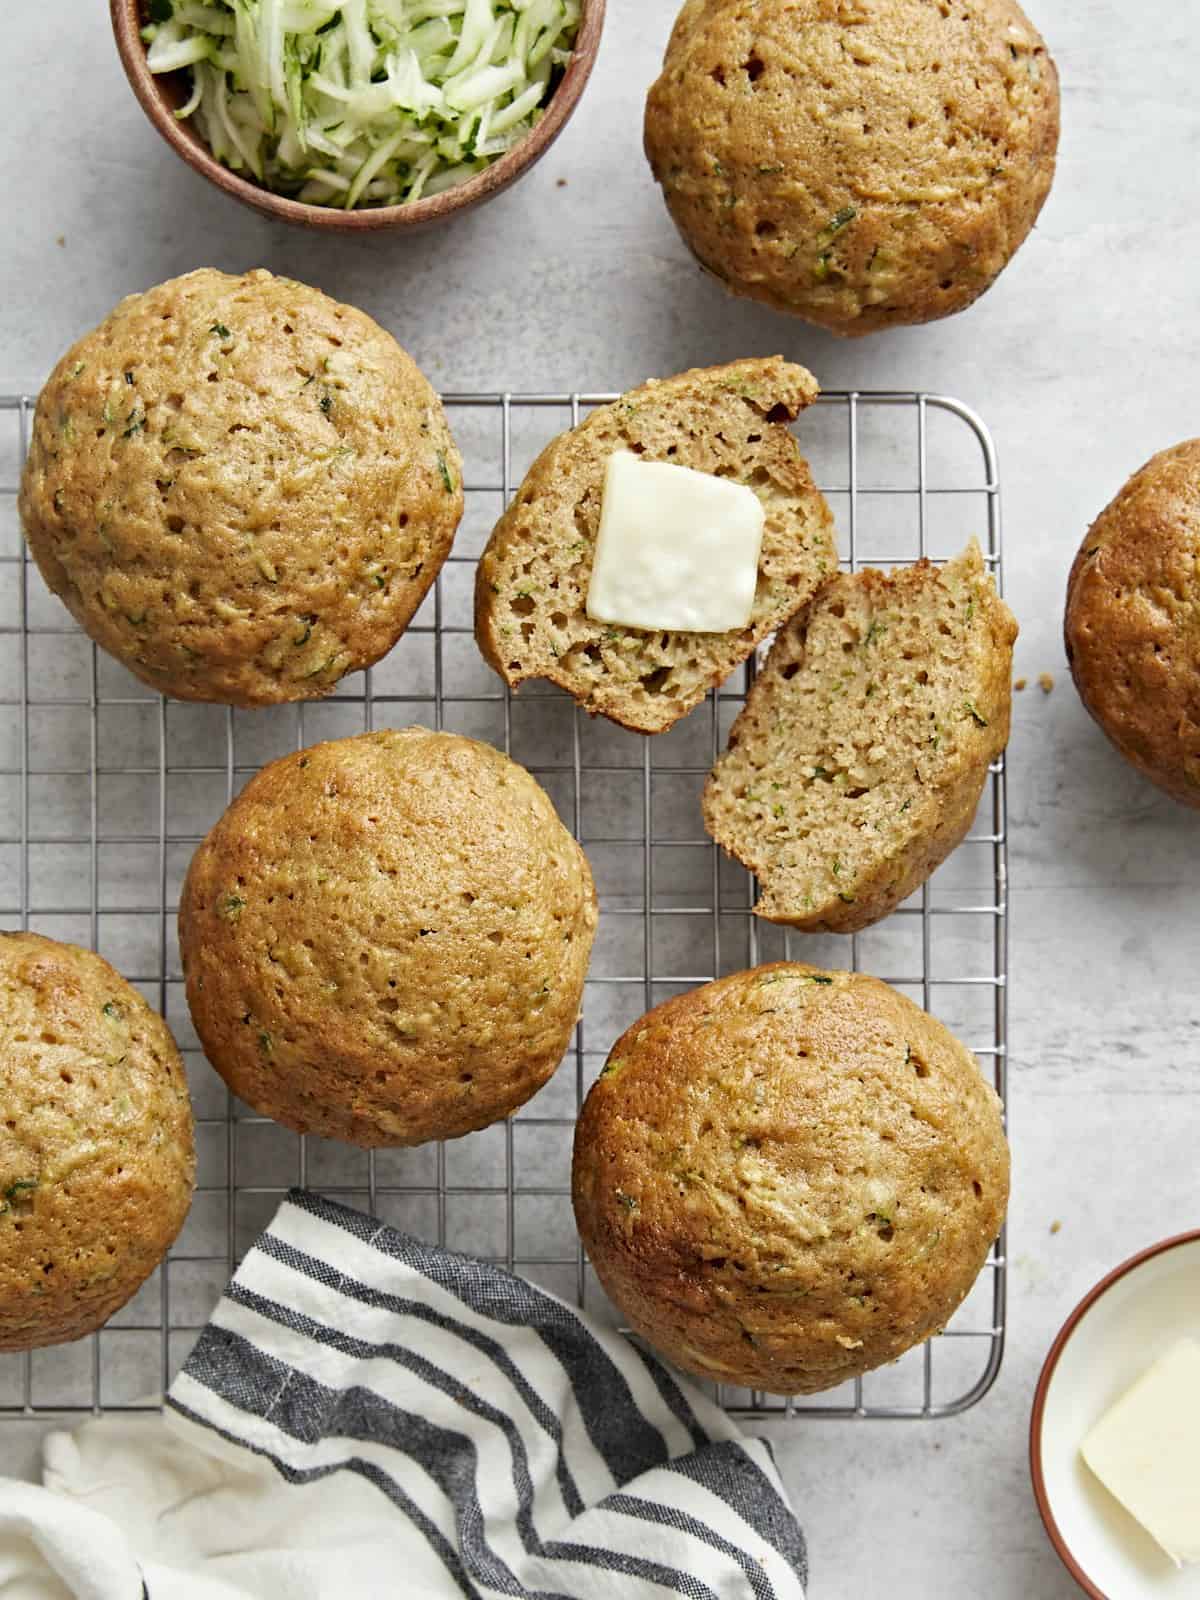
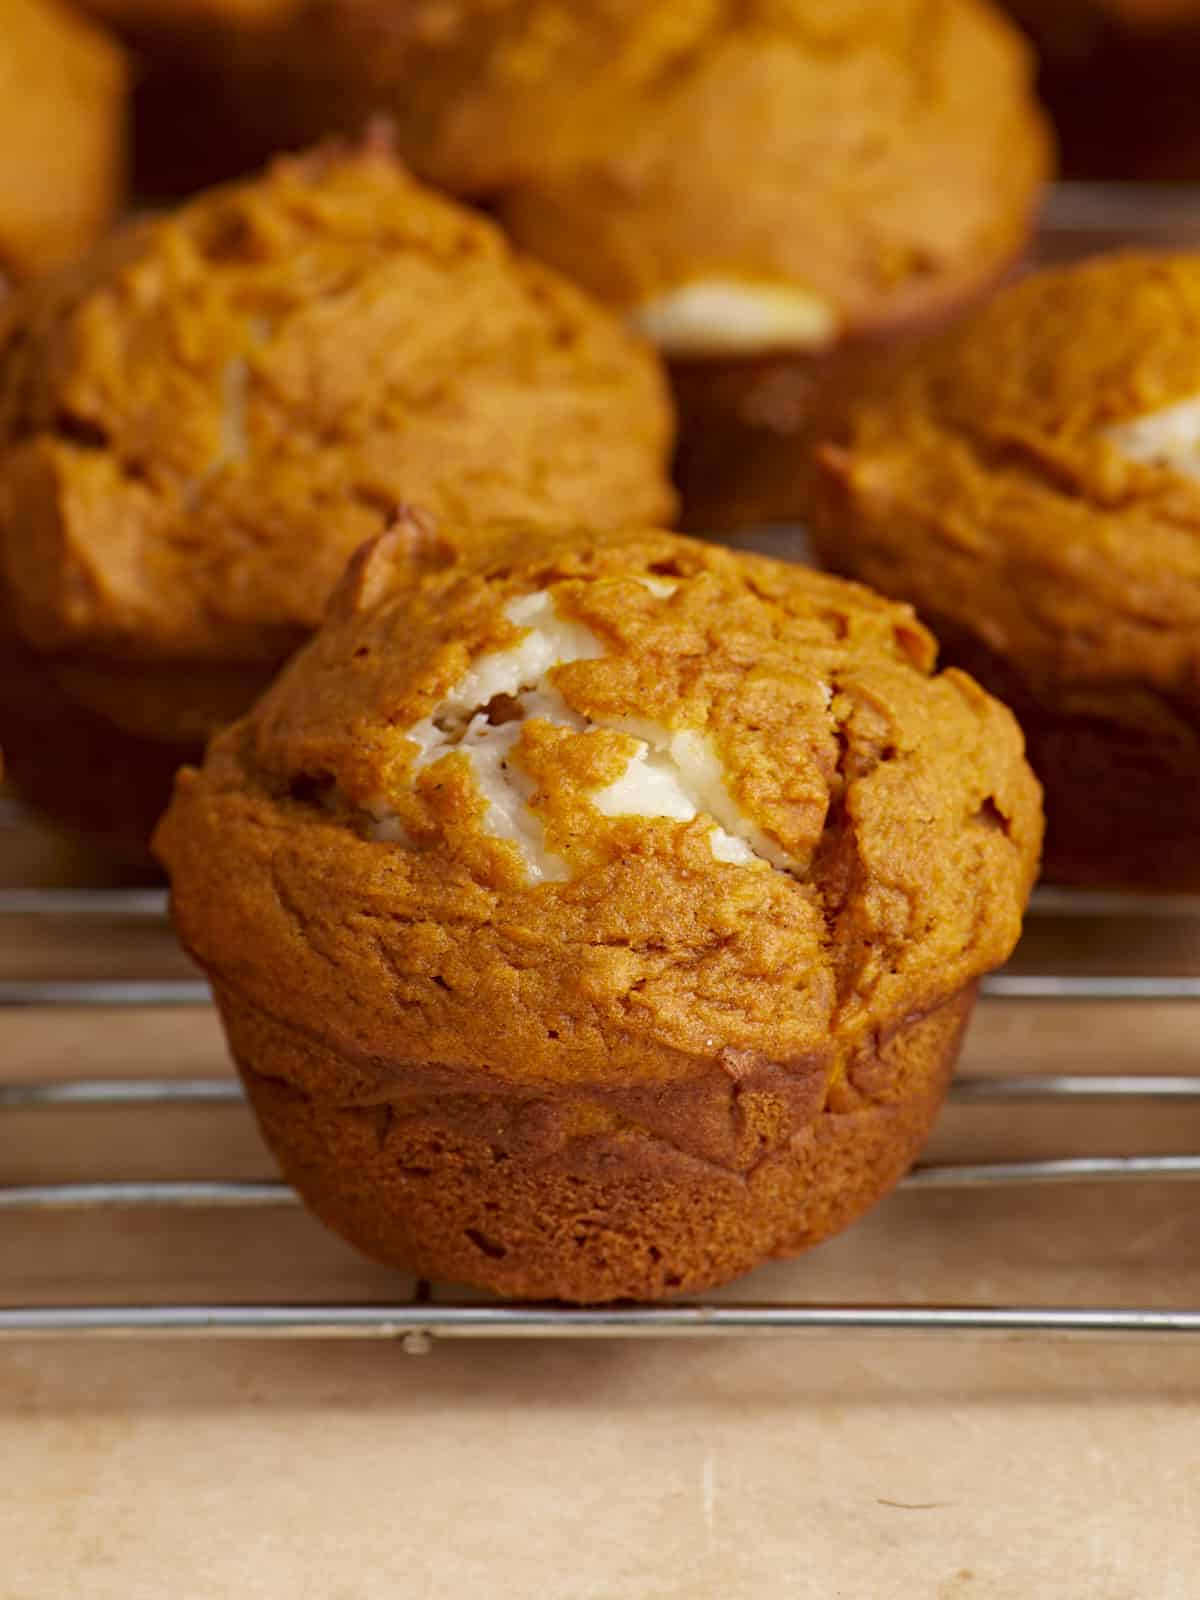
  • Remove the muffins from the oven and let them cool for about 5 minutes before gently removing them from the muffin pan and allowing them to finish cooling on a wire rack.

See how we calculate recipe costs here.

Nutrition

Serving: 1muffin | Calories: 292kcal | Carbohydrates: 39g | Protein: 4g | Fat: 14g | Sodium: 224mg | Fiber: 2g
Overhead view of pumpkin muffins on a wire cooling rack.

How to Make Pumpkin Muffins – Step by Step Photos

Dry ingredients for pumpkin muffins in a bowl, not mixed together.

Preheat the oven to 350ºF. In a medium bowl, stir together 2 cups all-purpose flour, 1 tsp baking powder, ½ tsp baking soda, ½ tsp salt, and 1 tsp pumpkin pie spice until evenly combined.

Wet ingredients for pumpkin muffins in a bowl, not stirred together.

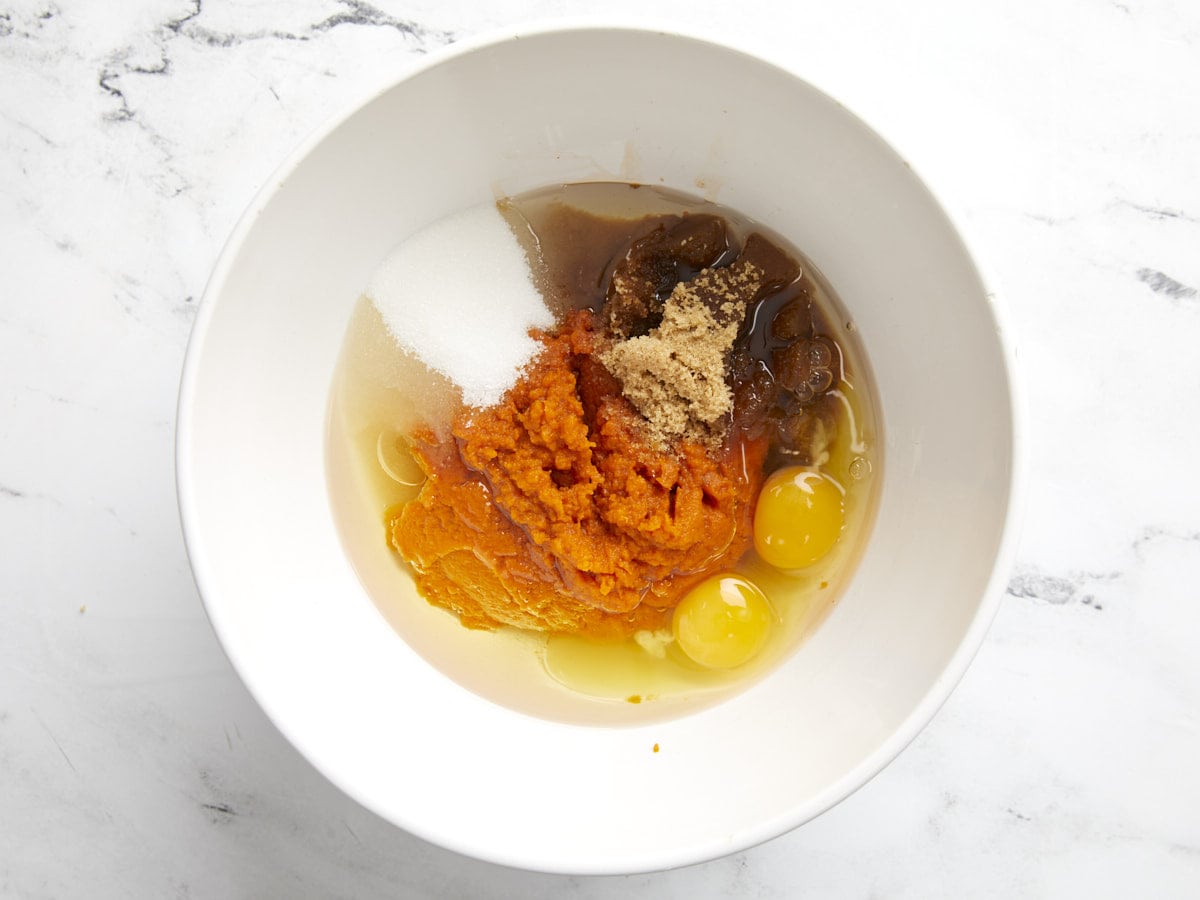
In a separate large bowl, stir together one 15oz. can of pumpkin purée, 2 large eggs, ½ cup white sugar, ½ cup brown sugar, ½ cup cooking oil, and 1 tsp vanilla extract until smooth.

Pumpkin muffin batter mixed together in the bowl.

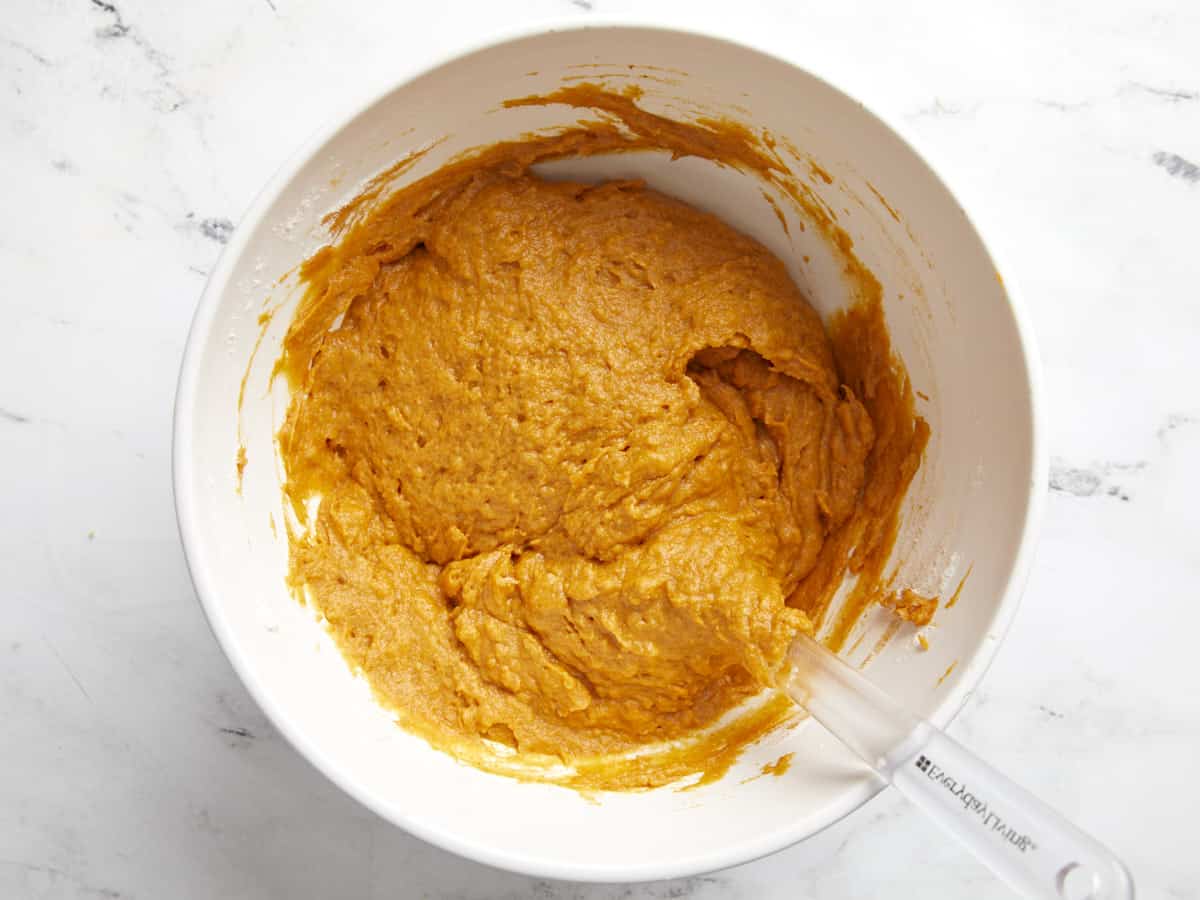
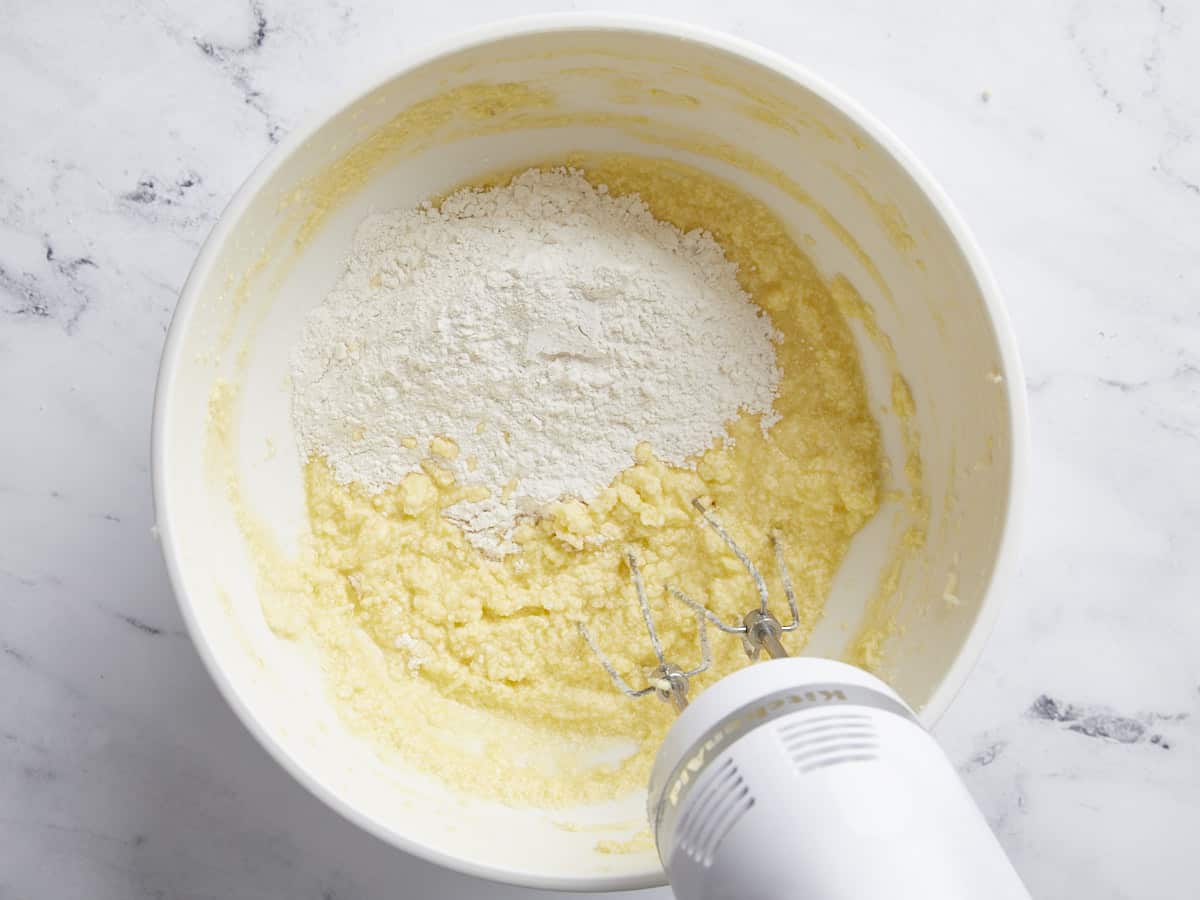
Add the dry ingredients to the bowl of wet ingredients and stir them together just until combined. A few small lumps are okay, just be careful not to over-stir.

Cream cheese filling mixed in a bowl with a spoon.

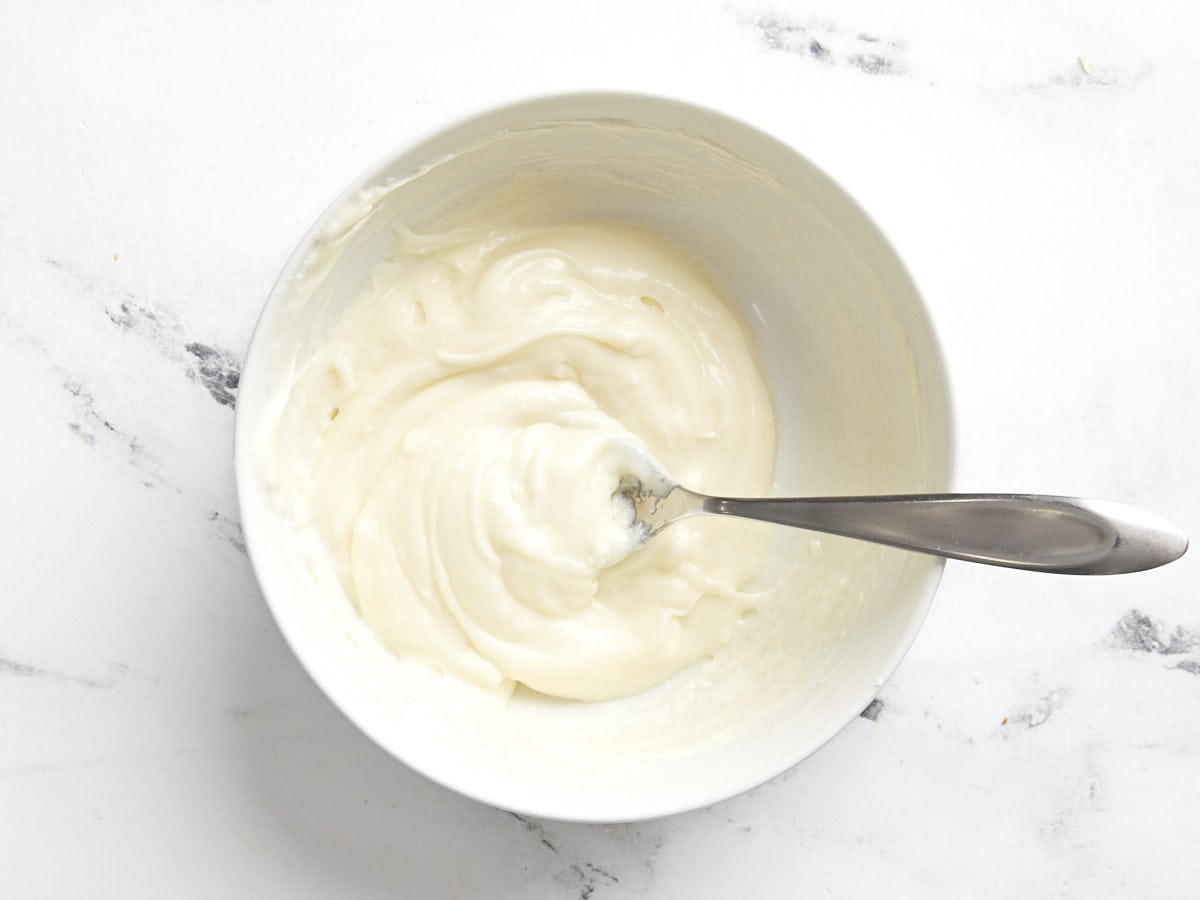
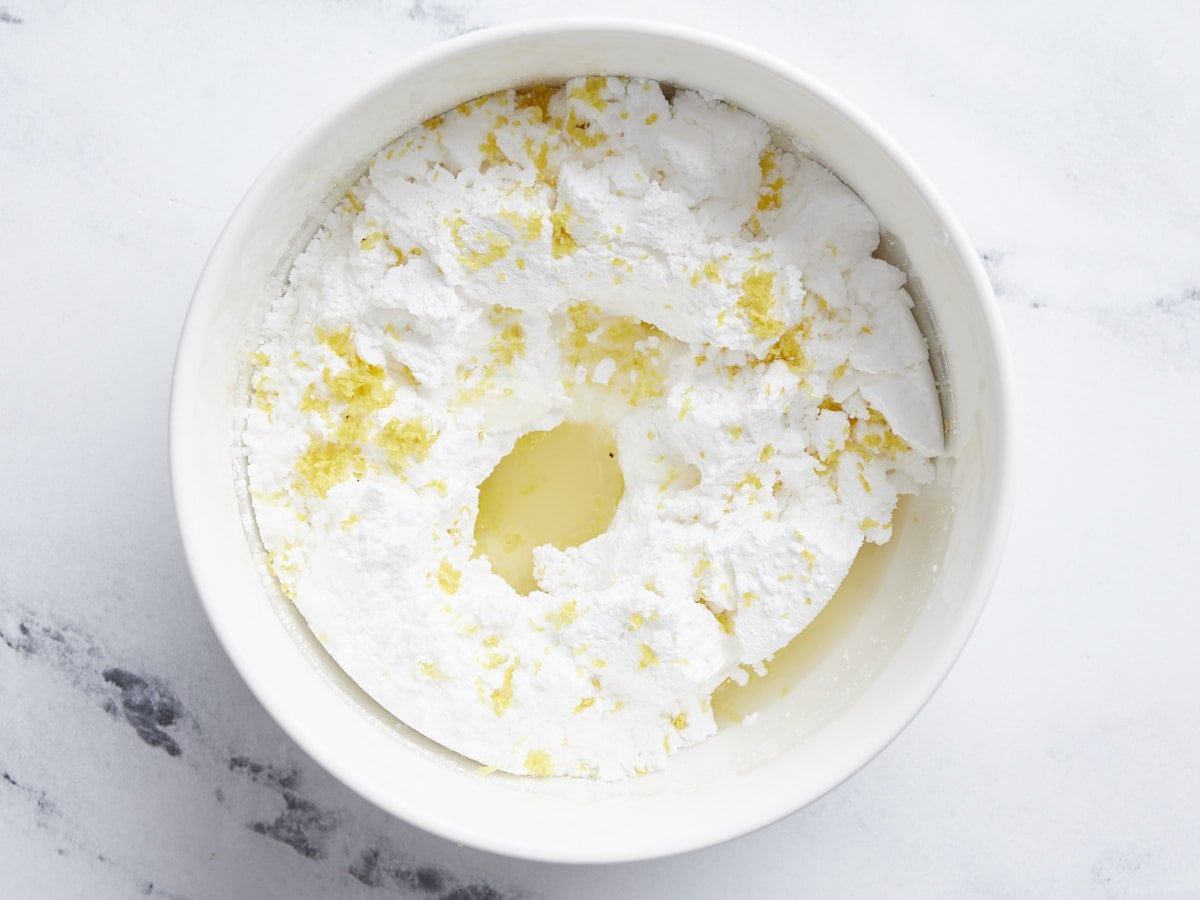
To make the cream cheese filling, stir together 4oz. room temperature cream cheese and 2 Tbsp white sugar.

Muffin tin being filled with pumpkin batter and cream cheese filling.

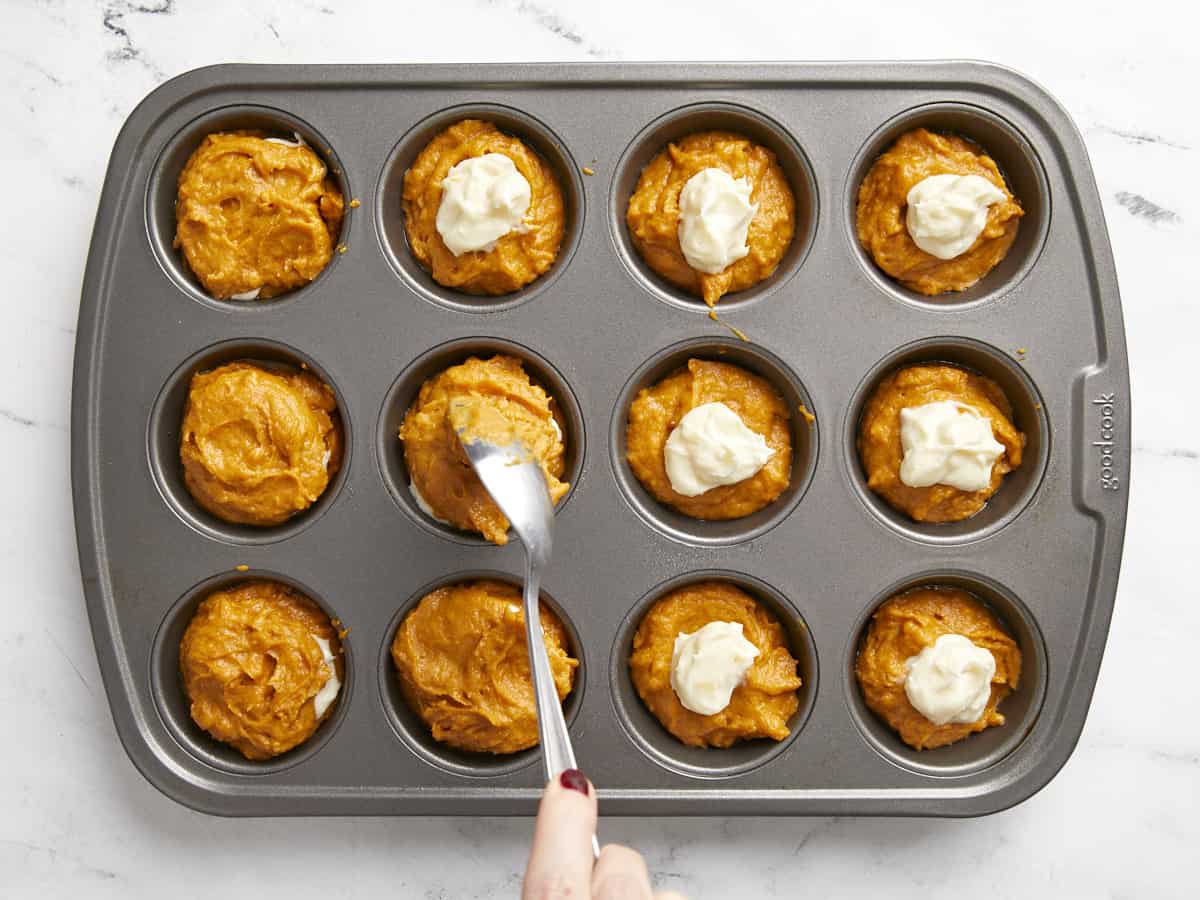
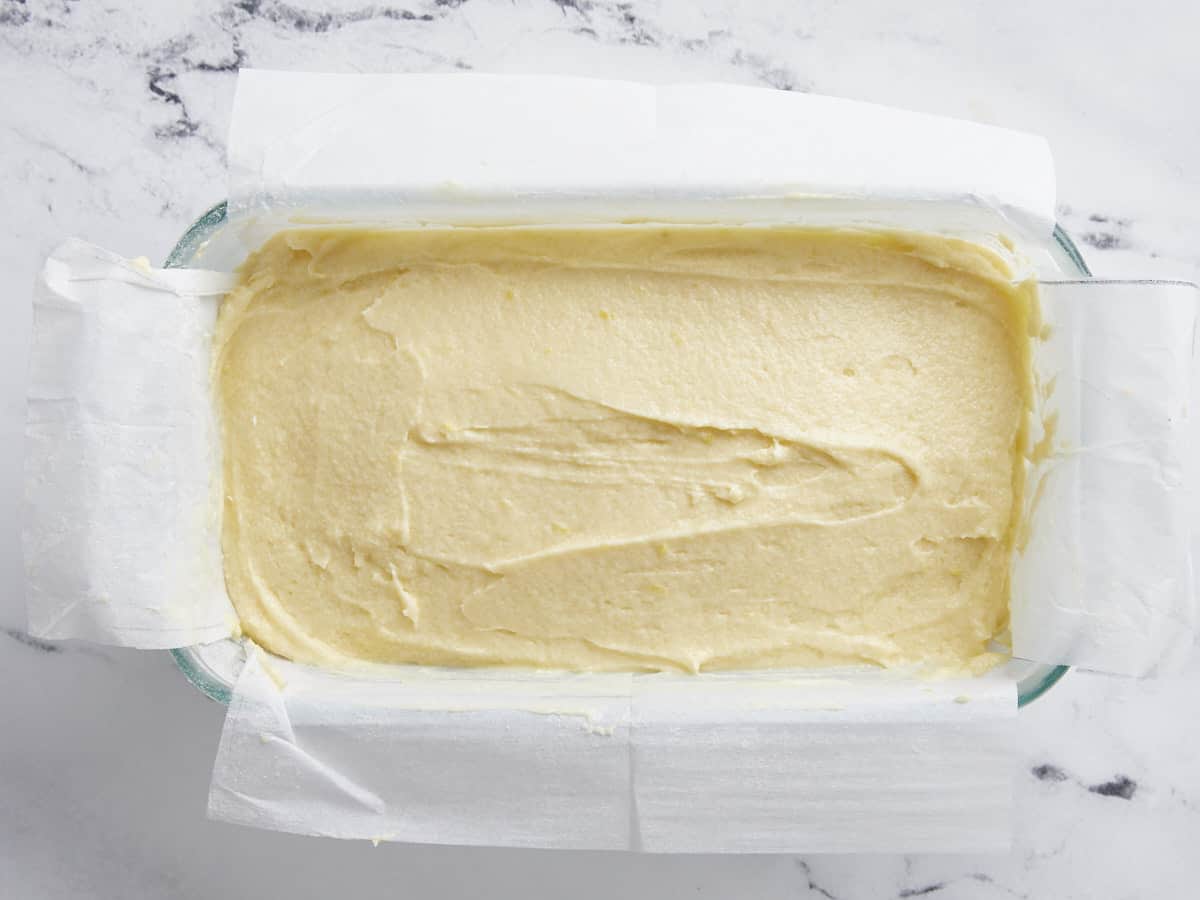
Grease a muffin tin or line with paper liners. Fill each well in the tin about ⅓ full with pumpkin batter, then add a dollop of the sweetened cream cheese on top. Fill the rest of the way with the remaining pumpkin batter. Or, if choosing not to do the cream cheese filling, simply divide the pumpkin batter among the 12 wells of the muffin tin.

Baked pumpkin muffins in the muffin tin.

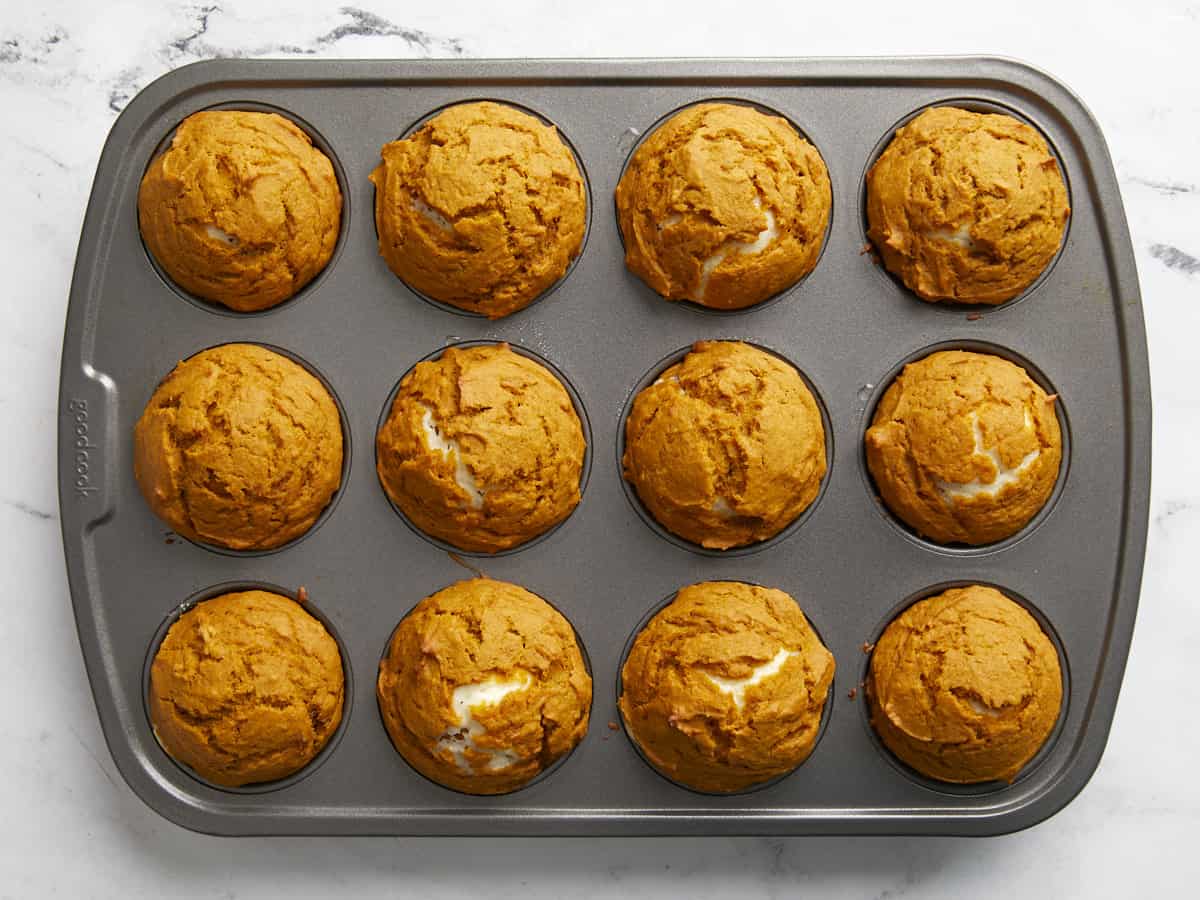
Bake the muffins in the preheated 350ºF oven for about 24 minutes, or until the muffins are fully puffed in the center and cracked slightly, and a little golden on the edges. Let them cool for about 5 minutes in the muffin pan before gently transferring them to a wire rack to finish cooling.
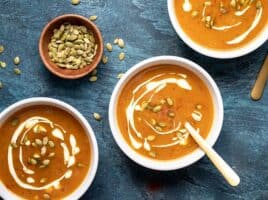
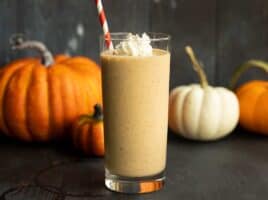
Close up side view of the pumpkin muffins cooling on a wire rack.

The post Pumpkin Muffins appeared first on Budget Bytes.

Seedy Quinoa Breakfast Cookies

When mornings are too rushed to make a wholesome breakfast (we get it!), enter seedy quinoa breakfast cookies! These chewy, satisfying, lightly sweetened cookies feature whole grains and nutrient-packed seeds to keep you nourished on the go. 
Nut-…

Seedy Quinoa Breakfast Cookies

When mornings are too rushed to make a wholesome breakfast (we get it!), enter seedy quinoa breakfast cookies! These chewy, satisfying, lightly sweetened cookies feature whole grains and nutrient-packed seeds to keep you nourished on the go. 

Nut-free and meal prep-friendly, these tasty cookies are perfect for school lunches, snacks, or any time you’re too rushed to make breakfast! Just 1 bowl and 25 minutes required.

Seedy Quinoa Breakfast Cookies from Minimalist Baker →

Lemon Pound Cake

This delicious, moist and easy lemon pound cake recipe is made with fresh lemon juice and zest, and perfect for dessert or paired with coffee or tea.

The post Lemon Pound Cake appeared first on Budget Bytes.

This Lemon Pound Cake will make you swoon! It’s moist, tender, tart, and tangy. The light fluffy crumb is the perfect texture for soaking up the sweet and sour lemon glaze. Even better- it’s the absolute easiest cake to make. I bet you have everything you need in your pantry right now! 

Overhead view of lemon pound cake sliced on a wire cooling rack.

What is Lemon Pound Cake?

This classic dessert is baked in a loaf pan and is bursting with refreshing citrus notes that cut through the buttery sweetness of the cake. This easy recipe for Lemon Pound Cake is also one of my favorite ways to use up extra lemons, as the batter and glaze are loaded with lemon juice and zest.

Ingredients for Lemon Pound Cake

This cake is gorgeous and the flavors are zippy and balanced. It’s the perfect easy dessert recipe for a casual dinner or a fancy get-together (or if you’re in the mood for cake that isn’t too sweet.) Here’s what you need to make Lemon Poundcake:

  • Butter:  creates a light, tender texture and helps the cake rise.
  • Granulated Sugar and Powdered Sugar: these sugars do more than sweeten the cake and the icing. Granulated sugar softens the cake crumb, adds moisture, and balances the tartness of the lemon juice in the batter. Powdered sugar creates structure in icing and helps mellow out the sourness of lemon juice.
  • Eggs: create structure that helps the cake rise and keeps the crumb airy.
  • Flour: the base of our batter, it creates the structure of the crumb. While we have not tested this recipe with gluten-free flour, a 1-to-1 gluten-free baking flour should be a great substitute.
  • Lemons: are the heart of this recipe. If lemons are out of your budget, you can try bottled lemon juice, and though it won’t taste quite as tart and refreshing, it will still be a good cake. If lemons are too tart for you, leave them out and just make plain, buttery, pound cake!

How To Serve Lemon Pound Cake

This cake is fantastic still warm from the oven or served at room temperature. It pairs beautifully with No-Churn Strawberry Ice Cream. Or served with a fresh dollop of Homemade Whipped Cream. Double down on the lemon flavor and try it with Homemade Lemon Curd

How To Store Lemon Pound Cake

Place leftovers in an air-tight container and store at room temperature for up to 3 days. You can also wrap leftovers tightly in a layer of parchment paper and a second layer of aluminum foil, then freeze for up to 3 months. While you can refrigerate pound cake, it does dull the flavors and changes the texture of the cake. If you choose to refrigerate or freeze it, try warming it in a 350°F with a touch of butter brushed on each slice. I don’t know if you’ve ever tried frozen cake, but it’s delightful straight out of the freezer as well. The crumb stays soft and it’s a perfect treat for a hot summer day.

Side view of a sliced loaf of lemon pound cake.
Print

Lemon Pound Cake

This delicious, moist and easy lemon pound cake recipe is made with fresh lemon juice and zest, and perfect for dessert or paired with coffee or tea.
Course Dessert
Cuisine Amercian
Total Cost $4.85 recipe / $0.40 serving
Prep Time 20 minutes
Cook Time 1 hour
Cool Time 10 minutes
Total Time 1 hour 30 minutes
Servings 12 (1 slice each)
Calories 330kcal

Ingredients

  • 1 cup room temperature salted butter (plus more for greasing) $2.01
  • 1.5 cups all-purpose flour (plus more for dusting) $0.22
  • 1/2 tsp baking powder $0.03
  • 1/4 tsp baking soda $0.01
  • 1/4 tsp salt $0.02
  • 1 cup granulated sugar $0.39
  • 4 large eggs, beaten $0.36
  • 1/4 cup buttermilk $0.16
  • 3 lemons, juiced and zested, divided $1.32
  • 1 cup powdered sugar $0.33

Instructions

  • Place an oven rack in the center of your oven and preheat the oven to 350°F. Grease an 8×4 loaf pan with butter. Line the pan with parchment. Butter the parchment and dust with flour, shaking off excess flour.
  • Mix the flour, baking powder, baking soda, and salt in a medium bowl.
  • Mix the butter and sugar in a large bowl until light and fluffy. Add the beaten eggs, buttermilk, 1/4 cup lemon juice, and 1 tablespoon zest. Mix until incorporated.
  • Add the flour mixture to the butter and egg mixture in thirds, mixing after each addition and scraping down the sides before the next addition.
  • Add batter to the prepared pan. Bake for 50 to 60 minutes in the preheated 350°F oven until the cake springs back when you press the center and a toothpick inserted into the center comes out clean.
  • Remove the pound cake from the oven and cool for ten minutes before removing it from the pan and placing it on a cooling rack.
  • To make the glaze, mix the powdered sugar with 2 tablespoons lemon juice and 1 1/2 teaspoons lemon zest.
  • Drizzle the glaze on the cooled pound cake and serve!

See how we calculate recipe costs here.

Nutrition

Serving: 1slice | Calories: 330kcal | Carbohydrates: 41g | Protein: 4g | Fat: 17g | Sodium: 241mg | Fiber: 1g
Icing being drizzled over a loaf of lemon pound cake.

How to Make Lemon Pound Cake – Step by Step Photos

Loaf pan being buttered and dusted with flour.

Place an oven rack in the center of your oven and preheat the oven to 350°F. Grease an 8×4 loaf pan with butter. Line the pan with parchment. Butter the parchment and dust with flour, shaking off excess flour.

Dry ingredients for lemon pound cake being whisked together in a bowl.

Mix 1.5 cups of all-purpose flour, 1/2 tsp baking powder, 1/4 tsp baking soda, and 1/4 tsp salt in a medium bowl. 

Wet ingredients for lemon pound cake in a bowl.

Mix 1 cup of room-temperature salted butter and 1 cup of granulated sugar in a large bowl until light and fluffy. Add 4 beaten large eggs, 1/4 cup of buttermilk,  1/4 cup lemon juice, and 1 tablespoon zest. Mix until incorporated.

Wet and dry ingredients for lemon pound cake being mixed together.

Add the flour mixture to the butter and egg mixture in thirds, mixing after each addition and scraping down the sides before the next addition. 

Lemon pound cake batter in the loaf pan ready to be baked.

Add batter to the prepared pan. Bake for 50 to 60 minutes in the preheated 350°F oven until the cake springs back when you press the center and a toothpick inserted into the center comes out clean.

Baked lemon pound cake in the baking pan.

Remove the poundcake from the oven and cool for ten minutes before removing it from the pan and placing it on a cooling rack.

Ingredients for the icing in a bowl.

To make the glaze, mix 1 cup powdered sugar with 2 tablespoons lemon juice and 1 1/2 teaspoons lemon zest. 

Glaze being poured over the pound cake.

Drizzle the glaze on the cooled pound cake and serve!

Front view of a loaf of lemon pound cake sliced on a cooling rack.

The post Lemon Pound Cake appeared first on Budget Bytes.

The BEST Gluten-Free Chocolate Cake (Vegan, 1 Bowl!)

Friends, we’ve heard your pleas to release our secret gluten-free chocolate cake recipe, and today is your lucky day! It’s based off the baking mix we released last year after almost a year of development and countless taste tests. And it’s now ready t…

The BEST Gluten-Free Chocolate Cake (Vegan, 1 Bowl!)

Friends, we’ve heard your pleas to release our secret gluten-free chocolate cake recipe, and today is your lucky day! It’s based off the baking mix we released last year after almost a year of development and countless taste tests. And it’s now ready to make from scratch in your kitchen!

This cake is FLUFFY, moist, perfectly chocolaty, and undetectably vegan, gluten-free, grain-free, and naturally sweetened.

The BEST Gluten-Free Chocolate Cake (Vegan, 1 Bowl!) from Minimalist Baker →

Zucchini Muffins

These irresistible Zucchini Muffins are fluffy, super moist and the perfect way to use up your generous supply of summer zucchini!

The post Zucchini Muffins appeared first on Budget Bytes.

This recipe goes out to all of my fellow zucchini lovers who have an abundance of zucchini growing in their gardens right now. Or maybe you’re like me and just have extra zucchini hanging out in the fridge that you need to use before it goes bad. Either way, one of my favorite ways to use up zucchini is by making these delicious and slightly irresistible Zucchini Muffins. They’re soft, super moist and the perfect way to sneak in a green vegetable!

Close up side shot of Zucchini muffins on a wire rack.

Ingredients Needed for Zucchini Muffins

What I love about baking recipes is that they often include pantry staple ingredients that you already have on hand. You can easily whip up a batch of these zucchini muffins using the following:

  • Grated Zucchini – Zucchini naturally contains a lot of water, but there’s no need to pat or squeeze out the excess water for this recipe. In this case the extra liquid helps add moisture to the muffins – saving you an extra step!
  • All Purpose flour – this gives the muffins structure. We used all-purpose flour, but you can safely substitute up to half of the flour for whole wheat flour without affecting the flavor or texture too much.
  • Baking Powder & Baking Soda – both are leavening agents to help the muffins rise. We used both due to the extra acidity from the applesauce.
  • Eggs – to help bind all of the muffin ingredients together.
  • White Granulated Sugar & Brown Sugar – the combination of both sugars helps to balance the sweetness, moisture and texture of the muffins.
  • Applesauce & Oil – yes, we’re using both in this recipe! The combination of both oil and applesauce helps keep the muffins moist, but not too oily, and you gain more flavor and moisture by incorporating the applesauce. We’re not making any dry muffins over here! :)
  • Cinnamon & Vanilla – keeping the added spices simple is key. These two pair nicely together to help enhance the flavor of the zucchini muffins.

Should You Peel the Zucchini Before Grating It

Thankfully there is no need to peel your zucchini before grating it. The skin of the zucchini is very thin and tender, so it’s barely noticeable once baked into the muffins. Just give it a good wash with your hands or a vegetable brush and you’ll be good to go!

A Few Recipe Tips!

  1. Don’t over mix the batter. Overmixing will cause the muffins to become dense and tough instead of light and fluffy. Mix the dry and wet ingredients together until they are just barely combined and there are no traces of dry flour left in the bowl.
  2. Oil your muffin pan well. Even if you are using a nonstick muffin pan, make sure to oil it well or use cupcake liners to prevent your muffins from sticking to the pan.
  3. You can easily stretch this batter and get 12 regular size muffins. We were going for larger, bakery style muffins, so we divided the batter into eight muffin wells.
Overhead view of Zucchini muffins on a wire rack with one cut open and butter spread on top.

How to Store Zucchini Muffins

Allow the muffins to cool completely at room temperature before storing. You can store leftover zucchini muffins in an airtight container or a food storage bag at room temperature or in the fridge for 4-5 days. For longer storage, store in a freezer-safe storage bag for up to 3 months. Thaw frozen muffins at room temperature or microwave for about 30 seconds until warm, then add a little butter and enjoy!

Need to use up the rest of your Zucchini?

Some other great ways to use up your supply of summer zucchini include making a batch of these crispy, Baked Zucchini Fries, this easy Lemon Pepper Zucchini, or baked Zucchini Slice. Other great zucchini recipes include our simple Charred Corn and Zucchini Salad or easily add sautéed zucchini to your favorite meal like this Blackened Salmon with Zucchini dish!

Close up overhead shot of Zucchini muffins
Side view of Zucchini muffins on a wire rack.
Print

Zucchini Muffins

These irresistible Zucchini Muffins are fluffy, super moist and the perfect way to use up your generous supply of summer zucchini!
Course Breakfast
Cuisine American
Total Cost $3.53 recipe / $0.44 each
Prep Time 15 minutes
Cook Time 24 minutes
Total Time 39 minutes
Servings 8 muffins
Calories 306kcal

Ingredients

  • 2 cups grated zucchini (about 1 lb.) $1.49
  • 2 cups all-purpose flour $0.28
  • 1 tsp baking powder $0.06
  • 1/2 tsp baking soda $0.02
  • 1/2 tsp salt $0.04
  • 1 tsp cinnamon $0.10
  • 2 large eggs $0.22
  • 1/2 cup granulated sugar $0.20
  • 1/2 cup brown sugar $0.28
  • 1/3 cup applesauce $0.18
  • 1/4 cup cooking oil $0.16
  • 1 tsp vanilla extract $0.50

Instructions

  • Preheat the oven to 350°F. Next wash the zucchini well, trim off the stem of the zucchini, then using the large holes on a box grater, grate the zucchini and set it to the side.
  • In a large bowl, whisk together the dry ingredients (flour, baking powder, baking soda, salt, and cinnamon) until well combined.
  • In a separate bowl, whisk together the wet ingredients (eggs, granulated sugar, brown sugar, applesauce, oil and vanilla extract) until well combined.
  • Add the grated zucchini to the bowl with the wet ingredients. Stir until combined.
  • Pour the wet ingredients into the same bowl as the dry ingredients. Stir together until just combined. Be careful not to overmix at this point.
  • Divide the batter between eight greased or lined muffin wells.
  • Bake the muffins for about 24 minutes or until golden brown and puffed in the center. Allow the muffins to cool for about 5 minutes, then carefully loosen the edges with a knife and transfer the muffins to a wire rack to finish cooling. Enjoy!

See how we calculate recipe costs here.

Nutrition

Serving: 1muffin | Calories: 306kcal | Carbohydrates: 52g | Protein: 5g | Fat: 9g | Sodium: 292mg | Fiber: 1g
Zucchini muffins plated with one cut open and butter spread in the middle.

How to Make Zucchini Muffins – Step by Step Photos

Shredding Zucchini with a box grater on a cutting board

Preheat the oven to 350°F. Next wash the zucchini well, trim off the stem of the zucchini, then grate 2 cups of zucchini (roughly about 1 lb.) and set the grated zucchini to the side.

Dry Ingredients for zucchini muffins in a large white bowl.

In a large mixing bowl, whisk together 2 cups all-purpose flour, 1 tsp baking powder, 1/2 tsp baking soda, 1/2 tsp salt, and 1 tsp cinnamon until well combined.

Wet ingredients for zucchini muffins in a white bowl.

In a separate bowl, whisk together 2 large eggs, 1/2 cup granulated sugar, 1/2 cup brown sugar, 1/3 cup applesauce, 1/4 cup cooking oil and 1 tsp vanilla extract until well combined.

Shredded zucchini added to wet ingredients bowl

Add the 2 cups of grated zucchini to the bowl with the wet ingredients. Stir until well combined.

Dry ingredients combined with wet ingredients and mixed together.

Pour the wet ingredients into the same bowl as the dry ingredients. Stir together until just barely combined and there are no traces of dry flour left in the bowl. Be careful not to overmix the batter at this point.

Zucchini muffin batter added to nonstick muffin pan.

Divide the batter between eight greased or lined muffin wells.

Overhead view of baked zucchini muffins in a muffin pan.

Bake for about 24 minutes or until golden brown and puffed in the center. And be prepared for your kitchen to smell amazing! Allow the muffins to cool for about 5 minutes then carefully loosen the edges of the muffin with a knife. Transfer the muffins to a wire rack to finish cooling.

Overhead view of zucchini muffins on a wire rack with one cut open and butter spread in the middle.

Enjoy these soft, fluffy, and absolutely delicious Zucchini Muffins by themselves or with a little butter spread on top!

More Irresistible Muffin Recipes

The post Zucchini Muffins appeared first on Budget Bytes.

Texas Sheet Cake

Texas Sheet Cake might be the ultimate chocolate cake. It’s incredibly easy to make and has a buttery richness with a pure chocolate punch.

The post Texas Sheet Cake appeared first on Budget Bytes.

Texas Sheet Cake might be the ultimate chocolate cake. It’s incredibly easy to make and has a buttery, velvety richness with a pure chocolate punch. PS, because you make it in a sheet pan, it’s easy to slice and perfect for feeding a crowd. Seriously. You can get 25 slices from one cake! I’m in love.

Side shot of three slices of Texas Sheet Cake stacked on top of one another on a white plate.

What is Texas Sheet Cake?

Texas Sheet Cake is a very simple chocolate cake recipe made in a 10×15 sheet pan that’s two inches deep (also known as a jelly roll pan). You can also use a 12 x18 baking pan, but the cake won’t be as thick and will cook faster. Once cooled, you cover the sheet cake in a thick layer of warm, buttery homemade chocolate icing, right in the pan.

The difference between Texas Sheet Cake and regular cake is the thickness of the cake. Traditional cakes are thicker and sometimes layered. You also remove the cakes from the pans and then frost. Texas Sheet Cake is made in one pan. The thin layer of batter bakes quicker than traditional cakes. You then frost the cake right in the pan.

Ingredients For Texas Sheet Cake

This is one of those recipes that needs to be followed as written. Cakes are a science, so, unfortunately, I don’t have substitutions for any of the following ingredients. You are, of course, welcome to experiment, but I can’t offer guidance or guarantee results. Here’s what you need to make Texas Sheet Cake:

  • All-Purpose Flour – creates the structure of your crumb.
  • Brown Sugar, Granulated Sugar, and Powdered Sugar – these sugars do more than sweeten the cake and the icing. Brown and granulated sugar soften the cake crumb and add moisture. Powdered sugar creates structure in icing.
  • Baking Powder and Baking Soda – leaven the cake and create a light, airy crumb.
  • Butter– creates a light, tender texture and helps the cake rise. It also adds richness to the icing.
  • Unsweetened Cocoa Powder – adds a deep chocolate flavor to the cake and the icing.
  • Coffee– adds depth to the chocolate.
  • Eggs– provide structure to help leaven the cake.
  • Mayo – adds moisture and richness to the cake.
  • Heavy Cream– thins the icing and adds richness.
  • Vanilla – adds depth to the icing.
Overhead shot Texas Sheet Cake being sliced on a sheet pan.

Tips For Making Perfect Texas Sheet Cake

  • For a richer chocolate flavor, use dark cocoa powder.
  • Grease your sheet pan with melted butter, dust it with flour, and then freeze it while you make the batter. That way, the batter doesn’t move the butter around when it hits the pan, creating spots that your cake could stick to. 
  • You serve this cake in the sheet pan it was baked in, so I’d avoid using parchment. Your knife could shred the parchment as you slice the cake, and little bits of paper could get caught up in the slices.
  • To add a little texture and crunch to your cake, top it off with chopped nuts before you frost it. Toast them for extra yum-factor.
  • You can frost the cake while it’s still warm for an ooey-gooey, though slightly sloppy experience. If you want cleaner cuts, wait until the cake has completely cooled before icing it. And then let it sit for a bit and allow the icing to solidify some.
  • Texas sheet cake is traditionally served warm, but it’s also delicious at room temperature, chilled, or frozen. (IE Anytime.)

Can You Make The Cake Ahead?

Yes, you can make Texas Sheet Cake ahead of time. However, to keep the icing glossy, I would frost it the day of. Bake the cake up to 2 days ahead of time. Let it cool, wrap it in plastic, and then aluminum. Leave it at room temperature or freeze and then thaw. Make your icing when you’re ready to serve.

Side shot of Texas Sheet Cake in a sheet pan with a slice being taken out of it.

How To Cut Texas Sheet Cake

The beauty of this cake is that it’s simple to slice. You don’t have to cut through multiple layers hoping your slices are even. Instead, you cut through one layer in easy-to-manage squares or rectangles. We did brownie-sized 3×3 slices and got 15 pieces out of it. But you can cut 2×3 pieces and get 25 servings! This is the perfect cake for large gatherings like potlucks or school bake sales.

How To Store Texas Sheet Cake

Texas sheet cake can be stored at room temperature for up to three days. To prevent it from drying out, wrap the cake tightly in plastic wrap and then in a layer of aluminum foil. You can also freeze the double-wrapped cake for up to 2 months. It’s perfect for chocolate emergencies. (Beth and I have those at least once a week). You can thaw it at room temperature overnight. But you don’t have to bring it to room temperature to enjoy it. On hot summer days, I eat it straight from the freezer.

Overhead shot of three slices of Texas Sheet Cake on a sheet pan and two white plates.
Side shot of Texas Sheet Cake in a sheet pan with a slice being taken out of it.
Print

Texas Sheet Cake

Texas Sheet Cake might be the ultimate chocolate cake. It's incredibly easy to make and has a luscious buttery richness with a pure chocolate punch!
Course Dessert
Cuisine American
Total Cost ($11.27 recipe / $0.75 serving)
Prep Time 20 minutes
Cook Time 25 minutes
Total Time 45 minutes
Servings 15 slices
Calories 546kcal

Ingredients

Cake

  • 2 cups all-purpose flour, plus more for dusting $0.28
  • 1 cup granulated sugar $0.40
  • 1 cup brown sugar, light or dark $0.44
  • 1/2 tsp salt $0.04
  • 2 tsp baking powder $0.12
  • 1/2 tsp baking soda $0.02
  • 1 cup salted butter (2 sticks) $2.50
  • 1/3 cup unsweetened cocoa powder, sifted $0.31
  • 1 cup coffee, hot $0.15
  • 2 eggs $0.78
  • 1/2 cup mayonnaise $0.87
  • 1 tsp vanilla extract $0.72

Icing

Instructions

  • Place a rack in the center of your oven and preheat it to 350°F. Grease a jelly roll pan (10×15) with a 2-inch rim with melted butter. Lightly flour the pan. Shake off any excess and place in the freezer.
  • In a large bowl, combine the flour, granulated sugar, brown sugar, salt, baking powder, and baking soda.
  • In a saucepan over medium heat, melt the butter, then brown it. Take the pan off the heat.
  • Add the unsweetened cocoa powder to the brown butter, and stir to incorporate.
  • Place the pan back over medium heat. Add the hot coffee, and stir. Take the pan off the heat.
  • Add the eggs and vanilla to the mayonnaise and combine. Add a few tablespoons of chocolate to temper (warm) the egg mixture.
  • Once the egg mixture is warm, mix the chocolate and egg mixture together.
  • Pour the wet ingredients into the dry ingredients and stir just enough to combine.
  • Add the batter to the sheet pan and bake for 15 to 20 minutes, until the cake has a slight spring when you press a finger on its surface and a toothpick inserted into the middle comes out clean.
  • Once the cake is out of the oven, make the icing. Set a large saucepan over medium heat, and add the butter, heavy cream, cocoa, vanilla, and powdered sugar. Stir until incorporated.
  • Pour 3/4 of the warm frosting over the center of the cooled cake. Begin to spread it over the cake with a spatula and add more frosting if necessary to cover the cake from end to end. Cut, serve, then sit back and enjoy the marathon of compliments you're going to get!

See how we calculate recipe costs here.

Nutrition

Serving: 1slice | Calories: 546kcal | Carbohydrates: 63g | Protein: 4g | Fat: 33g | Sodium: 428mg | Fiber: 2g
Side shot of three slices of Texas Sheet Cake stacked on top of one another on a white plate.

How to Make Texas Sheet Cake – Step by Step Photos

Overhead shot of sheet pan with a layer of frozen butter and a touch of flour on it.

Place a rack in the center of your oven and preheat it to 350°F. Use a pastry brush or paper towel to grease a jelly roll pan (10×15) with a 2-inch rim with 1 tablespoon of melted butter. Lightly flour the pan. Shake off any excess and place in the freezer.

Overhead shot of dry ingredients in a white bowl.

In a large bowl, combine the 2 cups of all-purpose flour, 1 cup white sugar, 1 cup brown sugar, 1/2 teaspoon salt, 2 teaspoons baking powder, and 1/2 teaspoon baking soda.

Overhead shot of browned butter in a silver skillet.

In a saucepan over medium heat, melt 1 cup of butter (2 sticks) in a light-colored pan. It will foam, then begin to brown. Stir constantly to distribute the heat evenly. As soon as it turns a light caramel color take it off the heat.

Overhead shot of of coca powder being added to browned buter.

Add 6 tablespoons of unsweetened cocoa powder, and stir to incorporate.

Overhead shot of coffee being added to chocolate batter.

Place the pan back over medium heat. Add 1 cup of hot coffee, and stir. Then take the pan off the heat.

Overhead Shot of egg mixture being tempered by a bit of chocolate.

In a large bowl combine the two eggs,1 teaspoon of vanilla, and 1/2 cup of mayonnaise. Add a few tablespoons of chocolate to temper the egg mixture. Tempering raises the temperature of the egg mixture slowly so that the eggs don’t heat too quickly and solidify into scrambled eggs.

Overhead shot of egg mixture being added to bowl of chocolate mixture.

Once the egg mixture is warm, add the tempered egg mixture to the chocolate mixture and combine.

Overhead shot of wet ingredients being added to dry ingredients in a white bowl.

Next, pour the wet ingredients into the dry ingredients and stir just enough to combine.

Overhead shot of finished Texas Sheet Cake in a sheet pan.

Then add the batter to the sheet pan and bake for 15 to 20 minutes, until the cake has a slight spring when you press a finger on its surface and a toothpick inserted into the middle comes out clean.

Overhead shot of icing ingredients in a pot.

Once the cake is out of the oven make the icing. Set a large saucepan over medium heat and add 1 cup of butter (two sticks), 1/4 cup of heavy cream, 1/3 cup of unsweetened cocoa powder (sifted to prevent lumps), 1 teaspoon of vanilla, and 2 1/2 cups of powdered sugar (sifted to prevent lumps). Stir until incorporated. Do not boil.

Overhead shot of icing being poured on top of Texas Sheet Cake.

Pour 3/4 of the warm frosting over the center of the cooled cake. There might be extra frosting depending on the depth of your pan and how much your cake has risen. Begin to spread it over the cake with a spatula and add more frosting if necessary to cover the cake from end to end. Cut, serve, then sit back and enjoy the marathon of compliments you’re going to get!

Overhead shot Texas Sheet Cake sliced in a sheet pan with a few slices taken out of it.

More Delicious Cakes

The post Texas Sheet Cake appeared first on Budget Bytes.

Gluten-Free Nutter Butters (Vegan)

Peanut butter lovers, rejoice! We’ve cracked the vegan, gluten-free, naturally sweetened code on the perfect little peanut butter cookie: Nutter Butters! Think a crispy, perfectly sweet peanut butter cookie and soft, creamy peanut butter filling. Swoon…

Gluten-Free Nutter Butters (Vegan)

Peanut butter lovers, rejoice! We’ve cracked the vegan, gluten-free, naturally sweetened code on the perfect little peanut butter cookie: Nutter Butters! Think a crispy, perfectly sweet peanut butter cookie and soft, creamy peanut butter filling. Swoon!

Easy to make with just 8 ingredients, this snack-able dessert will be loved by EVERYONE. Get ready to fill your cookie jar…if they make it that far! Let’s bake!

How to Make Vegan Gluten-Free Nutter Butters

When it comes to Nutter Butters, there are two essentials: peanut butter and peanut butter.

Gluten-Free Nutter Butters (Vegan) from Minimalist Baker →

Hummingbird Cake

This luscious Hummingbird Cake is dotted with bananas, pineapple, and pecans, then smothered in cream cheese frosting- and it’s under $20!

The post Hummingbird Cake appeared first on Budget Bytes.

Hummingbird Cake doesn’t last- you’ll reach for a second slice before you finish your first! If you’ve never heard of it, this luscious banana cake is dotted with pineapple and pecans, then smothered in scrumptious cream cheese frosting. You’ll pay up to $80 for this beauty at a bakery, but I’m showing you how to make Hummingbird Cake for under $20! Here’s the best part: you can slice and freeze it, then gobble it up whenever you crave it!

What is Hummingbird Cake?

Hummingbird cake is a classic Southern recipe that originated in Jamaica. The batter goes heavy on the fruit and nuts; almost half of it is chopped banana, pineapple, and pecans. Once baked, the cake is layered and topped with buttery cream cheese frosting and garnished with more pecans or pineapple.

What You’ll Need

Is this an easy breezy recipe? No. But it’s manageable, and it’s worth it! Bakeries sell this cake for $50 to $80, but I’m showing you how to put it together for under $20! Here’s what you’ll need to make Hummingbird Cake.

  • Pecans – add texture and earthiness. You can omit them if there is a nut allergy.
  • Pineapple and Bananas– add sweetness and flavor. They also add moisture and tenderize the cake.
  • All Purpose Flour – creates the structure you need to stand up to all the fruit in the batter.
  • Sugar – sweetens the cake and locks in moisture.
  • Baking Soda and Baking Powder – these leavening agents help your cake rise.
  • Vegetable Oil – helps the cake bake evenly and rise higher.
  • Vanilla Extract – helps flavor the cake batter and the frosting.
  • Cream Cheese and Butter – add flavor and also give the frosting its structure, making it easier to spread.
  • Powdered Sugar – sweetens the frosting and gives the frosting structure.

Tips For The Best Hummingbird Cake

  • Use very ripe bananas and don’t drain the crushed pineapple.
  • Do not overmix the batter. The more you mix, the denser the cake becomes.
  • Prepare your pans like a pro: grease them, line the bottom with parchment, and then grease and flour the parchment and the sides of the pan.
  • Pour equal amounts of batter into the cake pans by using a dry measuring cup.
  • Cool the layers completely before frosting them and frost from the center out.

Can I Make It Ahead Of Time?

Yes, you can make your Hummingbird Cake layers ahead of time! Allow them to cool completely before wrapping them in a double layer of plastic wrap. You can keep them at room temperature for up to a day, refrigerate them for up to two days, or freeze them for up to a month. Frozen cake layers are easier to frost anyway. You can also make the frosting ahead of time. Keep it in an airtight container with plastic wrap over the surface of the frosting, and refrigerate for up to 5 days

How To Store Hummingbird Cake

You can store Hummingbird Cake in an airtight container or wrapped in plastic wrap in your refrigerator for up to 5 days. (Your loved ones will devour it way before then.) Hummingbird Cake also freezes well and can be stored in an airtight container or wrapped in a double layer of foil and plastic for up to 4 months. I usually portion mine in thick slices and keep them in the freezer for future cravings. Frozen cake on a hot summer day is AMAZING.

Side shot of Hummingbird Cake with a slice being taken out of it.
Print

Hummingbird Cake

This luscious Hummingbird Cake is dotted with bananas, pineapple, and pecans, then smothered in cream cheese frosting. It's scrumptious!
Course Dessert
Cuisine American
Total Cost $15.90 recipe / $1.33 serving
Prep Time 30 minutes
Cook Time 30 minutes
Resting Time 1 hour
Total Time 2 hours
Servings 12 slices
Calories 1287kcal

Ingredients

For the Cake

  • 1 cup chopped pecans $4.59
  • 3 cups all-purpose flour, plus more for dusting pans $0.42
  • 2 cups sugar $0.78
  • 1 tsp salt $0.08
  • 1 tsp baking soda $0.02
  • 1/2 tsp baking powder $0.03
  • 1 tsp ground cinnamon $0.08
  • 3 large eggs, lightly beaten $1.17
  • 1 ½ cups cooking oil $1.12
  • 1 ½ tsp vanilla extract $0.86
  • 1 (8 oz) can crushed pineapple in juice, undrained* $0.56
  • 2 cups chopped bananas (about 4 medium bananas) $1.00

For the Frosting

  • 12 oz cream cheese, softened $2.62
  • 12 Tbsp salted butter, softened $0.38
  • 3/4 tsp vanilla extract $0.43
  • 1 pinch salt $0.01
  • 6 cups powdered sugar $1.75

Instructions

  • Set a rack in the center of your oven and preheat it to 350°F. While the oven preheats, set a heavy-bottomed skillet over medium heat and add the pecans in a thin layer. Toast the pecans for 5 to 8 minutes, stirring occasionally.
  • While the pecans toast, whisk together the flour, sugar, salt, baking soda, baking powder, and cinnamon in a large bowl.
  • Add the eggs and vegetable oil, stirring just until the wet ingredients moisten the dry ingredients and no more.
  • Add vanilla, crushed pineapple in its juices, chopped bananas, and toasted pecans. Stir the ingredients as little as possible while fully incorporating them.
  • Grease three 9-inch cake pans. Cover the bottoms with parchment paper, grease the parchment, and lightly dust the bottom and sides of the pans with flour. Divide the batter evenly between the pans and bake until a toothpick inserted in the center comes out clean, about 25 to 30 minutes. Cool pans for 10 minutes before removing the cake layers. Cool layers for 1 hour.
  • While the cake bakes, in a very large bowl, add the cream cheese, salted butter, vanilla, and a pinch of salt. Beat with an electric mixer on medium speed until smooth. Then add the powdered sugar cup by cup, beating at low speed after each addition.
  • Once the sugar has been fully incorporated, increase the speed to medium-high, and beat until fluffy, 1 to 2 minutes.
  • Place the first cake layer on a serving platter or cake stand. Spread 1 cup of the frosting on top, starting from the center and working your way out. You want a layer of frosting that is ¼ inch deep.
  • Top with the second cake layer and spread with 1 cup of frosting, working from the center out.
  • Top with the third layer, and spread the remaining frosting over the top and lightly around the sides. Garnish the top with pecans, berries, or candied pineapple rings.*

See how we calculate recipe costs here.

Notes

*An 8 ounce can contains ⅓ cup pineapple juice plus ½ cup crushed pineapple.
*This recipe is for a naked cake, IE the sides are barely frosted. If you’d like to frost the sides with a thicker layer, use 2 sticks of butter, 2 packages of cream cheese, 8 cups of powdered sugar, and 1 teaspoon of vanilla.
*To candy the pineapple rings cover them in a thick layer of brown sugar and fry them in 2 tablespoons of butter per ring over medium heat until golden.

Nutrition

Serving: 1slice | Calories: 1287kcal | Carbohydrates: 195g | Protein: 10g | Fat: 57g | Sodium: 510mg | Fiber: 8g

How to Make Hummingbird Cake – Step by Step Photos

Set a rack in the center of your oven and preheat it to 350°F. While the oven preheats, set a heavy-bottomed skillet over medium heat and add 1 cup of chopped pecans in a thin layer. Toast the pecans for 5 to 8 minutes, stirring occasionally. They’re ready when they have slightly deepened in color and the air smells toasty.

While the pecans toast, whisk together 3 cups of flour, 2 cups of sugar, 1 teaspoon of salt, 1 teaspoon of baking soda, 1/2 teaspoon of baking powder, and 1 teaspoon of cinnamon in a large bowl.

Add the 3 eggs and 1 1/2 cups vegetable oil, stirring just until the wet ingredients moisten the dry ingredients. Do not overmix.

Add 1 1/2 teaspoons of vanilla, 8 ounces of crushed pineapple, 2 cups of chopped bananas, and a cup of toasted pecans. Then stir the ingredients as little as possible while fully incorporating them.

Grease three 9-inch cake pans. Cover the bottoms with parchment paper, grease the parchment, and lightly dust the bottom and sides of the pans with flour. Use a dry cup measure to divide the batter evenly. Bake until a toothpick inserted in the center comes out clean, about 25 to 30 minutes. Cool the pans on wire racks for 10 minutes before removing the cakes from the pans. Cool the layers on wire racks before frosting for 1 hour.

While the cake bakes, in a very large bowl, add the 12 ounces of cream cheese, the 12 tablespoons of salted butter, 3/4 teaspoon vanilla, and a pinch of salt. Beat with an electric mixer on medium speed until smooth. Then add the powdered sugar cup by cup, beating at low speed after each addition until blended.

Once the sugar has been fully incorporated, increase the speed to medium-high, and beat until fluffy, 1 to 2 minutes.
To frost, first, place one cake layer on a serving platter or cake stand. Then spread 1 cup of the frosting on top, starting from the center and working your way out. You want a layer of frosting that is ¼ inch deep.
Next, top the cake with the second cake layer and spread with 1 cup of frosting, working from the center out.
Next, top the cake with the third layer, and spread the remaining frosting over the top and lightly around the sides. Finally, garnish the top with pecans, berries, or candied pineapple rings.*

Is this Hummingbird Cake a beauty, or what?! It’s truly a dessert you can’t get enough of. So much so, that Beth and I have slices of it in the test kitchen freezer for whenever our sweet tooth strikes! (Which is every single day TBH.) We were literally just looking at this post, contemplating driving to the test kitchen to get a slice! Get your cake pans ready for a win that’s under $20!

More Budget-Friendly Cakes

The post Hummingbird Cake appeared first on Budget Bytes.

The Ultimate Gluten-Free Banana Bread (Bakery Worthy!)

What do Britney Spears, Back to the Future, and banana bread have in common? They’re all undeniable National Treasures. And not to be dramatic, but this gluten-free banana bread might be the be-all, end-all of banana bread: tender, moist, perfectly swe…

The Ultimate Gluten-Free Banana Bread (Bakery Worthy!)

What do Britney Spears, Back to the Future, and banana bread have in common? They’re all undeniable National Treasures. And not to be dramatic, but this gluten-free banana bread might be the be-all, end-all of banana bread: tender, moist, perfectly sweet, and undetectably gluten-free (seriously!). 

It requires simple ingredients and methods, and all the magic happens in just 1 bowl. What are you waiting for?!

The Ultimate Gluten-Free Banana Bread (Bakery Worthy!) from Minimalist Baker →

Gluten-Free PB&J Thumbprint Cookies

You can’t go wrong when peanut butter and jelly are involved. And in a cookie? Irresistible! These vegan and gluten-free thumbprint cookies are tender with crisp edges, packed with peanut butter flavor, and have a fruity jam center (a.k.a. cookie perfe…

Gluten-Free PB&J Thumbprint Cookies

You can’t go wrong when peanut butter and jelly are involved. And in a cookie? Irresistible! These vegan and gluten-free thumbprint cookies are tender with crisp edges, packed with peanut butter flavor, and have a fruity jam center (a.k.a. cookie perfection!).

Plus, they’re easy to make with just 8 ingredients, 1 bowl, and 30 minutes required! Naturally sweetened, grain-free, and oil-free too! We know: It’s magic.

Gluten-Free PB&J Thumbprint Cookies from Minimalist Baker →