Easy Oven Braised Beef Short Ribs with Spicy BBQ Sauce

As soon as you take a bite of these fall-off-the-bone tender, moist Braised Beef Short Ribs slathered in a divinely delicious, slightly fiery sauce, you’re going to wonder where they’ve been all your life. And, you’ll wonder even more after you discover how easy they are to make! This Braised Beef Short Rib Recipe is a…

The post Easy Oven Braised Beef Short Ribs with Spicy BBQ Sauce appeared first on A Well Seasoned Kitchen.

As soon as you take a bite of these fall-off-the-bone tender, moist Braised Beef Short Ribs slathered in a divinely delicious, slightly fiery sauce, you’re going to wonder where they’ve been all your life. And, you’ll wonder even more after you discover how easy they are to make!
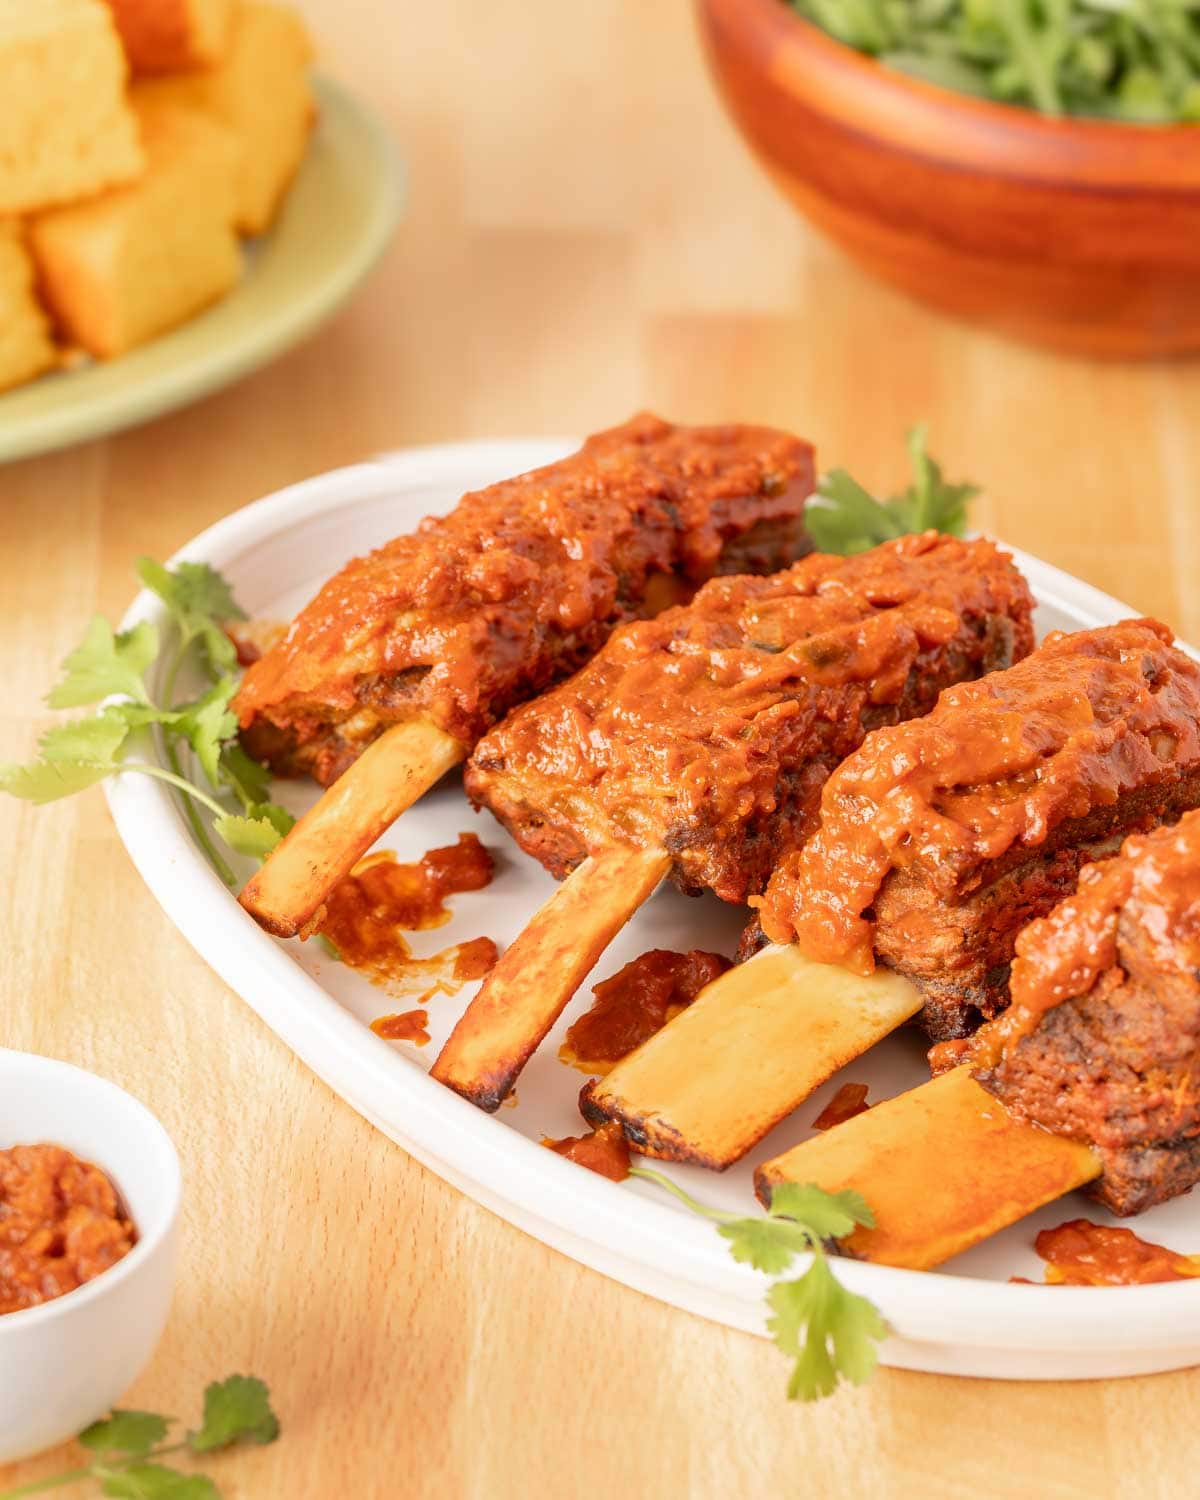
White platter holding 4 Spicy Beef Ribs with cornbread and salad in the back

This Braised Beef Short Rib Recipe is a Tender, Flavorful Winner! 

Over 10 years ago, I shared a recipe for Spicy Short Ribs. Since then, I’ve given it a delicious makeover based on rounds of tweaking and testing. After rave reviews on the latest version, it’s time for an upgrade! Here’s what makes this new version of Braised Beef Short Ribs recipe a guaranteed crowd-pleaser:

  • Melt-in-your-mouth tenderness. We now use English-style short ribs, known for becoming incredibly tender and flavorful through slow braising, more so than their flanken-style counterparts.
  • Rich, caramelized flavor and nice color. Searing the ribs before braising creates a beautiful brown crust and infuses them with deep savory notes.
  • Sweet and savory sauce. Sautéed onions add a layer of sweetness and depth to the braising sauce, which thickens into a flavorful glaze that coats the ribs perfectly.
  • Extra flavor boost. The braising liquid is now prepared in the same pan used for searing (and braising), capturing all those delicious browned bits for an even richer sauce – and one less pan to clean, too!

Benefits of Oven Braising

Oven braising is a cooking technique that involves searing meat over high heat. After this initial sear, the meat is slowly cooked in a covered pan with liquid. This slow cooking process allows the tough connective tissue in the meat to break down, resulting in tender and succulent ribs. For these beef ribs, the braising technique allows them to slowly tenderize in a rich, spicy sauce.

Once you see how easy it is to braise ribs, you’ll wonder why you haven’t been doing it for years. Simply sear the ribs in a hot pan, prep the braising sauce, add the ribs, cover, and bake. 
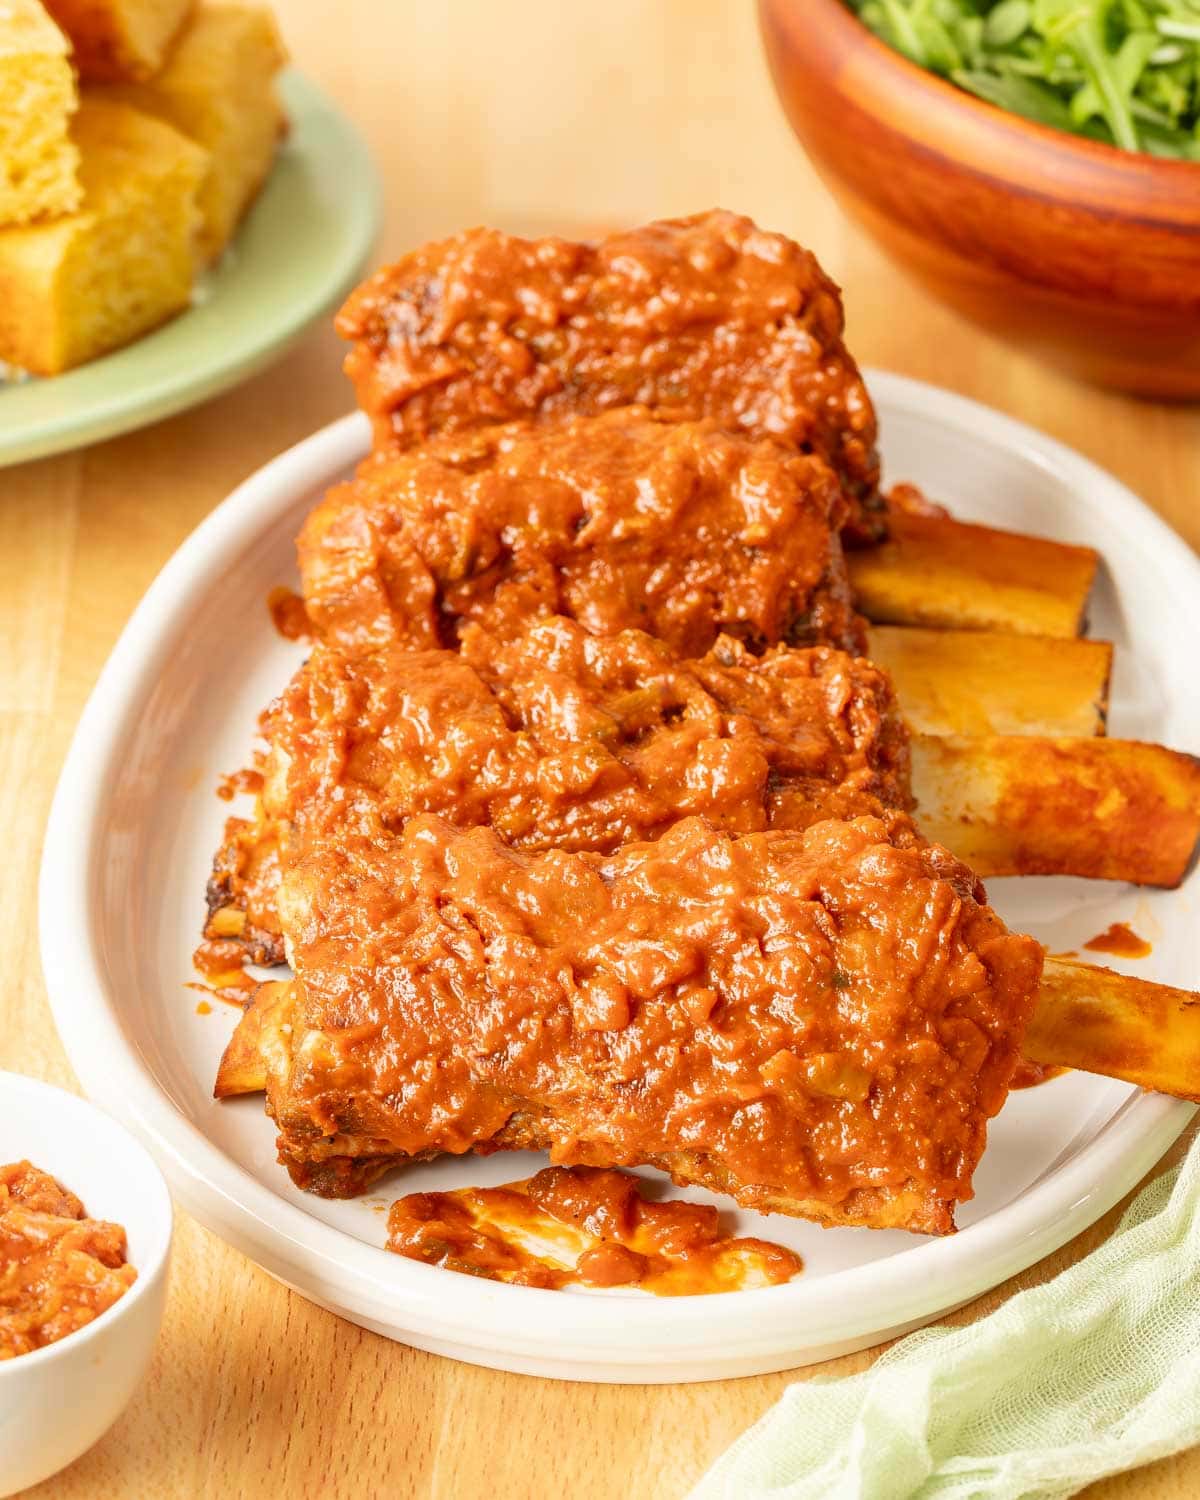
 

White platter holding 4 Spicy Beef Ribs with cornbread and salad in the back

Selecting the Right Beef Short Ribs

The ideal cut of beef for braising is bone-in short ribs, as the bone adds richness and depth of flavor to the dish. Beef short ribs come in two main styles, English and Flanken:

  • English-style short ribs are cut parallel to the bone, with one bone per piece, and contain a larger piece of meat. They are often more tender and have a higher fat content, making them ideal for braising.
  • Flanken-style ribs are cut across the bone, resulting in thinner pieces of meat with several smaller bones attached.

When selecting beef short ribs for this recipe, opt for English-style ribs if you can find them. The marbling (fat distribution) within the meat, adds flavor and helps keep the ribs moist during cooking. And, look for ribs that have a bright red color and avoid those with excessive fat or a grayish hue.

If you can’t find bone-in English-style ribs, you can use either boneless or flanken-style with this recipe. Just keep in mind that they will have sightly less flavor.

Braised Beef Short Ribs Recipe Ingredients

all Braised Beef Short Ribs ingredients laid out with labels

Here are the ingredients you’ll need to make this easy recipe, all of which should be available at your local grocery store (quantities are included in the recipe card below):

  • Bone-in beef short ribs, preferably English cut
  • Vegetable oil, canola oil or other high smoke point oil
  • Kosher salt
  • Fresh ground pepper
  • Yellow onion
  • Tomato sauce
  • Light brown sugar
  • Jalapeno pepper
  • Garlic
  • Dry mustard
  • Cayenne pepper
  • Ground cloves
  • Ground cinnamon
  • Beer
  • Fresh cilantro, optional for garnish

How to Make Spicy Short Ribs

Here’s a detailed step-by-step guide to braising beef short ribs (more abbreviated directions are in the recipe card below):

A. Prepare the ribs

  1. Bring to room temperature.
    Take the short ribs out of the refrigerator bring to room temperature. Allowing the meat to warm up slightly before cooking ensures more even cooking throughout.
  2. Rinse and pat dry.
    Rinse the ribs under cold running water and dry with paper towels to remove any excess moisture. This step is important because it helps create a nice crust on the meat when searing. 
  3. Season.
    Brush the ribs all over with vegetable oil, then generously sprinkle both sides with kosher salt and ground black pepper. The salt helps enhance the meat’s natural flavors while the pepper adds a subtle kick. And, the oil helps to form a nice crust.
  4. Sear.
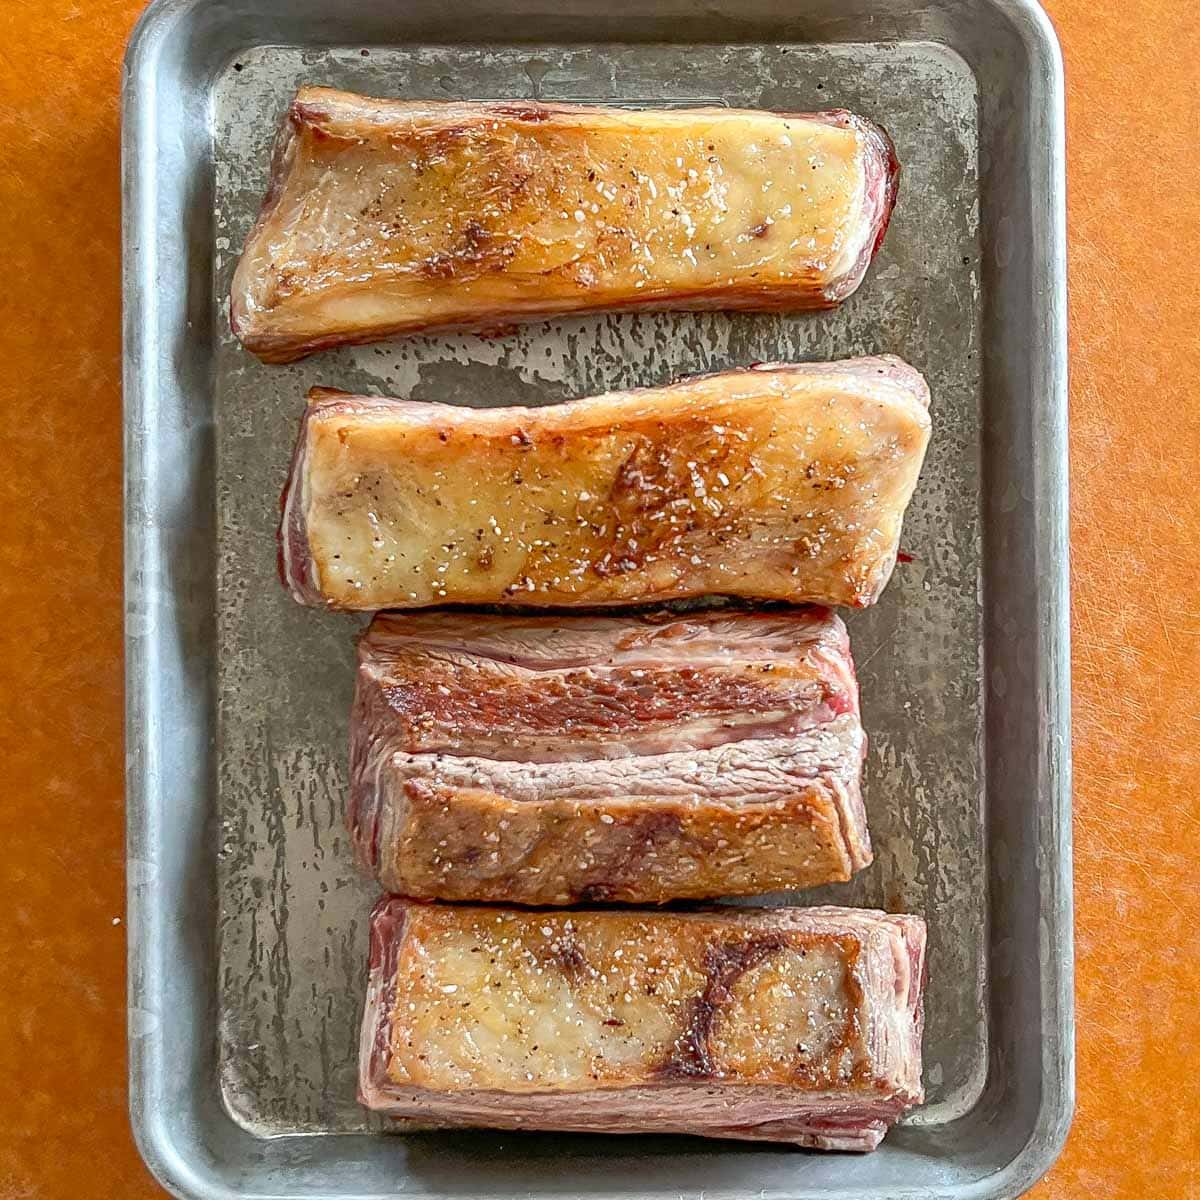
    Heat a large Dutch oven or other heavy-bottomed pan over medium-high heat. Add ribs in one layer, preferably without touching each other, and sear for 2 minutes on each side or until lightly browned. Remove ribs and set aside; don’t clean out the pan! Beef Short Ribs after searing, before braising
  5. Preheat oven.
    Move one of the racks to the bottom third of the oven and preheat to 325 degrees.

B. Prepare the Spicy Sauce

  1. Cook onions.
    With the burner turned off but while the pan is still hot, add onions and cook, stirring, until they stop sizzling. 
  2. Add remaining sauce ingredients; simmer.
    Add the tomato sauce, vinegar, sugar, Jalapeno pepper, garlic, mustard, cayenne pepper, cloves, and cinnamon to the onions; stir well to combine. Bring to a boil, reduce heat, and simmer, stirring occasionally, for around 5 minutes. close up of spicy sauce for Braised Beef Short Ribs simmering
  3. Turn off heat and stir in beer. 

Braise the beef ribs in the Spicy Sauce

  1. Add ribs to sauce.
    Nestle ribs among the sauce, bone side up (fat side down), in one layer. Seared beef short ribs in spicy sauce, before braising
  2. Cover and braise.
    Cover the pan and bake until meat is very tender, around 2 to 2 1/2 hours. You can check the tenderness with a fork; the meat should easily pull away from the bone.
  3. Remove from oven, let sit.
    Remove pan from oven and let ribs sit in sauce, covered, for 10 minutes. 
  4. Plate and serve.
    Remove ribs to a serving platter. Spoon some sauce over the ribs, garnish the ribs or platter with cilantro (if desired), and serve, passing additional sauce on the side. 

Tips for Making Perfect Braised Beef Short Ribs

Here are some helpful tips to keep in mind:

  • Sear the ribs before braising. Briefly cooking the short ribs over high heat before braising adds flavor and texture to the final dish. I used to skip this step,  but then when I added in searing the ribs, I discovered that the resulting dish had much more depth!
  • Make sure ribs are dry before searing. Wet meat will tend to steam and not brown. 
  • Place ribs correctly in braising liquid. When placing ribs in the sauce, put them bone side up (fat down) for the best flavor and moistest meat.
  • Don’t overcrowd the pot. When searing the short ribs, make sure not to cram the ribs in next to – or overlapping – each other. Overcrowding can cause the meat to steam instead of brown, resulting in a less flavorful end result. Work in batches if necessary to brown the ribs evenly.
  • Braise ribs in a covered pan. If you don’t, the sauce will mostly cook off before the ribs are tender and you’ll be left with dry meat and little sauce.
  • Let the meat rest before serving. Once the short ribs are braised, it’s best to let them sit at room temperature for around 10 minutes before serving. Resting allows the juices to redistribute throughout the meat, resulting in a juicier and more flavorful result.

Spicy Short Ribs Make Ahead Instructions

Ribs can be prepared up to 3 days ahead: once cooked, cool to room temperature. Either cover the pan (ribs with sauce) or place the ribs and sauce in an airtight container and refrigerate.

To reheat: bring to room temperature, then cover and place in a 375-degree oven until heated through, around 30 to 40 minutes. 

Braised Short Ribs and Spicy BBQ Sauce Storage

 If you are making these spicy short ribs ahead or have leftovers, cool to room temperature, place in an airtight container, and refrigerate. 

Braised Beef Short Rib Variations

While these ribs and sauce are delicious as is, they are also very flexible and you can modify this recipe to suit your tastes and to make it your own. Here are a few suggestions:

  • Use flanken-style ribs. They will cook faster; start checking after around 1 1/2 hours.
  • Use boneless ribs. Just keep in mind they may not hold their shape when done cooking.
  • Use dry red wine in place of the beer. Or, use chicken broth for a non-alcoholic version.
  • Add chopped celery and/or bell peppers.
  • Add a dash of Worcestershire sauce to deepen flavor even more.
  • Mix in fresh herbs like thyme.

In addition, you can vary the cooking method as well:

  • Slow cooker – Place seared ribs and prepared sauce in a slow cooker and cook, covered, on low for 6 to 8 hours.
  • Cooktop – Leave the prepared ribs and sauce on the cooktop, on medium-low to low heat, and cook for 2 to 2 1/2 hours.

Serving Suggestions for Beer Braised Beef Short Ribs

These oven-baked beef ribs are very versatile and can be served for every day or a special occasion any time of the year. Many different side dishes pair well with these short ribs. Here are a few suggestions:
Print
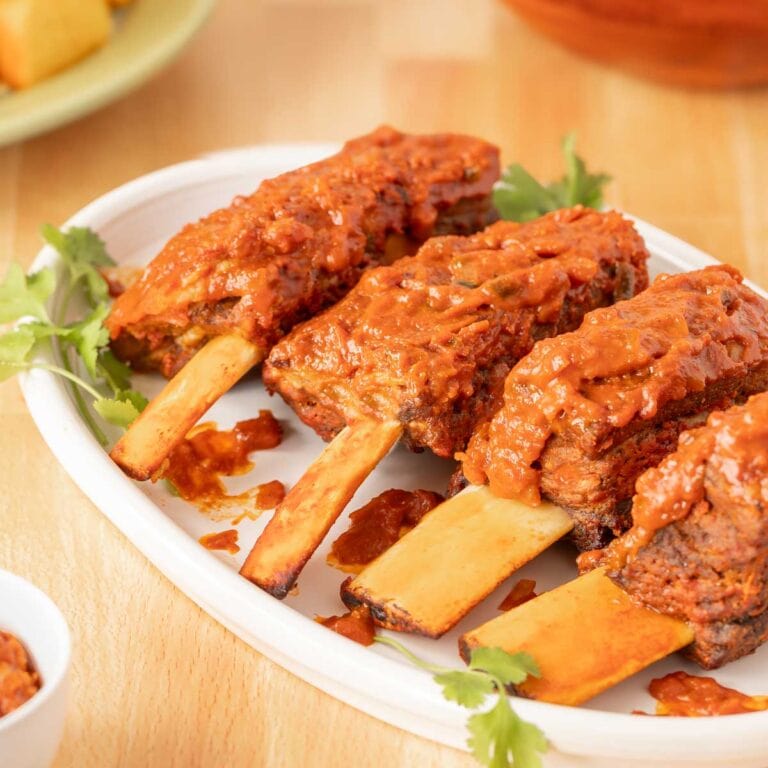
White platter holding 4 Spicy Beef Ribs with cornbread and salad in the back

Braised Beef Short Ribs Recipe – with Spicy Sauce

5 Stars 4 Stars 3 Stars 2 Stars 1 Star

No reviews

As soon as you take a bite of these fall-off-the-bone tender, moist Braised Beef Short Ribs slathered in a divinely delicious, slightly fiery sauce, you’re going to wonder where they’ve been all your life. And, you’ll wonder even more after you discover how easy they are to make!

  • Prep Time: 5 minutes
  • Resting Time: 10 minutes
  • Cook Time: 165 minutes
  • Total Time: 3 hours
  • Yield: 4 servings
  • Diet: Gluten Free

Ingredients

(See gluten-free adaptations in the Notes section at the bottom of the recipe.)

  • 4 pounds individual bone-in beef short ribs, preferably English cut – see Note
  • Vegetable oil, canola oil or other high smoke point oil
  • Kosher salt
  • Fresh ground pepper
  • 1 medium yellow onion, chopped
  • 1 1/2 cups (15-ounce can) tomato sauce
  • 2 1/2 tablespoons red wine vinegar
  • 2 1/2 tablespoons packed light brown sugar
  • 2 tablespoons seeded and finely chopped Jalapeno peppers
  • 1 1/2 teaspoons chopped garlic
  • 2  teaspoons dry mustard
  • 3/8 teaspoon cayenne pepper
  • 1/4 teaspoon ground cloves
  • 1/2 teaspoon cinnamon
  • 1 1/2 cups (12-ounce can or bottle) beer
  • Fresh cilantro, optional for garnish

Instructions

  1. Bring ribs to room temperature; rinse and pat dry. Brush ribs all over with oil, then season with salt and pepper.
  2. Move one of the racks to the bottom third of the oven and preheat to 325 degrees.
  3. Heat a large Dutch oven or other heavy-bottomed pan over medium-high heat. Add ribs in one layer, preferably without touching each other, and sear for 2 minutes on each side or until lightly browned. Remove ribs and set aside; don’t clean out the pan!
  4. With the burner turned off but while the pan is still hot, add onions and cook, stirring, until they stop sizzling.
  5. In a large saucepan, stir together the tomato sauce, vinegar, sugar, Jalapeno pepper, garlic, mustard, cayenne pepper, cloves, and cinnamon. Bring to a boil, reduce heat, and simmer, stirring occasionally, for around 5 minutes. Turn off heat and stir in beer.
  6. Nestle ribs among the onions, bone side up (fat side down), in one layer. Cover the pan, and bake until meat is very tender, around 2 to 2 1/2 hours.
  7. Remove pan from oven and let ribs sit in sauce, covered, for 10 minutes.
  8. Remove ribs to a serving platter. Spoon some sauce over the ribs, garnish ribs or platter with cilantro (if desired), and serve, passing additional sauce on the side.

Notes

Gluten free: Use gluten-free beer.

Make ahead: Ribs can be prepared up to 3 days ahead: once cooked, cool to room temperature. Either cover the pan (ribs with sauce) or place ribs and sauce in an airtight container and refrigerate. To reheat, bring to room temperature, then place in a 375 degree oven until heated through, around 30 to 40 minutes

  • Author: Lee Clayton Roper
  • Category: Meats, Beef, easy entertaining
  • Method: Roast
  • Cuisine: American

Nutrition

  • Serving Size: 1 English-style rib
  • Calories: 167
  • Sugar: 21.1 g
  • Sodium: 1202.4 mg
  • Fat: 4.6 g
  • Saturated Fat: 3.1 g
  • Carbohydrates: 25.3 g
  • Fiber: 2.4 g
  • Protein: 7.2 g
  • Cholesterol: 0 mg

Note: This recipe was originally posted in 2010 and then significantly updated in 2024 with changes to the method and new photos added.

The post Easy Oven Braised Beef Short Ribs with Spicy BBQ Sauce appeared first on A Well Seasoned Kitchen.

Strawberry Rhubarb Rose Crumble Bars

My dear ones! It’s been another while since being in the blog space and I’m happy to be here with you, in the glory of summer unfolding. I love having the time to craft these posts, since they are a true outpouring from my heart…

The post Strawberry Rhubarb Rose Crumble Bars appeared first on My New Roots.

My dear ones! It’s been another while since being in the blog space and I’m happy to be here with you, in the glory of summer unfolding. I love having the time to craft these posts, since they are a true outpouring from my heart to yours, in the hopes that it will tether us to this time and place, land, season, and true nourishment. Strawberry Rhubarb Rose Crumble Bars is one of the special ones, that has been bubbling away in my consciousness since last summer.

I was cycling on the boardwalk at the beach near my home last August, and out of the corner of my eye, I saw a flash of fuchsia – the unmistakable pink of rose hips. Ahhh this gorgeous bushy plant is one that I first became familiar with in Denmark, where they bloom along the shores of every beach, punctuating the salty summer air with rose perfume. And here it was, at the water’s edge in Ontario, the very last petals dropping in the slanted summer sun. I knew I was too late to do anything with them at that point, so the idea-seed was planted for next year. Which is now, right on time!  

They say what grows together goes together, so for this recipe I waited for the rose hip to bloom, and then checked out what the other plants were peaking in my garden; strawberries and rhubarb! What a divine and classic combination! I couldn’t wait to get to celebrating this triple-blessing of flavours.  

Early Summer Stars

Peak-season strawberries are nutritional super stars. They’re loaded with vitamin C, and good amounts of manganese, folate, and fibre. Their total antioxidant capacity is extremely high, and as we learn more about this summer delight, there is evidence proving its positive effects on cardiovascular health. After consumption, there is less platelet aggregation, less lipid peroxidation and an increase in free-radical scavenging – meaning those antioxidants get to SNACK!

Rhubarb is also a high-fibre food, which is essential for digestion. Fibre is exclusively a plant nutrient, as plants grow it for structural support. Animals have bones, so fibre is not a significant part of their composition. Therefore, increasing our dietary intake of plants in comparison to animal-based foods means an increase in our fibre intake. Makes sense, right? 

So much of our nourishment depends on the healthy passage of food through our digestive tract. Without the fibre in things like strawberries and rhubarb, it is impossible for our digestion to take place in a balanced way. With imbalanced digestion comes the risk of poor nutrient absorption, and along with that comes compromised metabolism, immunity, even our mental health. The risk of most chronic diseases is lowest when whole plant foods, like a simple serving of strawberries and rhubarb, are plentiful in the diet. These bars also contain high-fibre oats, almonds and almond flour, so basically what I am saying is eat a lot of these. 

The Strawberry Rhubarb Rose Compote

I knew that I wanted the seasonal ingredient to really shine in this recipe, so I started by making a compote with the strawberries and rhubarb, adding a kiss of vanilla and rose. The results were like, mind-blowing, people. I’ve made this compote several times now, simply because it is delicious on everything and in so many ways. So far I’ve slathered it on the Revolutionary Pancakes with almond butter, hemp, salt, and even more fresh strawberries. I made popsicles with it (blended this with more strawberries and froze it). And warmed slightly over vanilla ice cream? Unreasonable. The fact that it comes together in under 15 minutes is also motivating for me – I know I’m not in for a huge project to make it, even though the end result *feels* like such a luxurious extra in my life.  Make a triple batch now and freeze it I say! 

If you want to get ahead, you can make the compote up to seven days in advance. And yes it lasts that long in the fridge. So convenient. 

You can use store-bought, instead of homemade rosewater in this recipe to skip a step, but I understand that sourcing store-bought might be just as much of a challenge for some. Surprisingly, I can find bottled rosewater at my local, small-town grocery store, so check with an employee at your closest market since you might be surprised they stock it! Heath foods stores are a good bet too. And if you can find fresh rose / rose hip flowers, then harvest them sustainably and make your own rose water. Recipe and two methods here. As a last resort, order online! 

The Crumble Bars

The top and bottom layer of these bars are a slight upgrade from my original crumble bar recipe with blackberries and hazelnuts, back in 2014 (!). This time I made more of a cookie base, kind of like a giant shortbread cookie with almond flour, which turned out to be more moist and easier to cut than the one just made with oats. I really love this change, and hope you will too! The crumble topping is exactly the same except for swapping out the brown rice flour for almond flour, since it’s yummier / fattier / moister. And since knowing that almonds are in the strawberry and rose family (Rosaceae!) it only made sense. 

Enjoy this literal slice of summer, friends and lovers. These Strawberry Rhubarb Rose Crumble Bars are truly a moment, captured. And I hope you choose to savour it. 

Print

Strawberry Rhubarb Rose Crumble Bars

Author Sarah Britton

Ingredients

Strawberry Rhubarb Rose Compote

  • 400 g / 14oz rhubarb
  • 2 Tbsp. pure maple syrup
  • 1 Tbsp. water
  • 300 g / 10.5oz ripe strawberries
  • pinch of salt
  • 1 tsp. vanilla extract
  • 2 tsp. rosewater to taste

Shortbread Base

  • 2 cups / 200g rolled oats divided (gluten-free if desired)
  • ¾ cup / 70g almond flour
  • ¾ tsp. fine grain sea salt
  • 1 tsp. baking powder
  • 60 g expeller-pressed coconut oil ghee or butter
  • ¼ cup / 60ml pure maple syrup
  • 1 tsp. vanilla extract

Crumble Topping

  • 1 cup / 100g rolled oats
  • 2 Tbsp. pure maple syrup
  • 2 Tbsp. expeller-pressed coconut oil ghee, or butter
  • cup / 100g almonds
  • ¼ tsp. fine sea salt
  • 3 Tbsp. almond flour

Instructions

  • Start by making the compote. Bring water and maple syrup to a simmer in a medium saucepan. Roughly chop rhubarb and add it to the pan, stir and cover. Simmer for 5 minutes, stir again and use the back of a wooden spoon to smash the rhubarb. If it’s still quite tough, cover and continue to cook until almost soft. While the rhubarb is simmering, wash and stem the strawberries, then roughly chop. Add them to the soft rhubarb, stir well and cook covered, for 2-3 minutes. Remove from heat, and smash the mixture with the back of your spoon, until it’s your desired texture. I like mine pretty chunky. Stir in the salt, vanilla and rosewater. Adjust the flavours to suit your taste. The compote will firm up as it cools. Measure out 2 ½ cups / 625ml of compote and set aside.
  • Preheat oven to 350°F / 175°C. In a food processor blend 1 ½ cups / 150 grams of oats on high until you have a rough flour, like coarse sand. Add almond flour, salt, and baking powder, then pulse to combine. Add maple syrup, coconut oil, and vanilla. Pulse until evenly moist, then fold or pulse in the whole oats. The dough will be quite firm and sticky.
  • Turn the dough out into a lightly greased, or parchment-lined 8" x 8” / 20 cm x 20 cm glass or metal pan and press firmly, especially around the edges – it helps to wet your hands so that the dough doesn’t stick to your fingers. Place in the preheated oven and bake for 15 minutes.
  • While the base is baking, make the crumble topping. Without cleaning the food processor, add the all the ingredients for the crumble, and pulse a few times to mix. You can chop the ingredients as finely as you like, but I like mine pretty chunky.
  • Remove the base from the oven, and spread the compote over top in an even layer. Crumble the topping over, and place back in the oven for another 30-35 minutes, until the top and bottom are golden brown, and the middle is a bit bubbly.
  • Let cool completely before cutting into bars. Say thank you and enjoy. Store in an airtight container in the fridge for five or six days. Freeze for up to 3 months and let warm for a few minutes before enjoying!

The post Strawberry Rhubarb Rose Crumble Bars appeared first on My New Roots.

High-Vibe Condiment Classics

Summer is fast-approaching (at last!) and I don’t know about you, but to me this means grilling, eating outside, and enjoying all of the classic, warm-weather treats. But wait! Did you know that there are all kinds of funky ingredients hiding in the most innocuous…

The post High-Vibe Condiment Classics appeared first on My New Roots.

Summer is fast-approaching (at last!) and I don’t know about you, but to me this means grilling, eating outside, and enjoying all of the classic, warm-weather treats. But wait! Did you know that there are all kinds of funky ingredients hiding in the most innocuous places, like your ketchup, mustard and relish?! We shouldn’t have to forgo these truly classic condiments just because we’re walking on the whole foods path. No way! So I decided to do a high-vibe makeover all of the condiments that you’d find at a barbecue, picnic, or baseball game: ketchup, mustard, honey mustard, Dijon, relish, mayo and secret sauce, without any refined ingredients, colours, or preservatives. They are entirely vegan (except for the honey mustard), and taste absolutely incredible. 

Making your own condiments from scratch is empowering, and you too will see that by whisking up your very own mustard, or blending your very own ketchup that you are incredibly capable in the kitchen! It’s a serious delight to realize that you’re not only qualified to make things you thought you needed to buy, but that you’re also doing yourself a giant favour in cutting questionable ingredients out of your life.

When I was a kid, I loved hotdogs with mustard and relish (not ketchup, that was for burgers). The vinegary tang of the yellow mustard with the sweetness of pickle relish perfectly offset the salty squishiness of a microwaved wiener. This was a typical Saturday lunch, with doughnuts for dessert, all washed down with a giant glass of milk. I wanted to recreate that nostalgia, minus pretty much everything else. The flavours bring me back to simple times and simple food.

But simple food is not always so simple. Have you read the ingredients on a squeeze bottle of relish lately? It’s a complicated collection of chemicals that I certainly wouldn’t want in my body. High-fructose corn syrup, “natural flavour”, and food colouring are just a few of the ingredients that plague most tasty toppings. Food additives are everywhere, especially in shelf-stable products. If you’re not going to refrigerate something or preserve it properly, it has to have things in it to prevent it from spoiling. It also has to look appealing and taste good, even after months (or years!) on a grocery store shelf. That is why it is so important to read labels and be discerning about what you choose to buy. This is not to say that these additives are inherently harmful, but they are far from natural, and I’m a believer in eating as close to the earth as possible! Luckily my condiments are not only based on whole foods, but they taste amazing and are actually good for you.   

Here is a small list of the food additives to watch out for and avoid, if possible. Remember to check the packages of your other summer favourites, like chips, salad dressings, sparkling beverages, soda and “juice”, ice cream, popsicles, and frozen yogurt. 

High Fructose Corn Syrup Sometimes labeled HFCS, this highly-refined artificial sweetener has become the number one source of calories in North America. It is found in almost all processed foods, since it is cheap to make, shelf-stable, super sweet, and highly addictive. Excessive consumption has been linked to obesity, and type 2 diabetes. Watch out for it in condiments, salad dressing, bread, candy, soda, yogurt, breakfast cereals, even canned vegetables and fruit. 

Natural Flavours This is a sneaky term meant to throw you off. When you see these words on an ingredient list, they refer to a naturally-derived flavouring agent that has to be extracted from plant or animal sources, designed to enhance the taste of food. Conversely, artificial flavours are synthetically created, with their original sources being manmade chemicals. Natural flavours however, are still made in laboratories by food chemists who can add any numbers of chemicals, including preservatives, solvents and other substances, which are defined as “incidental additives”, to what they are creating. Food manufacturers are not required to disclose whether these additives come from natural or synthetic sources, and as long as the original flavouring comes from plant or animal material, they can be classified as natural. The point is, natural flavours don’t appear to be any healthier than artificial flavours, and they can still contain ingredients that may cause reactions in sensitive individuals, especially children. To avoid them, cut back on packaged products and stick to the real-deal whole foods! 

Food Dyes / Colours To make food look bright, fresh, and especially appealing to children, food manufacturers add dyes to obvious things like candy, sports drinks and baked goods, but also not-so-obvious things like condiments (!), pickles, cereals, salad dressing, yogurt, and chocolate milk. Some of these dyes are approved for use in certain countries, while others have banned them, making it challenging for consumers to navigate. The safety of food dyes is controversial, especially in regards to children. Studies have linked them to hyperactivity in sensitive kids, and they may cause allergic reactions in some people. Because most food dyes are found in unhealthy processed foods, it’s easy to avoid them if you’re sticking to a more natural diet. 

Hydrogenated / Partially Hydrogenated Oils You know when the World Health Organization plans on eliminating these fats from the global food supply, they must be pretty problematic. Created by forcing hydrogen gas into vegetable fats under extremely high pressure to turn liquid into solid, hydrogenation creates trans fats, which increases the amount of LDL cholesterol, lowers HDL cholesterol, therefore significantly increasing the risk of coronary heart disease. What’s more is that these fats are pro-inflammatory. Although their use has been banned in several countries, trans fats still lurk in many processed foods.  As long as there is less than .5% per serving, it isn’t required in to be listed in the ingredients or nutritional information. The best way to avoid them is by cutting out processed foods, especially margarine, coffee creamer, chips and crackers, frozen pizza, fast foods, baked goods, and microwave popcorn.  

Health Claims – these are put on the front of the box to lure you in, and can include buzz words like ”natural”, “whole grain”, “low-fat”, “no added sugar”, “organic”, “light”, “low calorie”, “gluten-free”, and “enriched”. Terms like these should be a red flag for you, so read the entire label, including the ingredient list, the serving size, the amount and types of sweetener and fat used. Think critically and be selective – if it sounds too good to be true, it probably is. 

The bottom line?! Stick to whole, or minimally-processed foods and ingredients as often as possible. It’s better for you, and your family to make your own from scratch whenever possible. Not to mention, it’s fun to brag to everyone that you’re a condiment master, a yogurt wizard, or a salad dressing whisperer. 

I had so much FUN with these recipes! It was a blast to brainstorm which condiments I would attempt to health-ify, experiment with, and eventually master to make them all easy-to-make and delicious. My condiments won’t last years in the fridge, but all of them passed the two-week mark with flying colours (all of them natural, of course). As long as you’re using clean utensils to scoop out your servings, you shouldn’t have a problem keeping these toppings around for a few weeks – ya know, if you can ration them for that long! 

Yellow Mustard
This was in fact my first attempt at making yellow mustard and it proved to be ridiculously easy! I think I’d built it up in my head to be some complicated project, but wow was I mistaken. Just a few simple ingredients, and a little stovetop whisking will get you the brightest, tangiest, most beautiful ballpark mustard of your dreams! I must warn you, from one condiment-master to another, that the bubbling mixture gets darn hot and tends to splatter when it’s cooking. To avoid scalding yourself, use the pot lid as s shield (insert laughing emoji here). 

Honey Mustard
Depending on how sweet you like your honey mustard, it’s just the above yellow mustard recipe with as much honey stirred in as you like! I added two tablespoons and it was perfect for me, but if you want even more, got for it. I recommend avoiding very runny honey, since this will loosen the mustard. Instead, opt for something on the thicker side to maintain the consistency. If you’re vegan, brown rice or date syrup would be the best choices, since they are more viscous than maple syrup, for example. I love this on sandwiches with lots of fresh veggies and sprouts!

Grainy Dijon Mustard
This style of Dijon is a whole-seed one, which is my favourite because of the great texture and colour variations. It’s spicy and complex, and will only get better with time. Keep in mind that this recipe is in two stages, the first one requiring you to soak your mustard seeds the night before you plan on blending. 

Sweet Pickle Relish
This was the most anticipated condiment to try and make myself, since it’s one of my favourites, but also one of the worst offenders for additives. I successfully recreated that gorgeous tang, and succulent texture of commercial relish that I loved so much as a kid. The taste of this one is off the charts! My recipe uses coconut sugar instead of refined sugar and syrups, so the colour is a little darker and browner than the conventional types, but I don’t think you’ll notice – and you certainly won’t miss the food colouring!

Tomato Ketchup
This ketchup was an old blog post that I revisited and revised. I used to make this recipe in the oven, but my new method eliminates the need to crank up the heat when it’s probably the last thing you want to do. Instead, the whole thing is made on the stove, then blitzed up in the blender. It’s deeply spiced and complex, so much more interesting than store-bought ketchup. The first time I made the new version, I used a good portion of it for a soup base, then added more to a dip – both were delicious, so if you have leftovers, put it to use in an unexpected place. It’s tasty with everything! 

Aquafaba Mayonnaise
This was the most exciting discovery to make: vegan mayo using aquafaba! Aqua faba translates to “bean water” and it’s the cooking liquid from chickpeas. Although any can of chickpeas will have this, I make my own, since there are no additives or chemicals that have leached from the can itself. If you cook your own chickpeas from dried, you have aquafaba. Although I wouldn’t normally consume large amounts of aquafaba, in this case it’s used in such a small amount that I think it’s fine. Plus, did I mention it makes vegan mayo?! The results are so unbelievably shocking and delightful that I’m a convert, even though I eat eggs!

I highly suggest using the most neutral-tasting olive oil you can find for this recipe. Since it makes up the majority of the flavour of the mayonnaise, a strong-tasting olive oil will overpower the delicate nature of this condiment. I used the one from Pineapple Collaborative, which works perfectly. I also tried avocado oil, grapeseed, and sunflower, but didn’t like the results as much as mild olive oil. It’s up to you! You can really use whatever you have on hand, just keep in mind that it will really dictate the taste of the final result. 

Smoky Secret Sauce
This is the creamy, tangy, and perfectly seasoned sauce that most famously adorns the Big Mac burger from McDonalds. What’s best about my version is that it has zero secrets…nothing weird to hide here! I had the most fun with this recipe, since it required a number of the condiments that I’d already made as ingredients. I did deviate a tad from the original and added smoked paprika, since I love the added dimension of smoke flavour to anything that’s going on grilled food, but I’ve also found this to be a stellar salad dressing, especially for chop-style salads that have chunky, less delicate ingredients. I hope you find some fun things to slather it on this summer. It’s lip-smakingly tasty! 

As a bonus, I’ve included this stellar recipe for carrot hot dogs – since you’ll need a high-vibe wiener to put your condiments on! Hahaaa! I realize that carrot hot dogs are pretty 2018, but I’d never tried them before and it was a very amusing undertaking. I looked at a number of recipes online and my version is a mash-up of the ones that sounded the most delicious. My method is also much easier and faster than other versions I’ve seen, since it’s just a braise on the stove and a quick grill (no marinating, steaming, roasting, etc). 

The important thing to keep in mind for this recipe, is that the amount of time you braise the carrots for,I’m  will be dictated by the girth of the carrots. Mine were more sausage-sized (approx 1.5” or 3.5-3.75 cm) than a typical hot dog wiener, and a 20-minute simmer was the perfect amount. If your carrots are smaller, I’d go down to 15 minutes. Insert a sharp knife to check on the doneness after 10 minutes or so, and take them out when they are tender, but way before they get mushy. Remember that you’re also going to be grilling them for 10 minutes so they will cook even more, and you don’t want them too soft. The final result should be tender all the way through, but shouldn’t fall apart in your mouth.

I wish you all an incredible summer ahead! I recognize that this season is going to look very different from years past, but as long as we’re all healthy and the sun is shining, we’ve got it pretty good. Stay safe out there, and keep fuelling your body with the whole foods it needs to thrive and feel alive! 

All love and happy condiment-making,
Sarah B

The post High-Vibe Condiment Classics appeared first on My New Roots.