This crustless quiche recipe is for those of us (ahem, me) who love quiche but don’t love making pie crust. Like a classic quiche, it’s flavorful and satisfying, the rich egg custard studded with broccoli, herbs, and cheese. But without a c…
This crustless quiche recipe is for those of us (ahem, me) who love quiche but don’t love making pie crust. Like a classic quiche, it’s flavorful and satisfying, the rich egg custard studded with broccoli, herbs, and cheese. But without a crust to fuss with, it’s SO much easier to make! This crustless quiche is the perfect simple-yet-special dish for the hectic holiday season. Serve it for brunch alongside fresh fruit and mimosas, or make it for an easy weeknight dinner. If you’re lucky enough to have leftovers, warm them up for a healthy breakfast or lunch the next day. […]
This spinach mushroom quiche makes a delicious brunch or a light dinner! The buttery, flaky crust is packed with savory mushrooms and a cheesy custard.
We’re all about pie, and to us a savory pie is even more fun. Here’s one that’s become an instant favorite: this spinach mushroom quiche! The buttery, flaky crust is packed with savory mushrooms, wilted greens, onion, garlicky, and a creamy cheesy custard. Each tender bite is an explosion of flavor and textures, perfect as a savory brunch main dish or even as a light dinner! We’re already getting hungry.
Making a spinach mushroom quiche: overview
This classic spinach mushroom quiche recipe is best made on a day where you have a few hours set aside. The crust is best made completely from scratch with this homemade quiche crust, but it does require 20 minutes to put together and at least 1 hour of chilling. You can also make it in advance, which shortcuts the 1 hour chill time! You can also use store-bought refrigerated pie crust for a shortcut. Here’s an overview of the time you’ll need:
20 minutes active, 1 hour chilling for homemade (or make in advance for quicker prep!)
Shape the crust
5 to 10 minutes, active
Refrigerate the dough
30 minutes, inactive
Blind bake the dough+ make the filling
30 minutes, active
Bake the quiche
40 to 50 minutes, inactive
Ingredients in the spinach quiche filling
This spinach mushroom quiche is one of our favorite quiche recipes because of the bold, meaty flavor that comes from the mushrooms and cheese. We like using frozen spinach for quick and easy prep, but you can also substitute fresh spinach if you prefer, adding it in with the onions in Step 6 of the recipe below. Here’s what you’ll need for the filling:
Our favorite type of mushroom for cooking are cremini mushrooms, also known as baby bella mushrooms. Look for packages marked with either name at the grocery store. They’re a small mushroom with a round brown top, and their flavor is more savory and developed than button mushrooms.
Cremini mushrooms are the same variety as button mushrooms and portobellos, just a different growth phase. White button mushrooms are an earlier growth stage and have a milder flavor. Portobello mushrooms are the oldest stage, so they have the most meaty and savory flavor.
Cremini mushrooms have an earthy, savory flavor that tastes like a milder version of a portobello and a more developed version of a white mushroom.
You can substitute white button mushrooms for cremini if desired. The flavor is not quite as savory, but they taste comparable.
Tip: blind bake the crust!
The biggest key to making a great quiche is to blind bake the crust! Blind baking is baking a pastry crust without the filling first. It’s necessary for pies with a very liquid filling, since they can make the bottom crust soggy without it. Here’s what to know about how to get the perfect flaky quiche crust:
First, refrigerate the crust 30 minutes. This helps the crust to hold its shape while blind baking.
Prick holes with a fork all over the crust. This is called docking: it helps keep the crust from puffing up while in the oven without filling.
Add parchment paper then pie weights, dried beans, or rice! Pour them right into the crust. We use two sets of these pie weights. Bake for 18 minutes at 400°F, then reduce the heat to 350°F.
Remove the pie weights. Remove the weights and bake 18 to 22 more minutes until the crust is golden. Then the quiche is ready to fill.
How to make a pie crust shield
For this spinach mushroom quiche, you’ll also need a pie crust shield. This tool prevents pie crust from burning in the oven by covering just the crust, allowing the filling to bake normally. However, you don’t need to run out and buy anything: you can make your own! Here’s what to know:
It’s easy to make a pie crust shield with aluminum foil. Cut a hole in the center of a large sheet of foil that’s the diameter of your pie plate. The foil will rest on the crust but let the filling bake uncovered. Here’s a video with instructions for more details.
Make ahead instructions for spinach mushroom quiche
This spinach mushroom quiche saves very well. In fact, it’s even better after it’s cooled to room temperature. It even tastes great cold! You can bake it in advance and reheat it as desired. Here’s what to know about making quiche in advance:
Make the quiche 1 to 3 days in advance. Then refrigerate it until serving! You can eat it cold, room temperature or warm.
To reheat, warm in a 200°F oven for about 20 minutes.
The quiche saves 5 days refrigerated. Wrap it in plastic or aluminum foil to keep it fresh.
Love a good quiche? It’s the perfect easy brunch idea that everyone will enjoy and there are lots of filling flavors to choose from! Here are a few other tasty quiche recipes to try:
This spinach mushroom quiche makes a delicious brunch or a light dinner! The buttery, flaky crust is packed with savory mushrooms and a cheesy custard.
Prepare the crust: If using Homemade Quiche Crust, prepare it in the pie pan using Steps 1 through 4 in the linked recipe. If using refrigerated pie dough, transfer the dough to the pie pan (make sure it is standard and not deep dish). Fold the overhanging dough backwards and seal it to form a rim. With refrigerated crust, it’s easiest to press in the tines of the fork to decorate the edges (like in this asparagus quiche; it’s harder to get the crimped edges to keep their shape while baking). Use a fork to gently prick holes in the bottom and sides of the crust (which helps it to not puff up while blind baking).
Refrigerate the crust (30 minutes): Place the pan in the refrigerator for 30 minutes to chill (this prevents shrinkage during the blind bake).
Preheat the oven: Preheat the oven to 400°F. Place a rack in the lower third of the oven with a rimmed baking sheet covered in foil to preheat.
Blind bake the crust at 400°F: Crumple a piece of parchment paper, then open it and place on top of the crust. Fill the parchment paper with pie weights (we used two sets of these), dry beans, or dry rice. Bake for 18 minutes at 400°F.
Reduce the oven temperature and blind bake at 350°F: Immediately reduce the oven temperature to 350°F. Remove the pie from the oven and carefully remove the parchment and weights, then place the pie back in the oven. Bake an additional 18 to 22 minutes until the bottom is lightly browned. Remove from the oven and add the filling once it is ready.
Prepare the filling: Meanwhile, thaw the frozen spinach. Squeeze out all the moisture with your fingers (or use a strainer) until the spinach is dry and crumbly. In a sauté pan or skillet, heat the butter and olive oil over medium high heat. Add the mushrooms and cook for 2 minutes, stirring often (the mushrooms will start to release their liquid at this point). Reduce to medium and add the onion, garlic, oregano, ¼ teaspoon of the kosher salt and pepper. Cook 4 to 5 minutes, until mushrooms and onion are tender. Set aside.
Make the filling: In a medium bowl, whisk together the eggs, milk, cream, dried mustard, ¾ teaspoon of the kosher salt, and several grinds black pepper. Place the cheddar and Parmesan cheese in the bottom of the crust, followed by an even mix of the spinach, mushrooms, onion and garlic, saving out a few handfuls for topping. Pour the egg mixture over the top. Sprinkle the top with another handful of shredded cheddar cheese and the reserved spinach and mushrooms.
Bake: Add a pie crust shield (purchased or homemade with foil*). Bake at 350°F for 40 to 50 minutes minutes, until the center is set and the top is lightly browned. Cool at least 30 minutes, then serve or refrigerate. Re-warm in a 200 degree oven for 20 minutes. (You can also serve it cold.) Leftovers stay for 5 days refrigerated or frozen for up to 3 months (see How to Freeze Quiche).
Notes
*To make your own crust shield, cut a hole in the center of a large sheet of foil that’s the diameter of your pie plate. The foil will rest on the crust but let the pie filling be uncovered. Here’s a video with instructions for more details.
Category:Brunch
Method:Baked
Cuisine:French
Diet:Vegetarian
Keywords: Spinach mushroom quiche, spinach and mushroom quiche
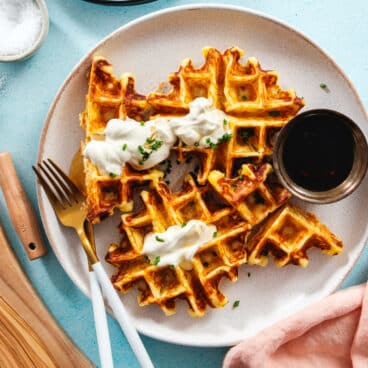
Potato waffles are crispy and delicious! Made with mashed potatoes, they make a savory or sweet breakfast, appetizer, or brunch.
Want a fun way to make a savory breakfast: try Potato Waffles! These crispy waffles are to-die-for, with a crispy exterior and a fluffy, cheesy interior. They taste like a combination of a hashbrown and a waffle, and wow are they delicious. Serve them up savory with sour cream and chives (or as chicken and waffles). Or, they work just as well served sweet with maple syrup! They’re the perfect idea for using up leftover mashed potatoes from Thanksgiving or any meal.
What you need for potato waffles
This potato waffles recipe is perfect if you happen to have leftover mashed potatoes, but you can make them anytime. The delicious cheesy, savory potato flavor will have you hooked! This one went over extremely well in our family, and we loved both the savory and sweet ways to serve them. Other than the mashed potatoes, you don’t need much to bring these together:
This mashed potato waffles recipe works for either Belgian or standard waffles. Our personal preference is Belgian waffles, since they’re thicker and look more impressive. (Here’s the Belgian waffle iron we use.) Here’s more about the different types:
Belgian waffles are twice as large as regular waffles. They’re 1 ½ inches thick with a deep grid pattern. One serving size is half of a Belgian waffle, since it’s double the size of a standard waffle — unless you make the half size with ruffled edges (see below).
Regular waffles, aka American waffles are about 1/2-inch thick. They’re half the size of the Belgian waffles, and the serving size is 1 waffle.
Tips on cooking potato waffles
For these potato waffles, we like to cook them in a Belgian waffle maker but make ruffled edges by using half the standard batter. We love the look of these: and you can make more waffles in a single batch! Here’s how to do it:
Ruffled edges: Simply use about ½ cup of the batter in a Belgian waffle maker and don’t spread it to the edges. You can also do this in a standard waffle maker by using about ¼ cup batter.
Full circular waffles: Use about 1 cup for a Belgian waffle maker or ½ cup for a standard waffle marker, and spread it the edges. These quantities depend on the waffle maker, so eyeball it and adjust quantities as necessary.
Toppings for potato waffles
You can serve potato waffles savory or sweet, which makes them incredibly versatile! We like them as a savory breakfast or appetizer topped with sour cream and chives. But they’re just as good sweet with maple syrup. Here are a few savory and sweet ways we like to top them:
Sour cream and chives for a savory breakfast or appetizer
As written, this potato waffles recipe is vegetarian. For dairy-free, omit the cheese and add another pinch of salt. Use oat milk, and serve with cashew cream.
For gluten-free, you can use gluten-free 1-for-1 flour. Almond flour is another option, but the pancakes would be more fragile and you might want to make them smaller to be easier to flip.
More waffle recipes
These potato waffles are great for using up leftover mashed potatoes at Thanksgiving, or just as a fun and unique savory breakfast idea. Here are a few more waffle recipes to try:
Whisk the eggs, then add the oil, baking powder, flour and salt and whisk until combined. Change to a spatula and stir in the shredded cheese, mashed potatoes and milk.
Grease or butter your waffle iron. Add about ½ cup of the batter into the center of the waffle iron (don’t spread it out if it’s a Belgian waffle maker**), then cook according to the waffle iron’s instructions until golden brown: about 3 to 4 minutes depending on your waffle iron. Note that this takes slightly longer than a standard waffle because the batter is denser. Remove the cooked waffles and place them on a parchment-lined or greased baking sheet without stacking. Make the waffles to order, or place cooked waffles in a 250°F oven to keep warm.
Serve immediately with sour cream and chives or maple syrup. Cooked waffles can be frozen; place them in a plastic bag and remove the remaining air with a straw before sealing. To reheat, remove from the freezer and lightly toast in a toaster.
Notes
*If your mashed potatoes are not seasoned with salt, use ⅛ to ¼ teaspoon kosher salt.
**Make small Belgian waffles by using half the batter and not spreading to the edges, which makes for a ruffled edge look.
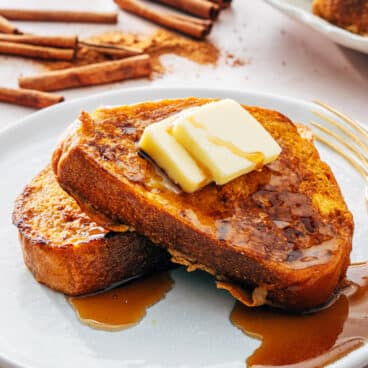
Banana bread French toast is a fun way to repurpose leftovers into breakfast or brunch! Topped with syrup, it’s a rich and decadent treat.
Here’s a fun way to transform banana bread into a decadent breakfast treat: Banana Bread French Toast! This is the ultimate breakfast or brunch for banana lovers: the moist, dense texture of the quick bread is ideal for frying until golden brown and cinnamon-spiced. Topped with bananas, chopped pecans, and a drizzle of maple syrup, it’s a luxurious way to start the day (that’s honestly more like dessert). Needless to say, our family are big, big fans of this one!
Ingredients for banana bread French toast
Banana bread French toast starts with a good bread, of course! Our favorite is our best banana bread recipe, but you can use any recipe you like. Cut the bread into slices, then dredge it into our classic French toast custard mixture of eggs, milk, cinnamon, and nutmeg. The main difference is that the custard has none of the customary sugar, since this quick bread is very sweet. Here’s what you’ll need for this recipe:
Banana bread is very filling: one slice is much denser and more filling than a typical slice of bread. For that reason, plan to eat only one slice of banana bread French toast per person. This recipe is rich and decadent, so you’ll want to account for that in your serving! For
Tips for making banana bread French toast
If you’ve got banana bread, this French toast recipe is a breeze! All you’ve got to do is whisk the custard, dip the bread, and fry it up. Here’s how to make French toast:
Slice: Slice the banana bread into 3/4-inch slices. (This is the perfect width; too thin and it falls apart but too thick and it’s too filling.)
Whisk: In a wide shallow bowl or container, whisk together eggs, milk, vanilla, cinnamon, nutmeg and kosher salt.
Dip: Preheat a griddle over medium heat and melt 1 tablespoon butter. Soak each side of 4 slices of bread in the egg mixture for about 30 seconds.
Fry: Place the bread on the hot skillet and cook 2 to 3 minutes per side, until browned.
Topping ideas
Banana bread French toast is very rich in itself, so it doesn’t need a lot of toppings to make it taste incredible! We like it best with the following:
If you like, you can add other toppings, but keep in mind it’s very sweet. You could try Greek yogurt sweetened with a little maple syrup to cut the sweetness with the acidity in the yogurt, or some sliced strawberries or raspberries. Or, go with a small dollop of whipped cream for an even more decadent treat.
Diet variations
Working with a special diet? Here are a few ways to modify this recipe to fit different dietary needs:
Dairy-free: This recipe works with banana bread baked with neutral oil and using non-dairy milk. We recommend oat milk here!
There are many ways to make French toast: baked, casserole, stuffed, and more! Here are some of our favorites for a banana breakfast treat or a fun weekend brunch:
In a wide shallow bowl or container, whisk together eggs, milk, sugar, vanilla, cinnamon, nutmeg and kosher salt.
Preheat a griddle over medium heat and melt 1 tablespoon butter. Soak each side of 4 slices of bread in the egg mixture about 30 seconds per side until it becomes saturated. Place the bread on the hot skillet and cook 2 to 3 minutes per side, until browned.
Repeat with the remaining butter and 4 slices bread. Serve immediately with maple syrup and a dusting of powdered sugar.
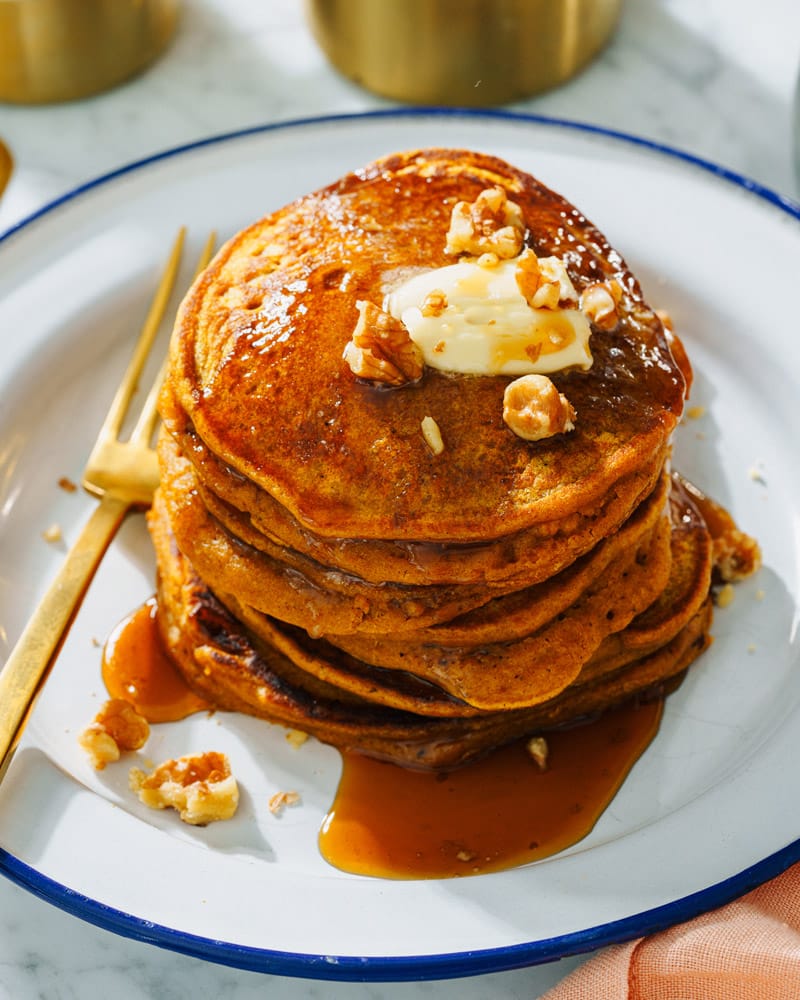
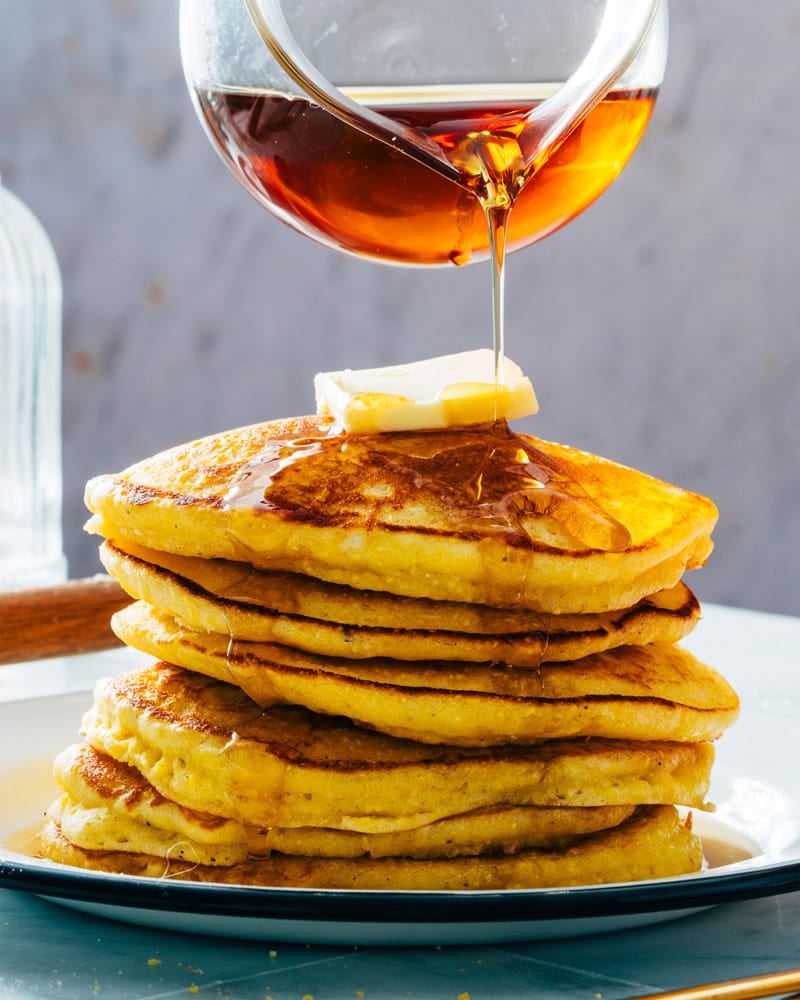
These pumpkin spice pancakes are fluffy and cozy-spiced! Whip up a batch as a tasty and easy breakfast idea.
Fall calls for all the pumpkin breakfast recipes, and here’s one to add to the regular rotation: pumpkin spice pancakes! These fluffy, tender flapjacks are perfectly spiced with cinnamon and pumpkin pie spice. Top with maple syrup and a melty pad of butter, and there’s nothing better for a cool morning! If you’ve got a jar of pumpkin spice, this is one of our top ways to use it.
Ingredients for pumpkin spice pancakes
This pumpkin spice pancakes recipe is optimized for that jar of pumpkin spices in your spice rack or cabinet: but you can also make your own DIY pumpkin pie spice! You’ll just need those key cozy spices: cinnamon, ginger, nutmeg, allspice and cloves. Other than that, pumpkin pancakes require the typical cast of fall characters, plus pumpkin puree! Here’s what you’ll need:
Flour
Brown sugar
Baking powder
Cinnamon
Pumpkin pie spice
Salt
Eggs
Pumpkin puree
Milk of choice
Neutral oil
Why pumpkin spice + cinnamon?
When it comes to ingredients, you’ll notice that pumpkin spice pancakes require both pumpkin pie spices and cinnamon! In the many pumpkin recipes we’ve developed, we’ve noticed that for the best “pumpkin” flavor, it’s essential to have both.
Cinnamon brings in the sweet notes, and pumpkin spices bring in the spicy, cozy and more bitter elements. The combination of the two makes the best balanced flavor. We also use this trick in our pumpkin bars and pumpkin dip.
Tips for cooking pumpkin spice pancakes
Pumpkin spice pancakes are quick and simple: mix the wet ingredients with the dry ingredients, then fry until golden brown! Here are a few tips for the process:
Use a large griddle: a non-stick surface is helpful. Use a quality griddle or skillet, since some can have uneven heating. A non-stick surface is a plus, though you’ll still want to cook with butter to get them golden brown.
Experiment to find the right heat level. Medium low heat is ideal, but it’s different on every stovetop. It should take a few minutes to get the pan up to heat. If the heat is too low, the pancakes won’t puff as much when cooking.
Don’t worry if the first pancake isn’t perfect! Use it as a test for honing in your pancake skills and adjust the heat accordingly.
Mix ins and toppings
Why not add a few mix-ins to pumpkin pancakes? Here are a few ideas for mixing into the batter to step up these pancakes or ideas for toppings:
Chocolate chips: Add a few handfuls of chocolate chips to the batter
Pecans: Add chopped pecans to the batter, or top the pancakes with candied pecans.
Walnuts: Add chopped walnuts to the batter, or top the pancakes with candied pecans.
Pumpkin spice syrup: Top the pancakes with Pumpkin Spice Syrup for an extra hit of spices.
Apple cider syrup: Add a fruity element with Apple Cider Syrup.
More pumpkin recipes
Love pumpkin? Here are a few more recipes to flex your pumpkin spice muscles:
In a medium bowl, whisk together the flour, brown sugar, baking powder, cinnamon, pumpkin pie spice, and salt.
In a separate bowl, whisk the eggs, then whisk in the pumpkin puree, milk, and oil (or melted butter).
Stir the wet ingredients into the dry ingredients and mix with a spatula until no dry patches remain and a smooth batter forms.
Lightly butter a skillet or griddle and wipe off extra grease with a paper towel. Heat the skillet to medium low heat. Pour the batter into small circles (about ¼ cup). Cook the pancakes until the bubbles pop on the top and the bottoms are golden. Then flip them and cook until cooked through and no longer gooey at the edges (the batter may ooze out a bit at the sides; just keep cooking until fully cooked, adjusting the heat as necessary so they don’t brown too fast).
Place the cooked pancakes under an inverted bowl to keep them warm. Repeat with the remaining batter, adjusting the heat as necessary to maintain an even temperature. Serve immediately with butter and maple syrup.
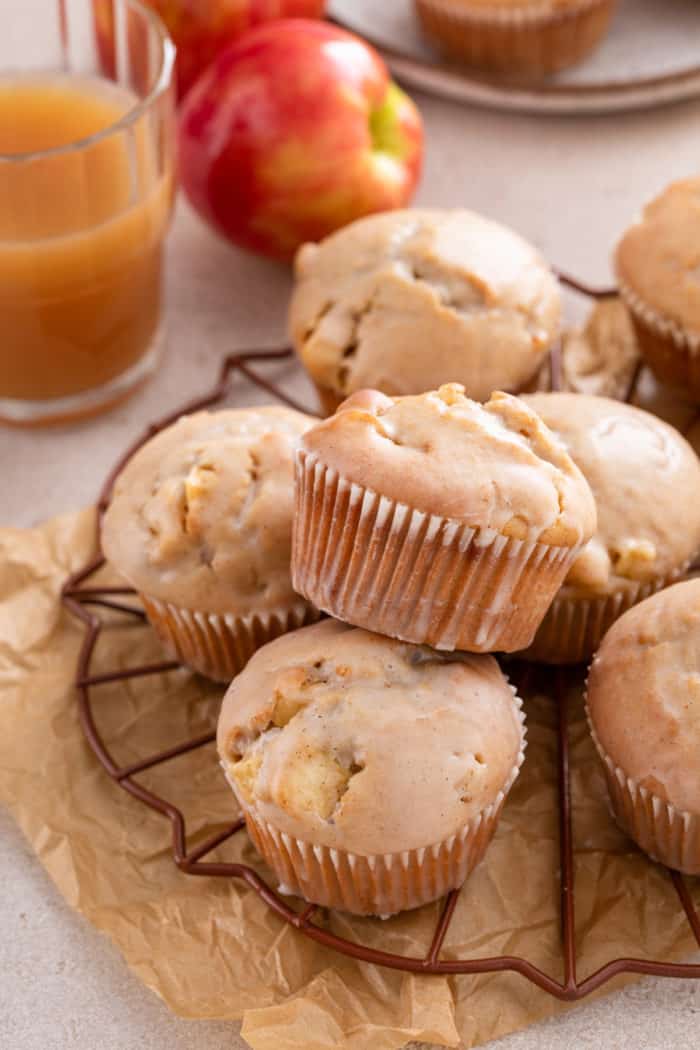
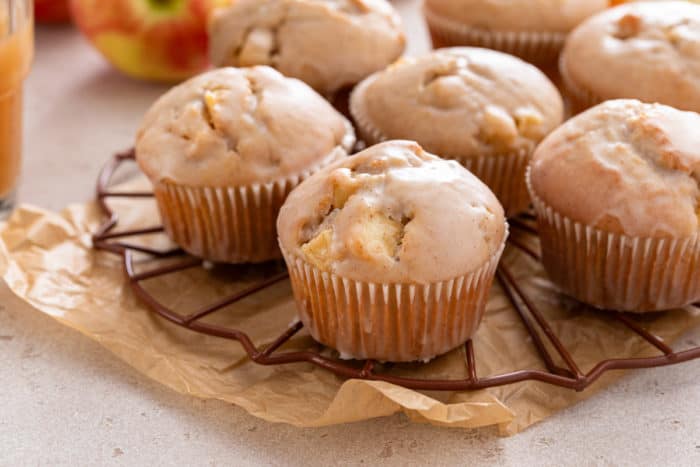
Flavored with rich apple cider and filled with diced apples and warm spices, these apple cider donut muffins are a special fall treat. Top them with the apple cider glaze for the perfect sweet finish. One of the best parts of fall is taking a trip to the apple orchard. I’m all about grabbing a …
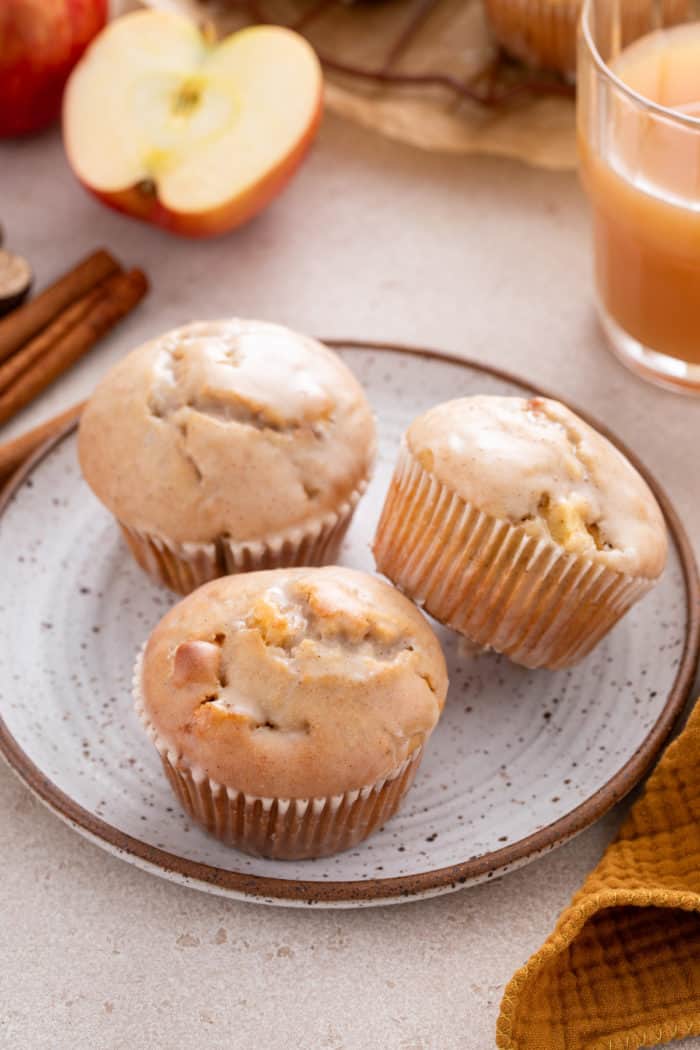
Flavored with rich apple cider and filled with diced apples and warm spices, these apple cider donut muffins are a special fall treat. Top them with the apple cider glaze for the perfect sweet finish.
One of the best parts of fall is taking a trip to the apple orchard.
I’m all about grabbing a few bags of crisp apples, a dozen freshly made apple cider donuts, and a jug of pressed apple cider.
And as much as I love making a big batch of spiced apple cider to enjoy while watching a movie, I also love taking some of that cider and recreating those orchard-fresh donuts with these apple cider donut muffins.
WHAT ARE DONUT MUFFINS?
Have you ever had a donut muffin before? I know we usually think of those as two separate breakfast treats, but magic happens when we combine them into one.
Imagine all of the deliciousness of a classic cake donut made just as easy as your favorite muffins.
Yes, you can use a donut pan to make baked donuts, but the one downside there is that you have to have a donut pan.
But when you make donut muffins, you can make them in your standard muffin pan – no special equipment needed!
I love my glazed donut muffins, but this time I decided to channel the flavors of the apple orchard and apple cider donuts and make these apple cider donut muffins.
HOW TO MAKE APPLE CIDER DONUT MUFFINS
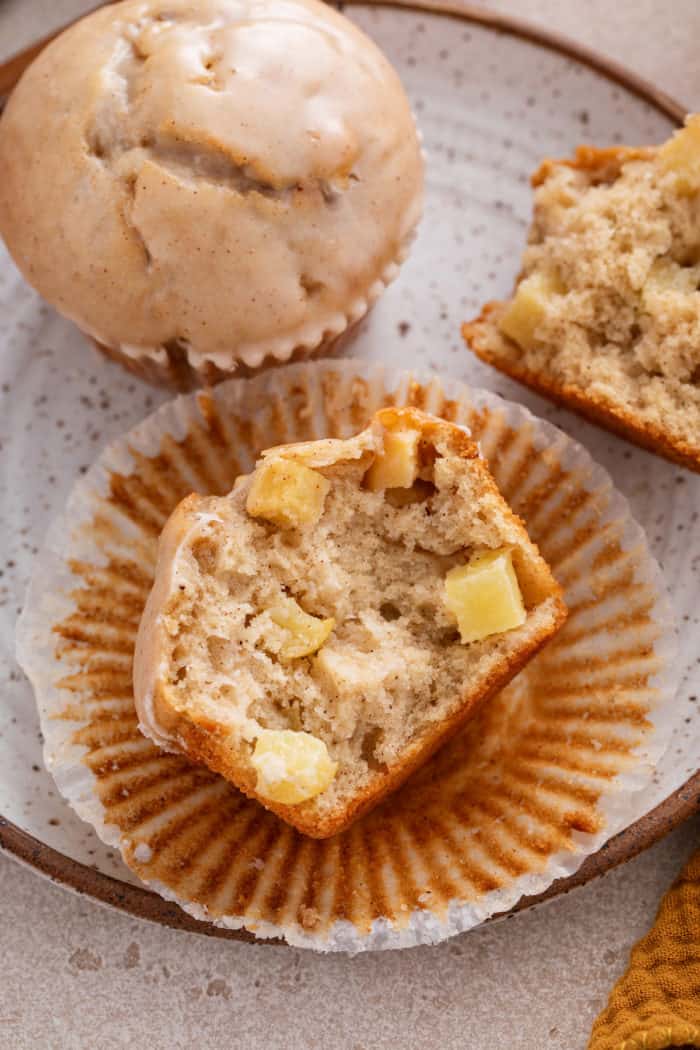
These apple cider donut muffins have apple cider in the batter and glaze. When combined with diced apples in the donuts and plenty of warm spices, they are bursting with fall flavor in every bite.
I always love using my homemade apple pie spice. The combination of spices works perfectly in recipes like these apple cider donut muffins, apple hand pies, apple fritter bread, and so much more.
If you don’t have apple pie spice on hand, feel free to use ground cinnamon instead.
If you want to make these during a time of year when apple cider isn’t available, you can substitute unfiltered apple juice for a very similar flavor.
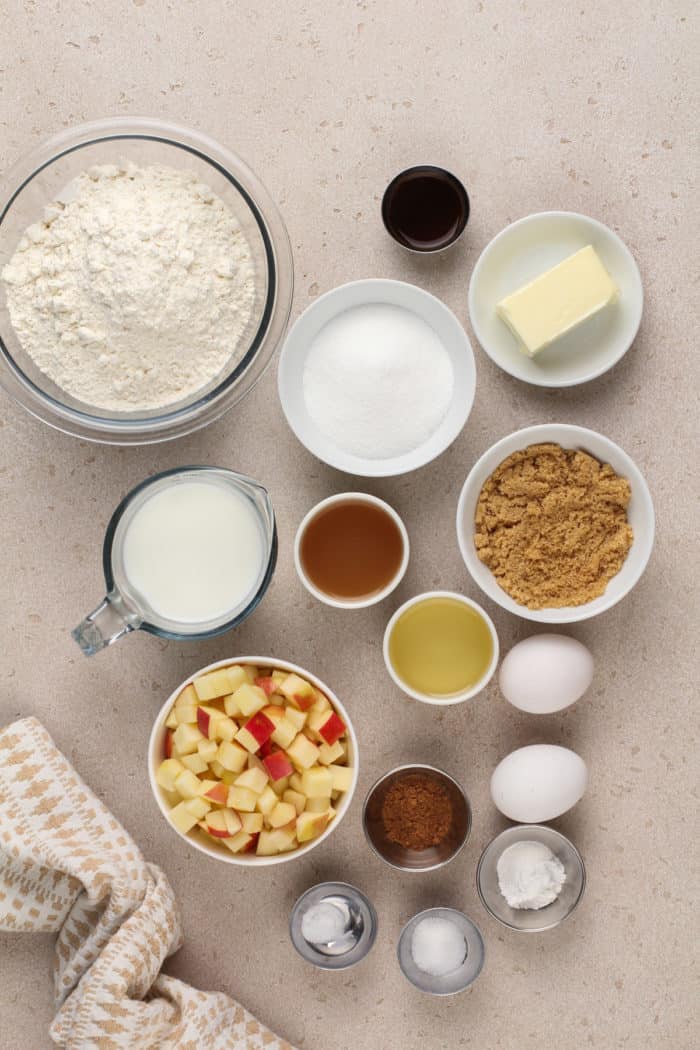
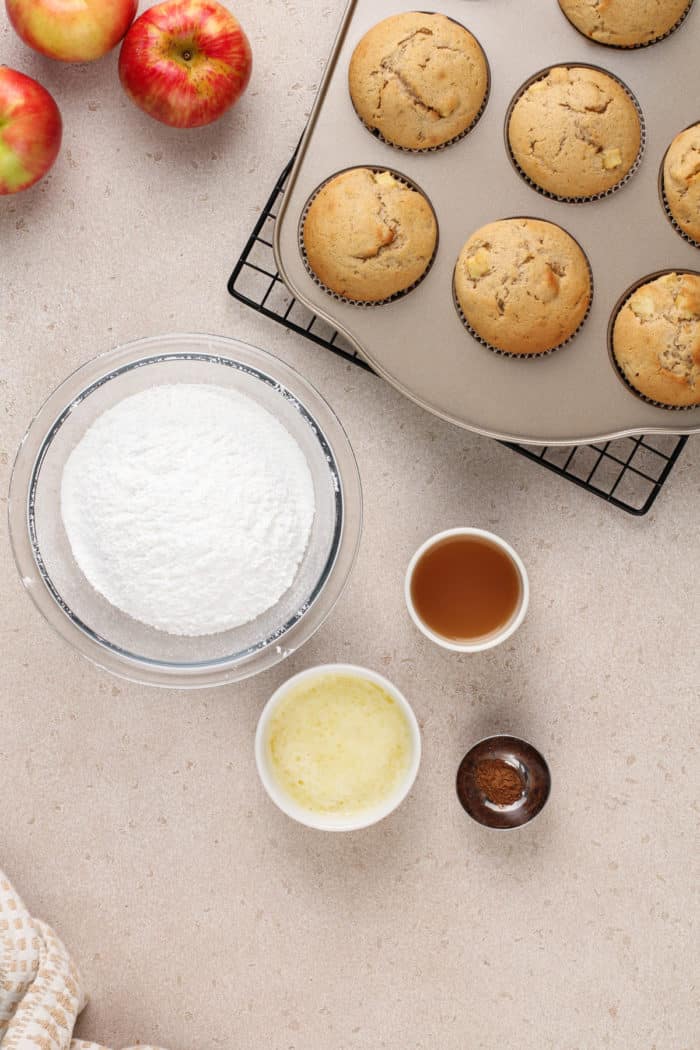
For the glaze, you will need:
3 tablespoons butter; melted
1 cup confectioners’ sugar; sifted
¼ teaspoon homemade apple pie spice
3 tablespoons apple cider, at room temperature
Again, if necessary, you can substitute ground cinnamon for the apple pie spice and unfiltered apple juice for the apple cider.
Making this recipe
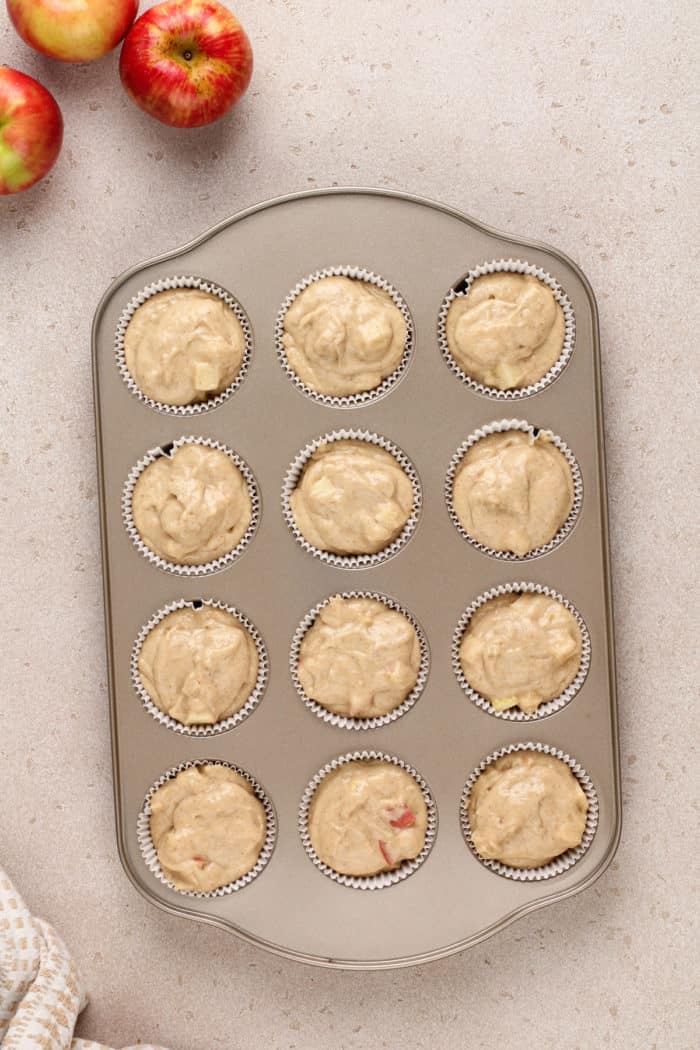
This recipe makes 12 donut muffins, so begin by lining a standard 12-cup muffin tin with paper liners.
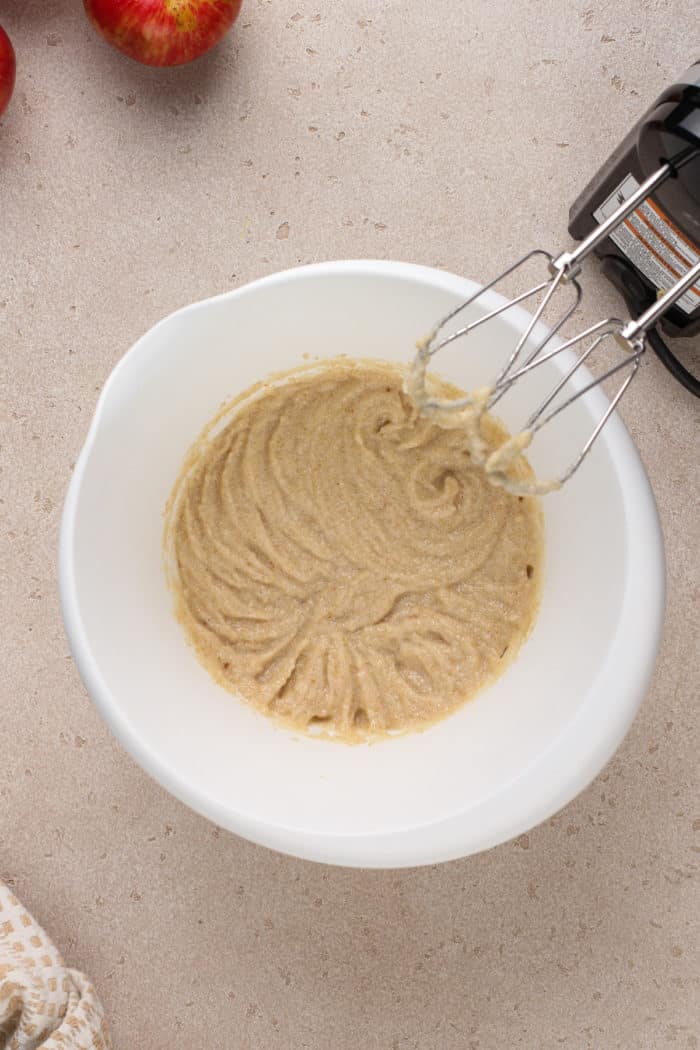
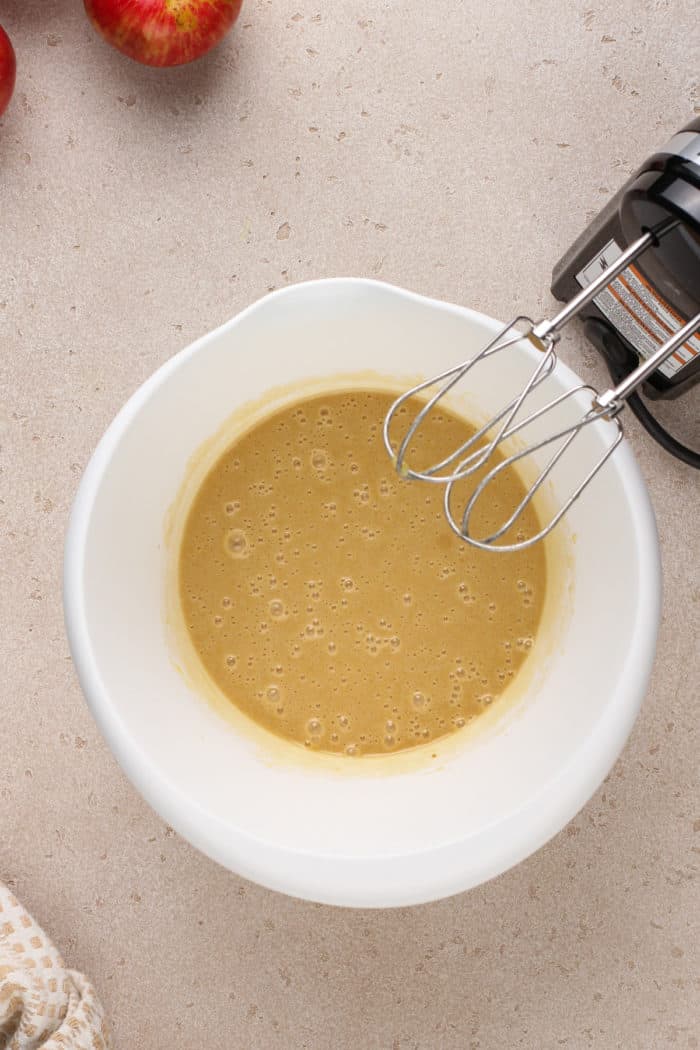
To start the batter, cream together the butter, vegetable oil, and sugars until smooth. Add the eggs and vanilla and mix to combine.
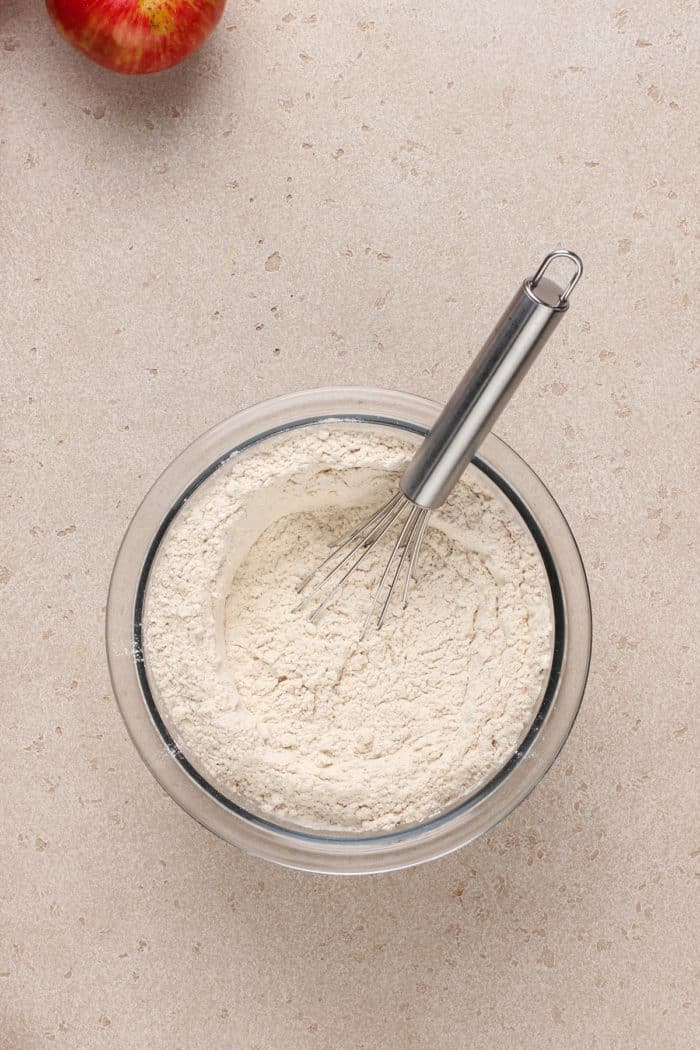
In a separate bowl, whisk together the dry ingredients: flour, baking powder, baking soda, apple pie spice, and salt.
In a measuring cup, combine the milk with the apple cider.
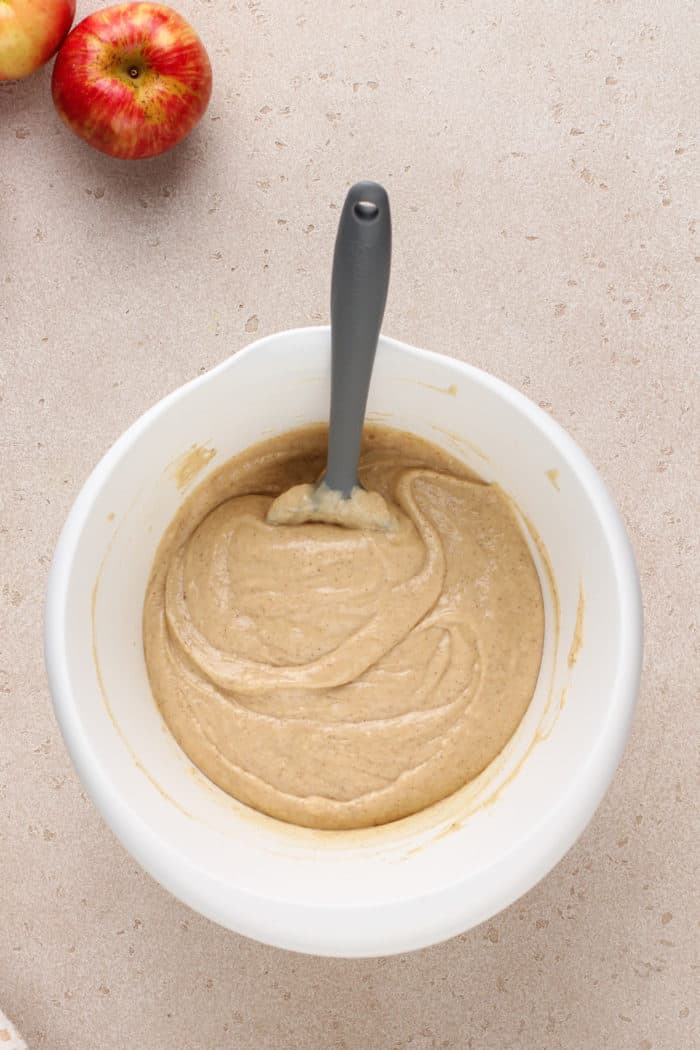
Add half of the flour mixture to the butter mixture, then add the milk and cider, then end with the rest of the flour mixture. Make sure you combine well after each addition.
Fold in the diced apples, the divide the batter into the prepared muffin cups. The cups will be nearly full.
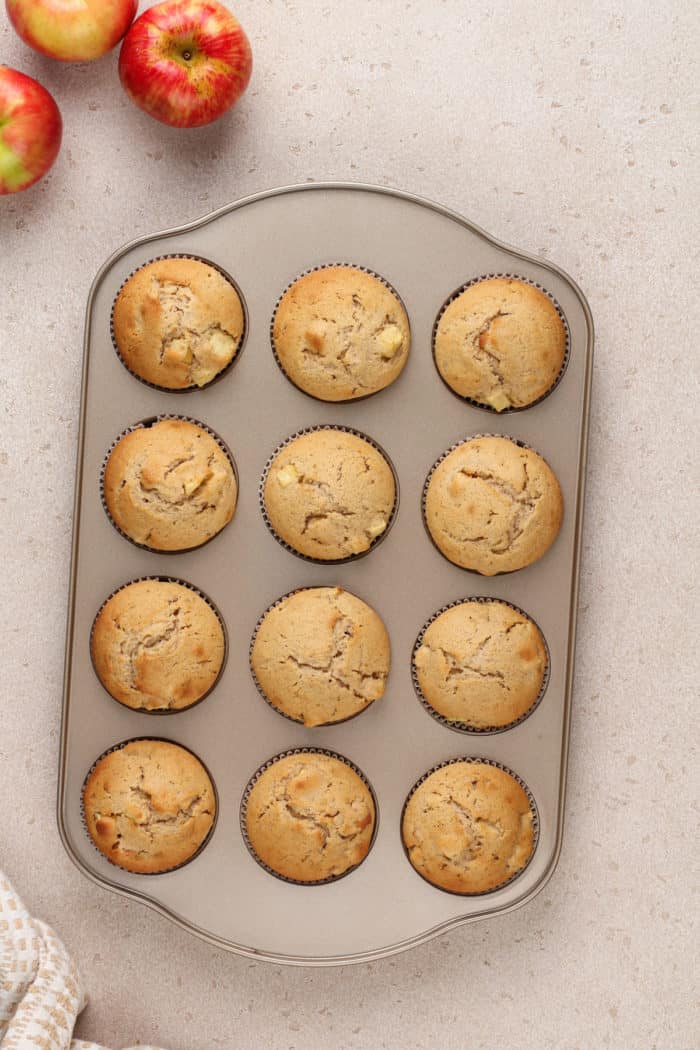
Bake for 15-17 minutes. The donut muffins are done when the tops are domed and golden and a toothpick inserted in the center comes out clean.
Let the muffins cool for 15-20 minutes, then whisk together the glaze.
In a bowl, whisk together the glaze ingredients until smooth. Place a piece of parchment paper or a rimmed baking sheet under the cooling rack the muffins are on – this will help catch any glaze that drips off of the muffins.
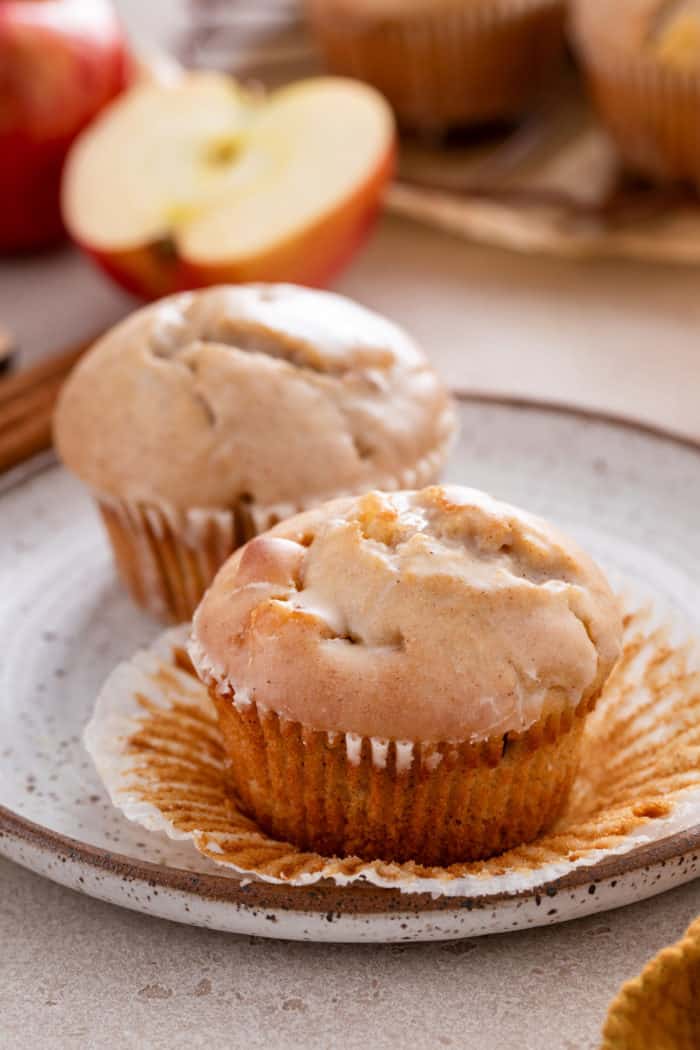
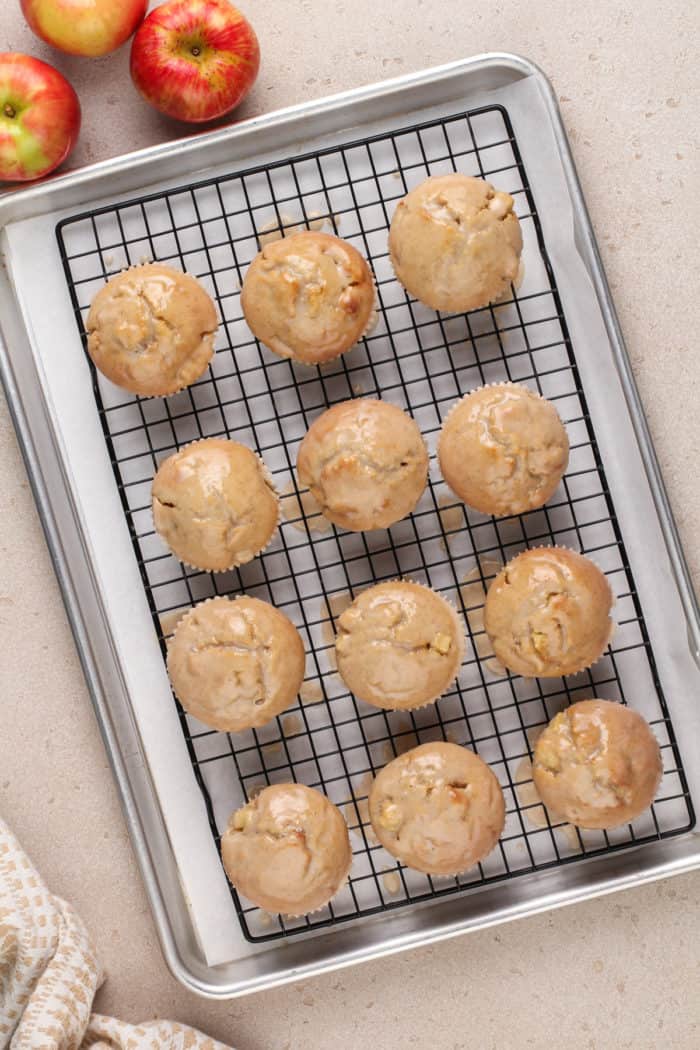
Dip the muffin tops in the glaze, then set them back on the rack to allow the glaze to harden. If you have enough glaze left, you could even dip them twice for an extra-thick glaze.
HELPFUL RESOURCES
Before getting started, make sure you know how to measure flour correctly. You can also use this measuring method for the powdered sugar.
If you’re out of brown sugar, try whipping up a quick brown sugar substitute. You can also learn how to soften brown sugar if yours has hardened and save yourself a trip to the grocery store.
Grab a few of my tips for how to soften butter quickly if you forgot to set yours out to soften ahead of time.
STORAGE
Store the apple cider donut muffins in an airtight container at room temperature for up to 3 days. Because of the fresh apple in the muffins, they will get more moist as the days go on, so the glaze may start to soak into the tops of the muffins.
If you would like to make these donut muffins ahead of time and freeze them, I recommend freezing them before they are glazed. Place them in a zip-top freezer bag and freeze for up to a month. Thaw at room temperature before glazing.
Flavored with rich apple cider and filled with diced apples and warm spices, these apple cider donut muffins are a special fall treat. Top them with the apple cider glaze for the perfect sweet finish.
Preheat the oven to 425°F. Lightly grease a standard muffin tin, or line with 12 paper muffin cups.
In the bowl of a stand mixer fitted with a paddle attachment or in a large mixing bowl with an electric mixer, cream together the butter, vegetable oil, and sugars until smooth. Add the eggs and vanilla, beating to combine.
In a medium bowl, combine the flour, baking powder, baking soda, apple pie spice and salt. In a glass measuring cup, combine the milk and apple cider. Stir the flour mixture into the butter mixture alternately with the milk/cider, beginning and ending with the flour and making sure everything is thoroughly combined. Fold in diced apples.
Spoon the batter evenly into the prepared pan, filling the cups nearly full.
Bake the muffins for 15 to 17 minutes, or until they’re a pale golden brown and a cake tester inserted into the middle of one of the center muffins comes out clean. Remove pan to a cooling rack and allow muffins to cool for about 15-20 minutes.
In a medium bowl, prepare the glaze by mixing together the melted butter, confectioners’ sugar, apple pie spice and apple cider. Whisk until smooth.
Place a layer of wax or parchment paper under the cooling rack. Dip the muffin crowns into the glaze, place the muffins back onto the cooling rack and allow the glaze to harden.
Notes
Store in an airtight container at room temperature for up to 3 days.
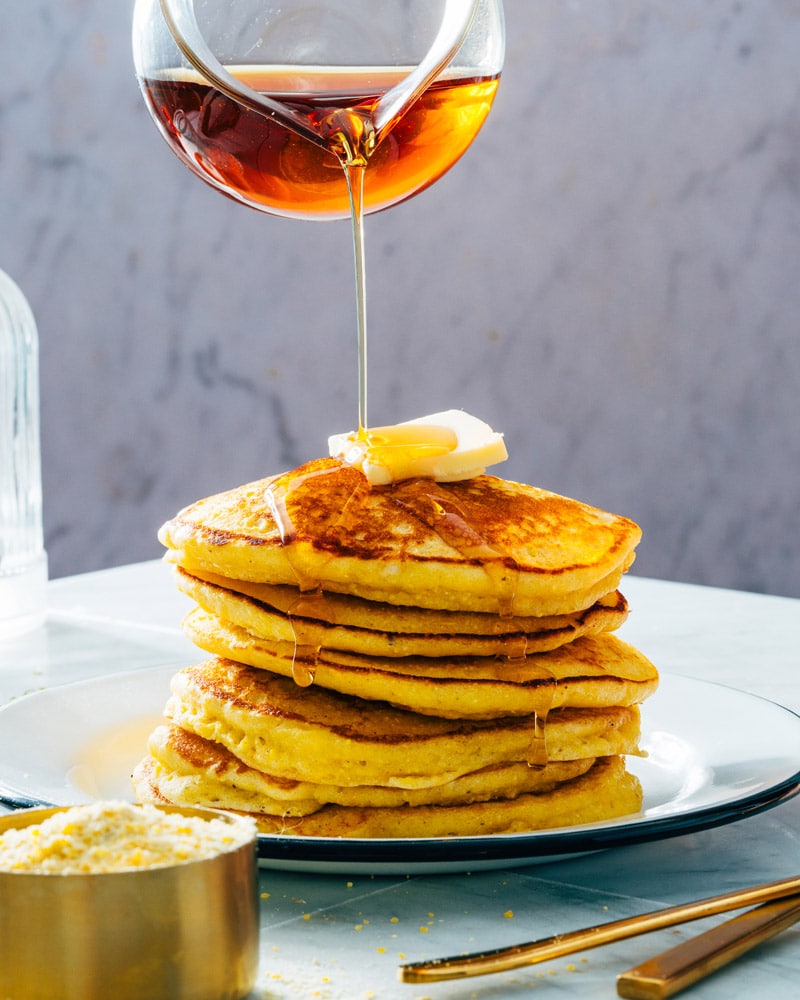
These cornmeal pancakes are ultra fluffy and golden! Fry up a stack and drizzle with maple syrup for a satisfying breakfast.
There are so many types of pancakes, from buttermilk to blueberry to cottage cheese. Here’s one that rises to the top of our list: Cornmeal Pancakes! These tasty flapjacks are crisp and golden on the outside, with a fluffy interior that tastes just like cornbread. Top them with a drizzle of maple syrup and a pat of butter and they’re perfect for a morning breakfast or special brunch! Our son Larson especially gobbled these down (though he has yet to meet a pancake he doesn’t like!).
Ingredients in cornmeal pancakes
Cornmeal pancakes are a fun cozy breakfast, and come out beautifully fluffy and golden. The magic ingredient? Buttermilk, which makes that airy texture and adds a hint of tang to the flavor. You’ll want to use the real stuff here (no substitutes!). Otherwise, you might have all the other items on hand in your pantry and fridge. Here are the ingredients for cornmeal pancakes:
Fine ground cornmeal
All-purpose flour
Baking powder
Granulated sugar
Kosher salt
Egg
Salted butter
Buttermilk
Use real buttermilk for the best results
Buttermilk is absolutely crucial to making a light and fluffy muffin with a beautiful crumb. Many people, ourselves included, are often tempted to use even a buttermilk substitute: the most popular is milk and lemon juice (or another acidic ingredient like apple cider vinegar).
But for the best flavor and rise, it’s got to be the real thing! The substitute can work in a pinch, but there’s something about the flavor and texture that’s luxuriously rich when you use actual buttermilk.
Tips for cooking cornmeal pancakes
Cornmeal pancakes come together in the same way as any other pancake. Mix the wet ingredients with the dry ingredients, then cook on a skillet until golden brown! However, there are a few nuances to the process that are helpful:
Use a large griddle: a non-stick surface is helpful. Some griddles have uneven heating, so use a quality griddle or skillet. A non-stick surface is a plus, though you’ll still want to cook the pancakes in butter to get them golden brown.
Experiment to find the right heat level. Medium low heat is ideal, but it’s different on every stovetop. It should take a few minutes to get the pan up to heat. If the heat is too low, the pancakes won’t puff as much when cooking.
Don’t worry if the first pancake isn’t perfect! Use it as a test for honing in your pancake skills and adjust the heat accordingly.
The batter sometimes becomes very thick while waiting for the second batch. If so, add a teaspoon or two of buttermilk until the batter is pourable.
Mix-ins, toppings, and variations
Want to mix up these cornmeal pancakes? It’s fun to add mix-ins to add a burst of flavor. You can also add fun toppings to step them up. Here are a few ideas:
Blueberries: Pour the batter into circles on the griddle, then place a handful of blueberries into the top of each pancake (this works better than mixing them into the batter).
Strawberries or raspberries: Add a handful of sliced strawberries or raspberries to each pancake while it cooks.
Pecans: Add a hint of nutty flavor with a handful of finely chopped pecans in each pancake.
Nut butter: Try them slathered with almond butter for hearty breakfast.
Cornmeal pancake leftovers and storage info
Cornmeal pancakes are easy to store: they’re actually great as leftovers. Store them refrigerated for tasty snacks with nut butter and a little maple syrup. Cornmeal pancakes store in a sealed container for up to 5 days refrigerated and 3 months frozen. It’s a nice way to extend the life of a batch.
What to do with leftover buttermilk
Most buttermilk recipes don’t use the entire container. What to do with the remainder if you buy it for these cornmeal pancakes?
In a medium bowl, stir together the cornmeal, flour, baking powder, sugar, and kosher salt. In another bowl, whisk together the egg, melted butter, and buttermilk.
Pour the dry ingredients into the wet ingredients, then stir gently to combine until the batter comes together and is pourable but slightly lumpy.
Lightly butter a skillet or griddle and wipe off extra grease with a paper towel. Heat the skillet to medium low heat. Pour the batter into circles (about ¼ cup). Cook the pancakes until the bubbles pop on the top and the bottoms are golden. Then flip them and cook until cooked through. If the batter becomes very thick on the second batch, add a teaspoon or two of buttermilk until the batter is pourable.
Place the cooked pancakes under an inverted bowl to keep them warm. Repeat with the remaining batter, adjusting the heat as necessary to maintain an even temperature. Serve immediately with butter and maple syrup.
Thin and almost crepe-like, these gluten-free pancakes are the perfect vehicle for your favorite syrup or fruit sauce. One of the best things about the weekend: having time to make a great breakfast. Throw together some bisquick pancakes, maybe fry up some bacon, and add a little fresh summer fruit and you have one of …
Thin and almost crepe-like, these gluten-free pancakes are the perfect vehicle for your favorite syrup or fruit sauce.
One of the best things about the weekend: having time to make a great breakfast.
Throw together some bisquick pancakes, maybe fry up some bacon, and add a little fresh summer fruit and you have one of the best meals.
But what if you or one of your family members is gluten intolerant?
I always like having a handful of gluten-free recipes close at hand in case I’m baking for someone who is gluten free. After all, they deserve to have a delicious weekend breakfast, too!
This gluten-free pancake recipe is yet another fantastic gluten-free creation from my friend Erin at Texanerin Baking. They’re a great option to have up your sleeve any time you need to make a special gluten-free breakfast.
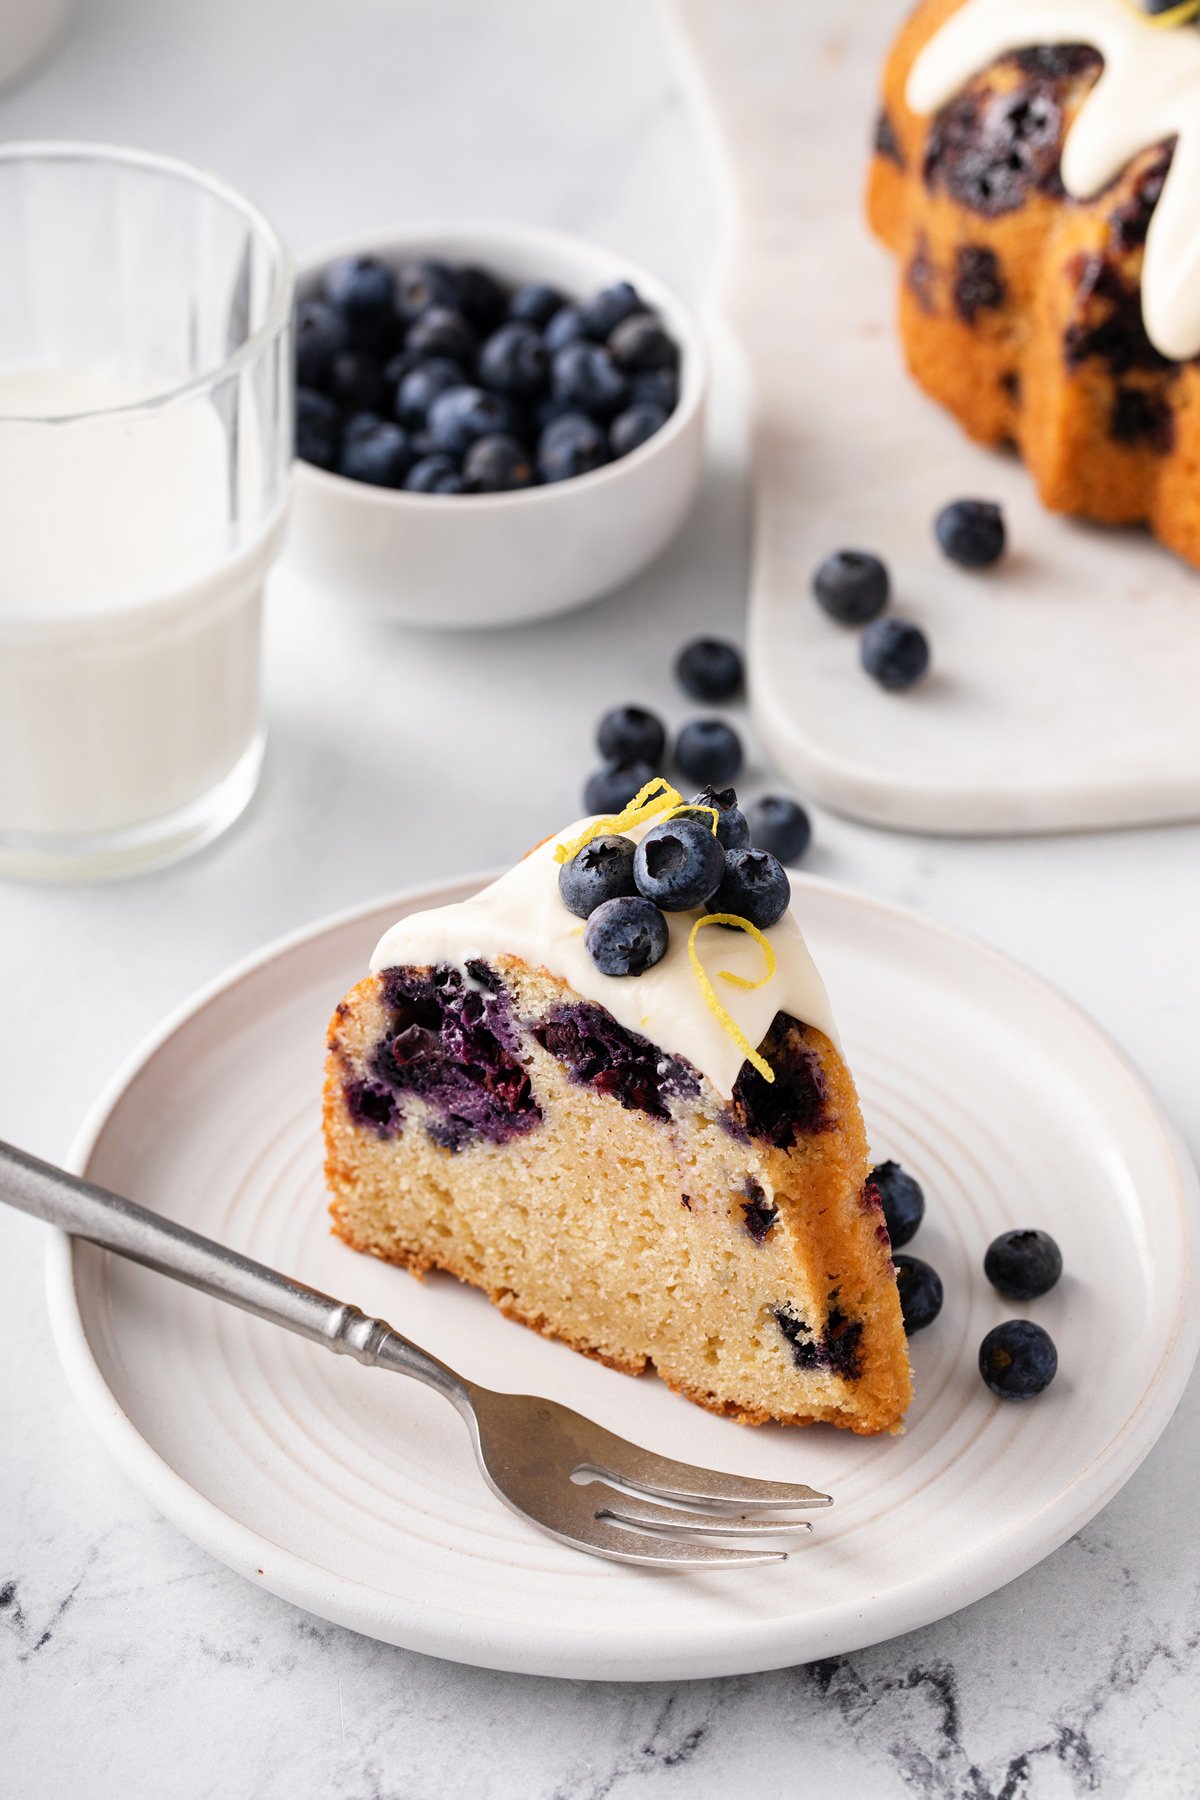
Tart lemon and sweet blueberries combine in this lemon-blueberry bundt cake for a summery dessert that can’t be beat. Dust it with powdered sugar or top it with a lemony cream cheese glaze for the perfect finish. I know it’s controversial, but I would choose a lemony dessert over a chocolatey dessert nearly any day. …
Tart lemon and sweet blueberries combine in this lemon-blueberry bundt cake for a summery dessert that can’t be beat. Dust it with powdered sugar or top it with a lemony cream cheese glaze for the perfect finish.
I know it’s controversial, but I would choose a lemony dessert over a chocolatey dessert nearly any day.
And this lemon-blueberry bundt cake is no exception. If you love the combination of lemon and blueberries as much as I do, this bundt cake is a MUST for you this summer!
Currently, I spend nearly all of my waking hours reading, organizing, editing, and writing about recipes. These food and drink manuals have somehow snuck into every facet of my working life—and I love it. Every month, I try to make as many of our recip…
Currently, I spend nearly all of my waking hours reading, organizing, editing, and writing about recipes. These food and drink manuals have somehow snuck into every facet of my working life—and I love it. Every month, I try to make as many of our recipes as I can. These were the five best I made in May.
This required just four ingredients (challah bread, eggs, heavy cream, and butter), took maybe five minutes to put together, and tasted, well, good. As the name suggests, it’s not particularly unique (no bells) nor overly creative (sans whistles), but I rarely want that on Saturday morning. Instead, I want delicious and to-the-point French toast I can make well even if I can only access seven of my brain cells.