If you’re in charge of dessert this Thanksgiving—arguably one of the most important responsibilities—and are feeling the pressure to make something memorable, we’ve got you covered. We’ve rounded up some of our favorite Thanksgiving pie recipes, from t…
If you’re in charge of dessert this Thanksgiving—arguably one of the most important responsibilities—and are feeling the pressure to make something memorable, we’ve got you covered. We’ve rounded up some of our favorite Thanksgiving pie recipes, from timeless classics to unexpected new favorites, that will have everyone asking for seconds. Whether you’re looking for an elevated pecan pie, a fresh take on apple, or a new spin on sweet potato, these recipes are sure to wow your guests and leave them wishing they had saved more room for dessert.
Plus, the best part about pie is that you can prep it in advance—we recommend our fool-proof pie crust recipe, or for even fewer dishes, our stand-mixer pie dough. And, if you do run into any pie problems on the big day, check out our expert tips for all the quick fixes.
With only 3-ingredients, our homemade Graham Cracker Crust is a no brainer replacement to the taste-less store-bought alternatives. It takes minutes to make and tastes amazing. There’s no secret I love pie recipes, and a pie is only good as its crust, so be sure to try my Easy Pie Crust and Oreo Pie Crust.…
With only 3-ingredients, our homemade Graham Cracker Crust is a no brainer replacement to the taste-less store-bought alternatives. It takes minutes to make and tastes amazing.
If you have 15 extra minutes, you have time to use a homemade graham cracker crust in your favorite pie recipe. Homemade makes such a difference in taste and texture and the store bought versions are packed with corn syrup and taste like cardboard. You will thank yourself for spending a few extra minutes, with just 3 ingredients!
How to make a Graham Cracker Crust:
Combine: Mix graham cracker crumbs and sugar in a bowl then pour in the melted butter, stirring well to incorporate.
Press the graham cracker mixture into a pie pan, pressing firmly to the bottom and up the sides–I like to use the back of a measuring cup.
Bake: I recommend baking this crust because it binds the butter and sugar together so it stays together. Bake at 350°F for 10 minutes then let cool before adding your favorite pie filling.
For a No-Bake option, place it in the fridge for several hours so the butter can harden and hold together This option works for our no-bake cheesecake, for example.
Make Ahead and Freezing Instructions:
To Make Ahead: homemade graham cracker crust will keep in the fridge or at room temperature, 1-2 days in advance.
To Freeze: Freeze baked or unbaked for up to 3 months Thaw completely before using or baking.
Vegan Graham Cracker Crust: Buy vegan graham crackers (most brands are) then swap out the butter for a vegan butter or margarine substitute.
Brown Sugar: The granulated sugar can be swapped for brown sugar. You can use honey, but I recommend using a combination of honey and granulated sugar.
Strawberry Cheesecake Ice Cream – Spread the ice cream into the graham cracker pie crust and freeze it and serve it as an ice cream pie, or break up the crust to stir into the ice cream.
Mix graham cracker crumbs, sugar, and melted butter in a small bowl.
Press into Pan: Pour crumb mixture into an 8" – 9.5" pie pan and use the back of a measuring spoon to press it firmly in the bottom and up the sides of the pan.
Bake for 10 minutes. Remove from oven and allow to cool completely before filling with your favorite pie.
Video
Notes
Make Ahead Instructions: homemade graham cracker crust will keep in the fridge or at room temperature, 1-2 days in advance.Freezing Instructions: Freeze baked or unbaked for up to 3 months Thaw completely before using or baking.Vegan adaptation: Buy vegan graham crackers (most brands are) then swap out the butter for a vegan butter or margarine substitute.Gluten Free: Use gluten free graham cracker crumbs.Brown Sugar: The granulated sugar can be swapped for brown sugar. You can use honey, but I recommend using a combination of honey and granulated sugar.Other Graham Cracker Flavors: Try using cinnamon or chocolate graham crackers.
Lemon Blueberry Scones are traditional scones enriched with fresh blueberries to enhance their daily vitamin values further. This is the best recipe I have ever had. The crispy crust on the outside will charm your palate. My family likes the delicate lemon flavor combined with fresh blueberries the most. Homemade scones are very easy and quick …
Lemon Blueberry Scones are traditional scones enriched with fresh blueberries to enhance their daily vitamin values further. This is the best recipe I have ever had. The crispy crust on the outside will charm your palate. My family likes the delicate lemon flavor combined with fresh blueberries the most.
Homemade scones are very easy and quick to make, and the effect will surprise everyone who tries them.
How to choose the best ingredients for Lemon Blueberry Scones Recipe
Fresh lemon zest is essential because it gives the scones extra flavor.
Lemon juice: The sour taste of the lemon balances the sweet taste and makes the muffins, together with fresh blueberries, refreshing.
All-purpose flour: Here, you can try any flour; it doesn’t have to be special for baking.
Baking powder/baking soda: Combining these two leavening agents makes the scones rise beautifully and remain moist.
Milk: you can use any milk you have, it doesn’t have to be fatty. Milk is very important here because it allows us to bring out the lemon flavor.
Egg: A large egg will be the best in room temperature.
Sugar: (light/dark brown) or any sugar that fits this recipe.
Butter: the best is unsalted butter
Kosher salt: balanced, sweet taste
FreshBlueberries: This recipe uses fresh blueberries as its basis; it is best to choose medium-sized or small ones, and then it is better to work with the dough while rolling.
Tips and Tricks
If next you have cold scones, and if you like warm scones for breakfast, it is ideal to put them in an air fryer for 1 minute at 347°F (175°C)
If you do not have time to cool the dough in the fridge, put it in the freezer, but in a flatter form, for 10-15 minutes.
You can use other berries instead of blueberries, like raspberries. This scone will also be fine with chocolate chips and making chocolate chip scones.
I love using it on the top of the Sweet Lemon Glaze, but it will also work if you sprinkle the scones with coarse sugar.
Lemon Blueberry Scones Recipe Step-by-Step Guide
This is my favorite scone recipe because it’s easy. I love mixing lemon flavor with juicy blueberries.
Get yourself a small saucepan, large bowl, hand mixer or food processor, mixing spoon, sharp knife for cutting, or a pizza knife/ pastry cutter if you have one.
Step 1: Combine the flour mixture and the dry ingredients in a small bowl, sift into a large bowl, and cut the butter into pieces.
Step 2: In the next step, combine the frozen butter with the dry ingredients and add sugar. The dough will not be uniform but more like dough crumbs. Rub the butter with the flour between your fingers. Do it quickly so the butter only warms up a little in your fingers.
Step 3: Properly wet ingredients in a small saucepan. Heat the milk with lemon zest so that the lemon scent is noticeable; this is precisely the best part of homemade scones.
Step 4: Cool the milk and beat it in the egg. Beat everything until fluffy with a mixer (hand mixer is best)
Step 5: Once you have reached the right consistency, pour in the cooled milk with lemon zest and knead with your hands. Add lemon juice and knead.
Step 6: Then wash and lightly dry the blueberries. You can gently roll them in flour. Add the prepared fruit to the dough and gently work it into it so that it does not crack (some will crack when rolling anyway, but that’s another step).
Step 7: Form one piece of the dough and put it in a bag or plastic wrap to refrigerate for about one hour or overnight.
Step 8: To make the chili scone dough, remove it from the refrigerator and gently roll it out into a circle with a diameter of 8-9 inches (22cm).
Step 9: Divide the dough into pieces like a pizza.
Step 10: Transfer scones to a sheet pan lined with parchment paper and spread with melted butter. This will make the scones’ crust even crispier and beautifully golden brown.
*Butter is better than egg white because it gives scones a beautiful crispness; this is a trick of my grandmother, who taught me how to bake various rolls and cakes.
Step 11: Bake scones in preheated oven to 350°F/ 180°C for 25 min.
Step 12: While the scones are baking, prepare the lemon glaze. Pour the lemon juice into a small bowl and add the icing sugar. Mix thoroughly until all the ingredients are combined. The glaze should be thick enough to run in a thick string.
Step 13: Drizzle the previously made sweet lemon glaze on the tops of the scones.
Enjoy!
Sides To Serve Blueberry Lemon Scones
My family loves eating them with fresh milk, and I love to have a hot cup of coffee. The rest of the food is similar because we love to dip scones in milk and coffee.
This is not the only way to eat these incredibly delicious scones.
You can serve them:
Whipped Cream or the classic Clotted Cream
Lemon Curd: to further enhance the lemon flavor in these scones.
Fresh Berries or Fruit Compote
Honey or Maple Syrup
Greek Yogurt or Flavored Yogurt
Assorted Cheeses: brie, camembert, cream cheese, and gouda for more aroma and sensations for the taste buds.
Lemon blueberry scones can be stored in an airtight container, such as a cookie jar, for a few days (3-5). Freshly baked and well-cooled, they can be frozen and removed as needed.
If you like this recipe, try my other fruit-baked goods
By Holidays Christmas, Independence Day, New Year’s Day, Thanksgiving
Prep Time 20 minutesminutes
Cook Time 25 minutesminutes
Servings 8pieces
Calories 372kcal
Ingredients
Scones Dough
Zest one lemon
2cupsall purpouse flour
1tspbaking powder
1/2tspbaking soda
1/2cupmilk
1egg
1cupsugar(light/dark brown)
4ozcold/frozen butter
1/2tsokosher salt
1tbspmelted butter for garnish
1cupfresh blueberries
Sweet Lemon Glaze
1tbsplemon juice
5-6tbsppowdered sugar
Instructions
Combine the flour mixture and the dry ingredients in a small bowl, sift into a large bowl, and cut the butter into pieces.
In the next step, combine the frozen butter with the dry ingredients and add sugar. The dough will not be uniform but more like dough crumbs. Rub the butter with the flour between your fingers. Do it quickly so the butter only warms up a little in your fingers.
Properly wet ingredients in a small saucepan. Heat the milk with lemon zest so that the lemon scent is noticeable; this is precisely the best part of homemade scones.
Cool the milk and beat it in the egg. Beat everything until fluffy with a mixer (hand mixer is best)
Once you have reached the right consistency, pour in the cooled milk with lemon zest and knead with your hands. Add lemon juice and knead.
Then, wash and lightly dry the blueberries. You can gently roll them in flour. Add the prepared fruit to the dough and gently work it into it so that it does not crack (some will crack when rolling anyway, but that’s another step).
Form one piece of the dough and put it in a bag or plastic wrap to refrigerate for about one hour or overnight.
To make the chili scone dough, remove it from the refrigerator and gently roll it out into a circle with a diameter of 8-9 inches (22cm).
Divide the scones dough into pieces like a pizza.
Transfer scones to a sheet pan lined with parchment paper and spread with melted butter. This will make the scones’ crust even crispier and beautifully golden brown.*Butter is better than egg white because it gives scones a beautiful crispness; this is a trick of my grandmother, who taught me how to bake various rolls and cakes.
Bake scones in preheated oven to 350°F/ 180°C for 25 min.
While the scones are baking, prepare the lemon glaze. Pour the lemon juice into a small bowl and add the icing sugar. Mix thoroughly until all the ingredients are combined. The glaze should be thick enough to run in a thick string.
Drizzle the previously made sweet lemon glaze on the tops of the scones.Enjoy!
This no-bake pumpkin cheesecake bars recipe features a sweet, spiced Biscoff crust, a soft, pumpkin pie filling, and a Biscoff spread on top!
If you’re craving a smooth, creamy dessert that brings together fall’s best flavors without any baking, these No Bake Pumpkin Cheesecake Bars are your answer! Layers of spiced pumpkin and rich cream cheese sit on top of a buttery Biscoff cookie crust, making every bite absolutely irresistible.
What are No Bake Pumpkin Cheesecake Bars?
No bake pumpkin cheesecake bars are a layered dessert with a spiced pumpkin and cream cheese filling over a cookie crumb crust. With a base made from Biscoff cookies and pecans, this dessert has a sweet, caramelized flavor that pairs perfectly with the creamy, pumpkin-filled topping. The result is a smooth, satisfying bite that combines the warmth of fall spices with a slight crunch from the crust, making these bars an instant seasonal favorite!
What makes this recipe especially appealing is the lack of oven time, making it perfect for when you’re short on time or just want to keep things easy. With a few simple steps, the cheesecake layers set beautifully in the fridge, creating a chilled dessert that’s rich, creamy, and comforting. These bars are great for a cozy night in or as a make-ahead dessert for holiday get-togethers!
Ingredients You Need
Crust:
Biscoff Cookie Crumbs – These give the crust a caramelized, slightly spiced base that’s perfect for fall flavors. Use a food processor to get the crumbs nice and fine.
Whole Pecans – We add these to the crust for a touch of nutty richness that complements the Biscoff flavor beautifully. Pulse them with the cookies until well blended.
Light Brown Sugar – This adds a bit of sweetness and helps the crust bind together. We love how it deepens the caramel notes.
Cinnamon – Just a little bit of this spice enhances the warmth of the crust. Cinnamon is a perfect match for pumpkin.
Sea Salt – A small amount of salt balances out the sweetness and makes the other flavors pop.
Unsalted Butter – Melted butter is essential for a moist crust that holds together when sliced.
Filling:
Cream Cheese – Room temperature cream cheese is the base of the smooth, creamy filling.
Heavy Whipping Cream – This adds fluffiness to the filling and helps create a light, airy texture. Make sure it’s cold when you whip it.
Powdered Sugar – Provides sweetness and a silky smooth consistency without graininess.
Pure Vanilla Extract – Just a hint adds warmth and depth and balances the spices and sweetness in the filling.
Sea Salt – Salt enhances the flavors of the other ingredients and keeps the filling from being too sweet.
Pumpkin Puree – Real pumpkin puree brings an earthy, slightly sweet element. Make sure it’s plain, not pie-filling!
Cinnamon – Brings warmth and coziness to the filling and complements the pumpkin.
Nutmeg – Nutmeg adds a subtle spice with a hint of sweetness.
Cloves – A little goes a long way here, adding depth and more fall flavor.
Ginger – Brings a touch of warmth and spice, balancing the sweetness of the filling.
Allspice – Adds a hint of spiciness that rounds out the pumpkin flavor.
Topping:
Melted Biscoff Spread – Melting Biscoff spread makes it easily spreadable, creating a gorgeous topping with a sweet, spiced flavor that complements the pumpkin and cream cheese filling.
How to Make No Bake Pumpkin Cheesecake Bars
Prepare the Crust. Add the Biscoff cookie crumbs, pecans, brown sugar, cinnamon, and sea salt to a food processor. Pulse until the mixture is fine and well-blended. Pour in the melted butter and pulse again until the crumbs become moist.
Press and Chill. Firmly press the crust mixture into a prepared pan. Place in the fridge to chill and firm up.
Make the Cheesecake Filling. Place the cream cheese in a large bowl and beat with a mixer. Once it’s smooth and fluffy, pour in the powdered sugar, salt, and vanilla extract and mix again. Then, add pumpkin puree, heavy cream, cinnamon, nutmeg, cloves, ginger, and allspice and mix a final time.
Assemble the Layers. Spread the pumpkin cream cheese mixture evenly over the chilled crust. Smooth it with a spatula to create a flat, even layer, and return it to the refrigerator.
Add the Topping. Melt the Biscoff in the microwave before pouring it over top of the cheesecake. Use a spatula or toothpick to gently swirl the spread for a decorative look.
Chill the Bars. Refrigerate for several hours or until fully set. Then, top with sea salt, cut them into bars, and serve cold.
Variations
Graham Crackers – Swap the Biscoff cookies for graham cracker crumbs.
Chocolate Chips – Fold mini chocolate chips into the filling for a chocolatey twist.
Maple Syrup – Add a touch of maple syrup to the filling for an extra hint of fall flavor.
Whipped Cream – A dollop of whipped cream makes each bar feel a bit more indulgent.
Ginger Snaps – Use ginger snap crumbs in place of Biscoff cookies for a spicier, festive crust.
Nuts – Chopped pecans or walnuts add extra crunchy texture and nuttiness.
Can I Store Leftovers?
These bars stay fresh in the fridge for days and can even be frozen.
Refrigerate leftovers in an airtight container for up to 3 days.
Wrap the bars with plastic wrap and then aluminum foil and store them in the freezer for up to 3 months.
More Cheesecake Recipes
If you’re like us, and can’t get enough of cheesecake, you’ll want to check out more of our creamy, dreamy recipes!
In a food processor, combine Biscoff cookie crumbs, pecans, brown sugar, cinnamon, and sea salt. Pulse until finely ground. Add melted butter and mix until the crumbs are moistened. Press the mixture into a lined 9×9-inch pan and refrigerate for 30 minutes.
In a large mixing bowl, beat the cream cheese until smooth. Add powdered sugar, vanilla extract, and sea salt, mixing until well combined. Add pumpkin puree, heavy cream, cinnamon, nutmeg, cloves, ginger, and allspice into the cream cheese mixture. Beat on low speed until everything is combined. Slowly increase the speed to medium high and whip until medium-stiff peaks. Be careful not to over beat.
Drizzle the melted Biscoff spread (melt for 15-30 seconds in the microwave, you just want it spreadable. Add it to on top of the pumpkin layer. Spread or you can use a spatula or toothpick to create a swirled design.
1/2 cup melted Biscoff spread
Chill and Serve:
Refrigerate for at least 4 hours, or until set. Sprinkle with sea salt, Cut into bars and serve chilled.
Our delicious Apple Pie recipe is like the red carpet of desserts – it’s flavorful, classic, and always a crowd pleaser, from summer BBQ’s to holidays feasts. Do you love pie recipes as much as I do? Try my Lemon Sour Cream Pie, Triple Berry Pie, or Pumpkin Cheesecake! How to make Apple Pie Filling:…
Our delicious Apple Pie recipe is like the red carpet of desserts – it’s flavorful, classic, and always a crowd pleaser, from summer BBQ’s to holidays feasts.
Apple Pie is an American classic that’s gotta be done right!
I’m so proud of this recipe and feel like it is the absolute perfect apple pie! It has the delicious flavor we love with tender cinnamon sugar apples and it also stays together when you serve it, ensuring everyone gets their share of filling and flaky crust. A truly perfect pie recipe is only as good as the crust, so be sure to start this one with our easy homemade pie crust! You wont regret making this all from scratch.
How to make Apple Pie Filling:
Prep Apples and : Peel, slice, and core each apple. (I use my johnny apple peeler, which does all three at once).
Cinnamon sugar: In a small bowl, combine cinnamon, cloves, salt, nutmeg, and sugar.
Make Filling: Melt butter in a large pan then add apple slices and lemon juice. Sprinkle cinnamon sugar mixture on top and stir to coat. Cook over medium heat for 3-5 minutes, stirring often. Sprinkle cornstarch and flour over the apples and stir well. Remove from heat and allow to cool to room temperature (optional: pour mixture onto a baking sheet to cool quicker).
Assemble Apple Pie: Prepare a 9-inch deep-dish pie pan with an unbaked pie crust. Add cooled apple pie filling. Cut the top crust into strips for a lattice crust, or place the whole pie crust on top and cut slits to let the steam escape. Seal top and bottom pie dough edges together.
Bake: Make an egg wash and lightly brush it over the apple pie and add a sprinkle of sugar. Bake at 425°F for 20 minutes then reduce the temperature to 375°F, leaving the pie in the oven. Continue baking for 30-40 minutes longer, until the filling is bubbly and the crust is golden brown. Remove from oven and allow to cool completely, at least 2-3 hours.
Serve the best apple pie with a scoop of vanilla ice cream!
Make Ahead, Storing, and Freezing Instructions:
To Make Ahead: You can make the pie crust dough several days in advance, or freeze for months. The apple pie filling can also be made ahead, stored in the fridge before assembling and baking.
To Store: Store at room temperature for up to several hours, or keep covered in the refrigerator for 2-3 days.
To Freeze: The pie crust and apple pie filling can be made and frozen in separate freezer safe containers for up to 3 months. Thaw completely before assembling. Baked apple pie can also be frozen once it has cooled completely. Cover the pie with plastic wrap and aluminum foil and freeze for up to 3 months. Thaw completely in the fridge (about 1.5 days) before serving.
Peel, core, and thinly slice apples. I use a johnny apple peeler which does all three at once. Make sure the apple slices are relatively thinly.
Apple Pie Filling: Whisk together the cinnamon, cloves, nutmeg, salt and ¾ cup sugar, and set aside. Melt butter in a large skillet over medium heat. Once melted, add the apples and lemon juice. Sprinkle the sugar mixture over the top and gently stir to coat. Cook the apple mixture for 3-5 minutes, until the apples are slightly tender. Sprinkle the flour and cornstarch over the apples and toss until well combined.
Remove from heat and allow to cool to room temperature. Optional: Pour the apple pie filling out onto a baking sheet to cool faster.
Preheat oven: Place a large baking sheet on the middle rack of oven and preheat the oven (with the pan inside) to 425 degrees F. (Cooking the pie on a hot baking sheet will help the bottom crust crisp and not get soggy.)
Roll out pie crusts: Remove one disc of pie dough from the refrigerator and roll it out to about 12 inches in diameter. Place crust inside a 9-inch pie plate. Refrigerate while you roll out the second, top pie crust.
Assemble: Remove the pie pan from the fridge and pour the apple pie filling into it. Cover with the second, top layer of dough. You can either place the entire circle of pie dough over the filling and cut a few slits in it to allow steam to escape, or make a simple lattice crust. Pinch the pie dough edges together to seal. Crimp pie edge.
Brush with egg wash: Mix 1 egg with 1 Tablespoon milk or water. Lightly brush the top of the pie with egg wash and sprinkle with remaining Tablespoon of sugar.
Bake: Place pie in oven on top of hot baking sheet and bake for 20 minutes. Leave the pie in the oven and reduce temperature to 375 degrees F. Continue to cook until the filling is bubbling and the crust is golden, about 30 to 40 more minutes. If the crust is getting too browned, Tent a piece of aluminum foil over the top.
Cool: Remove the pie from the oven and allow it to cool completely, at least 2-3 hours. This allows the filling to set up so it wont fall apart when slicing.
Video
Notes
Make Ahead Instructions: You can make the pie crust dough several days in advance, or freeze for months. The apple pie filling can also be made ahead, stored in the fridge before assembling and baking.Storing Instructions: Store at room temperature for up to several hours, or keep covered in the refrigerator for 2-3 days.Freezing Instructions: The pie crust and apple pie filling can be made and frozen in separate freezer safe containers for up to 3 months. Thaw completely before assembling. Baked apple pie can also be frozen once it has cooled completely. Cover the pie with plastic wrap and aluminum foil and freeze for up to 3 months. Thaw completely in the fridge (about 1.5 days) before serving.
This mint chocolate cheesecake recipe has a Oreo crust, topped with a peppermint-flavored cheesecake filling, and slathered in rich, mint-flavored ganache!
These Thanksgiving desserts are the most luscious, sumptuous treats for your table! Pick from ideas like pies, brownies, cheesecake, and…
These Thanksgiving desserts are the most luscious, sumptuous treats for your table! Pick from ideas like pies, brownies, cheesecake, and more.
Hunting for a stunning Thanksgiving dessert for your celebration? The holiday is the best time for pulling out all the stops with fall flavors to impress your guests. Here we’ve put together our top Thanksgiving desserts that will wow everyone!
Along with a few of our favorite recipes from this website, we’re featuring selections from two top baking experts: Jocelyn Delk Adams of Grandbaby Cakes and Tessa Arias of Handle the Heat. We know you’ll be blown away by the flavors of their no-fail baked recipes.
This luscious pumpkin tiramisu stars layers of spiced whipped mascarpone and coffee-soaked lady fingers—a true masterpiece! This Thanksgiving dessert is easy to make in advance and doesn't even require an oven: perfect for the holiday.
Imagine, bread cubes baked in a pumpkin-spiced custard until puffed and golden. Drizzle it with a golden bourbon butter sauce and it's a little bit of heaven. It's a great Thanksgiving alternative to pumpkin pie.
Here’s a Thanksgiving dessert that we like even better than pie (we think!). It’s thick and moist, scented with cinnamon, ginger and nutmeg. The best part? A layer of tangy, fluffy cream cheese frosting is the ideal flavor pairing.
These mini pies are more than just the novelty factor: though everything is more fun mini-sized! These pies are half the serving of a normal piece of pumpkin pie, and they’re incredibly tasty. Each bite has the perfect ratio of silky smooth filling to flaky pie crust.
Here's a stunning Thanksgiving dessert: scoop up lusciously soft pumpkin ice cream. It's creamy, scented with just the right hit of cinnamon, ginger, allspice and nutmeg. Take it to the next level and add candied pecans for a sweet, salty crunch.
This really is Grandma’s recipe: we worked with Alex’s mom to adapt her famous fall favorite for your home kitchen. Tender, cozy-spiced apples are baked up in a flaky pasty crust with a spiced brown sugar syrup. There’s a reason Grandma is famous for these!
Another favorite Thanksgiving dessert, these bars are perfectly moist and cakey, with just the right warm-spiced interior from cinnamon, ginger and nutmeg. They’re topped off with a lusciously creamy layer of cream cheese frosting that gives a tangy lift to each bite.
This apple cranberry crisp is a stunning Thanksgiving dessert! The tartness of fresh cranberries melds with sweet, comforting apples in a cinnamon-spiced fruit layer. The berries add a zingy flavor and a bright red hue, and it's topped with golden buttery crisp crumbles.
For a lighter Thanksgiving dessert, try Baked Apples! It’s like a short-cut apple crumble, but lighter, easier and tastier. Stuff the sweet tart fruit with oats, brown sugar, cinnamon, ginger and allspice, then bake until sweet and tender.
Want an easy Thanksgiving dessert that will have everyone talking? Try apple pie bars! It’s simple to whip up this handheld treat: the same dough makes a sturdy bottom crust and buttery crumbles of streusel topping! It’s topped with a sweet maple icing drizzle that tastes a bit like melty vanilla ice cream.
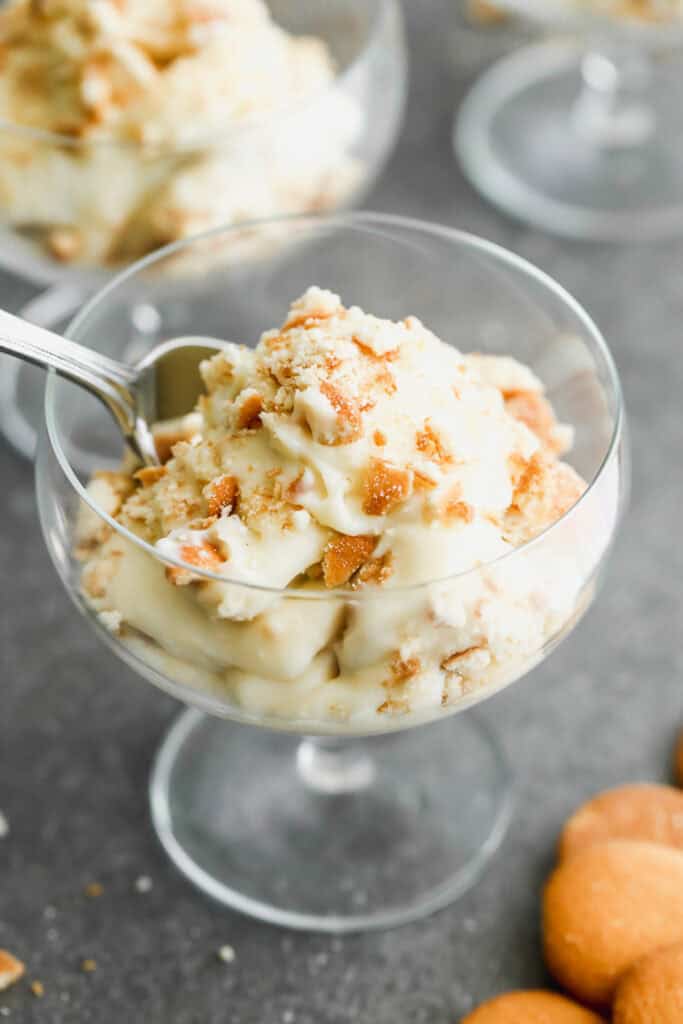
This sweet custard is made like a traditional homemade pudding with added pumpkin puree and cozy spices. To serve, add crushed gingersnaps or graham crackers and top with whipped cream! It’s like pumpkin pie filling in a glass: but a mini version with all the fun and none of the fuss.
Here’s a cozy Thanksgiving dessert calling your name: apple cobbler! The topping is a meld of a biscuit and a sugar cookie, chewy, sweet and baked into golden-brown dollops. It covers a sweetly-spiced apple layer that’s flavored with cinnamon, ginger, nutmeg and lemon zest for a little pop.
One of our ultimate Thanksgiving desserts is these pumpkin cookies! They're lusciously pillowy and chewy, scented with a burst of fall spices and a hint of molasses. The exterior has a subtle sugar crunch and a drizzle of simple sweet icing.
Who says Thanksgiving desserts are only pie? Here the crumble topping is the ideal texture: crispy but not crunchy, and buttery but not soft. The fruit layer below will make your heart sing: cinnamon, a hint of ginger and allspice set off just a hint of orange and lemon zest.
What makes this pie incredible? Let us count the ways. It tastes just like your favorite pumpkin pie, but it's 100% plant based! This vegan pie is so full of pumpkin-spiced sweetness and the flavors are so delightfully elevated, no one will guess it’s not the real thing.
They’re fudgy, chewy, chocolaty: try these sweet potato brownies! These brownies could not be more thrilled by their sweet potato interior. It makes the best chewy texture and loads them with nutrients.
A good pumpkin bread recipe works as dessert, especially if it's topped with this maple glaze! It’s tender and moist, but not too fluffy or too dense. The best part? It’s simple to whip up: one bowl, no special equipment; just dump and stir!
Thanksgiving desserts call for cozy spices like these chewy molasses ginger cookies! These soft and chewy cookies have a sugar-crisp exterior infused with cozy, bold spices. Each one is fractured into picture-perfect crinkles, and when you sink in your teeth for the first bite, it’s like being enveloped in a warm hug.
Variation: Make an ice cream sandwich with two of these cookies and pumpkin ice cream!
If there's someone we trust when it comes to Southern pies, it's Jocelyn Delk Adams of Grandbaby Cakes. Her Southern Pecan Pie is the best classic pie: nutty, sweet and buttery. It's made to be on your holiday table, especially when served with vanilla ice cream! via Grandbaby Cakes
Another fantastic pie from Jocelyn Delk Adams is this Sweet Potato Pie! It's filled with tender baked sweet potato, indulgent fall flavors and baking spices in a flaky buttery crust. If you vote sweet potato pie vs pumpkin, this is the Thanksgiving dessert you need. Via Grandbaby Cakes
Here's a Thanksgiving dessert that gives you the best of both worlds: Butter Pecan Cheesecake! A crisp graham cracker crust, salted brown sugar cheesecake filling and buttery pecan pie topping come together to create a unique, flavorful holiday dessert! via Grandbaby Cakes
Here's a Thanksgiving dessert that will have everyone talking: try this mashup of s'mores and pumpkin pie! Layers of buttery graham cracker crust encase a spiced pumpkin pie filling, toasted marshmallows, and decadent chocolate ganache. via Grandbaby Cakes
This Apple Tarte Tatin starts with slow-cooked, caramelized apples that are baked into a flaky, buttery puff then topped with a spiced Baileys Apple Pie liqueur cream sauce. It's all about fall flavors! via Grandbaby Cakes
Want pecan pie but in bars form? Try these indulgent and gooey pecan pie bars! They've got a buttery shortbread base, toasted pecans, sticky caramel, loads of chocolate and a salt sprinkle. via Grandbaby Cakes
Here's a unique Thanksgiving dessert featuring the flavors of the season: Brown Butter Maple Blondies! These blondies are easy-to-make and absurdly tasty. They're buttery, chewy, packed with maple flavor and made with pantry-staple ingredients. via Grandbaby Cakes
Thanksgiving is the ideal festive occasion for pound cakes! This apple cake has a sticky caramel icing, and it's made with a decadent, buttery cream cheese and topped with sauteed fresh apples. Delightful! via Grandbaby Cakes
Here's a fun Thanksgiving dessert that's a mashup of the traditional pecan pie with an ice cream pie! It’s sweet, creamy, studded with crunchy pecans and swirled with sweet syrup. It's a stunner! via Grandbaby Cakes
Creamy, smooth, rich, and indulgent Pumpkin Cheesecake made with a Biscoff cookie crust and topped with homemade whipped cream. This sumptuous dessert by baking expert Tessa Arias is fall perfection and perfect for any Thanksgiving dessert table! via Handle the Heat
Caramel pecan blondies for Thanksgiving dessert? Yes please! They feature an ultra chewy brown sugar blondie with a hidden layer of rich, gooey, and crunchy caramel pecan filling. Truly stunning! via Handle the Heat
Here's a unique Thanksgiving dessert that will have everyone coming back for more: Sweet Potato Pie Bars! They've got a thick graham cracker crust, fresh sweet potato filling, and tall toasted homemade marshmallow topping. via Handle the Heat
Looking for a traditional Thanksgiving dessert? Try an Apple Galette! The rustic crust makes it much easier than apple pie. It's got a buttery, flaky tart crust and a perfectly spiced apple filling. via Handle the Heat
Here's a fun, unique Thanksgiving dessert: creme brulee pumpkin bars! They're a fun twist on the traditional pumpkin pie with a graham cracker crust, chocolate layer, and creamy, spiced cheesecake filling, all topped with a crunchy caramelized sugar topping.
Are pecans your jam? Try this butter pecan sheet cake! It's moist and fluffy, studded with butter pecans, and topped with a luscious brown sugar glaze. It's easy to whip up with no mixer required! via Handle the Heat
Last up: pumpkin and chocolate make magic in these Pumpkin Chocolate Cheesecake Bars! They're luscious, thick, and smooth with a crunchy, buttery crust and swirls of chocolate. via Handle the Heat
There are so many tasty Thanksgiving recipes, it’s hard to know where to start! We’ve got ideas for every type of recipe, from sides to mains. Here are some of our top Thanksgiving ideas:
Preheat the oven to 350 degrees Fahrenheit. Butter or grease a 9 x 13-inch baking dish.
Cut or tear the bread into 1-inch squares. Place it in the baking dish and place in the preheating oven for 5 to 10 minutes until lightly dried but not browned.
Meanwhile, whisk the eggs. Then whisk in the milk, pumpkin puree, brown sugar, granulated sugar, vanilla, pumpkin pie spice, and salt. Pour it over the bread in the pan and mix it with your hands until fully coated.
Place in the oven and bake 45 to 50 minutes, until it is puffed and golden and you can no longer see standing liquid. Allow to cool for at least 15 minutes before serving. Make ahead: This recipe is great made ahead: make it day of and allow to sit at room temperature until serving, or make it 1 day in advance and refrigerate. If you’d like, you can crisp up the top by reheating it in a 350 degree oven until warmed.
Make the bourbon sauce: Prior to serving, in a small saucepan, whisk together all bourbon sauce ingredients over medium heat. When it starts to simmer, simmer lightly bubbling for 3 minutes, maintaining the heat at medium to medium low so that it doesn’t bubble heavily. Once it turns golden brown at about 3 minutes, taste and make sure the flavor is caramelly with a hint of bourbon (the bite of the bourbon should be cooked out). Remove from the heat and strain it into a pitcher. Makes ¾ cup; make up to 3 days in advance, refrigerate, and warm over medium heat before serving.