THE BEST Brownie Recipe I’ve Ever Made!

I’m not exaggerating when I say that this is absolutely the BEST brownie recipe of my life. I spend a lot of time baking (and eating!) and I’ve never had another brownie like this one. It is the ultimate in rich, fudgy, chocolatey flavor, all thanks to the magic of browned butter. Regular brownies just…

I’m not exaggerating when I say that this is absolutely the BEST brownie recipe of my life. I spend a lot of time baking (and eating!) and I’ve never had another brownie like this one. It is the ultimate in rich, fudgy, chocolatey flavor, all thanks to the magic of browned butter. Regular brownies just can’t compete with this depth of flavor. Originally posted January 30, 2013.
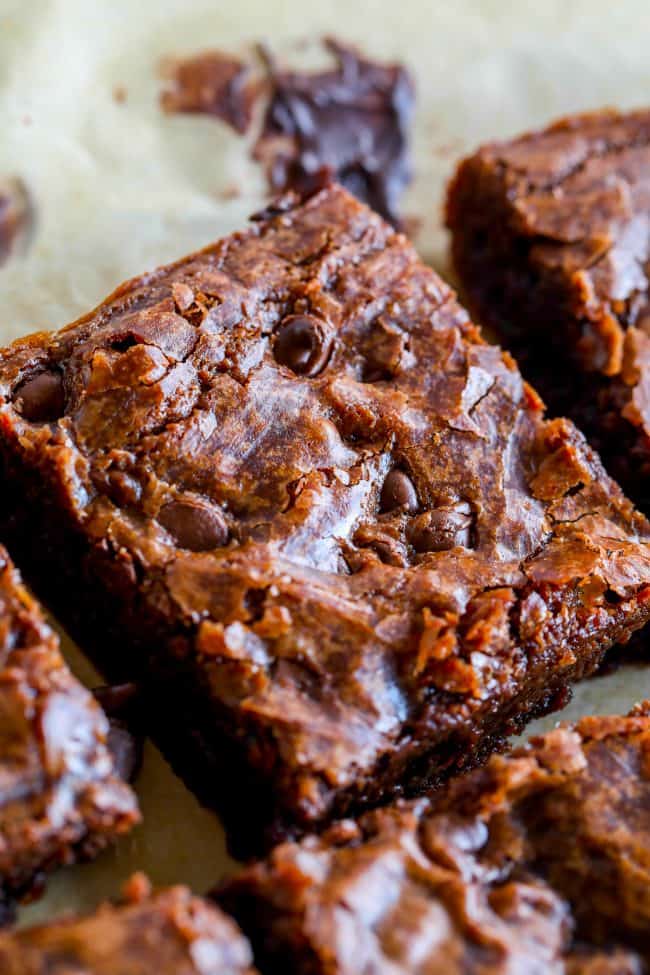
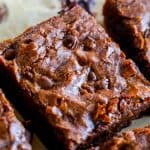
brownie cut into a rectangle.
Table of Contents
  1. Why this is the Best Brownie Recipe
  2. Brownie Ingredients
  3. How to make the Best Brownies
  4. How to store Brownies
  5. Best Brownies Recipe FAQs
  6. More brownie recipes you need in your life!
  7. Best Brownie Recipe EVER Recipe

The other day Truman asked me from the back of the car if he would have time to play legos before dinner when we got home. I cheerfully said, “Absolutely!” And then there was this pause, and he said, very confused, “So…will there be time to play legos?”

I laughed so hard. He was confused because for some reason, I say the phrase “Absolutely not!” when my kids are in trouble or need reprimanding. I think they’ve picked up some unjustified negative connotations on the word “absolutely,” so he had no idea that I was trying to say “yes” in a happy and emphatic way.
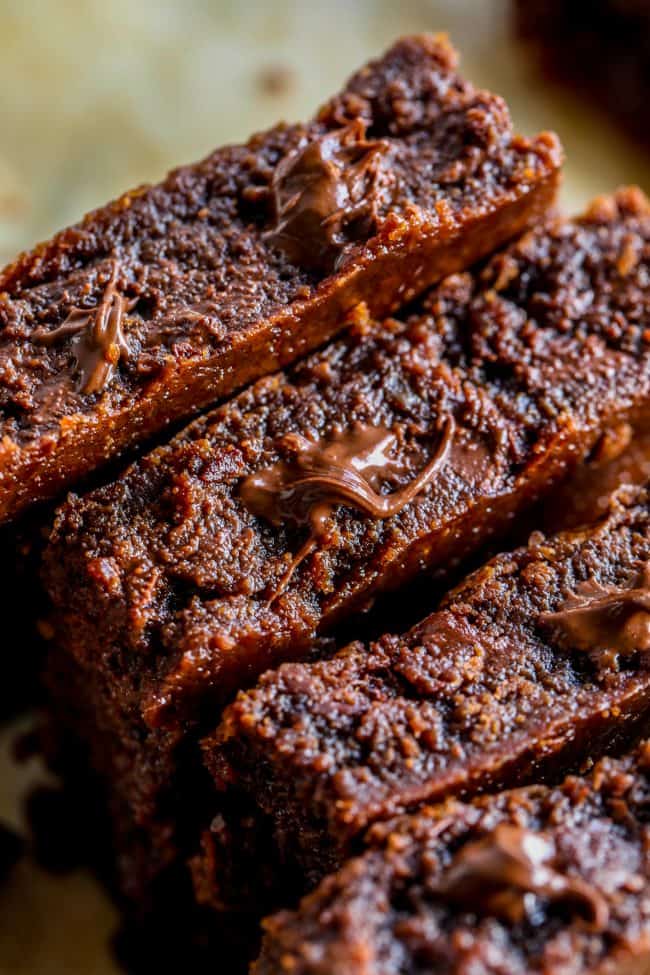
3 brownies lined up on edge.

Absolutely means, “with no qualification, restriction, or limitation; totally.” And I can say with fervency, guys, that these brownies are ABSOLUTELY the best ones to ever come out of my kitchen, or, dare I say, to cross my lips.

Everyone’s got a homemade brownie recipe, right? They are just an American classic. Even the boxed brownie mixes are okay. I mean they are nothing to write home about, but in a pinch, a brownie is still a brownie, right?
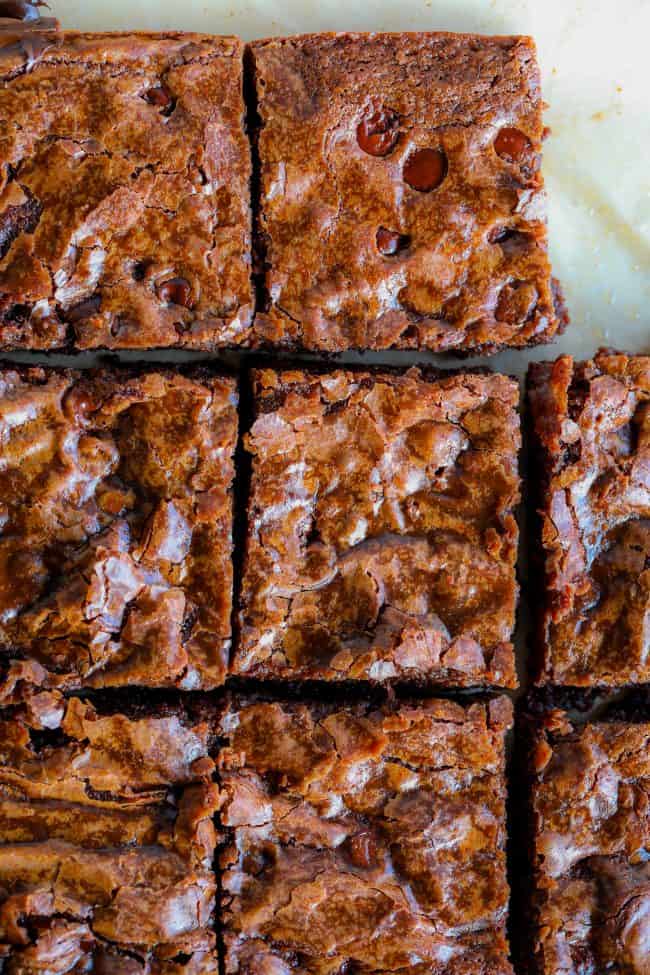
homemade brown butter brownies in squares.

I mean it’s chocolate and sugar, it’s going to taste delicious even if you mess them up or use a subpar recipe. It’s like pizza. Even when it’s bad, it’s good. (Have you ever bought a Little Caesar’s Hot and Ready intended for kids only but then you end up eating half the box? Guilty.)

But I say if you’re going to make brownies, you should go all in. Don’t waste your time or calories on brownies that don’t make you want to shout hallelujah.
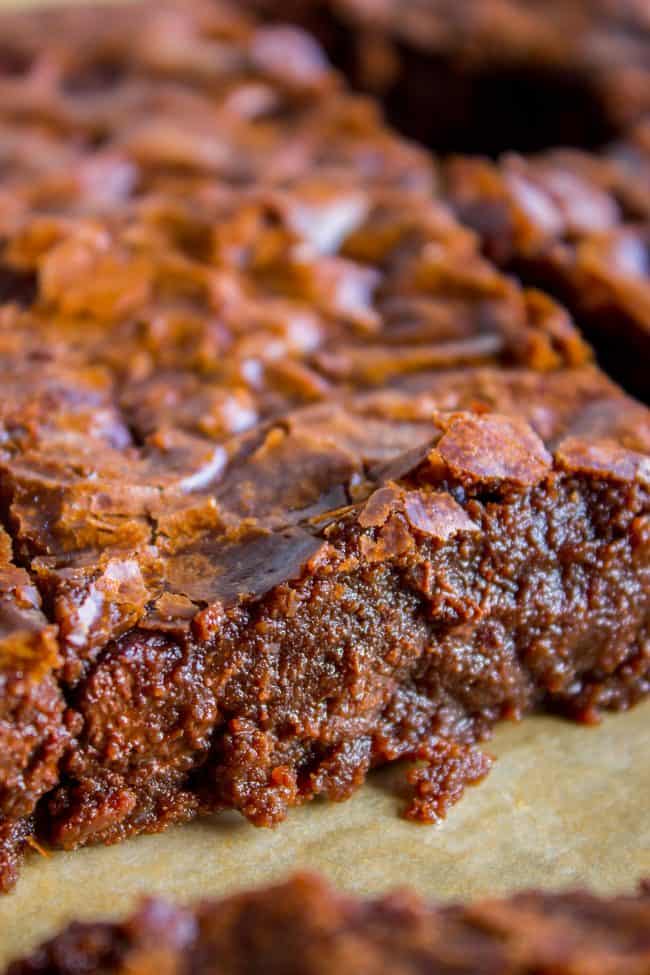
gooey brownies cut into squares.

Why this is the Best Brownie Recipe

I will tell you the secret: BROWNED BUTTER.

It is the best way to take brownies from, “wow, these brownies are so good” to, “OH MY GOSH WHAT IS THIS MAGIC.” And the awesome news is that it’s not even hard to do this. We’re not using any special ingredients. We’re not dirtying half a sink full of pots and bowls.

It’s a one-pot brownie recipe that is so gooey and fudgy and deep in flavor, you will be nervous that it is so dangerously simple to make. You can have these in the oven in 15 minutes flat.

Browned butter typically lends a nutty, almost toffee-like flavor to whatever you add it to. But this recipe is a little different. Chocolate is such a strong flavor (and there is so much of it!), that these brownies do not have that toffee-ish flavor. Instead, the browned butter serves to deepen the chocolate flavor.

I don’t like to add espresso in my baked goods, but I know that it adds depth to chocolate flavor without tasting like coffee. Browned butter does the same thing. It makes the brownies rich and deep. And it’s SO easy. The best brownie recipes always call for melted butter anyway, so just…carry on a bit until it turns brown. You will not regret it!
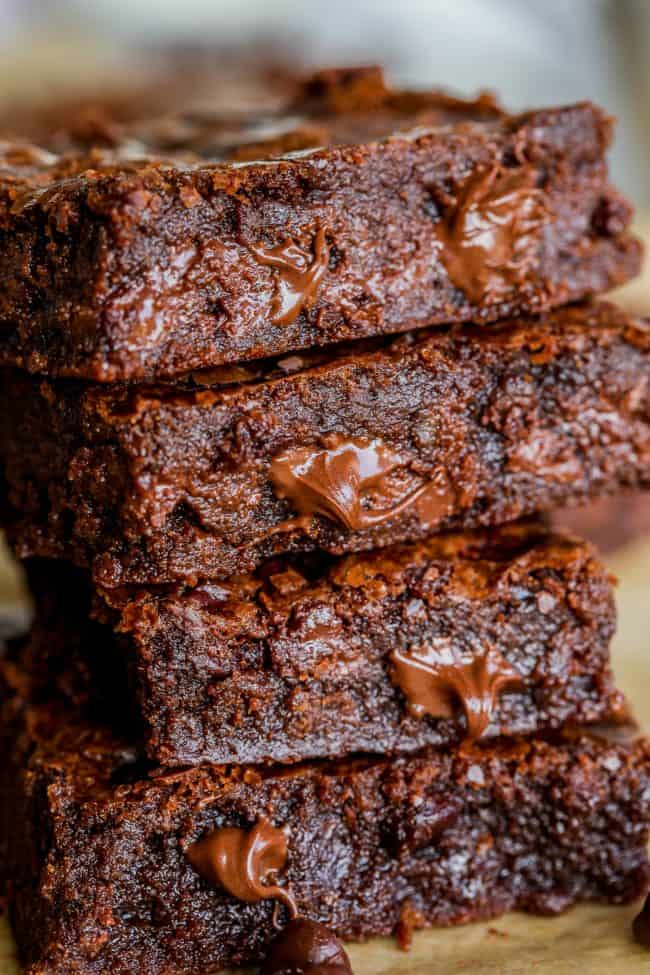
brownies in a stack with melting chocolate chips.

Brownie Ingredients

You probably already have all these ingredients, but don’t forget to make sure your chocolate chips are high-quality!

  • Salted butter
  • Unsweetened baking chocolate
  • Granulated sugar
  • Salt
  • Vanilla extract
  • All purpose flour
  • Large eggs
  • Semi-sweet chocolate chips, high quality

Yes, I said high quality chocolate chips. This isn’t the time to save fifty cents, people. Did I say the Best Minus 50 Cents Brownie? No, I said, Absolutely the BEST Brownies Recipe I’ve Ever Made. Mic drop.

How to make the Best Brownies
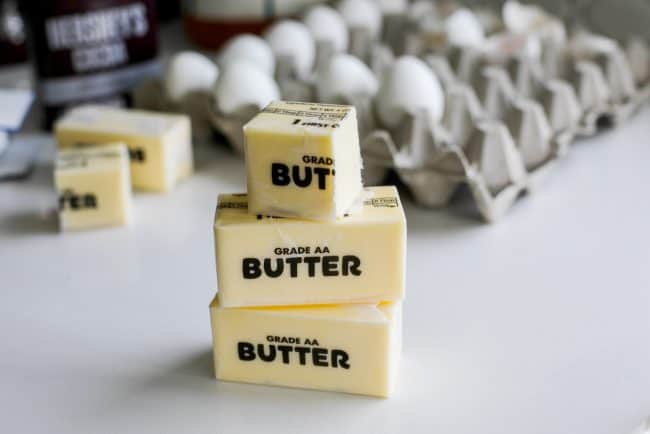
stack of butter sticks in front of eggs.

Buttaaaaaaaaa. All ready to get toasty brown.

Guys, once I teach you how to brown butter, the rest is so easy! Here’s an overview, followed by pictures and things to watch out for. All instructions given in the recipe.

  1. Brown the butter in a pot.
  2. Add unsweetened chocolate and sugar.
  3. Add salt, water, and vanilla.
  4. Stir in the eggs one at a time, making sure each egg is fully incorporated before adding the next one.
  5. Add 1 cup all-purpose flour. Stir in the flour until just barely incorporated.
  6. Pour the hot batter into your pan before adding the chocolate chips, so they melt in place rather than swirling into the batter.
  7. Bake!
brown butter in a pot, simmering and browning.

Here’s how to do it. Grab your pot and melt all that butter. Stir occasionally. The butter will foam, turn white, and rise up in the pan.

How long does it take to brown butter?

It depends on how much butter you are browning! One stick of butter will take about 5-8 minutes to brown, but since we are using so much butter in this recipe it takes more like 10-12 minutes. This really depends on the heat level of your stove, and every stove is different. It’s better to watch for browned butter signs like white foam and browned bits and a nutty scent.
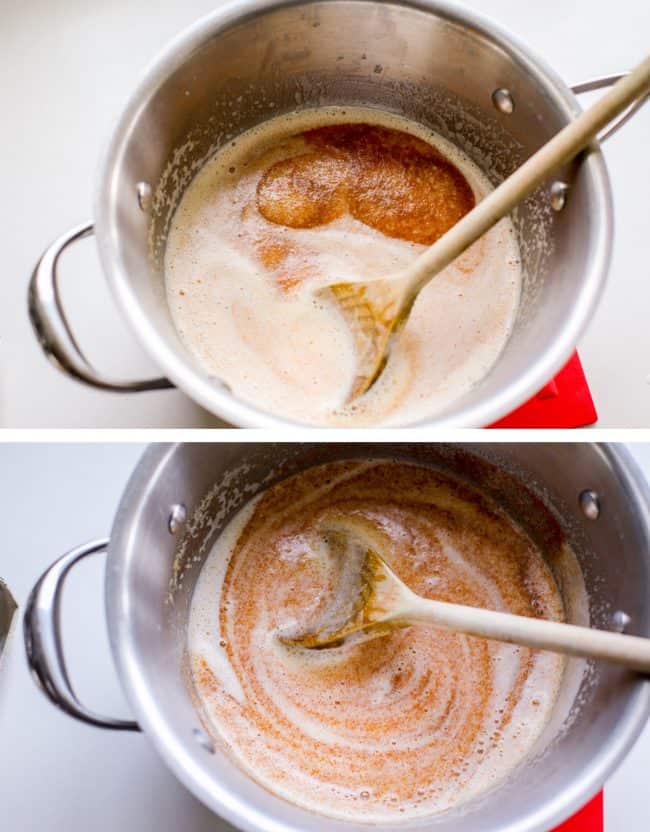
brown butter in a pot, simmering, taking on a caramel color.

Pretty soon after it foams, it will look like this gorgeous swirly goodness.

How do you know when brown butter is done?

It’s all about the color change! And the scent.

As the butter heats, it will turn white on top, then it will foam up. Once it is foamy, it will start forming brown colored milk solids or “bits”. They will swirl up when you stir. Once you see brown bits, remove the pan from the heat. It’s much better to rely on this very drastic color change and the nutty scent than to rely on timing.

Don’t stop cooking the butter until it is completely browned, or the brownies will have too much liquid and may not bake correctly. Some people have commented that this recipe never bakes for them, that the brownies turn to “lava.” It’s a case of too much liquid!

(Also I think it might be a case of people not understanding brownies. I’m serious. This ain’t no cake, people. You call it lava, I call it the best freaking gooiest brownie of your life.) Rest assured, these brownies bake up just fine when made correctly.
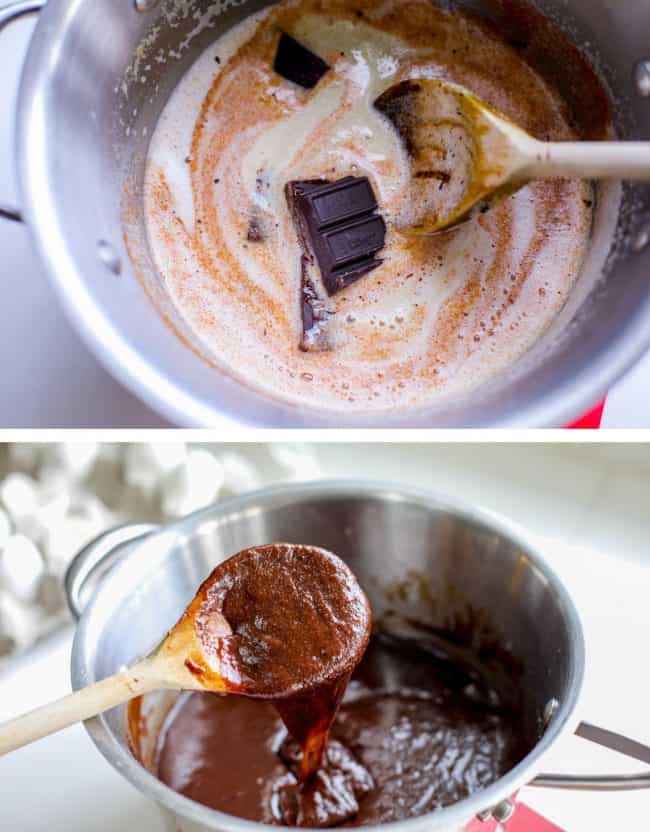
Sticks of chocolate melting into browned butter.

Here’s the batter all finished, once you’ve added the eggs and flour.

batter in a 9x13 inch pan with a measuring cup of chocolate chips to the side.

I like to add my chocolate chips after the warm batter is in the pan, so that they don’t melt and swirl into the batter.
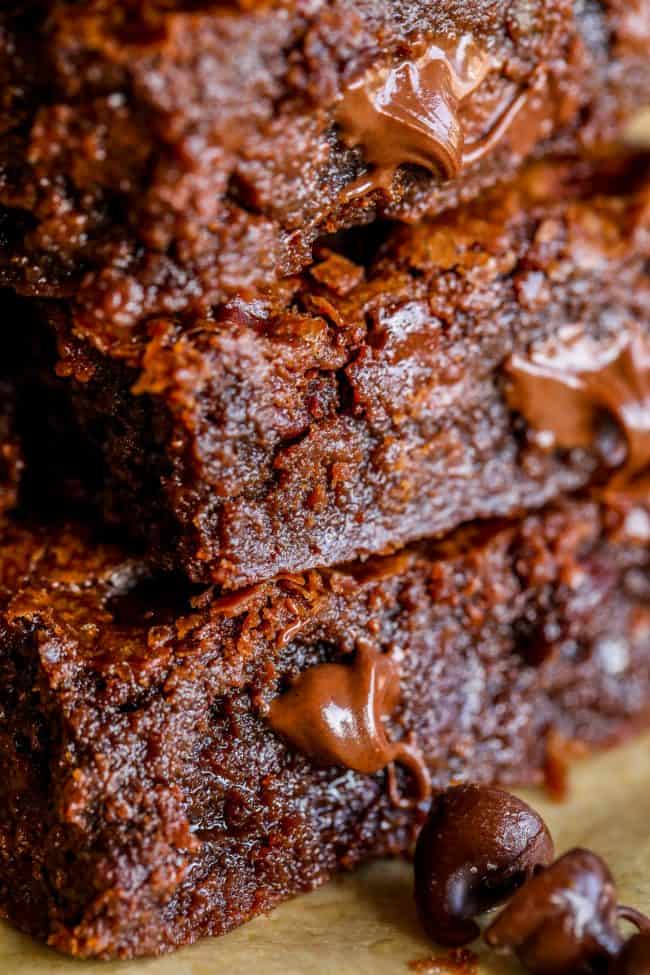
a stack of gooey, chocolately brownies shot up close.

How to store Brownies

Brownies never last long at my house. This might be because every time I walk past the kitchen I’m grabbing a “little” taste (I walk past the kitchen 100 times a day, you do the math). Put a lid on the pan, put some tinfoil on top, cut them into squares and put them in a ziplock in the freezer. You’re still not keeping them away from me no matter what you do. If you have better control than I do, they’ll last 3-4 days at room temperature or for 2-3 months in the freezer.

Best Brownies Recipe FAQs

Why are my brownies too gooey?

Does not compute. Ha! Just kidding.

I already mentioned browning the butter all the way. The other culprit is undercooking the brownies. I know, I know. You want soft brownies. I do too. The best way to check for doneness is the toothpick test: poke a toothpick in the center of the brownies and if there is no wet batter sticking to it, it’s done. (If there is, leave it in for a couple more minutes.)

Be sure to poke a couple times so that you know you’re not poking into a melted chocolate chip. Every oven is different, so you are going to have to use your best judgment here on the bake time! Do NOT over bake, or the brownies will be too dry. In my opinion, slightly underbaked is better than over-baked.

Keep in mind that the brownies will firm up as they cool. It’s actually really important to let this brownie recipe set up in the pan before cutting into them. Wait a good 15-30 minutes before slicing. They will fall apart and not stay in squares if you cut into them too soon. (I mean, this never stops me because I’m an animal apparently. But if you are planning to serve these to guests or gift these on a plate, it’s good to know.)

Can this recipe be made with a different type of chocolate?

Yes, you can make this recipe with either unsweetened baking chocolate OR 1 cup unsweetened cocoa powder. See notes! I just did a test making both versions of these brownies (unsweetened baking chocolate vs cocoa powder) during our Covid party last week (Omicron, amiright? ;) and the jury was split on which one people preferred. I guess you’ll have to try both! I prefer the recipe as stated, made with baking chocolate.

What can I substitute if I don’t have unsweetened chocolate?

This recipe requires either unsweetened baking chocolate or cocoa powder. I accidentally made these just over the weekend (January 2022) four different times, testing between unsweetened baking chocolate and cocoa powder. But on my first test I accidently used a bar of semi-sweet chocolate instead of unsweetened. It was waaay too sweet. Don’t be like me. Get yourself some unsweetened baking chocolate, Baker’s brand is best.

As for the semi-sweet chocolate chips, you can swap them out for milk chocolate or dark chocolate no prob. (Dark chocolate is goooood.) Or go to town and try Rolos or Reese’s cups, because YES.
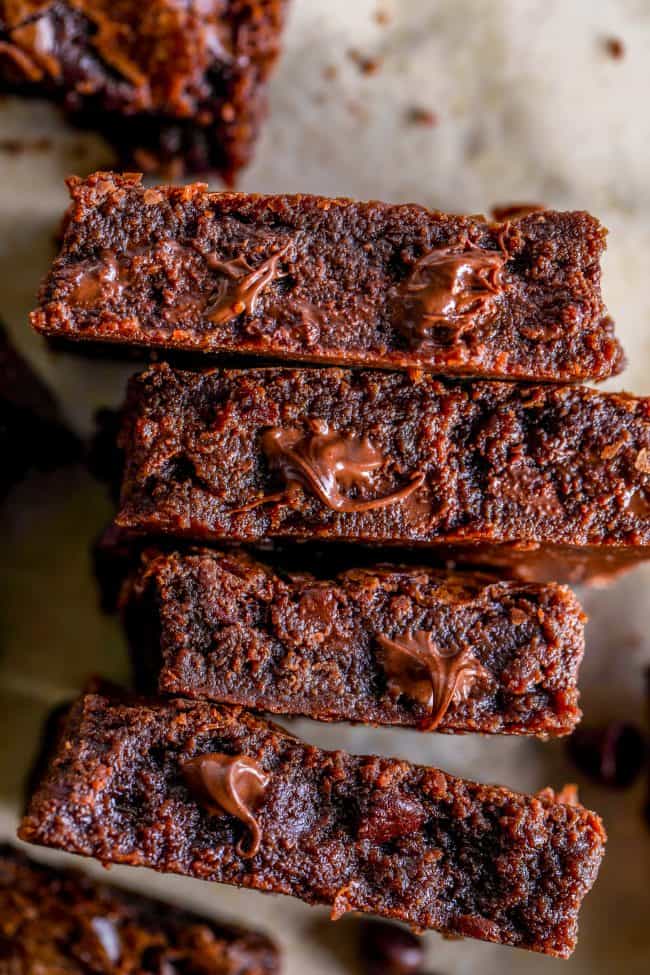
brownies cut into squares.

I’ve been making these homemade brownies for many years now, and get so many requests for the recipe. I just gave leftovers from this batch you see in the photos to a friend of mine, and she texted me a few hours later that her husband was going on about the brownies and needed the recipe. I promise, it will not let you down. Everyone needs a go-to brownie recipe, and this one should be yours!

I only have one other brownie recipe that I make on the regular: Nana’s Famous Fudge Brownies. They do not have browned butter, but there is fudge frosting involved, meaning they are ultra decadent. I love them, but the frosting is necessary in my opinion, and I don’t always want frosted brownies. I need those crackly tops in my life. Only these browned butter brownies will do when the need for a classic brownie strikes.
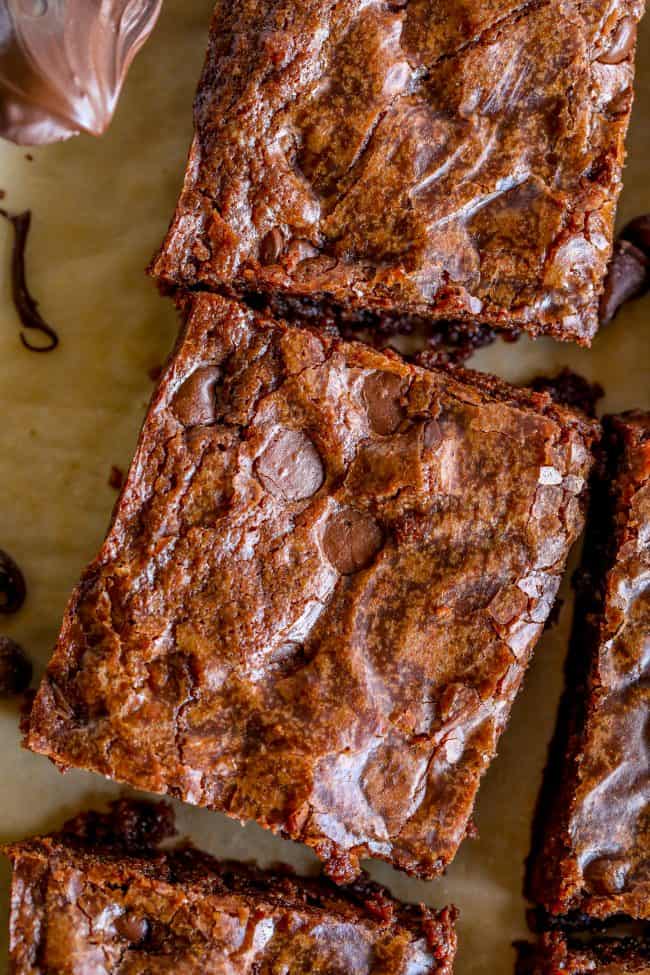
shiny tops of brownie squares.

I’m a brownies-and-milk kind of girl, but even I have to admit that ice cream definitely takes these already fabulous fudgy brownies over the top. Prepare yourself. You will need something, because these brownies will make all of those got-milk commercials come true, and you may actually die from chocolate overload if you don’t have at least a glass of milk. Enjoy!

More brownie recipes you need in your life!

Facebook | Pinterest | Instagram

Print

Best Brownie Recipe EVER

I'm not exaggerating when I say that this is absolutely the BEST brownie recipe of my life. I spend a lot of time baking (and eating!) and I've never had another brownie like this one. It is the ultimate in rich, fudgy, chocolatey flavor, all thanks to the magic of browned butter. Regular brownies just can't compete with this depth of flavor. 
Course Dessert
Cuisine American
Prep Time 10 minutes
Cook Time 25 minutes
Total Time 35 minutes
Servings 24 Servings
Calories 275kcal

Ingredients

  • 1 & 1/4 cups salted butter
  • 4 ounces unsweetened baking chocolate *broken up
  • 2 & 1/2 cups granulated sugar
  • 1/2 teaspoon salt
  • 1 tablespoon water **
  • 2 teaspoons vanilla extract
  • 4 large eggs
  • 1 cup all purpose flour
  • 1 & 1/4 cups semi-sweet chocolate chips high quality

Instructions

  • Preheat your oven to 350 degrees. Line a 9×13 inch baking pan with parchment paper. You can also line it with aluminum foil (be sure to spray the foil with nonstick spray). Or you can just spray the pan.
  • In a medium pot (I use a 3 quart saucepan), melt 1 and 1/4 cups of butter over medium heat. Yes, 1 and 1/4 cup. I called these the best brownies of all time, not healthy brownies!
  • Stir the butter occasionally. See photos for how to brown butter. It will turn white on top, then it will foam up. Once it is foamy, it will start forming brown colored milk solids or “bits”. They will swirl up when you stir. The scent of the butter will change to a “nutty” or toffee like aroma. Once you see brown bits, remove the pan from the heat. Do not stop cooking the butter until it is completely browned, see note.
  • Immediately add 4 ounces of unsweetened baking chocolate. Break it up into pieces so that they melt faster. Stir until it is melted all the way.
  • Add 2 and 1/2 cups sugar and stir it together. If there are still bits of chocolate that have not melted, put it back on the burner on low until it is smooth.
  • Add 1/2 teaspoon salt, 1 tablespoon water, and 2 teaspoons vanilla. Stir it together.
  • Whisking vigorously so they don't curdle in the hot batter, stir in the eggs one at a time, making sure each egg is fully incorporated before adding the next one. I highly recommend an actual whisk for this step; a wooden spoon won't break up the egg whites as well.
  • Add 1 cup all-purpose flour, spooned and leveled. That means take a large spoon and add flour to your measuring cup, then level off the top with something flat like a butter knife. Stir in the flour with a wooden spoon until just barely incorporated.
  • Do not over mix. Over-mixed batter makes for a tough brownie, which is not what we're going for. You want soft, tender brownies! Once you don't see any more flour streaks, stop messing with it.
  • Scrape the batter into the prepared pan and spread to the edges.
  • Sprinkle 1 and 1/4 cups chocolate chips evenly over the batter. Use your spatula to gently fold it in. If you add the chocolate chips to the batter before pouring it into the pan, they tend to melt and swirl on you. Which might be okay with you. I prefer my chocolate to stay in chip form so that when you bite into a brownie you get tiny little pools of chocolate. Mmm.
  • Bake at 350 for about 25-30 minutes. The edges should be set. The center of the pan should not wobble when you shake it. I always do the toothpick test: poke a toothpick in the center of the brownies and if there is no wet batter sticking to it, it's done. (If there is, leave it in for a couple more minutes) Be sure to poke a couple times so that you know you're not poking into a melted chocolate chip. Every oven is different, so you are going to have to use your best judgment here on the bake time! Do NOT over bake, or the brownies will be too dry. In my opinion, slightly under baked is better than over baked. Keep in mind that the brownies will firm up as they cool.
  • When the brownies are done, remove from the oven and let cool as long as you can before giving in and trying a piece.
    If you need them to look nice, you need to let them set up in the pan for at LEAST 15-30 minutes.
  • To cut these into nice looking squares, once the brownies have cooled, lift the parchment paper or foil out of the pan. Cut with a sharp knife, wiping the knife on a clean wet towel in between slices.
  • These are almost impossible to eat without a glass of milk.
Notes

*You can also use 1 cup unsweetened cocoa powder! It changes the texture though. I much prefer these made with unsweetened baking chocolate.
**I know brownies don’t usually call for water. This recipe has water to replace some of the liquid lost in browning the butter. 
 

Nutrition

Calories: 275kcal | Carbohydrates: 31g | Protein: 3g | Fat: 16g | Saturated Fat: 10g | Polyunsaturated Fat: 1g | Monounsaturated Fat: 5g | Trans Fat: 1g | Cholesterol: 57mg | Sodium: 147mg | Potassium: 113mg | Fiber: 2g | Sugar: 24g | Vitamin A: 345IU | Calcium: 19mg | Iron: 2mg

The BEST Buttercream Sugar Cookie Frosting Recipe

The only buttercream frosting recipe you will ever need to top your soft Sugar Cookies with! Two special ingredients make this frosting the most vanilla-y recipe you ever did taste. Originally posted March 17, 2017. My tried and true Buttercream Frosting for Cookies Happy St. Patrick’s Day everyone! What are you doing to celebrate Ireland getting all…

The only buttercream frosting recipe you will ever need to top your soft Sugar Cookies with! Two special ingredients make this frosting the most vanilla-y recipe you ever did taste. Originally posted March 17, 2017.

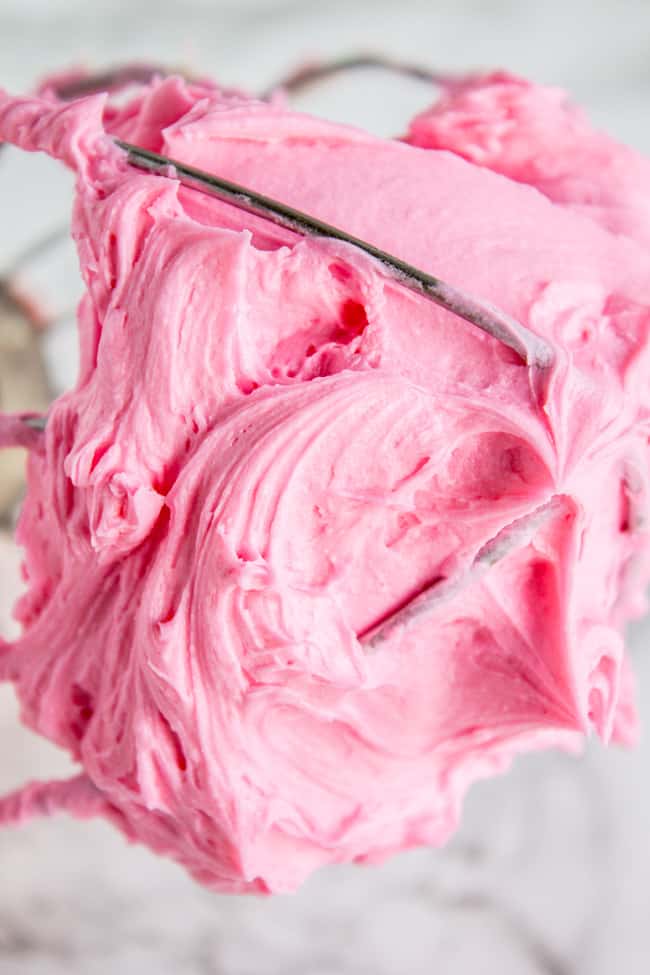
Pink sugar cookie frosting on knife
Table of Contents
  1. My tried and true Buttercream Frosting for Cookies
  2. Sugar Cookie Frosting Ingredients
  3. How to make Frosting for Sugar Cookies
  4. How to Frost Sugar Cookies
  5. How to store
  6. Sugar Cookie Frosting Recipe FAQs
  7. More great frosting recipe to put on Sugar Cookies!
  8. Here are some more killer desserts with frosting!
  9. Cookie Frosting Recipe Recipe

My tried and true Buttercream Frosting for Cookies

Happy St. Patrick’s Day everyone! What are you doing to celebrate Ireland getting all the snakes out of the land? Is that a myth? What is St. Patrick’s Day about again??

All I know is that I’m glad I’m not in school anymore, because I’m pretty sure I would be pinched within an inch of my life. I have ZERO green in my wardrobe right now. That’s because my wardrobe consists of 5 shirts. (Even after asking my friends on Facebook where to buy shirts and getting tons of suggestions, I still ended up buying all 5 shirts at Target, where I always buy my shirts. Because I’m classy and like to pick up my fashion digs and toilet paper all in one run.)

Sugar cookie frosting recipe in white on a cookie with sprinkles.

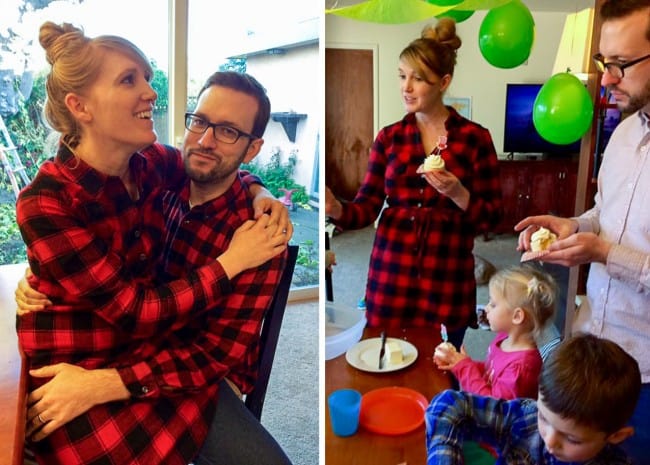
3 of my 5 shirts are the same shirt in different colors. (So if you see a blonde girl picking up toilet paper at Target wearing a black, red, or blue plaid button up, it’s me.) This is my uniform lately because I’m still working on getting that beach body back after having my 3rd kid (har har), and because I like to wear button up shirts because I’m still nursing.

Sugar cookie decorated with white frosting for sugar cookie and sprinkles.

The other day I get this text from my best friend Sarah:

“Ok so today we went to Muir Woods and Max [her 5 year old] saw a picture of someone standing next to a redwood tree. He said, ‘Why are Karen and Eric in that picture?’ I had no idea what he was talking about until I saw the person was wearing a red and black plaid shirt.”

couple in plaid shirts.

These photos were taken on 2 different occasions at Sarah’s house. I can see why Max is confused.

Side note: When Sarah texted me, I sent her a picture of myself. Because I was wearing that exact same red plaid shirt. With my hair up in a bun. What is it with me?? Somebody call the fashion police.

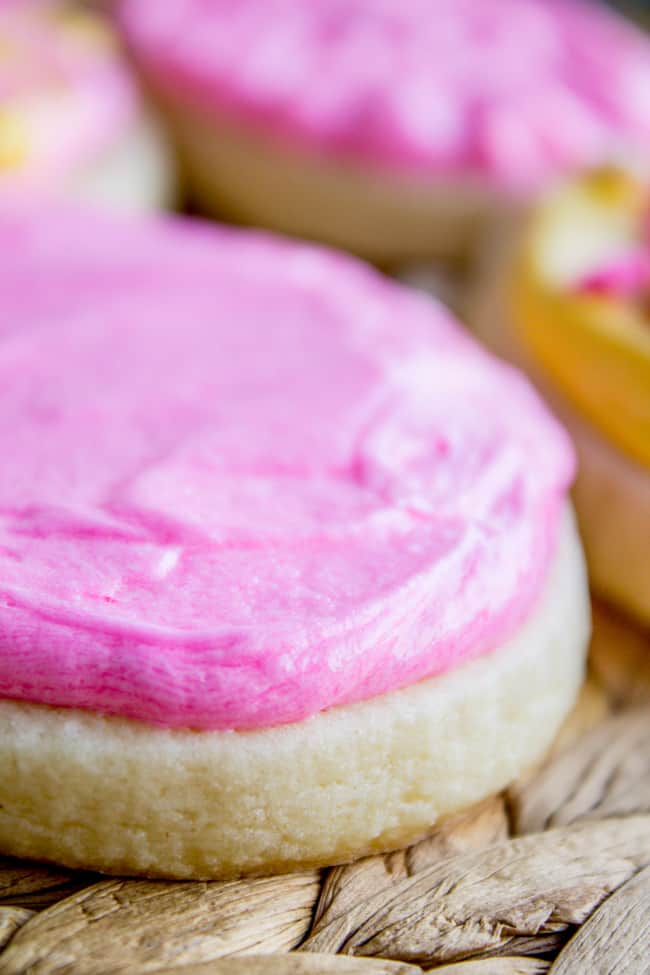
Pink cookie frosting on top of sugar cookie.

I hope you guys saw my post earlier this week where I shared the recipe for the Softest Sugar Cookies! This frosting is the perfect compliment! This recipe is a classic buttercream: all butter, whisked together with a bunch of powdered sugar and cream. Typically for vanilla frosting all you have to do is add a bit of vanilla extract. But THIS recipe also adds in coconut and almond extract.

You might think it sounds overkill, but I swear it’s not. This is a copycat recipe for the frosting at The Sweet Tooth Fairy, which is an amazing bakery chain in Utah. Sweet Tooth Fairy has the BEST sugar cookies. The frosting is so light and fluffy and just has the most amazing flavor…now you know the secret, it’s a little touch of almond and coconut.

extracts for making sugar cookies.

Trifecta of awesomeness.

Don’t wimp out on me and go with only vanilla as a flavoring. It’s so worth a trip to the baking aisle for these lesser-used extracts! I’m telling you!

  • Salted butter, softened. Add ¼ teaspoon of kosher salt to the recipe if you are using unsalted butter.
  • Powdered sugar
  • Heavy cream. No, you’re not going to dump coffee creamer in your frosting! You’re going to head to the milk section of your grocery store and find a carton of delicious heavy cream (sometimes called whipping cream).

Tools needed

You can really go to town on decorating supplies, including buying a whole kit and sometimes even a whole caboodle! You really don’t need much for buttercream though. To start with though, make sure you have these on hand:

  • Piping Bags. These are often sold in the baking or party aisles of a store. You can also use a sandwich bag and just snip off the corner!
  • Piping Tips (or piping nozzles as they are also called). These come in all different shapes. Again, if you don’t have one, you can cut a small hole in the corner of a sandwich bag to mimic a round tip. You aren’t going to have as much control over your design though.
  • Butter knife or thin spatula for spreading the frosting.

How to make Frosting for Sugar Cookies

Get ready for the FLUFFY! If you have a stand mixer, be sure to use the whisk attachment. It gets so much fluffier than when you use the paddle! I tested it both ways. Fluffy frosting=love. (All instructions are also given in the recipe.)

  • Beat the softened butter until it is fluffy, about 2-3 minutes.
  • Add half of the powdered sugar and 2 tablespoons cream. Beat well. Scrape the sides and bottom of the bowl.
  • Add the remaining powdered sugar and 2 more tablespoons of cream. Beat well.
  • Add salt, vanilla, coconut, and almond extracts. Beat well. Scrape the sides and bottom of the bowl.
  • Add remaining 1-2 tablespoons of cream, if needed.
  • Add gel food coloring if you want to tint the frosting. Avoid liquid food coloring because it can mess with the consistency.
  • Frost the cookies! Keep reading for decorating ideas!

You can frost these however you want, but I wanted to show you how to do this fun technique:

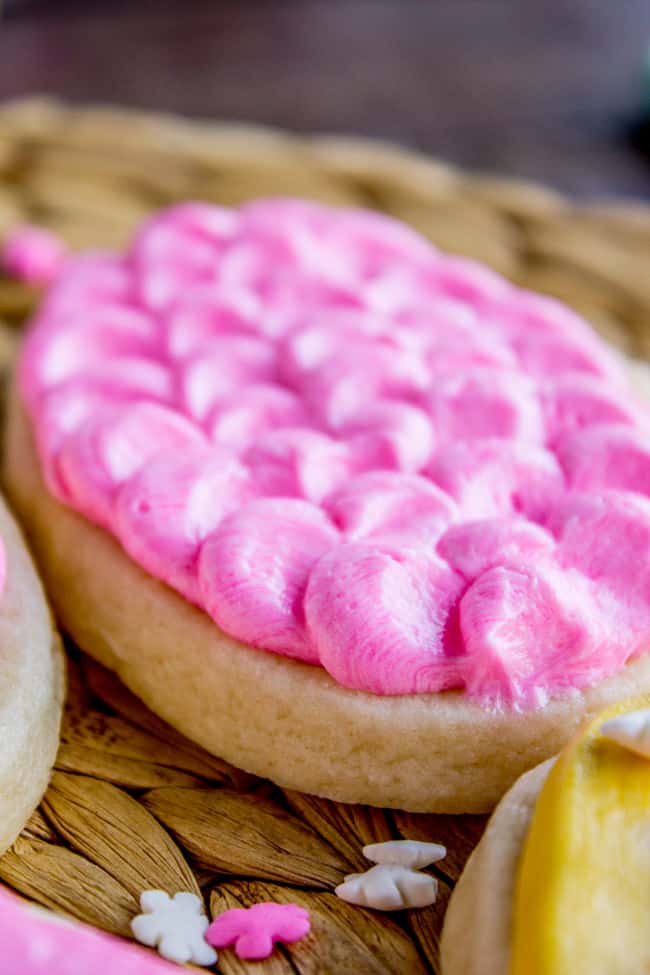
Buttercream frosting for cookies in decorative scallops on top of a soft sugar cookie.

Aren’t these little scallops cute? It’s easy enough that even a frosting dummy like me could pull it off. Let’s get into the details:

How to Frost Sugar Cookies

putting buttercream icing into a piping bag.

Now that you have your supplies, you’re ready for all the fun!

First, fill your bag with frosting. Do you guys know the glass trick? It’s so much easier to add the frosting if the bag is draped over the edge of a glass. Or if you don’t have a piping bag you can use a sandwich bag and snip the end off like in the picture above.

icing cookies with buttercream.

Next, using the decorating bag with a round decorating tip, add dollops of frosting in a row at the top of the cookie. With your butter knife or spatula, smear the frosting, starting at the center of the dollop and dragging the knife toward the bottom of the cookie. Add a new row of dollops of frosting on top of the row of frosting smears. Repeat all the way down the cookie.

You can also do two colors if you want, like the yellow and pink one I did up there. Or how about a rainbow one! That would be so cute!

Green sugar cookie frosting on top of a Christmas tree shaped cookie.

Poll time: ^^Sprinkles?^^ Yay or nay? I’m a total scrooge and hate sprinkles. Unless they are jimmies. But they sure do look festive! Don’t let my sprinkle-hating ways ruin things for you!! (This cookie was delicious after I scraped all those white balls of crunchiness off of my super soft cookie.)

How to store

In your stomach. That’s where all your cookies should be stored. Possibly your hips if you wait long enough. I’m telling you, one batch will be GONE. Two batches? GONE. Three batches? Fine. Maybe.

But seriously though. Even if you eat ‘em all, storage is ESSENTIAL for soft cookies. I’m not worried about your frosting, I’m worried about your cookies. As I explain in my post on the Softest Sugar Cookie of Your Life, (which you should absolutely check out because I mean the SOFTEST COOKIE!), you need to seal your cookies in an air-tight container within minutes of them cooling and only take them out to frost or eat them. Or photograph them, or maybe just to deeply inhale their scent. No judgment here.

A soft sugar cookie topped with pink frosting with a bite taken out of it.

Should frosted sugar cookies be refrigerated?

I say no. Buttercream frosting will keep on the counter for several days. (Although if they are sitting right there on your counter there is no way they will last that long!) Baked goods stored in the fridge dry out faster than they do at room temperature.

However, there are some people who really enjoy chilled sugar cookies, and I have to say that over the years I have come to appreciate a chilled cookie! Try it out!

Also, if summer is upon you and your house is hotter than room temperature, then refrigeration in an air-tight container is the best for these cookies. Buttercream frosting is made of (surprise!) butter, which can literally melt in warm temperatures. Otherwise, an air-tight container on the counter is fine. No letting them dry out! Now go forth and FROST!

Buttercream Cookie Frosting vs. Royal Icing – What is the difference?

So this buttercream frosting gives sugar cookies the creamiest, softest, most nuanced flavor. But is buttercream frosting for every cookie?

I know, I know, some of you are going to want to stack sugar cookies for shipping. No, you can’t use buttercream if you’re doing that. You need royal icing and a royal amount of patience. Royal icing hardens to a candy-like texture that holds its shape during apocalypses, should you run into any.
THIS frosting is sweet, dreamy buttercream, and is meant for jamming into your mouth immediately after slapping it on top of the Softest Sugar Cookie of Your Life. No apologies. If you insist on using royal icing (here’s a recipe), be very careful not to break the cookies. These cookies are much more delicate than your average sugar cookie, meaning they break easier when shipping.

Will this frosting harden like some other cookie icings?

No, buttercream frosting stays fluffy and creamy forever, thank heaven! Just make sure to store it air-tight!

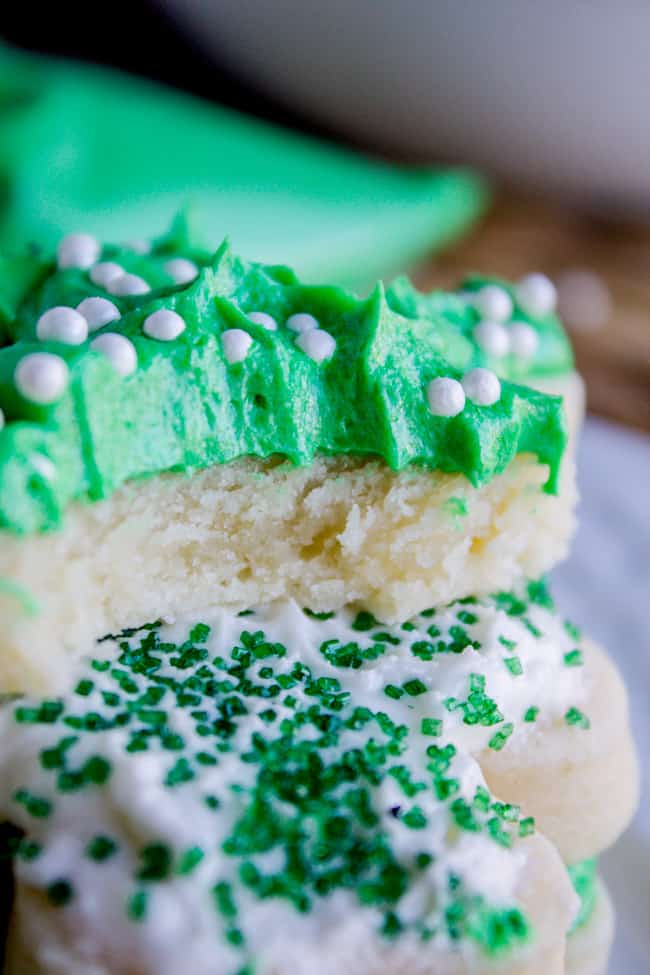
Green frosting for cookies with sprinkles on top of cookie with bite taken out of it.

More great frosting recipe to put on Sugar Cookies!

Here are some more killer desserts with frosting!

Facebook | Pinterest | Instagram

The BEST Buttercream Frosting for Sugar Cookies from The Food Charlatan
Print
The only buttercream frosting recipe you will ever need for Sugar Cookies! Two special ingredients make this the most vanilla-y recipe you ever did taste.
Course Dessert
Cuisine American
Prep Time 10 minutes
Total Time 10 minutes
Servings 24 cookies
Calories 155kcal

Ingredients

  • 1 cup salted butter softened (2 sticks)
  • 4 cups powdered sugar divided
  • 4-6 tablespoons cream divided**
  • 1/4 teaspoon salt
  • 1 teaspoon vanilla I love Mexican vanilla
  • 1/2 teaspoon coconut extract
  • 1/2 teaspoon almond extract
  • gel food coloring

Instructions

  • In a large bowl or stand mixer, use the whisk attachment* to beat the softened butter until it is fluffy, about 2-3 minutes. Remember to scrape down the sides and bottom of the bowl!
  • Add half of the powdered sugar and 2 tablespoons cream**. Beat well. Scrape the sides and bottom of the bowl.
  • Add the remaining powdered sugar and 2 more tablespoons of cream. Beat well.
  • Add salt, vanilla, coconut, and almond extracts. Beat well. Scrape the sides and bottom of the bowl.
  • Add remaining 1-2 tablespoons of cream, if needed.
  • Add gel food coloring if you want to tint the frosting. (liquid food coloring can mess with the consistency.)
  • This is enough frosting to do about 2 dozen cookies, but that totally depends on your cookie shape. Frost the cookies (Here's the cookie recipe) and store in a tupperware on the counter for 2-3 days.
  • Leftover frosting is great on graham crackers!

Notes

*I tested this recipe using the paddle attachment one time and the whisk attachment the other time. So much fluffier with the whisk! I’m never going back!
*Heavy cream is usually sold near the milk at the store. It is sometimes called whipping cream. The different names refer to different fat content levels. (Any type of cream will do for this recipe. The higher the fat content, the richer your frosting will be) Heavy cream is not coffee creamer. It is the thick, rich part of milk that rises to the top when you milk a cow. Those of you who know what cream is think it is odd that I am explaining this, but it is one of my most-asked questions when I post a recipe involving cream!
 

Nutrition

Serving: 1cookie | Calories: 155kcal | Carbohydrates: 20g | Protein: 1g | Fat: 9g | Saturated Fat: 5g | Polyunsaturated Fat: 1g | Monounsaturated Fat: 2g | Trans Fat: 1g | Cholesterol: 24mg | Sodium: 93mg | Potassium: 5mg | Sugar: 20g | Vitamin A: 273IU | Vitamin C: 1mg | Calcium: 4mg | Iron: 1mg

The Best Homemade White Cake from Scratch

HALLELUJAH! Finally a moist white cake from scratch that doesn’t taste like cardboard.  I promise, this will be the best homemade white cake recipe of your life! It is soft and fluffy, while still being super moist. The balance of fluffy and moist is exactly perfect for how cake ought to be! It’s full of buttery…

HALLELUJAH! Finally a moist white cake from scratch that doesn’t taste like cardboard.  I promise, this will be the best homemade white cake recipe of your life! It is soft and fluffy, while still being super moist. The balance of fluffy and moist is exactly perfect for how cake ought to be! It’s full of buttery rich flavor. I’m so excited. You are going to love it too! This recipe was originally posted on April 12, 2019.

white cake with vanilla frosting.
Table of Contents
  1. Moist White Cake Recipe
  2. White Cake Ingredients
  3. How to make Homemade White Cake
  4. How to store Homemade White Cake
  5. Best White Cake Recipe FAQs
  6. Here are a few of my other BEST CAKES:
  7. The Best Moist White Cake Recipe Recipe
  8. More recipes you will love!

Over the past few years, especially after I hit the 30 mark (and had my 3rd kid), I’ve become a lot more stingy with the carbs in my life. 10 years ago, a sandwich for lunch was standard, and there were zero feelings of indulgence. Pasta for dinner? Of course! It’s cheap.

These days, I tend to view all carbs as equal. Pasta is basically cookies. Bread is kind of the same as cake. You can choose to eat a dinner roll, but just know that it’s basically dessert.

This is a bit extreme and ridiculous I know, but I think it’s my weird brain’s way of putting limits on the carbs in my life. The unfortunate development after all this brainwashing is that these days, I sometimes skip out on regular mealtime foods, because I know I’m going to eat brownies later, whether or not I eat the real food.

homemade white cake with vanilla frosting.

Should I eat a healthy lunch at 11:30, after skipping breakfast? (I dabble in intermittent fasting.) Or shall I just start off with a few bites of this gorgeous homemade white cake? I mean, I did skip breakfast. So this is just kind of like the breakfast that I would have had…But now I ate the whole slice, and who really needs lunch anyway?

Do you see the slippery slope??

Moist White Cake Recipe

I have a quarter of this white cake left. It’s sitting on my counter right now, on the white cake stand you see in these photos, with an ugly metal bowl inverted on top, because I don’t have a pretty cake dome thing. Eric is hosting his book club tonight and he told me that they can take care of the cake if I want.

He meant it as an offering, a service. You see, I’ve been testing white cake recipes for weeks now, and I’ve been shoving off white cake to every single human who passes the threshold of this house, and even those who don’t. I beg Eric to take the rest to work. I yell at my mail lady as she fills our box. I call over my neighbors. I chase down my friends who are doing carpool drop off. “WAIT, DO YOU WANT SOME CAKE?”

moist white cake with vanilla frosting.

But now it’s just me. Alone in my house, with a quarter of a homemade white cake sitting next to me, trying to write a blog post about said white cake.

You might be thinking, who even likes white cake? I mean isn’t chocolate always better? WRONG SIR. White cake from a box destroyed my opinion of white cake, but I’m telling you guys, one bite of this from-scratch version will have you shouting hallelujah. It is moist, tender, and perfectly fluffy. The vanilla flavor really comes through. It’s a winner!

White Cake Ingredients

You’ll need a few things beyond pantry staples. Here’s what to get at the store. (Quantities given in the recipe below.)

  • Salted butter. You can use unsalted butter, but you may want to add another pinch of salt to the recipe.
  • Granulated sugar
  • Vegetable oil. I like to use light olive oil, but any kind (canola oil, etc) will do.
  • Large eggs
  • Buttermilk*
  • Vanilla extract
  • Full fat sour cream. Yes, I said full fat!
  • Flour. I used all-purpose flour and have a moist, fluffy cake!
  • Kosher salt. A flakey salt that absorbs moisture. To substitute table salt instead of kosher salt, use ¾ teaspoon table salt for every 1 teaspoon of kosher salt called for in the recipe.
  • Baking powder

*Cheater buttermilk will do just fine! I tried it. Add 1 tablespoon vinegar to a 1 cup measuring cup, then fill it to the 1 cup mark with milk. Use the highest fat content milk you have; whole milk is best. Stir it together and let sit a couple minutes to thicken up.
White Cake Frosting Ingredients

Mmm, frosting. We are making a classic American buttercream. (Quantities given in the recipe below.)

  • Butter. You can use unsalted butter, but you may want to add another pinch of salt to the recipe. To soften butter, remove the butter from the wrapper and place it on a small plate. Put in the microwave for 30-40 seconds on power level one. Don’t use full power! Your butter will melt!
  • Powdered sugar. Sift the powdered sugar if it looks extra clumpy (I usually don’t bother)
  • Heavy cream. *Feel free to use  whole milk or whatever milk you have on hand. It won’t be quite as thick and creamy but it will work.
  • Kosher salt. A flaky salt that absorbs moisture. To substitute table salt instead of kosher salt, use ½ table salt for every 1 teaspoons of kosher salt called for in the recipe.
  • Vanilla
white cake with vanilla frosting on a cake stand.

Can you substitute a different extract flavor besides vanilla?

I am a huge chocolate person (see The Best Chocolate Cake I’ve Ever Had), but I actually love frosting this cake with vanilla frosting. It really lets the vanilla and butter flavor shine. If you are looking for something a little more unique, try these ideas! You can use these as a replacement for the 1 tablespoon of vanilla called for in the cake or frosting.

  • ½ tablespoon almond extract
  • 1 tablespoon citrus zest
  • ½ tablespoon butter extract

How to make Homemade White Cake

So let’s get started making this tall, glorious, carby, moist, delectable homemade white cake to end all white cakes. (All instructions given in the recipe below.)

mixing cake batter in a stand mixer.

We’re going to beat the heck out of some butter and sugar (left). Then we’re going to add a bit of oil. I love using oil in my cakes. You need the butter for flavor, but you’re not going to get that soft moist texture without a bit of oil. Your cake will be dry if you use all butter. I like to use light olive oil (see notes), but any vegetable oil will work.

mixing wet and dry ingredients separately.

Grab two other medium bowls, one for dry and one for wet ingredients.

On the left we have 5 whole eggs*, buttermilk (cheater buttermilk works fine! See notes) a bit of vanilla, and sour cream. Sour cream and I are like THIS when it comes to cake. I just love the tender moistness it adds. (When I do make box cakes, I always add sour cream. It works wonders.)

On the right, sift some flour, salt, and baking powder.

Stir the dry ingredients into the wet ingredients ONLY until just combined. Don’t over-stir.

*See below for a whole conversation on why some white-cake bakers will literally kill me for putting egg yolks into this white cake recipe. But it tastes better. (It does, okay?)

cutting parchment to fit a cake pan.

Line the bottom of two 9-inch pans with parchment paper, then spray the heck out of it. I can’t tell you how many cakes I’ve destroyed by forgetting parchment paper. I think it’s especially helpful if you have cheap cake pans, which apparently I do (more on that below).

Bake the cakes at 325 for about 28-32 minutes. I like to bake my cakes one at a time because my oven is not exactly amazing. I’ve done 2 cakes at a time, but I wouldn’t do all 3 cakes at once, unless you have a pretty stellar oven that you trust.

Rotate each cake 2/3 of the way through the bake time. This means turn the pan 180 degrees if there is one cake, or if there are two cakes, switch their places. The cake pans should NOT touch the edge of the oven.

Do NOT open the oven door at all, except for when you need to rotate the pans. Rotate the pans at about the 22 minute mark. If the whole top looks completely liquidy, do not rotate yet. You don’t want to deflate your cake. Again, the total bake time for each cake is about 28-32 minutes.

Remove the cake/s from the oven. Let cool on a cooling rack for about 10-15 minutes. Use a knife to loosen the edge of the cake from the pan. Use your hand to invert the cake onto the cooling rack and continue cooling. At this point I often put them in the freezer for 20 minutes or so to speed up the cool time.

frosting three layer white cake with vanilla frosting.

If you look at the photo above of the layered cakes before I frosted them, you will see how torn up the outside edges are on the bottom two. This is because my cake pans are garbage apparently. I grabbed a new $6 one at the grocery store the 3rd time I made this cake, because I was tired of having to wait to bake my third cake (I only had 2 pans.) And that $6 cake pan did a way better job releasing my cake intact. You can see the top cake in that photo is perfectly intact. So the point is that high quality cake pans are actually important. (Or at least $6 grocery store ones are?? ha. That’s going to be a gamble.) I just bought these USA brand pans. My mother-in-law Kris swears by USA pans. And well, if Kris trusts it, then you all know that we should too ;) UPDATE: I’ve been using the USA pans for years now and they are phenomenal.)

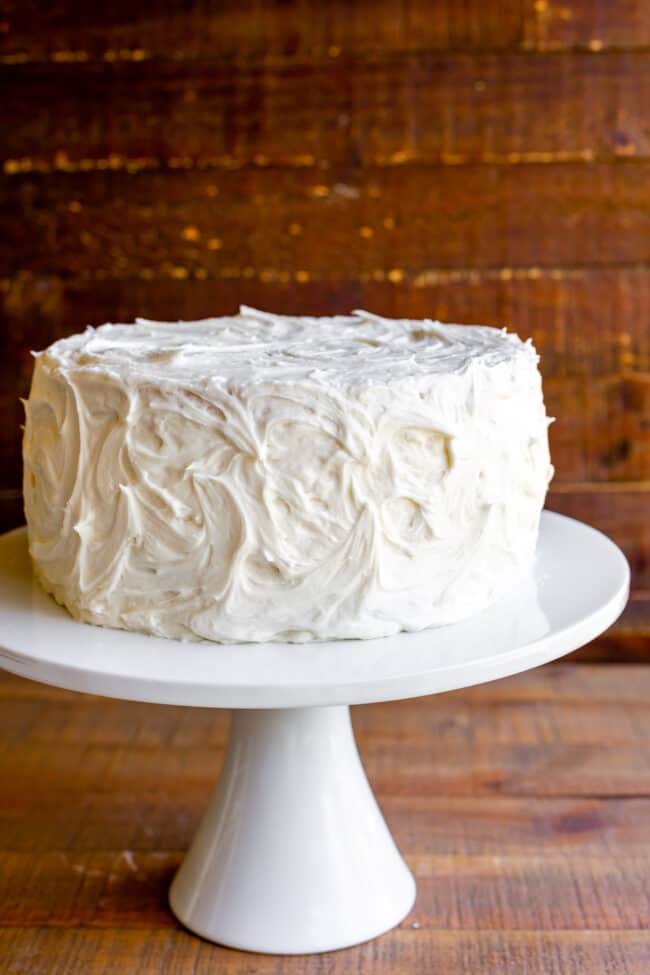
gorgeous layer cake with swirled vanilla frosting.

How to make the frosting for this White Cake Recipe

Soooo creamy! (All instructions also given in the recipe below)

  1. Beat 2 cups butter until completely smooth.
  2. Add powdered sugar and cream, alternating. Add 1 cup powdered sugar and then 1/4 cup cream. Repeat until all the sugar and cream has been added.
  3. Add 1 tablespoon vanilla and 1 teaspoon kosher salt. (less if you’re using table salt)
  4. Beat until very fluffy, at least 2-3 minutes. Be sure to scrape the sides!
  5. Assemble your cake once cool. Smear a bit of frosting on your cake stand so it doesn’t go sliding off, then place your cake on the stand.
  6. Add frosting to the top of the cake and spread evenly.
  7. Add the next cake. Repeat.
  8. Add the final cake. Add all the remaining frosting to the top of the cake.
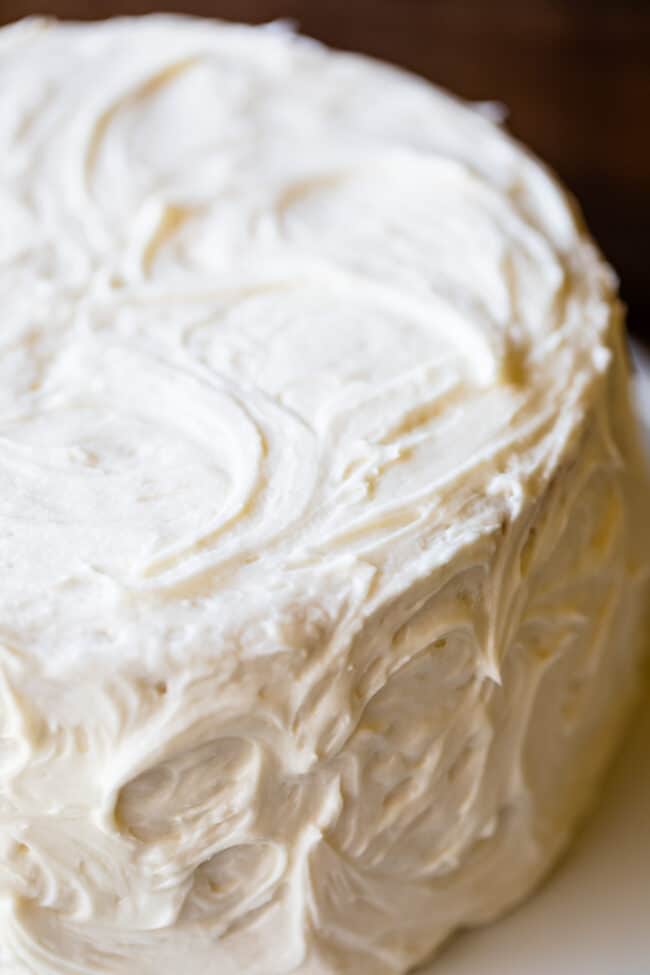
  9. Spread the frosting over the top of the cake, and then use an offset spatula to drag some of the frosting from the top over the edge of the cake. Keep moving the frosting all the way down. Continue this method until all sides and top are frosting.
  10. If you want to make nice swirls like you see in the photos, use the back of a spoon.
  11. Devour! Try not to eat it for breakfast. (That’s a dare. Be sure to read that right. Just TRY not to eat it for breakfast, mwahahaha!)

What to frost a simple White Cake with

I haven’t even talked about the amazing frosting yet. I love to frost my cakes with American buttercream, which is just butter, powdered sugar, cream, vanilla, and some salt. For this 3 layer cake, I used a full pound of butter just for the frosting. This is a bit excessive, which is exactly how I like it. As my friend Melissa once told me, “If you don’t like frosting, don’t eat cake.” Amen and amen.  

I put measurements in the notes for a more reasonable amount that will do the job just fine if you are not a frosting fanatic like me. (If you plan to do a crust coat, make the full amount.)

white cake with vanilla frosting.

How to store Homemade White Cake

White cake can be stored at room temperature for 3-4 days. If you have a cake stand with a cover or a cake carrier with a tightly fitting lid, it’ll stay nice and fresh. 

If by some miracle you happen to have leftover cake you don’t know what to do with, you can freeze individual slices or as much of the whole cake as you like. Let it defrost at room temperature (or in the fridge if you prefer). The frosted cake really does freeze well so don’t be afraid to save some for the next time you have a wicked cake craving and no time to bake.

Best White Cake Recipe FAQs

What is the difference between white cake and vanilla cake?

How many types of “white cake” have you seen before? It turns out, there may be as many definitions of white cake as there are people baking white cake! This recipe produces the creamy homemade yellow you see in the pictures.

It is not the bright crayon-yellow of “yellow” cake mixes you buy in a box at the store, nor is it the bright white of many wedding cakes.

Some white cake recipe purists might be shaking their fists at me for adding the yolks to my white cake. By some definitions, a traditional white cake uses no egg yolks, and you are supposed to even beat the egg whites to get it SUPER DUPER fluffy and BRIGHT WHITE. (Think angel food cake). But guys, I tried it. It’s just not as flavorful.

We’re not baking a showy wedding cake here, we’re making a homemade white cake with a rich, creamy flavor and texture. Unless you’re going for wedding-white, I say no to egg-whites only.

Why is my white cake yellow?

Yup, you guessed it. The egg yolk makes your “white” cake take on a creamy yellow hue. My feeling is that taste is king. (Did you read the part above where I ate cake for breakfast?!?)

Let me ask you this: would you rather have a regular omelette made with whole eggs, or an egg white omelette? Obviously no one wants to eat plain egg whites unless they’re on a diet, because guess what, most of the yummy egg flavor is found in the yolk. And this cake, my friends, is NOT on a diet, to say the least. So I just couldn’t handle leaving them out. I’m not alone here, in my research I found plenty of white cake recipes that use the egg yolk. I think it’s just a matter of preference!

What size cake pans do you recommend? Can I use a different size? If so, how will that affect the baking time?

This recipe calls for the batter to be poured into three 9-inch cake pans, meaning three round pans that are each 9 inches in diameter. I haven’t tried making this cake in any other size pans. There is a lot of batter, so it won’t work in two 9-inch pans.

Any pan that you try out (a bundt cake pan, a 9×13 inch cake pan, etc.) just be sure to only pour the batter into the pan about ⅔ of the way up the sides of the pan. Any extra batter will cause your cakes to rise too high and then fall in on themselves. You will have to use your best judgment to know when the cakes are done baking. Check for doneness by inserting a toothpick to the center. If the toothpick comes out of the cake clean (meaning there’s no wet batter on it), the cake is done. 

Can this simple white cake recipe be made into cupcakes?

Can it ever!

You must use paper cupcake liners. Grease each cupcake liner with a non-stick spray if you are nervous about them sticking. I usually don’t bother.
Fill each cupcake liner only ⅔ full. Do not overfill or they will rise high and then fall flat!
Bake cupcakes at 325º F for 12-18 minutes.
Check for doneness by inserting a toothpick in the center. If the toothpick comes out clean, the cupcakes are done.

How do I make a cake more moist?

Listen, you’re going to get a moist cake from this recipe! It’s homemade and uses exceptional ingredients. That said, here are some tips for a moist cake:

Don’t overmix the wet and dry ingredients. Mix ONLY until just combined, making sure to scrape the bottom to get any hidden pockets of dry ingredients.
Sift your flour, salt, and baking powder to add lots of airiness.
Don’t overbake. Set a timer and then check for doneness by inserting a toothpick to the center. If the toothpick comes out clean, the cupcakes are done.
Use sour cream and/or buttermilk for moisture (this recipe has both!)

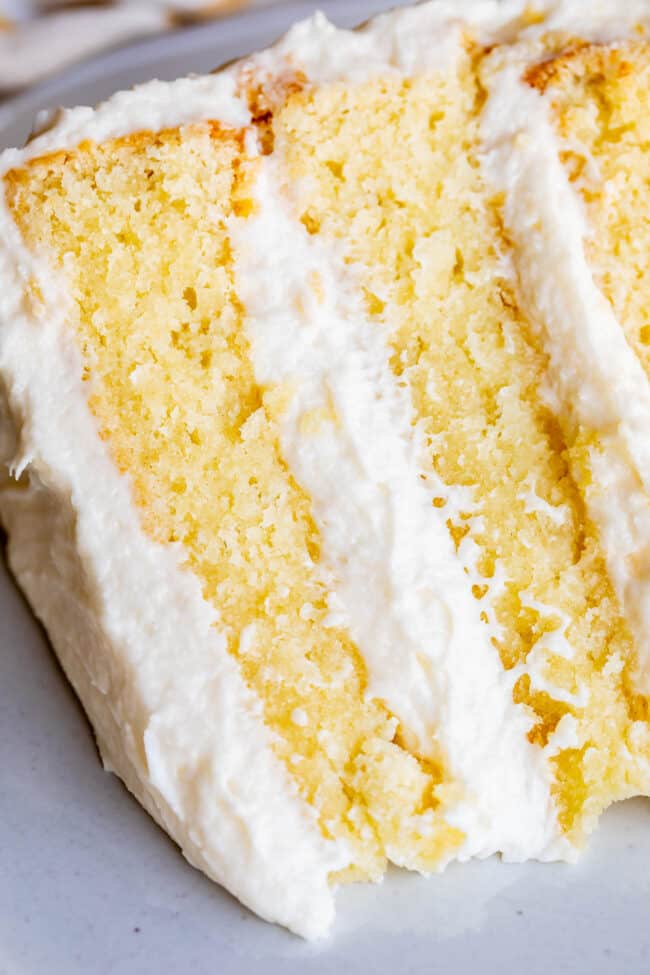
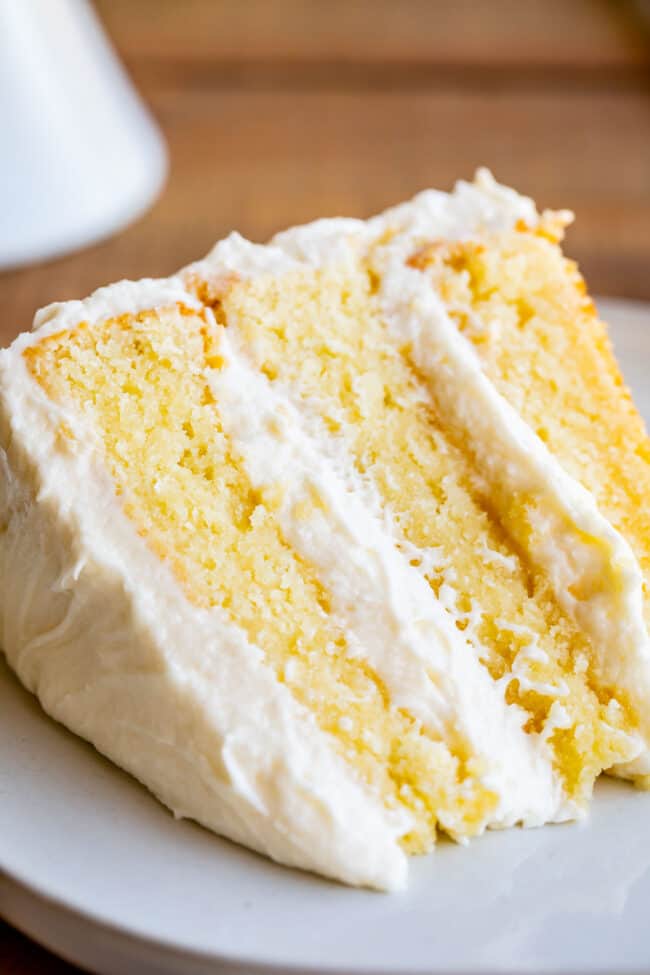
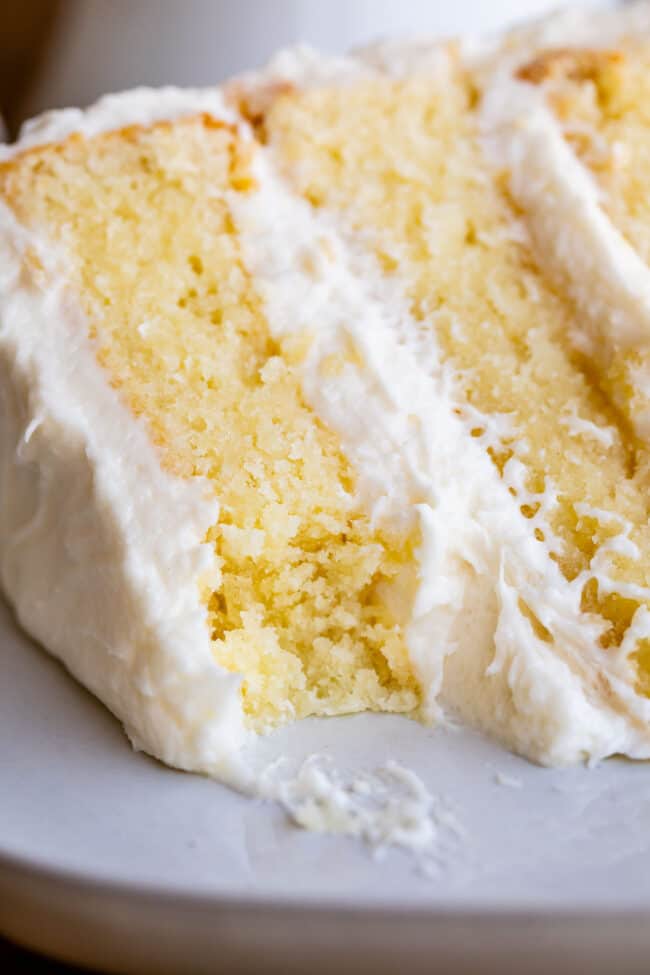
slice of vanilla cake with white frosting with a bite taken.

And there you have it! The best white cake recipe that is moist, tall, fluffy, and flavorful all at once. Hallelujah!

I think this homemade white cake recipe would be stunning to serve after your holiday festivities! Dress up the top and edges with some fresh berries for a stunning presentation. Everyone will love you!!

P.S. Update: Eric’s book club did not see any of this cake. I made them brownies instead. ;)

Here are a few of my other BEST CAKES:

Facebook | Pinterest | Instagram

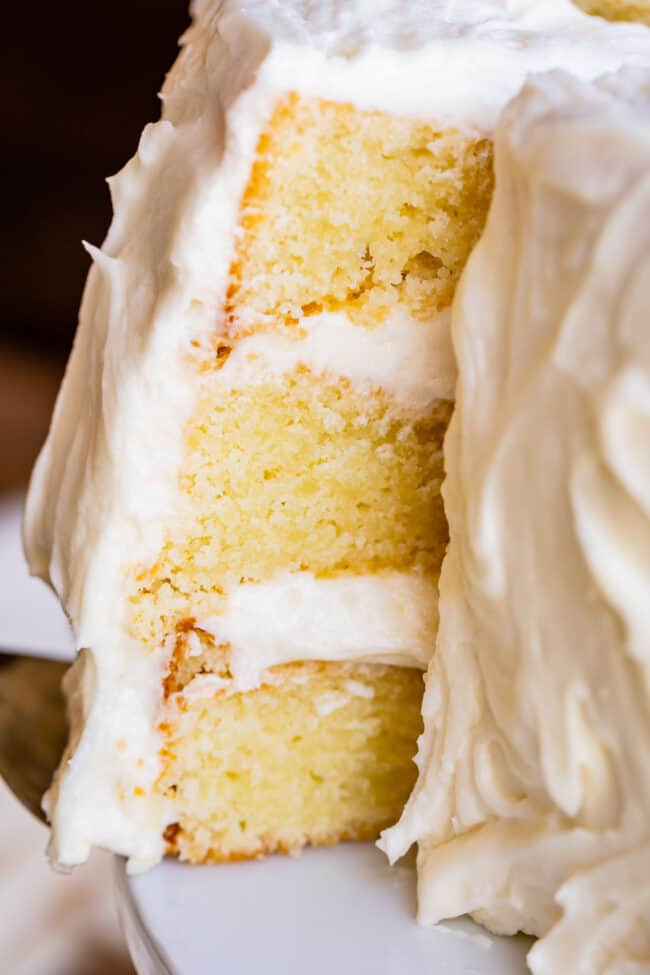
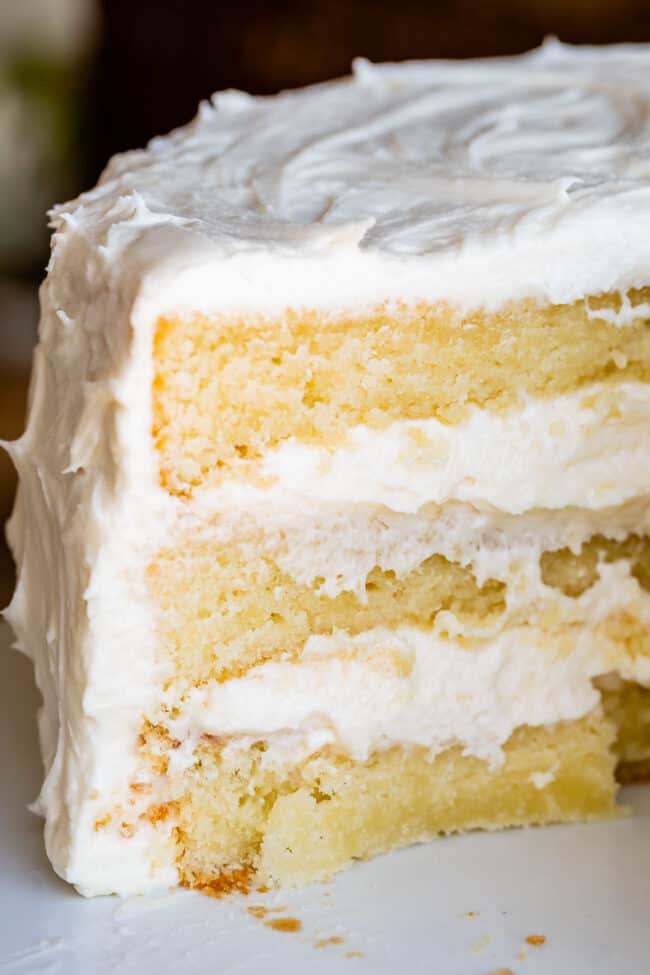
close up of triple layered simple white cake recipe from scratch
Print

The Best Moist White Cake Recipe

HALLELUJAH! Finally a moist white cake from scratch that doesn’t taste like cardboard.  I promise, this will be the best homemade white cake recipe of your life! It is soft and fluffy, while still being super moist. I got the balance of fluffy and moist exactly perfect for how cake ought to be! It’s fluffy yet full of buttery rich flavor. I’m so excited. You are going to love it too!
Course Dessert
Cuisine American
Prep Time 15 minutes
Cook Time 30 minutes
Total Time 45 minutes
Servings 16 Servings
Calories 875kcal

Ingredients

For the cake

  • 1 cup salted butter 2 sticks, softened
  • 3 cups granulated sugar
  • 1/2 cup vegetable oil I like to use light olive oil
  • 5 large eggs
  • 1 cup buttermilk*
  • 1 tablespoon vanilla extract
  • 1/2 cup full fat sour cream
  • 3 & 1/4 cups all-purpose flour spooned and leveled
  • 3/4 teaspoon kosher salt
  • 1 tablespoon baking powder

For the frosting

  • 2 cups butter 4 sticks, softened
  • 8 cups powdered sugar
  • 1 cup heavy cream divided
  • 1 teaspoon kosher salt
  • 1 tablespoon vanilla

Instructions

  • Preheat your oven to 325 degrees F. Trace the outline of 3 9-inch cake pans** on parchment paper. Cut out the circles and place in the bottom of each cake pan. See photos. With the paper in the bottom of the pan, use nonstick spray to grease each cake pan very well, including up the sides.***
  • In a large bowl or stand mixer, beat the butter until is is smooth. (You can actually start with cold butter if you have a stand mixer. Just beat a couple minutes, scraping sides, until it’s smooth.)
  • Add 3 cups granulated sugar. Beat butter and sugar for 2 minutes, stopping once to scrape sides and bottom.
  • Add 1/2 cup light olive oil (“light” refers to the taste, not the calorie level. Sad, right? ;) Beat butter and sugar with the oil for 2 minutes, stopping to scrape once.
  • In a medium bowl (or in one of those giant 8 cup glass measuring cups, wish I had one), add 5 large eggs. Beat with a whisk until smooth. Add 1 cup buttermilk*, 1 tablespoon vanilla, and 1/2 cup full fat sour cream. Whisk it all together til smooth.
  • Place a fine mesh strainer over another medium bowl. Spoon and measure 3 and 1/4 cups all purpose flour into the strainer. Add 3/4 teaspoon salt and 1 tablespoon baking powder. Stir until it has all gone through the strainer and is sifted well.
  • Alternate adding the liquid and the flour mixture to the butter mixture, beating every time. I added half the liquid, stirred, half the flour, stirred, then repeated.
  • Mix ONLY until just combined. Scrape the bottom and sides to make sure it’s all incorporated.
  • Divide the batter between the 3 prepared pans.
  • Bake the cakes at 325 for about 28-32 minutes.
  • Notes on baking: I like to bake my cakes one at a time because my oven is not exactly amazing. I’ve also done 2 cakes at a time though. I wouldn’t do all 3 cakes at once, unless you have a pretty stellar oven that you trust.
  • However you choose to bake, make sure you rotate them 2/3 of the way through the bake time. This means turn the pan 180 degrees if there is one cake, or if there are two cakes, switch their places. The cake pans should NOT touch the edge of the oven.
  • Do NOT open the oven door at all, except for when you need to rotate the pans. Rotate the pans at about the 22 minute mark. If the whole top looks completely liquidy, do not rotate yet. You don’t want to deflate your cake. Again, the total bake time for each cake is about 28-32 minutes.
  • Remove the cake/s from the oven. Let cool on a cooling rack for about 10-15 minutes. Use a knife to loosen the edge of the cake from the pan. Use your hand to invert the cake onto the cooling rack and continue cooling. At this point I often put them in the freezer for 20 minutes or so to speed up the cool time.
  • Make the frosting: Beat 2 cups butter until it is completely smooth.
  • Add powdered sugar one cup at a time. Add the cream in 1/4 cup increments in between cups of powdered sugar. Add 1 tablespoon vanilla and 1 teaspoon kosher salt. (less if you’re using table salt) Beat until very fluffy, at least 2-3 minutes. Scrape the sides and bottom at least once or twice. 
  • Once all the cakes are completely cool, assemble your cake. Smear a bit of frosting on your cake stand so it doesn’t go sliding off, then place your cake on the stand. Place several squares of parchment paper under the edge of your cake so that you don’t get frosting all over your cake stand (see photos).
  • Add about 1 and 1/2 cups frosting (just eyeball it) to the top of the cake and spread evenly.
  • Add the next cake. Repeat.
  • Add the final cake. Add all the remaining frosting to the top of the cake. Spread it over the top of the cake, and then use an offset spatula to drag some of the frosting from the top over the edge of the cake. Keep moving the frosting all the way down. Continue this method until all sides and top are frosting.
  • If you want to make nice swirls like you see in the photos, use the back of a spoon.
  • Devour! Try not to eat it for breakfast like I did!

Video

Notes

*Cheater buttermilk will do just fine! I tried it. Add 1 tablespoon vinegar to a 1 cup measuring cup, then fill it to the 1 cup mark with milk. Use the highest fat content milk you have, whole milk is best. Stir it together and let sit a couple minutes to thicken up.
**I just bought these cake pans that I linked to. If you look at the photo of the layered cakes before I frosted them, you will see how torn up the outside edges are on the bottom two. This is because my cake pans are garbage apparently. I grabbed a new $6 one at the grocery store the 3rd time I made this cake, because I was tired of having to wait to bake my third cake (I only had 2 pans.) And that $6 cake pan did a way better job releasing my cake intact. You can see the top cake in that photo is perfectly intact. So the point is that high quality cake pans are actually important. (Or at least $6 grocery store ones are?? ha. That’s going to be a gamble.) I just bought these ones that are the USA brand, my mother-in-law Kris swears by USA pans. And well, if Kris trusts it, then you all know that we should too ;)
***I ALWAYS take the time to do this annoying step of lining my pans with parchment paper. I’ve destroyed too many cakes trying to release them from the pan! I don’t trust the grease-and-then-dust-with-flour method. It’s failed me too many times. Although now I’m thinking maybe this was because I had crappy cake pans. HMM. 
Frosting:
If you do not want a ton of frosting but still want to be able to comfortably frost a 3 layer cake, use:
  • 3 sticks of butter (1 and 1/2 cups)
  • 6 cups powdered sugar
  • 3/4 cup cream
  • 2 teaspoons vanilla
  • 1/2 teaspoon kosher salt
Follow directions above for making the frosting. 
CUPCAKES: I haven’t made these as cupcakes, but if you want to try it, make sure you only fill the liners 2/3 of the way full and bake at 350 instead of 325! Start checking for doneness at 18-20 minutes. 

Nutrition

Serving: 1slice | Calories: 875kcal | Carbohydrates: 119g | Protein: 6g | Fat: 43g | Saturated Fat: 27g | Polyunsaturated Fat: 2g | Monounsaturated Fat: 12g | Trans Fat: 1g | Cholesterol: 168mg | Sodium: 687mg | Potassium: 102mg | Fiber: 1g | Sugar: 97g | Vitamin A: 1426IU | Vitamin C: 1mg | Calcium: 102mg | Iron: 2mg

More recipes you will love!

How to make Strawberry Shortcake

This classic recipe for Strawberry Shortcake is just like the kind your grandma made! A thick, sweetened shortcake with golden flaky layers, just like biscuits. Topped with the BEST Strawberry Topping and a mountain of whipped cream. Stop buying those weird yellow sponge cakes at the store. This is the real deal! I will show…

This classic recipe for Strawberry Shortcake is just like the kind your grandma made! A thick, sweetened shortcake with golden flaky layers, just like biscuits. Topped with the BEST Strawberry Topping and a mountain of whipped cream. Stop buying those weird yellow sponge cakes at the store. This is the real deal! I will show you exactly how to make it. Originally published April 3, 2021.

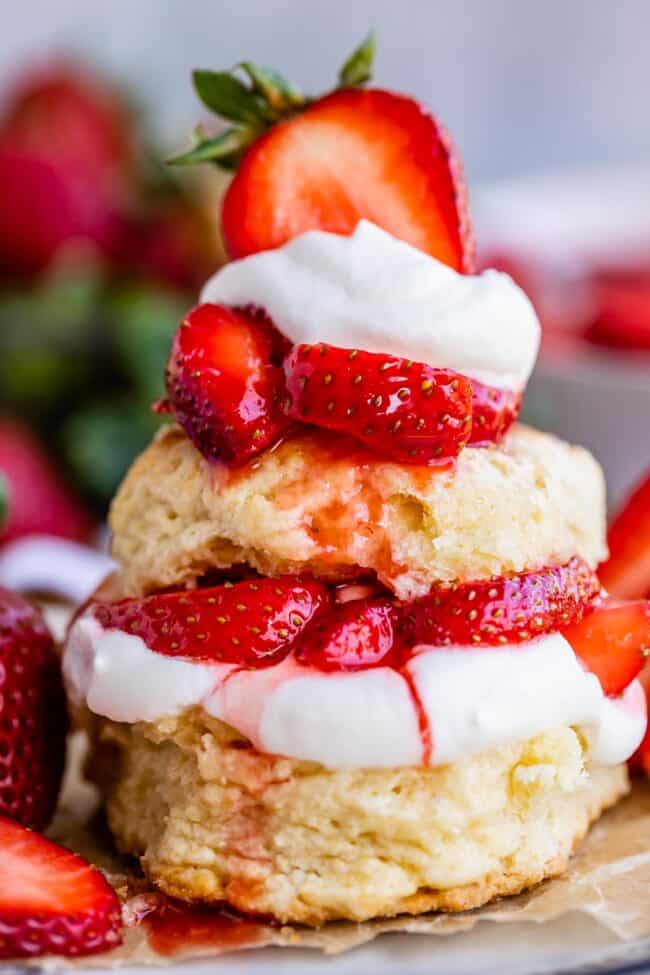
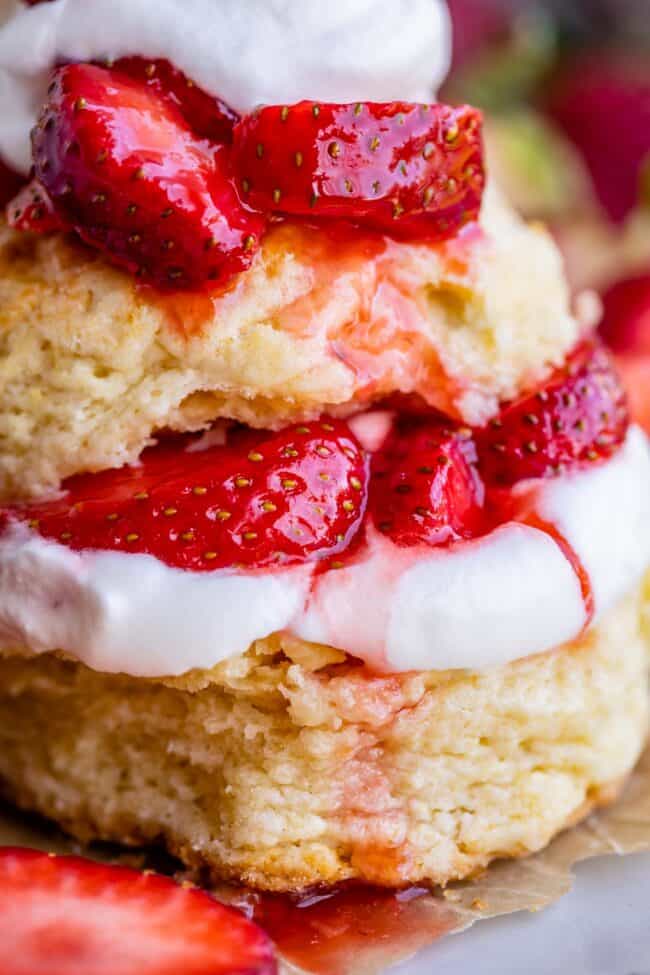
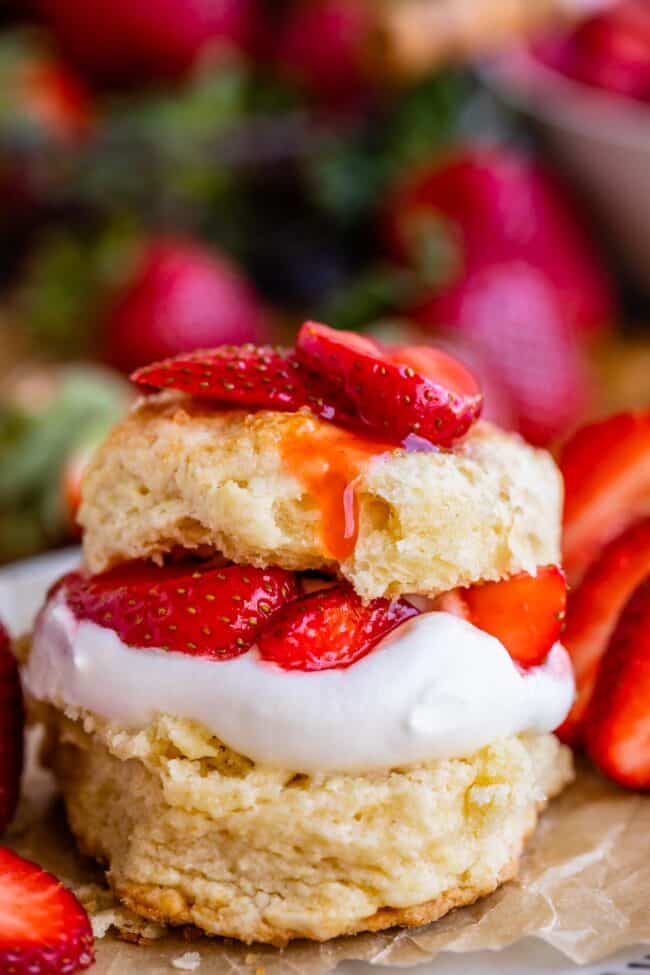
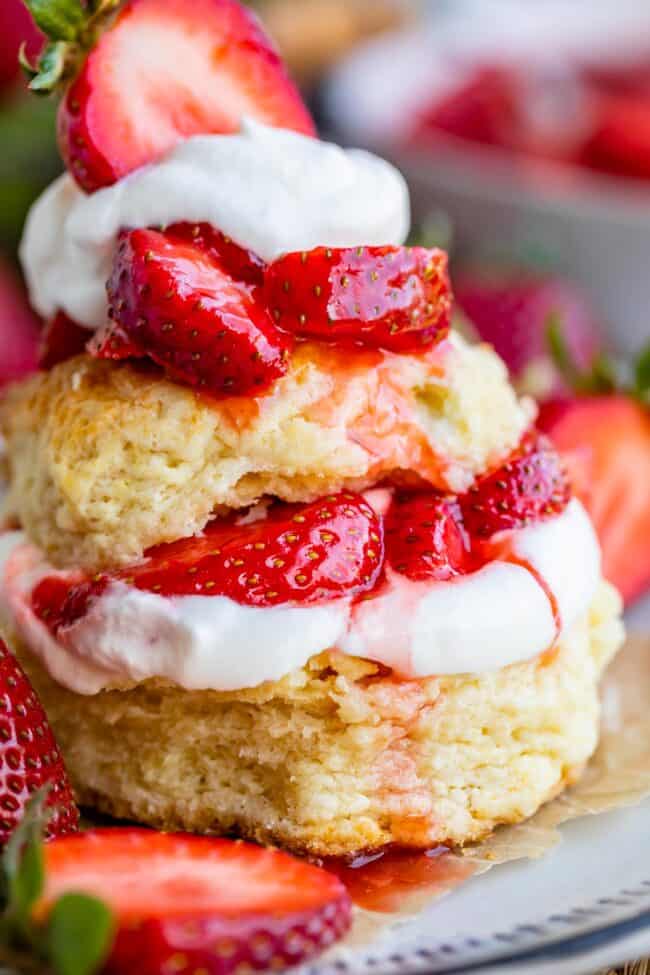
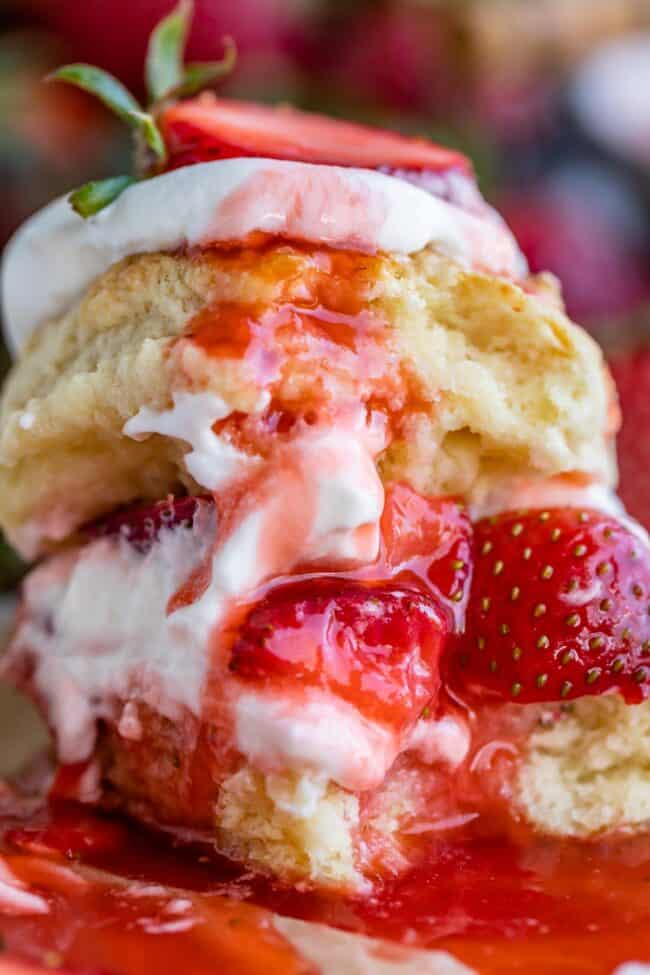
strawberry shortcake biscuits stacked together with strawberries and whipped cream.
Table of Contents
  1. Strawberry Shortcake: classic summer treat
  2. Will the real strawberry shortcake please stand up
  3. Strawberry Shortcake Ingredients
  4. How to make Strawberry Shortcake
  5. How to make Strawberry Shortcake Topping
  6. How to make whipped cream
  7. Strawberry Shortcake Recipe Tips
  8. Strawberry Shortcake Serving Ideas
  9. Storing Strawberry Short Cake
  10. Best Strawberry Shortcake Recipe FAQs
  11. More summer desserts you will love!
  12. Strawberry Shortcake Recipe Recipe

I just came to the realization today that my EIGHT-year-old son wears size 2T/3T underwear. No, I’m not kidding. I wish I were.

He is literally wearing the same set of underwear that I bought when I POTTY TRAINED him, when he was 3 years old. I bought him a couple packs of super cool Star Wars underwear (that I remember hoping would motivate him to make it to the toilet).

And here we are. FIVE YEARS LATER. Now, he is small for an 8-year-old for sure, but still. Five YEARS?? Should anyone wear the same underwear for 5 years in a row?? (Don’t answer that. And please do not ask how old my underwear is. I HAVE NO IDEA.)

He even mentioned it the other day. “Mom, I think I need new underwear.” You know it’s bad when an 8-year-old boy notices something about his clothes. They usually don’t notice anything at all unless there is a pocket knife, dragons, or Pokemon involved.

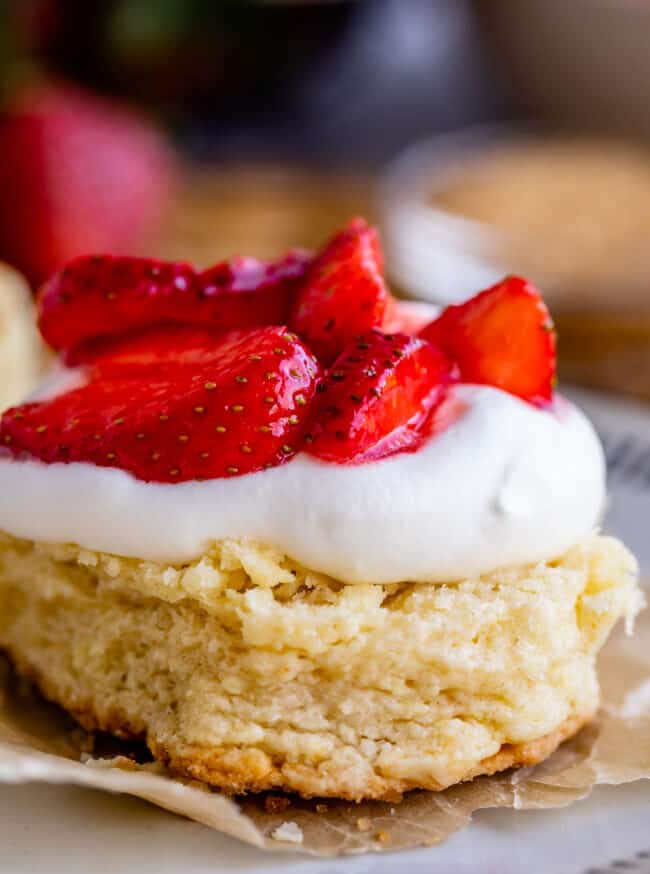
shortcake on parchment paper topped with whipped cream and strawberries.

I took a look at his underwear and he was right, they barely cover his booty. Then I checked the tag and was utterly horrified when I was finally able to discern the mostly-faded 2T/3T markings. Are you kidding me??

Why am I so bad at this? My ineptitude when it comes to supplying my children with appropriate clothing shocks even me sometimes. FIVE YEARS???

classic strawberry shortcake with biscuits, whipped cream, and berries.

The problem is that the management of children’s wardrobes is so overwhelming to me that I often push it to the back of my head. Charlotte may say something like, “I need new pants” and then I add it to my shopping list. What a smart person would do is say, “Hm, seems like Char is growing, I better take inventory and buy all kinds of new stuff.”

Nope. That’s way too overwhelming. I usually end up thinking to myself, well, they are wearing clothes today. Probably they can wear them again tomorrow. And it will be fine. You guys! What is wrong with me!

strawberry shortcake stacked on parchment paper on a plate with strawberries in the background.

People probably look at my kids with their high waters and think we are really poor. Nope. Just in denial over here. Just failing at LITERALLY one of my most basic tasks as a mother, making sure my children do not go naked. Please don’t call the police.

In my defense, I do the exact same thing with my own wardrobe. I definitely still have clothes from high school. (But probably not any underwear. LET’S HOPE.)

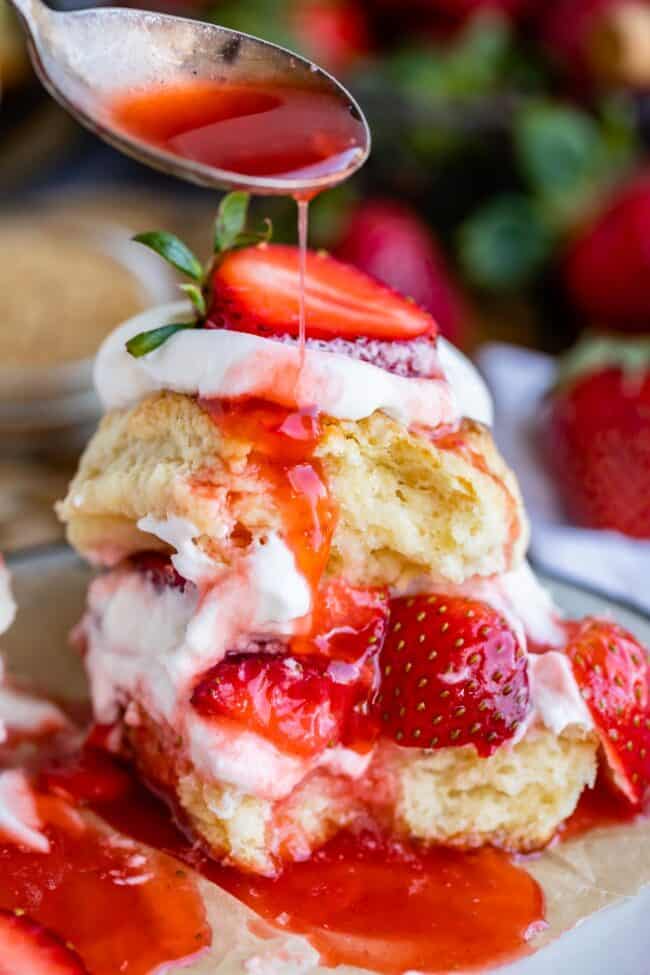
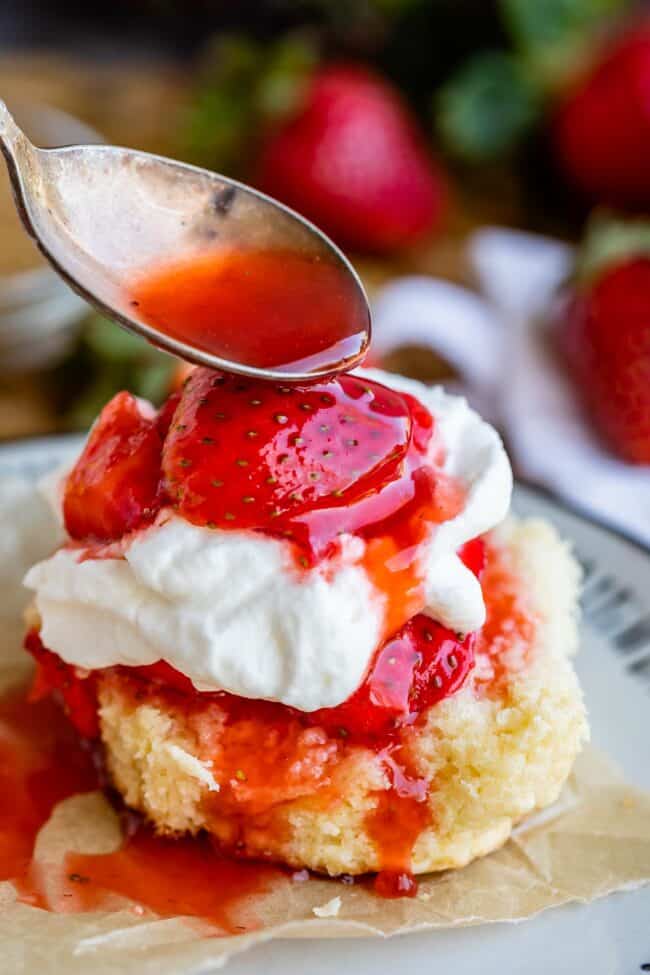
drizzling juice over classic strawberry shortcake.

So now that you’re feeling a lot better about yourself after reading about our underwear situation (you’re welcome for the self esteem boost, by the way. I’m sure you’re thinking, man, I thought I had problems. This woman is a disaster.) Anyway. Let’s talk Strawberry Shortcake.

Strawberry Shortcake: classic summer treat

Is it just me, or is Strawberry Shortcake basically the dessert of summer’s dreams? It is just a perfectly light treat for a hot and sticky day.

Have you seen those sad little round yellow cakes they sell in the deli at the grocery store? The weird, spongey things? Sometimes they display them over into the produce section next to the strawberries, trying to entice you. Like, yum, don’t you want to eat this questionable squishy thing with these strawberries?

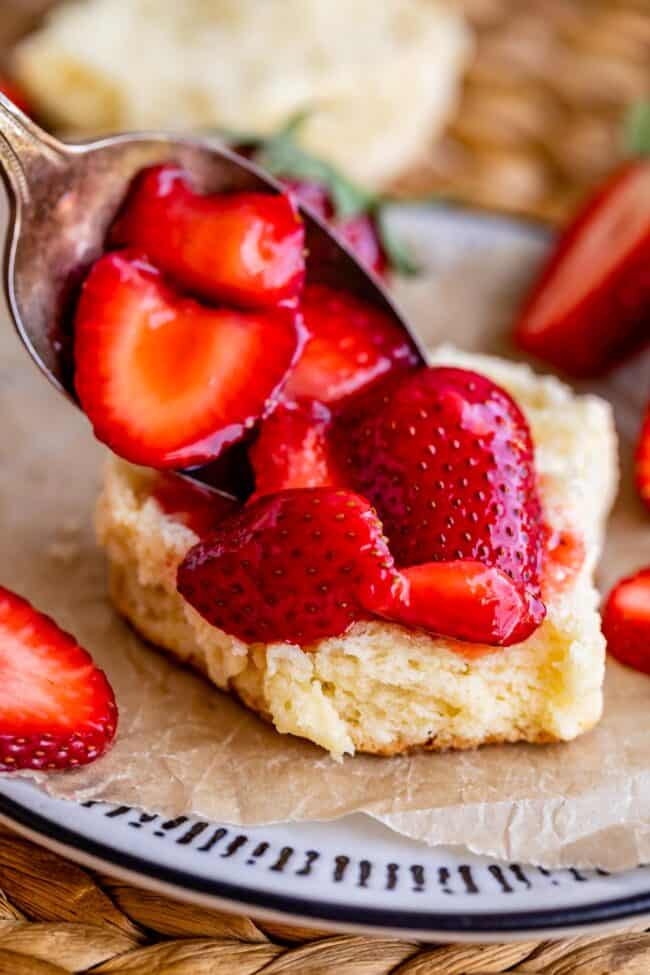
spooning strawberries onto shortcake on a plate.

NO. No I don’t. Every time I see those sad imposter cakes (that are disturbingly called “Dessert Shells” apparently),  I give them the finger and curse them for ruining the reputation of real, actual strawberry shortcake, and all its flaky crispy glory. THE WORLD DOESN’T KNOW WHAT IT’S MISSING.

Will the real strawberry shortcake please stand up

But we do. We know. We, the bakers of the internet, can come together today and rejoice that we are no longer subject to such offenses as dyed prepackaged sponges passing for a classic strawberry shortcake recipe. Let’s go over this:

What’s the difference between cake and shortcake?

REAL Strawberry Shortcake, your grandma’s strawberry shortcake, is made just like biscuits. Have you tried my Ultra Flaky Buttermilk Biscuits? Today’s shortcake is almost the same recipe, with a bit less salt and a little more sugar. But then we go and dump a huge amount of sweet juicy strawberries on top, and then top it off with a mountain of homemade whipped cream. A mountain, I say! THAT’S what makes it strawberry shortcake.

strawberry shortcake biscuits stacked together with strawberries and whipped cream.

Strawberry Shortcake Ingredients

This is an overview! All amounts given in the recipe below.

  • Butter 
  • Egg
  • Buttermilk
  • Heavy cream, powdered sugar, and vanilla (makes up a simple and quick homemade whipped cream!)

If you can make biscuits, you can make strawberry shortcake. And guess what, even if you can’t make biscuits, I’m here to confound all your previous baking insecurities, because it’s really just not that hard.

How to make Strawberry Shortcake

Start out by adding some flour, sugar, salt, and baking powder into a bowl. Whisk it together.

Chop up some COLD COLD butter. You can even use frozen butter. Cold butter makes for flaky biscuits and don’t you forget it.

cutting butter into flour in a glass bowl with a pastry knife.

Then get out your trusty pastry cutter and cut it in. If you don’t have a pastry cutter, you can use a fork or a butter knife. (You can even use a cheese grater to incorporate the butter; see my biscuit post for details on that method.) You don’t want to blend the butter into the flour; you want to CUT the butter into small chunks. By the time you’re done, it should look like a bunch of small, pea-sized pieces of butter with flour stuck to them.

adding buttermilk to a bowl of flour and butter, stirring it together with a red spatula.

Now it’s time for cold buttermilk. I love the tart flavor that buttermilk brings, but you can use heavy cream or even half and half will do. See notes for how to make “cheater” buttermilk with vinegar or lemon juice.

Use a rubber spatula to mix the buttermilk into the flour mixture. When it forms a shaggy dough, cover your hands with flour and start kneading with your hands. Don’t overwork the dough.

kneaded dough in a glass bowl, dough rolled out in a rectangle.

Turn the dough onto a floured surface and roll into a rectangle about 9×13 inches. Fold it in half.

rolled out dough folded in half.

Then in half again, and again.

rolled out dough folded in quarters, a canister of flour with a biscuit cutter in it.
Dip your biscuit cutter in some flour so it doesn’t stick.

Then pat the dough into a thick rectangle. Use a rolling pin if you need to, or just your hands is fine if the top is smooth enough. You want your final dough to be about 1 and 1/4 inch thick. We want nice and tall shortcakes!

pressing a biscuit cutter into dough, brushing the tops of biscuits with cream.

Brush with cream, sprinkle with a bit of sugar and bake. Look at all those flaky layers!

uncooked biscuits in a pan, a baked flaky biscuit on a cooling rack.

How to make Strawberry Shortcake Topping

Here is my secret for the BEST strawberry shortcake. It’s all about the Fresh Strawberry Topping.

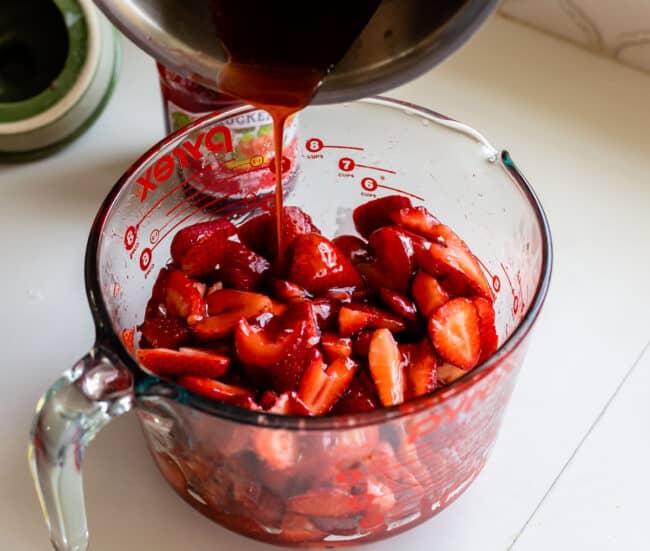
strawberries in a bowl with sugar sprinkled on top, jam in a pot bubbling.

We are not just sprinkling a little sugar on sliced strawberries and calling it a day. That’s the traditional method. As the sugar dissolves into the strawberries, it makes the fruit release its juices and you end up with a nice thin syrupy situation.

adding cooked jam to a bowl of sliced strawberries.

But a minimal amount of thin syrupy juice is not enough for me. So after we’ve added the sugar, we’re going to cook down some strawberry jam for the ultimate thick and juicy strawberry shortcake topping! A little lemon and vanilla bring out all the tart sweetness of these beautiful berries.

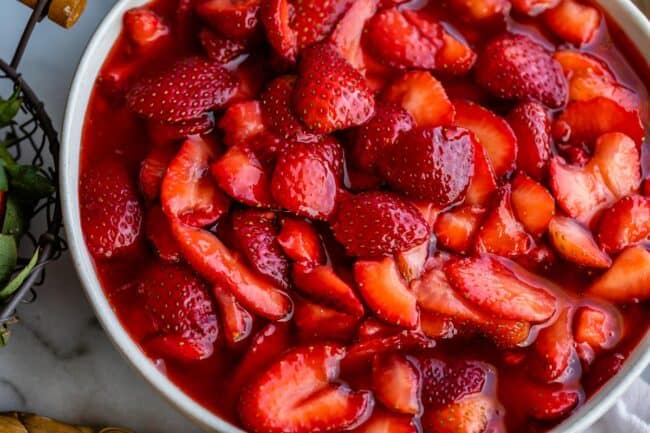
sliced strawberry topping in a white bowl.
can you see how juicy it is??

I posted this Fresh Strawberry Topping recipe on the blog years ago, and I love using it as a topping for ice cream, pancakes, french toast, basically anything! It’s so good.

You don’t have to take these extra steps. Plain ol’ fresh strawberries sprinkled with sugar is still going to taste amazing! But I love that the extra strawberry syrup that this recipe makes means that every shortcake gets completely soaked in strawberry goodness. Who can say no to that??

How to make whipped cream

Whipped cream is so easy to make if you have a stand mixer or electric mixer. Just beat the cream with a little bit of powdered sugar and vanilla and that’s IT. Eventually it will start to thicken and peak. When it starts to look like a dreamy creamy cloud that is perfect for dolloping, it’s done!

The whipped cream comes together in a few simple steps:

  • Add the ingredients to your bowl or stand mixer: cream, powdered sugar, vanilla. 
  • Beat these ingredients on high speed for 2-5 minutes
  • When the cream has thickened, peaks are forming, and when you lift the beaters out the peaks hold their shape, you’re done! Stop mixing.
  • Keep the whipped cream refrigerated until ready to serve.
spooning juice over the top of strawberry shortcake stack.

Then assemble: Split each shortcake in half. Top with strawberries, whipped cream, the other half of the shortcake, and more whipped cream and strawberries! You really can’t go wrong no matter what order you go in. It’s going to taste delicious no matter what!

Strawberry Shortcake Recipe Tips

  • Use cold butter! Cold butter is the key to light, flaky biscuits.
  • Spoon and level the flour. I recommend scooping the flour into your measuring cup with a spoon, then gently leveling it off with your finger or a knife. The goal is to not pack it in too tightly. Too much flour makes for dry, crumbly biscuits. 
  • Don’t overwork the dough. Over-handled dough can become tough and dry. Remember, the goal is light and tender! 
  • To cut in the butter, you can use a pastry cutter, fork, or butter knife. Don’t overdo it! It should look shaggy and pebbly.
  • Milk substitutes: I love the tart flavor that buttermilk brings, but you can use heavy cream or even half-and-half instead.

Strawberry Shortcake Serving Ideas

Strawberry shortcake is already the best of the best, but that doesn’t mean you can’t put your own spin on it. Here are a few ideas!

  • Add fresh blueberries to the cooked, cooled strawberry topping or just sprinkle some on top for patriotic appeal. ‘Murica!
  • Instead of strawberry topping, feel free to top these shortcakes with other fresh fruits, like juicy mangoes, ripe peaches, or even sweet cherries.
  • Drizzle dark chocolate sauce on top for that chocolate-covered-strawberry vibe.
  • Switch out the whipped cream for high quality vanilla ice cream.
  • Add a little coconut or rum extract to the whipped cream. 

Storing Strawberry Short Cake

The key to storing strawberry shortcake is to store the strawberry sauce and the short cake separately. If you store them together, you’ll just end up with soggy cake. 

On its own, the shortcake will last on the countertop (well covered) for 2-3 days, or in the fridge for up to a week. They can also be stored in the freezer for 2-3 months.  To enjoy again, thaw on the counter in the sealed container if frozen, then serve with strawberry sauce. 

The strawberry sauce will last in the fridge for up to 1 week. You can also freeze it for up to 3 months. When you’re ready to serve, thaw in the fridge, then serve cold or warm on the stove or in the microwave.

Best Strawberry Shortcake Recipe FAQs

What is the difference between strawberry cake and strawberry shortcake?

Strawberry cake is a classic cake that’s strawberry flavored. Strawberry shortcake, on the other hand, is made with a base of flaky buttermilk biscuits that are topped off with strawberry sauce!

Why do they call it strawberry shortcake?

As it turns out, shortcake does not get its name from the height of the cake. It’s actually named from an English cooking definition of “short,” which describes something that has a crisp texture thanks to the addition of fat. In the case of shortcake, it’s made crispy and flaky with the addition of butter!

Are biscuits and shortcake the same?

While shortcake and biscuit dough are very similar, they are slightly different. Biscuits tend to be less sweet with less sugar and a little more salt. Shortcake, as a dessert, is made with less salt and sweetened with more sugar! 

What makes a cake a shortcake?

A shortcake is different from a regular cake in that it’s made more like biscuits. It’s soft and flaky in the middle with a crisp outer edge and it’s typically topped off with fresh strawberry slices or strawberry sauce!

how to make strawberry shortcake with real biscuits and strawberry topping.

More summer desserts you will love!

Any of these desserts would be perfect for your Easter celebration!

Facebook | Pinterest | Instagram

strawberry shortcake biscuits stacked together with strawberries and whipped cream
Print

Strawberry Shortcake Recipe

This classic recipe for Strawberry Shortcake is just like the kind your grandma made! A thick, sweetened shortcake with golden flaky layers, just like biscuits. Topped with the BEST Strawberry Topping and a mountain of whipped cream. Stop buying those weird yellow sponge cakes at the store. This is the real deal! I will show you exactly how to make it.
Course Dessert
Cuisine American
Prep Time 20 minutes
Cook Time 20 minutes
Freeze Time 20 minutes
Total Time 1 hour
Servings 9
Calories 604kcal

Ingredients

For the strawberries

  • 1 batch of Fresh Strawberry Topping*

For the shortcake

  • 3 cups all purpose flour spooned and leveled
  • 1/3 cup granulated sugar
  • 1 teaspoon kosher salt
  • 2 tablespoons baking powder
  • 3/4 cup butter COLD (1 & 1/2 sticks)
  • 1 large egg cold
  • 3/4 cup buttermilk** COLD
  • 1-2 tablespoons buttermilk cold OR ice water

For the whipped cream

  • 2 cups heavy cream***
  • 1/3 cup powdered sugar
  • 1 teaspoon vanilla

Instructions

  • Start by making the Fresh Strawberry Topping.* Cover and set aside to thicken. You can serve it room temperature or chill it in the fridge.
  • Make the shortcake. In a large bowl, add 3 cups flour, 1/3 cup granulated sugar, 1 teaspoon kosher salt, and 2 tablespoons baking powder. Whisk it together.
  • Use a knife to chop 3/4 cup COLD butter into small chunks.
  • Add the butter to the flour mixture and use a pastry cutter to cut the butter into the flour. See photos. You want to end up with a crumbly mixture and pieces of butter about the size of a pea.
  • In a small bowl or glass measuring cup, add 3/4 cup COLD buttermilk**. Whisk the large egg into the buttermilk.
  • Add the buttermilk/egg mixture to the flour and use a rubber spatula to stir it together and create a shaggy dough. It’s ok if all the flour is not incorporated.
  • Cover your hands with flour and knead the dough a few times right there in the bowl, smashing in any loose flour with your hands. If it is too dry to come together, add 1 tablespoon cold buttermilk or 1 tablespoon ice water to get it to come together.
  • Turn the dough out onto a floured surface (I love my pastry cloth). Use a rolling pin to roll the dough into a rectangle about 9×13 inches, it doesn’t have to be exact. Fold the dough in half, then in quarters, then again. Pat the dough out with your hands to make a smooth top, and use the rolling pin if necessary to roll it gently into a rectangle about 1 and 1/4 inch thick.
  • Dip a 2 and 1/2 inch biscuit cutter into flour and use it to cut the dough. Do not twist the biscuit cutter, it inhibits rising in the oven. Just push straight down.
  • Re-roll the scraps and repeat.
  • Place the shortcake in a buttered cast iron skillet or greased 9×9 inch square baking pan. I prefer to make them in a pan that has sides; this helps the shortcakes rise upward instead of falling on their sides in the oven. You want to place the shortcakes snuggly together, either touching or about 1/2 inch apart. They will help each other rise.
  • If you have time, I highly recommend freezing the whole pan of prepared shortcake for about 20 minutes. Cold dough going into a hot oven is how you get perfect flaky layers. While you freeze the dough, preheat the oven to 425 for at least 20 minutes.
  • Just before putting them in the oven, brush the top of each shortcake with buttermilk or heavy cream. This will help them brown. Sprinkle generously with sugar (I like chunky raw sugar for a nice crunch).
  • Bake at 425 degrees F for about 18-22 minutes. You will know they are done when the tops are a deep golden brown, the edges of the biscuits have firmed to the touch, and the bottoms are starting to brown. If you still can’t tell, gently split one of the shortcakes and lift it up to see the center. If it is at all gooey, put it back in the oven. If they are not done but the tops are getting too brown, top with foil for the last few minutes of baking.
  • Meanwhile, make the whipped cream. In a large bowl or stand mixer, add 2 cups of cream, 1/3 cup powdered sugar, and 1 teaspoon vanilla. Beat on high speed for 2-5 minutes, depending on the power of your mixer. You will know it is ready when the cream has thickened, you can see peaks forming, and when you lift the beaters out they hold their shape in a nice curl. Keep refrigerated if you are not ready to serve right away.
  • Assemble the shortcakes while they are still warm: split a shortcake in half, top with strawberries and whipped cream, top with the other half, then top with more strawberries and whipped cream.
  • Make ahead: You can make and freeze the unbaked shortcakes once they are shaped. Seal well and freeze for up to 2 months. Bake straight from frozen: bake at 450 for about 5 minutes, then lower the temperature to 400 and bake for another 15 minutes.

Video

Notes

*Of course if you want to simplify things you can skip the Fresh Strawberry Topping and just add a little sugar to your strawberries to let them macerate. You will need 6-8 cups of strawberries. Stir in about 1/2 cup sugar, and let sit for 20 minutes before serving.  
**You can use cheater buttermilk for this recipe. Add a teaspoon of vinegar or lemon juice to a measuring cup, and then fill to the 3/4 cup line with cream (preferable) or half and half. You can use whole milk in a pinch. Stir and let sit 5 minutes before using in the recipe. 
***Heavy cream is sold near the milk in the dairy section. It is not coffee creamer. Sometimes it is labeled whipping cream, ultra heavy whipping cream, etc. These names differentiate fat content levels. For making whipped cream, buy the cream with the highest fat content you can! The cream I use is 36% fat content.  

Nutrition

Serving: 1biscuit with topping and whipped cream | Calories: 604kcal | Carbohydrates: 64g | Protein: 7g | Fat: 37g | Saturated Fat: 23g | Polyunsaturated Fat: 2g | Monounsaturated Fat: 10g | Trans Fat: 1g | Cholesterol: 136mg | Sodium: 733mg | Potassium: 140mg | Fiber: 1g | Sugar: 20g | Vitamin A: 1321IU | Vitamin C: 4mg | Calcium: 232mg | Iron: 2mg

Caramelized French Onion Dip

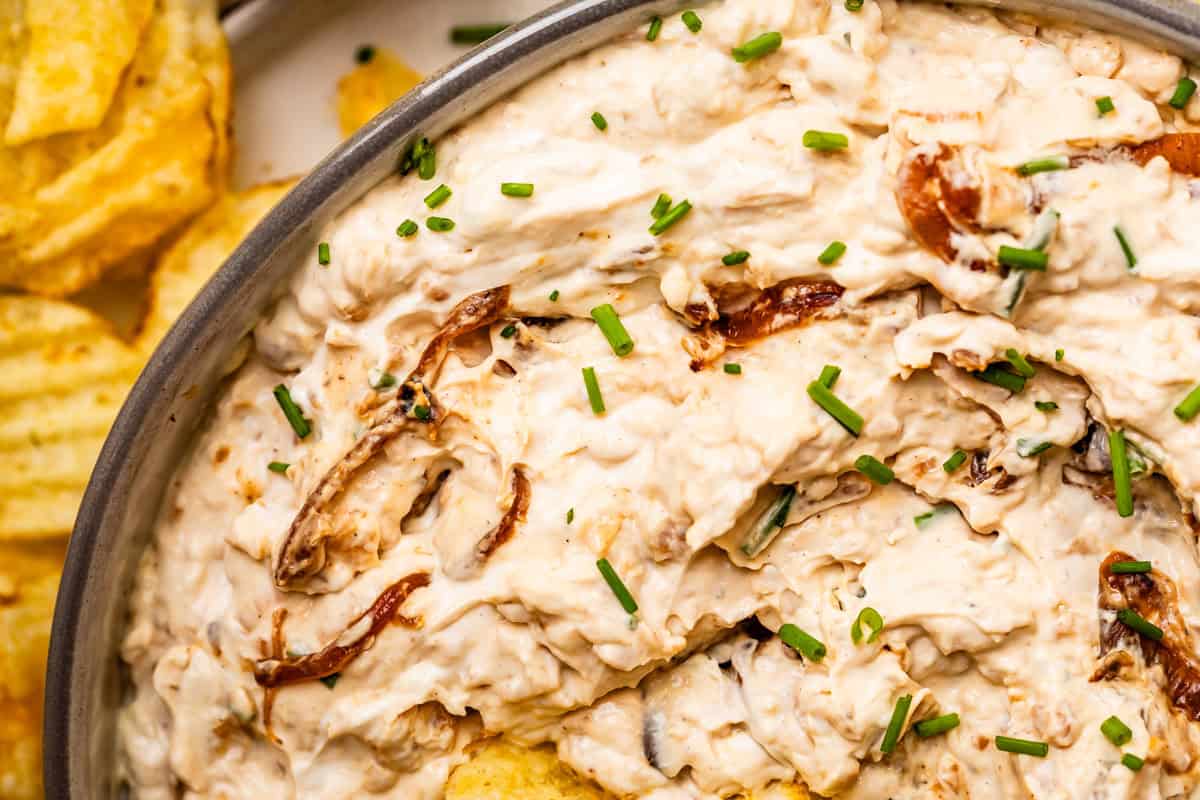
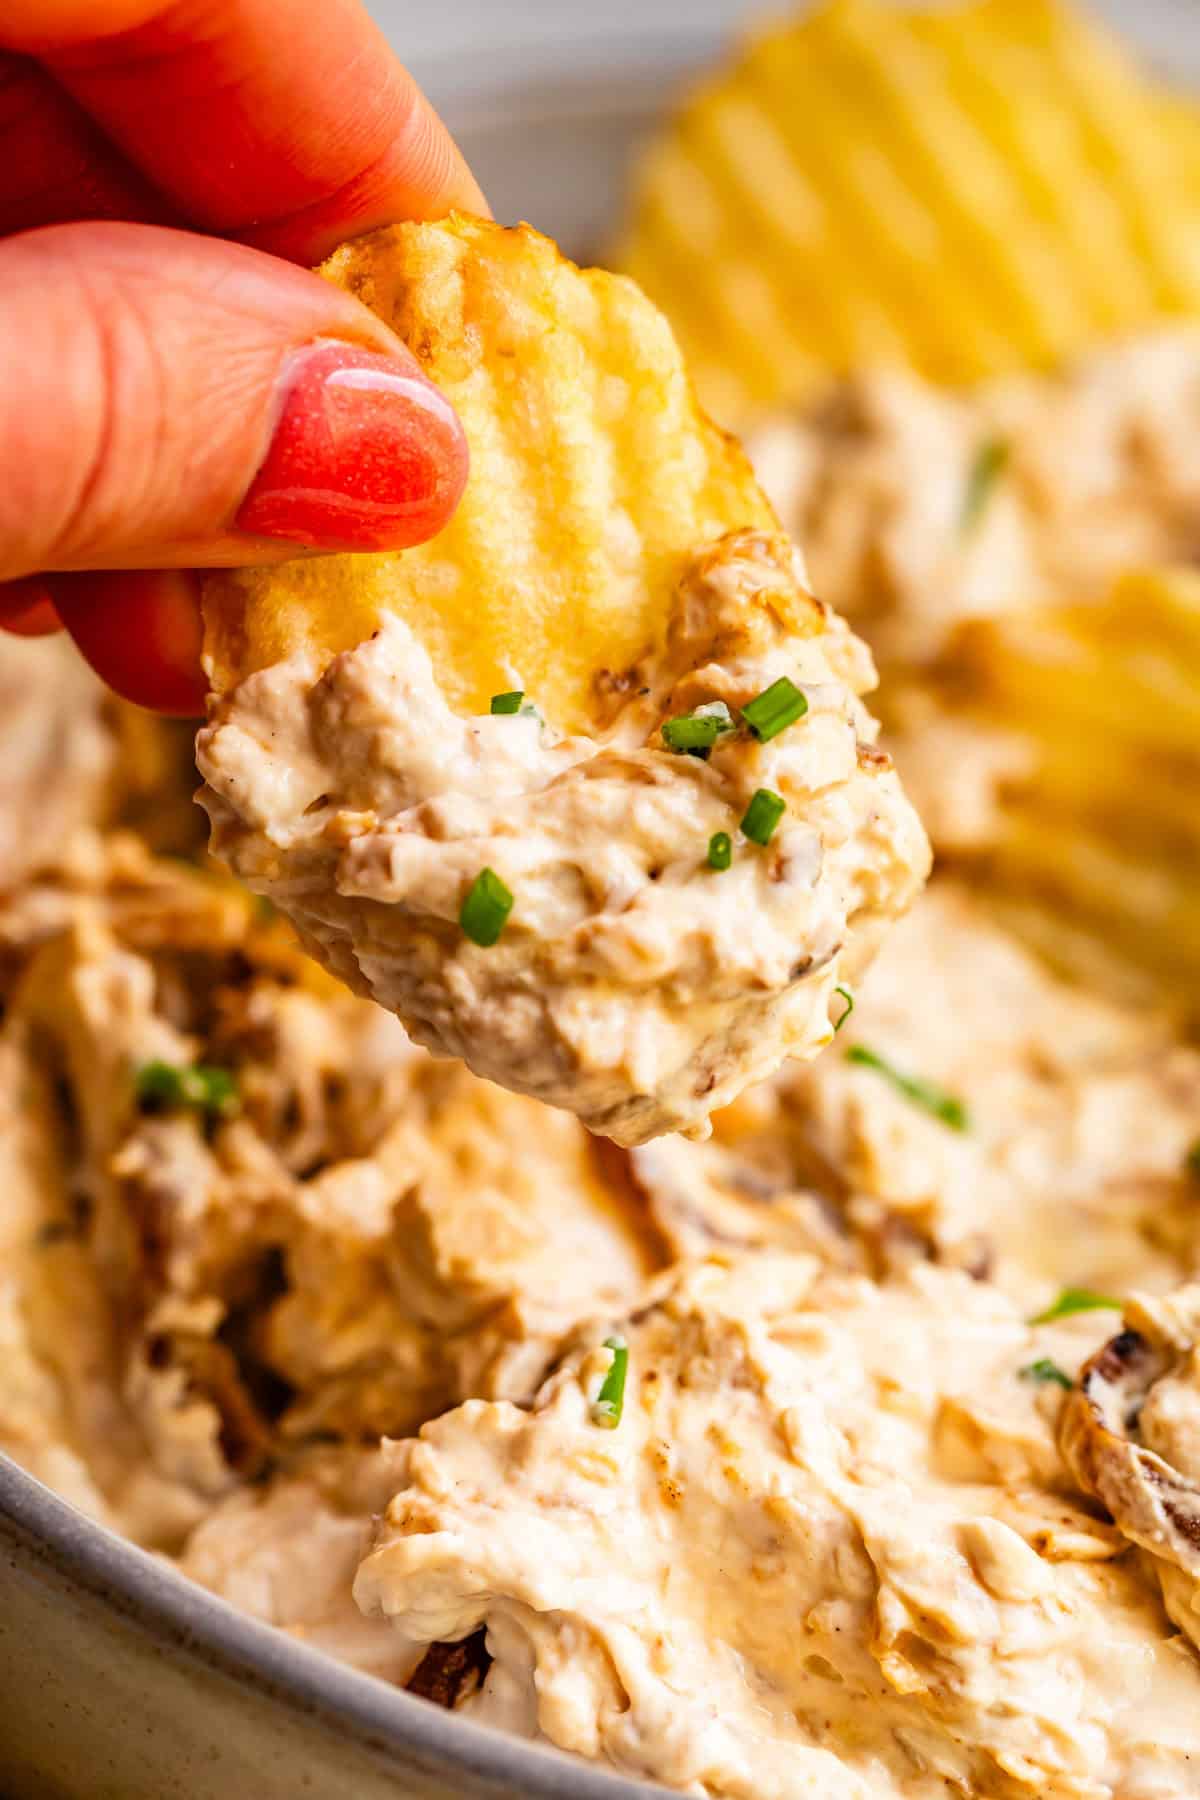
I have your dip recipe for the summer guys!! This French Onion Dip features caramelized onions in all their sweet and savory glory, rounded out with some tangy cream cheese and sour cream. Your potato chips have never known such bliss! I honestly thought I didn’t like onion dip, (it’s so…oily?) but homemade French Onion…

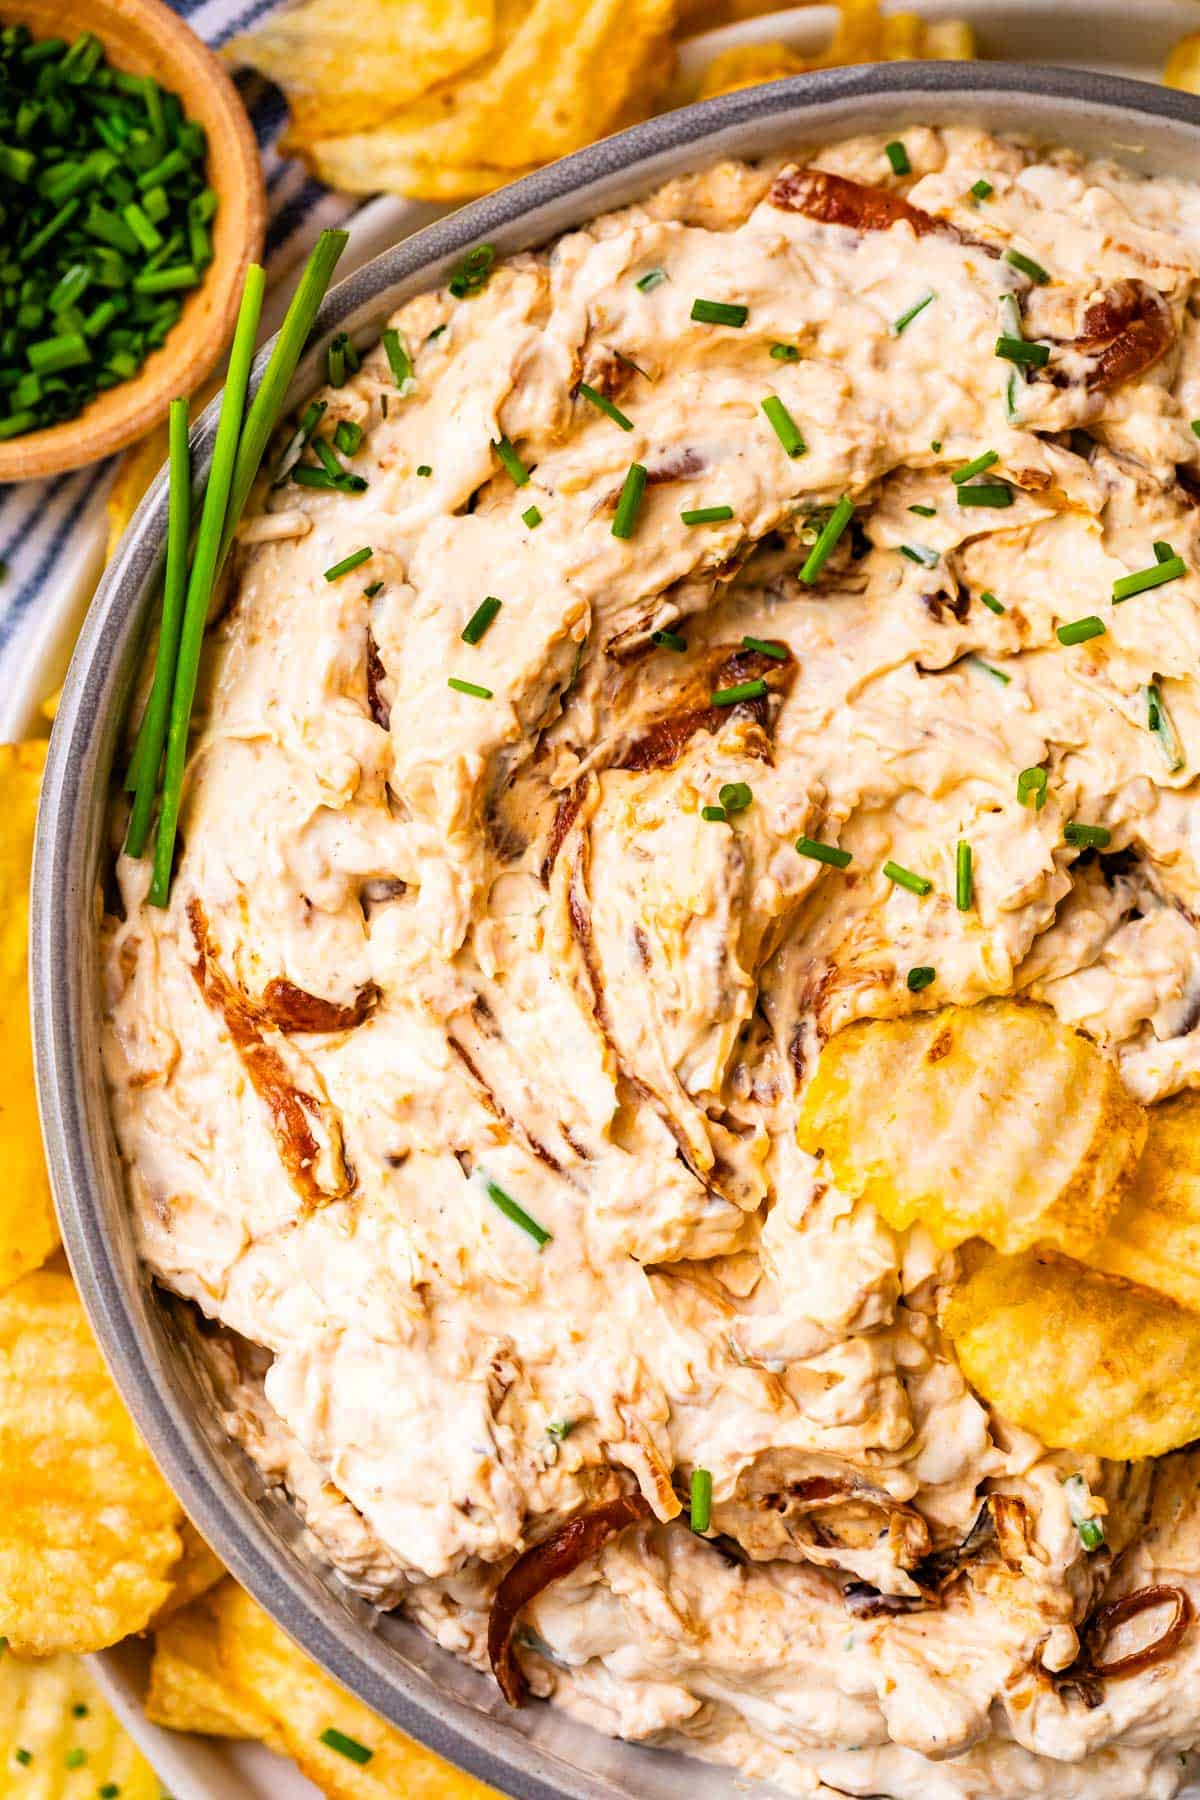
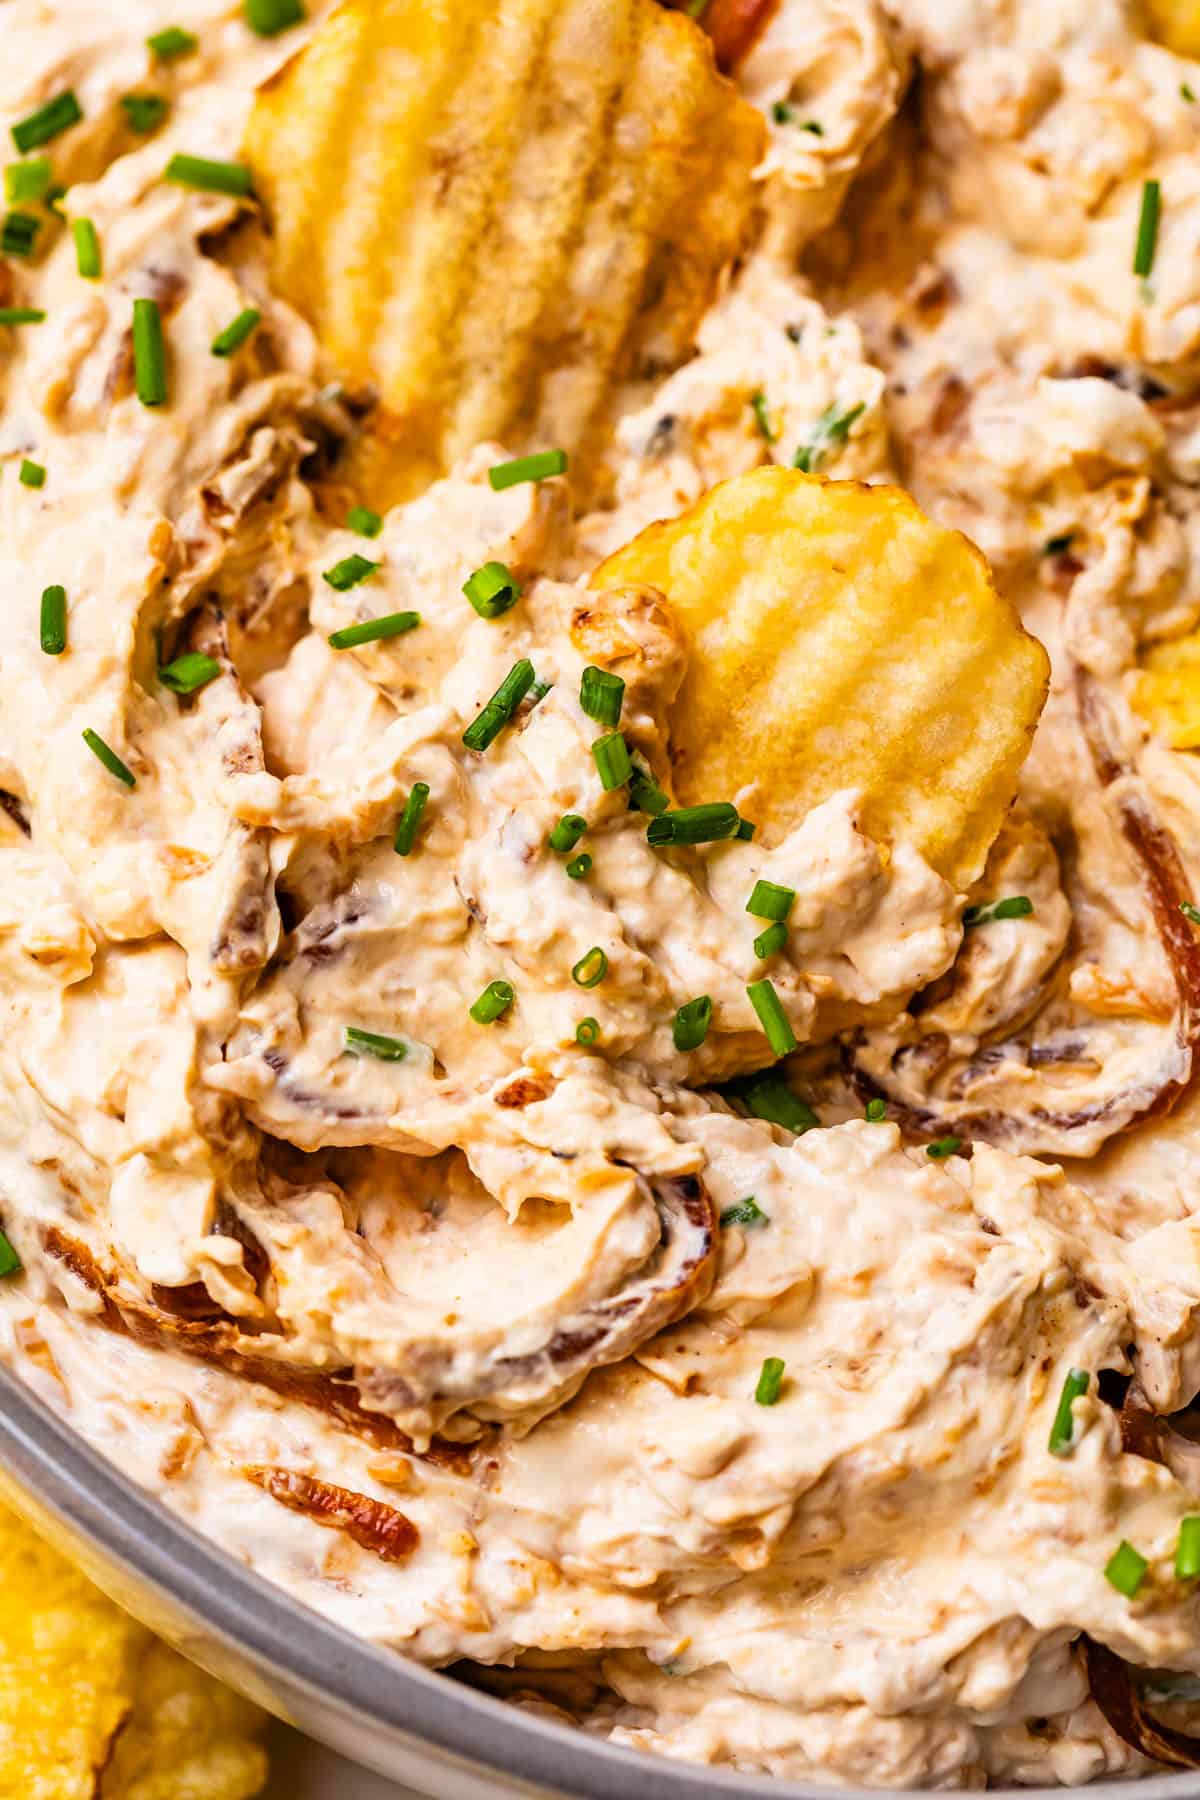
I have your dip recipe for the summer guys!! This French Onion Dip features caramelized onions in all their sweet and savory glory, rounded out with some tangy cream cheese and sour cream. Your potato chips have never known such bliss! I honestly thought I didn’t like onion dip, (it’s so…oily?) but homemade French Onion Dip is a whole nother level of creamy, cheesy caramelized perfection.

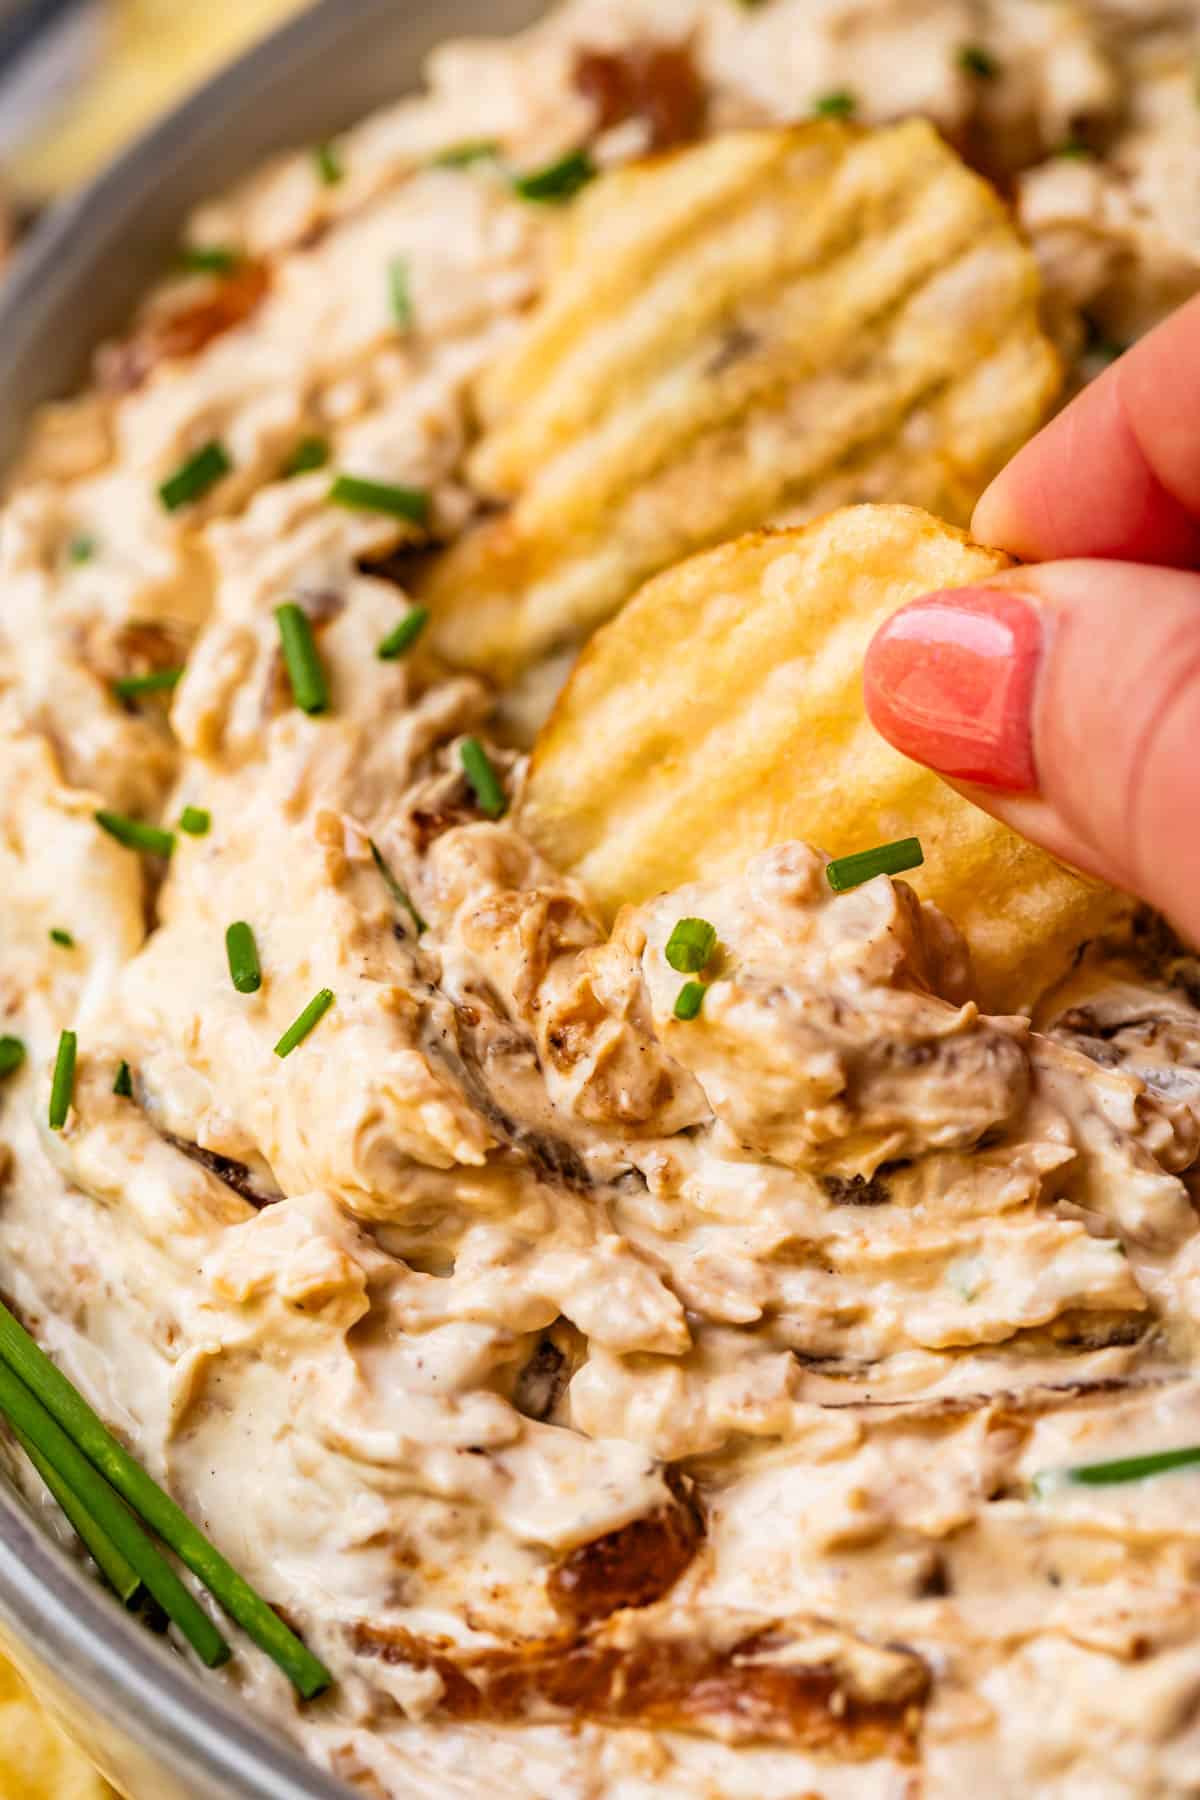
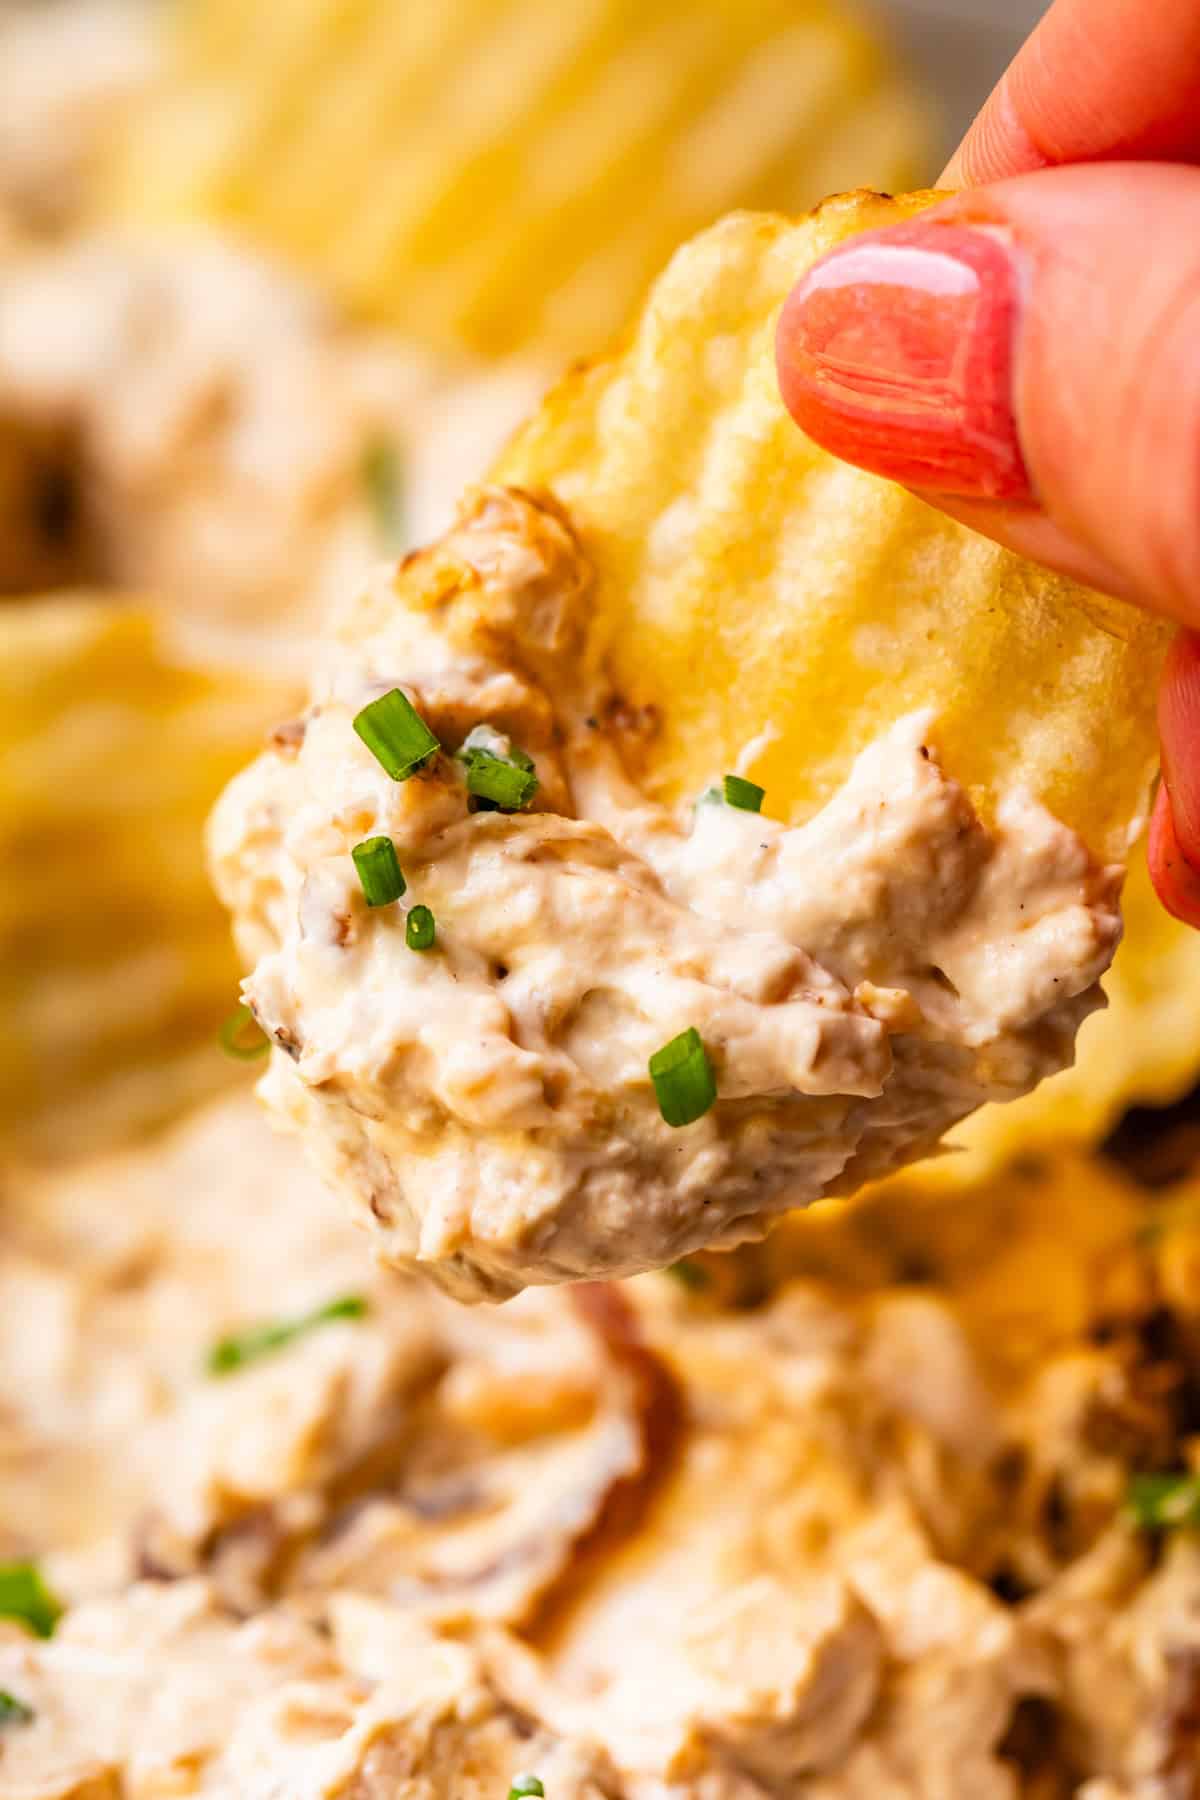
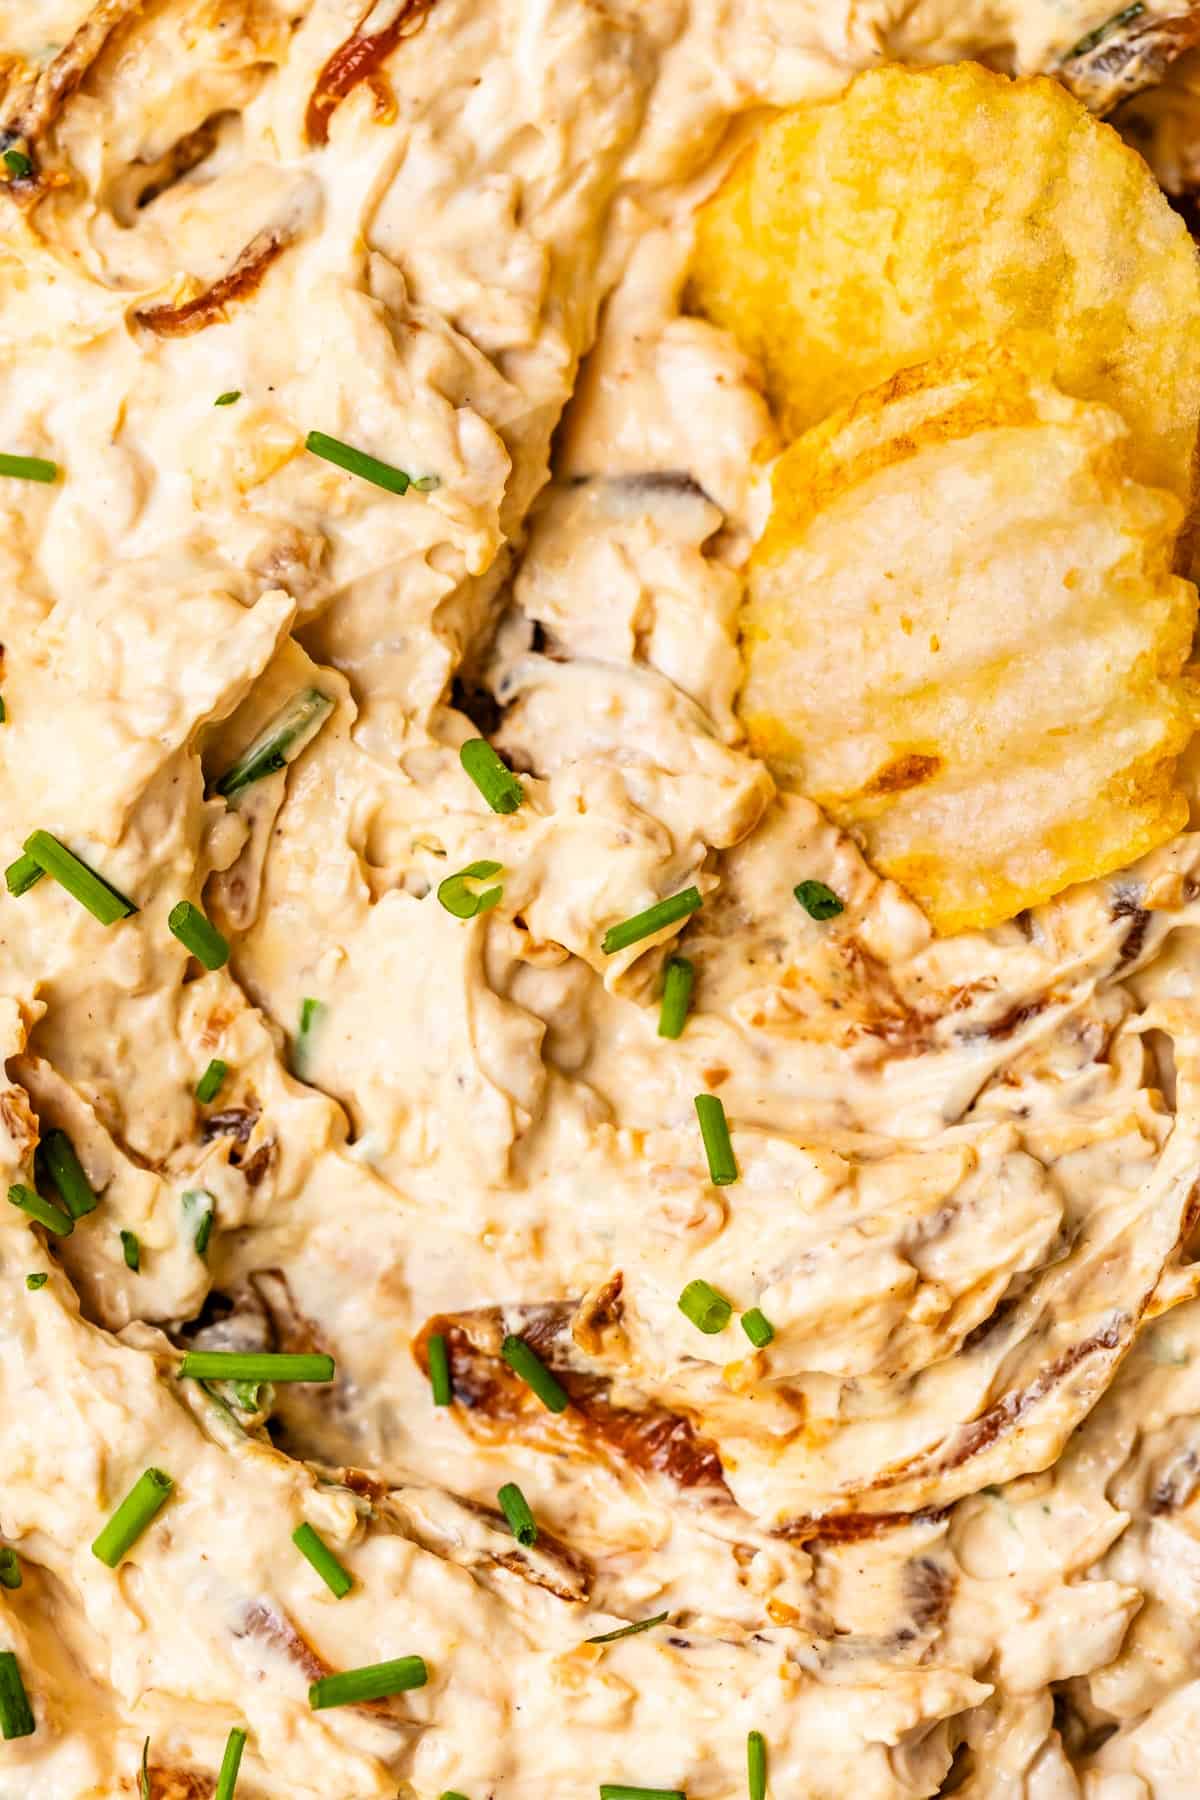
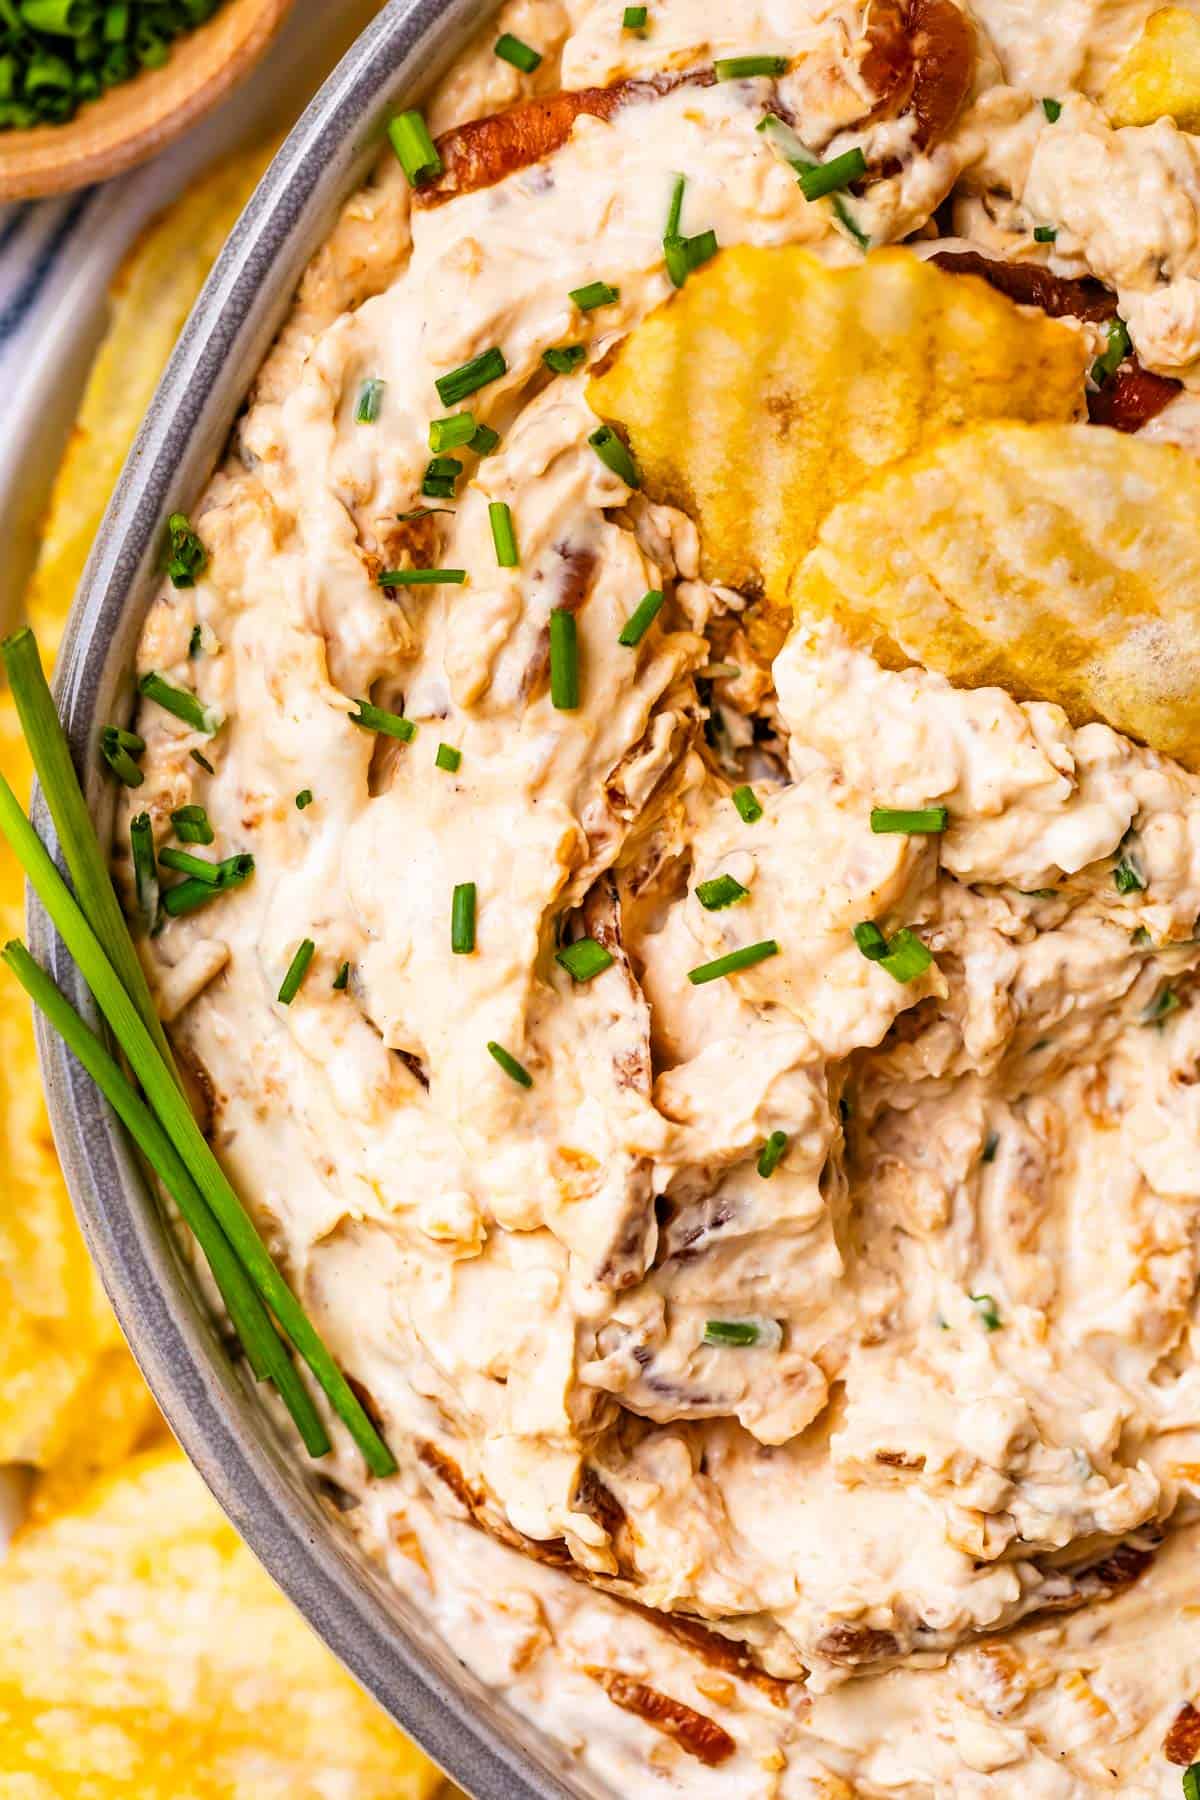
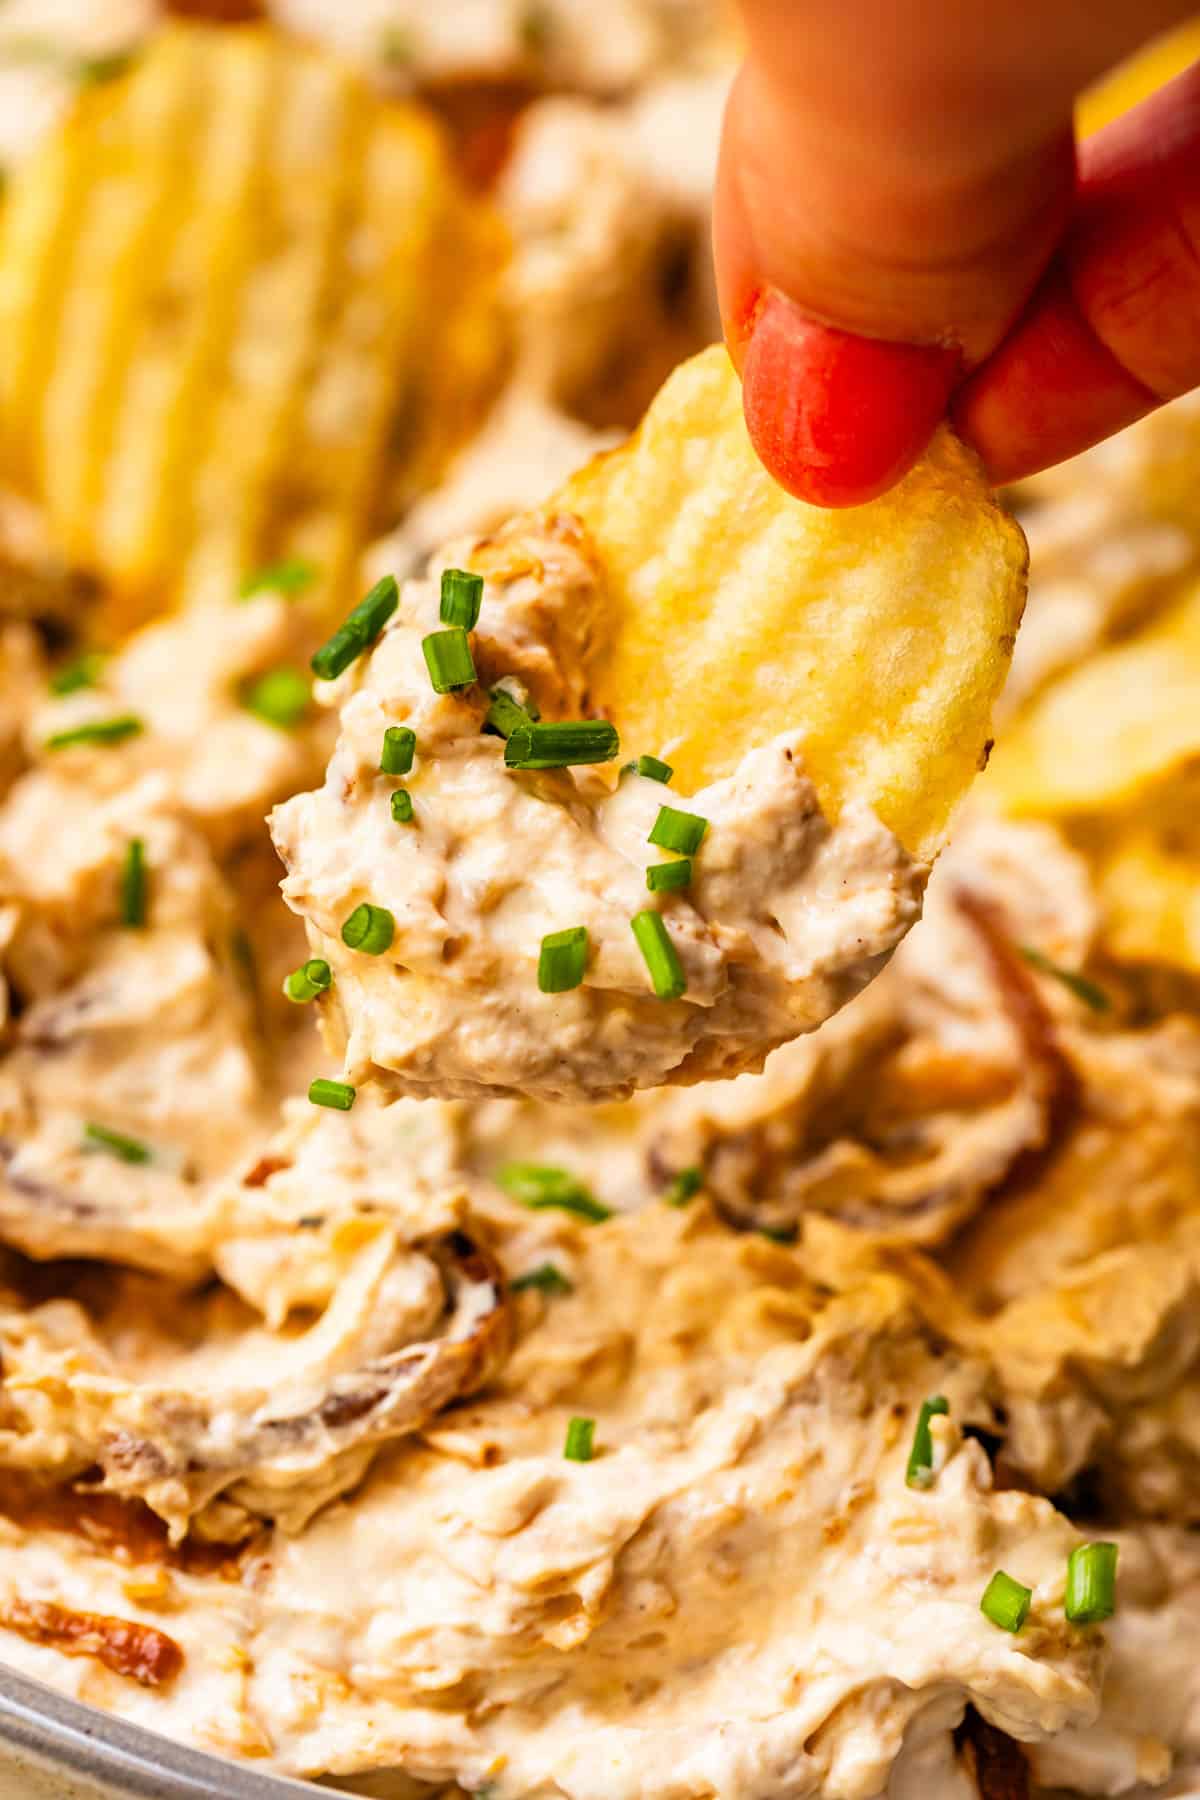
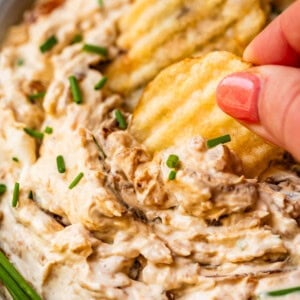
hand pulling crinkle cut potato chip scooping up french onion dip.
Table of Contents
  1. The best recipe for French onion dip
  2. What is French onion dip?
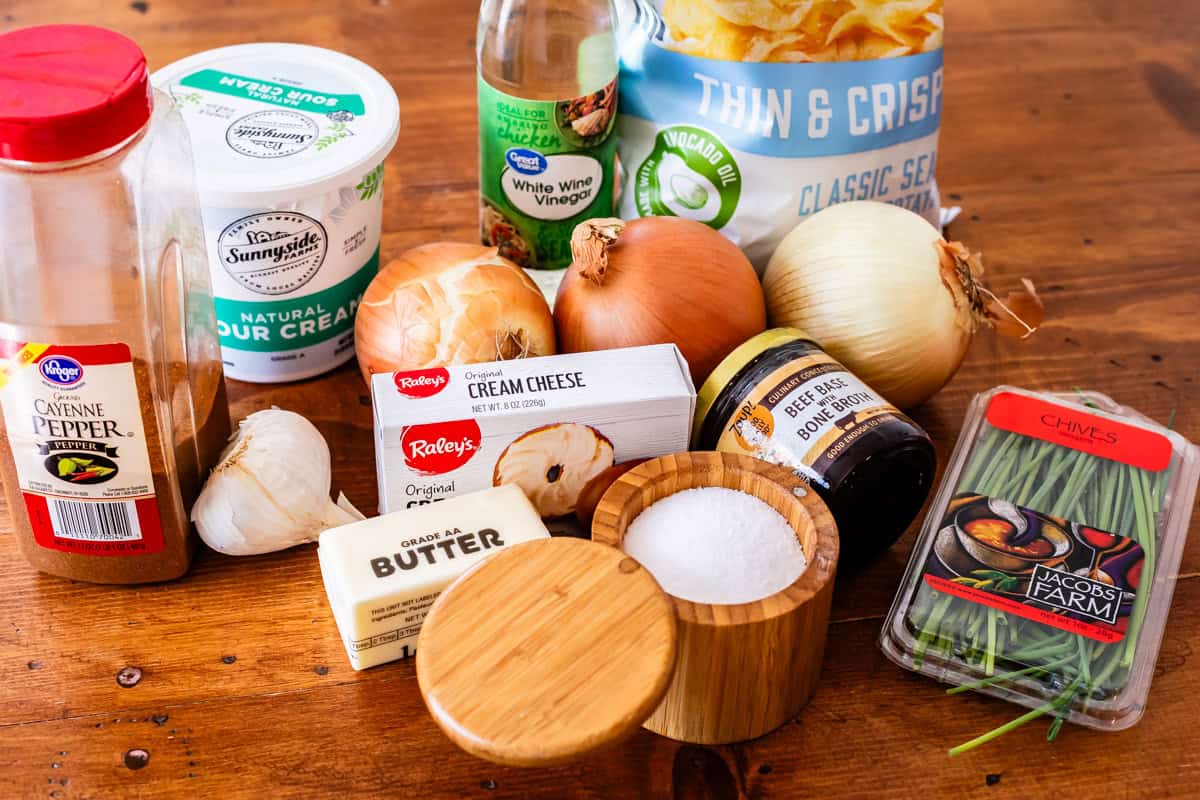
  3. French onion dip recipe ingredients
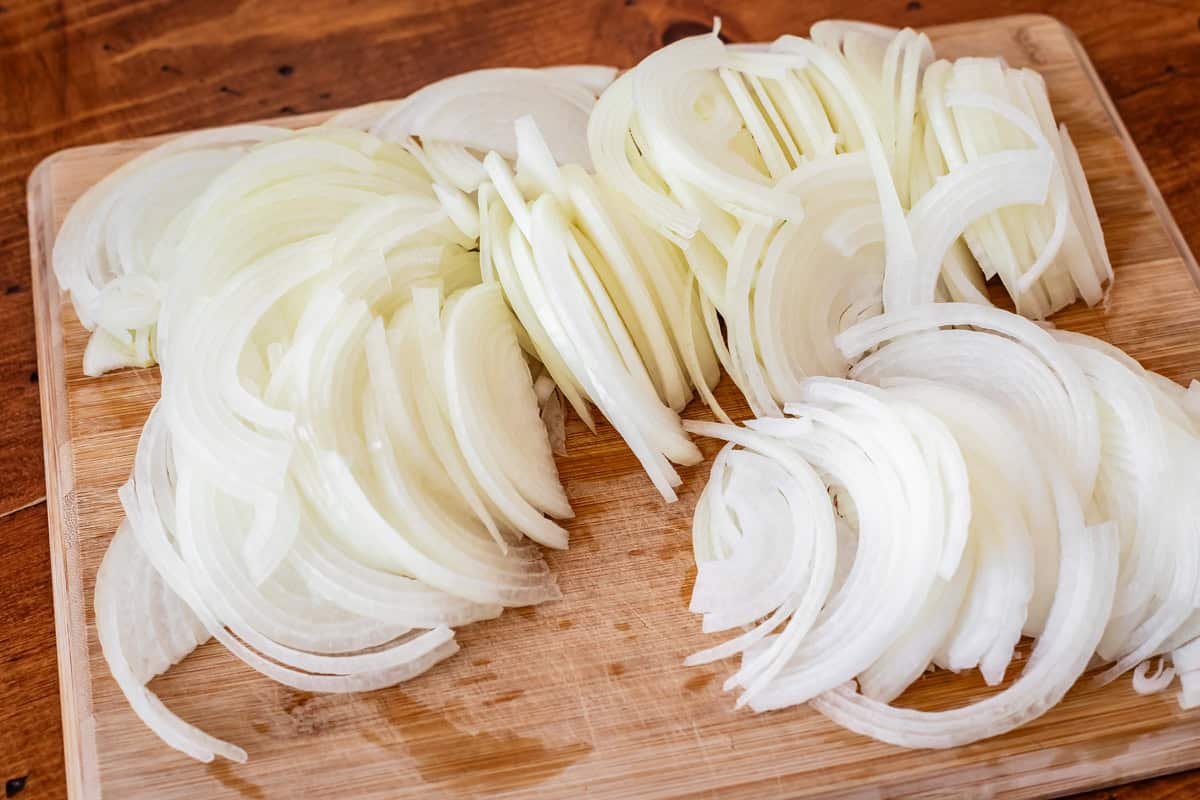
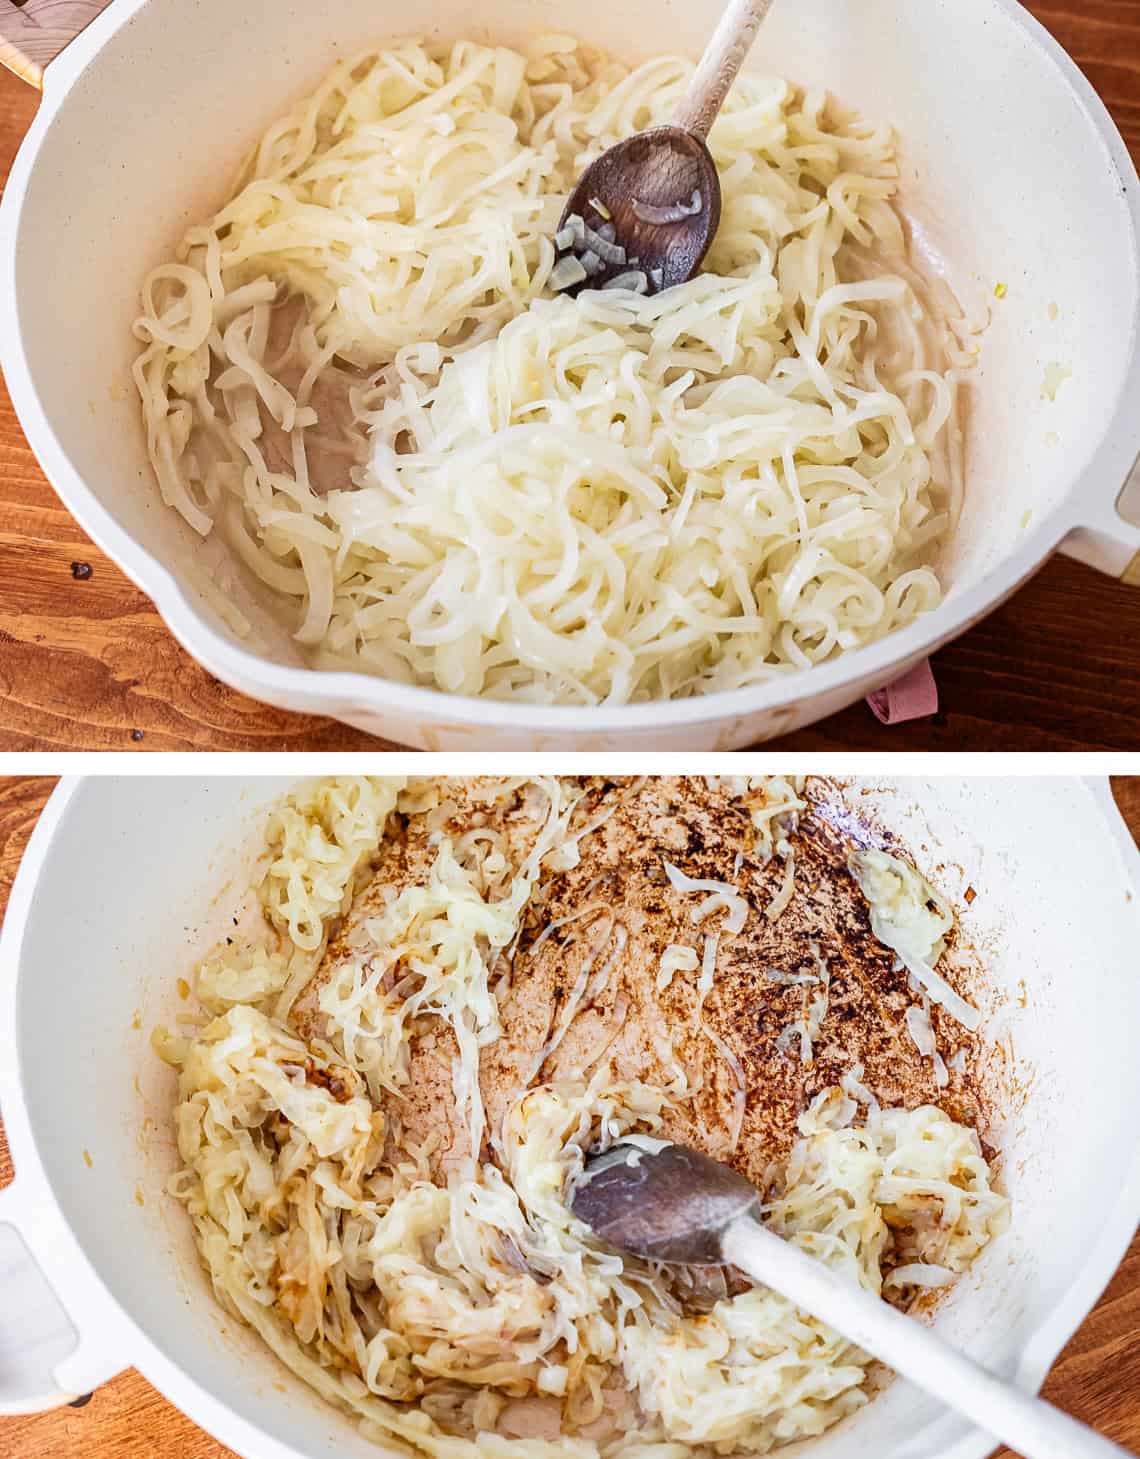
  4. How to make French onion dip
  5. What do you eat with French onion dip?
  6. How long does French onion dip last?
  7. Can you freeze French onion dip?
  8. French onion dip frequently asked questions
  9. More incredible dips and sauces you’ll love!
  10. French Onion Dip Recipe

Growing up, our house backed up to an intersection. Kitty corner from us was our church, where I attended seminary every morning in high school at 6:05am (!!!), and across the street was the high school. I always joked with my friends that my entire life was encapsulated in one intersection.

We were literally 50 yards from everything, but you had to walk down the entire block and then back again to get there. If you wanted to stick with those conventional sidewalks, that is.

Hopping the 6 foot cement fence in the backyard was the obvious solution, but how? My dad came up with the idea of using a ladder, the kind with a shepherd’s hook at the top, that people use for above-ground swimming pools. Voila!

little girl on a ladder on a cement fence with purple tree.
Valentine learning to hop the fence 💕

The whole neighborhood started using the ladder to skip the extra block to school, and it was used for years. My dad still hops the fence to get to church every week. He likes to race my mom, who drives the two blocks (ain’t no way she’s hopping the fence in a skirt), and sometimes he beats her.

When you hop a 6-foot fence several times every single day, you get pretty casual about it, or at least I did in high school. One morning on the way to seminary, when it as still dark outside, I jumped without looking, and landed directly in front of this woman out for her morning jog. She screamed sooo loud and was clearly terrified that a random teenager had literally fallen out of nowhere into her path. We didn’t collide, thank goodness, but it was very close! 16-year-old-me felt so bad, but not so bad that I don’t still kind of laugh about it to this day. (I wonder what HER story is 😅)

I asked my family for more fence hopping stories:

I think you can guess which messages are from my brothers, always keepin it classy 😅

One day, my dad was making scrambled eggs. He went outside, knelt down by the weeds that grew out of the landscape edging we all stepped over every single day on the way to to hop the fence, snipped said weeds with scissors, and sprinkled them over his eggs. Because they were CHIVES. My mind was absolutely blown. Yer a wizard, Dad! I had NO idea we had edible weeds in our yard 😂

I always think of this when I buy chives, like for today’s recipe, which I am SOOO excited about!!

ceramic bowl filled with French onion dip and garnished with snipped chives and potato chips.

The best recipe for French onion dip

I never thought I could adore a dip the way I adore this dip. I love me some caramelized onions, but go ahead and add a ton of creamy cheese and chips? Stop itttt.

This will be the only thing I’m snacking on poolside this summer. If you invite me to your summer BBQ, I’m showing up toting this dip. I might even still be stuck on it come Thanksgiving, where it actually makes a perfect centerpiece to a Charcuterie Board. (I would know, this dip with charcuterie is what I served last November! I’ve been holding out on you for months with this recipe!!)

glass bowl of French onion dip with a few crinkle cut potato chips stuck in the top.

What is French onion dip?

Have you ever had French Onion Soup? If not, please go make that right now, then we can talk.

Just kidding. (Also, did you click over? Those pictures are sooo old but I promise the soup is legit.)

French Onion Dip is just the cheesy, dip-able version of the glorious soup.

The soup starts out with a ton of onions, which we slowly caramelize with the patience of turning coal into diamonds. (Trust me, worth it). Once finished, we immerse them in a rich beef broth. THEN we top it with crusty bread and cheese, which is broiled to perfection. I know, RIGHT??

The dip version takes the flavors and adds a ton more cheese, minus all the liquid, plus potato chips. I mean how can we go wrong here?

French onion dip is specifically made with beef broth flavors. If it doesn’t have the beef component, then it’s just onion dip. I have some BEEF with today’s sneaky snack makers, because there are so many store-bought ready-to-eat dips out there claiming to be French onion, that are really just plain ol’ onion dip. NOT SO, SIR! Give me my beef or give me death. Or something like that.

Onion dip is mostly sour cream with dried minced onion and a few other seasonings, almost like a super oniony ranch. I mean, don’t get me wrong. I can get down with a good onion dip as much as the next guy, but it is not the same!! No beef, no caramelized onions, and doesn’t come close to the deep, savory, almost sweet flavor of French onion dip!

close up of French onion dip showing the creaminess as well as the bits of real, caramelized onions.

French onion dip recipe ingredients

Here’s a quick overview of the ingredients you’ll need to make this dip. Nothing special, the magic happens when we caramelize! Check out the recipe card for exact amounts!

ingredients for french onion dip - cream cheese, onions, beef base, sour cream, and more.
  • yellow onions
  • butter
  • kosher salt
  • granulated sugar
  • cayenne pepper
  • Beef base
  • white wine vinegar
  • cream cheese
  • sour cream
  • garlic
  • Worcestershire sauce
  • lemon juice
  • chives, optional
  • crinkle cut potato chips

How to make French onion dip

This dip takes an hour to make, but only because caramelized onions refuse to be rushed. They are drama queens like that. Caramelizing is not hard work, it just takes a while. The toughest part is actually chopping them up!!

super thinly sliced onions on a wooden cutting board, all ready to be caramelized.

The fact that I was willing to cry my way through these onions is testament to how much I LOVE THIS DIP. One onion I can handle, but three? So many tears. I busted out the onion goggles for sure (they actually work. I use regular swim goggles! They seal to your face better than marketed “onion goggles“. The only downside is that I have raccoon eyes for an hour afterward.)

woman wearing goggles in kitchen

Onion time 😂

My other tip I learned from my mom: when the tears come, run your wrists under cold water from the tap. It works every time! Bodies are weird guys. What do your wrists have to do with your eyeballs?? Just thinking about this makes me want to go try acupuncture.

Toss all your hard-earned onions in a skillet with a couple tablespoons butter. Heat over medium for a few minutes to get them going, then turn the heat down to medium low.

top pic: onions in pan, bottom, onions starting to brown and scorch.

When the pan dries out and the onions start to stick to the pan (and even, eep, start to blacken, yikes) it’s time to add the white wine vinegar. Deglaze the pan, stirring up all the brown bits and glorying in all the flavor you are working up! Then add in some beef base. This addition of beefy flavor is what distinguishes this dip as “French onion.” Without the beef flavor, it would just be onion dip. I love the deep umami it adds!

top pic: beef base in pan with browned onions, bottom pic wooden spoon mixing them together.

And voila, 40-50 minutes later, your onions are caramelized! Don’t they look so good?? Give them a taste. MARVELOUS.

Chop them up now if you didn’t do it before caramelizing. (You can totally chop the onions into a dice before caramelizing. I’m just always crying a river at that point, so I chop after when it’s easier 🤣)

top pic: chefs knife chopping browned onions smaller, bottom pic hand mixer beating cream cheese.

Beat up your softened cream cheese and sour cream.

top pic: beaten cream cheese in glass bowl, bottom pic chopped onion and other ingredients added.

Add in the garlic, Worcestershire, and lemon juice, and of course the onions. Don’t add them hot! Let them cool a little bit so you don’t melt your cream cheese. Fold it all together.

Guys, that’s it!! Dig in! Sprinkle with some chopped fresh chives that you have snipped from the weeds in your yard 😂, or some green onions that you have chopped more finely than usual.

hand holding a crinkle cut potato chip loaded with French onion dip and chive garnish.

What do you eat with French onion dip?

Well if you’re like me, you could eat this stuff straight up with a spoon. But there are a few particular items that I particularly love that work as dippers at parties!

  • crinkle cut potato chips are BY FAR the best potato chip option, with that classic potato chip taste to complement the flavor of the dip and strong enough to scoop inappropriate amounts of it without breaking
  • I love this dip with veggies: carrots especially, but also cucumbers, bell pepper, celery, jicama, snap peas, etc.
  • try other crinkle cut chip flavors: I absolutely love this dip with Salt & Vinegar Chips. Or try different vegetable crinkle cut chips (like sweet potato, tomato, spinach, etc)
  • french fries! hello!
  • pita chips, pretzels, or any kind of cracker
  • slices of good bread like French or sourdough, or crostini (toasted baguettes). Bread would make it feel a little like Spinach Artichoke Dip, hello yum.

You can also use your dip as a condiment to elevate so many foods! Check ’em out:

a crinkle cut potato chip laden with French onion dip hovering over the bowl of dip.

How long does French onion dip last?

First, make sure it’s in an airtight container. Then store it in the refrigerator where it should last for 5-7 days. French onion dip IS PERFECT for making ahead to save you time the day of serving. I’m thinking Thanksgiving, New Years Eve, any potluck ever. It can be served chilled, so it will be ready to pull out and use right away. But don’t limit yourself if you have travel time. This dip is killer when served room temperature. (I actually prefer room temp.)

Can you freeze French onion dip?

I do not recommend it. Dairy, in particular the sour cream in this case, does not do well in the freezing and thawing process. It tends to separate and get watery or grainy. No thank youuuu. Stick to keeping this dip in the fridge for storage. If you don’t think you can eat the whole batch in 5-7 days ((or honestly, you didn’t hear it from me, but it lasts longer than this if well sealed), I recommend either making a half recipe or planning to gift some to friends or neighbors.

two crinkle cut potato chips nestled into french onion dip with snipped chive garnish.

French onion dip frequently asked questions

What is french onion dip made of?

French onion dip starts with a creamy base made up of cream cheese and sour cream. Then we’re adding perfectly golden caramelized onions and rich beef broth flavors are mixed in. That’s it! It does take some time to cook down the onions, but please ditch the onion soup mix because I promise: the knock-your-socks-off flavor is 100% worth it!!

What’s the difference between French onion dip and onion dip?

French onion soup is derived from the flavors of French onions soup. Sweet caramelized onions and savory beef broth are the backbone of the soup, and those same flavors are mixed with a smooth cream cheese and sour cream base to make a dip. The end result is deeply flavored, savory but sweet deliciousness. Onion dip, on the other hand, has no beef influence. It’s just the cheese and the onion. It’s kinda like ranch dip’s more oniony cousin, and is a lighter dip option than French onion.

what is the best chip to eat with French onion dip?

This girl enjoys a quite high dip to chip ratio, so I’m all about the crinkle cut potato chips!! Buy a high quality brand like like Kettle or Boulder Canyon, but really any kind will do ya fine. Basic potato flavor is best, so you get the salt and crunch, but nothing else to compete with the flavors of the dip. And as far as classic thin potato chips, only buy them if you enjoy a frustrating, chip-breaking dip session. They’re just too thin to hold up!

If you can’t find regular crinkle cut potato chips, stick with crinkle cut style, and choose something like a veggie chip (I know some brands have sweet potato chips, or more exotic roots like taro). The next best option is probably a good plain pita chip, or toasty baguettes!

close up showing half a bowl filled with caramelized French onion dip with chive garnish and chips.

More incredible dips and sauces you’ll love!

I’m a sucker for a good condiment. It can totally make a whole meal or even event to have just the right sauce or dipper!! Look through these recipes for your favorite dip recipes and more!

finger and thumb holding a crinkle cut potato chip loaded with French onion dip with chive garnish.

Facebook | Pinterest | Instagram

hand pulling crinkle cut potato chip scooping up french onion dip.
Print

French Onion Dip

Course Appetizer, Snack
Cuisine American
Prep Time 15 minutes
Cook Time 40 minutes
Total Time 55 minutes
Servings 10
Calories 203kcal

Ingredients

  • 3 large yellow onions
  • 3 tablespoons butter
  • 2 teaspoons kosher salt
  • 1 tablespoon granulated sugar
  • 1/8 teaspoon cayenne pepper
  • 3 tablespoons white wine vinegar
  • 1 teaspoon Beef base
  • 1 tablespoon water if needed
  • 8 ounces cream cheese softened
  • 1 and 1/2 cups sour cream
  • 1 small clove garlic smashed and minced
  • 1 teaspoon Worcestershire sauce
  • 1 teaspoon lemon juice
  • chives chopped, to garnish
  • 1 large bag high quality potato chips for serving

Instructions

  • Set out your block of cream cheese so that it is soft when you need to beat it later.
  • Caramelize the onions: Thinly slice the 3 onions. Thin slices caramelize more evenly than big ol pieces!*
  • Set a 12-inch high sided pan over medium heat. Melt 3 tablespoons butter, then add all the onions. Sprinkle with 2 teaspoons kosher salt, 1 tablespoon sugar, and 1/8 teaspoon cayenne pepper. The cayenne is for flavor and not heat, if you like things a lil spicy, add 1/4 teaspoon!
  • Saute the onions over medium heat for about 5 minutes, stirring occasionally. Lower the heat to medium low, and settle in for the long haul. Onions take about 40-50 minutes to caramelize fully.
  • Eventually, after 10-15 minutes, the bottom of the pan will get dry and the onions will start sticking to the pan. At this point, deglaze the pan by adding 3 tablespoons white wine vinegar and using a wooden spoon to scrape up all the browned bits on the bottom of the pan.
  • Add 1 teaspoon beef base and stir it all together. Keep sauteing until you have reached the 40-50 minute mark. If the pan gets very dry and the onions start to blacken on the edges, add 1 tablespoon water and stir. Repeat this process as often as necessary. At the end, your onions should be a deep brown caramel color, with no white parts, and not blackened. (not too much, anyway.)
  • Remove the onions from the heat and let cool for a while. When you can handle them, scrape them onto a cutting board and chop into bite-size pieces.*
  • Make the dip: Meanwhile, in a medium bowl, add 8 ounces softened cream cheese. Beat with a hand mixer until it is smooth and creamy, and there are no lumps.
  • Add 1 and 1/2 cups sour cream, 1 small clove of minced garlic (about 1 teaspoon), 1 teaspoon Worcestershire sauce, and 1 teaspoon lemon juice. Continue beating until it's all mixed together. Give it a taste and add salt and pepper to taste!
  • Use a rubber spatula to fold in the cooled and chopped caramelized onions. Transfer to a serving dish and sprinkle with chopped chives (or green onions are good too, thinly sliced).
  • Serve right away with potato chips! I like the crinkle cut potato chips, I feel like they are sturdier and hold up better for dipping.
  • Store the dip in a covered container in the fridge. It will keep for a couple weeks! (Ask me how I know 😂) This is a GREAT make ahead appetizer, the flavors just get better with time.

Notes

*You can chop your onions into a normal dice before cooking, if you wish. I’m always crying a thousand tears by this point and want to get them in the pan as fast as possible, so I just slice and go! We don’t want long stringy onions in our dip; I always take the step to chop up the onions after they have caramelized. But if you are not a crier, you can do the full dice before cooking, if that’s more convenient! 

Nutrition

Calories: 203kcal | Carbohydrates: 9g | Protein: 3g | Fat: 18g | Saturated Fat: 10g | Polyunsaturated Fat: 1g | Monounsaturated Fat: 4g | Trans Fat: 0.1g | Cholesterol: 52mg | Sodium: 632mg | Potassium: 149mg | Fiber: 1g | Sugar: 5g | Vitamin A: 636IU | Vitamin C: 4mg | Calcium: 70mg | Iron: 0.2mg

Chocolate Chip Cookie Cake Recipe

This delicious Chocolate Chip Cookie Cake takes everything we adore about the iconic cookies and creates the best cookie cake…
Vanilla buttercream frosting has been piped in star flower shapes around the edge of this chocolate chip cookie cake. Piping bag full of frosting is next to cake, all on marble countertop.This delicious Chocolate Chip Cookie Cake takes everything we adore about the iconic cookies and creates the best cookie cake…

Lemon Pound Cake Recipe

This easy Lemon Pound Cake recipe makes a dream dessert for lemon lovers! Made with fresh lemon juice and zest…
Side view of lemon pound cake with lemon buttermilk glaze drizzled on top.This easy Lemon Pound Cake recipe makes a dream dessert for lemon lovers! Made with fresh lemon juice and zest…
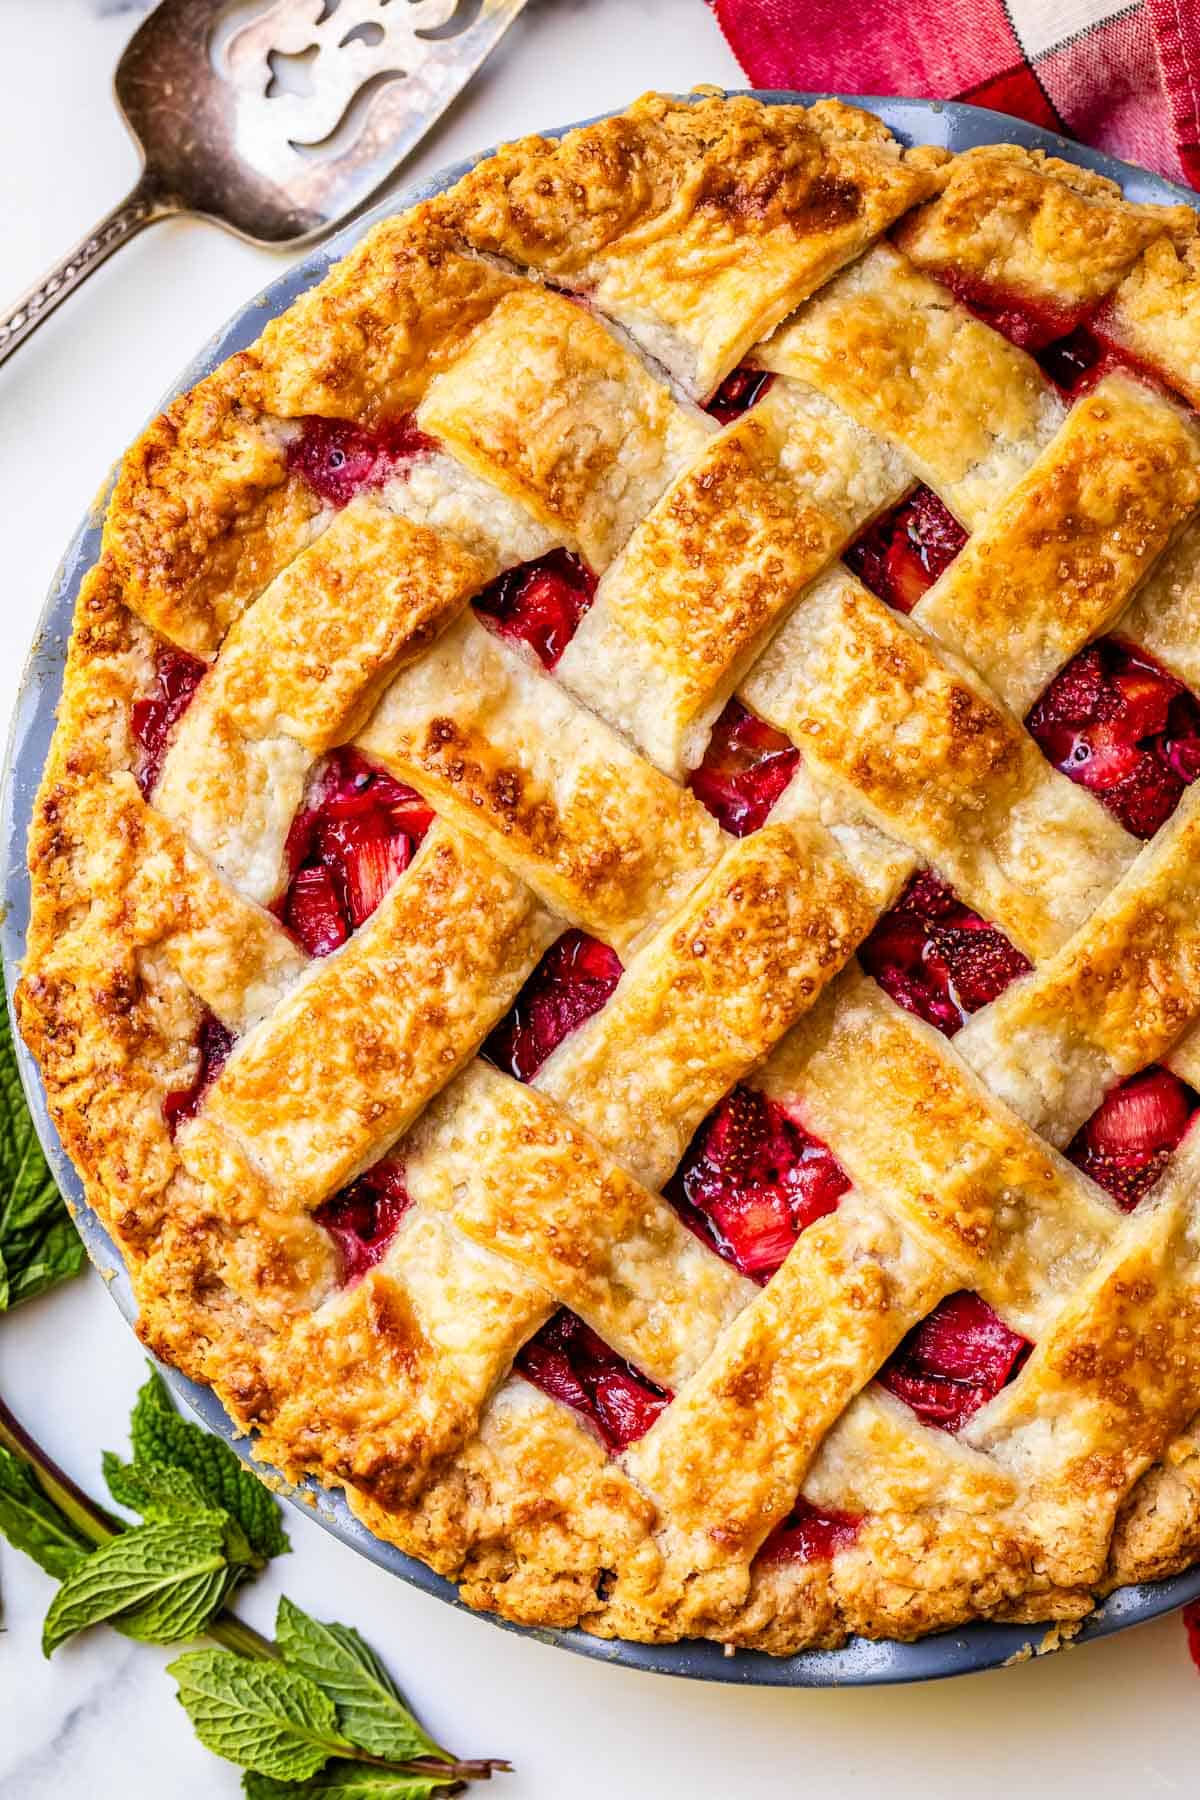
Strawberry Rhubarb Pie

Are you into rhubarb? If not, I’m here to tell you what’s up. This Strawberry Rhubarb Pie is one of my absolute FAVORITE pies of all time! Tart rhubarb paired with bright and sweet strawberries, tucked into a flaky golden pie crust, OR layered with a truly phenomenal crumble topping, you choose! I honestly can’t…

Are you into rhubarb? If not, I’m here to tell you what’s up. This Strawberry Rhubarb Pie is one of my absolute FAVORITE pies of all time! Tart rhubarb paired with bright and sweet strawberries, tucked into a flaky golden pie crust, OR layered with a truly phenomenal crumble topping, you choose! I honestly can’t decide which I like better, so we’re going with BOTH.

piece of lattice crust rhubarb and strawberry pie with lots of filling in a pie pan.
Table of Contents
  1. Rhubarb forever
  2. Best strawberry rhubarb pie
  3. Strawberry rhubarb pie recipe ingredients
  4. How to make strawberry rhubarb pie
  5. Double Crust Strawberry Rhubarb Pie
  6. Strawberry Rhubarb Crumble Pie
  7. What to serve with rhubarb strawberry pie
  8. Does strawberry rhubarb pie need to be refrigerated?
  9. Can you freeze strawberry rhubarb pie?
  10. Strawberry rhubarb pie frequently asked questions
  11. More fabulous fruit desserts
  12. Strawberry Rhubarb Pie Recipe
  13. Strawberry Rhubarb Crumble Pie:

I spent last week back and forth between home and my friend Mardee’s house, looking out for her kids while she and her husband took a much-needed trip away together. Several friends checked in on me over the course of the week, bringing dinners and making sure I wasn’t breaking down from taking care of two families. (Eric helped sooo much, bless him!)

I told my friends everything with the kids was totally fine, but I was definitely having a mental breakdown trying to wrap my head around all the perfect systems in Mardee’s house.

vertical shot of a whole, baked, lattice crust strawberry rhubarb pie with a serving pie serving spoon.

I spent an entire morning taking pictures of all her under-sink cupboards and sending them to Eric. “Look at these handy shelves Mardee has to organize her cleaning products! There is not a single wadded up grocery bag shoved in the side!” (My under-sink cupboards are the kind where something falls out whenever you open them.)

Or, “Look at Mardee’s pantry. She has BINS for every snack item, applesauces here, granola bars here! Amazing!” I have one bin for all the snacks in my cupboard. It’s full of loose Cheez-It’s and at least twelve half-eaten sleeves of Ritz crackers (because the kids never check to see if there is one already open). Oh, and probably some half eaten pretzels, with literal bite marks in them, because 4-year-old Edison often decides halfway through eating a snack that he’s done with it and just…puts it back.

a slice of crumble topping strawberry rhubarb pie in a pie pan with strawberry slice garnish.

Mardee even has labels on all her kitchen cupboard shelves. Pitchers go here, serving bowls go here. When house guests offer to help unload my dishwasher, they say things like, where does this serving bowl go? And I will say, “Good question. Where would YOU put it in this kitchen??” This exact scenario has happened multiple times.

I took pictures of the ice packs she uses in her kids lunch boxes. Why have I never considered this? My kids don’t want string cheese packed in their lunch anymore because they get floppy and warm by noon. Of course you buy an ice pack to solve this problem. Not me. We just stopped buying string cheese. Guys!!

I’ve never lived in someone else’s house before, pretending to be them. Mardee’s house is like a well oiled machine of perfectly functioning intimidation. She even has laminated chore charts, encouraging signs, and reminders everywhere for her kids.

sign in the bathroom- body sludge.

Like this one 🤣

I spent the entire week searching for handy bins and organizers, and added them all to my Amazon account. Where they still sit, because I can’t get my act together enough to actually follow through on this. My house is just going to remain in its state of body sludge.

Although, Mardee told me when she came back, “In transparency, I don’t think anyone has improved their body-sludge wiping since I made this–even though it is laminated.” Welp. Can’t win them all I guess 😅

Rhubarb forever

Every single year in March or April I start obsessively calling grocery stores near me to chat with the produce guy. “Is there rhubarb yet??” I send texts to every group thread I’m on. “Has anyone seen rhubarb? If you see it, BUY OUT THE STORE and I will come get it from you!” Seriously, this happens every single year. My rhubarb love goes deep, and my tradition of to making Rhubarb Meringue Layers and Rhubarb Shortbread Bars every single spring requires a lot of coordination to get my hands on this stuff! I seriously need to start growing it myself.

looking down at a bunch of about 7 or 8 whole stalks of rhubarb on a wooden cutting board.

Best strawberry rhubarb pie

Strawberry Rhubarb Pie is definitely the most traditional way to use up rhubarb, but I had never even had a slice before a few weeks ago. Every time I get my hands on rhubarb, I make my previous-favorite ​Rhubarb Custard Pie​. That pie is so freaking good that I had no room in my heart to even try America’s beloved Strawberry Rhubarb. But after 16 years of Rhubarb Custard Pie (I celebrate my rhubarbiversary alongside mine and Eric’s anniversary, since his family introduced us) I was finally ready to branch out. You know, maybe go on a few dates.

Y’allllll it has been love at first taste. Strawberry and rhubarb play off each other in the most magical way, the sweetness of the berries and the sharp tartness of the rhubarb combine to make something perfectly balanced. And THEN we wrap it up in a flaky buttery pie crust.

Or do we top with it with a ridiculous amount of buttery crumble?? How to choose??

Let’s try both, shall we?

whole crumble topped rhubarb strawberry pie with slices cut and one removed from pan.

Strawberry Rhubarb Pie with Streusel Crumb Topping (above): A regular pie crust on the bottom, the same strawberry rhubarb filling, and a party on top in the form of some butter, sugar, and flour crumbled together to make the most amazing streusel-y situation of your life. This was the crowd favorite among all my testers.

Double Crust Strawberry Rhubarb Pie (below): The main star of this pie is the fruit fruit fruit, complemented by copious amounts of the flakiest, butteriest pasty crust. It is simple, and I love that you can focus on the flavor of the rhubarb and strawberry. If you threatened me to the point of death, I might admit a small preference for a double crust pie!

But honestly guys, they are both so good. You will have to try them both and let me know which one you love the most! Are we ready? Let’s do this thing!

close up of side view of a slice of strawberry rhubarb pie with flaky crust and strawberry garnish.

Strawberry rhubarb pie recipe ingredients

For a pie, this recipe is pretty easy to throw together. Strawberries, rhubarb, and a just a few extras that you might already have on hand. Full instructions and recipe measurements are included in the recipe card below, this is just an overview!

ingredients for strawberry rhubarb pie like rhubarb, strawberries, butter, lemon, etc.
  • 1 homemade pie crust
  • grenadine syrup, optional!
  • strawberries
  • rhubarb
  • granulated sugar
  • lemon
piece of lattice crust strawberry and rhubarb pie with lots of filling and fresh strawberry garnish.

How to make strawberry rhubarb pie

First things first, grab some rhubarb! I like small pieces of rhubarb in my pie, so I usually slice it lengthwise before chopping.

top pic: several stalks of rhubarb sliced lengthwise, bottom: the sliced stalks being cut perpendicular into cubes.
chopped rhubarb with some ribbony string still attached that the knife struggled to cut through.

In the photo above you can kind of see how rhubarb is a little stubborn when you are chopping it. If you don’t have a very sharp knife, it won’t cut all the way through the ribbon-like outer edge of the rhubarb. Some people peel these off entirely, which is such a shame because it often is the prettiest most colorful part of the rhubarb. No matter how stringy and weird it looks, I promise once it’s cooked, it breaks down into the most delicious pie, so don’t worry about the strange texture right now. Use a sharp knife, cut all the way through, and peel off what you have to, but keep as much as you can!

The other thing you might notice from the photos above is the huge color difference of rhubarb from one stalk to the next! Sometimes you will get red and white rhubarb, sometimes it’s as green as celery with a reddish edge. I love my desserts to look RED because that’s the most appetizing color, so I always soak my chopped rhubarb in grenadine syrup for a couple hours before making my dessert:

chopped rhubarb soaking in grenadine in a glass bowl to get extra red coloring.

This sweetens the rhubarb just a smidge, and turns even the greenest rhubarb a nicer shade of pink. You can absolutely skip this step if you like! Your pie will taste amazing without it!

Drain the rhubarb in a colander and return the drained rhubarb to the same now-empty large bowl. Add the other filling ingredients.

top pic: pie strawberry, rhubarb, sugar and more unmixed in glass bowl, bottom everything all mixed.

Mix it up. Stick it in the fridge if your pie crust isn’t ready yet!

top pic: pie shell fluted in pie pan, bottom: strawberry rhubarb filling poured into shell.

Head over to my Homemade Pie Crust post for a bajillion details about how to make a homemade pie crust. It’s not as hard as you think, especially with egg in the dough like my crust has – it helps bind the dough together and makes it way easier to roll out and less likely to crack.

Double Crust Strawberry Rhubarb Pie

Everything is the same up to this point no matter which topping you choose. But here are the details for a double crust.

Don’t forget to dot with butter before putting on the top crust!

top pic: butter dotting top of filling in crust, bottom lattice crust laid on top.

Lattice crusts are not as hard as they look, head over to my Lattice Pie Crust post for all the details!

top pic: pastry brush spreading milk over lattice crust, bottom sugar sprinkled over top.

Brush the top of the pie with milk, or with a combo of milk and egg. With my homemade crust, I always have a half egg leftover, but I don’t like how glossy a straight-up egg wash looks, so I do half milk, half egg. Sprinkle with sugar and she’s ready for the oven!

Strawberry Rhubarb Crumble Pie

Let’s make our streusel topping! Normally, for a crumb topping (like for Dutch Apple Pie) I would use brown sugar and cinnamon, but not for this pie. Brown sugar has molasses in it, and cinnamon is such a strong spicy flavor. I do not want those deep dark flavors masking the brightness of my lemony fresh rhubarb. But that’s just me! Add in 1/2 teaspoon cinnamon if you want! (and/or 1/4 teaspoon nutmeg would also be good!)

top pic: flour and sugar in a ceramic bowl, bottom melted butter being poured into bowl.

Add in some melted butter, not too hot. I’ve tried so many different ways of making streusel: cutting in cold butter, softened butter, etc.

top pic: stirring melted butter into flour mix, bottom everything almost completely mixed.

But melting, giving it a rough stir, and then chilling and breaking up the crumbles with my hands is my favorite method. You get the biggest most delicious crumbles! Put this mixture in the fridge or freezer for 30 minutes or so. It has to be cold when it goes in the oven, or it will just melt into the pie filling.

looking down at a strawberry rhubarb pie with crumble on top ready to bake.

Add some of the crumble topping to the top of your chilled pie, but NOT all of it. We are adding it in a couple layers to ensure a super crisp topping.

top pic: pie with some baked streusel on top, bottom more streusel added on top of already baked.

About halfway through the bake time, pile on the rest, yes, all of it!! It’s so good you guys.

Now I’m going to show you how to make something you need no matter which type of pie you are making. It’s a homemade pie shield!

top pic: a square piece of foil, bottom the square folded in half to make a pie shield.

No pie goes out of my kitchen without using one of these handy shields. No more overcooked crust edges! Many pies have to be in the oven for a full hour (including today’s recipe) and the crust can get too brown a lot of the time. This foil shield protects your crust, keeping it tender and flaky.

top pic: square foil piece folded twice into quarters, bottom scissors cutting center circle out.
strawberry rhubarb pie with crumble topping with crust protected by a foil shield.

And then the center of your pie can still brown as necessary. I do this for both the crumble pie and for the double crust pie.

a perfectly baked strawberry rhubarb pie with a perfectly cooked lattice crust.

And that’s it!! Which pie are you going to make first?? Call all the grocery stores, find yourself some rhubarb! You need this!

What to serve with rhubarb strawberry pie

As a dessert, there’s really no need to serve this pie alongside anything, except a generous scoop of vanilla ice cream. Yes please! But this is one of my favorite spring time desserts, so here are some of my favorite spring time lunch and dinner recipes to eat beforehand!

looking at the side of a piece of pie with all the strawberry and rhubarb filling showing.

Does strawberry rhubarb pie need to be refrigerated?

Not at first! Like other fruit pies, strawberry rhubarb pie will be good on the counter at room temperature for about two days. Loosely cover the top of the pie plate with plastic wrap so the crust doesn’t get soggy, then slice and eat at will. I can’t personally imagine having leftover pie another two full days after making it. Like, what?! But if you happen to have more self control than I do, transfer any remaining pie to an airtight container and stick it in the fridge, and it should last another day or two (but may start to get runny or soggy).

Can you freeze strawberry rhubarb pie?

The only way I recommend freezing this pie is totally assembled but UNBAKED. It’s actually a really great method for getting all the work done in advance of the day you need it. Prepare the recipe all the way through putting the top crust on and fluting the edges. Flash freeze with the pie plate on top of a cookie sheet in the freezer for about 30-45 minutes. Then, wrap the pie carefully in a few layers of plastic wrap and one layer of heavy foil OR put the whole pie pan in a 2 gallon freezer bag and seal well with as much air removed as possible.

The pie will be good in the freezer for up to 3 months. On baking day, take the pie out of the freezer, unwrap it and brush the milk and sprinkle the sugar on the top crust, then put it in a COLD oven. If you have glass or ceramic pie pans you run the risk of them cracking and breaking if they go straight into a hot oven due to thermal shock from extreme temperature changes. Once placed in the cold oven, go ahead and bring the temperature up to 425. Plan on about double the cook time for baking from frozen.

If you won’t be baking the pie in the next few days and need the pie plate, you can line the pie plate with parchment paper or foil sprayed with non-stick spray before assembly. Flash freeze as described above, then lift the pie out of the pan with the paper/foil. Carefully pull the foil or paper off the crust of the pie. At this point you can use the wrapping, freezing, and baking instructions in the previous paragraphs. I haven’t tried this yet but it’s SUCH a good idea for times like Thanksgiving when you need all your pie dishes at once!

baked strawberry rhubarb pie with crumble topping in pie pan with slice removed.

Strawberry rhubarb pie frequently asked questions

why combine strawberry and rhubarb?

It’s a classic combo for a few reasons. First is that strawberry and rhubarb are both spring harvests (in a garden they actually help each other grow!) so they naturally are in abundance around the same time. It makes sense they would end up together at some point! They’re both a fantastic rosy pinkish red color. Also, rhubarb is quite tart/sour, so it’s often combined with other fruit like strawberries to help tame the acidity. (I mean, for rhubarb wussies. I LOVE me some straight up rhubarb!)

Where is strawberry rhubarb pie popular?

It has a cult following by many throughout the country, but it seems to be most popular in the midwest and great plains areas. Rhubarb needs the ground to freeze to do well, and growth is suppressed at temperatures over 90 degrees, so it makes sense that it’s more of a northern state, colder climate favorite.

why is my strawberry rhubarb pie soupy?

More than likely, the filling what was not cooked long enough, or you forgot to add the thickening agent, in this case cornstarch. The cornstarch needs to bind with the sugars in the fruit to thicken at a high temperature for a certain amount of time in order to thicken. Also, be sure you’re not throwing in extra fruit or juice just because you have it. You’ll want to adjust the recipe and add more cornstarch if you decide you want more fruit in the filling.

How do you keep rhubarb pie from getting soggy?

Now, to me, soggy is different than soupy. See the answer above if your pie is soupy! Soggy is when the crust, either on top or bottom, gets wet and isn’t crisp and flaky anymore. The worst! There are a few things you can do to avoid that. First, bake initially at a very high temperature so the crust cooks quickly and doesn’t soak up liquid from the filling. (That’s why we start at 425 F) Next, make sure the filling is nice and thick, so liquid doesn’t seep into the bottom crust during baking or afterward. Third, make sure you leave the crust uncovered while cooling and barely covered with plastic wrap or foil for storing, so condensation from the pie doesn’t stay in the crust.

a piece of strawberry rhubarb pie in the pan with flaky lattice crust.

More fabulous fruit desserts

side view with all the strawberry rhubarb filling of a piece of pie in a pie pan with strawberry garnish.

Facebook | Pinterest | Instagram

piece of lattice crust rhubarb and strawberry pie with lots of filling in a pie pan.
Print

Strawberry Rhubarb Pie

Course Dessert
Cuisine American
Prep Time 30 minutes
Cook Time 1 hour
Cooling time 4 hours
Total Time 5 hours 30 minutes
Servings 10
Calories 411kcal

Ingredients

For the filling:

  • 3 and 1/4 cups rhubarb chopped (about 6 stalks, buy 1.5 pounds)
  • 3 and 1/4 cups strawberries chopped (buy 1.5 pounds)
  • 1 and 1/3 cups granulated sugar
  • 1/2 teaspoon lemon zest from 1 lemon
  • 2 tablespoons lemon juice
  • 1/4 teaspoon kosher salt
  • 1/8 teaspoon nutmeg
  • 1/4 cup cornstarch
  • 2 tablespoons butter cut in pieces

Pie assembly and serving:

  • 1 tablespoon milk to brush on pie crust
  • 1 and 1/2 tablespoons granulated sugar for sprinkling on pie crust
  • vanilla ice cream or whipped cream for serving

Instructions

  • Soak your rhubarb in grenadine: This step is totally optional. It helps bring out the RED color of rhubarb. Rhubarb is greenish sometimes, and can look a little funny in a pie. Soaking in grenadine not only sweetens the rhubarb slightly, but brightens the fruit to make your pie more appetizing. After all, we eat with our eyes first. You can skip it no problem!
  • Chop about 4-6 stalks of rhubarb in half lengthwise, if they are thick. Then chop each split stalk into 1/4 inch pieces. You need a very sharp knife for rhubarb, and you need to cut through all the way. If you don't, the edges of the stalk will strand off in ribbons. This is no big deal, but it is kind of annoying, and you often lose the outer edge of red color if you peel off the outside strands. So chop confidently and thoroughly.
  • Measure the rhubarb to make sure you have about 3 and 1/4 cups. (Don't just toss in all that you have.) Add to a medium bowl and pour 1/2 cup grenadine syrup over the top. Stir together well and cover. Chill in the fridge for about 60 minutes, or up to overnight.
  • Make your pie crust: If you know what's good for you, make a homemade pie crust. Seriously. No shade, Pillsbury, but you cannot compete. I've got lots of tips and tricks for success on my pie crust post. Make the recipe as written for a double pie crust.*
  • Roll out your pie dough and place in a deep 9 inch pie dish, with the excess hanging over the edges. Chill in the fridge until your filling is ready.
  • Make the filling. Preheat your oven to 425 degrees F. Drain the rhubarb in a colander. Return the drained rhubarb to the now-empty bowl (no need to wash it.) Chop 3 and 1/4 cups strawberries into bite size pieces. Add to the rhubarb.
  • Add 1 and 1/3 cups granulated sugar, 1/2 teaspoon lemon zest (I love to use my microplane grater for zesting), 2 tablespoons fresh lemon juice, 1/4 teaspoon kosher or sea salt, 1/8 teaspoon nutmeg, and 1/4 cup cornstarch. Stir with a rubber spatula until well combined.
  • Roll out the second pie crust quickly, to keep it cold.
  • Pour the filling into the chilled bottom pie crust. Mound the filling in the center slightly. Chop 2 tablespoons butter into small pieces and scatter them over the top of the strawberry rhubarb filling.
  • Top the pie with the second rolled out crust. You can even make a Lattice Pie Crust if you are feeling fancy! If you top with the whole pie crust, be sure to use a sharp knife to make a few cuts in the top of the pie, so the steam from the filling can vent.
    (If you have any down time at all during the pie assembly process, the pie dough and filled pie should be chilled in the fridge or freezer, if possible. Chilled pie going into a hot oven makes for a super flaky crust!)
  • If you have time and space, freeze the assembled pie for 20 minutes.
  • Place your gorgeous pie on a baking sheet, in case the filling overflows. Brush the top with 1 tablespoon milk. (Or you can do 1 tablespoon milk whisked together with half a beaten egg. I always have a half egg leftover from my homemade pie crust.) Milk brushed on top of the pie will make the crust brown and matte. Egg brushed on will make it brown and shiny. I like a combo :)
  • Sprinkle the brushed pie with 1 tablespoon demerara sugar, or regular granulated sugar is great too.
  • Bake at 425 degrees F, with the rack in the lower 1/3 of the oven, for 15 minutes. The crust on the edge should be turning light brown.
  • Make a pie shield out of tin foil. Get a square of foil that is the same size as your pie. Fold it in half, then in half again. Cut out the center. Open it up again. You should have a square of foil with a circle cut out of the center. See photos above.
  • Lower the oven temperature to 350 degrees F. Remove the pie from the oven and place the foil on the edges of the crust. Loosely crimp it around the edges. This will protect it from burning.
  • Return the pie on the baking sheet to the oven. Don't forget, the oven should be at 350 now. Bake for 30 minutes.
  • Take a peek at your pie through the door. If the whole top of the pie looks golden brown, top the pie with another square of tin foil. No need to crimp or anything fancy, literally just place the foil on top of the pie.
  • Bake for another 15 minutes. The pie should be in the oven a total of about an hour.
  • Cool. Take the pie out of the oven and let cool completely on a wire rack. It will take at least 3-5 hours for this pie to reach room temperature. If you cut into it early, it will be a juicy mess. (Delicious, but the wrong texture.) Pie! a lesson in patience indeed.
  • Serve this pie with vanilla ice cream or whipped cream, you cannot miss out on this opportunity!! Such an amazing combo.

Notes

*Pie Crust: If you are making the Crumble topping, you only need a single pie crust.

Strawberry Rhubarb Crumble Pie:

Make the pie as directed, until you have the filling poured into the pie crust. Flute the edges of your single pie crust. Skip the 2 tablespoons butter that are normally chopped and sprinkled on top of the pie. In a small bowl, whisk together the flour, sugar, and salt:
  • 1 and 1/4 cups flour
  • 3/4 cups + 2 tablespoons granulated sugar
  • 1/4 teaspoon kosher salt
  • 10 tablespoons butter (1 stick + 2 tablespoons), melted and cooled
Melt the butter in a medium bowl and let cool slightly. Add the flour to the butter mixture and use a rubber spatula to mix it together. (put your flour bowl back in the cupboard.) See photos, you don’t want to combine the flour and butter too much. Some flour streaks are ok. Put this mixture in the fridge or freezer for 20-40 minutes until it’s chilled. Keep your assembled pie in the fridge or freezer if there is wait time. 
Preheat the oven to 425. When the oven is really hot and the crumble is completely chilled, add less than half of the crumble to the top of the pie. Use your fingers to break up the crumble into chunks that about about the size of a dime or less. You want some sandy bits, and some bigger chunks. Work it with your fingers. Only sprinkle on as much of the mixture as you need to barely cover the strawberry rhubarb filling. Save the remaining crumble in the fridge.
Bake the pie on a metal baking sheet (to protect from overflow) on a rack this is placed in the lower 1/3 of the oven. Bake at 425 for 15 minutes. Then lower the heat to 350. 
Make a tin foil pie shield, see photos in the post.
Remove the pie from the oven and cover the edges of the crust with the tin foil shield.
Don’t forget to lower the heat to 350. Place the pie back in the oven and bake another 15 minutes. 
Remove the pie from the oven one last time. Take off the pie shield and add the remaining crumble, all of it, pile it on. Replace the pie shield on the edges of the pie, making sure the crumble part is exposed. 
Bake at 350 for another 20-30 minutes. (the pie should be in the oven for a total of 50-60 minutes.) Check the pie toward the end, and if the crumble topping looks very brown, get a square of tin foil and place it right on top of the other shield (no need to crimp or anything, just toss it on top.) This is to protect the top from overbrowning, but you want the rhubarb to be in the oven for at least 50-60 minutes, to make sure it gets fully cooked. 

Nutrition

Calories: 411kcal | Carbohydrates: 69g | Protein: 3g | Fat: 14g | Saturated Fat: 5g | Polyunsaturated Fat: 2g | Monounsaturated Fat: 6g | Trans Fat: 0.1g | Cholesterol: 6mg | Sodium: 264mg | Potassium: 240mg | Fiber: 3g | Sugar: 39g | Vitamin A: 119IU | Vitamin C: 32mg | Calcium: 54mg | Iron: 1mg

Make-Ahead Mother’s Day Brunch Recipes

These easy Make-Ahead Mother’s Day Brunch Recipes help you plan a delicious and stress-free Mother’s Day with choices for brunch, including dessert! Celebrate with some of…
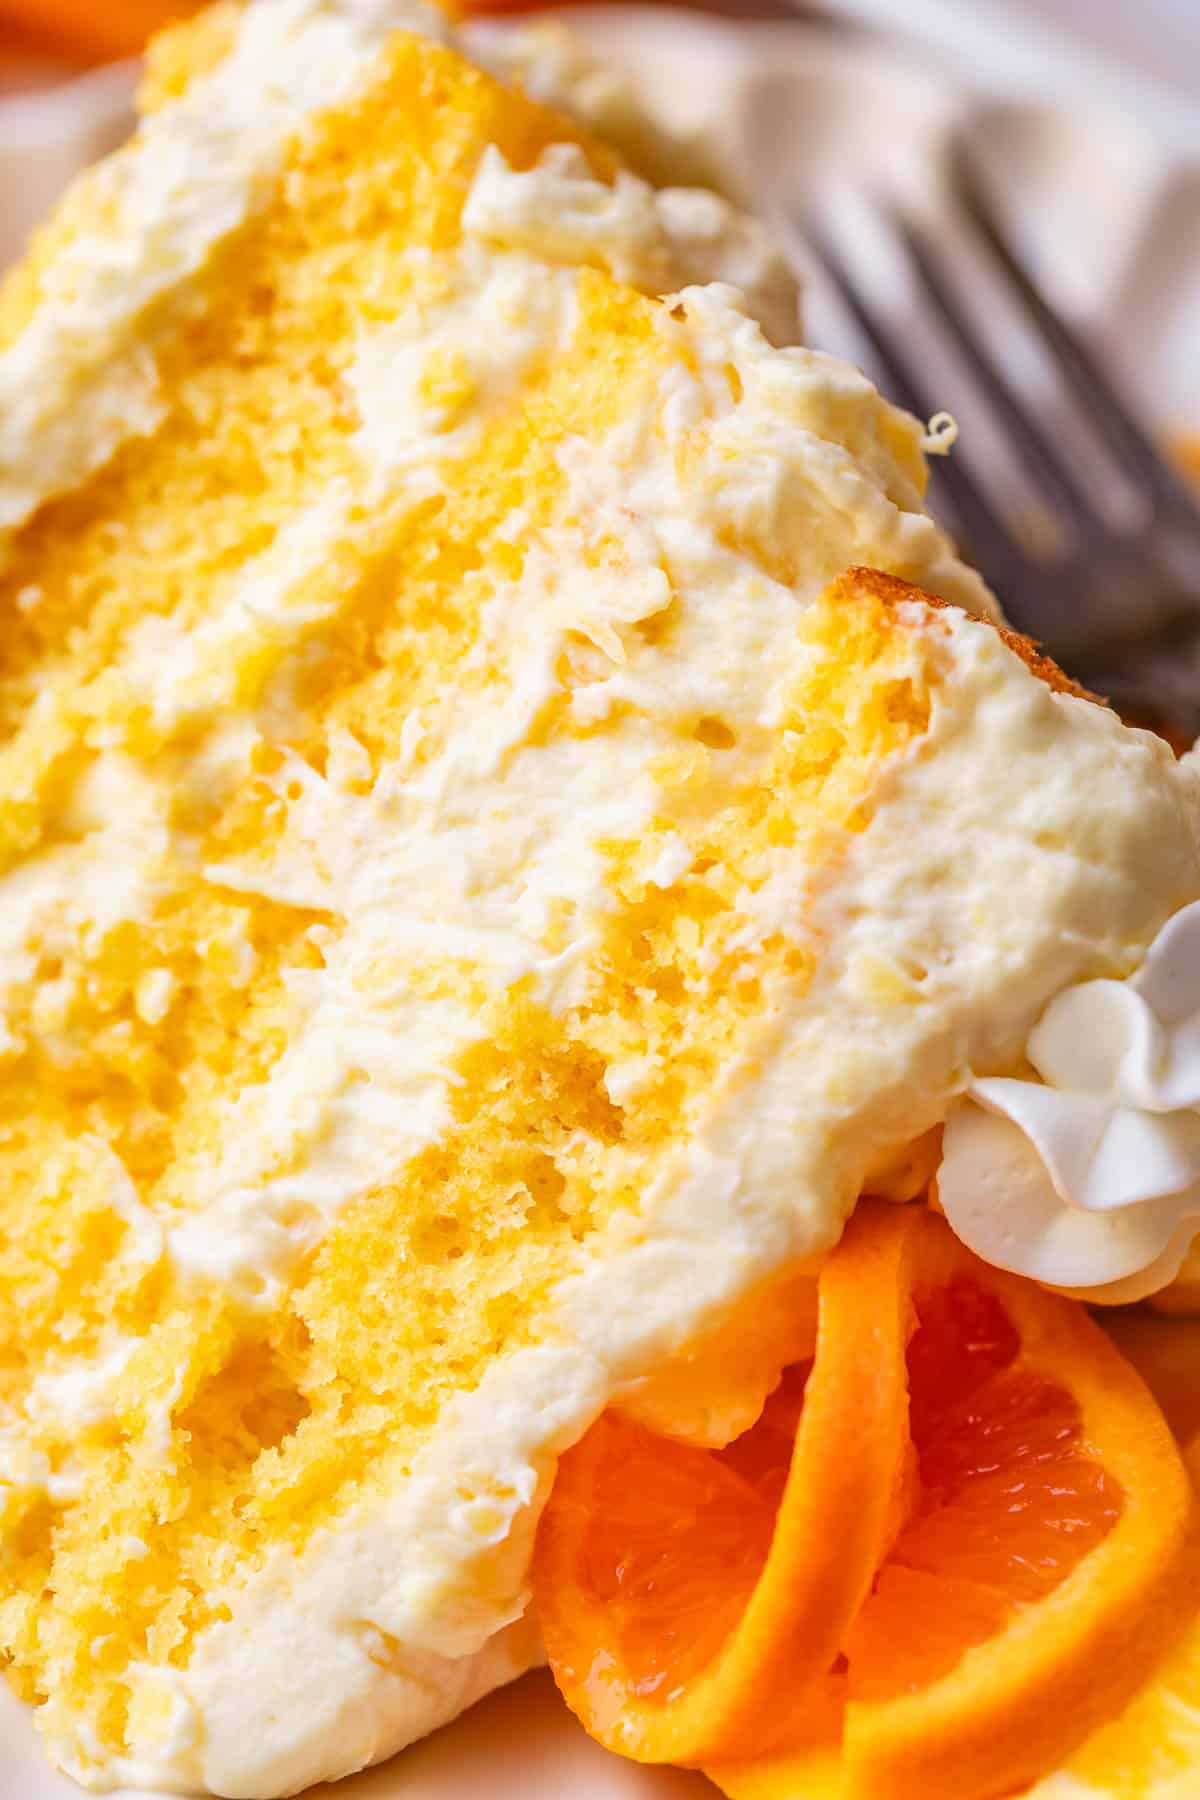
Bacon Egg Cups Recipe - Bacon Egg Cups make a delicious recipe perfect for serving for breakfast, brunch or snack! Great to make for a crowd or to make ahead and reheat for busy mornings! // addapinch.comThese easy Make-Ahead Mother’s Day Brunch Recipes help you plan a delicious and stress-free Mother’s Day with choices for brunch, including dessert! Celebrate with some of…
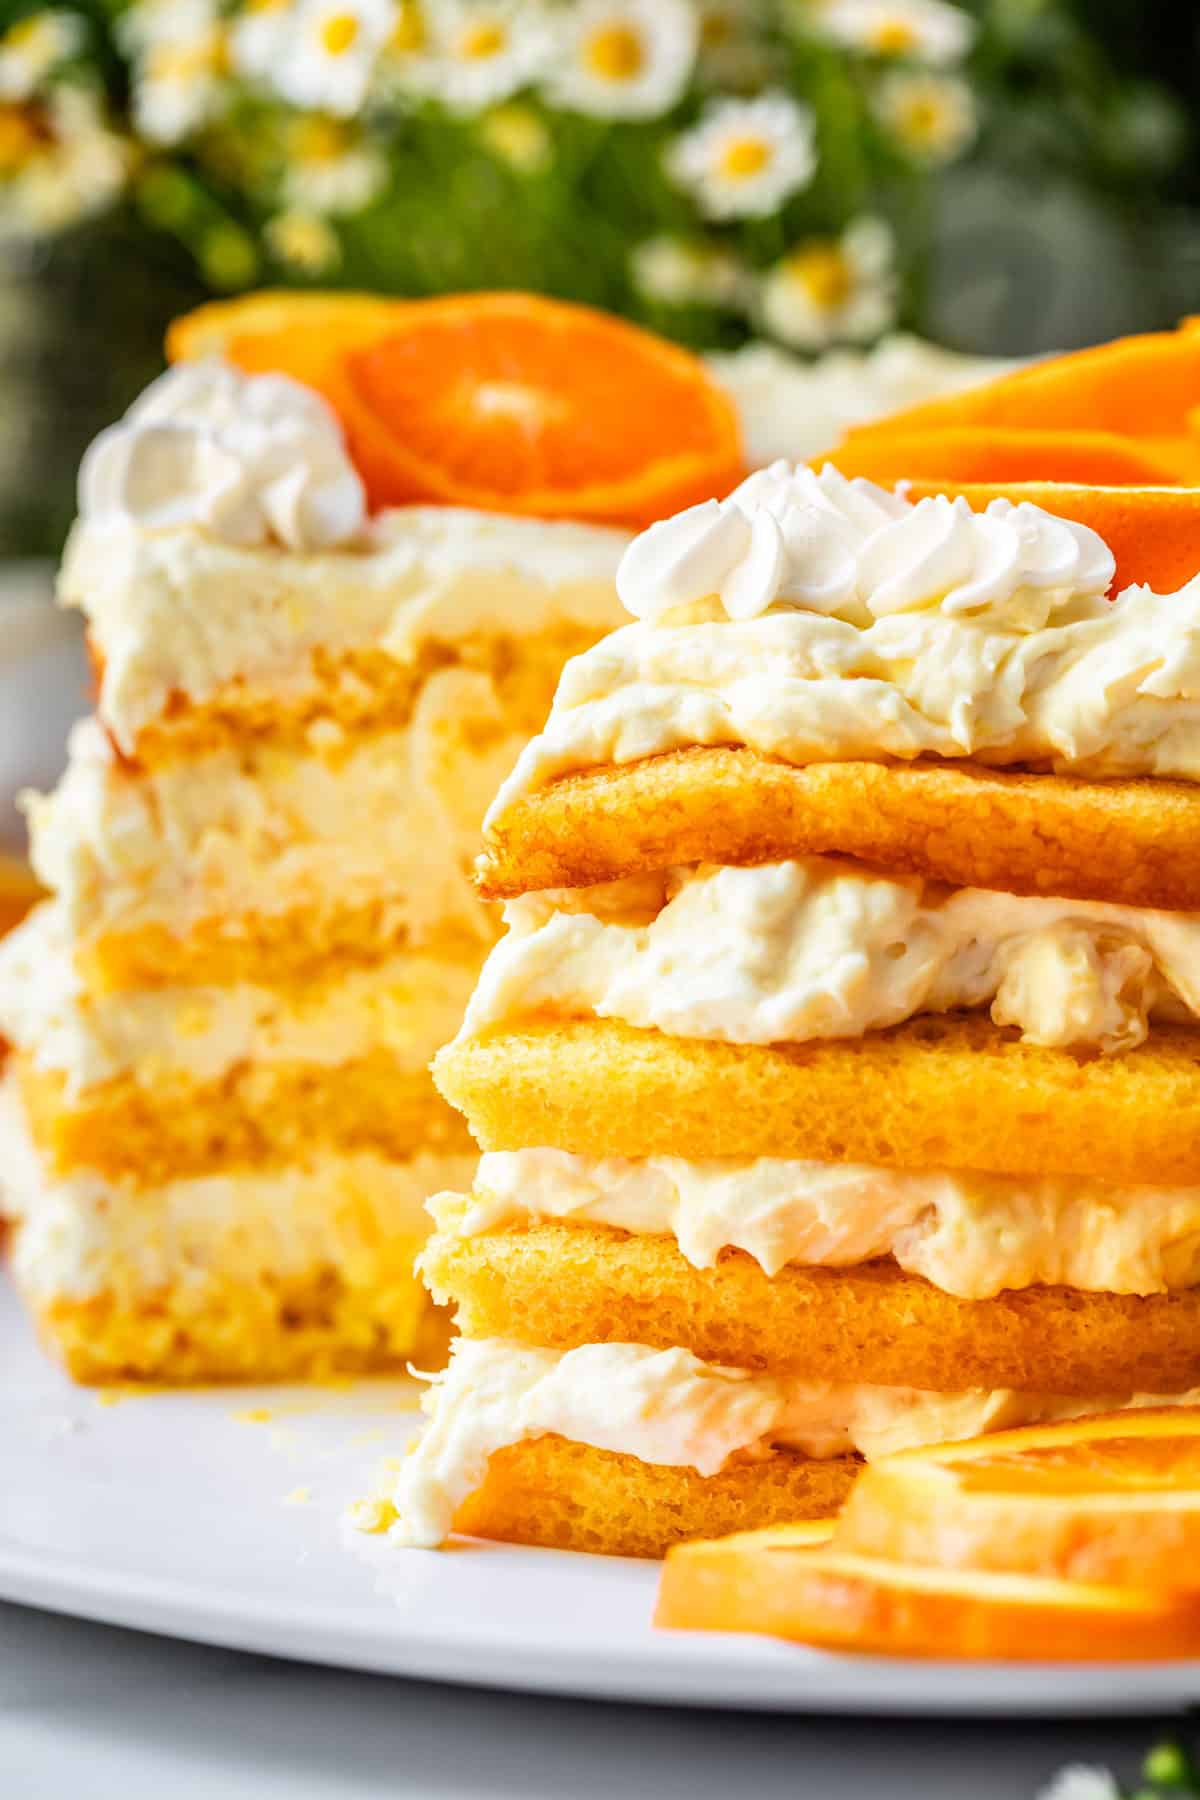
Pig Pickin Cake (Sunshine Cake)

Okay, hear me out folks. I know “Pig Pickin Cake” may not sound the most appealing, but I’M TELLING YOU. This cake is legit. Sometimes called a “Sunshine Cake,” it is a yellow cake with mandarin oranges baked right into it, then layered with pineapple whipped cream. It’s a classic from yesteryear and is SO…

Okay, hear me out folks. I know “Pig Pickin Cake” may not sound the most appealing, but I’M TELLING YOU. This cake is legit. Sometimes called a “Sunshine Cake,” it is a yellow cake with mandarin oranges baked right into it, then layered with pineapple whipped cream. It’s a classic from yesteryear and is SO light, bright, and tasty, you will want to bring it to every summer potluck, picnic, or BBQ this year! Also would be a great dessert for Mother’s Day.

slice of four layers of yellow mandarin cake layered with pineapple whipped cream on a plate.
Table of Contents
  1. Sunshine Cake
  2. What is Pig Pickin’ Cake?
  3. Why do they call it Pig Pickin Cake?
  4. The BEST sunshine cake
  5. Pig Pickin Cake recipe ingredients
  6. How to make pig pickin cake
  7. What to serve with pineapple sunshine cake
  8. How to store sunshine cake
  9. Can you freeze pig pickin cake?
  10. Can you make it ahead?
  11. Pig pickin cake frequently asked questions
  12. More summer desserts to try
  13. Sunshine Cake (Pig Pickin Cake) Recipe

I currently have 4 giant squares of blue painted on my bedroom wall, all slightly different shades (but mostly the same, of course.) Has anyone done this before, painted different colors on the wall to see which one you like?

Guess what, they all look blue. I have ZERO vision when it comes to interior decorating. I won’t know which one I hate the most until I’ve painted the entire room that color, and then it will be too late, and of course I won’t be invested enough to fix it. I will have the blue room that I wanted, only slightly-off, like the Upside Down in Stranger Things. People will walk in and silently judge me. “This is the color she chose for her bedroom??”

side view of sunshine cake with exposed edges to see layers and a slice missing.

That is, of course, if I ever get around to actually painting the wall. It might be my new thing, to have a white wall with 4 blue squares on it. Adding this kind of thing to my to-do list and never following through on it is definitely my m.o.

One time years and years ago, my mom was painting the hallways of the entire house. She chose a slightly different shade of off-white from the previous off-white. She ran out of paint right over the top of her bedroom door. There was a tiny strip of wall about 2-3 feet long that she didn’t have enough to cover. And she just said, heck with it. I’m out.

The two toned paint is still there to this day. It’s not that noticeable of course, you kind of have to know about it to be able to tell.

side view of all four layers each of cake and pineapple whipped cream in a slice of cake.

The apple doesn’t fall far from the tree, guys. Mark my words, these blue squares are going to be on my wall for at least a year. I was visiting my sister in Texas a few weeks ago and noticed a little tan spot right smack in the middle of her kitchen wall. “Thinking about painting?” “Yup. I painted that 2 years ago.” 😂

Sunshine Cake

Who is ready for days and days of sunshine? I have the PERFECT springtime cake to share with you today! My sister Laura (the one with the tan spot in her kitchen, lol) has been telling me for YEARS about this cake that her mother-in-law makes regularly. She tested and tested it to make it juuust right (Laura helps me out with recipe development for the blog!) and we ate her final version together when I came out to visit for the eclipse.

top of a round, decorated pig picking cake with orange slice garnish.

I had never had this cake, and I was blown away! It’s a dangerous cake because it has to be refrigerated, and after we ate it for Easter dinner, there wasn’t enough fridge space to store it all layered and beautiful on it’s platter. We had to chop it up and store it in tupperware.

Which meant that EVERY time I passed through her kitchen I would stop at the fridge with a new fork and grab myself a lil bite. (“I think I need a little treat!” a dangerous concept indeed.) For some reason a tupperware of kinda-smashed cake is a lot easier to steal from than a gorgeous layered cake under a glass dome. No regrets, it was so good. (And sorry I ate all the cake, Laura.)

It’s a very simple recipe that is light and bright and not at all heavy. I love this cake because it almost feels like a trifle with all the layers!

What is Pig Pickin’ Cake?

Weirdest name ever, right?? Okay, forget the name and listen up: We’ve got four thin and delicate layers of buttery mandarin orange cake (whaaat?), stacked with generous pillows of fluffy pineapple whipped cream. Pineapple whipped cream, my friends!

looking straight at a piece of sunshine cake with the first bite taken.

The cake’s other name, Sunshine Cake, is a lot more descriptive. It really does feel like tropical sunshine, perfect for a swelteringly hot day where the idea of heavy hot fudge or cookie dough cupcakes just makes you feel like you need a glass of water. It is perfectly light and refreshing. The best ending to any dinner, bbq, or summer potluck.

The cake only has a few ingredients since it’s a doctored cake mix (which means minimal prep time!). But I wanted to amp up the pineapple flavor so I decided to try adding ground up freeze-dried pineapple to the whipped cream. Whaaaat yes, it is so good my friends. If you know you’re going to have trouble finding freeze dried pineapples, don’t sweat it. This cake is so good the traditional way. I just couldn’t help it, pineapple is my favorite fruit!

slice of sunshine cake showing all the layers on a ceramic plate with a metal fork.

Why do they call it Pig Pickin Cake?

Okay, now for the deets on the name. This cake is a true Southern treat and has a true Southern nickname! It goes back to earlier times when people would get together for a whole pig roast. It’s just what it sounds like! They would roast a whole hog in large underground pits for hours until perfectly cooked, and then party-goers would pick off the tender roasted meat. It’s easy to see how the gatherings became known as pig-pickin’ parties! (I’ve never been and I’d really like to be invited to one. Anyone?!)

This cake somehow became the traditional mascot dessert for pig-pickin parties. I can see why. I’m sure these parties were all going on in the heat of the summer, and this cake is the perfect dessert for a hot and sticky BBQ! I actually call it Sunshine Cake most of the time. Because I mean, just look at this edible sunshine!!

whole pig pickin' cake with a slice cur but not removed, and orange slices as garnish.

The BEST sunshine cake

There are many variations on this cake, it’s an old classic that’s been through a thousand grandma’s-recipe-boxes. But they usually follow the same format: a box of yellow cake mix combined with with mandarin oranges, with pineapple pudding whipped cream. But, being me 😅, I decided to amp up the flavors a bit to get more of that tropical vibe from the oranges and pineapple. So here are a few things we’re doing to make this version the BEST.

  • double the mandarin oranges
  • no mandarin orange syrup; most recipes add in the heavy syrup from the can but I just replaced it with MORE MANDARIN yes please.
  • real whipping cream instead of cool whip. this is a no brainer, duh.
  • freeze dried pineapple, buzzed into a powder and added to the whipped cream. IT’S SO GOOD!! Praise Jesus for this modern age of intense fruit flavors in baked goods. All hail the freeze dried fruit hack.
  • Adding dried sugared mandarin oranges to the top of the cake takes it to a WHOLE new level, more on that later!
4 layer pig pickin' cake with golden cake and topping, plus chopped dried mandarin oranges as garnish.

Pig Pickin Cake recipe ingredients

This recipe is so simple! Just a handful of ingredients to pick up, and some you may already have hanging out in your pantry or fridge. Be sure to check the recipe card for exact ingredient measurements and instructions!

wooden table with yellow cake mix, whipping cream, and other ingredients for pig pickin cake.
  • yellow cake mix
  • canned mandarin oranges
  • vegetable oil
  • eggs
  • canned, crushed pineapple
  • instant vanilla pudding mix
  • whipping cream
  • powdered sugar
  • freeze dried pineapple, totally optional
  • dried sugared mandarin oranges (optional)

How to make pig pickin cake

Layer cakes always feel a little intimidating, but I swear, this one is super duper easy (especially since we are leaving the sides exposed and you don’t have to worry about smooth frosting.) You just dump in all the ingredients:

top all cake ingredients in a metal mixing bowl, bottom, everything all mixed together.

And beat it up like so. You’re gonna feel weird doing this but I promise it works. The mandarins are so tender, they break down easily from the beaters.

pig pickin cake batter divided evenly into 4 metal 8-inch round baking pans.

Then divide the cake into four cake pans. If you don’t have four pans, just pour batter into two pans and you can split the cakes once they are baked.

While the cakes are baking (which goes so fast since they are so thin) make up the whipped topping. Start with the freeze dried pineapple, if you have it! Totally optional. I found it at Whole Foods, but you can also get it online.

left freeze dried pineapple pieces in a food processor, right the pineapple turned into a powder.

Powdered flavor, right here!! Give it a taste. So good.

Meanwhile, softly whip your cream in the bowl of a stand mixer or with a hand mixer.

left whipped cream whipped to soft peaks in metal mixing bowl, right pudding mix added to it.

Once soft peaks have formed, add in the vanilla instant pudding mix. This serves two purposes: it provides some of the classic sweet “pudding” flavor for this cake, but more importantly, the starch in the pudding mix serves as a stabilizer, meaning your whipped cream is going to stay cloud-like and dreamy, even when smashed in between layers of cake. No need to fold it with a spatula; just keep using the mixer.

And voila! Stable whipped cream! Even when you dump an entire can of crushed pineapple (with the juice!) into said whipped cream. What!! Yes really.

top pineapple added to stabilized whipped cream, bottom pineapple all mixed in.

Don’t forget to add in the freeze dried pineapple powder at this point, if you have it. It really amps up the flavor!

Once your cakes have cooled, place the first one on your serving platter or cake stand. See how delectably thin they are?? I love it.

top very thin cake layer on plate with thumb, bottom layer of pineapple whipped cream on the cake.

Add about 1/4 of the pineapple whipped cream on top and spread to the edges, but not down the sides.

top added second layer of cake, bottom layer third layer with cream added.

Keep going, adding the next cake and then the next layer of whipped cream.

And that’s it! I think this cake is pretty just as it is, but if you want you can add orange slices, mandarin orange slices, or chamomile flowers on top. (don’t eat the flowers 😂)

One ingredient that I decided to add on top last minute, were chopped up dried mandarin oranges as garnish.

package of trader joes "soft & juicy mandarins" on top of a countertop with plated cake behind it.

Have you had these from Trader Joe’s? You can get them online too. I’m obsessed. Totally unnecessary as a cake garnish, and kind of changes the lightness vibe of the cake (adds a decent amount of chew) but I really loved it.

close up of layered pig pickin cake with thinly chopped dried mandarin oranges on top.

That’s it! She’s ready for the Pig Pickin’ Party! You can serve it right away or refrigerate it and serve the cooled cake later.

What to serve with pineapple sunshine cake

Obviously this cake can definitely stand alone, for dinner, if you’re like me on a low will-power day. That said, I really do think it is SO well suited to its origins: a good and proper cookout! Here are some of my favorite summer party/BBQ recipes that would be the perfect meal to serve before this cake.

How to store sunshine cake

With all the whipped cream, this cake will absolutely need to be kept refrigerated. If you have a top for your cake plate and a ton of fridge space, you can simply cover it and put it in the refrigerator.

If you don’t, you can either cut the cake into smaller pieces and transfer them to airtight containers, or stick toothpicks all around the top of the cake and carefully cover with plastic wrap so the plastic doesn’t stick to the topping. If you transfer to tupperware, just be aware that it may squish together a bit since it is such a moist cake. This is not an apology, because all the flavors come together and it ends up tasting like an amazing trifle! Not ideal for serving at an event, but absolutely ideal for nabbing a forkful with every kitchen pass-through for days on end.

piece of 8 layer pig pickin' cake on a ceramic plate with scalloped edges.

Can you freeze pig pickin cake?

Yes, you can! Transfer slices or the whole cake on top of parchment paper on a cookie sheet and flash freeze for about 30-60 minutes depending on how big the portion is. After flash freezing, carefully wrap the cake in a few layers of plastic wrap and then heavy foil. Be sure to label it! It will be good in the freezer for a month or two. After that, the quality really starts to deteriorate and you risk freezer burn. To use, move from the freezer to the refrigerator and let thaw for several hours or overnight.

If I were trying to make this in advance for later, I would make and freeze just the cake portion. Then, thaw the cake pieces in the refrigerator and make the topping fresh, and assemble.

Can you make it ahead?

On that note, yes, you can. Make and store the cakes tightly in plastic wrap and freeze (unless it’s going to be less than 12 hours from when you are serving it; then just wrap and store on the counter.) Make the whipped cream topping start to finish, and store in the fridge. The pudding helps preserve the whipped cream so it will still be pretty fluffy when you need to use it. Assemble the cake last minute and serve!

slice of caking lying on its side on a ceramic plate, with orange slices as garnish on top.

Pig pickin cake frequently asked questions

Why do they call it pig pickin cake?

It all started a long time ago at community events where people would have “Pig Pickin’s,” parties where they would roast a whole pig and then “pick” the meat off. This cake was the cool thing to bring for these potlucks, and became so synonymous with Pig Pickin’ events that it took on the name!

What is another name for pig pickin cake?

SO MANY NAMES, GUYS! The most common ones aside from Pig Pickin’ Cake are Sunshine Cake, or Pineapple Sunshine Cake, because of bright tropical flavors. There are actually several more though, you ready? Pea Pickin’ Cake, Pig Eatin’ Cake, Pig Lickin’ Cake, Orange Pineapple Layer Cake, Summer Cake, Tropical Dream Cake, Mandarin Crush Cake, Virginia Farmer’s Wife Cake, Arnold Felcher Cake, and even Celestial Snow Cake! I want to hear more about that last one! I’m guessing each locality had their own name. The most popular name overall is definitely Pig Pickin’ Cake, which seems to come from North Carolina (where pig roasts are super popular, so that makes sense!)

side view of a tall piece of sunshine cake with 8 layers, garnished with an orange slice.

More summer desserts to try

I love all the lightness and brightness of summer desserts! Not to mention the fruit. There’s nothing like a nice, COLD treat to top off your BBQ or 4th of July party. Here are some more options you’ll love!

Facebook | Pinterest | Instagram

slice of four layers of yellow mandarin cake layered with pineapple whipped cream on a plate.
Print

Sunshine Cake (Pig Pickin Cake)

Okay, hear me out folks. I know "Pig-Pickin Cake" does not exactly sound appetizing, but I'M TELLING YOU. This cake is legit. Sometimes called a "Sunshine Cake," it is a yellow cake with mandarin oranges baked right into it, then layered with pineapple whipped cream. It's a classic from yesteryear and is SO light, bright, and tasty, you will want to bring it to every summer potluck, picnic, or BBQ this year! Also would be a great dessert for Mother's Day.
Course Dessert
Cuisine American
Prep Time 30 minutes
Cook Time 30 minutes
Total Time 1 hour
Servings 16
Calories 298kcal

Ingredients

For the cake

  • 1 (15.25 ounce) yellow cake mix
  • 2 (11-ounce) cans mandarin oranges drained
  • 1 cup vegetable oil
  • 4 large eggs

For the whipped cream topping

  • 3 cups heavy cream*
  • 1/4 cup powdered sugar
  • 1 (5.1-ounce) package instant vanilla pudding mix dry powder
  • 1 (20-ounce) can crushed pineapple with juices
  • 2 (1.5 ounce) packages freeze dried pineapple blended to powder (OPTIONAL)
  • 1/2 cup dried mandarin oranges chopped, optional

Instructions

  • Get yourself set up. Preheat the oven to 350 degrees.
  • Prepare four (9-inch) round cake pans by tracing the bottom of the cake pan onto parchment paper. Cut out four circles and place in the bottom of each pan. Spray each parchment-lined pan generously with nonstick spray. (if you only have two cake pans, that's fine, prep them the same way.)
  • Make the cake batter. In a large bowl or stand mixer, add 1 box of yellow cake mix. Open 2 cans of mandarin oranges and drain them completely. Add all the canned oranges to the the cake mix in the bowl. Add 1 cup vegetable oil. Add 4 eggs. Beat all of it together with a hand mixer. I know, this feels weird with the oranges, right? Trustttt.
  • Once the batter is completely mixed (the oranges will break down into small bits), carefully spoon the batter into the prepared cake pans. If you have four cake pans, you need 1 and 1/4 cup batter in each pan. (If you are using two cake pans, split the batter evenly between the pans.)
  • Bake the cakes at 350 degrees. If you have four pans, bake them 12-15 minutes, rotating the pans in the oven about the 9 minute mark.
    If you have two pans, bake for 23-30 minutes, checking early to make sure you don't over bake.
    The cake is done when the edges are just starting to pull away from the pans. Don't over bake! A toothpick inserted in the center will come out with no wet batter on it.
  • Let the cakes cool on wire racks. About 15 minutes after they have come out of the oven, carefully flip each cake onto the wire rack. Let cool completely.**
  • Make the whipped cream topping. For best results when whipping cream, put the whisk/beaters and bowl in the freezer 5-10 minutes before whipping. Chilled tools makes the cream whip higher and faster!
    In a large bowl or stand mixer set up with the whisk attachment, add 3 cups of whipping cream.* Add 1/4 cup powdered sugar. Beat for 2-4 minutes, until soft peaks are forming.
  • Add in the entire 5.1-ounce package of pudding mix. Mix for about 30 seconds. It will start to get very thick and even look a little congealed or grainy. Don't panic.
  • Add the 20-ounce can of crushed pineapple WITH all of the juices. Fold in with a rubber spatula, until it looks light and fluffy.
  • You can stop here, but if you have the freeze dried pineapple, it really bumps up the flavor in this cake! Use a food processor or blender to blend two (1.5 ounce) packages of freeze dried pineapple until it is a fine powder. Add to the whipped cream mixture. Fold in with a rubber spatula until it is light and fluffy and fully combined.
    If you are not ready to assemble the cake now, cover and refrigerate the whipped cream.
  • Split your cakes, if necessary. If you baked the cake in two layers, split each layer horizontally with a large serrated bread knife to make 4 layers. Place your serrated knife at about the halfway down point on the side of the cake, and gently saw back and forth toward the center of the cake. Turn the cake every so often as you cut, to make sure you are cutting evenly.
  • Assemble the cake. Place the first layer of cake down on a serving plate. Top with about 1/4 of the whipped cream topping. Spread to the edges and make sure the whole top is well covered, but not the sides of the cake. Continue with each layer until you've added them all.***
  • Decorate with extra mandarin oranges, fresh pineapple, or pipe on plain whipped cream. OR top with chopped up dried mandarins, you can get them online or at Trader Joe's! Love the chew factor this adds, but it's optional.
  • Store this cake in the fridge, for sure. That whipped cream topping needs to be chilled!

Notes

*Heavy cream is sold near the milk in the dairy section. It is not coffee creamer. Sometimes it is labeled whipping cream, ultra heavy whipping cream, etc. These names differentiate fat content levels. For making whipped cream, buy the cream with the highest fat content you can! The cream I use has 36% fat content. 40% is even better. 
** If you want to speed up the process of cooling your cakes, you can toss them in the freezer for a few minutes! Wrap in plastic wrap if you can’t fit the whole cooling rack in the freezer. Just make sure they stay flat and don’t get misshapen. 
*** The crushed pineapple in this cake is so tasty, but it makes the frosting look kinda weird. It’s just not a smooth frosting like people are expecting on a layer cake, so I don’t like to frost the entire outside of the cake. The “naked cake” trend, with exposed edges, is the answer. But if you prefer, add less whipped cream to each inside layer (about 1 cup per layer) and use the remaining frosting to cover the top and sides of the cake. 

Nutrition

Calories: 298kcal | Carbohydrates: 3g | Protein: 3g | Fat: 31g | Saturated Fat: 13g | Polyunsaturated Fat: 9g | Monounsaturated Fat: 8g | Trans Fat: 0.1g | Cholesterol: 97mg | Sodium: 31mg | Potassium: 60mg | Fiber: 0.01g | Sugar: 3g | Vitamin A: 724IU | Vitamin C: 0.3mg | Calcium: 37mg | Iron: 0.3mg