Candied Pecans

This recipe for candied pecans only requires a few ingredients and makes the most deliciously sweet, cinnamon-flavored, crunchy nuts for snacking.

The post Candied Pecans appeared first on Budget Bytes.

You know those candied pecans they sell from kiosks in shopping malls this time of year? The ones that beckon you from yards away with their buttery, nutty aroma? Well, I’m about to show you how to make them at home with just a few ingredients. They’re the perfect holiday snack for parties or as a little snacky snack while you’re wrapping gifts, watching a classic Christmas movie, or waiting for Christmas dinner to be ready. In other words, bookmark this candied pecans recipe because I promise you’ll be making them over and over for years to come.
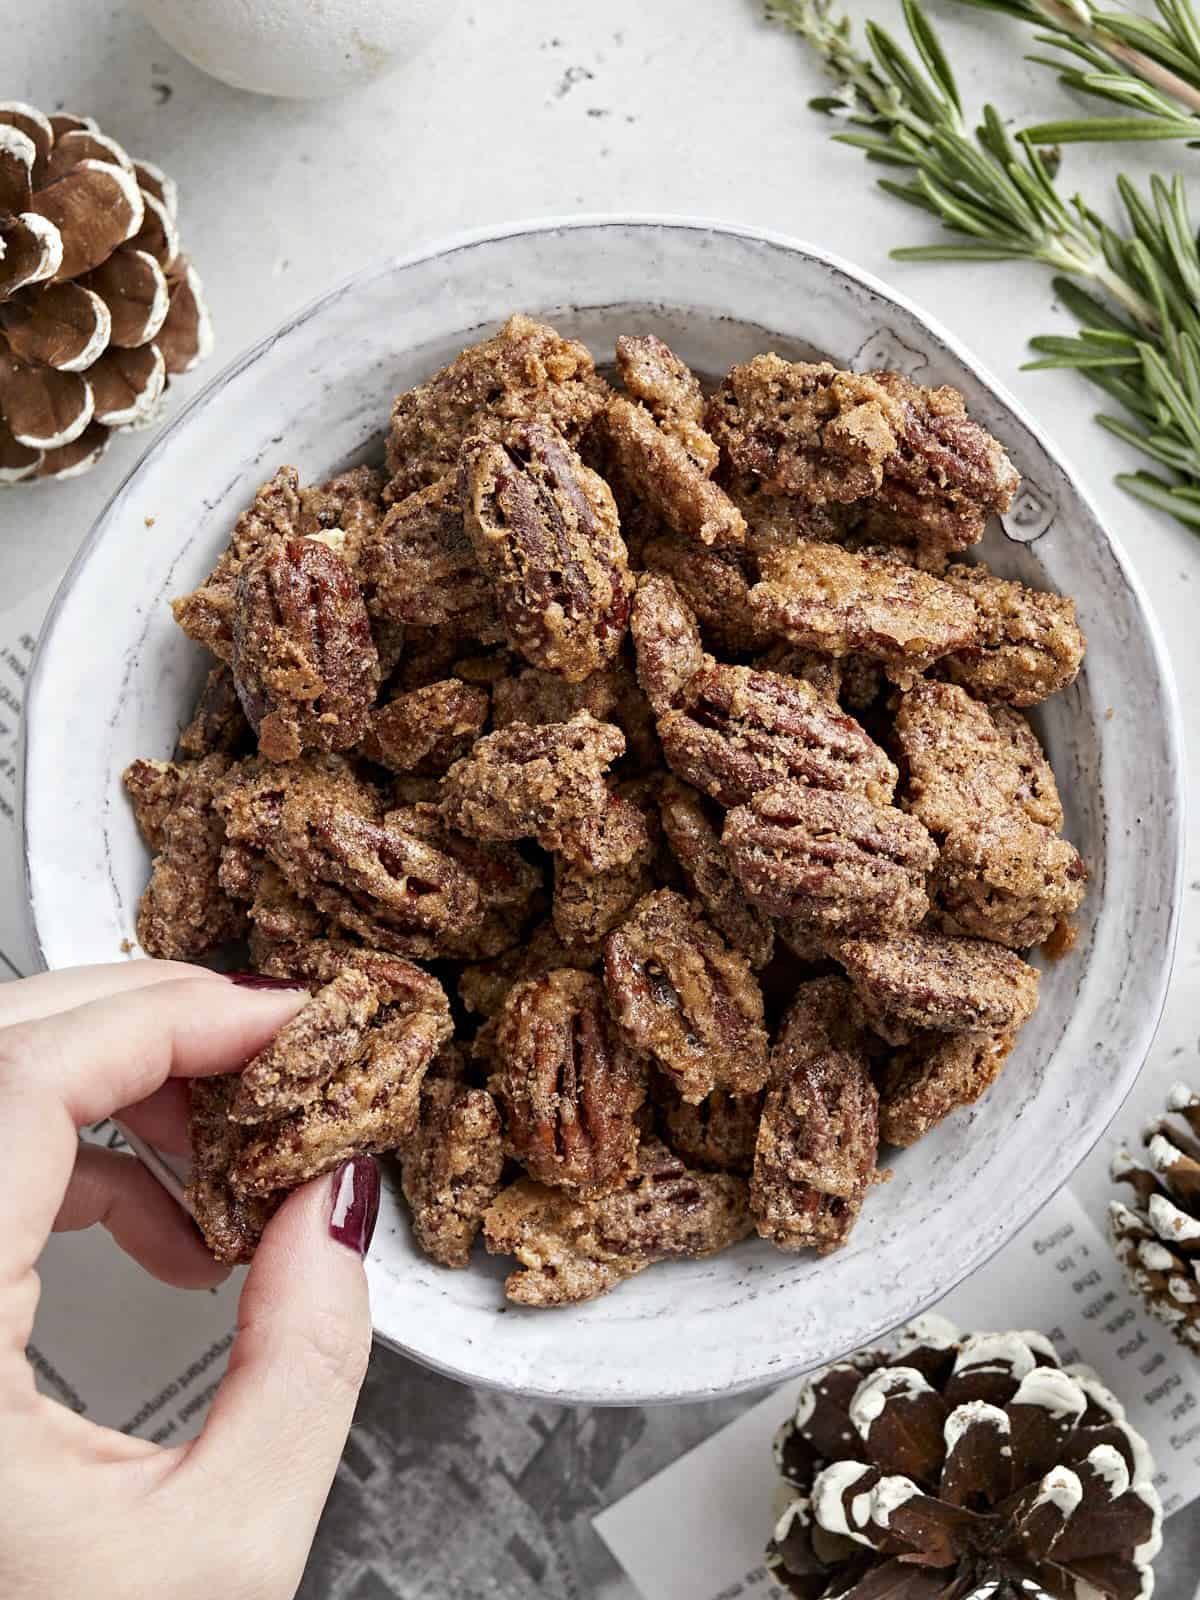
Overhead view of a bowl full of candied pecans with a hand grabbing one.

What Are Candied Pecans?

This perfect little holiday snack is simply pecan halves that have a crunchy brown sugar, cinnamon, and vanilla-flavored coating. The nuts roast as they bake in the oven, giving them an even toastier, nutty flavor. These candied nuts are absolutely addictive and are the perfect item to bring to any holiday party, or to package up for easy homemade Christmas gifts.

Ingredients for Candied Pecans

You only need a handful of simple ingredients to make this recipe for candied pecans:

  • Pecan Halves: You’ll need shelled pecan halves for this recipe. Chopped pecans or pecan pieces will be too small for this method. Make sure to check grocery store websites and circulars to find the best price for pecan halves in your area, as this is the most expensive ingredient in the recipe. We got a great deal at ALDI!
  • Brown Sugar: Brown sugar gives the sugar coating on the pecans a really rich warm flavor, thanks to the molasses that gives brown sugar it’s characteristic color.
  • White Sugar: White sugar is added to the brown sugar to create the crunchy coating on the nuts, helping it bake up a little crunchier than brown sugar alone.
  • Cinnamon: A healthy dose of cinnamon gives the nuts a super warm and cozy flavor, perfect for the holidays
  • Vanilla: Vanilla adds a warm element to the flavor profile and just pairs perfectly with the cinnamon and nuts.
  • Egg: Egg white helps the sugar coat the nuts and it changes the texture of the sugar coating to be a really light, airy, and crispy texture instead of a smooth, glassy candy coating.
  • Salt: A little bit of salt really goes a long way in this recipe to really make the candy coating extra flavorful. The salt balances the sugars and really makes everything pop.

How to Store Candied Pecans

Once the candied pecans are completely cooled, these candied pecans can be stored in an air-tight container at room temperature for about a week, or frozen for longer storage. They’ll stay fresh in the freezer for about three months and can be thawed at room temperature.

You might also like our Small Batch Candied Walnuts (perfect for salads!) or our Candied Almonds!
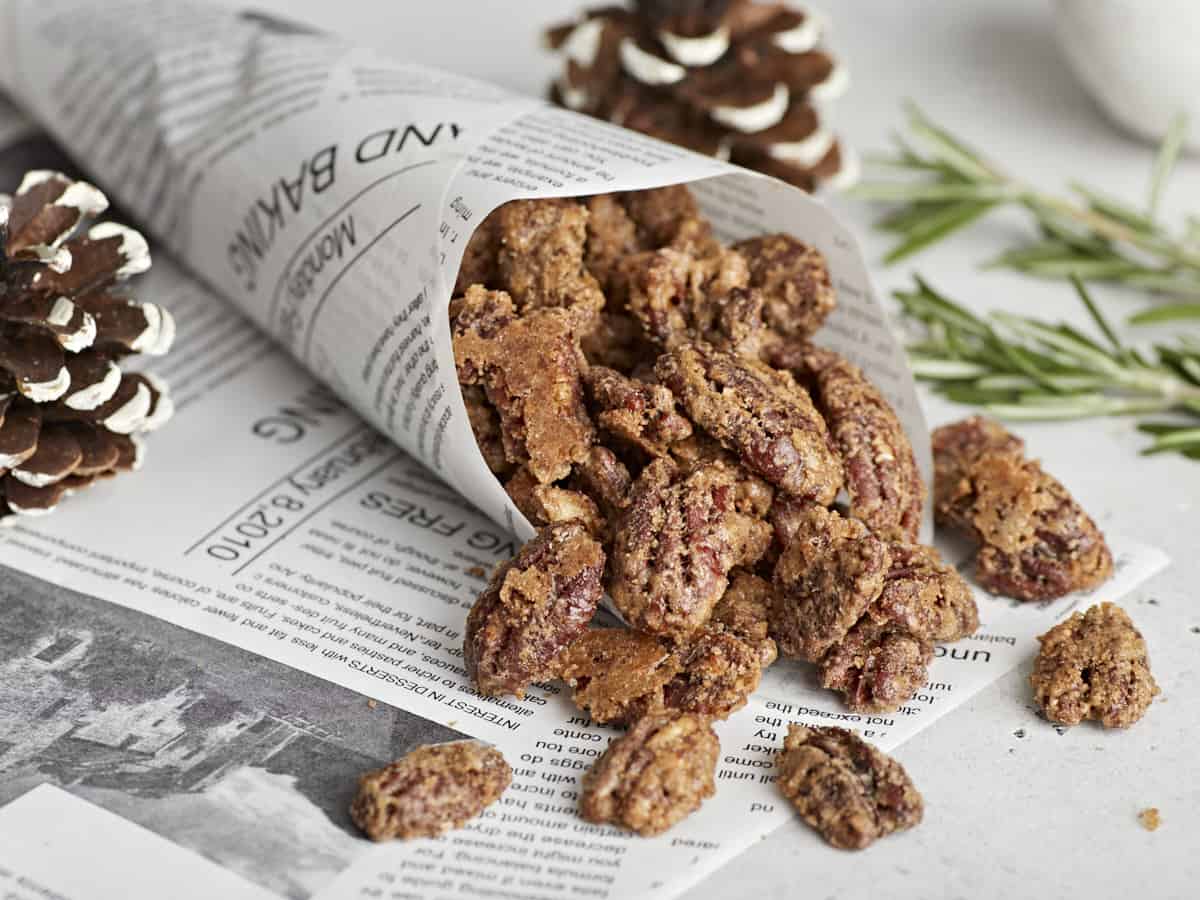
A paper cone filled with candied pecans that are spilling out.
Overhead view of a bowl full of candied pecans.
Print

Candied Pecans

This recipe for candied pecans only requires a few ingredients and makes the most deliciously sweet, cinnamon-flavored, crunchy nuts for snacking.
Course Appetizer, Dessert, Snack
Cuisine American
Total Cost $6.40 recipe / $0.40 serving
Prep Time 10 minutes
Cook Time 25 minutes
Total Time 35 minutes
Servings 16 (¼ cup each)
Calories 231kcal

Ingredients

  • 1/3 cup brown sugar $0.17
  • 1/3 cup granulated sugar $0.12
  • 1 tsp cinnamon $0.10
  • 1/2 tsp salt $0.02
  • 1 large egg, separated $0.09
  • 1/2 tsp vanilla extract $0.30
  • 1 lb. pecan halves $5.60

Instructions

  • Preheat the oven to 350ºF. Add the brown sugar, granulated sugar, cinnamon, and salt to a bowl, then stir them together until evenly combined.
  • Separate the egg and place the egg white in a large bowl. Lightly whisk the egg white until it is frothy, then add the vanilla extract and briefly whisk again to combine.
  • Add the pecans to the egg white mixture and stir to coat. Sprinkle the cinnamon sugar mixture over the nuts and stir to coat again.
  • Spread the coated nuts out onto a large baking sheet lined with parchment paper.
  • Bake the nuts in the preheated 350ºF for 25 minutes, stirring once halfway through.
  • Allow the nuts to cool completely before enjoying or storing for later.

See how we calculate recipe costs here.

Nutrition
Serving: 0.25cup | Calories: 231kcal | Carbohydrates: 13g | Protein: 3g | Fat: 20g | Sodium: 77mg | Fiber: 3g
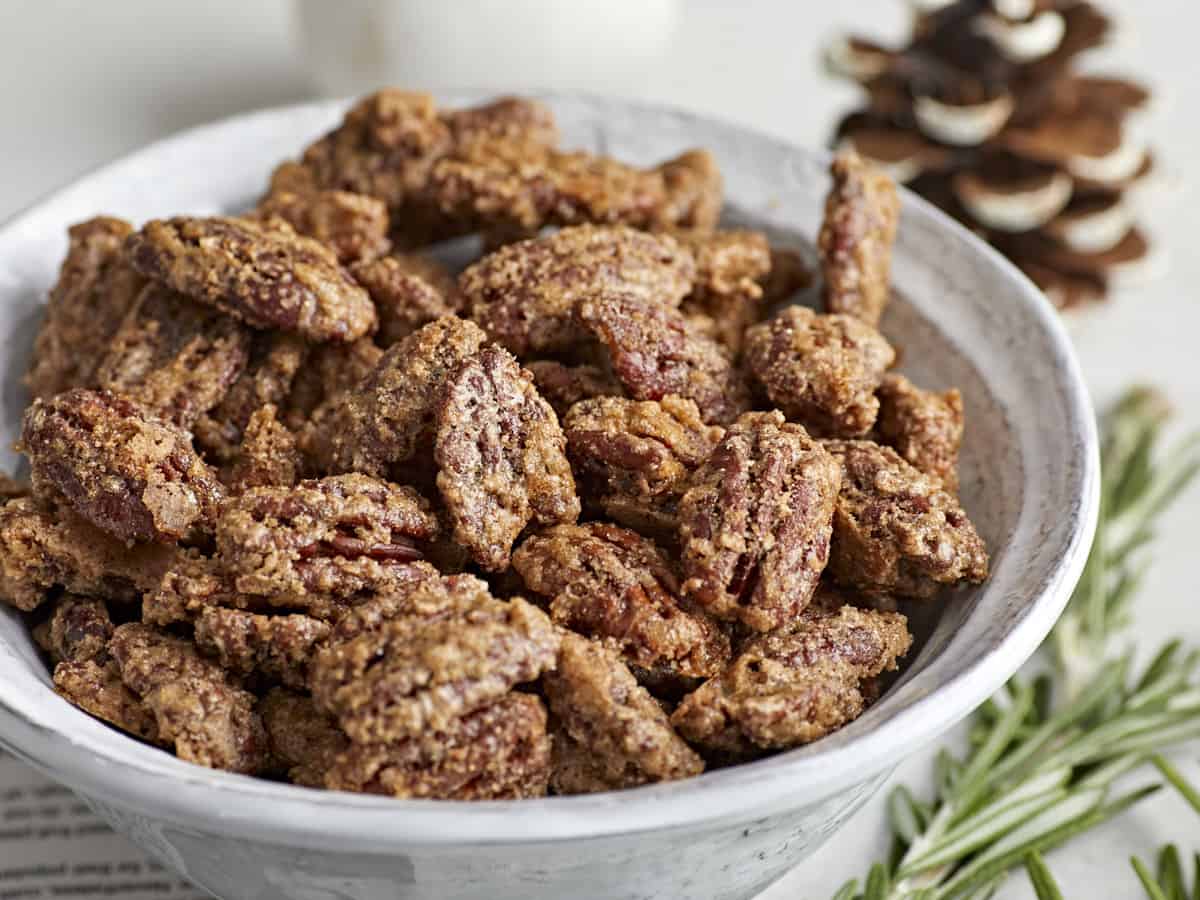
Side view of a bowl full of candied pecans.

How to Make Candied Pecans – Step by Step Photos
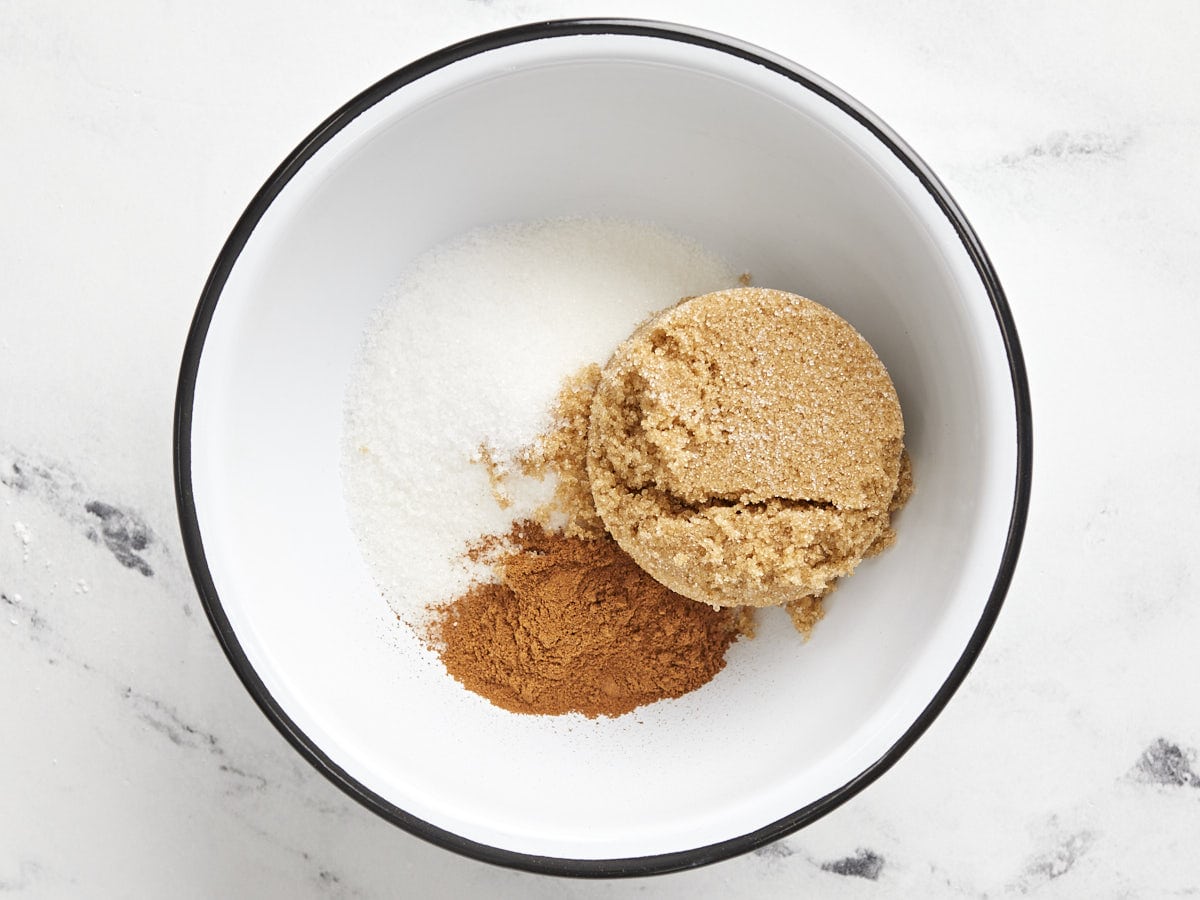
Sugar and cinnamon in a bowl.

Preheat the oven to 350ºF. Add ⅓ cup brown sugar, ⅓ cup white sugar, 1 tsp cinnamon, and ½ tsp salt to a bowl and stir them together until they’re evenly combined.
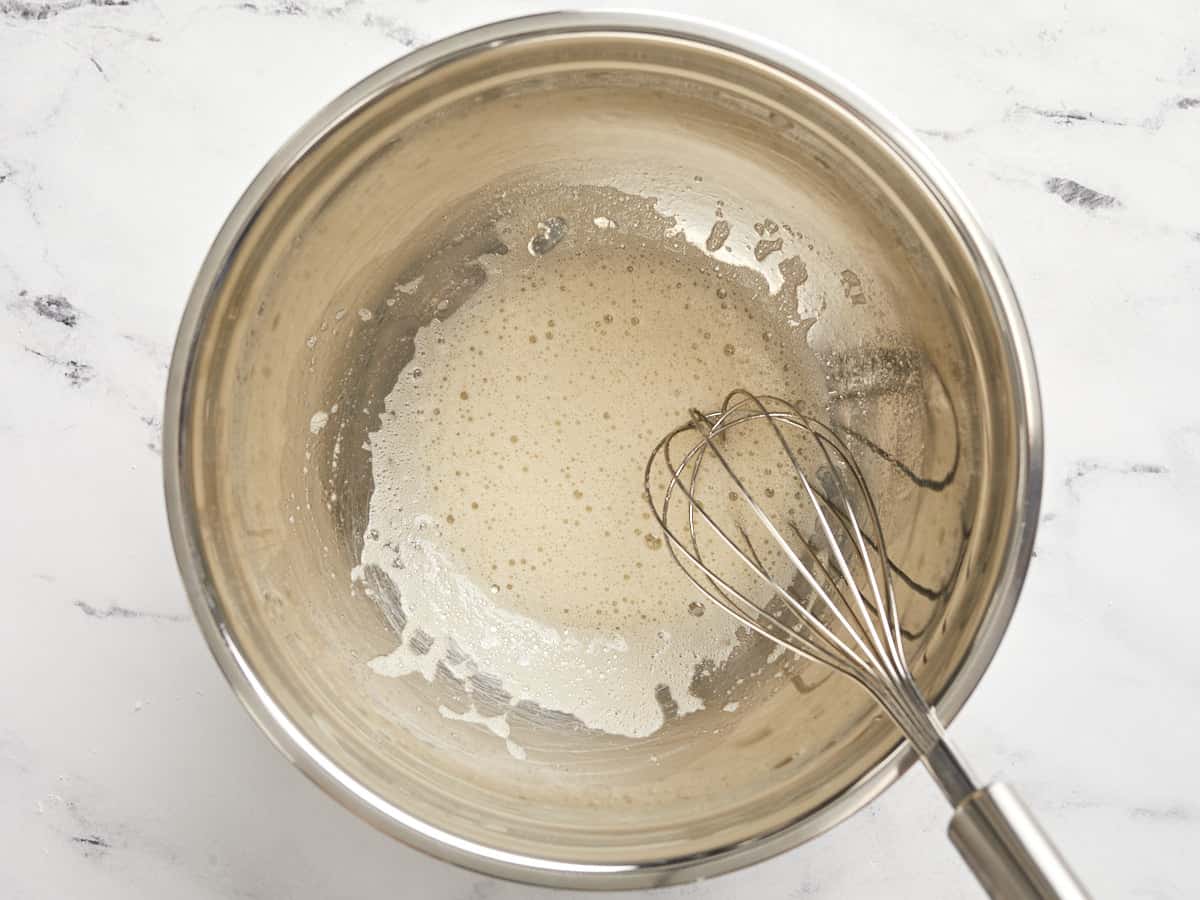
Lightly whisked egg white with vanilla extract.

Separate one large egg. Add the egg white to a large bowl and whisk it just until it gets a little frothy, then add ½ tsp vanilla extract and whisk briefly again to combine.
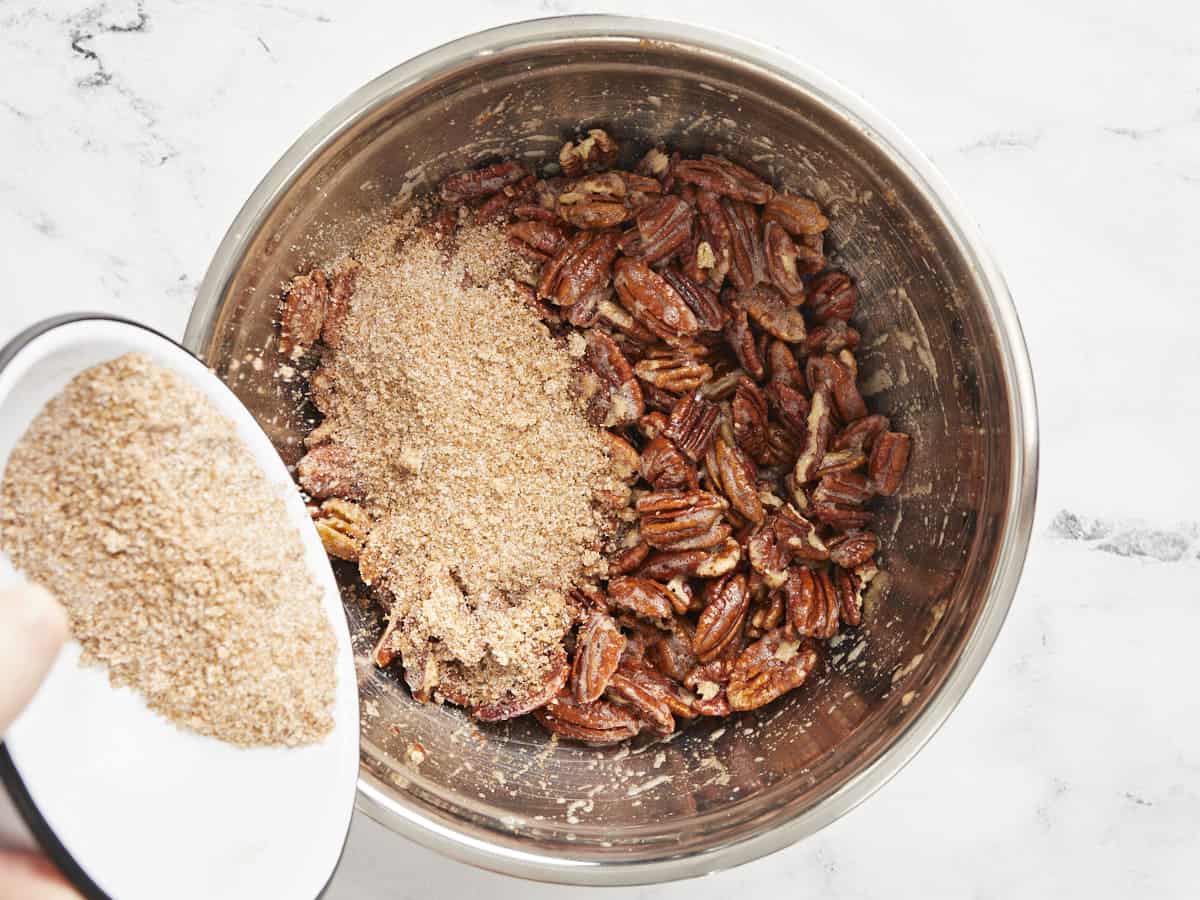
Pecans in the bowl coated in egg white, cinnamon sugar being poured over top.

Add 1 lb. pecan halves to the lightly whisked egg whites and stir until the nuts are coated in the egg white. Sprinkle the cinnamon sugar mixture over the nuts and stir to coat again.
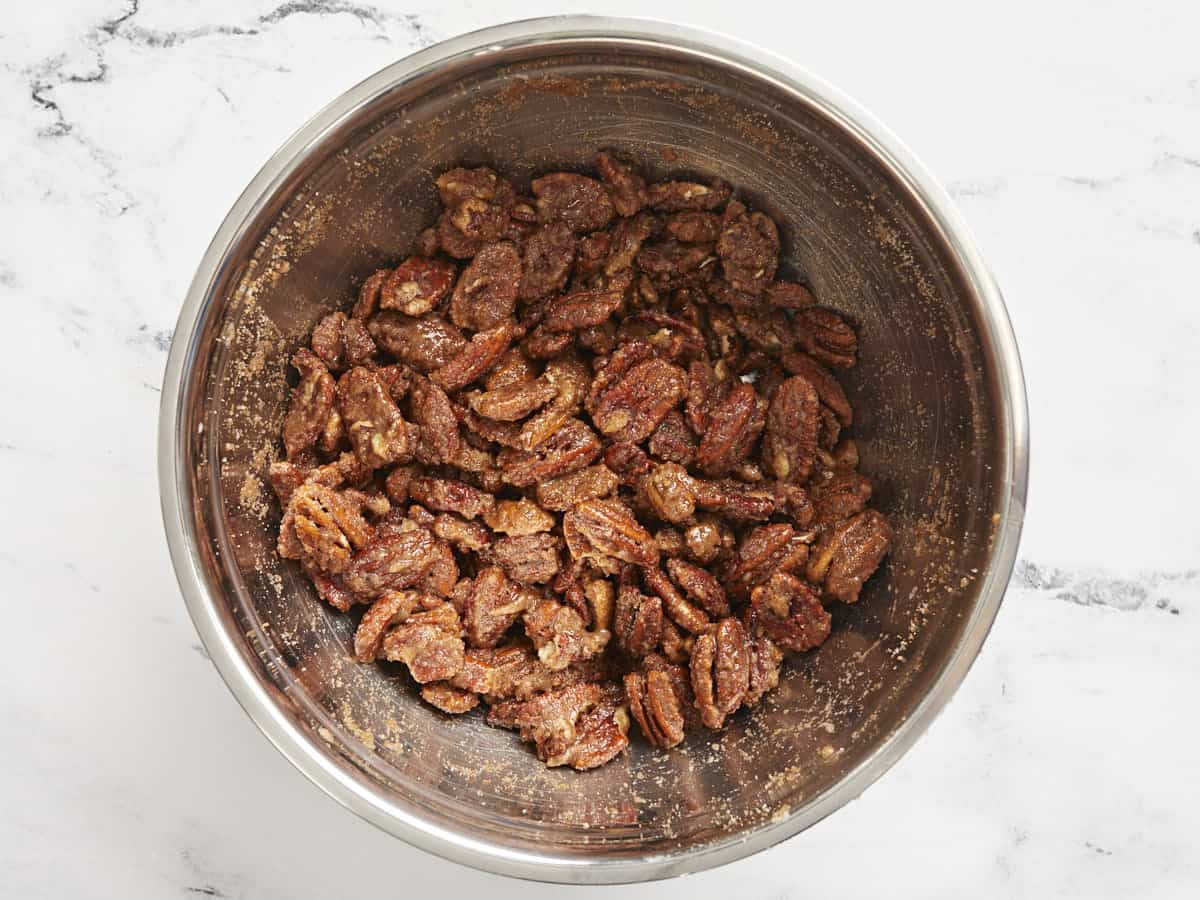
Pecans coated in egg, cinnamon, and sugar.

This is what they’ll look like when coated in egg and cinnamon-sugar.
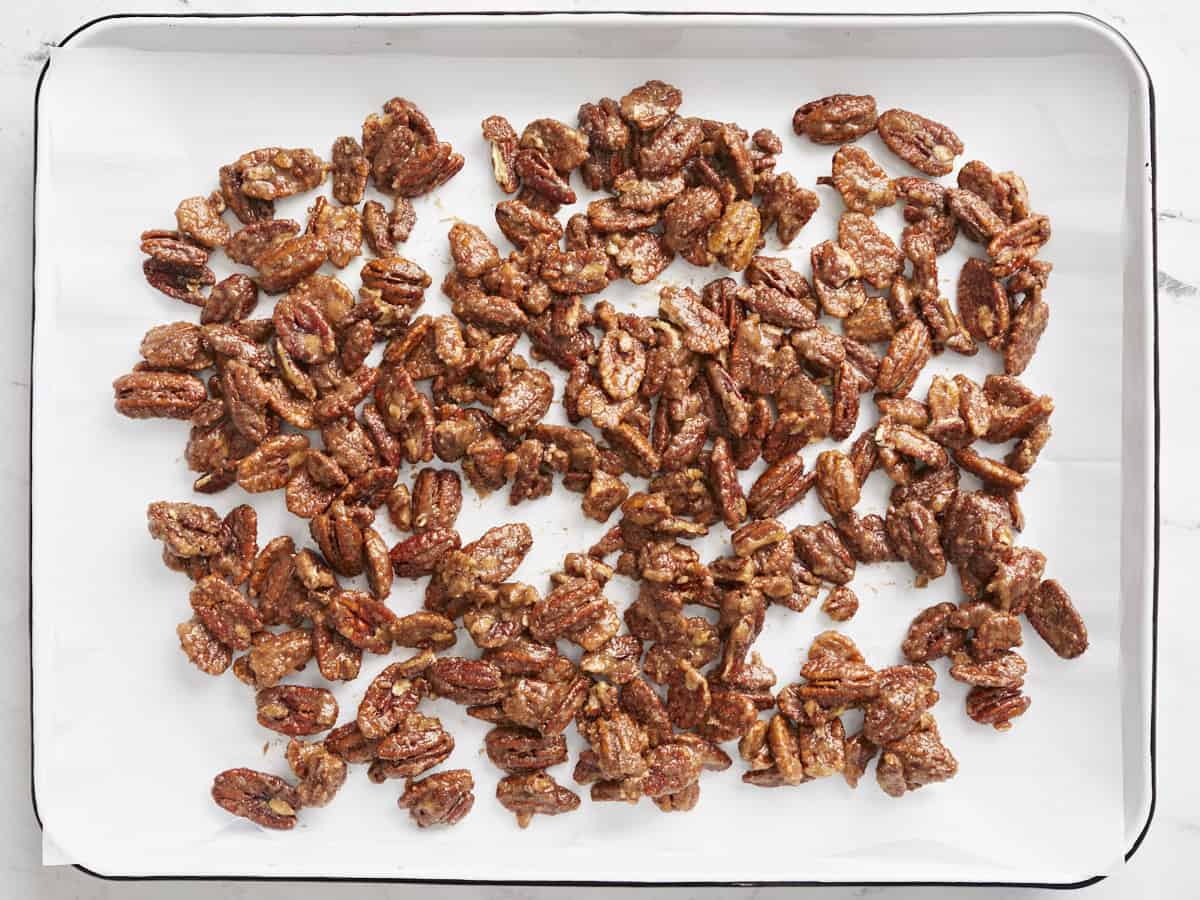
Candied pecans spread onto a baking sheet, ready to bake.

Spread the pecans out onto a baking sheet lined with parchment paper.
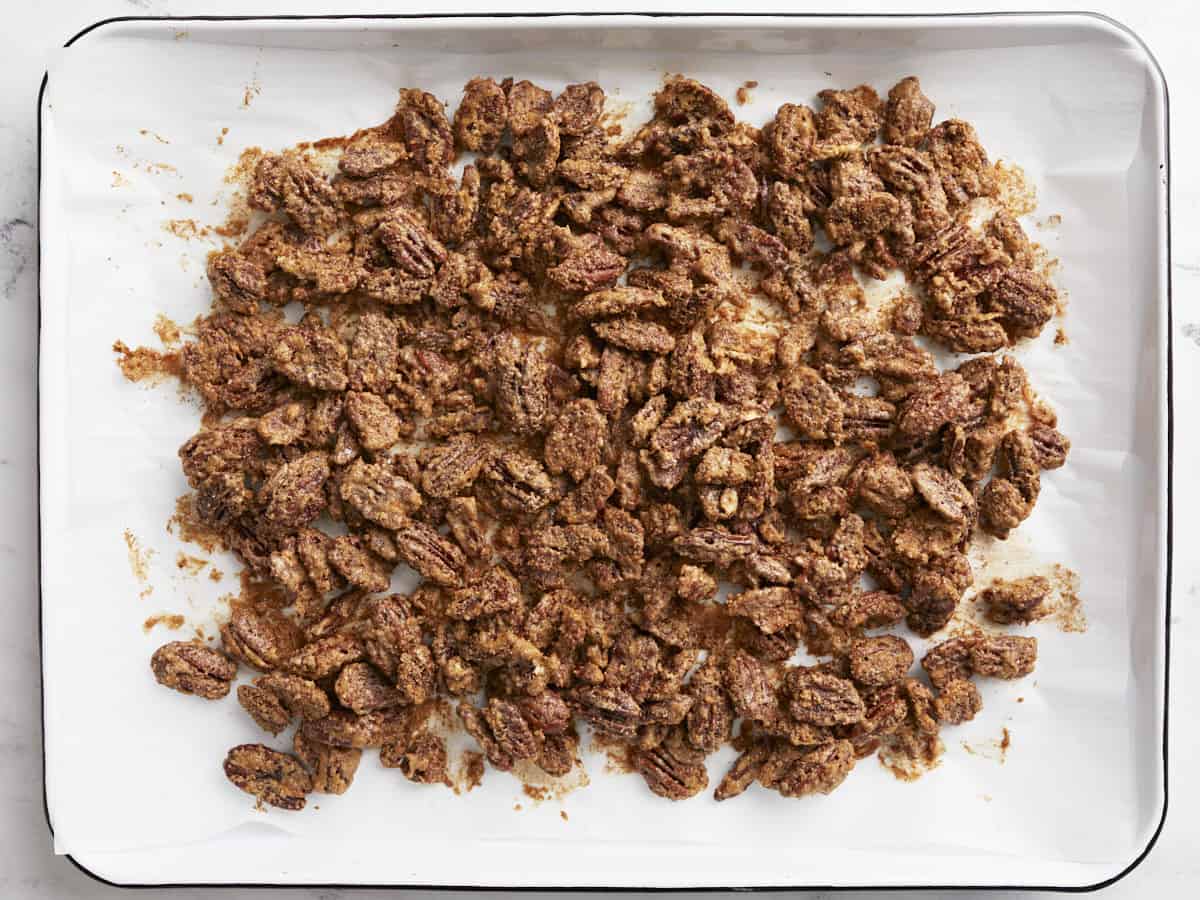
Baked candied pecans on the baking sheet.

Bake the pecans in the preheated 350ºF oven for about 25 minutes, stirring once halfway through. Allow the pecans to cool completely before enjoying or packing for storage.
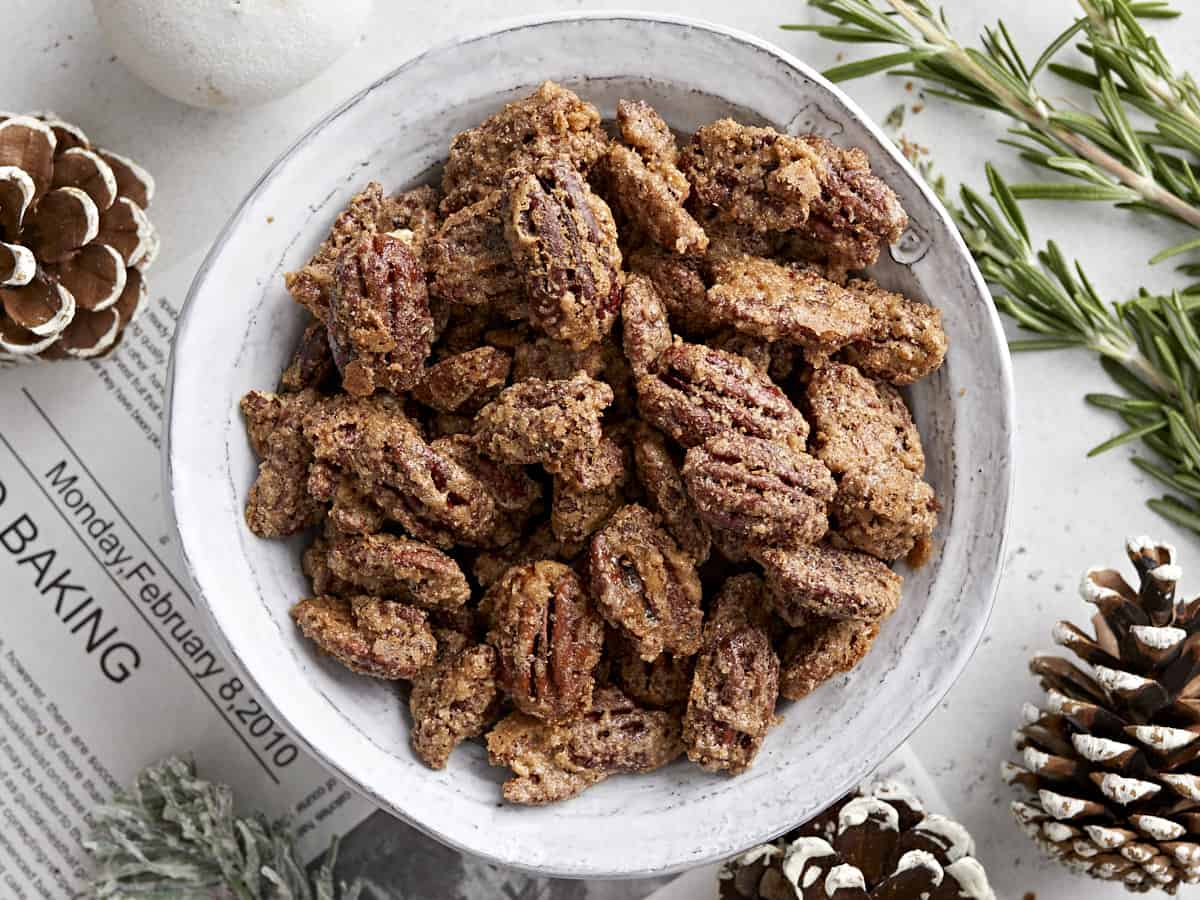
Overhead view of a bowl full of candied pecans.

The post Candied Pecans appeared first on Budget Bytes.

Air Fryer Brussels Sprouts

These Air Fryer Brussels Sprouts are perfectly brown on the outside and tender on the inside. An easy recipe to whip up any day of the week!

The post Air Fryer Brussels Sprouts appeared first on Budget Bytes.
You know those foods you grew up thinking you didn’t like even though you never actually tried them? Yeah, well Brussels sprouts was one of those vegetables that I just assumed I didn’t like until I was in my 30’s. But once I finally tried Roasted Brussels Sprouts, there was no turning back. Now I absolutely love Brussels sprouts, especially these easy Air Fryer Brussels Sprouts! This no-fuss Brussels sprouts recipe creates a brown and slightly crispy outside white still remaining tender on the inside. The air fryer makes it super easy to whip up this vegetable side dish any day of the week! And since they are in season right now, they were also on sale at my local grocery store. #Winning!

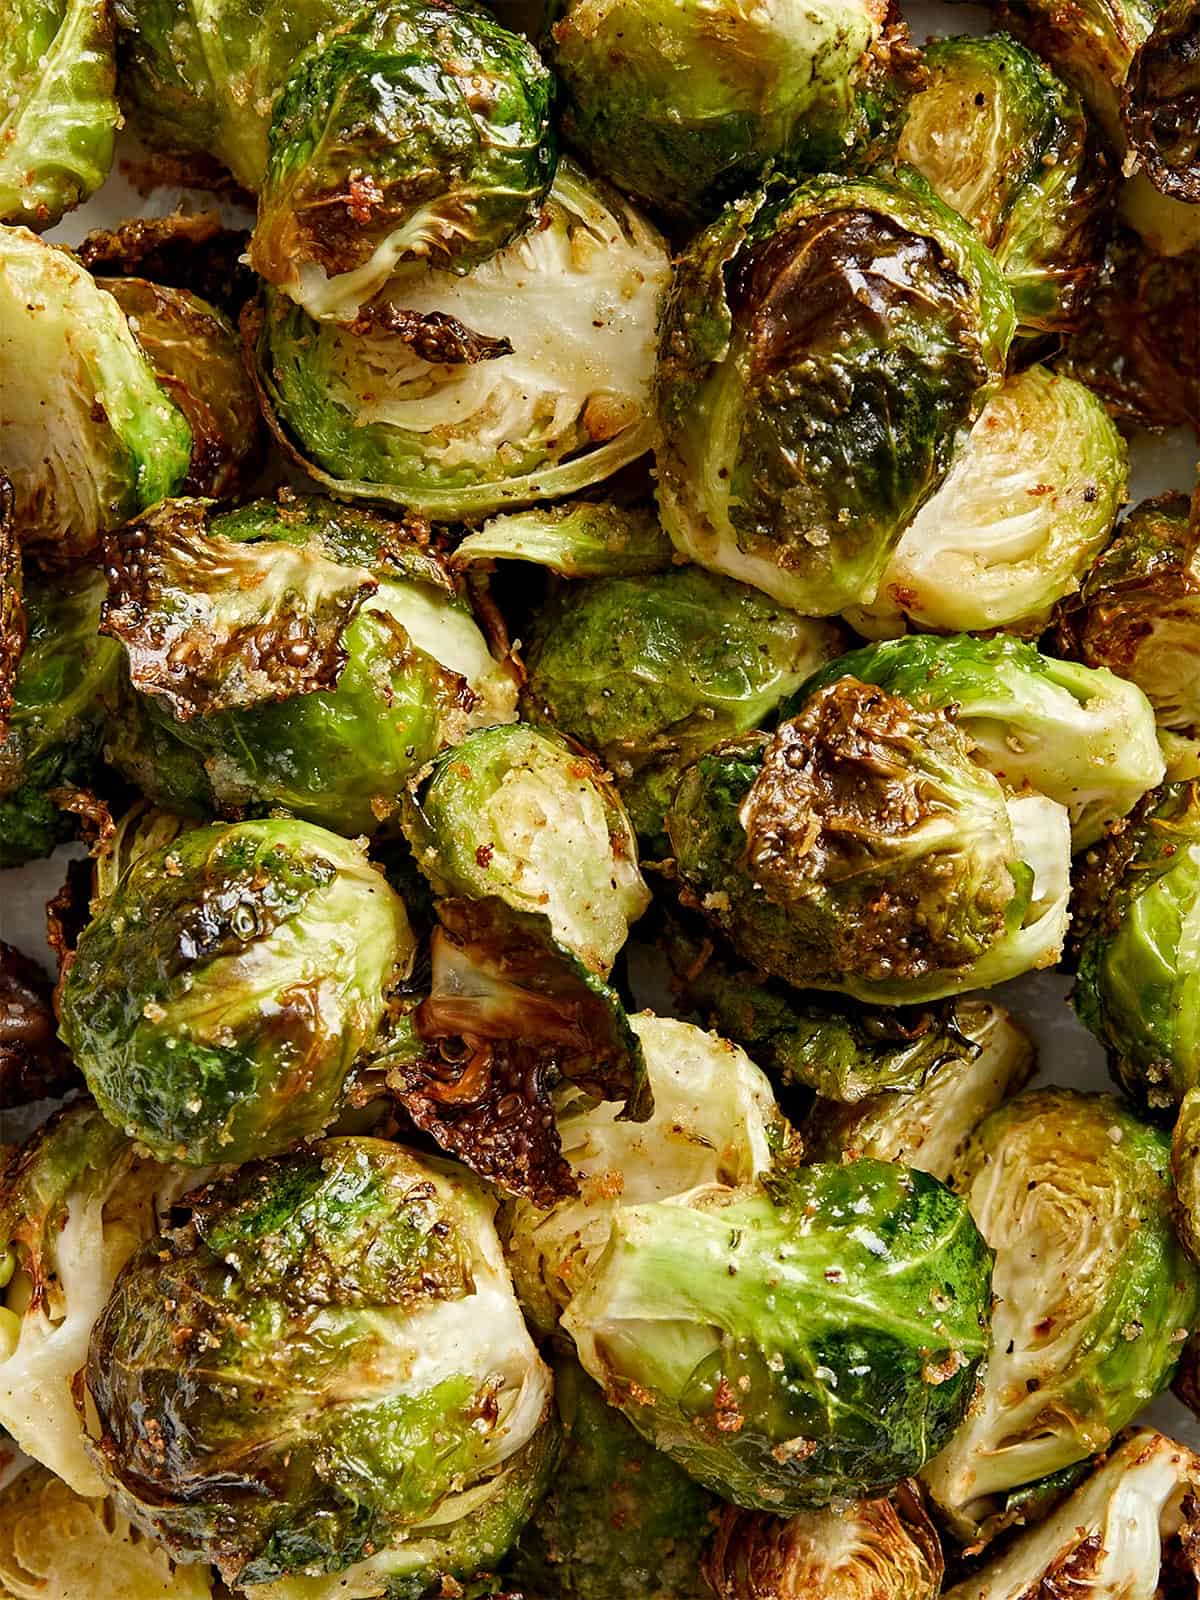
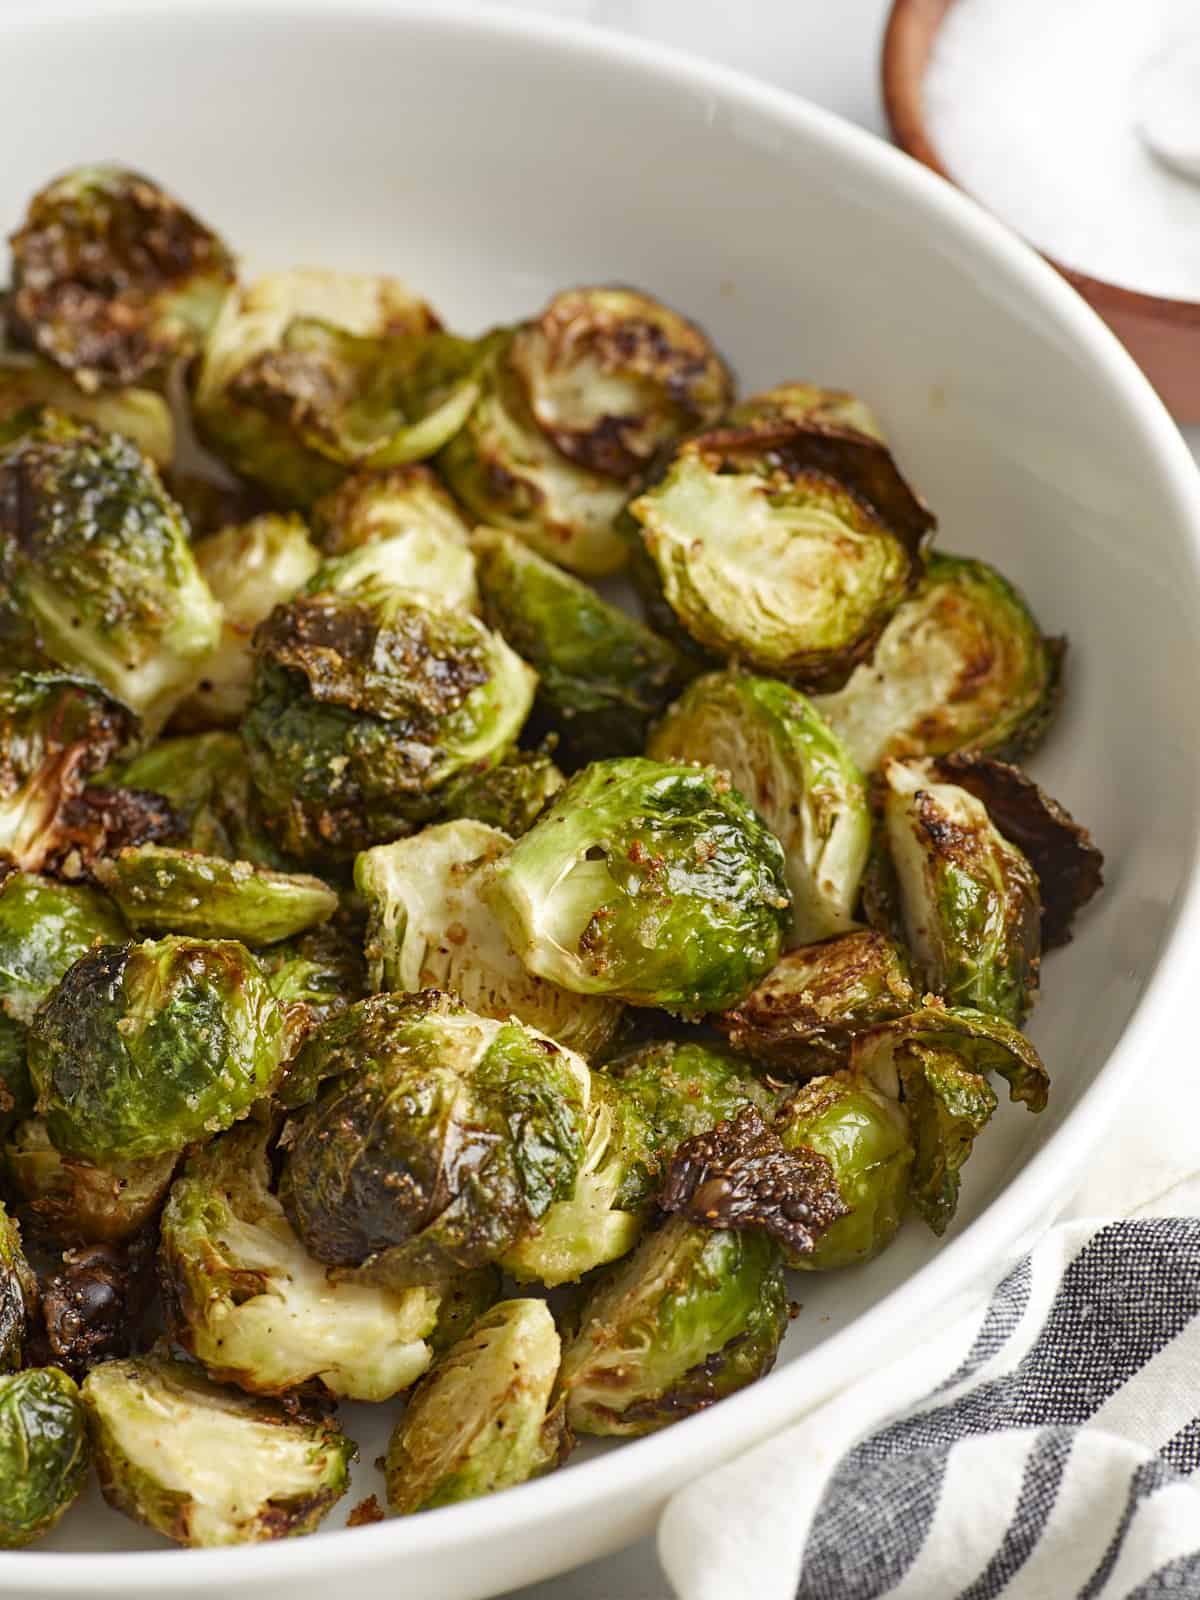
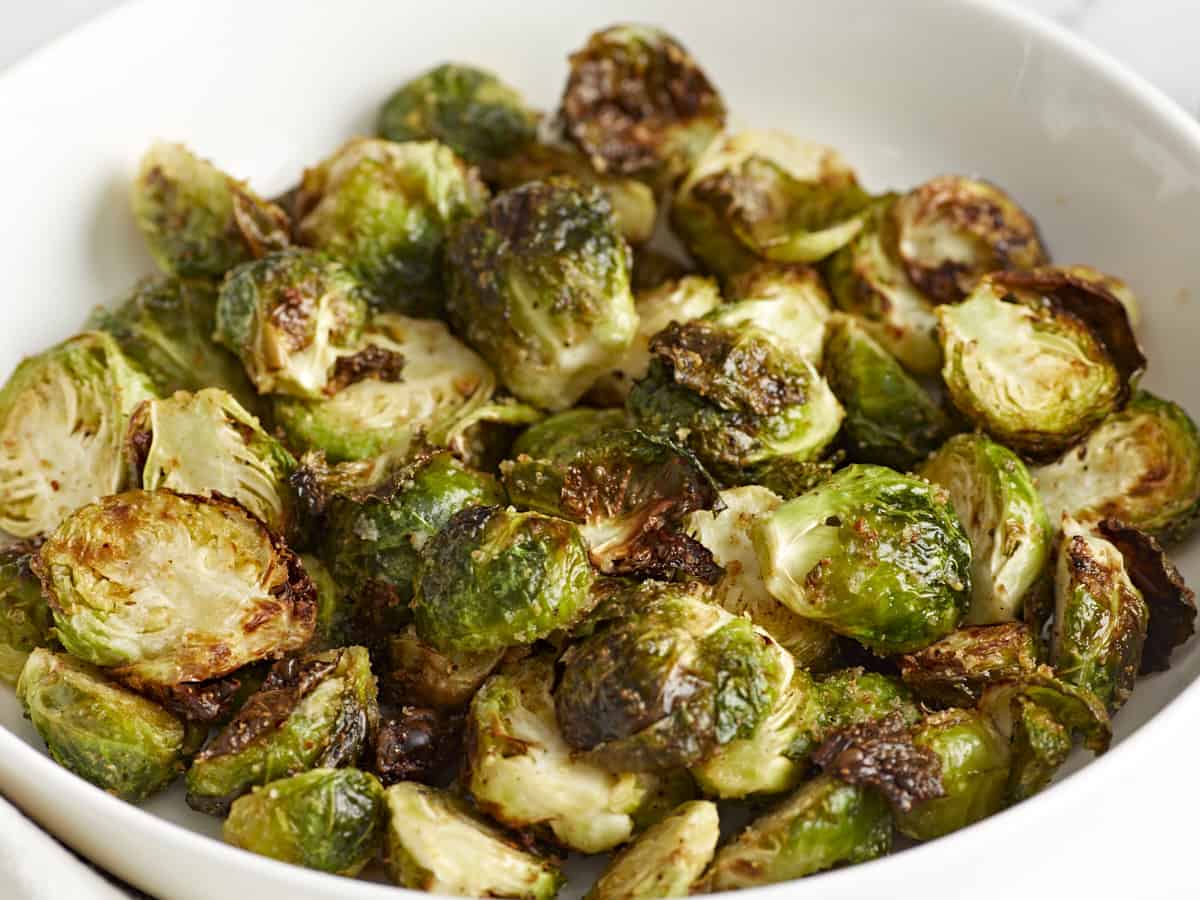
Close up macro view of Air Fryer Brussels Sprouts.

Ingredients For Air Fryer Brussels Sprouts

I’m all for simple recipes and with simple ingredients! Here are the 6 items you need to make this easy Air Fryer Brussels Sprouts recipe:

  • Brussels Sprouts: This cruciferous vegetable can often be found year-round in your local grocery store. However, sometimes they are on the pricier side, so take advantage of them while they are in season and usually on sale. They are usually in season during the late fall and winter months from October to February.
  • Olive Oil: Olive oil helps keep the Brussels sprouts from getting too dry and too charred on the outside. It also helps the seasoning coat the Brussels sprouts perfectly.
  • Seasoning: A mix of salt, pepper, garlic powder, and onion powder adds just the right amount of flavor and keeps things simple, but still delicious!

Recipe Variations

Although we went with a simple mix of olive oil + seasoning for this Brussels sprouts recipe, you can easily try some of these other combinations:

  • Switch up the seasoning: Try some steak seasoning, curry powder, Cajun seasoning or a seasoning salt like Lawry’s, or a Creole seasoning like Tony Chachere’s.
  • Parmesan cheese: We also tested these air fryer Brussels sprouts tossed in a little parmesan cheese and they were absolutely delicious!
  • Dipping Sauces: My favorite way to enjoy these Brussels sprouts is with a simple mix of Dijon mustard and pure maple syrup. They would also taste really good dipped in our Comeback Sauce!
  • Homemade balsamic glaze: And if you’re a balsamic vinegar lover, once the Brussels sprouts are out of the air fryer, try drizzling a little bit of homemade balsamic glaze on top!

Tips For Making Air Fryer Brussels Sprouts

  1. Don’t skip the oil – It may be tempting to use less oil since you’re cooking in an “air fryer” but I wouldn’t recommend it. We tested this recipe using a little less oil and it resulted in the Brussels sprouts being too dry and very charred.
  2. Preheat the air fryer – It’s always good to preheat the air fryer before you add the Brussels sprouts to the basket. If your air fryer does not have a pre-heat function, simply let it run with an empty basket for about 3-4 minutes at 360ºF.
  3. Shake halfway through – Give the Brussels sprouts a good shake and flip some of them over halfway through the cook time so they can brown evenly on both sides.
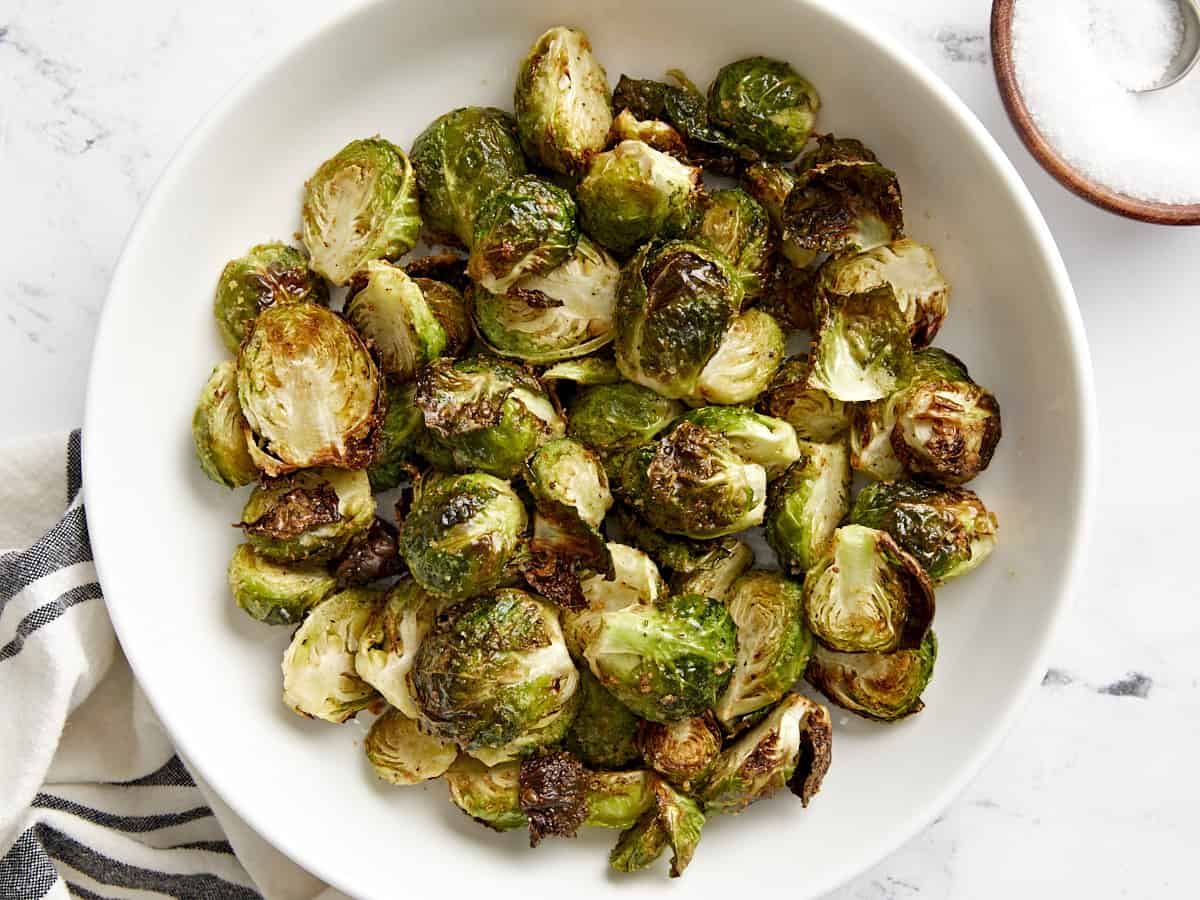
Overhead view of air fryer brussels sprouts in a white serving dish.
Print

Air Fryer Brussels Sprouts

These Air Fryer Brussels Sprouts are perfectly brown on the outside and tender on the inside. An easy recipe to whip up any day of the week!
Course Side Dish
Cuisine American
Total Cost $3.03 recipe / $0.75 serving
Prep Time 10 minutes
Cook Time 9 minutes
Total Time 19 minutes
Servings 4
Calories 113kcal

Equipment

Ingredients

Instructions

  • Wash and dry the Brussels sprouts, then trim off the dry ends. Cut each Brussels sprout in half lengthwise.
  • Add the Brussels sprouts to a large bowl along with the olive oil, salt, black pepper, garlic powder, and onion powder. Mix all the ingredients together until the Brussels sprouts are well coated in the oil and seasoning.
  • Preheat the air fryer to 360°F. Once preheated, add the Brussels sprouts and spread them evenly inside the air fryer basket. Air fry for 9 minutes, flipping and shaking the Brussels sprouts halfway through to help them brown evenly on both sides. Add an additional 1-2 minutes of cook time depending on the level of browning that you like.
  • Remove the Brussels sprouts from the air fryer and enjoy as is or with your favorite dipping sauce.

See how we calculate recipe costs here.

Nutrition

Serving: 1serving | Calories: 113kcal | Carbohydrates: 11g | Protein: 4g | Fat: 7g | Sodium: 320mg | Fiber: 4g
Side front view of air fryer Brussels sprouts in a white serving dish.

How to Make Air Fryer Brussels Sprouts – Step by Step Photos

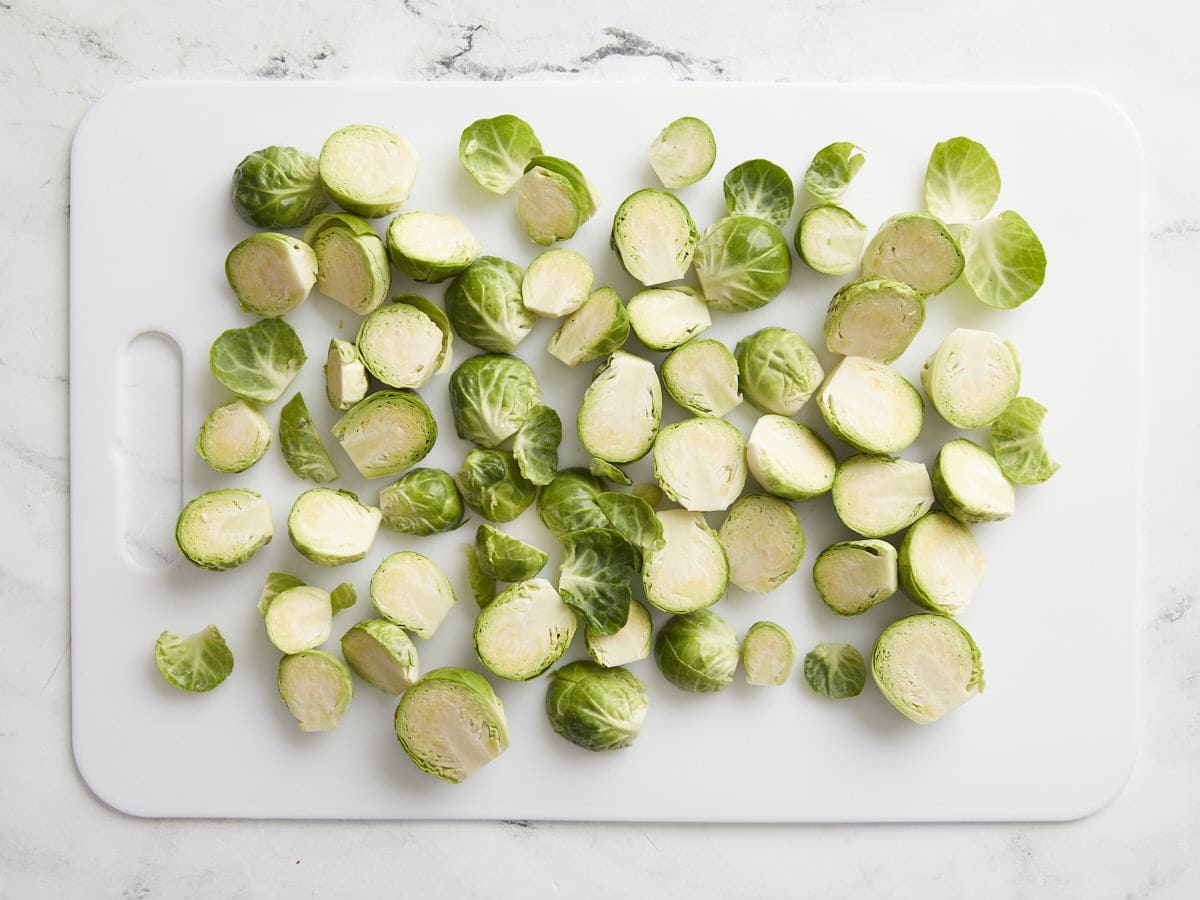
Brussel sprouts sliced in half on a white cutting board.

Wash and dry 1 lb. of Brussels sprouts, then trim off the dry ends. Cut each Brussels sprout in half lengthwise.

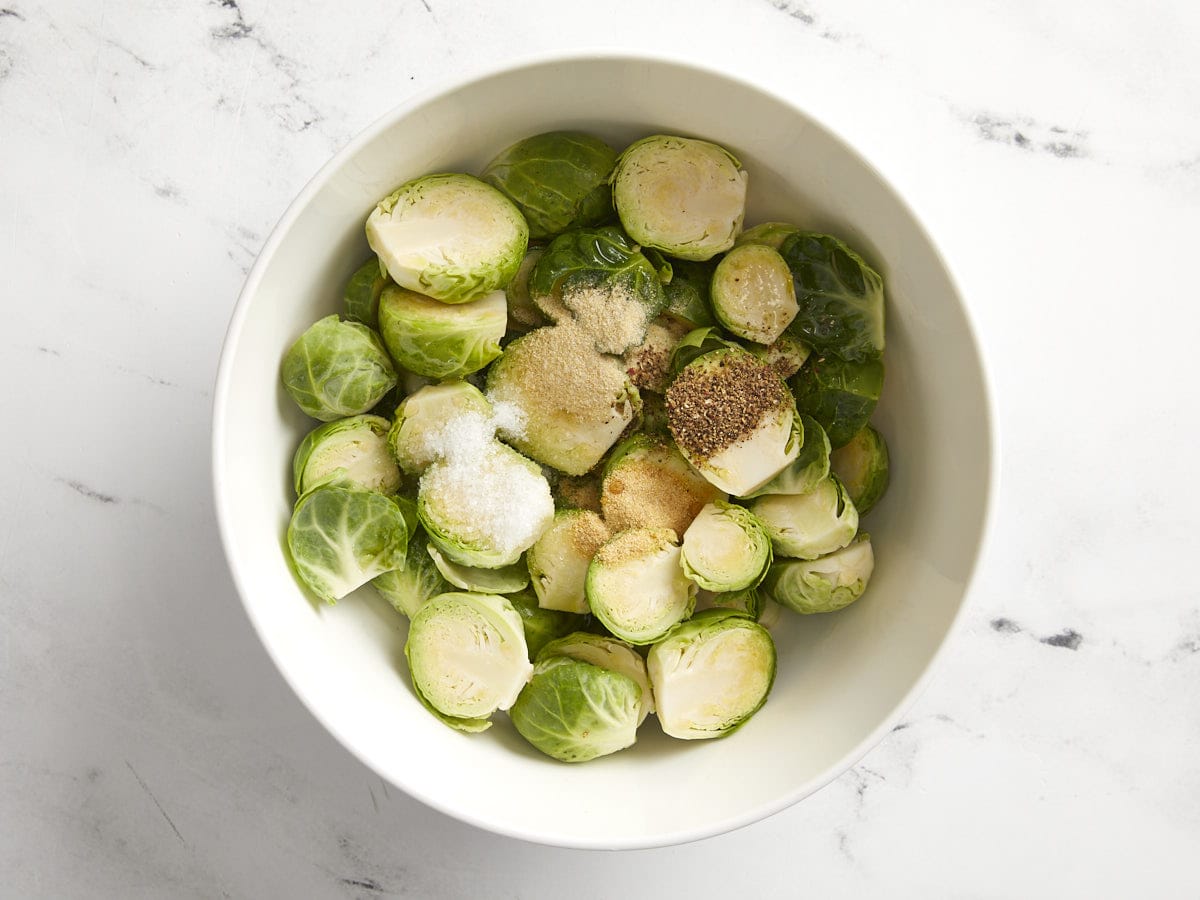
Halved Brussels sprouts in a bowl with olive oil and spices.

Add the Brussels sprouts to a large bowl along with 2 Tbsp of olive oil, 1/2 tsp salt, 1/2 tsp freshly cracked black pepper, 1/2 tsp garlic powder, and 1/2 tsp onion powder. Mix all the ingredients together until the Brussels sprouts are well coated in the oil and seasoning.

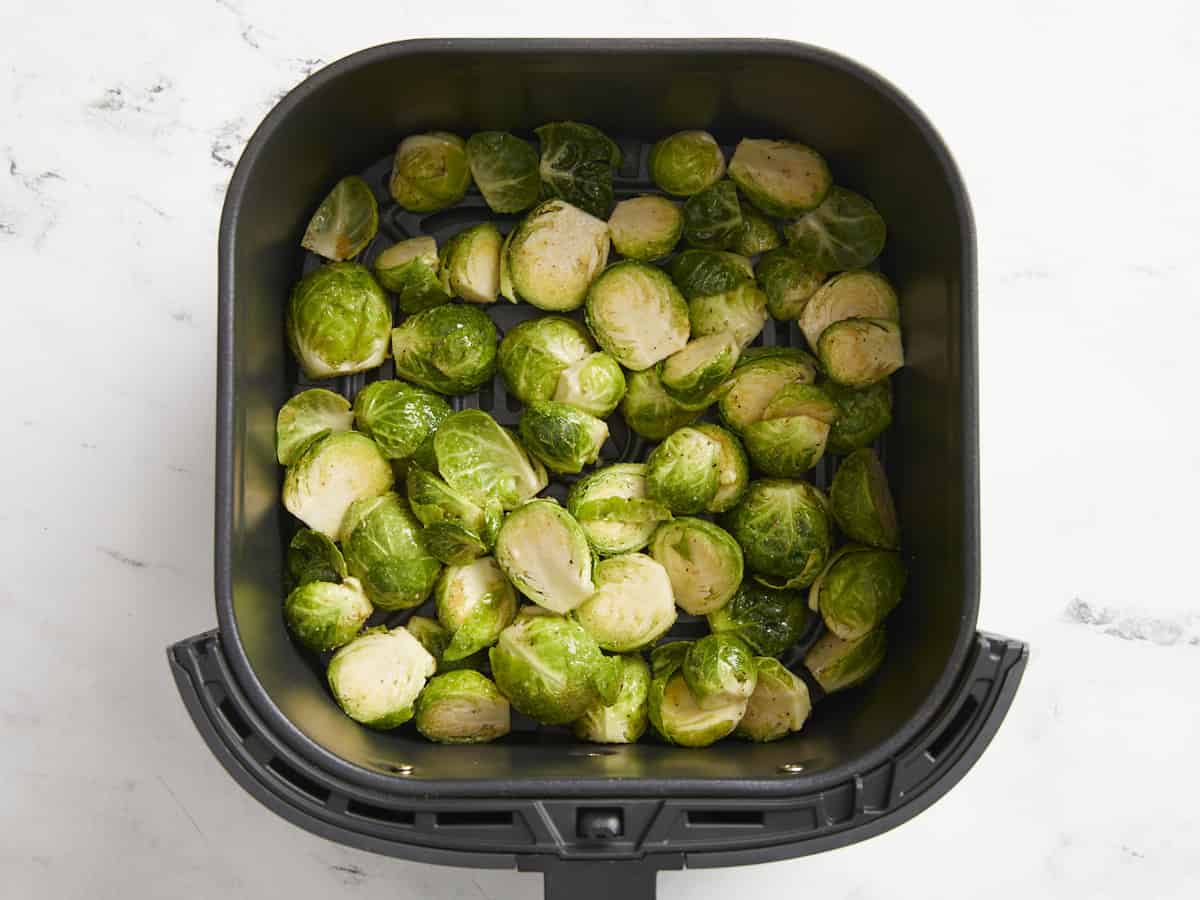
Seasoned and pre-cooked Brussels sprouts in the air fryer.

Preheat the air fryer to 360°F. Once preheated, add the Brussels sprouts and spread them evenly inside the air fryer basket.

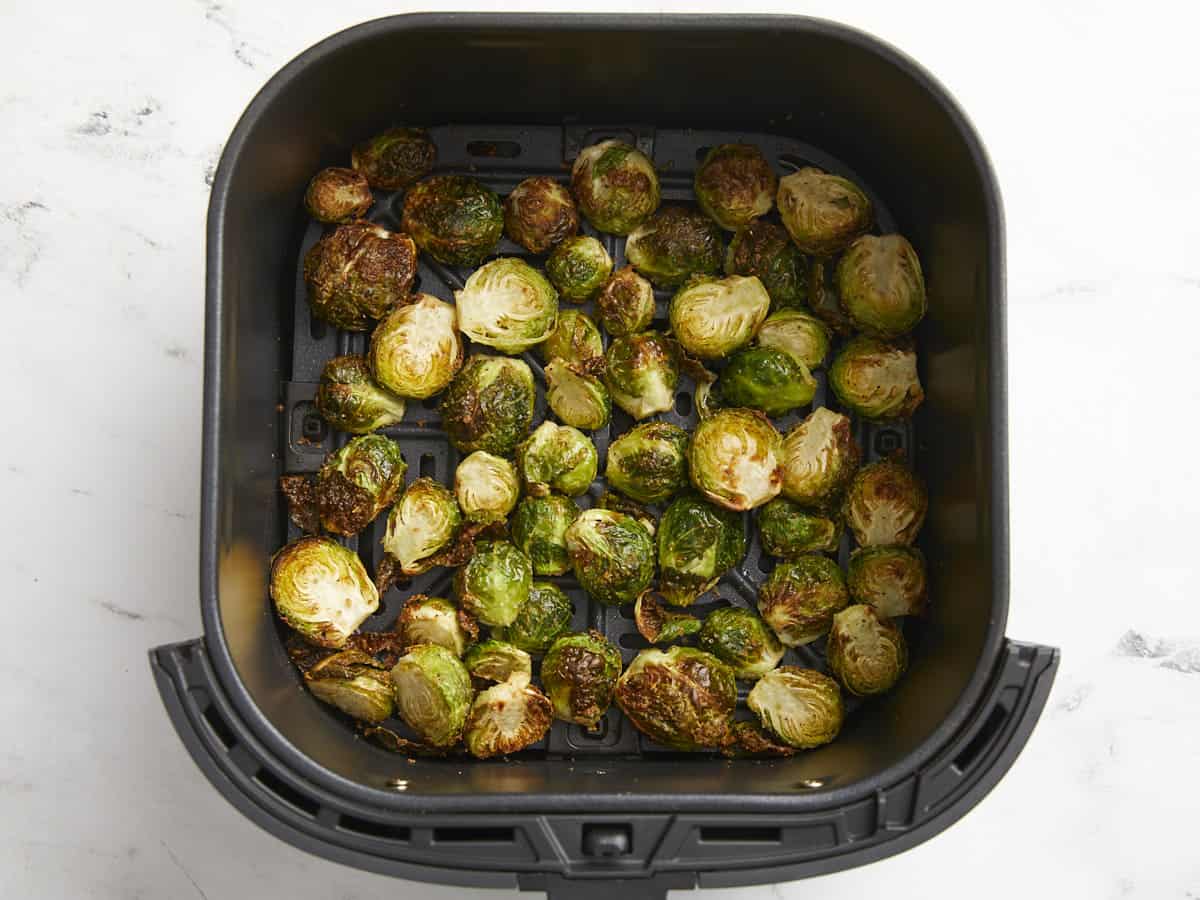
Cooked Brussels sprouts in the air fryer.

Air fry for 9 minutes, flipping and shaking the Brussels sprouts halfway through to help them brown evenly on both sides. Add an additional 1-2 minutes of cook time depending on the level of browning that you like.

Overhead view of air fryer brussels sprouts in a white serving dish.

Enjoy these super delicious Brussels sprouts with a little parmesan cheese or your favorite dipping sauce. And try not to eat them all before they make it to the dinner table ;)

Side view of Air Fryer Brussels sprouts in a white serving dish.

The post Air Fryer Brussels Sprouts appeared first on Budget Bytes.
Lentils with Wine-Glazed Vegetables

These simple, wine-glazed lentils, from Deborah Madison, saw me through my twenties, and then my thirties. I made them often in my first solo apartment in San Francisco.

Continue reading Lentils with Wine-Glazed Vegetables on 101 Cookbooks

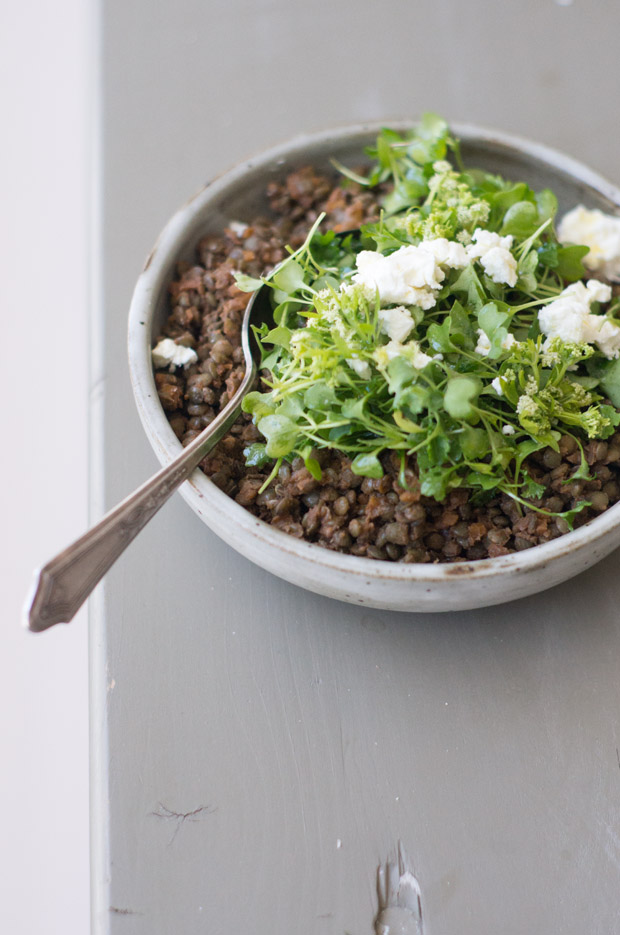
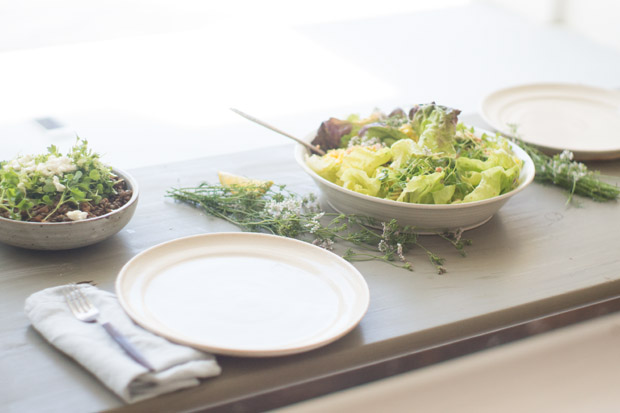
As promised – the Deborah Madison lentil recipe. They’re the ones you see on the table in the background of this post, a recipe I know by heart. These simple, wine-glazed lentils saw me through my twenties, and then my thirties. I made them often in my first solo apartment in San Francisco. And, because they travel well, they’ve kept me well-fed on a range of flights – Dar es Salaam and Bangkok included. When asked to call out one favorite recipe from Vegetarian Cooking for Everyone – this was the recipe I chose.

Deborah Madison's Lentils with Wine-Glazed Vegetables

The Details:

You have some options with this recipe! I go the butter / tarragon route (as opposed to olive oil / parsley), and always use either French or Umbrian green lentils. Deborah calls for red wine, but I sometimes do white (whatever is open, really), and I’ve even swapped in Belgian ale on occasion. What I mean is, red is best, but don’t be discouraged if you don’t have a bottle open or on hand – use what you have!
Deborah Madison's Lentils with Wine-Glazed Vegetables

Serving Ideas!

Many of you have cooked this recipe over the years and have noted favorite serving ideas. Here are a few stand outs.

  • Baked Potatoes: There are a lot of ways to enjoy these lentils, I love them over a perfectly baked potato along with a generous dollop of creme fraiche or sour cream and a shower of finely snipped chives.
  • Pockets: Kelly mentioned she might wrap the lentils in filo pastry with some goat cheese for a potluck. Brilliant!
  • Donna mentions, “I served it with creme fraiche and arugula over new potatoes. Leftovers were brought to a friend’s to add to the farro she made.”

More Lentil Recipes

Continue reading Lentils with Wine-Glazed Vegetables on 101 Cookbooks

Cranberry Cream Cheese Dip

Cranberry cream cheese dip is an easy appetizer everyone will love! Homemade sauce has bright, sweet tart flavor (add jalapeno…

A Couple Cooks – Recipes worth repeating.

Cranberry cream cheese dip is an easy appetizer everyone will love! Homemade sauce has bright, sweet tart flavor (add jalapeno if you like).

Cranberry Cream Cheese Dip

Need a simple appetizer to wow at parties? Try this easy cranberry cream cheese dip! The homemade sauce bursts with sweet and tart cranberries, orange juice, and if you’d like, a little jalapeno for a tang. Spoon it over cream cheese and it’s perfect for dipping crackers or even apple slices. It comes together in minutes with minimal effort. So ditch the store-bought dips and make a batch of this homemade cranberry appetizer for your next party! Everyone will gather around the bowl.

Components for cranberry cream cheese dip

Cranberry cream cheese dip is cranberry sauce served over room temperature cream cheese, which brings a sweet tart burst to each bite. We like serving with crunchy salted pecans over the top for a little texture. While you can make this dip with canned cranberry sauce, the flavor isn’t nearly as good. It takes just a few minutes to whip up homemade cranberry sauce and the flavor is beautifully developed, with notes of orange and cinnamon. Here’s what you’ll need for this easy dip:

  • Cranberry sauce: Cranberries (fresh or frozen), granulated sugar, orange juice (or water), jalapeno pepper (optional)
  • Cream cheese
  • Pecans
  • Green onion
Cranberry Cream Cheese Dip

Tips for making the cranberry sauce

This cranberry sauce is a half recipe of our homemade cranberry sauce, with some optional ingredients. It takes just 10 minutes to simmer, and the flavor comes out beautifully bright. Here’s what you need to know:

  • Simmer all ingredients over medium heat until a saucy texture forms. The timing will vary based on your pan and the exact heat level, but it should take about 10 minutes. We like to see most cranberries burst and dissolved, but there can be a few that are still whole.
  • Substitutes are welcome. Don’t have orange juice? You can use water instead if you like.
  • Add orange zest if desired. When you zest the orange, make sure to only get the orange part of the peel: not the white pith! The pith tastes very bitter and if you zest too aggressively, it makes the cranberry sauce taste bitter.
  • Use jalapeno if desired, but it’s not required. The jalapeno pepper adds just a hint of bright flavor without heat.
Cranberry Sauce

Jalapeno is optional (and not spicy!)

Cranberry and jalapeño pepper is a classic flavor combination. This cranberry cream cheese dip is not spicy with jalapeno: since you remove the seeds before dicing it, it simply adds a tangy, irresistible flavor to the dip. Make sure to protect your hands when cutting the pepper and wash them immediately afterwards.

Can you make it spicy? Absolutely! Simply add a few of the jalapeno seeds to the mix when making the cranberry sauce. Another classic way to enjoy cranberry and jalapeno? Try this Cranberry Salsa, another crowd favorite.

Cranberry Cream Cheese Dip

Ways to serve cranberry cream cheese dip

This cranberry cream cheese dip is a sure crowd pleaser at parties! Simply add crackers or bread and it’s perfect for dipping. It’s great for holiday parties like as a Christmas appetizer or Thanksgiving appetizer, but it works anytime using frozen cranberries when fresh aren’t in season. Here are a few of our favorite ways to dip:

And that’s it! Let us know if you plan to try this cranberry cream cheese dip at your next party! Our friends and family couldn’t stop dipping it.

More party appetizers

Love to entertain? Here are a few of our favorite appetizer recipes that are perfect for parties:

This cranberry cream cheese dip is…

Vegetarian and gluten-free (with gluten-free crackers or apple slices).

Print
Cranberry Cream Cheese Dip

Cranberry Cream Cheese Dip


  • Author: Sonja Overhiser
  • Prep Time: 10 minutes
  • Cook Time: 10 minutes
  • Total Time: 20 minutes
  • Yield: 8

Description

Cranberry cream cheese dip is an easy appetizer everyone will love! Homemade sauce has bright, sweet tart flavor (add jalapeno if you like).


Ingredients

  • 6 ounces fresh or frozen cranberries
  • ½ cup granulated sugar
  • ½ cup fresh or bottled orange juice (plus zest of 1/4 orange, if desired)
  • 1 cinnamon stick (or ⅛ teaspoon ground cinnamon)
  • 1/2 jalapeño pepper, seeds removed and diced (optional*)
  • 1 8-ounce block cream cheese
  • 2 tablespoons chopped salted pecans (or pistachios, walnuts, hazelnuts, etc)
  • 2 tablespoons thinly sliced green onion top

Instructions

  1. Place the cranberries, sugar, orange juice, cinnamon stick, and optional orange zest and diced jalapeño pepper in a saucepan and bring to a simmer over medium heat. Simmer until the cranberries pop and it becomes saucy, about 10 minutes. Allow to cool for 10 minutes before serving (place in the freezer to speed up the process if desired). You can also make the cranberry sauce in advance and reheat it until warm the stovetop before serving (stir in a little water if it is too thick).
  2. Soften the cream cheese by microwaving the block for 10 seconds on High power. Or, allow the cream cheese to stand for 30 minutes at room temperature.
  3. To serve, spoon the warm cranberry sauce over the cream cheese. Top with chopped pecans and green onions. Serve with crackers.

Notes

*The combination of cranberry and jalapeno is classic for this type of dip, but not required! Removing the seeds makes the pepper add flavor but not heat.

  • Category: Appetizer
  • Method: Stovetop
  • Cuisine: American
  • Diet: Vegetarian

Keywords: Cranberry cream cheese dip, cranberry jalapeno cream cheese dip

A Couple Cooks - Recipes worth repeating.

Christmas Punch

This easy Christmas Punch Recipe is the perfect drink to get you in the holiday mood with flavors of apple, cranberry, and sparkling ginger.

The post Christmas Punch appeared first on Budget Bytes.
Whether you’re hosting a big Christmas party this year or plan to spend the chilly evenings of December cozy at home, this easy Christmas Punch recipe will put you in a festive mood. This apple-cranberry-ginger drink can be made in a large batch to share with friends, or you can mix it up one glass at a time to enjoy solo anytime you need a sparkly refreshment. …And you can spike it too, if that’s your vibe. ;)

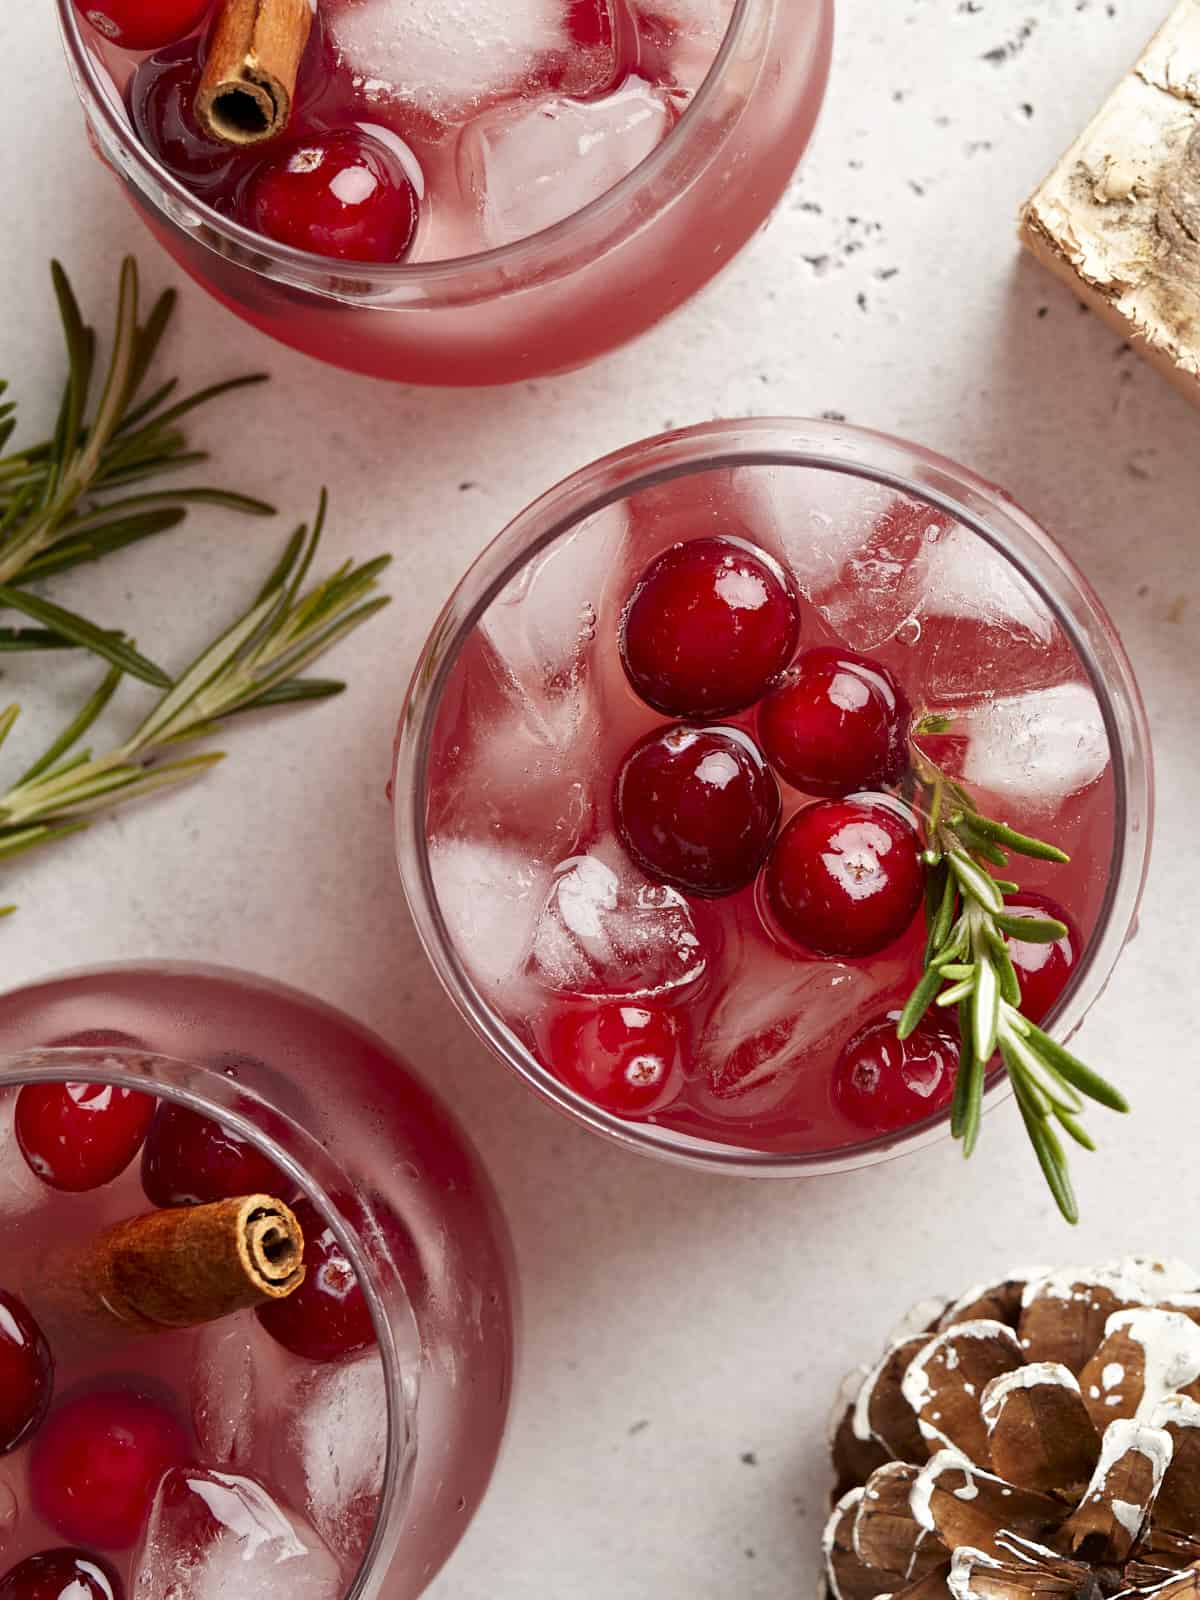
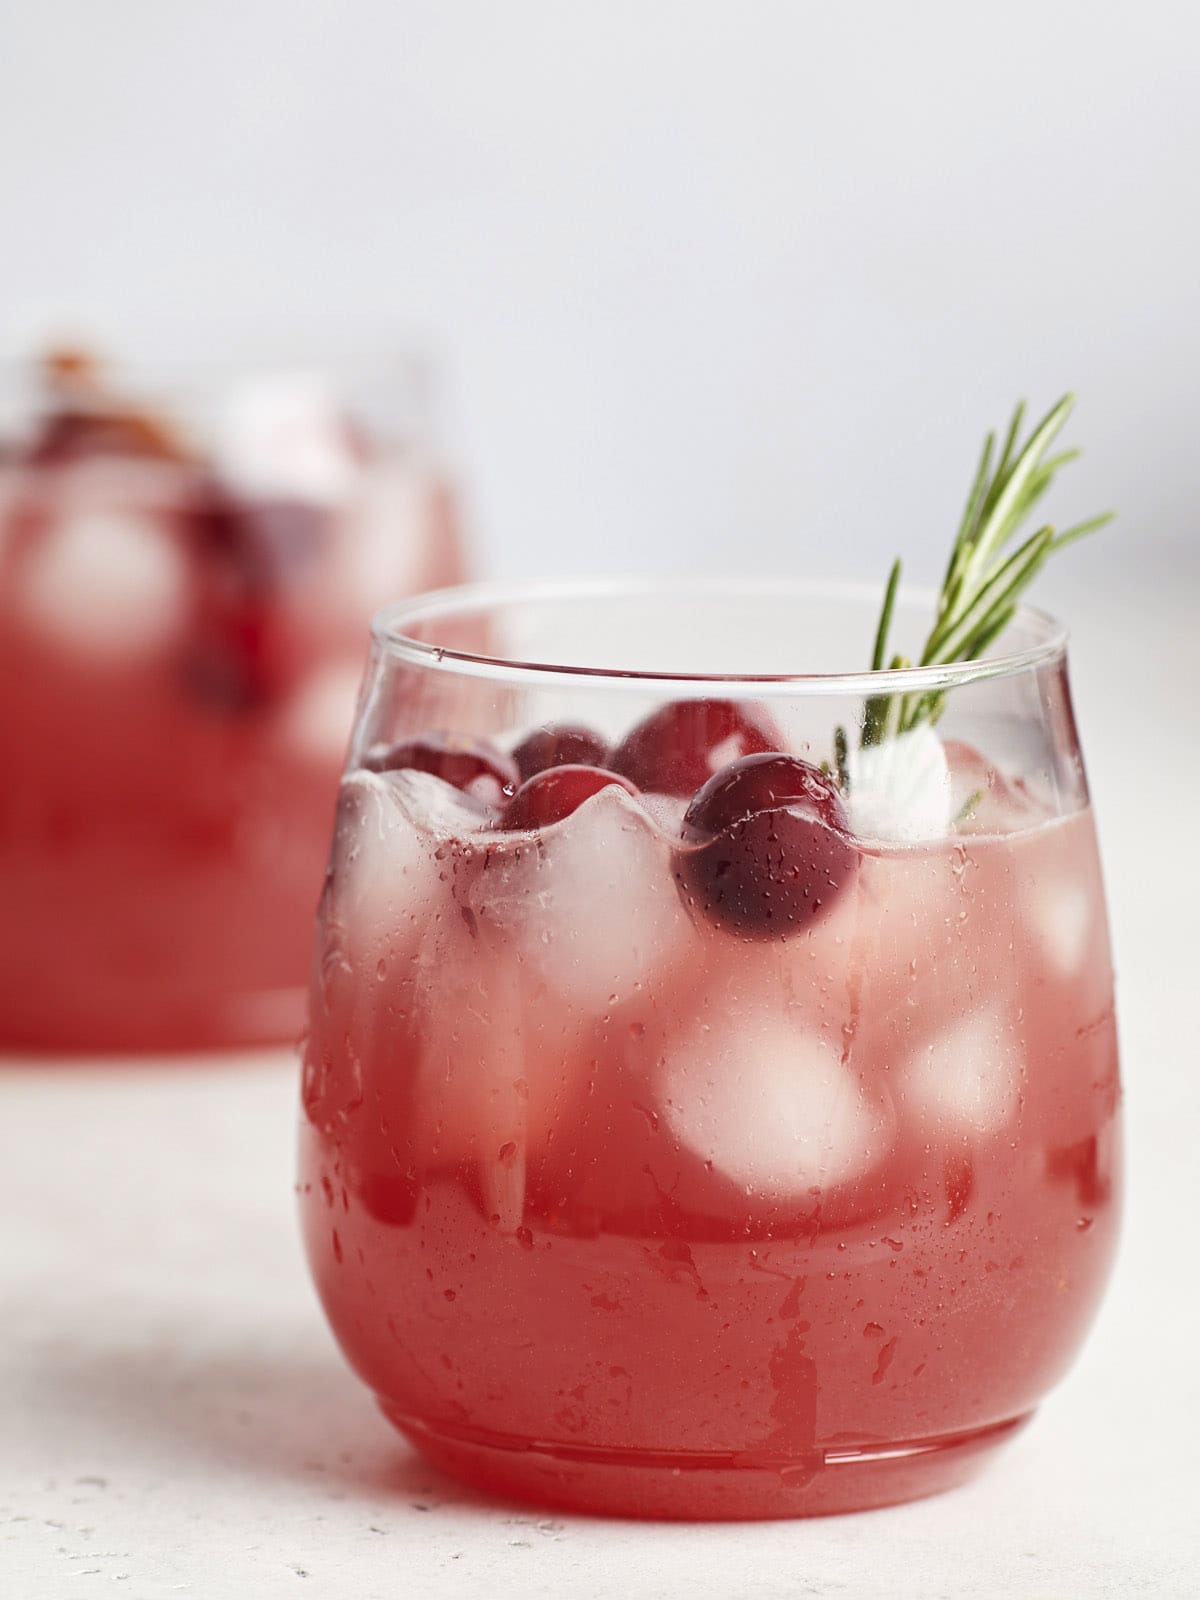
Overhead view of three glasses of Christmas punch garnished with cranberries and fresh rosemary.

Ingredients for Christmas Punch

This incredibly simple holiday drink has only three main ingredients:

  • Apple Cider: You can use either apple cider or unfiltered apple juice for this recipe, but do not use regular clear apple juice.
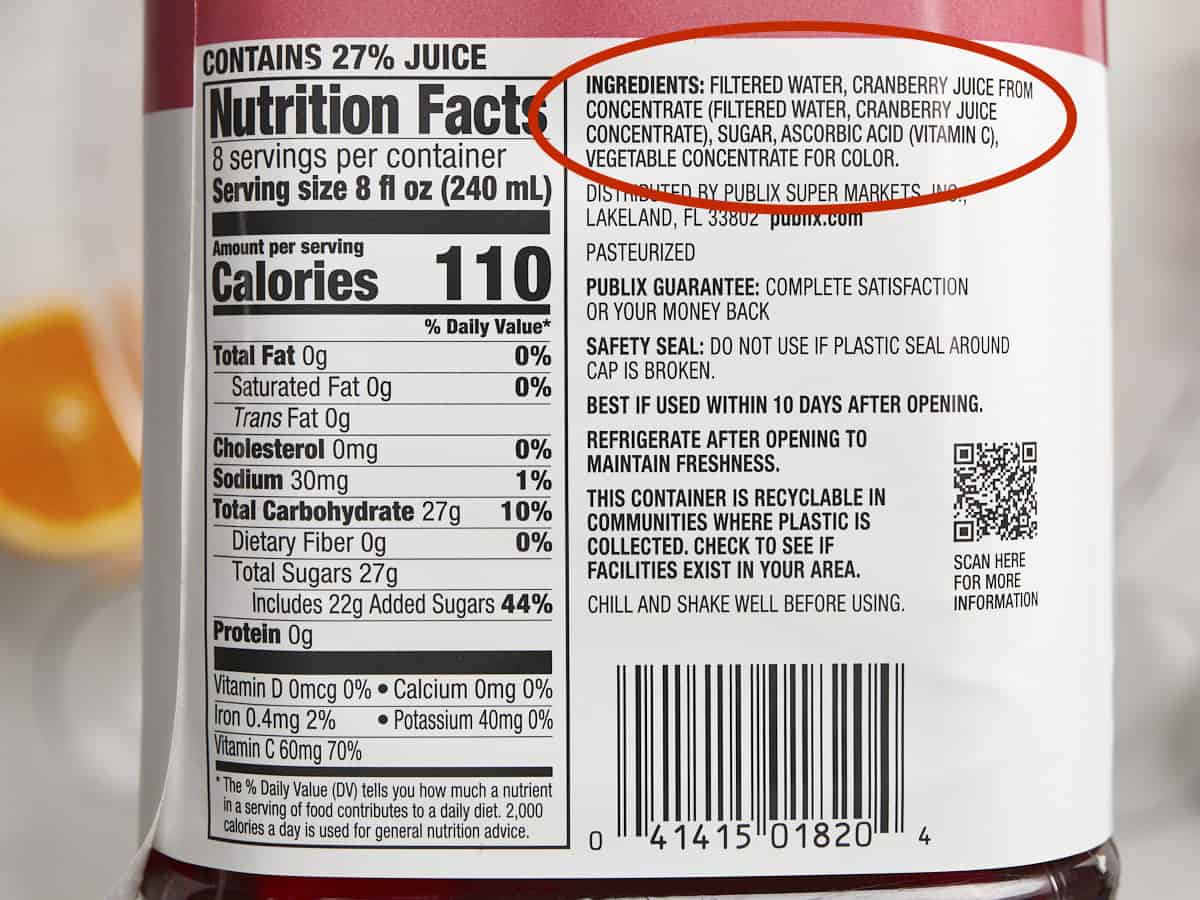
  • Cranberry Juice: It’s important to use a 100% cranberry juice cocktail for this punch, not unsweetened cranberry juice. Do not get a cranberry juice cocktail that contains a mix of fruit juices. Check the juice ingredients to be sure it only contains cranberry juice, water, and sugar (and maybe a preservative like vitamin C or ascorbic acid, etc.), no grape juice, apple juice, or any other fruit juices.
  • Ginger Ale: Ginger ale brings sweetness, a peppery bite, and a festive fizz to the punch.

Optional Garnishes

In addition to the three ingredients for the punch itself, you can garnish the punch with several ingredients, some of which can provide additional flavor to the punch. Here are some garnish ideas:

  • Fresh Cranberries: Having cranberries float in the punch is visually stunning, but they will not provide additional flavor to the punch.
  • Orange Slices: Orange slices will add a nice subtle citrus flavor to the punch, and they are a beautiful contrast to the red color of the punch.
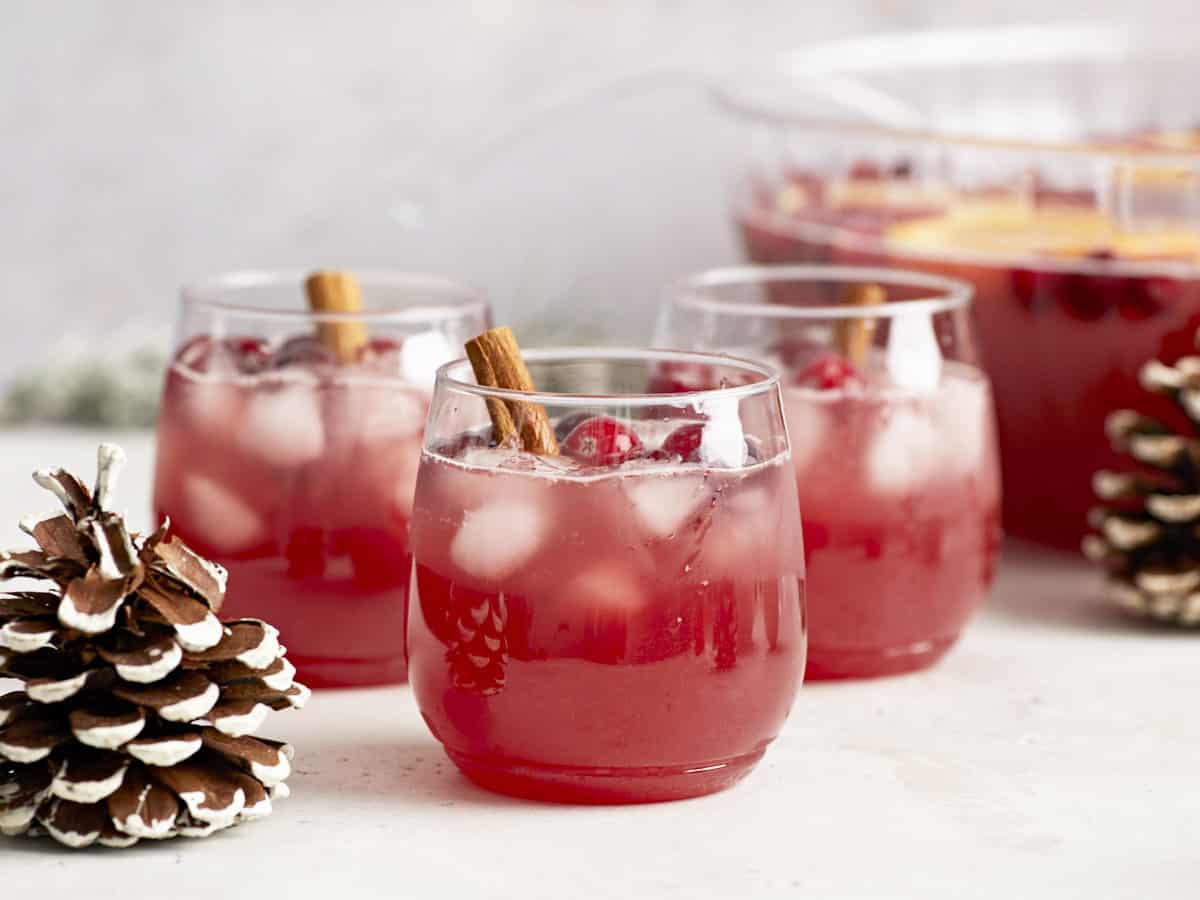
  • Cinnamon Sticks: Placing a cinnamon stick in each glass adds a slight cinnamon aroma every time you sip the punch, which I found to be absolutely delicious. You can also float a few sticks in the bowl of punch if adding one stick per glass is too expensive. You can find cinnamon sticks for a good price at Latin grocery stores or in major grocery store chains in the international food aisle. Badia is a good affordable brand to look for.
  • Fresh Rosemary: If you grow your own rosemary, I would highly suggest adding this beautiful garnish to each glass. It doesn’t add flavor, but the extra greenery is so pretty and festive with the red punch.

Tip: Kill two birds with one stone by using frozen cranberries as a garnish AND to help keep the punch cold!

Overhead view of the punch bowl with a ladle lifting a serving.

Christmas Punch by the Glass

To make this Christmas Punch recipe in smaller quantities, you can adjust the number of servings in the recipe card below to have the ingredient amounts auto-adjust, or, follow the simple ratio of 2 parts cranberry juice + 2 parts ginger ale + 1 part apple cider. So if you wanted to make one glass you’d use 4 oz. cranberry juice, 4 oz. ginger ale, and 2 oz. apple cider. Easy!

Spike It!

The recipe below is for a non-alcoholic Christmas Punch, but it’s super easy to add alcohol either by the glass or to the entire punch bowl! Simply add 1 to 2oz. of vodka, white rum, or gin to each glass or 20-40oz. to the punch bowl.

Keep it Chilled

To avoid letting the Christmas punch get watered down, I suggest starting with chilled ingredients and adding ice to each glass rather than to the punch bowl itself. Another option is to make a double batch of punch, freezing half in ice cube trays, and using that to chill the punch in the bowl bowl.

Side view of three glasses of Christmas Punch garnished with cinnamon with the punch bowl in the back.
Close up side view of three glasses of Christmas Punch
Print

Christmas Punch

This easy Christmas Punch Recipe is the perfect drink to get you in the holiday mood with flavors of apple, cranberry, and sparkling ginger. 
Course Drinks
Cuisine Amercian
Total Cost $13.88 recipe / $0.69 serving
Prep Time 5 minutes
Total Time 5 minutes
Servings 20 cups
Calories 104kcal

Ingredients

Punch

  • 64 oz. 100% cranberry juice cocktail* $2.50
  • 32 oz. apple cider $1.90
  • 2 L ginger ale $2.99

Optional Garnishes

  • 1 orange $0.99
  • 1 cup frozen cranberries $0.75
  • 1.5 oz. cinnamon sticks $4.65

Instructions

  • Make sure the cranberry juice cocktail, apple cider, and ginger ale are fully chilled beforehand.
  • Add the cranberry juice cocktail, apple cider, and ginger ale to a large punch bowl or drink dispenser.
  • Add optional garnishes: orange slices, frozen cranberries, cinnamon sticks (cinnamon is nice to add per glass). To enjoy, ladle the punch over a glass full of ice, with or without your favorite alcoholic spirit.

See how we calculate recipe costs here.

Notes

*Make sure to get sweetened cranberry juice cocktail that only contains cranberry juice, not a mix of cranberry and other fruit juices. 

Nutrition

Serving: 1cup | Calories: 104kcal | Carbohydrates: 26g | Protein: 0.05g | Fat: 0.1g | Sodium: 11mg | Fiber: 0.1g

How to Make Christmas Punch – Step by Step Photos

Close up of the ingredient label on a bottle of cranberry juice cocktail.

This recipe is written using 100% cranberry juice cocktail. The labeling of cranberry juice can be very confusing, so make sure to check the ingredient list. What you’re looking for is sweetened cranberry juice, not a mix of cranberry and other fruit juices. Do not buy unsweetened cranberry juice because it is far too tart for the ingredient ratios listed here. …And it’s super expensive.

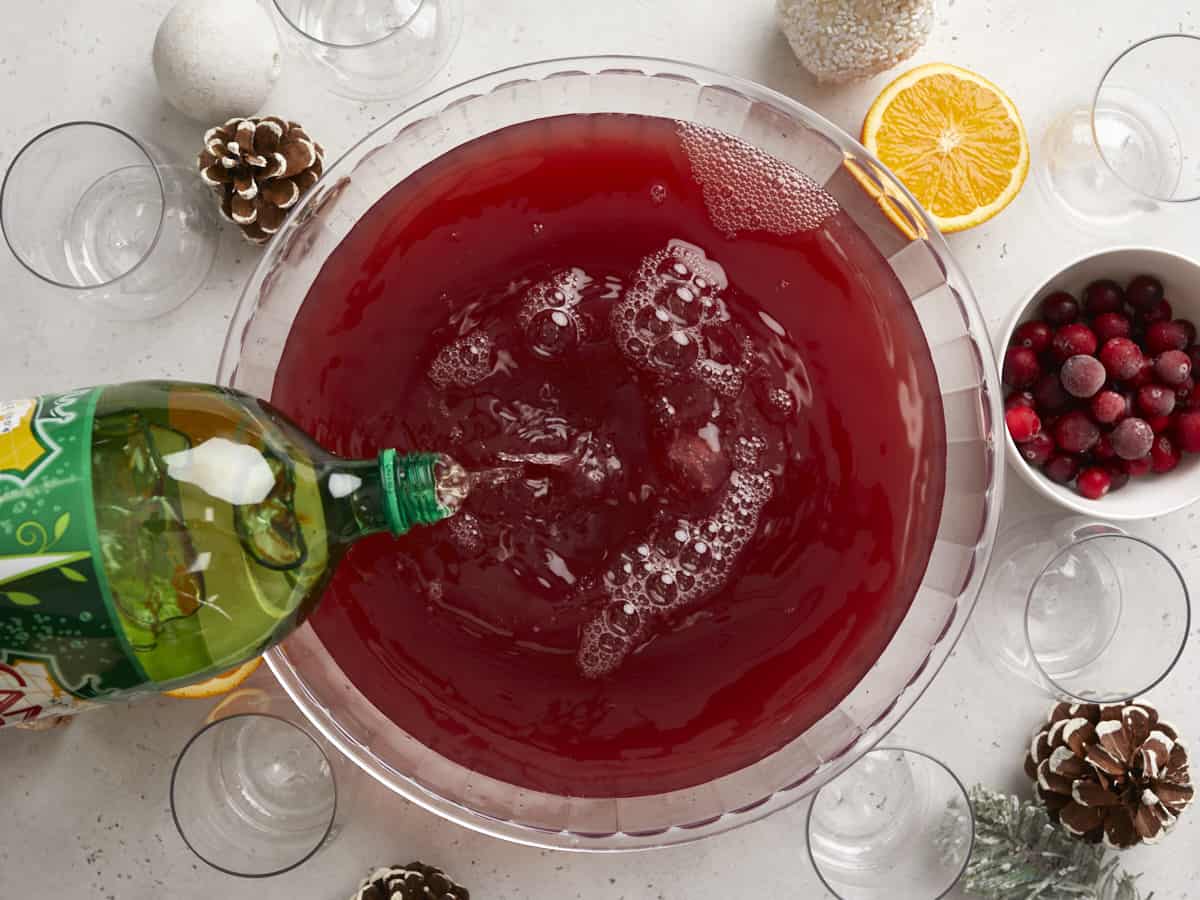
Ginger ale being poured into a punch bowl with cranberry juice and apple cider.

Combine 64oz. chilled cranberry juice cocktail (100% cranberry), 32oz. chilled apple cider or unfiltered apple juice, and 2 liters of chilled ginger ale.

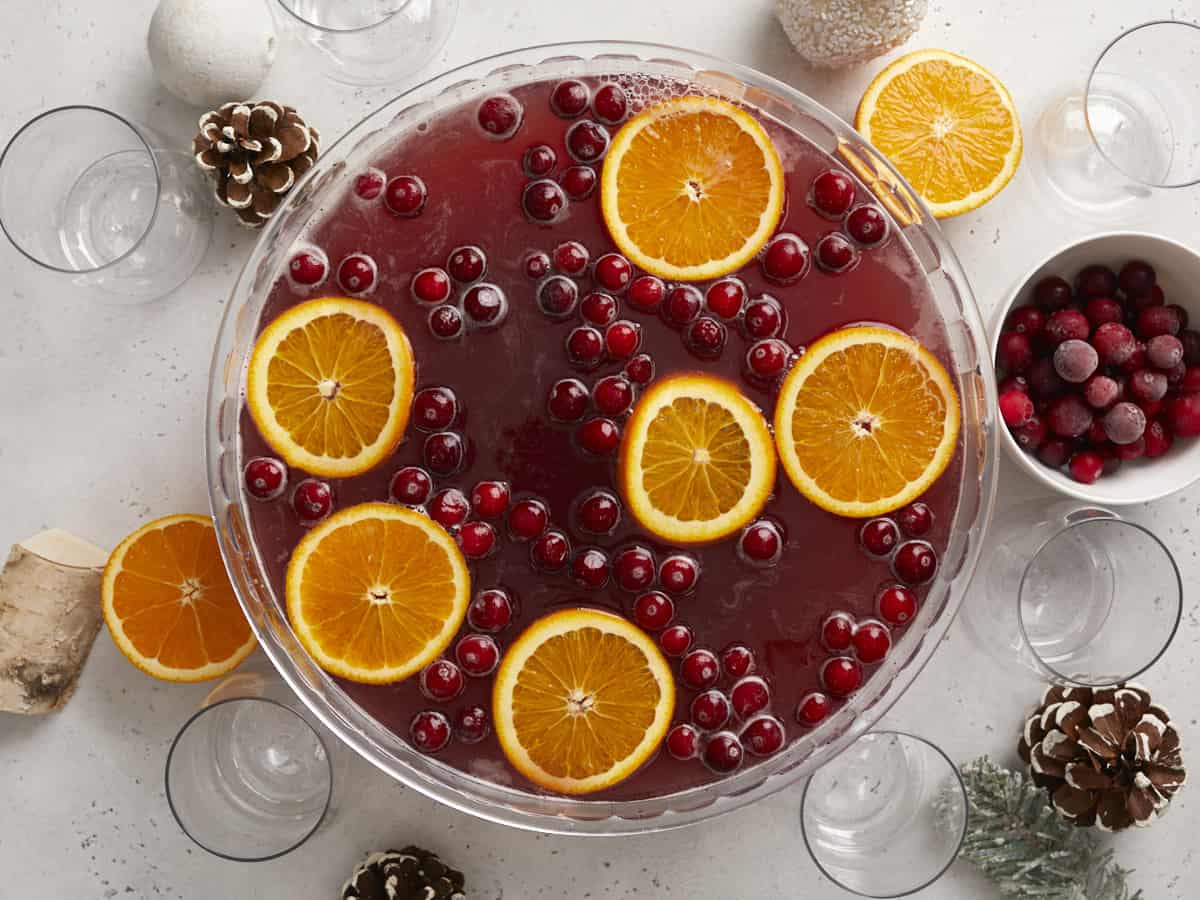
Garnishes added to the punch bowl.

Add any optional garnishes. I love adding some sliced oranges because they give just the slightest hint of citrus flavor to the punch. Frozen cranberries help keep the punch cold, but will not add any additional flavor. I also love adding a cinnamon stick to every glass because it gives just a hint of cinnamon flavor as you sip, but you could also float a few sticks in the punch bowl.

Close up side view of two glasses of Christmas punch garnished with cranberries and fresh rosemary.

Fresh rosemary is super pretty in the glass, but I don’t find that it offers any additional flavor. And don’t forget, you can spike each glass of punch with 1-2oz. of your favorite vodka, white rum, or gin! ;)

The post Christmas Punch appeared first on Budget Bytes.
40 Easy Christmas Appetizers

These brilliant easy Christmas appetizers make any spread more festive! Try all the best ideas like finger foods, dips, spreads,…

A Couple Cooks – Recipes worth repeating.

These brilliant easy Christmas appetizers make any spread more festive! Try all the best ideas like finger foods, dips, spreads, and more.

Cheese Board overhead with fruit, cheese, grapes, raspberries, focaccia bread, and rosemary

Throwing a party and looking for appetizer ideas? When the holidays roll around, it’s easy to get stuck in a rut. So we put together this list of easy Christmas appetizers to make the festivities a breeze! These finger foods, dips and spreads are simple to put together and look stunning for Christmas Eve. Whip up an epic cheese board like a pro, or whiz up a few easy dips that will keep everyone coming back for more. (And how fun is that Christmas pizza?)

And now…easy Christmas appetizers!

More Christmas ideas

Looking for more inspiration? Outside of these Christmas appetizers, try these other holiday-themed recipes:

Print
Cheese Board

40 Easy Christmas Appetizers


  • Author: Sonja Overhiser
  • Prep Time: 15 minutes
  • Cook Time: 0 minutes
  • Total Time: 15 minutes
  • Yield: 8 to 10

Description

These brilliant easy Christmas appetizers make any spread more festive! Try all the best ideas like finger foods, dips, spreads, and more. Try this Ultimate Cheese Board, or scroll up for all the Christmas appetizer ideas. 


Ingredients

  • 4 ounce soft cheese, such as a blue cheese or goat cheese
  • 4 ounce aged cheese, such as English white cheddar or French blue cheese 
  • 4 ounce mild slicing cheese, such as Manchego
  • 4 ounce wild card cheese (anything that looks interesting!)
  • Bread and crackers: crostini, crackers, focaccia bread slices
  • Spicy mustard
  • Jellies or preserves: fig, blackberry, blueberry, apricot, lingonberry, peach, orange
  • Fruit: seedless grapes, sliced apples, pears, peaches, plums, raspberries, blueberries or black berries, dried or fresh figs 
  • Mixed pickles
  • Olives: ripe green or black olives, Castelvetrano olives, or other varieties
  • Salted nuts: marcona almonds, pecans, walnuts, or pistachios
  • Marinated artichokes
  • Peppadews
  • Cured meats like prosciutto, salami, chorizo, etc
  • Fresh herbs, for garnish (rosemary or thyme sprigs, or other)

Instructions

  1. Start by placing the 4 types of cheese onto the board. Slice cheese that slices easily, and add a knife for more crumbly cheese. Place the cheese at angles that look pleasing on the board. (If you have them, cheese markers are nice to label the cheeses.)
  2. Place the ingredients that need bowls into small bowls on the board, like the mustard, olives, and jam or preserves. Make sure the bowls aren’t too large so they don’t crowd the board.
  3. Fill in the remainder of the space on the board with piles of fruit, crackers, breads and other items. Arrange the ingredients with variation in color and shape in mind. Apple slices look nice placed in a fan, and other fruits can be casually dropped in groups. Stems of grapes always make a nice statement. Start with the largest ingredients and gradually fill in the smaller items.
  4. Once the board is mostly complete, tuck in a few sprigs of fresh herbs to complete the tray (like rosemary or thyme sprigs).
  5. Serve immediately, with small plates, forks and toothpicks if desired. The cheese board can sit out for up to 2 hours at room temperature. Make the board up to 24 hours in advance, wrap in plastic wrap, and refrigerate: allow to come to room temperature 30 minutes before serving.
  • Category: Appetizer
  • Method: No Cook
  • Cuisine: Appetizer
  • Diet: Vegetarian

Keywords: Christmas appetizers, appetizers for Christmas, Christmas appetizer ideas

A Couple Cooks - Recipes worth repeating.

Creamy Wild Rice Soup

A hearty wild rice soup loaded with mushrooms, flecked with fresh thyme, and bolstered with Gruyere cheese and cream. The perfect winter warmer.

Continue reading Creamy Wild Rice Soup on 101 Cookbooks

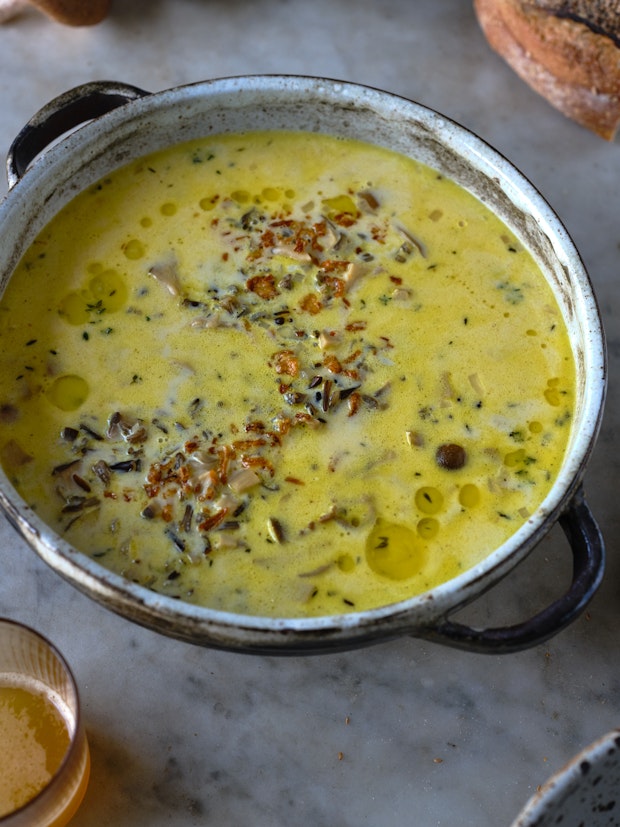
Do yourself a favor and buy a couple bags of wild rice. Now cook up a big pot, be patient, wait for the rice to plump and split. Freeze some for future meals, and put the rest to use in whatever you’re cooking this week. I’m never sorry to have wild rice at the ready and this creamy wild rice soup is case in point. It’s a creamy winter warmer loaded with chewy, nutty wild rice and pan-fried mushrooms, fragrant with fresh thyme. So delicious!

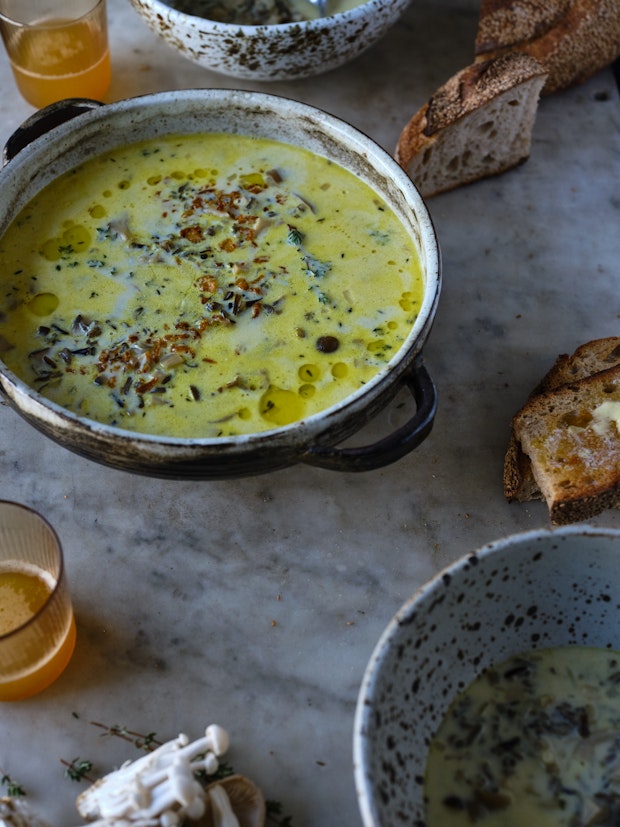
A pot of soup on a marble table with chunks of sourdough bread and bowls.

Creamy Wild Rice Soup: the Ingredients

The ingredient list for this soup is relatively short. Once you have some cooked wild rice (which you can make a couple days ahead of time), the rest of the prep is primarily chopping mushrooms and grating a bit of cheese.

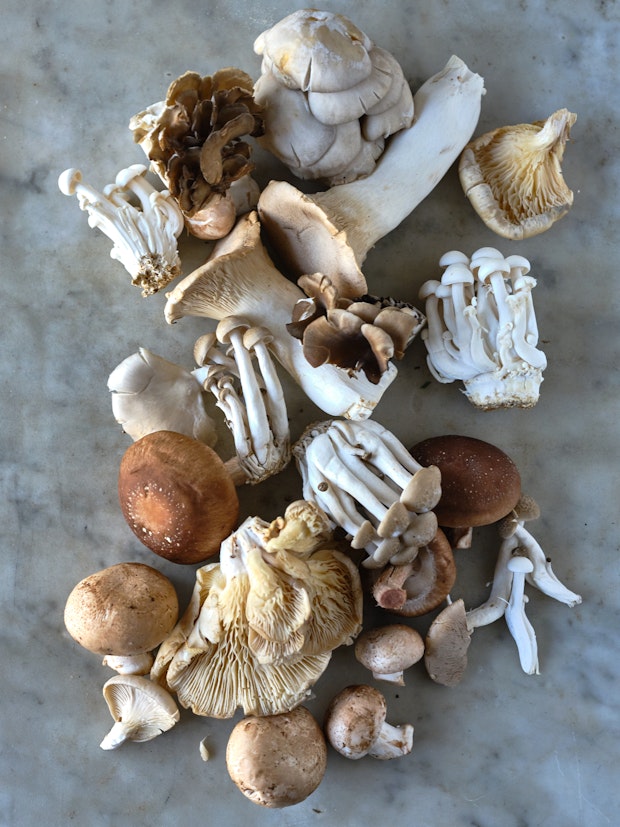
  • Mushrooms: You have a lot of flexibility here. You can use whatever mushrooms you typically purchase, or experiment with varietals you find at local farmers’ markets.  Brown button mushrooms from the grocery store work well. Or mix it up like I did for the version pictured here. Each mushroom has a unique flavor and texture. Floppy mushrooms I like to tear into pieces. And chopping firmer mushrooms into small pieces is the way to go.
    A sampler of different mushroom varietals
  • Wild Rice: My pro-tip related to wild rice is to avoid undercooking it. It definitely takes some time to cook, often an hour or more, but I like to let a lot of the grains split before draining off any additional water.
  • Cheese: I like to use a creamy, assertive cheese like Gruyere in this soup, but you can experiment. The key is strong flavor – give cheeses like mozzarella a pass here.
  • Cream: I use a heavy cream to give the broth in this soup body and richness. But on occasion I’ll substitute cashew cream – I tend to keep cashews on hand, but not always heavy cream. Instructions for both are included below.

A pot of creamy wild rice soup in a rustic pot.

How To Make Wild Rice Soup

To make this an easy weeknight meal you’ll want to cook the wild rice ahead of time. Just choose a window a day or two ahead of time so it’s ready to go when you want to make the soup. From there it’s quite straightforward.

  1. Saute the shallots and fresh thyme.
  2. Chopped mushrooms go in next, cook until browned.
  3. Add the water, broth, and/or bouillon.
  4. Stir in the wild rice.
  5. Grated cheese and cream are the grand finale.
  6. Season with salt and black pepper.

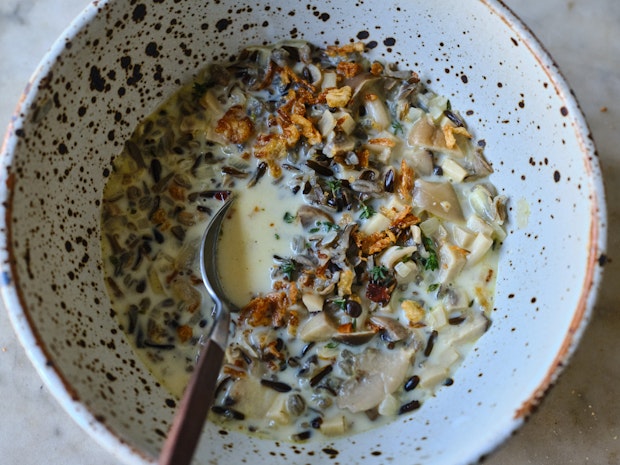
A bowl filled with creamy wild rice soup topped with fried shallots
Also, don’t sleep on the leftovers here. This is one of those soups that is even better the day after. It thickens a bit, the flavors deepen and meld in a wonderful way. 

Variations:

If you end up loving this soup, and making it part of your cooking repertoire, you can switch up a bit.

  • Make it spicy: I like to add a minced serrano pepper (or two) to introduce a bit of kick here. You could also use dried chile pepper flakes.
  • Not mad at celery: If you add a couple stalks worth of chopped celery along with the shallots, you really introduce that holiday stuffing flavor profile. People love it and the whole situation makes your house smell like a place everyone wants to be.
  • Roasted winter squash: Adding some roasted winter squash to this wild rice soup is an ideal paring. If you finish off each bowl with some roasted delicata squash, or simple, roasted butternut or honeynut squash you add a bit of visual flare as well. And toss in some toasted pumpkin seeds while you’re at it!

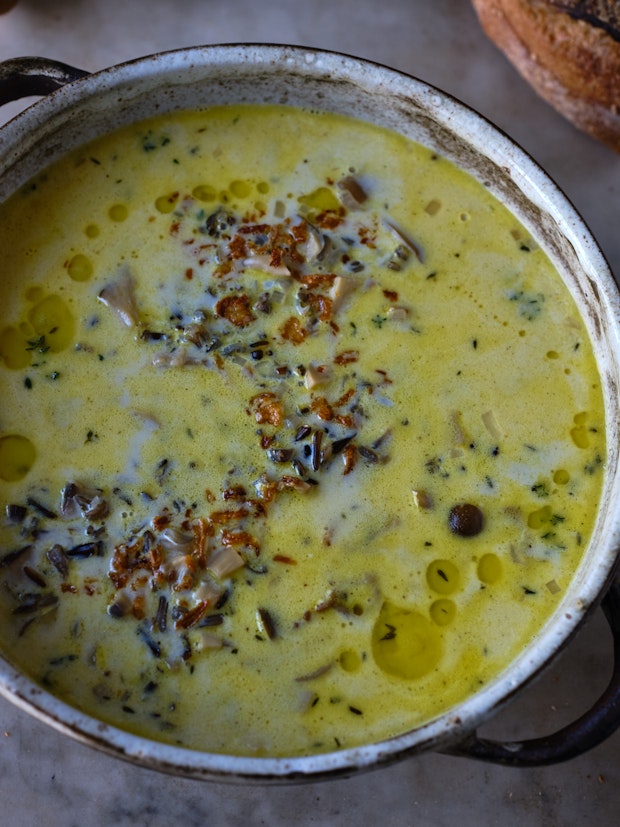
A pot of creamy wild rice soup in a rustic pot.

More Creamy Soup Recipes

More Soup Recipes

Continue reading Creamy Wild Rice Soup on 101 Cookbooks

Peanut Butter Balls

This chocolate peanut butter balls recipe is the best easy dessert! A handful of ingredients makes an irresistible treat. Chocolate…

A Couple Cooks – Recipes worth repeating.

This chocolate peanut butter balls recipe is the best easy dessert! A handful of ingredients makes an irresistible treat.

Peanut butter balls

Chocolate and peanut butter are one of those classic flavor combinations that will never go out of style. Here’s our one of our favorite easy treats starring these flavor besties: peanut butter balls. They’re simple to make, requiring no special equipment and under 30 minutes of your time. Whip up a batch and enjoy that crunchy chocolate coating covering an irresistibly creamy and chewy peanut butter interior. Here’s how to make this irresistibly tasty treat!

Ingredients for this peanut butter ball recipe

There’s a short ingredient list for peanut butter balls, making it a quick and easy way to a decadent treat! The recipe is similar to buckeyes, those traditional Christmas cookies with a rich peanut butter interior and crisp chocolate coating.

These peanut butter balls are rich, chocolaty, and please anyone. They also happen to be vegan, using coconut oil in the filling instead of the typical butter. If you don’t have coconut oil, you can substitute melted butter. The filling also uses pure maple syrup for a nuance in flavor, which brings in caramel and vanilla notes. Here are the ingredients you’ll need:
  • Creamy peanut butter: Creamy peanut butter with a drippy consistency is best; you can add a bit more oil if the dough doesn’t come to the correct texture.
  • Pure maple syrup: This is the key to the nuanced filling flavor! You can also use honey or agave syrup.
  • Refined coconut oil: Coconut oil helps add richness to the filling: use butter if you don’t have coconut oil on hand. Refined coconut oil is preferred since it has a neutral flavor (unrefined has a stronger coconut flavor).
  • Powdered sugar: Powdered sugar mixes with peanut butter to create a play doh like filling consistency.
  • Salt and vanilla extract: These two seasonings round out the rich filling flavor.
  • Semi sweet baking chocolate: We like 64% Guittard baking chocolate. You can also use dark chocolate for a richer, more bitter flavor.
peanut butter balls recipe

Tips for making the filling

Peanut butter balls are simple to make: all you have to do is mix the filling ingredients together and roll them into balls. Here are a few tips for the process:

  • The dough should be Play Doh consistency. The consistency can vary based on the brand of peanut butter and the measurement of powdered sugar. If necessary, add a teaspoon or so more coconut oil to come to the correct consistency.
  • Using a food scale to weigh the dough is easiest for rolling the balls. This way, all the balls are exactly the same size. Use 15 to 16 grams per ball.
  • Or, use a 1 tablespoon measure. A tablespoon works if you don’t have a food scale.
  • Freeze the balls while melting the chocolate. They’ll become chilled in about 5 minutes while you melt the chocolate. If desired, you can also refrigerate the balls until you’re ready to coat them in chocolate, up to 2 days.
Peanut butter balls

Melting chocolate for the peanut butter balls

There are a few important things to note about how to melt chocolate for these peanut butter balls! Chocolate can be temperamental, so it’s key to observe best practices when melting chocolate. Here are a few notes on this recipe:

  • Use the microwave to heat the chocolate in short bursts. Go to How to Melt Chocolate in a Microwave to read all our tips on the process.
  • Or, melt the chocolate on the stovetop. Fill a large saucepan halfway with water and bring to a simmer. Once the water is simmering, turn off the heat and place a large heat proof bowl over the saucepan. Add the chocolate and butter to the bowl, and stir until the chocolate is fully melted.
  • Don’t let any water touch the chocolate or it will seize! That means your glass measuring cup or bowl must be 100% dry before placing the chocolate chips inside. If you’re using the stovetop method, don’t let any water splash inside.
  • Don’t overheat the chocolate! Scorched chocolate also seizes up and can become grainy. When you’re microwaving chocolate, it’s easy to get it too hot. So you’ll need to be very careful when you’re microwaving not to go too far. Follow the instructions in the recipe below carefully.
  • Once the balls are covered in chocolate, refrigerate to let the balls set. The chocolate should set in about 30 minutes.
Peanut butter balls

Variations and add-ins

There are so many ways you can vary these peanut butter balls! Add a few different touches to the outside, or add other flavors to the interior. Here are some ideas:

  • Sea salt. Sprinkle the balls with flaky sea salt before the chocolate sets.
  • Chocolate drizzle. Use leftover or additional chocolate to drizzle over the top with a fork.
  • Sprinkles. Make holiday-ready peanut butter balls by coating them in festive sprinkles.
  • Crushed peanuts or pistachios. Add a shower or crushed nuts to the top for a different look.
  • Half dip. Dip only half the peanut butter ball for a unique look.
  • Rice cereal. Add rice cereal to the interior to add a crunch.
Peanut butter balls

Storage for peanut butter balls

Because they are covered in chocolate, it’s best to store peanut butter balls refrigerated. They store this way for up to 2 weeks. You should also be able to store them up to 3 months frozen (we have not tested this, since they get eaten much faster at our house!).

More chocolate peanut butter recipes

This peanut butter balls recipe is a delicious vegan dessert that works for anytime, from Christmas to Valentine’s Day! Here are a few more chocolate and peanut butter recipes to try:

This peanut butter balls recipe is…

Vegetarian, vegan, plant-based, dairy-free and gluten-free.

Print
Peanut butter balls

Easy Peanut Butter Balls


  • Author: Sonja Overhiser
  • Prep Time: 25 minutes
  • Cook Time: 0 minutes
  • Total Time: 25 minutes
  • Yield: 15

Description

This chocolate peanut butter balls recipe is the best easy dessert! A handful of ingredients makes an irresistible treat.


Ingredients

  • ½ cup creamy peanut butter*
  • 1 tablespoon pure maple syrup (or honey or agave syrup)
  • 1 tablespoon plus ¼ teaspoon refined coconut oil**
  • ¾ cup powdered sugar
  • 1 pinch salt
  • 1 teaspoon vanilla extract
  • 3 ounces semi sweet baking chocolate (64%; we like Guittard)
  • Flaky sea salt, if desired

Instructions

  1. In a medium bowl, mix the peanut butter, maple syrup, 1 tablespoon melted coconut oil, powdered sugar, salt and vanilla extract until a uniform dough forms. (If the dough is too sticky, you can add a teaspoon or so more oil to get it to come together; it should have a playdough consistency.)
  2. Roll the peanut butter dough into 1 tablespoon sized balls (it’s easiest to weigh them, using 15 to 16 grams for each ball).
  3. Place the balls on a parchment lined baking sheet and freeze them for at 5 minutes while you melt the chocolate.
  4. Meanwhile, break the chocolate into pieces. Place it in a dry glass bowl or liquid measuring cup with the ¼ teaspoon coconut oil. Microwave on High power for 20 seconds, then stir. Microwave another 20 seconds, stir, and 20 seconds more and stir. At this point it should be mostly melted with a few chunks: keep stirring until all the chocolate chunks disappear and the chocolate is perfectly smooth.
  5. Use two forks to place each peanut butter ball into the chocolate, rotating it to evenly cover, then remove from the chocolate, gently shake off any excess, and place it back onto the parchment lined baking sheet. If desired, top with flaky sea salt. 
  6. Refrigerate for 30 minutes until set. Store up to 2 weeks refrigerated (or 3 months frozen). 

Notes

*Double this recipe for a total of 30 peanut butter balls; click the 2x recipe button for easy doubling.

**Or, substitute melted butter and omit the ¼ teaspoon butter in the chocolate. Refined coconut oil is preferred since it has a neutral flavor (unrefined has a stronger coconut flavor).

  • Category: Dessert
  • Method: No Cook
  • Cuisine: Dessert
  • Diet: Vegan

Keywords: Peanut butter balls, peanut butter balls recipe, chocolate peanut butter balls

A Couple Cooks - Recipes worth repeating.

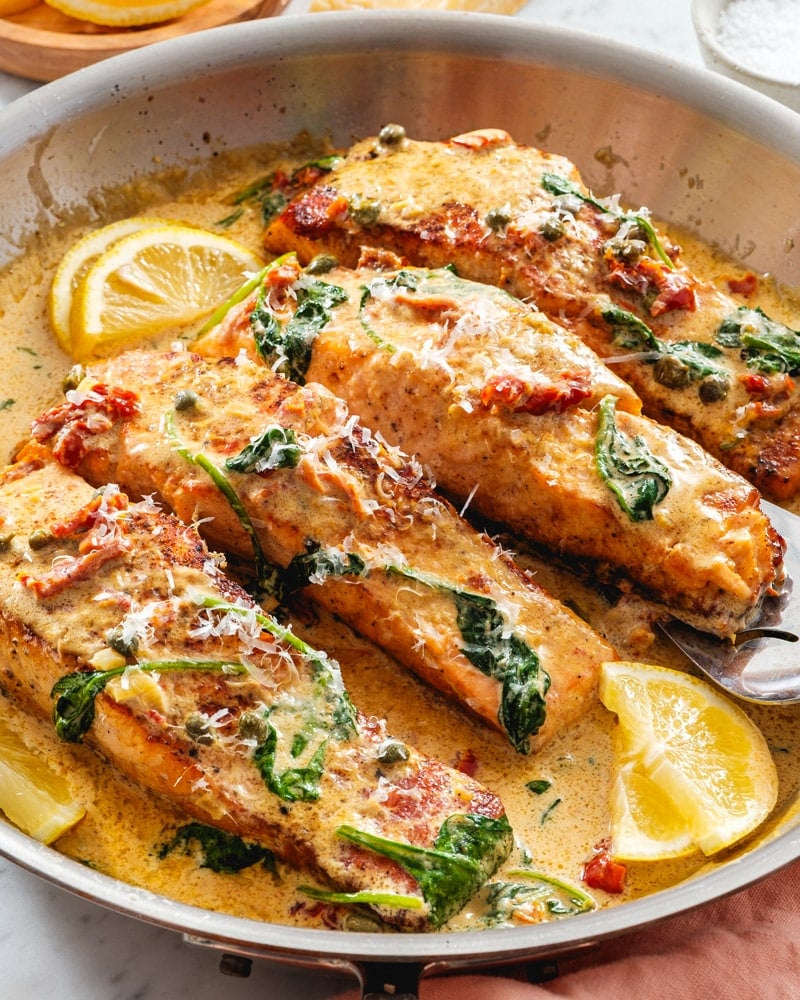
Tuscan Salmon

Impress everyone with this creamy Tuscan Salmon! It might just be the best salmon recipe ever, made in just 30…

A Couple Cooks – Recipes worth repeating.

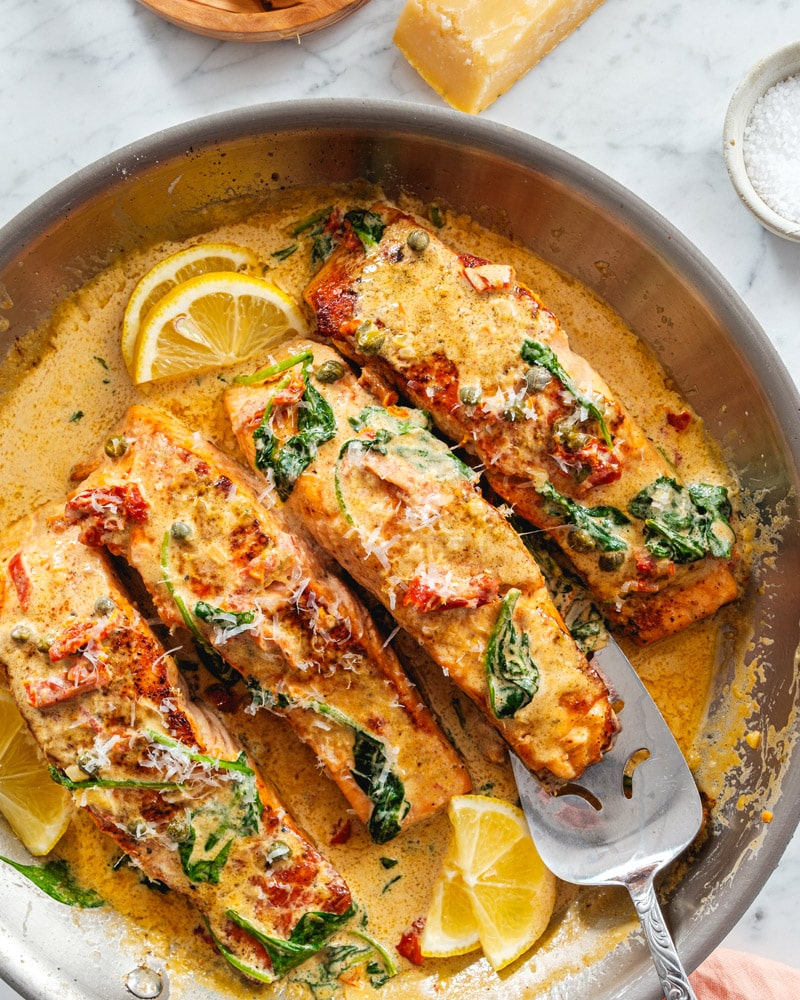
Impress everyone with this creamy Tuscan Salmon! It might just be the best salmon recipe ever, made in just 30 minutes.
Tuscan Salmon

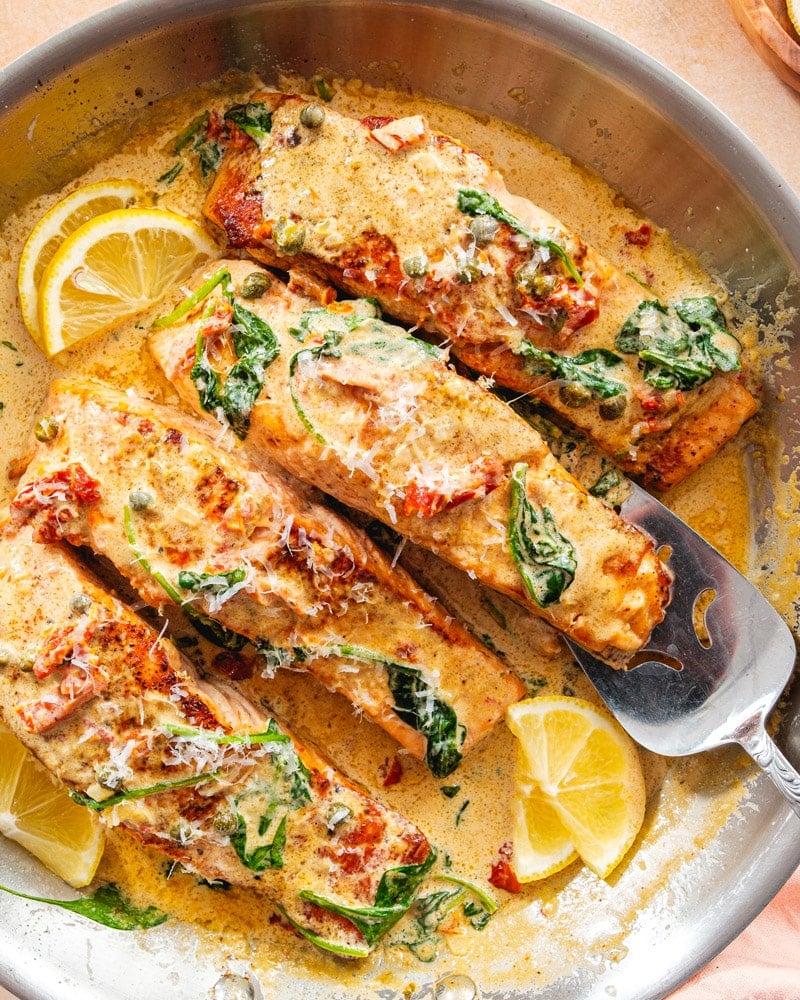
There are salmon recipes and then there’s this creamy Tuscan salmon. It might result in a few marriage proposals, which is why we also like to call it “Marry Me Salmon!” The tender fish is bathed in a luscious cream sauce with garlic, sun dried tomatoes, spinach, and capers, making each bite bright, salty, and luxurious. It tastes restaurant-style, but it’s easy to whip up at home in just 30 minutes. Honestly, it might be the best salmon recipe we’ve made!

Ingredients in this Tuscan salmon recipe

We’re not exaggerating when we say this is one of the best salmon recipes we’ve made. Multiple friends and family have tried it and can’t stop raving, then immediately ask for the recipe! This is the one we pull out to impress at dinner parties and for entertaining. Each ingredient here packs a flavor punch, so no substitutions. Here’s what you’ll need:

  • Protein: Salmon fillets, skin on and 1 to 1 ½ inches thick
  • Pantry: Olive oil, garlic powder, salt, pepper
  • Dairy: Salted butter, milk, heavy cream, Parmesan cheese
  • Fresh ingredients: Garlic, spinach, lemon (for garnish)
  • Special ingredients: Sun dried tomatoes, capers
Tuscan Salmon recuoe

Buying high-quality salmon is key

The most important thing for a great salmon recipe is a buying high quality fillets of salmon. Lower quality salmon can taste very fishy and have a mushy texture. It can also have a lot of white stuff (called albumin) when it’s cooked. While it’s not harmful, it doesn’t look appetizing! Here’s what to know when shopping for salmon:

  • 1 to 1 1/2-inch thick fillets are good for this recipe; you might find it labeled center cut at the store. Thicker fillets can take longer to cook and are slightly harder to pan fry since they can become blackened before they’re cooked on the inside.
  • Look for wild caught salmon. Fish that is wild caught in your country is usually a sustainable choice. (There are also quality options in well-regulated farms; see Seafood Watch Consumer Guide.)
  • Buy fresh salmon. Salmon that’s fresh from the fish counter usually has the best flavor. Frozen can work, but try to find highest-quality frozen salmon. Avoid big economy-sized bags, which have thinner fillets that can taste fishy.

Avoiding the white stuff

Ever noticed the white stuff that oozes to the top of some salmon recipes when cooking it? It is coagulated protein that seeps to the surface called albumin. The amount of albumin varies depending on the fish. We’ve bought certain varieties of salmon that have little to no albumin when cooked, but others that consistently have it ooze out.

There’s one thing we’ve found that helps: brining the salmon. In a side by side test, we found it helped to reduce the albumin in two similar fillets. (Keep in mind it did not reduce all of the albumin, so to fully reduce it you have to find a grocery store or other source for salmon that reliably has no white stuff.) Here’s what to do:

  • In a large shallow dish, whisk together 4 cups room temperature water and 3 tablespoons kosher salt until dissolved.
  • Place the salmon in the water and wait for 15 minutes.
Creamy Tuscan Salmon in pan

Making Tuscan salmon for a crowd

This Tuscan salmon recipe is perfect for impressing guests, whether it’s for a dinner party or a holiday like Christmas or Valentine’s Day. It’s pan seared, so you can cook as many fillets as fit in a large skillet. If you want to increase the serving size for this recipe for serving a crowd, you can do it two ways:

  • Pan sear the salmon in batches. Sear a double version of the salmon in batches.
  • Bake the salmon. Use the method in this Baked Salmon recipe, but season with the quantities of garlic powder, salt and pepper in the recipe below. For a crispy top similar to pan searing, broil for 2 minutes at the end of the bake time.
  • Make a large amount of the sauce in a skillet, then pour it into each fillet. Re-warm the salmon if necessary, then top with the creamy sauce right before serving.
Tuscan Salmon

Leftover storage

This Tuscan salmon recipe stores well, if you do end up having leftovers! (We rarely do.) Store in a sealed container for up to 3 days, refrigerated. Re-warm in a skillet over medium heat until warmed through. If the sauce becomes dried out, add a splash of milk or cream or a pat of butter.

More salmon recipes

Salmon is always a hit around here! Here are a few more salmon recipes to enjoy:

This Tuscan salmon recipe is…

Gluten-free and pescatarian.

Print
Tuscan Salmon

Creamy Tuscan Salmon


  • Author: Sonja Overhiser
  • Prep Time: 10 minutes
  • Cook Time: 20 minutese
  • Total Time: 30 minute
  • Yield: 4

Description

Impress everyone with this creamy Tuscan Salmon! It might just be the best salmon recipe ever, made in just 30 minutes.


Ingredients

  • 1 1/2 pounds or 4 (6-ounce) salmon fillets, wild caught if possible, about 1 to 1 1/2 inches thick
  • 1 ¼ teaspoon kosher salt, divided
  • ½ teaspoon garlic powder
  • Fresh ground black pepper
  • 3 tablespoons olive oil
  • 2 tablespoons salted butter
  • 2 cloves garlic, finely minced
  • ¼ cup chopped sun dried tomatoes
  • 2 tablespoons capers, drained
  • ¾ cup heavy cream
  • ¼ cup milk
  • 2 cups baby spinach, loosely packed
  • Grated Parmesan cheese, for serving
  • 2 lemon wedges, for serving

Instructions

  1. Allow the salmon to come to room temperature for 15 minutes (or brine it*). Pat the salmon dry with a clean towel. Rub it generously with olive oil and sprinkle it with 1 teaspoon of the kosher salt, the garlic powder, and a few grinds of black pepper.
  2. Heat a large skillet over medium high heat and add the olive oil. Add the salmon skin side up and cook for 3 to 5 minutes until cooked about halfway to the center of the thickest part of the salmon.
  3. Reduce to medium heat and flip the salmon (a fish spatula makes easy work of it). Tilt the pan down slightly and quickly spoon the pan juices over the top of the fish a few times. Cook for 4 to 5 minutes, continuously spooning the butter over the salmon. Cook until just tender and pink at the center (the internal temperature should be between 125 to 130°F in the center when removed).
  4. Remove the salmon to a plate and set aside. Drain the pan of any liquid and quickly wipe it out with a paper towel. 
  5. Place the pan over low heat and melt the butter. Then add the garlic and sun-dried tomatoes and cook for 30 seconds to 1 minute until the garlic is lightly browned and fragrant. Add the capers, cream, milk, and remaining ¼ teaspoon kosher salt. Simmer for 2 minutes, stirring occasionally and scraping the brown bits off the bottom of the pan. Add the spinach and cook until wilted, about 1 minute, then return the salmon to the pan and warm it for 2 minutes, spooning the sauce over the salmon.
  6. Serve topped with the sauce and grated Parmesan cheese.

Notes

*To help reduce the white stuff (albumin) that can ooze from salmon when it’s cooked, we recommend brining the salmon to bring it to room temperature. In a large shallow dish, whisk together 4 cups room temperature water and 3 tablespoons kosher salt until dissolved. Place the salmon in the water and wait for 15 minutes.

  • Category: Main dish
  • Method: Stovetop
  • Cuisine: Seafood
  • Diet: Vegetarian

Keywords: Tuscan salmon, tuscan salmon recipe, salmon tuscan, creamy tuscan salmon

A Couple Cooks - Recipes worth repeating.

Chocolate Energy Bites

Good-quality dark chocolate packed with lots of chopped nuts, seeds, and dried fruit make these a favorite nutritious and energizing snack. Big thumbs up.

Continue reading Chocolate Energy Bites on 101 Cookbooks

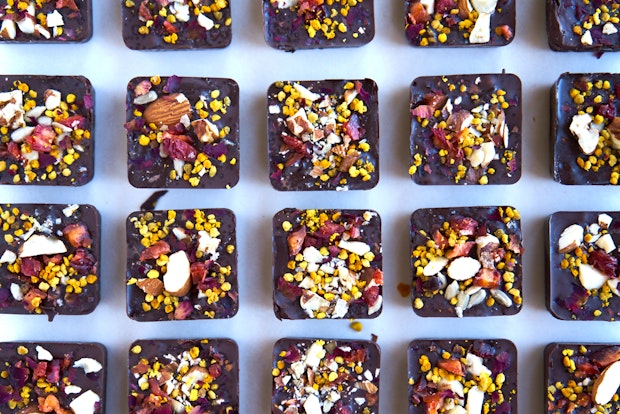
A dark chocolate energy bite always delights. They can punctuate any afternoon as a snack, travel well on road trips, and make a thoughtful homemade gift for any chocolate lovers in your life.
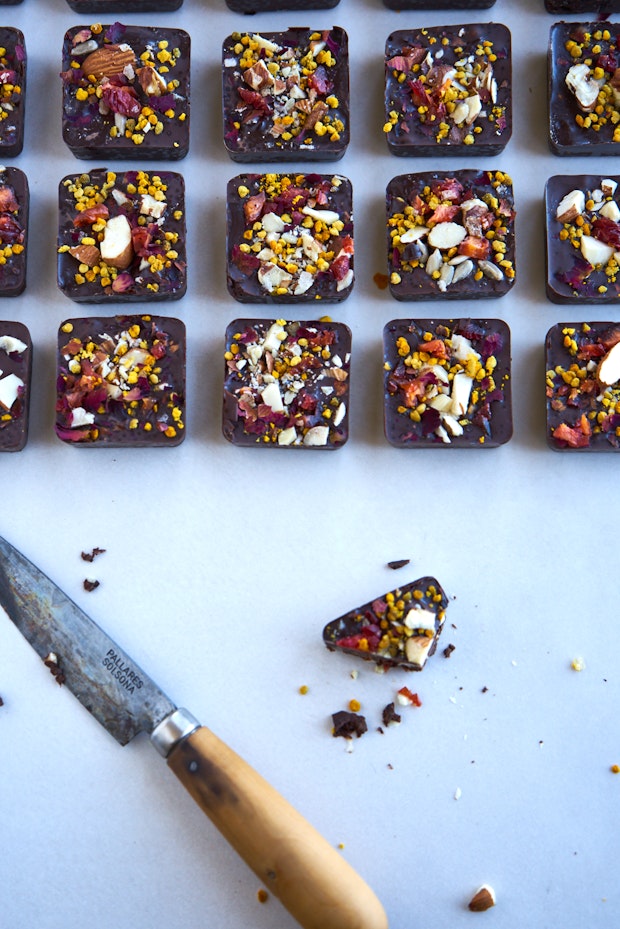
chocolate energy bites topped with all sorts of pretty, delicious ingredients

Chocolate Energy Bites: The Concept

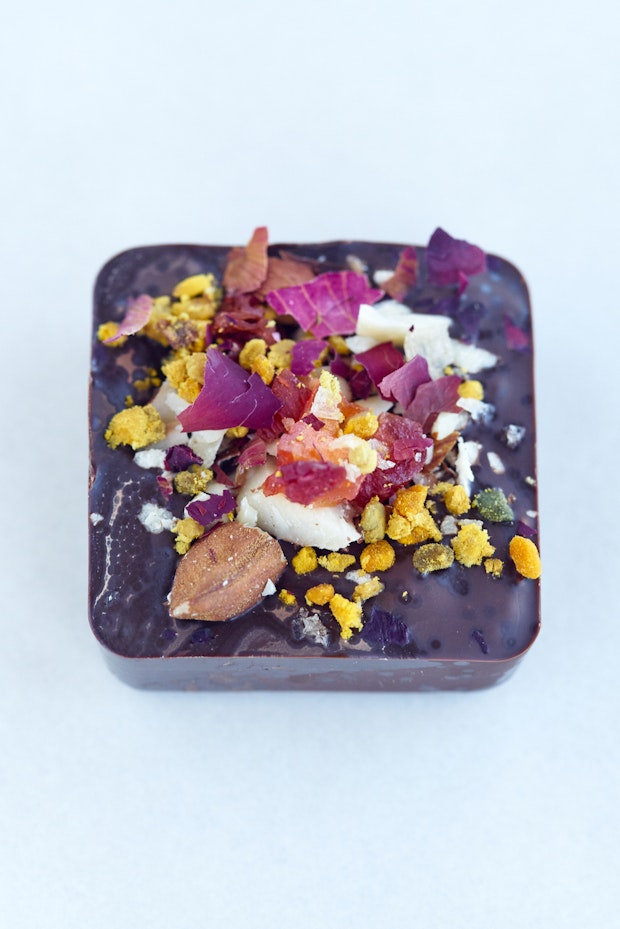
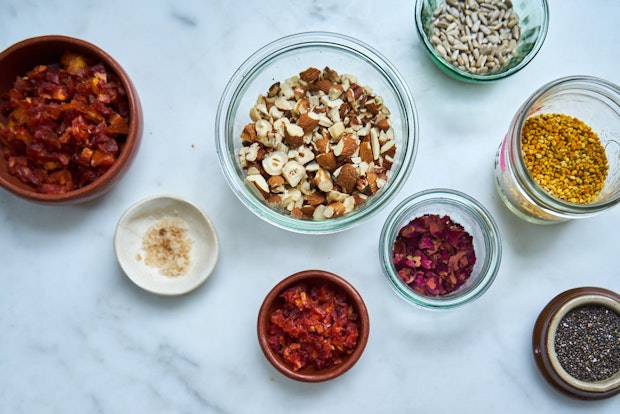
These are homemade squares of good-quality dark chocolate crammed with as much good stuff as it can hold. I love to pack the little bars with all manner of chopped nuts, seeds, and dried fruit. Sprinkle them with things like bee or fennel pollen, crushed rose petals, sea salt, and more nuts and seeds to give them a bit of nutritional boost, and to bump up the pretty.
chocolate energy bites topped with all sorts of pretty, delicious ingredients

After you make a batch, wrap them in gold foil candy paper, or parchment, and place in a drawer. You’re set for the month. For this round of bites, I used a mix of almonds, pecans, walnuts, hazelnuts, and dried nectarines. But, as you can imagine, the recipe is very flexible – dates, raisins, dried blueberries or cherries, all make good substitutions. Use great quality dark chocolate – 70% or higher if possible. 

a range of topping ingredients including rose petals, dried plums, almonds, chia seeds
See all the toppings and inclusions for these energy bites in the photo above.

chocolate energy bites alongside a wood handled paring knife

More Homemade Food Gifts

Continue reading Chocolate Energy Bites on 101 Cookbooks