Pumpkin Pasta

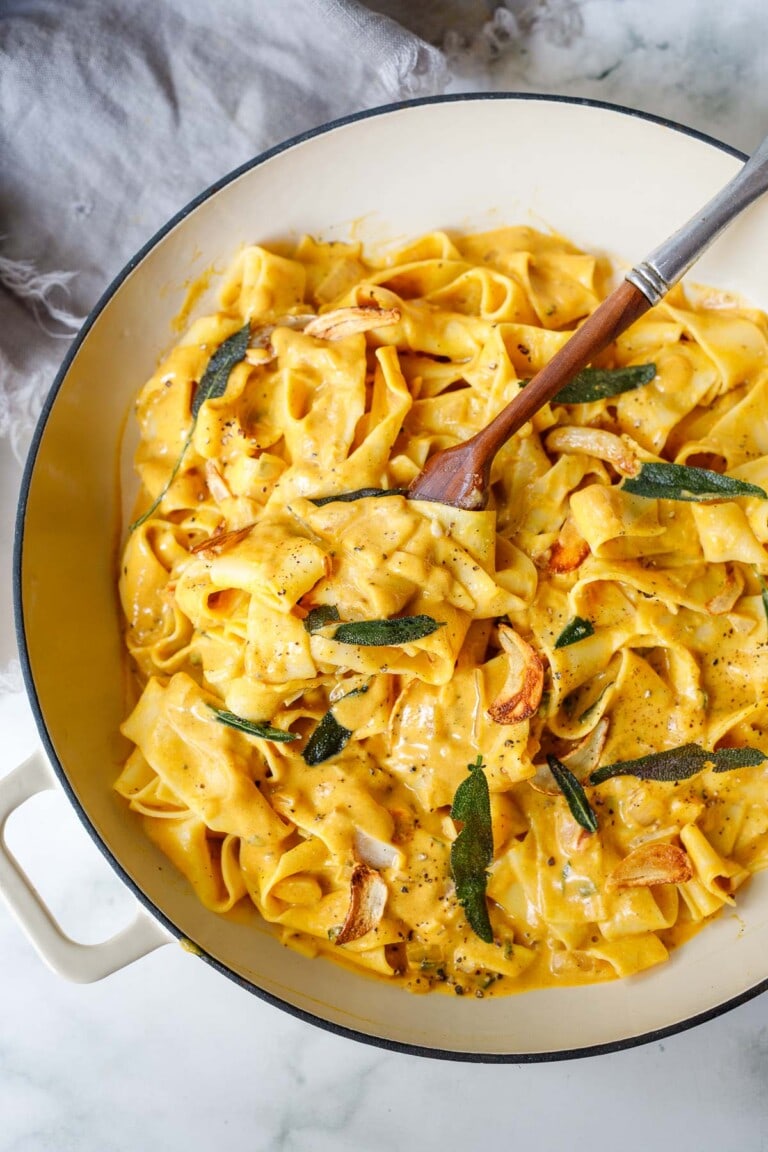
This creamy Pumpkin Pasta recipe is made with simple ingredients in under 15 minutes. Deceptively vegan, it will soon become your new favorite!

This creamy Pumpkin Pasta recipe is made with canned pumpkin, coconut milk, sage and garlic- simple ingredients in under 15 minutes. Deceptively vegan, it will soon become your new favorite!
This creamy Pumpkin Pasta recipe is made with simple ingredients in under 15 minutes. Deceptively vegan, it will soon become your new favorite!

Whipped Ricotta

This Whipped Ricotta Dip is the easiest appetizer you’ll ever make! It’s simple & fast while feeling elevated. A creamy, luscious dip, that can go either sweet or savory depending on your toppings.
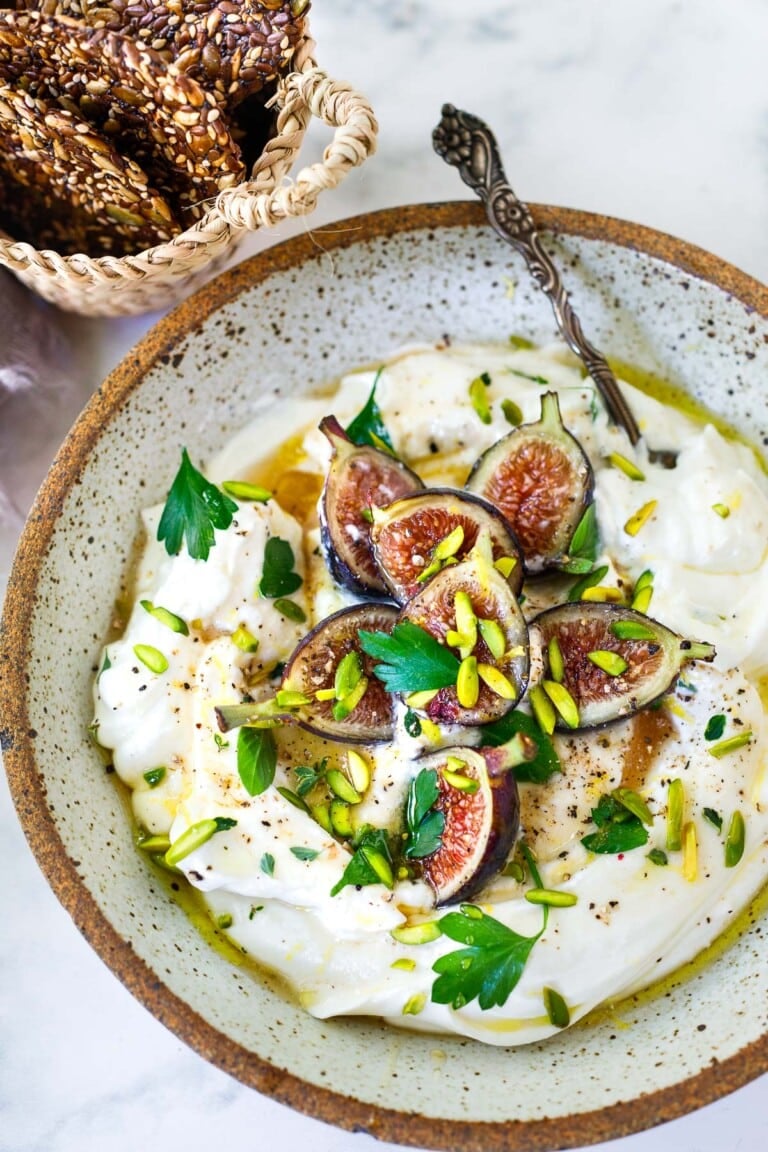
This Whipped Ricotta recipe is the easiest appetizer you'll ever make! It's simple & fast while feeling elevated. A creamy, luscious dip, that can go either sweet or savory depending on your toppings.
This Whipped Ricotta Dip is the easiest appetizer you'll ever make! It's simple & fast while feeling elevated. A creamy, luscious dip, that can go either sweet or savory depending on your toppings.

Pumpkin Risotto

This pumpkin risotto is a satisfying meal for the season! Cook it up with sage and Parmesan and it’s a…

This pumpkin risotto is a satisfying meal for the season! Cook it up with sage and Parmesan and it’s a cozy fall dinner or side dish.

Pumpkin Risotto in bowl with spoon and sage garnish

We are pumpkin fiends around here, and we love nothing more than a savory pumpkin recipe. So here’s a seasonal favorite: try making pumpkin risotto! Its bright orange color and autumnal flavor makes it the ideal fall dinner or side dish for the season.

Homemade risotto is easy to whip up: all you need are a few ingredients and a bit of time to stir in that luxurious broth until it all becomes absorbed by the rice. You’ll be surprised by the hearty, savory flavor! Pair with a fall salad to make it a meal.

Ingredients in pumpkin risotto

Risotto is an Italian rice dish where short grain Arborio rice is cooked in broth until it becomes creamy. Most methods use butter, onion, and garlic, white wine to deglaze the pan, and Parmesan cheese to finish. Using canned pumpkin adds a bright orange color and autumnal flavor, paired with fresh and dried sage. Here are the ingredients you’ll need for this pumpkin risotto recipe:

  • Arborio rice: Arborio rice is a type of short grain Italian rice used to make risotto and other dishes like rice pudding and arancini. It absorbs the liquid as it cooks, naturally creating a creamy and thickened texture. Avoid substituting another variety of rice like long grain rice or brown rice. Arborio rice is easy to find at your local grocery, so make sure to find the real thing!
  • Pumpkin puree: Use pumpkin puree and not pumpkin pie filling, which has added sugar and spices.
  • Vegetable or chicken broth: Either work here; chicken broth adds even more savory flavor.
  • White wine: It’s optional, but we love using white wine in a risotto to add flavor complexity.
  • Onion and garlic: These vegetables are traditional in a classic risotto recipe.
  • Butter, olive oil, and Parmesan cheese: These infuse rich, savory flavor.
  • Fresh and dried sage: A combination of fresh and dried herbs adds complexity; don’t leave them out!
Pumpkin Risotto in bowl with Parmesan and sage garnish

On cooking with wine

Risotto is classically made with white wine to deglaze the pan, so this pumpkin risotto uses white wine too. Most of the alcohol is cooked out in the cooking process, so it should be suitable for children and pregnant mothers.

However if you prefer (or simply don’t want to crack open a bottle), you can skip the wine and it will still taste great. If you do choose to use it, make sure to pour yourself a glass while cooking!

Tips for making pumpkin risotto

Making a risotto is simple, but it does require a little know-how to get the best result. Here are our top tips for making pumpkin risotto:

  • Heat the broth. Arborio rice immediately absorbs broth if it’s hot, but if the broth is cold it changes the temperature of the dish and affects the cooking process. Add a few ladles of warm broth at a time.
  • Stir in broth gradually: be patient! Add a few ladles, then keep stirring to incorporate the broth. As soon as it’s absorbed, add more. Continue in this way for about 12 minutes.
  • Adjust the heat as necessary to keep a steady simmer. If the heat is too high, it can burn or not cook through. If the heat is too low, the rice grains can get waterlogged.
  • It’s ready when it’s tender but slightly al dente. The grains of rice should be slightly al dente (to have a bite of chew in the center) and stay separate from each other as they float in the thickened broth.

Storing leftovers

Important: this pumpkin risotto is best served immediately. We don’t recommend making it in advance. Here are a few notes on storage:

  • The texture becomes thick as it sits, especially when it’s chilled.
  • If desired, you can reheat leftovers on the stovetop and add a little extra broth and Parmesan cheese, and a few pinches salt to taste.
  • While we don’t recommend making risotto in advance, you could try undercooking the rice slightly at first, then reheat and finish it off with the final few scoops of broth before serving.  
Pumpkin Risotto

Ways to serve pumpkin risotto

You can serve pumpkin risotto as a side dish, or make it a main dish by adding a protein source and some sides with fiber. If you’re making it into a fall dinner, make sure to add a protein because risotto in itself is not filling enough for a meal. Here are a few ideas for how to serve it:

More pumpkin recipes

When it’s the season for pumpkin, it’s time for all the pumpkin recipes! Here are a few favorites to try:

Dietary notes

This pumpkin risotto recipe is vegetarian and gluten-free.

Print
Pumpkin Risotto

Pumpkin Risotto


5 Stars 4 Stars 3 Stars 2 Stars 1 Star

5 from 1 review

  • Author: Sonja Overhiser
  • Prep Time: 10 minutes
  • Cook Time: 20 minutes
  • Total Time: 30 minutes
  • Yield: 4 to 6
Save Recipe

Description

Pumpkin risotto is perfect for fall! Cook it up with sage and Parmesan and it’s a cozy autumn dinner or side dish.


Ingredients

  • ½ cup minced sweet onion
  • 2 cloves garlic, minced
  • 1 quart chicken broth or vegetable broth
  • 15-ounce can pumpkin puree
  • 1 teaspoon dried sage
  • 1 ½ teaspoons kosher salt
  • 4 tablespoons salted butter, sliced into 4 pieces
  • 2 cups dry white arborio rice
  • 1 cup dry white wine, such as Pinot Grigio or Chardonnay*
  • ¾ cup grated Parmesan cheese, plus more for garnish
  • 1 tablespoon finely chopped fresh sage (optional but recommended)
  • Freshly ground black pepper

Instructions

  1. Prep the vegetables: Mince the onion and garlic.
  2. Heat the broth: Combine the broth, pumpkin puree, and dried sage with 2 cups water and 1 teaspoon kosher salt in a saucepan and bring it to a low simmer. Reduce heat to low.
  3. Sauté the vegetables: In a large skillet, place the butter in a skillet over medium heat. Heat for a few minutes until it melts, turns foamy, and then starts to become golden brown in color and smells nutty. Add the minced onion cook for about 2 minutes until tender and fragrant. Add the garlic and dry rice and cook, stirring occasionally, about 2 minutes until the rice starts to turn light brown.
  4. Add the wine: Stir in the wine and cook, stirring occasionally, until the liquid is fully absorbed, about 2 minutes.
  5. Add the broth: Add two ladles of the hot broth to the risotto. Cook, stirring occasionally until the liquid is fully absorbed, then add two more ladles of both. Cook in this same manner for about 12 minutes, adding two ladles and stirring frequently. Continue to adjust the heat to make sure the risotto is at a steady simmer. After 12 minutes, taste a grain of rice. If it’s creamy but still al dente in the center, you’re ready for the final step! If not, continue to cook and add broth for a few minutes more. Try not to go past al dente or the final risotto will be too soggy. (You’ll have some broth left over: save it for reheating leftovers.) 
  6. Finish the risotto: When the rice is al dente, reduce the heat to low. Add two more ladles of broth, the Parmesan cheese, fresh sage, and ½ teaspoon kosher salt. Stir vigorously for 1 to 2 minutes until you’ve got a thick and creamy risotto.
  7. Serve immediately with additional Parmesan cheese to top. You’ll have about 1 ½ cups broth remaining; save it to stir in to get a creamier texture when serving (the rice absorbs liquid as it sits) or to refresh leftovers.  
  8. Storage info: The flavor and texture are best served immediately. If desired, you can reheat on the stovetop and add a little extra broth and Parmesan cheese, and a few pinches salt to taste. We don’t recommend making it in advance, but if you want to try, undercook the risotto slightly at first, then reheat and finish it off with the final few scoops of broth before serving.  

Notes

*If you prefer avoiding wine, you can skip Step 4 and move straight to adding the broth.

  • Category: Rice
  • Method: Stovetop
  • Cuisine: Italian inspired
  • Diet: Vegetarian

Pumpkin Pie Bars

These easy Pumpkin Pie Bars are rich, creamy, and made with a buttery shortbread crust. The perfect stress-free dessert to make this holiday season!

The post Pumpkin Pie Bars appeared first on Budget Bytes.

The classic, irresistible flavor and taste of pumpkin pie, but in a more convenient, easy to share form…umm, yes I’m sold! These easy Pumpkin Pie Bars are rich, creamy, full of warm spices, and made with a buttery shortbread crust. It’s the perfect dessert to enjoy during the fall season at family gatherings, holiday parties, or any time during the week. The best part is you can cut these bars as big or as little as you want, to make your dollar stretch, and to make them the perfect size for sharing, because trust me…they’re worth the hype!
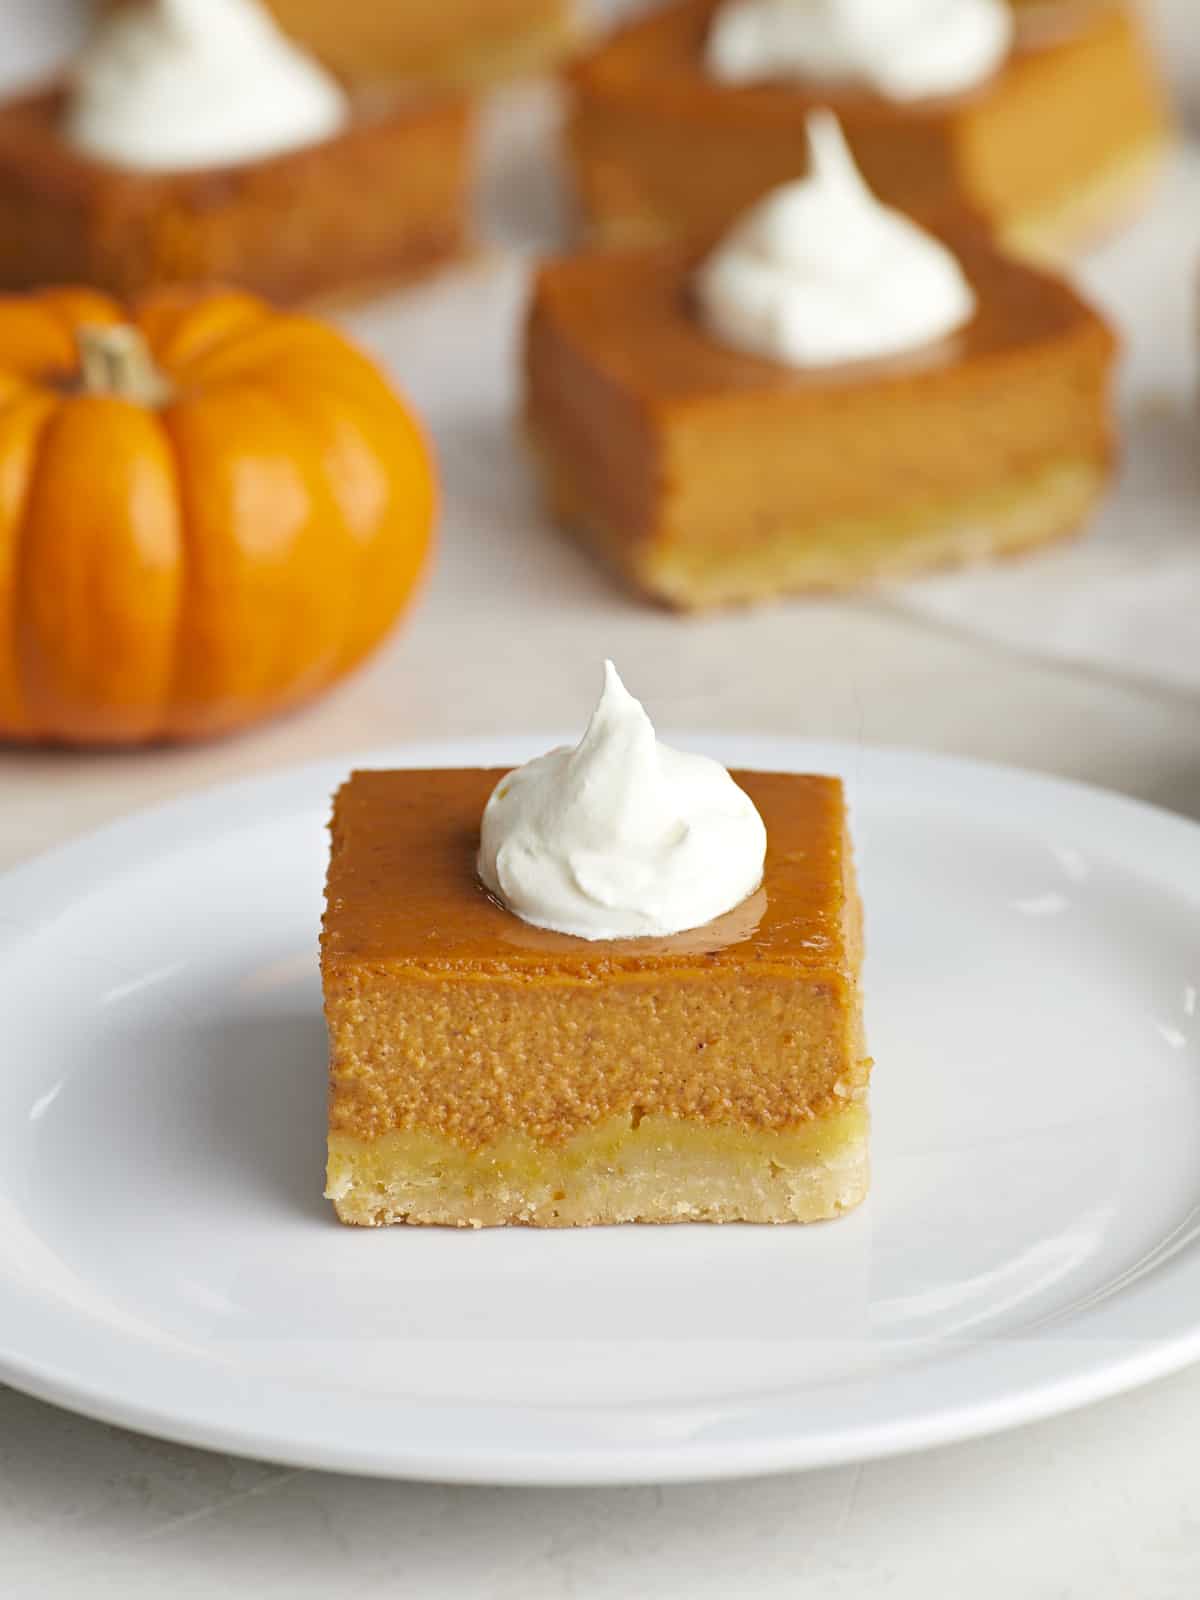
Side view of a pumpkin pie bar on a white plate with whipped cream on top.

What’s So Special About Pumpkin Pie Bars?

I’ll be honest, making a homemade pie crust for a traditional pumpkin pie can be a little intimidating. These pumpkin pie bars are made with a super easy, buttery, 4-ingredient shortbread crust. After testing this recipe, I fell in love with the light & airy texture of the crust combined with the smooth, custardy pie filling. One word…Heaven!

And with a traditional pie you typically get about 6-8 slices; not to mention the added pressure to cut the slices evenly 😳. But these pumpkin pie bars are unbelievably easy to cut into 9 squares or more and they’re very easy to serve. Basically, if you’re looking for a simple and stress-free dessert to make this season, it’s definitely going to be this one!

Ingredients For Pumpkin Pie Bars

Here are the ingredients you need to make this pumpkin pie bar recipe:

  • All-purpose flour, Butter & Powdered Sugar  –  These pumpkin pie bars are made with a quick and easy shortbread crust. It’s a simple combination of flour, butter, powdered sugar and salt. It has a crumbly, crisp texture with a buttery, semi-sweet flavor. It’s the perfect foundation for this luscious pumpkin pie filling!
  • Pumpkin Purée – Pumpkin purée is of course the star of the show! It gives these pie bars a beautiful color and rich flavor. And we tested these with both the Kroger store brand and the Libby’s brand. They were both equally delicious. So feel free to save some money in that area without sacrificing flavor!
  • Evaporated Milk – Evaporated milk gives this custard pie filling a rich and creamy texture.
  • Granulated Sugar – Granulated white sugar enhances the flavor of the pumpkin puree and provides extra sweetness to the pie filling.
  • Pumpkin Pie Spice – Pumpkin pie spice is a simple mix of warm spices like cinnamon, ginger, and nutmeg. It gives these pie bars amazing flavor! Feel free to use store-bought or make your own!
  • Eggs – Eggs help the custard pie filling set.

Tips For Making Pumpkin Pie Bars!

  1. The shortbread crust mixture will look slightly crumbly at first, but will hold together nicely once pressed into the baking dish.
  2. The best way to tell when your pumpkin pie bars are done is to give the dish a little shake at around 50-55 minutes. The center should be mostly set and jiggle just slightly. If the center still looks too wet, then it needs more time to bake.
  3. When the bars are done baking, the top of the filling will be slightly puffed up. But don’t worry, it will settle back down as it cools.
  4. Make sure you allow the bars to cool at room temperature before transferring to the refrigerator to chill completely for at least one hour or more.
  5. And definitely allow the bars to chill and set completely before cutting.

Storing Leftovers

If you’re lucky enough to have any leftovers, you can store them covered in an airtight container in the fridge for up to 4 days. Just make sure they are completely cool before refrigerating.
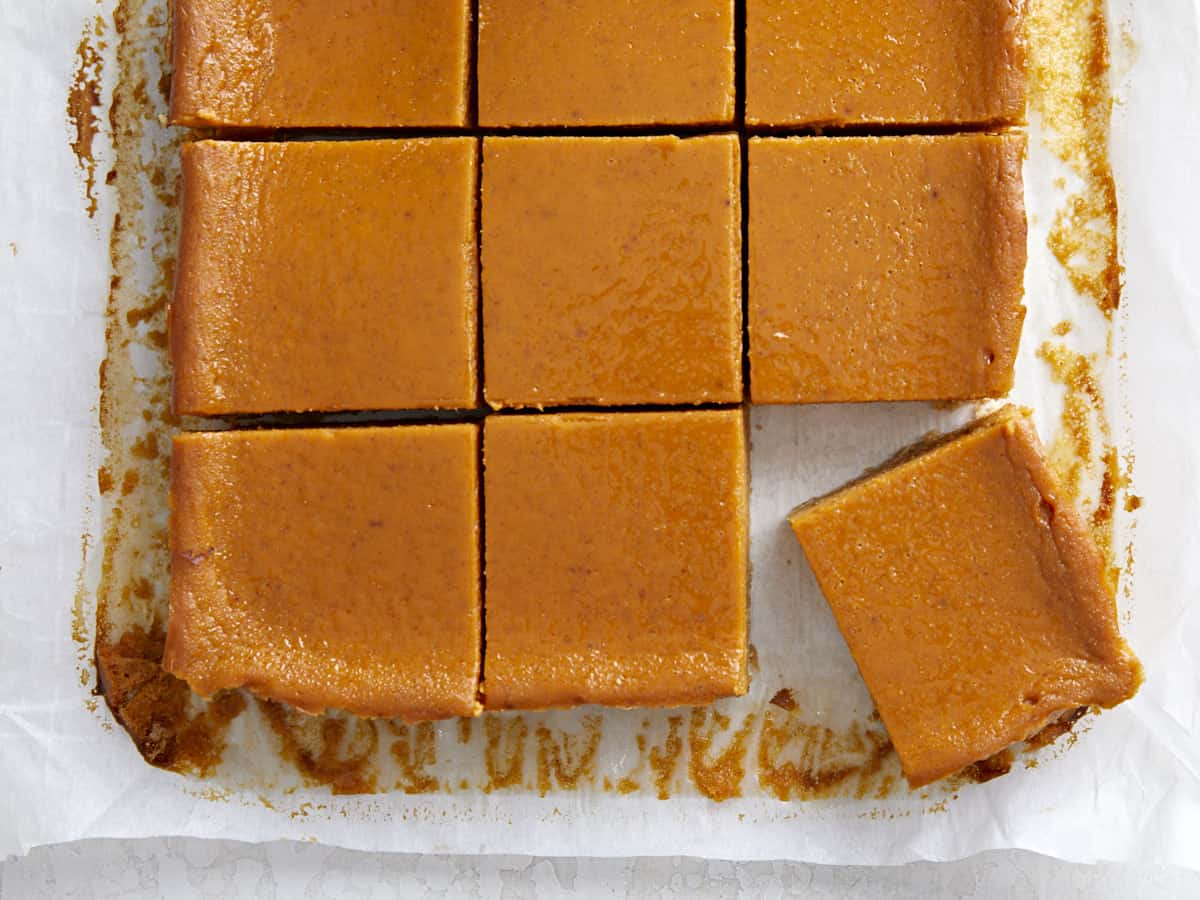
Overhead view of pumpkin pie bar squares on parchment paper.
Side view of a pumpkin pie bar on a white plate with whipped cream on top.
Print

Pumpkin Pie Bars

These easy Pumpkin Pie Bars are rich, creamy, full of warm spices, and made with a buttery shortbread crust. The perfect stress-free dessert to make this holiday season!
Course Dessert
Cuisine American
Total Cost $5.63 recipe / $0.63 serving
Prep Time 15 minutes
Cook Time 1 hour 10 minutes
Chill Time 2 hours 30 minutes
Total Time 3 hours 55 minutes
Servings 9
Calories 238kcal

Ingredients

Shortbread Crust

  • 1 cup all-purpose flour $0.14
  • 1/3 cup powdered sugar $0.12
  • 1/4 tsp salt $0.01
  • 1/2 cup salted butter, softened $1.07

Pumpkin Pie Filling

  • 1 15oz. can pumpkin purée $2.19
  • 1 12oz. can evaporated milk $1.50
  • 3/4 cup granulated sugar $0.25
  • 1.5 tsp pumpkin pie spice $0.15
  • 1/2 tsp salt $0.02
  • 2 large eggs, lightly beaten $0.18

Instructions

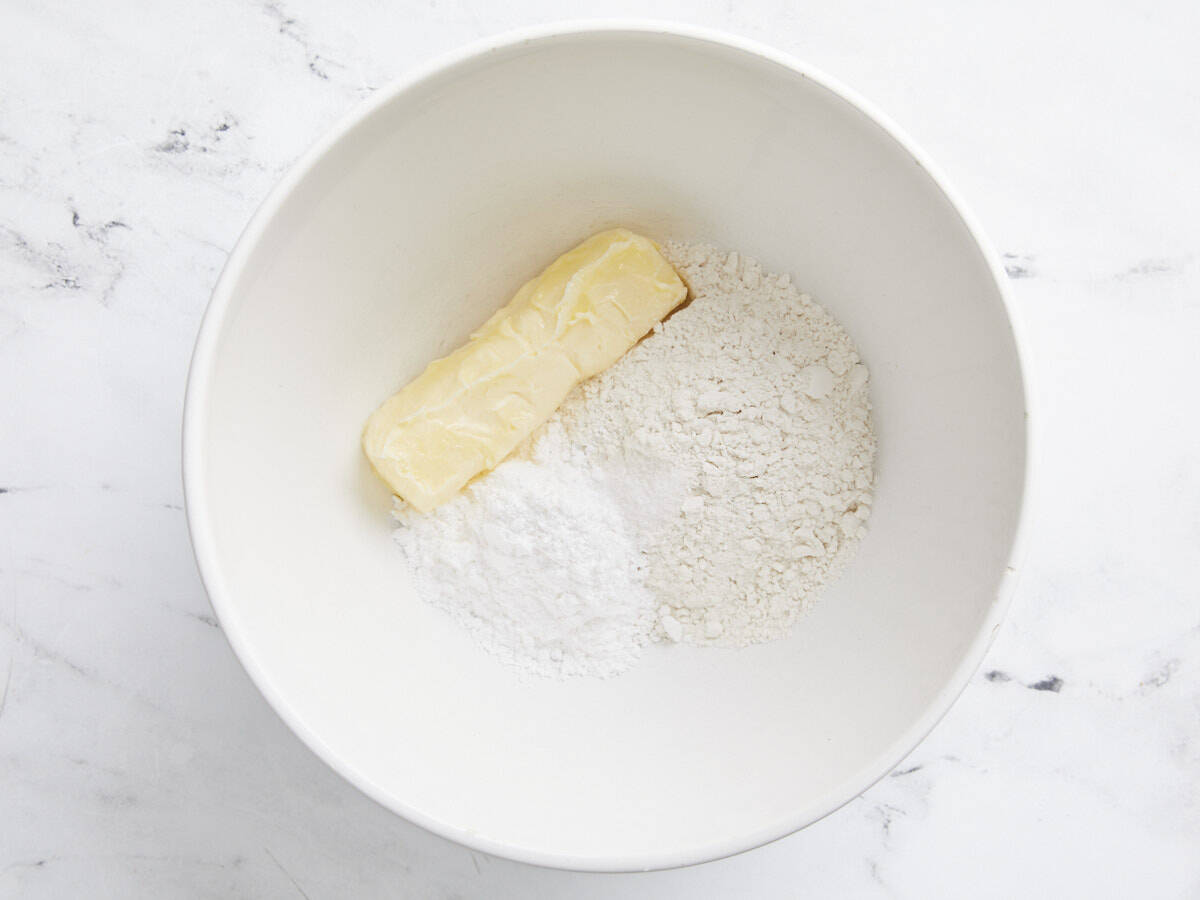
  • Preheat the oven to 350°F. In a large bowl add the flour, powdered sugar, salt, and softened butter for the shortbread crust. Mix the ingredients together with a fork or spatula until they are well combined. The mixture should look slightly crumbly.
  • Line an 8×8-inch baking dish with parchment paper. Press the shortbread mixture into the bottom of the dish in an even layer.
  • Transfer the baking dish to the oven and bake the crust for 15 minutes or just until the crust is lightly golden.
  • While the crust is baking, begin to make the filling. In another large bowl add the pumpkin purée, evaporated milk, sugar, pumpkin pie spice, salt, and beaten eggs.
  • Blend with a hand mixer or whisk the pie filling ingredients together until smooth.
  • When the crust is finished baking, pour the pumpkin pie filling into the baking dish on top of the crust, then transfer it back to the oven and bake for 50-55 minutes, or until the filling is set and the center jiggles just slightly when you shake the baking dish.
  • Remove the baking dish from the oven and allow the pie bars to cool for about 30 minutes, then transfer the dish to the refrigerator to chill completely for at least 2 hours.
  • Once the pumpkin pie bars are completely chilled, remove them from the baking dish and slice into 9 bars. Top with some fresh whipped cream (optional) and enjoy!

See how we calculate recipe costs here.

Nutrition

Serving: 1square | Calories: 238kcal | Carbohydrates: 32g | Protein: 3g | Fat: 11g | Sodium: 290mg | Fiber: 0.4g

Love pumpkin pie? Try our regular Pumpkin Pie or our Maple Brown Butter Pumpkin Pie next!
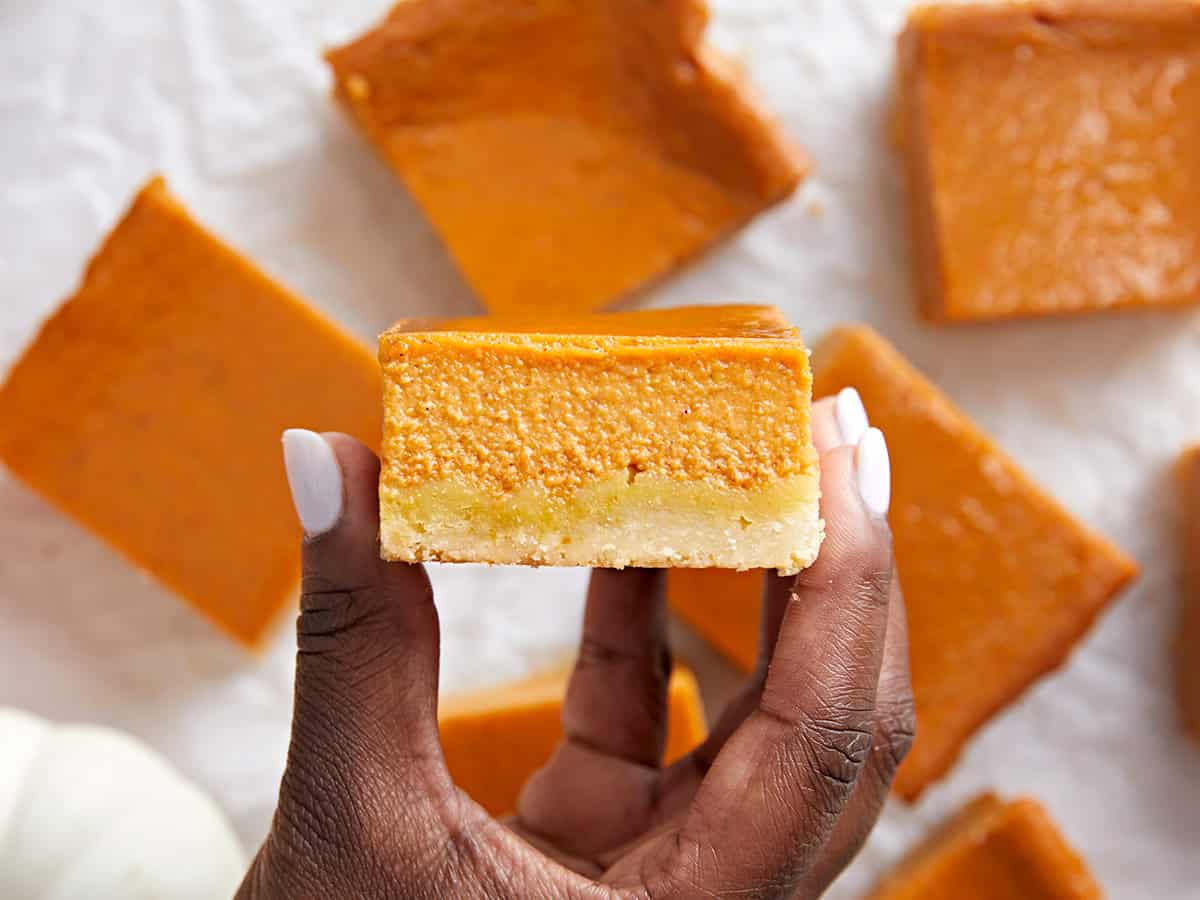
Overhead view of a pumpkin pie bar being held up to the camera on it's cut side.

How to Make Pumpkin Pie Bars – Step by Step Photos

Shortbread crust ingredients in a small white bowl.

Preheat the oven to 350°F. In a large bowl add 1 cup all-purpose flour, 1/3 cup powdered sugar, 1/4 tsp salt, and 1/2 cup (1 stick) of softened butter for the shortbread crust. Mix the ingredients together with a fork or spatula until they are well combined. The mixture should look slightly crumbly.
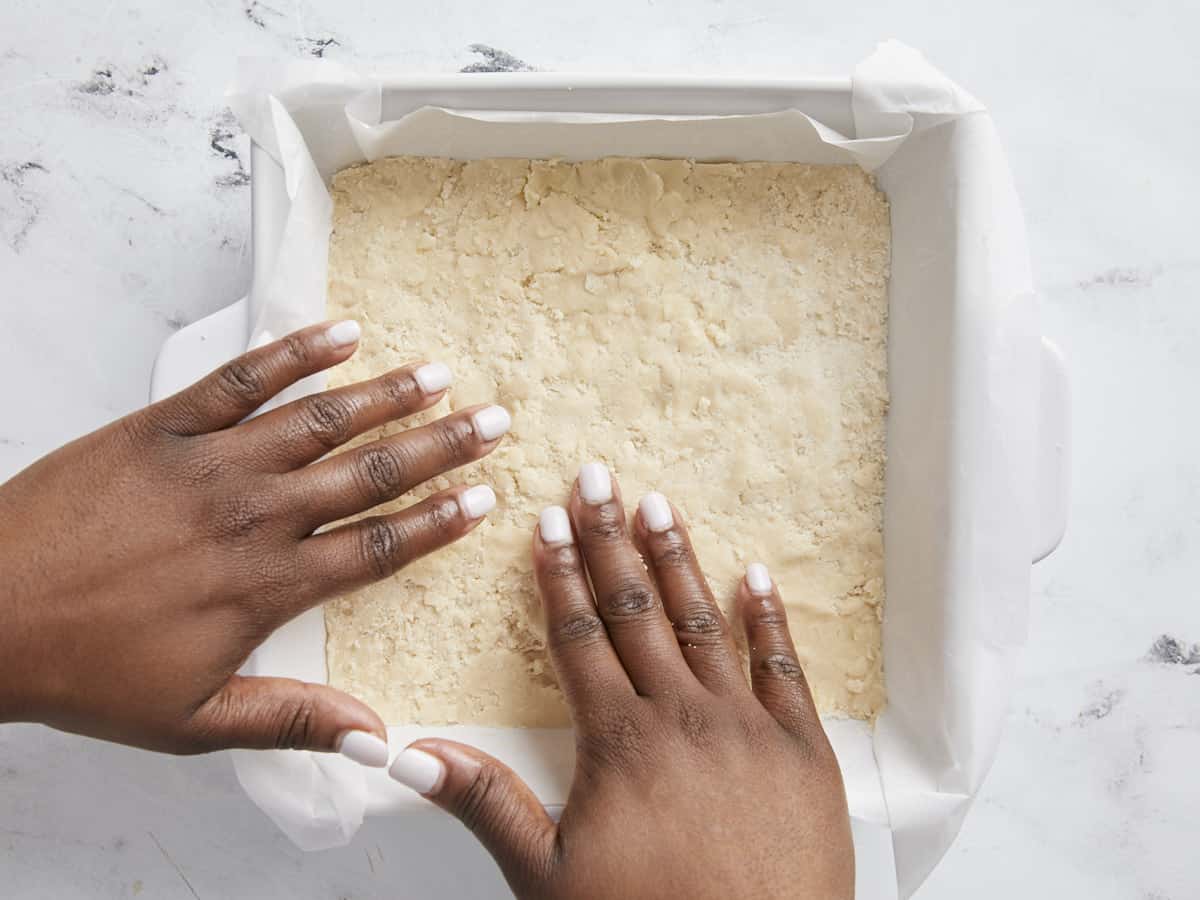
Shortbread crust being pressed into a white baking dish.

Line an 8×8-inch baking dish with parchment paper. Press the shortbread mixture into the bottom of the dish in an even layer. Transfer the baking dish to the oven and bake the crust for 15 minutes or just until the crust is lightly golden.
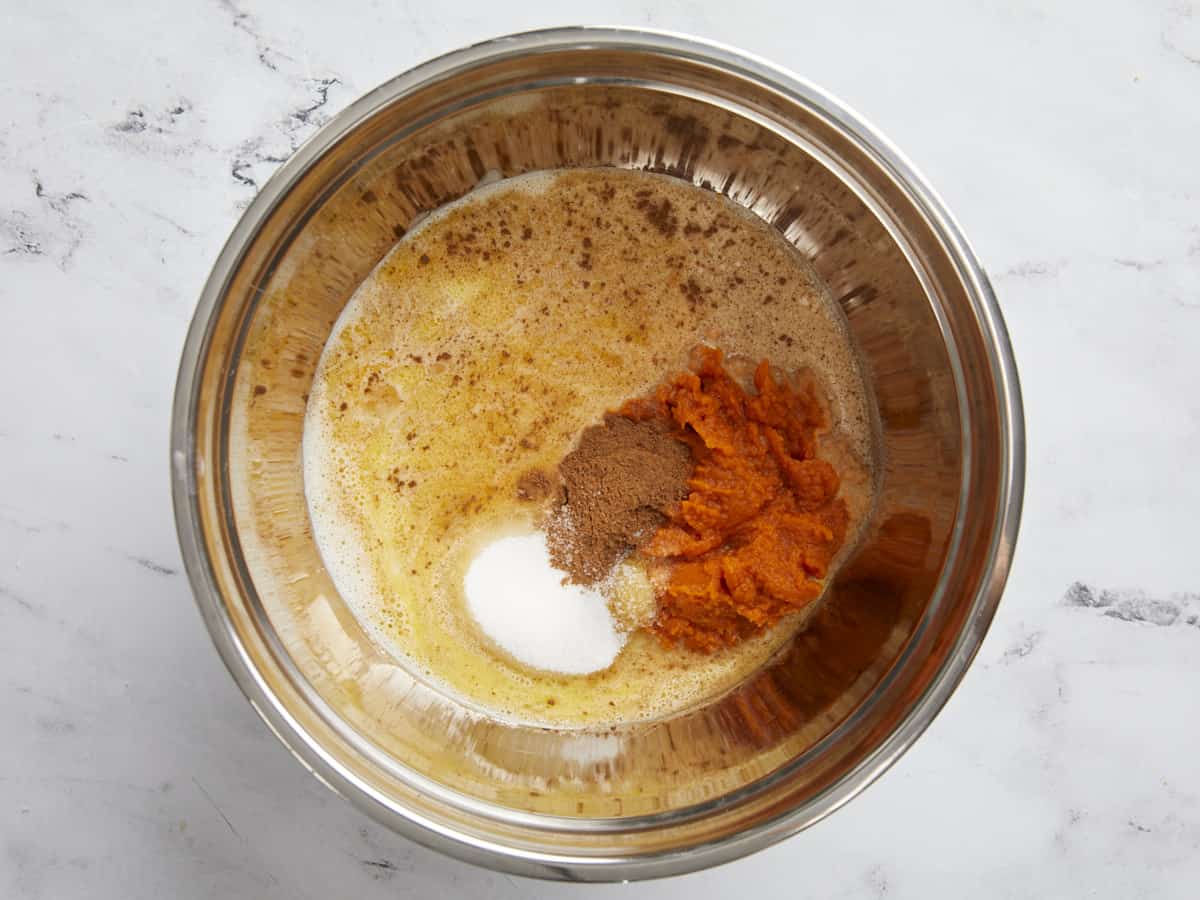
Pumpkin pie filling ingredients in a stainless steel bowl.

While the crust is baking, begin to make the pie filling. In another large bowl add 1-15oz. can of pumpkin purée, 1-12oz. can of evaporated milk, 3/4 cup granulated sugar, 1 1/2 tsp pumpkin pie spice, 1/2 tsp salt, and 2 large beaten eggs. Blend with a hand mixer or whisk the pie filling ingredients together until smooth.
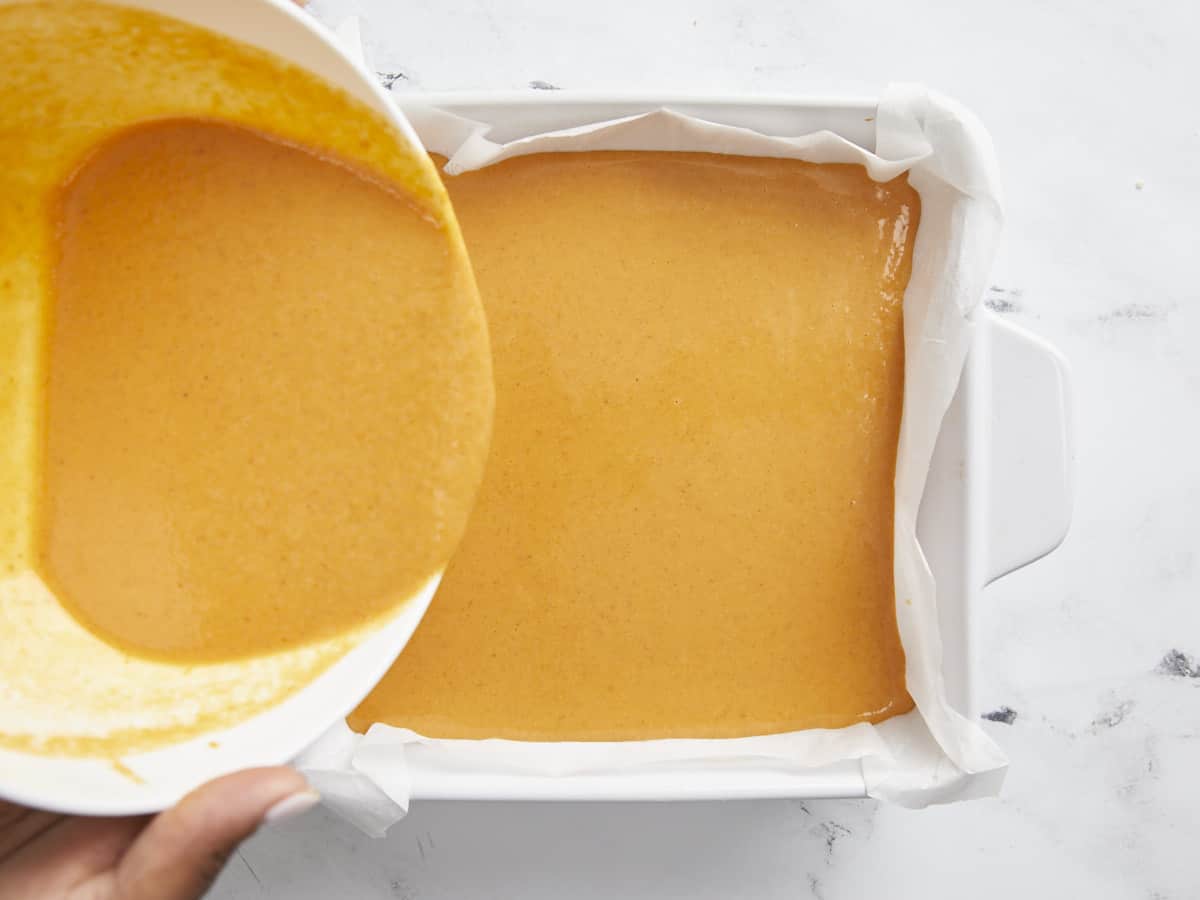
Pumpkin pie filling being poured on top of baked shortbread crust.

When the crust is finished baking, pour the pumpkin pie filling into the baking dish on top of the crust, then transfer it back to the oven and bake for 50-55 minutes, or until the filling is set and the center jiggles just slightly when you shake the baking dish.
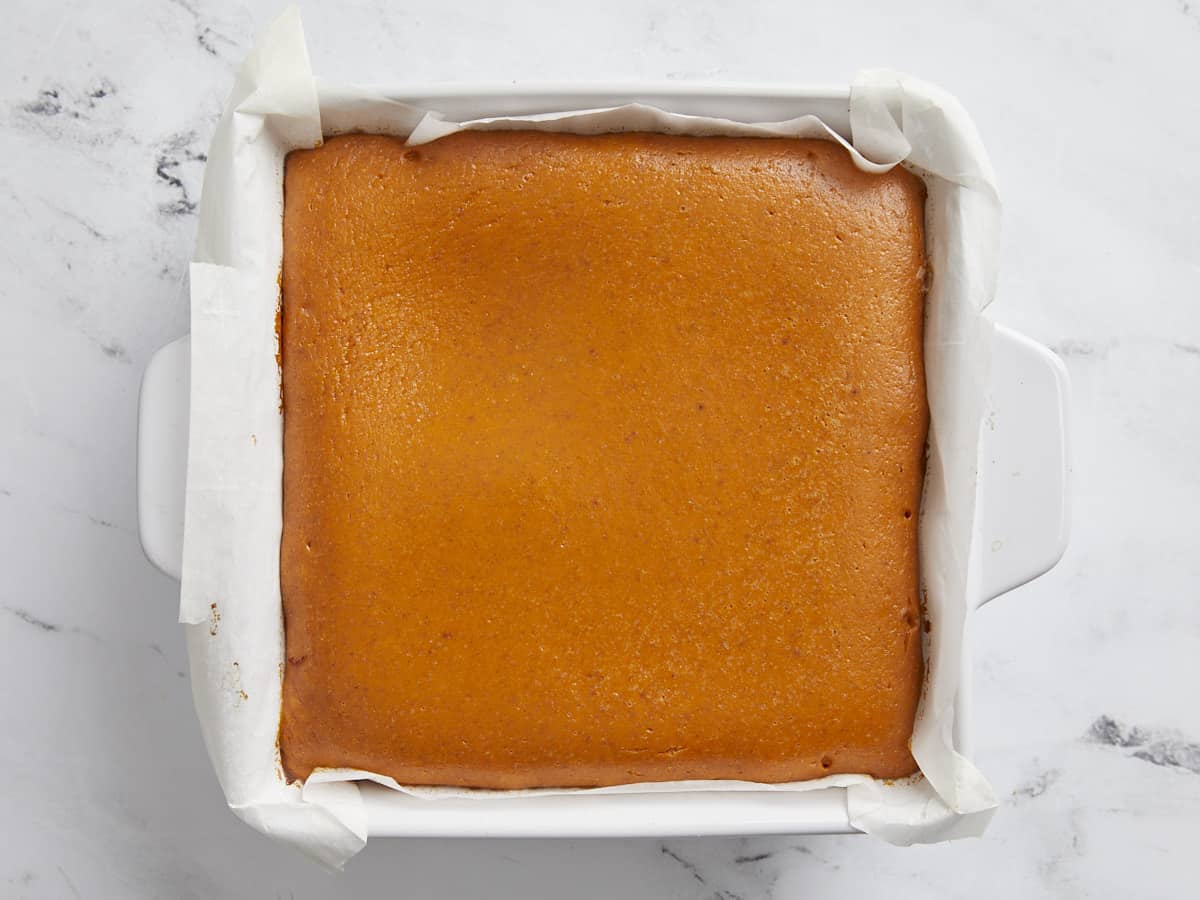
Overhead view of baked pumpkin pie bars in white baking dish.

Remove the baking dish from the oven. The top of the pie filling will look slightly puffed when it comes out of the oven, but it will settle as it cools. Allow the pie bars to cool for about 30 minutes, then transfer the dish to the refrigerator to chill completely for at least 2 hours.

Overhead view of pumpkin pie bar squares on parchment paper.

Once the pumpkin pie bars are completely chilled, remove them from the baking dish and slice them into 9 bars.
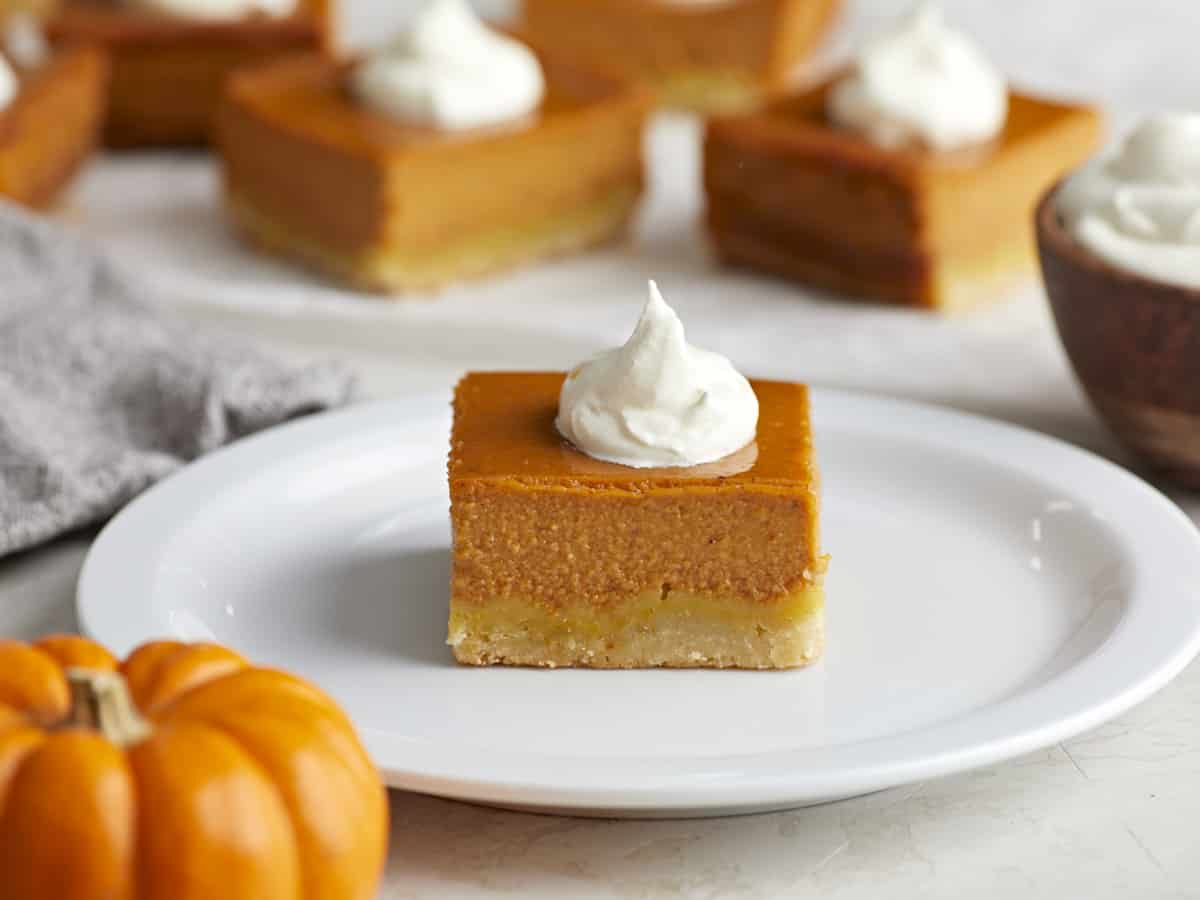
Side view of a pumpkin pie bar on a white plate with whipped cream on top.

Top with some fresh whipped cream (optional) and enjoy!
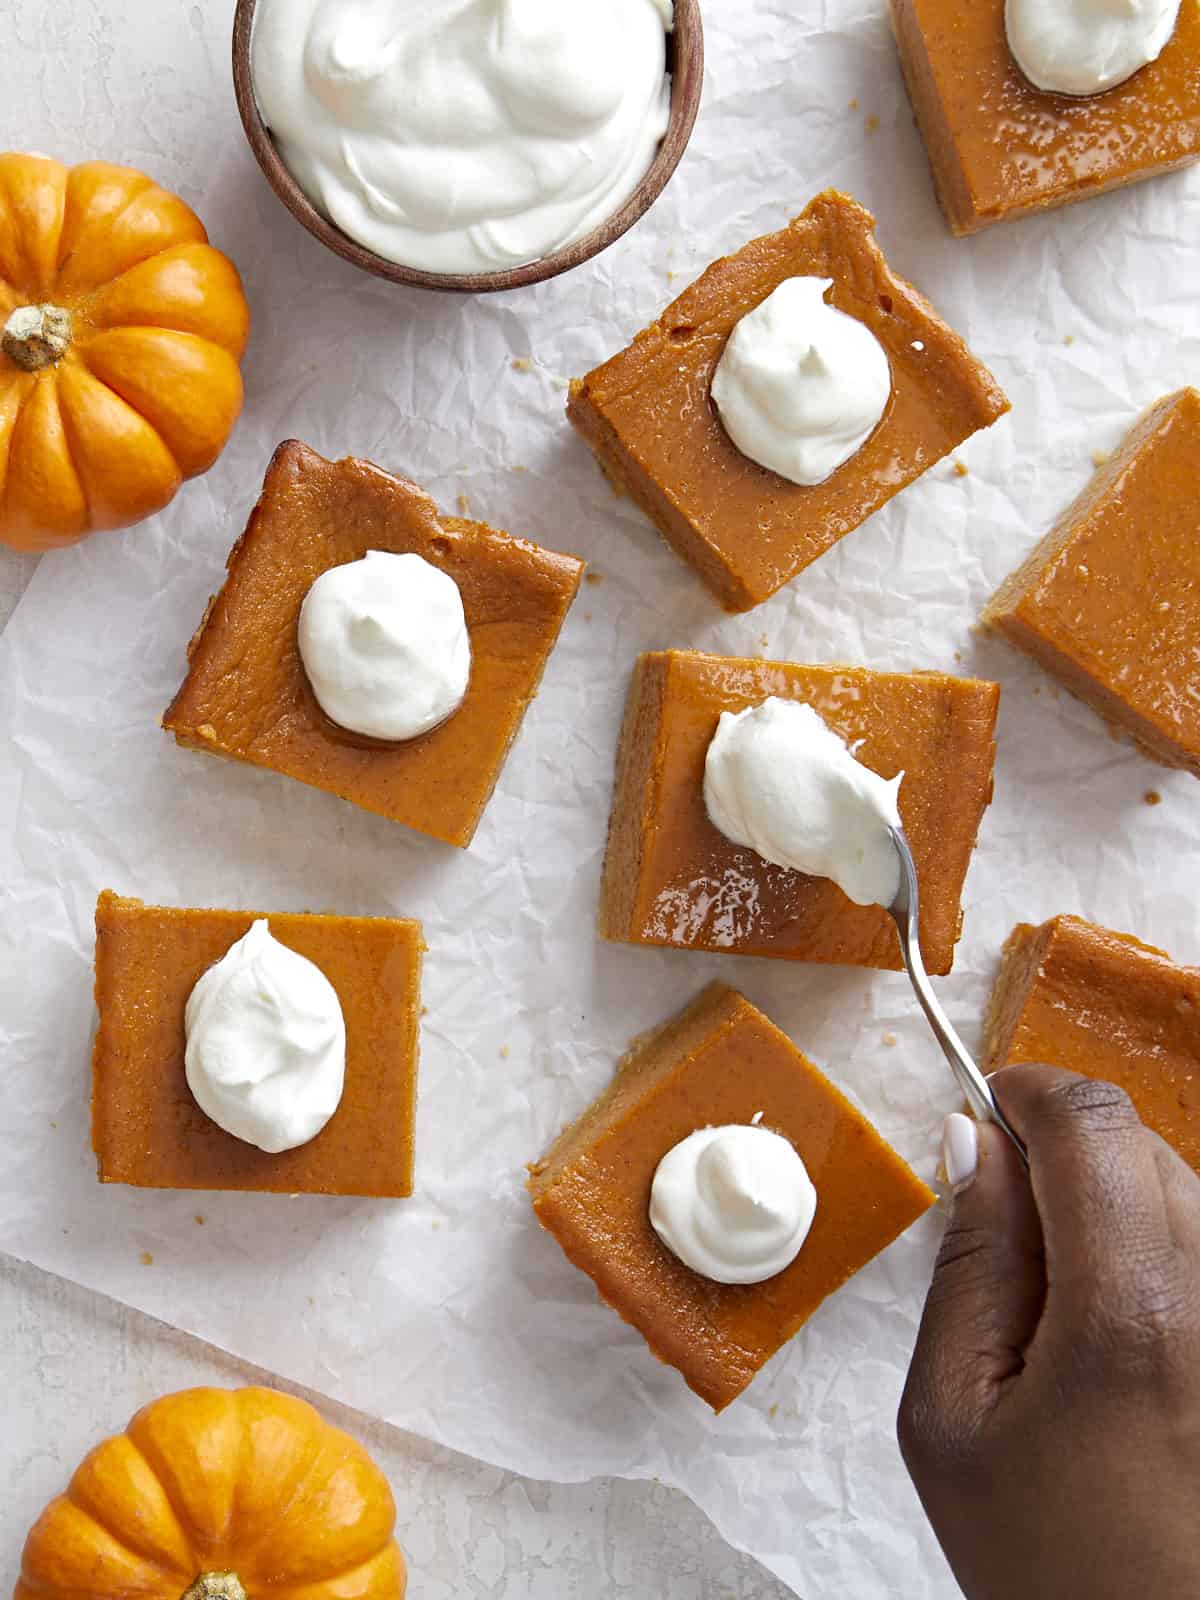
Overhead view of pumpkin pie bars separated on parchment paper with whipped cream being added on top.

The post Pumpkin Pie Bars appeared first on Budget Bytes.

Eggplant Parmesan

This Eggplant Parmesan recipe is made with layers of lightly breaded baked eggplant, flavorful marinara sauce, parmesan cheese and melty mozzarella. Robust and flavorful, this classic Italian dish is one your whole family will love.
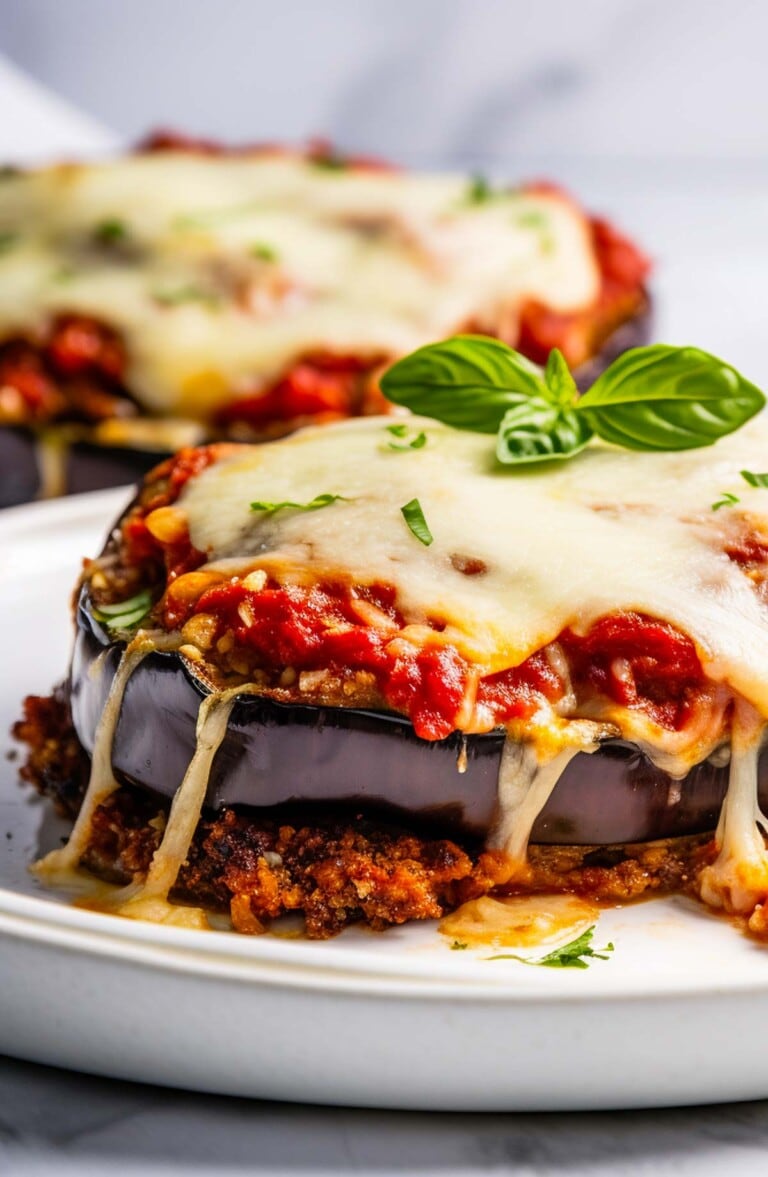
This Eggplant Parmesan recipe is made with layers of lightly breaded baked eggplant, flavorful marinara sauce, parmesan cheese and melty mozzarella. Robust and flavorful, this classic Italian dish is one your whole family will love.

Pumpkin Muffins

These pumpkin muffins are moist, subtly sweet, full of warm spices and have a hidden dollop of sweet cream cheese in the center.

The post Pumpkin Muffins appeared first on Budget Bytes.

Want a more budget-friendly way to get your pumpkin spice fix than going to Starbucks for a PSL? Then you’ve got to make a batch of these Pumpkin Muffins. These muffins are moist, subtly sweet, full of warm spices, and have a hidden dollop of sweet cream cheese in the middle. They’re totally indulgent and you get a whole batch of twelve pumpkin muffins for about the price of one pumpkin spice latte. Plus, they’re freezer-friendly so you thaw one at a time to have with your morning coffee from now until the end of pumpkin season! 🙌
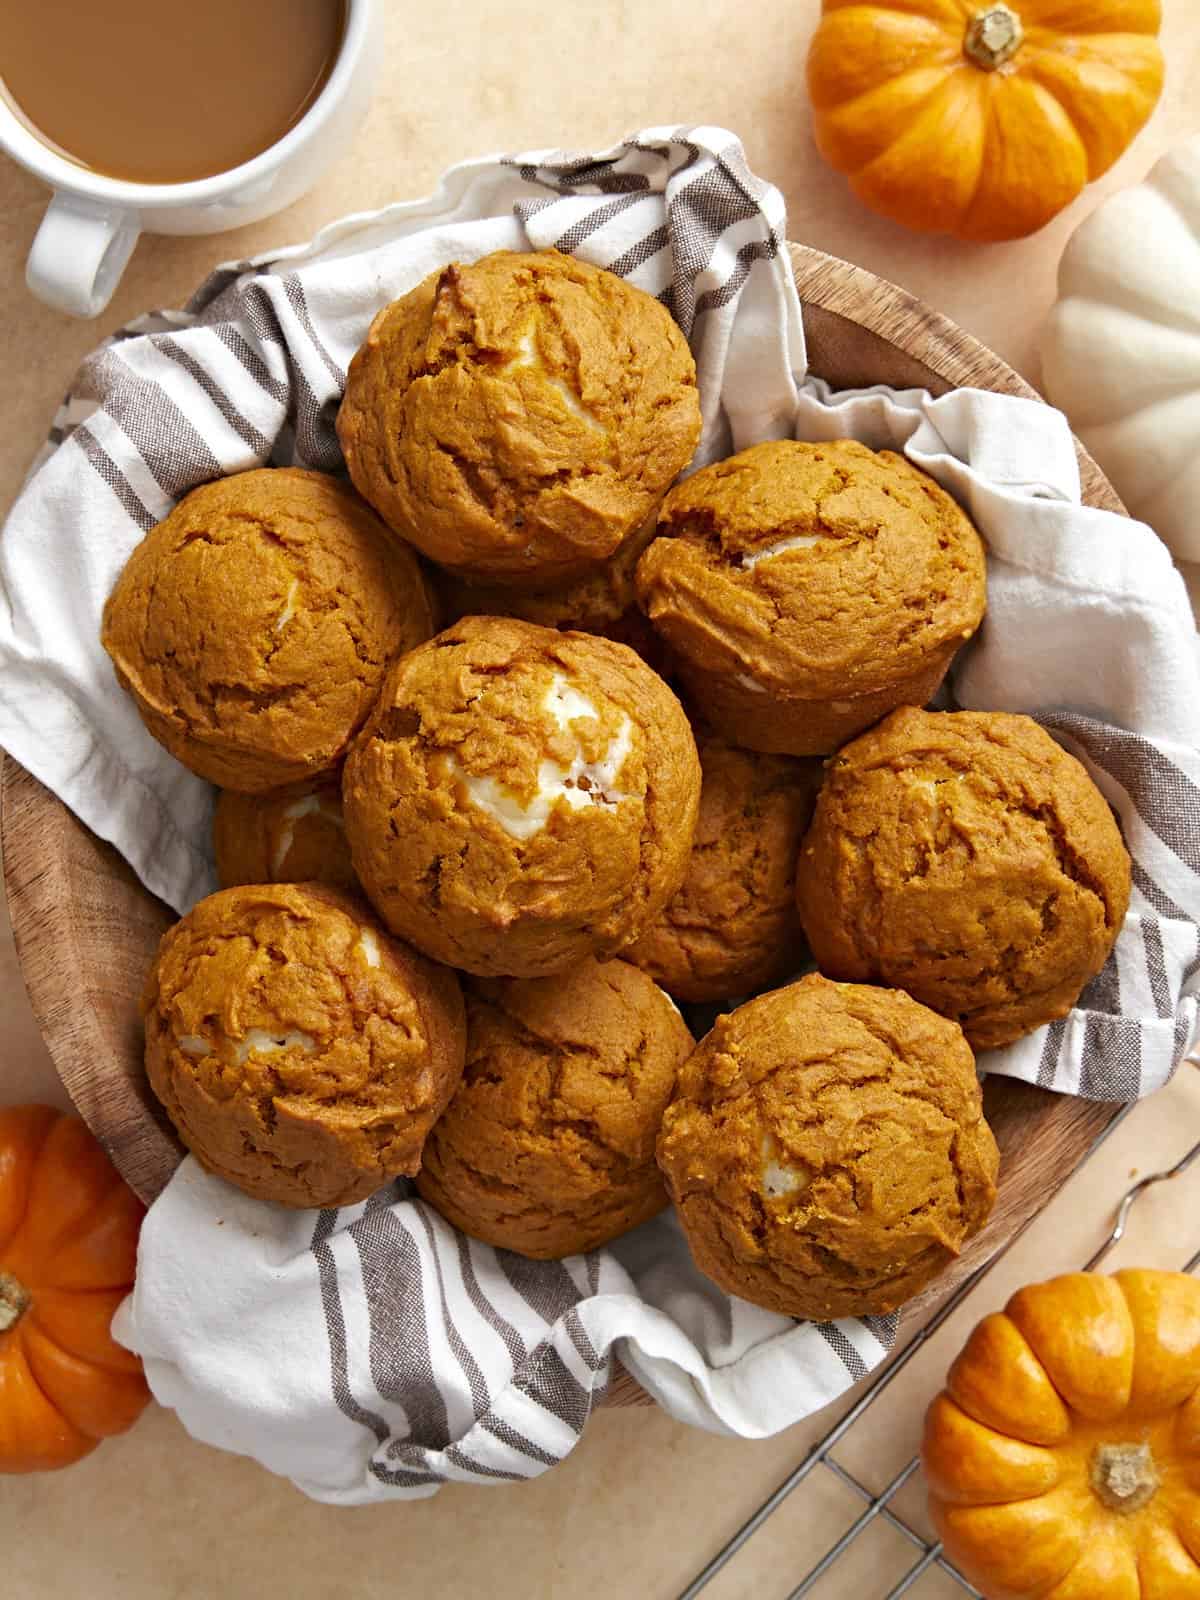
Overhead view of pumpkin muffins in a basket with a tea towel.

What Are Pumpkin Muffins Like?

Pumpkin purée is kind of magic because it can be added to both sweet and savory dishes, and it attracts moisture, which helps keep baked goods super soft, tender, and moist. The pumpkin flavor is slightly earthy with a subtle sweetness that, when paired with the warm pumpkin pie spice, is absolutely COZY. Bake up a batch of these pumpkin muffins on a weekend morning to make your house smell amazing and have the coziest of cozy fall experiences. 🥰

Ingredients for Pumpkin Muffins

Here’s what you’ll need to make this incredible pumpkin muffin recipe:

  • All-Purpose Flour: Flour gives the batter strength and body. It’s the vehicle for all that pumpkin-y goodness!
  • Baking Powder & Baking Soda: These muffins get a one-two punch of leavening to help them bake up light and airy, despite the density of the pumpkin purée.
  • Pumpkin Pie Spice and Vanilla: A simple mix of pumpkin pie spice and warm vanilla extract is all you need to flavor these delicious muffins.
  • White Sugar & Brown Sugar: A combination of white sugar and brown sugar gives the muffins sweetness with a slightly warm richness from the molasses in the brown sugar. The sugars also help keep the muffins moist.
  • Eggs: Eggs also help leaven baked goods when the water in the eggs turn to steam in the oven. When the egg solidifies as it bakes, it helps the muffins hold their puffed shape.
  • Pumpkin Purée: Pumpkin purée provides color, flavor, and moisture to the muffins. It’s the star of the show!
  • Cooking Oil: Oil helps the muffins stay moist and tender, and gives the muffin an extra rich flavor.
  • Cream Cheese & Sugar: A little dollop of sweetened cream cheese in the center of each muffin makes them extra special! But you can skip the cream cheese filling and make plain pumpkin muffins if you prefer.

How to Store Leftovers

This recipe makes a batch of 12 muffins, but that’s no reason to not make them for yourself if you live alone. Simply let the muffins cool completely to room temperature, then transfer to an air-tight food storage container. They’ll last about three days in the refrigerator, or you can freeze them for about three months. Thaw and reheat the frozen muffins with a quick 30 seconds in the microwave, or let them thaw at room temperature for about 15 minutes. Quick, easy, homemade muffins on demand!

Pumpkin Muffin Variations

You can take this basic pumpkin muffin batter and add so many different twists. Here are a couple of fun ideas for making this recipe your own:
  • Skip the cream cheese center and fold in chocolate chips
  • Top the muffins with a mixture of coarse sugar and cinnamon
  • Add chopped pecans to the batter or on top of each muffin
  • Make a quick cinnamon sugar glaze (powdered sugar + cinnamon + milk) to drizzle over the muffins (I did this during testing and while it didn’t look so pretty, it made them taste like cinnamon-coated donuts!)
  • Add a streusel topping
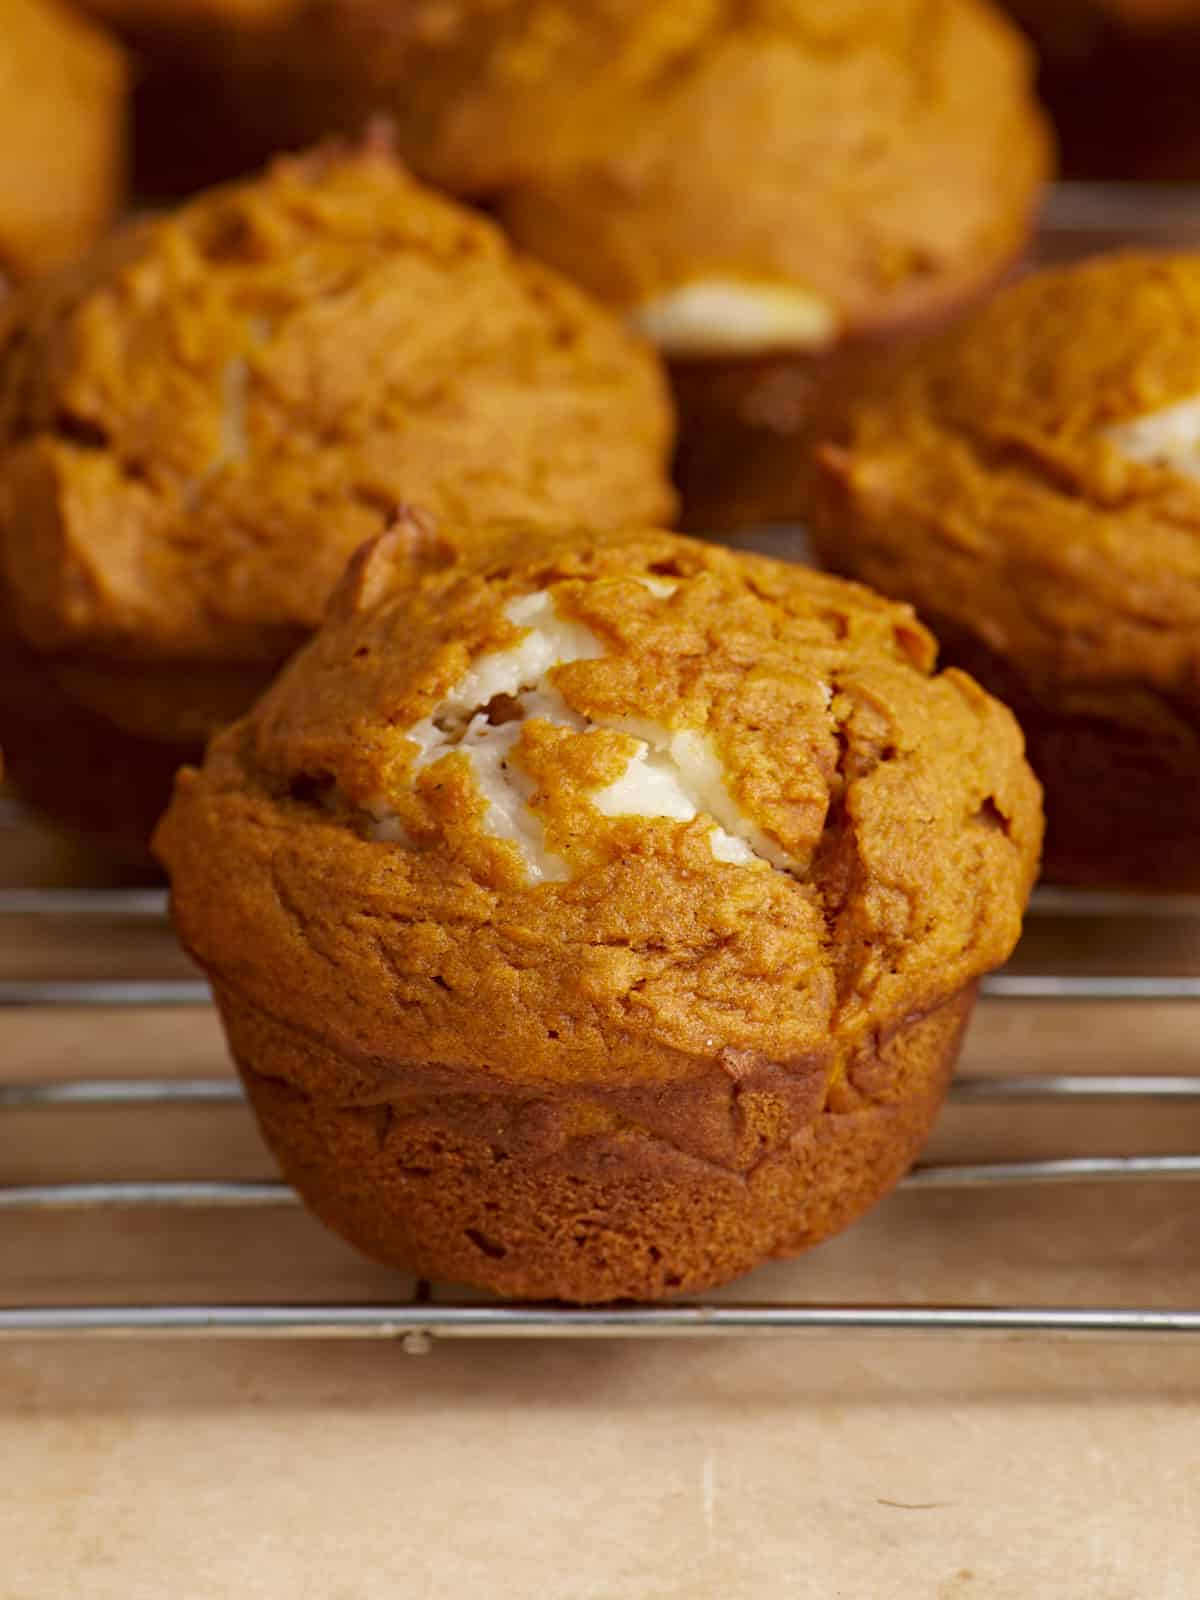
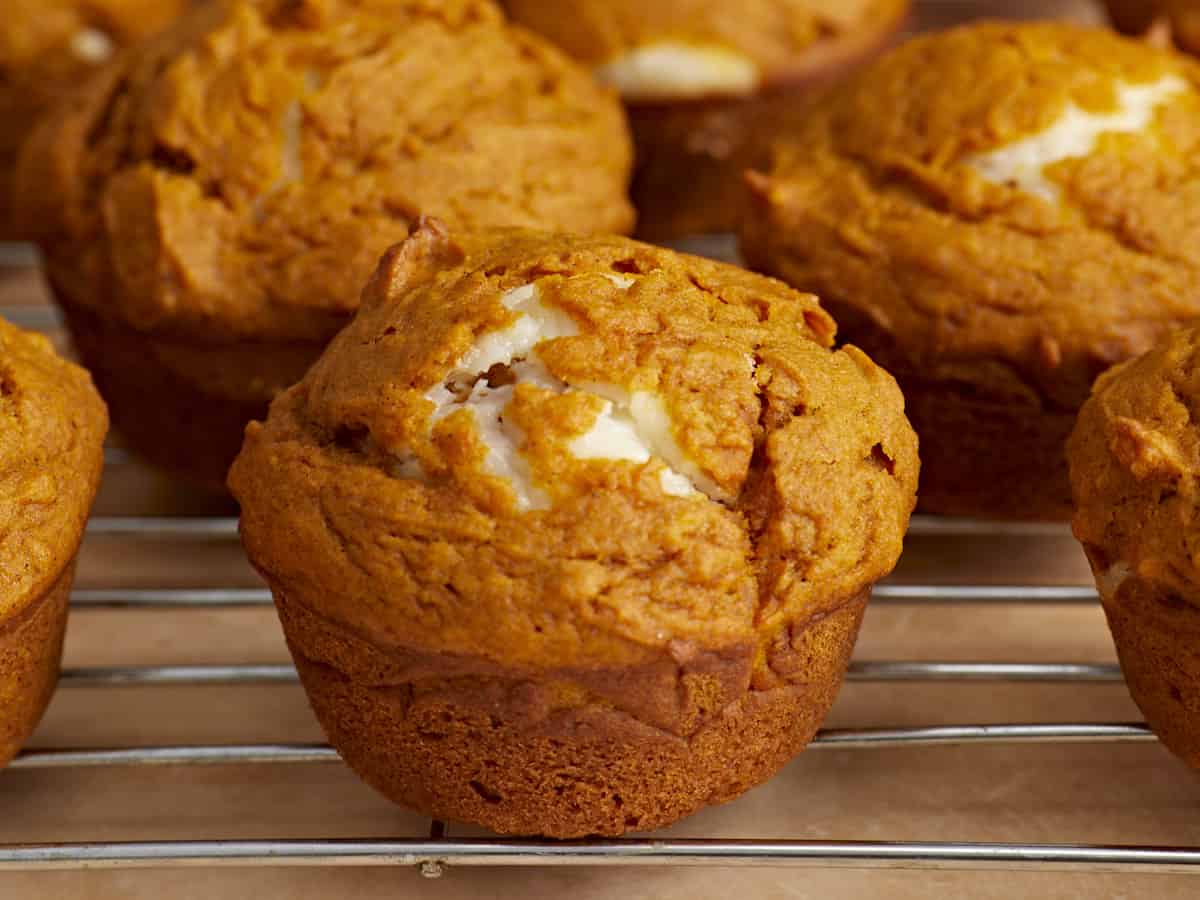
Side view of pumpkin muffins on a wire cooling rack.
Overhead view of a basket full of pumpkin muffins with coffee and pumpkins on the sides.
Print

Pumpkin Muffins

These pumpkin muffins are moist, subtly sweet, full of warm spices and have a hidden dollop of sweet cream cheese in the center. 
Course Breakfast, Dessert
Cuisine American
Total Cost $5.43 recipe / $0.45 each
Prep Time 15 minutes
Cook Time 24 minutes
Total Time 39 minutes
Servings 12 muffins
Calories 292kcal

Equipment

Ingredients

Cream Cheese Filling (optional)

  • 4 oz. cream cheese, room temperature $1.10
  • 2 Tbsp granulated sugar $0.04

Instructions

  • Preheat the oven to 350ºF. In a medium bowl, stir together the flour, baking powder, baking soda, salt, and pumpkin pie spice.
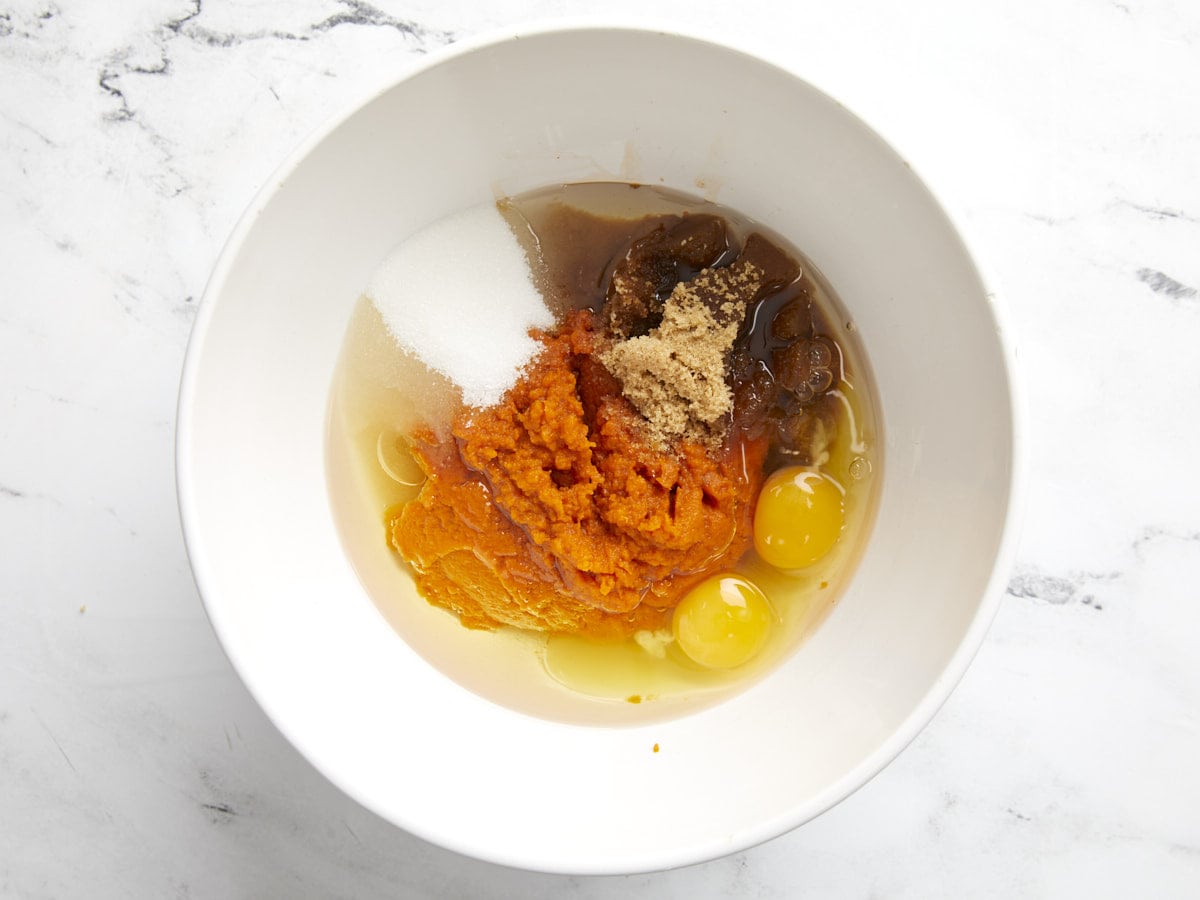
  • In a separate large bowl, whisk together the eggs, granulated sugar, brown sugar, pumpkin purée, oil, and vanilla extract.
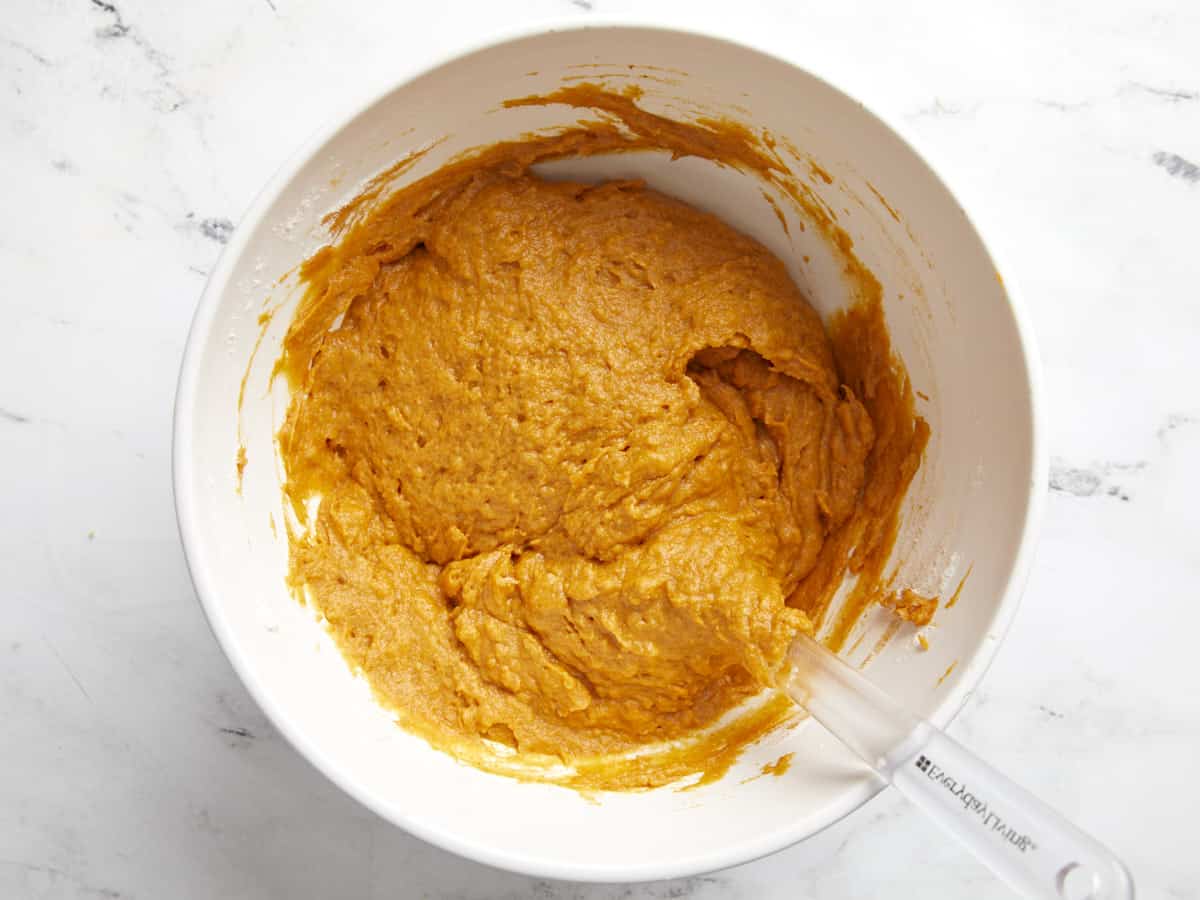
  • Pour the bowl of dry ingredients into the bowl of wet ingredients and stir together just until combined. A few small lumps are okay, just try not to overmix.
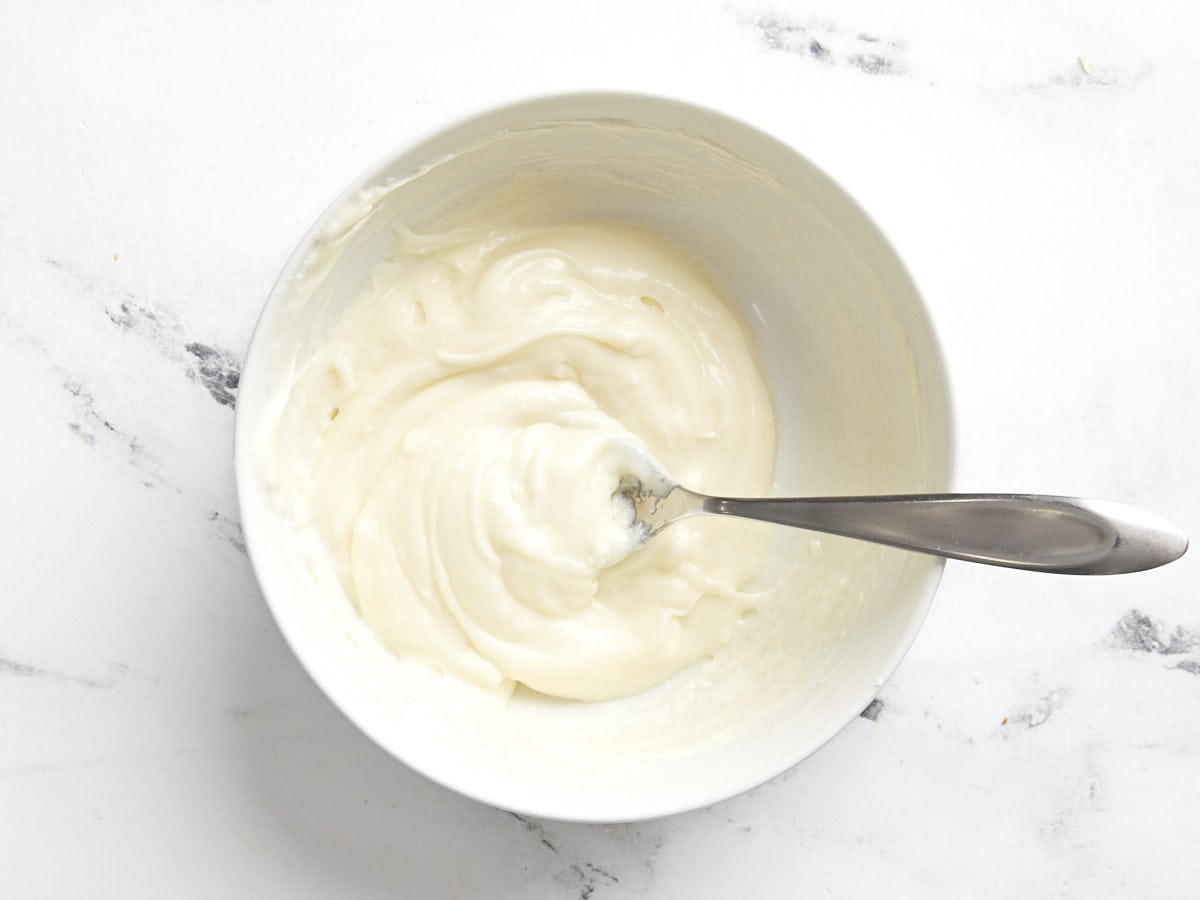
  • In a separate small bowl, stir together the cream cheese and sugar for the cream cheese filling.
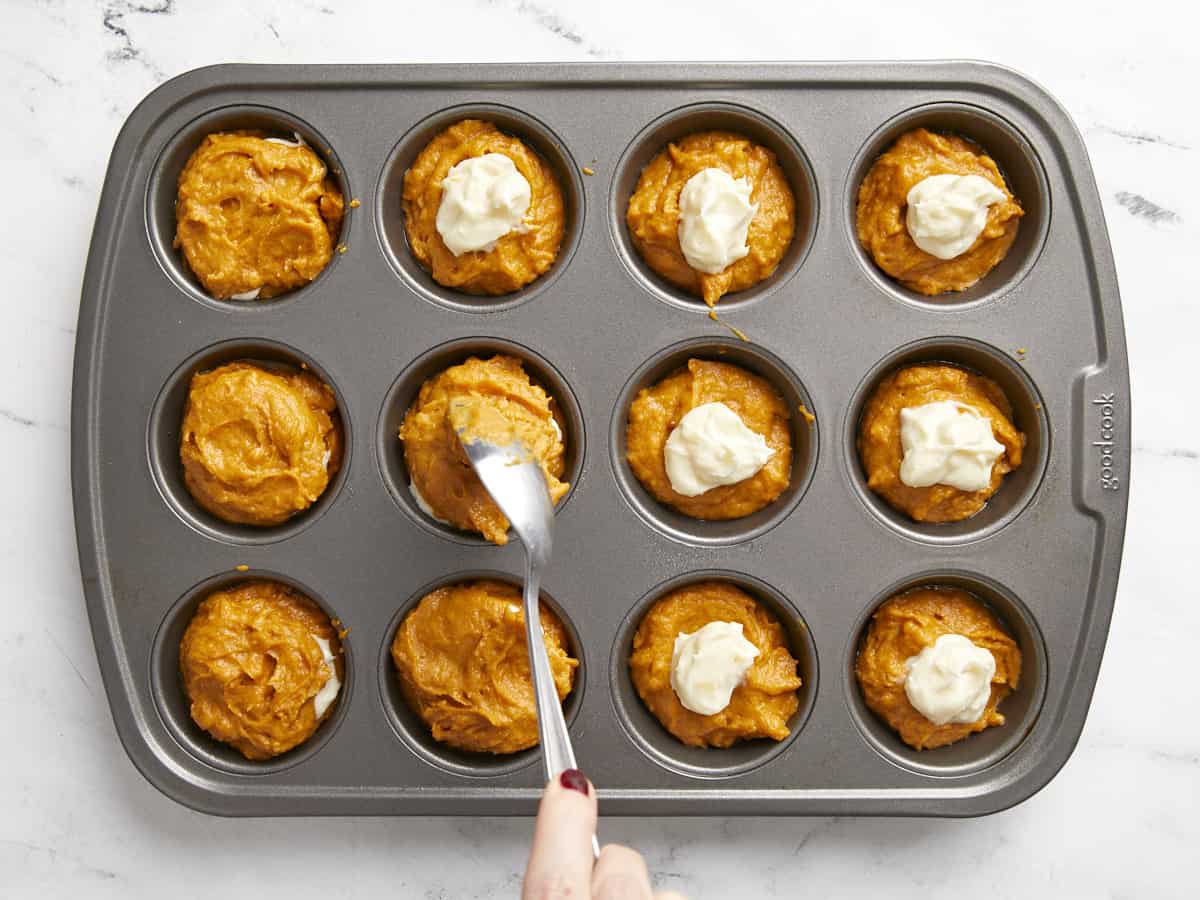
  • Grease a muffin tin or line with muffin liners. Fill each well in the muffin pan about ⅓ full. Add a small dollop of the cream cheese to each well, in the center of the muffin batter. Divide the remaining muffin batter between each well, covering the cream cheese. Each well in the muffin pan should be filled about ¾ full.
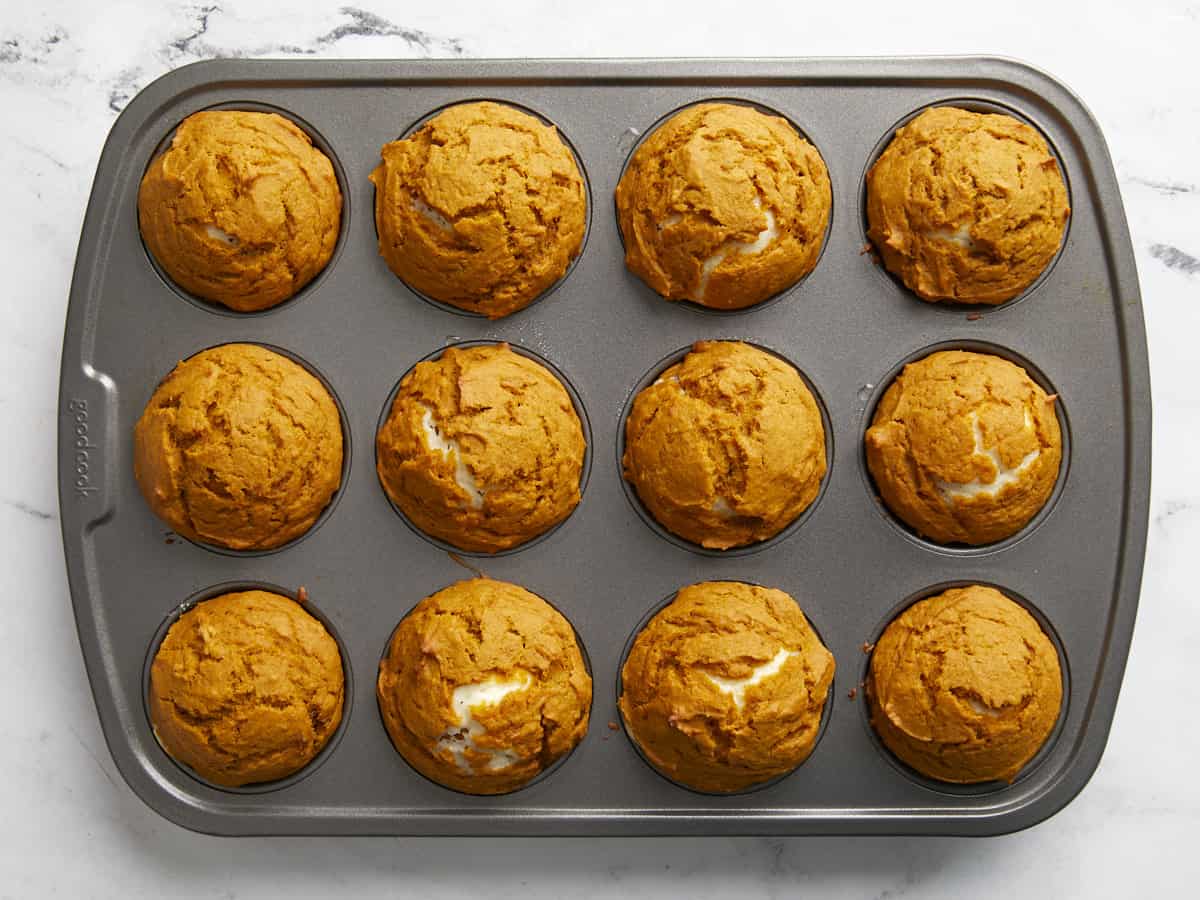
  • Bake the muffins for about 24 minutes, or until fully puffed in the center and slightly cracked on top.
  • Remove the muffins from the oven and let them cool for about 5 minutes before gently removing them from the muffin pan and allowing them to finish cooling on a wire rack.

See how we calculate recipe costs here.
Nutrition

Serving: 1muffin | Calories: 292kcal | Carbohydrates: 39g | Protein: 4g | Fat: 14g | Sodium: 224mg | Fiber: 2g
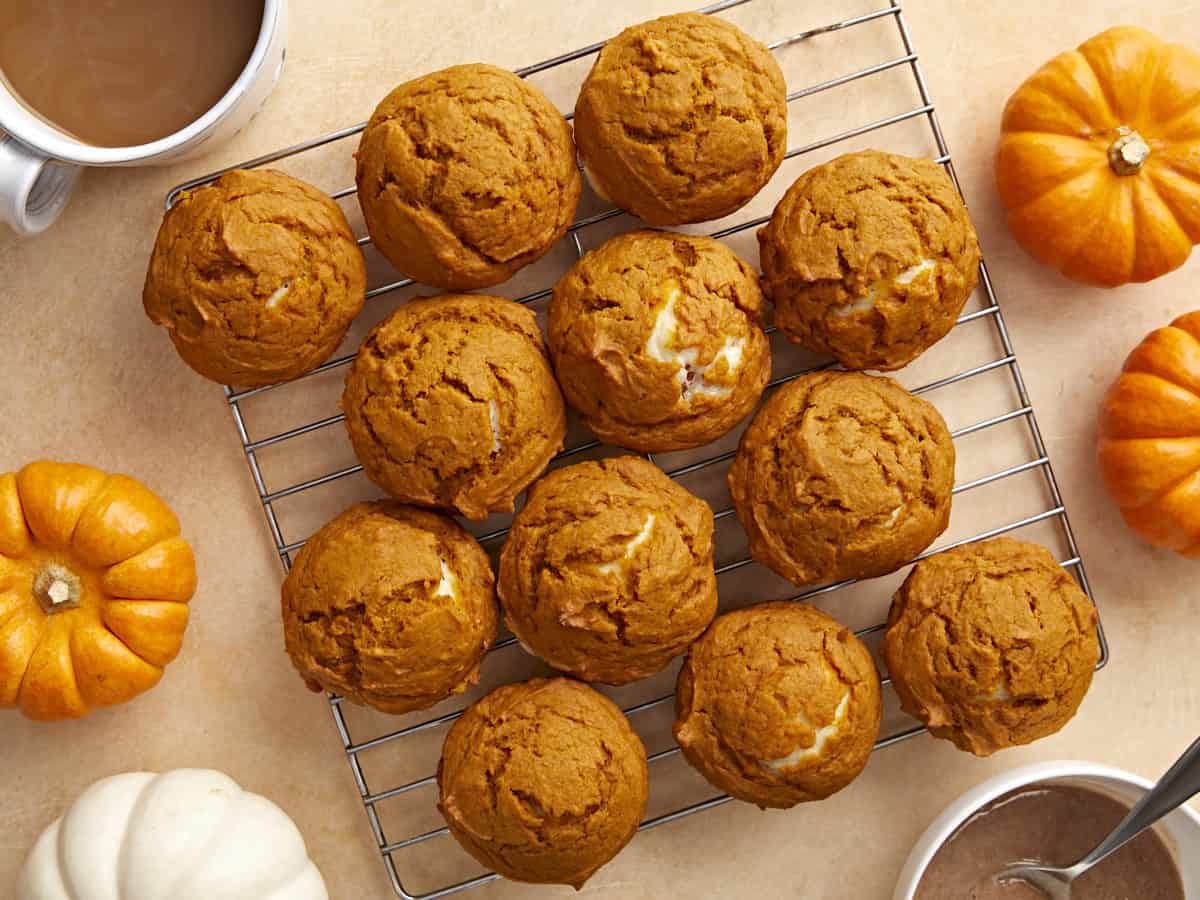
Overhead view of pumpkin muffins on a wire cooling rack.

How to Make Pumpkin Muffins – Step by Step Photos

Dry ingredients for pumpkin muffins in a bowl, not mixed together.

Preheat the oven to 350ºF. In a medium bowl, stir together 2 cups all-purpose flour, 1 tsp baking powder, ½ tsp baking soda, ½ tsp salt, and 1 tsp pumpkin pie spice until evenly combined.

Wet ingredients for pumpkin muffins in a bowl, not stirred together.

In a separate large bowl, stir together one 15oz. can of pumpkin purée, 2 large eggs, ½ cup white sugar, ½ cup brown sugar, ½ cup cooking oil, and 1 tsp vanilla extract until smooth.

Pumpkin muffin batter mixed together in the bowl.

Add the dry ingredients to the bowl of wet ingredients and stir them together just until combined. A few small lumps are okay, just be careful not to over-stir.

Cream cheese filling mixed in a bowl with a spoon.

To make the cream cheese filling, stir together 4oz. room temperature cream cheese and 2 Tbsp white sugar.

Muffin tin being filled with pumpkin batter and cream cheese filling.

Grease a muffin tin or line with paper liners. Fill each well in the tin about ⅓ full with pumpkin batter, then add a dollop of the sweetened cream cheese on top. Fill the rest of the way with the remaining pumpkin batter. Or, if choosing not to do the cream cheese filling, simply divide the pumpkin batter among the 12 wells of the muffin tin.

Baked pumpkin muffins in the muffin tin.

Bake the muffins in the preheated 350ºF oven for about 24 minutes, or until the muffins are fully puffed in the center and cracked slightly, and a little golden on the edges. Let them cool for about 5 minutes in the muffin pan before gently transferring them to a wire rack to finish cooling.

Close up side view of the pumpkin muffins cooling on a wire rack.

The post Pumpkin Muffins appeared first on Budget Bytes.

Stuffed Spaghetti Squash

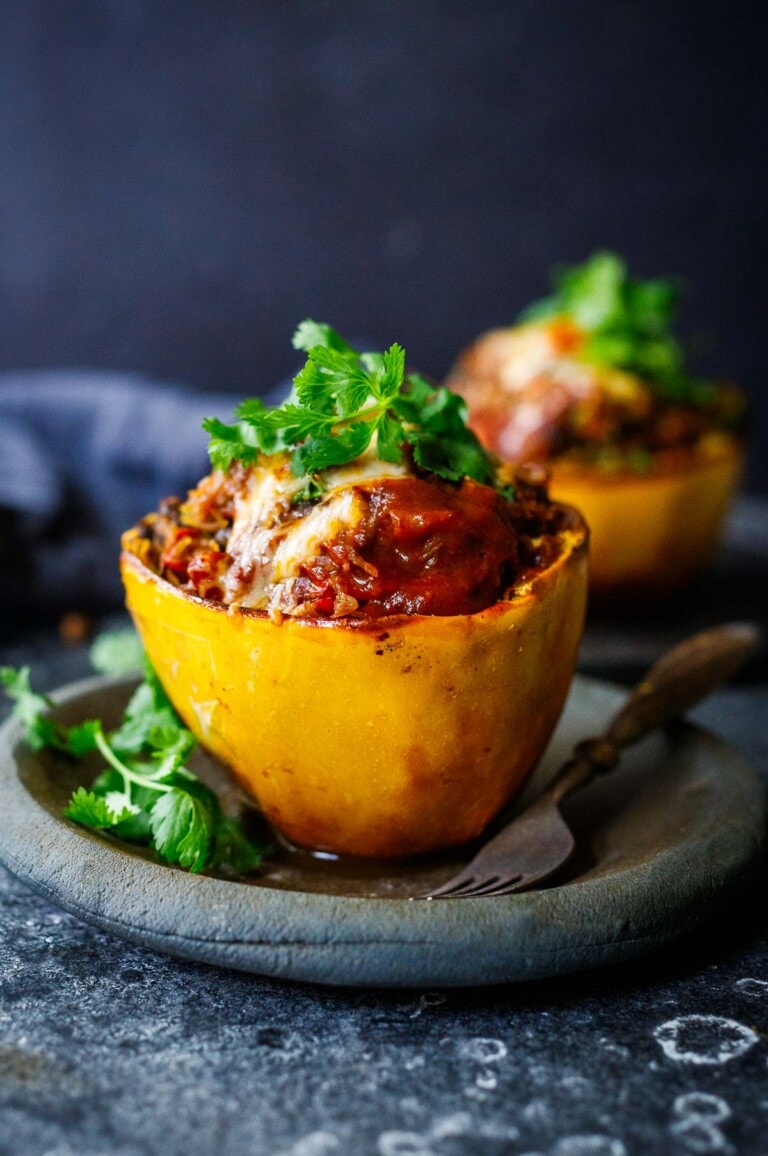
A delicious vegetarian recipe for Stuffed Spaghetti Squash with a Mexican twist. Black beans, corn, bell pepper, onion and cilantro, enchilada sauce and melty cheese give this spaghetti squash recipe the best flavor. Low-carb and vegan-adaptable!

A delicious vegetarian recipe for Stuffed Spaghetti Squash with a Mexican twist. Black beans, corn, bell pepper, onion and cilantro, enchilada sauce and melty cheese give this spaghetti squash recipe the best flavor! Vegan-adaptable!
A delicious vegetarian recipe for Stuffed Spaghetti Squash with a Mexican twist. Black beans, corn, bell pepper, onion and cilantro, enchilada sauce and melty cheese give this spaghetti squash recipe the best flavor. Low-carb and vegan-adaptable!

Homemade Applesauce

A simple & delicious Homemade Applesauce recipe with no added sugar, four simple ingredients, and lots of cozy fall flavor!

The post Homemade Applesauce appeared first on Budget Bytes.

I always get a warm and cozy feeling anytime I make homemade applesauce. The smell of apples and cinnamon spreads through the kitchen as it cooks and soon the scent of Fall has filled the entire house. Fall is also the best time to make this homemade applesauce recipe because apples are in season so there are a lot of varieties to choose from, their flavor is at their peak, and they’re inexpensive. Sure you can buy store-bought applesauce, but trust me it’s no comparison to the taste of homemade applesauce!

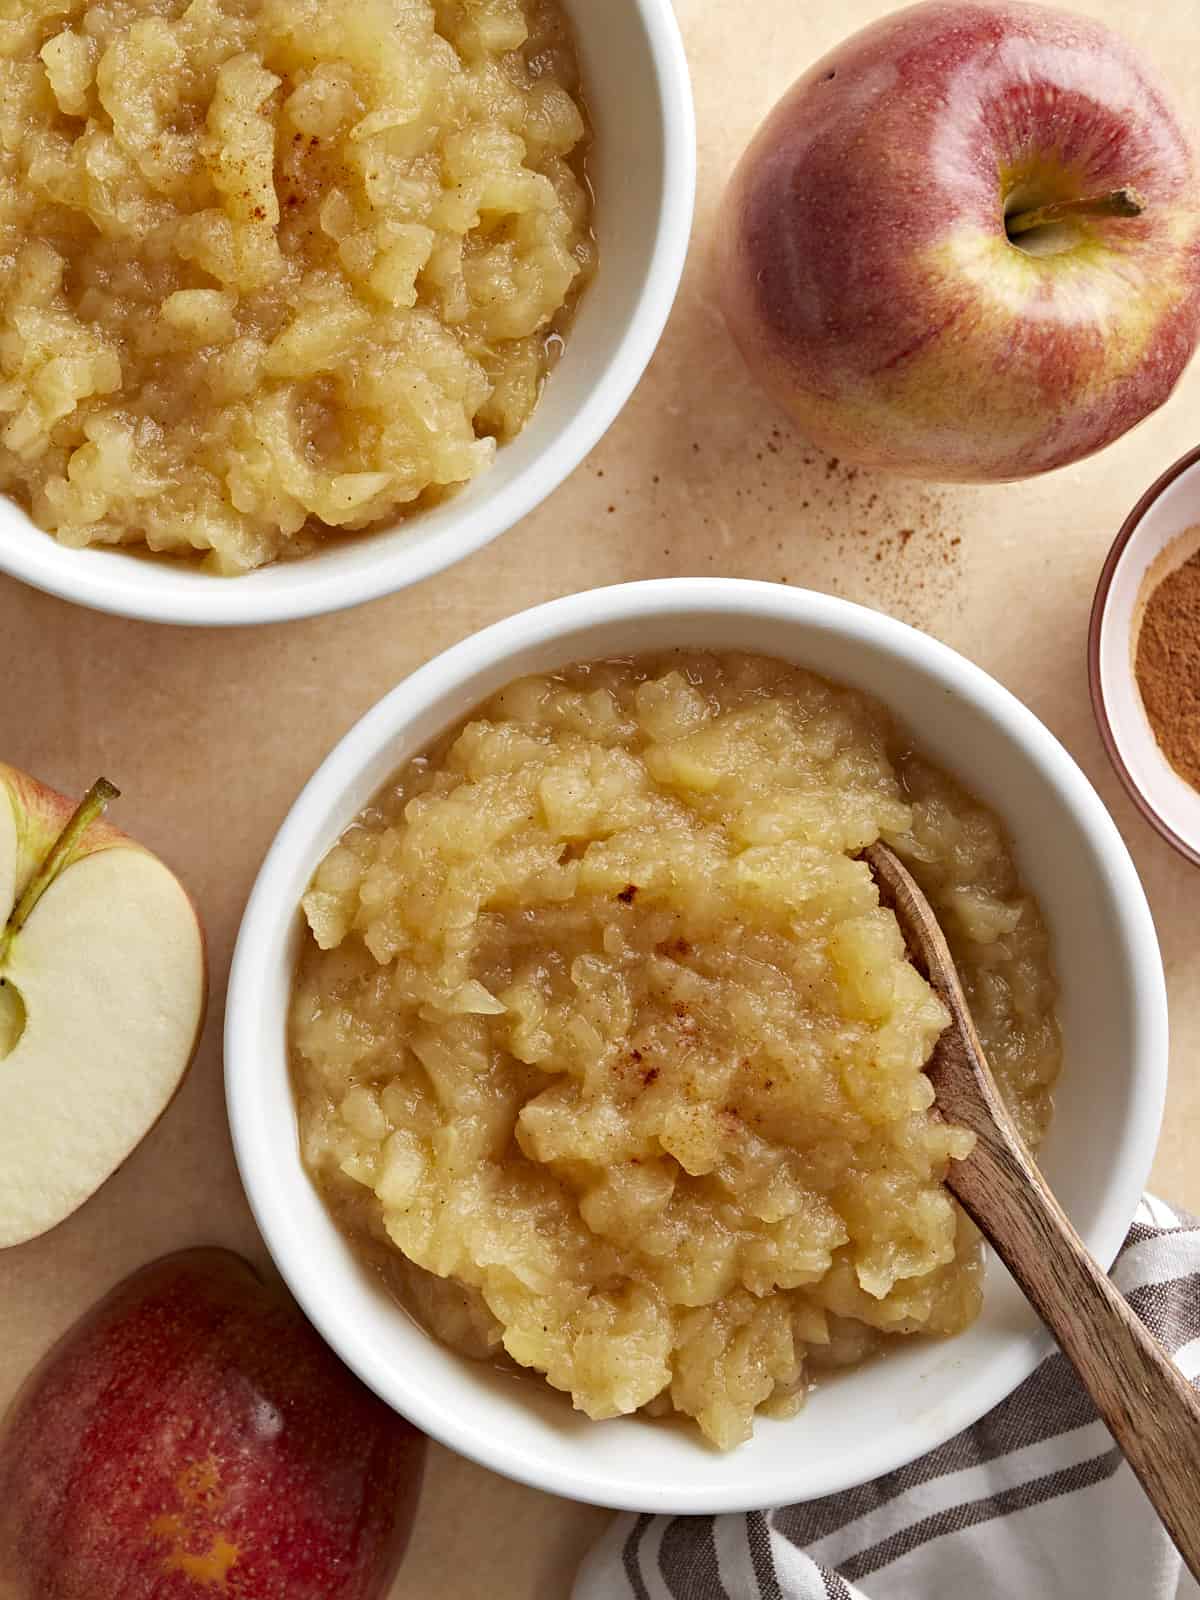
Two small bowls of homemade applesauce with apples and cinnamon on the side.

Ingredients for Homemade Applesauce

You only need 4 simple ingredients to make this easy homemade applesauce recipe:

  • Apples – Of course, there are lots of different apples to choose from when making applesauce, but in general you’ll want to stick with sweet or semi-sweet varieties. If you choose a tart apple, like granny smith, you may want to add some additional sugar. We used Gala apples for this recipe.
  • Water –  Water is used to cook the apples. Using water instead of apple juice or apple cider allows the fresh flavor of the apples to shine through!
  • Ground cinnamon – A touch of ground cinnamon goes a long way and tastes great with cooked apples. It also gives the applesauce just a hint of flavor. 
  • Lemon juice – A little lemon juice brightens up the applesauce and helps the flavors pop. Don’t skip this one!

That’s it! Perfect homemade applesauce and no added sweetener needed.

What Kind of Apples Are Best For Making Applesauce?

You can honestly use several different types of apples to make applesauce. But to keep from having to add any sugar or sweetener, I suggest using a sweeter or semi-sweet variety of apple, like Fuji, Gala, Pink Lady, or Honeycrisp. You can use just one kind or a combination of 2 varieties if you want. And, of course, if you’re making your applesauce during the fall season, you’ll find the best deals and the sweetest apples during this time of year. ;)

Should You Peel The Apples?

This is a great question and it honestly depends on personal preference. I like to peel my apples when making applesauce in order to get a smoother consistency. But it’s definitely not required. If you’re short on time, just give them a good wash and leave the peel on.

How To Store Homemade Applesauce?

Homemade applesauce stores very well in the refrigerator and the freezer. Just store any leftover applesauce in an airtight container in the refrigerator for 4-5 days or in the freezer for up to 3 months. To thaw the applesauce, let it sit in the refrigerator overnight.

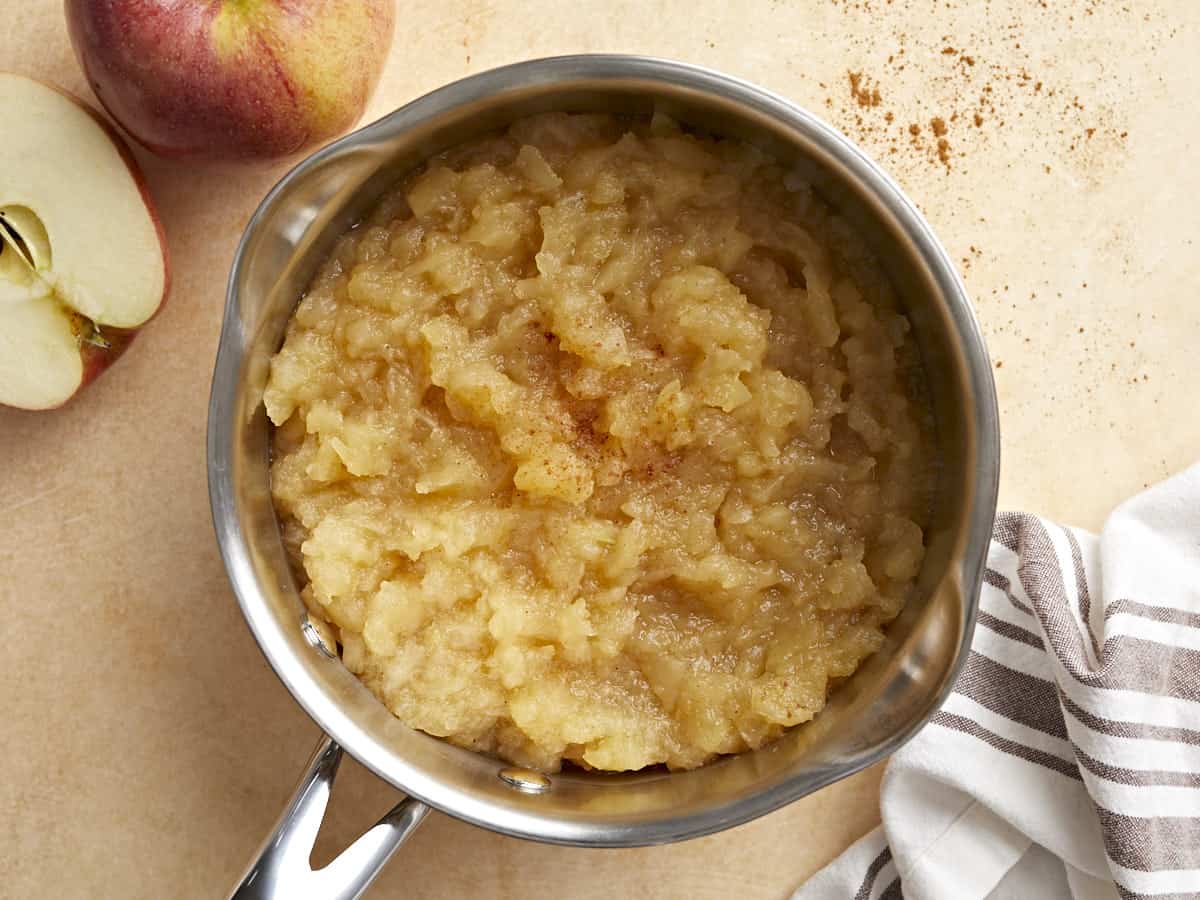
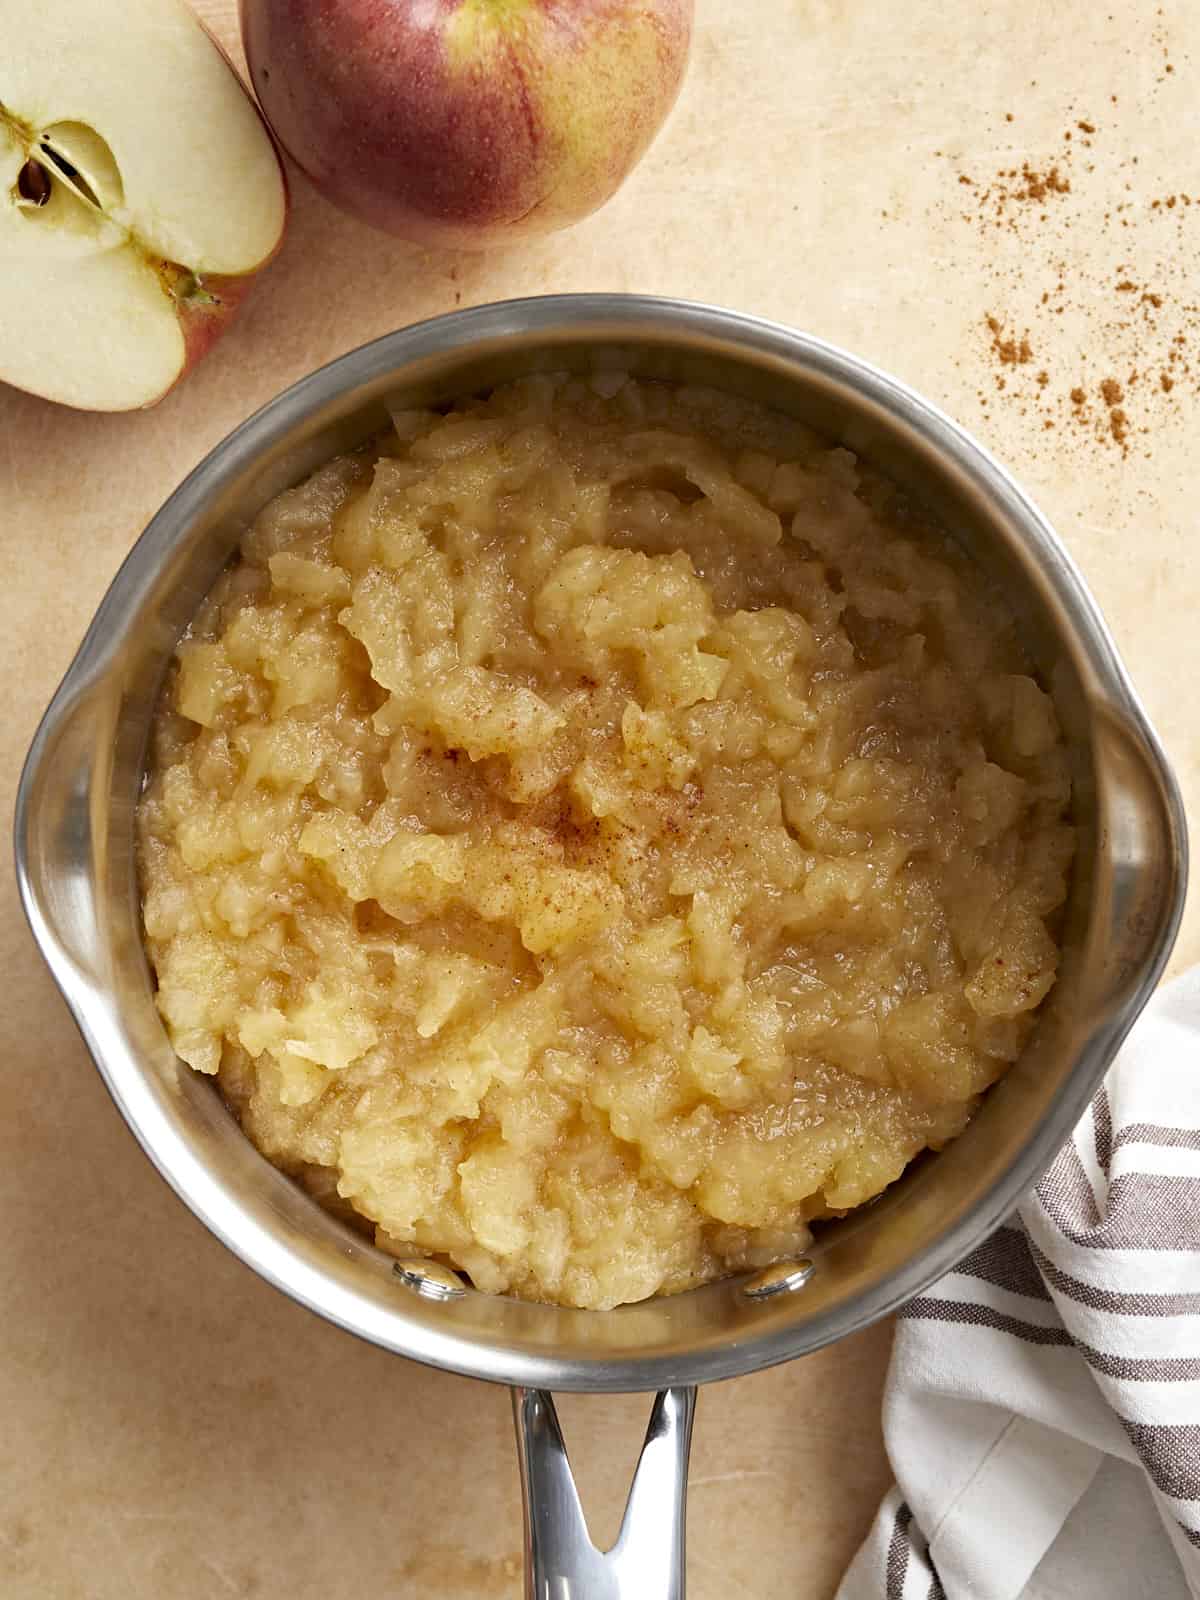
Homemade applesauce in a small saucepan with apples and a napkin on the side.
Two small bowls of homemade applesauce with apples and cinnamon on the side.
Print

Homemade Applesauce

A simple & delicious Homemade Applesauce recipe with no added sugar, four simple ingredients, and lots of cozy fall flavor!
Course Breakfast, Dinner, Lunch
Cuisine American
Total Cost $5.14 recipe / $0.85 serving
Prep Time 10 minutes
Cook Time 20 minutes
Total Time 30 minutes
Servings 6
Calories 190kcal

Equipment

Ingredients

  • 6 large apples (about 3 lbs.) $5.07
  • 1/4 tsp ground cinnamon $0.03
  • 3/4 cup water $0.00
  • 2 tsp lemon juice $0.04

Instructions

  • Wash, peel, and remove the core from the apples. Chop the apples into small 3/4 inch chunks.
  • Add the chopped apples, ground cinnamon and water to a medium pot and place a lid on top. Heat the apples over medium, allowing them to come up to a simmer. Continue to simmer the apples for 15-20 minutes, stirring occasionally, until they are tender. The total cook time will vary depending on the variety of apple used.*
  • Remove the pot from heat. Mash the apples with a potato masher inside the pot for a chunky texture. Or allow the apples to cool slightly and blend with an immersion blender or carefully inside a blender for a smoother texture.
  • Add the lemon juice to the applesauce and stir to combine. Serve homemade applesauce warm or chilled in the refrigerator.

See how we calculate recipe costs here.
Notes

* If the applesauce is too thick you can add a little more water, or if it’s too runny it can be simmered a little longer, without a lid, to thicken.

Nutrition

Serving: 0.5cups | Calories: 190kcal | Carbohydrates: 51g | Protein: 1g | Fat: 1g | Sodium: 7mg | Fiber: 9g
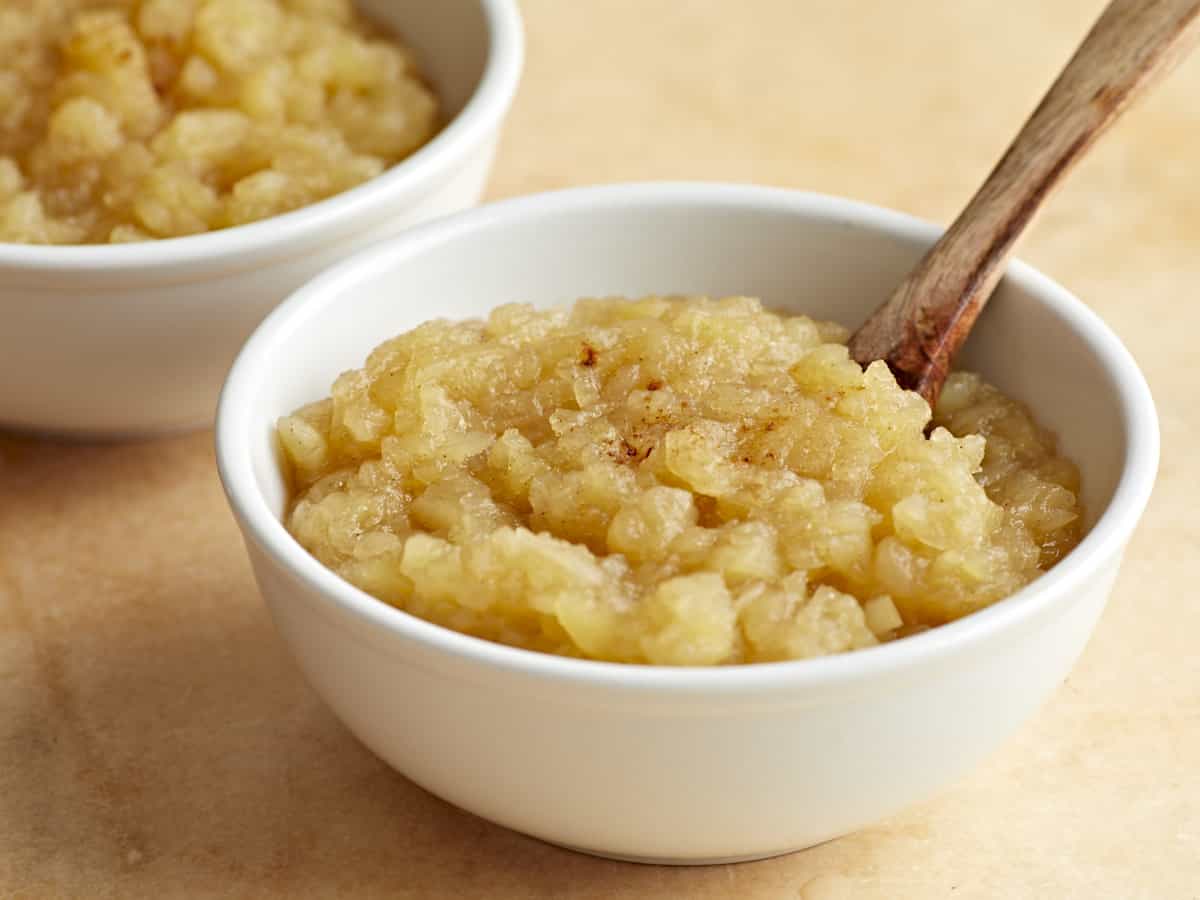
Side view of two bowls of homemade applesauce.

How to Make Homemade Applesauce – Step by Step Photos

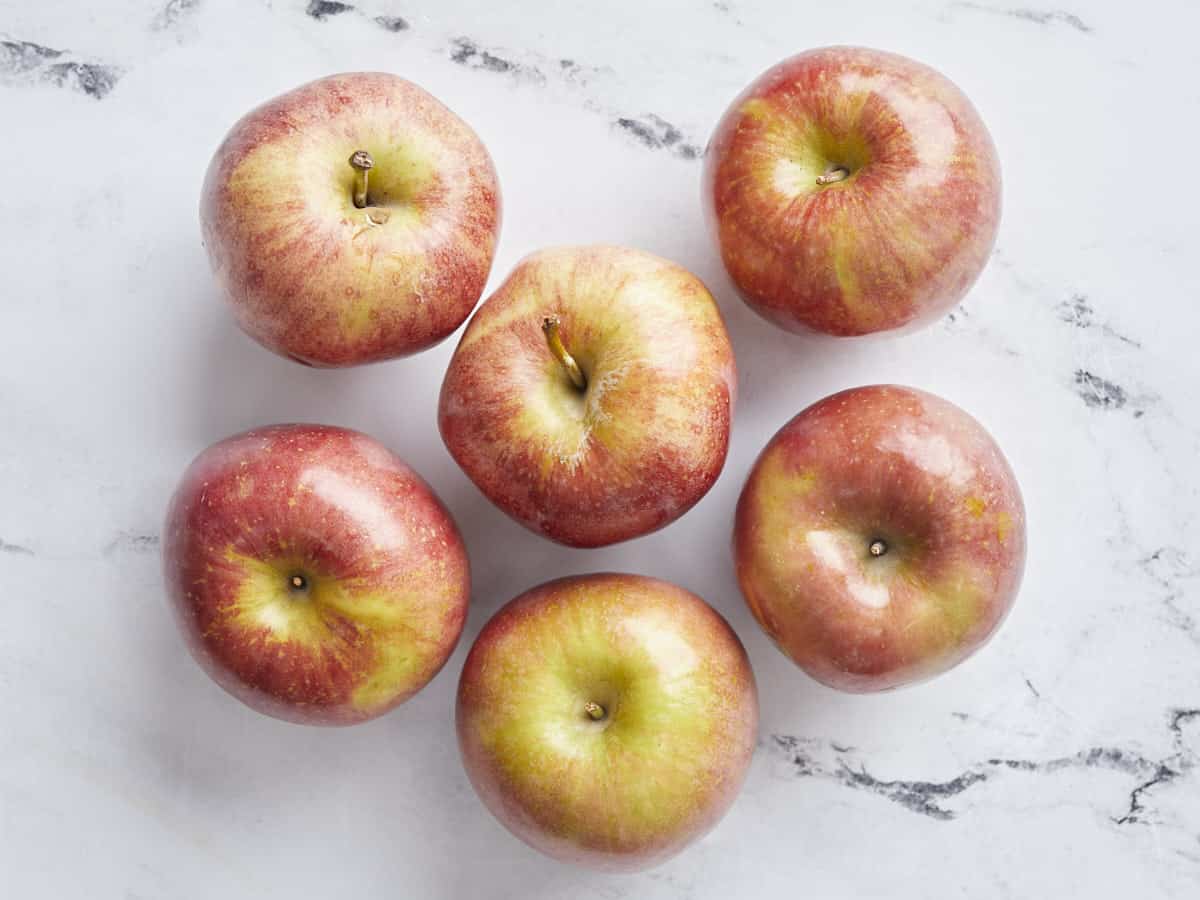
Overhead view of six apples on a counter.

Wash, peel, and remove the core from 6 apples. Chop the apples into 3/4 inch small chunks.

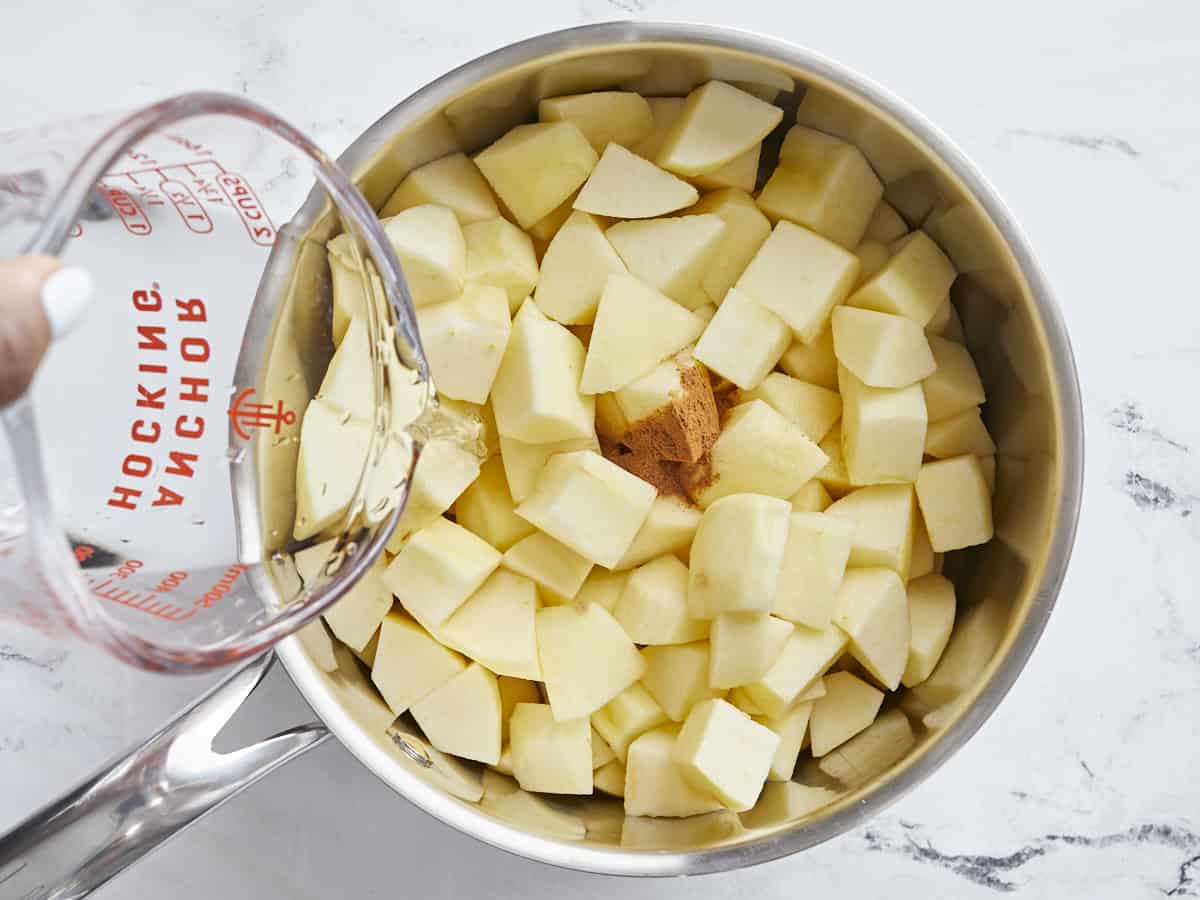
Overhead view of peeled and diced apples in a small saucepan with cinnamon and water being poured on top.

Add the chopped apples, 1/4 tsp ground cinnamon, and 3/4 cup of water to a medium pot and place a lid on top. Heat the apples over medium heat, allowing them to come up to a simmer. Continue to simmer the apples for 15-20 minutes, stirring occasionally, until they are tender. The total cook time will vary depending on the variety of apple used.

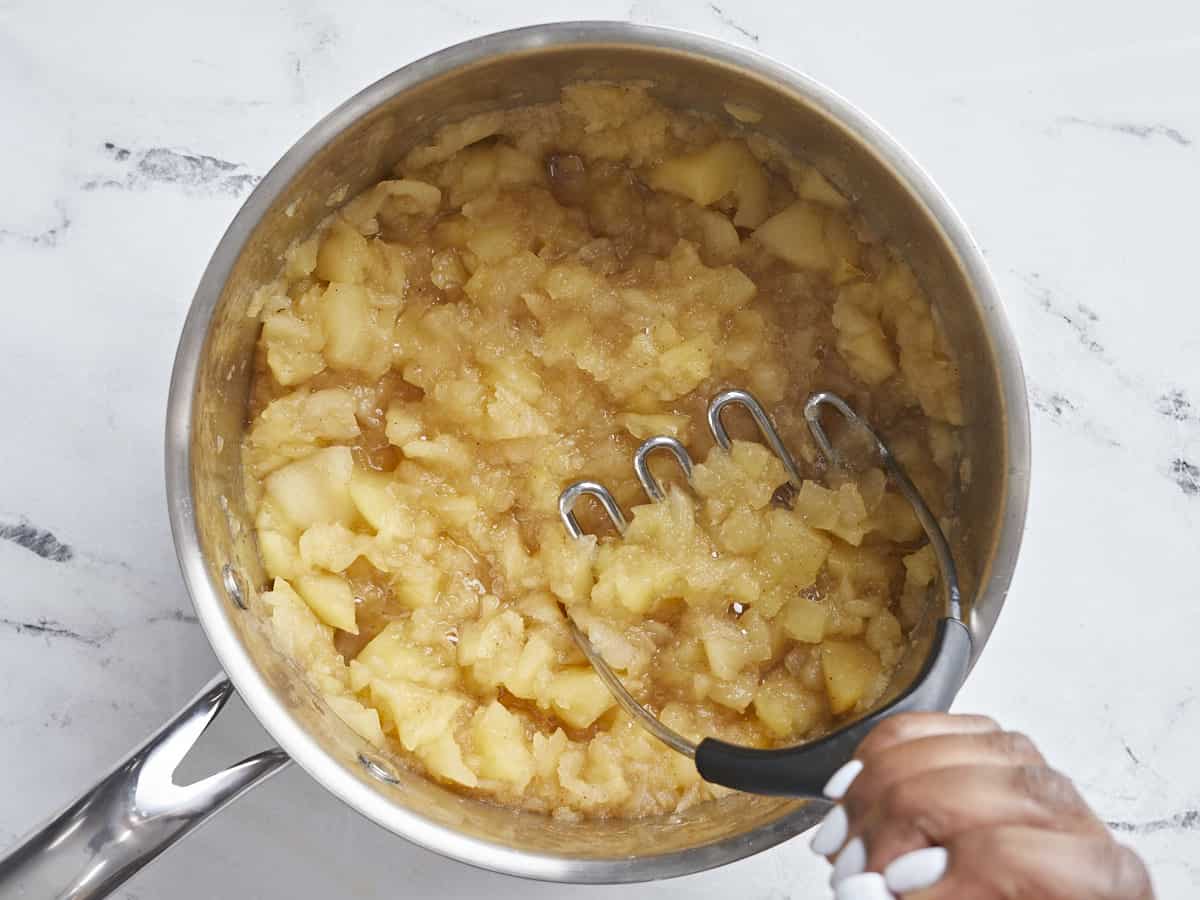
Overhead view of cooked apples in a saucepan being mashed with a potato masher.

Remove the pot from heat. Mash the apples with a potato masher inside the pot for a chunky texture. Or allow the apples to cool slightly and blend with an immersion blender or carefully inside a blender for smoother texture.

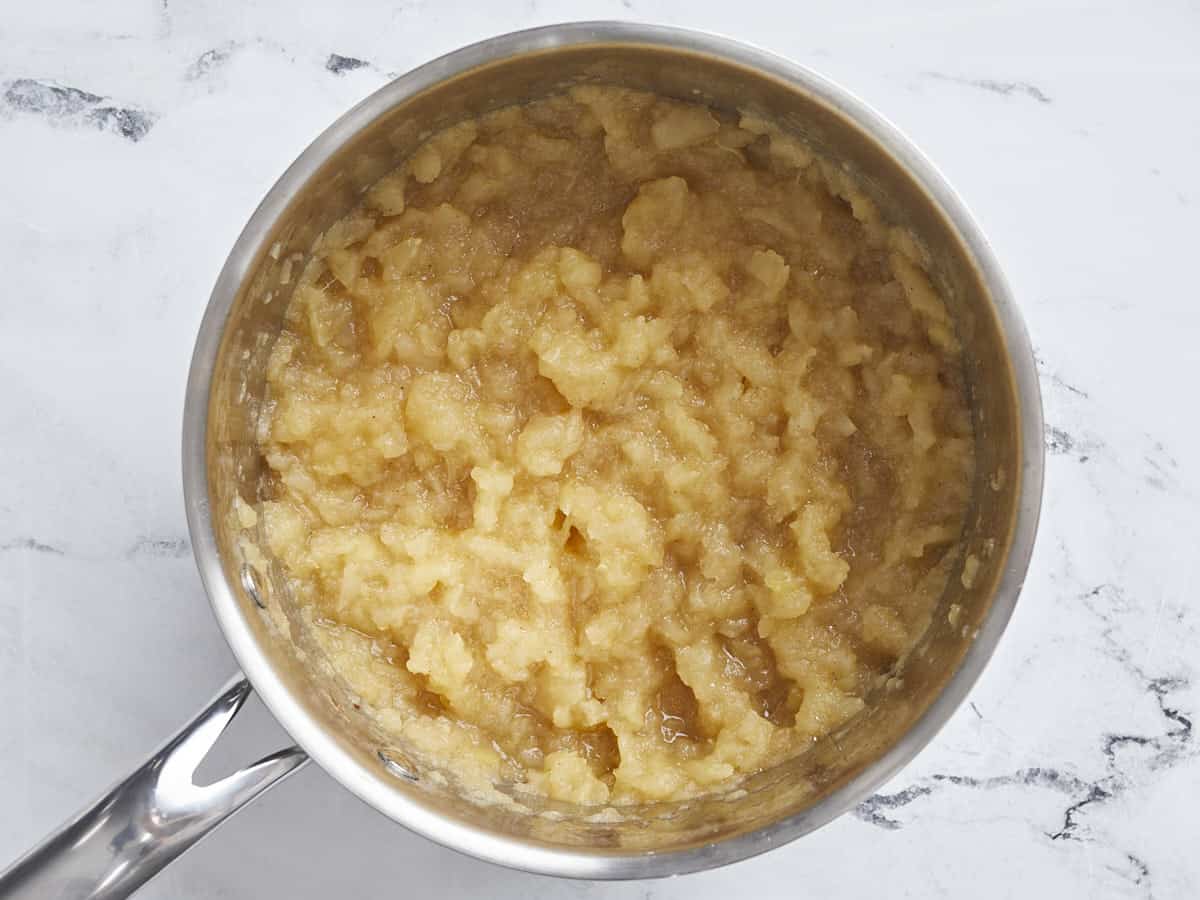
Overhead view of mashed homemade applesauce in a small saucepan.

Add the 2 tsp of lemon juice to the applesauce and stir to combine. Serve homemade applesauce warm or chilled in the refrigerator. Enjoy!

Homemade applesauce in a small saucepan with apples and a napkin on the side.

The post Homemade Applesauce appeared first on Budget Bytes.

The BEST Buttermilk Pancakes

No Sunday morning breakfast is complete without a tall stack of pancakes. But if you’re tired of flat flapjacks, we’re about to change your breakfast world with this buttermilk pancake recipe. You’ll love how light and fluffy these pancakes are, the tangy sweet flavor, and the little crunch that comes from the butter-browned edges. Serve these buttermilk pancakes with a little blackberry jam, syrup, and a side of bacon and scrambled eggs for a simple,…

Read More

The post The BEST Buttermilk Pancakes appeared first on Spoon Fork Bacon.

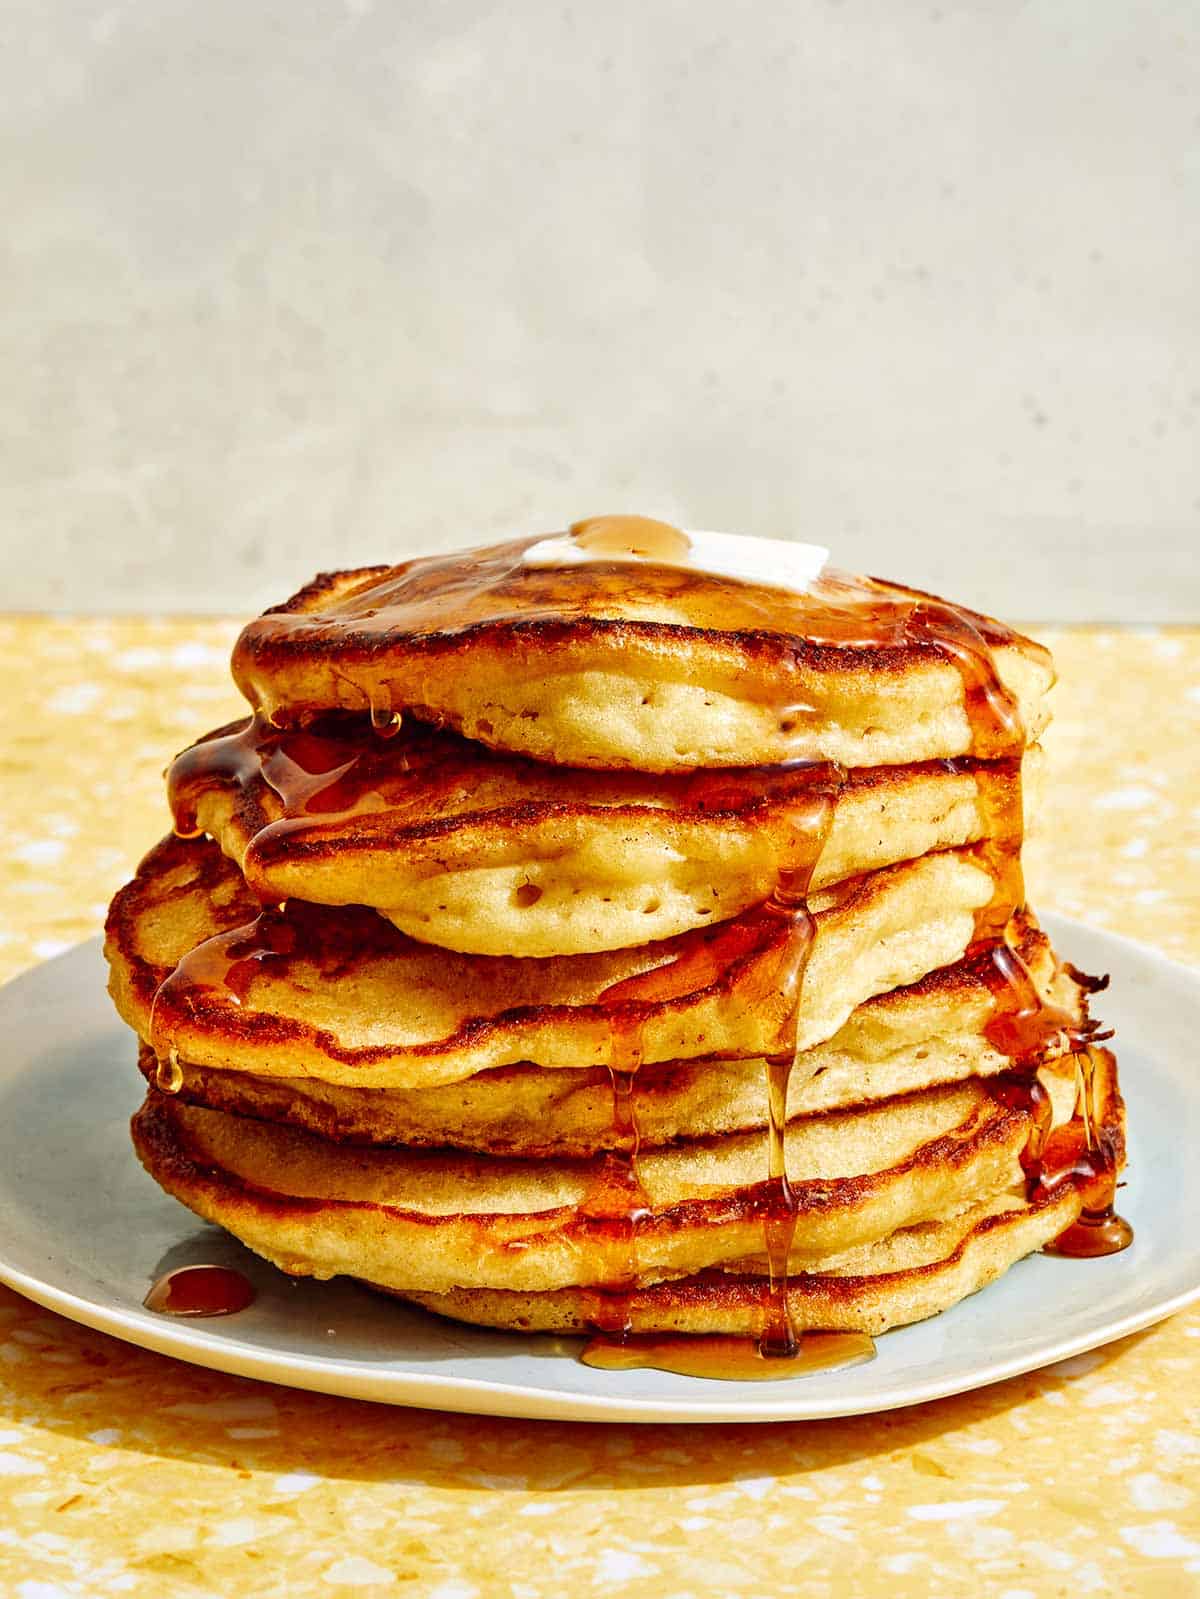
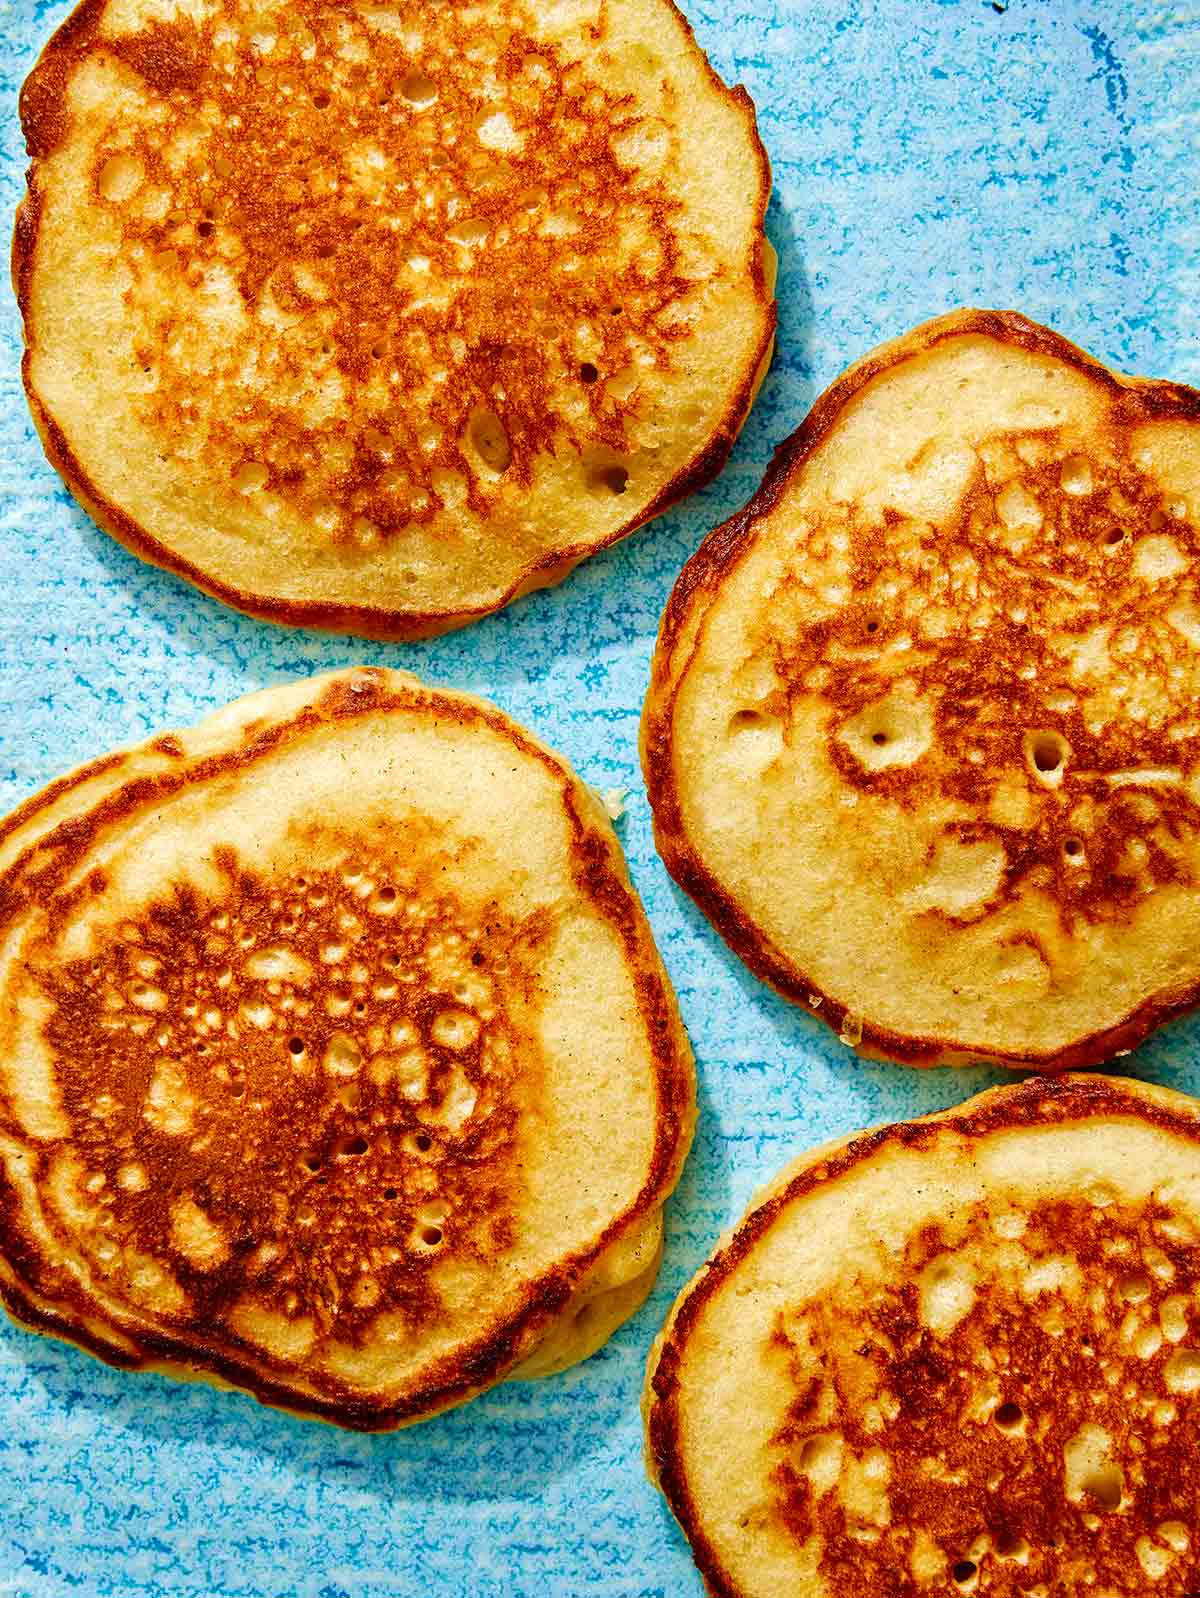
Buttermilk Pancake recipe with syrup poured on top.

No Sunday morning breakfast is complete without a tall stack of pancakes. But if you’re tired of flat flapjacks, we’re about to change your breakfast world with this buttermilk pancake recipe. You’ll love how light and fluffy these pancakes are, the tangy sweet flavor, and the little crunch that comes from the butter-browned edges.

Serve these buttermilk pancakes with a little blackberry jam, syrup, and a side of bacon and scrambled eggs for a simple, filling, and incredibly delicious breakfast. And if you want to enjoy these pancakes any day of the week, make extras and freeze them. They’re perfect for warming up in the toaster for a 5-minute breakfast on a busy morning!

Why We Love These Buttermilk Pancakes

  • They’re extra light and fluffy.
  • The buttermilk adds the perfect amount of tang, perfectly balanced by a light sweetness.
  • You can easily freeze any extras for a quick and delicious weekday morning breakfast!
  • Super versatile! Keep everyone happy by using various add-ins like blueberries, chocolate chips, or bananas and cinnamon!
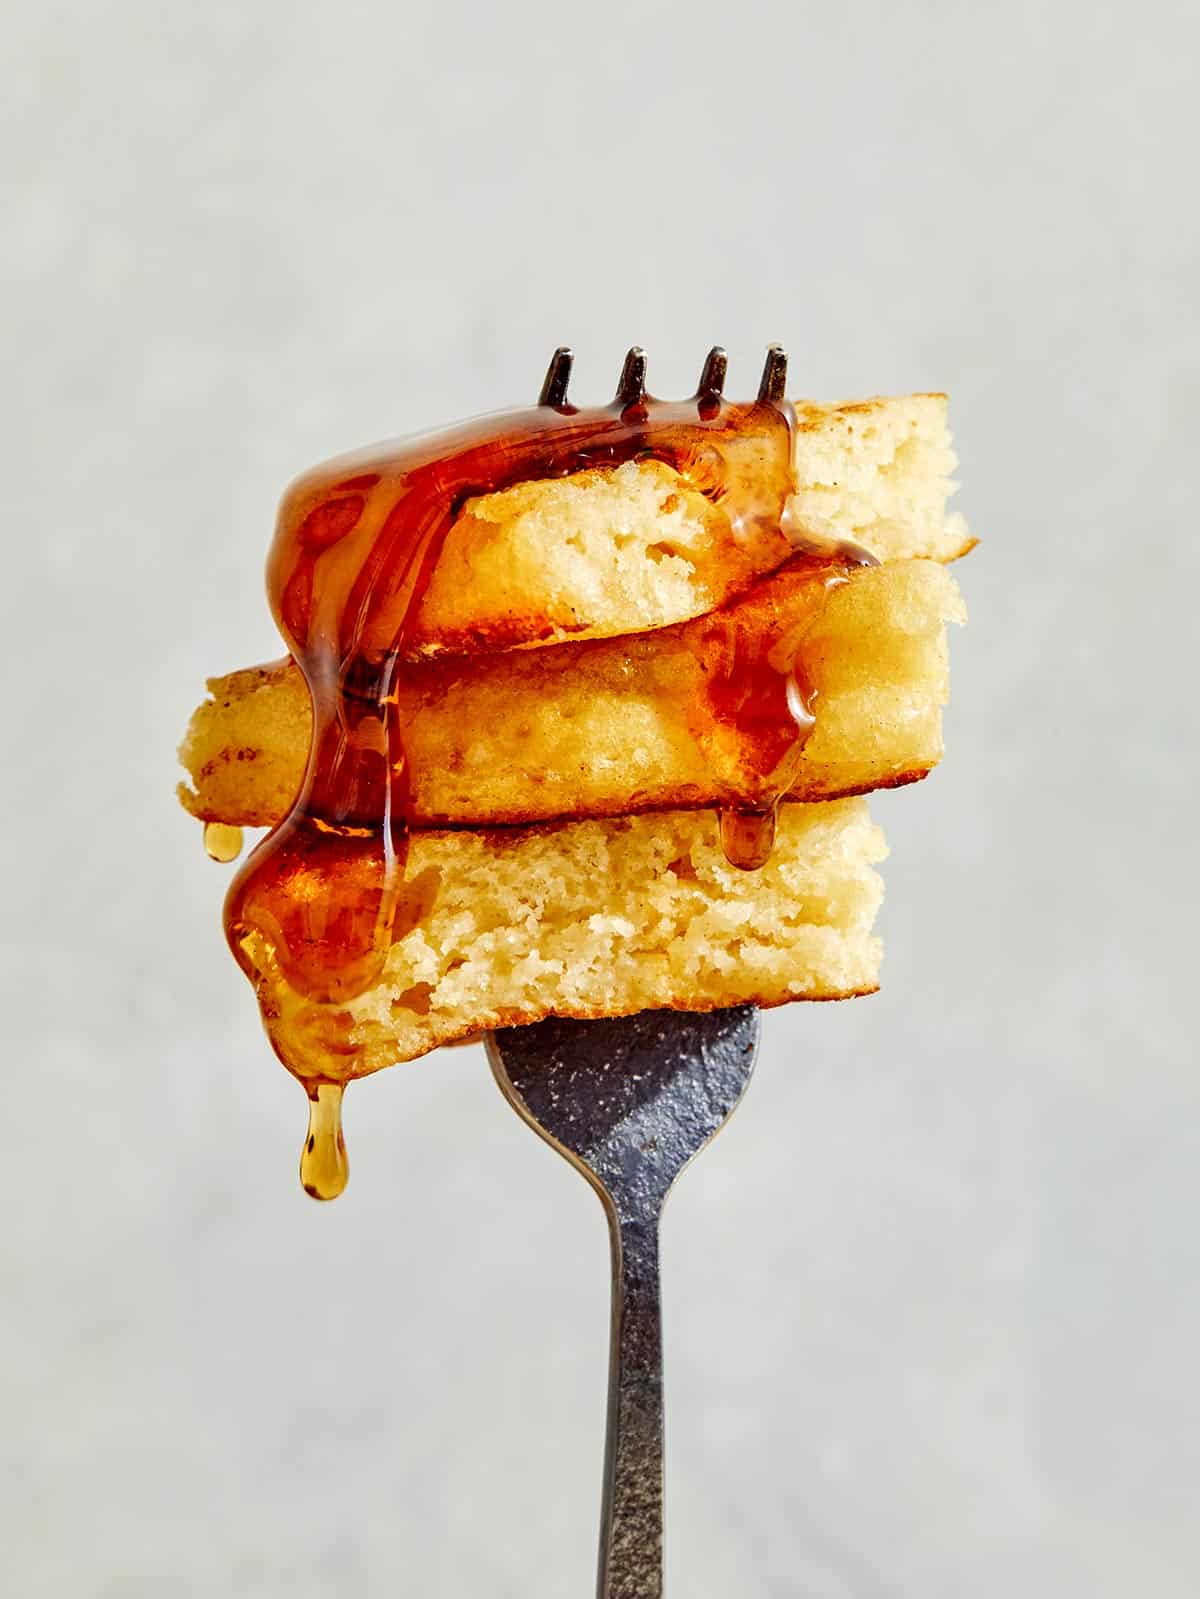
Buttermilk pancake bite on a fork with syrup poured over it.

How to Make the BEST Buttermilk Pancakes

Ingredients

Process

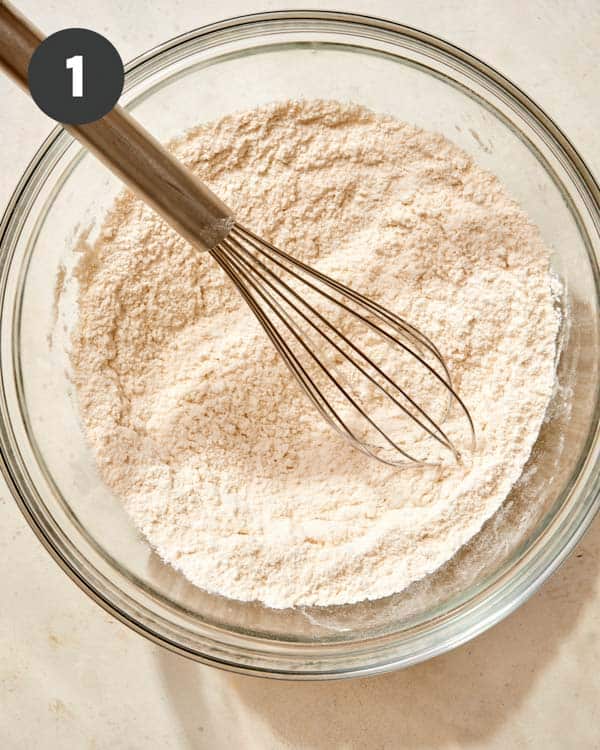
1.Place all of the dry ingredients into a mixing bowl and whisk together until combined.

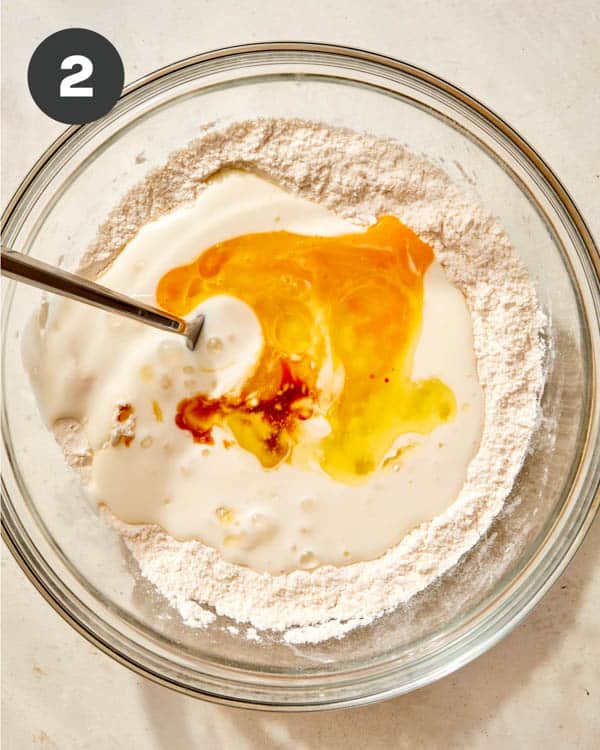
2. Add all remaining ingredients, except for the 3 tablespoons of (un-melted) butter.

Dry ingredients for buttermilk pancakes whisked together.
Buttermilk pancakes wet ingredients into dry.

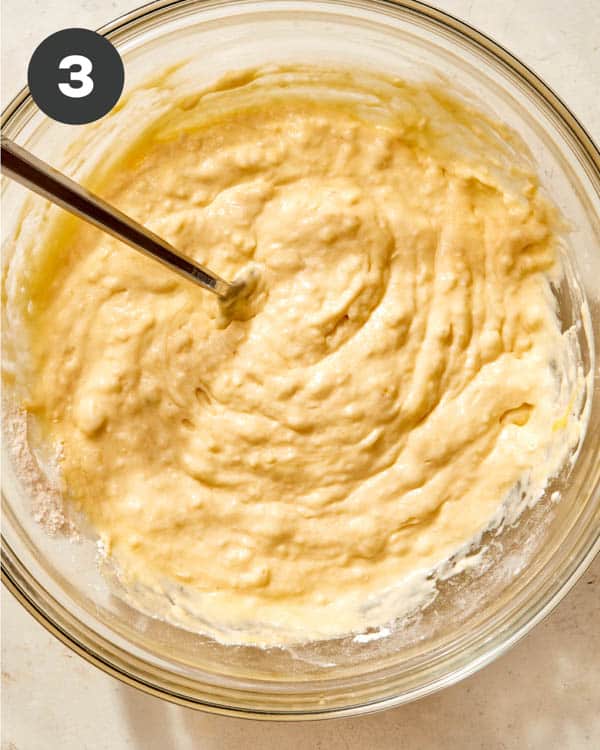
3. Whisk the wet ingredients into the dry with a fork until no dry spots remain but the batter is still lumpy.

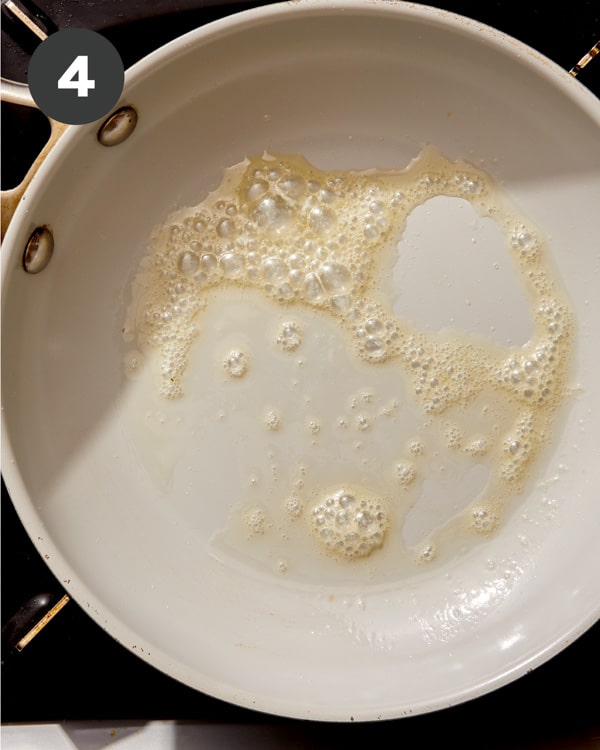
4. Place a griddle or skillet over medium heat. Add remaining butter and melt (if using skillet, melt butter and make pancakes in batches).

Buttermilk pancake batter in a bowl.
Butter melted in a skillet to cook buttermilk pancakes.

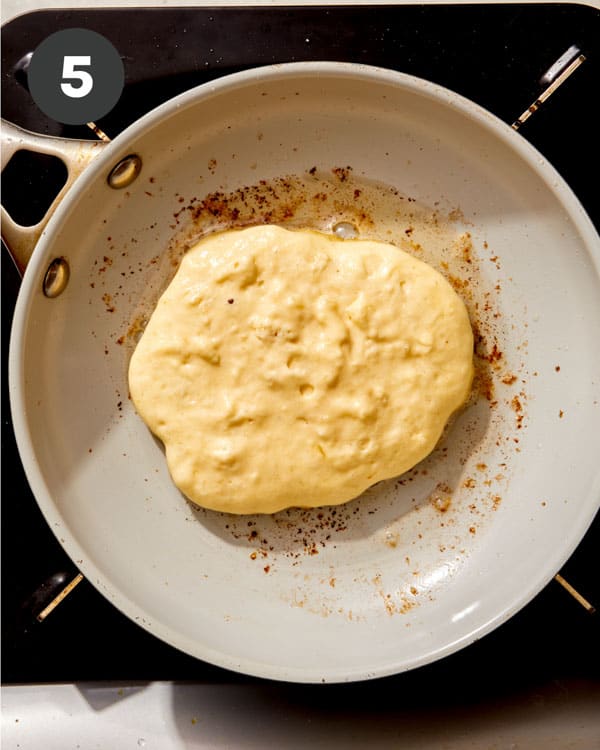
5. Pour 1/3 cup batter over melted butter and lower heat to medium-low. Cook pancakes until the top begins to bubble and barely set, about 3 to 4 minutes.

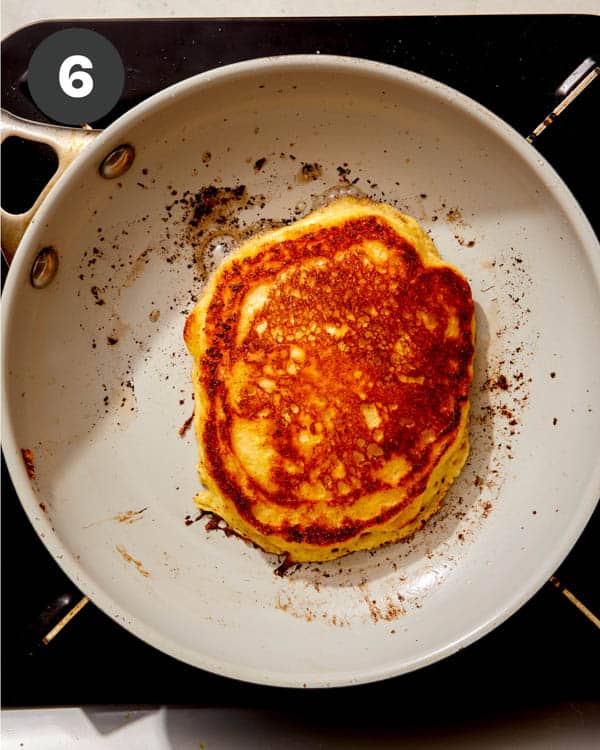
6. Flip and continue to cook until set, about 2 to 3 minutes. Remove from heat and serve.

Buttermilk pancakes cooking in a skillet.
Buttermilk pancakes in a skillet.
Buttermilk pancakes up close.

Tips and Tricks for the BEST Buttermilk Pancakes

  • Avoid overmixing the batter! You want to combine the wet and dry ingredients just until there are no more dry spots left. Too much mixing will make the pancakes dense and tough.
  • Pour the pancakes onto a hot griddle or pan. To see if it’s hot enough, flick just a little water onto the griddle. If it sizzles and quickly evaporates, the skillet is hot enough. This helps the outside brown nicely as the inside cooks.
  • Wait to flip the pancakes until you start to see bubbles in the top of the batter pop and form little holes. At this point, the underside and inside should be cooked enough to flip and cook just a little bit longer.
  • When your pancakes are done, avoid stacking them while you wait for everyone to be served. Stacking pancakes on top of each other can make the outside mushy instead of crispy. Keep them in a single layer until ready to serve to keep the outsides crisp!

Variations

While these pancakes are amazing when just served with a bit of butter and syrup, you can always try these delicious options as well!

  • Use Add-ins: Toss in half to one cup of blueberries, diced strawberries, mixed berries, diced bananas, chocolate chips, and any combination of add-ins to make each pancake a special treat!
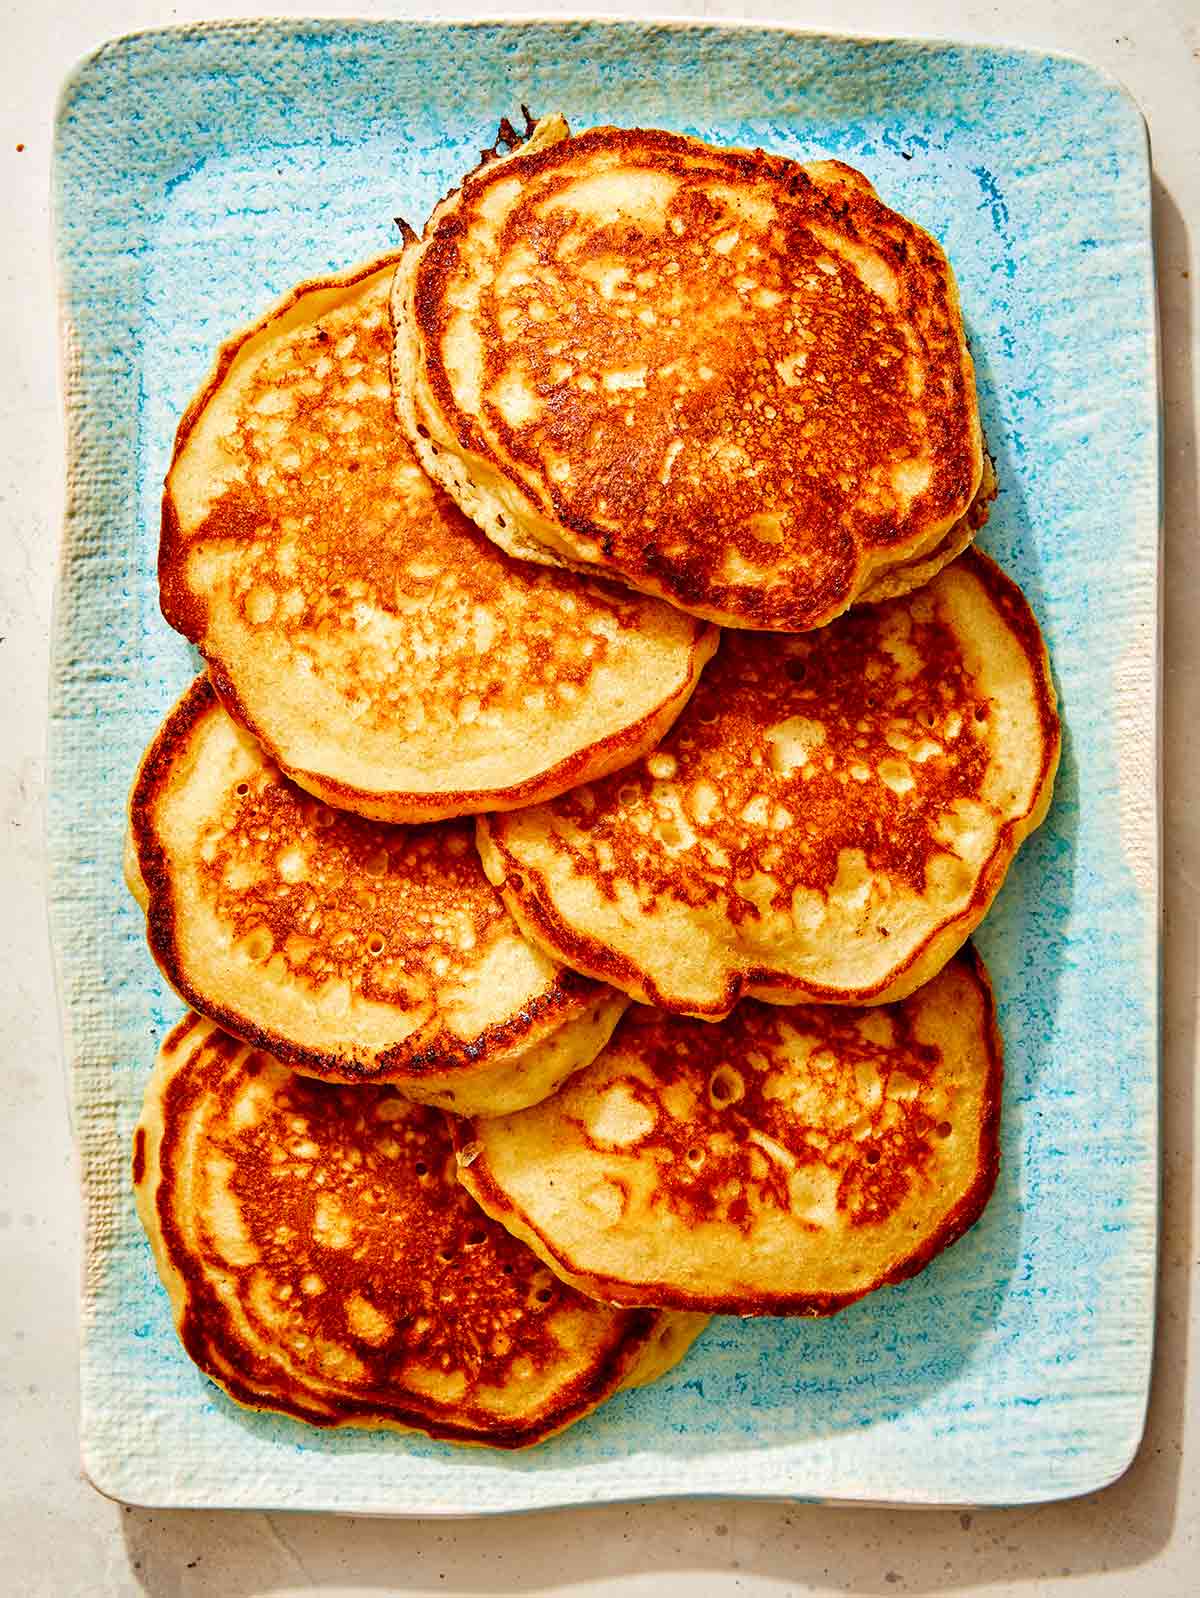
Buttermilk pancakes on a platter.

Storing Leftover Batter and Reheating Pancakes

While you may be able to store some types of pancake batter in the refrigerator or freezer, buttermilk batter doesn’t keep as well. As this batter sits too long, the pancakes won’t fluff up like they will when the batter is freshly made that same day.

You can, however, store leftover cooked buttermilk pancakes. And we highly recommend doing so!

Whether you end up with a few extra pancakes or double the batch with the intention of leftovers, these pancakes can be refrigerated or frozen to enjoy later. **We recommend slightly undercooking the pancakes you intend to reheat at a later date.

To store leftover pancakes in the refrigerator: Place them on a platter or a pan in a single layer or place a small sheet of parchment paper in between a stack of pancakes. Keep them in an airtight container in the refrigerator for up to 3 days. To reheat, we recommend a toaster oven or a toaster. Just pop them in the toaster and toast on low or until they’re heated through.

To store leftover pancakes in the freezer: Place the pancakes on a sheet pan in a single layer and freeze for 2-4 hours. Then, add all of the pancakes to an airtight container or freezer bag and freeze for up to 3 months. To reheat frozen buttermilk pancakes, pop them into the toaster until heated.

Our Favorite Dishes to Serve with Buttermilk Pancakes

Buttermilk pancakes go well with any breakfast spread (or just on their own if we’re being honest!), but especially these breakfast favorites!

More Delicious Breakfast Recipes You Will Love

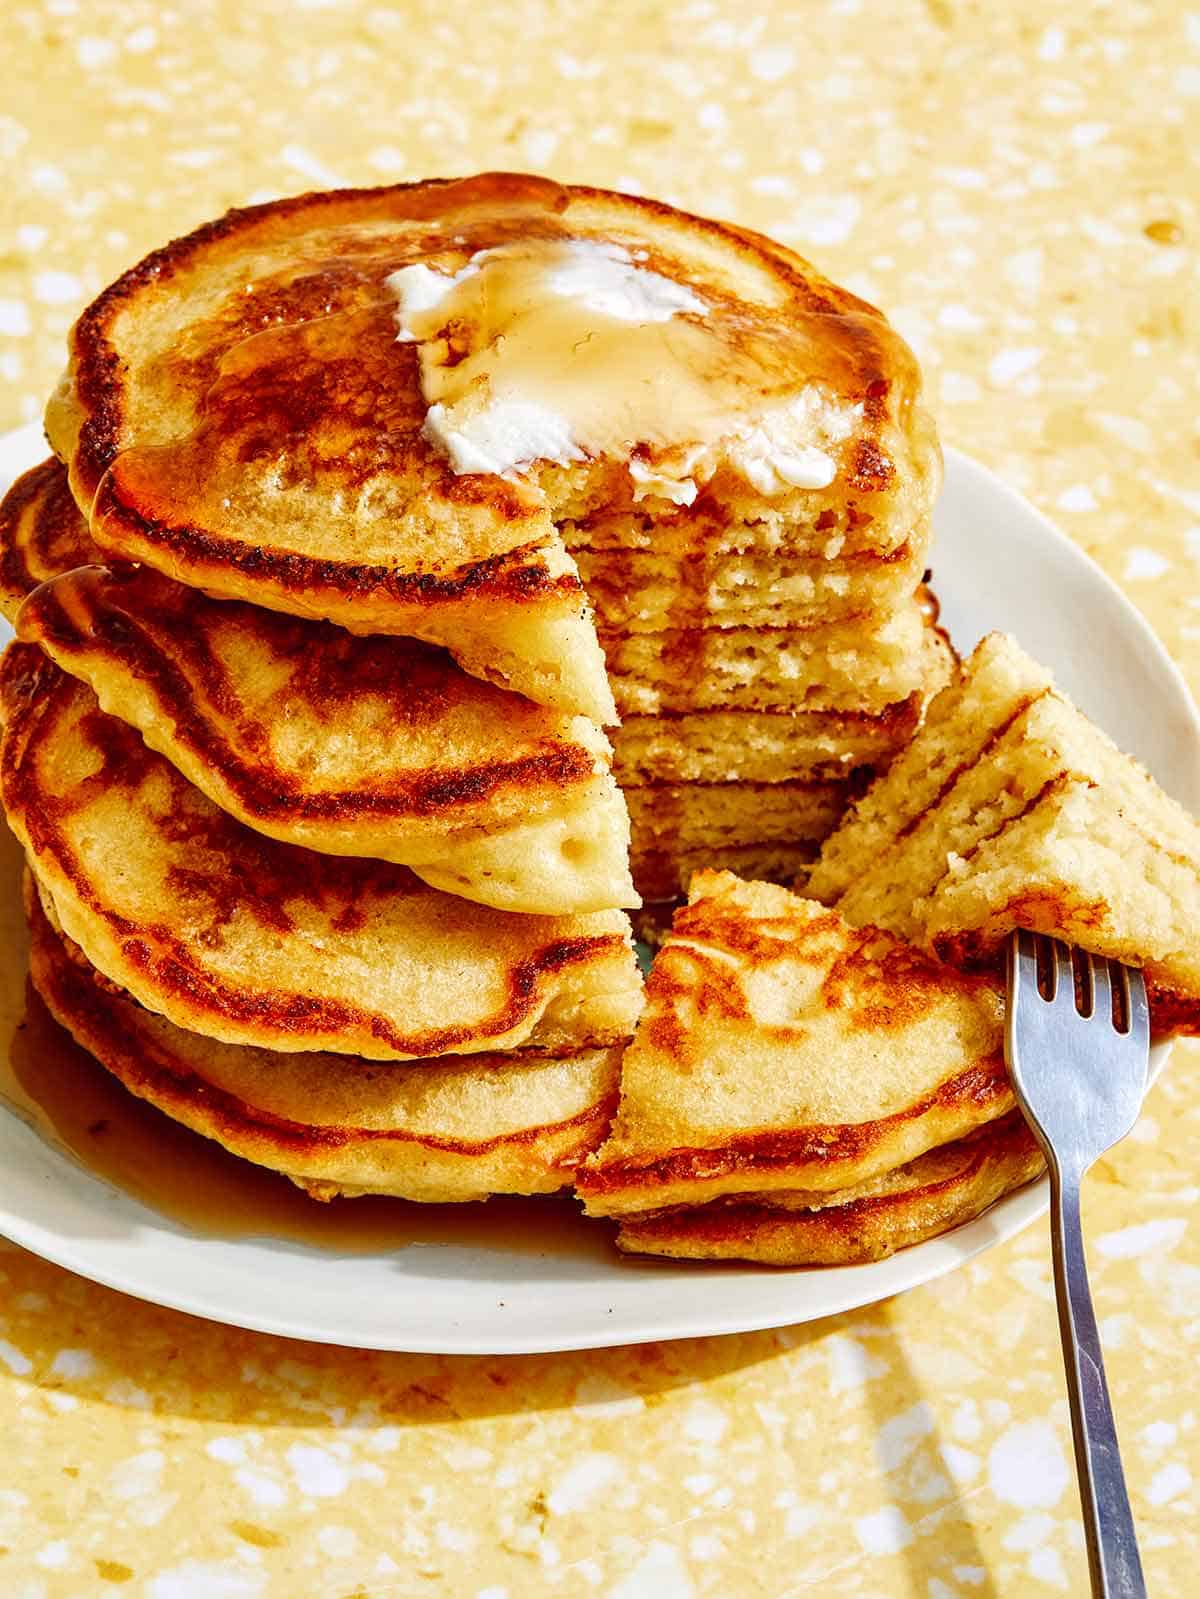
Buttermilk pancakes on a plate with a slice taken out of the stack.
Buttermilk Pancake recipe with syrup poured on top.
Print

The BEST Buttermilk Pancakes

Light, fluffy, and super simple, you'll never make pancakes any other way again after trying this recipe for the BEST buttermilk pancakes.
Course Breakfast, Main Course, Side Dish
Prep Time 5 minutes
Cook Time 7 minutes
Total Time 12 minutes
Servings 3
Calories 458kcal

Equipment

Ingredients

  • 1 cup all purpose flour
  • 2 tablespoons sugar
  • 1 teaspoon baking powder
  • 1/2 teaspoon baking soda
  • 1/4 teaspoon salt
  • 1 cup buttermilk
  • 1 large egg
  • 3 tablespoons unsalted butter melted and cooled
  • 1 teaspoon vanilla extract
  • 3 tablespoons unsalted butter

Instructions

  • Place all dry ingredients in a mixing bowl and whisk together.
  • Add remaining ingredients, except 3 tablespoons (un-melted) butter.
  • Whisk with a fork until no dry spots remain, but the batter is still lumpy.
  • Place a griddle or skillet over medium heat. Add remaining butter and melt (if using skillet, melt butter and make pancakes in batches).
  • Pour 1/3 cup batter over melted butter and lower heat to medium-low. Cook pancakes until the top begins to bubble and barely set, 3 to 4 minutes.
  • Flip and continue to cook until set, about 2 to 3 minutes. Remove from heat and serve.

Notes

**Recipe Makes 6 Pancakes – 2 Per Serving**

Nutrition

Calories: 458kcal | Carbohydrates: 44g | Protein: 9g | Fat: 27g | Saturated Fat: 16g | Polyunsaturated Fat: 1g | Monounsaturated Fat: 7g | Trans Fat: 1g | Cholesterol: 124mg | Sodium: 626mg | Potassium: 182mg | Fiber: 1g | Sugar: 12g | Vitamin A: 911IU | Calcium: 192mg | Iron: 2mg

The post The BEST Buttermilk Pancakes appeared first on Spoon Fork Bacon.

Sweet Cream Cold Foam

Sweet cream cold foam is a creamy and sweet delight that takes seconds to make and will transform hot or iced coffee into a treat.

The post Sweet Cream Cold Foam appeared first on Budget Bytes.

Making your coffee at home probably won’t make you suddenly afford to buy a house, but it could help you buy more groceries every week especially when Starbucks is charging $1.25 just to add sweet cream cold foam on top of your drink. 🤨 I’m going to show you just how fast and easy it is to make sweet cream cold foam so you can make yourself a special drink at home and save that $5 for groceries. It adds up fast!

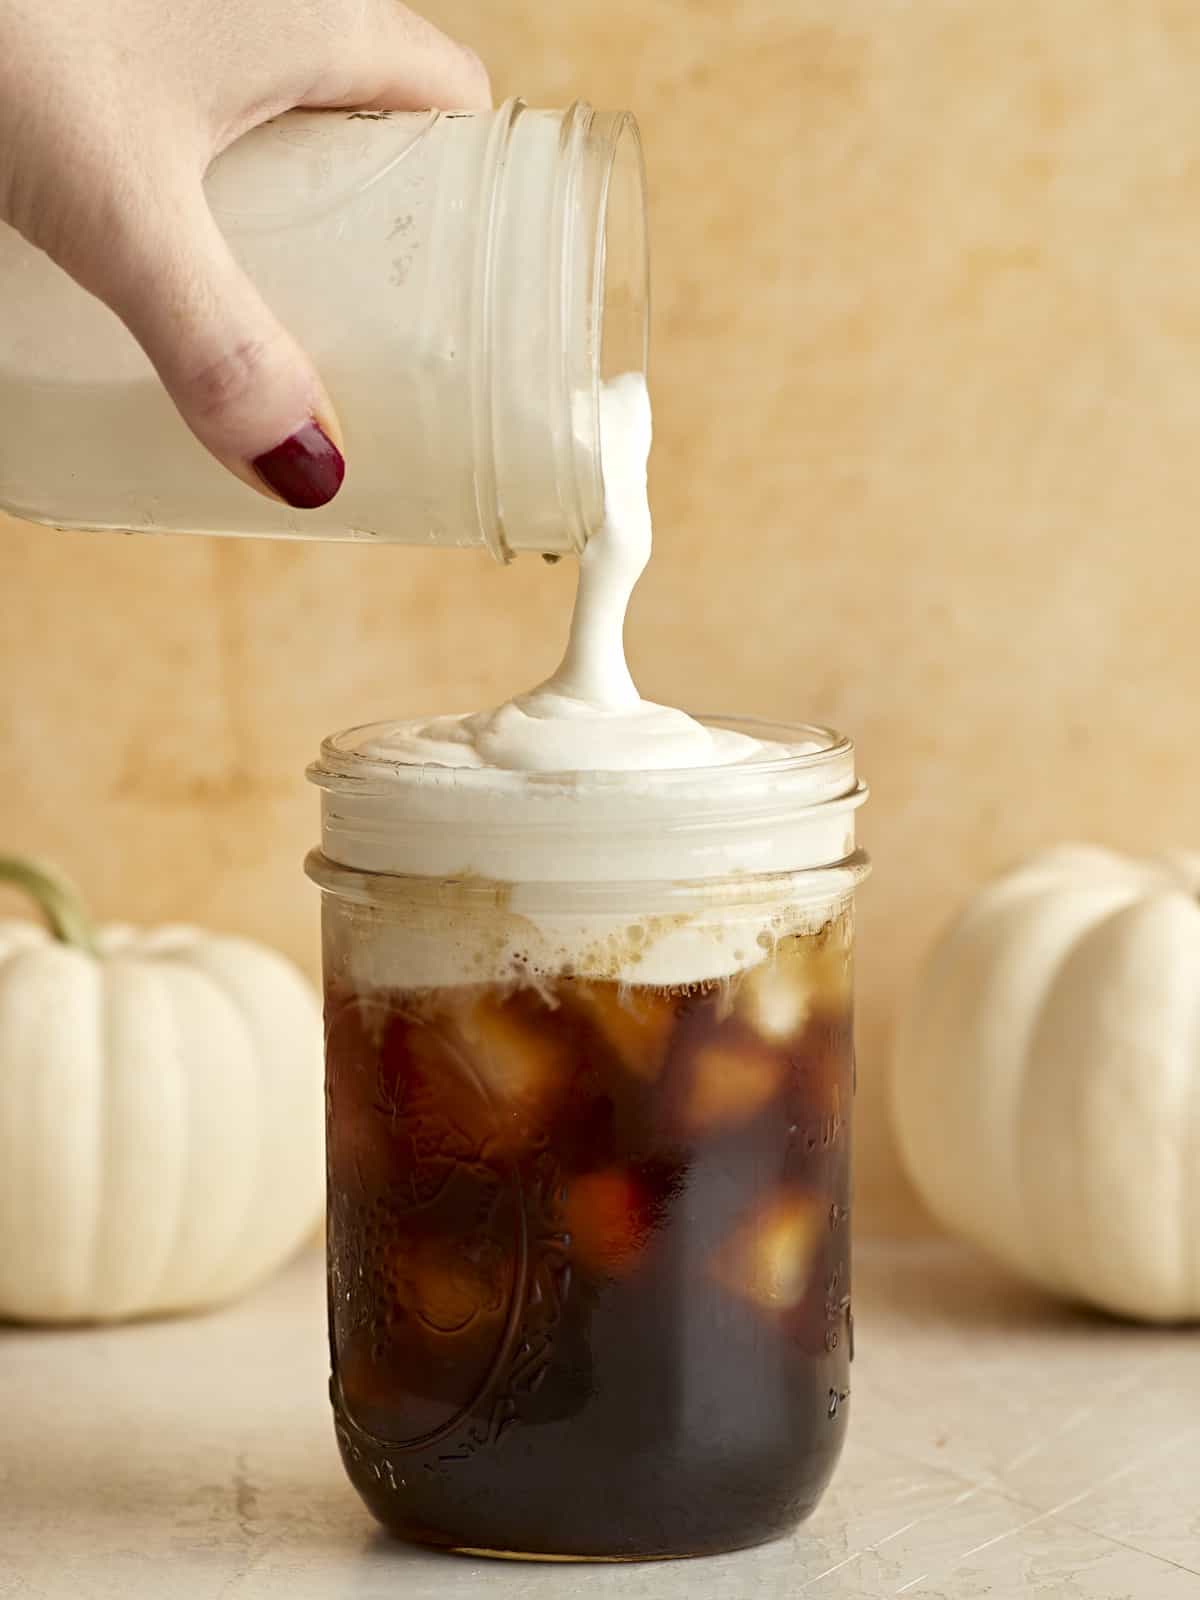
Sweet cream cold foam being poured over a mason jar full of iced coffee.

What is Sweet Cream Cold Foam?

Sweet cream cold foam is a lot like whipped cream, except not as stiff. It’s smooth and pourable, but still light, airy, and sweet. You can use it to top both hot and iced coffee drinks and it stirs into the drinks easily to make every sip extra creamy.

Ingredients for Sweet Cream Cold Foam

Making sweet cream cold foam only takes a few ingredients and about 30 seconds. Here’s what you’ll need to make sweet cream cold foam:

  • Milk: Make sure to use whole milk to keep the cold foam rich and thick. The milk helps thin the heavy cream just enough to make it pourable once whipped.
  • Heavy Cream: Heavy cream whips up into a light and airy foam while staying super creamy.
  • Vanilla Extract: A splash of vanilla extract adds to the extra creamy flavor.
  • Powdered Sugar: Powdered sugar dissolves quickly and easily into the thick dairy so you aren’t left with a grainy foam.

What Kind of Frother is Best?

If you make a lot of beverages at home, I highly suggest getting one of these little handheld frothers because it will pay for itself in no time. I find myself using it all the time. It whips up this sweet cream cold foam in seconds. You can also whisk by hand or vigorously shake the mixture in a tightly closed mason jar. Make sure the mason jar is at least double the volume of the liquid ingredients to give it room to aerate.

Can you Store the Leftovers?

This sweet cream cold foam is best when used immediately after making, so it’s best to make it in small batches like the recipe below. If the cold foam sits for a while before you pour it onto the drink, it will begin to separate into a stiffer foam layer on top and a fluid milk layer below. If it does separate, you can easily whisk it back together before pouring.

My Favorite Iced Coffee Recipe:

Here’s my favorite way to use the sweet cream cold foam at home. It makes the most delicious fall-flavored iced coffee drink!

  1. Stir 1 Tbsp maple syrup and a pinch of cinnamon into 8oz. strong hot coffee.
  2. Pour the coffee over ice.
  3. Top with the sweet cream cold foam and enjoy!
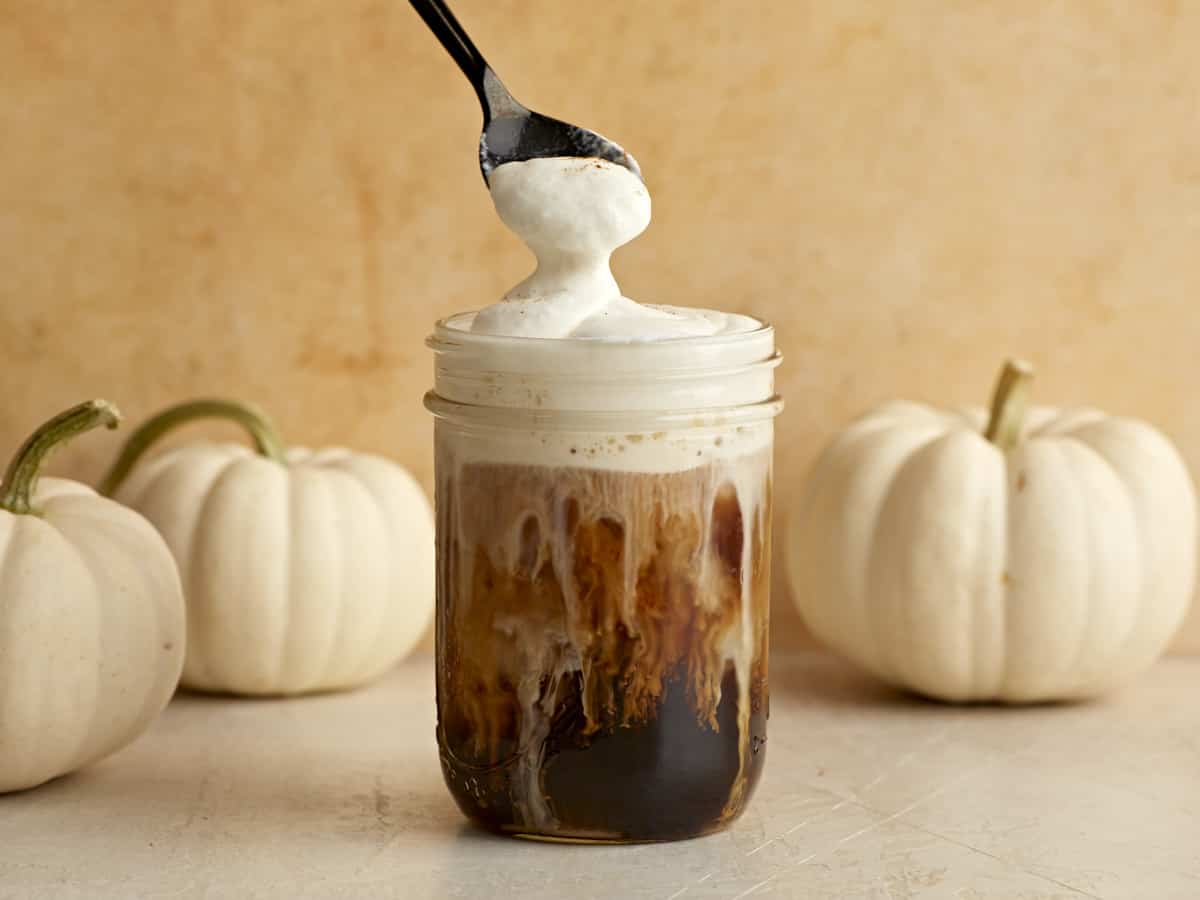
A spoon lifting some sweet cream cold foam off the top of the glass of iced coffee.
Sweet Cream Cold Foam being poured over a jar full of iced coffee.
Print

Sweet Cream Cold Foam

Sweet cream cold foam is a creamy and sweet delight that takes seconds to make and will transform hot or iced coffee into a treat.
Course Beverage, Drinks
Cuisine American
Total Cost $0.32 recipe / $0.16 serving
Prep Time 2 minutes
Total Time 2 minutes
Servings 2 (about ⅓ cup each)
Calories 86kcal

Ingredients

  • 1/4 cup whole milk $0.05
  • 2 Tbsp heavy cream $0.19
  • 1/4 tsp vanilla extract $0.06
  • 1 Tbsp powdered sugar $0.02

Instructions

  • Add all of the ingredients to a glass or 8oz. jar. Use a milk frother or close the jar tightly and shake the mixture vigorously until it turns into a smooth foam.
  • Pour the sweet cream cold foam over a hot or cold beverage immediately, and enjoy.

See how we calculate recipe costs here.
Nutrition

Serving: 0.33cup | Calories: 86kcal | Carbohydrates: 6g | Protein: 1g | Fat: 6g | Sodium: 16mg

How to Make Sweet Cream Cold Foam – Step by Step Photos

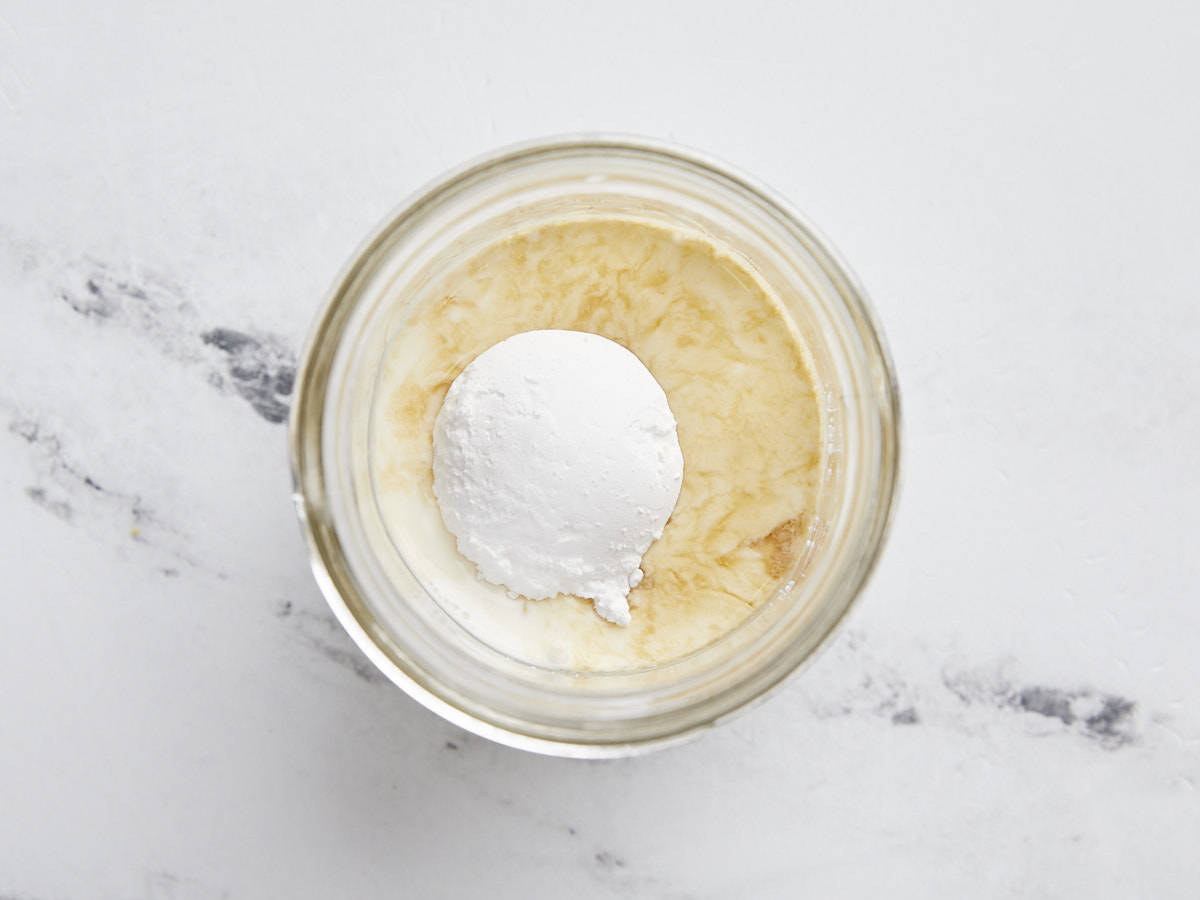
Milk, cream, sugar, and vanilla in a jar.

Add ¼ cup whole milk, 2 Tbsp heavy cream, ¼ tsp vanilla extract, and 1 Tbsp powdered sugar to a glass or an 8oz. jar.
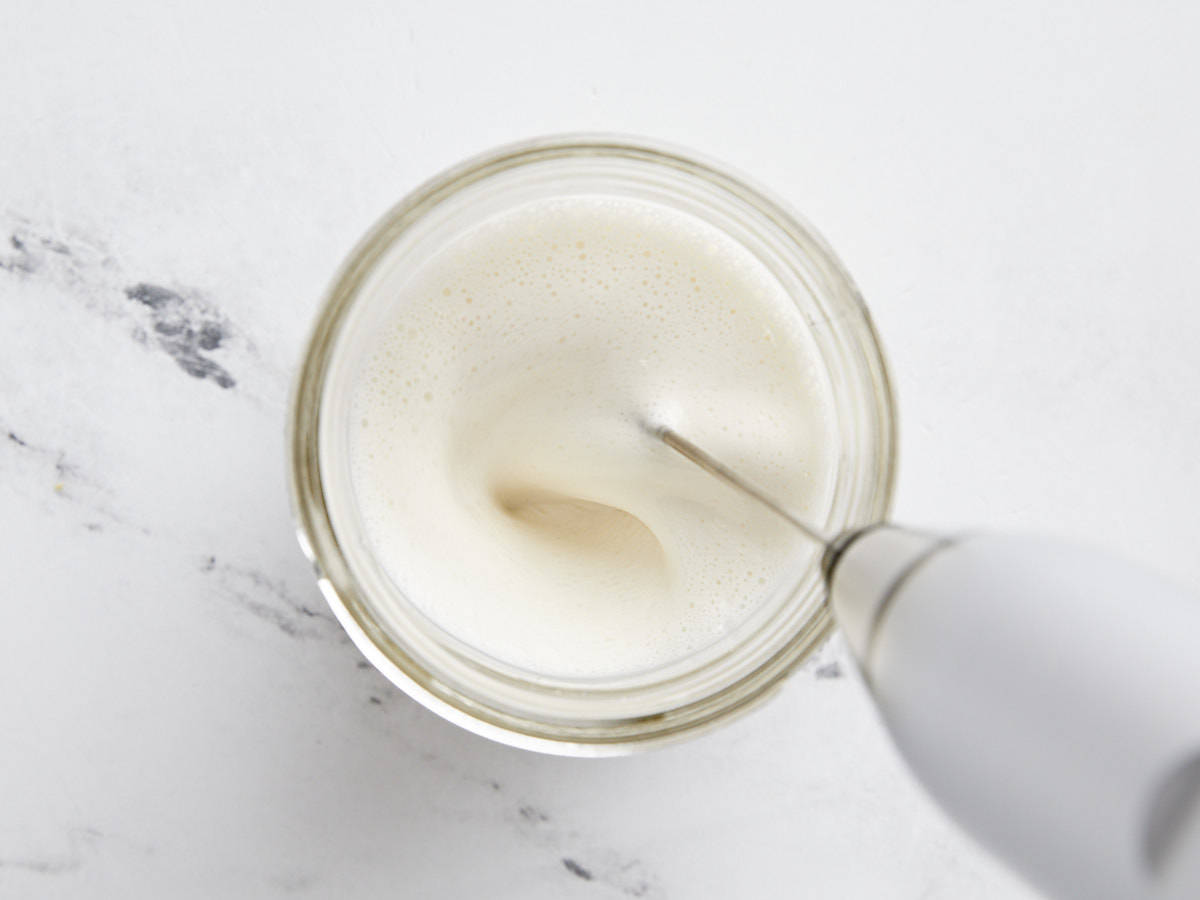
Sweet cream cold foam being whisked in a jar.

Use a handheld frother to whip the mixture into a smooth foam, or close the jar and shake vigorously until it’s a thick, foamy consistency.
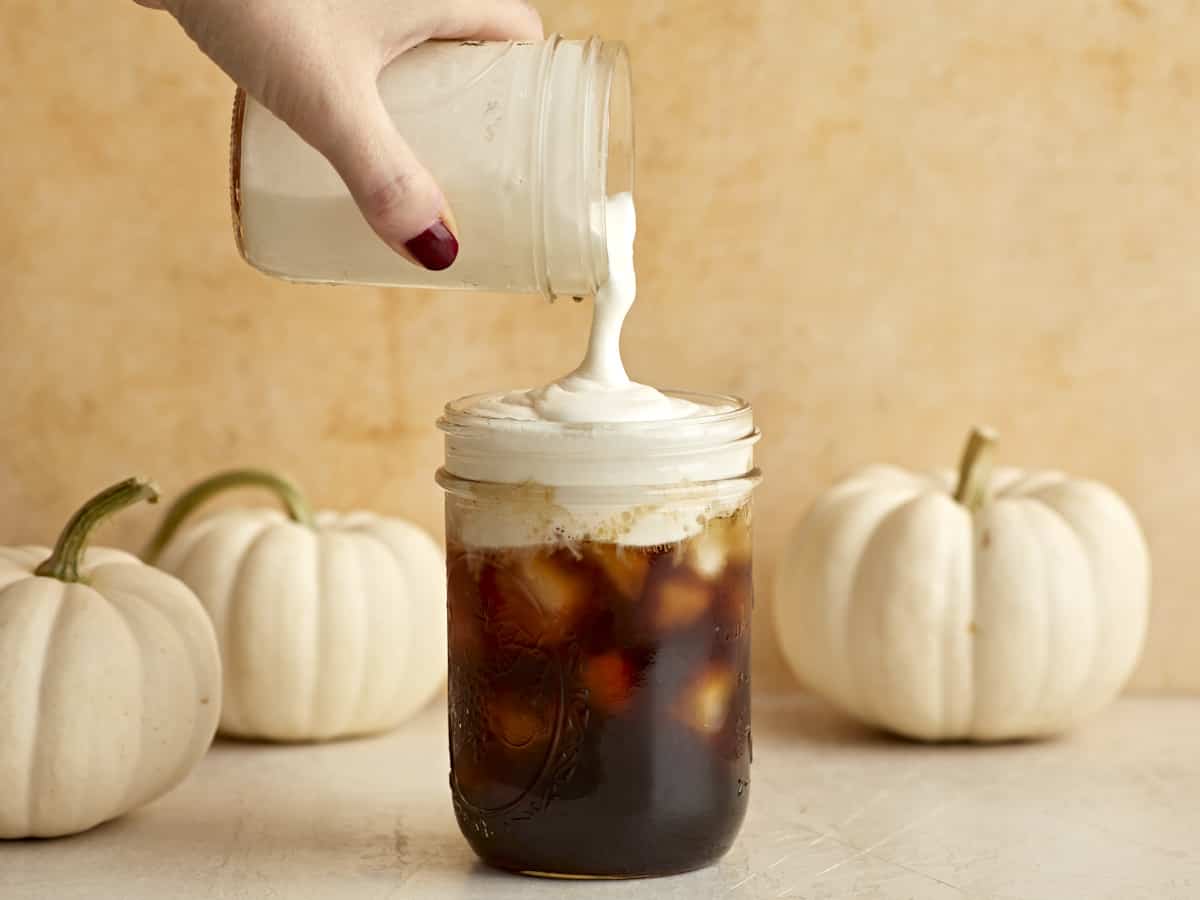
Sweet Cream Cold Foam being poured over a jar full of iced coffee.

Pour the sweet cream cold foam over your favorite coffee drink (hot or cold) and enjoy immediately! If the cold foam sits a few minutes before you’re ready to pour, make sure to whisk it up again briefly before pouring.

The post Sweet Cream Cold Foam appeared first on Budget Bytes.