After a busy day I love being able to whip up a quick dinner meal like this Honey Garlic Chicken recipe. I almost always have all of the ingredients at home and saucy chicken recipes happen to be my family’s favorite! This dish includes lots of tender chicken that gets covered in a super delicious sweet & tangy honey garlic sauce. It’s simple enough to make for lunch or dinner, and is so good you might get a special request to make it every week!
Ingredients For Honey Garlic Chicken
It doesn’t take much to make this easy honey garlic chicken recipe. Here’s what you’ll need:
- Chicken Breast: I used boneless, skinless chicken breasts for this recipe, but if your budget is tight, you can also use boneless, skinless chicken thighs instead.
- All-Purpose Flour: A light coating of flour adds a little bit of texture to the chicken.
- Butter and Garlic: A good amount of garlic is sautéed in butter which infuses the sauce with lots of garlicky flavor.
- The Sauce: This yummy honey garlic sauce is what brings the entire dish together. It includes honey for sweetness, soy sauce for some umami flavor, rice vinegar to balance the sweetness of the honey, sriracha for a little kick, toasted sesame oil, and a little cornstarch to thicken the sauce.
Recipe Tips!
- Make the sauce first. This recipe cooks pretty fast, so you want the sauce to be ready when it’s time to add it to the skillet.
- Don’t overcook the chicken. Since the chicken is being cut into smaller bite-sized pieces, it won’t take them long to cook.
- Don’t crowd the skillet. Cook the chicken in 2 separate batches if you need to.
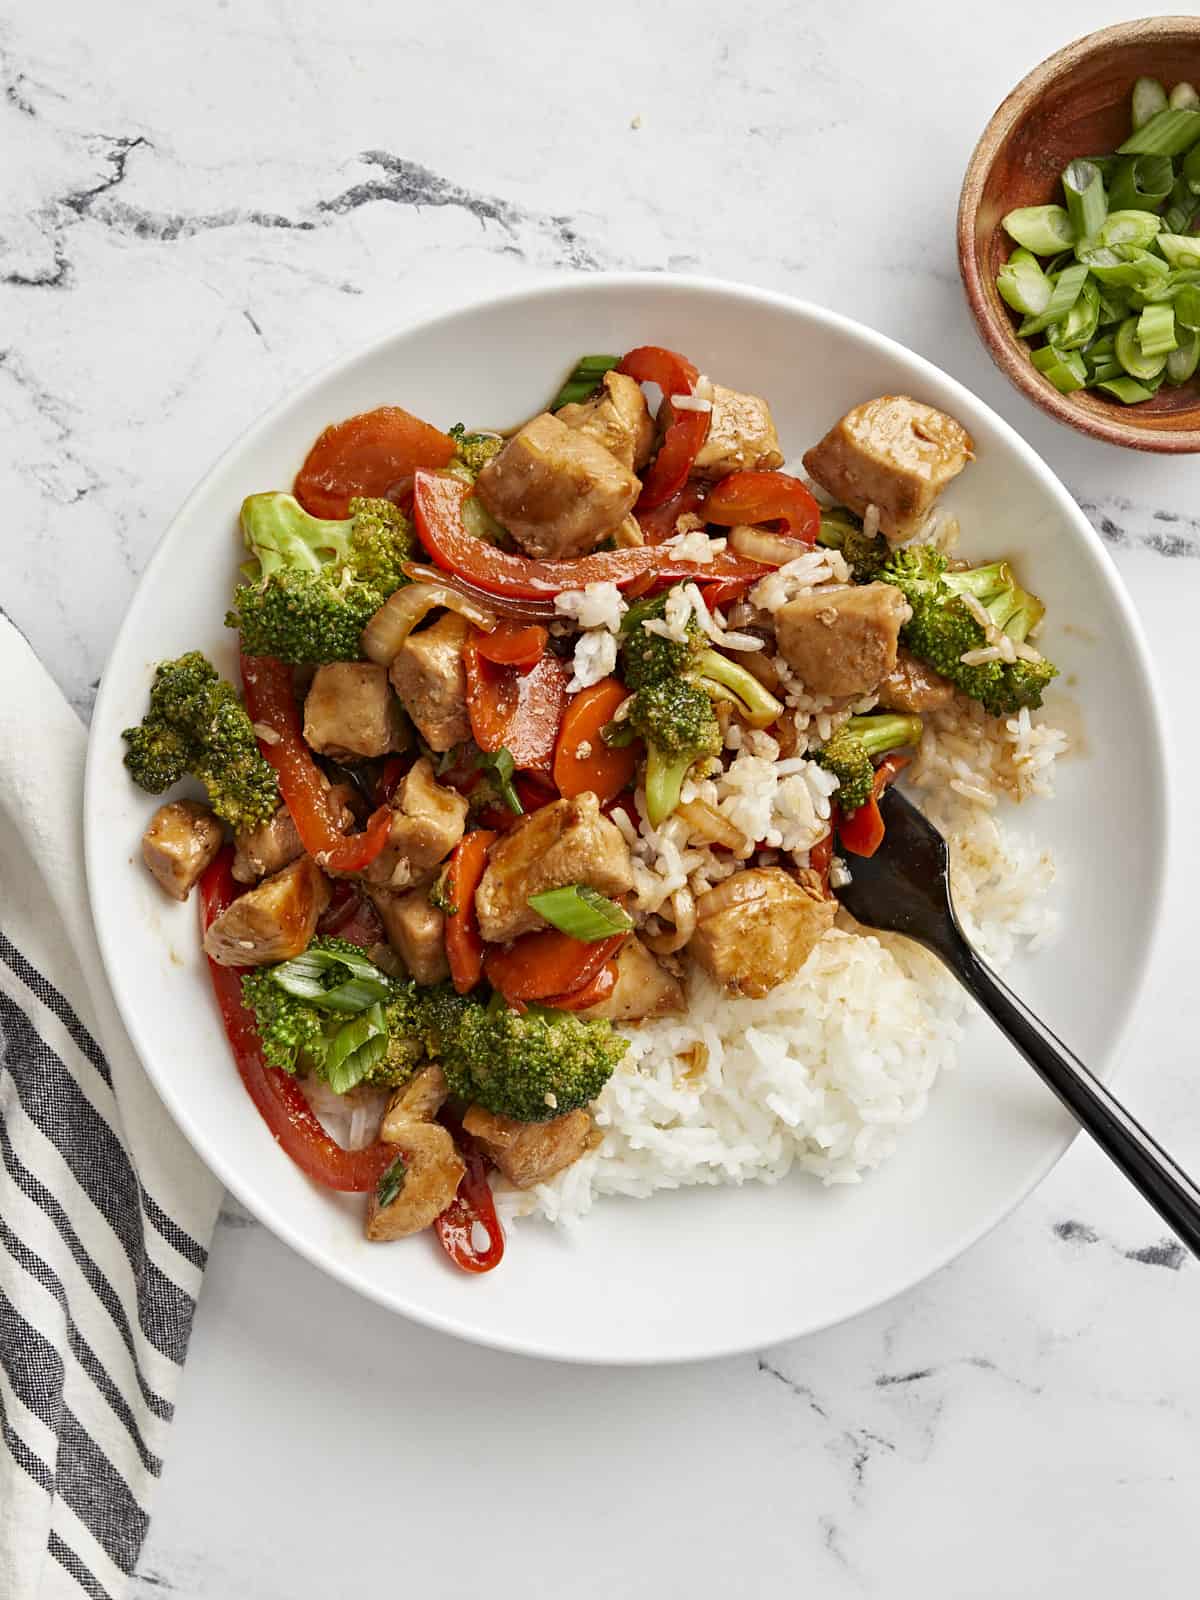
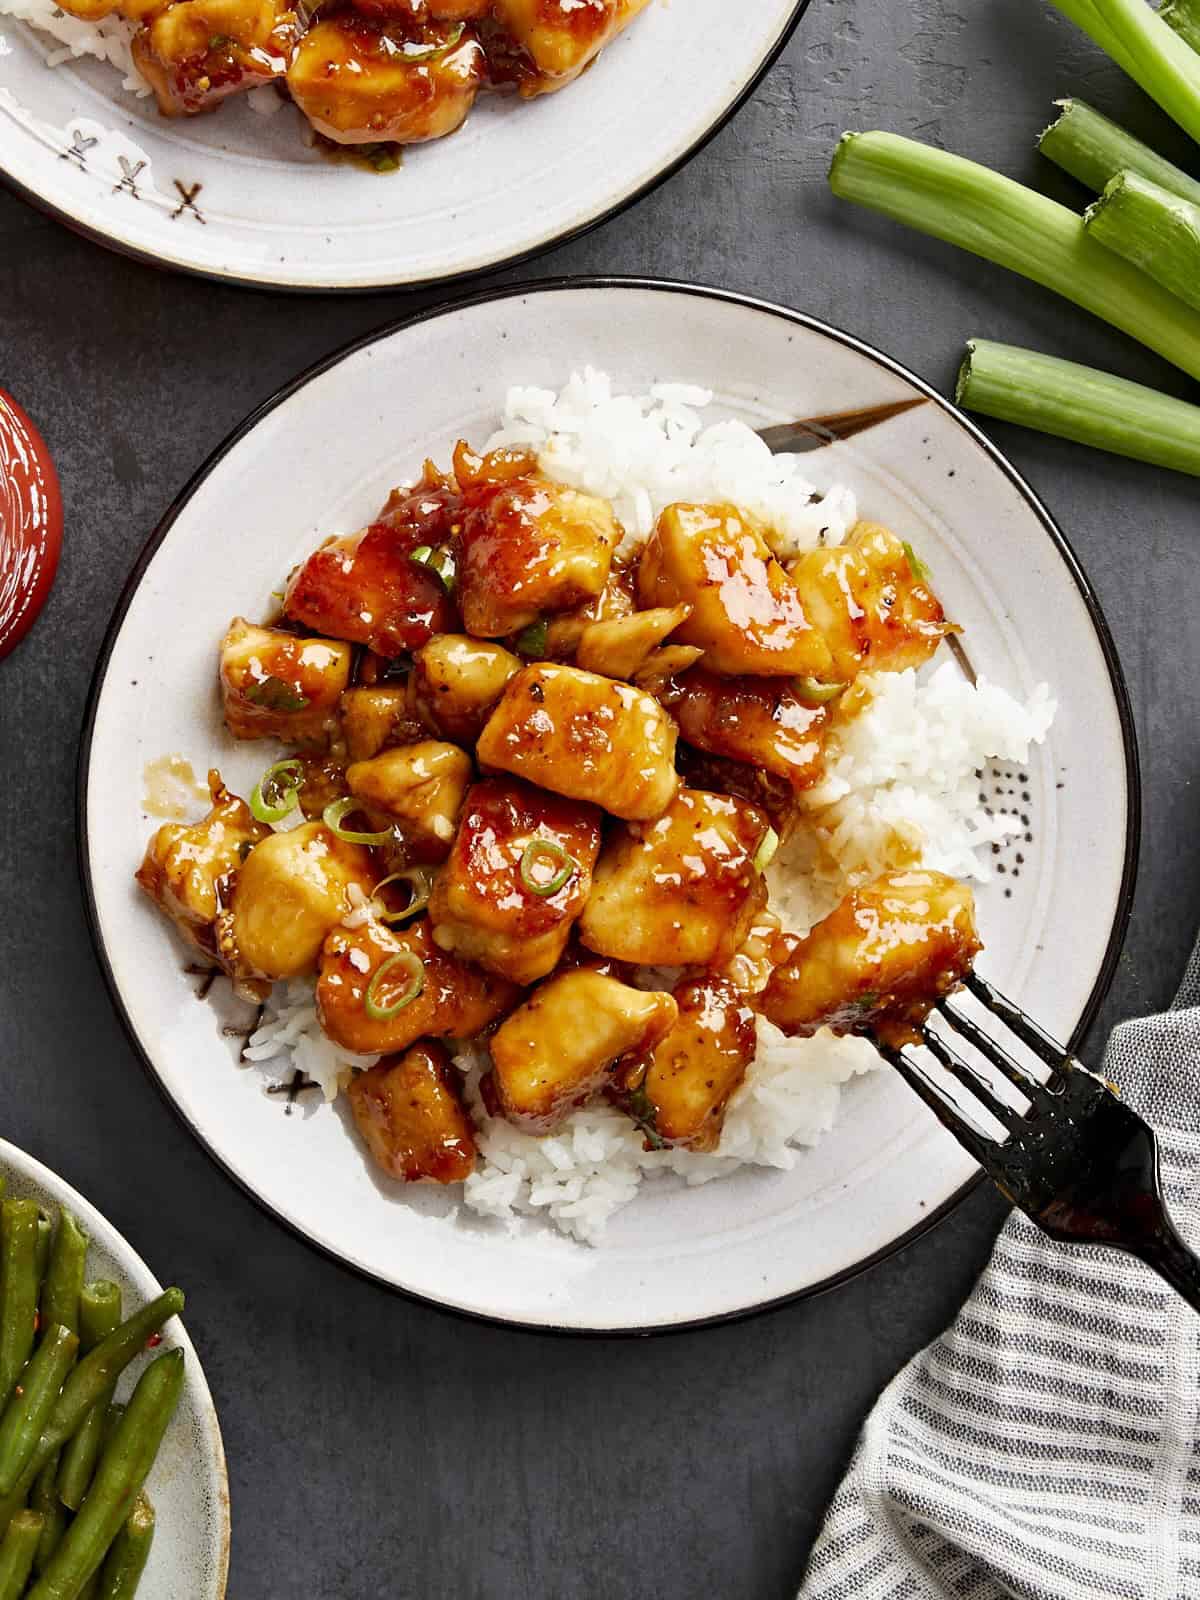
Serving Suggestions
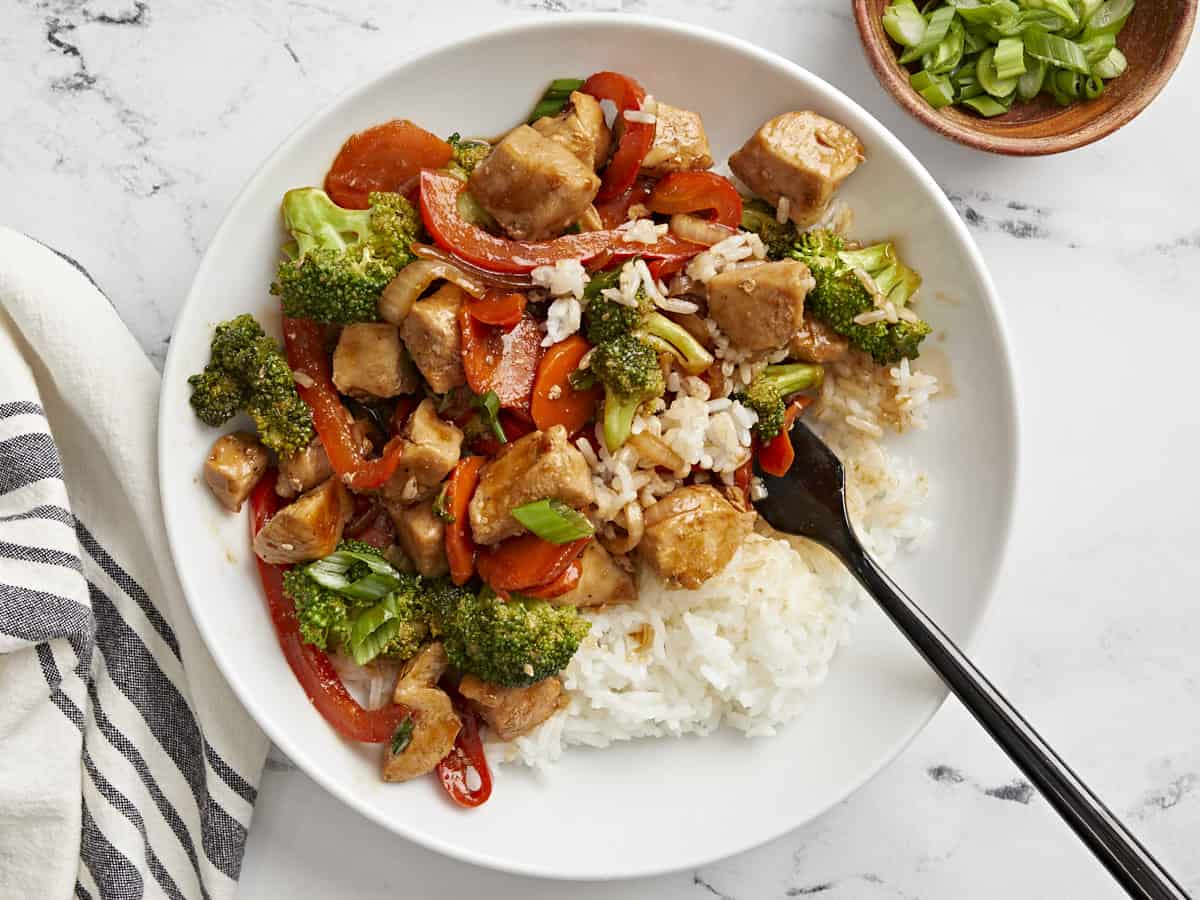
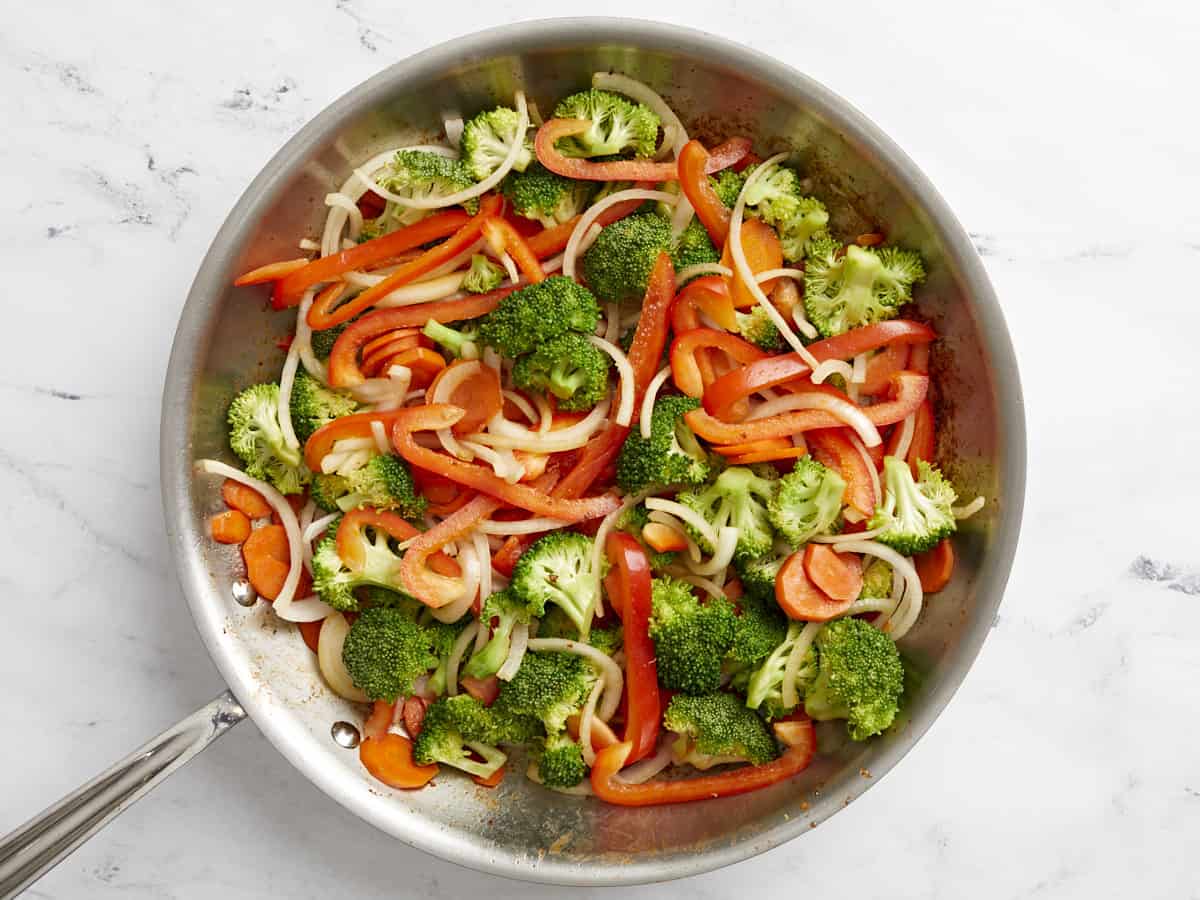
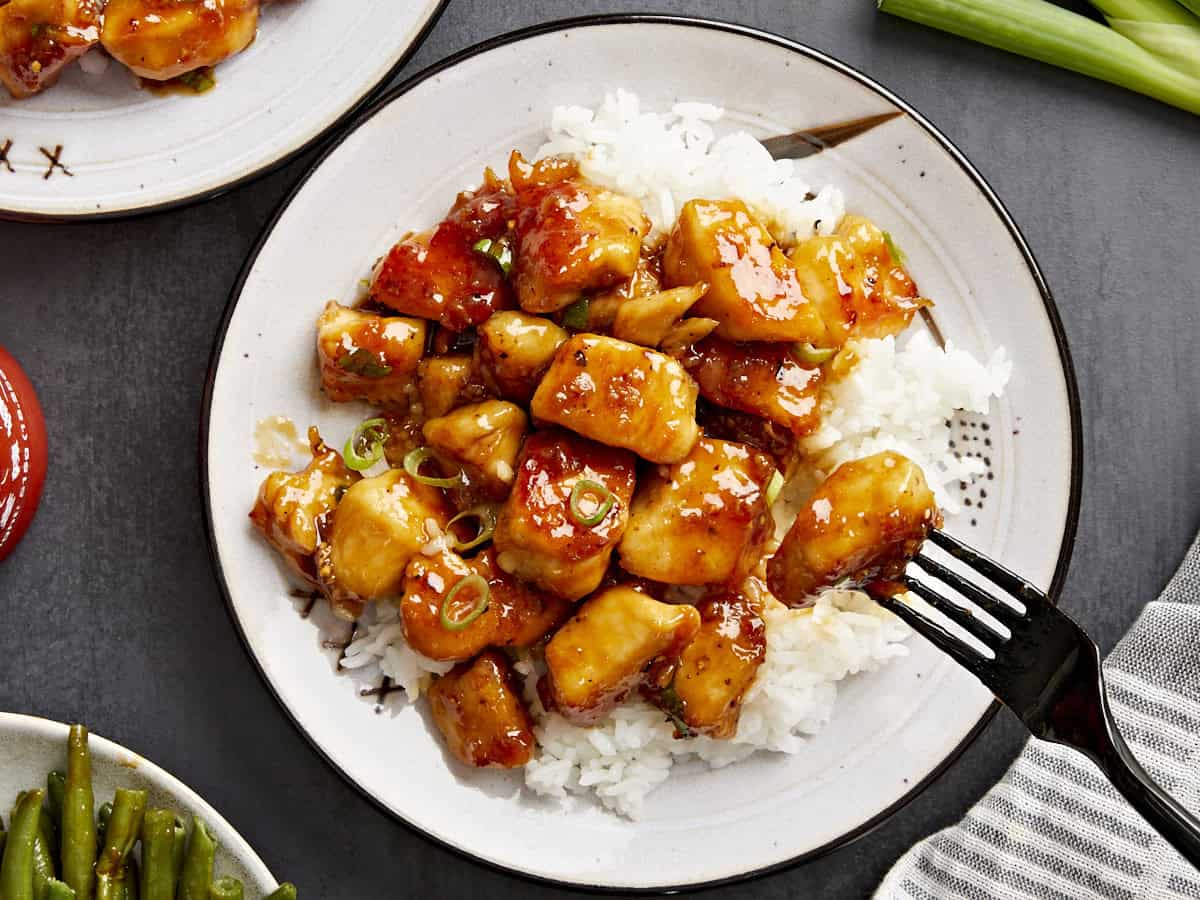
I served this honey garlic chicken with a side of white rice and some sliced green onions on top. But you can also enjoy it with brown rice, vegetable fried rice or even cauliflower rice. Sautéed green beans or a side of this sesame cucumber salad would also taste great!

Honey Garlic Chicken
Equipment
Ingredients
Sauce
- 1/3 cup honey $1.08
- 2 Tbsp soy sauce $0.14
- 1 Tbsp rice vinegar $0.10
- 1 tsp sriracha $0.05
- 2 tsp toasted sesame oil $0.20
- 1 Tbsp cornstarch $0.05
Chicken
- 2 boneless, skinless chicken breasts $6.49
- 1 tsp salt $0.05
- 1/2 tsp black pepper $0.02
- 1/2 tsp garlic powder $0.05
- 2 Tbsp all-purpose flour $0.04
- 3 Tbsp olive oil $0.48
- 2 Tbsp butter $0.27
- 4 cloves of garlic, minced $0.32
- 2 green onions, sliced $0.24
Instructions
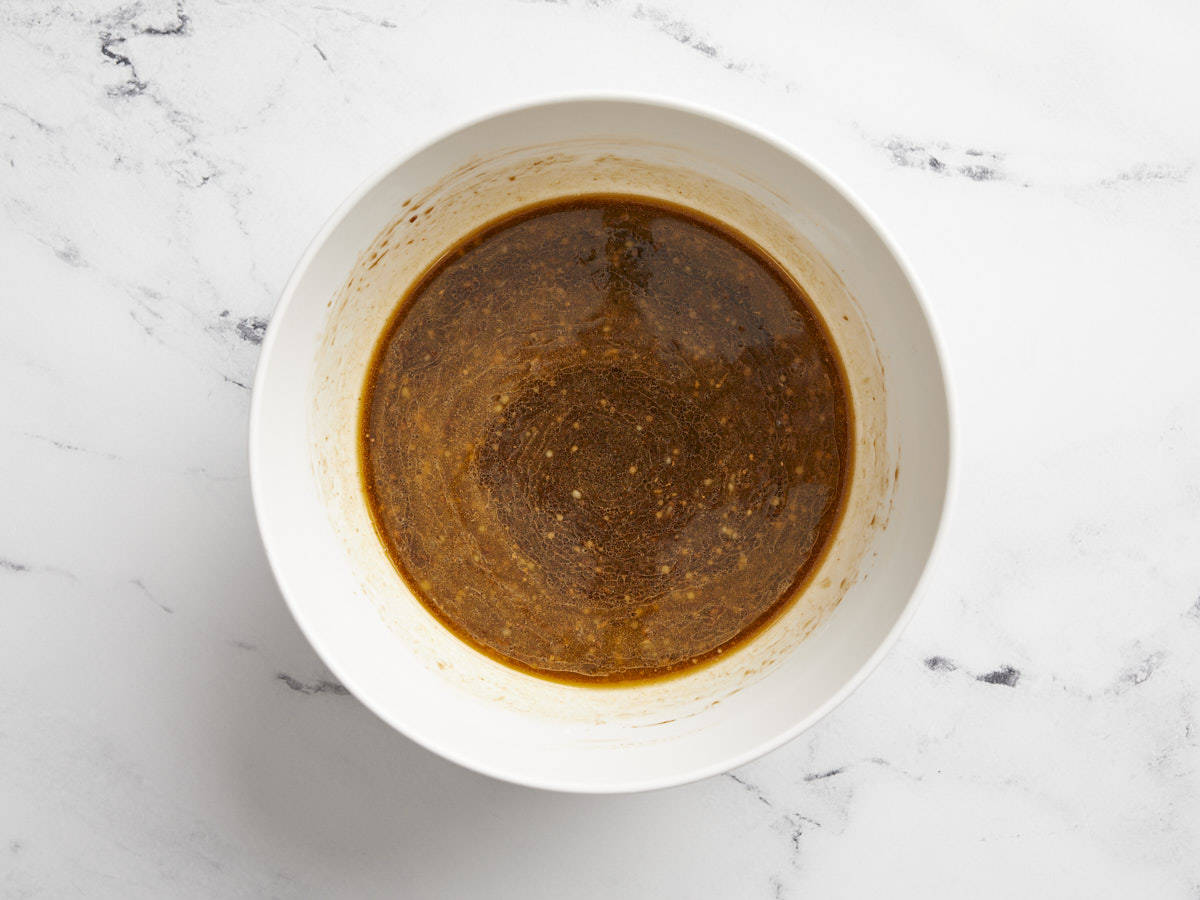
- Start by making the sauce. Combine the honey, soy sauce, rice vinegar, sriracha, toasted sesame oil, and cornstarch together in a small bowl. Set the sauce aside.
- Cut the chicken breasts into small 1/2 inch sized pieces. Season with salt, black pepper and garlic powder. Then toss the chicken pieces in the flour until each piece is evenly coated.
- Heat a large skillet over medium-high heat and add 2 Tbsp of oil. Swirl to coat the surface of the skillet. Once the skillet is hot, add half of the chicken and cook until browned on all sides and cooked through. Remove the chicken from the skillet onto a separate plate and set aside. Add the remaining 1 Tbsp of oil and repeat with cooking the 2nd batch of chicken until cooked through. Set all of the chicken aside.
- In the same skillet add the butter and lower the heat down to medium-low heat. Add the minced garlic cloves and saute for 30-60 seconds until fragrant.
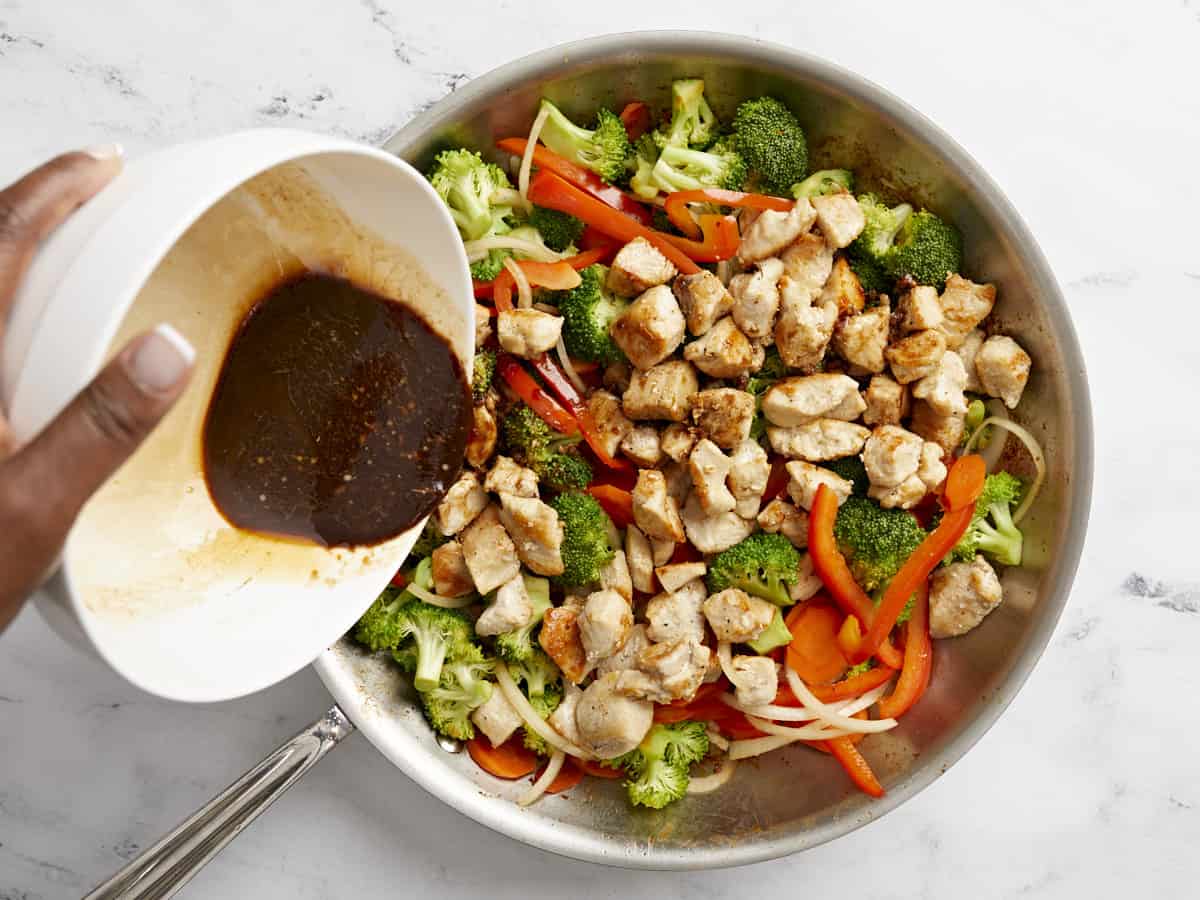
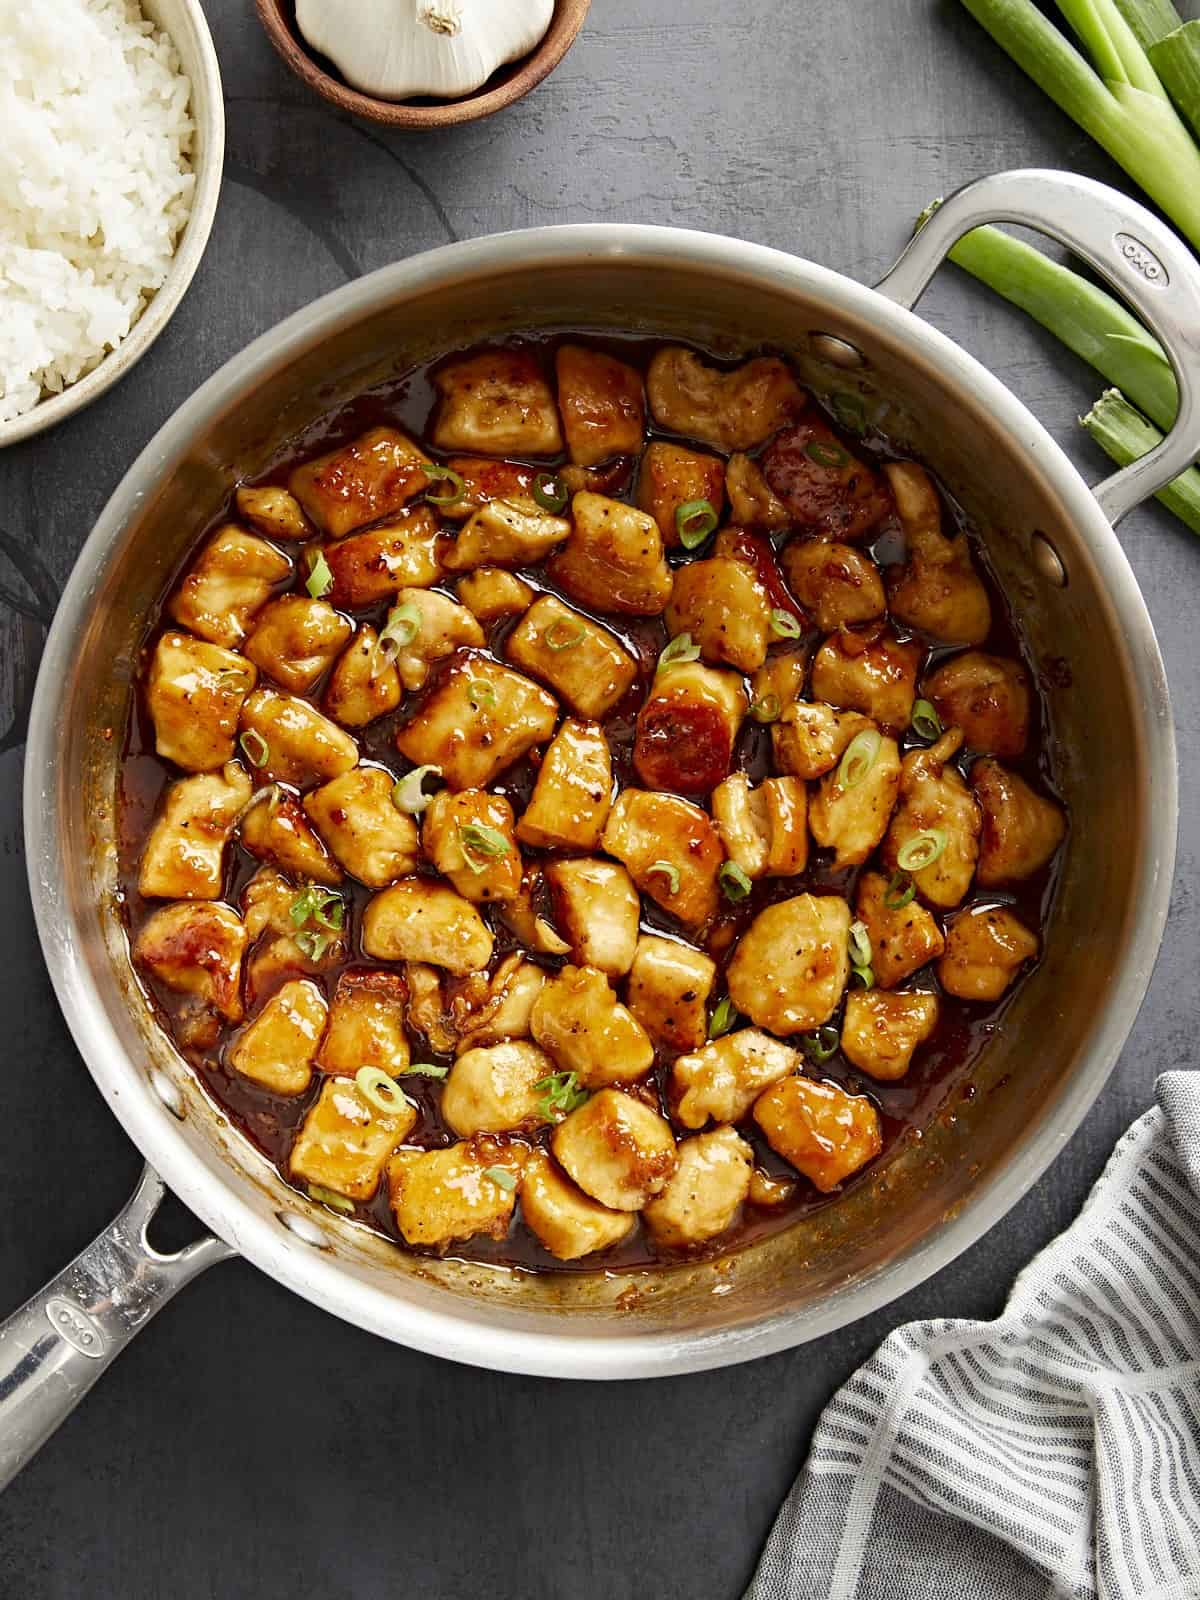
- Next give the sauce another brief stir, then pour the sauce into the skillet with the garlic. Stir the sauce and scrape up any browned bits that are stuck at the bottom of the skillet. Let the sauce simmer for about 2 minutes to allow the cornstarch to activate and thicken the sauce.
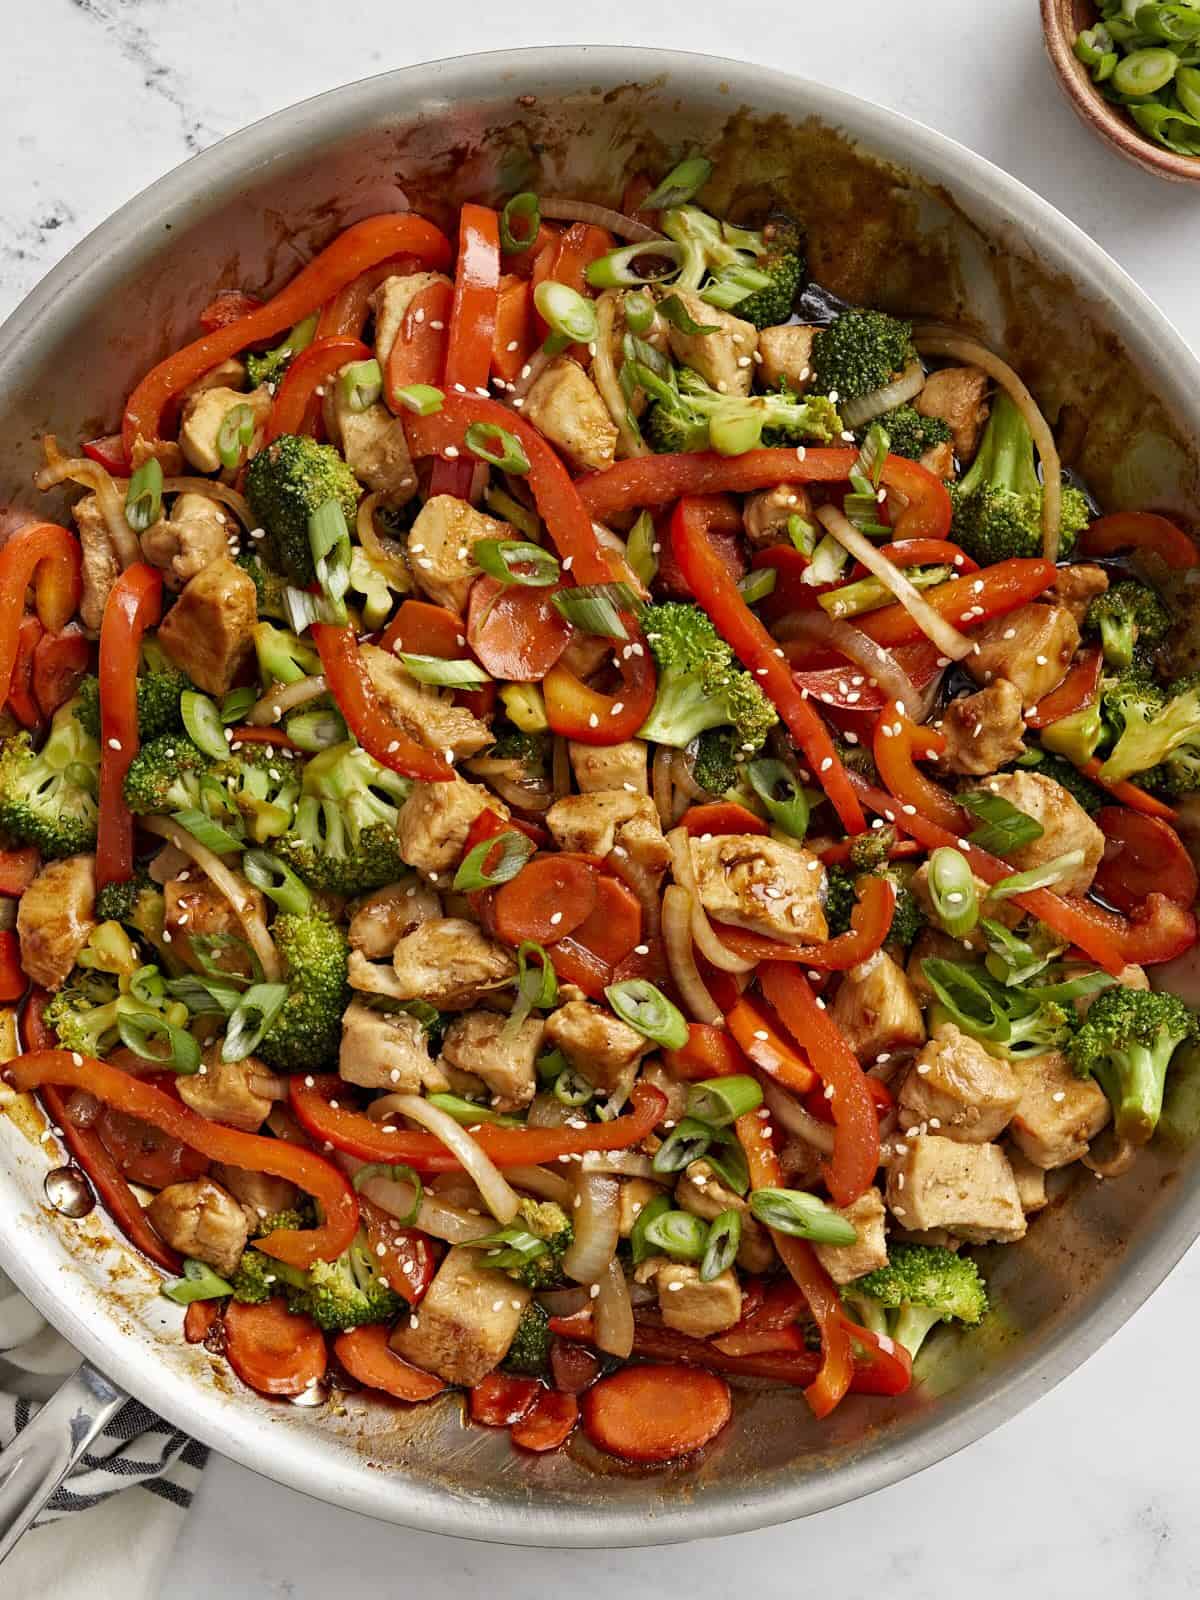
- Now add the cooked chicken back to the skillet and stir with the sauce until all of the pieces are evenly coated. Continue to cook for 1-2 more minutes to allow the chicken to heat through.
- Remove the skillet from the heat, top with sliced green onions, and enjoy!
See how we calculate recipe costs here.
Nutrition

How to Make Honey Garlic Chicken – Step by Step Photos
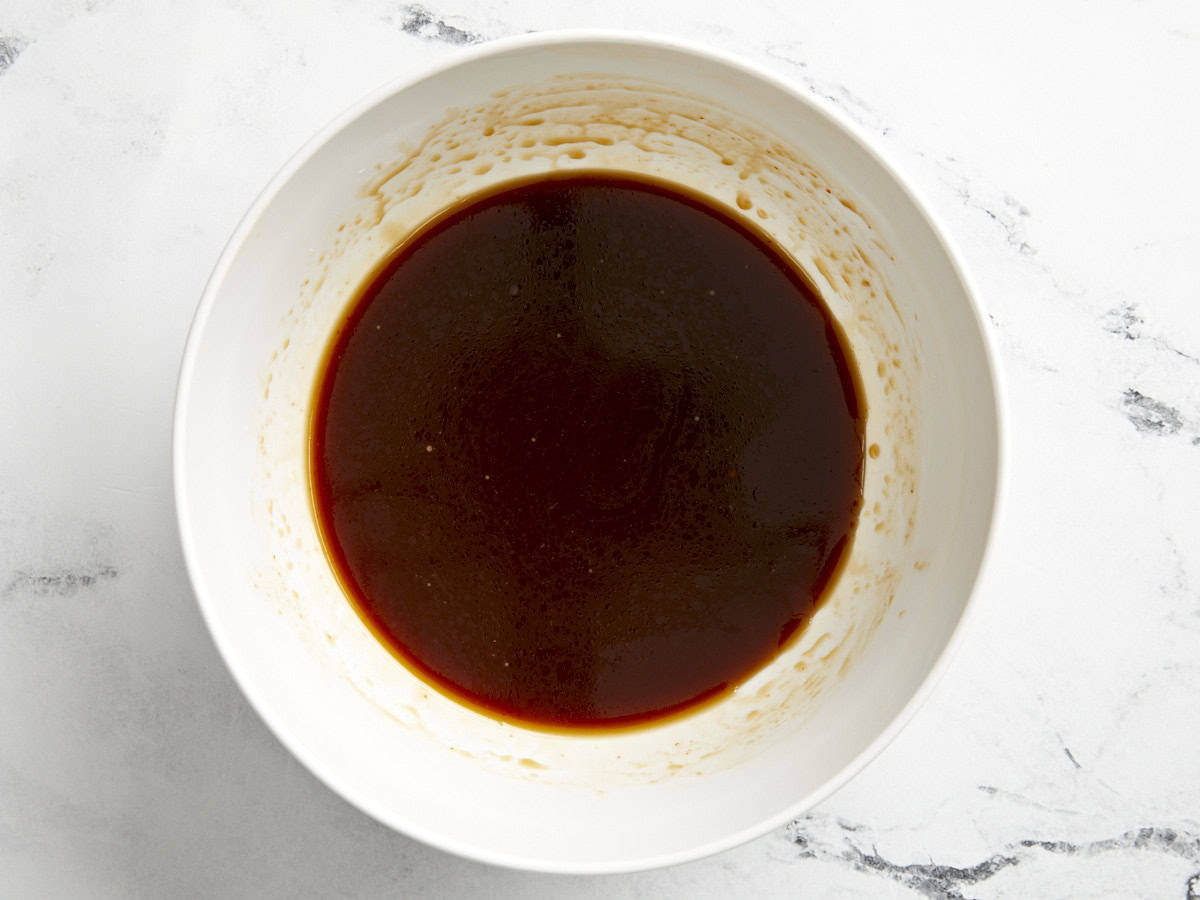
Start by making the sauce. Combine the 1/3 cup honey, 2 Tbsp soy sauce, 1 Tbsp rice vinegar, 1 tsp sriracha, 2 tsp toasted sesame oil, and 1 Tbsp cornstarch together in a small bowl. Set the sauce aside.
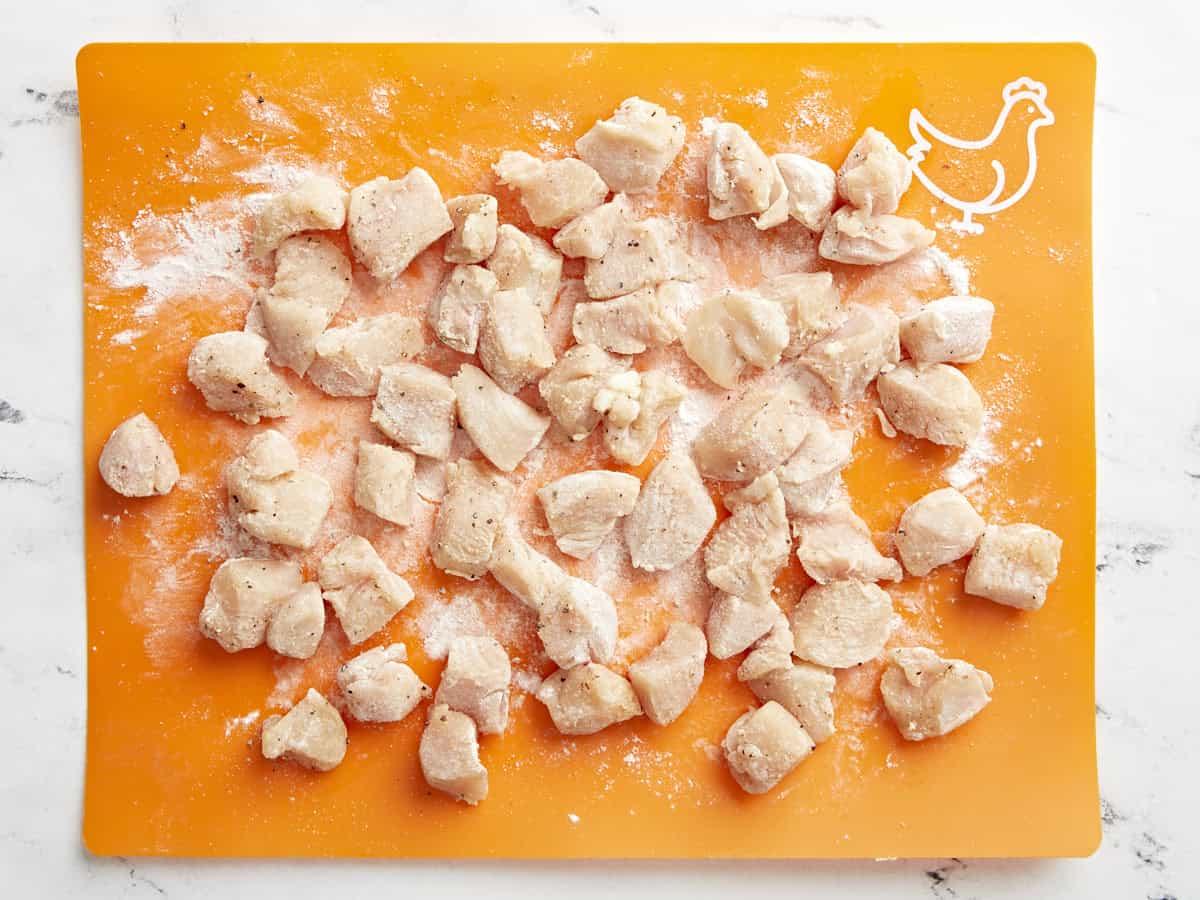
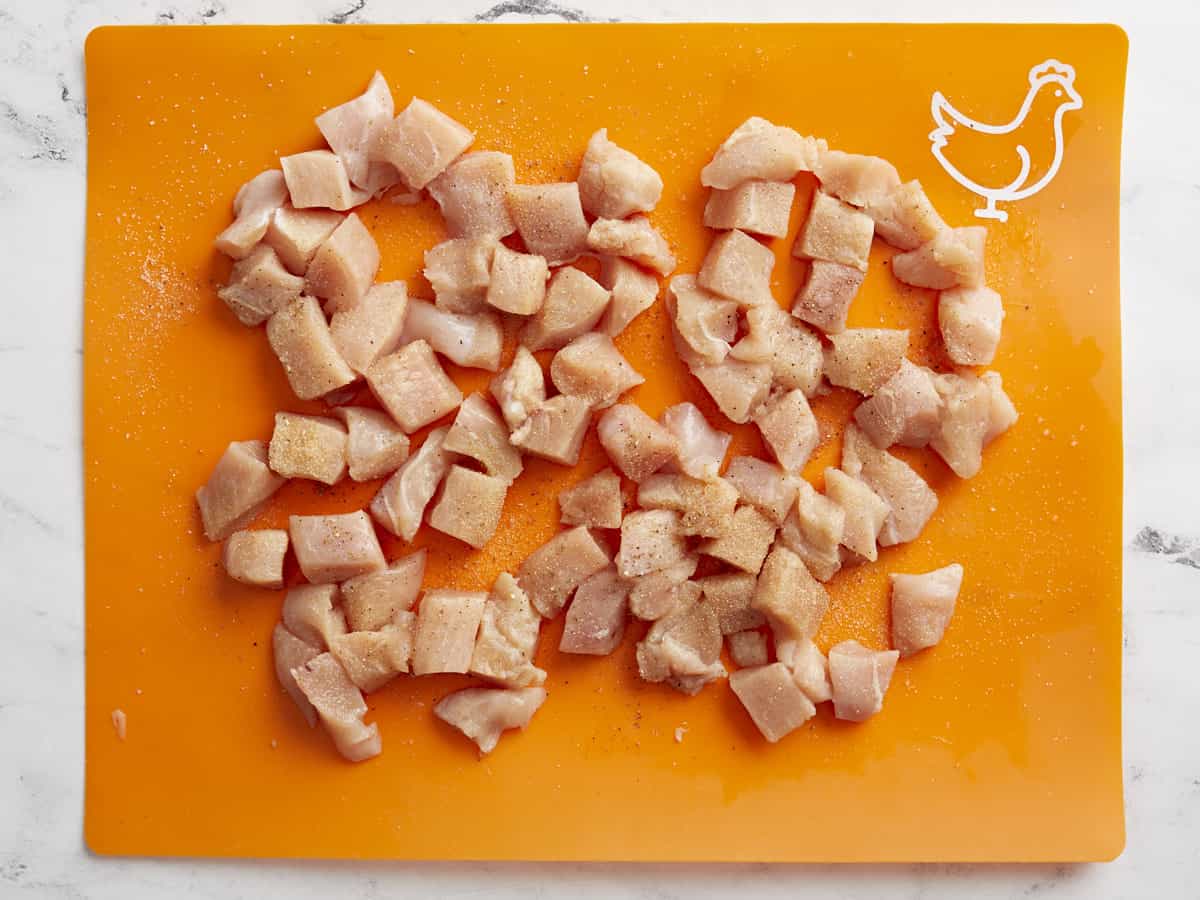
Cut 2 boneless, skinless chicken breasts into 1/2 inch sized pieces. Season with 1 tsp salt, 1/2 tsp black pepper and 1/2 tsp garlic powder. Then toss the chicken pieces in 2 Tbsp all-purpose flour until each piece is evenly coated.
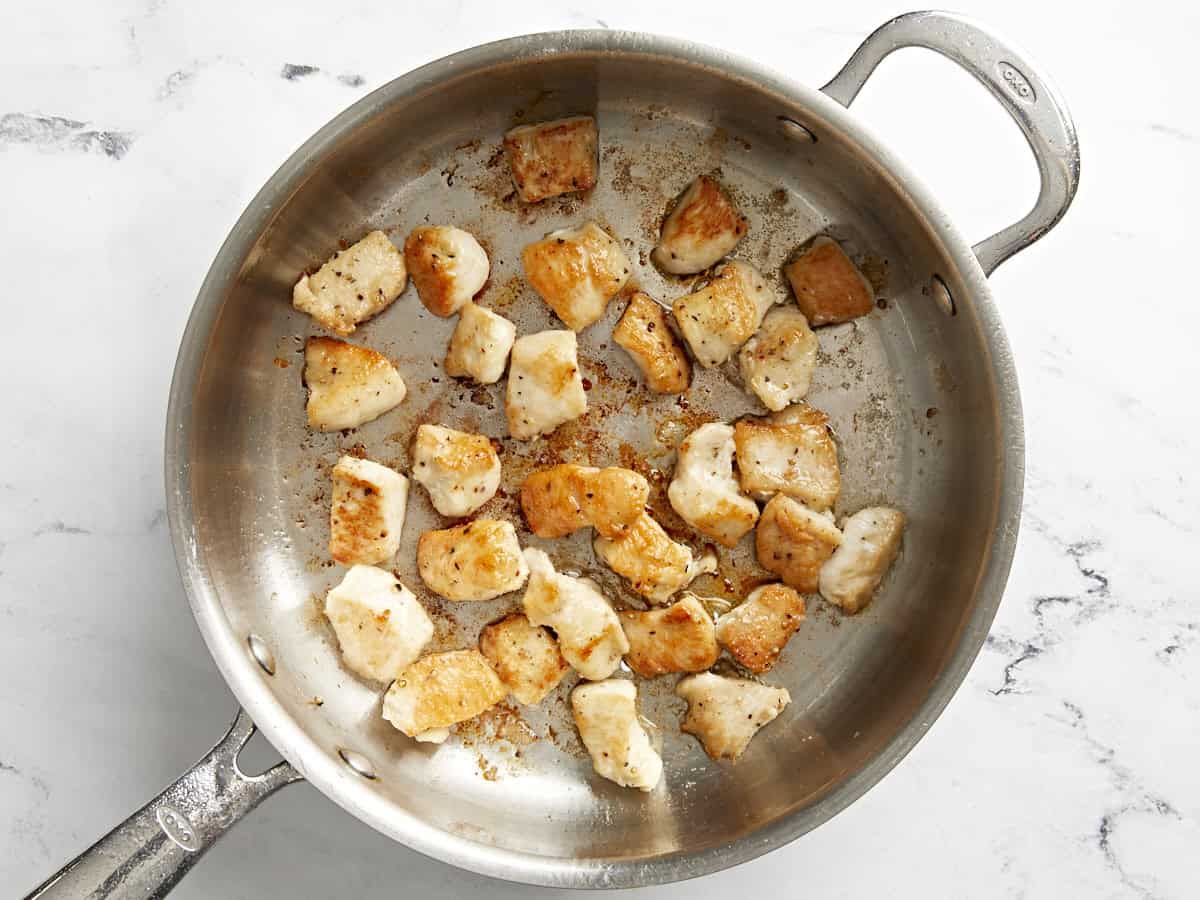
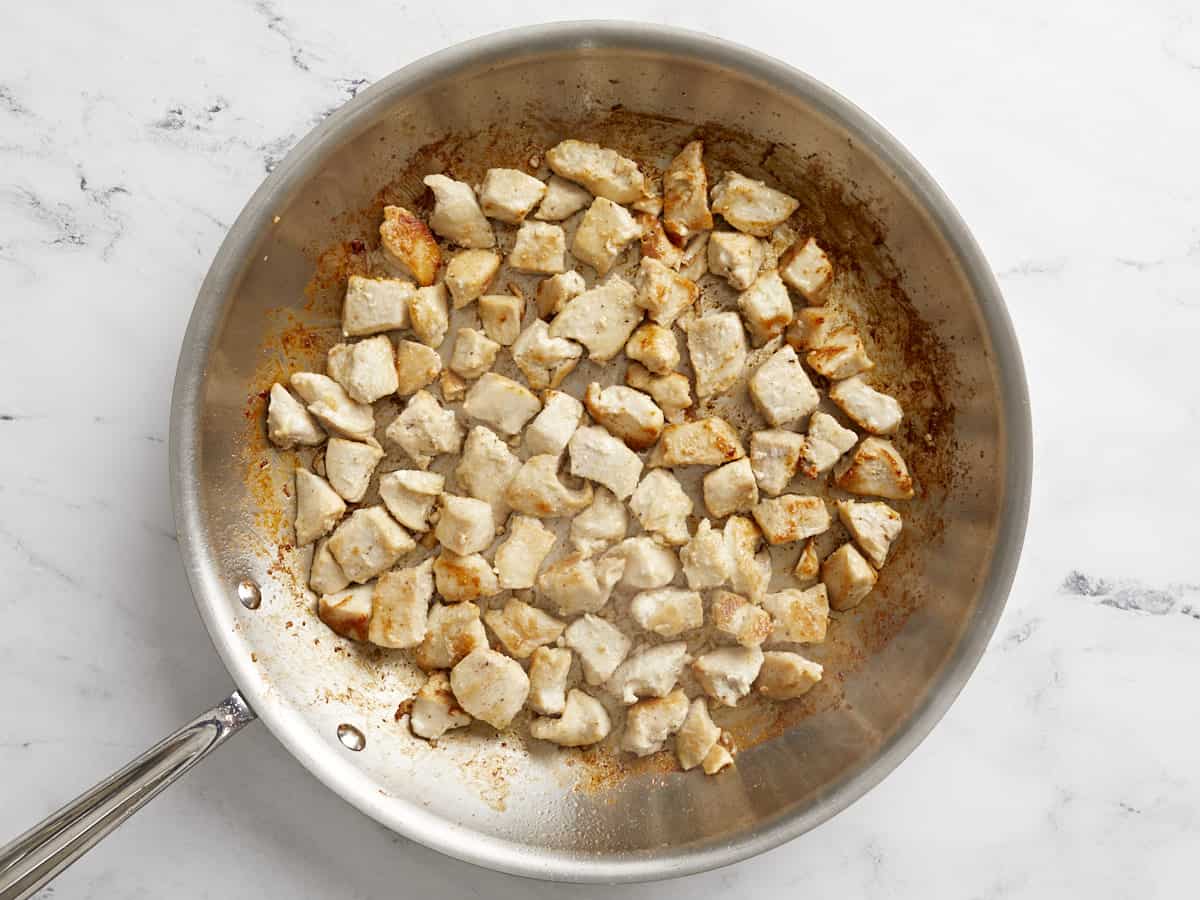
Heat a large skillet over medium-high heat and add 2 Tbsp of oil. Swirl to coat the surface of the skillet. Once the skillet is hot, add half of the chicken and cook until browned on all sides and cooked through. Remove the chicken from the skillet onto a separate plate and set aside. Add the remaining 1 Tbsp of oil and repeat with cooking the 2nd batch of chicken until cooked through. Set all of the chicken aside.
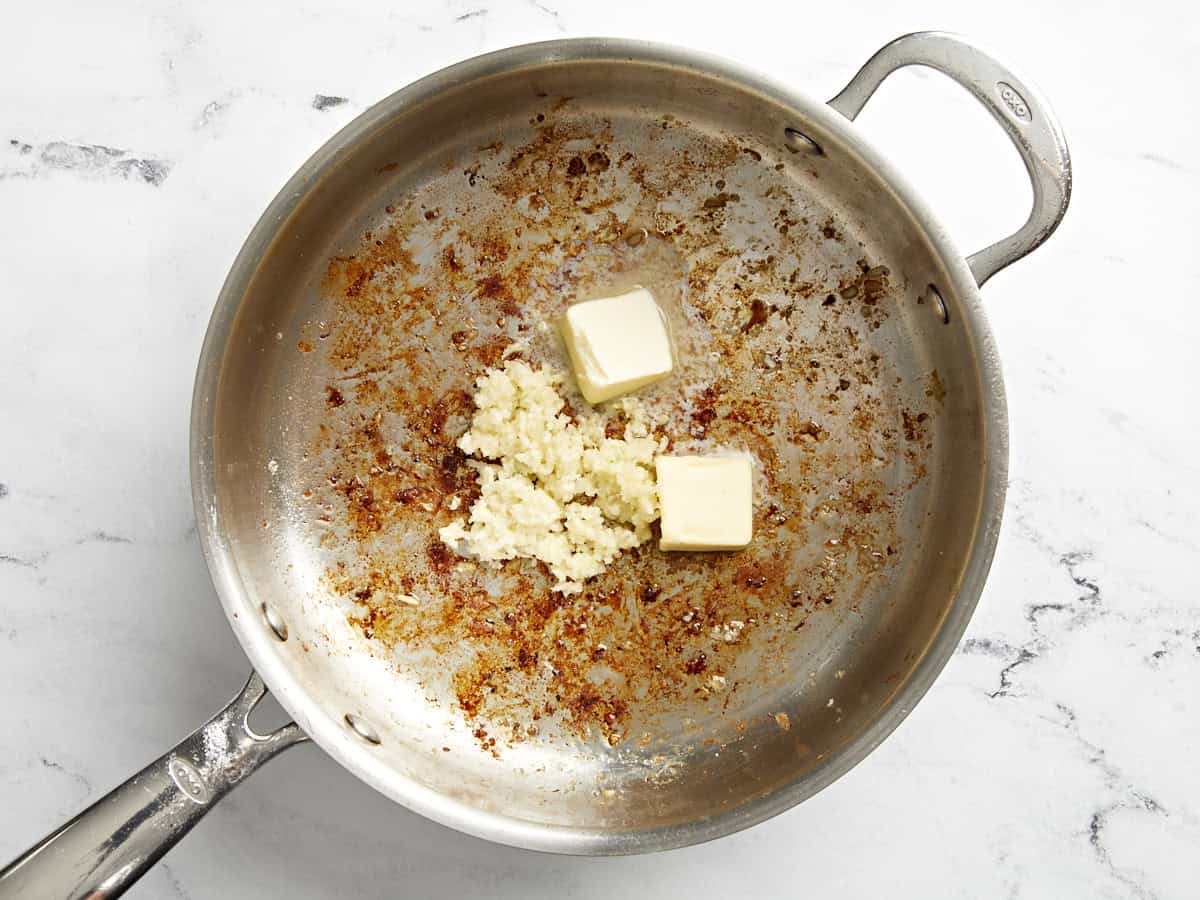
In the same skillet add 2 Tbsp of butter and lower the heat down to medium-low heat. Add four minced garlic cloves and sauté for 30-60 seconds until fragrant.
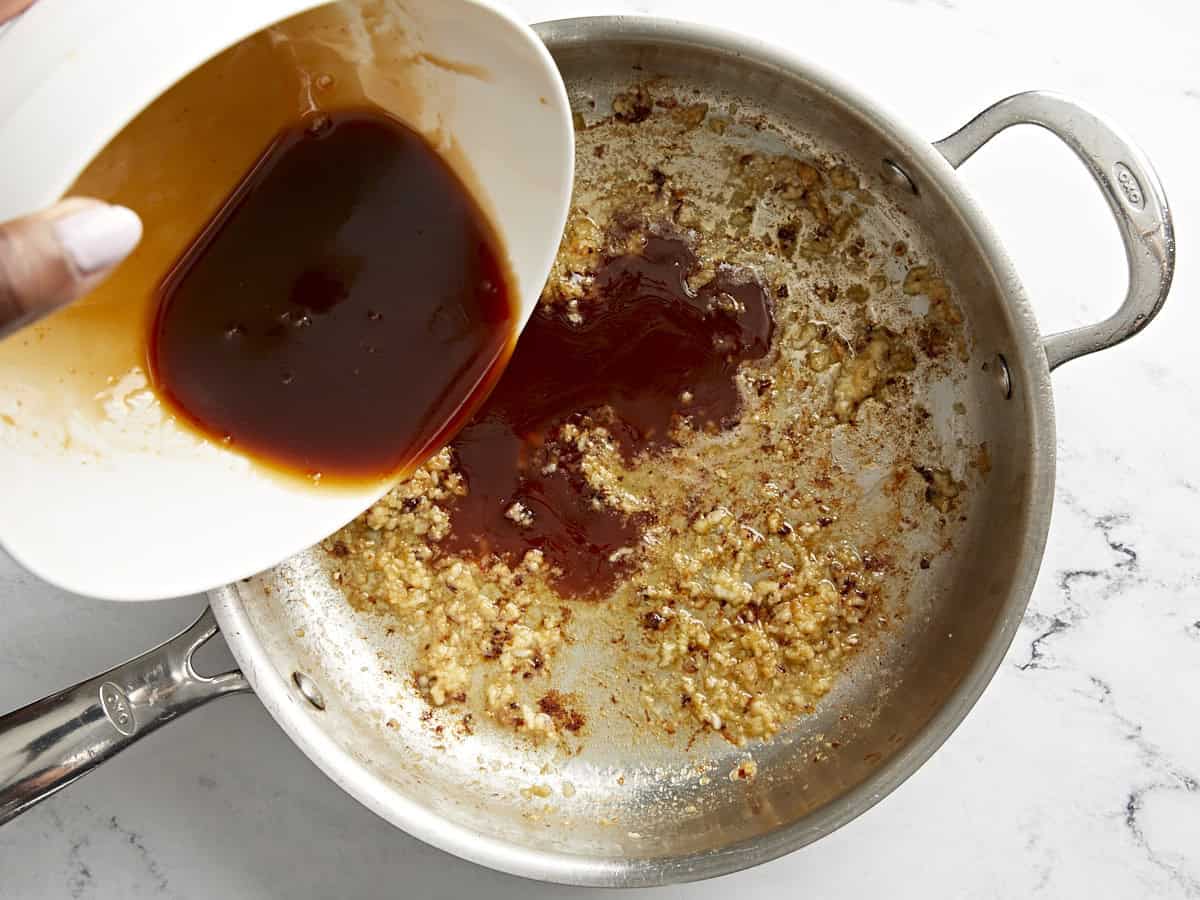
Next give the sauce another brief stir, then pour the sauce into the skillet with the garlic. Stir the sauce and scrape up any browned bits that are stuck at the bottom of the skillet.
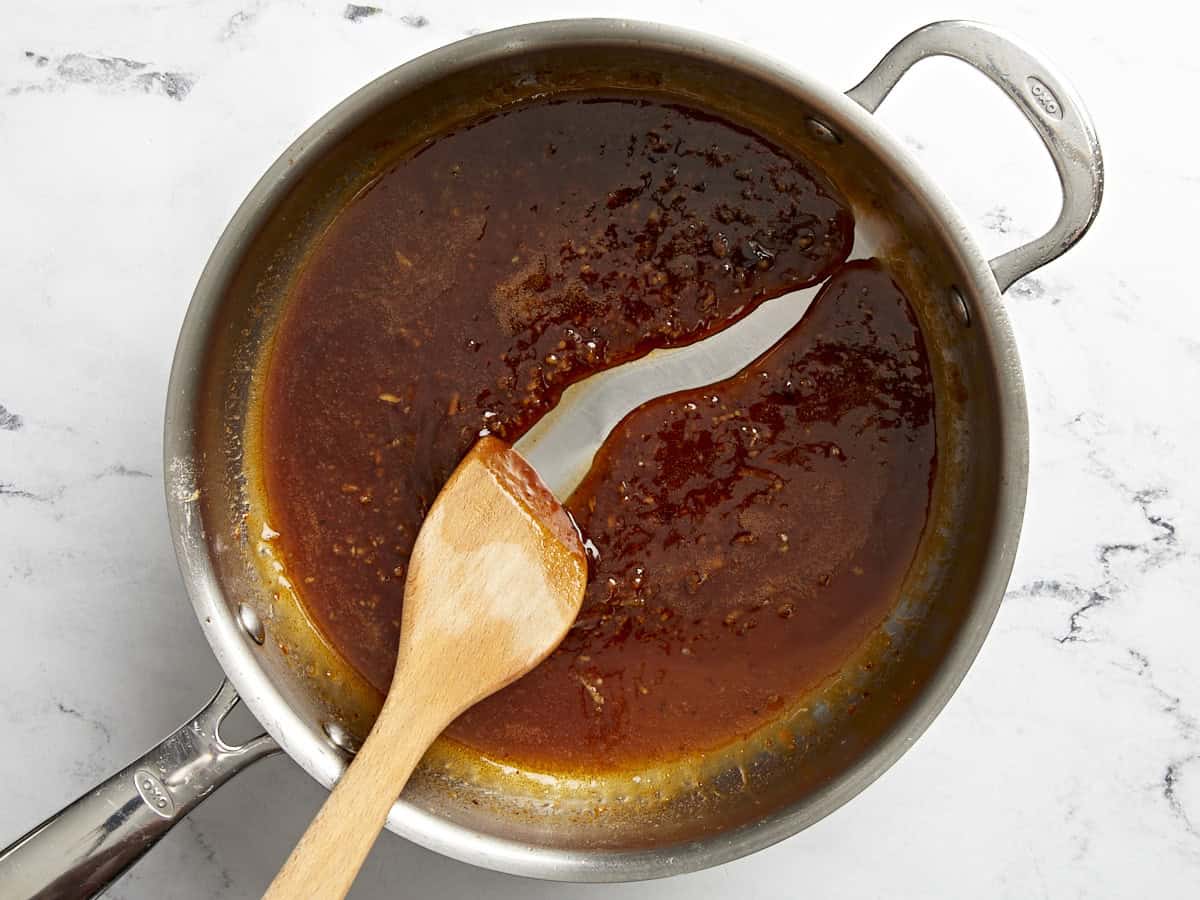
Let the sauce simmer for about 2 minutes to allow the cornstarch to activate and thicken the sauce.
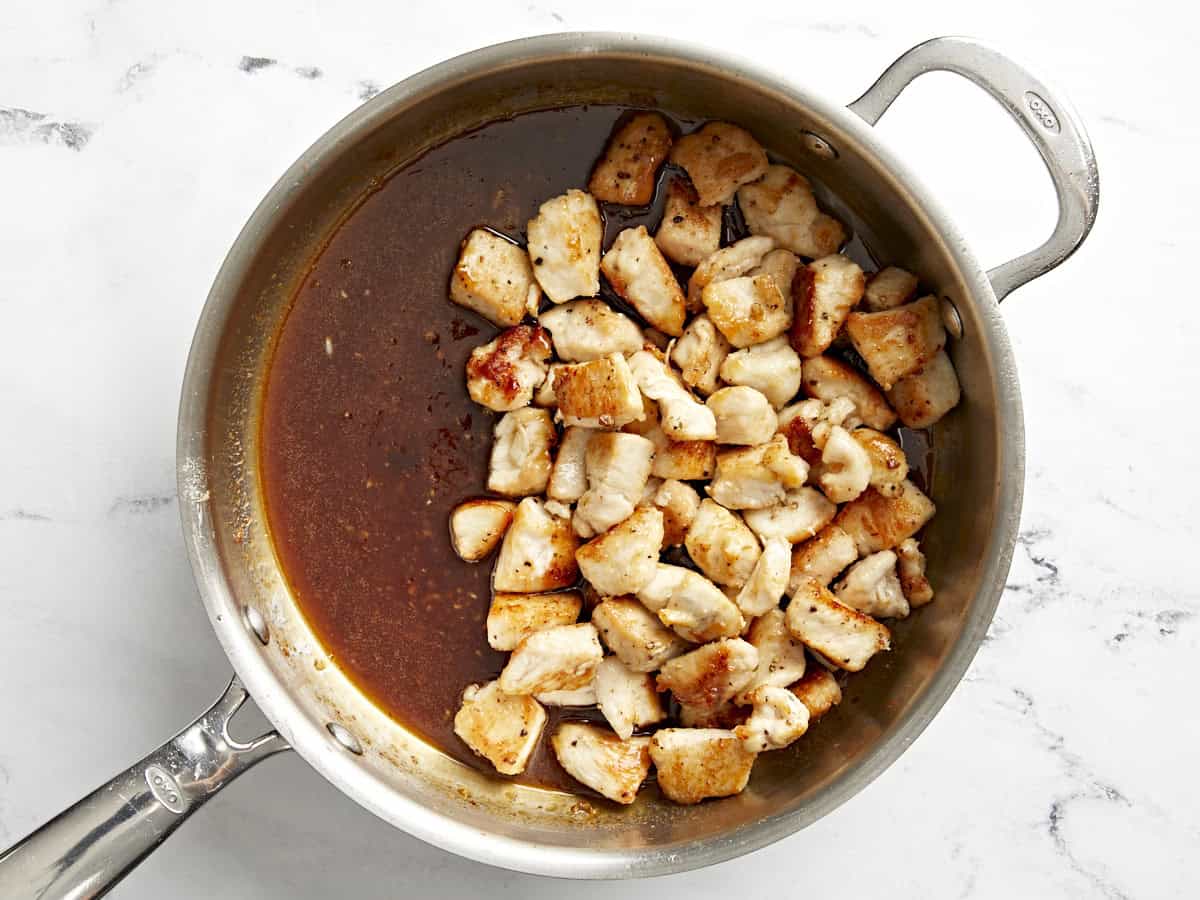
Now add the cooked chicken back to the skillet and stir with the honey garlic sauce until all of the pieces are evenly coated. Continue to cook for 1-2 more minutes to allow the chicken to heat through.
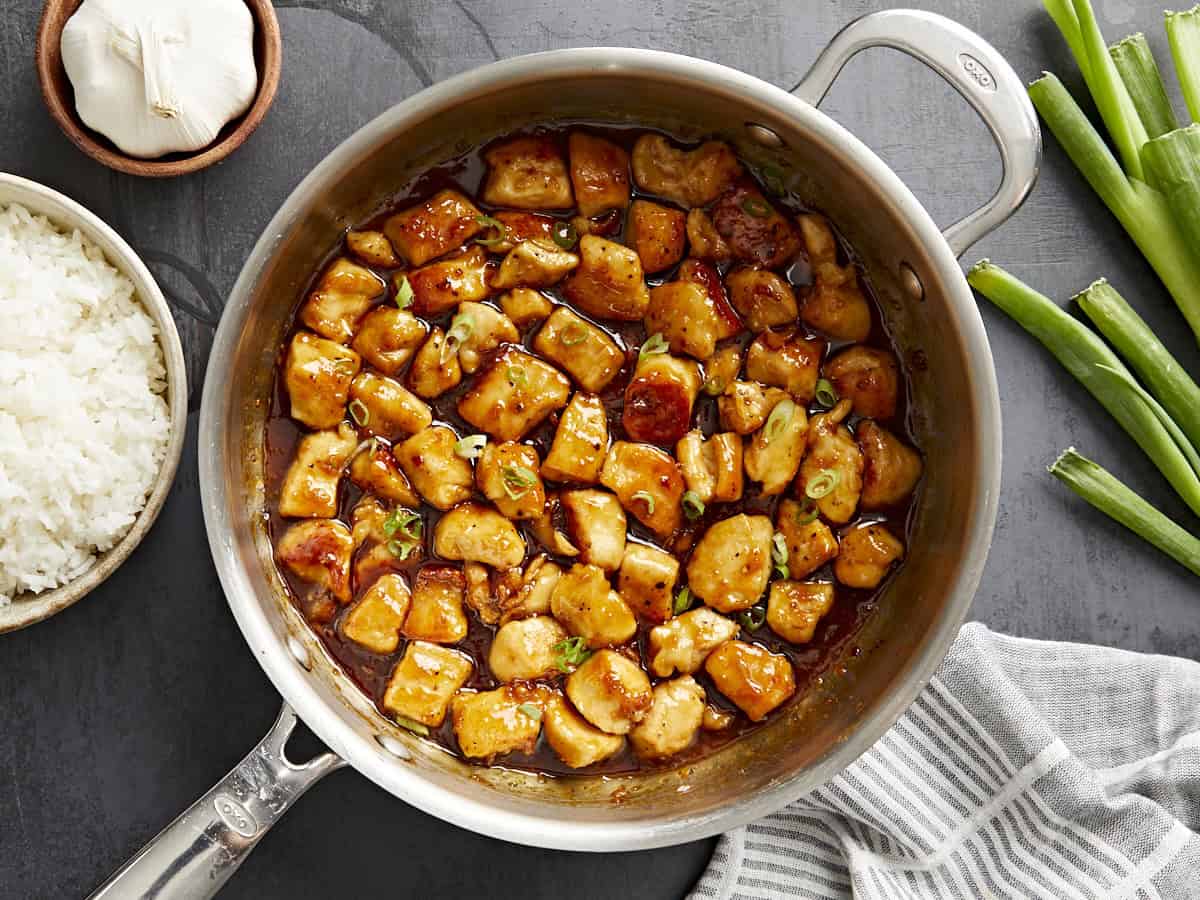
Remove the skillet from the heat and top with sliced green onions. Enjoy with fluffy white or brown rice!
More Easy Chicken Recipes


The post Honey Garlic Chicken appeared first on Budget Bytes.
 There's more room to play with flavors and textures!