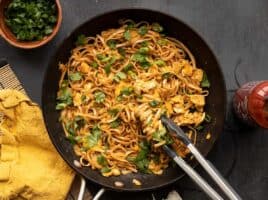
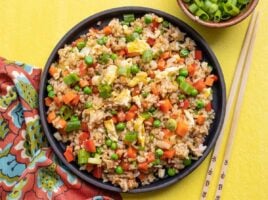
We’re all guilty of ordering Chinese takeout on a desperate night. But with this Chicken Fried Rice recipe, you won’t have to resort to that any longer! Make delicious, ultra-flavorful chicken fried rice that tastes even better than takeout– and costs less too. Easily stretch leftover rice and a single chicken breast into a budget-friendly and satisfying meal the whole family will love!
What is Chicken Fried Rice?
Chicken fried rice is a Chinese dish made with cooked rice that is stir-fried in a wok with chicken, vegetables, and eggs, and seasoned with a savory sauce. It’s extremely flexible and budget-friendly, which is why we love this dish! The recipe below is an American adaptation, using a skillet instead of a wok and ingredients that are easily sourced in most American grocery stores. If you are vegetarian, you can make this without the chicken, or try our Vegetable Fried Rice recipe!
Do I Need a Wok?
This recipe is designed to be made easily in a regular pan; however, we highly recommend using a nonstick pan over stainless steel. We found in testing that some of the eggs stuck to the bottom of the stainless steel pan and burned, adding an unpleasant flavor to the whole dish.
Ingredients for Chicken Fried Rice
Here’s what you’ll need to make chicken fried rice:
- Chicken Breast: You’ll need 1 large boneless skinless chicken breast (about 2/3 lb.) for this recipe.
- Oil: Toasted sesame oil adds a warm and nutty flavor, while cooking oil (we like canola or vegetable) helps everything cook without burning.
- Soy Sauce: Adds rich, salty, umami flavor. If you’re gluten-free, you can use tamari or coconut aminos instead.
- Garlic: Creates a savory and earthy base of flavor.
- Ginger: Fresh ginger will create the best flavor, but paste or powder will also work.
- Vegetables: We used green onions, carrot, red bell pepper, and frozen peas.
- Eggs: Scrambled eggs help stretch this recipe, adding extra protein and healthy fats.
- Cooked and Cooled Rice: To avoid clumpy or gummy fried rice, use rice that has been previously cooked and completely cooled.
What Else Can I Put In Chicken Fried Rice?
If you have any leftover veggies from previous dinners, you can chop them up and toss them in this tasty chicken fried rice. It’s also easy to grab a bag of frozen mixed vegetables (carrots, peas, corn, and green beans) to save on prep time!
How To Store Leftovers
Store leftover chicken fried rice in an airtight container in the refrigerator for up to 3 days. Reheat in a pot set over medium-low heat with a little bit of water added to rehydrate the rice. You can also sprinkle some water over individual portions and microwave in 30-second increments until warmed through.
Chicken Fried Rice
Ingredients
- 2 cloves garlic, minced $0.16
- 1 tsp grated fresh ginger $0.10
- 3 green onions, sliced $0.30
- 1 carrot, diced small $0.16
- 1 red bell pepper, diced $1.50
- 1 cup frozen peas $0.50
- 1 large boneless skinless chicken breast $2.62
- 2 large eggs $0.46
- 3 Tbsp cooking oil, divided $0.13
- 3 Tbsp toasted sesame oil $0.96
- 3 Tbsp soy sauce $0.15
- 3 cups cooked and cooled rice $0.62
Instructions
- Prepare the vegetables beforehand so they’re ready to go when needed. Mince the garlic, grate the ginger, dice the carrot and bell pepper, slice the green onions (separate the green ends from the white ends), and measure the frozen peas.
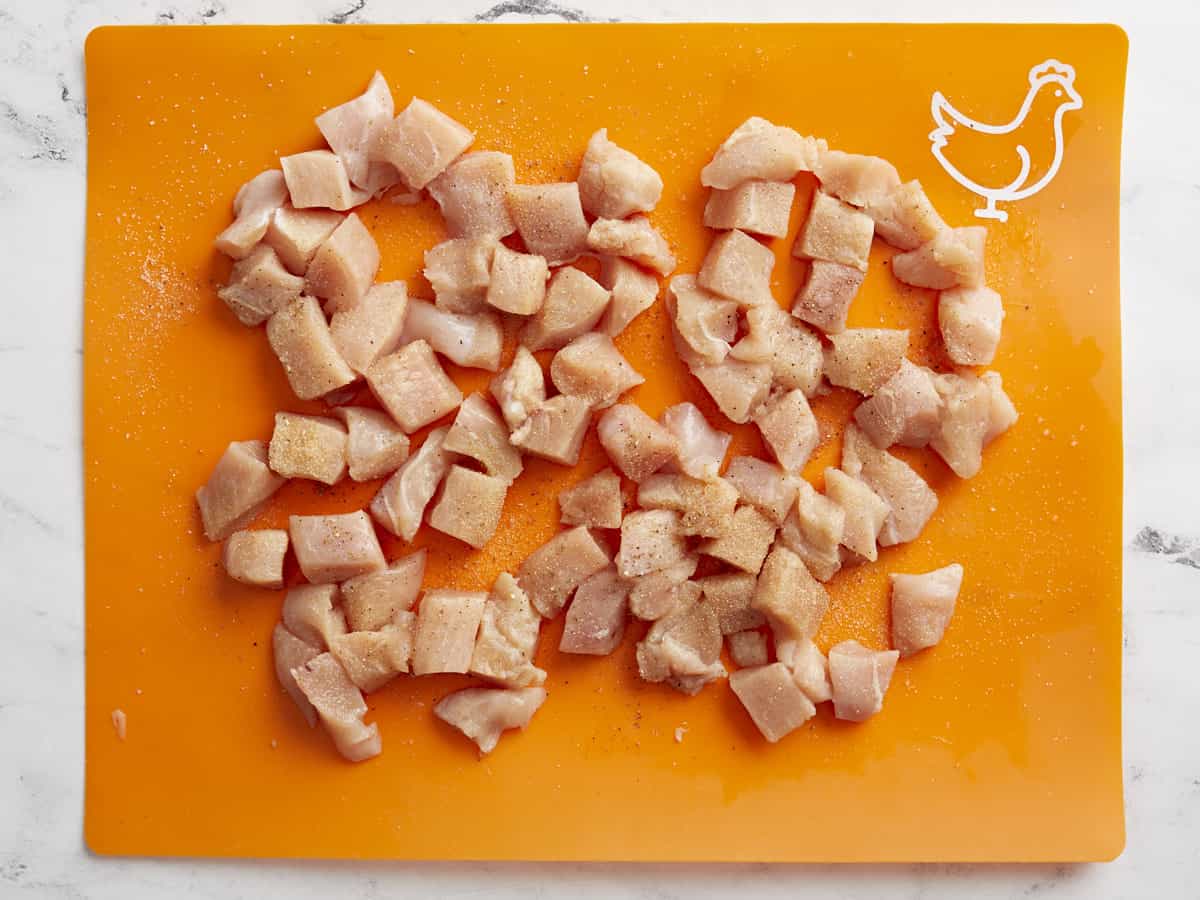
- On a separate, clean cutting board, cut your chicken into ½ inch pieces so you get a little in every bite. Set aside (and wash your hands!)
- Lightly whisk the eggs in a small bowl. Heat a large skillet over medium heat. Once hot, add 2 Tbsp of cooking oil and swirl to coat the surface. Add the eggs and gently scramble until cooked through. Transfer the cooked eggs to a clean bowl or plate off to the side.
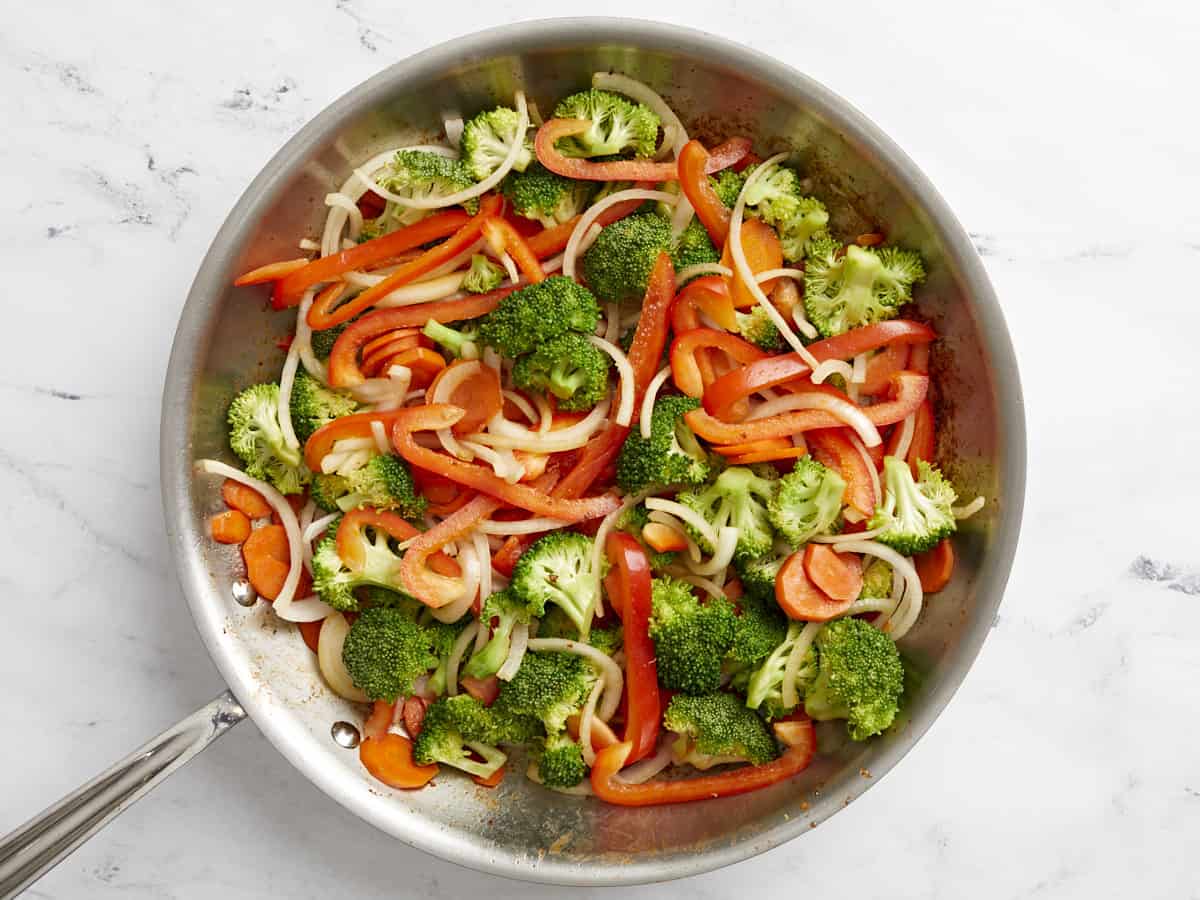
- Turn the heat up to medium-high. Add the diced carrots, stir, and cook for about two minutes. Next, add the bell pepper and the white firm ends of the green onions. Cook and stir for one minute more. Finally, add the frozen peas and stir and cook until heated through. Transfer the vegetables to a clean bowl or plate.
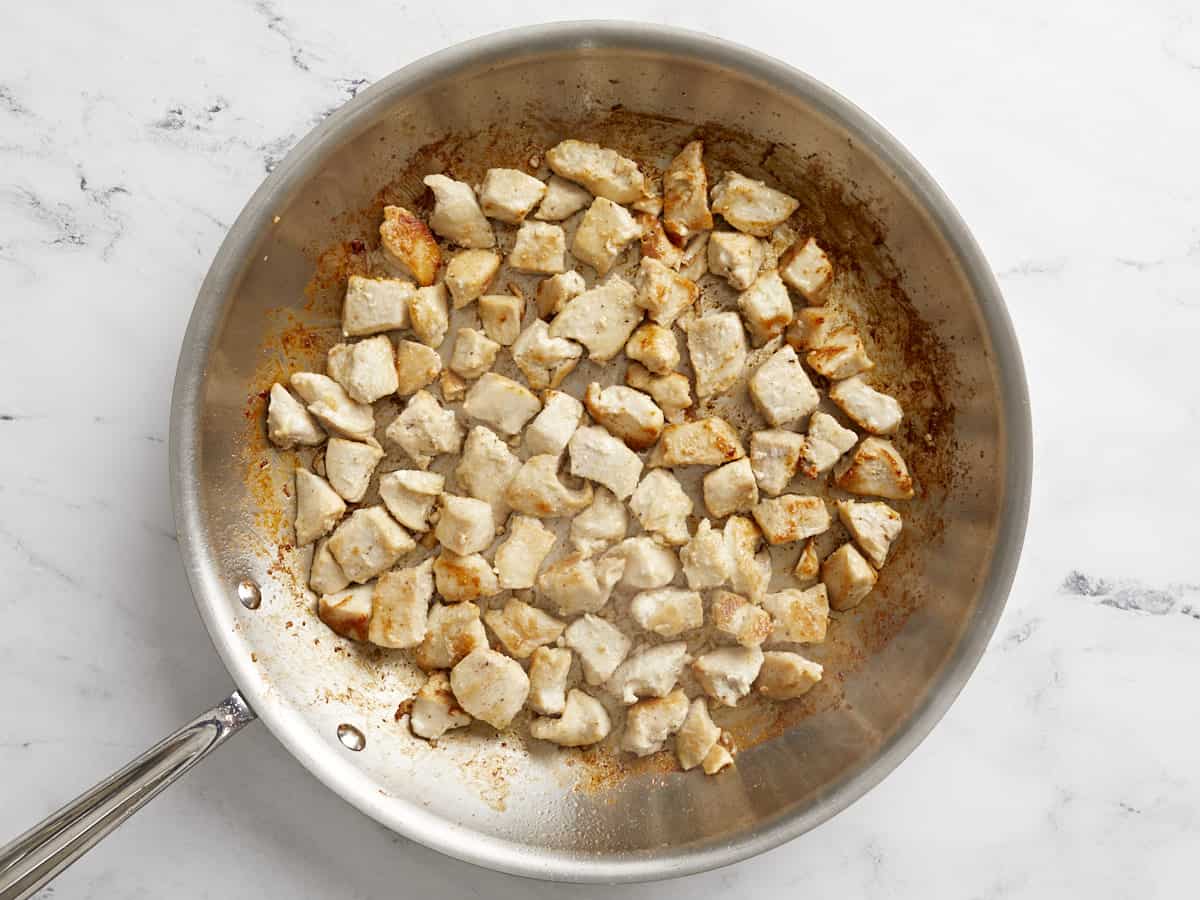
- Add the remaining 1 Tbsp cooking oil to the skillet and swirl to coat the surface. Add the ½ inch pieces of chicken and completely cook through, about 4 minutes. Once the chicken is about ½ of the way cooked through (2-3 minutes), add the garlic and ginger and cook for an additional 2-3 minutes.
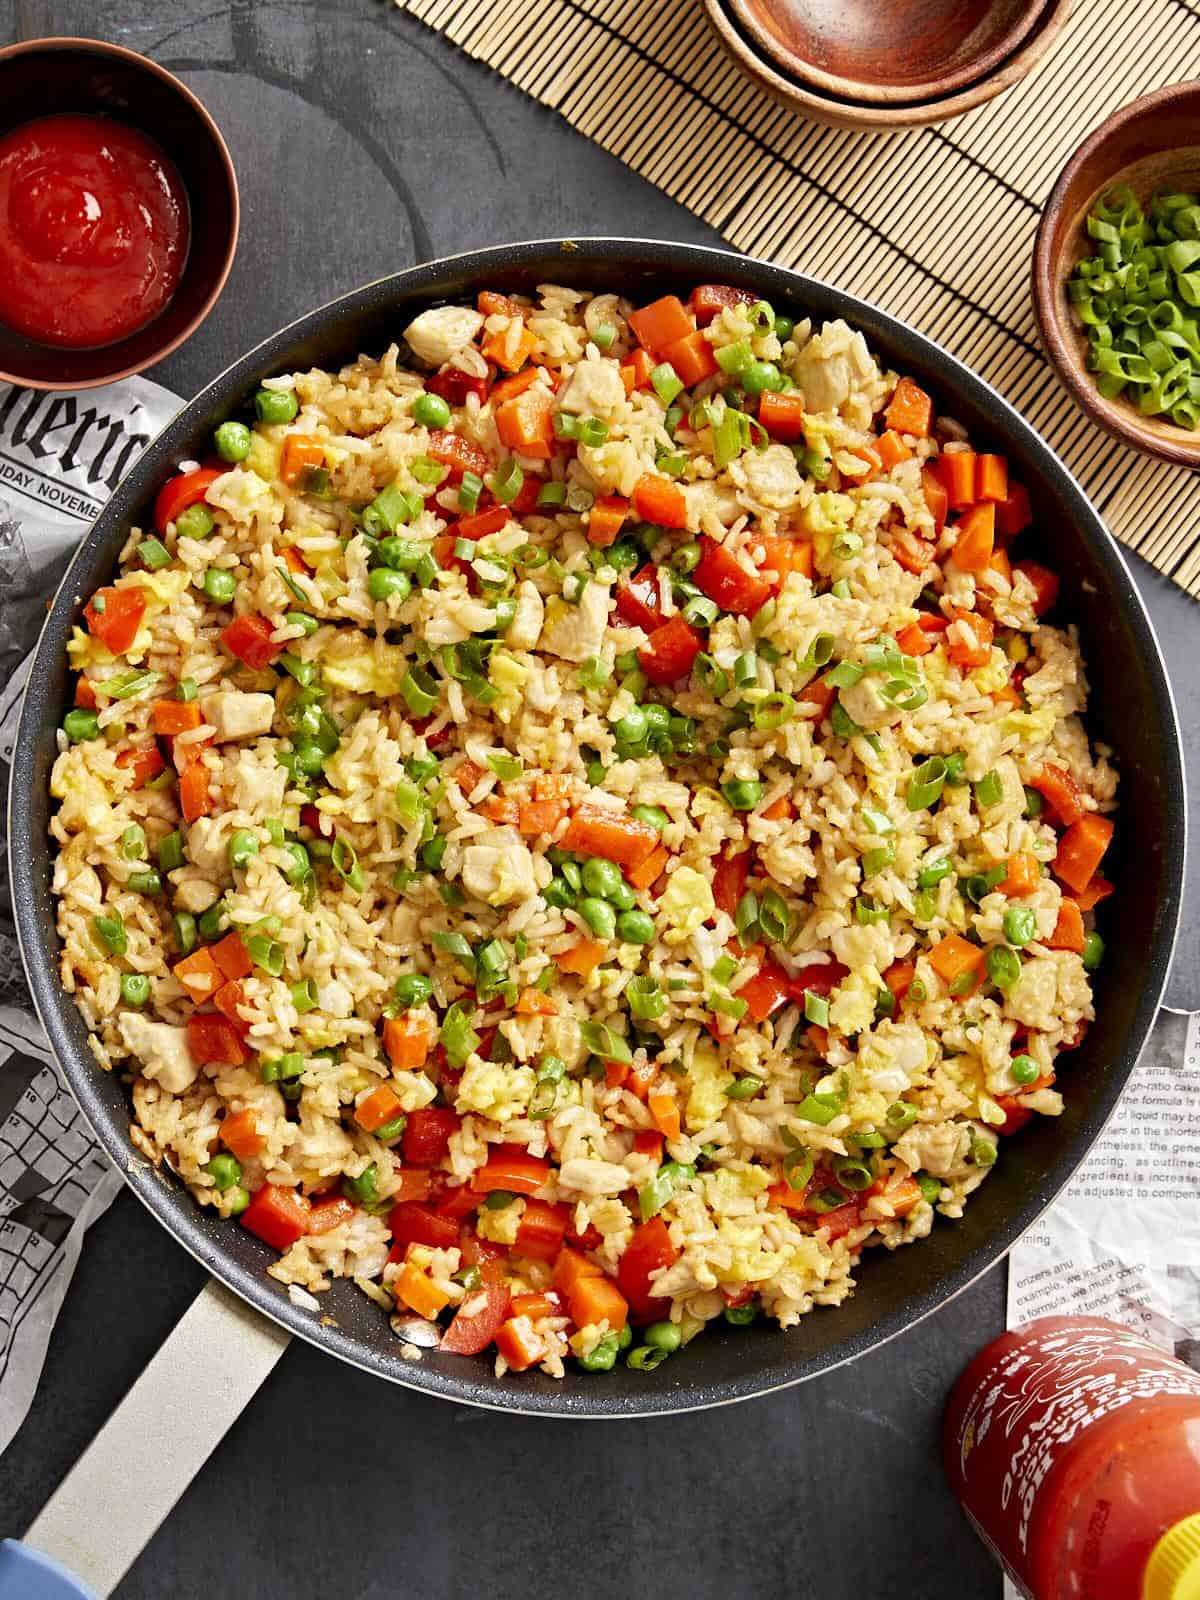
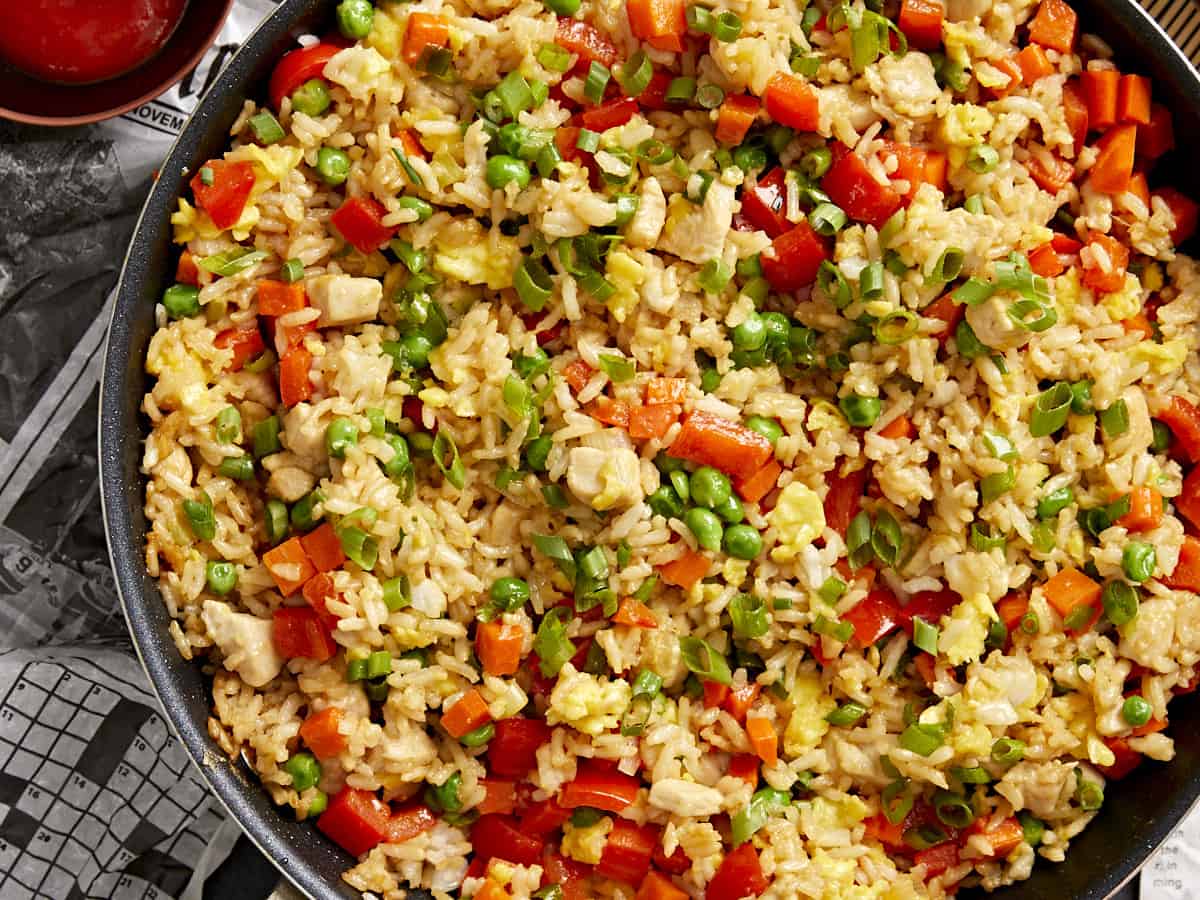
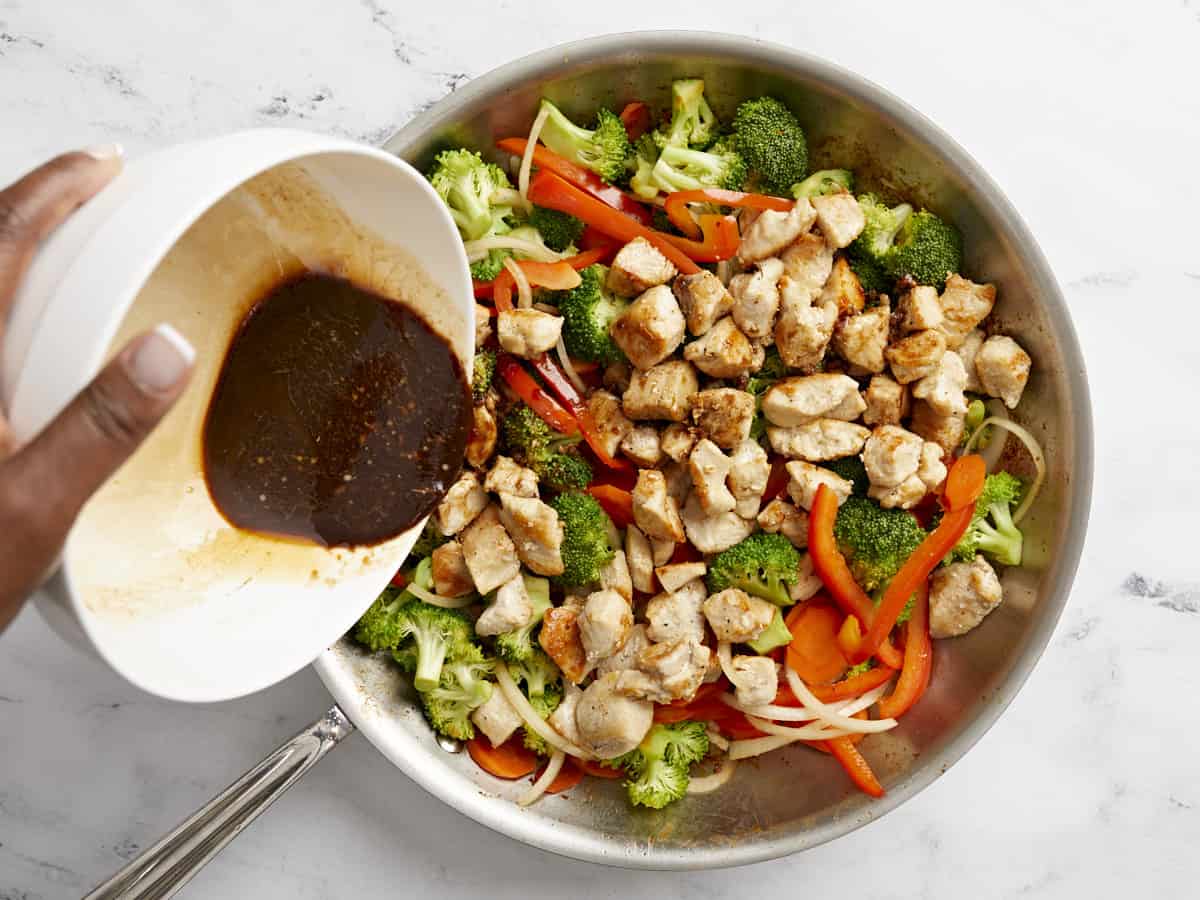
- Then, add the cooked and cooled rice to the skillet. Stir and cook the chicken and rice together for about 2 minutes, or until the rice is heated through. Pour the soy sauce and toasted sesame oil over the rice. Stir the rice and sauce together until evenly combined. Turn the heat off.
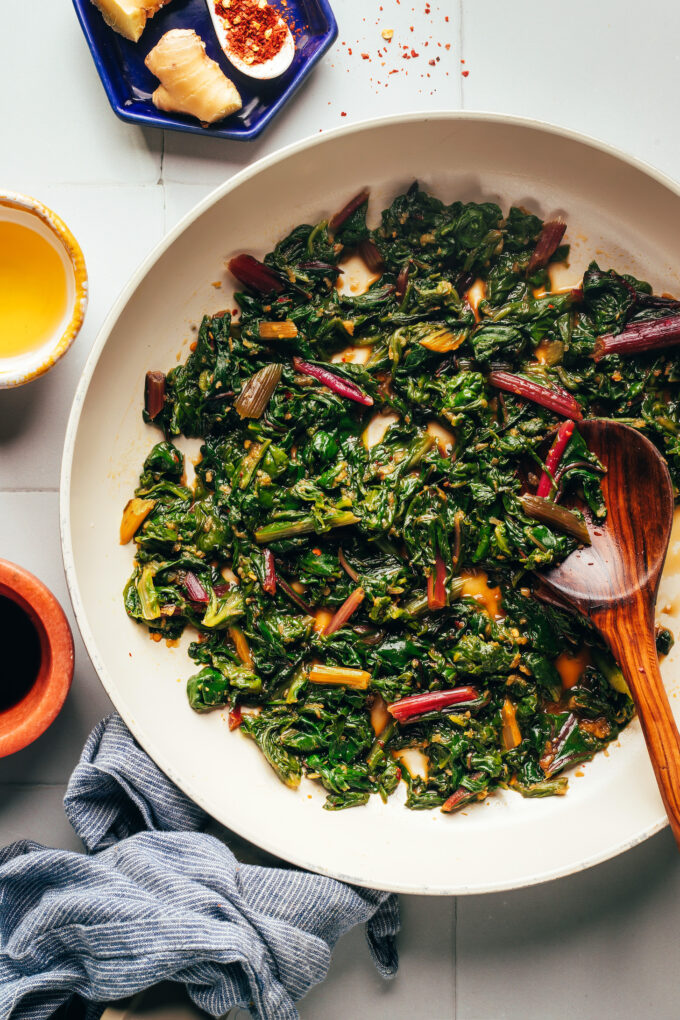
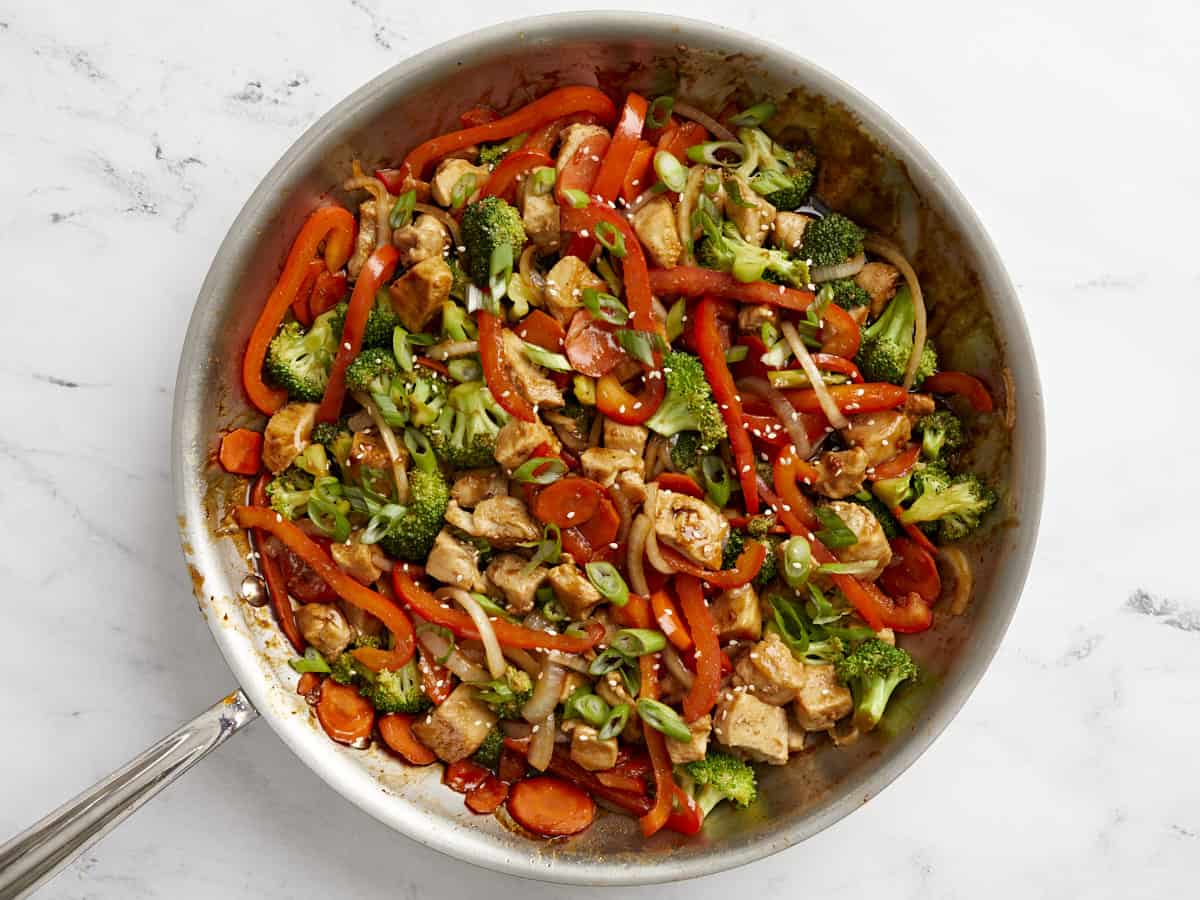
- Add the eggs and vegetables back to the skillet with the chicken and rice and stir to combine. Allow the residual heat to heat everything through. Top with the remaining green ends of the sliced green onions. Taste and adjust the soy sauce or sesame oil to your liking.
See how we calculate recipe costs here.
Nutrition
how to make Chicken Fried Rice – step by step photos
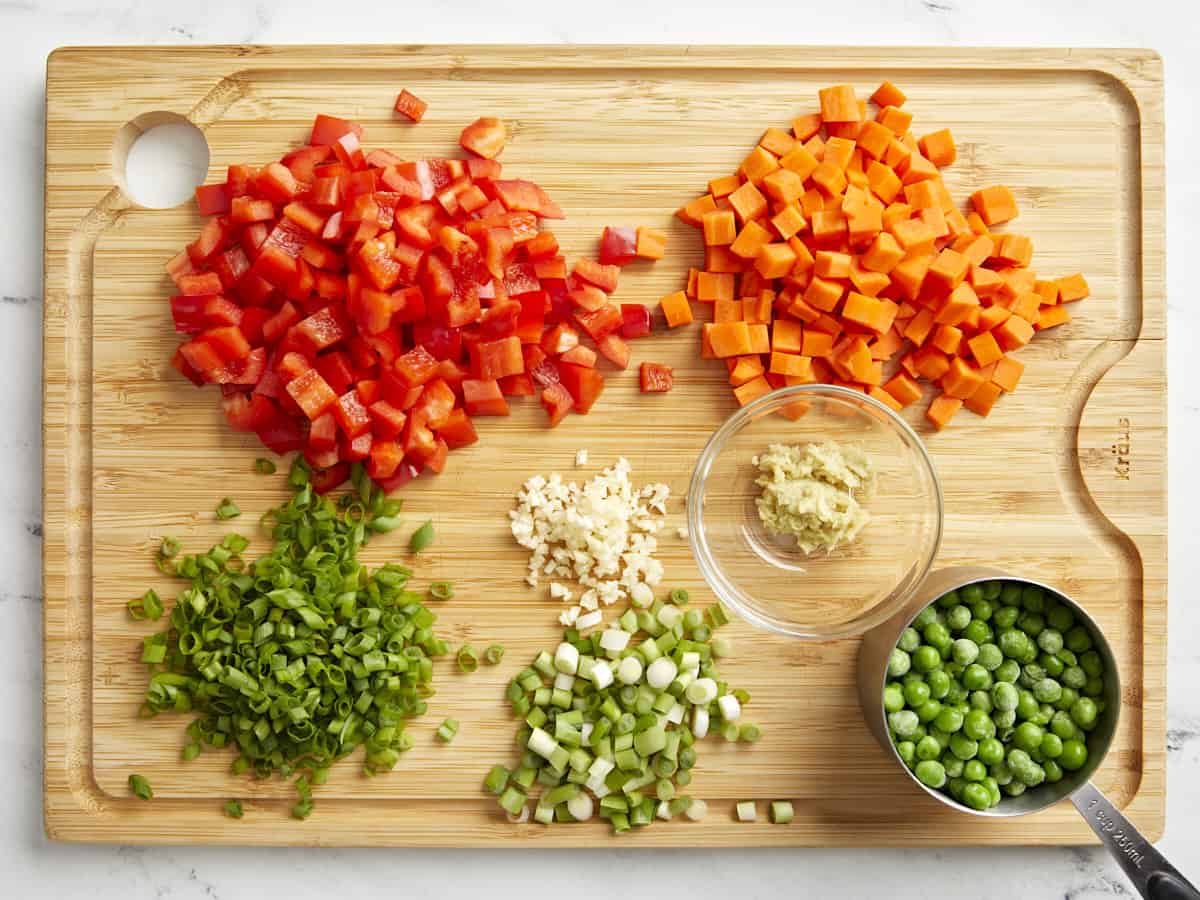
Prepare the vegetables beforehand so they’re ready to go when needed. Mince the garlic, grate the ginger, dice the carrot and bell pepper, slice the green onions (separate the green ends from the white ends), and measure the frozen peas.
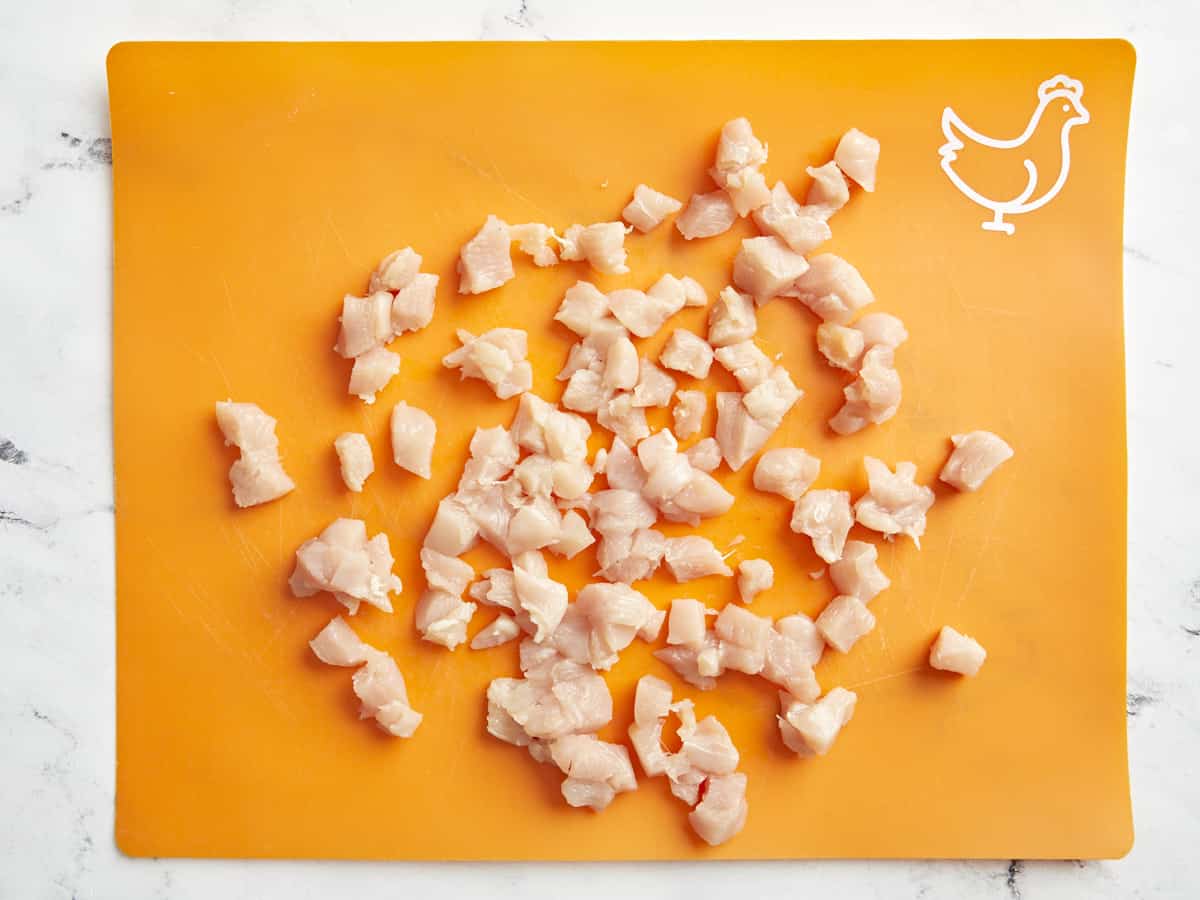
On a separate, clean cutting board, cut your chicken into ½ inch pieces so you get a little in every bite. Set aside (and wash your hands!)
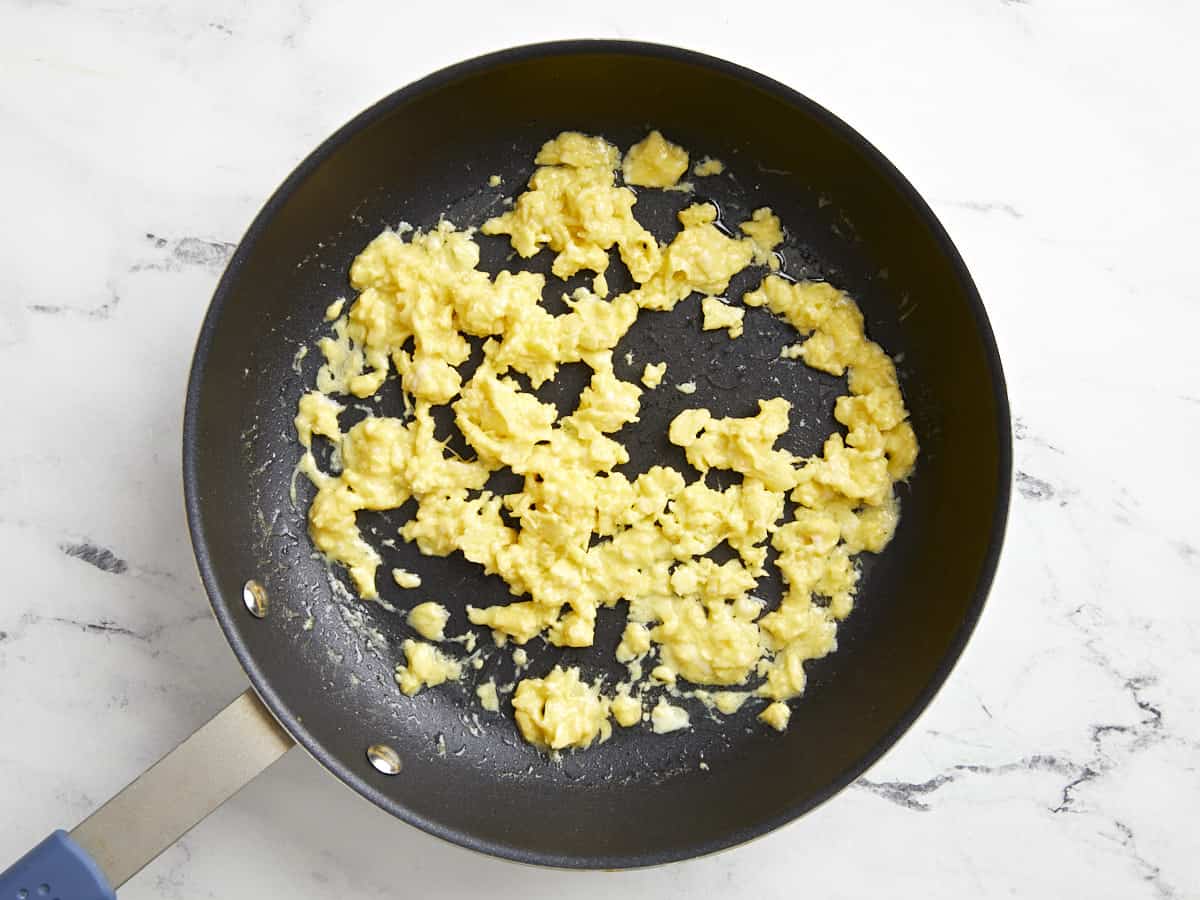
Lightly whisk the eggs in a small bowl. Heat a large skillet over medium heat. Once hot, add 2 Tbsp of cooking oil and swirl to coat the surface. Add the eggs and gently scramble until cooked through. Transfer the cooked eggs to a clean bowl or plate off to the side.
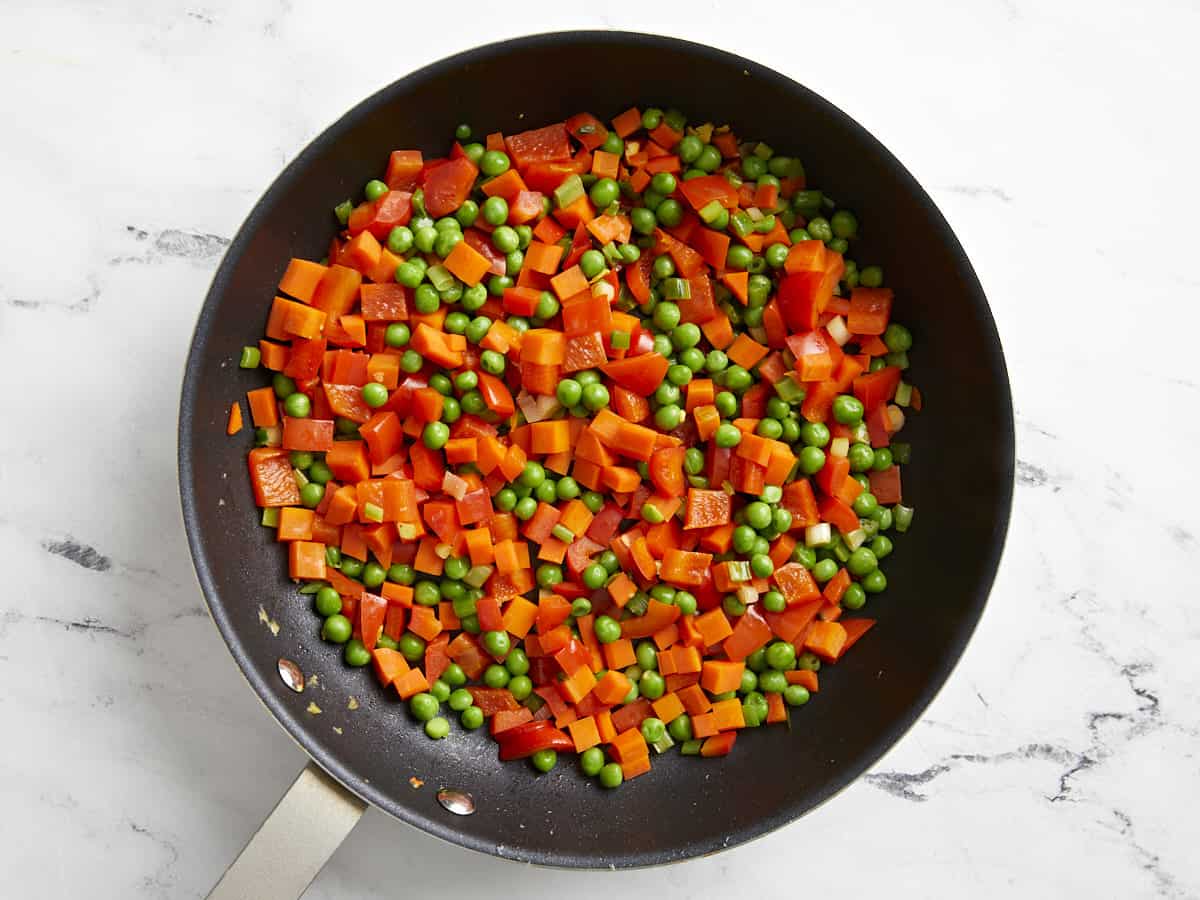
Turn the heat up to medium-high. Add the diced carrots, stir, and cook for about two minutes. Next, add the bell pepper and the white firm ends of the green onions. Cook and stir for one minute more. Finally, add the frozen peas and stir and cook until heated through. Transfer the vegetables to a clean bowl or plate.
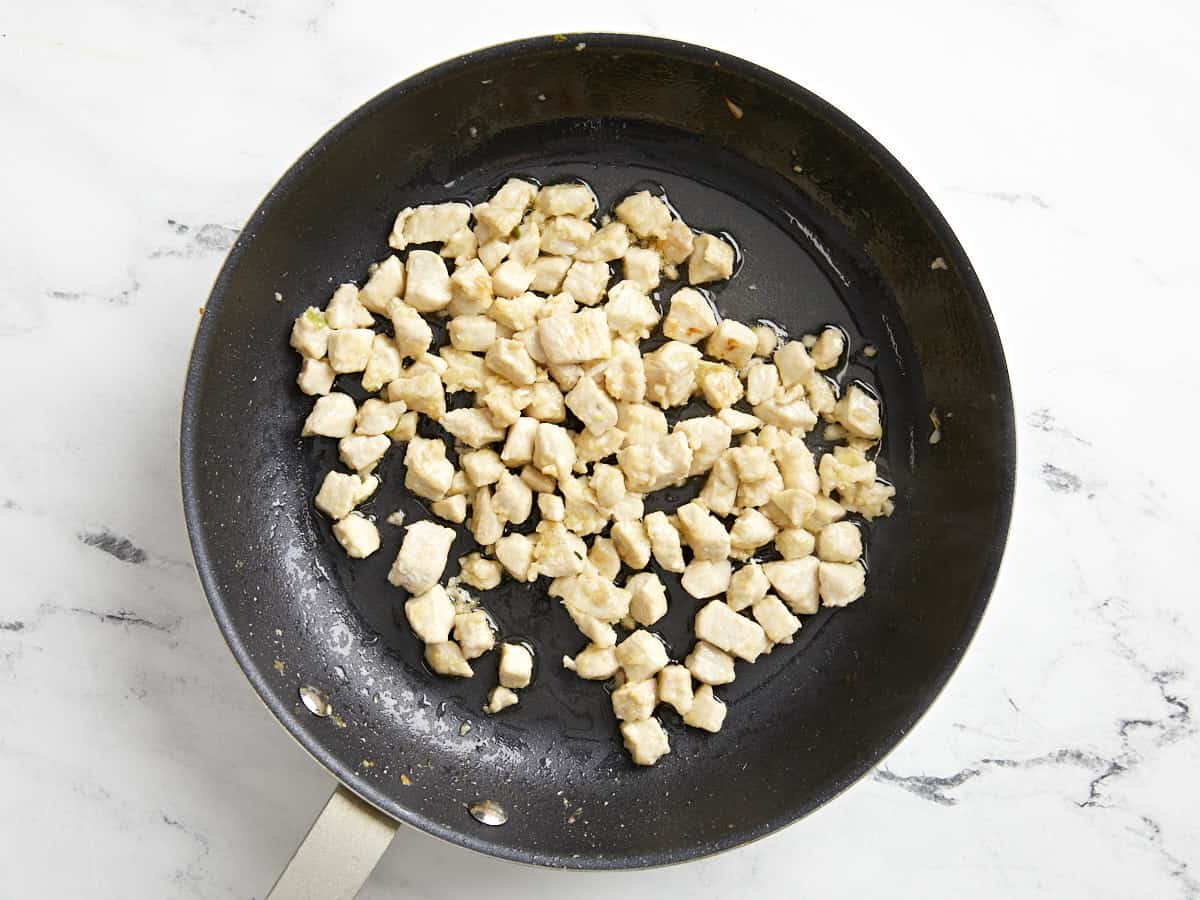
Add the remaining 1 Tbsp cooking oil to the skillet and swirl to coat the surface. Add the ½ inch pieces of chicken and completely cook through, about 4 minutes. Once the chicken is about ½ of the way cooked through (2-3 minutes), add the 2 cloves of garlic and 1 tsp ginger and cook for an additional 2-3 minutes.
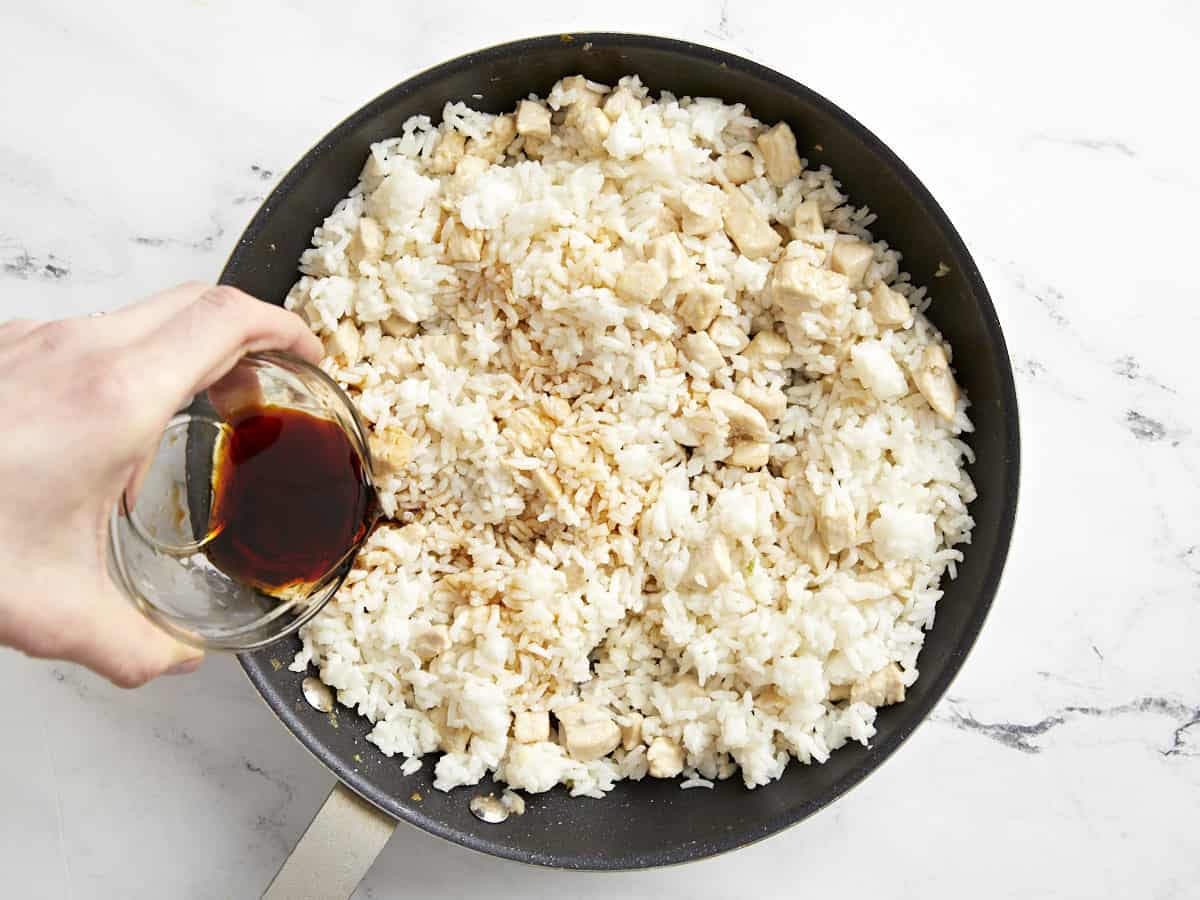
Then, add the cooked and cooled rice to the skillet. Stir and cook the chicken and rice together for about 2 minutes, or until the rice is heated through. Pour the 3 Tbsp soy sauce and 3 Tbsp toasted sesame oil over the rice. Stir the rice and sauce together until evenly combined. Turn the heat off.
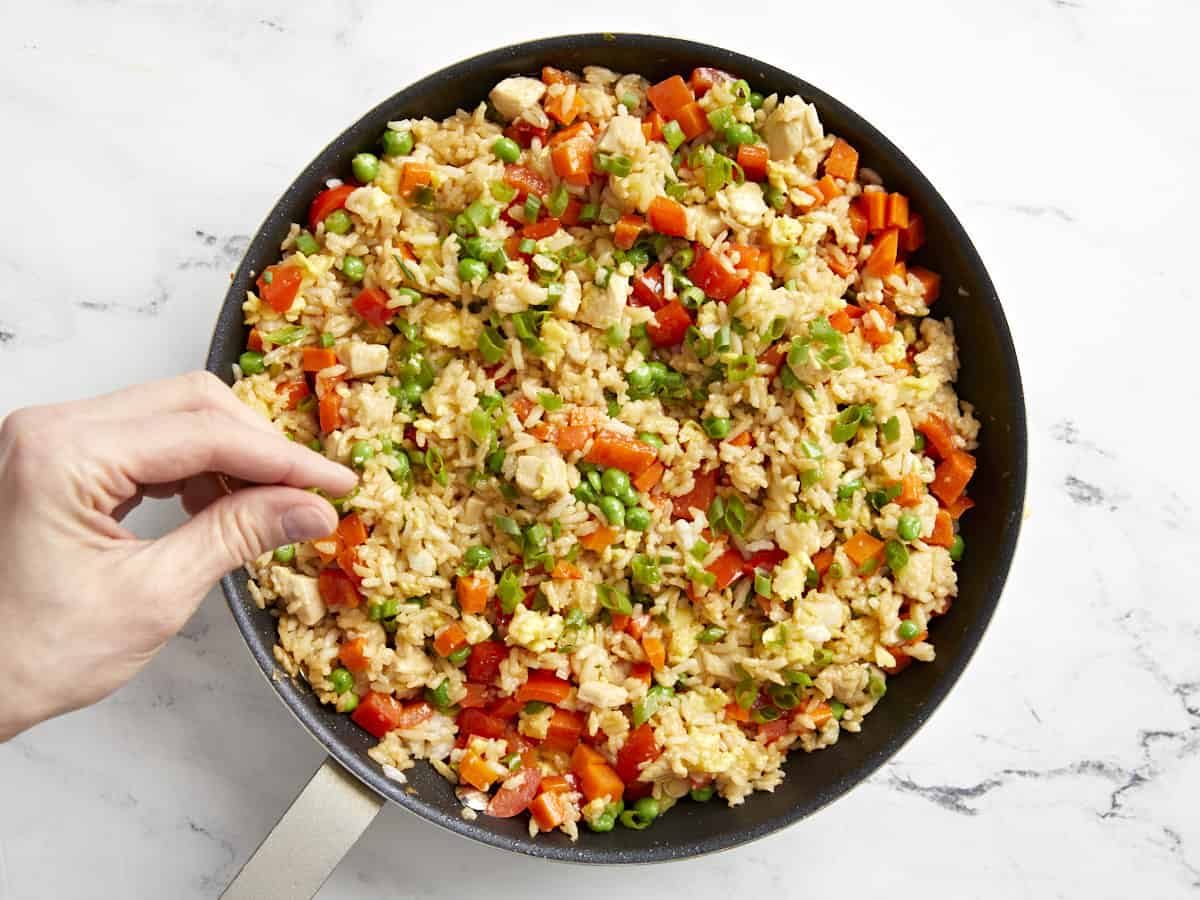
Add the eggs and vegetables back to the skillet with the chicken and rice and stir to combine. Allow the residual heat to heat everything through. Top with the remaining green ends of the sliced green onions. Taste and adjust the soy sauce or sesame oil to your liking.
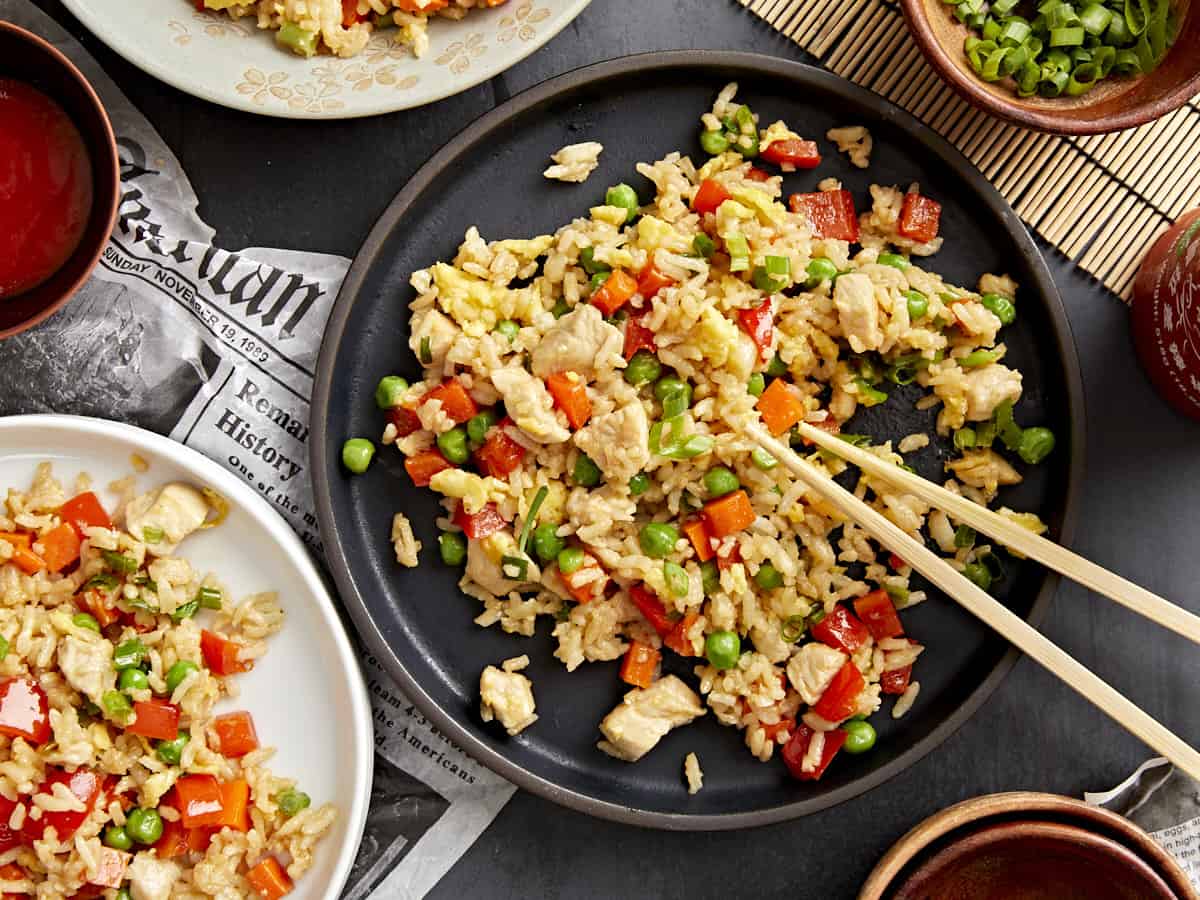
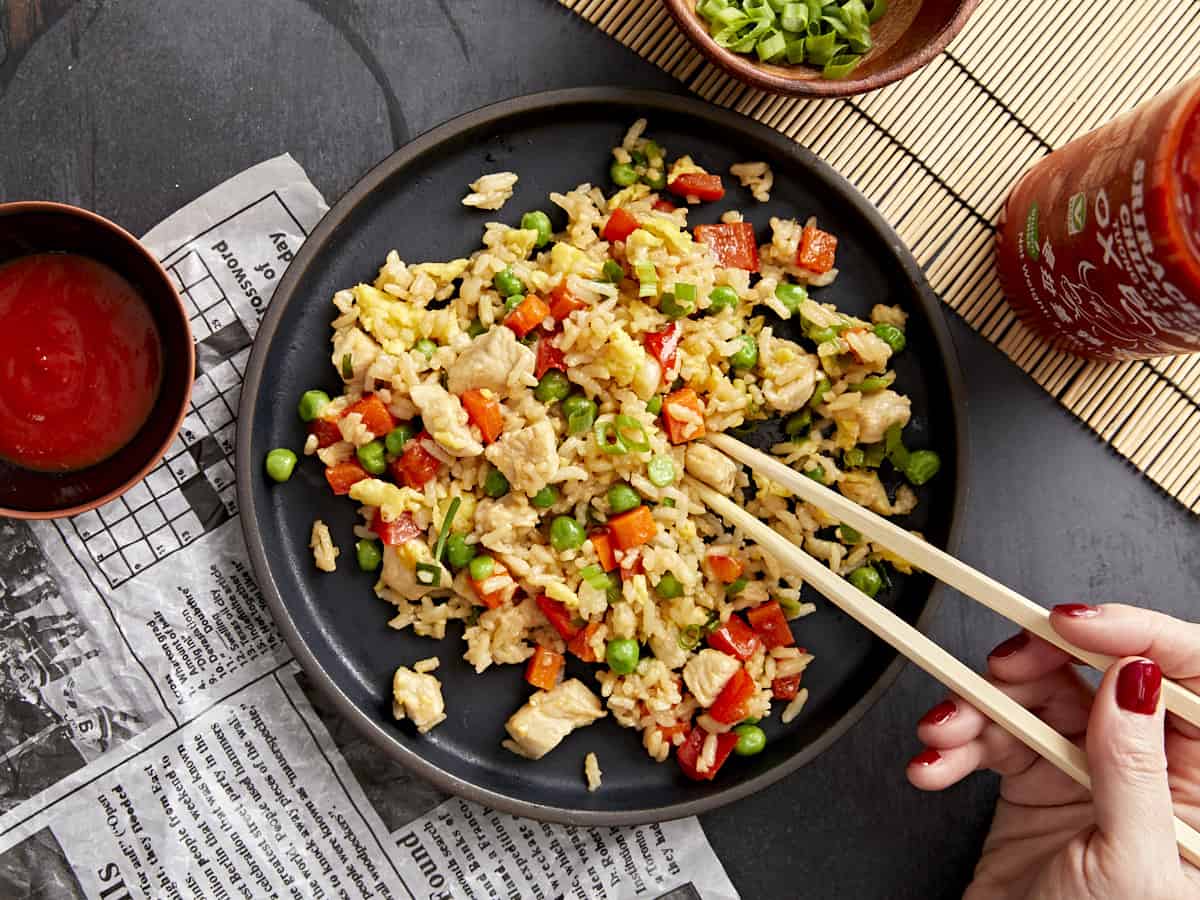
This flavorful chicken fried rice is so much better than takeout!
More Easy Takeout Recipes
The post Chicken Fried Rice appeared first on Budget Bytes.


 I love Rolo candies. If you haven’t had Rolos, let me introduce you. They are rich chocolate caramel candies wrapped in a shiny foil wrapper. I love using them to make my chocolate Rolo cookies, they are a classic. I also use them to make Rolo pretzels. During the holiday months, I love making my…


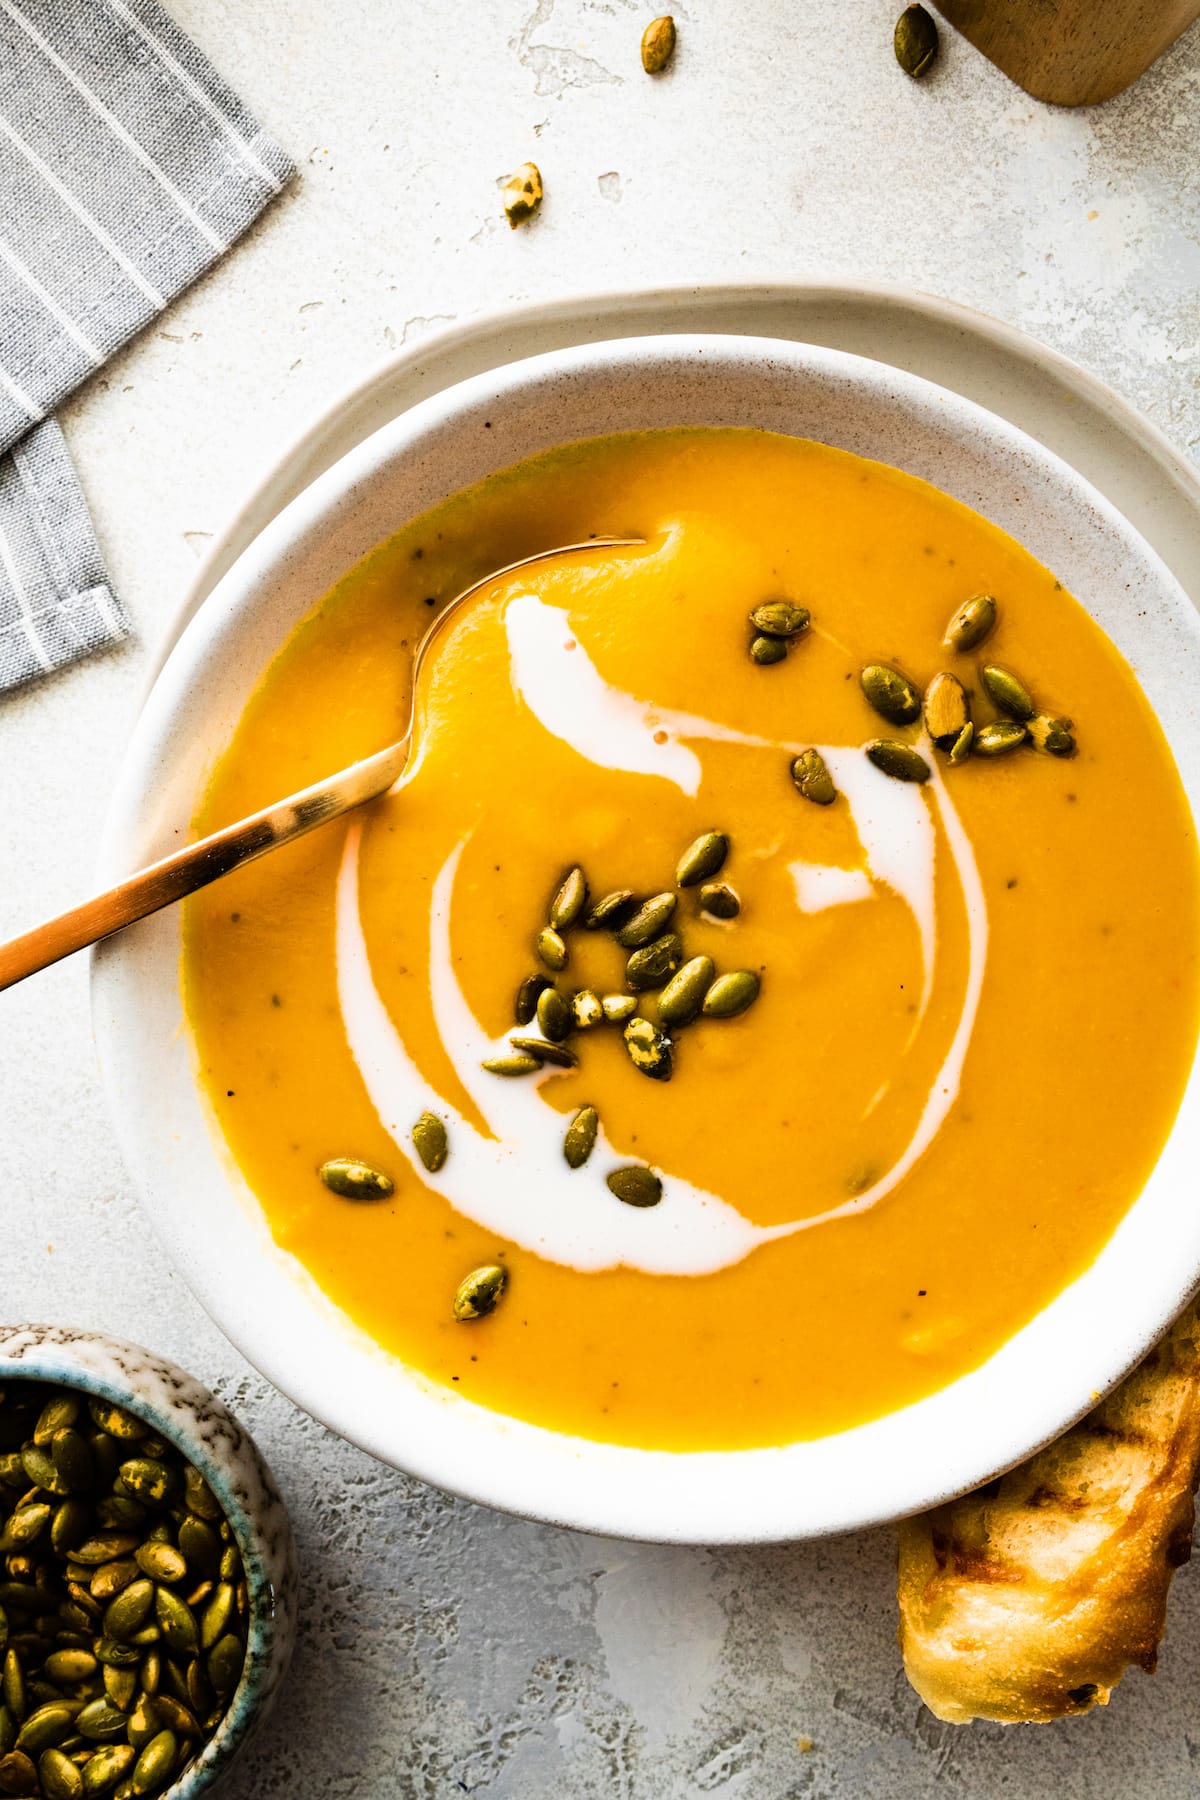 Butternut Squash Soup is one of my all-time favorite soups. I make it all of the time during the fall months. I love my classic recipe, but sometimes it is fun to mix it up. I love making this Roasted Butternut Squash Pear Ginger Soup because the flavors are phenomenal. This soup recipe reminds me…