Ham and Potato Soup

This ham and potato soup is creamy but not too heavy and loaded with fresh veggies and salty ham. It’s perfect for the seasonal transition!

The post Ham and Potato Soup appeared first on Budget Bytes.

These hot and cold spring days have me feeling all kinds of confused about what to make for dinner. One day it’s warm and sunny, and the next it feels like winter all over again. But no matter the mood, I feel like soup is always the right answer, and this Ham and Potato Soup is a crowd pleaser. Creamy but not too heavy, and loaded with fresh veggies and salty ham, this soup is perfect for this transitional season!

a ladleful of ham and potato soup suspended over a pot of soup.

What is Ham and Potato Soup?

This rich and creamy soup is made from a base of vegetable broth enriched with milk and butter and stuffed to the brim with fresh veggies, chunky potatoes, and salty ham. It’s real belly-warming food, perfect for taking the chill off!

Ingredients for Ham and Potato Soup

Here’s what you’ll need to make ham and potato soup:

  • Oil: I used olive oil, but a neutral-flavored oil like canola or vegetable oil will also work well.
  • Mirepoix: A base of celery, carrots, and onion builds the flavor of this soup.
  • Potatoes: I used 2 medium potatoes, which came out to be 3 1/2 cups once diced. I prefer to peel my potatoes for this recipe, but you can leave the skins on if you like them!
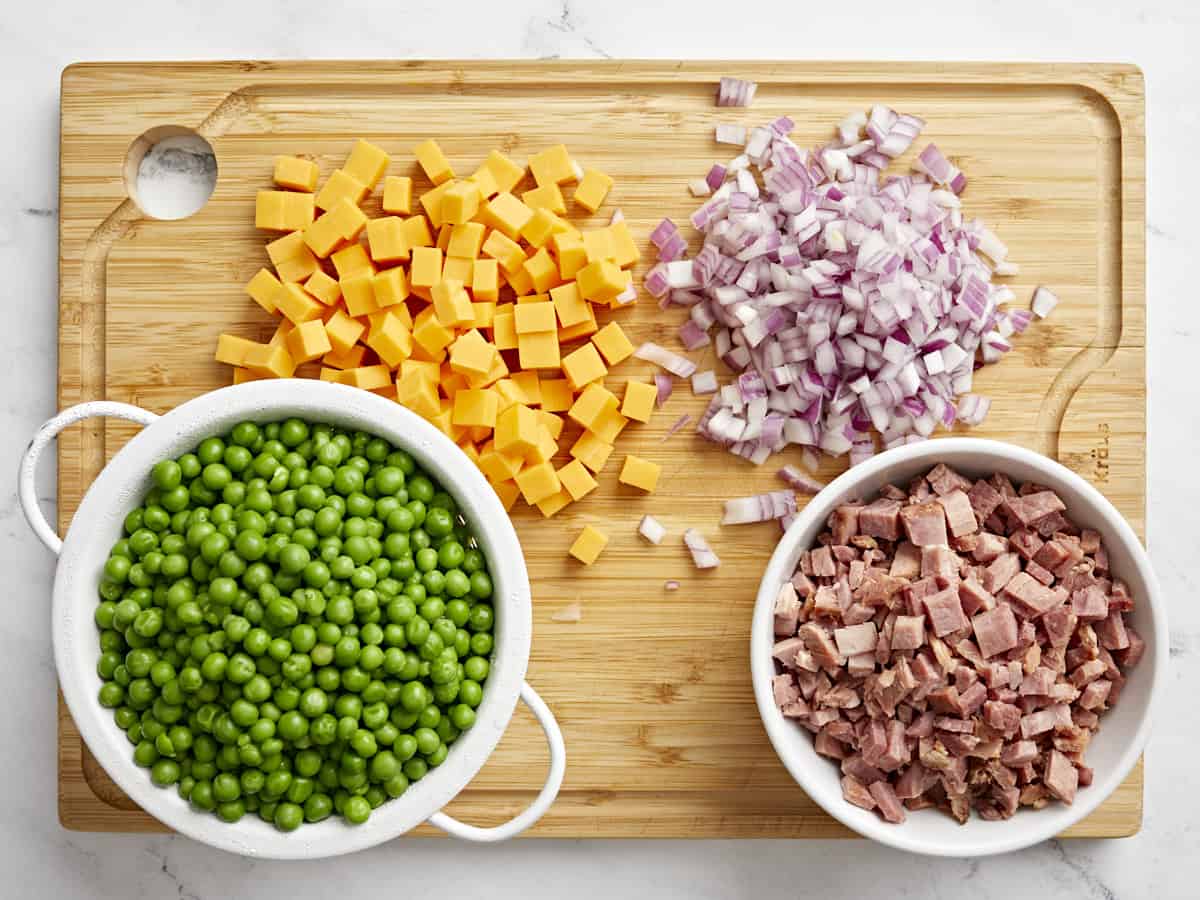
  • Cooked Ham: You can buy a ham steak or use your leftover ham from our Baked Ham recipe! Vegetarian? No problem. You can leave out the ham and this becomes more of a vegetable chowder and it is delicious!
  • Vegetable Broth: You’ll need 6 cups, or you can dissolve 2 Tbsp of vegetable bouillon in 6 cups of water. You can also use Chicken Broth if that’s what you have on hand!
  • Salted Butter: Adds richness and helps form the roux that thickens the soup.
  • All-Purpose Flour: Combines with the butter to form a roux that thickens the soup.
  • Milk: Adds creaminess to the soup.
  • Salt and Pepper: Enhance the overall flavor of the soup.
  • Parsley: A bit of minced fresh parsley adds some color and freshness to the soup.

What Potatoes Are Best For Soup?

The best potato for any given soup really depends on the texture you’re after.

  • With this soup, I wanted to keep distinct chunks of intact potato, so I went for red potatoes. Other varieties that hold their shape well include new potatoes, baby potatoes, and fingerlings.
  • If you’re looking for your potatoes to soften up a bit more but still mostly hold their shape, Yukon Golds are a great choice for this soup.
  • Starchier potatoes, like Russets, will melt into the soup, making it super thick, but you won’t get the whole potato texture in every bite.

A Note on Salt

You may not need any salt depending on the ham you’re using, so taste often and adjust as you see fit. Between the salted butter, bouillon, and the ham from our Baked Ham recipe, I didn’t have a need for more than a pinch of additional salt.

How Do You Thicken Ham and Potato SOup?

I chose to thicken this soup with what’s known as a “blonde roux.” It’s a mixture of butter and flour that is cooked over medium-low heat until it juuust starts to change color from white to blonde. This deepens the flavor of the soup without overpowering the natural flavor of the other ingredients.

three-quarters view of a serving of ham and potato soup in a white bowl.
a ladleful of ham and potato soup suspended over a pot of soup.
Print

Ham and Potato Soup

This ham and potato soup is creamy but not too heavy and loaded with fresh veggies and salty ham. It's perfect for the seasonal transition!
Course Dinner, Main Course, Soup
Cuisine American
Total Cost $11.24 recipe / $1.40 serving
Prep Time 20 minutes
Cook Time 40 minutes
Total Time 1 hour
Servings 8 (1.5 cups each)
Calories 212kcal
Author Jess Rice

Equipment

Ingredients

  • 2 Tbsp olive oil $0.34
  • 2 carrots, peeled and diced $0.20
  • 3 stalks celery, diced $0.30
  • 1 small white onion, diced $1.02
  • 2 medium potatoes, peeled and diced (roughly 3½ cups) $1.66
  • 6 cups vegetable broth $0.53
  • 2 cups cooked diced ham $6.38
  • 2 Tbsp salted butter $0.24
  • 1/4 cup all-purpose flour $0.05
  • 2 cups milk $0.38
  • 2 Tbsp minced fresh parsley $0.08
  • 1 tsp freshly cracked black pepper $0.05
  • Salt, to taste $0.01

Instructions

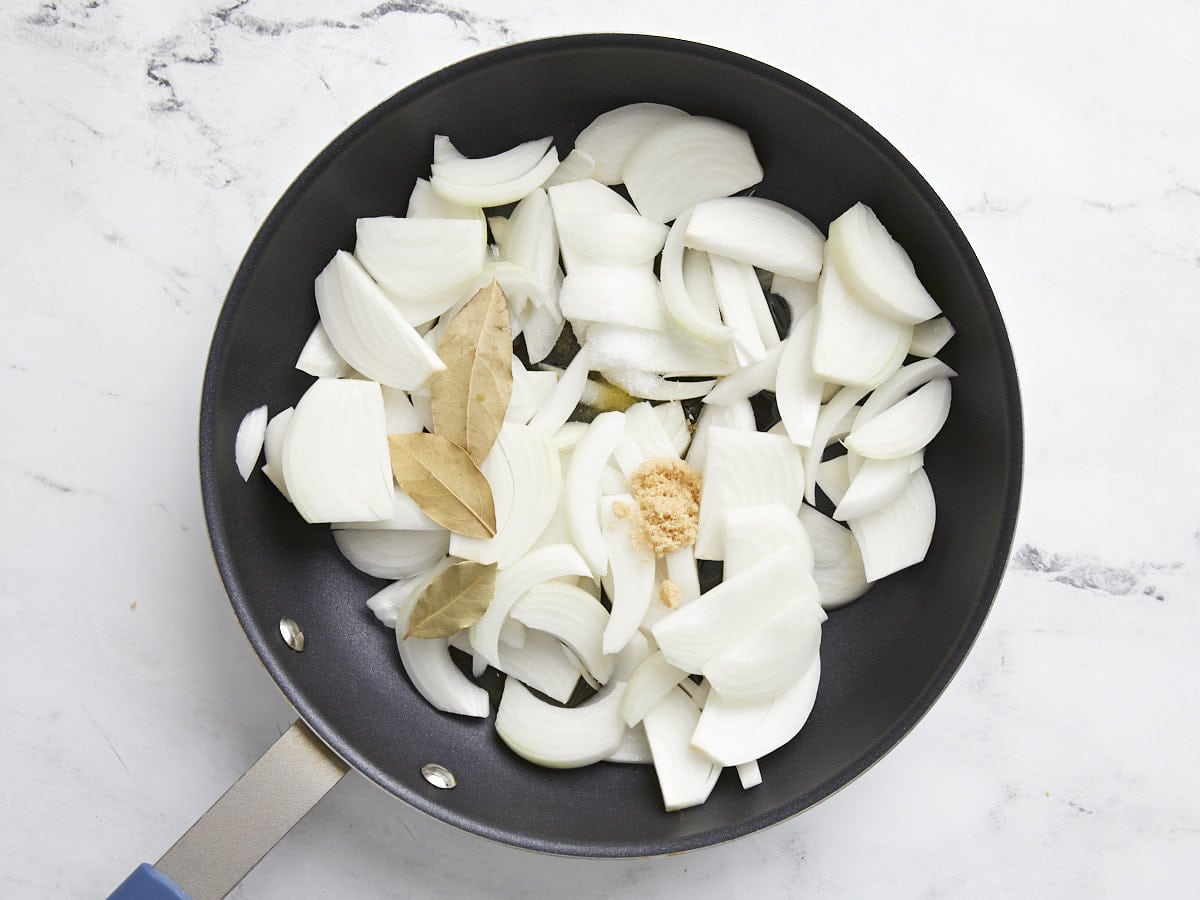
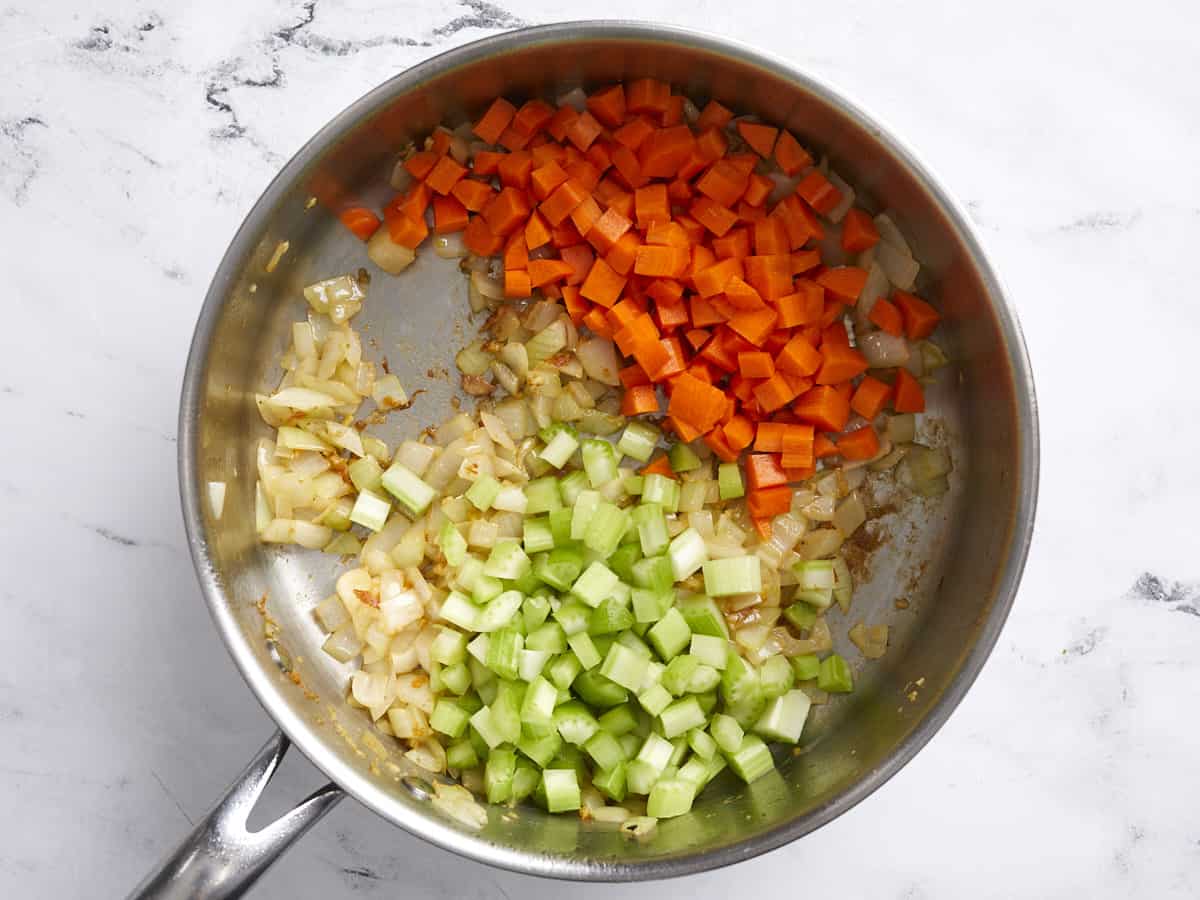
  • In the stock pot, add 2 Tbsp olive oil on medium heat. Add the carrots, celery, and onion and cook down until slightly softened and the onions are nice and glossy, about 5 minutes.
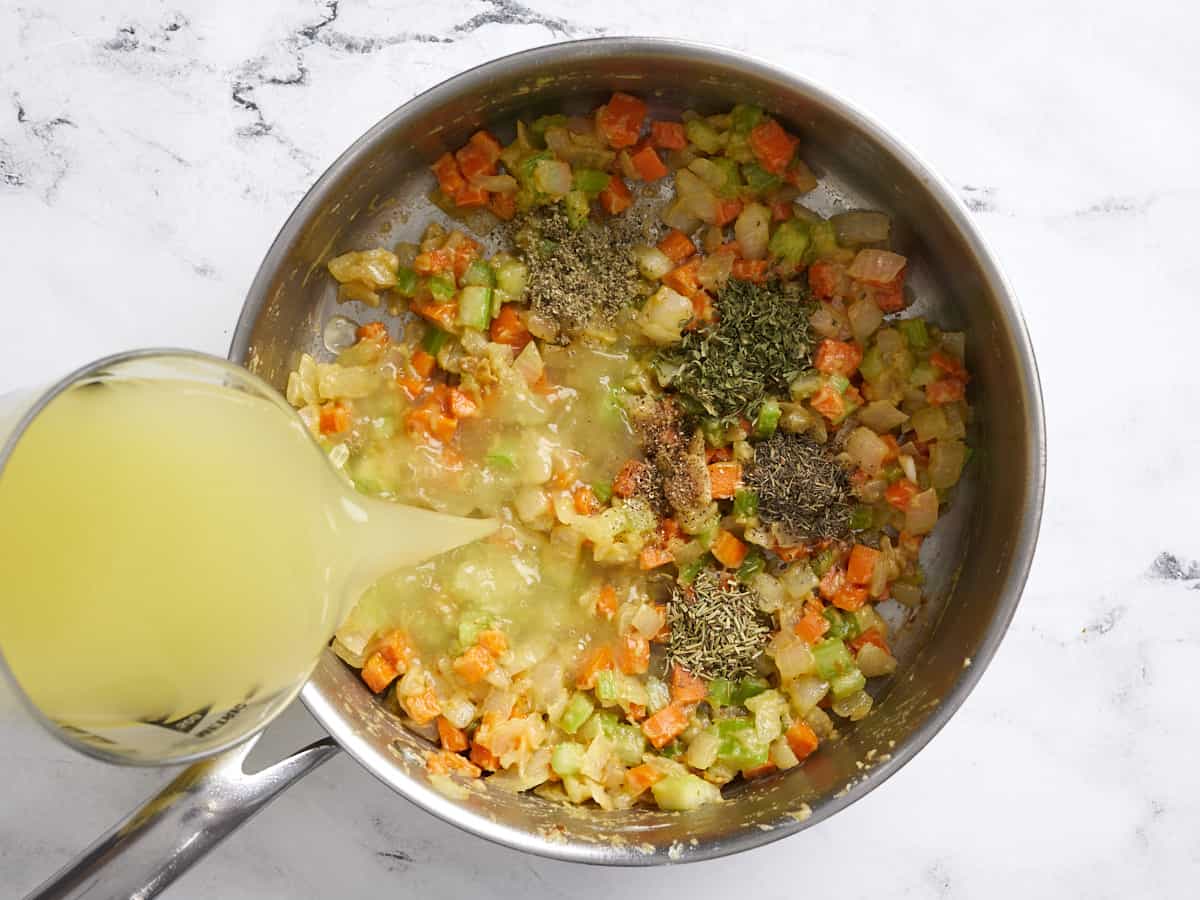
  • Add potatoes, vegetable broth, and ham in the stockpot. Bring the pot to a boil. Once boiling, turn the heat down to medium and let the potatoes simmer for about 15 minutes, or until they are tender. Stir in the pepper.
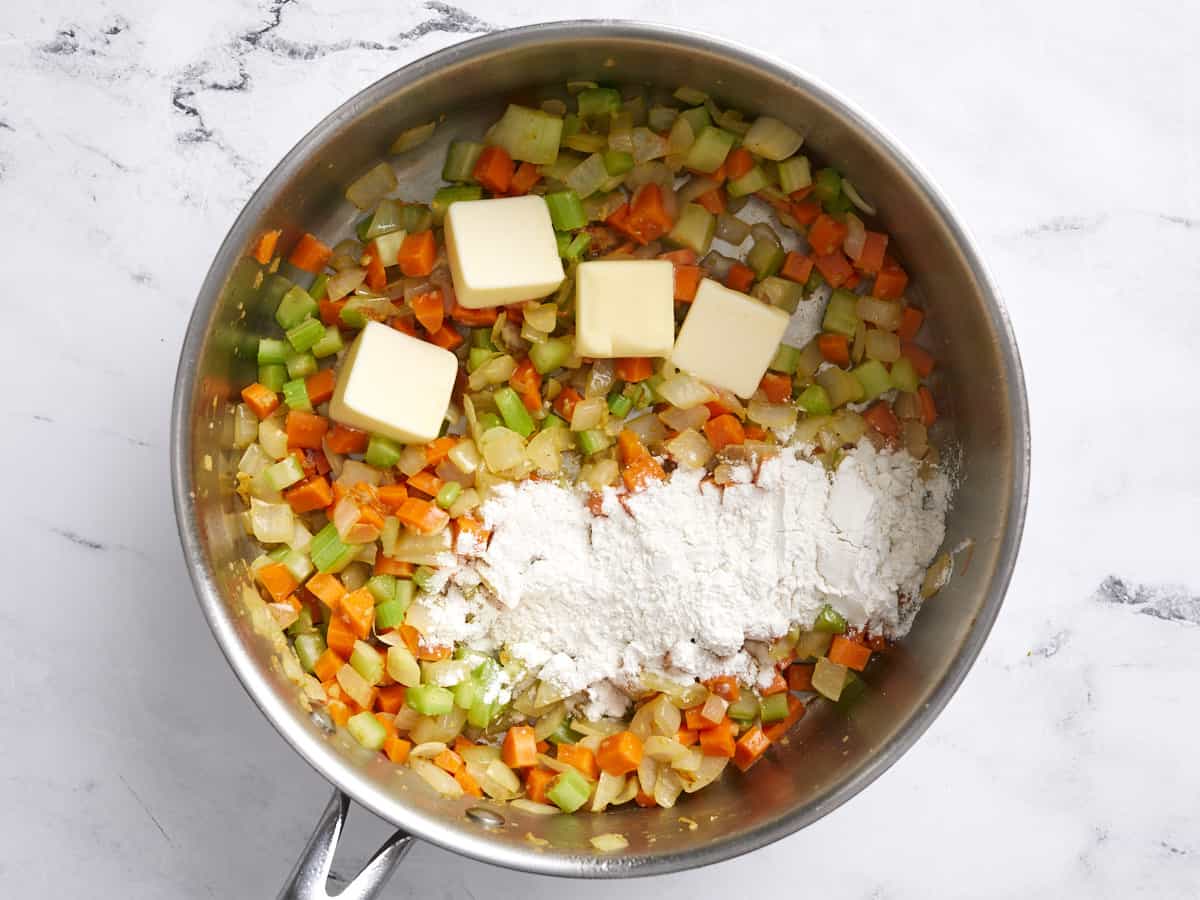
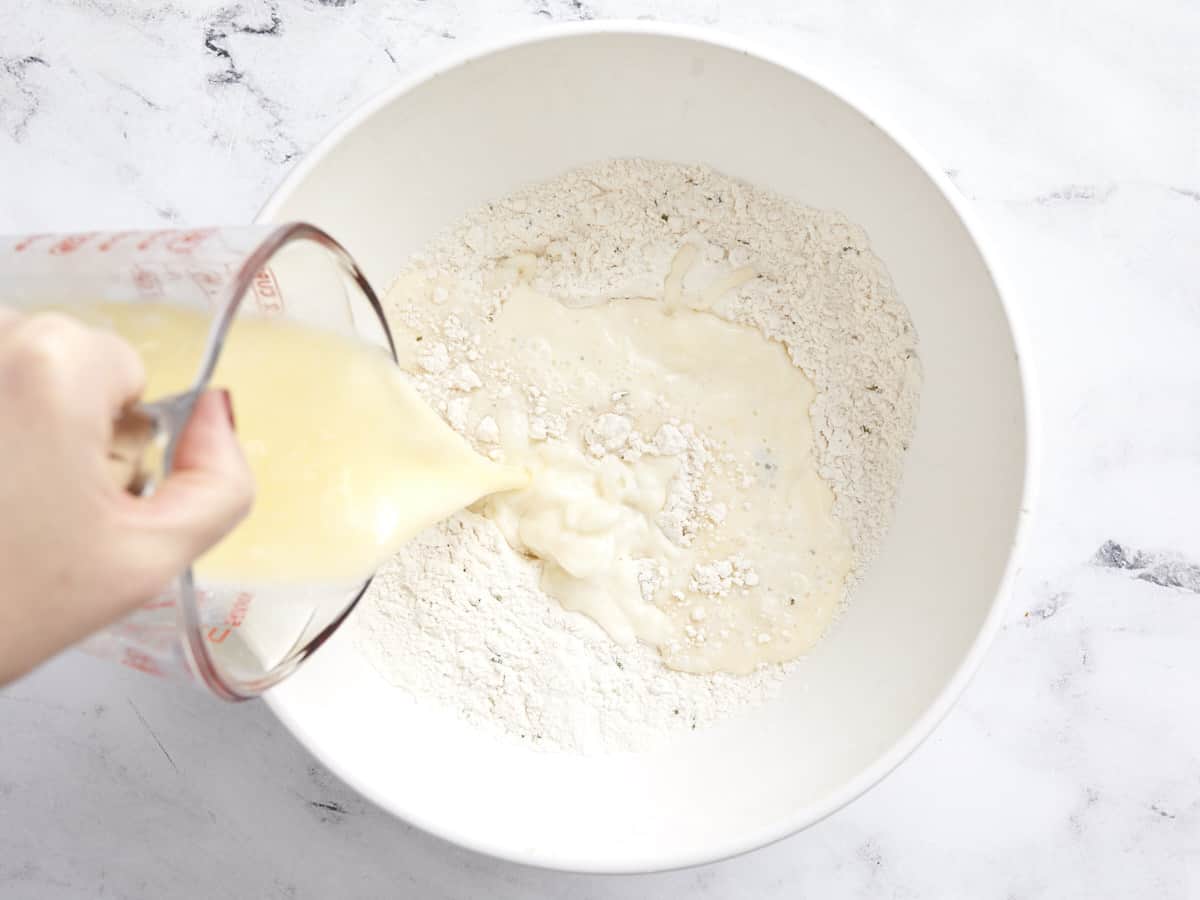
  • Melt the butter in a separate medium-size saucepan over medium-low heat. Whisk in the all-purpose flour until smooth. Cook for about 1 minute. (Note: this is a “blonde roux” so you don’t want the flour to toast too much!) Whisk in milk and cook for about 4 minutes until thick and warm.
  • Pour milk/roux mixture into the stockpot with ham soup and whisk to combine. Cook until all vegetables reach desired tenderness and soup thickens to your liking, another 10 minutes should do it. Add the parsley, additional salt and pepper if needed and enjoy!

See how we calculate recipe costs here.

Notes

This makes 12 cups of soup, but we found 1 1/2 cups to be perfect for a meal, so if that’s your serving size, you can serve 8 people.

Nutrition

Serving: 1bowl | Calories: 212kcal | Carbohydrates: 20g | Protein: 9g | Fat: 11g | Sodium: 1109mg | Fiber: 2g
overhead view of ham and potato soup in a white dutch oven.

how to make Ham and Potato Soup – step by step photos

chopped celery, carrots, and onions in s white dutch oven.

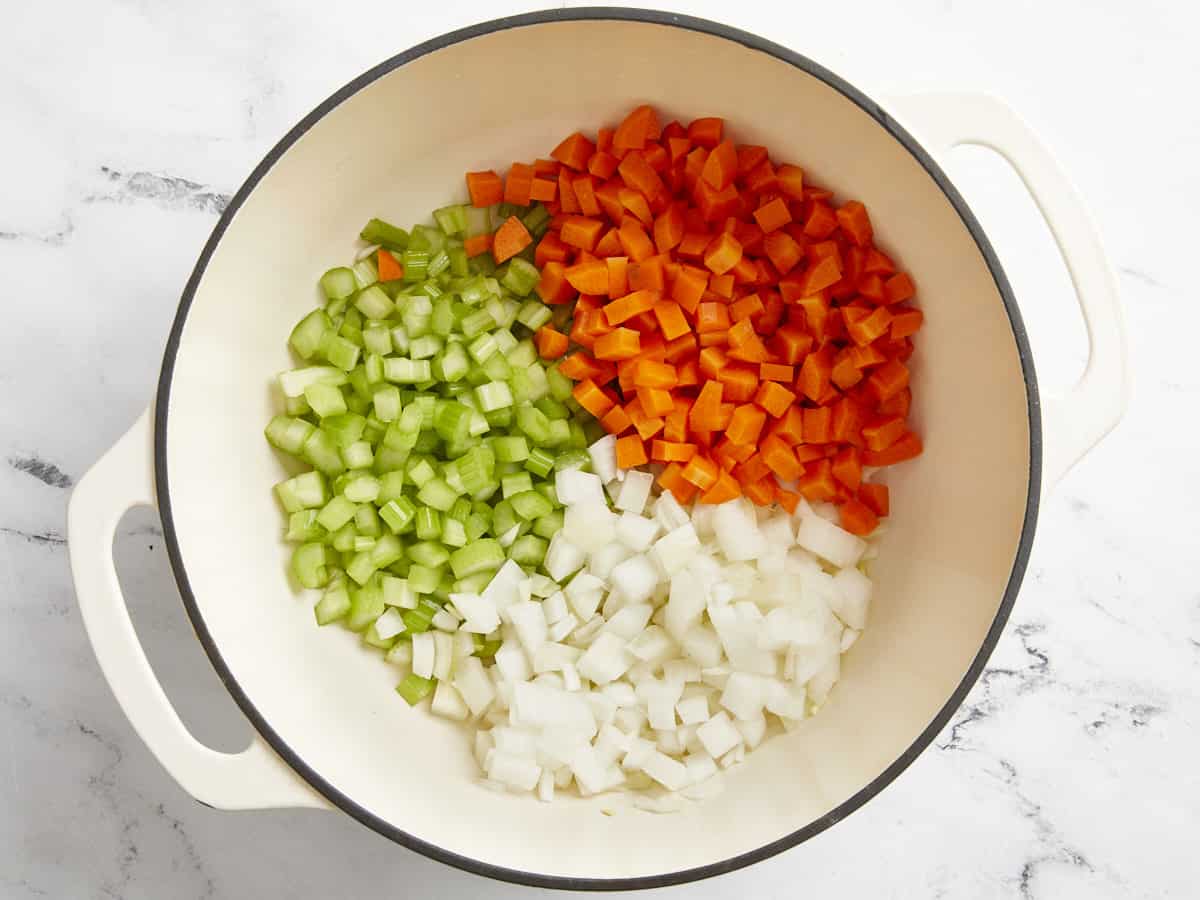
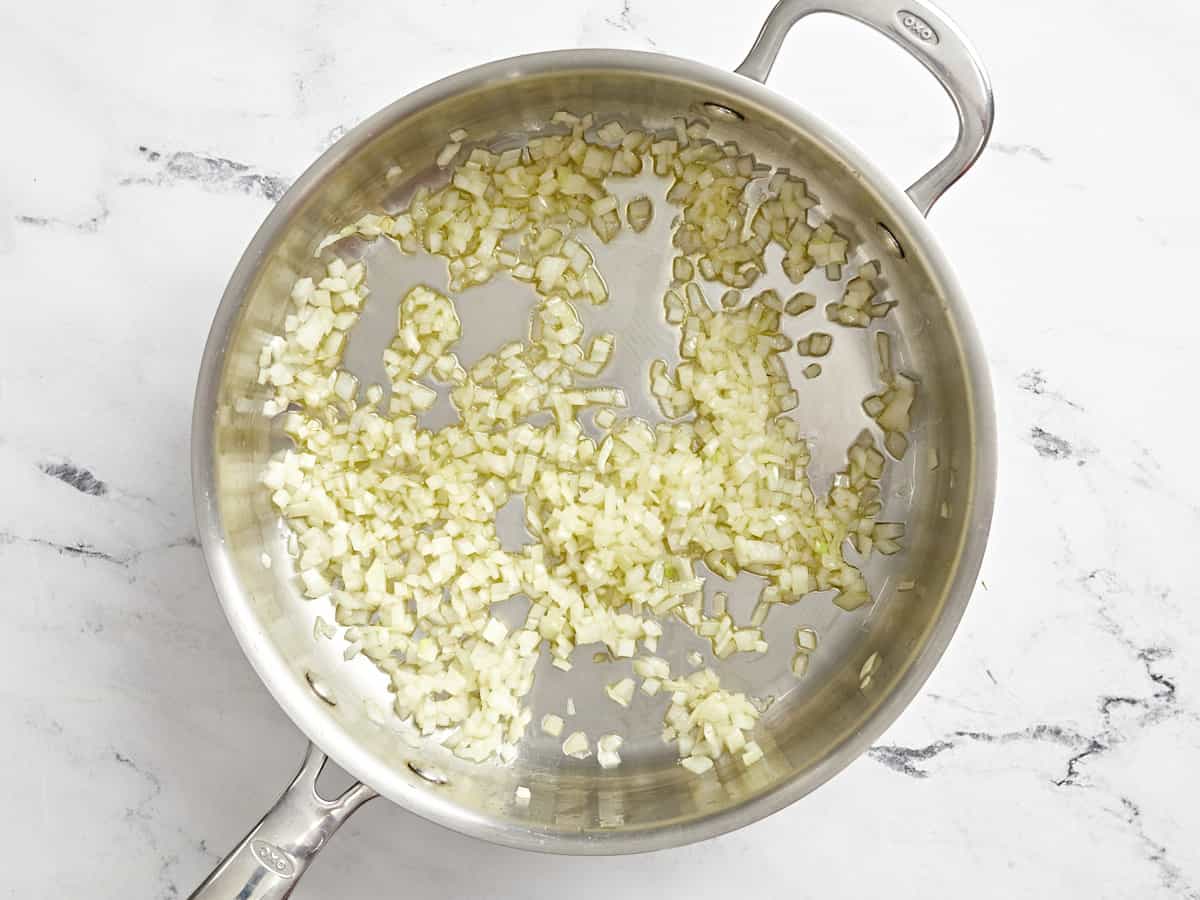
In your stock pot, add 2 Tbsp olive oil on medium heat. Add 2 peeled and diced carrots, 3 diced stalks celery, and 1 diced small white onion and cook down until slightly softened and the onions are nice and glossy, about 5 minutes.

broth poured over mirepoix, potatoes, and ham in a dutch oven.

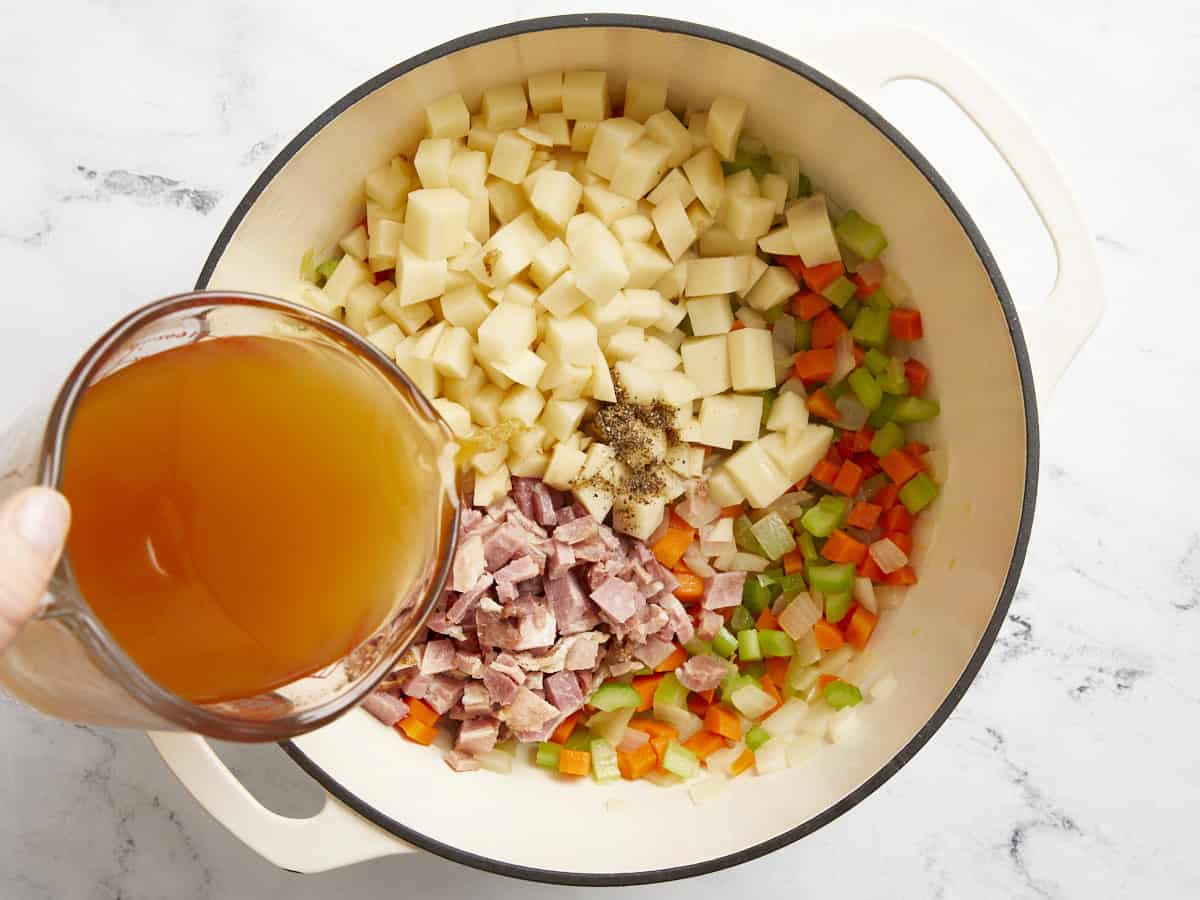
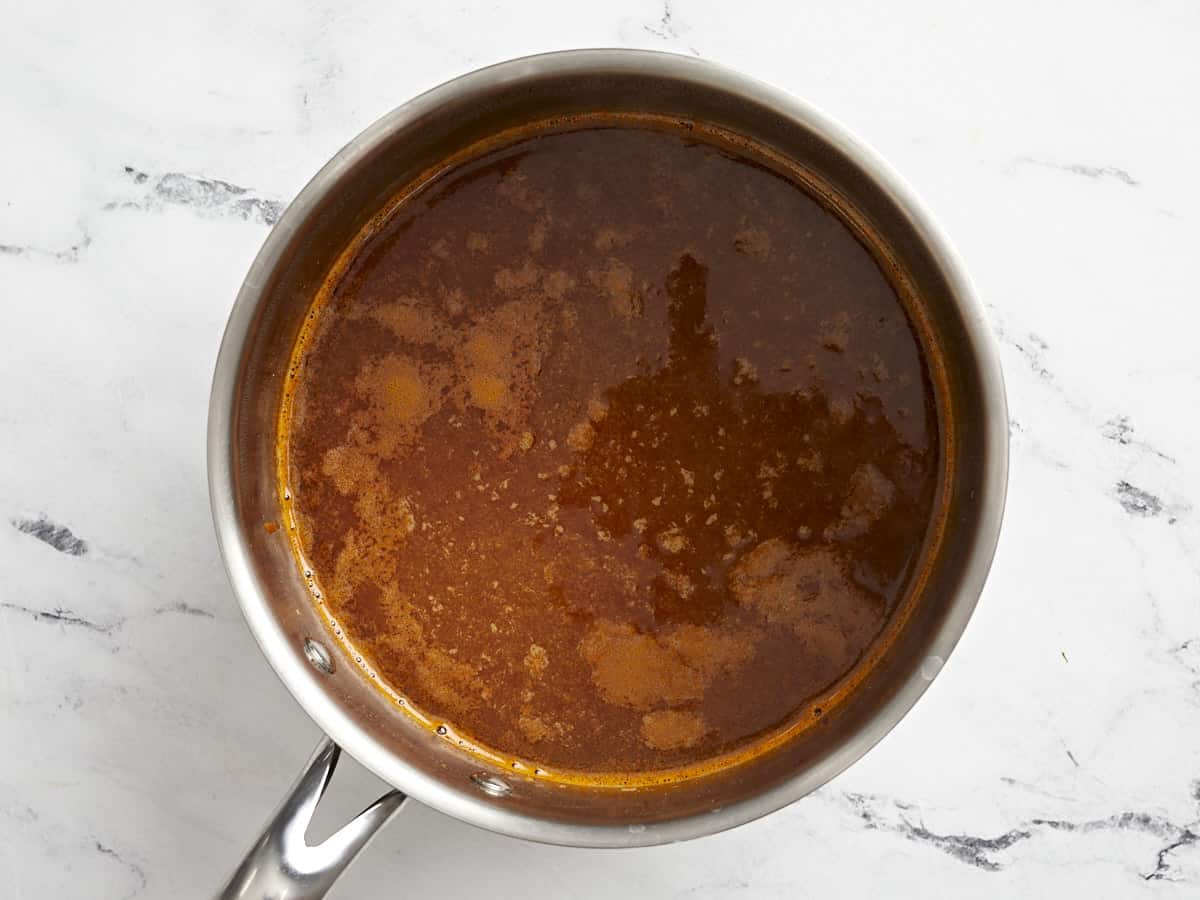
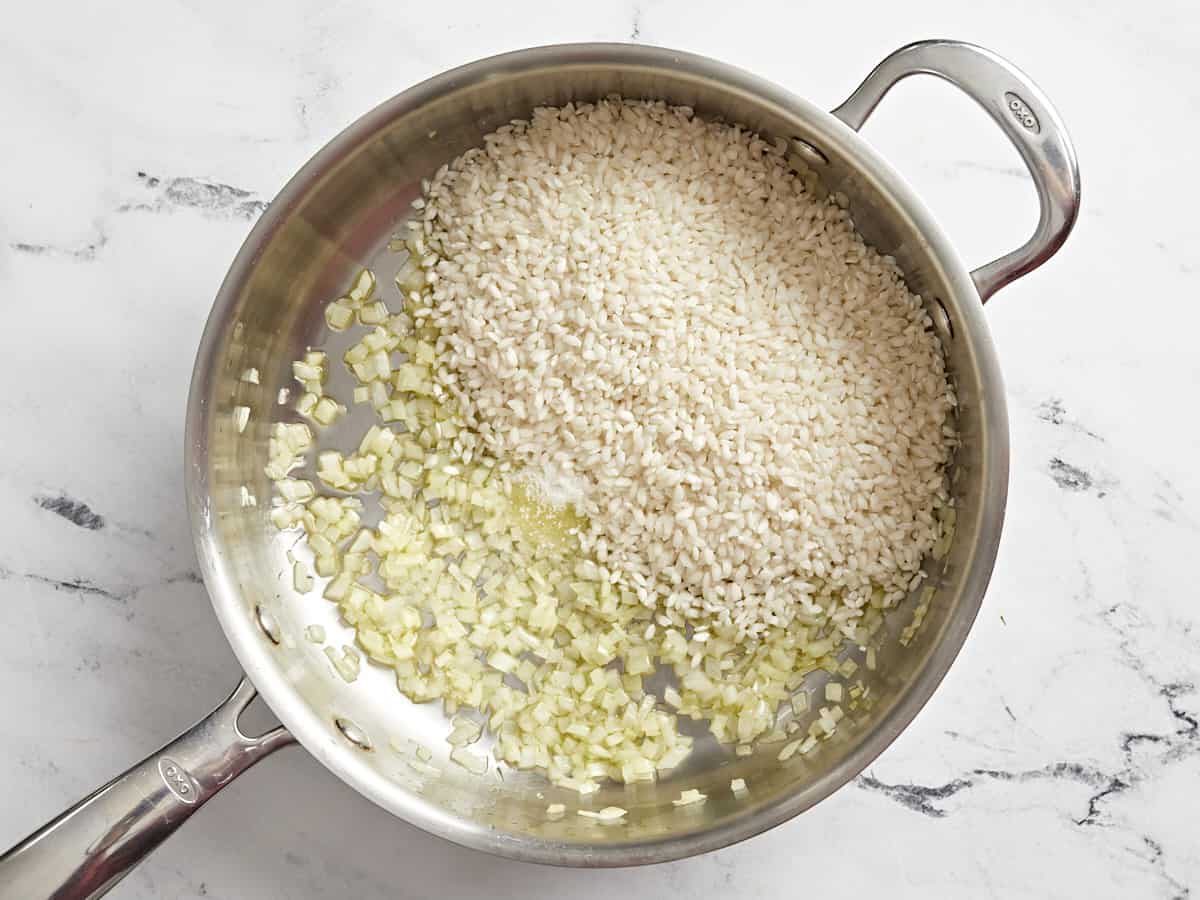
Add 2 peeled and diced potatoes, 6 cups vegetable broth, and 2 cups diced cooked ham in the stockpot. Bring to a boil; simmer over medium heat until potatoes are tender, about 15 minutes. Stir in your 1 tsp black pepper.

milk poured over butter and flour paste in a frying pan with a whisk.

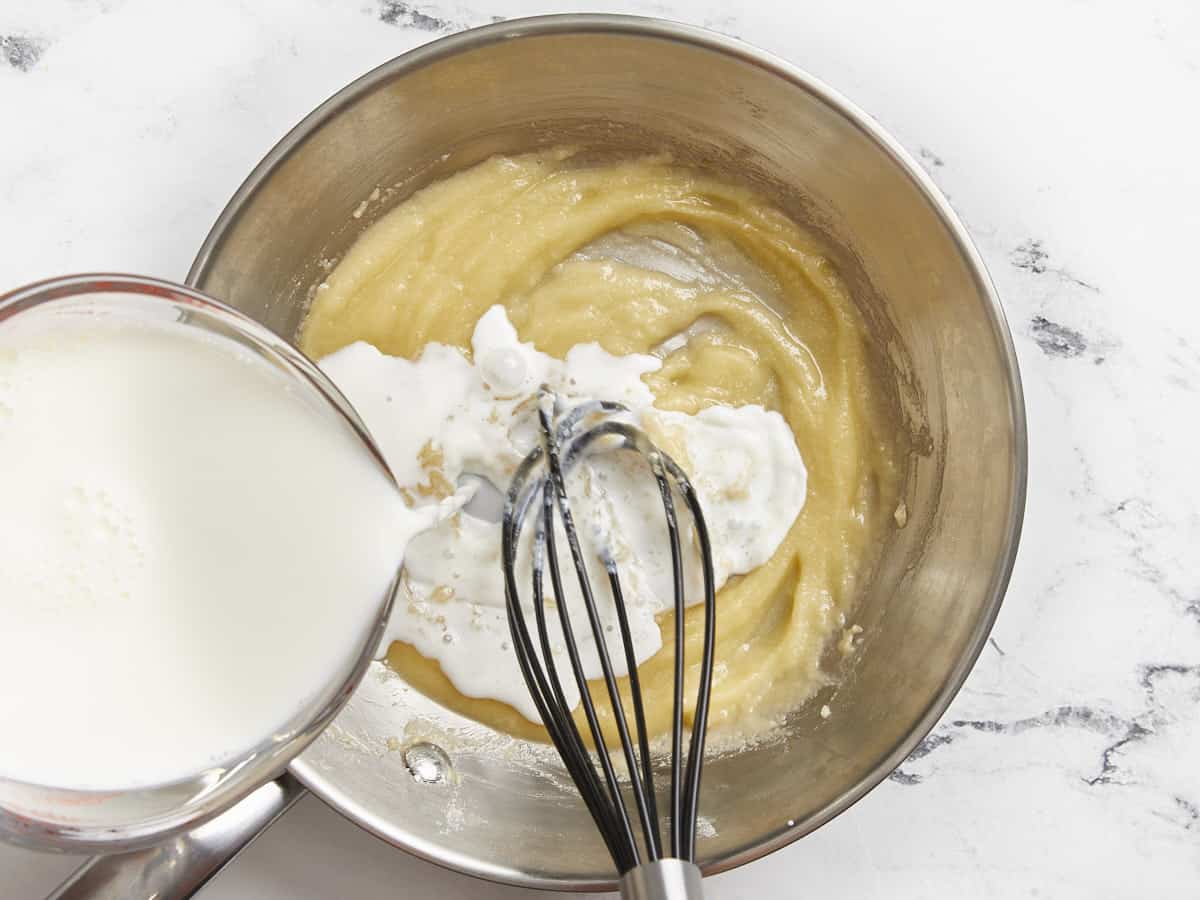
Melt 2 Tbsp salted butter in a separate medium-size saucepan over medium-low heat. Whisk in 1/4 cup all-purpose flour until smooth. Cook for about 1 minute. (Note: this is a “blonde roux” so you don’t want the flour to toast too much!) Whisk in 2 cups milk and cook for about 4 minutes until thick and warm.

ham and potato soup in a dutch oven.

Pour milk/roux mixture into the stockpot with ham soup and whisk to combine. Cook until all vegetables reach desired tenderness and soup thickens to your liking, another 10 minutes should do it. Add parsley, additional salt, and pepper if needed and enjoy!

overhead view of a spoonful of ham and potato soup suspended above a serving of soup in a white bowl.

This creamy ham and potato soup is perfect for the changing seasons!

The post Ham and Potato Soup appeared first on Budget Bytes.

Parmesan Risotto

Creamy Parmesan risotto is comfort food at its finest! Warm, rich, and cheesy, this dish is a perennial favorite.

The post Parmesan Risotto appeared first on Budget Bytes.

Creamy Parmesan risotto is comfort food at its finest! Warm, rich, and cheesy, this dish is a perennial favorite. It’s loaded with belly-filling Arborio rice and Parmesan cheese to keep you full and satisfied for under $10. What could be better?!

overhead view of a wooden spoon in a pan of parmesan risotto.

What is Parmesan Risotto?

Risotto is a magical dish created by slow-cooking starchy rice in broth. Part of the magic is how the rice leeches its starches into the liquid, creating a creamy and rich sauce. This is achieved by adding the broth slowly over a longer period of time and stirring continuously. Most risotto has cheese, and we love Parmesan, so it felt like a natural choice for this Parmesan risotto recipe!

Ingredients for Parmesan Risotto

Here’s what you’ll need to make Parmesan risotto:

  • Vegetable Broth: We used Better than Bouillon to cut costs. You can also substitute chicken broth if you prefer.
  • Dry White Wine: We used a mini chardonnay Bota Box for this recipe, but white cooking wine also works well. If you don’t have white wine on hand, just up your recipe to 5 cups of vegetable broth.
  • Olive Oil: Helps cook the onion without burning it. You can use canola or vegetable oil to cut costs.
  • Yellow Onion: Adds a sweet and earthy flavor to the risotto.
  • Arborio Rice: An Italian, short-grain rice that has a high starch content, perfect for making risotto.
  • Butter: Salted or unsalted is fine, you will just need to adjust any additional salt based on whatever butter you have on hand. We used unsalted butter.
  • Salt and Pepper: Enhance the overall flavor of this risotto.
  • Parmesan Cheese: Provides the majority of the flavor of this dish. We do not recommend using pre-shredded cheese for this recipe. Shred yours fresh!
  • Parsley: Adds a pop of freshness and color.

What Else Can I Add to Parmesan Risotto?

This Parmesan risotto is great as is, but you can also make it your own by experimenting with additional ingredients. Try adding:

  • Sauteed mushrooms
  • Frozen peas
  • Frozen corn kernels
  • Cherry tomatoes
  • Ricotta cheese
  • Crushed red pepper flakes

Tips for Making Parmesan Risotto

  • This recipe requires few ingredients, but it is a labor of love! You don’t want to pour all of the broth in at once, because then you will just have regular boiled rice. Your rice will slowly absorb the liquid and become super creamy if you take your time and follow the directions. Risotto shouldn’t take you much longer than 20 minutes from start to finish. As you can see in the photos, we used up all of the veggie broth, so be patient and watch the magic happen!
  • Risotto is traditionally enjoyed “al dente” with a little chew left to it.
  • Typically, we don’t use wine on Budget Bytes because it tends to hike the grocery bill up and, if you don’t imbibe, you will have a lot leftover and therefore a lot of waste. This is definitely a special date night recipe, so we say you splurge for the wine and enjoy yourselves!
  • If you are vegan or just dairy-free, you can definitely make risotto with vegan butter or margarine and omit the Parmesan cheese.

What to Serve with Parmesan Risotto

We love serving risotto with sauteed asparagus and fresh herbs. It’s also fantastic with sauteed or balsamic roasted mushrooms. YUM!

overhead view of parmesan risotto in a white bowl with asparagus spears.
overhead view of a wooden spoon in a pan of parmesan risotto.
Print

Parmesan Risotto

Creamy Parmesan risotto is comfort food at its finest! Warm, rich, and cheesy, this dish is a perennial favorite.
Course Main Course
Cuisine Italian
Total Cost $7.97 recipe / $1.99 serving
Prep Time 5 minutes
Cook Time 35 minutes
Total Time 40 minutes
Servings 4
Calories 454kcal
Author Jess Rice

Ingredients

  • 4 1/2 cups vegetable broth $0.36
  • 2 Tbsp extra-virgin olive oil $0.34
  • 1 small yellow onion, diced small $0.78
  • 1/4 tsp salt $0.02
  • 1 1/2 cups Arborio rice, uncooked and unrinsed $2.62
  • 1/2 cup dry white wine or vegetable broth $1.04
  • 1 Tbsp butter $0.13
  • 1/2 tsp freshly cracked black pepper $0.03
  • 1/2 cup grated Parmesan $2.57
  • 1 Tbsp minced fresh parsley $0.08

Instructions

  • Bring the vegetable broth to a simmer in a large saucepan. Keep warm over low heat.
  • Heat a large deep sauté pan over medium-high heat. Add oil to the pan. Swirl to coat and add your onion and salt. Cook for 5 minutes, stirring occasionally until onions look glossy and clear. Your onions should not caramelize or brown for this recipe.
  • Add the Arborio rice to the pan and stir to combine. Toast the onion and rice together for about 1 minute, stirring constantly.
  • Deglaze your pan with room temperature white wine and let it cook down until there’s just a little left in the pan, about ½ or less of what you poured in.
  • Now, begin adding 1 ladle of hot broth at a time, stirring the risotto constantly until the broth is about 75% absorbed by the arborio rice. I find it usually takes a solid minute or two before I add another ladle of broth. Add another ladle until your entire supply of hot stock has been used up. This step takes approximately 20 minutes total. Once you have used up all of your broth and your Arborio rice is al dente and creamy, remove pot from heat.
  • Stir in butter, pepper, and cheese. Taste and adjust salt, if needed, and finish with the parsley.

See how we calculate recipe costs here.

Nutrition

Serving: 1serving | Calories: 454kcal | Carbohydrates: 67g | Protein: 9g | Fat: 14g | Sodium: 1448mg | Fiber: 2g
three-quarters view of parmesan risotto in a white bowl with asparagus spears and a fork.

how to make Parmesan Risotto – step by step photos

orange liquid in a saucepan.

Bring 4 1/2 cups vegetable broth to a simmer in a large saucepan. Keep warm over low heat.

diced onion in a pan.

Heat a large deep sauté pan over medium-high heat. Add 2 Tbsp olive oil to the pan. Swirl to coat and add 1 diced yellow onion and 1/4 tsp salt. Cook for 5 minutes, stirring occasionally until onions look glossy and clear. Your onions should not caramelize or brown for this recipe.

diced onion and rice in a pan.

Add the Arborio rice to the pan and stir to combine. Toast the onion and rice together for about 1 minute, stirring constantly.

white wine poured over rice and onions in a pan.

Deglaze your pan with 1/2 cup of room-temperature white wine and let it cook down until there’s just a little left in the pan, about half or less of what you poured in.

vegetable broth added to rice in a pan.

Now, begin adding 1 ladle of hot broth at a time. Stir the risotto constantly until the broth is about 75% absorbed by the arborio rice. Then, add another ladle every time until your entire supply of hot stock has been used up. Remove pot from heat.

parmesan risotto in a pan.

Stir in 1 Tbsp butter, 1/2 tsp pepper, and 1/2 cup grated Parmesan cheese. Taste and adjust salt, if needed, and finish with 1 Tbsp minced fresh parsley.

overhead view of parmesan risotto on a white plate with asparagus spears and a fork.

Make this rich and creamy Parmesan risotto for your next cozy night in!

The post Parmesan Risotto appeared first on Budget Bytes.

Pea Salad

Super simple and inexpensive, this creamy pea salad is the perfect side dish for your next family get-together.

The post Pea Salad appeared first on Budget Bytes.

Super simple and inexpensive, this creamy pea salad is the perfect side dish for your next family get-together. We coat sweet peas, salty ham, and savory cheddar cheese in a creamy dressing, creating the perfect balance of sweet and savory flavors. It makes a huge batch and comes together in just minutes, no cooking required!

overhead view of pea salad with a spoon.

What is Pea Salad?

Pea salad is a classic side dish made from sweet peas tossed with ham, cheddar cheese, and red onion, and coated in a creamy and tangy dressing. This salad has a beautiful balance of flavors and is so versatile!

Ingredients for Pea Salad

Here’s what you’ll need to make pea salad:

  • Greek Yogurt: Makes the dressing creamy and tangy with fewer calories and fat than sour cream. We highly recommend Greek yogurt over plain yogurt or sour cream for its thicker texture.
  • Mayonnaise: Adds richness and creaminess to the dressing.
  • White Vinegar: Adds a refreshing tanginess to the dressing to balance the creaminess.
  • Parsley: Adds a pop of freshness.
  • Frozen Peas: Just as bright and flavorful as fresh, these are a great budget option for this salad.
  • Ham Steak: You’ll need a 12 oz. ham steak, or you can use leftover ham or cooked bacon. Vegetarian? No problem! If you leave out the ham, this pea salad is still flavorful and fresh.
  • Red Onion: Adds a bit of bite to the recipe and a wonderful crunchy texture, creating a great contrast to the sweet peas.
  • Cheddar Cheese: Adds a creamy and salty component to this delicious salad.
  • Salt and Pepper: Enhance the overall flavor of the salad.

What Else Can I Add to Pea Salad?

This creamy salad is a great recipe to add leftovers to. We like to add:

  • Leftover short noodles, like macaroni or bowties
  • Finely diced carrots
  • Chopped broccoli florets
  • Raisins or other dried fruits
  • Vegetarian meat substitutes also work well.

Budget-Saving Tip!

If you want to make your money stretch a little bit further, then this is a great recipe to use up any leftover ham that you might have from the holidays. It will help reduce waste and make the recipe cheaper. That’s a win-win!😊

What to Serve with Pea Salad

This cold pea salad is the perfect refreshing side for smoky BBQ ribs, savory smash burgers, or garlic marinated chicken.

close up view of pea salad with a spoon.
overhead view of pea salad with a spoon.
Print

Pea Salad

Super simple and inexpensive, this creamy pea salad is the perfect side dish for your next family get-together.
Course Side Dish
Cuisine American
Total Cost $9.54 recipe / $0.95 serving
Prep Time 10 minutes
Cook Time 0 minutes
Total Time 10 minutes
Servings 10 (1 cup each)
Calories 214kcal
Author Jess Rice

Ingredients

  • 4 cups frozen peas $2.28
  • 2 cups cubed ham steak $3.99
  • 1/2 small red onion, diced small $0.22
  • 8 oz. cheddar cheese, cubed small $2.49
  • 1 Tbsp minced parsley $0.05
  • 1/3 cup plain Greek yogurt $0.32
  • 1 Tbsp mayonnaise $0.07
  • 1 Tbsp white vinegar $0.02
  • 1 tsp salt $0.05
  • 1 tsp freshly cracked black pepper $0.05

Instructions

  • Rinse the frozen peas in cool water. Strain and leave out at room temperature. Meanwhile, cut the ham into small dice cubes and prep the red onion, cheddar cheese, and parsley.
  • In a small mixing bowl, whisk together Greek yogurt, mayonnaise, white vinegar, minced parsley, and salt and pepper.
  • Toss all ingredients together in a large bowl. Serve immediately or enjoy all week!

See how we calculate recipe costs here.

Nutrition

Serving: 1serving | Calories: 214kcal | Carbohydrates: 10g | Protein: 18g | Fat: 11g | Sodium: 996mg | Fiber: 3g
pea salad in a white bowl.

how to make Pea Salad – step by step photos

ingredients for pea salad on a cutting board.

Rinse 4 cups frozen peas in cool water. Strain and leave out at room temperature. Meanwhile, cut 2 cups ham into small dice cubes, dice 1/2 small red onion, cube 8 oz. cheddar cheese, and mince 1 Tbsp fresh parsley.

stirred mayonnaise dressing with herbs in a white bowl.

In a small mixing bowl, whisk together 1/3 cup Greek yogurt, 1 Tbsp mayonnaise, 1 Tbsp white vinegar, the minced parsley, and 1 tsp each salt and pepper.

ingredients for pea salad in a white bowl.

Toss all ingredients together in a large bowl. Serve immediately or enjoy all week!

overhead view of pea salad in a white bowl.

This pea salad is such a beautiful centerpiece to any table!

The post Pea Salad appeared first on Budget Bytes.

Gremolata

Gremolata is a zesty Italian condiment, made with fresh parsley, lemon zest, and garlic. It adds a layer of flavor…

A Couple Cooks – Recipes worth repeating.

Gremolata is a zesty Italian condiment, made with fresh parsley, lemon zest, and garlic. It adds a layer of flavor to elevate dishes, perfect for sprinkling over vegetables, pasta, chicken, seafood, and more!

Gremolata

We know what you’re thinking: gremolata sounds like something that’s too fancy for an everyday dinner. But this classic Italian condiment could not be simpler! All you need are three ingredients to make an elevated garnish that’s a layer of flavor to every dish. Once we tried this on our one pot chicken and rice dinner, we were hooked. It’s ideal for adding a splash of zesty flavor to vegetables, pasta, seafood, chicken, and more!

3 simple ingredients behind gremolata

Gremolata is a vibrant Italian condiment that adds a burst of fresh flavor to any dish. This simple combination of finely chopped parsley, lemon zest, and aromatic garlic makes a bright, balanced profile. It’s similar to green sauces like chimichurri, pesto, and pistou, but the texture is dry and fluffy. We were surprised to find it’s more like a garnish than a sauce, since it doesn’t use oil to blend together into an emulsified texture.

Gremolata was traditionally used as a finishing touch for ossobuco, the popular Italian veal stew. But it’s even more versatile: it’s a tasty garnish for pasta, roasted vegetables, fish, and even soups and stews. The three ingredients for a gremolata recipe are:

  • Fresh Italian parsley: Parsley is an herb with a clean, peppery flavor and subtly bitter undertone. There are two types of parsley: curly parsley has curly leaves and Italian parsley has dark green, flat leaves (which is often confused with cilantro.) Make sure to use Italian parsley for this recipe.
  • Lemon zest: A fresh lemon is key for the zesty flavor.
  • Garlic clove: Fresh garlic is also a must: avoid jarred or preserved garlic.
  • Salt and pepper: Just a pinch of salt and a few grinds of pepper are all you need for seasoning.
Gremolata in bowl with parsley, lemon zest and garlic

A trick for storing parsley

Ever brought home a bunch of parsley, only to discover it’s wilted before you get time to use it? This is a common issue for home cooks, and one that’s happened to us before we knew this trick. Once you know how to store fresh parsley for gremolata, you’ll never be stuck with wilted herbs again!

Here’s the secret: store the parsley in a canning jar or herb saver! This keeps the parsley fresh for 1 to 2 weeks, much longer than placing it the produce drawer. Avoid storing it in those plastic produce bags from the grocery store, which make it wilt immediately. Here’s how to store parsley:

  • Use a large canning jar with lid, or purchase an herb saver. We like using an herb saver for parsley, because it’s just the right height and width for the bunch. Here’s the herb saver we’ve used for years. (You can use it to store any fresh herbs!)
  • Add a few inches water inside and add the herbs. Place the cut sides of the parsley into the water.
  • Add the lid. Capping with a lid helps to keep the herbs fresh for even longer. Stored this way, they can last 1 to 2 weeks.
How to store parsley

How to cut parsley, step by step

The most time-consuming part of making gremolata is finely chopping the parsley. Here are step by step photos to show a quick way to chop this fresh herb.

Step 1: Hold the root ends of the parsley with your non-cutting hand. Use a large chef’s knife to scrape off the leaves in a downward motion.

How to cut cilantro | Scrape with knife

Step 2: Use your fingers to remove any large stems from the parsley leaves; small tender stems are okay.

How to cut cilantro | Remove large stems

Step 3: Holding the top of the knife blade with your non-cutting hand, rock the blade back and forth to chop the parsley leaves. Pull the leaves back into a pile and go over them with the knife several times until the pieces are the size that you’re looking for.

How to cut cilantro | Chop leaves with rocking motion

Best tools for zesting a lemon

The best way to zest a lemon for using in recipes? Use a microplane grater. A microplane is a handheld grater with sharp holes in it. Grating foods with a microplane is faster and more consistent than a box grater. We use ours all the time for zest, but it’s also perfect for garlic and ginger. If you don’t have a microplane, a box grater works too. Here’s how to zest a lemon:

  1. Hold the microplane in one hand, place one end on a flat surface and hold it at an angle.
  2. Hold the lemon in the other hand, and drag it down over the microplane holes (or the holes of the box grater). Make sure to remove the yellow part of the skin only! Avoid the bitter pith.
  3. Gradually turn the lemon until all yellow parts of the peel have been removed.
One pot chicken and rice with gremolata topping

Ways to use gremolata

There are countless ways to use gremolata to add a level of flavor to dishes, from chicken to fish and vegetables to pasta. Here are some favorite ways:

Storage and make-ahead info

This gremolata recipe makes quite a bit, so you might not use it all in one sitting. It stores for 1 to 2 days placed in a sealed container and refrigerated. You can also make a half recipe if you don’t think you’ll eat it all in one sitting: it’s best as fresh as possible!

More green sauce recipes

While the consistency is not saucy, gremolata is considered in the family of green sauces like pesto! Here are a few of our top green sauces to make as garnishes:

Print
Gremolata

Gremolata


  • Author: Sonja Overhiser
  • Prep Time: 5 minutes
  • Cook Time: 0 minutes
  • Total Time: 5 minutes
  • Yield: ¾ cup

Description

Gremolata is a zesty Italian condiment, made with fresh parsley, lemon zest, and garlic. It adds a layer of flavor to elevate dishes, perfect for sprinkling over vegetables, pasta, chicken, seafood, and more!


Ingredients

  • ¾ cup finely chopped Italian parsley, (about 1 bunch)
  • 1 tablespoon lemon zest (1 large lemon)
  • 1 small garlic clove, minced
  • 1 pinch of kosher salt
  • Fresh ground black pepper, to taste

Instructions

  1. In a medium bowl, stir together all ingredients. Store leftovers in a sealed container and refrigerated for up to 2 days.
  • Category: Essential Recipes
  • Method: No Cook
  • Cuisine: Condiment
  • Diet: Vegan

Keywords: Gremolata, gremolata recipe

A Couple Cooks - Recipes worth repeating.

Lentil Tabbouleh

This light and refreshing lentil tabbouleh salad recipe puts a delicious twist on the classic tabbouleh that will fill you up without weighing you down! Requiring just three steps to make, this easy Mediterranean dish is perfect for a quick and easy lu…

This light and refreshing lentil tabbouleh salad recipe puts a delicious twist on the classic tabbouleh that will fill you up without weighing you down! Requiring just three steps to make, this easy Mediterranean dish is perfect for a quick and easy lunch. Or, serve it on a platter with fresh pita bread, fruits, and...

Read More

The post Lentil Tabbouleh appeared first on My Pure Plants.

Green Goddess Tahini Dip

Bored by your dinner plans? This green goddess tahini will liven up any basic meal! I’m always so happy to have it in the refrigerator to serve…

The post Green Goddess Tahini Dip appeared first on Cookie and Kate.

green goddess tahini dip recipe

Bored by your dinner plans? This green goddess tahini will liven up any basic meal! I’m always so happy to have it in the refrigerator to serve as an appetizer or snack.

Just a dollop or two brings together random leftovers and simple meals made with veggies, greens, whole grains or beans. You can also spread it onto your sandwiches or wraps. Green goddess tahini is here to save the day. You’ll find many more serving suggestions below.

green goddess tahini sauce ingredients

This recipe was inspired by a similar dip that I grabbed at Whole Foods before hosting girls’ night (I can’t seem to find the brand name). A couple of my friends follow dairy free and vegan diets, so I’m always on the lookout for fun options that satisfy our requirements. As the night went on, we all fell in love with the dip—it’s creamy, rich yet fresh, and satisfying. It’s irresistible.

So, I combined my Best Tahini Sauce (truly the best) with the herbs from my Easy Green Goddess Dressing, and here you have it. You can make this recipe with any combination of cilantro, parsley, basil, dill and/or mint. Add a small handful of fresh tarragon if you can find it for that characteristic green goddess flavor. This dip (or sauce) is lovely in any season and at any holiday. I hope you fall in love with it!

Continue to the recipe...

The post Green Goddess Tahini Dip appeared first on Cookie and Kate.

Roasted Carrots with Farro, Chickpeas & Herbed Crème Fraîche

Can we talk about how beautiful those rainbow carrots are?! You are looking good today, carrots. This stunning roasted carrot dish features warm whole grains, protein-rich chickpeas, spiced…

The post Roasted Carrots with Farro, Chickpeas & Herbed Crème Fraîche appeared first on Cookie and Kate.

roasted carrots with farro and chickpeas

Can we talk about how beautiful those rainbow carrots are?! You are looking good today, carrots. This stunning roasted carrot dish features warm whole grains, protein-rich chickpeas, spiced pepitas and a light herbed crème fraîche sauce.

Don’t be intimidated by its gourmet looks—this recipe is simple to make once you get going. It has several different components, but none are complicated, and they come together beautifully.

ingredients for vegetarian carrot farro dish

This recipe is an absolutely lovely vegetarian option for your holiday table. Call it a main dish for the vegetarians and a side dish for everyone else. It’s also a well-balanced weeknight or special occasion dinner.

If this recipe looks familiar, it’s because it’s one of my all-time favorites. It even made it into my cookbook with a tahini sauce variation. Today, I’m sharing it again with updated photos and a video so you can watch how it all comes together.

Continue to the recipe...

The post Roasted Carrots with Farro, Chickpeas & Herbed Crème Fraîche appeared first on Cookie and Kate.

Chickpea Spread with Caramelized Onions

This simple but elegant chickpea spread combines sweet caramelized onions with a creamy, savory puréed chickpea spread, the perfect appetizer for any occasion!

The post Chickpea Spread with Caramelized Onions appeared first on Budget Bytes.

Party season is just around the corner so it’s time to start bookmarking all the good appetizer recipes to bring to holiday gatherings! When I saw this simple but elegant (and budget-friendly!) Chickpea Spread with Caramelized Onions in Michal Korkosz’s new book, Polish’d: Modern Vegetarian Cooking from Global Poland, I knew I had to try it because I l-o-v-e turning a humble can of beans into something special. And guess what? This dip was every bit as delicious as it looked. So big thanks to Michal and his publisher for letting us share this amazing recipe with you today, just in time for the holidays!

Close up overhead view of a bowl full of chickpea spread with caramelized onions, a cracker being dipped into the side.

What’s in This Chickpea Spread?

The base of the chickpea spread is simply chickpeas brightened up with a little lemon juice and puréed until smooth with cold water. To give the spread a boost of flavor, caramelized onions and fresh parsley are added to the mix. The caramelized onions give the chickpeas a subtly sweet and savory flavor, while the parsley adds a breath of freshness. The combination of flavors is absolutely divine and it will definitely have you coming back for dip after dip!

How to Serve the Chickpea Spread

This appetizer is best served with a variety of crackers or bread for dipping, but I think it would also make an amazing spread to add to sandwiches or even just a slice of toast. Michal notes in his book to serve with bread and dill pickles. Yum!

Storing Leftovers

The chickpea spread will stay good in the refrigerator for about 3-4 days, but the presentation is definitely best on the day it’s made when the caramelized onions are at their most beautiful. Caramelized onions do tend to get a little cloudy when refrigerated as they absorb moisture.

Close up overhead view of the caramelized onions on top of the chickpea dip.
Overhead view of a bowl full of chickpea spread with caramelized onions surrounded by crackers.
Print

Chickpea Spread with Caramelized Onions

This simple but elegant chickpea spread combines sweet caramelized onions with a creamy, savory puréed chickpea spread, the perfect appetizer for any occasion!
Course Appetizer, Snack
Cuisine Polish
Total Cost $3.58 recipe / $0.60 serving
Prep Time 15 minutes
Cook Time 25 minutes
Total Time 40 minutes
Servings 6 (¼ cup each)
Calories 175kcal

Ingredients

  • 1/4 cup olive oil $0.63
  • 1 lb. white onions $1.29
  • 3 bay leaves $0.45
  • 1 tsp salt, divided $0.05
  • 1/2 tsp brown sugar $0.01
  • 1 15oz. can chickpeas $0.79
  • 1/3 cup cold water $0.00
  • 1 Tbsp lemon juice $0.06
  • 1/4 cup fresh parsley $0.30

Instructions

  • Heat the oil in a large skillet over medium heat. Add the onions, bay leaves, ½ teaspoon of the salt, and the brown sugar. Cook over low heat, stirring occasionally, until golden brown and caramelized, about 25 minutes. Remove the bay leaves and discard.
  • Place the chickpeas in a food processor with the cold water and remaining ½ tsp salt. Blend until smooth, about 2 minutes. Add the caramelized onions (save some for the garnish) and the lemon juice and parsley. Pulse once or twice to combine. Season with pepper.
  • Transfer to a serving bowl. Top with the remaining caramelized onions and season with more pepper. Serve with your favorite bread and dill pickles.

See how we calculate recipe costs here.

Nutrition

Serving: 0.25cup | Calories: 175kcal | Carbohydrates: 17g | Protein: 4g | Fat: 10g | Sodium: 589mg | Fiber: 5g
Side view of a cracker being dipped into a bowl of chickpea spread with caramelized onions.

How to Make Chickpea Spread with Caramelized Onions

Sliced onions in a skillet with brown sugar and bay leaf.

Start caramelizing the onions first, as they’ll take about a half hour to cook. Slice one pound of white onions and add them to a skillet with ¼ cup olive oil, 3 bay leaves, ½ tsp salt, and ½ tsp brown sugar.

Caramelized onions in the skillet.

Cook the onions over low heat, stirring occasionally, until they deep golden brown and caramelized. You can increase the heat to medium-low if they are taking too long, just make sure to stir often. Discard the bay leaves.

Chickpeas in a food processor with lemon juice, salt, and water.

Drain one 15oz. can of chickpeas and add them to a food processor with ½ tsp salt and ⅓ cup cold water.

Puréed chickpeas in the food processor.

Purée the chickpeas until smooth. If the chickpeas seem dry, you can add a little extra water or olive oil until they blend smoothly.

Caramelized onions and parsley added to the food processor.

Add 1 Tbsp lemon juice, half of the caramelized onions, and about ¼ cup fresh parsley to the food processor.

Finished chickpea spread in the food processor.

Pulse the chickpeas to combine with the parsley and caramelize onions. Give it a taste, season with pepper, and adjust the salt, lemon, or other ingredients to your liking.

Overhead view of a bowl full of chickpea spread with caramelized onions surrounded by crackers.

Serve the chickpea spread in a bowl, topped with the remaining caramelized onions, and some freshly cracked pepper. Enjoy!

The post Chickpea Spread with Caramelized Onions appeared first on Budget Bytes.

Chicken and Dumplings

Tender chicken thighs simmered in a rich gravy and topped with fluffy dumplings makes these chicken and dumplings the perfect comfort food for cold nights.

The post Chicken and Dumplings appeared first on Budget Bytes.

I’m thoroughly obsessed with this chicken and dumplings recipe. This is some serious comfort food and I’m all about comfort food. 😅 We’re talking tender chicken thighs cooked in a rich gravy with a medley of colorful vegetables and then topped with tender, fluffy, and flavorful dumplings. This recipe is so cozy that eating a bowl of these chicken and dumplings feels like being wrapped up in a big warm hug. And the best part? They’re made 100% from scratch. 🙌 Ugh, brb, I need to go make another batch because my mouth is WATERING.

Overhead view of a skillet full of chicken and dumplings with a wooden spoon in the side.

What Are Chicken and Dumplings?

Chicken and dumplings can mean different things depending on where you live, but they’re always super cozy, filling, and comforting. While they usually always have tender chicken smothered in a savory gravy as their base, the dumplings can either be a thick noodle, or a pillowy biscuit steamed on top of the gravy. I love both versions, but today we’re making the pillowy cloud dumplings!

Ingredients for Chicken and Dumplings

Here’s what you’ll need to make these delicious chicken and dumplings:

  • Chicken: I used boneless, skinless chicken thighs because they’re almost impossible to overcook and they always stay moist and tender, making this recipe foolproof. You can use chicken breast if you prefer, just be careful not to overcook the chicken.
  • Vegetables: A mix of onion, garlic, carrot, and celery provides the flavor base for the gravy, as well as adds a ton of color and texture to the dish.
  • Butter and Flour: A butter and flour roux is used to thicken the gravy and add a ton of rich flavor to the gravy.
  • Herbs: Parsley, thyme, rosemary, sage, and pepper create a classic chicken soup flavor profile that is extra warm and cozy.
  • Chicken Broth and Milk: The gravy is made with a combination of broth and milk for tons of flavor and a creamy finish.
  • Dumplings: The dumplings are made with a simple mix of flour, milk, melted butter, herbs, baking powder, salt, and sugar. They come together in minutes with very little mixing required!

How to Store the Leftovers

Leftover chicken and dumplings are SO delicious, so make sure to save some for lunch the next day! Simply divide the leftovers into single-serving containers and refrigerate. The gravy will get quite thick when refrigerated, but they’re still delicious! Chicken and dumplings will stay good in the refrigerator for about 3-4 days.

You can also freeze the chicken and dumplings. Once chilled in the refrigerator, transfer the chicken and dumplings to the freezer and store for 2-3 months. To reheat the frozen chicken and dumplings either thaw in the refrigerator overnight before microwaving until hot, or use the defrost function on the microwave.

Tips for Fluffy Dumplings

  • Make sure the dumpling batter is moist enough. It should be a soft, sticky, scoopable dough. If it’s too dry, the dumplings won’t be able to puff up as much.
  • Make sure the gravy is simmering before adding the dumplings. The dumplings need the steam action from the simmering gravy to cook and fluff up.
  • Keep the lid on the pot the entire time the dumplings are cooking (this holds in the steam and ensures they cook from all sides.
  • Don’t make the dumplings too big. They’ll double in size as they cook and larger dumplings will take much longer to cook.
Overhead view of a bowl full of chicken and dumplings with a spoon in the side.
Overhead view of chicken and dumplings in a skillet.
Print

Chicken and Dumplings

Tender chicken simmered in a rich gravy and topped with fluffy dumplings makes these chicken and dumplings the perfect comfort food for cold nights.
Course Dinner, Main Course
Cuisine American
Total Cost $7.26 recipe / $1.21 serving
Prep Time 20 minutes
Cook Time 35 minutes
Total Time 55 minutes
Servings 6 (about 1.5 cups each)
Calories 369kcal

Ingredients

Chicken and Gravy

  • 4 boneless, skinless chicken thighs (about 1 lb.) $3.29
  • 1 Tbsp olive oil $0.12
  • 1 yellow onion, diced $0.32
  • 2 cloves garlic, minced $0.16
  • 2 stalks celery, diced $0.50
  • 2 carrots, diced $0.31
  • 1/4 cup all-purpose flour $0.04
  • 4 Tbsp butter $0.50
  • 1 tsp dried parsley $0.10
  • 1/2 tsp dried thyme $0.05
  • 1/2 tsp dried rosemary $0.05
  • 1/2 tsp dried sage $0.05
  • 1/4 tsp freshly cracked black pepper $0.02
  • 2 cups chicken broth $0.34
  • 1 cup whole milk $0.48
  • 1/2 tsp salt $0.02

Dumplings

Instructions

Chicken and Gravy

  • Heat the olive oil in a deep skillet or Dutch oven over medium heat. Once hot, add the chicken thighs and brown on each side. The chicken does not need to be cooked through at this point, just make sure they get very brown on the outside. Transfer the partially cooked chicken to a clean bowl.
  • After removing the chicken from the skillet, add the diced onion and minced garlic and sauté over medium heat until the onions have softened. Stir to dissolve the browned bits off the bottom of the skillet as the onions cook.
  • Add the diced carrot and celery to the skillet with the onion and garlic and continue to sauté for about five minutes more.
  • Add the butter and flour to the skillet and stir until the butter has melted and created a paste with the flour that coats the vegetables. Continue to cook and stir this mixture for about two minutes.
  • Add the parsley, thyme, rosemary, sage, salt, pepper, chicken broth, and milk to the skillet. Turn the heat up to medium-high and continue to stir and cook until the mixture comes up to a simmer and thickens into a gravy.
  • Dice the chicken and add it back to the skillet with the vegetables and gravy. Cover with a lid and let the chicken simmer in the gravy over medium heat while you prepare the dumplings.

Dumplings

  • To prepare the dumplings, combine the flour, parsley, sugar, salt, baking powder, garlic powder, and pepper in a bowl.
  • Pour the milk and melted butter into the flour mixture, then stir until a soft, scoopable batter is formed. Do not over stir.
  • Remove the lid from the chicken and gravy and drop the dumpling batter onto the surface of the gravy in 2 tablespoon dollops. You should get about 12 dumplings.
  • Make sure the gravy is still simmering, then place the lid back on the skillet and allow the dumplings to simmer for 15 minutes. Make sure they're simmering the entire time. After 15 minutes the dumplings should have doubled in size and will be fluffy and cooked in the center. Serve hot and enjoy!

See how we calculate recipe costs here.

Nutrition

Serving: 1.5cups | Calories: 369kcal | Carbohydrates: 28g | Protein: 20g | Fat: 19g | Sodium: 991mg | Fiber: 2g
Side view of a bowl of chicken and dumplings with a spoon cutting into a dumpling.

How to Make Chicken and Dumplings

Browned chicken thighs in a deep skillet.

Add 1 Tbsp olive oil to a large deep skillet and heat over medium. Once hot, add four boneless, skinless chicken breasts to the pan and allow them to brown very well on each side. The chicken doesn’t need to cook through at this point, just make sure it gets very brown. Remove the browned chicken to a clean cutting board and set aside.

Onion, carrot, and celery in the skillet.

Add two minced cloves of garlic and one diced yellow onion to the skillet and sauté over medium heat until the onions are softened. Add two diced carrots and two diced celery stalks and continue to sauté over medium for 2-3 minutes more.

Butter and flour added to the skillet with the vegetables.

Add four tablespoons of butter and ¼ cup of all-purpose flour to the skillet. Continue to stir and cook over medium heat. The butter will melt and combine with the flour to create a sort of paste that coats the vegetables. Continue to cook this mixture for about two minutes more.

Herbs added to the skillet and broth being poured in the side.

Add 1 tsp dried parsley, ½ tsp dried thyme, ½ tsp dried rosemary, ½ tsp dried sage, ½ tsp salt, ¼ tsp pepper, 2 cups chicken broth, and 1 cup milk to the skillet. Whisk the ingredients together, making sure to dissolve any browned bits from the bottom of the skillet. Turn the heat up to medium-high and allow this mixture to come back up to a simmer, at which point it will thicken into a gravy.

Diced chicken added back to the thickened gravy.

Once the mixture has thickened to a gravy, dice the chicken thighs and stir them back into the skillet. Cover with a lid and allow the chicken to simmer in the gravy while you prepare the dumplings.

Wet ingredients being poured into the dry ingredients in a bowl.

To make the dumplings, stir together 1 cup all-purpose flour, ½ tsp salt, 1.5 tsp baking powder, ⅛ tsp garlic powder, ⅛ tsp pepper, 1 tsp dried parsley, and ½ tsp sugar in a bowl. Melt 2 Tbsp butter and combine it with ½ cup milk. Pour the milk mixture into the flour mixture.

Dumpling dough in a bowl with a spoon.

Stir the wet and dry ingredients together until it forms a soft, sticky dough. It should be soft enough that you can easily scoop it with a spoon.

Dumpling dough being dropped into the skillet with the gravy.

Make sure the gravy is fully simmering, then drop the dumpling dough into the gravy in 2 Tbsp portions. The dumplings will expand quite a bit as they steam, so don’t worry that they don’t fully cover the surface.

Cooked dumplings in the gravy.

Place the lid on the skillet and allow the dumplings to steam in the simmering gravy for 15 minutes without lifting the lid. Make sure the gravy is simmering the whole time. After 15 minutes they should be about double in size. Cut one open to make sure it’s fluffy all the way through.

Chicken and dumplings in the skillet being scooped out with a spoon.

Serve the chicken and dumplings hot and enjoy! (shown garnished with parsley for color)

The post Chicken and Dumplings appeared first on Budget Bytes.

Butternut Squash Pasta Sauce

This butternut squash pasta sauce blends the warmth of seasonal ingredients with the classic taste of Italian cuisine, all in one delicious bowl. It combines the earthy flavors of roasted butternut squash with the comforting goodness of pasta. It&#8217…

This butternut squash pasta sauce blends the warmth of seasonal ingredients with the classic taste of Italian cuisine, all in one delicious bowl. It combines the earthy flavors of roasted butternut squash with the comforting goodness of pasta. It’s like getting the best of both worlds on your plate! Check out my other pasta sauce...

Read More

The post Butternut Squash Pasta Sauce appeared first on My Pure Plants.