Korean Beef Bulgogi

Korean Beef Bulgogi is something my mom made for dinner frequently while I was growing up. My mom’s bulgogi is a family favorite and I still look forward to it whenever we get together. Since my parents live in Chicago and I live in LA, I decided I needed to learn to make it myself, so I could enjoy it whenever I wanted. I love that this dish can be enjoyed in so many ways….

Read More

The post Korean Beef Bulgogi appeared first on Spoon Fork Bacon.

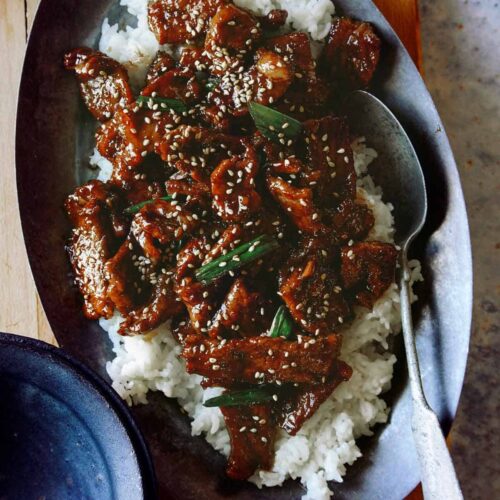
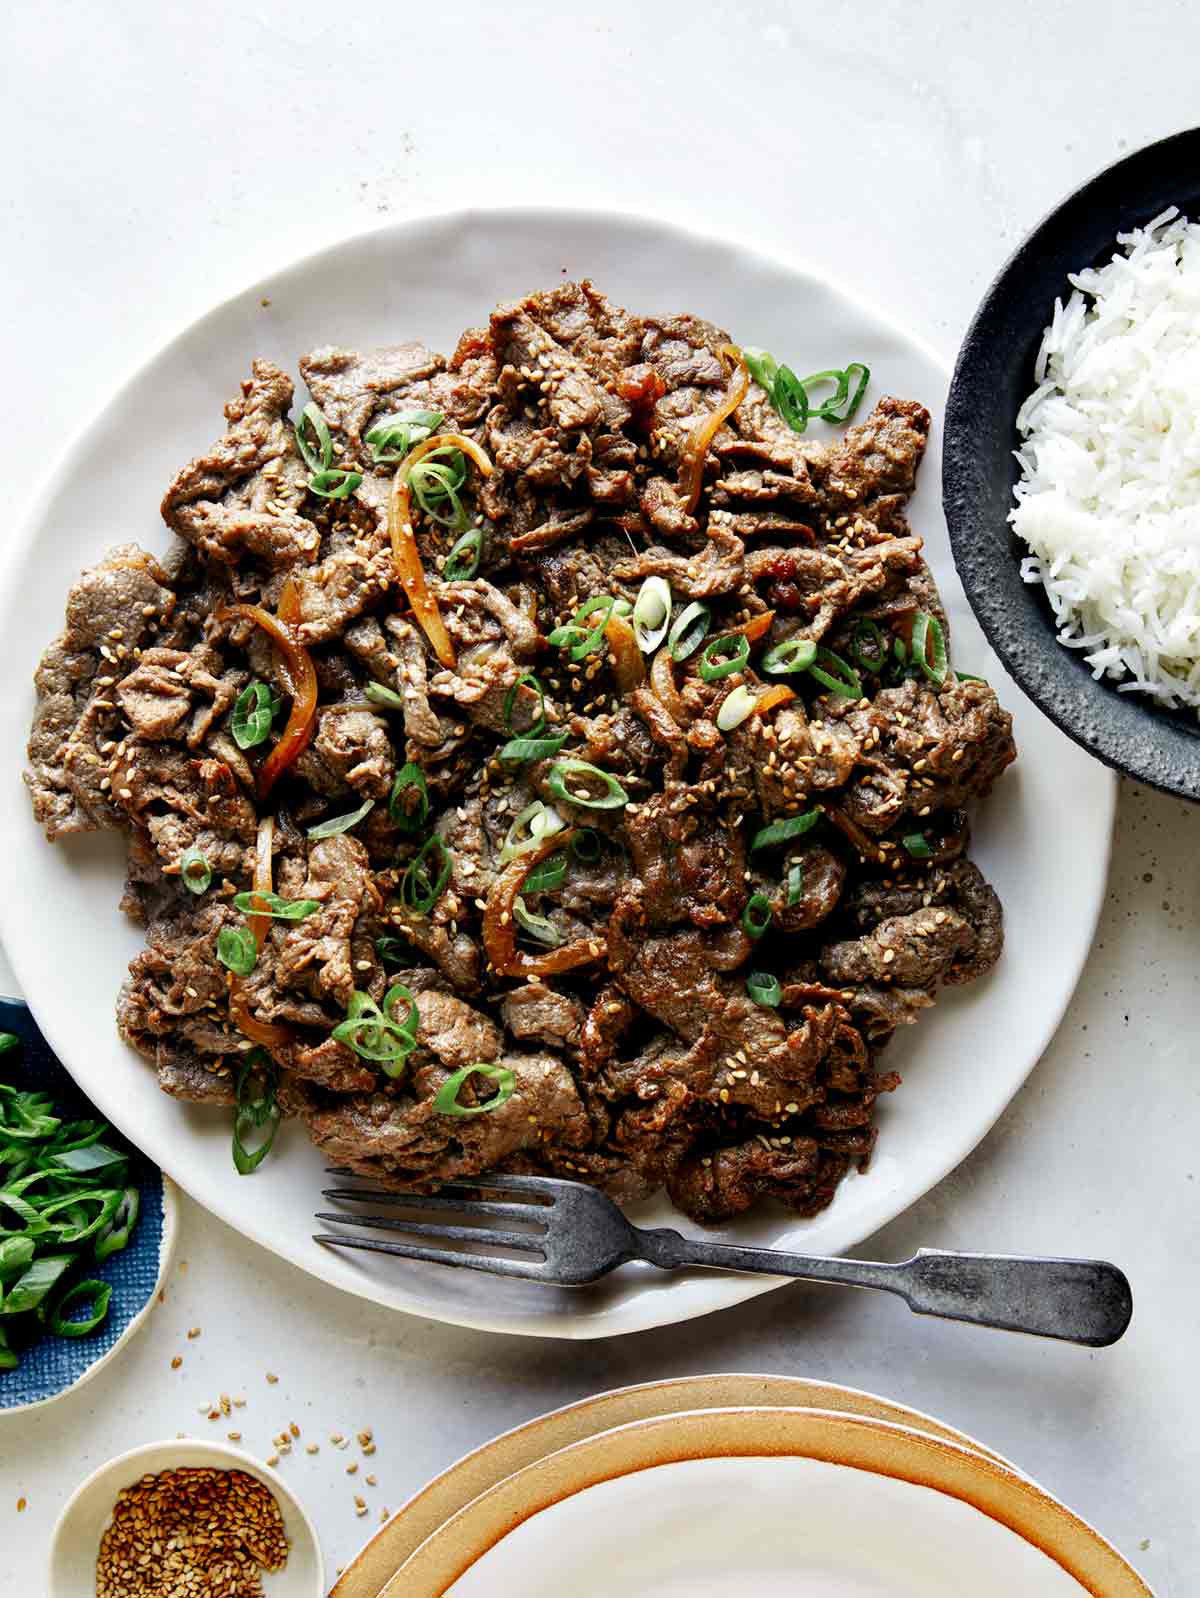
Beef bulgogi recipe on a plate with rice.

Korean Beef Bulgogi is something my mom made for dinner frequently while I was growing up. My mom’s bulgogi is a family favorite and I still look forward to it whenever we get together. Since my parents live in Chicago and I live in LA, I decided I needed to learn to make it myself, so I could enjoy it whenever I wanted.

I love that this dish can be enjoyed in so many ways. You can simply serve it with a side of steamed rice, in tacos and burritos, as a filling ingredient for kimbap, in nachos, tossed together with noodles, diced and cooked into a fried rice, the options are really endless!

What is Bulgogi and What Does it Taste Like?

Bulgogi is a popular Korean BBQ dish (literally translating to “fire meat”) made of thinly sliced marinated beef ribeye or sirloin. The beef is marinated in a blend of soy sauce, sesame oil, onion, garlic, ginger, sugar, asian pear, and black pepper. It’s marinated for several hours which flavors and tenderizes the meat.

The flavor of bulgogi is savory, salty and sweet. Our recipe has a mildly sweet and salty flavor – more mild than other recipes or what you may have tasted from a Korean bbq restaurant. If you want to up the sweetness or the saltiness or both, just add a couple more teaspoons of brown sugar and soy sauce (or a couple extra pinches of salt) to the marinade. Also, always taste the marinade before combining it with the beef to ensure the flavor is to your liking.

How to Make Our Korean Beef Bulgogi

Ingredients
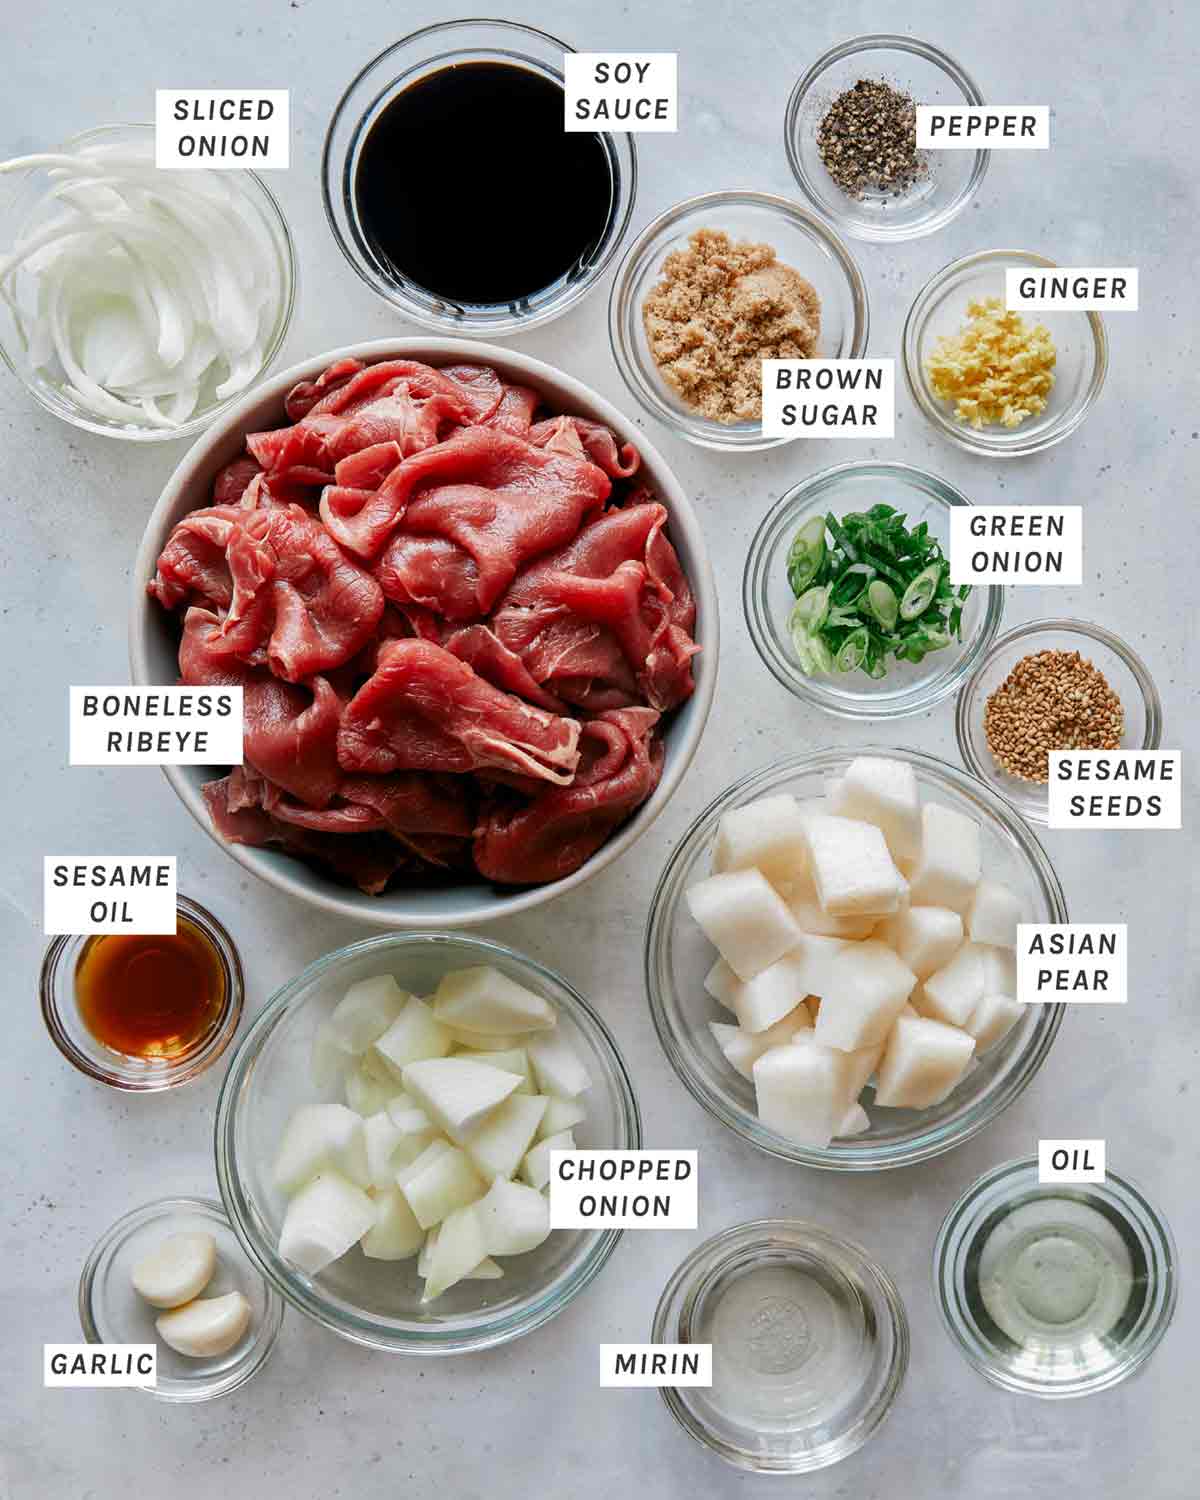
Beef bulgogi ingredients on a kitchen counter.

Process

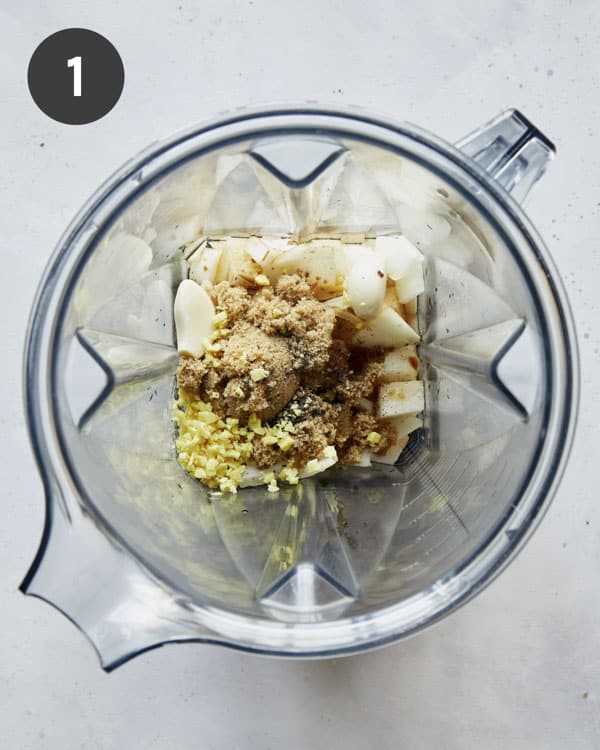
  1. Place all marinade ingredients into a blender.
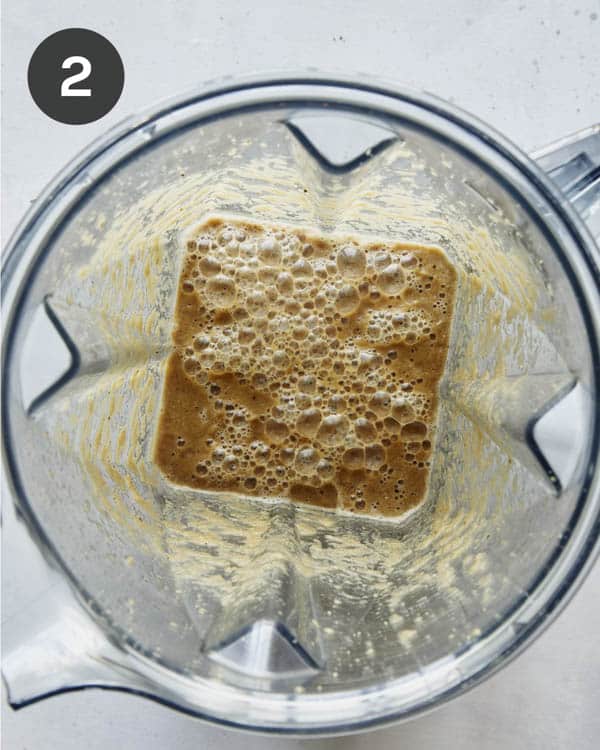
  2. Blend until smooth.
Korean bulgogi marinade in a blender about to be blended.
Korean beef bulgogi marinade in a blender.
  1. Place beef and thinly sliced onion into a mixing bowl and toss together.
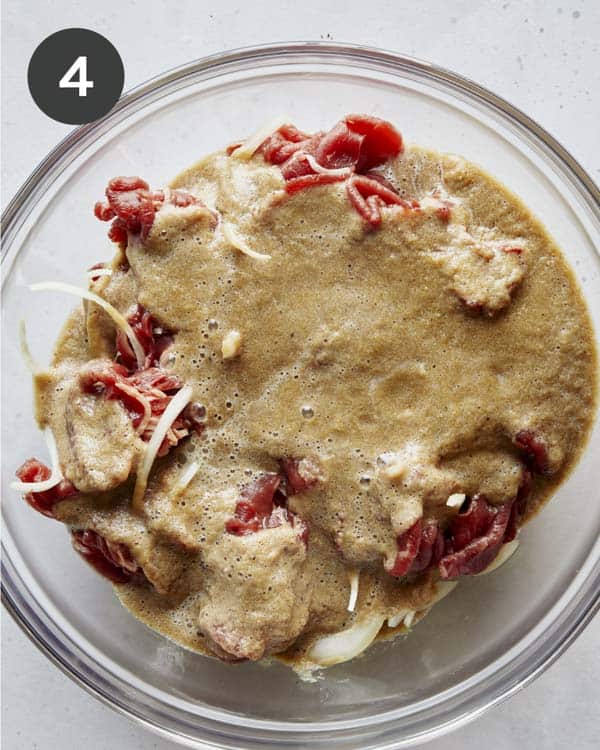
  2. Pour marinade over beef and onion mixture.
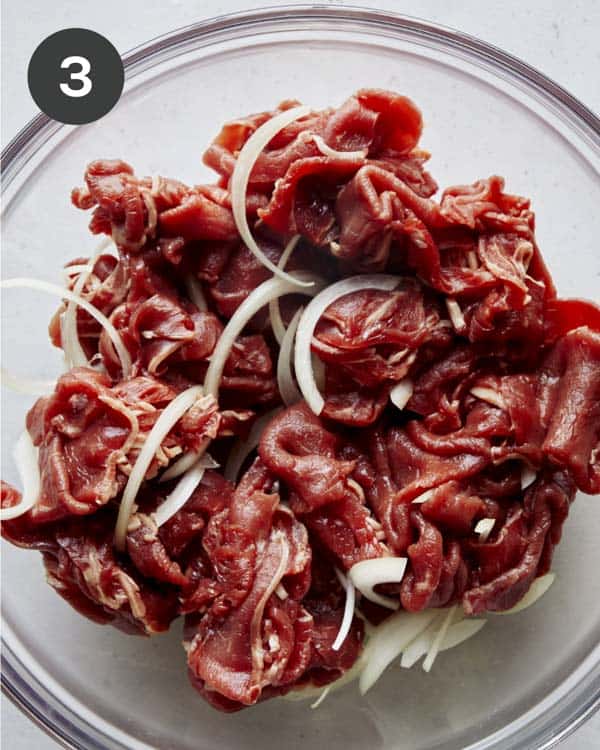
Thinly sliced beef ribeye in a bowl with onion.
Thinly sliced beef ribeye in a bowl with bulgogi marinade.
  1. Mix together until all beef is well and evenly coated.
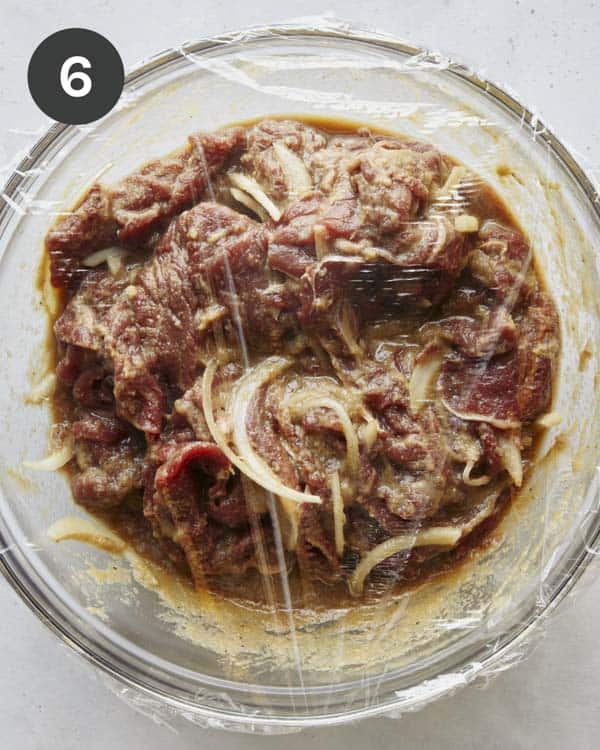
  2. Cover beef and refrigerate for at least 6 hours and up to 24 hours.
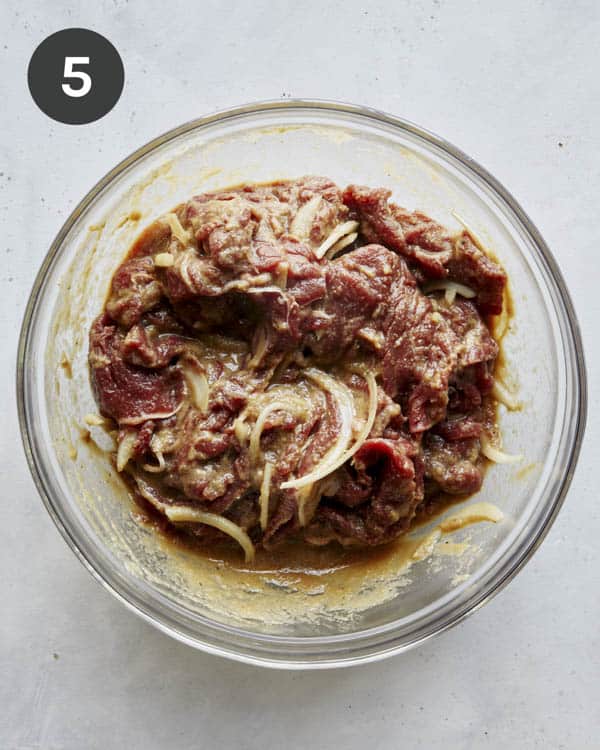
Beef mixed together in a bowl with marinade to make Korean bulgogi.
Beef marinating in a bowl with plastic wrap for Korean Beef Bulgogi.
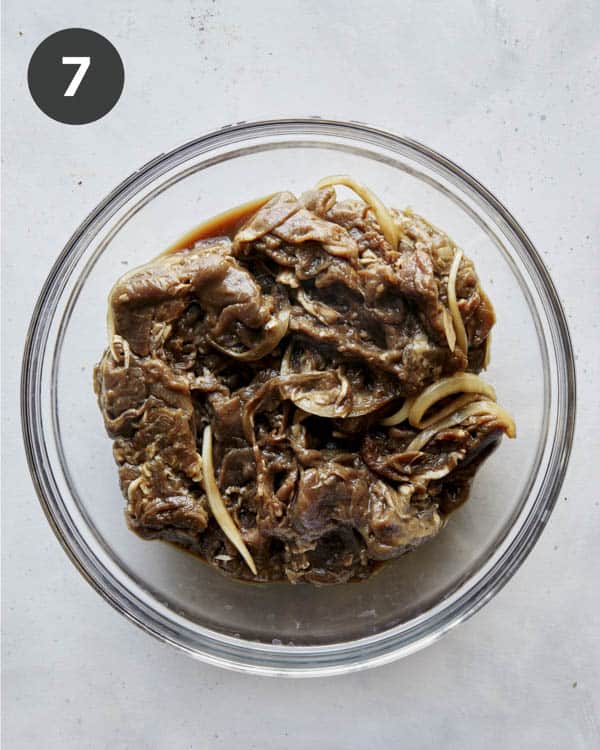
  1. Remove from refrigerator, uncover and allow mixture to sit for about 10 minutes.
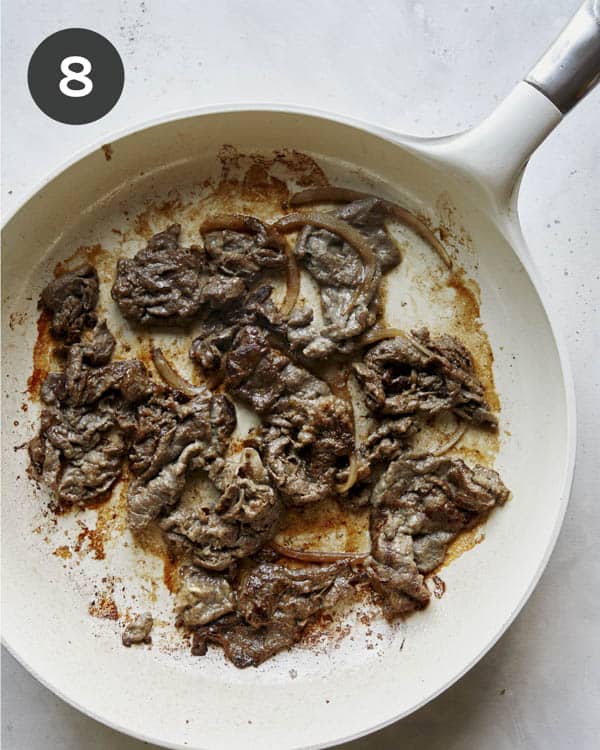
  2. Place a large skillet over medium-high heat. Once skillet is hot add half vegetable oil and swirl to coat. Add half beef and onion mixture and cook, stirring beef as needed until cooked through. Transfer beef to a plate. Add remaining oil to skillet followed by remaining beef and onion and repeat until beef has just cooked through and sliced onions just begin to soften. Remove from heat and combine with rest of the cooked bulgogi.
Marinated beef bulgogi in a bowl.
Cooked beef bulgogi in a skillet.

Best Cuts of Beef to Use for Bulgogi

Boneless ribeye steak is our cut of choice for this recipe and the most popular because it is tender and flavorful with nice marbling. Sirloin is also commonly used to make bulgogi and is slightly leaner that ribeye. You can also use flank steak in a pinch with good results, but the texture won’t be quite as tender.

Where to Find Pre-Shaved Beef for Bulgogi

Shaved (or very thinly sliced) beef can be found at practically all Korean, Chinese and Japanese markets and most other asian markets. Some Trader Joes locations also sell shaved ribeye!

If you’re unable to find pre-shaved or thinly sliced beef, you can buy a boneless steak and slice it yourself. If you do decide to slice it yourself make sure to partially freezing the beef first in your freezer (about 15 to 30 minutes) before attempting to slice it. Partially freezing the beef makes it way easier to slice very thin and even pieces.

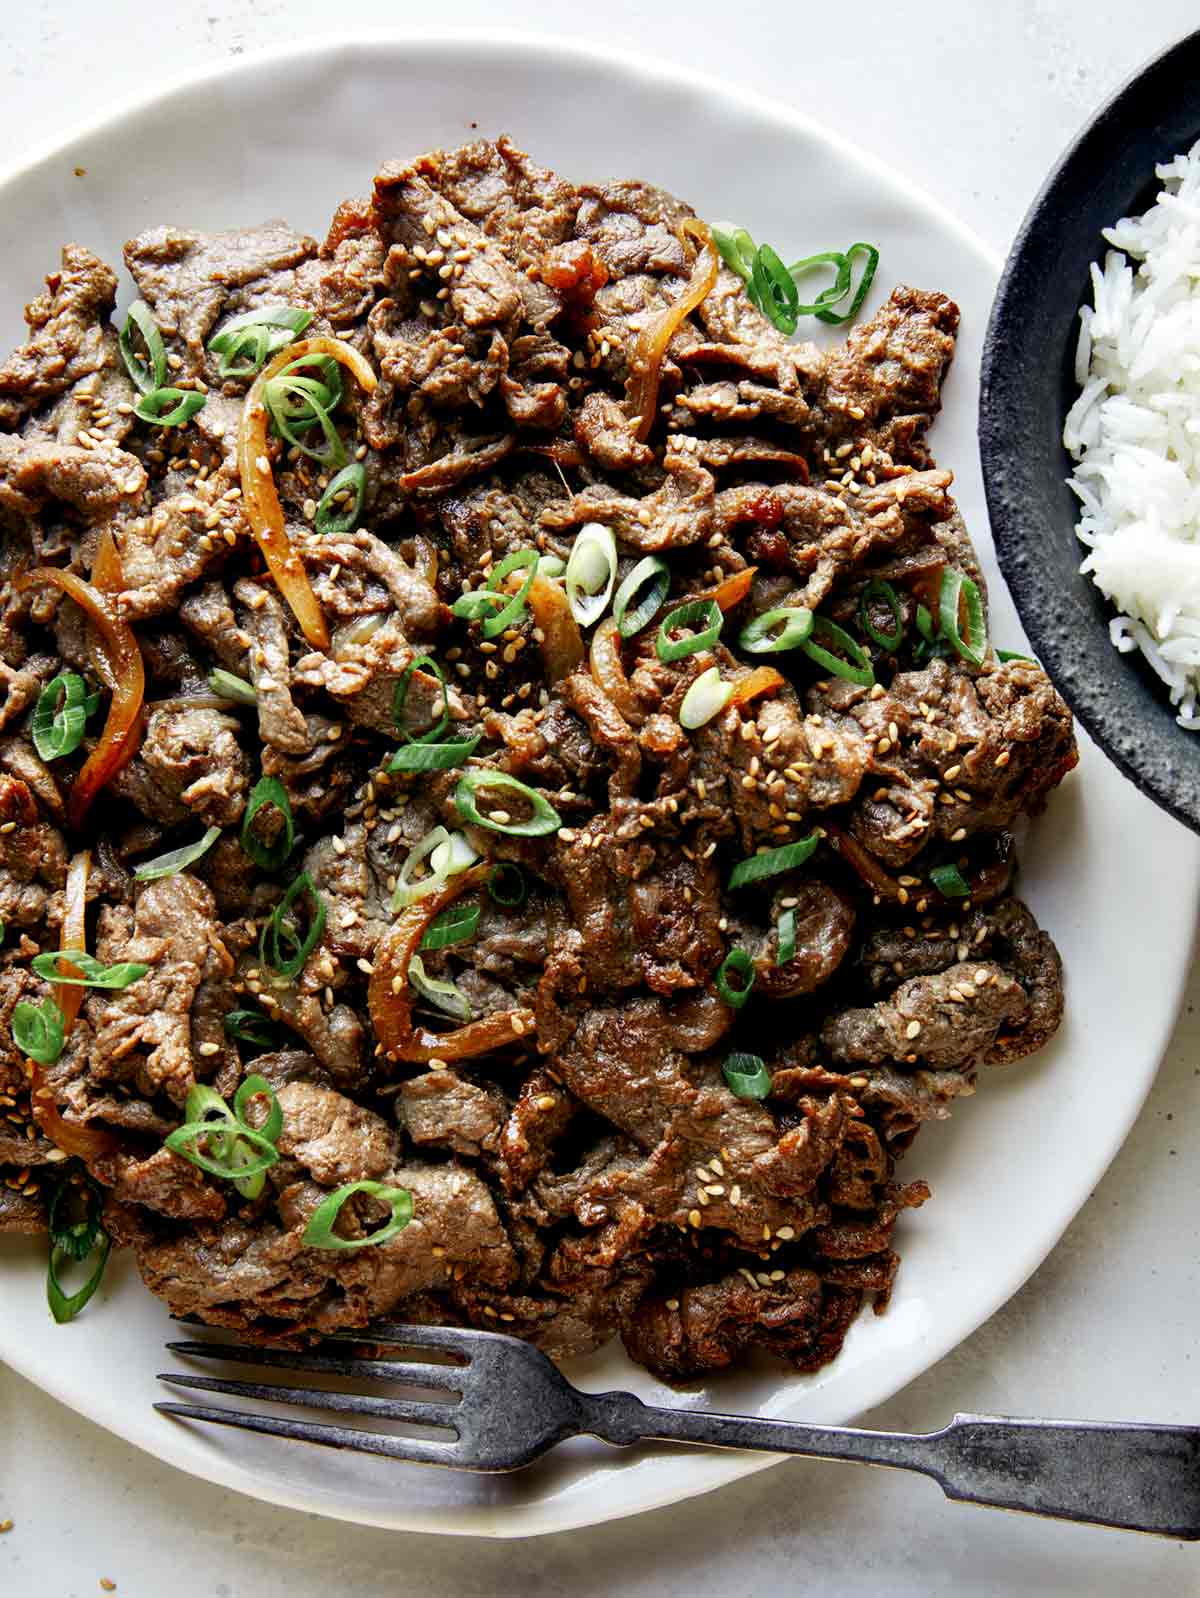
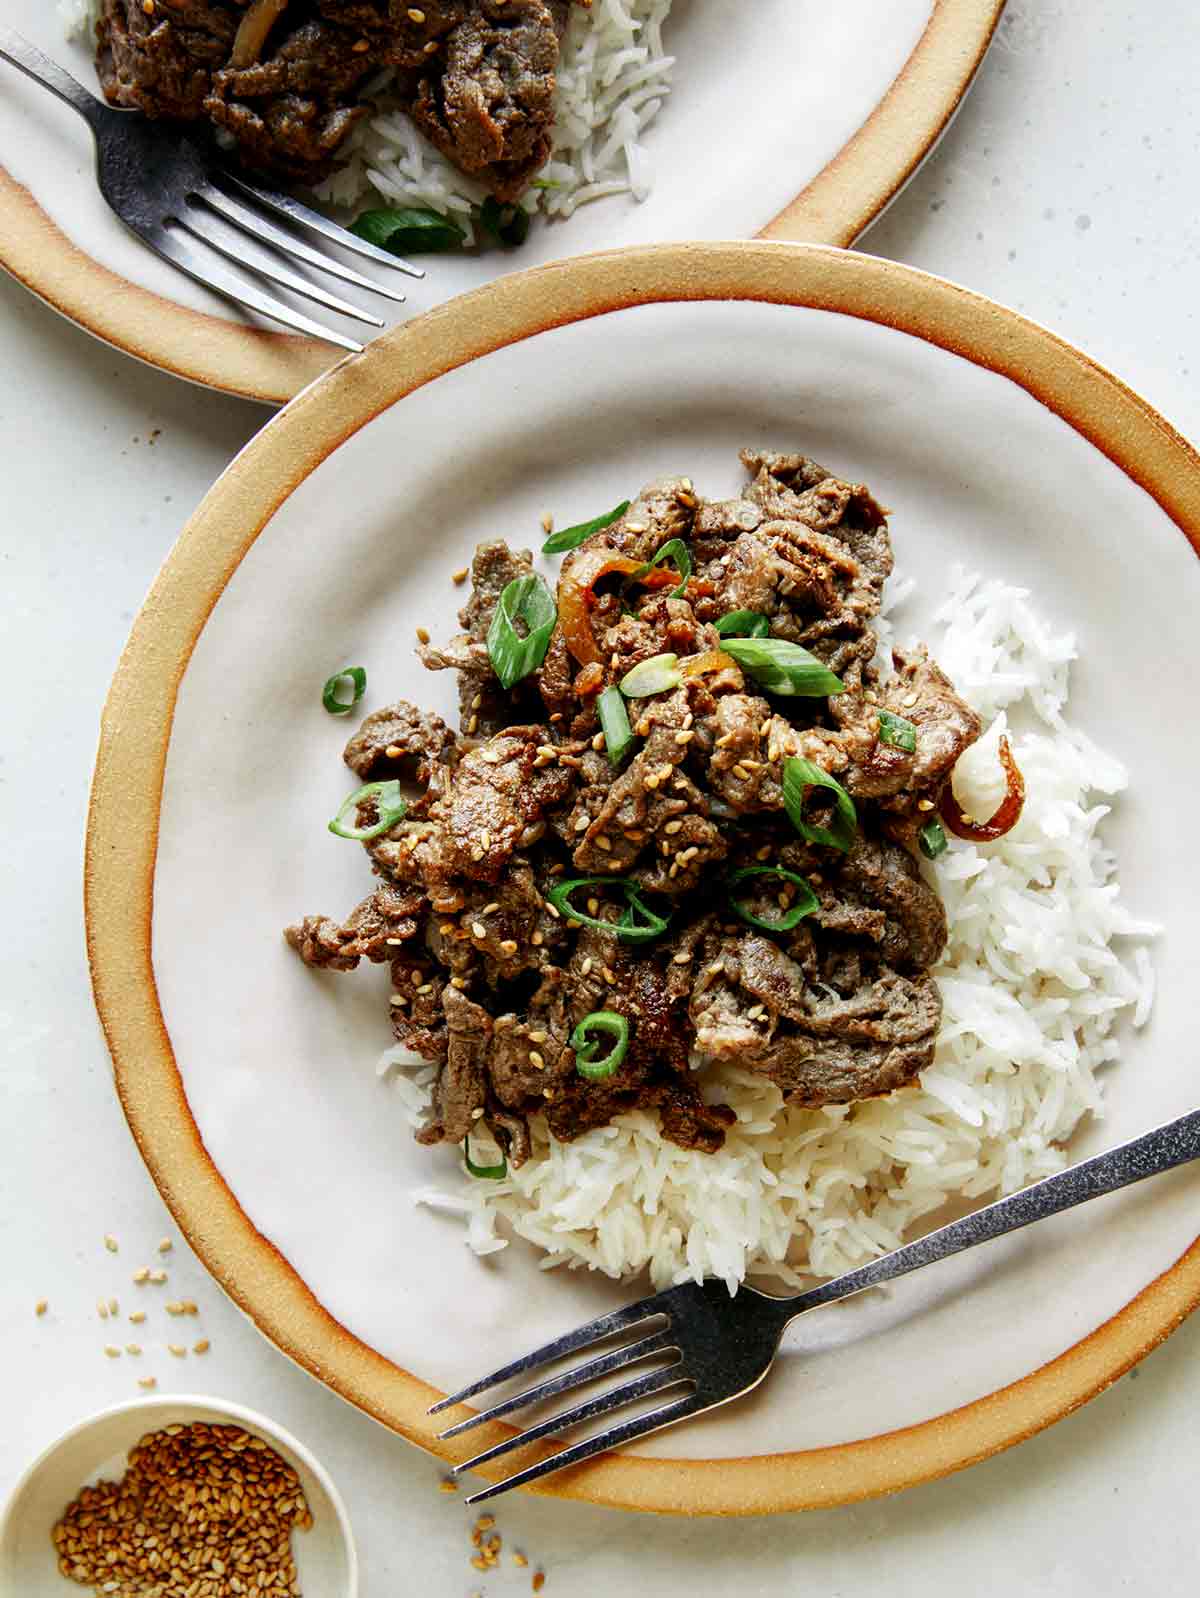
Korean beef bulgogi with rice on the side  and sesame seeds.

Grilling vs Pan Searing

Bulgogi can be cooked on both a grill or in a pan/skillet. If using a pan or skillet natural juices will release and gather in the pan, which is often enjoyed with the cooked beef. If using a grill, there will be a distinct ‘char-grilled’ flavor. The flavors will be ever so slightly different depending on how the beef is cooked, but equally delicious!

Can Bulgogi be Frozen?

Yes, our Korean Beef Bulgogi recipe can be marinated and frozen (uncooked) ahead of time for up to 2 months.

Freezing Instructions

Marinate beef for at least 6 hours. Transfer mixture to a freezer-proof ziploc bag, removing all the air, and seal. Freeze for up to 2 months. When ready to use, thaw beef in the refrigerator overnight. Drain off any excess liquid from the bag. Cook bulgogi in skillet with oil over high heat for 4 to 6 minutes, flipping halfway through, and serve.

Korean beef bulgogi recipe on two place.

More Delicious Korean Recipes You Will Love

Beef bulgogi recipe on a plate.
Print

Korean Beef Bulgogi

This Korean Beef Bulgogi recipe is a version of my mom's recipe I enjoyed so much growing up (and still enjoy today!). It's so simple to make at home and the beef is tender, packed with tons of classic Korean bbq flavor! It's the best homemade version you'll find!
Course dinner, lunch
Cuisine korean
Prep Time 10 minutes
Cook Time 12 minutes
Marinade time 6 hours
Total Time 6 hours 22 minutes
Servings 4 people
Calories 338kcal

Ingredients

beef

  • pounds boneless ribeye shaved or very thinly sliced
  • ½ small yellow onion thinly sliced
  • 2 tbsp vegetable oil

beef marinade

  • 1/2 cup soy sauce
  • 3 tbsp brown sugar
  • 2 tbsp mirin (rice wine)
  • 1 tbsp sesame oil
  • ¼ tsp cracked black pepper
  • 1 small Asian pear (about 6 ounces) peeled cored and chopped (or 1 sweet apple such as gala)
  • ½ small yellow onion chopped
  • 2 garlic cloves
  • 1 tsp minced ginger

garnish

  • 1 green onion thinly sliced
  • 1 tsp toasted sesame seeds

Instructions

beef

  • Place beef and thinly sliced onion into a mixing bowl and toss together.

marinade

  • Place all marinade ingredients into a blender and blend until smooth.
  • Pour marinade over beef and onion mixture and mix together until all beef is well and evenly coated.
  • Cover beef and refrigerate for at least 6 hours and up to 24 hours.
  • Place a large skillet over medium-high heat. Once skillet is hot add half vegetable oil and swirl to coat. Add half beef and onion mixture and cook for 4 to 6 minutes, stirring beef as needed until cooked through. Transfer beef to a plate. Add remaining oil to skillet followed by remaining beef and onion and repeat until beef has just cooked through and sliced onions just begin to soften. Remove from heat and combine with rest of the cooked bulgogi.
  • Top bulgogi with remaining green onion and sesame seeds and serve with rice.

Notes

Best Cuts of Beef to Use for Bulgogi

Boneless ribeye steak is our cut of choice for this recipe and the most popular because it is tender and flavorful with nice marbling. Sirloin is also commonly used to make bulgogi and is slightly leaner that ribeye. You can also use flank steak in a pinch with good results, but the texture won’t be quite as tender.

Where to Find Pre-Shaved Beef for Bulgogi

Shaved (or very thinly sliced) beef can be found at practically all Korean, Chinese and Japanese markets and most other asian markets. Some Trader Joes locations also sell shaved ribeye.

If you’re unable to find pre-shaved or thinly sliced beef, you can buy a boneless steak and slice it yourself. If you do decide to slice it yourself make sure to partially freezing the beef first in your freezer (about 15 to 30 minutes) before attempting to slice it. Partially freezing the beef makes it way easier to slice very thin and even pieces.
Freezing Instructions
Marinate beef for at least 6 hours. Transfer mixture to a freezer-proof ziploc bag, removing all the air, and seal. Freeze for up to 2 months. When ready to use, thaw beef in the refrigerator overnight. Drain off any excess liquid from the bag. Cook bulgogi in skillet with oil over high heat for 4 to 6 minutes, flipping halfway through, and serve.
Grilling vs Pan Searing
Bulgogi can be cooked on both a grill or in a pan/skillet. If using a pan or skillet natural juices will release and gather in the pan, which is often enjoyed with the cooked beef. If using a grill, there will be a distinct ‘char-grilled’ flavor. The flavors will be ever so slightly different depending on how the beef is cooked, but equally delicious!
 

Nutrition

Calories: 338kcal | Carbohydrates: 55g | Protein: 7g | Fat: 11g | Saturated Fat: 6g | Sodium: 1580mg | Potassium: 204mg | Fiber: 2g | Sugar: 14g | Vitamin A: 114IU | Vitamin C: 6mg | Calcium: 43mg | Iron: 1mg

The post Korean Beef Bulgogi appeared first on Spoon Fork Bacon.

Baked Ziti

This Baked Ziti recipe is so classic and delicious and the perfect make ahead weeknight meal. You can totally make your own sauce but you can also buy a great quality jar from the store to keep things simple. We love this jarred marinara sauce. This recipe also makes really great leftovers for the next day. It reheats really well and you don’t have to worry about this dish drying out since we’ve made ours…

Read More

The post Baked Ziti appeared first on Spoon Fork Bacon.
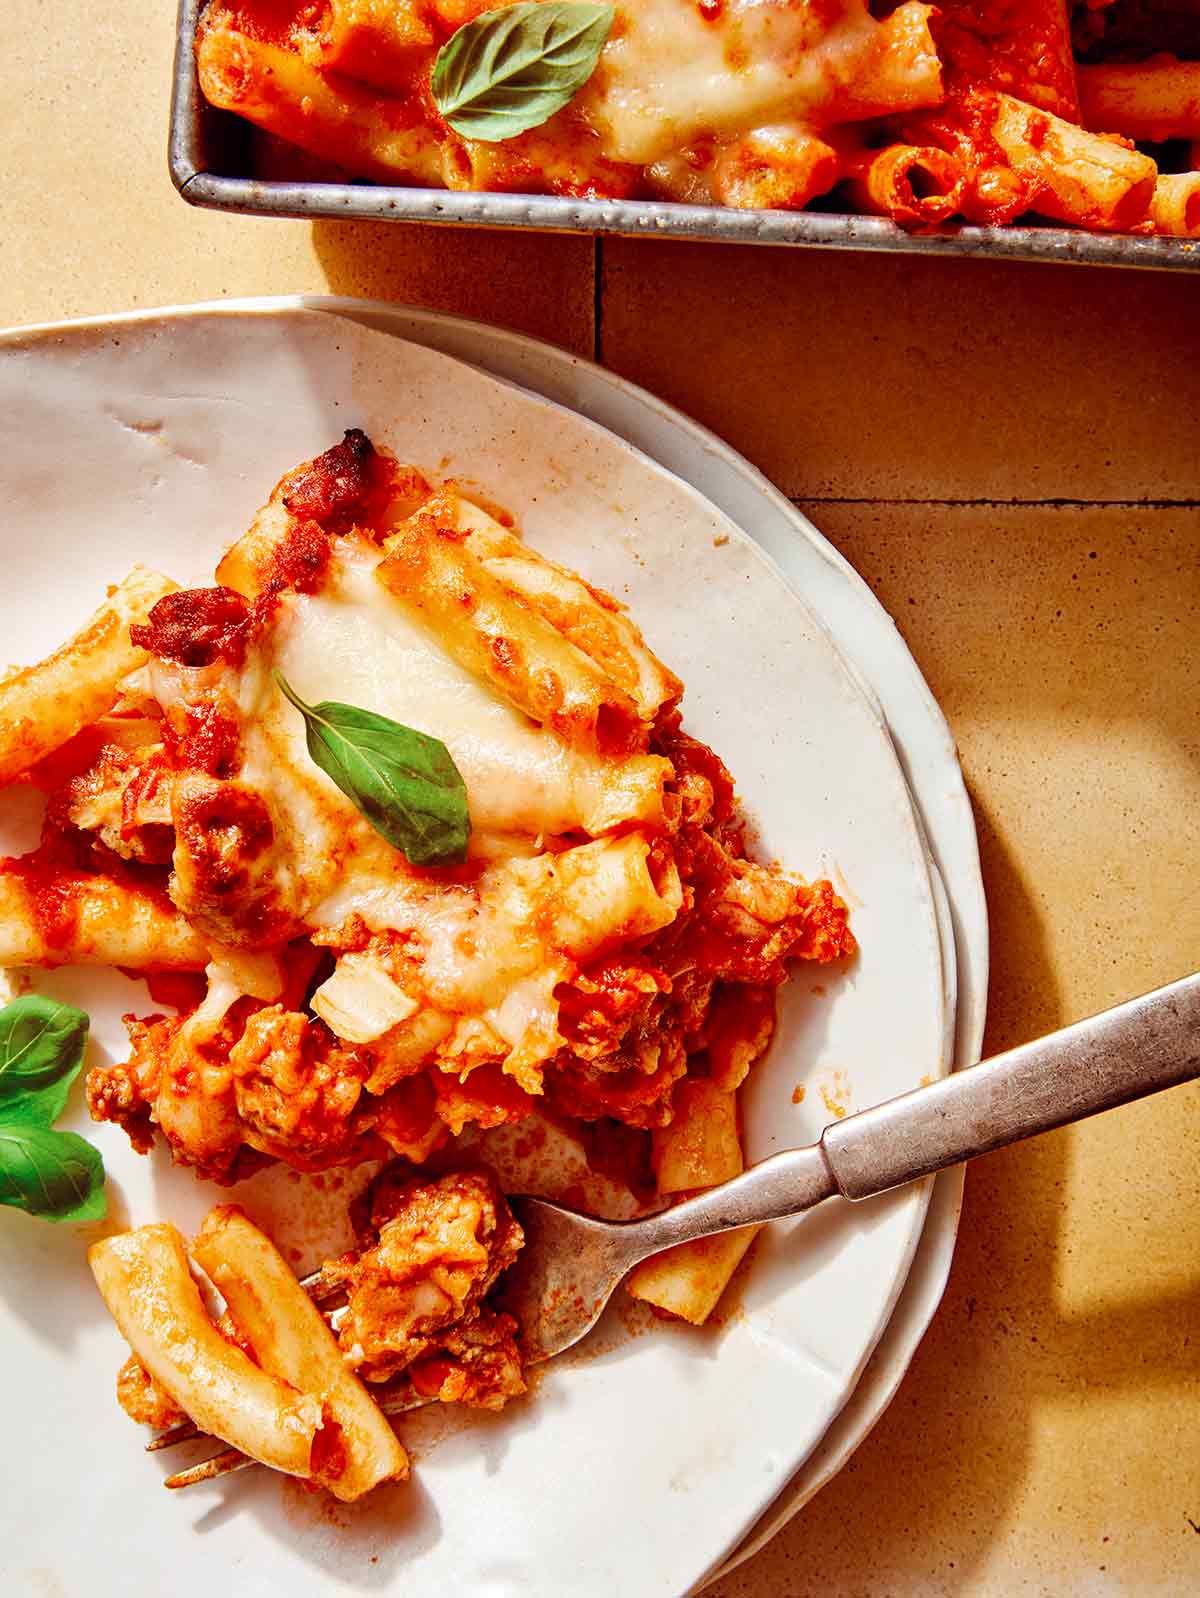
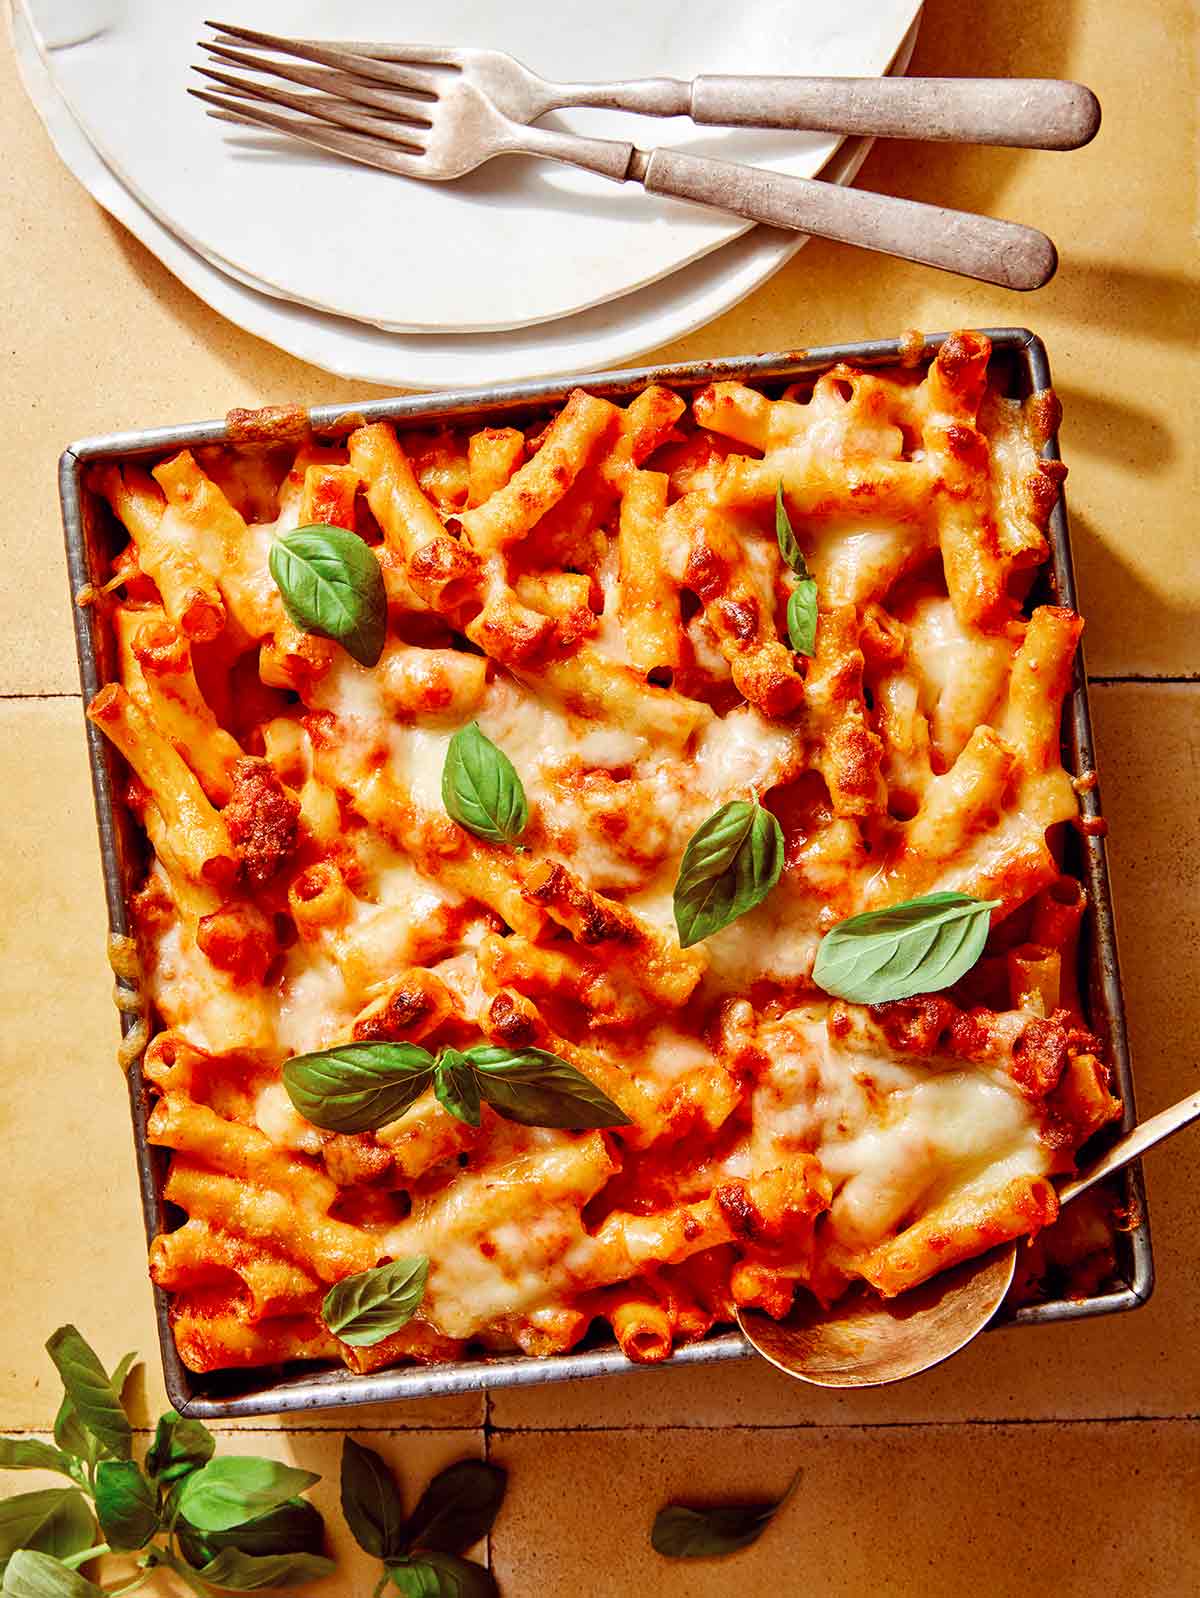
Baked ziti in a baking dish with some scooped out next to it.

This Baked Ziti recipe is so classic and delicious and the perfect make ahead weeknight meal. You can totally make your own sauce but you can also buy a great quality jar from the store to keep things simple. We love this jarred marinara sauce.

This recipe also makes really great leftovers for the next day. It reheats really well and you don’t have to worry about this dish drying out since we’ve made ours pretty saucy. Our baked ziti so comforting, delicious and makes enough to feed a small crowd.

What is Baked Ziti?

Baked Ziti is a classic American Italian dish. It is made in a casserole dish, and typically uses a tomato sauce, and cheese, as well as other ingredients to suit your taste. It is prepared with cooked ziti pasta, and then baked in the oven.

How to Make Baked Ziti

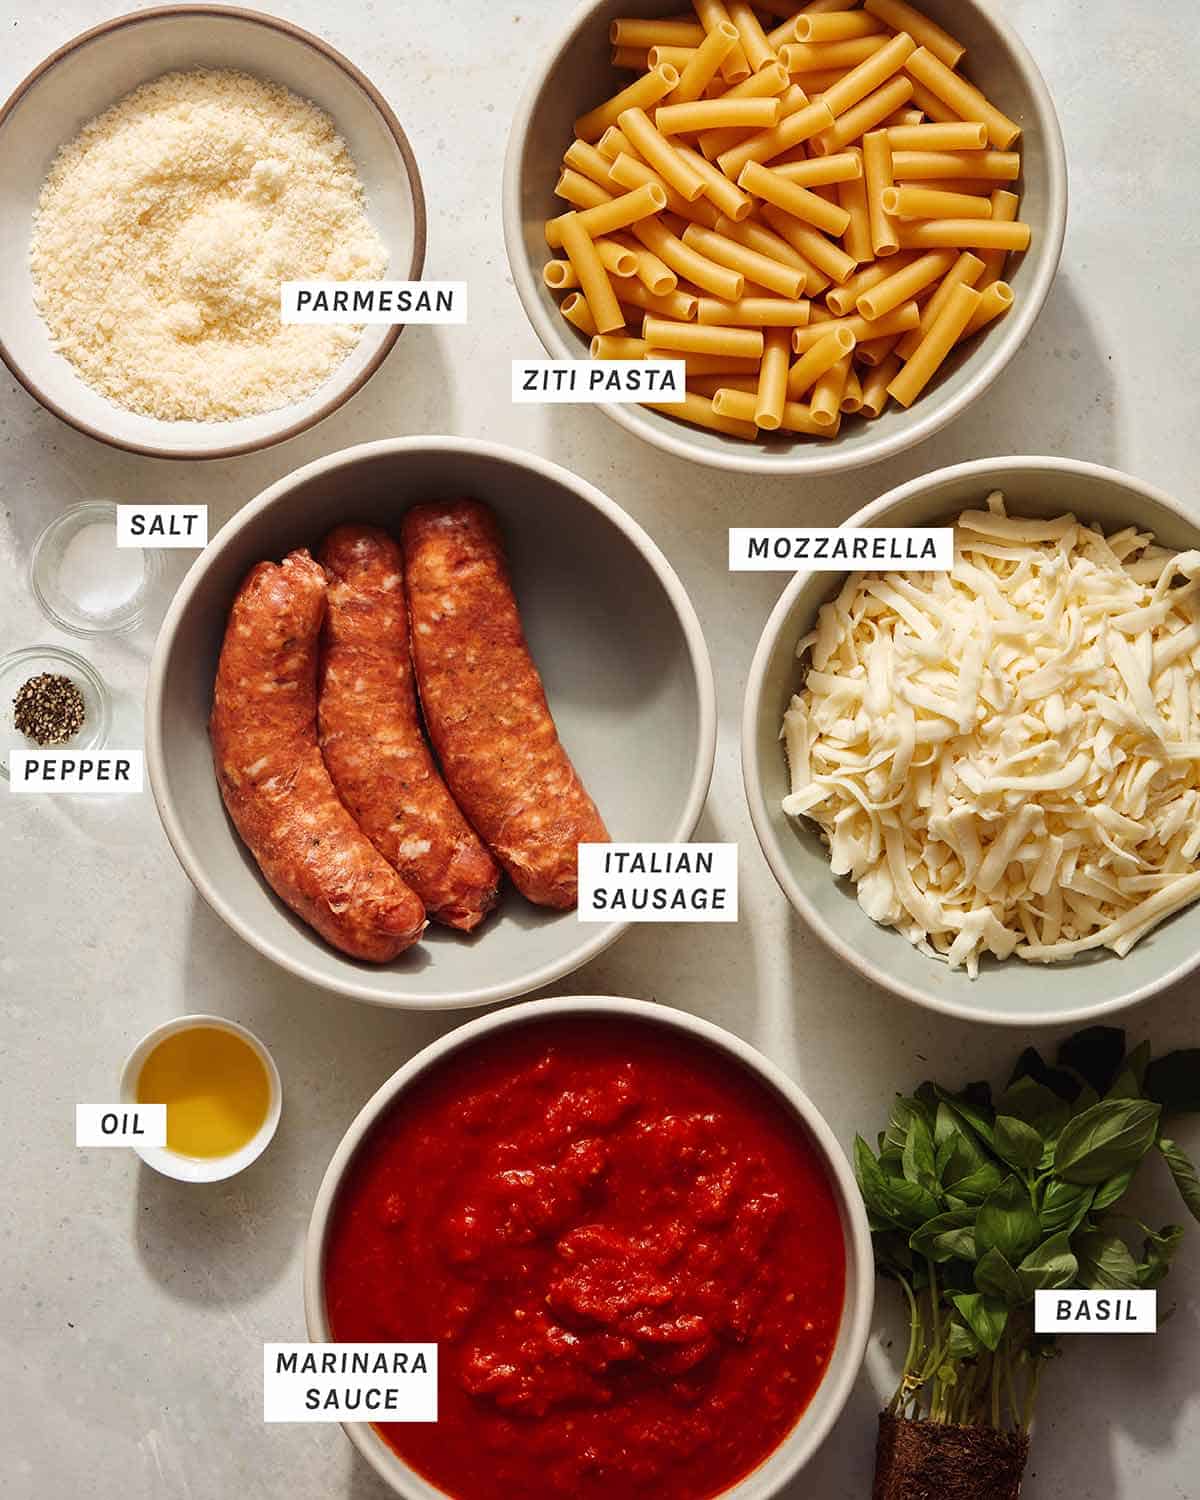
Ingredients

Ingredients to make baked ziti.

Process

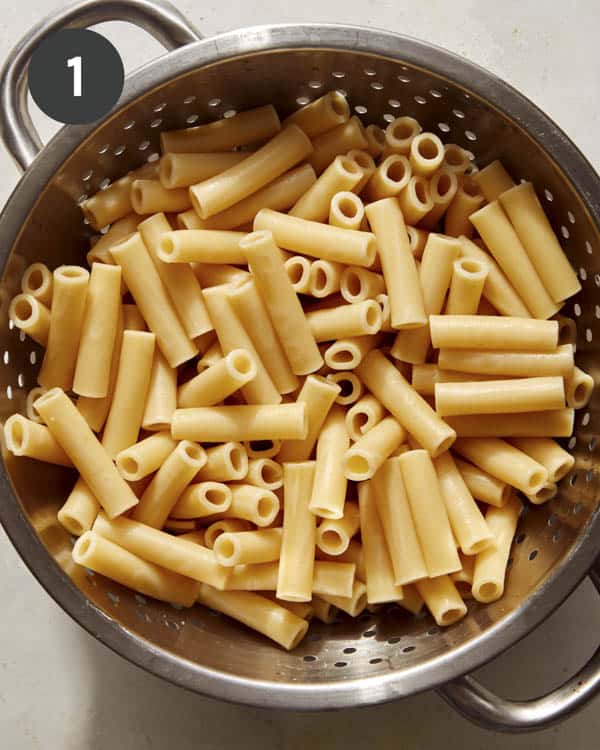
  1. Preheat oven to 350°F. Fill a large pot with water and bring to a boil. Add a small handful of salt and pasta to water and stir. Boil pasta for 7 to 10 minutes, stirring occasionally, or until pasta is al dente. Drain, toss with a teaspoon of oil, pour into a large mixing bowl.
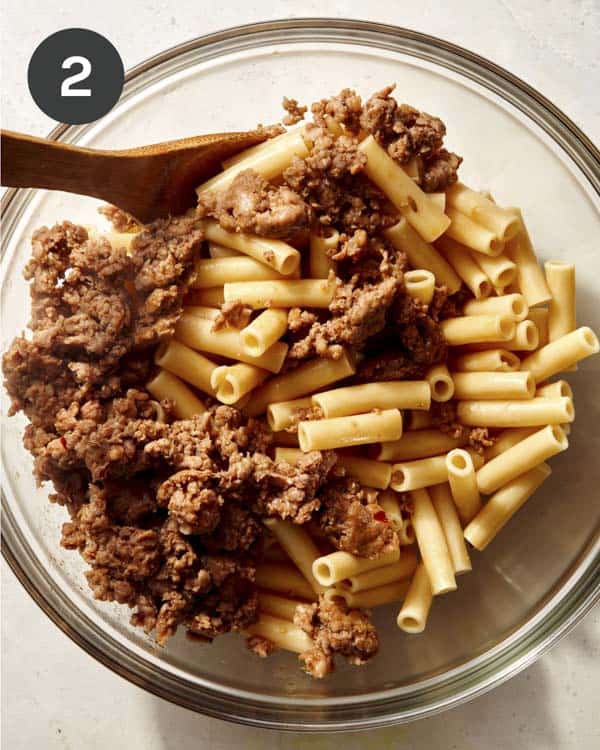
  2. Pour olive oil into a large sauté pan and place over medium- high heat. Add sausage and break apart with a wooden spoon. Cook sausage for about 5 minutes or until evenly browned. Drain and add to pasta.
Pasta in a colander draining for baked ziti.
Meat mixed with pasta in a bowl for baked ziti.
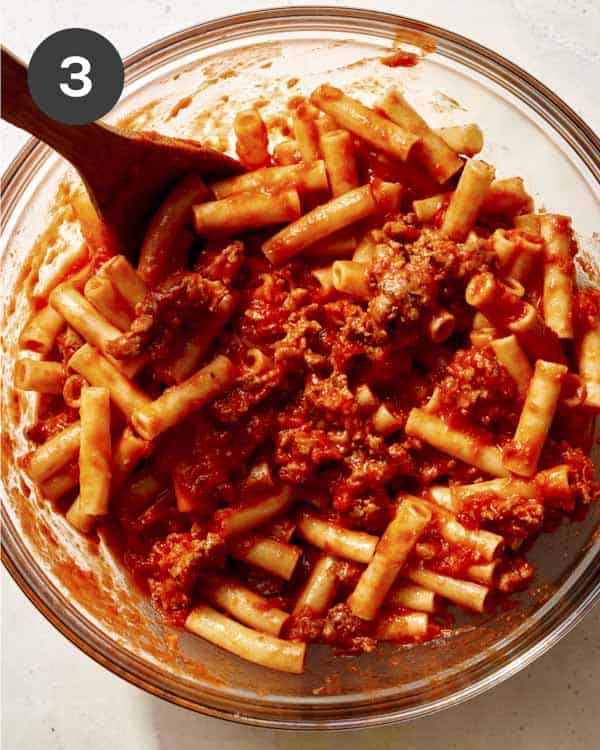
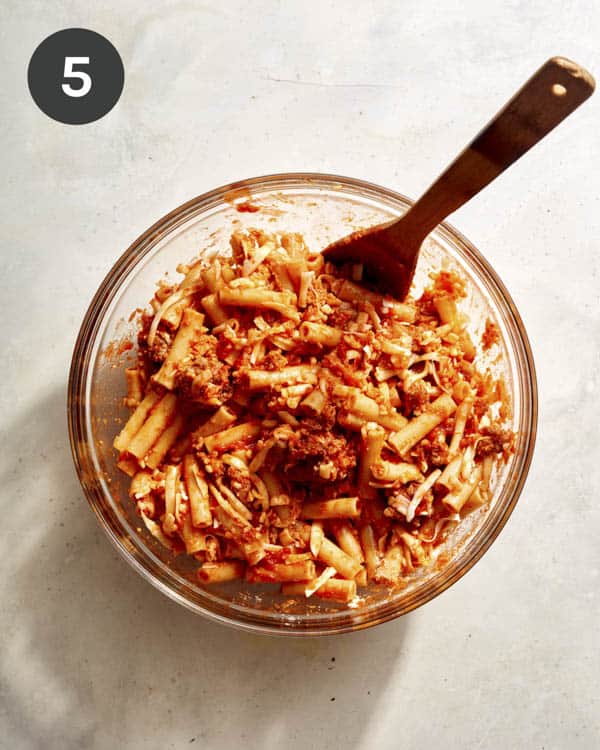
  1. Add marinara and stir together.
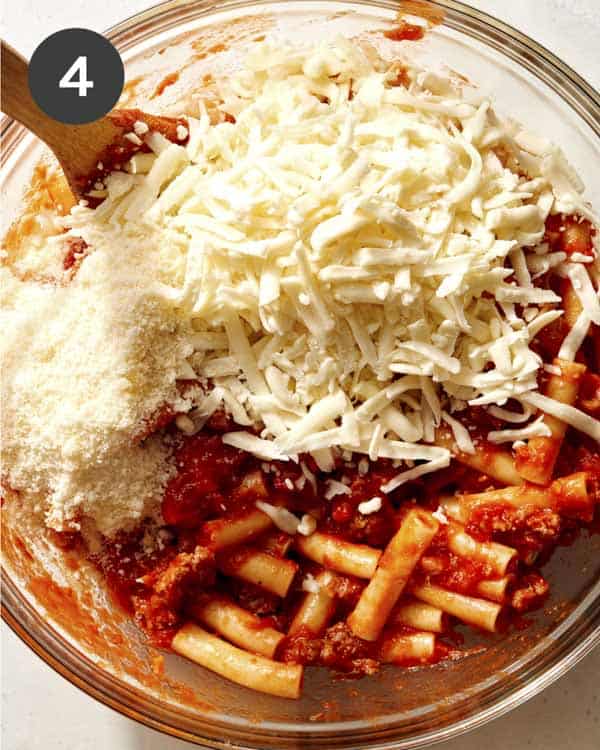
  2. Add 1 1/2 cups mozzarella and 1/4 cup Parmesan.
Marinara sauce mixed with pasta and meat.
Cheese being mixed with pasta and meat for baked ziti.
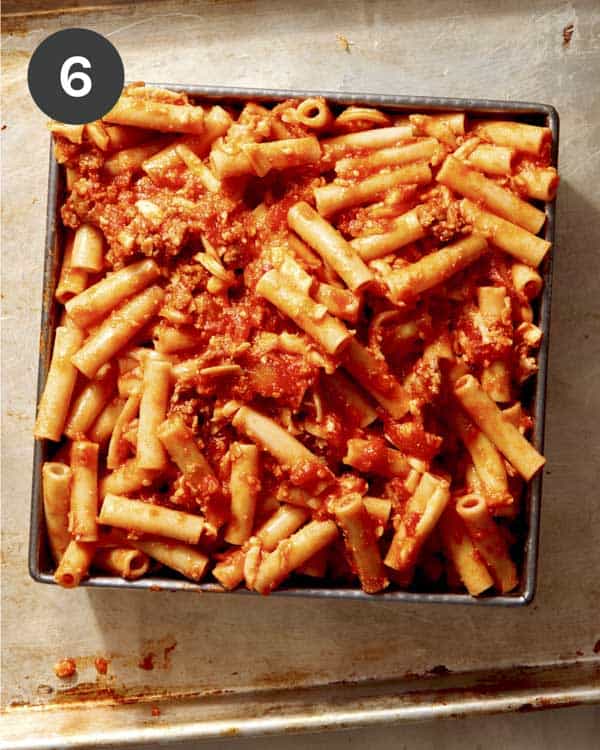
  1. Fold together until fully incorporated. Adjust seasonings as needed.
  2. Pour mixture into a lightly greased 8”x 8” baking dish.
Baked ziti mixed in a bowl.
Ziti mixture loaded in a baking dish.
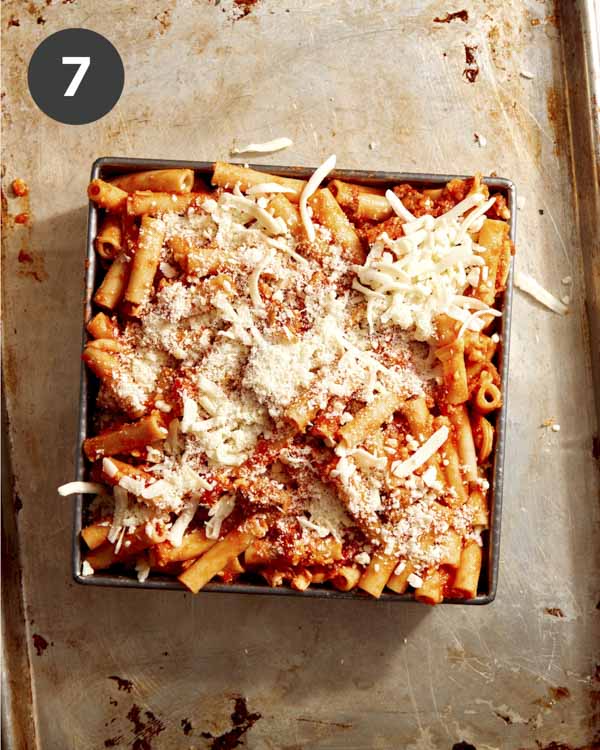
  1. Top ziti with remaining mozzarella and Parmesan.
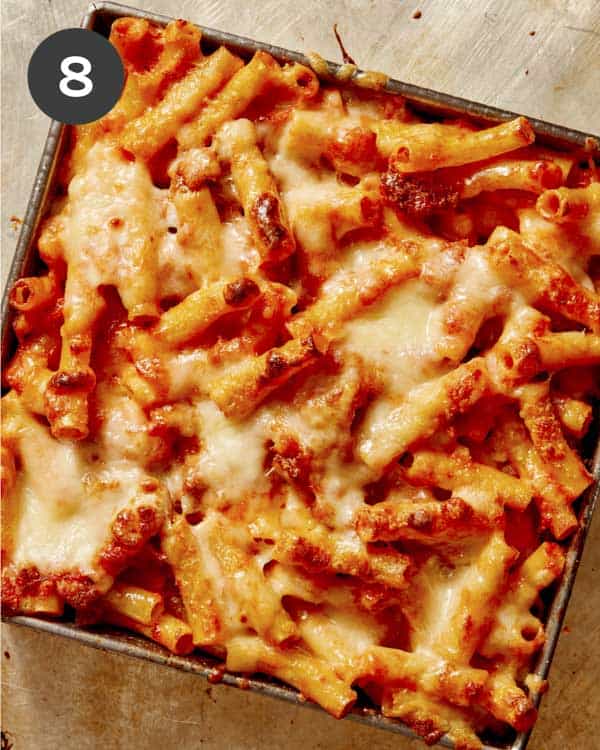
  2. Bake for 20 to 25 minutes. Transfer to broiler for 1 or 2 minutes until top has browned and is bubbling. Allow ziti to cool for 5 to 7 minutes, top with fresh basil leaves and serve.
Baked ziti in a baking dish topped with some cheese.
Baked ziti baked in a baking dish.

Make Ahead and Freezing Instructions

Make Ahead

Prepare the recipe as directed, until it’s time to place it in the oven. Tightly wrap the ziti in foil and place it in the refrigerator for up to three days.

When ready to serve bake the ziti, with the foil, for 15 minutes. Remove foil and continue to bake for an additional 15 minutes, or until completely heated through.

Freezing

Prepare the recipe as directed, until it’s time to place it in the oven. Tightly wrap the ziti in foil and place it in the freezer for up to three months.

When ready to serve place frozen ziti directly into a hot oven, with foil, for 45 minutes. Remove foil and continue to bake for an additional 15 minutes, or until completely heated through.

Baked ziti in a baking dish.

What to Serve with Baked Ziti

Baked Ziti is a great stand alone dish, but if you want something to sop up any extra sauce or you’re looking to add some vegetables/greens to the meal, our favorite options are below!

Variations

  • The Italian pork sausage can be swapped out for turkey sausage or a plant-based alternative.
  • Sautéed mushrooms can also be swapped into for the sausage for the vegetarian friendly option.
  • Sautéed spinach, kale and blanched broccoli florets can be added to the mixture to get more vegetables into the dish (just add a little more sauce to the mixture to ensure the dish doesn’t end up dry out of the oven.
  • Try stirring a small amount of cream into the sauce before combining with the other ingredients for a richer sauce.
Close up on a baking dish full of baked ziti.

More Delicious Baked Pasta Recipes You Will Love

Baked ziti on a plate with a fork on it.
Close up on baked ziti with a spoon in it.
Print

Baked Ziti

Baked Ziti – our delicious baked pasta casserole that is so cozy and comforting and incredibly easy to make! You can prep and freeze it ahead of time for worry free weeknight dinners!
Course dinner
Cuisine American, Italian
Prep Time 10 minutes
Cook Time 30 minutes
Total Time 40 minutes
Servings 8
Calories 389kcal

Equipment

  • casserole dish

Ingredients

  • 8 ounces ziti pasta
  • 1 tbsp extra virgin olive oil
  • 3 sweet or spicy Italian sausages casings removed
  • 2 cups marinara sauce homemade or store bought
  • 2 cups shredded mozzarella cheese divided
  • 1/2 cup parmesan grated
  • salt and pepper to taste
  • basil leaves garnish

Instructions

  • Preheat oven to 350°F.
  • Fill a large pot with water and bring to a boil. Add a small handful of salt and pasta to water and stir. Boil pasta for 7 to 10 minutes, stirring occasionally, or until pasta is al dente. Drain, toss with a teaspoon of oil, pour into a large mixing bowl.
  • Pour remaining olive oil into a large sauté pan and place over medium- high heat. Add sausage and break apart with a wooden spoon. Cook sausage for about 5 minutes or until evenly browned. Drain and add to pasta.
  • Add marinara, 1 1/2 cups mozzarella and 1/4 cup parmesan and gently fold together until fully incorporated. Adjust seasonings.
  • Pour mixture into a lightly greased 8”x 8” baking dish and top with remaining mozzarella and parmesan. Bake for 20 to 25 minutes. Transfer to a broiler and broil for 1 to 2 minutes until browned and bubbling.
  • Allow ziti to cool for 5 to 7 minutes before topping with basil leaves and serving.

Video

Notes

Make Ahead: Prepare the recipe as directed, until it’s time to place it in the oven. Tightly wrap the ziti in foil and place it in the refrigerator for up to three days. When ready to serve bake the ziti, with the foil, for 15 minutes. Remove foil and continue to bake for an additional 15 minutes, or until completely heated through.
Freeze Ahead: Make recipe through step #6. Place baking dish in freezer until completely frozen. Tightly cover with foil or plastic wrap and store in freezer until ready to use. When ready to use, preheat oven to 350˚F. Place covered, frozen ziti directly into oven and bake for 45 minutes. Uncover and continue baking for an additional 15 minutes or until completely heated through and cheese on top has melted and browned. Serve.

Nutrition

Calories: 389kcal | Carbohydrates: 26g | Protein: 19g | Fat: 23g | Saturated Fat: 10g | Polyunsaturated Fat: 2g | Monounsaturated Fat: 10g | Cholesterol: 58mg | Sodium: 1311mg | Potassium: 379mg | Fiber: 2g | Sugar: 3g | Vitamin A: 503IU | Vitamin C: 5mg | Calcium: 238mg | Iron: 2mg

The post Baked Ziti appeared first on Spoon Fork Bacon.

Easy Chicken Pot Pie

We’ve transformed your favorite special occasion comfort meal into a quick and simple dinner for two that can be made any night of the week! Our easy chicken pot pie recipe uses puff pastry instead of a traditional pie crust. It’s just as flaky and decadent but without all the hassle of chilling and rolling. By cooking your chicken ahead of time, you’ll spend just 10 minutes prepping your vegetables and 30 minutes cooking, which…

Read More

The post Easy Chicken Pot Pie appeared first on Spoon Fork Bacon.

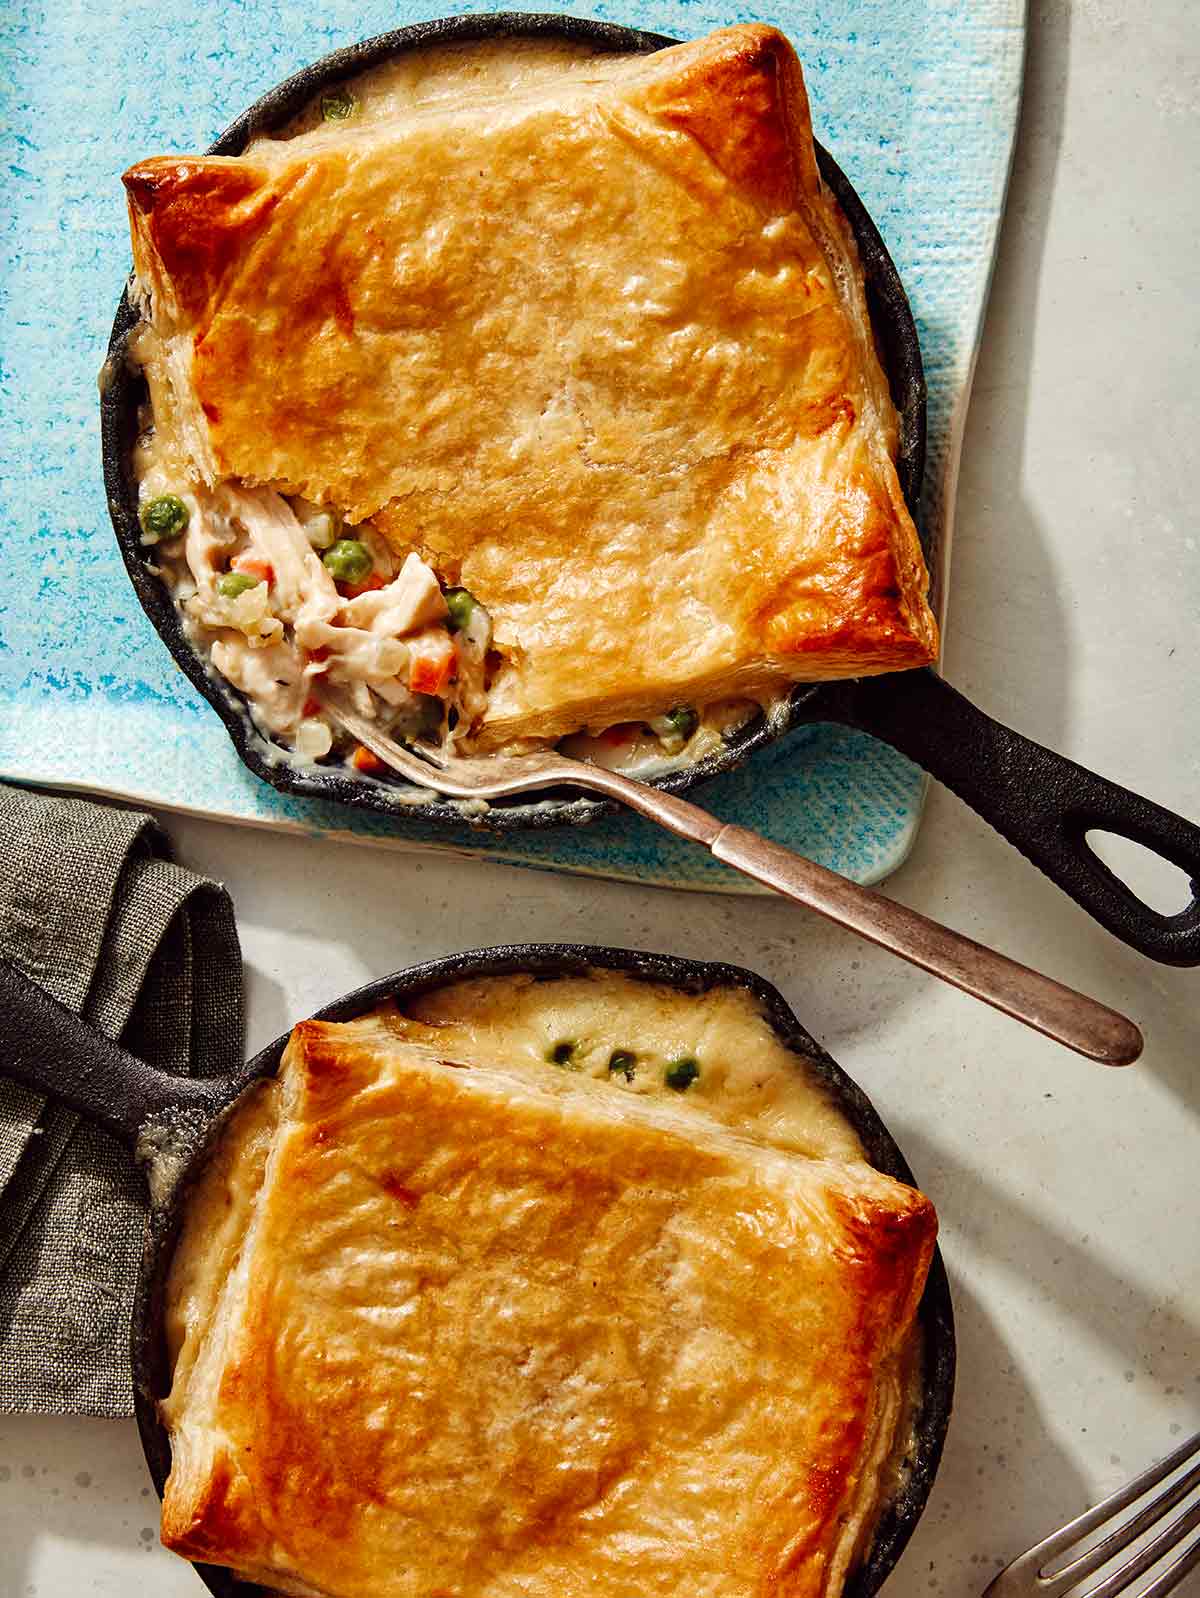
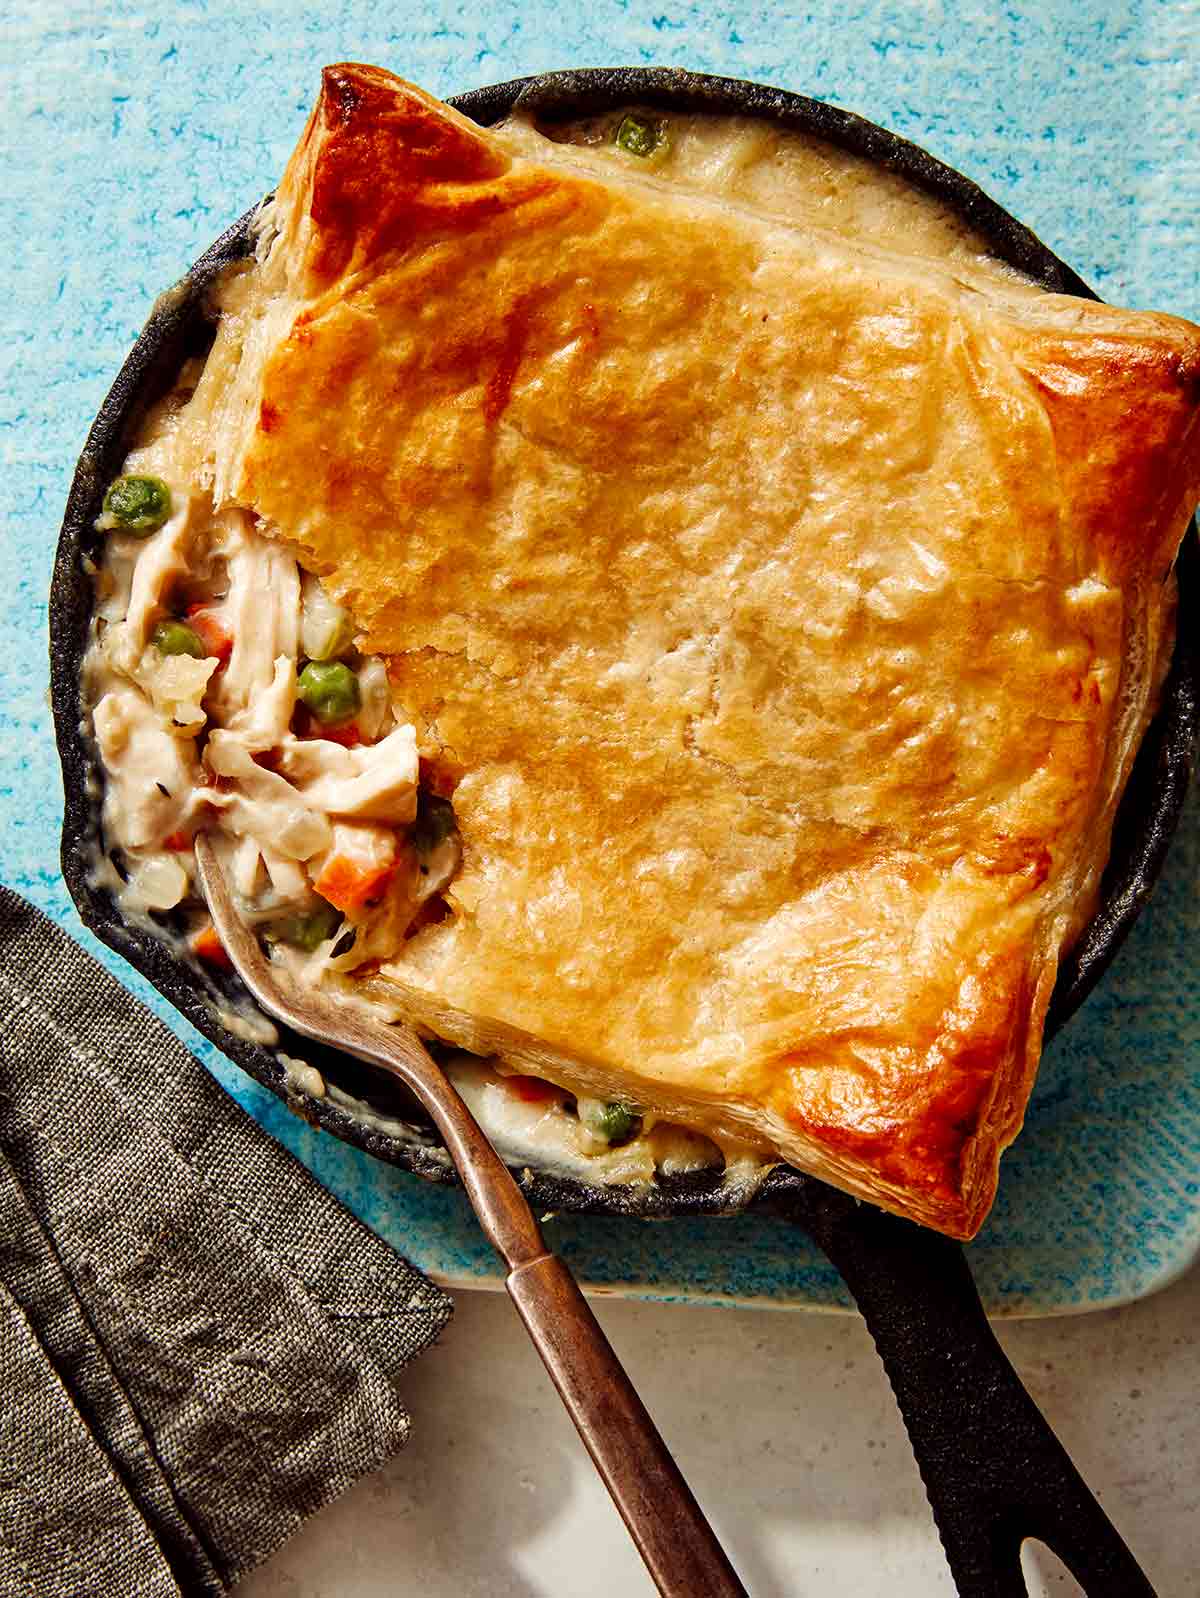
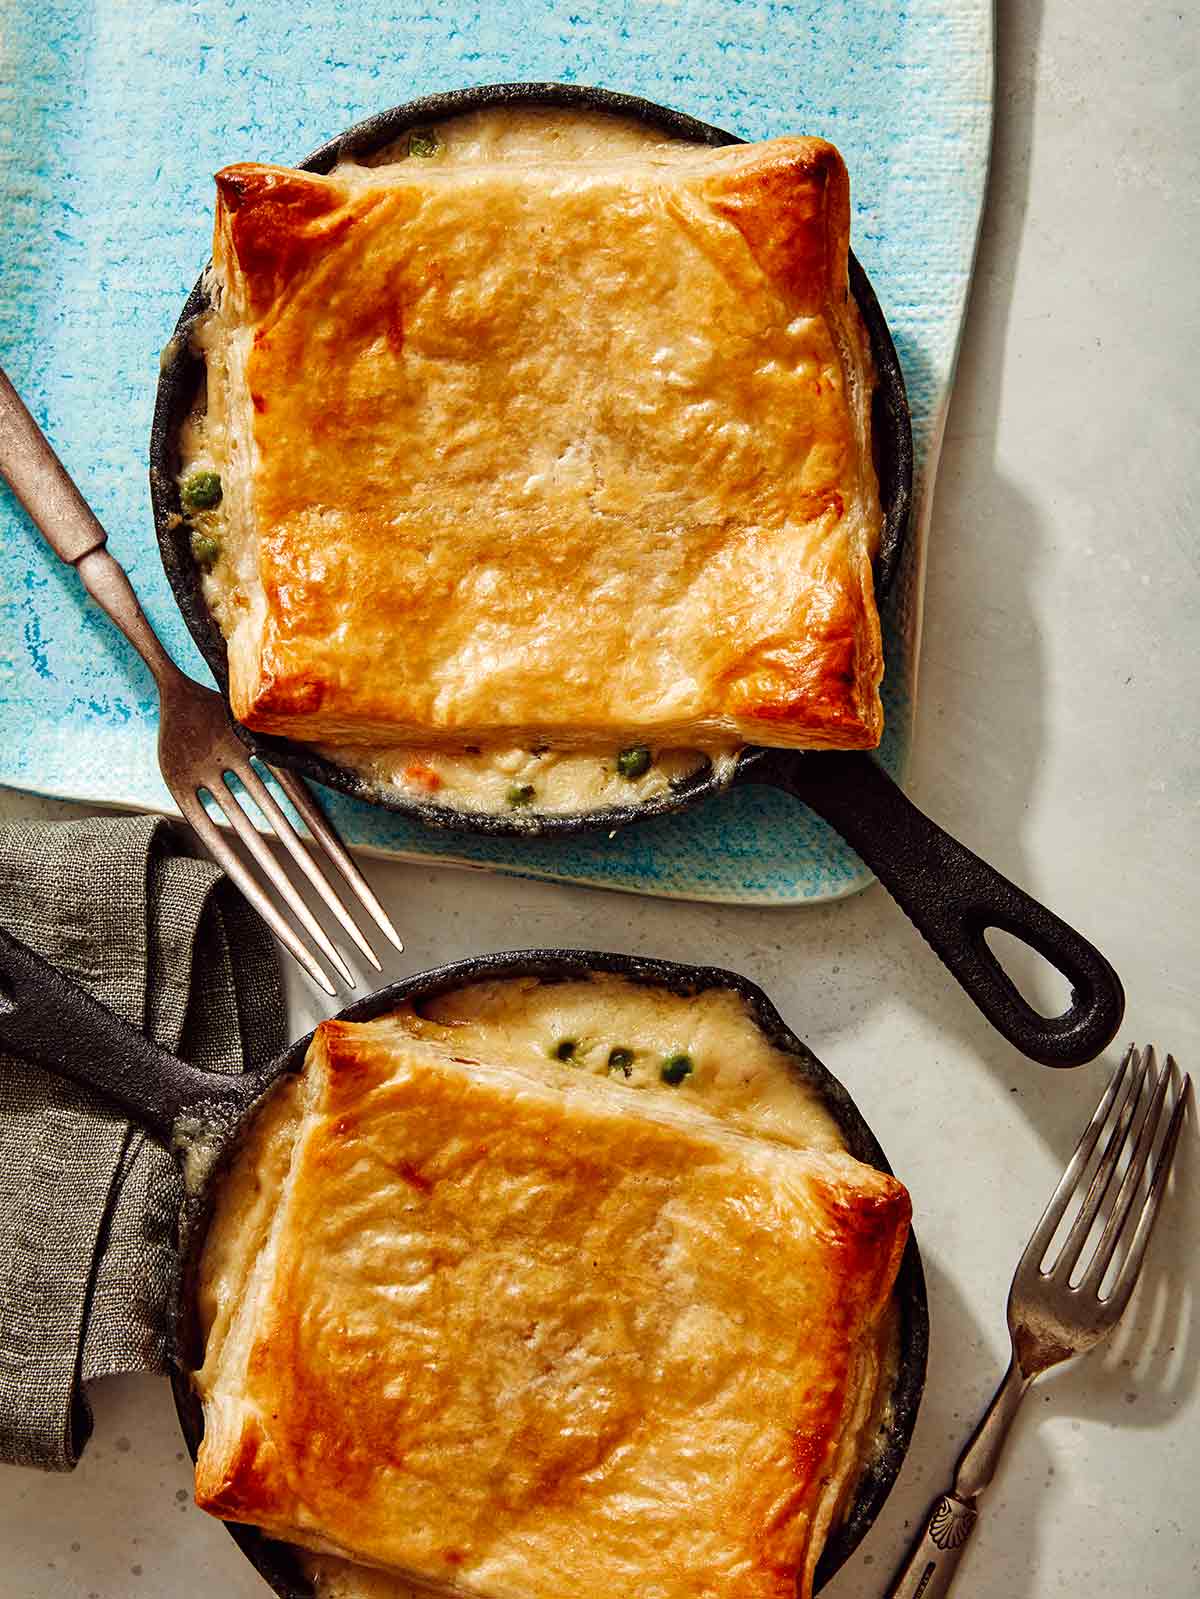
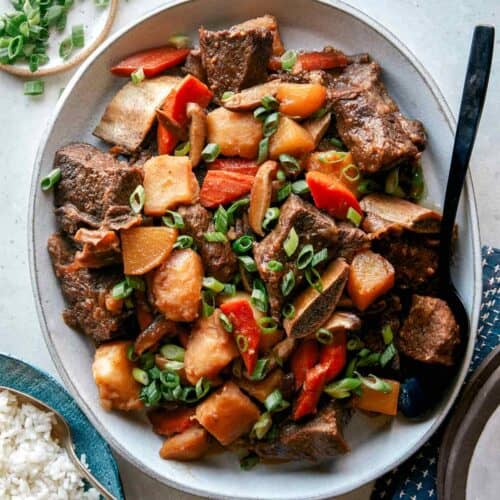
Easy chicken pot pie recipe made in a skillet with a fork in it.

We’ve transformed your favorite special occasion comfort meal into a quick and simple dinner for two that can be made any night of the week! Our easy chicken pot pie recipe uses puff pastry instead of a traditional pie crust. It’s just as flaky and decadent but without all the hassle of chilling and rolling.

By cooking your chicken ahead of time, you’ll spend just 10 minutes prepping your vegetables and 30 minutes cooking, which makes this perfect for a chilly weeknight dinner for two. Instead of using a pie pan, we’re using two 6-inch cast iron skillets for two individual pot pies. Serving each meal in its own skillet is such a fun way to serve this dish – just like our creamy kale and turkey skillet lasagna and individual apple crisps! Either make both for you and a plus one for dinner, or leave off the puff pastry until you’re ready to cook the second one, and have freshly baked chicken pot pie two nights this week!

How to Make an Easy Chicken Pot Pie

Ingredients

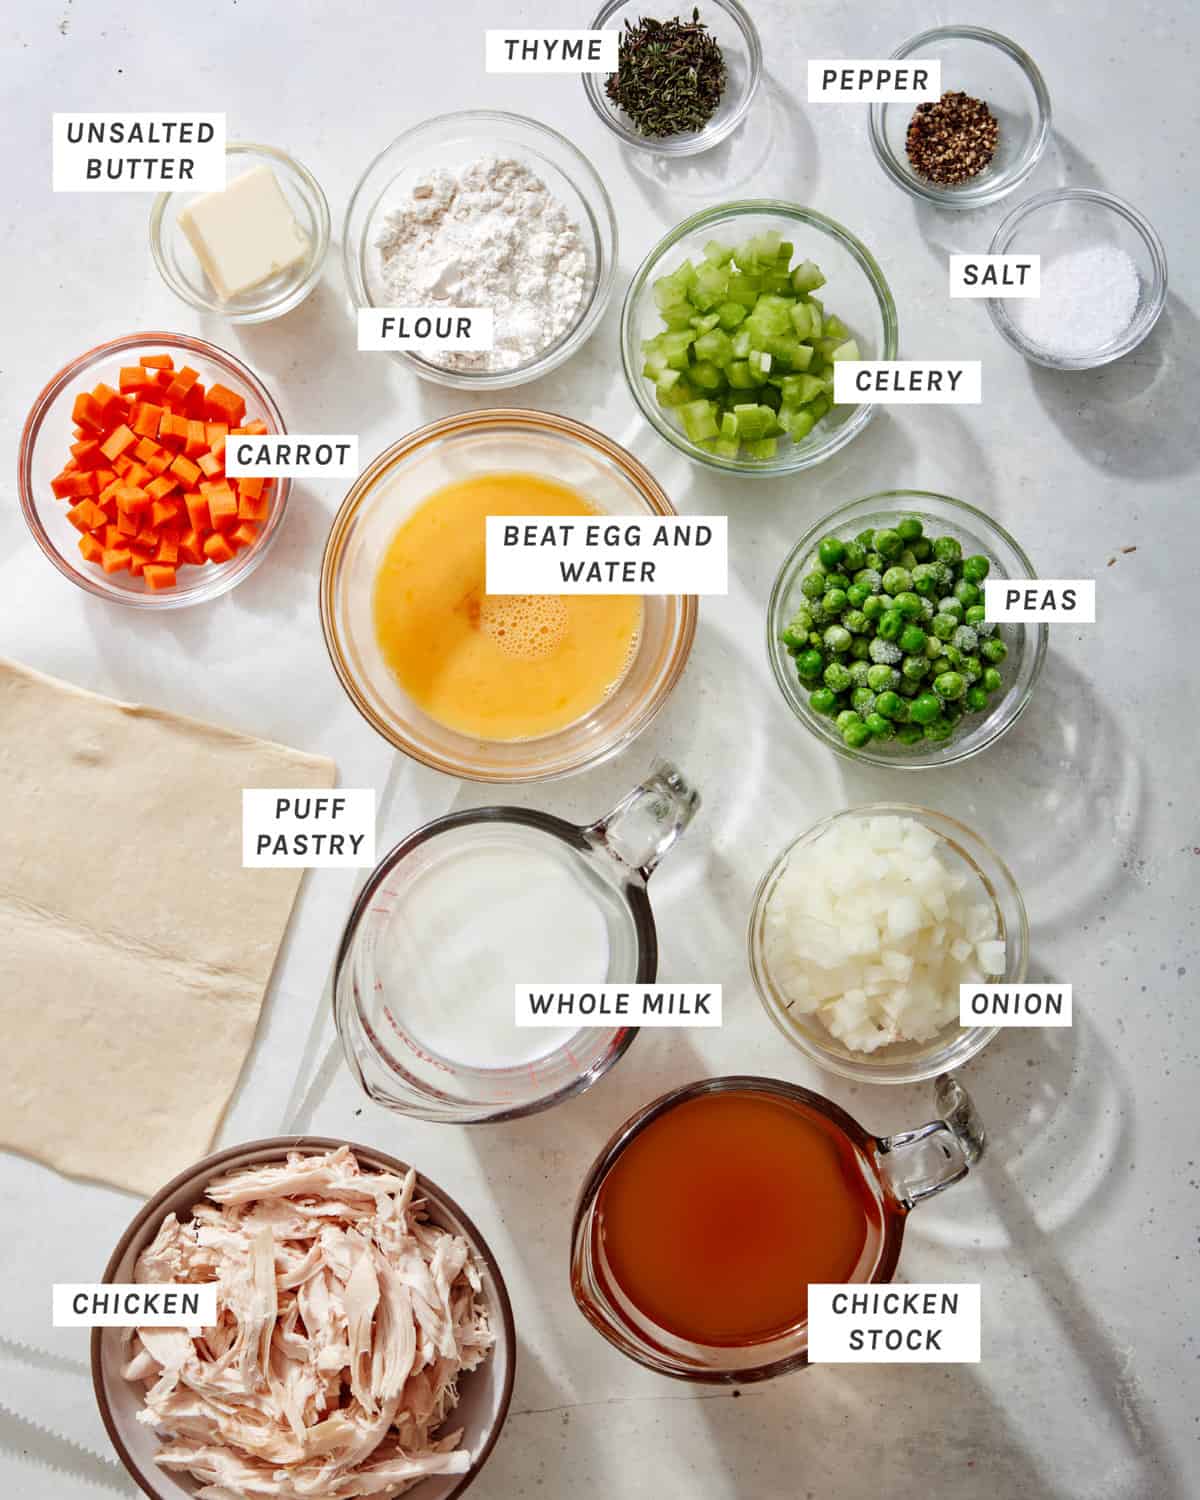
Ingredients for chicken pot pie in a skillet.

Process

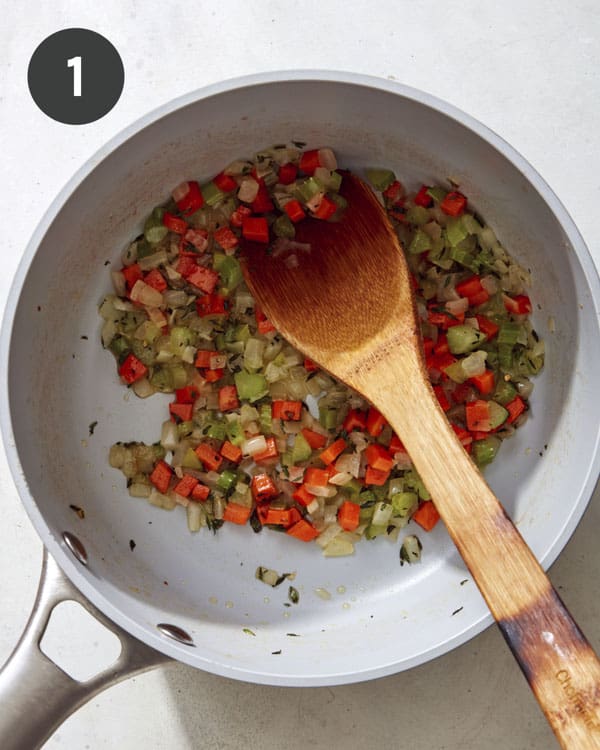
  1. Preheat oven to 400˚F. Melt butter in a medium saucepan over medium-high heat. Add onions, carrot and celery, and sauté for 3 to 4 minutes. Add thyme and season with salt and pepper.
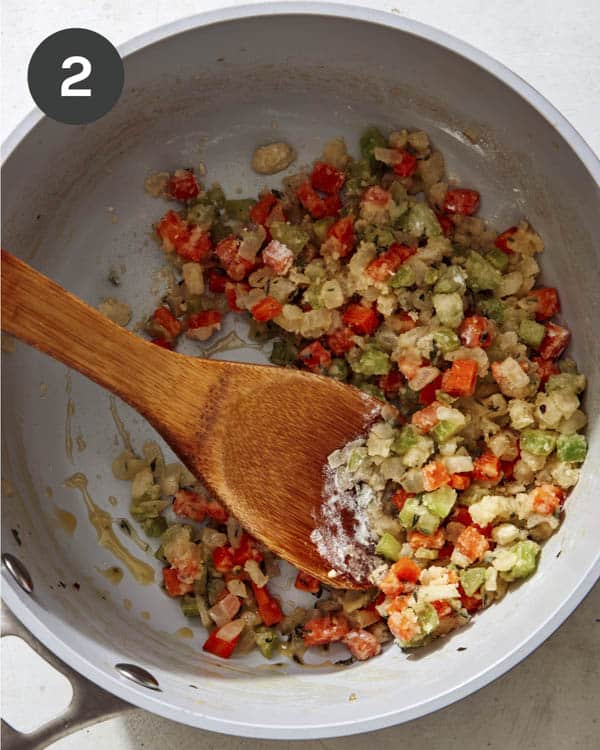
  2. Reduce heat to medium, stir in the flour, and cook for 2 minutes.
Carrots, celery, peas and onions cooking in a pot.
Vegetables for chicken pot pie cooking in a pot with flour.
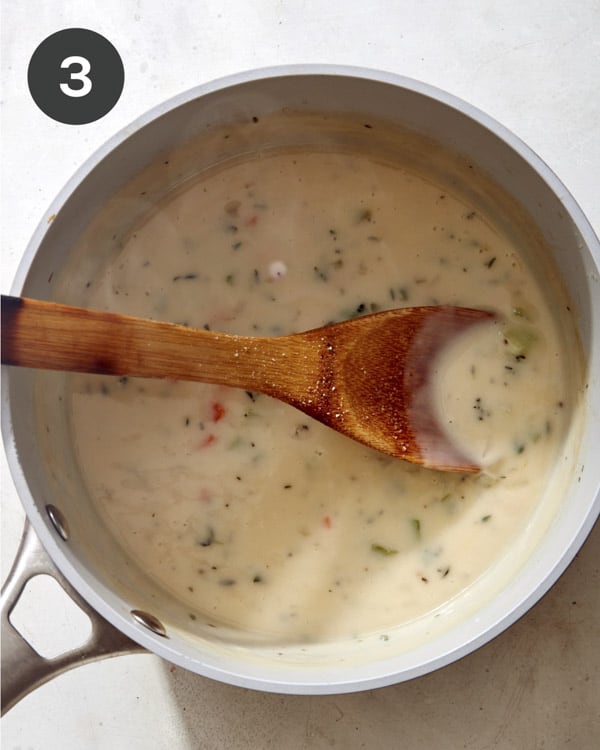
  1. Stir in stock, followed by milk, and continue to stir until the mixture thickens enough to coat the back of a wooden spoon, 3 to 4 minutes.
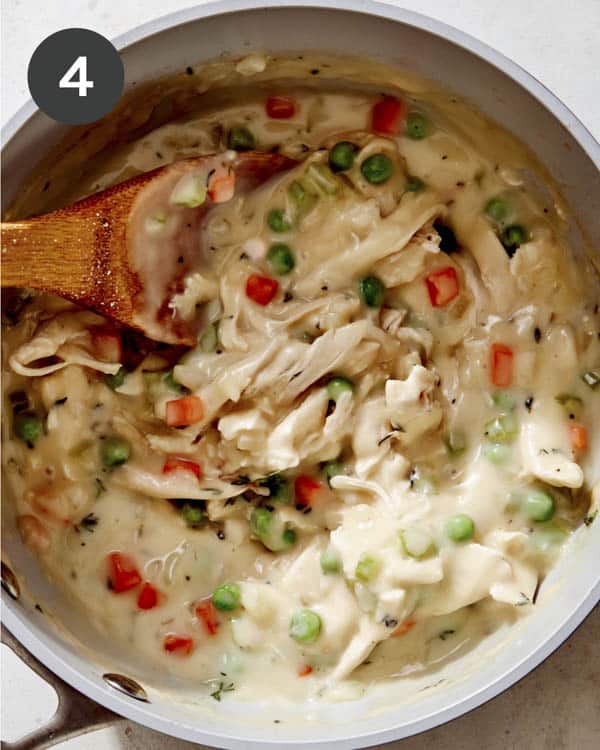
  2. Fold in chicken and peas. Adjust seasonings as needed.
Chicken pot pie filling in a skillet cooking.
Chicken pot pie filling in a pot simmering.
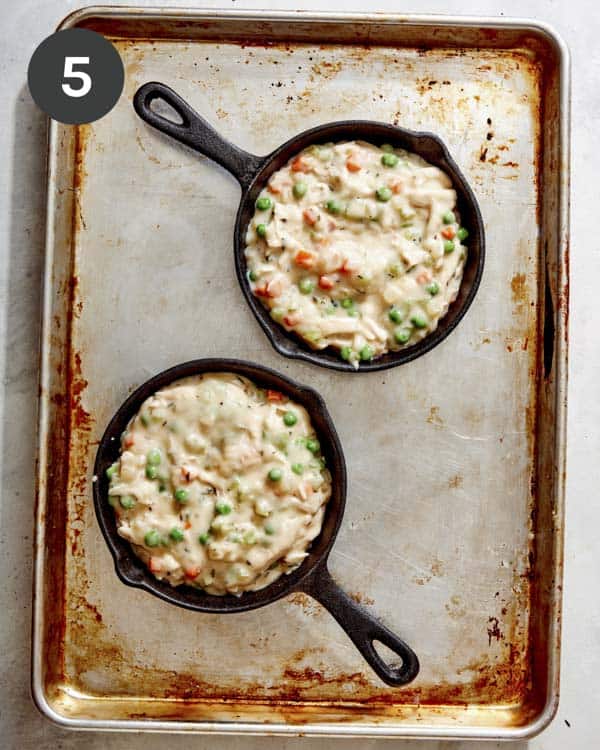
  1. Place each skillet onto a baking sheet. Scoop the chicken mixture into individual skillets.
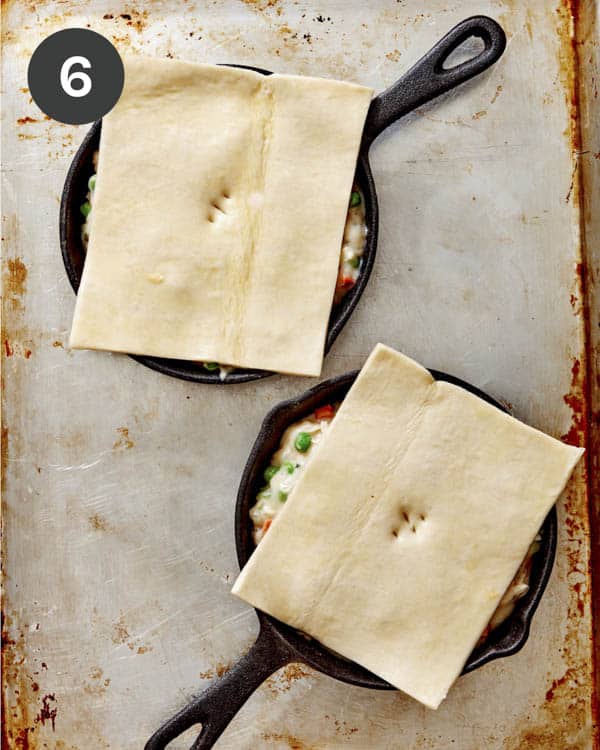
  2. Top each skillet with a square of puff pastry.
Chicken pot pie on a sheet pan in individual skillets.
Chicken pot pie with puff pastry on top about to go into the oven.
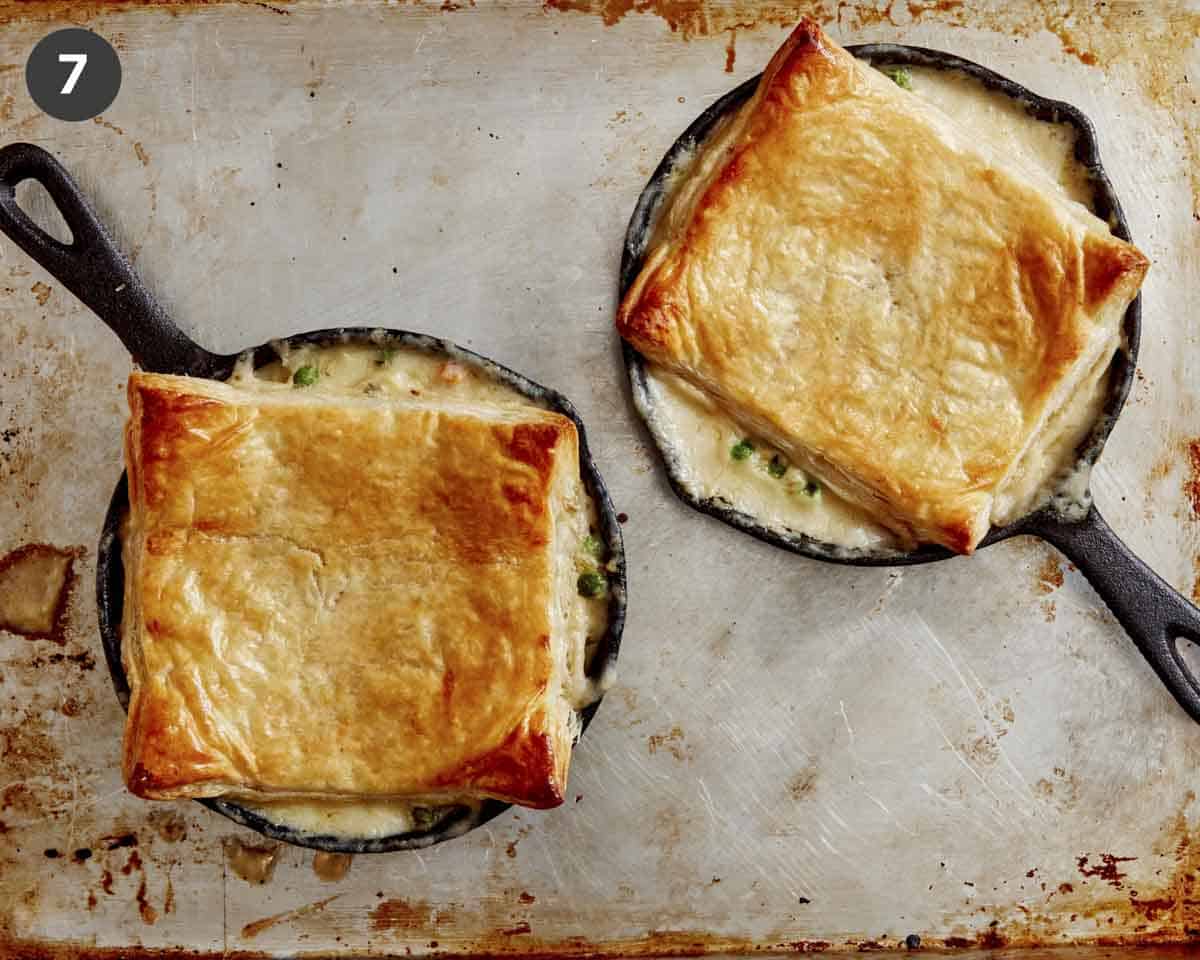
  1. Brush each square of puff pastry with egg wash. Bake for 15 to 20 minutes or until puff pastry has puffed and browned. Remove from oven, cool slightly, and serve.
Chicken pot pie freshly baked out of the oven.

Tips and Tricks for the BEST Chicken Pot Pie

  • To save time, you can pre-chop your carrots, onions, and celery and store them in an airtight container in the refrigerator for up to 3 days before making your chicken pot pie.
  • Be careful not to burn the flour when adding it to the vegetables, but cook long enough so that the flour is actually cooked. Stir frequently and wait for a slightly nutty aroma.
  • Add the stock into the pot slowly, stirring as you do to avoid clumps. Using a whisk can help all of the stock and flour incorporate smoothly into the flour and vegetable mixture.
  • You can use either cooked chicken breast or chicken thighs or, to save even more time, shredded and chopped rotisserie chicken!
Close up on a chicken pot pie in a skillet.

Variations

  • Use one 12-inch cast iron skillet if you don’t have two 6-inch skillets to use. Just layer the puff pastry sheets to fit.
  • Swap the tablespoon of fresh minced thyme for a teaspoon of dried thyme.
  • For a more aromatic effect, you can also add half a teaspoon of dried rosemary or sage.
  • For a gluten-free, easy chicken pot pie, use gluten-free all-purpose flour instead of regular when making the roux, and top your pot pies with a gluten-free puff pastry.
  • While this chicken pot pie has a creamy filling, you can make an even richer and creamier filling by swapping the whole milk with heavy cream.

Make Ahead, Storing and Freezing Instructions

Make Ahead

You can easily make this dish ahead of time and assemble and bake it when you’re ready to eat. Prepare the filling as directed, then let it cool and store in the refrigerator for up to two days. When you’re ready to make your pot pie, follow the assembly directions and bake!

Storing

To store leftovers, let the chicken pot pie cool, then cover and store in the refrigerator for 3-4 days. To reheat, preheat the oven to 350˚F and bake your pot pie for 15-20 minutes or until heated through. If the top begins to brown too much, cover it in foil.

Freshly baked chicken pot pies in skillets.

Freezing

You can easily prepare your pot pie ahead of time and freeze it to be cooked at a later date.

For a pot pie that you can remove from the freezer and bake: make the filling and let it fully cool. Add it to an oven and freezer-safe pan or pie dish. Top with puff pastry and then freeze it for 2-3 hours. Once the puff pastry has been somewhat frozen, wrap the dish in plastic wrap, then foil (pre-freezing the dish keeps the plastic from sticking to the puff pastry). Freeze for up to 3 months. To bake, remove from the freezer and remove the plastic wrap. Add an egg wash to the top of the puff pastry, then bake as directed. You may need to add an additional 15-20 minutes of baking time (and possibly cover the top in foil if it starts to brown to quickly).

More Delicious and Cozy Recipes You Will Love

Easy chicken pot pie recipe made in skillets.
Close up on a chicken pot pie in a skillet.
Print

Easy Chicken Pot Pies

This super easy chicken pot pie uses cooked chicken and puff pastry and cooks in individual cast iron skillets for a simple and tasty dinner for two!
Course dinner, Main Course
Cuisine American
Prep Time 10 minutes
Cook Time 30 minutes
Total Time 40 minutes
Servings 2
Calories 915kcal

Equipment

  • 2 6" cast iron skillets

Ingredients

Chicken Pot Pie Filling

  • 2 tbsp unsalted butter
  • 1/3 cup diced yellow onion
  • 1/3 cup peeled and diced carrot
  • 1/3 cup diced celery
  • 1 tbsp minced thyme
  • 3 tbsp all purpose flour
  • 1 cup chicken stock
  • 1/3 cup whole milk
  • 1 1/2 cups cooked and shredded chicken
  • 1/2 cup frozen peas
  • salt and pepper to taste

pastry topping

  • 2 thawed puff pastry squares 6 inches each
  • 1 egg plus 1 tablespoon of water beaten together

Instructions

Filling:

  • Preheat oven to 400˚F. Melt butter in a medium saucepan over medium-high heat. Add onions, carrot and celery and sauté for 3 to 4 minutes. Add thyme and season with salt and pepper.
  • Reduce heat to medium and stir in flour and cook for 2 minutes.
  • Stir in stock, followed by milk and continue to stir until mixture thickens enough to coat the back of a wooden spoon, 3 to 4 minutes.
  • Fold in chicken and peas. Adjust seasonings as needed.

Assembly

  • Place each skillet onto a baking sheet. Scoop chicken  mixture into individual skillets
  • Top each skillet with a square of puff pastry.
  • Brush each square of puff pastry with egg wash.
  • Bake for 15 to 20 minutes or until puff pastry has puffed and browned. Remove from oven, cool slightly and serve.

Notes

Tips and Tricks 
  • To save time, you can pre-chop your carrots, onions, and celery and store them in an airtight container in the refrigerator for up to 3 days before making your chicken pot pie.
  • Be careful not to burn the flour when adding it to the vegetables, but cook long enough so that the flour is actually cooked. Stir frequently and wait for a slightly nutty aroma.
  • Add the stock into the pot slowly, stirring as you do to avoid clumps. Using a whisk can help all of the stock and flour incorporate smoothly into the flour and vegetable mixture.
  • You can use either cooked chicken breast or chicken thighs or, to save even more time, shredded and chopped rotisserie chicken!
Make Ahead
You can easily make this dish ahead of time and assemble and bake it when you’re ready to eat. Prepare the filling as directed, then let it cool and store in the refrigerator for up to two days. When you’re ready to make your pot pie, follow the assembly directions and bake!
Storing
To store leftovers, let the chicken pot pie cool, then cover and store in the refrigerator for 3-4 days. To reheat, preheat the oven to 350˚F and bake your pot pie for 15-20 minutes or until heated through. If the top begins to brown too much, cover it in foil.
Freezing
You can easily prepare your pot pie ahead of time and freeze it to be cooked at a later date.
For a pot pie that you can remove from the freezer and bake: make the filling and let it fully cool. Add it to an oven and freezer-safe pan or pie dish. Top with puff pastry and then freeze it for 2-3 hours. Once the puff pastry has been somewhat frozen, wrap the dish in plastic wrap, then foil (pre-freezing the dish keeps the plastic from sticking to the puff pastry). Freeze for up to 3 months. To bake, remove from the freezer and remove the plastic wrap. Add an egg wash to the top of the puff pastry, then bake as directed. You may need to add an additional 15-20 minutes of baking time (and possibly cover the top in foil if it starts to brown to quickly).

Nutrition

Calories: 915kcal | Carbohydrates: 62g | Protein: 43g | Fat: 55g | Saturated Fat: 19g | Polyunsaturated Fat: 7g | Monounsaturated Fat: 25g | Trans Fat: 0.5g | Cholesterol: 196mg | Sodium: 2150mg | Potassium: 762mg | Fiber: 5g | Sugar: 7g | Vitamin A: 4662IU | Vitamin C: 24mg | Calcium: 137mg | Iron: 6mg

The post Easy Chicken Pot Pie appeared first on Spoon Fork Bacon.
Easy Chicken Pot Pie

We’ve transformed your favorite special occasion comfort meal into a quick and simple dinner for two that can be made any night of the week! Our easy chicken pot pie recipe uses puff pastry instead of a traditional pie crust. It’s just as flaky and decadent but without all the hassle of chilling and rolling. By cooking your chicken ahead of time, you’ll spend just 10 minutes prepping your vegetables and 30 minutes cooking, which…

Read More

The post Easy Chicken Pot Pie appeared first on Spoon Fork Bacon.
Easy chicken pot pie recipe made in a skillet with a fork in it.

We’ve transformed your favorite special occasion comfort meal into a quick and simple dinner for two that can be made any night of the week! Our easy chicken pot pie recipe uses puff pastry instead of a traditional pie crust. It’s just as flaky and decadent but without all the hassle of chilling and rolling.

By cooking your chicken ahead of time, you’ll spend just 10 minutes prepping your vegetables and 30 minutes cooking, which makes this perfect for a chilly weeknight dinner for two. Instead of using a pie pan, we’re using two 6-inch cast iron skillets for two individual pot pies. Serving each meal in its own skillet is such a fun way to serve this dish – just like our creamy kale and turkey skillet lasagna and individual apple crisps! Either make both for you and a plus one for dinner, or leave off the puff pastry until you’re ready to cook the second one, and have freshly baked chicken pot pie two nights this week!

How to Make an Easy Chicken Pot Pie

Ingredients

Ingredients for chicken pot pie in a skillet.

Process

  1. Preheat oven to 400˚F. Melt butter in a medium saucepan over medium-high heat. Add onions, carrot and celery, and sauté for 3 to 4 minutes. Add thyme and season with salt and pepper.
  2. Reduce heat to medium, stir in the flour, and cook for 2 minutes.
Carrots, celery, peas and onions cooking in a pot.
Vegetables for chicken pot pie cooking in a pot with flour.
  1. Stir in stock, followed by milk, and continue to stir until the mixture thickens enough to coat the back of a wooden spoon, 3 to 4 minutes.
  2. Fold in chicken and peas. Adjust seasonings as needed.
Chicken pot pie filling in a skillet cooking.
Chicken pot pie filling in a pot simmering.
  1. Place each skillet onto a baking sheet. Scoop the chicken mixture into individual skillets.
  2. Top each skillet with a square of puff pastry.
Chicken pot pie on a sheet pan in individual skillets.
Chicken pot pie with puff pastry on top about to go into the oven.
  1. Brush each square of puff pastry with egg wash. Bake for 15 to 20 minutes or until puff pastry has puffed and browned. Remove from oven, cool slightly, and serve.
Chicken pot pie freshly baked out of the oven.

Tips and Tricks for the BEST Chicken Pot Pie

  • To save time, you can pre-chop your carrots, onions, and celery and store them in an airtight container in the refrigerator for up to 3 days before making your chicken pot pie.
  • Be careful not to burn the flour when adding it to the vegetables, but cook long enough so that the flour is actually cooked. Stir frequently and wait for a slightly nutty aroma.
  • Add the stock into the pot slowly, stirring as you do to avoid clumps. Using a whisk can help all of the stock and flour incorporate smoothly into the flour and vegetable mixture.
  • You can use either cooked chicken breast or chicken thighs or, to save even more time, shredded and chopped rotisserie chicken!
Close up on a chicken pot pie in a skillet.

Variations

  • Use one 12-inch cast iron skillet if you don’t have two 6-inch skillets to use. Just layer the puff pastry sheets to fit.
  • Swap the tablespoon of fresh minced thyme for a teaspoon of dried thyme.
  • For a more aromatic effect, you can also add half a teaspoon of dried rosemary or sage.
  • For a gluten-free, easy chicken pot pie, use gluten-free all-purpose flour instead of regular when making the roux, and top your pot pies with a gluten-free puff pastry.
  • While this chicken pot pie has a creamy filling, you can make an even richer and creamier filling by swapping the whole milk with heavy cream.
Freshly baked chicken pot pies in skillets.

Make Ahead, Storing and Freezing Instructions

Make Ahead

You can easily make this dish ahead of time and assemble and bake it when you’re ready to eat. Prepare the filling as directed, then let it cool and store in the refrigerator for up to two days. When you’re ready to make your pot pie, follow the assembly directions and bake!

Storing

To store leftovers, let the chicken pot pie cool, then cover and store in the refrigerator for 3-4 days. To reheat, preheat the oven to 350˚F and bake your pot pie for 15-20 minutes or until heated through. If the top begins to brown too much, cover it in foil.

Freezing

You can easily prepare your pot pie ahead of time and freeze it to be cooked at a later date.

For a pot pie that you can remove from the freezer and bake: make the filling and let it fully cool. Add it to an oven and freezer-safe pan or pie dish. Top with puff pastry and then freeze it for 2-3 hours. Once the puff pastry has been somewhat frozen, wrap the dish in plastic wrap, then foil (pre-freezing the dish keeps the plastic from sticking to the puff pastry). Freeze for up to 3 months. To bake, remove from the freezer and remove the plastic wrap. Add an egg wash to the top of the puff pastry, then bake as directed. You may need to add an additional 15-20 minutes of baking time (and possibly cover the top in foil if it starts to brown to quickly).

Easy chicken pot pie recipe made in skillets.

More Delicious and Cozy Recipes You Will Love

Close up on a chicken pot pie in a skillet.
Print

Easy Chicken Pot Pies

This super easy chicken pot pie uses cooked chicken and puff pastry and cooks in individual cast iron skillets for a simple and tasty dinner for two!
Course dinner, Main Course
Cuisine American
Prep Time 10 minutes
Cook Time 30 minutes
Total Time 40 minutes
Servings 2
Calories 915kcal

Equipment

  • 2 6" cast iron skillets

Ingredients

Chicken Pot Pie Filling

  • 2 tbsp unsalted butter
  • 1/3 cup diced yellow onion
  • 1/3 cup peeled and diced carrot
  • 1/3 cup diced celery
  • 1 tbsp minced thyme
  • 3 tbsp all purpose flour
  • 1 cup chicken stock
  • 1/3 cup whole milk
  • 1 1/2 cups cooked and shredded chicken
  • 1/2 cup frozen peas
  • salt and pepper to taste

pastry topping

  • 2 thawed puff pastry squares 6 inches each
  • 1 egg plus 1 tablespoon of water beaten together

Instructions

Filling:

  • Preheat oven to 400˚F. Melt butter in a medium saucepan over medium-high heat. Add onions, carrot and celery and sauté for 3 to 4 minutes. Add thyme and season with salt and pepper.
  • Reduce heat to medium and stir in flour and cook for 2 minutes.
  • Stir in stock, followed by milk and continue to stir until mixture thickens enough to coat the back of a wooden spoon, 3 to 4 minutes.
  • Fold in chicken and peas. Adjust seasonings as needed.

Assembly

  • Place each skillet onto a baking sheet. Scoop chicken  mixture into individual skillets
  • Top each skillet with a square of puff pastry.
  • Brush each square of puff pastry with egg wash.
  • Bake for 15 to 20 minutes or until puff pastry has puffed and browned. Remove from oven, cool slightly and serve.

Notes

Tips and Tricks 
  • To save time, you can pre-chop your carrots, onions, and celery and store them in an airtight container in the refrigerator for up to 3 days before making your chicken pot pie.
  • Be careful not to burn the flour when adding it to the vegetables, but cook long enough so that the flour is actually cooked. Stir frequently and wait for a slightly nutty aroma.
  • Add the stock into the pot slowly, stirring as you do to avoid clumps. Using a whisk can help all of the stock and flour incorporate smoothly into the flour and vegetable mixture.
  • You can use either cooked chicken breast or chicken thighs or, to save even more time, shredded and chopped rotisserie chicken!
Make Ahead
You can easily make this dish ahead of time and assemble and bake it when you’re ready to eat. Prepare the filling as directed, then let it cool and store in the refrigerator for up to two days. When you’re ready to make your pot pie, follow the assembly directions and bake!
Storing
To store leftovers, let the chicken pot pie cool, then cover and store in the refrigerator for 3-4 days. To reheat, preheat the oven to 350˚F and bake your pot pie for 15-20 minutes or until heated through. If the top begins to brown too much, cover it in foil.
Freezing
You can easily prepare your pot pie ahead of time and freeze it to be cooked at a later date.
For a pot pie that you can remove from the freezer and bake: make the filling and let it fully cool. Add it to an oven and freezer-safe pan or pie dish. Top with puff pastry and then freeze it for 2-3 hours. Once the puff pastry has been somewhat frozen, wrap the dish in plastic wrap, then foil (pre-freezing the dish keeps the plastic from sticking to the puff pastry). Freeze for up to 3 months. To bake, remove from the freezer and remove the plastic wrap. Add an egg wash to the top of the puff pastry, then bake as directed. You may need to add an additional 15-20 minutes of baking time (and possibly cover the top in foil if it starts to brown to quickly).

Nutrition

Calories: 915kcal | Carbohydrates: 62g | Protein: 43g | Fat: 55g | Saturated Fat: 19g | Polyunsaturated Fat: 7g | Monounsaturated Fat: 25g | Trans Fat: 0.5g | Cholesterol: 196mg | Sodium: 2150mg | Potassium: 762mg | Fiber: 5g | Sugar: 7g | Vitamin A: 4662IU | Vitamin C: 24mg | Calcium: 137mg | Iron: 6mg

The post Easy Chicken Pot Pie appeared first on Spoon Fork Bacon.
Honey Garlic Chicken Skewers (Air Fryer Recipe)

If you typically reserve kabobs or skewers for summertime grilling, you’ll love our air fryer chicken skewer recipe! Pieces of juicy chicken are infused with honey garlic marinade, air-fried to perfection, and then coated with a sweet and sticky glaze just before serving. All served on a skewer for easy presentation and eating! Whether you serve them as an appetizer or overtop of rice for an easy dinner, you’ll love having this chicken skewer recipe…

Read More

The post Honey Garlic Chicken Skewers (Air Fryer Recipe) appeared first on Spoon Fork Bacon.
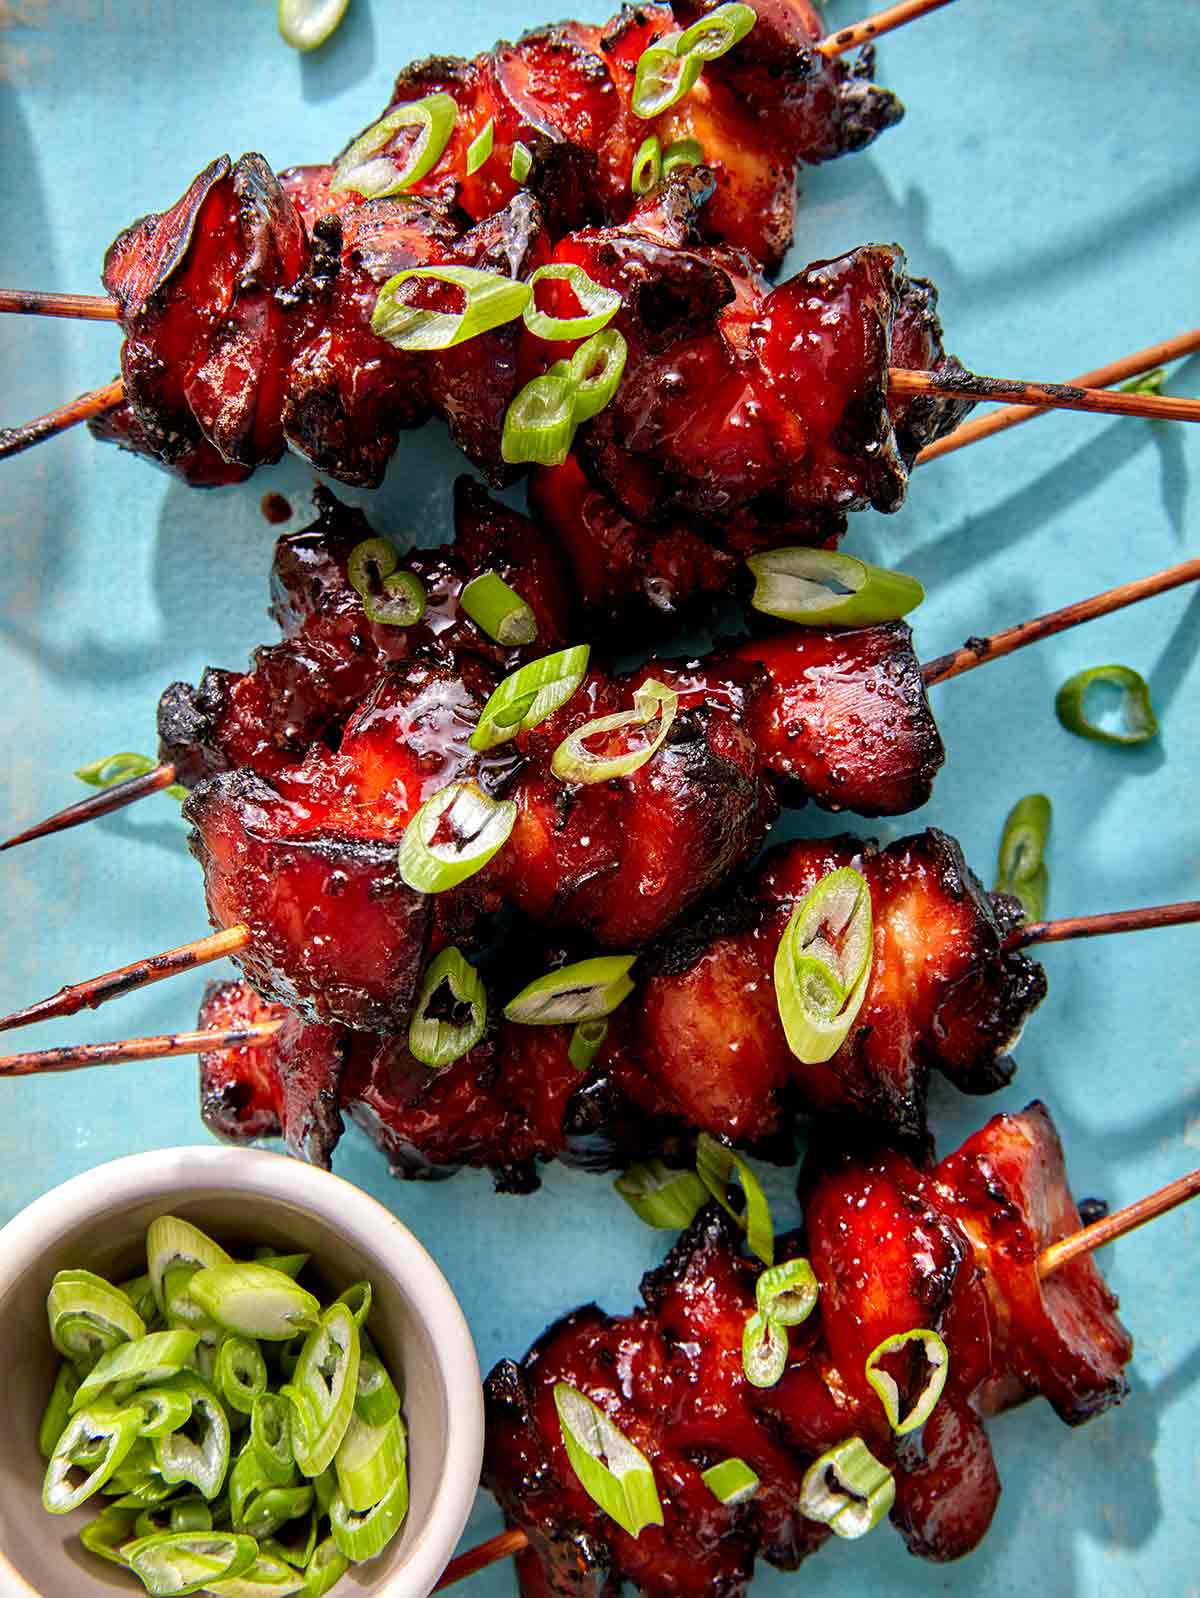
Air fryer chicken skewers on a platter with green onions on top.

If you typically reserve kabobs or skewers for summertime grilling, you’ll love our air fryer chicken skewer recipe! Pieces of juicy chicken are infused with honey garlic marinade, air-fried to perfection, and then coated with a sweet and sticky glaze just before serving. All served on a skewer for easy presentation and eating!

Whether you serve them as an appetizer or overtop of rice for an easy dinner, you’ll love having this chicken skewer recipe in your back pocket.

Like our lamb kabobs, these chicken skewers can be served with rice, over mashed potatoes, with romaine leaves, or on their own as an appetizer.

How to Make Honey Garlic Air Fryer Chicken Skewers

Ingredients

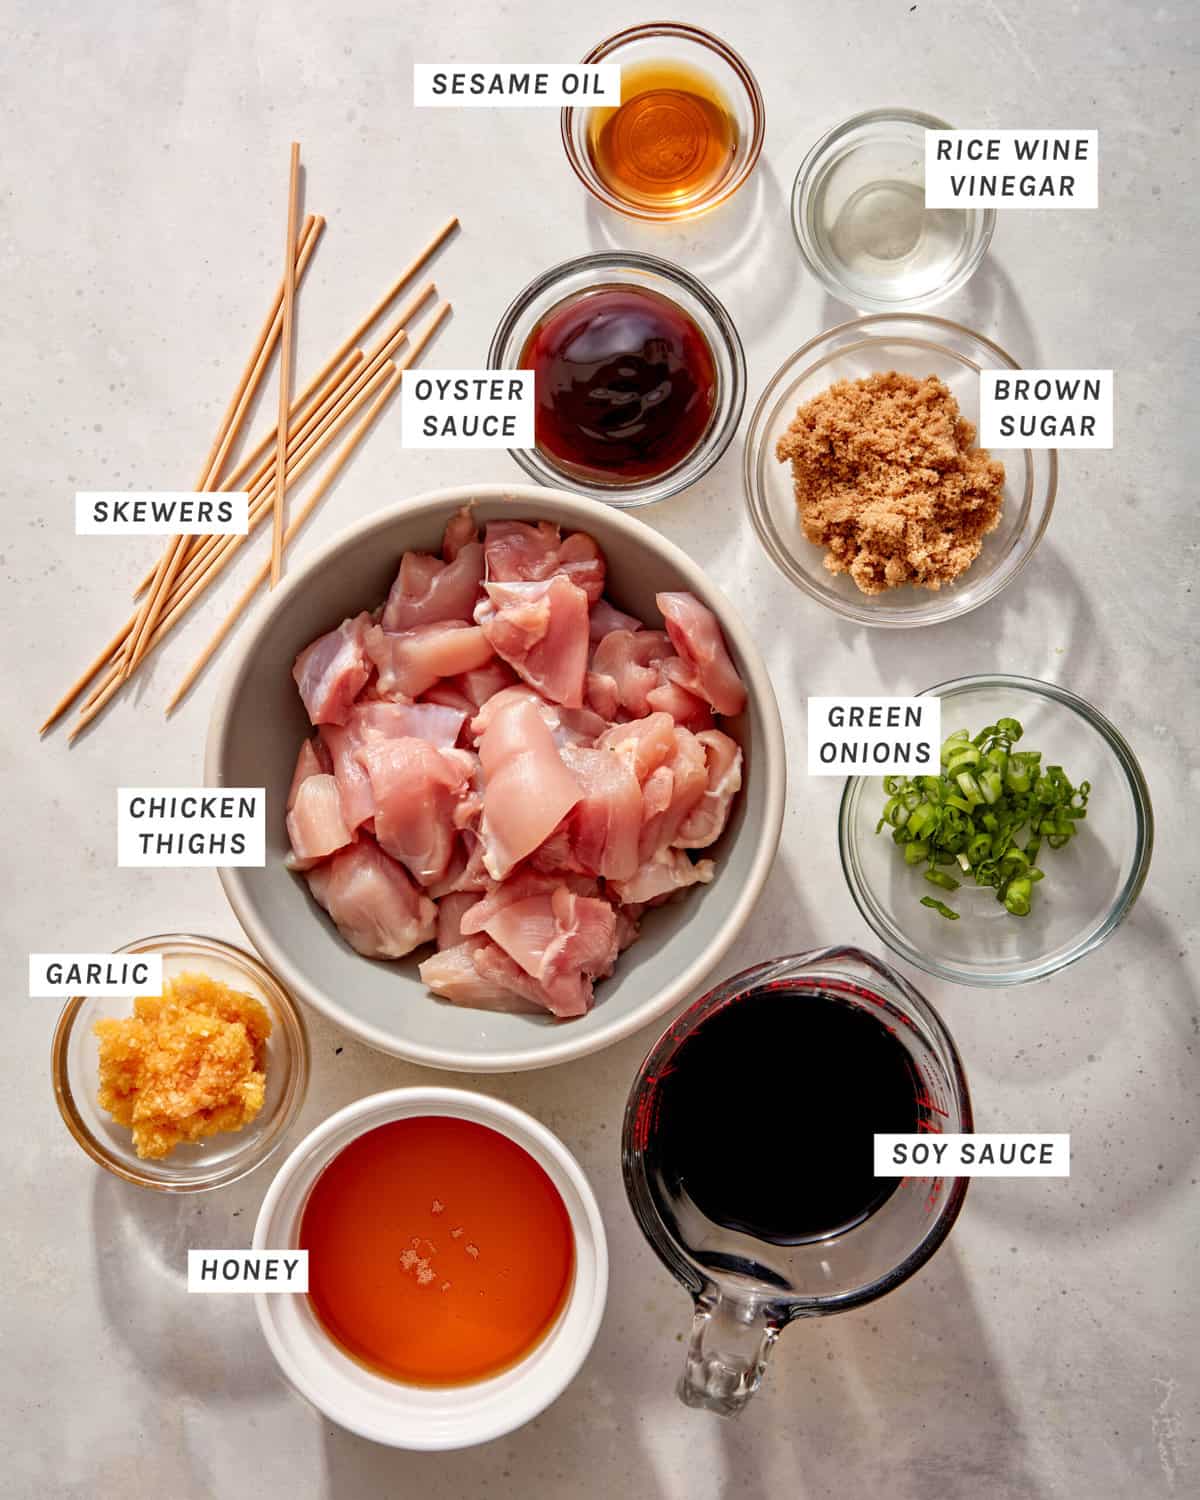
Ingredients to make garlic honey chicken skewers in a kitchen.

Process

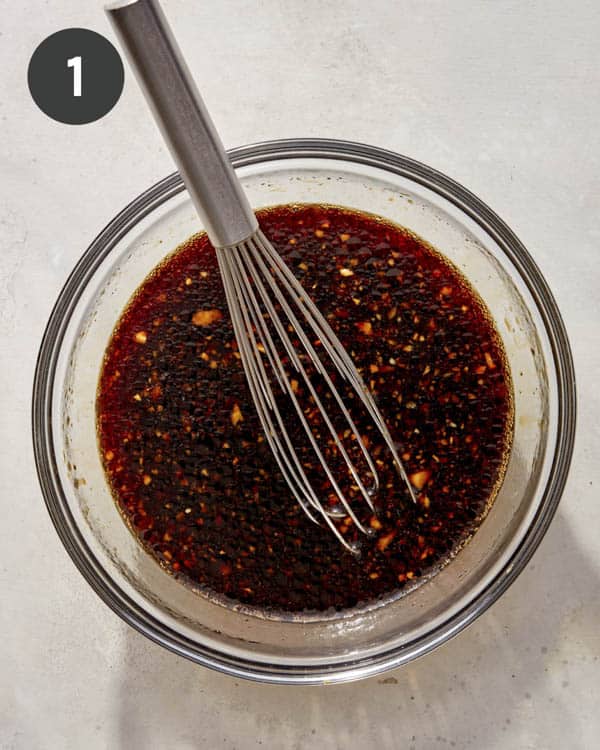
  1. In a mixing bowl, combine all sauce ingredients and whisk them together.
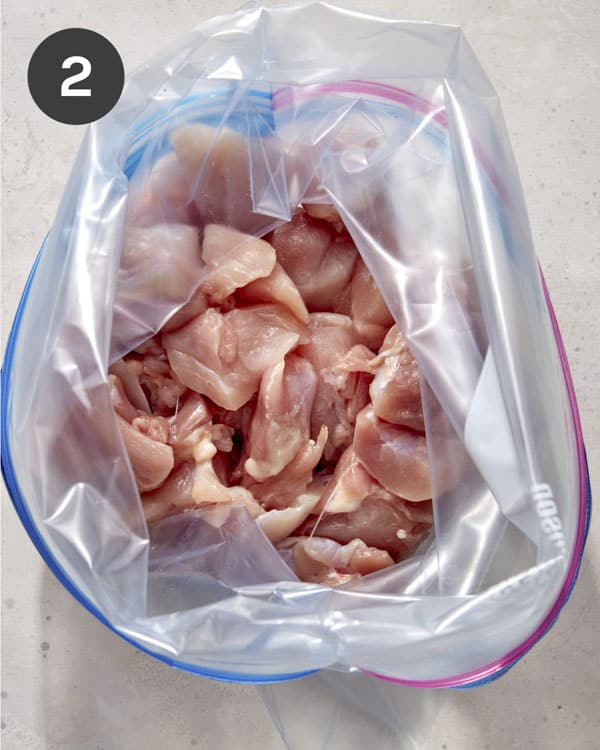
  2. Transfer the chicken to a resealable plastic bag or airtight container.
Sauce in a bowl being whisked together.
Chicken thighs in a bag cut up.
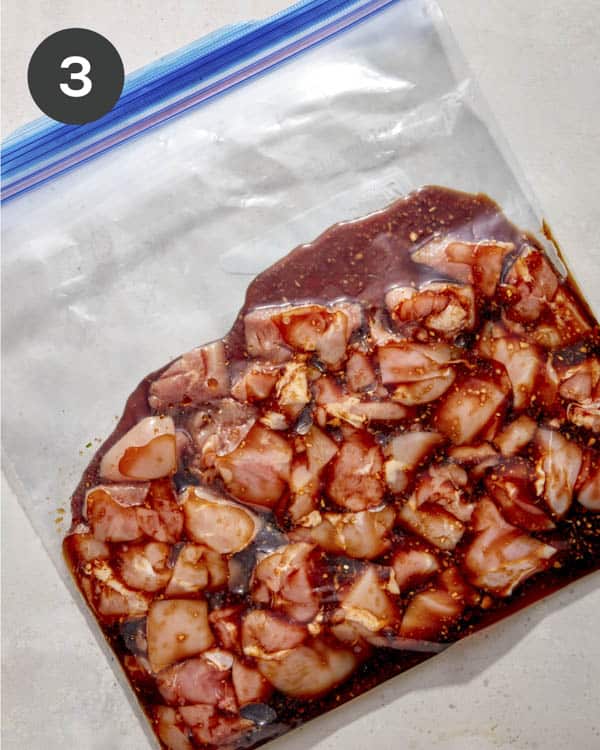
  1. Pour half the marinade over the chicken, tightly seal it, shake it up to mix it, and refrigerate it for at least 4 hours and up to 24 hours.
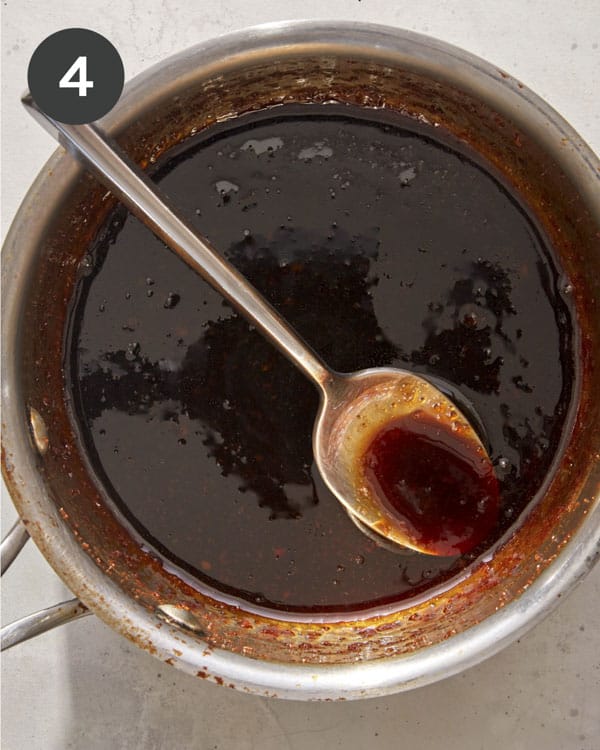
  2. Pour the remaining marinade into a small pot and simmer for 5 to 7 minutes or until slightly reduced (Glaze will thicken as it cools). Remove from heat and set aside.
Chicken thighs in a bag with marinate.
Honey garlic sauce in a pot being simmered.
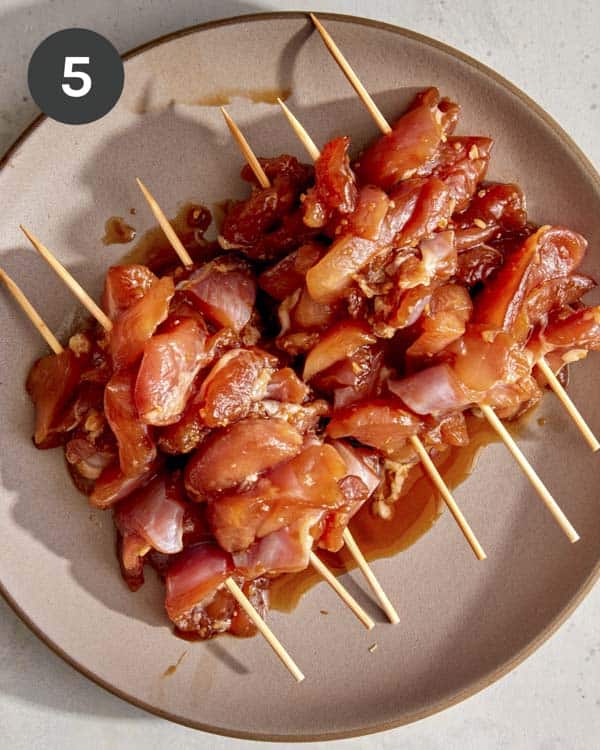
  1. Once the chicken has marinated, pierce 7 to 8 pieces of chicken through each skewer. Repeat until all chicken has been used.
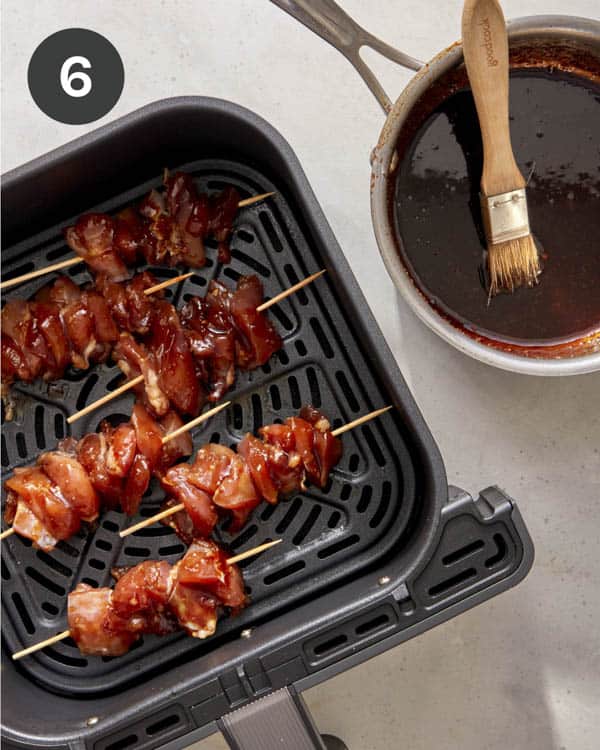
  2. Lightly spray the air fryer basket with cooking spray and top it with skewers, leaving about a 1/2-inch space between each one (cook in batches to avoid overcrowding). Brush each skewer with glaze.
Chicken thighs on skewers with marinade on them.
Chicken skewers cooking in a air fryer being brushed with glaze.
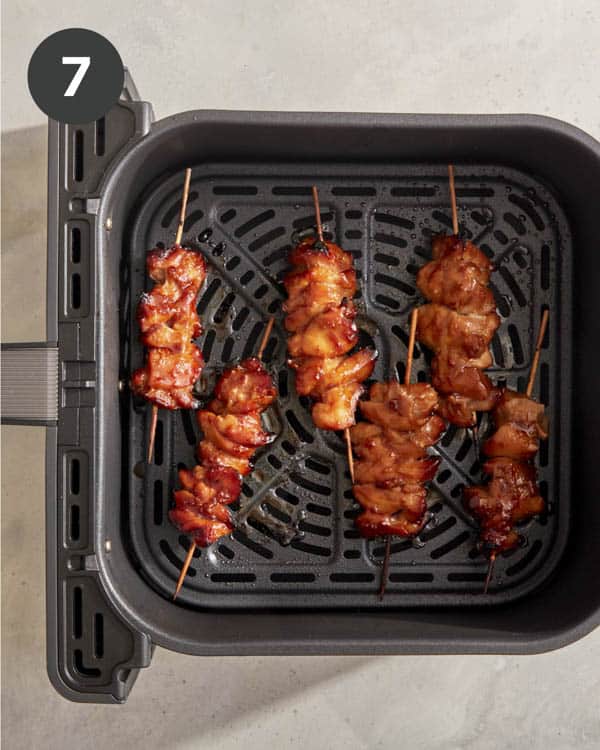
  1. Air-fry chicken skewers at 400˚F for 8 minutes. Flip each skewer and brush with more glaze. Continue to air-fry for an additional 6 to 8 minutes or until the chicken has cooked through.
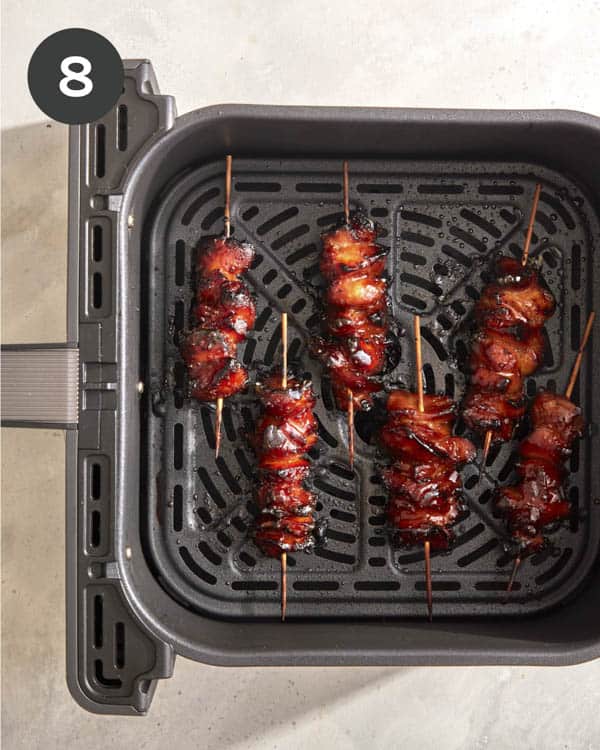
  2. Remove skewers from the air fryer basket and brush with glaze once more.
Air fryer chicken skewers cooking in a basket.
Air fryer chicken skewers being cooked.
  1. Transfer skewers to a serving dish, top with green onion, and serve.
Air fryer chicken skewers on a platter with green onions.

Why Soak Wooden Skewers in Water?

Soaking your wooden skewers in water for at least thirty minutes is an essential step in making these chicken kabobs. This helps prevent the wood from burning or becoming too charred while the chicken cooks.

Not only would burnt wood be a safety hazard, but it can add an unpleasant flavor to the chicken. By soaking the skewers ahead of time, they’ll hold your chicken without catching fire or charring and affecting the flavor of the meat.

Variations

We love this recipe as is, but feel free to make these substitutions for a little variety!

Swap the meat. Instead of chicken thighs, you could use chicken breast or another type of meat altogether. Beef sirloin or ribeye, lamb, pork tenderloin, or turkey breast are all great options for these kabobs.

Make it spicy: Add a tablespoon of sriracha or chili paste to the marinade.

A citrus twist: add the zest and juice of a lemon or an orange.

BBQ: add a few tablespoons of your favorite BBQ sauce (or our sweet and range BBQ) to the marinade.

Make Ahead, Storing and Reheating Instructions

From start to finish, this recipe takes around four and a half hours (including marinade time), but there are plenty of things you can do ahead of time to make dinner as easy as possible.

Make Ahead

Mix the marinade and add the cubed chicken up to 24 hours before cooking. Not only does this make dinner easy, but it also helps add maximum flavor to every bite!

You can also make the glaze ahead of time and store it in the refrigerator until you’re ready to use it, or up to 3 days.

Storing

Store any leftover cooked chicken in an airtight container in the refrigerator for 3-4 days.

Air fryer chicken skewers with green onions on top.

Reheating

To reheat the chicken:

Microwave it, covered, on a plate for 30-60 seconds or until warmed.

Bake it in the oven at 350˚, covered, for 5-10 minutes or until warmed through.

In a pan on the stove over medium heat, add a small amount of oil to help keep the chicken from sticking. Add the chicken and saute for 3-5 minutes or until heated through, tossing occasionally.

In the air fryer, preheat the basket to 350˚, add the chicken, and cook for 3-5 minutes or until heated through.

What to Serve with Our Air Fryer Chicken Skewers

For a complete meal, try serving our air-fried honey garlic chicken skewers with:

More Delicious Chicken Recipes You Will Love

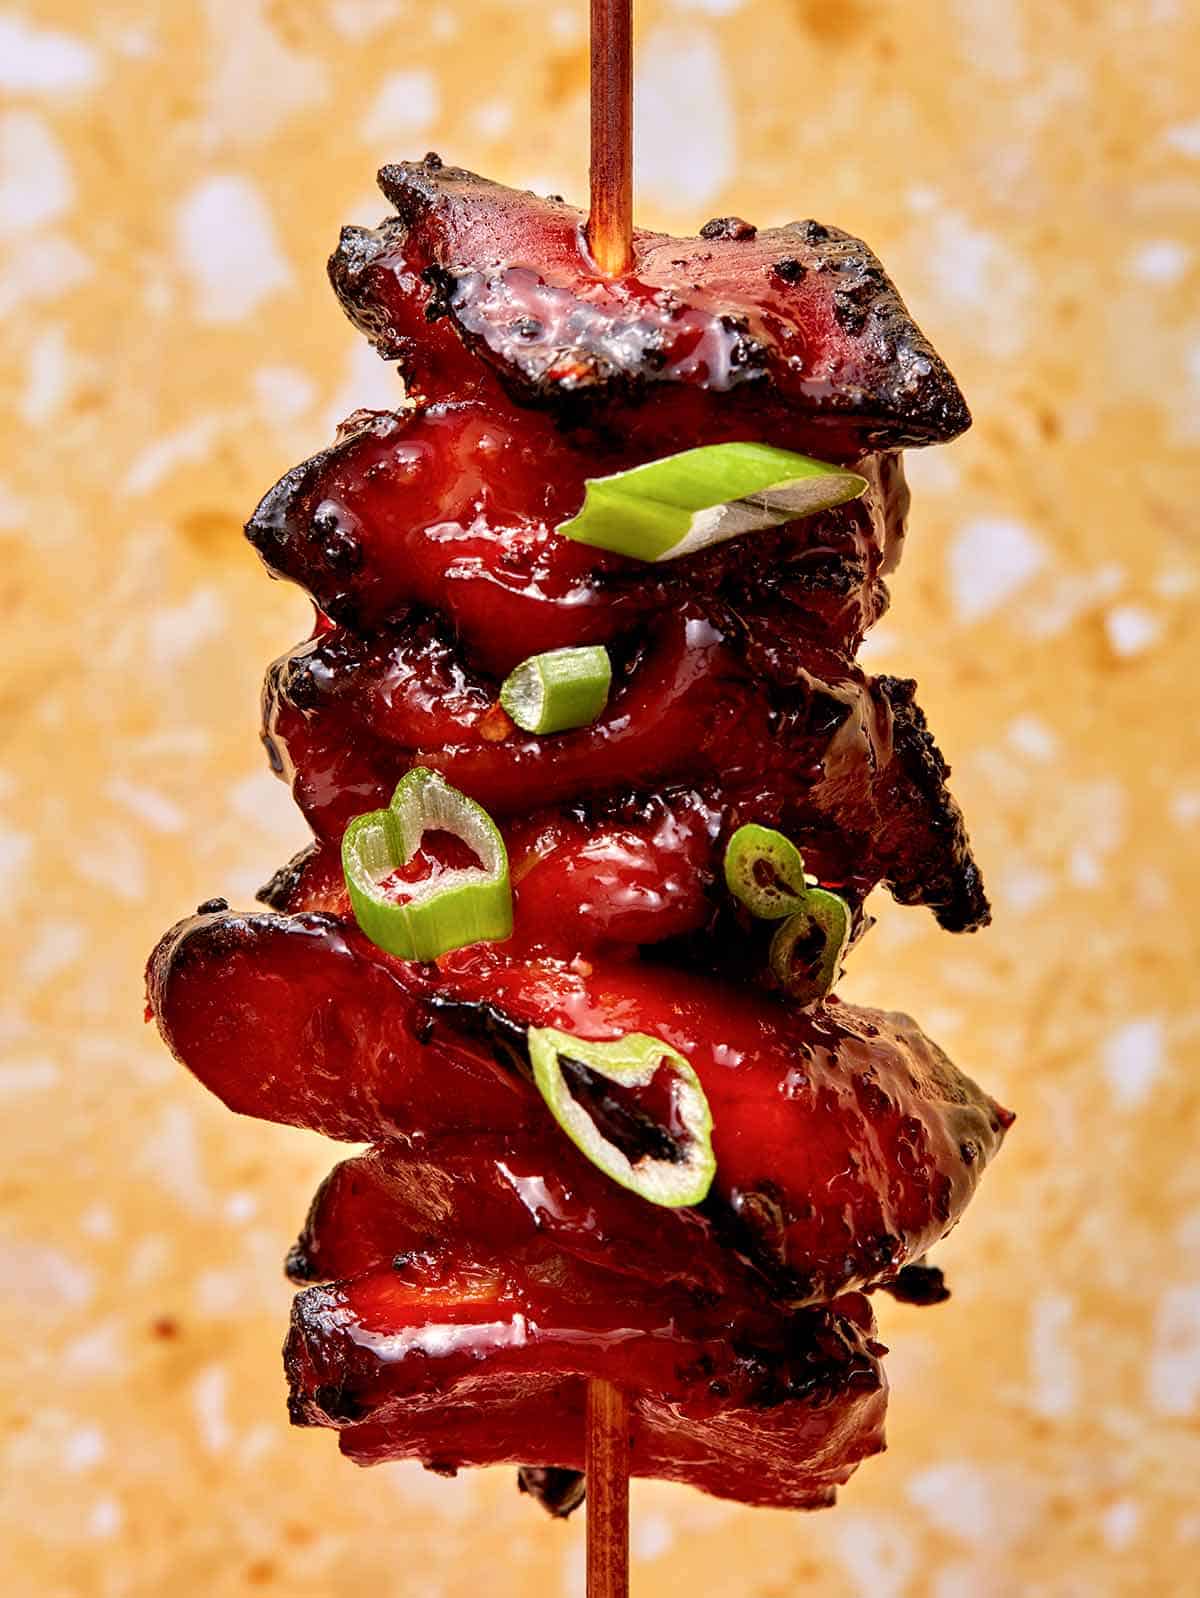
Close up on an air fryer chicken skewer.
Air fryer chicken skewers with green onions on top.
Print

Honey Garlic Chicken Skewers (Air Fryer Recipe)

Marinated in a sweet and savory honey garlic sauce, these chicken skewers are tender and juicy, taking just minutes to cook in the air fryer!
Course Appetizer, dinner, lunch, Snack
Cuisine asian
Prep Time 15 minutes
Cook Time 16 minutes
marinating time 4 hours
Total Time 4 hours 31 minutes
Servings 4
Calories 337kcal

Equipment

  • 8 (6") wooden skewers soaked in water for 30 minutes

Ingredients

marinade/glaze

  • 1/2 cup soy sauce
  • 1/2 cup honey
  • 3 tablespoons minced garlic
  • 2 tablespoons oyster sauce
  • 2 tablespoons light brown sugar
  • 1 tablespoon rice wine vinegar
  • 2 teaspoon sesame oil

chicken

  • 1 pound boneless, skinless chicken thighs cut into 1 inch pieces
  • 1 thinly sliced green onion

Instructions

  • In a mixing bowl combine all sauce ingredients and whisk together.
  • Transfer chicken to a resealable plastic bag or airtight container.
  • Pour half marinade over chicken, tightly seal, shake up to mix and refrigerate for at least 4 hours and up to 24 hours.
  • Pour remaining marinade into a small pot and simmer for 5 to 7 minutes or until slightly reduced (Glaze will thicken as it cools). Remove from heat and set aside.
  • Once chicken has marinated, pierce 7 to 8 pieces of chicken through each skewer. Repeat until all chicken has been used.
  • Lightly spray air fryer basket with cooking spray and top with skewers, leaving about1/2 inch space between each one (cook in batches to avoid overcrowding). Brush each skewer with glaze.
  • Air-fry chicken skewers at 400˚F for 8 minutes. Flip each skewer and brush with more glaze. Continue to air-fry for an additional 6to 8 minutes or until chicken has cooked through.
  • Remove skewers from air fryer basket and brush with glaze once more.
  • Transfer skewers to a serving dish, top with green onion and serve.

Notes

**recipe makes 8 skewers – 2 skewers make 1 serving**
 

Nutrition

Calories: 337kcal | Carbohydrates: 46g | Protein: 26g | Fat: 7g | Saturated Fat: 1g | Polyunsaturated Fat: 2g | Monounsaturated Fat: 2g | Trans Fat: 0.02g | Cholesterol: 108mg | Sodium: 1972mg | Potassium: 407mg | Fiber: 1g | Sugar: 41g | Vitamin A: 58IU | Vitamin C: 3mg | Calcium: 40mg | Iron: 2mg

The post Honey Garlic Chicken Skewers (Air Fryer Recipe) appeared first on Spoon Fork Bacon.
Air Fryer Turkey Meatballs

Need a simple appetizer or entree for dinner? These turkey meatballs are as good with pasta and vodka sauce for a hearty dinner as they are slathered in sweet and tangy BBQ sauce and served on a platter to guests. No matter how you serve these meatballs, you’ll love how easy they are to make, how moist and flavorful they are, and that they use zero breadcrumbs, making them a perfect choice for anyone gluten-free…

Read More

The post Air Fryer Turkey Meatballs appeared first on Spoon Fork Bacon.
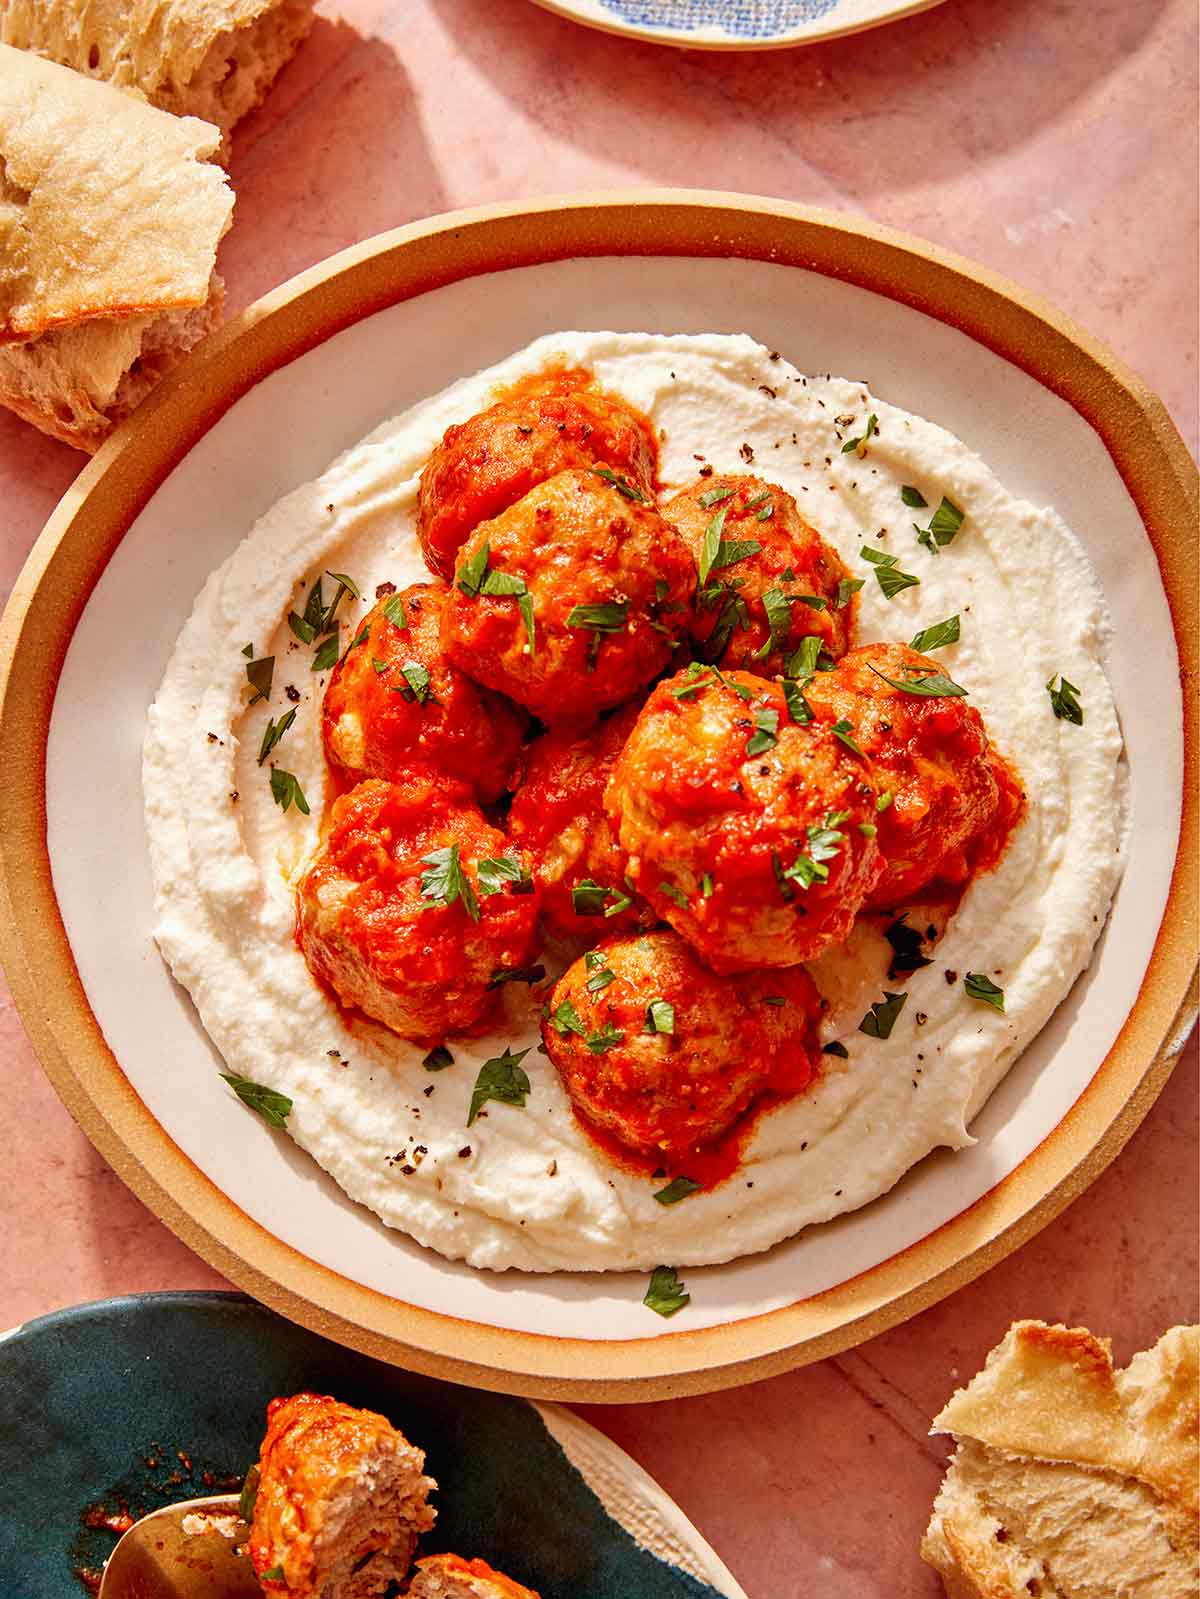
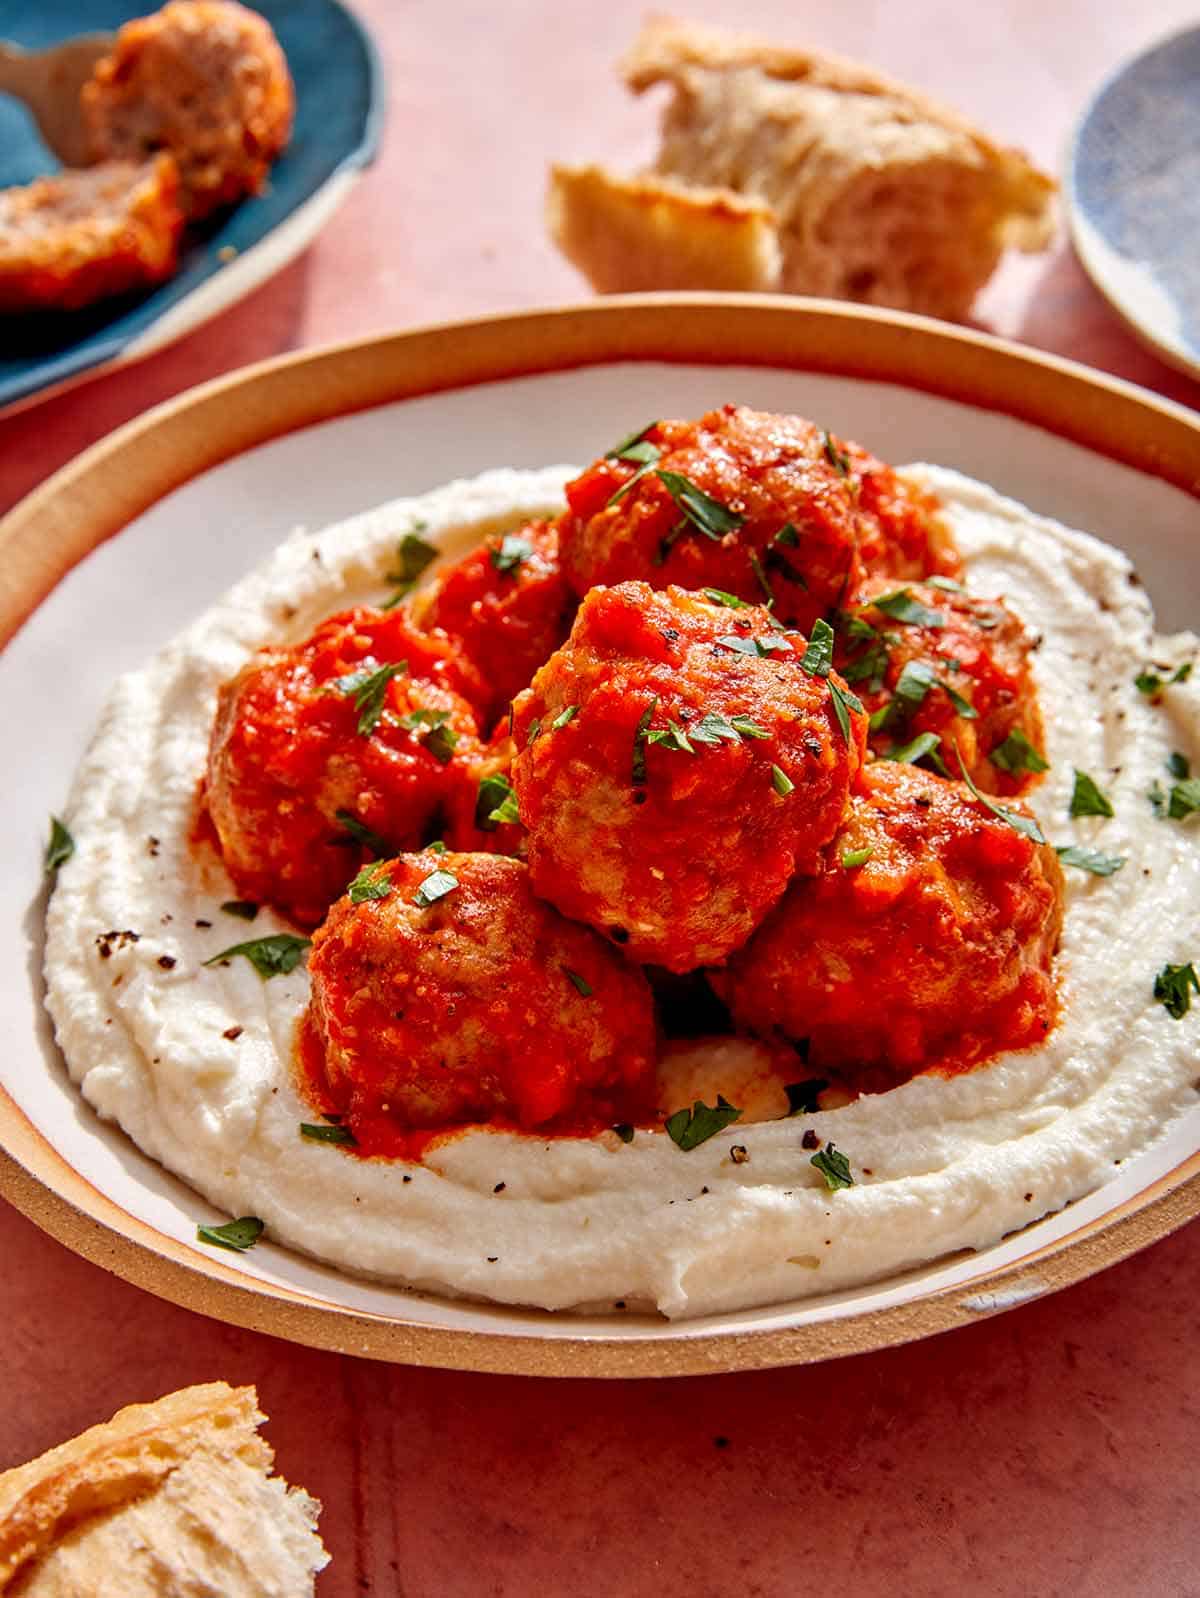
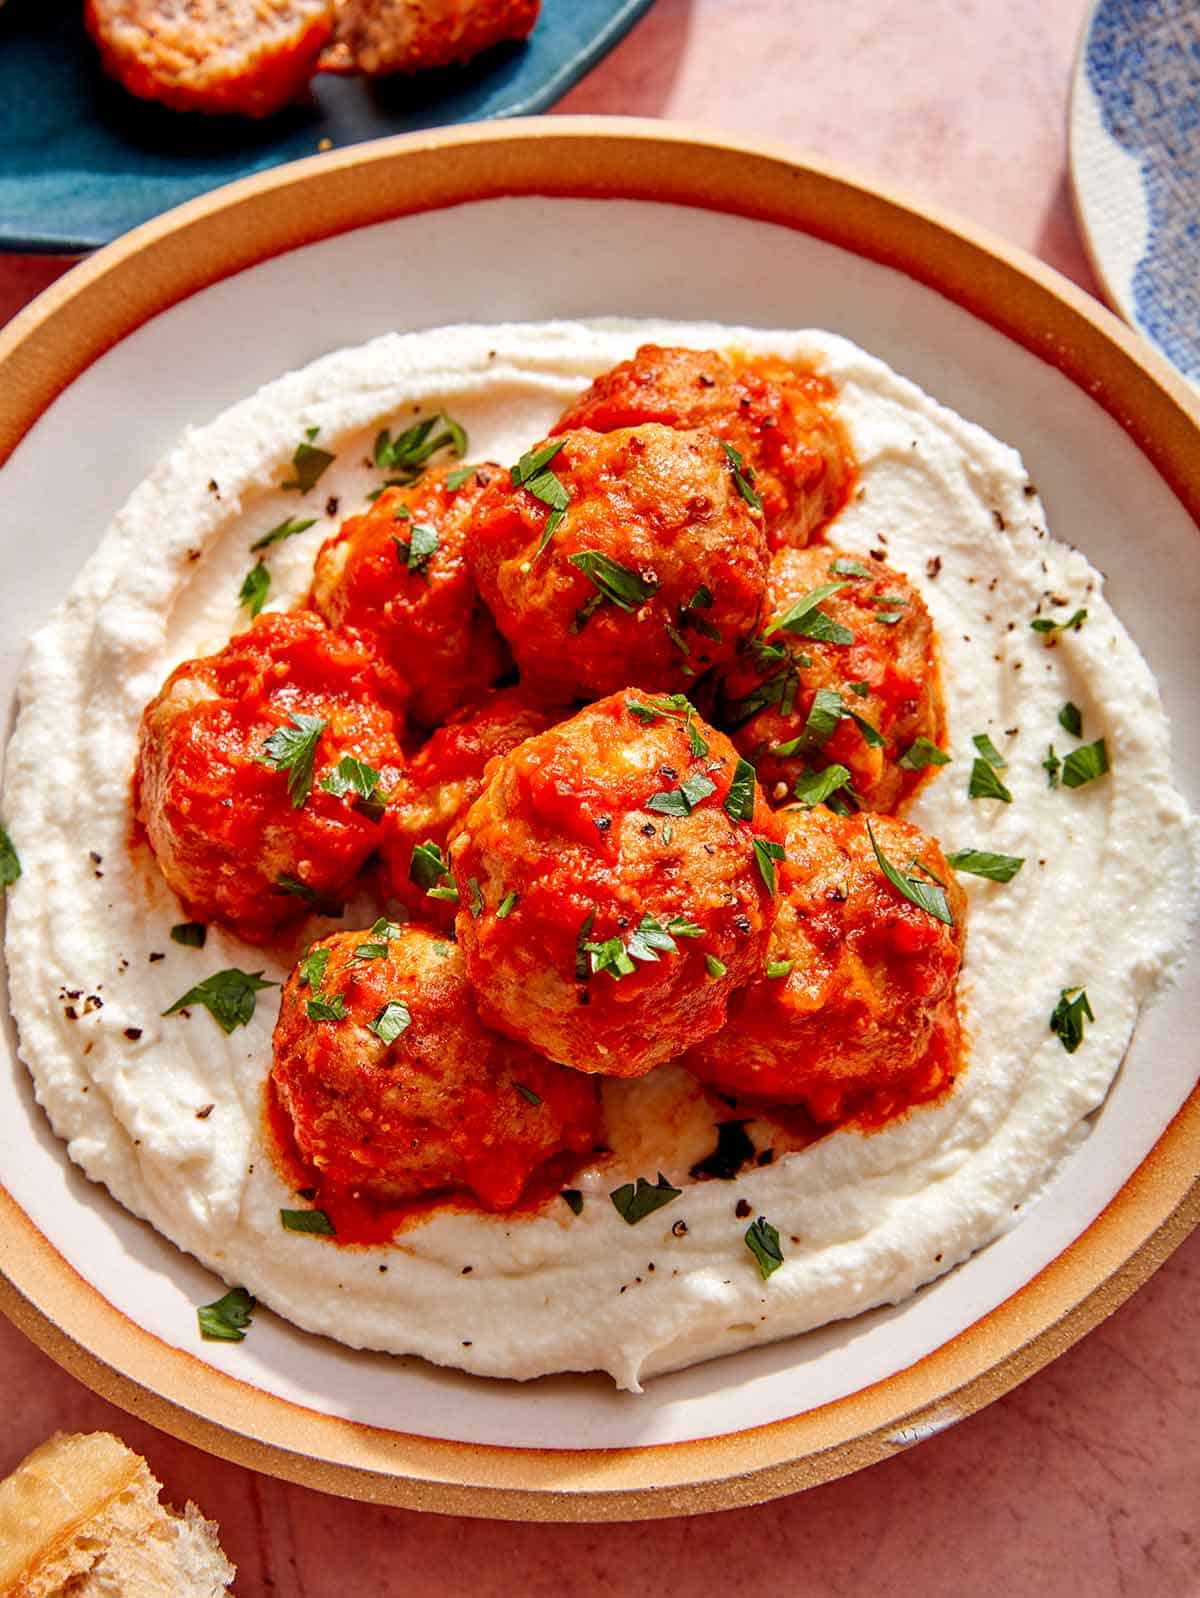
Air fryer turkey meatballs on a plate with bread on the side.

Need a simple appetizer or entree for dinner? These turkey meatballs are as good with pasta and vodka sauce for a hearty dinner as they are slathered in sweet and tangy BBQ sauce and served on a platter to guests.

No matter how you serve these meatballs, you’ll love how easy they are to make, how moist and flavorful they are, and that they use zero breadcrumbs, making them a perfect choice for anyone gluten-free or eating a low-carb diet.

Cottage cheese is the secret ingredient for perfectly moist and flavorful turkey meatballs that always stick together. We know it sounds odd, but hear us out! Instead of breadcrumbs and eggs, we add cottage cheese to our meatballs, increasing the protein, adding moisture, and holding everything together.

How to Make Air Fryer Turkey Meatballs

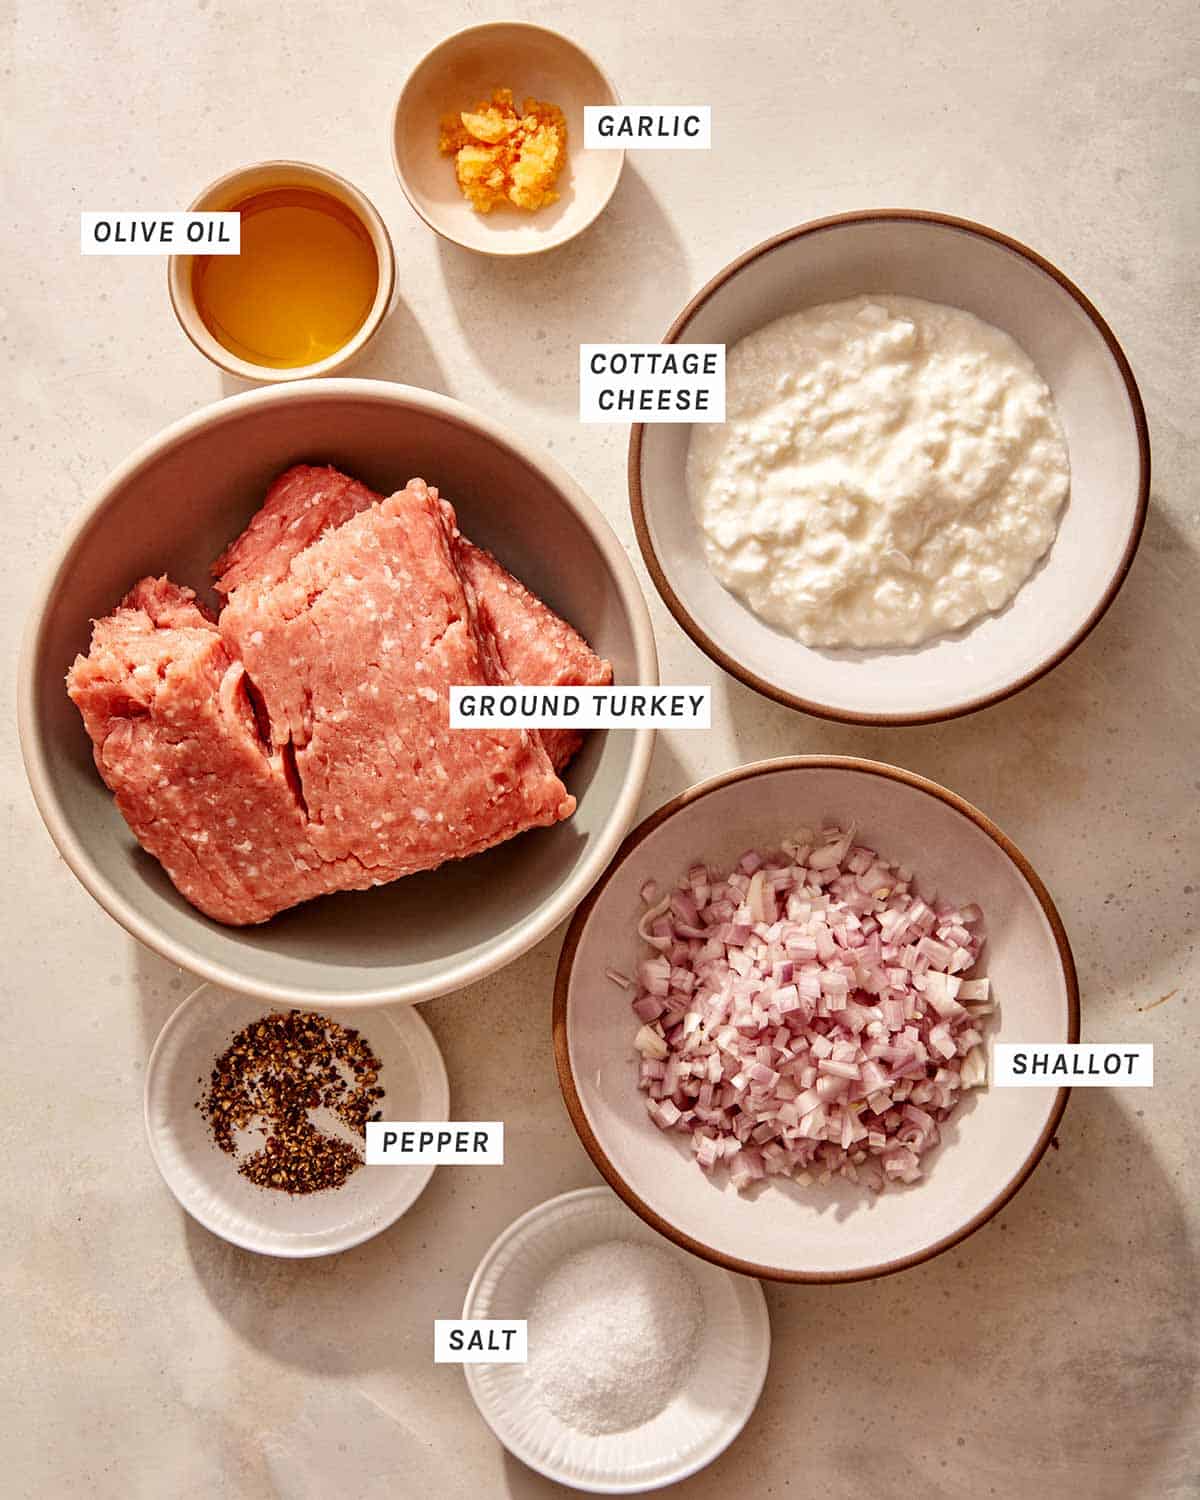
Ingredients

Ingredients to make turkey meatballs in an air fryer.

Process

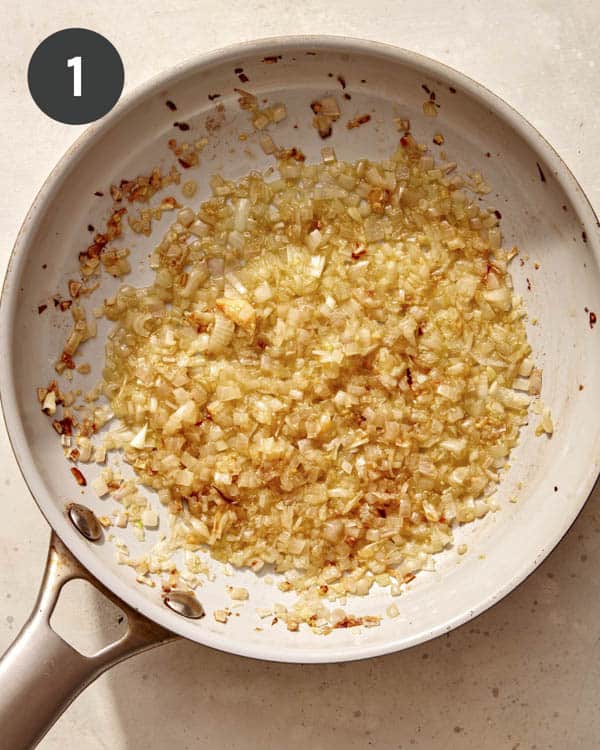
  1. Place a pan over medium heat. Once hot, add oil and swirl around the pan. Sauté shallots and garlic for 2 to 3 minutes. Set aside and cool for a few minutes.
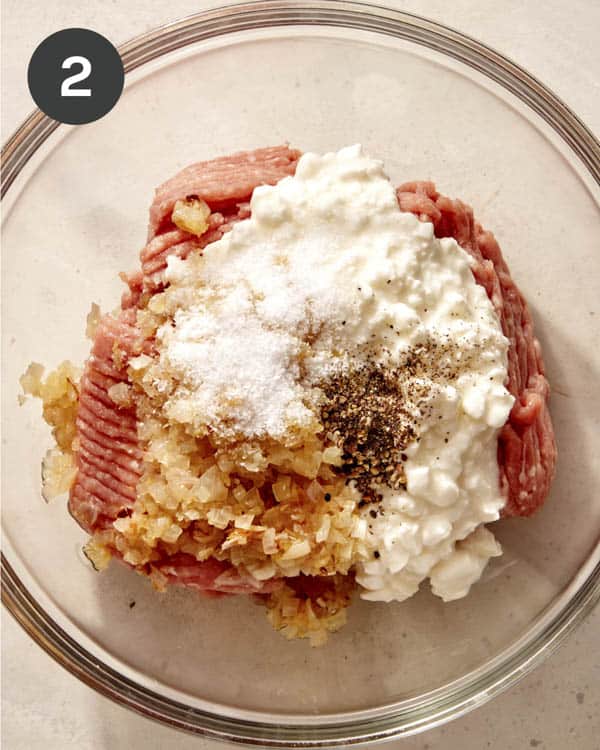
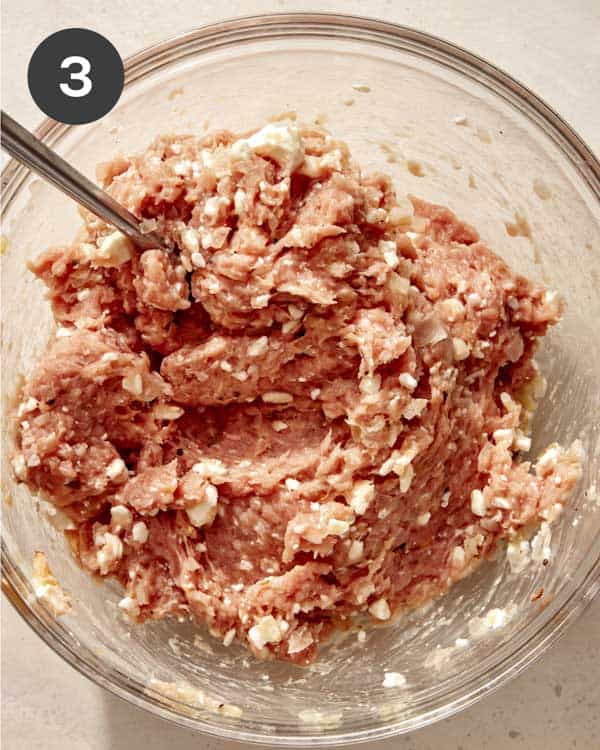
  2. Add ground turkey, sauté mixture, cottage cheese, salt, and pepper to a large mixing bowl.
Shallots and garlic cooking in a pan.
Meatball mixture in a bowl ready to be mixed up.
  1. Mix until fully combined.
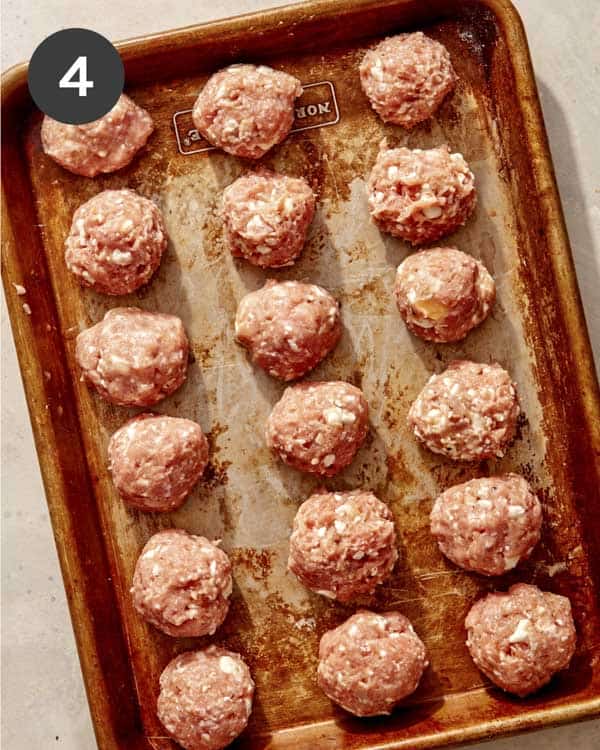
  2. Form 2 tablespoon-sized meatballs with the meat mixture.
Turkey meatballs in a bowl ready to be rolled up.
Turkey meatballs rolled on a baking sheet.
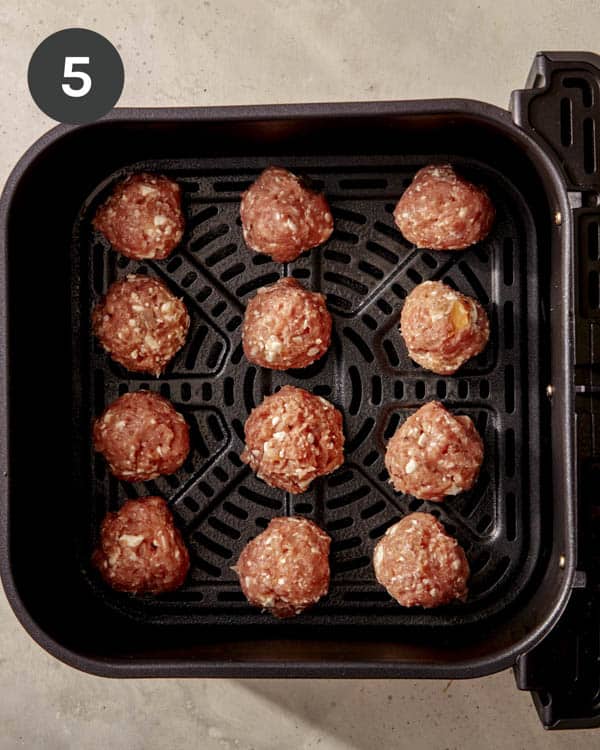
  1. Preheat the air fryer to 400˚F. Lightly grease the fryer basket with cooking spray. Line the air fryer with a single layer of meatballs (leaving space between each for even air frying). Do this in two batches if needed. Spray the tops of the meatballs with cooking spray.
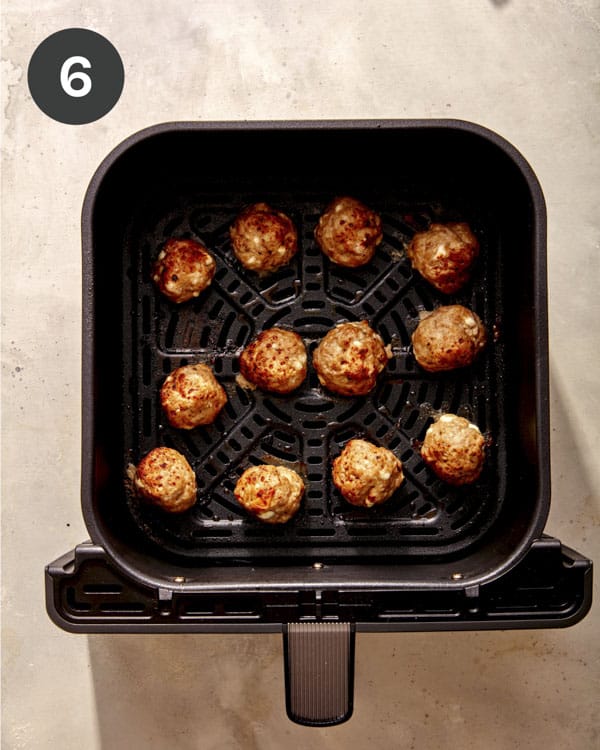
  2. Air fry meatballs for 10 minutes or until just cooked through. Remove meatballs from the air fryer and cool for a few minutes before serving.
Turkey meatballs being cooked in an air fryer.
Turkey meatballs cooked in an air fryer.

Why Add Cottage Cheese to Meatballs?

Cottage cheese may seem like an odd ingredient to add to meatballs, but this addition replaces breadcrumbs and eggs for incredible moisture, binding, and improved nutrition.

We love the moist texture you get from using cottage cheese, as well as the slightly creamy texture and flavor it adds.

Plus, half a cup of cottage cheese adds protein to the meatballs and keeps the nutrients low-carb and gluten-free, which works well if you have dietary restrictions you need to be cautious of.

Cottage Cheese Alternatives

If you don’t have cottage cheese or don’t want to use this ingredient, you can always replace it with:

  • Ricotta cheese – this is similar in texture and flavor to cottage cheese and works the same.
  • Yogurt (Greek or strained) – make sure to use unflavored yogurt and either Greek or Skyr, which is thick in consistency, or strained regular yogurt to remove some of the excess moisture.
  • Firm tofu – a good dairy-free substitute
  • Sour cream – adds more of a tangy flavor but has a similar effect.
  • Mashed beans – use mashed white beans for a light and mild flavor that adds creaminess and extra fiber.

Make Ahead, Storing and Reheating Instructions

Make Ahead and Storing

These turkey meatballs are easy to make ahead and refrigerate or freeze until you’re ready to make and eat them.

To make them ahead of time, combine all ingredients as instructed and form the meatballs. Place them in a container with a lid. You can keep the uncooked turkey meatballs in the refrigerator for up to 2 days before cooking in the air fryer as directed.

You can also cook the turkey meatballs, store in the refrigerator in an airtight container for up to four days, reheating to eat. This works for making them ahead of time or for storing leftovers.

Reheating

To reheat meatballs that were cooked and stored in the refrigerator, you can either:

  • Microwave them on a plate, covered, for 30-60 seconds or until heated through.
  • Air fry them at 350˚F for 3-5 minutes or until warmed through.
  • Bake them at 350˚F in the oven, covered with foil, for 5-7 minutes or until warmed.

If they seem dry, add a small amount of broth to the bottom of the pan when reheating in the oven or microwave.

Freezing and Thawing/Reheating Air Fryer Turkey Meatballs Instructions

Meatballs are the perfect food to make ahead, freeze, and have on hand for an easy dinner or last-minute appetizer.

Air fryer turkey meatballs in a bowl.

Freezing

To freeze raw meatballs, mix and portion them, then place them on a cooking sheet lined with parchment paper and freeze them for 1-2 hours. Then, transfer the raw, frozen meatballs to a plastic freezer bag and freeze them for up to 3-4 months.

Freezing the meatballs raw may help them retain more moisture when you cook them, giving them a little better texture and flavor in the end.

To freeze cooked meatballs, let them cool completely, then place on a cooking sheet lined with parchment paper and freeze for 1-2 hours. Then, transfer the cooked, frozen meatballs to a plastic freezer bag and freeze for up to 3-4 months.

Freezing cooked meatballs makes reheating more convenient and takes less time.

Thawing/Reheating

You don’t have to thaw the meatballs before reheating them from frozen, but you can if you’d like them to cook more quickly. To thaw them, place them in the refrigerator overnight, then reheat them the next day.

To reheat meatballs in the oven: Preheat the oven to 400˚F and place the meatballs on a sheet pan lined with parchment paper. Bake for 15-20 minutes, turning halfway through. If your meatballs were frozen raw, be sure to check that the internal temperature is at least 165˚F.

To reheat meatballs in the air fryer. Preheat the air fryer to 400˚F and spray the basket with cooking spray, then place the meatballs in the basket, leaving room around each. Air fry for 10-15 minutes, shaking halfway through. If your meatballs were frozen raw, be sure to check that the internal temperature is at least 165˚F.

Variations

The seasonings in these turkey meatballs make them the perfect vehicle for any flavor you want to add with a variety of sauces. But if you want each bite packed with a particular taste, try one of these variations!

Italian: Add 1/3 cup of parmesan cheese, 1/4 cup of freshly minced parsley, and 1-2 teaspoons of Italian-style dried herbs like oregano, basil, rosemary, or a combination.

BBQ: Add 1/4 cup of breadcrumbs and 1/4 cup of BBQ sauce to the meat mixture.

Asian-style: Add one tablespoon of soy sauce, one teaspoon of toasted sesame oil, one teaspoon of freshly grated ginger, and a dash of red pepper flakes.

You can also swap the ground turkey for beef, lamb, or venison!

Baking Turkey Meatballs in the Oven

While we love the convenience and effect of the air fryer, you can make these meatballs in the oven just as easily.

Preheat the oven to 400˚F and line a sheet pan with parchment paper.

Prepare the meatballs as directed, but place them on the sheet pan with 1-2 inches of space between each.

Bake for 20-25 minutes, flipping halfway through, or until heated with an internal temperature of 165˚F.

How to Serve Air Fryer Turkey Meatballs

This recipe is incredibly versatile and goes with a variety of foods for all sorts of occasions! Here are some delicious ways you can serve them:

On a meatball sub

With Homemade Pasta and Arrabiata Sauce

In Tortellini Soup

With Teriyaki sauce and rice

Dipped in your favorite BBQ sauce and served with cocktail toothpicks

More Delicious Air Fryer Recipes You Will Love

Air fryer meatballs on a plate with ricotta.
Air fryer turkey meatballs on a plate with bread on the side.
Print

Air Fryer Turkey Meatballs

Tender, juicy, and flavorful, these Air Fryer Turkey Meatballs take less than 20 minutes to make for the perfect entree or appetizer!
Course Appetizer, dinner, Main Course
Cuisine Italian
Prep Time 15 minutes
Cook Time 10 minutes
Total Time 25 minutes
Servings 6
Calories 148kcal

Equipment

Ingredients

  • 2 tablespoons olive oil
  • 1 minced shallot (about 1/2 cup)
  • 2 minced garlic cloves
  • 1 pound ground turkey
  • 1/2 cup cottage cheese strained
  • 1 1/2 teaspoons salt
  • 1/2 teaspoon black pepper

Instructions

  • Place a pan over medium heat. Once hot add oil and swirl around pan. Sauté shallots and garlic for 2 to 3 minutes. Set aside and cool for a few minutes.
  • Add ground turkey, sauté mixture, cottage cheese, salt, and pepper to a large mixing bowl.
  • Mix together until full combined.
  • Form 2 tablespoon sized meatballs with the meat mixture.
  • Preheat air fryer to 400˚F. Lightly grease fryer basket with cooking spray. Line air fryer with a single layer of meatballs (leaving space between each for even air frying). Do this in two batches if needed. Spray the tops of the meatballs with cooking spray.
  • Air fry meatballs for 10 minutes or until just cooked through. Remove meatballs from air fryer and cool for a few minutes before serving.

Notes

**Recipe Makes 18 – 3 Meatballs Per Serving**

Nutrition

Calories: 148kcal | Carbohydrates: 2g | Protein: 20g | Fat: 7g | Saturated Fat: 1g | Polyunsaturated Fat: 1g | Monounsaturated Fat: 4g | Trans Fat: 0.01g | Cholesterol: 45mg | Sodium: 676mg | Potassium: 262mg | Fiber: 0.2g | Sugar: 1g | Vitamin A: 45IU | Vitamin C: 1mg | Calcium: 21mg | Iron: 1mg

The post Air Fryer Turkey Meatballs appeared first on Spoon Fork Bacon.
Beer Bread Recipe (with Parmesan and Black Pepper)

Have you ever tried making bread with beer? This beer bread recipe is simple and incredibly flavorful with the addition of parmesan cheese and freshly cracked black pepper and the texture is perfectly tender and buttery. While we love this beer bread with just a generous pat of butter slathered on top, it’s even better when dipped into a big bowl of chili or broccoli cheddar soup! If you’re looking for a quick bread with…

Read More

The post Beer Bread Recipe (with Parmesan and Black Pepper) appeared first on Spoon Fork Bacon.
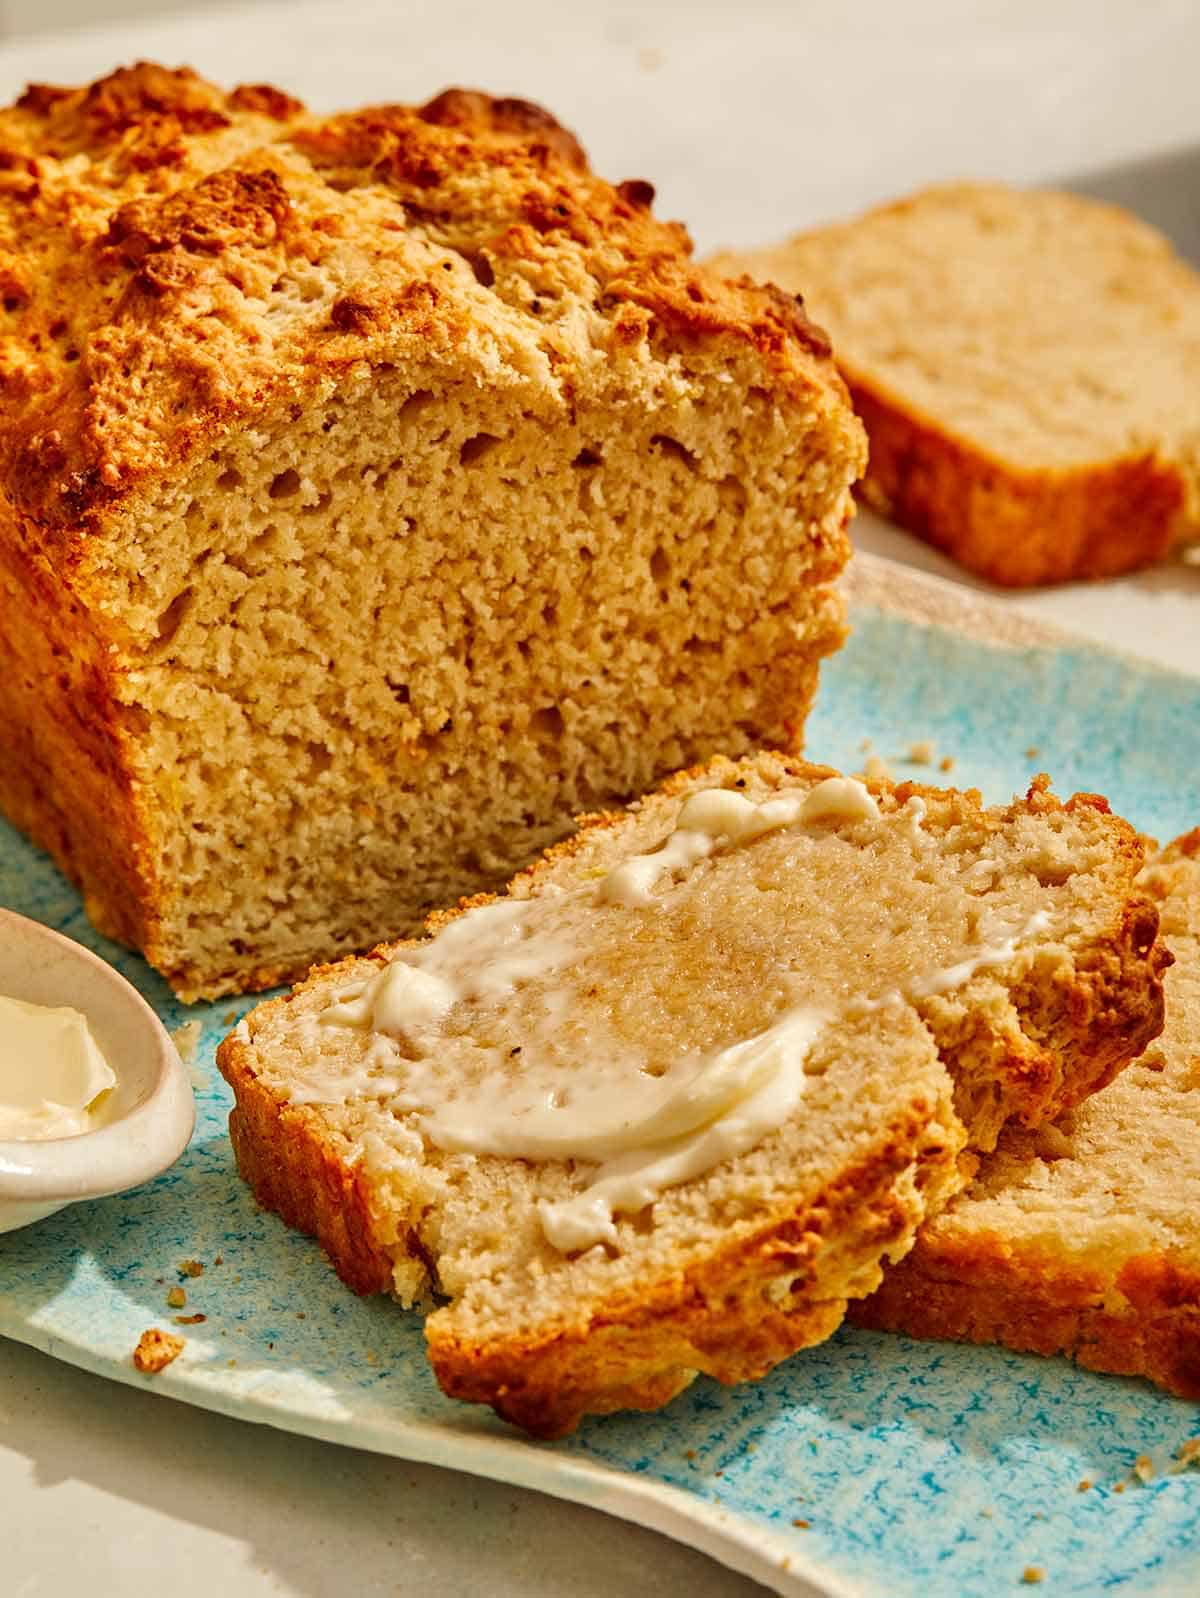
Black pepper parmesan beer bread with butter.

Have you ever tried making bread with beer? This beer bread recipe is simple and incredibly flavorful with the addition of parmesan cheese and freshly cracked black pepper and the texture is perfectly tender and buttery. While we love this beer bread with just a generous pat of butter slathered on top, it’s even better when dipped into a big bowl of chili or broccoli cheddar soup! If you’re looking for a quick bread with tons of savory flavor, this recipe is about to be your new favorite!

What is Beer Bread?

Want a deliciously comforting loaf of bread that doesn’t require hours of proofing yeast, rising, and baking? Beer bread is a quick bread that uses the natural yeasts in beer to activate a rise. The beer reacts with baking powder to help the bread rise as it bakes. Depending on the type of beer you use, you’ll also add extra flavor to the bread. But don’t worry, all or most of the alcohol cooks out of the bread, leaving you with all the flavor but no alcohol.

How to Make Our Beer Bread Recipe

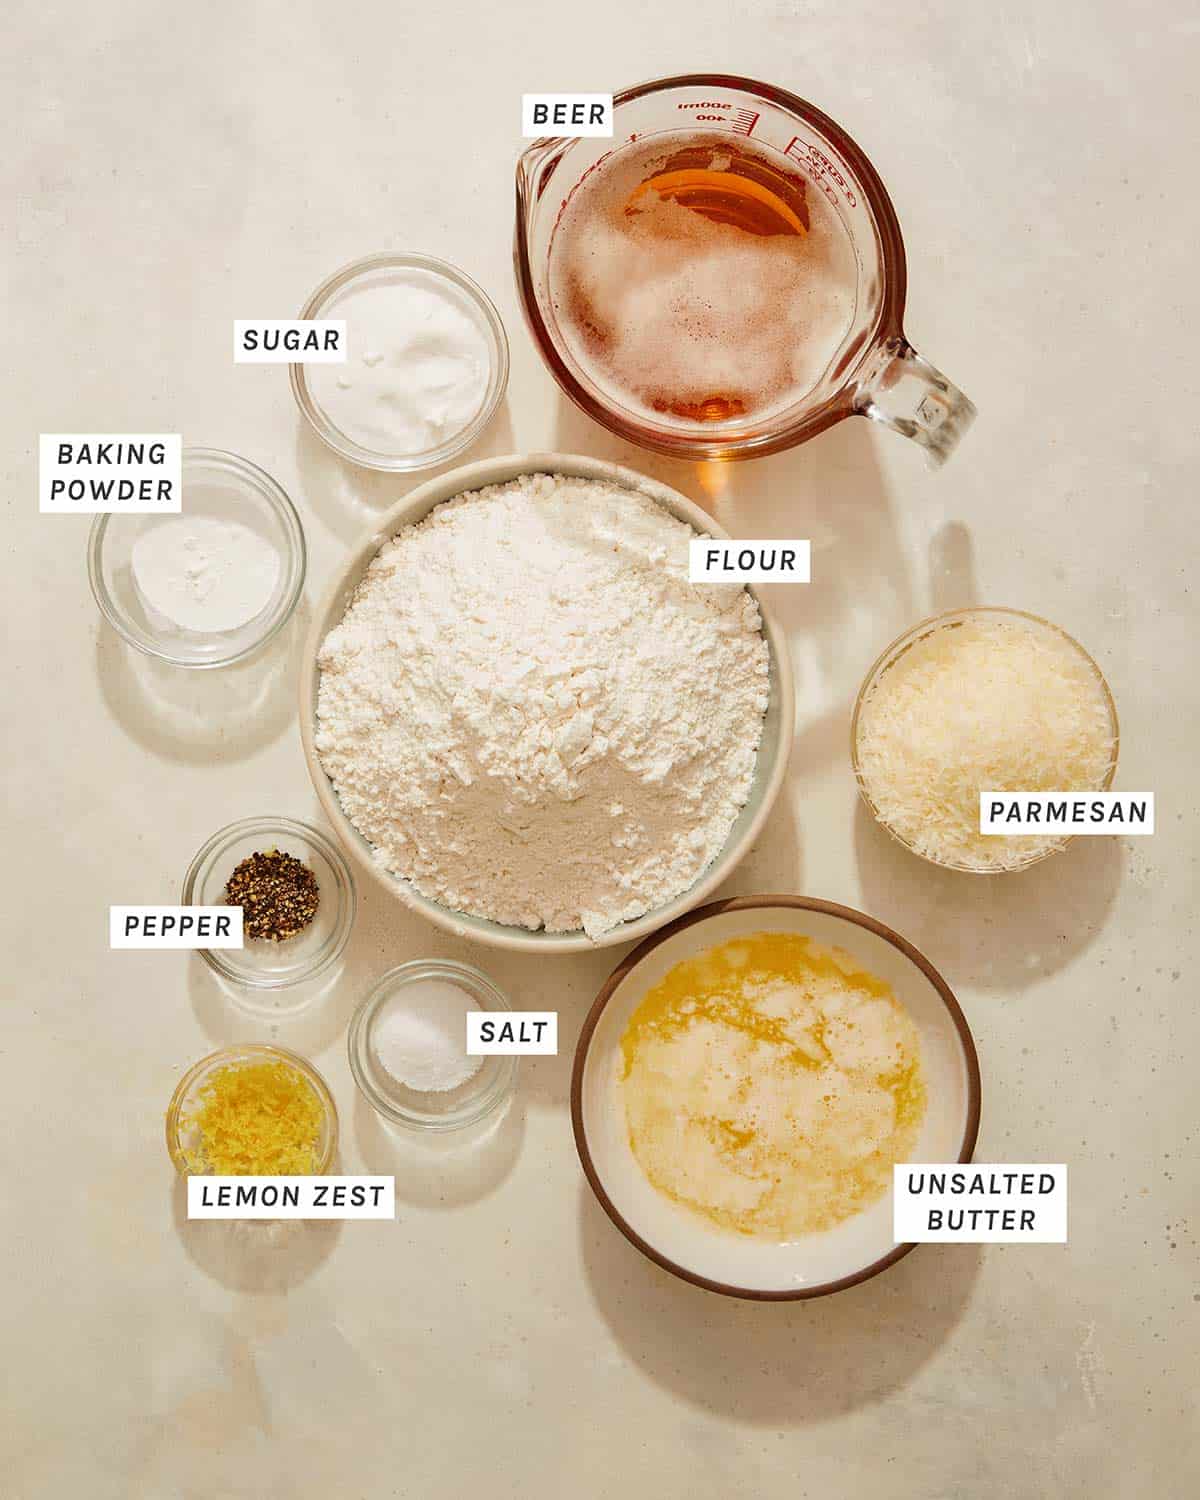
Ingredients

Beer bread ingredients measured and on a kitchen counter.

Process

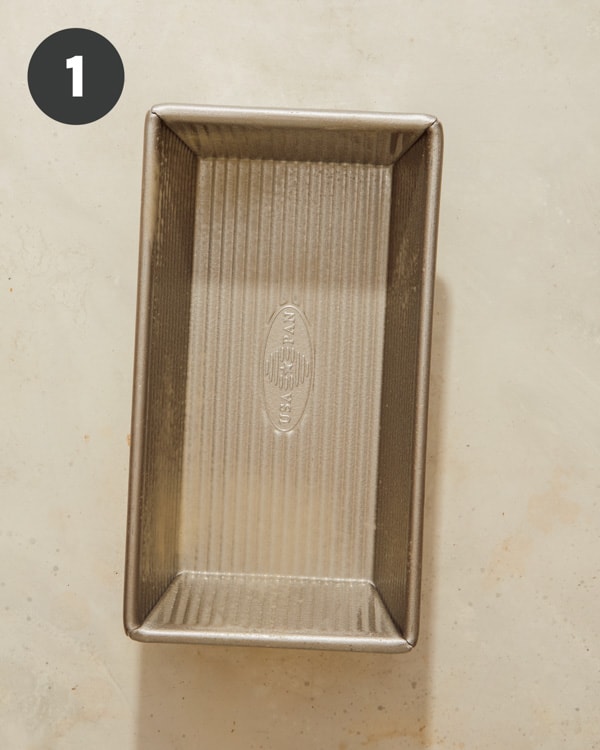
  1. Preheat oven to 375°F. Lightly grease the loaf pan and set aside.
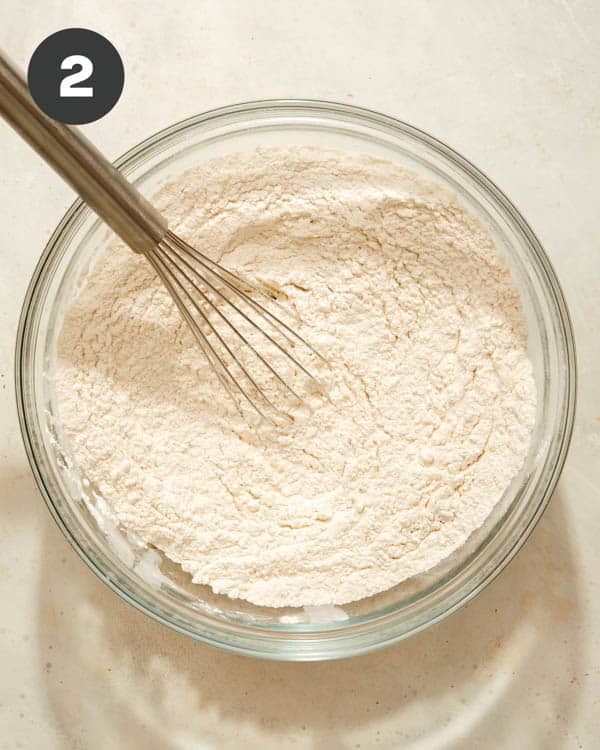
  2. Place flour, sugar, baking powder, and salt in a mixing bowl and whisk together.
A lightly greased loaf pan for beer bread.
Flour in a bowl being whisked together.
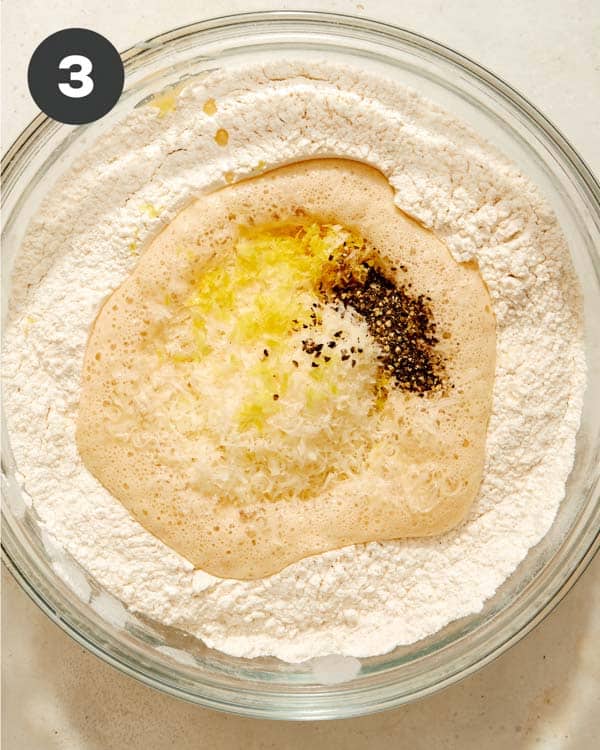
  1. Create a small well in the center of the flour mixture.
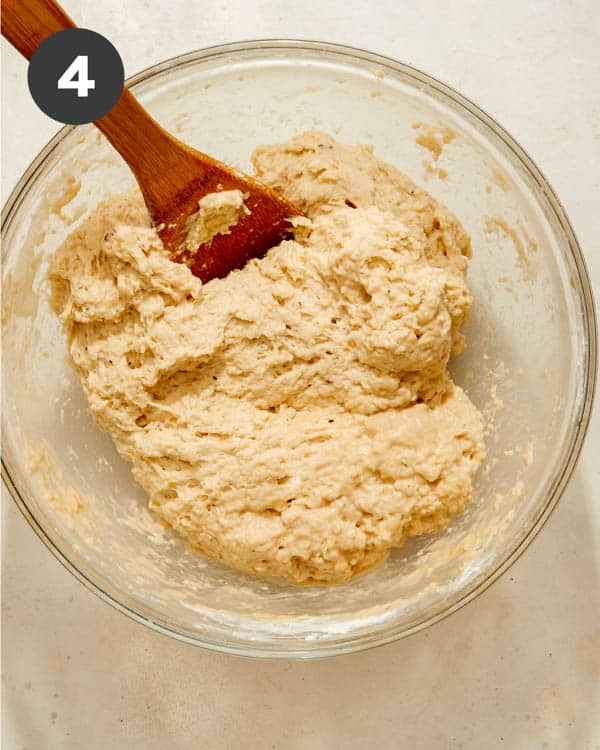
  2. Add beer, ¼ cup melted butter, lemon zest (if using), parmesan, and black pepper. Stir together until the dough just comes together. Do not over-mix! (if there are small flour pockets, gently stir them away – a couple of remaining flour pockets are okay).
Beer bread ingredients in a bowl.
Beer bread dough in a bowl with a spoon in it.
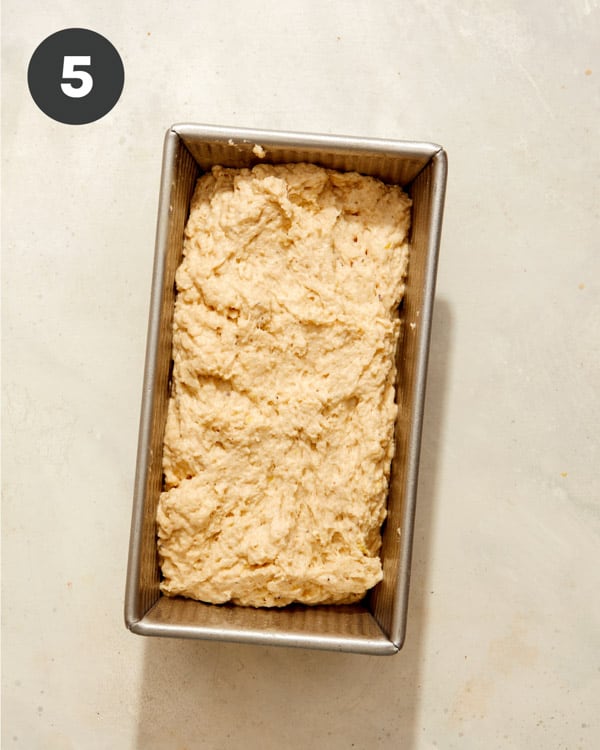
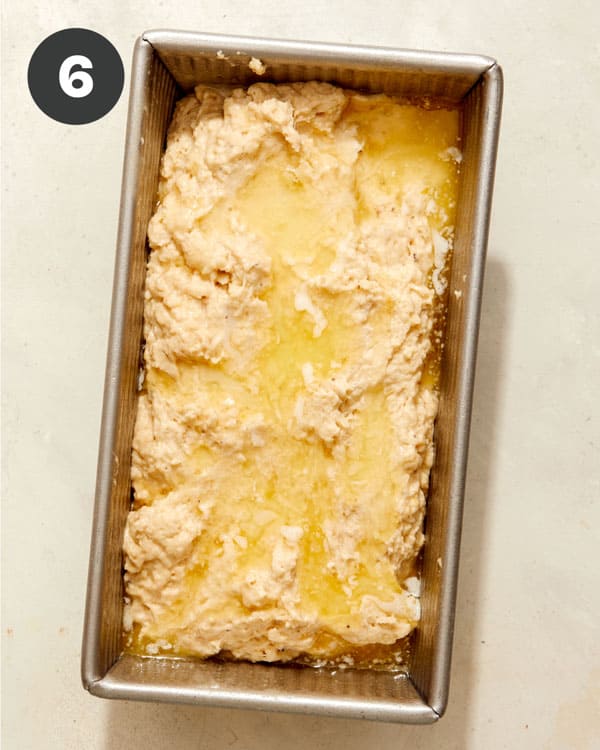
  1. Pour mixture into a prepared loaf pan.
  2. Pour the remaining butter over the top of the batter. Bake for about 1 hour to 1 hour and 10 minutes, or until a toothpick comes out clean when inserted into the center of the loaf.
Beer bread dough in a loaf pan pre oven.
Beer bread dough in a loaf pan with melted butter poured over it.
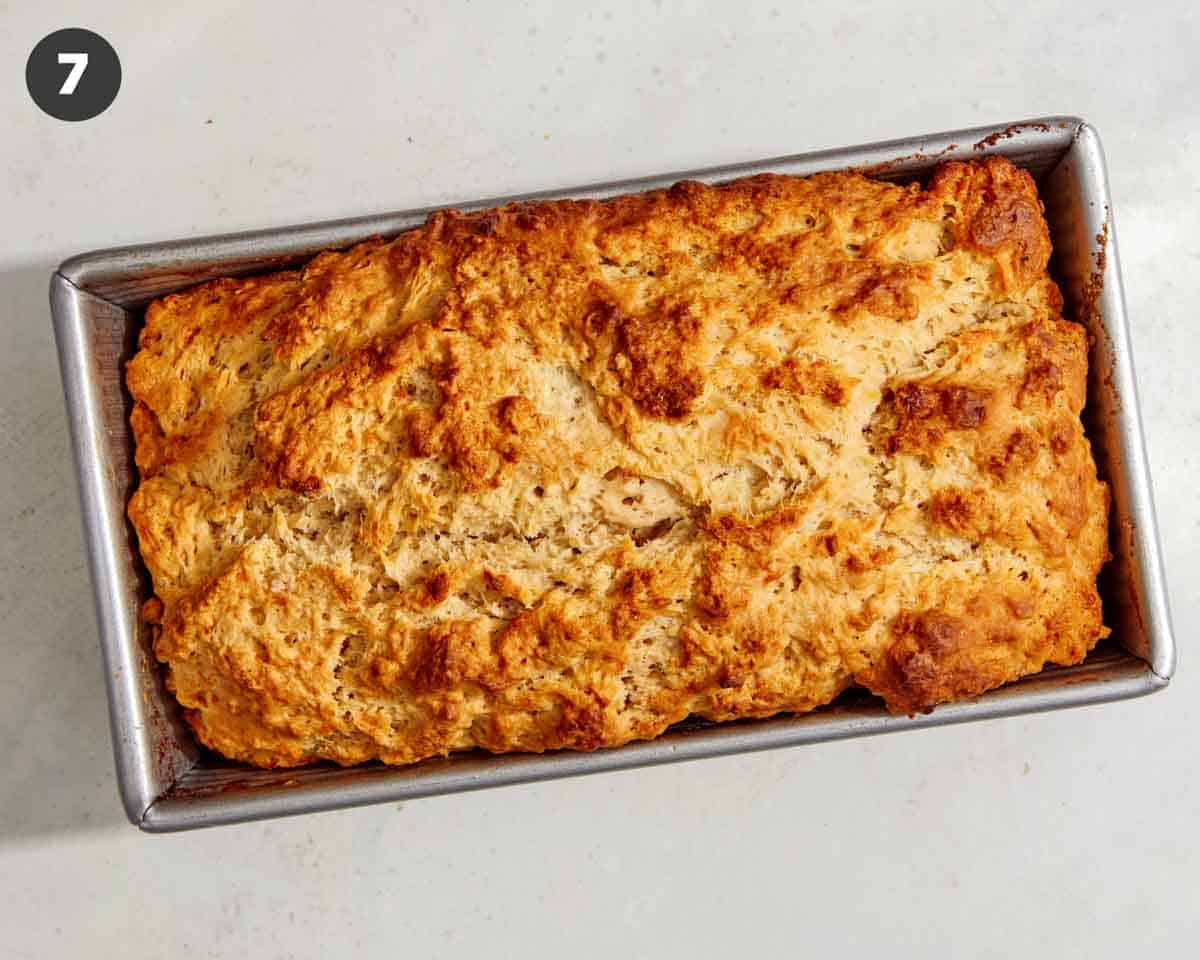
  1. Remove the loaf from the pan and allow it to cool until warm to the touch (about 1 hour and 30 minutes.
Freshly baked beer bread in a loaf pan.
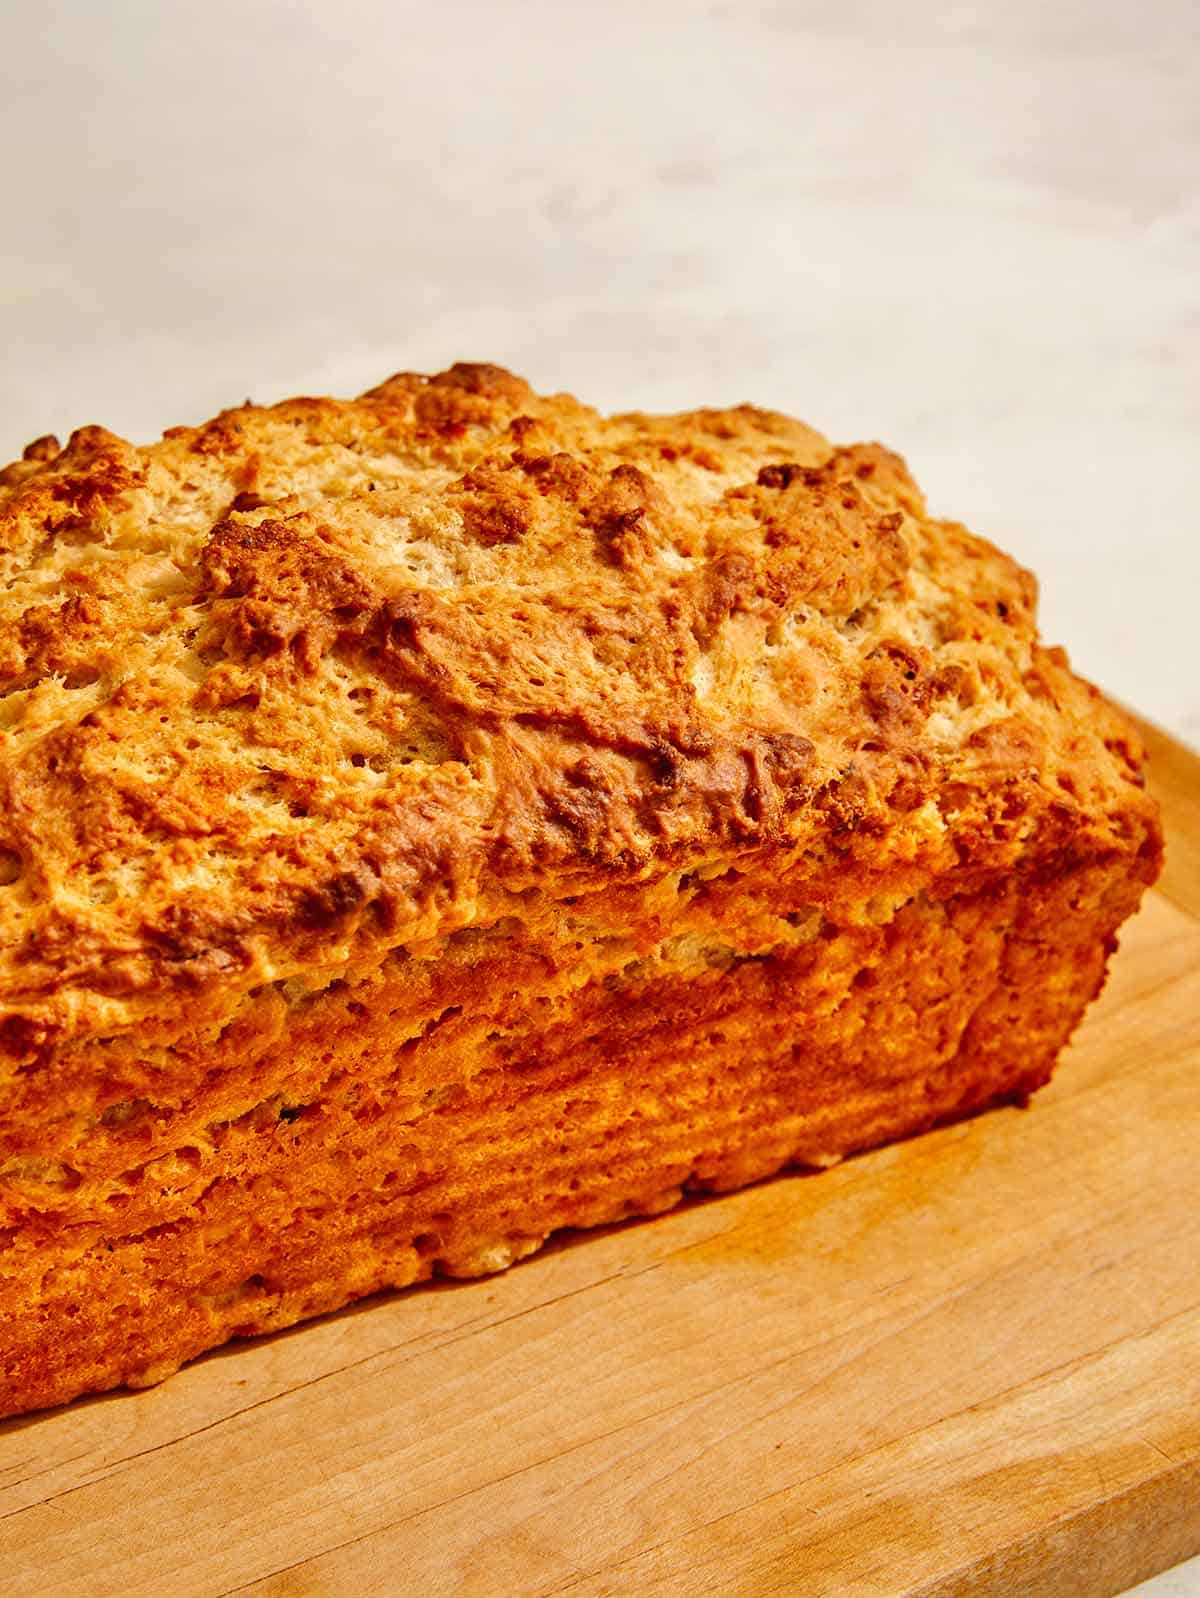
Beer bread on a cutting board.

Tips and Tricks for the BEST Beer Bread

Choose a flavorful beer. Craft beers, stouts, ales, or any darker beer are likely to have yeast present that will help the bread rise while also lending a nice flavor to the bread. Some beers have yeast filtered out, like Sam Adams Boston Lager, Miller Lite, or Heineken, and may not be the best choice.

Don’t overmix the batter. Be sure to just mix the batter until most of the flour pockets are gone. Stirring too much will lead to a dense loaf.

Don’t let the batter sit too long. Once the batter is mixed, get it into the pan and into the oven within 10-15 minutes. If you wait too long, the baking soda and beer will react too much before the heat is added, preventing a good rise.

Bake just until the toothpick comes out clean. If you overbake the bread, it may become dry and crumbly instead of tender.

Let the bread cool before slicing. Letting the bread rest for an hour to an hour and a half before slicing will help the slices hold their shape.

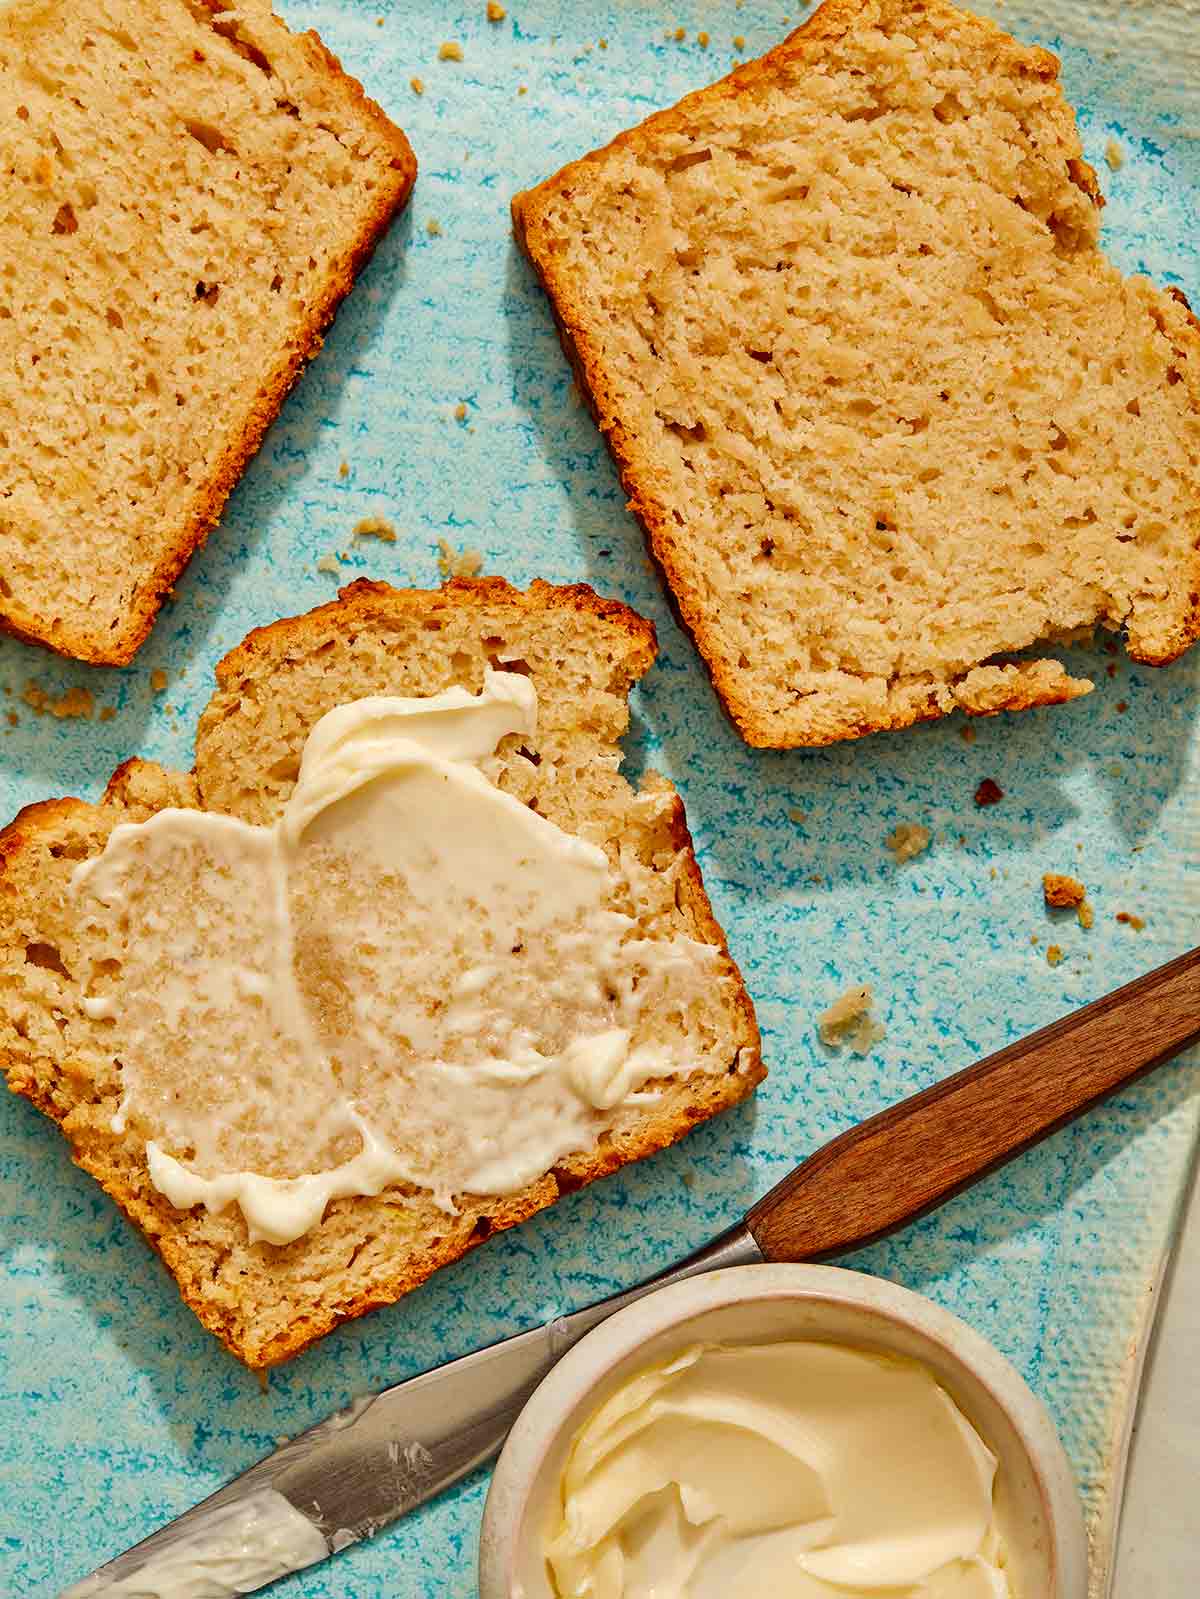
Beer bread on a plate with butter on the slices.

Variations

Switch up the beer. Choose your favorite craft beer or a spiced seasonal variety to add a little extra flavor to the bread. Darker beers, like Guinness, will also add more flavor to your beer bread.

Add cheese. We added parmesan cheese to this recipe, but sharp cheddar, Gruyere, mozzarella, or Monterrey Jack can also be used.

Mix in the herbs. Fresh herbs, including rosemary, thyme, dill, or oregano, can add a new, fun flavor to the bread. Freshly minced garlic or garlic powder also adds incredible flavor to this bread!

Make it spicy. Add chopped fresh jalapeno peppers, red pepper chili flakes, or pepper jack cheese.

Make it sweet. Add dried fruit like raisins, cranberries, or chopped apricots to the bread, along with chopped walnuts, pecans, or pistachios. Don’t forget a drizzle of honey as well!

Storing Instructions

To keep your beer bread fresh, let it cool completely, then wrap it in plastic wrap and place it in an airtight container for up to 2-3 days on the counter.

You can also freeze baked beer bread by wrapping it in plastic and then in an airtight freezer-safe container. Freeze for up to 3 months. Thaw on the counter or in the refrigerator and store in the refrigerator for up to 3 days after thawing.

What to Eat with Our Beer Bread Recipe?

One of the best things about beer bread is that it tastes incredible by itself but can also be eaten with a wide variety of different foods:

Eat it with a dip like Spinach and Artichoke Dip or Hot Crab Dip.

Enjoy it along with a hearty BBQ Chicken Salad or Summer Steak Salad.

Use it to sop up a bowl of Creamy Pumpkin Soup or Chicken Gnocchi.

More Delicious Quick Bread Recipes You Will Love

Beer bread slices on a plate with butter on the side.
Black pepper parmesan beer bread with butter.
Print

Beer Bread Recipe (with Black Pepper and Parmesan)

This incredibly moist and buttery beer bread recipe is simple to make and loaded with fresh parmesan and cracked pepper flavor!
Course Side Dish
Cuisine American
Prep Time 15 minutes
Cook Time 1 hour 10 minutes
Total Time 1 hour 25 minutes
Servings 12
Calories 243kcal

Equipment

  • 1 loaf pan 8.5" x 4.5" x 2.75" (9"x 5" is fine too)

Ingredients

  • 3 cups all purpose flour
  • 2 1/2 tablespoons granulated sugar
  • 1 tablespoon baking powder
  • 1 1/2 teaspoons salt
  • 12 ounces (a nice flavorful) beer
  • 1/2 cup unsalted butter melted and divided
  • 3/4 cup grated parmesan cheese
  • 1 1/2 teaspoons freshly cracked black pepper
  • zest of 1 lemon (optional)

Instructions

  • Preheat oven to 375°F. Lightly grease loaf pan and set aside.
  • Place flour, sugar, baking powder, and salt in a mixing bowl and whisk together.
  • Create a small well in the center of the flour mixture.
  • Add beer, ¼ cup melted butter, lemon zest (if using), parmesan, and black pepper. Stir together until the dough just comes together. Do not over mix! (if there are small flour pockets, gently stir them away – a couple remaining flour pockets are okay).
  • Pour mixture into a prepared loaf pan.
  • Pour remaining butter over top of batter. Bake for about 1 hour to 1 hour and 10 minutes, or until a toothpick comes out clean when inserted into the center of the loaf.
  • Remove loaf from pan and allow it to cool until just warm to the touch (about 1 hour and 30 minutes).

Notes

**Makes 1 (9”x5” loaf)**
Tips and Tricks for the BEST Beer Bread
Choose a flavorful beer. Craft beers, stouts, ales, or any darker beer are likely to have yeast present that will help the bread rise while also lending a nice flavor to the bread. Some beers have yeast filtered out, like Sam Adams Boston Lager, Miller Lite, or Heineken, and may not be the best choice.
Don’t overmix the batter. Be sure to just mix the batter until most of the flour pockets are gone. Stirring too much will lead to a dense loaf.
Don’t let the batter sit too long. Once the batter is mixed, get it into the pan and into the oven within 10-15 minutes. If you wait too long, the baking soda and beer will react too much before the heat is added, preventing a good rise.
Bake just until the toothpick comes out clean. If you overbake the bread, it may become dry and crumbly instead of tender.
Let the bread cool before slicing. Letting the bread rest for an hour to an hour and a half before slicing will help the slices hold their shape.

Nutrition

Calories: 243kcal | Carbohydrates: 31g | Protein: 6g | Fat: 10g | Saturated Fat: 6g | Polyunsaturated Fat: 1g | Monounsaturated Fat: 2g | Trans Fat: 0.3g | Cholesterol: 26mg | Sodium: 509mg | Potassium: 64mg | Fiber: 1g | Sugar: 3g | Vitamin A: 292IU | Calcium: 124mg | Iron: 2mg

The post Beer Bread Recipe (with Parmesan and Black Pepper) appeared first on Spoon Fork Bacon.
Beer Bread Recipe (with Parmesan and Black Pepper)

Have you ever tried making bread with beer? This beer bread recipe is simple and incredibly flavorful with the addition of parmesan cheese and freshly cracked black pepper and the texture is perfectly tender and buttery. While we love this beer bread with just a generous pat of butter slathered on top, it’s even better when dipped into a big bowl of chili or broccoli cheddar soup! If you’re looking for a quick bread with…

Read More

The post Beer Bread Recipe (with Parmesan and Black Pepper) appeared first on Spoon Fork Bacon.
Black pepper parmesan beer bread with butter.

Have you ever tried making bread with beer? This beer bread recipe is simple and incredibly flavorful with the addition of parmesan cheese and freshly cracked black pepper and the texture is perfectly tender and buttery. While we love this beer bread with just a generous pat of butter slathered on top, it’s even better when dipped into a big bowl of chili or broccoli cheddar soup! If you’re looking for a quick bread with tons of savory flavor, this recipe is about to be your new favorite!

What is Beer Bread?

Want a deliciously comforting loaf of bread that doesn’t require hours of proofing yeast, rising, and baking? Beer bread is a quick bread that uses the natural yeasts in beer to activate a rise. The beer reacts with baking powder to help the bread rise as it bakes. Depending on the type of beer you use, you’ll also add extra flavor to the bread. But don’t worry, all or most of the alcohol cooks out of the bread, leaving you with all the flavor but no alcohol.

How to Make Our Beer Bread Recipe

Ingredients

Beer bread ingredients measured and on a kitchen counter.

Process

  1. Preheat oven to 375°F. Lightly grease the loaf pan and set aside.
  2. Place flour, sugar, baking powder, and salt in a mixing bowl and whisk together.
A lightly greased loaf pan for beer bread.
Flour in a bowl being whisked together.
  1. Create a small well in the center of the flour mixture.
  2. Add beer, ¼ cup melted butter, lemon zest (if using), parmesan, and black pepper. Stir together until the dough just comes together. Do not over-mix! (if there are small flour pockets, gently stir them away – a couple of remaining flour pockets are okay).
Beer bread ingredients in a bowl.
Beer bread dough in a bowl with a spoon in it.
  1. Pour mixture into a prepared loaf pan.
  2. Pour the remaining butter over the top of the batter. Bake for about 1 hour to 1 hour and 10 minutes, or until a toothpick comes out clean when inserted into the center of the loaf.
Beer bread dough in a loaf pan pre oven.
Beer bread dough in a loaf pan with melted butter poured over it.
  1. Remove the loaf from the pan and allow it to cool until warm to the touch (about 1 hour and 30 minutes.
Freshly baked beer bread in a loaf pan.
Beer bread on a cutting board.

Tips and Tricks for the BEST Beer Bread

Choose a flavorful beer. Craft beers, stouts, ales, or any darker beer are likely to have yeast present that will help the bread rise while also lending a nice flavor to the bread. Some beers have yeast filtered out, like Sam Adams Boston Lager, Miller Lite, or Heineken, and may not be the best choice.

Don’t overmix the batter. Be sure to just mix the batter until most of the flour pockets are gone. Stirring too much will lead to a dense loaf.

Don’t let the batter sit too long. Once the batter is mixed, get it into the pan and into the oven within 10-15 minutes. If you wait too long, the baking soda and beer will react too much before the heat is added, preventing a good rise.

Bake just until the toothpick comes out clean. If you overbake the bread, it may become dry and crumbly instead of tender.

Let the bread cool before slicing. Letting the bread rest for an hour to an hour and a half before slicing will help the slices hold their shape.

Beer bread on a plate with butter on the slices.

Variations

Switch up the beer. Choose your favorite craft beer or a spiced seasonal variety to add a little extra flavor to the bread. Darker beers, like Guinness, will also add more flavor to your beer bread.

Add cheese. We added parmesan cheese to this recipe, but sharp cheddar, Gruyere, mozzarella, or Monterrey Jack can also be used.

Mix in the herbs. Fresh herbs, including rosemary, thyme, dill, or oregano, can add a new, fun flavor to the bread. Freshly minced garlic or garlic powder also adds incredible flavor to this bread!

Make it spicy. Add chopped fresh jalapeno peppers, red pepper chili flakes, or pepper jack cheese.

Make it sweet. Add dried fruit like raisins, cranberries, or chopped apricots to the bread, along with chopped walnuts, pecans, or pistachios. Don’t forget a drizzle of honey as well!

Storing Instructions

To keep your beer bread fresh, let it cool completely, then wrap it in plastic wrap and place it in an airtight container for up to 2-3 days on the counter.

You can also freeze baked beer bread by wrapping it in plastic and then in an airtight freezer-safe container. Freeze for up to 3 months. Thaw on the counter or in the refrigerator and store in the refrigerator for up to 3 days after thawing.

What to Eat with Our Beer Bread Recipe?

One of the best things about beer bread is that it tastes incredible by itself but can also be eaten with a wide variety of different foods:

Eat it with a dip like Spinach and Artichoke Dip or Hot Crab Dip.

Enjoy it along with a hearty BBQ Chicken Salad or Summer Steak Salad.

Use it to sop up a bowl of Creamy Pumpkin Soup or Chicken Gnocchi.

More Delicious Quick Bread Recipes You Will Love

Beer bread slices on a plate with butter on the side.
Black pepper parmesan beer bread with butter.
Print

Beer Bread Recipe (with Black Pepper and Parmesan)

This incredibly moist and buttery beer bread recipe is simple to make and loaded with fresh parmesan and cracked pepper flavor!
Course Side Dish
Cuisine American
Prep Time 15 minutes
Cook Time 1 hour 10 minutes
Total Time 1 hour 25 minutes
Servings 12
Calories 243kcal

Equipment

  • 1 loaf pan 8.5" x 4.5" x 2.75" (9"x 5" is fine too)

Ingredients

  • 3 cups all purpose flour
  • 2 1/2 tablespoons granulated sugar
  • 1 tablespoon baking powder
  • 1 1/2 teaspoons salt
  • 12 ounces (a nice flavorful) beer
  • 1/2 cup unsalted butter melted and divided
  • 3/4 cup grated parmesan cheese
  • 1 1/2 teaspoons freshly cracked black pepper
  • zest of 1 lemon (optional)

Instructions

  • Preheat oven to 375°F. Lightly grease loaf pan and set aside.
  • Place flour, sugar, baking powder, and salt in a mixing bowl and whisk together.
  • Create a small well in the center of the flour mixture.
  • Add beer, ¼ cup melted butter, lemon zest (if using), parmesan, and black pepper. Stir together until the dough just comes together. Do not over mix! (if there are small flour pockets, gently stir them away – a couple remaining flour pockets are okay).
  • Pour mixture into a prepared loaf pan.
  • Pour remaining butter over top of batter. Bake for about 1 hour to 1 hour and 10 minutes, or until a toothpick comes out clean when inserted into the center of the loaf.
  • Remove loaf from pan and allow it to cool until just warm to the touch (about 1 hour and 30 minutes).

Notes

**Makes 1 (9”x5” loaf)**
Tips and Tricks for the BEST Beer Bread
Choose a flavorful beer. Craft beers, stouts, ales, or any darker beer are likely to have yeast present that will help the bread rise while also lending a nice flavor to the bread. Some beers have yeast filtered out, like Sam Adams Boston Lager, Miller Lite, or Heineken, and may not be the best choice.
Don’t overmix the batter. Be sure to just mix the batter until most of the flour pockets are gone. Stirring too much will lead to a dense loaf.
Don’t let the batter sit too long. Once the batter is mixed, get it into the pan and into the oven within 10-15 minutes. If you wait too long, the baking soda and beer will react too much before the heat is added, preventing a good rise.
Bake just until the toothpick comes out clean. If you overbake the bread, it may become dry and crumbly instead of tender.
Let the bread cool before slicing. Letting the bread rest for an hour to an hour and a half before slicing will help the slices hold their shape.

Nutrition

Calories: 243kcal | Carbohydrates: 31g | Protein: 6g | Fat: 10g | Saturated Fat: 6g | Polyunsaturated Fat: 1g | Monounsaturated Fat: 2g | Trans Fat: 0.3g | Cholesterol: 26mg | Sodium: 509mg | Potassium: 64mg | Fiber: 1g | Sugar: 3g | Vitamin A: 292IU | Calcium: 124mg | Iron: 2mg

The post Beer Bread Recipe (with Parmesan and Black Pepper) appeared first on Spoon Fork Bacon.

Pumpkin Waffles

These pumpkin spice waffles are one of our new favorite breakfasts for fall! They’re crispy on the outside, hot and fluffy on the inside, and full of pumpkin flavor. Once we had the recipe perfected, they were quickly added to our list of favorite pumpkin recipes because as soon as the first leaf falls, we can’t get enough of the orange stuff! Get ready to rotate between pumpkin donuts, these pumpkin waffles, and cheesy pumpkin…

Read More

The post Pumpkin Waffles appeared first on Spoon Fork Bacon.
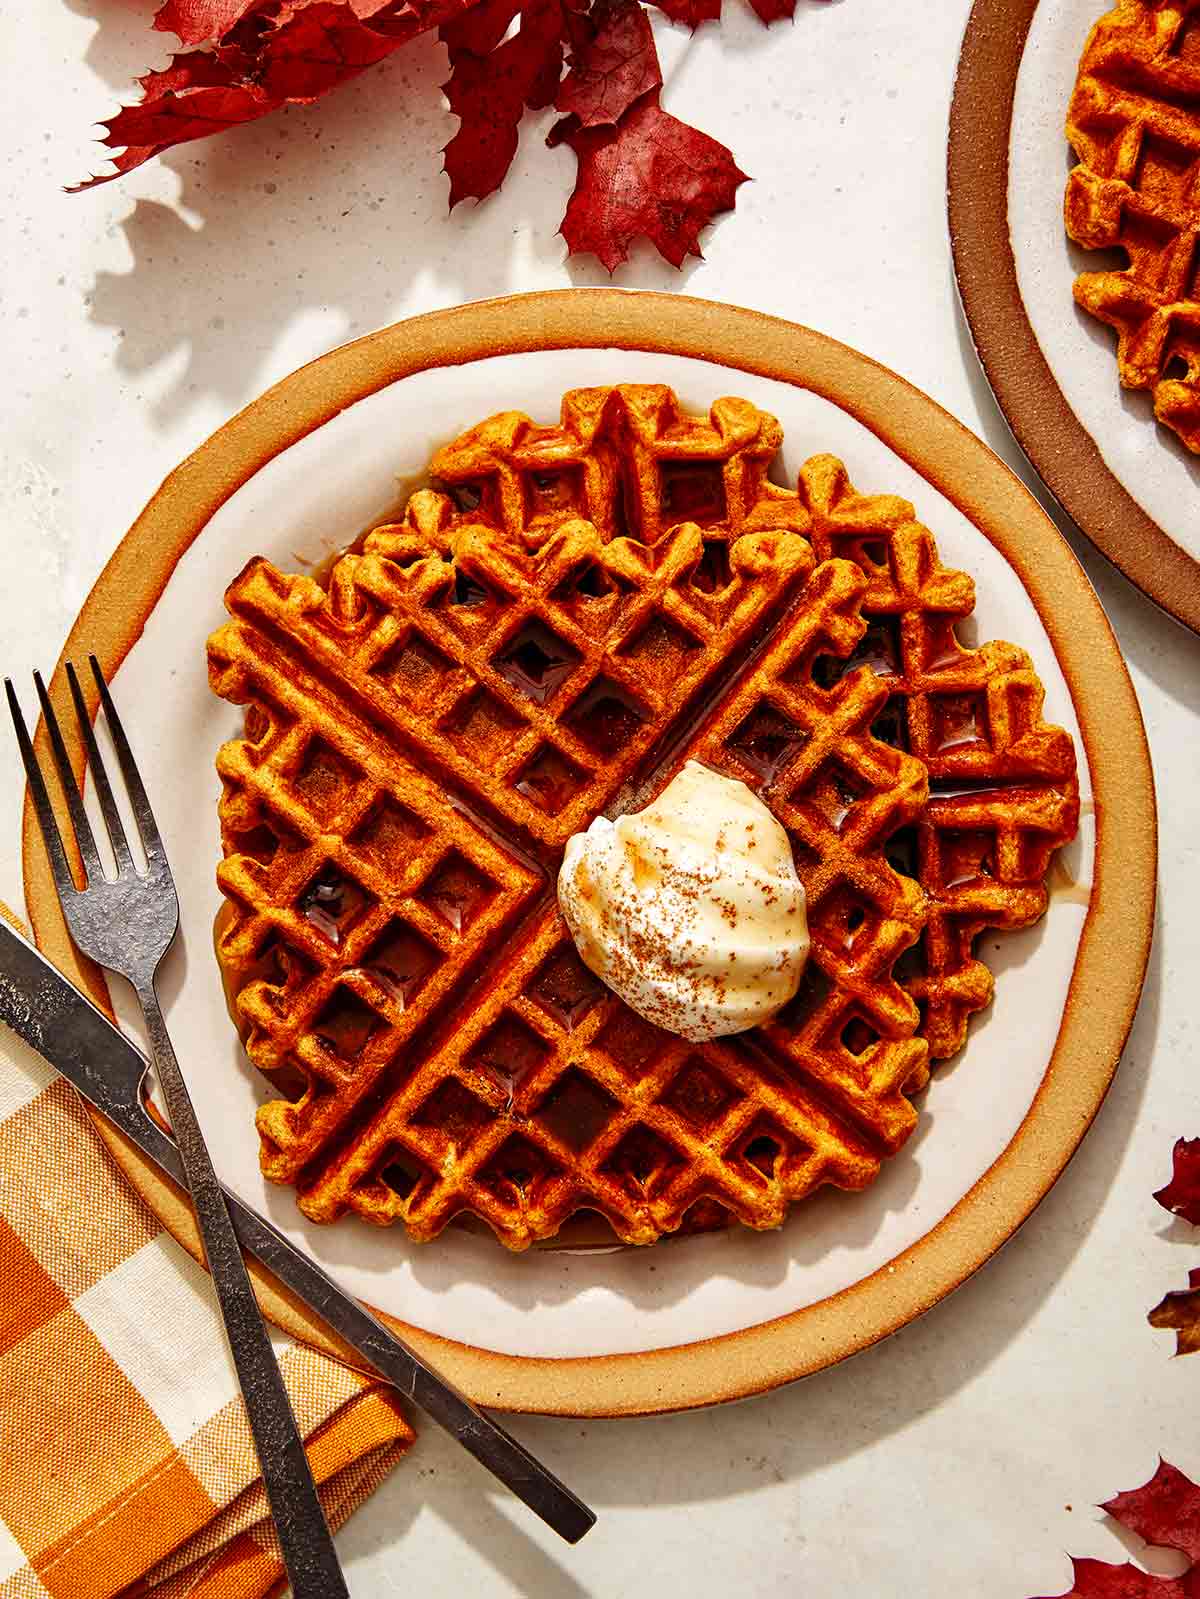
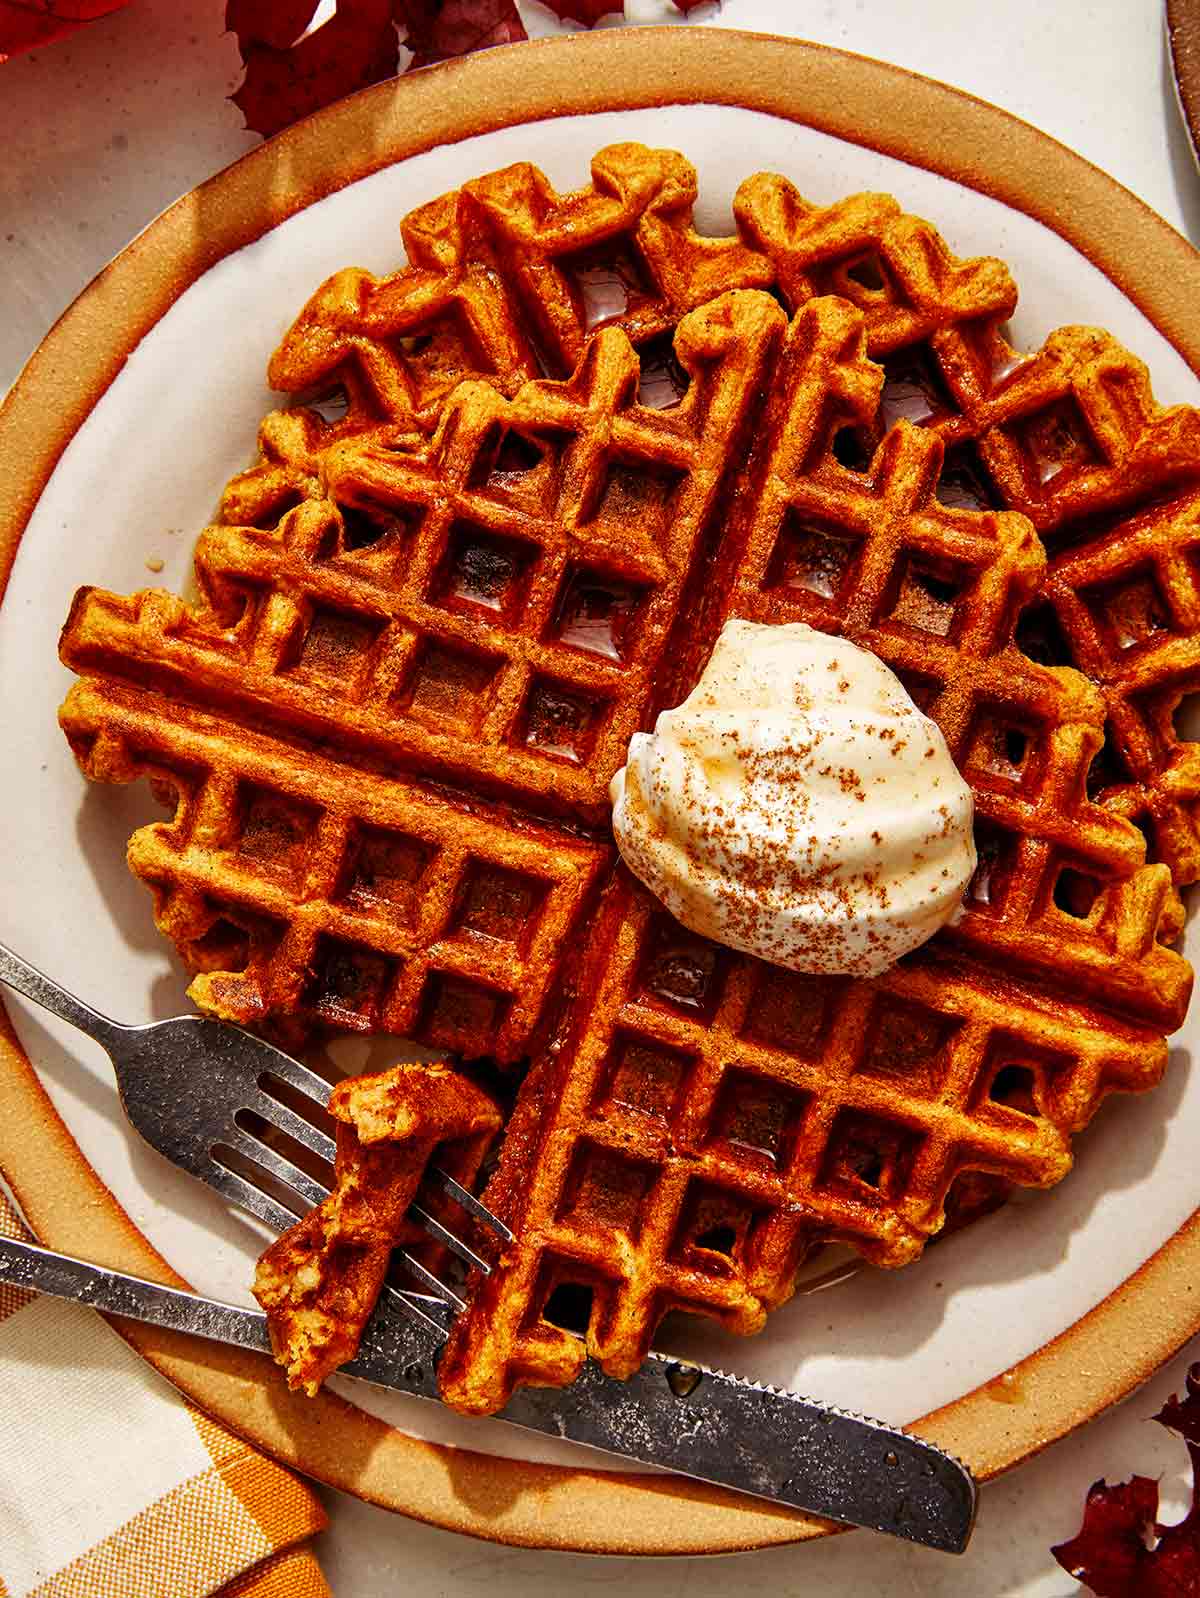
Pumpkin waffles on a plate with whipped cream on top.

These pumpkin spice waffles are one of our new favorite breakfasts for fall! They’re crispy on the outside, hot and fluffy on the inside, and full of pumpkin flavor. Once we had the recipe perfected, they were quickly added to our list of favorite pumpkin recipes because as soon as the first leaf falls, we can’t get enough of the orange stuff! Get ready to rotate between pumpkin donuts, these pumpkin waffles, and cheesy pumpkin pancakes for a deliciously festive fall season!

You’ll love how easy these waffles are to make and how delicious they taste straight out of the iron. All you need is a little butter and syrup, but we won’t say no to a dollop of pumpkin butter slathered on top, either! We recommend making more than you need and freezing the extras for a quick weekday breakfast that just needs to be popped back into the toaster!

Pumpkin waffle recipe on a plate being served.

How to Make Pumpkin Waffles

Ingredients

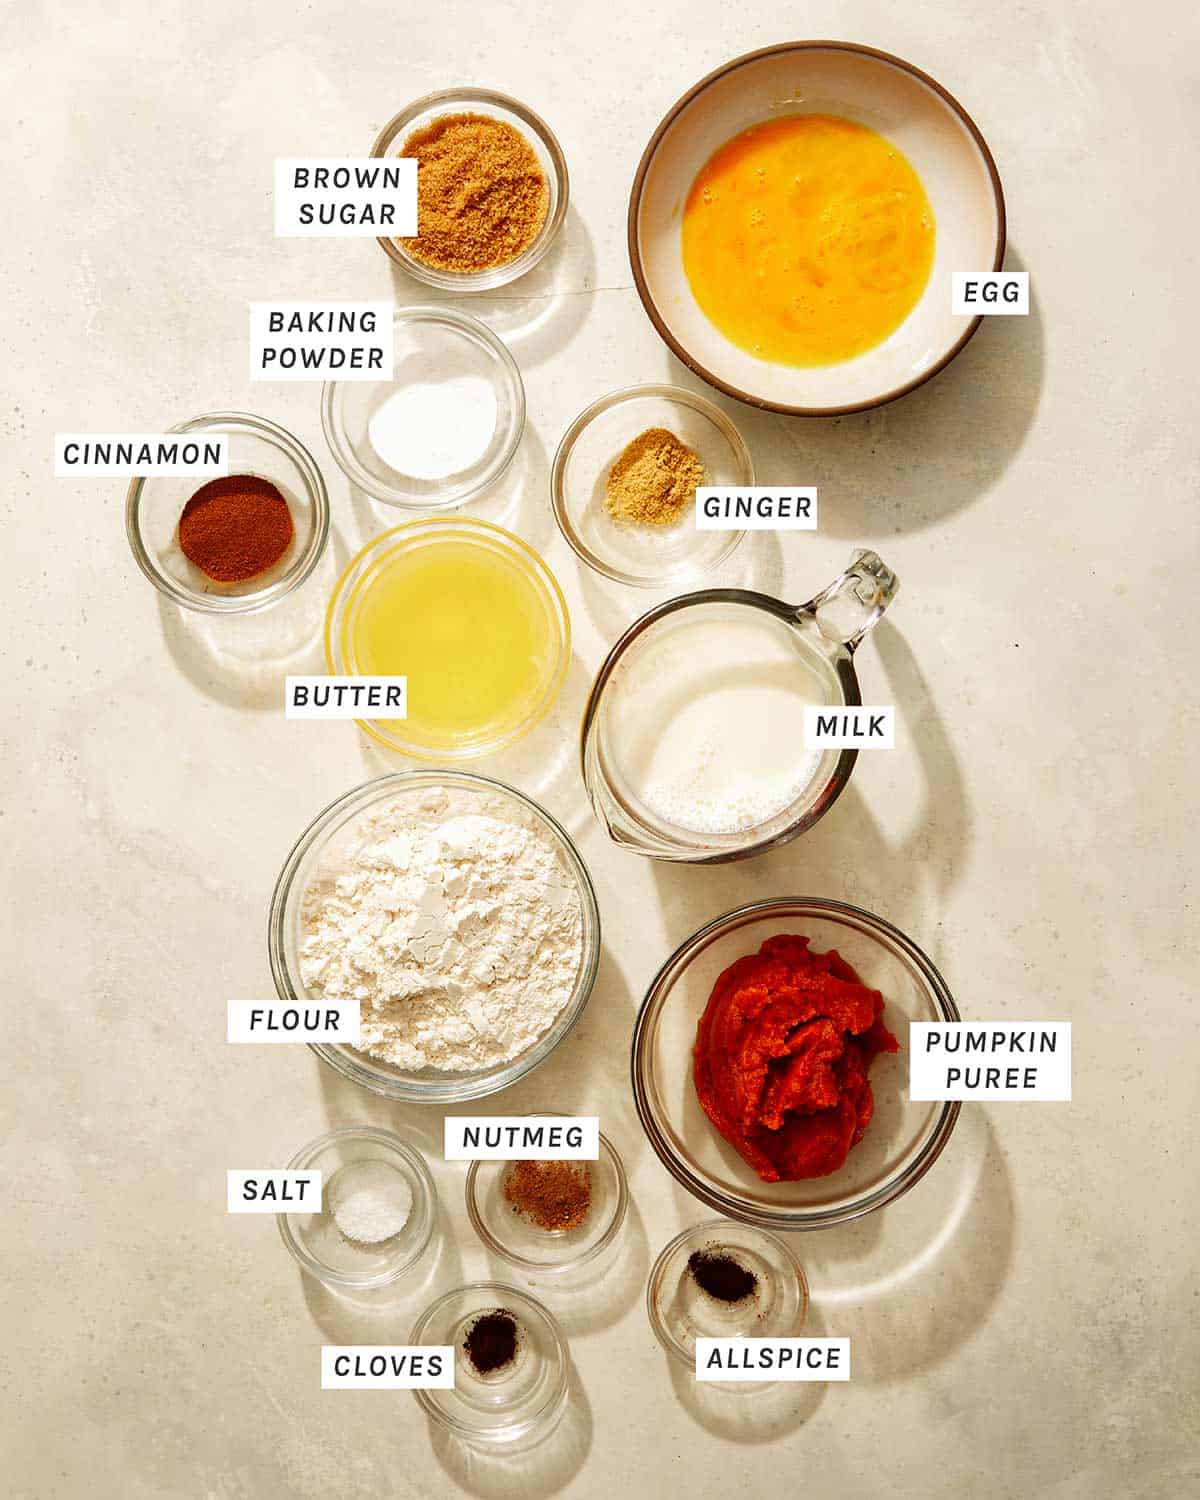
Ingredients to make pumpkin waffles.

Process

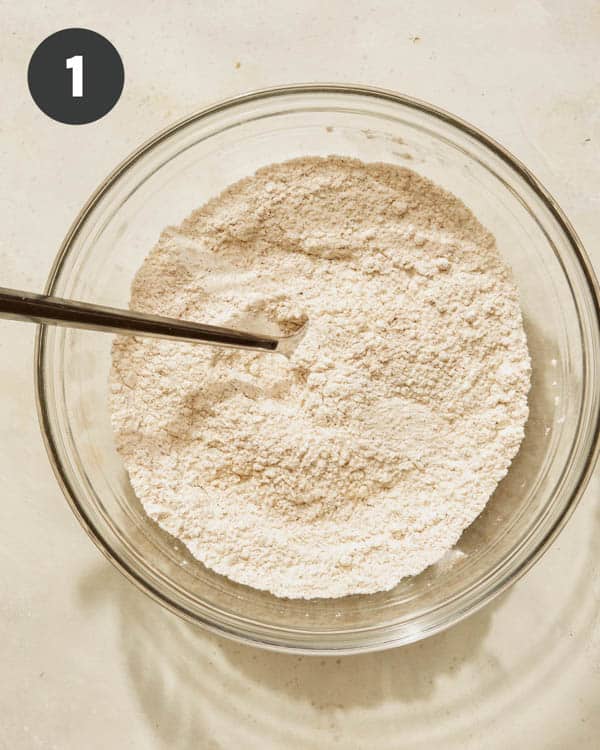
  1. In a mixing bowl, whisk together flour, sugar, baking powder, spices, and salt.
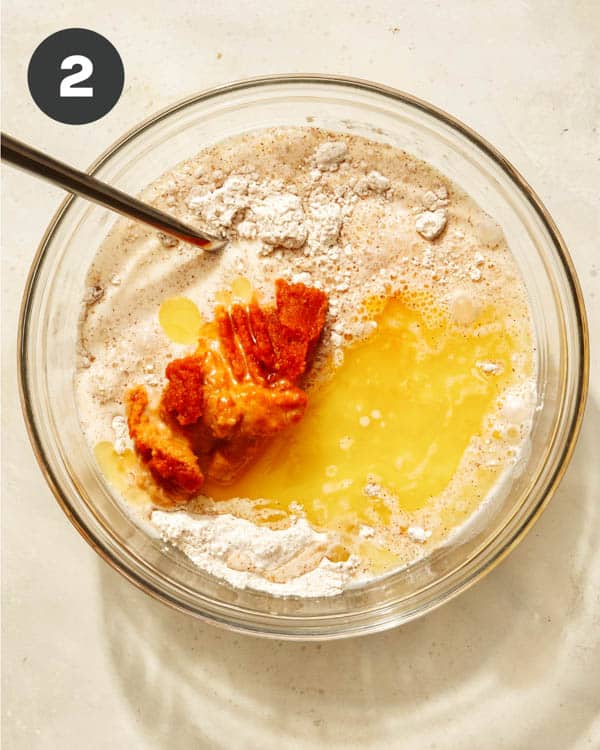
  2. Add the remaining ingredients.
Flour mixture in a bowl whisked together for pumpkin waffles.
Pumpkin waffle batter ready to be mixed together.
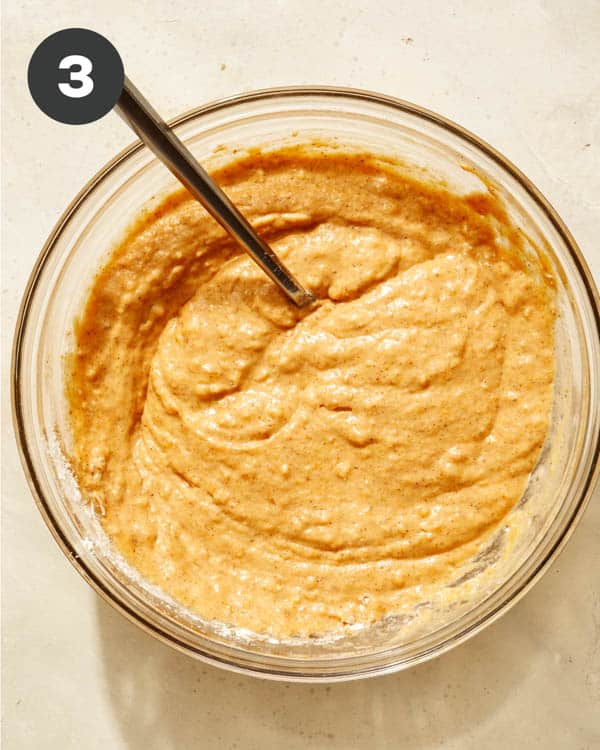
  1. Stir together with a fork until a batter forms and the mixture is still lumpy, but no dry spots remain.
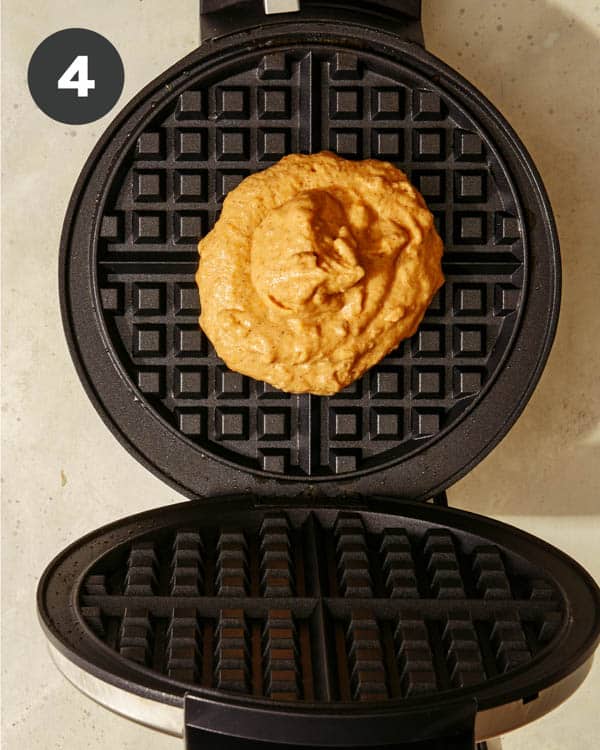
  2. Set the waffle iron to the desired temperature. Once heated, lightly spray the top and bottom with nonstick cooking spray.
Pumpkin waffles batter in a bowl.
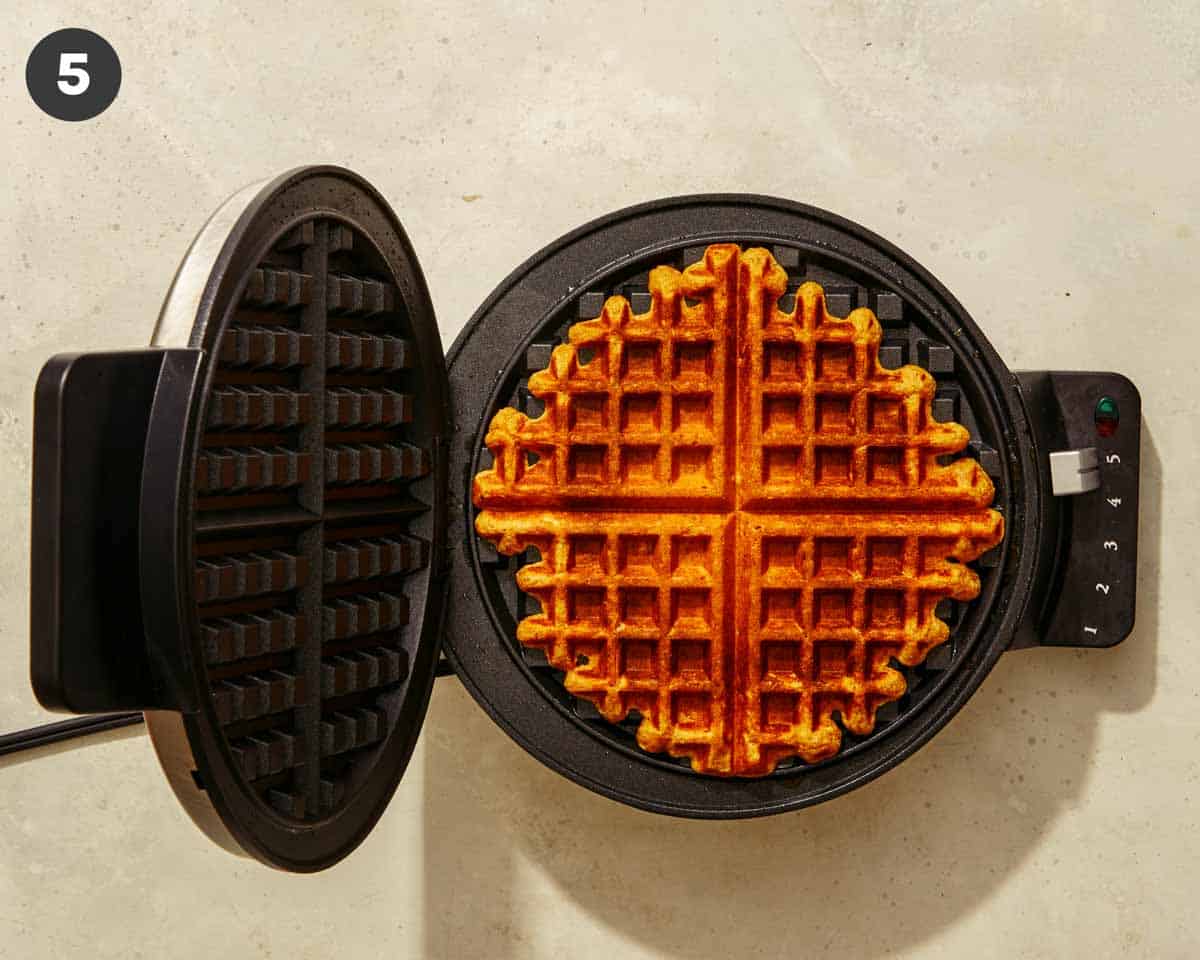
Pumpkin waffles batter in a waffle iron.
  1. Pour ⅓ cup of the batter into the center of the waffle iron and press. Once desired doneness has been achieved, transfer the waffle to a baking sheet and repeat until all batter has been used, keeping the waffles in a single layer.
Pumpkin waffles being made in a waffle iron.

Storing Leftover Waffle Batter

If you’re not ready to use all of the batter and want to save it for another morning, you can! When storing waffle batter, keep in mind that the longer the batter sits, the more leavening power will be lost from the baking powder. We recommend storing any leftover waffle batter in the refrigerator in an air-tight container for up to two days.

For an easier pumpkin waffle breakfast, you can combine all of the dry ingredients for this recipe ahead of time and store it in an airtight container in the pantry until you’re ready to use it.

Storing and Reheating Leftover Waffles

Whether you’re making a double (or a triple!) batch of these waffles or end up having one or two left uneaten, they’re perfect for saving and eating another day.

You can store leftovers in the refrigerator for up to three days. Lay the waffles in a single layer on a pan or plate, cover, and refrigerate.

If you want to keep them for more than three days, store your leftovers in the freezer! Lay the waffles in a single layer on a sheet pan and freeze for 2-4 hours or until mostly frozen. Then, add the waffles to a freezer bag or an airtight freezer container and freeze for up to 3 months.

To reheat waffles, pop them in the toaster until warmed through. If reheating from frozen, you may need to warm it in the microwave for 20-30 seconds first so that the outside doesn’t get over-browned before the inside warms through.

Tips for Making the BEST Pumpkin Waffles

  • Avoid overmixing the batter, or the waffles will be dense and tough. Mix only until the dry spots are gone. The batter will still be a bit lumpy.
  • We love the mix of cinnamon, ginger, nutmeg, clove, and allspice to give these waffles a warm pumpkin spice flavor. If you’re short on time or don’t have all the spices needed, a second option would be to use a pre-mixed pumpkin pie spice mix.
  • If you plan on making extras to freeze and reheat later, slightly undercooked the ones you want to freeze, just so the outside isn’t too dark. This way, you can brown them and warm them in the toaster without burning the outside of the waffles.

What to Serve with Our Waffles

For a complete fall breakfast, serve these pumpkin spice waffles with:

More Delicious Breakfast Recipes You Will Love

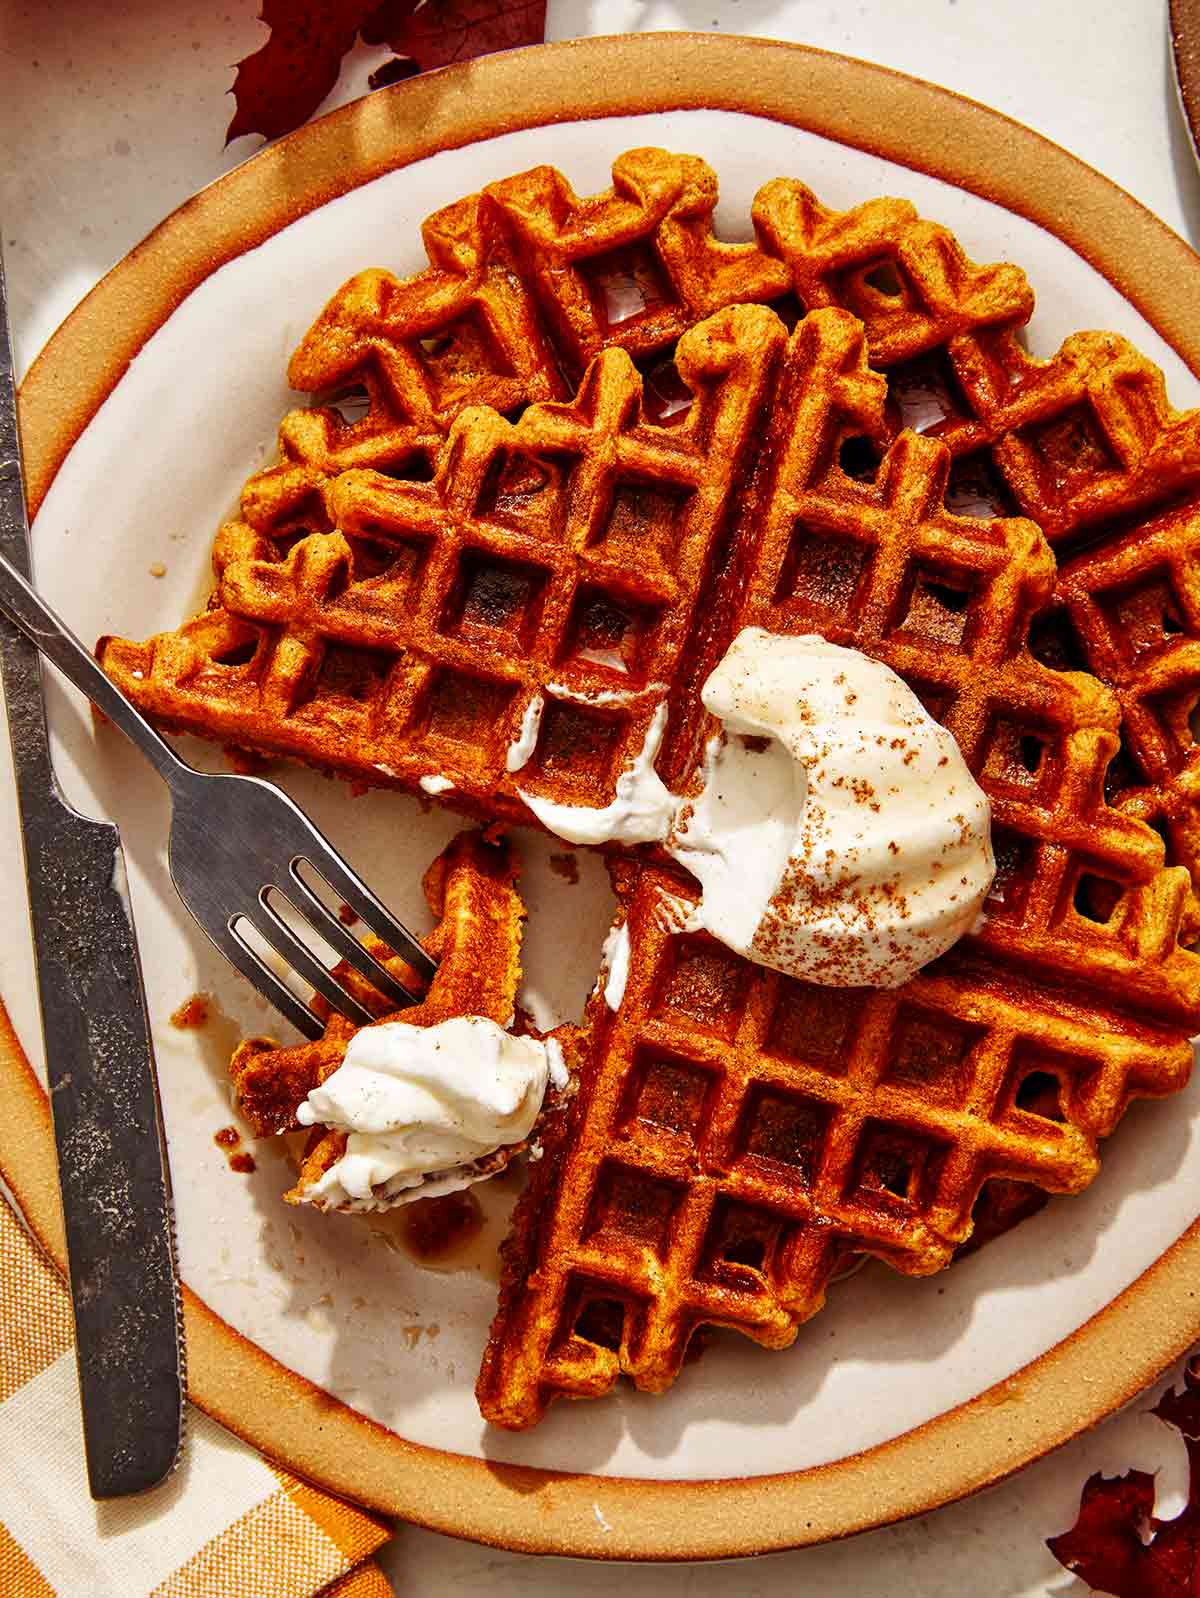
Pumpkin waffles with a bite taken out of them.
Pumpkin waffle recipe on a plate.
Print

Pumpkin Waffles

Crispy on the outside and full of all the pumpkin flavor you love on the fluffy inside, these pumpkin spice waffles are a new fall breakfast favorite!
Course Breakfast, brunch
Cuisine Belgium
Prep Time 10 minutes
Cook Time 15 minutes
Total Time 25 minutes
Servings 6
Calories 174kcal

Equipment

Ingredients

  • 1 cup all purpose flour
  • 1 tablespoon light brown sugar
  • 2 teaspoons baking powder
  • 1 1/2 teaspoons ground cinnamon
  • 1/2 teaspoon ground ginger
  • 1/2 teaspoon ground nutmeg
  • 1/8 teaspoon ground cloves
  • 1/8 teaspoon ground allspice
  • 1/4 teaspoon salt
  • 3/4 cup whole milk
  • 1/2 cup pumpkin puree
  • 3 tablespoons unsalted butter, melted and cooled
  • 1 large egg beaten
  • nonstick spray

Instructions

  • In a mixing bowl whisk together flour, sugar, baking powder, spices, and salt.
  • Add the remaining ingredients.
  • Stir together with a fork until a batter forms, mixture is still lumpy, but no dry spots remain.
  • Set waffle iron to desired temperature. Once heated, lightly spray the top and bottom with nonstick cooking spray.
  • Pour ⅓ cup of the batter into the center of the waffle iron and press. Once desired doneness has been achieved, transfer waffle to a baking sheet and repeat until all batter has been used.

Notes

**Recipe Makes 6 Waffles – Each Waffle is 1 Serving**

Nutrition

Calories: 174kcal | Carbohydrates: 22g | Protein: 5g | Fat: 8g | Saturated Fat: 5g | Polyunsaturated Fat: 1g | Monounsaturated Fat: 2g | Trans Fat: 0.2g | Cholesterol: 50mg | Sodium: 265mg | Potassium: 132mg | Fiber: 2g | Sugar: 4g | Vitamin A: 3449IU | Vitamin C: 1mg | Calcium: 138mg | Iron: 2mg

The post Pumpkin Waffles appeared first on Spoon Fork Bacon.
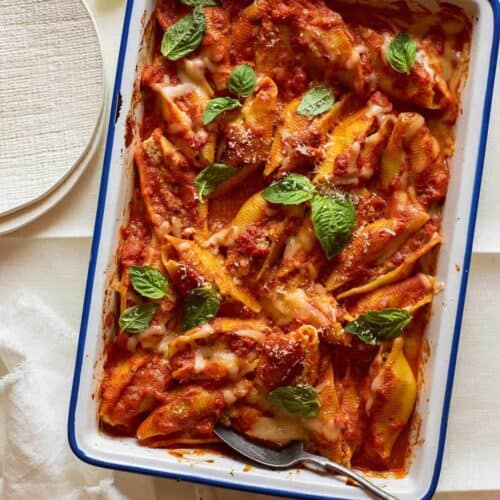
How to Make Fried Rice

Few dishes are as versatile as fried rice, filled with chicken, shrimp, steak, or vegetarian with only eggs – everyone has a favorite spin. Our simple recipe is incredibly tasty, takes less than 20 minutes to make, and is close to (or even better than) your favorite Chinese- American takeout fried rice! Leftover rice, eggs, a few frozen veggies, Chinese sausage, and a couple of sauces are all you need to whip up a savory…

Read More

The post How to Make Fried Rice appeared first on Spoon Fork Bacon.
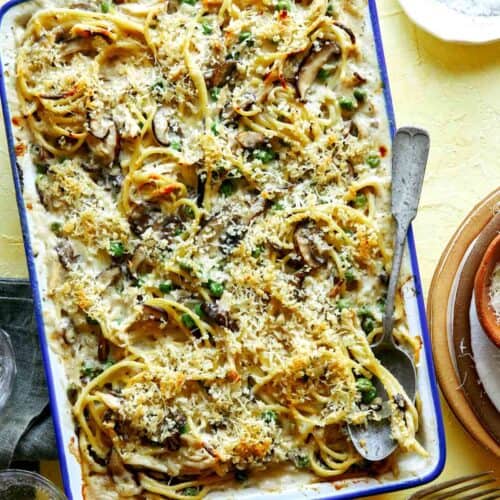
Fried rice in a bowl.

Few dishes are as versatile as fried rice, filled with chicken, shrimp, steak, or vegetarian with only eggs – everyone has a favorite spin. Our simple recipe is incredibly tasty, takes less than 20 minutes to make, and is close to (or even better than) your favorite Chinese- American takeout fried rice!

Leftover rice, eggs, a few frozen veggies, Chinese sausage, and a couple of sauces are all you need to whip up a savory and satisfying dish of fried rice. While we wrote this recipe how we love it the most, it’s so versatile that you can customize it with almost anything on hand. We even included a list of easy variations in case you need to substitute any ingredients!

Next time you have leftover rice in the fridge, use this simple guide on how to make fried rice to transform it into a delicious one-dish meal!

How to Make Fried Rice

Fried rice ingredients on a kitchen counter.
  1. Place a large skillet over high heat. Add 1 tablespoon of sesame oil. Add eggs and scramble in skillet until fully cooked, 1 to 2 minutes.
  2. Transfer eggs to a plate and place skillet back over heat.
Scrambled eggs in a skillet.
Scrambled eggs on a plate resting.
  1. Add an additional 1 tablespoon of oil to the skillet. Add sausage and cook for 2 to 3 minutes.
  2. Add garlic and peas and carrot and cook for 30 seconds.
Sausage cooking in a skillet for fried rice.
Sausage and veggies cooking in a skillet to make a fried rice recipe.
  1. Stir in oyster sauce and soy sauce.
  2. Add rice and mix around to coat evenly. Continue to cook rice for 3 to 4 minutes until slightly crisp around the edges.
Fried rice ingredients in a skillet.
Rice in a skillet cooking to make fried rice.
  1. Add the egg back to the skillet, along with a pinch of white pepper, and toss together until evenly distributed.

Fried rice in a skillet finished.
  1. Remove from heat and stir in green onion. Serve.
Fried rice in a bowl with a spoon in it.

Tips and Tricks for Fried Rice Success

Follow these essential tips for the best, better than take-out fried rice!

Start with cold, leftover rice. Letting rice sit in the refrigerator overnight firms up each rice grain to keep its shape and give you the signature fried rice texture. Freshly cooked rice can lead to mushy fried rice.

Start with a HOT pan. Cooking at high heat helps everything brown and crisp up without overcooking. If the heat is too low, you’ll have to cook everything much longer for the outside to get toasty brown.
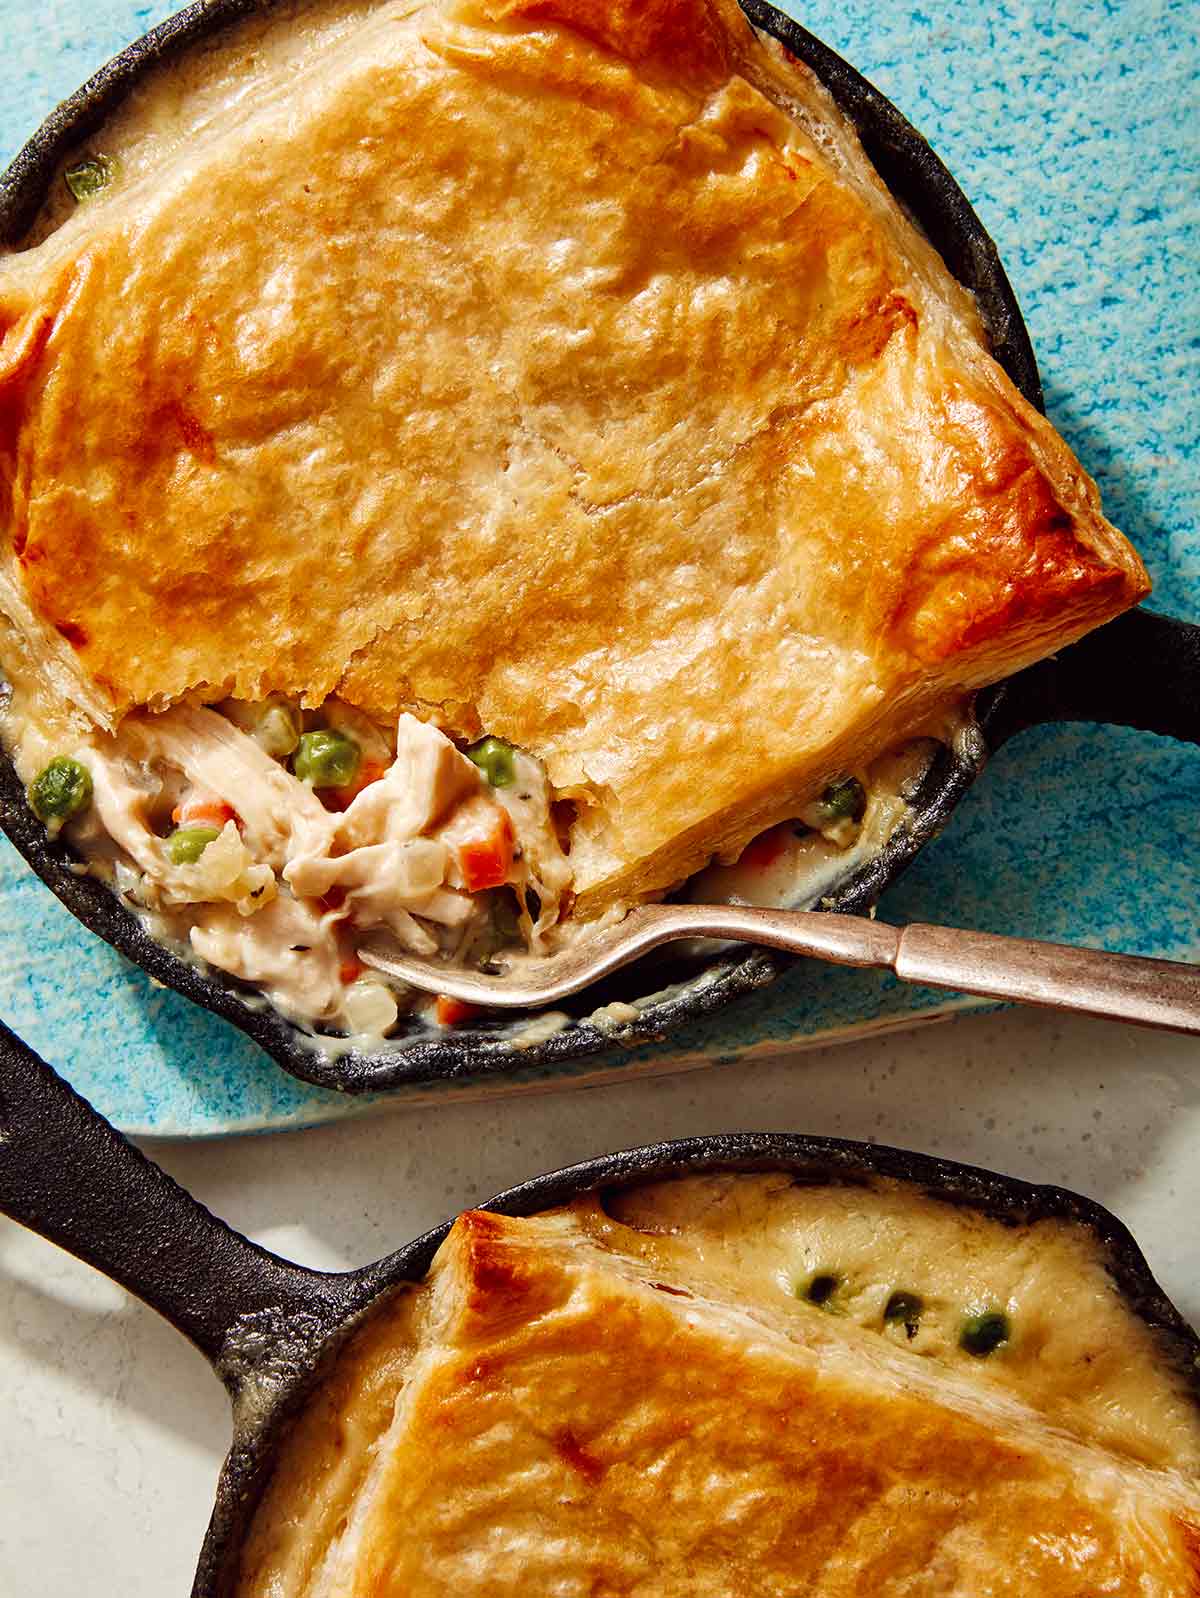
Don’t overcrowd the pan. You’ll want to use a large skillet for this dish, but if all you have is something smaller, only add as much sausage, peas, and carrots to fill the bottom of the pan, working in batches if you have to. Overcrowding increases the chances of overcooking.

Add more sauce as needed. Start with the amount of soy sauce in the recipe, but feel free to add more as you taste it. Some people like the salty taste more than others. Two tablespoons of soy sauce is just right for us, but you can customize it to your liking.

Variations

You can mix up most of the ingredients to make this the perfect leftover or clean-out-the-fridge meal. Here are some possible ideas.

Vegetables: Use any combination of frozen peas, carrots, corn, onions, or edamame or fresh sliced mushrooms, broccoli, or bell peppers.

Proteins: Instead of Chinese sausage, you can use diced chicken, steak, pork sausage, salmon, or shrimp.

Rice: We like to use short-grain rice, like Arborio, carnaroli, or Japanese sushi rice. But you can also use long-grain rice, including Jasmine or basmati.

Make Ahead, Reheating and Freezing Instructions

Prep/Make Ahead

Cooking your rice ahead of time makes this meal come together quickly any night of the week. Cook rice up to 3 days ahead and store in the refrigerator until ready to use.

You can also meal prep this entire dish and reheat it when you’re ready to eat. Like Chinese food takeout leftovers, this fried rice is almost better the next day!

Just let your fried rice cool, then store it in an airtight container in the refrigerator for up to 3-4 days.

Freezing

You can freeze your fried rice if you want to store it for longer than a few days. Just portion your completely cooled rice into freezer bags, squeeze out all of the air and store in the refrigerator for up to 3 months.

Reheating

From Refrigerator

The best way is to “re-fry” the rice in a hot skillet. Heat 1 tablespoon of oil in a skillet on the stove and add the rice and a tablespoon of water. Cover the skillet and cook for 1-2 minutes, then remove the cover and cook for another 2-3 minutes until hot.

You can also reheat your fried rice in the microwave, covered with a moist paper towel to help prevent the rice from drying out. Heat for 1-2 minutes until warmed through.

From Freezer

Preferably, let your frozen rice unthaw in the refrigerator and follow either reheating direction above.

If reheating from frozen, cover with a moist paper towel and heat in the microwave, 45-60 seconds at a time, until hot. Or, heat 1 tablespoon of oil in a skillet on the stove and add the rice and 1-2 tablespoons of water. Cover the skillet and cook for 3-4 minutes, then remove the cover and cook for another 4-5 minutes or until hot. Add extra water if the rice dries out.

What to Serve with Our Fried Rice Recipe

While fried rice is perfectly capable of serving as a meal itself, we love serving it along with these favorites:

More Delicious Asian Inspired Recipes You Will Love

Fried rice in a bowl with green onions on the side.
Print

How to Make Fried Rice

Learn how to make fried rice in less than 20 minutes at home for a savory and satisfying better-than-takeout dinner!
Course dinner, lunch, Side Dish
Cuisine Chinese
Prep Time 10 minutes
Cook Time 10 minutes
Total Time 20 minutes
Servings 3
Calories 400kcal

Ingredients

  • 3 tablespoons sesame oil divided
  • 3 large eggs beaten
  • 4 ounces diced Chinese sausage (about 3 sausages)
  • 1 tablespoon minced garlic
  • 2/3 cup frozen peas and carrots
  • 1 tablespoon oyster sauce
  • 2 tablespoons soy sauce
  • 16 ounces leftover cooked short grain rice
  • pinch white pepper
  • 2 thinly sliced green onion

Instructions

  • Place a large skillet over high heat. Add 1 tablespoon sesame oil. Add eggs and scramble in skillet until fully cooked. 1 to 2 minutes.
  • Transfer eggs to a plate and place skillet back over heat.
  • Add an additional 1 tablespoon oil to skillet. Add sausage and cook for 2 to 3 minutes.
  • Add garlic and peas and carrot and cook for 30 seconds.
  • Stir in oyster sauce and soy sauce.
  • Add rice and mix around to evenly coat. Continue to cook rice for 3 to 4 minutes until slightly crisp around the edges.
  • Add egg back to the skillet, along with a pinch of white pepper and toss together until evenly distributed.
  • Remove from heat and stir in green onion. Serve.

Nutrition

Calories: 400kcal | Carbohydrates: 47g | Protein: 11g | Fat: 19g | Saturated Fat: 3g | Polyunsaturated Fat: 7g | Monounsaturated Fat: 7g | Trans Fat: 0.02g | Cholesterol: 164mg | Sodium: 898mg | Potassium: 161mg | Fiber: 0.4g | Sugar: 1g | Vitamin A: 318IU | Vitamin C: 2mg | Calcium: 41mg | Iron: 3mg

The post How to Make Fried Rice appeared first on Spoon Fork Bacon.