Classic Asparagus Quiche

This asparagus quiche recipe is a total showstopper! Flaky pastry crust, tender asparagus spears, and a savory cheese filling come…

This asparagus quiche recipe is a total showstopper! Flaky pastry crust, tender asparagus spears, and a savory cheese filling come together for a satisfying and impressive dish.

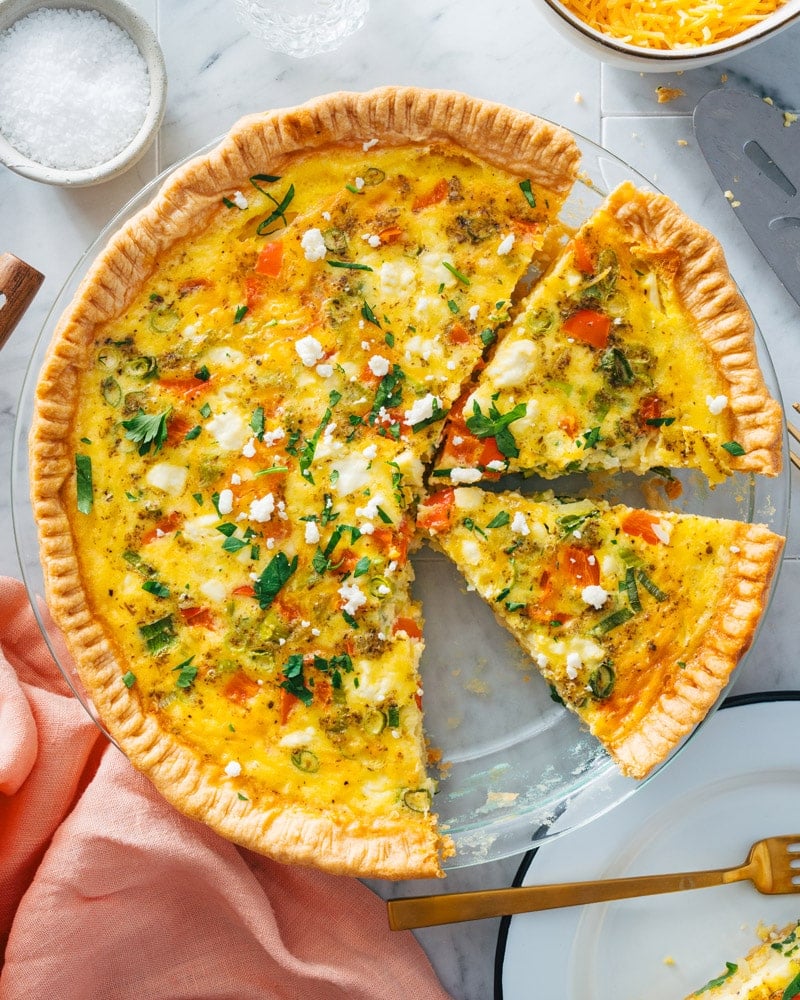
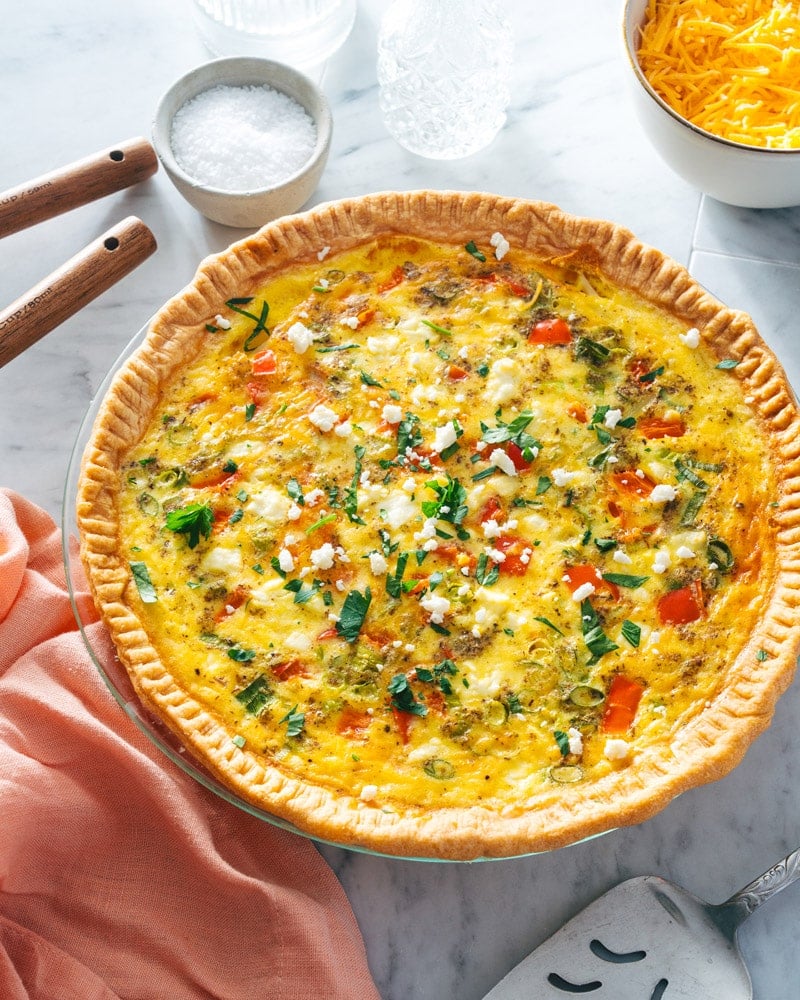
Asparagus Quiche in pie pan with feta cheese garnish.

The buttery scent of this asparagus quiche recipe in the oven may win you one or two marriage proposals—or at least it will have the neighbors wandering by to snatch up a slice! It’s packed with savory, cozy flavor, perfect for spring brunches or light dinners with a crisp glass of white wine.

Why we love this recipe: This asparagus quiche is worth every second of time for the satisfaction you’ll get from making a quiche from scratch. Plus, it’s easy to make in advance. We served it to guests who went gaga over this one. Come: let’s make quiche!

How to make this asparagus quiche recipe: an overview!

In under 2 hours, you’ve got a complete masterpiece of an asparagus quiche recipe: made completely from scratch. That includes a homemade quiche crust. Want a shortcut? You can do store-bought crust too: see below. But we highly recommend the homemade crust: it’s crispy, buttery perfection. Here’s what to expect from this process timing-wise:

Make the quiche dough20 minutes, active
Freeze the crust15 minutes, inactive
Blind bake the dough + make the filling25 minutes, active
Bake the quiche40 to 50 minutes, inactive

Here is an overview in photographs of how to make this asparagus quiche. For all the details, jump to the full recipe below.

Step 1: Blind bake the quiche crust.

Step 1: Make the quiche crust (go this quiche crust recipe for instructions). Freeze it for 15 minutes. Blind bake the crust with pie weights at 375°F for 15 minutes.

Step 2: Saute the asparagus and make the filling.

Step 2: Make the filling: sauté the asparagus. Whisk together the eggs, milk, cream, salt, and pepper. Place grated smoked mozzarella cheese in bottom of the crust. Pour the egg mixture over the top. Sprinkle the sauteed asparagus and feta cheese crumbles.

Step 3: Bake the quiche.

Step 3: Bake the quiche for 40 to 50 minutes at 350°F.

Tips for homemade quiche crust

Ever made a quiche crust from scratch? It’s pretty simple, but you do need a few dough-making techniques. Working with dough takes time and practice. If it’s your first time, give yourself patience and grace.

  • Use a standard 9-inch pie plate, not deep dish. Deep dish will be too thick for the filling amount here.
  • A pastry cloth can be helpful (optional). It helps for rolling out the dough so it doesn’t stick on the counter. If you don’t have one, just lightly dust the counter with flour.
  • Use the tines of a fork to decorate the edge. This is easier than a fluted edge, though either works.
  • You’ll freeze the crust 15 minutes before blind baking it. This helps the crust to hold its shape while blind baking. This freezer method shortcuts refrigerating for a few hours. (You’re welcome!)
Asparagus Quiche slice with fork.

Blind baking is key for the crust

The biggest key to making an asparagus quiche recipe is blind baking the crust. Blind baking is baking a pie crust without the filling. This makes sure that crust is perfectly firm before you add the wet filling, which is especially important for a custard pie like a quiche because the filling is so wet. If you don’t blind bake, you’ll get soggy bottom crust for sure (we did!). Here’s what to know about blind baking and how to get the perfect flaky crust:

  • Prick holes with a fork all over the crust. This is called docking the crust: it makes it puff up less while in the oven.
  • Add pie weights: like dried beans or rice! You can use ceramic pie weights (we used these) to weigh down the crust so it doesn’t get too puffy. Or, you can use dried beans or dry rice! It doesn’t harm the beans or rice: you can still cook them as normal after using them as weights.

Shortcut: use store-bought crust

Yes, you can short-cut the effort to make your homemade crust and go with a store-bought pastry crust. Any type of purchased pie crust works (we don’t have a favorite brand since we always make our own). You’ll still need to blind bake the store-bought crust! So start in the recipe below at Step 3.

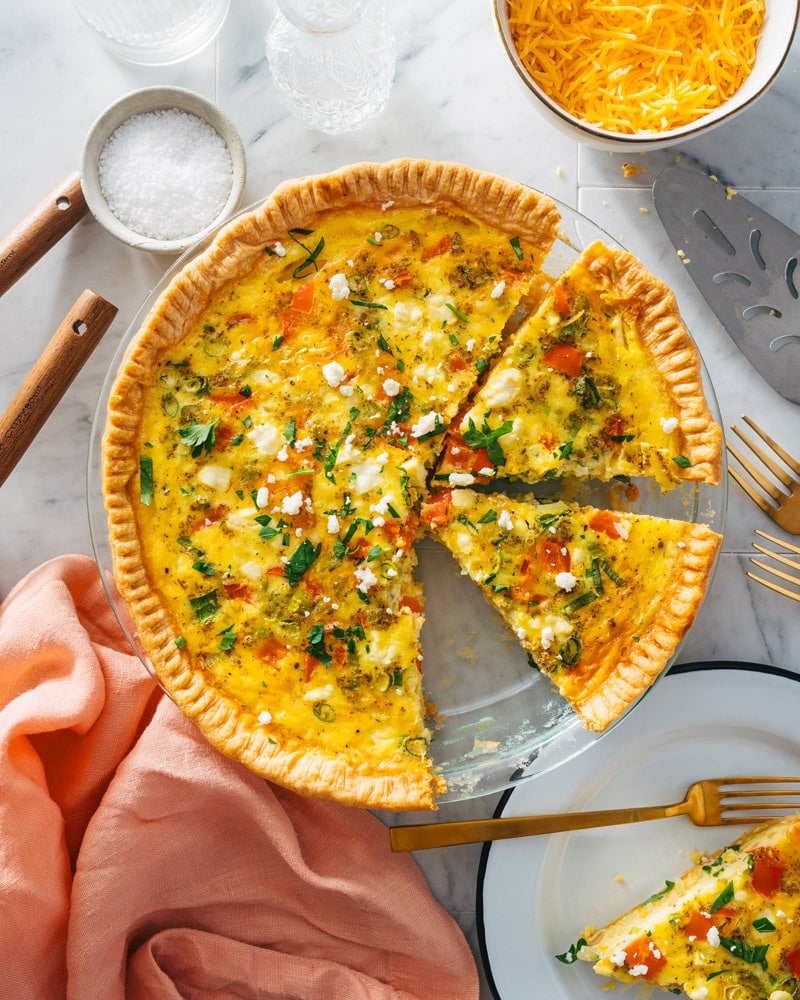
Asparagus Quiche with slice out and table setting.

Make ahead instructions

Yes, it takes about 2 hours to make! But here’s the thing: only about 1 hour of it is active time. Even better: it saves VERY well. It’s so easy to make the night before, or even a few days in advance! Here’s what to do:

  • Make the entire quiche 1 to 3 days in advance. Then refrigerate it until serving!
  • Warm in a 200 degree oven for about 20 minutes before serving. It’s also delicious cold, but we like it warmed up.
  • Saves 5 days refrigerated. Wrap it in plastic or aluminum to keep it fresh.

Ways to serve asparagus quiche

This asparagus quiche recipe is a total showstopper! We served this at a spring birthday brunch for my mom and everyone went crazy over it. In fact, it was suddenly gone before we knew it! It was absolutely perfect for a festive occasion (it would be great for Easter or Mother’s Day). While recipe testing, we also ate it for dinner: which was perfect as well. Here are some ways to serve quiche:

Dietary notes

This asparagus quiche is vegetarian.

Frequently asked questions

Do I need to pre-cook the asparagus?

Pre-cooking the asparagus for a few minutes is essential to ensure it’s tender throughout the quiche.

How can I avoid a soggy quiche crust?

Soggy quiche crust can happen for a few reasons. Make sure your dough is chilled before baking to prevent it from melting too quickly. It’s essential to pre-bake (blind bake) the crust for a few minutes before adding the filling.

Can I use a store-bought pie crust?

Absolutely! Using a store-bought crust is a great time-saver. Just follow the package instructions for pre-baking.

How can I tell when my quiche is done?

The quiche is done when the center is no longer jiggly and a toothpick inserted comes out clean. The crust should also be golden brown.

Print
Quiche crust

Classic Asparagus Quiche


5 Stars 4 Stars 3 Stars 2 Stars 1 Star

No reviews

  • Author: Sonja Overhiser
  • Prep Time: 30 minutes
  • Cook Time: 1 hour 15 minutes
  • Total Time: 1 hour 45 minutes
  • Yield: 8

Description

This asparagus quiche recipe is a total showstopper! Flaky pastry crust, tender asparagus spears, and a savory cheese filling come together for a satisfying and impressive dish.


Ingredients

For the quiche crust*

  • 1 cup all-purpose flour
  • ½ teaspoon kosher salt
  • ¼ teaspoon baking powder
  • 6 tablespoons unsalted butter
  • 4 to 6 tablespoons ice water

For the asparagus quiche

  • 4 ounces asparagus (about 8 thin stalks)
  • 1 tablespoon olive oil
  • 1 teaspoon kosher salt, divided
  • 3 large eggs
  • 1 cup milk
  • ½ cup heavy cream
  • Fresh ground black pepper
  • 3 ounces (about ¾ cup) smoked mozzarella or smoked gouda, grated
  • ¼ cup feta cheese crumbles

Instructions

  1. Make the quiche crust: Preheat the oven to 375°F. In a medium bowl, mix the all-purpose flour, kosher salt, and baking powder. Slice the butter into pieces, then cut it into the flour mixture using a pastry blender until a coarse meal texture is obtained. Sprinkle the ice water over the flour 1 tablespoon at a time, mixing gradually with fork until the dough sticks together. Add additional water by the tablespoon until the dough comes together but is not sticky. Form the dough into a ball.
  2. Roll out and freeze the dough: If you have a pastry cloth, set it up and dust it with flour; otherwise, flour a clean work surface. Put on a rolling pin cover (optional), and either way, dust the pin in flour. Roll the dough to an even 12-inch circle (which corresponds to the 9-inch pie pan). Use a rolling pin to transfer the dough to the pie pan (make sure it is standard and not deep dish). Fold the overhanging dough backwards and seal it to form a rim. Then press it with the tines of a fork to decorate the edges (see the photos). Use a fork to gently prick holes in the bottom and sides of the crust (this helps it to not puff up while blind baking). Freeze the crust for 10 minutes before blind baking. 
  3. Blind bake the crust: Remove the dough from the freezer and place a sheet of parchment paper on top of the crust. Fill the dough with pie weights (we used two sets of these), dry beans, or dry rice. Bake for 15 minutes, then carefully remove the parchment and weights and bake additional 8 minutes until the bottom is lightly browned. Remove from the oven and go to Step 5.
  4. Sauté the asparagus: Meanwhile, wash the asparagus and trim off the ends. Cut the stalks into bite-sized pieces. In a large skillet, heat the olive oil over medium high heat. Add the asparagus, ¼ teaspoon kosher salt, and a few grind black pepper. Cook, stirring occasionally, until the largest pieces are tender, about 5 to 8 minutes. This depends on the thickness and maturity of the asparagus, so it’s different every time! Taste and remove when it’s just tender and still bright green, but not crunchy.
  5. Reduce the oven heat: When the crust is done blind baking, remove it from the oven and reduce the heat of the oven to 350°F. 
  6. Make the filling: In a medium bowl, whisk together the eggs, milk, cream, ¾ teaspoon kosher salt, and several grinds black pepper. Place the grated smoked mozzarella cheese in bottom of the crust. Pour the egg mixture over the top. Sprinkle the sauteed asparagus and feta cheese crumbles.
  7. Bake: Bake 40 to 50 minutes minutes, until the center is set and the top is lightly browned. Cool at least two hours. It’s easiest to make the night before, so you can refrigerate until serving. Re-warm in a 200°F oven for 20 minutes. (You can also serve it cold.) Leftovers stay for 5 days refrigerated. 

Notes

*You can also use a storebought pastry crust to shortcut some time. You’ll still need to blind bake the crust, so start with Step 3.

  • Category: Main dish
  • Method: Baked
  • Cuisine: American
  • Diet: Vegetarian

Fudgy Olive Oil Brownies

This fudgy olive oil brownies recipe is surprisingly easy and delivers rich, chocolaty goodness – minus the butter! Everyone will…

This fudgy olive oil brownies recipe is surprisingly easy and delivers rich, chocolaty goodness – minus the butter! Everyone will love this simple treat.

Photo of fudgy olive oil brownies with shiny tops and chocolate chips.

Here’s a fun simple baking recipe we’re so excited to share with you! These fudgy olive oil brownies are rich and chewy: without the use of dairy. We’ve been re-focusing on the Mediterranean diet and it emphasizes cooking with olive oil. So I wondered: could it be possible to make brownies with olive oil? These dairy free brownies were born.

Jump to the recipe—now.

Why we love these dairy free fudgy olive oil brownies

This brownie recipe is one I created for my nephews as a baking project. I was curious about using olive oil in baked goods and they wanted to include their favorite ingredient, peanut butter. Turns out, nut butter works surprisingly well in olive oil brownies: it adds a chewy texture and robust flavor, complementing the oil perfectly. I referenced this tahini olive oil brownies recipe as a proof of concept, but changed it up quite a bit. The result? A chewy, rich, fudgy chocolate brownie recipe using olive oil! Here’s why we love these brownies:

  • They’re easy to make, with no stand mixer or special equipment required
  • They use healthy fats like olive oil and peanut butter
  • They feature dark chocolate (my favorite food group!)
  • They are rich and chewy, and you don’t notice there’s no dairy! Everyone will love them, no matter their diet.

What people are saying

We passed this recipe by a few readers as recipe testers before sharing it with you. Here’s what they had to say!

  • “The BEST homemade brownies! Fudgy and moist, with a deep chocolaty flavor. I’ll never buy a box mix again…. so easy to make and so delicious!” -Julie
  • “These brownies are sooo rich and fudgy!! Yet somehow I think they’d also appeal to those who prefer cake-like brownies. The chocolate flavor dominates but there’s also a very welcome taste of peanut butter that comes through perfectly.” -Andrea
  • “The brownies baking in the oven were hands down the best air freshener! No heavy oil taste and the peanut butter cuts out some of the richness of a brownie (in a good way). As my kiddo said with a full mouth, “These are really good!” 10/10 would make again.” -Claire-Anne
  • “SO good! So good, in fact, one kid said this “must be” the go-to brownie going forward. We had them still warm and later for dessert, with whipped cream and rainbow sprinkles. Both were awesome!” -Nicole
List of ingredients for olive oil brownies.

Ingredients you need

These dairy free brownies have simple ingredients and no “tricks” or substitutions, aside from the olive oil and peanut butter standing in for the traditional butter. However, many brownie experts like our friend Tessa at Handle the Heat use both oil and butter in a brownie recipe, so the true swap here might be peanut butter! Here’s what you need:

  • Dutch process or dark cocoa powder: This is the key ingredient! It’s a special type of cocoa powder is treated with an alkali to make it pH neutral, giving it a darker color and milder flavor. This type has deep rich notes instead of the lighter fruity notes that you’ll get with regular cocoa powder. It’s available at most grocery stores!
  • All purpose flour: You’ll need just a hint of flour for this recipe. Almond flour should work for gluten-free.
  • Olive oil: Use only extra virgin olive oil.
  • Creamy peanut butter: Peanut butter brings a rich, savory flavor and offsets any bitter notes from the olive oil. You could use almost butter as well, or any other nut butter. Use sunflower butter for nut free.
  • Dark chocolate chips: Most dark chocolate chips brands are vegan, but make sure the package says dairy-free. We like the brand Guittard 63%.
  • Granulated and brown sugar: A mix of sugar types adds nuance to the flavor.
  • Eggs: Eggs make a smooth batter and bind it together. For an egg free version, go to vegan brownies.
  • Vanilla extract: Vanilla adds the final nuance to the flavor.
  • Salt: Salt balances the sweet flavor.

Keep in mind, these dairy free brownies do contain eggs. Head here for our vegan brownie recipe for a full vegan recipe!

Fudgy olive oil brownies close up shot.

Can you use olive oil in brownies?

Olive oil works as a replacement for vegetable oil in most brownie recipes. However, it does have a bitter aftertaste, which can compete with the other flavors in baked goods. We suggest using the brownies recipe below, which is customized for olive oil in combination with nut butter.

Since this recipe uses less olive oil than a 1:1 replacement in a standard brownie recipe, it tones down the bitter flavor, which is also offset by the rich melted chocolate and nut butter. The reduced quantity of olive oil in this recipe also helps you save money, since olive oil is more expensive than vegetable oils and most brownie recipes call for a large quantity (½ cup in a pan this size).

Gluten free variation

We’ve had readers test the gluten free variation of this recipe with almond flour and it worked well! Here are notes from reader Lexi:

“I made the brownies and oh my gosh, they are so good! I actually ended up making two batches. One batch I made gluten free with almond flour and almond butter. They turned out very well with a great fudgy texture. Very chocolaty, not too sweet. They were perfect! You couldn’t even tell they were gluten free.

The second batch I made as the recipe was written, with AP flour and peanut butter. They were equally as delicious! They had a slightly chewier texture than the gluten free batch, just as fudgy. Great chocolaty flavor with a hint of peanut butter, a little sweet. Very well balanced.

We actually had a really hard time picking a favorite. I will definitely be making both versions again!”

How to make fudgy olive oil brownies (dairy free!)

Brownies are quick and simple, and don’t even require a mixer! This brownie recipe comes together like most:

First, mix together the dry ingredients: cocoa powder, flour, and salt.

Bowl with whisk and cocoa powder flour and salt.

Then, melt the olive oil, peanut butter, and chocolate chips on the stovetop over low heat until completely melted and smooth.

Saucepan with melted chocolate and peanut butter.

Pour the melted chocolate into a mixing bowl. Whisk in the granulated sugar and brown sugar, then the eggs and vanilla extract. Switch to a spatula and mix in the dry ingredients until a very thick dough forms.

Brownie batter ingredients in a bowl with whisk.

Fold in the remaining chocolate chips. Then pour the batter into an 8 x 8″ pan prepared with parchment paper. The batter will be very thick, which is as expected.

Pouring brownie batter into a prepared pan.

Bake 30 minutes until set and a toothpick inserted comes out clean (though there will be some melted chocolate if you hit a chocolate chip!). Allow to cool in the pan for 30 minutes, then use the parchment to lift out the brownies to cool further.

Baked olive oil brownies (dairy free) in pan.

Serving and storage info

Cut the brownies into 16 slices and serve them warm from the oven, or room temperature. Our favorite is room temperature, because the texture is a little more set. But if you just can’t wait, feel free to dig in!

These dairy free brownies store up to 5 days at room temperature. We recommend wrapping them in aluminum foil or they can become slightly dry. For longer term storage, place them in the refrigerator for up to 10 days. Just make sure to let them sit at room temperature for a few minutes before serving, since the texture becomes solidified when cold.

A few more brownies recipes

We hope you love these brownies as much as we do! They are a new family favorite. Here are a few more fun brownies recipes to try:

01

Fudgy Sweet Potato Brownies

These amazing sweet potato brownies will wow everyone! Fudgy and chewy, they’re loaded with flavor…good stuff, too. One swap and…

02

Gluten Free Brownies

This gluten free brownies recipe is everything: thick, chewy, rich, moist, and absolutely irresistible! No one will guess they’re flourless.…

03

Zucchini Brownies

This zucchini brownies recipe comes out ultra moist with deep chocolaty flavor! Bookmark this one for a deliciously simple treat.…

Dietary notes

These dairy free olive oil brownies are dairy-free. For vegan, go to vegan brownies or zucchini brownies. For gluten free, go to gluten free brownies.

Print
Photo of fudgy olive oil brownies with shiny tops and chocolate chips.

Fudgy Olive Oil Brownies (Dairy Free!)


  • Author: Sonja Overhiser
  • Prep Time: 20 minutes
  • Cook Time: 30 minutes
  • Total Time: 50 minutes
  • Yield: 16

Description

This fudgy olive oil brownies recipe is surprisingly easy and delivers rich, chocolaty goodness – minus the butter! Everyone will love this simple treat.


Ingredients

  • ¼ cup Dutch process cocoa powder
  • ¼ cup all purpose flour (or almond flour, for gluten-free)
  • ½ teaspoon kosher salt
  • ¼ cup olive oil
  • ⅓ cup creamy peanut butter (or other nut or sunflower butter)
  • 1 cup dark chocolate chips* plus one handful, divided (we like Guittard 63%)
  • ½ cup granulated sugar
  • ½ cup brown sugar, packed
  • 2 eggs
  • 1 teaspoon vanilla extract

Instructions

  1. Preheat the oven to 350°F. Line an 8 x 8″ baking dish with a piece of parchment paper, cut so that it extends on two sides to easily remove the brownies from the pan. Grease the exposed parts of the pan with butter or oil to prevent sticking. 
  2. In a small bowl, whisk the Dutch process cocoa powder, all purpose flour, and kosher salt.
  3. Place ½ cup chocolate chips, ⅓ cup peanut butter, and the olive oil in a small saucepan over low heat and heat for a few minutes, stirring frequently, until the chocolate is melted and the mixture is smooth. Pour into a medium mixing bowl. 
  4. Immediately whisk in the granulated sugar and brown sugar, then the eggs one at a time, then the vanilla extract. Switch to a spatula and stir in the dry ingredients until a very thick batter forms. Stir in the remaining ½ cup chocolate chips. 
  5. Pour the batter into the prepared pan and smooth into an even layer. Sprinkle another handful or two of chocolate chips over the top. 
  6. Bake 30 minutes until set and a toothpick inserted comes out clean (though there will be some melted chocolate if you hit a chocolate chip!). Allow to cool in the pan for 30 minutes, then use the parchment to lift out the brownies to cool further. Slice into 16 pieces and enjoy warm or cool to room temperature. 
  7. Store at room temperature wrapped in foil for up to 5 days or refrigerated for 10 days. Allow to come to room temperature before enjoying (the brownies solidify when cold).

Notes

*Most dark chocolate chips are dairy free, but look for a “dairy-free” marking on the package.

  • Category: Dessert
  • Method: Baked
  • Cuisine: American
  • Diet: Vegetarian

Keywords: Dairy free brownies, olive oil brownies, can you use olive oil in brownies,

Easy Lemon Cake

This easy lemon cake is bursting with bright citrus flavor! A quick sheet cake with simple icing and no mixer…

A Couple Cooks – Recipes worth repeating.

This easy lemon cake is bursting with bright citrus flavor! A quick sheet cake with simple icing and no mixer required, it’s the perfect sweet treat for any occasion.

Easy Lemon Cake

The days are getting brighter and warmer, and it’s the time that Alex and I start craving the flavors of sunshine. Here’s a cake recipe I created to match that mood: this easy lemon cake! My expertise as a recipe developer is in simple baking, like sheet cakes, easy muffins, and quick breads.

So this new lemon-infused recipe is fast and easy: a moist cake with a luscious tender crumb from buttermilk, drizzled with a zesty 2-ingredient lemon glaze! I gave away pieces from my recipe testing to friends and family, and they all couldn’t stop exclaiming how tasty it was.

Jump to the recipe—now.

Why to make this easy lemon cake

This lemon cake fits my vibe in the kitchen: uncomplicated baking. Layer cakes are lovely, but often I don’t feel like pulling out the mixer or attempting to ice a cake. So when I’m craving citrus, I make this lemon cake! Here are the reasons I like to make it:

  • It’s a sheet cake, made in a square baking dish. No need to stack and layer!
  • There’s no mixer required. All you need are two bowls, a whisk and a spatula.
  • You don’t need to wait for butter to come to room temperature. This one uses melted butter so there’s no need to wait.
  • The 2 ingredient icing is made in 2 minutes. This easy lemon glaze comes together quickly and you can pour it right over the cake.

In creating this recipe, I was inspired by simple snacking cakes like this meyer lemon cake from Sarah Kieffer and this blood orange yogurt cake from How Sweet Eats. If you’re looking for a more involved layer cake, this one from expert baker Sally’s Baking Addiction with cream cheese buttercream looks beautiful.

Lemon Cake

The 3 key ingredients for this easy lemon cake

This lemon cake is a cousin to this glazed lemon bread recipe I created recently. While they’re not exactly the same, they use some of the same flavor secrets to achieve the best zingy and zesty lemon flavor, along with a light and fluffy texture. Here are the three key ingredients you’ll need to have on hand:

  1. Buttermilk: Buttermilk is the key to baking quick breads, muffins and cakes with a tender crumb. As I mention in this lemon bread recipe, I learned the importance of buttermilk from professional baker and author Sarah Kieffer. After using it in recipes, I’ve seen a big difference in the texture of our baked goods! Don’t be tempted to make a substitution.
  2. Real lemons: Lemon zest adds a zingy flavor to the cake, and lemon juice is used in the icing. Using lemon juice in the cake isn’t necessary, since it can add a sour flavor.
  3. Lemon extract: The final key to lemony baked goods is using lemon extract! Over years of testing, we’ve found a combination of extract and real lemon zest makes the very best lemon flavor. It’s easy to find in the baking aisle at your grocery next to the other extracts.
Lemons

A few quick tips for baking

Here are a three quick tips for baking a lemon cake to understand before you roll up your sleeves and go to the recipe to get the baking! These notes provide a little bit of the “why” behind the instructions:

  1. For the strongest citrus flavor, rub the lemon zest into the sugar. Place the zest in the sugar and use your fingers to rub the zest into the sugar. This activates the essential oils in the zest, helping it to taste more lemony.
  2. Use an aluminum baking pan for best results. An aluminum pan bakes more evenly than ceramic or glass, and it’s our go-to for cakes, cookies, bars, breads, and muffins. (See this article from The Kitchn.)
  3. Use parchment paper to easily remove the cake. Cut the paper so it is the width of the loaf pan, then allow it to extend on either side of the pan to make a “sling” for easily removing the cake. This helps it cool faster, which is helpful since the cake must be cooled fully before adding the glaze.

Pro tip: We recommend a 9-inch aluminum square pan. You can use an 8-inch square pan as well to make thicker slices: simply increase the bake time by 5 to 10 minutes (adjust based on your oven and pan).

Lemon Cake recipe with lemon slices

Make ahead and storage info

This lemon cake stays incredibly moist during storage, and in fact it becomes even moister over time. Here are a few notes on making it ahead and storing it:

  • Make ahead: You can make lemon cake in advance and store refrigerated or at room temperature, covered in aluminum foil. Ice the cake right before serving.
  • Storage: The cake lasts at least 5 days at room temperature wrapped in aluminum foil or refrigerated for 10 or more days wrapped in foil. For best results, bring it to room temperature before enjoying. You can also freeze un-iced bread for up to 3 months. We suggest slicing it into pieces and wrapping it in plastic wrap then a freezer-safe bag or container before freezing.

More of our favorite lemony baked goods

We absolutely love baking up lemony treats in spring and summer! Here are a few more baked lemon recipes to try:

01

Classic Lemon Bars

This easy lemon bars recipe (aka lemon squares) has all of Grandma’s secrets! A zingy custard tops a thick shortbread…

02

Glazed Lemon Bread

Indulge in citrus bliss with this fluffy lemon bread recipe! Its soft texture, vibrant lemon flavor, and zingy glaze make…

03

Lemon Blueberry Muffins

These lemon blueberry muffins have just the right sweet and citrusy kick! Drizzle with a lemon glaze and they’re irresistible.…

Print
Lemon Cake

Easy Lemon Cake


  • Author: Sonja Overhiser
  • Prep Time: 30 minutes
  • Cook Time: 30 minutes
  • Total Time: 1 hour
  • Yield: 16

Description

This easy lemon cake is bursting with bright citrus flavor! A quick sheet cake with simple icing and no mixer required, it’s the perfect sweet treat for any occasion.


Ingredients

For the lemon cake

  • 1 ½ cups (210 g) all-purpose flour
  • 1 ½ teaspoons baking powder
  • ¼ teaspoon baking soda
  • ½ teaspoon kosher salt
  • 1 ½ tablespoons lemon zest (2 medium lemons)
  • 1 cup granulated sugar
  • ½ cup unsalted butter, melted
  • 2 eggs
  • ½ tablespoon lemon extract
  • 1 cup buttermilk

For the icing

  • 1 cup powdered sugar
  • 2 tablespoons fresh squeezed lemon juice

Instructions

  1. Heat the oven to 350°F. Butter a 9 x 9-inch baking dish. Line the pan with a piece of parchment paper, cut so that it extends on two sides to easily remove it from the pan.
  2. In a small bowl, whisk together the flour, baking powder, baking soda, and kosher salt.
  3. Place the lemon zest in a large bowl with the sugar. Use your fingers to rub the zest into the sugar until it is fragrant (this activates the flavor of the zest).
  4. Whisk in the melted butter until smooth. Whisk in the eggs one at a time, then the vanilla extract and lemon extract. Switch to a spatula. Add the dry ingredients and buttermilk and gently stir until smooth. Spread the batter evenly into the prepared pan.
  5. Bake 30 to 35 minutes or until top is light golden brown and toothpick inserted in center comes out clean. Cool 20 minutes.
  6. Meanwhile, mix together the powdered sugar with the lemon juice, adding slightly more if necessary to get to a thick but pourable consistency. Pour the glaze over the cake and smooth with a spatula. Cut into pieces within the first few minutes, before the glaze dries. If desired, top with more lemon zest or lemon slices.  Store in a sealed container at room temperature for up to 3 days or refrigerated for 1 week (bring to room temperature before serving).
  • Category: Dessert
  • Method: Baked
  • Cuisine: Dessert
  • Diet: Vegetarian

Keywords: Lemon cake, easy lemon cake

A Couple Cooks - Recipes worth repeating.

Glazed Lemon Bread

Indulge in citrus bliss with this fluffy lemon bread recipe! Its soft texture, vibrant lemon flavor, and zingy glaze make…

A Couple Cooks – Recipes worth repeating.

Indulge in citrus bliss with this fluffy lemon bread recipe! Its soft texture, vibrant lemon flavor, and zingy glaze make it an irresistible loaf for any season.

Lemon Bread recipe with lemon icing

It’s that time of year when we start craving lemon, and here’s the latest in our extensive collection of lemon recipes that you must try: this glazed buttermilk lemon bread recipe! We’ve been authors of baking recipes for over 10 years and we’ve learned a thing or two about baked goods, particularly quick breads. Here we’ve created the moistest, fluffiest, zingiest lemon loaf possible, topped with a flavor-popping zingy citrus glaze! It’s easy to whip up with just 10 ingredients.

What people are saying about this lemon bread recipe

When we create a recipe, we often like to have an independent recipe tester take a crack at it to verify that it’s as delicious and fool-proof as we think it is. This lemon bread recipe was tested by reader Lexi, who gave this testimonial:

“This lemon loaf turned out wonderful! The texture is wonderful, slightly moist, with a nice crumb. The lemon flavor is bright and zesty, balanced well with the sweet lemon glaze. It is so good the next day as well. We had it for breakfast this morning!”

Lemon Bread recipe with glaze and lemon slices

3 key ingredients for perfect lemon bread

Alex and I have been creating baking recipes for over 10 years, and we’ve learned a few things about quick breads. What we’ve learned? You can’t cut corners with baked goods: you’ve got to use the very best ingredients and techniques if you want the best flavor and textures! There are three key ingredients to make a perfect lemon bread in our opinion:

  1. Buttermilk: Turns out, buttermilk is the key to the fluffiest quick breads and muffins with the most tender crumb. We tried avoiding it for years since we didn’t regularly stock it, but it truly does wonders in this lemon bread. Don’t be tempted to make a buttermilk substitution! I learned the importance of buttermilk from professional baker and author Sarah Kieffer, and after using it in recipes I’ve seen a big difference in the texture of our baked goods!
  2. Real lemons: In this recipe, you’ll need lemon zest in the bread itself and lemon juice in the icing. Using lemon juice in the bread isn’t necessary, since it can add a sour flavor instead of infusing a zippy nuance.
  3. Lemon extract: The other key to lemony baked goods is using lemon extract! Over years of testing, we’ve found a combination of extract and real lemon zest makes the very best lemon flavor. It’s easy to find in the baking aisle, and you only use small amounts at a time. This is what makes it taste like a Starbucks lemon loaf!
Lemons

A few quick tips for baking the loaf

There are a few quick tips for baking this lemon bread recipe to make it the best loaf possible. After honing 20 quick bread recipes, here are a few tips for baking a lemon loaf:

  1. Rub the lemon zest into the sugar first. Instead of adding the lemon zest right to the recipe, place the zest in the sugar and use your fingers to rub the zest into the sugar. This activates the essential oils in the zest, helping it to taste more lemony.
  2. Use an aluminum baking pan for best results. Ceramic and glass pans don’t cook as evenly for quick breads. We recommend a 9-inch aluminum loaf pan. You can use an 8-inch pan as well: just increase the bake time slightly.
  3. Use parchment paper to easily remove the bread (and for quicker cooling). We cut the paper so it is the width of the loaf pan, then allow it to extend on either side of the pan to make a “sling” for easily removing the bread. This helps it cool faster, which is required before pouring on the glaze.
Lemon Bread recipe with lemon icing

That lemon glaze really seals in the zingy flavor!

The best part of this lemon bread recipe is the lemon glaze, which is the literal and figurative icing on top! It makes the bread taste significantly more lemony, almost like adding salt to a savory recipe to make it pop. Don’t be tempted to omit the icing! You can, but the bread will have a mellow quality: it’s nice, but it doesn’t have the “BOOM” flavor that it does with the icing. Here are a few tips for applying the lemon glaze:

  • Wait until the bread is cool prior to icing. Otherwise, the icing will melt into the bread.
  • Use a fork for drizzles, or a spatula for a smooth glaze. A fork makes the best drizzly lines: with a spoon it’s a bit too chunky. Use half the glaze for a drizzled look like this lemon blueberry bread. If you’re making the full glaze recipe, use a spatula to spread it on.

Make ahead and storage info

Because it’s made with buttermilk, this lemon bread recipe stays incredibly moist during storage! In fact, it gets even more moist over time. We tested this recipe with sour cream but it came out much drier especially over storage time. Buttermilk for the win!

You can make lemon bread in advance and cover in aluminum foil un-iced, then ice before serving.

The bread lasts at least 5 days at room temperature wrapped in aluminum foil or refrigerated for 10 or more days wrapped in foil (bring to room temperature before enjoying). You can also freeze un-iced bread for up to 3 months. We suggest slicing it into pieces and wrapping it in plastic wrap then a freezer-safe bag or container before freezing.

Lemon Loaf recipe

More of our favorite lemon recipes

There are so many fun lemon recipes try; here are a few of our favorites. Happy cooking!

01

Lemon Blueberry Bread

This lemon blueberry bread recipe is perfection! It’s moist and zesty, studded with fruit and topped with a sweet drizzle.…

02

Lemon Curd

This lemon curd recipe makes the best citrusy spread and topping! Use it for scones, pancakes, cakes and more. Are…

03

Classic Lemon Bars

This easy lemon bars recipe (aka lemon squares) has all of Grandma’s secrets! A zingy custard tops a thick shortbread…

This lemon bread recipe is…

Vegetarian. For vegan, try this Vegan Lemon Loaf. For gluten-free, try this Gluten Free Lemon Loaf.

Print
Lemon Bread recipe with lemon icing

Glazed Lemon Bread


  • Author: Alex Overhiser
  • Prep Time: 30 minutes
  • Cook Time: 1 hour
  • Total Time: 1 hour 30 minutes
  • Yield: 12 slices

Description

Indulge in citrus bliss with this fluffy lemon bread recipe! Its soft texture, vibrant lemon flavor, and zingy glaze make it an irresistible loaf for any season.


Ingredients

For the lemon bread

  • 1 3/4 [245 g] all-purpose flour
  • 1 ½ teaspoons baking powder
  • ¼ teaspoon baking soda
  • ½ teaspoon kosher salt
  • 1 cup plus 2 tablespoons granulated sugar
  • Zest of two medium lemons (about 1 ½ tablespoons)
  • ½ cup melted unsalted butter (or vegetable oil)
  • ¾ cup buttermilk
  • 3 eggs
  • 2 teaspoons lemon extract

For the glaze

  • 1 cup powdered sugar (120 g)
  • 2 tablespoons fresh squeezed lemon juice

Instructions

  1. Preheat the oven to 350°F. 
  2. Grease a 9-inch aluminum loaf pan. Line the pan with a piece of parchment paper, cut so that it extends on two sides to easily remove it from the pan.
  3. In a large bowl, whisk the all-purpose flour, baking powder, baking soda, and salt.
  4. Place the lemon zest in a large bowl with the sugar. Use your fingers to rub the zest into the sugar until it is fragrant (this activates the flavor of the zest).
  5. Whisk in the melted butter, then whisk the eggs one at a time. Whisk in the buttermilk and lemon extract. Switch to a spatula. Add the dry ingredients and stir until smooth. Spread evenly into the prepared pan.
  6. Bake 53 to 55 minutes until the top springs back when touched and a toothpick inserted comes out clean (if the top is not set at this point, bake a few minutes longer). The exact timing will depend on your oven and baking pan.
  7. Cool the bread in the pan for 30 minutes. Then run a knife around the edge and invert the loaf onto a cooling rack. Allow to cool fully to room temperature (about 30 minutes to 1 hour).
  8. Mix the ingredients in a small bowl until it comes together into a smooth icing (if it is too runny add a bit more powdered sugar; if it’s too thick add a few drops more lemon juice). Use a fork to drizzle the top of the bread with the icing (½ recipe) or a spatula to spread it (full recipe).
  9. Make ahead / storage: You can make the bread in advance and cover in aluminum foil un-iced, then ice before serving. The bread lasts at least 5 days at room temperature wrapped in aluminum foil or refrigerated for 10 or more days wrapped in foil (bring to room temperature before enjoying). You can also freeze un-iced bread for up to 3 months (slice it into pieces and wrap it in plastic wrap then a freezer-safe bag or container).
  • Category: Quick Bread
  • Method: Baked
  • Cuisine: Bread
  • Diet: Vegetarian

Keywords: Lemon bread, lemon bread recipe, lemon loaf

A Couple Cooks - Recipes worth repeating.

Thumbprint Cookies

These thumbprint cookies offer classic shortbread flavor with dazzling jam centers. Using almond flour makes them gluten free and extra delicious! They’re tender and buttery with a…

The post Thumbprint Cookies appeared first on Cookie and Kate.

thumbprint cookies recipe

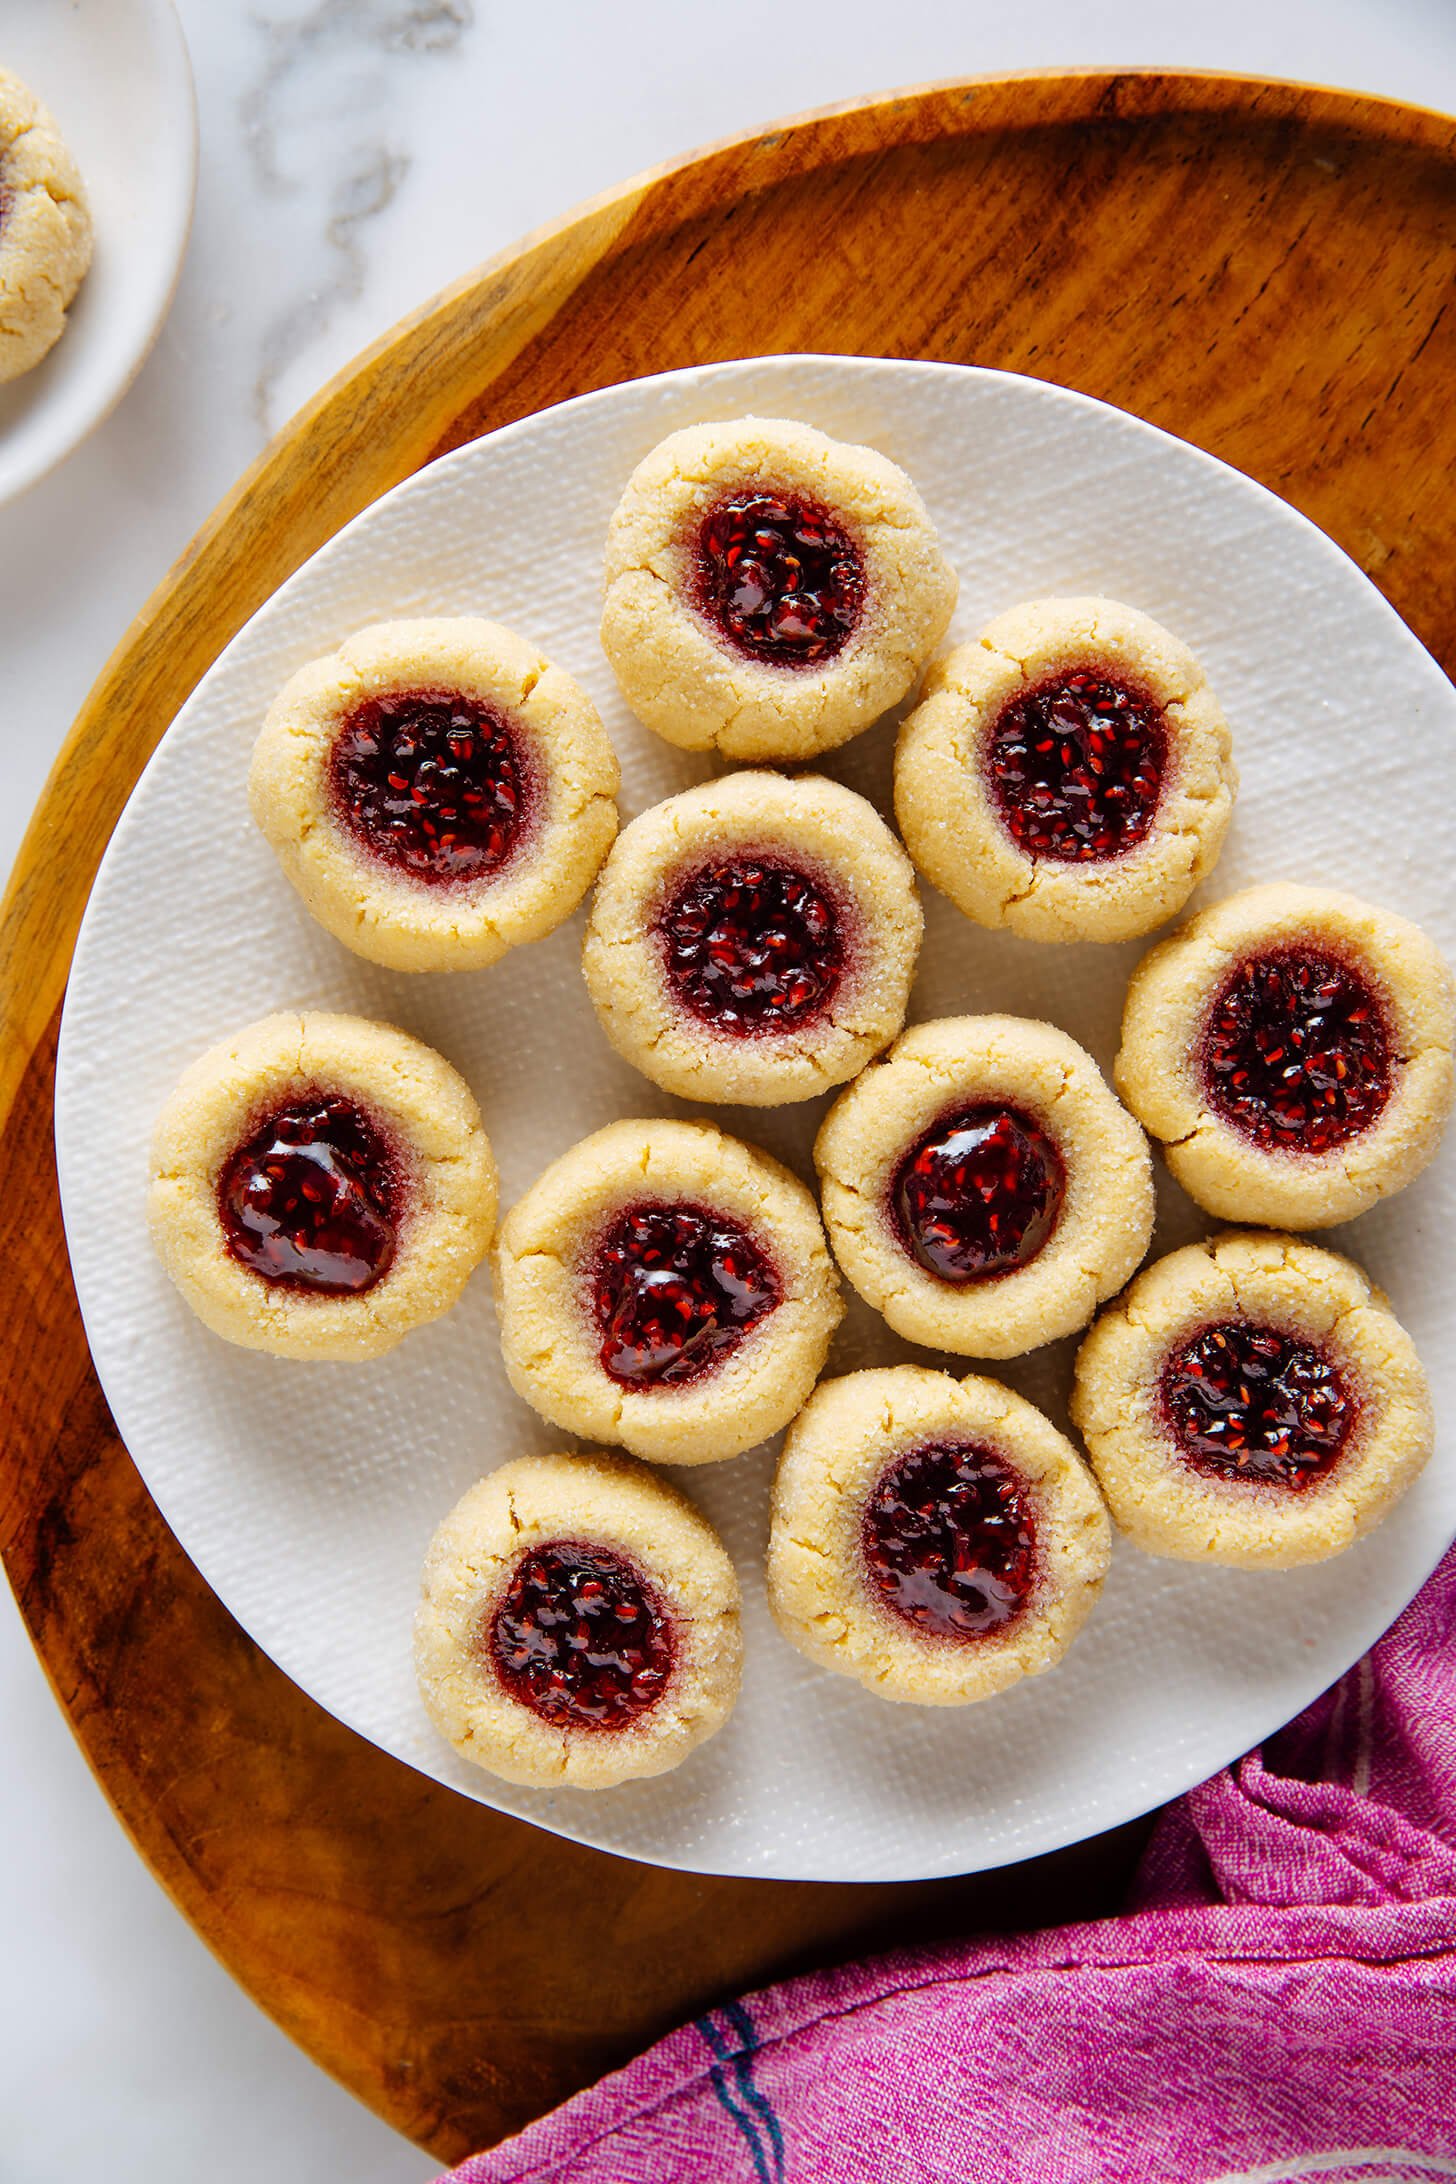
These thumbprint cookies offer classic shortbread flavor with dazzling jam centers. Using almond flour makes them gluten free and extra delicious! They’re tender and buttery with a pop of sweetness in the center. Make these irresistible cookies for any special occasion, or just because.

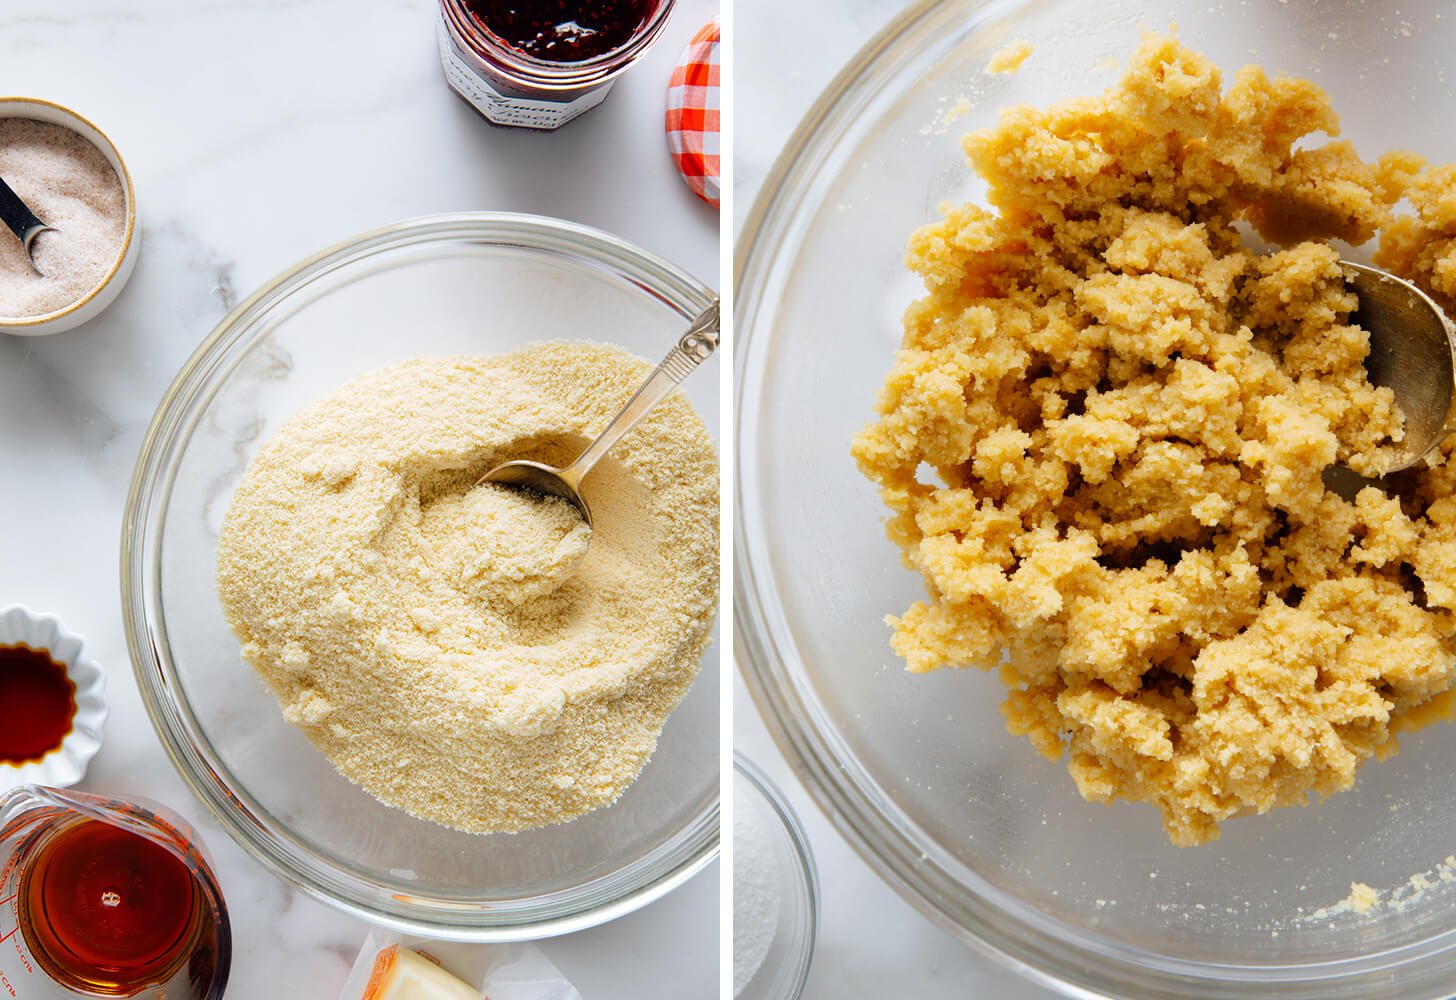
This thumbprint cookie recipe is honestly so easy to make. You don’t need a mixer. You don’t need to wait for perfectly softened butter. You don’t need to chill the dough before baking. The dough comes together so quickly and rolls so easily that this recipe would be a fun baking project with kids. If you don’t typically bake with almond flour, this recipe is absolutely worth buying the bag.

thumbprint cookies ingredients

Thumbprint cookies are particularly fun and versatile because you can change the flavor and the color of the centers by your choice of jam. These treats are perfect for the holidays, like Valentine’s Day (I suggest raspberry or strawberry filling), Easter (try several jams for a fun color mix), Independence Day (perhaps raspberry and blueberry), and Christmas (anything red).

For those with special diet considerations, I’ll point out that this recipe happens to be gluten free and egg free. You can make it dairy free and vegan by substituting coconut oil for the butter (see recipe notes). It’s also partially naturally sweetened with maple syrup. Of course, the recipe is not nut free due to the almond flour, but it might be just the cookie you’ve been searching for.

I’ve been perfecting this recipe over the past couple of months. I’m just so excited to share it with you! I hope it becomes a go-to recipe for you, too.

Continue to the recipe...

The post Thumbprint Cookies appeared first on Cookie and Kate.

Vegan Apple Crisp

This irresistible vegan apple crisp has warm, gooey apples and a golden oat-streusel topping! Made with simple plant-based ingredients, this…

A Couple Cooks – Recipes worth repeating.

This irresistible vegan apple crisp has warm, gooey apples and a golden oat-streusel topping! Made with simple plant-based ingredients, this comforting dessert is the perfect treat.

Vegan Apple Crisp

Looking for a delicious dessert that no one will know is plant-based? This vegan apple crisp! Crisps and crumbles are simple to make into vegan treats, and this one is an absolute flavor explosion. Juicy, caramelized apples mingle with a golden oat topping, and topped with melty vanilla ice cream, it’s truly sensational. In fact, we like this one better than our standard apple crisp!

Ingredient notes for vegan apple crisp

Crisps and crumbles work well transformed into vegan desserts: in fact, most people wouldn’t even guess this one is plant-based! Vegan butter and coconut oil work well as substitutes for butter in a crumble. Here are a few notes about the ingredients:

  • Vegan butter: Vegan butter works well as a substitute for butter, and there are many great brands that are easy to find in US grocery stores (we like Miyokos). If desired, you can substitute coconut oil; we recommend using refined coconut oil which has a more subtle coconut flavor than unrefined.
  • All purpose flour: All purpose flour is our standard, but for gluten-free you can also use almond flour with great results. Go to Gluten-Free Apple Crisp.
  • Old Fashioned rolled oats: Use whole rolled oats for the best crisp texture; avoid instant oats here.
  • Brown sugar and granulated sugar: Using a mix of sugar types adds nuance to the flavor.
  • Cinnamon, ginger and allspice: This mix of cozy spices brings in a warm, comforting flavor.
  • Cornstarch: Cornstarch helps to thicken the filling. As a substitute, try arrowroot powder.
  • Lemon juice and zest: Citrus accentuates the fruit flavors, like salt does for savory foods. Don’t omit the lemon if you can: it really adds to the flavor here!
  • Vanilla extract: Vanilla extract adds the final nuance in sweet flavor.
  • Sweet tart, crisp cooking apples: Tart apples are key; keep reading for our favorite apple types.
Vegan apple crisp

Best apples for vegan apple crisp

What’s the best type of apples to use in apple desserts like crisp and apple pie? Use firm, crisp sweet tart cooking apples. The acidity from a tart apple makes the sweet flavor pop, instead of tasty one-note. A firm texture is also helpful since the apples holds their shape when baking instead of becoming mushy.

Avoid varieties like Gala, Fuji or Red Delicious: they don’t perform well in crisps and crumbles. Here are a few of the varieties that shine in this vegan apple crisp recipe:

  • Pink Lady
  • Honeycrisp
  • Golden Delicious
  • Granny Smith
  • Jonathon or Jonagold
  • Ida Red

Make it into a vegan apple crumble

You can also make this into a vegan apple crumble recipe! Simply follow the instructions for the topping in this apple crumble recipe, which omits the oats for the classic crumble feel. Use vegan butter in place of the standard butter, and it comes together like a charm.

Vegan apple crisp recipe

How to serve it

Vegan apple crisp is a great dessert for any season: while it’s often served in fall or winter, it’s great in summer too! Like most crisps, the best topping is vanilla ice cream. The contrast of rich cream against the fruit filling is sublime! It’s pretty easy to find vegan ice cream at most well-stocked grocery stores in the US. Or you can make it homemade! The best options for topping vegan apple crisp are:

Leftover storage

This crisp tastes best the day it is baked, but it saves very well! The crisp texture holds up well over time. Here are best practices for how to store a crisp:

  • Keep it loosely covered at room temperature for 1 to 2 days. Keeping it loosely covered helps to maintain the crumble texture.
  • Refrigerate for up to 3 days. It holds up well in the fridge, and tastes even better when reheated.
  • Freeze up to 3 months. Freeze for up to 3 months in a sealed container. Reheat it in a 350°F oven until bubbly.
Vegan Apple Crisp

More vegan desserts

Love eating plant-based treats? Here are a few more of our top vegan desserts to try:

This vegan apple crisp recipe is…

Vegetarian, dairy-free, plant-based, and vegan. For gluten-free, use almond flour.

Print
Vegan Apple Crisp

Vegan Apple Crisp


  • Author: Sonja Overhiser
  • Prep Time: 25 minutes
  • Cook Time: 50 minutes
  • Total Time: 1 hour 15 minutes
  • Yield: 8

Description

This irresistible vegan apple crisp has warm, gooey apples and a golden oat-streusel topping! Made with simple plant-based ingredients, this comforting dessert is the perfect treat.


Ingredients

  • 2 pounds sweet tart, crisp cooking apples, about 6 cups (4 large or 6 medium)
  • 2 tablespoons lemon juice, plus 1 teaspoon lemon zest
  • 1 tablespoon cornstarch
  • ½ cup granulated sugar
  • 2 teaspoons ground cinnamon
  • ½ teaspoon ground ginger
  • ½ teaspoon ground allspice
  • ¾ cup all purpose flour (almond flour for gluten-free)
  • ¾ cup Old Fashioned rolled oats
  • ½ cup packed brown sugar
  • ¼ teaspoon kosher salt
  • 1 teaspoon vanilla extract
  • 8 tablespoons cold vegan butter (or refined coconut oil), cut into pieces

Instructions

  1. Preheat the oven to 375°F.
  2. Make the filling: Core, peel and thinly slice the apples. In a large bowl, combine the apples with the lemon juice, lemon zest, cornstarch, granulated sugar, 1 teaspoon of the cinnamon, the ginger, and allspice in a large bowl and toss until well coated. Pour it into a 9 x 9 inch baking dish or 7 x 11 inch baking dish.
  3. In a separate bowl, make the crumble topping: stir together the flour, oats, brown sugar, 1 teaspoon of the cinnamon, and kosher salt. Add the vanilla and stir. Cut the butter into small pieces and add it to the bowl. Use a pastry cutter or fork to mix it into the dry ingredients until fully distributed and a crumbly dough forms. It may take a while, so be patient; mix until all butter chunks are incorporated. 
  4. Evenly distribute the crumble over the top of the apples, breaking the topping into small crumbles as you add it.
  5. Bake for 45 to 50 minutes until browned and bubbly. Cool for 1 hour. Then serve with vanilla ice cream. Stores refrigerated for 3 days or freeze up to 3 months in a sealed container. Reheat it in a 350°F oven until bubbly and the topping is crisp.
  • Category: Dessert
  • Method: Baked
  • Cuisine: Dessert
  • Diet: Vegetarian

Keywords: Vegan apple crisp, vegan apple crisp recipe

A Couple Cooks - Recipes worth repeating.

Breakfast Quiche

This breakfast quiche recipe is hearty and easy, starring a well-seasoned filling of hashbrowns and vegetables encased in pastry crust!…

A Couple Cooks – Recipes worth repeating.

This breakfast quiche recipe is hearty and easy, starring a well-seasoned filling of hashbrowns and vegetables encased in pastry crust!

Breakfast Quiche

Looking for a standout quiche recipe to make mornings more delicious? Try this easy Breakfast Quiche! We’ve become positive quiche experts over here, trying every different flavor. This one has come out on top! Hearty hashbrowns, bell peppers, and feta cheese for a perfectly-seasoned savory filling. Encase it all in a flaky pastry crust, and it’s simple to bake up as a make-ahead breakfast or fancy brunch. Here’s how to do it!

Ingredients in this breakfast quiche

A quiche is a French pastry filled with a custard and savory fillings. Many quiche recipes you can eat for breakfast, brunch, lunch or dinner, making them extremely versatile! You can also eat them warm or cold, making leftovers a great snack or simple dinner. This breakfast quiche we created with ease in mind: the ingredients are simple and evocative of a breakfast casserole. Here’s what you’ll need:

  • Quiche crust: 1 homemade recipe or refrigerated pie dough*
  • Eggs
  • Milk
  • Heavy cream
  • Dried mustard, dried oregano, garlic powder, salt and pepper
  • Cheddar cheese
  • Feta cheese
  • Frozen or refrigerated hashbrowns
  • Green onions
  • Red bell pepper
Breakfast quiche recipe

For the crust: purchased is quickest

The best way to make a quiche recipe is with homemade quiche crust! But with a breakfast quiche, you may want to learn towards purchased crust to make preparation simpler. For this recipe, we used a purchased crust! Here are the pros and cons to each method:

  • Homemade crust holds its shape better and tastes better.  This quiche crust tastes so much better than store-bought: it’s more buttery and flaky. It can also hold a crimped crust better.
  • Purchased crust is faster. Purchased crust works too: especially for this breakfast quiche. We’ve had some issues with refrigerated pie dough holding its shape in a crimped pattern. For refrigerated or frozen crusts, we recommend using the decoration where you press the fork tines into the crust (see the photos).
Breakfast quiche

Tips for blind baking

The biggest key to making this breakfast quiche? Blind bake the crust! This means you bake the pastry crust without the filling first to avoid a soggy bottom. This is essential with quiche because the filling is so liquid (but not required with say, apple pie which has a chunkier filling). Here’s how to blind bake a crust:

  • Prick holes with a fork all over the crust. This is called docking: it helps keep the crust from puffing up while in the oven without filling.
  • Add parchment paper then pie weights, dried beans, or rice! Pour them right into the crust. We use two sets of these pie weights. Bake for 12 minutes at 400°F, then reduce the heat to 350°F.
  • Remove the pie weights. Remove the weights and bake 20 to 25 more minutes until the crust is golden.

For the pie crust shield

For this breakfast quiche recipe, you’ll also need to use a pie crust shield. This prevents the pie crust from burning in the oven by covering just the crust, allowing the filling to bake uncovered. There are two options for a pie crust shield:

  • Make a pie crust shield with aluminum foil. Cut a hole in the center of a large sheet of foil that’s the diameter of your pie plate. The foil will rest on the crust, but allow the filling to bake uncovered. Here’s a video with instructions for more details.
  • Or, buy a metal pie crust shield. Here’s a link to buy a pie crust shield online.
Breakfast Quiche

Breakfast quiche filling ideas

There are lots of ways to make a breakfast quiche! This one is flavored similar to our hashbrown breakfast casserole. But you can swap in different seasonings or filling ingredients to your liking! Here are a few ideas and tips:

  • Don’t overfill the quiche. Try to keep the approximate volume of vegetables similar to the recipe below.
  • Try other sauteed vegetables like very small broccoli florets, mushrooms, or onions.
  • Add fresh vegetables like sundried tomatoes, finely diced bell pepper, or frozen and thawed spinach (with all liquid squeezed out).
  • Vary the cheese. Try adding smoked gouda or smoked mozzarella in place of the cheddar cheese, or add grated Parmesan.

More quiche recipes

Love a good quiche? Here are a few other recipes you might enjoy:

This breakfast quiche recipe is…

Vegetarian.

Print
Breakfast Quiche

Breakfast Quiche


  • Author: Sonja Overhiser
  • Prep Time: 45 minutes
  • Cook Time: 45 minutes
  • Total Time: 1 hour 30 minutes
  • Yield: 8

Description

This breakfast quiche recipe is hearty and easy, starring a well-seasoned filling of hashbrowns and vegetables encased in pastry crust!


Ingredients

  • 1 Homemade Quiche Crust (made through Step 4) or 1 refrigerated pie dough*
  • 4 large eggs
  • ¾ cup milk
  • ½ cup heavy cream
  • 1 teaspoon dried mustard
  • 1 teaspoon dried oregano
  • 1 teaspoon garlic powder
  • 1 teaspoon kosher salt
  • Fresh ground black pepper
  • ¾ cup shredded mild cheddar cheese
  • ¼ cup feta cheese crumbles
  • 1 cup (4 ounces) frozen or refrigerated hashbrowns
  • 2 green onions, sliced (white, light and dark green portions)
  • ¼ cup finely diced red pepper

Instructions

  1. Prepare the crust: If using Homemade Quiche Crust, prepare it in the pie pan using the steps in the linked recipe. If using refrigerated pie dough, transfer the dough to the pie pan (make sure it is standard and not deep dish). Fold the overhanging dough backwards and seal it to form a rim. With refrigerated crust, it’s easiest to press in the tines of the fork to decorate the edges (like in the photos; it’s harder to get the crimped edges to keep their shape while baking). Use a fork to gently prick holes in the bottom and sides of the crust (which helps it to not puff up while blind baking).
  2. Freeze the crust: Freeze the crust in the pan for 15 minutes.
  3. Preheat the oven: Preheat the oven to 400°F.
  4. Blind bake the crust at 400°F: Place a sheet of parchment paper on top of the crust. Fill the dough with pie weights (we used two sets of these), dry beans, or dry rice. Bake for 12 minutes.
  5. Reduce the oven temperature and blind bake at 350°F: Reduce the oven temperature to 350°F and carefully remove the parchment and weights. Bake 20 to 25 minutes until the bottom is lightly browned (or more if necessary for refrigerated pie crust). Remove from the oven and add the filling once it is ready.
  6. Make the filling: In a medium bowl, whisk together the eggs, milk, cream, dried mustard, dried oregano, garlic powder, kosher salt, and several grinds black pepper. Place the cheddar cheese in the bottom of the crust, then add the hashbrowns. Pour the egg mixture over the top. Sprinkle the top with green onions and diced red pepper. Add feta and another handful of shredded cheese. 
  7. Bake: Add a pie crust shield (purchased or homemade with foil**). Bake at 350°F for 40 to 50 minutes minutes, until the center is set and the top is lightly browned. Cool at least 30 minutes, then serve or refrigerate. Re-warm in a 200 degree oven for 20 minutes. (You can also serve it cold.) Leftovers stay for 5 days refrigerated.

Notes

*Typically we recommend a homemade quiche crust, but to keep this breakfast quiche simple we used purchased crust.

**To make your own crust shield, cut a hole in the center of a large sheet of foil that’s the diameter of your pie plate. The foil will rest on the crust but let the pie filling be uncovered. Here’s a video with instructions for more details

  • Category: Breakfast
  • Method: Baked
  • Cuisine: French inspired
  • Diet: Vegetarian

Keywords: Breakfast quiche, breakfast quiche recipe

A Couple Cooks - Recipes worth repeating.

Spinach Mushroom Quiche

This spinach mushroom quiche makes a delicious brunch or a light dinner! The buttery, flaky crust is packed with savory…

A Couple Cooks – Recipes worth repeating.

This spinach mushroom quiche makes a delicious brunch or a light dinner! The buttery, flaky crust is packed with savory mushrooms and a cheesy custard.

Spinach and Mushroom Quiche

We’re all about pie, and to us a savory pie is even more fun. Here’s one that’s become an instant favorite: this spinach mushroom quiche! The buttery, flaky crust is packed with savory mushrooms, wilted greens, onion, garlicky, and a creamy cheesy custard. Each tender bite is an explosion of flavor and textures, perfect as a savory brunch main dish or even as a light dinner! We’re already getting hungry.

Making a spinach mushroom quiche: overview

This classic spinach mushroom quiche recipe is best made on a day where you have a few hours set aside. The crust is best made completely from scratch with this homemade quiche crust, but it does require 20 minutes to put together and at least 1 hour of chilling. You can also make it in advance, which shortcuts the 1 hour chill time! You can also use store-bought refrigerated pie crust for a shortcut. Here’s an overview of the time you’ll need:

Make the homemade quiche crust (or use purchased)20 minutes active, 1 hour chilling for homemade (or make in advance for quicker prep!)
Shape the crust5 to 10 minutes, active
Refrigerate the dough30 minutes, inactive
Blind bake the dough + make the filling30 minutes, active
Bake the quiche40 to 50 minutes, inactive

Ingredients in the spinach quiche filling

This spinach mushroom quiche is one of our favorite quiche recipes because of the bold, meaty flavor that comes from the mushrooms and cheese. We like using frozen spinach for quick and easy prep, but you can also substitute fresh spinach if you prefer, adding it in with the onions in Step 6 of the recipe below. Here’s what you’ll need for the filling:

  • Frozen ingredients: Spinach
  • Fresh ingredients: Baby bella (aka cremini) mushrooms, white onion, garlic, eggs
  • Dairy: Butter, 2% milk, heavy cream, cheddar cheese, Parmesan cheese
  • Pantry: Dried oregano, dried mustard, salt and pepper
  • Special: Pastry crust or homemade quiche crust
Spinach and Mushroom Quiche

Cremini vs baby bella and button mushrooms

Our favorite type of mushroom for cooking are cremini mushrooms, also known as baby bella mushrooms. Look for packages marked with either name at the grocery store. They’re a small mushroom with a round brown top, and their flavor is more savory and developed than button mushrooms.

  • Cremini mushrooms are the same variety as button mushrooms and portobellos, just a different growth phase. White button mushrooms are an earlier growth stage and have a milder flavor. Portobello mushrooms are the oldest stage, so they have the most meaty and savory flavor.
  • Cremini mushrooms have an earthy, savory flavor that tastes like a milder version of a portobello and a more developed version of a white mushroom.
  • You can substitute white button mushrooms for cremini if desired. The flavor is not quite as savory, but they taste comparable.

Tip: blind bake the crust!

The biggest key to making a great quiche is to blind bake the crust! Blind baking is baking a pastry crust without the filling first. It’s necessary for pies with a very liquid filling, since they can make the bottom crust soggy without it. Here’s what to know about how to get the perfect flaky quiche crust:

  • First, refrigerate the crust 30 minutes. This helps the crust to hold its shape while blind baking.
  • Prick holes with a fork all over the crust. This is called docking: it helps keep the crust from puffing up while in the oven without filling.
  • Add parchment paper then pie weights, dried beans, or rice! Pour them right into the crust. We use two sets of these pie weights. Bake for 18 minutes at 400°F, then reduce the heat to 350°F.
  • Remove the pie weights. Remove the weights and bake 18 to 22 more minutes until the crust is golden. Then the quiche is ready to fill.
Spinach and Mushroom Quiche

How to make a pie crust shield

For this spinach mushroom quiche, you’ll also need a pie crust shield. This tool prevents pie crust from burning in the oven by covering just the crust, allowing the filling to bake normally. However, you don’t need to run out and buy anything: you can make your own! Here’s what to know:

  • It’s easy to make a pie crust shield with aluminum foil. Cut a hole in the center of a large sheet of foil that’s the diameter of your pie plate. The foil will rest on the crust but let the filling bake uncovered. Here’s a video with instructions for more details.
  • Or, buy a metal pie crust shield. Here’s a link to buy a pie crust shield online.

Make ahead instructions for spinach mushroom quiche

This spinach mushroom quiche saves very well. In fact, it’s even better after it’s cooled to room temperature. It even tastes great cold! You can bake it in advance and reheat it as desired. Here’s what to know about making quiche in advance:

  • Make the quiche 1 to 3 days in advance. Then refrigerate it until serving! You can eat it cold, room temperature or warm.
  • To reheat, warm in a 200°F oven for about 20 minutes.
  • The quiche saves 5 days refrigerated. Wrap it in plastic or aluminum foil to keep it fresh.
  • You can also freeze quiche! Go to How to You Freeze Quiche.
Spinach and Mushroom Quiche

More quiche recipes

Love a good quiche? It’s the perfect easy brunch idea that everyone will enjoy and there are lots of filling flavors to choose from! Here are a few other tasty quiche recipes to try:

This spinach mushroom quiche recipe is…

Vegetarian.

Print
Spinach and Mushroom Quiche

Spinach Mushroom Quiche


  • Author: Sonja Overhiser
  • Prep Time: 15 minutes
  • Chill Time: 30 minutes
  • Cook Time: 1 hour 40 minutes
  • Total Time: 2 hours 25 minutes
  • Yield: 8

Description

This spinach mushroom quiche makes a delicious brunch or a light dinner! The buttery, flaky crust is packed with savory mushrooms and a cheesy custard.


Ingredients

  • 1 Homemade Quiche Crust (made through Step 4) or 1 refrigerated pie dough
  • 4 ounces frozen spinach
  • 1 tablespoon unsalted butter
  • 1 tablespoon olive oil
  • 4 ounces baby bella or cremini mushrooms, thinly sliced (or white mushrooms)
  • ½ teaspoon dried oregano
  • ¼ cup white onion, finely minced
  • 2 garlic cloves, minced
  • 1 teaspoon kosher salt, divided
  • 4 large eggs
  • ¾ cup 2% milk
  • ½ cup heavy cream
  • ½ teaspoon dried mustard
  • Fresh ground black pepper
  • ¾ cup shredded mild cheddar cheese
  • ¼ cup shredded Parmesan cheese

Instructions

  1. Prepare the crust: If using Homemade Quiche Crust, prepare it in the pie pan using Steps 1 through 4 in the linked recipe. If using refrigerated pie dough, transfer the dough to the pie pan (make sure it is standard and not deep dish). Fold the overhanging dough backwards and seal it to form a rim. With refrigerated crust, it’s easiest to press in the tines of the fork to decorate the edges (like in this asparagus quiche; it’s harder to get the crimped edges to keep their shape while baking). Use a fork to gently prick holes in the bottom and sides of the crust (which helps it to not puff up while blind baking).
  2. Refrigerate the crust (30 minutes): Place the pan in the refrigerator for 30 minutes to chill (this prevents shrinkage during the blind bake).
  3. Preheat the oven: Preheat the oven to 400°F. Place a rack in the lower third of the oven with a rimmed baking sheet covered in foil to preheat.
  4. Blind bake the crust at 400°F: Crumple a piece of parchment paper, then open it and place on top of the crust. Fill the parchment paper with pie weights (we used two sets of these), dry beans, or dry rice. Bake for 18 minutes at 400°F.
  5. Reduce the oven temperature and blind bake at 350°F: Immediately reduce the oven temperature to 350°F. Remove the pie from the oven and carefully remove the parchment and weights, then place the pie back in the oven. Bake an additional 18 to 22 minutes until the bottom is lightly browned. Remove from the oven and add the filling once it is ready.
  6. Prepare the filling: Meanwhile, thaw the frozen spinach. Squeeze out all the moisture with your fingers (or use a strainer) until the spinach is dry and crumbly. In a sauté pan or skillet, heat the butter and olive oil over medium high heat. Add the mushrooms and cook for 2 minutes, stirring often (the mushrooms will start to release their liquid at this point). Reduce to medium and add the onion, garlic, oregano, ¼ teaspoon of the kosher salt and pepper. Cook 4 to 5 minutes, until mushrooms and onion are tender. Set aside.
  7. Make the filling: In a medium bowl, whisk together the eggs, milk, cream, dried mustard, ¾ teaspoon of the kosher salt, and several grinds black pepper. Place the cheddar and Parmesan cheese in the bottom of the crust, followed by an even mix of the spinach, mushrooms, onion and garlic, saving out a few handfuls for topping. Pour the egg mixture over the top. Sprinkle the top with another handful of shredded cheddar cheese and the reserved spinach and mushrooms.
  8. Bake: Add a pie crust shield (purchased or homemade with foil*). Bake at 350°F for 40 to 50 minutes minutes, until the center is set and the top is lightly browned. Cool at least 30 minutes, then serve or refrigerate. Re-warm in a 200 degree oven for 20 minutes. (You can also serve it cold.) Leftovers stay for 5 days refrigerated or frozen for up to 3 months (see How to Freeze Quiche).

Notes

*To make your own crust shield, cut a hole in the center of a large sheet of foil that’s the diameter of your pie plate. The foil will rest on the crust but let the pie filling be uncovered. Here’s a video with instructions for more details.

  • Category: Brunch
  • Method: Baked
  • Cuisine: French
  • Diet: Vegetarian

Keywords: Spinach mushroom quiche, spinach and mushroom quiche

A Couple Cooks - Recipes worth repeating.

Fresh Cranberry Orange Muffins

These fluffy cranberry orange muffins will make your house smell like the holidays! I hope they become your new favorite holiday muffin recipe. They’re fluffy and moist…

The post Fresh Cranberry Orange Muffins appeared first on Cookie and Kate.

fluffy cranberry orange muffins

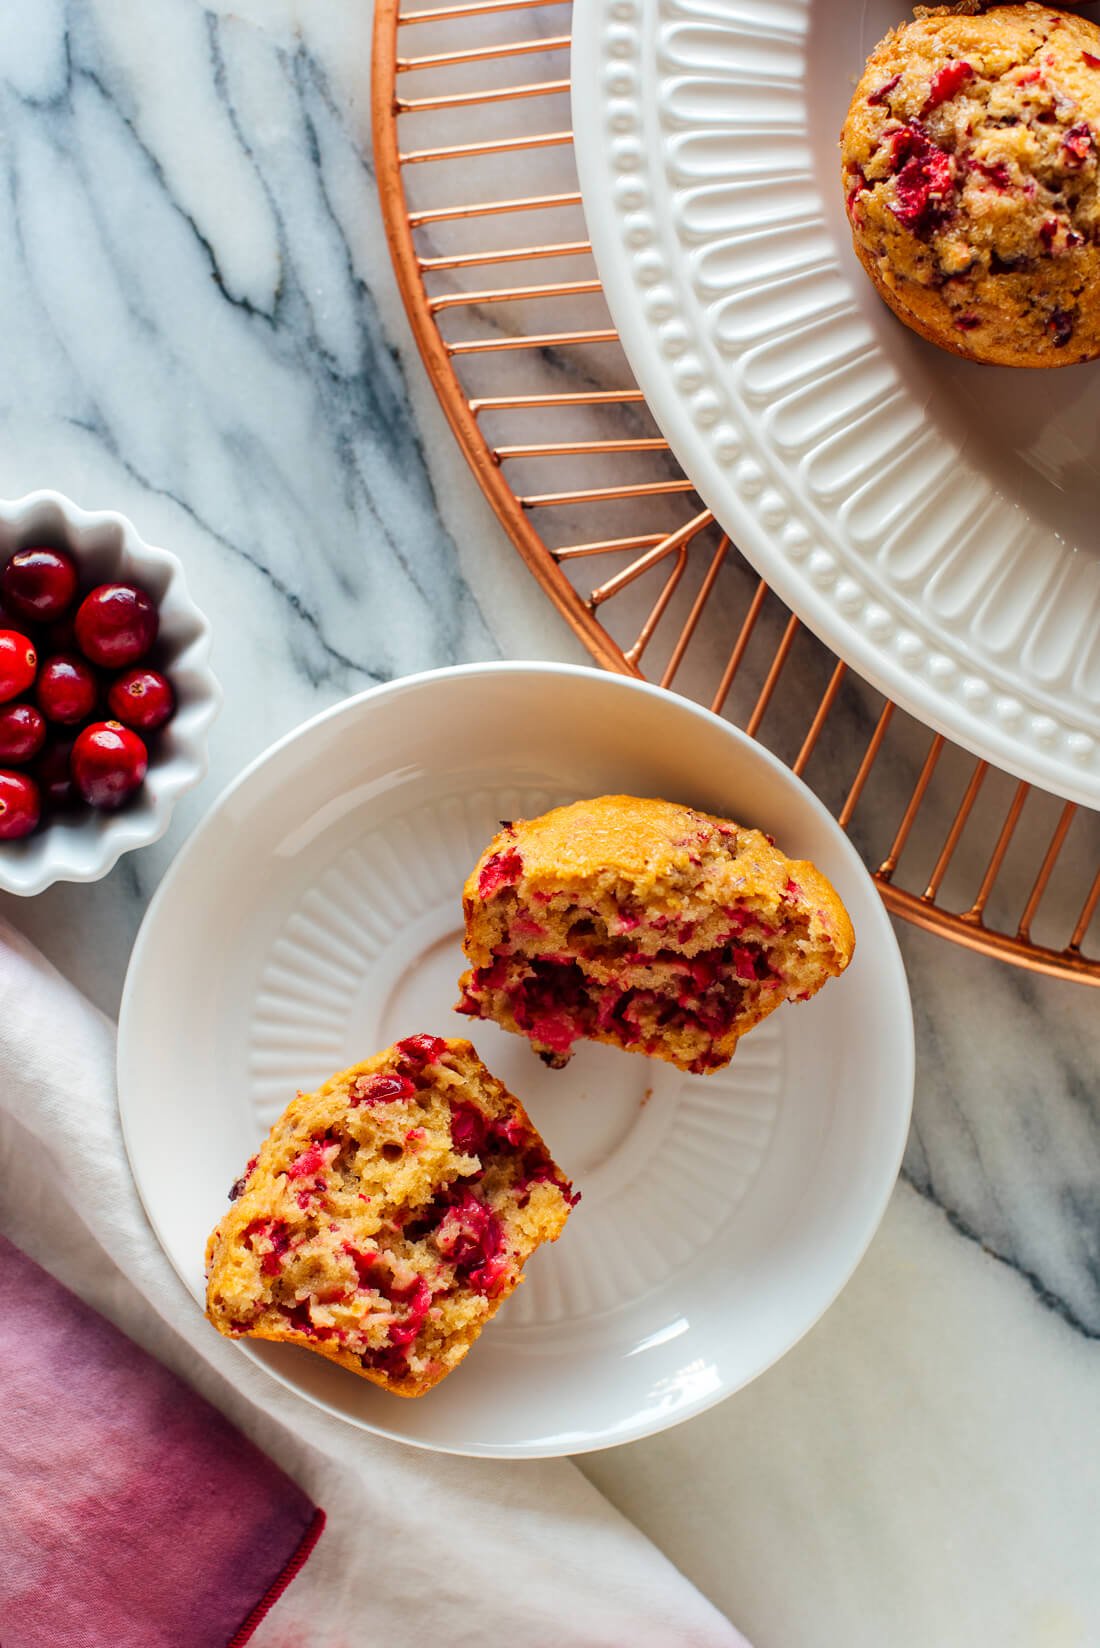
These fluffy cranberry orange muffins will make your house smell like the holidays! I hope they become your new favorite holiday muffin recipe. They’re fluffy and moist and delicious—everything I want a muffin to be.

These muffins are bursting with fresh cranberry and orange flavor. This recipe calls for fresh cranberries, which are generally available in United States grocery stores from October or November through December. You can also use frozen cranberries, but I don’t recommend dried cranberries here.

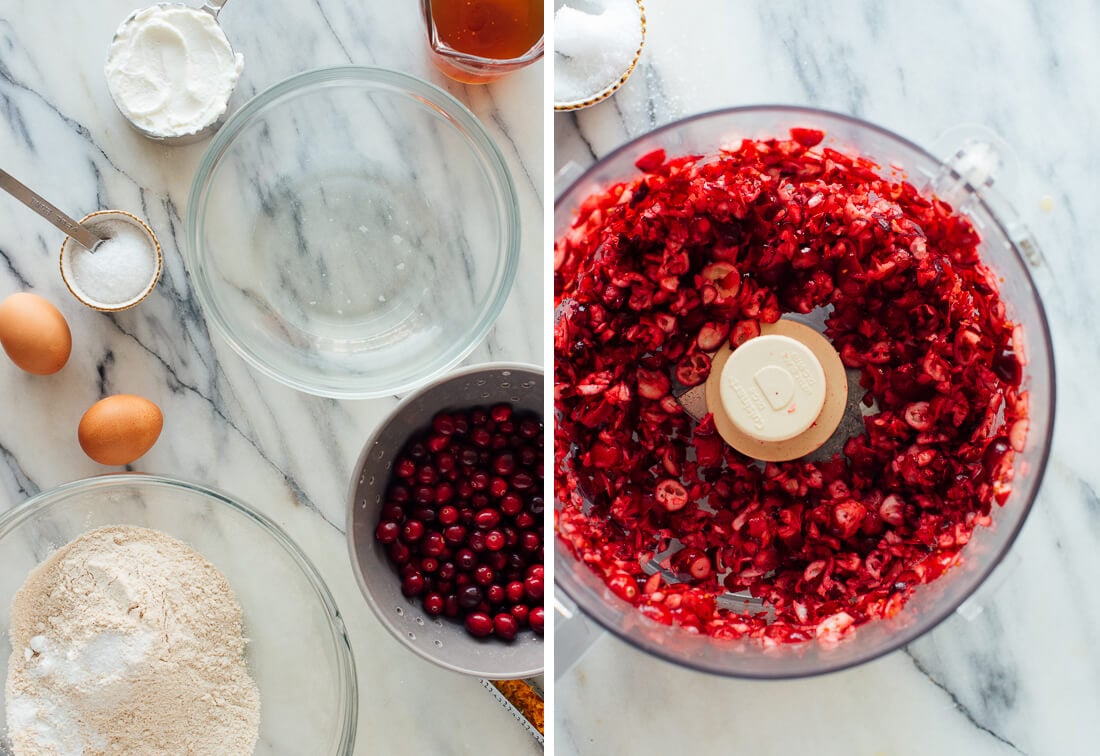
cranberry orange muffin ingredients

These muffins are made with wholesome ingredients like whole wheat flour and Greek yogurt. They’re naturally sweetened with honey or maple syrup. You can keep those details to yourself, though—no one will guess that these muffins are healthier than most.

You can easily mix these together by hand. No mixer required. Serve them for breakfast or brunch, or bring them to your holiday parties!

It took me eight tries to get these muffins just right, but they were absolutely worth the effort. I’m sharing the recipe again because they’re just so wonderful this time of year.

Continue to the recipe...

The post Fresh Cranberry Orange Muffins appeared first on Cookie and Kate.

Linzer Cookies

Linzer cookies are traditional Austrian jam-filled sandwich cookies! This classic recipe is simple to whip up at home. When it…

A Couple Cooks – Recipes worth repeating.

Linzer cookies are traditional Austrian jam-filled sandwich cookies! This classic recipe is simple to whip up at home.

Linzer Cookies

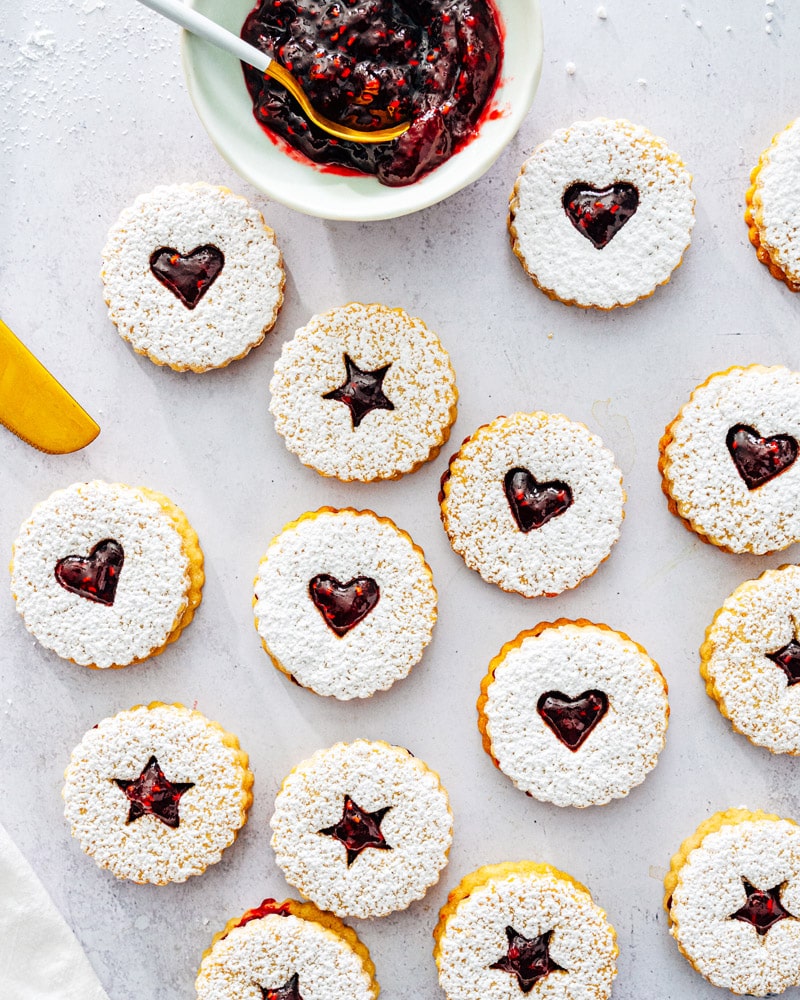
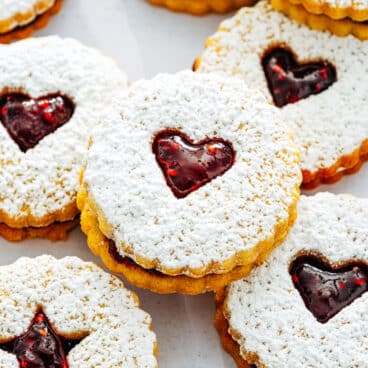
When it comes to Christmas cookies, here’s one type we can’t resist: Linzer cookies! This classic Austrian sandwich cookie stars buttery almond shortbread with fun cutout window to show a layer of fruity preserves, making a treat that’s nuanced and just sweet enough. This recipe spells childhood nostalgia for us, and here we’re sharing a traditional recipe for this classic cookie!

Ingredients in linzer cookies

Linzer cookies are a shortbread jam-filled sandwich cookie based on the Austrian dessert Linzer torte, a tart made with ground nuts and fruit preserves. Linzer cookies bring in those signature flavors by making a shortbread with both all-purpose flour and almond flour, which gives it a complex, nutty flavor. The traditional shape features cut-out windows where the jam shows through.

This recipe comes from my dear Austrian friend Milena’s mother: Milena currently lives in Vienna, but we grew up together in Minnesota eating Linzer cookies at the holidays. This recipe has the nostalgia of childhood all over it for us, and it’s perfect for the holidays, Valentine’s Day, or any time you need a sweet treat. Here’s what you’ll need for classic Linzer cookies:

  • Flour
  • Almond flour
  • Cinnamon
  • Fine sea salt
  • Unsalted butter
  • Granulated sugar
  • Egg
  • Vanilla extract
  • Raspberry jam or other fruit preserves
  • Powdered sugar

Tip: use almond flour, not almond meal!

Avoid using almond meal for Linzer cookies: look for almond flour when you are shopping. You should be able to find it at your local grocery, depending on your location.

  • Almond flour is made from blanched almonds, or almonds with their skins removed. It’s ground very finely, resulting in a fluffy texture in baked goods.
  • Almond meal contains the skins, making it darker brown in color instead of off-white like almond flour. It has a coarser grind than almond flour and results in denser, chewy texture in baked goods.
Linzer cookies

Linzer cookies are a cutout cookie with a twist! Instead of cutting out just one cookie, you’ll need two: a cookie with a window and a solid cookie. There are special cookie cutters just for this purpose, but you can also use a alternative based on what you have at home.

  • Option 1: Use a Linzer cookie cutter. We like this Linzer cookie cutter. It comes with various cutout window shapes: hearts, stars, flowers, etc. It is worth buying if you plan to make Linzer cookies multiple times!
  • Option 2: Use a 2-inch circular cutter and a smaller shape for the window. If you happen to have both of these shapes on hand, it’s easy to make your own version of cutout cookies!
Linzer Cookies

Tips for making the cookies

Linzer cookies are a fun baking project that results in visually-stunning, sugar dusted cookies with bright shapes of jam. There are a few notes for how to put together this recipe:

  • Chill the dough 1 to 3 hours. This is important with a cutout cookie dough: you’ll want it nice and cold to get uniform shapes.
  • Gently roll the dough slightly less than 1/4-inch thick. This makes just the right thickness for the finished cookie.
  • Simple cutout window shapes (like circles and hearts) are easier to cut out. The stars were a little trickier to cut, and they became more distorted when baked. But, they still turned out great.
Linzer Cookies

Once you’ve made your linzer cookies, you probably won’t be eating all 30 at once. How to store them? Here are some tips and notes about storage:

  • The cookies taste crisp the first day, then soft after storage. They’re delicious both ways, but we like the soft version best!
  • Store in a container with a few layers of parchment paper or foil between each. The powdered sugar on the bottom layer of cookies after a few days, so it’s good to protect between each layer.
  • Store at room temperature for 2 days or refrigerated up to 2 weeks. With room temperature storage, the powdered sugar can start to melt on the cookies that are stacked in layers beneath other cookies. We recommend storing them refrigerated for longer term storage. 
  • Or, freeze for up to 3 months. The powdered sugar topping is a little fragile, so keep in mind the cookies look best when they are fresh.
Linzer Cookies

Love a good batch of cookies? Here are a few more fun cookie recipes to enjoy:

This Linzer cookies recipe is…

Vegetarian.

Print
Linzer Cookies

Linzer Cookies


  • Author: Sonja Overhiser
  • Prep Time: 40 minutes (plus 1 hour chill time)
  • Cook Time: 30 minutes
  • Total Time: 1 hour 10 minutes
  • Yield: 30 to 32 cookies

Description

Linzer cookies are traditional Austrian jam-filled sandwich cookies! This classic recipe is simple to whip up at home.


Ingredients

  • 2 cups (240 g) flour, sifted
  • 1 cup (120 g) almond flour
  • 1 teaspoon cinnamon
  • ½ teaspoon fine sea salt
  • 1 cup (2 sticks) unsalted butter, softened
  • 2/3 cup granulated sugar
  • 1 egg
  • 1 teaspoon vanilla extract
  • 1 ⅓ cups raspberry jam
  • Powdered sugar, for dusting

Instructions

  1. In a medium bowl, whisk the flour, almond flour, cinnamon and salt. 
  2. In the bowl of a stand mixer add the butter and sugar. Beat with the paddle attachment on medium speed until light and fluffy, 2 to 3 minutes. Add the egg and vanilla, and mix on low speed until combined. Gradually add the flour mixture and continue mixing on low speed until just combined, about 30 seconds. Divide the dough into two disks. Wrap the disks in plastic wrap and refrigerate for 1 to 3 hours.
  3. Preheat the oven to 350°F.
  4. Take one disc of dough out of the fridge and place it on a floured surface. Using a light touch, roll the dough out until it is slightly less than 1/4-inch thick. Use plenty of flour on the counter and the rolling pin to prevent sticking. Moving quickly so the dough remains chilled, use a linzer cookie cutter (or a 2-inch round cutter and smaller heart-shaped cutter) to cut an equal number of cookies with and without a hole in the center. Place excess dough back in the refrigerator and re-roll it after it’s chilled again (after baking the first sheet). Place the cookies on a baking sheet and refrigerate the sheet for 5 minutes.
  5. Transfer the baking sheet directly to the oven and bake for 11 to 14 minutes, until lightly browned. Cool the cookies for 1 minute on the cookie sheet. Then transfer to a cooling rack.
  6. Repeat with remaining disc of dough and re-rolled scraps of dough.
  7. Cool the cookies completely, at least 15 minutes. Then sift powdered sugar the cookies with the cutout centers. On the bottom cookies, spread a layer of jam about 1/8” thick (about 2 teaspoons per cookie), not quite to the edges of a cookie. Then very gently press on the top cookie to sandwich the jam. 
  8. Repeat for all cookies to make 30 to 32 sandwiches. Store room temperature with several sheets of parchment paper between the cookies for up to 2 days*, or refrigerated for 2 weeks. You can also freeze for up to 3 months. The cookies taste crispy the first day, and become softer after storage (both delicious, but we prefer the softer version!).

Notes

*With room temperature storage, the powdered sugar can start to melt on the cookies that are stacked in layers beneath other cookies. We recommend storing them refrigerated for longer term storage. 

  • Category: Cookies
  • Method: Baked
  • Cuisine: Austrian
  • Diet: Vegetarian

Keywords: Linzer cookies, linzer cookie recipe

A Couple Cooks - Recipes worth repeating.