Baked oatmeal is one of my all-time favorite breakfasts. It is so hearty and comforting. I also love making baked oatmeal cups. The individual size cups are so fun and they make a great grab and go breakfast or snack. These Lemon Blueberry Baked Oatmea…
Baked oatmeal is one of my all-time favorite breakfasts. It is so hearty and comforting. I also love making baked oatmeal cups. The individual size cups are so fun and they make a great grab and go breakfast or snack. These Lemon Blueberry Baked Oatmeal Cups are bursting with lemon flavor and juicy blueberries. The…
Friends, meet the vanilla cake of your DREAMS! It’s super fluffy, perfectly moist, undetectably gluten-free (& dairy-free), and seriously…the BEST. It’s impressive enough for a birthday or even a wedding!
Bonus? It’s also SO easy …
Friends, meet the vanilla cake of your DREAMS! It’s super fluffy, perfectly moist, undetectably gluten-free (& dairy-free), and seriously…the BEST. It’s impressive enough for a birthday or even a wedding!
Bonus? It’s also SO easy to make, with simple methods, 1 bowl, and 9 ingredients. Preheat your oven. Let them eat cake!
This cake could not be easier to make! Simply whisk, pour, bake, and enjoy your cake, for goodness sake!
This asparagus quiche recipe is a total showstopper! Flaky pastry crust, tender asparagus spears, and a savory cheese filling come…
This asparagus quiche recipe is a total showstopper! Flaky pastry crust, tender asparagus spears, and a savory cheese filling come together for a satisfying and impressive dish.
The buttery scent of this asparagus quiche recipe in the oven may win you one or two marriage proposals—or at least it will have the neighbors wandering by to snatch up a slice! It’s packed with savory, cozy flavor, perfect for spring brunches or light dinners with a crisp glass of white wine.
Why we love this recipe: This asparagus quiche is worth every second of time for the satisfaction you’ll get from making a quiche from scratch. Plus, it’s easy to make in advance. We served it to guests who went gaga over this one. Come: let’s make quiche!
How to make this asparagus quiche recipe: an overview!
In under 2 hours, you’ve got a complete masterpiece of an asparagus quiche recipe: made completely from scratch. That includes a homemade quiche crust. Want a shortcut? You can do store-bought crust too: see below. But we highly recommend the homemade crust: it’s crispy, buttery perfection. Here’s what to expect from this process timing-wise:
Make the quiche dough
20 minutes, active
Freeze the crust
15 minutes, inactive
Blind bake the dough+ make the filling
25 minutes, active
Bake the quiche
40 to 50 minutes, inactive
Here is an overview in photographs of how to make this asparagus quiche. For all the details, jump to the full recipe below.
Step 1: Make the quiche crust (go this quiche crust recipe for instructions). Freeze it for 15 minutes. Blind bake the crust with pie weights at 375°F for 15 minutes.
Step 2: Make the filling: sauté the asparagus. Whisk together the eggs, milk, cream, salt, and pepper. Place grated smoked mozzarella cheese in bottom of the crust. Pour the egg mixture over the top. Sprinkle the sauteed asparagus and feta cheese crumbles.
Step 3: Bake the quiche for 40 to 50 minutes at 350°F.
Tips for homemade quiche crust
Ever made a quiche crust from scratch? It’s pretty simple, but you do need a few dough-making techniques. Working with dough takes time and practice. If it’s your first time, give yourself patience and grace.
Use a standard 9-inch pie plate, not deep dish. Deep dish will be too thick for the filling amount here.
A pastry cloth can be helpful (optional). It helps for rolling out the dough so it doesn’t stick on the counter. If you don’t have one, just lightly dust the counter with flour.
Use the tines of a fork to decorate the edge. This is easier than a fluted edge, though either works.
You’ll freeze the crust 15 minutes before blind baking it. This helps the crust to hold its shape while blind baking. This freezer method shortcuts refrigerating for a few hours. (You’re welcome!)
Blind baking is key for the crust
The biggest key to making an asparagus quiche recipe is blind baking the crust. Blind baking is baking a pie crust without the filling. This makes sure that crust is perfectly firm before you add the wet filling, which is especially important for a custard pie like a quiche because the filling is so wet. If you don’t blind bake, you’ll get soggy bottom crust for sure (we did!). Here’s what to know about blind baking and how to get the perfect flaky crust:
Prick holes with a fork all over the crust. This is called docking the crust: it makes it puff up less while in the oven.
Add pie weights: like dried beans or rice! You can use ceramic pie weights (we used these) to weigh down the crust so it doesn’t get too puffy. Or, you can use dried beans or dry rice! It doesn’t harm the beans or rice: you can still cook them as normal after using them as weights.
Shortcut: use store-bought crust
Yes, you can short-cut the effort to make your homemade crust and go with a store-bought pastry crust. Any type of purchased pie crust works (we don’t have a favorite brand since we always make our own). You’ll still need to blind bake the store-bought crust! So start in the recipe below at Step 3.
Make ahead instructions
Yes, it takes about 2 hours to make! But here’s the thing: only about 1 hour of it is active time. Even better: it saves VERY well. It’s so easy to make the night before, or even a few days in advance! Here’s what to do:
Make the entire quiche 1 to 3 days in advance. Then refrigerate it until serving!
Warm in a 200 degree oven for about 20 minutes before serving. It’s also delicious cold, but we like it warmed up.
Saves 5 days refrigerated. Wrap it in plastic or aluminum to keep it fresh.
Ways to serve asparagus quiche
This asparagus quiche recipe is a total showstopper! We served this at a spring birthday brunch for my mom and everyone went crazy over it. In fact, it was suddenly gone before we knew it! It was absolutely perfect for a festive occasion (it would be great for Easter or Mother’s Day). While recipe testing, we also ate it for dinner: which was perfect as well. Here are some ways to serve quiche:
Pre-cooking the asparagus for a few minutes is essential to ensure it’s tender throughout the quiche.
How can I avoid a soggy quiche crust?
Soggy quiche crust can happen for a few reasons. Make sure your dough is chilled before baking to prevent it from melting too quickly. It’s essential to pre-bake (blind bake) the crust for a few minutes before adding the filling.
Can I use a store-bought pie crust?
Absolutely! Using a store-bought crust is a great time-saver. Just follow the package instructions for pre-baking.
How can I tell when my quiche is done?
The quiche is done when the center is no longer jiggly and a toothpick inserted comes out clean. The crust should also be golden brown.
This asparagus quiche recipe is a total showstopper! Flaky pastry crust, tender asparagus spears, and a savory cheese filling come together for a satisfying and impressive dish.
Make the quiche crust: Preheat the oven to 375°F. In a medium bowl, mix the all-purpose flour, kosher salt, and baking powder. Slice the butter into pieces, then cut it into the flour mixture using a pastry blender until a coarse meal texture is obtained. Sprinkle the ice water over the flour 1 tablespoon at a time, mixing gradually with fork until the dough sticks together. Add additional water by the tablespoon until the dough comes together but is not sticky. Form the dough into a ball.
Roll out and freeze the dough: If you have a pastry cloth, set it up and dust it with flour; otherwise, flour a clean work surface. Put on a rolling pin cover (optional), and either way, dust the pin in flour. Roll the dough to an even 12-inch circle (which corresponds to the 9-inch pie pan). Use a rolling pin to transfer the dough to the pie pan (make sure it is standard and not deep dish). Fold the overhanging dough backwards and seal it to form a rim. Then press it with the tines of a fork to decorate the edges (see the photos). Use a fork to gently prick holes in the bottom and sides of the crust (this helps it to not puff up while blind baking). Freeze the crust for 10 minutes before blind baking.
Blind bake the crust: Remove the dough from the freezer and place a sheet of parchment paper on top of the crust. Fill the dough with pie weights (we used two sets of these), dry beans, or dry rice. Bake for 15 minutes, then carefully remove the parchment and weights and bake additional 8 minutes until the bottom is lightly browned. Remove from the oven and go to Step 5.
Sauté the asparagus: Meanwhile, wash the asparagus and trim off the ends. Cut the stalks into bite-sized pieces. In a large skillet, heat the olive oil over medium high heat. Add the asparagus, ¼ teaspoon kosher salt, and a few grind black pepper. Cook, stirring occasionally, until the largest pieces are tender, about 5 to 8 minutes. This depends on the thickness and maturity of the asparagus, so it’s different every time! Taste and remove when it’s just tender and still bright green, but not crunchy.
Reduce the oven heat: When the crust is done blind baking, remove it from the oven and reduce the heat of the oven to 350°F.
Make the filling: In a medium bowl, whisk together the eggs, milk, cream, ¾ teaspoon kosher salt, and several grinds black pepper. Place the grated smoked mozzarella cheese in bottom of the crust. Pour the egg mixture over the top. Sprinkle the sauteed asparagus and feta cheese crumbles.
Bake: Bake 40 to 50 minutes minutes, until the center is set and the top is lightly browned. Cool at least two hours. It’s easiest to make the night before, so you can refrigerate until serving. Re-warm in a 200°F oven for 20 minutes. (You can also serve it cold.) Leftovers stay for 5 days refrigerated.
Notes
*You can also use a storebought pastry crust to shortcut some time. You’ll still need to blind bake the crust, so start with Step 3.
You won’t believe the flavor in these fast and easy egg tacos! The vegetarian “taco meat” filling works for any…
You won’t believe the flavor in these fast and easy egg tacos! The vegetarian “taco meat” filling works for any meal of the day.
Looking for a 5-minute breakfast idea, an easy lunch, or a fast and easy dinner? Well, here’s a recipe that’s all three at once. (Audible gasp.) Meet these amazing egg tacos! This is one of our favorite kitchen tricks of all time. We created it as a dare from my sister to create a dinner recipe that can be made in 5 minutes. Sounds impossible, but it works!
Did you know that eggs can taste like taco meat? Yes, somehow the spiced scrambled eggs filling channels the flavor of taco meat. Alex and I have used this trick over and over to get fast dinners on the table, and our kids love it! It works for easy breakfasts or lunch ideas, too. This one’s in our arsenal of recipes every cook should know.
The key ingredients for egg tacos
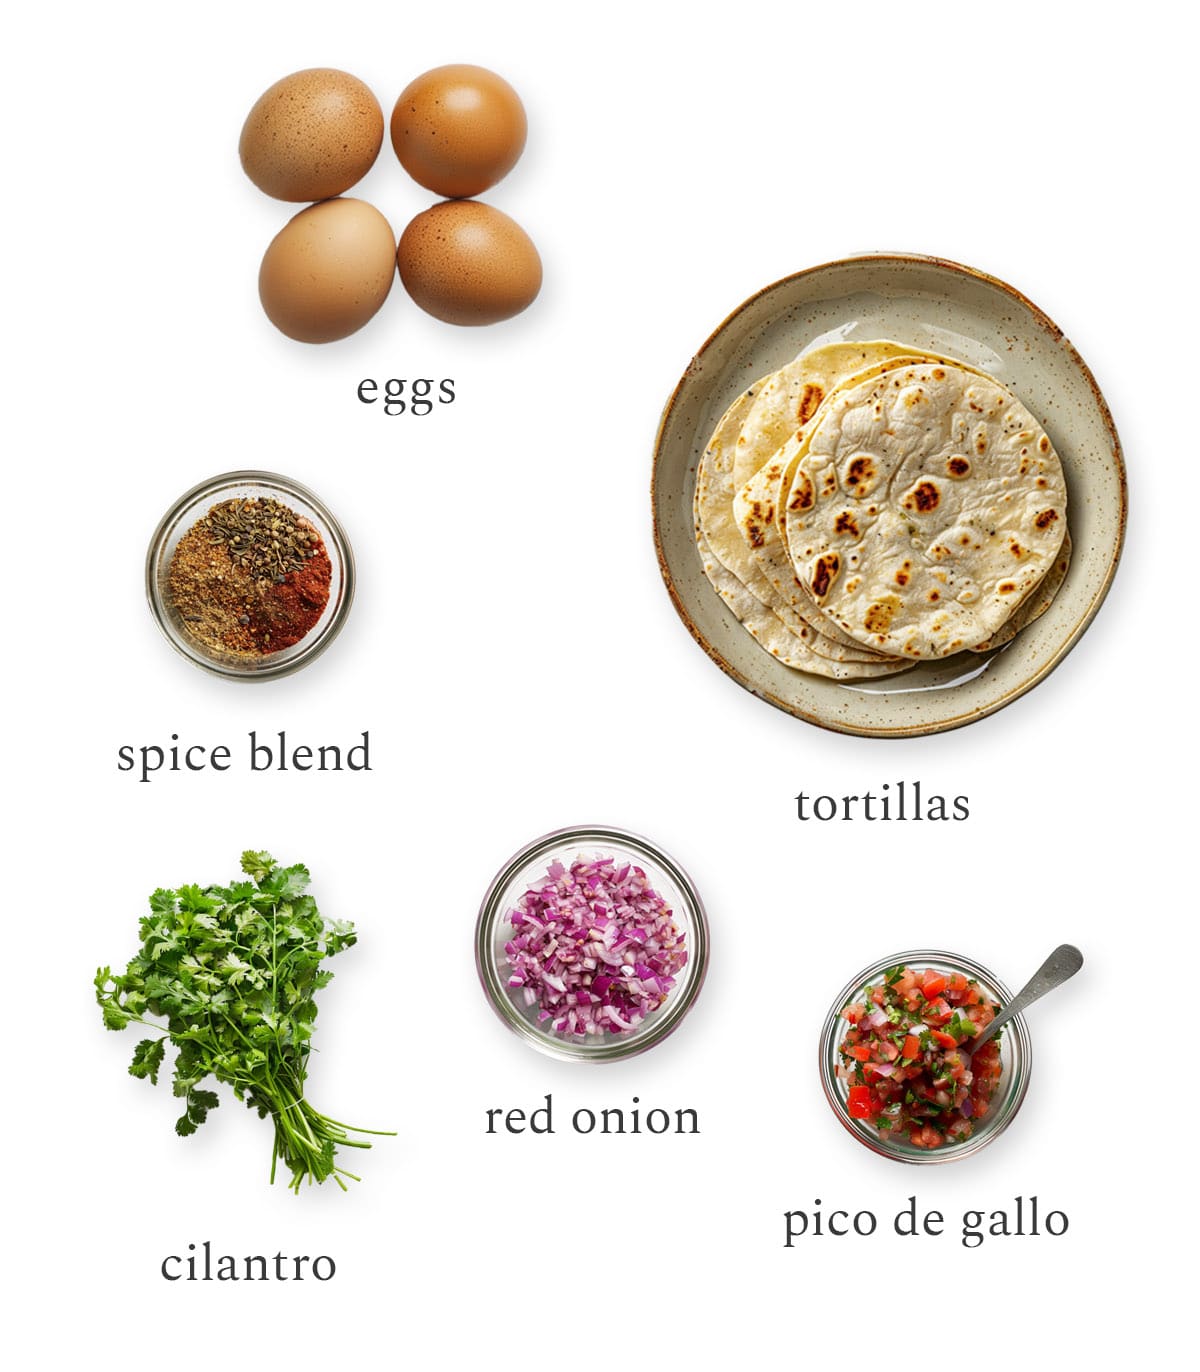
Wait a minute: egg tacos that taste like they have meat? Yes, this trick is like kitchen magic. These scrambled eggs are perfectly seasoned and they take only 5 minutes to make. Here are the ingredients you need for the filling:
Eggs: Buy organic eggs if you can, and local eggs if possible.
Chili powder, garlic powder, cumin, and salt: You’ll notice it’s a heavy amount of seasoning: ½ tablespoon each for the chili powder, garlic powder and cumin. But trust us: this is what brings the meaty flavor!
Tortillas: Flour tortillas are our preference, but as a gluten free recipe this works with corn tortillas or grain free tortillas.
Toppings: We like pico de gallo, red onion, and cilantro, but you can use any toppings you like.
How to cook the eggs: a few tips!
The key to these egg tacos is the special method for cooking the eggs. Many people over cook scrambled eggs, and break them into too small of pieces. This method makes luscious folds of eggs, so the filling texture holds up in the tacos. Here’s what to know:
Cook over medium low heat. Don’t have the heat too high: you’ll want it just above low heat.
Scrape with a spatula as the eggs solidify, for 3 to 4 minutes. They’ll start to form together into a meat-like texture.
Don’t stir too much! You don’t want tiny bits of eggs, you’ll want it to hold together into a cohesive texture.
Toppings for egg tacos
Once you’ve cooked the eggs (in just 5 minutes!), all you have to do is top the tacos! For this egg tacos recipe, we tried to keep it as simple as possible. But if you have more time, the sky’s the limit! Here’s what we added to these tacos, then a few more ideas to get your wheels turning:
Salsa fresca or pico de gallo: We used store-bought to keep it quick, but you can also use homemade.
Jarred salsa: Or go traditional with a jar of red salsa or salsa verde.
Red onion: Use thinly sliced fresh onion (rinse and drain it a few times to remove the bite, if you like!). Pickled red onion adds a tangy flair.
Cilantro: Quickly tear off a few leaves for a great garnish
Lettuce: Crunchy romaine lettuce adds another nice texture
You absolutely must warm your tortillas for egg tacos: it gives them just the right supple texture. No one likes a tough, cold tortilla! While you’re at it, place them in a tortilla warmer to keep them toasty while you’re eating (here’s the tortilla warmer we use). Here are two ways for how to warm tortillas:
Stovetop: Char the tortillas by placing them on an open gas flame on medium for a few seconds per side, flipping with tongs, until they are slightly blackened and warm (this also infuses a charred flavor).
Oven: Wrap a few tortillas (in packets of no more than 5) in aluminum foil and place on the oven grates to 350°F for 15 to 20 minutes.
Sides to serve with egg tacos
Want to make these egg tacos into a full-blown meal? They work as a fast breakfast, healthy lunch or easy dinner. If we only have 5 minutes, we just whip these up and scarf them down. But if we have a few extra minutes, here are some sides we like to pair:
Black beans: These easy black beans take just 5 minutes to whip up on the side.
These egg tacos are one of our favorite tricks that we make again and again! Egg recipes are always saving us for quick weeknight meals. Here are some of our other ways to make eggs into a meal:
In a medium bowl, whisk together the 4 eggs. Add the chili powder, garlic powder, cumin, and kosher salt, and whisk until combined.
In a skillet, heat the olive oil. Add the eggs and cook over medium low heat, scraping as the eggs solidify, about 3 to 4 minutes total. As you scrape, they’ll start to form together into a meat-like texture. Don’t scrape too much or you’ll make too small of pieces: just enough for that it comes together!
If time, warm and char the tortillas by placing them on an open gas flame on medium for a few seconds per side, flipping with tongs, until they are slightly blackened and warm. (See How to Warm Tortillas.)
Top with salsa fresca (drain extra liquid before serving), thin sliced red onions, torn cilantro leaves, and hot sauce.
Who needs takeout when this easy Pad Thai recipe is ready in just 25 minutes? My lightened up version has that signature sweet-and-tangy flavor, along with rice noodles, bean sprouts, tender shrimp, and scrambled eggs. Customize it with your …
Who needs takeout when this easy Pad Thai recipe is ready in just 25 minutes? My lightened up version has that signature sweet-and-tangy flavor, along with rice noodles, bean sprouts, tender shrimp, and scrambled eggs. Customize it with your favorite protein! Easy Pad Thai Noodles Recipe I love Thai food, so it’s no surprise that I’m a […]
This blueberry cake recipe is easy to make and bursting with fresh blueberries. Blueberry season calls for my favorite blueberry cake! ♡ I first shared this blueberry cake recipe here ten years ago. And now, over a decade later, it still continues to be a favorite tradition of ours each spring when blueberry season rolls […]
This blueberry cake recipe is easy to make and bursting with fresh blueberries.
Blueberry season calls for my favorite blueberry cake! ♡
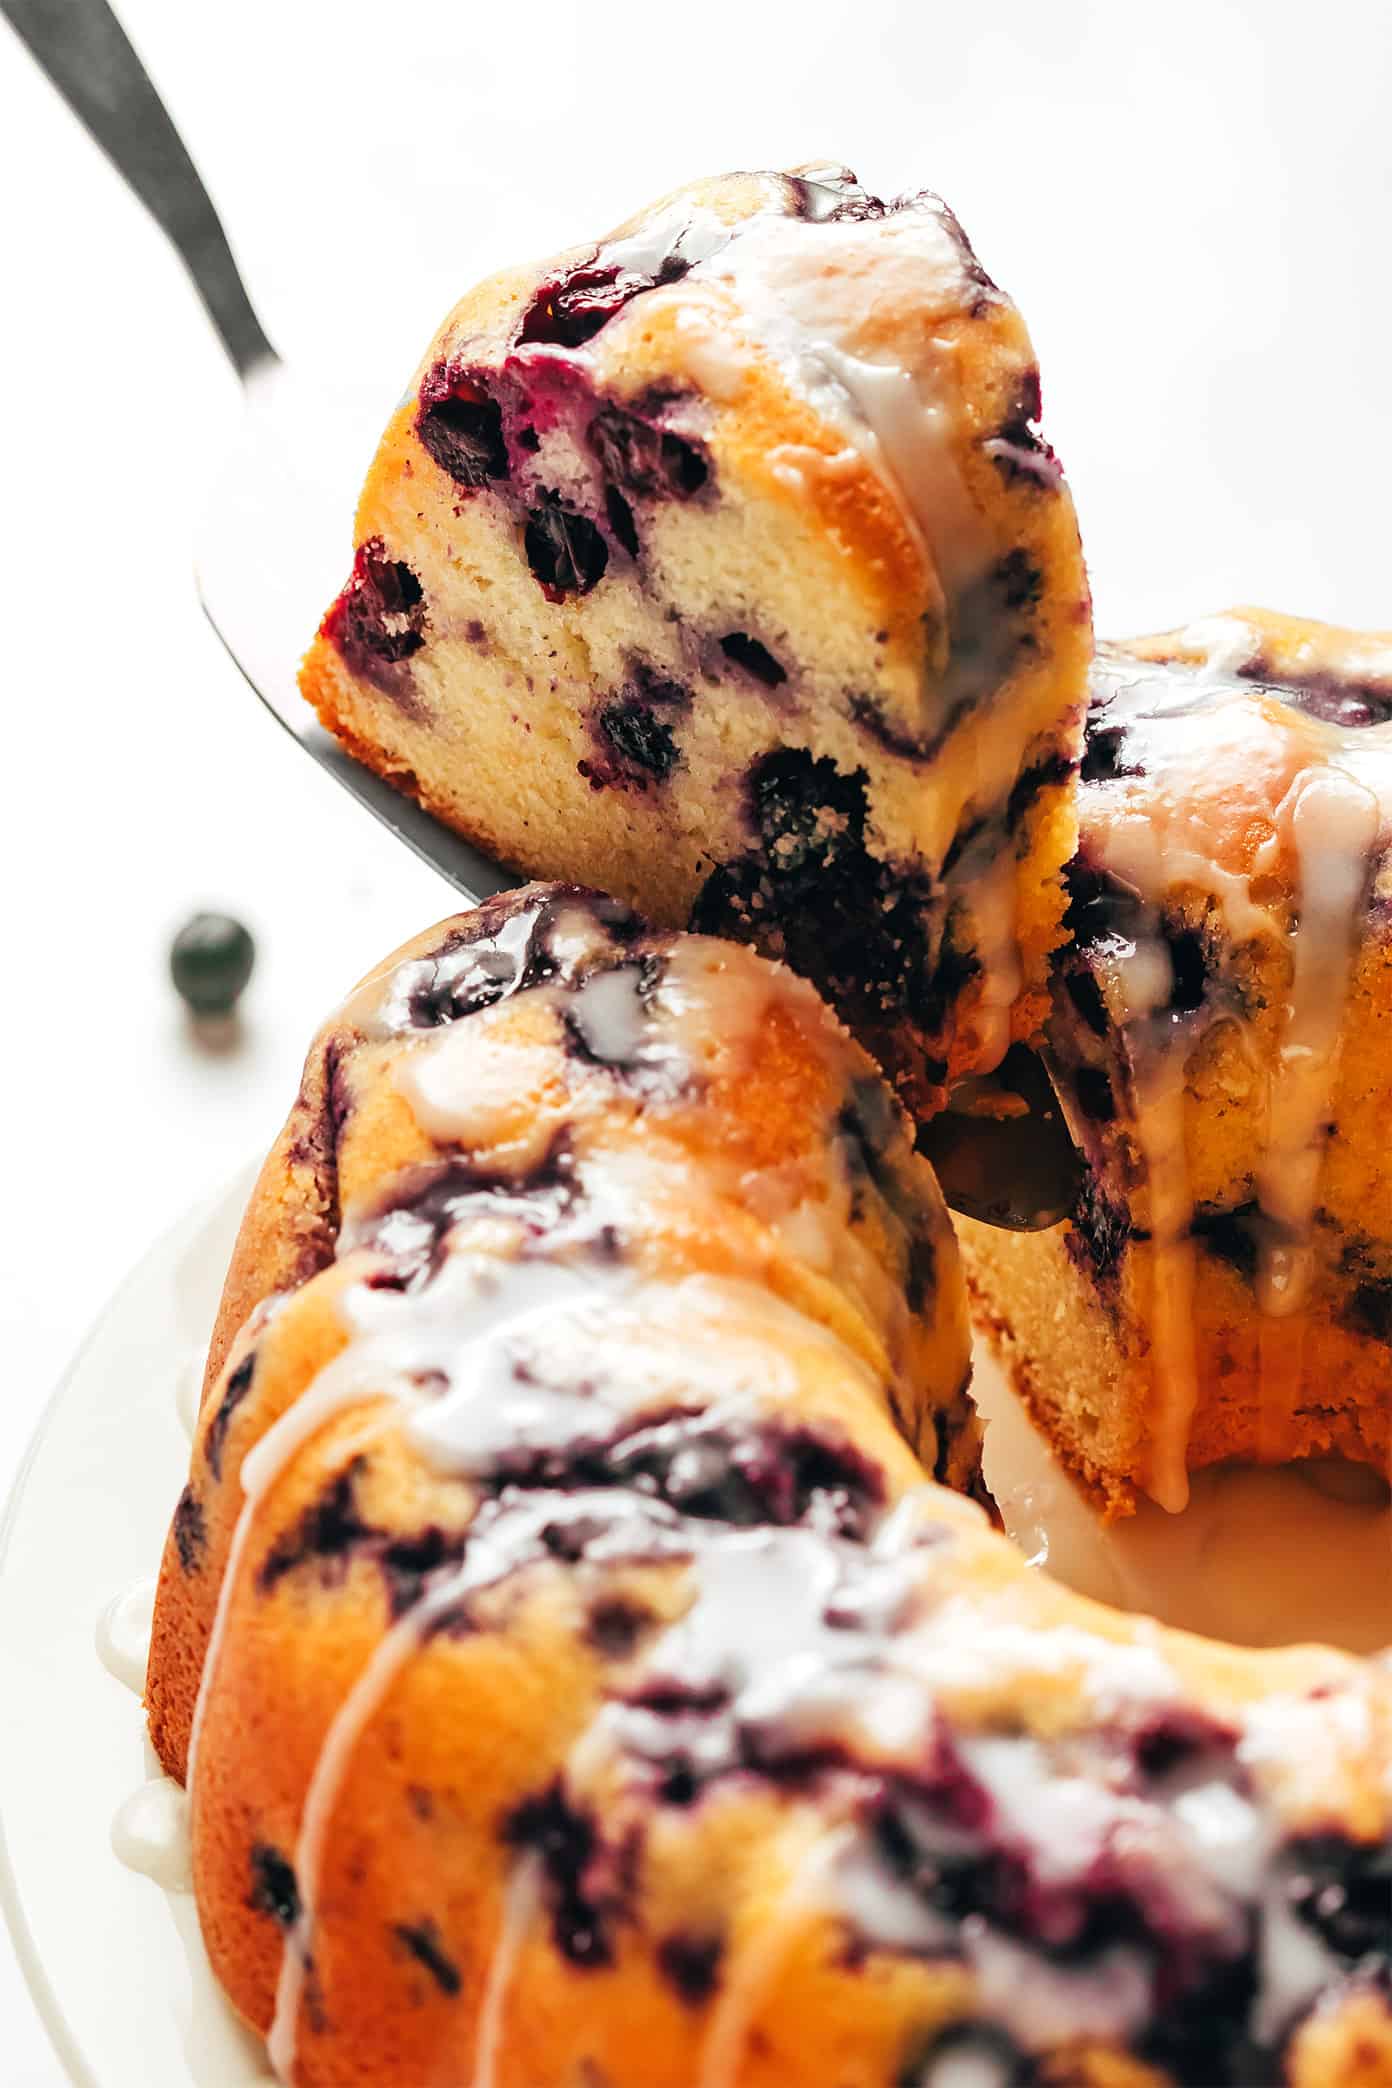
I first shared this blueberry cake recipe here ten years ago. And now, over a decade later, it still continues to be a favorite tradition of ours each spring when blueberry season rolls back around. It’s loaded up with a full two pints of fresh blueberries, which add a burst of vibrant sweetness to each bite. Then when mixed with a simple vanilla white cake batter, baked up in a bundt pan, and drizzled lightly with a sweet glaze, this cake is downright lovely through and through. Always such a beautiful cake for springtime!
In the years since I first shared this recipe, I’ve come to love adding a hint of lemon to brighten up the cake batter and glaze. And while I love this cake with fresh blueberries, I’ve also updated the notes below with instructions on how to make it using frozen blueberries too if that’s what you have on hand.
This recipe is always a winner in our house, so I hope you enjoy it as much as we do!
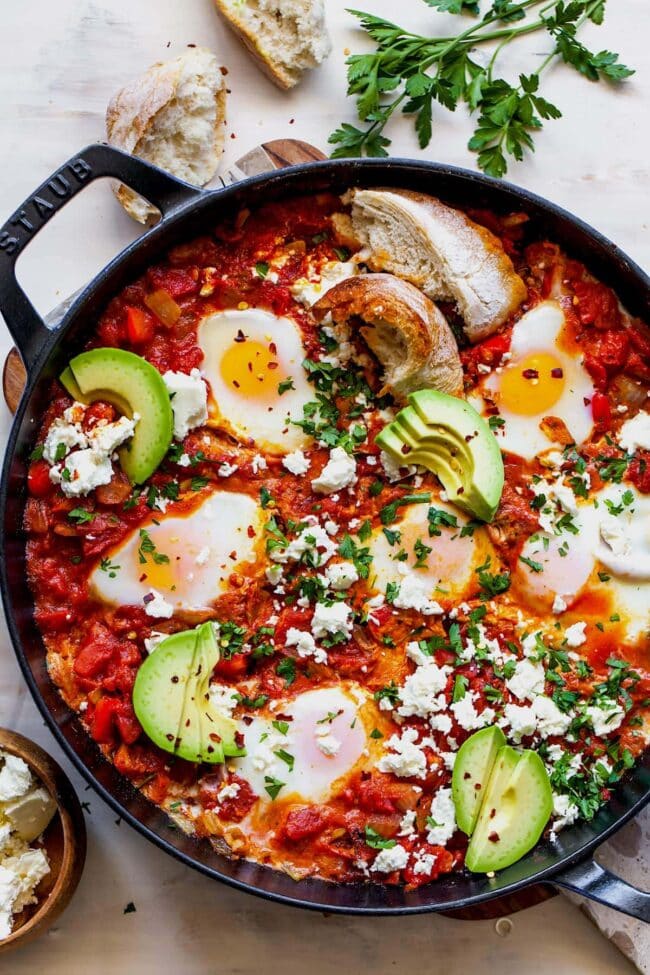
Let me introduce you to one of my all-time favorite meals, Shakshuka! This spiced egg-and-tomato dish is a wonderful and easy meal to make at home. We love it for an ultra-savory breakfast or a quick and easy dinner. Oh…and it’s pronounced …
Let me introduce you to one of my all-time favorite meals, Shakshuka! This spiced egg-and-tomato dish is a wonderful and easy meal to make at home. We love it for an ultra-savory breakfast or a quick and easy dinner. Oh…and it’s pronounced shock-shoe-ka, just in case you weren’t sure! This simple skillet meal is made…
Runny, custardy, or firm – how do you like your yolk? This 15-minute recipe will teach you how to boil eggs just the way you like them every time. Plus, we’ve got some peeling hacks so you can dig in faster! Why You’ll Love This Boile…
Runny, custardy, or firm – how do you like your yolk? This 15-minute recipe will teach you how to boil eggs just the way you like them every time. Plus, we’ve got some peeling hacks so you can dig in faster! Why You’ll Love This Boiled Eggs Recipe Learning how to boil eggs is quite...
Nothing says breakfast like perfectly fried eggs with tender whites and rich yolks. This no-flip recipe teaches you how to make them sunny side up, over-hard, and everything in between. Why You’ll Love This Fried Eggs Recipe What You’ll Nee…
Nothing says breakfast like perfectly fried eggs with tender whites and rich yolks. This no-flip recipe teaches you how to make them sunny side up, over-hard, and everything in between. Why You’ll Love This Fried Eggs Recipe What You’ll Need Things don’t get much easier than butter and eggs. Scroll to the bottom of the...
It’s no secret that I LOVE Cadbury Mini Eggs. Those little pastel eggs are the BEST candy and I look forward to them every spring. When they hit the grocery store shelves, I buy SEVERAL bags so I can make my Cadbury Egg Cookies, Cadbury Egg Blond…
It’s no secret that I LOVE Cadbury Mini Eggs. Those little pastel eggs are the BEST candy and I look forward to them every spring. When they hit the grocery store shelves, I buy SEVERAL bags so I can make my Cadbury Egg Cookies, Cadbury Egg Blondies, and eat the candy by the handful. I…
 Baked oatmeal is one of my all-time favorite breakfasts. It is so hearty and comforting. I also love making baked oatmeal cups. The individual size cups are so fun and they make a great grab and go breakfast or snack. These Lemon Blueberry Baked Oatmeal Cups are bursting with lemon flavor and juicy blueberries. The…


 Let me introduce you to one of my all-time favorite meals, Shakshuka! This spiced egg-and-tomato dish is a wonderful and easy meal to make at home. We love it for an ultra-savory breakfast or a quick and easy dinner. Oh…and it’s pronounced shock-shoe-ka, just in case you weren’t sure! This simple skillet meal is made…
 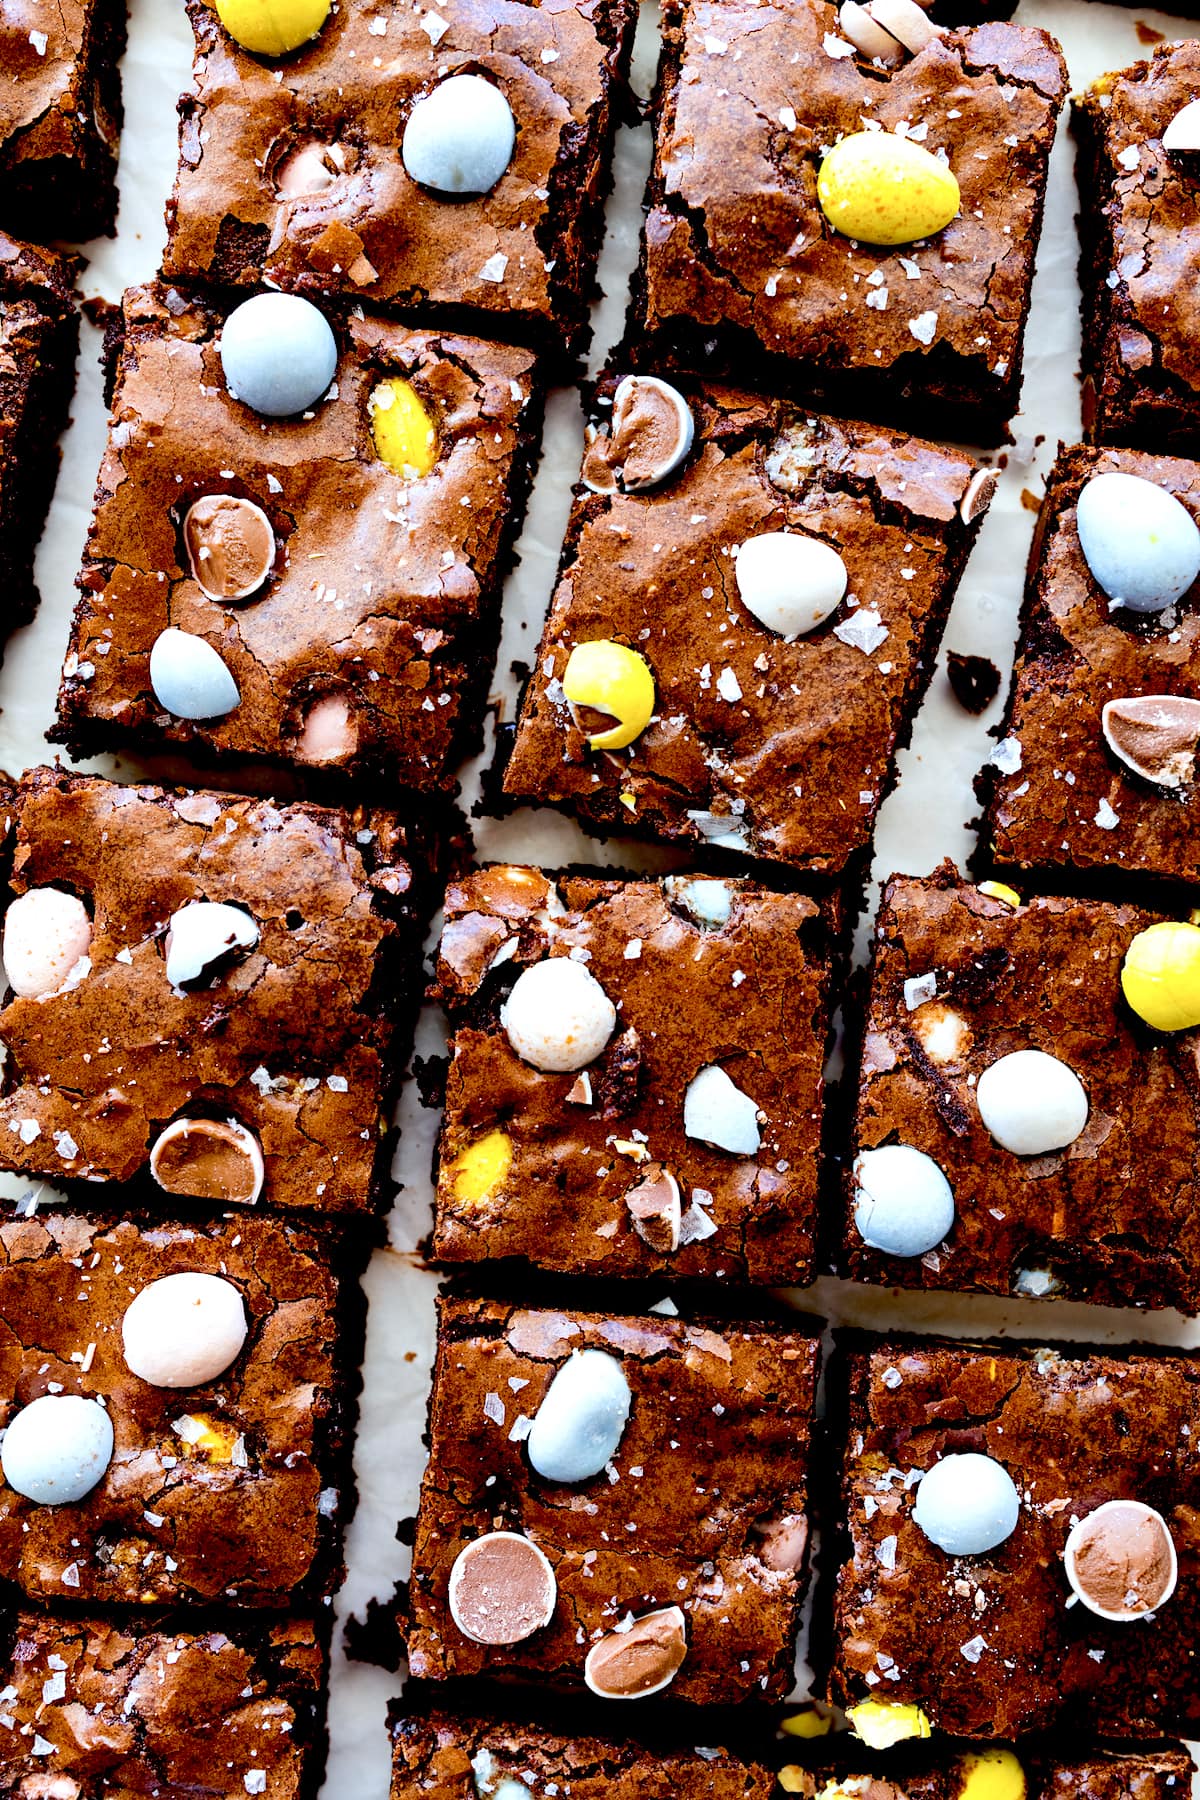 It’s no secret that I LOVE Cadbury Mini Eggs. Those little pastel eggs are the BEST candy and I look forward to them every spring. When they hit the grocery store shelves, I buy SEVERAL bags so I can make my Cadbury Egg Cookies, Cadbury Egg Blondies, and eat the candy by the handful. I…