Anyone else have an awkwardly long list of modifications when ordering drinks from coffee shops? Welcome to the club. Sometimes we spare ourselves the embarrassment and make them at home.
Inspired by the dangerously delicious Mayan Mocha from Picnik, t…
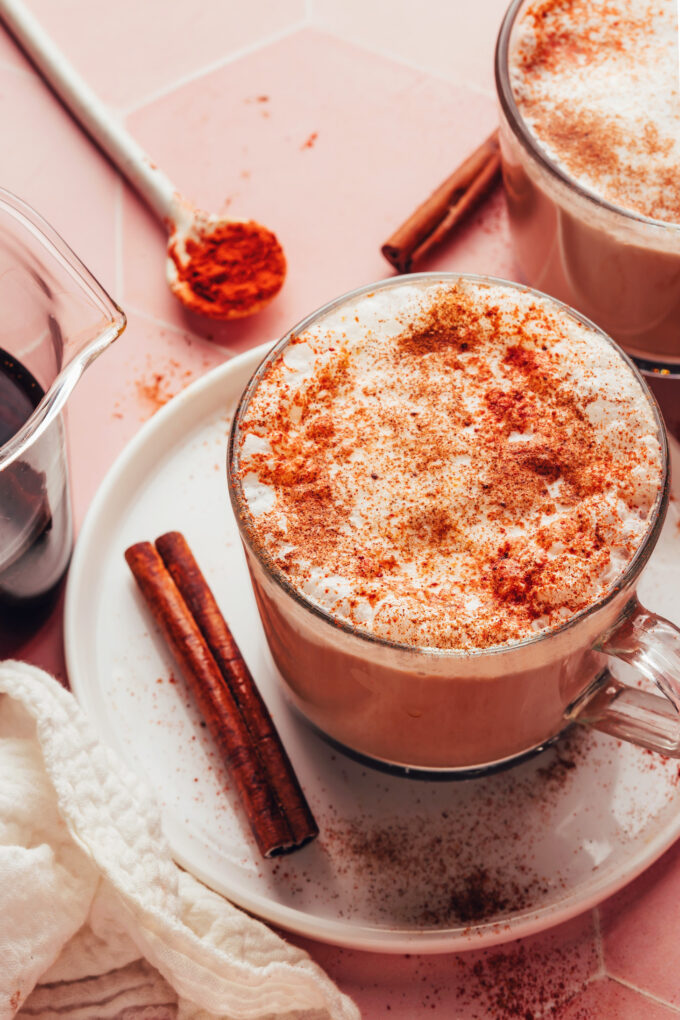
Anyone else have an awkwardly long list of modifications when ordering drinks from coffee shops? Welcome to the club. Sometimes we spare ourselves the embarrassment and make them at home.
Inspired by the dangerously delicious Mayan Mocha from Picnik, this creamy, dreamy drink is a little sweet, spicy, and chocolaty. It’s also dairy-free and can be made with dandelion root for a low-caffeine, coffee-free option. Let us show you how it’s done!
Butternut Squash Soup is one of my all-time favorite soups. I make it all of the time during the fall months. I love my classic recipe, but sometimes it is fun to mix it up. I love making this Roasted Butternut Squash Pear Ginger Soup because the flavo…
Butternut Squash Soup is one of my all-time favorite soups. I make it all of the time during the fall months. I love my classic recipe, but sometimes it is fun to mix it up. I love making this Roasted Butternut Squash Pear Ginger Soup because the flavors are phenomenal. This soup recipe reminds me…
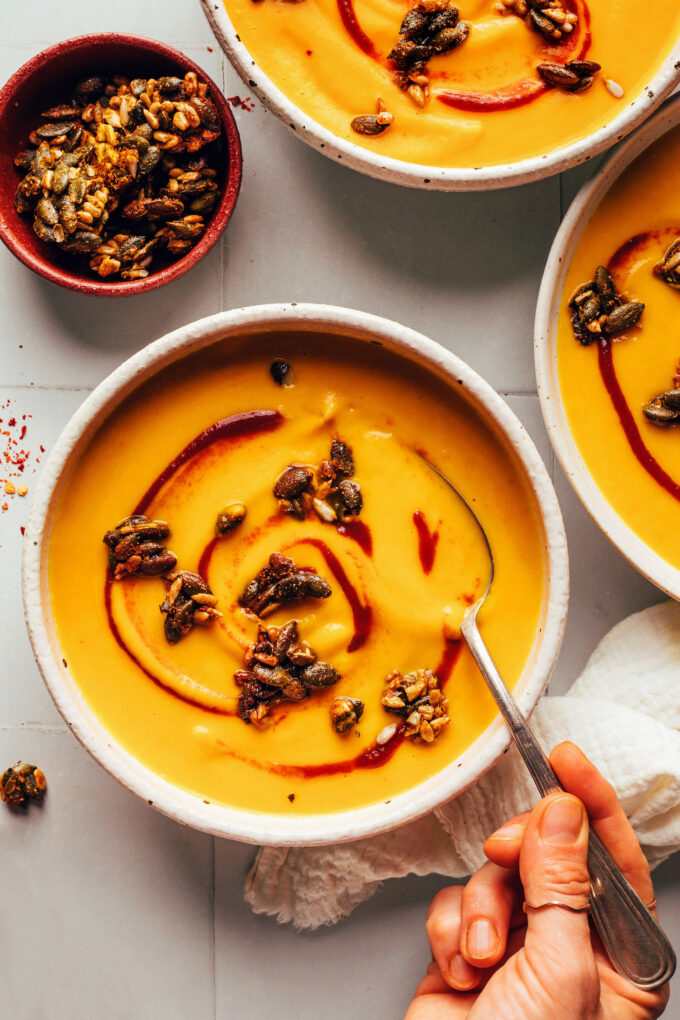
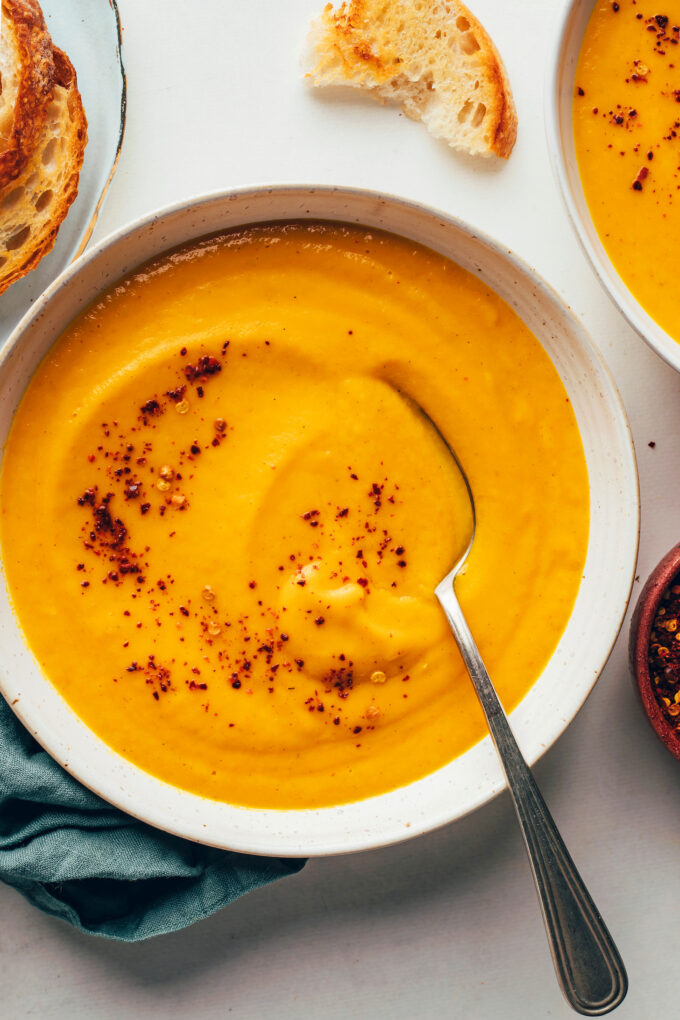
If our creamy vegan carrot soup and Thai-inspired butternut squash soup had a baby, this carrot ginger soup would be her! And she’s got both her parents’ best features. Creamy and luxurious, a little spicy and gingery, and not too complicated. Oh, and …
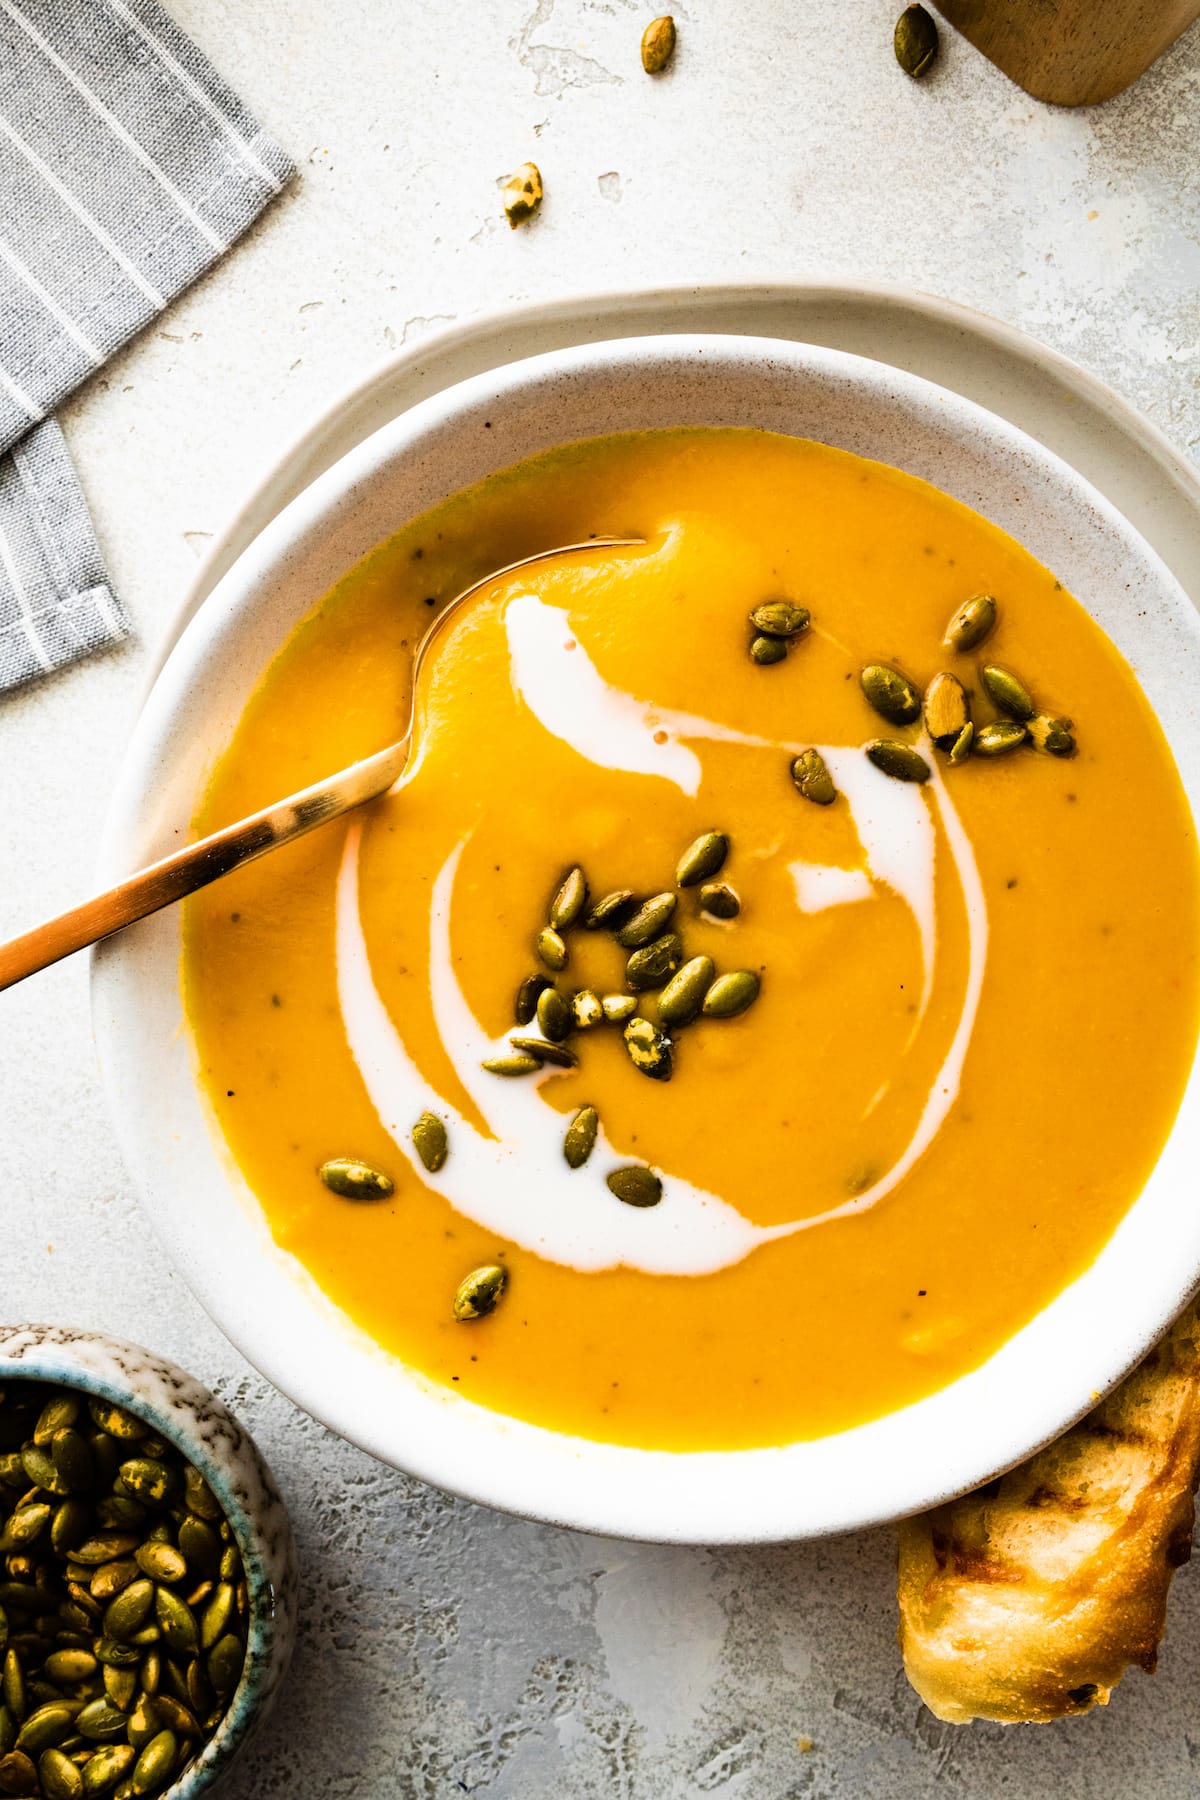
If our creamy vegan carrot soup and Thai-inspired butternut squash soup had a baby, this carrot ginger soup would be her! And she’s got both her parents’ best features. Creamy and luxurious, a little spicy and gingery, and not too complicated. Oh, and her sweet and spicy seedy topping? Highly recommended!
Just 1 pot and 8 simple ingredients required for this vibrant, warming chilly weather staple. Let us show you how it’s done!
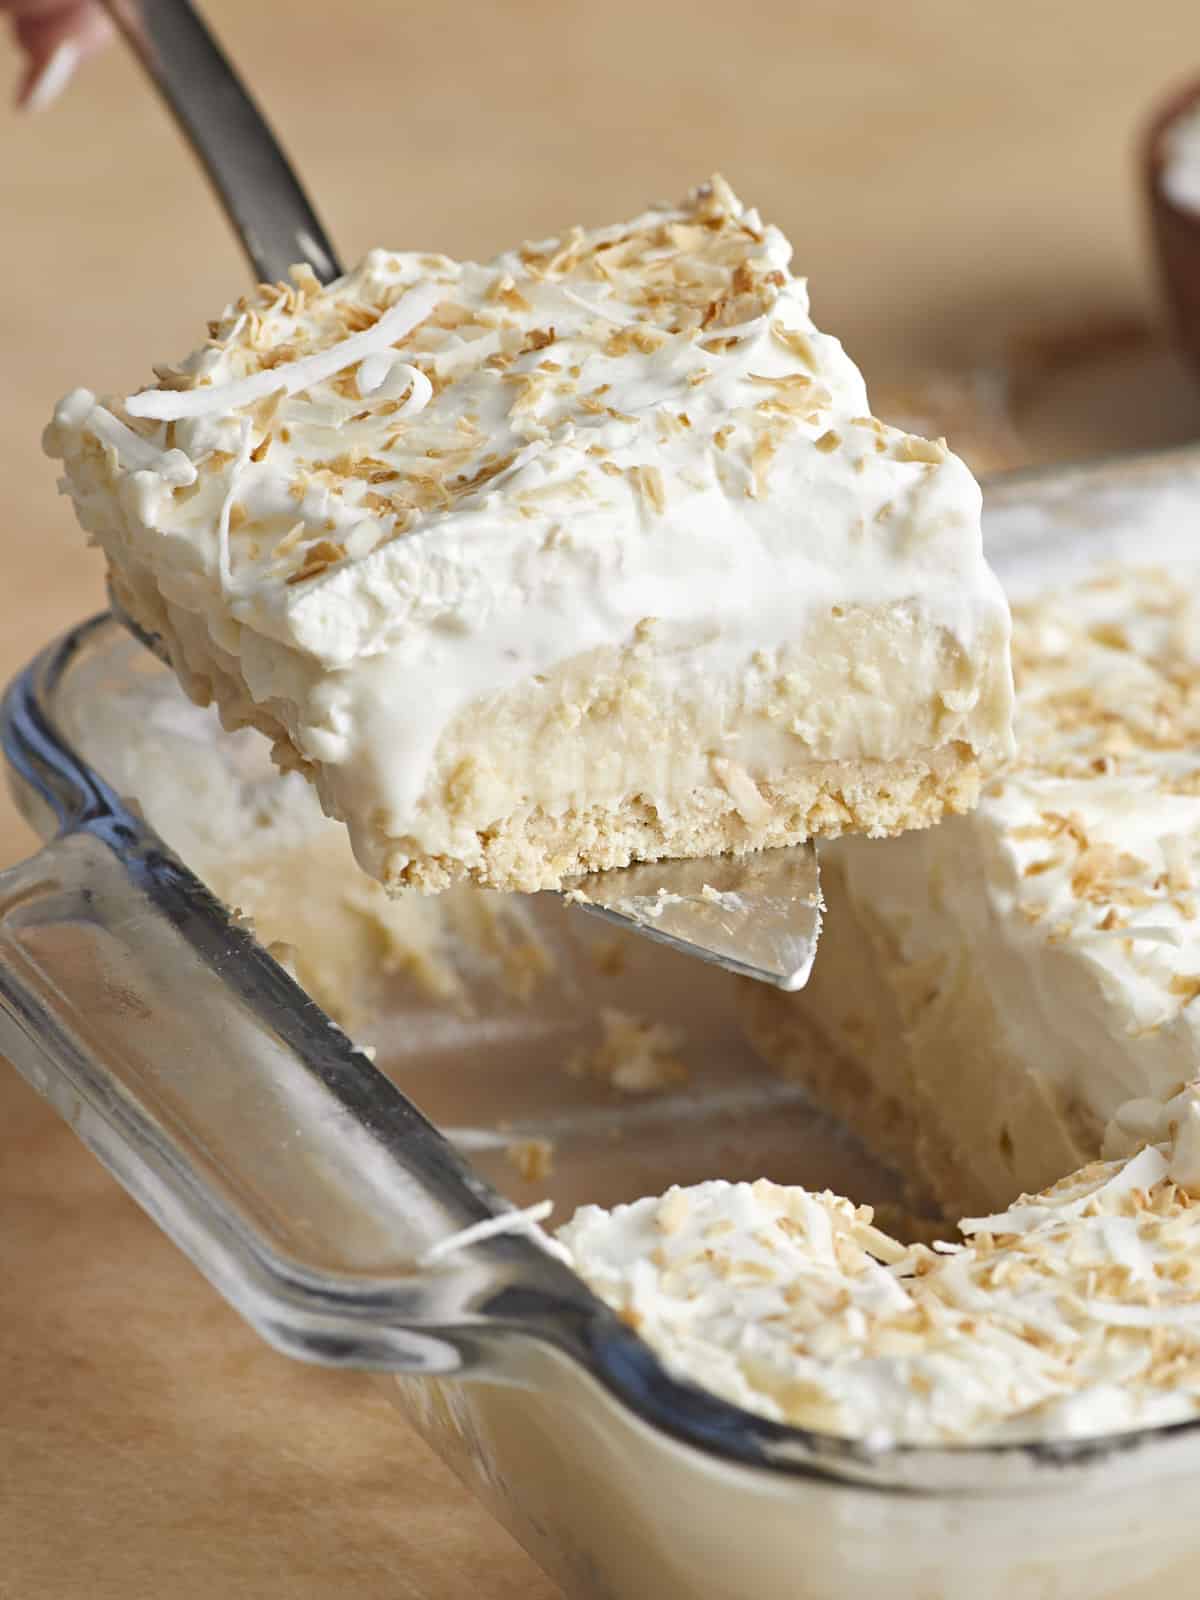
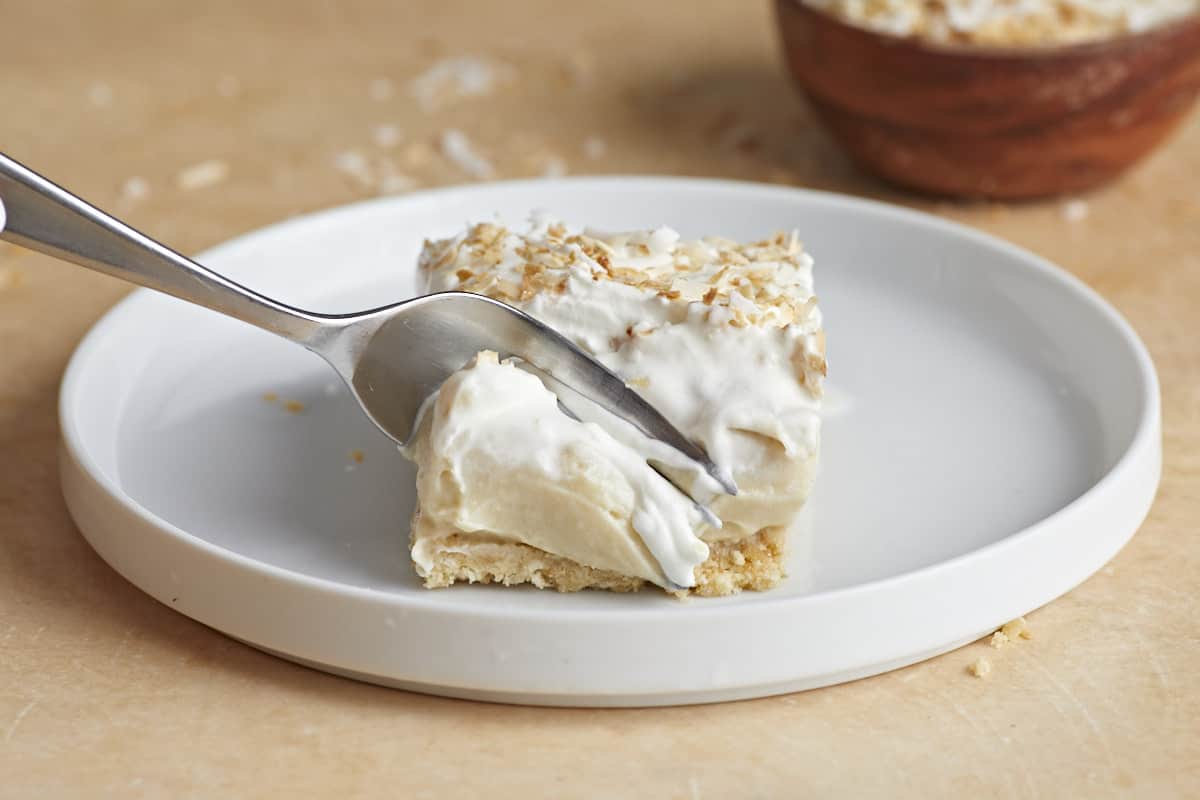
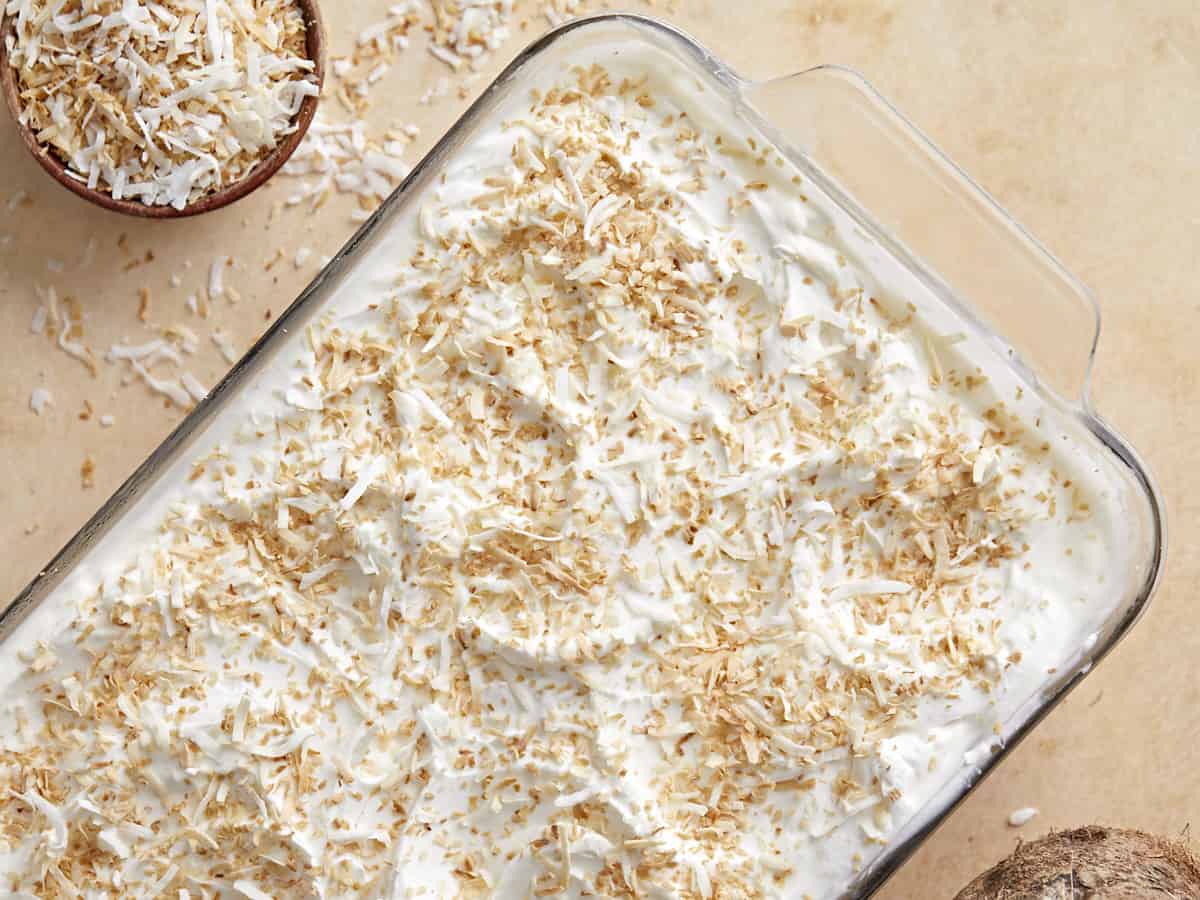
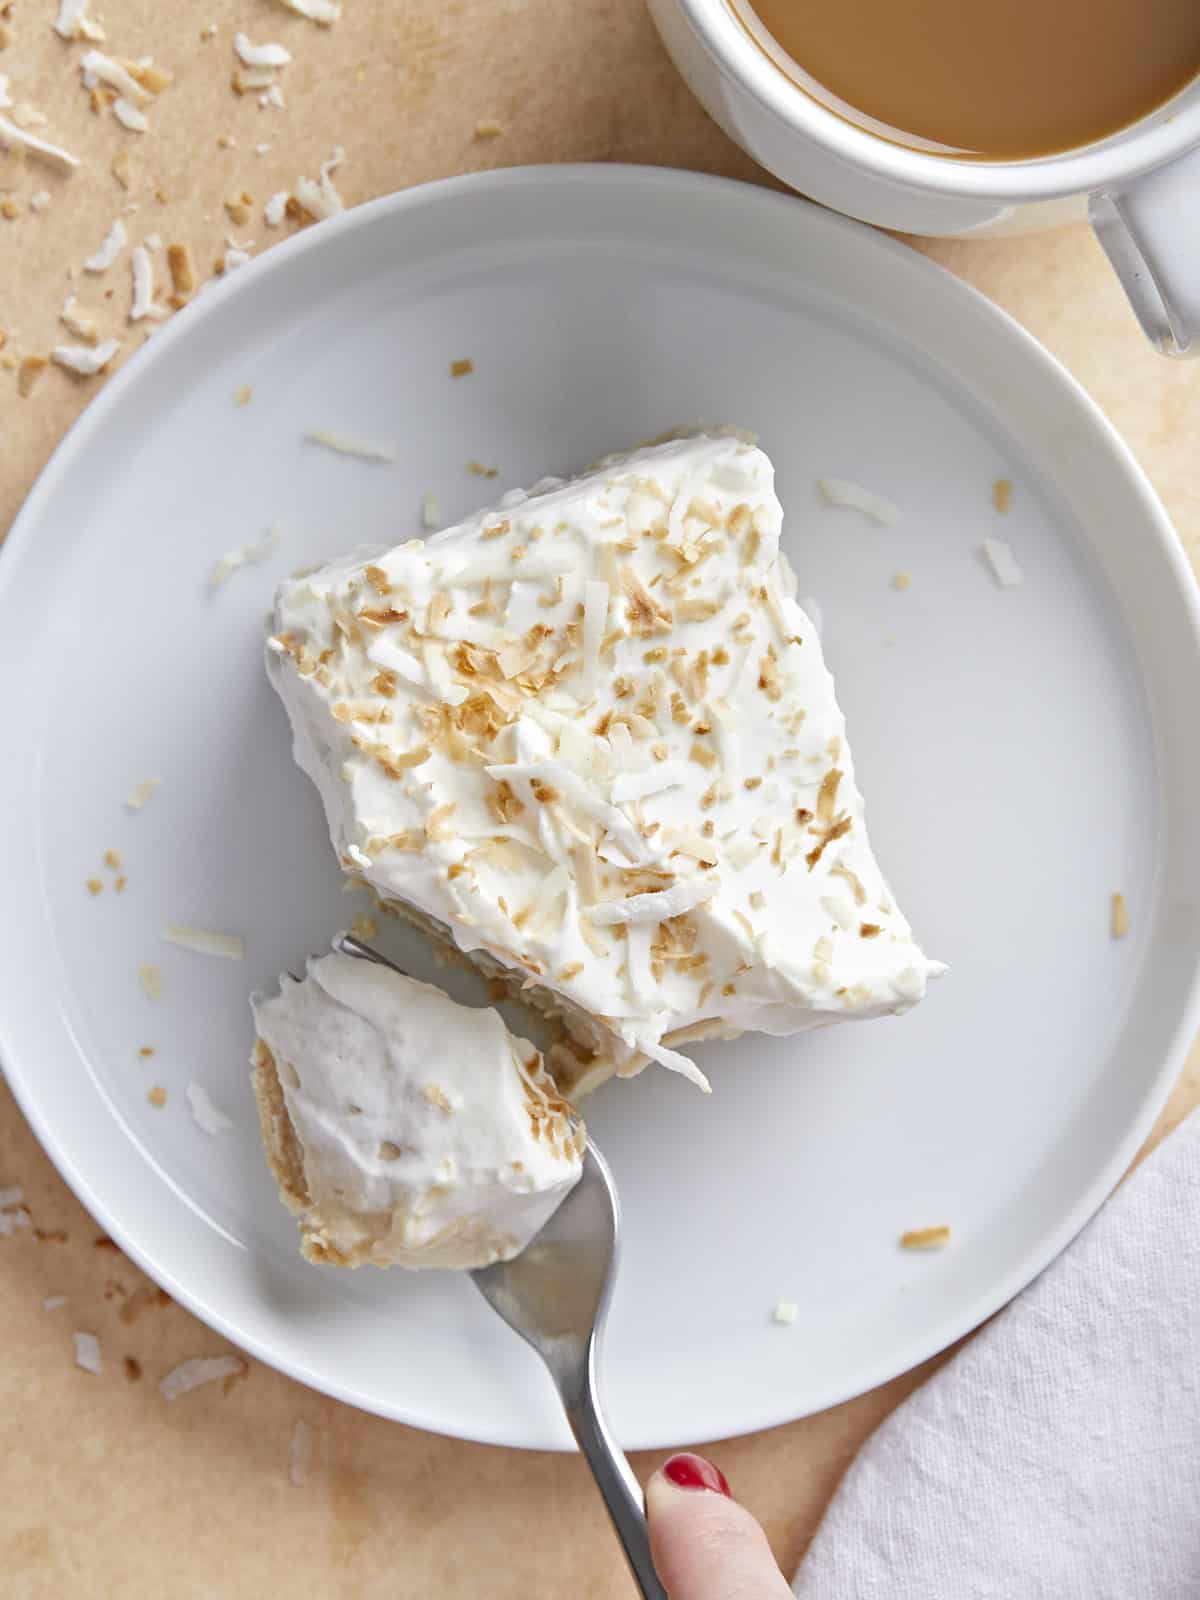
These Coconut Cream Pie Bars are so decadent that I could eat them for breakfast, lunch, and dinner. (And by could, I mean I HAVE.) They’re made with a buttery vanilla cookie crust and a rich and velvety coconut cream filling and topped with dollops of vanilla-scented whipped cream. You get 24 slices from this easy Coconut Cream Pie Bars recipe, so it’s perfect for a school bake sale or a large get-to-gether. I’m obsessed!
What Are Coconut Cream Pie Bars?
Coconut Cream Pie Bars are basically a simplified Coconut Cream Pie. Instead of making a pie crust and blind baking it, I use a cookie crust that comes together in seconds. I put the most work into the filling, steeping coconut milk with coconut flakes to really punch in on that tropical flavor. The flakes are strained out to create the silkiest texture, and the whole thing is topped with canned whipped cream (which can withstand a hot summer day without liquifying). The final touch is a generous sprinkle of crunchy toasted coconut flakes.
Ingredients For Coconut Cream Pie Bars
This recipe scores a 100 for convenience. You can make the crust and fill it with custard a day ahead, then refrigerate until it’s go time. You can even freeze it up for up to three months. Just leave the whipped cream topping and coconut flake garnish for when you’re ready to serve. Here’s what you need to make Coconut Cream Pie Bars:
Unsweetened Flaked Coconut: helps flavor the coconut milk custard and is used as a garnish. I use unsweetened to control the amount of sugar in the recipe. If you want to use sweetened coconut flakes, skip the sugar. You don’t have to strain the coconut flakes out of the custard, but chunky custard isn’t my thing, so I do.
Coconut Milk, Condensed Milk, and Evaporated Milk: create our custard base. If two cans of coconut milk are out of your budget, replace one can with a second can of evaporated milk and steep the mixture for an hour instead of 20 minutes.
Brown Sugar and Granulated Sugar: these sweeten the custard, with the brown sugar adding notes of molasses to deepen the flavor.
All-Purpose Flour and Cornstarch: help thicken the custard.
Eggs: Egg yolks thicken the custard and help deepen its color. Reserve the white for a different preparation, or use them to make meringue!
Salted Butter: adds a velvety finish to the custard.
Vanilla Extract: rounds out the flavor of the filling
Whipped Cream Topping: I use canned whipped cream because it’s stabilized and tends to hold up on a hot summer day. But if you’re eating this in a controlled and cool environment, and you’re not scared of the cream getting a little soupy, try it with frozen whipped cream or our easy Homemade Whipped Cream.
How To Store Coconut Cream Pie Bars
Place leftover bars in an airtight container, top with a piece of parchment paper, seal, and refrigerate for up to 3 days or freeze for up to 3 months. If you plan on making the bars to freeze for later, skip the whipped cream topping and coconut flake garnish. Pour the custard into the cookie crust and refrigerate it until it sets. Then top it with a sheet of parchment directly on the surface, wrap it in two layers of aluminum, and keep it in an airtight container (or wrap it in plastic.) Thaw the frozen bars in the refrigerator before topping them with whipped cream and garnishing them with coconut flakes.
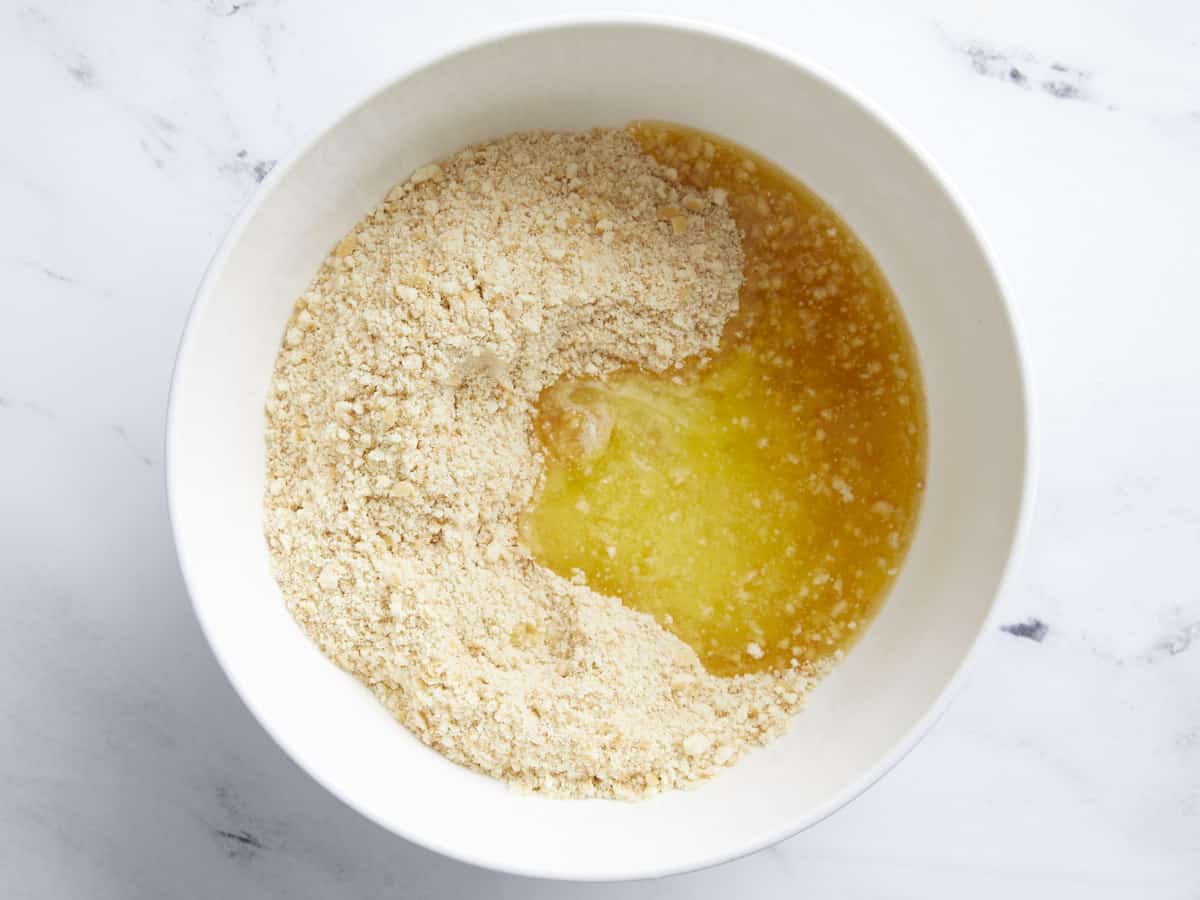
In a blender or food processor, blend the vanilla wafers into a sandy consistency.
Mix in the melted butter and salt until the cookie crumbs are completely saturated and have deepened in color.
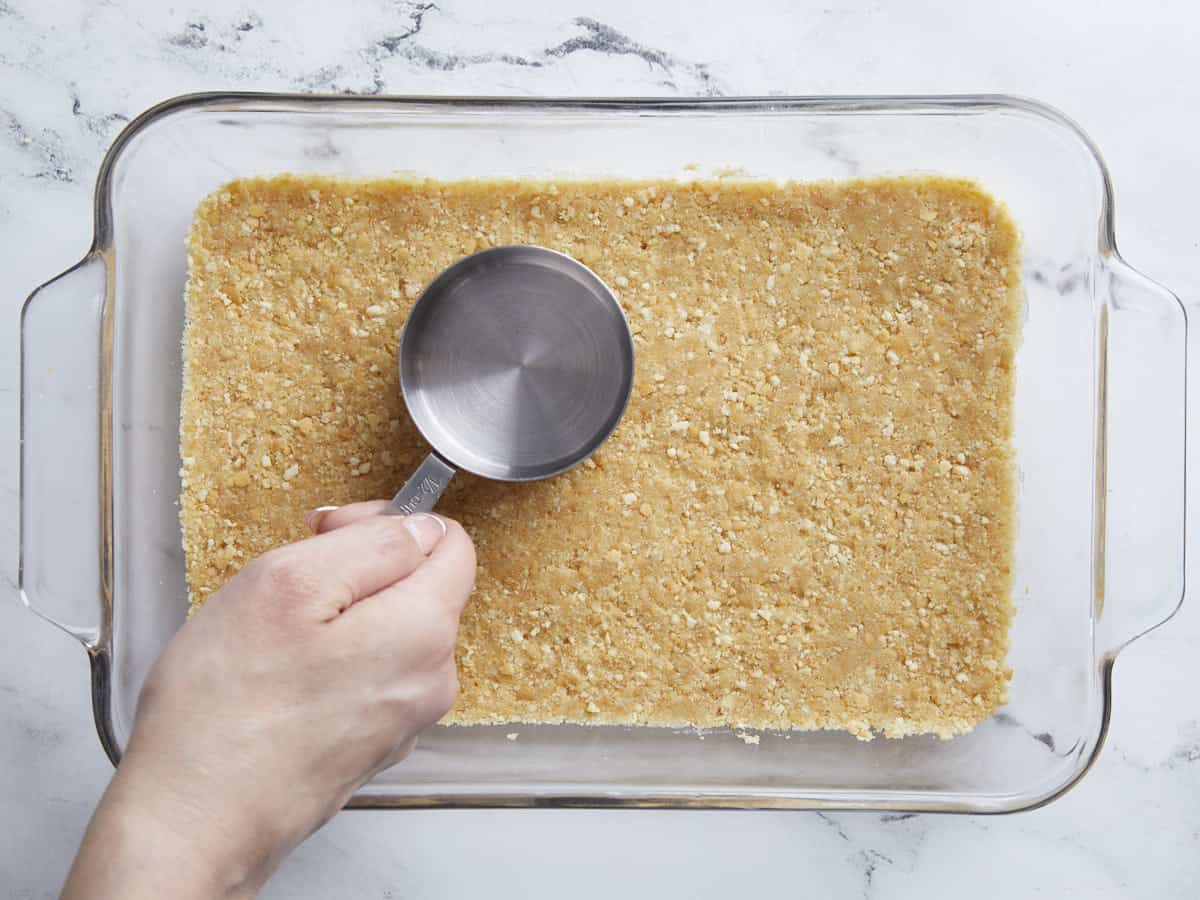
Press the cookie crust into an 11×7-inch baking dish in an even layer and freeze. If you don't have an 11×7-inch dish, use any square or rectangle dish with a 10-cup (2.5 qt) volume.
Filling
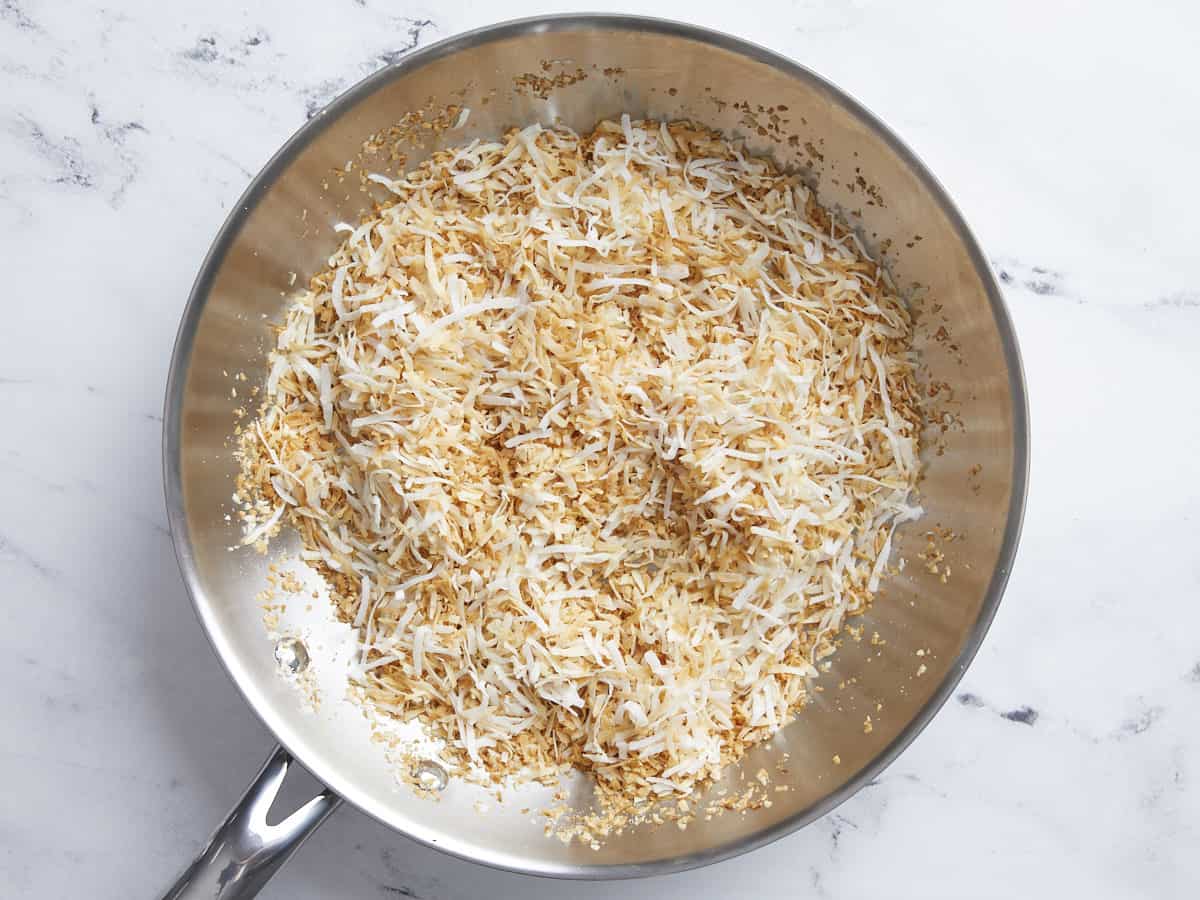
Add the unsweetened coconut flakes to a large saucepan set over medium heat. Toast the flakes, stirring occasionally so they don't burn. Remove them from the pan when they are golden brown.
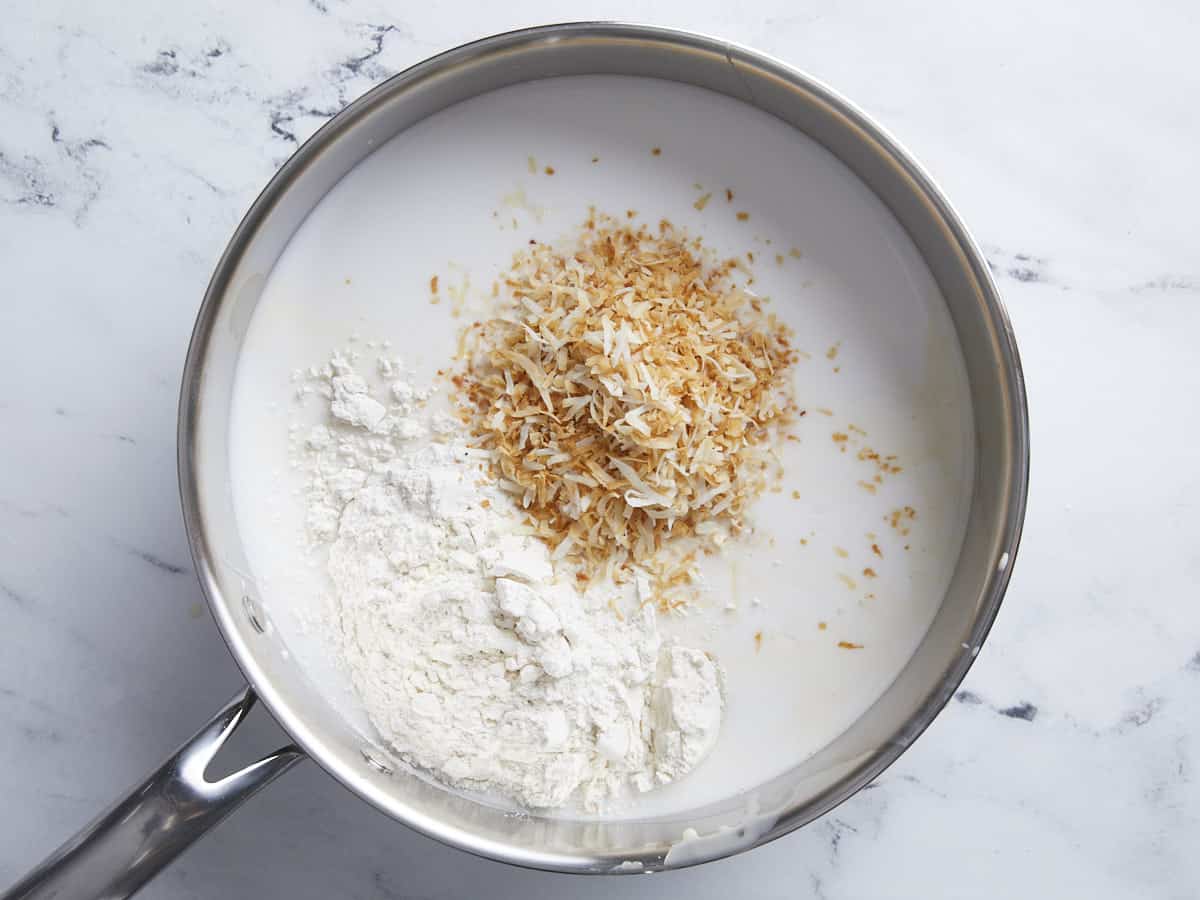
Add 1 cup of the toasted coconut flakes, the condensed milk, evaporated milk, coconut milk, salt, and flour to a heavy-bottomed saucepan set over medium heat. Stir until everything is combined and the milk has thickened, about 5 minutes.
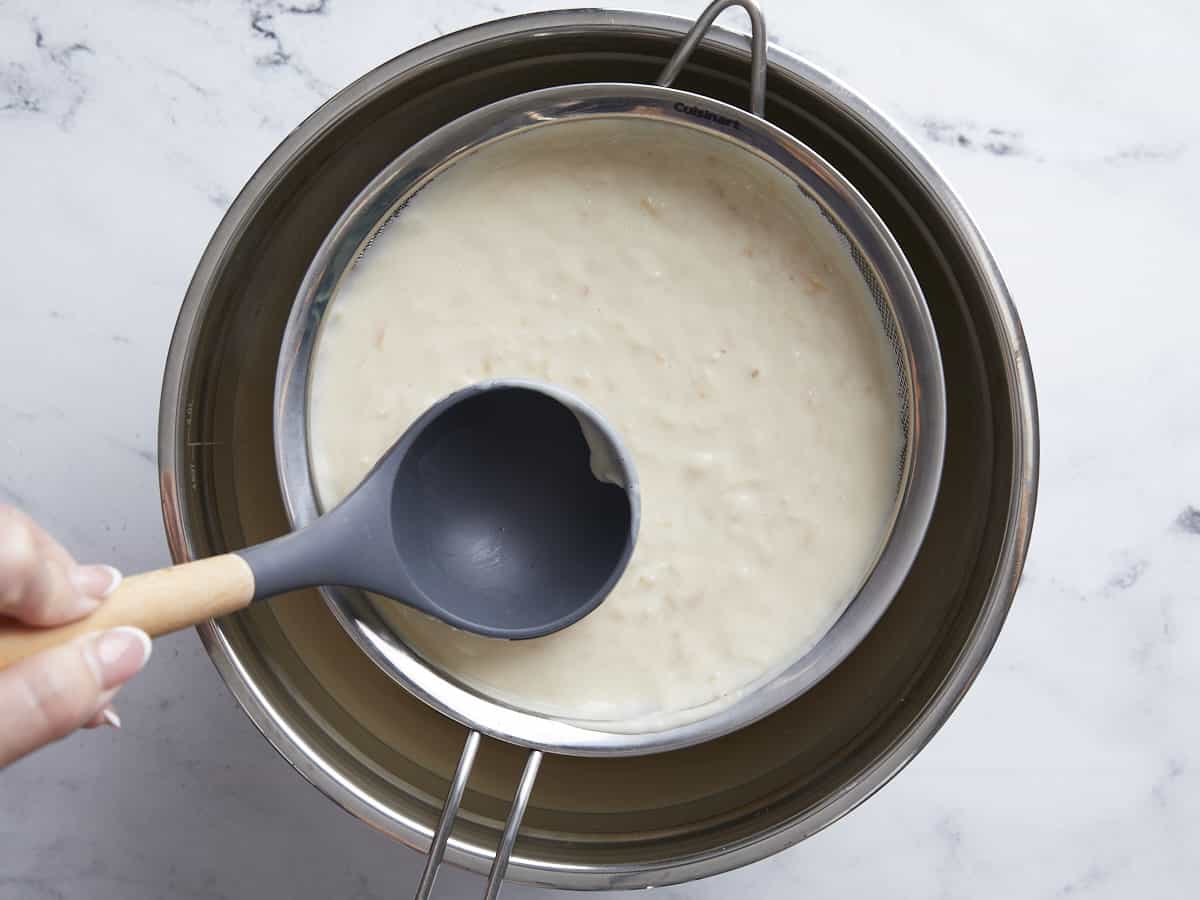
Take the milk mixture off the heat and let it steep for 20 minutes. Use a fine-mesh sieve to strain the coconut flakes from the milk mixture and discard. Add the milk mixture back to the pan and set over medium heat.
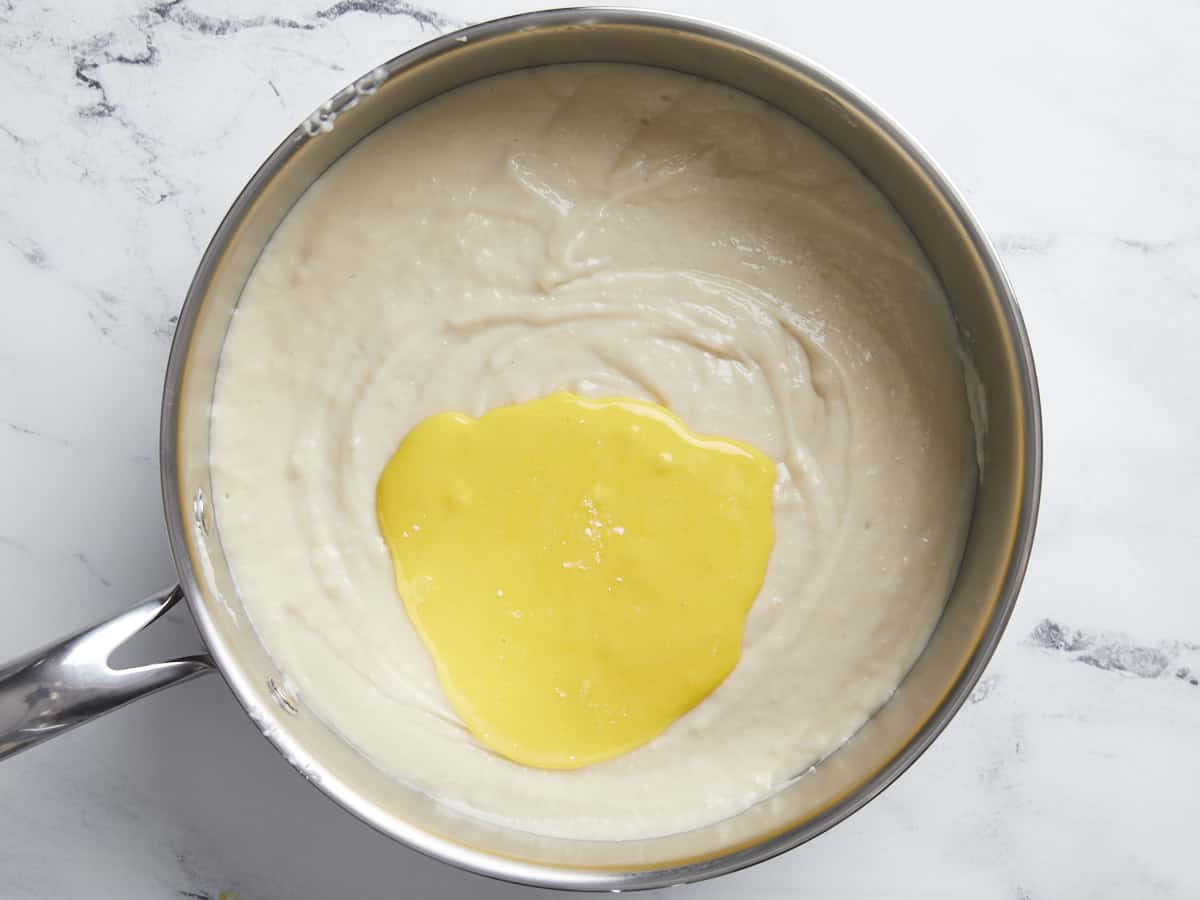
In a small bowl, add the water to the egg yolks. Mix in the cornstarch to create a slurry, then add it to the milk mixture in the pan. Cook over medium heat, stirring constantly until the custard bubbles in spurts.
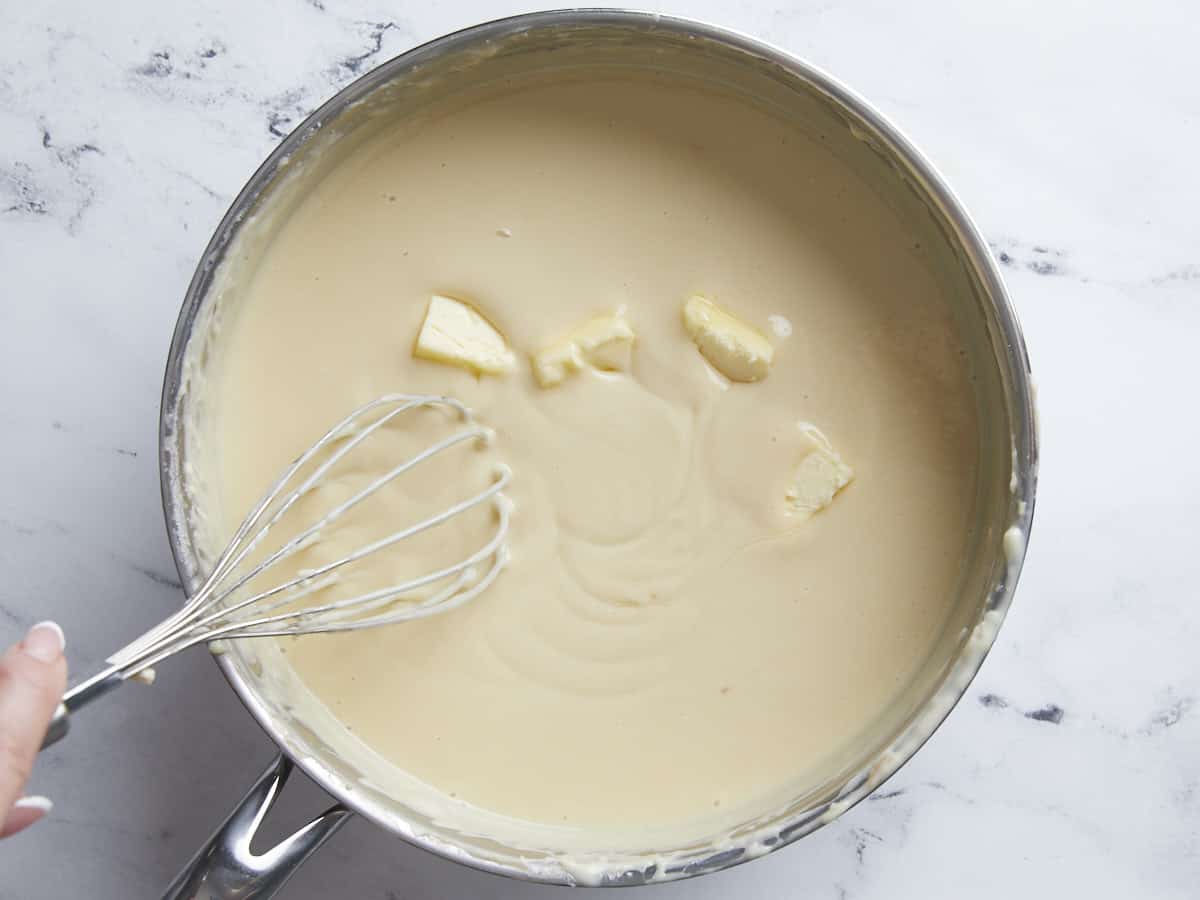
Take the pan off the heat and add the butter and vanilla extract. Mix until the butter dissolves.
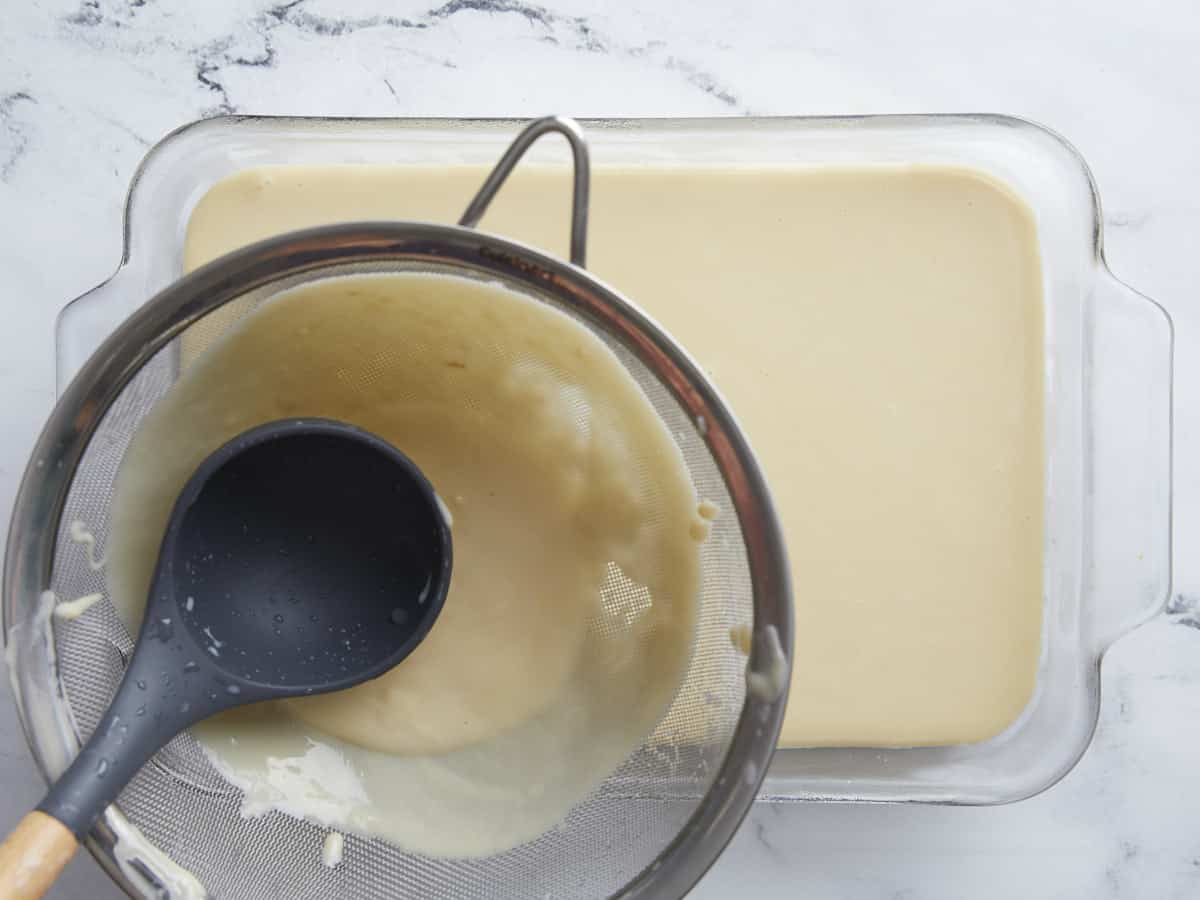
Strain the mixture through a fine-mesh sieve directly into the chilled crust. Refrigerate until set, about 2 to 3 hours.
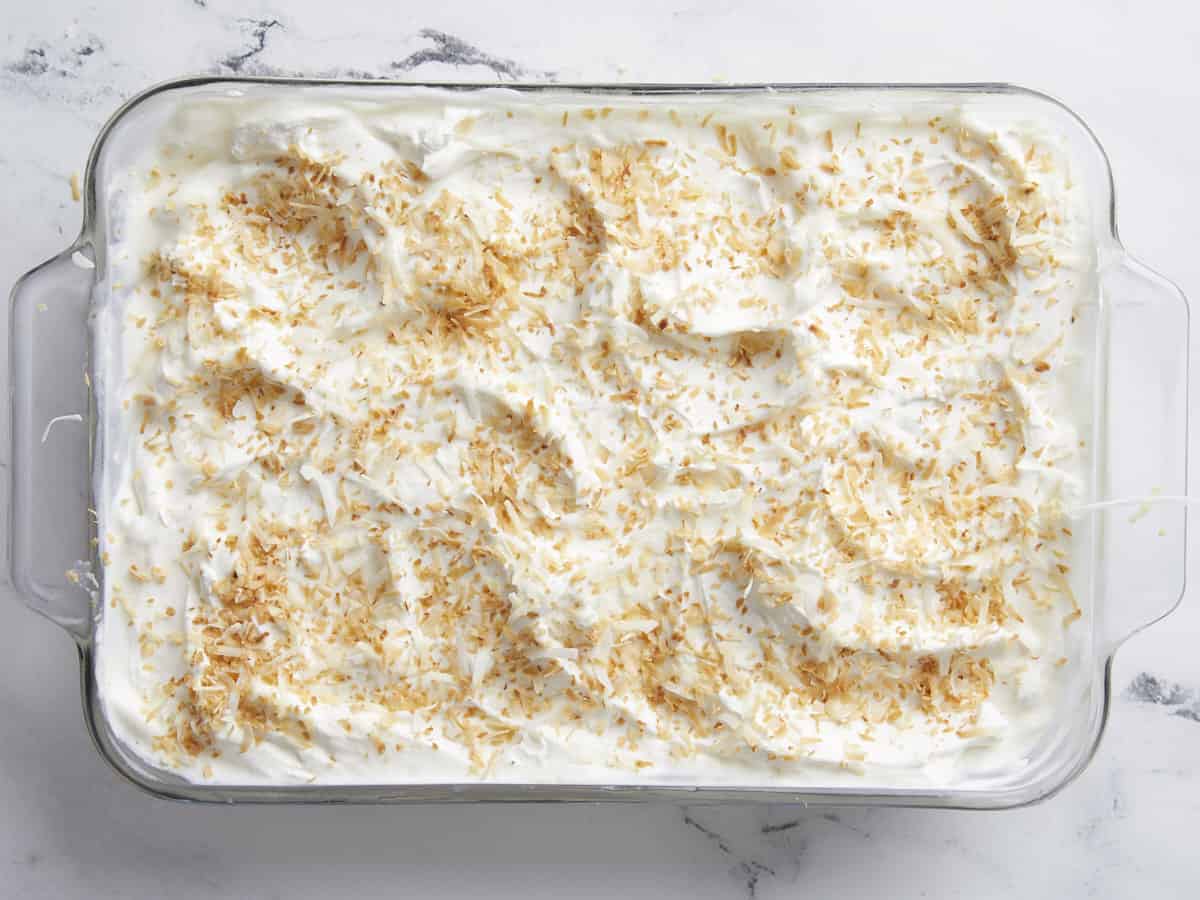
Top with whipped cream topping and sprinkle the whipped cream with the remaining 1/2 cup of toasted coconut flakes.
How to Make Coconut Cream Pie Bars – Step by Step Photos
In a blender or food processor, blend the 8 ounces of vanilla wafers into a sandy consistency. Mix in 1/2 cup of melted butter and a pinch of salt until the cookie crumbs are completely saturated and have deepened in color.
Press the cookie crust into an 11×7-inch baking dish in an even layer and freeze. If you don’t have an 11×7-inch dish, use any square or rectangle dish with a 10-cup volume.
Add the 1 1/2 cups of unsweetened coconut flakes to a large saucepan set over medium heat. Toast the flakes, stirring occasionally so they don’t burn. Remove them from the pan when they are golden brown.
Add 1 cup of toasted coconut flakes, one 14oz. can of condensed milk, one 12oz. can of evaporated milk, two 13.5oz. cans of coconut milk, 1/4 teaspoon of salt, and 3/4 cup of flour to a heavy-bottomed saucepan set over medium heat. Stir until everything is combined and the milk has thickened, about 5 minutes.
Take the milk mixture off the heat and let it steep for 20 minutes. Use a fine-mesh sieve to strain the coconut flakes from the milk mixture and discard. Add the milk mixture back to the pan and set over medium heat.
In a small bowl, add 2 tablespoons of water to the 3 egg yolks. Mix in the 1/4 cup of cornstarch to create a slurry, then add it to the milk mixture. Cook over medium heat, stirring constantly until the custard bubbles in spurts.
Take the pan off the heat and add the 4 tablespoons of butter and 1 teaspoon of vanilla extract. Mix until the butter dissolves.
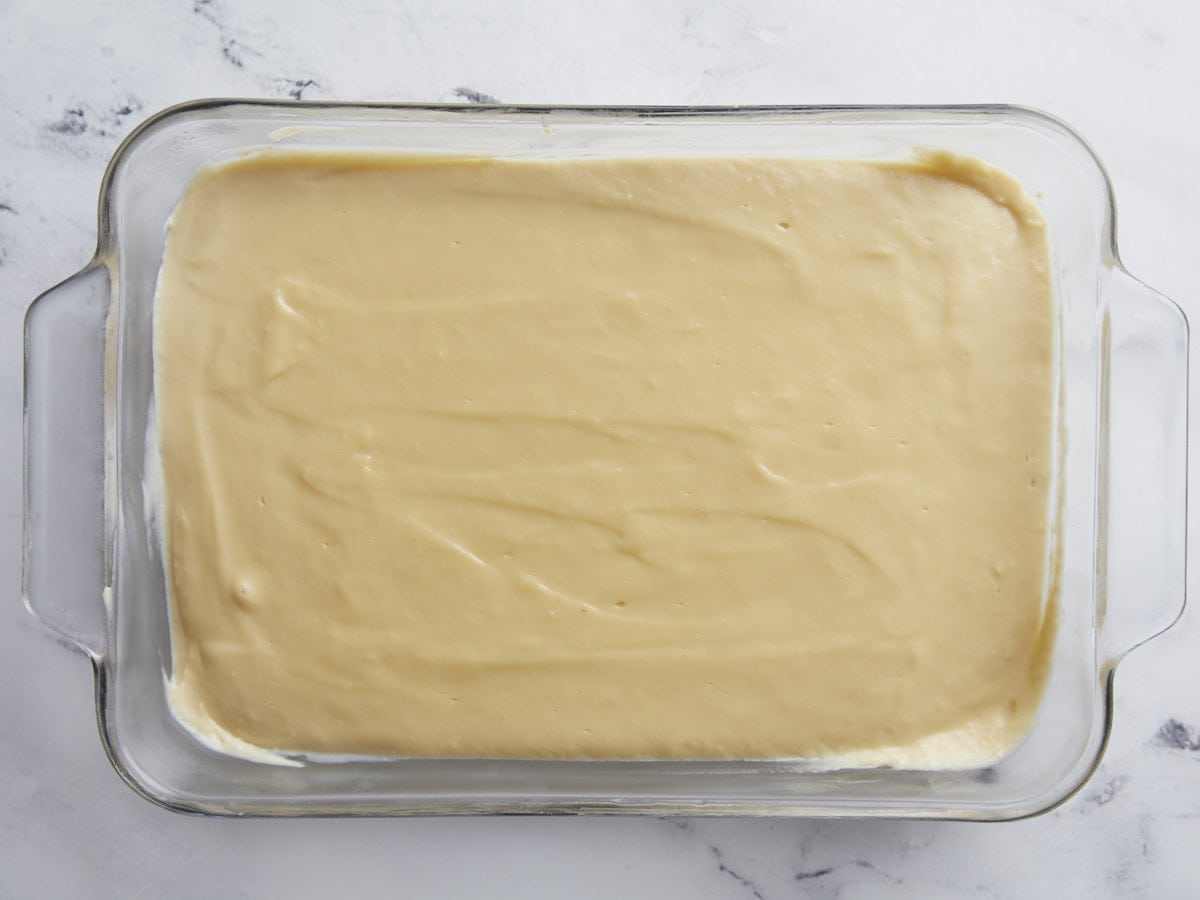
Strain the mixture through a fine-mesh sieve directly into the chilled crust.
Refrigerate until set, about 2 to 3 hours.
Top with 2 cups of whipped cream topping and sprinkle the whipped cream with the remaining 1/2 cup of toasted coconut flakes.
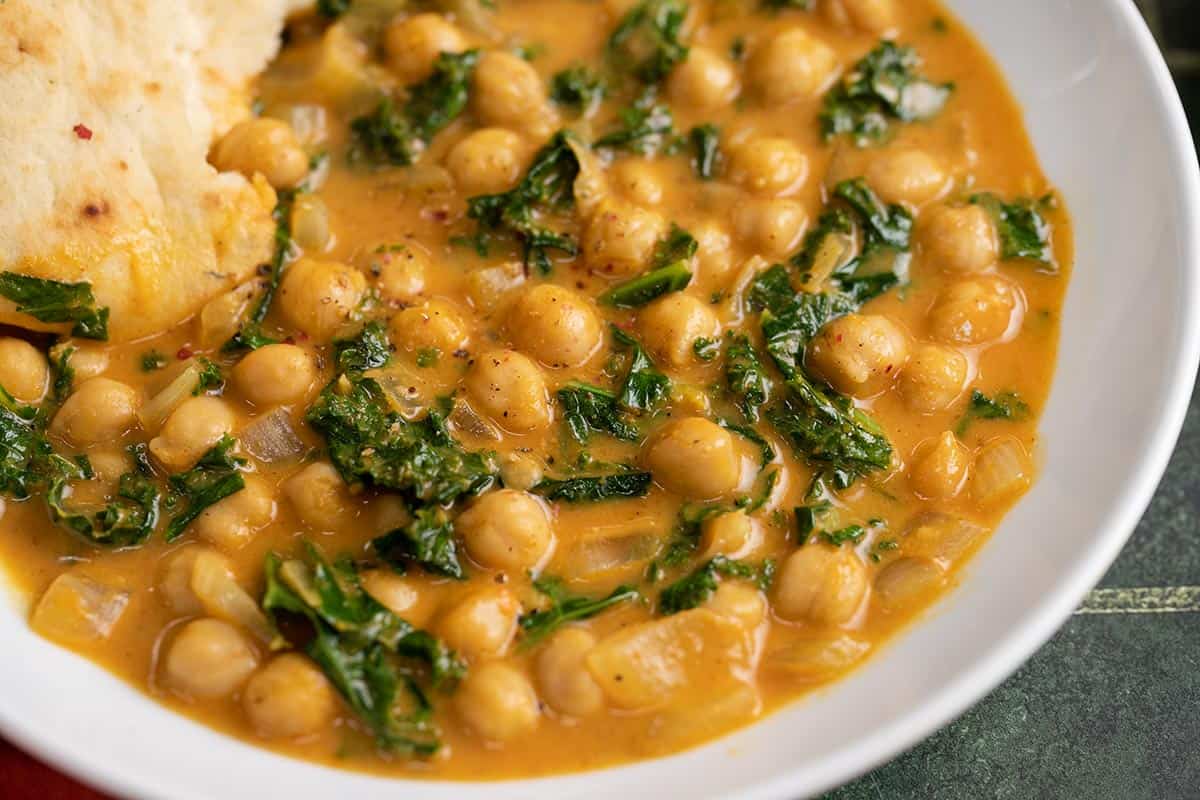
Quick curries are my favorite kind of weeknight dinner because they’re incredibly flavorful, require very little effort, and the leftovers are even better the next day. Plus, that creamy curry sauce makes everything taste good, so you can pack them with all sorts of nutrient-dense goodies, like chickpeas and kale. So basically, what I’m trying to say is, you need to make these Coconut Curry Chickpeas ASAP!
What’s in Coconut Curry Chickpeas
You’ll only need a handful of ingredients to make this warm and hearty dish, most of which you can keep on hand for last-minute dinners. Here are the ingredients you’ll need to make coconut curry chickpeas:
Aromatics: onion, garlic, and ginger create a powerful flavor base for this dish.
Spices: Curry powder and cumin. If you want a hot curry, you can always add a bit of cayenne pepper, too!
Tomato sauce: a little bit of tomato sauce adds just the right amount of acidity to the dish to balance the creamy coconut.
Coconut milk: full-fat coconut milk gives the curry sauce a ton of body and provides a creamy base to balance the potent flavors of the spices and aromatics.
Chickpeas: Inexpensive chickpeas fill out this dish, providing tons of belly-filling power and good-for-you fiber.
Kale: kale adds a little more variety in texture, color, and flavor to this dish. If you’re not into kale, you can substitute with fresh spinach.
What Kind of Curry Powder to Use
Curry powders can vary quite a bit in flavor from brand to brand, so make sure you experiment to find one that you enjoy. I’ve never met a curry powder that I didn’t like, so I don’t have one particular brand to suggest, but you definitely want to make sure it’s fresh! Old spices that have been sitting in your pantry a while begin to lose flavor and become dull and bland with time.
You also have the option to use either hot or mild curry powder. If you enjoy spicy foods you can use a hot curry powder, OR simply add some crushed red pepper or cayenne pepper to the dish when adding the curry powder and cumin.
How to Serve Coconut Curry Chickpeas
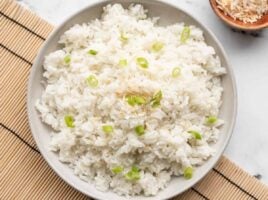
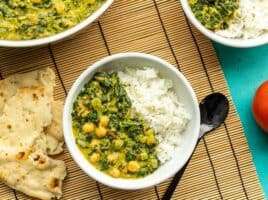
This warm and saucy dish is great over rice, or crusty bread or naan for dipping. You definitely want some sort of starchy goodness to soak up all of that sauce! You can also experiment with topping your chickpeas with fresh cilantro or even a squeeze of lime. Something light and refreshing, like Creamy Cucumber Salad, would also pair nicely with these curry chickpeas.
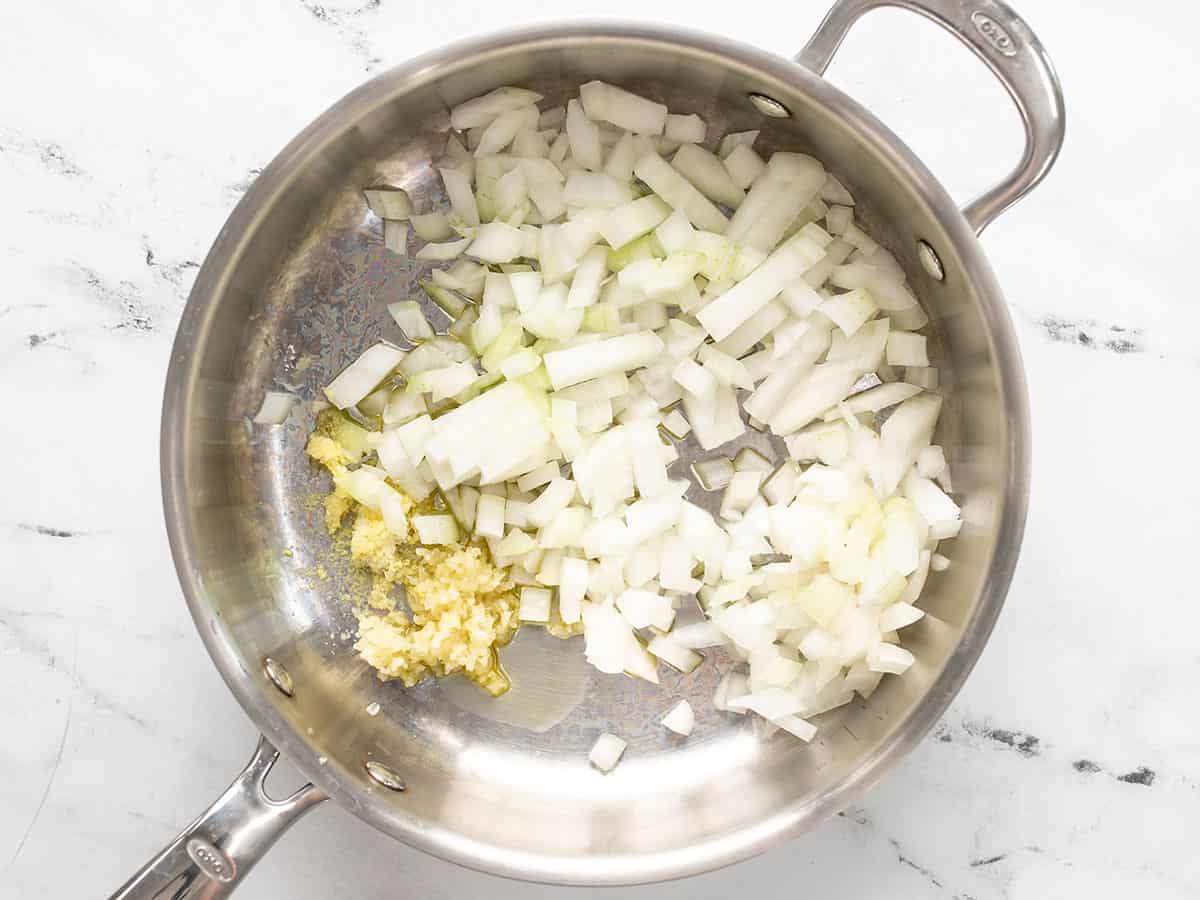
Dice the onion, mince the garlic, and grate the ginger. Add the onion, garlic, and ginger to a large deep skillet along with the olive oil. Sauté the aromatics over medium-low heat for about five minutes, or until the onions are soft and translucent.
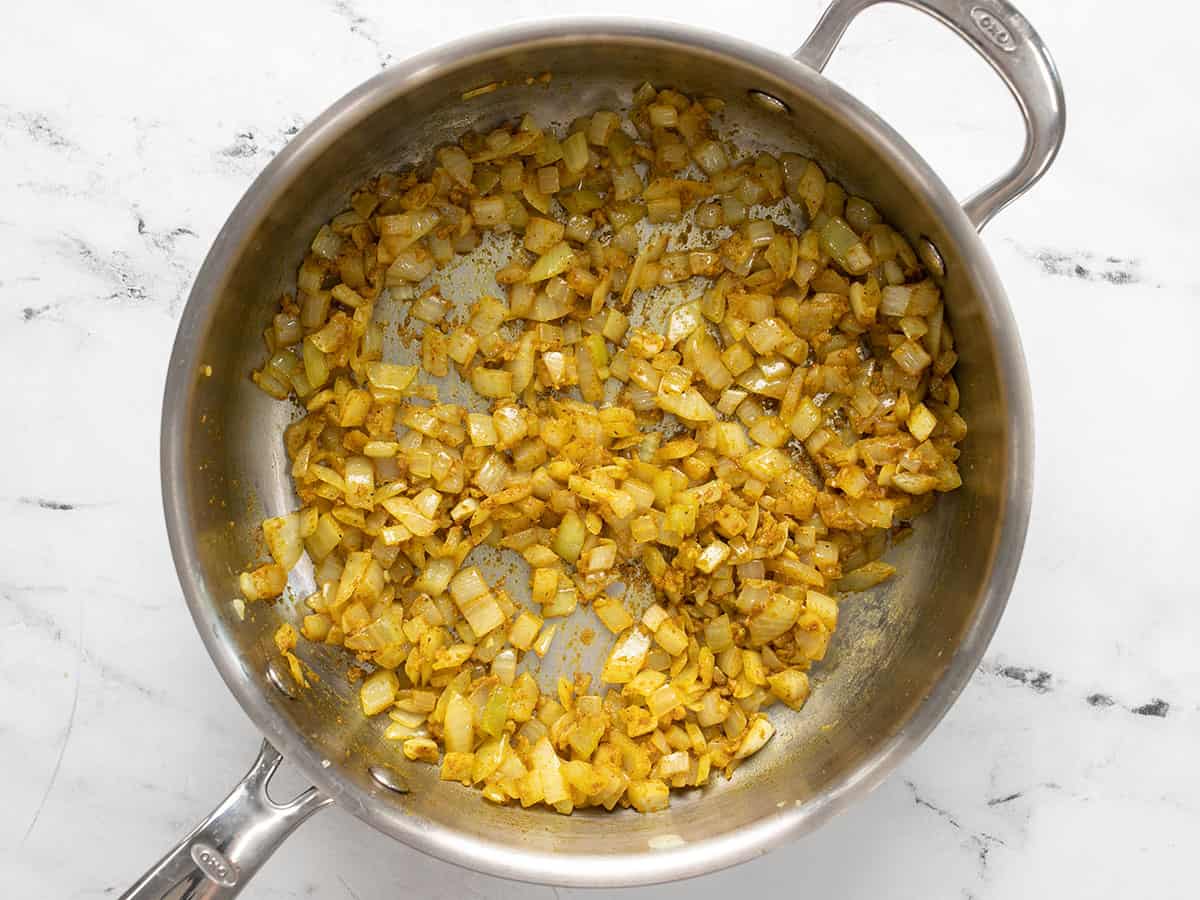
Add the curry powder and cumin to the skillet and continue to stir and cook for about one minute more to toast the spices.
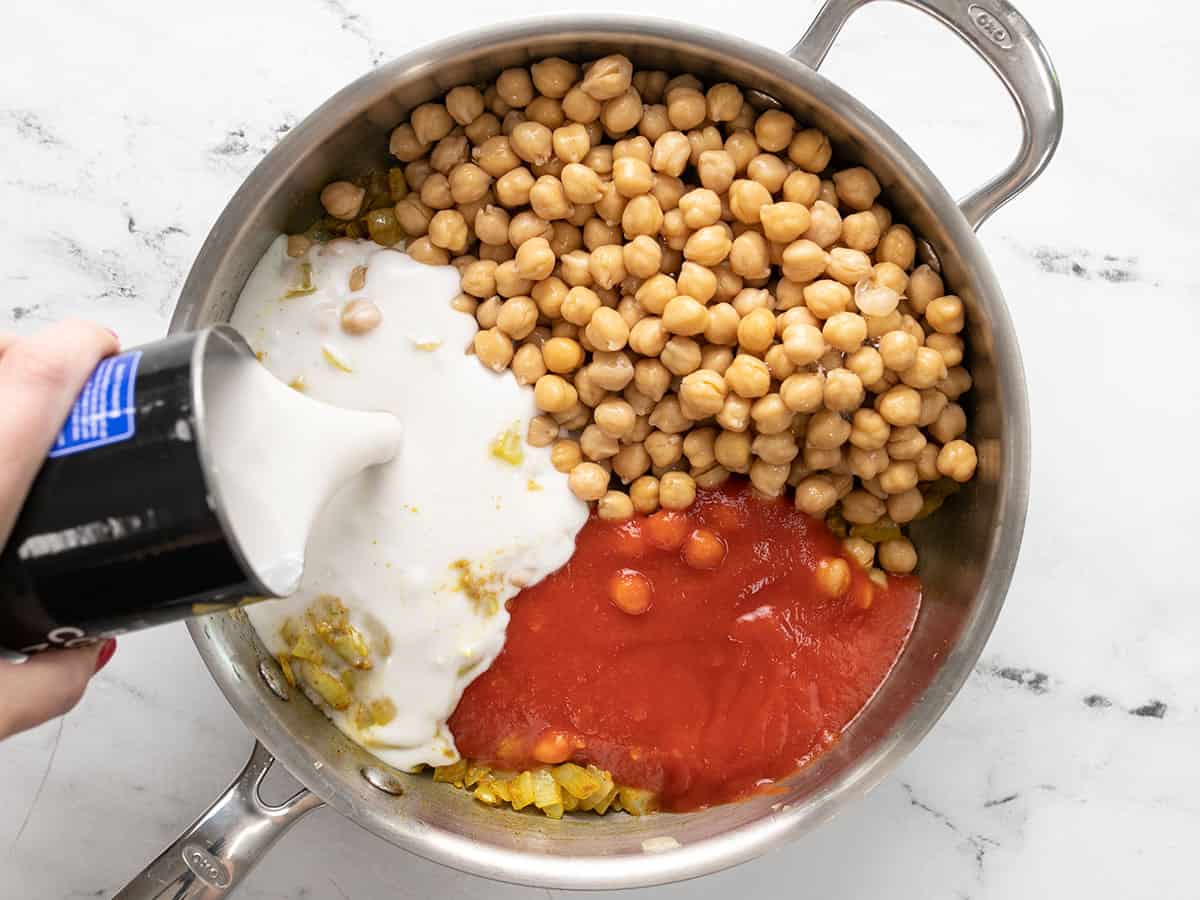
Drain the chickpeas, then add them to the skillet along with the tomato sauce and coconut milk. Stir everything to combine.
Turn the heat up to medium-high to bring the sauce up to a simmer. Once simmering, turn the heat back down to medium-low and allow the curry to continue to simmer for 15 minutes, stirring occasionally.
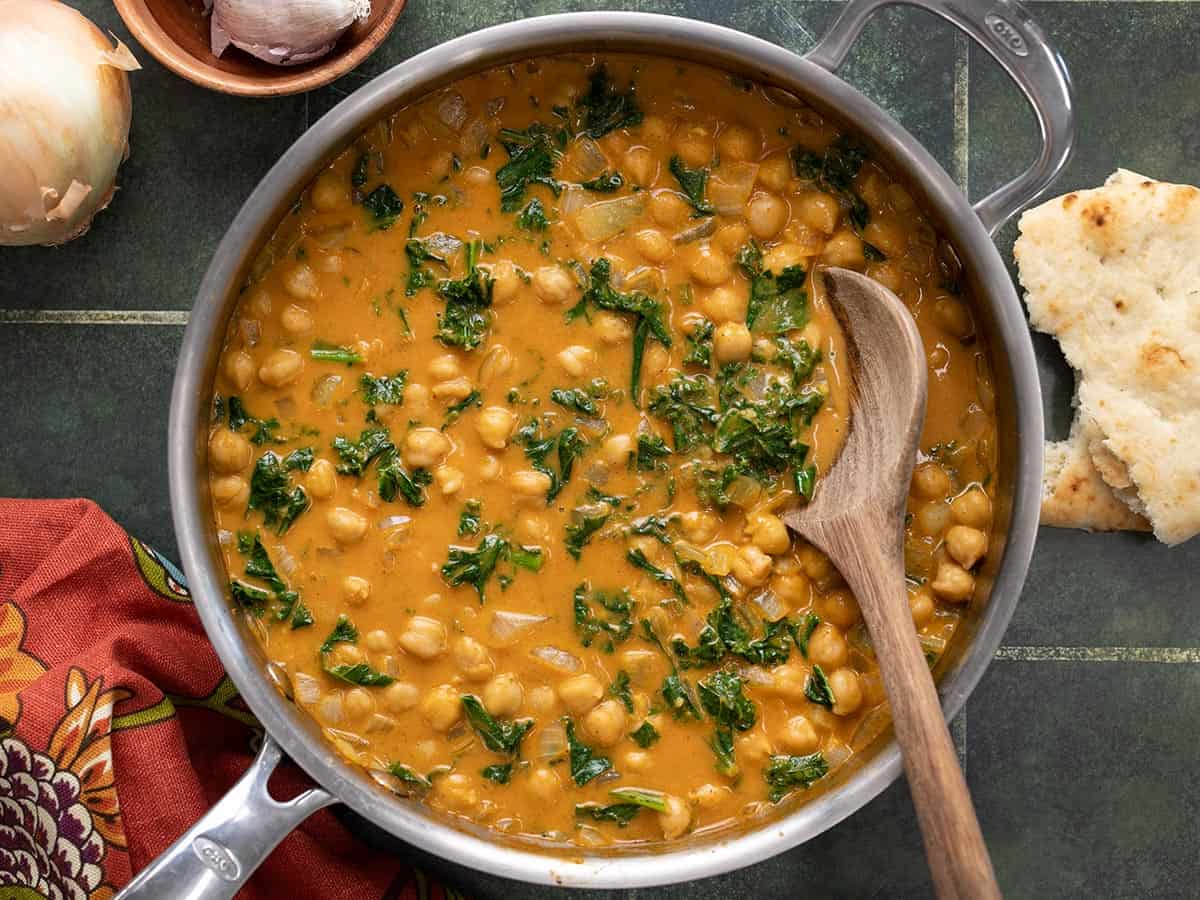
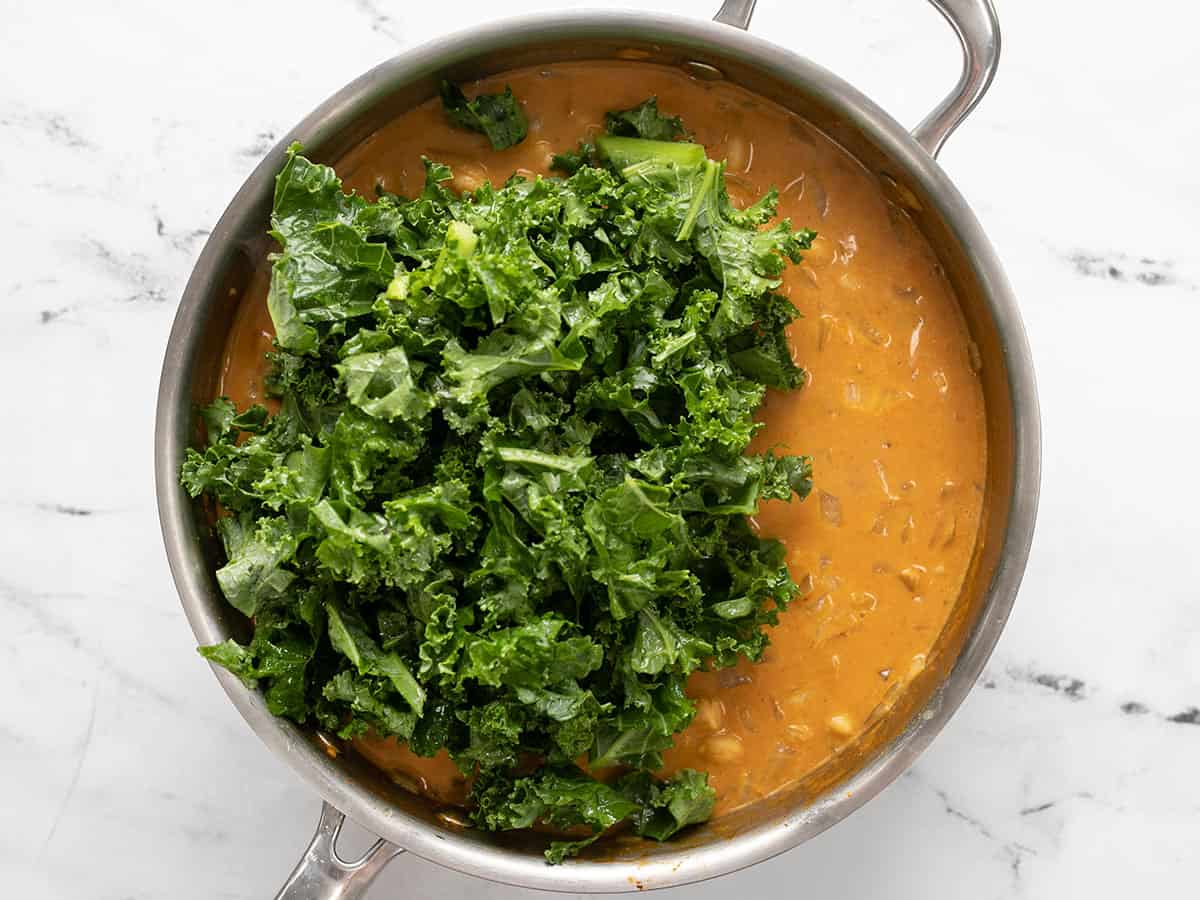
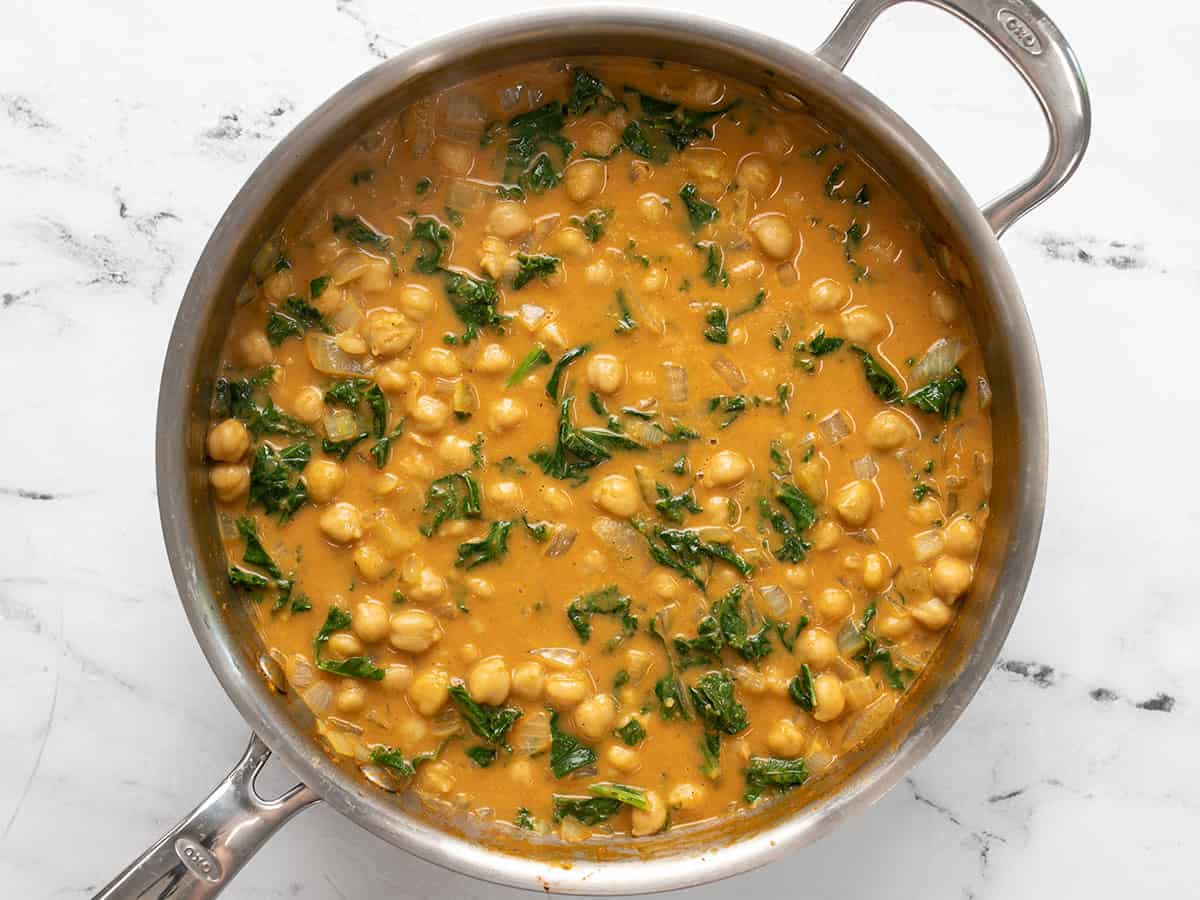
Add the kale and stir it into the sauce. Continue to cook and stir until the kale has wilted to your desired tenderness (I cook for about 5 minutes more). Finally, taste the curry and add salt to taste (about ½ tsp). Serve hot with rice or bread for dipping!
How to Make Coconut Curry Chickpeas – Step by Step Photos
Dice one yellow onion, mince two cloves of garlic, and grate about one teaspoon of fresh ginger. Add the onion, garlic, and ginger to a deep skillet along with 2 Tbsp olive oil. Sauté the aromatics over medium-low heat for about five minutes, or until the onion is soft and translucent.
Add 1.5 Tbsp curry powder and 1 tsp cumin to the skillet. Continue to stir and cook for about one minute more to toast the spices.
Drain two cans of chickpeas, then add them to the skillet along with 8 oz. tomato sauce and a 13.5 oz. can of coconut milk (full fat).
Stir until everything is evenly combined, turn the heat up to medium-high, and allow the sauce to come up to a simmer. Once simmering, turn the heat down to medium-low and let it continue to simmer for 15 minutes, stirring occasionally.
Add 4 oz. (about three cups) of fresh chopped kale to the skillet. I buy the pre-chopped bagged kale to make this easier.
Continue to cook and stir until the kale has wilted to your desired tenderness. I enjoy the kale with a bit more texture, so I only simmer for a few minutes more. Taste the curry and add salt to taste to help the flavors pop (about ½ tsp).
Prepare for the most nostalgic recipe to hit the internet this summer: rainbow sherbet(!!). This DIY, no-churn, dairy-free version is fresh, perfectly sweet, and packed with allll the creamy, fruity flavor of the classic. Refreshing is an understatemen…
Prepare for the most nostalgic recipe to hit the internet this summer: rainbow sherbet(!!). This DIY, no-churn, dairy-free version is fresh, perfectly sweet, and packed with allll the creamy, fruity flavor of the classic. Refreshing is an understatement!
It features a naturally sweetened frozen fruit base with creamy coconut milk and tangy lime. We even snuck some spinach in there, but we promise you can’t taste it — just wholesome deliciousness here.
I scream, you scream, we all scream for soft serve! Isn’t that how it goes? This fluffy, creamy, and oh-so classic vegan soft serve has all the nostalgic goodness you know and love, with no dairy or ice cream maker required.
Just 6 ingredients and sim…
I scream, you scream, we all scream for soft serve! Isn’t that how it goes? This fluffy, creamy, and oh-so classic vegan soft serve has all the nostalgic goodness you know and love, with no dairy or ice cream maker required.
Just 6 ingredients and simple methods, friends. Let us show you how it’s done!
It all begins with a happy accident we discovered a couple years ago.
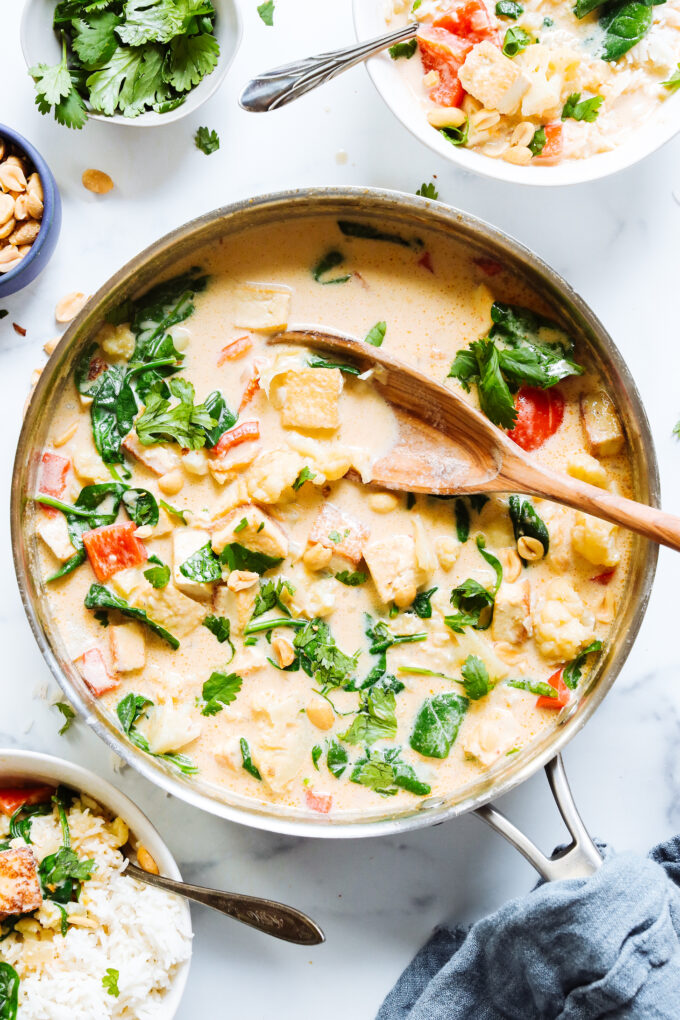
Curry that’s faster to make than it is to get it delivered? We’re in. We’ve done green, red, yellow, and Massaman curries, but we were missing another Thai classic: panang curry! Never had it? It’s like red curry’s richer, milder, peanutty cousin, and …
Curry that’s faster to make than it is to get it delivered? We’re in. We’ve done green, red, yellow, and Massaman curries, but we were missing another Thai classic: panang curry! Never had it? It’s like red curry’s richer, milder, peanutty cousin, and it’s SO good!
This is our inspired, veggie-packed version made with easier-to-find ingredients and your choice of chicken or tofu for protein. It’s SO rich and comforting, you won’t believe it only takes 30 minutes.
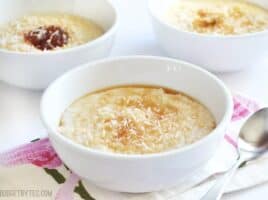
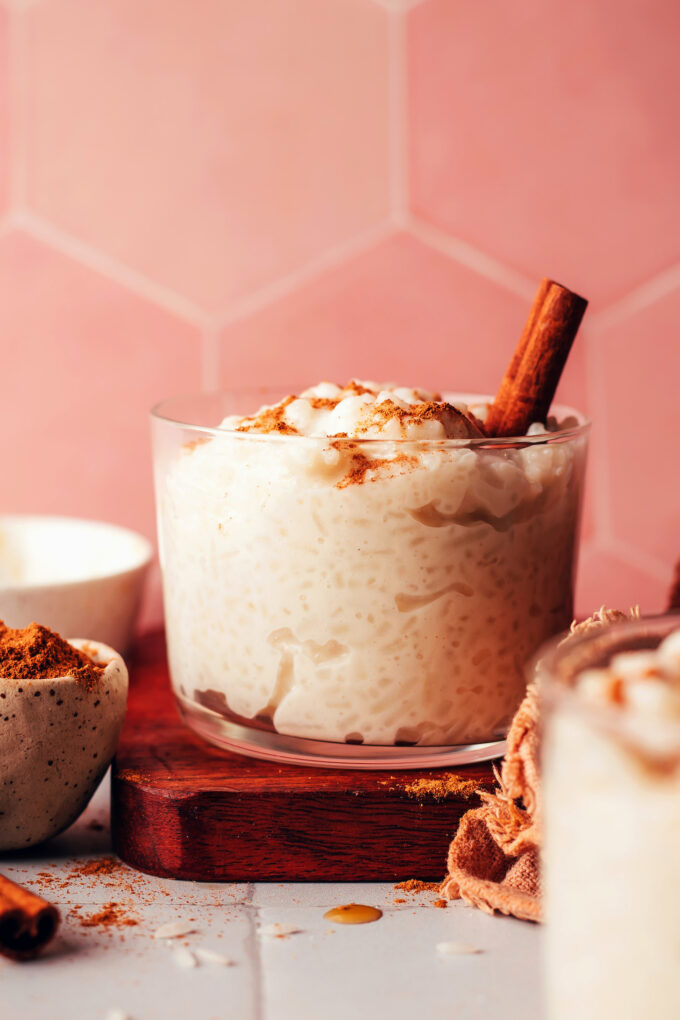
Does it get more classic than a bowl of rice pudding? Talk about nostalgia! We’d been craving this comforting dessert for far too long, and so our perfected vegan version was born. It’s perfectly sweet, super creamy, and SO classic!
Naturally sweetened…
Does it get more classic than a bowl of rice pudding? Talk about nostalgia! We’d been craving this comforting dessert for far too long, and so our perfected vegan version was born. It’s perfectly sweet, super creamy, and SO classic!
Naturally sweetened and just 7 ingredients, 1 pot, and 25 minutes required. Let’s make rice pudding!
Origins of Rice Pudding
Rice pudding exists in many forms in cultures around the world (source).
Move over, butternut squash! Carrots are back and ready to be the new SOUPer star in this creamy vegan carrot soup. It’s rich thanks to coconut milk and subtly spicy from red pepper flakes, making it super warming and perfect for the transition from wi…
Move over, butternut squash! Carrots are back and ready to be the new SOUPer star in this creamy vegan carrot soup. It’s rich thanks to coconut milk and subtly spicy from red pepper flakes, making it super warming and perfect for the transition from winter to spring!
The best part? It’s made in 1 pot with just 10 ingredients you may have around right now. Let us show you how it’s done!
 Butternut Squash Soup is one of my all-time favorite soups. I make it all of the time during the fall months. I love my classic recipe, but sometimes it is fun to mix it up. I love making this Roasted Butternut Squash Pear Ginger Soup because the flavors are phenomenal. This soup recipe reminds me…