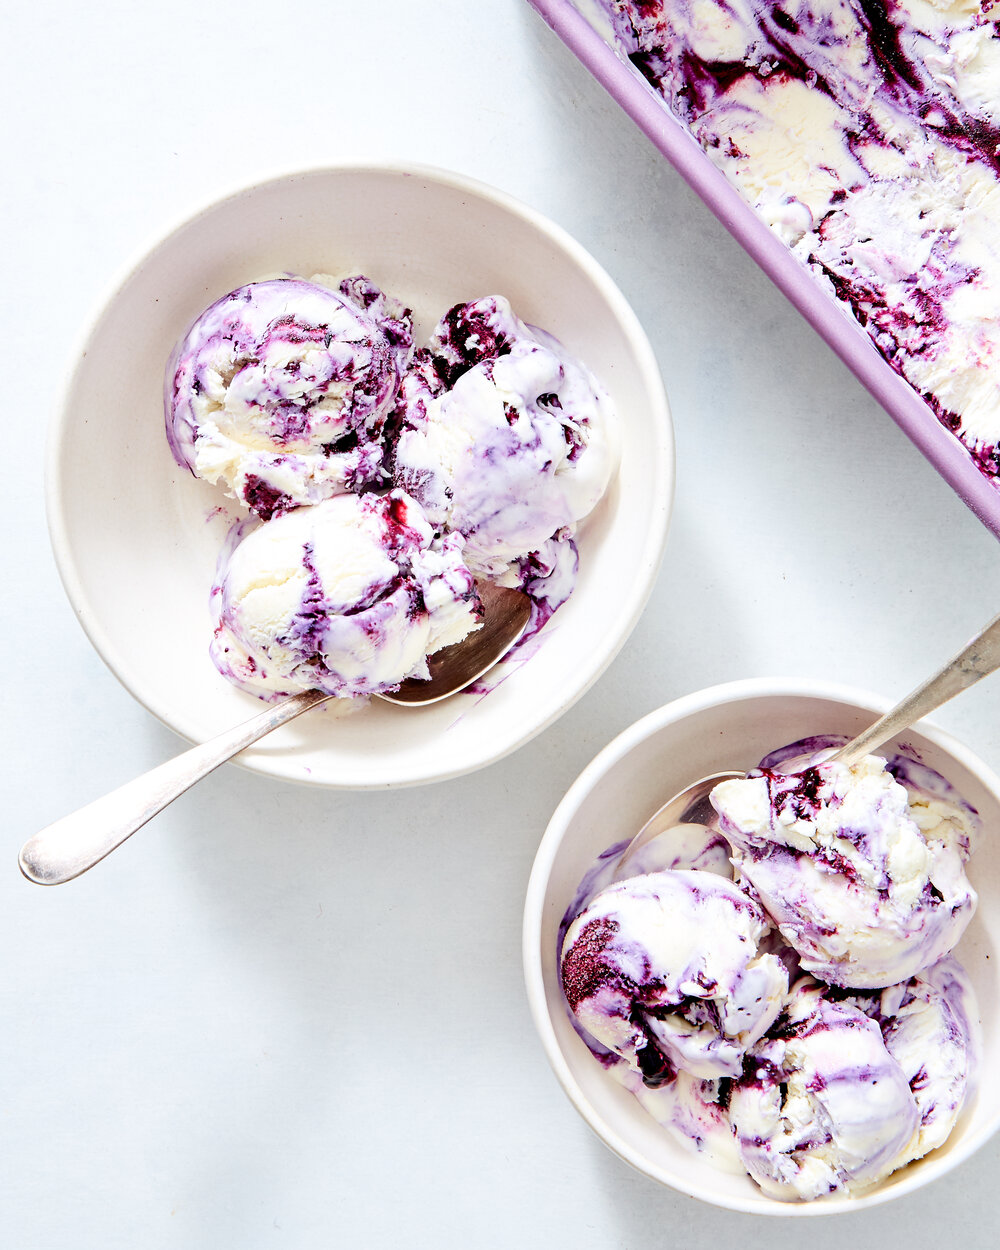
This no churn blueberry and crème fraîche ice cream is a super simplified version of one of my favorite ice cream recipes from my book, Sweeter off the Vine, and you don’t need any special equipment to make it! I know when I want ice cream, I don’t want to wait a full 24 hours for the bowl of my ice cream maker to freeze. Not to mention the fact that there is usually so much other stuff in my tiny freezer that the bowl doesn’t even fit.
No churn ice cream recipes all have pretty much the same ingredients: heavy cream, sweetened condensed milk, and whatever flavorings you’re in the mood for. This version swaps a bit of tangy cultured crème fraîche, for the heavy cream which gives the base a bit of tangy richness. The gorgeous blueberry ripple adds bright berry flavor and beautiful color.
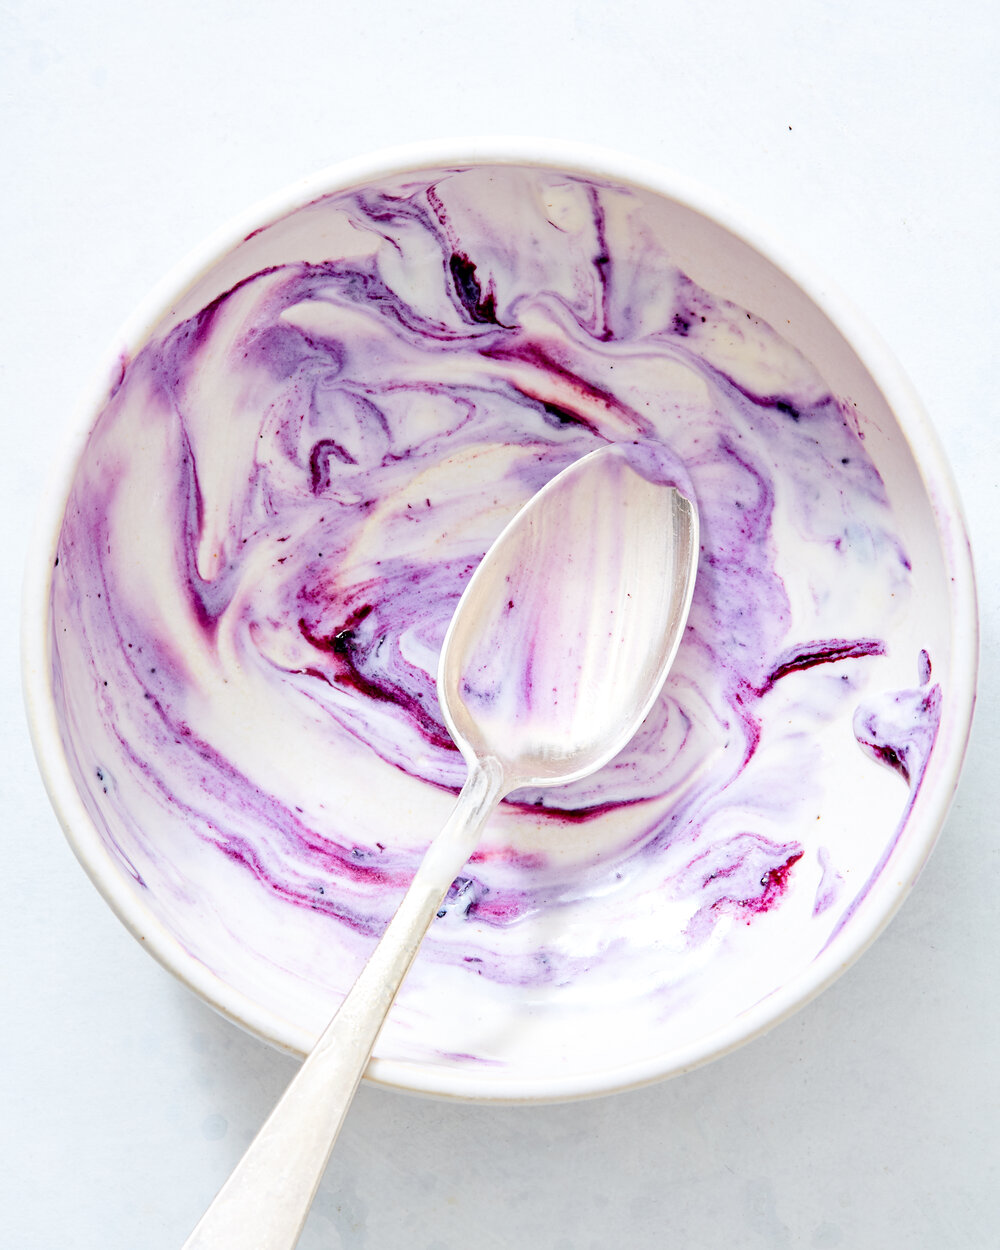
The base comes together in no time flat, all you need to do is whip the cream and creme fraiche, then fold it into the sweetened condensed milk. That mixture is layered and swirled with the blueberry sauce in a loaf pan. You do have to wait for the mixture to freeze overnight, so don’t forget to plan ahead. You could substitute just about any berry or stone fruit for the blueberries here in equal quantity.
No Churn Crème Fraîche and Blueberry Ice Cream
Makes about 4 cups
The subtle tang of crème fraîche and sweet blueberry sauce are a perfect pair in this easy to make creamy frozen treat. Substitute any berries or stone fruit you like for the blueberries.
Blueberry Swirl
1 cup/140g blueberries
3 tablespoons granulated sugar
1 tablespoon freshly squeezed lemon juice
Base
1 14 oz can sweetened condensed milk
1 tablespoon vanilla extract or vanilla bean paste
Pinch salt
1 cup/240ml heavy cream, cold
1 cup/225g crème fraiche, cold
In a small saucepan, combine the blueberries and sugar with 1 tablespoon water and smash with a potato masher. Bring the mixture to a boil over medium heat and cook until the blueberries are broken down and the liquid has thickened until syrupy, about 3 minutes. Stir in the lemon juice. Blend the mixture with an immersion blender, then transfer to a heat proof container and refrigerate until completely cold.
When the blueberry mixture is cold, make the base.
To make the base: In a large bowl, whisk the sweetened condensed milk, vanilla extract, and a pinch of salt.
In a separate large bowl combine the heavy cream and crème fraiche and use an electric mixer to whip the mixture to stiff peaks.
Stir a large spoonful of the cream into the condensed milk to lighten it, then add the remaining cream and fold it until just combined.
To assemble: Spoon 1/3 of the base into a loaf pan, then spoon 1/3 of the blueberry mixture over the top. Use a skewer to swirl the blueberry into the base. Repeat 2 more times with the remaining base and blueberries. Loosely cover the pan then freeze until firm, 6 hours or overnight.
In the heat of summer, I am always looking for fun low (or no) cook ways to make and enjoy a little dessert. Give me all of your icebox cakes, no bake bars, and no bake cheesecakes! No bake cheesecake has all of the rich cream cheese flavor of its baked counterpart, but it is a bit lighter in texture and so easy to make. There are no water baths to fuss with and no worry about the top splitting on you.
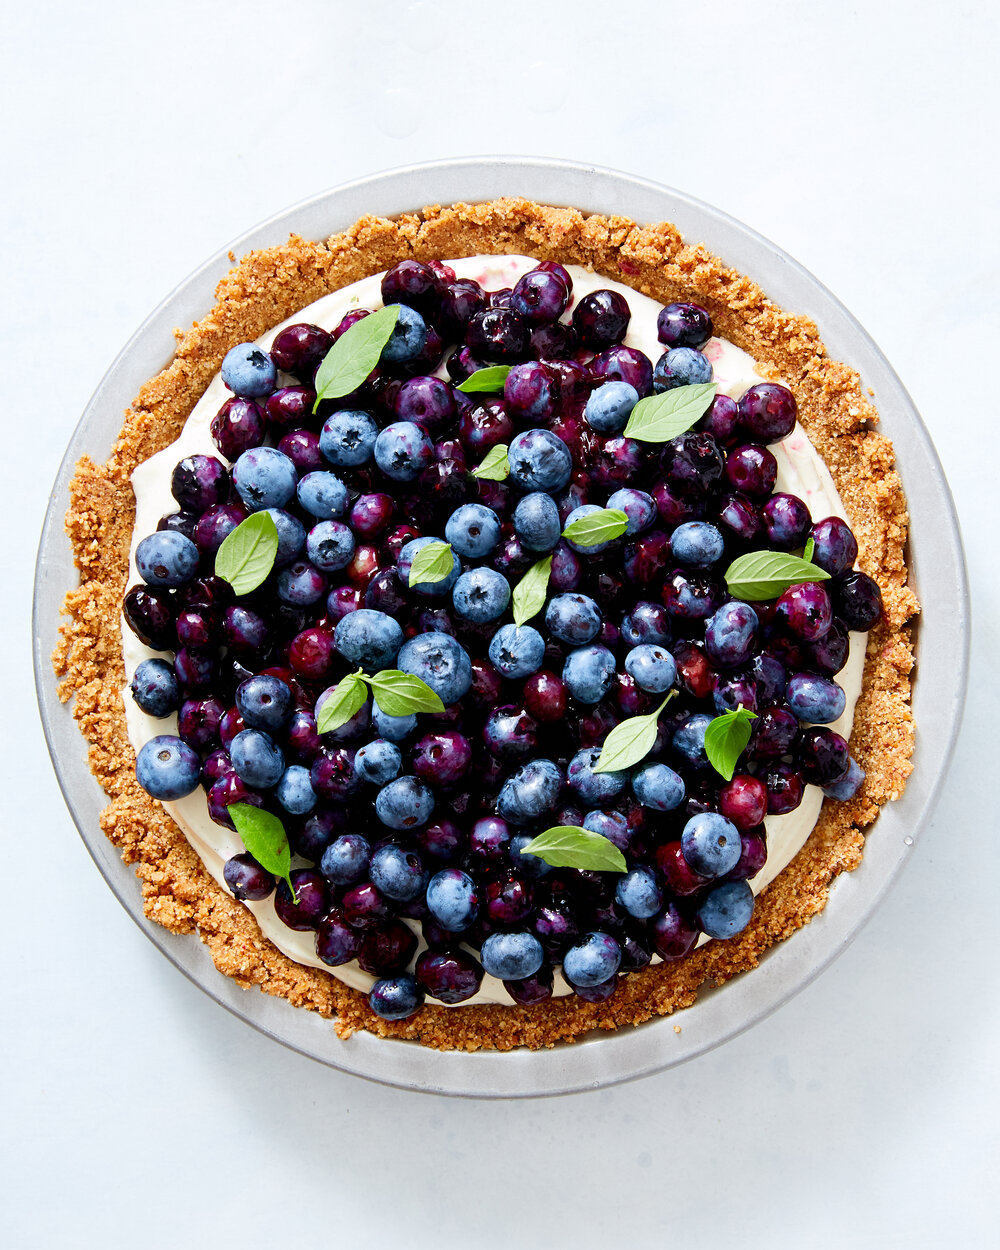
This no bake cheese cake is a great base for all sorts of summer fruit, but it would also be delicious with caramel or chocolate drizzled over the top instead. This version uses a heap of gorgeous fresh blueberries.
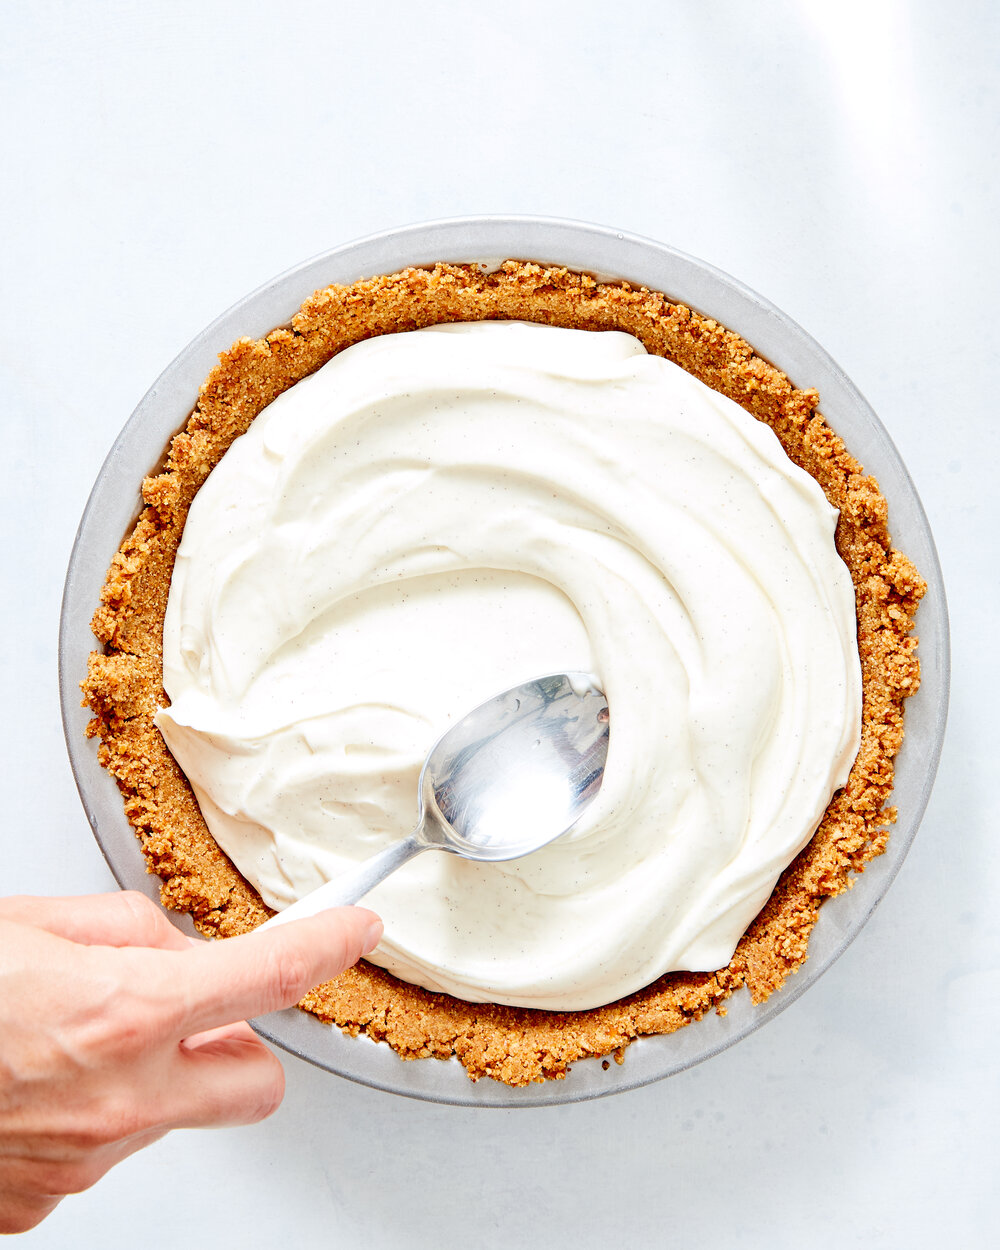
The salty pretzel and nutty browned butter crust comes together quickly too, no baking required. It also ensures that the whole dessert is nice and balanced, and not too sweet. For a sweeter version feel free to substitute graham cracker or biscoff cookie crumbs for the preztels. You could even skip browning the butter in favor of just melting it, but the browned butter adds a ton of great flavor so I wouldn’t!
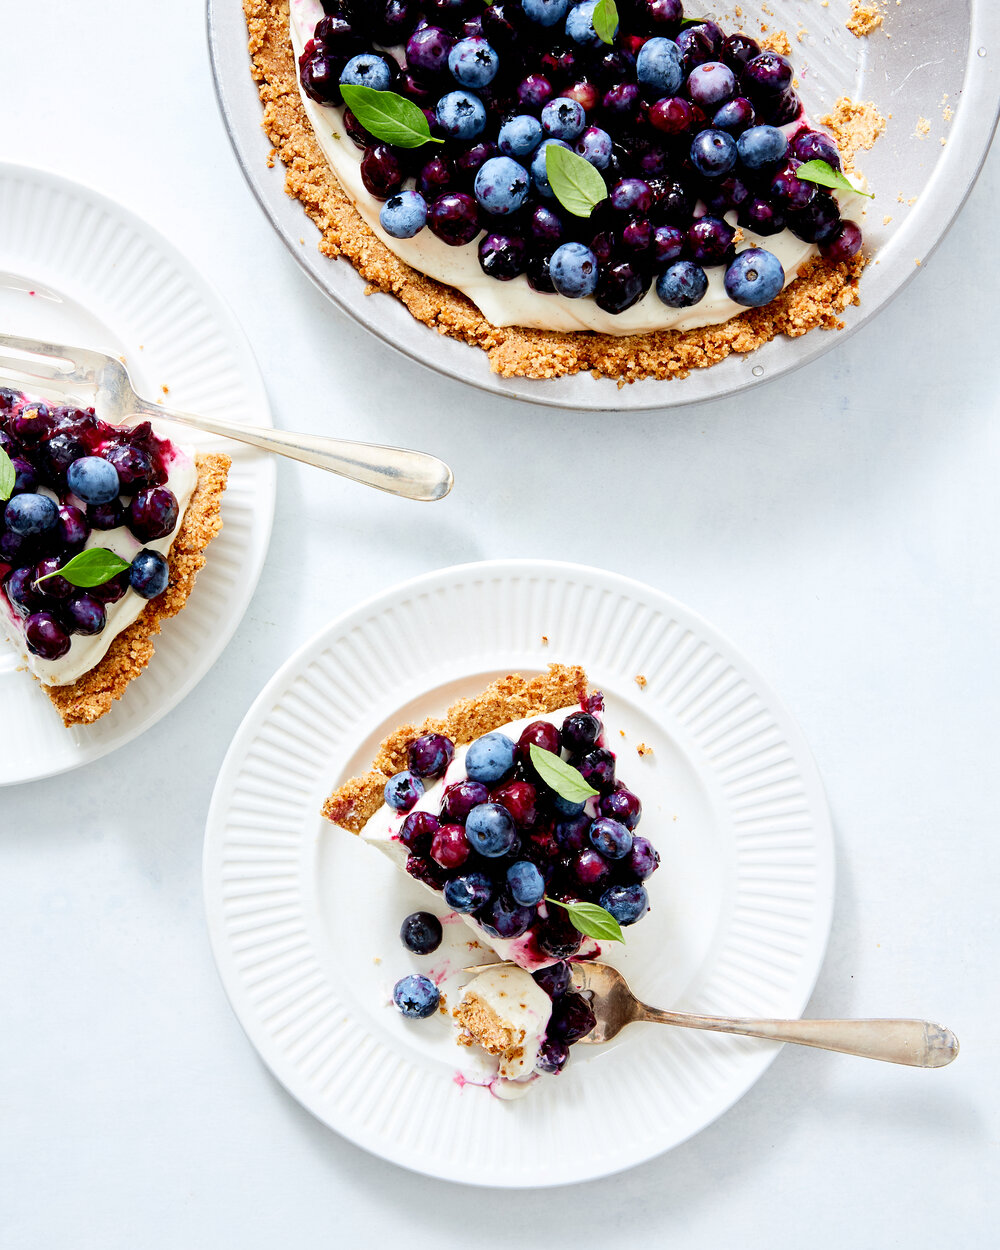
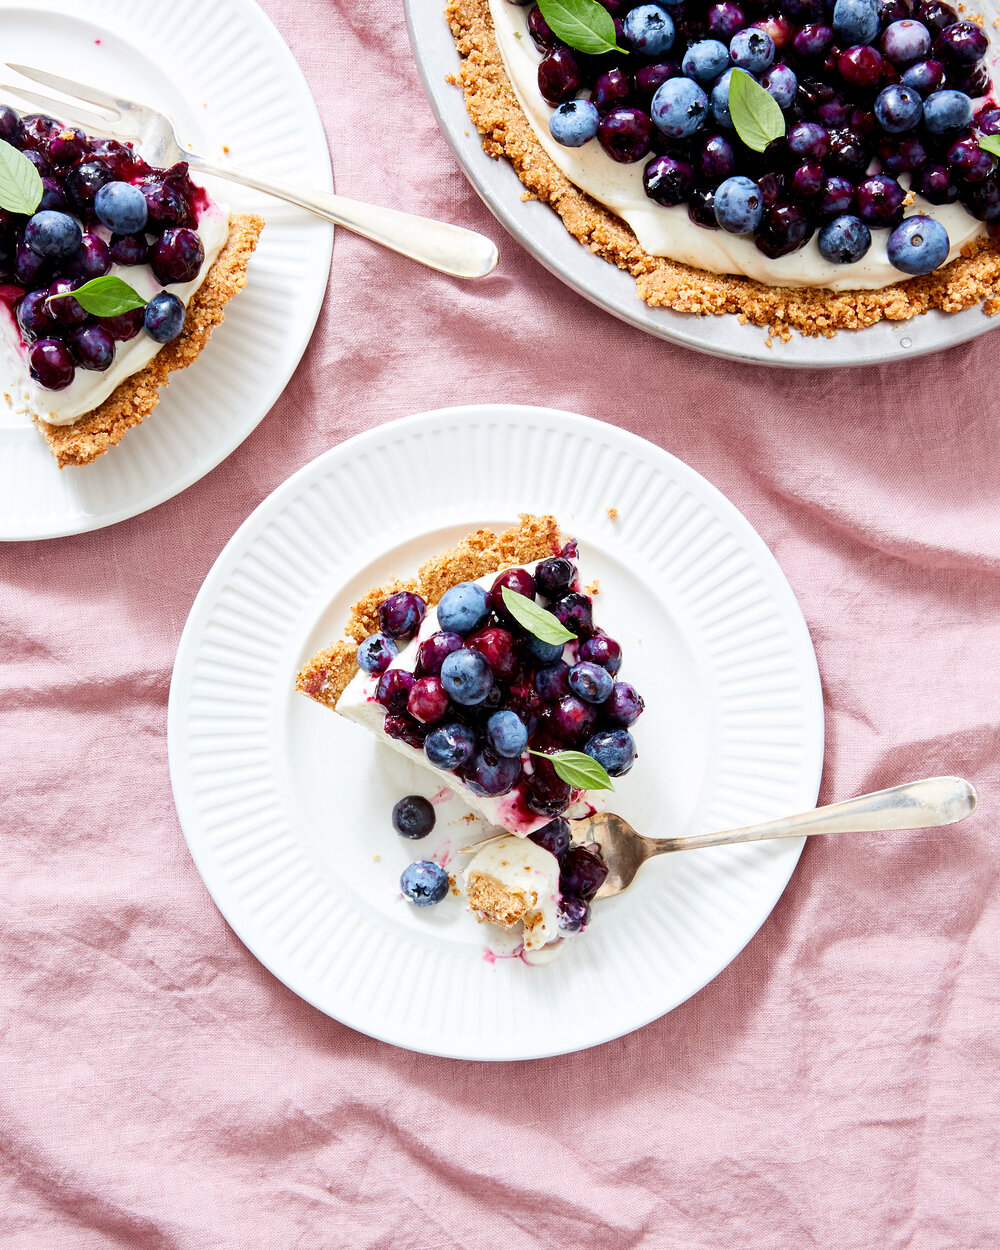
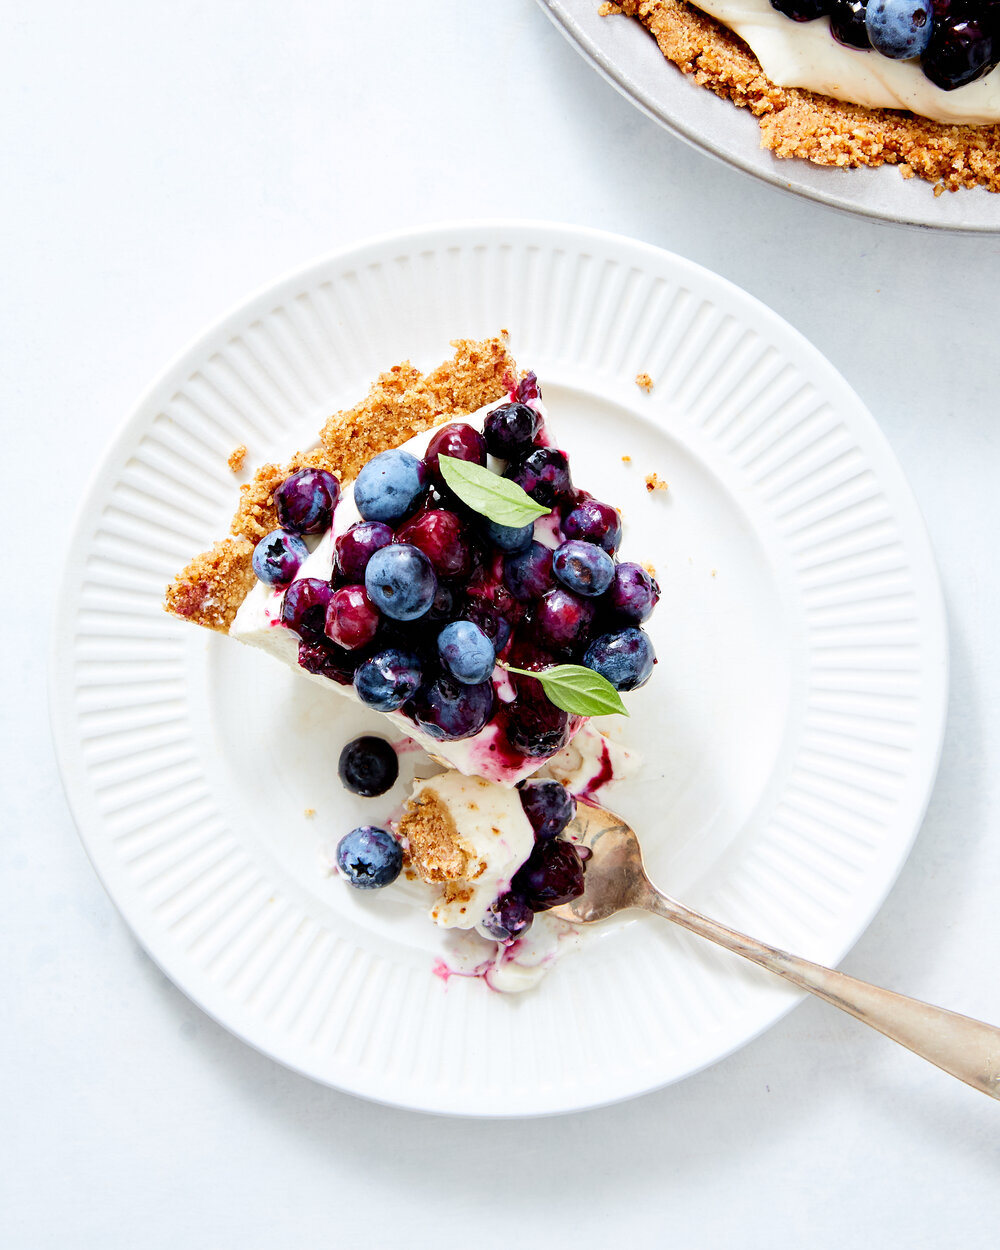
The topping is a combination of fresh and cooked blueberries, the cooked ones make it a little saucy and help the blueberries stick together instead of sliding all over the place. I topped the whole thing with a few small leaves from my basil plant that look little little blueberry leaves. Mint would work too but the herbs are totally optional.
No Bake Blueberry Cheesecake
Salty pretzels make a perfect base for this not to sweet cheesecake, but you could use graham crackers or biscoff cookie crumbs for a sweeter version - use gluten free cookies to make this desert for your gluten avoiding friends and family. The blueberry topping is partially cooked which creates some sauciness that helps the blueberries stick together, but if that’s a bridge too far for lazy summer cooking, you can just pile the top with lots of fresh blueberries. They may roll of when you slice it though!
Crust
175g/ 1 1/2 cups finely ground pretzels
50g/ 1/4 cup granulated sugar
170g/12 tablespoons unsalted butter
Filling
450g/ 1 pound cream cheese, at room temperature
100g/ 1/2 cup granulated sugar
2 tablespoons freshly squeezed lemon juice
1 tablespoon vanilla paste or extract
240ml/ 1 cup heavy cream, cold
Topping
490g/ 3 1/2 cups blueberries
1 tablespoon sugar
1 teaspoon cornstarch
Mint or basil leaves if desired
To make the crust: Combine the pretzels and sugar in a large bowl. Melt the butter in a small saucepan set over medium heat. Cook the butter while scraping the bottom and sides of the pan occasionally with a rubber spatula. The butter will foam, then the solids will turn deep golden brown and smell nutty.
Once the butter has browned pour it over the pretzels in the bowl then stir to combine. Let the mixture cool for a minute or two then pour it into a 9-inch pie pan.
Carefully press it evenly on the bottom and up the sides of the pan, a 1/3 cup measure is a great tool for this. Set the pan in the freezer while you prepare the filling.
To make the filling: In the bowl of a stand mixer fitted with the paddle attachment mix the cream cheese and sugar on low speed until combined. Turn the mixer up to medium and beat until smooth and fluffy, about 3 minutes. Scrape the bottom and sides of the bowl occasionally to ensure even mixing.
Add the vanilla and lemon and stir to combine.
Switch to the whisk attachment and with the mixer on low, add the heavy cream. Turn the mixer up to medium high and whip until the mixture comes to stiff peaks, about 3 minutes.
Spoon the filling into the chilled crust and smooth the top. Refrigerate for about 8 hours or overnight.
To make the topping: When you are ready to serve the cheesecake put 280g/2 cups of the blueberries in a large bowl and set aside. Combine 140g/1 cup of the blueberries, 2 tablespoons of water, and 1 tablespoon sugar in a saucepan over medium heat. Cover the pan and cook until the blueberries have burst and released their juices, about 2 minutes.
In a small bowl stir the cornstarch with 1 tablespoon of water, slowly pour it into the blueberry mixture in the pan while stirring constantly. Bring the mixture to a simmer, stirring constantly for 45 seconds, until thick and glossy.
Pour the mixture over the blueberries in the bowl and stir to combine. Pour the blueberries over the chilled cheesecake and scatter the remaining 70g/ 1/2 cup blueberries over the top. Sprinkle mint or basil over the top and let the pie sit for a few minutes before slicing. Store leftovers in the fridge for a few days.
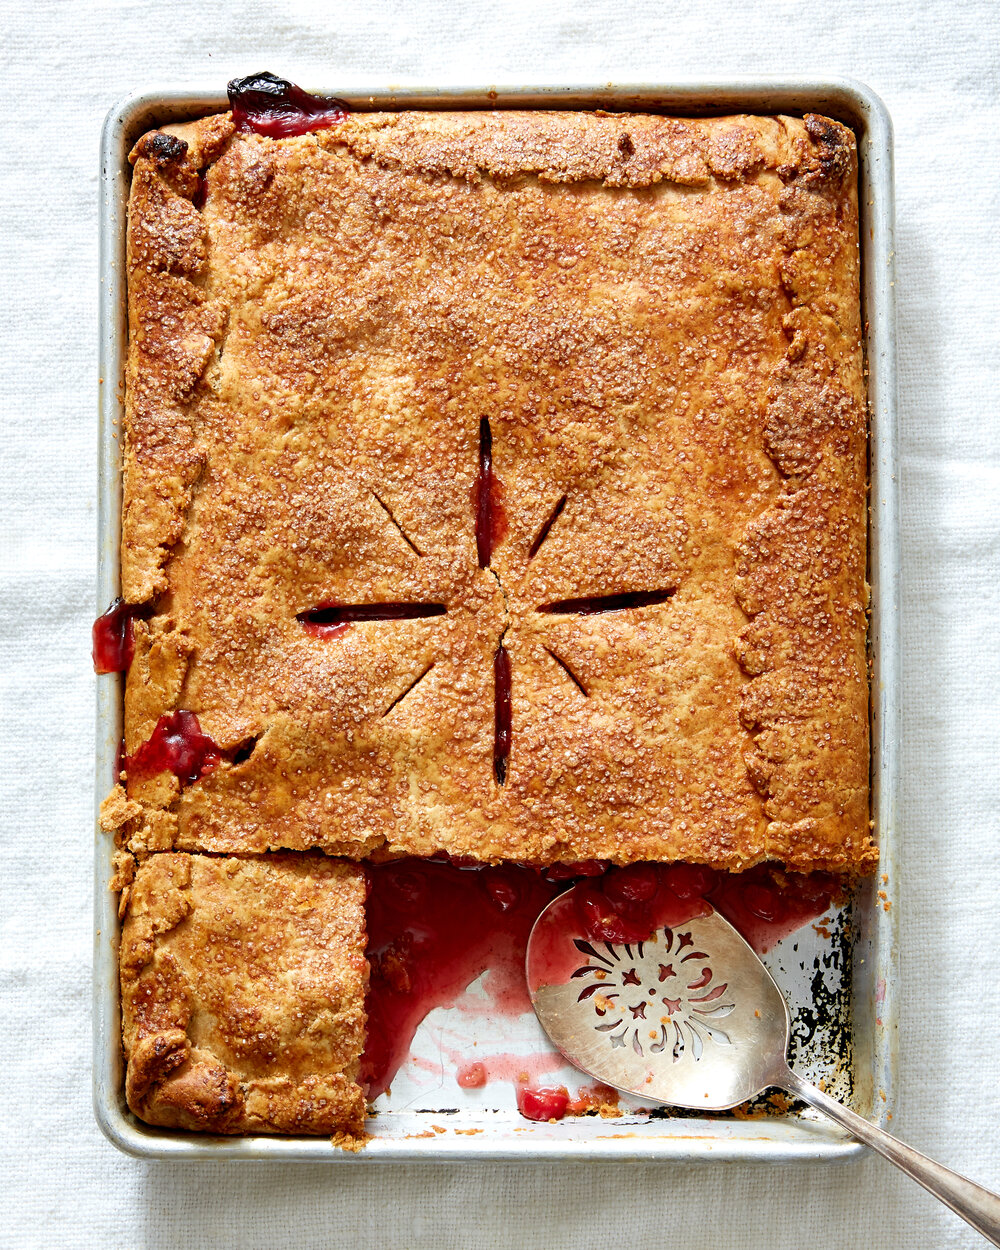
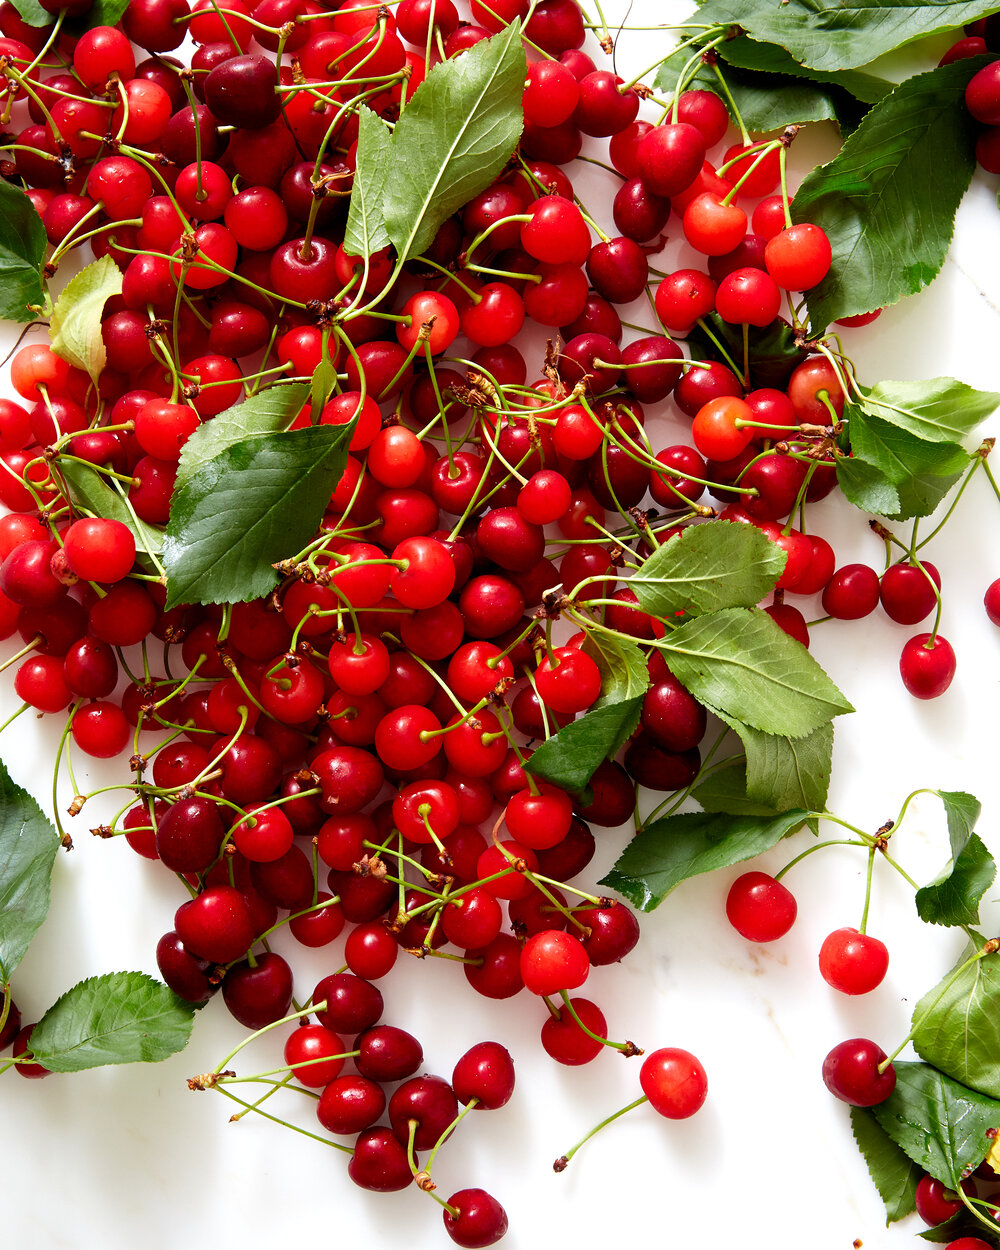
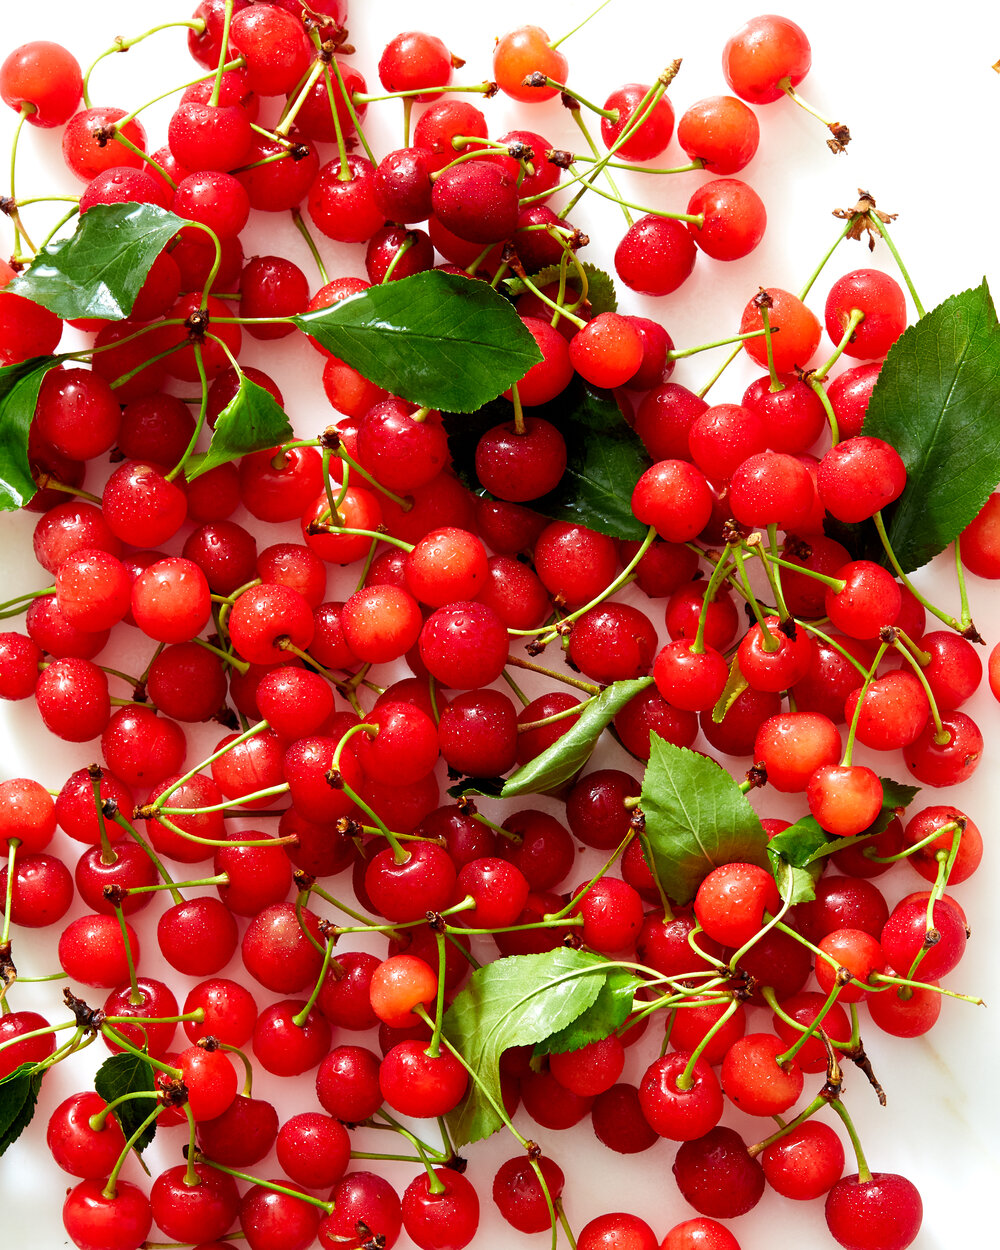
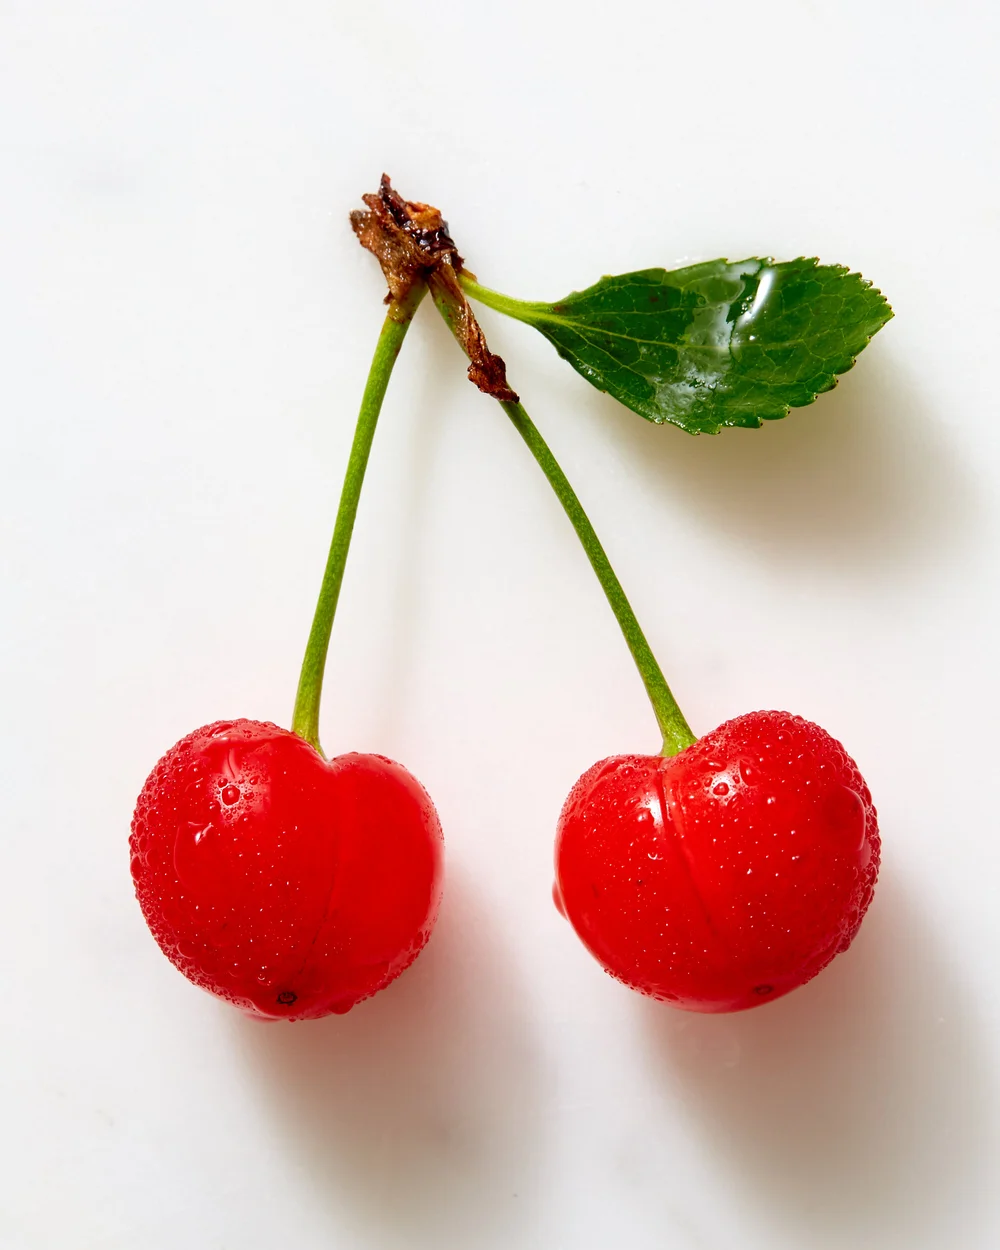
I had the good fortune of a day off right at the beginning of sour cherry season last week (What, you don’t mark the weeks of summer using hyper-seasonal fruit as a guide? Just me?) so I put on some sunscreen and a hat, hopped in the car, and went in search of a u-pick farm. I was not disappointed to find a row of trees, heavy with fruit and not a soul in site at a farm a few hours from Brooklyn. It was a hot, hot day and the scent of the last strawberries in the field nearby filled the air as I filled up my bucket with precious sour cherries.
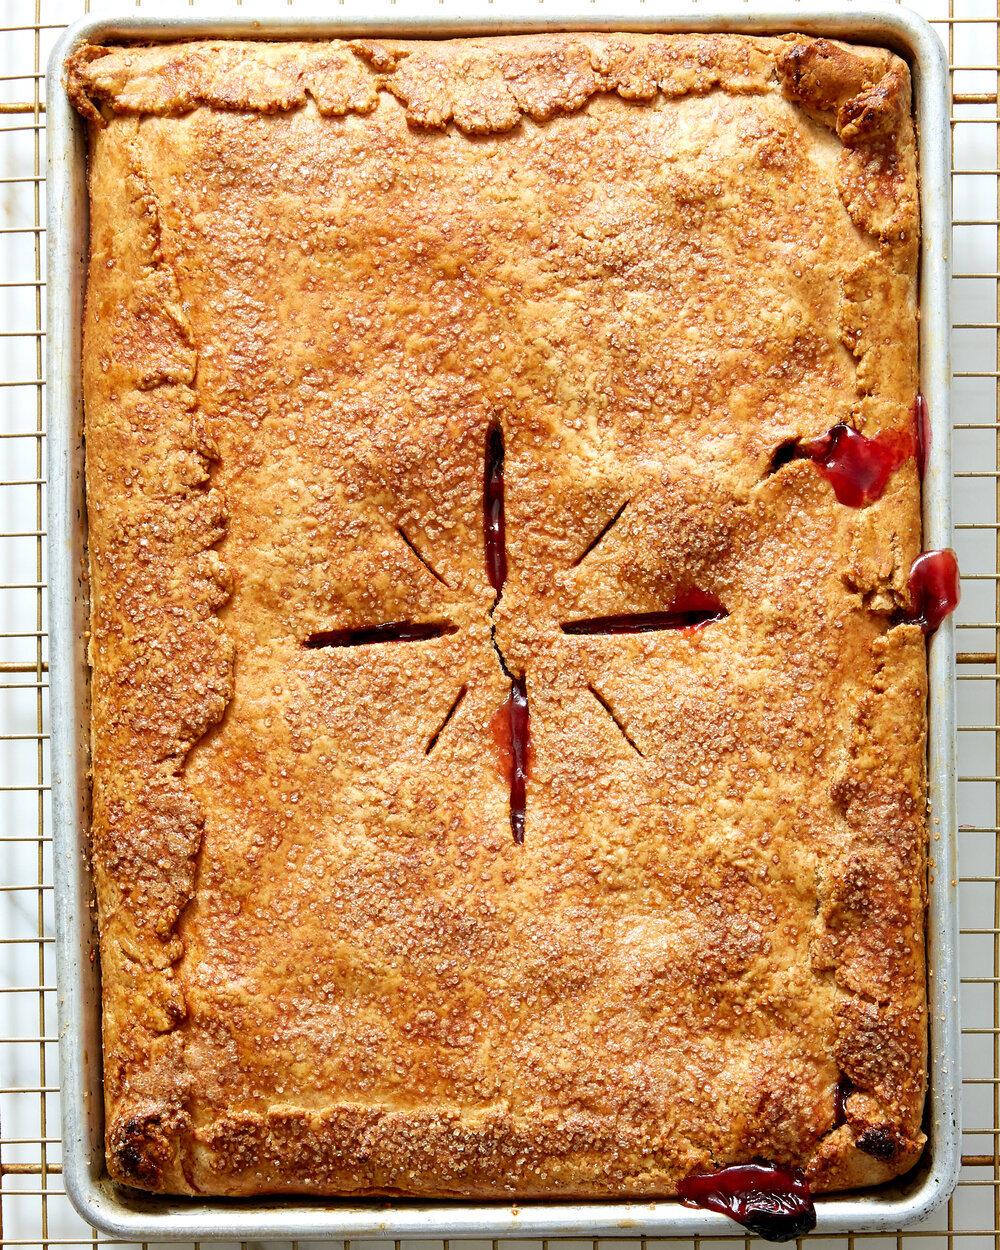
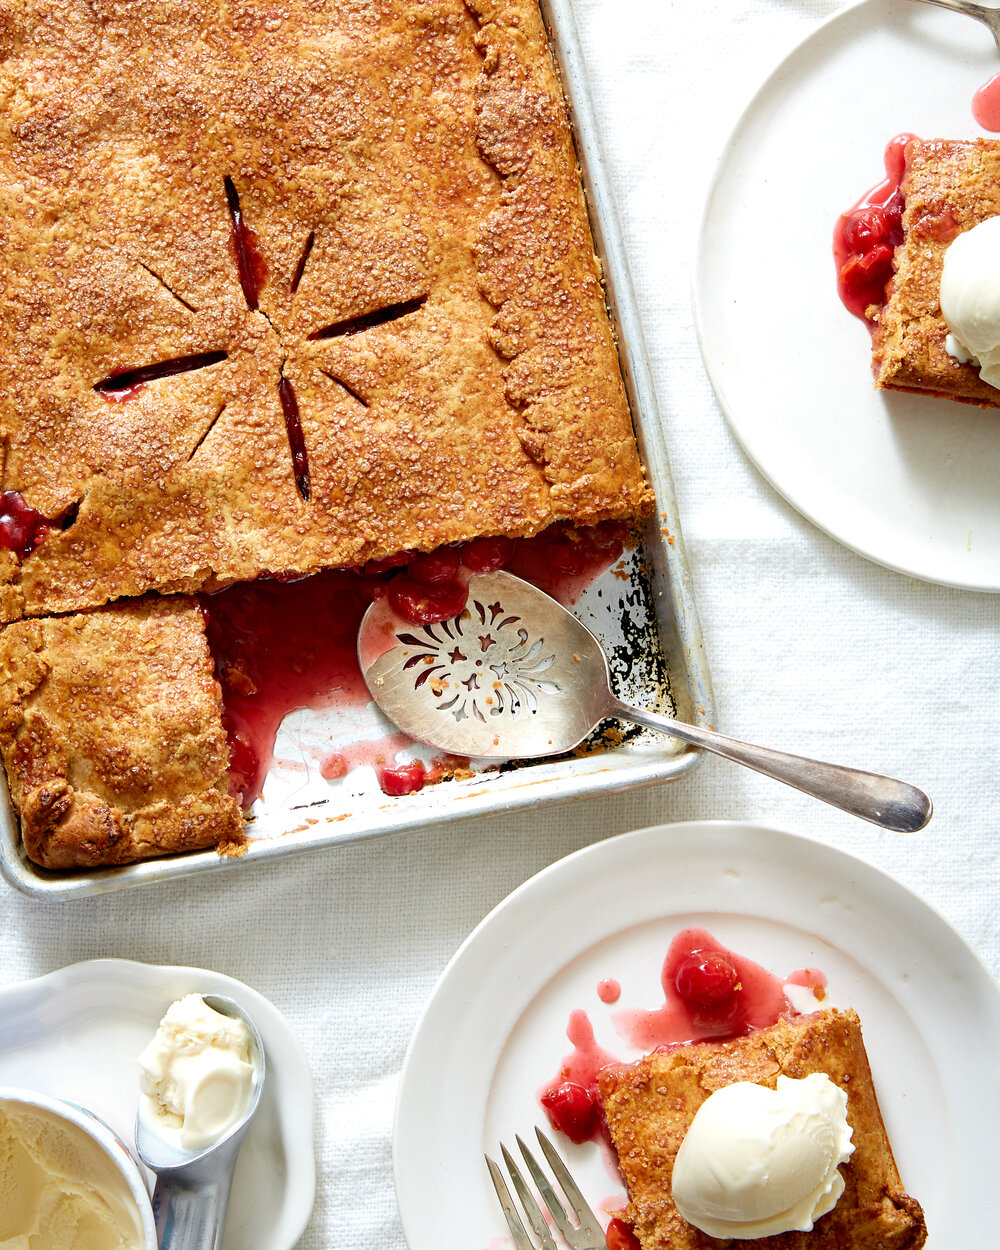
When I got home with my bounty, pie was the only choice. Instead of a traditional round, I went slab style and baked it in a quarter sheet pan. If you don’t have a quarter sheet pan or two, I highly recommend picking one up. At roughly 9x13x1, they are the perfect size to bake focaccia, a few cookies, toast nuts, or roast just about anything…but back to the sour cherries.
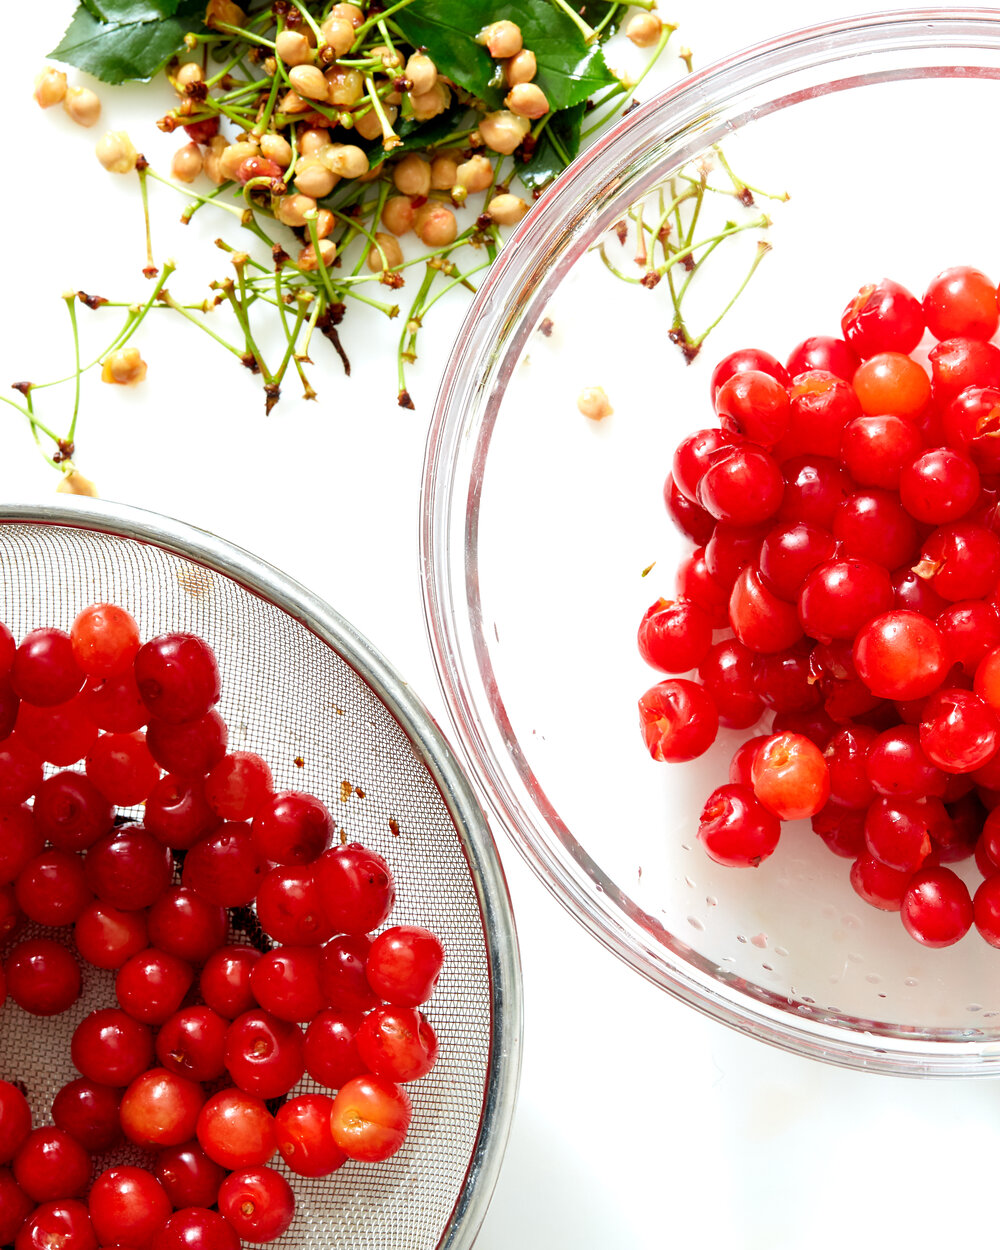
Pitting cherries can be kind of a pain, but since sour cherries are so soft, I usually skip the pitter and just use my thumb to ease out the pits. It’s a bit of a sticky, drippy process so you can move your operation to the sink to make clean up super easy.
I like my fruit pie fillings pretty simple, especially when the fruit is so special (and hard earned). This one is just sweet enough to highlight the cherries without totally overtaking their tart bite. I also added a bit of vanilla bean paste to round out the flavor, but a little bit of extract will do the trick too.
The all butter pie crust has a bit of rye flour and brown sugar for toasty depth that is delicious with just about any fruit if sour cherries aren’t available where you live. It might be a little intimidating to roll out such a big piece of dough, but don’t you worry. To add both flakiness and structure to the dough, this recipe calls for a series of folds. The folds will make the dough both exceptionally delicious and easier to roll out and move around. Win-win. Check out the gif above to see how it’s done.
Don’t worry if your dough rips a bit when you roll it out though, you can always pinch it back together. If you have time, make your dough the say before you plan to use it. A long rest will hydrate the dough and make it easier to roll out.
I realize, it is a little unfair to share this recipe because sour cherries can be hard to get your hands on, but you still have a few more weeks to seek them out. Frozen will work in a pinch too, or substitute an equal amount of your favorite summer fruit - you will need a little less sugar for sweeter fruit.
Real Deal Cherry Pie
Makes one 1/4 sheet slab pie
This pie makes the best of one of summer’s most fleeting pleasures, sour cherries. They are only available for a few weeks in late June/early July, but they are worth the wait, and the trouble of pitting them. The crust uses a bit of rye flour which adds some nutty and creamy flavor to the crust, and pairs beautifully with fruit desserts. Use an equal amount of all purpose flour if you have rye flour on hand. This filling recipe was lightly adapted from Deb at Smitten Kitchen, who adapted from Martha Stewart, and loves sour cherries as much as I do.
Rye Crust
340g/2 2/3 cups all purpose flour
170g/1 1/3 cups rye flour (I used Abruzzi Heirloom Rye from Anson Mills)
1 tablespoon brown sugar
1 teaspoon kosher salt
10-12 tablespoons ice water
1 tablespoon apple cider vinegar
340g/1 1/4 cups unsalted butter, cut into tablespoon sized pieces
Filling
900g/about 6 cups pitted sour cherries
3/4 cup + 1 tablespoon (165g) sugar (I used a natural cane sugar here, but granulated works too)
30g/1/4 cup cornstarch
Juice of 1/2 lemon
1 tablespoon vanilla bean paste
Pinch salt
To finish
1 egg, for egg wash
Turbinado sugar to finish
To make the crust: Add the flours, brown sugar, and salt to a large bowl. Stir them together until combined. Add the apple cider vinegar to the ice water. Working quickly, add the butter to the flour and toss to coat. Then use your fingers or the palms of your hands to press each cube of butter into a flat sheet. Keep tossing the butter as you go to ensure that each butter piece is coated with flour. The idea is to create thin, flat shards of butter that range from about the size of a dime to about the size of a quarter. Sprinkle about 6 tablespoons of the water over the flour mixture and use your hands to mix gently, making sure to get all of the way down to the bottom of the bowl. Continue to add more water a couple of teaspoons at a time.
You have added enough water when you can pick up a handful of the dough and squeeze it together easily without it falling apart.
Press the dough together, then pat it into a rectangle. Fold the dough into thirds like a letter, then split it in to two pieces one slightly larger than the other, form each piece into a rectangle and wrap each piece in plastic wrap. Chill the dough for at least one hour before using, or overnight. I prefer an overnight rest if possible.
When you are ready to bake the pie, heat your oven to 400ºF.
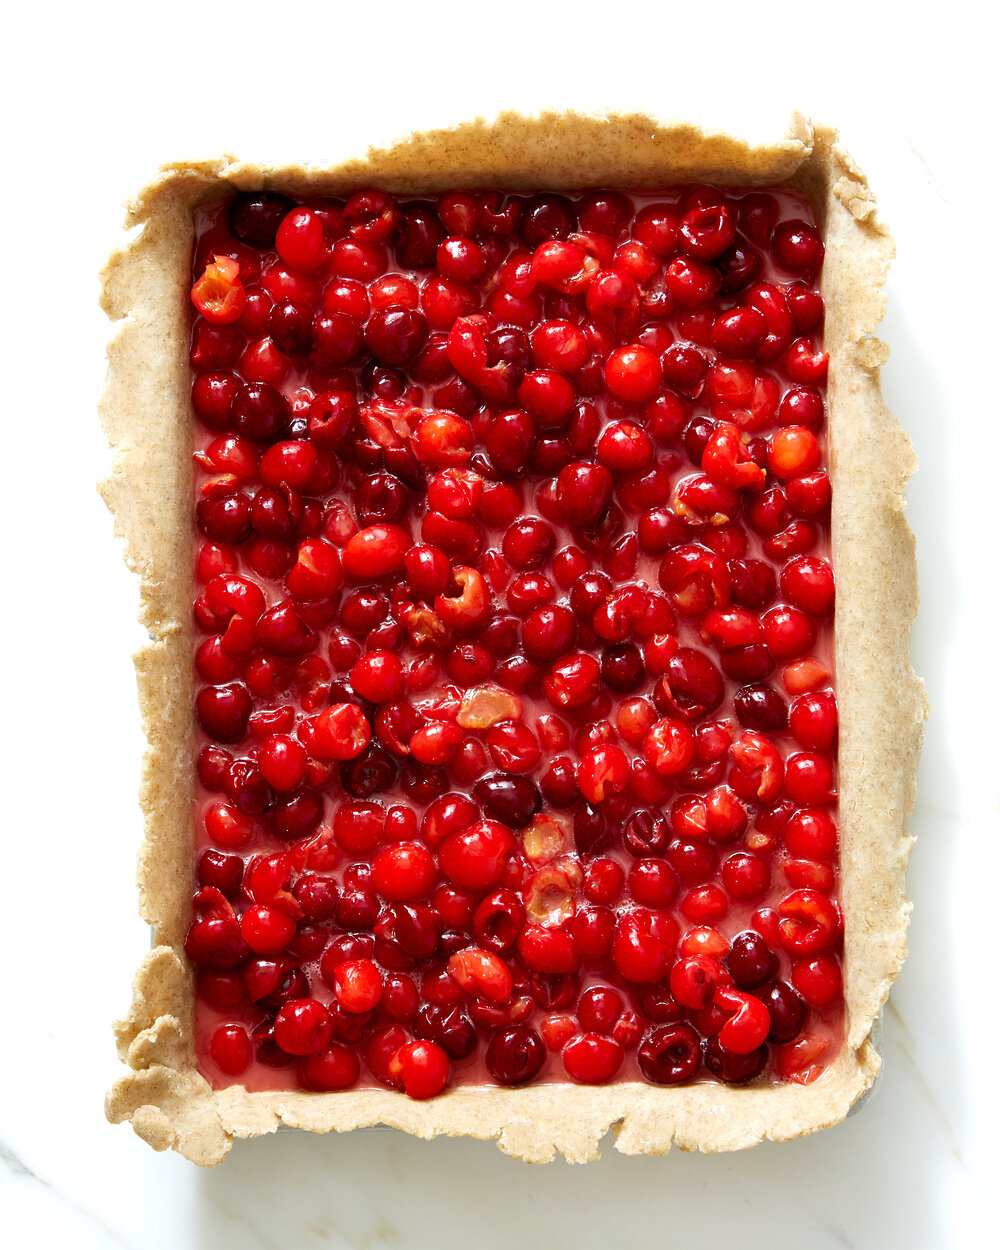
Add the pitted cherries, sugar, cornstarch, lemon juice, vanilla bean paste, and salt to a large bowl and stir gently to combine.
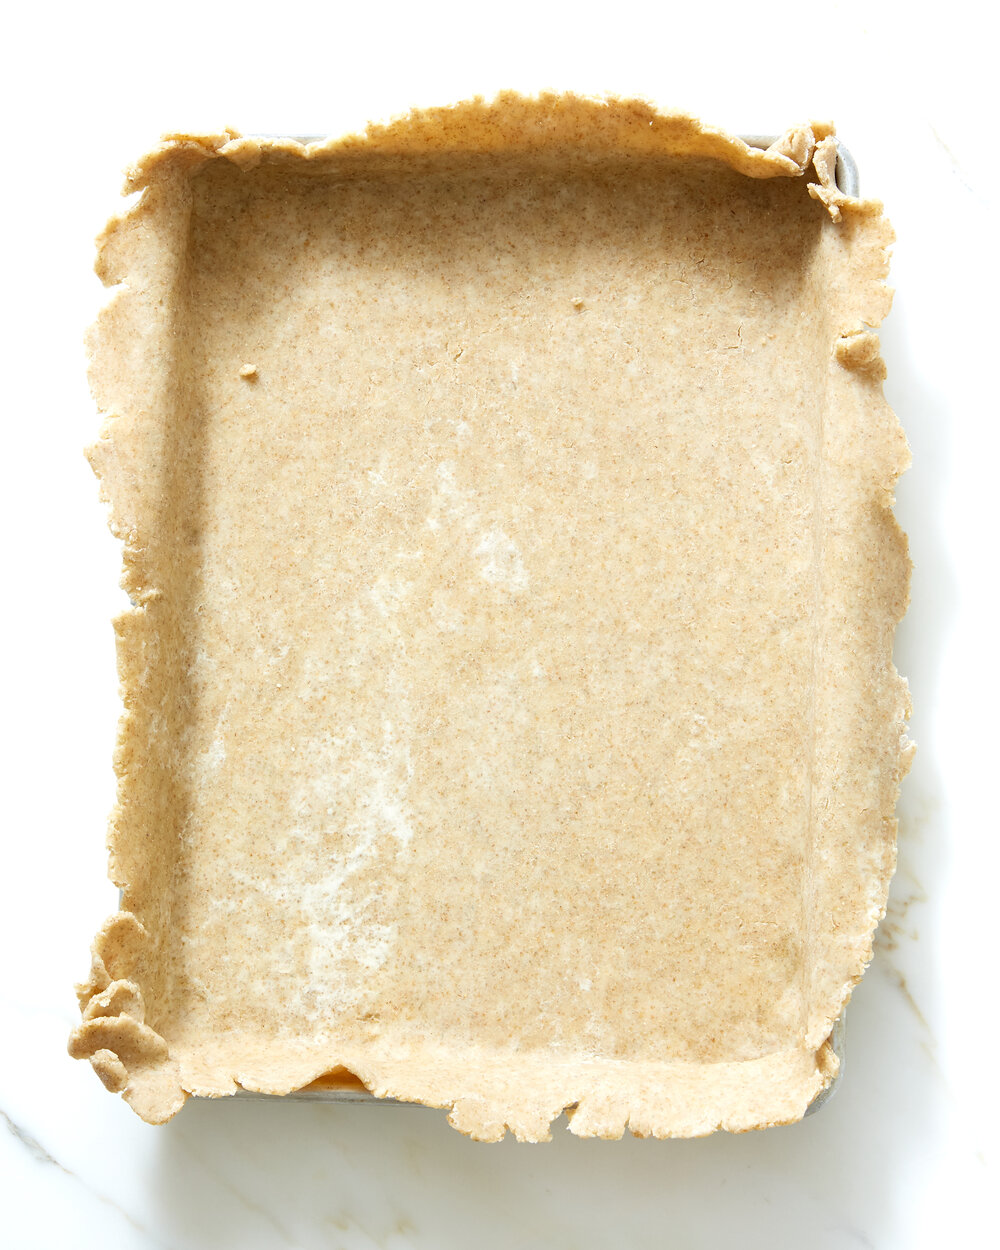
Roll the larger piece of the dough on a lightly floured surface into a rectangle about 11x15. Gently tuck it into a metal quarter sheet pan, letting the excess hang over the sides. Roll the other piece of dough into a rectangle about 10x14.
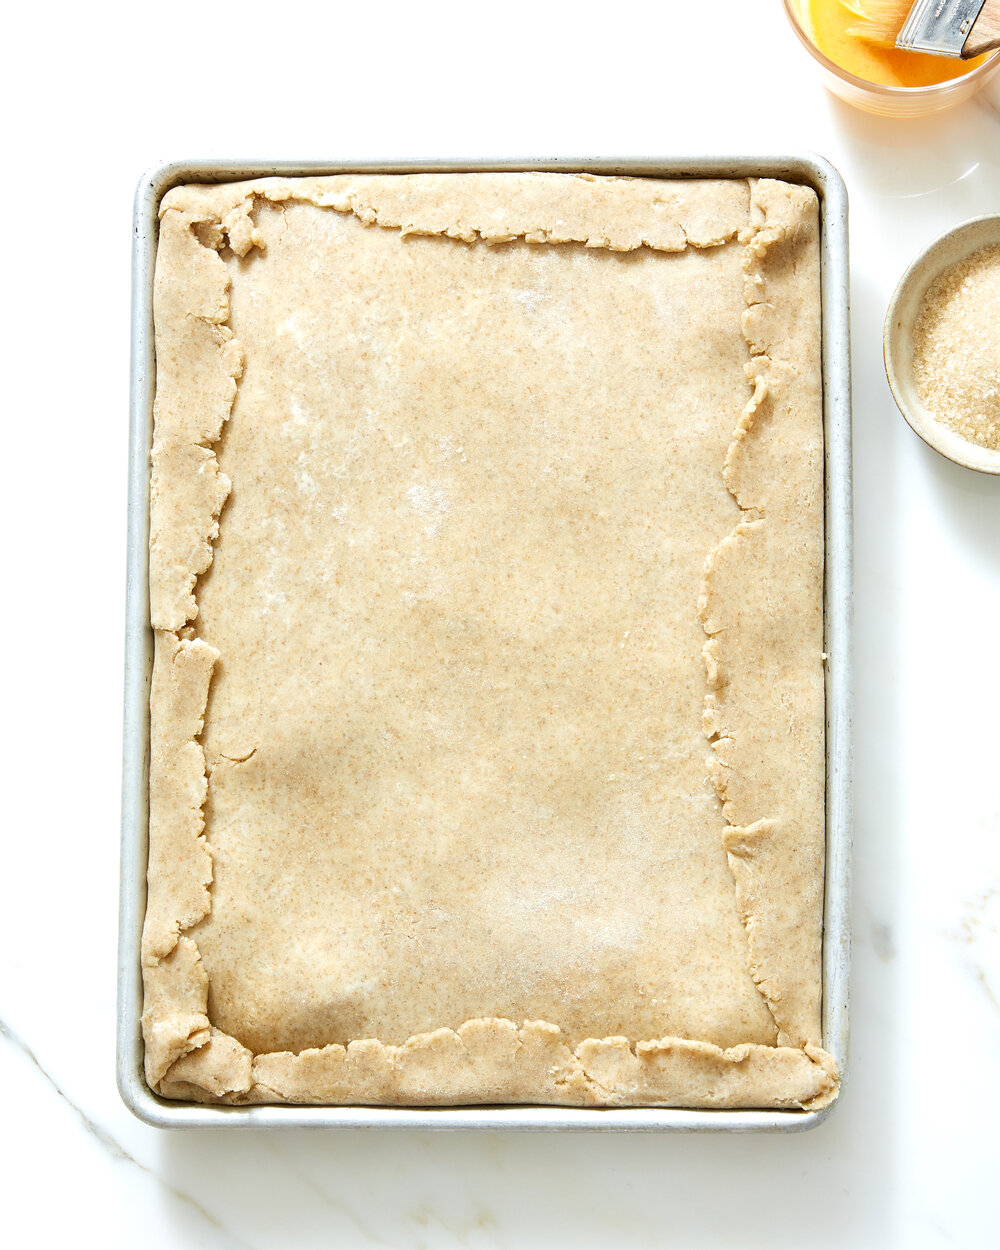
Pour the cherries into the dough lined pan and top with other piece of dough. Gently fold the bottom dough up and over the top and press gently. Refrigerate the pie until the crust is firm, about 15 minutes.
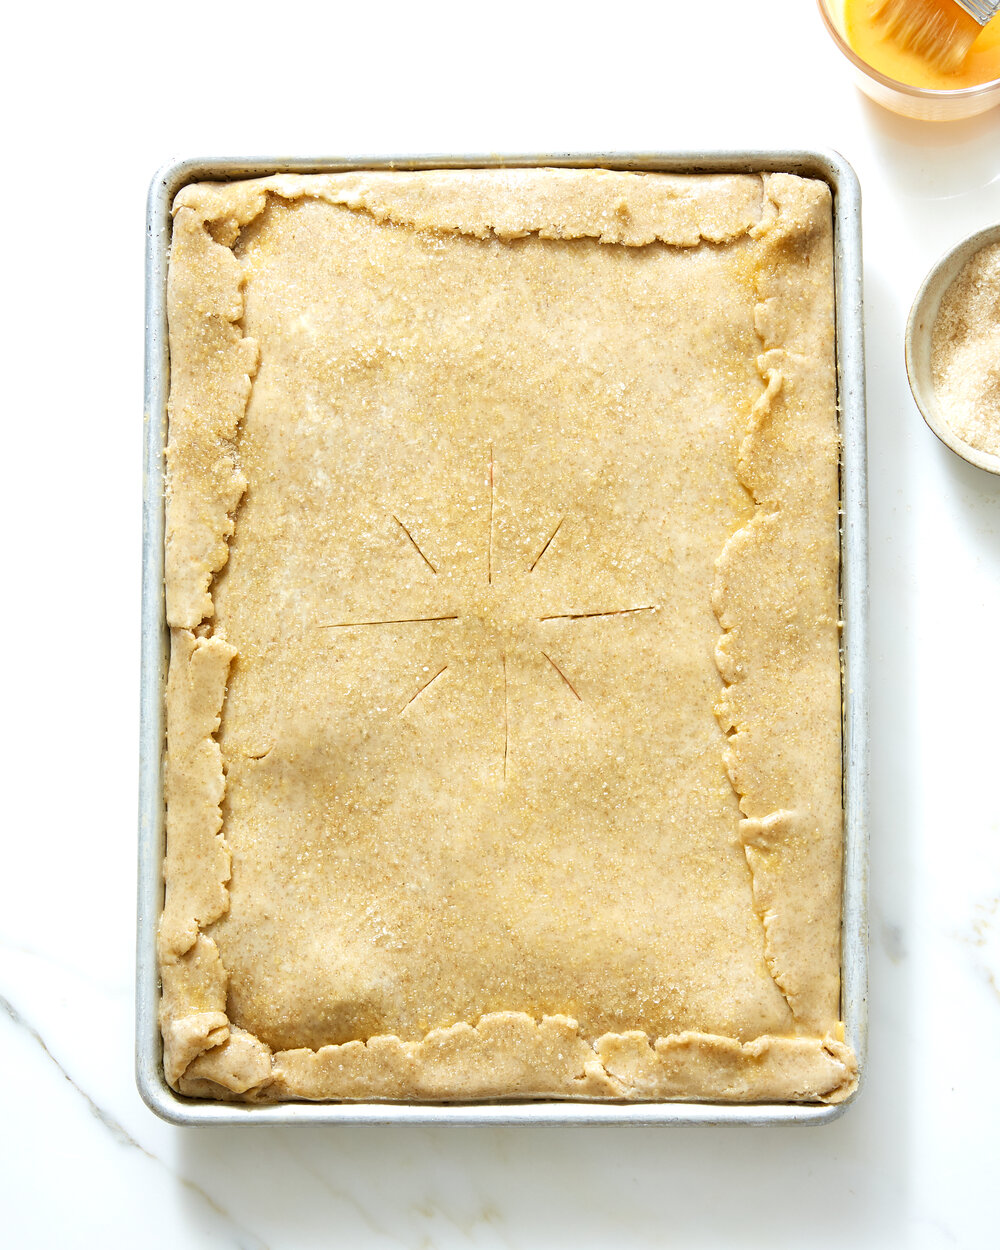
While the pie chills, beat the egg with a few drops of water to make the egg wash. When the pie is nice and chilled gently brush the surface with egg wash and sprinkle with turbinado sugar. Cut a few vents in the top then bake until the crust is deep golden brown and the juices are bubbling, 45-60 minutes.
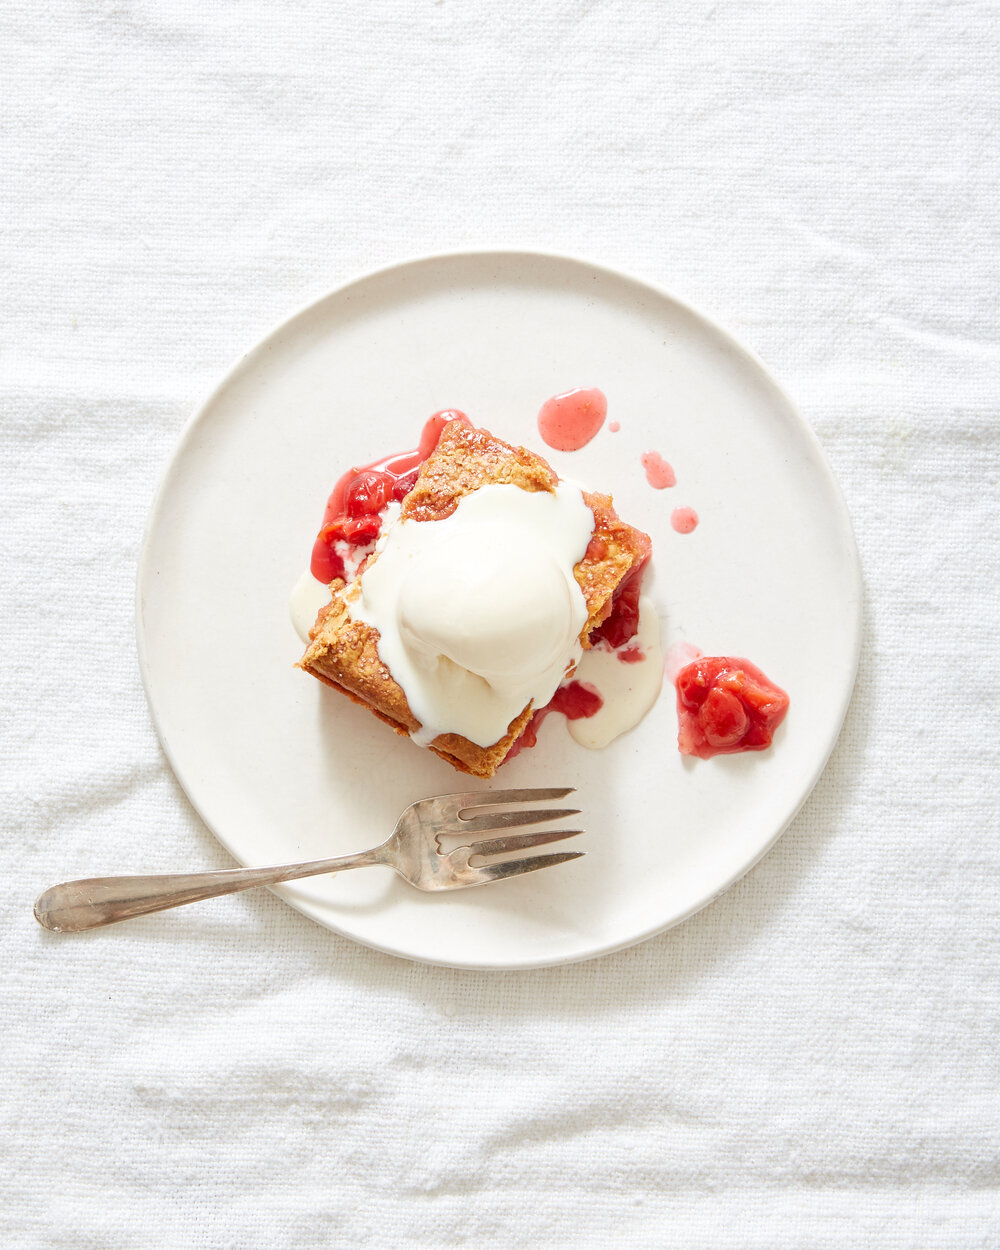
Let the pie cool on a rack before serving warm or at room temperature. Ice cream is optional, but highly suggested.
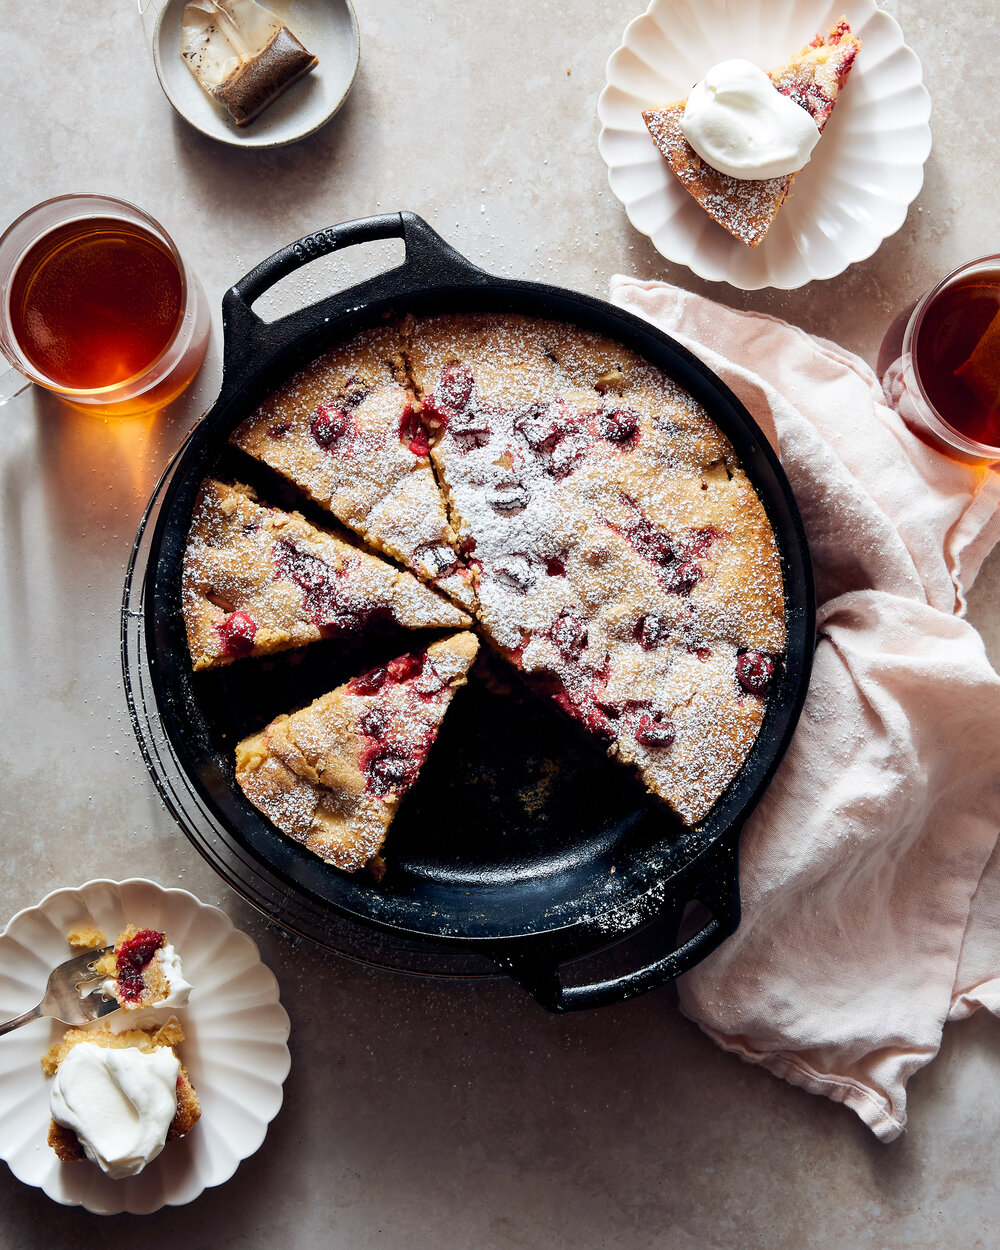
This easy skillet cake with cranberries and apples highlights some of my favorite fall flavors – in a lightly spiced batter.
…
This easy skillet cake with cranberries and apples highlights some of my favorite fall flavors – in a lightly spiced batter.
Fall and winter are such cozy seasons for baking that I find myself with something in the oven at least a few times a week. This skillet cake is a wonderfully versatile recipe that you can really serve any time of day.
This post is sponsored by Lodge Cast Iron. Their new bakeware line is gorgeous, sturdy, super versatile (hello, stove to oven to table!) and sure to become some of your favorites. I’ve used Lodge Cast Iron for years in my kitchen and I was very excited to learn about their new line of bakeware including this Baker’s Skillet which is perfect for everything from a savory quiche to a simple and comforting cake like this one.
Have a slice with tea or coffee in the afternoon, but make sure to save a bit for breakfast the next day too. Or, you can dress it up with a little bit of confectioner’s sugar and whipped crème fraiche for a gorgeous, low lift dessert.
The addition of rye flour here makes the cake exceptionally tender and I love the addition of tart cranberries for both color and a little pop of bright flavor that offsets the sweet and spice. If you don’t keep rye flour you can substitute and equal amount of all purpose or whole wheat flour, and feel free to sub pears for the apples too.
Skillet Rye Cranberry Apple Cake
Makes one 9 or 10-inch cake
3/4 cup (150g) light brown sugar
2 large eggs
1/2 cup (115g) unsalted butter, melted
2/3 cup (160g) crème fraiche
1 teaspoon cinnamon
1/4 teaspoon nutmeg
1 cup (130g) all purpose flour
1/2 cup (65g) light rye flour
2 teaspoons baking powder
3/4 teaspoon kosher salt
1 1/2 cups peeled and chopped apple, from 1 large apple
3/4 cup (75g) fresh or frozen cranberries
4 teaspoons crunchy sugar like turbinado
Confectioners sugar and whipped crème fraiche to serve, if desired
1. Position a rack in the center of your oven and preheat the oven to 350°F. Generously butter the Lodge Bakers’s Skillet or 9-inch cake pan
2. In a large bowl, whisk the brown sugar and eggs until pale and foamy, about 1 minute. Add the melted butter, crème fraiche, and spices. Whisk until smooth and emulsified.
3. Add the flour, baking powder, and salt and whisk until almost combined.
4. Switch to a rubber spatula and add the cranberries and apples. Fold to combine making sure no streaks of flour remain.
4. Spoon the batter into the prepared pan and smooth the top of the batter with an offset spatula. Sprinkle the sugar over the top.
5. Bake until puffed and golden, and a tester inserted into the center comes out clean, 25 to 35 minutes. Set the pan on a rack to cool. Serve warm or room temperature with a dusting of confectioners sugar and whipped crème fraiche if desired.
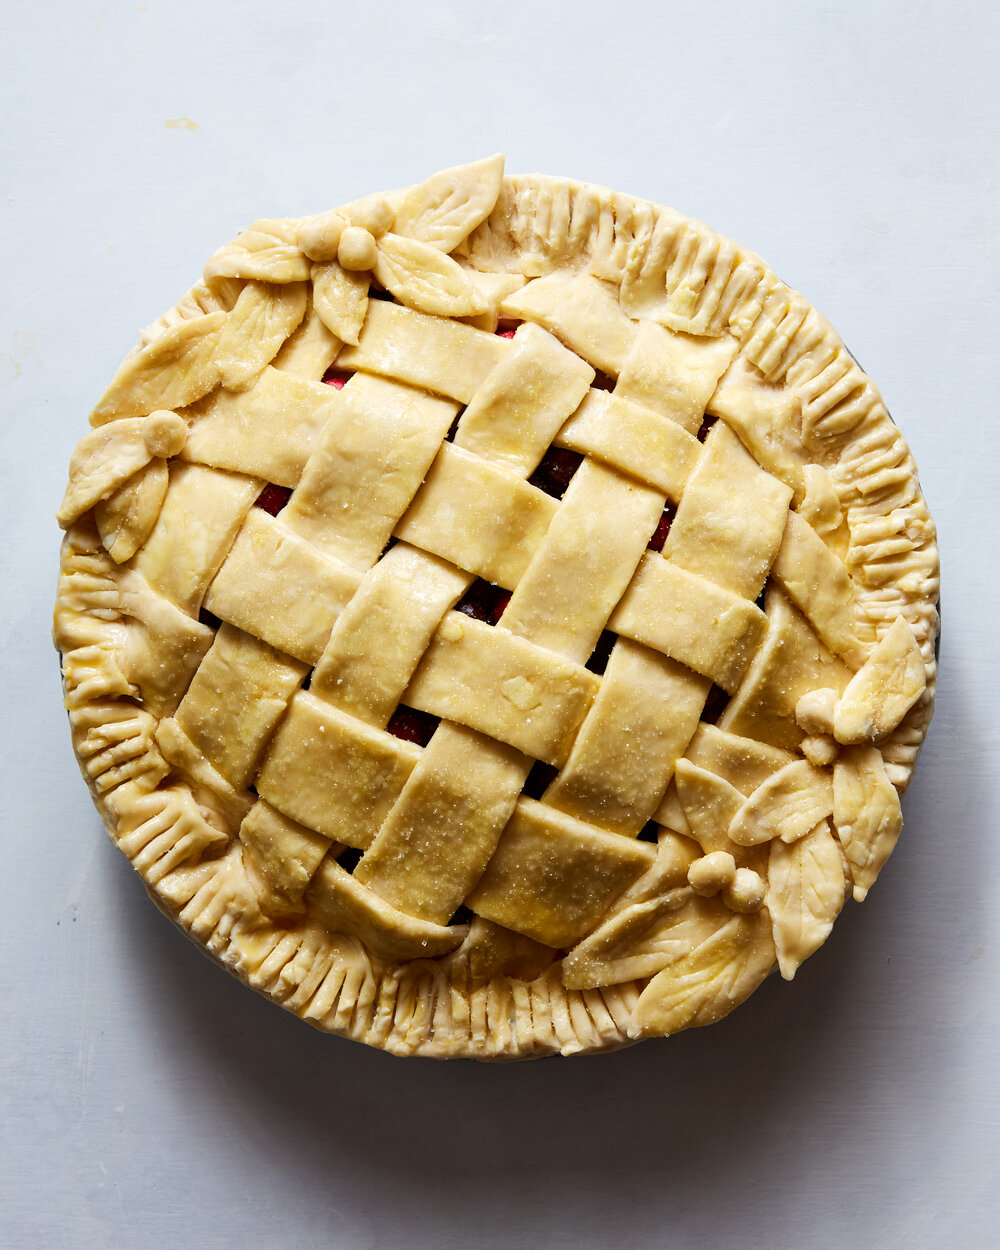
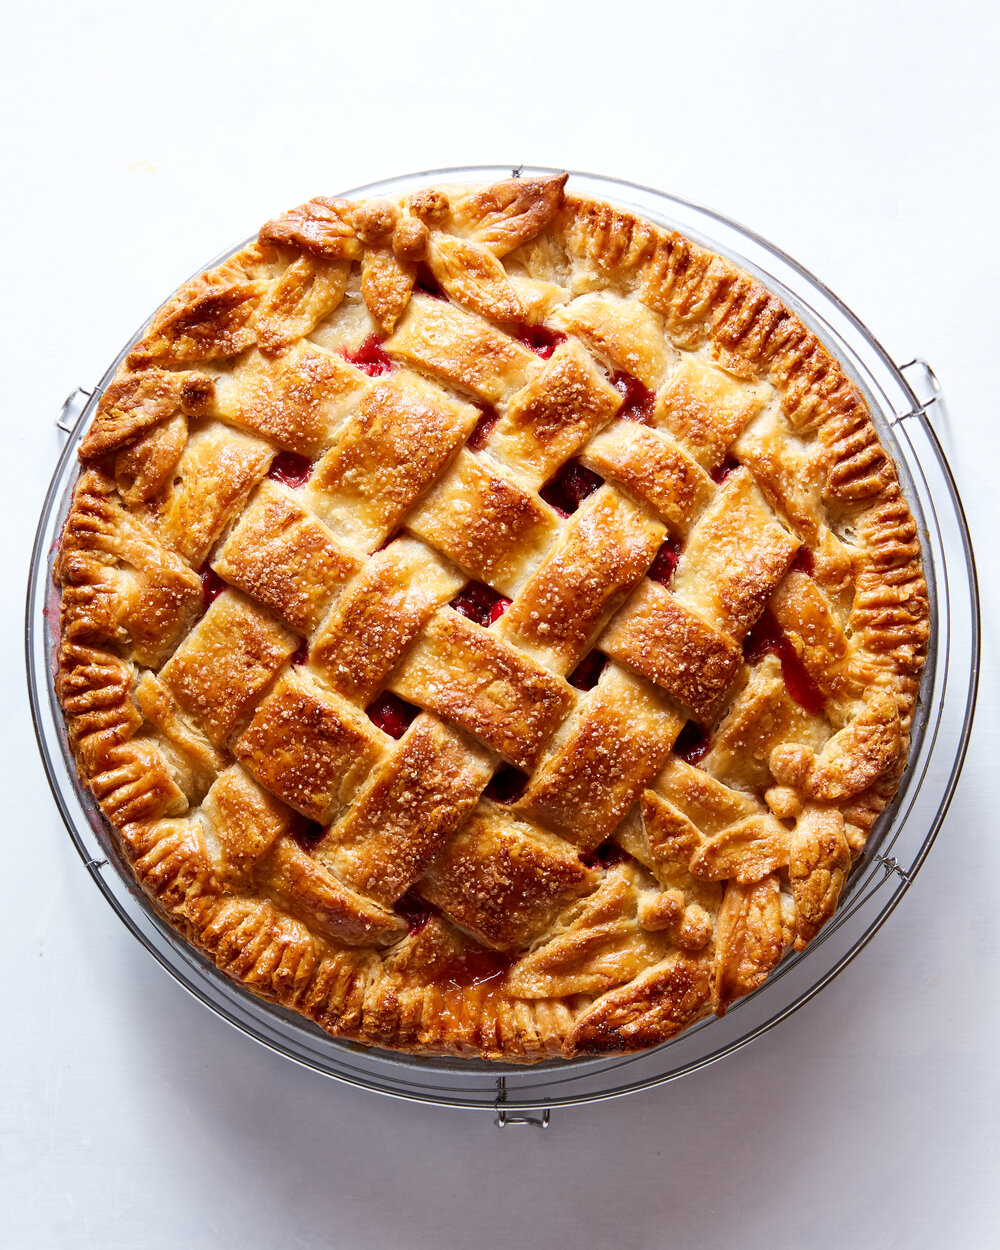
This Cranberry and Apple Cider Caramel Pie is a perfect Fall treat. With a crisp, tender all butter crust, this lattice topped beauty would be perfect at any holiday table.
…
This Cranberry and Apple Cider Caramel Pie is a perfect Fall treat. With a crisp, tender all butter crust, this lattice topped beauty would be perfect at any holiday table.
I’ve partnered with Bob’s Red Mill and Bake from Scratchmagazine to be part of their Better Baking Academy this year, and I’m talking about one of my favorite subjects - Lattice Topped Pie. Each month they share a new recipe with lots of in-depth step-by-step photos tricks and tips. Head over to Bake from Scratch to see their technique for adding lattice to the top of a custard pie.
For this recipe, I went with some of my favorite fall fruits - apples and cranberries with a generous amount of apple cider caramel mixed in. The caramel is also delicious on its own or on top of ice cream, I’m sure you’ll find a way to use it.
Lattice topped pies can seem intimidating because at first glance, but once you try it, you realize it’s not as scary as it seems. Here are some tips for pie dough success!
Some Pie Dough Tips
Keep everything cold. That means making sure your butter is cold and cubed and the water is icy. You can even chill your bowl and flour if you want to go the extra mile. I usually don’t do this because I work quickly, but it’s a great way to buy yourself some extra chilled time.
Hydrate the dough properly. Add enough water to the dough so it holds together easily, but not so much that it’s wet. Dry dough is a pain to work with because it will fall apart on you and wet dough will be tough and chewy. If you have any dry spots in your dough you can sprinkle a few drops of water just in that spot to hydrate.
Don’t overmix. Make sure that the dough is well and evenly mixed, you can even knead it a few times, but don’t go crazy and knead it like bread dough. You want to press it together firmly, while making sure there are distinct flat bits of butter in the dough that will puff up and make it flaky.
Let it rest. Give the dough some time to relax and hydrate. It will make the dough easier to roll out and flakier in the end.
Keep it cool (again). There is nothing more frustrating than trying to maneuver warm, melty, falling apart dough into a woven pattern. If they are tearing on you and you get frustrated, try transferring all of the lattice strips to a parchment lined baking sheet to chill for a few minutes while you gather your composure. Better yet, do this before you start weaving if you are worried about it.
Have Fun! Don’t worry about it too much! No one will notice if your strips aren’t all the same size! Add some decorative cutouts if you are feeling it!
This filling combines some of my favorite fall flavors into a gorgeous and delicious holiday showstopper. The cider caramel is just as good on its own as it is combined with these gorgeous fall fruits. Make sure to save the extra to drizzle on top of the warm slices of pie.
Sponsored Post: This post was created in partnership with Bob’s Red Mill and Bake from Scratch magazine.
Cranberry and Apple Cider Caramel Pie
Dough adapted from Bake from Scratch magazine
Pie Dough
Makes 1 (9-inch) double crust
4 cups (500 grams) Bob’s Red Mill Organic All-Purpose Flour
1/4 cup (50 grams) granulated sugar
1 tablespoon (9 grams) kosher salt
1 1/3 cup (303 grams) cold unsalted butter, cut into 1-inch cubes
13 to 14 tablespoons (195 to 210 grams) ice water
Cider Caramel
Makes about 1 1/2 cups
1 cup (200 grams) sugar
1/4 cup (60 grams) water
1/4 cup (60 grams) butter
1/2 cup (120 grams) heavy cream
1/4 cup ( 72 grams) boiled cider syrup (see note)
1 teaspoon (4 grams) vanilla extract
1/2 teaspoon (1.5 grams) kosher salt
Filling
3 medium baking apples like mutsu or honey crisp (about 450 grams), peeled and thinly sliced
3 cups (345 grams) cranberries
1/2 cup (100 grams) sugar
4 tablespoons (32 grams) cornstarch
2 teaspoons (4 grams) cinnamon
1/2 teaspoon nutmeg
Pinch salt
1/2 cup (125 grams) cider caramel
Make the dough: In a large bowl, stir together flour, sugar, and salt. Using your fingers to press and cut in each piece of cold butter until mixture resembles coarse crumbs and butter is pea-size to walnut-size, flat shards. Make a well in center, and add 13 tablespoons (195 grams) ice water. Stir with fingers, and knead dough together just until dry ingredients are moistened. Add additional 1 tablespoon (25 grams) water if needed. Alternatively, in the work bowl of a food processor, place flour, sugar, and salt; pulse until combined. Add cold butter, and pulse until mixture resembles coarse crumbs and butter is pea-size. With processor running, pour 13 tablespoons (195 grams) ice water through food chute in a slow, steady stream just until dough comes together. (Mixture may appear crumbly. It should be moist and hold together when pinched.) Add additional 1 tablespoon (25 grams) water if needed.
Turn out dough, and divide in half (about 530 grams each). Shape each half into a disk. Wrap tightly in plastic wrap, and refrigerate for at least 1 hour. Dough may be refrigerated for up to 3 days or frozen for up to 2 months.
Make the cider caramel: Combine the sugar, water, and butter in a medium saucepan. Cook over medium heat, swirling the pan occasionally, until the sugar melts and turns deep amber in color , about 10-15 minutes. Remove the pan from the heat then carefully whisk in the cream, cider syrup, vanilla, and salt. Mixture will bubble vigorously. Let the sauce cool to room temperature before using.
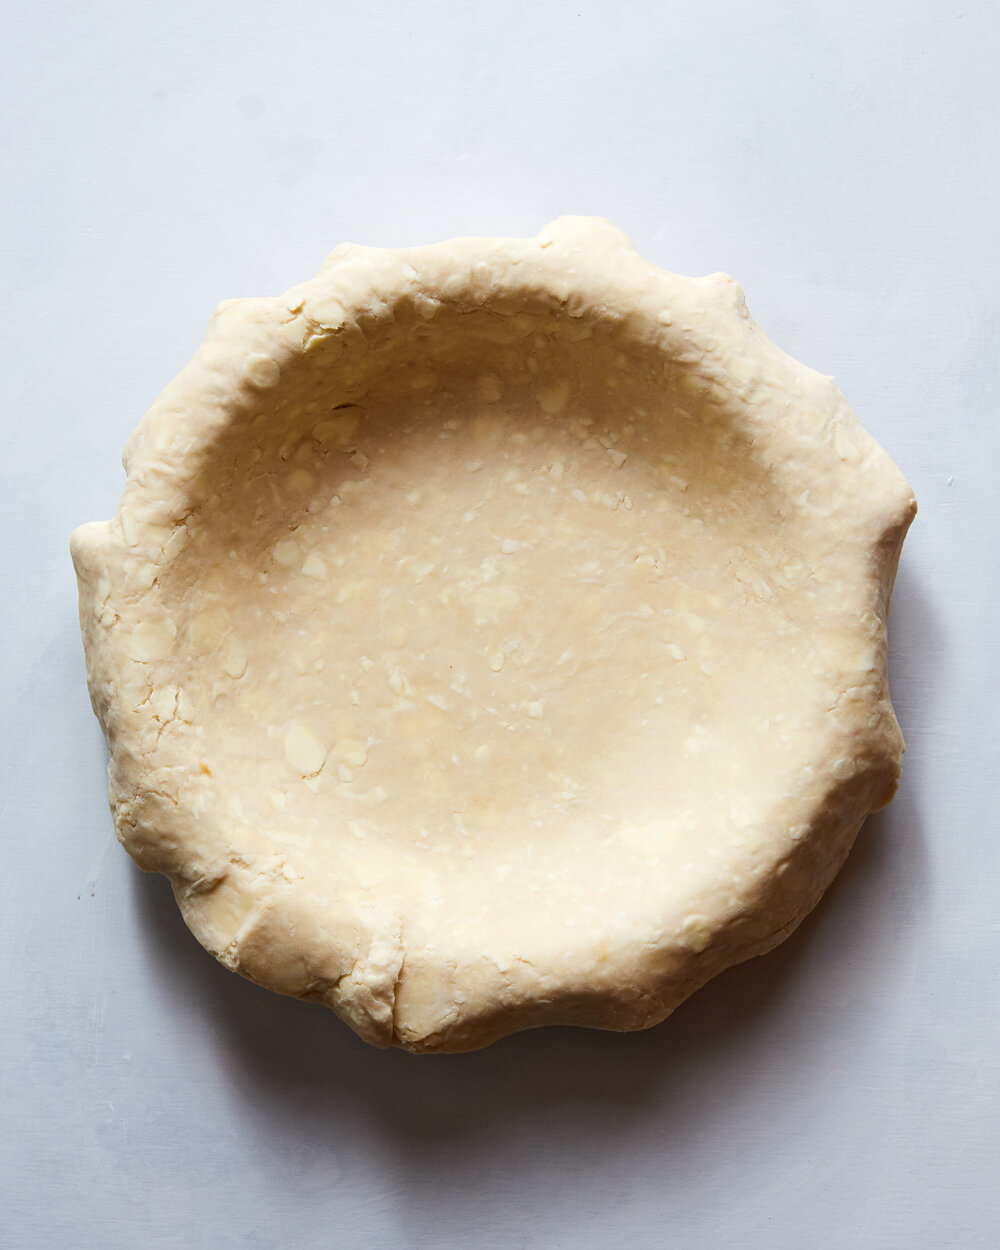
Assemble the pie: On a lightly floured surface, roll half of Pie Dough into a 13 1/2-inch circle (3/16-inch thick). Transfer to a 9-inch pie plate, pressing into bottom and up sides. Freeze until firm, 20 to 30 minutes.
Prepare the filling: In a large bowl combine the sliced apples, cranberries, sugar, cornstarch, cinnamon, nutmeg, and salt. Toss gently to combine. Drizzle the caramel over the top and stir gently.
Assemble the pie: Transfer the filling into the chilled pie dough and press gently to compact the fruit.
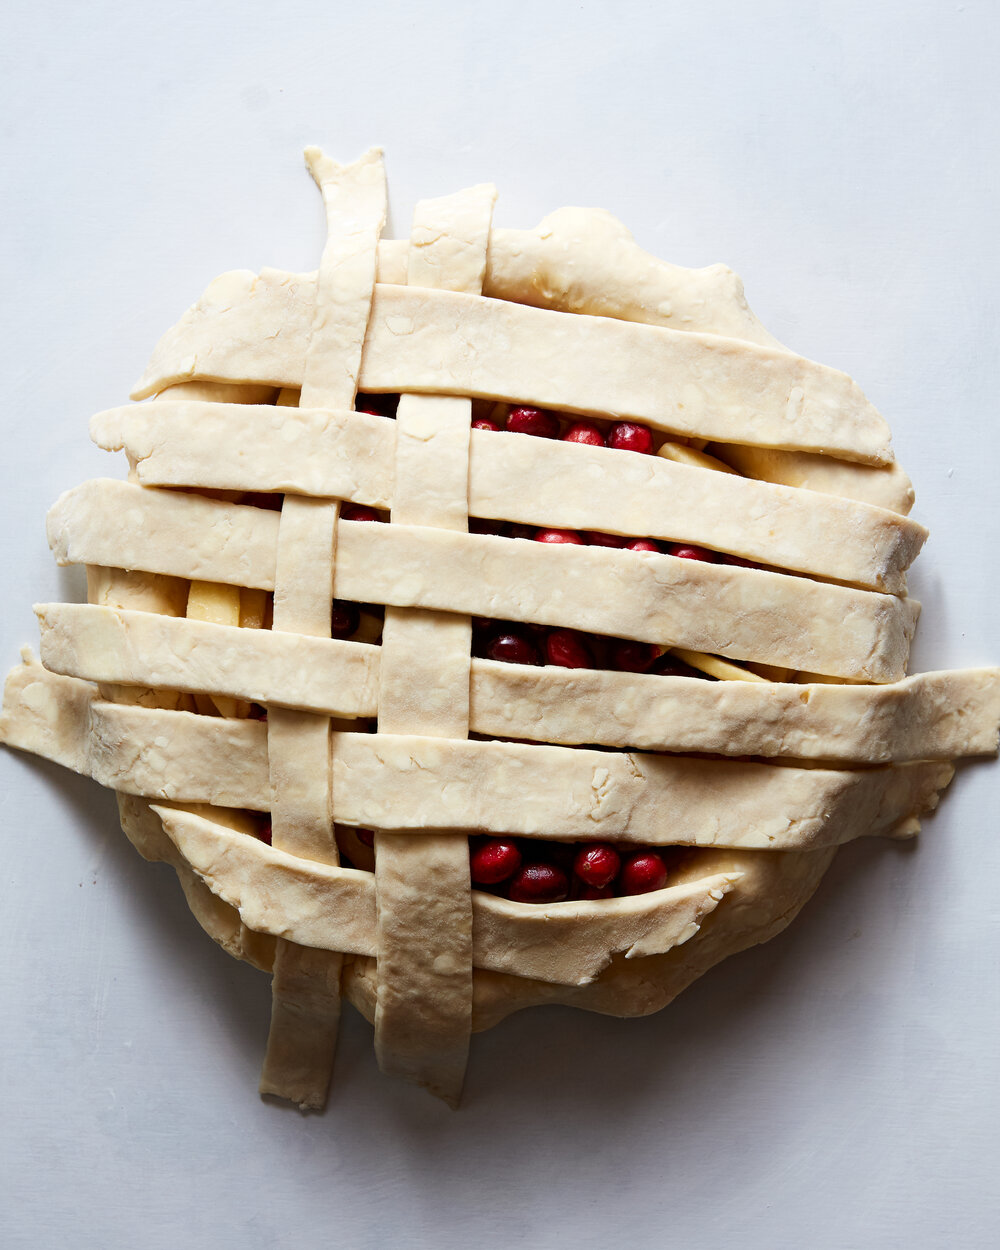
On a lightly floured surface, roll remaining Pie Dough into a 14-inch circle (1/8 inch thick). Using a pastry wheel, cut 2 inches off one side of dough; set aside. Starting at cut edge, cut 12 (3/4-inch-wide) strips; set aside any unused rolled-out Pie Dough. Place 6 strips horizontally over the filling. Fold back alternating strips, and place 1 strip vertically across horizontal strips; unfold strips. Repeat weaving with remaining strips, starting and ending at 1-inch marks and spacing strips 3/4 inch apart. Using kitchen scissors, trim strips even with the bottom crust, leaving about 1/2-inch overhang. Roll the bottom crust up and over the trimmed lattice and press gently. Use a fork dipped in flour to press the rolled edge down onto the pie pan. Use scissors to trim the fork-crimped edge flush with the pie pan. Place the pie on a baking sheet.
If desired, use small decorative cutters or scissors to cut remaining rolled-out Pie Dough and scraps and place on baking sheet around the pie. Refrigerate until firm and ready to use, 20 to 30 minutes.
Bake the pie: Preheat oven to 400°F (200°C) with a rack set in the bottom third.
In a small bowl, whisk together 1 egg (50 grams) and 1 teaspoon (5 grams) water. Brush lattice with egg wash. Brush bottom of each cutout with egg wash, one at a time, and place around outside edge of lattice, overlapping slightly. Brush tops of cutouts with egg wash.
Bake the pie for about 1 hour or until it is deep golden brown and the juices are bubbling. If the edges begin to darken before the filling is bubbling, tent the edges with aluminum foil. Let cool before slicing. Serve with additional cider caramel sauce.
Note: Boiled cider can be purchased or you can make your own. For this recipe, add 4 cups of apple cider to a large pot set over high heat. Bring the mixture to a full boil, and cook until reduced to 1/2 cup, stirring occasionally. This will take about 30 minutes but keep a close eye on it. It will darken slightly and thicken to the consistency of thin honey when ready.
Hello! This post is a little refresh of my very favorite recipe - Galettes! If you follow me on instagram you know that I am a galette evangelist. I think galettes are the very best and most fun dessert because they are so easy to make and adaptable, but my recipe was a little bit hidden in the archives so I am pulling it out into the spotlight with this easy to find post. You can use just about any fruit you like or a combination of fruits, and feel free to adjust the sugar to taste. Be free! Don’t worry about it too much! Have fun!
If you bake a galette make sure to tag me and #summerofgalettes on instagram and feel free to message me with any questions. I love seeing what you bake!
All Butter Pie Crust
All pie crust is made from the same basic ingredients: flour, fat, water, and salt. I am partial to an all-butter crust because I think it tastes the best. The key to flaky pie crust is to keep the ingredients nice and cold— especially the butter and water—and to work quickly and intentionally. I like to mix pie crust with my hands rather than a food processor or pastry blender because I can control the exact size and shape of the butter pieces for the flakiest results. Add a few teaspoons of sugar if you prefer a sweetened crust.
Ingredients
2 2⁄3 cups (340g) all purpose flour
1 teaspoon kosher salt
1 cup plus 2 tablespoons (255g) very cold unsalted butter
1 tablespoon apple cider vinegar
8-10 tablespoons (120ml) ice water
Whisk the flour and salt together in a large bowl, cut the butter into 1⁄2-inch cubes, and add the apple cider vinegar to the ice water.
Working quickly, add the butter to the flour and toss to coat. Then use your fingers or the palms of your hands to press each cube of butter into a flat sheet. Keep tossing the butter in the flour as you go to ensure that each butter piece is coated with flour. The idea is to create flat, thin shards of butter that range from about the size of a dime to about the size of a quarter. If at any time the butter seems warm or soft, briefly refrigerate the bowl.
Sprinkle about 6 tablespoons of the icy cold vinegar-water mixture over the flour mixture. Use a gentle hand or wooden spoon to stir the water into the flour until just combined. If the dough seems dry, add more cold water a couple of teaspoons at a time. You have added enough water when you can pick up a handful of the dough and easily squeeze it together without it falling apart.
Press the dough together, then split it in half. Form each half into a disk, and wrap each disk in plastic wrap. Chill the dough for at least 2 hours before using, but preferably overnight. Keeps for up to three months in the freezer wrapped in a double layer of plastic wrap and a layer of foil. Thaw in the refrigerator before using.
VARIATIONS: For a rye variation, substitute 11⁄3 cups (175g) rye flour for an equal amount of the all purpose flour. For a spelt variation, substitute 11⁄3 cups (175g) spelt flour for an equal amount of the all purpose flour. You also may need a bit more water to bind the dough for these variations.
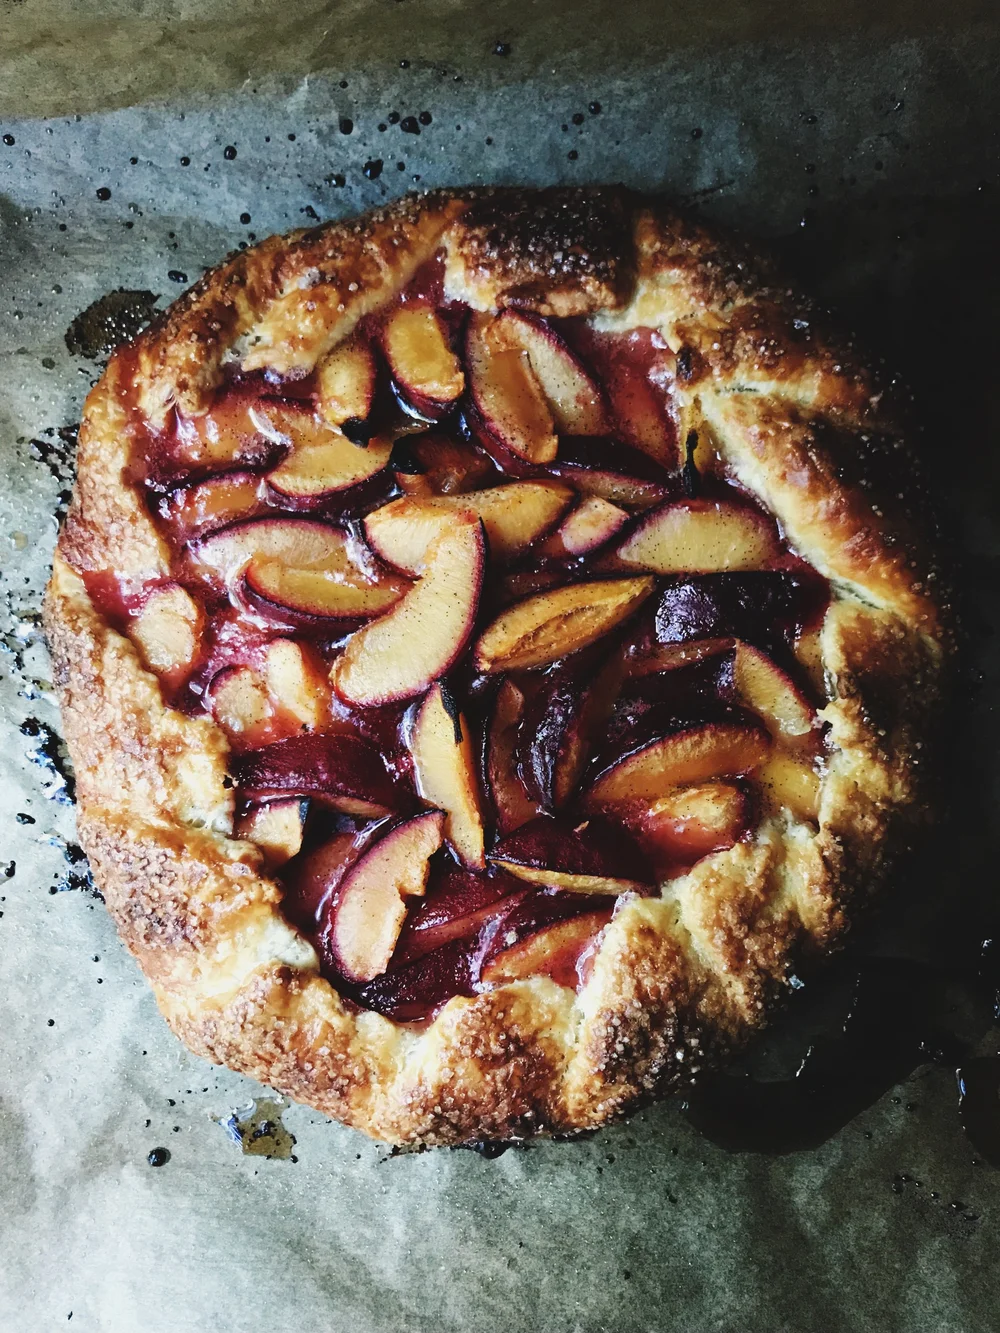
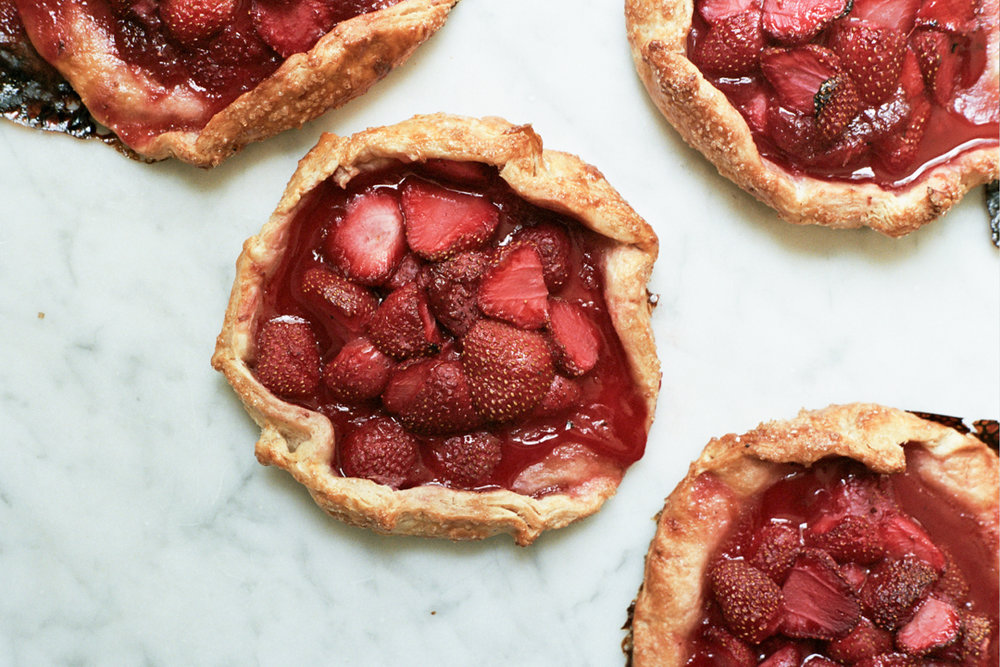
Any Fruit Galette
Yield: One 8-inch galette
You can use this formula with just about any seasonal fruit. For apples, pears, and stone fruit peel if desired then slice into 1/4-1/3-inch slices. Apricots (my fave!) can be gently torn in half or cut into quarters. Slice strawberries in halves or quarters if they are large. Rhubarb can be sliced into thin batons or 1/2-inch chunks. Feel free to experiment with combining your favorite fruits. I love stone fruit and berries together in the summer. Also, the apricot jam can be replaced with any jam or marmalade you like that will compliment the fruit you are using.
1 disc pie crust
3/4 pound (340g) fresh fruit
1/4 cup apricot jam
1/4 cup (50g) granulated sugar, to taste
2 tablespoons flour
1/2 teaspoon lemon zest
seeds of one vanilla bean (optional)
pinch salt
1 egg, for egg wash
turbinado sugar and flaky salt for sprinkling
Arrange a rack in the oven in the lower third and preheat oven to 425ºF. Line a baking sheet with parchment paper.
Combine the sugar vanilla bean seeds, lemon zest, flour and salt in a bowl. Add the fruit to a large bowl and sprinkle the sugar mixture over the top, but don’t stir quite yet.
On a lightly floured surface roll the dough into a rough circle between 1/8-1/4-inch thick and transfer it to a parchment lined baking sheet. Gently stir the fruit mixture until well combined.
Spread the jam onto the center of the dough, then pour the fruit into the center of the galette. Press gently to compact the fruit into an even layer. Fold the edges of the dough up and over the fruit and press the folds gently to seal. Refrigerate the formed galettes until the dough is very firm.
Brush the galette with egg wash, sprinkle with turbinado sugar and flaky salt if desired and bake until deep golden brown and bubbling, 45-55 minutes. Serve warm with vanilla ice cream.
We are still in a bit of an in between produce season, but the weather is warming up and the sun is out so I am craving fresh fruit desserts like it’s my job. I guess it kind of is my job…I love to make desserts like this pavlova because it is fairly low lift and aside from a low, slow bake in the oven for the meringue (which you can make the day before if it’s not too humid where you live) everything comes together in a few minutes.
The tart crushed raspberries provide some nice sauciness here and contrast well with sweet strawberries and the crisp, pillowy meringue. Make sure to use the best strawberries you can find for this dessert, and adjust the sugar to your personal tastes. In NYC we get some really nice organic berries from California but they are $$ so you may just want to bookmark this until they are in season locally where you live. The mini mint leaves are also totally optional, but they do add a nice freshness and beautiful pop of contrasting color.
Crushed Raspberry and Strawberry Pavlova
Crisp and chewy meringue, pillowy whipped cream, and sweet-tart berries are combined to make this super springy, and fairly simple dessert. Assemble just before serving for the best textural experience as the meringue will weep and melt as it sits.
Meringue
4 large egg whites
1 cup (200g) superfine sugar
1 1/2 teaspoons cornstarch
1/4 teaspoon salt
1/8 teaspoon cream of tartar
1 teaspoon vanilla extract
1 teaspoon white vinegar
Berries
1 pound of the best strawberries you can find
1/2 cup fresh raspberries
2 teaspoons sugar
1/2 vanilla bean, seeds scraped
pinch salt
To Serve
1 cup (240ml) heavy cream
1 tablespoon sugar
mint leaves
To make the meringue: Preheat the oven to 250ºF (130ºC/Gas Mark 1/2). Trace an 8-inch (20cm) circle onto a piece of parchment paper and flip it upside down on a baking sheet.
Stir the cornstarch and sugar together in a small bowl. In the bowl of a stand mixer fitted with the whisk attachment or with a handheld electric mixer in a large bowl, beat the egg whites, salt, and cream of tartar on high speed until soft peaks form. With the mixer running, slowly add the sugar mixture about one tablespoon at a time until you have added all of the sugar and the egg whites are stiff and glossy about 7 minutes. Add the vanilla extract and vinegar and mix for 30 more seconds.
Dollop the meringue onto the prepared baking sheet and use an offset spatula to spread it evenly to the edges of the traced circle. Make a shallow indent in the center of the meringue which will hold all of the delicious toppings. Bake the meringue for 1-1 1/2 hours or until the outside looks dry and slightly creamy in color. Turn off the oven and prop the door ajar with a wooden spoon. Let the meringue cool completely in the oven. It should feel firm and crackly when you press it, but will be soft and marshmallowy in the center. When cooled, you should be able to gently peel it off of the parchment paper and place it on a serving platter or cake stand.
To make the topping: Slice the strawberries in half if they are small, quarters if they are large. Combine the raspberries, sugar, vanilla bean seeds and a pinch of salt in a large bowl and crush the berries with a fork. Gently stir in the strawberries and let the fruit macerate for a few minutes. Taste and add a bit more sugar if desired, keeping in mind that the meringue will be quite sweet.
Whip the cream and sugar together to soft peaks. Top the cooled meringue with the whipped heavy cream, followed by the berries. Sprinkle mint leaves over the top and serve immediately.
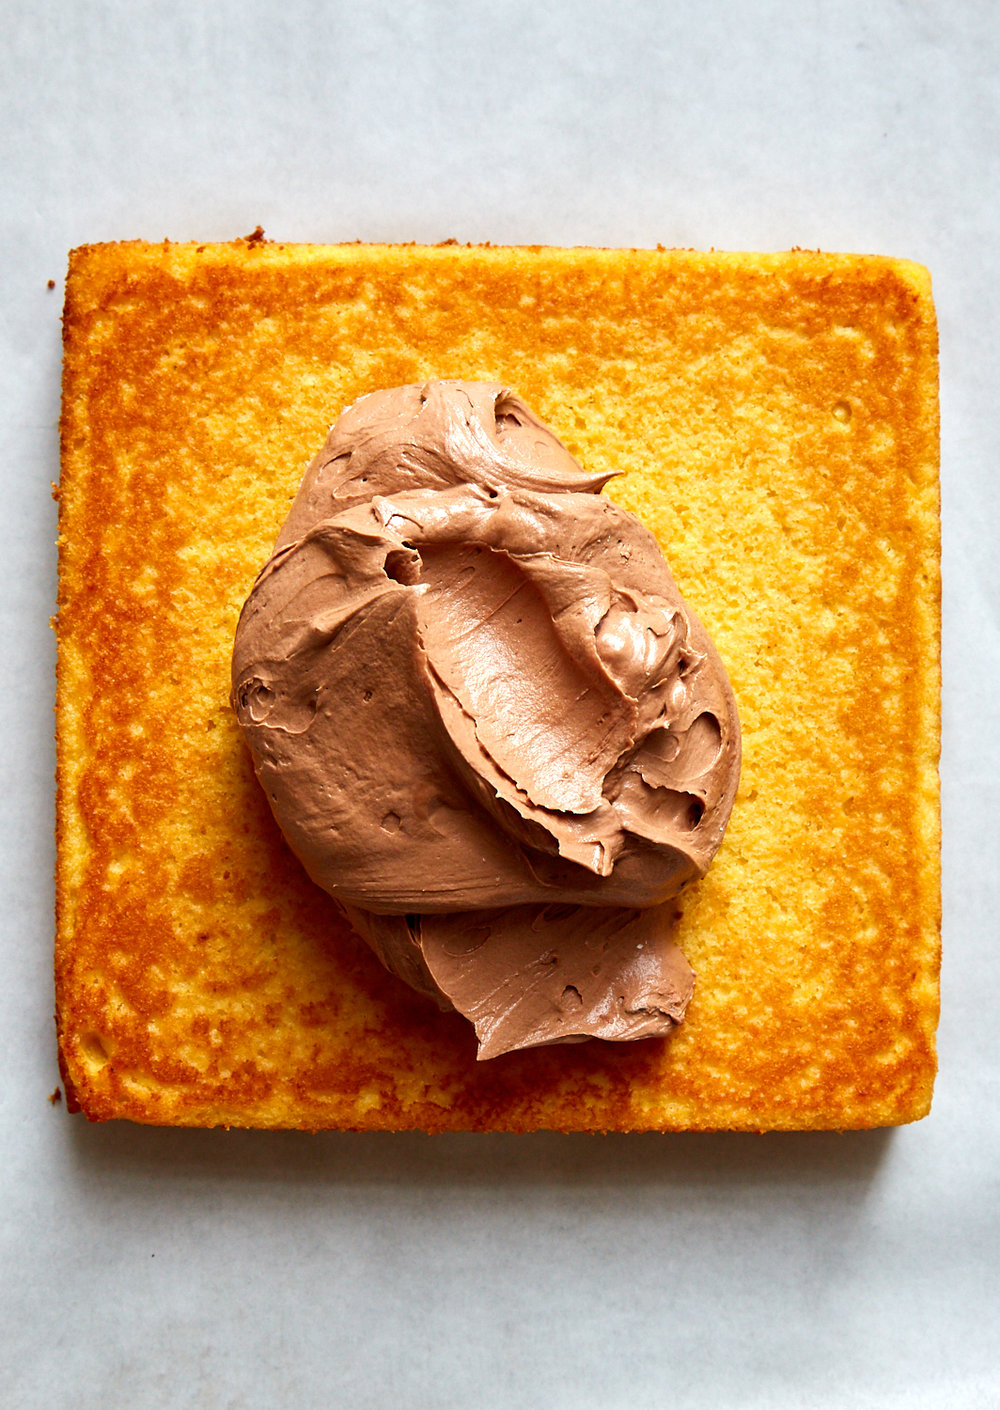
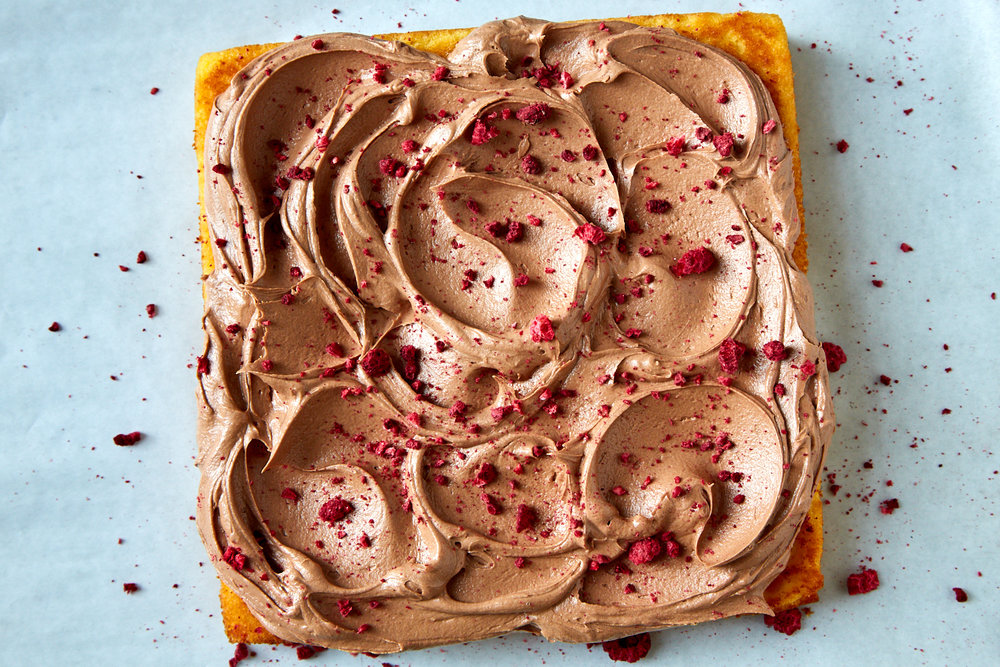
I love a cake that you can stir together in one bowl, and this passionfruit cake fits the bill. It is packed with passionfruit flavor and is mouth-puckering tart, but the *ahem generous* swoops of chocolate frosting balance it quite nicely. You could also add an additional 1/4 cup (50g) sugar for a sweeter cake, but I’m a fan of the contrast. If you aren’t a huge frosting fan you may want to hold a little back when you are topping the cake. The cake is also delicious - tart, floral, and tropical - on its own. If you’d prefer to skip the frosting all together, make a little bit of glaze made from passionfruit and confectioners sugar and drizzle it over the top instead.
Would you believe that I have misplaced my sprinkles? I’m not sure how it happened, but after my Christmas cookie bonanza I managed to hide ALL OF MY SPRINKLES from myself and I didn’t discover it until I went their normal storage spot to grab some to sprinkle this beaut. In the end it was a blessing because I crushed up a handful of dehydrated raspberries for decor instead and they added a nice tart punch to the topping.
p.s. I use a spoon, instead of an offset spatula, to get these deep swoops and swirls.
One Bowl Passion Fruit Cake with Fluffy Chocolate Frosting
I used Goya brand passionfruit puree for this cake which I can find easily at most of the supermarkets in my area. Its also very inexpensive and runs about 3 bucks for 7 ounces. You can certainly make your own puree or use a higher end brand, but I’m here to tell you that the inexpensive stuff works just fine. Choose your own adventure. Although, if you can find fresh passionfruit, a few of the seeds and pulp sprinkled over the top would make a beautiful, crunchy garnish. This cake tastes best the day that it is baked, but holds up for a couple of days at room temperature. If you use dehydrated fruit as a garnish it will soften as it sits.
1/2 cup (115 grams) unsalted butter, at room temperature
1 tablespoons milk, plus more if necessary
1/2 teaspoon vanilla extract
fat pinch of salt
Heat oven to 350ºF and butter and flour or spray an 8x8 inch baking pan with non-stick spray.
In a large bowl, whisk the sugar, passionfruit puree, sour cream, melted butter, eggs, vanilla extract, and salt until combined and smooth.
Combine the flour and baking powder in a fine mesh sieve and sift it into the large bowl. Whisk the batter until smooth and pour into the prepared pan. Slide the pan into the oven and bake until a cake tester inserted into the center comes out clean 20-25 minutes.
Cool the cake in the pan on a rack.
While the cake is cooling make the frosting.
Add all of the frosting ingredients to a large bowl and beat until smooth and fluffy, add a bit more milk if necessary. Alternately, Deb makes the frosting in a food processor.
Spread the frosting evenly over the cooled cake and decorate with a shit-ton of sprinkles. Enjoy immediately! This cake keeps is best the day it’s baked, but will keep for a couple of days, covered at room temperature. The dehydrated raspberries will soften over time.