This vegan bacon recipe came to be in a moment of inspiration while making pasta that needed a salty garnish. I had shiitakes on hand and the rest is history!
The result is a savory-sweet, smoky, crispy plant-based bacon that’s SO FAST to make and perf…
This vegan bacon recipe came to be in a moment of inspiration while making pasta that needed a salty garnish. I had shiitakes on hand and the rest is history!
The result is a savory-sweet, smoky, crispy plant-based bacon that’s SO FAST to make and perfect for adding to salads, sandwiches (hello vegan BLT), pasta, and more! Just 1 pan, 7 ingredients, and 15 minutes required!
I used to hate chicken wings. But, OMG, I think I’m officially a convert. These crispy, oven-baked honey mustard wings are so seriously delicious that I’ve craved them every day since I first made them. The simple oven baking technique delivers a surprisingly crispy skin without having to brave hot deep fryer grease, and my basic Honey Mustard Sauce makes an incredible glaze.
I used to hate chicken wings. But, OMG, I think I’m officially a convert. These crispy, oven-baked honey mustard wings are so seriously delicious that I’ve craved them every day since I first made them. The simple oven baking technique delivers a surprisingly crispy skin without having to brave hot deep fryer grease, and my basic Honey Mustard Sauce makes an incredible glaze. You just have to try them.
Yes, Baked Wings CAN be Crispy
If you fear deep frying, like me, then you’re going to love these baked wings. The trick to getting a nice crispy skin on chicken wings in the oven is the light coating of cornstarch. The cornstarch absorbs some of the fat from the skin as it melts and bakes to an incredibly crispy crunch. It’s just SO EASY and there’s no chance of accidentally burning your face off with splashing grease. ;)
Serve Immediately for Best Results
Kind of like their fried counterpart, these baked honey mustard chicken wings are best when they’re served right after they come out of the oven. If you do need to wait a bit before serving, don’t toss them in the honey mustard sauce until just before serving. The longer the sauce sits on the chicken, the softer the skin will become. For that reason, this recipe is not a great candidate for leftovers.
What to Serve with Honey Mustard Wings
My Honey Mustard Sauce is great for dipping vegetables as well as chicken wings, so I made a little extra so I could serve some broccoli florets along with the wings. You could also do some celery and carrot sticks for more variety. A little bit of classic Creamy Coleslaw would also be a nice side.
Honey Mustard Wings
These simple oven-baked honey mustard chicken wings are deliciously crispy and are coated in sweet and tangy homemade sauce.
Preheat the oven to 400ºF. Line a baking sheet with parchment paper or foil, then place two wire cooling racks over top to elevate the chicken wings.
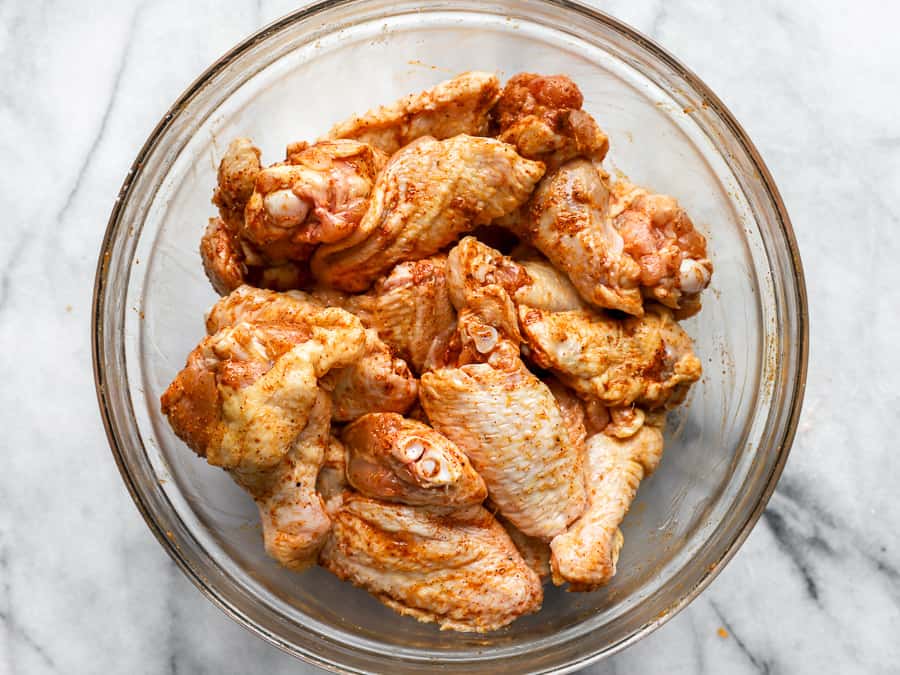
In a small bowl, stir together the cornstarch, salt, pepper, and garlic powder. Pat the chicken wings dry, then add them to a bowl with the cornstarch mixture, and stir until the chicken wings are coated.
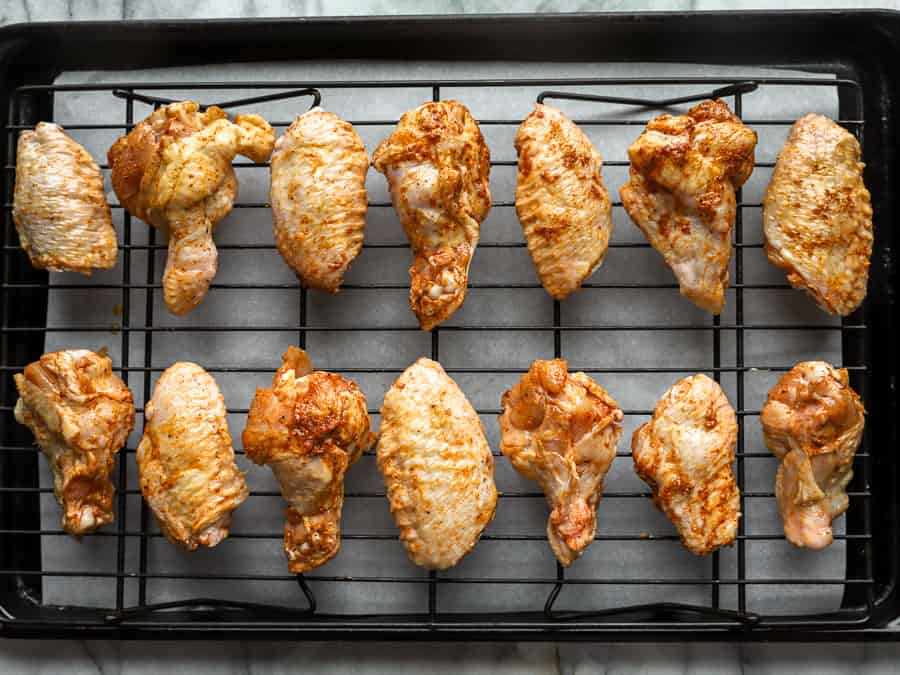
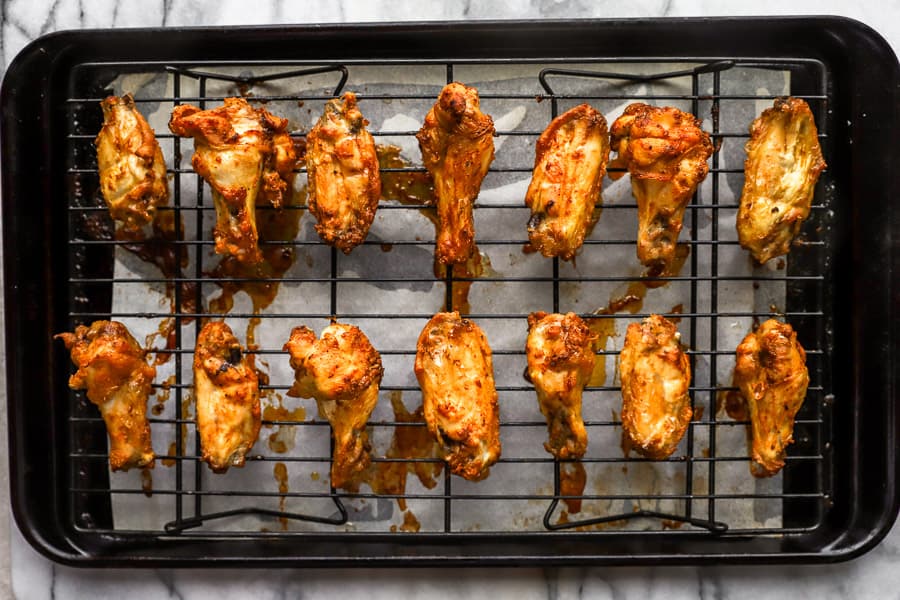
Place the cornstarch coated wings on the prepared baking sheet (on the wire racks). Bake in the oven for 50 minutes, give or take 5 minutes depending on the size of the wings, or until they are light golden brown and the skin is crispy.
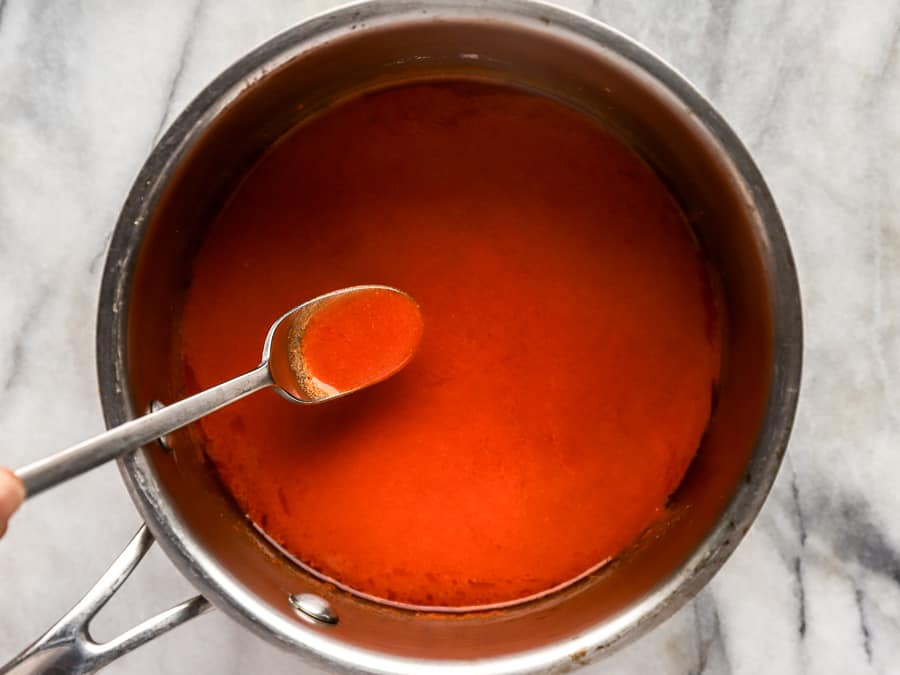
While the wings are baking, make the honey mustard sauce. Stir together the mayonnaise, Dijon, yellow mustard, honey, vinegar, garlic powder, paprika, salt, and pepper in a bowl.
When the chicken wings are finished baking, place them in a clean bowl and pour the honey mustard sauce over top. Stir until the wings are coated. Serve immediately.
Notes
*This recipe makes enough honey mustard to coat the chicken wings. If you’d like enough honey mustard sauce to have extra for dipping, like in the photos, I suggest doubling the sauce ingredients.
How to Make Honey Mustard Wings – Step by Step Photos
Preheat the oven to 400ºF. Line a large baking sheet with parchment paper or foil, then place two wire cooling racks on top (this holds the chicken above the surface of the baking sheet). In a small bowl, stir together 3 Tbsp cornstarch, ¼ tsp salt, ¼ tsp pepper, and ¼ tsp garlic powder.
Pat dry 2 lbs. chicken wings or drumettes, or both, with paper towel.
Place the chicken wings in a large bowl, then pour the cornstarch mixture over top. Stir the wings until they are lightly and evenly coated in cornstarch.
Place the chicken wings on the prepared baking sheet, spaced out so they are not touching.
Bake the chicken wings in the preheated 400ºF oven for 50 minutes, or until they are golden brown and crispy (they will not get deeply browned). Total baking time will vary depending on the size of your wings.
While the wings are baking, prepare the honey mustard sauce. In a bowl combine ¼ cup mayonnaise, ½ Tbsp Dijon mustard, ½ Tbsp yellow mustard, 1.5 Tbsp honey, ½ tsp apple cider vinegar, 1/16 tsp garlic powder, 1/16 tsp paprika, 1/16 salt, and ⅛ tsp pepper. This is enough honey mustard to coat the wings. If you want extra for dipping, double the sauce.
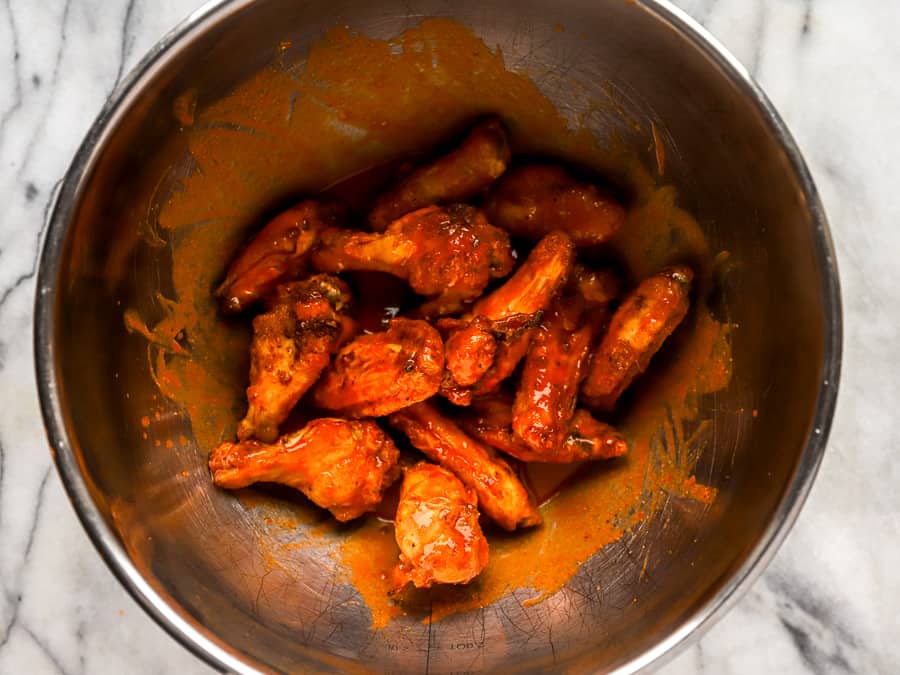
Place the baked wings in a clean bowl and pour the honey mustard sauce over top.
Toss the wings until they are coated in the honey mustard sauce and then serve immediately!
Buttermilk Fried Chicken
This crispy buttermilk fried chicken recipe is THE BEST thanks to an overnight marinade, a dip in buttermilk, and a special dredging technique. Extra crunchy on the outside, tender and juicy on the inside, you won’t want …
This crispy buttermilk fried chicken recipe is THE BEST thanks to an overnight marinade, a dip in buttermilk, and a special dredging technique. Extra crunchy on the outside, tender and juicy on the inside, you won’t want to put this chicken down! Make a delicious fried chicken sandwich, or use this recipe for fried chicken […]
Happy New Year, friends! What better way to kick off a new year than with a big bowl of Black Eyed Peas & Greens? Not only is it incredibly delicious, but this dish is also believed to bring good luck and prosperity, and we could all use a little m…
Happy New Year, friends! What better way to kick off a new year than with a big bowl of Black Eyed Peas & Greens? Not only is it incredibly delicious, but this dish is also believed to bring good luck and prosperity, and we could all use a little more of that in our lives.
This plant-based version is incredibly comforting and delicious. Plus, it’s quick and easy to make with a little help from the Instant Pot.
Roasted pork loin is probably one of the easiest (and inexpensive) main dishes you can make. Just add a little seasoning, pop it in the oven, and let it do its thing. The only thing you have to be mindful of is overcooking.
Roasted pork loin is probably one of the easiest (and inexpensive) main dishes you can make. Just add a little seasoning, pop it in the oven, and let it do its thing. The only thing you have to be mindful of is overcooking, but we’ll talk more about that below. As long as you avoid that one pitfall, you’ll have a tender, juicy pork loin that makes a deeelish main dish that can be paired with tons of different sides.
Pork Loin vs. Pork Tenderloin
This recipe is written for pork loin, sometimes called a pork loin roast, which is different than pork tenderloin. Pork loin is a large roast, usually sold in 3-4 pound cuts. Pork tenderloin is a different, smaller muscle that tends to be slightly darker and more tender. Here is a more in-depth look (with photos) at the difference between pork loin and pork tenderloin. If you’re looking for a recipe for roasted pork tenderloin, try my Herb Roasted Pork Tenderloin.
About that Brown Sugar Rub…
If you’ve made my Glazed Pork Chops, you’ll be familiar with this sweet and spicy brown sugar rub. It’s the perfect mix of sweet, savory, and spicy, and it’s just so incredibly simple. When it’s used with the direct contact heat of a skillet it turns into a glaze, but when it’s baked in the dry air of an oven it forms a delicious crust on the surface of the pork. Either way, it’s a winner!
The Key to Good Pork Loin
Don’t overcook it. That’s it! Overcooked pork is dry, tough, and resembles something like a hockey puck. So how do you not overcook it? You really need to get a meat thermometer (my favorite is linked in the recipe card below) since every pork loin is a different size and shape, and every oven cooks a little different.
How Long to Cook Pork Loin
The safe internal temperature for pork (excluding ground pork) is 145ºF. The estimated amount of time you’ll need to cook your pork loin using the method below (starting at 400ºF then reducing to 350ºF), is about 15 minutes per pound after the initial ten minutes at 400ºF. Use your trusty thermometer about ten minutes before the estimated time to see if you’re getting close, then about every 10-15 minutes after that until you reach 145ºF.
And lastly, make sure to let your pork rest for about 10 minutes after it’s removed from the oven before slicing. This gives the steam pressure time to reduce, which means more of the moisture will stay in the meat instead of evaporating out once it’s sliced.
Preheat the oven to 400ºF. In a bowl, combine the brown sugar, cayenne, garlic powder, paprika, salt, and pepper.
Place the pork loin on a parchment lined baking sheet or in a large casserole dish with the fat cap facing up. Begin packing the brown sugar and spice mixture all over the surface of the pork loin (no need to get the bottom). The moisture from the pork loin should help the sugar mixture stick to the surface.
Transfer the pork loin to the oven. Roast at 400ºF for ten minutes, then reduce the heat to 350ºF and continue to roast for about 15 minutes per pound of roast, or until the internal temperature reaches 145ºF. Always use a meat thermometer just to be sure.
After roasting, let the pork loin rest for 10 minutes before slicing into ½-inch thick slices and serving.
Notes
*To reduce the spiciness of this dish, reduce the cayenne to ½ or even ¼ tsp.
How to Make Brown Sugar Roasted Pork Loin – Step by Step Photos
Preheat the oven to 400ºF.Combine ½ cup brown sugar, 1 tsp cayenne, 1 tsp garlic powder, 1 tsp paprika, 1 tsp salt, ½ tsp pepper, and 3 Tbsp olive oil in a bowl.
Mix the rub ingredients together until they look like damp sand.
This is the pork loin I used, which was 4 pounds. Your cooking time will vary depending on the size of your pork loin, so make sure to use a meat thermometer so you can prevent over or under-cooking the pork.Pork loin usually has a “fat cap” which is a layer of fat on one side (it’s on the bottom in the photo above so you can’t see it).
Place the pork loin on a parchment-lined baking sheet or in a casserole dish with the fat cap side facing up. Pack the brown sugar rub all over the surface of the pork loin.
Roast the pork for 10 minutes at 400ºF, then reduce the heat to 350ºF and roast for an additional 20 minutes per pound of pork, or until the internal temperature reaches 145ºF. The temperature of the roast will continue to rise slightly after it is taken out of the oven, due to carryover cooking. (Don’t worry if the brown sugar burns on the baking sheet, the rub ON the pork will not be burned. The burned sugar can be cleaned off with a quick soak in hot soapy water.)
Let the pork loin rest for ten minutes before slicing into ½-inch slices and serving.
There’s nothing quite like the smell of a pot of soup simmering away on the stove top when it’s cold and blustery outside. This tomato lentil soup is full of vegetables and herbs for a simple, flavorful, and warming winter soup.
There’s nothing quite as comforting as a pot of soup simmering away on the stove top when it’s cold and wintry outside. The smell alone warms me from the inside out. This week I was craving a simple vegetable forward soup, so I whipped up this really easy Tomato Lentil Soup. I’ve been enjoying the leftovers for days, sometimes with a grilled cheese on the side. :)
Garnished with a little fresh parsley for visual appeal.
What Does Tomato Lentil Soup Taste Like?
This soup kind of tastes like a traditional vegetable soup, but with a slightly more tomato-y broth, plus a little earthiness from the lentils. It’s super hearty and comforting, which is exactly what I love about a good bowl of soup in the winter!
What Kind of Lentils Should I Use?
Lentils can be confusing, especially since there isn’t a lot of consistency in labeling in the United States. I used a basic brown lentil, which has a drab brown-olive color and cooks with about 20 minutes of simmering. Sometimes these lentils are labeled “green lentils” sometimes just “lentils” so to be sure you have the right kind, check the cooking instructions on the package. It should say to simmer for about 20 minutes, not 45 minutes.
I do not suggest using a red, orange, or yellow lentil for this soup because they break down too easily and you’ll end up with something more along the lines of a lentil porridge than a lentil soup. :) (It would probably still taste good, though!)
How are the Leftovers?
One of the reasons I love soup is because they almost always make great leftovers, and this soup is no exception. The leftovers will stay good in the fridge for about 4-5 days, or you can freeze it for longer storage. I always suggest dividing the soup into single portions just after cooking so it cools down more quickly in the refrigerator, which will give you more longevity with the leftovers. Once cooled you can transfer some to the freezer for later!
Tomato Lentil Soup
This tomato lentil soup is full of vegetables and herbs for a simple, flavorful, and warming winter soup. Makes great leftovers!
Dice the onion, mince the garlic, and slice the carrots (I like smaller pieces for this recipe, so I do a quarter round slice). Add the onion, garlic, carrots, and olive oil to a large soup pot and sauté over medium heat until the oniosn are soft. While the vegetables are cooking, peel and dice the potato into ½-inch cubes.
Add the tomato paste and continue to sauté for 2-3 minutes, or until the tomato paste begins to coat the bottom of the pot.
Add the cubed potato, stewed tomatoes (with juices), paprika, basil, oregano, pepper, and vegetable broth to the pot. Stir to combine.
Place a lid on top and allow the soup to come up to a boil. Once boiling, turn the heat down to low and let the soup simmer for about 40 minutes or until the lentils are super tender and have begun to break down slightly (this helps thicken the soup).
Add the soy sauce to the soup, then give it a taste and adjust the salt if needed (the total amount will depend on the salt content of your vegetable broth). Serve hot with crusty bread for dipping.
How to Make Tomato Lentil Soup – Step by Step Photos
Dice one onion, mince two cloves of garlic, and slice three carrots. I like to do smaller pieces of carrot for this soup, so I cut the slices into quarter rounds. Add the onion, carrot, and garlic to a large soup pot with 2 Tbsp olive oil. Sauté over medium until the onions are soft.While the carrot and onion are sautéing, peel and dice one russet potato into ½-inch cubes.
Add 2 Tbsp tomato paste and continue to sauté for a few more minutes, or until the tomato paste begins to coat the bottom of the pot.
Add the cubed potato, two 15oz. cans of stewed tomatoes (with juices), 1 cup lentils (not cooked), ½ tsp paprika, ½ tsp dried basil, ½ tsp dried oregano, ¼ tsp pepper, and 4 cups vegetable broth.
Stir everything to combine. Place a lid on top and bring the soup up to a boil. Once boiling, reduce the heat to low and simmer for about 40 minutes, or until the lentils are very soft and have begun to break down a bit.
After simmering the soup, stir in 2 Tbsp soy sauce. Taste the soup and adjust the salt if needed (this will depend on the salt content of your broth. I did not add any in addition to the soy sauce).
Serve hot with some crusty bread for dipping! (I garnished with a little parsley for color, but it’s not needed to flavor this soup.)
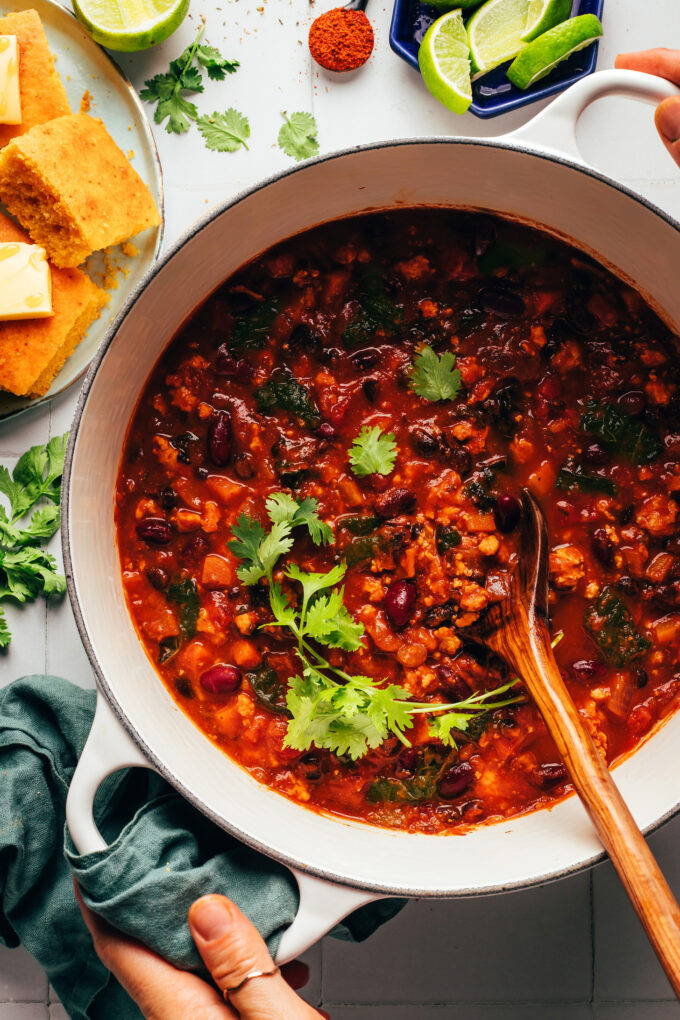
When you’re craving chili and need it on the table fast, this is the recipe for you! Say hello to our Instant Pot Chili (!) made with simple, wholesome ingredients and BIG flavor.
Smoky spices marry perfectly with kidney and black beans and sweet…
When you’re craving chili and need it on the table fast, this is the recipe for you! Say hello to our Instant Pot Chili (!) made with simple, wholesome ingredients and BIG flavor.
Smoky spices marry perfectly with kidney and black beans and sweet potatoes. It’s hearty, warming, and incredibly comforting. Let us show you how it’s done!
Origins of Chili
While many think chili was created in Mexico, apparently that’s not where it originated! Who knew?
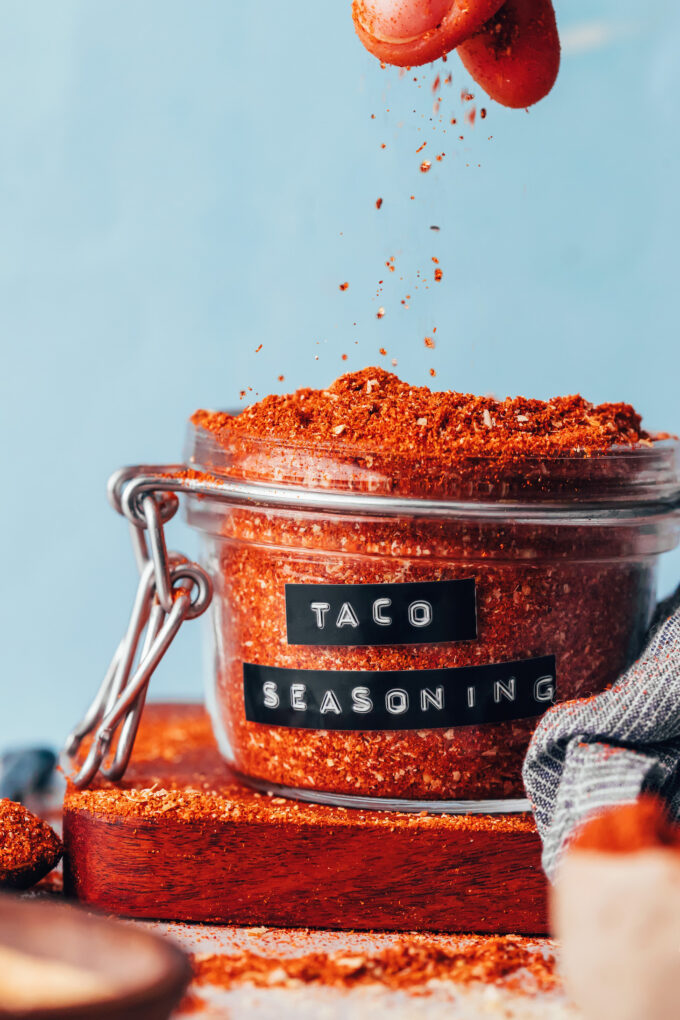
With winter in full swing, it’s chili season around here — time for our favorite cold-weather dish. But after recently running out of chili powder, we decided to make our own, and I’m so glad we did.
This homemade chili powder takes just 15 minutes to…
With winter in full swing, it’s chili season around here — time for our favorite cold-weather dish. But after recently running out of chili powder, we decided to make our own, and I’m so glad we did.
This homemade chili powder takes just 15 minutes to make when using whole dried chiles, and just 5 minutes to make if using pre-ground chiles. And we must say, it’s so fresh and much better than store-bought, so there’s no going back!
It amuses me when people talk about snooty people sitting around, leisurely eating pâté, because pâté is rustic, country fare, not considered fancy in France. While pâté can have a pastry-type crust (pâté en croûte) and some are a little fancier than others, the cousins of pâté, terrines, are truly down-to-earth. They can be baked in a special mold (you can come across them at…
It amuses me when people talk about snooty people sitting around, leisurely eating pâté, because pâté is rustic, country fare, not considered fancy in France. While pâté can have a pastry-type crust (pâté en croûte) and some are a little fancier than others, the cousins of pâté, terrines, are truly down-to-earth. They can be baked in a special mold (you can come across them at French flea markets for around 5 bucks, like the one I used here), they can also be baked in any ovenproof bowl, which I did with this terrine. So there’s no excuse not to sit around and eat pâté, or terrine, all day. And not only is this one incredibly easy, it’s also one of the best terrines I’ve ever had.
This easy, delicious, and creamy Pumpkin Soup is filled with fresh flavors and warm spices. It is the perfect soup for a quick and easy fall meal or a great addition to any holiday menu. I am all about pumpkin during the fall months. I have A LOT of sw…
This easy, delicious, and creamy Pumpkin Soup is filled with fresh flavors and warm spices. It is the perfect soup for a quick and easy fall meal or a great addition to any holiday menu. I am all about pumpkin during the fall months. I have A LOT of sweet pumpkin recipes: pumpkin chocolate chip…