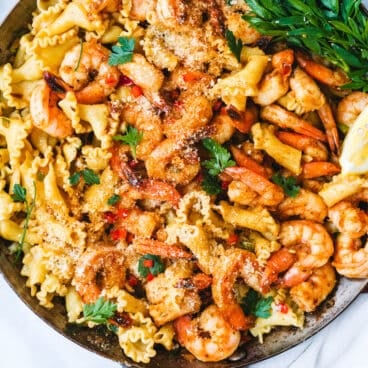
Craving lemon garlic shrimp pasta at home? This recipe is your answer! Made with just a few simple ingredients, it’s ready in under 30 minutes for a dinner that’s bursting with fresh, juicy flavor.

If there’s a combination of flavors we never tire of, it’s lemon, garlic, butter, and shrimp. The way that savory garlic meets bright lemon and juicy seafood is truly one of our favorites ever. So why not make them into a quick and tasty dinner? Introducing, our favorite new garlic shrimp pasta.
Why we love this recipe: Yes, we’ve made shrimp pasta every which way, from shrimp primavera to shrimp linguine. But this one is special! Here’s what we love about it:
- The citrusy, juicy flavor impresses everyone. Just one bite will make your heart sing! We love it so much, we’ve featured a similar recipe in our new cookbook.
- It’s fast and easy. This one comes together in under 30 minutes, making it great for weeknight dinners or easy entertaining with a dinner party. Come, let’s make it!
Key ingredients in garlic shrimp pasta
You’ll need just a handful of ingredients to make this lemon garlic shrimp pasta recipe! Always, quality is key to achieve the best tasting result in this dish:
- Pasta: We like using spaghetti here, but you can also use other long noodles like linguine or bucatini. Use whole wheat pasta for Mediterranean diet, or gluten-free or legume pasta for gluten-free.
- Shrimp: Use deveined medium shrimp for this recipe (they may be labeled 41 to 50 count), either shelled or tail on. Use either fresh or frozen; we tend to find fresh shrimp is slightly better. Prioritize wild caught shrimp if possible.
- Old Bay: Old Bay is the flavor maker here. It’s a seasoning blend invented in Maryland that’s often used to season seafood, like in a shrimp boil.
- Butter and garlic: Make sure to use fresh garlic, not jarred or packaged. Salted butter brings the best flavor to sauteing shrimp, but you can substitute olive oil if desired.
- Grated Parmesan cheese: Look for grated cheese, which has a powdery texture that melds into the dish. Substitute another hard cheese like Pecorino Romano if desired.
- Lemon juice and zest: A fresh lemon is key to the zippy flavor; avoid bottled juice.

How to make garlic butter shrimp: step by step
This garlic shrimp pasta comes together quickly, especially if you’re used to making sauteed shrimp! Here’s what to do:
Step 1: Bring a large pot of generously salted water to a boil. Add the pasta and boil until al dente). Reserve about ½ cup pasta water, then drain the pasta and return it to the pot. Toss with a little olive oil if the sauce is not yet ready.

Step 2: Toss the shrimp with salt and Old Bay, in a bowl.

Step 3: In a very large skillet, heat butter over medium heat. Add the shrimp and cook for 1 to 1 ½ minutes, then flip and stir in minced garlic. Cook 1 to 1 ½ minutes until the shrimp is opaque and just cooked through.
Step 4: Toss with the drained pasta, grated Parmesan cheese, lemon juice and zest, parsley, more salt, and a few tablespoons pasta water until saucy. Enjoy warm.
Leftovers and make ahead tips
This garlic shrimp pasta recipe is best served the day it is made. You can store leftovers up to 3 days refrigerated. However, around here we’re not huge fans of next day shrimp (just our personal preference). It’s best within a day or so. Reheat gently on the stovetop before serving, and add a drizzle of olive oil and a pinch of salt.
Ways to serve garlic shrimp pasta
This garlic shrimp pasta is a quick and easy meal, accessorized with a green salad or a simple vegetable side dish. To avoid crowding the stove, you may want to try a quick roasted side vegetable like roasted asparagus or roasted green beans. Here are some of our top easy side dishes:
- Make a green salad like arugula salad, chopped salad, kale salad, apple salad, or strawberry salad
- Try a quick vegetable like baked asparagus or roasted green beans
- Mix up a veggie sauté like ultimate sauteed vegetables, peas with lemon, or sauteed kale


More top shrimp recipes
We love working with this juicy seafood! Here are a few more of our top shrimp recipes to make:


Dietary notes
This garlic shrimp pasta recipe is pescatarian. For gluten-free, use gluten-free or legume pasta. For dairy-free, use olive oil, omit the Parmesan cheese, and add more salt to taste. For Mediterranean diet, use olive oil and whole wheat pasta.
Frequently asked questions
For this recipe, we recommend deveined shrimp that’s medium in size, either tail on or shelled. Tail on looks the best aesthetically, but you’ll have to remove it with your fingers when eating.
Garlic shrimp pasta is delicious on its own, but you can also pair it with a simple side salad, roasted vegetables, or even crusty bread for dipping in the garlicky sauce.
This dish is best made right before serving, especially since the dish relies on hot pasta water for making the sauce. Since it’s ready in just 30 minutes, it’s a great easy weeknight dinner.

Garlic Shrimp Pasta
-
 Prep Time: 15 minutes
 -
Cook Time: 15 minutes
-
Total Time: 30 minutes
-
 Yield: 4
Description
Craving lemon garlic shrimp pasta at home? This recipe is your answer! Made with just a few simple ingredients, it’s ready in under 30 minutes for a dinner that’s bursting with fresh, juicy flavor.
Ingredients
- 8 ounces spaghetti noodles
- 1 pound medium shrimp, deveined (tail on or peeled)
- 1 teaspoon kosher salt, plus more for pasta water and to taste
- 1 teaspoon Old Bay, plus more for garnish
- 4 tablespoons salted butter (or olive oil)
- 4 garlic cloves, finely minced
- ¼ cup grated Parmesan cheese
- 2 tablespoons lemon juice, plus the zest of 1 lemon
- 1 tablespoon finely minced parsley
Instructions
- Bring a large pot of generously salted water to a boil. Add the pasta and boil until al dente (check a few minutes before the package instructions indicate). Reserve about ½ cup pasta water, then drain the pasta and return it to the pot. Toss with a little olive oil if the sauce is not yet ready.
- Thaw the shrimp, if frozen. Pat the shrimp dry. Place it in a bowl and sprinkle it with ½ teaspoon kosher salt and Old Bay (if using). Stir to combine.
- In a very large skillet, heat the butter over medium heat. Add the shrimp in a single layer (without stacking it) and cook for about 1 to 1 ½ minutes, until cooked on one side.
- Flip the shrimp with tongs. Add the minced garlic and stir briefly. Cook for another 1 to 1 ½ minutes until the shrimp is opaque and just cooked through.
- In the skillet, toss the drained pasta, grated Parmesan cheese, lemon juice and zest, parsley, ½ teaspoon kosher salt, and just enough pasta water until saucy (start with 2 to 3 tablespoons). Taste again and add a few more pinches of salt if desired. Enjoy warm. Leftovers store up to 3 days refrigerated. Re-warm in a skillet and add a few pinches of salt if desired.
Notes
Medium shrimp (41 to 50-count) is best for this recipe; use wild caught shrimp if possible.
Other long pasta shapes work, like linguine or bucatini. You could even swap in short pastas like rigatoni, penne, or bow ties.
Use olive oil for cooking instead of butter if desired. For dairy-free, omit the Parmesan cheese and add more salt to taste.
Pecorino Romano is another aged cheese that works well; its flavor is slightly saltier and stronger than Parmesan.
 Category: Main dish
 Method: Stovetop
 Cuisine: Seafood
Keywords: Garlic shrimp pasta, garlic shrimp pasta recipe


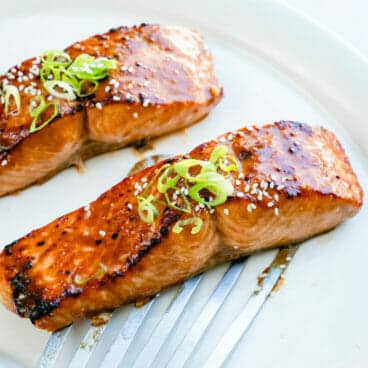
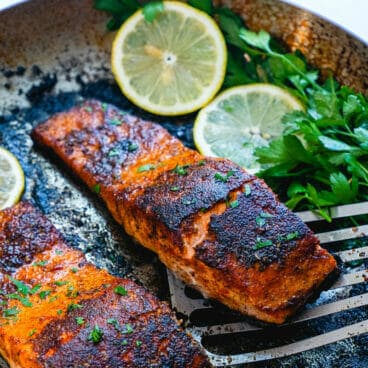
 Want to mix up this baked salmon? Our favorite variation is


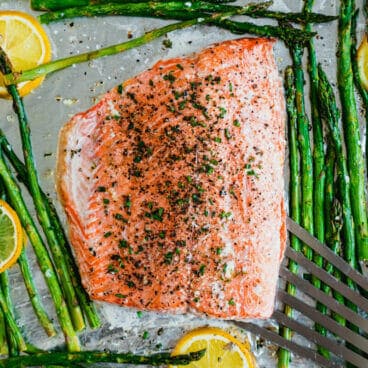
 Pro tip: When working with asparagus: always trim off the tough, woody bottoms of the stalks. Here’s