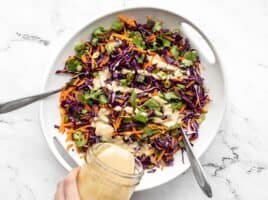
Broccoli Salad

This broccoli salad is the perfect creamy, crunchy, rich, and flavorful side to go with any meal. It’s my new go-to for parties!

The post Broccoli Salad appeared first on Budget Bytes.

It’s nearly grilling season, and I need a reliable side dish to bring to parties, family reunions, and barbecues. This broccoli salad is the perfect creamy, crunchy, rich, and flavorful side to go with any meal. It has a great balance of sweet and tangy flavors, and the texture is unbeatable. It’s a fact that if you add bacon to any vegetable dish, even the most discerning meat eaters will give it a try. Baby steps, right?! I love making sure my loved ones eat their vegetables!
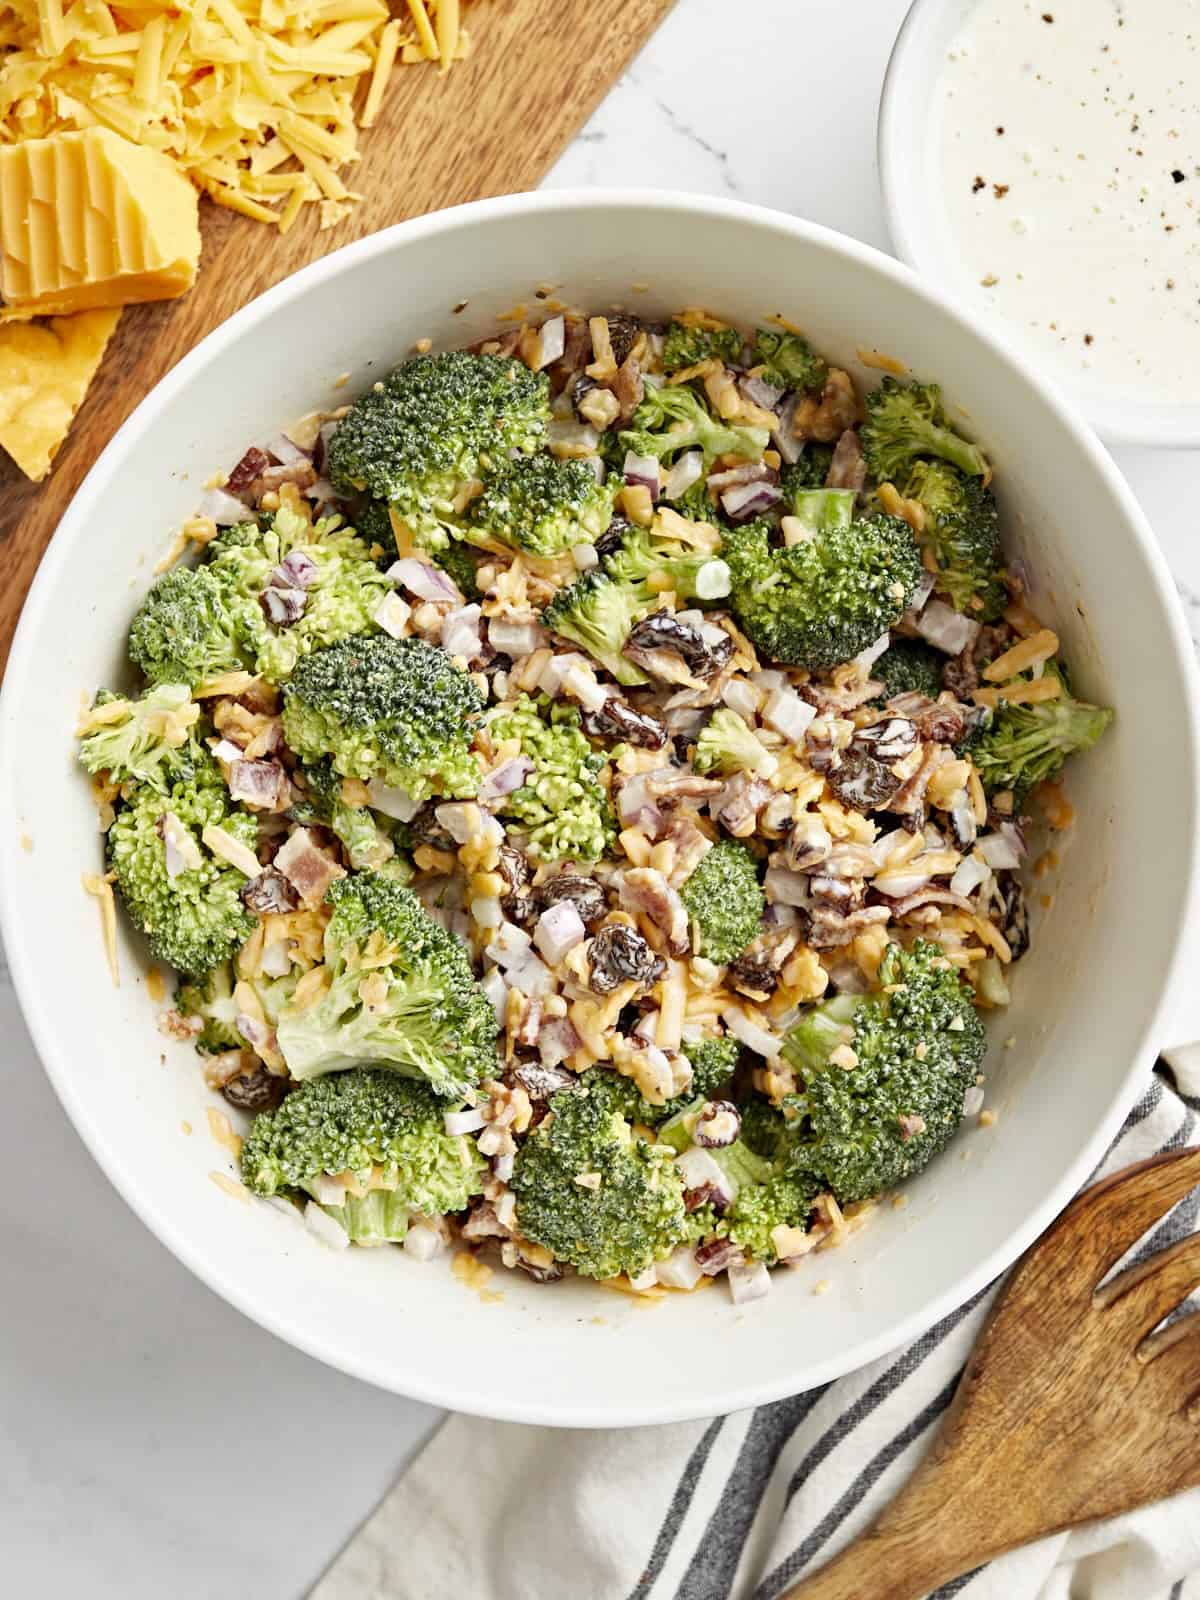
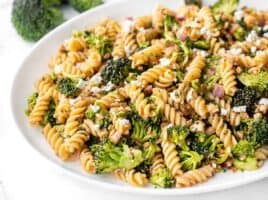
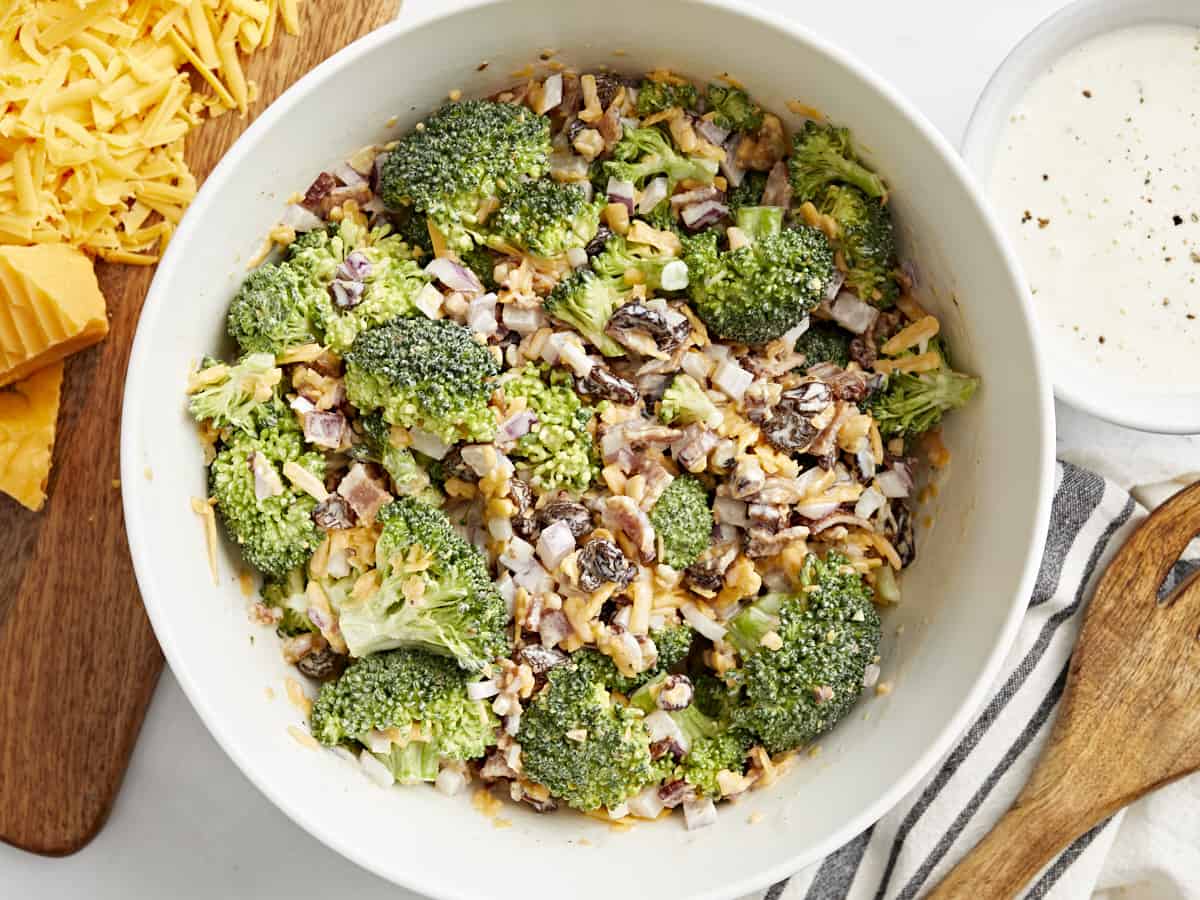
overhead view of broccoli salad in a white bowl.

What Is Broccoli Salad?

Broccoli salad is a classic side dish made from broccoli florets tossed with cheddar cheese, raisins, bacon, walnuts, and red onion, coated in a creamy and tangy dressing. This salad has a wonderful balance of flavors and textures and is so versatile!

Ingredients

Here’s what you’ll need to make broccoli salad:

  • Broccoli: Has an earthy and slightly sweet, slightly bitter flavor, as well as a delightful crunch!
  • Cheddar Cheese: Adds a creamy and salty component to the salad.
  • Raisins: Add a pop of sweet and fruity flavor.
  • Bacon: Adds a great savory and umami flavor. You’ll need 6 strips of cooked bacon. Vegetarian? No problem, just leave it out. Sometimes I put the bacon on the side for gatherings where there might be varied dietary restrictions.
  • Walnuts: Add a nutty flavor and delicious crunch.
  • Red Onion: Adds a bit of bite to the recipe and a wonderful crunchy texture, creating a great contrast to the sweet and chewy raisins.
  • Mayo: Adds richness and creaminess to the dressing.
  • Greek Yogurt: Makes the dressing extra creamy and tangy with fewer calories and fat than sour cream. I highly recommend Greek yogurt over plain yogurt or sour cream for its thicker, creamy texture.
  • White Vinegar: Adds a refreshing brightness and tanginess to the dressing to balance the richness.
  • Sugar: Adds sweetness to balance out the vinegar.
  • Salt and Pepper: Enhance the overall flavor of the salad.

Should I Blanch The Broccoli?

In testing, I preferred the final texture of raw broccoli over blanched, but you certainly can blanch the broccoli if you prefer. The blanching process takes out some of the natural bitter flavor from the broccoli; simply drop the florets in a large pot of salted boiling water for 1 minute, then quickly shock in a bowl of ice water. Instead, I opted to simply rinse my broccoli florets in hot water to make them extra bright green and make sure they were nice and clean.

Top Tip

To keep your broccoli salad from turning out watery, make sure to thoroughly dry the florets. The salt in the dressing will naturally draw out some of the moisture from the veggies, so making sure they are dry after washing them is an important step! I like to spread them out on a clean kitchen towel and gently pat them dry with another towel laid on top while I prep the rest of my ingredients.

What To Serve with Broccoli Salad

Broccoli salad is such a fresh and crunchy dish with a ton of flavor, so I suggest pairing it with simple proteins, like air fryer chicken breast or glazed pork chops.
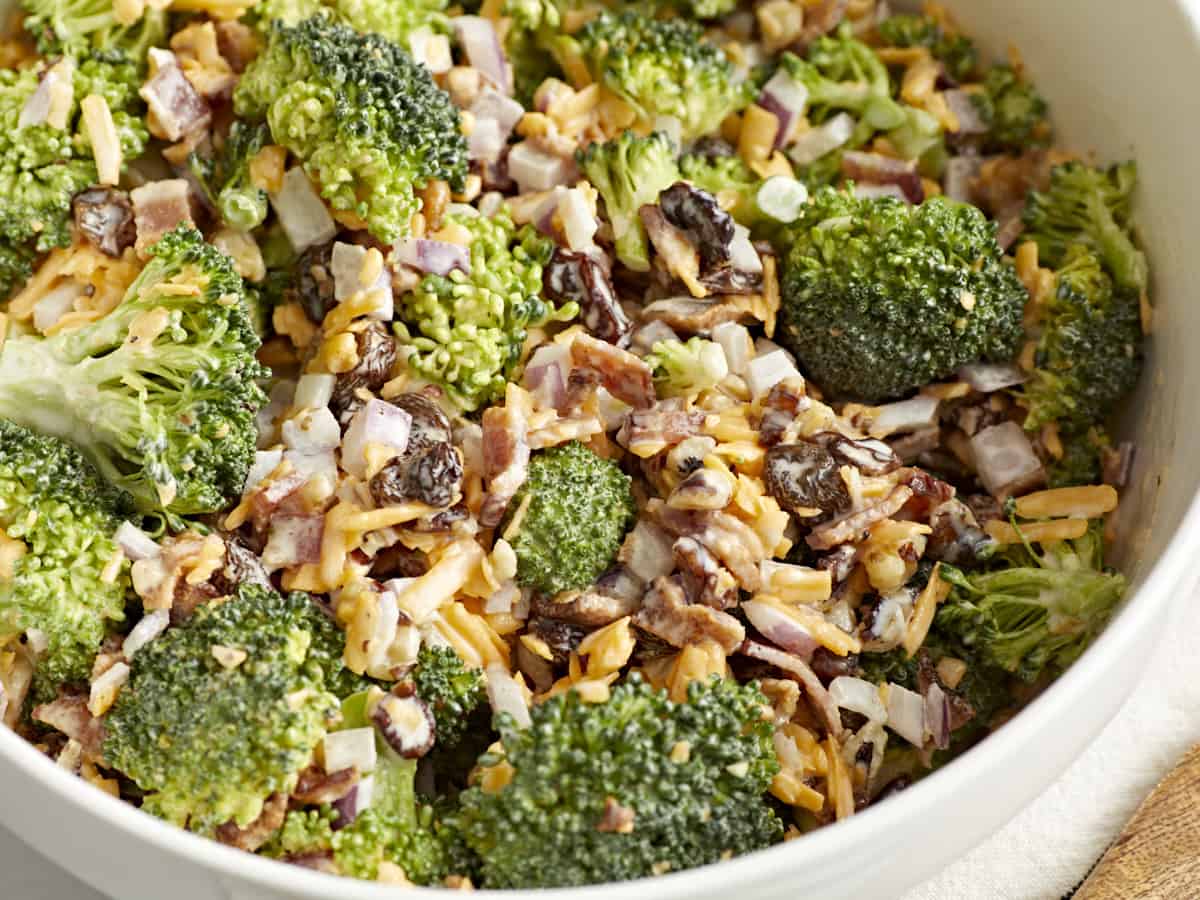
close up of broccoli salad on a white plate.
overhead view of broccoli salad in a white bowl.
Print

Broccoli Salad

This broccoli salad is the perfect creamy, crunchy, rich, and flavorful side to go with any meal. It's my new go-to for potlucks!
Course Salad
Cuisine American
Total Cost ($5.79 recipe / $0.96 serving)
Prep Time 15 minutes
Cook Time 5 minutes
Total Time 20 minutes
Servings 6 (about 1 cup each)
Calories 305kcal

Ingredients

Broccoli Salad

  • 1 large broccoli crown, separated into florets (about 4 cups) $1.10
  • 1 cup shredded cheddar cheese $1.24
  • 1/4 cup raisins $0.39
  • 6 strips bacon $0.90
  • 1/4 cup walnuts, crushed $0.80
  • 1/4 red onion, diced into small pieces $0.21

Broccoli Salad Dressing

  • 1/2 cup mayo $0.75
  • 2 Tbsp Greek yogurt $0.21
  • 1 Tbsp white vinegar $0.04
  • 1 Tbsp sugar $0.05
  • 1/4 teaspoon salt $0.05
  • 1/4 teaspoon pepper $0.05

Instructions

  • Cook the bacon until crispy. Let cool on clean paper towel-lined plate. Chop into bite sized bits and set aside.
  • In a small mixing bowl, combine mayo, Greek yogurt, white vinegar, sugar, salt, and pepper. Whisk together and set dressing aside.
  • Cut broccoli into florets, shred the cheddar cheese, gather raisins, crumble bacon, crush walnuts, and dice red onion.
  • Combine salad ingredients in a large mixing bowl and toss to combine.
  • Pour the dressing over broccoli salad and toss together until completely coated. Serve immediately, or let it marinate and get extra yummy in the fridge for up to 5 days!

See how we calculate recipe costs here.

Nutrition
Serving: 1serving | Calories: 305kcal | Carbohydrates: 9g | Protein: 9g | Fat: 26g | Sodium: 477mg | Fiber: 1g
overhead view of broccoli salad in a white bowl.

how to make Broccoli Salad – step by step photos
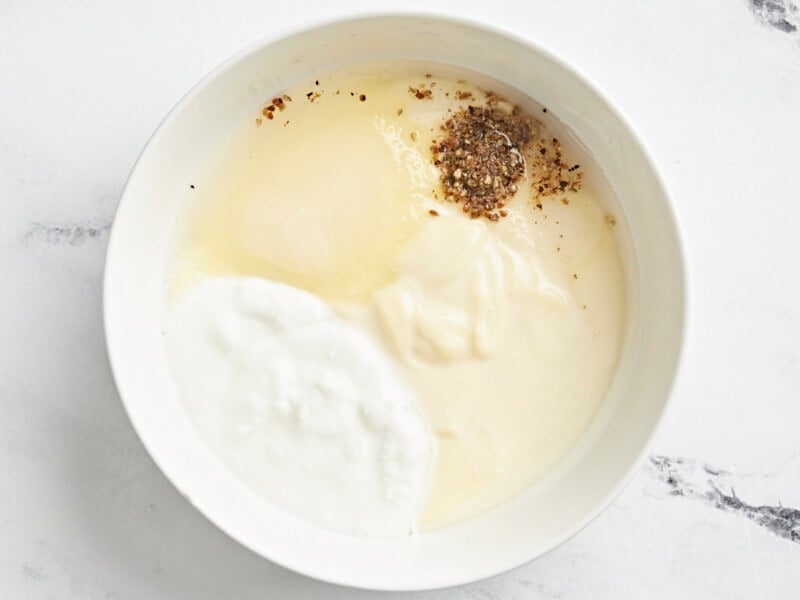
ingredients for salad dressing in a white bowl.

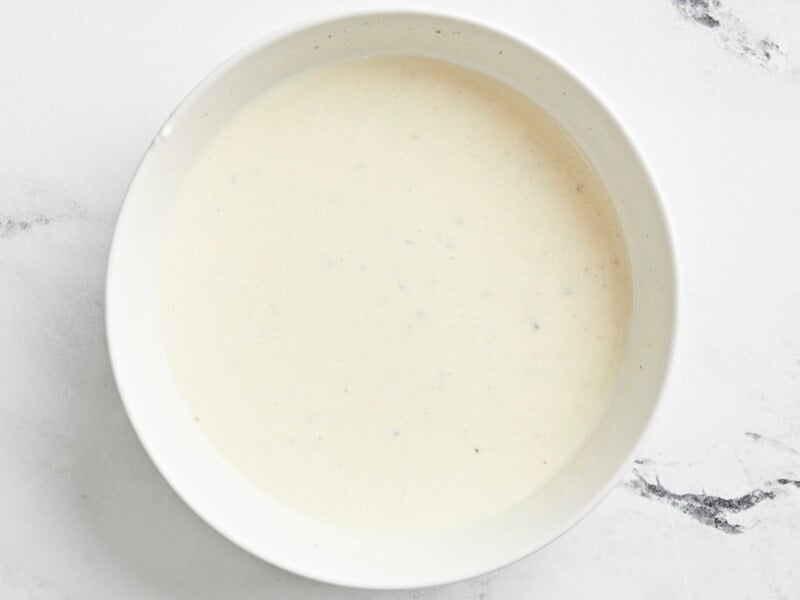
In a small mixing bowl, combine 1/2 cup mayo, 2 Tbsp Greek yogurt, 1 Tbsp white vinegar, 1 Tbsp sugar, 1/4 tsp salt, and 1/4 tsp pepper.
creamy dressing in a white bowl.

Whisk together and set dressing aside.

overhead view of ingredients for broccoli salad on a wooden cutting board.

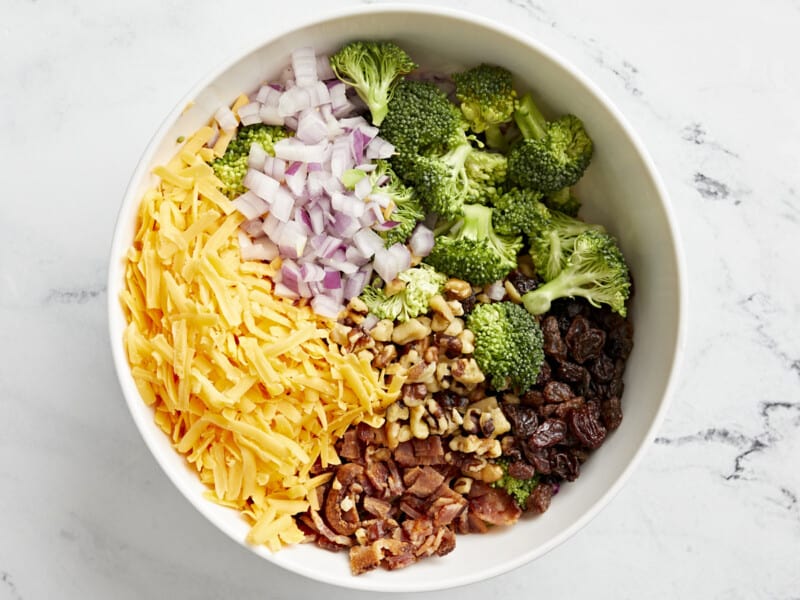
Cut 1 large crown of broccoli into florets, shred 1 cup of cheddar cheese, gather 1/4 cup of raisins, crumble 6 strips of crispy bacon, crush 1/4 cup walnuts, and dice 1/4 of a red onion.
ingredients for broccoli salad in a white bowl.

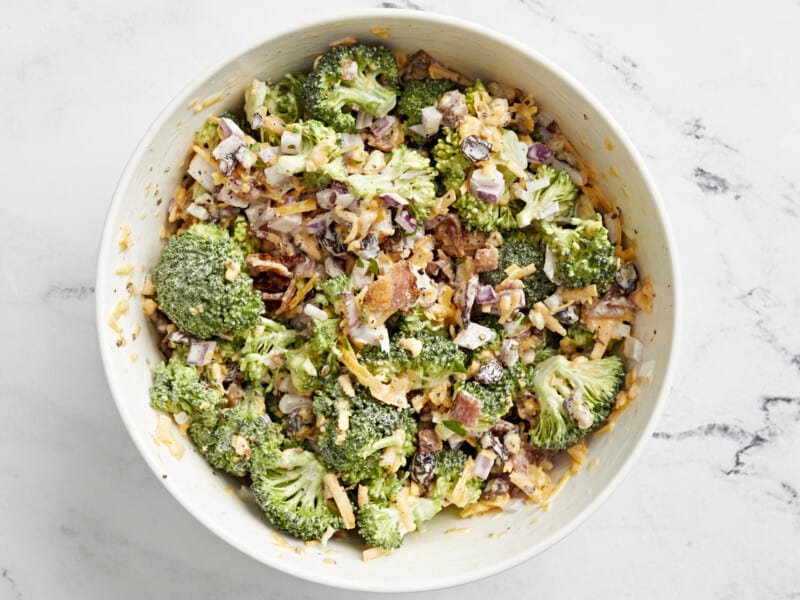
Combine salad ingredients in a large mixing bowl and toss to combine.
broccoli salad in a white bowl.

Pour the dressing over broccoli salad and toss together until completely coated. Serve immediately, or let it marinate and get extra yummy in the fridge for up to 5 days!

The post Broccoli Salad appeared first on Budget Bytes.
Taco Salad

This taco salad recipe is super customizable without compromising on its hearty and satisfying flavors. It’s the ultimate meal prep salad!

The post Taco Salad appeared first on Budget Bytes.
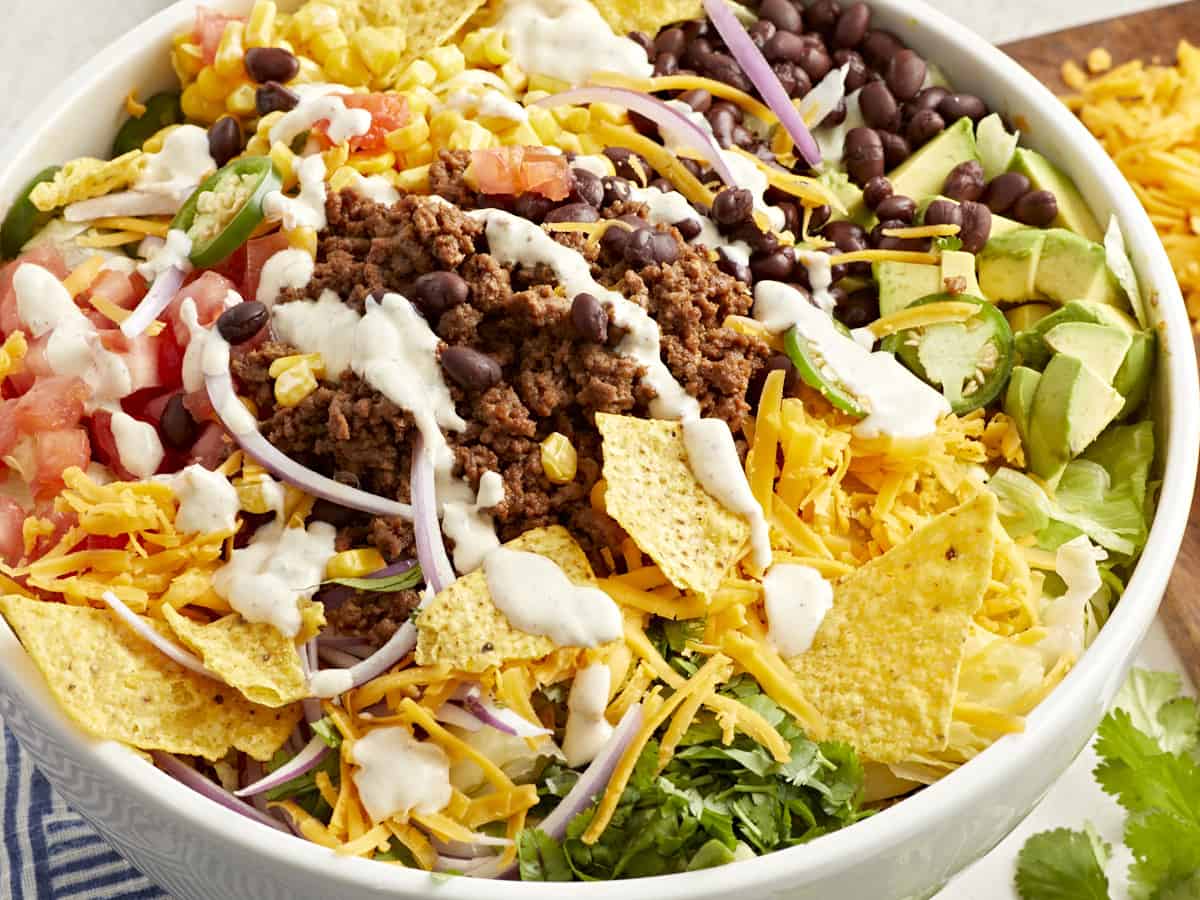
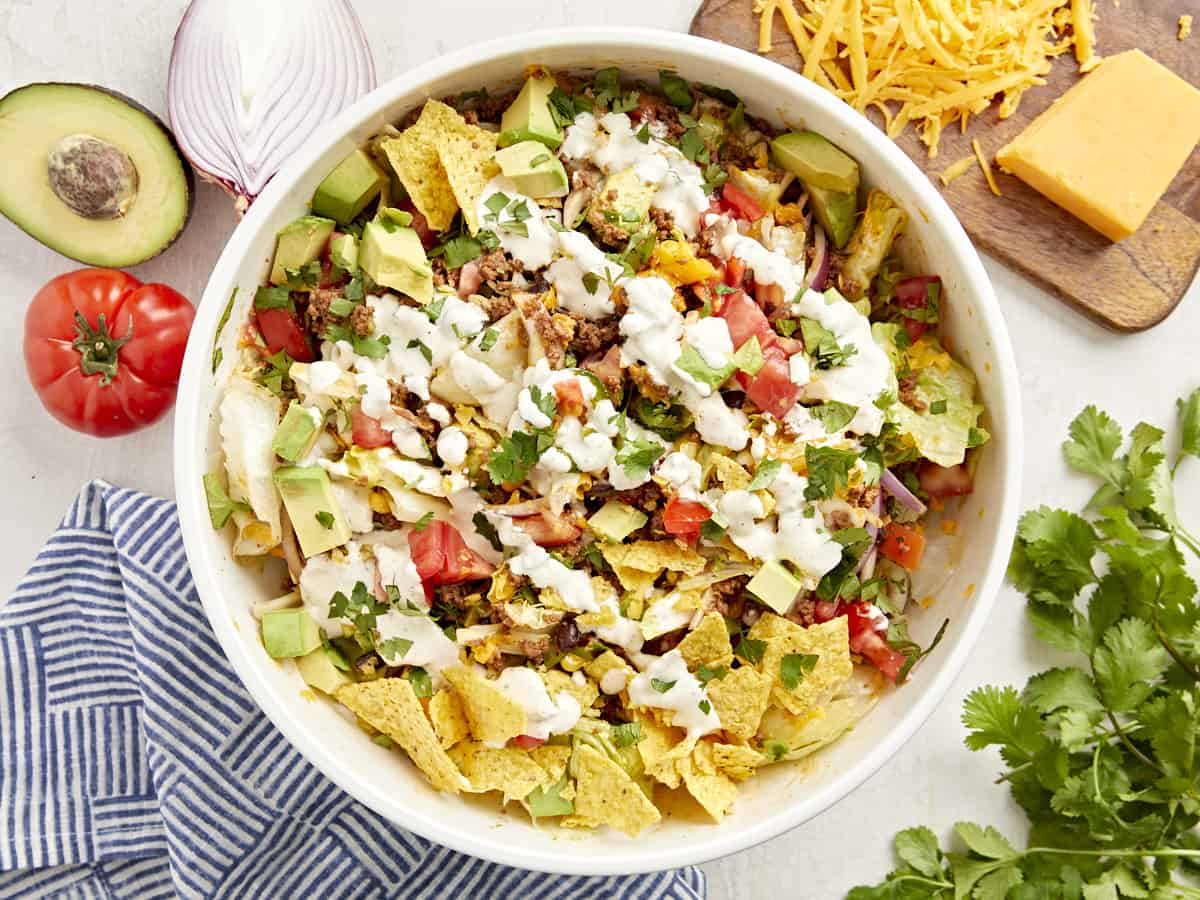
Listen, I love Taco Tuesday as much as the next gal, but Taco Salads are really where it’s at. I have always said that salad is the ultimate “fast food”, and I’m sticking to it. Think about it, they’re quick, easy, and almost always require very little cooking. When you want a little extra somethin’ special, this taco salad with lean ground beef is it. You can make taco salad at home for a fraction of the price and have enough salad to meal prep all week long.

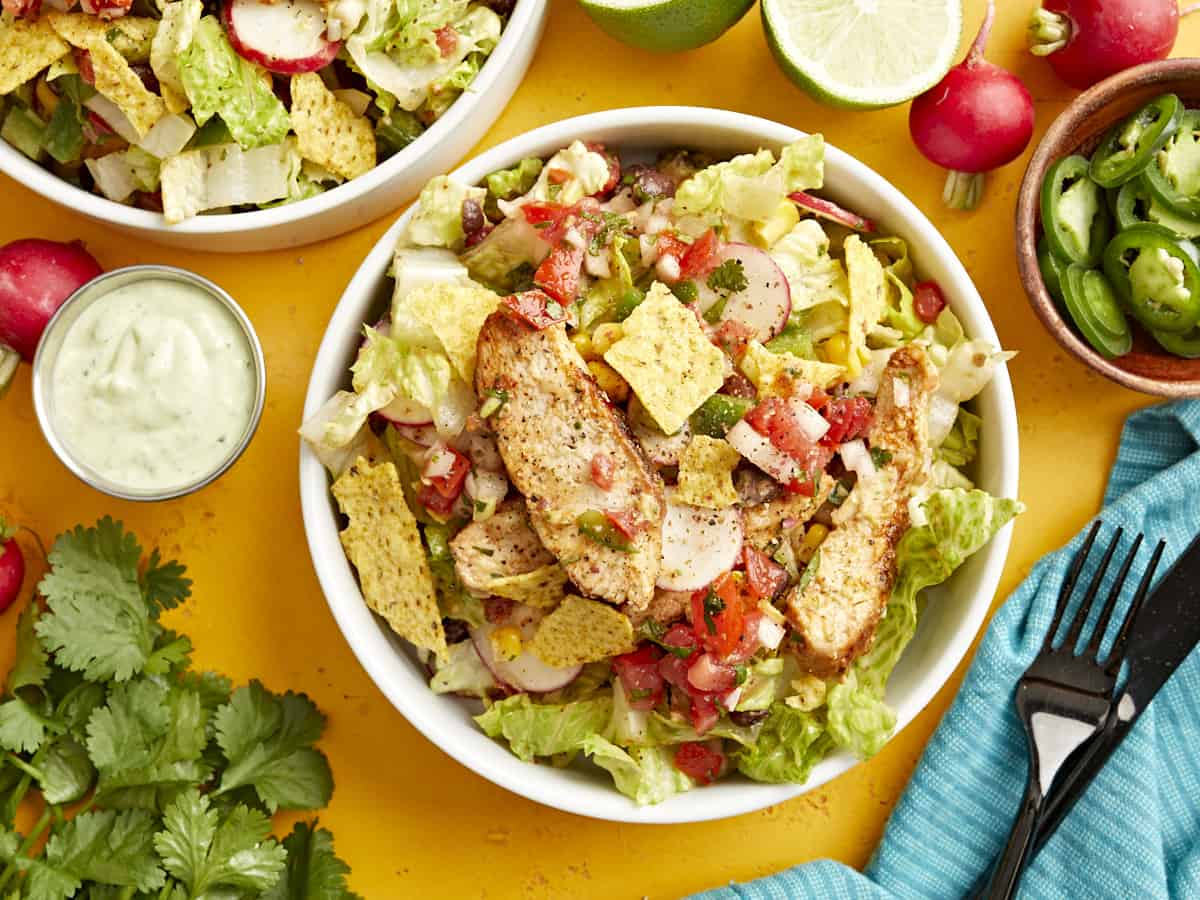
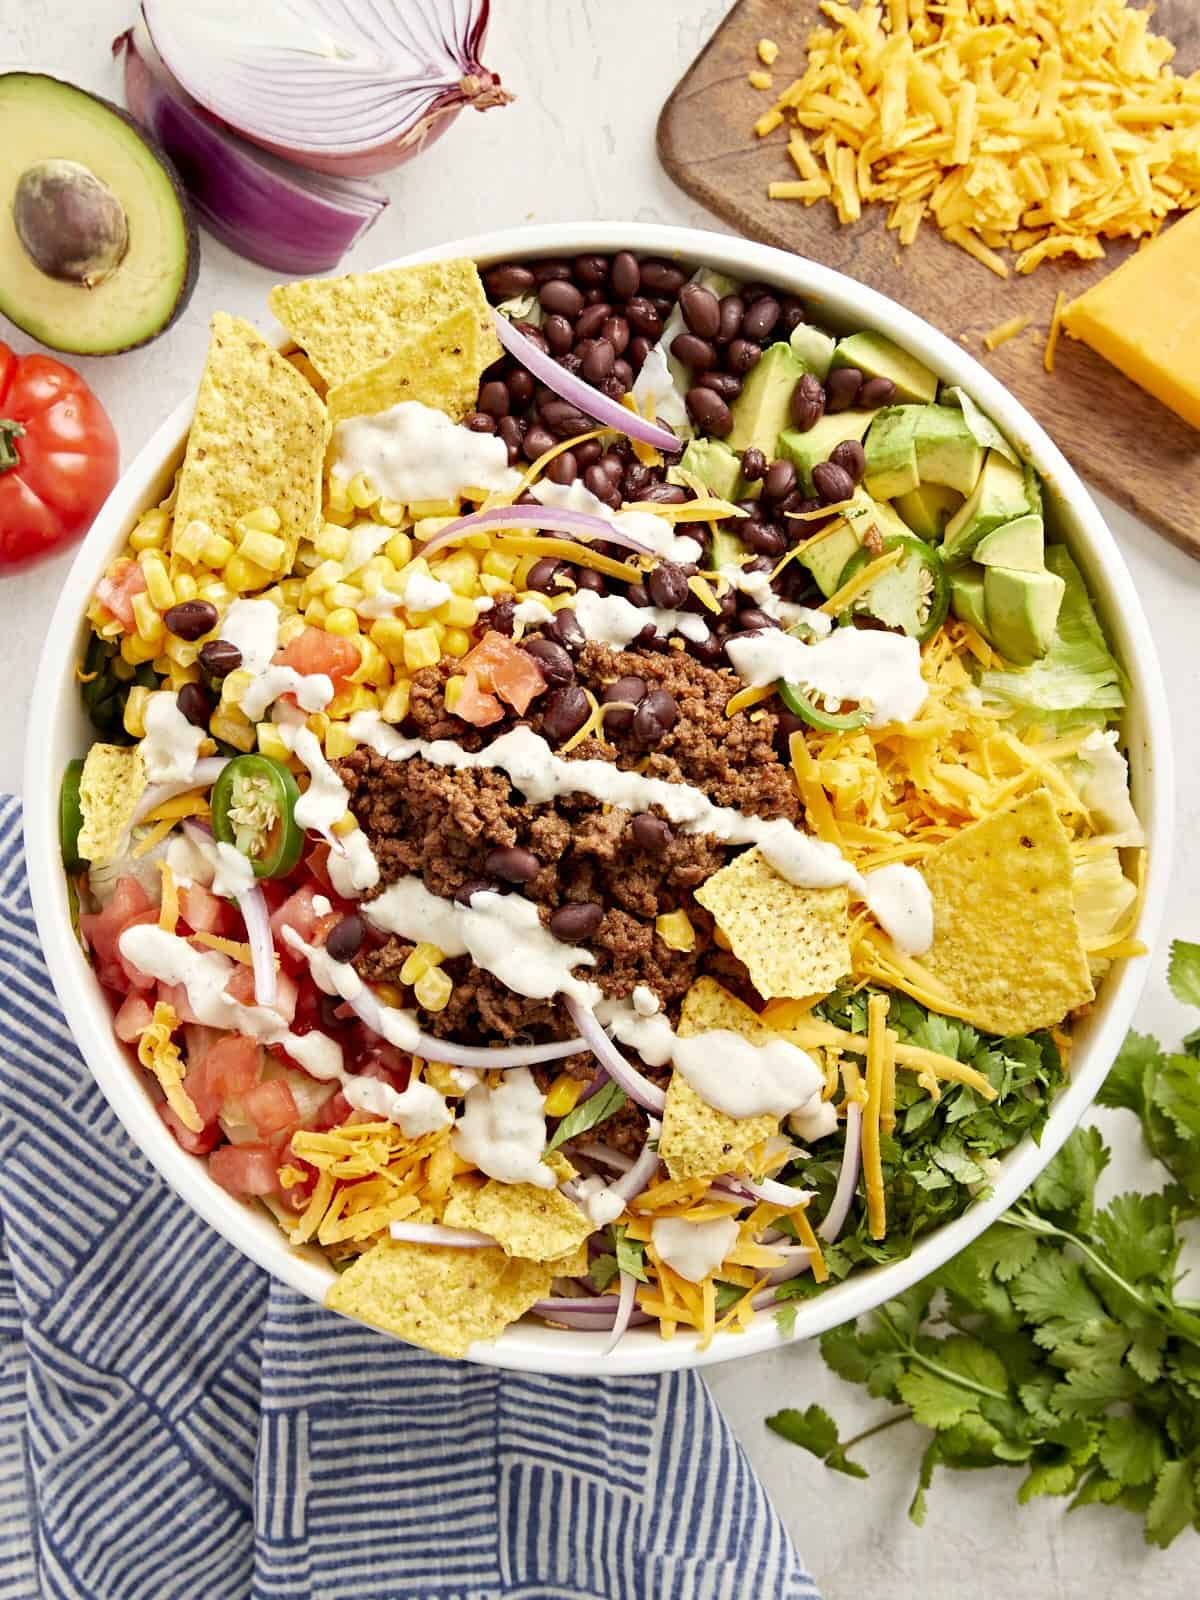
overhead view of taco salad with creamy white dressing and corn chips in a white bowl.

What Is Taco Salad?

Taco salad is everything you love about crispy beef tacos but in salad form! I’ve made sure it’s jam-packed with lettuce and extra veggies to keep you full all day long.

Ingredients

Here’s what you’ll need to make this taco salad:

  • Sour Cream: Forms the creamy and tangy base of the dressing.
  • Lime: The juice and zest of two limes adds acidity and bright citrus flavor to the dressing.
  • Garlic: Adds a balancing earthiness to the dressing.
  • Seasonings: Salt, chili powder, and sugar balance out the flavor of the dressing.
  • Olive Oil: Helps to emulsify the dressing.
  • Ground Beef: The classic choice for a taco salad. You could easily swap for ground chicken or turkey if you prefer. I used a lean ground beef, so I didn’t have to strain off any fat from cooking, saving me a little time. Vegetarian? No problem! This salad is crazy flavorful with or without the meat.
  • Taco Seasoning: Adds that classic Mexican flavor.
  • Vegetables: Red onion, tomato, corn, avocado, and jalapeño add freshness, crunch, and a touch of spice.
  • Black Beans: Add creaminess and extra protein.
  • Corn Chips: Add saltiness and crunch.
  • Cheddar Cheese: Adds creamy, cheesy flavor.
  • Iceberg Lettuce: The perfect neutral crunchy base lettuce to let the veggies shine.

What Else Can I Add?

I love that this is a great recipe to clean out those leftovers from the fridge. Here are some ideas:

Recipe Tip!

This salad is a crowd-pleaser! If I’m entertaining and have guests or family members who don’t eat certain ingredients, I keep everything separate so everyone can build their own perfect taco salad! I like mine without the ground beef and always use extra beans… yum! I love that everyone can enjoy this salad together with a wide range of toppings and feel full and content.

three-quarters view of taco salad in a white bowl.
overhead view of taco salad with creamy white dressing and corn chips in a white bowl.
Print

Taco Salad

This taco salad recipe is super customizable without compromising on its hearty and satisfying flavors. It's the ultimate meal prep salad!
Course Main Course
Cuisine Mexican
Total Cost ($17.89 recipe / $2.98 serving)
Prep Time 25 minutes
Cook Time 5 minutes
Total Time 30 minutes
Servings 6 salads (about 2 cups each)
Calories 804kcal

Ingredients

Dressing

  • 4 oz. sour cream $0.49
  • 2 limes, juiced and zested $1.00
  • 1 clove minced garlic $0.05
  • 1/4 tsp salt $0.01
  • 1/4 tsp chili powder $0.03
  • 1/2 tsp sugar $0.01
  • 4 Tbsp olive oil $0.80

Ground Beef Mixture

Additional Toppings

  • 1/2 red onion, julienned $0.37
  • 2 roma tomatoes $0.60
  • 1 cup corn kernels $1.66
  • 1 15-oz. can black beans, drained and rinsed $0.89
  • 1 avocado, diced $0.99
  • 1 cup tortilla chips, crushed $1.44
  • 1 cup shredded cheddar (about 1/2 of an 8-oz. block) $1.25
  • 1 jalapeno, sliced into thin rings $0.30
  • 1 head iceberg lettuce, chopped into bite-sized pieces $1.79

Instructions

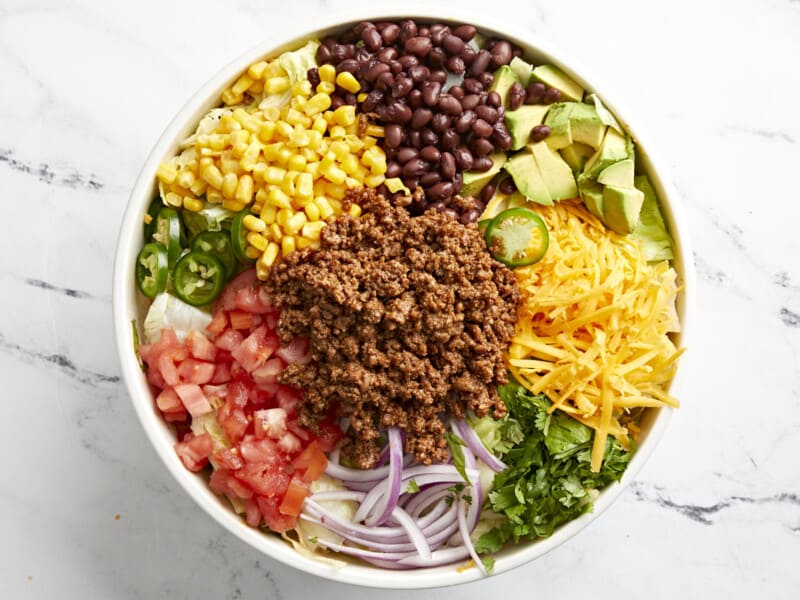
  • Gather and prep all topping ingredients: julienne red onion, chop tomato, defrost frozen corn, drain and rinse black beans, dice avocado, crush tortilla chips, shred cheddar cheese, and slice jalapeno. Set aside or mix together in a large serving bowl.
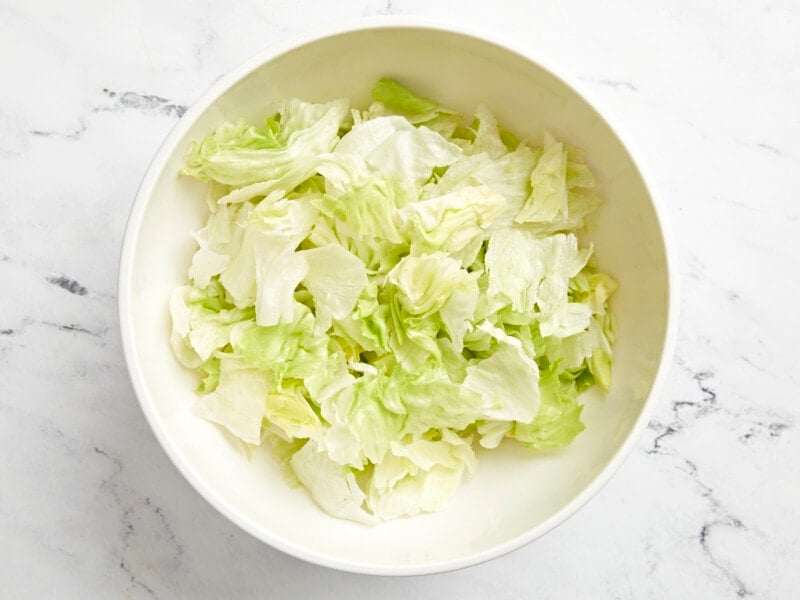
  • Chop iceberg lettuce into bite-sized pieces.
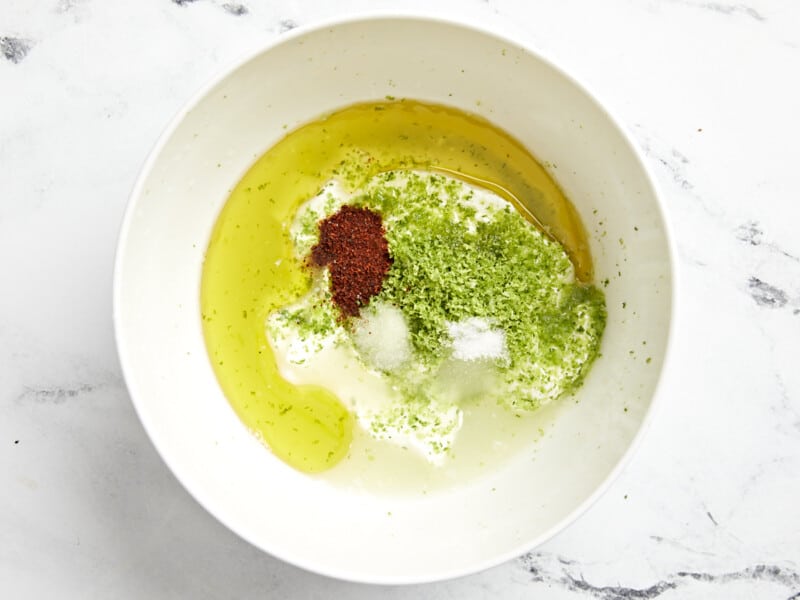
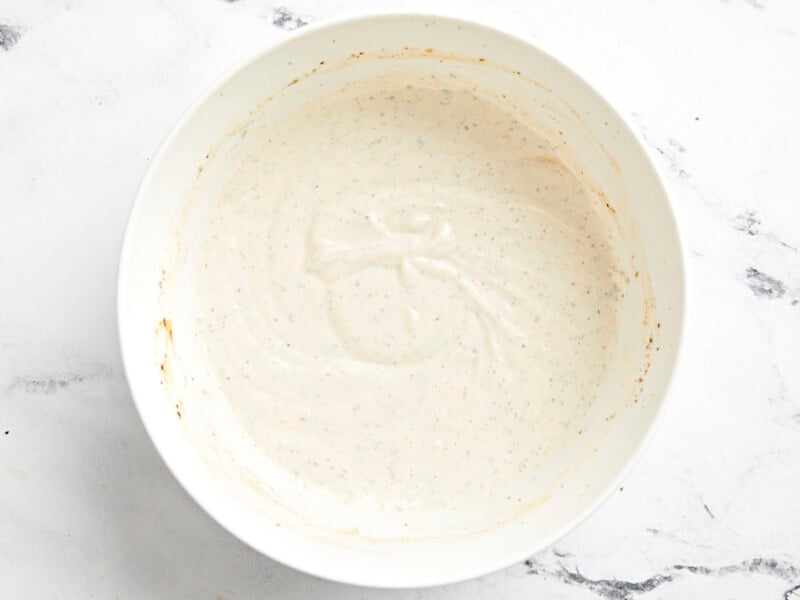
  • Combine sour cream, juice and zest from limes, minced garlic, salt, chili powder, sugar, and oil in a small mixing bowl. Whisk to combine.
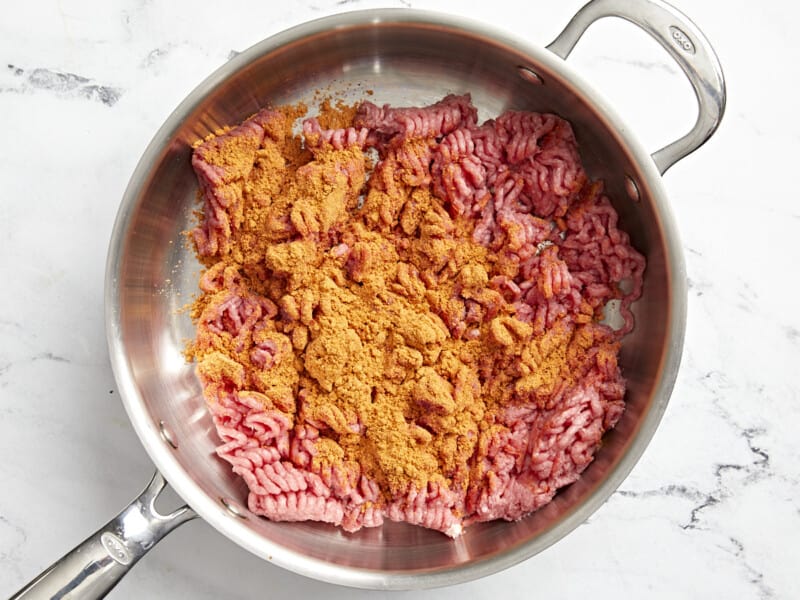
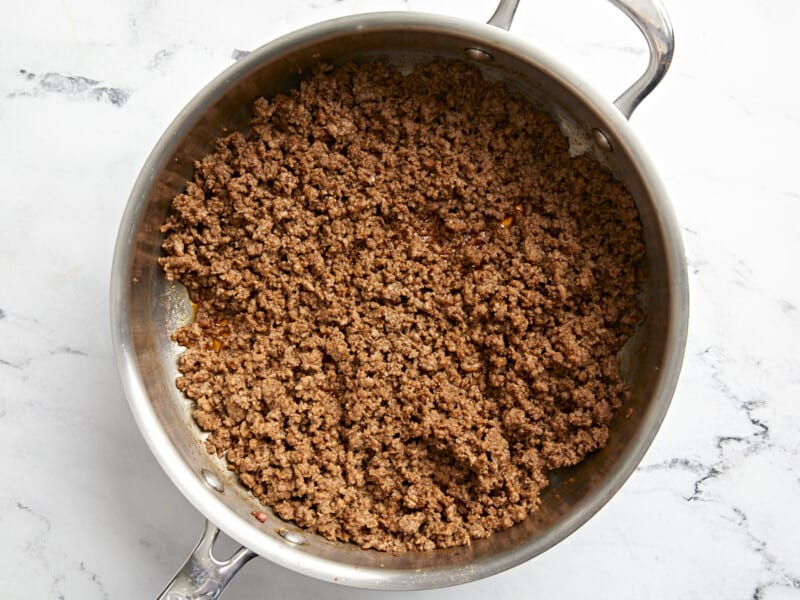
  • Add lean ground beef and taco seasoning packet to skillet. Break apart the ground beef with a spatula and mix in the taco seasoning. Cook until all of the ground beef has turned brown.*
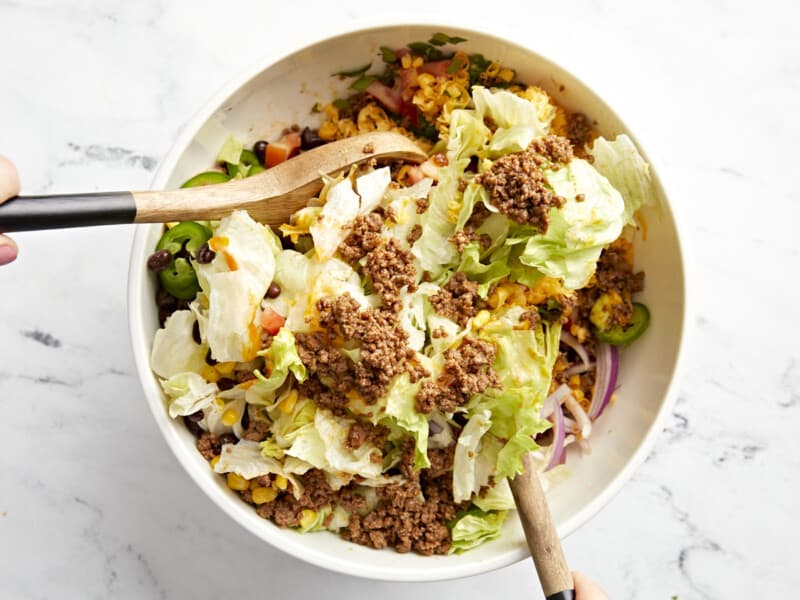
  • Top chopped lettuce with prepped veggies and cooked ground beef. Toss all ingredients together.
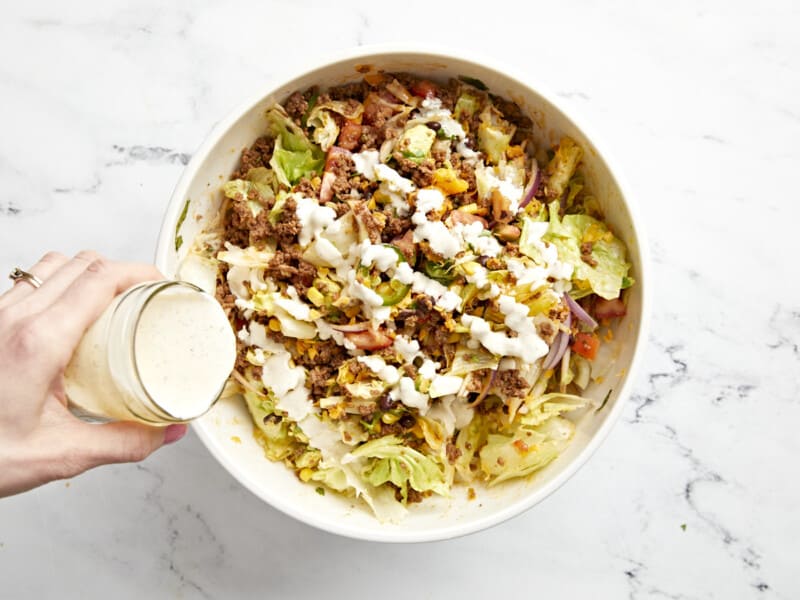
  • Drizzle a generous helping of dressing over the top with crumbled tortilla chips! Serve and enjoy.**

See how we calculate recipe costs here.

Notes

*I used a lean ground beef, so I added my seasoning and beef at the same time. I didn’t have any fat to strain off at the end, which saved me a little prep time.
**If you are meal prepping, keep the wet ingredients (like the beef and salad dressing) separate so your veggies and lettuce do not wilt and the tortilla chips do not get soggy. Just dress and toss when you’re ready for lunch.

Nutrition

Serving: 1salad | Calories: 804kcal | Carbohydrates: 56g | Protein: 28g | Fat: 55g | Sodium: 1228mg | Fiber: 13g
overhead view of a serving of taco salad on a white plate.

how to make Taco Salad – step by step photos

overhead view of chopped veggies on a cutting board.

Gather all topping ingredients. Julienne 1/2 red onion, chop 2 roma tomatoes, defrost 1 cup frozen corn, drain and rinse 1 can black beans, dice 1 avocado, crush 3 cups of tortilla chips, shred 1 cup cheddar cheese, slice 1 jalapeno. Set aside or mix together in a large serving bowl.

chopped lettuce in a white bowl.

Chop 1 head of iceberg lettuce into bite-sized pieces.

dressing ingredients in a white bowl.

Combine 4 oz sour cream, juice and zest from 2 limes, 1 clove of minced garlic, 1/4 tsp salt, 1/4 tsp chili powder, 1/2 tsp sugar, and 4 Tbsp oil in a small mixing bowl.

creamy white dressing in a white bowl.

Whisk to combine.

raw ground beef and spices in a frying pan.

Add 1 pound lean ground beef and 1 packet of taco seasoning to skillet. Break apart the ground beef with a spatula and mix in the taco seasoning.

cooked seasoned ground beef in a frying pan.

Cook until all of the ground beef has turned brown. I used a lean ground beef, so I added my seasoning and beef at the same time. I didn’t have any fat to strain off at the end, which saved me a little prep time.

overhead view of taco salad with ingredients separated in a white bowl.

Top chopped lettuce with prepped veggies and cooked ground beef.

tossing taco salad in a white bowl.

Toss all ingredients together.

drizzling dressing over taco salad in a white bowl.

Drizzle a generous helping of dressing over the top with crumbled tortilla chips! Serve and enjoy.

overhead view of taco salad with creamy white dressing in a white bowl.

This hearty taco salad is sure to satisfy!

More Southwest-Inspired Recipes

The post Taco Salad appeared first on Budget Bytes.
Santa Fe Salad

This Santa Fe salad is the ultimate Southwestern salad. It’s loaded with tender, juicy chicken, fresh veggies, and creamy black beans.

The post Santa Fe Salad appeared first on Budget Bytes.
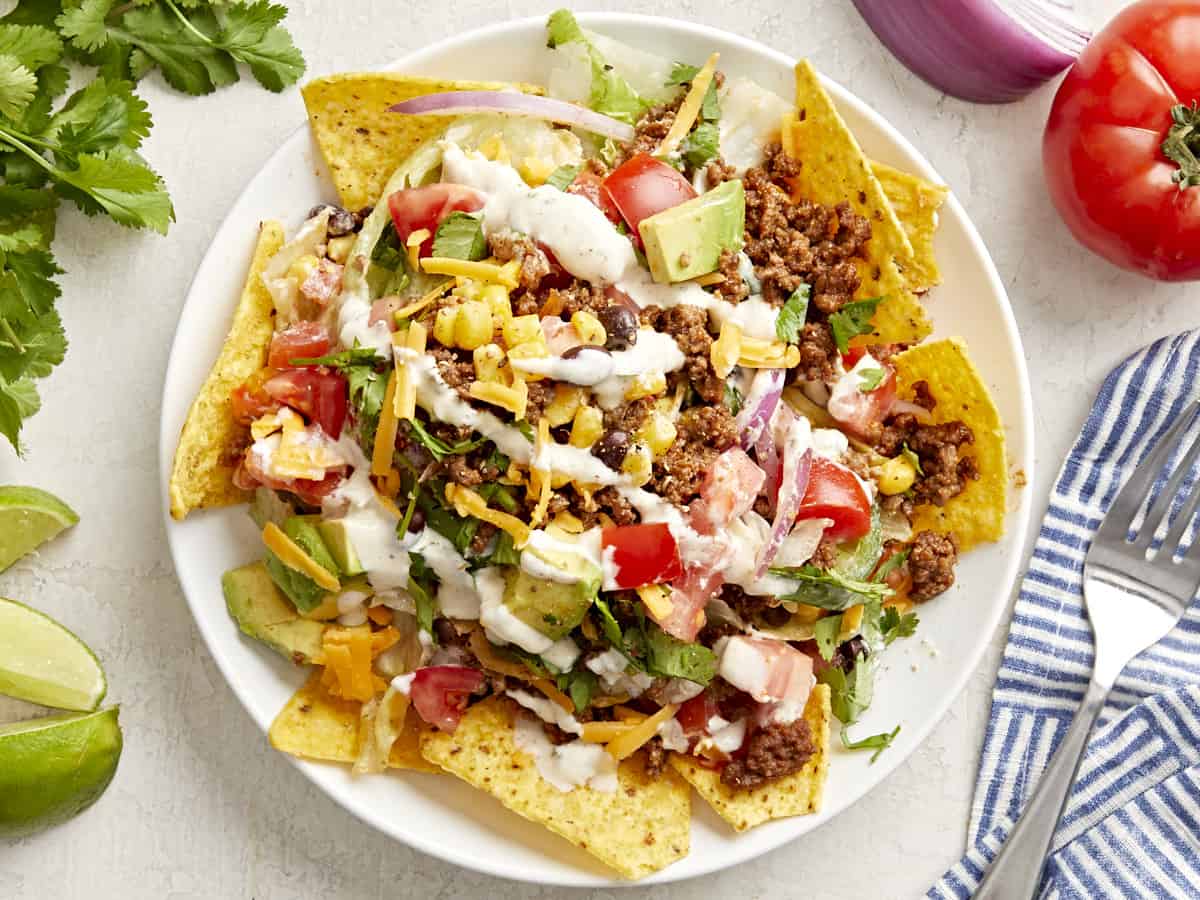
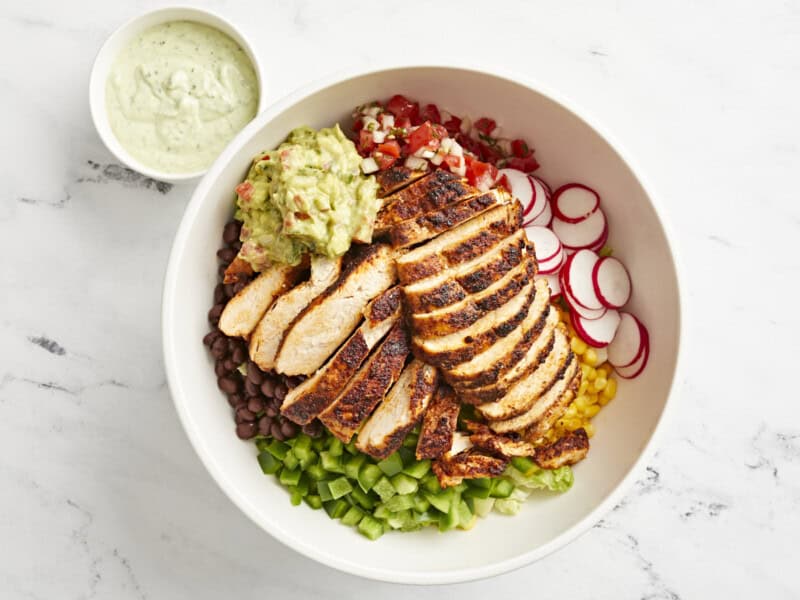
I have a major weakness for Southwestern flavors, and this Santa Fe salad is the ultimate combination. It’s loaded with tender, juicy chicken, fresh veggies, and creamy black beans. I love it tossed in our creamy avocado dressing. It’s a great hearty entrée-sized salad that’ll keep you full for hours. If you are plant-baseed, this flavor bomb of a salad still packs the same punch without the chicken. This salad is a true crowd pleaser.

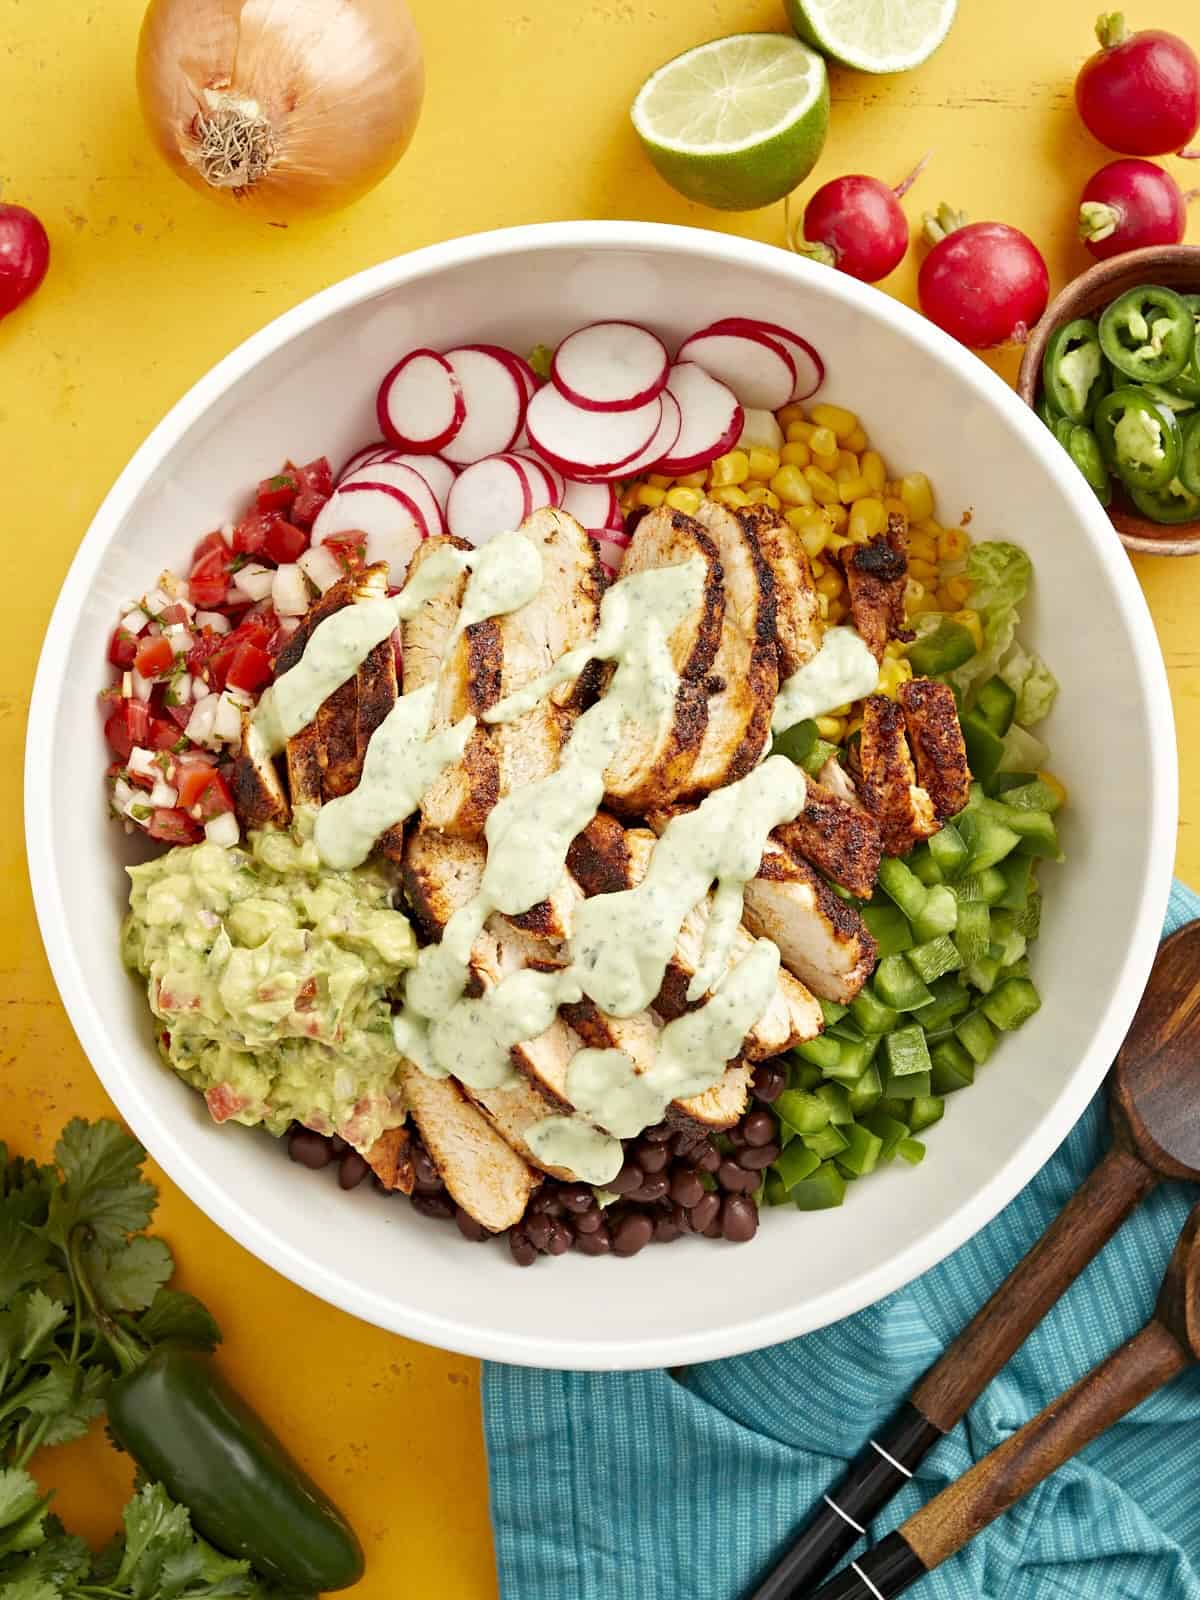
creamy avocado dressing drizzled over santa fe salad in a large white bowl.

What Is A Santa Fe Salad?

This tasty Santa Fe salad recipe starts with a bed of romaine lettuce topped with Southwestern favorites, like corn, black beans, bell pepper, cheese, and tortilla chips. Top it off with our favorite creamy avocado dressing, some fresh pico de gallo, and a dollop of homemade guacamole for a filling salad that’s bursting with flavor!

Ingredients

Here’s what you’ll need to make a Santa Fe salad:

  • Chicken Breasts: Tender, juicy chicken breasts are a great source of protein on this hearty salad. For a budget-saving option, chicken thighs work well. If you’re vegetarian or vegan, substitute the chicken with extra-firm tofu (seasonings and all) or go heavier on the black beans. Mmm!
  • Olive Oil: Helps the spices stick to the chicken and helps the chicken sear in the pan.
  • Seasonings: Chili powder, paprika, cayenne pepper, ground cumin, garlic powder, onion powder, salt, and pepper add Southwestern flair to the chicken.
  • Romaine Lettuce: The perfect crunchy base for this salad. Buy whole heads rather than the pre-chopped bagged stuff to save money.
  • Bell Pepper: I like to use a green bell pepper, but any color works well to add some crunch!
  • Frozen Corn: You can also use fresh or canned corn– just be sure to drain and rinse first if you use canned.
  • Canned Black Beans: Add creaminess and extra protein to this salad.
  • Cheddar Cheese: Adds a hint of saltiness. Mexican blend also works well.
  • Tortilla Chips: I like to crumble some on top for extra crunch.
  • Creamy Avocado Dressing: Pulls the whole salad together. If you’re short on time, use a store-bought chipotle or Southwest ranch dressing.
  • Pico de Gallo: Adds a hit of freshness and acidity.
  • Guacamole: This is totally optional but ups the creaminess of this salad!

What Else Can I Add?

This Southwestern salad is a great fridge clean-out recipe. Here are some other things I love to add when I have them on hand:

How To Store Leftovers

As with most salads, I recommend storing the veggie components separately from the chicken and dressing and tossing everything together just before serving. This helps protect the lettuce from wilting. Stored correctly, this salad should keep well in the refrigerator for up to 3 days, making it great for meal prep!

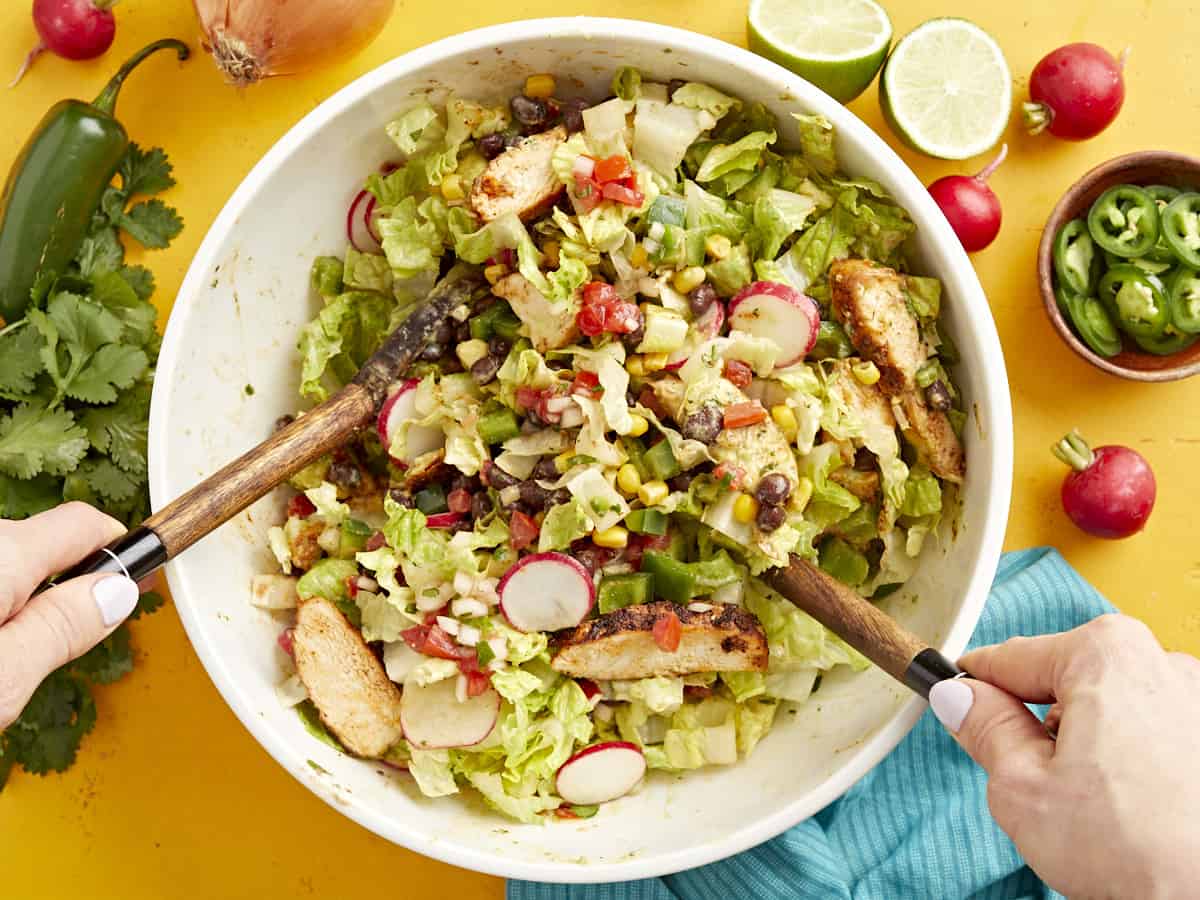
tossing santa fe salad in a large white bowl with wooden spoons.
creamy avocado dressing drizzled over santa fe salad in a large white bowl.
Print

Santa Fe Salad

This Santa Fe salad is the ultimate Southwestern salad. It's loaded with tender, juicy chicken, fresh veggies, and creamy black beans.
Course Salad
Cuisine American, texmex
Total Cost ($17.21 recipe / $2.95 serving)
Prep Time 30 minutes
Cook Time 10 minutes
Total Time 40 minutes
Servings 6
Calories 516kcal

Ingredients

For the Dressing

  • 1 avocado $0.89
  • 1/2 cup sour cream $0.24
  • 1 clove garlic, minced $0.08
  • 1/4 tsp salt $0.02
  • 2 tbsp lime juice $0.50
  • 1/4 bunch fresh cilantro $0.20
  • 1/4 cup water $0.00

For the Salad

  • 2 heads romaine lettuce, chopped into bite-size pieces $2.98
  • 1 green bell pepper, diced $0.89
  • 5 radishes, sliced thin $0.49
  • 1 cup frozen corn, thawed and rinsed $0.47
  • 1 15oz. can black beans, rinsed and drained $0.89
  • 1/4 cup shredded cheddar cheese $0.83
  • 1/2 cup pico de gallo $0.44
  • 1 cup crushed tortilla chips $0.50

For the Chicken

  • 2 boneless, skinless chicken breasts $5.69
  • 2 Tbsp olive oil, divided $0.08
  • 1 Tbsp chili powder $0.30
  • 2 tsp paprika $0.20
  • 1/2 tsp cayenne pepper $0.06
  • 1 tsp ground cumin $0.10
  • 1 tsp garlic powder $0.05
  • 1 tsp onion powder $0.05
  • 1 tsp salt $0.05
  • 1 tsp freshly ground black pepper $0.05

Instructions

  • Add the avocado, sour cream, minced garlic, salt, lime juice, and cilantro to a food processor or blender. Puré until smooth. Cover and set aside in the refrigerator.
  • Chop romaine lettuce into bite-sized pieces and transfer to a large salad bowl.
  • Dice bell peppers, slice radishes, thaw frozen corn, and rinse and strain canned black beans. Add this and 1/2 cup of pico de gallo to the large salad bowl on top of chopped romaine lettuce. Cover and keep in the refrigerator while you prepare the chicken.
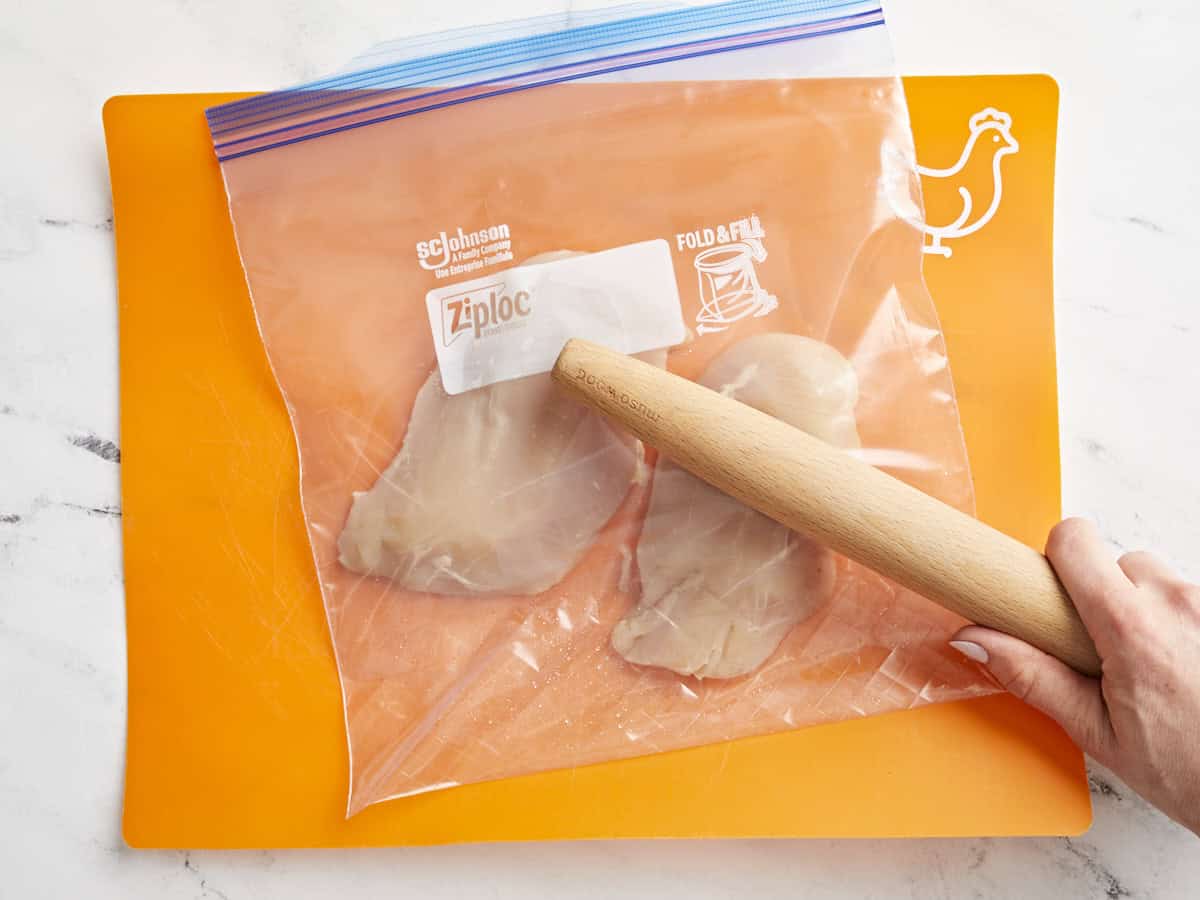
  • Place the chicken breasts inside a heavy duty food storage bag and flatten with a rolling pin or a tenderizing mallet until the breasts are consistently about 3/4 inch thick. Start in the middle at the thickest part of each breast for more even cooking. This step helps the chicken cook more evenly.
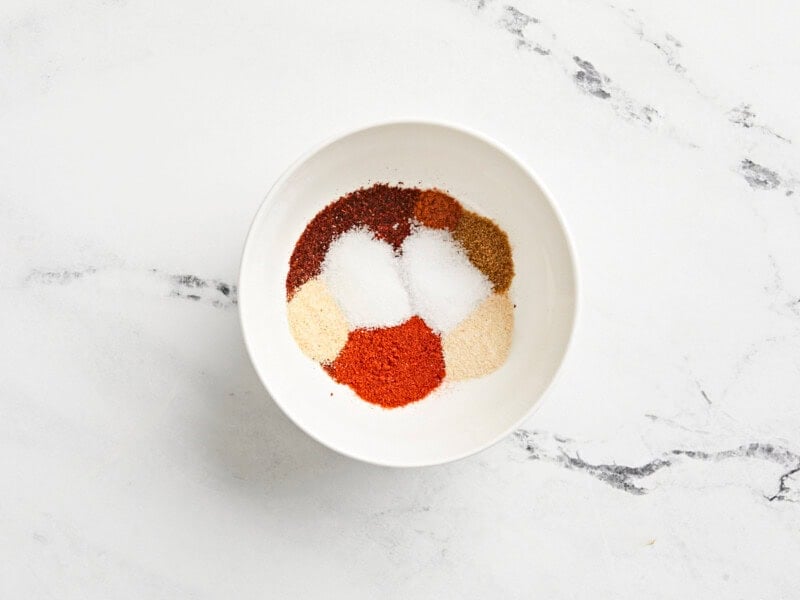
  • Prepare the Santa Fe Chicken seasoning blend by combining chili, paprika, cayenne, cumin, garlic powder, onion powder, salt, and black pepper.
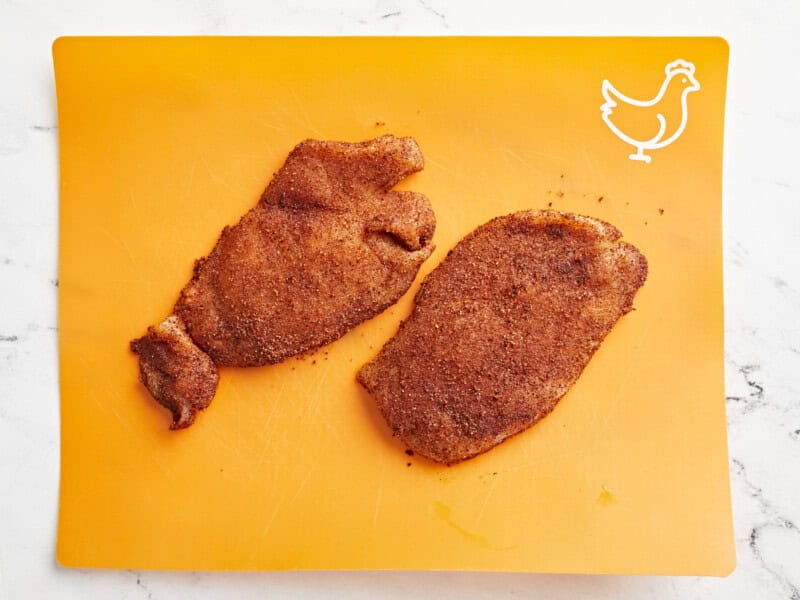
  • Rub chicken breasts with 1 Tbsp olive oil and divide the seasoning blend between the them, making sure to thoroughly coat the entire surface of each chicken breast with seasoning.
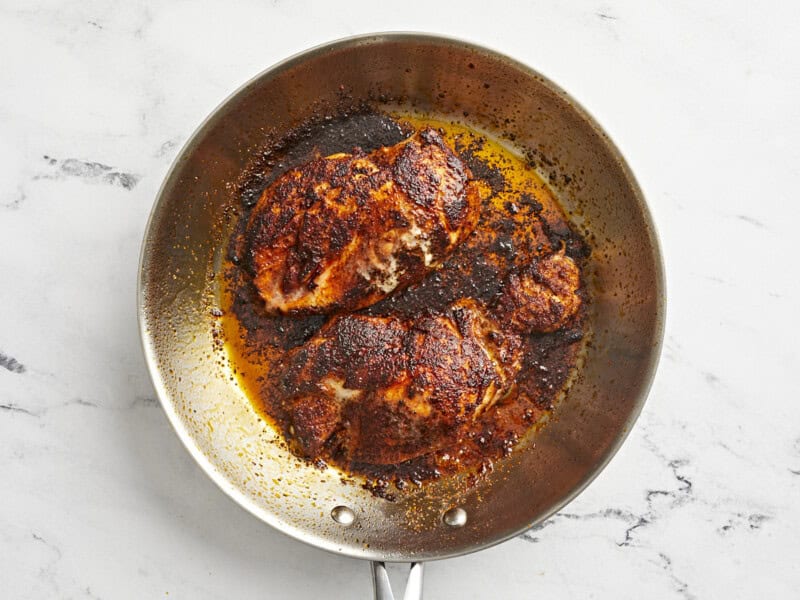
  • In a large skillet, add 1 Tbsp olive oil over medium-high heat. When the oil is glistening and hot, add the chicken breasts. Cook your chicken for a total of 10-12 minutes, flipping halfway. While the chicken cooks, do not wiggle or disturb it except for flipping. Remove the chicken from the heat when it reaches an internal temperature of 160°F. Allow chicken to rest on a cutting board for 5-10 minutes before slicing into strips. After resting, the chicken should reach an internal temperature of 165°F. 
  • Fan out the sliced chicken on top of the salad and drizzle creamy avocado dressing over the top. Toss and serve!

See how we calculate recipe costs here.

Notes

Nutritional information does not include the guacamole. Click the recipe link to view nutritional information.

Nutrition

Serving: 1bowl | Calories: 516kcal | Carbohydrates: 61g | Protein: 29g | Fat: 21g | Sodium: 1791mg | Fiber: 14g
overhead view of a santa fe salad in a white bowl.

how to make a Santa Fe Salad – step by step photos

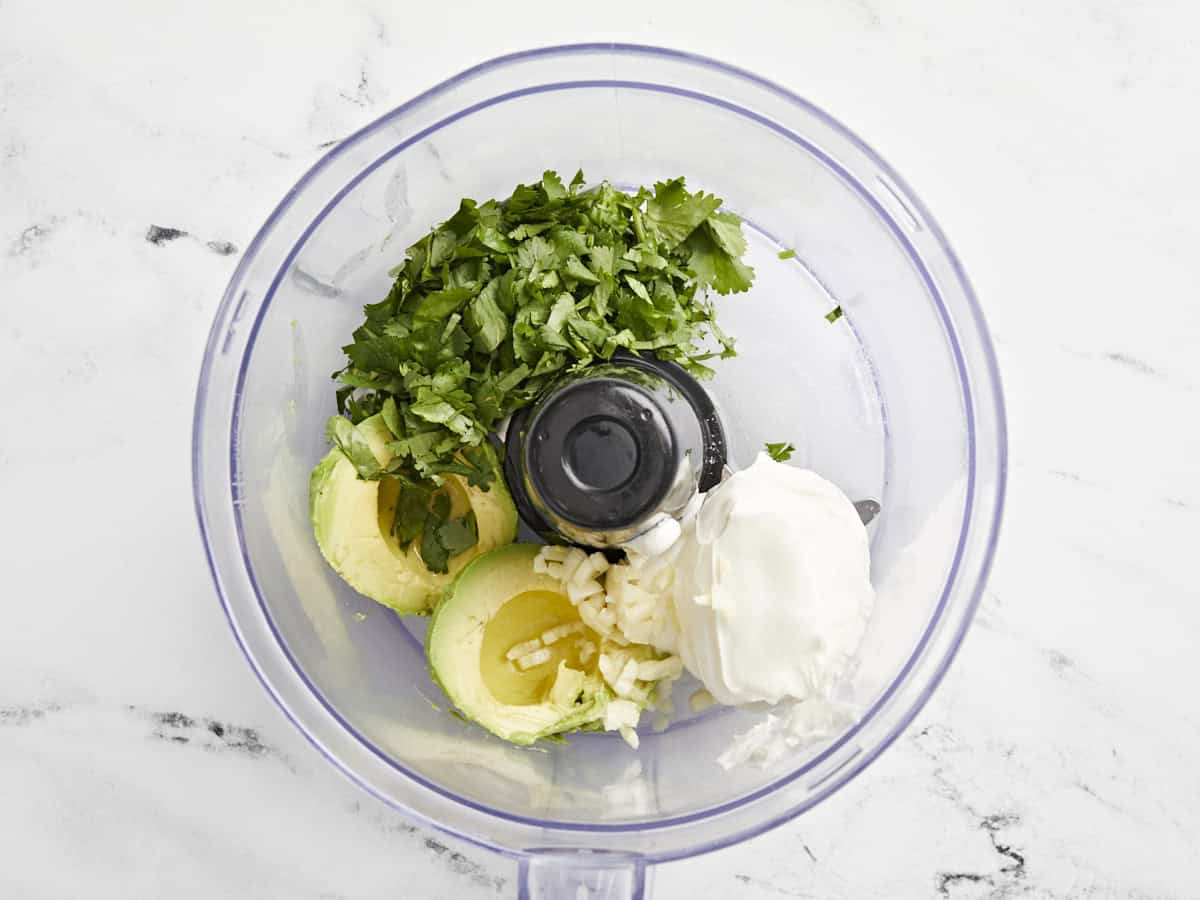
ingredients for avocado dressing in food processor

Add 1 avocado, ½ cup sour cream, 1 clove of garlic (minced), ¼ tsp salt, 2 Tbsp lime juice, and ¼ bunch cilantro to a food processor or blender.

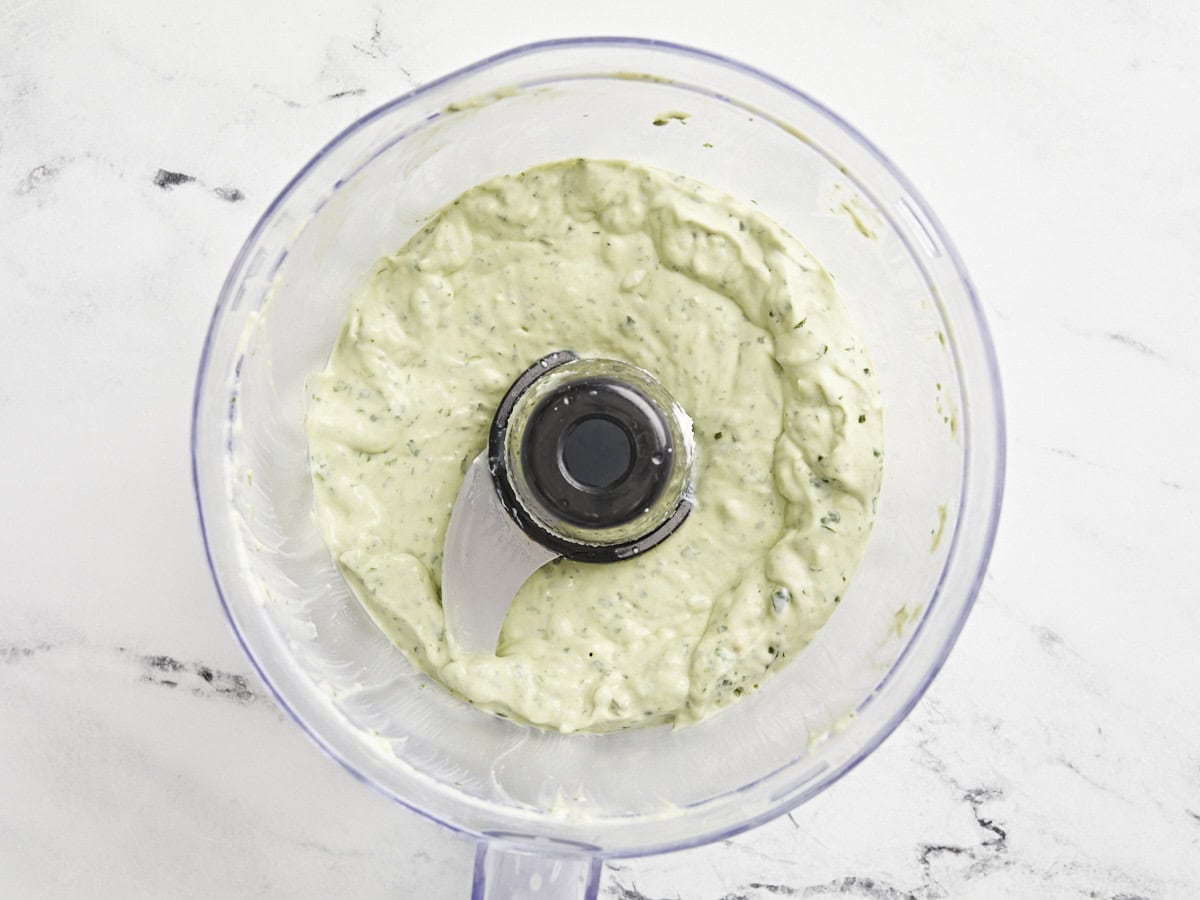
creamy avocado dressing in food processor

Puré until smooth. Cover and set aside in the refrigerator.

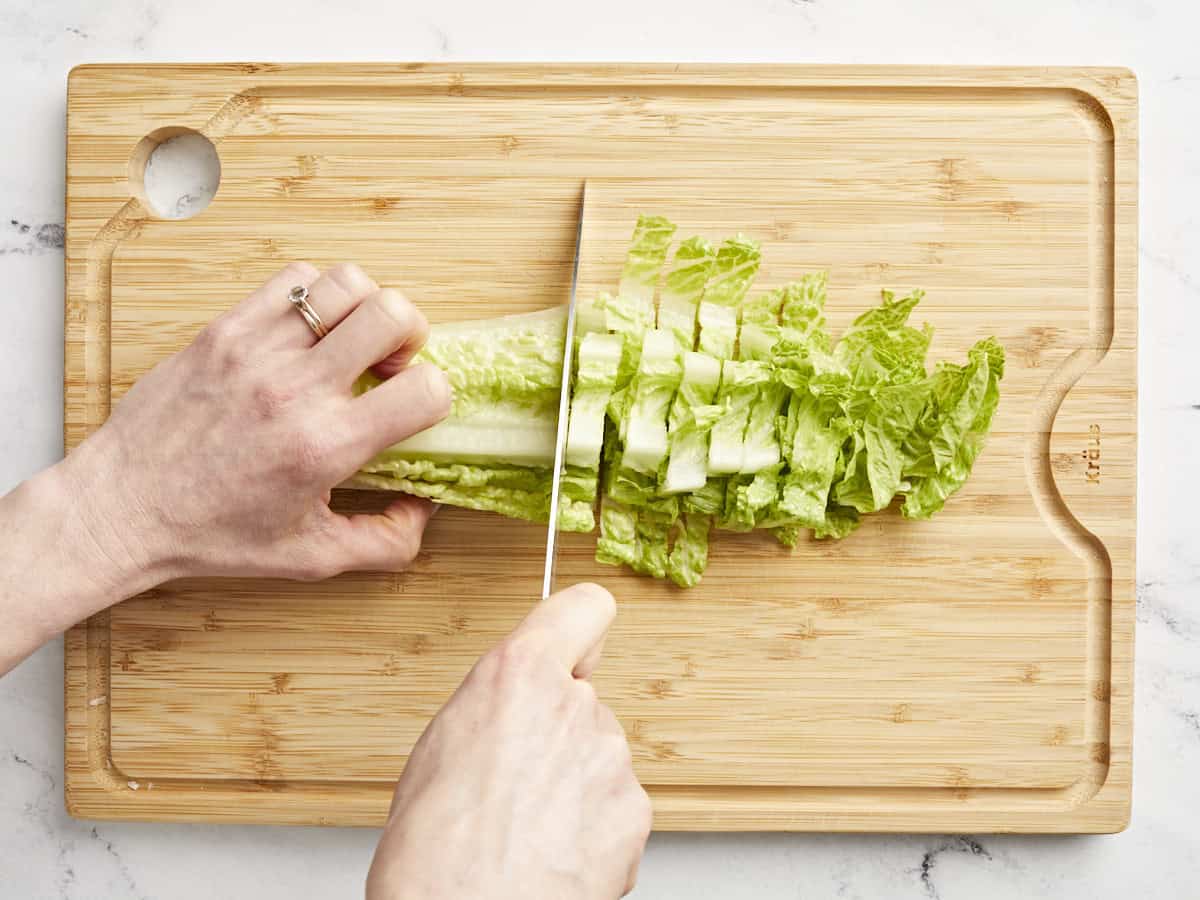
chopping lettuce

Chop 2 heads of romaine lettuce into bite-sized pieces and transfer to a large salad bowl.

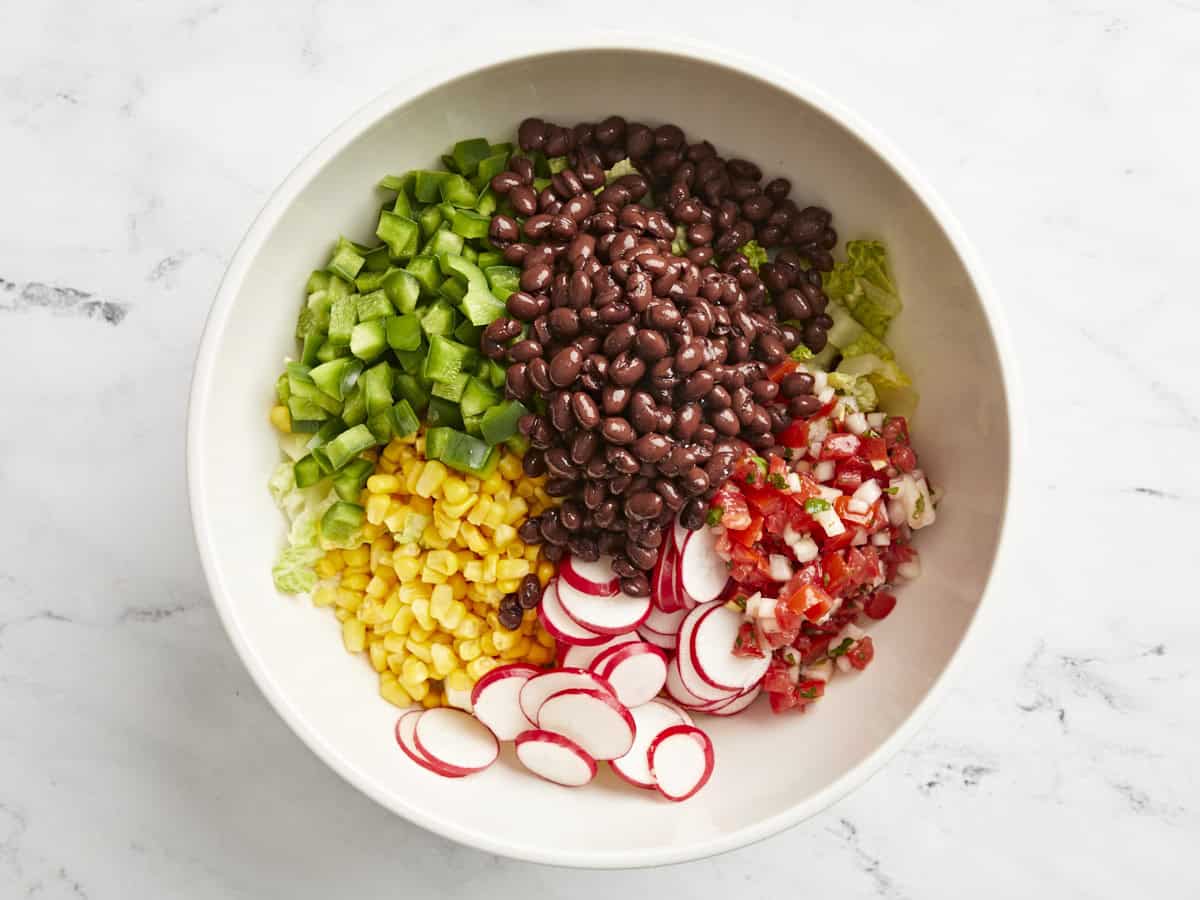
ingredients for santa fe salad in a white bowl

Dice 1 bell pepper, slice 5 radishes, thaw 1 cup frozen corn, and rinse and strain 1 can of black beans. Add this and 1/2 cup of pico de gallo to the large salad bowl on top of chopped romaine lettuce. Cover and keep in the refrigerator while you prepare the chicken.

pounding chicken

Place the chicken breasts inside a heavy duty food storage bag and flatten with a rolling pin or a tenderizing mallet until the breasts are consistently about 3/4 inch thick. Start in the middle at the thickest part of each breast for more even cooking. This step helps the chicken cook more evenly.

spice rub for chicken

Prepare the Santa Fe Chicken seasoning blend by combining 1 Tbsp chili, 2 tsp paprika, 1/2 tsp cayenne, 1 tsp cumin, 1 tsp garlic powder, 1 tsp onion powder, 1 tsp salt and 1 tsp black pepper together.

chicken coated with spice rub

Rub chicken breasts with 1 Tbsp olive oil and divide the seasoning blend between the them, making sure to thoroughly coat the entire surface of each chicken breast with seasoning.

chicken in skillet

In a large skillet, add 1 Tbsp olive oil over medium-high heat. When the oil is glistening and hot, add the chicken breasts. Cook your chicken for a total of 10-12 minutes, flipping halfway. While the chicken cooks, do not wiggle or disturb it except for flipping. Remove the chicken from the heat when it reaches an internal temperature of 160°F. Allow chicken to rest on a cutting board for 5-10 minutes before slicing into strips. After resting, the chicken should reach an internal temperature of 165°F. 

completed santa fe salad

Fan out the sliced chicken on top of the salad and drizzle Creamy Avocado Dressing over the top. Toss and serve!

The post Santa Fe Salad appeared first on Budget Bytes.
Pea Salad

Super simple and inexpensive, this creamy pea salad is the perfect side dish for your next family get-together.

The post Pea Salad appeared first on Budget Bytes.
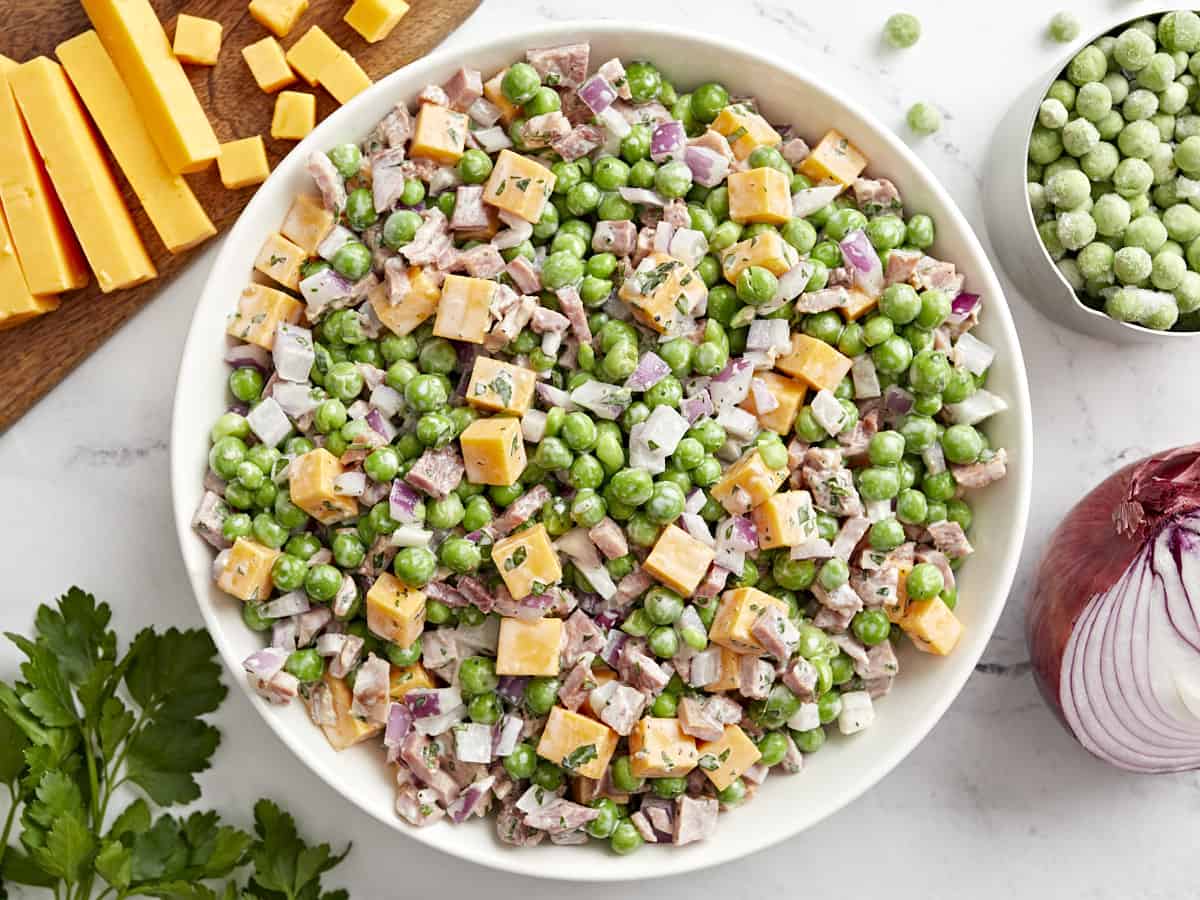
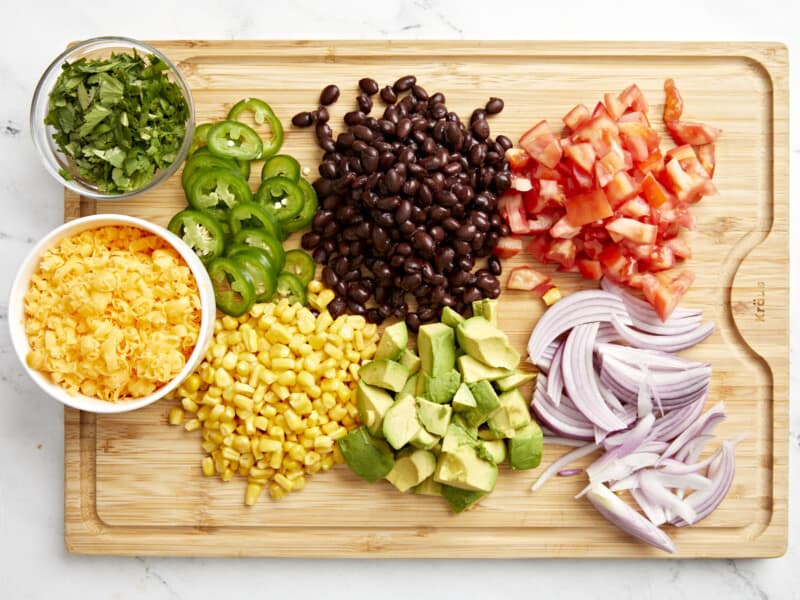
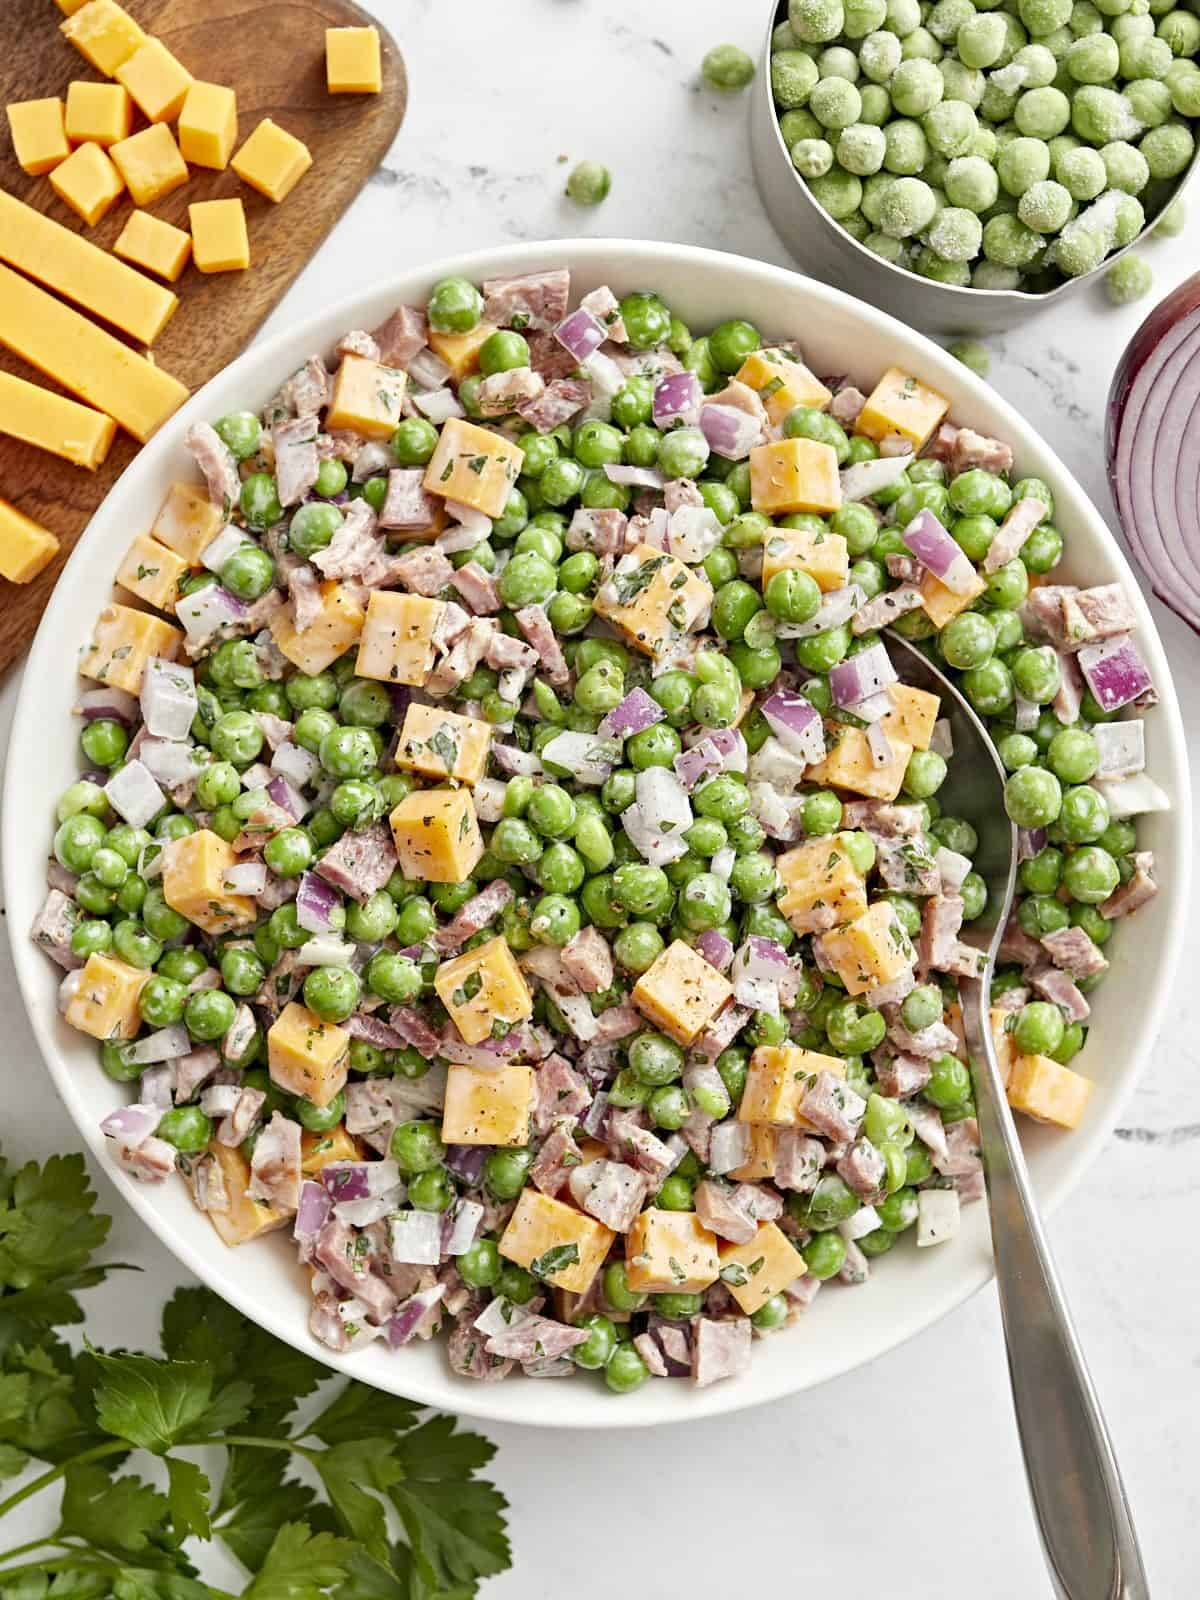
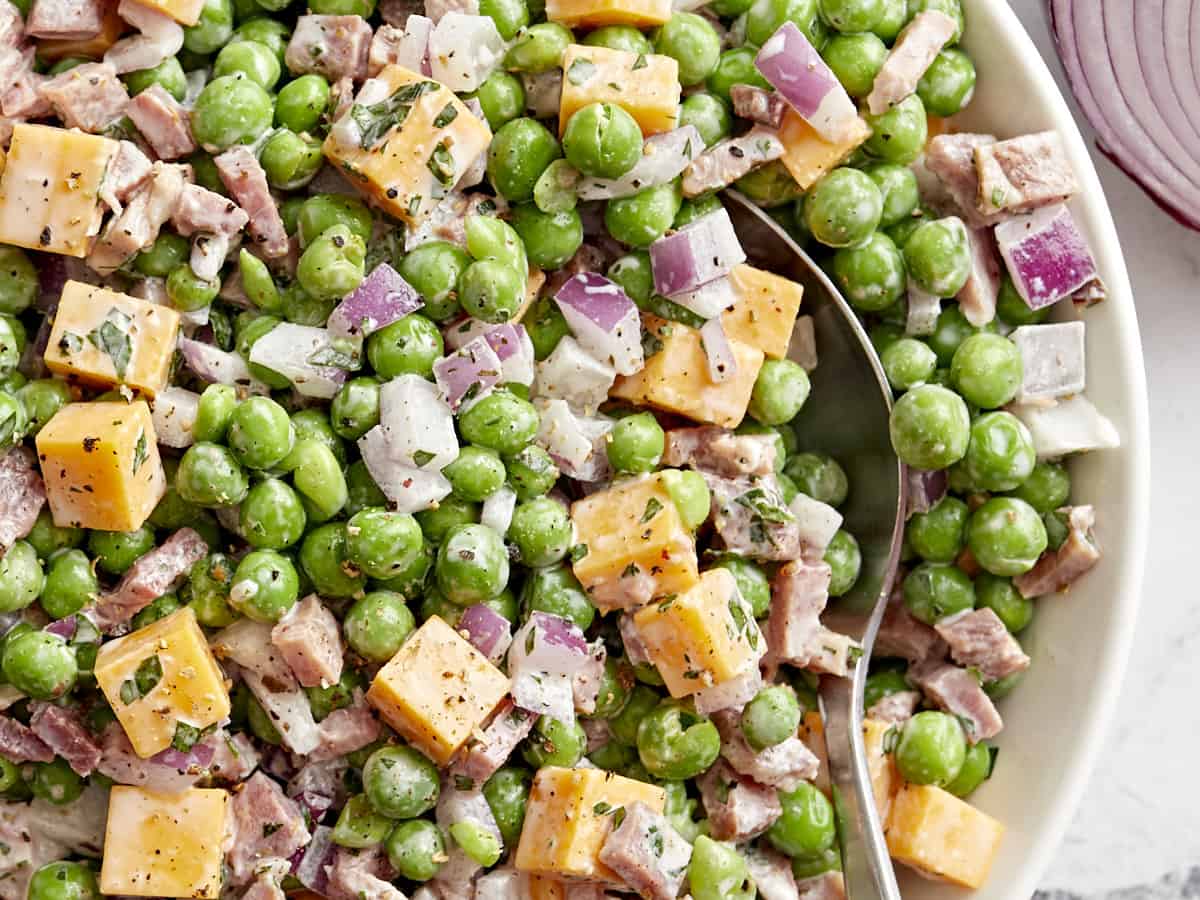
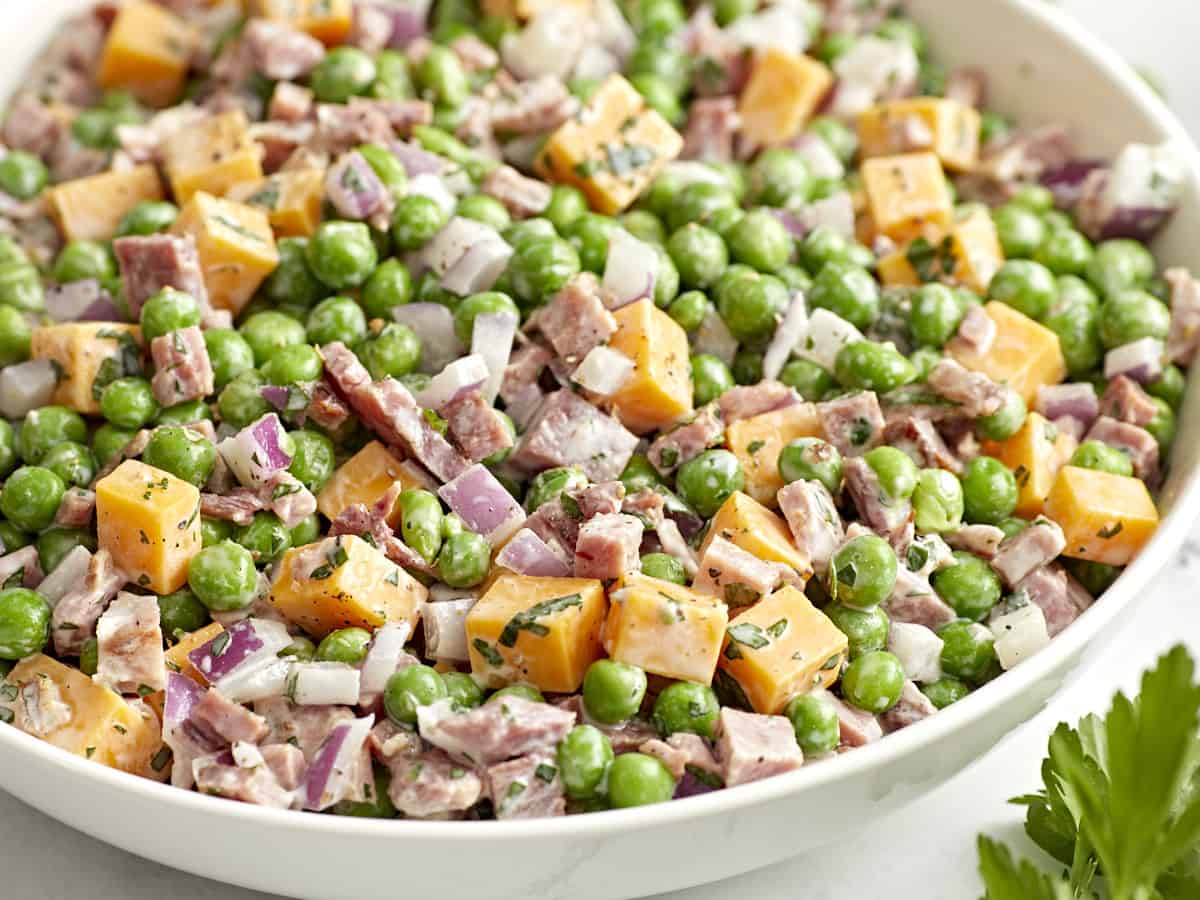
Super simple and inexpensive, this creamy pea salad is the perfect side dish for your next family get-together. We coat sweet peas, salty ham, and savory cheddar cheese in a creamy dressing, creating the perfect balance of sweet and savory flavors. It makes a huge batch and comes together in just minutes, no cooking required!

overhead view of pea salad with a spoon.

What is Pea Salad?

Pea salad is a classic side dish made from sweet peas tossed with ham, cheddar cheese, and red onion, and coated in a creamy and tangy dressing. This salad has a beautiful balance of flavors and is so versatile!

Ingredients for Pea Salad

Here’s what you’ll need to make pea salad:

  • Greek Yogurt: Makes the dressing creamy and tangy with fewer calories and fat than sour cream. We highly recommend Greek yogurt over plain yogurt or sour cream for its thicker texture.
  • Mayonnaise: Adds richness and creaminess to the dressing.
  • White Vinegar: Adds a refreshing tanginess to the dressing to balance the creaminess.
  • Parsley: Adds a pop of freshness.
  • Frozen Peas: Just as bright and flavorful as fresh, these are a great budget option for this salad.
  • Ham Steak: You’ll need a 12 oz. ham steak, or you can use leftover ham or cooked bacon. Vegetarian? No problem! If you leave out the ham, this pea salad is still flavorful and fresh.
  • Red Onion: Adds a bit of bite to the recipe and a wonderful crunchy texture, creating a great contrast to the sweet peas.
  • Cheddar Cheese: Adds a creamy and salty component to this delicious salad.
  • Salt and Pepper: Enhance the overall flavor of the salad.

What Else Can I Add to Pea Salad?

This creamy salad is a great recipe to add leftovers to. We like to add:

  • Leftover short noodles, like macaroni or bowties
  • Finely diced carrots
  • Chopped broccoli florets
  • Raisins or other dried fruits
  • Vegetarian meat substitutes also work well.

Budget-Saving Tip!

If you want to make your money stretch a little bit further, then this is a great recipe to use up any leftover ham that you might have from the holidays. It will help reduce waste and make the recipe cheaper. That’s a win-win!😊

What to Serve with Pea Salad

This cold pea salad is the perfect refreshing side for smoky BBQ ribs, savory smash burgers, or garlic marinated chicken.

close up view of pea salad with a spoon.
overhead view of pea salad with a spoon.
Print

Pea Salad

Super simple and inexpensive, this creamy pea salad is the perfect side dish for your next family get-together.
Course Side Dish
Cuisine American
Total Cost $9.54 recipe / $0.95 serving
Prep Time 10 minutes
Cook Time 0 minutes
Total Time 10 minutes
Servings 10 (1 cup each)
Calories 214kcal
Author Jess Rice

Ingredients

  • 4 cups frozen peas $2.28
  • 2 cups cubed ham steak $3.99
  • 1/2 small red onion, diced small $0.22
  • 8 oz. cheddar cheese, cubed small $2.49
  • 1 Tbsp minced parsley $0.05
  • 1/3 cup plain Greek yogurt $0.32
  • 1 Tbsp mayonnaise $0.07
  • 1 Tbsp white vinegar $0.02
  • 1 tsp salt $0.05
  • 1 tsp freshly cracked black pepper $0.05

Instructions

  • Rinse the frozen peas in cool water. Strain and leave out at room temperature. Meanwhile, cut the ham into small dice cubes and prep the red onion, cheddar cheese, and parsley.
  • In a small mixing bowl, whisk together Greek yogurt, mayonnaise, white vinegar, minced parsley, and salt and pepper.
  • Toss all ingredients together in a large bowl. Serve immediately or enjoy all week!

See how we calculate recipe costs here.

Nutrition

Serving: 1serving | Calories: 214kcal | Carbohydrates: 10g | Protein: 18g | Fat: 11g | Sodium: 996mg | Fiber: 3g
pea salad in a white bowl.

how to make Pea Salad – step by step photos

ingredients for pea salad on a cutting board.

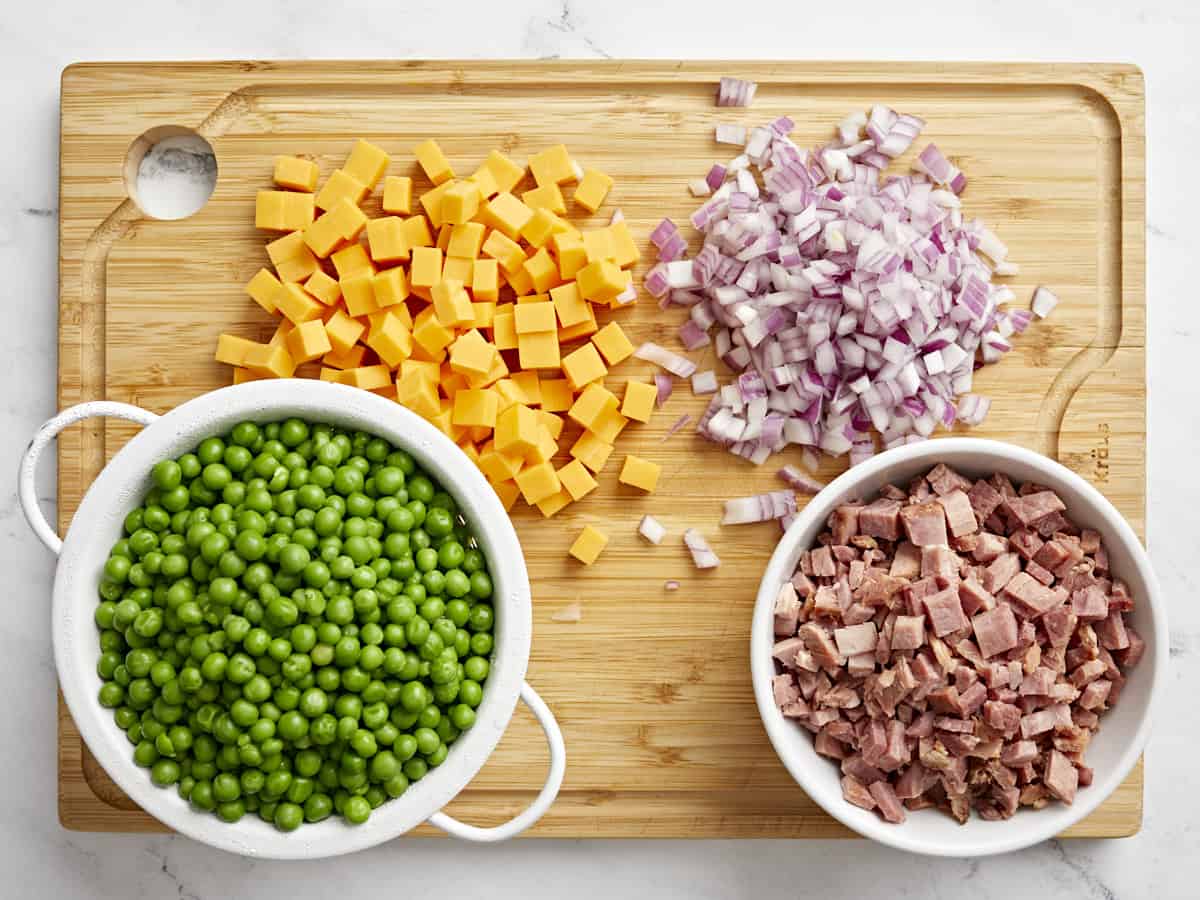
Rinse 4 cups frozen peas in cool water. Strain and leave out at room temperature. Meanwhile, cut 2 cups ham into small dice cubes, dice 1/2 small red onion, cube 8 oz. cheddar cheese, and mince 1 Tbsp fresh parsley.

stirred mayonnaise dressing with herbs in a white bowl.

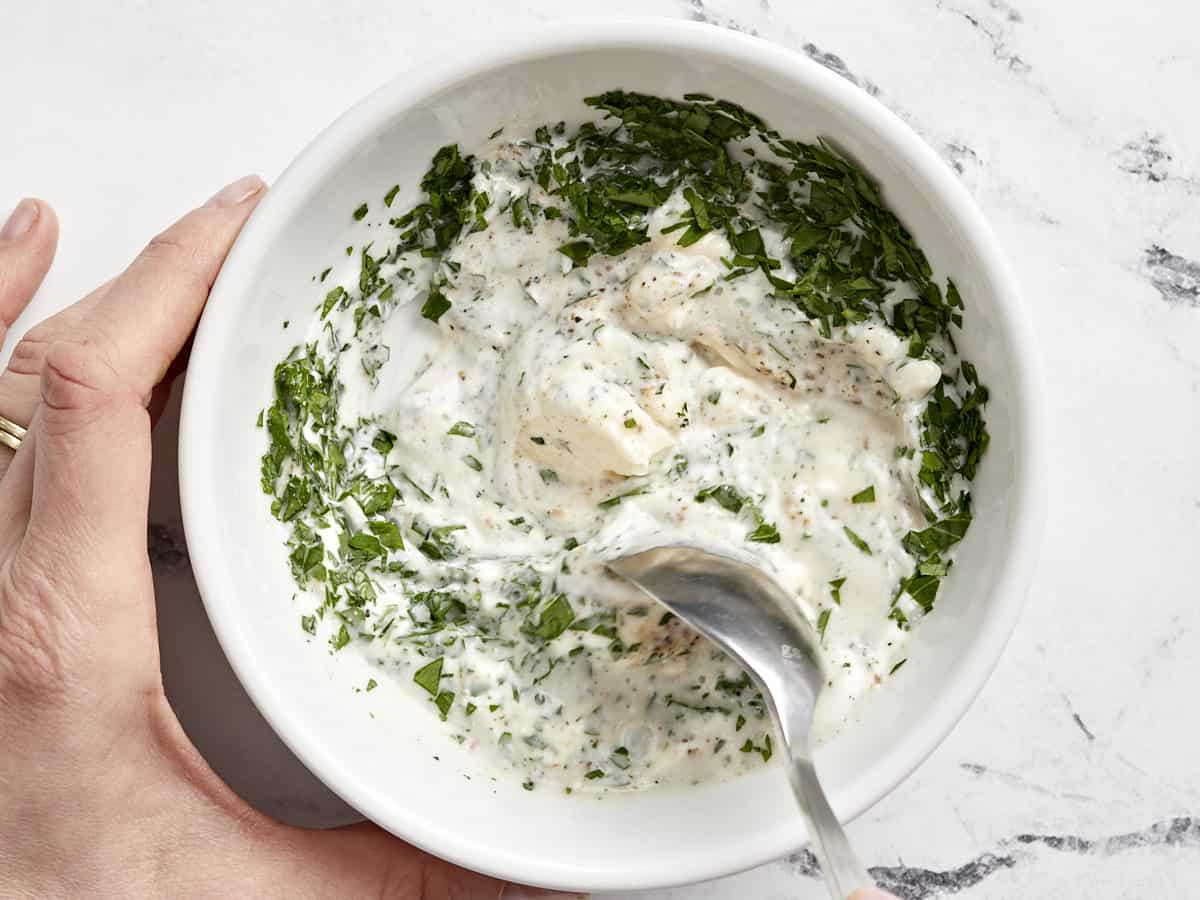
In a small mixing bowl, whisk together 1/3 cup Greek yogurt, 1 Tbsp mayonnaise, 1 Tbsp white vinegar, the minced parsley, and 1 tsp each salt and pepper.

ingredients for pea salad in a white bowl.

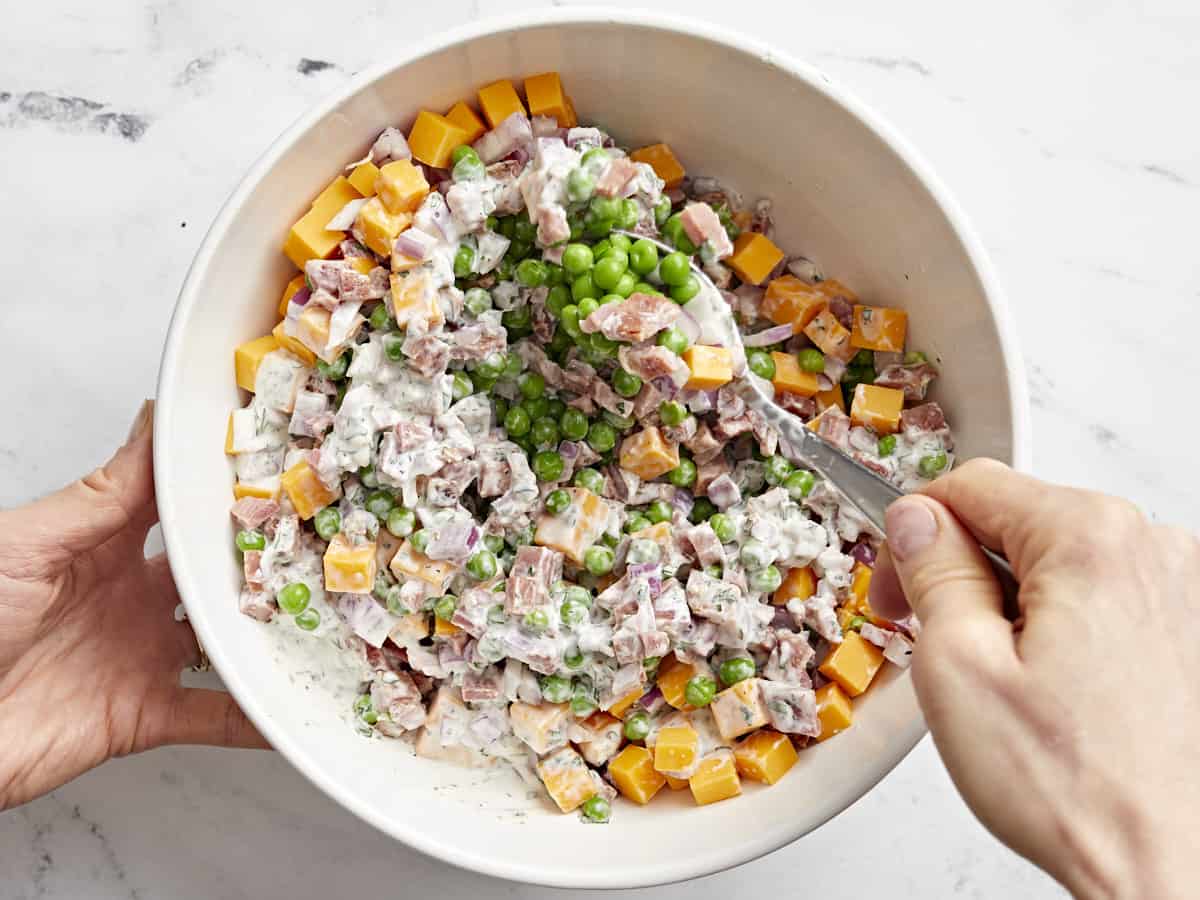
Toss all ingredients together in a large bowl. Serve immediately or enjoy all week!

overhead view of pea salad in a white bowl.

This pea salad is such a beautiful centerpiece to any table!

The post Pea Salad appeared first on Budget Bytes.
Potato Casserole

Make those potatoes go the extra mile with this cheesy potato casserole! Fit to serve a crowd, this casserole is the ultimate comfort food.

The post Potato Casserole appeared first on Budget Bytes.
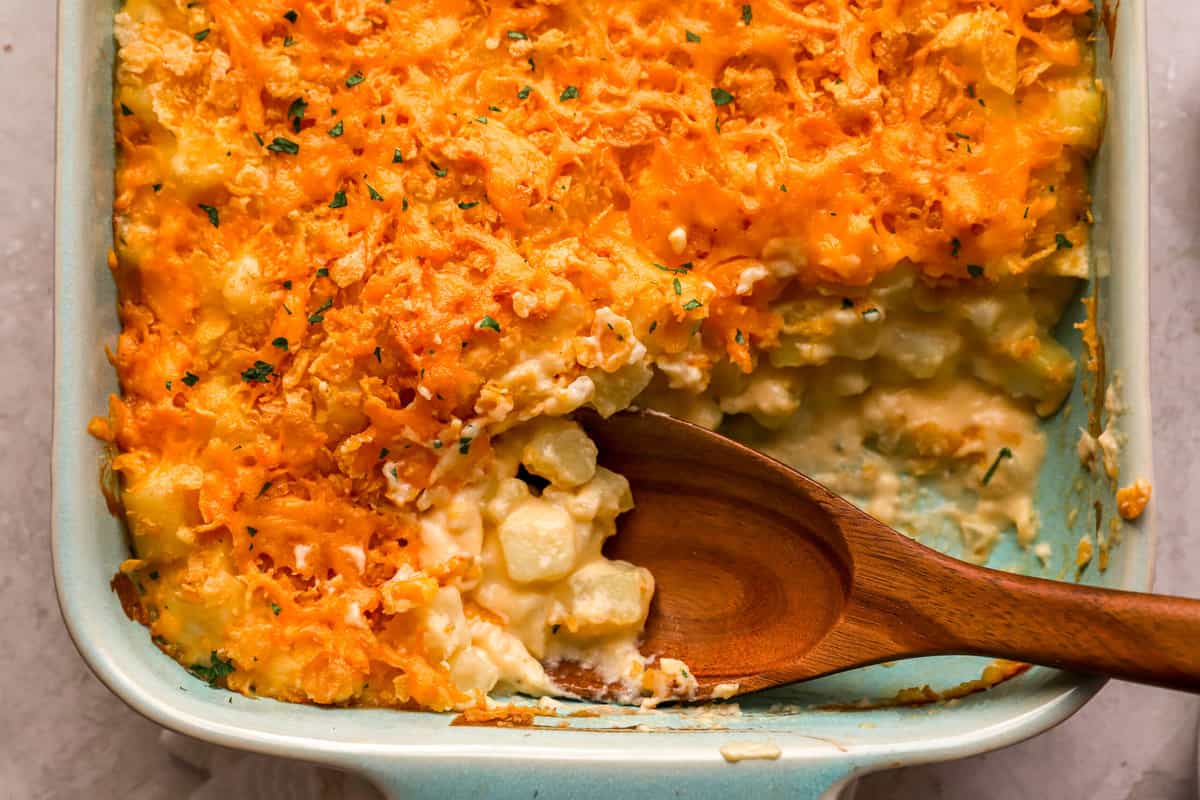
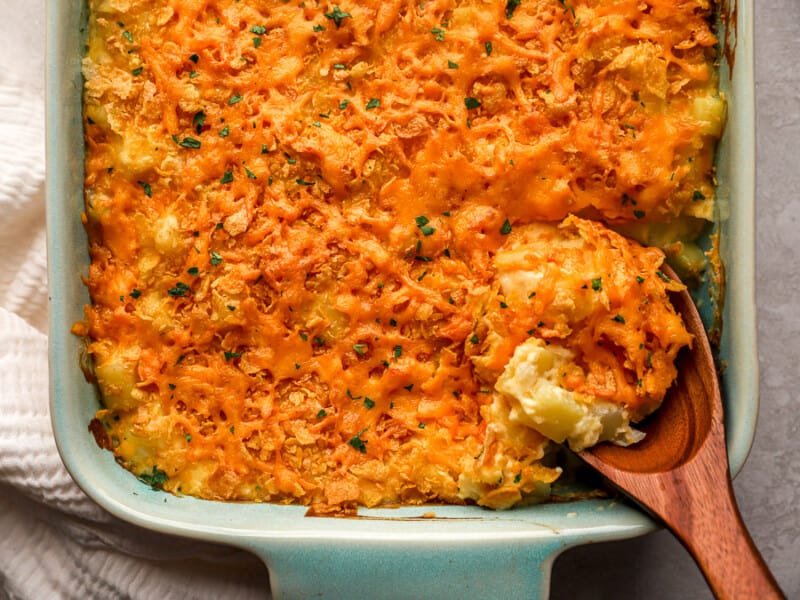
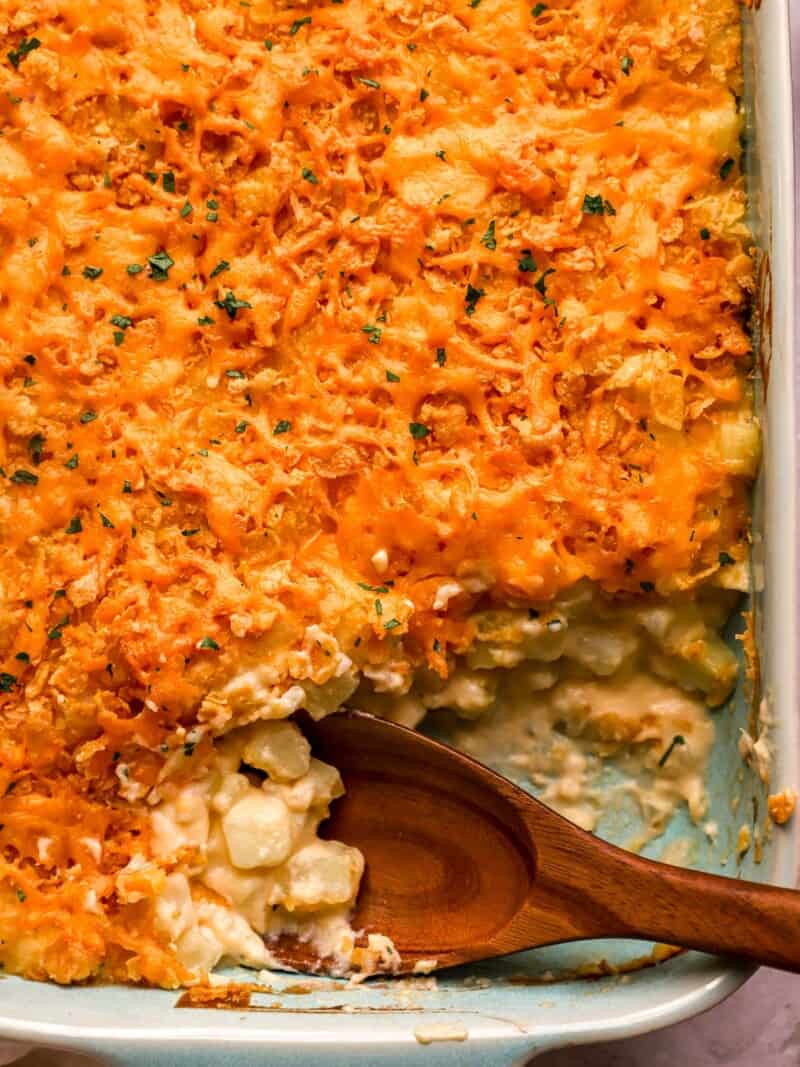
Make those potatoes go the extra mile with this creamy, cheesy potato casserole! Fit to serve a crowd, this potato casserole recipe is comfort food at its best. The crunchy, cheesy topping is a little sweet, a lot savory, and makes this the perfect side for Easter, Thanksgiving, or Christmas.

What is Potato Casserole?

Diced potatoes are blanketed in a sauce made from cheddar cheese, milk, and sour cream; seasoned with onions and garlic; and topped with crunchy corn flake cereal. It’s the ultimate cheesy, creamy, and crunchy side dish. So grab a 5 lb. bag or potatoes and get cooking!

Ingredients for Potato Casserole

  • Yukon Gold Potatoes: These potatoes are in between starchy and waxy, making them perfect for this casserole since they hold their shape well. You’ll need 3 lbs. or about 6 medium potatoes.
  • Butter: Unsalted butter adds a rich flavor to the dish and helps prevent the onions and garlic from burning in the pan.
  • Onion and Garlic: These alliums add a classic earthy and sweet flavor that adds depth to this dish.
  • Salt: Kosher salt enhances the natural flavor of the potatoes.
  • All-Purpose Flour: A little bit of flour helps to thicken up the sauce.
  • Milk: Milk adds moisture to the sauce. You can use any kind of milk you have on hand, including plant-based.
  • Extra Sharp Cheddar Cheese: We love the flavor of extra sharp, but any kind of cheddar works well.
  • Sour Cream: Sour cream adds a touch of brightening tanginess and richness to the dish.
  • Corn Flake Cereal: Crushed corn flakes create the perfect slightly sweet, super crunchy topping for this casserole. You can also use Panko breadcrumbs or crushed butter crackers if that’s what you have on hand.

What Else Can I Add To Potato Casserole?

This is a great recipe for using up leftovers. Got some bacon or ham burning a hole in your refrigerator? Throw it in! You can swap the sour cream for Greek Yogurt if that’s what you have on hand. And feel free to top it with any leftover herbs you have lying around– parsley, chives, or scallions would all be delicious!

How to Serve Potato Casserole

Serve this creamy, cheesy potato casserole with Air Fryer Chicken Breasts, Classic Homemade Meatloaf, or some Turkey Meatballs. It’s also great for breakfast with Fried Eggs or Maple Sage Breakfast Sausage.

How to Store Leftovers

Store leftover potato casserole tightly covered with aluminum foil in the refrigerator for up to 5 days, or you can wrap it in a double-layer of plastic wrap and aluminum foil to store in the freezer for up to 3 months. You can reheat it covered with foil in a 350°F oven for 20-30 minutes, or until warmed through and bubbly.

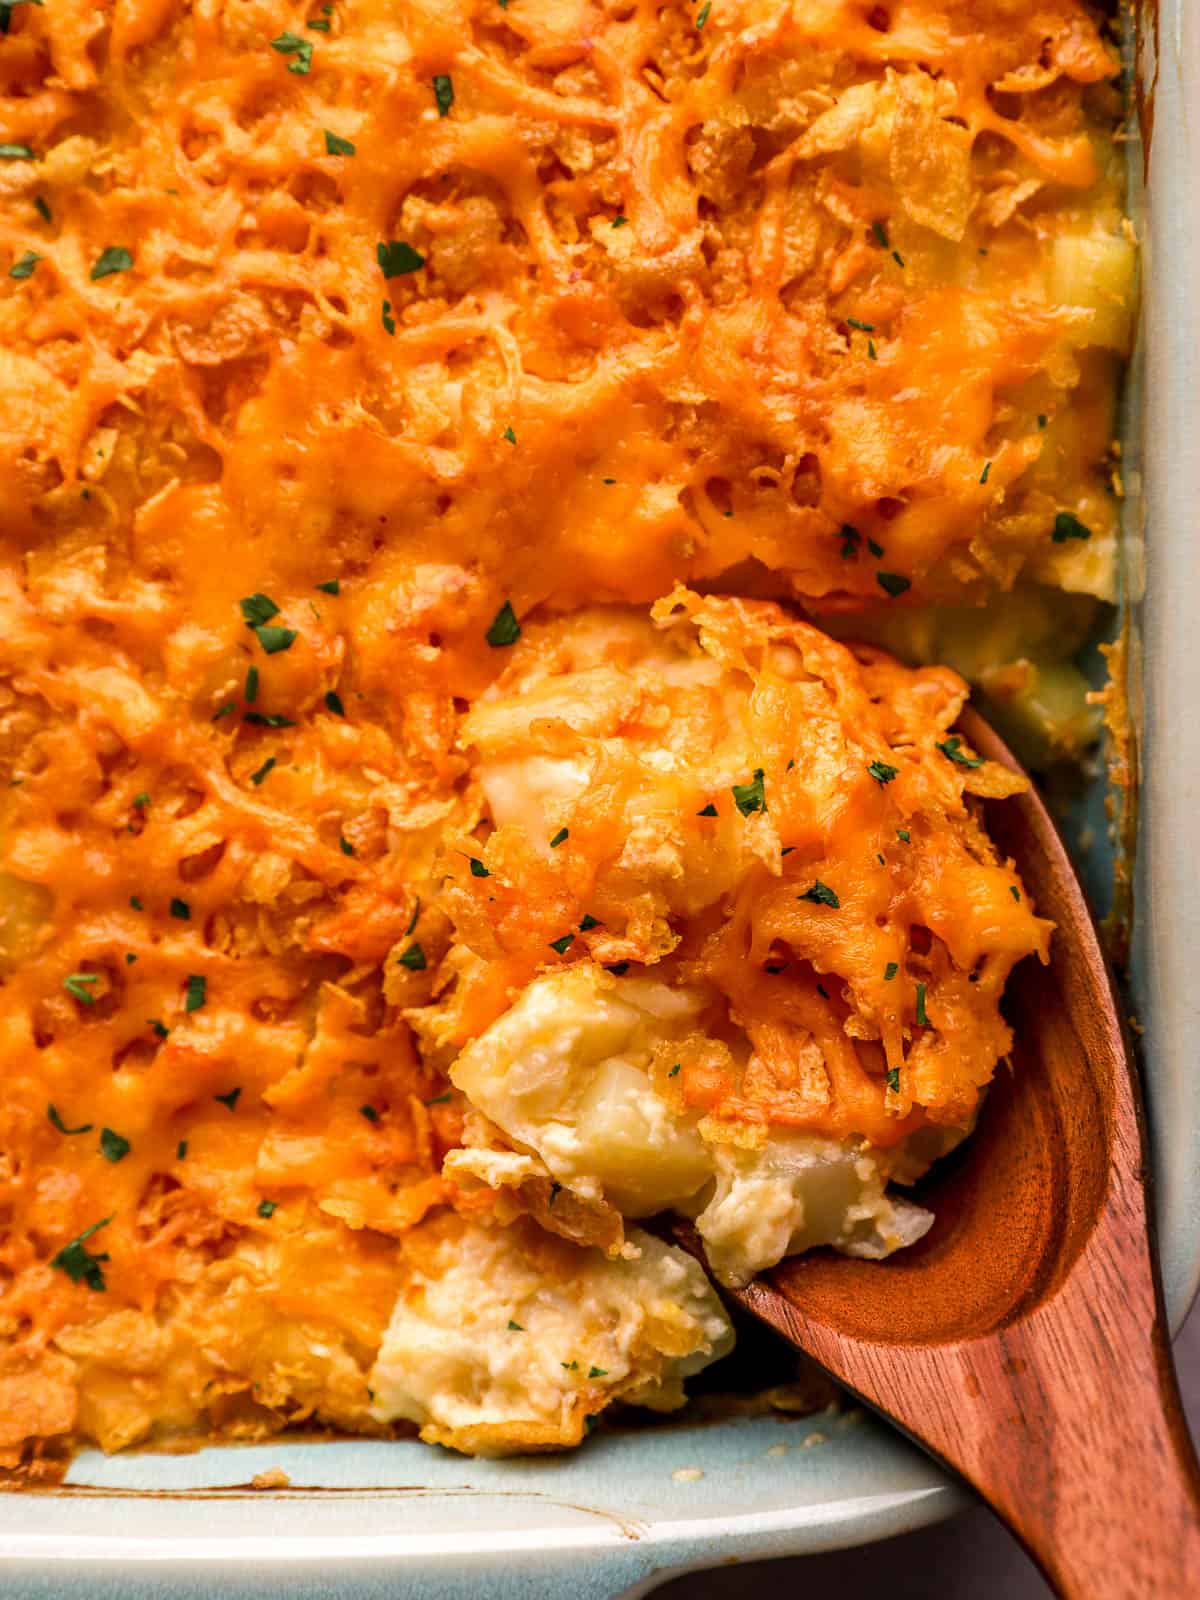
close up view of a wooden spoon in potato casserole.
Print

Potato Casserole

Make those potatoes go the extra mile with this cheesy potato casserole! Fit to serve a crowd, this casserole is the ultimate comfort food.
Course Side Dish
Cuisine American
Total Cost $9.06 recipe / $0.90 serving
Prep Time 30 minutes
Cook Time 20 minutes
Total Time 50 minutes
Servings 10
Calories 459kcal

Ingredients

  • 3 lbs. Yukon gold potatoes $3.00
  • 1/4 cup butter $0.53
  • 1/2 onion $0.16
  • 2 cloves garlic $0.16
  • 1/2 tsp salt $0.02
  • 1/4 cup all-purpose flour $0.05
  • 2 cups milk $0.96
  • 3 1/2 cups extra sharp cheddar cheese, divided $3.21
  • 1/2 cup sour cream $0.53
  • 1 cup crushed corn flake cereal $0.44

Instructions

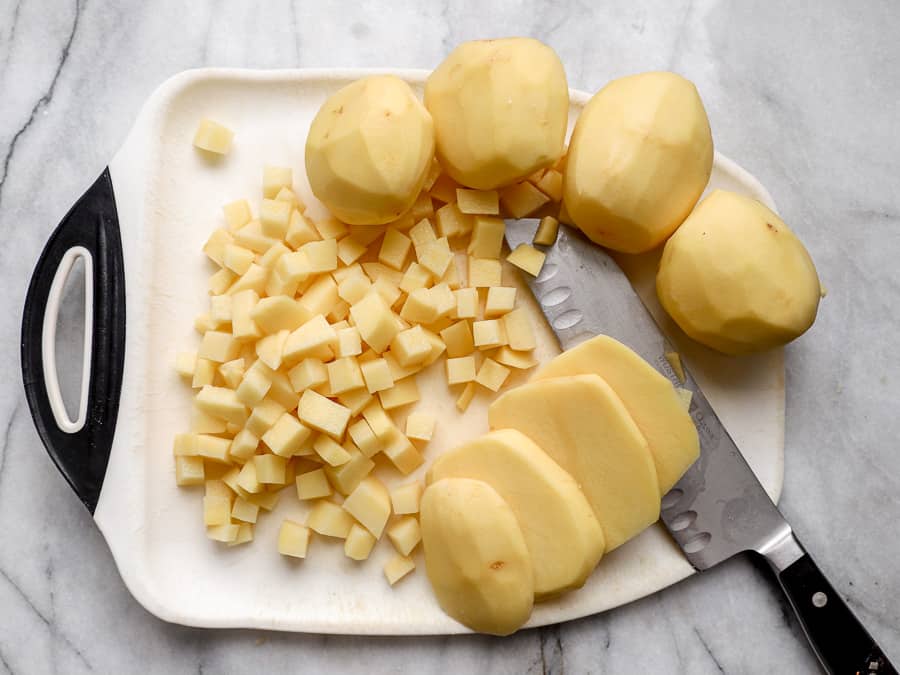
  • Preheat the oven to 375°F. Peel and dice the potatoes, finely chop the onion, and mince the garlic.
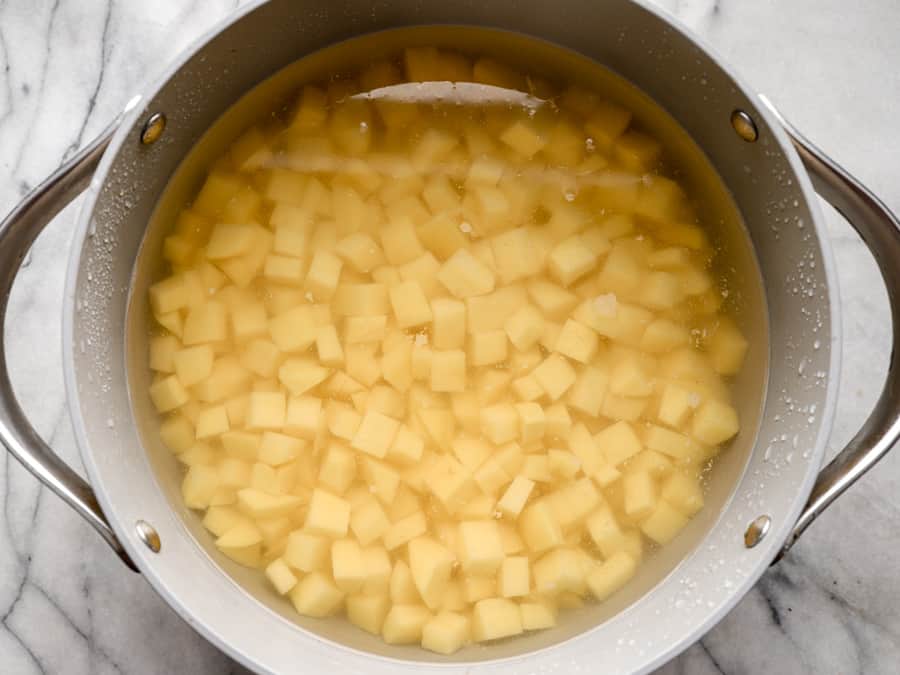
  • Add the potatoes to a large pot of water. Bring to a boil, cooking for 8-10 minutes until fork tender. Strain in a colander. Then, transfer the potatoes to a greased 9×13 casserole dish.
  • While the potatoes are boiling, melt the butter in a large saucepan or pot over medium heat.
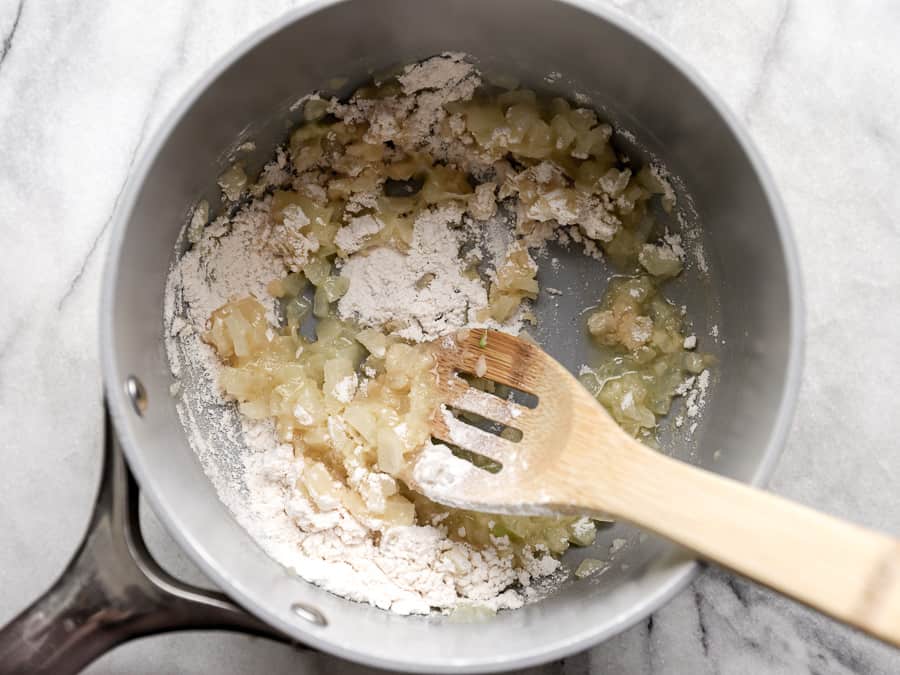
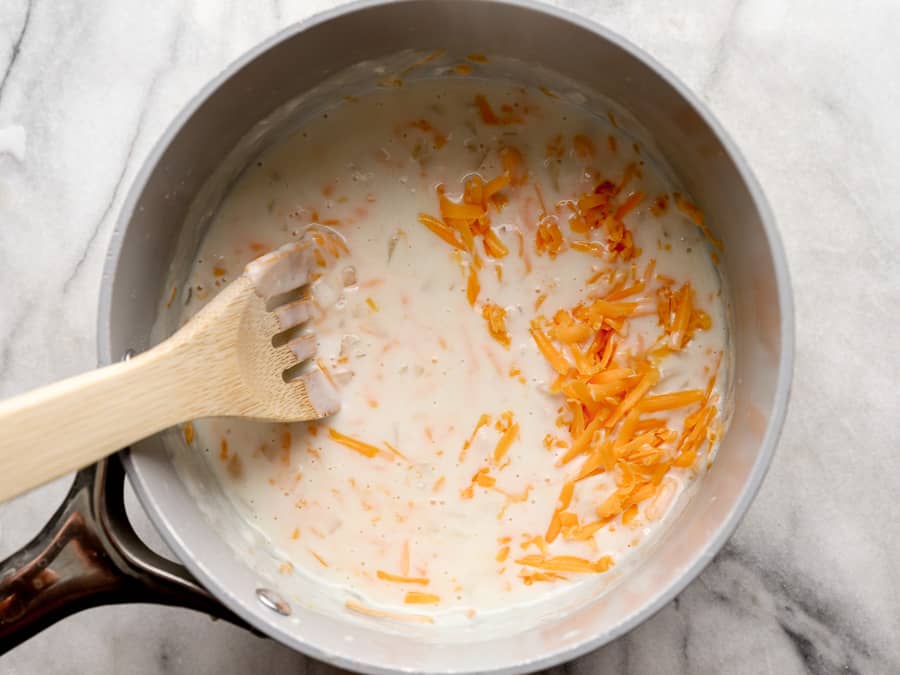
  • Add in the onion and salt, and cook for a few minutes until softened. Add in the garlic and cook for a minute. Then, stir in the flour.
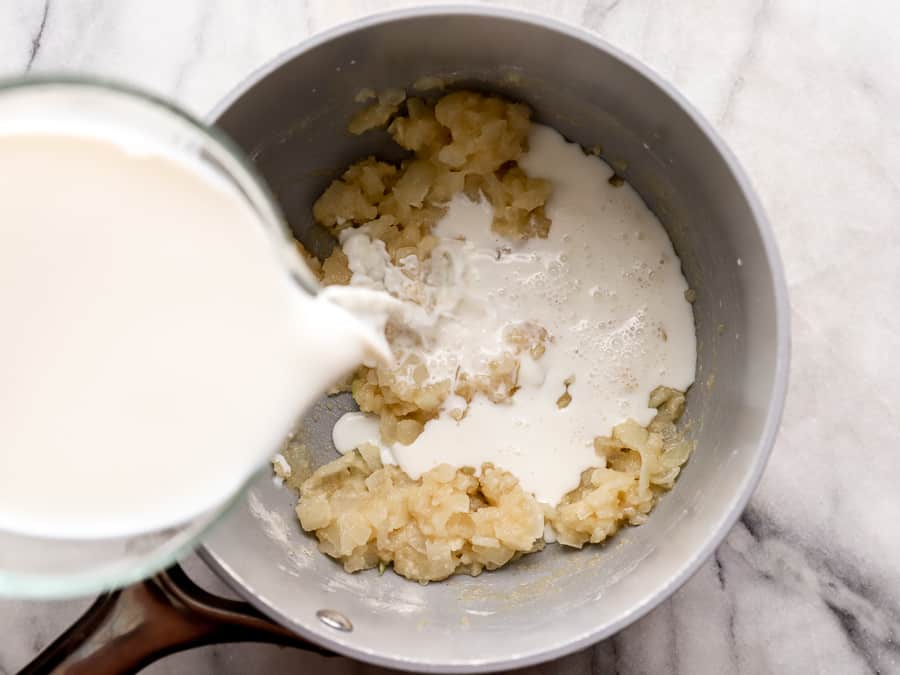
  • Slowly pour in the milk while whisking to incorporate.
  • Add in 2 cups of cheese and the sour cream. Stir until melted and incorporated.
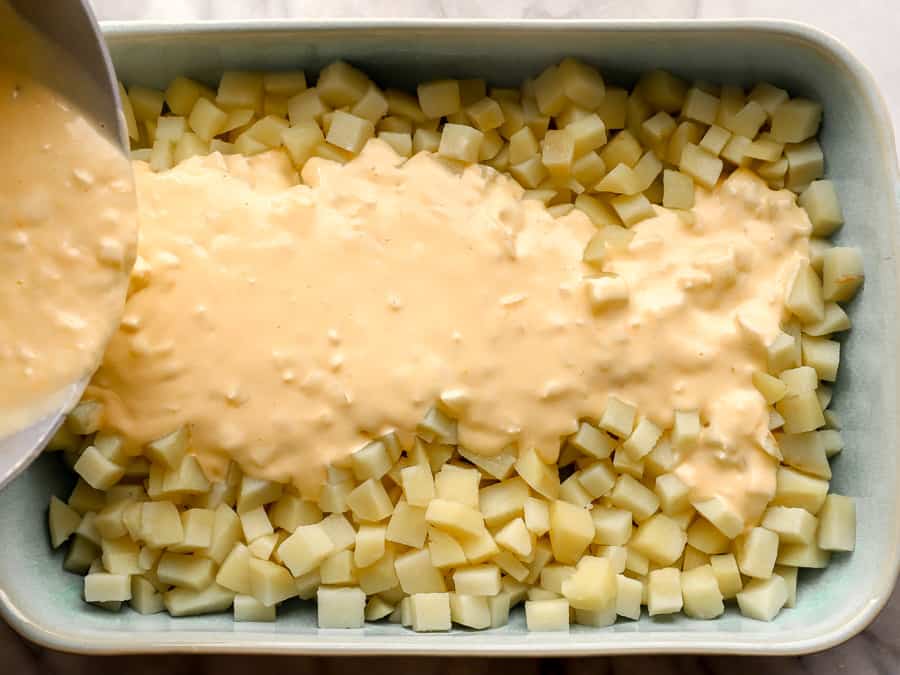
  • Pour the cheese sauce over the potatoes. Gently combine until the potatoes are fully coated.
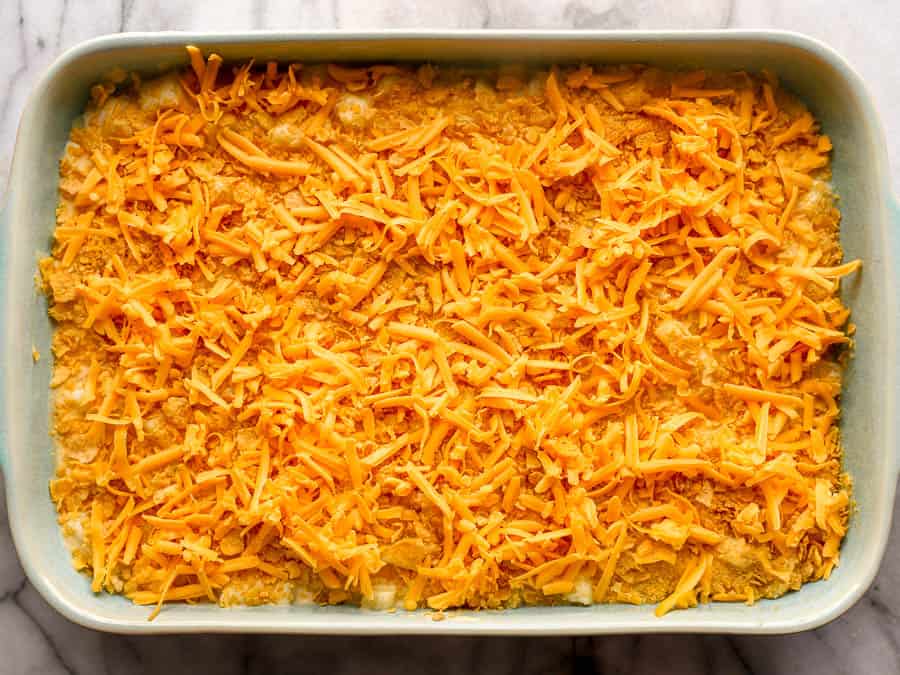
  • Top with the crushed cereal and the remaining 1 1/2 cups of cheddar cheese.
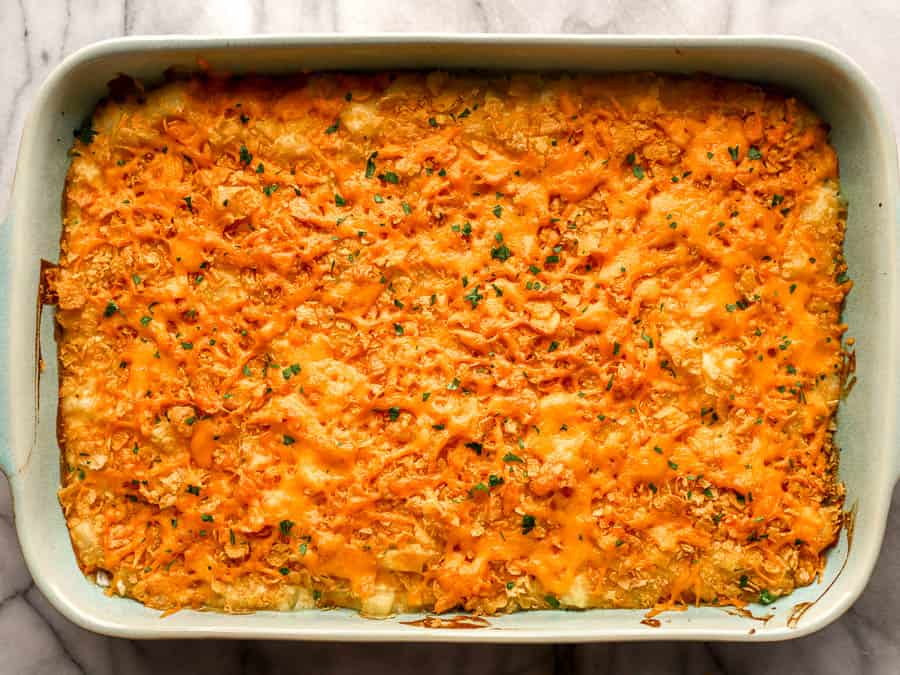
  • Bake for 20 minutes until the cheese is bubbly.

See how we calculate recipe costs here.

Nutrition

Serving: 1serving | Calories: 459kcal | Carbohydrates: 51g | Protein: 16g | Fat: 22g | Sodium: 615mg | Fiber: 4g

how to make Potato Casserole – step by step photos

Preheat the oven to 375°F. Peel and dice 3 lbs. Yukon gold potatoes, finely chop 1/2 onion, and mince 2 cloves garlic.

Add the potatoes to a large pot of water. Bring to a boil, cooking for 8-10 minutes until fork tender. Strain in a colander. Then, transfer the potatoes to a greased 9×13 casserole dish.

While the potatoes are boiling, melt 1/4 cup butter in a large saucepan or pot over medium heat. Add in the onion and 1/2 tsp salt, and cook for a few minutes until softened. Add in the garlic and cook for a minute. Then, stir in 1/4 cup all-purpose flour.

Slowly pour in 2 cups milk while whisking to incorporate.

Add in 2 cups of cheese and 1/2 cup sour cream. Stir until melted and incorporated.

Pour the cheese sauce over the potatoes. Gently combine until the potatoes are fully coated.

Top with 1 cup crushed corn flake cereal and the remaining 1 1/2 cups of cheddar cheese.

Bake for 20 minutes until the cheese is bubbly.

This savory and cheesy potato casserole is the perfect side dish for your next brunch or dinner party!

The post Potato Casserole appeared first on Budget Bytes.
7 Layer Dip

This easy 7 Layer Dip is the perfect appetizer for parties, football games, and gatherings. No cooking needed and it feeds a large crowd!

The post 7 Layer Dip appeared first on Budget Bytes.
When you need a quick party appetizer that tastes good, is easy to make, and feeds a large crowd…this 7 Layer Dip is the one to make! It has all of my favorite Tex-Mex flavors in one dish and it’s perfect for serving at potlucks, football parties, and family gatherings. I’m always down for any type of chips and dip, but this 7 layer dip takes dips to a whole new level! I’m not sure which part I love the most, the fact that I don’t have to cook anything over a stove to make this recipe or that it comes in at just over $1 per serving. Either way, I highly recommend adding this 7 layer dip recipe to your Super Bowl menu this weekend.😉

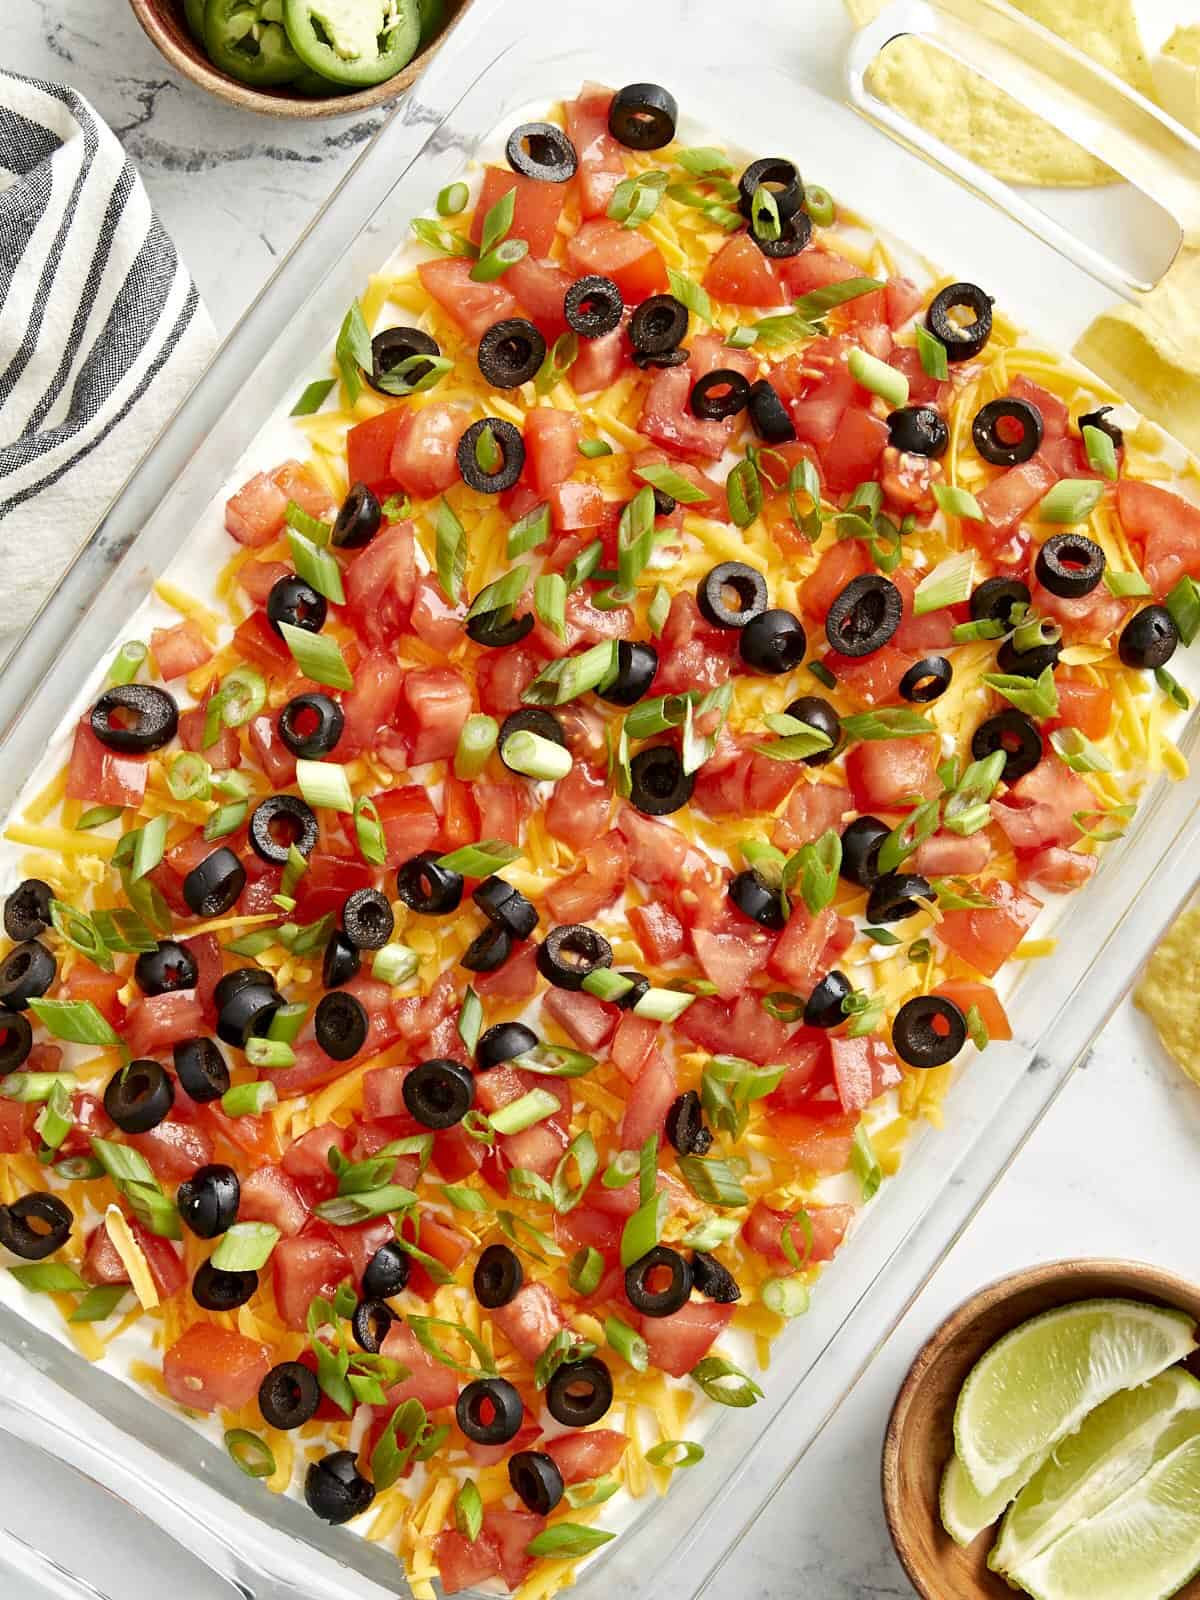
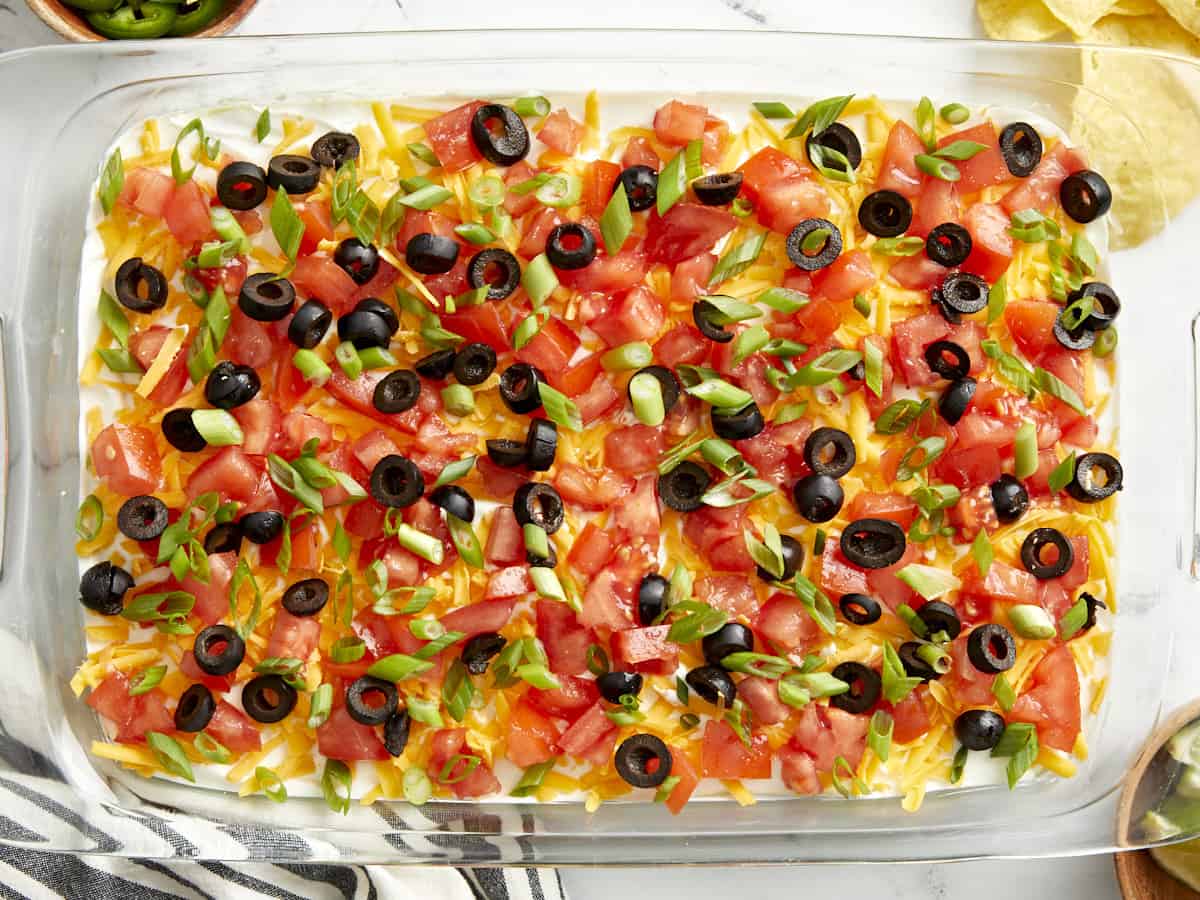
Overhead view of 7 layer dip in a glass casserole dish with a napkin, chips, and lime wedges on the side.

What Is 7 Layer Dip?

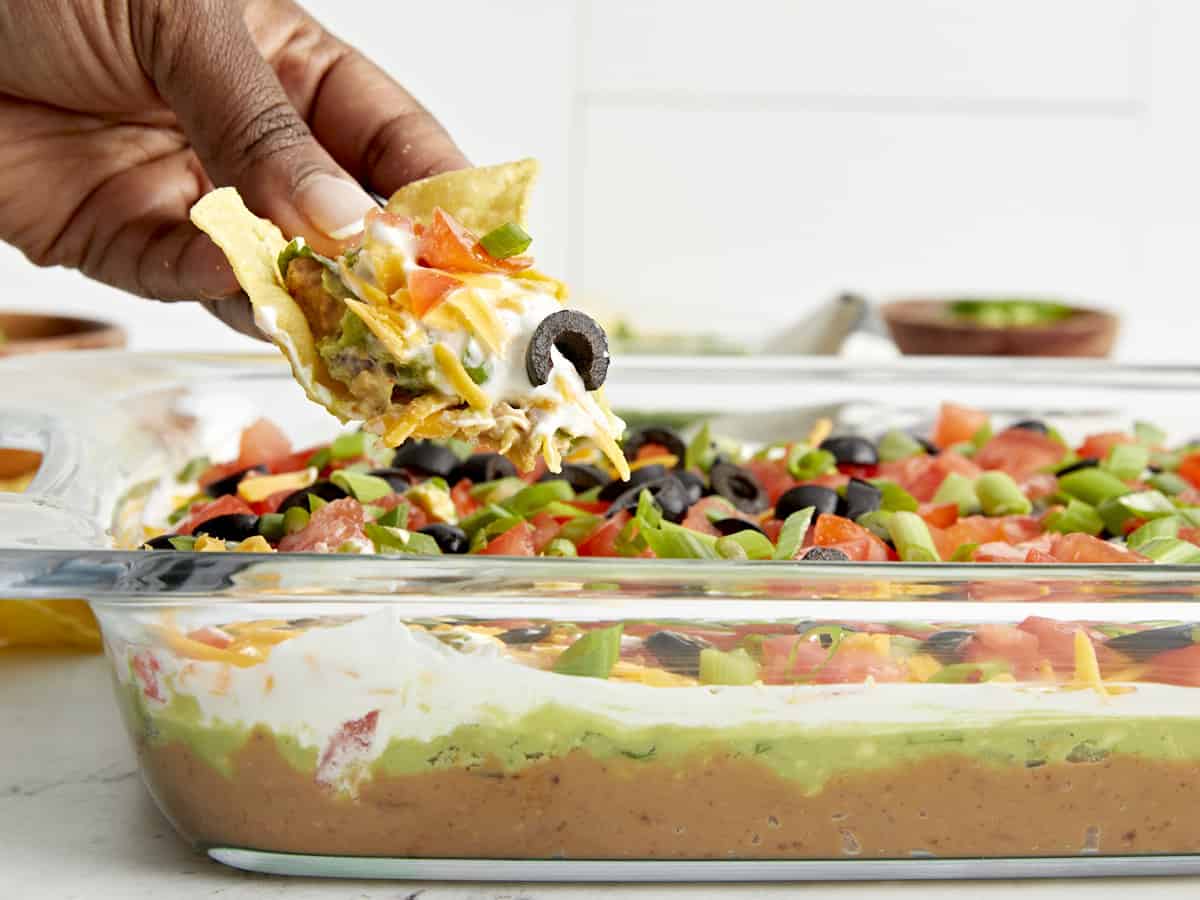
7 layer dip is an easy party appetizer that’s made by building layers of creamy, flavorful, ingredients like refried beans and guacamole into a 9×13” dish. It’s fun to serve at football parties and family gatherings, there’s no need to heat up a stove, and it’s perfect for feeding a crowd!

Ingredients For 7 Layer Dip

Here’s everything you need to make this easy 7 Layer Dip:

  • Refried Beans: You can certainly make your own refried beans, but to make things easy we used canned refried beans and seasoned it with a few spices.
  • Guacamole: We made a quick batch of our homemade guacamole recipe, but to save time you can easily substitute with your favorite store-bought guacamole.
  • Sour Cream: No need to overthink this layer, just grab a tub of regular sour cream to spread on top of the guacamole. It adds the perfect creamy and tasty flavor to balance the beans and guacamole.
  • Cheddar Cheese: We used medium cheddar cheese but you can certainly use mild or a different flavor cheese if you prefer. And we highly recommend buying the cheese in block form and shredding it yourself for this recipe.
  • Tomatoes: Diced Roma tomatoes or vine-ripe tomatoes both work well and are added on top of the cheese layer.
  • Black Olives: Black olives add wonderful color, texture, and flavor to the dip. Because olives tend to be salty and tangy with bold flavors, you’ll only need a few of them for this 7 layer dip.
  • Green Onions: The final layer is a sprinkle of sliced green onions which add not only great flavor, but also a beautiful vibrant color to the dip!

Recipe Variations

  1. Use taco seasoning – If you happen to have a batch of taco seasoning in your panty, use 1 ½ tablespoons of it instead of the chili powder, cumin, and salt to season your refried beans. This will give the beans even more flavor! You can also mix a little bit in to your sour cream to give it an extra boost of flavor.
  2. Add seasoned ground meat – You can make this 7 layer dip even more filling by adding a layer of taco seasoned ground beef or ground turkey. I would add it right after the refried beans layer.
  3. Add salsa – Your favorite thick salsa also works really well with this dip recipe. If you want to add it as a layer, just make sure to drain any excess liquid from the salsa to keep the dip from getting too soggy.

Storing LEftovers

This dip is definitely best served and eaten the same day it’s made, but if you happen to have leftovers, just store any leftovers covered tightly in the refrigerator for 3-4 days. The guacamole may start to brown slightly and the dip may get a bit watery around the edges, but it will still taste delicious!

Side view of 7 layer dip with a hand holding a chip and scooping some out.
Overhead view of 7 layer dip in a glass casserole dish with a napkin, chips, and lime wedges on the side.
Print

7 Layer Dip

This easy 7 Layer Dip is the perfect appetizer for parties, football games, and gatherings. No cooking needed and it feeds a large crowd!
Course Appetizer, Side Dish
Cuisine Mexican, Southwest
Total Cost $16.72 recipe / $1.11 serving
Prep Time 20 minutes
Total Time 20 minutes
Servings 15 (1/2 cup each)
Calories 170kcal

Ingredients

  • 2 tomatoes $1.46
  • 1 1/2 cups shredded cheddar cheese $1.87
  • 1/2 cup sliced black olives $2.19
  • 3 green onions $0.45
  • 2 16oz. cans refried beans $2.38
  • 1 Tbsp chili powder $0.30
  • 1/2 tsp cumin $0.05
  • 1/4 tsp salt $0.02
  • 2 Tbsp water $0.00
  • 2 1/2 cups guacamole $6.25
  • 1 1/2 cups sour cream $1.75

Instructions

  • Dice the tomatoes, shred the cheddar cheese, drain the black olives, and slice the green onions. Set these ingredients to the side.
  • In a medium bowl add the refried beans along with the chili powder, cumin, salt, and water. Mix these ingredients together until well combined.
  • Spread the seasoned refried beans into the bottom of a 9×13” casserole dish.
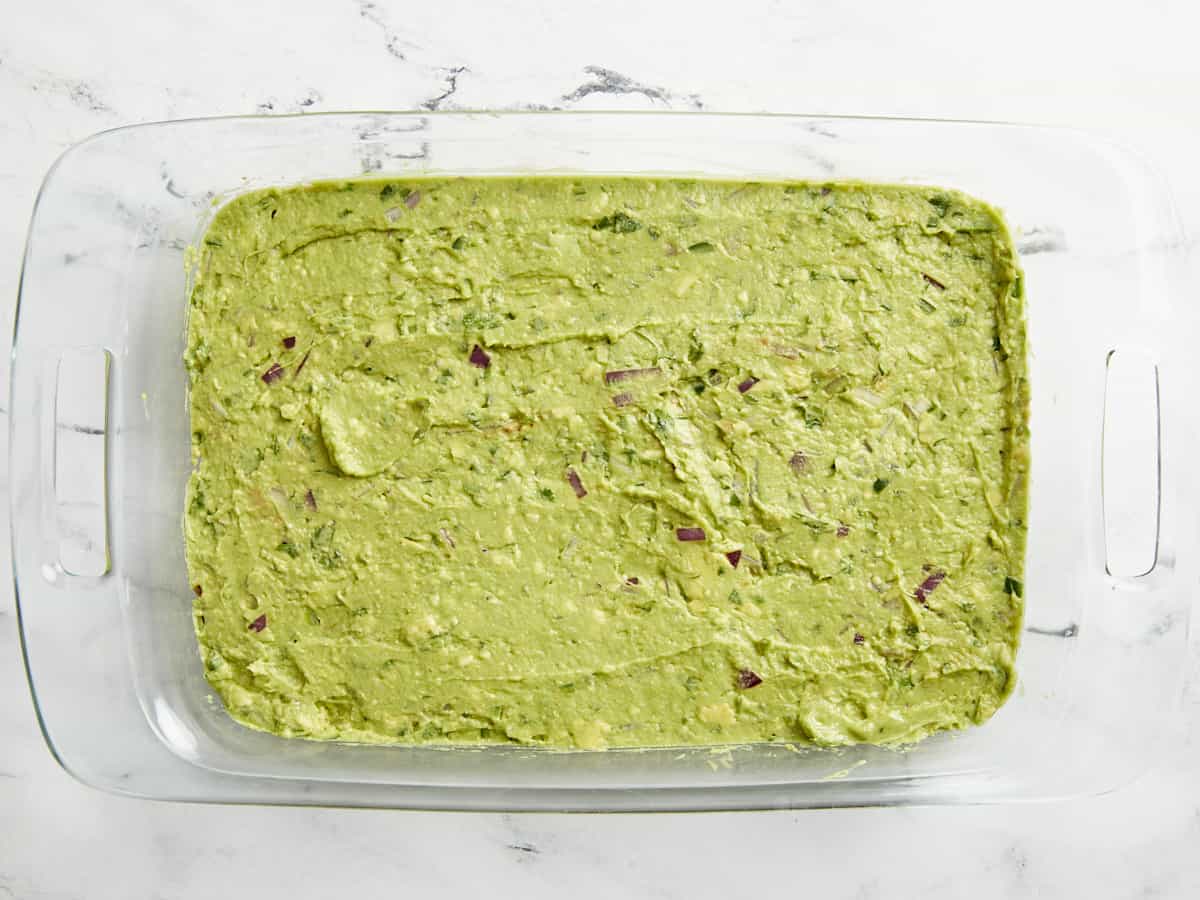
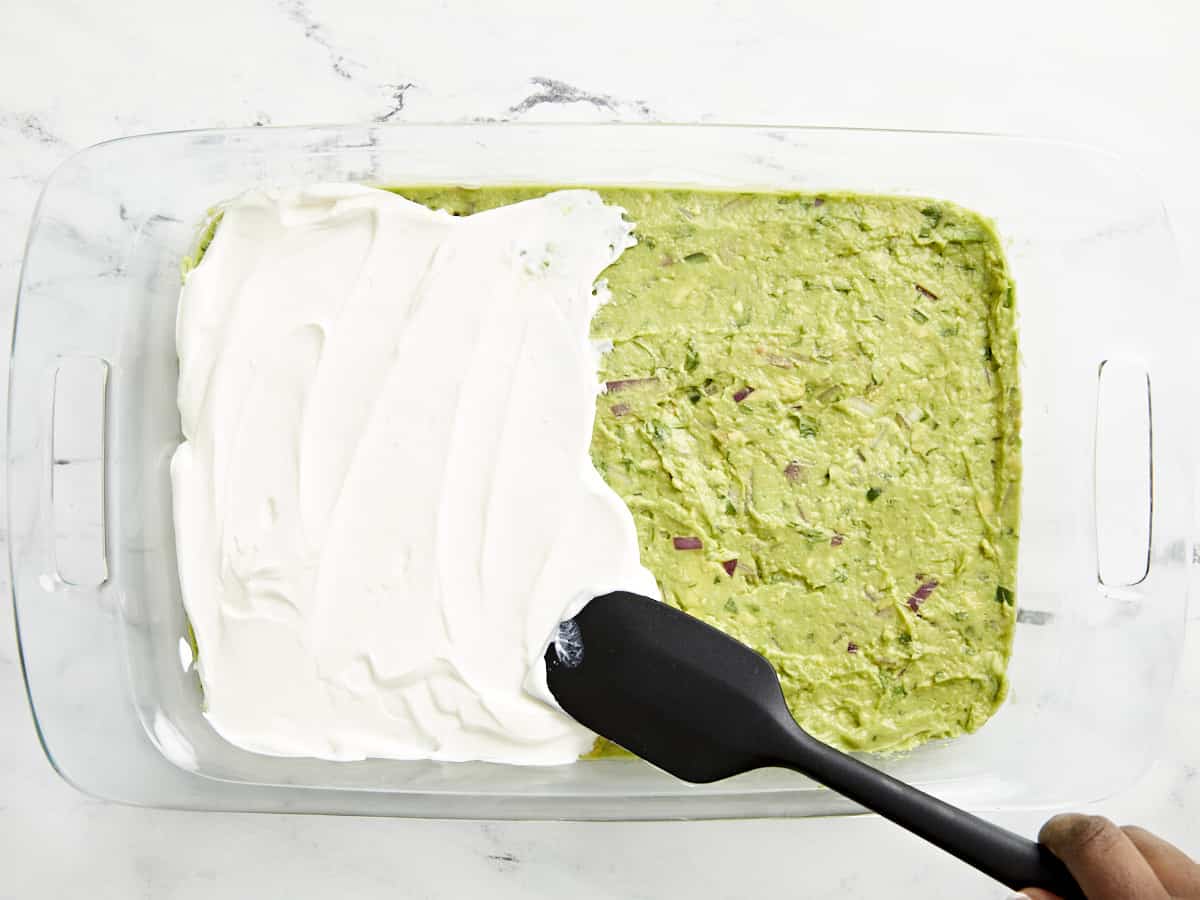
  • Next spread the guacamole evenly on top of the refried beans. Then spread the sour cream evenly on top of the guacamole mixture.
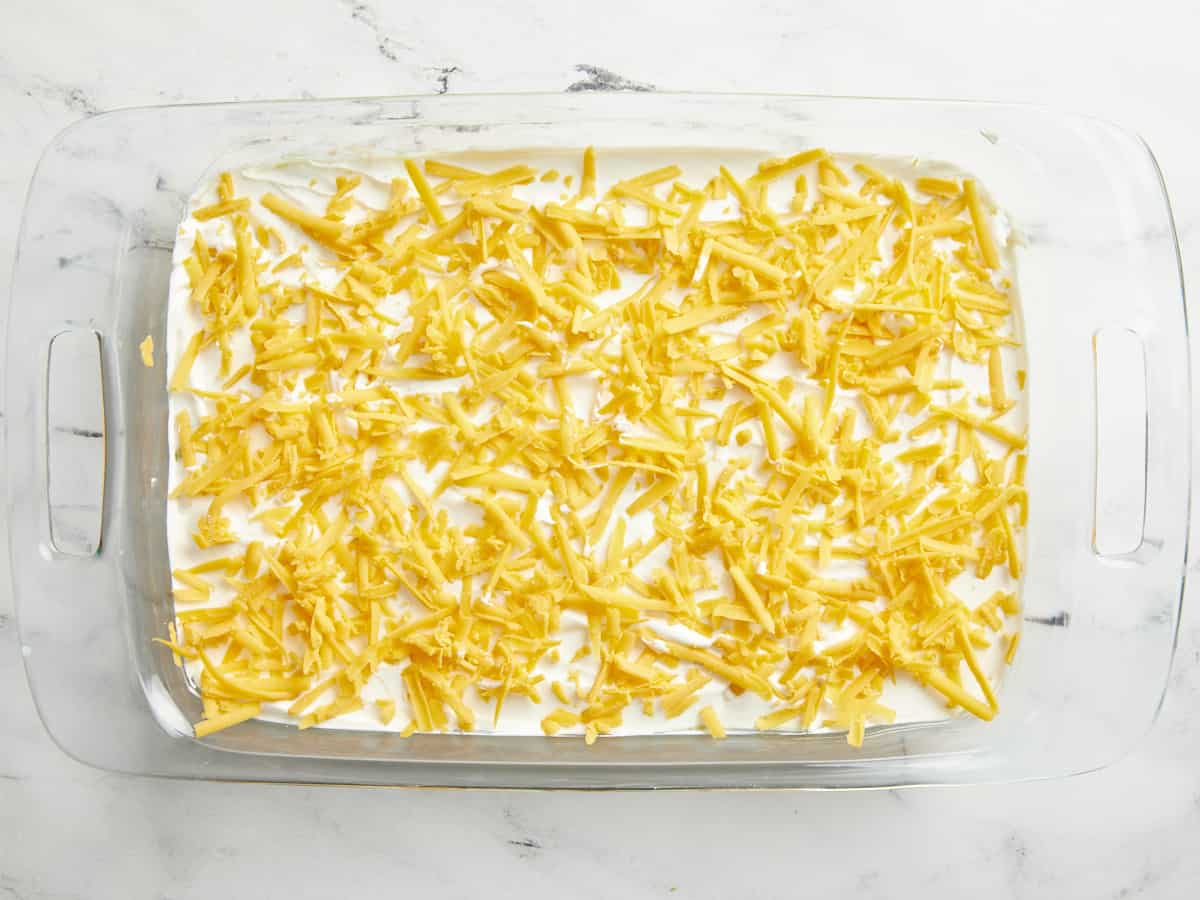
  • Sprinkle the shredded cheese evenly on top of the sour cream.
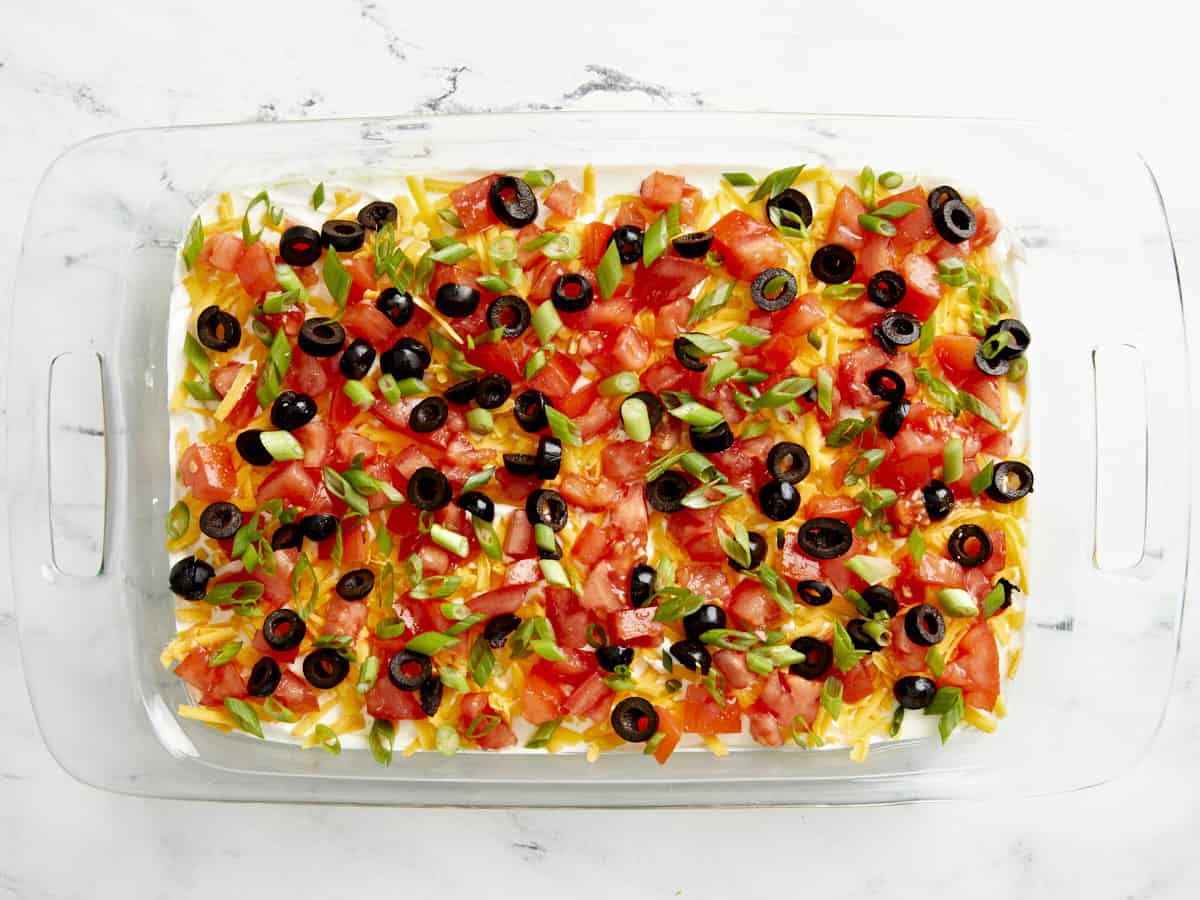
  • Now add the diced tomatoes, black olives, and green onions on top. Make sure everything is spread as evenly as possible.
  • Serve immediately with tortilla chips or cover and place in the refrigerator until ready to serve.

See how we calculate recipe costs here.

Nutrition

Serving: 1serving | Calories: 170kcal | Carbohydrates: 6g | Protein: 4g | Fat: 15g | Sodium: 204mg | Fiber: 3g
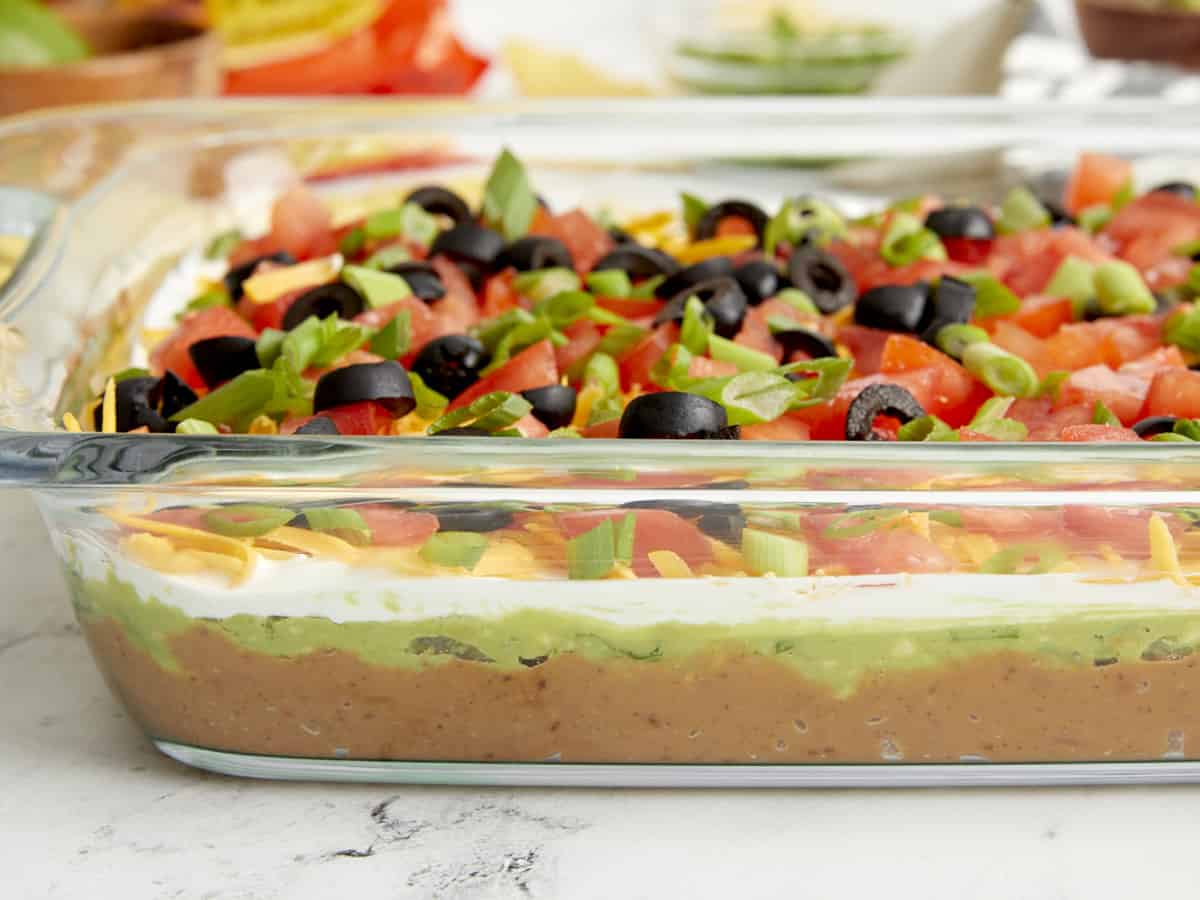
Side close up view of 7 layer dip in a glass casserole dish.

How to Make 7 Layer Dip – Step by Step Photos

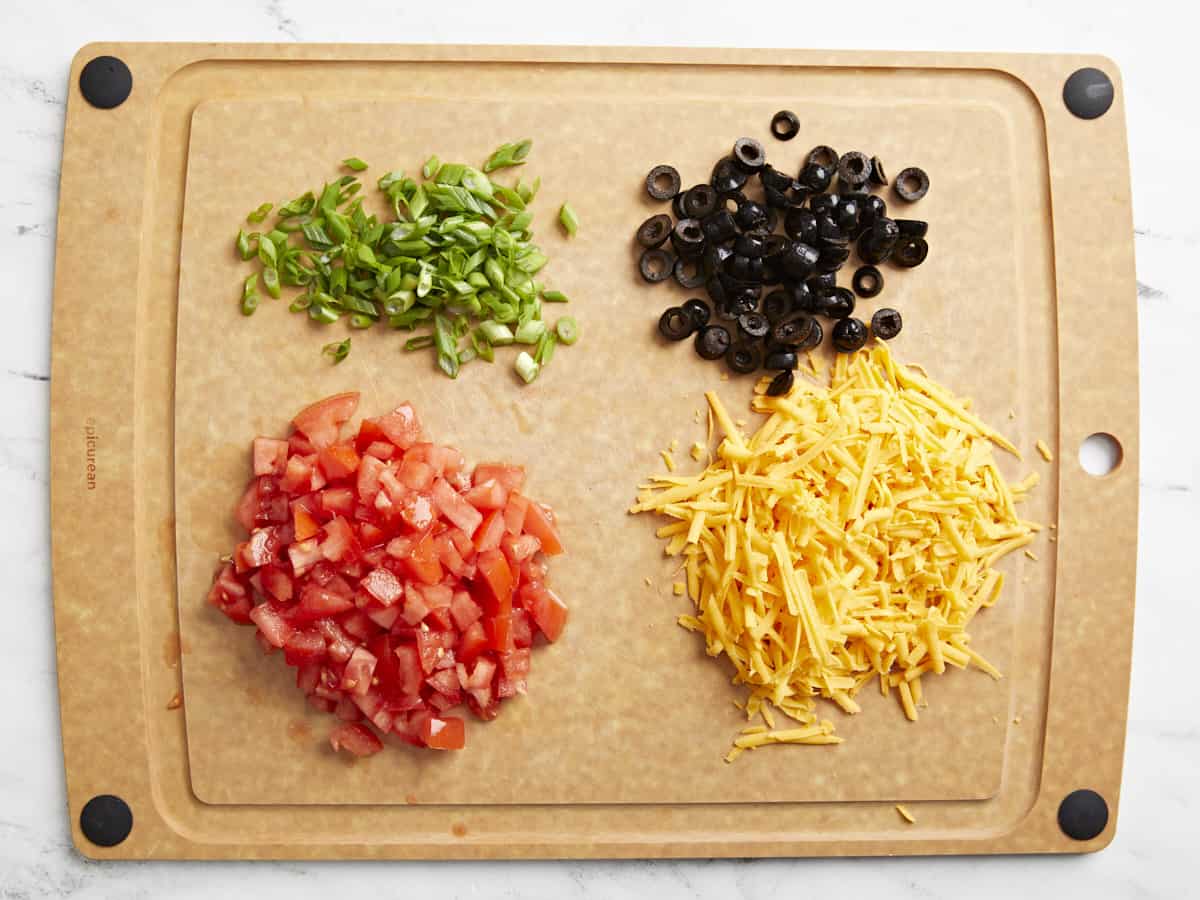
7 layer dip ingredients on a cutting board.

Dice 2 tomatoes, shred 1 1/2 cups of cheddar cheese, drain 1/2 cup black olives, and slice 3 green onions. Set these ingredients to the side.

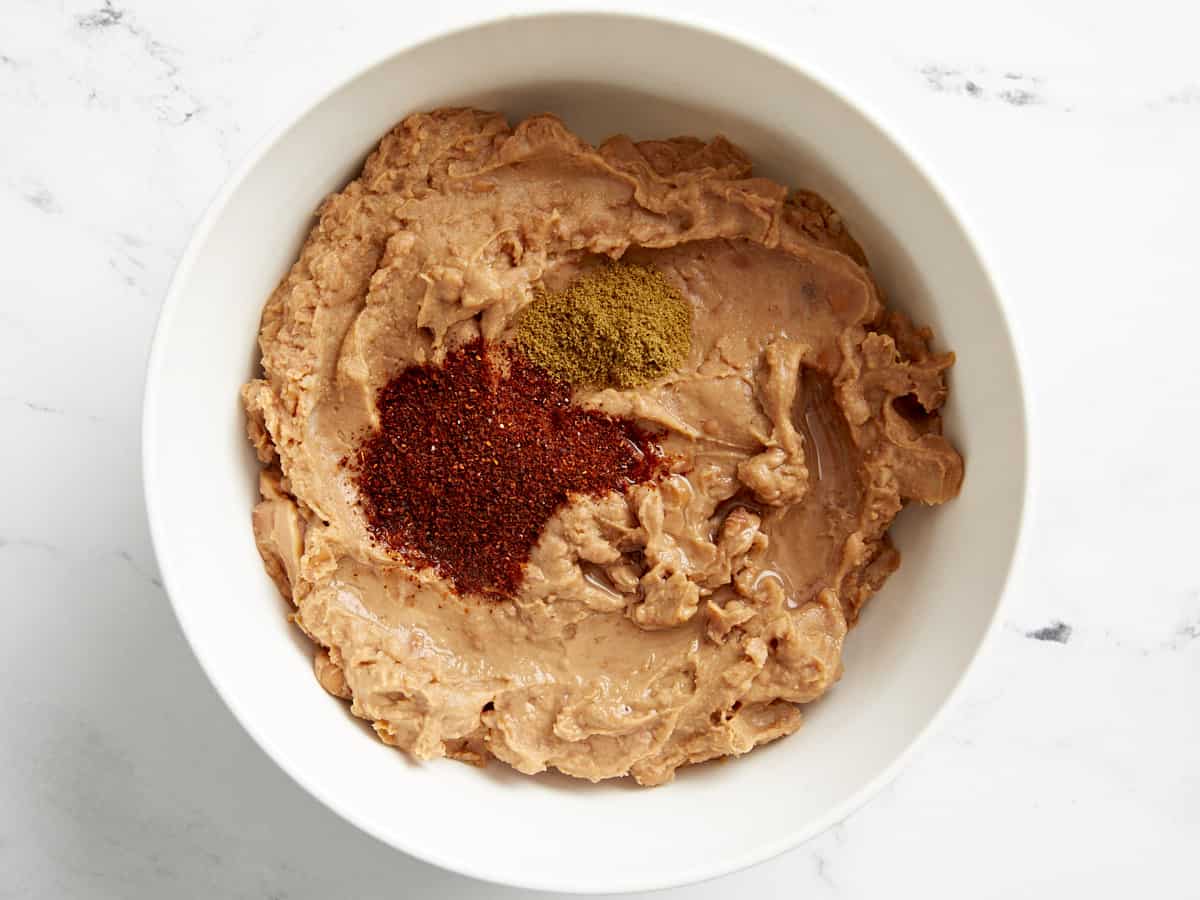
Refried beans in a white mixing bowl with seasoning on top.

In a medium bowl add 2-16oz. cans of refried beans along with 1 Tbsp chili powder, 1/2 tsp cumin, 1/4 tsp salt, and 2 Tbsp water. Mix these ingredients together until well combined.

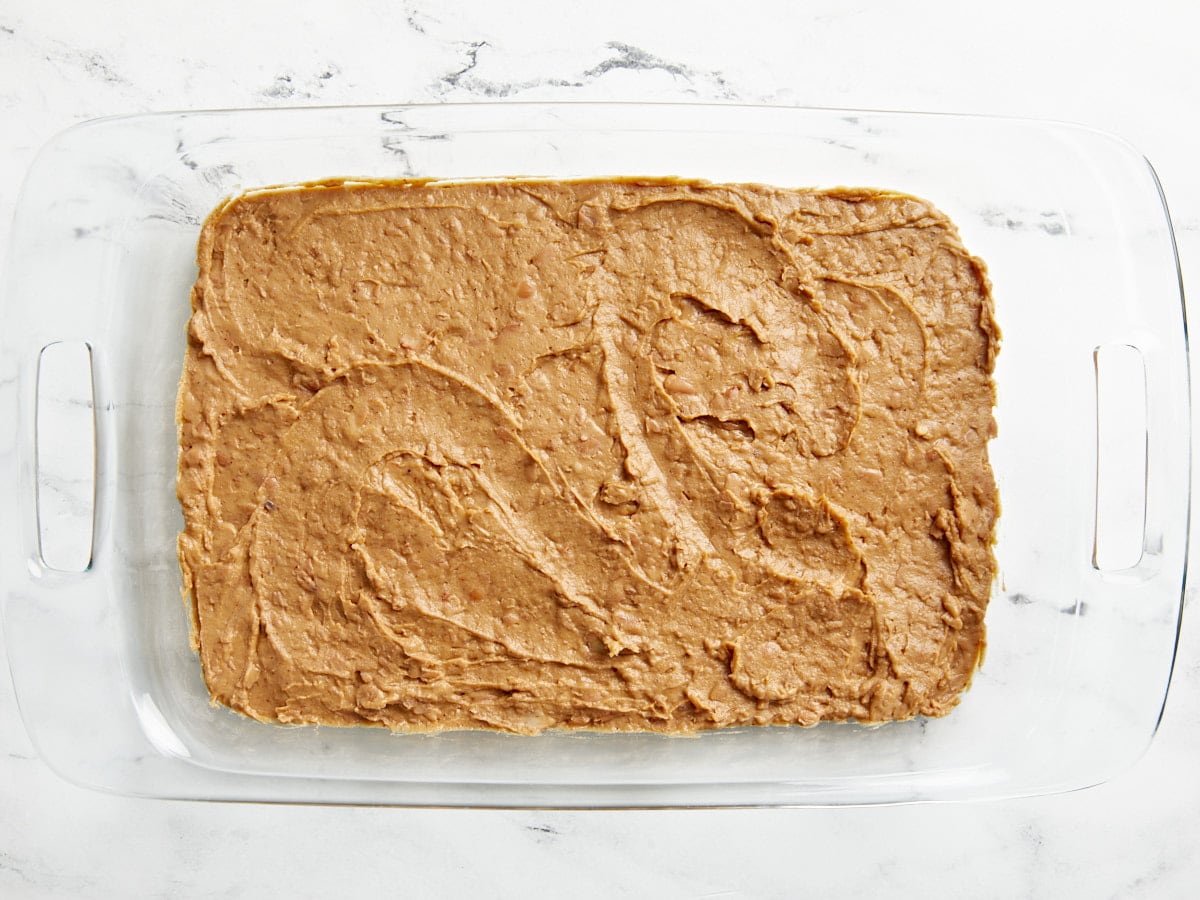
Refried beans spread evenly in a glass casserole dish.

Spread the seasoned refried beans into the bottom of a 9×13” casserole dish.

Guacamole spread evenly on top of refried beans in glass casserole dish.

Next spread 2 1/2 cups of guacamole evenly on top of the refried beans.

Sour cream being spread on top of guacamole with a black spatula.

Then spread 1 1/2 cups of sour cream evenly on top of the guacamole mixture.

Shredded cheese added evenly on top of sour cream layer.

Sprinkle the shredded cheese evenly on top of the sour cream.

Chopped tomatoes, black olives, and sliced green onions added and spread out evenly on top of shredded cheese layer.

Now add the diced tomatoes, black olives, and green onions on top. Make sure everything is spread as evenly as possible.

Overhead view of 7 layer dip in a glass casserole dish with a napkin, chips, and lime wedges on the side.

Enjoy this tasty appetizer dip immediately with tortilla chips or cover and place in the refrigerator until ready to serve.

The post 7 Layer Dip appeared first on Budget Bytes.
One Pot Chili Mac

This super filling comfort food classic, One Pot Chili Mac, is like the hamburger helper of your childhood but all grown up and 100% from scratch!

The post One Pot Chili Mac appeared first on Budget Bytes.
So you grew up on Hamburger Helper, but now you’re an adult and have a more ✨refined✨ palate (read: sarcasm). Well, this One Pot Chili Mac recipe is your grown-up “I actually know how to cook now” substitute! And don’t worry, it’s almost just as easy as the boxed mix. Promise. It’s rich, hearty, cheesy, beefy comfort food pasta all cooked in one easy-to-clean pot. WIN!

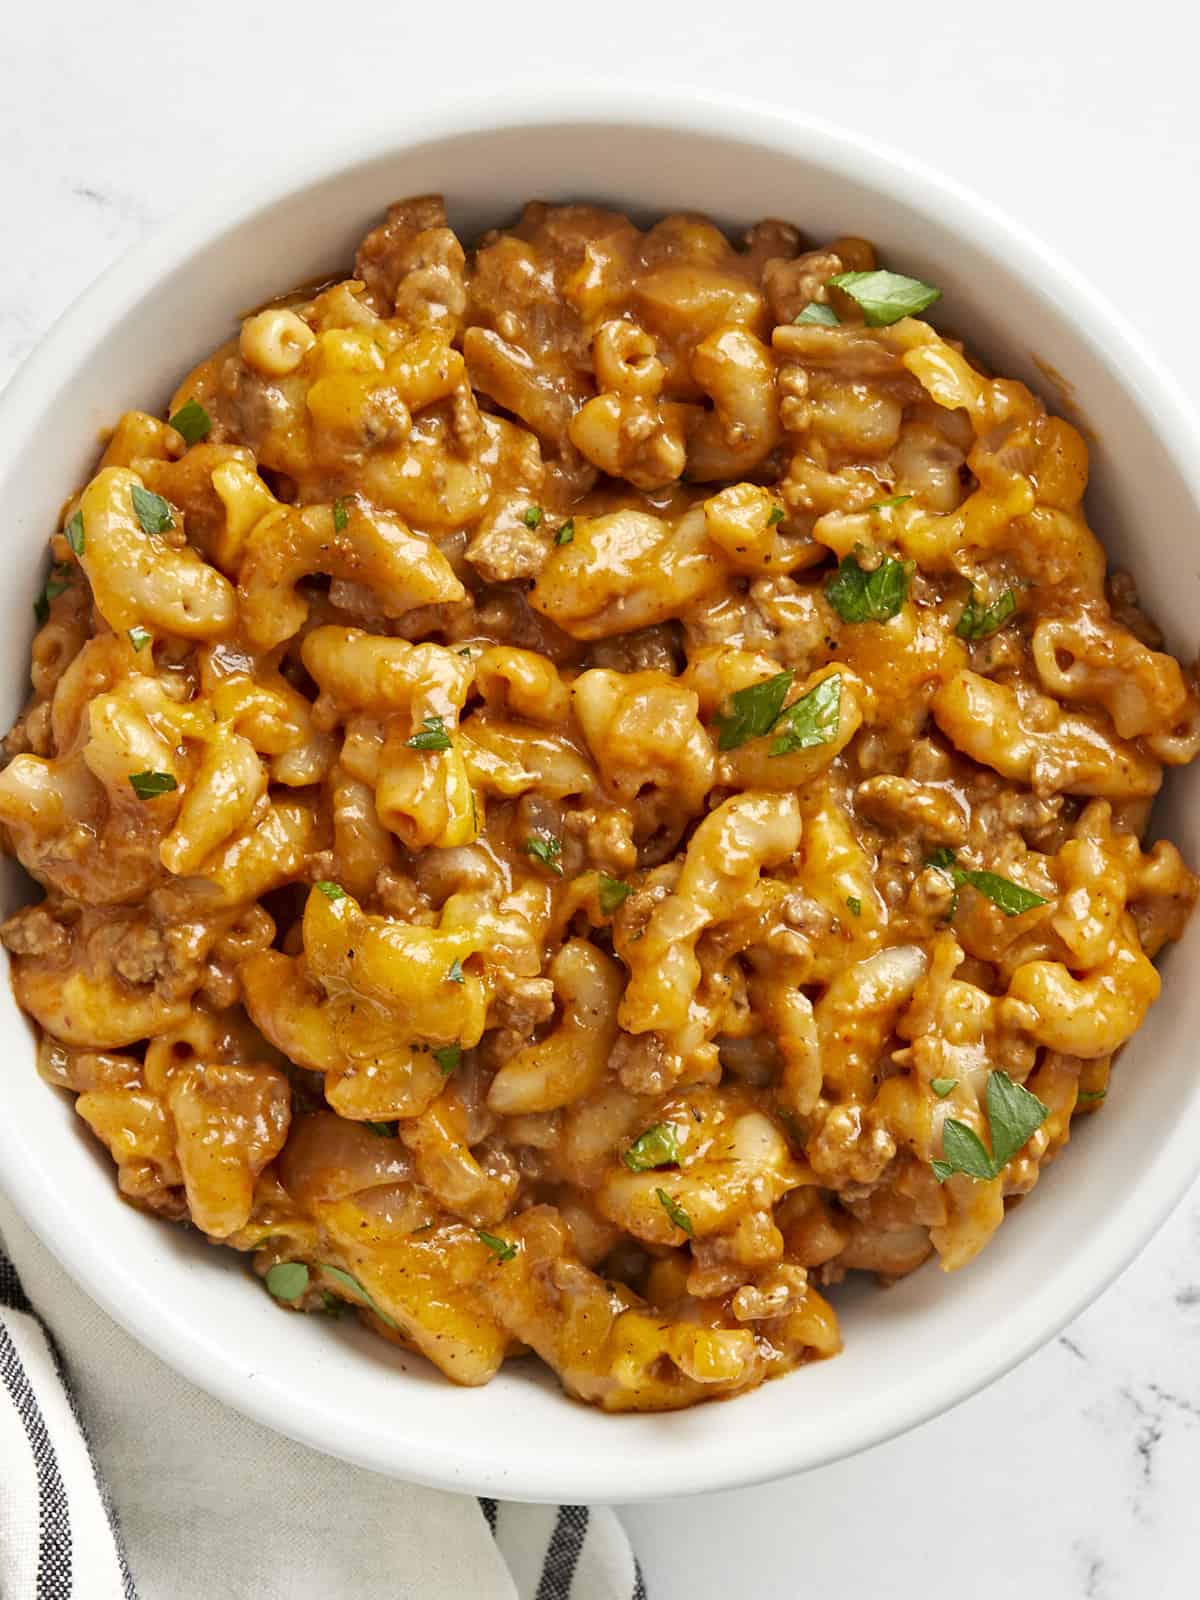
Overhead view of a bowl full of chili mac, garnished with parsley.

What Is Chili Mac?

Chili Mac is simply macaroni noodles drenched in a rich tomato-based meat sauce, seasoned with chili spices, and with plenty of creamy cheddar cheese melted in. Some recipes also include beans, but I’m going for more of a Hamburger Helper dupe with mine, so I went sans beans. And you might be thinking, “I call that Goulash in my house.” While Chili Mac is similar to American Goulash in that they both contain macaroni noodles and a tomato-based meat sauce, they differ in their seasonings and flavor profiles.

Ingredients for Chili Mac

Here’s what you’ll need to make your own homemade chili mac:

  • Onion and Garlic: The delicious meat sauce starts with onions and garlic sautéed in olive oil to give the beef plenty of flavor.
  • Ground Beef: Ground beef makes this dish super hearty and delicious, while still being quick and easy to make. Opt for 85 or 90% lean ground beef to avoid having to drain the fat from the pan.
  • Flour: A little flour cooked into the sauce helps thicken it up into a delicious gravy-like consistency.
  • Spices: A mix of spices are added to the sauce for maximum flavor, including chili powder, smoked paprika, garlic powder, and oregano.
  • Tomato Sauce: Tomato sauce gives the sauce a tangy tomato flavor and adds to the chili flavor profile.
  • Beef Broth: Beef broth adds tons of flavor to this dish and enough salt to keep everything properly seasoned. If using a low-sodium broth, you may need to add a little salt at the end to taste to really help the flavors pop. We used Better Than Bouillon to make our beef broth for maximum flavor.
  • Macaroni: Macaroni noodles are an inexpensive and filling ingredient that helps stretch the cost of the beef and keep the entire recipe budget-friendly.
  • Cheddar Cheese: Cheddar cheese is stirred into the sauce and added on top of the noodles for extra cheesy flavor!

What Else Can I Add?

If you want to take your chili mac to the next level, try adding one or more of these ingredients:

  • Drained kidney or black beans
  • Frozen corn kernels
  • Sliced green onions
  • Pickled jalapeños
  • Diced tomatoes (or tomatoes with green chiles)
  • Chipotle chile powder

What to Serve with Chili Mac

Chili mac is a true meal in a bowl, but if you want to serve something on the side I’d go for something fresh and light like Cowboy Caviar, Sweet Corn Salsa, or even Cumin Lime Coleslaw.

Storing and Reheating Leftovers

As with any pasta dish, the macaroni will continue to get softer as it absorbs moisture from the sauce, so if softer pasta is not tolerable to you, you may not enjoy the leftovers. That being said, I will gobble up these leftovers without a second thought and love making this Chili Mac for meal prep and even to stock my freezer. I simply refrigerate single-serving portions for up to five days or freeze for up to three months. Let frozen portions thaw in the refrigerator overnight, then reheat using the microwave.

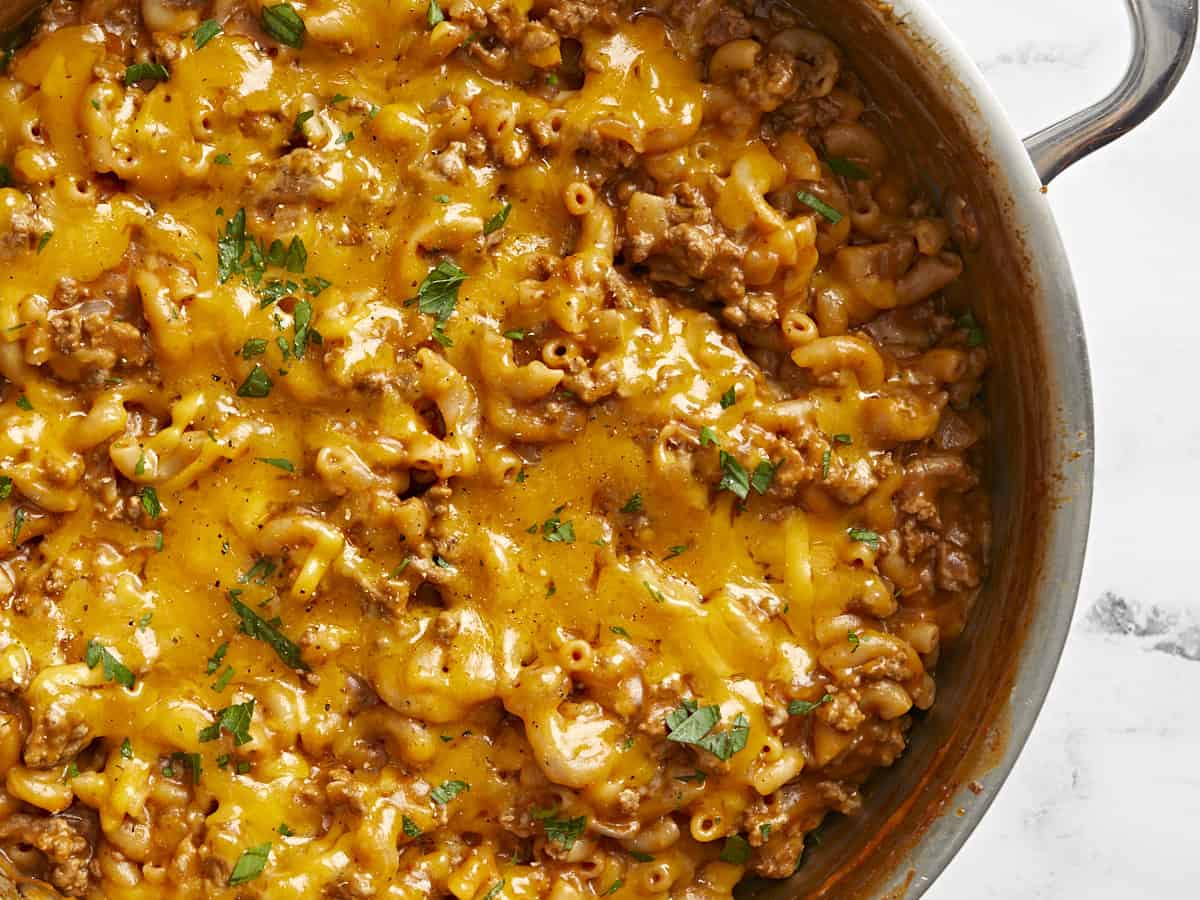
Close up overhead view of chili mac in the pan.
Close up overhead view of a bowl of chili mac.
Print

One Pot Chili Mac

This super filling comfort food classic, One Pot Chili Mac, is like the hamburger helper of your childhood but all grown up and 100% from scratch!
Course Dinner, Main Course
Cuisine American
Total Cost $9.79 recipe / $1.63 serving
Prep Time 5 minutes
Cook Time 30 minutes
Total Time 35 minutes
Servings 6 (1 cup each)
Calories 471kcal

Ingredients

Instructions

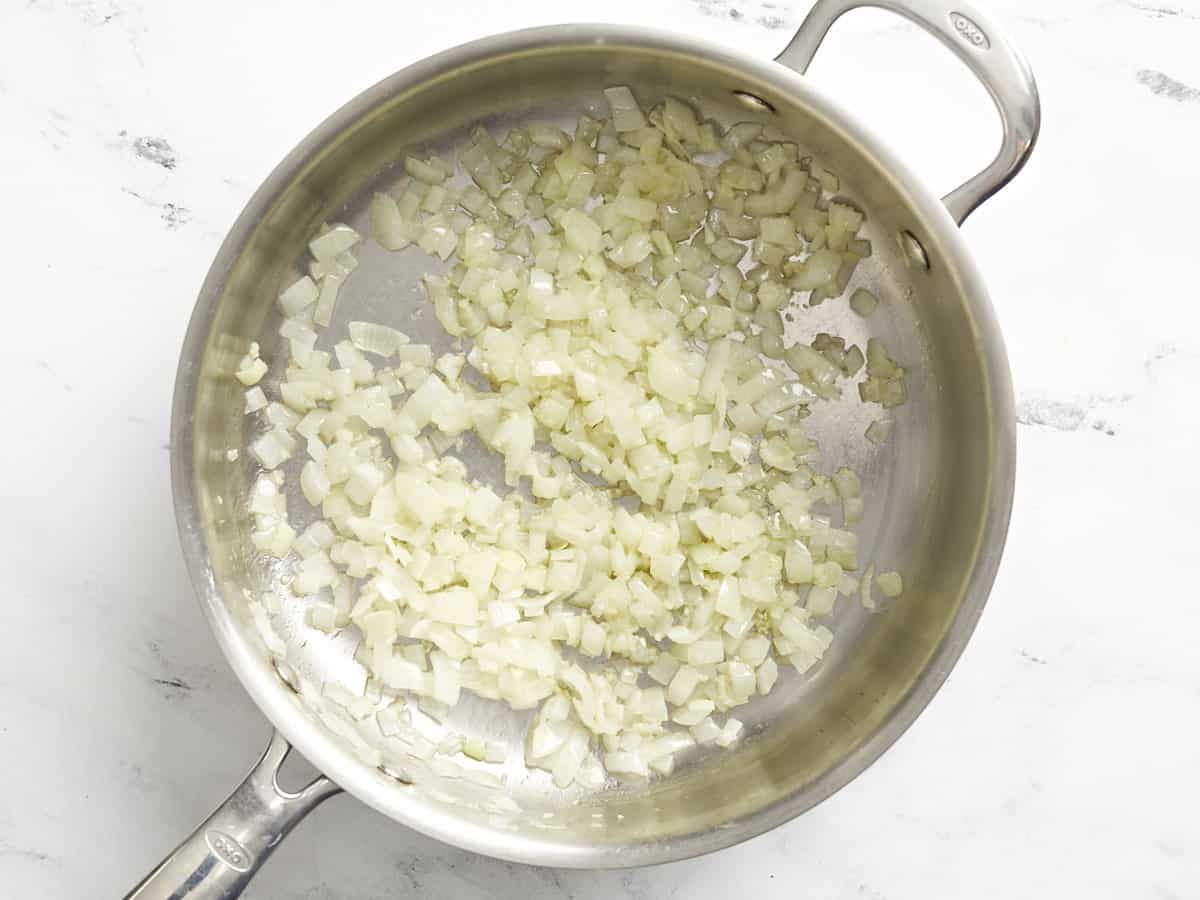
  • Dice the yellow onion and mince the garlic. Add the onion and garlic to a large deep skillet or Dutch oven with the olive oil and sauté over medium heat until the onions are soft and translucent (about 5 minutes).
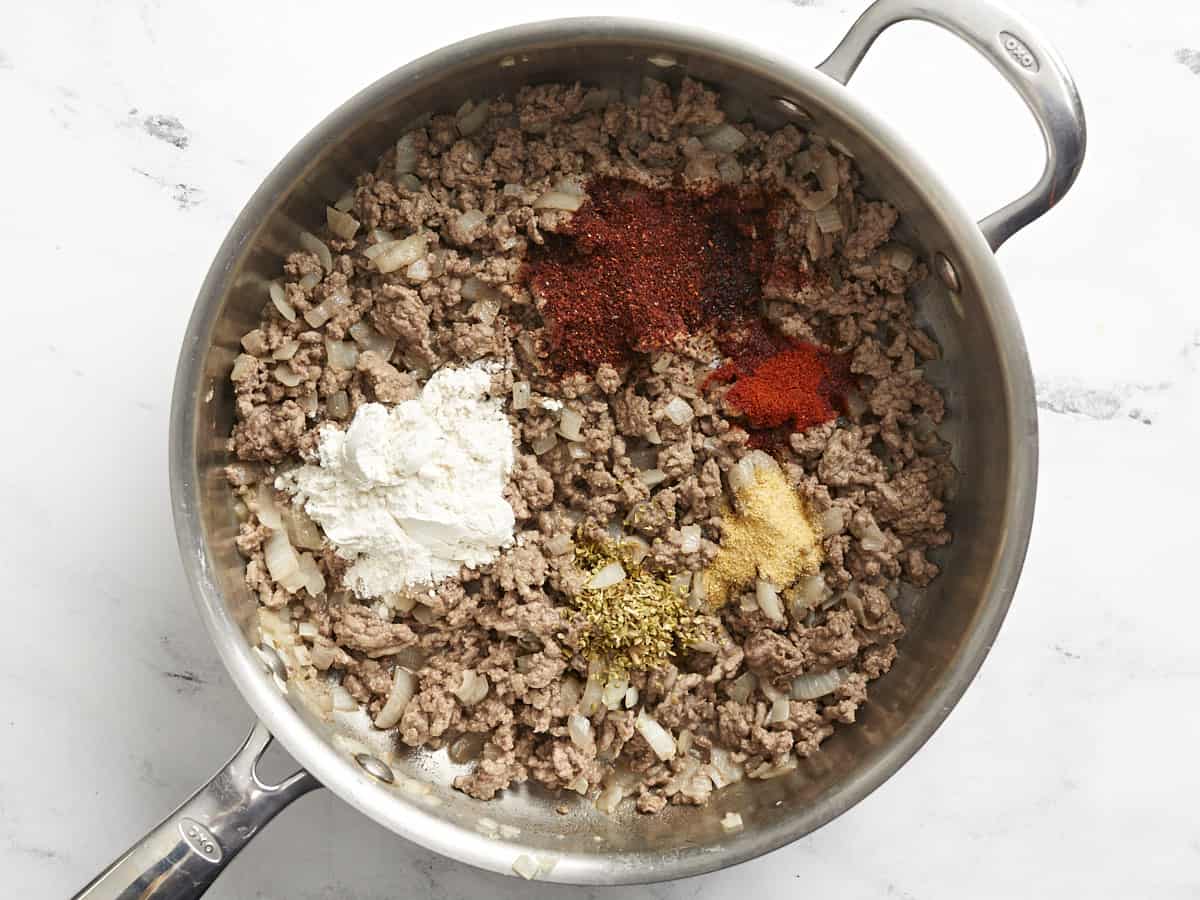
  • Add the ground beef to the skillet and continue to stir and cook until the beef is cooked through. If using a higher fat content ground beef, you may want to drain off the excess fat at this point.
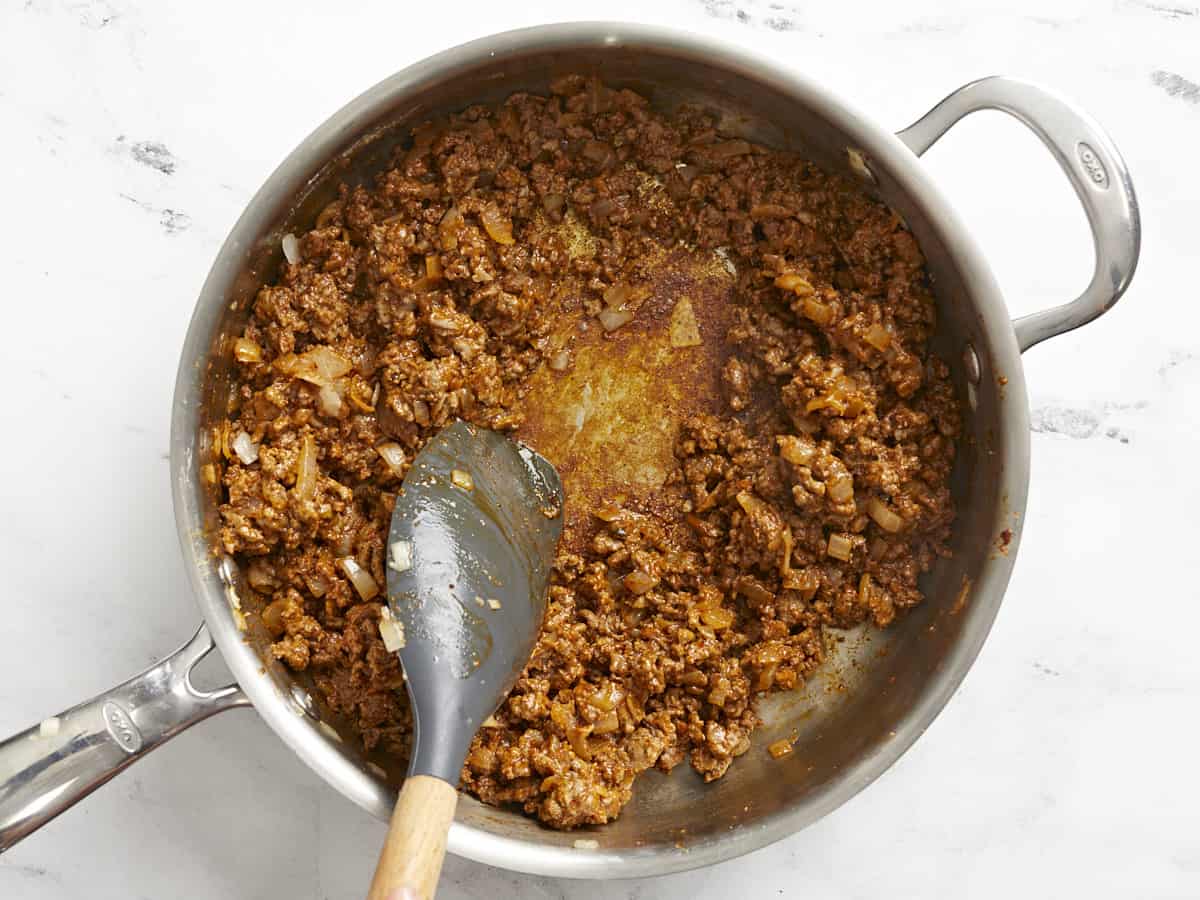
  • Add the flour, chili powder, smoked paprika, garlic powder, and oregano to the skillet with the beef and onions. Continue to cook and stir for about two minutes, allowing the flour and spices to coat the bottom of the skillet, but not burn.
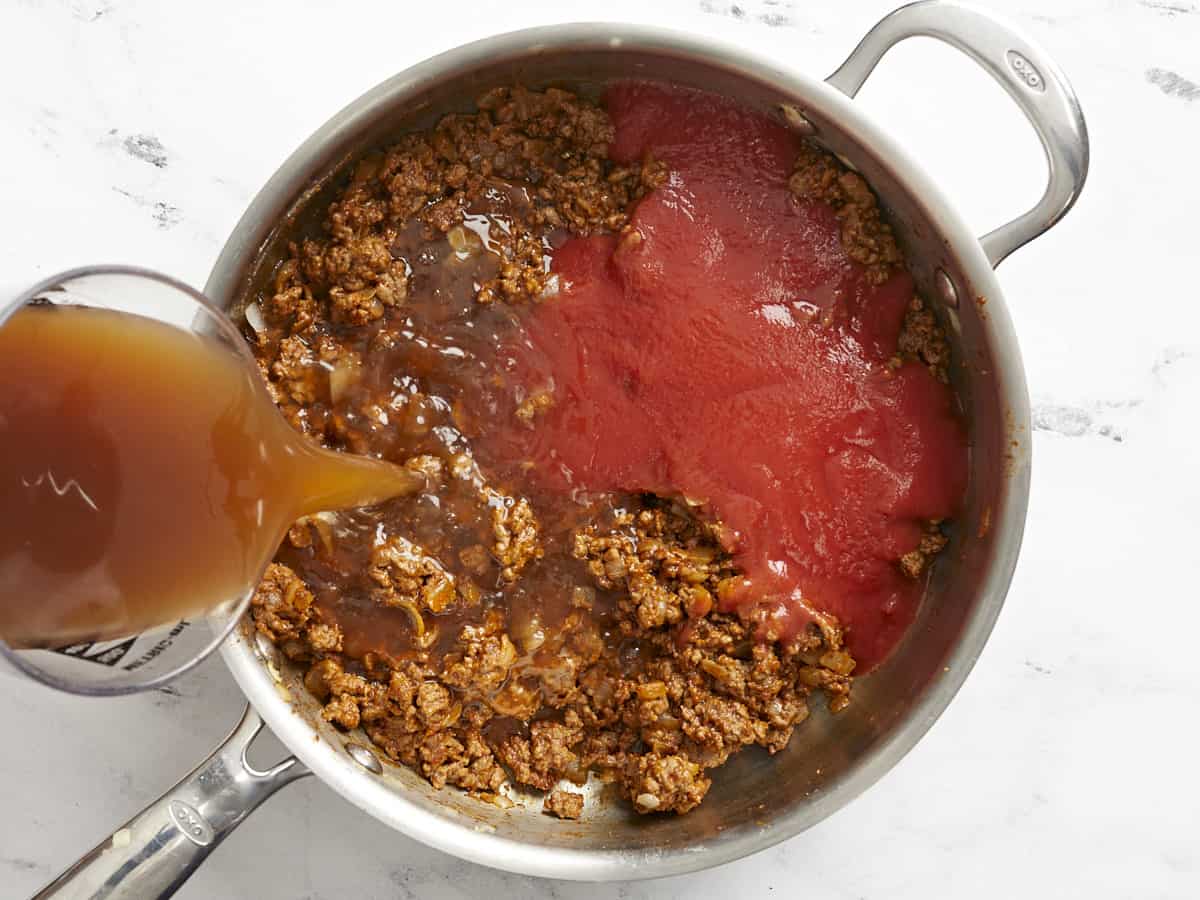
  • Add the tomato sauce and beef broth to the skillet and stir well to combine, making sure to scrape and dissolve any browned bits off the bottom of the skillet.
  • Add the uncooked macaroni and stir to combine. Place a lid on the skillet and turn the heat up to medium-high. Allow the broth to come up to a full boil. Once boiling, give the pasta a quick stir to loosen any that is stuck to the bottom, turn the heat down to medium-low, and place the lid back on top.
  • Allow the macaroni to simmer, stirring every few minutes and always replacing the lid, until the macaroni is tender and the broth has reduced to a rich red gravy (about 10 minuts).
  • Stir half of the shredded cheese into the sauce until melted, and sprinkle the remainder on top. Place a lid on the pot, turn the heat off, and allow the residual heat to melt the cheese on top. Serve hot and enjoy!

See how we calculate recipe costs here.

Nutrition

Serving: 1cup | Calories: 471kcal | Carbohydrates: 36g | Protein: 25g | Fat: 25g | Sodium: 825mg | Fiber: 3g
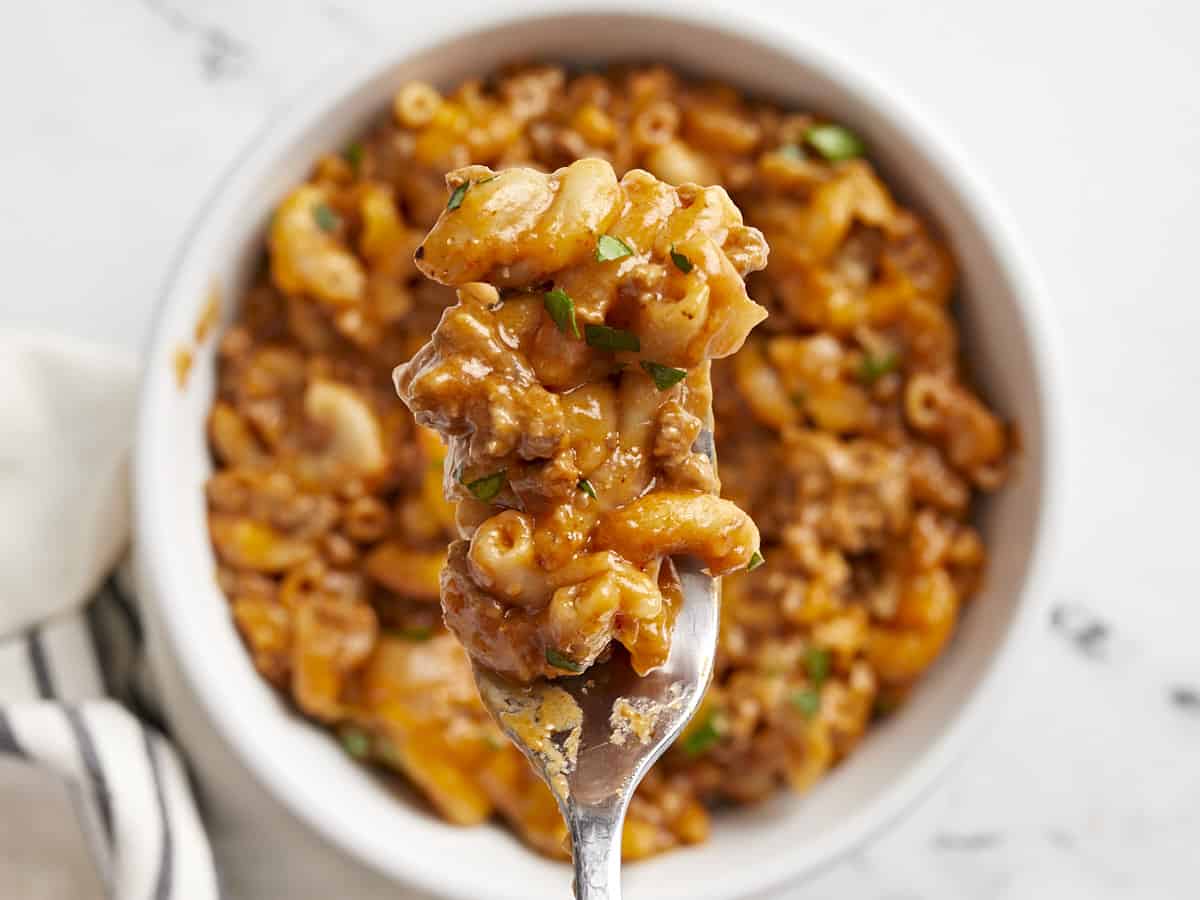
Close up of chili mac on the fork held over a bowl.

How to Make Chili Mac – Step by Step Photos

Sautéed onion and garlic in a deep skillet.

Dice one yellow onion and mince two cloves of garlic. Add the onion and garlic to a large deep skillet or Dutch oven with 1 tablespoon of olive oil and sauté over medium heat until the onions are soft and translucent (about 5 minutes).

Flour and spices added to browned ground beef in the skillet.

Add one pound of ground beef to the skillet and continue to stir and cook until the beef is fully browned. If you’re using a higher fat content beef, drain the excess fat out of the pan. Next, add 2 tablespoons of flour, 1 tablespoon of chili powder, ½ teaspoon of smoked paprika, ½ teaspoon of garlic powder, and ½ teaspoon of dried oregano.

Flour and spices cooked into ground beef.

Continue to stir and cook the flour and spices into the beef for about two minutes, allowing it to coat the bottom of the skillet, but not burn.

Tomato sauce added to the skillet and beef broth being poured into the side.

Add one 8oz. can of tomato sauce and three cups of beef broth to the skillet. Stir well until everything is evenly combined, making sure to scrape and dissolve all of the browned bits off the bottom of the skillet.

Macaroni being poured into the skillet.

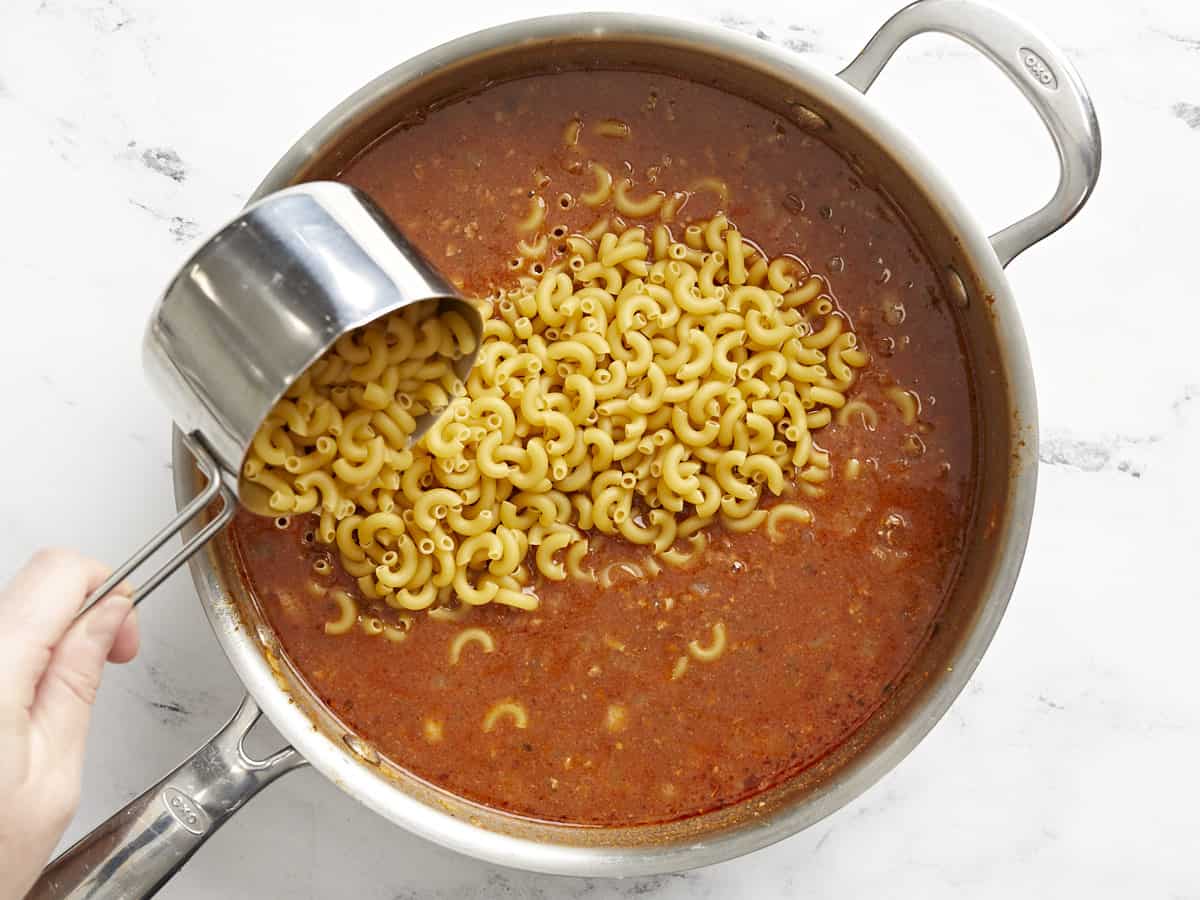
Add ½ pound (about 2 cups) of uncooked macaroni to the skillet and stir to combine. Place a lid on the skillet, turn the heat up to medium-high, and allow the broth to come up to a boil. Once boiling, give everything a quick stir to loosen any macaroni from the bottom of the skillet, turn the heat down to medium-low, and place the lid back on top.

Cooked macaroni in the skillet.

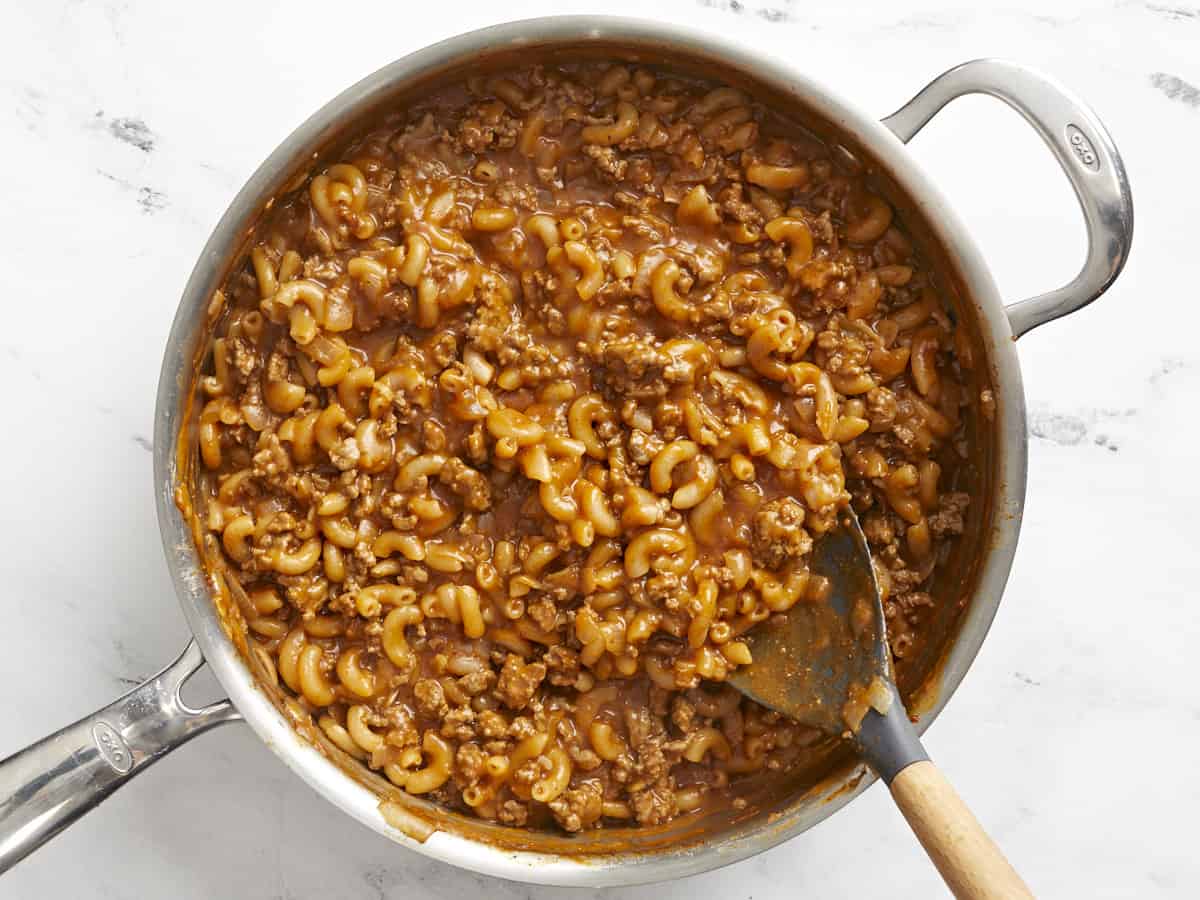
Let the macaroni simmer in the broth, stirring every few minutes or so and always placing the lid back on top, until the macaroni is tender and the broth has reduced to a saucy red gravy (about 10 minutes).

Cheddar cheese added to the skillet.

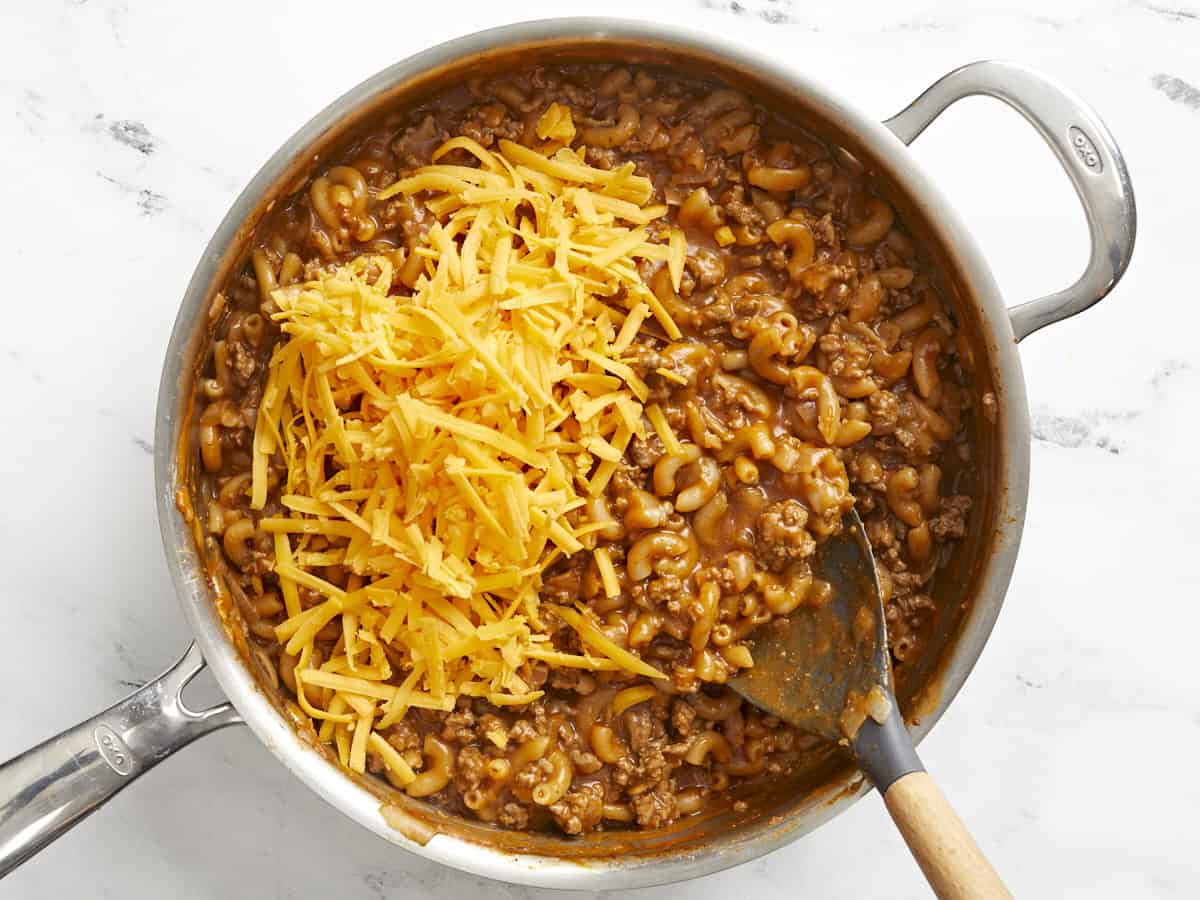
Add ½ cup of shredded cheddar cheese to the chili mac and stir it into the sauce until melted.

Melted cheese on top of the chili mac, garnished with chopped parsley.

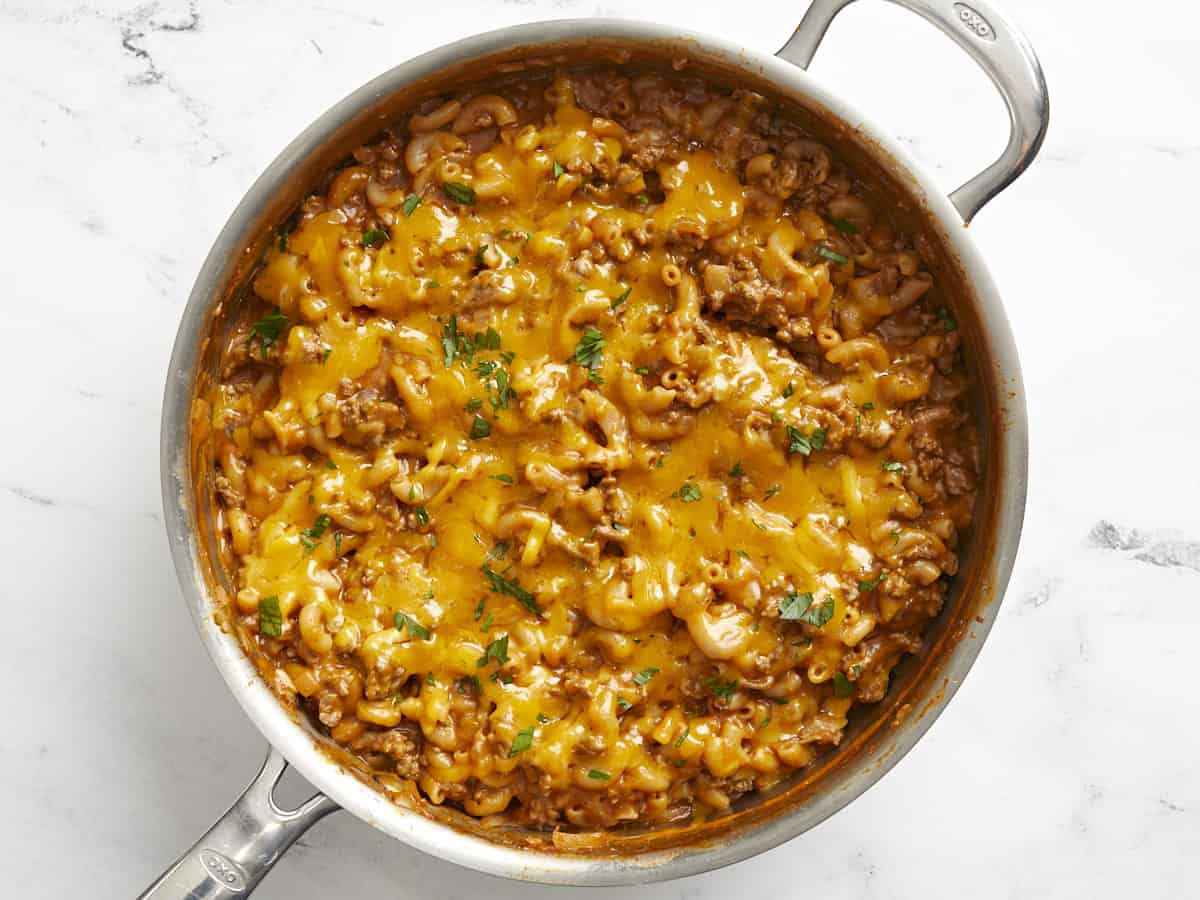
Sprinkle the remaining ½ cup of shredded cheese on top. Place a lid on the skillet and turn the heat off. Let the residual heat melt the cheese, then serve. You can garnish with chopped cilantro or sliced green onions, if desired.

Side view of chili mac being scooped out of the skillet

So cheesy, beefy, and delicious!!

The post One Pot Chili Mac appeared first on Budget Bytes.
Jalapeño Poppers

The perfect easy appetizer for New Year’s Eve, tailgating parties, or the big game, this Jalapeño Popper recipe is a spicy, cheesy home run!

The post Jalapeño Poppers appeared first on Budget Bytes.
If you love spicy and you love cheesy, you’ll definitely love Jalapeño Poppers! This cute little appetizer recipe has New Year’s Eve written all over it, and it’s perfectly easy and delicious for football games as well. …Or, if you’re just as obsessed with them as I am, they’re also great for a regular Monday afternoon. 😜

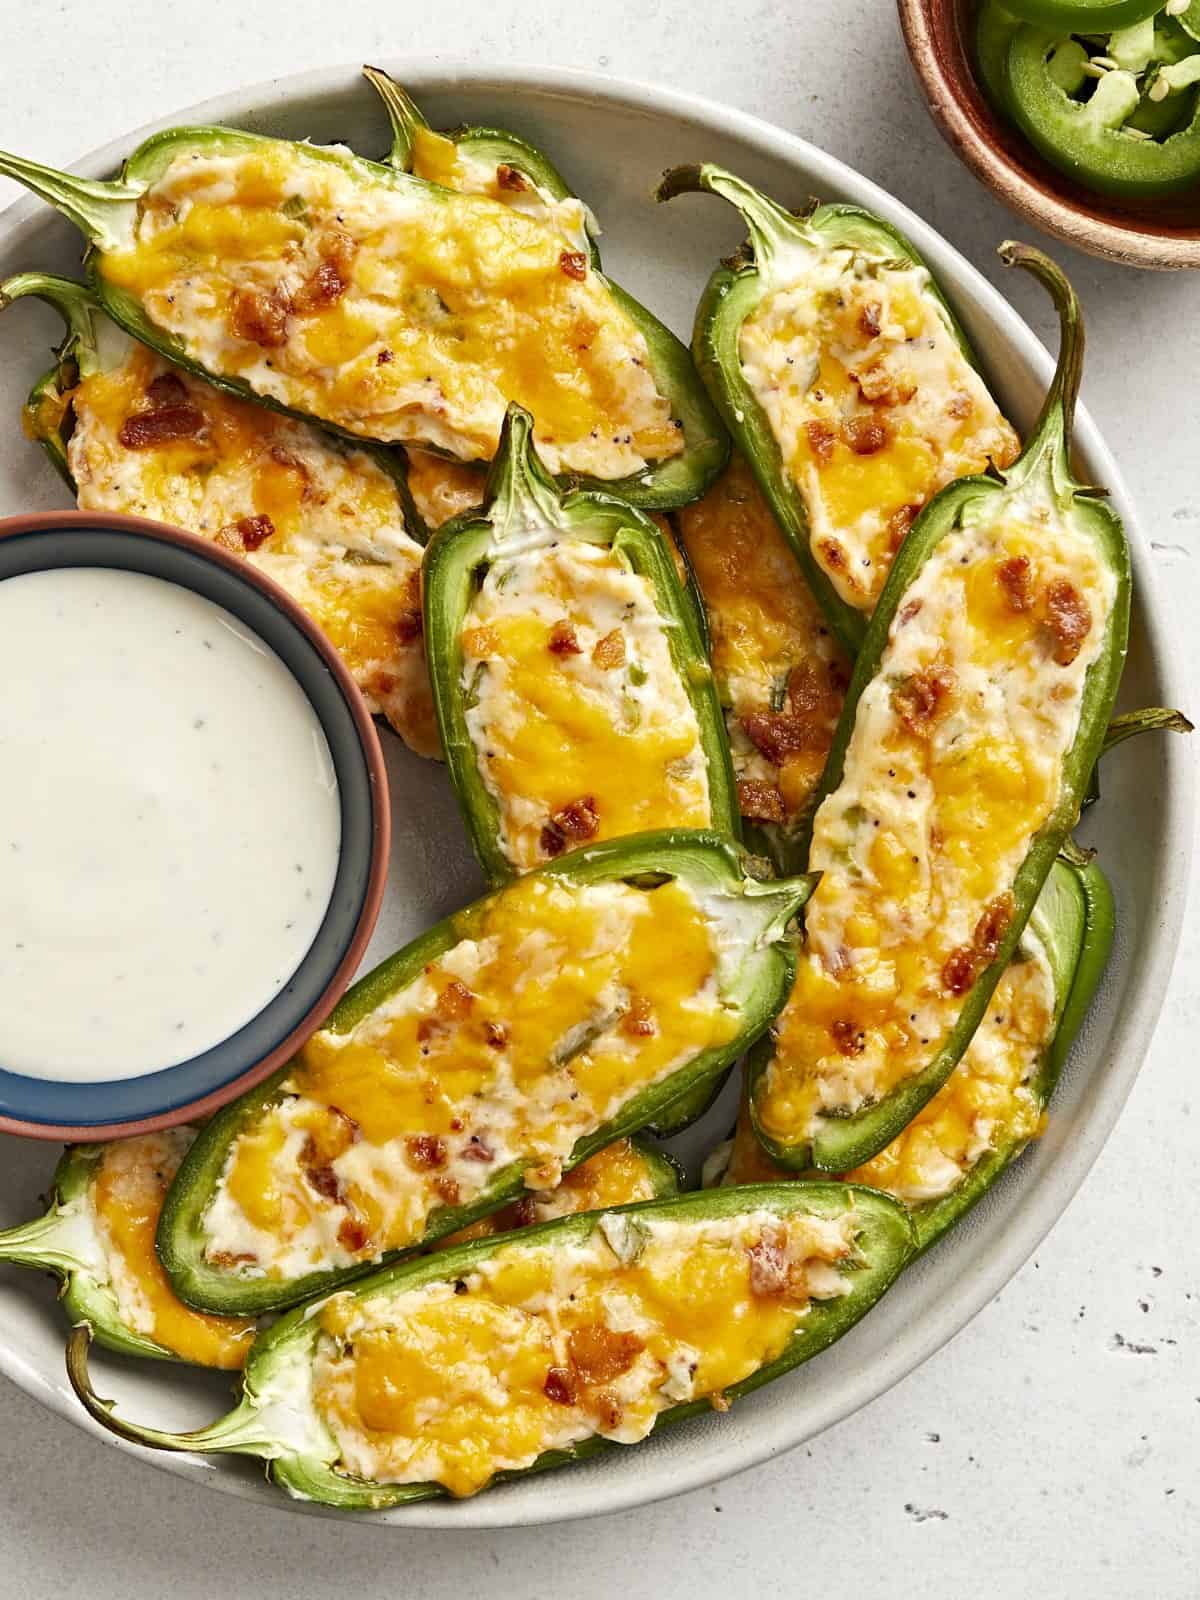
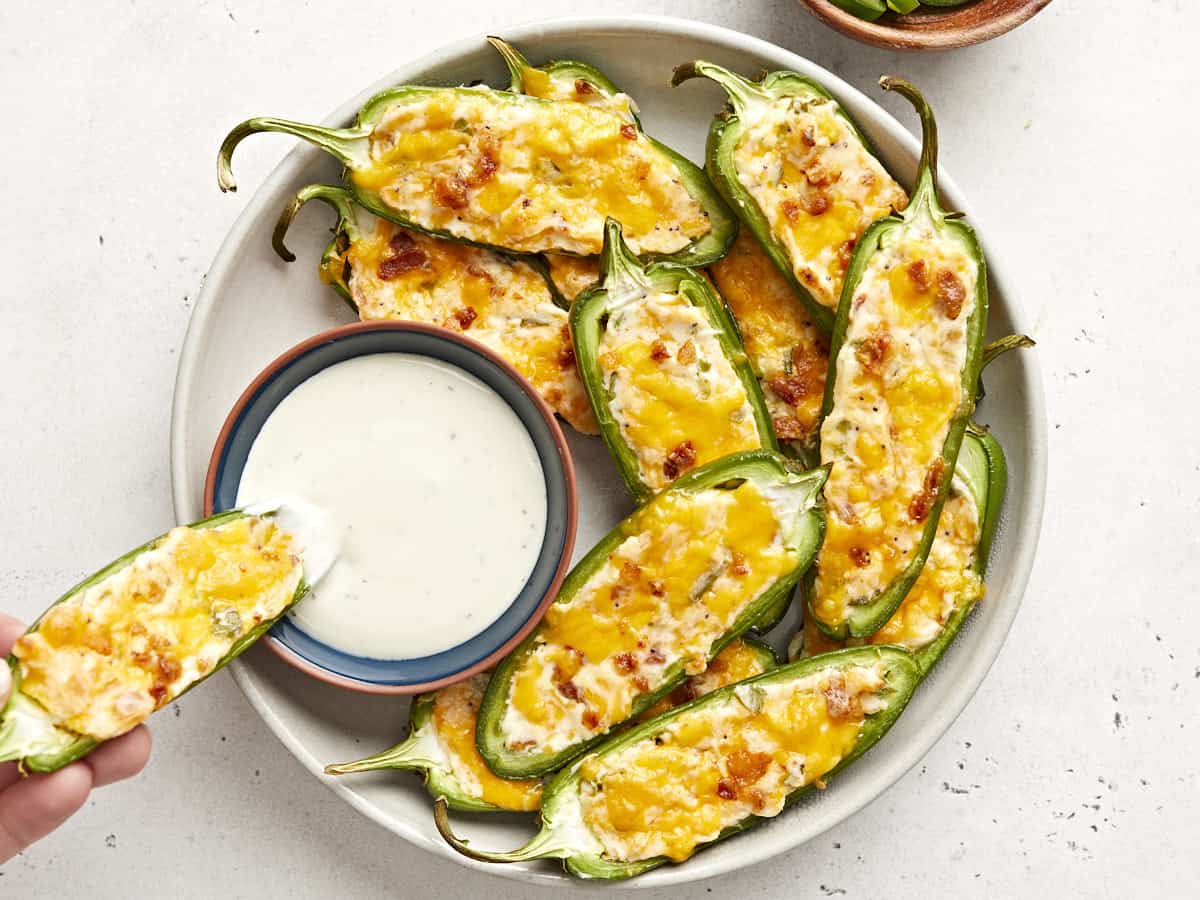
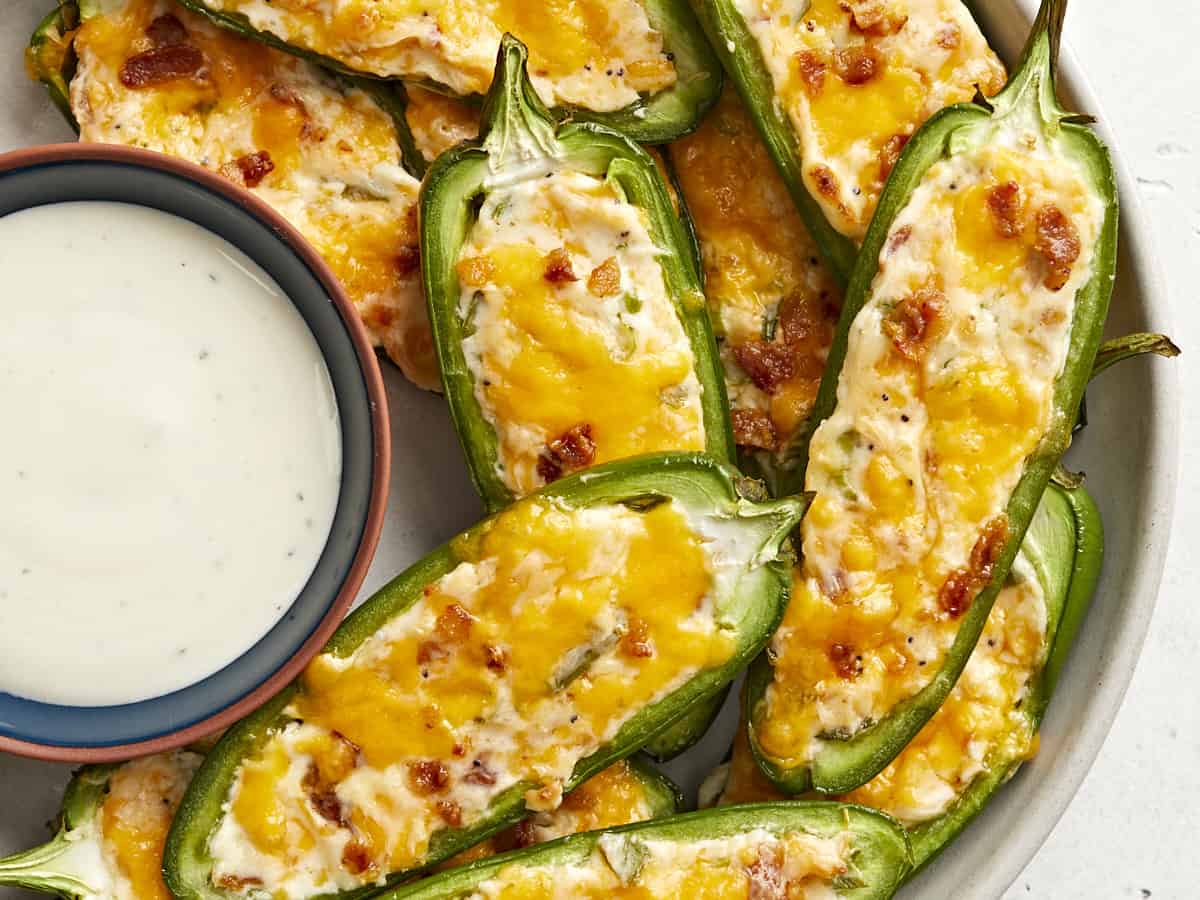
Overhead view of a plate full of jalapeño poppers with a dish of ranch dressing.

What Are Jalapeño Poppers?

Jalapeño poppers are a staple in American pop food culture and are often served at sports bars or other fast-casual restaurants. They can take several forms, sometimes breaded and deep fried, sometimes baked, and sometimes wrapped in bacon, but they always consist of fresh jalapeño peppers stuffed with a flavorful mix of cheese for that spicy-cheesy-creamy flavor combo.

For this jalapeño popper recipe, we went the easy and budget-friendly route (obvi) and opted for baked poppers with just enough bacon added in to give great flavor without making them over-the-top expensive. These jalapeño poppers are easy enough for even a beginner to make, and tasty enough that you’ll be thankful you didn’t drop a ton of cash on ordering out!

Ingredients for Jalapeño Poppers:

Here’s what you’ll need to make this delicious jalapeño popper recipe at home:

  • Fresh Jalapeños: Luckily, jalapeños are usually some of the least expensive items in the produce aisle, but if you can’t find them for a good price at your local chain grocery store, look for a Hispanic or Latin grocery store where they’re guaranteed to be super affordable. Look for Jalapeños that are about 3 inches in length for this recipe.
  • Cheese: We used a mix of cream cheese and cheddar cheese for this recipe so we could get an ultra-creamy finish with a nice cheddar bite. You can also try using Monterey Jack or Pepper Jack (if you like it EXTRA spicy!).
  • Bacon: Bacon is a classic flavor in jalapeño poppers and it gives a nice smokey finish to the flavor profile. We use just enough to give these poppers flavor without driving up the price too high.
  • Seasoning: These jalapeño poppers are seasoned with garlic powder, Everything Bagel Seasoning, and green onions. They’re flavorful but not so complicated that you lose the flavor of the jalapeños and bacon. If you don’t have Everything Bagel Seasoning you can increase the garlic powder in the recipe to ½ tsp, and add ⅛ tsp of both salt and pepper.

Are Jalapeño Poppers Spicy?

Yes, jalapeño poppers are pretty spicy! Despite removing the seeds and ribs (the spiciest part of the jalapeño), some of the spicy oils remain in the jalapeño, giving these poppers just the right amount of spicy heat to balance the creamy cheeses. If you’re not a spicy foods fan you’ll probably want to skip this one!

How to Remove Jalapeño Oil From Your Hands

If you’ve ever cooked with jalapeños before, you know the horror of accidentally touching your eyes afterward. Jalapeños contain natural oils that can easily transfer from your hands to your eyes or any other delicate skin, causing an intense burning sensation, and sometimes just washing your hands isn’t enough to remove the oils. Here are a few extra steps you can take to reduce the burn:

  1. Massage a teaspoon or two of cooking oil into your hands. The oil will help dissolve the spicy oils from the jalapeños that are stuck to your hands.
  2. Wash your hands with dish soap instead of hand soap. Dish soap is formulated to break up oily residues whereas hand soaps are often designed to keep skin moisturized.
  3. Rub your hands with an acidic substance, like lemon juice, vinegar, or tomato sauce. This can help break up any spicy oils left on the skin.
  4. OR just wear gloves while working with the jalapeños and avoid the risk. ;)

What to Serve with Jalapeño Poppers

I love these little poppers on their own, but if you want a dipping sauce I would definitely recommend ranch dressing. I’m not usually a ranch person, but the flavor combination between the spicy jalapeño poppers and cooling ranch dressing is hard to beat! I’d also serve them with another starchy appetizer, maybe something like our Steak Fries or Loaded Smashed Potatoes.

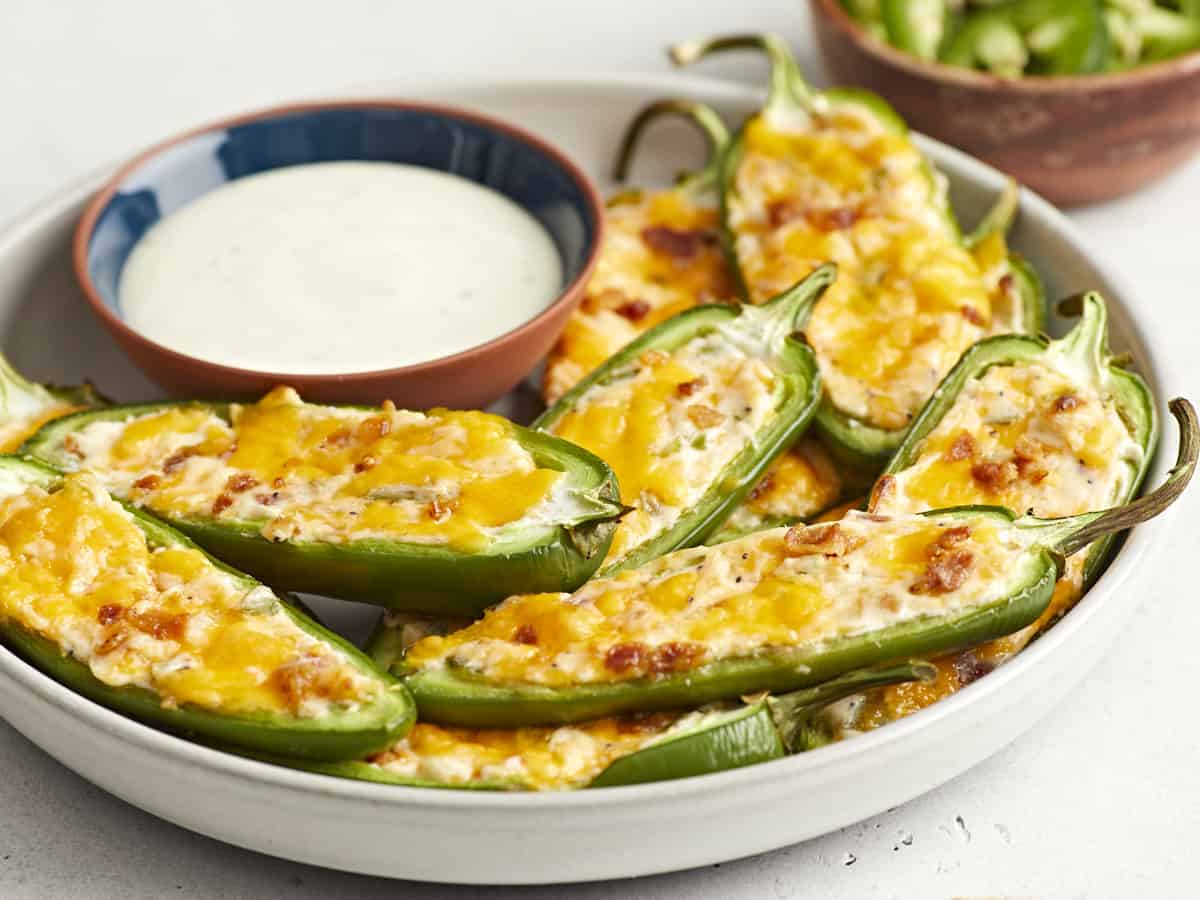
Side view of a plate full of jalapeño poppers with a dish of ranch on the side.
Super close up view of jalapeño poppers on a plate with a bowl of ranch.
Print

Jalapeño Poppers

The perfect easy appetizer for New Year's Eve, tailgating parties, or the big game, this Jalapeño Popper recipe is a spicy, cheesy home run!
Course Appetizer
Cuisine Amercian
Total Cost $3.94 recipe / $0.66 serving
Prep Time 15 minutes
Cook Time 15 minutes
Total Time 30 minutes
Servings 6 (2 poppers each)
Calories 149kcal

Ingredients

  • 2 oz. bacon (about 2 slices) $0.50
  • 6 jalapeños* $1.50
  • 4 oz. room-temperature cream cheese $1.10
  • 1/2 cup shredded cheddar cheese $0.62
  • 1 green onion, sliced $0.10
  • 1 tsp everything bagel seasoning $0.10
  • 1/4 tsp garlic powder $0.02

Instructions

  • Preheat the oven to 425ºF. Cook the bacon in a skillet over medium heat until it is brown and crispy. Remove it from the pan and let it cool on a paper-towel-lined plate.
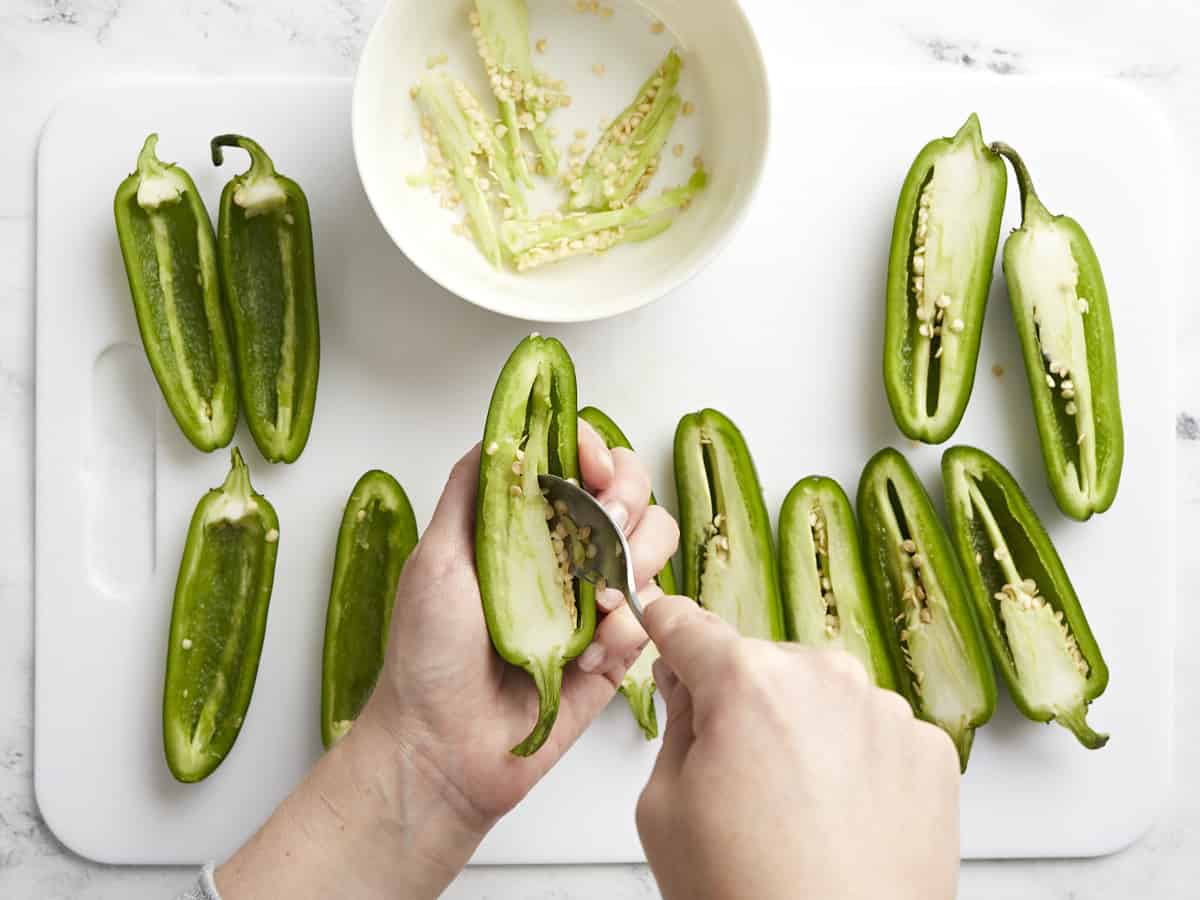
  • Slice the jalapeños in half lengthwise and then use a spoon to scoop out the seeds and white ribs, being careful not to tear or puncture the peppers.
  • Once the bacon is cool, crumble it into tiny pieces and reserve about 1 tablespoon to use as a topping. Add the bacon to a bowl with the cream cheese, shredded cheddar (reserve a small amount for topping as well), sliced green onion, Everything bagel seasoning, and garlic powder. Mix the ingredients together until they're evenly combined.
  • Divide the cheese filling between the 12 pepper halves and then spread it out to fill and smooth out the top.
  • Place the filled peppers on a large parchment-lined baking sheet then sprinkle the reserved crumbled bacon and cheddar cheese over the top.
  • Bake the peppers for 15 minutes or just until the cheese is melted and slightly bubbly. Avoid over-baking the peppers or else they'll become too soft to pick up and enjoy. Allow the poppers to cool just enough to handle, then serve and enjoy!

See how we calculate recipe costs here.

Notes

*Look for jalapeños that are about 3 inches long.

Nutrition

Serving: 2poppers | Calories: 149kcal | Carbohydrates: 3g | Protein: 5g | Fat: 14g | Sodium: 228mg | Fiber: 0.5g
Super close up view of jalapeño poppers on a plate with a bowl of ranch.

How to Make Jalapeño Poppers – Step by Step Photos

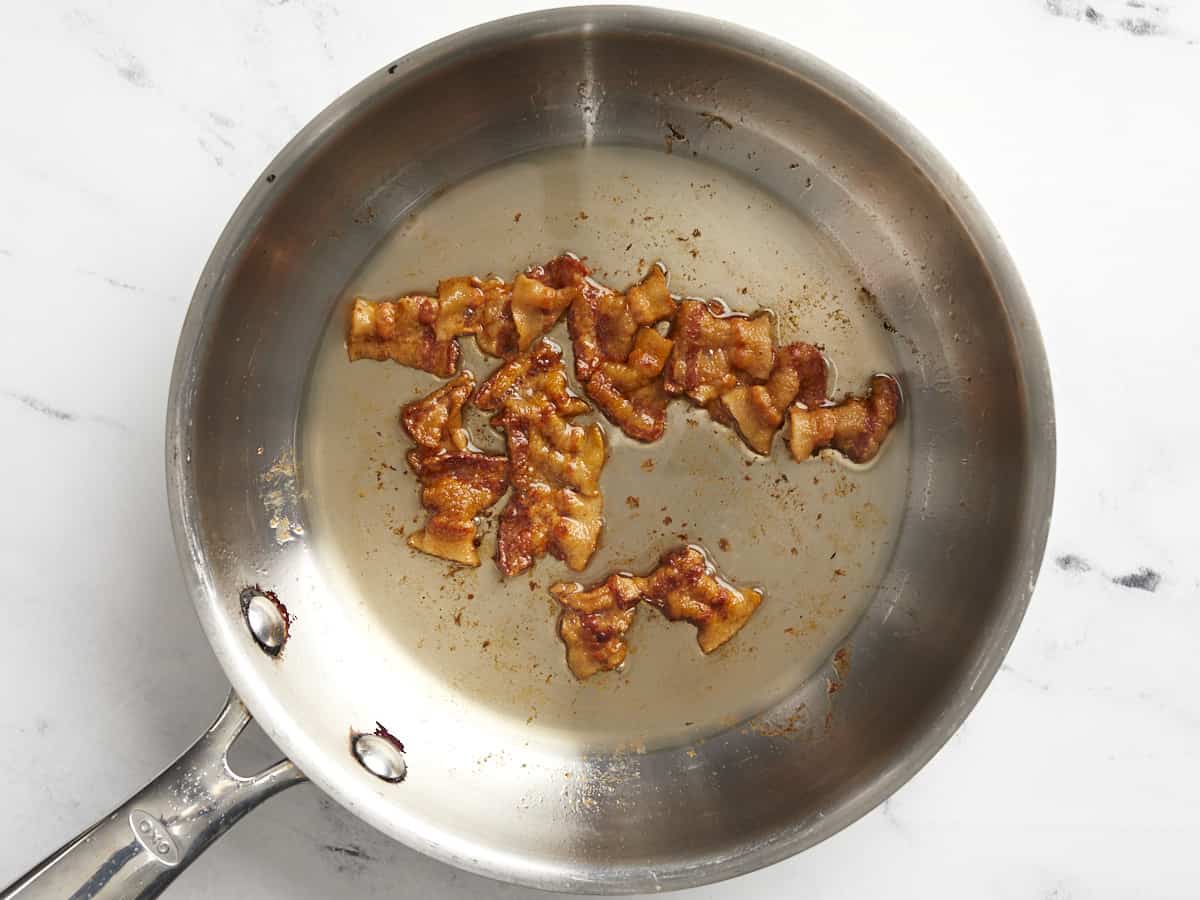
Cooked bacon in a skillet.

Cook about 2 oz. of bacon (about 2 slices) in a skillet over medium heat until it is brown and crispy. Remove the bacon from the skillet and let it drain on a paper towel-lined plate as you prepare the rest of the dish.

Scraping out the insides of the jalapeño peppers.

Slice six jalapeño peppers in half length-wise, then scrape out the seeds and white ribs with a spoon, taking care not to tear the outside of the pepper. To prevent the transfer of spicy oils from your hands to your eyes, mouth, or nose, either use gloves while preparing the peppers or see our tips above for removing jalapeño oil from your hands.

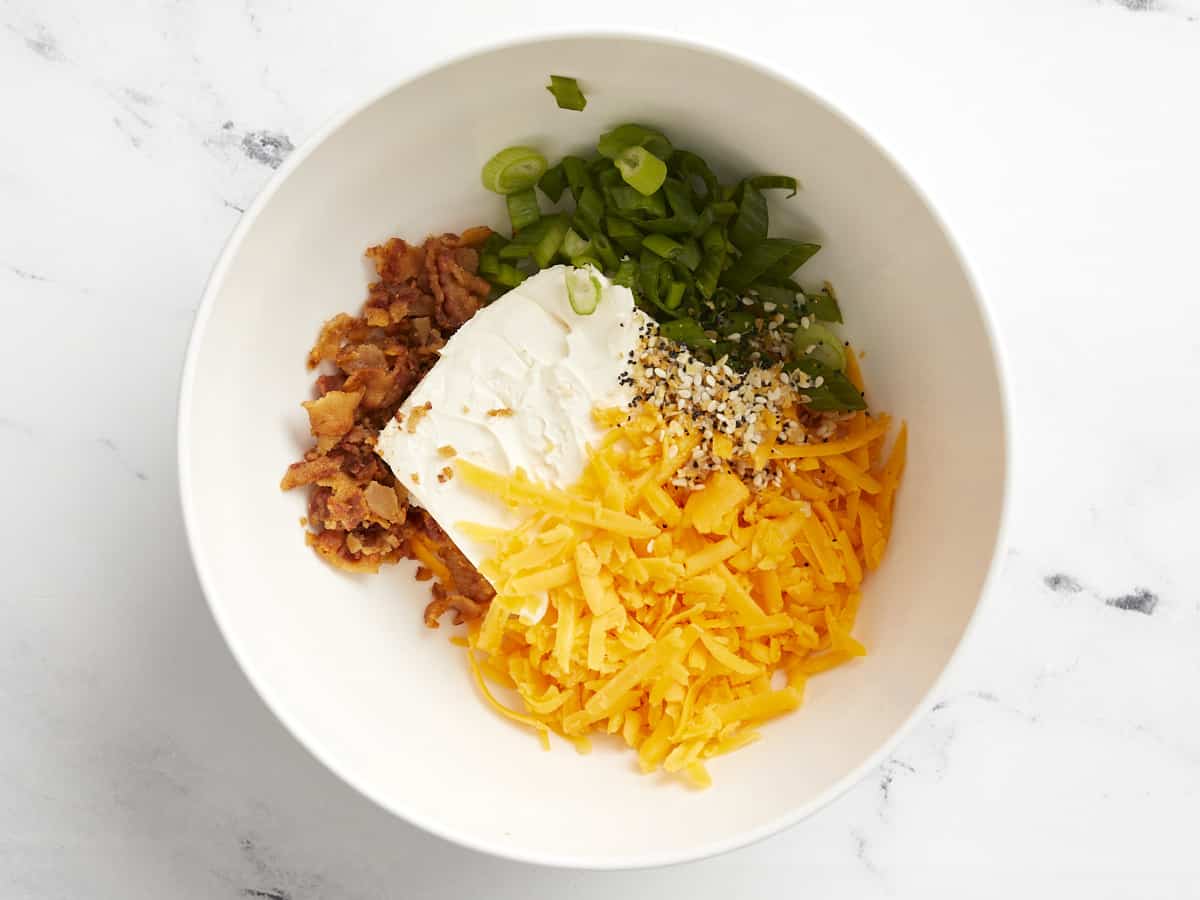
Cheese filling ingredients in a bowl, unmixed.

Once the bacon is cool enough to touch, crumble it into tiny pieces. Reserve about 1 teaspoon of the bacon to use as a topping, then add the rest to a bowl with 4 oz. of room-temperature cream cheese, ½ cup shredded cheddar cheese (reserve about 2 Tbsp for topping), 1 sliced green onion, 1 teaspoon Everything Bagel Seasoning, and ¼ teaspoon garlic powder. Mix these ingredients together until evenly combined.

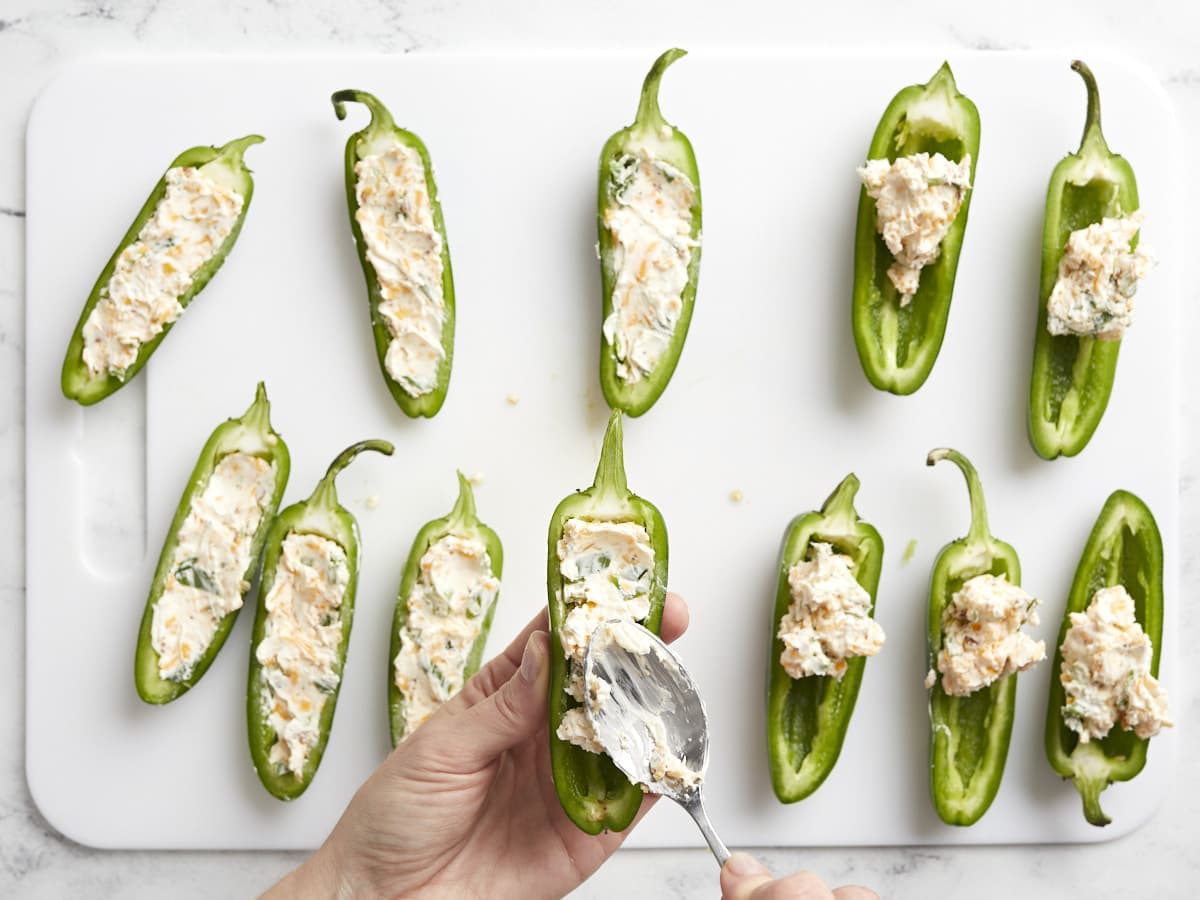
Cheese filling being spooned into jalapeño halves.

Divide the cheese mixture evenly between the 12 jalapeño halves, then spread it out to fill the peppers, smoothing out the top.

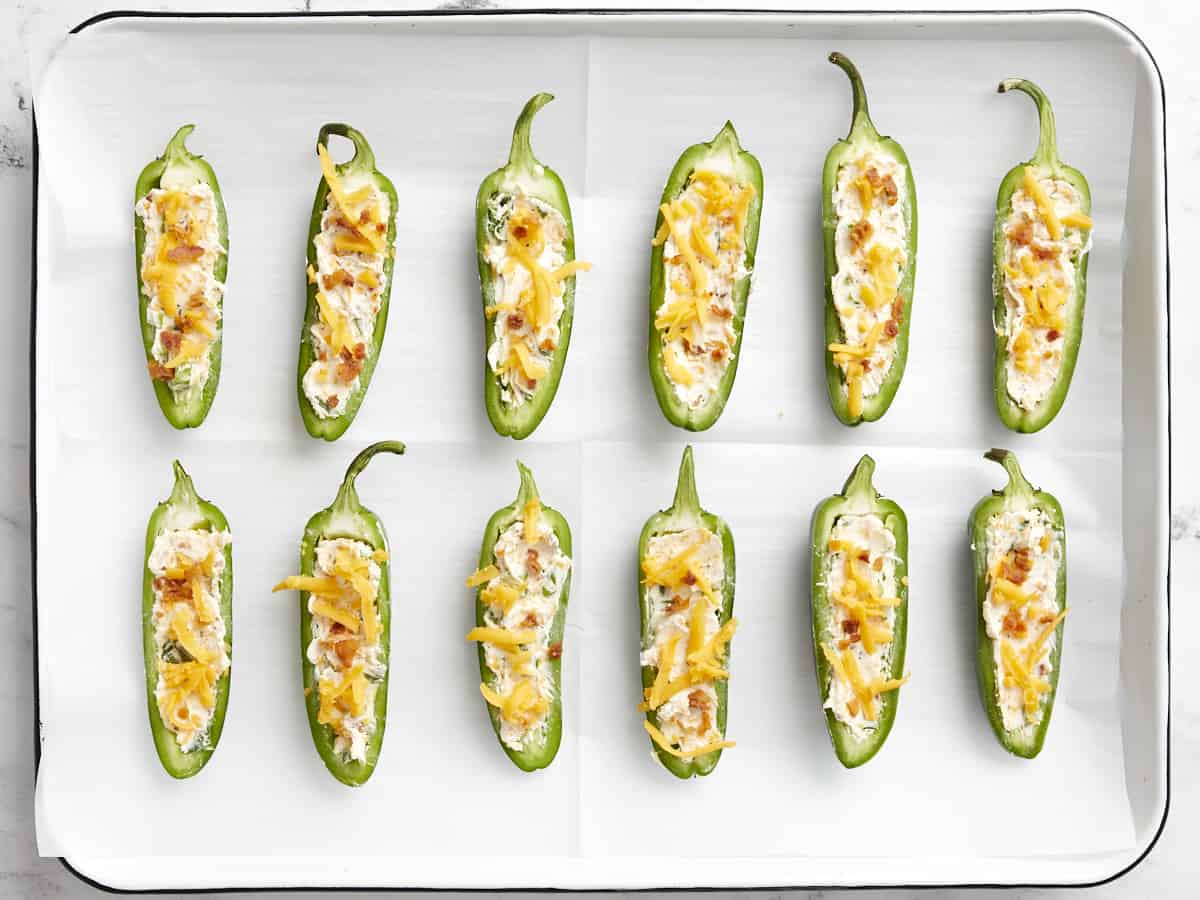
Jalapeño poppers ready to bake on a parchment-lined sheet pan.

Place the filled jalapeños on a large parchment-lined baking sheet, then sprinkle the reserved bacon bits and shredded cheddar over top.

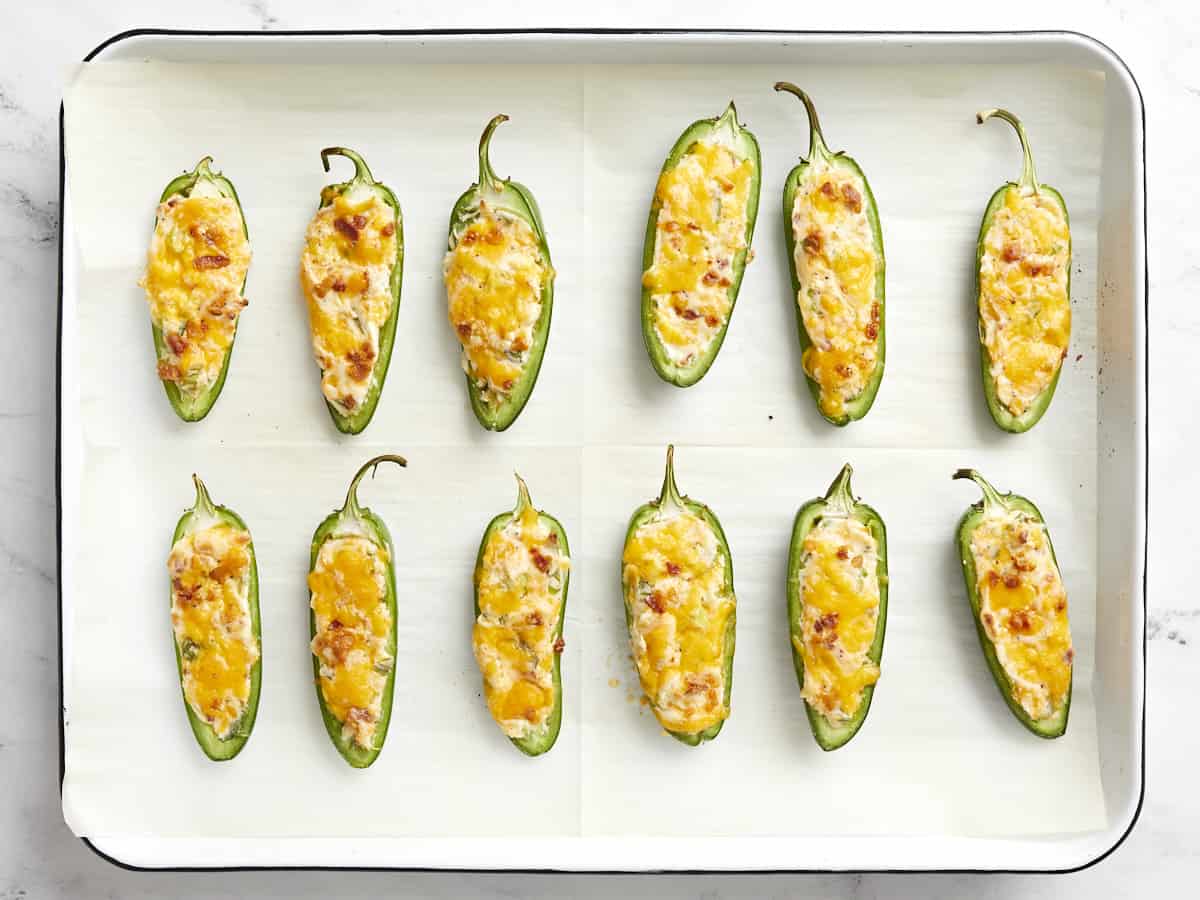
Baked jalapeño poppers on the baking sheet.

Bake the jalapeño poppers in the preheated 425ºF oven for 15 minutes, or just until the cheese is melted and bubbly on top. Avoid overcooking the poppers or else the peppers will get too soft to pick up and eat. Allow the peppers to cool just enough to handle, then serve and enjoy!

Overhead view of a plate of jalapeño peppers with one being dipped into a bowl of ranch.

The post Jalapeño Poppers appeared first on Budget Bytes.

Chicken Spaghetti

This creamy Chicken Spaghetti recipe is made with a cheesy, luscious, cream sauce and baked to perfection. A pasta lover’s dream!

The post Chicken Spaghetti appeared first on Budget Bytes.
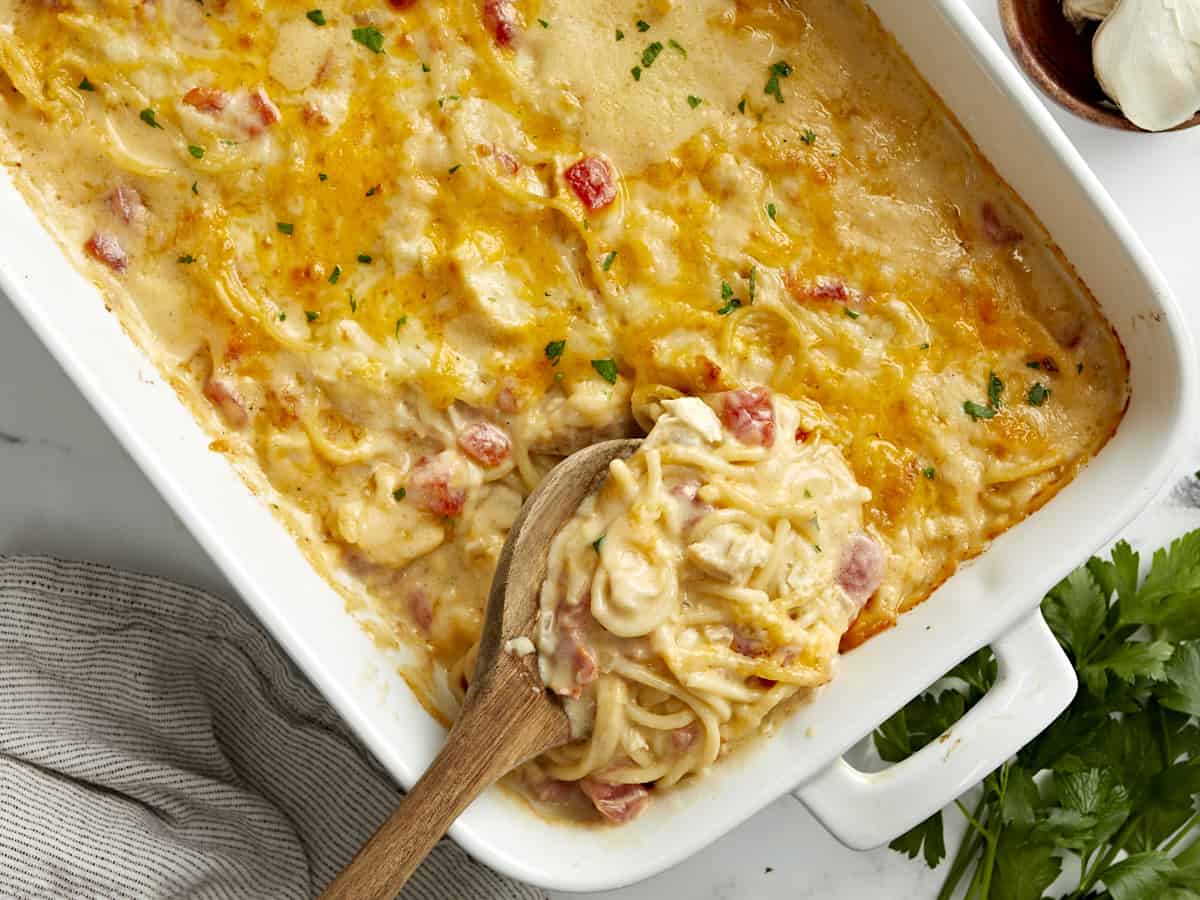
Let me start by saying my husband requested that I make this recipe over my usual chicken pasta recipe that I’ve been making for 10 years!! I was appalled. But honestly I can’t even blame him. This creamy Chicken Spaghetti recipe is a pasta lover’s dream. Tender chicken breast and spaghetti pasta are coated with a luscious cream sauce, then baked to perfection with extra cheese on top! And this casserole is made with simple pantry and refrigerated ingredients. I don’t know about you but I always seem to have a box of spaghetti noodles hanging out in my cabinet. If you do need to make a quick store run, make sure you grab two of whatever item you need, because trust me you’ll want to add this one to your weekly dinner rotation!

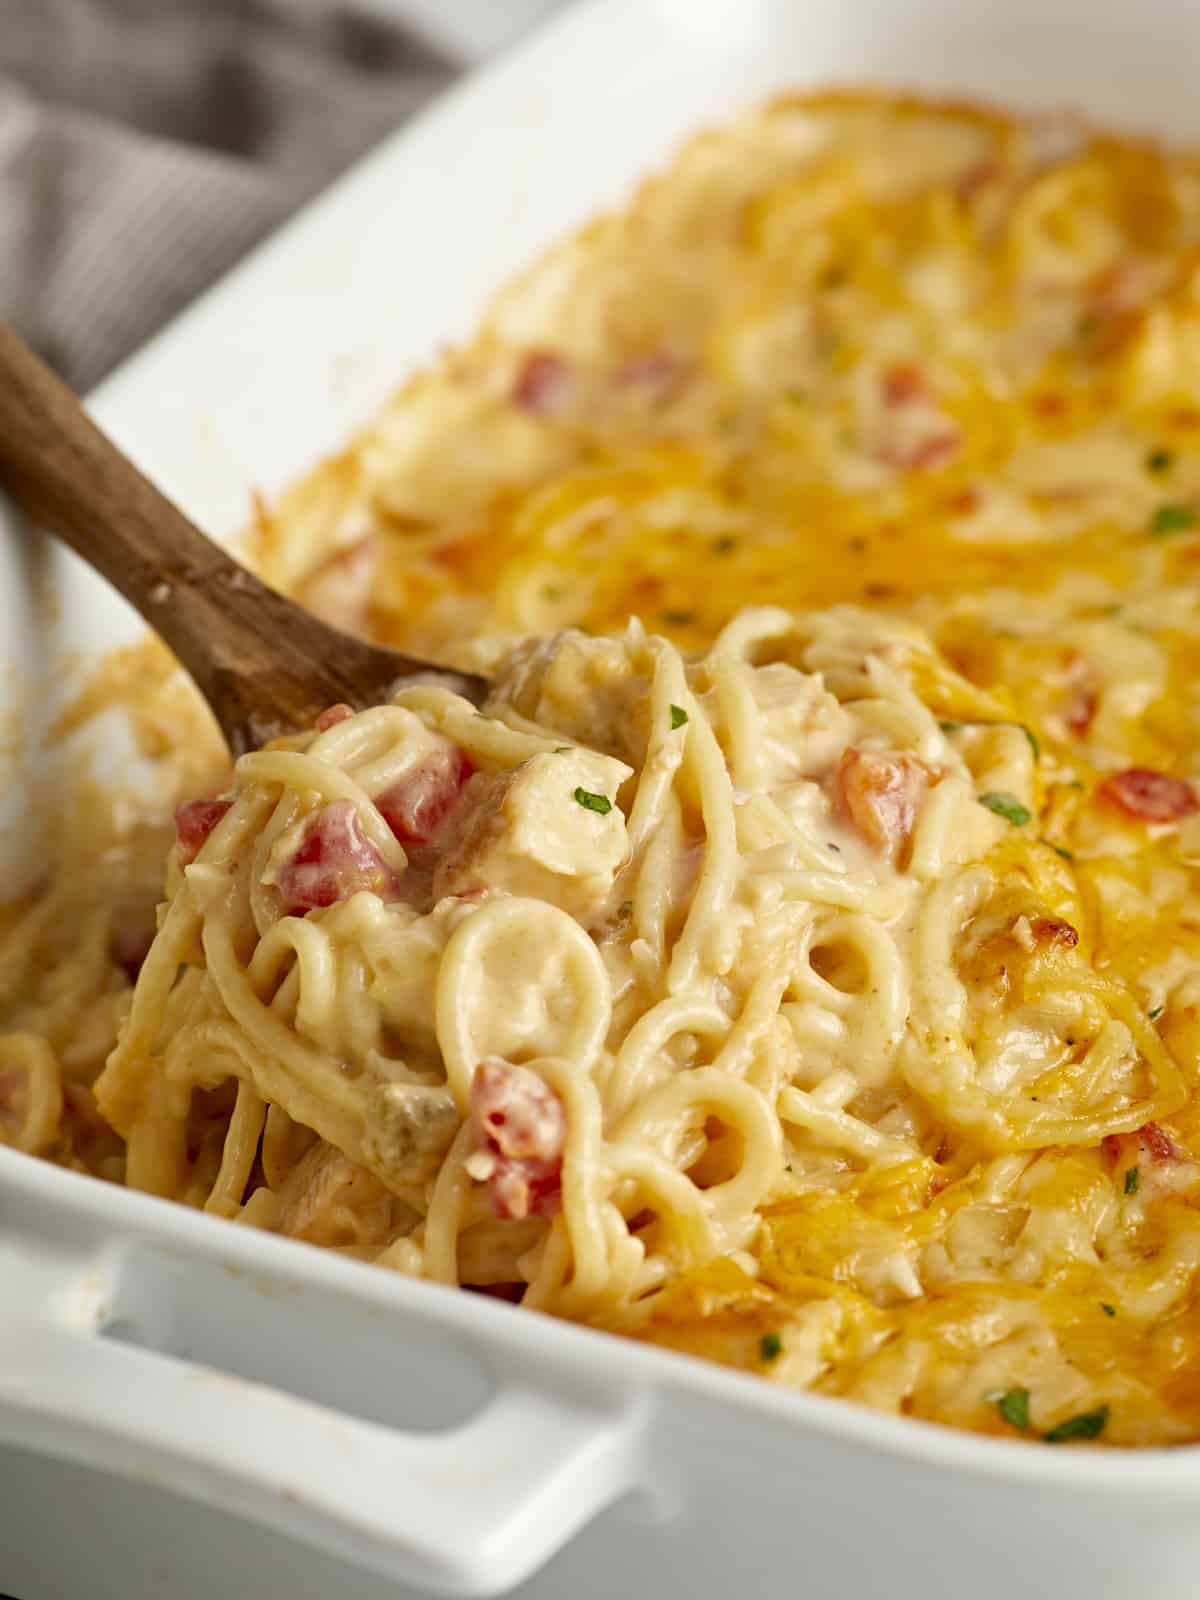
Side close up view of chicken spaghetti in a casserole dish with a wooden spoon lifting some out.

What Is Chicken Spaghetti?

When you read the words “Chicken Spaghetti” I’m sure you were thinking how on earth do those two foods go together? Well friend, let me ease your mind. This is not the traditional spaghetti sauce recipe that you’re probably familiar with. Chicken spaghetti is made with a creamy, cheesy, super flavorful cream sauce that coats tender chicken and spaghetti noodles. Tangy Rotel tomatoes are also added to give it an extra pop of flavor and to balance the creaminess of the dish. The mixture is then placed in a casserole dish and baked until it’s gooey and bubbly around the sides. Great, now I’m sitting here drooling just thinking about it again!

Ingredients For Chicken Spaghetti

Whenever it’s possible I like to keep things pretty simple, so you may already have everything you need to make this chicken spaghetti recipe. Here’s a list of ingredients you’ll need:

  • Chicken: I opted for two boneless skinless chicken breasts. But if your budget is tight, you can certainly use boneless skinless chicken thighs instead.
  • Aromatics: Onion and garlic are sautéed in butter to give the casserole a wonderful base layer of flavor.
  • Butter & Flour: Butter is used to sauté the onion and garlic. All-purpose flour then mixes with the butter to create a simple roux, which thickens the creamy sauce.
  • Chicken Broth: Chicken broth combines with the roux to create a rich and thick sauce. And we always recommend using a good quality chicken broth because it adds a lot of flavor to your dish. We use Better than Bouillon to make our broth.
  • Seasoning: A simple mix of Italian seasoning, salt, and pepper is all you’ll need!
  • Cheddar & Mozzarella Cheese: A combination of cheddar cheese and mozzarella cheese adds depth of flavor to the casserole and makes it extra rich and cheesy! And yes I do recommend using both types of cheeses. We first tested this recipe using just cheddar cheese, but adding some mozzarella cheese with it really boosted the level of flavor!
  • Heavy Cream: Heavy cream adds even more richness to the dish and gives the sauce a wonderful creamy texture.
  • Rotel: A can of Rotel tomatoes with green chiles adds a LOT of flavor to the cream sauce and makes this chicken casserole absolutely delish! So don’t skip it!

Serving Suggestions

Serve this chicken casserole with some crusty bread or try our Homemade Garlic Bread. It would also pair well with a simple side salad to keep dinner simple and easy. With that being said, me and my family totally enjoyed this dish by itself…no extra sides needed for us!😉

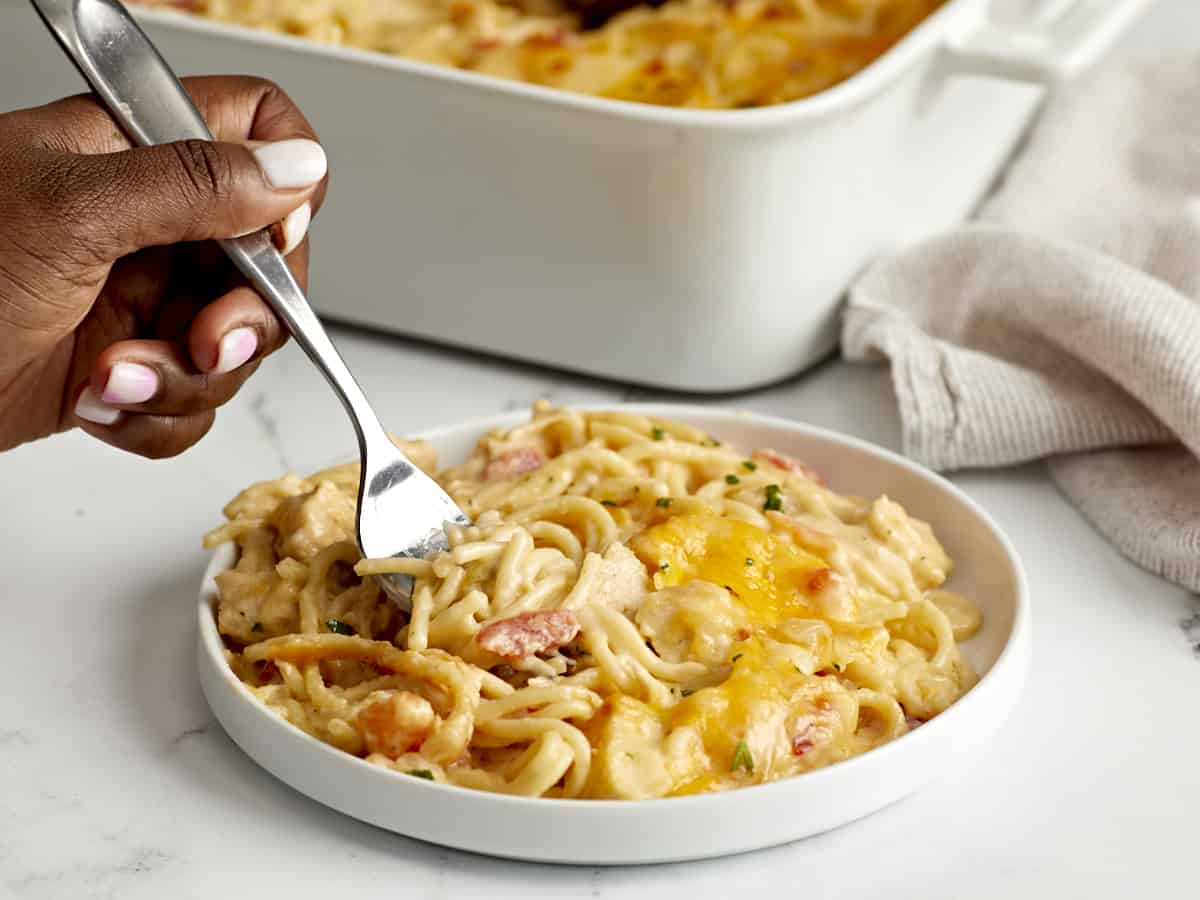
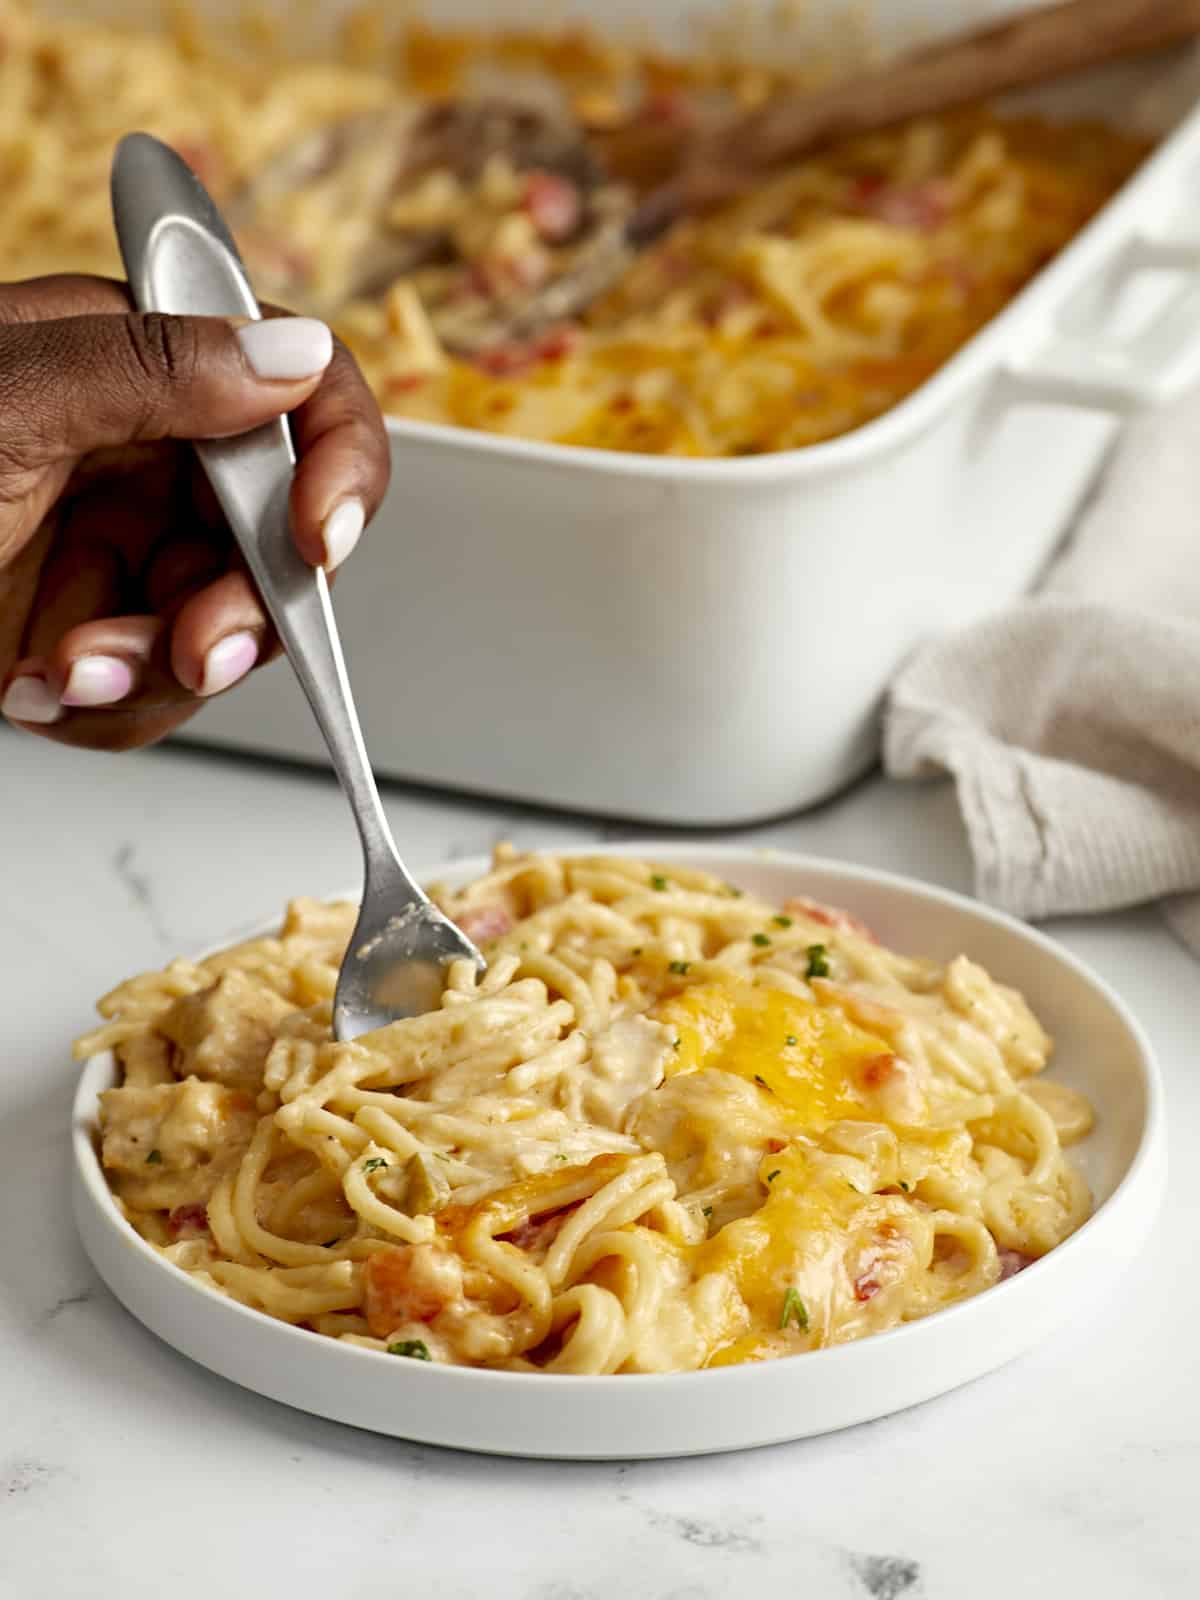
Side view of Chicken Spaghetti plated with a forklifting some out
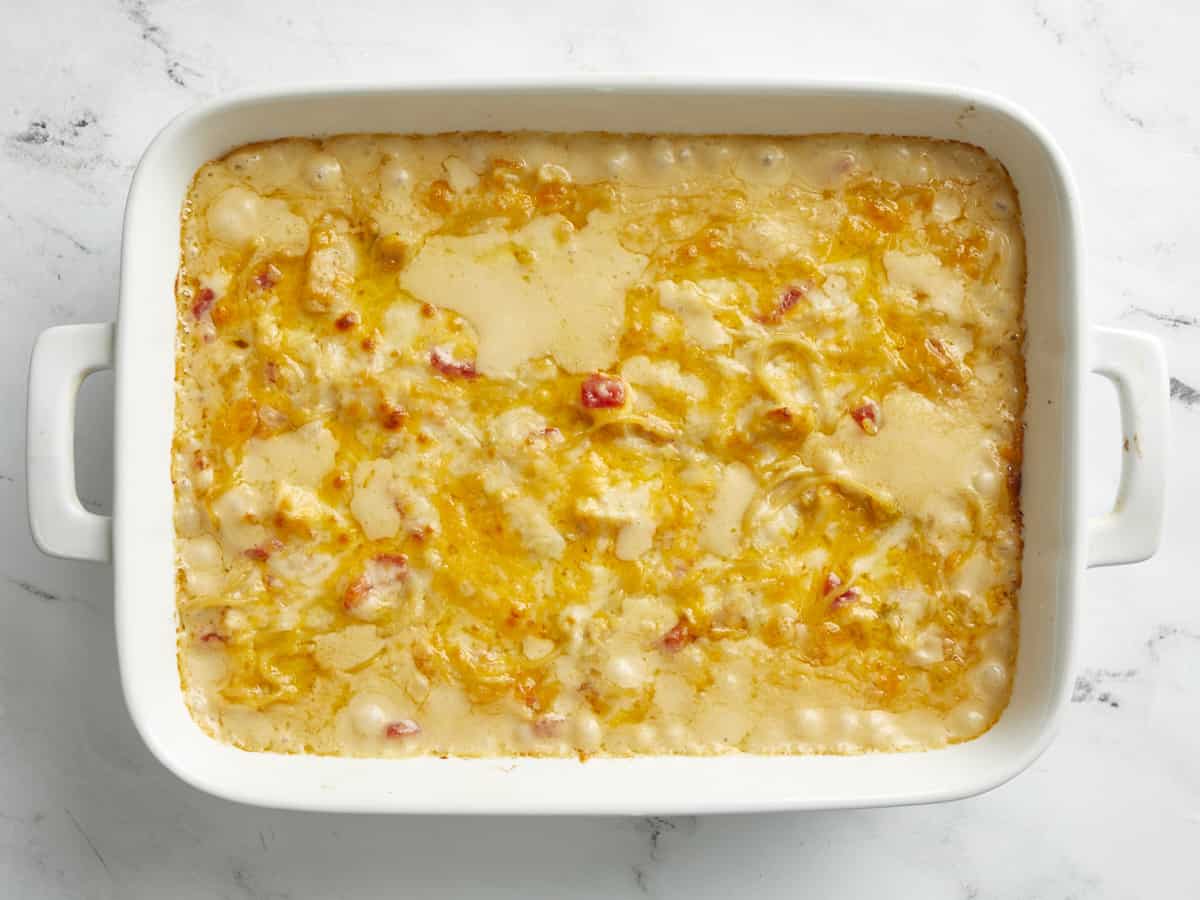
Overhead view of chicken spaghetti in a white casserole dish with a wooden spoon placed inside.
Print

Chicken Spaghetti

This creamy Chicken Spaghetti recipe is made with a cheesy, luscious, cream sauce and baked to perfection. A pasta lover’s dream!
Course Dinner
Cuisine American
Total Cost $11.81 recipe / $1.96 serving
Prep Time 10 minutes
Cook Time 50 minutes
Total Time 1 hour
Servings 6
Calories 572kcal

Ingredients

  • 2 boneless, skinless chicken breasts (about 1.5 lb total) $4.70
  • 1 Tbsp olive oil $0.12
  • 1/2 Tbsp salt (for the pasta water) $0.04
  • 8 oz spaghetti $0.62
  • 1/4 cup salted butter $0.52
  • 1 onion, diced $0.32
  • 2 cloves garlic, minced $0.16
  • 1/4 cup all-purpose flour $0.06
  • 2 cups chicken broth $0.34
  • 1/2 tsp salt $0.02
  • 1/4 tsp freshly cracked black pepper $0.02
  • 1/2 tsp Italian seasoning $0.05
  • 1 cup shredded cheddar cheese, divided $1.24
  • 1 cup shredded mozzarella cheese, divided $1.24
  • 1 cup heavy cream $1.36
  • 1 10oz. can diced tomatoes with green chiles, drained (Rotel) $1.00

Instructions

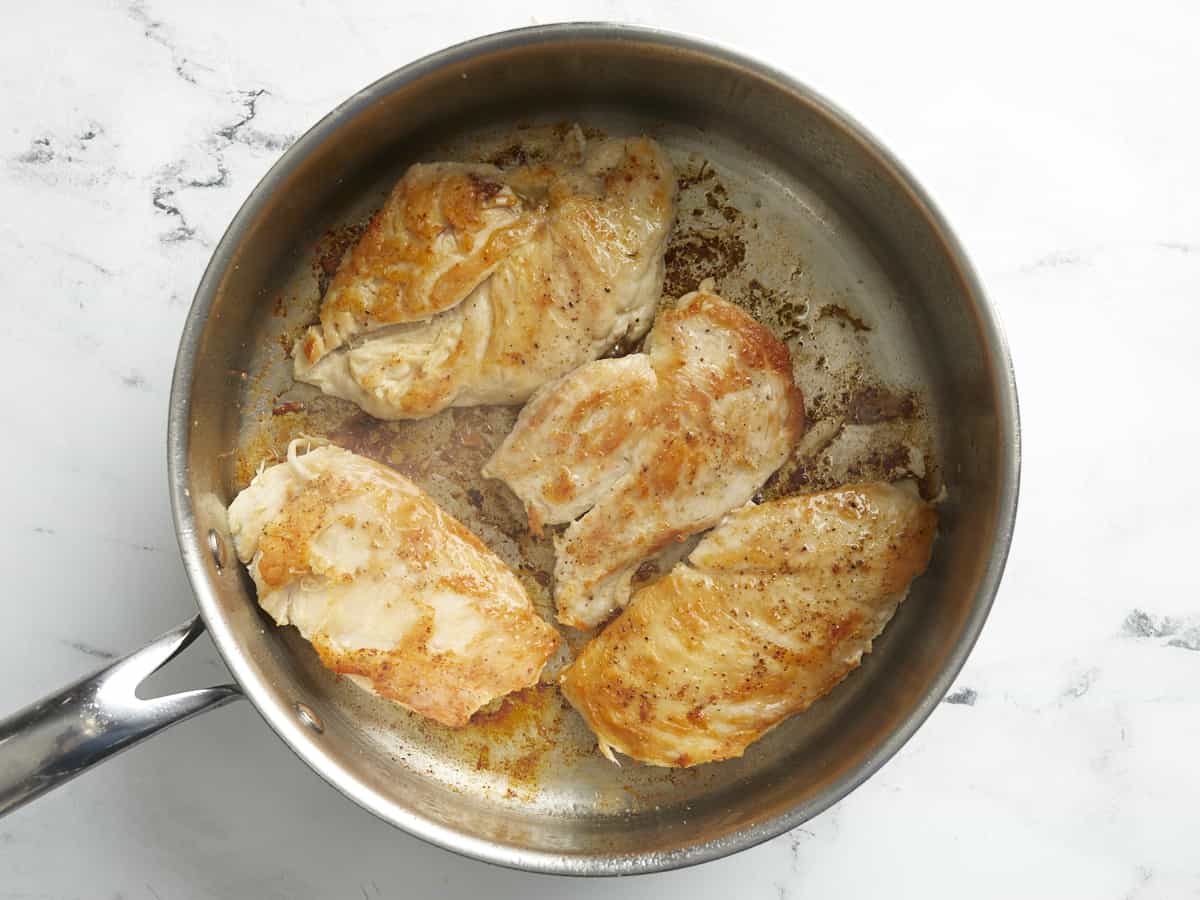
  • Preheat the oven to 375°F. Using a sharp knife, carefully fillet each chicken breast into two thinner cutlets. Heat a large deep skillet over medium heat and add the olive oil. Add the four chicken cutlets to the skillet and cook on each side until golden brown and cooked through (about 7-10 minutes total). Remove the chicken to a clean cutting board, and allow it to rest.
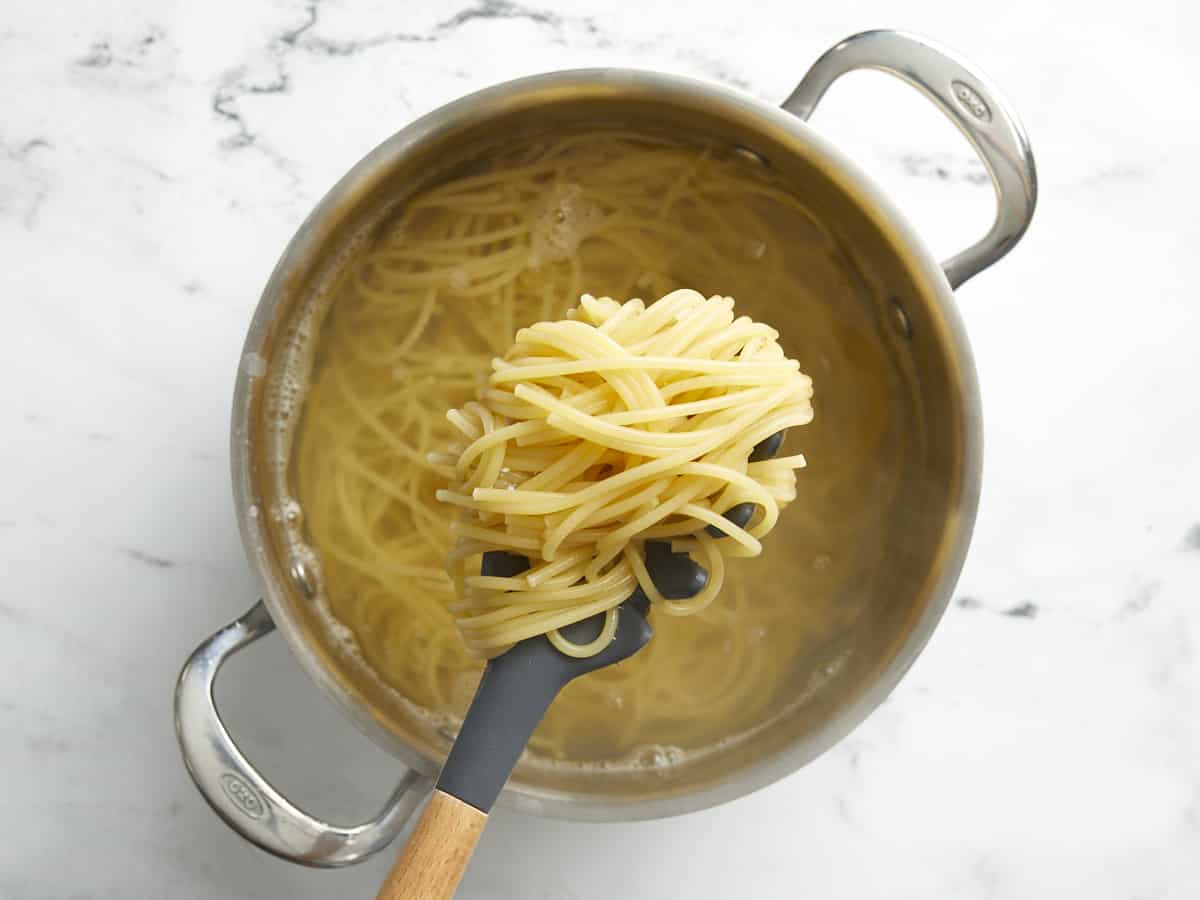
  • While the chicken is cooking, bring a large pot of water to a boil over high heat. Add 1/2 Tbsp of salt to the water then add the spaghetti pasta and boil until the pasta is tender (or al dente). Drain the pasta in a colander.
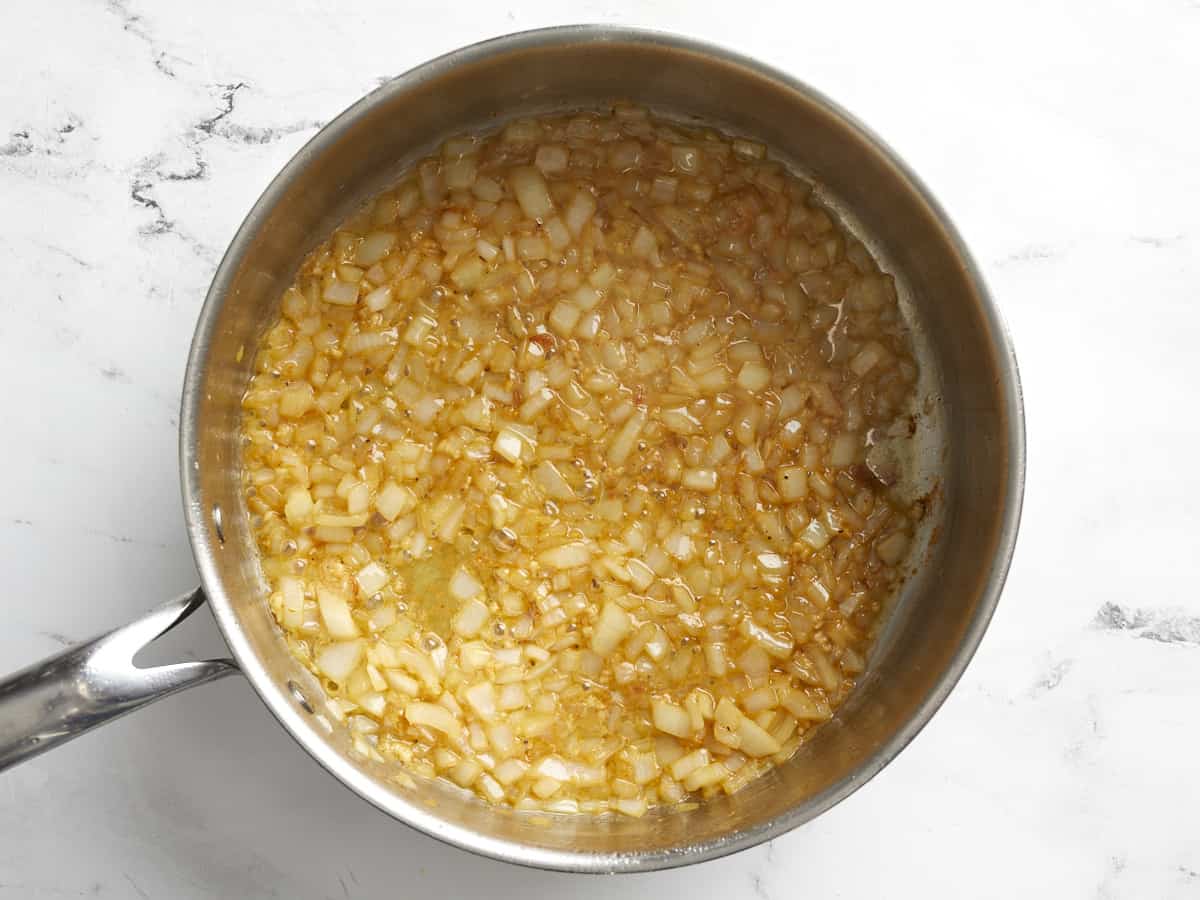
  • While the pasta is cooking, start making the sauce. In the same skillet that the chicken was cooked in, heat the butter over medium-high heat. Add the diced onion and minced garlic. Sauté for 3-4 minutes or until onion is translucent.
  • Sprinkle the flour into the skillet and stir with the onion and garlic. Cook for 2-3 minutes, stirring occasionally, until flour starts to turn golden brown.
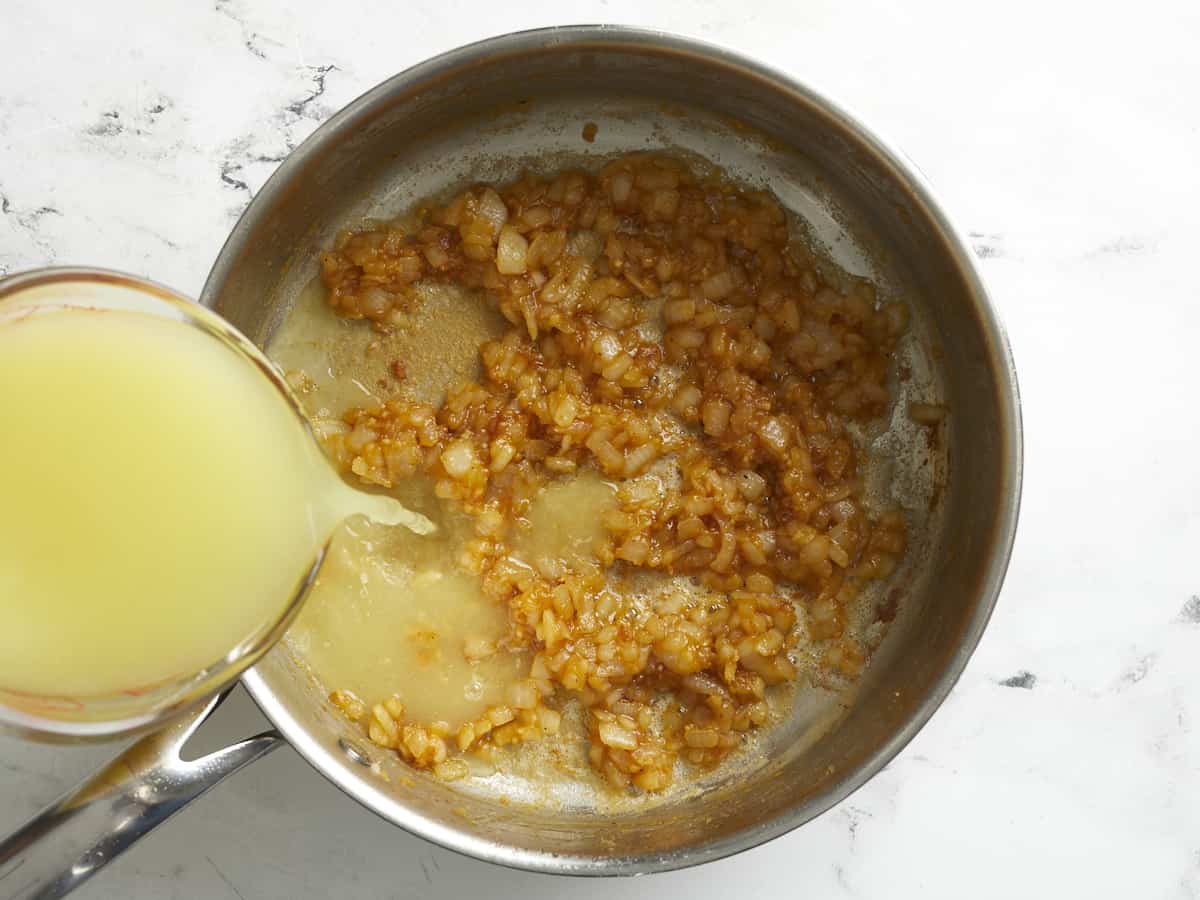
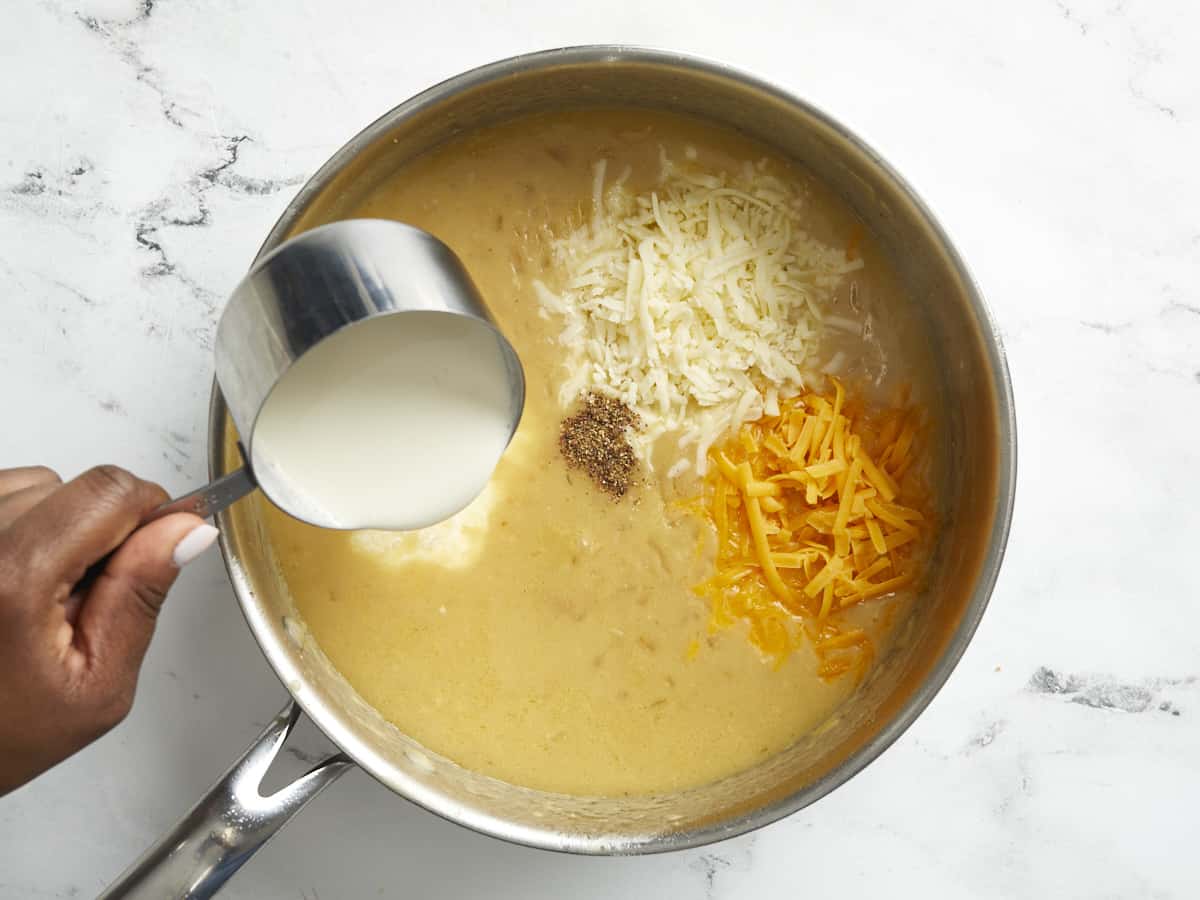
  • Slowly pour the chicken broth into the skillet and stir to fully dissolve the flour from the bottom of the skillet. The flour will start to thicken the sauce when it returns to a simmer. Add 1/2 tsp of salt, black pepper, Italian seasoning, 1/2 cup cheddar cheese, 1/2 cup mozzarella cheese, and the heavy cream to the skillet. Stir until the cheese is melted and the sauce is smooth.
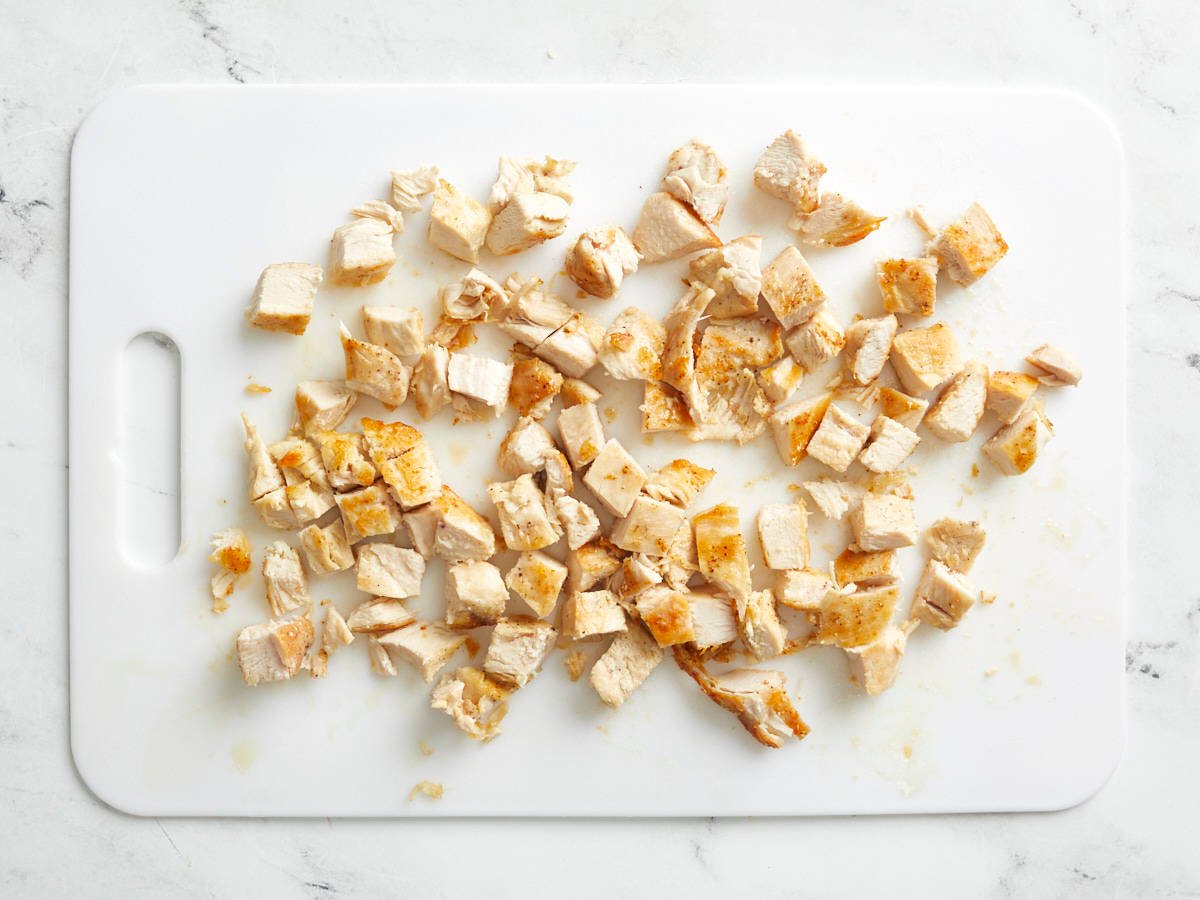
  • After the chicken breasts have rested, chop them into smaller ½ inch pieces.
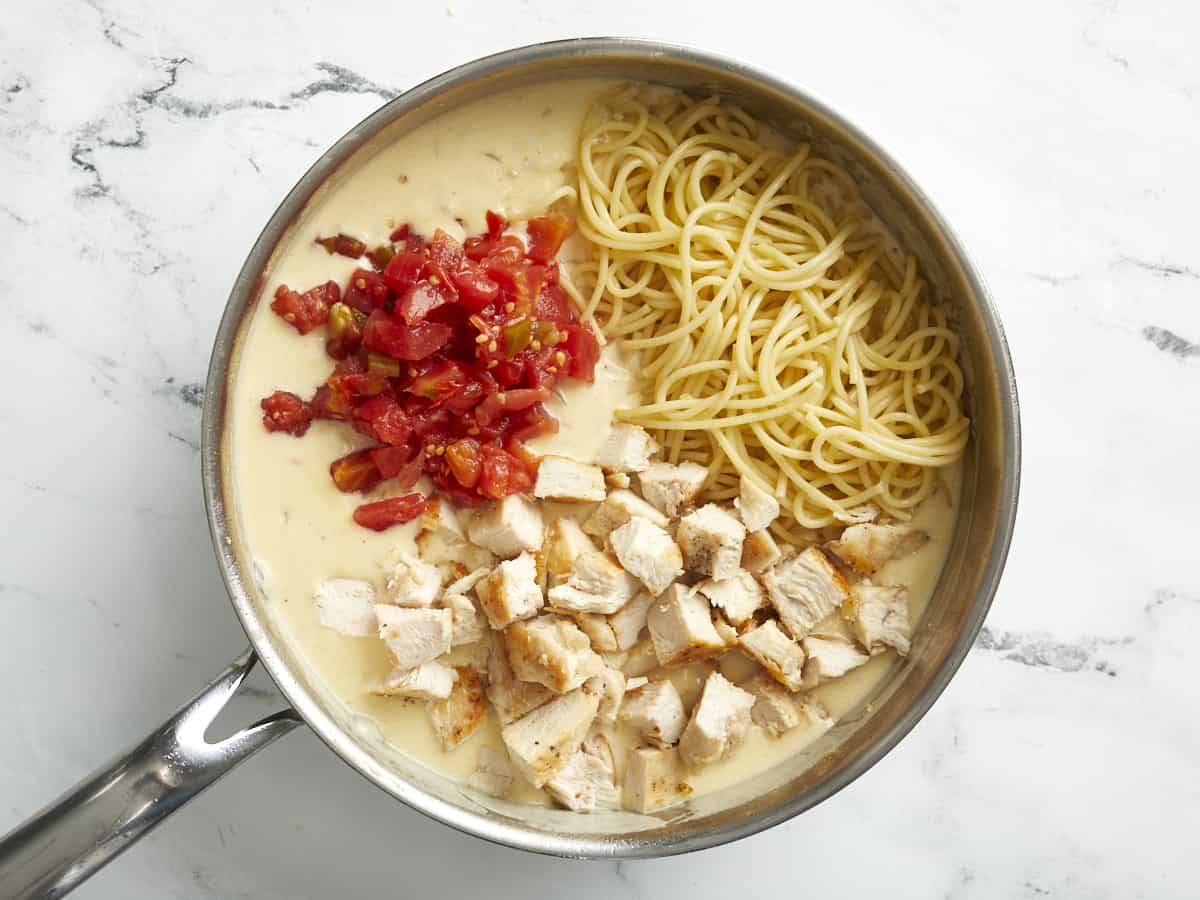
  • Turn the heat off the skillet and add the drained diced tomatoes with green chiles, the chopped chicken, and the cooked spaghetti to the pan. Mix until combined.
  • Add the chicken spaghetti mixture to a 9×13” casserole dish. Top with the remaining 1/2 cup of cheddar cheese and 1/2 cup of mozzarella cheese.
  • Bake the casserole in the preheated oven for 25 minutes or until bubbly around the edges and cheese is melted.

See how we calculate recipe costs here.

Nutrition

Serving: 1serving | Calories: 572kcal | Carbohydrates: 37g | Protein: 24g | Fat: 37g | Sodium: 843mg | Fiber: 2g
Overhead view of chicken spaghetti in a white casserole dish with a wooden spoon placed inside.

How to Make Chicken Spaghetti – Step by Step Photos

Seared chicken breasts in a skillet.

Preheat the oven to 375°F. Using a sharp knife, carefully fillet each chicken breast into two thinner cutlets. Here is a great tutorial on How to Cut Chicken Breasts Into Cutlets by Serious Eats. Heat a large deep skillet over medium heat and add 1 Tbsp olive oil. Add the four chicken cutlets to the skillet and cook on each side until golden brown and cooked through (about 7-10 minutes total). Remove the chicken to a clean cutting board, and allow it to rest.

Cooked spaghetti noodles in a pot.

While the chicken is cooking, bring a large pot of water to a boil over high heat. Add 1/2 Tbsp of salt to the water, then add 8 oz. of spaghetti pasta, and boil until the pasta is tender (or al dente). Drain the pasta in a colander.

Onion and garlic sauteed in butter

While the pasta is cooking, start making the sauce. In the same skillet that the chicken was cooked in, heat 1/4 cup salted butter over medium-high heat. Add 1 diced onion and 2 minced garlic cloves. Sauté for 3-4 minutes or until onion is translucent.

Chicken broth being added to sauteed onions, garlic and cooked flour.

Sprinkle 1/4 cup of flour into the skillet and stir with the onion and garlic. Cook for 2-3 minutes, stirring occasionally, until flour starts to turn golden brown. Slowly pour 2 cups of chicken broth into the skillet and stir to fully dissolve the flour from the bottom of the skillet. The flour will start to thicken the sauce when it returns to a simmer.

Heavy cream, cheese, salt and pepper added to skillet.

Add 1/2 tsp salt, 1/4 tsp black pepper, 1/2 tsp Italian seasoning, 1/2 cup cheddar cheese, 1/2 cup mozzarella cheese, and 1 cup of heavy cream to the skillet. Stir until the cheese is melted and the sauce is smooth.

Chicken breasts chopped on a cutting board.

Now chop the cooked chicken breasts into smaller ½ inch pieces.

Cooked spaghetti, chopped chicken breasts, and rotel being added to skillet.

Turn the heat off the skillet and add 1 can of drained diced tomatoes with green chiles, the chopped chicken, and the cooked spaghetti to the pan. Mix until combined.

Chicken spaghetti mixture added to a white baking dish with the remainder of the cheese sprinkled on top.

Add the chicken spaghetti mixture to a 9×13” casserole dish. Top with the remaining 1/2 cup of cheddar cheese and 1/2 cup of mozzarella cheese.

Overhead view of cooked chicken spaghetti in a casserole dish.

Bake the casserole in the preheated oven for 25 minutes or until bubbly around the edges and the cheese is melted on top.

Overhead view of chicken spaghetti in a white casserole dish with a wooden spoon placed inside.

This Chicken Spaghetti casserole is so creamy and delicious, it’ll soon become one of your favorite recipes! Enjoy!

Side view of Chicken Spaghetti plated with a forklifting some out.

The post Chicken Spaghetti appeared first on Budget Bytes.

Slow Cooker Potato Soup

This creamy Slow Cooker Potato Soup is rich, comforting and hearty, plus the slow cooker does all the heavy lifting for you!

The post Slow Cooker Potato Soup appeared first on Budget Bytes.
I could literally eat a bowl of creamy potato soup every single day. There was a time when I would call my favorite lunch spots each week just to see if the “soup of the day” was potato soup! Yes, I was that hooked. But nothing, I mean absolutely nothing, beats the taste of homemade potato soup! Even better when the slow cooker does all the work for you. This Slow Cooker Potato Soup is rich, creamy, comforting, and absolutely delicious!

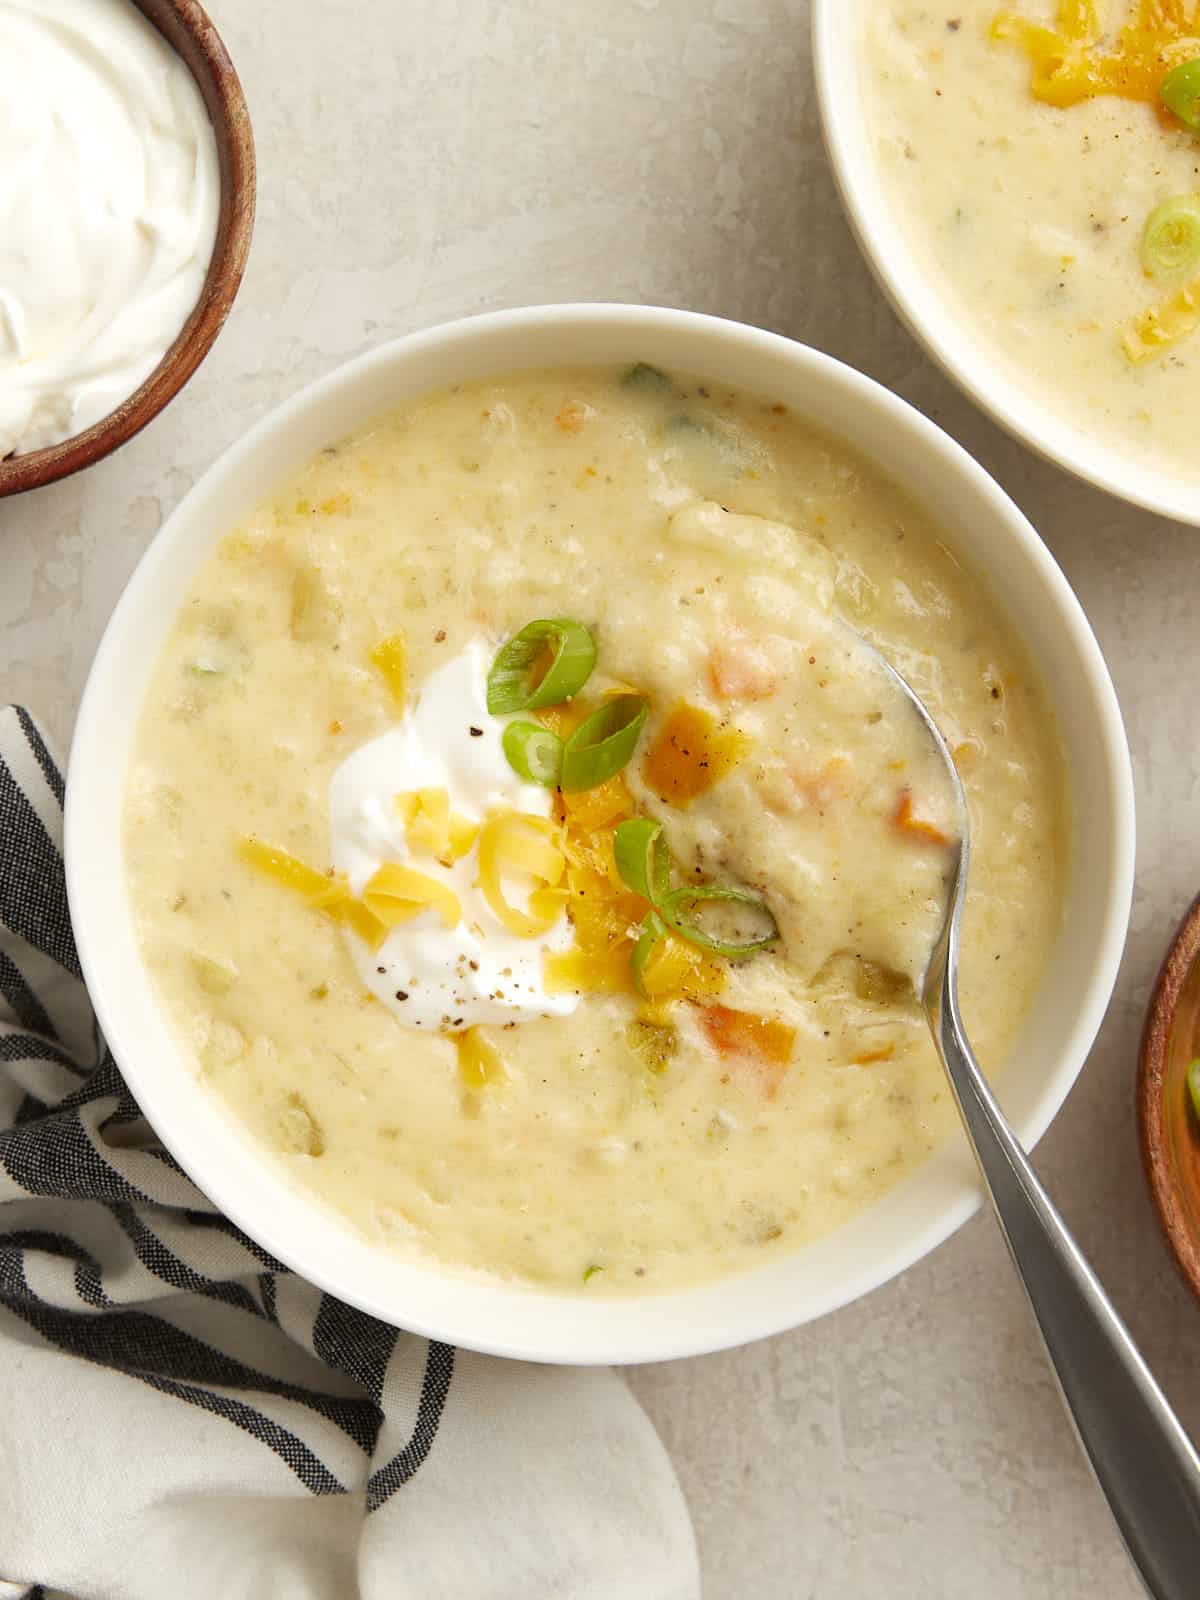
Overhead photo of slow cooker potato soup in a white bowl with sour cream, green onions, and shredded cheese on top.

If you don’t have a slow cooker you can still enjoy a warm bowl of potato soup by making our stovetop Loaded Potato Soup recipe.

Ingredients For Slow Cooker Potato Soup

Here are the ingredients you need to make this delicious, velvety potato soup recipe!

  • Vegetables: A combination of carrots, celery, onion and garlic were used to add depth, flavor, and texture to the soup.
  • Potatoes: Potatoes are of course the foundation for this soup. We used Yukon gold potatoes because we love their creamy texture and they hold up well in the slow cooker. Russet potatoes are also a great option.
  • Seasoning: A simple combination of Italian seasoning, salt and pepper seasons the soup.
  • Chicken Broth: Make sure to use a very flavorful chicken broth as a LOT of the soup flavor will come from the broth. We use Better than Bouillon to make our broth.
  • Flour: A quick and simple slurry with all-purpose flour and water is needed to thicken the soup. We tested the recipe without the slurry and it makes a BIG difference.
  • Heavy Cream & Sour Cream: Heavy cream also helps thicken the soup and gives it a creamy texture. Sour cream adds even more flavor and creaminess to the soup!
  • Cheddar Cheese & Green Onions: We finished the soup with a final pop of extra flavor and color with some fresh shredded cheddar cheese and sliced green onions.

Topping Options

There are several different toppings you can choose from to finish your creamy potato soup. Try any of these options: shredded cheddar cheese, sliced green onions or chives, sour cream, greek yogurt, chopped bacon, homemade croutons, or extra fresh cracked black pepper.

What To Serve With Potato Soup

Just like many soup recipes, this slow cooker potato soup pairs well with a simple side salad, a Caesar salad, or even a fresh pasta salad like our Broccoli Pasta Salad with Tomato Vinaigrette. Soups and sandwiches are also a great combination. Try serving this potato soup with a Chicken Caesar Wrap or a gourmet Spinach and Feta Grilled Cheese!

Storing Leftovers

Store any leftover potato soup in an airtight container in the refrigerator for up to five days. We would not recommend freezing this potato soup recipe. All the dairy and anything thickened with flour or cornstarch tends to separate upon thawing.

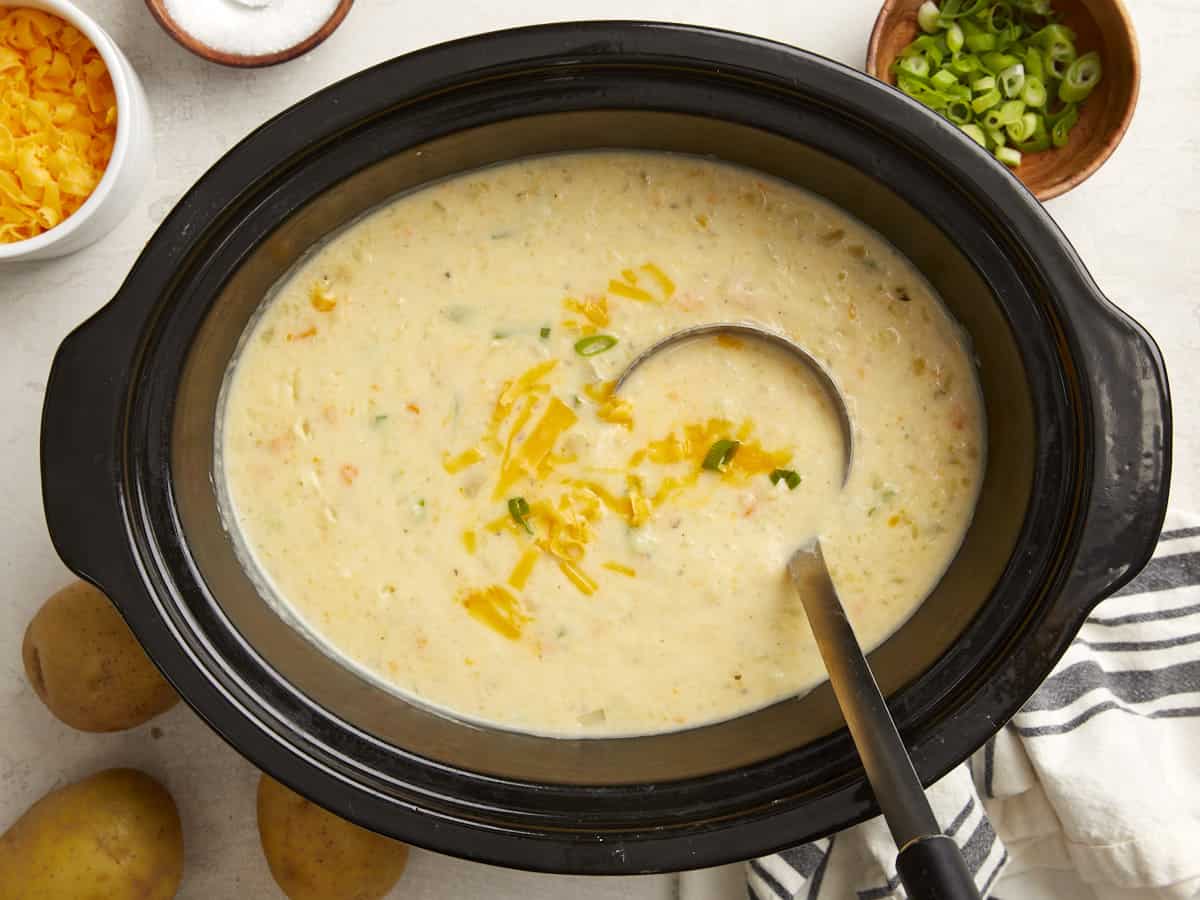
Potato soup in a slow cooker with shredded cheese, sliced green onions and a napkin on the side.
Overhead photo of slow cooker potato soup in a white bowl with sour cream, green onions, and shredded cheese on top.
Print

Slow Cooker Potato Soup

This creamy Slow Cooker Potato Soup is rich, comforting and hearty, plus the slow cooker does all the heavy lifting for you!
Course Dinner, Lunch
Cuisine American
Total Cost $8.10 recipe / $1.35 serving
Prep Time 20 minutes
Cook Time 3 hours 10 minutes
Total Time 3 hours 30 minutes
Servings 6 1.5 cups each
Calories 394kcal

Ingredients

  • 2 stalks celery $0.50
  • 2 carrots $0.30
  • 1 yellow onion $0.32
  • 3 cloves garlic $0.24
  • 3 lbs Yukon gold potatoes $3.29
  • 1 tsp Italian seasoning $0.10
  • 1 1/4 tsp salt $0.05
  • 1/2 tsp freshly cracked black pepper $0.02
  • 3 cups chicken broth $0.51
  • 2 Tbsp all-purpose flour $0.04
  • 2 Tbsp water $0.00
  • 1/2 cup heavy cream $0.68
  • 1/2 cup sour cream $0.53
  • 1 cup shredded cheddar cheese, divided $1.16
  • 3 green onions, sliced & divided $0.36

Instructions

  • Wash and dice the celery stalks, peel and dice the carrots, dice the onion, and mince the garlic. Wash, peel, and chop the potatoes into ½ – ¾ inch chunks.
  • Add the potatoes, carrots, celery, onion, and the garlic to a 5 or 6 quart slow cooker or crock pot. Then add the Italian seasoning, salt, and freshly cracked black pepper to the slow cooker.
  • Pour the chicken broth over the vegetables and spices in the slow cooker. Stir all the ingredients together so that everything is evenly distributed. Place the lid on the slow cooker and cook on high for 3 hours.
  • Once the potatoes are almost finished cooking, make a quick flour slurry by adding the flour and water to a small bowl and whisking together until smooth and there are no lumps.
  • After the potato soup has cooked for 3 hours, check to make sure the potatoes are tender and can be easily pierced with a fork. Now add the slurry, heavy cream, and sour cream to the slow cooker. Stir well to combine, replace the lid, and continue to cook on high for an additional 10 minutes.
  • During the last 10 minutes of cooking, while the slurry and heavy cream are thickening the soup, shred the cheddar cheese and slice the green onions.
  • Remove the slow cooker lid then use a potato masher to mash the potato chunks into smaller pieces. Add ½ cup of the shredded cheese and half of the sliced green onions. Stir until the cheese has melted into the soup.
  • Taste the soup and adjust the salt or black pepper to your liking. Use the remaining shredded cheese and green onions to garnish individual bowls. Serve hot and enjoy!

See how we calculate recipe costs here.

Nutrition

Serving: 1.5cups | Calories: 394kcal | Carbohydrates: 49g | Protein: 12g | Fat: 18g | Sodium: 1086mg | Fiber: 6g
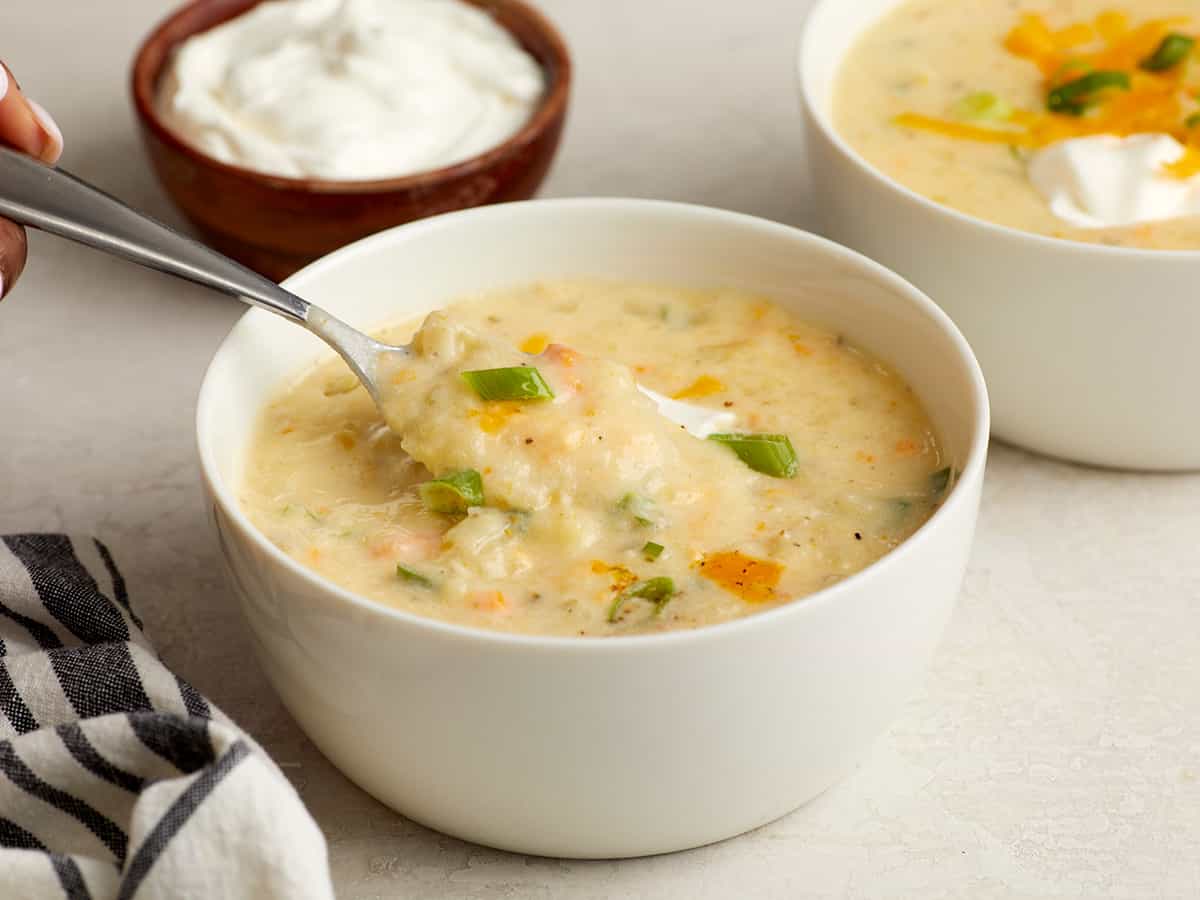
A spoonful of soup being lifted from the bowl.

How To Make Slow COoker Potato Soup – Step By Step PHotos

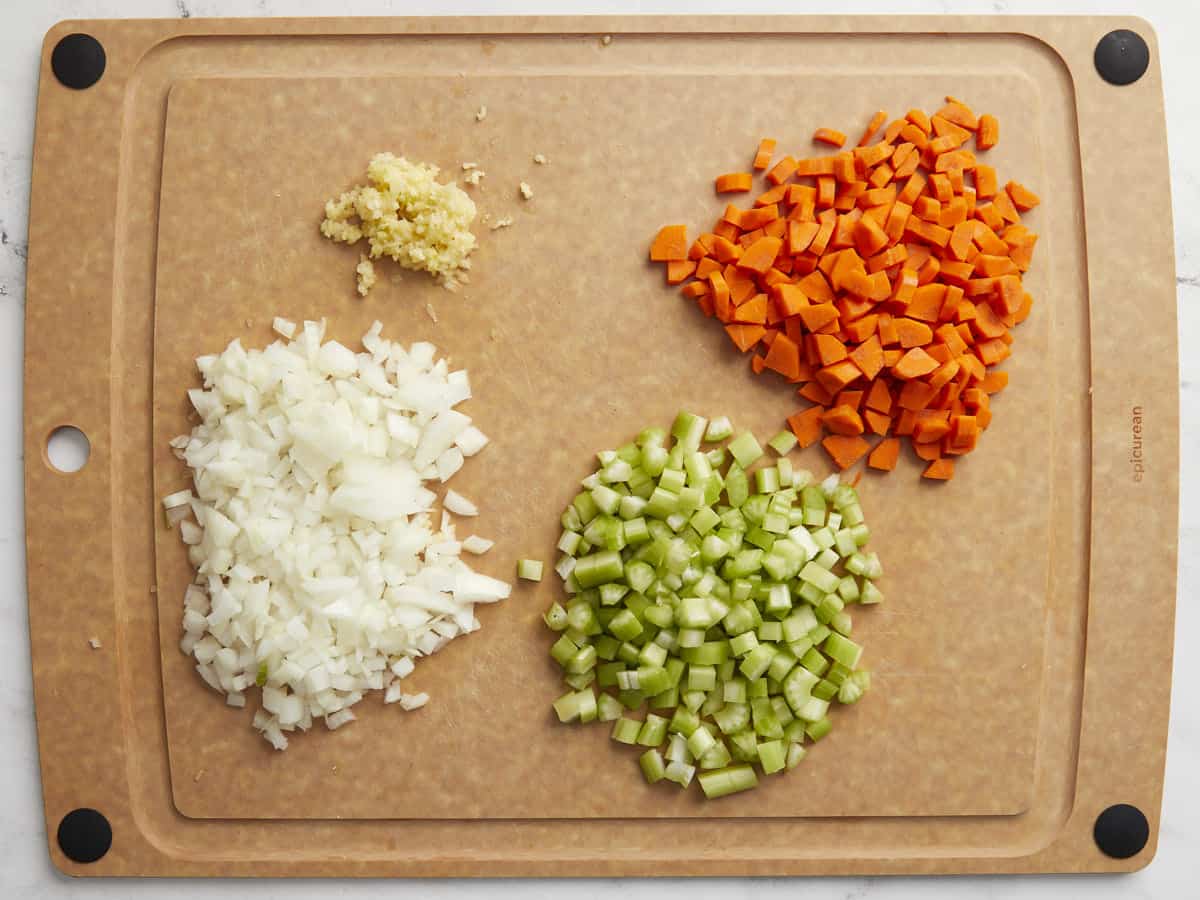
Diced carrots, diced onion, diced celery, and minced garlic on a cutting board.

Wash and dice 2 celery stalks, peel and dice 2 carrots, dice 1 onion, and mince 3 garlic cloves.

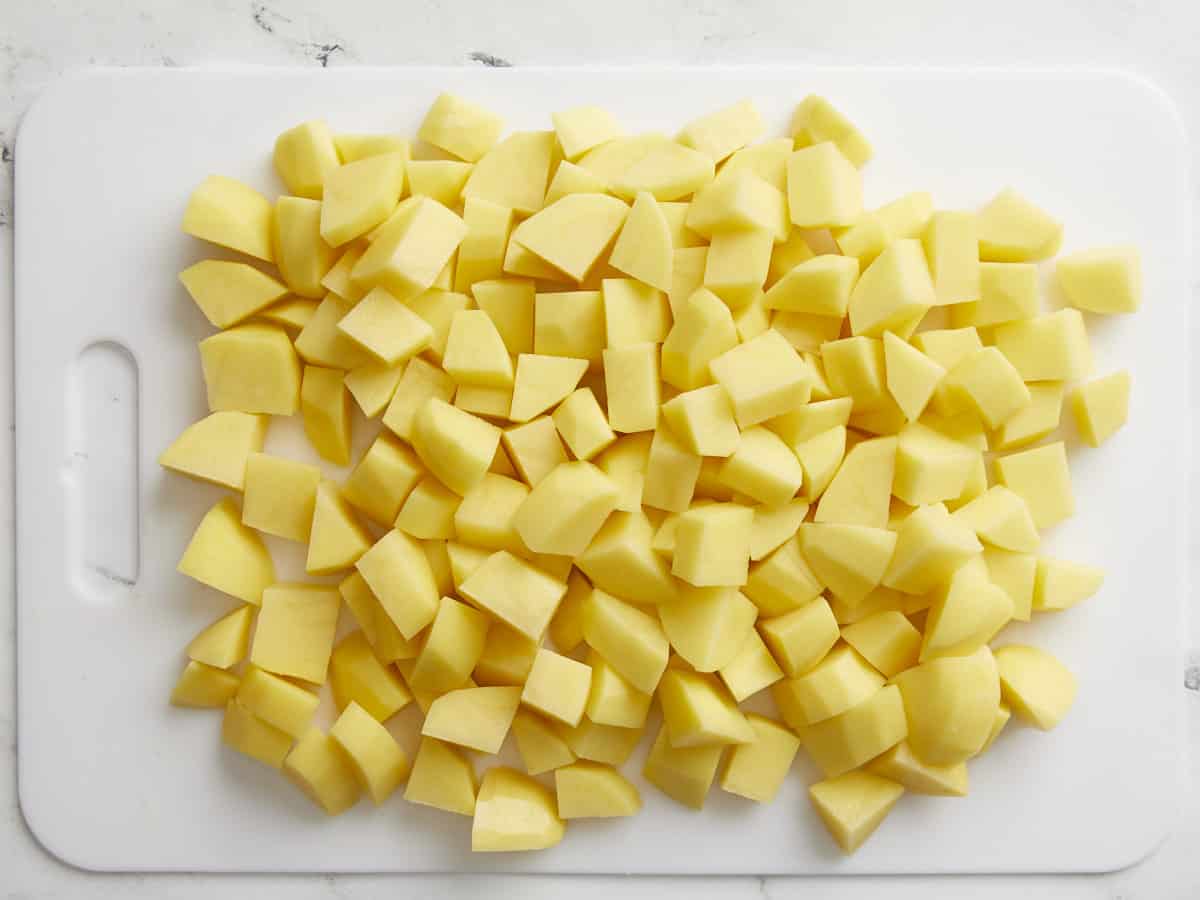
Yukon gold potatoes peeled and chopped on a cutting board.

Wash, peel, and chop 3 lbs. of Yukon gold potatoes into roughly ½ – ¾ inch chunks.

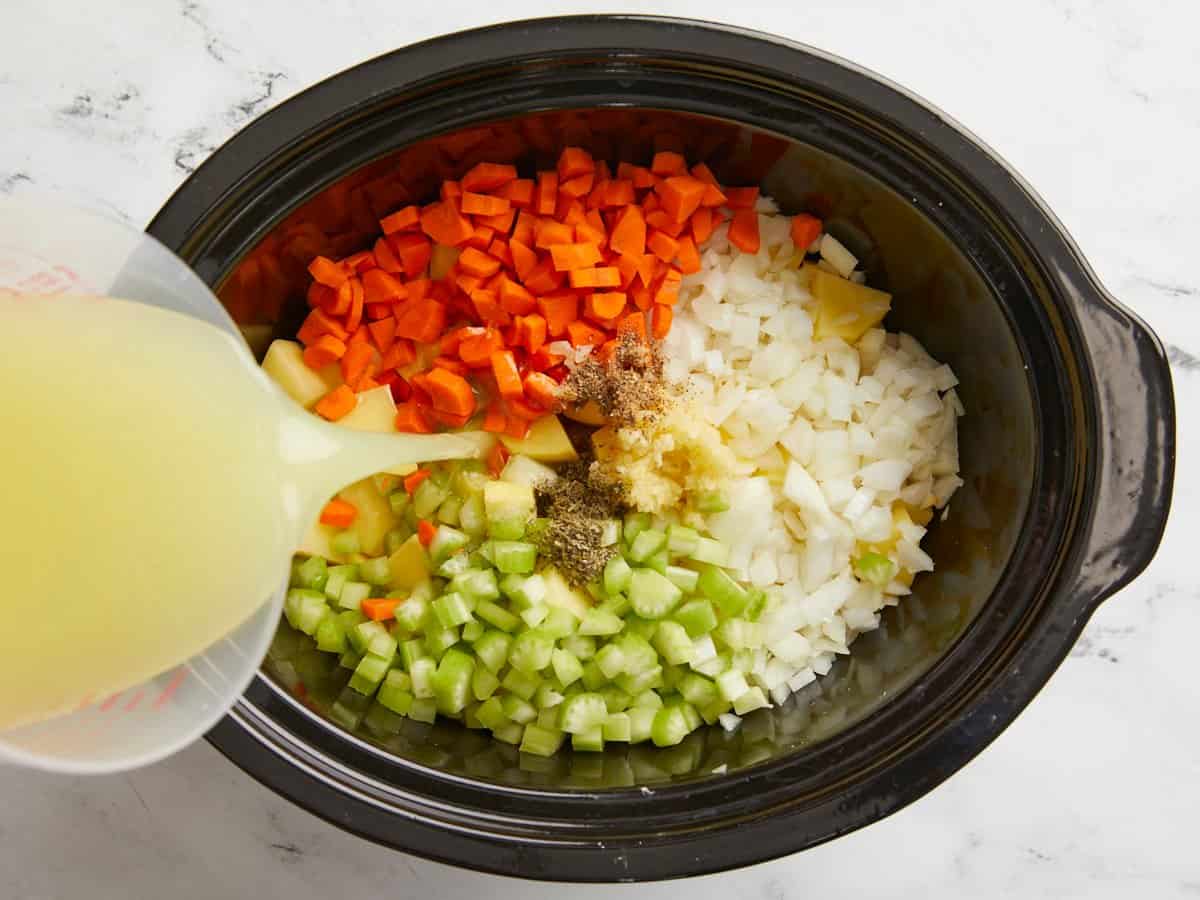
Diced vegetables, potatoes, seasoning and chicken broth added to a slow cooker.

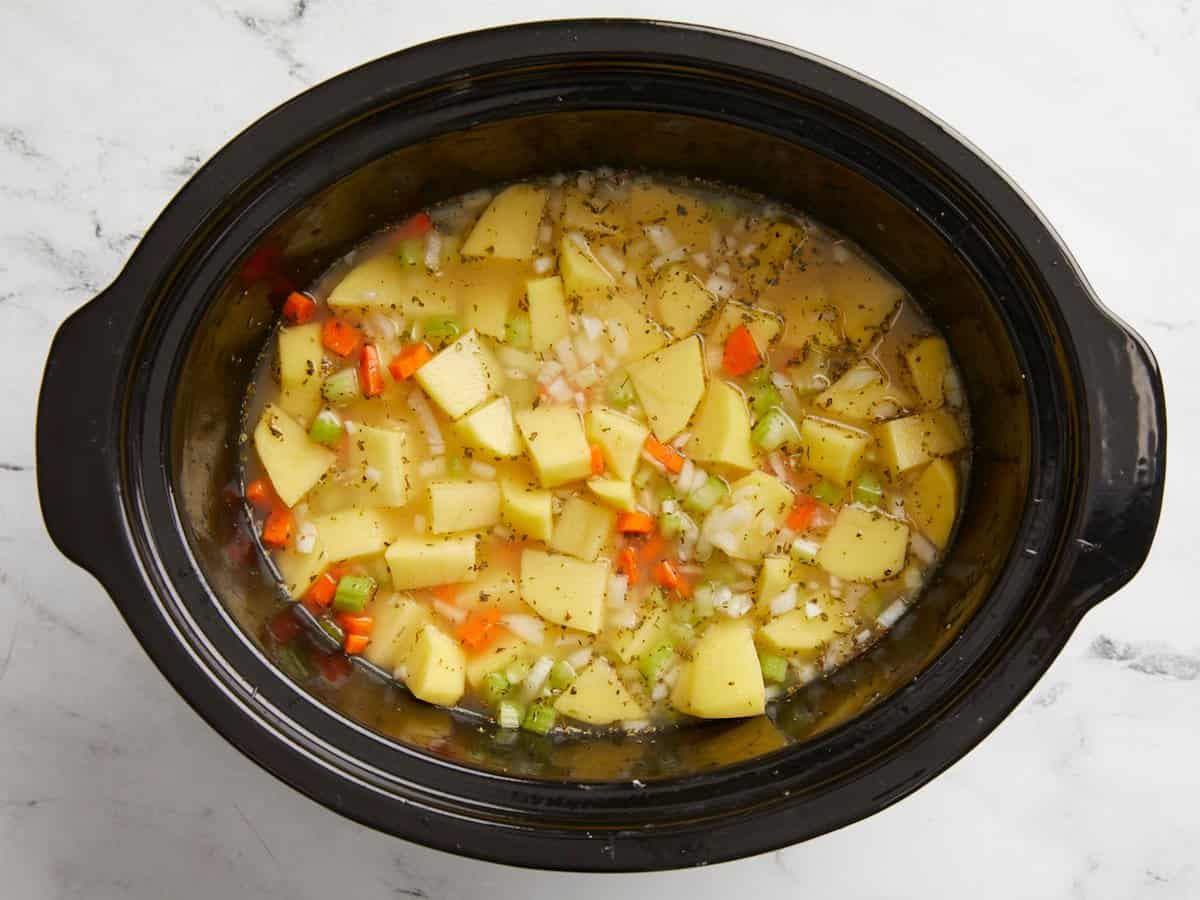
Add the potatoes, carrots, celery, onion, and the garlic to a 5 or 6 quart slow cooker or crock pot. Then add 1 tsp of Italian seasoning, 1 1/4 tsp of salt, and 1/2 tsp of freshly cracked black pepper to the slow cooker. Next pour 3 cups of chicken broth over the vegetables and spices in the slow cooker.

Potato soup ingredients added to a slow cooker and mixed.

Stir all the ingredients together so that everything is evenly distributed. Place the lid on the slow cooker and cook on high for 3 hours. Once the potatoes are almost finished cooking, make a quick flour slurry by adding 2 Tbsp of flour and 2 Tbsp of water to a small bowl and whisking together until smooth and there are no lumps.

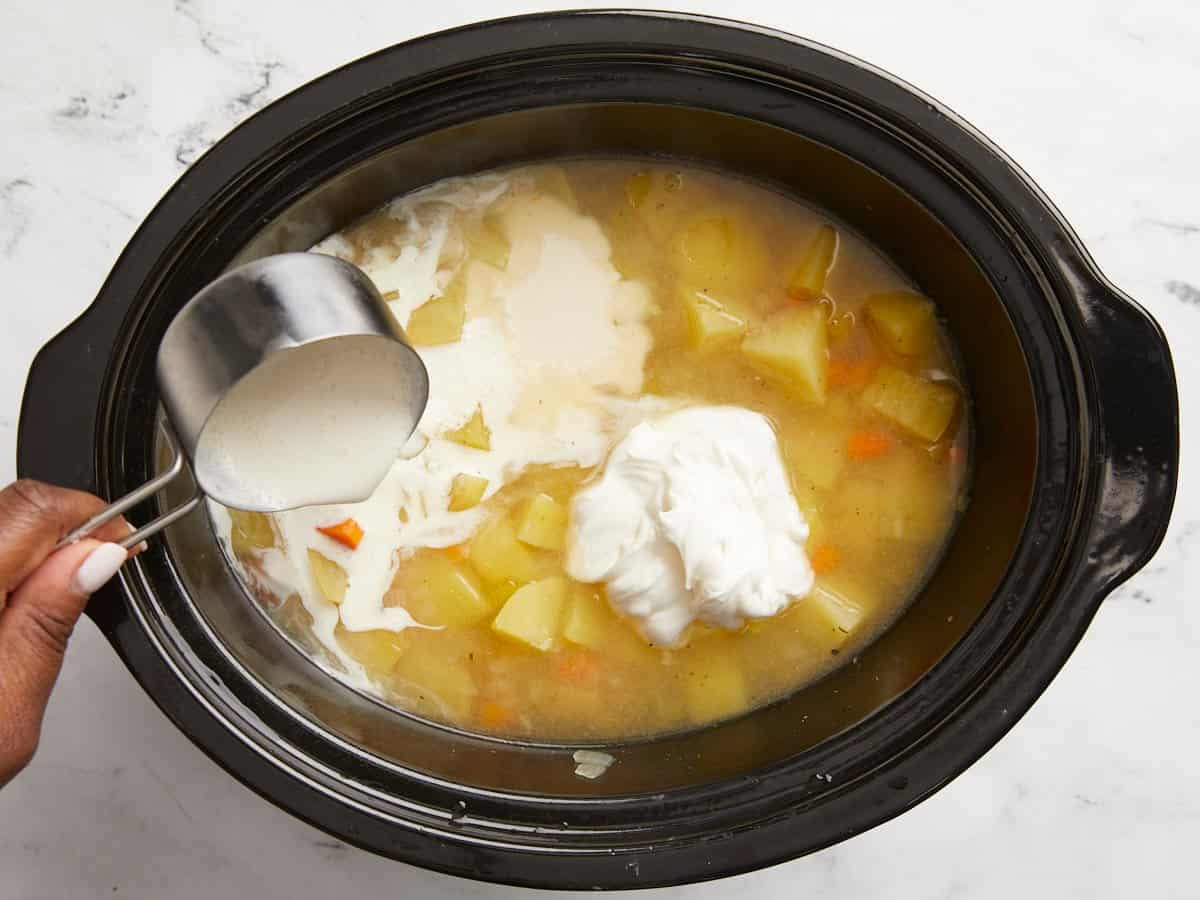
Heavy cream and sour cream added to potato soup in a slow cooker.

After the potato soup has cooked for 3 hours, check to make sure the potatoes are tender and can be easily pierced with a fork. Now add the flour slurry, 1/2 cup of heavy cream, and 1/2 cup of sour cream to the slow cooker. Stir well to combine, replace the lid, and continue to cook on high for an additional 10 minutes. During the last 10 minutes of cooking, while the slurry and heavy cream are thickening the soup, shred the cheddar cheese and slice 3 green onions.

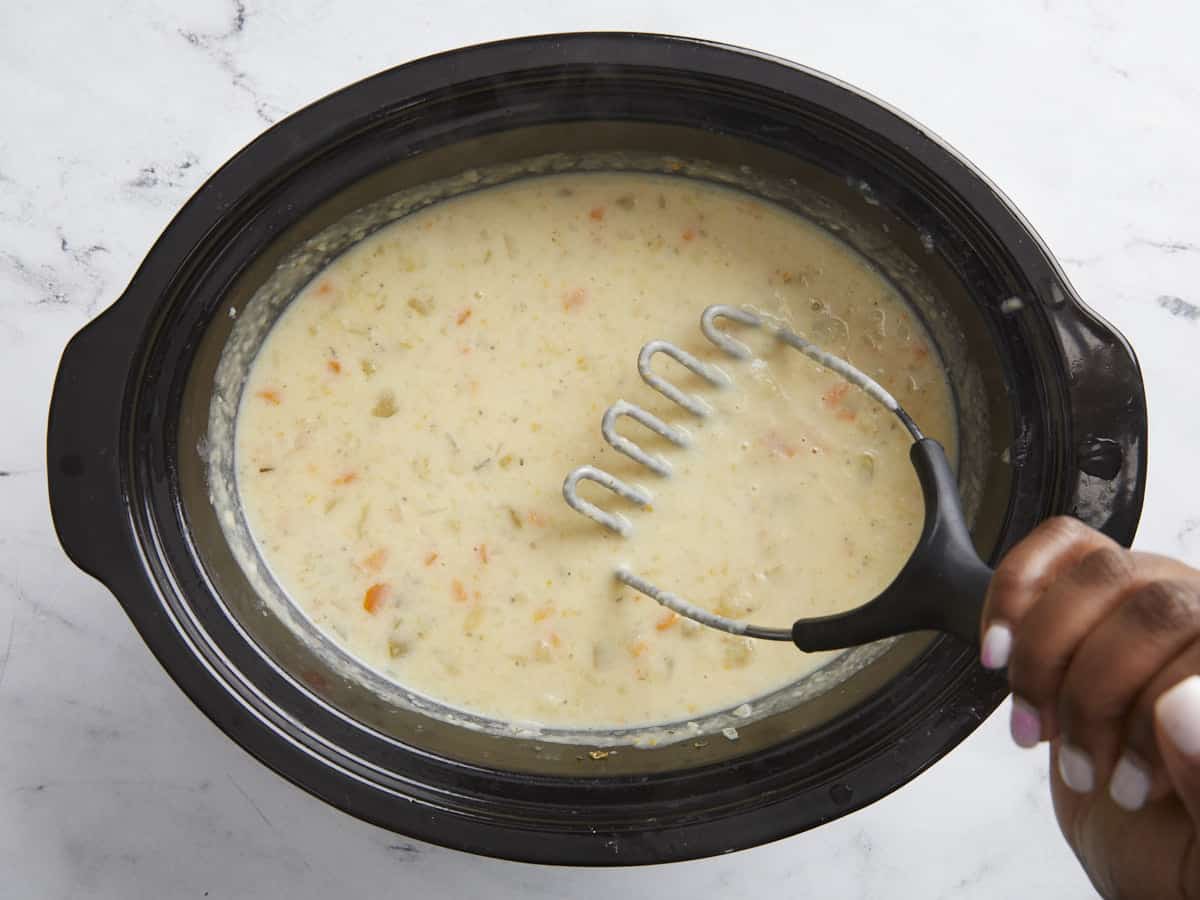
Potato soup ingredients being mashed with a potato masher in a slow cooker.

Remove the slow cooker lid then use a potato masher to mash the potato chunks into smaller pieces.
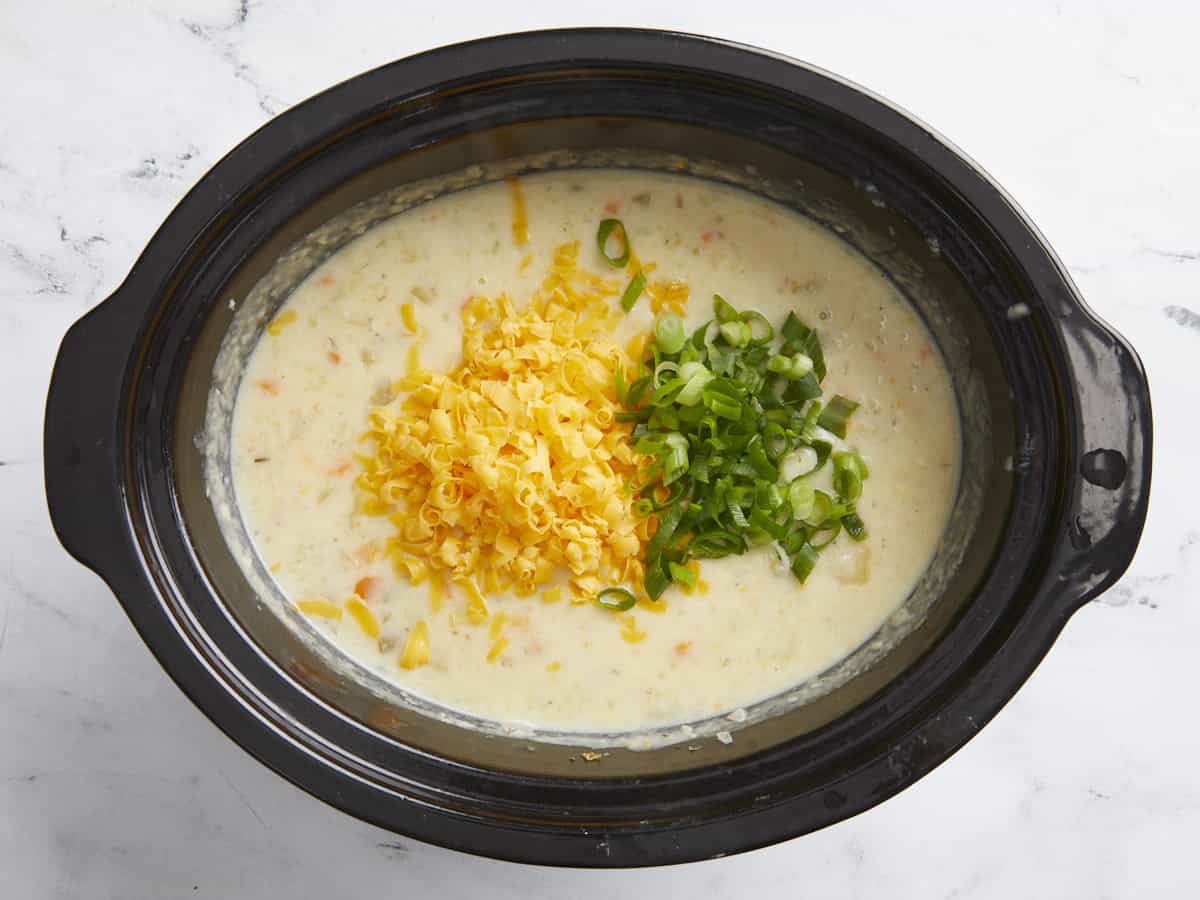
Shredded cheese and green onions being added to potato soup in a slow cooker.

Add ½ cup of the shredded cheese and half of the sliced green onions. Stir until the cheese has melted into the soup.
Potato soup in a slow cooker with shredded cheese, sliced green onions and a napkin on the side.

Taste the soup and adjust the salt or black pepper to your liking.

Overhead view of two bowls of slow cooker potato soup.

Use the remaining shredded cheese and green onions to garnish individual bowls. We also topped ours with a little soup cream and some freshly cracked black pepper. Simple, creamy, delicious, and SO GOOD!

The post Slow Cooker Potato Soup appeared first on Budget Bytes.