Taco Salad

This taco salad recipe is super customizable without compromising on its hearty and satisfying flavors. It’s the ultimate meal prep salad!

The post Taco Salad appeared first on Budget Bytes.

Listen, I love Taco Tuesday as much as the next gal, but Taco Salads are really where it’s at. I have always said that salad is the ultimate “fast food”, and I’m sticking to it. Think about it, they’re quick, easy, and almost always require very little cooking. When you want a little extra somethin’ special, this taco salad with lean ground beef is it. You can make taco salad at home for a fraction of the price and have enough salad to meal prep all week long.
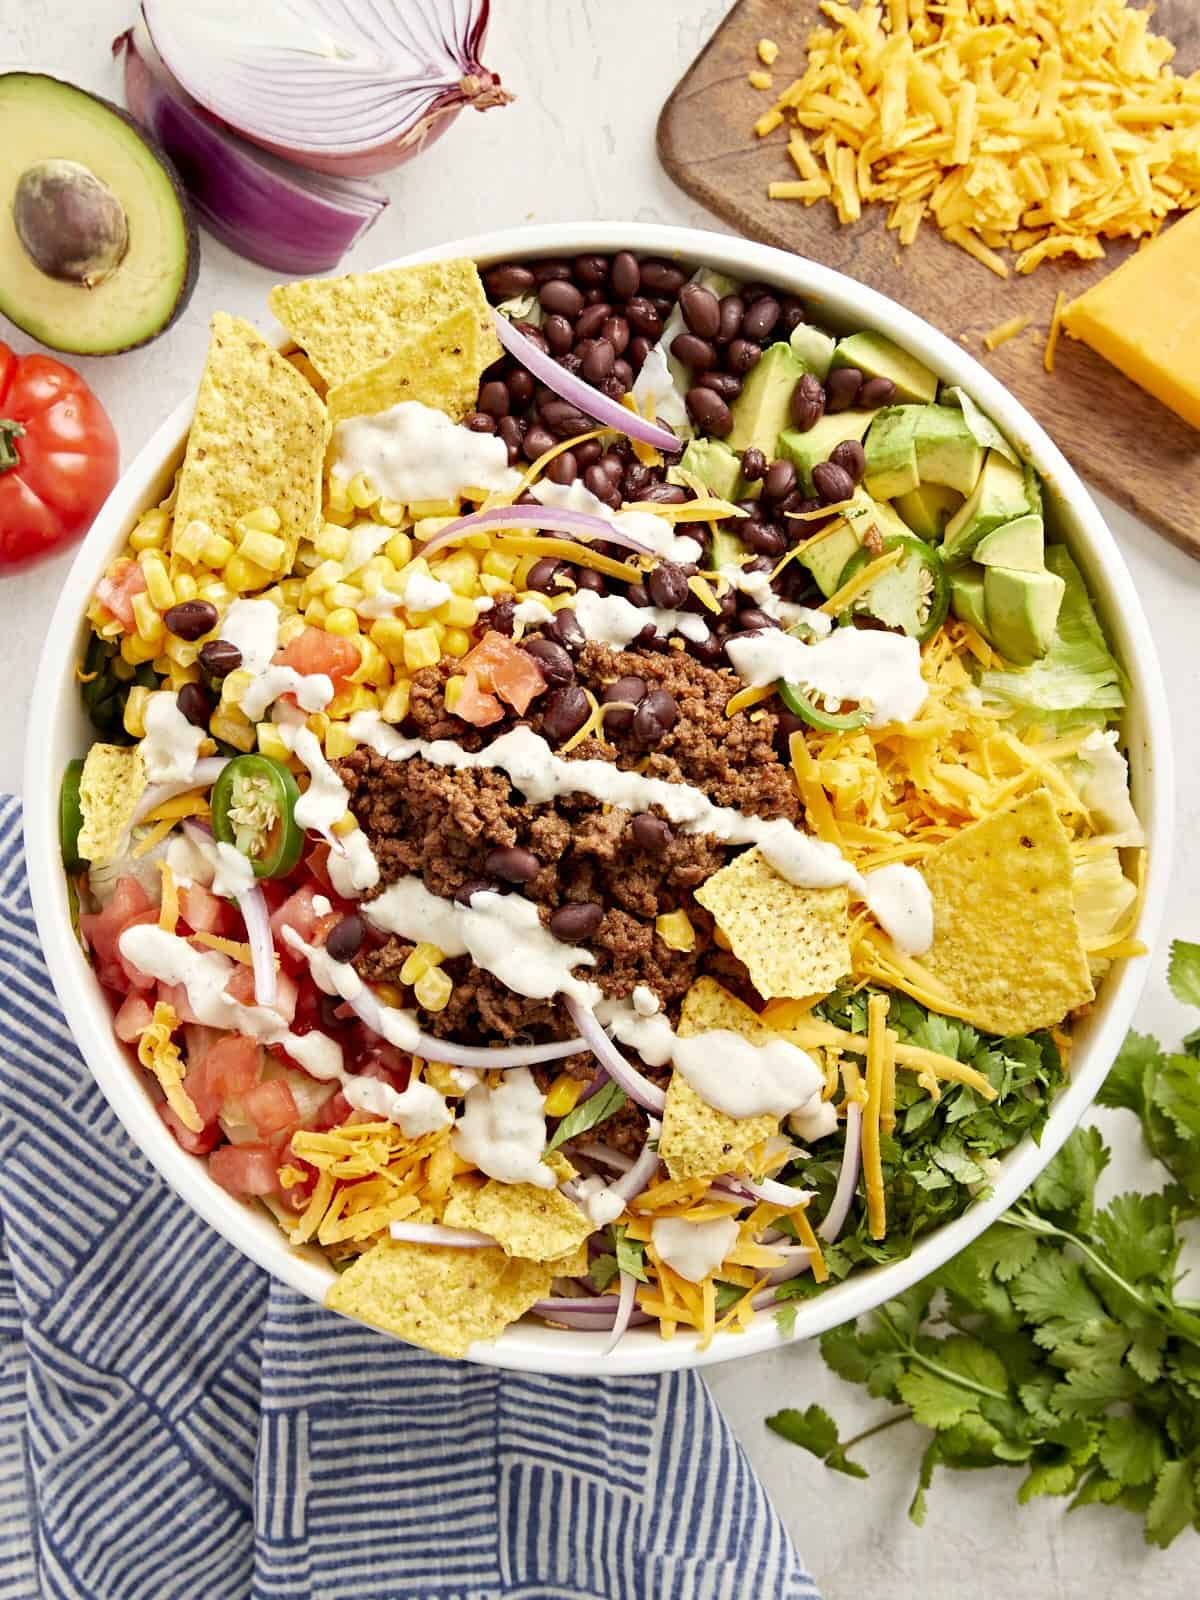
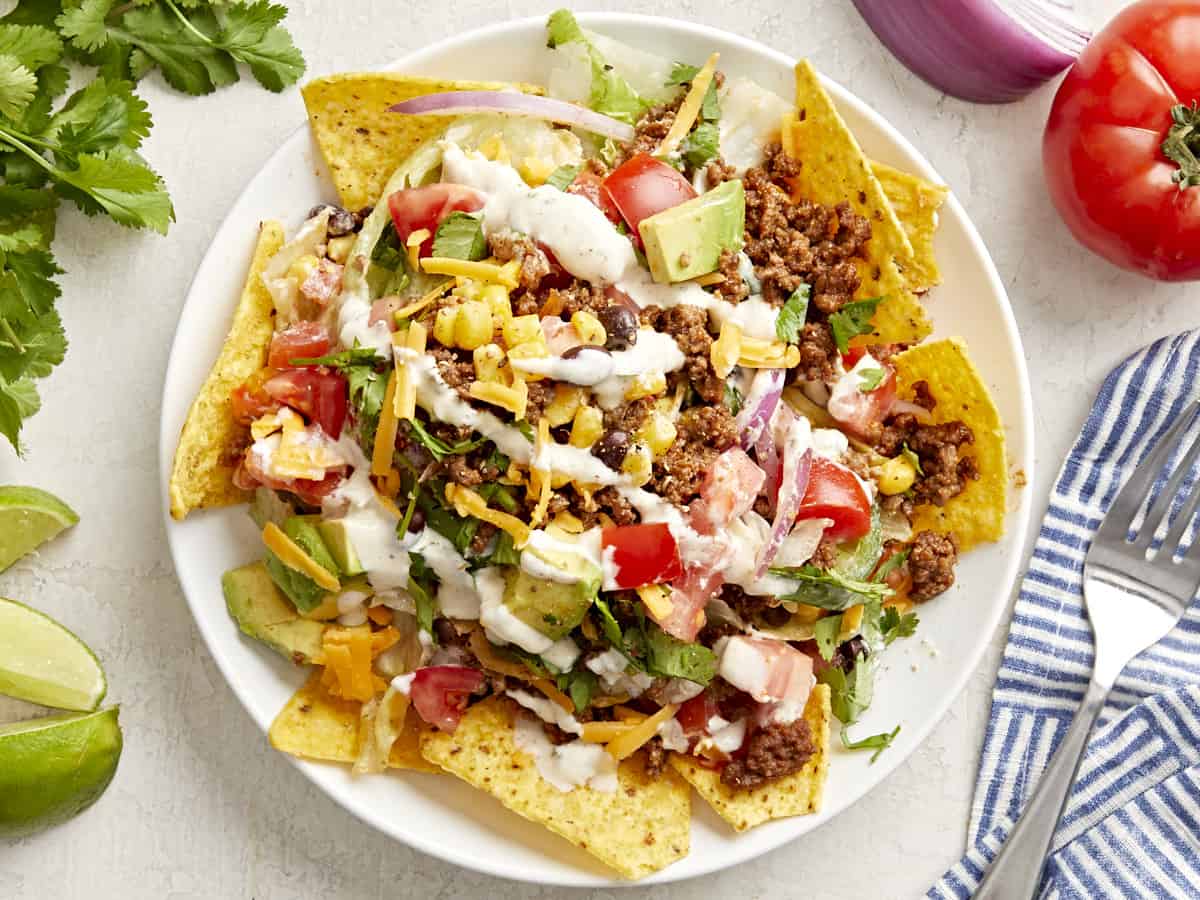
overhead view of taco salad with creamy white dressing and corn chips in a white bowl.

What Is Taco Salad?

Taco salad is everything you love about crispy beef tacos but in salad form! I’ve made sure it’s jam-packed with lettuce and extra veggies to keep you full all day long.

Ingredients

Here’s what you’ll need to make this taco salad:

  • Sour Cream: Forms the creamy and tangy base of the dressing.
  • Lime: The juice and zest of two limes adds acidity and bright citrus flavor to the dressing.
  • Garlic: Adds a balancing earthiness to the dressing.
  • Seasonings: Salt, chili powder, and sugar balance out the flavor of the dressing.
  • Olive Oil: Helps to emulsify the dressing.
  • Ground Beef: The classic choice for a taco salad. You could easily swap for ground chicken or turkey if you prefer. I used a lean ground beef, so I didn’t have to strain off any fat from cooking, saving me a little time. Vegetarian? No problem! This salad is crazy flavorful with or without the meat.
  • Taco Seasoning: Adds that classic Mexican flavor.
  • Vegetables: Red onion, tomato, corn, avocado, and jalapeño add freshness, crunch, and a touch of spice.
  • Black Beans: Add creaminess and extra protein.
  • Corn Chips: Add saltiness and crunch.
  • Cheddar Cheese: Adds creamy, cheesy flavor.
  • Iceberg Lettuce: The perfect neutral crunchy base lettuce to let the veggies shine.

What Else Can I Add?

I love that this is a great recipe to clean out those leftovers from the fridge. Here are some ideas:

Recipe Tip!

This salad is a crowd-pleaser! If I’m entertaining and have guests or family members who don’t eat certain ingredients, I keep everything separate so everyone can build their own perfect taco salad! I like mine without the ground beef and always use extra beans… yum! I love that everyone can enjoy this salad together with a wide range of toppings and feel full and content.
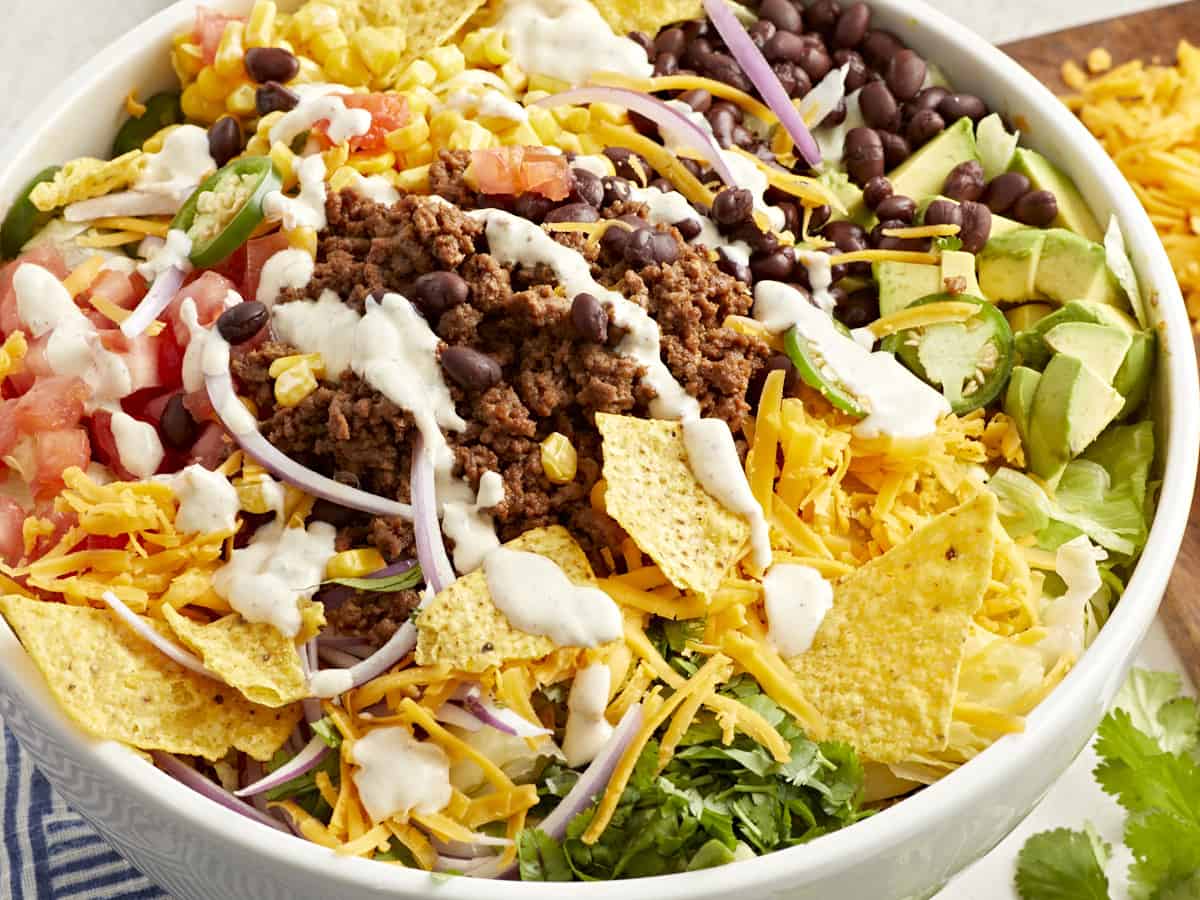
three-quarters view of taco salad in a white bowl.
overhead view of taco salad with creamy white dressing and corn chips in a white bowl.
Print

Taco Salad

This taco salad recipe is super customizable without compromising on its hearty and satisfying flavors. It's the ultimate meal prep salad!
Course Main Course
Cuisine Mexican
Total Cost ($17.89 recipe / $2.98 serving)
Prep Time 25 minutes
Cook Time 5 minutes
Total Time 30 minutes
Servings 6 salads (about 2 cups each)
Calories 804kcal

Ingredients

Dressing

  • 4 oz. sour cream $0.49
  • 2 limes, juiced and zested $1.00
  • 1 clove minced garlic $0.05
  • 1/4 tsp salt $0.01
  • 1/4 tsp chili powder $0.03
  • 1/2 tsp sugar $0.01
  • 4 Tbsp olive oil $0.80

Ground Beef Mixture

Additional Toppings

  • 1/2 red onion, julienned $0.37
  • 2 roma tomatoes $0.60
  • 1 cup corn kernels $1.66
  • 1 15-oz. can black beans, drained and rinsed $0.89
  • 1 avocado, diced $0.99
  • 1 cup tortilla chips, crushed $1.44
  • 1 cup shredded cheddar (about 1/2 of an 8-oz. block) $1.25
  • 1 jalapeno, sliced into thin rings $0.30
  • 1 head iceberg lettuce, chopped into bite-sized pieces $1.79

Instructions

  • Gather and prep all topping ingredients: julienne red onion, chop tomato, defrost frozen corn, drain and rinse black beans, dice avocado, crush tortilla chips, shred cheddar cheese, and slice jalapeno. Set aside or mix together in a large serving bowl.
  • Chop iceberg lettuce into bite-sized pieces.
  • Combine sour cream, juice and zest from limes, minced garlic, salt, chili powder, sugar, and oil in a small mixing bowl. Whisk to combine.
  • Add lean ground beef and taco seasoning packet to skillet. Break apart the ground beef with a spatula and mix in the taco seasoning. Cook until all of the ground beef has turned brown.*
  • Top chopped lettuce with prepped veggies and cooked ground beef. Toss all ingredients together.
  • Drizzle a generous helping of dressing over the top with crumbled tortilla chips! Serve and enjoy.**

See how we calculate recipe costs here.

Notes

*I used a lean ground beef, so I added my seasoning and beef at the same time. I didn’t have any fat to strain off at the end, which saved me a little prep time.
**If you are meal prepping, keep the wet ingredients (like the beef and salad dressing) separate so your veggies and lettuce do not wilt and the tortilla chips do not get soggy. Just dress and toss when you’re ready for lunch.

Nutrition

Serving: 1salad | Calories: 804kcal | Carbohydrates: 56g | Protein: 28g | Fat: 55g | Sodium: 1228mg | Fiber: 13g
overhead view of a serving of taco salad on a white plate.

how to make Taco Salad – step by step photos
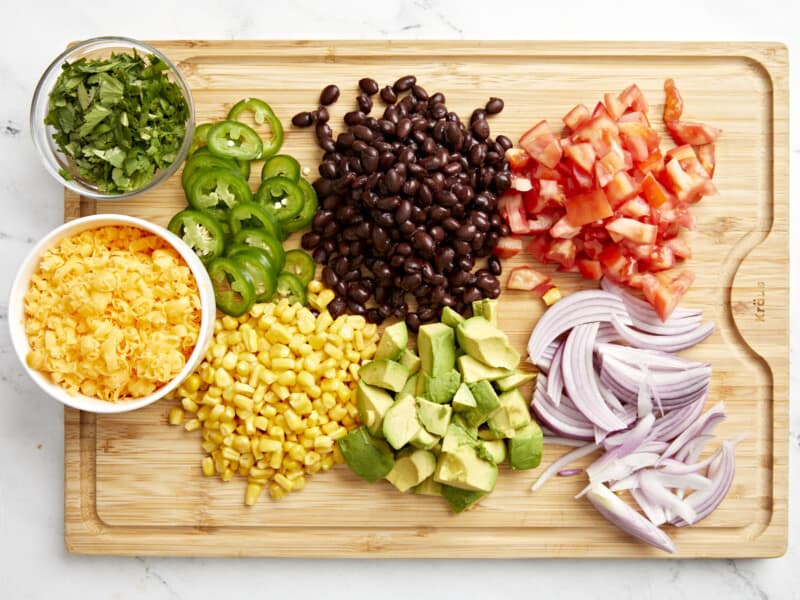
overhead view of chopped veggies on a cutting board.

Gather all topping ingredients. Julienne 1/2 red onion, chop 2 roma tomatoes, defrost 1 cup frozen corn, drain and rinse 1 can black beans, dice 1 avocado, crush 3 cups of tortilla chips, shred 1 cup cheddar cheese, slice 1 jalapeno. Set aside or mix together in a large serving bowl.
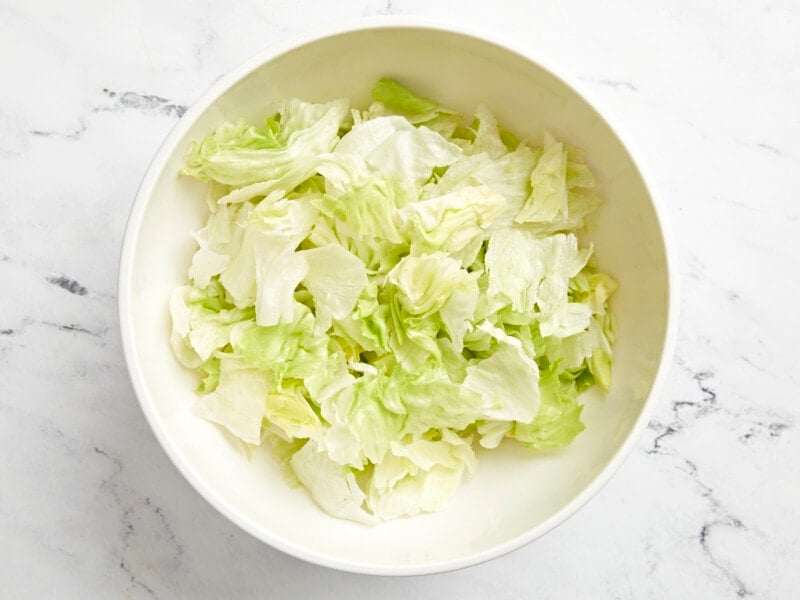
chopped lettuce in a white bowl.

Chop 1 head of iceberg lettuce into bite-sized pieces.
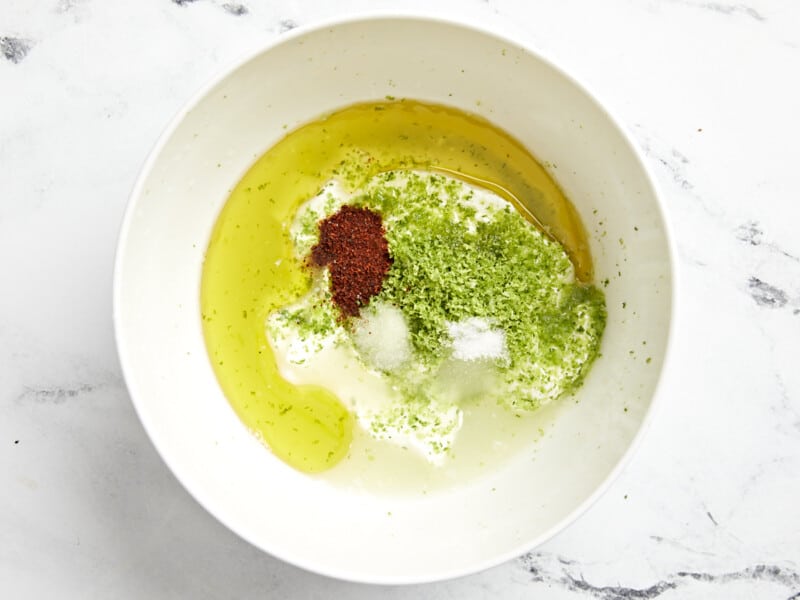
dressing ingredients in a white bowl.

Combine 4 oz sour cream, juice and zest from 2 limes, 1 clove of minced garlic, 1/4 tsp salt, 1/4 tsp chili powder, 1/2 tsp sugar, and 4 Tbsp oil in a small mixing bowl.
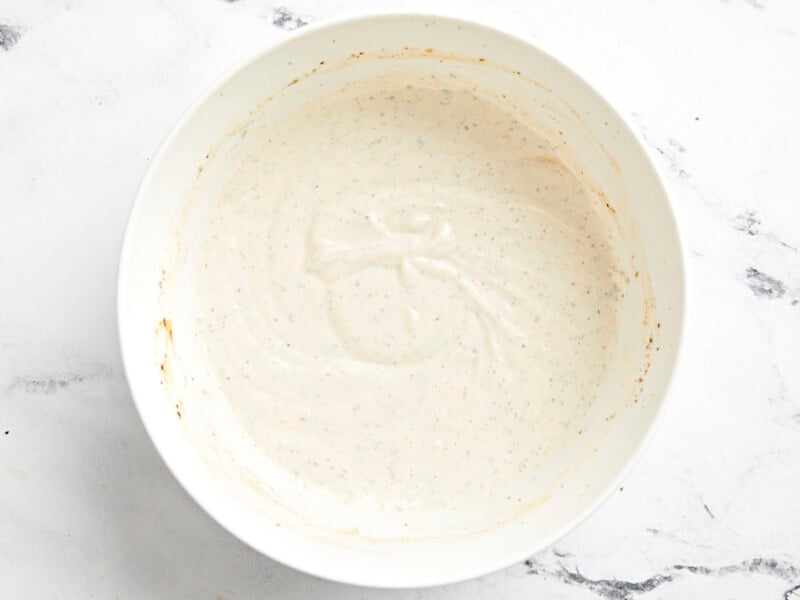
creamy white dressing in a white bowl.

Whisk to combine.

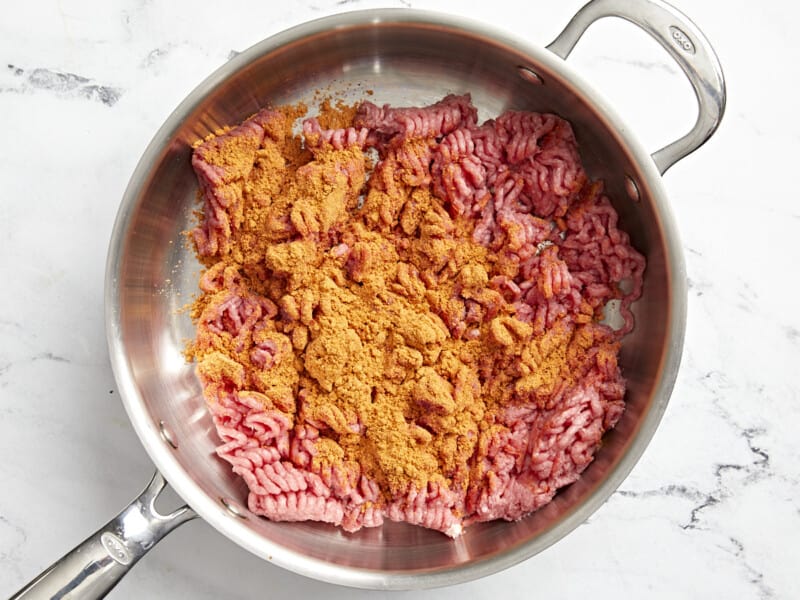
raw ground beef and spices in a frying pan.

Add 1 pound lean ground beef and 1 packet of taco seasoning to skillet. Break apart the ground beef with a spatula and mix in the taco seasoning.
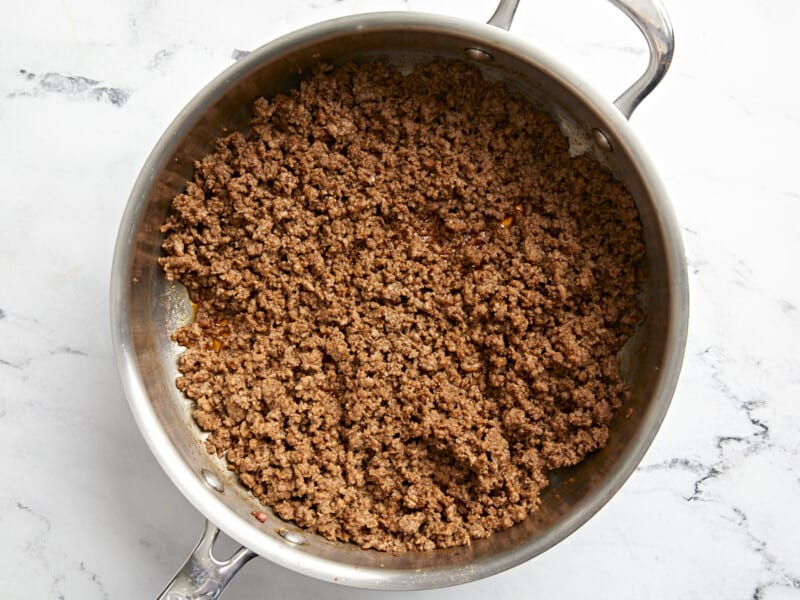
cooked seasoned ground beef in a frying pan.

Cook until all of the ground beef has turned brown. I used a lean ground beef, so I added my seasoning and beef at the same time. I didn’t have any fat to strain off at the end, which saved me a little prep time.
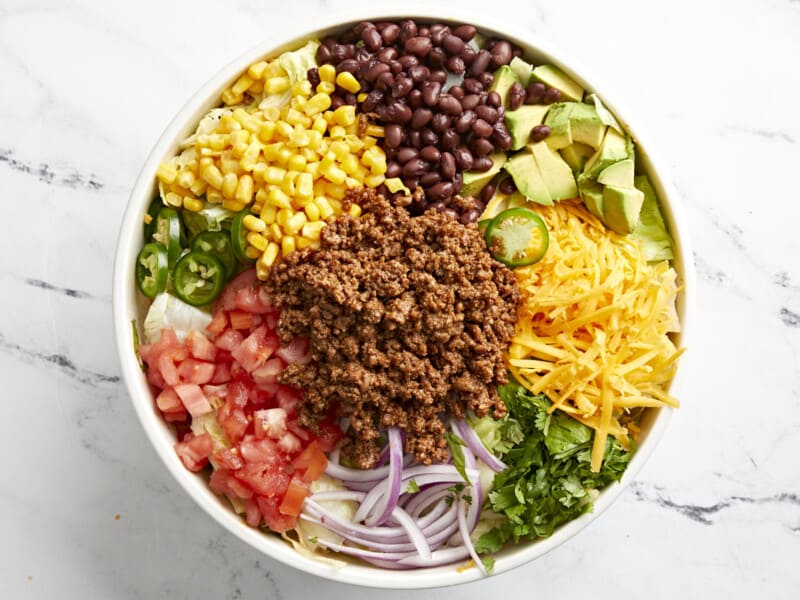
overhead view of taco salad with ingredients separated in a white bowl.

Top chopped lettuce with prepped veggies and cooked ground beef.
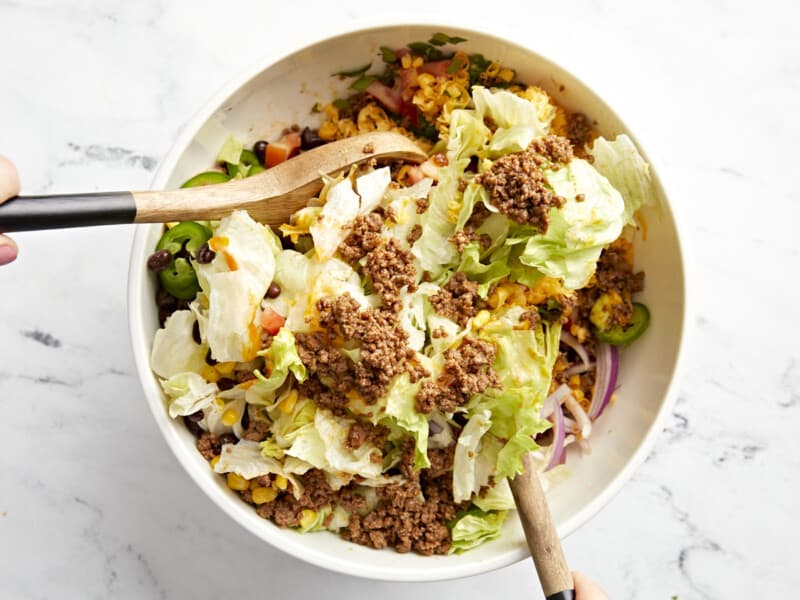
tossing taco salad in a white bowl.

Toss all ingredients together.

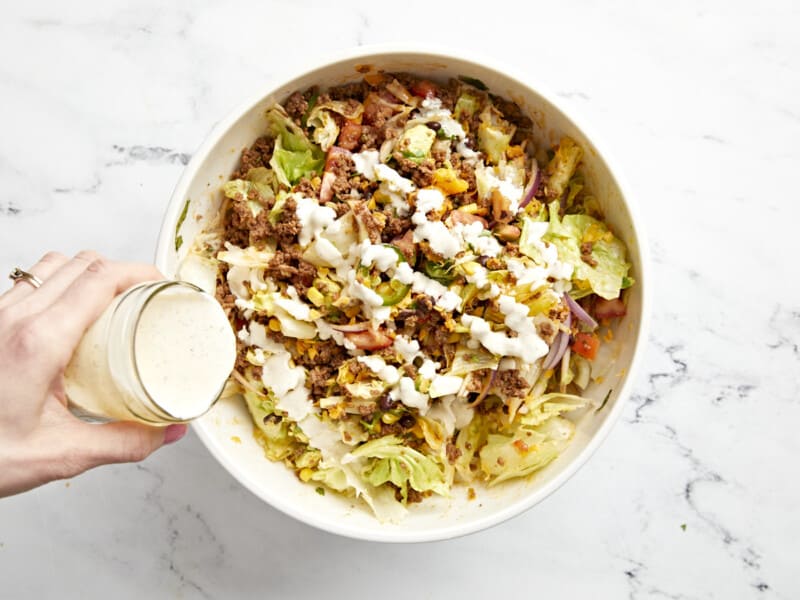
drizzling dressing over taco salad in a white bowl.

Drizzle a generous helping of dressing over the top with crumbled tortilla chips! Serve and enjoy.
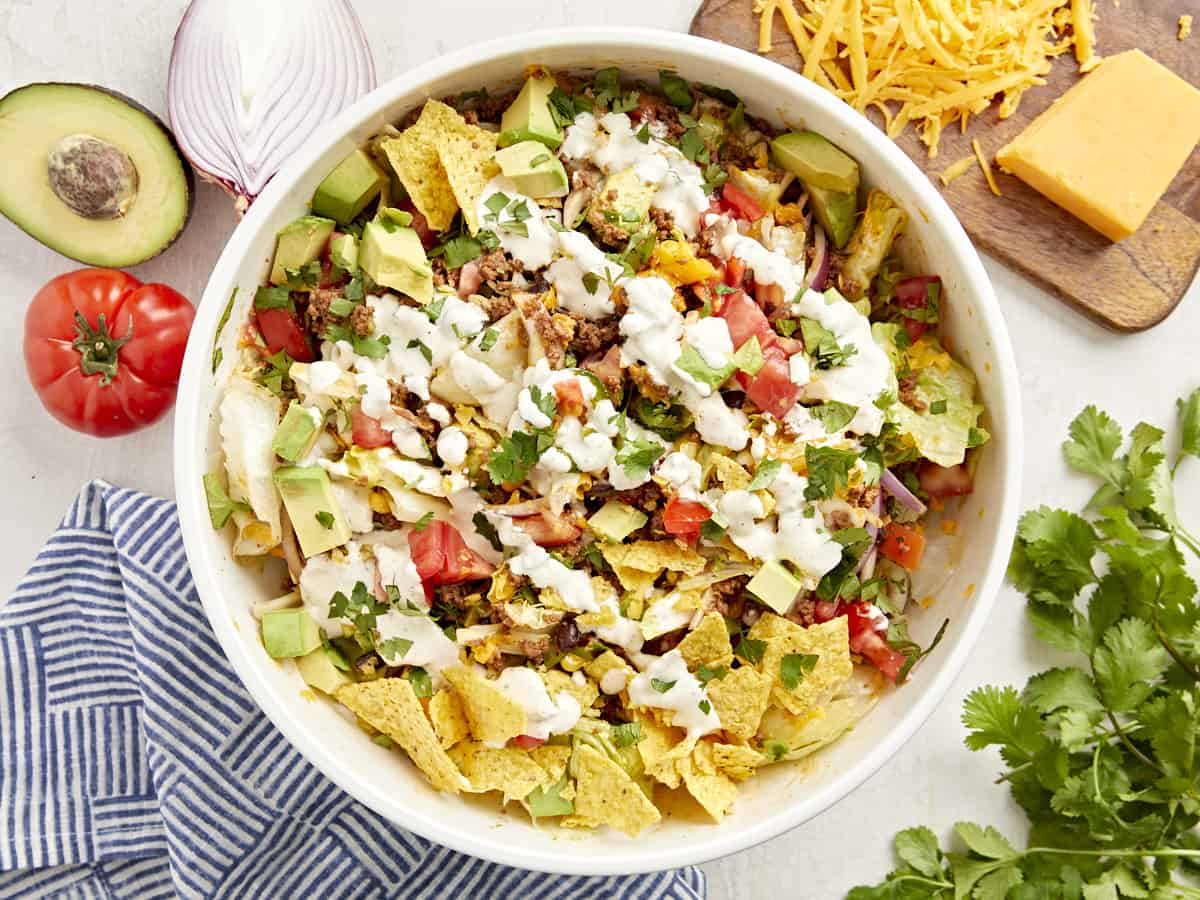
overhead view of taco salad with creamy white dressing in a white bowl.

This hearty taco salad is sure to satisfy!

More Southwest-Inspired Recipes

The post Taco Salad appeared first on Budget Bytes.
Tostadas

These tostadas made with mashed pinto beans are piled high with salsa, veggies, and cheese for a satisfying (and fun!) weeknight meal.

The post Tostadas appeared first on Budget Bytes.
With the sun working overtime during these hot summer months, I’ve got tacos on my mind (and tortillas in my fridge) 24/7. I love how balanced and fresh Mexican-inspired cuisine can be, and these tostadas are no exception! Crispy tortillas are piled high with mashed pinto beans, salsa, veggies, and cheese for a different spin on your typical taco night. Plus, I love that I can use up any leftover tortillas I have on hand so nothing goes to waste! These are super customizable based on your family’s preferences, so you can add or omit just about anything you want.

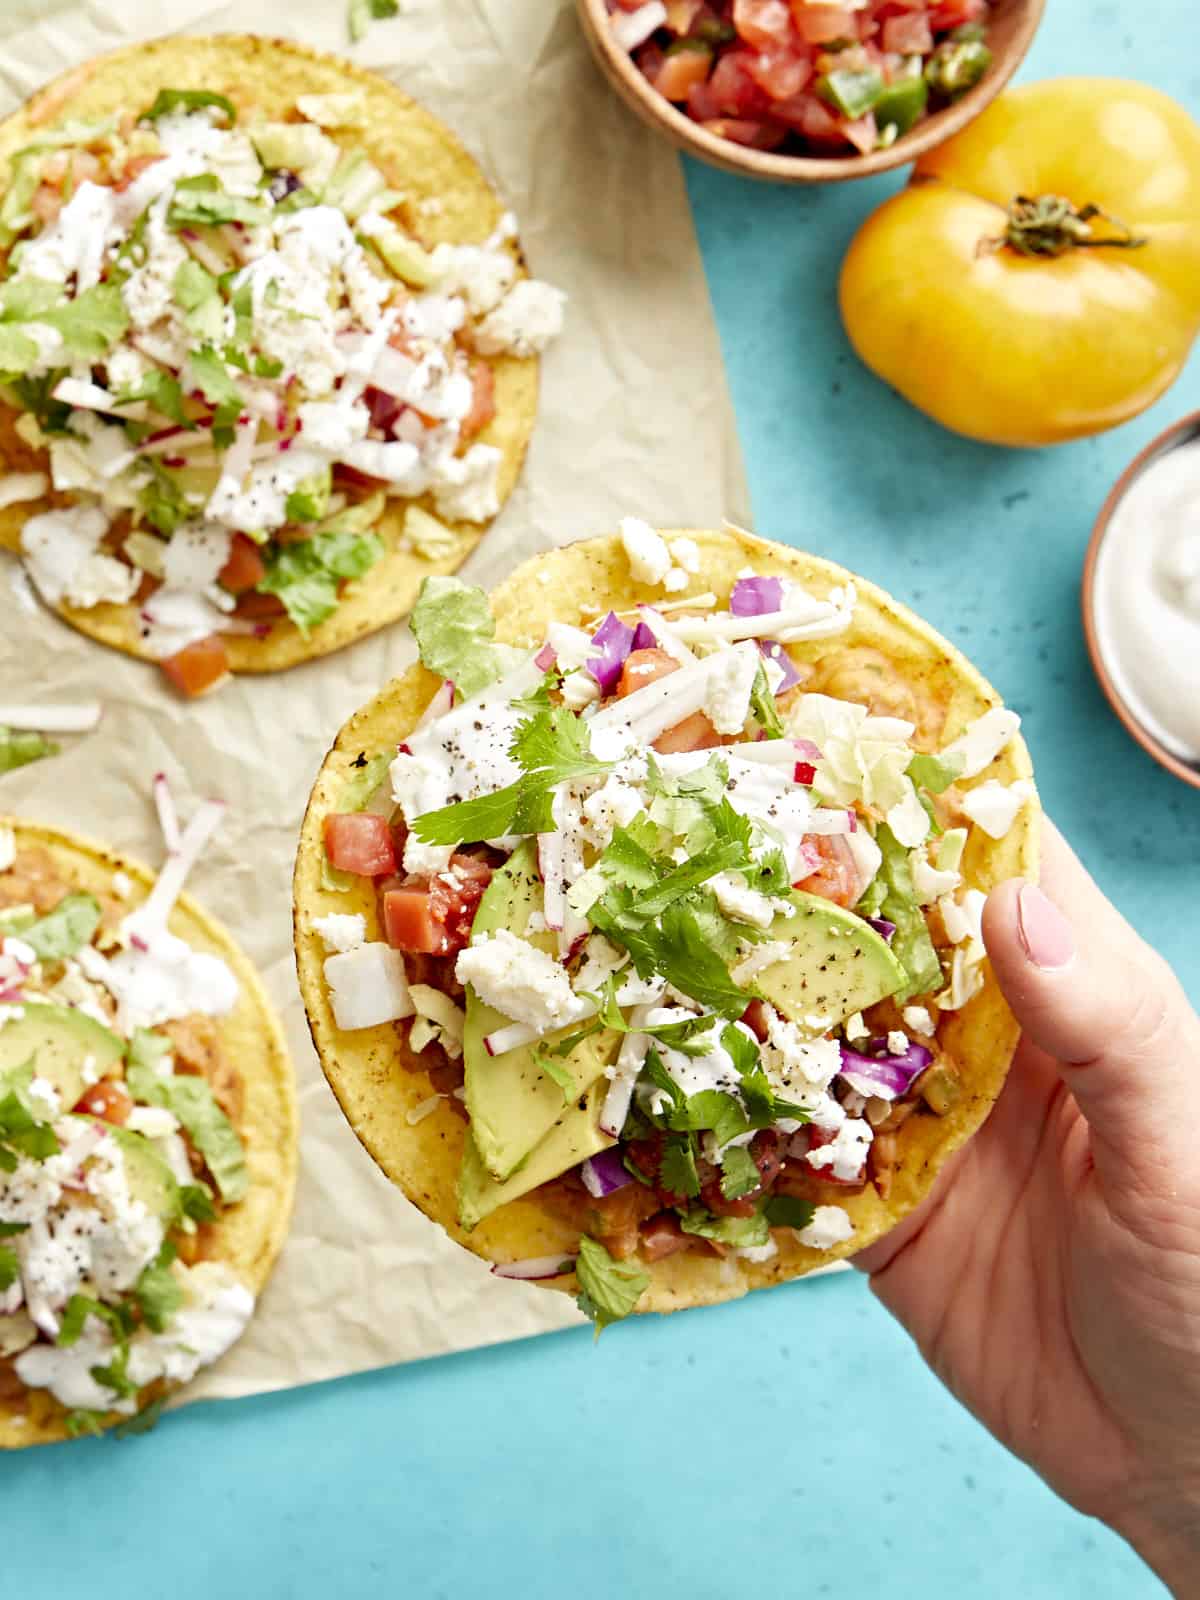
close up of a hand holding a tostada.

What Is A Tostada?

The word “tostada” translates to “toasted” in reference to the crispy toasted tortilla shell that serves as the base of the dish. It’s sort of like a flattened taco piled high with filling. It’s also a great way to use up the last of those leftover tortillas that are starting to go stale!

Ingredients

Here’s what you’ll need to make these tostadas:

  • Onion: I used white onion because it was on sale, but yellow or Vidalia will also work well in this recipe.
  • Jalapeño: Adds a bit of heat to the filling.
  • Olive Oil: Helps the filling cook without burning. Neutral cooking oils like canola or vegetable also work well.
  • Pinto Beans: Create a mushy, refried bean-like texture. If you have some leftover, our favorite (Not) Refried Beans can also work well in this recipe!
  • Taco Seasoning: An easy way to add classic Mexican flavors.
  • Water: Helps make the beans easier to mash.
  • Salsa: Adds freshness to the tostadas. I love this Fire Roasted Salsa, but store-bought works just fine.
  • Tostada Shells: These small, crunchy corn tortillas are like a flat hard taco shell. A Mexican open-faced sandwich, if you will!
  • Radishes: Add a delightful, fresh crunch!
  • Slaw Mix: A cheap and easy hack to add extra veggies to this dish.
  • Sour Cream: Adds creaminess and tanginess.
  • Cilantro: Adds a pop of freshness and color.
  • Avocado: Adds a creamy texture. Guacamole also works well.
  • Queso Fresco: Can’t find queso fresco or cotija cheese? Cheddar cheese will do just fine, or omit it altogether.

What Is the Difference Between A Tostada and a Tortilla?

A tostada is a tortilla that has been baked or fried until it is crispy. You can purchase ready-made tostada shells from popular brands like Old El Paso, or you can make your own by baking 6-inch corn tortillas until toasted and crispy.

How to Eat A Tostada

Tostadas are finger foods, so use your hands, not a fork and knife! I like the two-handed method of holding the edges of the tostada and taking bites like a slice of toast. I also like to crack the tostadas into smaller pieces and eat it in smaller bites that way.

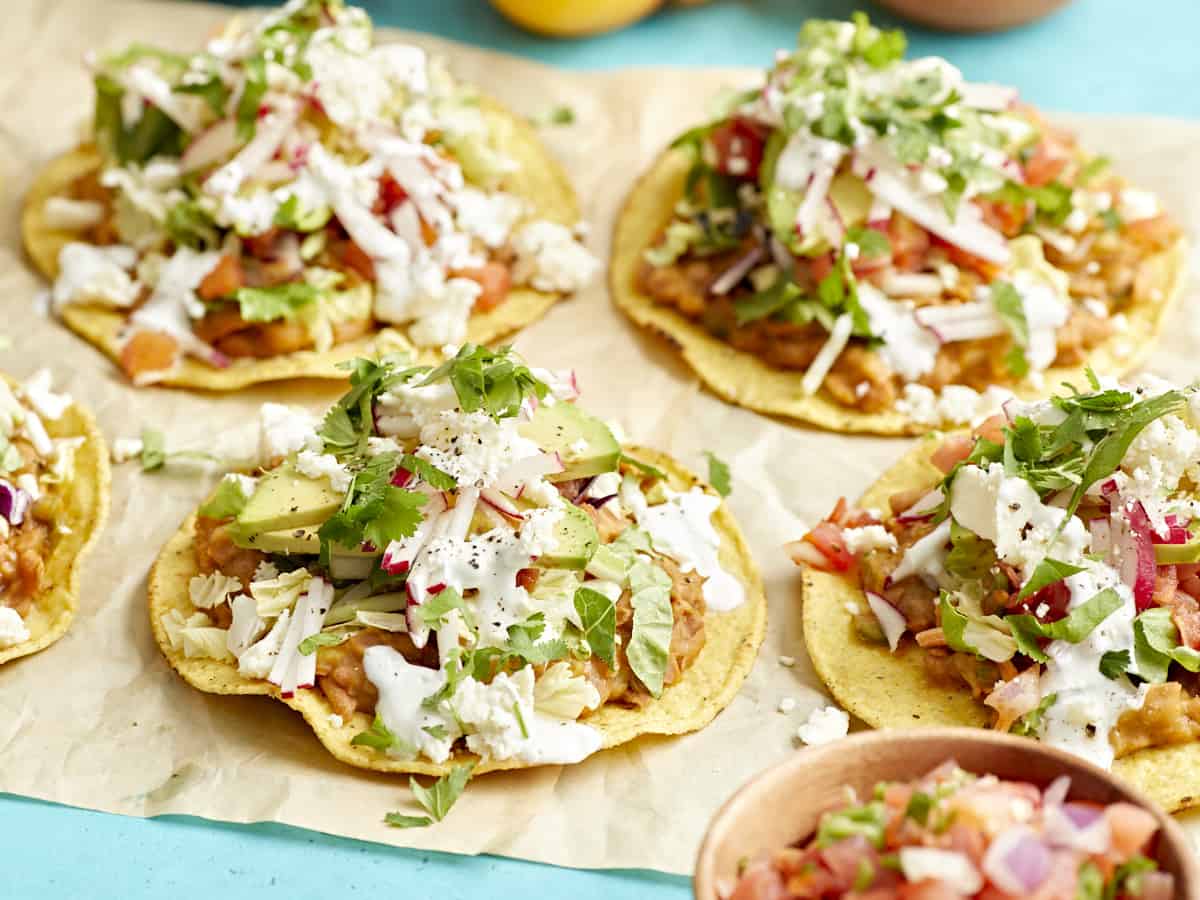
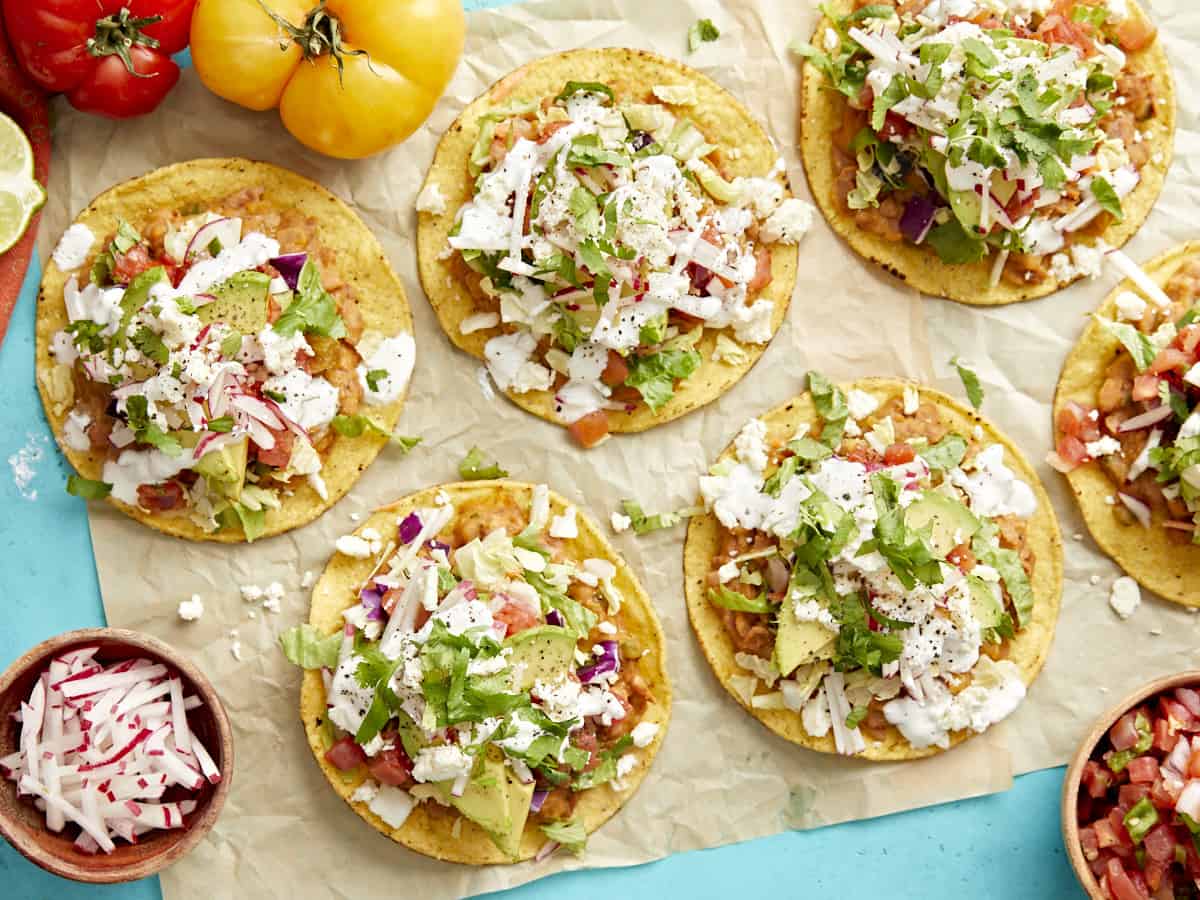
side view of tostadas on a piece of parchment paper on a blue table.
holding a tostada over a table topped with tostadas.
Print

Tostadas

These tostadas made with mashed pinto beans are piled high with salsa, veggies, and cheese for a satisfying (and fun!) weeknight meal.
Course Appetizer, Main Course
Cuisine Mexican
Prep Time 20 minutes
Cook Time 20 minutes
Total Time 40 minutes
Servings 4 servings
Calories 535kcal

Ingredients

  • 1 Tbsp olive oil $0.20
  • 1/2 white onion, diced $0.45
  • 1 jalapeño, seeded and diced $0.24
  • 1 1-oz. packet taco seasoning $0.59
  • 2 15-oz. cans pinto beans, drained and rinsed $1.78
  • 1 cup water $0.00
  • 8 tostada shells $0.88
  • 1/2 cup salsa $0.49
  • 3 radishes, julienned $0.37
  • 1/2 14-oz. bag pre-chopped slaw mix $0.99
  • 1/4 cup sour cream $0.31
  • 2 Tbsp chopped fresh cilantro $0.12
  • 1 avocado, sliced $0.99
  • 2 Tbsp crumbled queso fresco $0.35

Instructions

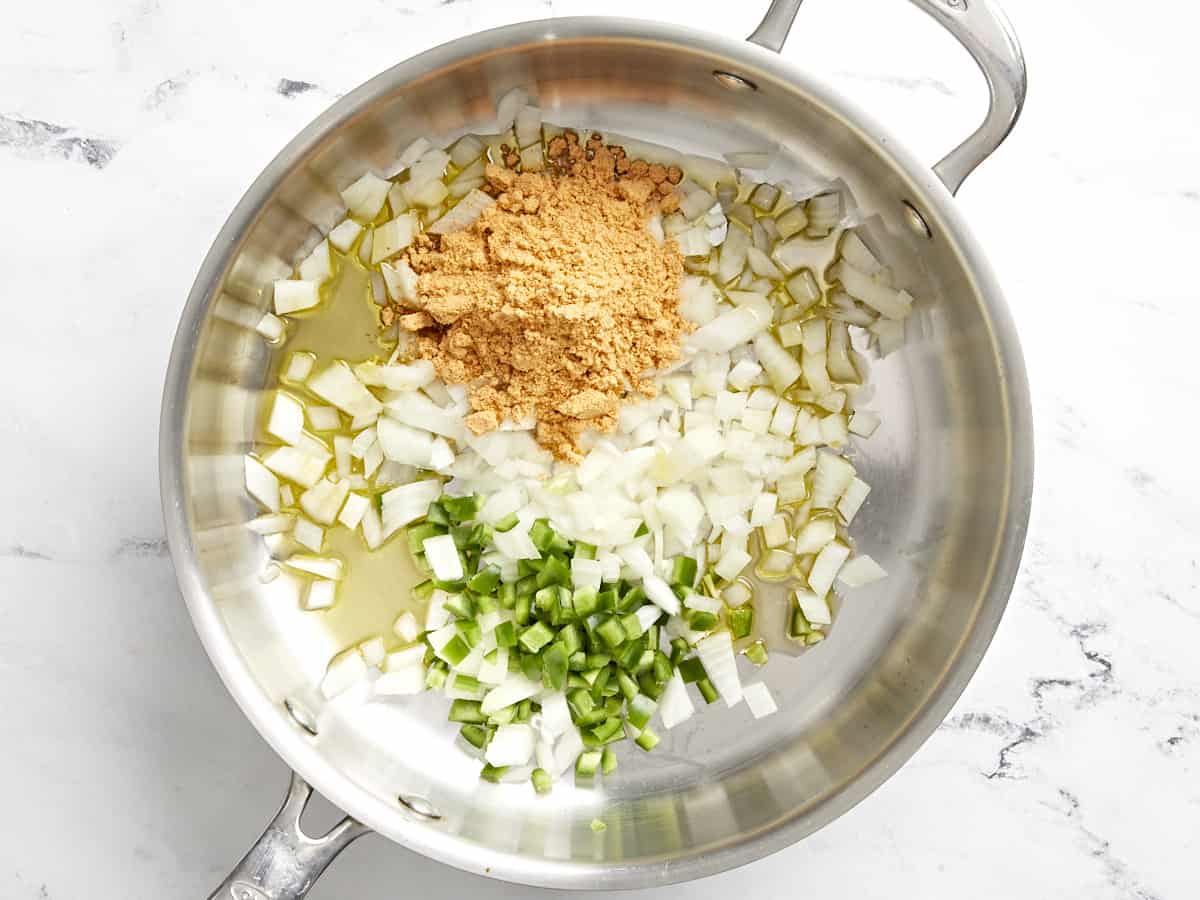
  • Add the olive oil, onions, jalapeño, and taco seasoning mix to a skillet. Stir to combine and cook over medium heat until the onions are soft and glossy.
  • Add the drained and rinsed pinto beans to the skillet with 1 cup of water and simmer for 5-8 minutes, until the beans start to dissolve and break down and the liquid reduces to about 1/2.
  • Remove from the heat and mash the bean mixture together. Set aside.
  • Crumble queso fresco, julienne or slice radishes, mince cilantro, thinly the avocado, and gather your premixed cabbage and salsa of choice.
  • Spread out tostada shells on a cookie sheet and toast in the oven at 350°F for 5 minutes. This makes the tostadas extra crunchy!
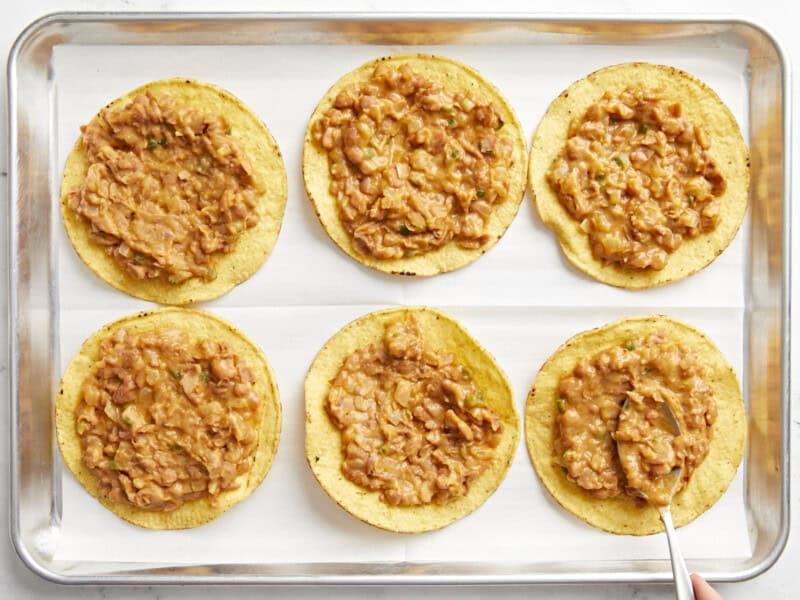
  • Assemble tostadas: The tostada shell will be on the bottom, topped with mashed pinto beans.
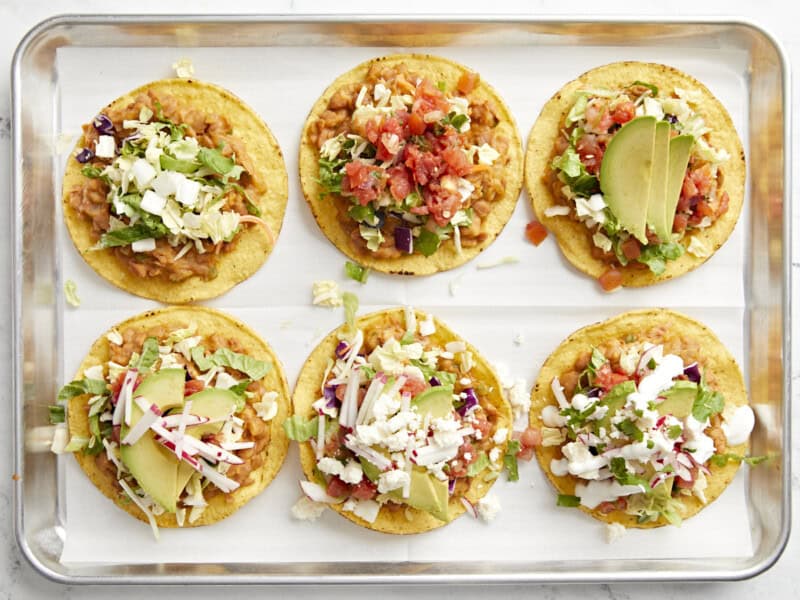
  • Then, add all other toppings; divide the pre-chopped slaw mix, salsa, sour cream, chopped fresh cilantro, avocado, and crumbled queso fresco between all tostadas. Enjoy!

See how we calculate recipe costs here.

Notes

This recipe is easily made vegan by leaving off the sour cream and cheese. There are amazing vegan substitutes available for both of those ingredients nowadays, too!

Nutrition

Serving: 2tostadas | Calories: 535kcal | Carbohydrates: 69g | Protein: 16g | Fat: 24g | Sodium: 1649mg | Fiber: 19g

how to make Tostadas – step by step photos

onion, jalapeno, and taco seasoning in a frying pan.

Add the 1 Tbsp olive oil, 1/2 diced white onion, 1 seeded and diced jalapeño, and 1 oz. packet of taco seasoning mix to a skillet. Stir to combine and cook over medium heat until the onions are soft and glossy.

step 2: add beans and water

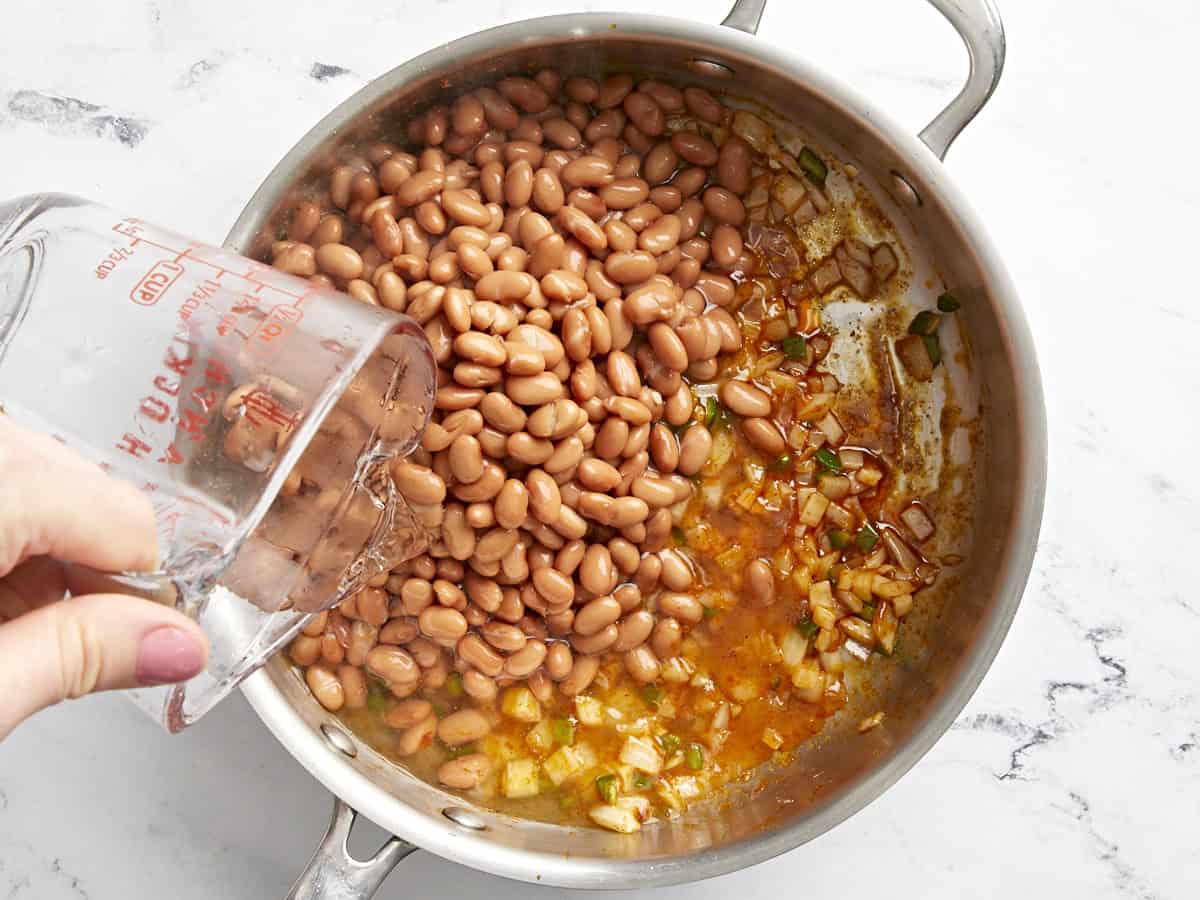
Add the 2 cans of drained and rinsed pinto beans to the skillet with 1 cup of water and simmer for 5-8 minutes, until the beans start to dissolve and break down and the liquid reduces by about 1/2.

step 4: mash the beans

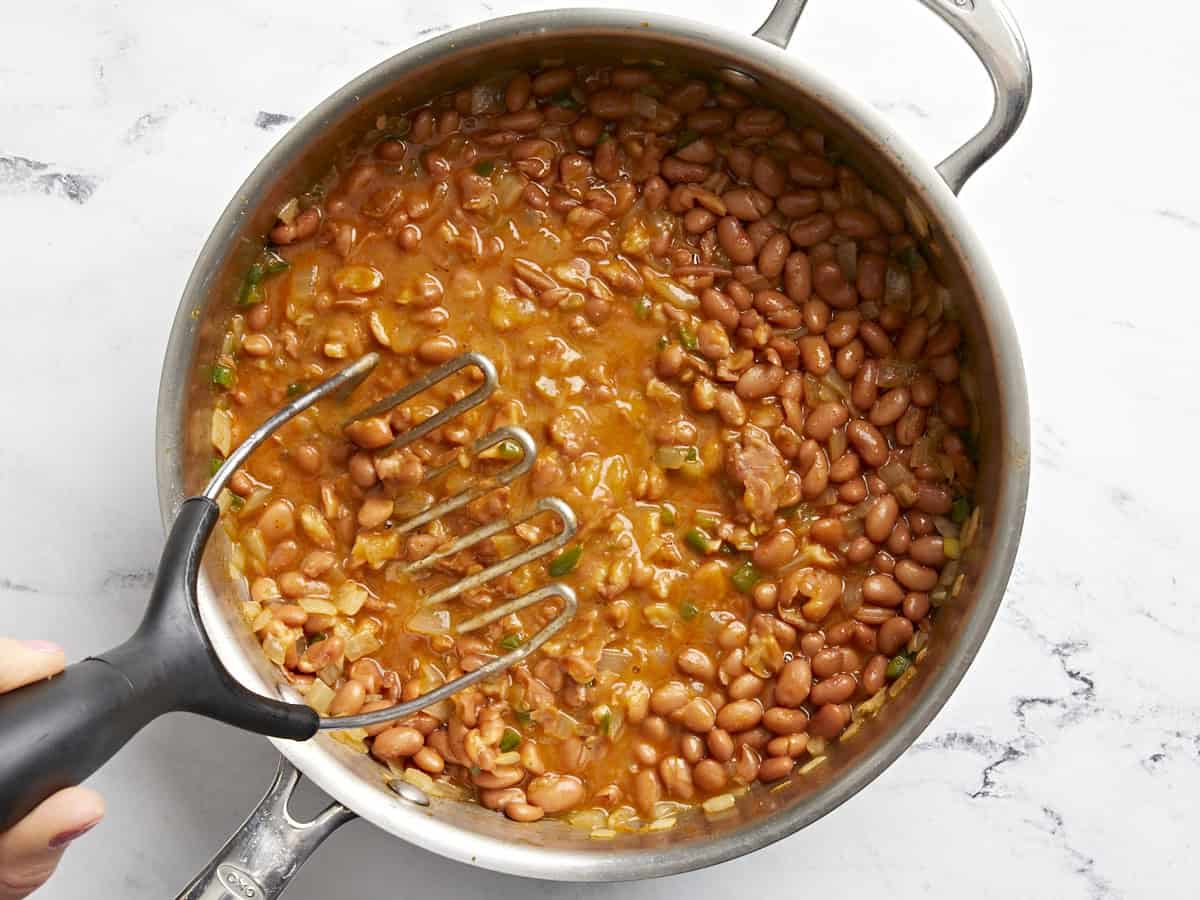
Remove from the heat and mash the bean mixture together.

step 6: chopped veggies on cutting board

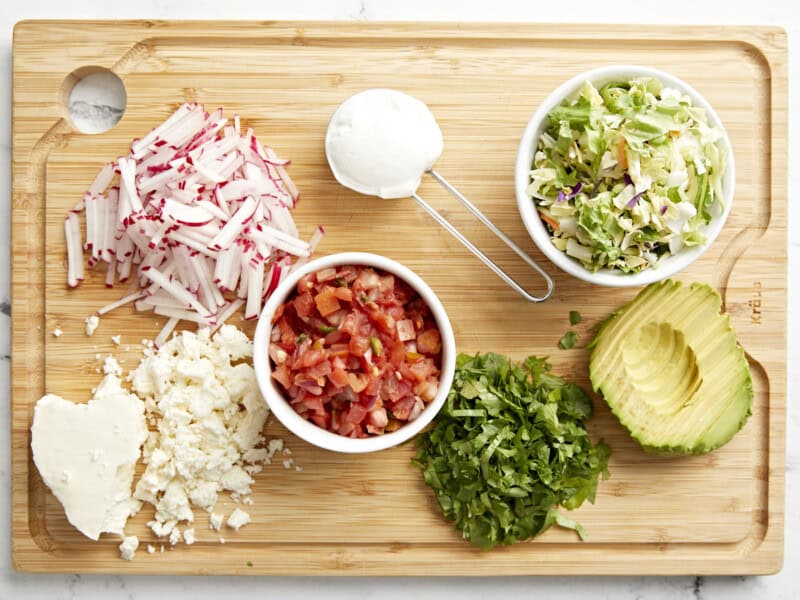
Crumble 2 Tbsp queso fresco, julienne or slice 3 radishes, mince 2 Tbsp cilantro, thinly slice the avocado, and gather your premixed cabbage and salsa of choice.

step 6 lay out tostadas and toast

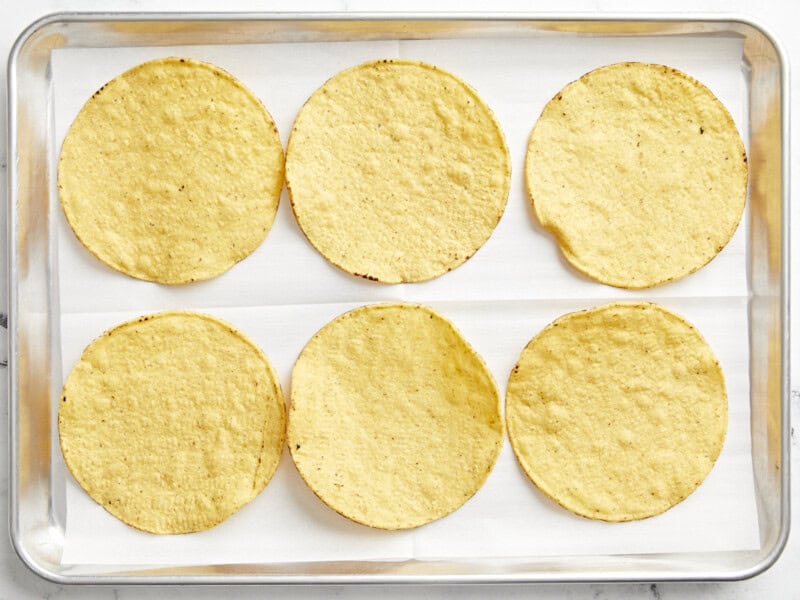
Spread out 8 tostada shells on a cookie sheet and toast in the oven at 350°F for 5 minutes. This makes the tostadas extra crunchy!

step 7: add beans to tostatdas

Assemble tostadas: The tostada shell will be on the bottom, topped with mashed pinto beans.

8 add all the toppings 1 by 1 to tostadas

Then, add all other toppings; divide the 1/2 bag of pre-chopped slaw mix, 1/2 cup salsa, 1/4 cup sour cream, 2 Tbsp chopped fresh cilantro, 1 sliced avocado, and 2 Tbsp crumbled queso fresco between all tostadas. Enjoy!

overhead view of tostadas on a piece of parchment paper on a blue table.

More Recipes with Tortillas

The post Tostadas appeared first on Budget Bytes.
Chicken Enchilada Soup

This super flavorful Chicken Enchilada Soup is made with tender chicken breast, lots of spices, and a simple homemade enchilada sauce.

The post Chicken Enchilada Soup appeared first on Budget Bytes.
We are still in the middle of soup season and if you’re looking for a new soup recipe to make this month, then friend you’re in luck! Today we’re making Chicken Enchilada Soup! It’s made with tender chicken breast and lots of bold flavors. Dare I say, it might just be your new favorite soup this year! And the secret ingredient…our homemade enchilada sauce. Keep on reading to find out just how easy it is to make this hearty and satisfying, chicken enchilada soup!

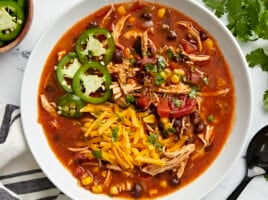
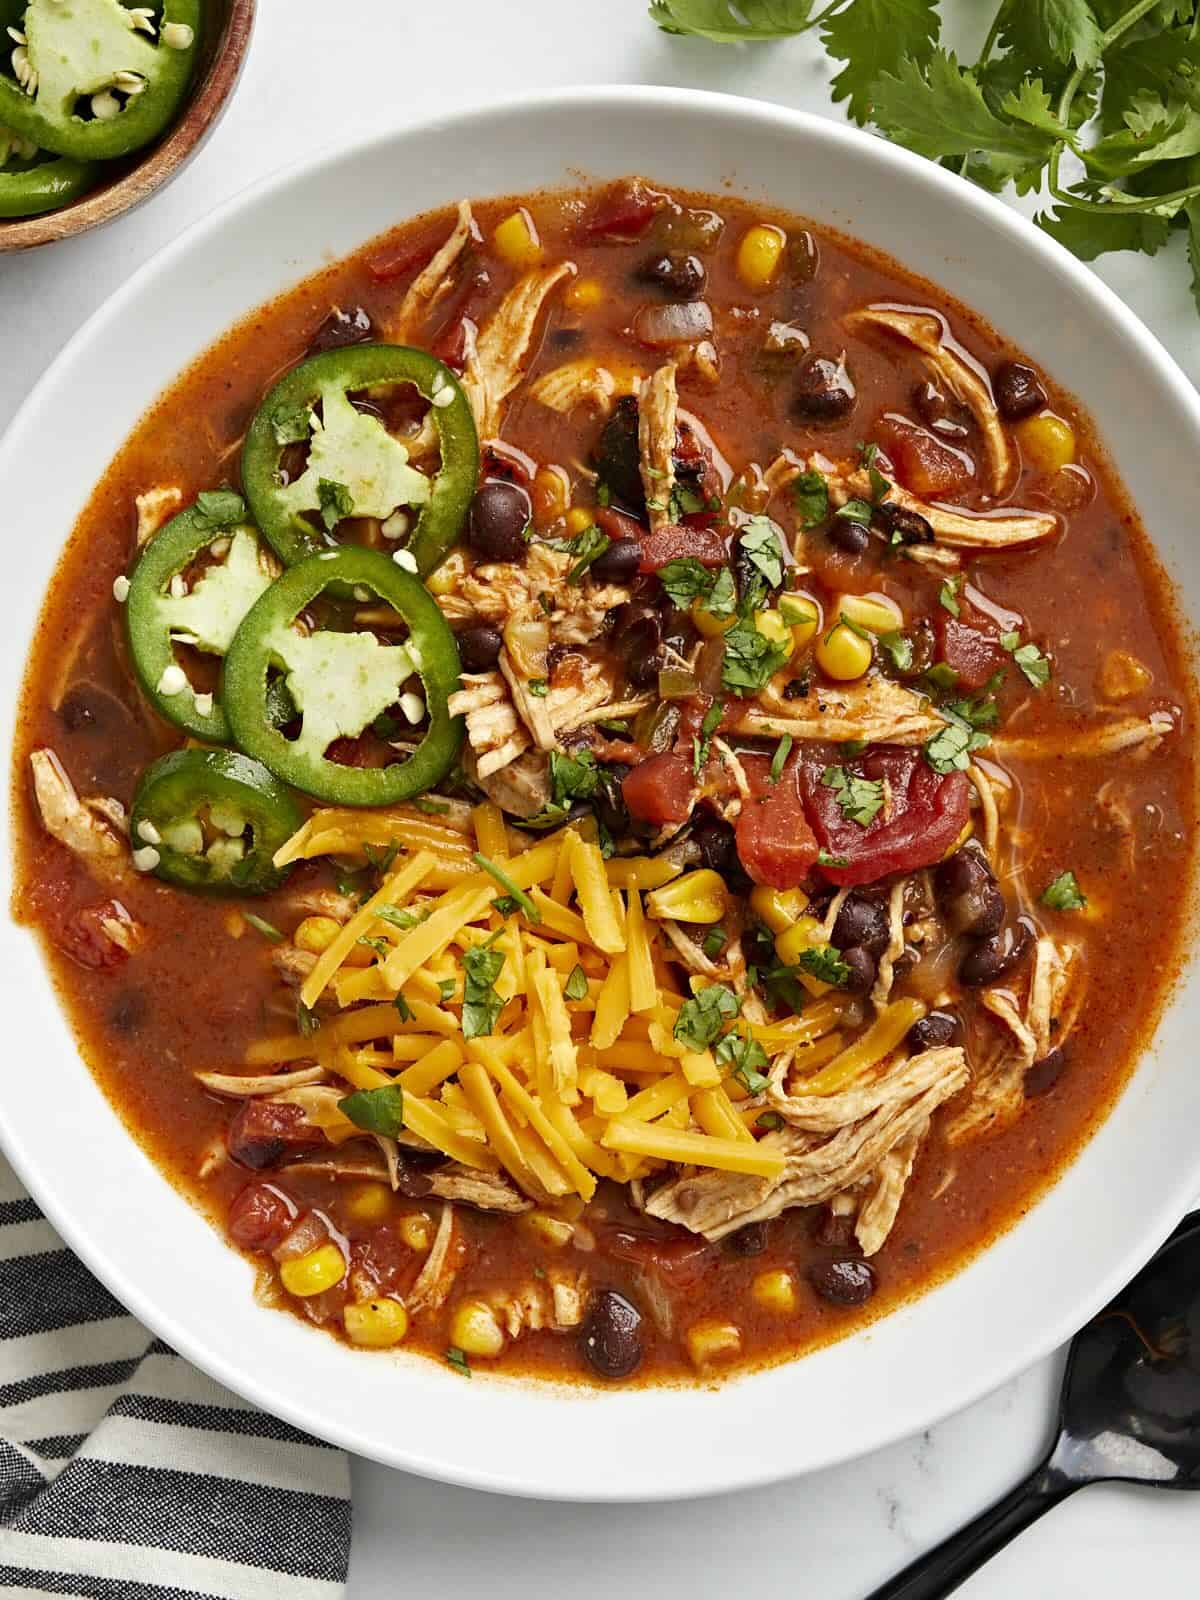
Overhead view of Chicken Enchilada Soup in a white bowl with a black spoon on the side.

What Is Chicken Enchilada Soup?

Chicken Enchilada Soup is everything you love about regular chicken enchiladas, but it’s conveniently made in one pot! It reminds me of chicken tortilla soup, with tender chicken meat and bold flavors, except it’s made with an easy homemade enchilada sauce. The enchilada sauce is cooked directly in the soup pot with the rest of the ingredients and gives this soup TONS of flavor!

Ingredients For Chicken Enchilada Soup

Here is everything you need to make this chicken enchilada soup recipe:

  • Chicken Breasts: Boneless, skinless chicken breasts are used for this recipe, but you could also substitute with boneless, skinless chicken thighs instead. The cook time may vary slightly when using chicken thighs.
  • Onion, Garlic, and Jalapeño: Sautéed onion, garlic, and jalapeño sets the base foundation and adds great flavor to the soup.
  • Enchilada Sauce: You can certainly use store-bought enchilada sauce, but we used a batch of our Easy Enchilada Sauce recipe for this soup. Instead of making the sauce separately in a different pot, it’s made directly in the same pot that the soup cooks in. The homemade enchilada sauce makes it easy to control the spices and the heat level of this soup and it tastes SO much better than store-bought sauce!
  • Beans & Corn: Beans and corn add more color, flavor, and texture to the soup!
  • Tomatoes: A combination of fire-roasted tomatoes, diced tomatoes with green chiles, and tomato paste adds even more flavor and texture to the soup. The tomato paste is used to make the enchilada sauce and it helps thicken the soup, so I wouldn’t skip it.
  • Chicken Broth: Using a good quality chicken broth will give the soup extra flavor. We use Better than Bouillon to make our broth.

How Spicy Is This SOup?

This chicken enchilada soup definitely has a kick to it. It has jalapeño, chili powder, and cayenne pepper added to it. The brand of chili powder we use is completely mild, but other brands can sometimes carry some heat. If you are using a spicy chili powder, simply reduce or eliminate the cayenne powder from this recipe to compensate. I would say the heat level of this soup is medium spicy, like a medium salsa.

What To Serve WIth Chicken Enchilada Soup

The same day we made this soup at the studio, Beth just happened to also be making some Homestyle Cornbread. So we drizzled a little bit of honey on top of the cornbread to eat with the soup, and OMG…a match made in heaven! The combination of the sweetness from the honey with the spicy and smoky flavors of the enchilada soup were perfect and absolutely delicious. In addition to cornbread, you can also pair this soup with Cilantro Lime Rice or even our Sweet Corn Salsa. And don’t forget the toppings! Some cheddar cheese, a little bit of cilantro, sliced avocado, a dollop of sour cream, or a few more sliced jalapeños (if you like the extra heat) would all be great!

Storing Leftovers

This soup stores very well in the fridge and the freezer. We always suggest dividing the soup into single portions just after cooking so it cools down more quickly in the refrigerator, which will give you more longevity with the leftovers. You can store any leftovers in an airtight container in the refrigerator for about 4-5 days, or you can freeze it for longer storage (about 3 months).

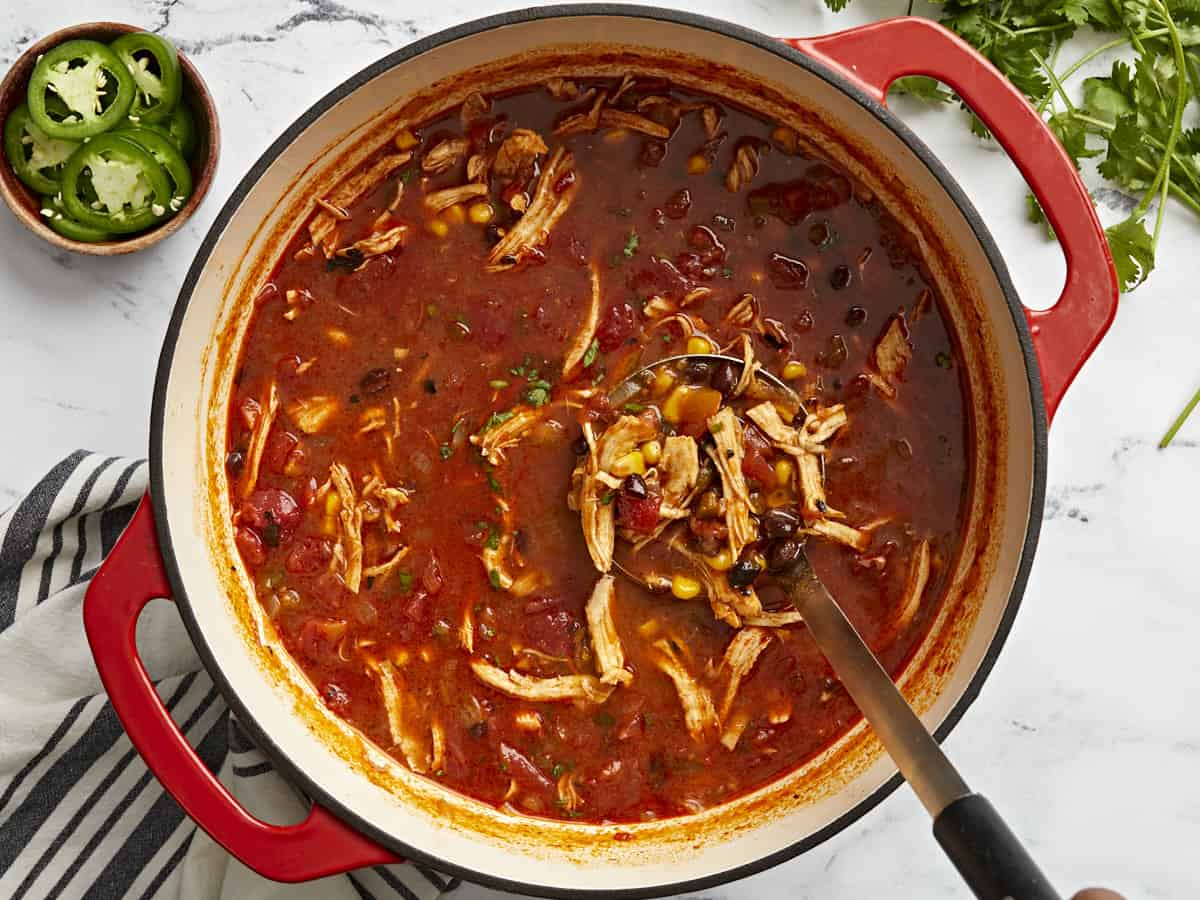
Overhead view of chicken enchilada soup in a dutch oven with a ladle scooping some soup out.
Overhead view of Chicken Enchilada Soup in a white bowl with a black spoon on the side.
Print

Chicken Enchilada Soup

This super flavorful Chicken Enchilada Soup is made with tender chicken breast, lots of spices, and a simple homemade enchilada sauce.
Course Dinner, Lunch
Cuisine American, Southwest
Total Cost $11.52 recipe / $1.92 serving
Prep Time 10 minutes
Cook Time 1 hour
Total Time 1 hour 10 minutes
Servings 6 (about 1.5 cups each)
Calories 181kcal

Equipment

Ingredients

  • 3 Tbsp cooking oil, divided $0.12
  • 1 yellow onion, diced $0.32
  • 1 jalapeno, seeded & diced $0.25
  • 2 cloves garlic, minced $0.16
  • 2 Tbsp all-purpose flour $0.04
  • 2 Tbsp chili powder $0.60
  • 1/2 tsp ground cumin $0.05
  • 1/2 tsp garlic powder $0.05
  • 1/4 tsp cayenne pepper $0.02
  • 3/4 tsp salt $0.05
  • 3 oz. tomato paste $0.50
  • 1 15oz. can black beans, drained $0.89
  • 1 15oz. can fire roasted diced tomatoes $1.33
  • 1 10oz. can diced tomatoes with green chiles $1.00
  • 1 cup frozen corn $0.47
  • 4 cups chicken broth $0.42
  • 2 boneless, skinless chicken breasts (about 1.5 lb. total) $5.25

Instructions

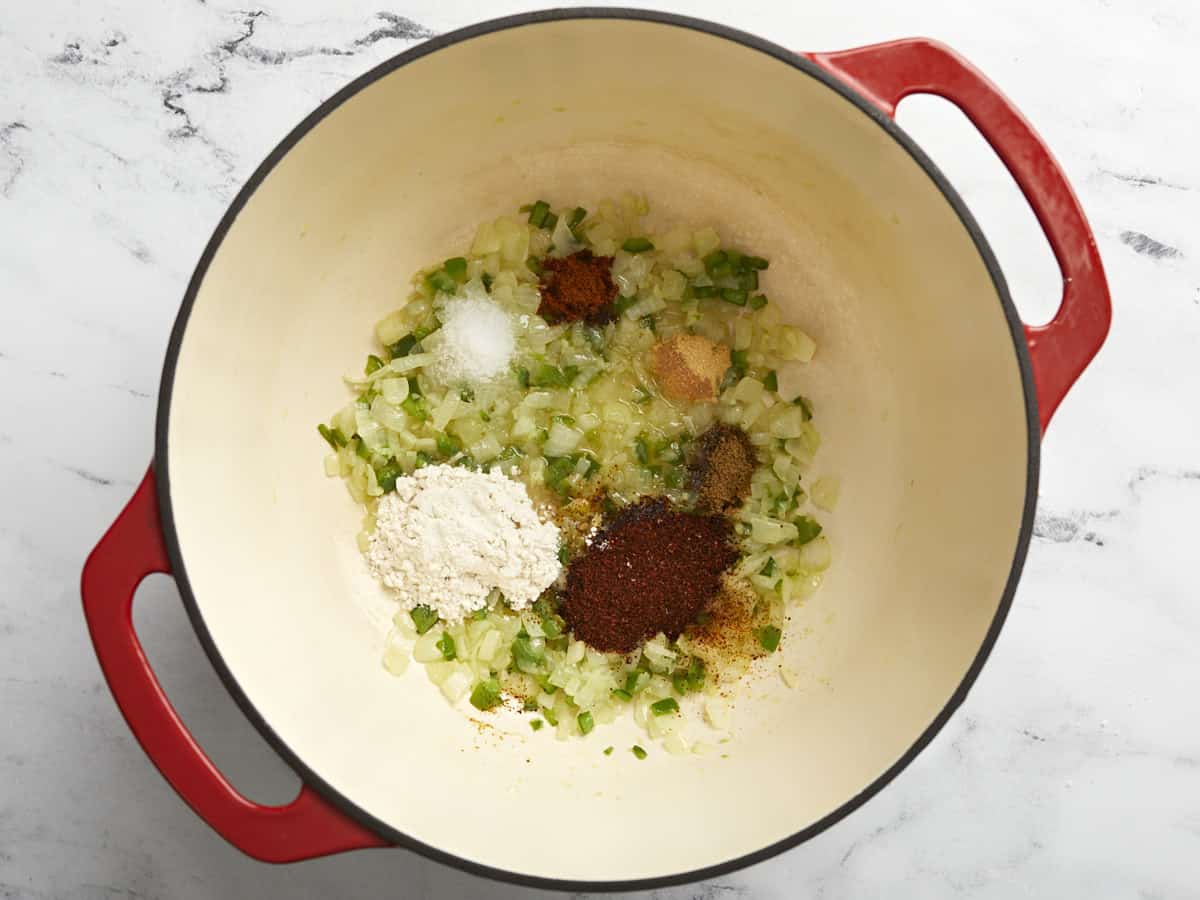
  • Add 1 Tbsp of cooking oil along with the diced onion, finely diced jalapeño and minced garlic cloves to a large dutch oven or soup pot over medium heat. Sauté for 2-3 minutes or until onions are soft and translucent.
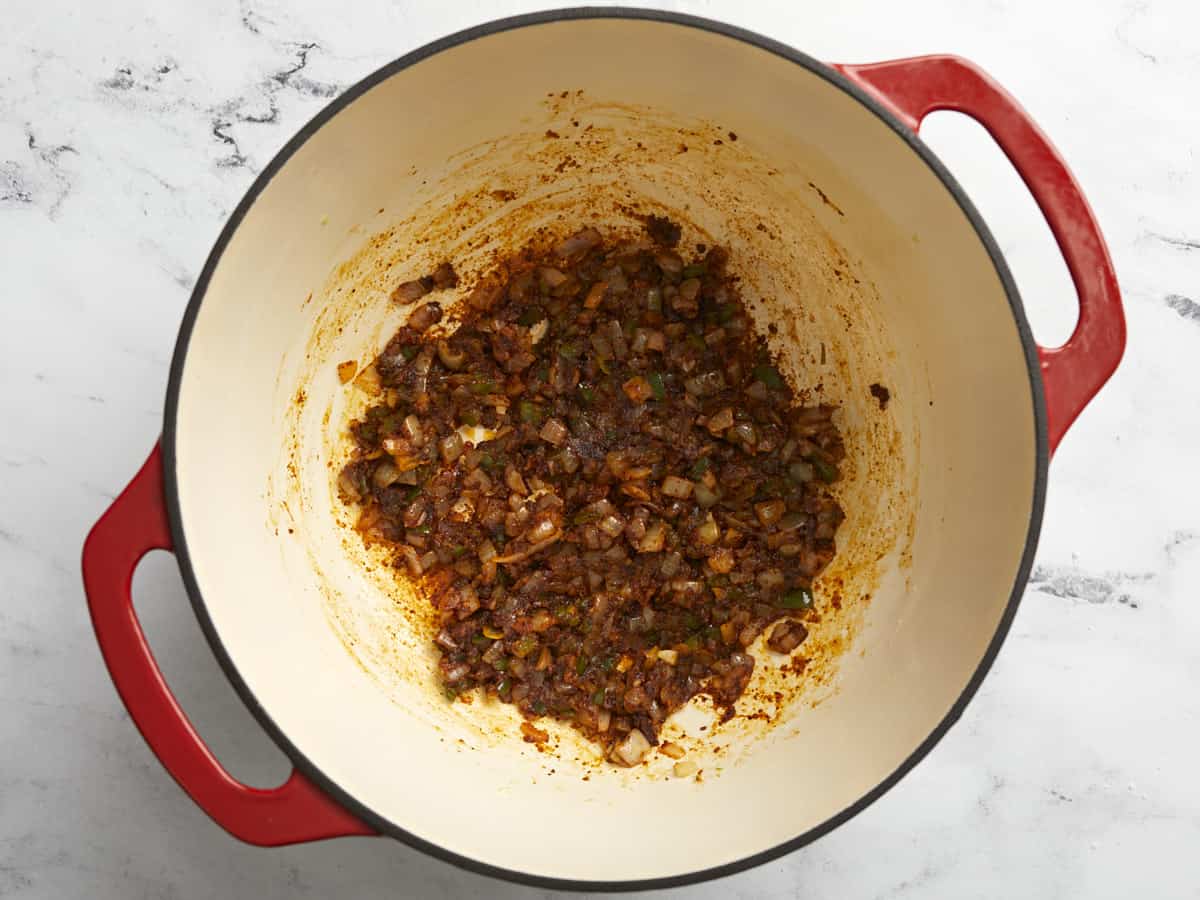
  • Next add the all-purpose flour, chili powder, ground cumin, garlic powder, cayenne pepper, salt, and the remaining 2 Tbsp of cooking oil to the pot. Stir well and cook the flour and spices with the vegetables for 2 minutes.
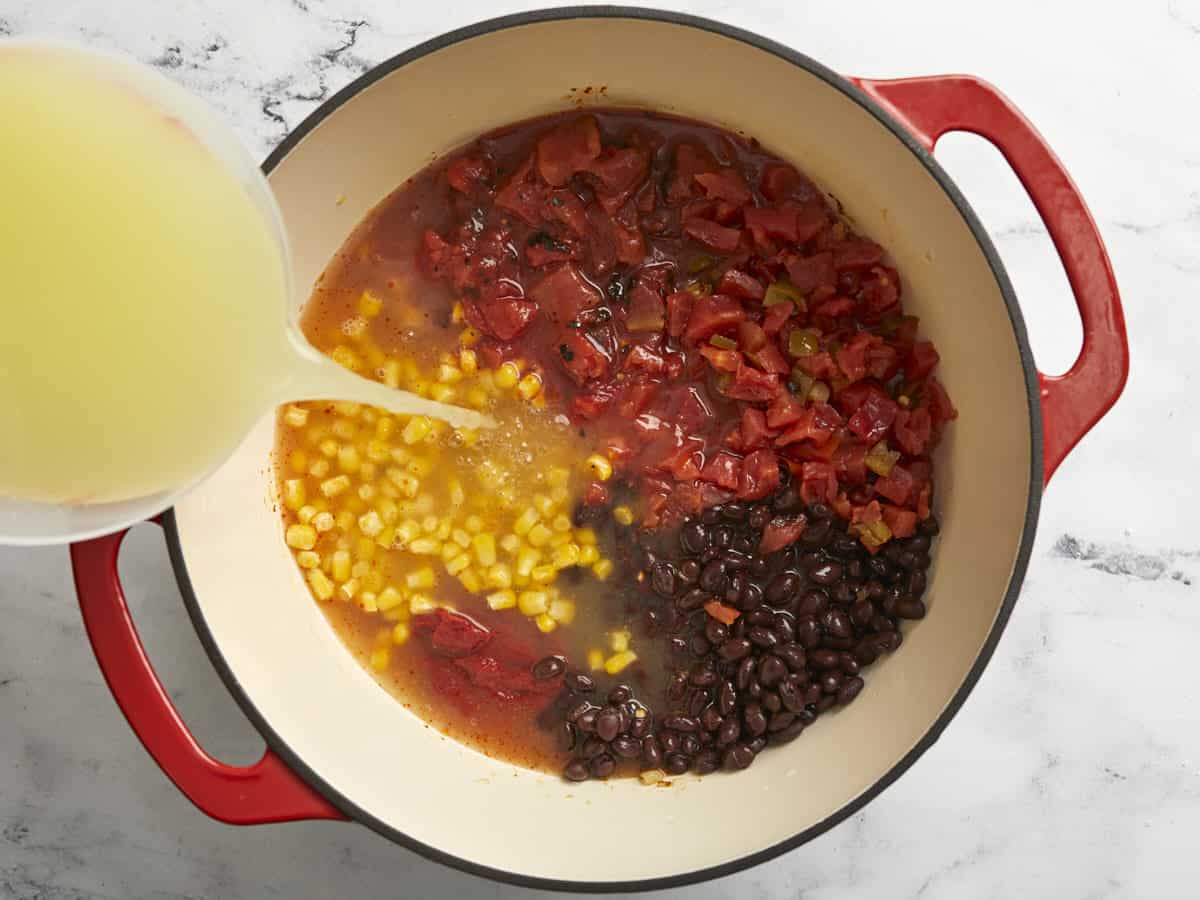
  • Add the tomato paste, drained black beans, fire roasted tomatoes, diced tomatoes with green chiles, frozen corn, and chicken broth to the pot. Stir all the ingredients together making sure to dissolve the tomato paste and scrape up any spices that may be stuck at the bottom of the pot.
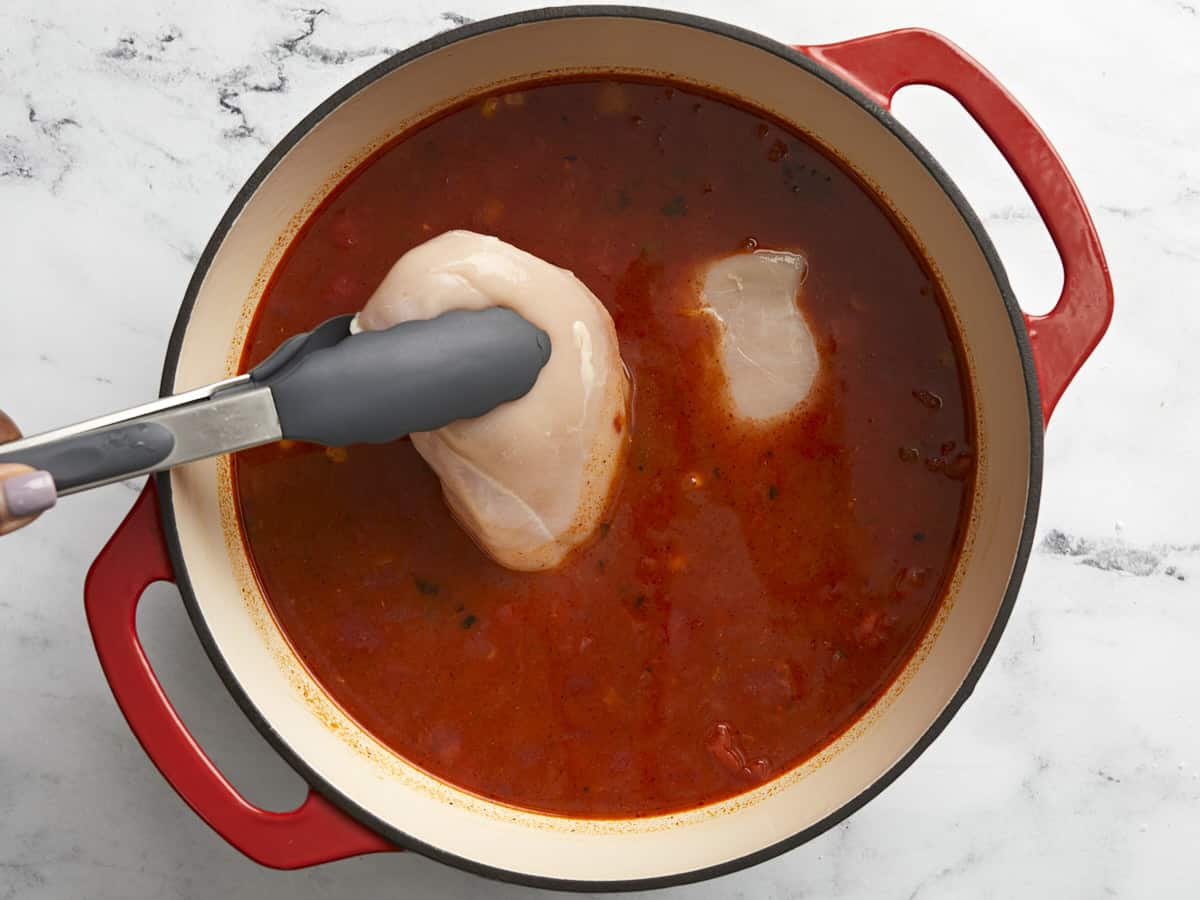
  • Now add the chicken breasts directly inside the pot on top of the rest of the ingredients. Place a lid on the pot and bring the soup up to a boil. Once boiling, reduce the heat to medium-low and allow the soup to simmer for 45 minutes. Make sure the soup is just at a steady simmer at this point, as this will help to create tender chicken breast meat.
  • After the soup has simmered for 45 minutes, remove the chicken breasts and place them on a clean cutting board. Once cool enough to touch, shred the chicken breasts with a fork.
  • Add the shredded chicken meat back to the soup pot and stir until the chicken is evenly distributed throughout the soup.
  • Serve this soup with your favorite toppings like shredded cheese, cilantro, sliced avocado, a dollop of sour cream, or even some more sliced jalapeño. Enjoy!

See how we calculate recipe costs here.

Nutrition

Serving: 1serving | Calories: 181kcal | Carbohydrates: 16g | Protein: 12g | Fat: 9g | Sodium: 1075mg | Fiber: 3g
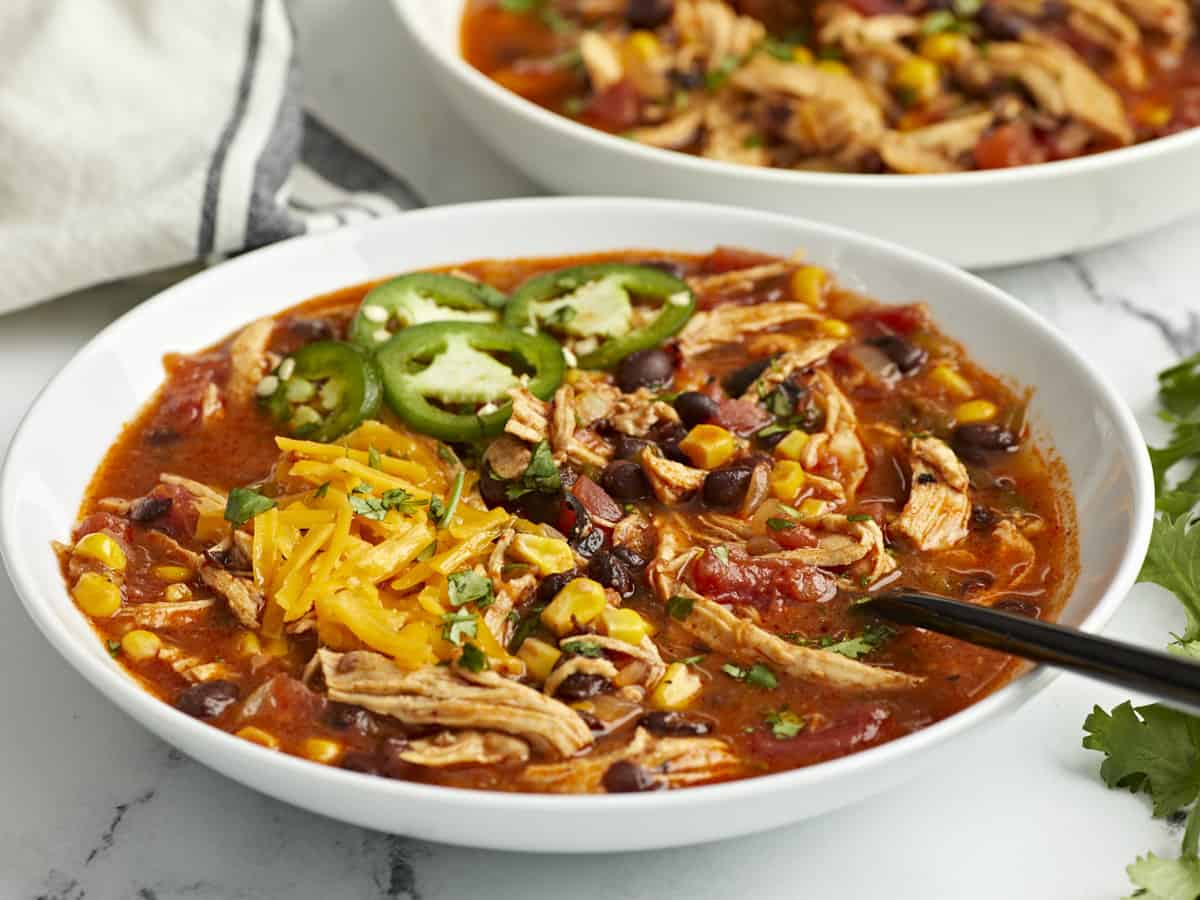
Side view of two bowls of chicken enchilada soup with a black spoon inside the soup.

How to Make Chicken Enchilada Soup – Step by Step Photos

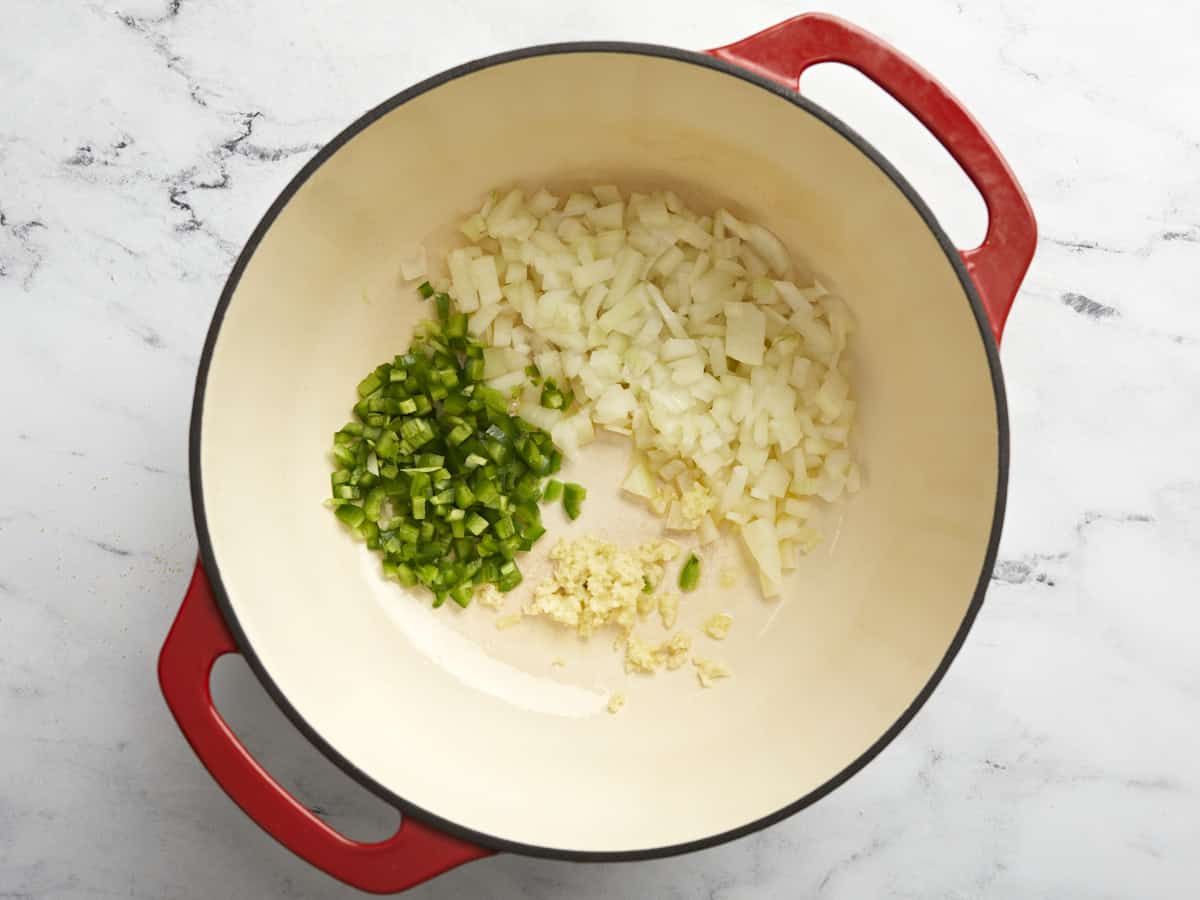
Diced onion, jalapeno, and garlic in a dutch oven.

Add 1 Tbsp of cooking oil, one diced onion, one finely diced jalapeño and two minced garlic cloves to a dutch oven or large pot over medium heat. Sauté for 2-3 minutes or until onions are soft and translucent.

Spices added to sautéed vegetables in a dutch oven.

Next add 2 Tbsp all-purpose flour, 2 Tbsp chili powder, 1/2 tsp ground cumin, 1/2 tsp garlic powder, 1/4 tsp cayenne pepper, 3/4 tsp salt, and the remaining 2 Tbsp of cooking oil to the pot.

Spices mixed and sautéed in dutch oven.

Stir well and cook the flour and spices with the vegetables for 2 minutes.

Tomatoes, black beans, corn, tomato paste, and chicken broth added to the dutch oven.

Add 3oz. of tomato paste, one 15oz. can of black beans (drained), one 15oz. can of fire roasted tomatoes (with juices), one 10oz. can of diced tomatoes with green chiles (with juices), one cup of frozen corn, and 4 cups of chicken broth to the pot. Stir all the ingredients together making sure to dissolve the tomato paste and scrape up any spices that may be stuck at the bottom of the pot.

Two chicken breasts being placed in the dutch oven on top of the soup ingredients.

Now add two chicken breasts directly inside the pot on top of the rest of the ingredients. Place a lid on the pot and bring the soup up to a boil. Once boiling, reduce the heat to medium-low and allow the soup to simmer for 45 minutes. Make sure the soup is just at a steady simmer at this point, as this will help to create tender chicken breast meat.

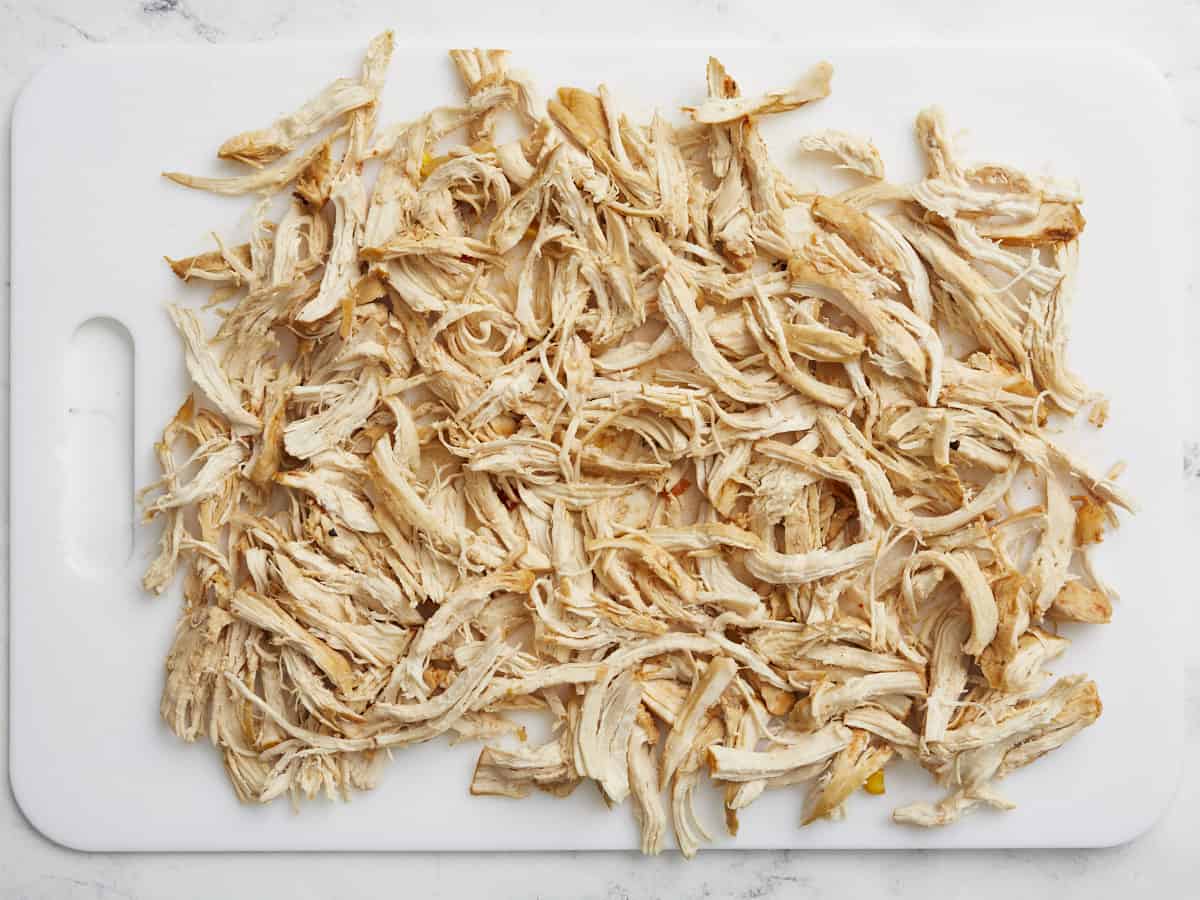
Cooked chicken breasts being shredded on a clean cutting board.

After the soup has simmered for 45 minutes, remove the chicken breasts and place them on a clean cutting board. Once cool enough to touch, shred the chicken breasts with a fork.

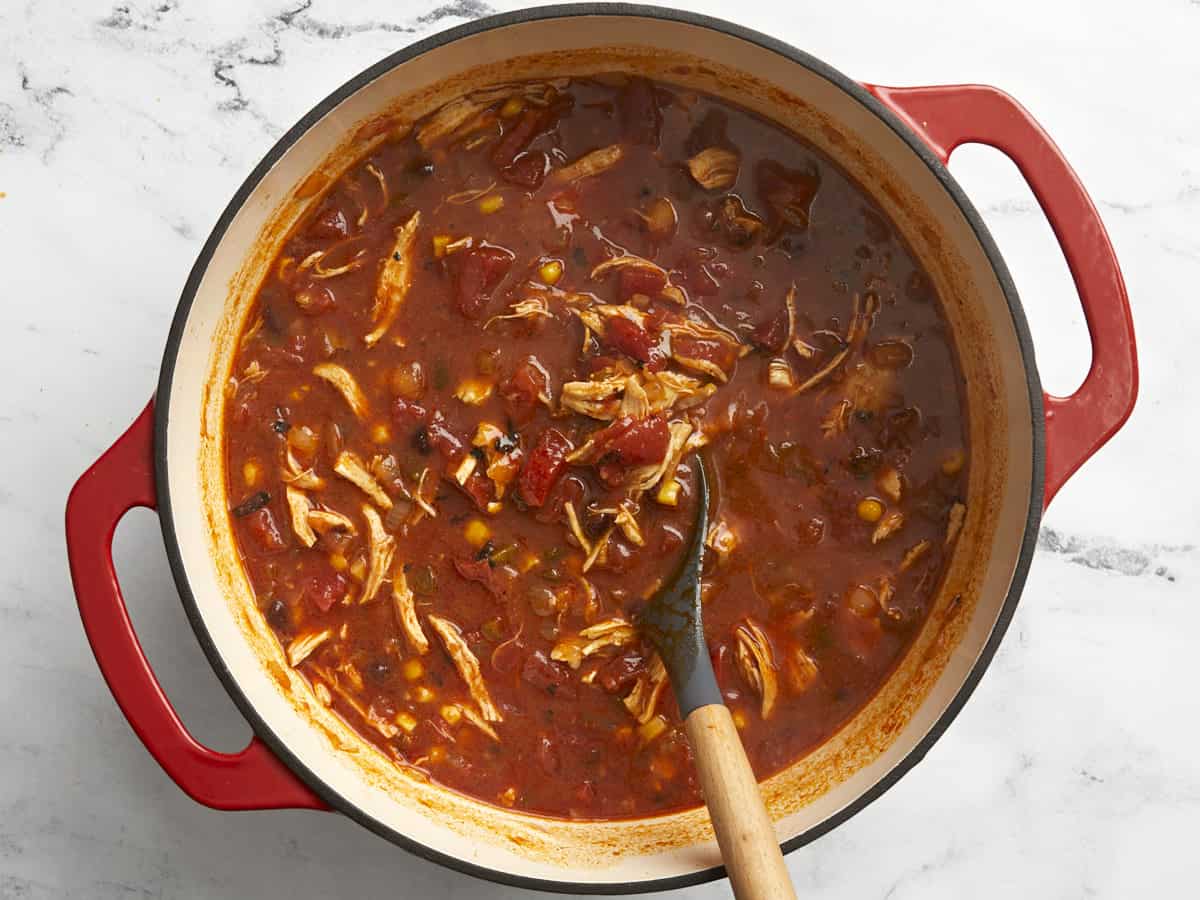
Overhead view of finished Chicken Enchilada Soup with a large silicone spoon inside the soup pot.

Add the shredded chicken meat back to the soup pot and stir until the chicken is evenly distributed throughout the soup.

Overhead view of chicken enchilada soup in a dutch oven with a ladle scooping some soup out.

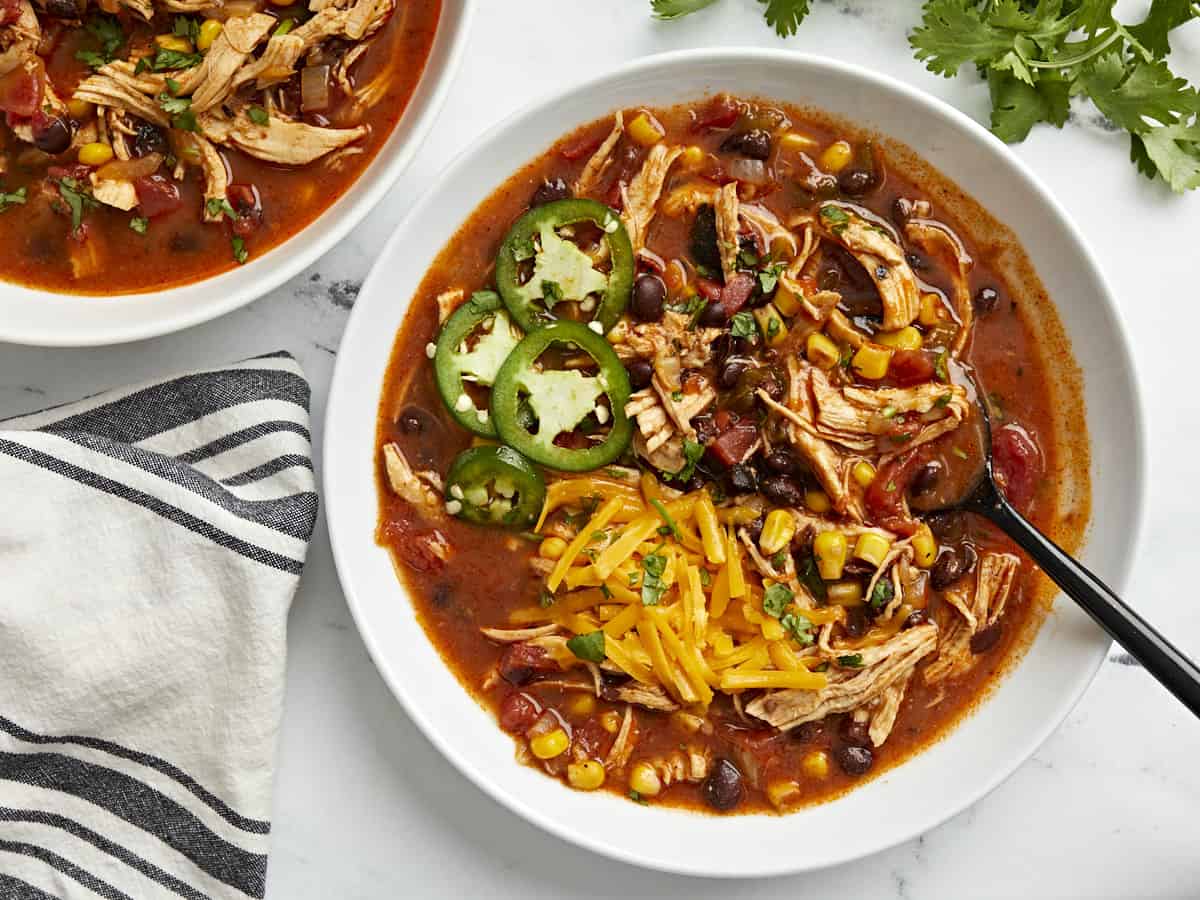
Serve this soup with your favorite toppings like shredded cheese, cilantro, sliced avocado, sour cream, or even some more sliced jalapeño and enjoy!

Overhead view of two bowls of chicken enchilada soup with jalapeno and shredded cheese on top.

The post Chicken Enchilada Soup appeared first on Budget Bytes.
Jalapeño Poppers

The perfect easy appetizer for New Year’s Eve, tailgating parties, or the big game, this Jalapeño Popper recipe is a spicy, cheesy home run!

The post Jalapeño Poppers appeared first on Budget Bytes.
If you love spicy and you love cheesy, you’ll definitely love Jalapeño Poppers! This cute little appetizer recipe has New Year’s Eve written all over it, and it’s perfectly easy and delicious for football games as well. …Or, if you’re just as obsessed with them as I am, they’re also great for a regular Monday afternoon. 😜

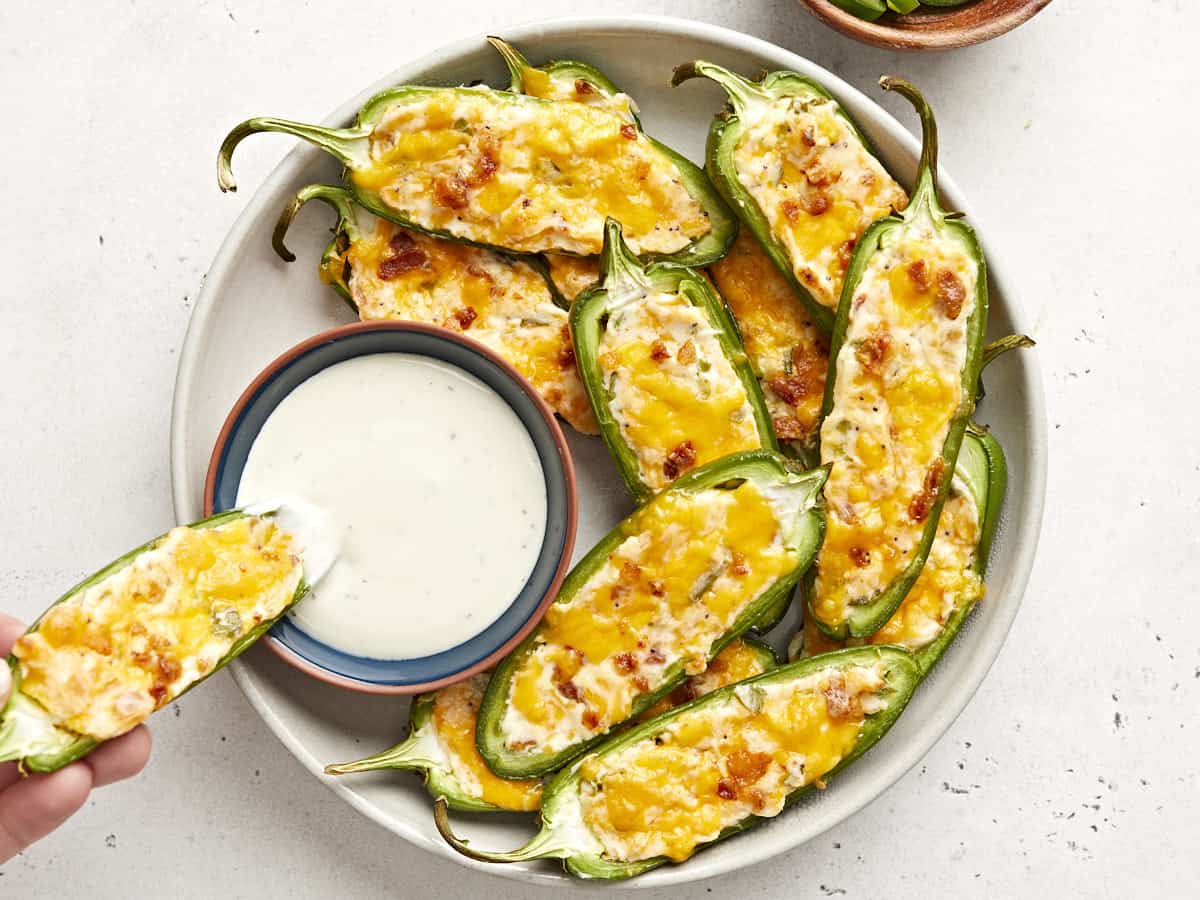
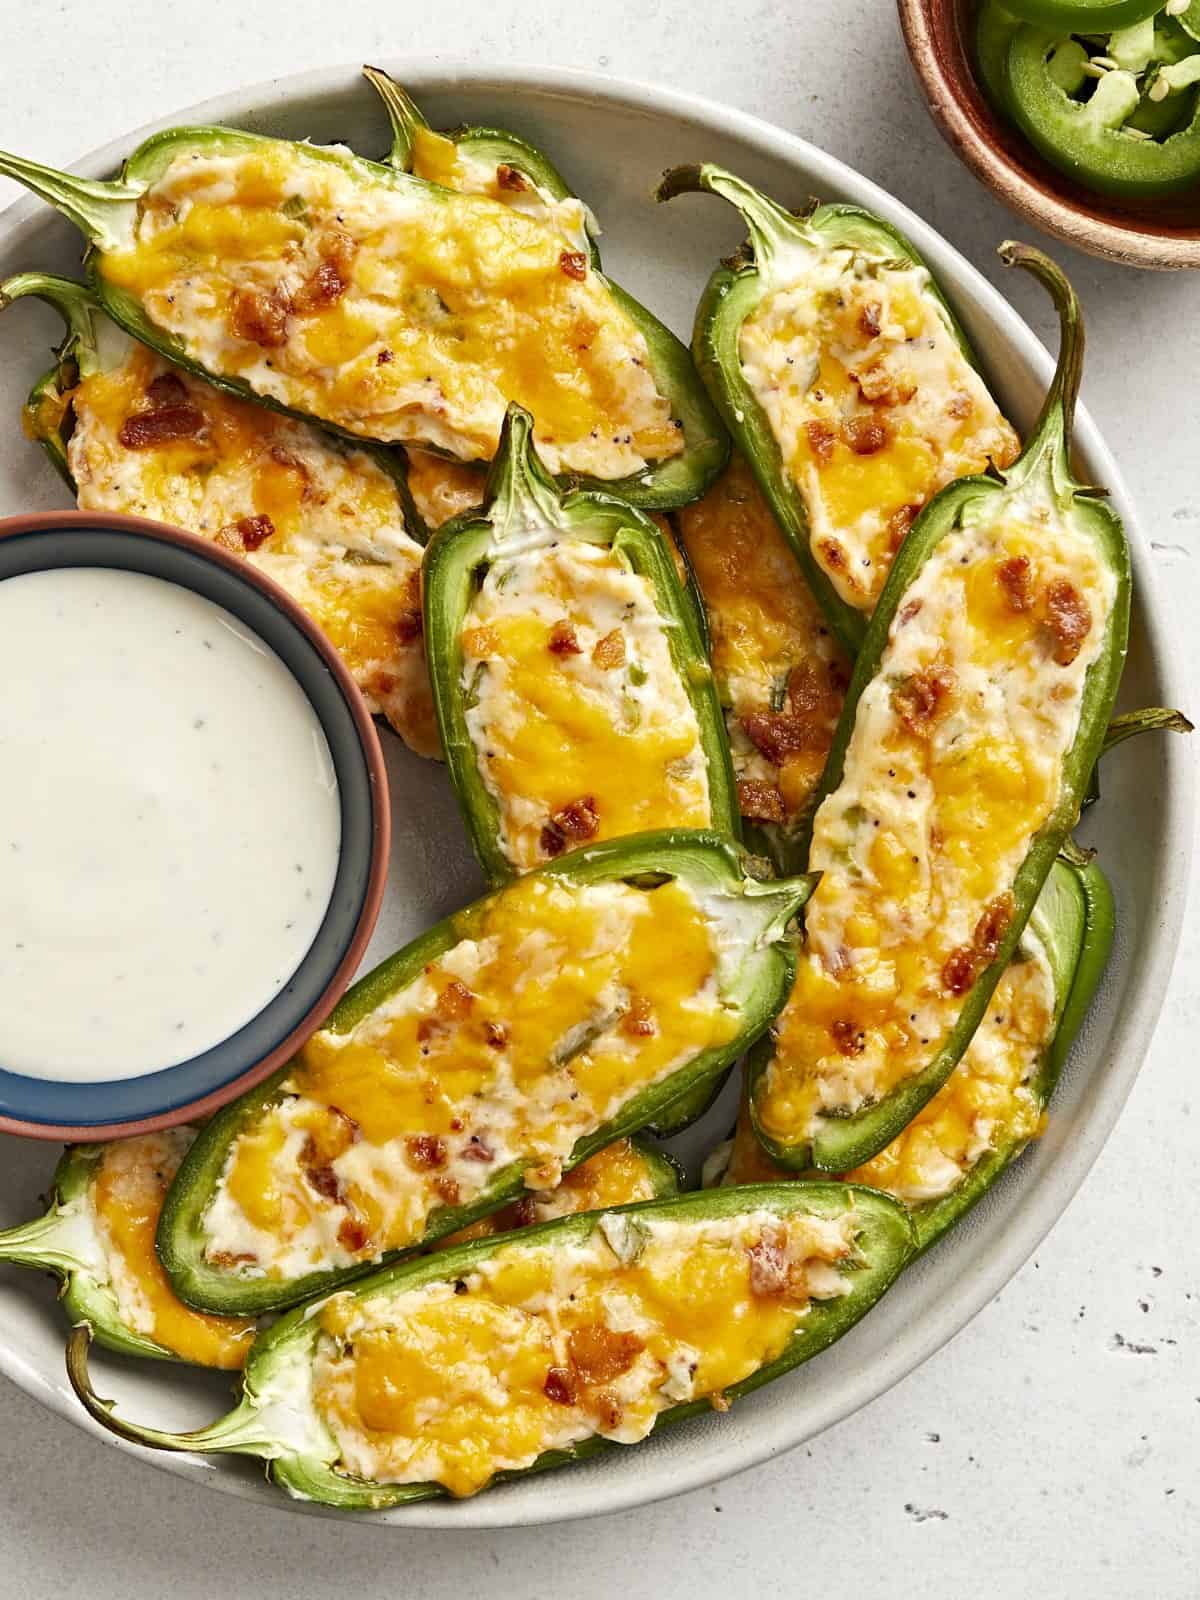
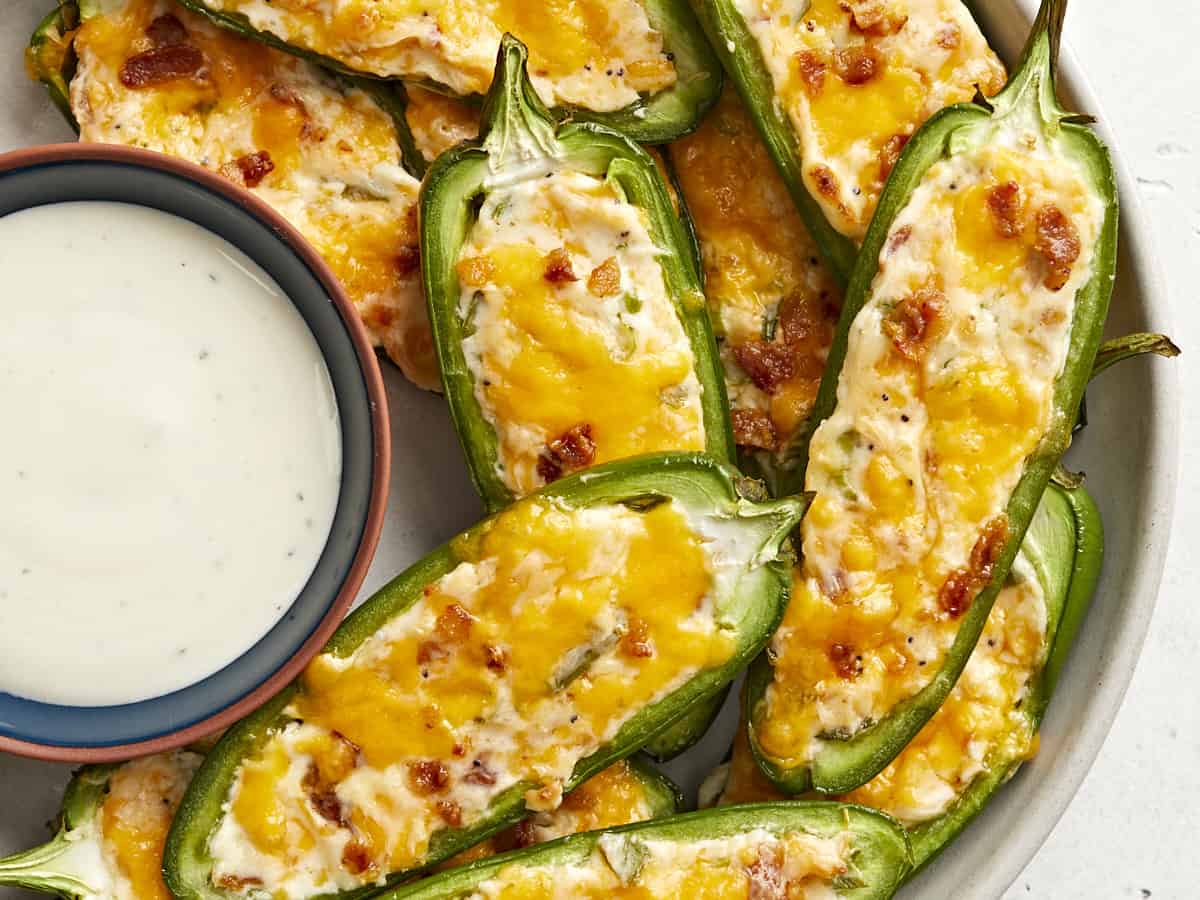
Overhead view of a plate full of jalapeño poppers with a dish of ranch dressing.

What Are Jalapeño Poppers?

Jalapeño poppers are a staple in American pop food culture and are often served at sports bars or other fast-casual restaurants. They can take several forms, sometimes breaded and deep fried, sometimes baked, and sometimes wrapped in bacon, but they always consist of fresh jalapeño peppers stuffed with a flavorful mix of cheese for that spicy-cheesy-creamy flavor combo.

For this jalapeño popper recipe, we went the easy and budget-friendly route (obvi) and opted for baked poppers with just enough bacon added in to give great flavor without making them over-the-top expensive. These jalapeño poppers are easy enough for even a beginner to make, and tasty enough that you’ll be thankful you didn’t drop a ton of cash on ordering out!

Ingredients for Jalapeño Poppers:

Here’s what you’ll need to make this delicious jalapeño popper recipe at home:

  • Fresh Jalapeños: Luckily, jalapeños are usually some of the least expensive items in the produce aisle, but if you can’t find them for a good price at your local chain grocery store, look for a Hispanic or Latin grocery store where they’re guaranteed to be super affordable. Look for Jalapeños that are about 3 inches in length for this recipe.
  • Cheese: We used a mix of cream cheese and cheddar cheese for this recipe so we could get an ultra-creamy finish with a nice cheddar bite. You can also try using Monterey Jack or Pepper Jack (if you like it EXTRA spicy!).
  • Bacon: Bacon is a classic flavor in jalapeño poppers and it gives a nice smokey finish to the flavor profile. We use just enough to give these poppers flavor without driving up the price too high.
  • Seasoning: These jalapeño poppers are seasoned with garlic powder, Everything Bagel Seasoning, and green onions. They’re flavorful but not so complicated that you lose the flavor of the jalapeños and bacon. If you don’t have Everything Bagel Seasoning you can increase the garlic powder in the recipe to ½ tsp, and add ⅛ tsp of both salt and pepper.

Are Jalapeño Poppers Spicy?

Yes, jalapeño poppers are pretty spicy! Despite removing the seeds and ribs (the spiciest part of the jalapeño), some of the spicy oils remain in the jalapeño, giving these poppers just the right amount of spicy heat to balance the creamy cheeses. If you’re not a spicy foods fan you’ll probably want to skip this one!

How to Remove Jalapeño Oil From Your Hands

If you’ve ever cooked with jalapeños before, you know the horror of accidentally touching your eyes afterward. Jalapeños contain natural oils that can easily transfer from your hands to your eyes or any other delicate skin, causing an intense burning sensation, and sometimes just washing your hands isn’t enough to remove the oils. Here are a few extra steps you can take to reduce the burn:

  1. Massage a teaspoon or two of cooking oil into your hands. The oil will help dissolve the spicy oils from the jalapeños that are stuck to your hands.
  2. Wash your hands with dish soap instead of hand soap. Dish soap is formulated to break up oily residues whereas hand soaps are often designed to keep skin moisturized.
  3. Rub your hands with an acidic substance, like lemon juice, vinegar, or tomato sauce. This can help break up any spicy oils left on the skin.
  4. OR just wear gloves while working with the jalapeños and avoid the risk. ;)

What to Serve with Jalapeño Poppers

I love these little poppers on their own, but if you want a dipping sauce I would definitely recommend ranch dressing. I’m not usually a ranch person, but the flavor combination between the spicy jalapeño poppers and cooling ranch dressing is hard to beat! I’d also serve them with another starchy appetizer, maybe something like our Steak Fries or Loaded Smashed Potatoes.

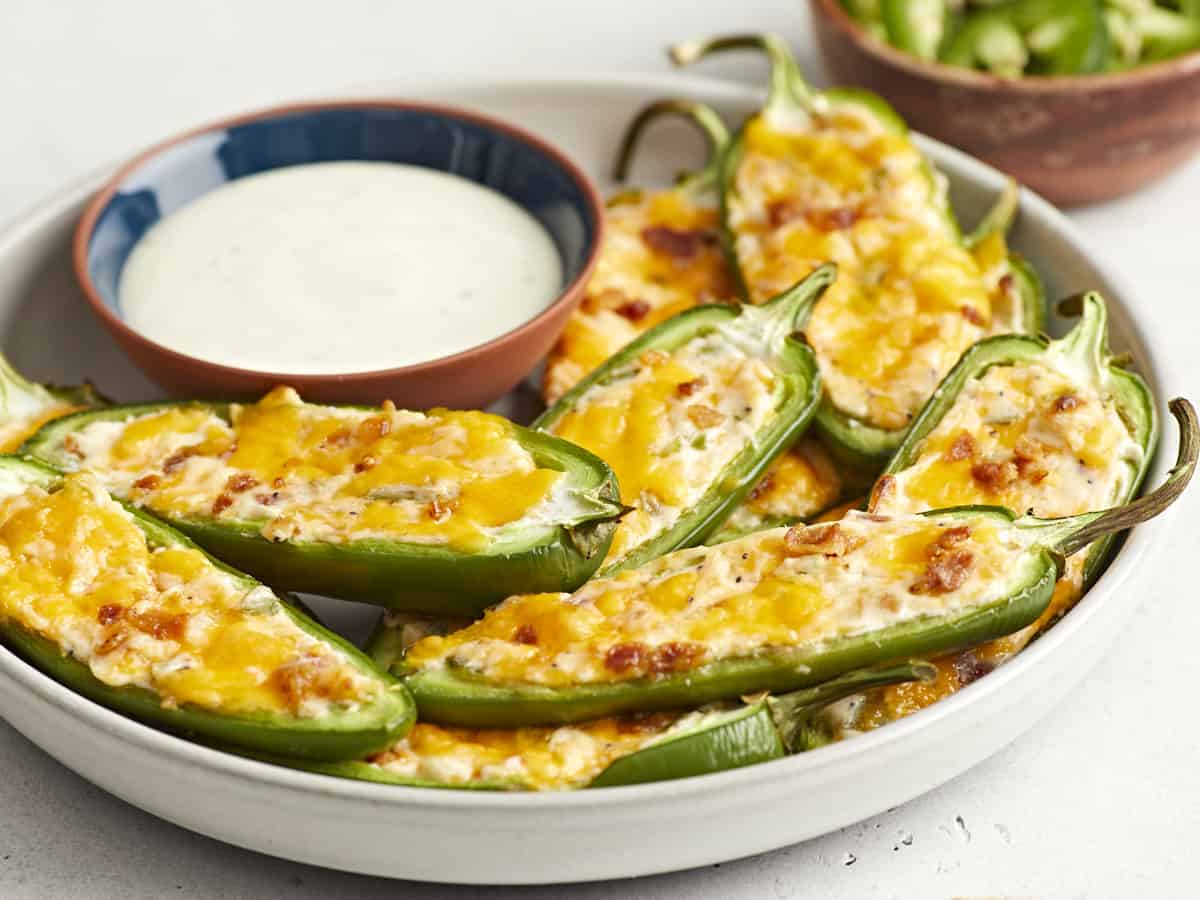
Side view of a plate full of jalapeño poppers with a dish of ranch on the side.
Super close up view of jalapeño poppers on a plate with a bowl of ranch.
Print

Jalapeño Poppers

The perfect easy appetizer for New Year's Eve, tailgating parties, or the big game, this Jalapeño Popper recipe is a spicy, cheesy home run!
Course Appetizer
Cuisine Amercian
Total Cost $3.94 recipe / $0.66 serving
Prep Time 15 minutes
Cook Time 15 minutes
Total Time 30 minutes
Servings 6 (2 poppers each)
Calories 149kcal

Ingredients

  • 2 oz. bacon (about 2 slices) $0.50
  • 6 jalapeños* $1.50
  • 4 oz. room-temperature cream cheese $1.10
  • 1/2 cup shredded cheddar cheese $0.62
  • 1 green onion, sliced $0.10
  • 1 tsp everything bagel seasoning $0.10
  • 1/4 tsp garlic powder $0.02

Instructions

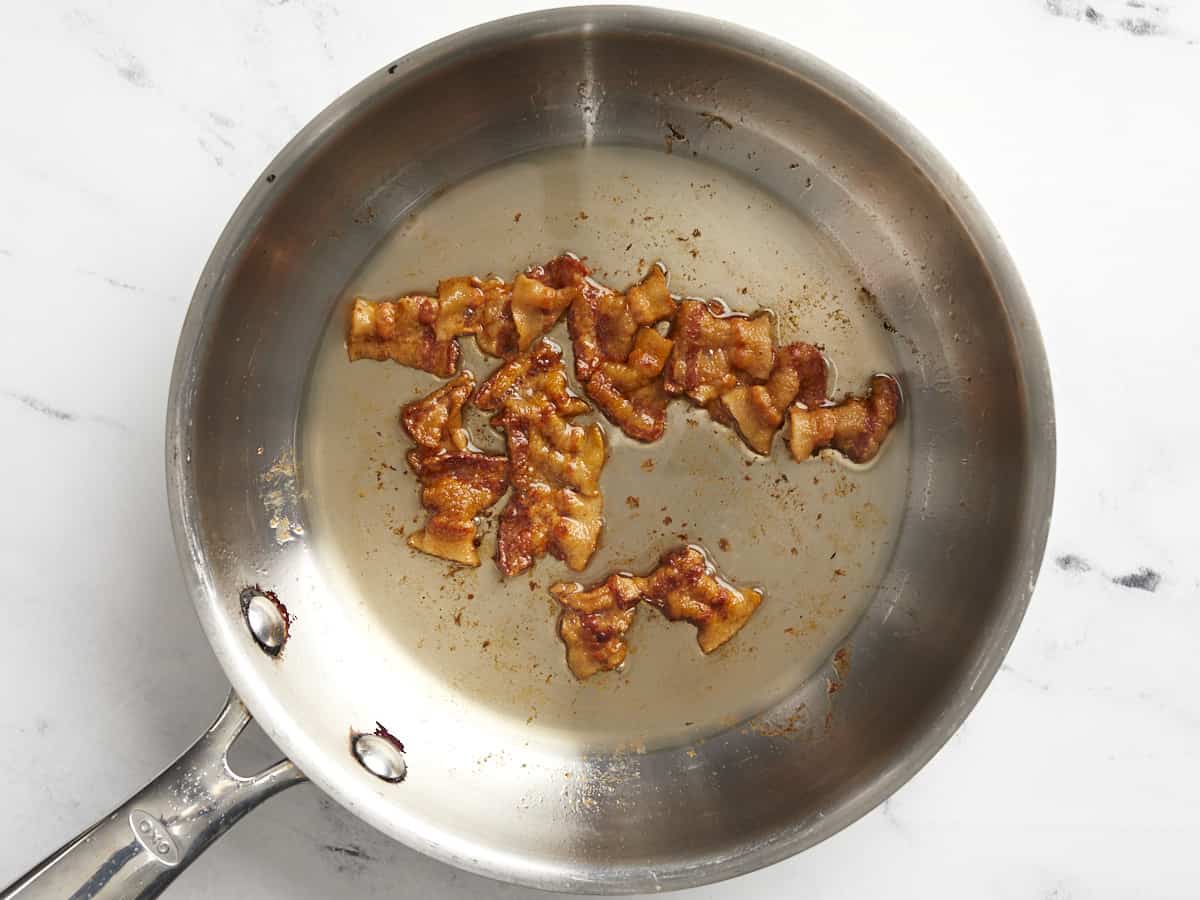
  • Preheat the oven to 425ºF. Cook the bacon in a skillet over medium heat until it is brown and crispy. Remove it from the pan and let it cool on a paper-towel-lined plate.
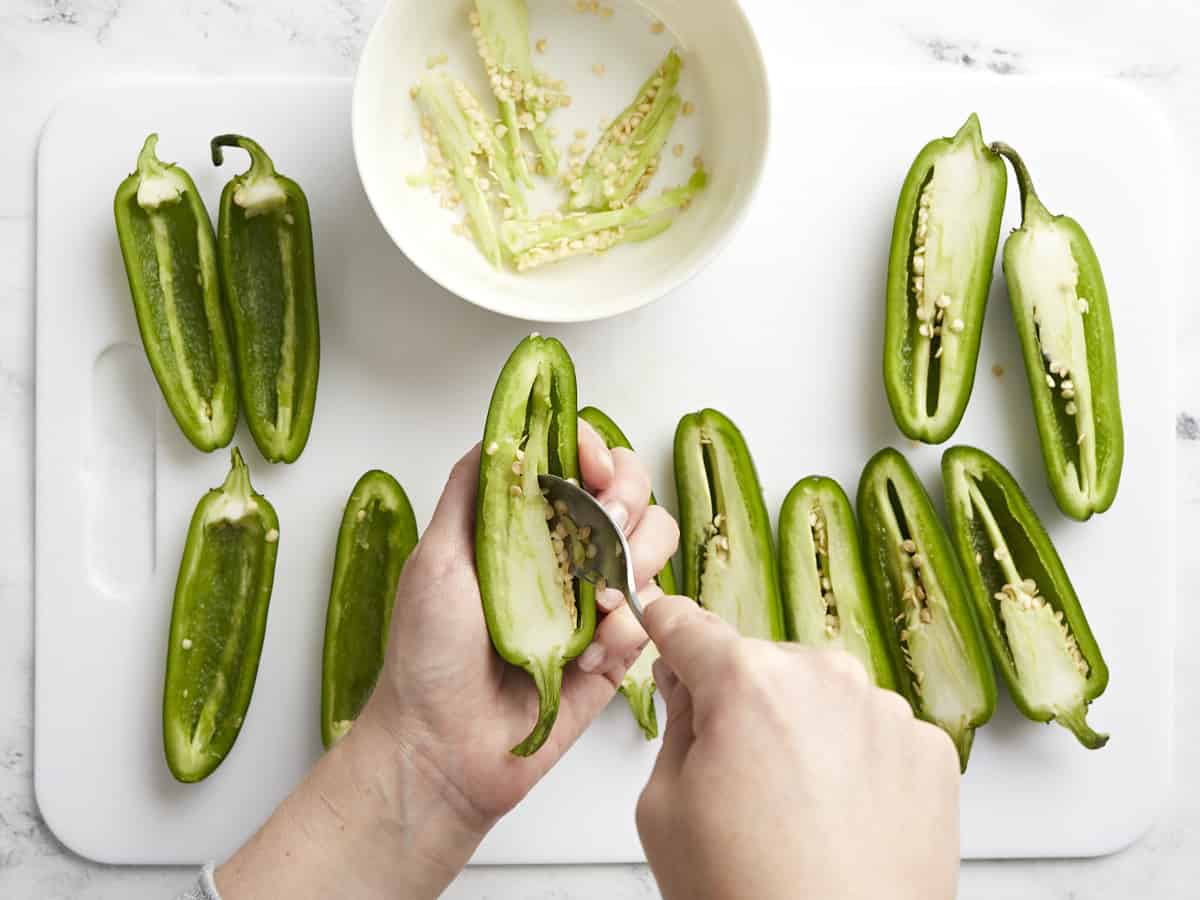
  • Slice the jalapeños in half lengthwise and then use a spoon to scoop out the seeds and white ribs, being careful not to tear or puncture the peppers.
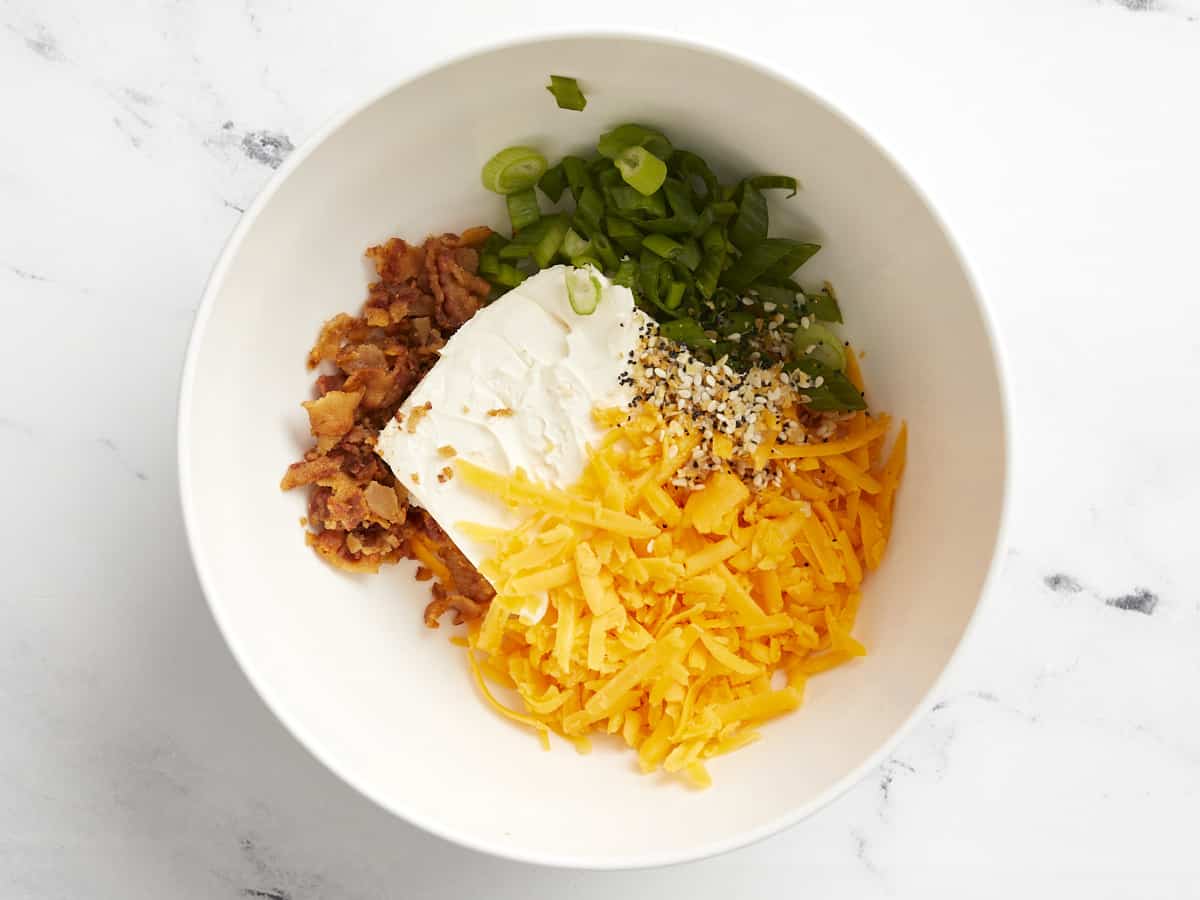
  • Once the bacon is cool, crumble it into tiny pieces and reserve about 1 tablespoon to use as a topping. Add the bacon to a bowl with the cream cheese, shredded cheddar (reserve a small amount for topping as well), sliced green onion, Everything bagel seasoning, and garlic powder. Mix the ingredients together until they're evenly combined.
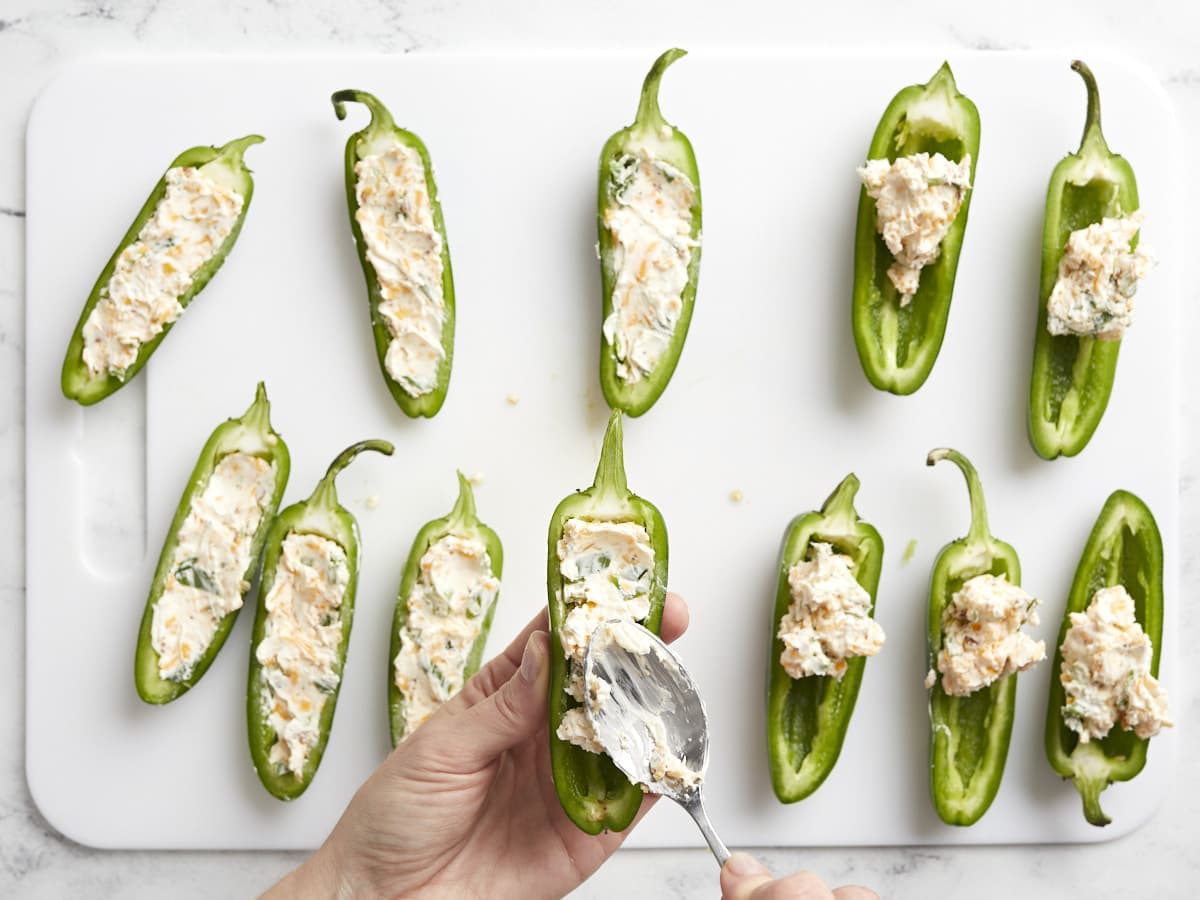
  • Divide the cheese filling between the 12 pepper halves and then spread it out to fill and smooth out the top.
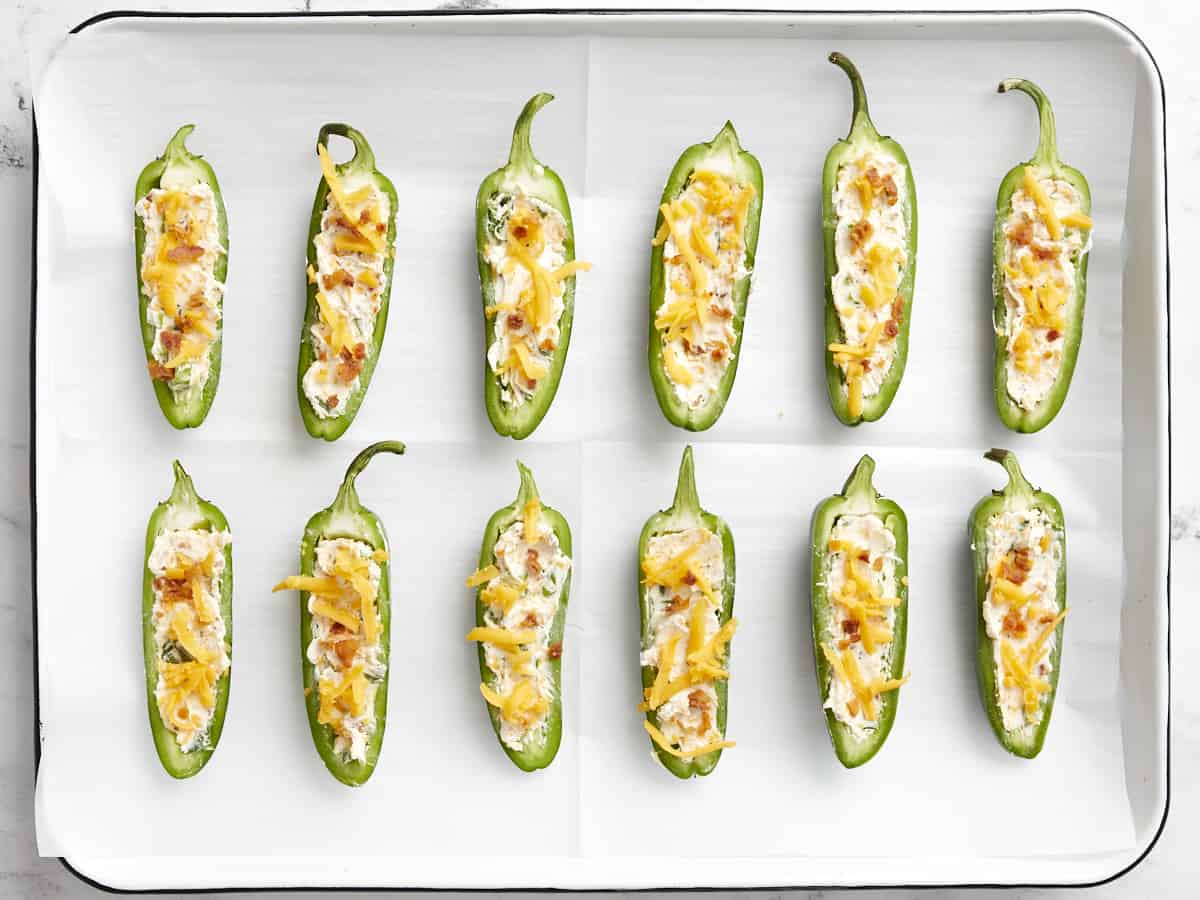
  • Place the filled peppers on a large parchment-lined baking sheet then sprinkle the reserved crumbled bacon and cheddar cheese over the top.
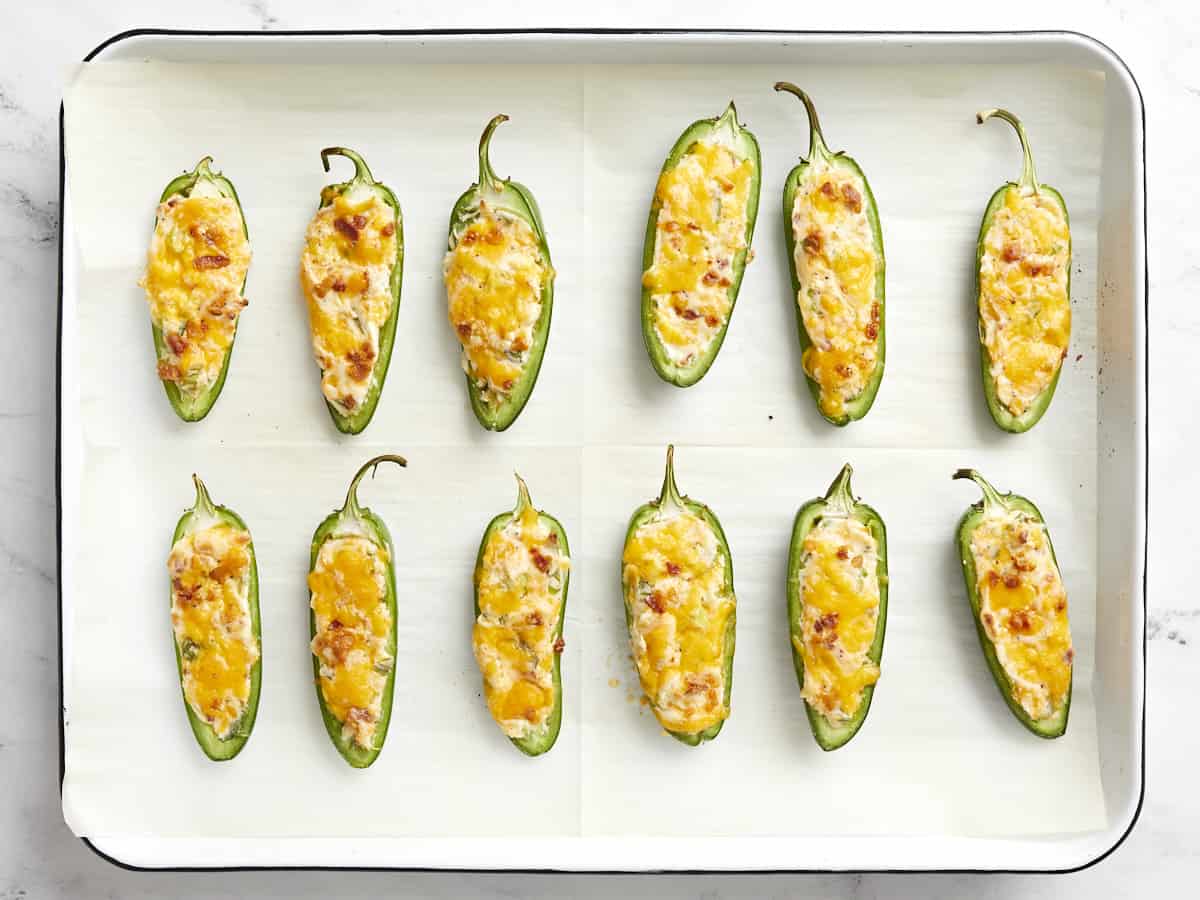
  • Bake the peppers for 15 minutes or just until the cheese is melted and slightly bubbly. Avoid over-baking the peppers or else they'll become too soft to pick up and enjoy. Allow the poppers to cool just enough to handle, then serve and enjoy!

See how we calculate recipe costs here.

Notes

*Look for jalapeños that are about 3 inches long.

Nutrition

Serving: 2poppers | Calories: 149kcal | Carbohydrates: 3g | Protein: 5g | Fat: 14g | Sodium: 228mg | Fiber: 0.5g
Super close up view of jalapeño poppers on a plate with a bowl of ranch.

How to Make Jalapeño Poppers – Step by Step Photos

Cooked bacon in a skillet.

Cook about 2 oz. of bacon (about 2 slices) in a skillet over medium heat until it is brown and crispy. Remove the bacon from the skillet and let it drain on a paper towel-lined plate as you prepare the rest of the dish.

Scraping out the insides of the jalapeño peppers.

Slice six jalapeño peppers in half length-wise, then scrape out the seeds and white ribs with a spoon, taking care not to tear the outside of the pepper. To prevent the transfer of spicy oils from your hands to your eyes, mouth, or nose, either use gloves while preparing the peppers or see our tips above for removing jalapeño oil from your hands.

Cheese filling ingredients in a bowl, unmixed.

Once the bacon is cool enough to touch, crumble it into tiny pieces. Reserve about 1 teaspoon of the bacon to use as a topping, then add the rest to a bowl with 4 oz. of room-temperature cream cheese, ½ cup shredded cheddar cheese (reserve about 2 Tbsp for topping), 1 sliced green onion, 1 teaspoon Everything Bagel Seasoning, and ¼ teaspoon garlic powder. Mix these ingredients together until evenly combined.

Cheese filling being spooned into jalapeño halves.

Divide the cheese mixture evenly between the 12 jalapeño halves, then spread it out to fill the peppers, smoothing out the top.

Jalapeño poppers ready to bake on a parchment-lined sheet pan.

Place the filled jalapeños on a large parchment-lined baking sheet, then sprinkle the reserved bacon bits and shredded cheddar over top.

Baked jalapeño poppers on the baking sheet.

Bake the jalapeño poppers in the preheated 425ºF oven for 15 minutes, or just until the cheese is melted and bubbly on top. Avoid overcooking the poppers or else the peppers will get too soft to pick up and eat. Allow the peppers to cool just enough to handle, then serve and enjoy!

Overhead view of a plate of jalapeño peppers with one being dipped into a bowl of ranch.

The post Jalapeño Poppers appeared first on Budget Bytes.
Black Beans with Eggs

Eggs poached in seasoned black beans served over a bed of rice with fresh onion and cilantro makes a fast, filling, and budget-friendly meal!

The post Black Beans with Eggs appeared first on Budget Bytes.
What are two of my favorite budget-friendly ingredients? Beans and eggs! And they come together perfectly to create a really simple and filling meal that’s great for breakfast, brunch, or just any time of the day (eggs all day every day, please!). And you really can’t beat the cost of this dish. Even with a few fancier toppings, my price per serving came in just over a dollar. 🙌

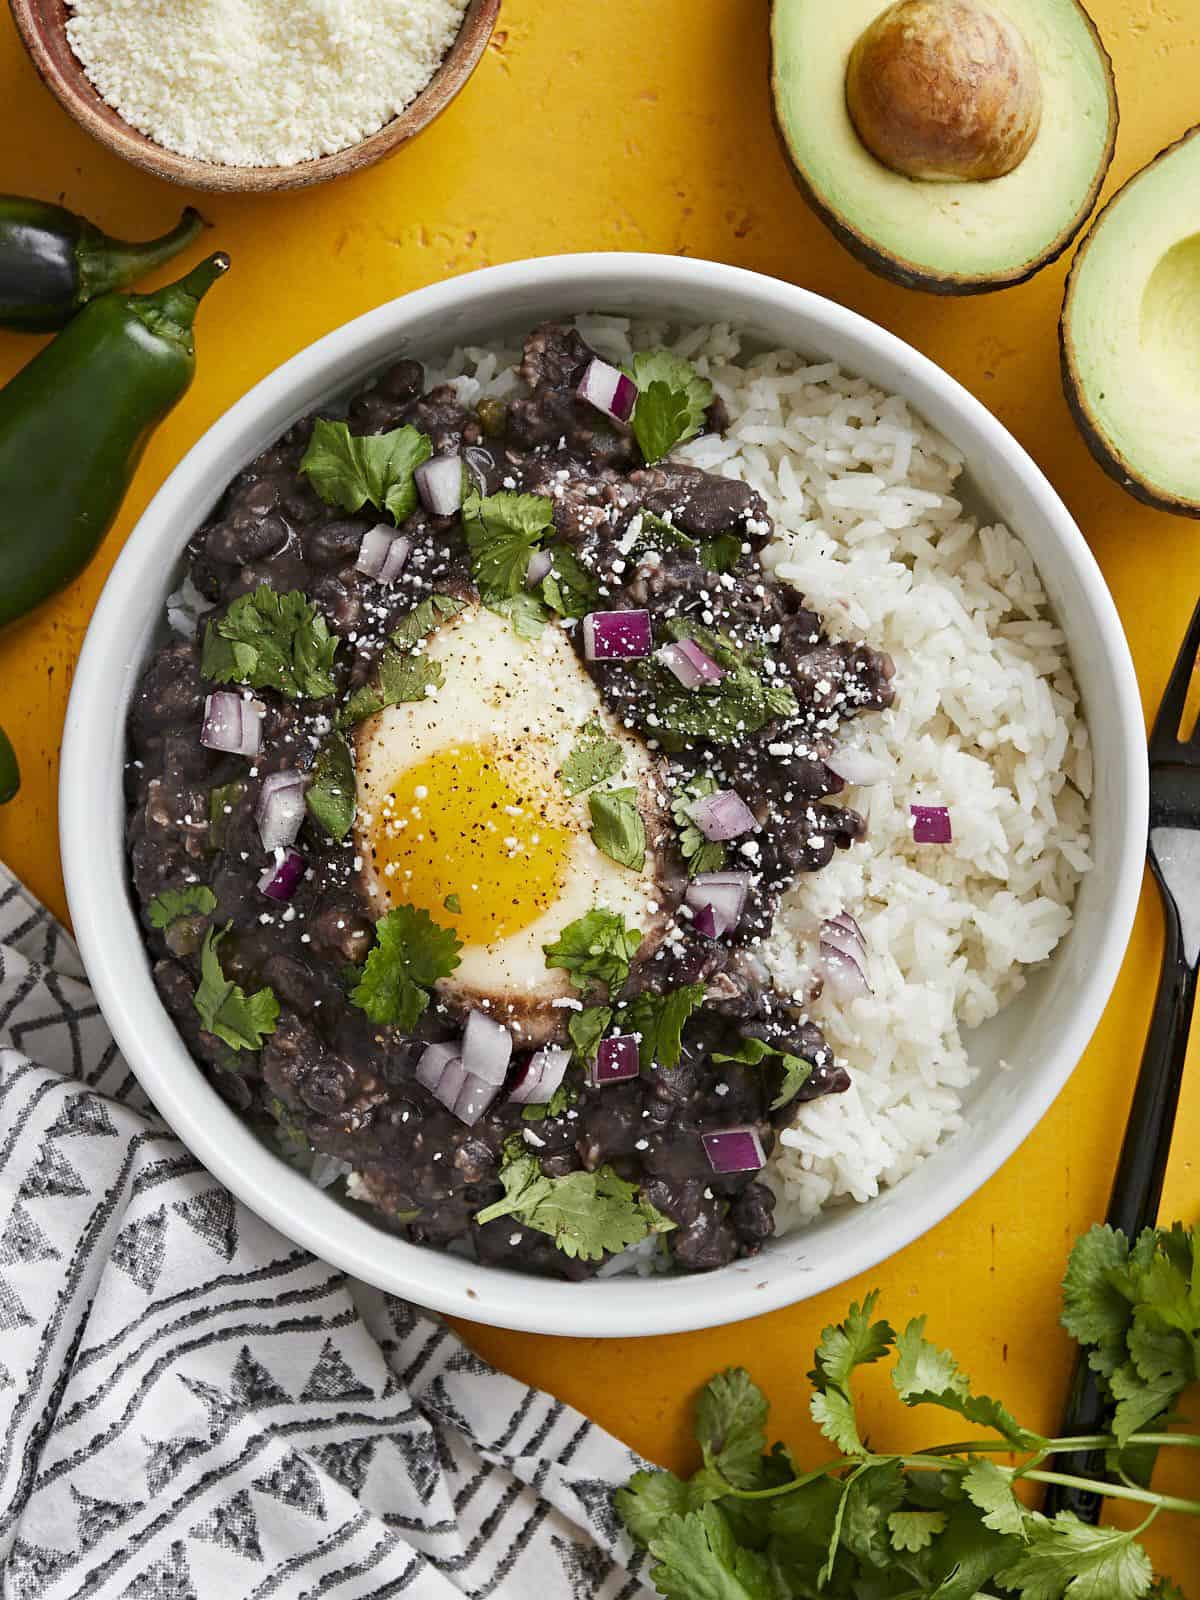
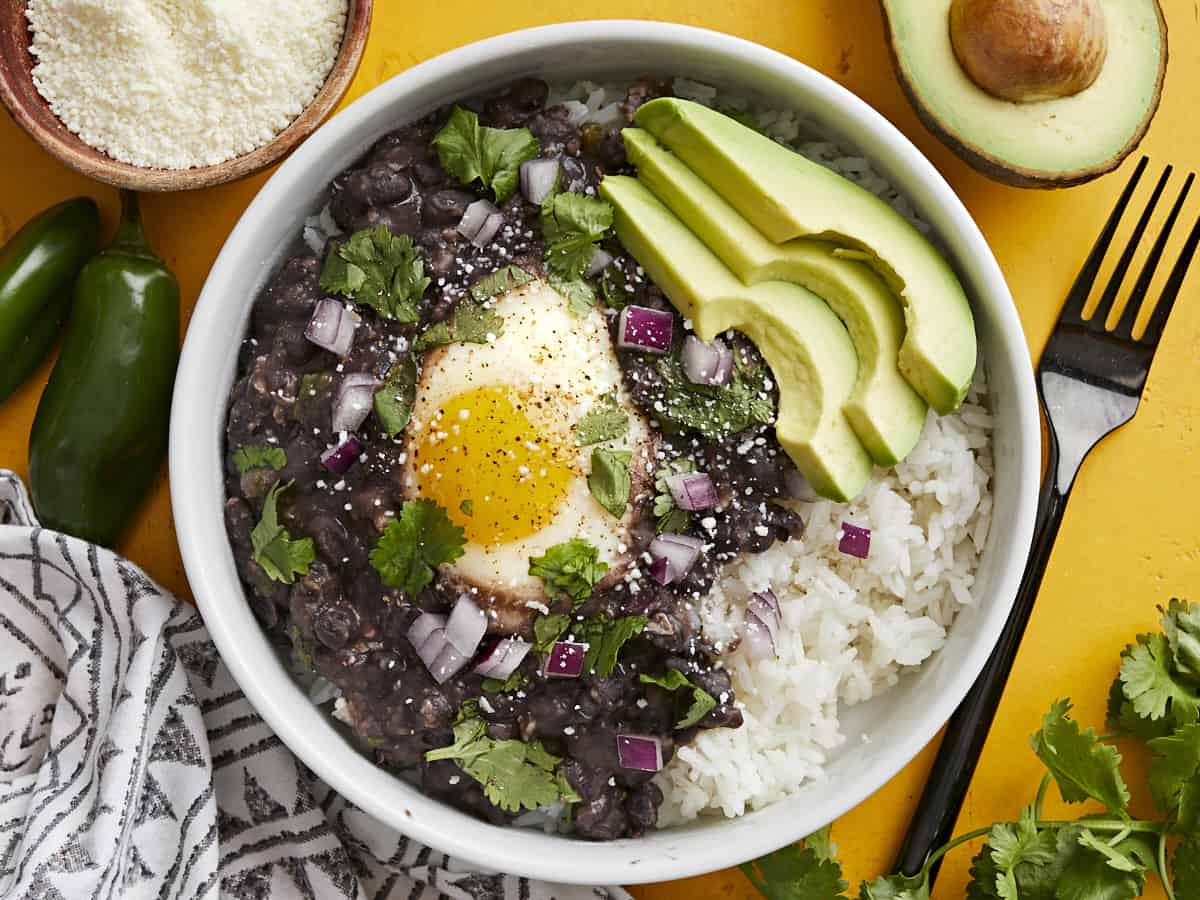
Overhead view of a bowl full of rice, black beans and eggs garnished with onion and cilantro.

I love turning an inexpensive can of beans into a delicious meal, so the other day I was thinking, “Hey, I wonder if you could cook eggs in some saucy beans like you do shakshuka?” So I tried it out and it worked! This recipe is super simple, satisfying, and you can make it as simple or as extravagant as you’d like, depending on how you top it.

Ingredients for Black Beans with Eggs

Here’s all you’ll need to make this super budget-friendly meal:

  • Garlic and Jalapeño: Sautéed fresh garlic and jalapeño create a super flavorful base for the beans, adding depth and a little spicy kick. If you don’t like spicy, you can skip the jalapeño. And you can totally “measure with your heart” for the garlic. ;)
  • Black Beans: Beans provide the bulk for this recipe, making it super filling while staying super cheap, AND adding tons of fiber and nutrients. Win! While you could potentially use any bean for this recipe, black beans definitely fit this flavor profile the best and have the best visual appeal.
  • Eggs: I used four large eggs, but you could certainly add more if you prefer. I chose to cook the eggs so the yolks were still a bit runny, but you can cook them longer if you prefer a solid yolk. Or, you could even scramble them separately and simply top your bowl of beans and rice after the fact!
  • Toppings: The toppings are totally customizable and can make this recipe super fancy or very simple. We used a combination of onion, cilantro, avocado, and Cotija cheese. See our list of other topping ideas below for more inspo!
  • Rice: I served the black beans and eggs over a bed of cooked rice, but you could also scoop them into a tortilla and enjoy them like an enchilada or burrito.

How to Store Leftovers

If you plan to eat your black beans and eggs over the course of a few days, do not pre-poach the eggs in the beans. Simply cook the seasoned beans and store the beans, rice, and toppings separately. Then cook a fresh egg each day to top the beans and rice. You can cook the egg using any method: scrambled, fried, soft-boiled, or hard-boiled.

Topping Ideas

This recipe is just asking for all sorts of fun toppings. You can really dress it up with tons of flavor and color, or keep it super simple and budget-friendly by drizzling some store-bought salsa over top. Here are some ideas for toppings other than what we used below:

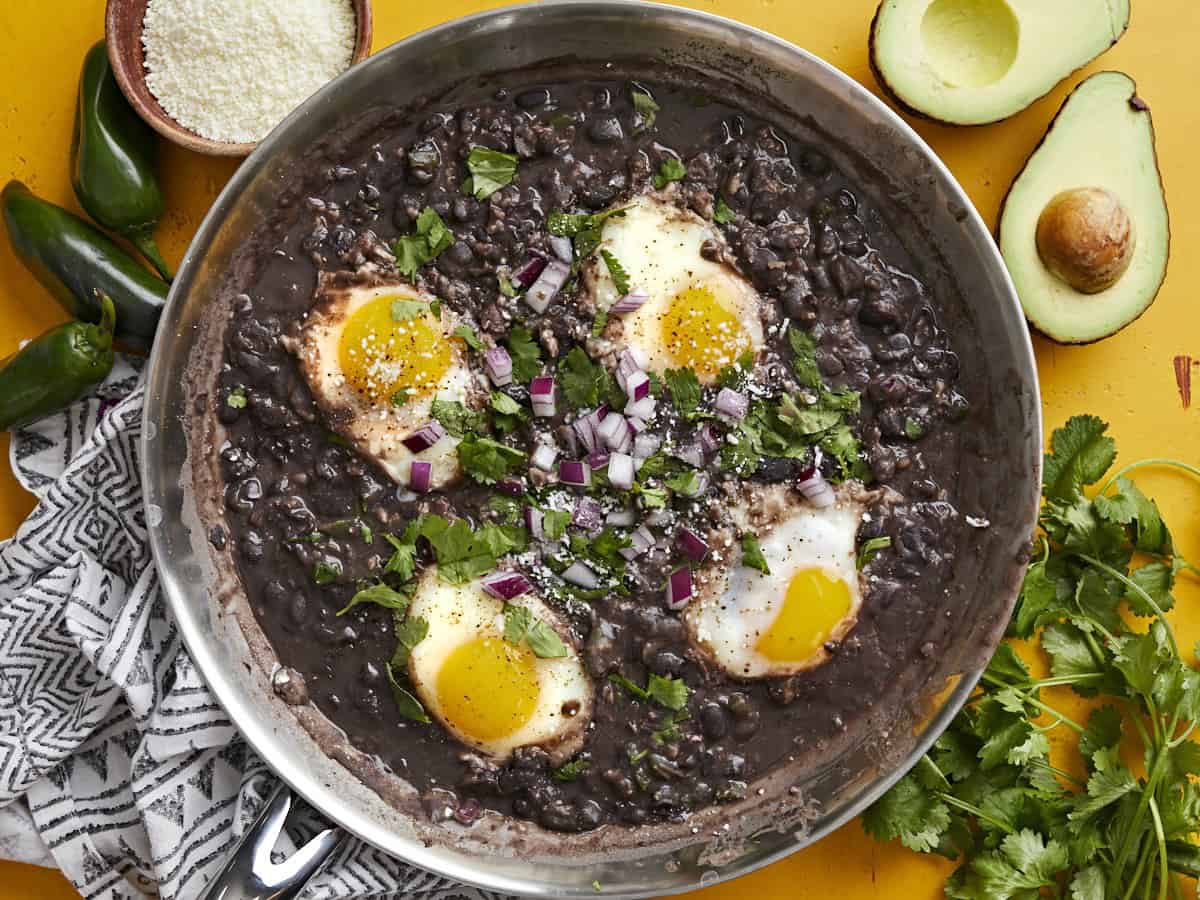
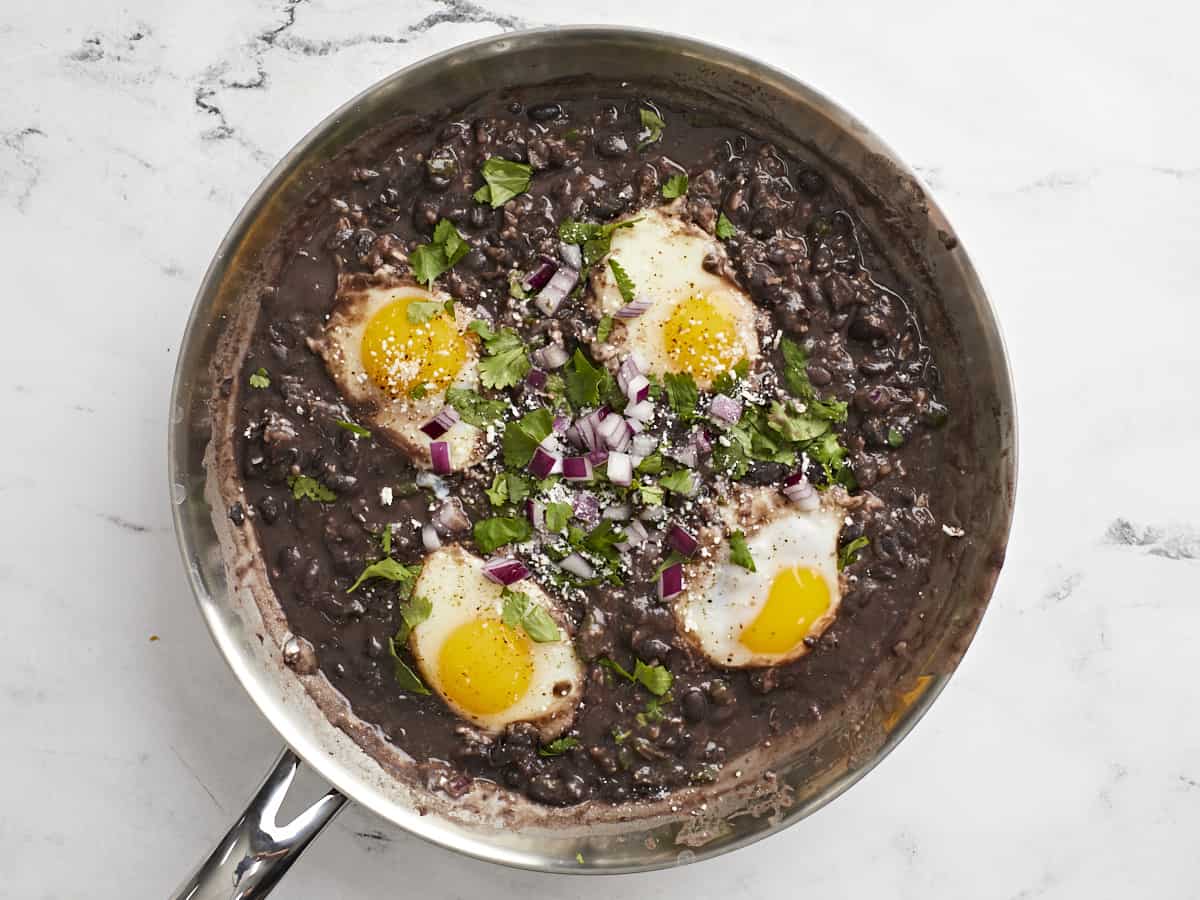
Overhead view of eggs poached in a skillet full of black beans garnished with cilantro and red onion.
Overhead view of a bowl of black beans with eggs over rice with sliced avocado on the side.
Print

Black Beans with Eggs

Eggs poached in seasoned black beans served over a bed of rice with fresh onion and cilantro make a fast, filling, and budget-friendly meal!
Course Breakfast, Brunch, Dinner, Lunch
Cuisine Mexican, Southwest
Total Cost $4.72 recipe / $1.18 serving
Prep Time 5 minutes
Cook Time 15 minutes
Total Time 20 minutes
Servings 4
Calories 529kcal

Ingredients

  • 2 cloves garlic $0.16
  • 1 jalapeño $0.25
  • 1 Tbsp olive oil $0.12
  • 2 15oz. cans black beans $1.58
  • 1 tsp cumin $0.10
  • 1/4 cup water $0.00
  • 4 large eggs $0.42

For Serving (optional)

  • 3 cups cooked rice $0.32
  • 1/4 red onion, diced $0.12
  • 1/4 cup chopped cilantro $0.20
  • 1 avocado, sliced $0.99
  • 1 oz. cotija, crumbled $0.46

Instructions

  • Mince the garlic and dice the jalapeño (seeds removed). Add the garlic and jalapeño to a large skillet with the olive oil and sauté over medium heat for about one minute, or just until the garlic softens a bit and becomes fragrant.
  • Add the canned beans (without draining) to the skillet along with the water and cumin. Stir to combine, then allow the beans to come up to a simmer.
  • Let the beans simmer, stirring often, for about five minutes. After the beans have softened slightly from simmering, use the back of a large spoon to smash some of the beans to thicken.
  • Turn the heat down to medium-low. Crack the eggs onto the beans. Partially cover the skillet with a lid and allow the eggs to simmer in the beans for 7-10 minutes, or until the eggs are cooked to your liking.
  • Top the skillet with your favorite ingredients (we used onion, cilantro, avocado, and cotija), and serve over a bed of warm rice. Enjoy!

See how we calculate recipe costs here.

Nutrition

Serving: 1serving | Calories: 529kcal | Carbohydrates: 70g | Protein: 23g | Fat: 18g | Sodium: 160mg | Fiber: 15g

How to Make Black Beans with Eggs – Step by Step Photos

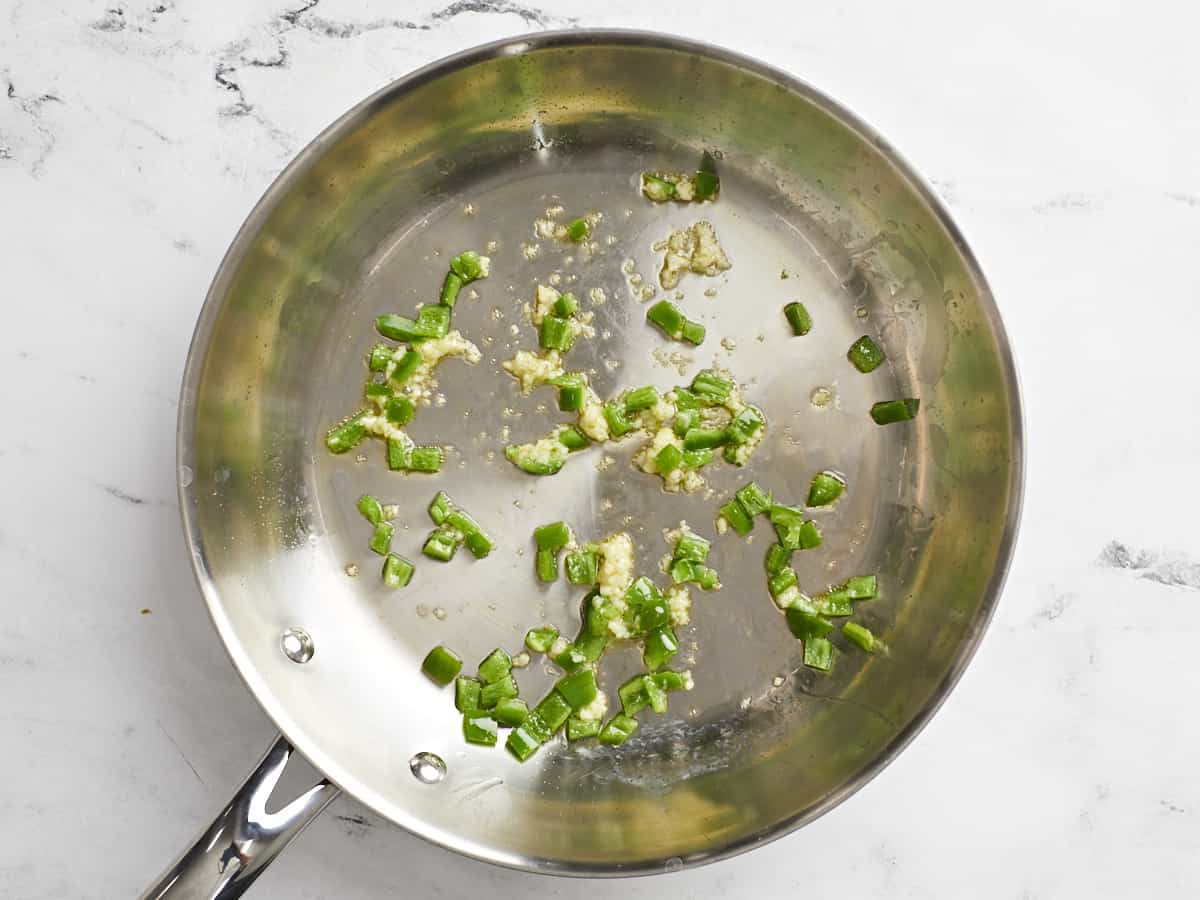
Sautéed garlic and jalapeño in a skillet.

Mince two cloves of garlic (or more, if you’d like!) and one jalapeño (seeds removed). Add the garlic and jalapeño to a large skillet with 1 Tbsp olive oil and sauté over medium heat for 1-2 minutes, or just until the garlic softens a bit and becomes very fragrant. Don’t let the garlic brown.

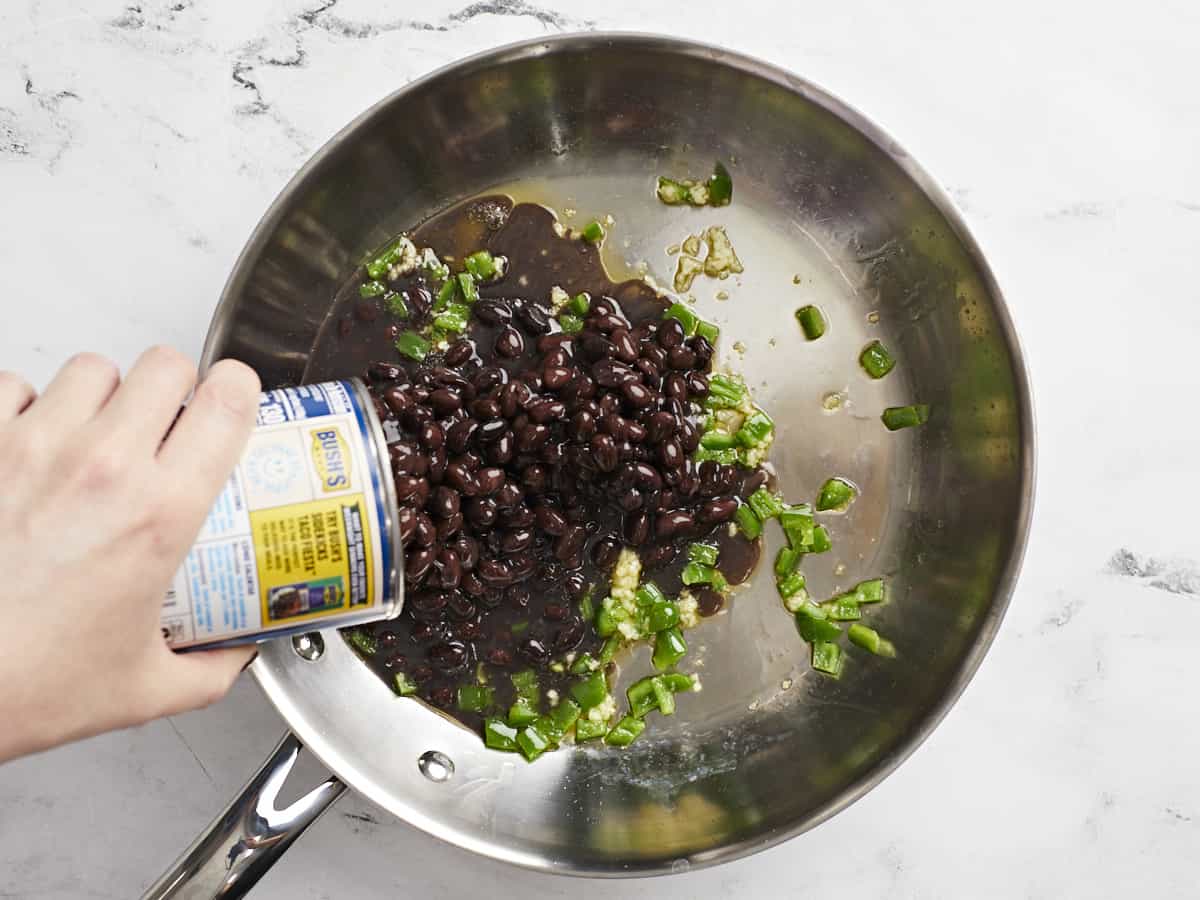
Black beans being poured into the skillet.

Add two undrained cans of black beans to the skillet along with ¼ cup water and 1 tsp cumin.

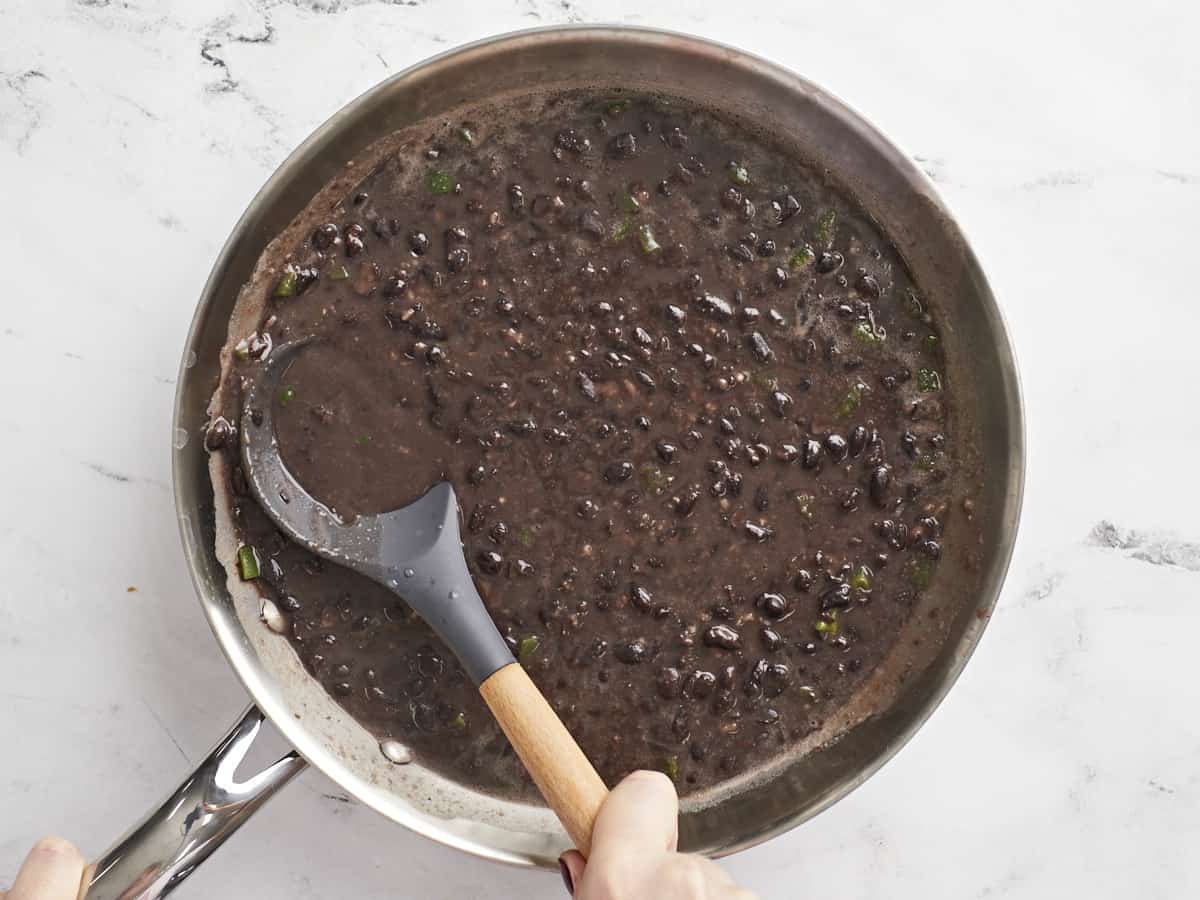
Simmered black beans in the skillet being smashed with the back of a spoon.

Stir everything to combine, then let the beans simmer over medium for about 5 minutes, stirring often to prevent the beans from sticking to the bottom of the skillet. After simmering for five minutes, use the back of a large spoon to smash some of the beans and thicken the sauce.

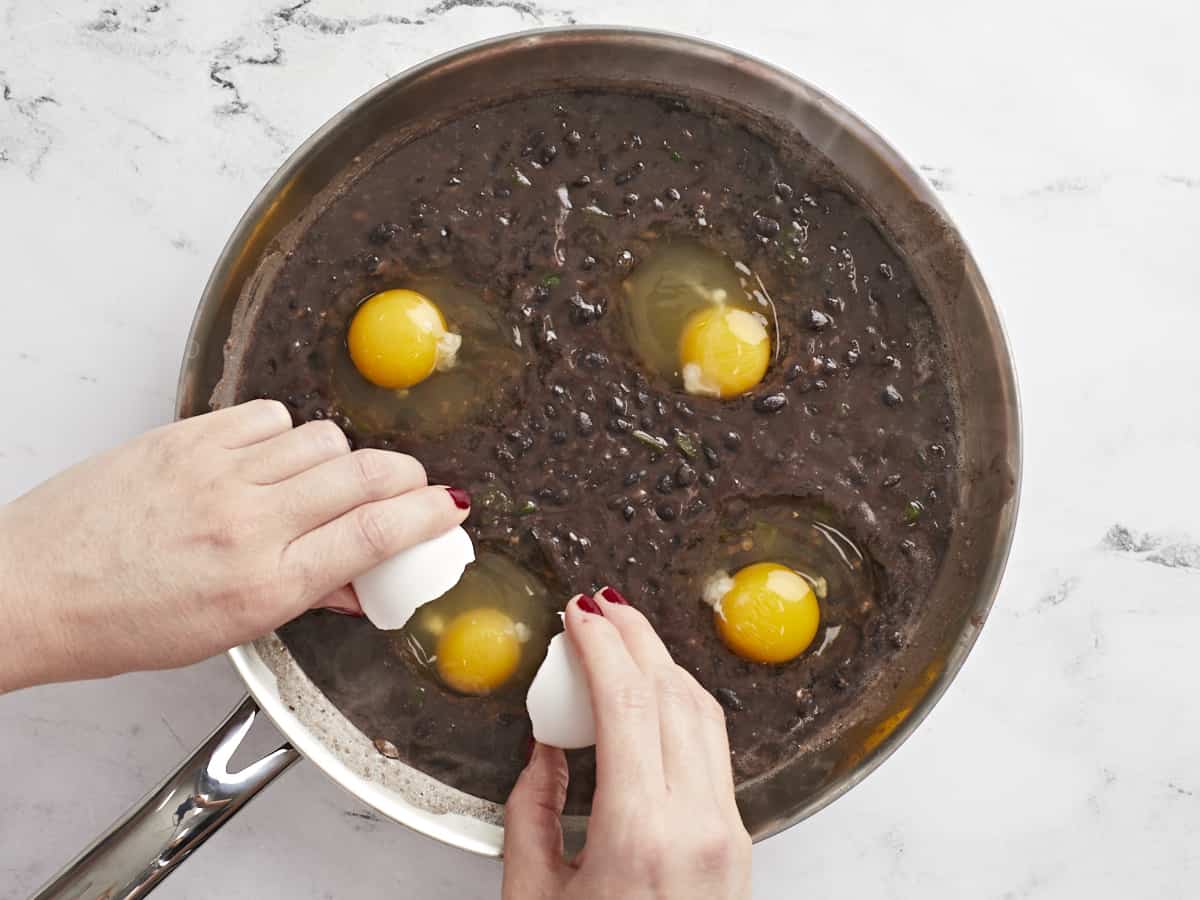
Eggs being cracked into the skillet of black beans.

Turn the heat down to medium-low and crack four large eggs onto the surface of the black beans.

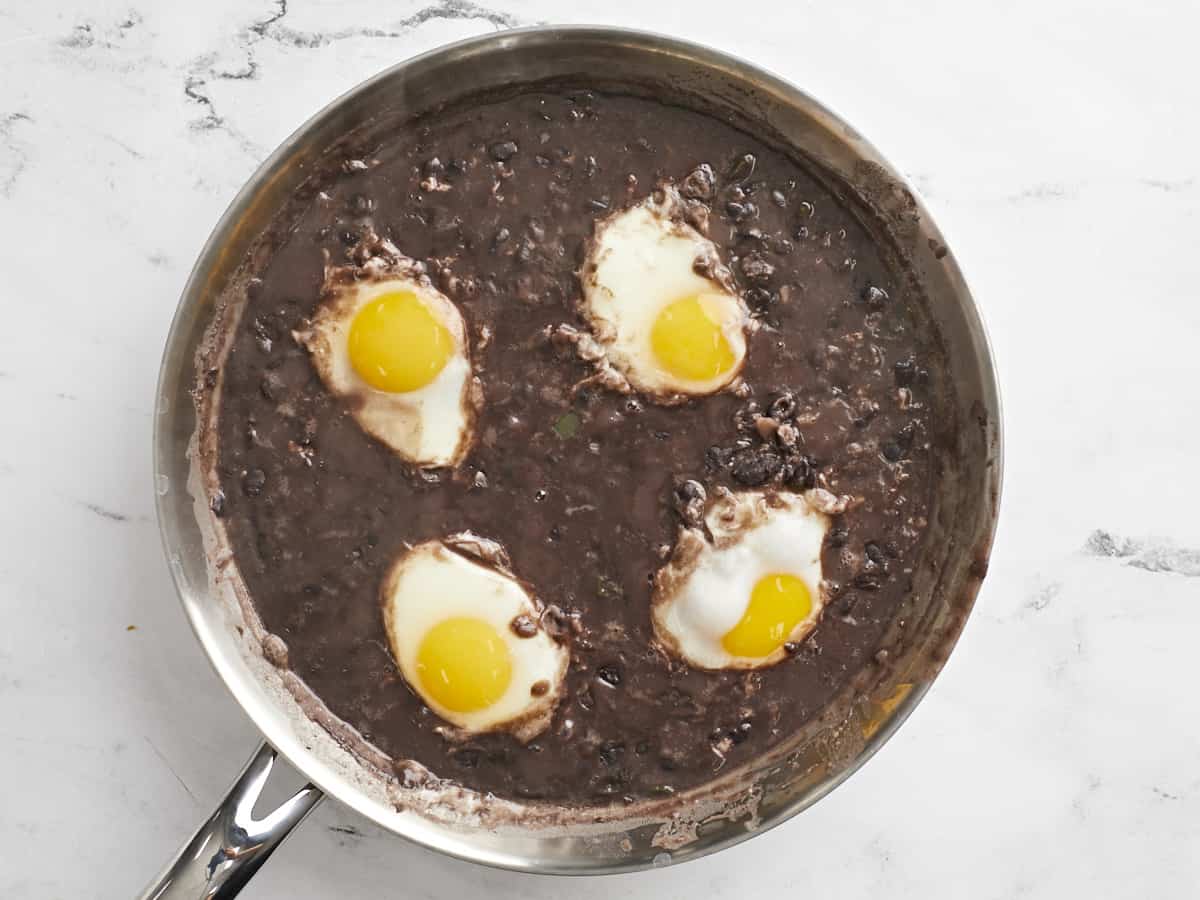
Cooked eggs in the black beans.

Partially cover the skillet with a lid and allow the eggs to simmer in the beans for 7-10 minutes, or until they are cooked to your liking (less time for runny yolks, more time for solid yolks). Cook time can vary depending on how hot the beans are and how cold the eggs are, so watch them closely.

Eggs and beans topped with cilantro and onion.

Top the eggs and black beans with chopped cilantro, diced red onion, and crumbled cotija cheese, or the toppings of your choice.

Overhead view of a bowl of black beans with eggs over rice with sliced avocado on the side.

Serve over cooked rice and enjoy!

The post Black Beans with Eggs appeared first on Budget Bytes.
Chipotle Chicken Tacos

Change up your Taco Tuesday with these spicy and smoky Chipotle Chicken Tacos. They’re a great weeknight meal or weekly meal prep!

The post Chipotle Chicken Tacos appeared first on Budget Bytes.
Kick up your Taco Tuesday recipe game with these fiery and deeply flavorful Chipotle Chicken Tacos! This easy recipe is fast, filling, and perfect for meal prep. It’s also a breeze to scale up, and you can even make it a little heartier by serving it with sides of Tomato Rice and Quick Seasoned Black Beans. Plus, it’s only a little over a dollar per serving.  I’m telling you, this one is clutch!  

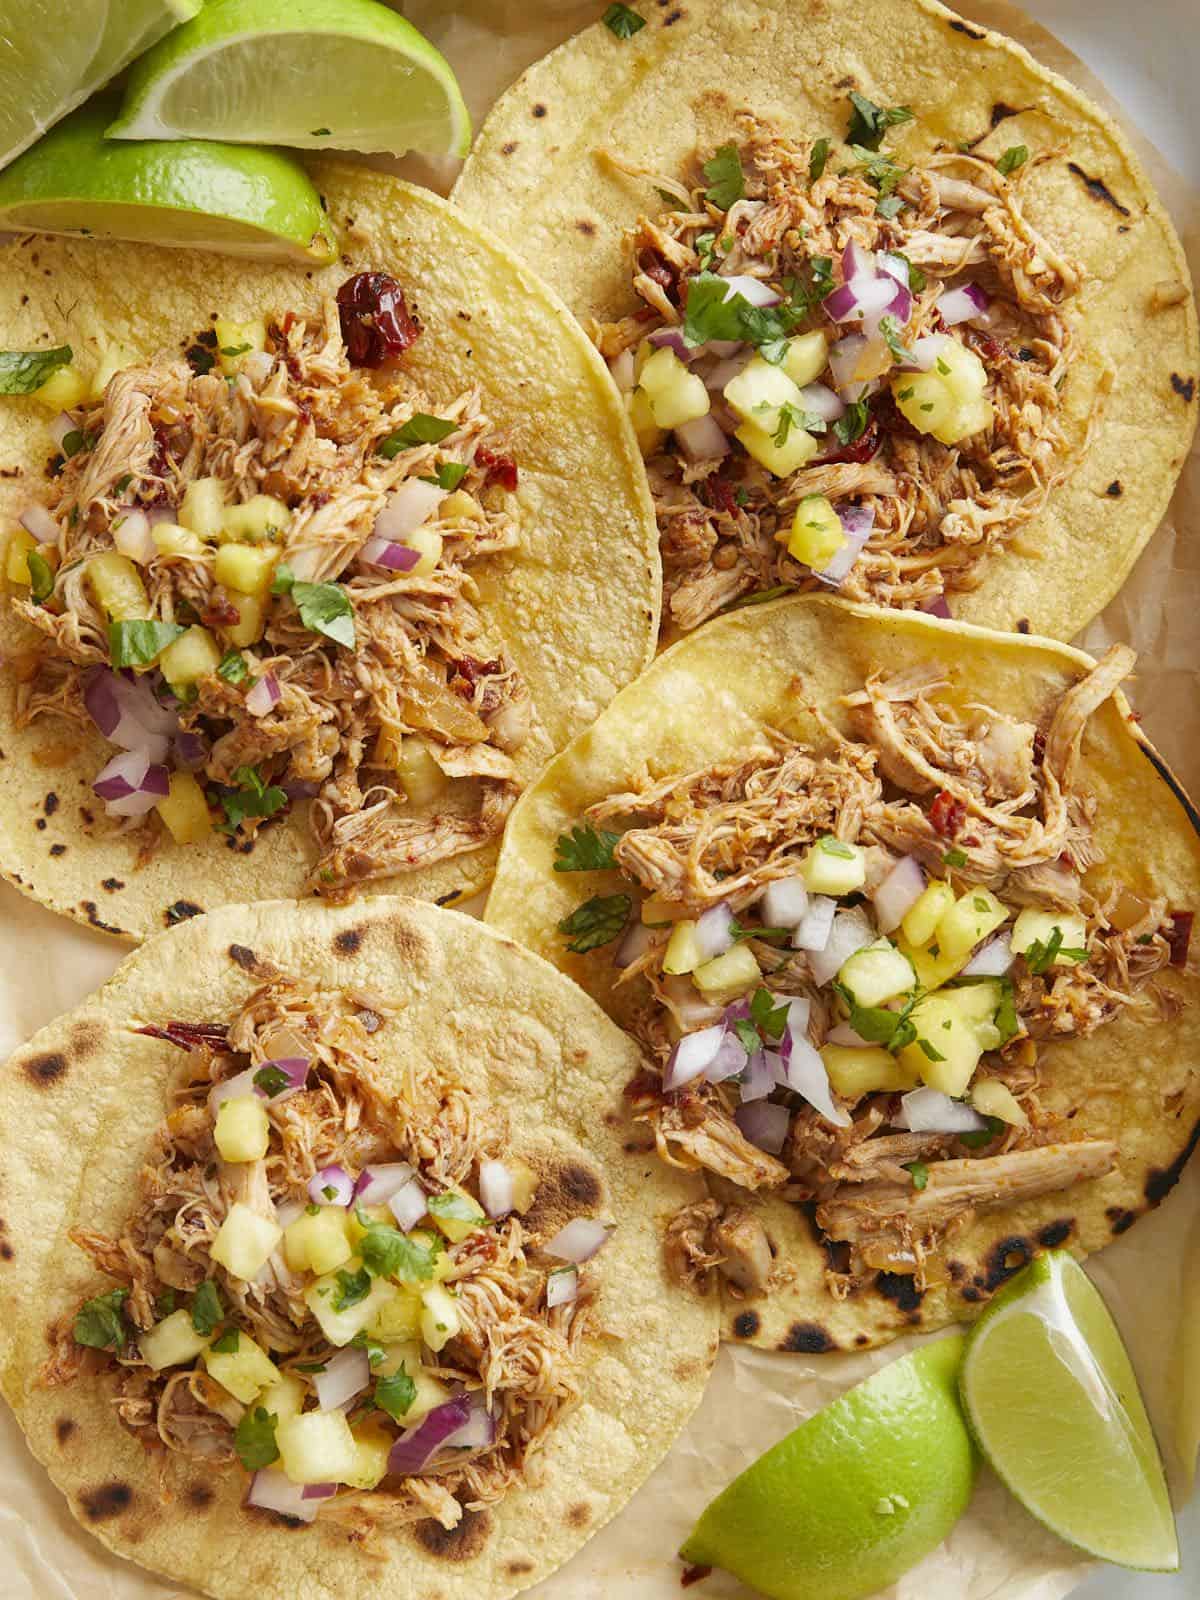
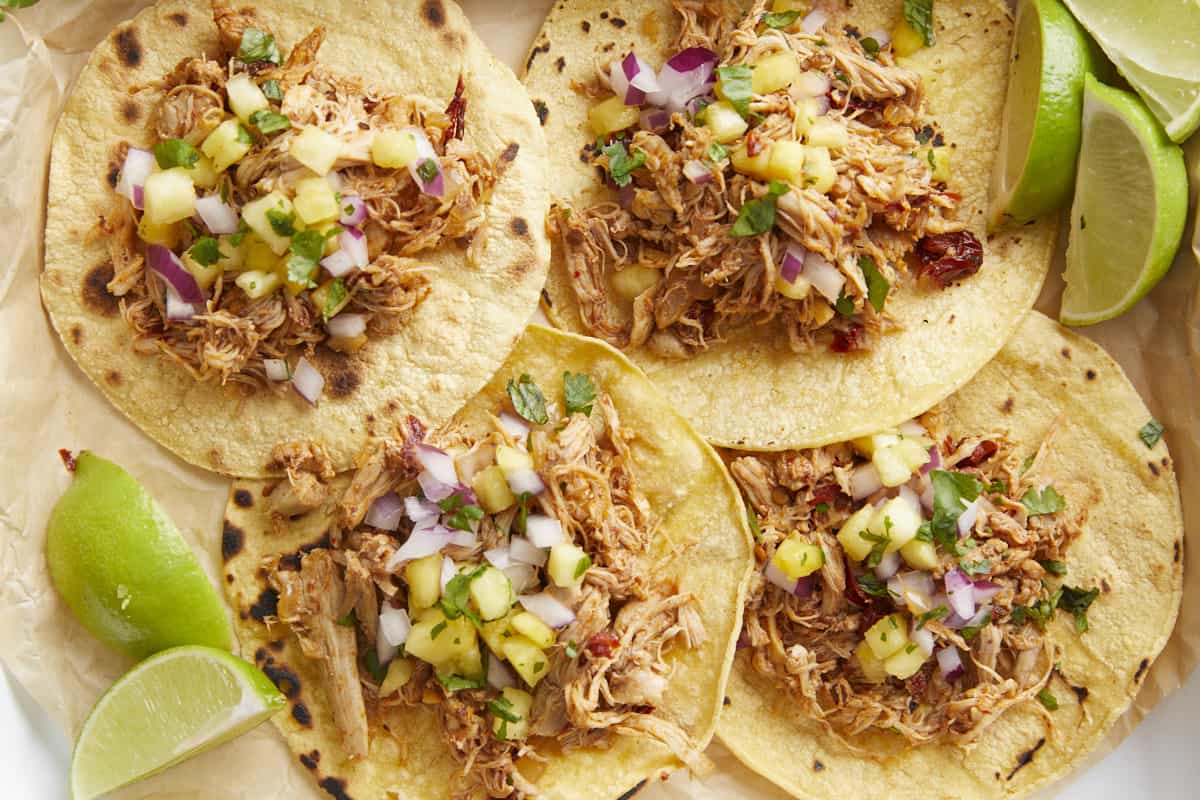
Close up overhead view of four chipotle chicken tacos on a tray with pineapple salsa.

What Are Chipotle Chicken Tacos? 

The base of this easy taco recipe is pulled chicken that’s been cooked in a fiery chipotle adobo sauce. A chipotle is a jalapeno pepper that’s smoked and dried. It has deep, earthy flavors and a bit of kick. When you buy chipotles in adobo, the adobo refers to the vinegary sauce the chiles are rehydrated in. 

While you can eat Chipotle Chicken Tacos as is, I pair them with Pineapple Salsa, which cuts beautifully through the fattiness of the chicken. Keep in mind that you can use this chicken for more than just tacos!  Mix pulled Chipotle Chicken into soups, rice, salads, and wraps. Use it as a topping for Nachos or Pizzas. There’s so much you can do with it.

Ingredients For Chipotle Chicken Tacos

Here’s what you’ll need to make Chipotle Chicken Tacos:

  • Chicken Thighs: Thighs are the cut of chicken we’re working with because they’re flavorful, fatty, and forgiving. Chicken breasts are more expensive, but they will still work here. I like to add a tablespoon of butter to the mix if I’m working with white meat to help keep it from drying out.
  • Garlic and Onion: Aromatics help scent and flavor our chicken. Substitute the garlic with ½ teaspoon of garlic powder and the onion with 1 tablespoon of onion powder or 3 tablespoons of onion flakes.
  • Bay Leaf: Adds depth to our braising broth, but feel free to skip it if you don’t have any.
  • Chipotles in Adobo: Add a spicy kick and deep smoky flavors to the sauce. If you want something with less kick, sub with our Enchilada Sauce recipe.
  • Corn tortillas: Are the base of our taco and hold everything together. Feel free to sub with flour tortillas or even pitas!
  • Pineapple Salsa: This tangy, fresh, and slightly sweet salsa pairs beautifully with the smoky and spicy flavors of the saucy chipotle chicken, as well as adding color and texture to the taco.

How To Serve Chipotle Chicken Tacos

This recipe is one of my favorites for a family-style taco night. I load the table with a platter of warm tortillas, a big bowl of pulled chipotle chicken and smaller plates loaded with garnishes like fresh cilantro, radish slices, Sour Cream, Guacamole, and Pineapple Salsa! You can also serve Pico De Gallo or Cowboy Caviar. Make this an even heftier meal with Tomato Rice and Quick Seasoned Black Beans.

How To Store Chipotle Chicken Tacos

Store pulled chicken in an airtight container for up to three days. You can freeze the chicken in an airtight container with a sheet of parchment or plastic directly on the surface of the chicken for up to 3 months. Thaw overnight in the fridge before reheating in a microwave or a pan set over medium heat until steaming.

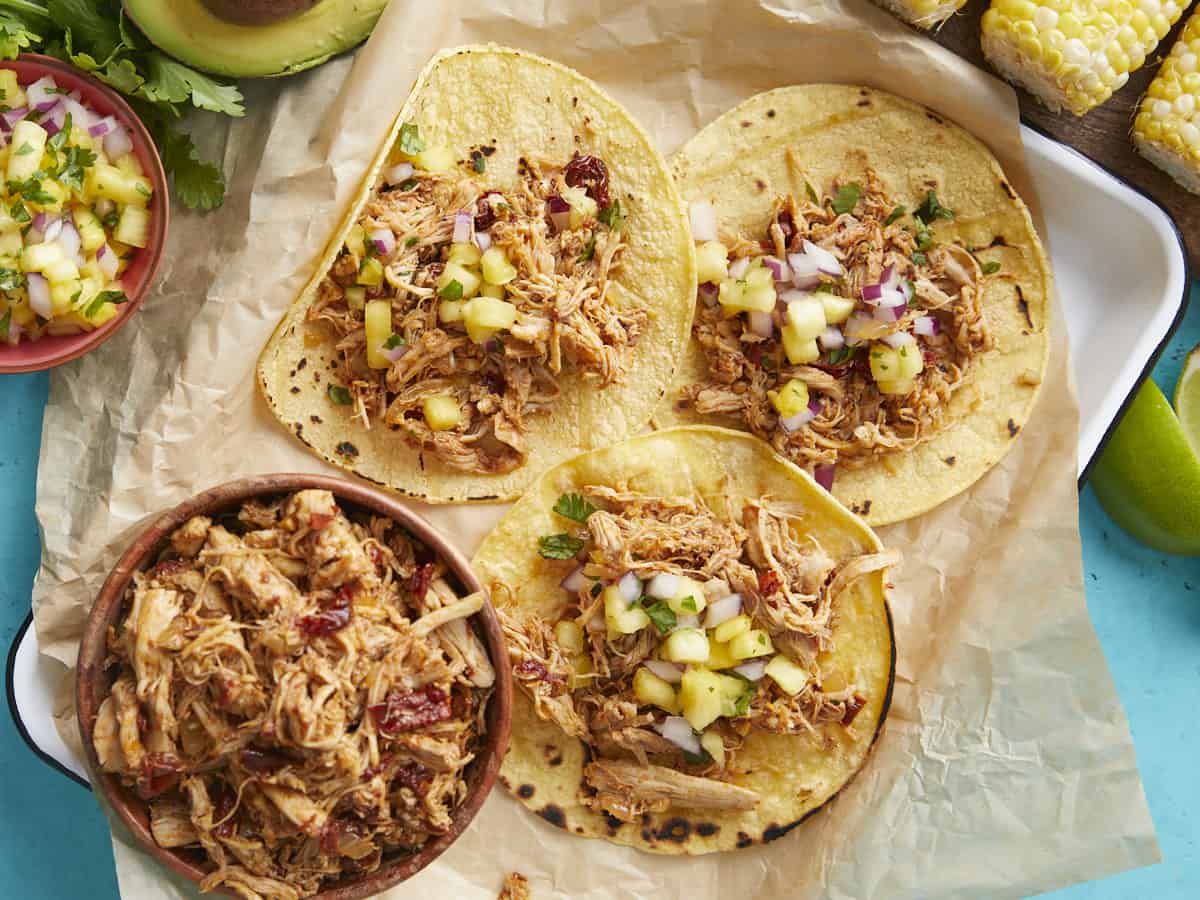
Overhead view of chicken tacos on a platter with a bowl of meat on the side.
Close up overhead view of chipotle chicken tacos with limes on the side.
Print

Chipotle Chicken Tacos

Change up your Taco Tuesday with these spicy and smoky Chipotle Chicken Tacos. They're a great weeknight meal or weekly meal prep!
Course Dinner, Lunch, Main Course
Cuisine American, Mexican
Total Cost $8.64 recipe / $1.44 serving
Prep Time 10 minutes
Cook Time 40 minutes
Total Time 50 minutes
Servings 12 tacos
Calories 186kcal

Ingredients

  • 4 boneless skinless chicken thighs $4.44
  • 4 cloves garlic, divided $0.32
  • 1 yellow onion, divided $0.33
  • 1 bay leaf $0.10
  • 4 peppercorns* $0.01
  • 1 tsp salt $0.05
  • 2 Tbsp olive oil $0.16
  • 2 oz. chipotle peppers in adobo** $0.49
  • 12 5-inch corn tortillas $0.72

Pineapple Salsa (optional)

  • 2 cups chopped pineapple (fresh or frozen) $0.75
  • 1/4 red onion, chopped $0.17
  • 1 jalapeño $0.11
  • 1 lime $0.59
  • 1/4 bunch cilantro (about ¼ cup) $0.35
  • 1 tsp salt (or to taste) $0.05

Instructions

  • Add the chicken thighs, 2 cloves of garlic, 1/2 of the onion, bay leaf, peppercorns, and salt to a pan, then add water to cover (about 4 cups). Place the pan over medium heat. Cover it, and cook for 20 minutes, or until the chicken is at an internal temperature of 160°F and fork tender.
  • Remove the chicken thighs from the broth. Reserve the broth. Shred the chicken with two forks.
  • Add oil to a saucepan on medium heat. Dice the remaining ½ onion and add it to the pan. Mince the remaining 2 cloves of garlic and add to the pan. Cook for about 2 minutes, until the onions steam and the garlic is fragrant.
  • Once the onions and garlic are fragrant, chop the chipotles in their sauce and add them to the pan. Stir well to incorporate. Then add the pulled chicken and 1/4 cup of the reserved broth. Combine thoroughly and taste. For more heat, mix in more adobo sauce. For saucy pulled chicken, add a touch more of the broth and stir. Once the sauce has thickened to a velvety consistency, take the chicken off the heat.
  • To make the pineapple salsa, finely chop the pineapple, onion, jalapeño, and cilantro. Combine the chopped pineapple, onion, juice of one lime, cilantro, and salt to taste.
  • Assemble the tacos. Add 1/4 cup of pulled chicken to a corn tortilla and top with pineapple salsa. Serve these babies up and enjoy a weeknight win!

See how we calculate recipe costs here.

Notes

*If you have a pepper grinder, open it to retrieve individual peppercorns, or substitute with ⅛ tsp cracked pepper.
**This is about ⅓ of a 7oz. can.

Nutrition

Serving: 2tacos | Calories: 186kcal | Carbohydrates: 14g | Protein: 9g | Fat: 11g | Sodium: 433mg | Fiber: 2g
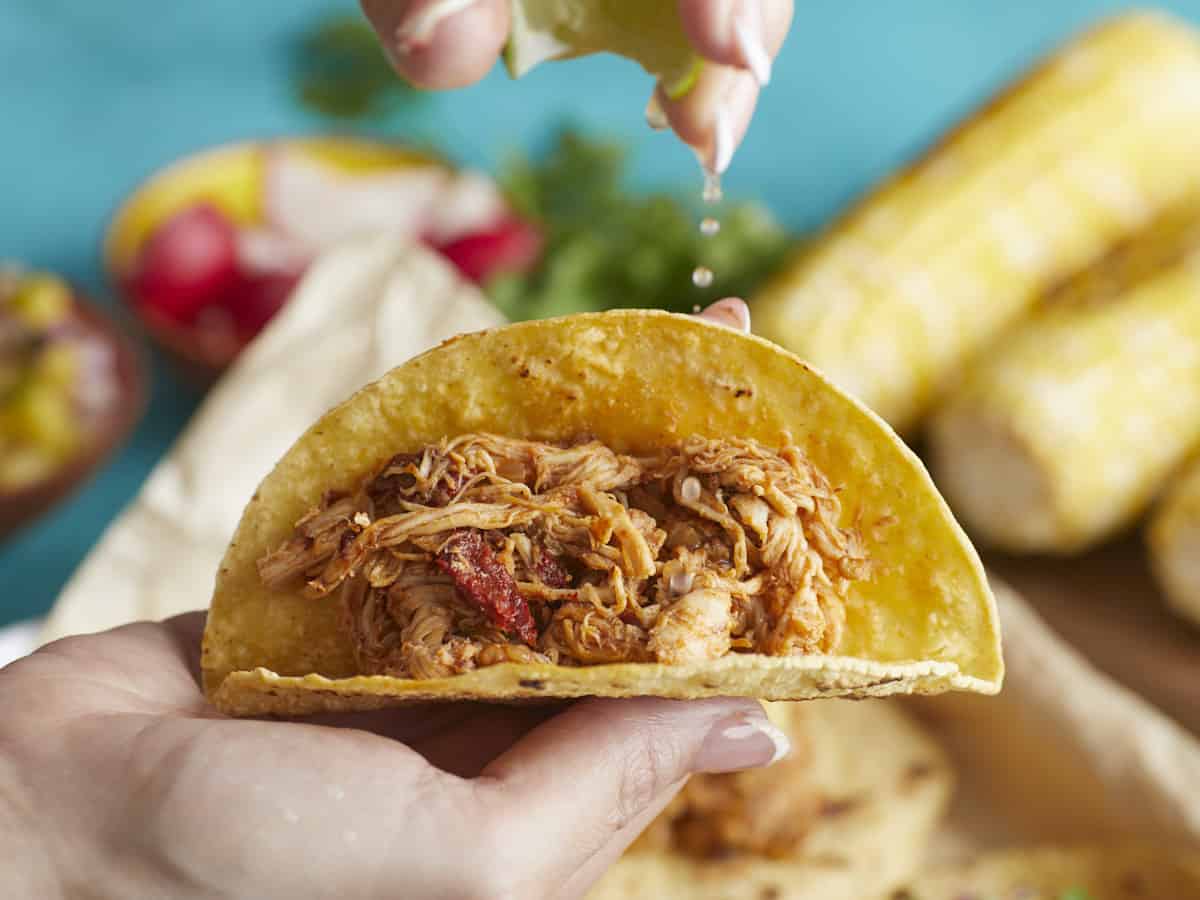
A taco held in a hand, lime being squeezed over top.

How to Make Chipotle Chicken Tacos – Step by Step Photos

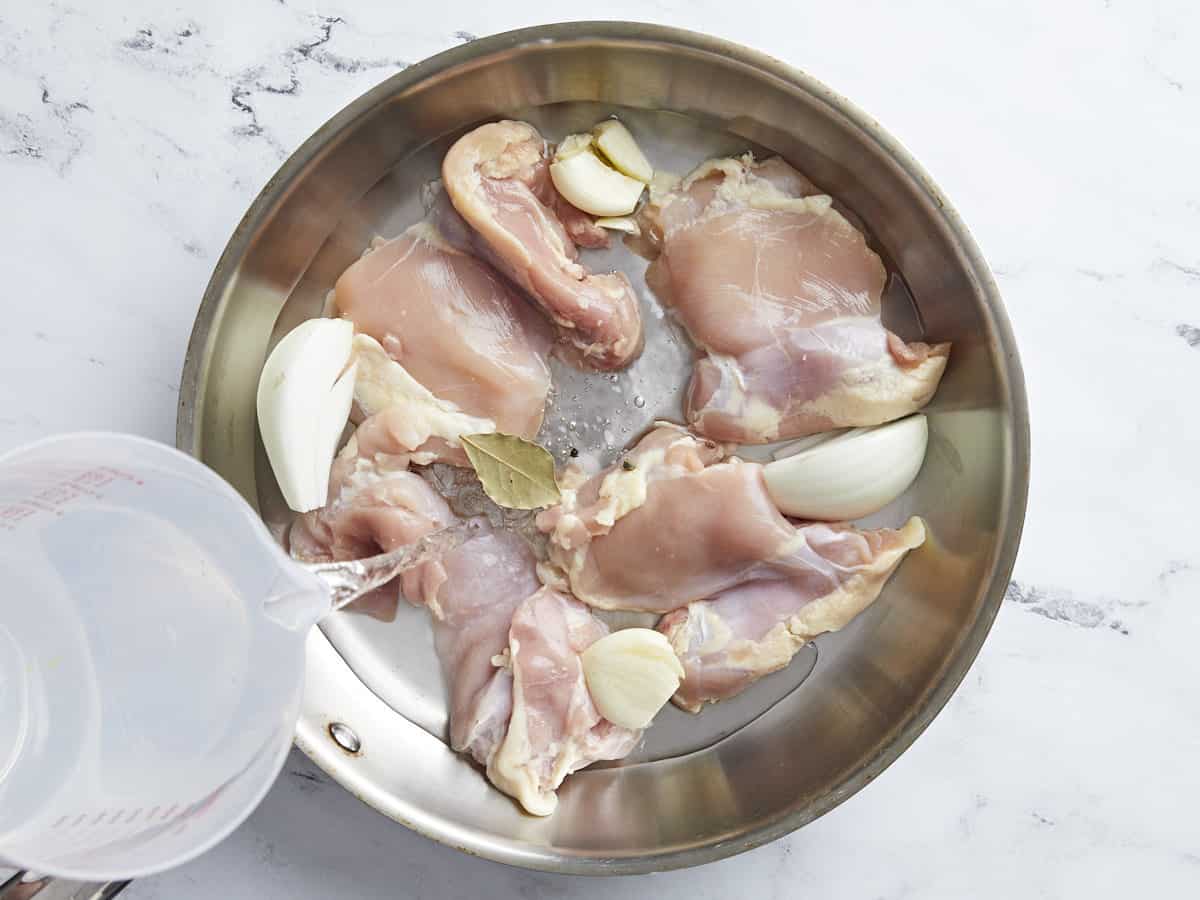
Chicken thighs in a pan with onion and garlic, water being poured in.

Add 4 boneless skinless chicken thighs, 2 cloves garlic, 1/2 of a yellow onion, 1 bay leaf, 4 peppercorns, and 1 teaspoon salt to a pan and add water to cover (about 4 cups). Place the pan over medium heat. Cover it, and cook for 20 minutes, or until the chicken is at an internal temperature of 160°F and fork tender.

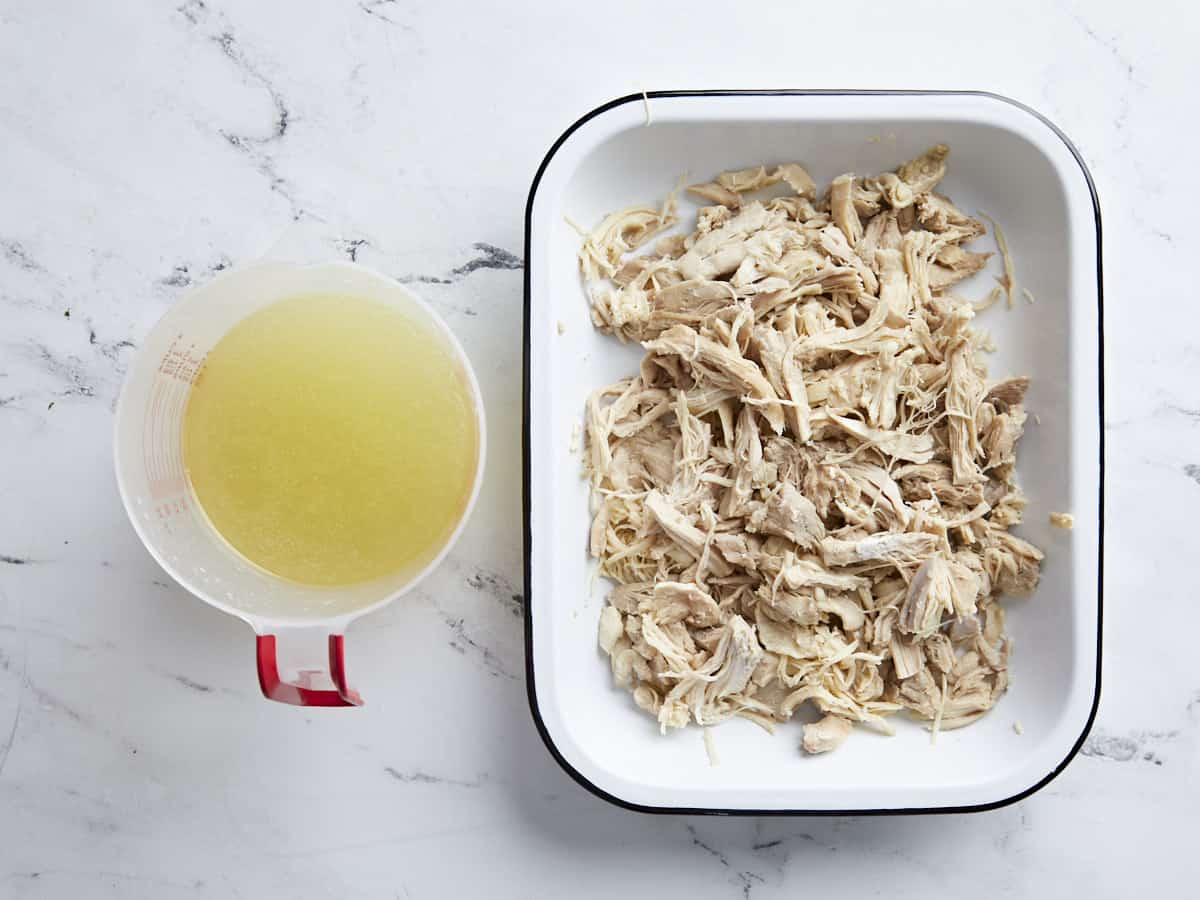
Shredded chicken in a dish, a measuring cup with broth on the side.

Remove the chicken thighs from the broth. Reserve the broth. Shred the chicken with two forks.

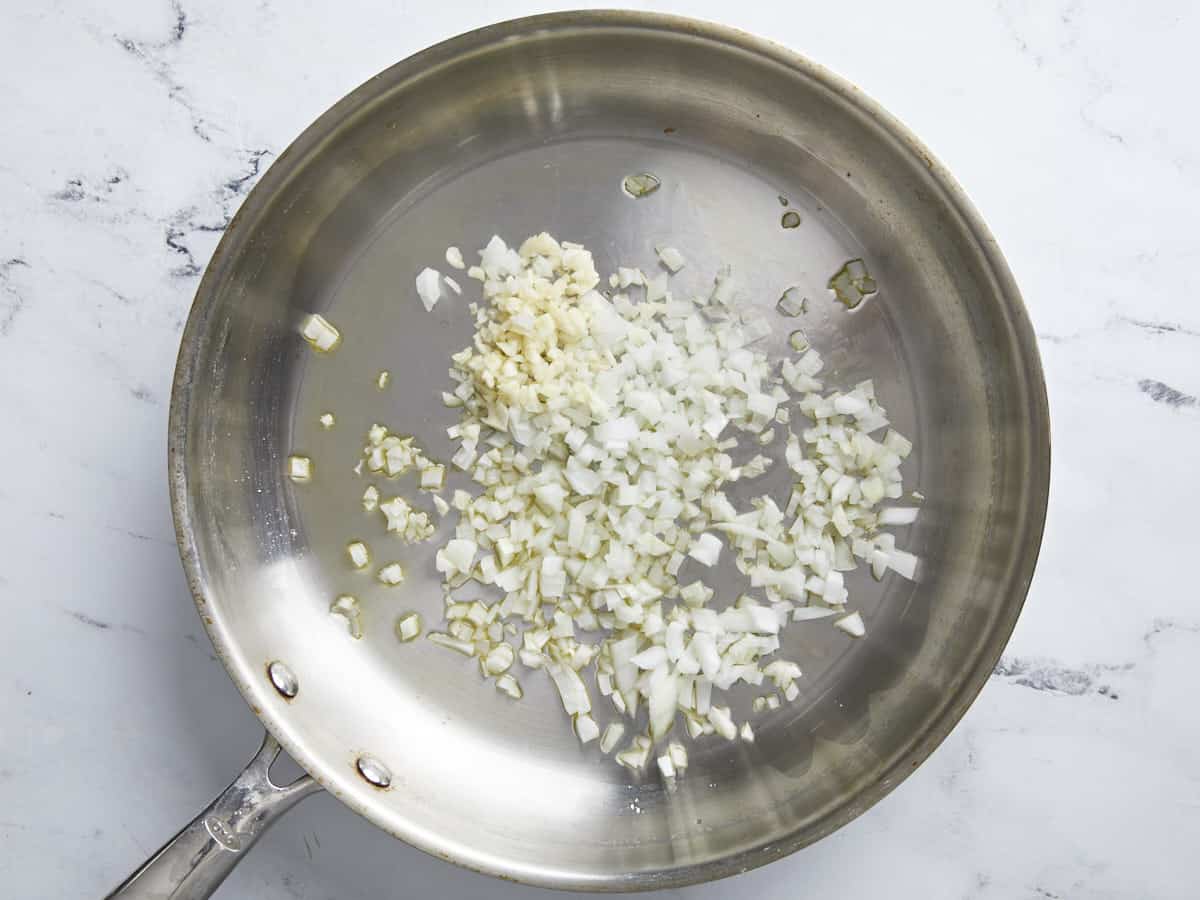
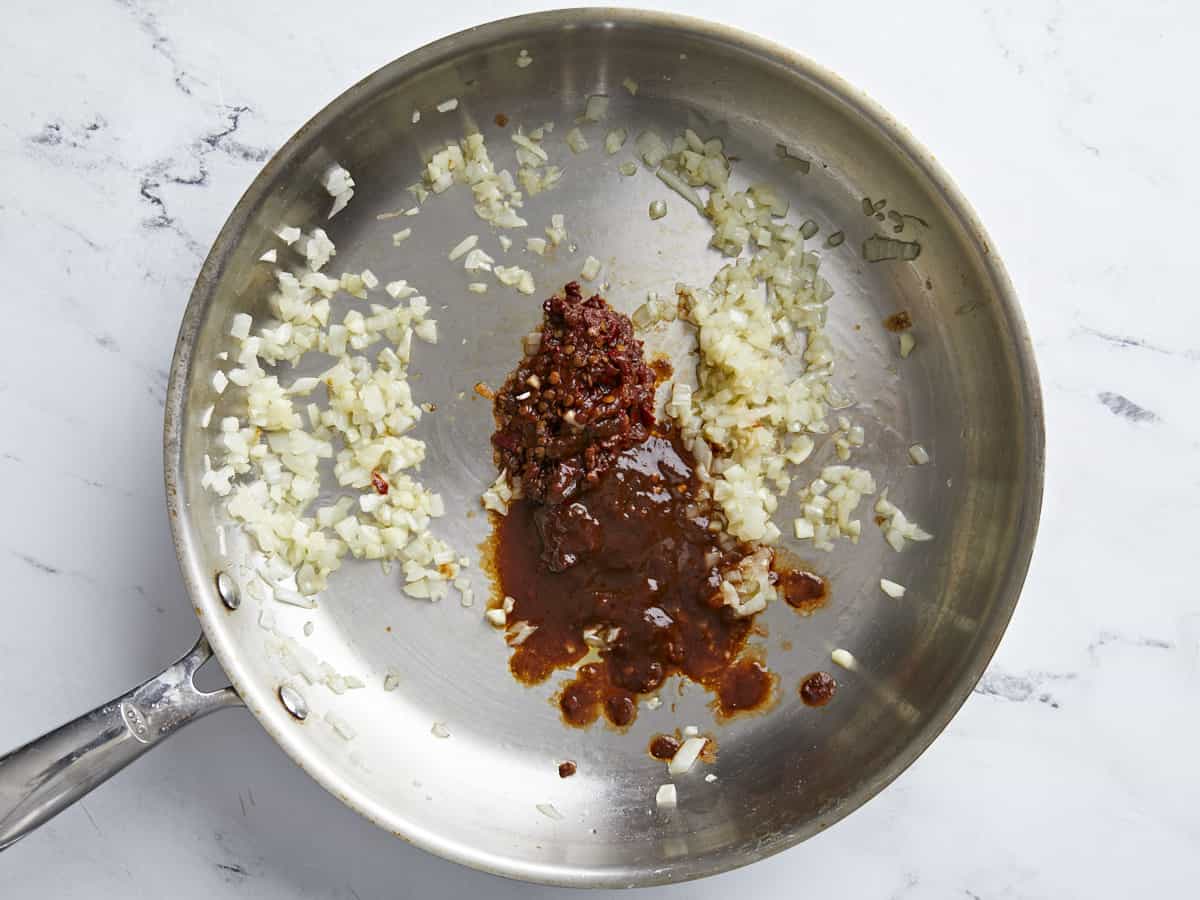
Onion and garlic in a skillet.

Add oil to a saucepan on medium heat. Dice the remaining half onion and add it to the pan. Mince the remaining 2 cloves of garlic and add to the pan. Cook for about 2 minutes, until the onions steam and the garlic is fragrant.

Chipotle peppers added to the skillet with onion and garlic.

Once the onions and garlic are fragrant, chop 2 ounces of chipotles in their sauce and add them to the pan. Stir well to incorporate.

Pulled chicken added to the skillet with the chipotles.

Then add the pulled chicken and 1/4 cup of the reserved broth to the skillet. Combine thoroughly and taste. For more heat, mix in more adobo sauce. For saucy pulled chicken, add a touch more of the broth and stir.

Finished chipotle chicken in the skillet.

Once the sauce has thickened to a velvety consistency, take the chicken off the heat.

Close up overhead view of chipotle chicken tacos with limes on the side.

The post Chipotle Chicken Tacos appeared first on Budget Bytes.

Pickled Jalapeños

These quick pickled jalapeños are the perfect way to top all of your favorite foods, including nachos, sandwiches, pizza, chili, and more.

The post Pickled Jalapeños appeared first on Budget Bytes.
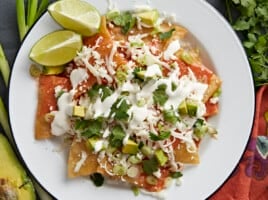
O.M.G. I thought I was obsessed with pickled red onions, but then I made these pickled jalapeños and I literally can’t stop eating them. Every time I go in the fridge I have to pop one or two in my mouth, in addition to adding a few on top of everything I’ve been eating. 😅 These little guys are addictive! So, if you’ve got a pepper plant that is still producing or are looking for a way to use up some leftover jalapeños from another recipe, trust me, you NEED to make these pickled jalapeños.

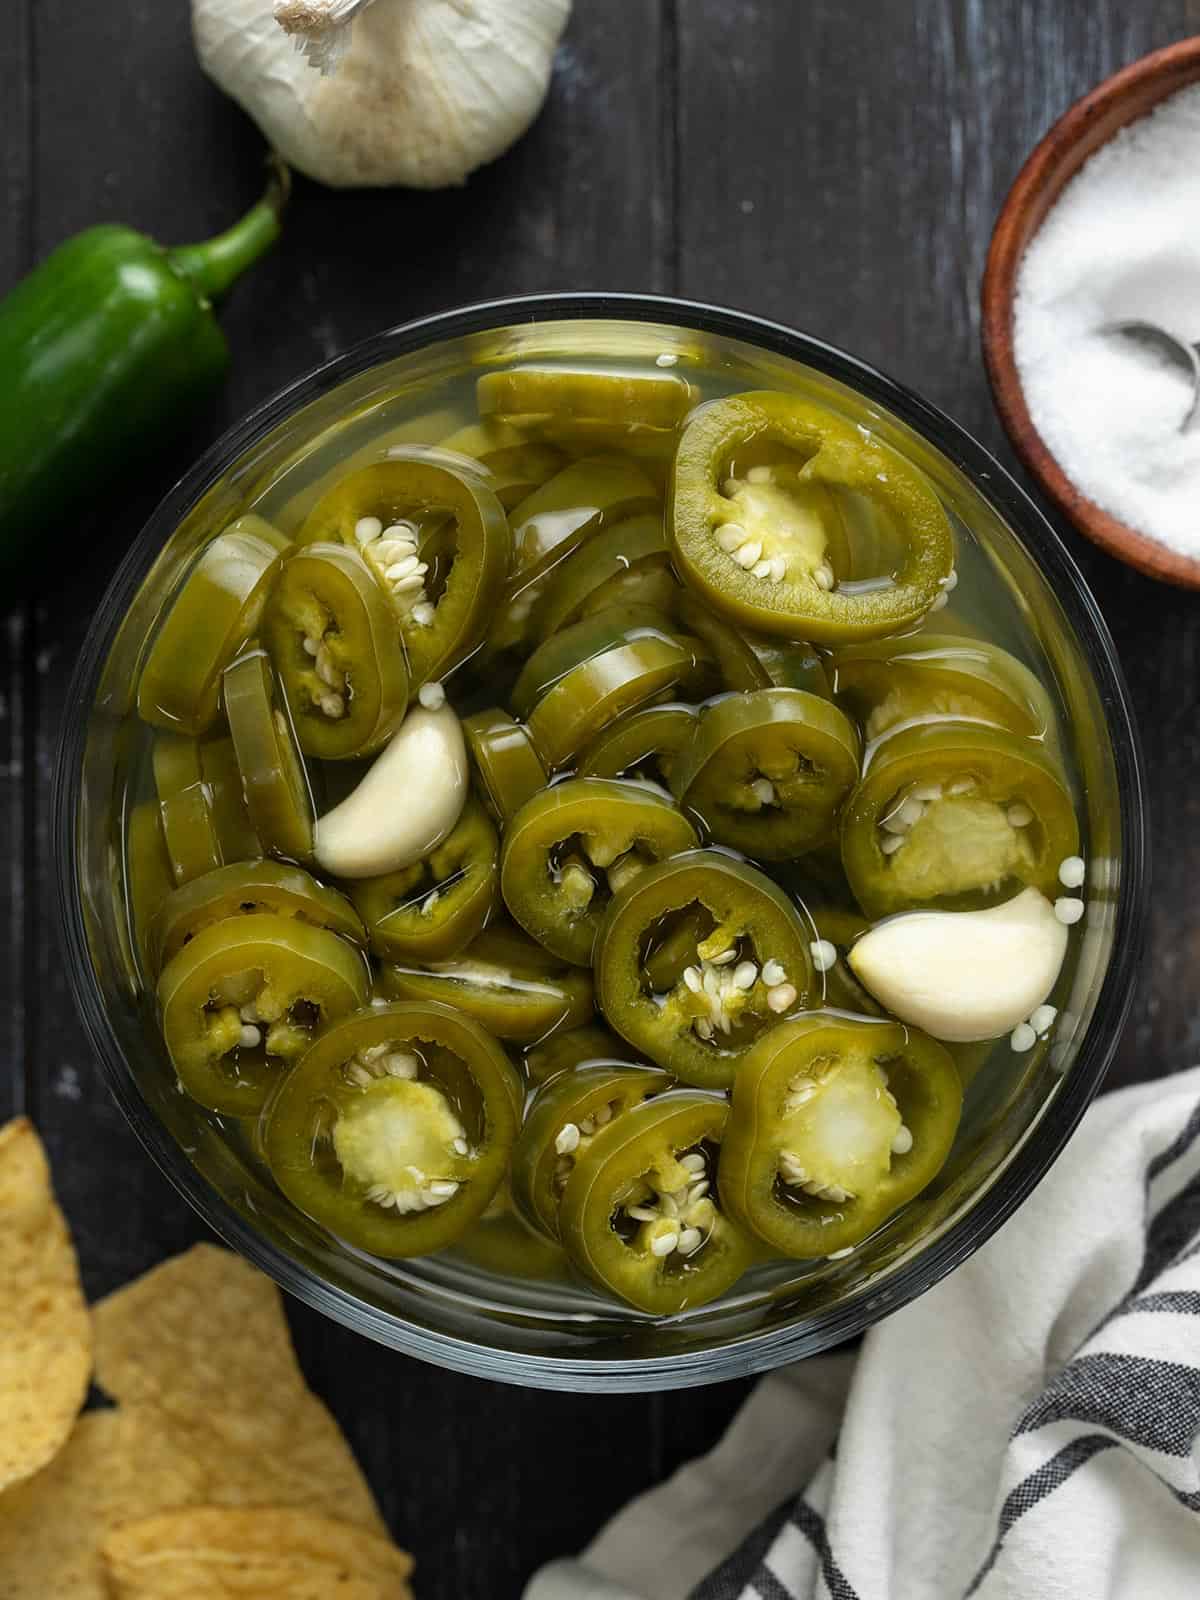
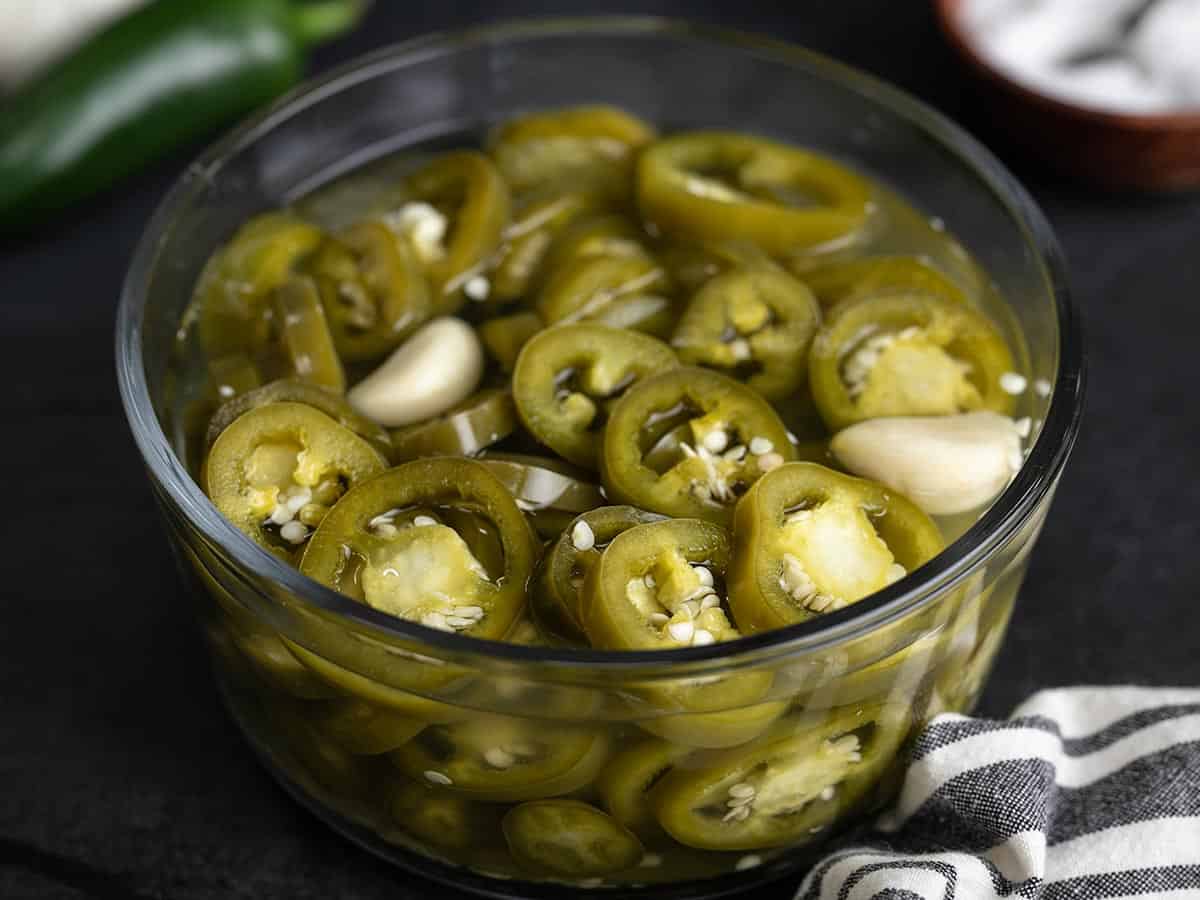
Overhead view of a bowl full of pickled jalapeños.

What are Quick Pickles?

There are two main ways to pickle vegetables: fermentation and quick pickling in a vinegar-based brine. Fermentation pickling takes days to weeks to accomplish, as natural bacteria produce acid that combines with added salt to create a brine. Quick pickles only take minutes because they start with a pre-made acidic brine made with vinegar and salt. The method I used for these pickled jalapeños is quick pickling, which I love because it’s so fast and convenient. Just keep in mind that quick pickles do not contain live cultures.

Ingredients for Pickled Jalapeños

Here’s what you’ll need to make quick pickled jalapeńos:

  • Fresh jalapeños: You can use green, red, or a combination of both! The recipe is written for one pound of jalapeños, but you can easily reduce the batch size if you don’t have that many peppers. Simply change the number of servings in the recipe card below and the amount of ingredients will auto-adjust for you.
  • Garlic: Adding a clove of garlic (or a few!) creates a nice depth to the flavor of the pickled jalapeños.
  • Vinegar: I used plain white vinegar to keep the flavor crisp and clean, but you can experiment with other flavors of vinegar like apple cider vinegar, red wine vinegar, or rice vinegar. I do not suggest using a sweet vinegar, like balsamic for this recipe.
  • Salt: Salt flavors the brine and aids the vinegar in preserving the jalapeños.
  • Sugar: A little bit of sugar helps balance the flavors in the pickled jalapeños, primarily the acidic vinegar. Don’t worry, we don’t use enough to make them sweet, just enough to provide balance.
  • Water: Adding a little bit of water to the brine softens the flavor of the brine just enough so you don’t feel like you’re eating straight vinegar, but not enough to reduce the preservation abilities of the vinegar.

What Else Can I Add?

If you want to experiment with your pickled jalapeños, you can try adding some of the following ingredients: a sliced carrot, whole peppercorns, ground cumin or cumin seeds, sliced shallots, or oregano.

How to Use Pickled Jalapeños

Aside from just sneaking one or two slices from the jar, here are some of my favorite foods to top with pickled jalapeños:

How Long Do Pickled Jalapeños Last?

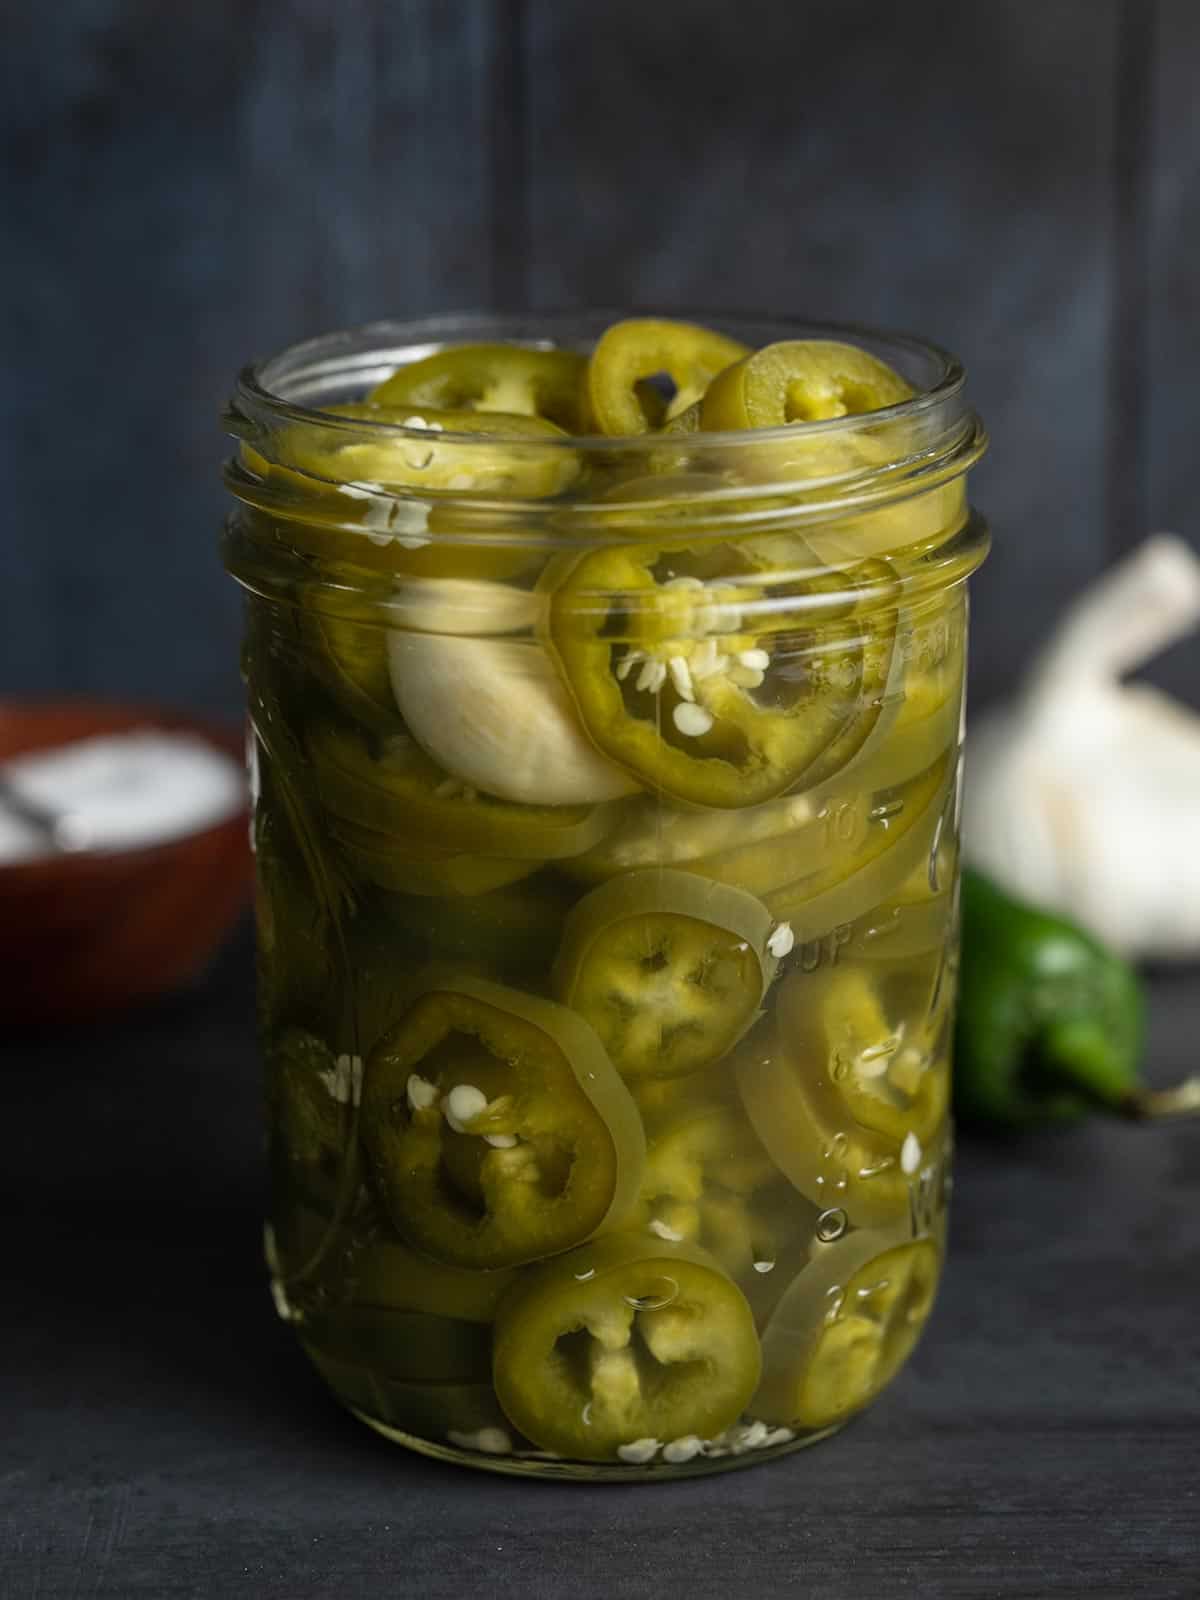
Keep these pickled jalapeños in an air-tight glass or plastic container in the refrigerator for up to two months (if you don’t eat them all first!). Use a fork or tongs to remove the jalapeños from the container to keep the brine as sterile as possible.

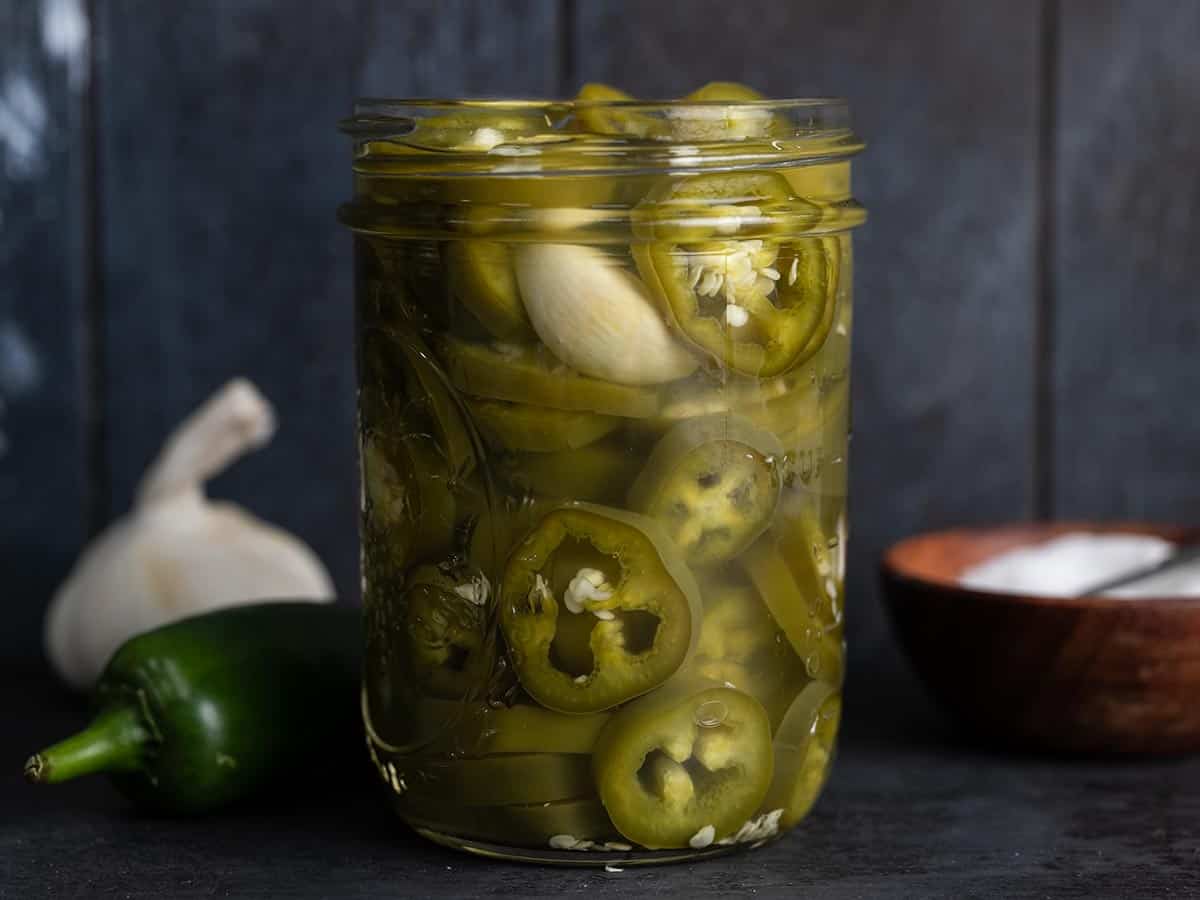
Side view of a jar full of pickled jalapeños.
Overhead view of a bowl full of pickled jalapeños.
Print

Pickled Jalapeños

These quick pickled jalapeños are the perfect way to top all of your favorite foods, including nachos, sandwiches, pizza, chili, and more.
Course condiment
Cuisine American
Total Cost $2.30 recipe / $0.29 serving
Prep Time 10 minutes
Cook Time 2 minutes
Marinate Time 30 minutes
Total Time 42 minutes
Servings 8 (¼ cup each)
Calories 32kcal

Ingredients

  • 1 lb. jalapeños $1.49
  • 2 cloves garlic $0.16
  • 1.5 cups white vinegar $0.52
  • 1/2 cup water $0.00
  • 1 Tbsp salt $0.10
  • 1 Tbsp sugar $0.03

Instructions

  • Wash and slice the jalapeños. Peel the garlic.
  • Add the vinegar, water, salt, and sugar to a medium sauce pot. Bring the mixture up to a boil over medium-high heat, stirring to dissolve the salt and sugar.
  • Once the brine reaches a boil, add the jalapeños and garlic. Turn the heat off, place a lid on the pot, and let the peppers marinate in the brine for 30 minutes. Stir them occasionally to make sure they all spend adequate time under the brine. Replace the lid each time.
  • After marinating in the brine for 30 minutes the peppers will change from bright green to olive green. Transfer the peppers to a non-reactive (glass or plastic) air-tight container, then store in the refrigerator for up to two months.

See how we calculate recipe costs here.

Notes

*The nutrition facts given include the brine, which is not usually consumed, so the sodium levels may be inflated.

Nutrition

Serving: 0.25cup | Calories: 32kcal | Carbohydrates: 5g | Protein: 1g | Fat: 0.2g | Sodium: 876mg | Fiber: 2g
Side view of a bowl full of pickled jalapeños.

How to Make Pickled Jalapeños – Step by Step Photos

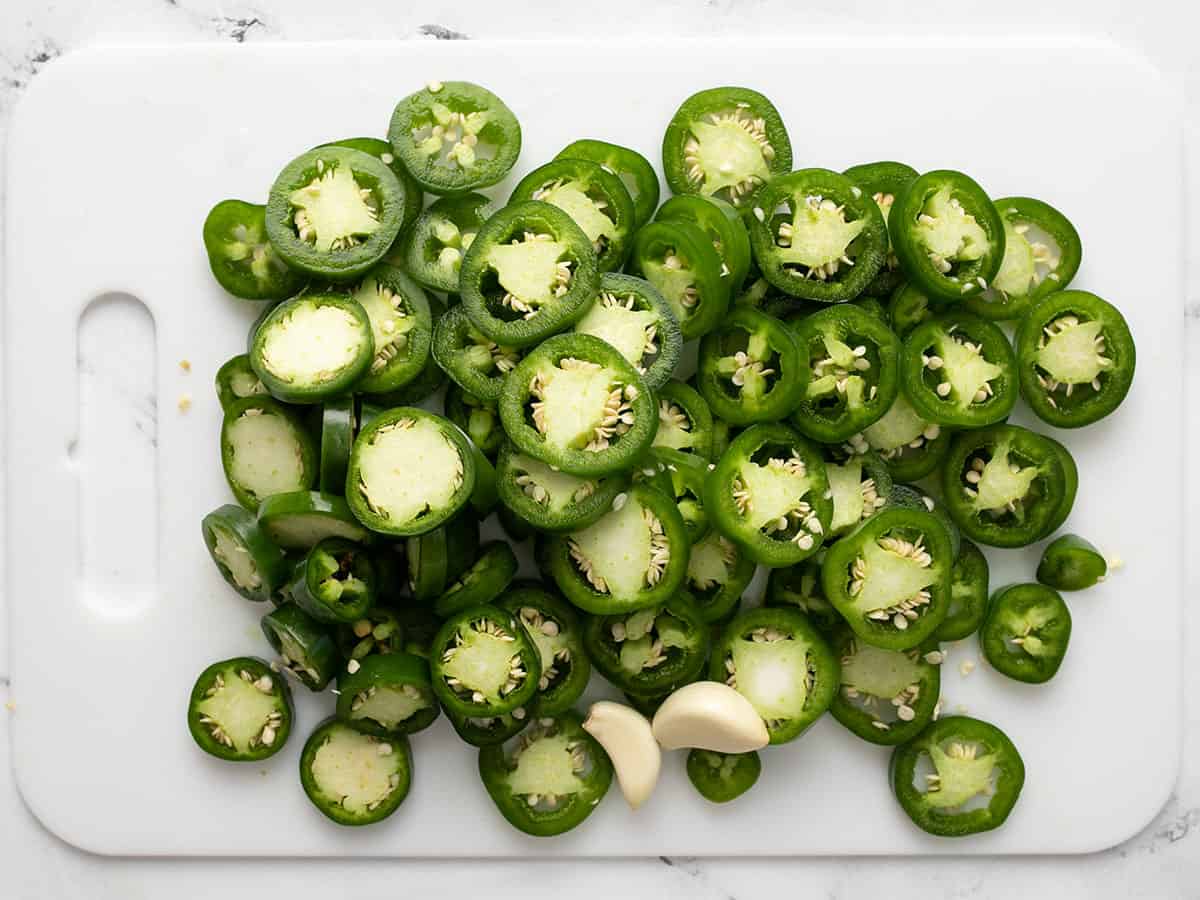
Sliced jalapeños and peeled garlic on a cutting board.

Wash then slice one pound of fresh jalapeños. Peel two (or more) cloves of garlic. Feel free to measure with your heart when it comes to the garlic!

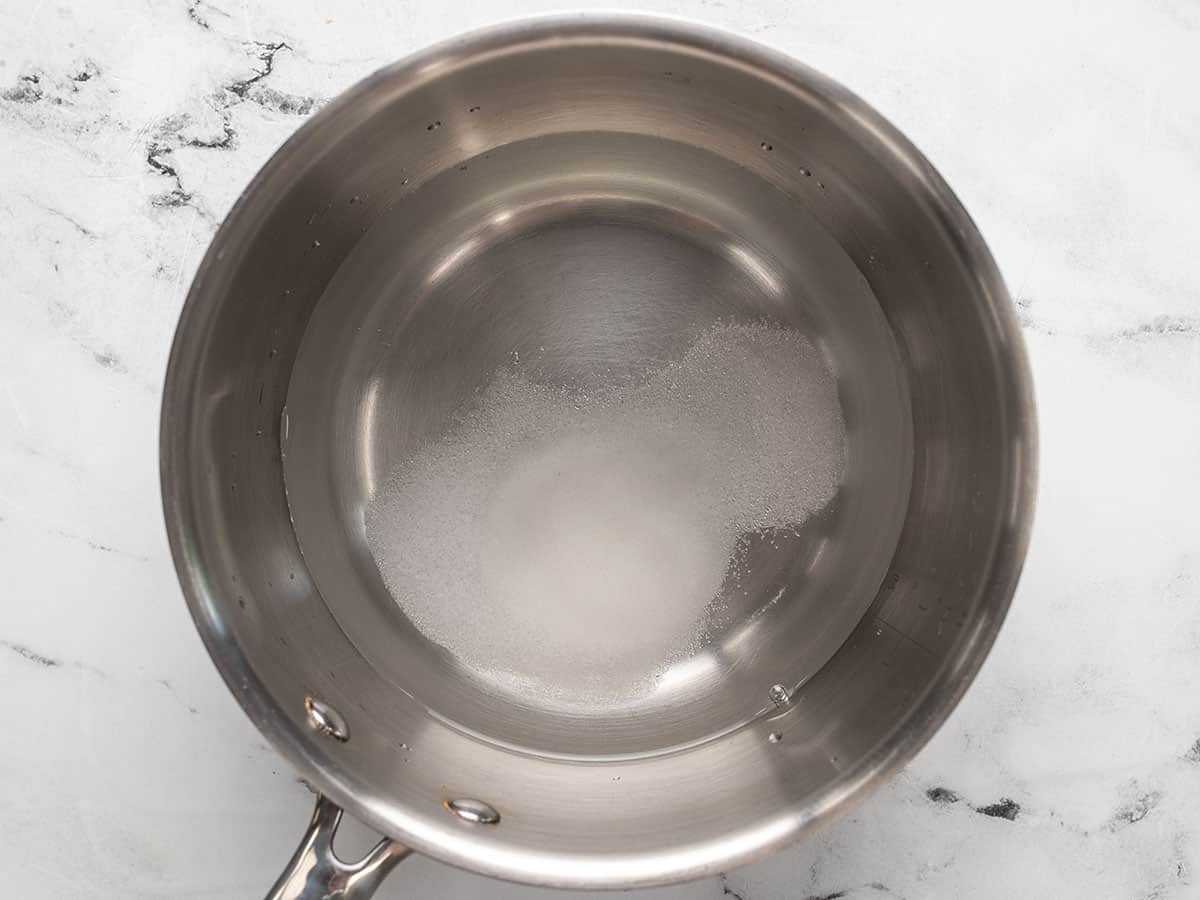
Vinegar, water, salt, and sugar in a sauce pot.

Add 1.5 cups white vinegar, ½ cup water, 1 Tbsp salt, and 1 Tbsp sugar to a medium saucepot. Bring the mixture up to a boil over medium-high heat, stirring to dissolve the salt and sugar.

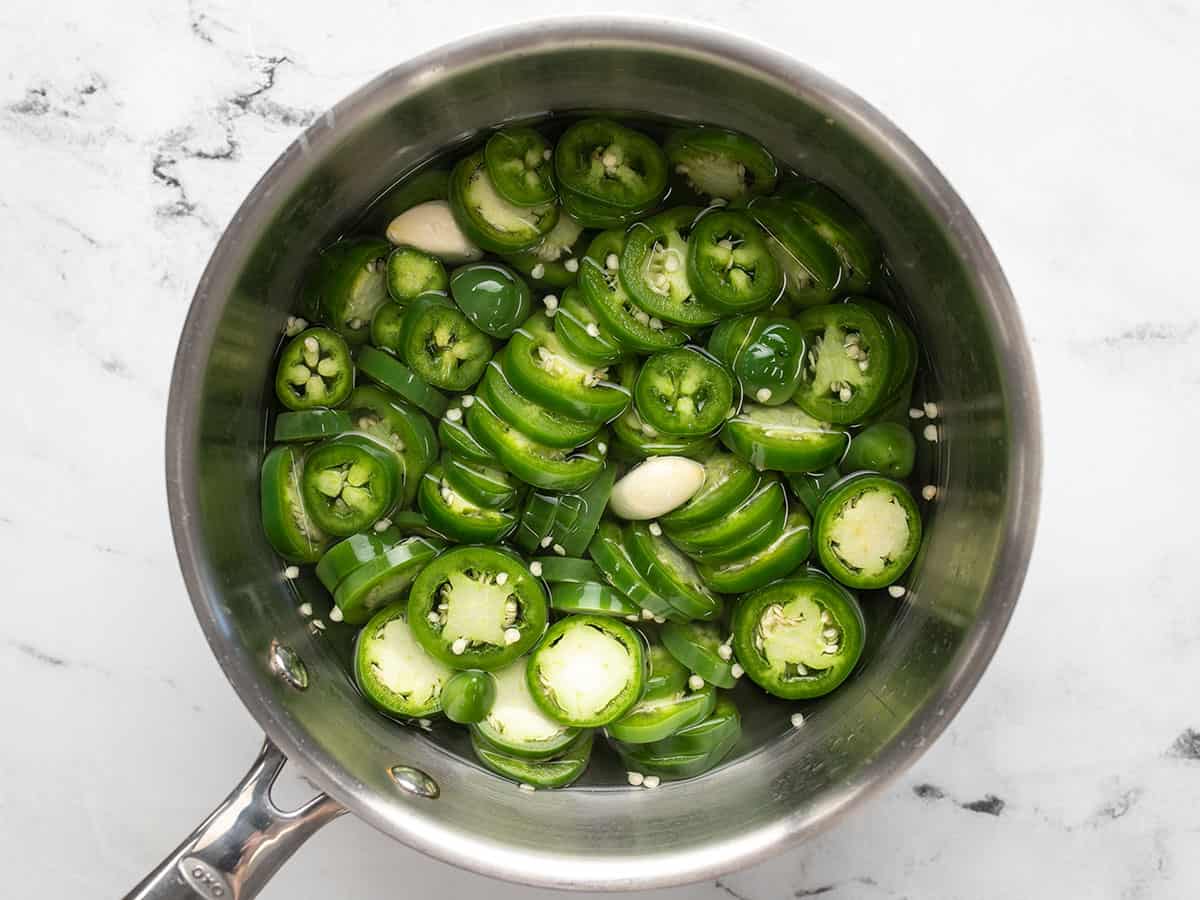
Sliced jalapeños and garlic added to the sauce pot with the brine.

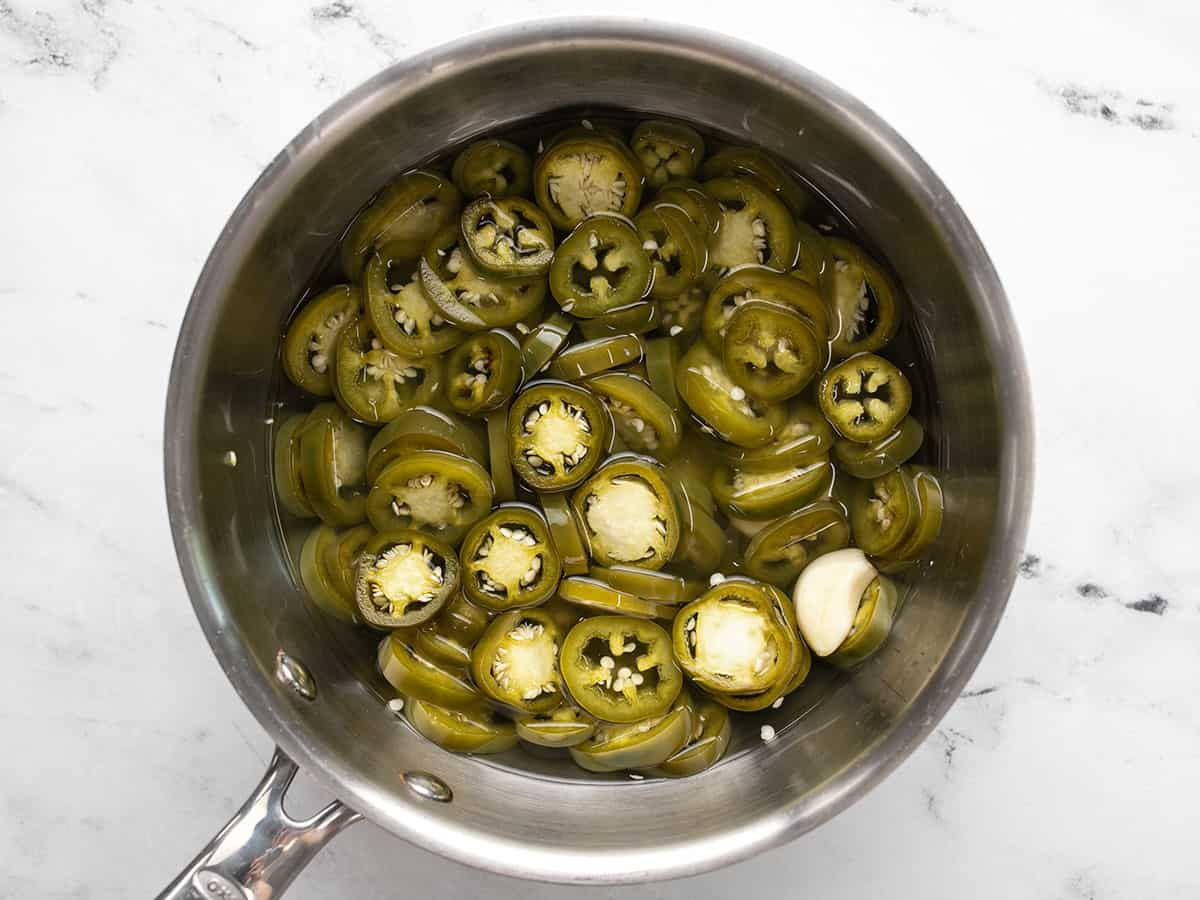
When the brine reaches a full boil, add the sliced jalapeños and peeled garlic. Turn the heat off, place a lid on the pot, and let the jalapeños marinate in the brine for 30 minutes, stirring occasionally to make sure all of the peppers get submerged. Try to resist tasting them until they’ve soaked for at least 30 minutes!

Pickled jalapeños in the brine in the sauce pot.

As the peppers soak in the hot brine they will change in color from bright green to the familiar olive green color of pickled jalapeños. Once they’ve marinated in the brine for 30 minutes, transfer the peppers and all of the brine to a non-reactive (glass or plastic) air-tight container, then transfer to the refrigerator for storage.

Side view of pickled jalapeños in a jar.

Store the jalapeños in the refrigerator for up to two months and enjoy them on all of your favorite foods! …Or just straight from the jar. 😏

The post Pickled Jalapeños appeared first on Budget Bytes.

Quick Shrimp Tacos with Mango Salsa

These fast and flavorful shrimp tacos are topped with a tangy mango salsa, fresh cilantro and a sprinkle of cotija cheese. Perfect for taco Tuesday (or Wednesday… or Thursday…) Our favorite weeknight dinners are fast, fresh, and flavorful, and these quick & easy shrimp tacos check all the boxes. The chipotle-spiced shrimp cook in mere […]

The post Quick Shrimp Tacos with Mango Salsa first appeared on Love and Olive Oil.

These fast and flavorful shrimp tacos are topped with a tangy mango salsa, fresh cilantro and a sprinkle of cotija cheese. Perfect for taco Tuesday (or Wednesday… or Thursday…)

Our favorite weeknight dinners are fast, fresh, and flavorful, and these quick & easy shrimp tacos check all the boxes. The chipotle-spiced shrimp cook in mere minutes, and the tangy mango salsa on top is like a little bit of sunshine in every bite.

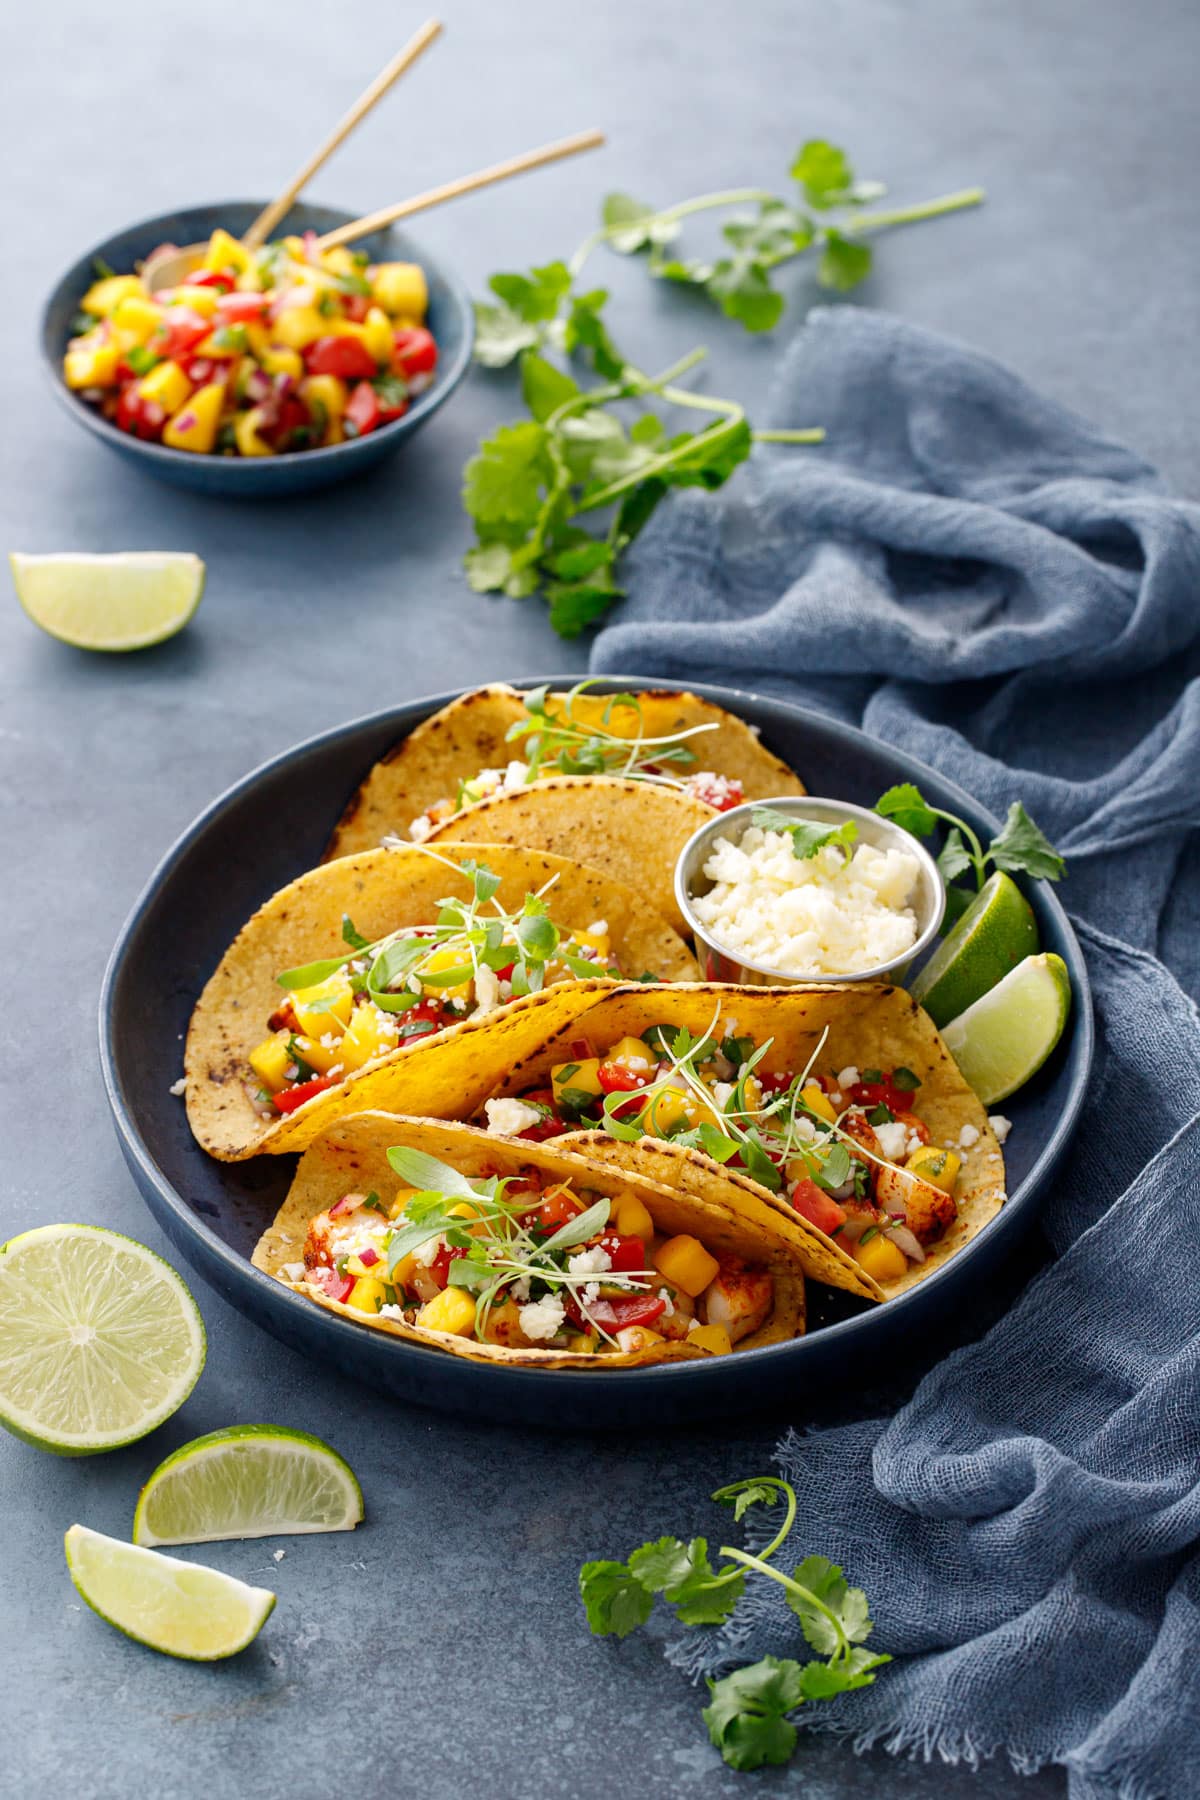
Navy platter of four Shrimp Tacos with yellow corn tortillas and topped with mango salsa and micro cilantro, fresh limes and a bowl of mango salsa on the side.

These shrimp tacos make for a super quick weeknight meal, easily prepared in less than 30 minutes.

It’s a dish we’ve made half a dozen times in the past few months, we’ve taken to keeping a bag of frozen shrimp in the freezer for this very reason. Even though it’s not terribly original (mango salsa recipes are a dime a dozen and all of them look pretty darn similar, shrimp tacos too for that matter), we still figured it was a recipe one worth sharing.

(more…)

Baked Buffalo Chicken Jalapeño Poppers

I love jalapeño poppers AND buffalo chicken so I decided to combine them both and really spice things up! Baked Buffalo Chicken Jalapeño Poppers These little Jalapeño Poppers pack a little kick! A delicious twist on the classic appetizer and the perfec…

I love jalapeño poppers AND buffalo chicken so I decided to combine them both and really spice things up! Baked Buffalo Chicken Jalapeño Poppers These little Jalapeño Poppers pack a little kick! A delicious twist on the classic appetizer and the perfect halftime snack. A few more recipes with jalapenos I love are Low-Carb Jalapeno

Chicken Nachos

This is THE BEST chicken nacho recipe! What’s not to love about crispy corn chips loaded with succulent chicken breast and melted cheese?

The post Chicken Nachos appeared first on Budget Bytes.
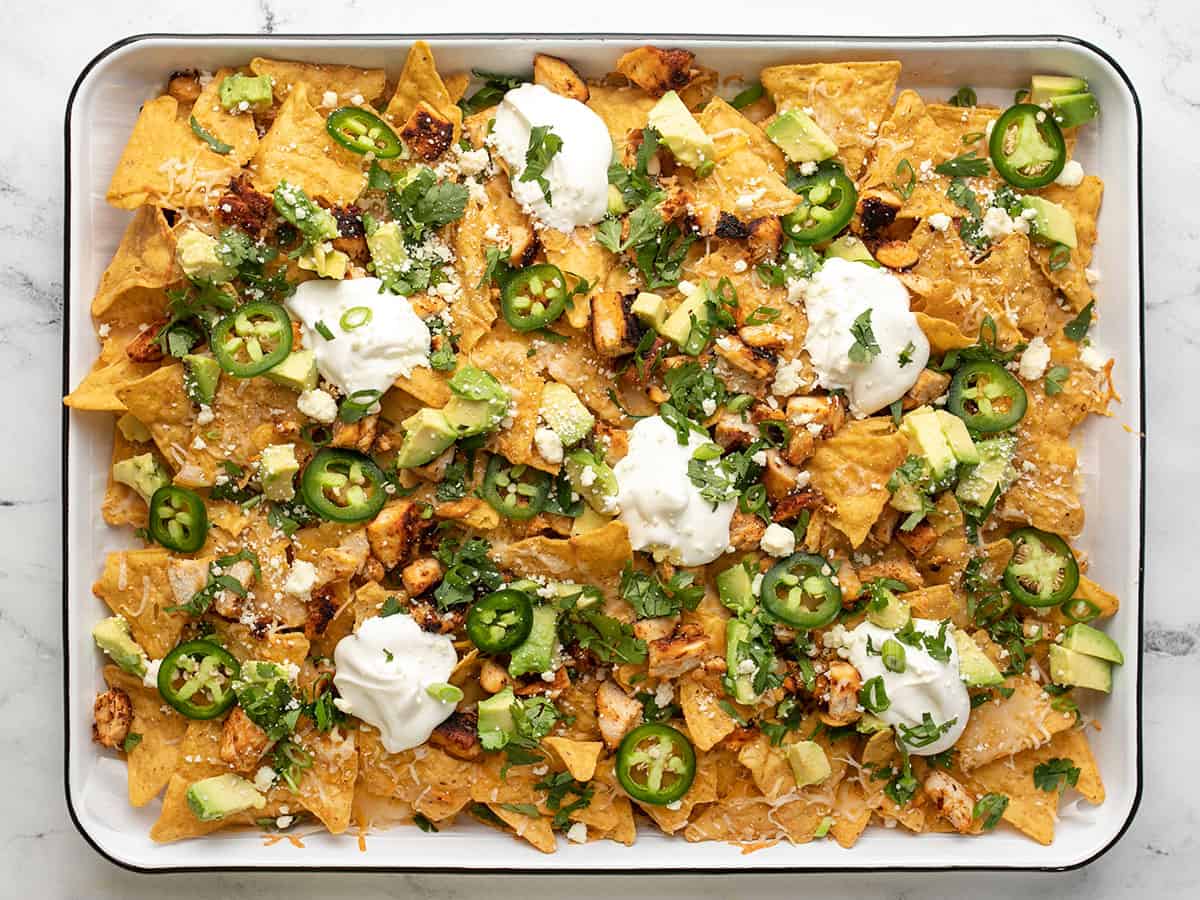
Sometimes you just need the crunchy, salty, cheesy goodness of chicken nachos. Am I right??? What’s not to love about crispy corn chips loaded with succulent chicken breast and dripping with tangy melted cheese and sour cream? They’re even better with earthy cilantro, creamy avocado, and the gentle heat from fresh jalapeno. Sigh. This is THE BEST chicken nacho recipe! It’s a perfect marriage of texture and umami bombs.

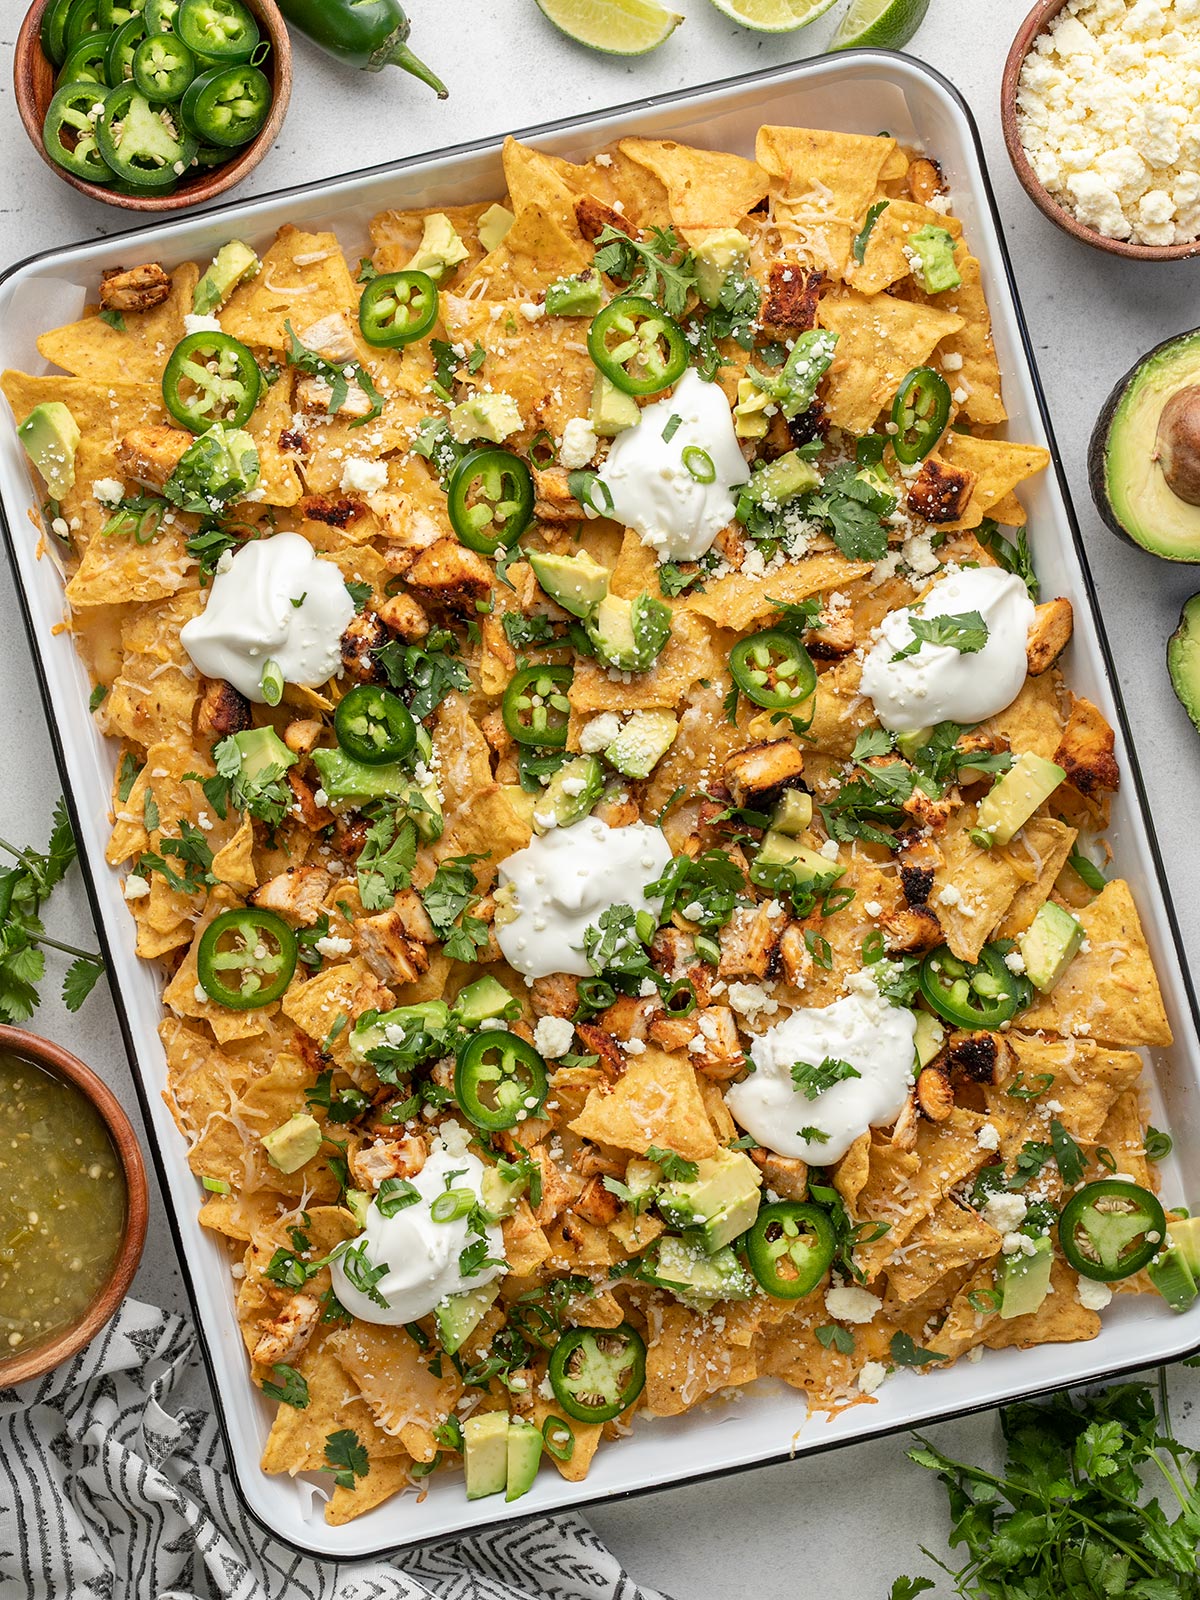
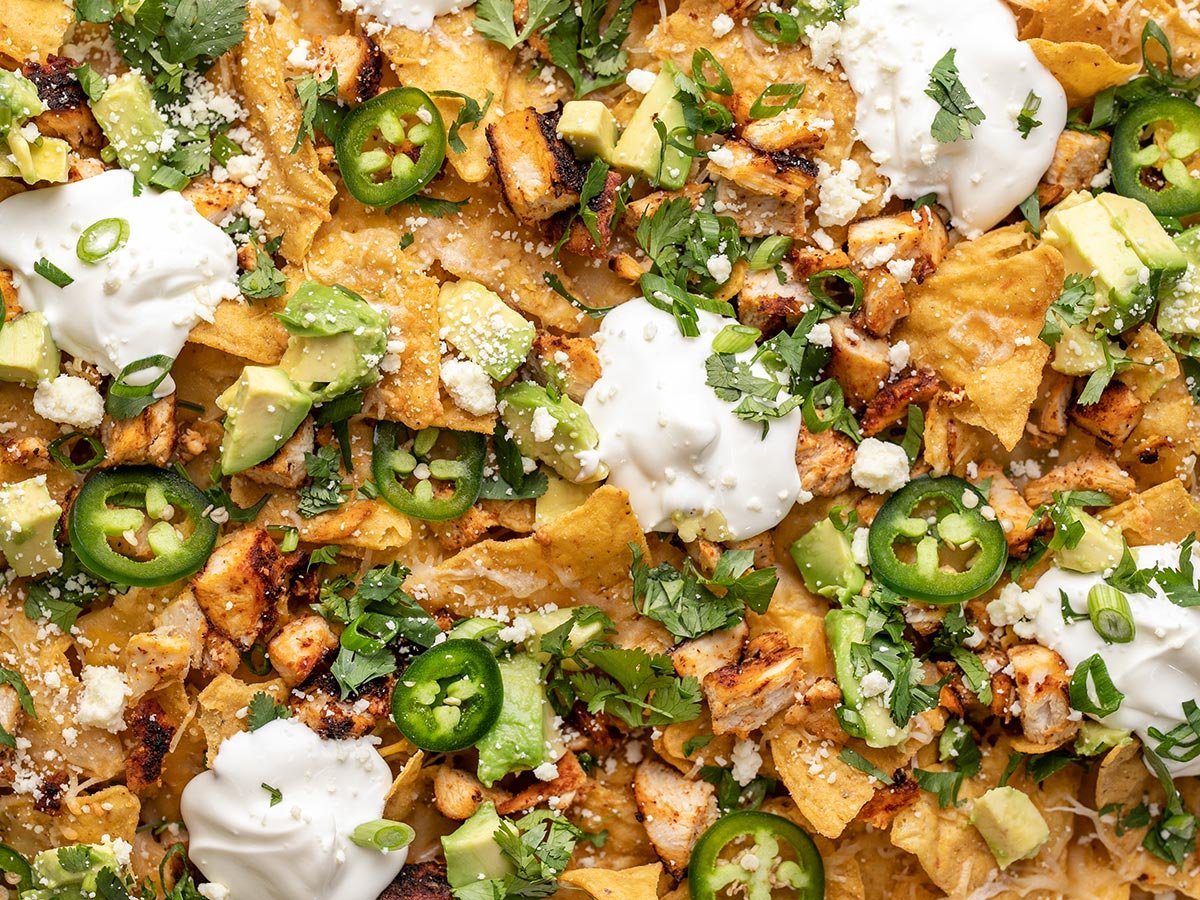
Overhead shot of sheet pan chicken nachos with sliced jalapeño, avocado, and cilantro.

What Should I Put On My Nachos?

I’m going ’88 Bobby Brown here and saying that when it comes to ingredients for nachos, it’s your prerogative. (If you’re not familiar with My Prerogative, please enjoy three minutes of 80’s perfection.) This recipe uses chicken, fresh jalapeño, cilantro, green onions, and avocado. Some other excellent choices are:

What Cheese Is Best For Nachos?

Not all cheeses melt well. So if you’re looking for an ooey-gooey cheese pull, opt for any combination of cheeses listed below. And if you can, shred your own. The additives in pre-shredded cheeses can prevent them from softening when heated.

  • Cheddar
  • Monterey Jack
  • Pepper Jack
  • Mozzarella
  • Queso Asadero
  • Queso de Oaxaca
  • Queso Quesadilla
  • Queso Chihuahua

All that being said, I still love a sprinkle of Queso Fresco all over my nachos. It doesn’t melt, but it is sooo YUMMY.

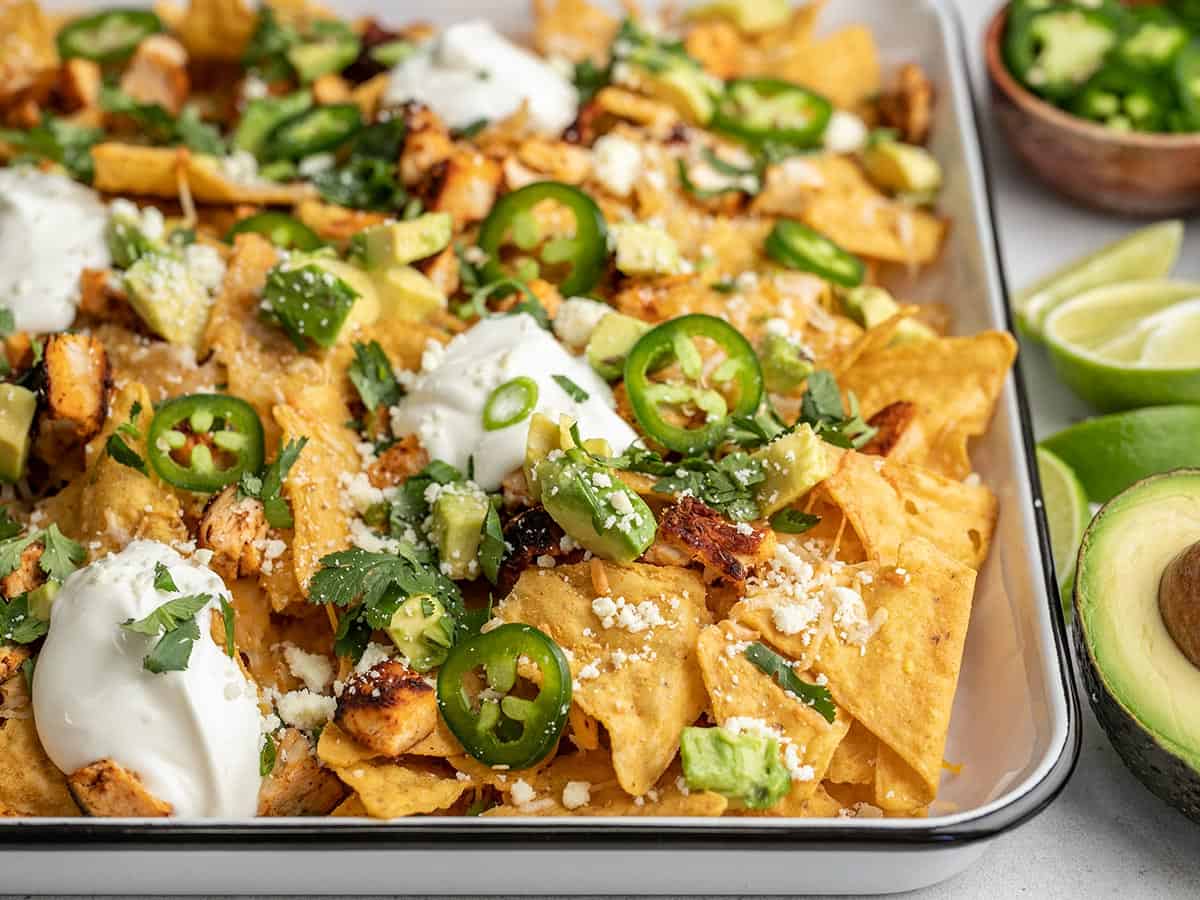
Forty five degree angle shot of sheet pan chicken nachos with sliced jalapeño, avocado, and cilantro.

What Sauces Go On Nachos?

You can use a simple salsa with nachos or go for something a little more complex. Drizzle it on top of your nachos or serve it on the side in a wide-mouth bowl for easy dunking. I chose a tangy Salsa Verde for this recipe, but a spicy Salsa Roja is just as good. You can also use any of these easy Budget Bytes recipes:

How To Make Perfect Chicken Nachos

  1. Choose a sturdy corn chip. Thicker chips can hold the weight of all of your toppings. A thin chip will break faster than a drama queen on The Bachelor.
  2. Line Your Sheet Pan. Use parchment or aluminum to make clean-up a breeze. Otherwise, you’ll be spending your night scrubbing burnt cheese.
  3. Layer your nachos. Put toppings on the first layer and then repeat. That way, you lessen the chance of getting a naked chip, i.e., the biggest nacho foul ever.
  4. Pre-cook your meat. Nachos should only be in the oven long enough to melt the cheese, which isn’t long enough to cook raw meat. Cook chicken ahead of time or opt for pre-cooked rotisserie chicken.
  5. Chop toppings into small dice. You want to get a bite with all of your carefully selected flavors. That will only happen with small chunks of meat and veggies. 
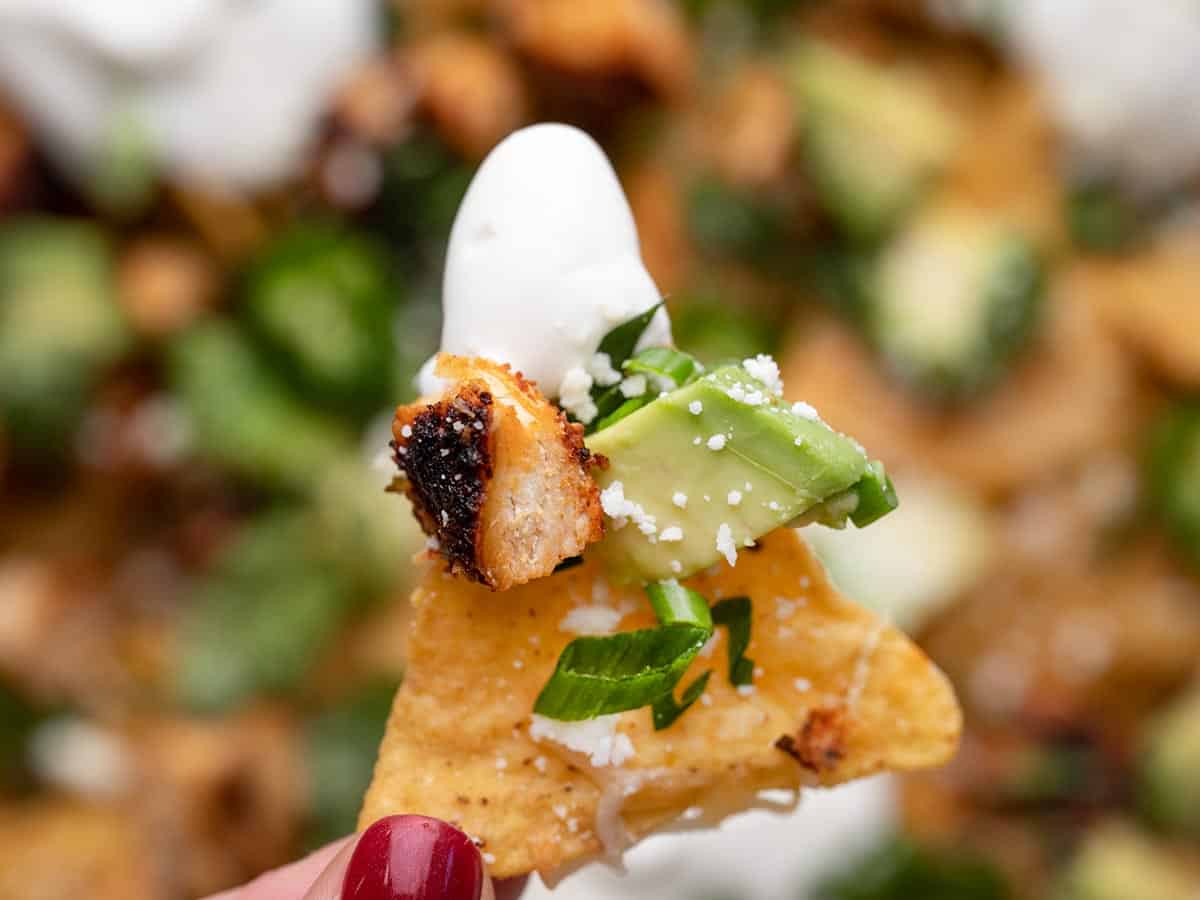
Close up of a chicken nacho chip with a touch of sour cream.
Overhead shot of sheet pan chicken nachos with sliced jalapeño, avocado, and cilantro.
Print

Chicken Nachos

This is THE BEST chicken nacho recipe! What's not to love about crispy corn chips loaded with succulent chicken breast and melted cheese?
Course Appetizer, Dinner, Lunch
Cuisine Mexican
Total Cost ($12.68 recipe / $1.58 serving)
Prep Time 10 minutes
Cook Time 10 minutes
Total Time 20 minutes
Servings 8 servings
Calories

Ingredients

  • 3 tsp taco seasoning $0.21
  • 1 lb boneless, skinless chicken breast $2.99
  • 1 Tbsp cooking oil $0.04
  • 15 oz corn tortilla chips (1 large bag) $3.69
  • 2 cups Mexican cheese blend, shredded $2.15
  • 1 jalapeño $0.24
  • 2 green onions $0.23
  • 1/2 cup fresh cilantro $0.23
  • 1 avocado $1.50
  • 1 lime, zested and juiced $0.60
  • 1/2 cup sour cream $0.50
  • 2 Tbsp queso fresco, crumbled $0.25

Instructions

  • Add a rack to the center of your oven and preheat it to 400°F. Pound the chicken breast an inch thick with a heavy skillet. Sprinkle liberally on both sides with taco seasoning.
  • Add cooking oil to a heavy-bottomed skillet set over medium-high heat. Sear the chicken breast for 5 minutes, then flip it and cook for a few minutes more, or until a thermometer reads 165°F.
  • Slice the jalapeño and two green onions. Chop the cilantro. Dice the avocado and drizzle lime juice over it to keep it from browning.
  • When your chicken has reached an internal temperature of 165°F, remove it from the pan and let it rest for five minutes. Chop it into 1/2-inch pieces.
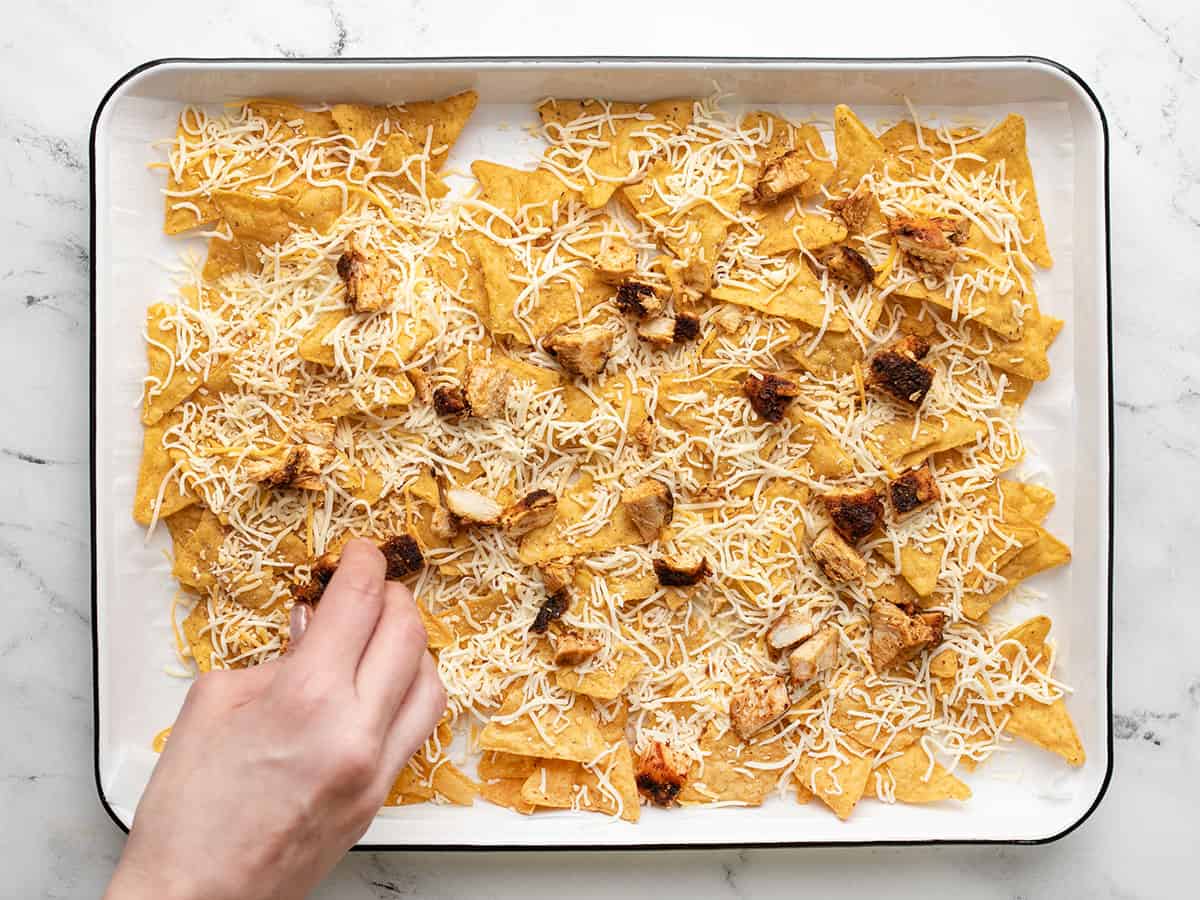
  • Line a sheet pan with parchment paper. Add half a bag of corn chips to the pan. Top with half of the shredded cheese and half of the chopped chicken.
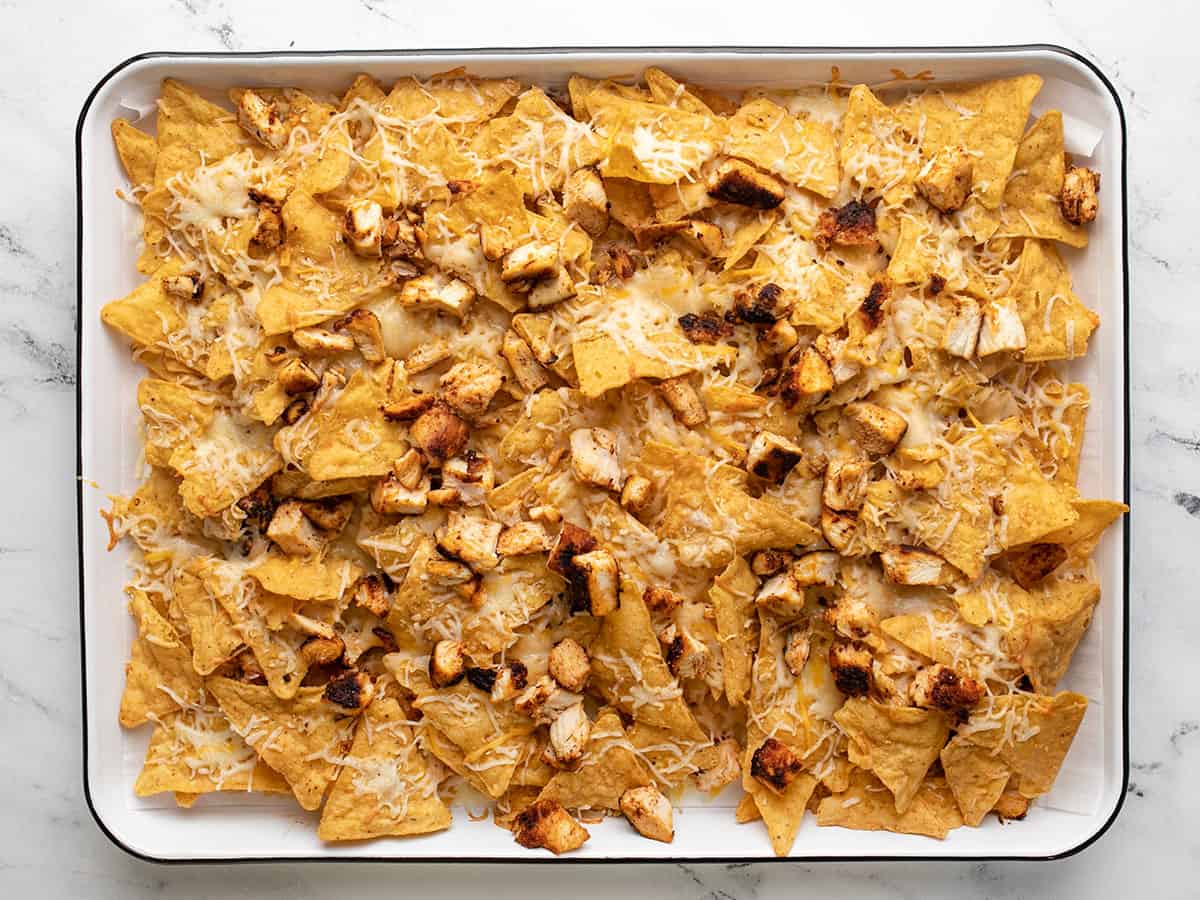
  • Repeat the layering process with the remaining chips, cheese, and chicken. Bake at 400°F until the cheese melts, about 7 to 10 minutes.
  • Sprinkle the nachos with the avocado, jalapeño, green onion, lime zest, and chopped cilantro. Finish with dollops of sour cream and sprinkle with crumbled queso fresco.
See how we calculate recipe costs here.

Overhead shot of sheet pan chicken nachos with sliced jalapeño, avocado, and cilantro.

How to Make Chicken Nachos – Step by Step Photos

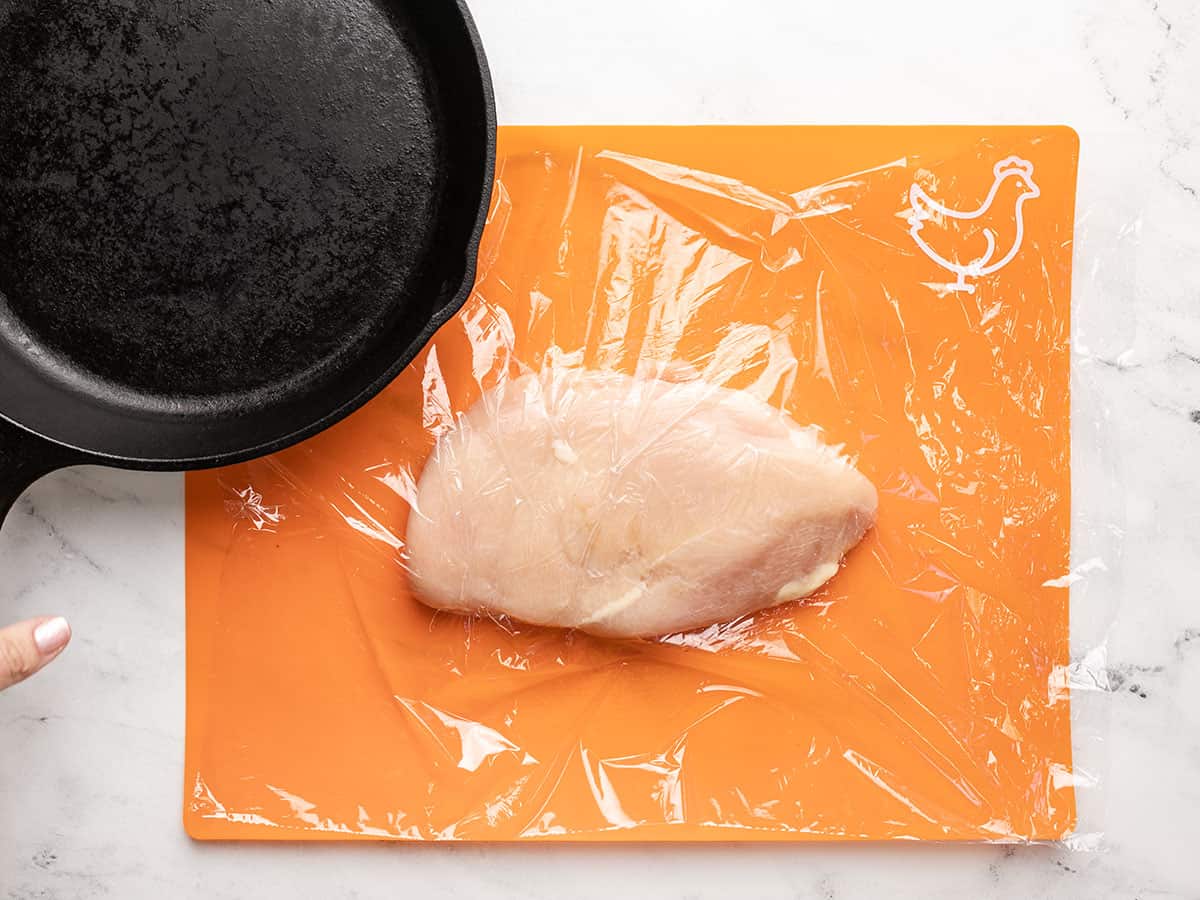
Overhead shot of a chicken breast covered in plastic wrap ready to be flattened by a cast iron pan.

Add a rack to the center of your oven and preheat it to 400°F. To ensure your chicken cooks evenly, cover it with a sheet of plastic wrap, and pound it an inch thick with a heavy skillet. Season your breast liberally with 3 teaspoons of taco seasoning.

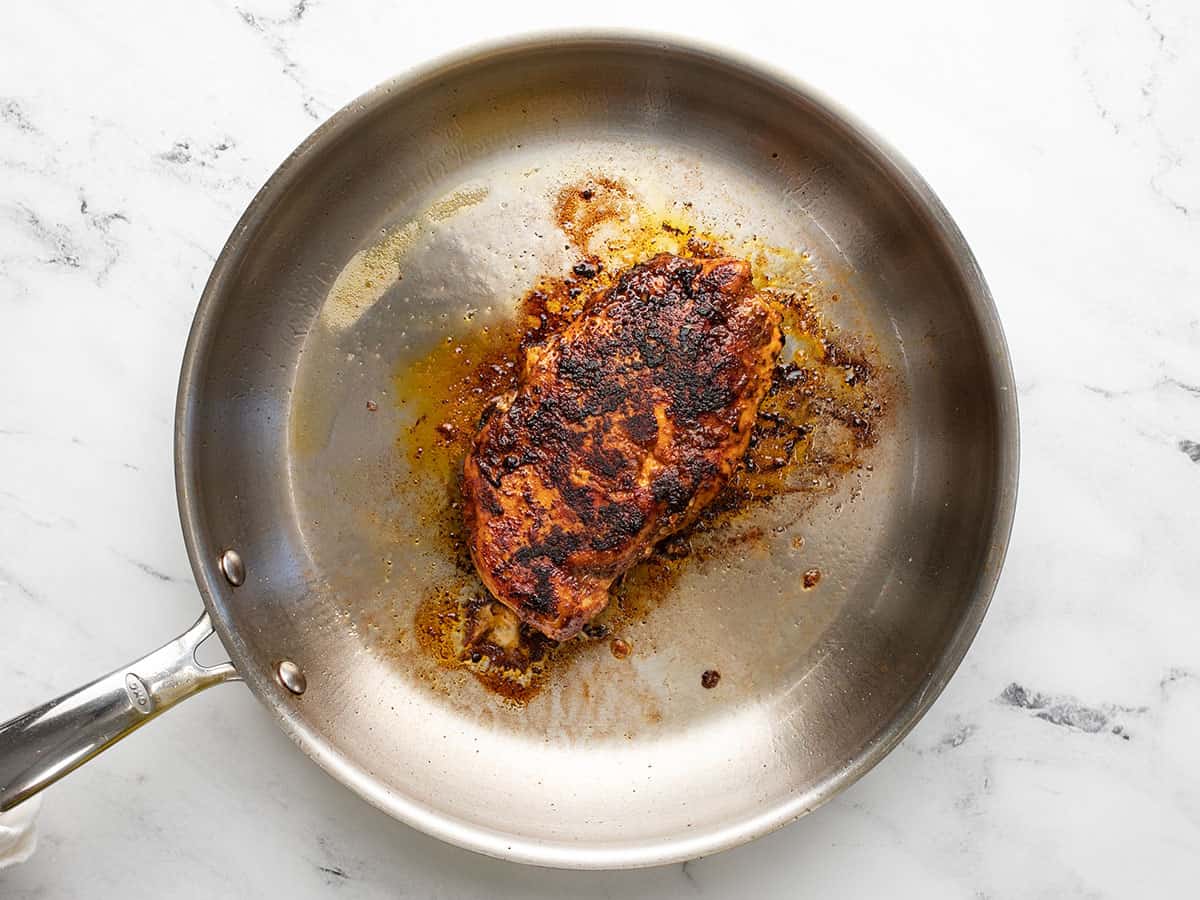
Overhead shot of a blackened chicken breast in a stainless steel skillet.

Place a heavy-bottomed skillet over medium-high heat. Add a tablespoon of oil. Once the oil is shimmering hot, add the breast. Cook for 5 minutes without moving it to create a thick sear. Then flip it and cook for a few minutes more, or until a thermometer reads 165°F.

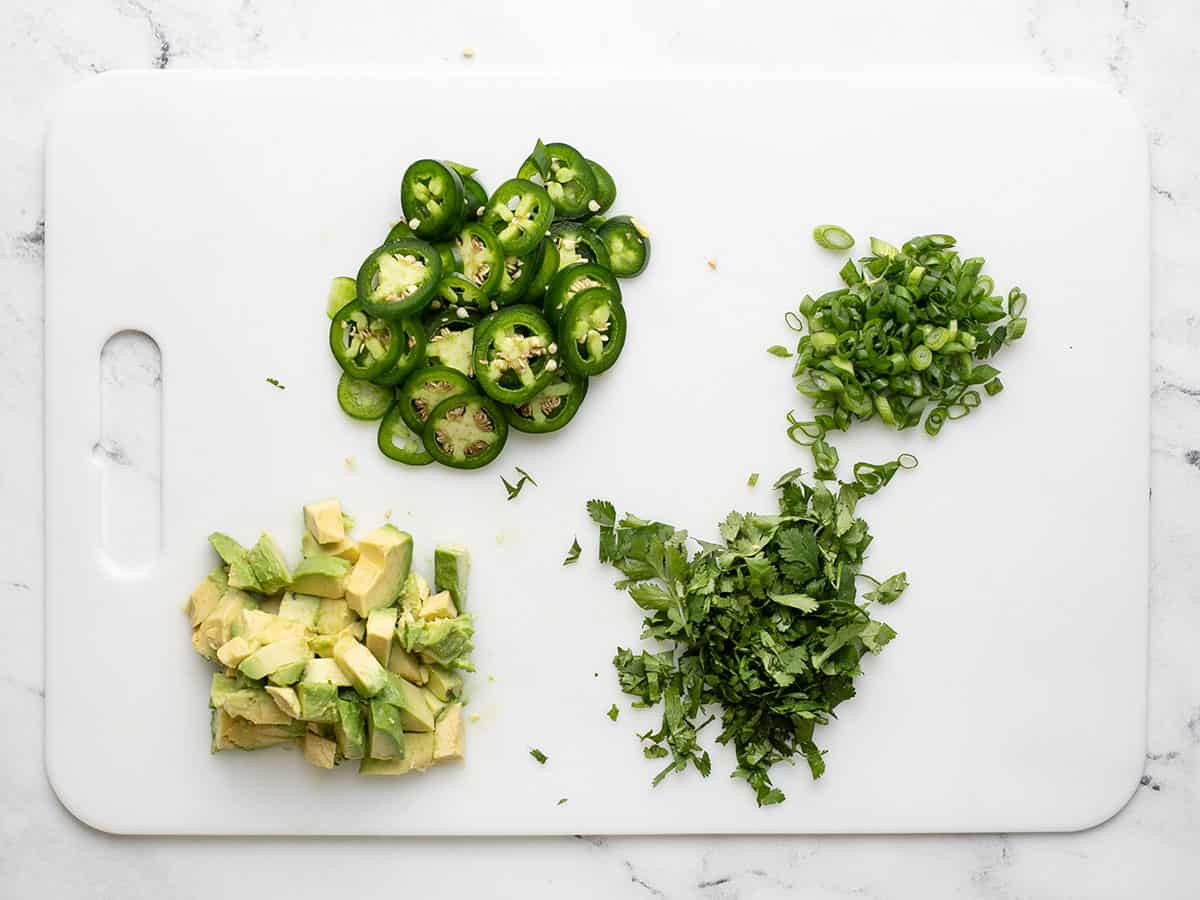
Overhead shot of chopped toppings on a white cutting board.

Chop your fresh ingredients: slice one jalapeño, two green onions, a 1/2 cup of cilantro, and dice an avocado. As soon as you dice the avocado, drizzle it with the lime juice to prevent it from turning brown.

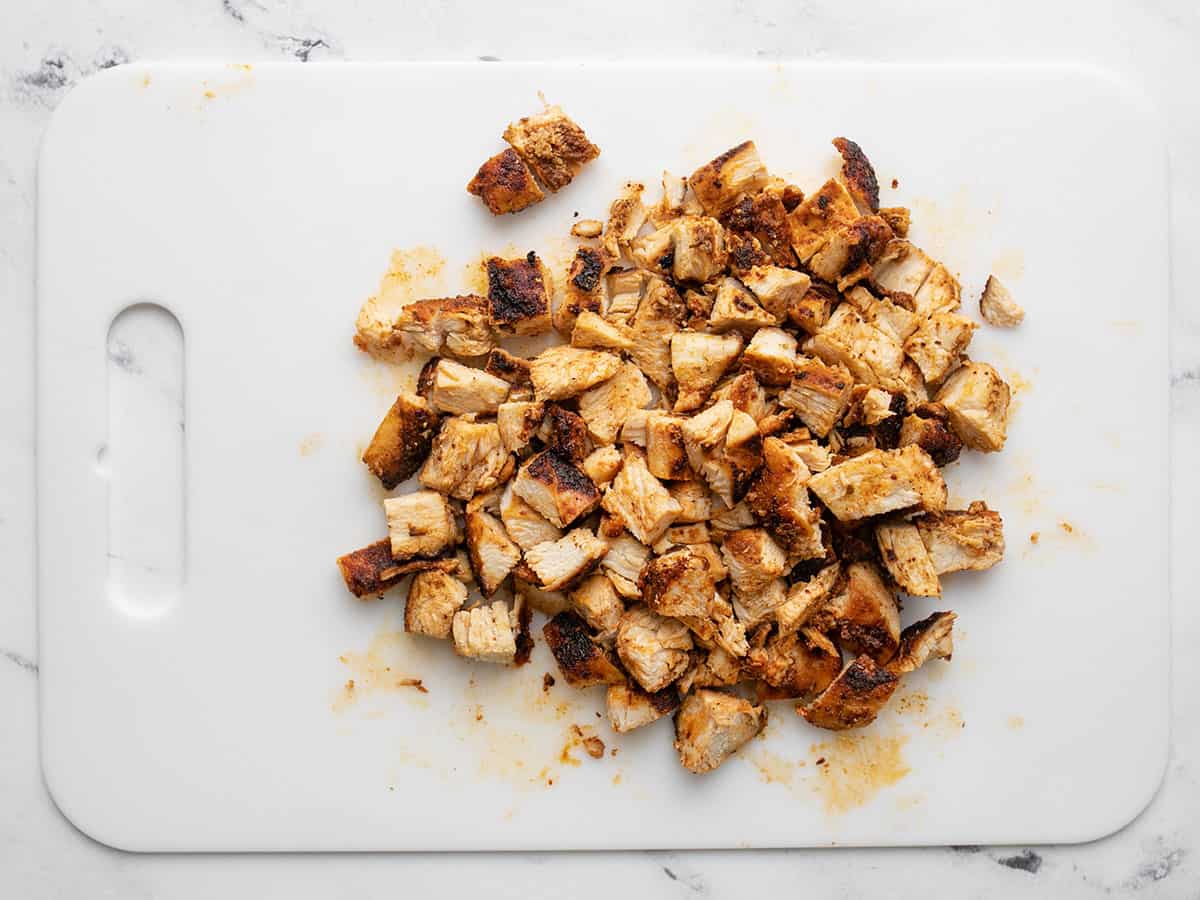
Overhead shot of chopped chicken breast on a white cutting board.

When your chicken has reached an internal temperature of 165°F, remove it from the pan and let it rest for five minutes before chopping it into 1/2-inch pieces.

Overhead shot of a hand putting chicken on the first layer of chicken nachos on a sheet pan..

Line a sheet pan with parchment paper. Then, add half a bag of corn chips to the pan. Next, top with 1 cup of shredded cheese. (If you prefer cheesier nachos, double the amount asked for in the recipe.) Sprinkle the chips with half of the chopped chicken breast.

Overhead shot of baked chicken nachos on a sheet pan.

Next, repeat the layering process with the remaining chips, cheese, and chicken. Bake at 400°F until the cheese melts, about 7 to 10 minutes.
Overhead shot of sheet pan chicken nachos with sliced jalapeño, avocado, and cilantro.

Sprinkle the nachos with the diced avocado, sliced jalapeño, 2 sliced green onions, lime zest, and 1/2 cup of chopped cilantro. Finish with dollops of the 1/2 cup of sour cream and sprinkle with 2 tablespoons of crumbled queso fresco. Finally, serve the whole sheet pan of nachos like a party platter and snack on! Ugh. I’m jealous. I want to have these again right now!
The post Chicken Nachos appeared first on Budget Bytes.