Easy Baked Salmon

This oven baked salmon recipe perfectly seasoned, bursting with flavor, and ready in just 20 minutes! It’s ideal for busy…

This oven baked salmon recipe perfectly seasoned, bursting with flavor, and ready in just 20 minutes! It’s ideal for busy weeknights or a quick meal to impress.

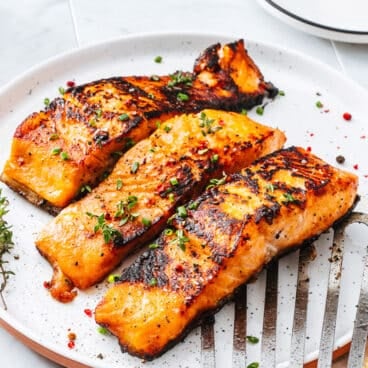
Oven baked salmon on a plate with serving forks and garnished with parsley.

Stop right there and bookmark this baked salmon recipe, because you’ll never need another! As married cookbook authors who have tried countless salmon recipes, this is the method that gets hands down rave reviews from friends and family. The tender fillet is perfectly seasoned with brown sugar and spices and has a lovely crisp topping, which is our favorite (no more mushy and under-seasoned fillets!).

What we love about this oven baked salmon recipe

This baked salmon recipe is our total go-to, from when our parents visit to a quick weeknight dinner for our kids. You’ll never need another recipe! Here’s why we love it:

  • It’s perfectly seasoned. The smoked paprika, onion powder, garlic powder and thyme combination hits a home run (we also use it on our baked chicken thighs).
  • It has a crispy top. Mushy salmon is our pet peeve. This one comes out with a lovely crispy topping from the brown sugar and if you’d like, a quick broil.
  • It’s so simple. It takes just 20 minutes to make this! Get ready to impress your mother in law, neighbors, boss, or partner with no effort at all.

“It was absolutely delicious, and so easy to make! The fish was very flaky and tender and the smokey flavor is almost addictive. What could be better than having something that is easy to make and tastes wonderful? I will no doubt make this again soon!” -Annika

Key ingredients

Oven baked salmon ingredients: salmon, olive oil, spice blend, kosher salt

For the very best baked salmon recipe, you’ve got to start with a great fillet of fish. This is easier said than done, since there are many different ways salmon is sold at the store. In general, stay away from those big economy-sized freezer bags. Here are a few tips:

  • Look for 1 to 1 1/2-inch thick salmon fillets. You might find this type labeled “center cut” at the store. You can also use thinner fillets like sockeye salmon, which take less time to cook.
  • Buy fresh salmon, wild caught if possible. Salmon fresh from the fish counter usually has the best flavor. Frozen can work, but opt for highest-quality possible. Fish that is wild caught in your country is usually a sustainable choice. There are also quality options in well-regulated farms; see Seafood Watch Consumer Guide.
  • Add this simple seasoning blend. You’ll need a combination of brown sugar, smoked paprika, onion powder, garlic powder, dried thyme, cumin, and salt. Before seasoning, brush on just a thin coating of olive oil.

How to bake salmon: step by step

This baked salmon recipe calls for seasoning the fish with brown sugar and spices, then baking until tender. We used to only bake salmon in a foil packet, but it gets very moist and mushy. This method for baking salmon that makes a lightly caramelized top, which we find gets rave reviews! Here are the steps for how to bake salmon:

Baked Salmon Step 1

Step 1: Preheat the oven to 400°F (200°C). Allow the salmon to come to room temperature (or brine it in salt water).

Step 2: Place the room temperature salmon on a foil lined baking sheet. Drizzle with olive oil and season (see full recipe).

Step 3: Bake the salmon for 10 to 16 minutes, until just tender and pink at the center and the internal temperature is 125 to 130°F in the center.

Serve garnished with finely chopped parsley. If desired, add a salmon sauce!

Oven Baked Salmon on plate with parsley garnish.

Variation: try baked lemon salmon

🍋 Want to mix up this baked salmon? Our favorite variation is lemon salmon, infused with citrusy fresh flavors!

  • Brush a medium baking dish with olive oil, then place slices from 1 lemon in the bottom and add 2 tablespoons olive oil. Place the salmon on top and sprinkle the fillets with 1 teaspoon kosher salt.
  • Mix 1 teaspoon garlic powder and ½ teaspoon each onion powder dried dill, then sprinkle evenly over the fillets.
  • Bake in the same manner as the base recipe, then spoon over the sauce in the pan before serving.
Lemon Salmon

Serve with a sauce!

The best part about this oven baked salmon recipe is that it’s perfectly seasoned on its own: it doesn’t required a sauce to make it taste great! But you’re welcome to add one to take it up a notch. Here are a few of our favorite salmon sauce ideas:

Ways to serve this baked salmon recipe

Want to make it a meal? Try some of these easy sides for salmon, none of which require the oven!

Storing leftovers

Leftover salmon lasts refrigerated for up to 3 days, stored in a sealed container. Reheat it in a skillet over medium heat, or in a 400F oven until warm. Or, repurpose it in leftover salmon recipes like salmon salad, a salmon rice bowl, and more!

More salmon recipes

Love cooking with salmon? Here are a few more salmon recipes to try:

Dietary notes

This oven baked salmon recipe is pescatarian, dairy-free and gluten-free.

Frequently asked questions

What’s the best temperature for baked salmon?

400°F (200°C) makes for a tasty, tender piece of fish.

How long to bake salmon?

Bake salmon at 400°F (200°C) for 10 to 16 minutes, depending on thickness, until just tender and pink at the center (the internal temperature should be between 125 to 130°F in the center). A 1-inch thick fillet should cook in about 15 minutes total.

For a crispy top, when the salmon is at 115°F, broil for about 2 minutes (about the last 2 minutes of the cook time).

What is the white stuff on baked salmon?

The gooey white stuff that oozes on the surface after cooking a piece of salmon is called albumin: it’s a coagulated protein that seeps to the surface while baking. The amount of albumin varies depending on the fish, so it’s not something you can control. It’s safe to eat, but it does look unappealing.

How do you prevent the white stuff on salmon?

Buy quality fresh fish. It’s best to buy fresh salmon and the white stuff can vary based on the fish counter at each grocery store, even though there’s no labeling difference. Experiment to find a source you love.

Brine the fish before cooking. Placing the fish in a brine solution for 15 minutes before baking can help to reduce albumin (see notes in the recipe below).

Print
Baked Salmon

Easy Oven Baked Salmon


  • Author: Sonja Overhiser
  • Prep Time: 5 minutes
  • Cook Time: 15 minutes
  • Total Time: 30 minutes
  • Yield: 4

Description

This oven baked salmon recipe perfectly seasoned, bursting with flavor, and ready in just 20 minutes! It’s ideal for busy weeknights or a quick meal to impress.


Ingredients

  • 1 1/2 pounds or 4 (6-ounce) salmon fillets, wild caught if possible*
  • Olive oil
  • 1 teaspoon kosher salt
  • ½ tablespoon brown sugar
  • 1 teaspoon smoked paprika
  • 1 teaspoon garlic powder
  • ½ teaspoon onion powder
  • ½ teaspoon dried thyme
  • ¼ teaspoon cumin

Instructions

  1. Preheat the oven to 400°F. Allow the salmon to come to room temperature (or brine it**). 
  2. Place a large sheet of aluminum foil on a baking sheet and brush it with olive oil. Pat each piece of salmon dry and place it on the foil skin side down. Brush with olive oil. Sprinkle the salmon with the kosher salt evenly divided among the fillets.
  3. In a medium bowl, mix together the brown sugar, paprika, garlic powder, onion powder, thyme, and cumin. Sprinkle the mixture evenly on top of the fillets. 
  4. Bake the salmon for 10 to 16 minutes, depending on thickness, until just tender and pink at the center (the internal temperature should be between 125 to 130°F in the center). A 1-inch thick fillet should cook in about 15 minutes total. For a crispy top, when the salmon is at 115°F, broil for about 2 minutes (about the last 2 minutes of the cook time).

Notes

*Lemon salmon variation: Brush a medium baking dish with olive oil, add the slices of 1 lemon, and drizzle with 2 tablespoons olive oil. Place the salmon on top of the lemons and sprinkle with 1 teaspoon kosher salt divided among the fillets. In a medium bowl, mix 1 teaspoon garlic powder, ½ teaspoon onion powder, and ½ teaspoon dried dill, then sprinkle the mixture evenly over the fillets. Bake in the salmon manner as Step 4 above, then spoon over the sauce in the pan before serving.

**Brine the salmon (optional): While the oven preheats, in a shallow dish mix together 4 cups room temperature water and 3 tablespoons kosher salt. Place the salmon in the water and wait for 15 minutes (this should be about the time it takes to preheat).

  • Category: Main Dish
  • Method: Baked
  • Cuisine: Seafood
  • Diet: Gluten Free

Keywords: Baked salmon, baked salmon recipe, oven baked salmon. how to bake salmon, how long to bake salmon

Fudgy Olive Oil Brownies

This fudgy olive oil brownies recipe is surprisingly easy and delivers rich, chocolaty goodness – minus the butter! Everyone will…

This fudgy olive oil brownies recipe is surprisingly easy and delivers rich, chocolaty goodness – minus the butter! Everyone will love this simple treat.

Photo of fudgy olive oil brownies with shiny tops and chocolate chips.

Here’s a fun simple baking recipe we’re so excited to share with you! These fudgy olive oil brownies are rich and chewy: without the use of dairy. We’ve been re-focusing on the Mediterranean diet and it emphasizes cooking with olive oil. So I wondered: could it be possible to make brownies with olive oil? These dairy free brownies were born.

Jump to the recipe—now.

Why we love these dairy free fudgy olive oil brownies

This brownie recipe is one I created for my nephews as a baking project. I was curious about using olive oil in baked goods and they wanted to include their favorite ingredient, peanut butter. Turns out, nut butter works surprisingly well in olive oil brownies: it adds a chewy texture and robust flavor, complementing the oil perfectly. I referenced this tahini olive oil brownies recipe as a proof of concept, but changed it up quite a bit. The result? A chewy, rich, fudgy chocolate brownie recipe using olive oil! Here’s why we love these brownies:

  • They’re easy to make, with no stand mixer or special equipment required
  • They use healthy fats like olive oil and peanut butter
  • They feature dark chocolate (my favorite food group!)
  • They are rich and chewy, and you don’t notice there’s no dairy! Everyone will love them, no matter their diet.

What people are saying

We passed this recipe by a few readers as recipe testers before sharing it with you. Here’s what they had to say!

  • “The BEST homemade brownies! Fudgy and moist, with a deep chocolaty flavor. I’ll never buy a box mix again…. so easy to make and so delicious!” -Julie
  • “These brownies are sooo rich and fudgy!! Yet somehow I think they’d also appeal to those who prefer cake-like brownies. The chocolate flavor dominates but there’s also a very welcome taste of peanut butter that comes through perfectly.” -Andrea
  • “The brownies baking in the oven were hands down the best air freshener! No heavy oil taste and the peanut butter cuts out some of the richness of a brownie (in a good way). As my kiddo said with a full mouth, “These are really good!” 10/10 would make again.” -Claire-Anne
  • “SO good! So good, in fact, one kid said this “must be” the go-to brownie going forward. We had them still warm and later for dessert, with whipped cream and rainbow sprinkles. Both were awesome!” -Nicole
List of ingredients for olive oil brownies.

Ingredients you need

These dairy free brownies have simple ingredients and no “tricks” or substitutions, aside from the olive oil and peanut butter standing in for the traditional butter. However, many brownie experts like our friend Tessa at Handle the Heat use both oil and butter in a brownie recipe, so the true swap here might be peanut butter! Here’s what you need:

  • Dutch process or dark cocoa powder: This is the key ingredient! It’s a special type of cocoa powder is treated with an alkali to make it pH neutral, giving it a darker color and milder flavor. This type has deep rich notes instead of the lighter fruity notes that you’ll get with regular cocoa powder. It’s available at most grocery stores!
  • All purpose flour: You’ll need just a hint of flour for this recipe. Almond flour should work for gluten-free.
  • Olive oil: Use only extra virgin olive oil.
  • Creamy peanut butter: Peanut butter brings a rich, savory flavor and offsets any bitter notes from the olive oil. You could use almost butter as well, or any other nut butter. Use sunflower butter for nut free.
  • Dark chocolate chips: Most dark chocolate chips brands are vegan, but make sure the package says dairy-free. We like the brand Guittard 63%.
  • Granulated and brown sugar: A mix of sugar types adds nuance to the flavor.
  • Eggs: Eggs make a smooth batter and bind it together. For an egg free version, go to vegan brownies.
  • Vanilla extract: Vanilla adds the final nuance to the flavor.
  • Salt: Salt balances the sweet flavor.

Keep in mind, these dairy free brownies do contain eggs. Head here for our vegan brownie recipe for a full vegan recipe!

Fudgy olive oil brownies close up shot.

Can you use olive oil in brownies?

Olive oil works as a replacement for vegetable oil in most brownie recipes. However, it does have a bitter aftertaste, which can compete with the other flavors in baked goods. We suggest using the brownies recipe below, which is customized for olive oil in combination with nut butter.

Since this recipe uses less olive oil than a 1:1 replacement in a standard brownie recipe, it tones down the bitter flavor, which is also offset by the rich melted chocolate and nut butter. The reduced quantity of olive oil in this recipe also helps you save money, since olive oil is more expensive than vegetable oils and most brownie recipes call for a large quantity (½ cup in a pan this size).

Gluten free variation

We’ve had readers test the gluten free variation of this recipe with almond flour and it worked well! Here are notes from reader Lexi:

“I made the brownies and oh my gosh, they are so good! I actually ended up making two batches. One batch I made gluten free with almond flour and almond butter. They turned out very well with a great fudgy texture. Very chocolaty, not too sweet. They were perfect! You couldn’t even tell they were gluten free.

The second batch I made as the recipe was written, with AP flour and peanut butter. They were equally as delicious! They had a slightly chewier texture than the gluten free batch, just as fudgy. Great chocolaty flavor with a hint of peanut butter, a little sweet. Very well balanced.

We actually had a really hard time picking a favorite. I will definitely be making both versions again!”

How to make fudgy olive oil brownies (dairy free!)

Brownies are quick and simple, and don’t even require a mixer! This brownie recipe comes together like most:

First, mix together the dry ingredients: cocoa powder, flour, and salt.

Bowl with whisk and cocoa powder flour and salt.

Then, melt the olive oil, peanut butter, and chocolate chips on the stovetop over low heat until completely melted and smooth.

Saucepan with melted chocolate and peanut butter.

Pour the melted chocolate into a mixing bowl. Whisk in the granulated sugar and brown sugar, then the eggs and vanilla extract. Switch to a spatula and mix in the dry ingredients until a very thick dough forms.

Brownie batter ingredients in a bowl with whisk.

Fold in the remaining chocolate chips. Then pour the batter into an 8 x 8″ pan prepared with parchment paper. The batter will be very thick, which is as expected.

Pouring brownie batter into a prepared pan.

Bake 30 minutes until set and a toothpick inserted comes out clean (though there will be some melted chocolate if you hit a chocolate chip!). Allow to cool in the pan for 30 minutes, then use the parchment to lift out the brownies to cool further.

Baked olive oil brownies (dairy free) in pan.

Serving and storage info

Cut the brownies into 16 slices and serve them warm from the oven, or room temperature. Our favorite is room temperature, because the texture is a little more set. But if you just can’t wait, feel free to dig in!

These dairy free brownies store up to 5 days at room temperature. We recommend wrapping them in aluminum foil or they can become slightly dry. For longer term storage, place them in the refrigerator for up to 10 days. Just make sure to let them sit at room temperature for a few minutes before serving, since the texture becomes solidified when cold.

A few more brownies recipes

We hope you love these brownies as much as we do! They are a new family favorite. Here are a few more fun brownies recipes to try:

01

Fudgy Sweet Potato Brownies

These amazing sweet potato brownies will wow everyone! Fudgy and chewy, they’re loaded with flavor…good stuff, too. One swap and…

02

Gluten Free Brownies

This gluten free brownies recipe is everything: thick, chewy, rich, moist, and absolutely irresistible! No one will guess they’re flourless.…

03

Zucchini Brownies

This zucchini brownies recipe comes out ultra moist with deep chocolaty flavor! Bookmark this one for a deliciously simple treat.…

Dietary notes

These dairy free olive oil brownies are dairy-free. For vegan, go to vegan brownies or zucchini brownies. For gluten free, go to gluten free brownies.

Print
Photo of fudgy olive oil brownies with shiny tops and chocolate chips.

Fudgy Olive Oil Brownies (Dairy Free!)


  • Author: Sonja Overhiser
  • Prep Time: 20 minutes
  • Cook Time: 30 minutes
  • Total Time: 50 minutes
  • Yield: 16

Description

This fudgy olive oil brownies recipe is surprisingly easy and delivers rich, chocolaty goodness – minus the butter! Everyone will love this simple treat.


Ingredients

  • ¼ cup Dutch process cocoa powder
  • ¼ cup all purpose flour (or almond flour, for gluten-free)
  • ½ teaspoon kosher salt
  • ¼ cup olive oil
  • ⅓ cup creamy peanut butter (or other nut or sunflower butter)
  • 1 cup dark chocolate chips* plus one handful, divided (we like Guittard 63%)
  • ½ cup granulated sugar
  • ½ cup brown sugar, packed
  • 2 eggs
  • 1 teaspoon vanilla extract

Instructions

  1. Preheat the oven to 350°F. Line an 8 x 8″ baking dish with a piece of parchment paper, cut so that it extends on two sides to easily remove the brownies from the pan. Grease the exposed parts of the pan with butter or oil to prevent sticking. 
  2. In a small bowl, whisk the Dutch process cocoa powder, all purpose flour, and kosher salt.
  3. Place ½ cup chocolate chips, ⅓ cup peanut butter, and the olive oil in a small saucepan over low heat and heat for a few minutes, stirring frequently, until the chocolate is melted and the mixture is smooth. Pour into a medium mixing bowl. 
  4. Immediately whisk in the granulated sugar and brown sugar, then the eggs one at a time, then the vanilla extract. Switch to a spatula and stir in the dry ingredients until a very thick batter forms. Stir in the remaining ½ cup chocolate chips. 
  5. Pour the batter into the prepared pan and smooth into an even layer. Sprinkle another handful or two of chocolate chips over the top. 
  6. Bake 30 minutes until set and a toothpick inserted comes out clean (though there will be some melted chocolate if you hit a chocolate chip!). Allow to cool in the pan for 30 minutes, then use the parchment to lift out the brownies to cool further. Slice into 16 pieces and enjoy warm or cool to room temperature. 
  7. Store at room temperature wrapped in foil for up to 5 days or refrigerated for 10 days. Allow to come to room temperature before enjoying (the brownies solidify when cold).

Notes

*Most dark chocolate chips are dairy free, but look for a “dairy-free” marking on the package.

  • Category: Dessert
  • Method: Baked
  • Cuisine: American
  • Diet: Vegetarian

Keywords: Dairy free brownies, olive oil brownies, can you use olive oil in brownies,

Easy Lemon Cake

This easy lemon cake is bursting with bright citrus flavor! A quick sheet cake with simple icing and no mixer…

A Couple Cooks – Recipes worth repeating.

This easy lemon cake is bursting with bright citrus flavor! A quick sheet cake with simple icing and no mixer required, it’s the perfect sweet treat for any occasion.

Easy Lemon Cake

The days are getting brighter and warmer, and it’s the time that Alex and I start craving the flavors of sunshine. Here’s a cake recipe I created to match that mood: this easy lemon cake! My expertise as a recipe developer is in simple baking, like sheet cakes, easy muffins, and quick breads.

So this new lemon-infused recipe is fast and easy: a moist cake with a luscious tender crumb from buttermilk, drizzled with a zesty 2-ingredient lemon glaze! I gave away pieces from my recipe testing to friends and family, and they all couldn’t stop exclaiming how tasty it was.

Jump to the recipe—now.

Why to make this easy lemon cake

This lemon cake fits my vibe in the kitchen: uncomplicated baking. Layer cakes are lovely, but often I don’t feel like pulling out the mixer or attempting to ice a cake. So when I’m craving citrus, I make this lemon cake! Here are the reasons I like to make it:

  • It’s a sheet cake, made in a square baking dish. No need to stack and layer!
  • There’s no mixer required. All you need are two bowls, a whisk and a spatula.
  • You don’t need to wait for butter to come to room temperature. This one uses melted butter so there’s no need to wait.
  • The 2 ingredient icing is made in 2 minutes. This easy lemon glaze comes together quickly and you can pour it right over the cake.

In creating this recipe, I was inspired by simple snacking cakes like this meyer lemon cake from Sarah Kieffer and this blood orange yogurt cake from How Sweet Eats. If you’re looking for a more involved layer cake, this one from expert baker Sally’s Baking Addiction with cream cheese buttercream looks beautiful.

Lemon Cake

The 3 key ingredients for this easy lemon cake

This lemon cake is a cousin to this glazed lemon bread recipe I created recently. While they’re not exactly the same, they use some of the same flavor secrets to achieve the best zingy and zesty lemon flavor, along with a light and fluffy texture. Here are the three key ingredients you’ll need to have on hand:

  1. Buttermilk: Buttermilk is the key to baking quick breads, muffins and cakes with a tender crumb. As I mention in this lemon bread recipe, I learned the importance of buttermilk from professional baker and author Sarah Kieffer. After using it in recipes, I’ve seen a big difference in the texture of our baked goods! Don’t be tempted to make a substitution.
  2. Real lemons: Lemon zest adds a zingy flavor to the cake, and lemon juice is used in the icing. Using lemon juice in the cake isn’t necessary, since it can add a sour flavor.
  3. Lemon extract: The final key to lemony baked goods is using lemon extract! Over years of testing, we’ve found a combination of extract and real lemon zest makes the very best lemon flavor. It’s easy to find in the baking aisle at your grocery next to the other extracts.
Lemons

A few quick tips for baking

Here are a three quick tips for baking a lemon cake to understand before you roll up your sleeves and go to the recipe to get the baking! These notes provide a little bit of the “why” behind the instructions:

  1. For the strongest citrus flavor, rub the lemon zest into the sugar. Place the zest in the sugar and use your fingers to rub the zest into the sugar. This activates the essential oils in the zest, helping it to taste more lemony.
  2. Use an aluminum baking pan for best results. An aluminum pan bakes more evenly than ceramic or glass, and it’s our go-to for cakes, cookies, bars, breads, and muffins. (See this article from The Kitchn.)
  3. Use parchment paper to easily remove the cake. Cut the paper so it is the width of the loaf pan, then allow it to extend on either side of the pan to make a “sling” for easily removing the cake. This helps it cool faster, which is helpful since the cake must be cooled fully before adding the glaze.

Pro tip: We recommend a 9-inch aluminum square pan. You can use an 8-inch square pan as well to make thicker slices: simply increase the bake time by 5 to 10 minutes (adjust based on your oven and pan).

Lemon Cake recipe with lemon slices

Make ahead and storage info

This lemon cake stays incredibly moist during storage, and in fact it becomes even moister over time. Here are a few notes on making it ahead and storing it:

  • Make ahead: You can make lemon cake in advance and store refrigerated or at room temperature, covered in aluminum foil. Ice the cake right before serving.
  • Storage: The cake lasts at least 5 days at room temperature wrapped in aluminum foil or refrigerated for 10 or more days wrapped in foil. For best results, bring it to room temperature before enjoying. You can also freeze un-iced bread for up to 3 months. We suggest slicing it into pieces and wrapping it in plastic wrap then a freezer-safe bag or container before freezing.

More of our favorite lemony baked goods

We absolutely love baking up lemony treats in spring and summer! Here are a few more baked lemon recipes to try:

01

Classic Lemon Bars

This easy lemon bars recipe (aka lemon squares) has all of Grandma’s secrets! A zingy custard tops a thick shortbread…

02

Glazed Lemon Bread

Indulge in citrus bliss with this fluffy lemon bread recipe! Its soft texture, vibrant lemon flavor, and zingy glaze make…

03

Lemon Blueberry Muffins

These lemon blueberry muffins have just the right sweet and citrusy kick! Drizzle with a lemon glaze and they’re irresistible.…

Print
Lemon Cake

Easy Lemon Cake


  • Author: Sonja Overhiser
  • Prep Time: 30 minutes
  • Cook Time: 30 minutes
  • Total Time: 1 hour
  • Yield: 16

Description

This easy lemon cake is bursting with bright citrus flavor! A quick sheet cake with simple icing and no mixer required, it’s the perfect sweet treat for any occasion.


Ingredients

For the lemon cake

  • 1 ½ cups (210 g) all-purpose flour
  • 1 ½ teaspoons baking powder
  • ¼ teaspoon baking soda
  • ½ teaspoon kosher salt
  • 1 ½ tablespoons lemon zest (2 medium lemons)
  • 1 cup granulated sugar
  • ½ cup unsalted butter, melted
  • 2 eggs
  • ½ tablespoon lemon extract
  • 1 cup buttermilk

For the icing

  • 1 cup powdered sugar
  • 2 tablespoons fresh squeezed lemon juice

Instructions

  1. Heat the oven to 350°F. Butter a 9 x 9-inch baking dish. Line the pan with a piece of parchment paper, cut so that it extends on two sides to easily remove it from the pan.
  2. In a small bowl, whisk together the flour, baking powder, baking soda, and kosher salt.
  3. Place the lemon zest in a large bowl with the sugar. Use your fingers to rub the zest into the sugar until it is fragrant (this activates the flavor of the zest).
  4. Whisk in the melted butter until smooth. Whisk in the eggs one at a time, then the vanilla extract and lemon extract. Switch to a spatula. Add the dry ingredients and buttermilk and gently stir until smooth. Spread the batter evenly into the prepared pan.
  5. Bake 30 to 35 minutes or until top is light golden brown and toothpick inserted in center comes out clean. Cool 20 minutes.
  6. Meanwhile, mix together the powdered sugar with the lemon juice, adding slightly more if necessary to get to a thick but pourable consistency. Pour the glaze over the cake and smooth with a spatula. Cut into pieces within the first few minutes, before the glaze dries. If desired, top with more lemon zest or lemon slices.  Store in a sealed container at room temperature for up to 3 days or refrigerated for 1 week (bring to room temperature before serving).
  • Category: Dessert
  • Method: Baked
  • Cuisine: Dessert
  • Diet: Vegetarian

Keywords: Lemon cake, easy lemon cake

A Couple Cooks - Recipes worth repeating.

Glazed Lemon Bread

Indulge in citrus bliss with this fluffy lemon bread recipe! Its soft texture, vibrant lemon flavor, and zingy glaze make…

A Couple Cooks – Recipes worth repeating.

Indulge in citrus bliss with this fluffy lemon bread recipe! Its soft texture, vibrant lemon flavor, and zingy glaze make it an irresistible loaf for any season.

Lemon Bread recipe with lemon icing

It’s that time of year when we start craving lemon, and here’s the latest in our extensive collection of lemon recipes that you must try: this glazed buttermilk lemon bread recipe! We’ve been authors of baking recipes for over 10 years and we’ve learned a thing or two about baked goods, particularly quick breads. Here we’ve created the moistest, fluffiest, zingiest lemon loaf possible, topped with a flavor-popping zingy citrus glaze! It’s easy to whip up with just 10 ingredients.

What people are saying about this lemon bread recipe

When we create a recipe, we often like to have an independent recipe tester take a crack at it to verify that it’s as delicious and fool-proof as we think it is. This lemon bread recipe was tested by reader Lexi, who gave this testimonial:

“This lemon loaf turned out wonderful! The texture is wonderful, slightly moist, with a nice crumb. The lemon flavor is bright and zesty, balanced well with the sweet lemon glaze. It is so good the next day as well. We had it for breakfast this morning!”

Lemon Bread recipe with glaze and lemon slices

3 key ingredients for perfect lemon bread

Alex and I have been creating baking recipes for over 10 years, and we’ve learned a few things about quick breads. What we’ve learned? You can’t cut corners with baked goods: you’ve got to use the very best ingredients and techniques if you want the best flavor and textures! There are three key ingredients to make a perfect lemon bread in our opinion:

  1. Buttermilk: Turns out, buttermilk is the key to the fluffiest quick breads and muffins with the most tender crumb. We tried avoiding it for years since we didn’t regularly stock it, but it truly does wonders in this lemon bread. Don’t be tempted to make a buttermilk substitution! I learned the importance of buttermilk from professional baker and author Sarah Kieffer, and after using it in recipes I’ve seen a big difference in the texture of our baked goods!
  2. Real lemons: In this recipe, you’ll need lemon zest in the bread itself and lemon juice in the icing. Using lemon juice in the bread isn’t necessary, since it can add a sour flavor instead of infusing a zippy nuance.
  3. Lemon extract: The other key to lemony baked goods is using lemon extract! Over years of testing, we’ve found a combination of extract and real lemon zest makes the very best lemon flavor. It’s easy to find in the baking aisle, and you only use small amounts at a time. This is what makes it taste like a Starbucks lemon loaf!
Lemons

A few quick tips for baking the loaf

There are a few quick tips for baking this lemon bread recipe to make it the best loaf possible. After honing 20 quick bread recipes, here are a few tips for baking a lemon loaf:

  1. Rub the lemon zest into the sugar first. Instead of adding the lemon zest right to the recipe, place the zest in the sugar and use your fingers to rub the zest into the sugar. This activates the essential oils in the zest, helping it to taste more lemony.
  2. Use an aluminum baking pan for best results. Ceramic and glass pans don’t cook as evenly for quick breads. We recommend a 9-inch aluminum loaf pan. You can use an 8-inch pan as well: just increase the bake time slightly.
  3. Use parchment paper to easily remove the bread (and for quicker cooling). We cut the paper so it is the width of the loaf pan, then allow it to extend on either side of the pan to make a “sling” for easily removing the bread. This helps it cool faster, which is required before pouring on the glaze.
Lemon Bread recipe with lemon icing

That lemon glaze really seals in the zingy flavor!

The best part of this lemon bread recipe is the lemon glaze, which is the literal and figurative icing on top! It makes the bread taste significantly more lemony, almost like adding salt to a savory recipe to make it pop. Don’t be tempted to omit the icing! You can, but the bread will have a mellow quality: it’s nice, but it doesn’t have the “BOOM” flavor that it does with the icing. Here are a few tips for applying the lemon glaze:

  • Wait until the bread is cool prior to icing. Otherwise, the icing will melt into the bread.
  • Use a fork for drizzles, or a spatula for a smooth glaze. A fork makes the best drizzly lines: with a spoon it’s a bit too chunky. Use half the glaze for a drizzled look like this lemon blueberry bread. If you’re making the full glaze recipe, use a spatula to spread it on.

Make ahead and storage info

Because it’s made with buttermilk, this lemon bread recipe stays incredibly moist during storage! In fact, it gets even more moist over time. We tested this recipe with sour cream but it came out much drier especially over storage time. Buttermilk for the win!

You can make lemon bread in advance and cover in aluminum foil un-iced, then ice before serving.

The bread lasts at least 5 days at room temperature wrapped in aluminum foil or refrigerated for 10 or more days wrapped in foil (bring to room temperature before enjoying). You can also freeze un-iced bread for up to 3 months. We suggest slicing it into pieces and wrapping it in plastic wrap then a freezer-safe bag or container before freezing.

Lemon Loaf recipe

More of our favorite lemon recipes

There are so many fun lemon recipes try; here are a few of our favorites. Happy cooking!

01

Lemon Blueberry Bread

This lemon blueberry bread recipe is perfection! It’s moist and zesty, studded with fruit and topped with a sweet drizzle.…

02

Lemon Curd

This lemon curd recipe makes the best citrusy spread and topping! Use it for scones, pancakes, cakes and more. Are…

03

Classic Lemon Bars

This easy lemon bars recipe (aka lemon squares) has all of Grandma’s secrets! A zingy custard tops a thick shortbread…

This lemon bread recipe is…

Vegetarian. For vegan, try this Vegan Lemon Loaf. For gluten-free, try this Gluten Free Lemon Loaf.

Print
Lemon Bread recipe with lemon icing

Glazed Lemon Bread


  • Author: Alex Overhiser
  • Prep Time: 30 minutes
  • Cook Time: 1 hour
  • Total Time: 1 hour 30 minutes
  • Yield: 12 slices

Description

Indulge in citrus bliss with this fluffy lemon bread recipe! Its soft texture, vibrant lemon flavor, and zingy glaze make it an irresistible loaf for any season.


Ingredients

For the lemon bread

  • 1 3/4 [245 g] all-purpose flour
  • 1 ½ teaspoons baking powder
  • ¼ teaspoon baking soda
  • ½ teaspoon kosher salt
  • 1 cup plus 2 tablespoons granulated sugar
  • Zest of two medium lemons (about 1 ½ tablespoons)
  • ½ cup melted unsalted butter (or vegetable oil)
  • ¾ cup buttermilk
  • 3 eggs
  • 2 teaspoons lemon extract

For the glaze

  • 1 cup powdered sugar (120 g)
  • 2 tablespoons fresh squeezed lemon juice

Instructions

  1. Preheat the oven to 350°F. 
  2. Grease a 9-inch aluminum loaf pan. Line the pan with a piece of parchment paper, cut so that it extends on two sides to easily remove it from the pan.
  3. In a large bowl, whisk the all-purpose flour, baking powder, baking soda, and salt.
  4. Place the lemon zest in a large bowl with the sugar. Use your fingers to rub the zest into the sugar until it is fragrant (this activates the flavor of the zest).
  5. Whisk in the melted butter, then whisk the eggs one at a time. Whisk in the buttermilk and lemon extract. Switch to a spatula. Add the dry ingredients and stir until smooth. Spread evenly into the prepared pan.
  6. Bake 53 to 55 minutes until the top springs back when touched and a toothpick inserted comes out clean (if the top is not set at this point, bake a few minutes longer). The exact timing will depend on your oven and baking pan.
  7. Cool the bread in the pan for 30 minutes. Then run a knife around the edge and invert the loaf onto a cooling rack. Allow to cool fully to room temperature (about 30 minutes to 1 hour).
  8. Mix the ingredients in a small bowl until it comes together into a smooth icing (if it is too runny add a bit more powdered sugar; if it’s too thick add a few drops more lemon juice). Use a fork to drizzle the top of the bread with the icing (½ recipe) or a spatula to spread it (full recipe).
  9. Make ahead / storage: You can make the bread in advance and cover in aluminum foil un-iced, then ice before serving. The bread lasts at least 5 days at room temperature wrapped in aluminum foil or refrigerated for 10 or more days wrapped in foil (bring to room temperature before enjoying). You can also freeze un-iced bread for up to 3 months (slice it into pieces and wrap it in plastic wrap then a freezer-safe bag or container).
  • Category: Quick Bread
  • Method: Baked
  • Cuisine: Bread
  • Diet: Vegetarian

Keywords: Lemon bread, lemon bread recipe, lemon loaf

A Couple Cooks - Recipes worth repeating.

Lemon Cookies

These lemon cookies are sure to brighten your day! The unique addition of semolina flour lends an irresistible texture, while lemon zest and vanilla extract add warmth and vibrancy—the perfect balance of sweet and tart.

These lemon cookies are sure to brighten your day! The unique addition of semolina flour lends an irresistible texture, while lemon zest and vanilla extract add warmth and vibrancy—the perfect balance of sweet and tart.

Easy Manicotti

This manicotti recipe is pasta bake comfort food at its finest! This easy no-boil method lets you indulge in layers…

A Couple Cooks – Recipes worth repeating.

This manicotti recipe is pasta bake comfort food at its finest! This easy no-boil method lets you indulge in layers of creamy cheese and savory filling without the fuss.

Manicotti recipe

Looking for a cozy pasta bake? Try this manicotti recipe, classic Italian American comfort food at its finest! There’s something so irresistible about pasta tubes filled with three cheeses and bathed in garlicky, tangy tomato sauce. This recipe is truly the easiest way to make manicotti: you don’t even have to boil pasta! No stovetop cooking required, and no fumbling stuffing flimsy pasta tubes. Fill them dry, then pop them in the oven so you can enjoy all the creamy cheese and savory filling without the fuss!

What is manicotti?

Manicotti are large pasta tubes that are pointed at the end with ridges, intended to be stuffed and baked. The word comes from the Italian word manicotto, meaning “big sleeves.” Manicotti is a popular Italian American pasta bake where the pasta is stuffed with a ricotta filling that can be either meat filled or vegetarian.

What is the difference between manicotti vs cannelloni? Cannelloni are large tubes just like manicotti, but they’re smooth and have flat ends. They are most often served with a meat filling, whereas manicotti can be vegetarian or with meat.

Manicotti Recipe

What makes this the easiest manicotti recipe

As we researched this manicotti recipe, we saw the same complaint over and over: “Why is it so hard to fill manicotti?” Once you boil the pasta tubes, they can become very delicate and difficult to fill. You can also overcook them, risking rubbery pasta.

Instead, this manicotti recipe is a no boil recipe so the dry pasta cooks in the sauce while baking. You’ll fill the pasta tubes while they are dry, then add 1 cup water to the marinara sauce which is enough moisture to cook the pasta at the same time as baking. (Note that you don’t need to buy no boil pasta, just standard manicotti.) The pasta comes out perfectly al dente: it’s magical!

Boiling option

Of course if you prefer cooking the pasta, you can do that too! Boil the pasta tubes before baking, fill them using a pastry bag, remove the 1 cup water from Step 2, and shorten the bake time by 30 minutes!

Manicotti Recipe

Best ways to fill the pasta

Manicotti is notoriously tricky to fill. It’s easiest to use a pastry bag to fill the tubes, since it squirts the filling right in. But if you’re like me, you might like avoiding the mess and hassle of pulling out your pastry bag.

Since this recipe uses dry pasta, it’s easier to fill! You can simply use a long spoon or other utensil to fill the manicotti. It takes slightly longer than the pastry bag, but it does the job well!

Ingredients for this manicotti recipe

This manicotti recipe has a three cheese filling, stuffed ricotta, mozzarella and Parmesan cheese along with with spinach, garlic, and herbs. Don’t worry: meat lovers won’t miss the meat! This one went over extremely well with friends and family! If you prefer meat, you can substitute the spinach for ¾ pound cooked and seasoned ground beef or sausage. Here’s what you’ll need for this manicotti recipe:

  • Manicotti
  • Fire roasted crushed tomatoes
  • Garlic
  • Olive oil
  • Dried oregano
  • Dried tarragon (optional)
  • Frozen spinach
  • Ricotta, Parmesan and mozzarella cheese
  • Egg
  • Fresh parsely
  • Kosher salt and pepper
Manicotti Recipe

Fire roasted tomatoes, & why to avoid jarred sauce

You’ll notice from the list above that this manicotti recipe uses a homemade tomato sauce with fire roasted tomatoes, garlic, olive oil, and dried oregano. Fire roasted tomatoes are key to the flavor: they’re roasted over an open flame so their flavor is sweet and developed right out of the can. If you can’t find them, use your best quality canned crushed tomatoes and add ¼ teaspoon sugar.

Avoid substituting jarred marinara sauce in this recipe! We tested this recipe with jarred marinara sauce and the flavors tasted flat and uninspired. It takes just 5 minutes to stir together the marinara sauce for this recipe: don’t skip it!

What to serve with manicotti

Want to make this manicotti recipe into a meal? Here are a few great simple sides you can make that don’t require an oven while your manicotti bakes:

This manicotti recipe is…

Vegetarian.

Print
Manicotti recipe

Easy Manicotti Recipe


  • Author: Sonja Overhiser
  • Prep Time: 30 minutes
  • Cook Time: 1 hour
  • Total Time: 1 hour 30 minutes
  • Yield: 6

Description

This manicotti recipe is pasta bake comfort food at its finest! This easy no-boil method lets you indulge in layers of creamy cheese and savory filling without the fuss.


Ingredients

  • 8 ounces manicotti (14 shells)
  • 28 ounces fire roasted crushed tomatoes
  • 2 garlic cloves, minced (divided)
  • 2 tablespoons olive oil
  • 2 teaspoons dried oregano, divided
  • 2 teaspoons kosher salt, divided
  • 10 ounces frozen spinach, thawed
  • 15 ounces ricotta cheese
  • ¾ cup grated Parmesan cheese, divided
  • 2 cups mozzarella cheese, divided
  • 1 egg
  • 2 tablespoons minced fresh parsley, plus ½ tablespoon for garnish
  • ¼ teaspoon dried tarragon (optional)
  • Black pepper, to taste

Instructions

  1. Preheat the oven to 375°F. 
  2. Make the tomato sauce: In a medium bowl, mix the fire roasted tomatoes, 1 clove grated or minced garlic, olive oil, 1 teaspoon dried oregano, and 1 teaspoon kosher salt. Mix well until all the olive oil is incorporated. Stir in 1 cup water (this added moisture allows the dry pasta to cook while baking*).
  3. Squeeze all the liquid out of the spinach using a strainer over the sink. Mix the spinach, ricotta cheese, ½ cup Parmesan cheese, 1 cup mozzarella cheese, 1 minced garlic clove, egg, parsley, the tarragon, 1 teaspoon dried oregano, 1 teaspoon kosher salt, and fresh ground black pepper to taste. 
  4. Spread 1 cup of the tomato sauce into the bottom of a 9 x 13” baking dish.
  5. Use a pastry bag or long spoon to place the filling into the dry manicotti pasta. Then place each pasta tube into the dish.
  6. Top with the remaining tomato sauce. Sprinkle the remaining 1 cup mozzarella cheese and ¼ cup Parmesan cheese. Cover with aluminum foil.
  7. Place the pan in the oven and bake covered with foil for 45 minutes, then uncover and bake for 15 minutes.  
  8. Garnish with additional chopped parsley. Allow to stand for 5 to 10 minutes before serving.

Notes

*This manicotti recipe is a no boil recipe so the dry pasta cooks in the sauce while baking. You’ll fill the pasta tubes while they are dry, then add 1 cup water to the marinara sauce which is enough moisture to cook the pasta at the same time as baking. (Important: you don’t need to buy no boil pasta, just standard manicotti.) If you prefer cooking the pasta, you can boil the pasta tubes before baking, fill them using a pastry bag, remove the 1 cup water from Step 2, and shorten the bake time by 30 minutes!

  • Category: Main dish
  • Method: Baked
  • Cuisine: Italian
  • Diet: Vegetarian

Keywords: Manicotti, manicotti recipe

A Couple Cooks - Recipes worth repeating.

Vegan Cornbread Muffins

Simple and delicious these Vegan Cornbread Muffins are so tender and light! Made in one bowl with 15 minutes of hands-on time.

Simple and delicious these Vegan Cornbread Muffins are so tender and light! Made in one bowl with 15 minutes of hands-on time.

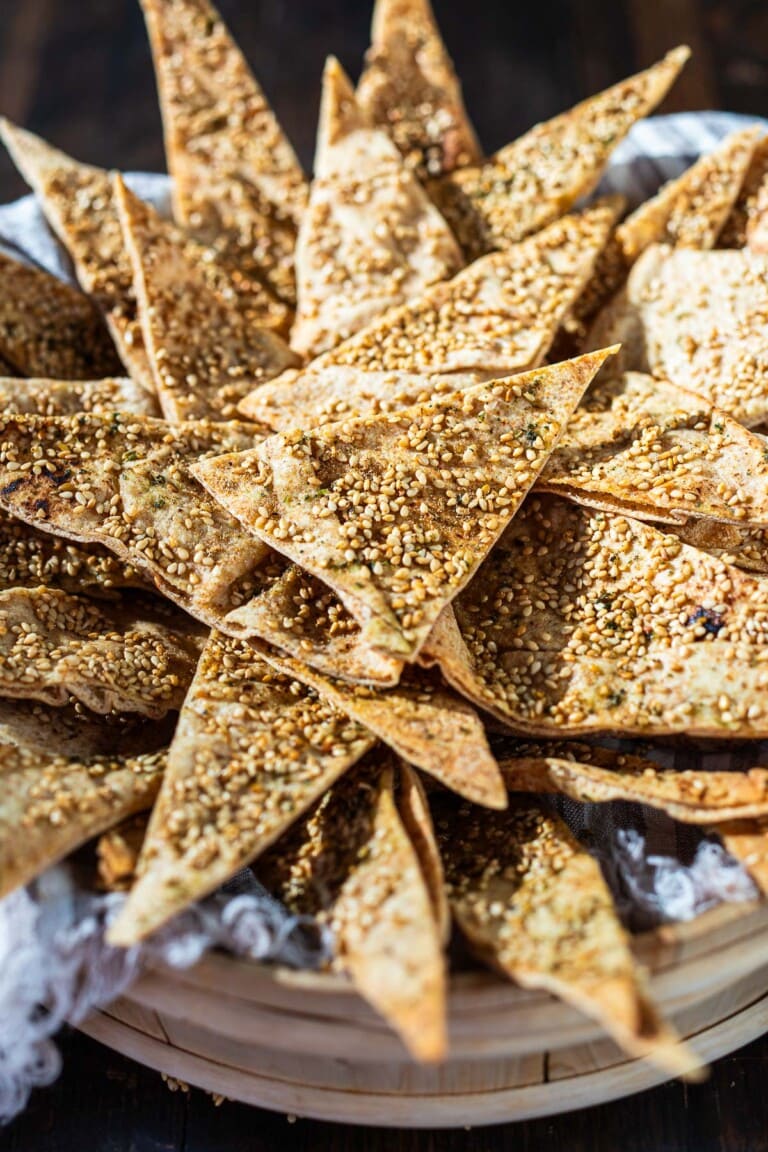
Crispy Homemade Pita Chips

How to make crispy homemade pita chips from scratch. Great for mezze platters, hummus, baba ganoush, or any of your favorite dips. Easy, vegan and fun to make!

homemade pita chips
How to make crispy homemade pita chips from scratch. Great for mezze platters, hummus, baba ganoush, or any of your favorite dips. Easy, vegan and fun to make!