Muffaletta Roll Ups

These Muffaletta Roll Ups are the best way to enjoy your favorite sandwich outside of NOLA! They’re the perfect meal-prep recipe on a budget.

The post Muffaletta Roll Ups appeared first on Budget Bytes.

Any time I can meal-prep lunches for the week, I’m all in! These Muffaletta Roll Ups are a fun twist on the classic New Orleans sandwich. They’re filled with all the traditional flavors of a muffaletta thanks to the layers of Italian salami, ham, cheeses (provolone AND mozzarella!), and a tangy homemade olive salad. But instead of using a loaf of bread, I wrap everything up in pizza dough and bake it until golden brown and crispy! These roll ups are perfect for lunchboxes, picnics, or your next game day spread.

A slice of muffaletta roll up on a plate

While teaching at the Canadian Food & Wine Institute at Niagara College, I volunteered to help with one of their Project Brew events, where the brewery students share their final projects (mmm, craft beer!) with the student body and the public. The class chooses a theme, and the culinary students help cater the event. I was thrilled to learn they had chosen “Brew Orleans” (ha, ha), so I had to bring my A-game regarding New Orleans-themed food.

My students and I chose to make muffaletta roll ups and vegan red beans and rice. The roll ups we made were completely vegan, but for Budget Bytes, I’ll walk you through something a bit more classic for the omnivores out there. However, it’s worth noting you can make this recipe entirely vegan—just find the plant-based meat and cheese substitutes you love the most and skip the egg wash! At home, I usually make one with classic cheese and deli meats for my husband, and then I make a plant-based version for myself. We eat them all week for lunch!

What is a Muffaletta Roll Up?

Muffaletta (or muffuletta) is a wide, round Sicilian bread topped with sesame seeds and a soft texture similar to focaccia or ciabatta. Muffaletta is also a well-loved and popular sandwich made famous in New Orleans. It’s believed the first muffaletta sandwich was created by Sicilian immigrant Salvatore Lupo, owner of Central Grocery in New Orleans, in 1906. The sandwich is traditionally made with Italian cold cuts, cheese, and a special olive salad that gives it its signature flavor.

The bread is almost as important (if not more so, depending on who you speak to!) than the filling. However, finding authentic muffaletta bread outside of NOLA is tricky. So, for this recipe, I wrap the sandwich filling in pre-made pizza dough and bake it for a delicious take on the classic. It’s like a cross between a stromboli, a sandwich, and muffaletta pinwheels!

Ingredients for Muffaletta Roll Ups

Here’s what you’ll need to make these muffaletta roll ups:

  • Green Olives: Olives are the base ingredient for the muffaletta salad, which is truly the star of this recipe! The salad is similar to an olive tapenade. I like green olives for their mild flavor, but you can use any type you prefer. (I found jalapeño stuffed olives, so I opted for those!)
  • Italian Giardiniera Mix: This mixture of pickled vegetables adds a refreshing crunch and tang to the olive salad. You can find giardiniera mix in the pickle aisle at your local grocery store.
  • Dried Italian Herbs: Infuses the salad with classic Italian flavors.
  • Garlic: Adds a delicious kick of flavor that only gets better as it marinates with the other ingredients.
  • Italian Salami & Thin Cut Ham: These are two of the classic deli meats you’ll find included in a traditional muffaletta sandwich. You can also add other meats or use your favorite veggie/vegan alternative.
  • Provolone & Mozzarella Cheese: A must-have for any muffaletta recipe! These cheeses melt beautifully and help the roll ups hold together.
  • Flour: To roll out the pizza dough, if needed.
  • Pre-Made Pizza Dough: If you can’t find pre-made balls of pizza dough at your grocery store, check the freezer section and ask the bakery staff, too! I have successfully made calzones and pizza with the Pillsbury Dough Pizza Crust in a can, but I haven’t tried it with these muffaletta roll ups yet. You may need to rely on the optional extra flour to roll it out if you try the Pillsbury kind, as I found it to be sticky to work with.
  • Egg: Gives the roll a beautiful, golden brown finish.
  • Sesame Seeds: Traditional muffalettas are made with bread that’s topped with sesame seeds. Sprinkling some on your roll ups helps to replicate that classic look and taste.

Tips and Suggestions

  1. Use thin-cut meats and cheeses as they roll up better and won’t make your roll ups too bulky.
  2. Muffaletta salad always tastes better when it has had time to marinate! Make the olive salad the day before and let it sit in the fridge overnight for maximum flavor.
  3. Use pitted or stuffed green olives (I used jalapeno-stuffed olives for an extra kick) so you don’t have to worry about removing the pit before chopping.
  4. Muffalettas are usually left to ‘rest’ before eating so the olive salad juices can soak into the bread. That won’t work for these roll ups, as the added moisture will create lots of steam and make them soggy. I recommend straining the olive salad well before adding it to the pizza dough!

Storage Instructions

Store your roll ups in the fridge for up to 5 days. They’re delicious, hot or cold, as leftovers! You can also try freezing them for up to 3 months by wrapping them in foil or plastic wrap and placing them in an airtight container. Let them thaw in the fridge overnight before enjoying. Just note that the salad and meat may become watery after thawing.

Do you love this New Orleans-inspired recipe?

Our founder, Beth, lived in NOLA for a while. She has some awesome recipes for classics like slow cooker jambalaya and Louisiana-style Red Beans and Rice here on the blog. Check them out! I think you’ll love my Shrimp Po’Boys recipe, too! (Spoiler alert: YUM!)

Hands holding a slice of muffaletta roll up
Print

Muffaletta Roll Ups

These Muffaletta Roll Ups are the best way to enjoy your favorite sandwich outside of NOLA! They're the perfect meal-prep recipe on a budget.
Course Lunch
Cuisine American
Total Cost ($14.14 recipe / $2.02 serving)
Prep Time 10 minutes
Cook Time 25 minutes
Total Time 35 minutes
Servings 7 servings (one 2 inch thick slice per serving)
Calories 593kcal

Ingredients

Muffaletta Salad Ingredients

  • ½ cup green olives* $1.73
  • ½ cup Italian giardiniera mix $0.71
  • 1 tsp dried Italian herbs $0.19
  • 1 clove garlic, minced $0.05

Roll Up Ingredients

  • 1 ball pizza dough $3.49
  • 1 Tbsp flour, if needed for rolling out pizza dough $0.02
  • 11 slices Provolone cheese $1.98
  • 8 slices mozzarella cheese $1.44
  • 10 slices of thin cut ham $1.98
  • 15 slices of thin cut Italian salami $2.19
  • 1 egg, beaten $0.22
  • 1 tsp sesame seeds for garnish $0.14

Instructions

Muffaletta Salad Directions

  • Add all the salad ingredients to your food processor and pulse until chunky and small.

Roll Up Directions

  • Preheat oven to 400 degrees. Roll out pre-made pizza dough onto a large piece of parchment paper, about 10×14” in size, nice and thin. Use a little flour if necessary to help you roll your dough flat if you find it’s a little sticky.
  • Top the dough with one layer of cheese slices. Leaving about 1 inch around 3 sides and 2-3 inches at the end so you can seal the dough after all of your layers are done.
  • Then, on top of your cheese layer, spread out Italian salami
  • On top of salami, layer the thin cut ham. Spoon the Muffuletta salad over the top. Try to drain any juices before adding the muffuletta salad to your roll up.
  • Add your last layer of cheese.
  • Carefully roll up your dough, starting from one short end of the rolled out dough.
  • Seal the dough gently with your finger tips to create a solid loaf.
  • Brush egg wash over the entire loaf.
  • Then, cut 3 slits in the top to help release steam so your roll up doesn’t burst at the seams. (Sometimes it still happens, as you can see from my process photos—don’t worry, it will be fine!) Sprinkle with sesame seeds.
  • Bake for 20-25 minutes on a parchment-lined baking sheet. Let sit for 5-10 minutes to cool before slicing into 2” portions. You can enjoy your Muffuletta Roll Up hot or cold. This recipe’s leftovers should be refrigerated and enjoyed within 5 days.

See how we calculate recipe costs here.

Notes

* I opted for jalapeno stuffed green olives I found at Walmart to give my muffaletta a little extra heat.

Nutrition

Serving: 1serving | Calories: 593kcal | Carbohydrates: 42g | Protein: 35g | Fat: 37g | Sodium: 2297mg | Fiber: 1g
Muffaletta roll ups on a wooden chopping board

how to make A Muffaletta Roll Up – step by step photos

Muffaletta salad ingredients in a food processor

Add ½ cup green olives, ½ cup Italian giardiniera mix, 1 tsp dried Italian herbs, and 1 minced garlic clove to your food processor.

Pulsed muffaletta salad ingredients in a food processor

Pulse until chunky and small.

Rolled out pizza dough

Preheat oven to 400 degrees. Roll out 1 ball of pre-made pizza dough onto a large piece of parchment paper, about 10×14” in size, nice and thin. Use 1 Tbsp flour if necessary to help you roll your dough flat if you find it’s a little sticky.

Pizza dough topped with cheese slices

Top the dough with 11 Provolone cheese slices. Leaving about 1 inch around 3 sides and 2-3 inches at the end so you can seal the dough after all of your layers are done.

Pizza dough topped with salami slices

Then, on top of your cheese layer, spread out 15 slices of Italian salami.

Fillings for muffaletta roll up on pizza dough

On top of salami, layer 10 slices thin cut ham. Spoon the Muffuletta salad over the top. Try to drain any juices before adding the muffuletta salad to your roll up.

Adding last cheese layer to a muffaletta roll up

Add 8 slices of mozzarella cheese on top.

Hands rolling the pizza dough over the fillings for muffaletta roll ups

Carefully roll up your dough, starting from one short end of the rolled out dough. Seal the dough gently with your finger tips to create a solid loaf.

A brush added an egg wash to an unbaked muffaletta roll up

Brush 1 beaten egg over the entire loaf.

Unbaked muffaletta roll up

Then, cut 3 slits in the top to help release steam so your roll up doesn’t burst at the seams. (Sometimes it still happens, as you can see from my process photos—don’t worry, it will be fine!)

Unbaked muffaletta roll up topped with sesame seeds

Sprinkle with 1 tsp sesame seeds.

Freshly baked muffaletta roll up on a parchment lined baking sheet

Bake for 20-25 minutes on a parchment-lined baking sheet. Let sit for 5-10 minutes to cool before slicing into 2” portions. You can enjoy your Muffaletta Roll Up hot or cold. This recipe’s leftovers should be refrigerated and enjoyed within 5 days. 

Overhead view of a muffaletta roll up on a plate

You’re going to love how quick, easy, and delicious this muffaletta roll up recipe is!

The post Muffaletta Roll Ups appeared first on Budget Bytes.

Air Fryer Tofu

If you’re looking to fire up a Meatless Monday tradition, this Air Fryer Tofu is super easy and tastes great.

The post Air Fryer Tofu appeared first on Budget Bytes.

This budget-friendly protein-packed tofu is begging to be the center of attention at your dinner table. If you’re looking to fire up a Meatless Monday tradition, or you’ve been on the tofu train for a long time, this Air Fryer Tofu is super easy and tastes great. I toss extra firm tofu in a simple soy sauce marinade and then drizzle with honey, sesame seeds, and green onions after it’s crisped up in the air fryer. The texture comes out perfect and the flavor profile is an easy hit with tofu experts and novices alike!

air fryer tofu on a white plate with a bowl of sweet chili dipping sauce.

I remember when my relationship with tofu first started about 20 years ago. Tofu could be found in a big bucket of water in the bottom of a cooler at the health food store, and I had to fish it out with tongs. I remember thinking, “What IS this stuff?!” The various options for firm, extra firm, soft, or silken were hard to come by back then, but now tofu is experiencing a much-deserved Renaissance!

You can find tofu everywhere– and the variety! (Swoon.) Already marinated, soft, extra firm, cut into chicken-like shapes, you name it. Even your local Walmart or Aldi probably has it. We don’t have to break the bank at luxury grocery stores to find it any longer and thank goodness that container full of tofu and water is a thing of the past.

What is Air Fryer Tofu?

Delightfully crispy on the outside with a delightfully chewy center, this Air Fryer Tofu is good enough to convert anyone into a tofu lover. The freezing step of the tofu is one you won’t want to skip! It gives it a dense texture that holds up great with all kinds of sauces. I attempted many different recipes for Air Fryer Tofu, trying to keep things as easy and inexpensive as possible. This recipe yielded the best result every time!

You can add whatever herbs or seasonings you like to this recipe, but the soy sauce and sesame oil are keepers; they add umami and savory notes to otherwise bland tofu. Tofu is so versatile and easy to add flavor to with whatever marinade ingredients you like best.

Ingredients

Here’s what you’ll need to make crispy air fryer tofu:

  • Extra Firm Tofu: This type of tofu holds up best to air frying. It holds its shape well, and it has a chewier texture than firm or regular tofu.
  • Soy Sauce: Adds tons of umami flavor to the tofu.
  • Sesame Oil: Adds a hint of nuttiness to the tofu and helps it brown in the air fryer.
  • Cornstarch: Absorbs excess moisture to create a super crispy coating. My recipe calls for much less than other recipes I have seen and this helps the texture big time!
  • Honey: Adds a touch of sweetness!
  • Sesame Seeds: Add a great crunch to the tofu.
  • Green Onion: Adds a pop of fresh onion flavor.

Serving Suggestions

My favorite way to serve this crispy air fryer tofu is over this delicious coconut rice! The slightly sweet and nutty flavor pairs so well with the savory, crispy tofu! For dipping, I love this sweet chili sauce (pictured) or homemade sweet and sour sauce.

Tips and Notes

  • Extra firm or super firm tofu works best. Firm tofu will also work, but the texture won’t be quite as dense. I do not recommend regular or silken tofu for this recipe, as neither holds up well.
  • Don’t skip freezing the tofu! It creates a denser, spongier texture that has a meatier chew.
  • If you like your tofu crunchier (and less chewy), you can press it between clean kitchen towels using a tofu press, a stack of books, or a heavy pan for 30-60 minutes to remove excess moisture.
overhead view of air fryer tofu in an air fryer basket.
air fryer tofu on a white plate with a bowl of sweet chili dipping sauce.
Print

Air Fryer Tofu

If you’re looking to fire up a Meatless Monday tradition, this Air Fryer Tofu is super easy and tastes great.
Course Dinner, Main Course
Cuisine Asian
Total Cost ($3.02 recipe / $1.51 serving)
Prep Time 1 hour 10 minutes
Cook Time 10 minutes
Total Time 1 hour 20 minutes
Servings 2 (1/2 block or 8 oz. of tofu per serving)
Calories 234kcal

Equipment

Ingredients

  • 16 oz. extra firm tofu $1.69
  • 1/4 cup soy sauce $0.59
  • 1 Tbsp sesame oil $0.33
  • 1 Tbsp cornstarch $0.06
  • 1 tsp honey $0.05
  • 1/4 tsp sesame seeds $0.14
  • 1 green onion, sliced $0.16

Instructions

  • Pat dry and freeze 1 block of extra firm tofu for 1 hour, minimum.* Remove the tofu from the freezer and allow it to thaw to the point where it can be cut with a knife.
  • Dice the tofu into 1/2-inch cubes. Gather soy sauce, sesame oil, and cornstarch.
  • Toss the cubed tofu with soy sauce and sesame oil. Then, lightly dust the dressed tofu with cornstarch, tossing or stirring until each piece is lightly covered.
  • Transfer to an air fryer basket and fry at 400°F for 10 minutes, shaking halfway through.
  • Garnish with a drizzle of honey, sesame seeds, and sliced green onions. Serve with your favorite dipping sauce or over a bed of white rice.

See how we calculate recipe costs here.

Notes

*I did not press my tofu for this recipe, but you can if you would like it to be more crunchy and less chewy.

Nutrition

Serving: 0.5block | Calories: 234kcal | Carbohydrates: 13g | Protein: 20g | Fat: 11g | Sodium: 1765mg | Fiber: 1g
overhead view of air fryer tofu with sweet chili dipping sauce on a white plate.

how to make Air Fryer Tofu – step by step photos

comparing frozen and thawed tofu (left) to refrigerated tofu (right).

Pat dry and freeze 1 (16-oz.) block of extra firm tofu for 1 hour, minimum.* Remove the tofu from the freezer and allow it to thaw to the point where it can be cut with a knife. (Notice the difference in texture with the frozen tofu on the left and the unfrozen on the right.)

diced tofu next to bowls of sesame oil, soy sauce, and cornstarch on a cutting board.

Dice the tofu into 1/2-inch cubes. Gather 1/4 cup soy sauce, 1 Tbsp sesame oil, and 1 Tbsp cornstarch.

pouring cornstarch over diced tofu in a white bowl.

Toss the cubed tofu with soy sauce and sesame oil. Then, lightly dust the dressed tofu with cornstarch, tossing or stirring until each piece is lightly covered.

tofu cubes in an air fryer basket.

Transfer to an air fryer basket and fry at 400°F for 10 minutes, shaking halfway through.

cooked crispy tofu cubes in an air fryer basket.

Garnish with 1 tsp honey, 1/4 tsp sesame seeds, and 1 sliced green onion. Serve with your favorite dipping sauce or over a bed of white rice.

dipping a cube of air fryer tofu in sweet chili dipping sauce with chopsticks.

Wonderfully chewy and crisp, this air fryer tofu is sure to be a hit!

The post Air Fryer Tofu appeared first on Budget Bytes.

Spicy Garlicky Sesame Tofu (30 Minutes!)

Welcome to another minimal effort, BIG flavor dish! This quicker-than-takeout sesame tofu is baked to crispy perfection and coated in a drool-worthy, sweet + spicy + garlicky sauce. It might have you questioning whether you’ll ever be ordering takeout …

Spicy Garlicky Sesame Tofu (30 Minutes!)

Welcome to another minimal effort, BIG flavor dish! This quicker-than-takeout sesame tofu is baked to crispy perfection and coated in a drool-worthy, sweet + spicy + garlicky sauce. It might have you questioning whether you’ll ever be ordering takeout again!

Pair with rice and steamed veggies for a simple, 30-minute meal that’s vegan, gluten-free, and naturally sweetened. Let’s make it!

Recipe Inspiration

This recipe is inspired by Sesame Chicken, which is commonly found in Chinese restaurants in the US and Canada (source).

Spicy Garlicky Sesame Tofu (30 Minutes!) from Minimalist Baker →
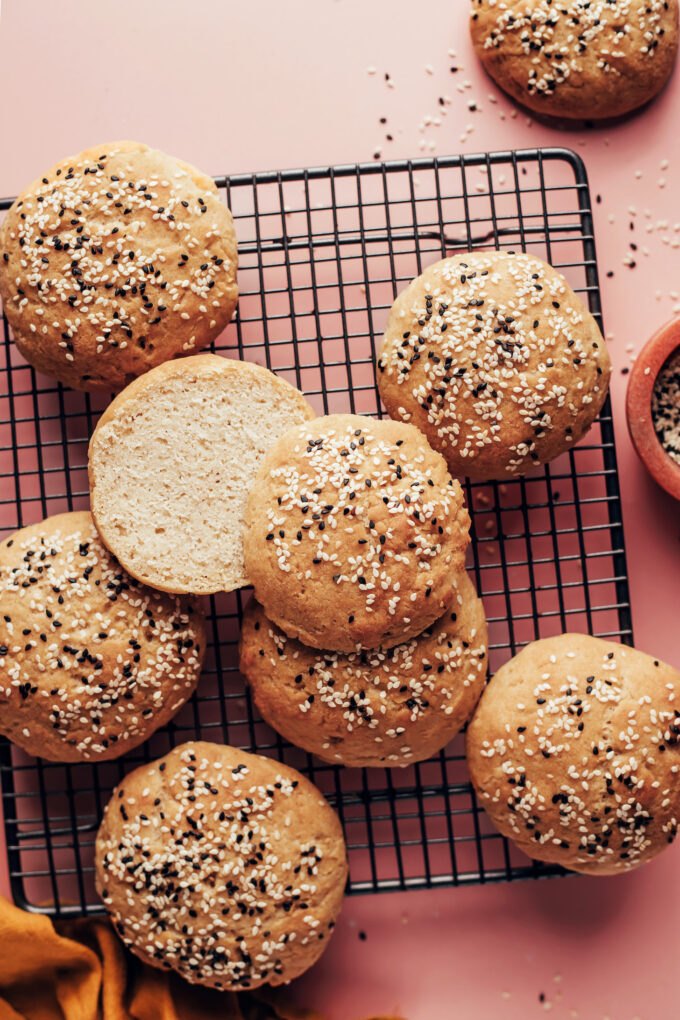
Gluten-Free Hamburger Buns (Vegan)

Gluten-free friends, the day is finally here: Meet our EPIC gluten-free hamburger buns! These slightly sweet, perfectly soft buns are sturdy enough to save your hands from condiments yet light and fluffy enough to avoid smashing your favorite veggie bu…

Gluten-Free Hamburger Buns (Vegan)

Gluten-free friends, the day is finally here: Meet our EPIC gluten-free hamburger buns! These slightly sweet, perfectly soft buns are sturdy enough to save your hands from condiments yet light and fluffy enough to avoid smashing your favorite veggie burger.

Bonus? They’re vegan and require just 10 ingredients! Get your grills ready — hamburger season is on!

How to Make Gluten-Free Hamburger Buns

These buns begin like any good FLUFFY bread recipe: with yeast!

Gluten-Free Hamburger Buns (Vegan) from Minimalist Baker →

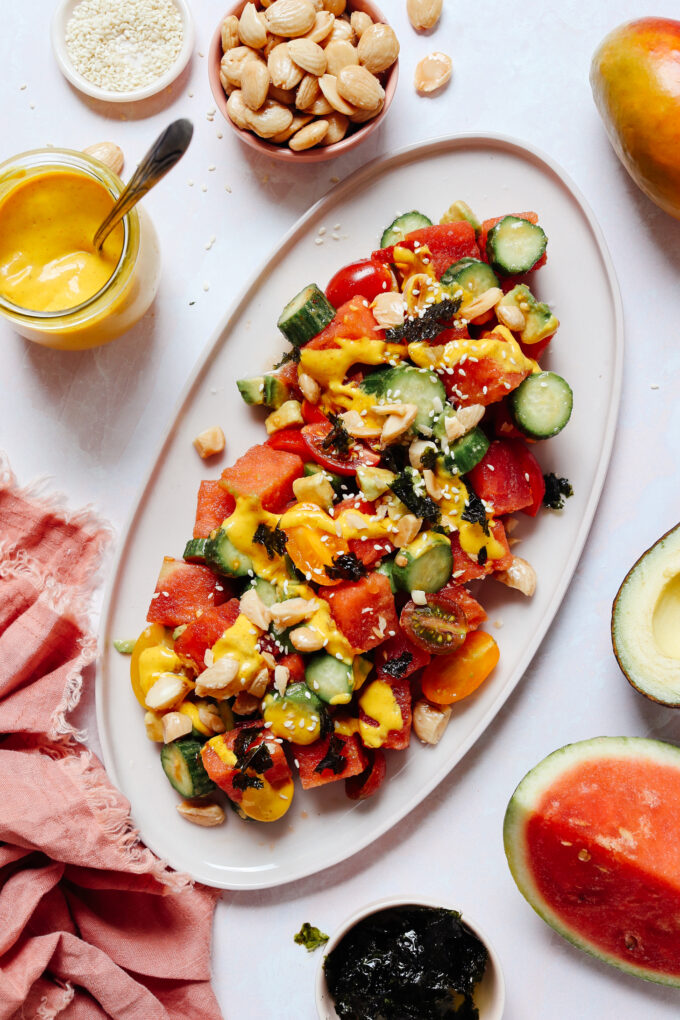
Spicy Watermelon Salad (True Food-Inspired!)

True Food, you’ve stolen our hearts with your Watermelon Salad. We’re talking one of the best salads we’ve ever eaten. A homemade rendition had to happen! 
Friends, it’s now your turn to be swept off your feet. Just 20 minutes stand between …

Spicy Watermelon Salad (True Food-Inspired!)

True Food, you’ve stolen our hearts with your Watermelon Salad. We’re talking one of the best salads we’ve ever eaten. A homemade rendition had to happen! 

Friends, it’s now your turn to be swept off your feet. Just 20 minutes stand between you and this show-stopping, sweet + spicy watermelon salad that’s so hydrating, fresh, and perfect for summer. Let us show you how it’s done!

The base of this AMAZING salad is crunchy cucumber and sweet watermelon with bites of avocado and cherry tomatoes.

Spicy Watermelon Salad (True Food-Inspired!) from Minimalist Baker →

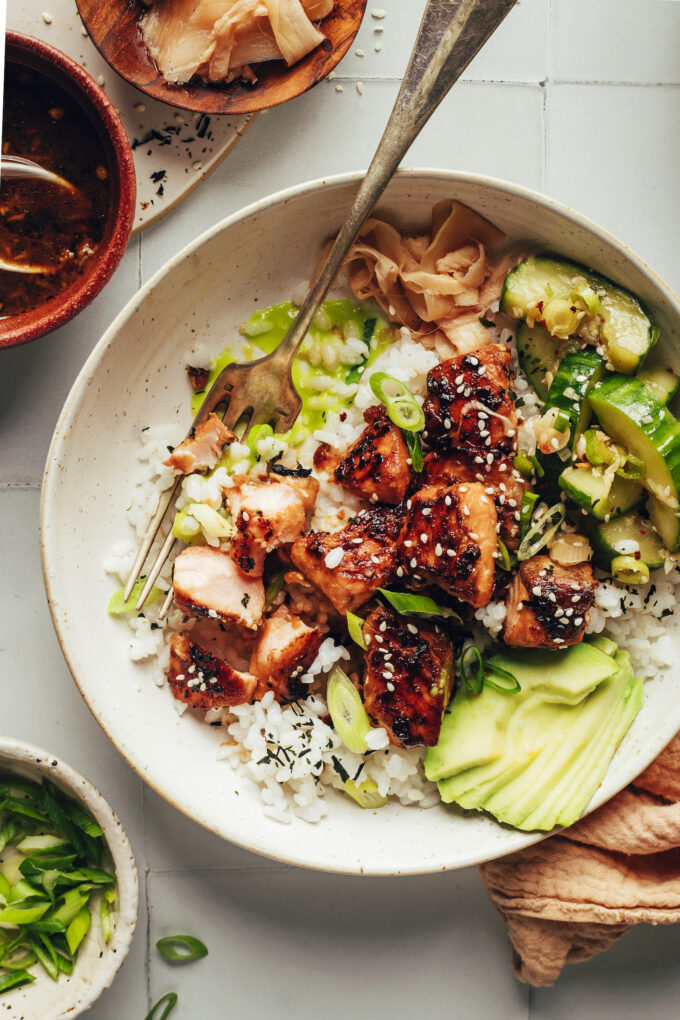
Easy Salmon “Sushi” Bowls

Who loves all things sushi but feels a little intimidated by making sushi at home? (Slowly raises hand.) Solution: this quick and easy salmon sushi bowl! It’s our take on the satisfaction of sushi without the need for sushi-grade fish or assembli…

Easy Salmon “Sushi” Bowls

Who loves all things sushi but feels a little intimidated by making sushi at home? (Slowly raises hand.) Solution: this quick and easy salmon sushi bowl! It’s our take on the satisfaction of sushi without the need for sushi-grade fish or assembling rolls! We’re into it. 

Just 9 ingredients required, friends. Let us show you how it’s done!

How to Make Salmon “Sushi” Bowls

These EASY salmon “sushi” bowls come together with just three required components, plus a few optional add-ons to step up the sushi vibes!

Easy Salmon “Sushi” Bowls from Minimalist Baker →

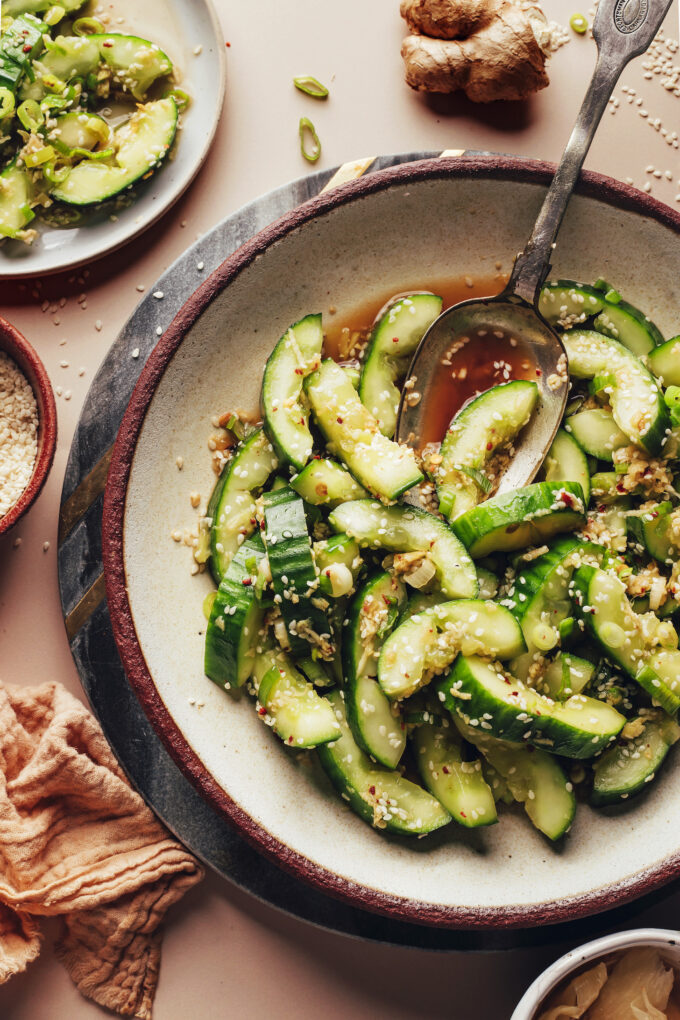
Gingery Smashed Cucumber Salad (Asian-Inspired)

Is it just us or does it seem like cucumbers repel any dressing you add to them? Not so fast! After some research and testing, we learned that smashing cucumbers helps the flavors stick around. Smashed cucumber salad to the rescue!
This Asian-inspired …

Gingery Smashed Cucumber Salad (Asian-Inspired)

Is it just us or does it seem like cucumbers repel any dressing you add to them? Not so fast! After some research and testing, we learned that smashing cucumbers helps the flavors stick around. Smashed cucumber salad to the rescue!

This Asian-inspired take is super fresh, crunchy, savory, a little spicy, and full of ginger and sesame flavor. Plus, so EASY — just 10 ingredients, 1 bowl, and 10 minutes required.

Gingery Smashed Cucumber Salad (Asian-Inspired) from Minimalist Baker →

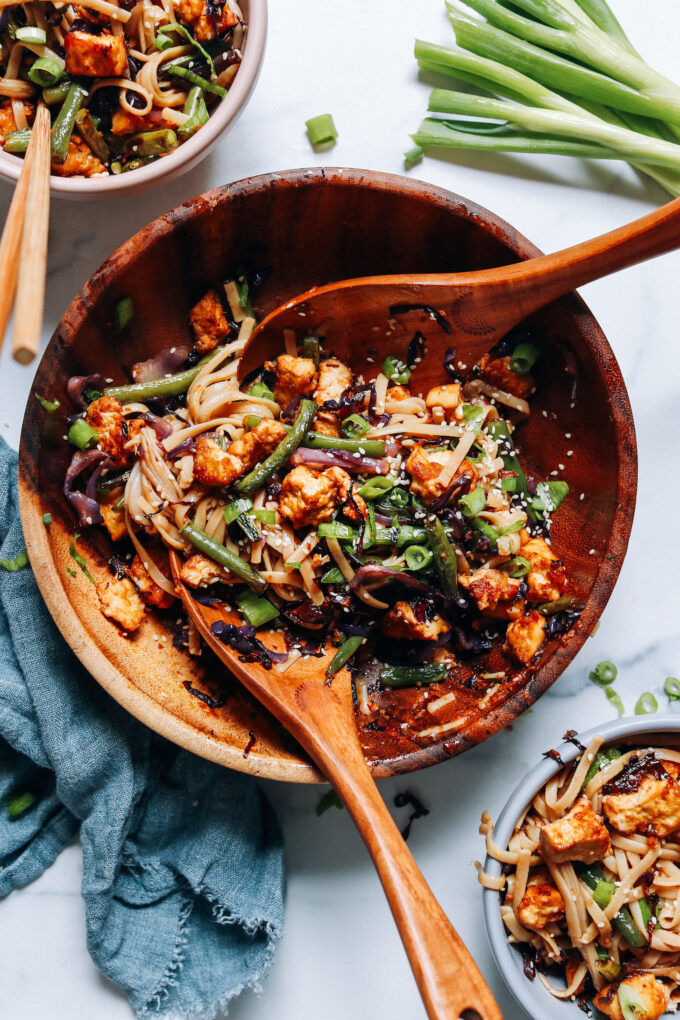
Vegan Ginger Sesame Noodles with Crispy Tofu

All the flavor and comfort of your favorite noodle stir-fry takeout, but easier than deciding where to order? You bet! This EASY, weeknight-friendly meal is a breeze thanks to one of our favorite kitchen essentials: the sheet pan.
Flavorful seasoned to…

Vegan Ginger Sesame Noodles with Crispy Tofu

All the flavor and comfort of your favorite noodle stir-fry takeout, but easier than deciding where to order? You bet! This EASY, weeknight-friendly meal is a breeze thanks to one of our favorite kitchen essentials: the sheet pan.

Flavorful seasoned tofu and crispy roasted veggies combine with saucy, gingery sesame noodles for a nourishing, 10-ingredient party in a bowl! Consider dinner planned. Let us show you how it’s done!

Vegan Ginger Sesame Noodles with Crispy Tofu from Minimalist Baker →

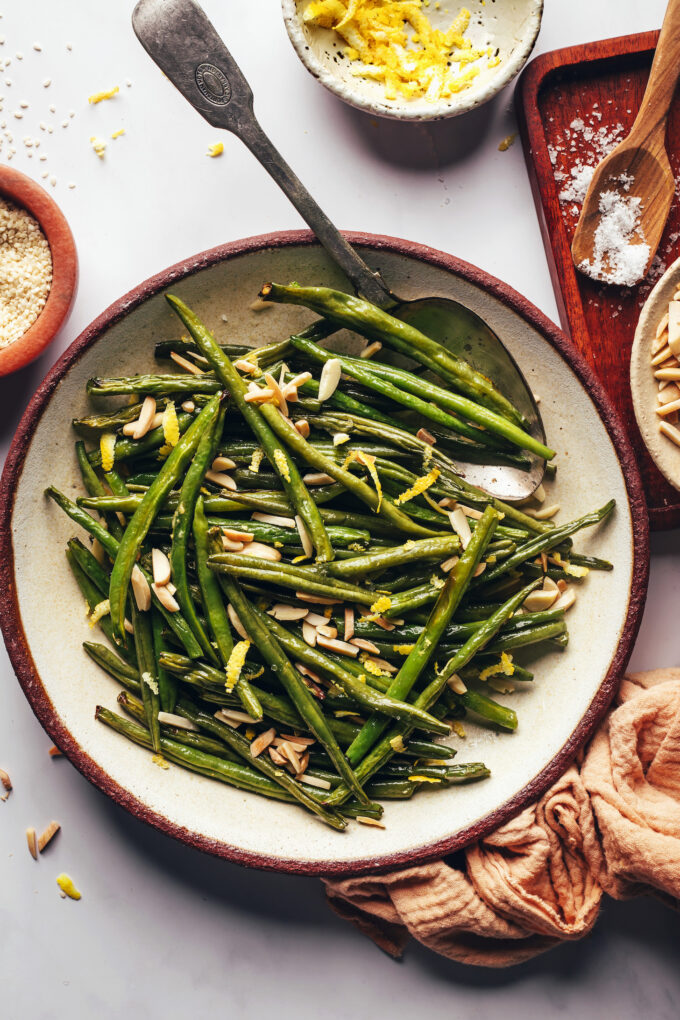
Perfect Roasted Green Beans

Green beans without the fuss? These PERFECT roasted green beans are an effortless side the whole family will love. Say goodbye to babysitting beans on the stovetop! 
Just 3 ingredients, 1 pan, and 20 minutes required for these savory, caramelized,…

Perfect Roasted Green Beans

Green beans without the fuss? These PERFECT roasted green beans are an effortless side the whole family will love. Say goodbye to babysitting beans on the stovetop! 

Just 3 ingredients, 1 pan, and 20 minutes required for these savory, caramelized, perfectly salted beans that basically cook themselves. Let the kitchen multi-tasking begin!

How to Make Roasted Green Beans

It doesn’t get much easier than roasted veggies!

Perfect Roasted Green Beans from Minimalist Baker →

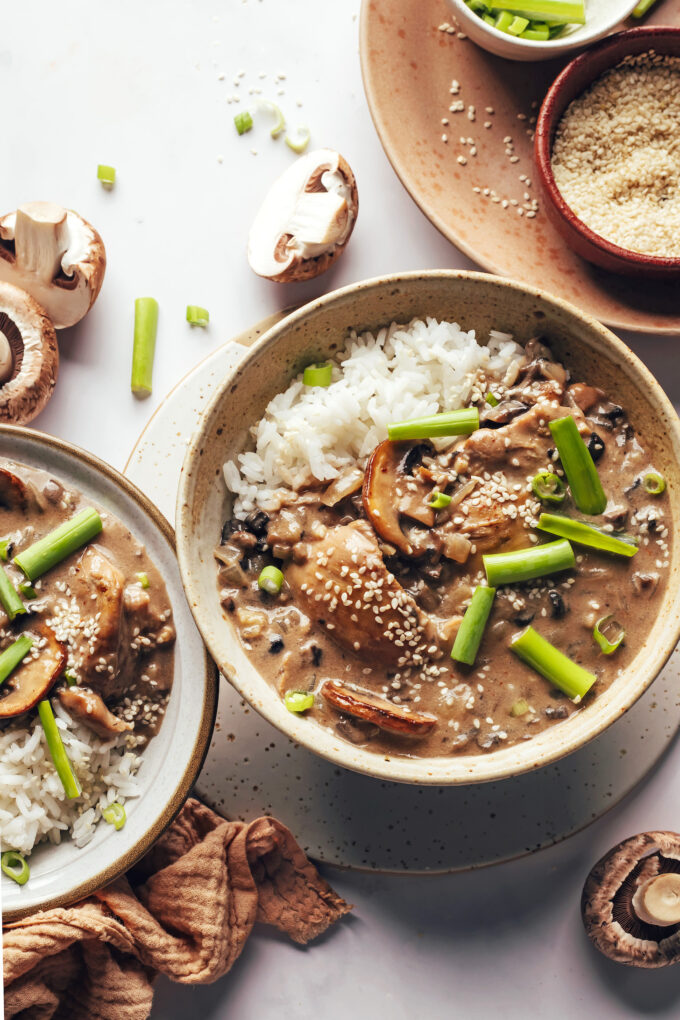
Creamy Mushroom Chicken (Samoan-Inspired)

Savory, saucy, and satisfying! What’s not to love?! This Creamy Mushroom Chicken is inspired by a Samoan dish and doesn’t skimp on comfort or richness.
It’s a flavorful, 1-pot meal that’s elegant enough for hosting but easy enough for weeknight dinners…

Creamy Mushroom Chicken (Samoan-Inspired)

Savory, saucy, and satisfying! What’s not to love?! This Creamy Mushroom Chicken is inspired by a Samoan dish and doesn’t skimp on comfort or richness.

It’s a flavorful, 1-pot meal that’s elegant enough for hosting but easy enough for weeknight dinners. Serve with veggies and rice (or coconut rice!) and it’s meal prep perfection. Let us show you how it’s done! 

This easy, 1-pot recipe begins with sautéing onion, mushrooms, garlic, and ginger for a flavorful base.

Creamy Mushroom Chicken (Samoan-Inspired) from Minimalist Baker →