I have a major weakness for Southwestern flavors, and this Santa Fe salad is the ultimate combination. It’s loaded with tender, juicy chicken, fresh veggies, and creamy black beans. I love it tossed in our creamy avocado dressing. It’s a great hearty entrée-sized salad that’ll keep you full for hours. If you are plant-baseed, this flavor bomb of a salad still packs the same punch without the chicken. This salad is a true crowd pleaser.
What Is A Santa Fe Salad?
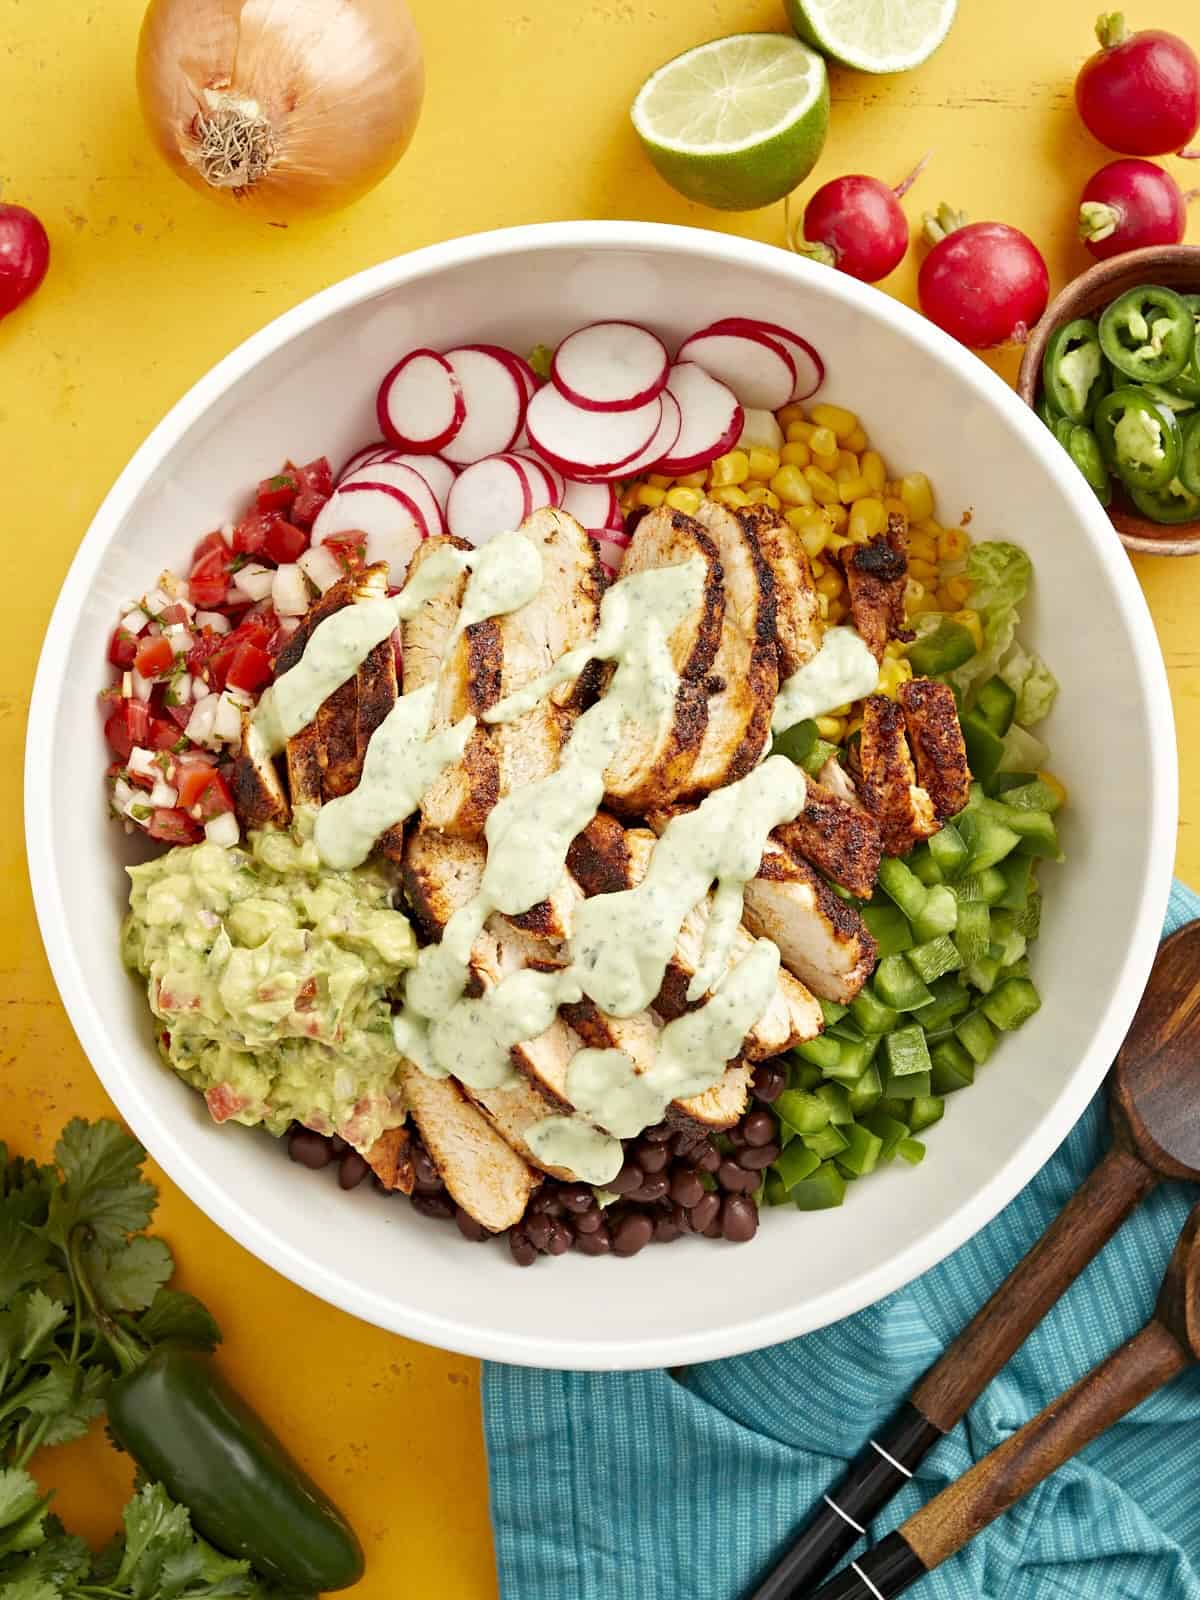
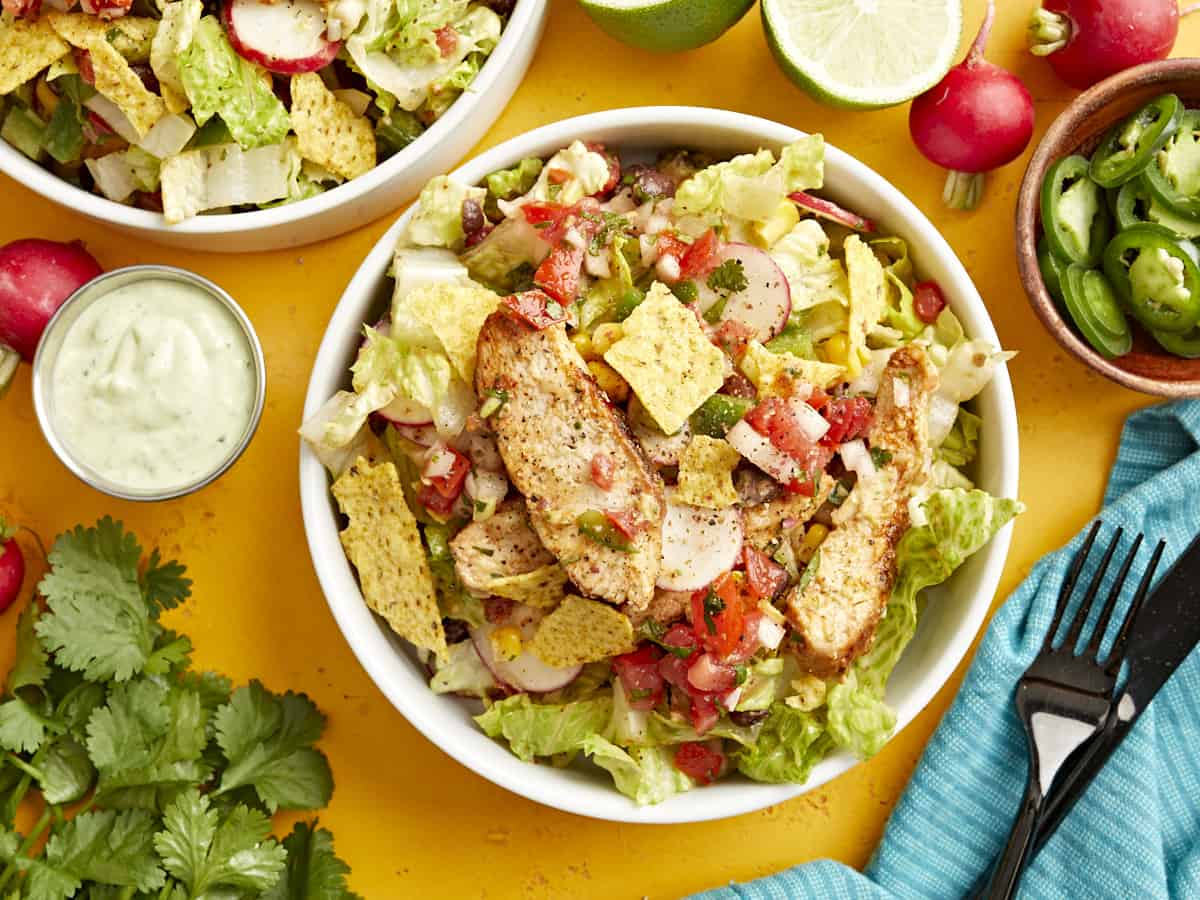
This tasty Santa Fe salad recipe starts with a bed of romaine lettuce topped with Southwestern favorites, like corn, black beans, bell pepper, cheese, and tortilla chips. Top it off with our favorite creamy avocado dressing, some fresh pico de gallo, and a dollop of homemade guacamole for a filling salad that’s bursting with flavor!
Ingredients
Here’s what you’ll need to make a Santa Fe salad:
- Chicken Breasts: Tender, juicy chicken breasts are a great source of protein on this hearty salad. For a budget-saving option, chicken thighs work well. If you’re vegetarian or vegan, substitute the chicken with extra-firm tofu (seasonings and all) or go heavier on the black beans. Mmm!
- Olive Oil: Helps the spices stick to the chicken and helps the chicken sear in the pan.
- Seasonings: Chili powder, paprika, cayenne pepper, ground cumin, garlic powder, onion powder, salt, and pepper add Southwestern flair to the chicken.
- Romaine Lettuce: The perfect crunchy base for this salad. Buy whole heads rather than the pre-chopped bagged stuff to save money.
- Bell Pepper: I like to use a green bell pepper, but any color works well to add some crunch!
- Frozen Corn: You can also use fresh or canned corn– just be sure to drain and rinse first if you use canned.
- Canned Black Beans: Add creaminess and extra protein to this salad.
- Cheddar Cheese: Adds a hint of saltiness. Mexican blend also works well.
- Tortilla Chips: I like to crumble some on top for extra crunch.
- Creamy Avocado Dressing: Pulls the whole salad together. If you’re short on time, use a store-bought chipotle or Southwest ranch dressing.
- Pico de Gallo: Adds a hit of freshness and acidity.
- Guacamole: This is totally optional but ups the creaminess of this salad!
What Else Can I Add?
This Southwestern salad is a great fridge clean-out recipe. Here are some other things I love to add when I have them on hand:
- Jalapeno
- Radish
- Cilantro
- Pickled red onions
- Lime juice
- Sour Cream
- Green Onion
How To Store Leftovers
As with most salads, I recommend storing the veggie components separately from the chicken and dressing and tossing everything together just before serving. This helps protect the lettuce from wilting. Stored correctly, this salad should keep well in the refrigerator for up to 3 days, making it great for meal prep!

Santa Fe Salad
Ingredients
For the Dressing
- 1 avocado $0.89
- 1/2 cup sour cream $0.24
- 1 clove garlic, minced $0.08
- 1/4 tsp salt $0.02
- 2 tbsp lime juice $0.50
- 1/4 bunch fresh cilantro $0.20
- 1/4 cup water $0.00
For the Salad
- 2 heads romaine lettuce, chopped into bite-size pieces $2.98
- 1 green bell pepper, diced $0.89
- 5 radishes, sliced thin $0.49
- 1 cup frozen corn, thawed and rinsed $0.47
- 1 15oz. can black beans, rinsed and drained $0.89
- 1/4 cup shredded cheddar cheese $0.83
- 1/2 cup pico de gallo $0.44
- 1 cup crushed tortilla chips $0.50
For the Chicken
- 2 boneless, skinless chicken breasts $5.69
- 2 Tbsp olive oil, divided $0.08
- 1 Tbsp chili powder $0.30
- 2 tsp paprika $0.20
- 1/2 tsp cayenne pepper $0.06
- 1 tsp ground cumin $0.10
- 1 tsp garlic powder $0.05
- 1 tsp onion powder $0.05
- 1 tsp salt $0.05
- 1 tsp freshly ground black pepper $0.05
Instructions
- Add the avocado, sour cream, minced garlic, salt, lime juice, and cilantro to a food processor or blender. Puré until smooth. Cover and set aside in the refrigerator.
- Chop romaine lettuce into bite-sized pieces and transfer to a large salad bowl.
- Dice bell peppers, slice radishes, thaw frozen corn, and rinse and strain canned black beans. Add this and 1/2 cup of pico de gallo to the large salad bowl on top of chopped romaine lettuce. Cover and keep in the refrigerator while you prepare the chicken.
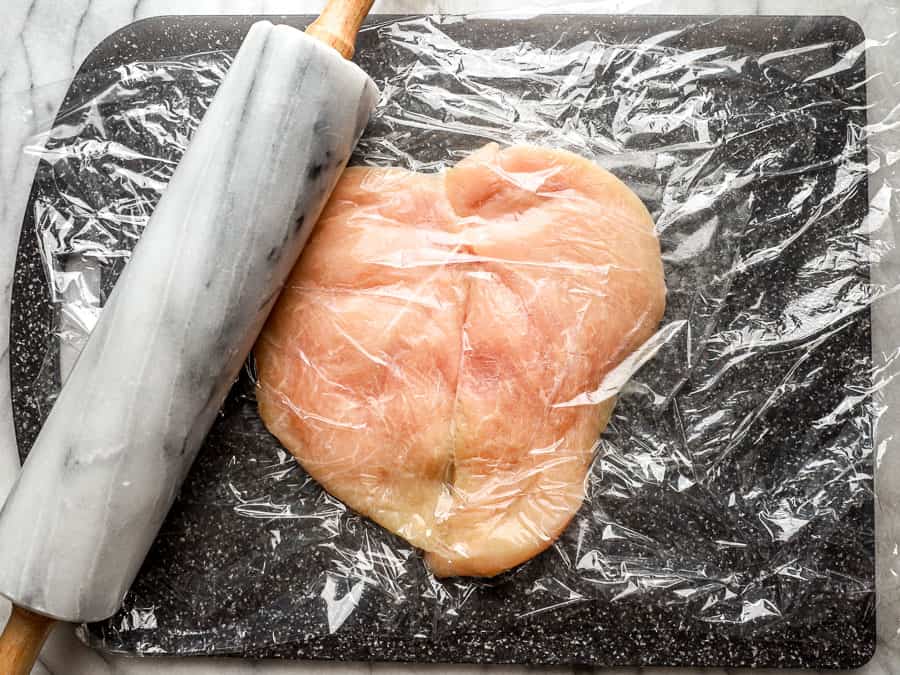
- Place the chicken breasts inside a heavy duty food storage bag and flatten with a rolling pin or a tenderizing mallet until the breasts are consistently about 3/4 inch thick. Start in the middle at the thickest part of each breast for more even cooking. This step helps the chicken cook more evenly.
- Prepare the Santa Fe Chicken seasoning blend by combining chili, paprika, cayenne, cumin, garlic powder, onion powder, salt, and black pepper.
- Rub chicken breasts with 1 Tbsp olive oil and divide the seasoning blend between the them, making sure to thoroughly coat the entire surface of each chicken breast with seasoning.
- In a large skillet, add 1 Tbsp olive oil over medium-high heat. When the oil is glistening and hot, add the chicken breasts. Cook your chicken for a total of 10-12 minutes, flipping halfway. While the chicken cooks, do not wiggle or disturb it except for flipping. Remove the chicken from the heat when it reaches an internal temperature of 160°F. Allow chicken to rest on a cutting board for 5-10 minutes before slicing into strips. After resting, the chicken should reach an internal temperature of 165°F.
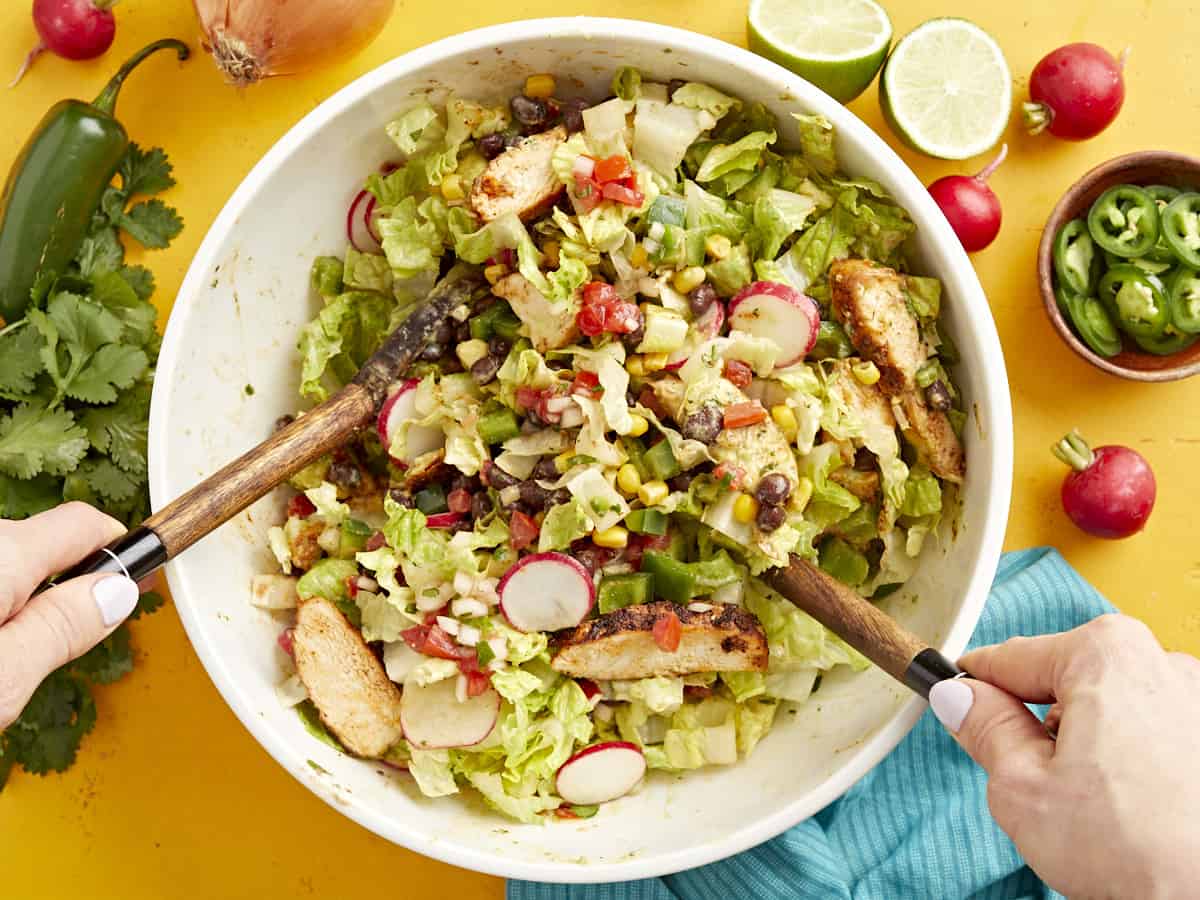
- Fan out the sliced chicken on top of the salad and drizzle creamy avocado dressing over the top. Toss and serve!
See how we calculate recipe costs here.
Notes
Nutrition
how to make a Santa Fe Salad – step by step photos
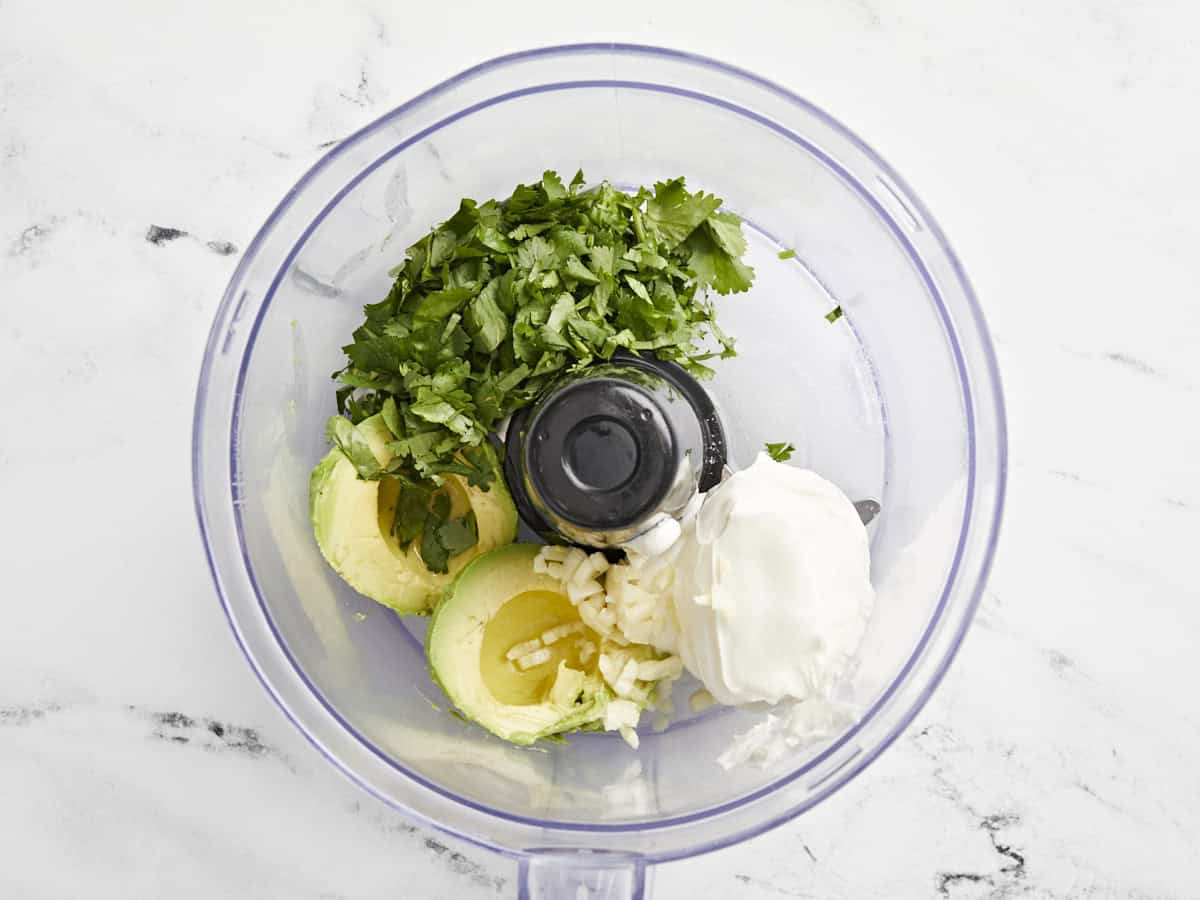
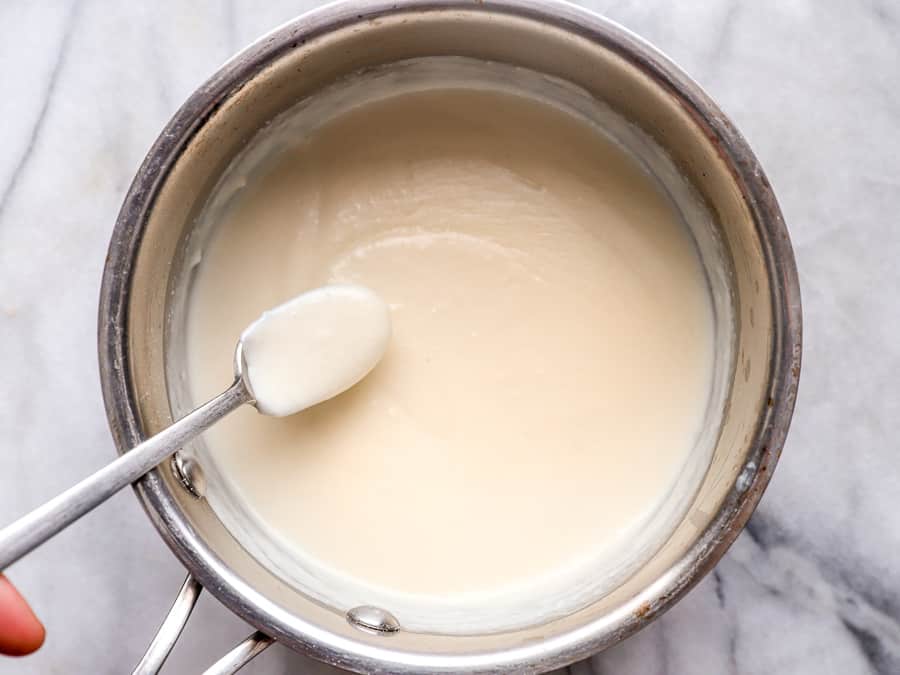
Add 1 avocado, ½ cup sour cream, 1 clove of garlic (minced), ¼ tsp salt, 2 Tbsp lime juice, and ¼ bunch cilantro to a food processor or blender.
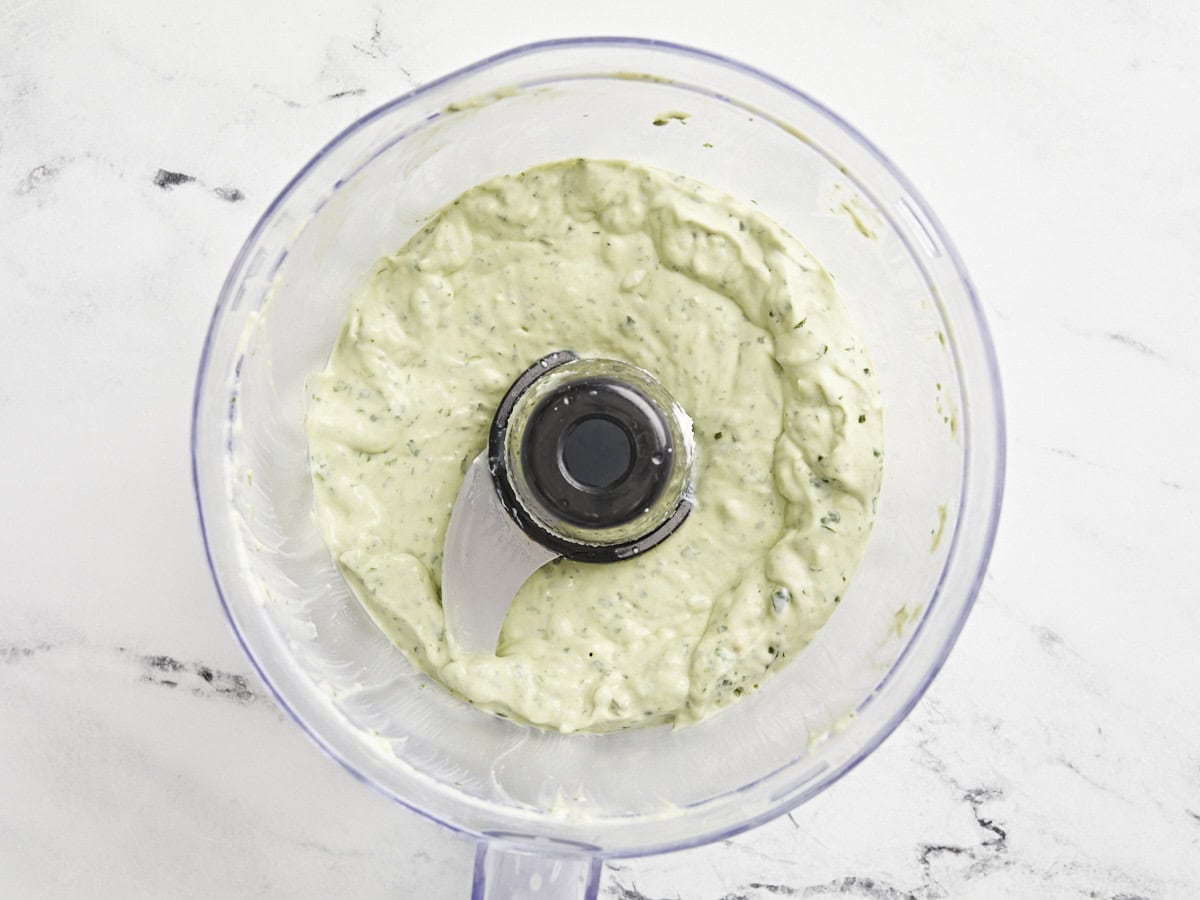
Puré until smooth. Cover and set aside in the refrigerator.
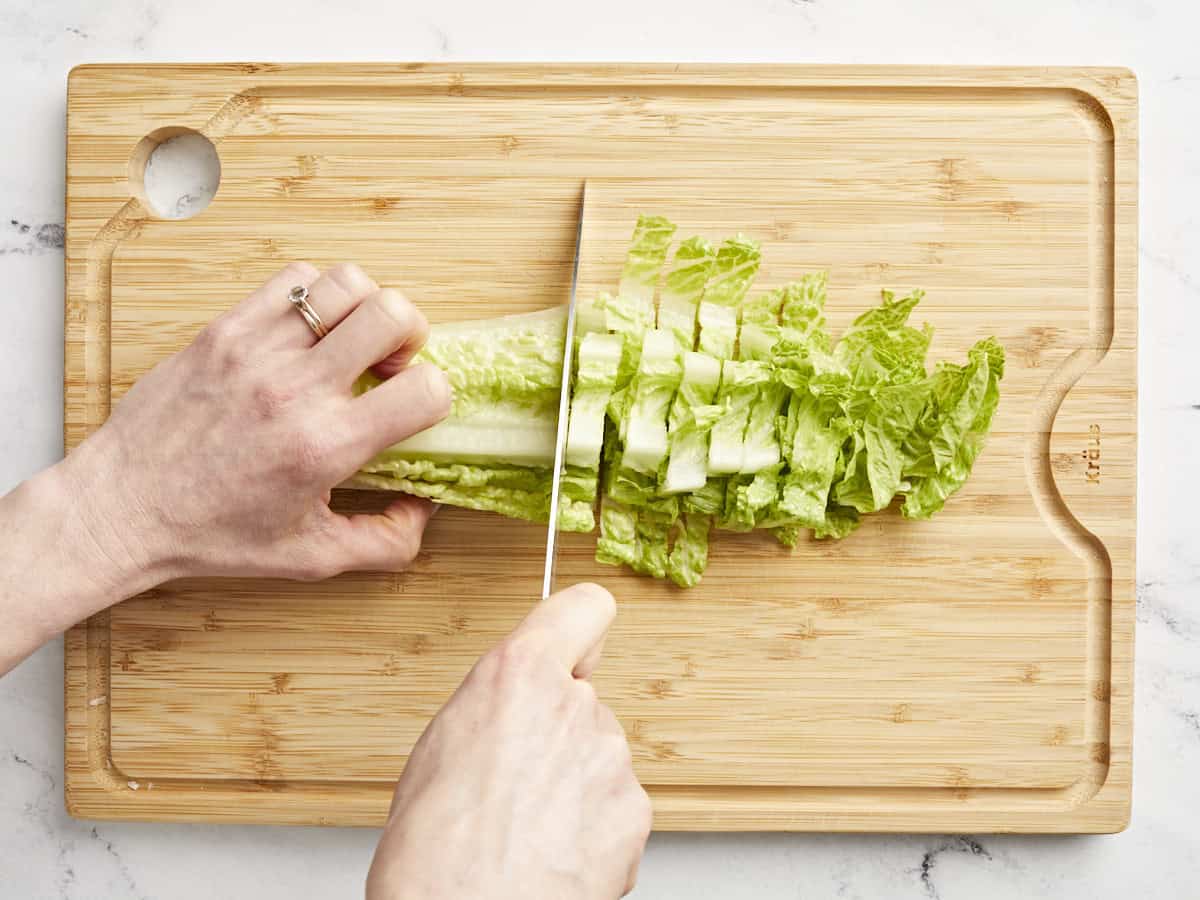
Chop 2 heads of romaine lettuce into bite-sized pieces and transfer to a large salad bowl.
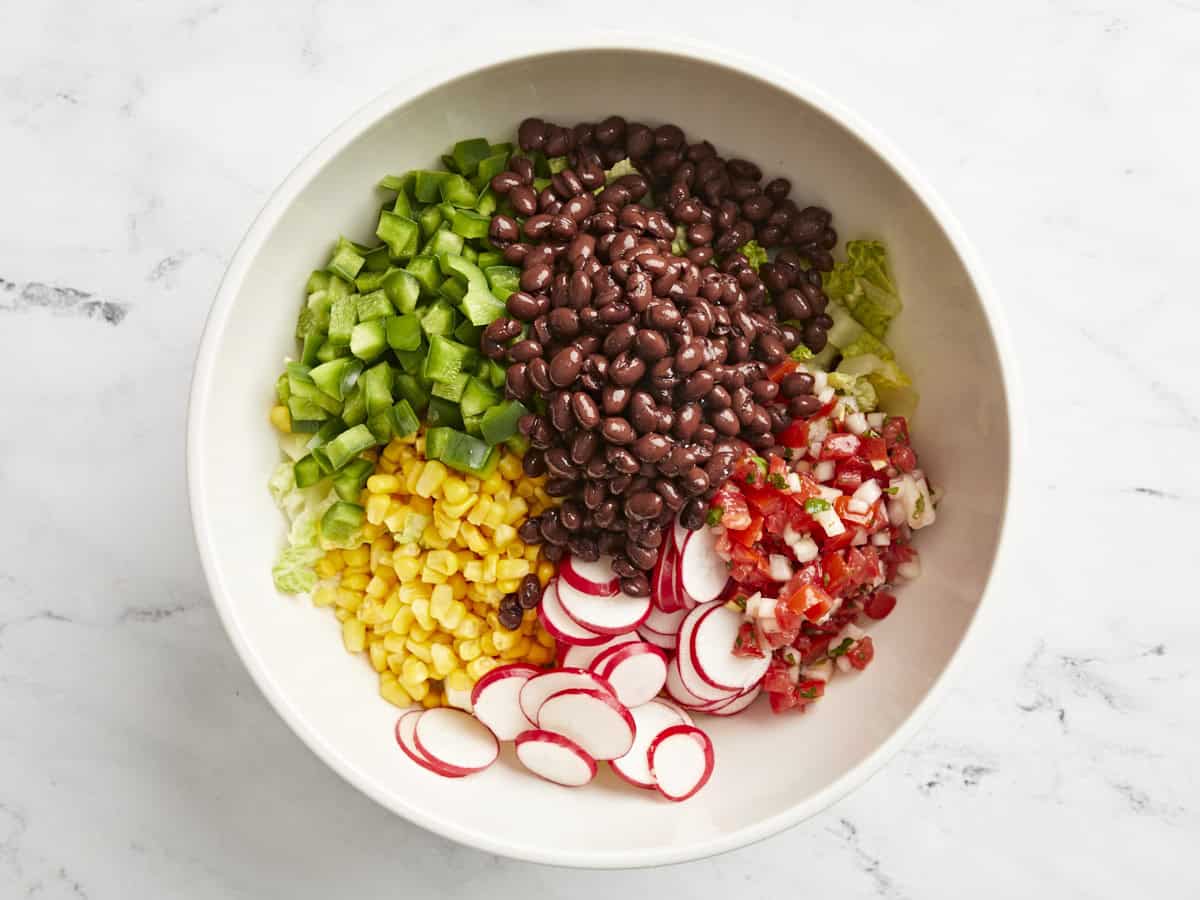
Dice 1 bell pepper, slice 5 radishes, thaw 1 cup frozen corn, and rinse and strain 1 can of black beans. Add this and 1/2 cup of pico de gallo to the large salad bowl on top of chopped romaine lettuce. Cover and keep in the refrigerator while you prepare the chicken.
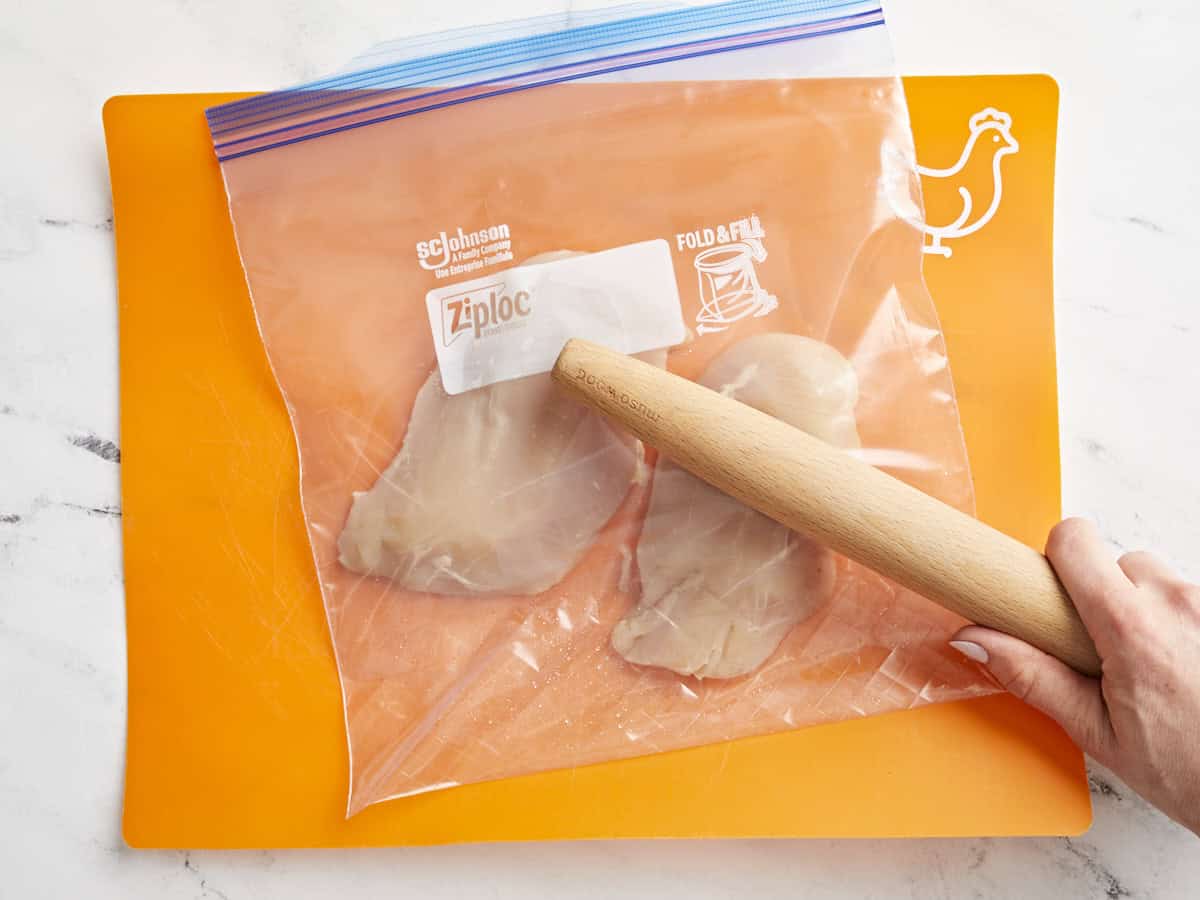
Place the chicken breasts inside a heavy duty food storage bag and flatten with a rolling pin or a tenderizing mallet until the breasts are consistently about 3/4 inch thick. Start in the middle at the thickest part of each breast for more even cooking. This step helps the chicken cook more evenly.
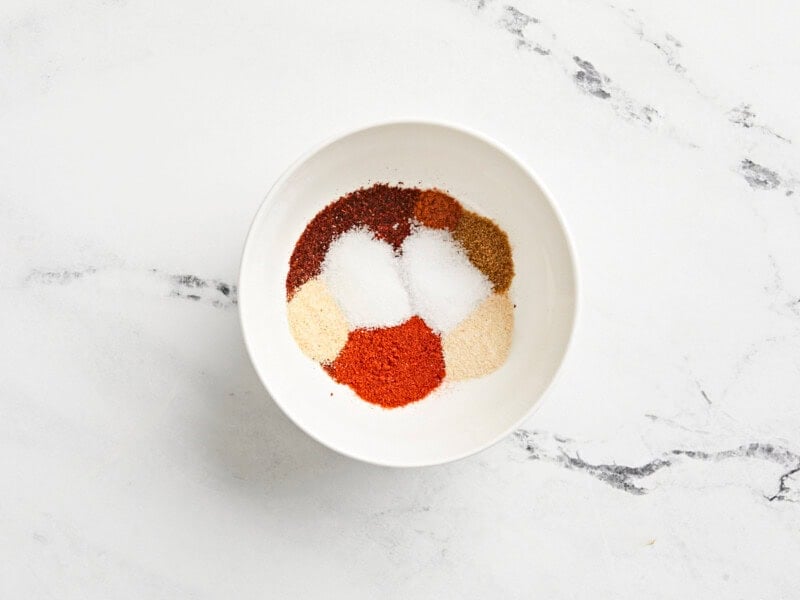
Prepare the Santa Fe Chicken seasoning blend by combining 1 Tbsp chili, 2 tsp paprika, 1/2 tsp cayenne, 1 tsp cumin, 1 tsp garlic powder, 1 tsp onion powder, 1 tsp salt and 1 tsp black pepper together.
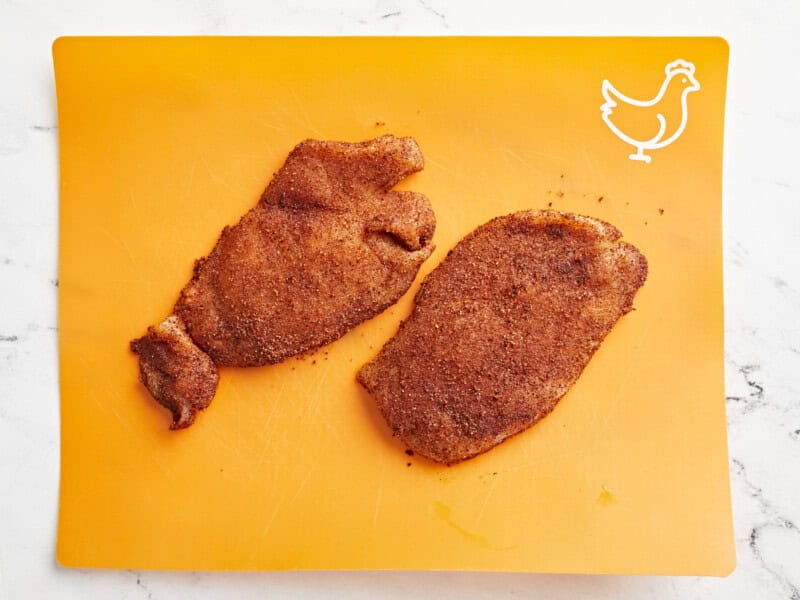
Rub chicken breasts with 1 Tbsp olive oil and divide the seasoning blend between the them, making sure to thoroughly coat the entire surface of each chicken breast with seasoning.
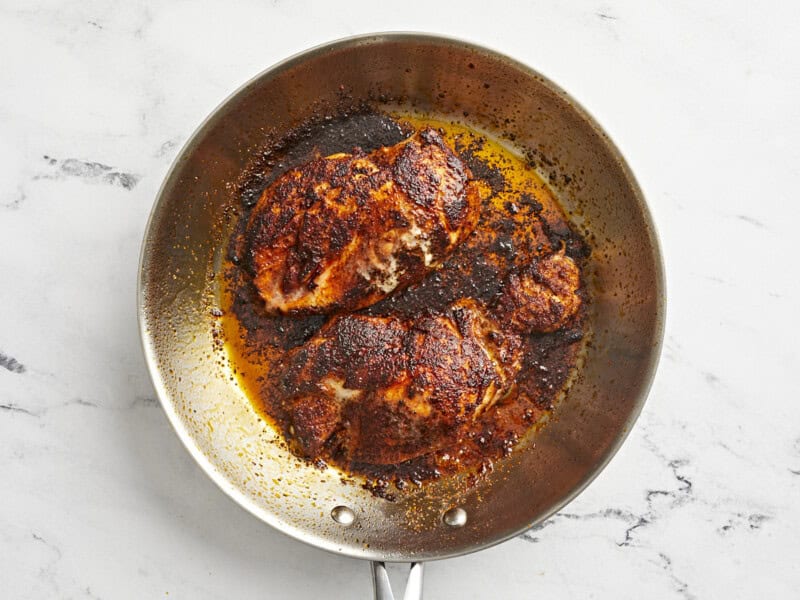
In a large skillet, add 1 Tbsp olive oil over medium-high heat. When the oil is glistening and hot, add the chicken breasts. Cook your chicken for a total of 10-12 minutes, flipping halfway. While the chicken cooks, do not wiggle or disturb it except for flipping. Remove the chicken from the heat when it reaches an internal temperature of 160°F. Allow chicken to rest on a cutting board for 5-10 minutes before slicing into strips. After resting, the chicken should reach an internal temperature of 165°F.
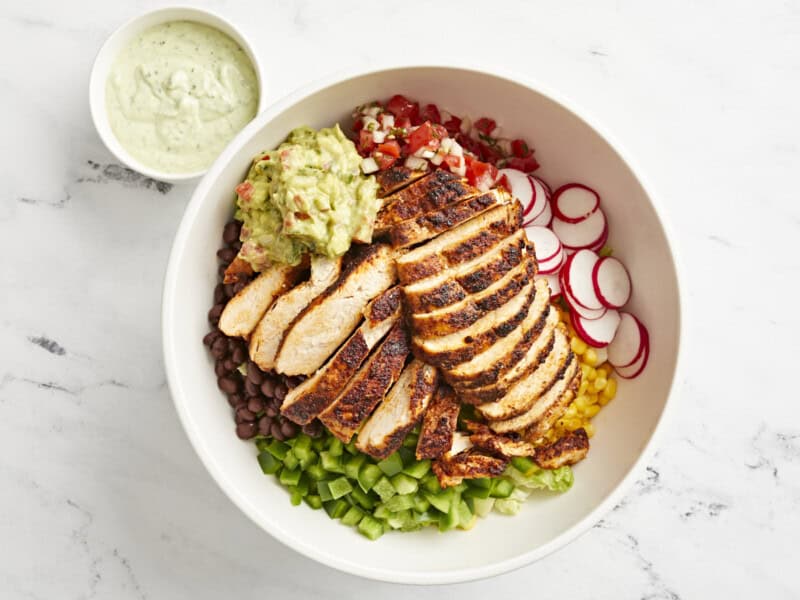
Fan out the sliced chicken on top of the salad and drizzle Creamy Avocado Dressing over the top. Toss and serve!
More Salad Recipes


The post Santa Fe Salad appeared first on Budget Bytes.


 Pro tip: The best skillet for sauteing is aluminum, copper, or cast iron, which gets the best sear and caramelization on the outside of the shrimp. Non-stick works too: there will be less browning, but it will still taste delicious.