Dive into a bowl of juicy berry flavor with strawberry oatmeal recipe! It’s fast and easy to make as a satisfying breakfast: the perfect balance of sweet and tart.

It’s easy to get in a rut with breakfasts. Here’s a fun spin on the classic breakfast that will make you look forward to mornings: strawberry oatmeal! Who can say no to pink oatmeal? The sweet berry flavor is irresistible, and topped with fresh berries and a drizzle of maple syrup and a hint of cream, it’s absolutely sublime.
Why we love this recipe: Alex and I eat a lot of oatmeal around here (it’s a daily occurrence!). This berry spin is our new favorite because it’s so much fun: sweet, cozy, and such a fun way to use seasonal berries. Strawberries and cream? Count us obsessed.
Ingredients in strawberry oatmeal
This strawberry oatmeal recipe relies on simple ingredients to make a fun, wholesome breakfast. Here are the ingredients you’ll need:
- Old Fashioned rolled oats: Old Fashioned oats are the key to the texture and cook time. Avoid substituting instant oats, quick cook oats, or steel cut oats here.
- Diced strawberries: Fresh strawberries are best in this recipe: they have the sweetest flavor, and they are necessary as a garnish for the full flavor to come out. You can use frozen berries too, but they have a slightly more tart flavor (add extra sweetener if desired).
- Pure maple syrup: Maple syrup is our natural sweetener of choice. You can also use honey or granulated sugar, if desired.
- Heavy cream or half and half: To make the strawberries and cream vibe, we’ve used a hint of heavy cream here. If desired, you can use half and half, whole milk, or a non-dairy creamer or coconut milk (oat milk is an option, but it doesn’t have the rich quality that cream brings).
- Vanilla extract and kosher salt: These ingredients round out the flavor.

How to make strawberry oatmeal: step by step
Strawberry oatmeal is quick and easy to make: the entire process takes about 10 minutes. It’s a great fun easy breakfast idea to look forward to. Here are the basic steps (or go to the full recipe):
Step 1: Dice the strawberries.
Step 2: In a saucepan, add the oats, water, strawberries, syrup, and vanilla extract, stirring. Bring to a simmer and cook for 5 to 7 minutes until thickened and the oats are tender. Smash the berries with the back of a large spoon as you stir.
Step 3: Garnish with fresh strawberries and maple syrup. This is important to allow the flavor to pop! If desired, add a drizzle of cream.
Fresh vs frozen strawberries
 Both fresh or frozen strawberries work here, but it’s best with fresh berries because the have the sweetest flavor. Also, adding fresh strawberries as a garnish is what makes the strawberry flavor pop.
But if all you have is frozen strawberries, they work too! Consider saving out a few and thawing them for a garnish (you don’t need to thaw the berries that go into the pot with the oatmeal). Since they’re more tart than fresh berries, you may need to add a little extra maple syrup.

Flavor variations for strawberry oatmeal
We think this strawberries and cream oatmeal is so much fun as a healthy breakfast idea: there’s really no need to change the flavor at all! But if you love changing things up, here are a few flavors that would pair well:
- Nuts and seeds: A topping of sliced almonds, chopped walnuts, chia seeds, or flaxseeds add a nice crunch and healthy fats.
- Nut butter: Add a spoonful of peanut butter or almond butter as a topping (for PB&J vibes)
- Cinnamon: Add ¼ teaspoon cinnamon while cooking.
- Blueberries: You can make this with blueberries instead: go to Blueberry Oatmeal.
Leftover storage and make ahead tips
Leftovers store refrigerated for up 3 days. Reheat on the stovetop or in the microwave, and make sure to garnish again with fresh strawberries and maple syrup.
A few of our top strawberry recipes
We love mixing up recipes with this seasonal berry! Here are some of our top strawberry recipes:
- This strawberry smoothie really is perfect.
- Go for a fun strawberry salad.
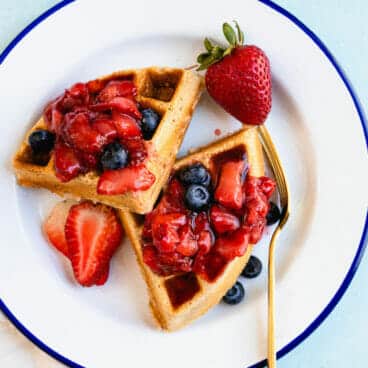
- Simmer up a pot of strawberry compote for topping oatmeal, pancakes, or waffles.
- Blend up a strawberry margarita or strawberry daiquiri.


Dietary notes
This strawberry oatmeal recipe is vegetarian and gluten-free (using gluten-free oats). For vegan, plant-based, and dairy-free, use plain non-dairy creamer or coconut milk.
Frequently asked questions
Rolled oats are the perfect choice for stovetop oatmeal, offering a creamy texture that complements the strawberries. If you prefer a quicker option, you can use instant oats, but be aware they might cook up a bit mushier.
Both work well! Fresh strawberries offer a brighter flavor, while frozen strawberries can add a thicker consistency (add additional sweetener to taste).
Honey, maple syrup, agave nectar, or even chopped dates are all delicious options. You can also use a sprinkle of brown sugar for a touch of caramel flavor.
Nuts and Seeds: Sliced almonds, chopped walnuts, chia seeds, or flaxseeds add a nice crunch and healthy fats.
Yogurt: A dollop of plain or flavored yogurt adds a creamy richness.
Coconut Flakes: For a tropical twist, sprinkle some toasted coconut flakes on top.
Chocolate: A drizzle of chocolate syrup or dark chocolate shavings is a decadent treat.

Strawberry Oatmeal
-
 Prep Time: 5 minutes
 -
Cook Time: 5 minutes
-
Total Time: 10 minutes
-
 Yield: 2
Description
Dive into a bowl of juicy berry flavor with strawberry oatmeal recipe! It’s fast and easy to make as a satisfying breakfast: the perfect balance of sweet and tart.
Ingredients
- 1 cup Old Fashioned rolled oats
- 2 cups water
- 1 cup diced strawberries, fresh or frozen*
- 2 tablespoons maple syrup
- ⅛ teaspoon kosher salt
- ½ teaspoon vanilla extract
- 2 tablespoons heavy cream (or oat milk, for vegan)
- For topping: maple syrup and fresh strawberries (required)
Instructions
- In a saucepan, add the oats, water, strawberries, maple syrup, salt, and vanilla extract, stirring. Bring to a simmer and cook for 5 to 7 minutes until thickened and the oats are tender, smashing the berries with the back of a large spoon as you stir. (Try to smash the majority of the berries to give the oatmeal its pink color.)
- Remove from the heat and stir in the cream. Top with a drizzle of maple syrup and sliced strawberries: this is required and what brings out the strawberry flavor. If desired, add a drizzle of cream.
- Leftovers store refrigerated for up 3 days. Reheat on the stovetop or in the microwave, and make sure to garnish again with fresh strawberries and maple syrup.
Notes
*Fresh or frozen strawberries work. Keep in mind that adding fresh strawberries as a garnish is what makes the strawberry flavor pop. If all you have is frozen berries, they work too! A few tips: consider saving out a few and thawing them for a garnish (you don’t need to thaw the berries that go into the pot with the oatmeal). Since they’re more tart than fresh berries, add a little extra maple syrup.
 Category: Breakfast
 Method: Stovetop
 Cuisine: American
 Diet: Vegan