Fresh Kimchi Spring Rolls

These creamy, tangy, and spicy kimchi spring rolls are the ultimate cold appetizer for any party or potluck!

The post Fresh Kimchi Spring Rolls appeared first on Budget Bytes.

When I opened my former restaurant, AVO, in Nashville, I knew this Kimchi Spring Roll appetizer would make it onto the menu. Not only did it make it onto the menu (and it’s still on the menu with a new chef at the helm and under new ownership!) but it was our best-selling item. The flavor balancing act is perfectly executed in the kimchi filling, so if you follow this recipe to a T, you will be the star at the next book club or potluck you attend, I promise!

overhead view of kimchi spring rolls on a platter with a bowl of sauce in the middle.

What Are FRESH KIMCHI SPRING Rolls?

This recipe is the ultimate crowd-pleaser, whether you’re typically a fan of kimchi or not. Who doesn’t love a fresh spring roll?! The spicy, tangy, creamy filling in a soft wrapping is a great bite to share when you have company over and the filling alone makes a great healthy topping on salad in place of the same old tuna salad. The flavors and textures balance so perfectly in this one.

My original recipe uses raw cashews instead of peanuts, but subbing the peanuts totally worked; they are a great budget-friendly substitute. The sauce packs a flavor punch as well but lets the kimchi filling really shine. I hope you love this recipe as much as I do. This one’s near and dear to my little veggie-loving heart!

Ingredients

Here’s what you’ll need to make these fresh kimchi spring rolls:

  • Dipping Sauce: A sweet, savory, and tangy combination of soy sauce, rice wine vinegar, sesame oil, sriracha, green onion, garlic, and fresh ginger.
  • Kimchi: This gut-friendly, probiotic-packed superfood is tangy, spicy, and a little bit sour. Opt for a mild kimchi if you’re not a fan of spice.
  • Peanuts: Roasted unsalted peanuts work perfectly in place of my original cashews to create a thick and creamy filling.
  • Peanut Butter: Enhances the peanut flavor and helps create a creamy filling.
  • Maple Syrup: Adds a touch of sweetness to balance out the spiciness and richness of the filling.
  • Sesame Oil: Toasted sesame oil adds a hint of nuttiness to the filling.
  • Veggies: Bell peppers, carrots, and cucumber make up the fresh and crunchy veggie filling of these spring rolls.
  • Lettuce: Green leaf lettuce helps create a barrier between the saucy filling and the spring roll wrappers.
  • Spring Roll Wrappers: Also called “rice paper wrappers,” these light and translucent wrappers are dry and firm until you soak them. Then, they become pliable and will stay chewy and soft.

What’s the Difference Between A SPRING ROLL, A SUMMER ROLL, and An Egg Roll?

While all these tasty bites are wrapped and rolled, spring rolls may be fresh, baked, or deep fried, where summer rolls are always served cold. An egg roll is a variation on a spring roll that is made with dough that has been enriched with eggs, typically fried. Technically, these fresh kimchi spring rolls could also called a summer roll. They are so refreshing!

Summer Roll Tips

  • You don’t need to use all of the spring roll wrappers… just keep rolling until all filling ingredients are gone!
  • Don’t overfill your spring rolls. Trying to pack in too much filling will surely make a mess!
  • Try to make a bed with the veggies and lettuce for the kimchi filling to lay on top of so your rice paper can firm up.
  • They are less likely to tear if the finished spring rolls touch if you sprinkle some sesame seeds on the sides. The rice paper remains sticky for a few minutes after rolling.
  • The spring rolls don’t keep particularly well for more than a day, but any extra kimchi filling and veggies will take any salad to the next level!
holding a kimchi spring roll to show the filling.
overhead view of kimchi spring rolls on a platter with a bowl of sauce in the middle.
Print

Fresh Kimchi Spring Rolls

These creamy, tangy, and fresh kimchi spring rolls are the ultimate chilled appetizer for any party or potluck!
Course Appetizer
Cuisine Asian
Total Cost $15.26 recipe / $1.90 serving
Prep Time 45 minutes
Cook Time 0 minutes
Total Time 45 minutes
Servings 8 (1 spring roll each)
Calories 377kcal

Ingredients

Dipping Sauce:

  • 1/3 cup soy sauce $0.26
  • 1/3 cup rice wine vinegar $1.44
  • 1 Tbsp sesame oil $0.32
  • 1 Tbsp sriracha $0.25
  • 1 minced green onion $0.10
  • 1 minced garlic clove $0.05
  • 1 inch ginger, peeled and grated $0.15

Summer Roll Veggies + Kimchi Filling:

  • 1 cup kimchi $2.99
  • 1 cup roasted unsalted peanuts $1.24
  • 2 Tbsp peanut butter $0.12
  • 1 Tbsp maple syrup $0.31
  • 2 Tbsp toasted sesame oil $0.64
  • 2 bell peppers, julienned $2.96
  • 2 carrots, julienned $0.18
  • 1 cucumber, seeded and julienned $0.82
  • 1 head green leaf lettuce, cut into 2-inch pieces $1.97

To assemble:

  • 1 package spring roll rice paper wrappers $1.46

Instructions

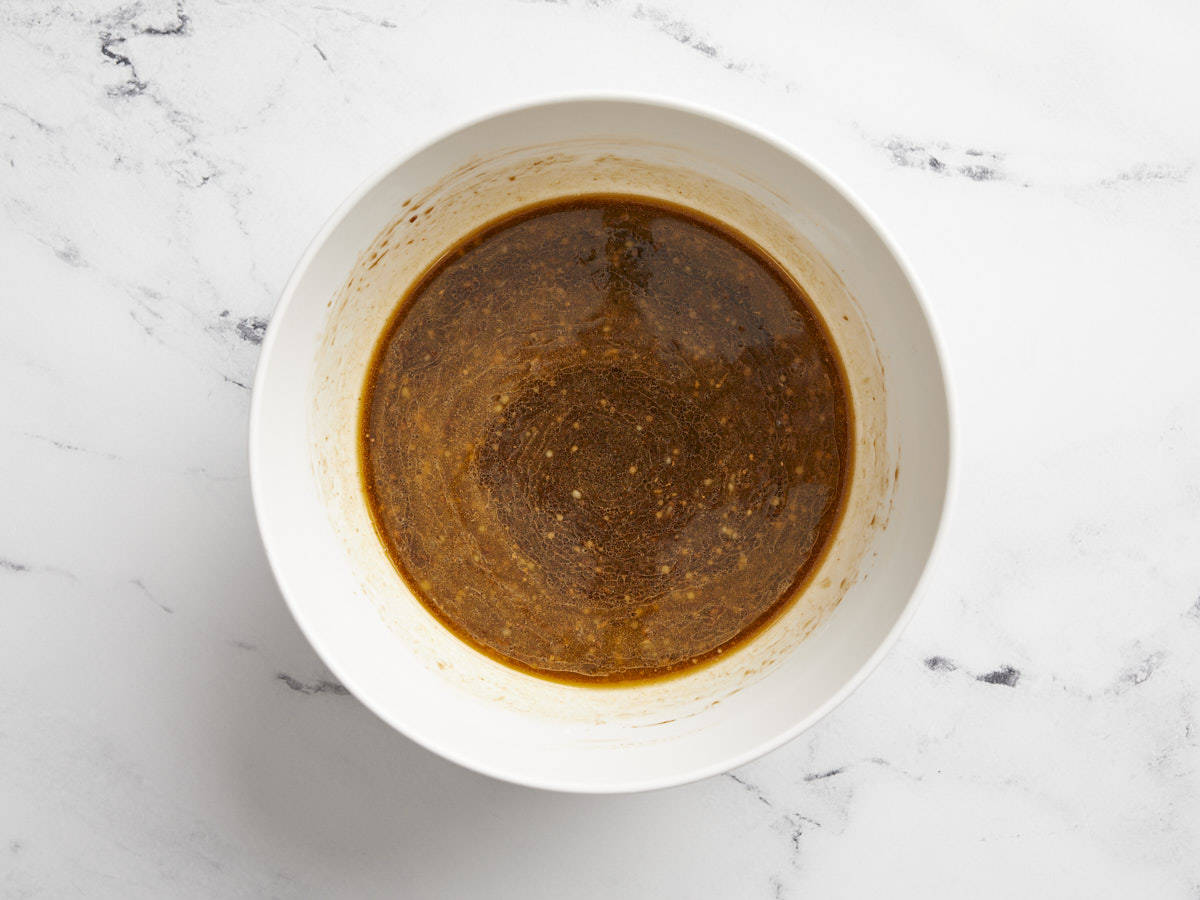
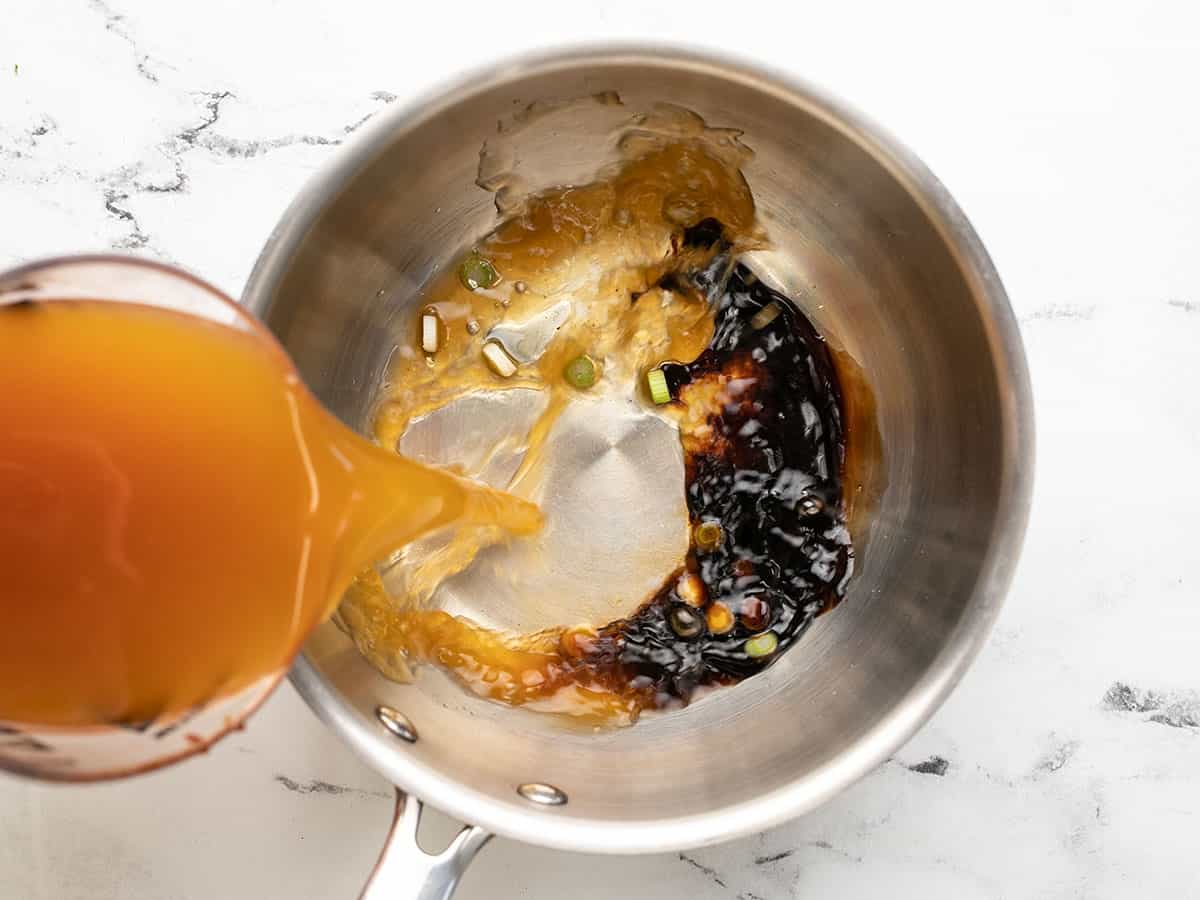
  • Combine the soy sauce, rice wine vinegar, sriracha, grated ginger, and garlic in a mixing bowl. Whisk together and stream sesame oil in very slowly while whisking to emulsify. Stir in green onions and set dipping sauce aside.
  • Add kimchi, peanuts, peanut butter, maple, and toasted sesame oil to a food processor.
  • Pulse until a thick, chunky, well-combined paste forms. Texture is a good thing, so don’t process it to the point of being smooth. Set aside in the fridge.
  • Julienne bell peppers, carrots, cucumber, and cut green leaf lettuce into 2 inch pieces.
  • Fill a shallow cookie sheet with warm water next to a clean cutting board or other suitable, clean work surface.
  • Dip the edible spring roll wrapper in the shallow warm water until soft and pliable, but not overly mushy.
  • Transfer to your clean work surface and carefully fill the spring roll wrapper with lettuce on the bottom, a 1-2 Tablespoon scoop of kimchi filling in the middle, a few julienned veggies and another piece of lettuce on top.**
  • Gently wrap each spring roll, tucking in the sides to keep all of the filling from falling out.
  • Sprinkle each spring roll with sesame seeds (optional, but they add a nice texture and help keep the finished rolls from sticking together and tearing.)
  • Repeat steps 5-8 until all of your filling is used up.
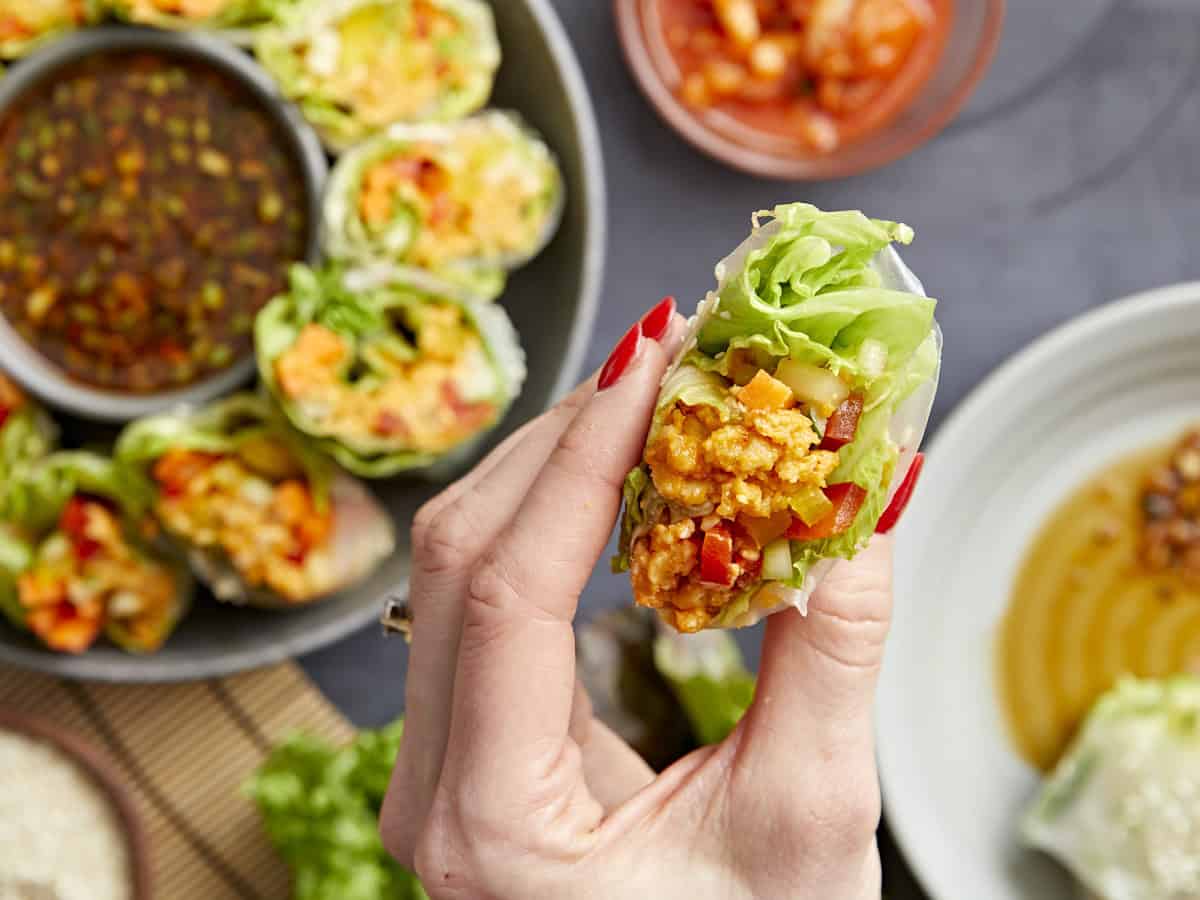
  • Serve fresh kimchi spring rolls cut in half with dipping sauce. Enjoy!

See how we calculate recipe costs here.

Notes

*If you are vegan, make sure to check that the kimchi you are buying does not list fish as an ingredient. If you are not vegan, no worries!
**Don’t let the kimchi filling touch the spring roll paper. It won’t firm up and is more likely to tear or stay mushy. You want the spring roll/rice paper wrapper to firm up as the finished spring rolls sit out for a bit.

Nutrition

Serving: 1summer roll | Calories: 377kcal | Carbohydrates: 44g | Protein: 13g | Fat: 17g | Sodium: 1008mg | Fiber: 4g
side view of kimchi spring rolls on a platter with a bowl of sauce in the middle.

how to make FRESH Kimchi SPRING Rolls – step by step photos

dipping sauce in a white bowl.

Combine the 1/3 cup soy sauce, 1/3 cup rice wine vinegar, 1 Tbsp sriracha, 1 inch of peeled and grated ginger, and 1 minced clove of garlic in a mixing bowl. Whisk together and stream 1 Tbsp sesame oil in very slowly while whisking to emulsify. Stir in 1 minced green onion and set dipping sauce aside.

kimchi, peanuts, peanut butter, and oil in a food processor.

Add 1 cup kimchi, 1 cup roasted unsalted peanuts, 2 Tbsp peanut butter, 1 Tbsp maple, and 2 Tbsp toasted sesame oil to a food processor.

kimchi filling in a food processor.

Pulse until a thick, chunky, well-combined paste forms. Texture is a good thing, so don’t process it to the point of being smooth. Set aside in the fridge.

julienned veggies and lettuce on a cutting board.

Julienne 2 bell peppers, 2 carrots, 1 cucumber, and cut 1 head of green leaf lettuce into 2-inch pieces.

dipping rice paper in water.

Fill a shallow cookie sheet with warm water next to a clean cutting board or other suitable, clean work surface. Dip the edible spring roll wrapper in the shallow warm water until soft and pliable, but not overly mushy.

filling a rice paper wrapper with kimchi and veggies.

Then, fill the spring roll wrapper with lettuce on the bottom, a 1-2 Tablespoon scoop of kimchi filling in the middle, a few julienned veggies and another piece of lettuce on top.*

rolling a kimchi spring roll.

Gently wrap each spring roll, tucking in the sides to keep all of the filling from falling out.

kimchi spring rolls on a cutting board.

Sprinkle each spring roll with sesame seeds (optional, but they add a nice texture and help keep the summer rolls from sticking together and tearing.) Repeat steps 5-8 until all of your filling is used up. Serve spring rolls cut in half with dipping sauce. Enjoy!

dipping a kimchi spring roll into a vat of sauce in the center of a platter.

These fresh kimchi spring rolls were a smash hit at AVO for a reason, and I’m confident this budget-friendly version will be a hit for you at home as well!

The post Fresh Kimchi Spring Rolls appeared first on Budget Bytes.

Chicken Stir Fry

This Chicken Stir Fry recipe is perfect for a quick & easy dinner meal. It has lots of chicken and veggies and a super delicious stir-fry sauce!

The post Chicken Stir Fry appeared first on Budget Bytes.

We’re taking the stress out of worrying about “what’s for dinner” this week and making this quick and easy Chicken Stir Fry recipe. It includes lots of chicken, tons of veggies, and THEE best sweet and savory stir fry sauce! It’s also perfect for using up vegetables that you already have on hand in your fridge or freezer. Not only is it great to add to your weekly dinner rotation, but it also makes a lot, so it’s perfect for meal prep! #winning

Overhead view of chicken stir fry in a large skillet with sliced green onions on the side.

Why I Love Stir Fry Recipes

I make stir fry recipes quite often because it helps take away the mental stress of worrying about what to cook for dinner. They’re quick, easy to make, and super versatile so you can always switch things up. Just pick your favorite protein, a mix of vegetables, make a yummy stir fry sauce, and dinner is ready in about 30 minutes!

Ingredients For Chicken Stir Fry

Here’s what we used to make this easy chicken stir fry recipe:

  • Chicken Breasts: I use boneless, skinless chicken breasts for this recipe, but if your budget is tight, you can also use boneless, skinless chicken thighs instead.
  • Vegetables: This is where you can really be flexible. I used a combination of broccoli, carrots, red bell pepper, and onion for this stir fry. But feel free to choose different vegetables based on your budget, what’s in season, or what’s in your fridge. Sometimes I’ll use just one or two vegetables because that’s what I currently have on hand. Some other great veggie options are green beans, zucchini, mushrooms, snap peas, or different color bell peppers. 
  • Stir Fry Sauce: A good stir fry sauce will definitely bring the entire dish together. I used our same stir fry sauce from our Vegetable Stir Fry recipe as a base, because it’s sooo good, increased the measurements slightly to make it extra saucy, and added a touch of sriracha sauce for just a little kick!

Stir-Fry Recipe Tips

  1. Make the stir fry sauce first. Stir fry recipes cook fast, so you want the sauce to be ready when it’s time to add it to the skillet.
  2. Use a big wok or very large skillet. In order for all of the chicken and vegetables to fit in the skillet with enough space to cook fairly evenly, you’ll want to use a big wok or large skillet. We used a 12-inch skillet for this recipe. 
  3. Don’t overcook the vegetables. You want the vegetables to just be tender-crisp and vibrantly colored. You can always cook them a little longer once the sauce is added at the end, but if you cook them too long in the first steps you’ll end up with limp vegetables that are a drab color.

What To Serve With Chicken Stir Fry

You can easily serve this chicken stir fry with a side of brown or white rice or give our Coconut Rice a try! And if you really want the full take-out experience, whip up some of our Vegetable Fried Rice to serve on the side.

Storing Leftovers

This chicken stir fry recipe stores very well in the fridge and works great for meal prep! You can make it on Sunday, divide it into equal portions, then store in meal prep containers along with your rice. This dish will stay good in the refrigerator for about four days.

Overhead view of a plate of chicken stir fry with white rice and a fork serving some out.
Overhead view of chicken stir fry in a large skillet with sliced green onions on the side.
Print

Chicken Stir Fry

This Chicken Stir Fry recipe is perfect for a quick & easy dinner meal. It has lots of chicken and veggies and a super delicious stir-fry sauce!
Course Dinner, Lunch
Cuisine American, Asian
Total Cost $10.55 recipe / $1.76 serving
Prep Time 15 minutes
Cook Time 20 minutes
Total Time 35 minutes
Servings 6 (about 1 cup each)
Calories 198kcal

Ingredients

Stir Fry Sauce

  • 1/3 cup soy sauce $0.44
  • 3 Tbsp brown sugar $0.12
  • 2 tsp toasted sesame oil $0.20
  • 2 cloves garlic, minced $0.16
  • 2 tsp grated fresh ginger $0.20
  • 1.5 Tbsp cornstarch $0.08
  • 1/3 cup water $0.00
  • 1 tsp sriracha $0.05

Stir Fry

  • 3/4 lb. broccoli 1.75
  • 2 carrots $0.31
  • 1 red bell pepper $1.33
  • 1 small onion $0.32
  • 2 green onions $0.22
  • 2 boneless, skinless chicken breasts (about 1.5 lb. total) $5.25
  • 3 Tbsp cooking oil, divided $0.12

Instructions

  • Start by making the stir fry sauce. Combine the soy sauce, brown sugar, toasted sesame oil, garlic, ginger, sriracha, cornstarch and water in a small bowl. Set the sauce aside.
  • Chop the broccoli into small florets. Slice the red bell pepper, onion, and carrots into similar sized pieces. Slice the green onions. Set all the vegetables aside.
  • Next, cut the chicken breasts into small 1/2 inch sized pieces.
  • Heat a very large skillet or wok over medium-high heat. Once hot add 2 Tbsp of cooking oil and swirl to coat the surface of the skillet. Add the chicken and cook until browned on all sides. Be careful not to overcook the chicken. Once the chicken is browned, remove it from the skillet onto a separate plate and set aside.
  • In the same skillet, add the remaining 1 Tbsp of cooking oil along with the carrots and broccoli. Cook and stir for one minute, or just until the broccoli begins to turn bright green.
  • Next, add the red bell pepper and onion to the skillet. Continue to cook and stir for 1-2 more minutes.
  • Give the stir fry sauce another brief stir. Now add the cooked chicken back to the skillet, then pour the stir fry sauce over the chicken and vegetables. Give everything a stir and allow the sauce to come up to a simmer, at which point it will start to thicken and turn glossy. Continue to cook for 1-2 more minutes or until it has reached your desired doneness.
  • Remove the chicken stir fry from the heat, top with green onions and sesame seeds (optional) and serve!

See how we calculate recipe costs here.

Nutrition

Serving: 1serving | Calories: 198kcal | Carbohydrates: 18g | Protein: 12g | Fat: 10g | Sodium: 819mg | Fiber: 3g
Side close up view of chicken stir fry in a skillet.

How to Make Chicken Stir Fry – Step by Step Photos

Chicken Stir Fry Sauce in a small bowl.

Start by making the stir fry sauce. Combine the 1/3 cup soy sauce, 3 Tbsp brown sugar, 2 tsp toasted sesame oil, 2 cloves minced garlic, 2 tsp grated fresh ginger, 1 tsp sriracha, 1 1/2 Tbsp cornstarch and 1/3 cup water in a small bowl. Set the sauce aside.

Chicken Stir Fry vegetables chopped on a cutting board.

Chop 3/4 lb. of broccoli into small florets. Slice 1 red bell pepper, 1 small yellow onion, and 2 carrots into similar sized pieces. Slice 2 green onions. Set the vegetables aside.

Chicken breasts cut into bite size pieces on a cutting board.

Cut 2 boneless, skinless chicken breasts into small 1/2 inch sized pieces.

Cooked chicken breast pieces in a skillet.

Heat a very large skillet or wok over medium-high heat. Once hot add 2 Tbsp of cooking oil and swirl to coat the surface of the skillet. Add the chicken and cook until browned on all sides. Be careful not to overcook the chicken. Once chicken is browned, remove it from the skillet onto a separate plate and set aside.

Broccoli and carrots being sautéed in a skillet.

In the same skillet, add the remaining 1 Tbsp of cooking oil along with the carrots and broccoli. Cook and stir for one minute, or just until the broccoli begins to turn bright green.

Peppers and onions added to a skillet with broccoli and carrots.

Next, add the red bell pepper and onion to the skillet. Continue to cook and stir for 1-2 more minutes.

Cooked chicken and stir fry sauce being added to vegetables in a skillet.

Give the stir fry sauce another brief stir. Now add the cooked chicken back to the skillet, then pour the stir fry sauce over the chicken and vegetables. Give everything a stir and allow the sauce to come up to a simmer, at which point it will start to thicken and turn glossy. Continue to cook for 1-2 more minutes or until it has reached your desired doneness.

Finished chicken stir fry in a skillet.

Remove the chicken stir fry from the heat, top with green onions and sesame seeds (optional) and dinner is served!

Chicken stir fry on a plate with white rice and a fork serving some out.

The post Chicken Stir Fry appeared first on Budget Bytes.

Scrambled Eggs with Rice

Scrambled Eggs with Rice is a simple and delicious budget-friendly meal that can be enjoyed for breakfast, lunch, or dinner!

The post Scrambled Eggs with Rice appeared first on Budget Bytes.

Rice is a quintessential budget-friendly ingredient, and my slogan has always been “put an egg on it!” So when I saw this recipe for Scrambled Eggs with Rice from the new cookbook The Simple Art of Rice: Recipes from Around the World for the Heart of Your Table by JJ Johnson and Danica Novgorodoff, I knew I had to make it. Not to mention, this recipe features the ingredient I currently can’t get enough of, gochujang! If you love fried rice, you’re going to love this recipe for scrambled eggs with rice. It’s just as easy, hearty, and delicious, plus it’s totally customizable. I’m definitely going to add this one to my budget-recipe rotation!

Overhead view of a plate full of scrambled eggs with rice, garnished with green onion.

Chef JJ mentions in his book that the recipe is inspired by breakfast dishes found in both Japanese and Korean cultures. This incredibly simple yet satisfying dish is similar to fried rice, but the ratio between the rice and egg are a bit more even and the rice is stirred into the egg before it’s fully cooked, which gives the dish a slightly creamy texture. Best of all, it’s super fast and easy, so you really can make it on a typical morning (provided you have some cooked rice stashed in the refrigerator). It’s the perfect recipe for using up the leftovers in your fridge!

Ingredients for Scrambled Eggs with Rice

Are you ready to see how easy this is? You’ll only need these simple ingredients to make scrambled eggs with rice:

  • Eggs: Eggs provide fat and protein to this dish, making it extra filling and satisfying. We used large eggs for this recipe. If you have smaller eggs, make sure to add a few more, or if you have extra large eggs, you can probably go with four.
  • Oil: Use your favorite cooking oil to lightly scramble the eggs.
  • Gochujang: This savory, sweet, and spicy Korean chile paste is having a moment in the U.S. right now, so you can probably find some at your local grocery store, although you’ll have a better selection at better prices if you shop at an Asian grocery store. If you can’t find gochujang, you can substitute chile oil or sriracha. The flavor will be different, but still delicious.
  • Rice: The original recipe, in The Simple Art of Rice: Recipes from Around the World for the Heart of Your Table, uses short-grain rice, which I’m sure would be even more spectacular, but we only had long grain on hand and it still made an amazing meal. You can use pretty much any type of rice for this flexible recipe. Whatever rice you’re using, make sure it’s pre-cooked and slightly warm.
  • Soy Sauce: A little soy sauce adds umami and depth to the flavor and enough salt for all of the flavors to pop.
  • Sesame Oil: toasted sesame oil adds a wonderfully nutty flavor to the dish, making it extra comforting and cozy.
  • Green Onions: Garnishing with sliced green onions adds a nice fresh pop of flavor to contrast the cozy meal.

What Else Can I Add?

Simple recipes like this are awesome because there is so much room for customization. Here are a few ideas for other add-ins that will take your scrambled eggs with rice to the next level:

  • Meat: Try sautéing some sliced ham, spam, shrimp, or smoked sausage in the skillet before cooking the eggs (remove from the skillet and stir back in at the end).
  • Vegetables: Just like with fried rice, you can add just about any vegetable to this dish. Onions, spinach, mushrooms, diced bell peppers, or even grape tomatoes would be awesome.
  • Toppings: I could go wild with fun toppings for this egg and rice dish. Cheddar cheese would be great, or how about some sliced avocado, kimchi, or furikake?

How to Store Leftovers

Thankfully, this recipe only takes minutes to whip up because it’s definitely best when freshly prepared. If you can’t eat it all in one sitting, store the rest in the refrigerator in an air-tight container for 2-3 days. Reheat using the microwave, sprinkling just a bit of water over top first (to help rehydrate the rice).

Overhead view of scrambled eggs with rice in the skillet.
Overhead view of a plate full of scrambled eggs with rice, fork on the side.
Print

Scrambled Eggs with Rice

Scrambled Eggs with Rice is a simple and delicious budget-friendly meal that can be enjoyed for breakfast, lunch, or dinner!
Course Breakfast
Cuisine Japanese, Korean
Total Cost $2.28 recipe / $0.57 serving
Prep Time 5 minutes
Cook Time 10 minutes
Total Time 15 minutes
Servings 4
Calories 420kcal

Ingredients

  • 6 large eggs $0.63
  • 2 Tbsp cooking oil $0.08
  • 2 tsp gochujang (or to taste) $0.16
  • 4 cups cooked rice, warm $0.43
  • 3 Tbsp soy sauce $0.18
  • 1 Tbsp toasted sesame oil $0.30
  • 4 green onions, sliced $0.50

Instructions

  • Crack the eggs into a bowl and beat well with a fork.
  • Warm the vegetable oil in a large non-stick skillet over medium-low heat. Add the eggs and scramble them lightly, leaving them slightly runny. Toward the end of cooking, add the gochujang and stir until well incorporated.
  • Stir in the warmed rice, using a wooden spoon to break up any clumps. Cook for several minutes, until the rice is heated through, then stir in the soy sauce and sesame oil.
  • Serve hot, in individual bowls, topped with the sliced green onions.

See how we calculate recipe costs here.

Nutrition

Serving: 1serving | Calories: 420kcal | Carbohydrates: 47g | Protein: 15g | Fat: 18g | Sodium: 865mg | Fiber: 1g
Side view of a plate full of scrambled eggs with rice and a fork in the side.

How to Make Scrambled Eggs with Rice – Step by Step Photos

Eggs in a bowl being whisked with a fork.

Crack six large eggs into a bowl and whisk with a fork.

Half-scrambled eggs in a skillet with gochujang added.

Add 2 Tbsp cooking oil to a large skillet and heat over medium-low. Once hot, add the eggs and lightly scramble. When they’re mostly set, add 2 tsp gochujang and stir to combine.

Rice being stirred into the eggs in the skillet.

Add four cups of warm pre-cooked rice and stir to combine.

Rice and eggs being seasoned with soy sauce.

Season the eggs and rice with 3 Tbsp soy sauce and 1 Tbsp toasted sesame oil. Fold to incorporate. Give the mixture a taste and add more gochujang if desired (I like it spicy, so I added more).

Finished scrambled eggs with rice garnished with sliced green onion.

Garnish with sliced green onions and serve!

Overhead view of a plate full of scrambled eggs with rice, a fork in the side.

The post Scrambled Eggs with Rice appeared first on Budget Bytes.

Easy Dumpling Soup

Easy Dumpling Soup is the perfect quick lunch or dinner because it’s endlessly versatile, insanely budget-friendly, and can be made in 15 minutes.

The post Easy Dumpling Soup appeared first on Budget Bytes.

Easy Dumpling Soup is one of my absolute favorite things to throw together if I want a quick-and-simple homemade lunch or an effortless dinner that’s still wholesome, comforting, and budget-friendly. I’ve designed this recipe to be as versatile as possible, dressing up mostly store-bought ingredients, in order to scratch that “itch” for whatever takeout favorite I’m craving when ordering out isn’t on the menu.

A large white bowl filled with dumpling soup and surrounded by a small bowl of white sesame seeds, an open jar of chili crisp and an orange decorative towel.

What is dumpling soup?

Our version of dumpling soup is a quick, semi-homemade soup inspired by dumpling soups found in Chinese, Korean and Japanese cuisines. The soup features a savory clear broth, delicate meat-filled dumplings, fresh greens, and an array of condiments to sprinkle on top. Here’s what you need for this Easy Dumpling Soup:

  • Frozen dumplings — You can find Asian-style dumplings in the freezer section, usually filled with pork, vegetables, shrimp, or a combination of those ingredients.
  • Broth — We fortified our vegetable broth with soy sauce and toasted sesame oil!
  • A handful of fresh greens — like sliced green onions, fresh spinach, or baby bok choy
  • Condiments — Use anything your heart desires! Try chili crisp, sesame seeds, black vinegar, cilantro, and more!

Is this an authentic recipe?

No, this is not an authentic dumpling soup, but we highly encourage you to read more about the wide variety and rich culture surrounding dumplings. Also, check out these recipes for authentic Chinese potstickers and Xiaolongbao (soup dumplings), Korean mandu, and Japanese gyoza.

What kind of dumplings to buy

Most grocery stores offer a variety of frozen dumplings options of different sizes, shapes, and fillings (usually pork, vegetable, shrimp, or a combination of those flavors)—and any type of frozen dumpling will work for this recipe. If you’re operating on an extra-tight budget, visiting an Asian grocery store is a great place to find a wider selection, larger quantities, and even lower prices.

How to know the dumplings are fully cooked:

Frozen dumplings are usually on the smaller side, so they cook quickly when added to boiling broth. However, since our suggested cook time is only based on the handful of brands we’ve tried (and there are so many others!), I highly recommend consulting the package directions on your dumplings to ensure you are cooking them long enough—as well as checking the suggested serving size to make sure you are preparing enough for two people.

Are the leftovers ANY good?

I would not recommend saving these leftovers. As it sits, the dumplings will keep soaking up the broth until they bloat and then fall apart. Instead, just make the amount you think you will eat, which is why I’ve developed the recipe for two servings rather than four. Since it comes together so quickly, it wouldn’t be the end of the world if you decided to make it twice in one night! 

A close up view of dumpling soup in a white bowl topped with white sesame seeds and chili crisp.

Take your Dumpling Soup to the next level

Some great flavor and topping additions for this soup are: 

  • Cubed tofu, cooked chicken, or another prepared protein
  • Mushrooms, or other fresh or frozen vegetables
  • Half of a hard-boiled egg
  • Fish sauce
  • Kimchi
  • Cilantro
  • Mirin 
  • Rice Vinegar or Lime Juice
  • Miso paste
  • A prepared sauce like Scheuzan chili oil, chili garlic sauce, sriracha, teriyaki sauce, or a prepared “dumpling sauce”
  • Sesame seeds, crushed nori, or a store-bought Furikake blend

My go-to Topping combinations

Plan to add any extra condiments and toppings directly to each serving bowl, so each person can mix and match them to suit their tastes. My go-to topping combinations are (per bowl): 

  • 1 Tbsp kimchi + handful of torn cilantro 
  • ¼ tsp Szechuan chili oil + hardboiled egg 
  • Sliced mushrooms + nori + sesame seeds
A close up view of dumpling soup in a white bowl topped with white sesame seeds and chili crisp.
Print

Easy Dumpling Soup

Easy Dumpling Soup is the perfect quick dinner because it’s endlessly versatile, insanely budget-friendly, and can be made in 15 minutes.
Course Dinner, Lunch
Cuisine Asian, Chinese, Japanese, Korean
Total Cost $2.98 RECIPE / $1.49 SERVING
Prep Time 5 minutes
Cook Time 10 minutes
Servings 2 bowls
Calories 290kcal

Ingredients

  • 10 frozen dumplings* $2.00
  • 2 cups vegetable broth** $0.24
  • 1 Tbsp soy sauce $0.06
  • 1 tsp toasted sesame oil $0.06
  • 1 green onion, thinly sliced, white and green parts separated $0.11
  • 1/2 cup fresh spinach*** $0.15

Garnishes, optional

Instructions

  • Combine the vegetable broth, soy sauce, toasted sesame oil, and the white parts of a sliced green onion in a medium-sized pot. (If using, also add the fish sauce, pre-cooked proteins or tofu, and any fresh or frozen vegetables that need time to soften.)
  • Bring the broth up to a boil on medium-high heat. Once boiling, add the dumplings.
  • Cover the pot and allow the soup to come back up to a boil. Boil the dumplings for about 2 minutes or until they are cooked through. (Consult package directions.)
  • Turn off the heat and stir in the green parts of the sliced green onion and a handful of spinach.
  • Split the soup into 2 serving bowls and top with any desired condiments.

See how we calculate recipe costs here.

Notes

*You can use any flavor (pork, vegetable, chicken, etc.), but I prefer ones with pork and vegetables.
**We use Better Than Bouillon mixed to make all of our broths. If substituted with a low-sodium broth, the final dish may need more salt. 
***or baby bok choy

Nutrition

Serving: 1bowl of soup | Calories: 290kcal | Carbohydrates: 46g | Protein: 8g | Fat: 9g | Sodium: 1809mg | Fiber: 3g
A single dumpling parcel on a black spoon raised above a large white bowl filled with dumpling soup topped with white sesame seeds and red chili crisp and an orange decorative towel.

How to Make easy dumpling soup – Step by Step Photos

A measuring cup of soup is poured into a small saucepan containing soy sauce, toasted sesame oil and the white parts of a green onion.

In a medium-sized pot, combine 2 cups of vegetable broth, 1 Tablespoon of soy sauce, 1 teaspoon of toasted sesame oil, and the white parts of a thinly sliced green onion (set the green parts aside for garnish), and cook over medium-high heat. You should also add the fish sauce now, if using — as well as any other extra ingredients that require some cooking time, like leftover cooked proteins from the fridge, tofu, mushrooms, or any other fresh or frozen vegetables that need time to soften.

Frozen dumplings in a white bowl being poured into a pot of boiling broth.

Bring the broth up to a boil on medium-high heat. Once boiling, add 10 frozen dumplings. Cover and allow the soup to come back up to a boil. Boil the dumplings for about 2 minutes or until they are cooked through. (Check out the suggested cooking time on your dumpling packaging to insure this will be enough time to cook them all the way through — at the same time, also check the nutrition label to make sure you add the correct amount for two servings.)

A pile of fresh spinach sitting on top of a pot full of warm dumpling soup.

Turn off the heat and stir in 1/2 cup of fresh spinach and the reserved green onion slices.

A medium-sized pot of finished dumpling soup.

Split the soup into two serving bowls and top each bowl with your desired garnishes. We chose to sprinkle ours with a few sesame seeds and a heaping spoonful of Sichuan Chili Crisp!

A close up view of dumpling soup in a white bowl topped with white sesame seeds and chili crisp.

GET IN MY BELLY!

The post Easy Dumpling Soup appeared first on Budget Bytes.