Black-Eyed Peas

Black Eyed Peas are a flavorful, budget-friendly, and nutrient packed meal for New Year’s Day or any day of the year!

The post Black-Eyed Peas appeared first on Budget Bytes.

It may be tradition to eat black-eyed peas on New Year’s Day, but I’m here to say that you need to be making these delicious and budget-friendly beans year-round! This big ol’ pot of peas is hearty, delicious, freezer-friendly, and about as budget-friendly as it gets. So try them out this New Year’s Day and then add them to your regular rotation for the coming year. Your wallet and taste buds will thank you. ;)

Overhead view of a pot of black-eyed peas being stirred with a wooden spoon.

What Are Black-Eyed Peas?

Black-eyed peas are a small white legume with a black dot, or “eye”, in the center. They’re traditionally served on New Year’s Day in the United States alongside collard greens (or mustard or turnip greens) to bring wealth in the new year. The black-eyed peas represent coins, while the greens signify paper dollars. Some even believe you must consume 365 black-eyed peas to bring the wealth, so make sure to dish yourself up an extra large bowl!

Ingredients for Black-Eyed Peas

Here’s what you’ll need to make this incredibly delicious pot of black-eyed peas:

  • Black-Eyed Peas: You’ll need one pound of dry black-eyed peas. You can find these near the other dry beans in the grocery store, or on a special display if you’re buying near the New Year!
  • Bacon: Bacon gives the black-eyed peas a deliciously smoky flavor and the fat gives the peas body and a wonderful mouthfeel. You can substitute by adding a ham hock or smoked turkey wing to the peas before simmering and using a bit of oil to sauté the vegetables in the beginning.
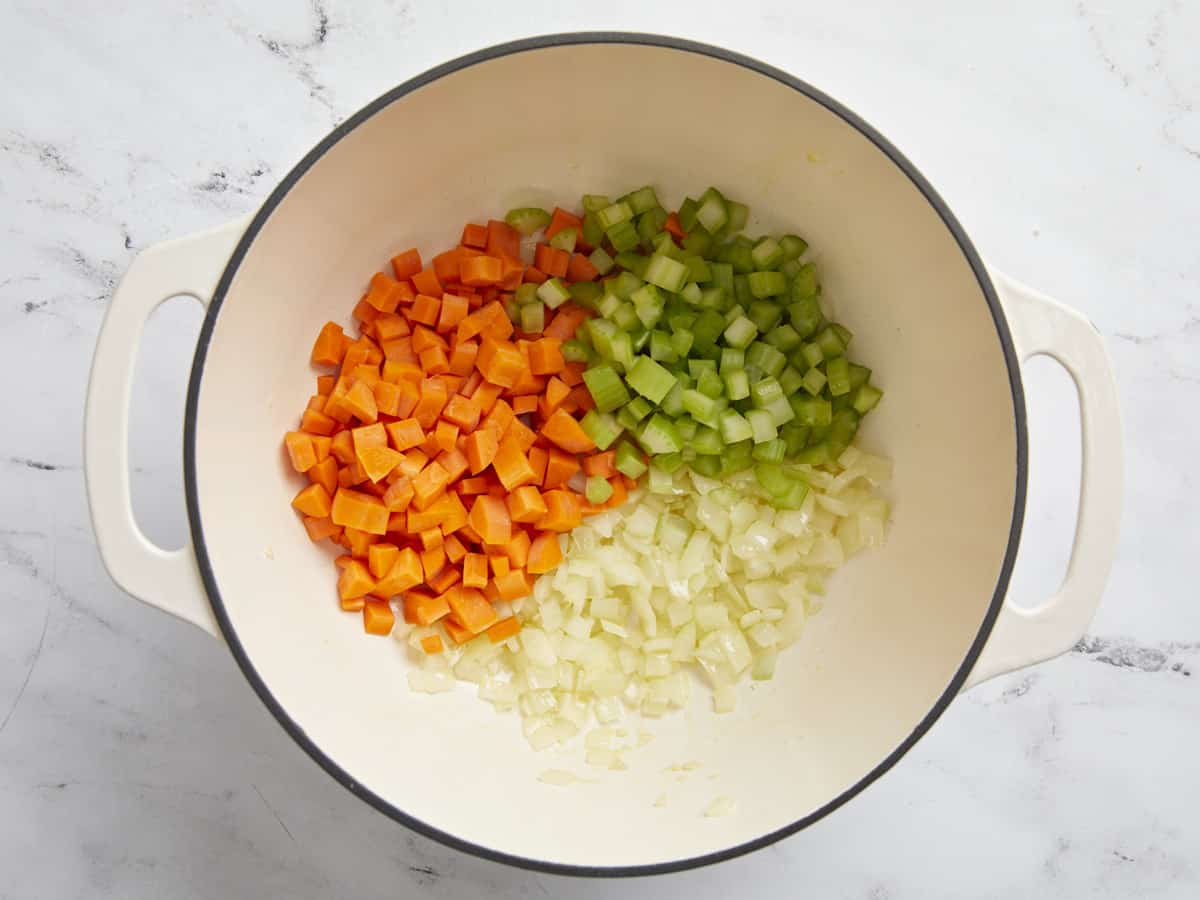
  • Vegetables: The black-eyed peas are flavored with a medley of vegetables like onion, garlic, bell pepper, and celery. The vegetables add flavor, color, and texture to the dish.
  • Spices: The pot of peas is seasoned with a savory mix of smoked paprika, oregano, thyme, cayenne pepper, and black pepper.
  • Chicken Broth: The black-eyed peas cook in chicken broth for maximum flavor. Make sure to use a good broth to ensure the peas are very flavorful. We like to use Better Than Bouillon because it’s cost-effective and has great flavor
  • Salt: As with any bean, it’s very important to add salt to taste at the end of cooking. Salt doesn’t just make food “salty” but it amplifies all of the flavors so you can taste each and every ingredient.

Recipe Variations

Vegetarian or Vegan: To make these black-eyed peas vegetarian, simply skip the bacon and use a few tablespoons of coconut oil to sauté the vegetables. The coconut oil has a similar mouthfeel to pork fat, making the peas extra hearty. You’ll also want to increase the smoked paprika slightly to make up for the smokiness of the bacon and swap vegetable broth for chicken broth.

Slow Cooker: To make black-eyed peas in the slow cooker, simply add all of the ingredients (including the pre-soaked peas) to a slow cooker and cook on high for about four hours, or until the peas are tender.

Canned Black-Eyed Peas: If you’re in a rush or forgot to soak your peas, canned black-eyed peas are a great shortcut. Simply follow our recipe for Quickie Black-Eyed Peas with Greens.

The Quick Soak Method

If you don’t have time to soak your beans overnight (or you just forgot), you can use the quick soak method to get the beans ready for cooking in about an hour. Here’s how to quick soak beans:

  1. Rinse the beans with cold water, then add them to a large pot. Add enough fresh water to cover the beans by 2-3 inches.
  2. Place a lid on the pot, turn the heat on to high, and bring the beans up to a boil. Allow the beans to boil for two minutes.
  3. Remove the beans from the heat and let them sit in the hot water, with the lid in place, for one hour.
  4. Rinse the soaked beans and continue to use them in place of the beans soaked overnight.

How to Store Leftover Black-Eyed Peas

This recipe is great for meal prep because the leftovers are amazing. Store the cooked black-eyed peas in the refrigerator for up to five days, or, once they’re chilled, transfer single portions to the freezer for longer storage. They can be kept in the freezer for about three months and easily reheated in the microwave or on the stovetop over medium-low heat, stirring often.

Overhead view of a bowl of black-eyed peas with a piece of cornbread on the side.
Overhead view of a pot of black-eyed peas with a wooden spoon.
Print

Black-Eyed Peas

Black Eyed Peas are a flavorful, budget-friendly, and nutrient packed meal for New Year's Day or any day of the year!
Course Dinner, Main Course
Cuisine American
Total Cost $6.36 recipe / $1.06 serving
Prep Time 15 minutes
Cook Time 1 hour 15 minutes
Soak Time 8 hours
Total Time 9 hours 30 minutes
Servings 6 (1.3 cups each)
Calories 362kcal

Equipment

Ingredients

  • 1 lb. dry black-eyed peas $1.99
  • 4 oz. bacon $1.33
  • 1 yellow onion $0.32
  • 4 cloves garlic $0.32
  • 1 bell pepper $0.99
  • 2 stalks celery $0.45
  • 1 tsp smoked paprika $0.10
  • 1 tsp dried oregano $0.10
  • 1 tsp dried thyme $0.10
  • 1/4 tsp cayenne pepper $0.02
  • 1/4 tsp black pepper $0.02
  • 1 bay leaf $0.15
  • 4 cups chicken broth $0.42
  • 1 tsp salt (or to taste) $0.05

Instructions

  • The day before, rinse the peas with cool water then place them in a large bowl and cover with 2-3 inches of cold water. Soak the peas in the refrigerator for eight hours or overnight.
  • When you're ready to cook the peas, add the bacon to a large pot and cook over medium heat until the bacon is brown and crispy. Remove the bacon, saving it for later, and leave all of the bacon grease in the pot.
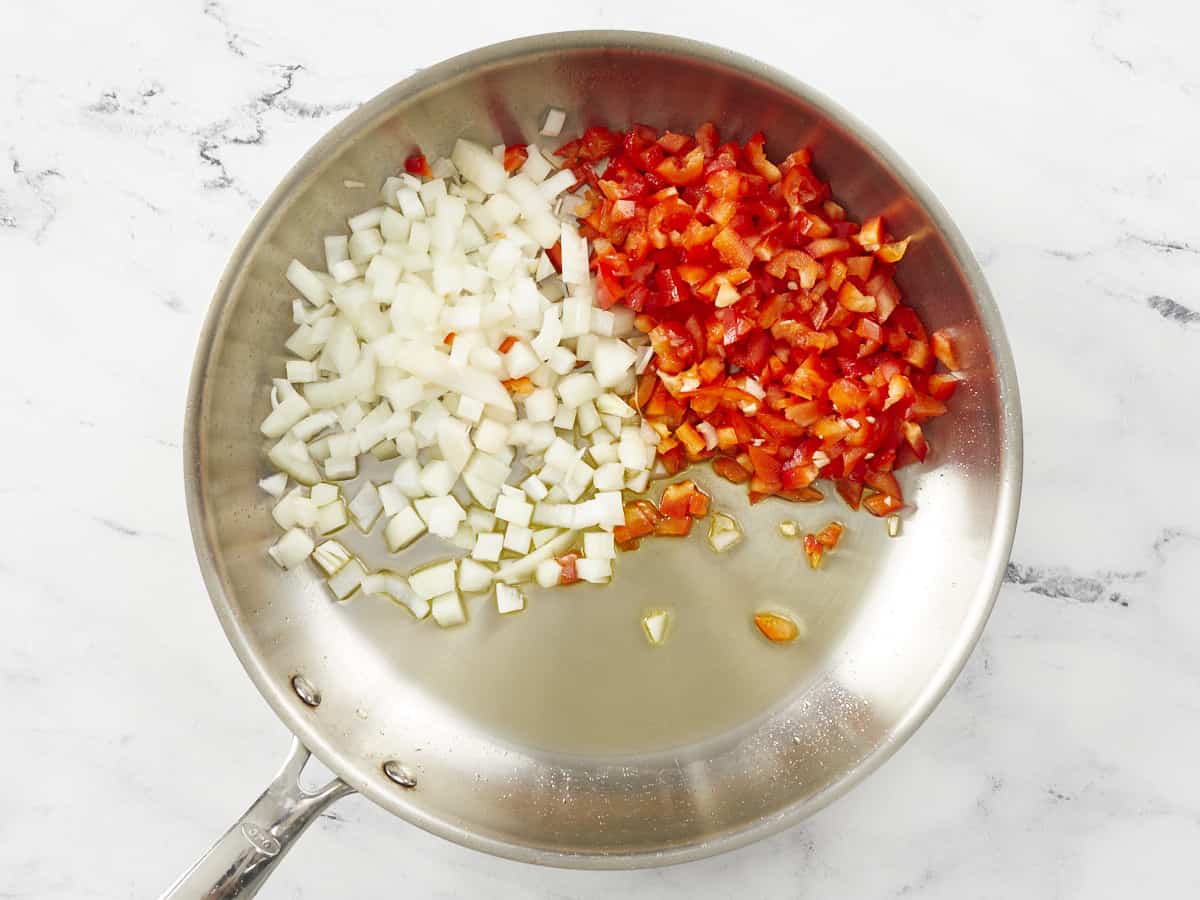
  • Dice the onion, bell pepper, and celery, and mince the garlic. Add the onion to the pot with the bacon grease and cook over medium until the onion is tender.
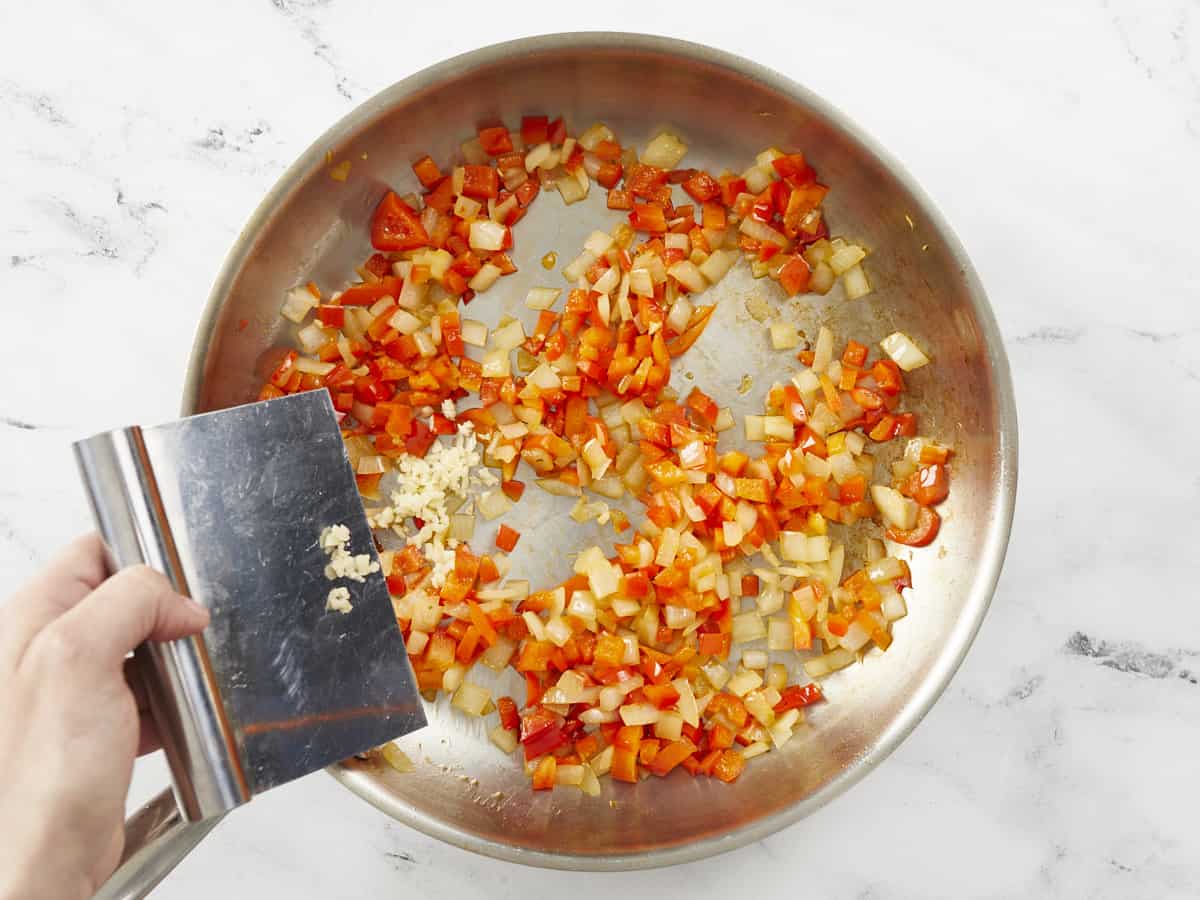
  • Add the bell pepper, celery, and garlic to the pot and continue to cook for about five minutes more.
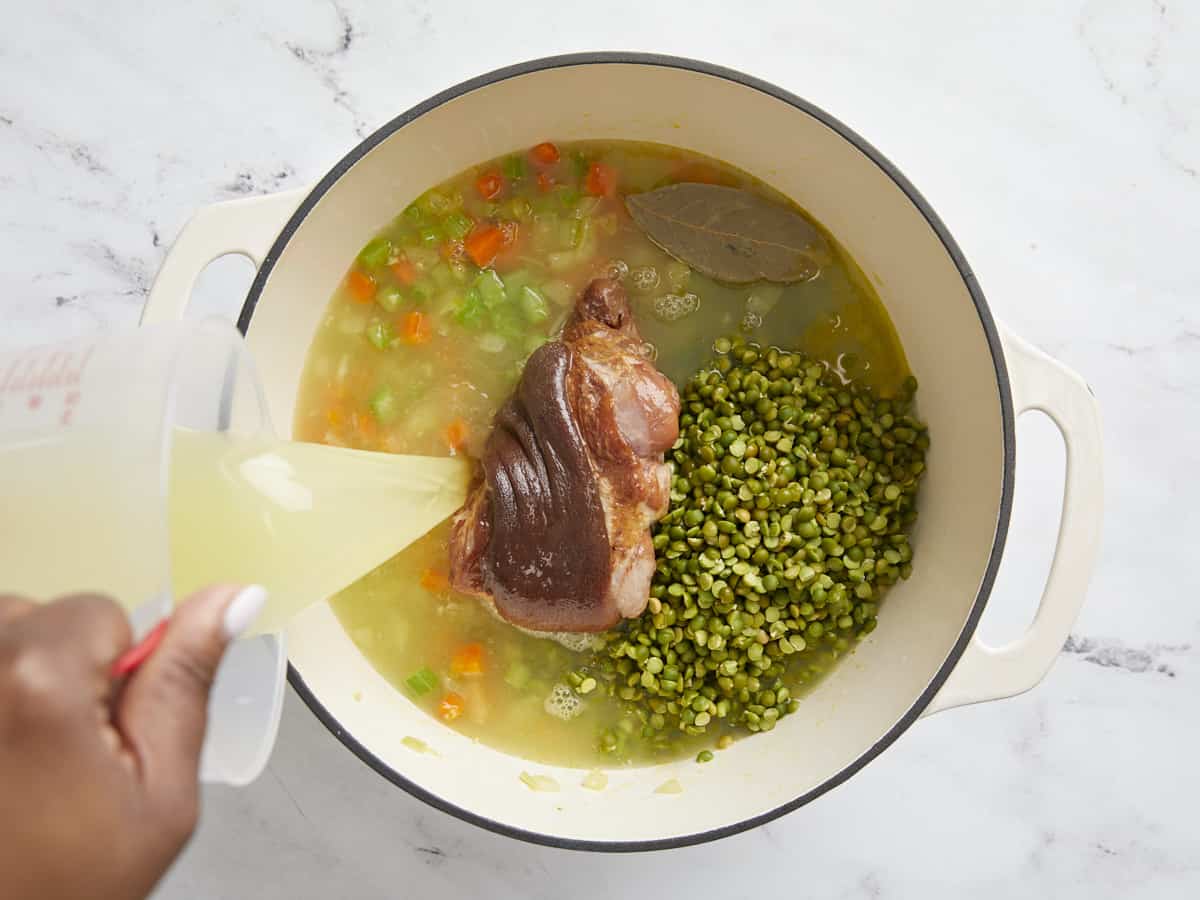
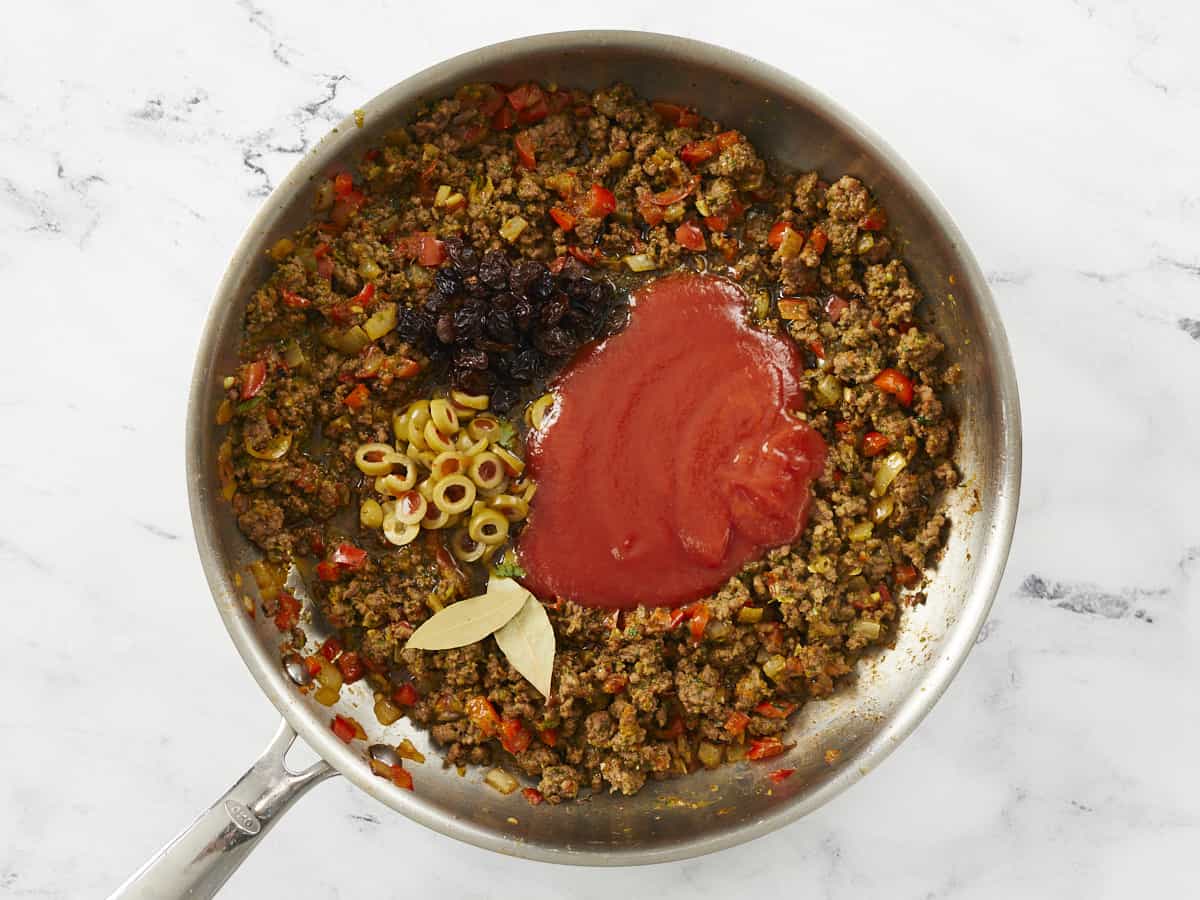
  • Drain the peas and give them a brief rinse. Add the peas to the pot along with the smoked paprika, oregano, thyme, cayenne pepper, black pepper, bay leaf, and chicken broth. Stir everything to combine, then place a lid on the pot.
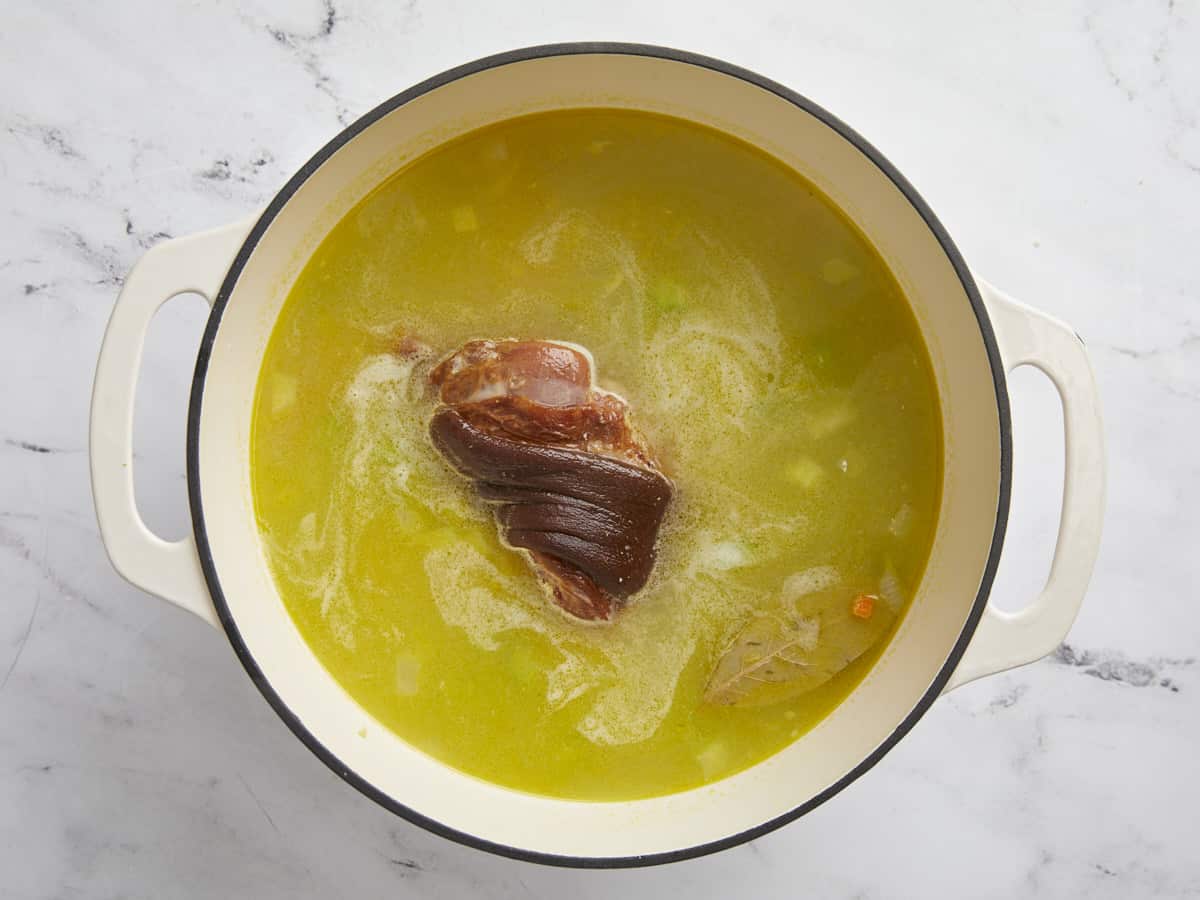
  • Turn the heat up to medium-high and allow the pot to come to a boil. Once it reaches a full boil, turn the heat down to medium-low and let the peas simmer for one hour, stirring occasionally, or until the peas are tender.
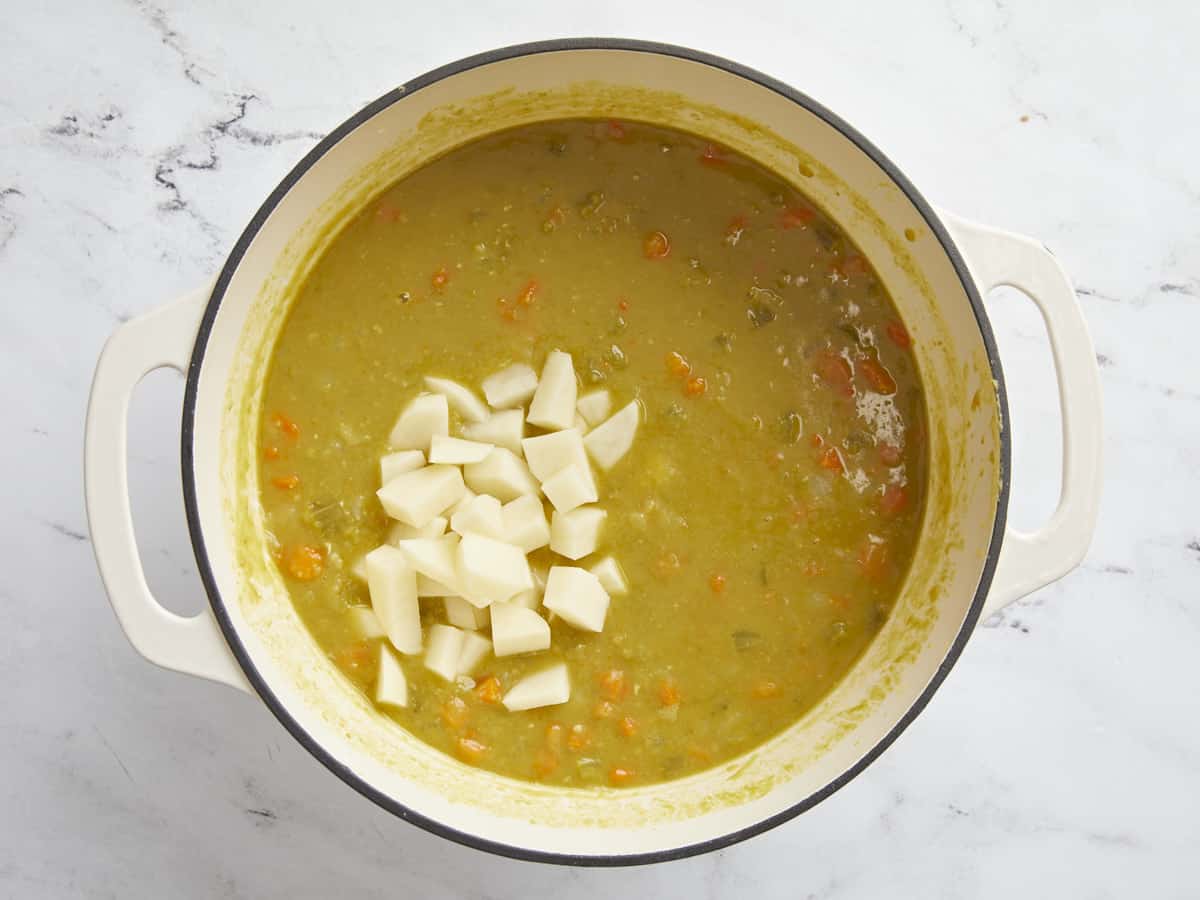
  • Once the peas have softened, crumble the bacon and stir it back into the pot. Season the peas with salt to taste, starting with ½ tsp and adding more until the flavors of the pot pop.
  • Remove the bay leaf from the pot and serve the peas with a side of collard greens and cornbread, or over a bowl of rice.

See how we calculate recipe costs here.

Nutrition

Serving: 1.3cups | Calories: 362kcal | Carbohydrates: 51g | Protein: 22g | Fat: 9g | Sodium: 1119mg | Fiber: 9g
Close up overhead view of a pot of black eyed peas with a bay leaf.

How to Make Black-Eyed Peas – Step By Step Photos

Soaked black-eyed peas in a bowl.

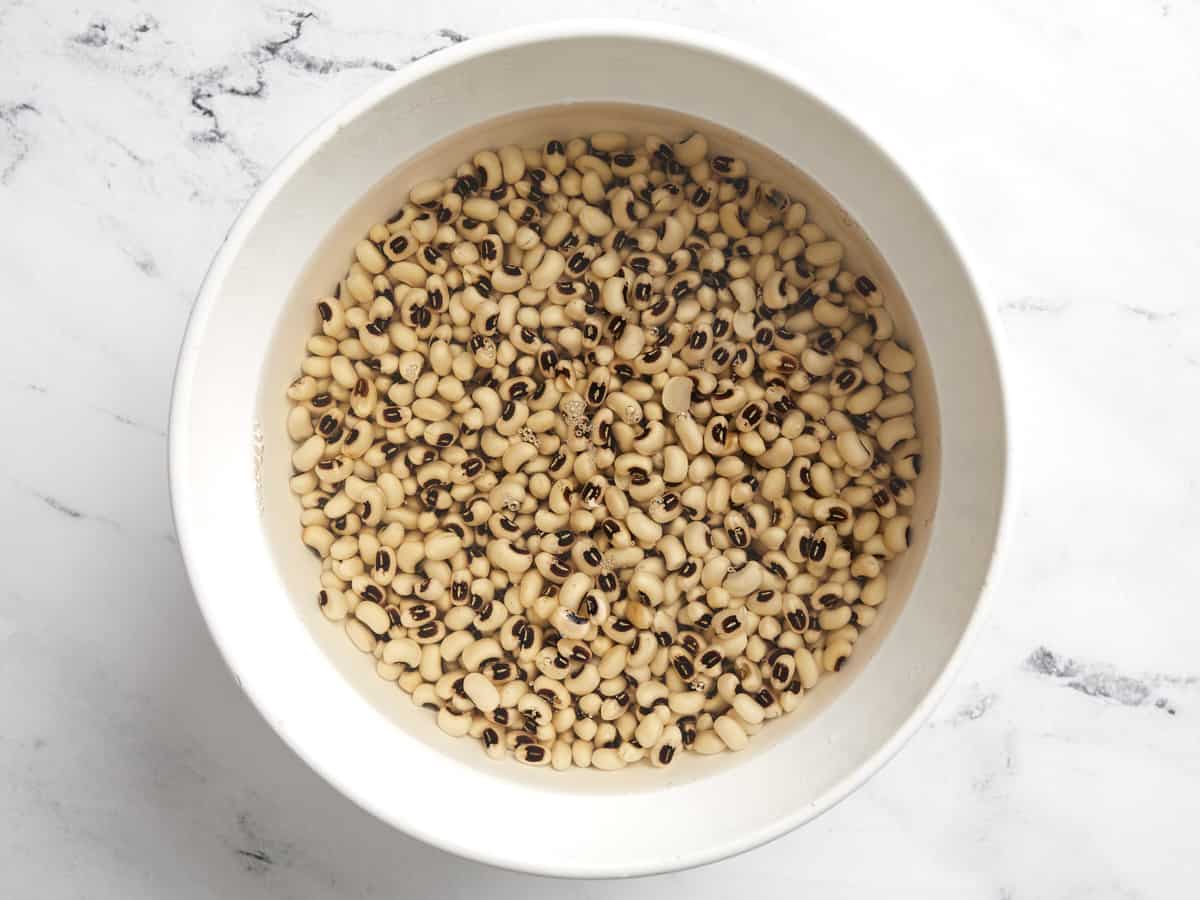
The night before, begin soaking the black-eyed peas. Rinse the peas well with cool water, then place them in a large bowl and cover with at least three inches of water. Soak the peas for at least eight hours in the refrigerator.

Browned bacon in a Dutch oven.

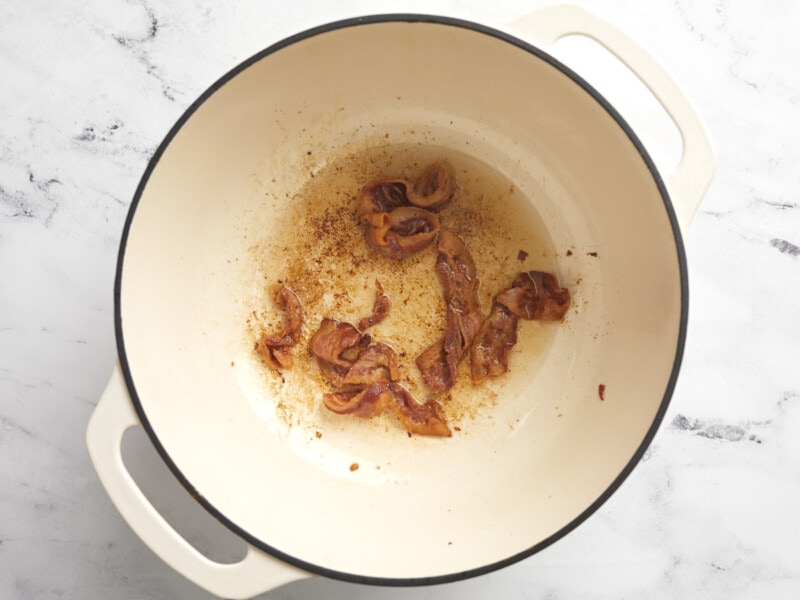
When you’re ready to cook the peas, add 4oz. bacon to a large pot and cook over medium heat until the bacon is brown and crispy. Remove the bacon and set it aside for later, leaving all of the bacon grease in the pot.

Diced bell pepper and celery added to the pot with sautéed onion and garlic.

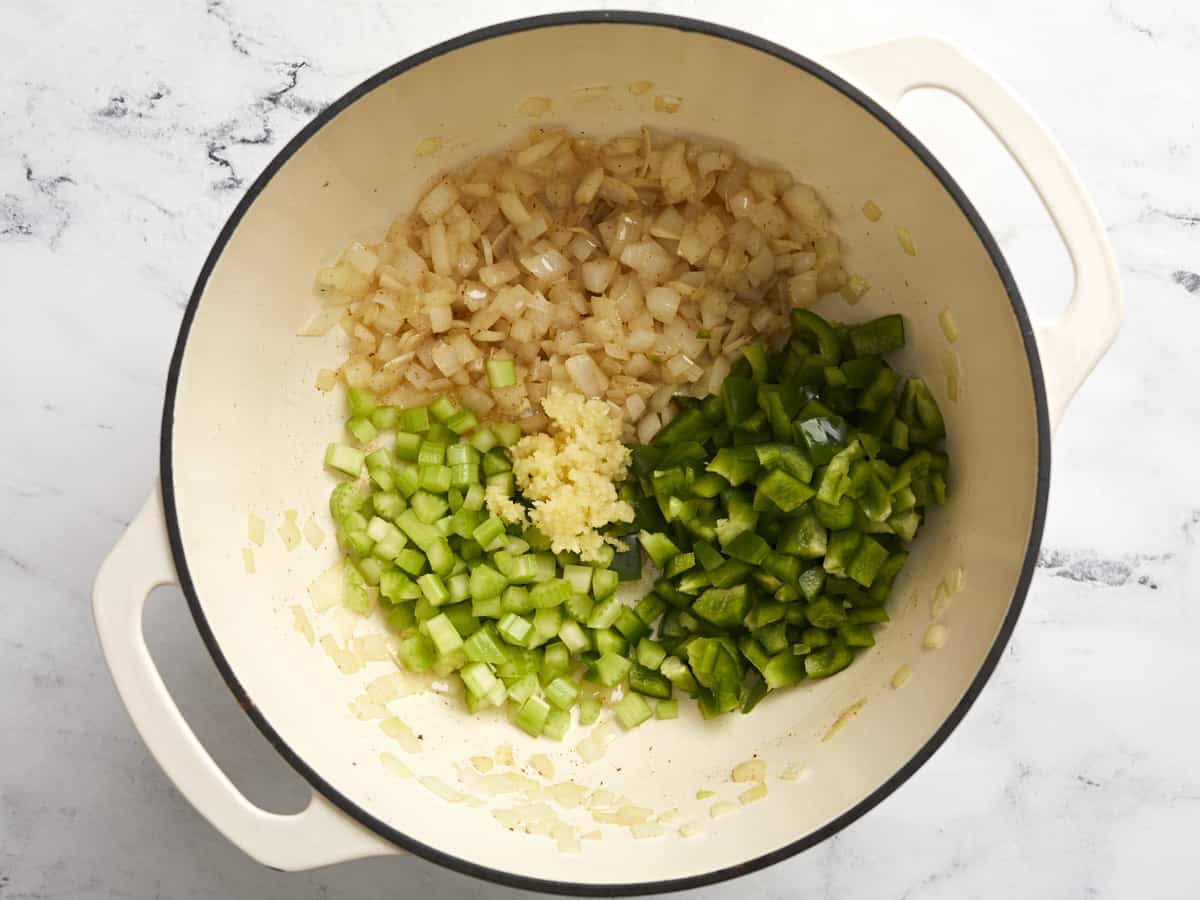
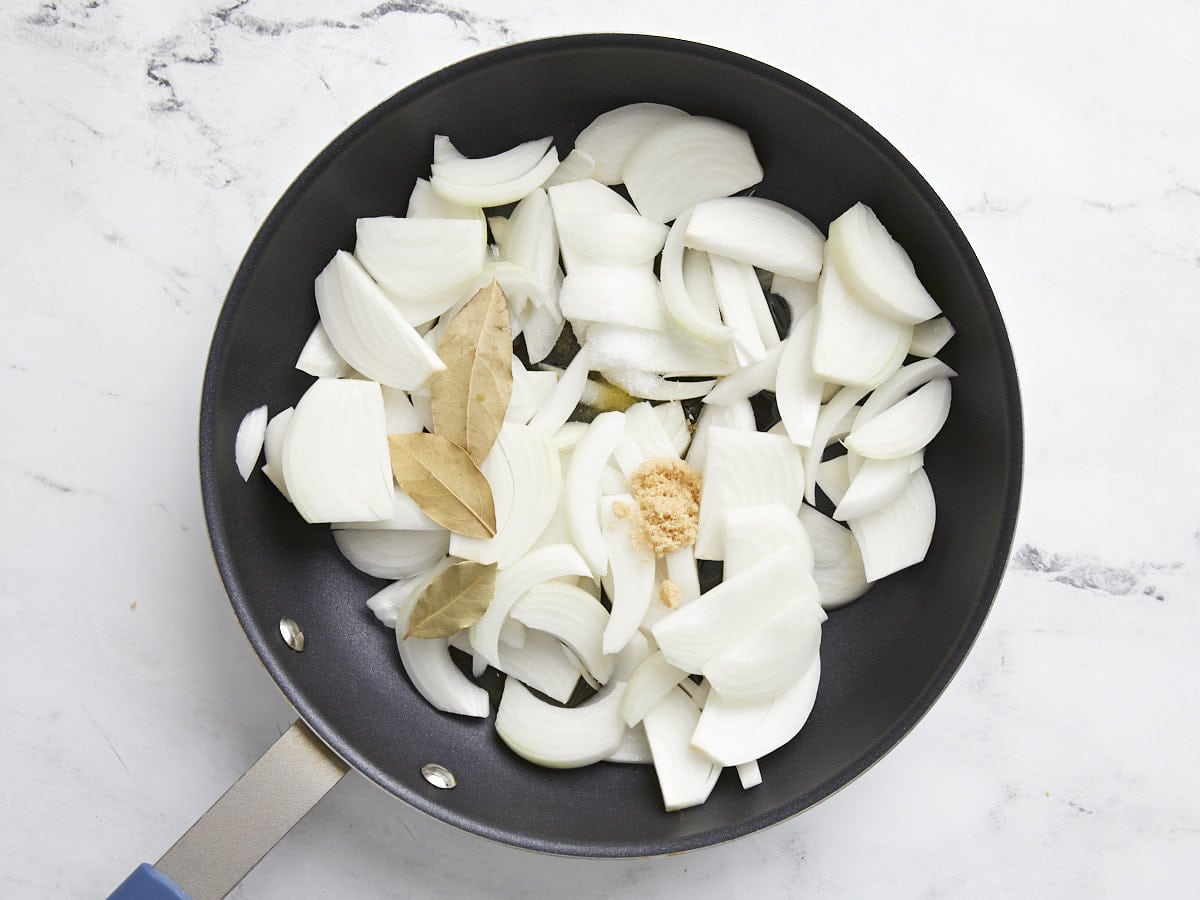
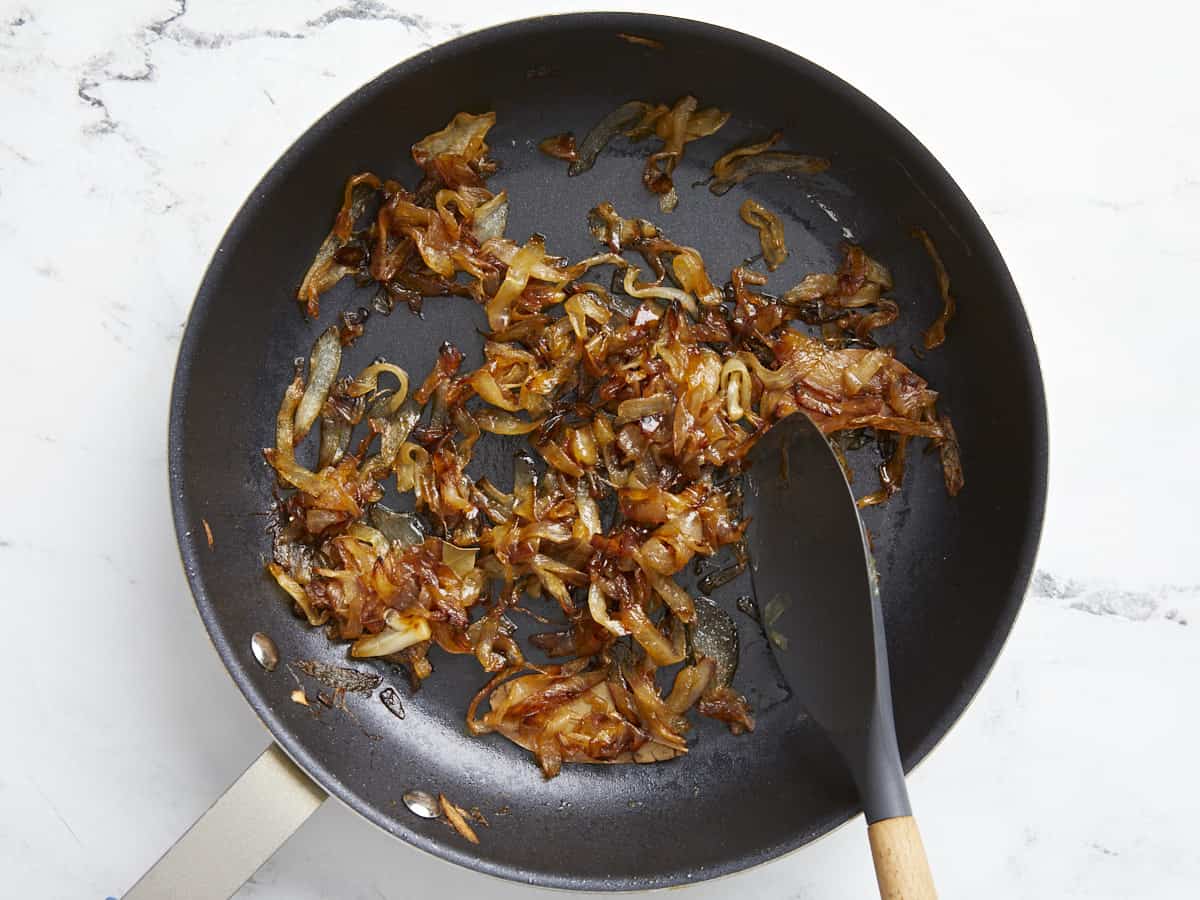
Dice one yellow onion, one green bell pepper, and two stalks of celery. Mince four cloves of garlic. Add the diced onion to the pot with the bacon grease and sauté over medium heat until the onions are soft, then add the bell pepper, celery, and garlic. Continue to sauté for about five minutes more.

Beans, spices, and chicken broth added to the pot.

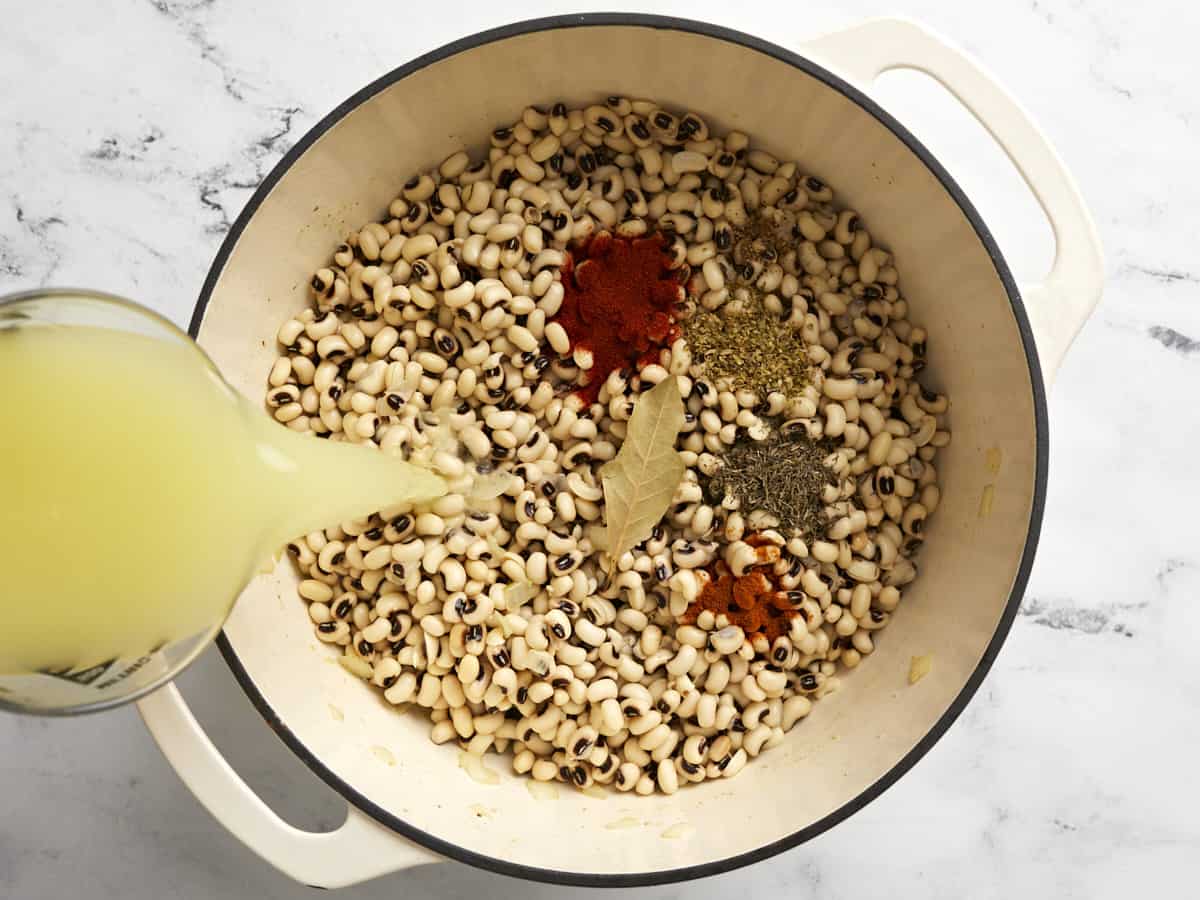
Add the drained black-eyed peas to the pot along with 1 teaspoon smoked paprika, 1 teaspoon dried oregano, 1 teaspoon dried thyme, ¼ teaspoon cayenne pepper, ¼ tsp black pepper, one bay leaf, and four cups of chicken broth.

Ingredients being stirred in the pot before cooking.

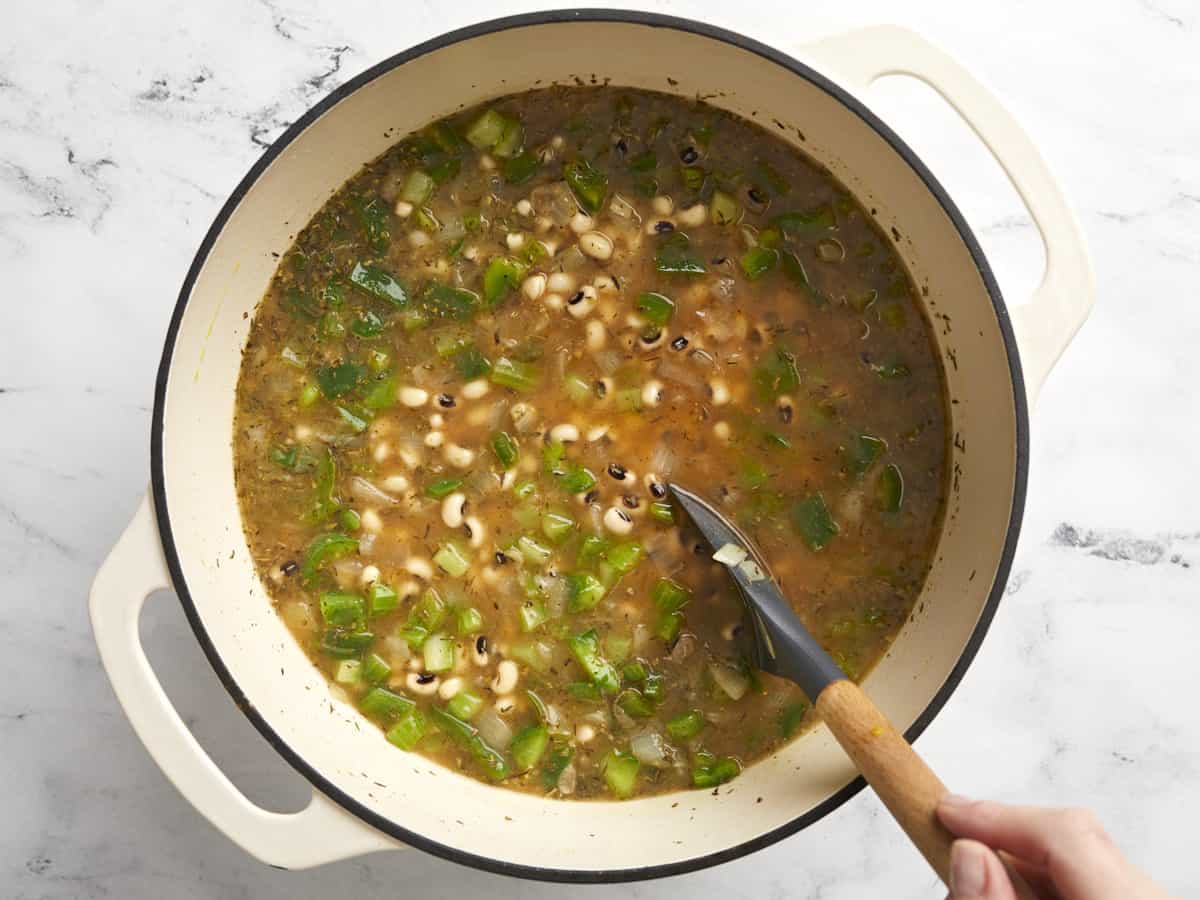
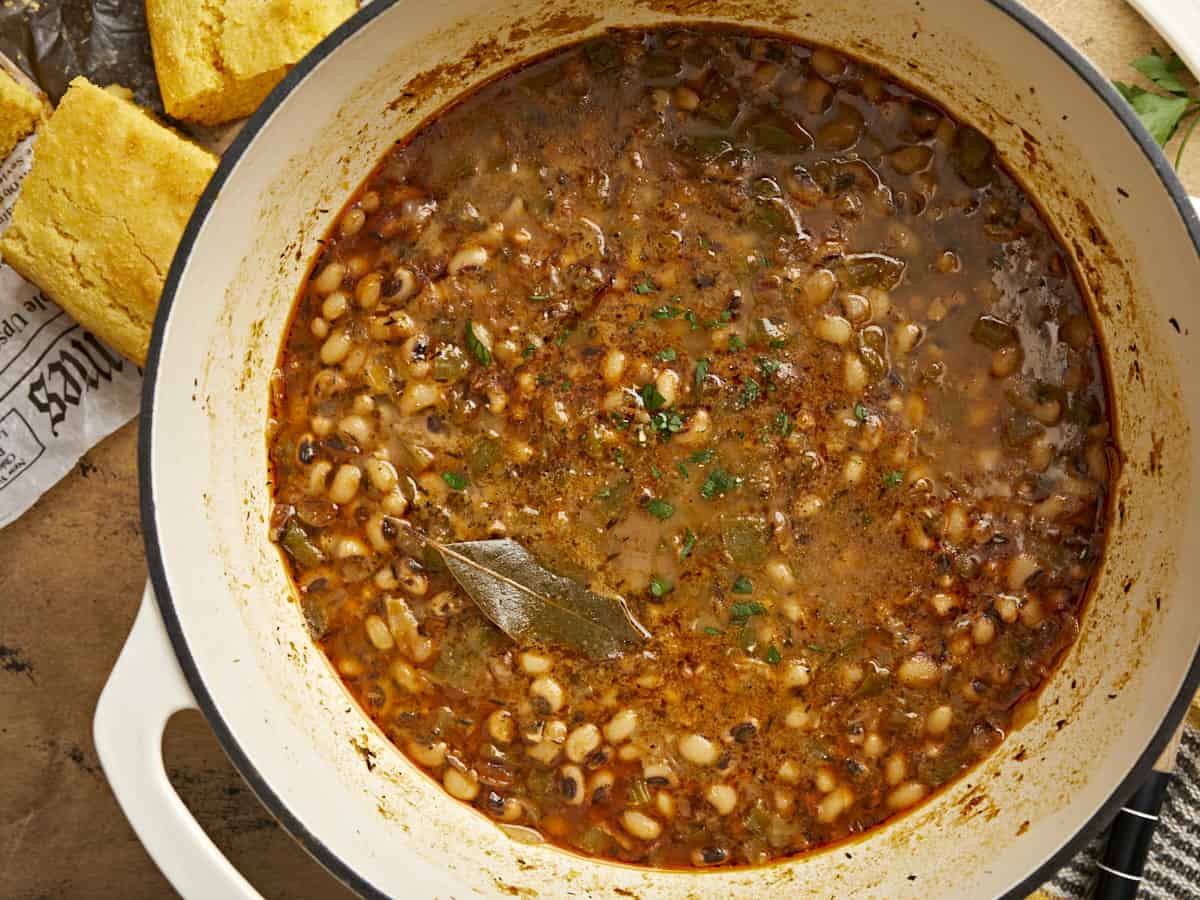
Stir all of the ingredients together, place a lid on the pot, and turn the heat up to medium-high. Allow the pot to come to a boil. Once it reaches a full boil, turn the heat down to medium-low and let the peas simmer, stirring occasionally, for one hour or until the peas are tender.

Salt being added to the pot of beans.

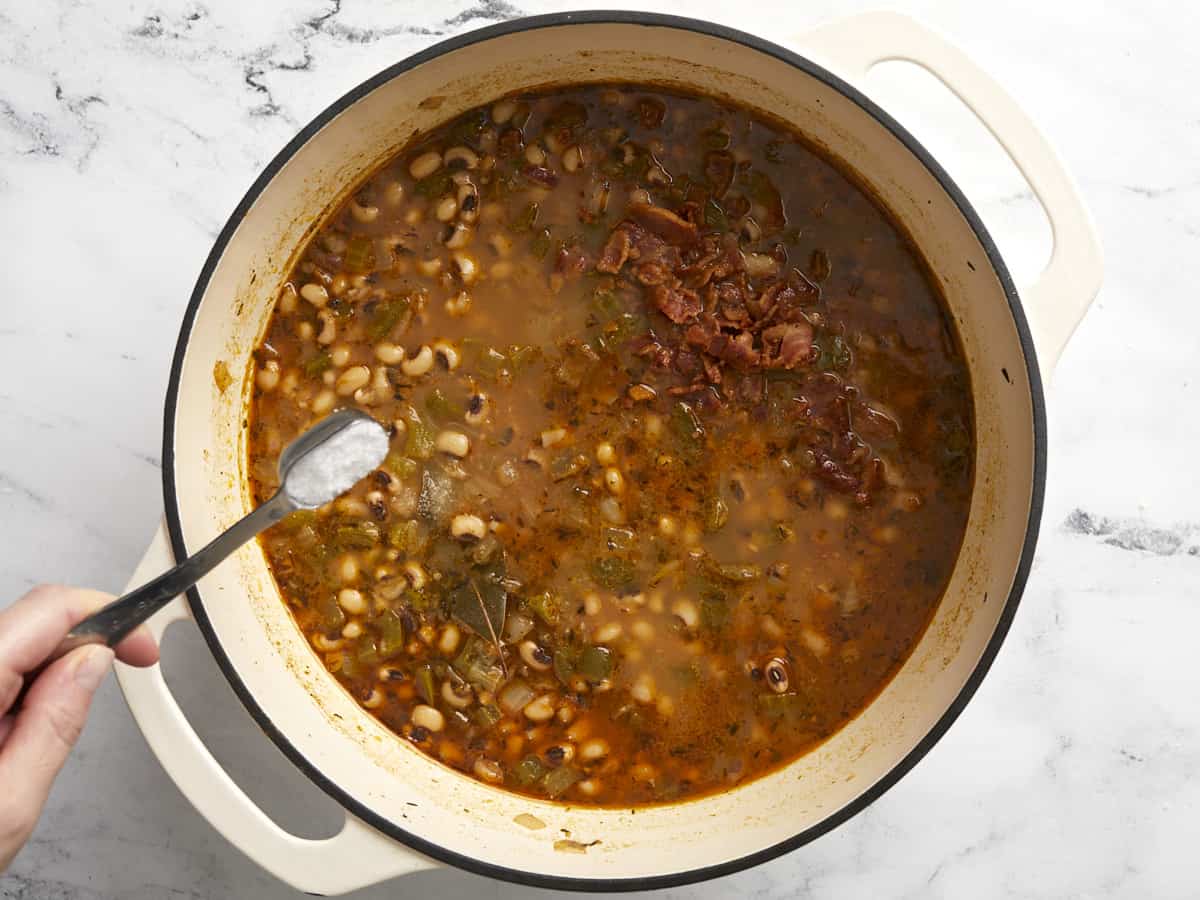
Once the peas are soft, crumble the bacon and stir it into the pot. Season the pot of peas with salt, starting with ½ teaspoon, and then add more to taste. The total amount needed will vary depending on how much salt is in the chicken broth used, but we used one teaspoon total.

Overhead view of a pot of black-eyed peas with a wooden spoon.

Remove the bay leaf then serve with a side of collard greens and cornbread, or over a bed of rice. Enjoy!

The post Black-Eyed Peas appeared first on Budget Bytes.

Flan

This flan recipe is an easy-to-make creamy dessert that is budget-friendly and perfect to share with family and friends on any occasion.

The post Flan appeared first on Budget Bytes.

If you’re looking for an easy-to-make dessert that’s crazy delicious with an absolute knock-out wow factor—this creamy, citrusy Puerto Rican-style flan is where it’s at! You can make it up to a week ahead, and it’s ridiculously budget-friendly.  Are you ready for a new family favorite?

Overhead view of flan with one slice being lifted out.

What Is Flan? 

Puerto Rican-style flan is a chilled custard made with eggs, milk, sugar, and vanilla extract. The custard base is poured over a layer of caramelized sugar, and then baked in a water bath, ensuring even cooking and preventing the flan from cracking. Once the flan is baked, it’s cooled completely before being inverted onto a serving plate. The caramel sauce flows over the flan, creating a gorgeous, glossy presentation.

Ingredients for Flan

I love how truly simple this recipe is. You probably have everything you need right in your pantry! Here’s what you need to make my easy recipe for Puerto Rican-style flan:

  • White Sugar: Creates the caramel sauce for our flan.
  • Orange: The juice and zest of this fruit help flavor the custard.
  • Sweetened Condensed Milk and Evaporated Milk: Create the base of our custard. You can substitute with Sweetened Condensed Coconut Milk and Evaporated Coconut milk.
  • Heavy Cream: Adds a velvety mouthfeel to the custard. You can substitute it with unsweetened coconut cream.
  • Bay Leaf: Adds an earthy note to the custard to balance the sweetness. If you don’t have a bay leaf, skip it.
  • Eggs: Thicken the custard and give it a buttery yellow hue. You need eggs to make this an authentic flan. But if you are trying to make this a plant-based dessert, mix 1/2 cup of cornstarch in 3/4 cup of water and add it to the milk mixture.
  • Vanilla Extract: Adds a floral note to the custard and helps balance the sweetness.

What To Serve With Flan

In Puerto Rico, flan is usually served plain, but you can top yours with Homemade Whipped Cream or shaved chocolate. Citrus zest is also lovely with this recipe, as are sliced fresh berries. If you want to lean in on the fruit angle, Strawberry Sauce or Cherry Sauce are fantastic with it as well.

How To Store Flan

Flan shouldn’t be left at room temperature for more than two hours. Store leftovers in an airtight container with a sheet of plastic or parchment directly on the surface. It will keep for up to 2 days in the fridge. To freeze flan for up to 2 months, slice leftovers and wrap well, then place in an airtight container. Thaw overnight in the fridge.

Side view of a slice of flan on a plate with caramel being drizzled over top.
Side view of a piece of flan being lifted from the plate.
Print

Flan

This flan recipe is an easy-to-make creamy dessert that is budget-friendly and perfect to share with family and friends on any occasion.
Course Dessert
Cuisine Latin, Puerto Rican
Total Cost ($8.16 recipe / $1.02 serving)
Prep Time 15 minutes
Cook Time 1 hour 30 minutes
Chill Time 9 hours
Total Time 10 hours 45 minutes
Servings 8 slices
Calories 434kcal

Ingredients

  • 3/4 cup granulated sugar $0.18
  • 1 orange, zested into thick strips and juiced $0.78
  • 1 14oz. can sweetened condensed milk $1.99
  • 1 12oz. can evaporated milk $1.50
  • 1 cup heavy cream $1.50
  • 1 bay leaf $0.10
  • 1 pinch salt $0.01
  • 4 large eggs $0.36
  • 1 Tbsp vanilla extract $1.74

Instructions

  • Preheat the oven to 450°F. Find a baking sheet large enough to accommodate a 9-inch pie dish or cake round with a flat top. It must lay flat for the flan to come out of it and onto a serving dish without breaking.
  • Set a light-colored sauce pot over medium heat and add the sugar and 1/4 cup of orange juice. (If the orange didn’t release a ¼ cup of juice, make up the difference with water.) Heat the sugar and melt it until it turns light golden brown, then take the pot off the heat. The sugar will continue to brown off the heat. Do not stir the sugar, which can cause it to recrystallize and get grainy. Instead, swirl the pan.
  • Pour the hot sugar syrup into the 9-inch pie dish or cake round, coating the bottom in an even layer. Set aside.
  • Add the sweetened condensed milk, evaporated milk, heavy cream, bay leaf, strips of orange zest, and a pinch of salt to a medium pot. Heat until steaming, then take off the heat, cover, and steep for 20 minutes.
  • When the milk mixture has finished steeping, beat 4 eggs with 1 tablespoon of vanilla in a large bowl. Pour the steeped milk mixture through a fine mesh sieve into the egg mixture and mix. Do not whip; you don't want to incorporate air into the liquid.
  • Meanwhile, bring 2 quarts of water to a boil for the water bath. Pour the milk and egg mixture into the prepared 9-inch pie dish or cake round, then place the pie dish or cake round onto the baking pan. Place the baking pan in the oven and fill halfway with boiling water to surround the pie dish or cake round, creating a water bath.
  • Lower the temperature of the oven to 350°F. Bake the flan for 60 to 70 minutes until the custard has set but still jiggles like thick lava in the middle. Let the flan cool completely. Then, place it in the fridge to set for at least 8 hours.
  • To serve the flan, run a knife around the edges of the pan. Then, top the 9-inch pie dish or cake round with the serving plate and carefully flip it over. Tap the baking dish gently to help the flan release. When you hear the flan release from the pie dish, remove the pie dish carefully and let caramel sauce flow over the flan.

See how we calculate recipe costs here.

Nutrition

Serving: 1slice | Calories: 434kcal | Carbohydrates: 52g | Protein: 11g | Fat: 21g | Sodium: 157mg | Fiber: 0.02g
Two plates with slices of flan, a fork with a piece on the end.

How to Make Flan

Preheat the oven to 450°F. Find a baking pan large enough to accommodate a 9-inch pie dish or cake round with a flat top. It must lay flat for the flan to come out of it and onto a serving dish without breaking.

Caramelized sugar and orange juice in a skillet.

Set a light-colored pot or skillet over medium heat and add ¾ cup of sugar and 1/4 cup of orange juice. (If the orange didn’t release a ¼ cup of juice, make up the difference with water.) Heat the sugar and melt it until it turns light golden brown, then take the pot off the heat. The sugar will continue to brown off the heat. Do not stir the sugar, which can cause it to recrystallize and get grainy. Instead, swirl the pan.

Caramel poured into the bottom of a cake pan.

Pour the hot sugar syrup into the 9-inch pie dish or cake round, coating the bottom in an even layer. Set aside.

Milk, bay leaf, and zest in a pot.

Add one 14oz. can of sweetened condensed milk, one 12oz. can of evaporated milk, one cup heavy cream, one bay leaf, strips of zest of one orange, and one pinch of salt to a medium pot. Heat until steaming, then take off the heat, cover, and steep for 20 minutes.

Steeped milk being poured through a sieve.

When the milk mixture has finished steeping, beat 4 eggs with 1 tablespoon of vanilla in a large bowl. Pour the steeped milk mixture through a fine mesh sieve into the egg mixture and mix. Do not whip; you don’t want to incorporate air into the liquid.

Milk mixture poured into a cake pan.

Pour the milk and egg mixture into the prepared 9-inch pie dish or cake round. Place the pie dish or cake round into the baking pan.

Boiling water being poured into a baking sheet around the cake pan.

Boil 2 quarts of water. Place the baking pan in the oven and fill halfway with boiling water to create a water bath around the pie pan. Lower the temperature of the oven to 350°F.

Baked flan in the cake pan.

Bake the flan for 60 to 70 minutes until the custard has set but still jiggles like thick lava in the middle. Let the flan cool completely. Then, place it in the fridge to set for at least 8 hours.

Finished flan flipped over onto a plate.

To serve the flan, run a knife around the edges of the pan. Then, top the 9-inch pie dish or cake round with the serving plate and carefully flip it over. Tap the baking dish gently to help the flan release. When you hear the flan release from the pie dish, remove the pie dish carefully and let caramel sauce flow over the flan.

Overhead view of flan being served, one slice being lifted.

The post Flan appeared first on Budget Bytes.

Chickpea Spread with Caramelized Onions

This simple but elegant chickpea spread combines sweet caramelized onions with a creamy, savory puréed chickpea spread, the perfect appetizer for any occasion!

The post Chickpea Spread with Caramelized Onions appeared first on Budget Bytes.

Party season is just around the corner so it’s time to start bookmarking all the good appetizer recipes to bring to holiday gatherings! When I saw this simple but elegant (and budget-friendly!) Chickpea Spread with Caramelized Onions in Michal Korkosz’s new book, Polish’d: Modern Vegetarian Cooking from Global Poland, I knew I had to try it because I l-o-v-e turning a humble can of beans into something special. And guess what? This dip was every bit as delicious as it looked. So big thanks to Michal and his publisher for letting us share this amazing recipe with you today, just in time for the holidays!

Close up overhead view of a bowl full of chickpea spread with caramelized onions, a cracker being dipped into the side.

What’s in This Chickpea Spread?

The base of the chickpea spread is simply chickpeas brightened up with a little lemon juice and puréed until smooth with cold water. To give the spread a boost of flavor, caramelized onions and fresh parsley are added to the mix. The caramelized onions give the chickpeas a subtly sweet and savory flavor, while the parsley adds a breath of freshness. The combination of flavors is absolutely divine and it will definitely have you coming back for dip after dip!

How to Serve the Chickpea Spread

This appetizer is best served with a variety of crackers or bread for dipping, but I think it would also make an amazing spread to add to sandwiches or even just a slice of toast. Michal notes in his book to serve with bread and dill pickles. Yum!

Storing Leftovers

The chickpea spread will stay good in the refrigerator for about 3-4 days, but the presentation is definitely best on the day it’s made when the caramelized onions are at their most beautiful. Caramelized onions do tend to get a little cloudy when refrigerated as they absorb moisture.

Close up overhead view of the caramelized onions on top of the chickpea dip.
Overhead view of a bowl full of chickpea spread with caramelized onions surrounded by crackers.
Print

Chickpea Spread with Caramelized Onions

This simple but elegant chickpea spread combines sweet caramelized onions with a creamy, savory puréed chickpea spread, the perfect appetizer for any occasion!
Course Appetizer, Snack
Cuisine Polish
Total Cost $3.58 recipe / $0.60 serving
Prep Time 15 minutes
Cook Time 25 minutes
Total Time 40 minutes
Servings 6 (¼ cup each)
Calories 175kcal

Ingredients

  • 1/4 cup olive oil $0.63
  • 1 lb. white onions $1.29
  • 3 bay leaves $0.45
  • 1 tsp salt, divided $0.05
  • 1/2 tsp brown sugar $0.01
  • 1 15oz. can chickpeas $0.79
  • 1/3 cup cold water $0.00
  • 1 Tbsp lemon juice $0.06
  • 1/4 cup fresh parsley $0.30

Instructions

  • Heat the oil in a large skillet over medium heat. Add the onions, bay leaves, ½ teaspoon of the salt, and the brown sugar. Cook over low heat, stirring occasionally, until golden brown and caramelized, about 25 minutes. Remove the bay leaves and discard.
  • Place the chickpeas in a food processor with the cold water and remaining ½ tsp salt. Blend until smooth, about 2 minutes. Add the caramelized onions (save some for the garnish) and the lemon juice and parsley. Pulse once or twice to combine. Season with pepper.
  • Transfer to a serving bowl. Top with the remaining caramelized onions and season with more pepper. Serve with your favorite bread and dill pickles.

See how we calculate recipe costs here.

Nutrition

Serving: 0.25cup | Calories: 175kcal | Carbohydrates: 17g | Protein: 4g | Fat: 10g | Sodium: 589mg | Fiber: 5g
Side view of a cracker being dipped into a bowl of chickpea spread with caramelized onions.

How to Make Chickpea Spread with Caramelized Onions

Sliced onions in a skillet with brown sugar and bay leaf.

Start caramelizing the onions first, as they’ll take about a half hour to cook. Slice one pound of white onions and add them to a skillet with ¼ cup olive oil, 3 bay leaves, ½ tsp salt, and ½ tsp brown sugar.

Caramelized onions in the skillet.

Cook the onions over low heat, stirring occasionally, until they deep golden brown and caramelized. You can increase the heat to medium-low if they are taking too long, just make sure to stir often. Discard the bay leaves.

Chickpeas in a food processor with lemon juice, salt, and water.

Drain one 15oz. can of chickpeas and add them to a food processor with ½ tsp salt and ⅓ cup cold water.

Puréed chickpeas in the food processor.

Purée the chickpeas until smooth. If the chickpeas seem dry, you can add a little extra water or olive oil until they blend smoothly.

Caramelized onions and parsley added to the food processor.

Add 1 Tbsp lemon juice, half of the caramelized onions, and about ¼ cup fresh parsley to the food processor.

Finished chickpea spread in the food processor.

Pulse the chickpeas to combine with the parsley and caramelize onions. Give it a taste, season with pepper, and adjust the salt, lemon, or other ingredients to your liking.

Overhead view of a bowl full of chickpea spread with caramelized onions surrounded by crackers.

Serve the chickpea spread in a bowl, topped with the remaining caramelized onions, and some freshly cracked pepper. Enjoy!

The post Chickpea Spread with Caramelized Onions appeared first on Budget Bytes.

Split Pea Soup

This cozy Split Pea Soup will fill you up and warm you through on those cold winter days. Super satisfying and oh so delicious!

The post Split Pea Soup appeared first on Budget Bytes.

The cold weather has finally creeped into my neck of the woods and all I’ve been craving lately is a big, warm bowl of soup! Lucky for me this easy Split Pea Soup recipe hits the spot! It has lots of veggies and the added ham gives it sooo much flavor! It’s thick, filling, and like most soup recipes it makes a big batch. Perfect to freeze any leftovers for later! Trust me, I’ll definitely be keeping this soup in rotation this season!

Overhead view of two bowls of split pea soup with parsley and a napkin on the side.

What Are Split Peas?

Split peas are just like they sound, peas that have been dried and split in half. They’re part of the legume family and are often found in both green and yellow varieties. Both can be used to make this easy, comforting split pea soup. We’ll be using green split peas for this recipe. You can find split peas in the dry bean aisle, next to bags of other types of dry beans.

Ingredients for Split Pea Soup

You won’t need much to make this thick and chunky split pea soup recipe. Here’s a quick rundown of the ingredients you’ll need:

  • Split Peas  – Split peas are the star of the show for this simple soup recipe. We’re using dry, uncooked green split peas.
  • Aromatics – Onion, celery, carrots, and garlic provide a wonderful flavor base for the soup.
  • Ham Hock – The ham hock provides lots of smoky, salty flavor to the soup. It also gives you a little bit of meat to enjoy with every other bite :)
  • Bay Leaf – Adds an extra subtle layer of flavor and depth to the soup.
  • Chicken Broth – Make sure you use a good quality chicken broth as a lot of the soup flavor will come from the broth. We use Better than Bouillon to make our broth. It’s economical and has great flavor!
  • Russet Potato – To make this an even more filling and hearty soup, we added one diced russet potato. It also helps to thicken the soup.
  • Salt and Pepper – You’ll be surprised how much salt and flavor comes from the ham hock and chicken broth. So taste the soup towards the end, then add any salt and freshly cracked black pepper to taste.

Do Split Peas Need To Be Soaked Before Cooking?

Nope! That’s what makes this soup so simple to make. Split peas cook quickly without any pre-soaking, and because they’re already split open, they break down well to thicken soups. I like to give the split peas just a quick rinse when I take them out of the package, but other than that you can add the peas directly to your pot (without soaking) with the rest of your ingredients.

How To Store Split Pea Soup

Split pea soup stores very well in the fridge or freezer. You can store any leftovers in an airtight container in the refrigerator for up to 5 days. If you don’t think you can eat all 6 servings in about 5 days, then freeze the rest in freezer-safe containers for up to 3 months.

Side view of two bowls of split pea soup with homemade croutons on top.

Pictured with Homemade Croutons on top!

Overhead view of a single bowl of split pea soup with one hand holding the bowl and another hand spooning some of the soup out.
Print

Split Pea Soup

This cozy Split Pea Soup will fill you up and warm you through on those cold winter days. Super satisfying and oh so delicious!
Course Dinner, Lunch
Cuisine American
Total Cost $9.51 recipe / $1.58 serving
Prep Time 10 minutes
Cook Time 1 hour 30 minutes
Total Time 1 hour 40 minutes
Servings 6 (1 1/3 cups each)
Calories 458kcal

Equipment

Ingredients

  • 2 Tbsp olive oil $0.24
  • 1 yellow onion, diced $0.32
  • 3 stalks of celery, diced $0.75
  • 3 carrots, diced $0.46
  • 2 cloves garlic, minced $0.16
  • 1 smoked ham hock $3.65
  • 1 lb split peas $1.69
  • 6 cups chicken broth 1.02
  • 1 bay leaf $0.10
  • 1 russet potato, peeled & diced $1.12

Instructions

  • Heat a large pot or dutch oven over medium-high heat. Add the olive oil, diced onion, diced celery, and diced carrots. Saute for about 4 minutes or until vegetables have softened. Stir in the minced garlic and saute for an additional 30 seconds.
  • Add the split peas, ham hock, bay leaf, and chicken broth to the pot and gently stir.
  • Add a lid and bring the pot to a gentle boil. Once boiling, reduce the heat to medium-low and simmer for 1 hour. Give the soup a stir periodically and flip the ham hock over once or twice, while the soup is simmering, so that it gets even exposure to the hot liquid.
  • After 1 hour the peas should have completely broken down almost to a mush. If they are still retaining their shape, continue to simmer for 10 more minutes.
  • Next remove the ham hock from the pot and set it aside to cool. Add the diced potato to the soup and stir to combine. Continue to simmer for about 12 more minutes or until potatoes are tender.
  • While the potatoes are simmering, and once the ham hock is cool enough to handle, remove the meat from the bone and shred into small pieces.
  • Add the ham meat back to the pot with the soup and gently stir to combine.
  • Feel free to season the soup with salt and freshly cracked black pepper to taste. Enjoy with crackers, homemade croutons, or crusty bread!

See how we calculate recipe costs here.

Nutrition

Serving: 1serving | Calories: 458kcal | Carbohydrates: 59g | Protein: 29g | Fat: 13g | Sodium: 994mg | Fiber: 21g

More Split Pea Soup Variations

Overhead view of a single bowl of split pea soup with one hand holding the bowl and another hand spooning some of the soup out.

How To Make Split Pea Soup – Step By Step Photos

Overhead view of diced onion, diced carrots, and diced celery in a dutch oven pot.

Heat a large pot or dutch oven over medium-high heat. Add 2 Tbsp olive oil, one diced yellow onion, three diced celery stalks, and three diced carrots. Sauté for about 4 minutes or until vegetables have softened. Stir in two minced garlic cloves and sauté for an additional 30 seconds.

Split peas, ham hock, bay leaf, and chicken broth added to the pot.

Add one pound of split peas, one ham hock, one bay leaf, and 6 cups of chicken broth to the pot and gently stir.

Overhead picture of the soup before it's cooked.

Add a lid and bring the pot to a gentle boil. Once boiling, reduce the heat to medium-low and simmer for 1 hour. Give the soup a stir periodically and flip the ham hock over once or twice, while the soup is simmering, so that it gets even exposure to the hot liquid.

Overhead picture of soup pot with diced potatoes being added and ham hock being removed.

After 1 hour the peas should have completely broken down almost to a mush. If they are still retaining their shape, continue to simmer for 10 more minutes. Next remove the ham hock from the pot and set it aside to cool. Add the diced potato to the soup and stir to combine. Continue to simmer for about 12 more minutes or until potatoes are tender.

Ham hock being pulled off the bone on a cutting board.

While the potatoes are simmering, and once the ham hock is cool enough to handle, remove the meat from the bone and shred into small pieces.

Add ham hock meat back to the soup pot.

Add the ham meat back to the pot with the soup and gently stir to combine.

Overhead view of finished split pea soup with ham.

Season the soup with salt and freshly cracked black pepper to taste.

Overhead view of a dutch oven pot full of split pea soup with homemade croutons on top.

Time to enjoy a warm, satisfying bowl of Split Pea Soup with some homemade croutons, crackers, or crusty bread! Yum!

The post Split Pea Soup appeared first on Budget Bytes.

Chipotle Chicken Tacos

Change up your Taco Tuesday with these spicy and smoky Chipotle Chicken Tacos. They’re a great weeknight meal or weekly meal prep!

The post Chipotle Chicken Tacos appeared first on Budget Bytes.

Kick up your Taco Tuesday recipe game with these fiery and deeply flavorful Chipotle Chicken Tacos! This easy recipe is fast, filling, and perfect for meal prep. It’s also a breeze to scale up, and you can even make it a little heartier by serving it with sides of Tomato Rice and Quick Seasoned Black Beans. Plus, it’s only a little over a dollar per serving.  I’m telling you, this one is clutch!  

Close up overhead view of four chipotle chicken tacos on a tray with pineapple salsa.

What Are Chipotle Chicken Tacos? 

The base of this easy taco recipe is pulled chicken that’s been cooked in a fiery chipotle adobo sauce. A chipotle is a jalapeno pepper that’s smoked and dried. It has deep, earthy flavors and a bit of kick. When you buy chipotles in adobo, the adobo refers to the vinegary sauce the chiles are rehydrated in. 

While you can eat Chipotle Chicken Tacos as is, I pair them with Pineapple Salsa, which cuts beautifully through the fattiness of the chicken. Keep in mind that you can use this chicken for more than just tacos!  Mix pulled Chipotle Chicken into soups, rice, salads, and wraps. Use it as a topping for Nachos or Pizzas. There’s so much you can do with it.

Ingredients For Chipotle Chicken Tacos

Here’s what you’ll need to make Chipotle Chicken Tacos:

  • Chicken Thighs: Thighs are the cut of chicken we’re working with because they’re flavorful, fatty, and forgiving. Chicken breasts are more expensive, but they will still work here. I like to add a tablespoon of butter to the mix if I’m working with white meat to help keep it from drying out.
  • Garlic and Onion: Aromatics help scent and flavor our chicken. Substitute the garlic with ½ teaspoon of garlic powder and the onion with 1 tablespoon of onion powder or 3 tablespoons of onion flakes.
  • Bay Leaf: Adds depth to our braising broth, but feel free to skip it if you don’t have any.
  • Chipotles in Adobo: Add a spicy kick and deep smoky flavors to the sauce. If you want something with less kick, sub with our Enchilada Sauce recipe.
  • Corn tortillas: Are the base of our taco and hold everything together. Feel free to sub with flour tortillas or even pitas!
  • Pineapple Salsa: This tangy, fresh, and slightly sweet salsa pairs beautifully with the smoky and spicy flavors of the saucy chipotle chicken, as well as adding color and texture to the taco.

How To Serve Chipotle Chicken Tacos

This recipe is one of my favorites for a family-style taco night. I load the table with a platter of warm tortillas, a big bowl of pulled chipotle chicken and smaller plates loaded with garnishes like fresh cilantro, radish slices, Sour Cream, Guacamole, and Pineapple Salsa! You can also serve Pico De Gallo or Cowboy Caviar. Make this an even heftier meal with Tomato Rice and Quick Seasoned Black Beans.

How To Store Chipotle Chicken Tacos

Store pulled chicken in an airtight container for up to three days. You can freeze the chicken in an airtight container with a sheet of parchment or plastic directly on the surface of the chicken for up to 3 months. Thaw overnight in the fridge before reheating in a microwave or a pan set over medium heat until steaming.

Overhead view of chicken tacos on a platter with a bowl of meat on the side.
Close up overhead view of chipotle chicken tacos with limes on the side.
Print

Chipotle Chicken Tacos

Change up your Taco Tuesday with these spicy and smoky Chipotle Chicken Tacos. They're a great weeknight meal or weekly meal prep!
Course Dinner, Lunch, Main Course
Cuisine American, Mexican
Total Cost $8.64 recipe / $1.44 serving
Prep Time 10 minutes
Cook Time 40 minutes
Total Time 50 minutes
Servings 12 tacos
Calories 186kcal

Ingredients

  • 4 boneless skinless chicken thighs $4.44
  • 4 cloves garlic, divided $0.32
  • 1 yellow onion, divided $0.33
  • 1 bay leaf $0.10
  • 4 peppercorns* $0.01
  • 1 tsp salt $0.05
  • 2 Tbsp olive oil $0.16
  • 2 oz. chipotle peppers in adobo** $0.49
  • 12 5-inch corn tortillas $0.72

Pineapple Salsa (optional)

  • 2 cups chopped pineapple (fresh or frozen) $0.75
  • 1/4 red onion, chopped $0.17
  • 1 jalapeño $0.11
  • 1 lime $0.59
  • 1/4 bunch cilantro (about ¼ cup) $0.35
  • 1 tsp salt (or to taste) $0.05

Instructions

  • Add the chicken thighs, 2 cloves of garlic, 1/2 of the onion, bay leaf, peppercorns, and salt to a pan, then add water to cover (about 4 cups). Place the pan over medium heat. Cover it, and cook for 20 minutes, or until the chicken is at an internal temperature of 160°F and fork tender.
  • Remove the chicken thighs from the broth. Reserve the broth. Shred the chicken with two forks.
  • Add oil to a saucepan on medium heat. Dice the remaining ½ onion and add it to the pan. Mince the remaining 2 cloves of garlic and add to the pan. Cook for about 2 minutes, until the onions steam and the garlic is fragrant.
  • Once the onions and garlic are fragrant, chop the chipotles in their sauce and add them to the pan. Stir well to incorporate. Then add the pulled chicken and 1/4 cup of the reserved broth. Combine thoroughly and taste. For more heat, mix in more adobo sauce. For saucy pulled chicken, add a touch more of the broth and stir. Once the sauce has thickened to a velvety consistency, take the chicken off the heat.
  • To make the pineapple salsa, finely chop the pineapple, onion, jalapeño, and cilantro. Combine the chopped pineapple, onion, juice of one lime, cilantro, and salt to taste.
  • Assemble the tacos. Add 1/4 cup of pulled chicken to a corn tortilla and top with pineapple salsa. Serve these babies up and enjoy a weeknight win!

See how we calculate recipe costs here.

Notes

*If you have a pepper grinder, open it to retrieve individual peppercorns, or substitute with ⅛ tsp cracked pepper.
**This is about ⅓ of a 7oz. can.

Nutrition

Serving: 2tacos | Calories: 186kcal | Carbohydrates: 14g | Protein: 9g | Fat: 11g | Sodium: 433mg | Fiber: 2g
A taco held in a hand, lime being squeezed over top.

How to Make Chipotle Chicken Tacos – Step by Step Photos

Chicken thighs in a pan with onion and garlic, water being poured in.

Add 4 boneless skinless chicken thighs, 2 cloves garlic, 1/2 of a yellow onion, 1 bay leaf, 4 peppercorns, and 1 teaspoon salt to a pan and add water to cover (about 4 cups). Place the pan over medium heat. Cover it, and cook for 20 minutes, or until the chicken is at an internal temperature of 160°F and fork tender.

Shredded chicken in a dish, a measuring cup with broth on the side.

Remove the chicken thighs from the broth. Reserve the broth. Shred the chicken with two forks.

Onion and garlic in a skillet.

Add oil to a saucepan on medium heat. Dice the remaining half onion and add it to the pan. Mince the remaining 2 cloves of garlic and add to the pan. Cook for about 2 minutes, until the onions steam and the garlic is fragrant.

Chipotle peppers added to the skillet with onion and garlic.

Once the onions and garlic are fragrant, chop 2 ounces of chipotles in their sauce and add them to the pan. Stir well to incorporate.

Pulled chicken added to the skillet with the chipotles.

Then add the pulled chicken and 1/4 cup of the reserved broth to the skillet. Combine thoroughly and taste. For more heat, mix in more adobo sauce. For saucy pulled chicken, add a touch more of the broth and stir.

Finished chipotle chicken in the skillet.

Once the sauce has thickened to a velvety consistency, take the chicken off the heat.

Close up overhead view of chipotle chicken tacos with limes on the side.

The post Chipotle Chicken Tacos appeared first on Budget Bytes.

Yuca En Escabeche

Yuca En Escabeche is a traditional Puerto Rican dish of pickled cassava, olives, and onions. It’s delicious, vibrant, easy, and versatile!

The post Yuca En Escabeche appeared first on Budget Bytes.

My mouth waters every time I think about Yuca En Escabeche, a traditional Puerto Rican pickled cassava dish that’s as delicious and vibrant as it is versatile. It’s a bit like a punchy vinegar-based potato salad but with olives, onions, and yuca. It holds exceptionally well and makes a perfect appetizer or side for a backyard BBQ or beach picnic.

Overhead shot of Yuca En Escabeche in a white bowl.

What is Yuca?

Yuca is a root vegetable like potato or taro. It is shaped like a large yam with a dark brown bark-like exterior and bright white flesh. It has a woody core that looks like a white root running through the middle of it lengthwise. You can find yuca fresh, frozen, and canned in most Latin grocery stores. It’s also often stocked in the freezer section at mainstream grocers.

What Is Escabeche?

Escabeche is a preserving technique that’s very popular all over Latin America. You warm a simple mix of oil and vinegar with a few aromatics and use it to pickle cooked vegetables, fruits (like green bananas), or fish. Because of the high acidity of the sauce, the pickled food stays fresh for a week, developing deeper flavors as it ages. Yuca En Escabeche is boiled cassava root smothered in escabeche sauce and served hot, cold, or at room temperature.

Ingredients

Get ready for your new summer favorite! It’s cooling on a hot day, comes together in just a few minutes, and you can easily double, triple, or quadruple the recipe. It’s one of those dishes I’ll make a big batch of and eat nonstop, paired with absolutely everything until it’s all gone. Here’s what you need to make Yuca En Escabeche:

  • Yuca– You can purchase yuca fresh or frozen. Fresh requires a lot of prep as you must peel off its woody bark and quarter it to remove the woody core. Frozen is my preference, as it’s already peeled and chopped. However, you should thaw it and make sure the woody core is removed, as sometimes it isn’t. Canned yuca is already prepped and cooked. You can simply drain it and add it to the escabeche sauce.
  • Olive Oil and Distilled White Vinegar– are the base of the escabeche sauce. Use an olive oil that has a flavor you enjoy. Though distilled vinegar is traditional, feel free to use apple cider vinegar or rice wine vinegar. This recipe is a 2 to 1 ratio of oil to vinegar. If you want something less acidic, use a 3 to 1 ratio. I prefer an aggressively acidic escabeche and use a 1 to 1 ratio of oil to vinegar. You do you!
  • Bay Leaves, Peppercorns, Salt, and Adobo – these spices add much-needed complexity to the simple escabeche sauce. If you don’t have adobo, omit it and up your salt game by a 1/4 teaspoon. Also add 1/4 teaspoon of garlic powder, 1/4 teaspoon of onion powder, and 1/4 teaspoon of ground cumin. Bay leaves are a must for me, but try subbing them with a pinch or two of dry oregano if you’re out.
  • Onions and Garlic– are an integral part of the escabeche. They add deep earthy flavors and texture to the dish. You can substitute yellow onion with white or red onion. Sometimes garlic will turn a blue-green color when exposed to a highly acidic sauce. Don’t fret. It isn’t mold. If blueish-hued garlic slices make you uncomfortable, remove them.
  • Spanish Olives and Olive Brine – these roasted red pepper-stuffed olives (AKA Manzanilla or green olives) add a pop of tart and fruity notes to the dish, while their brine rounds out the acidity of the escabeche and creates complexity.
Side shot of Yuca En Escabeche in a white bowl.

Variations on Yuca en Escabeche

Make this dish your own with additional veggies, spices, and proteins.

  • Strips of roasted red pepper make a beautiful and tasty addition. So do thin slices of fresh green and red bell peppers.
  • Mix different kinds of vinegar to add complexity. Just makes sure to use white or light-colored vinegar to preserve the color of the yuca.
  • Make a heartier version by topping the yuca with slices of hard-boiled egg, cooked shrimp, or chopped chicken.
  • Add different vegetables, such as chopped zucchini, squash, or tomatoes. Though not traditional choices, they are delicious.
  • Try using different spices, such as cumin, oregano, or cilantro.

What Do I Serve With Yuca En Escabeche?

This dish is excellent on its own, but I love it even more as a side. I pair it with Roasted Chicken, Chuletas Guisadas, or Puerto Rican Rice and Beans.

How To Store Leftovers

Store the yuca in an airtight container with plastic film over the surface. If at all possible, use a glass container, as the vinegar and garlic odors will cling to plastic. Refrigerate for up to a week. Freeze for up to 3 months. When ready to serve, thaw frozen yuca overnight in the fridge. Yuca can be served cold or at room temperature. If you prefer to serve it hot, warm it in a microwave until steaming.

Overhead shot of Yuca En Escabeche in a white bowl.
Side shot of Yuca En Escabeche in a white bowl with a wood spoon in it.
Print

Yuca En Escabeche

Yuca En Escabeche is a traditional Puerto Rican dish of pickled cassava, olives, and onions. It's delicious, vibrant, easy, and versatile!
Course Appetizer, Side Dish
Cuisine Latin
Total Cost ($4.53 recipe / $0.57 serving)
Prep Time 10 minutes
Cook Time 30 minutes
Resting Time 30 minutes
Total Time 1 hour 10 minutes
Servings 8 cups
Calories 270kcal

Ingredients

  • 1 lb yuca (fresh or frozen) $1.55
  • 4 tsp kosher salt, divided $0.16
  • 2/3 cup olive oil $0.84
  • 1/3 cup distilled white vinegar $0.41
  • 3 bay leaves $0.30
  • 1/2 tsp black peppercorns $0.05
  • 1 tsp adobo seasoning $0.04
  • 1 yellow onion, sliced in half moons $0.42
  • 8 cloves garlic, thinly sliced $0.34
  • 1/4 cup sliced Spanish olives (AKA Manzanilla olives ) $0.33
  • 1/8 cup olive brine $0.09

Instructions

  • If the yuca is fresh, peel and split it into 4-inch long quarters. Remove the woody center root. If the yuca is frozen, split it into 4-inch halves. Make sure the woody center has been removed and then cut each half in half.
  • Add yuca to a Dutch oven or other large heavy-bottomed pot. Add water until you cover the yuca by two inches. Add 2 teaspoons of salt. Boil until the yuca is fork-tender but not mushy, about 25 to 30 minutes. Then drain the yuca and cool.
  • While the yuca cooks, set a small pot over medium-low heat. Add the olive oil and warm. Add the vinegar, peppercorns, bay leaf, remaining 2 teaspoons salt, adobo, onions, garlic, olives, and olive brine to the warm oil. Cook for 10 minutes, stirring occasionally, then remove from the heat.
  • Add the yuca to a large bowl. Cover the drained yuca with escabeche. Let it sit at room temperature for at least 30 minutes to develop the flavors, then serve.

See how we calculate recipe costs here.

Nutrition

Calories: 270kcal | Carbohydrates: 24g | Protein: 1g | Fat: 19g | Sodium: 1346mg | Fiber: 2g
Side shot of Yuca En Escabeche in a white bowl.

How to Make Yuca En Escabeche – Step by Step Photos

Overhead shot of yuca on a cutting board with a knife removing the woody core.

Prepare 1 pound of yuca. If the yuca is fresh, peel and split it into 4-inch long quarters. Remove the woody center root. If the yuca is frozen, split it into 4-inch halves. Make sure the woody center has been removed and then cut each half in half.

Overhead shot of yuca in a large cream-colored pot with salt being added to it.

Add the yuca to a Dutch oven or other large heavy-bottomed pot. Add water until you cover the yuca by two inches. Add 2 teaspoons of salt. Boil until the yuca is fork-tender but not mushy, about 25 to 30 minutes. Then drain the yuca and cool.

Overhead shot of Yuca En Escabeche in a silver pot.

While the yuca cooks set a small stainless steel or enameled pot over medium-low heat. Avoid aluminum pots as highly acidic ingredients, like vinegar, can cause aluminum to leach into food, which leaves the food with a metallic taste. Add 2/3 cup of olive oil and warm. You don’t want the oil hot, just warm. Add the 1/3 cup of vinegar, 1/2 teaspoon peppercorns, 3 bay leaves, remaining 2 teaspoons salt, 1 teaspoon adobo, 1 medium onion sliced in half moons, 8 thinly sliced garlic cloves, 1/4 cup Spanish olives, and 1/8 cup of olive brine to the warm oil. Cook for 10 minutes, stirring occasionally. The onions should remain white but will wilt. Once wilted, remove from the heat.

Overhead shot of Yuca En Escabeche in a white bowl.

Add the boiled yuca to a large boil and cover with the warm escabeche sauce. Allow the yuca to pickle for a minimum of 30 minutes before serving. To develop deeper flavors, cover the bowl with plastic wrap directly on the surface of the yuca and refrigerate overnight. Serve cold, at room temperature, or heat in a microwave until steaming. Enjoy this incredible dish as is or serve it with Roasted Chicken, Chuletas Guisadas, or Puerto Rican Rice and Beans!

Side shot of Yuca En Escabeche in a white bowl.

More Puerto Rican Dishes

The post Yuca En Escabeche appeared first on Budget Bytes.

Chuletas Guisadas (Puerto Rican Stewed Pork Chops)

If you’re looking for a hearty family meal that’s mouthwateringly delicious and a breeze to put together, make these savory Chuletas Guisadas!

The post Chuletas Guisadas (Puerto Rican Stewed Pork Chops) appeared first on Budget Bytes.

If you’re looking for a hearty family meal that’s mouthwateringly delicious and a breeze to put together, you need to make these savory Chuletas Guisadas! I grew up eating this dish of unctuous stewed pork chops in Puerto Rico, where my Abuela would serve it at least once a week. It comes together in under thirty minutes, and as it stews, the fragrance is so overwhelmingly good everyone in your home will ask what’s cooking! (For real.)

Overhead shot of Chuletas Guisadas in a silver saucepan.

What Are Chuletas Guisadas?

Chuletas Guisadas is a popular Latin American dish of pork chops, onions, and peppers stewed in a flavorful tomato-based sauce. Every region has its own take on the dish, and this is the recipe my grandmother would make at least once a week. Some people don’t put olives in their Chuletas Guisadas, but my Abuela did, so that’s how I make it. I love mine served over Puerto Rican Rice And Beans with slices of ripe plantain. You can also pair it with a side salad or slices of ripe avocado.

What Are The Ingredients For Chuletas Guisadas?

My favorite thing about this dish is that the end result is much greater than its parts. But, of course, every Latin family has their version, and the ingredients vary by where you grew up. With that being said, this is what you need to make my version of Chuletas Guisadas:

  • Pork chops – How quickly the dish cooks depends on the thickness of your pork chops. I prefer thinly cut chops because they’re cheaper and cook faster. But you do you.
  • Sofrito – This robust flavor base adds complexity to every dish.
  • Tomato Sauce and Chicken Broth – are the foundation of your sauce.
  • Onions, Peppers, and Garlic – Add bulk to your dish and help flavor the sauce.
  • Vinegar and Olives– Add a briny brightness that helps cut through the fattiness of the pork.
  • Adobo, Sazon, Oregano, and Bay Leaf – these spices quickly build layers of flavor in your sauce and pork chops.
Side shot of Chuletas Guisadas in a silver saucepan.

Tips For Making Chuletas Guisadas

  1. Cut the vegetables the same size so that they cook evenly. If the vegetables are sliced in different sizes, some will be overcooked, and some undercooked.
  2. Keep the pan covered. It traps the moisture, which helps cook the meat evenly and keeps it moist and tender.
  3. Don’t overcook the pork chops. Even though they are in a sauce, they will end up tough and dry. The general rule is 7 minutes per 1/2 inch of thickness.

What Sides Go Well With Chuletas Guisadas?

I love gobbling this dish down with Puerto Rican Rice And Beans and fried slices of sweet plantain. Of course, you can always serve it with a Simple Side Salad or slices of ripe avocado. And you can even try it layered over Garlic Herb Mashed Potatoes. OMG. I want that right now!!!

How To Store Leftovers

Store leftovers in an airtight container in the refrigerator for up to 3 days or freeze for up to three months. To reheat frozen Chuletas Guisadas, thaw them in the fridge overnight. Then, warm them in a skillet over medium heat until steaming. When you reheat the pork chops, add a little chicken broth to the skillet to prevent them from drying out.

Print

Chuletas Guisadas (Puerto Rican Stewed Pork Chops)

If you're looking for a hearty family meal that's mouthwateringly delicious and a breeze to put together, make these savory Chuletas Guisadas! These stewed pork chops come together in under thirty minutes.
Course Dinner, Lunch
Cuisine Latin
Total Cost ($15.35 recipe / $3.84 serving)
Prep Time 5 minutes
Cook Time 20 minutes
Total Time 25 minutes
Servings 4 servings
Calories 516kcal

Equipment

  • 3 qt. Covered Sauté Pan

Ingredients

  • 3 Tbsp olive oil, divided $0.12
  • 2 lbs thinly cut pork chops, bone-in $9.98
  • 2 tsp adobo* $0.08
  • 6 Tbsp sofrito $1.08
  • 1 Tbsp minced garlic $0.14
  • 8 oz tomato sauce $0.59
  • 1 Tbsp white distilled vinegar $0.04
  • 1 1/2 tsp sazón* (1 packet) $0.17
  • 2 cups chicken broth $0.24
  • 1/4 cup Pimento-stuffed green olives, sliced* $0.33
  • 2 tsp oregano $0.20
  • 1 bay leaf $0.10
  • 1 onion, sliced in 1/4 inch half moons $0.42
  • 1 bell pepper, sliced into 1/4-inch strips $1.59
  • 1/4 cup fresh cilantro leaves $0.27

Instructions

  • Add 2 tablespoons of oil to a large saute pan and set it over medium-high heat. Mix adobo with the remaining 1 tablespoon of oil and rub the pork chops with the mixture. Sear pork chops in batches. Sear on both sides, about 2 minutes on each side.
  • Remove the pork chops from the pan, and set aside. Add the sofrito and garlic and saute until fragrant, about 2 minutes.
  • Add the tomato sauce, vinegar, and sazón and saute until the mixture thickens, about 4 minutes.
  • Add chicken broth, olives, oregano, and bay leaf, and stir well. Bring the sauce to a boil and reduce by one-quarter.
  • Add the pork chops back to the pan, cover, and lower the heat to medium-low. Cook until pork chops are tender, about 7 minutes for each 1/2 inch of thickness.
  • Add onion and bell pepper, cover, and cook until softened, about 5 minutes.
  • Take the pan off the heat and stir in cilantro leaves. Taste the sauce and add salt and pepper if necessary. Serve over white rice and enjoy your new favorite weeknight dish!

See how we calculate recipe costs here.

Notes

*If you cannot source Adobo, mix your own and then use the amount called for in the recipe. Store the rest in an airtight container.
2 Tbsp salt
1 Tbsp garlic powder
1 tsp ground oregano
1 tsp onion powder
1 tsp black pepper
1 tsp ground cumin
1/2 tsp turmeric
 
*A packet of sazón contains about 1.5 teaspoons of sazón. If you cannot source sazón use the following:
1/4 teaspoon of garlic powder
1/4 teaspoon ground cumin
1/4 teaspoon ground coriander
1/3 teaspoon ground annatto
1/8 teaspoon turmeric
1/8 teaspoon ground oregano
 
*Pimento-stuffed green olives are also known as  or Manzanilla Olives.

Nutrition

Serving: 1serving | Calories: 516kcal | Carbohydrates: 11g | Protein: 52g | Fat: 29g | Sodium: 1121mg | Fiber: 3g
Overhead shot of Chuletas Guisadas over rice in a white bowl with a black fork and knife in it.

How to Make Chuletas Guisadas – Step by Step Photos

Overhead shot of pork chops searing in a silver saucepan.

Add 2 tablespoons of oil to a large saute pan and set it over medium-high heat. Mix 2 teaspoons of adobo with the remaining 1 tablespoon of oil and rub the pork chops with the mixture. Sear the 2 pounds of pork chops in batches. Sear on both sides, about 2 minutes on each side.

Overhead shot of sofrito and garlic being added to a silver saucepan.

Remove the pork chops from the pan, and set aside. Add 1/3 cup of sofrito and 1 tablespoon of minced garlic to the pork chop drippings and saute until fragrant, about 2 minutes.

Overhead shot of tomato sauce being added to a sofrito in a silver saucepan.

Add the 8 ounces of tomato sauce, 1 tablespoon of white vinegar, and 1 1/2 teaspoon of sazón to the pan. Sauté until the mixture thickens, about 4 minutes.

Overhead shot of spices and olives being added to a sauce in a silver saucepan.

Add 2 cups of chicken broth, 1/4 cup of pimento-stuffed olives, 2 teaspoons of oregano, and 1 bay leaf to the pan and stir well. Bring the sauce to a boil and reduce by one-quarter.

Overhead shot of pork chops being added to a sauce in a silver saucepan.

Add the pork chops back to the pan, cover, and lower the heat to medium-low. Cook until pork chops are tender, about 7 minutes for each 1/2 inch of thickness.

Overhead shot of Chuletas Guisadas in a silver saucepan with raw slices of onions and red peppers on top.

Add 1 onion (sliced in 1/4 inch half moons) and 1 bell pepper (sliced into 1/4-inch strips) to the pan. Cover, and cook until softened, about 5 minutes.

Overhead shot of Chuletas Guisadas in a silver saucepan with a hand sprinkling cilantro into it.

Take the pan off the heat and stir in 1/4 cup of cilantro leaves. Taste the sauce and add salt and pepper if necessary. Serve over white rice and enjoy your new favorite weeknight dish!

Overhead shot of Chuletas Guisadas over rice in a white bowl with a black fork in it.

More Easy Latin Dishes

The post Chuletas Guisadas (Puerto Rican Stewed Pork Chops) appeared first on Budget Bytes.

Picadillo

Sweet, savory Puerto Rican-style Picadillo is a tomato-based ground beef stew that’s ridiculously delicious, versatile, and ready in thirty.

The post Picadillo appeared first on Budget Bytes.

Sweet and savory Puerto Rican-Style Picadillo is a ground beef stew that’s so ridiculously delicious it brings table talk to a complete stop because everyone’s too busy stuffing their face. This beef picadillo recipe is budget-friendly, comes together quickly, and is incredibly versatile. I don’t know any other way to say it: You. Need. To. Make. Picadillo.

A NOTE ON AUTHENTICITY

This is not a historically authentic recipe. We strive to create recipes that are accessible to everyone, which means ingredients need to be available at a mainstream budget grocery store. We test recipes using the least amount of steps, tools, and ingredients while still honoring the spirit of the recipe. I was born and raised in Puerto Rico and look forward to a time when our ingredients are available in mainstream markets. Until then, buen provecho!

What Is Picadillo?

Picadillo is a traditional sweet and savory Latin dish usually made with ground beef stewed in tomato sauce. In Puerto Rico, we cook it in a hearty tomato-based sauce with sofrito, adobo, olives, raisins, and sometimes diced potatoes. To the uninitiated, pairing raisins with beef sounds like blasphemy. But I promise you, IT WORKS.

What You’ll Need

Picadillo comes together in one pan in under 30 minutes. There’s a little chopping involved, and it takes about 7 minutes to assemble the recipe, but the rest of the time it simmers on the stovetop. I love a one-pot hands-off recipe! Don’t you?

  • Onion, Garlic, and Bell Pepper – this combination creates an aromatic and intensely flavored base
  • Sofrito – this is the flavor base of many Puerto Rican dishes. I have a simple recipe for you here, though you can definitely take it further if you have access to traditional ingredients like aji dulce and recao.
  • Sazón and Adobo – these seasoning blends go hand in hand to develop deep, earthy notes. The annatto in the sazón also deepens the color of the sauce. If these are hard to source, I have included recipes for both in the notes section of the recipe card.
  • Ground Beef – 80/20 is best as the fat adds flavor, but use what you have. You can also make this recipe with ground pork, chicken, lamb, or turkey. If you’re vegetarian or vegan, you can substitute ground beef with a plant-based alternative, chopped mushrooms, or black beans.
  • Green Olives – I prefer to use the sliced kind with pimento because it’s less work, but feel free to slice whole ones. If you can’t find Green Olives with Pimento (AKA Manzanilla or Spanish Olives), get pitted green olives and add a tablespoon of chopped roasted red pepper to the mix.
  • Raisins – though dark raisins are traditional, you can also use golden. I sometimes sub raisins with chopped prunes.
  • White Distilled Vinegar – helps cut through the fattiness of the ground beef and adds a sharp top note. Sub it with Apple Cider Vinegar.
  • Bay Leaves – have a mild tea-like flavor that sits in the background and helps enhance bolder flavors. Sub with a teaspoon of oregano.
  • Tomato Sauce – creates a liquid for the ground beef to stew in and adds acidic, fruity brightness.
Wooden spoon full og picadillo in the foreground with picadillo in a silver skillet in the background.

What TO Serve With Picadillo

This sweet and savory ground-beef stew is a weeknight staple at my house because I can eat it as is, or served over rice and mashed potatoes. I can also stuff it into an empanada, a burrito, or a lettuce wrap. I’ve even added it to marinara for Puerto Rican-style spaghetti. Picadillo is all-purpose!

How To Store Picadillo

This is one of those recipes that tastes even better the next day. (I love those recipes.) Store cooled Picadillo in an airtight container with plastic film or wax paper directly on the surface. It keeps in the fridge for up to 5 days and in the freezer for up to 3 months. Thaw frozen Picadillo overnight in the refrigerator, then warm it in a pan set over medium heat or microwave it until steaming.

Picadillo served over white rice in a white bowl.
Overhead shot of picadillo in a silver skillet with a wooden spoon in it.
Print

Picadillo

Sweet, savory Puerto Rican-style Picadillo is a tomato-based ground beef stew that's ridiculously delicious, versatile, and ready in thirty.
Course Dinner, Lunch
Cuisine Latin, Puerto Rican
Total Cost ($11.44 recipe / $1.43 serving)
Prep Time 5 minutes
Cook Time 25 minutes
Total Time 30 minutes
Servings 8 cups
Calories 212kcal

Ingredients

  • 1 1/2 Tbsp olive oil $0.06
  • 1 yellow onion, small dice $0.42
  • 1 red bell pepper, small dice $1.59
  • 1 Tbsp tablespoon garlic, minced $0.14
  • 1 lb ground beef (80/20) $5.49
  • 1 tsp coarse salt* $0.04
  • 1 1/2 tsp sazón* (1 packet) $0.17
  • 1 tsp adobo* $0.04
  • 1/2 cup sofrito $0.72
  • 1/2 cup sliced pimento-stuffed green olives * $0.66
  • 1/4 cup raisins $0.87
  • 1/2 Tbsp white vinegar $0.04
  • 15 oz tomato sauce $1.00
  • 2 bay leaves $0.20
  • 1/4 cup water $0.00

Instructions

  • Place a large skillet over medium-high heat and add the olive oil. When the oil is hot, add the onions and peppers to the pan and cook until the onions are transparent.
  • Add the garlic to the pan and cook until fragrant.
  • Add the beef to the pan and sprinkle with salt, sazón, and adobo. As the beef browns, break up big chunks with your spoon.
  • When the beef has browned, add the sofrito and cook, stirring constantly, until fragrant, about 2 minutes.
  • Add the olives, raisins, white vinegar, tomato sauce, bay leaves, and water. Continue to cook, occasionally stirring, for 10 minutes. Take the pan off the heat and allow it cool.

See how we calculate recipe costs here.

Notes

*If using fine salt, lower to 1/2 teaspoon.
*A packet of sazón contains about 1.5 teaspoons of sazón. If you cannot source sazón use the following:
1/4 teaspoon of garlic powder
1/4 teaspoon ground cumin
1/4 teaspoon ground coriander
1/3 teaspoon ground annatto
1/8 teaspoon turmeric
1/8 teaspoon ground oregano
*If you cannot source Adobo, mix your own and then use the amount called for in the recipe. Store the rest in an airtight container.
2 Tbsp salt
1 Tbsp garlic powder
1 tsp ground oregano
1 tsp onion powder
1 tsp black pepper
1 tsp ground cumin
1/2 tsp turmeric
*Pimento-stuffed green olives are also known as Spanish Olives or Manzanilla Olives.

Nutrition

Serving: 1cup | Calories: 212kcal | Carbohydrates: 7g | Protein: 11g | Fat: 16g | Sodium: 491mg | Fiber: 1g
Side shot of picadillo in a silver skillet.

How to Make Picadillo – Step by Step Photos

Onions and peppers in a silver pan.

Place a large saute pan over medium-high heat and add 1 1/2 tablespoons of olive oil. When the oil is hot, add 1 diced onion and 1 diced red bell pepper to the pan and cook until the onions are transparent.

Overhead shot of garlic being added to a pan of onions and peppers.

Add 1 tablespoon of minced garlic to the pan and cook until fragrant.

Meat being added to a pan of garlic, onions, and peppers.

Add the pound of ground beef to the pan and sprinkle with 1 teaspoon coarse salt, 1 and 1/2 teaspoons sazón, and 1 teaspoon adobo. As the beef browns, break up big chunks with your spoon.

Sofrito being added to a pan with browned meat in it.

When the beef has browned, add the 1/2 cup sofrito and cook, stirring constantly, until fragrant, about 2 minutes. Break up any remaining chunks of ground beef.

Tomato sauce, olives, and raisins added to a pan of browned meat and sofrito.

Add the 1/2 cup olives, 1/4 cup raisins, 1/2 tablespoon white vinegar, 15 ounces tomato sauce, 2 bay leaves, and 1/4 cup water.

Finished pan of picadillo.

Continue to cook, occasionally stirring, for 10 minutes. Take the pan off the heat and allow the Picadillo to cool slightly before serving. Tell me how long it takes for everyone to start talking again!

Picadillo served over white rice in a white bowl.

More Easy One-Pot Recipes

The post Picadillo appeared first on Budget Bytes.

Veggie Pot Pie

Creamy, savory, hearty, flaky, crispy- this Veggie Pot Pie is All. Of. The. Things! You can even make this veggie pot pie recipe vegan.

The post Veggie Pot Pie appeared first on Budget Bytes.

If you want your whole family clamoring around the dinner table with a dish everyone will love, this Veggie Pot Pie is All. Of. The. Things! Creamy, savory, hearty, crispy- you can even make this Veggie Pot Pie recipe vegan! It’s all cooked in a velvety sauce and encased in a flaky, buttery pie crust. Are you ready to make the ultimate comfort food? (Say yes!!!)

What Is Veggie Pot Pie?

A pot pie is just like a regular pie, except it’s usually savory and made in a creamy sauce. Pot pies can be made with a bottom and top crust or just a top crust. This pot pie recipe is a mix of colorful vegetables drenched in a savory gravy and cooked in a deliciously flakey double crust. Feel free to use just a top crust if you prefer it that way. I’m a crust person, so the more, the better!

What You’ll Need

For The Filling
  • Butter and Flour– with their powers combined, you’ll make a roux, and that blend of fat and flour will thicken your sauce.
  • Milk and Vegetable Broth– this is the base of your creamy sauce. You can substitute the milk with plant-based milk if you want to keep this bad boy dairy free. Alternatively, if you want to add more depth, try using chicken broth.
  • Mushrooms, Onions, Potatoes, and Mixed Veggies– these are the stars of your veggie filling. To minimize chopping, I use frozen mixed veggies. But any combination of veggies you have on hand will work. Just make sure to chop everything the same size and par-cook root veggies in the broth first.
  • Rosemary, Thyme, Bay Leaf, and Sage– add flavor and depth to the sauce. You can substitute them with your favorite spice blend.
  • Soy Sauce– adds umami, AKA savoriness, which anything vegetable-based will need loads of. You can also use a teaspoon of any Miso you have on hand or Worcestershire Sauce.
For The Crust
  • Double Pie Crust– encases everything in a buttery dream and adds incredible texture. You can use a store-bought crust, but I use my 3-Ingredient Pie Crust. You can also use puff pastry, but par-bake it before filling.
  • Egg– the white seals the bottom crust, so it doesn’t absorb liquid, and the yolk lacquers the top crust, giving you a golden finish. If you want to skip the egg, par-bake the bottom crust and use milk, cream, or plant-based milk to lacquer the top crust.

Make It Vegan

You can tweak this recipe to create an outstanding Vegan Pot Pie! Sub the butter with vegan butter or oil. Opt for a store-bought vegan pie crust, or make my Easy 3-Ingredient Pie Crust with Vegan Butter or Vegetable Shortening. Sub the milk with any plant-based milk. As far as the egg wash is concerned, you can brush your pie crust with water, aquafaba, or plant-based milk. Par-bake the bottom crust before filling.

Prevent A Soggy Bottom Crust

Brushing the bottom crust with egg white helps create a barrier that prevents the dreaded soggy bottom. You should also preheat the oven with a sheet pan in it. When you place the pie on it, the heat from the sheet pan melts the fat in the bottom pastry, creating a layer that prevents liquid from permeating the pie. You can also place an overturned cast iron skillet in your sheet pan and preheat them both. Bake your pie on the bottom of the overturned skillet. Cast iron holds heat and helps crisp up that bottom crust.

How To Store The Leftovers

You can store leftovers in an airtight container in the fridge for up to 4 days, though reheating is easier if you just store them in the pie plate and cover them tightly with foil. You can freeze a veggie pot pie for up to 2 months, tightly wrapped in plastic, then foil, and kept in an airtight container. Cover the top crust with foil to prevent burning, and reheat in a 350ºF oven until it has warmed throughout.

Side shot of a slice of veggie pot pie being removed from the pie dish.
Print

Veggie Pot Pie

If you want your whole family clamoring around the dinner table with a dish everyone will love, this Veggie Pot Pie is All. Of. The. Things! Creamy, savory, hearty, crispy- you can even make this recipe vegan!
Course Brunch, Dinner, Lunch
Cuisine American
Total Cost ($9.61 recipe / $1.20 serving)
Prep Time 20 minutes
Cook Time 1 hour 10 minutes
Total Time 1 hour 30 minutes
Servings 8 slices
Calories 281kcal

Ingredients

  • 1 3-Ingredient Pie Crust* $2.34
  • 7 Tbsp salted butter, divided $1.12
  • 1 yellow onion, small dice (about 1 cup) $0.41
  • 2 garlic cloves, minced (about 1 teaspoon) $0.24
  • 4 Tbsp flour $0.04
  • 1 cup veggie broth $0.13
  • 1/2 cup whole milk $0.13
  • 3/4 tsp salt $0.05
  • 1 bay leaf $0.15
  • 1/4 tsp ground rosemary $0.03
  • 1/4 tsp dried thyme $0.03
  • 1/4 tsp rubbed sage $0.03
  • 1/4 tsp black pepper $0.02
  • 1 tsp soy sauce $0.02
  • 1 Yukon gold potato, small dice* (about 1 cup) $0.27
  • 1 pint baby bellas, small dice $2.89
  • 12 oz frozen mixed vegetables $1.25
  • 1 egg, separated $0.46

Instructions

  • Grease a pie pan with 1 tablespoon of butter. If you're using store-bought dough, place the bottom crust in the pie pan. If you made 3-Ingredient Pie Crust, cut 1/3 of the dough off to be used as the top crust, wrap it in plastic, and refrigerate until you're ready to use it later.
  • Dust your work surface with flour and roll out the bigger 2/3 piece of dough into a circle that is 16 inches in diameter and about 1/4 inch thick. Line the pie pan with it.
  • Beat the egg white until frothy, then brush the bottom crust with it. Let the crust rest in the fridge.
  • Place a rack in the center of your oven along with a sheet pan and preheat it to 350ºF. Place a deep skillet over medium heat and add 5 tablespoons of salted butter to the pan. Once the butter foams, swish it around the pan until it turns an amber color and smells of hazelnuts.
  • Add the diced onions to the brown butter. Cook until the onions are translucent, about 5 minutes. Add the garlic, and cook for one minute. Sprinkle the flour over the onions and garlic in the skillet and continue to cook and stir for two minutes more.
  • To the pan, add veggie broth, milk, and salt. Whisk to combine and dissolve any flour off the bottom of the skillet. Then add the bay leaf, rosemary, thyme, sage, pepper, and soy sauce. Whisk occasionally as the liquid simmers and thickens.
  • Add the pint of diced mushrooms and the diced potato to the pan. Stir to combine and cook until the gravy has thickened more and reduced some, about 5 minutes.
  • Remove the skillet from the heat. Finally, add the frozen mixed vegetables and allow them to cool the ingredients in the pan.
  • Take the pie pan out of the fridge, prick the bottom crust a few times with a fork, and add the cooled filling to the pie pan. Dice the last tablespoon of butter and sprinkle it over the filling.
  • Roll the smaller piece of dough into a circle, about 10 inches wide and 1/4 inch thick. Cover the pie with it.
  • Beat the egg yolk. Trace a bit of yolk along the top edge of the bottom and top crusts. Fold the bottom crust over the top crust and crimp the edges shut. Cut vents into your top crust. Brush egg yolk in a light layer over the top crust.
  • Bake for 45 to 50 minutes, or until the pie dough is golden and flaky. Allow the Veggie Pot Pie to cool for ten minutes before serving.

See how we calculate recipe costs here.

Notes

*You can also use a store-bought double crust or puff pastry. 
*To prevent the diced potato from turning gray, place it in salted water and cover it with a wet paper towel, so it stays submerged. Drain before using in the recipe.

Nutrition

Serving: 1slice | Calories: 281kcal | Carbohydrates: 28g | Protein: 7g | Fat: 17g | Sodium: 465mg | Fiber: 4g

How to Make Veggie Pot Pie – Step by Step Photos

Grease a pie pan with 1 tablespoon of butter. If you’re using store-bought dough, place the bottom crust in the pie pan. If you are making 3-Ingredient Pie Crust, roll it into a large disc about 6 inches wide and two inches thick. Then cut 1/3 of it off to use as the top crust later on. Wrap it in plastic, and refrigerate.

Dust your work surface with flour and roll out the bigger 2/3 piece into a circle that is 16 inches in diameter and about 1/4 inch thick. Drape it over the pie pan and press down gently, gently pushing it into the bottom crease and sides of the pan.

Beat the egg white til frothy and then brush the bottom crust with it. Let the crust rest in the fridge.

Place a rack in the center of your oven along with a sheet pan and preheat it to 350ºF. Place a deep skillet over medium heat, add 5 tablespoons of salted butter to the pan, and brown it. The butter will melt, then foam, and finally, the solids will separate from the fat and turn a golden brown. The air will smell of hazelnuts.

Add the diced onion to the brown butter. Cook until translucent, about 5 minutes. Then add the 2 minced cloves of garlic and cook for 1 minute, until fragrant. Finally, sprinkle 4 tablespoons of flour over the onions and garlic in the skillet and continue to cook and stir for 2 minutes more.

Add 1 cup of veggie stock, 1/2 cup of milk, and 3/4 teaspoon salt. Then whisk to combine and dissolve any flour off the bottom of the skillet. Finally, add the bay leaf, 1/4 teaspoon rosemary, 1/4 teaspoon thyme, 1/4 teaspoon sage, 1/4 teaspoon black pepper, and 1 teaspoon soy sauce. Whisk occasionally as the liquid comes up to a simmer and thickens into gravy.

Next, add the pint of diced mushrooms and the diced potato to the pan. Stir to combine and cook until the gravy has thickened more and reduced some, about 5 minutes. You want to cook the potatoes a touch, to ensure they cook fully in the oven.

Next, remove the skillet from the heat. Finally, add the 12 ounces of frozen mixed vegetables to the filling, where they will quickly cool the other ingredients in the pan. Your filling is done!

Next, take the pie pan out of the fridge, prick the bottom crust a few times with a fork, and add the cooled filling to the pie pan. Then dice the last tablespoon of butter and sprinkle it over the filling.

Roll the smaller piece of dough into a circle, about 10 inches wide and 1/4 inch thick. Cover the pie with it.

Beat the egg yolk. Then trace a bit of yolk along the top edge of the bottom and top crusts. Fold the bottom crust over the top crust and crimp the edges shut. Cut vents into your top crust. Finally, brush the egg yolk in a light layer over the entire top crust.

Bake for 45 to 50 minutes, or until the pie dough is golden and flaky. Allow the Veggie Pot Pie to cool for ten minutes before serving. I gobbled up three slices of this in one sitting! I hope you do the same!

Other Great Savory Pie Recipes

The post Veggie Pot Pie appeared first on Budget Bytes.